
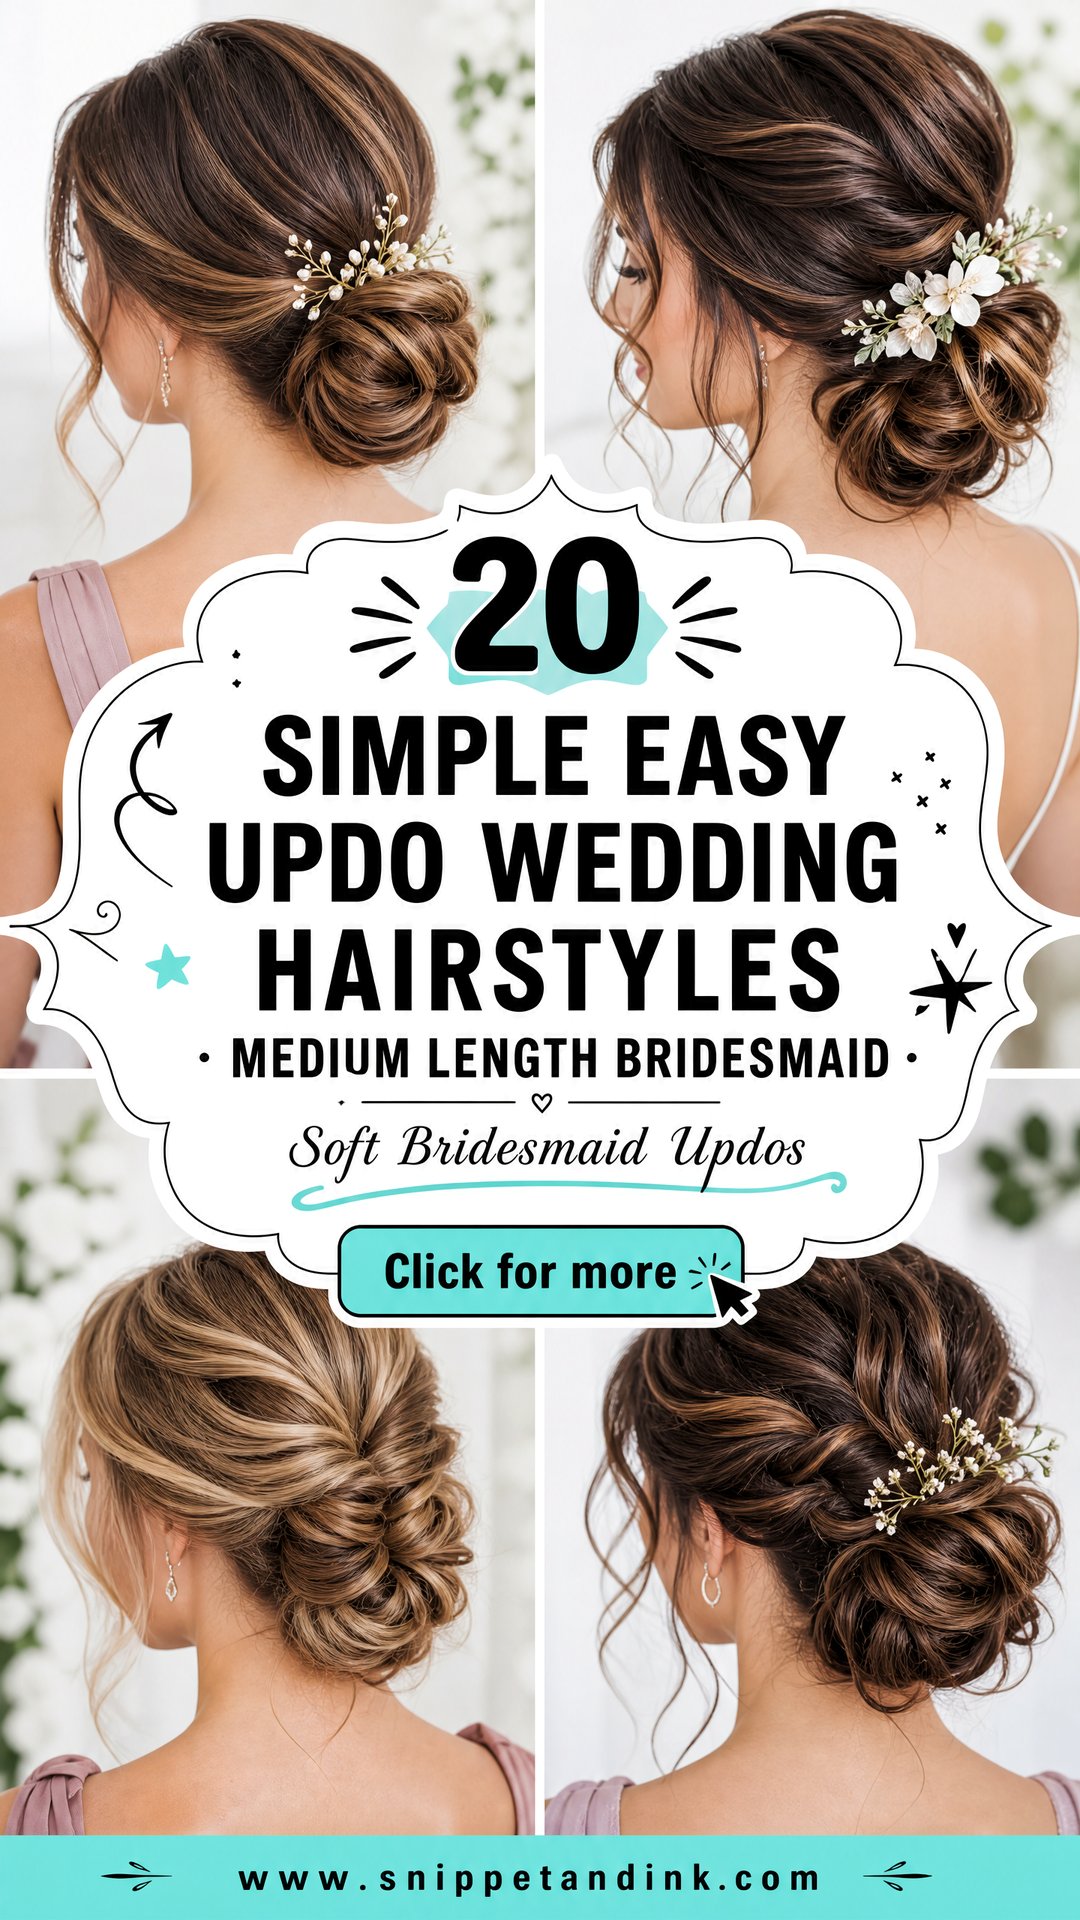
Medium hair is the length I’m happiest to see in a bridesmaid’s chair. There’s enough to pin, twist and braid, but not so much weight that the shape drags down by the first dance. Everything below is a low or mid-height style I’d trust on a wedding that runs from morning photos to a late reception: soft buns, chignons, braided shapes, knots and a couple of half-up options. None of these medium length bridesmaid updos needs extensions, and each one can be adjusted for fine hair, thick hair, curls or very straight strands with a little change in prep.
What Medium Hair Needs Before Anyone Picks Up a Pin
Most updos that fall apart were lost before styling started. Freshly washed, conditioned medium hair is too soft and slippery to hold a twist, so I ask bridesmaids to wash the evening before, use conditioner on the ends only, and skip any shine serum or oil that morning. Hair should arrive completely dry. Damp roots are the reason buns sag by mid-afternoon.
- Fine hair: a volumizing mousse at the roots the night before, then dry shampoo or texture spray at the chair. I want grip, not shine.
- Thick or coarse hair: blow it out smooth the night before so I’m not fighting frizz and bulk at the same time.
- Curly or coily hair: come with your usual wash-day routine done, defined and fully dry. Tell me what products your curls like.
- Fresh colour or a new cut: book it a week or two ahead, not the day before. A blunt new cut has sharp ends that poke out of rolls.
Wear a button-front or zip-front top to sit in. A finished updo dragged through a T-shirt neckline is squashed for good, and there’s no quick repair once that happens.
1. Low Bun Bridesmaid Updo
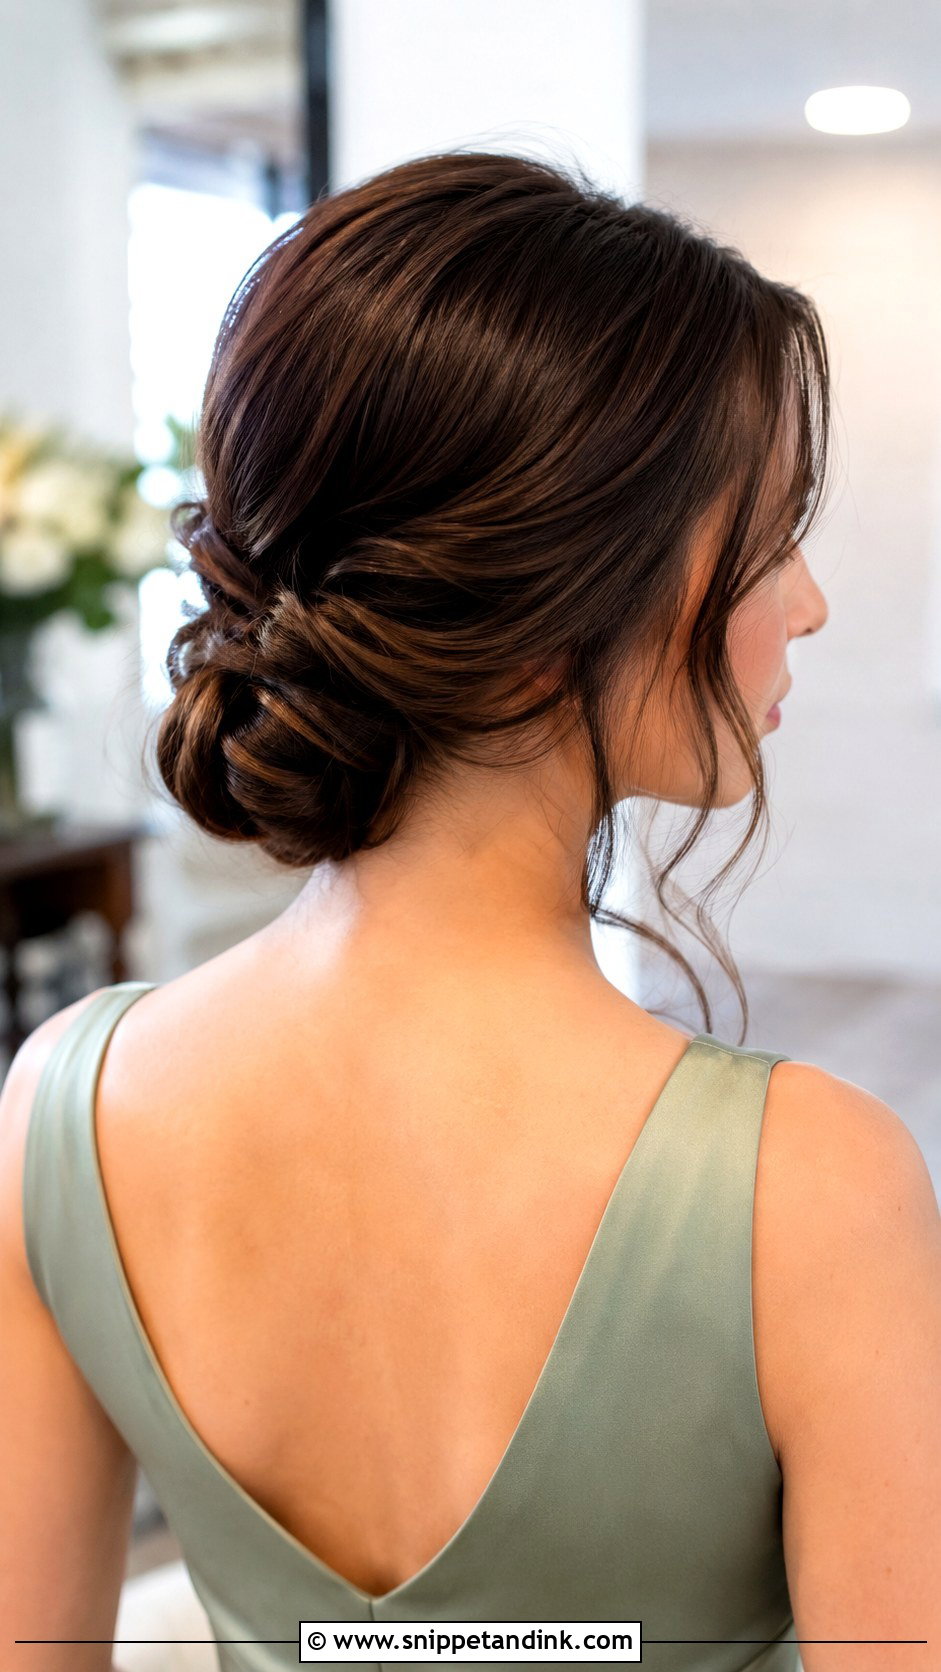
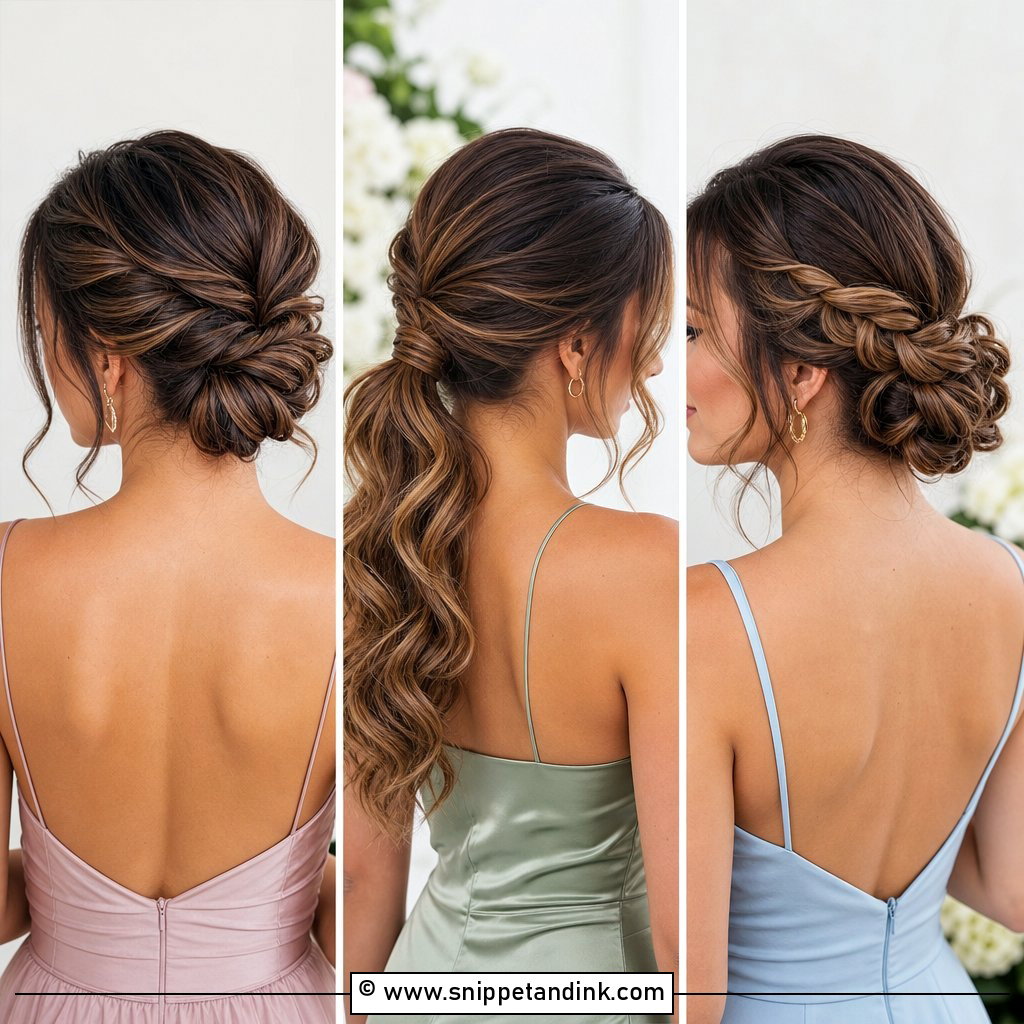
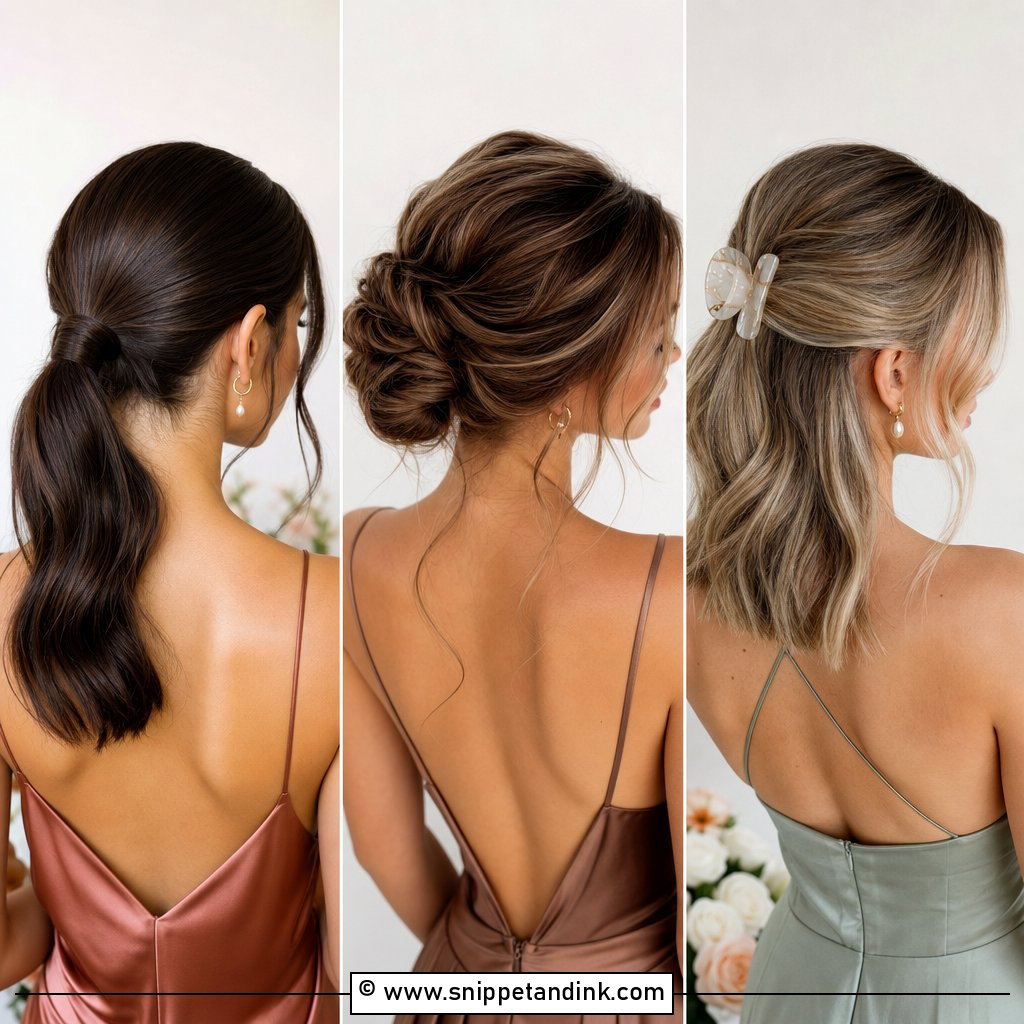
This is the one I suggest when a bridal party can’t agree on anything, because it suits almost every neckline and face shape. I gather the hair at the nape, twist it softly and pin it into a rounded bun, with the parting left to each bridesmaid. On fine hair I spray texture through the lengths before I gather anything, otherwise the pins slide out of clean, silky strands within an hour. Thick hair goes the other way: I split it into two smaller twists so the bun doesn’t sit like a heavy ball pulling on the scalp. Face-framing pieces suit a plain neckline; leave them out if the dress already has a lot going on.
2. Messy Low Bun Bridesmaid Updo
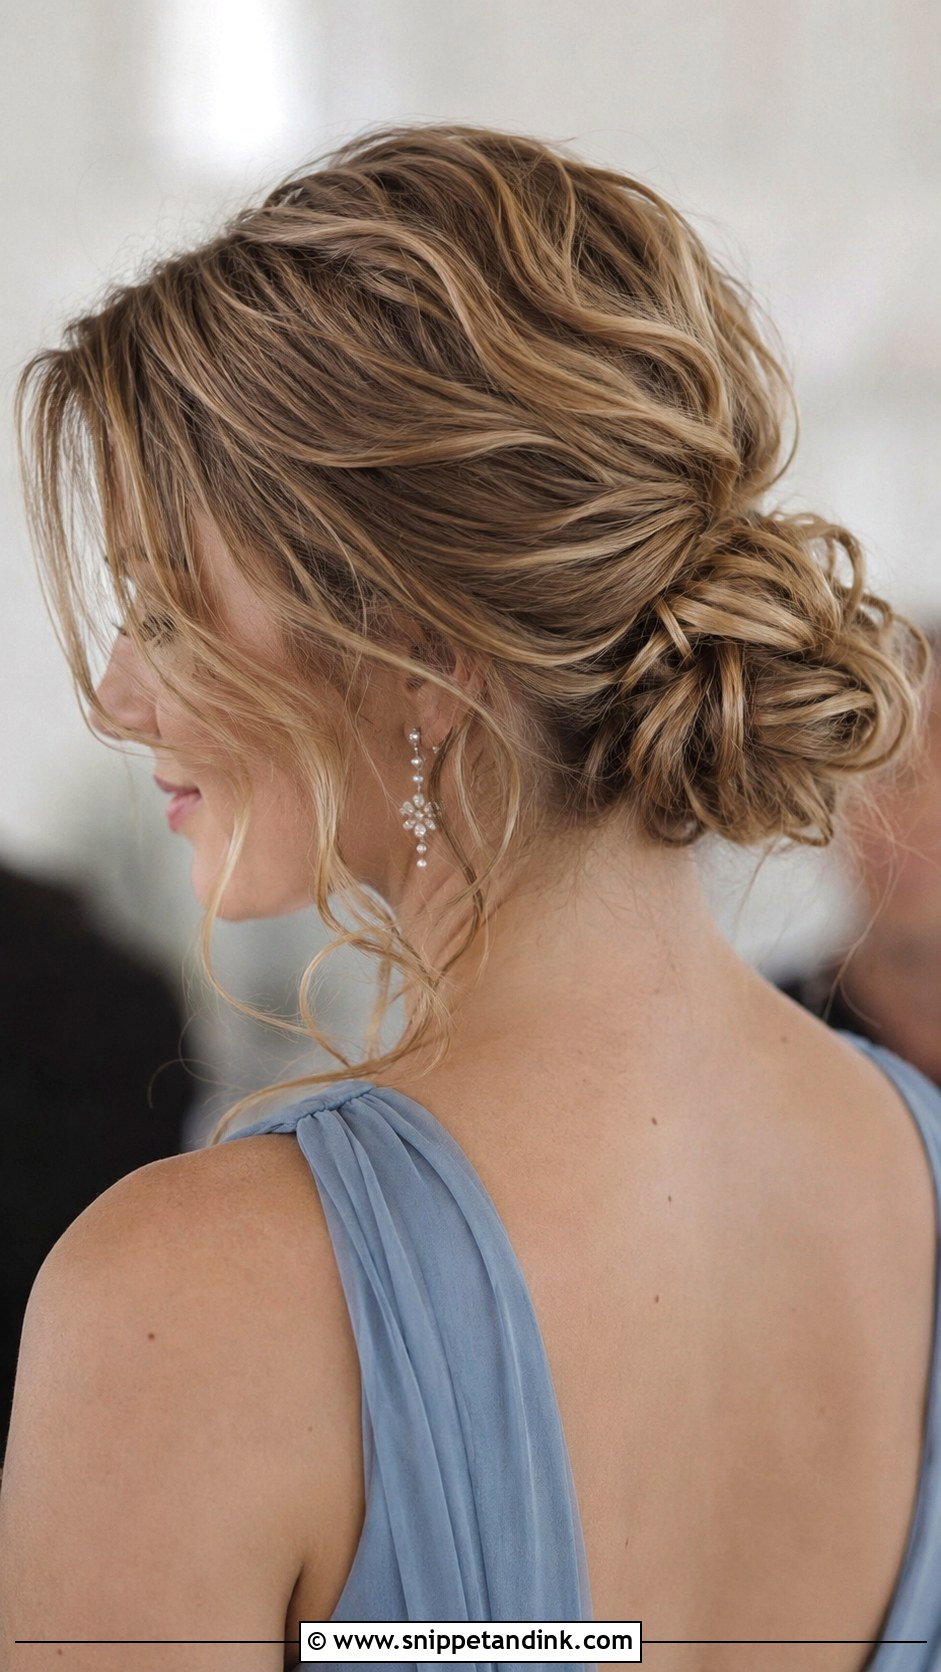
The difference between a messy bun and an unfinished one is how it’s pinned. I curl everything first, tease just the crown, then build the bun from small sections, each with its own pin, so the looseness is placed rather than accidental. A few pieces fall near the cheeks on purpose. I finish with a flexible spray, not a strong hold, because a crunchy texture looks wrong on a style meant to move. It’s the most forgiving option in this list for a relaxed garden or beach wedding, and it hides the odd pin slipping during the dancing.
3. Twisted Low Bun Bridesmaid Updo
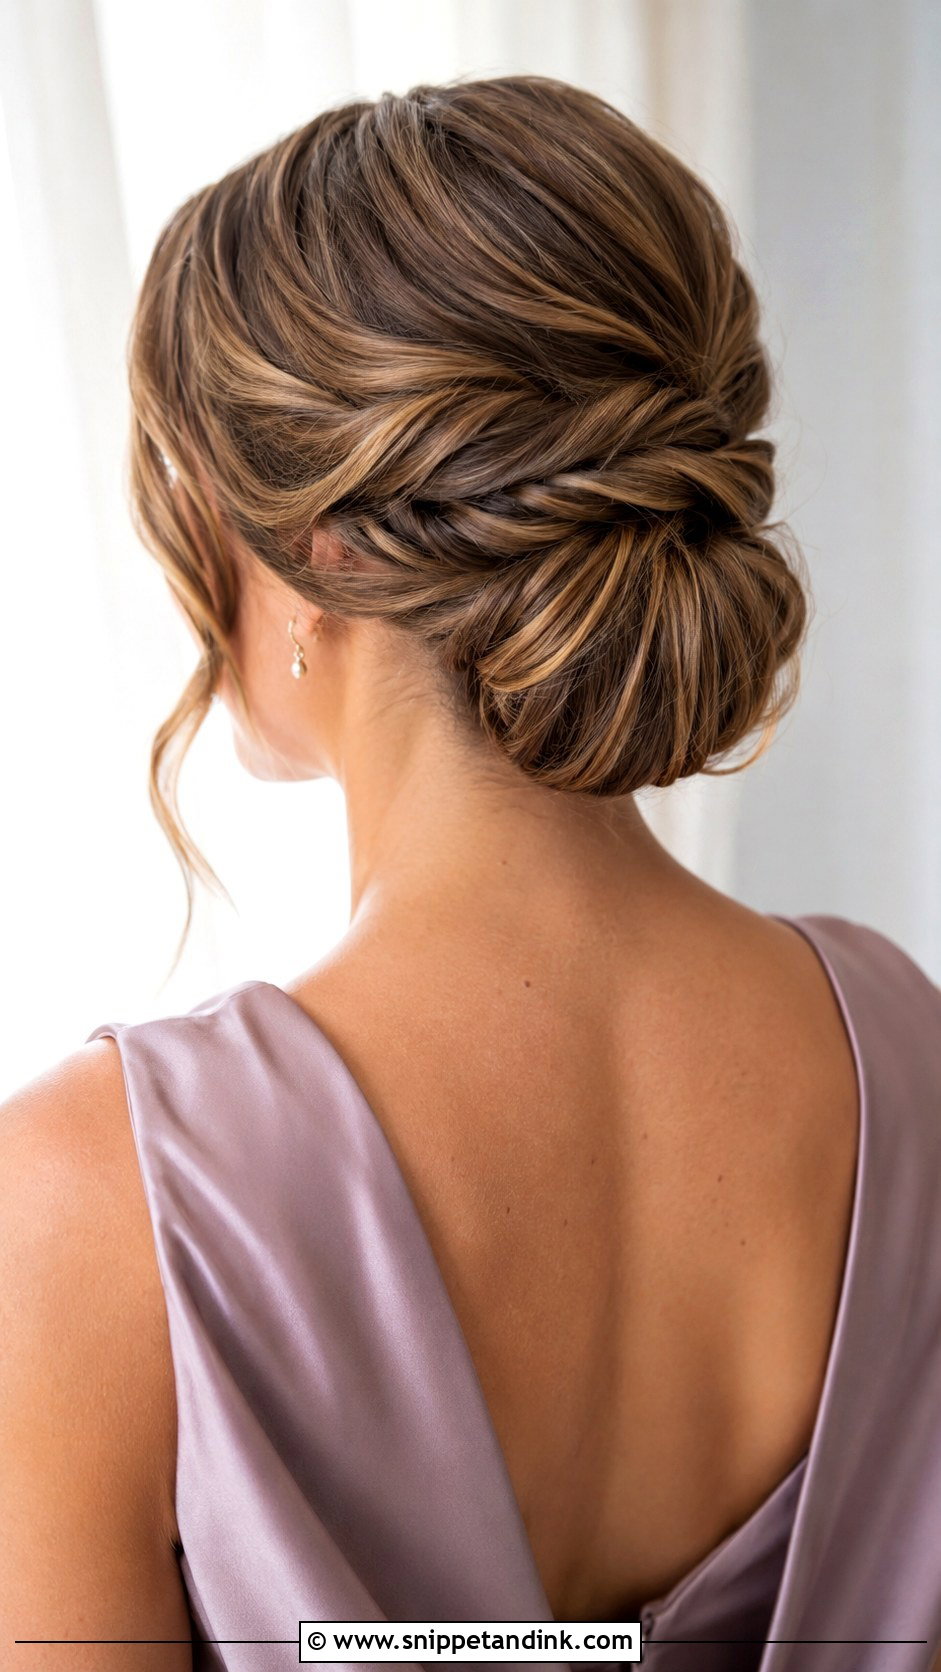
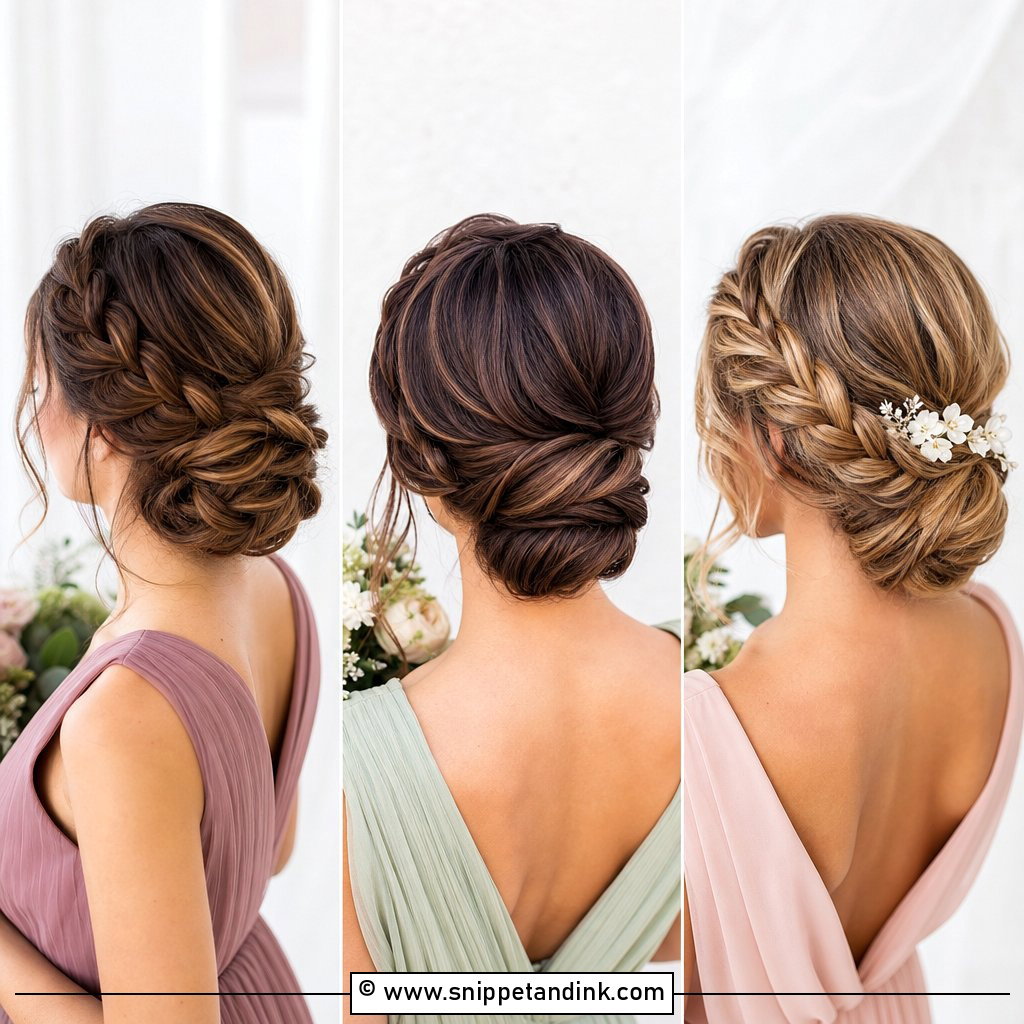
Twisting sections toward the centre before pinning gives a low bun shape from every angle, which matters because bridesmaids are photographed from behind at the ceremony far more than they expect. I usually work in four or five sections, twisting each away from the face. Highlights and balayage show up well here, since every twist turns the lighter and darker strands over. Layered cuts are fine as long as the shortest layer reaches the nape; shorter than that and I’d add a braid to catch it. Pearl or small floral pins along the twists finish it without hiding the work.
4. Braided Low Bun Bridesmaid Updo
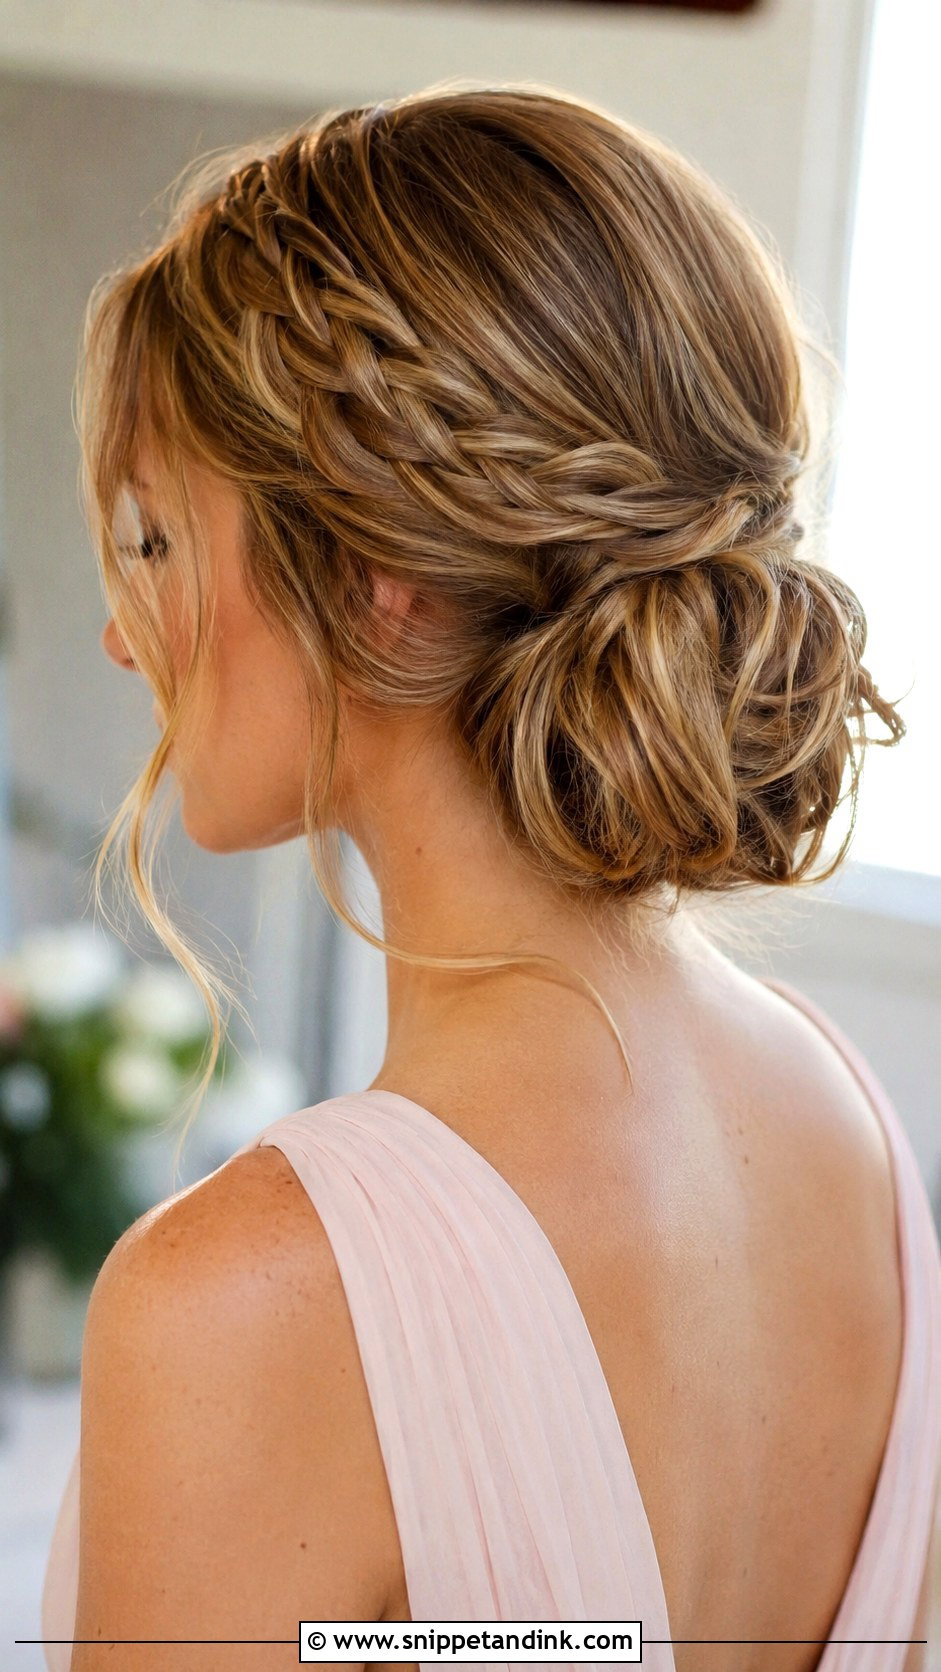
A braid is my favourite trick for layered medium hair. I start a loose braid on one side or across the back, then tuck its ends into the low bun, so the braid catches the shorter pieces that would otherwise spring free by the reception. Outdoors, it keeps the front from blowing across lip colour in every photo. I braid over soft waves rather than straight hair because the braid pancakes more evenly with some bend in it. Pin the bun close to the neck so the braid and bun read as one shape.
5. Side Bun Bridesmaid Updo
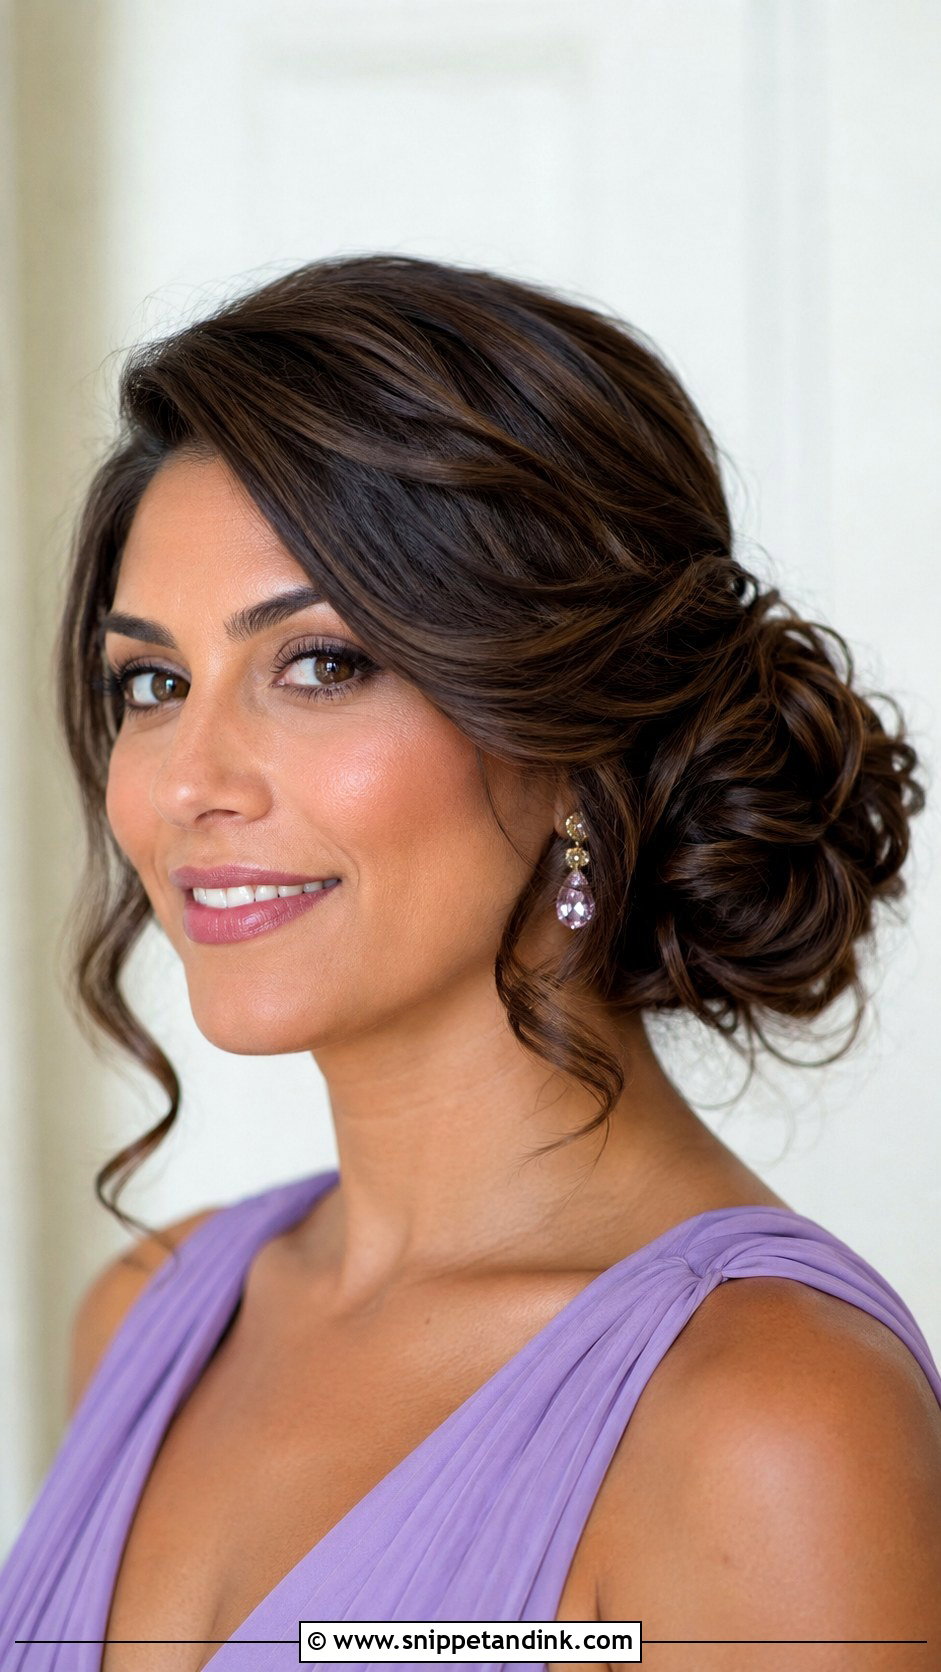
An off-centre bun sits near one side of the nape and balances a one-shoulder dress better than anything else here. I always ask which side the strap is on and place the bun on the opposite side, so the bare shoulder and the hair share the frame. Curling first gives the bun body and blends shorter layers into it. One side gets swept back and pinned flat behind the ear; the other keeps a light face-framing piece. If a bridesmaid’s hair has a stubborn flip on one side, I check it at the start, because that flip will fight the sweep all day.
6. Sleek Low Chignon Bridesmaid Updo
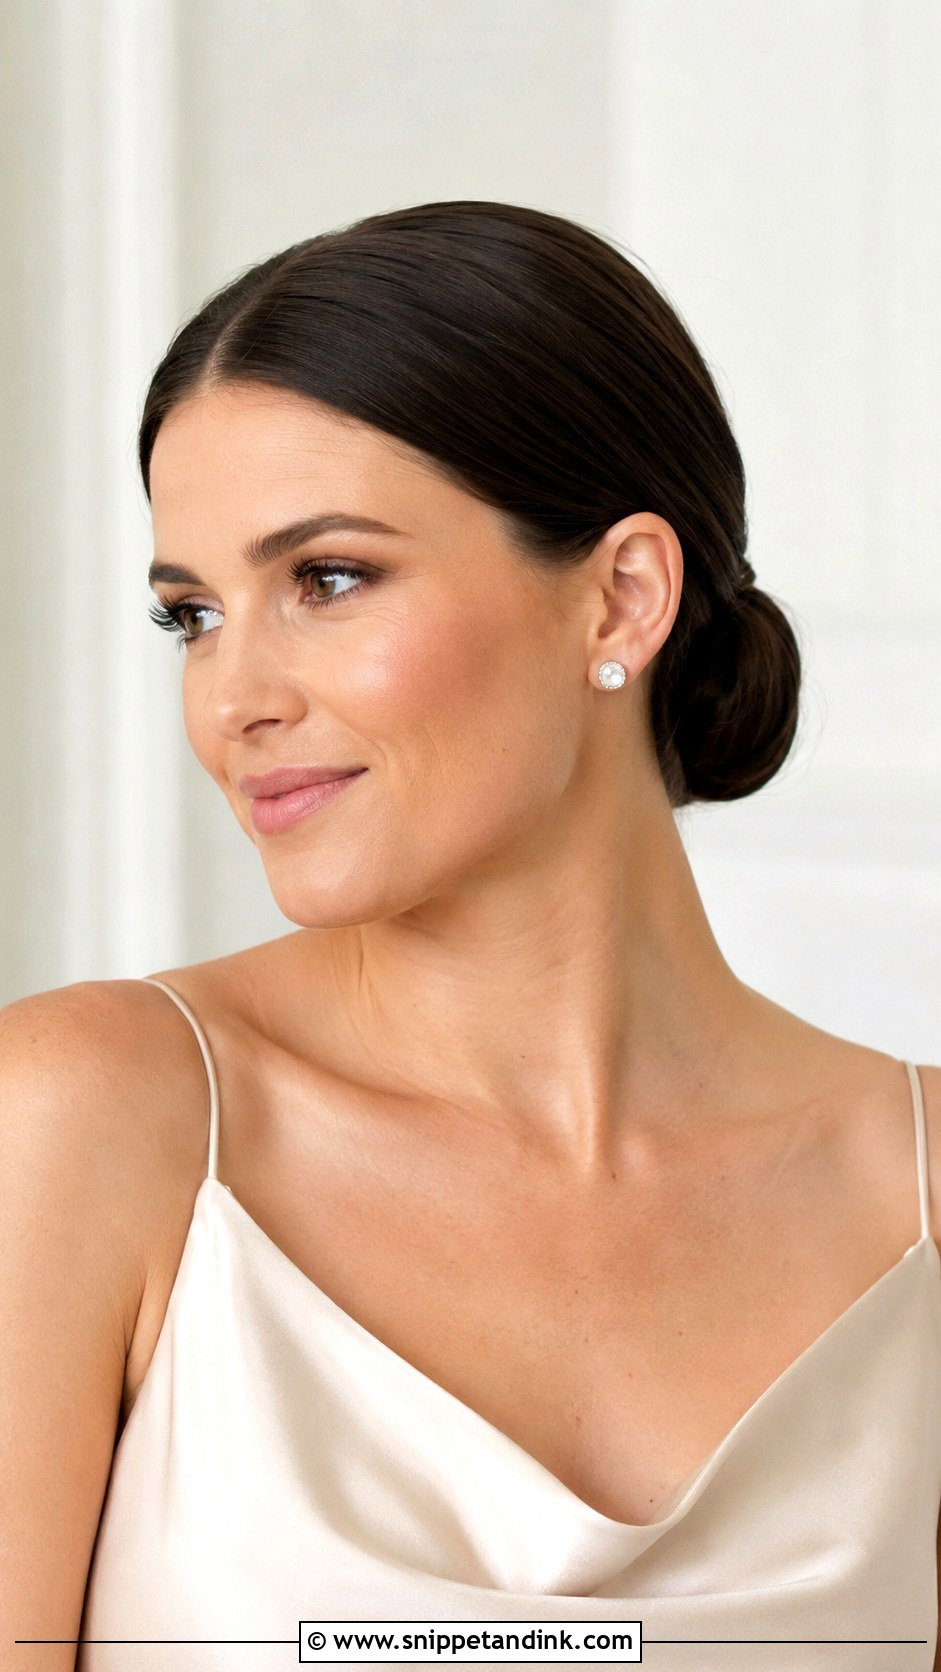
A sleek chignon shows every flaw in the prep, so I spend more time on the first ten minutes than on the shape itself. Smoothing cream goes on before the blow-dry, then I comb the part and the sides with a fine-tooth comb before forming a low knot or tucked roll at the nape. I cross the pins in an X through the chignon, which holds far better than pins pushed in straight. It suits satin and minimalist gowns and leaves the earrings with no competition. Skip heavy hairspray; a light shine spray stops the surface from looking dull under flash.
7. Loose Chignon Bridesmaid Updo
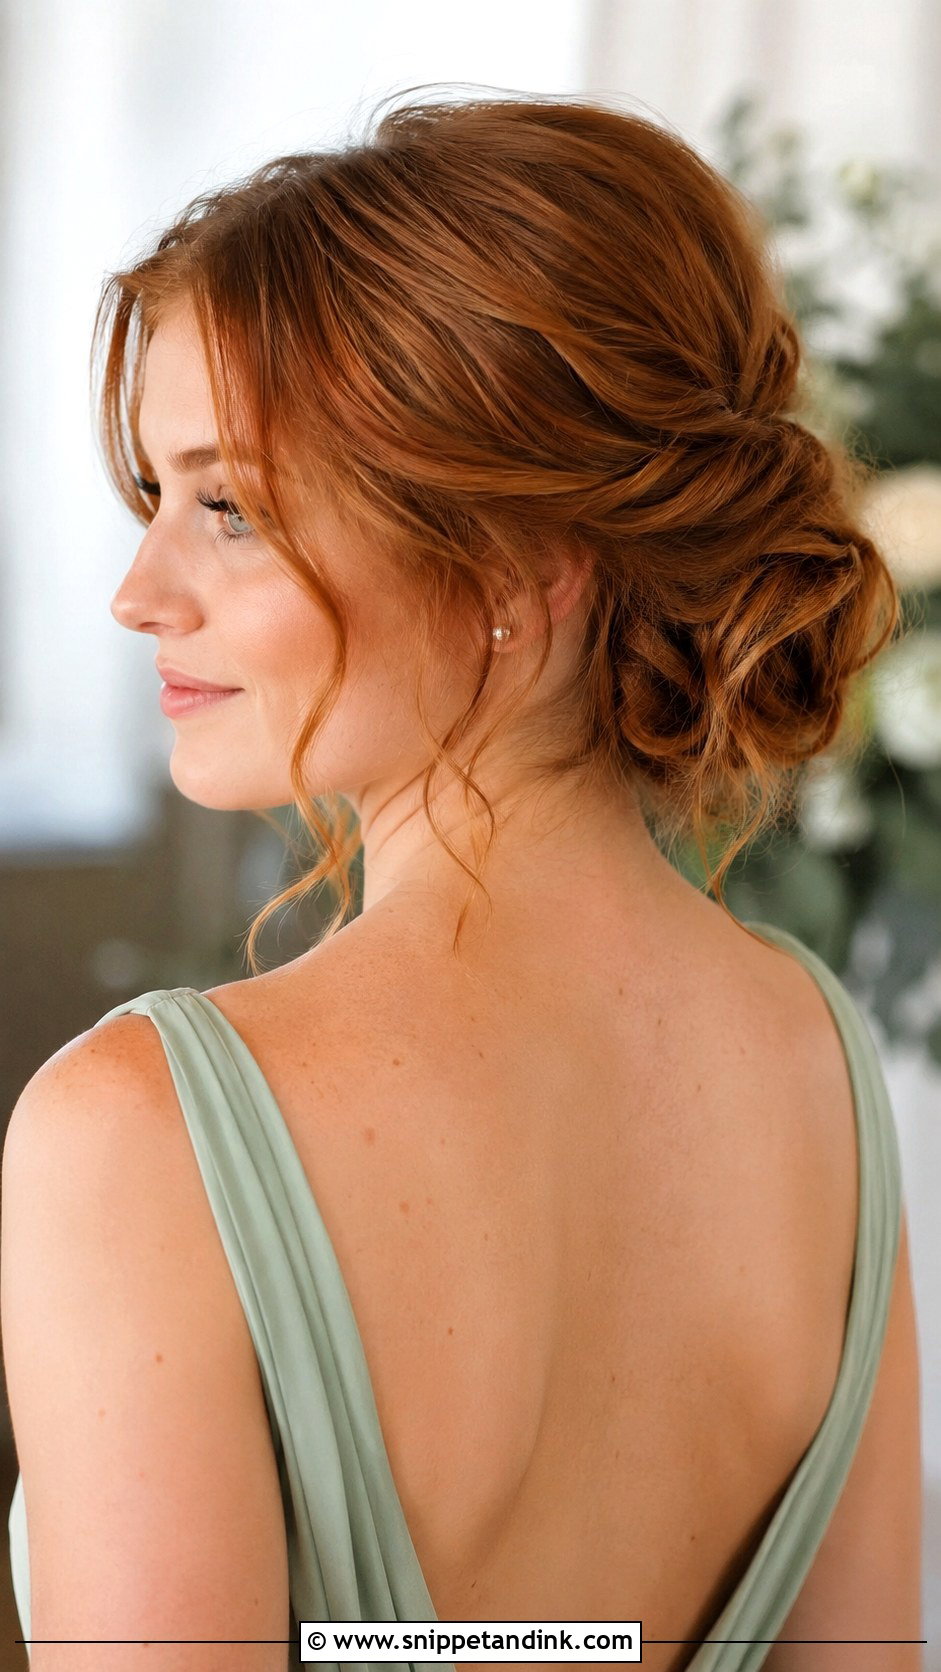
Medium hair makes a compact loose chignon that never looks bulky, which is why I prefer it here to long hair. I gather the hair low, roll or tuck it loosely and pin the roll from underneath so no pins show on the surface. A little lift at the crown balances thin straps or an open neckline. It holds on wavy, curled straight and naturally textured hair, though very slippery hair needs texture spray first. Keep the front light, but anchor the back properly: this is the shape that loosens first once someone starts dancing.
8. French Twist Bridesmaid Updo
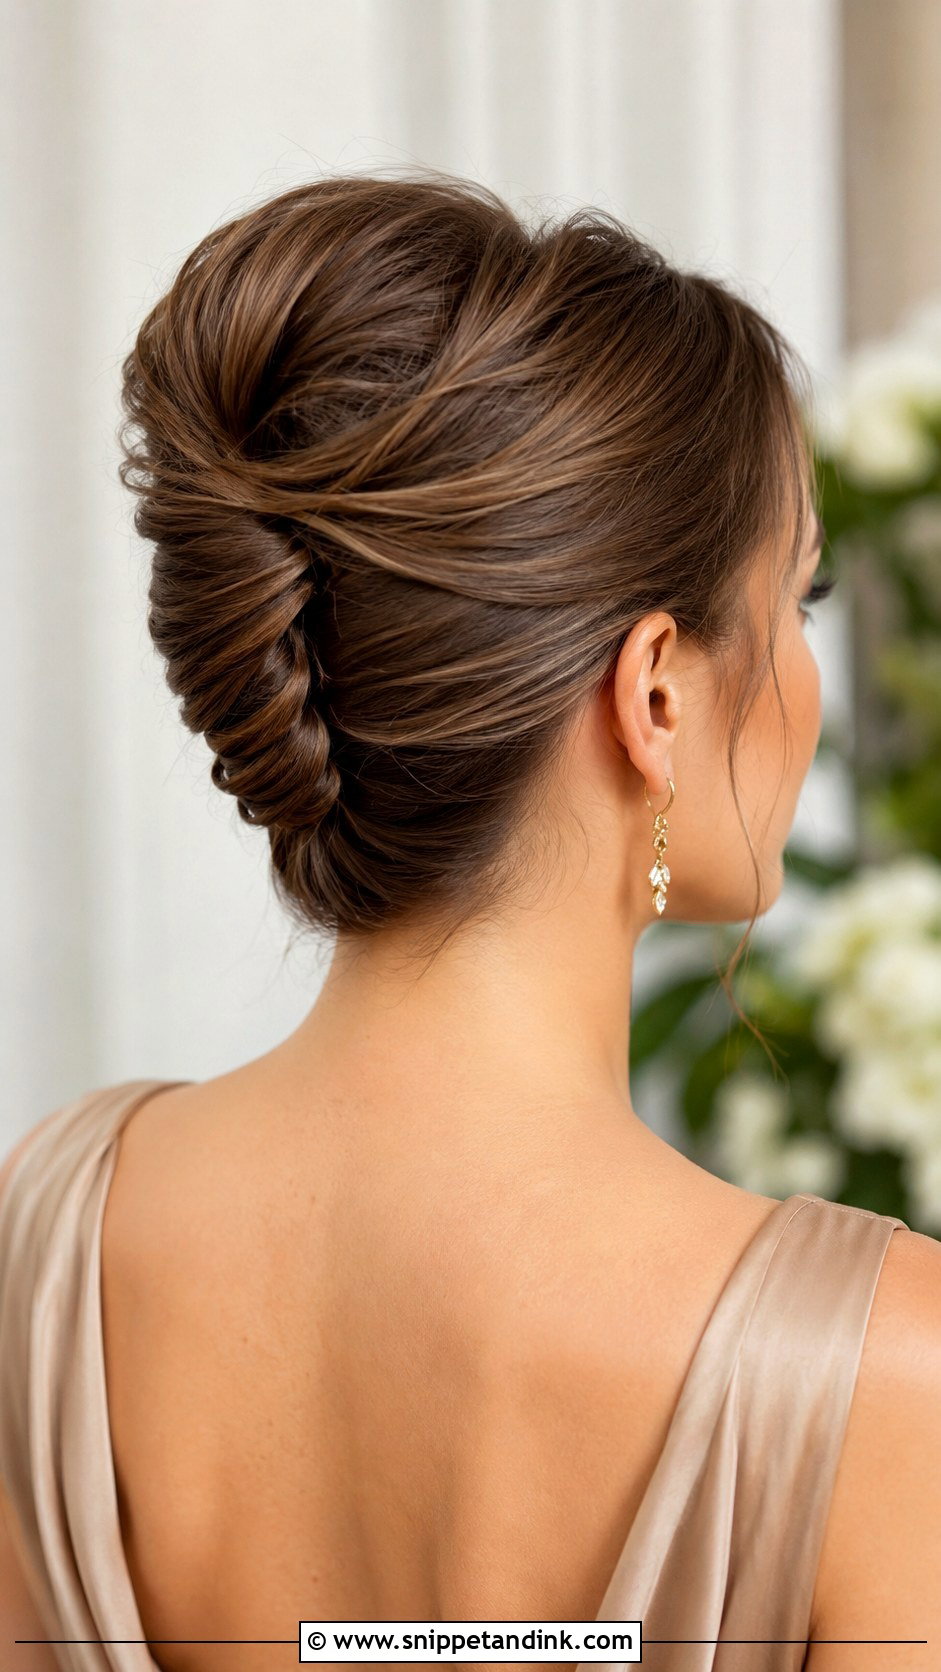
People assume a French twist needs long hair, but medium length is actually easier, because there’s less length to hide inside the roll. I prep with texture spray, sweep the hair back, roll it inward and pin vertically along the seam, pushing each pin into the base of the twist rather than its surface. For bridesmaids I keep it a touch softer than a bridal twist so it reads refined without competing with the bride. Leave some lift at the crown. The seam is what guests see during the ceremony, so I check it from behind with a hand mirror before anyone leaves the chair.
9. Soft French Twist Bridesmaid Updo
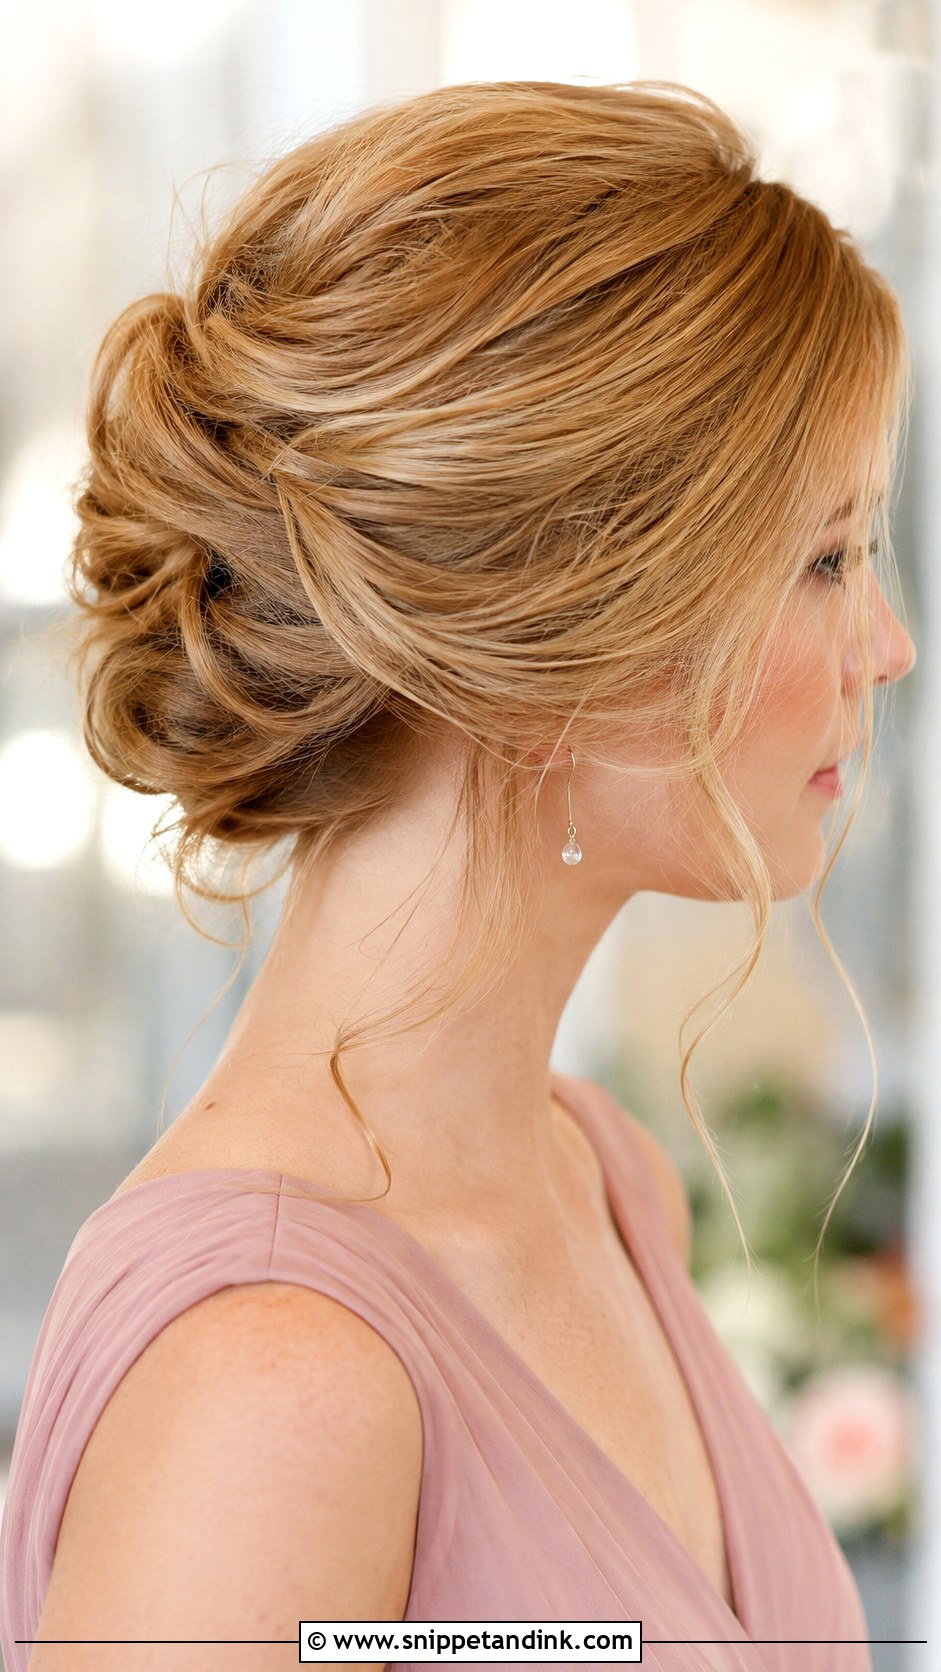
A softer twist is what I’d give fine to medium hair, because a tight roll on fine strands shows the scalp and looks thin. I sweep the hair into a loose vertical twist and leave small airy pieces around the face. Curling the ends before pinning makes the twist look fuller, since the curls pad the inside of the roll. Avoid this one if the hair is very blunt and heavy; it tends to unwind. A small comb or a few delicate pins along the seam suit it.
10. Rolled Updo Bridesmaid Hairstyle
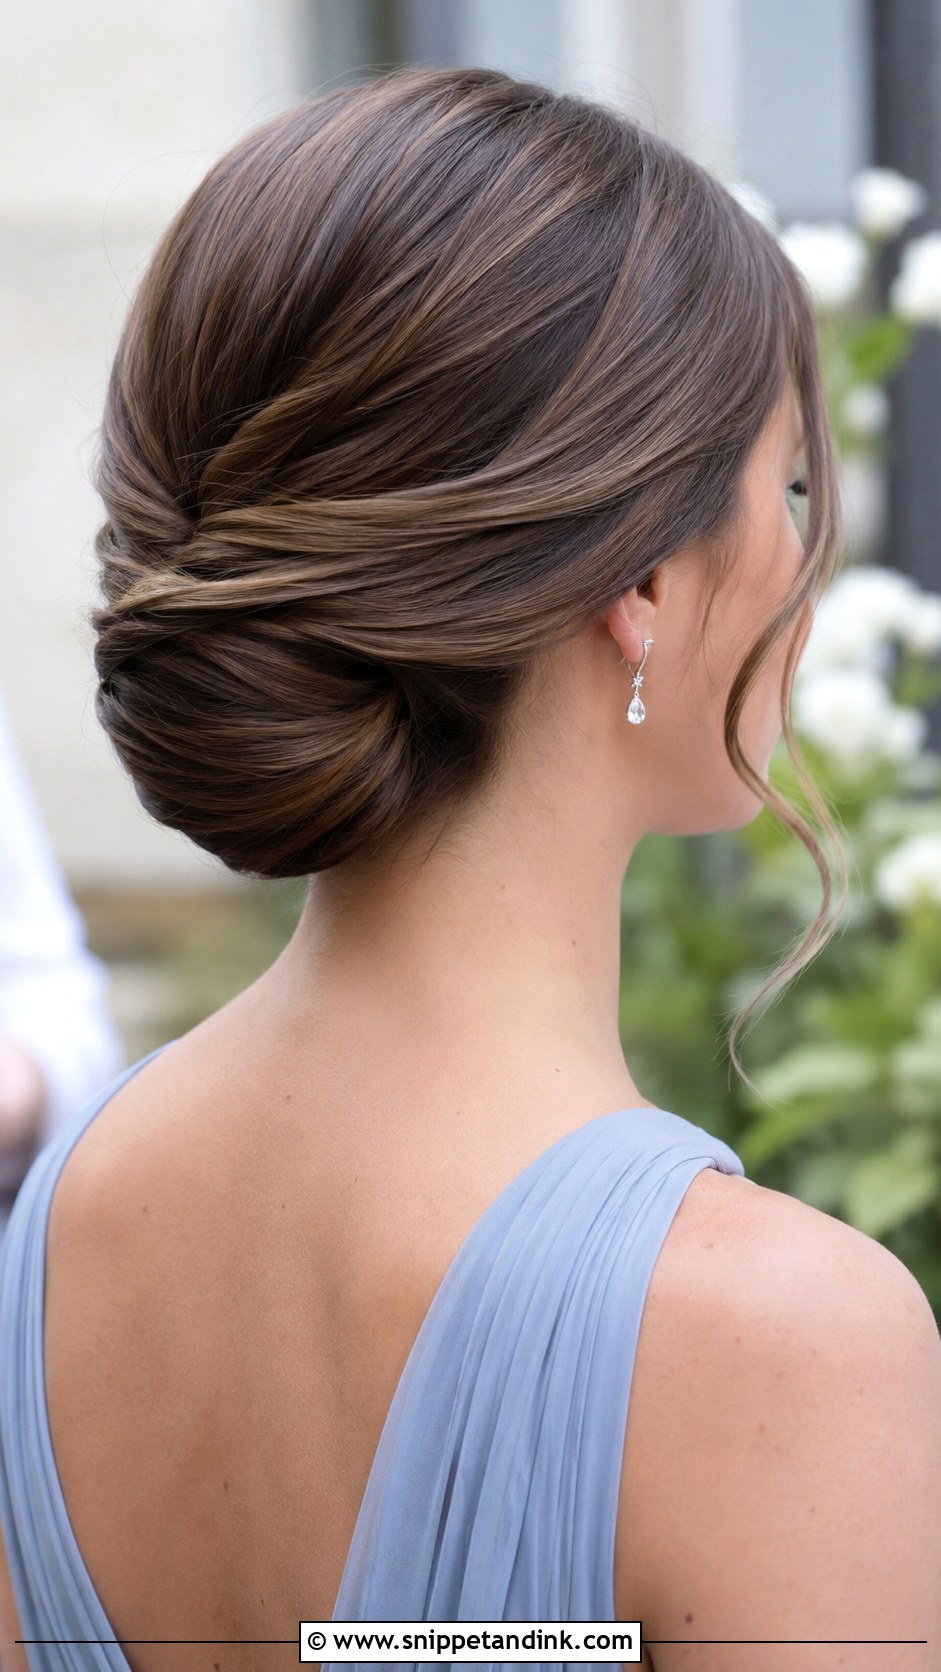
For shoulder-length hair, the rolled updo is the one I reach for first, because the ends don’t need to be long to disappear. The hair is tucked upward and inward and pinned along the nape. A headband or a stretchy elastic band gives the roll something to wrap around, and on hair that barely reaches the shoulders I add one or two tiny clear elastics inside the roll for support. It keeps the neck clear, which bridesmaids appreciate at a summer wedding. A light curl first makes the roll fuller.
11. Tucked Bun Bridesmaid Updo
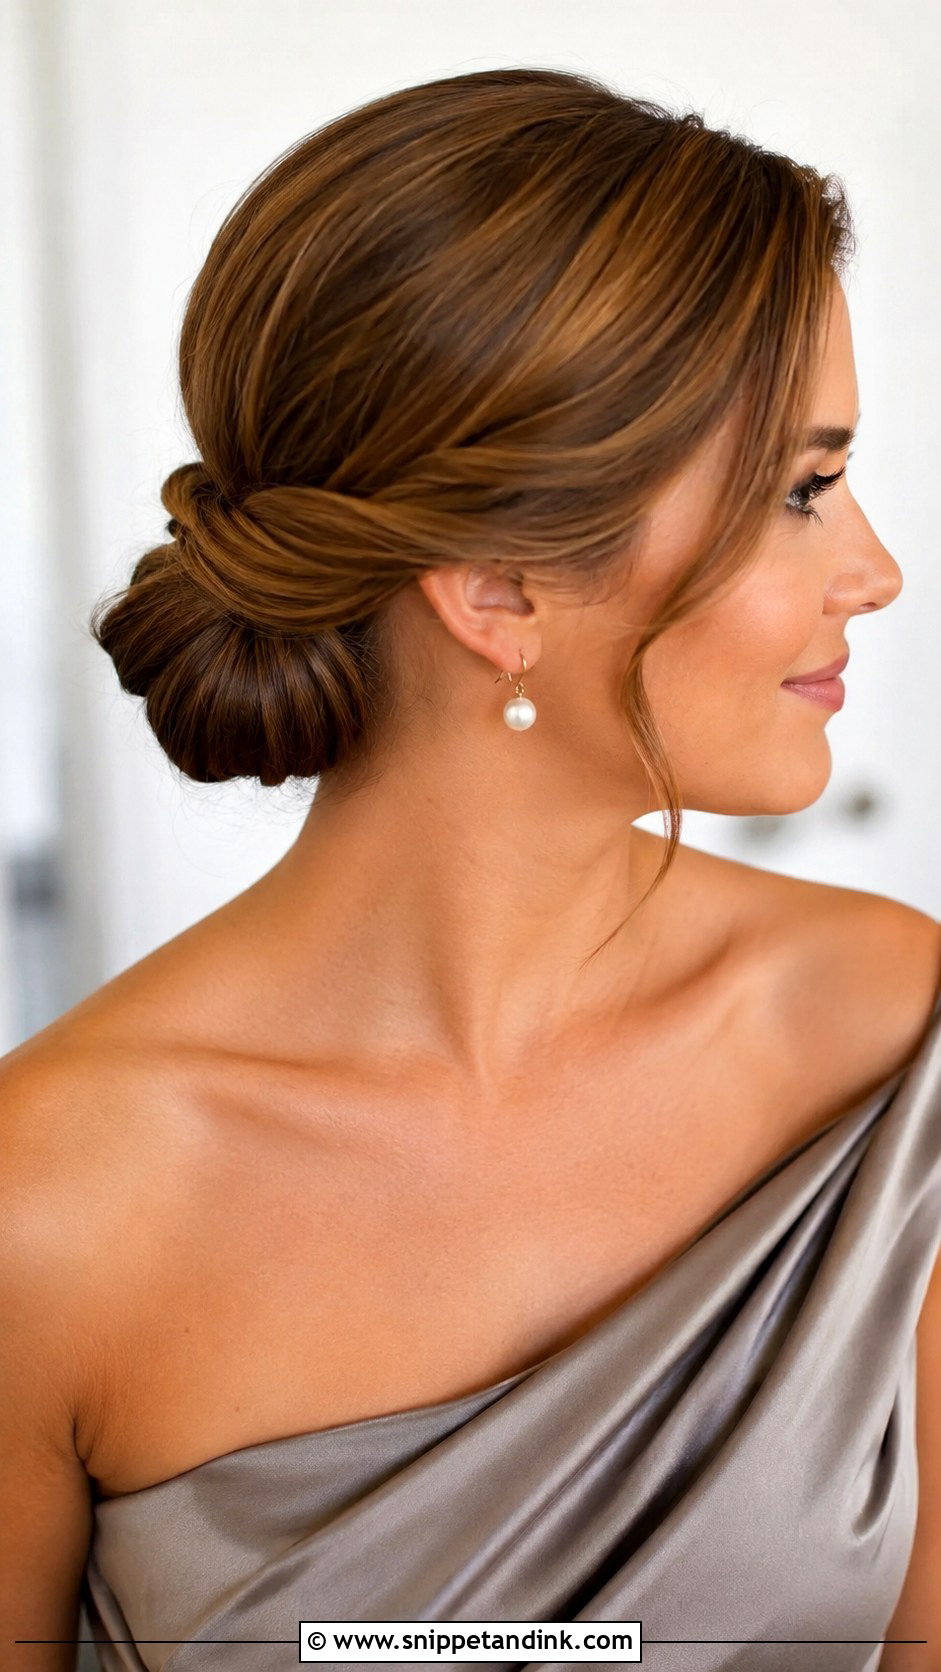
Slippery straight hair is the problem with a tucked bun, so dry texture spray goes in before I fold anything. The hair is gathered low, folded under and pinned so the ends vanish into a smooth, rounded shape. I like it on straight or slightly wavy hair because the smooth surface catches light cleanly. Very curly hair resists the fold and is better in the curly bun below. A middle part makes it sleek; loose front pieces soften it if the makeup is soft too.
12. Curly Low Bun Bridesmaid Updo
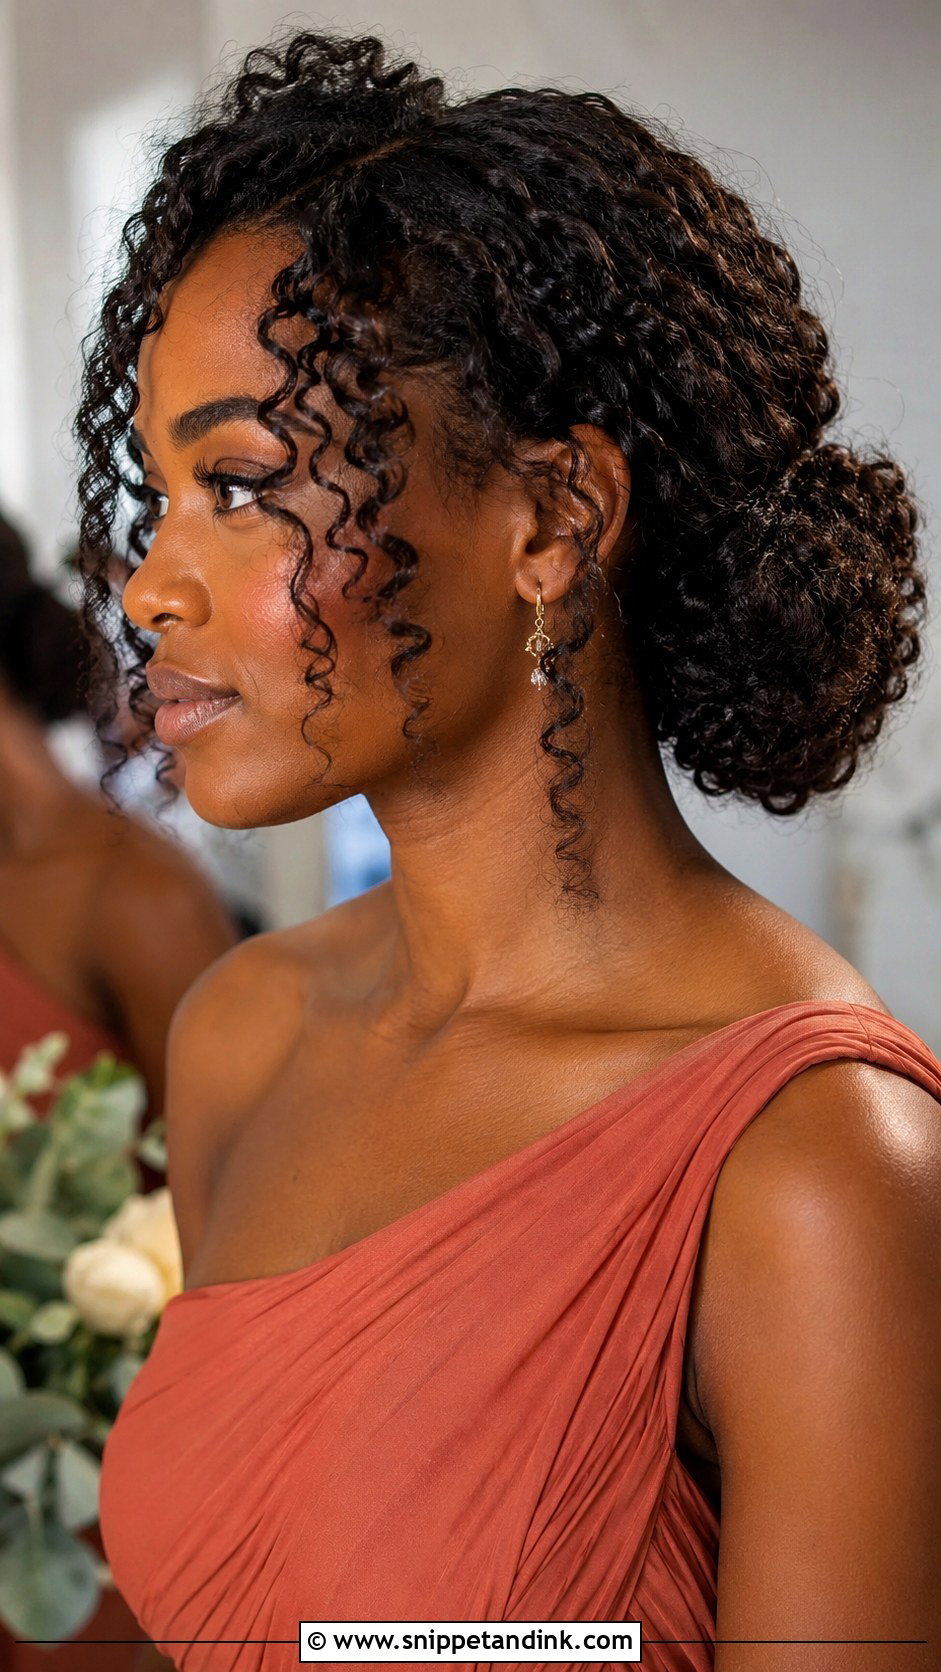
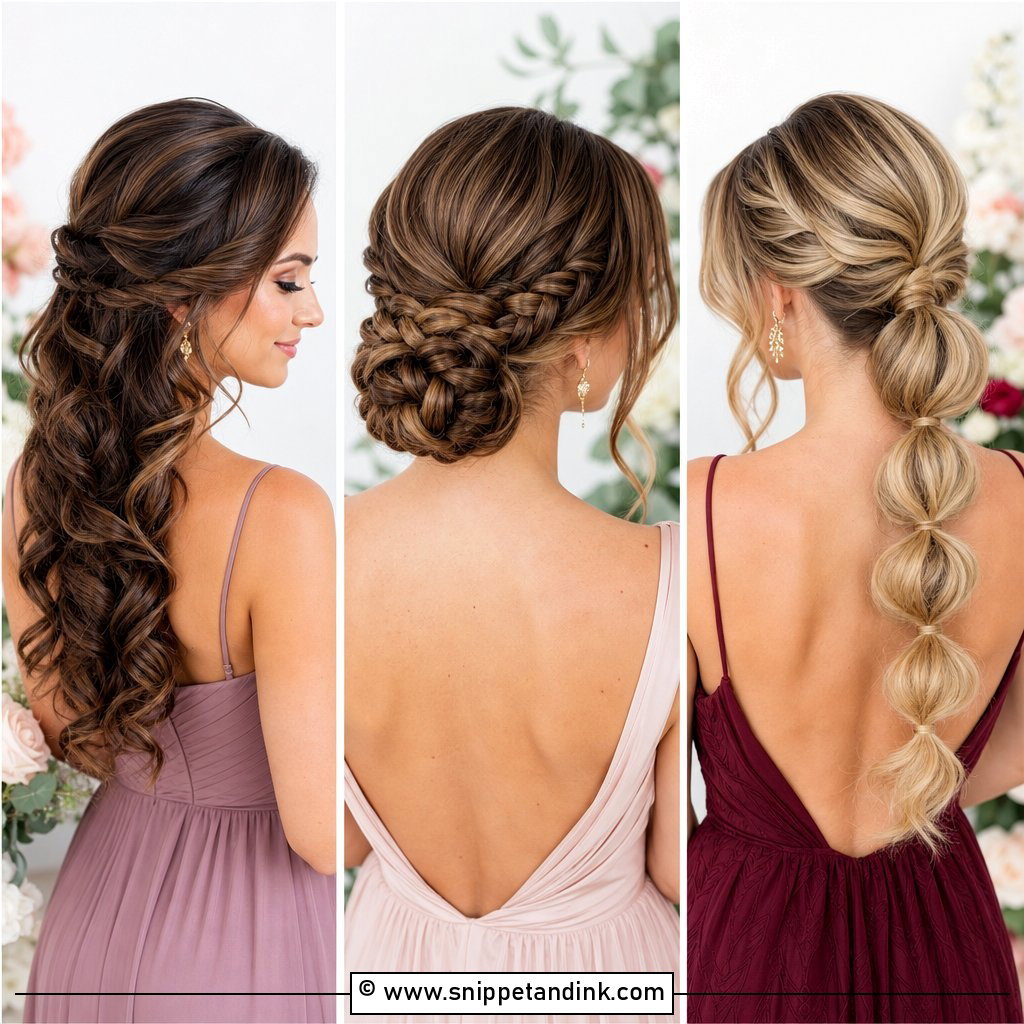
With natural curls I never brush the hair flat. I gather the curls loosely at the nape and pin them in small clusters, which keeps the curl pattern visible and stops the bun from turning into a frizzy puff. A curl cream or light gel defines the pieces at the temples. I ask curly-haired bridesmaids to arrive with hair washed and styled the way they normally wear it, not blow-dried straight, because I’m working with their pattern, not against it. It stays comfortable all day and doesn’t need much touching up.
13. Textured Bun Bridesmaid Updo
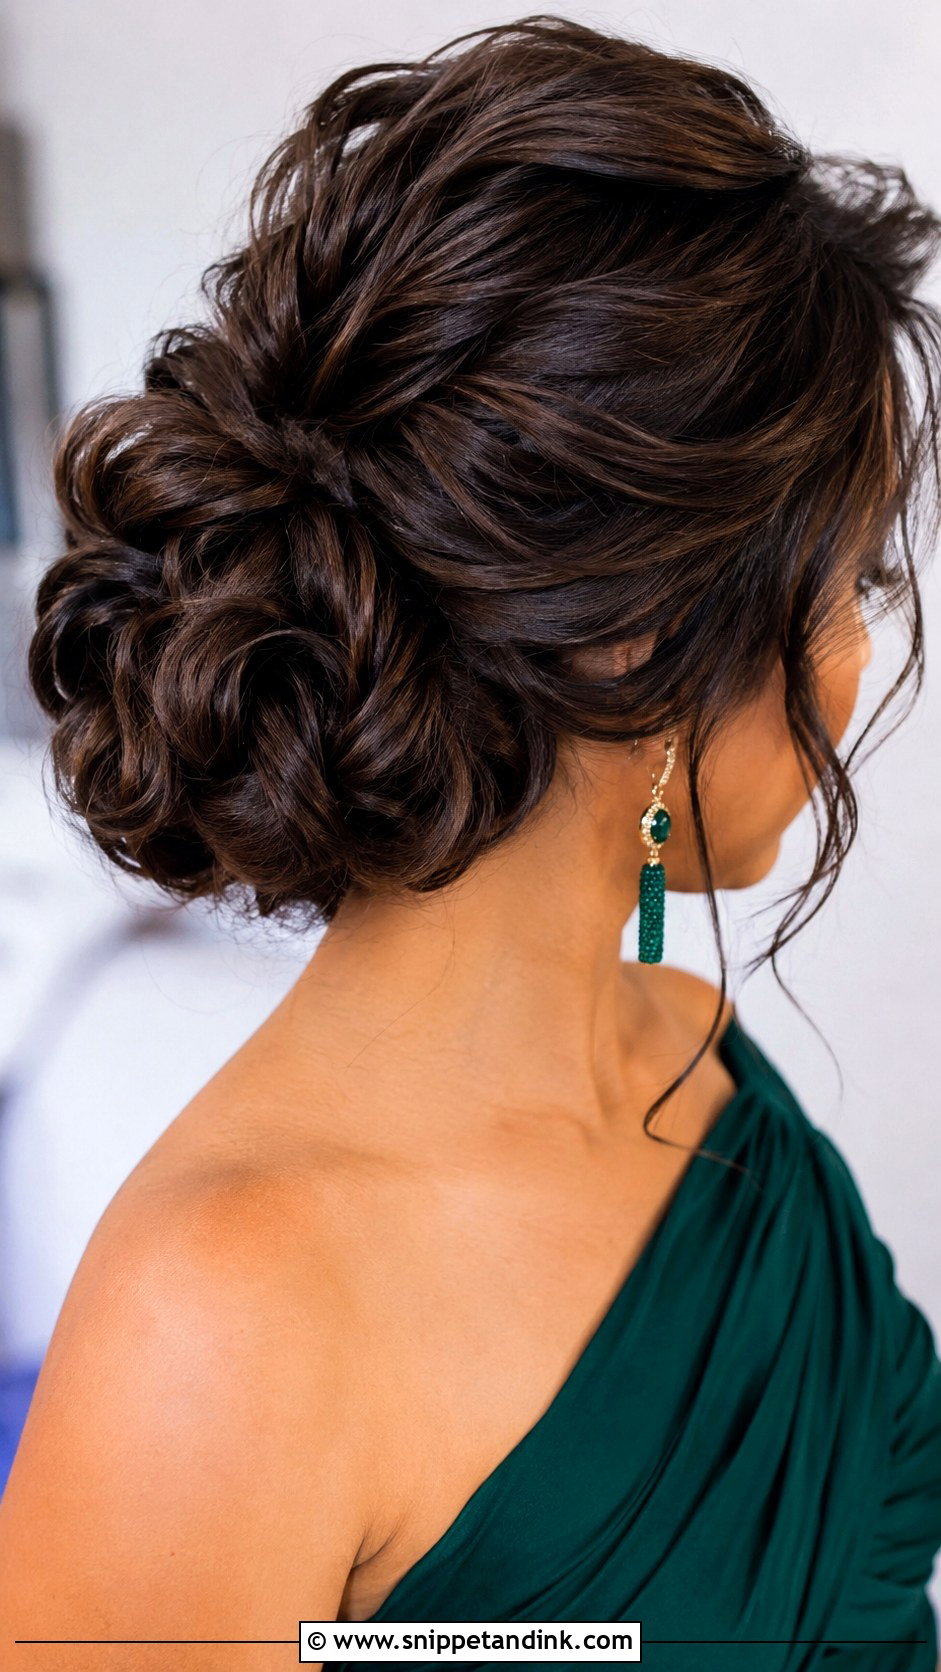
When a bridesmaid tells me her hair feels thin in a bun, this is the fix. I start with loose curls or waves, pin a low or mid-height bun, then pull pieces gently apart for fullness. Fine hair gets a small padding piece or a little backcombing at the crown so the bun reads bigger. Thick hair is the opposite case: I pin it in separate sections so the weight is spread across more pins. Stop pulling once the shape looks full; there’s a point where texture turns into mess, and it arrives faster than you think.
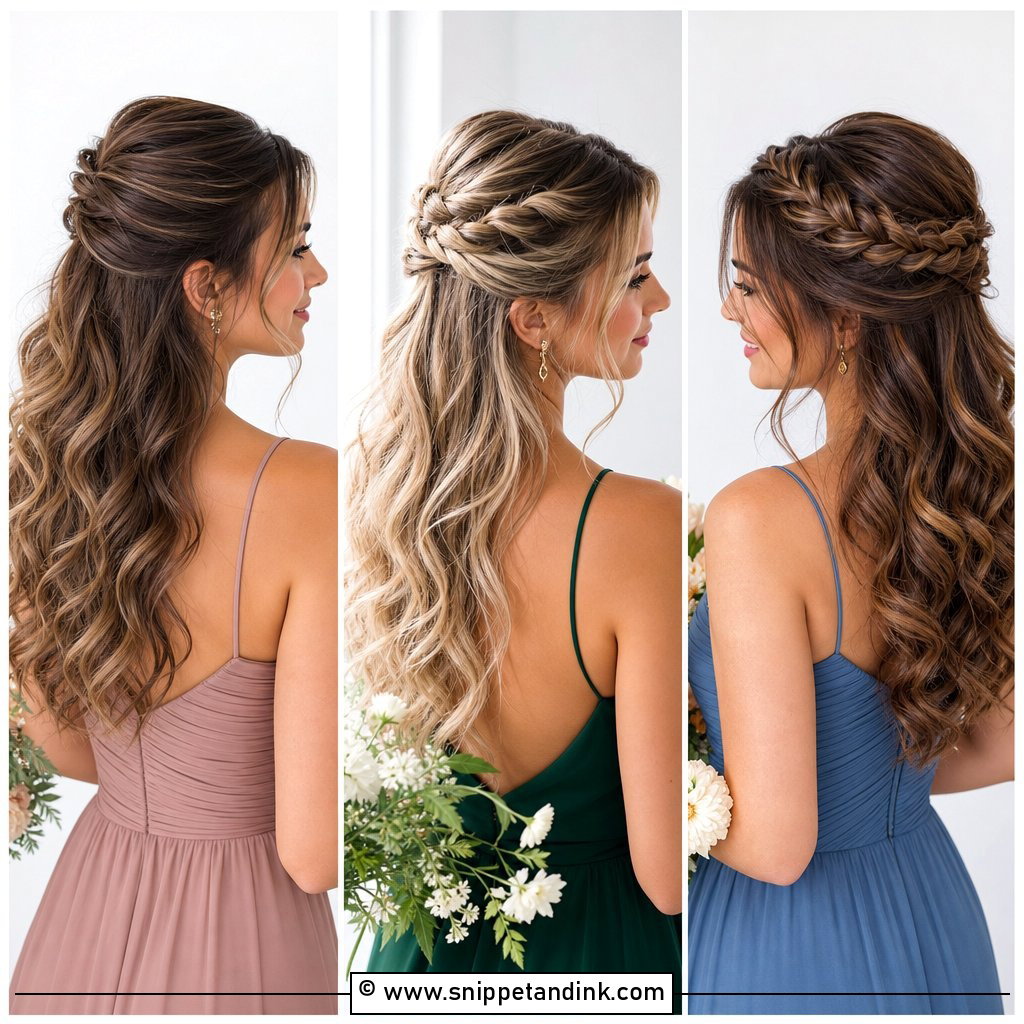
14. Half Updo Bridesmaid Hairstyle
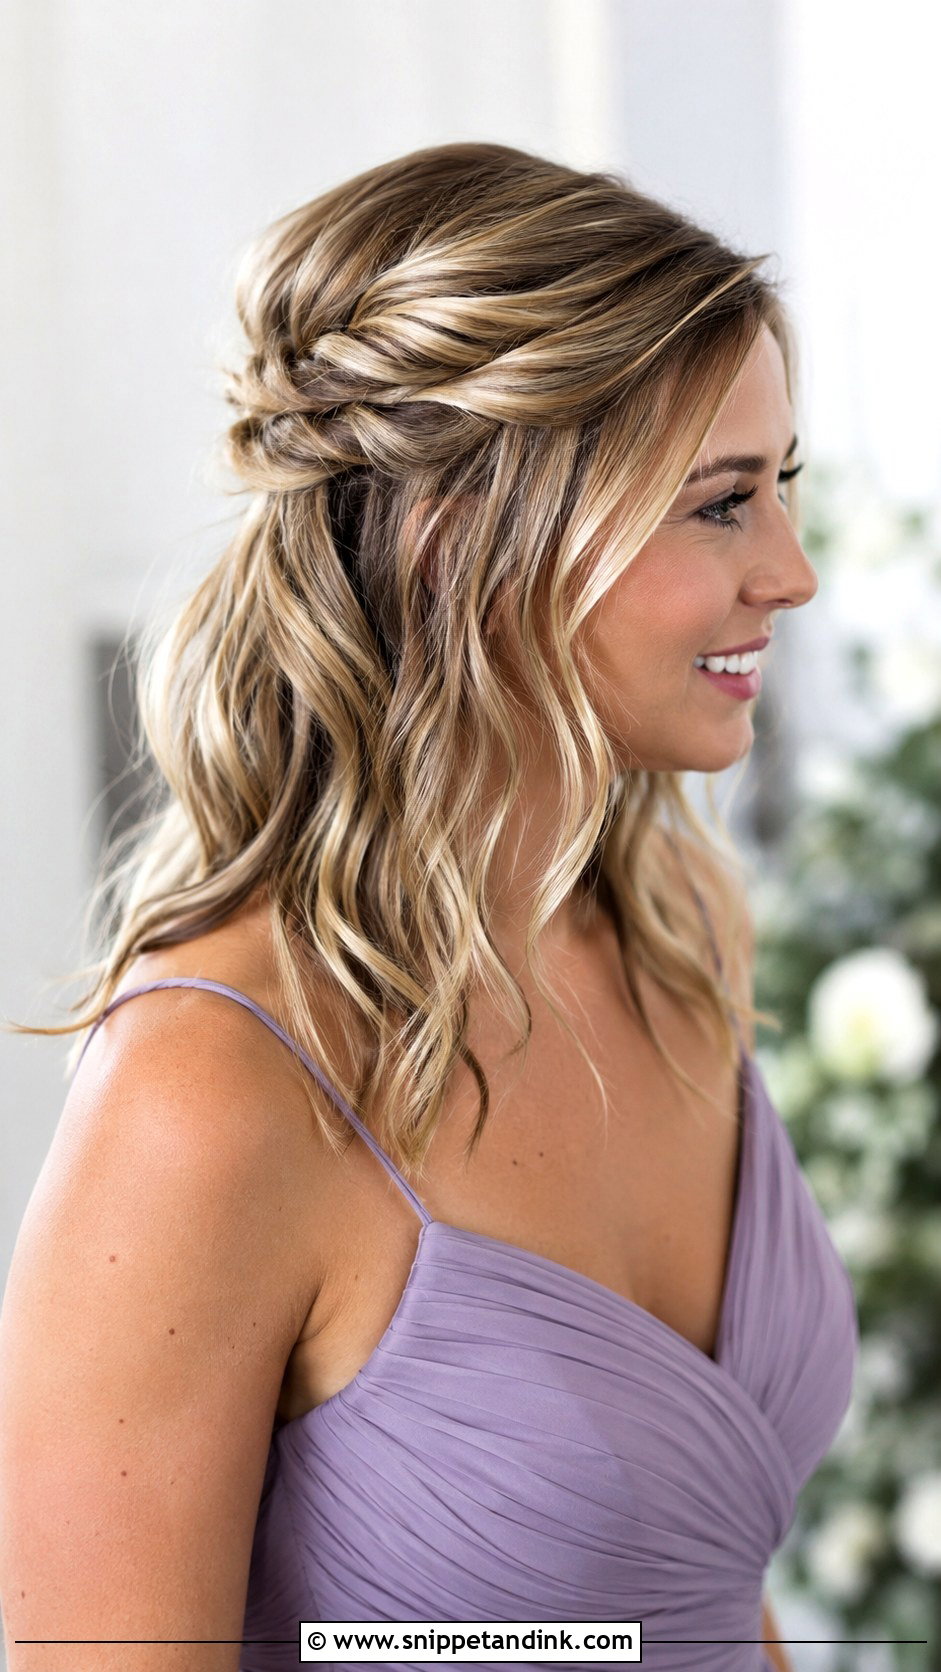
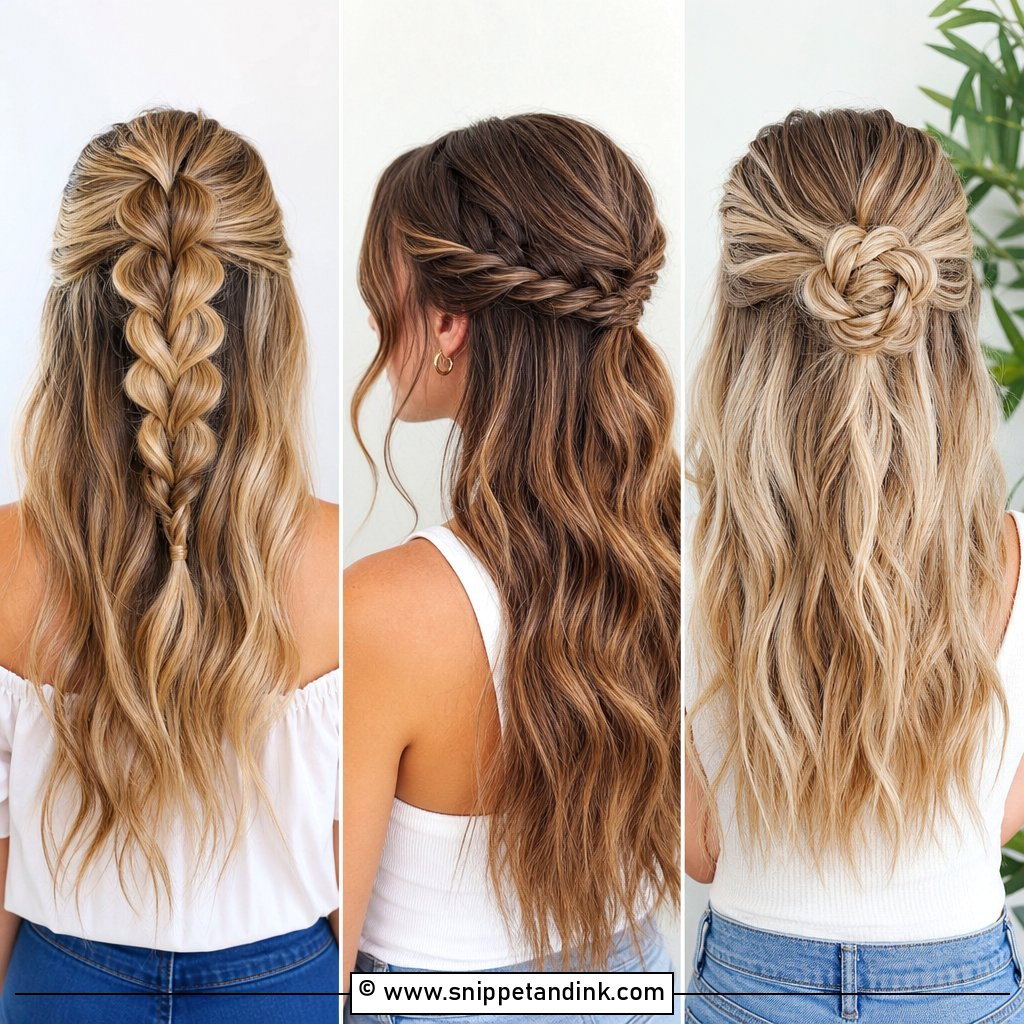
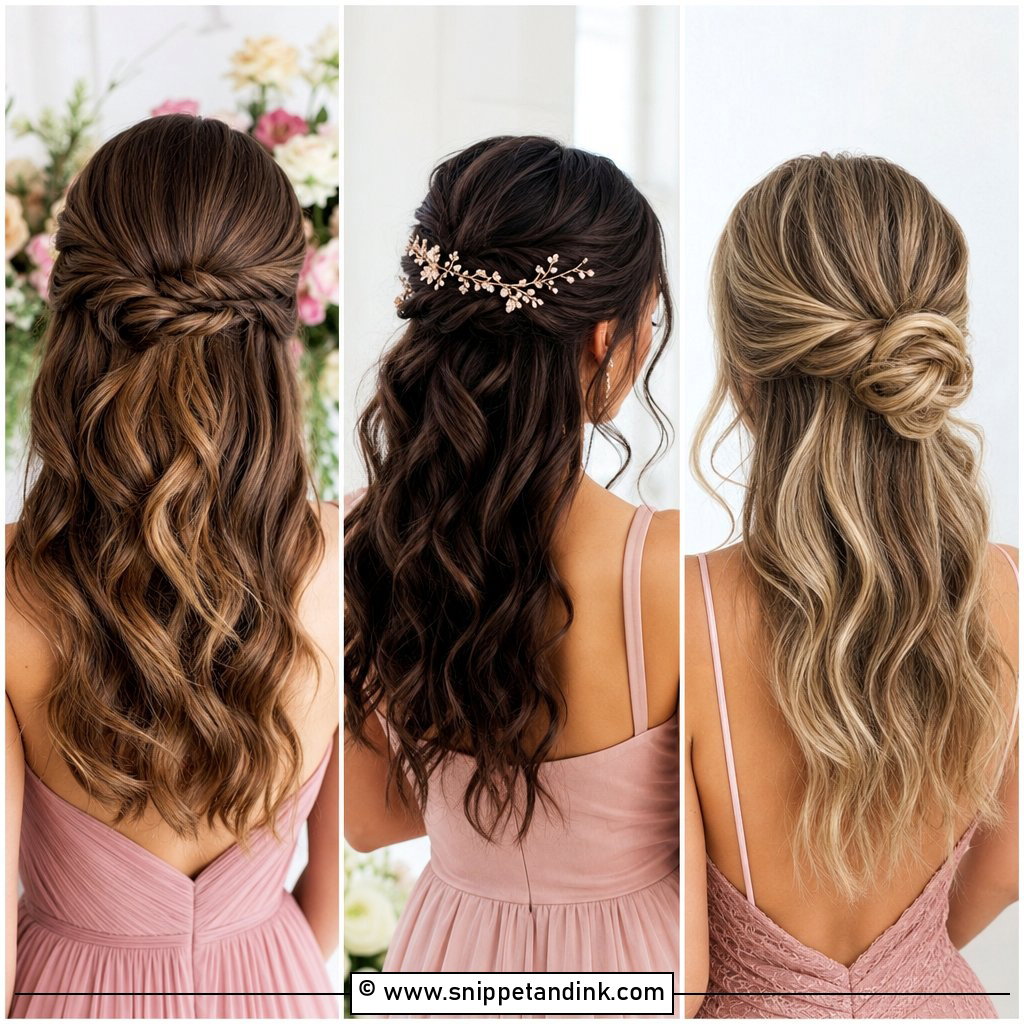
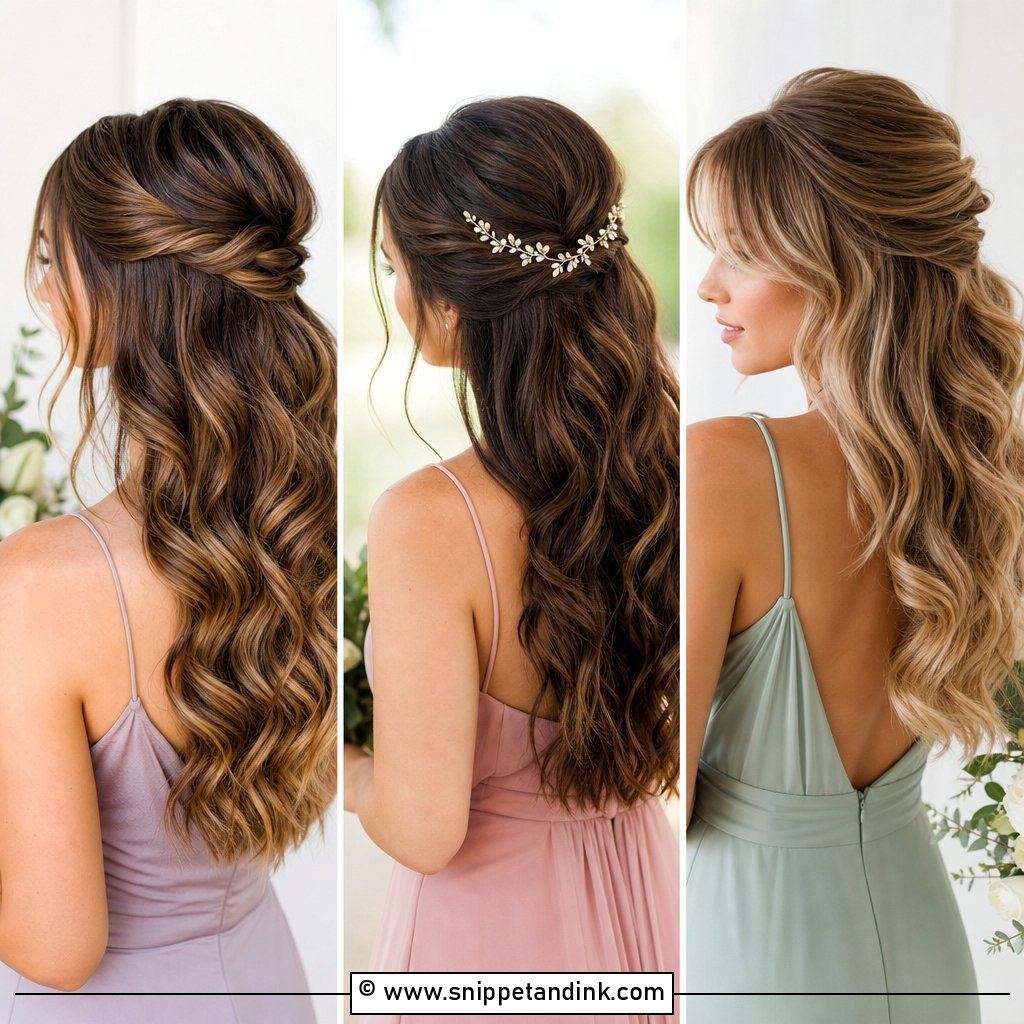
For a bridesmaid who hates hair off her shoulders, I’d do a half updo every time instead of forcing a full one. The top section is twisted or braided back and pinned at the crown, and the lower half stays in soft curls. The crown pin is the bit that fails, so I anchor it with crossed pins over a small hidden elastic. Medium hair keeps the curls from tangling against the back of the dress, which long half-up styles do by evening. Small pins or a comb can sit at the join if the bridal party wants some detail.
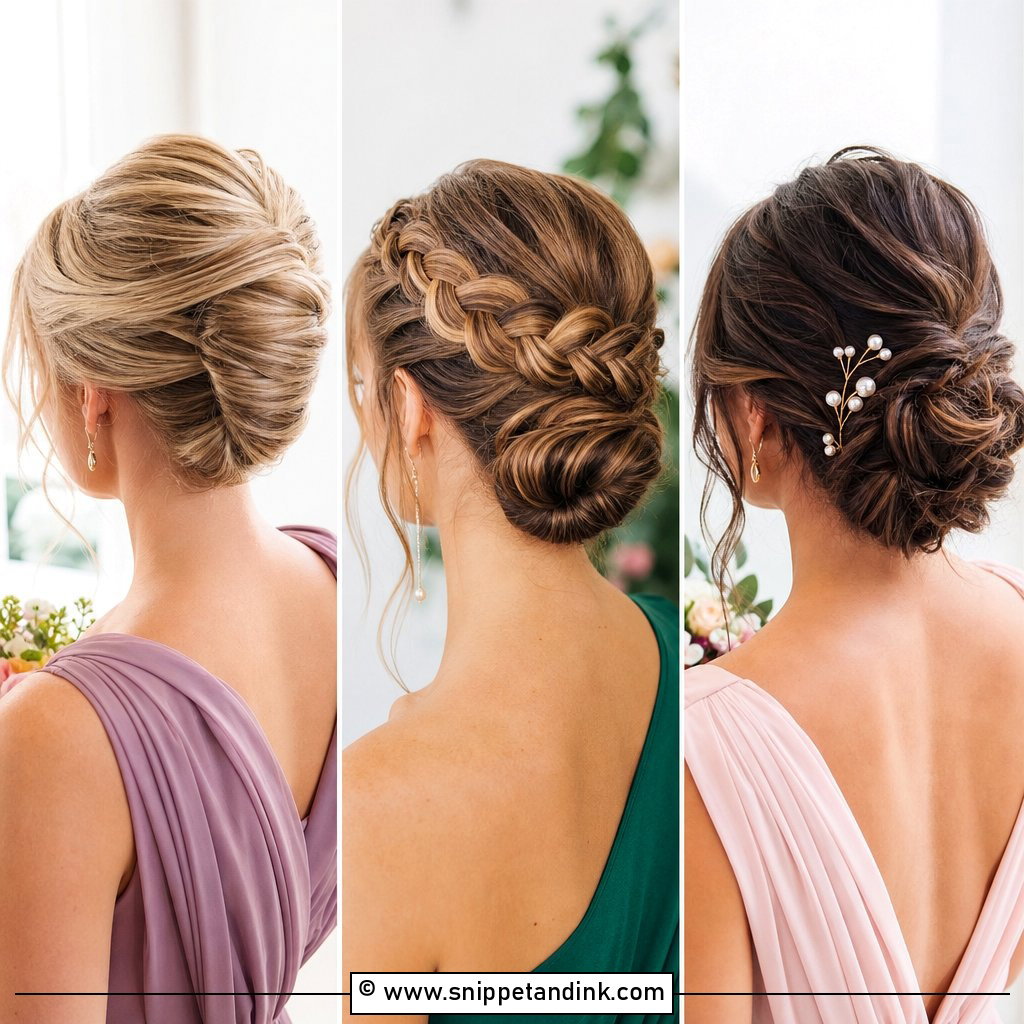
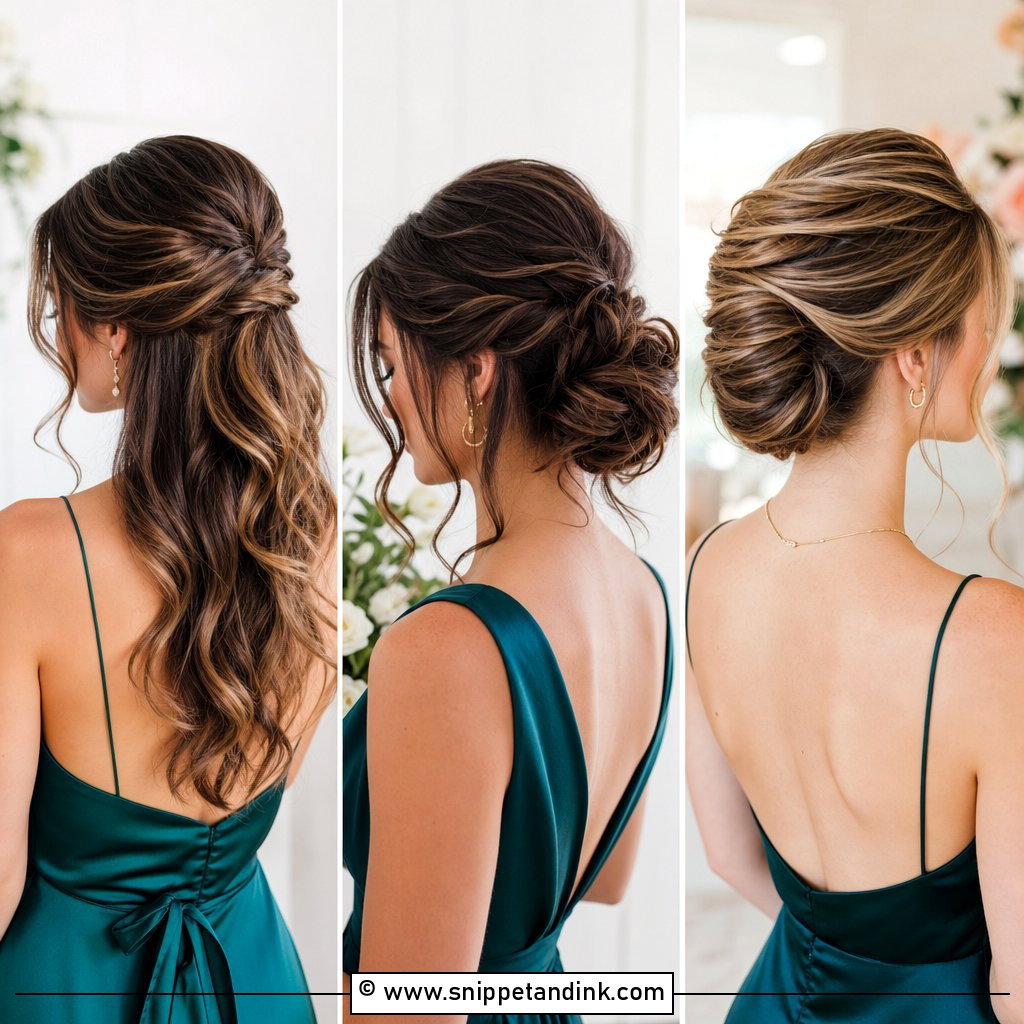
15. Braided Crown Bridesmaid Updo
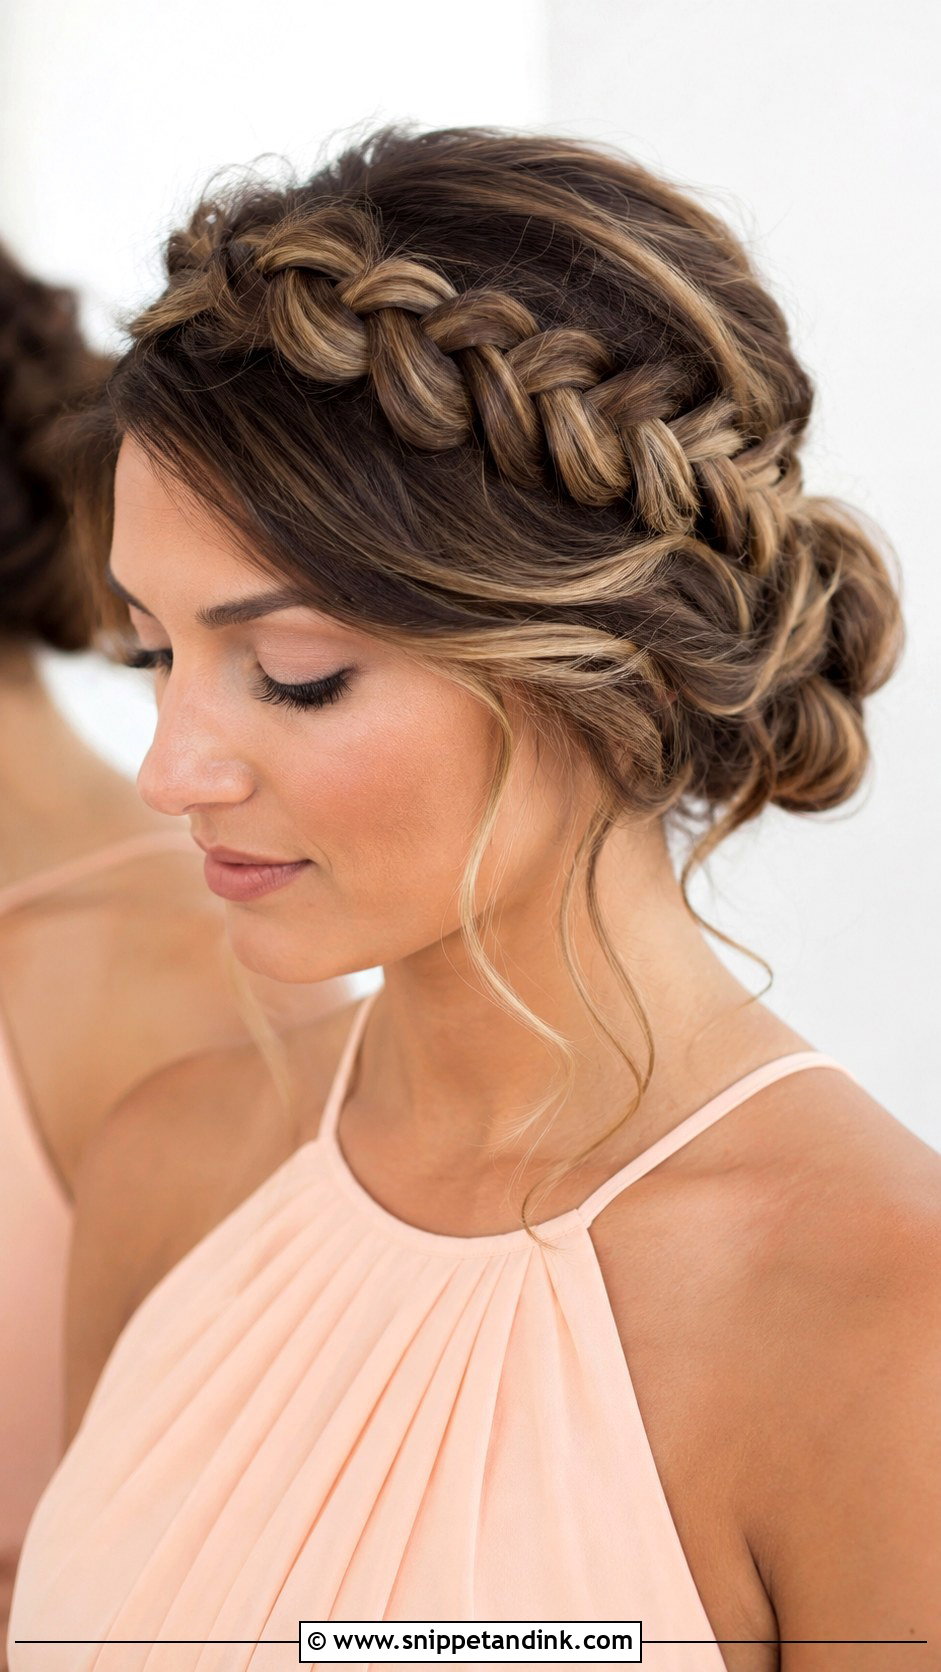
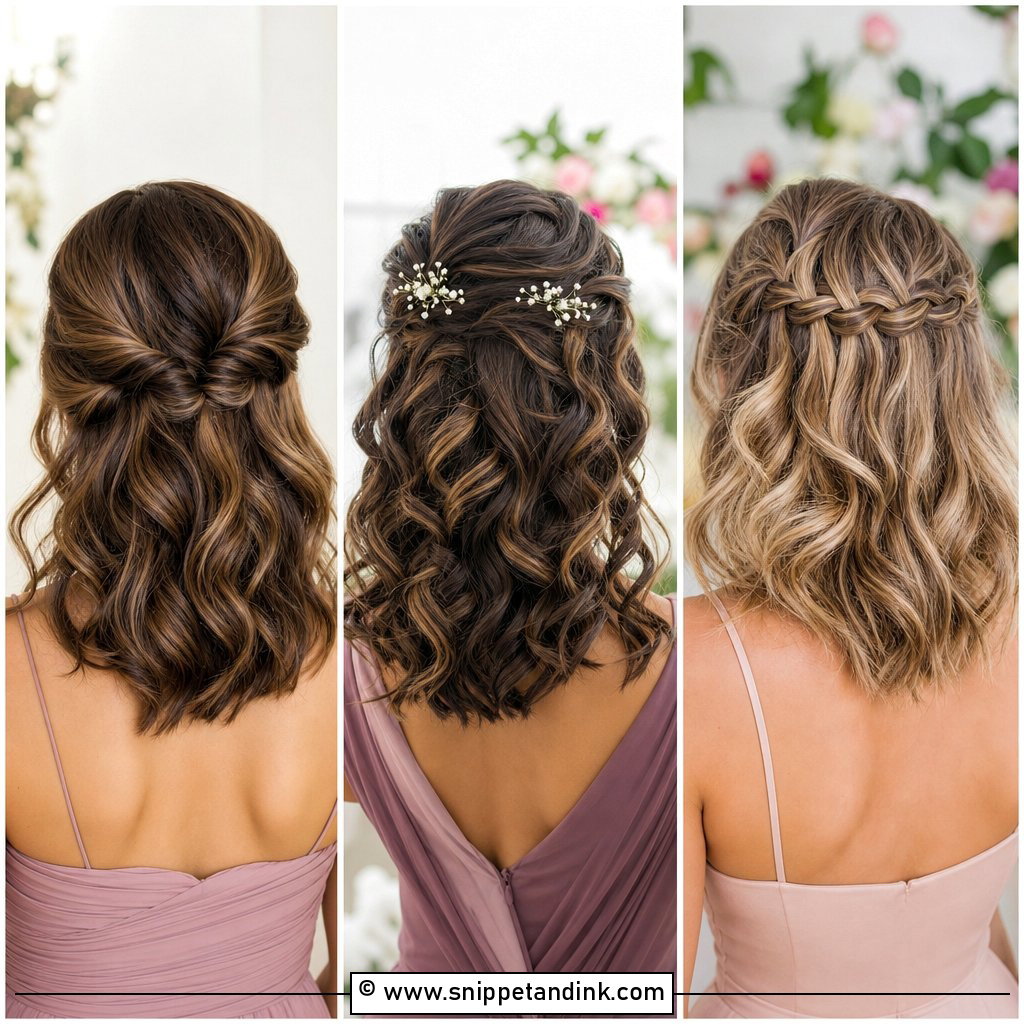
The braided crown bridesmaid updo is the most secure shape in this list for front layers, because the braid locks them in from the start. It can wrap across the front, around the sides, or sit like a halo above a low bun. I secure the braid fully before I pancake it, since pulling first and pinning later loosens the whole crown. On medium hair, the length left at the back goes into a small bun or a neat roll. A crown braid adds texture to a plain dress without any accessory.
16. Dutch Braid Bun Bridesmaid Updo
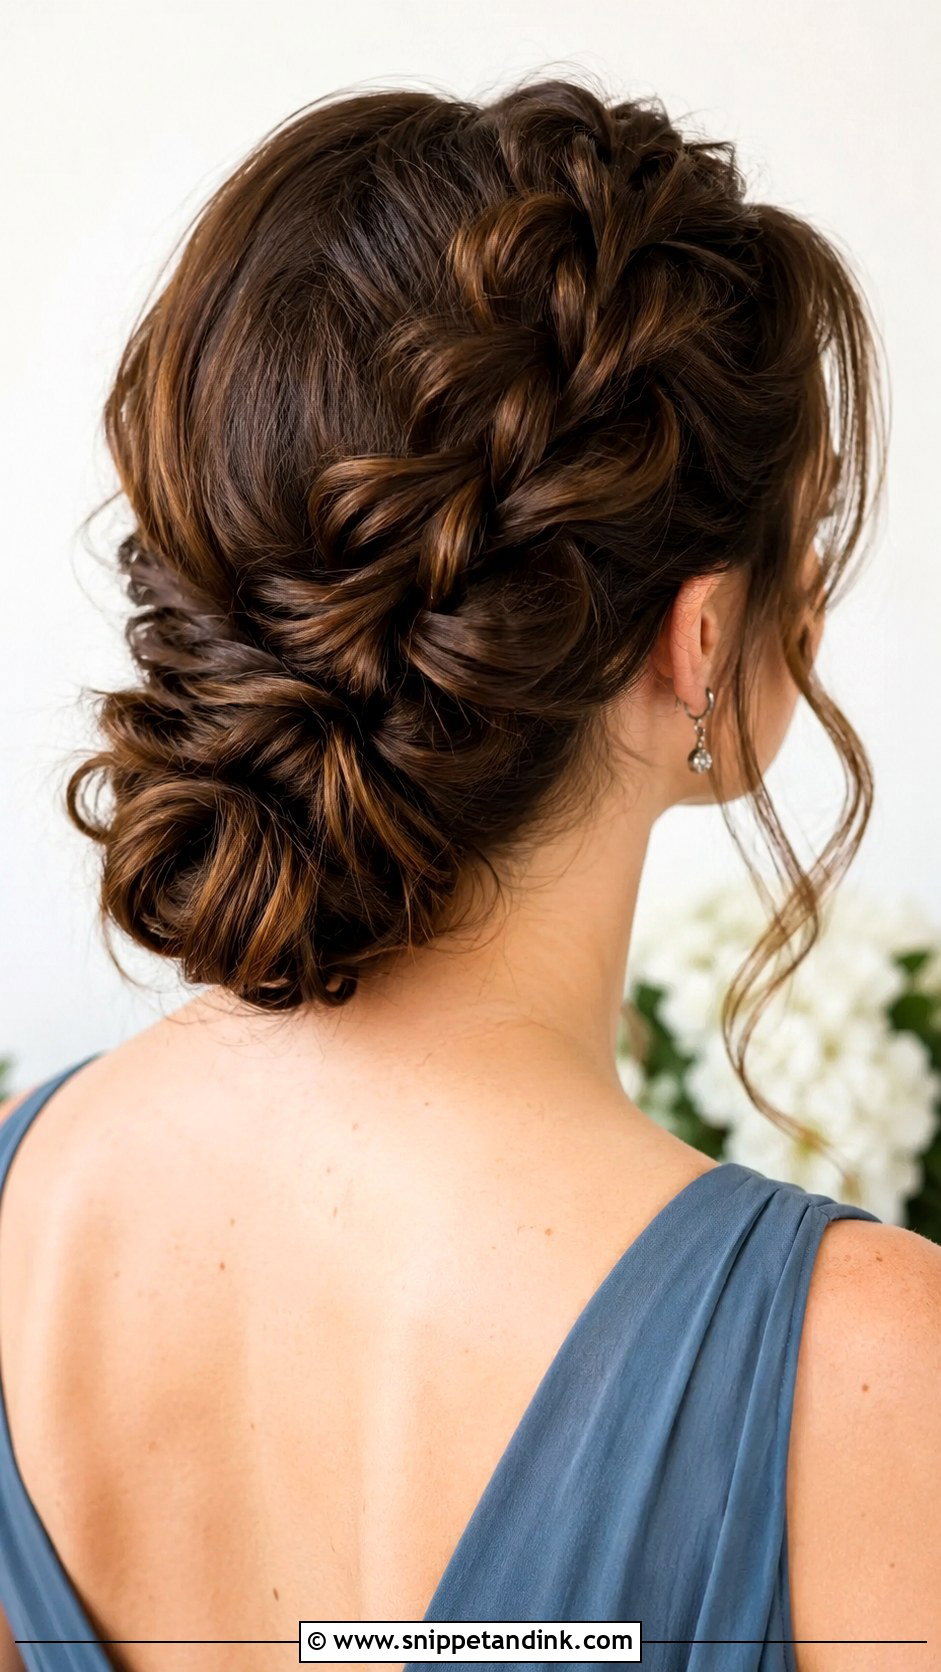
A Dutch braid bun sits raised on the scalp, so it grips harder than a regular braid. That’s why I choose it for windy outdoor ceremonies and for layered cuts that slip out of everything else. I start near the part or crown and guide the braid toward the nape, then twist whatever is left into a bun. The edges are what make it look bridal rather than gym-ready, so I loosen the hairline slightly and ease a few wisps out at the temples.
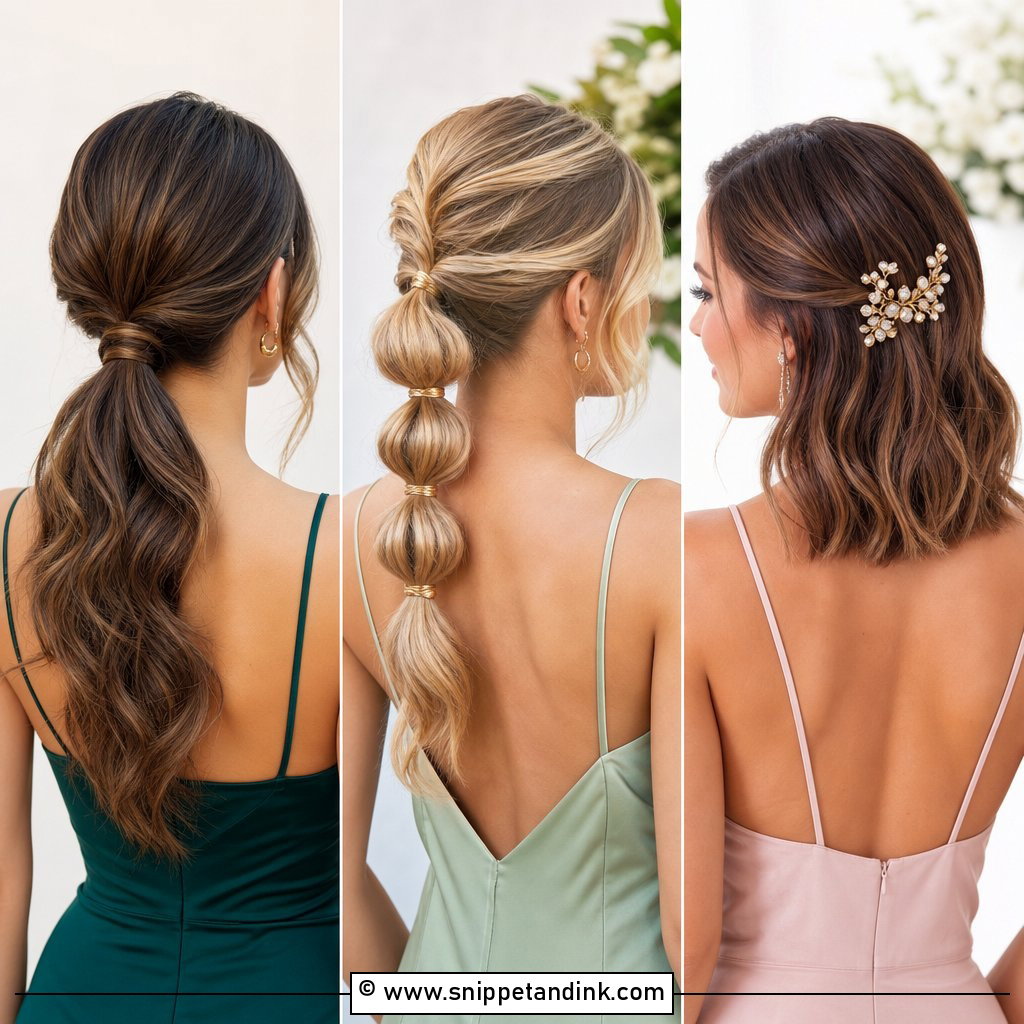
17. Low Ponytail Updo Bridesmaid Hairstyle
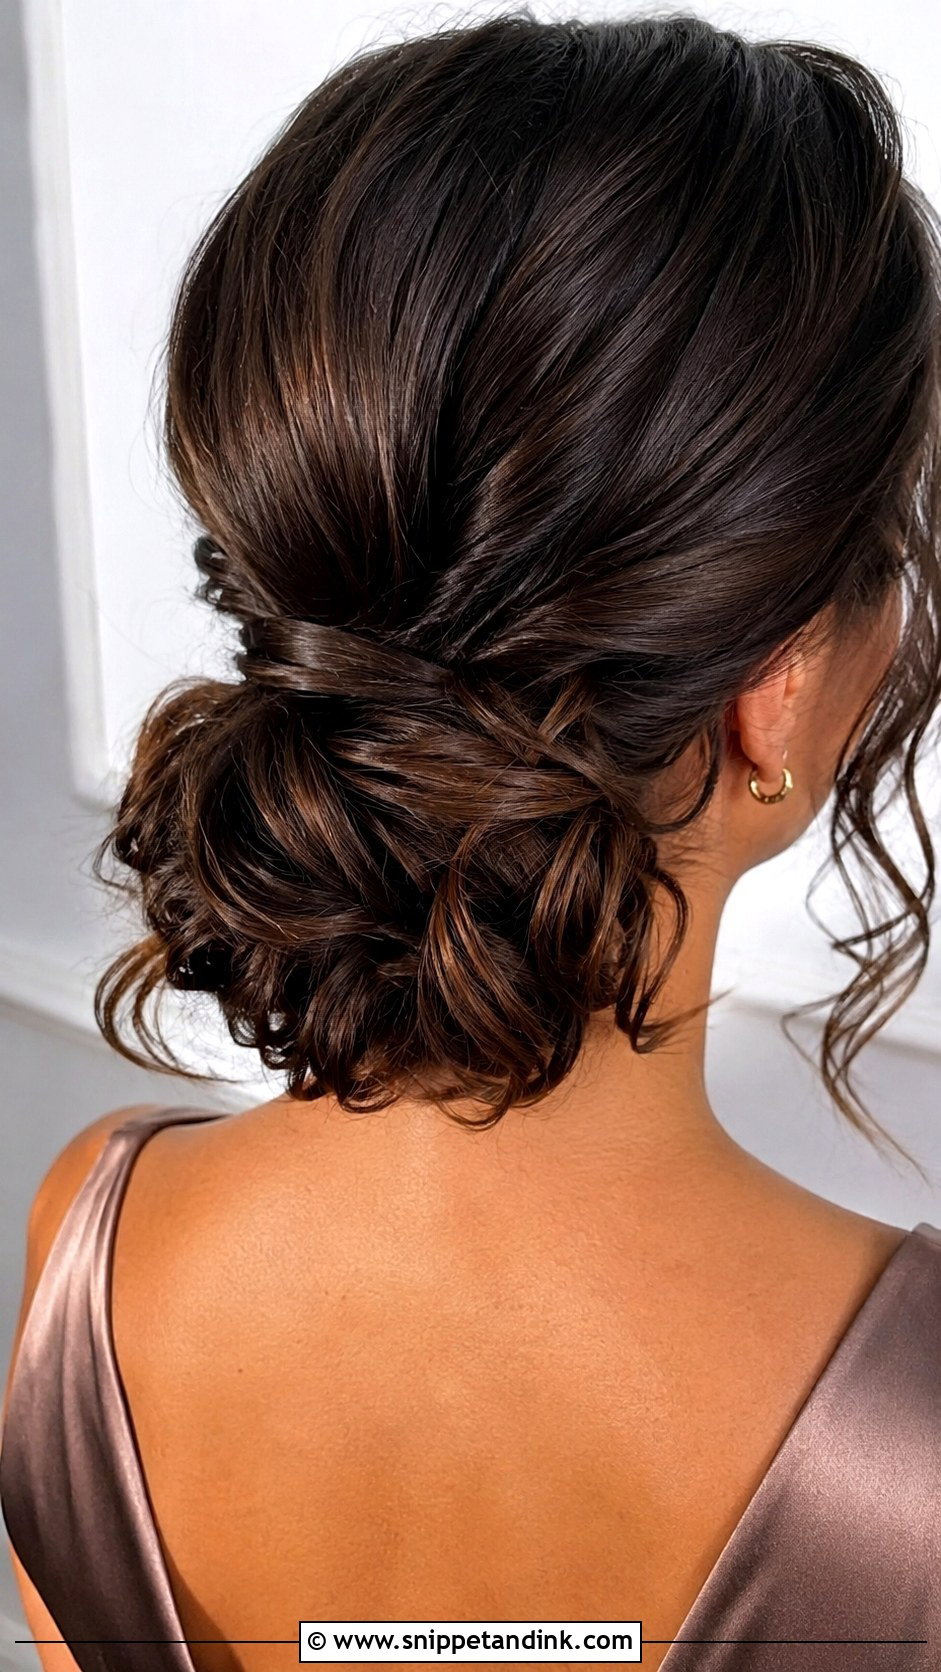
A low ponytail updo is my answer when a bridesmaid needs to be done in fifteen minutes. The hair is secured low, then the ends are curled, twisted or folded upward and pinned so the silhouette reads as an updo. I wrap a strand around the elastic and pin it underneath, because a visible elastic is the first thing that shows in a close-up. Add volume at the crown for a formal dress or keep it smooth for a modern one. It’s also the easiest style to fix in a restroom mirror halfway through the night.
18. Knotted Bun Bridesmaid Updo
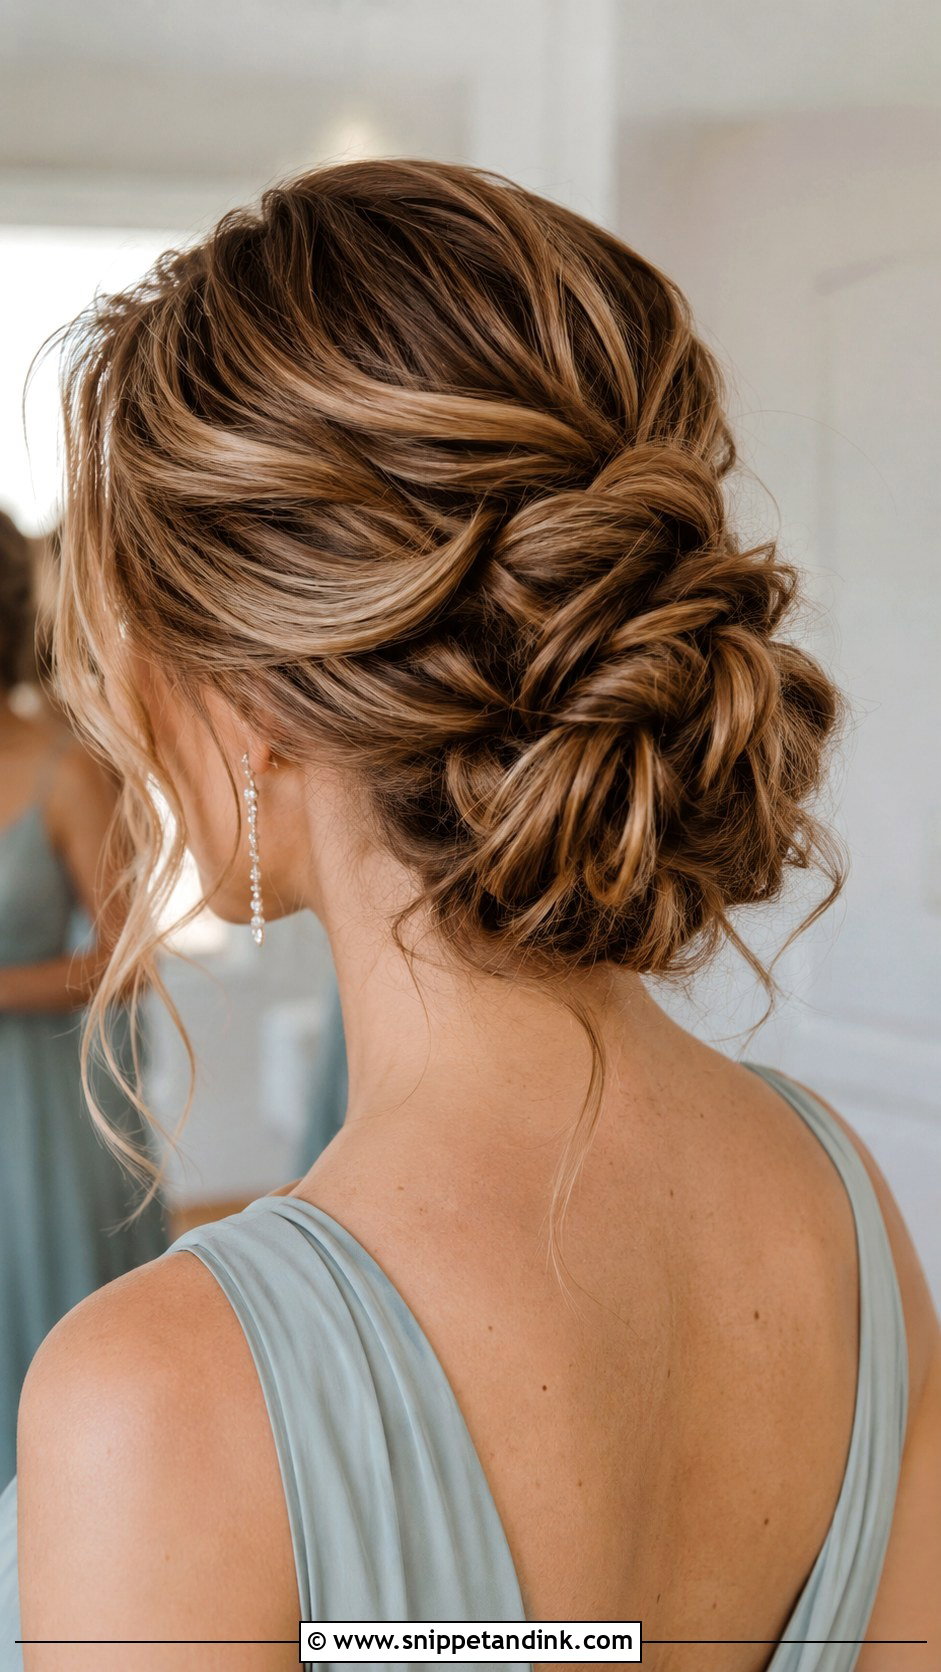
A knotted bun looks intricate, yet the technique is just sections tied into soft knots and pinned together at or above the nape. Medium hair is ideal, since long hair makes knots too bulky and short hair won’t tie. Highlights make each knot stand out. I hide a pin through the centre of every knot, not just around the edge, otherwise the knots loosen independently and the bun goes lopsided by the reception.
19. Claw Clip Bridesmaid Updo
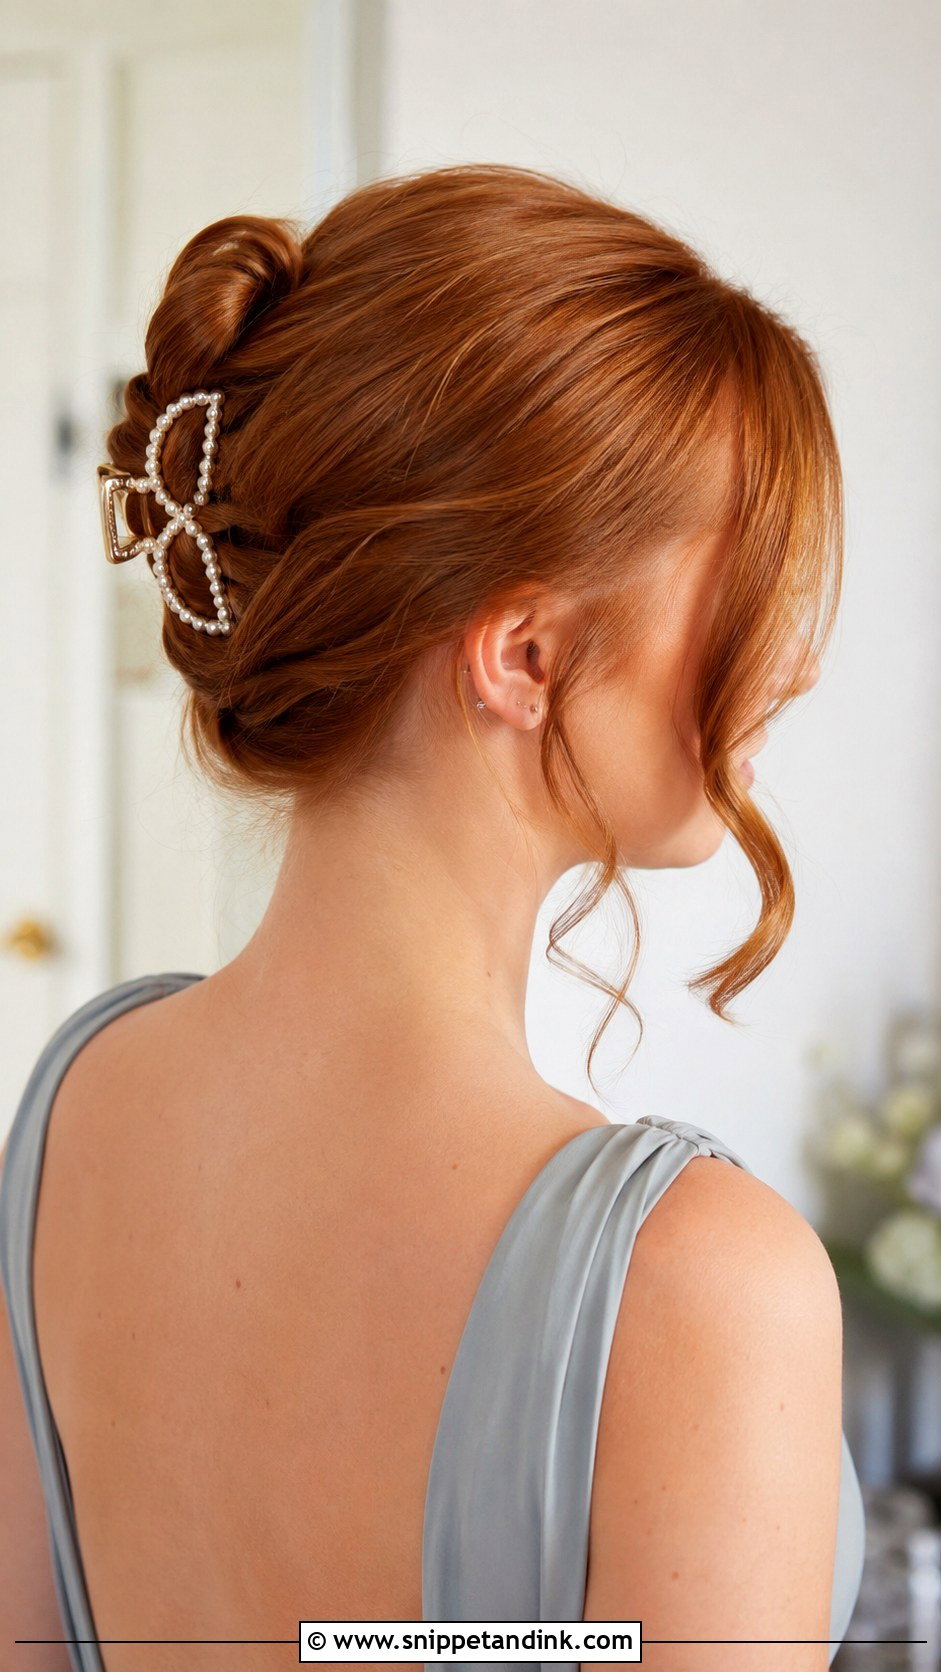
A claw clip bridesmaid updo can pass as wedding hair, but only with some work and the right clip. I’d go for pearl, gold, clear or a soft neutral that matches the dress tone, never the everyday tortoiseshell one. The hair is twisted upward, clipped, and softened with curled face-framing pieces. Smooth the sides and add texture through the ends so it looks deliberate. Check the clip’s weight before the day: a heavy clip on fine medium hair slides down within an hour, and I’d hide a couple of pins under it as insurance. It suits relaxed weddings and modern bridal parties, not a black-tie evening.
20. Pearl Pin Bun Bridesmaid Updo
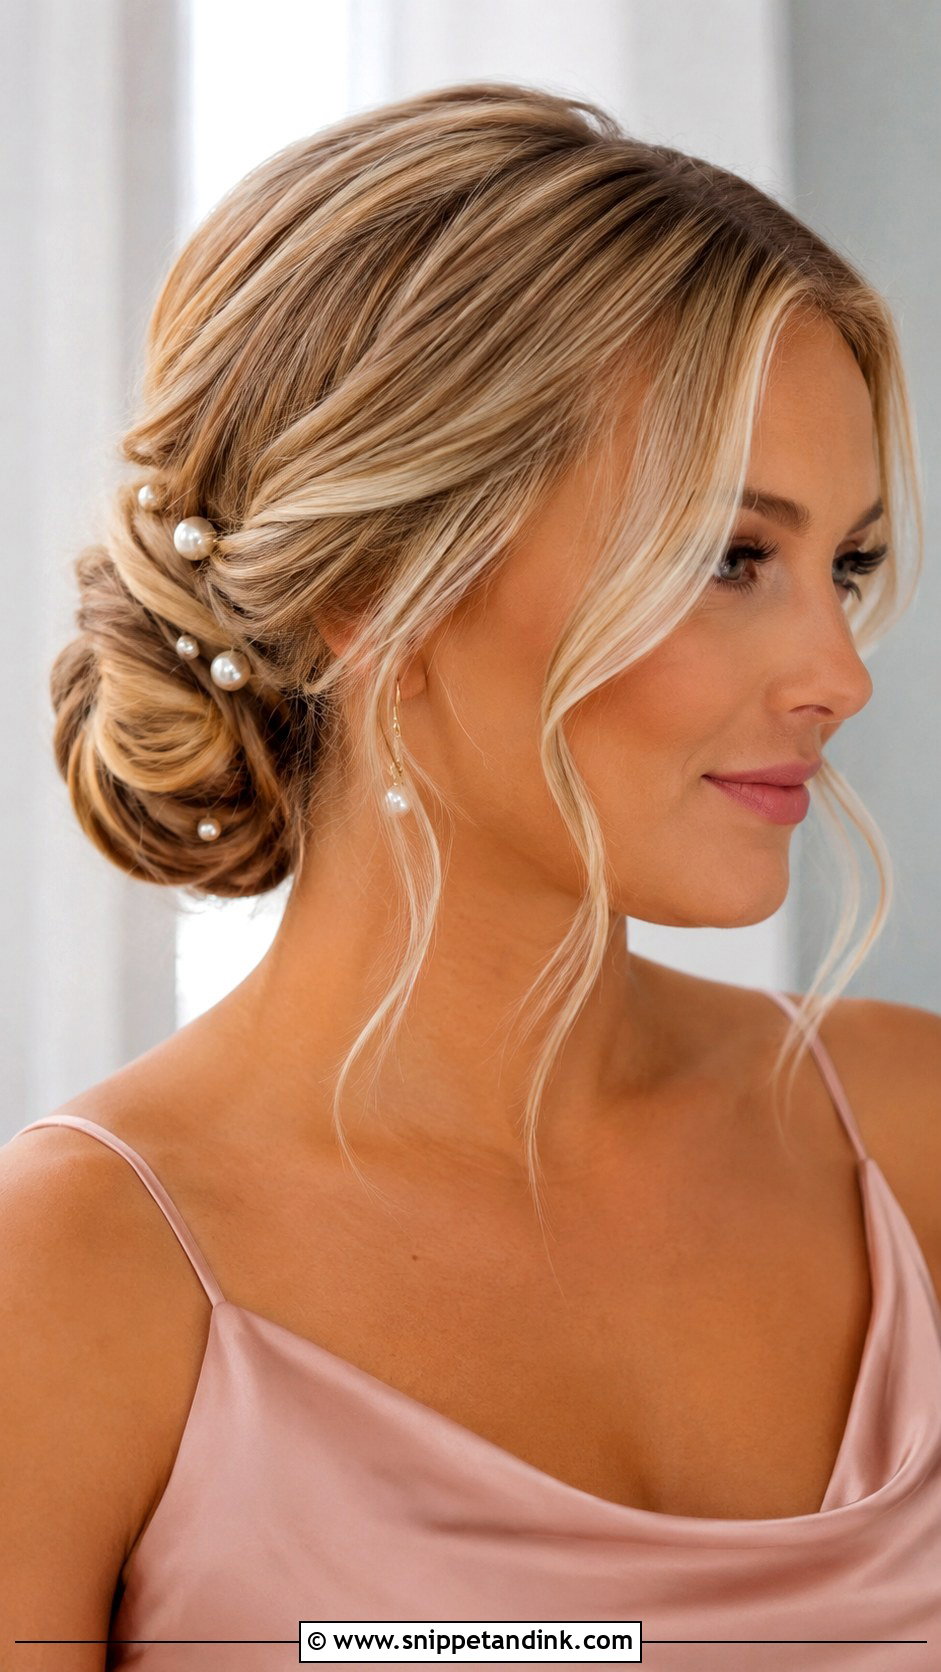
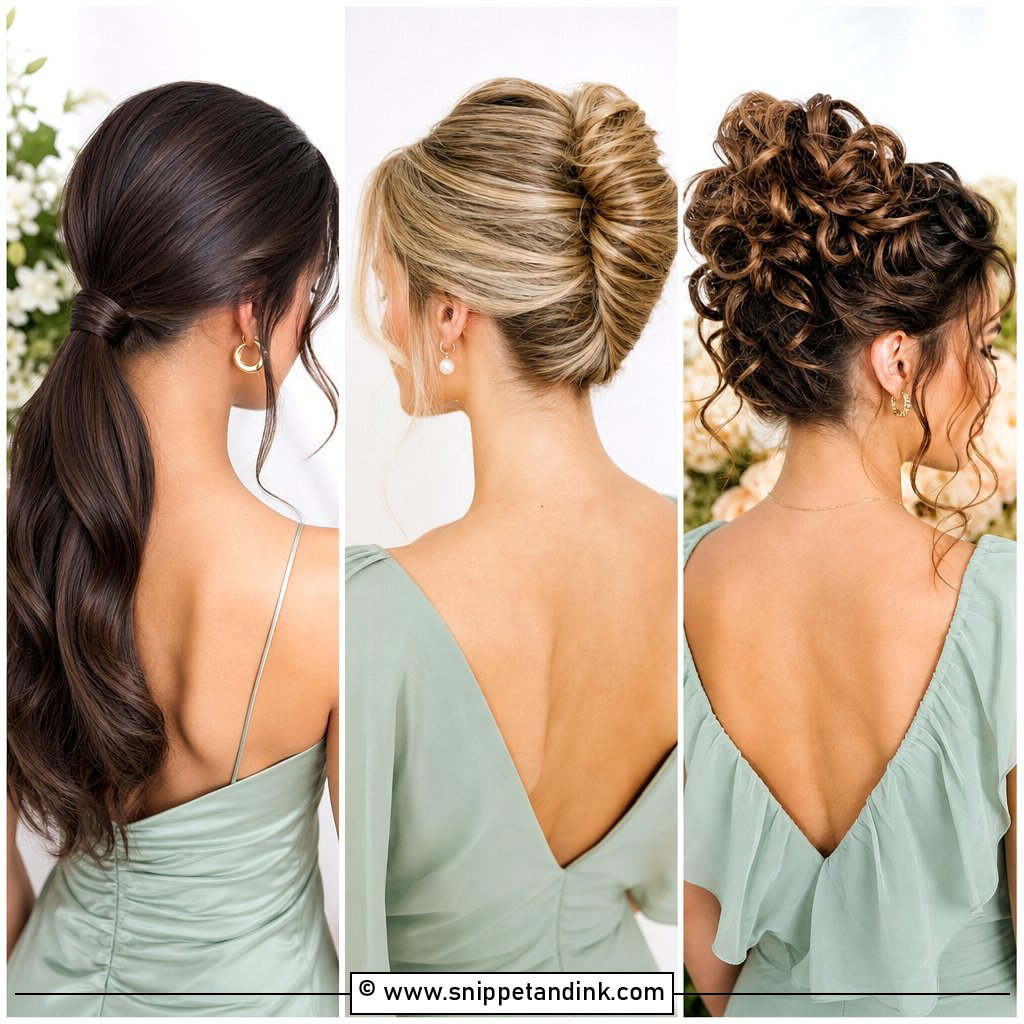
Pearl pins turn a plain bun into something that looks finished. Start with a low bun, a twisted bun or a tucked chignon, then place the pins lightly around the shape so they look scattered but balanced. I place them in odd numbers, usually five or seven, and I step back after each one, because crowding is the most common mistake. Medium hair keeps the bun compact, so each pin has a solid base to grip. Keep the front smooth with a little movement, and the pearls do the rest.
Six Bridesmaids, Six Hair Types, One Updo Family
Brides often want every bridesmaid in the identical bun, and on paper that looks tidy. In practice the same shape on fine straight hair and on thick curls looks like two different styles. What I suggest instead is one shared element: the same height on the head, the same accessory, or the same direction of sweep. Then each person gets the version her hair actually holds.
How I split a mixed group
- Shared low height at the nape, with a sleek chignon for straight hair, a curly bun for natural curls and a textured bun for fine hair.
- Shared pearl pins or a matching comb placed on the same side for everyone.
- Shared braid detail at the side, worn into a full updo or a half updo depending on how much each bridesmaid wants off her neck.
Timing matters as much as the plan. A simple medium-length updo usually takes thirty to forty-five minutes per person, longer for thick hair or a braid. Put the bridesmaids with the most forgiving styles last, closest to the photos, and do anyone with very fine hair early enough to reset a pin if something drops.
Layers That Escape by the Speeches
Shorter layers around the face and nape are the commonest reason a medium-length updo looks undone by evening. If your shortest layer stops above your chin or above the hairline at the back, tell your stylist at booking. I plan for it with a small braid or a twist at the nape that catches those pieces, rather than relying on spray.
For the bag: six bobby pins in your hair colour, a mini flexible hairspray and a small comb. If a section falls, don’t tug it back into the bun. Twist the loose piece flat, slide a pin in toward the centre of the bun, and leave the rest alone.
Pins, Photos and One Last Mirror Check
A simple updo works when the shape, the prep and the pinning are thought through, and that matters more than how complicated it looks. Start with the dress neckline and each bridesmaid’s hair texture, then pick from the low buns, chignons, braids, rolls and knots above. Bring two or three clear photos of the shape you like, from the back as well as the front. And book a short trial if anyone in the party has very fine or very layered hair, because that is where a plan on paper meets real hair.
You'll Like These Ideas:


Leave a Reply