
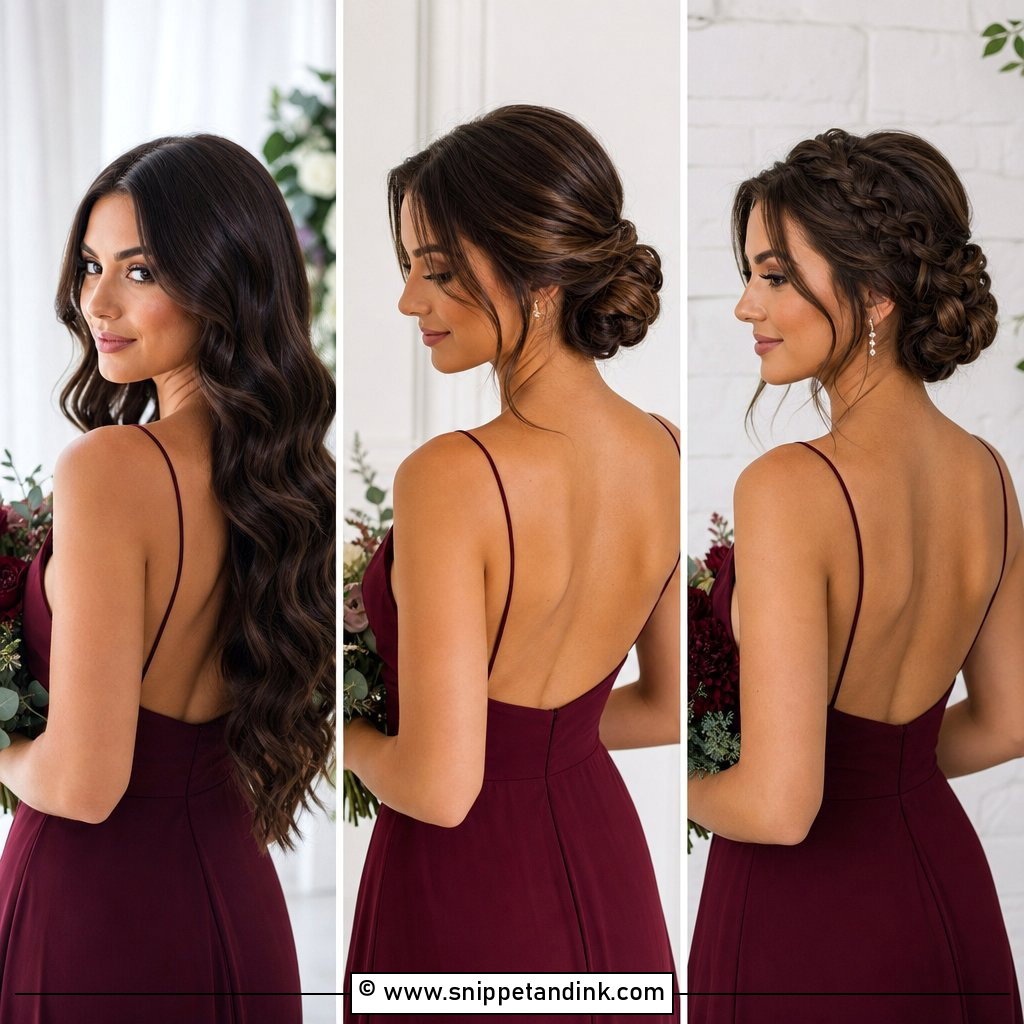
Most of the bridesmaid hair I do now ends up off the shoulders, and for good reason: an updo survives hugging, heat and a dance floor far better than loose curls do. The shapes below run from low buns and braided chignons to French twists, knots and a dressed-up ponytail. I’ve grouped these bridesmaids hairstyles updo options so you can see which ones hold on fine hair, which need length, and which suit a high neckline. Pick one direction for the group, then let each bridesmaid adjust the details to her own hair and face.
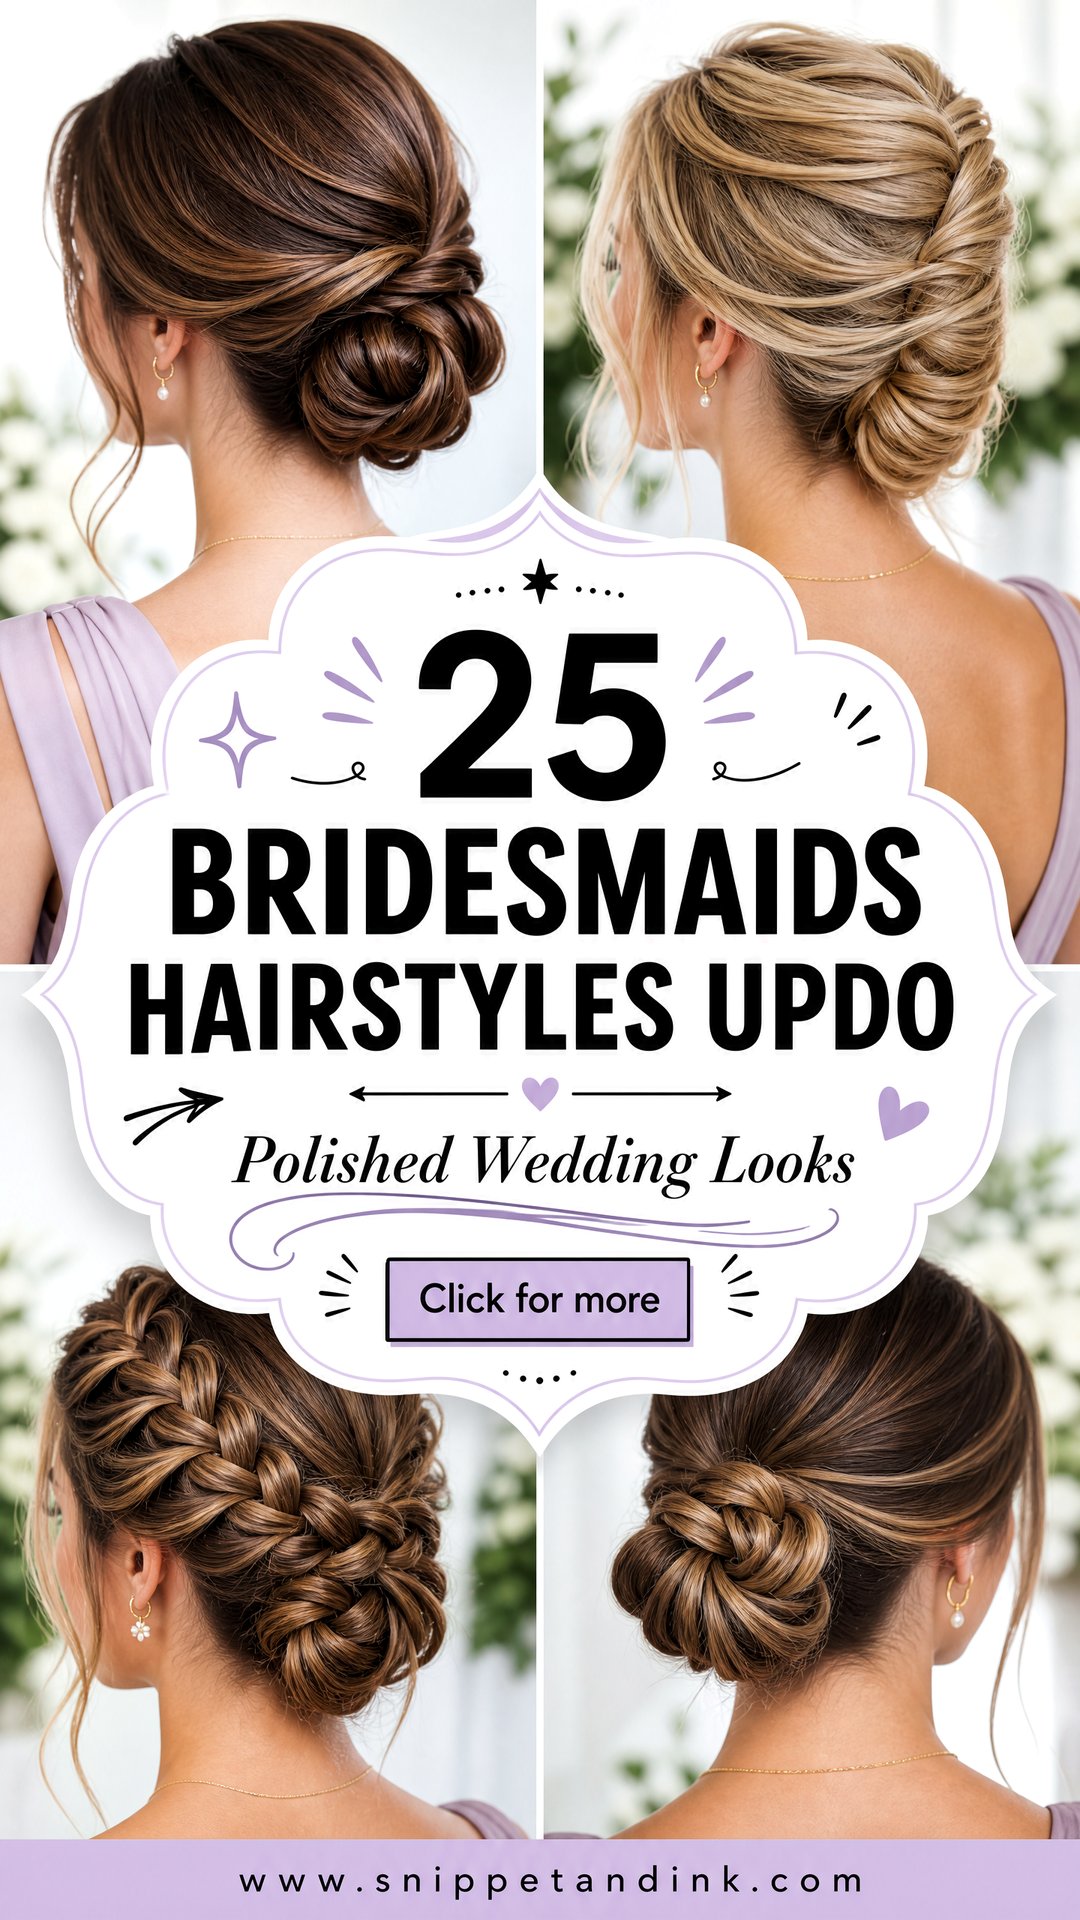
Fitting One Updo Brief to Five Very Different Heads of Hair
A bridal party is rarely made of matching hair. In one lineup I might have a pixie-length bob, waist-length curls and fine, layered hair that slips out of everything. So the brief I ask for is a direction, not a single photo copied five times. Tell me the height (nape, mid or crown), the finish (sleek or textured) and how much detail you want, and I’ll translate that for each head.
What each bridesmaid should send before the day
- A current photo of her hair from the back, loose and dry, so I can judge length and layering.
- The neckline of her dress, since a high neck pushes the bun up and a halter strap can sit right where a nape bun would go.
- Whether she has extensions, a sensitive scalp or a part she can’t change.
- How she plans to wash her hair: I prefer washed the night before with no conditioner on the roots, because squeaky-clean hair resists pins.
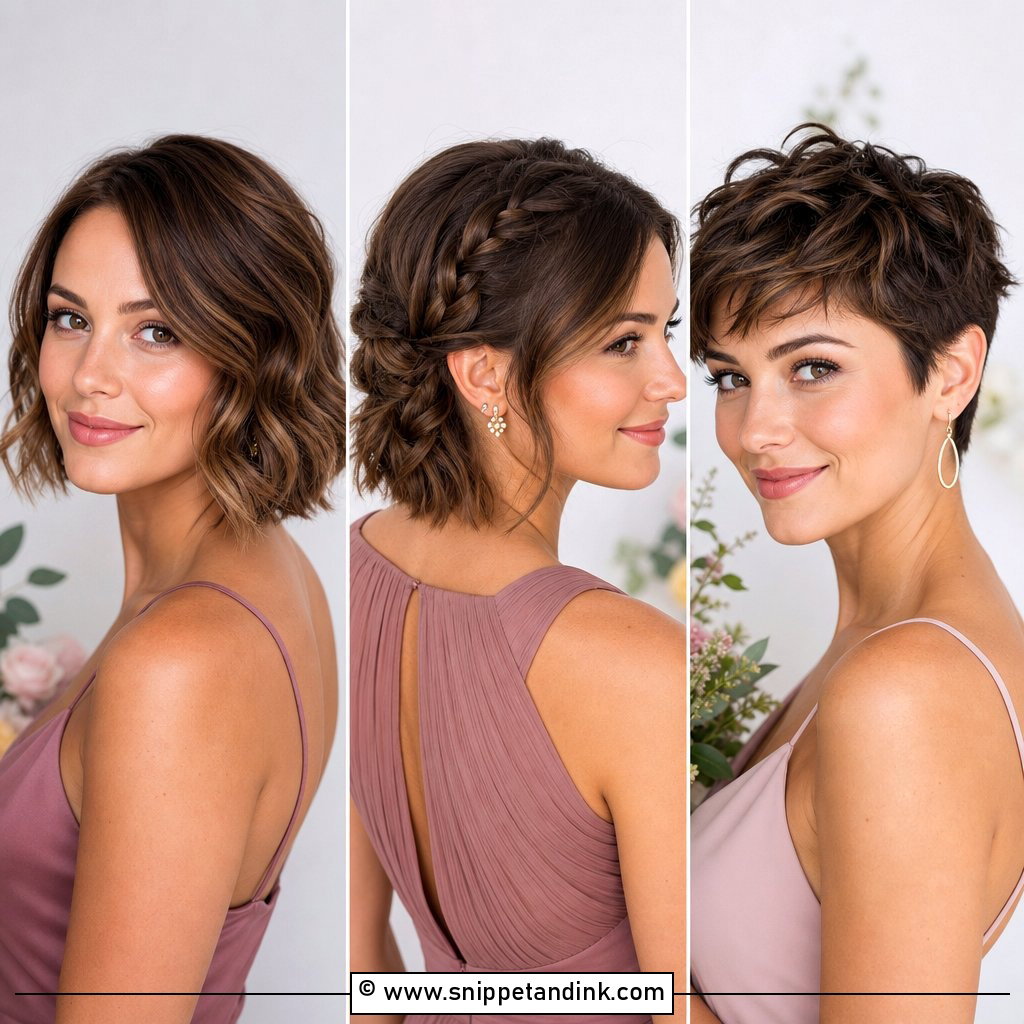
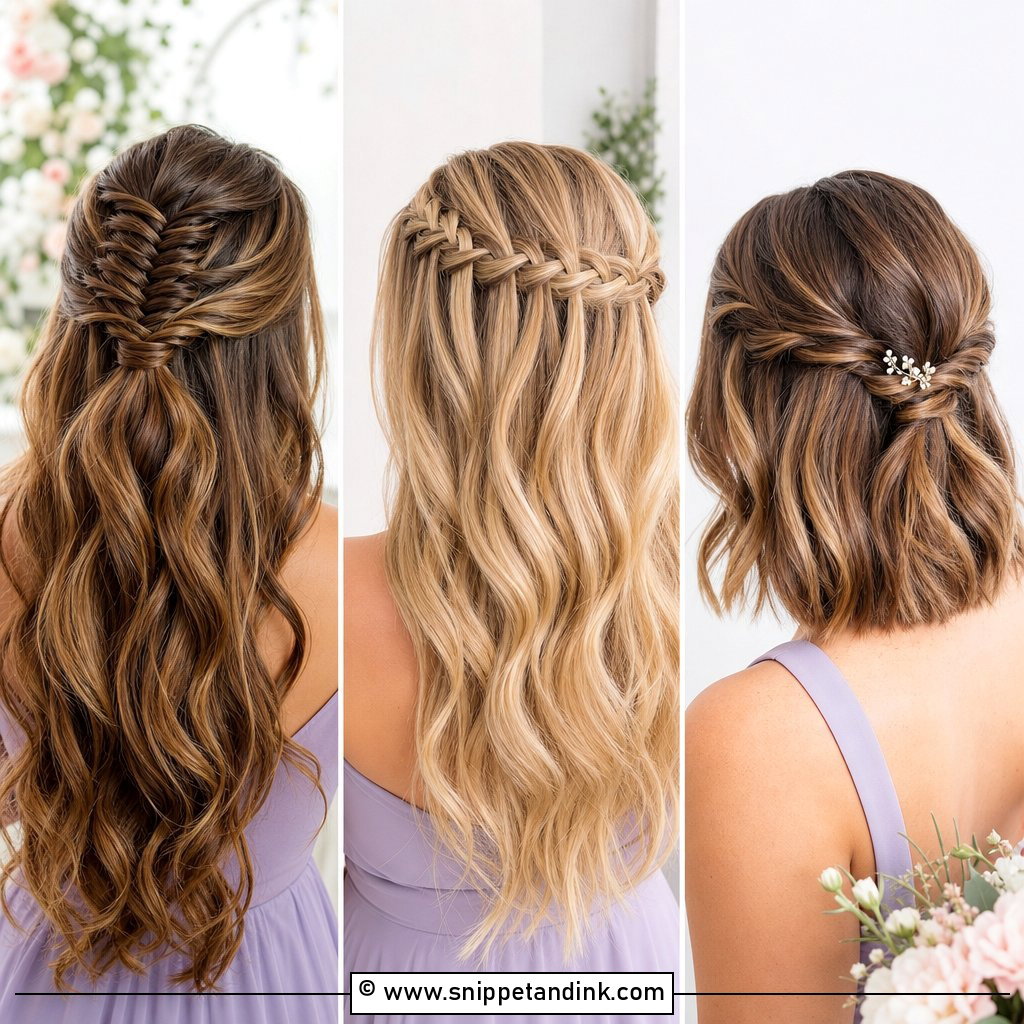
Shoulder-length hair can manage most low buns with a hidden padding or a few clip-ins, but it struggles with a crown braid or a full chignon. Very long, thick hair can do almost anything, yet it gets heavy, so I lean toward low placements for comfort. Short bobs get a braided or twisted half-up that echoes the group rather than a bun forced into place.
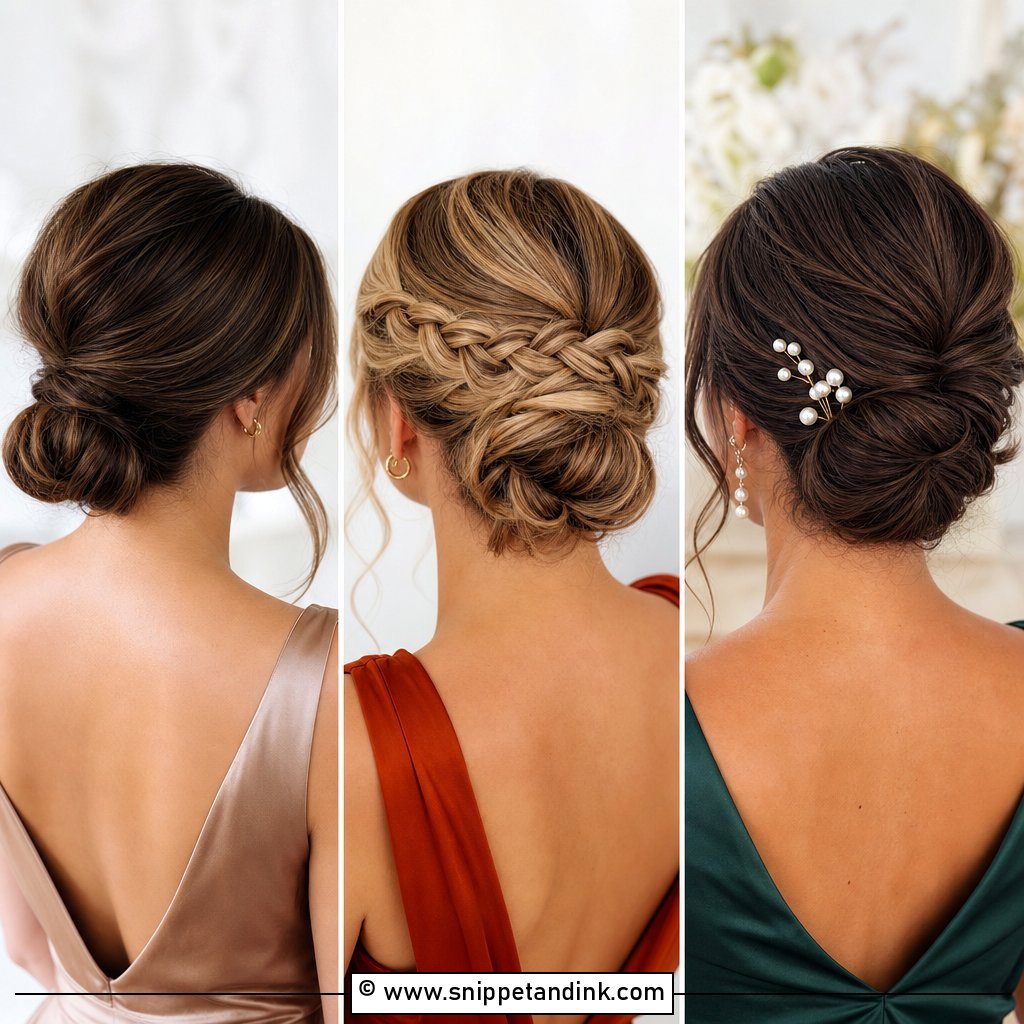
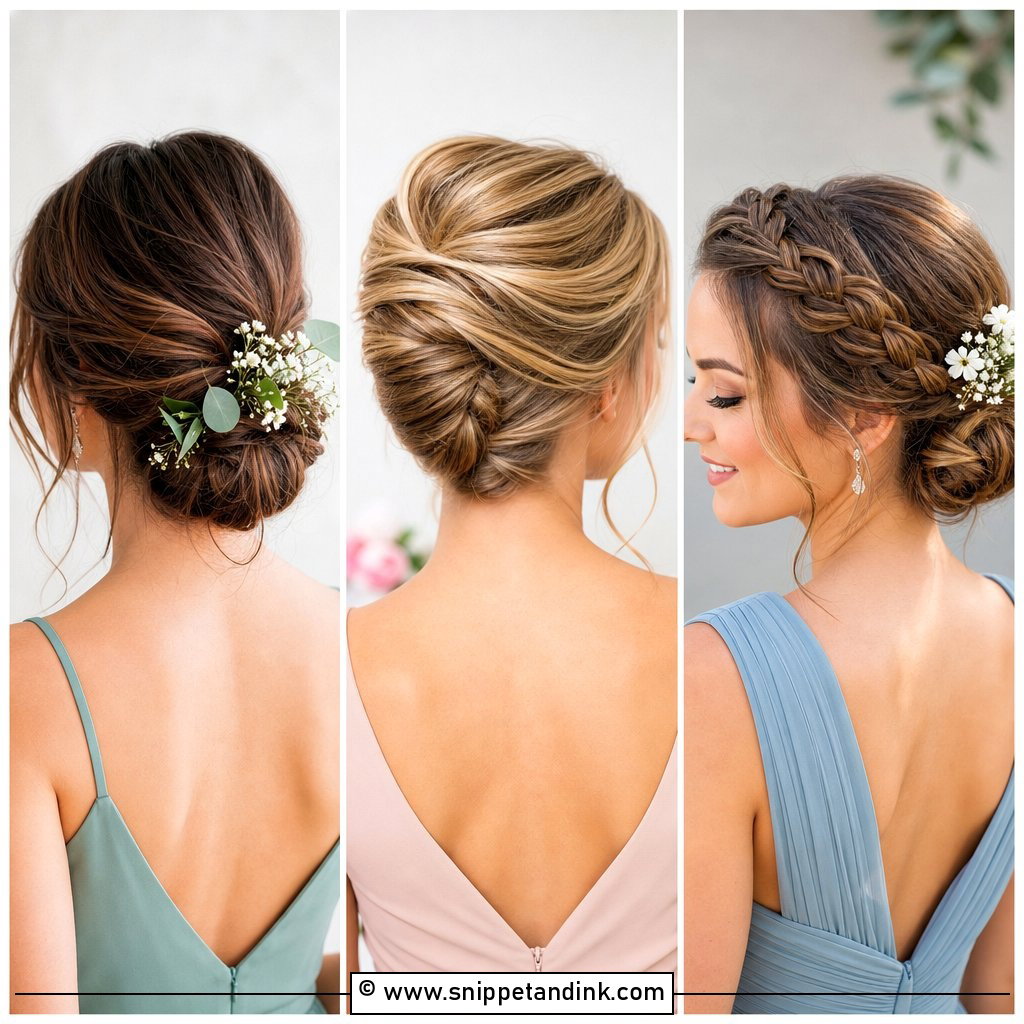
1. Low Bun Bridesmaid Updo
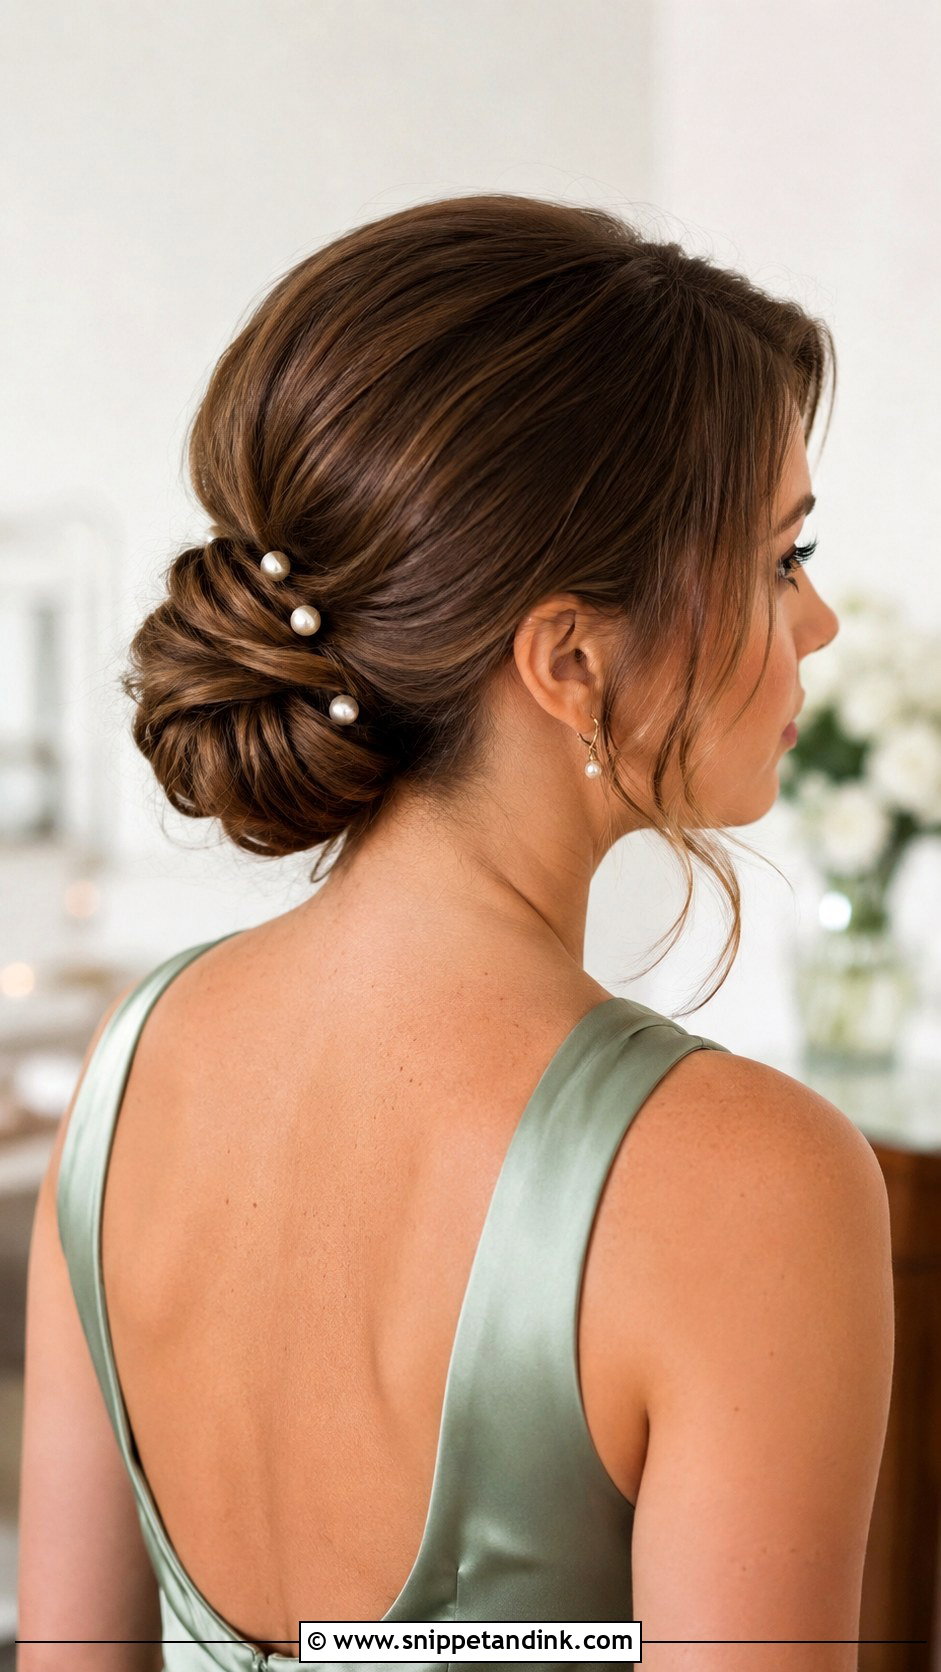
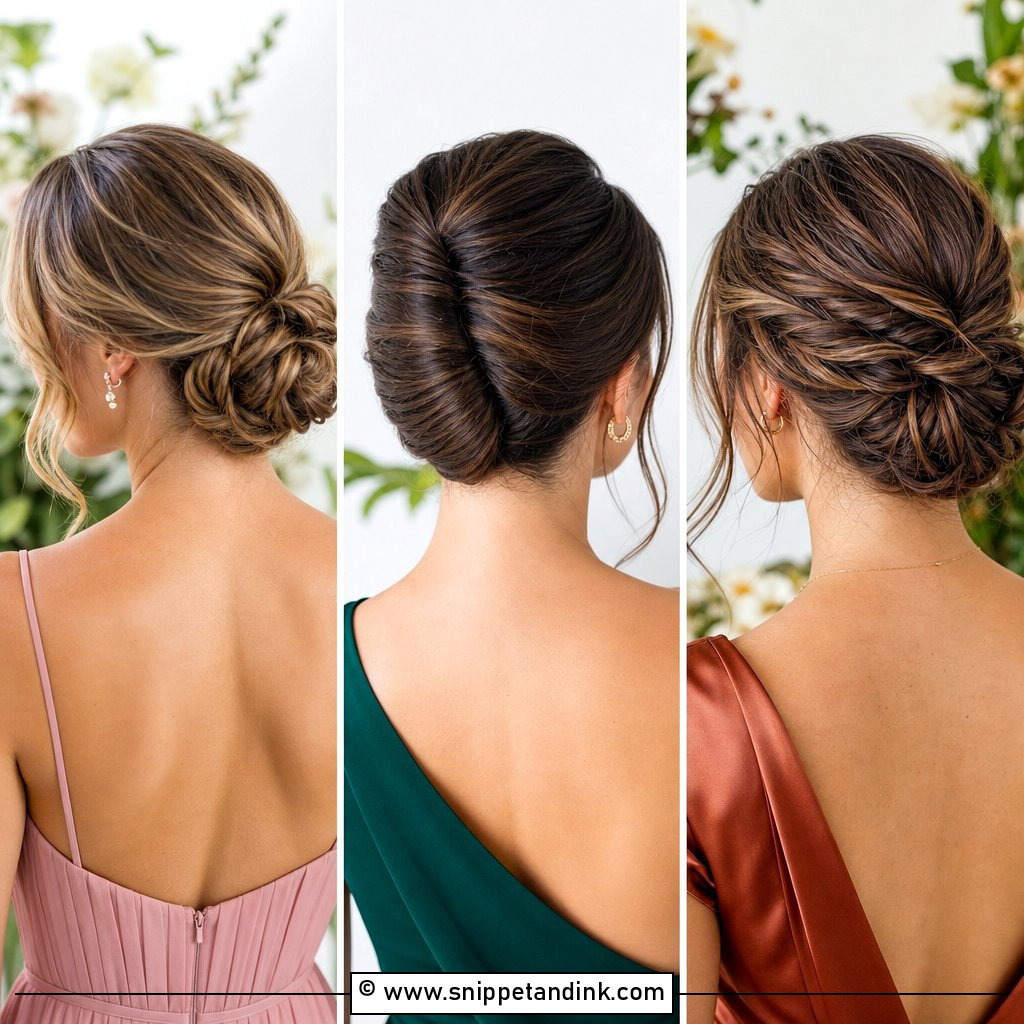
If a bride asks me for one shape that will suit an entire lineup, this is usually my answer. Sitting at the nape, it clears strapless, halter and square necklines without fighting any of them. I build it from three or four small pinned sections rather than one big twist, because a single heavy coil starts to sag by the speeches. Leave a couple of face-framing pieces for anyone who feels exposed with everything pulled back, and add pearl pins or a satin ribbon if the group wants a small accent.
2. Textured Low Bun Bridesmaid Updo
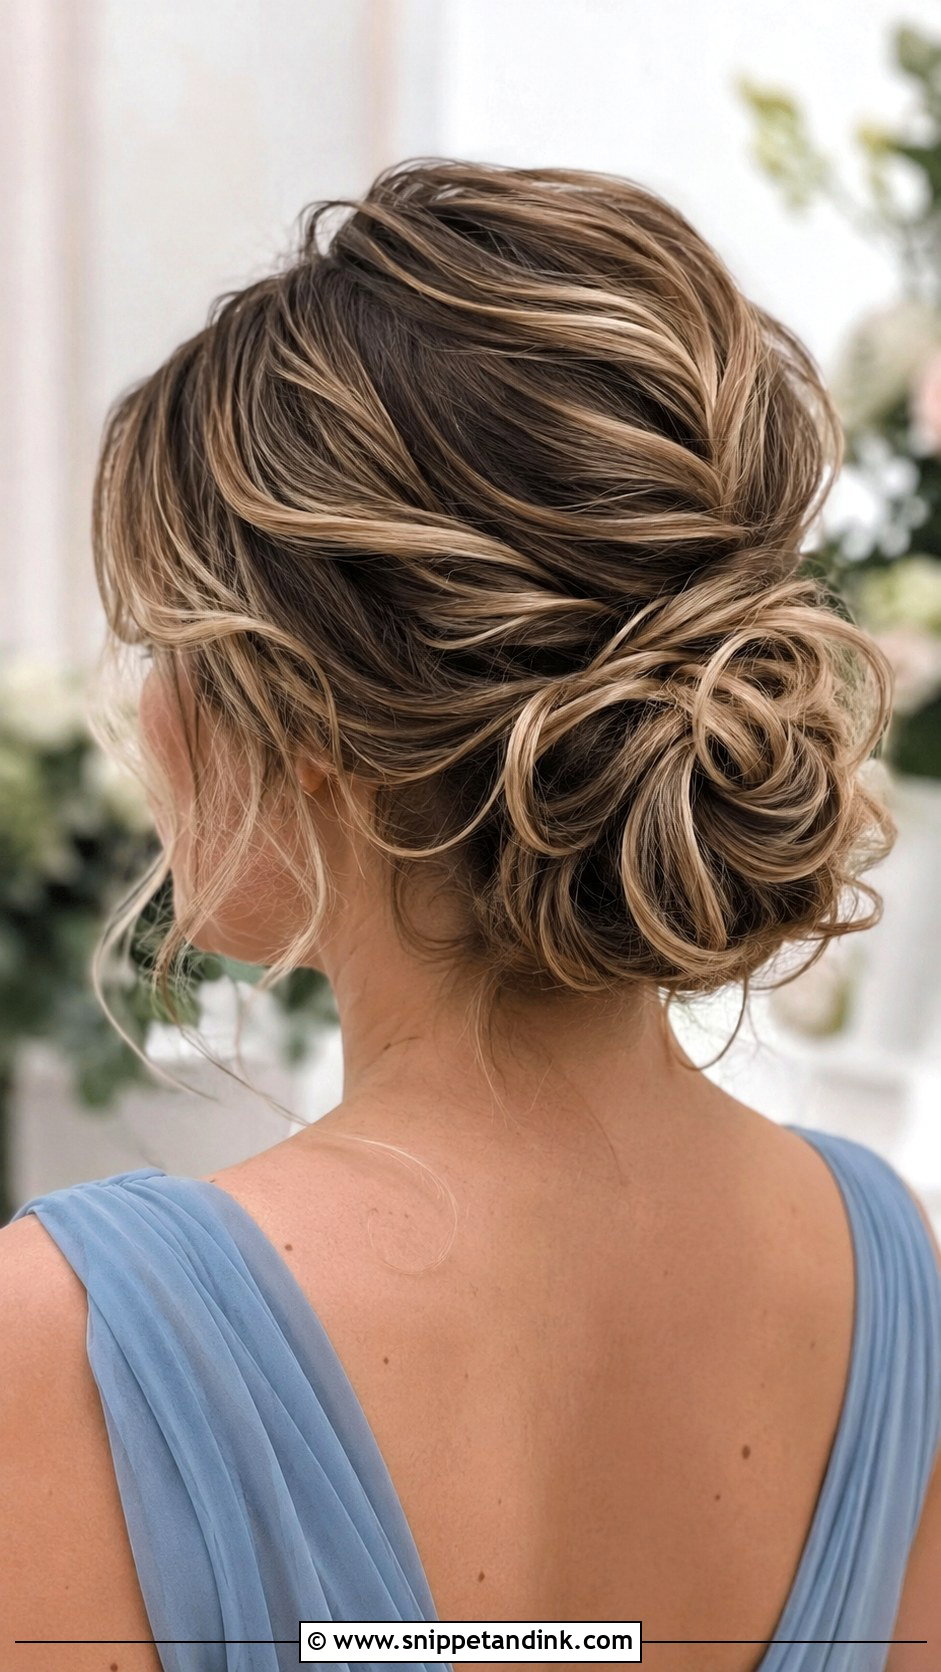
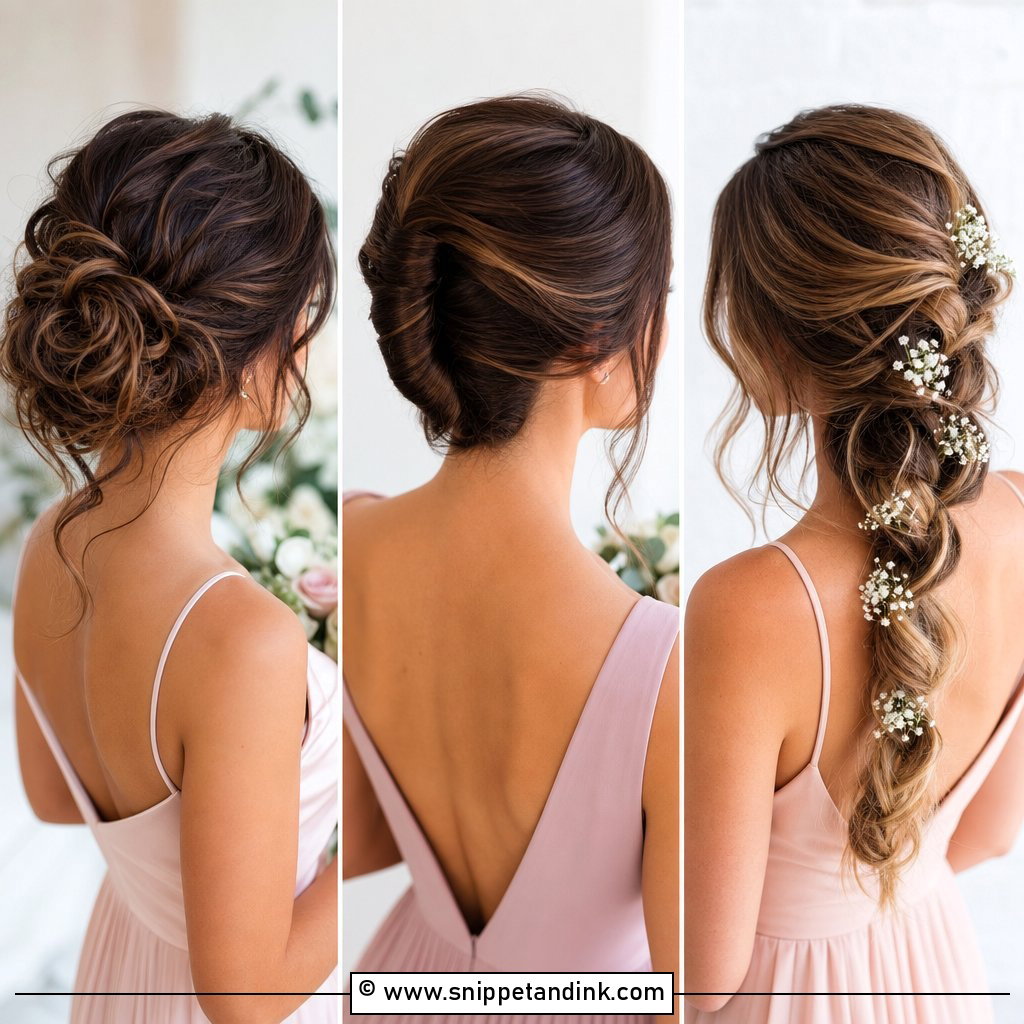
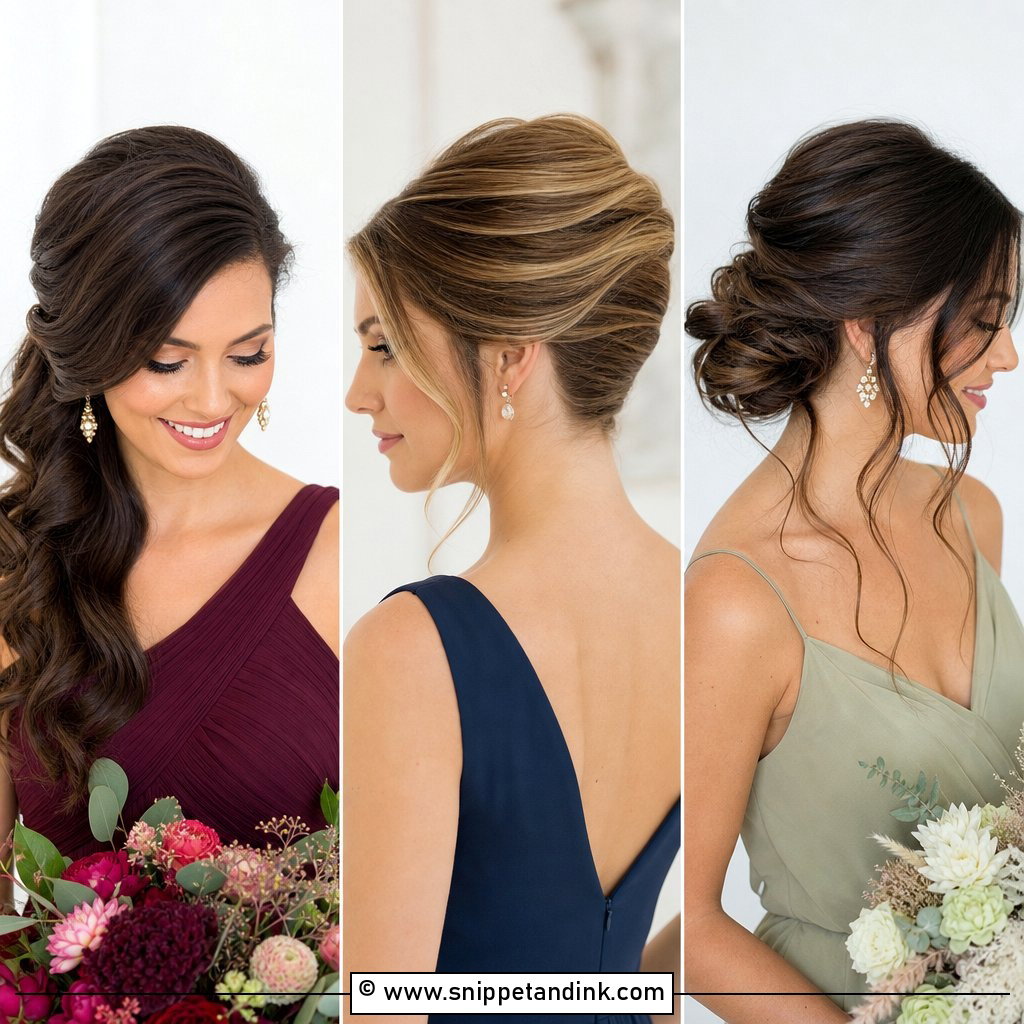
Here I curl everything first, let it cool completely, then gather it loosely at the nape so the bends stay visible. Skipping the cooling step is the most common reason a textured bun goes flat within an hour. Highlighted and balayage hair suits this one well, since the loose sections show off the different tones. On fine hair I backcomb lightly at the crown before gathering, which adds fullness without looking teased. The one thing I won’t do is drag the front back tight; that flat hairline undoes the whole relaxed feel.
3. Sleek Low Bun Bridesmaid Updo
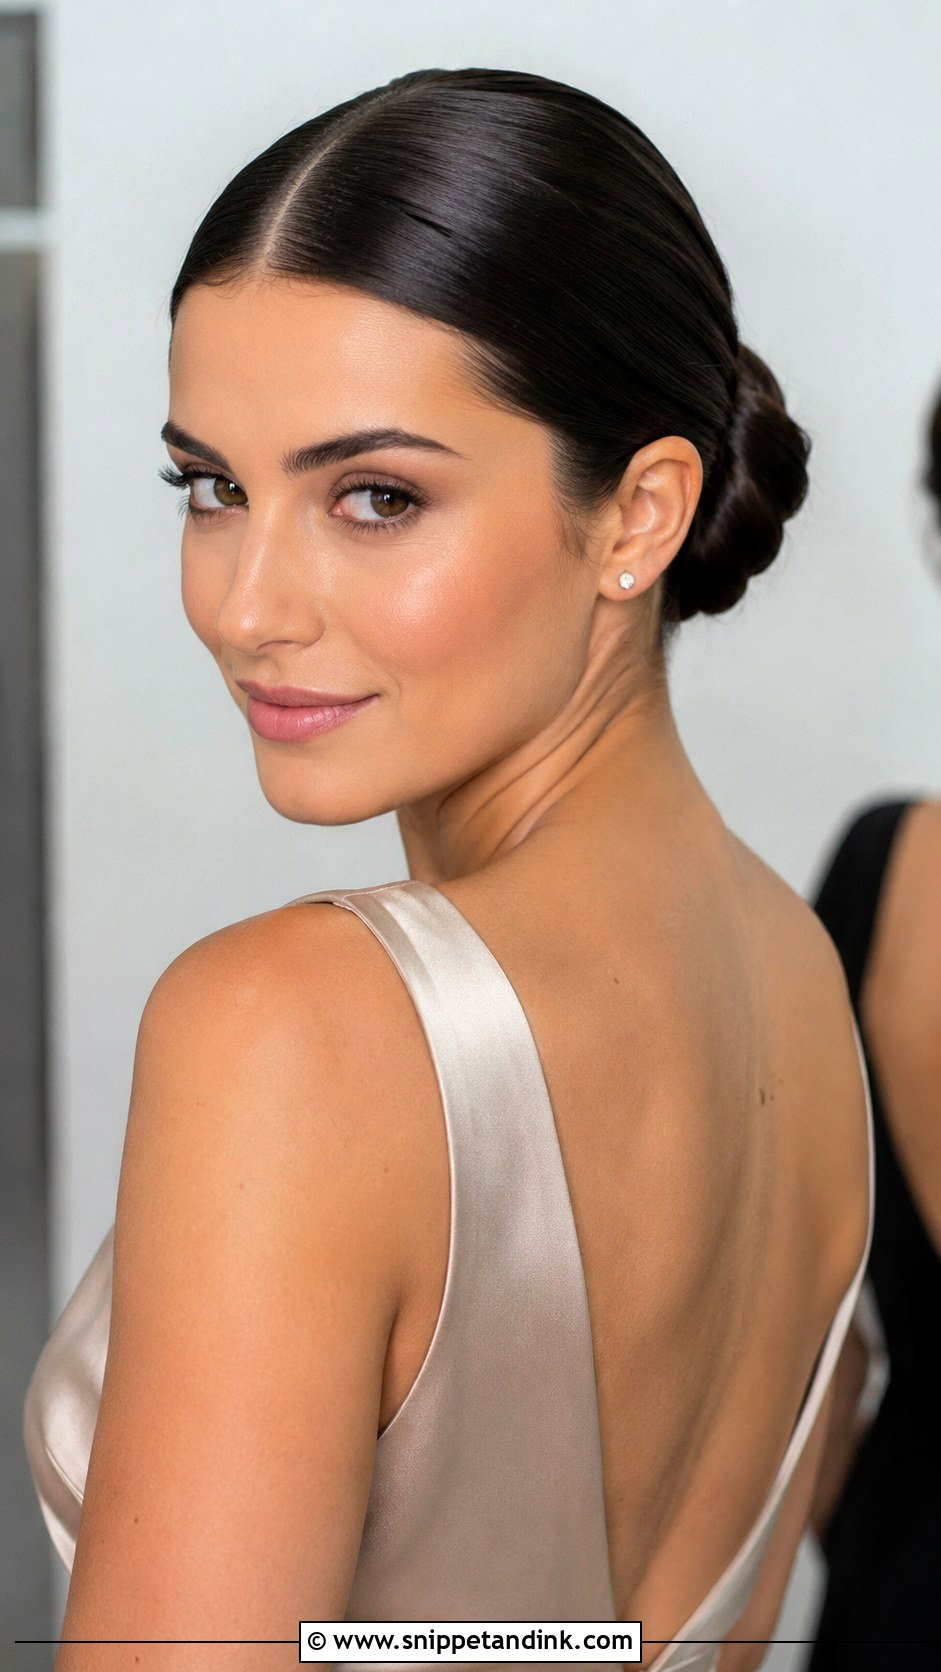
For a minimal wedding with satin dresses and clean jewelry, the sleek version is my first suggestion. The hair is smoothed close to the head on a center or side part and wrapped into a neat bun at the nape. Humid days are where it earns its place, because there are no curls to drop and flyaways are sealed down with a flexible gel. Use strong pins and a light shine spray. Be honest with yourself about your hairline, though: a slicked style shows every cowlick and gap, so I’d test it before committing.
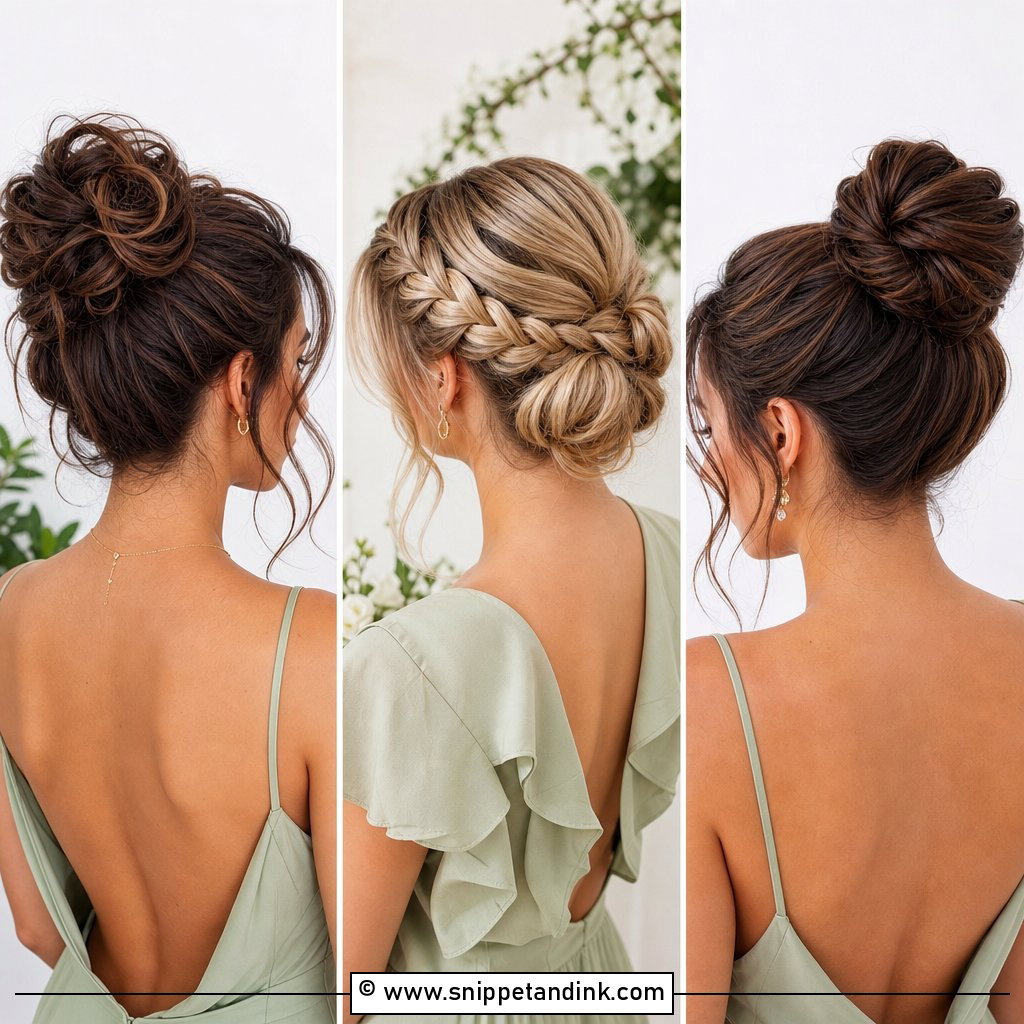
4. Braided Low Bun Bridesmaid Updo
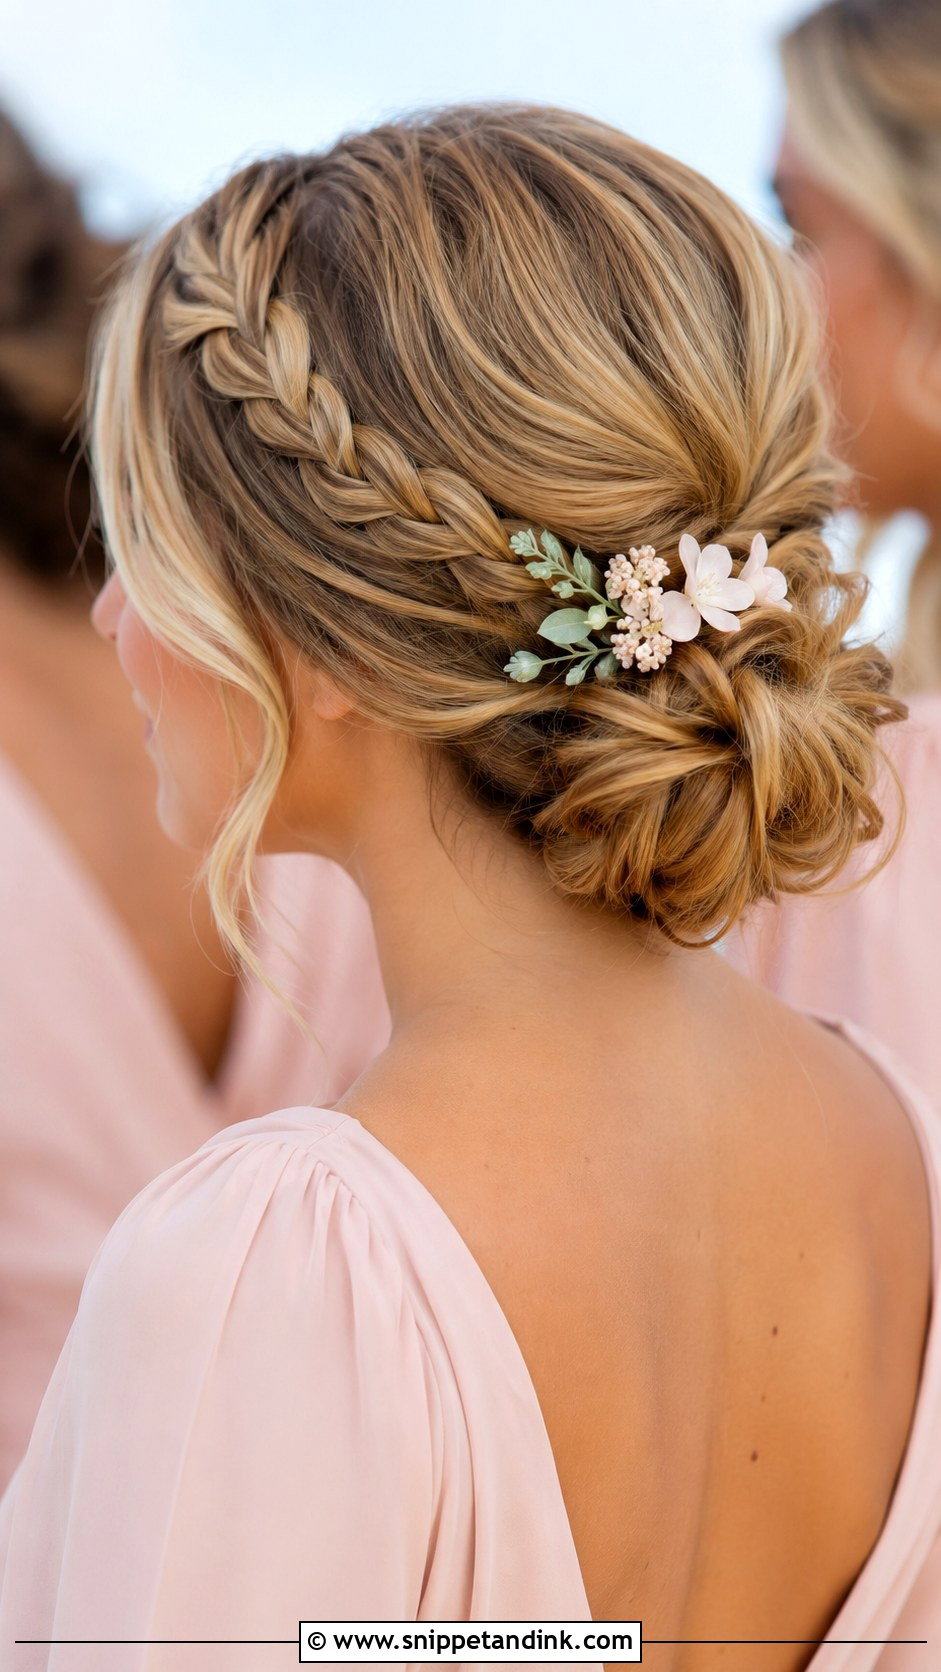
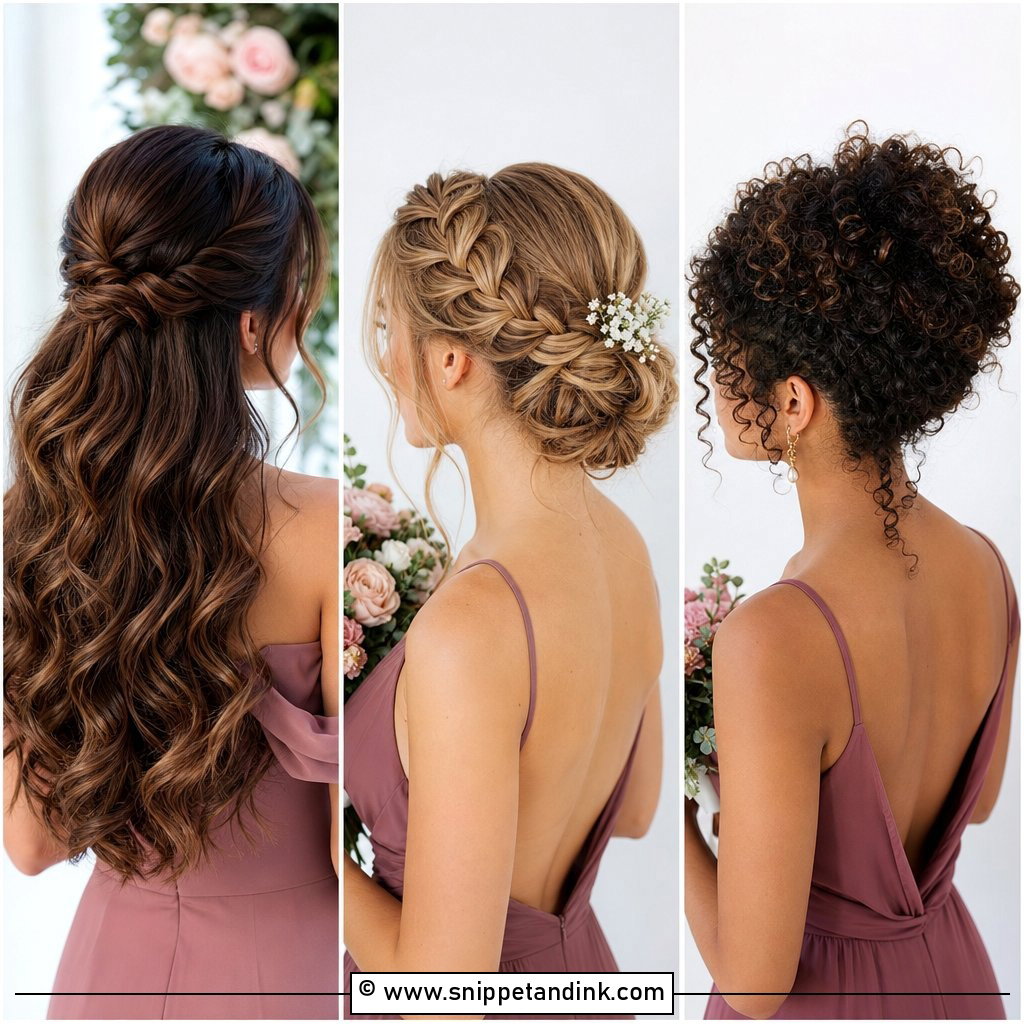
Adding a plait to a nape bun gives the eye something to follow without cluttering the shape. A braided low bun bridesmaid updo can start at the crown, sweep across one side or wrap around the bun itself. What I like most is the grip: a braid acts as an anchor, so on thick or heavily layered hair the pins have something solid to lock into. Garden and beach weddings suit it, and a few tiny pins or sprigs of baby’s breath are plenty.
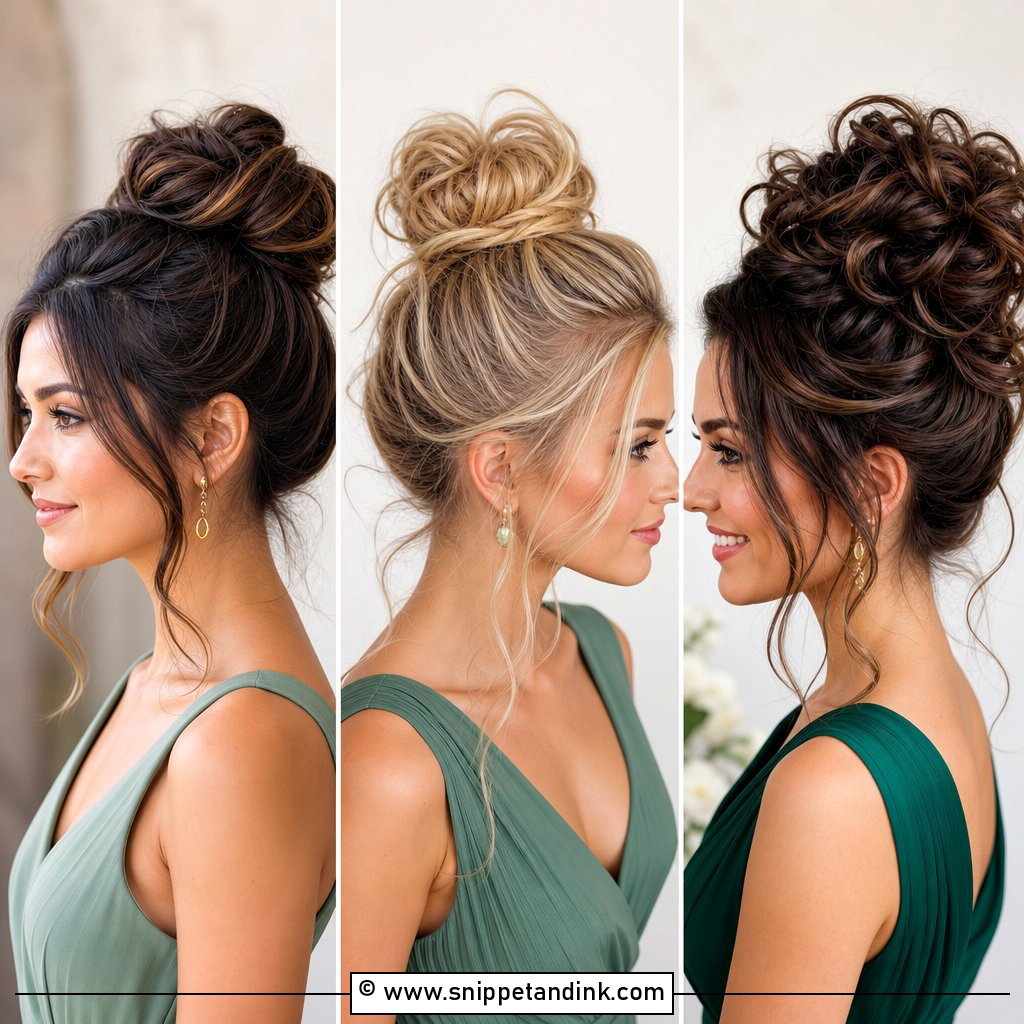
5. Messy Bun Bridesmaid Updo
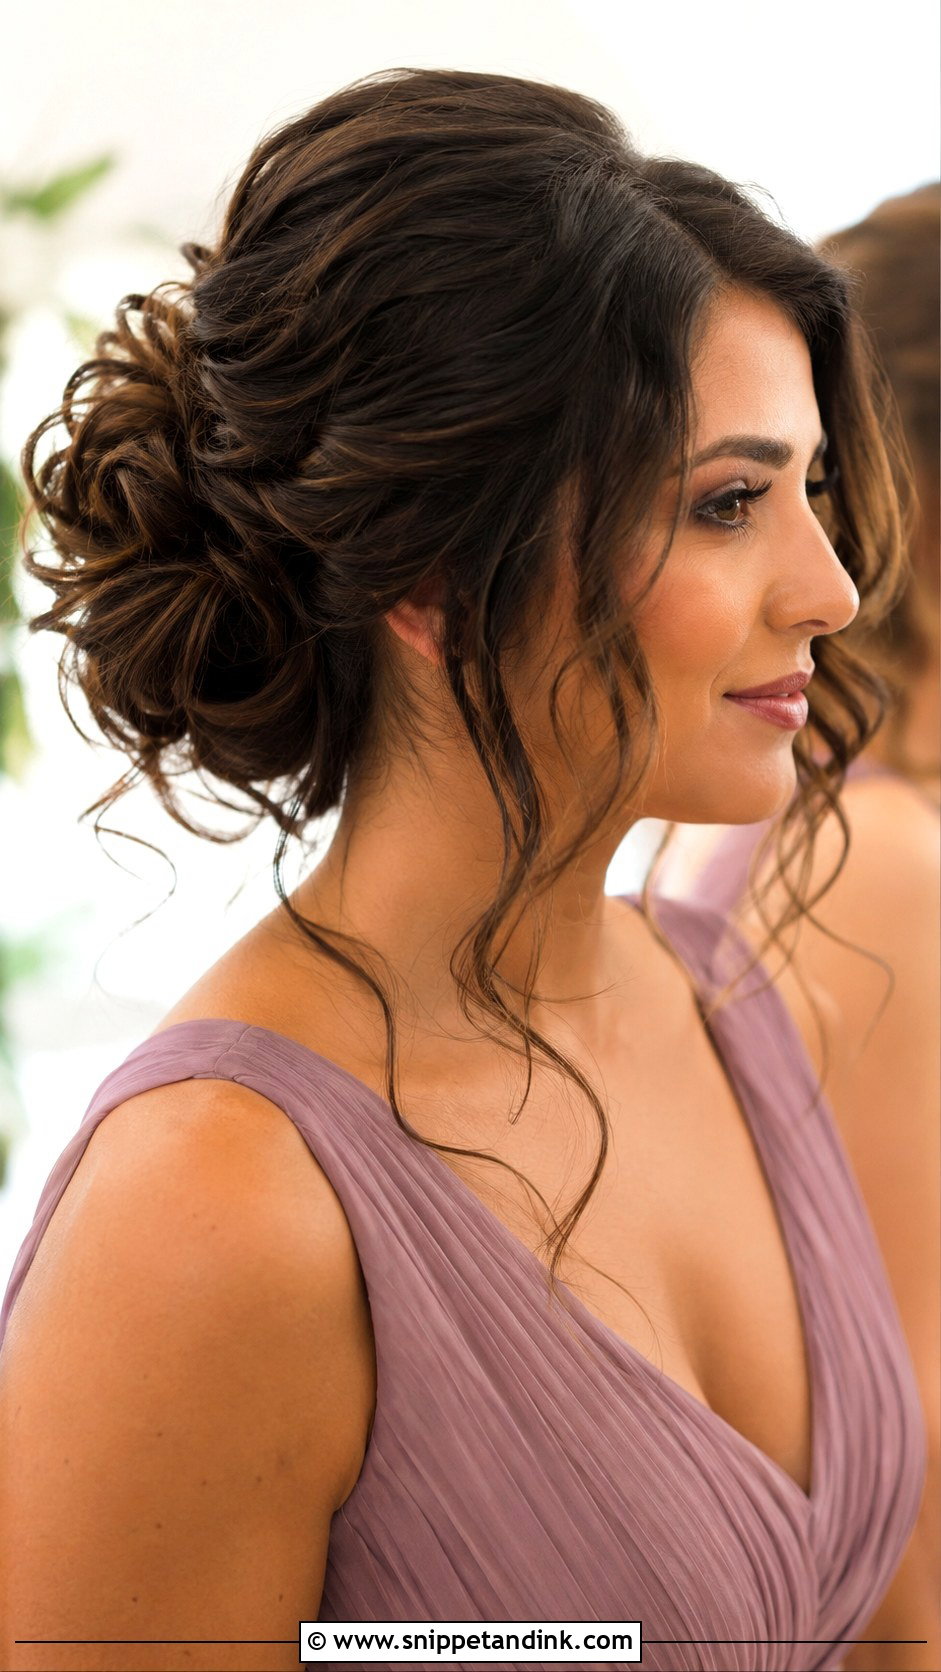
Nobody wants this to look like the bun you wear to the supermarket. The difference is all in the prep: I curl, backcomb lightly and pin in loose sections, so it looks airy from every side while the structure underneath is firm. Tendrils get placed deliberately at the cheekbones or jaw, not just pulled out at random. Bridesmaids who hate stiff hair tend to love it. A strong setting spray at the end matters more here than with any sleek style, since there’s less tension holding it together.
6. Twisted Bun Bridesmaid Updo
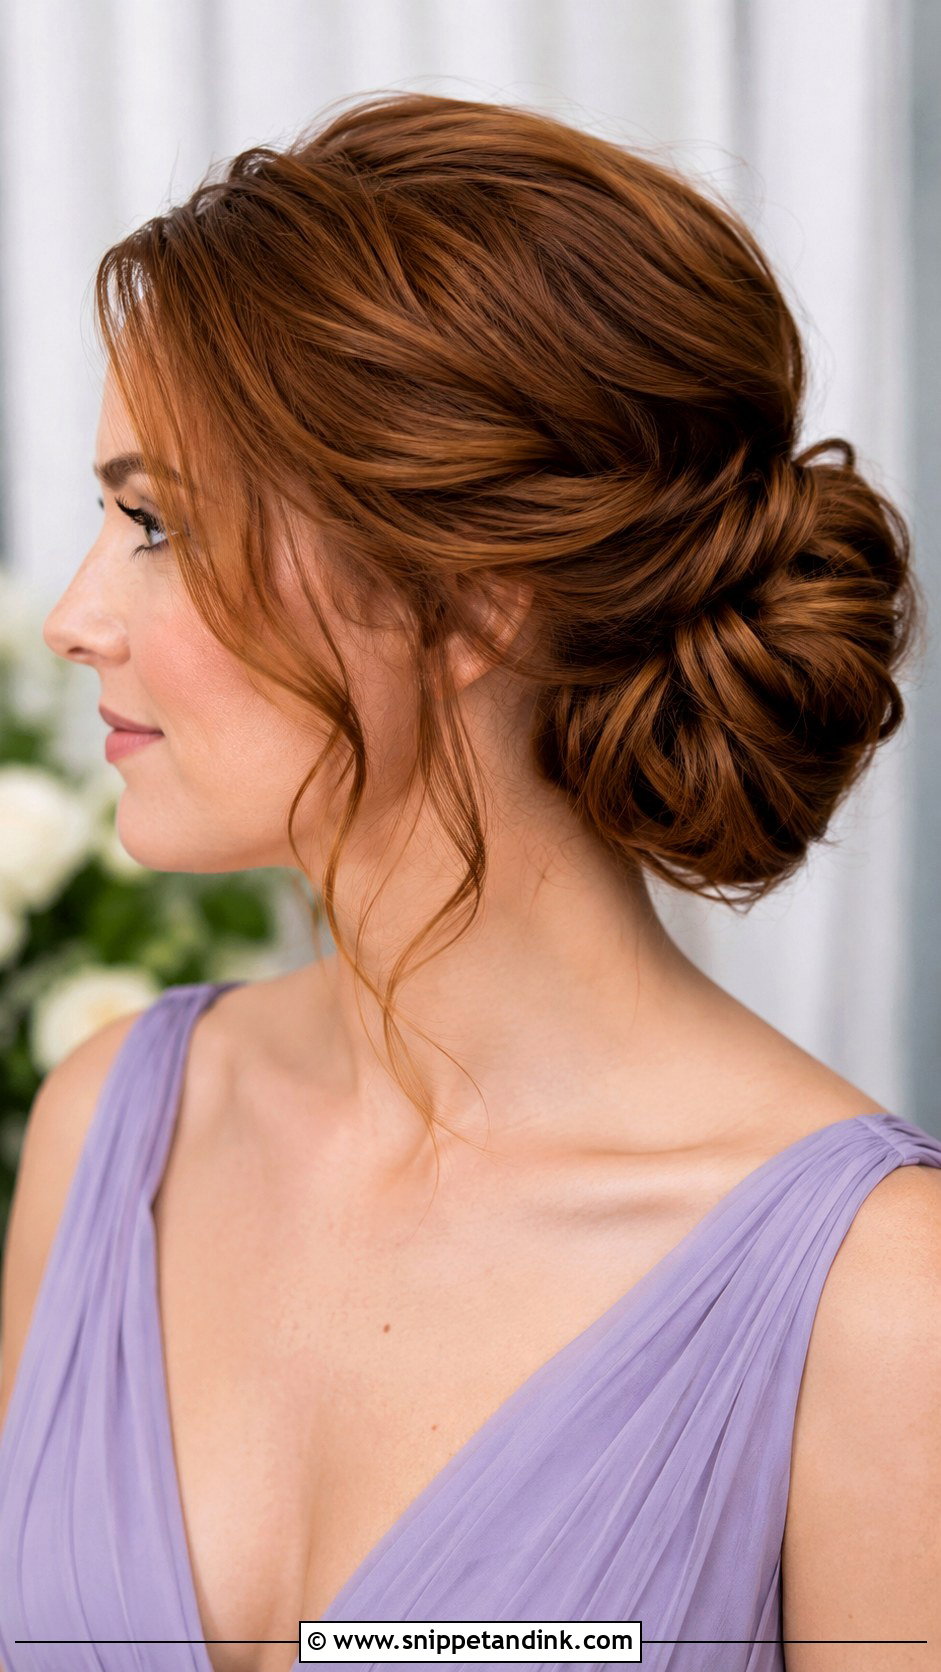
Twists give you detail without the time a braid takes. I take sections from the sides and crown, twist them back toward the nape and pin each into the bun, which leaves a sculpted shape with soft movement. Medium to long hair works best. For fine hair I take wider sections and pancake them gently once pinned, so the twists read fuller. Delicate pins and sheer dresses go well with it, and I keep makeup and accessories quiet so the twist work stays the focus.
7. Chignon Bridesmaid Updo
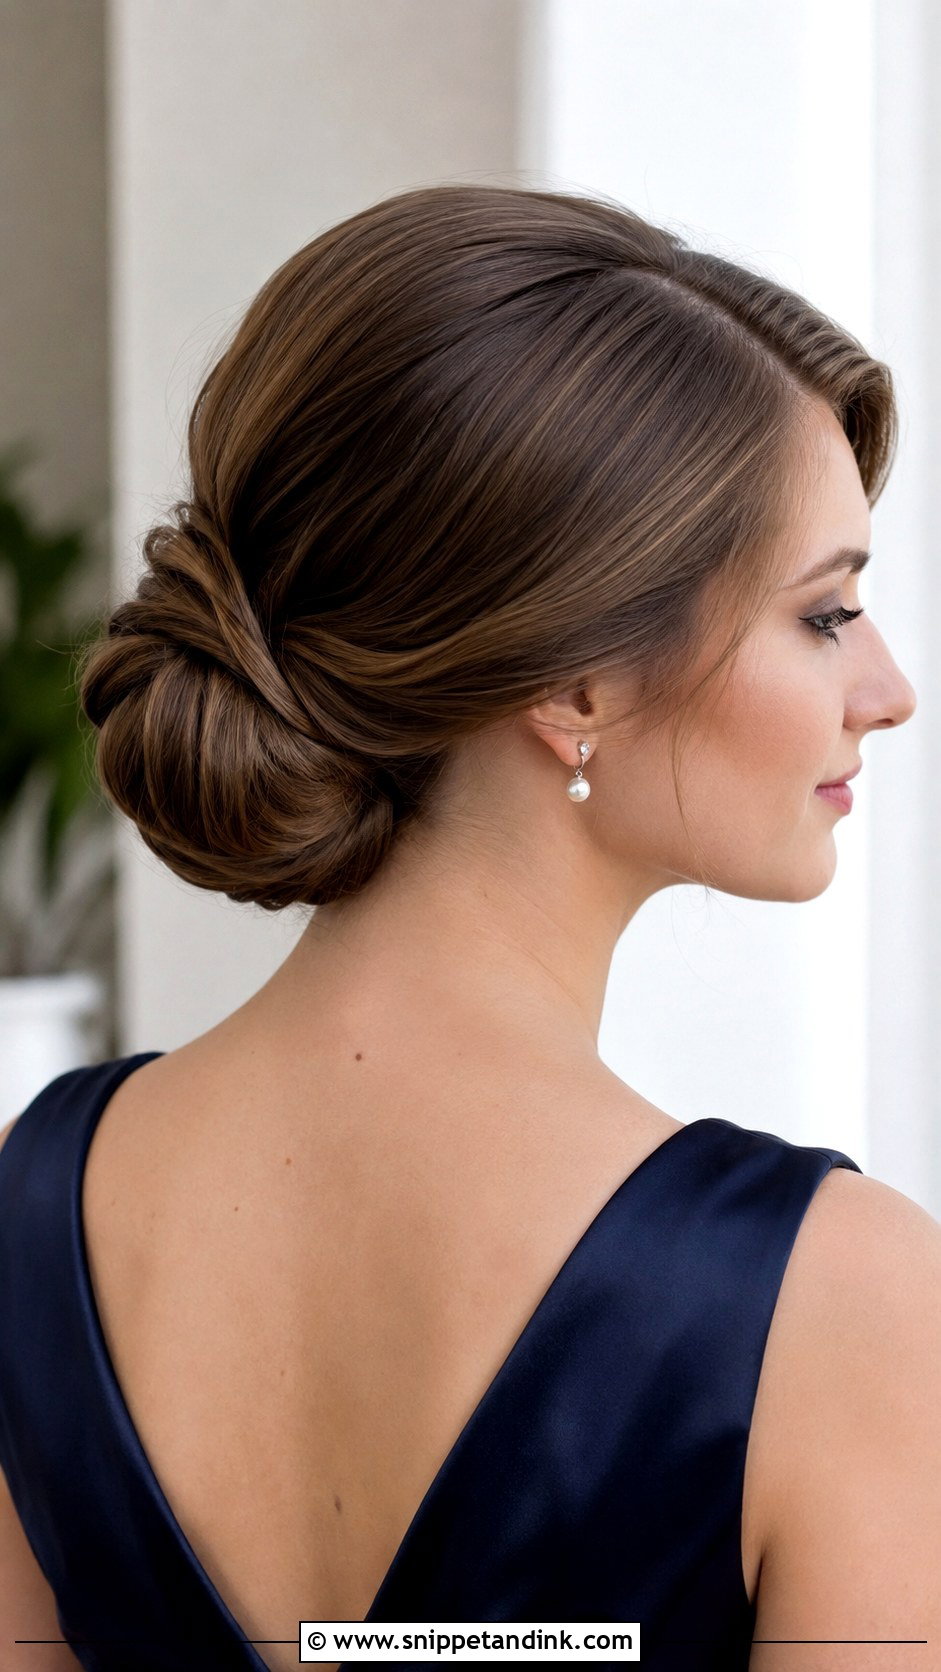
A smooth, rounded chignon is still the shape I reach for at black-tie and ballroom weddings. It sits low, it’s tidier than a messy bun, and it leaves the neck and shoulders open so earrings and dress details show. A center part reads modern; a side sweep softens it. The prep is a balance I get asked about a lot: smoothing cream for polish, then a texture spray so the pins can actually hold. Too much cream and the chignon slides out of place within a couple of hours.
8. Side Bun Bridesmaid Updo
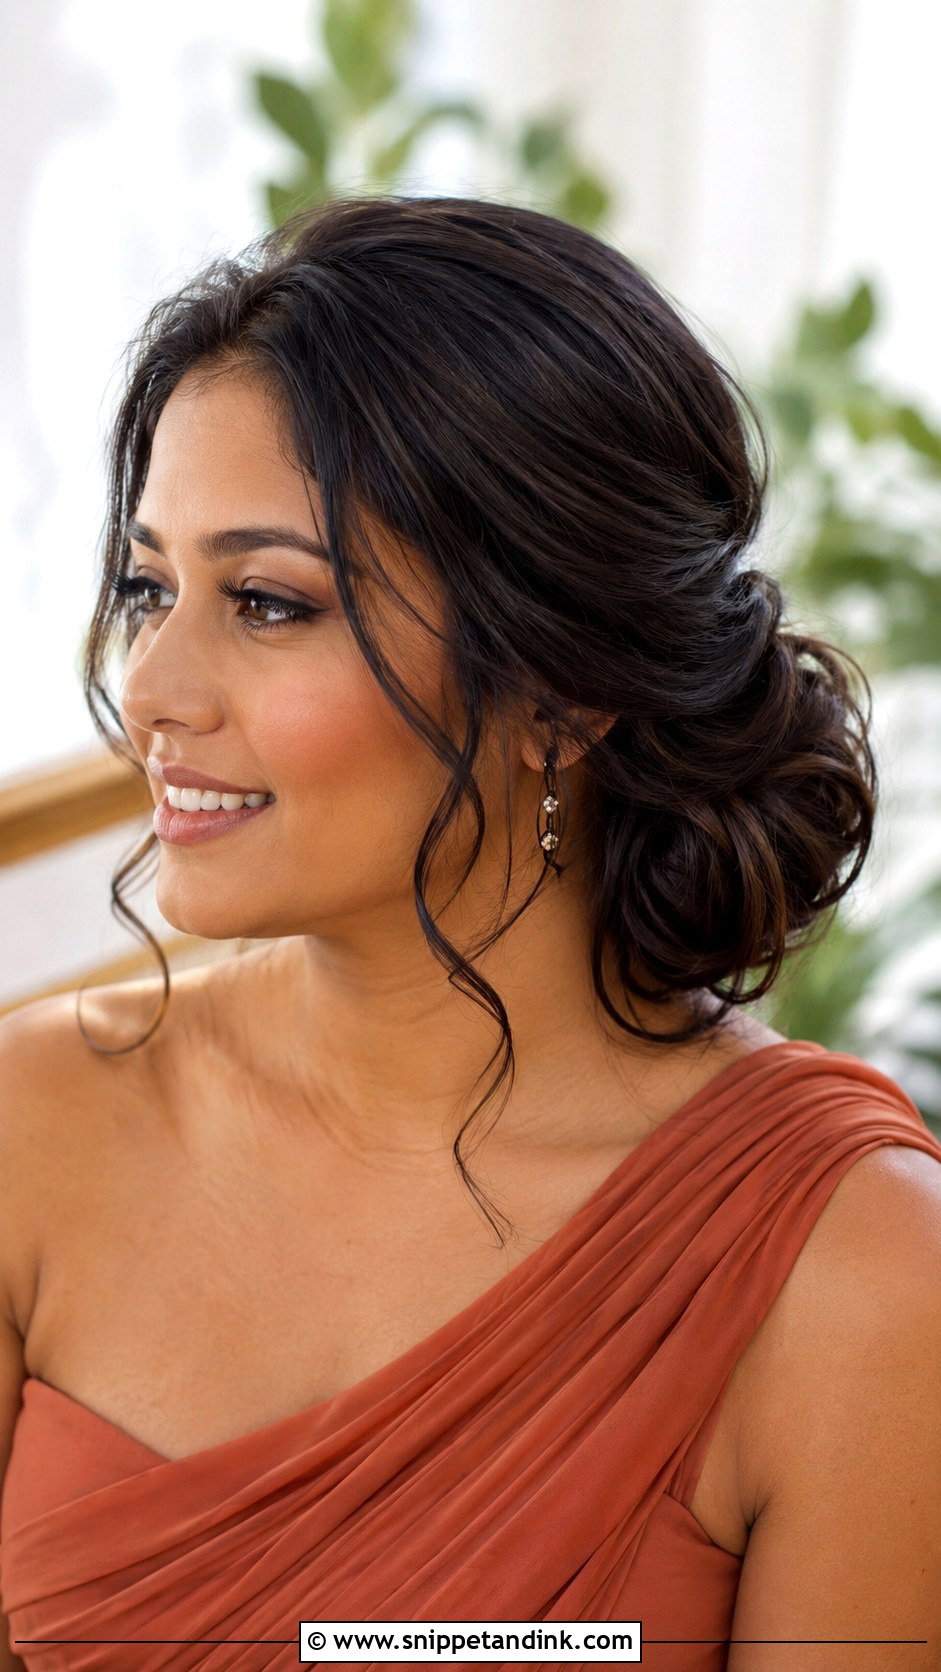
Moving the bun to one side of the neck means it’s visible in every front-facing photo, which a nape bun never is. I pair it most often with one-shoulder dresses, placing the bun on the bare side. It can be sleek, braided, twisted or textured. The thing I watch is weight: if the bun gets too big it pulls the whole head visually to one side, so I keep it a little smaller than a centered bun and soften the opposite side with a curl or two.
9. High Bun Bridesmaid Updo
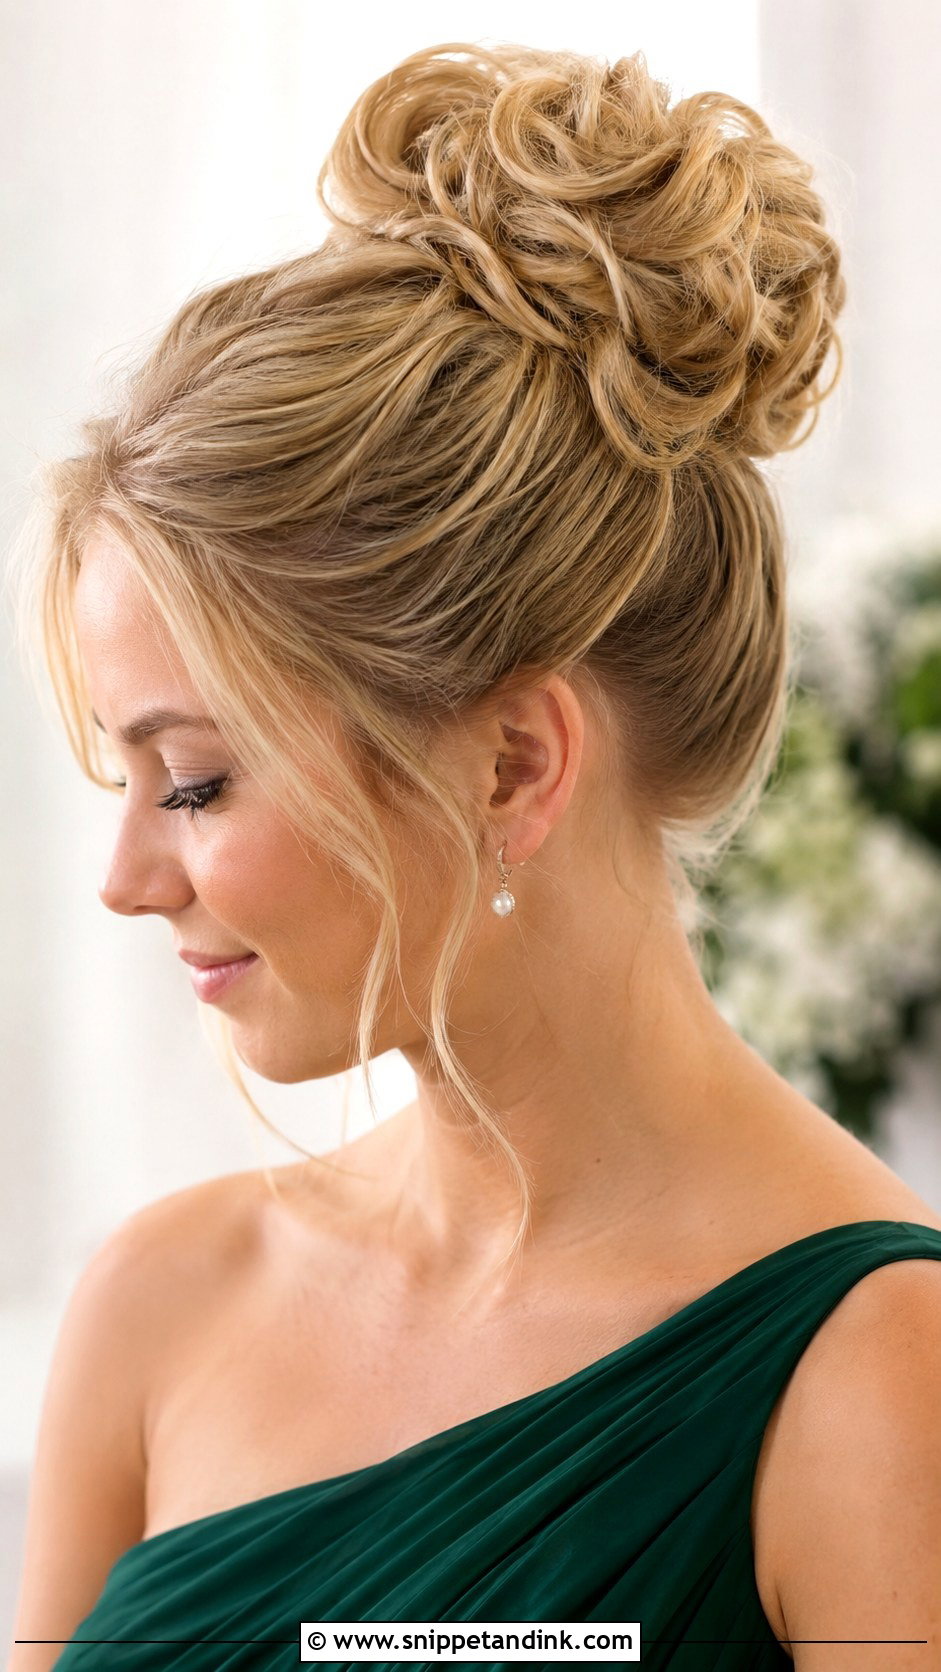
A bun above the crown lengthens the neck and keeps every strand off the shoulders, which bridesmaids appreciate at a midsummer outdoor ceremony. It also balances high-neck dresses and big earrings. The risk is weight. Long or thick hair placed that high will pull on the scalp by early evening, so I section it, anchor a base with a crisscross of pins and build the bun over that. If someone gets tension headaches, I’d steer her to a mid-height version instead.
10. Top Knot Bridesmaid Updo
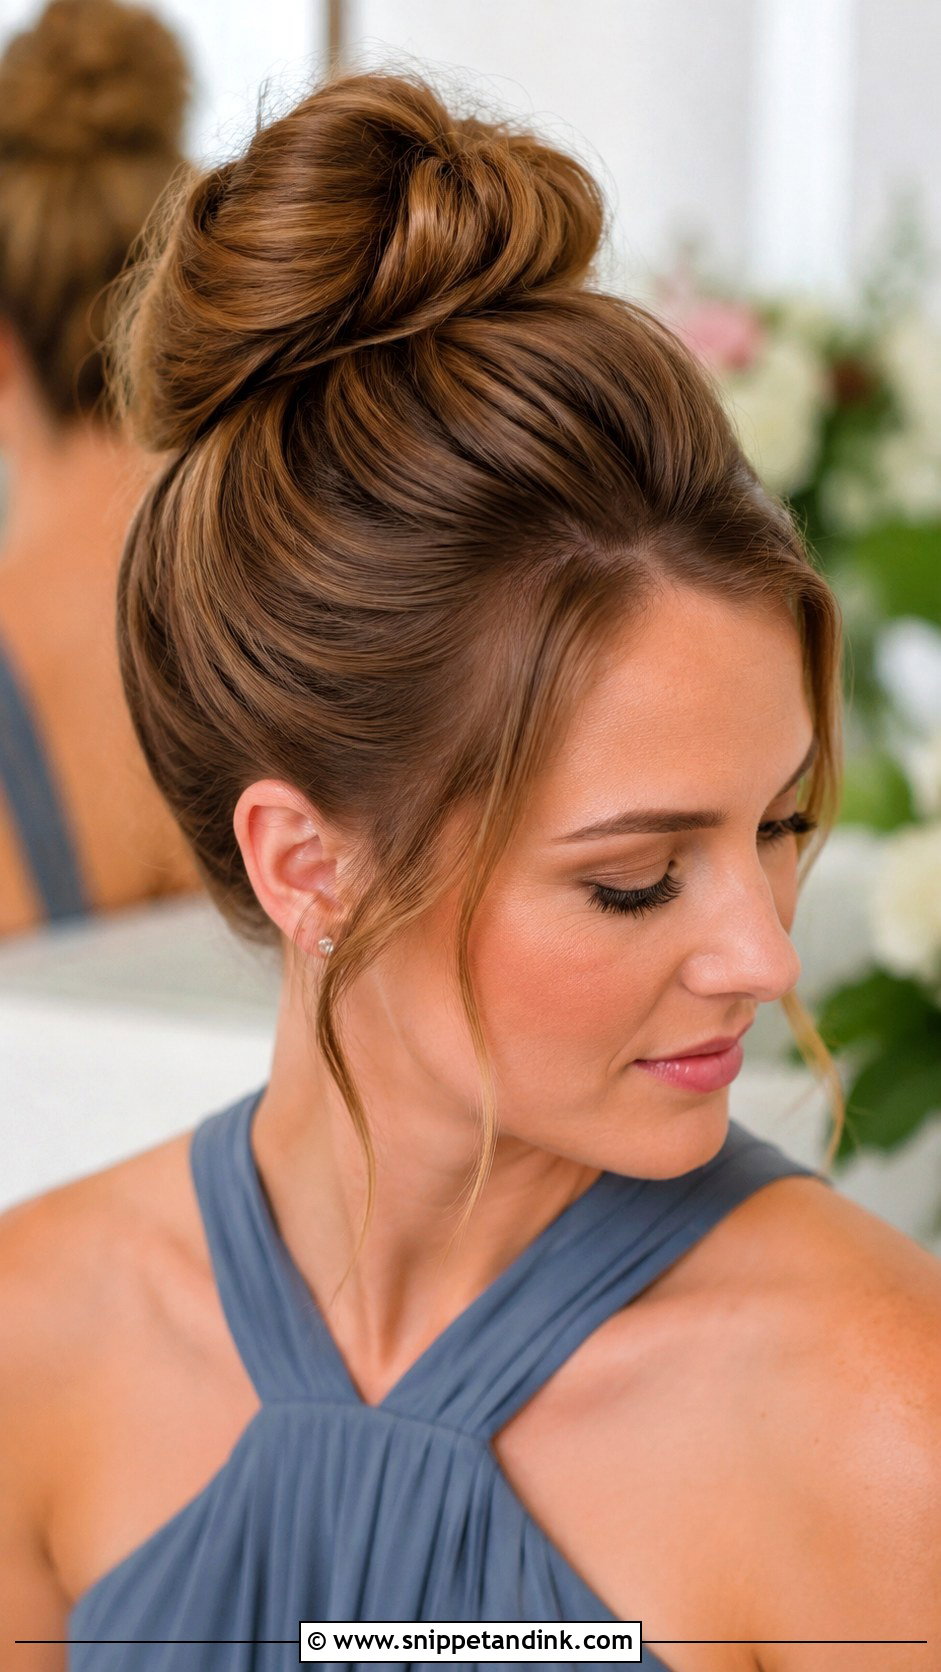
In group shots, a top knot bridesmaid updo is the shape people pick out first. The wedding version is built rather than twisted: I smooth the base, shape volume into the knot and hide every pin, with the front brushed back or a few loose pieces left at the temples. It keeps the neckline clear and stays cool in summer. My one warning is about size. A small, tight knot can look severe and a little like gym hair, so I always make it fuller than the bridesmaid expects.
11. French Twist Bridesmaid Updo
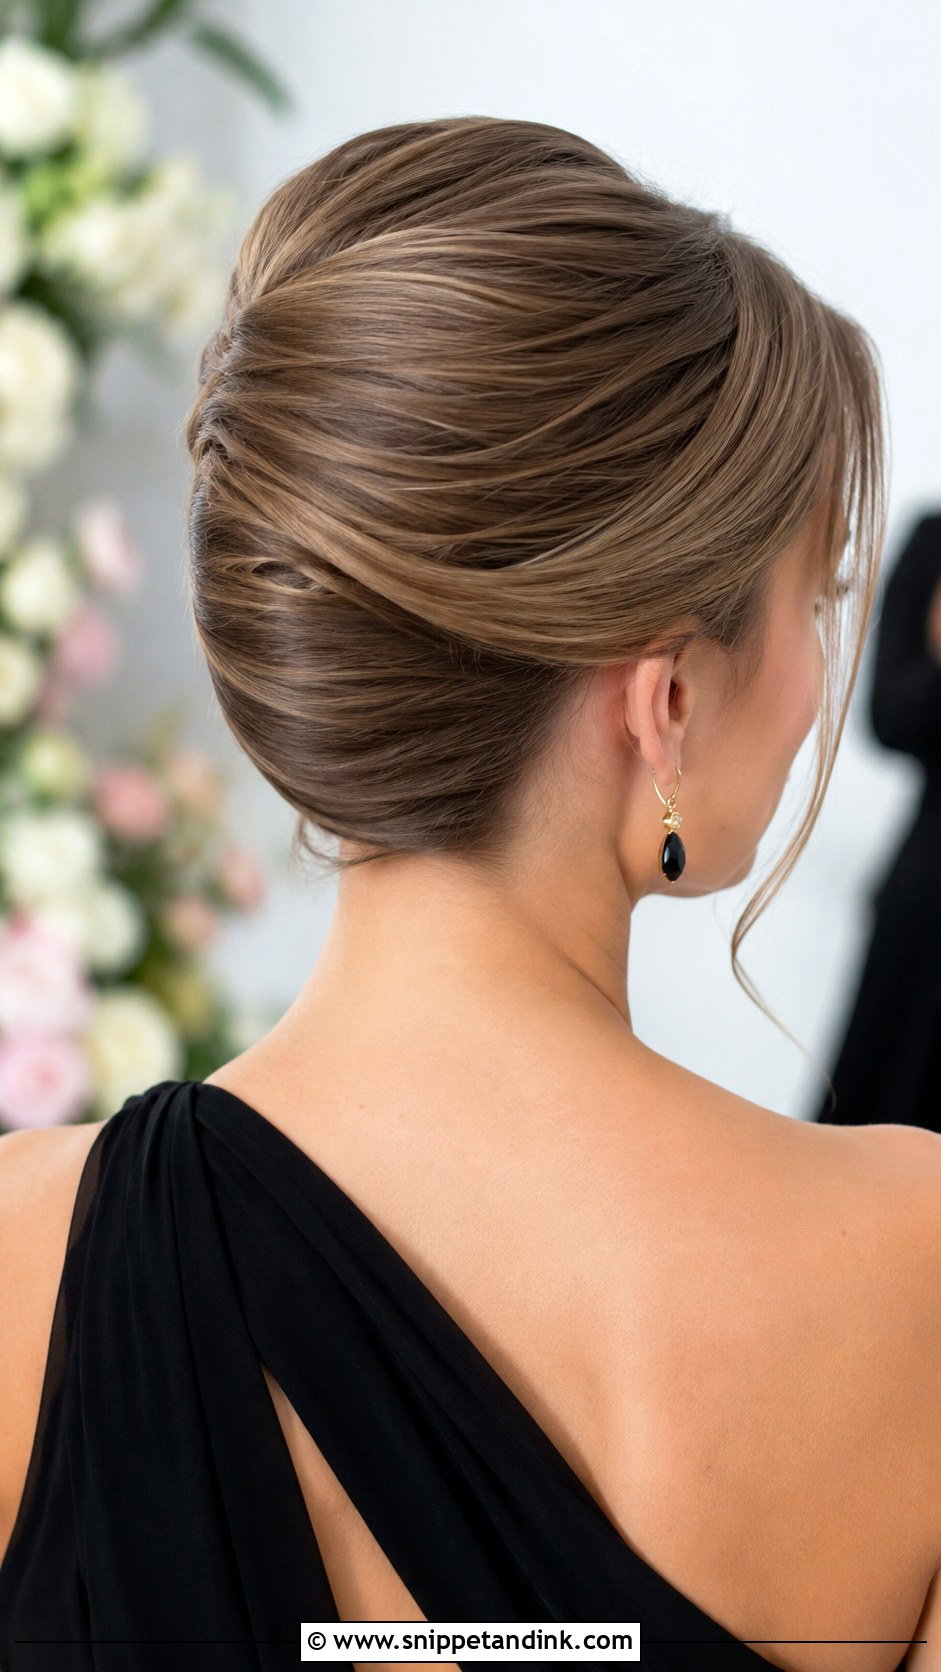
The French twist is my choice for city venues and dresses with clean lines. The hair is swept up and pinned into a vertical roll at the back of the head, either smooth or with a few soft pieces at the face. It doesn’t need extreme length, so shoulder-length hair can usually manage it. Texture spray before the twist is non-negotiable for me; freshly washed, silky hair will slowly unroll otherwise. Side-view portraits are where this one really shows its shape.
12. Loose French Twist Bridesmaid Updo
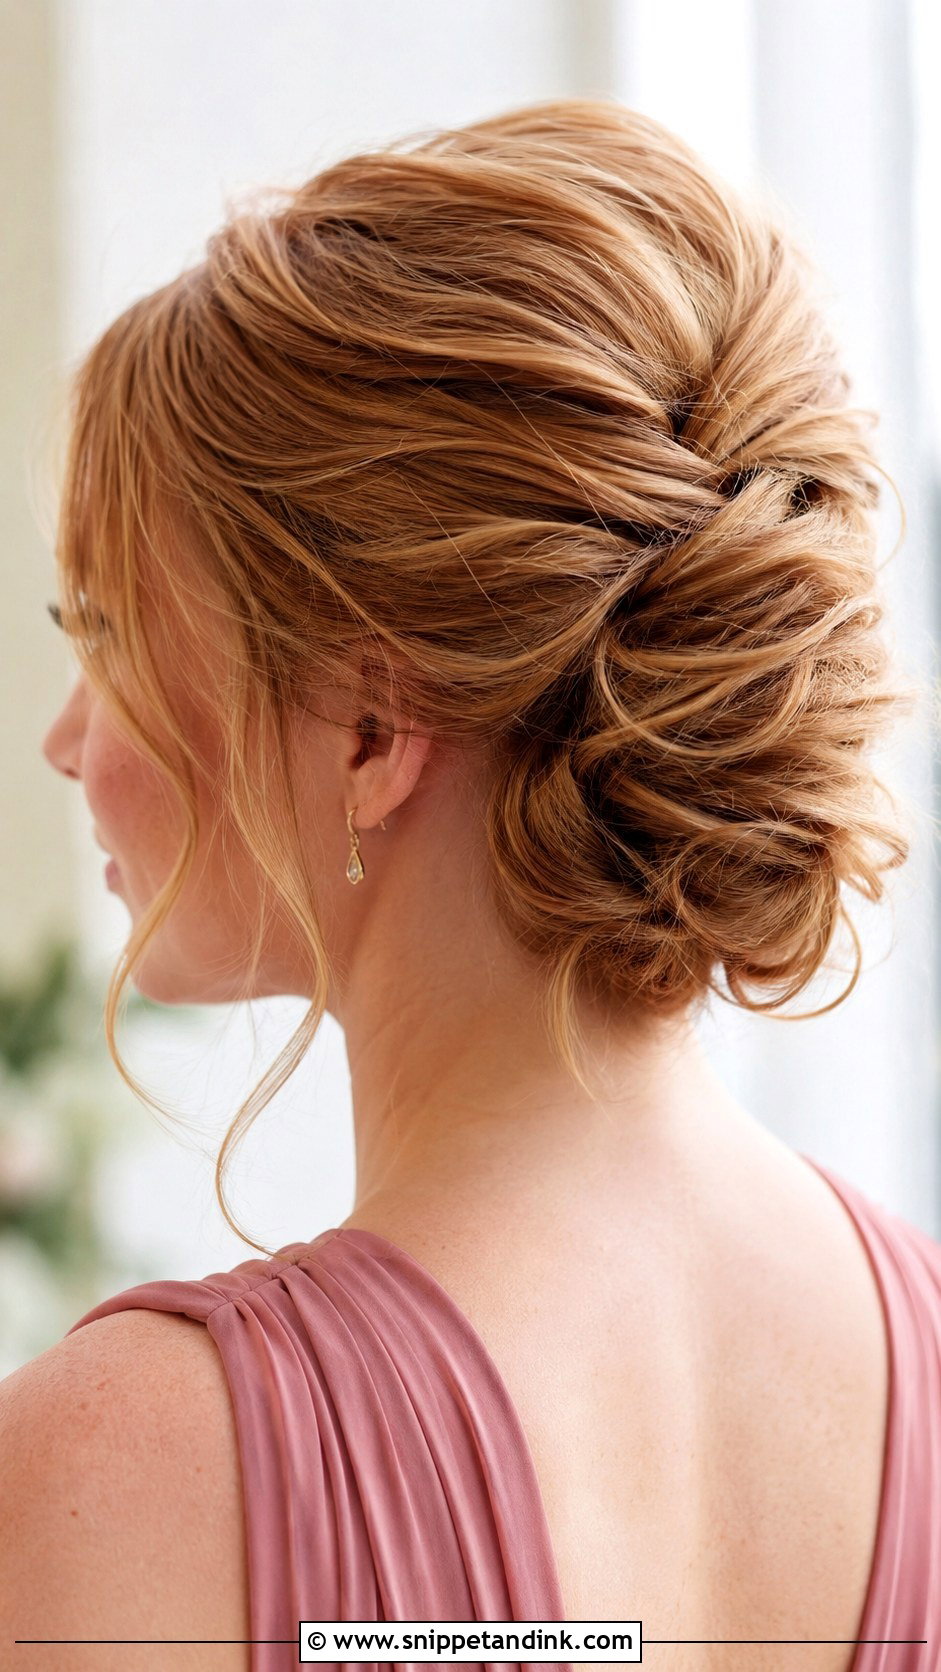
Loosening the classic twist lets it show bends and gaps instead of a tight shell, which takes it out of the formal register. I pin it with fewer, longer pins and leave curtain pieces or a side part at the front. Chiffon dresses and garden settings suit it. Layered cuts are the real winners here, because shorter layers that would poke out of a sleek twist simply blend into the undone shape.
13. Crown Braid Bridesmaid Updo
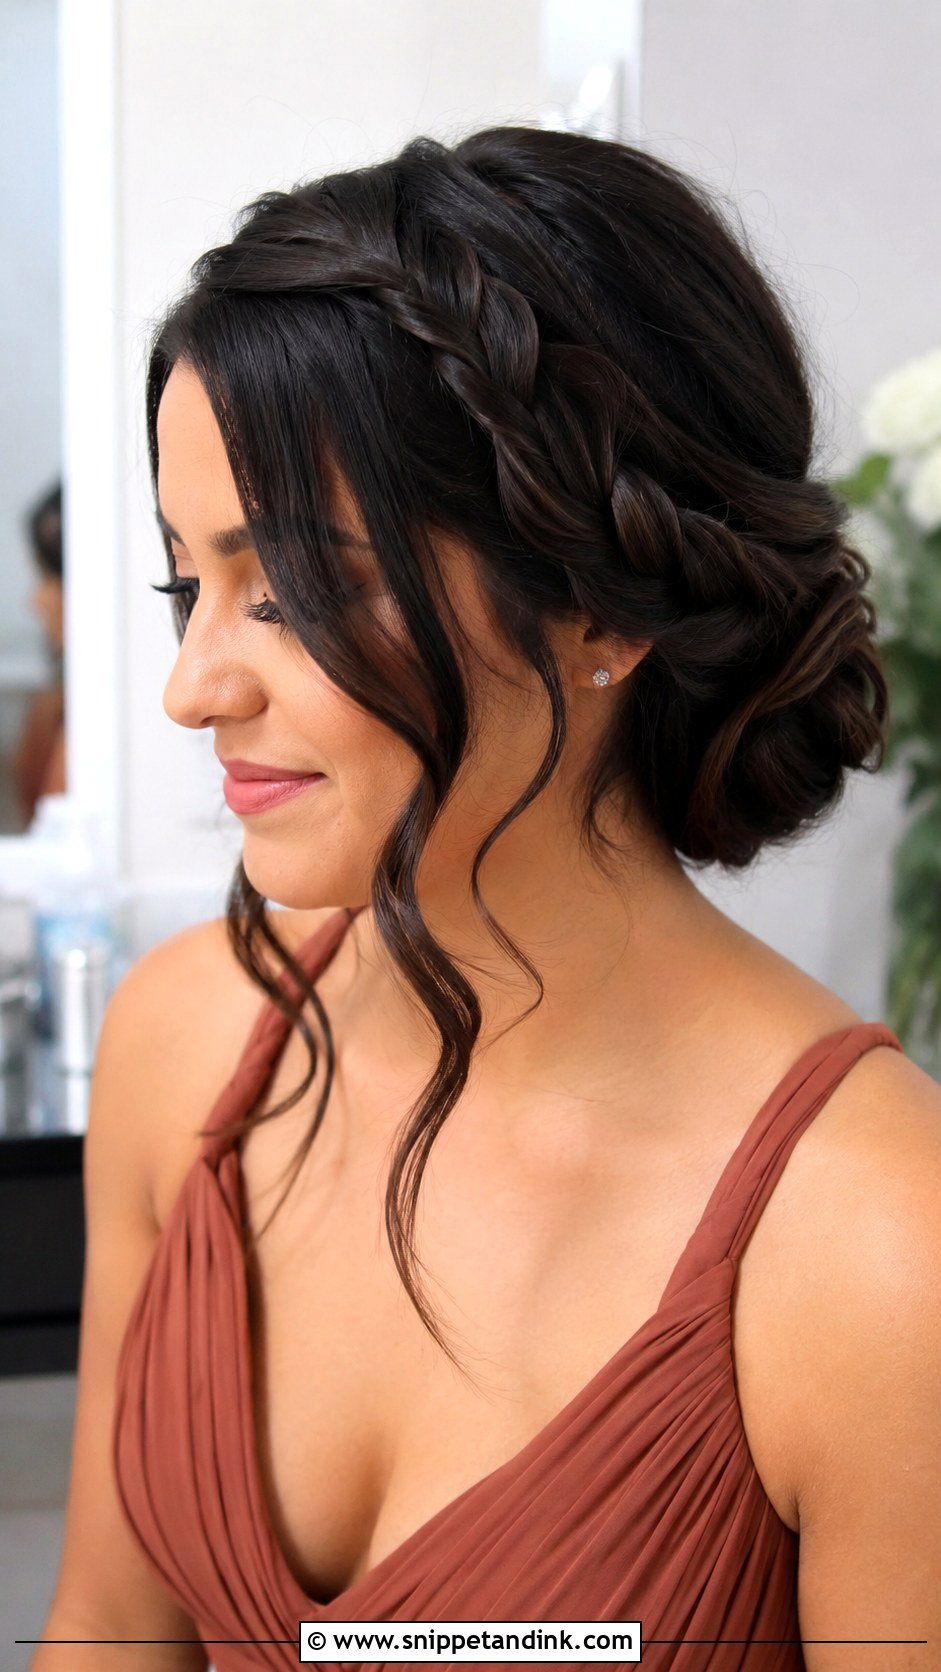
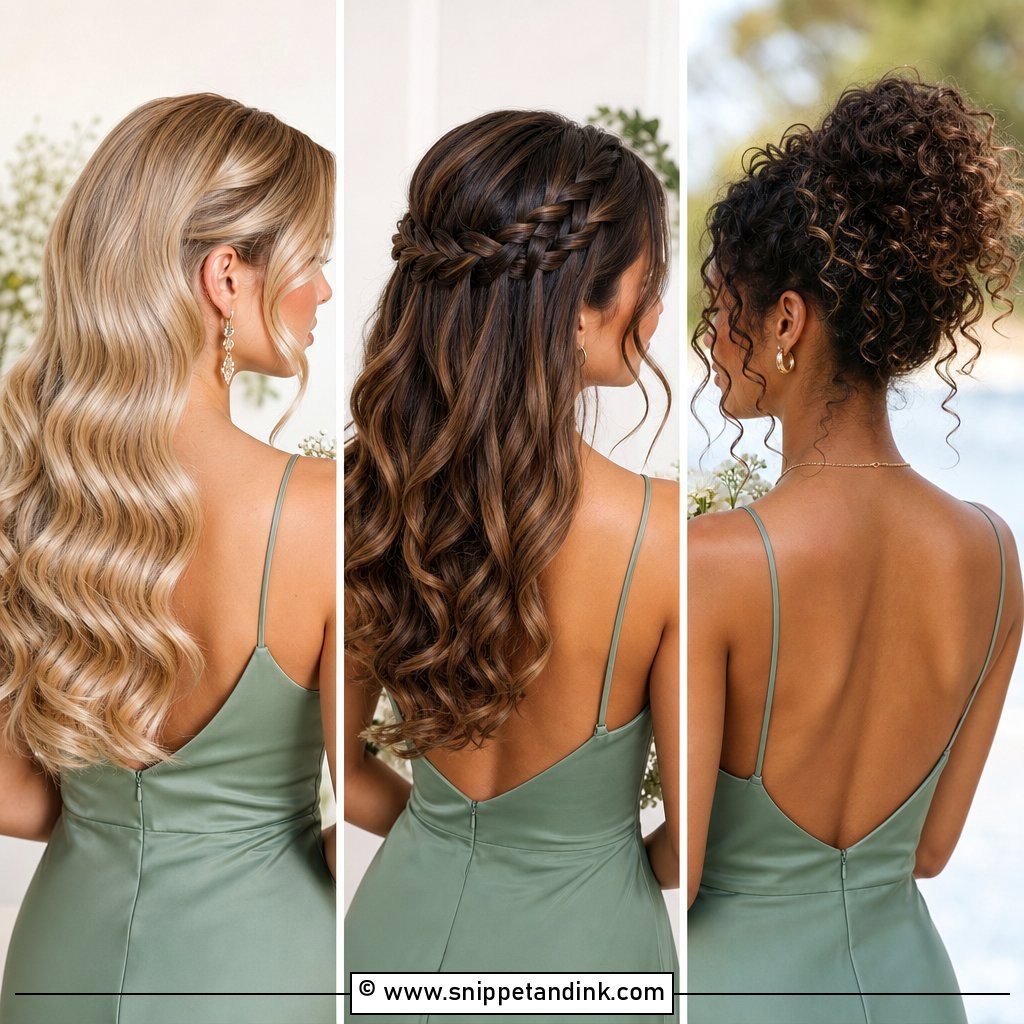
A braid wrapped around the head gives a halo effect that looks right at rustic and outdoor weddings. The braid can be tight and defined or pulled apart for softness, and the remaining hair is tucked into a low bun or pinned at the back. Practically, it’s one of the most secure styles on this list. I find it needs real length to go all the way around, so on shoulder-length hair I’ll do two braids meeting at the back instead. You don’t need flowers; the braid carries the detail on its own.
14. Fishtail Braid Bridesmaid Updo
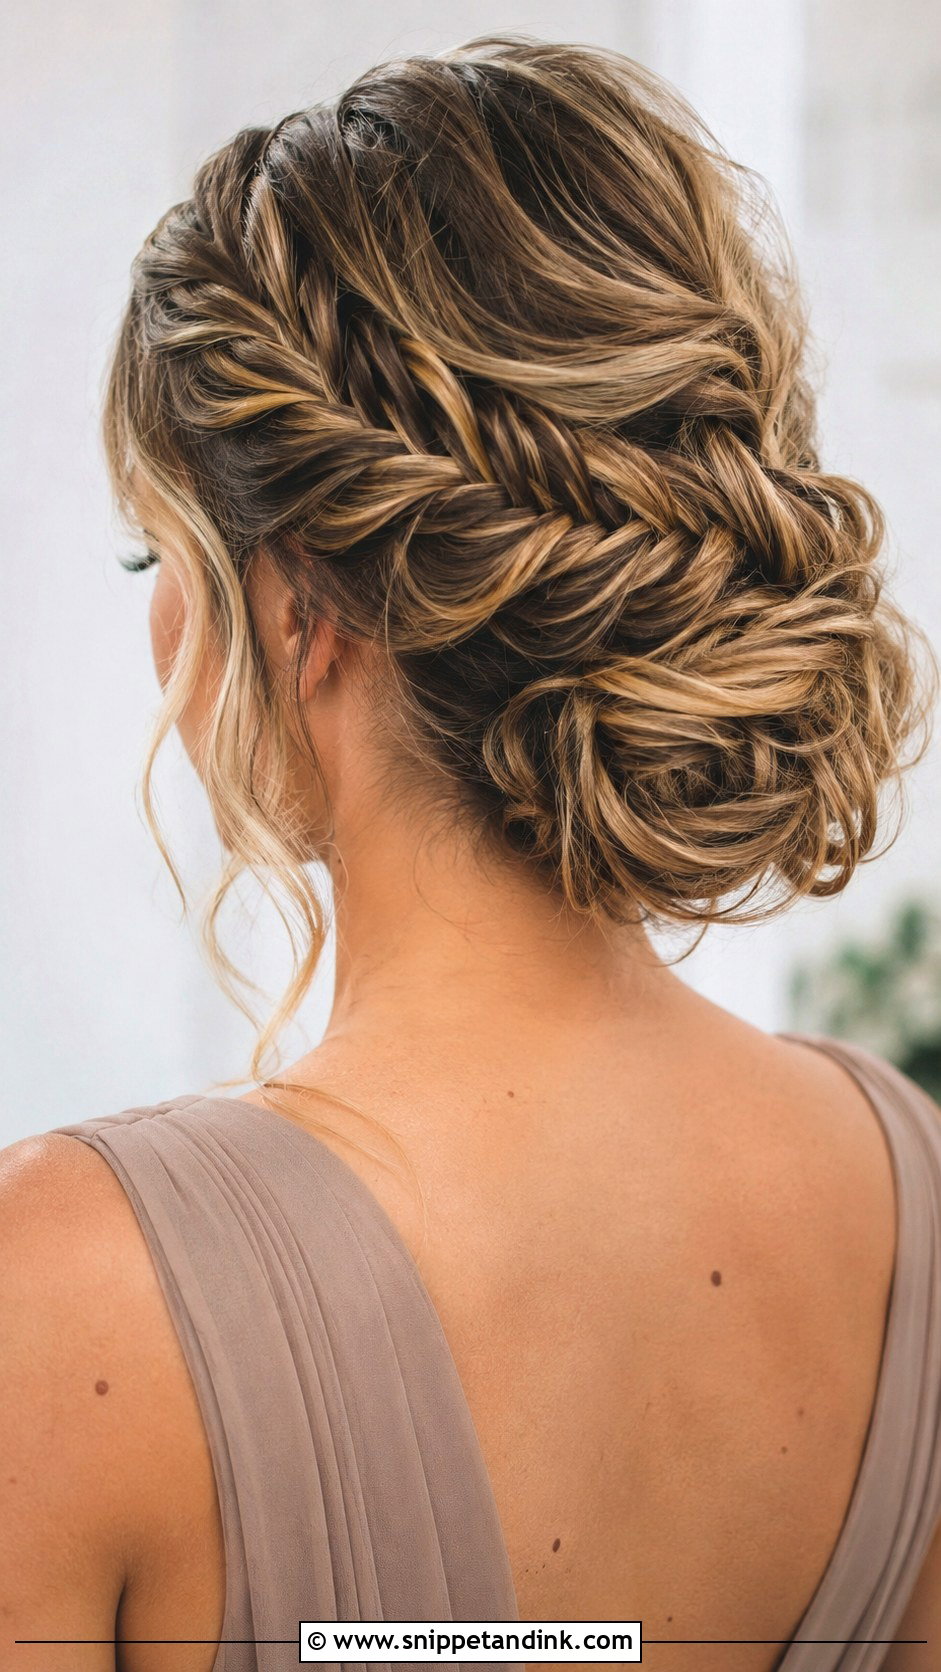
A fishtail has finer weaving than a standard three-strand plait, so it adds texture without bulk. It can run along one side, wrap into a bun or form part of a low pinned shape. On light brown, blonde, auburn or highlighted hair the woven pieces show up clearly; on very dark hair the pattern can disappear in photos unless it’s pulled apart more. I always loosen the edges after braiding so it reads fuller, which makes it a nice middle point between boho and polished.
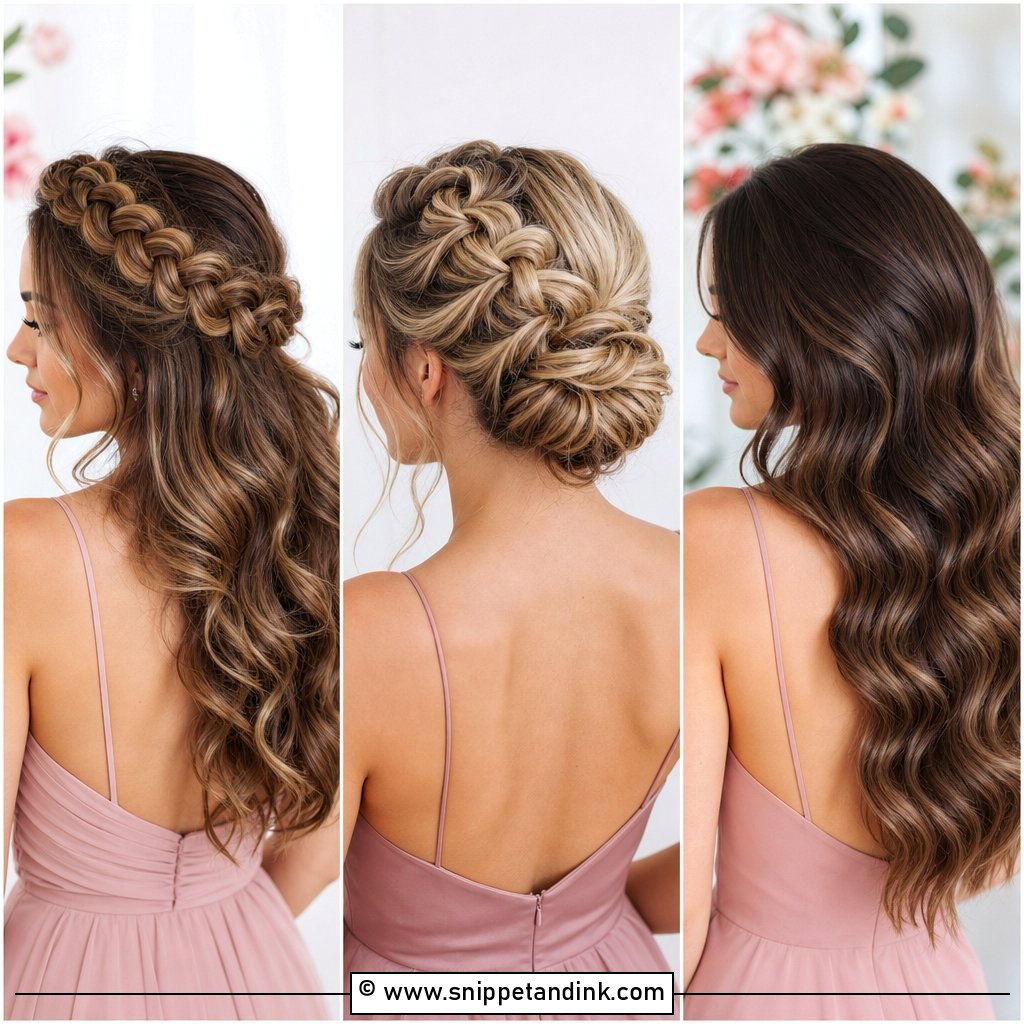
15. Dutch Braid Bridesmaid Updo
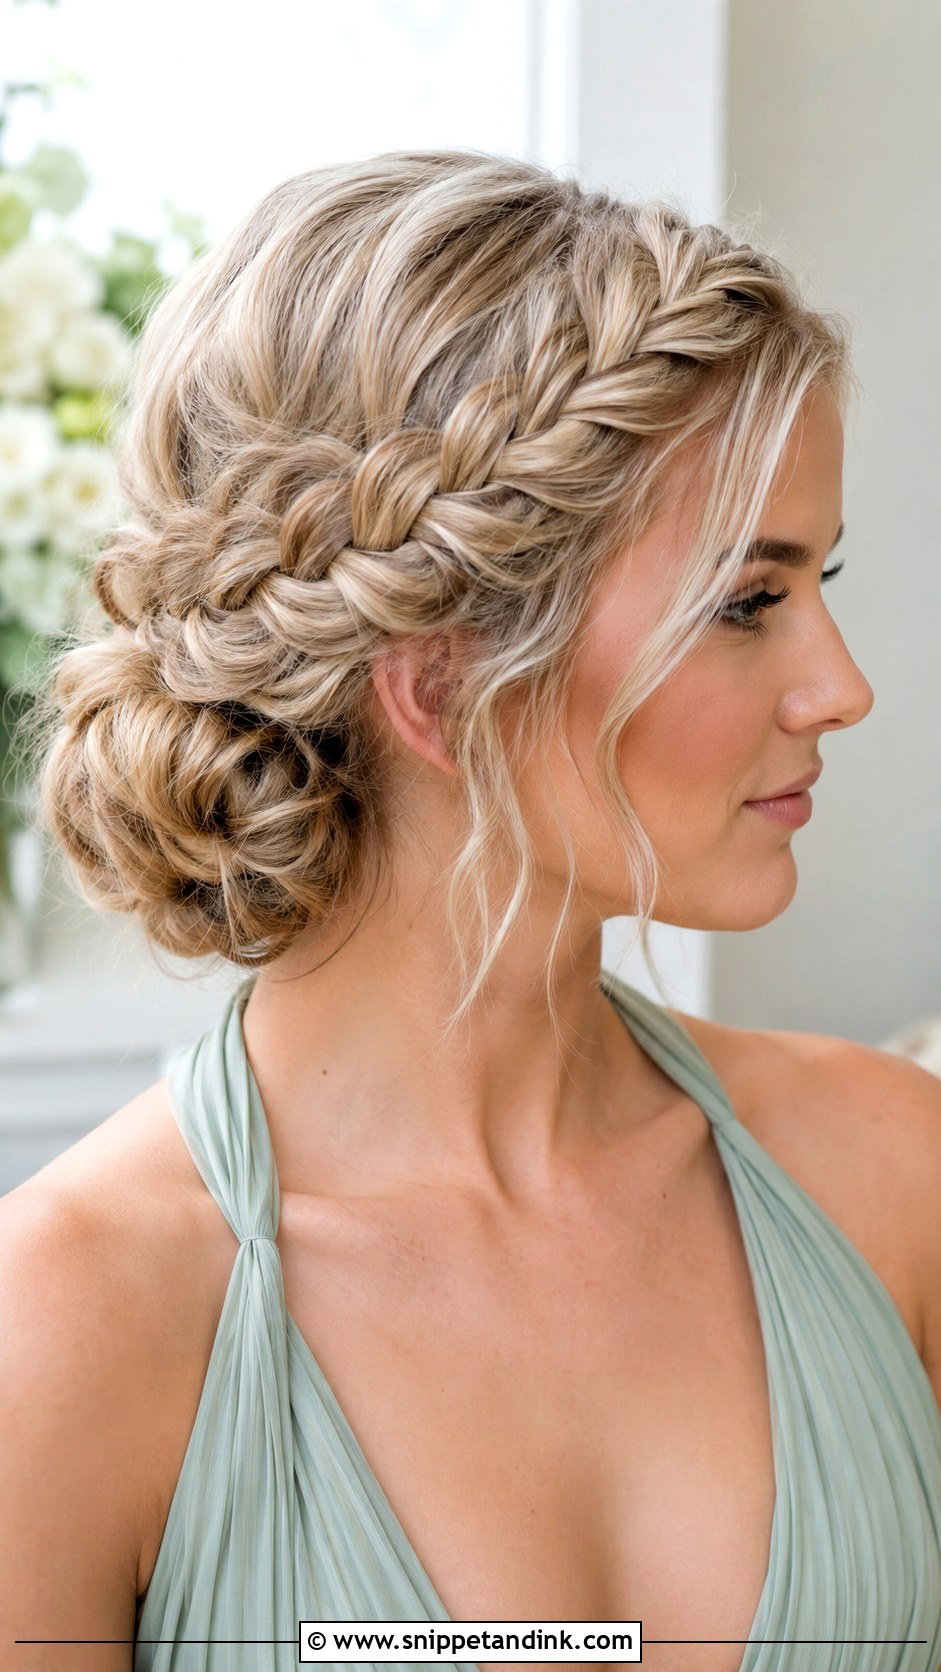
Because a Dutch braid is woven underneath, it sits raised on top of the hair and gives a firm foundation for a bun. A Dutch braid bridesmaid updo is the one I suggest when hold matters most: thick hair, long hair, or an outdoor ceremony with wind. It can begin at the hairline, run over the crown and end in a low bun. To soften it for a bridal party, I loosen the braid edges and curl the front pieces so it doesn’t look athletic.
16. Side Braid Bun Bridesmaid Updo
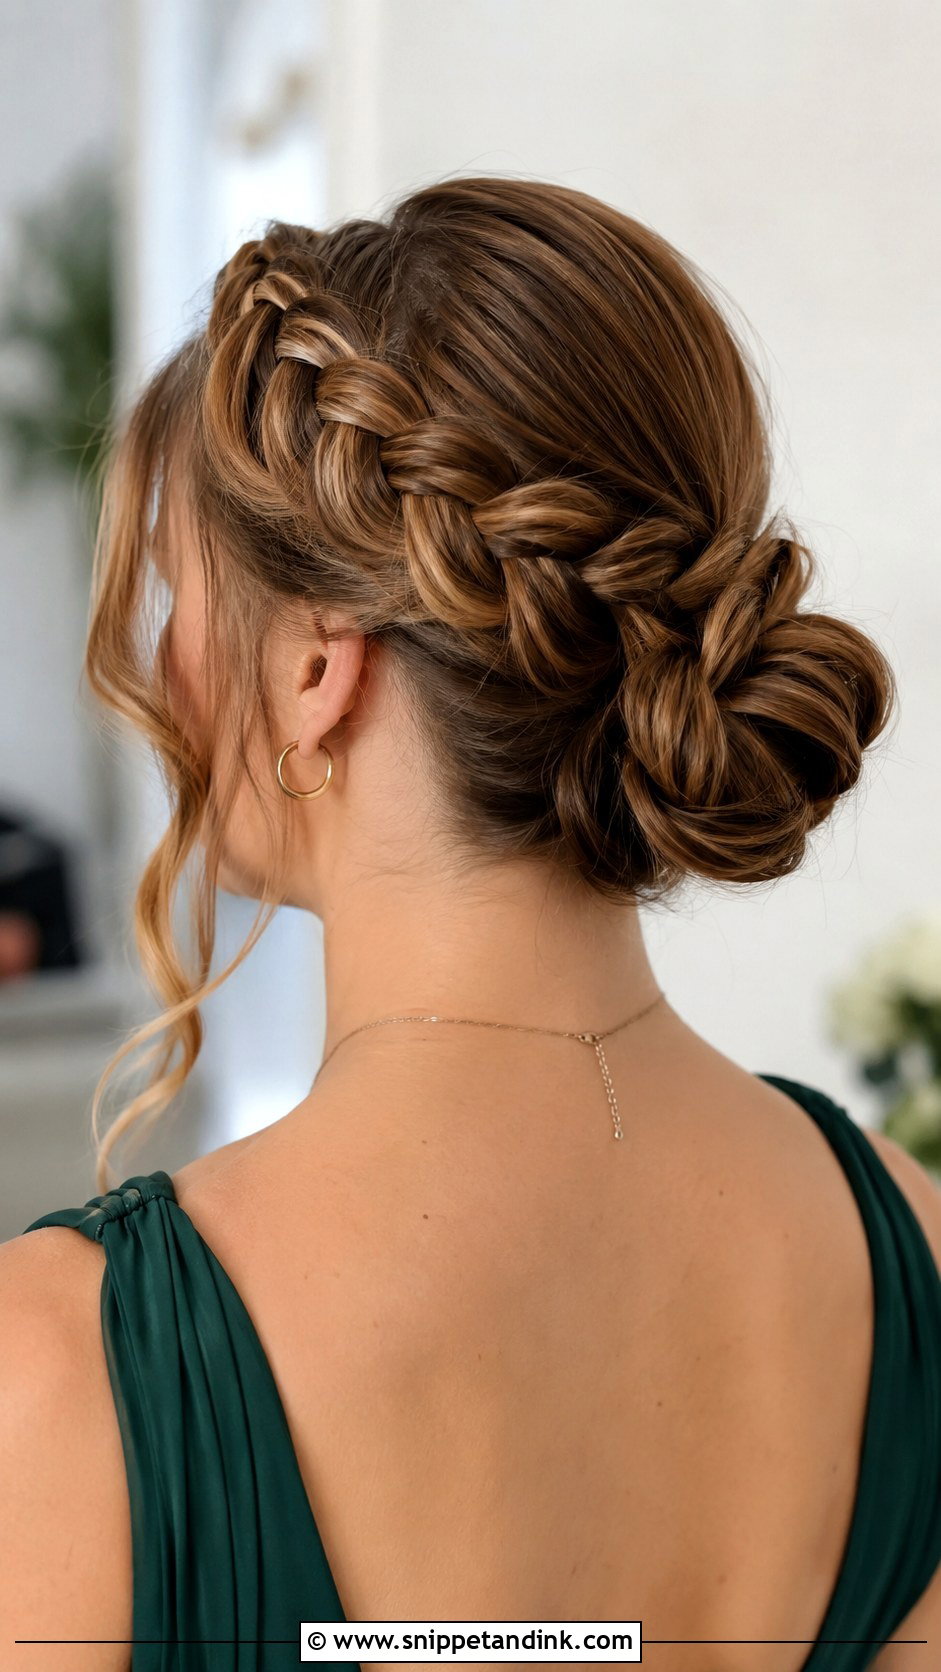
Starting near the part and running along one side into a nape bun, the side braid creates a diagonal line that looks good in photos. It’s a step up from a plain bun but still simple enough to match across a group. I loosen the braid for fullness on most textures. If the bride wants a uniform lineup, I put every side braid on the same side so the group reads together when they stand in a row.
17. Curly Bun Bridesmaid Updo
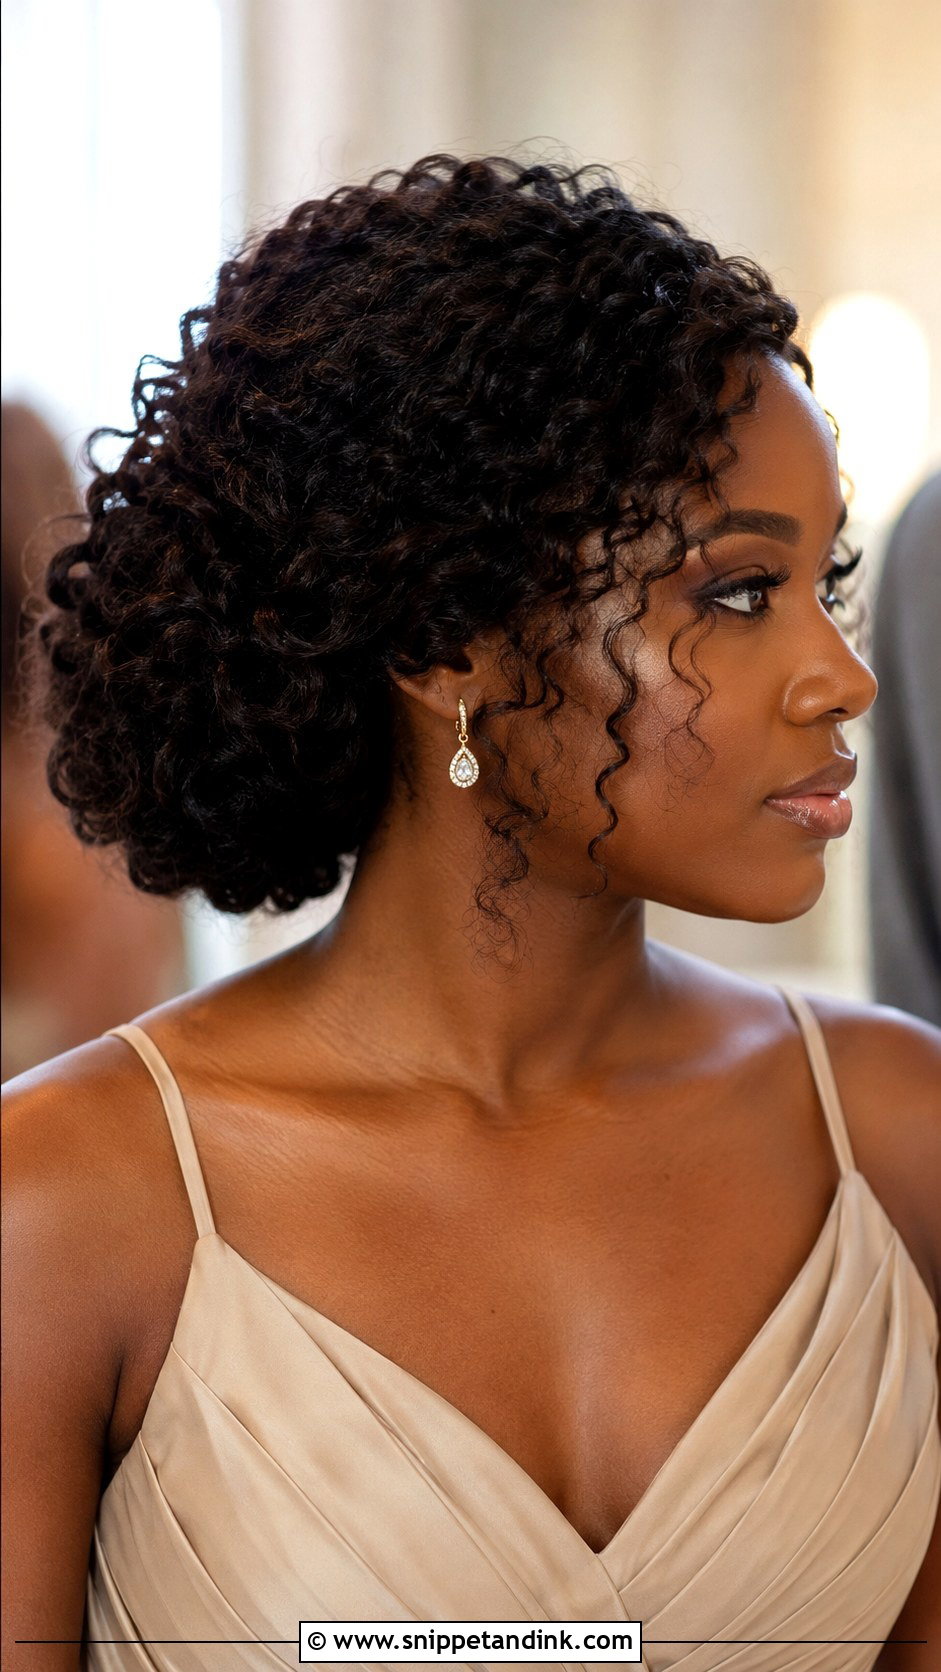
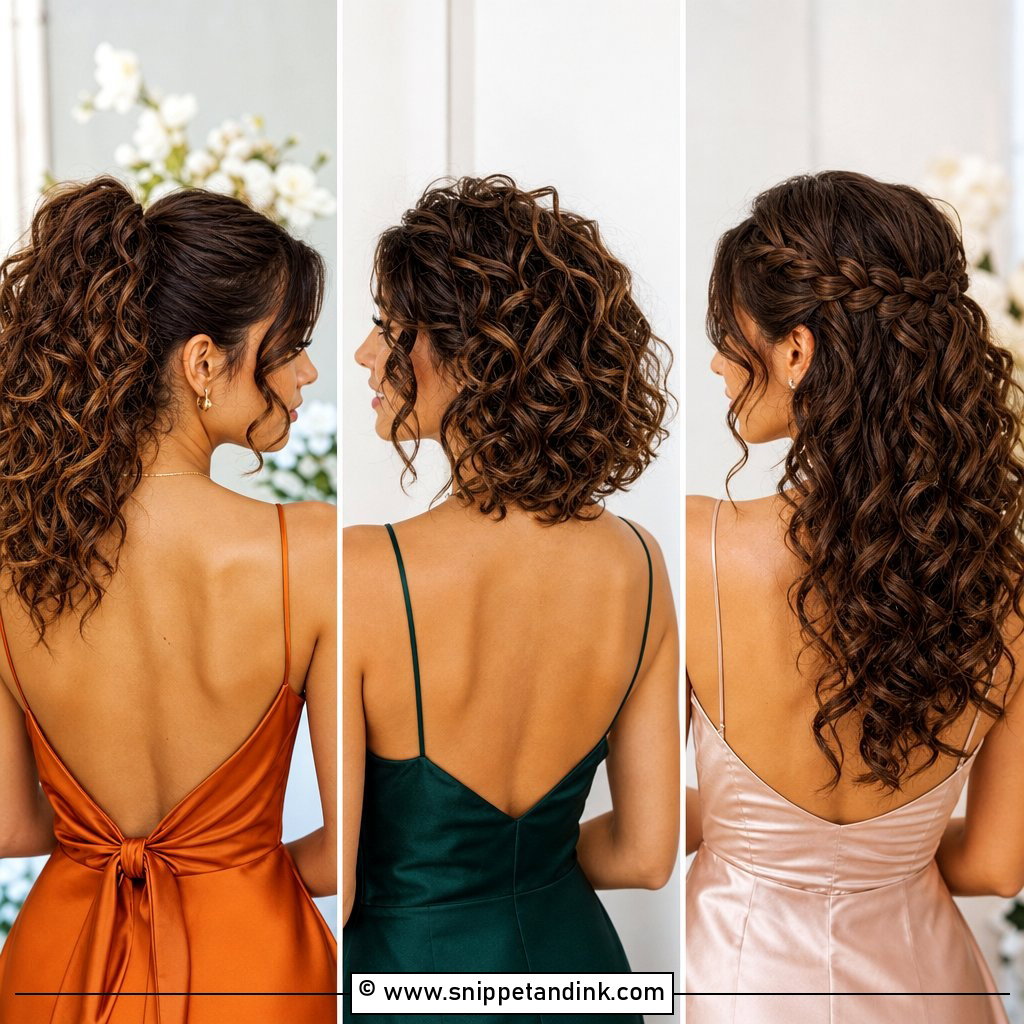
Whether curls are natural or wand-made, I gather them into the bun with my fingers instead of a brush so the pattern stays intact. You end up with shape and bounce rather than a smoothed-out ball. Curly, wavy and textured hair suits it naturally. The bun can sit low, mid-height or high depending on the neckline. Frizz is the enemy, so I work in curl cream and a light gel before pinning, and I avoid touching the curls once they’re set.
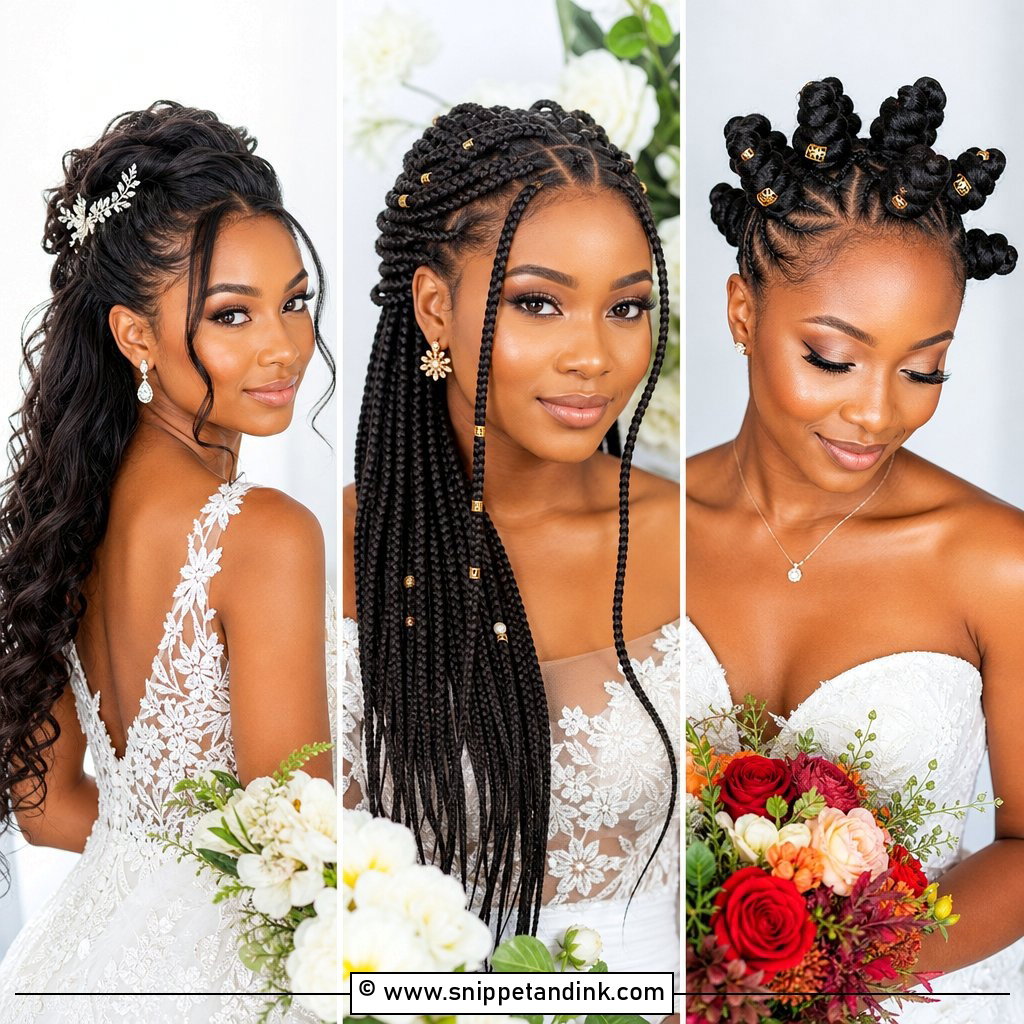
18. Natural Hair Bridesmaid Updo
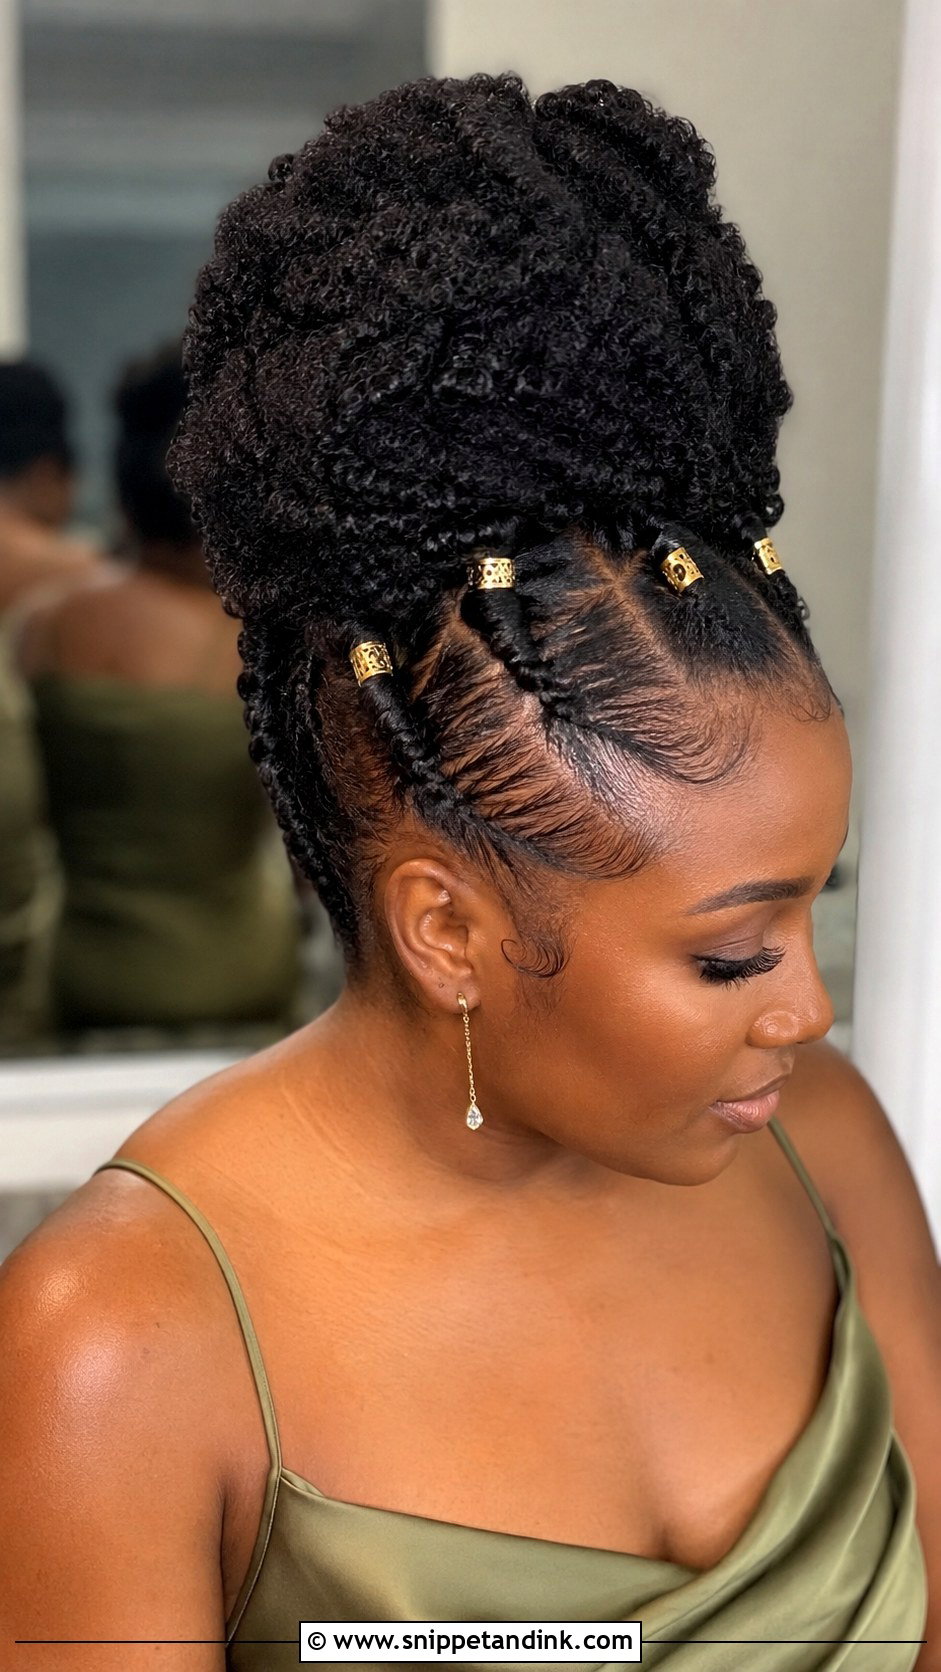
With coils and natural curls, I start by asking how the bridesmaid normally wears her hair and what her scalp tolerates. A high puff, pinned bun, flat-twist updo or sculpted low style can all hold for a full day if they’re built on moisturized, well-stretched hair. Prep includes leave-in conditioner, curl cream and edge control if she wants it. Decorative pins or gold cuffs look great. What I won’t do is force the hair into a texture that isn’t its own just to match the group.
19. Curly Updo With Face Framing Pieces
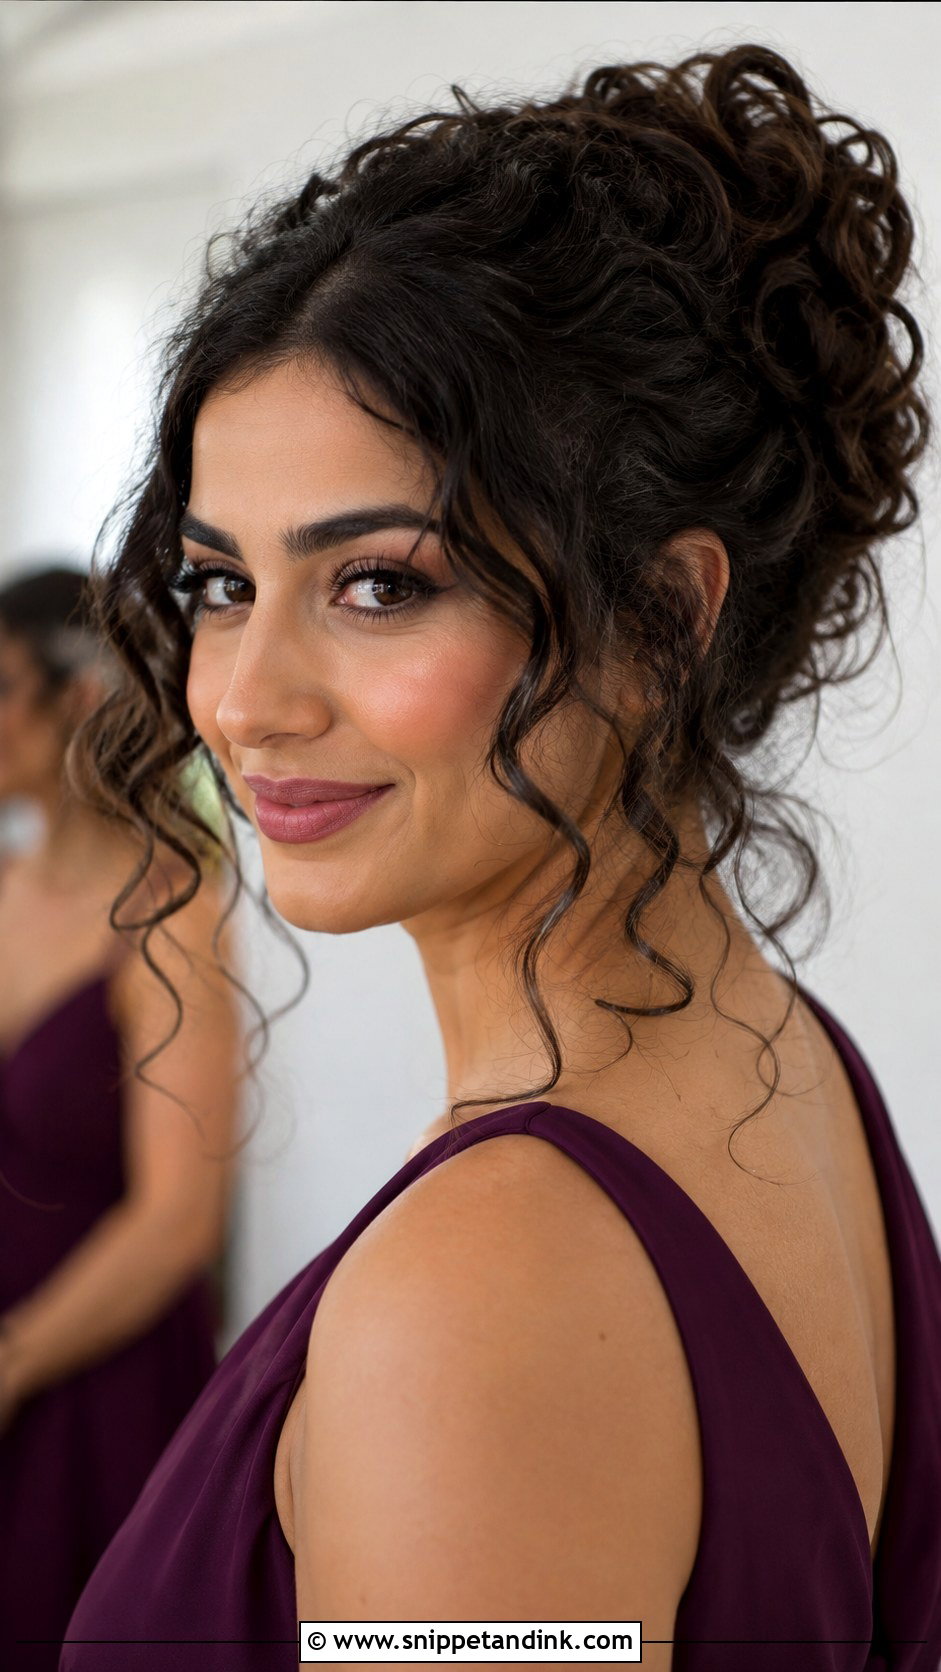
Some bridesmaids feel bare with everything pulled away from the face. For them I pin the curls up loosely and leave a few defined pieces at the temples, cheeks or neckline. Those pieces have to be placed, not just left behind; I usually curl them separately, in the opposite direction from the face, so they frame it rather than fall into the eyes. A medium-hold spray lets them move without dropping. Natural curls, wand curls and brushed-out curls all work.
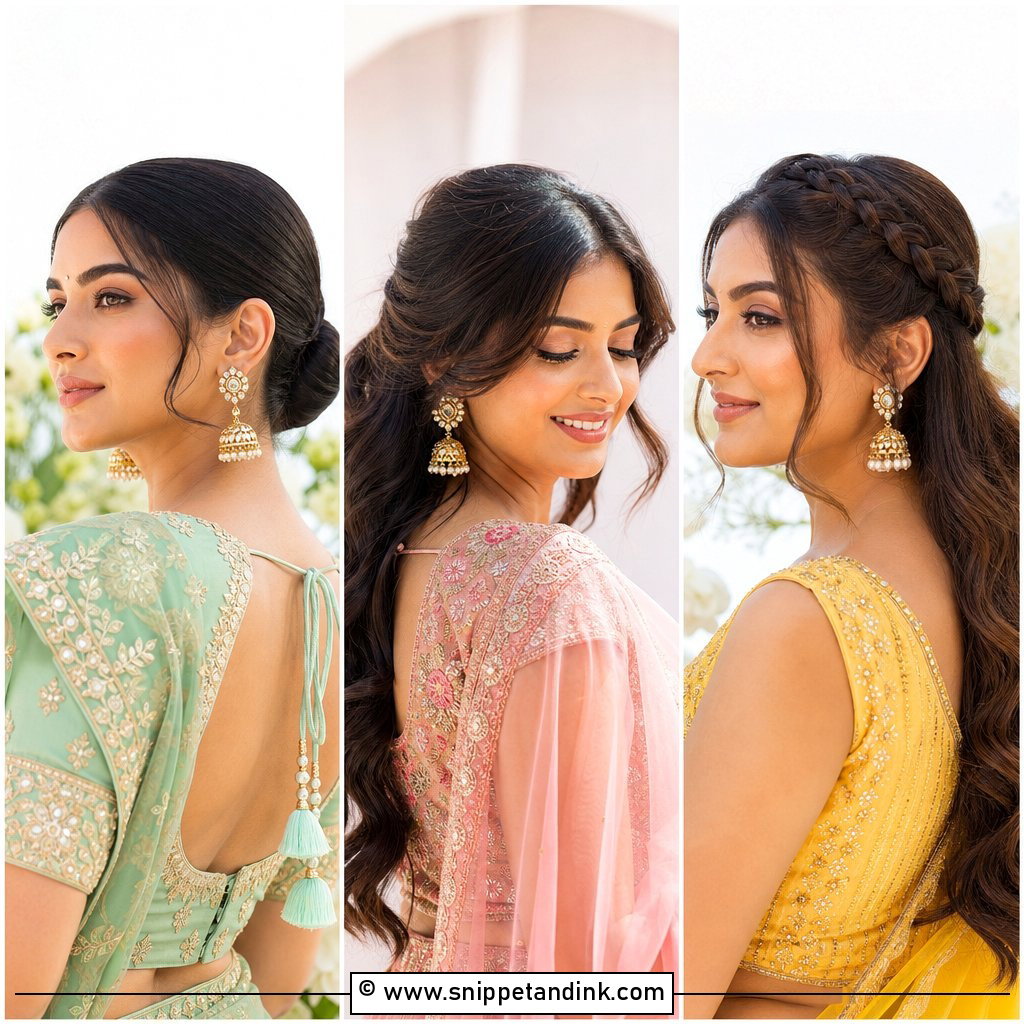
20. Low Knot Bridesmaid Updo
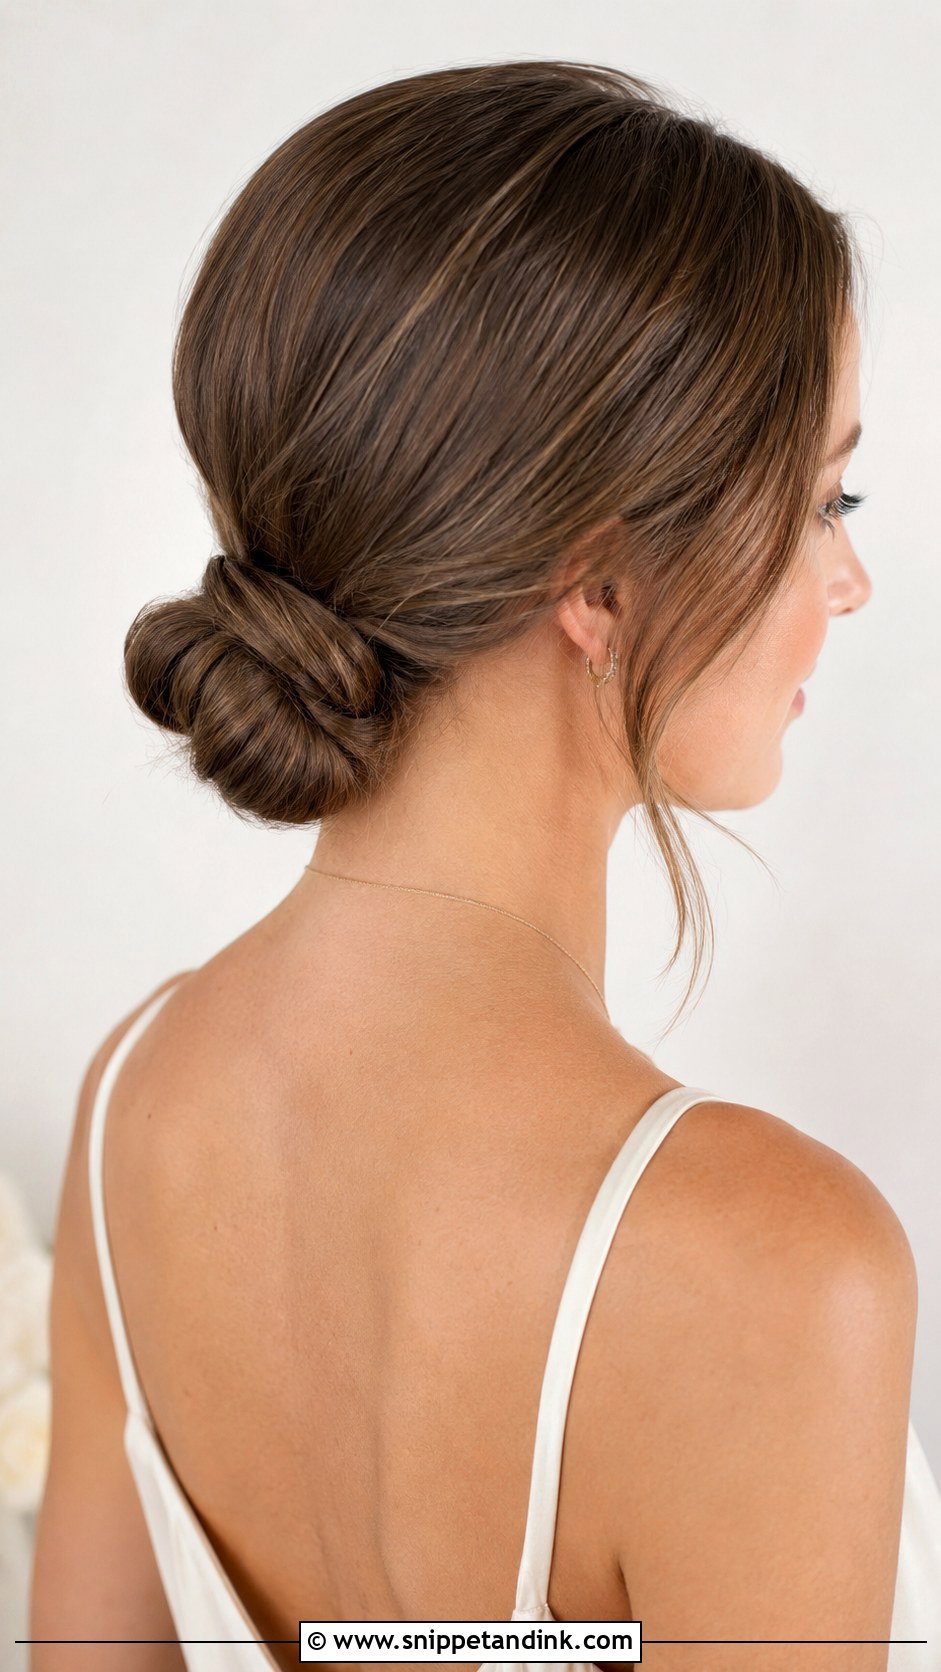
A compact knot at the nape is one of my quietest options. Instead of a round bun, a low knot bridesmaid updo is tied or twisted into a tighter shape that suits minimalist dresses. It can be sleek or lightly textured. On fine hair the knot can look small, so I add a little padding or teasing before tying it. It sits close to the head, which makes it comfortable through a long day.
21. Knotted Bun Bridesmaid Updo
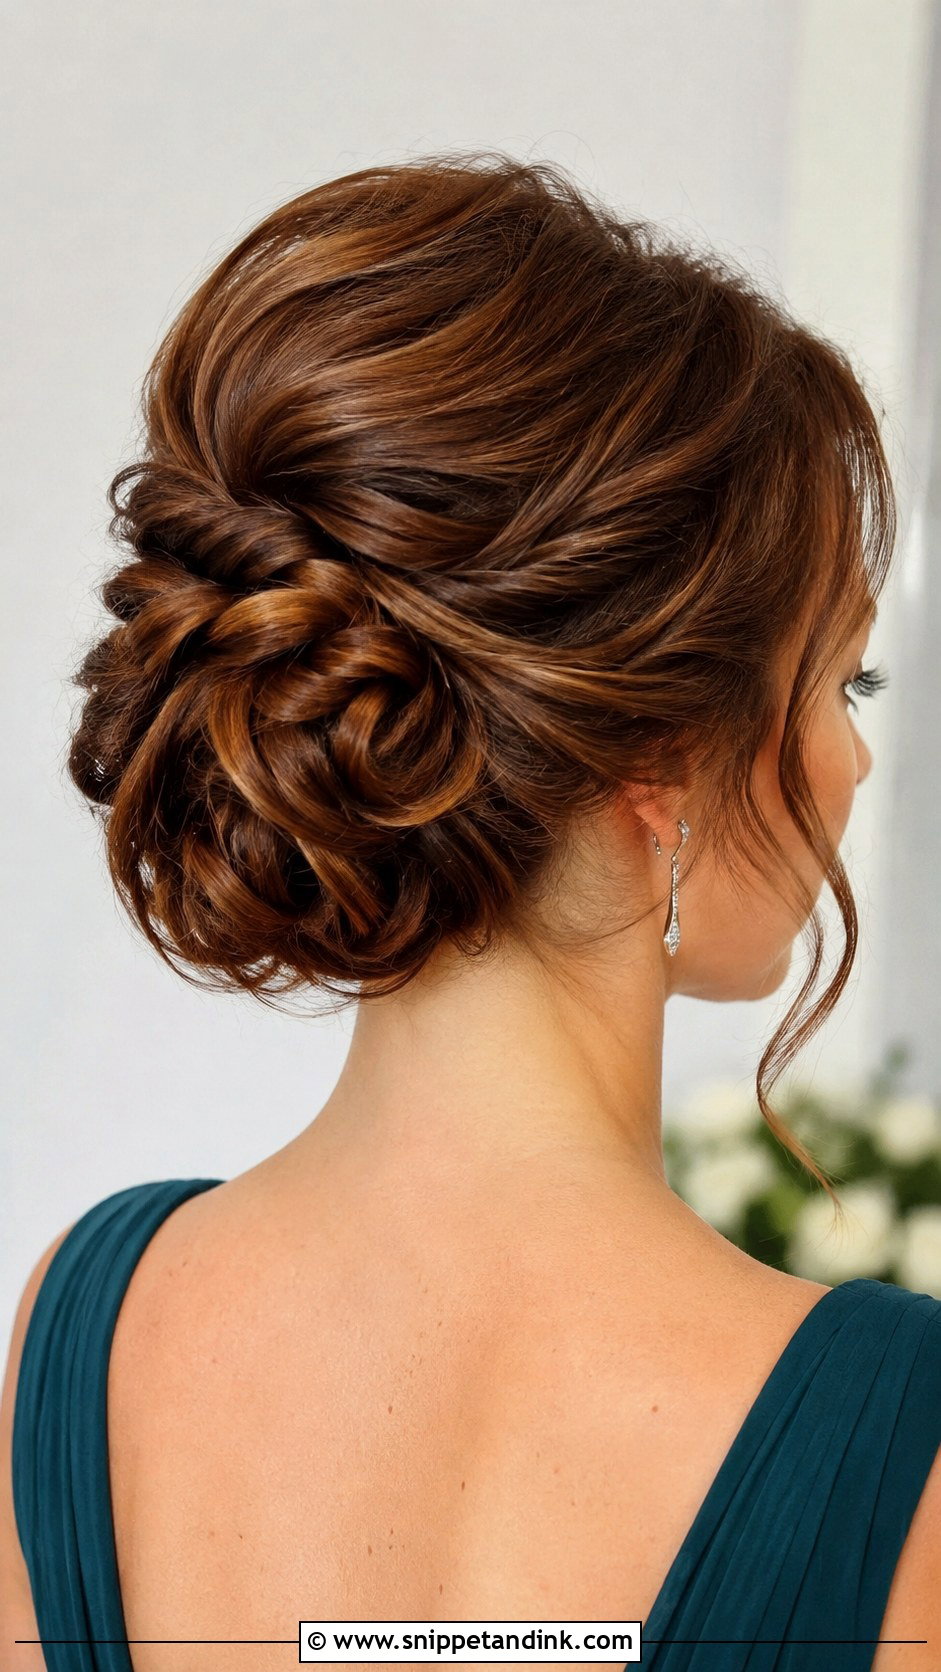
Loops of hair are crossed and pinned at the back to make a woven knot, so this has more visible structure than a regular bun. I suggest it when the bride wants matching updos but still wants some detail in the lineup. Open-back and low-back dresses show it off from behind. It needs wave or texture to start with; on straight, silky hair the loops slide apart, so I curl first even if the curls won’t be seen. Keep the front smooth with a little softness near the ears.
22. Vintage Roll Bridesmaid Updo
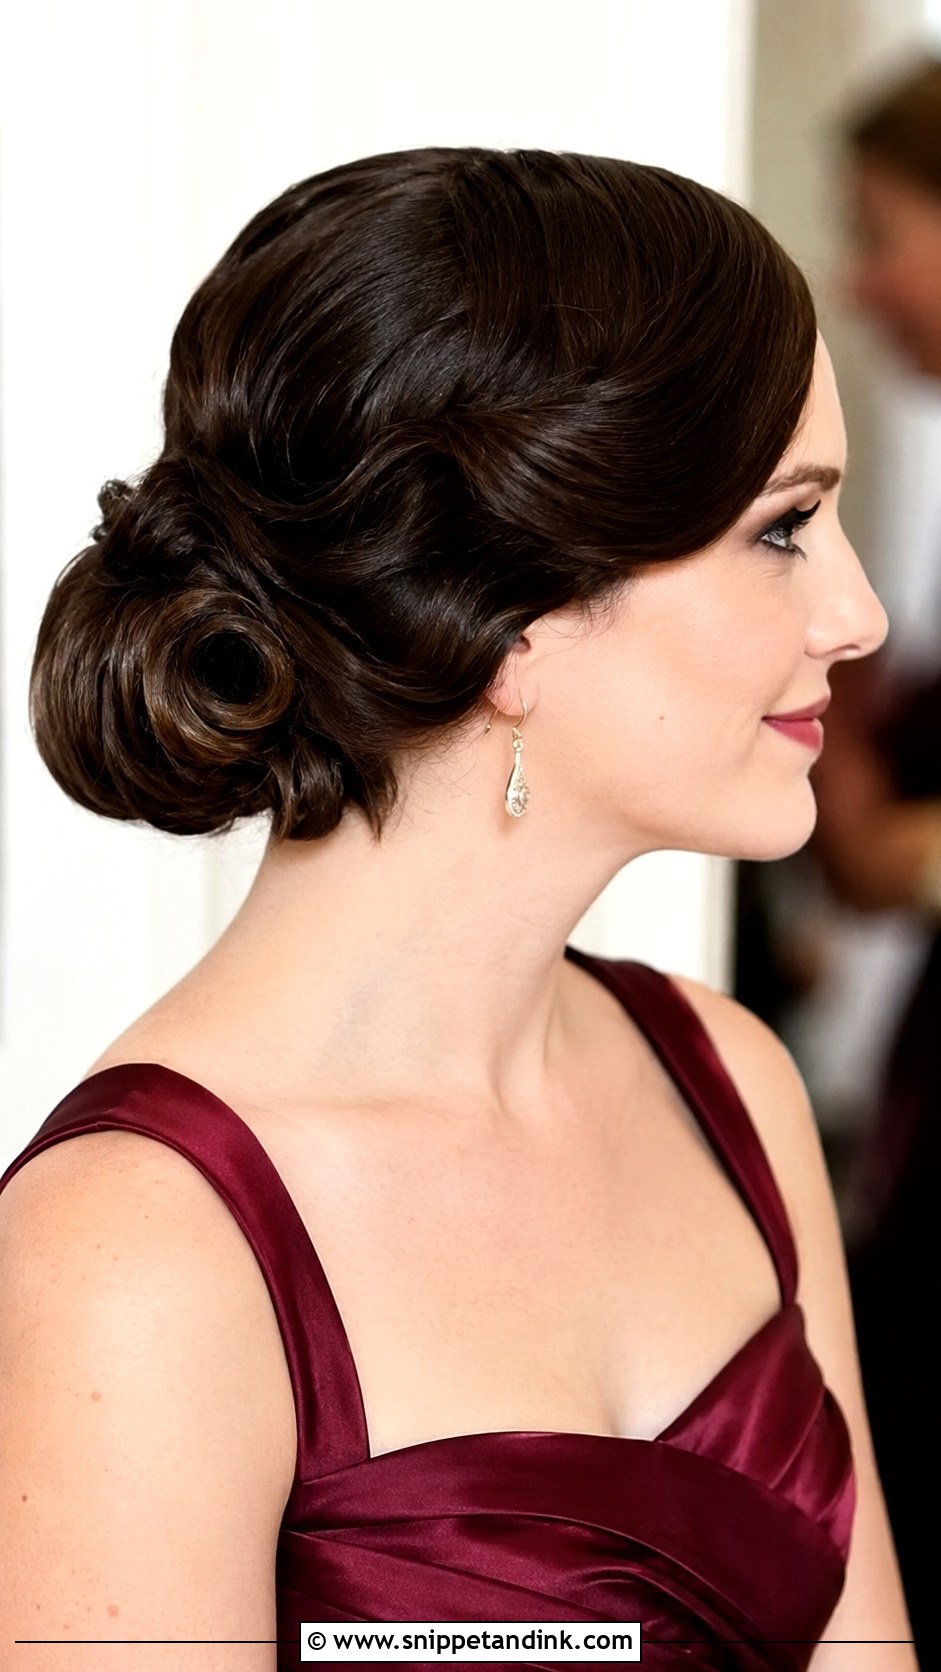
Smooth sculpted rolls near the nape or along one side give a vintage roll bridesmaid updo its old Hollywood shape. It’s a natural partner for red lips, pearl earrings and satin or crepe dresses. This is the most technical style here: it needs careful smoothing, firm pinning and hair that holds a set curl. Medium to long hair is best. I’d only promise it to a whole group if every bridesmaid has a trial, because the rolls look very different on slippery hair.
23. Pearl Pin Bridesmaid Updo
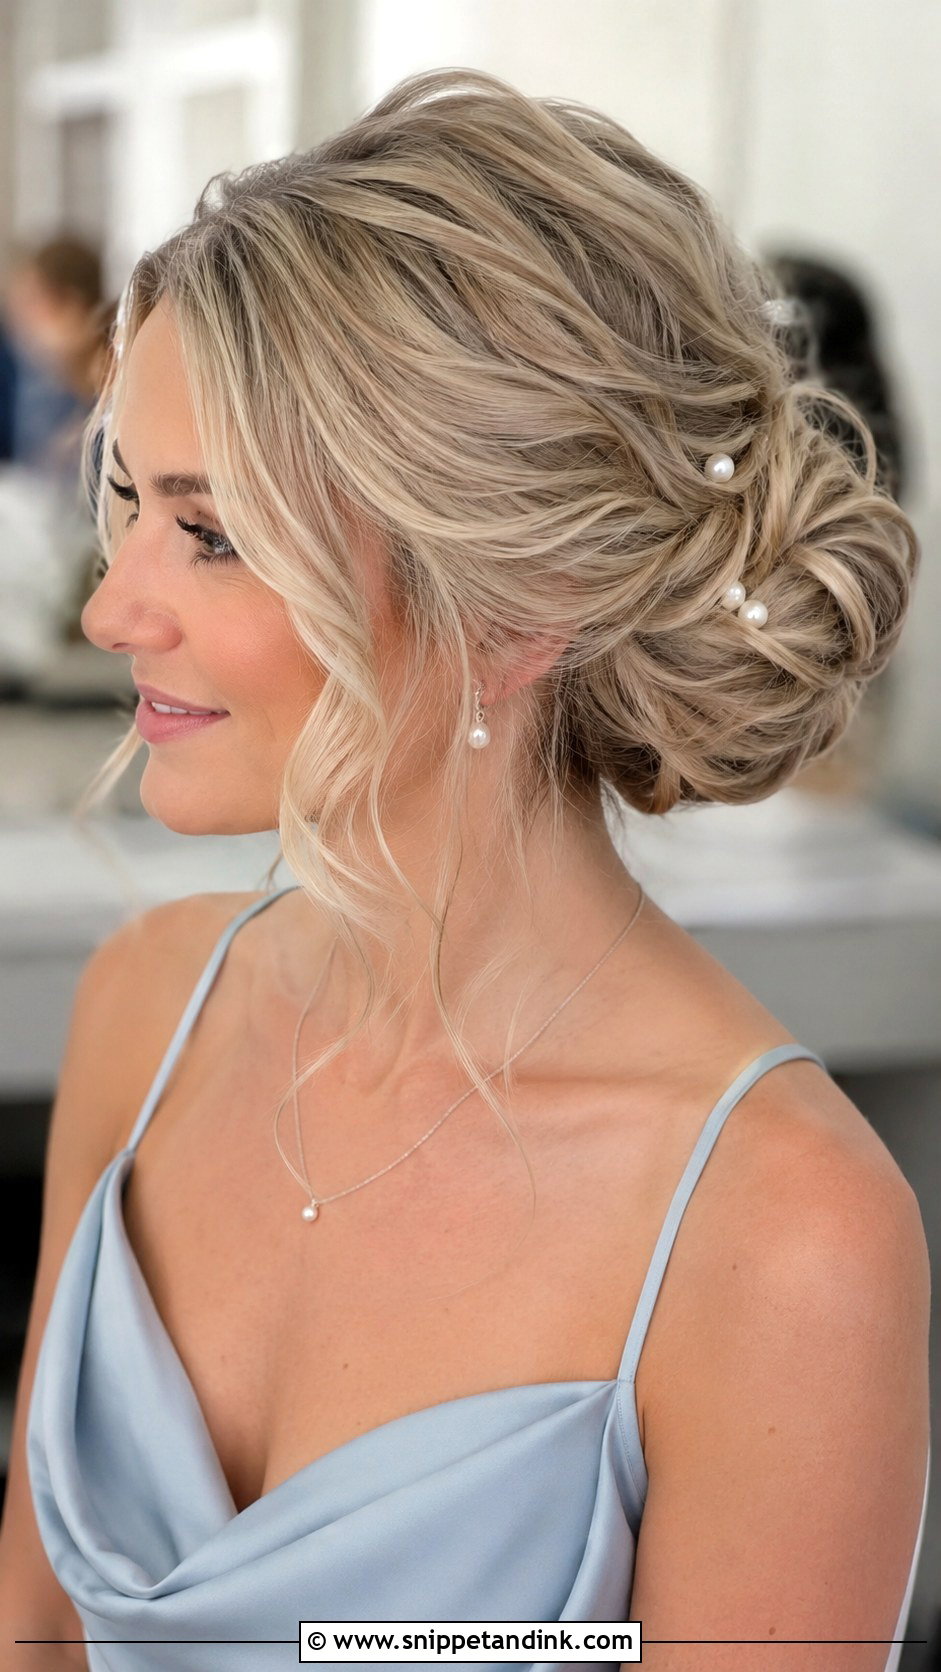
Pearl pins turn almost any bun or twist into something wedding-ready, from a low bun to a soft French twist. They catch light without pulling attention from the bride. I place them unevenly, in loose clusters rather than a straight line, so they look scattered instead of studded. The shape underneath still has to be solid; pins are heavy enough that a weak base will tilt by the afternoon. Neutral dresses and soft makeup suit them best.
24. Floral Bun Bridesmaid Updo
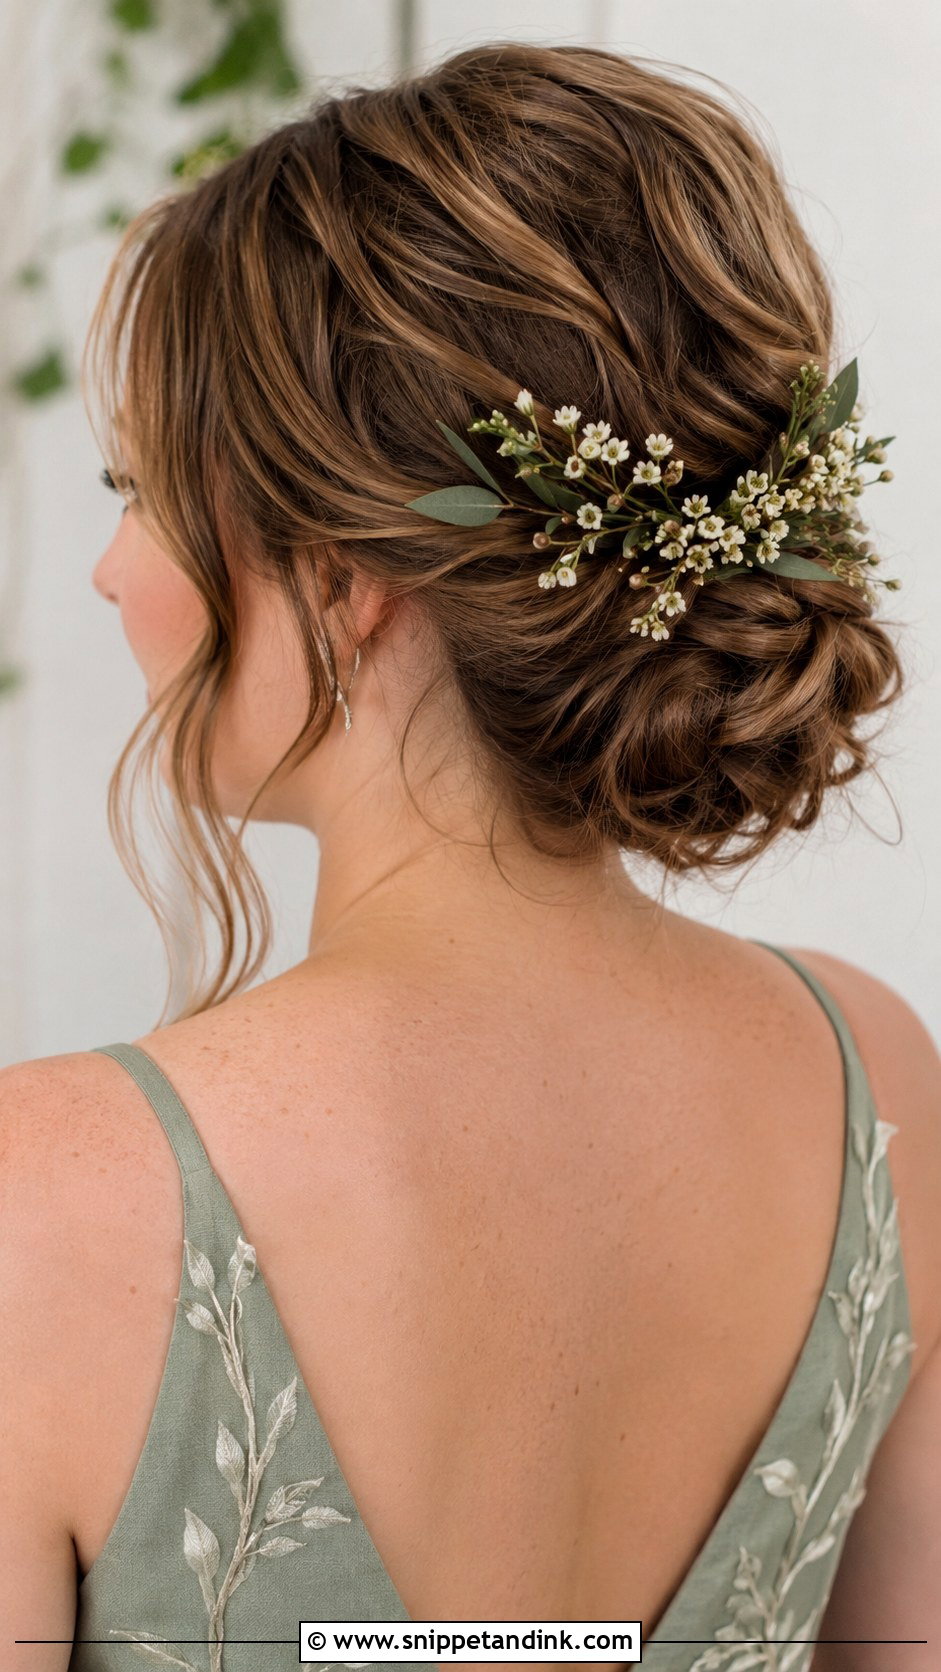
Spring, summer and garden weddings are when I tuck small flowers into a low bun, braided bun or textured chignon to tie the hair to the bouquet. Small is the key word. Baby’s breath, spray roses and bits of greenery hold up; big heads overpower a bridesmaid look and wilt fast against a warm scalp. I wire or pin each stem separately so nothing drops during the first hug. Loose texture and a few face-framing strands complete it.
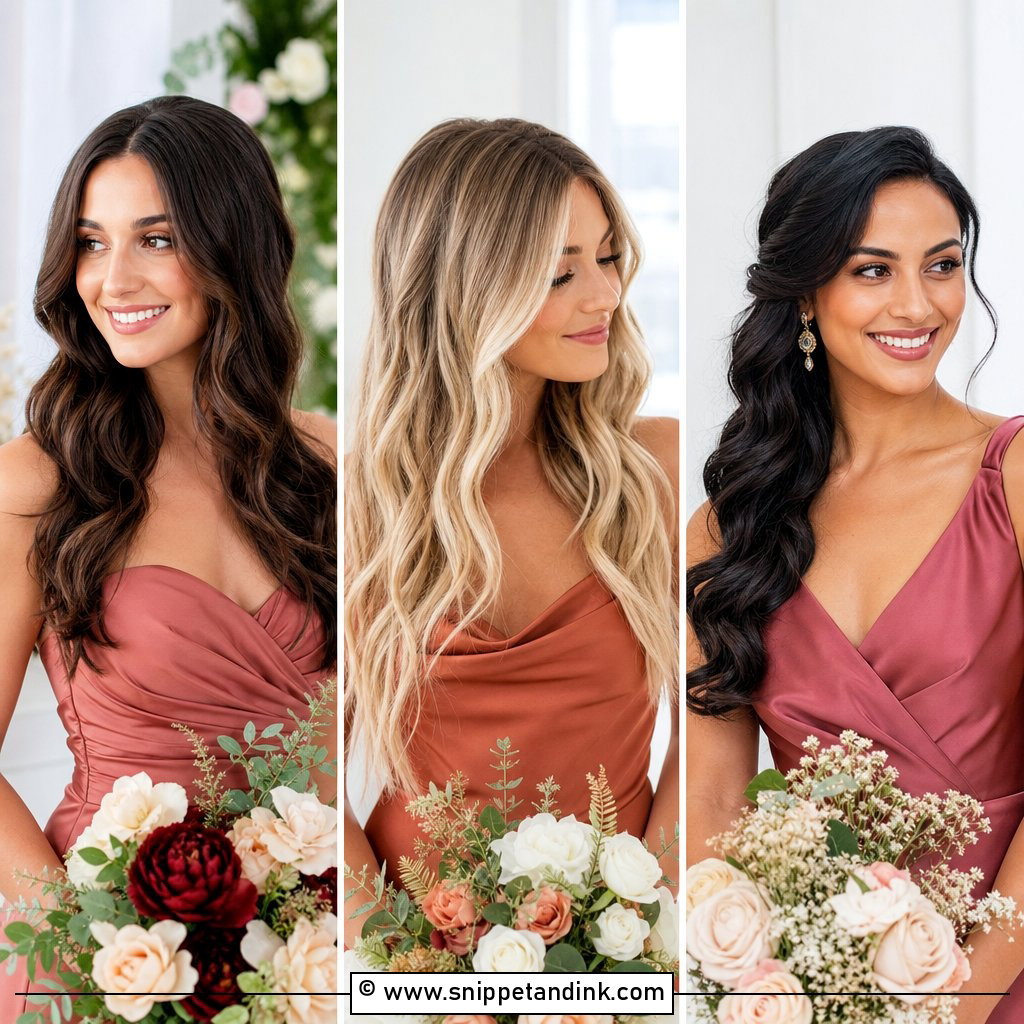
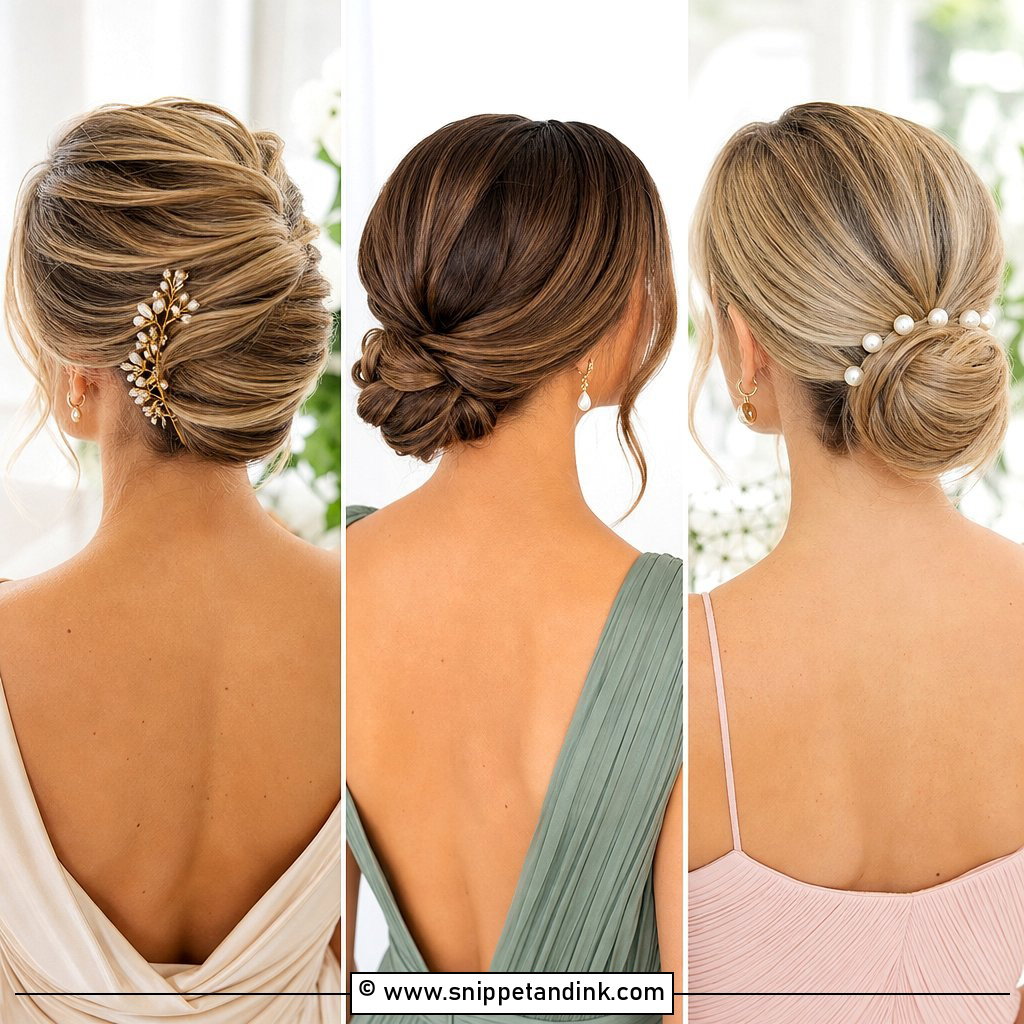
25. Low Ponytail Updo Bridesmaid Hair
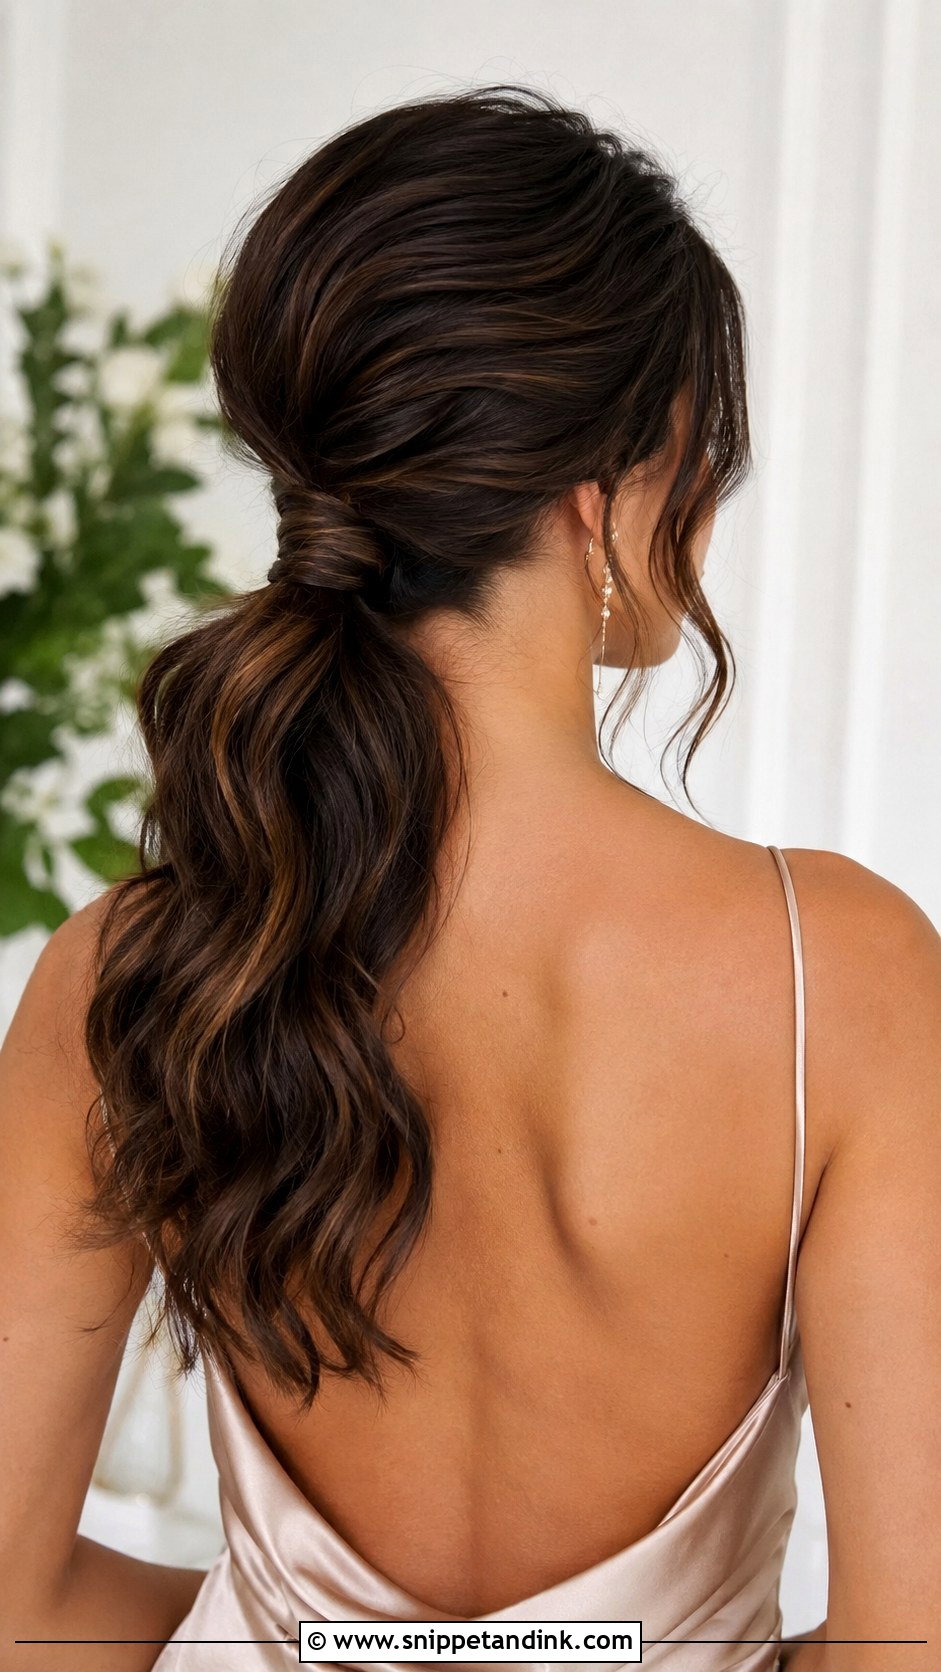
Technically it’s a ponytail, but gathered low, wrapped around the elastic and shaped with waves or volume at the crown, it reads as styled as any updo. I offer it to bridesmaids with long or heavily layered hair that won’t stay in a bun all day. A ponytail is honest about weight; it hangs rather than strains, so it’s comfortable. It suits sleek dresses and simple accessories.
How Many Hours Five Updos Really Take on the Morning
Brides almost always underestimate this. A simple low bun on prepped hair can take around thirty to forty minutes; braided styles, vintage rolls and natural hair updos often need closer to an hour, and timings vary between stylists and hair types. Multiply that by the number of bridesmaids and the schedule fills quickly. If the party is large, it’s worth asking whether the stylist brings an assistant.
I put the most complicated or the thickest hair first, while I’m fresh and while there’s slack in the schedule. The bride goes near the end but not last, so there’s a buffer before photos. Bridesmaids with easy, sleek styles fill the gaps. Ask everyone to arrive with dry hair; blow-drying a full head of wet hair can add thirty minutes on its own.
When an Updo Starts Slipping at the Reception
Updos rarely collapse in one go. They loosen at the pins that carry the most weight, usually at the base of the bun, and you’ll feel it as a slight wobble before anyone can see it. The fix is to push a long bobby pin back in at an angle, scooping a bit of the base hair with it, rather than adding a new pin on the surface.
I give each bridesmaid, or one organized maid of honor, a tiny kit: a few bobby pins matched to the hair color, two or three U-pins, a travel-size hairspray and a clear elastic. Humidity is the main enemy of textured styles, so outdoor parties should expect curls to relax by evening and accept a softer look. Sleek styles hold better in damp air but show frizz at the hairline, which a fingertip of gel or a balm takes care of.
Settle the Group Shape First, Then Let Each Bridesmaid Adjust
Every updo here comes down to a few decisions: how low it sits, how smooth the finish is, and how much detail the group wants. Settle those once for the whole party, such as soft low updos or sleek polished buns, then let the details change with each bridesmaid’s hair and neckline. Book the trials, bring the dresses or at least the necklines, and trust your stylist when she says a shape won’t hold on your hair. A lineup that looks connected but not identical is what I aim for every time.
You'll Like These Ideas:


Leave a Reply