
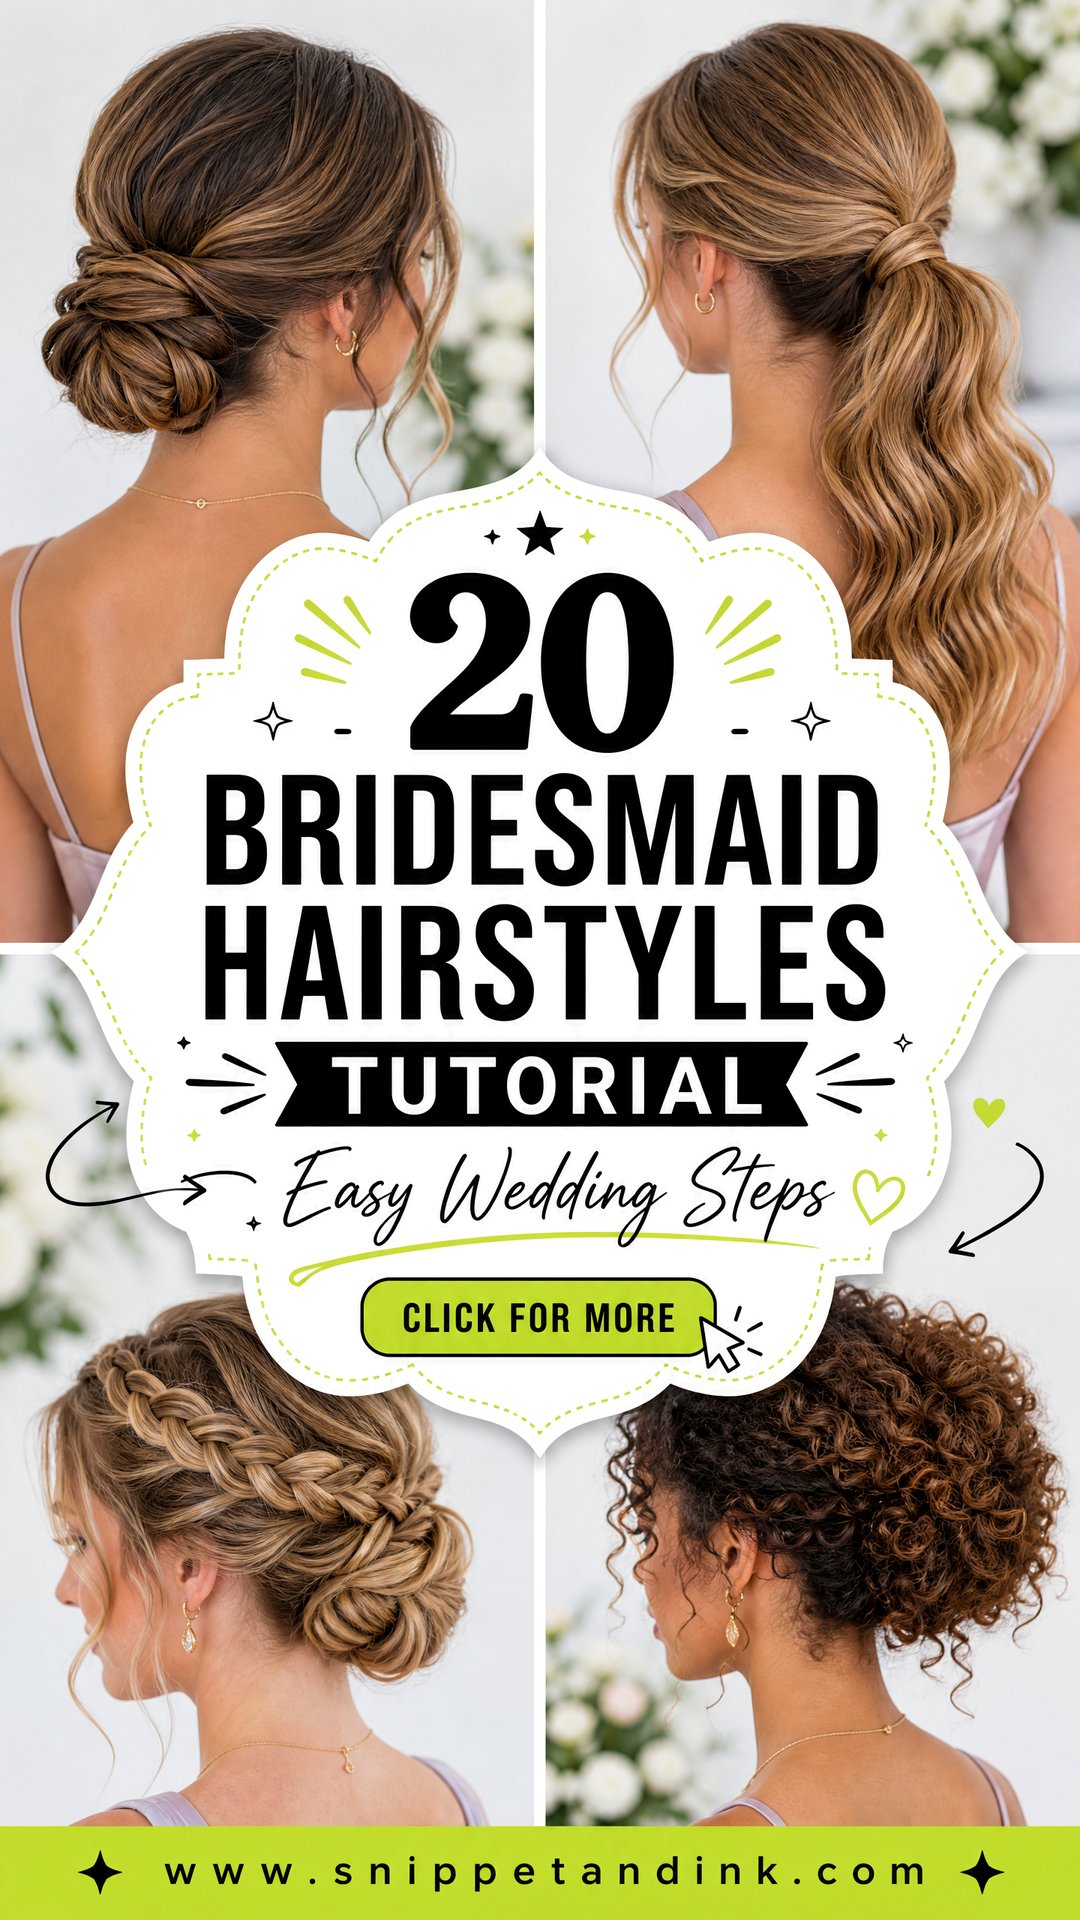
Choosing bridesmaid hair gets much easier when every look feels pretty, secure, and realistic for a long wedding day. The best bridesmaid hairstyles right now are polished without looking stiff, and they do not need to match perfectly to look coordinated. A good tutorial look should work with the dress neckline, venue, weather, and each person’s hair texture. Think soft low buns, romantic waves, sleek ponytails, braided half-up looks, and natural curls shaped with care. These bridesmaid hairstyles tutorial options are made to feel easy to explain, easy to save on Pinterest, and beautiful from the ceremony through the last group photo.
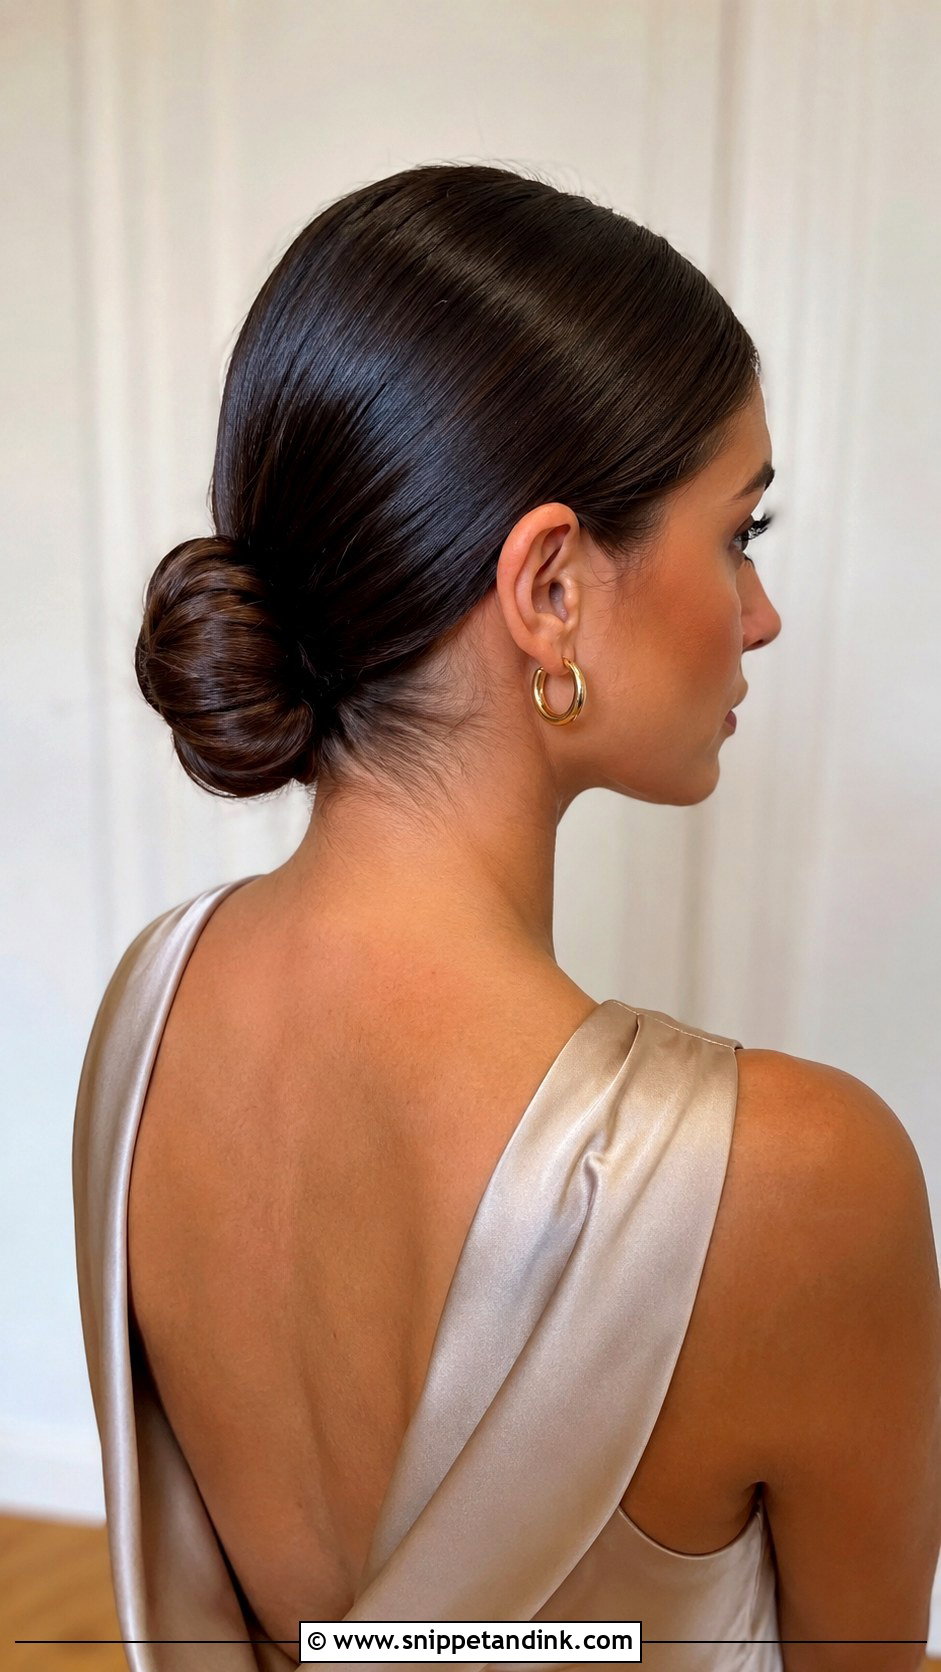
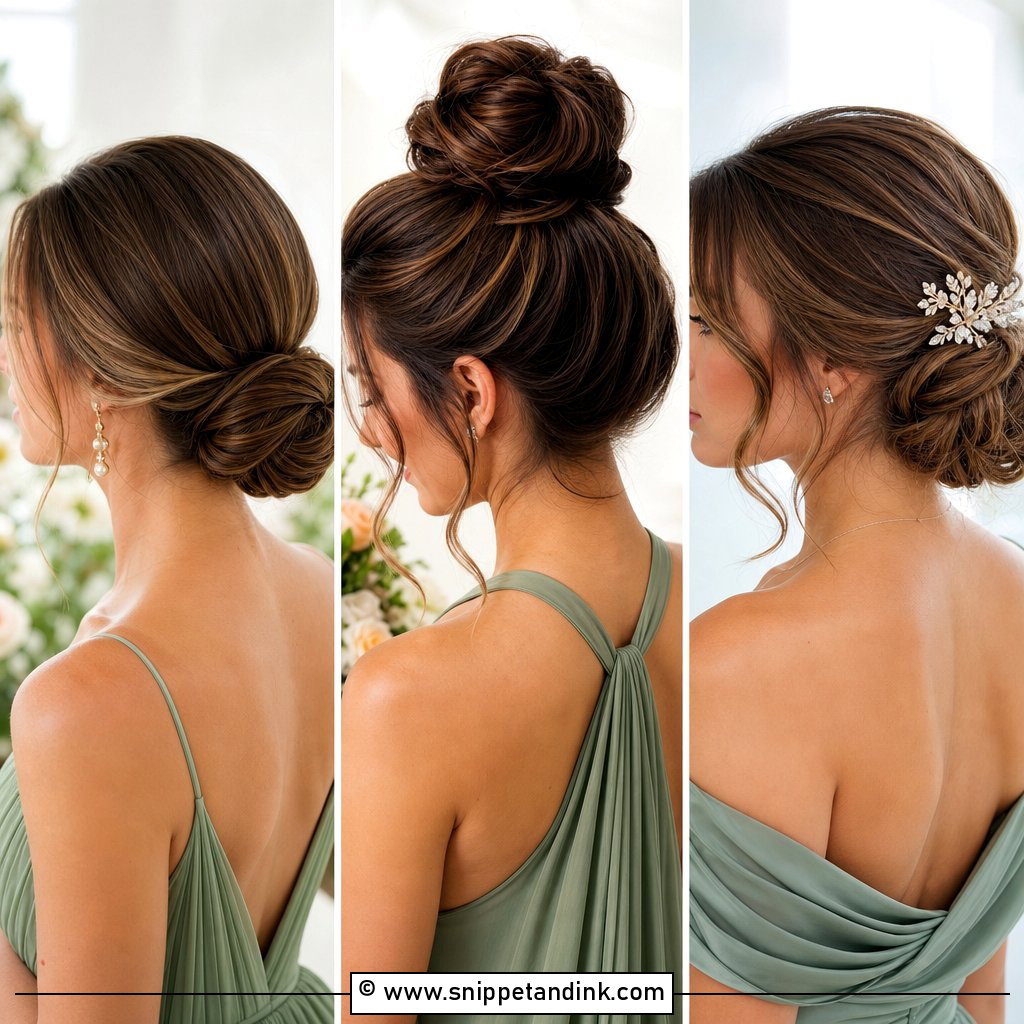
1. Bridesmaid Low Chignon Tutorial
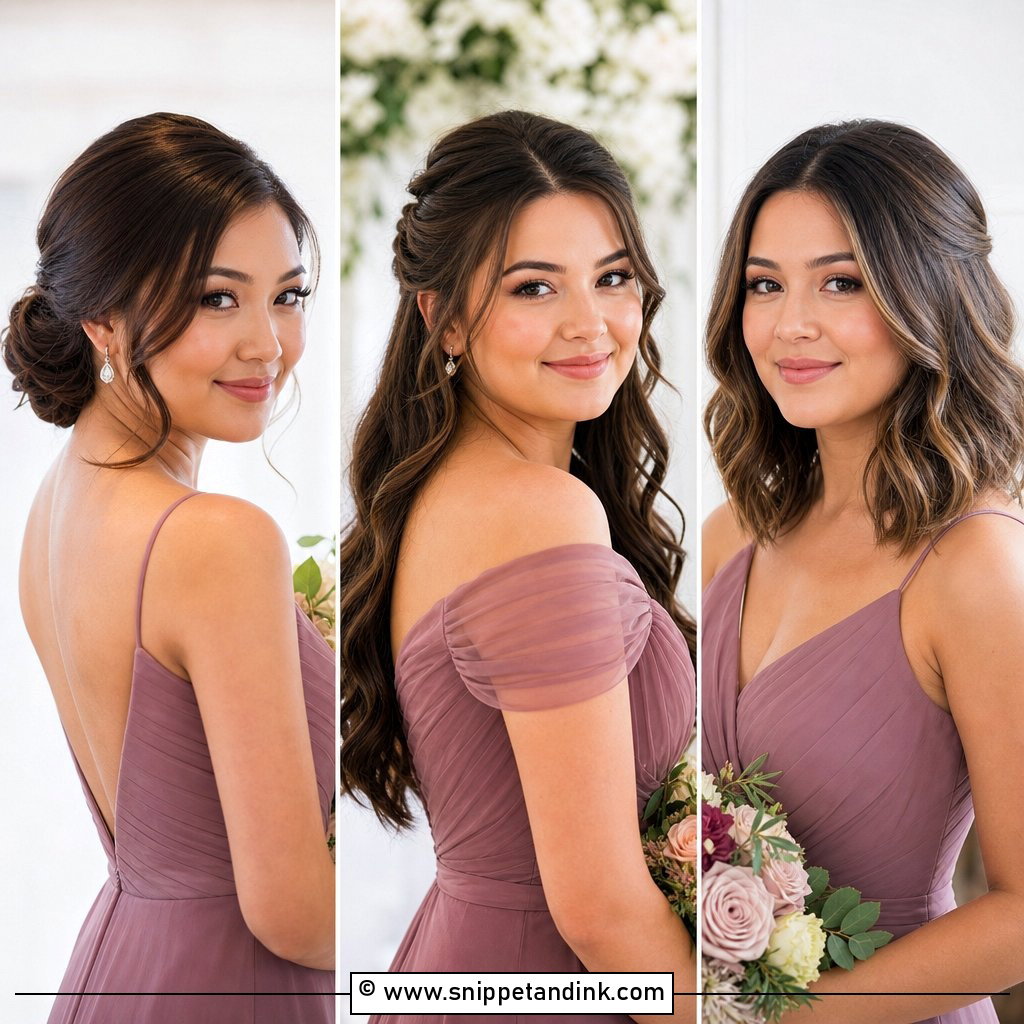
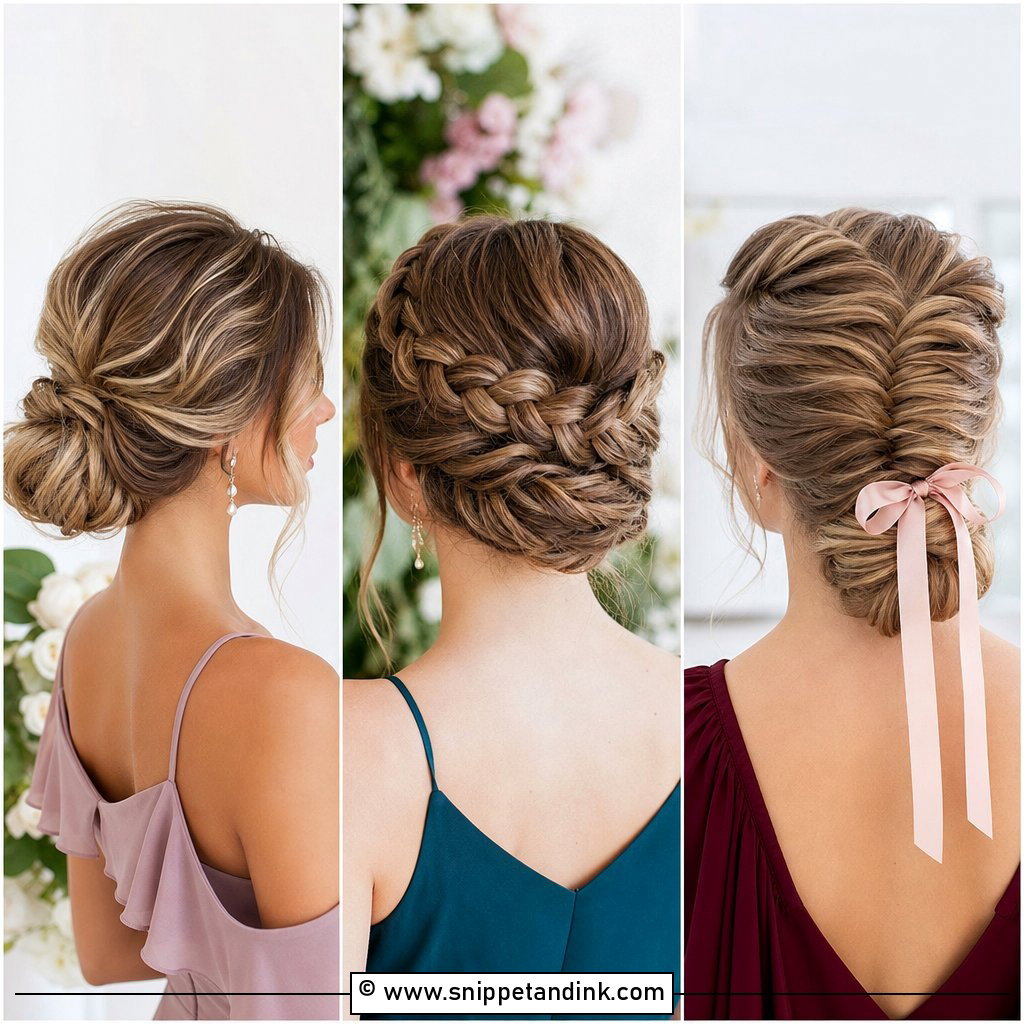
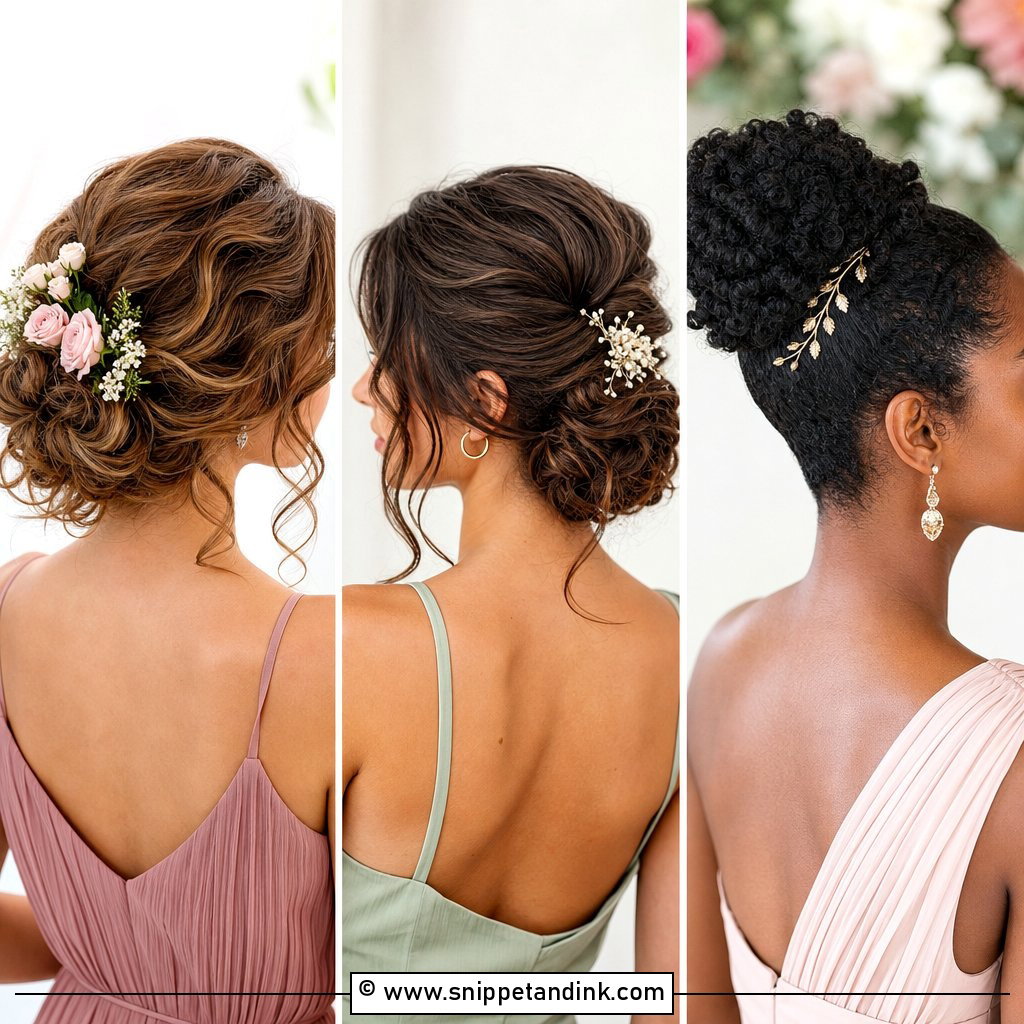
A low chignon is one of the most reliable bridesmaid hairstyles because it looks elegant from every angle and stays secure for hours. Start with smooth, lightly waved hair so the bun has shape instead of looking flat. Part the hair in the middle or slightly off-center, then gather it at the nape into a low ponytail. Twist the ponytail into a soft coil and pin it close to the head. Pull out a few face-framing pieces if the wedding feels romantic or garden-inspired. Finish with flexible hairspray, not a crunchy hold, so the chignon still looks soft in photos.
2. Bridesmaid Messy Low Bun Tutorial
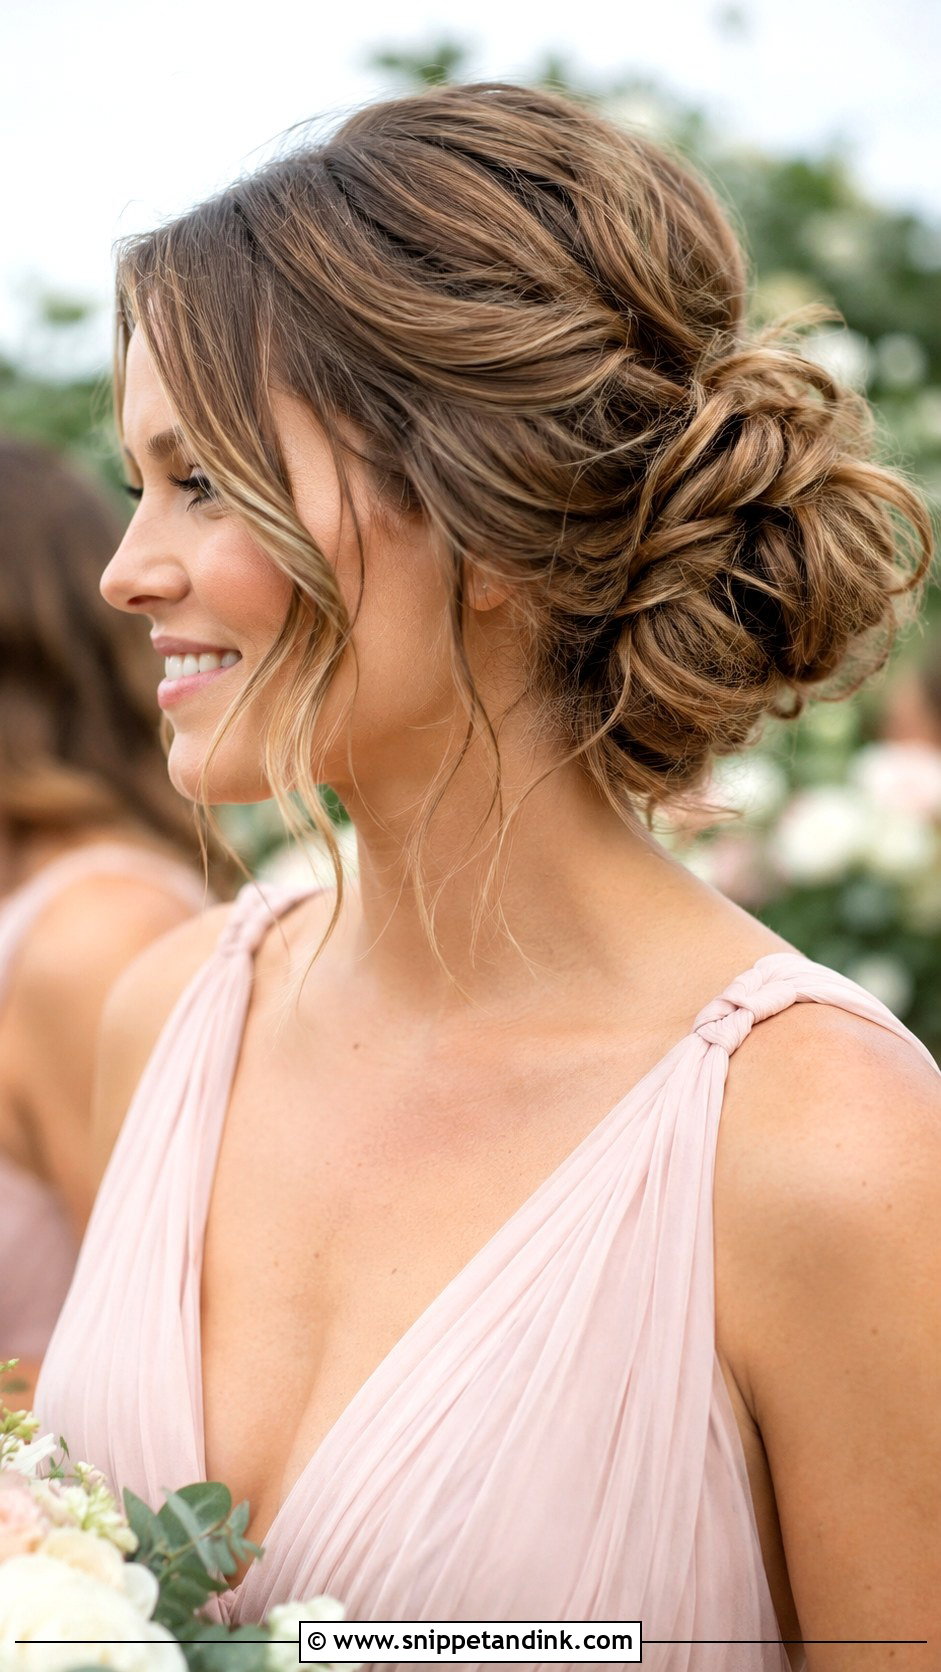
A messy low bun gives that relaxed wedding look without feeling undone. The trick is to build texture first, especially if the hair is fine or very silky. Add loose curls with a medium barrel iron, then rake through them with your fingers. Gather the hair low at the nape and twist it into a loose bun, pinning sections instead of forcing one tight shape. Leave soft strands around the temples and neckline for movement. This bridesmaid hairstyle works beautifully with chiffon dresses, outdoor weddings, and boho flowers because it feels romantic, comfortable, and easy to wear all day.
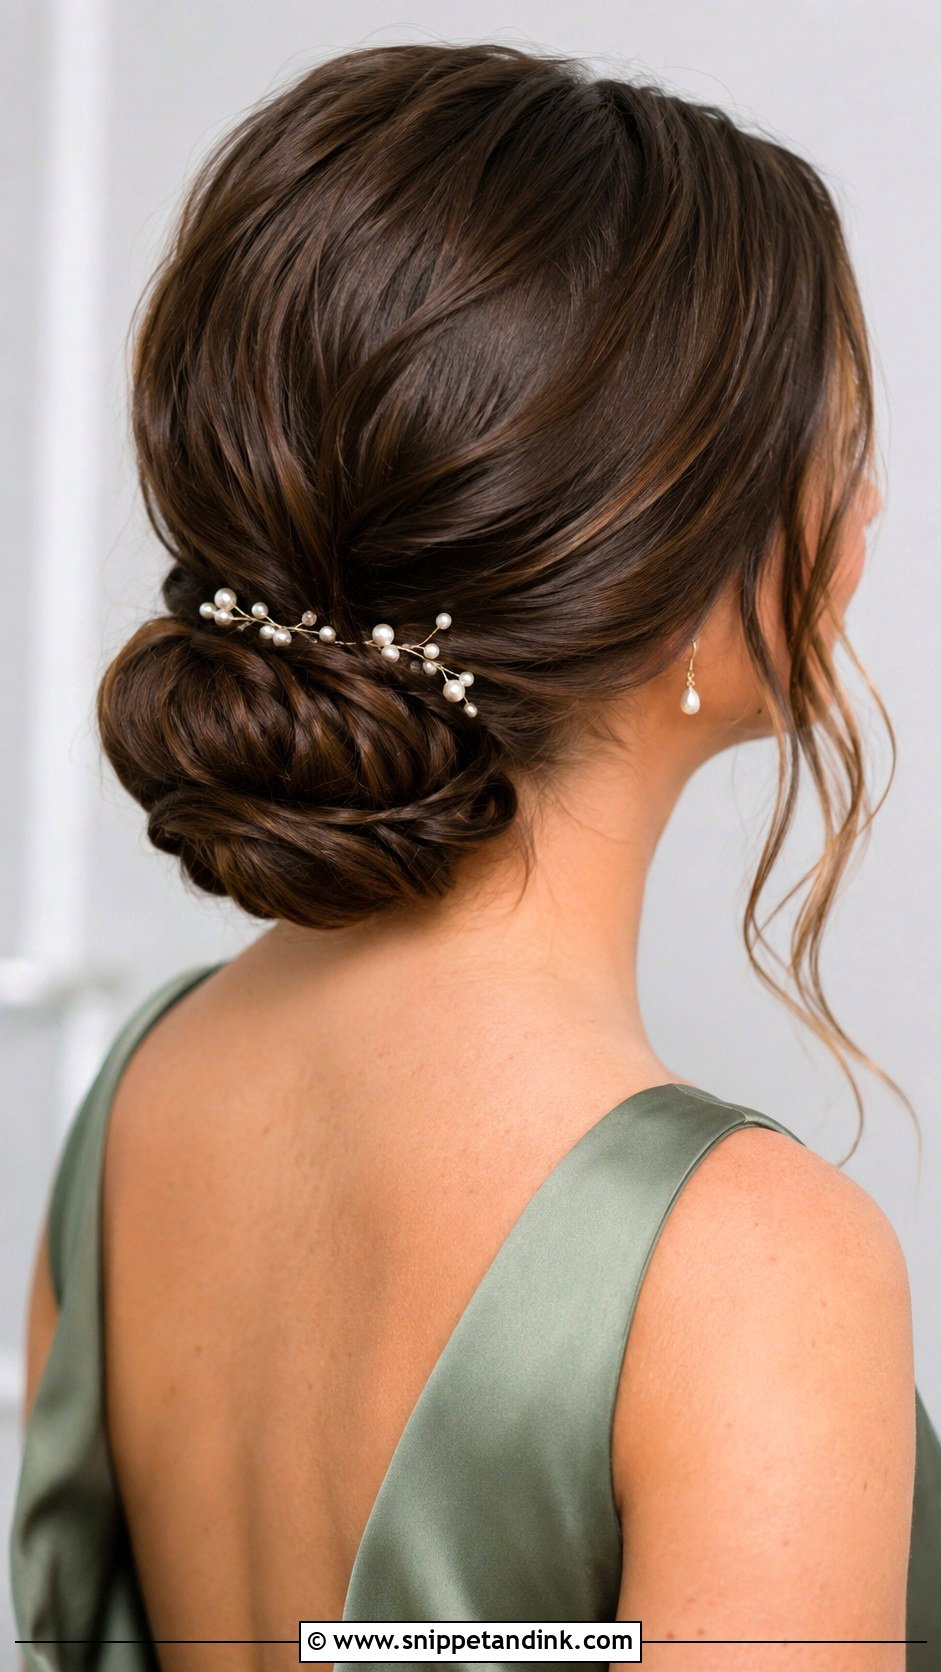
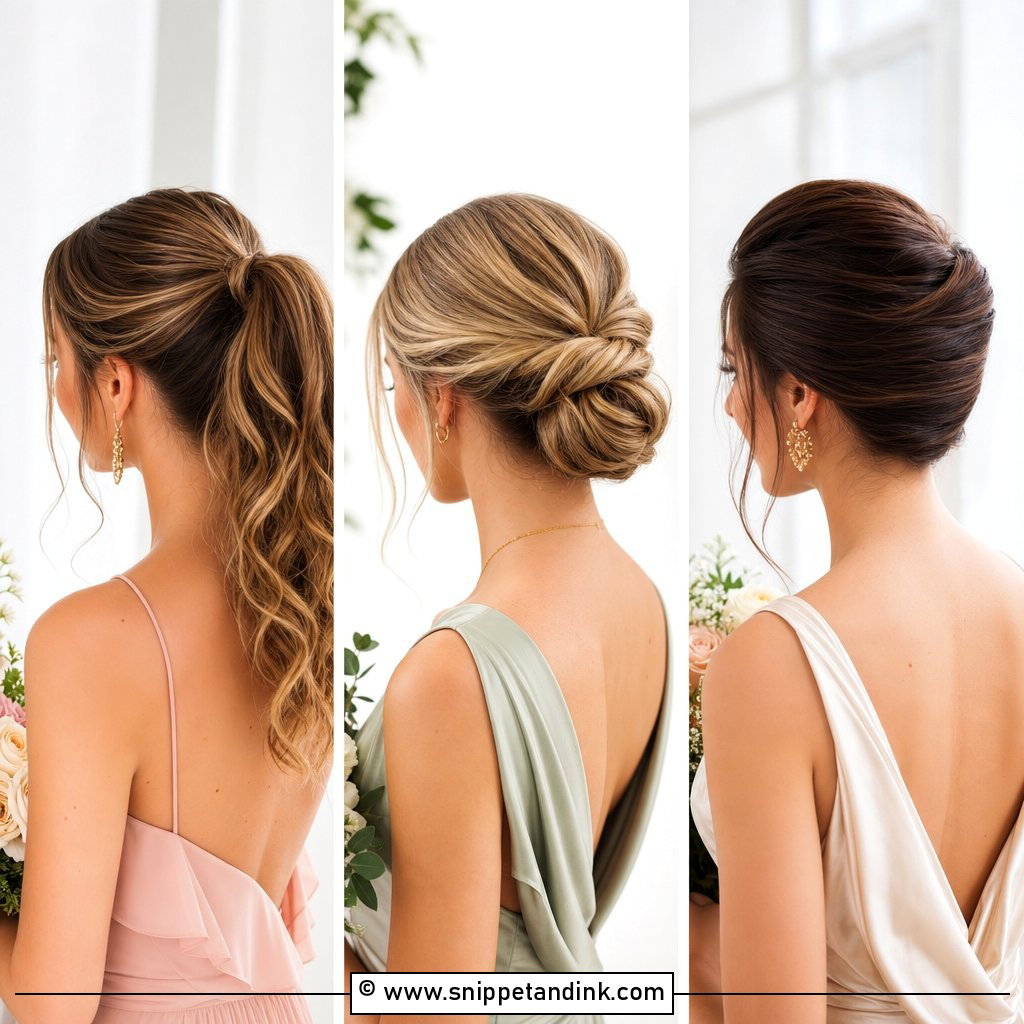
3. Bridesmaid Sleek Low Bun Tutorial
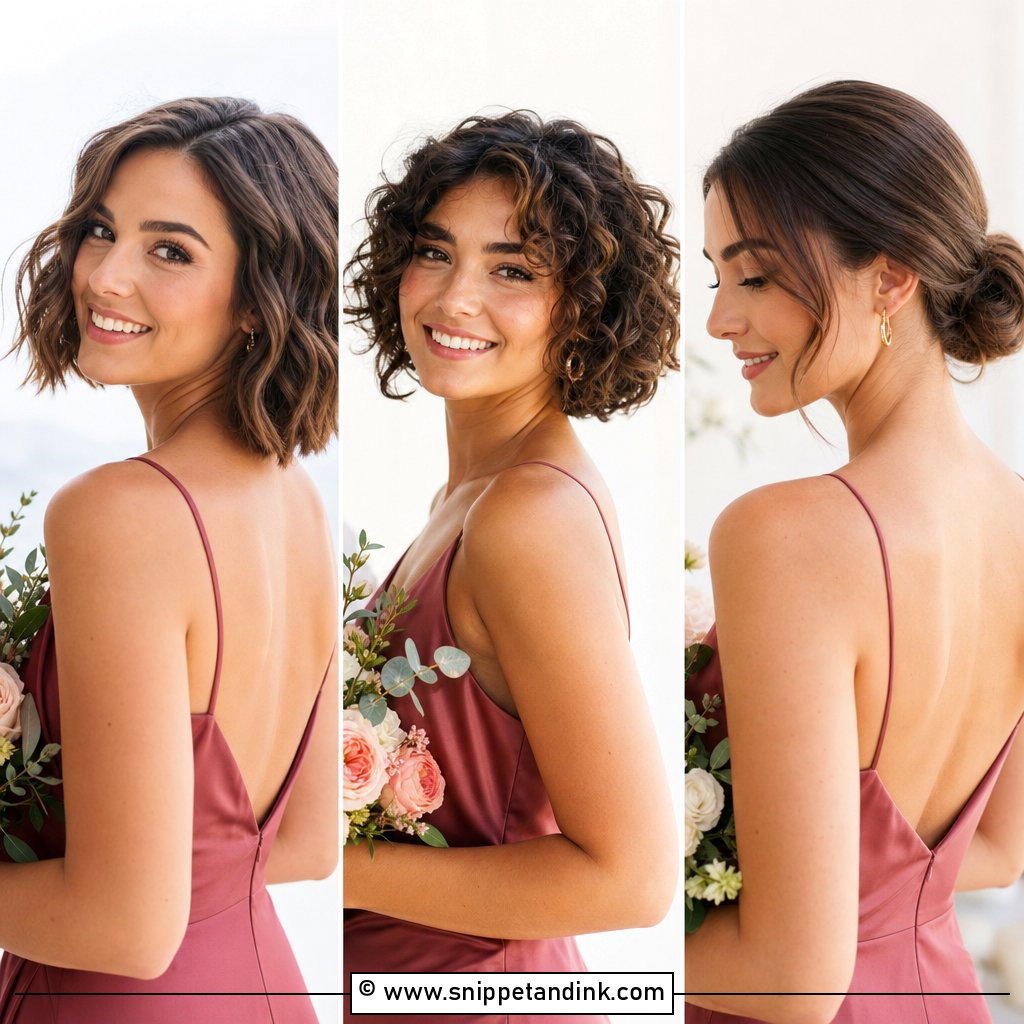
A sleek low bun is perfect when the wedding look is modern, clean, and minimal. Begin by applying a smoothing cream through the hair, then create a sharp middle part with a tail comb. Brush the hair tightly toward the nape and secure it with an elastic. Twist the ponytail into a neat bun and pin it flat so the shape looks sculpted. Use a toothbrush with a little gel to refine flyaways around the hairline. This tutorial works best for straight or stretched hair and pairs well with satin dresses, square necklines, and simple pearl or metallic accessories.
4. Bridesmaid Twisted Updo Tutorial
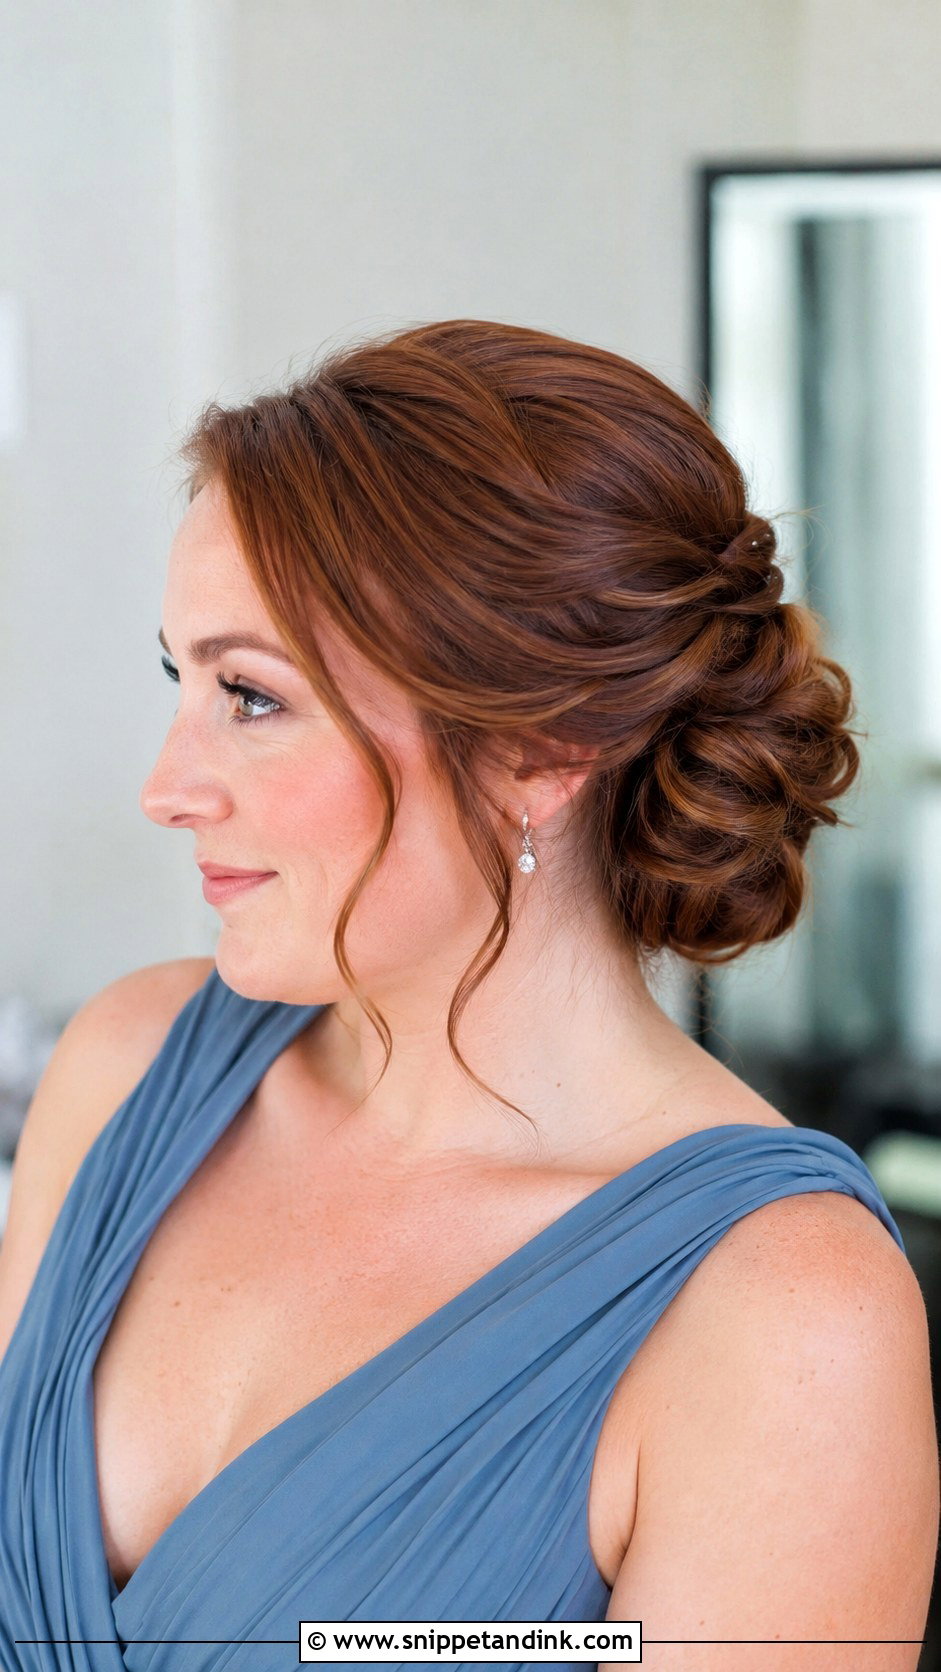
A twisted updo looks detailed, but it is easier than it seems when you break it into sections. Curl the hair first for grip and softness, then divide it into left, right, and back sections. Roll the back section into a low bun and pin it in place. Take each side section, twist it loosely away from the face, and wrap it over the bun. Tuck and pin the ends underneath. Gently loosen the twists with your fingers so they look full, not tight. This bridesmaid hairstyle is great for medium to long hair and gives a soft formal finish.
5. Bridesmaid French Twist Tutorial
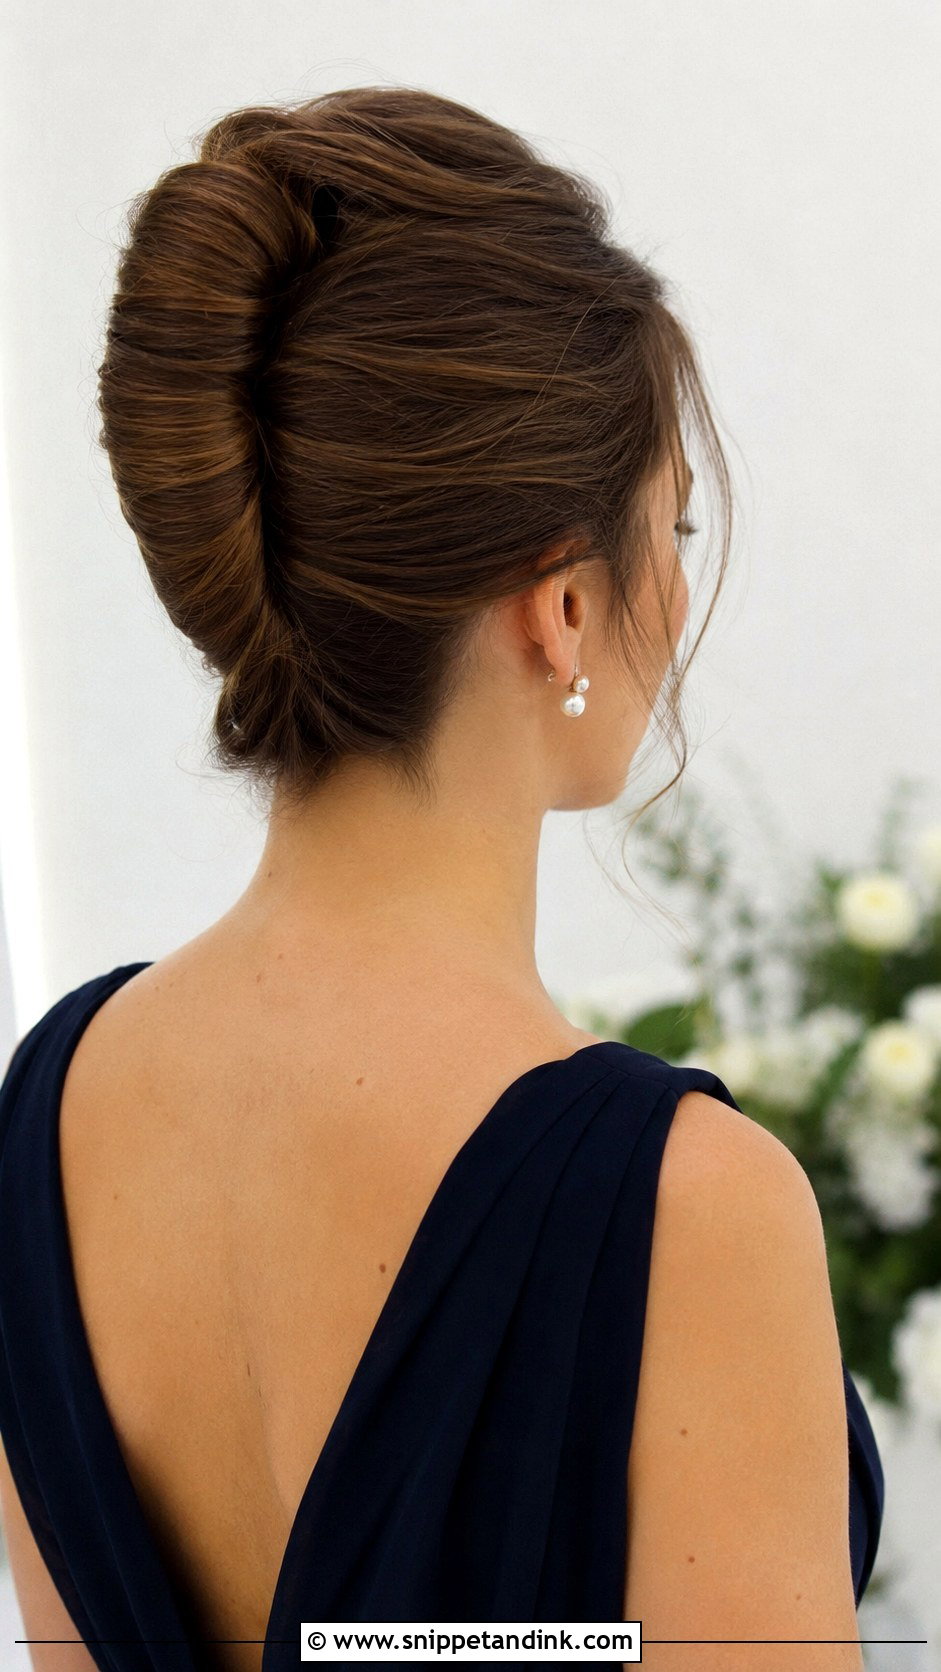
The French twist is a timeless choice for bridesmaids who want a polished, grown-up hairstyle. Start by adding texture spray to the roots and lengths so the twist has grip. Brush the hair back as if making a low ponytail, then sweep it to one side and secure a vertical line of pins at the center. Roll the hair back over the pins, tucking the ends inside the twist. Add more pins along the seam until it feels secure. Keep the crown smooth or lightly lifted. This style is beautiful for formal venues, black-tie weddings, and classic bridesmaid dresses.
6. Bridesmaid Half Up Half Down Tutorial

A half up half down hairstyle is ideal when bridesmaids want their hair down but still need it controlled around the face. Curl the hair in soft sections, then let the curls cool before brushing them into waves. Take two pieces from the front, twist them back, and secure them at the crown with pins or a small elastic. Add volume at the top by gently lifting the crown with a comb. This tutorial works for long and medium hair, and it flatters many face shapes. It is also easy to personalize with a ribbon, pearl pins, or tiny flowers.
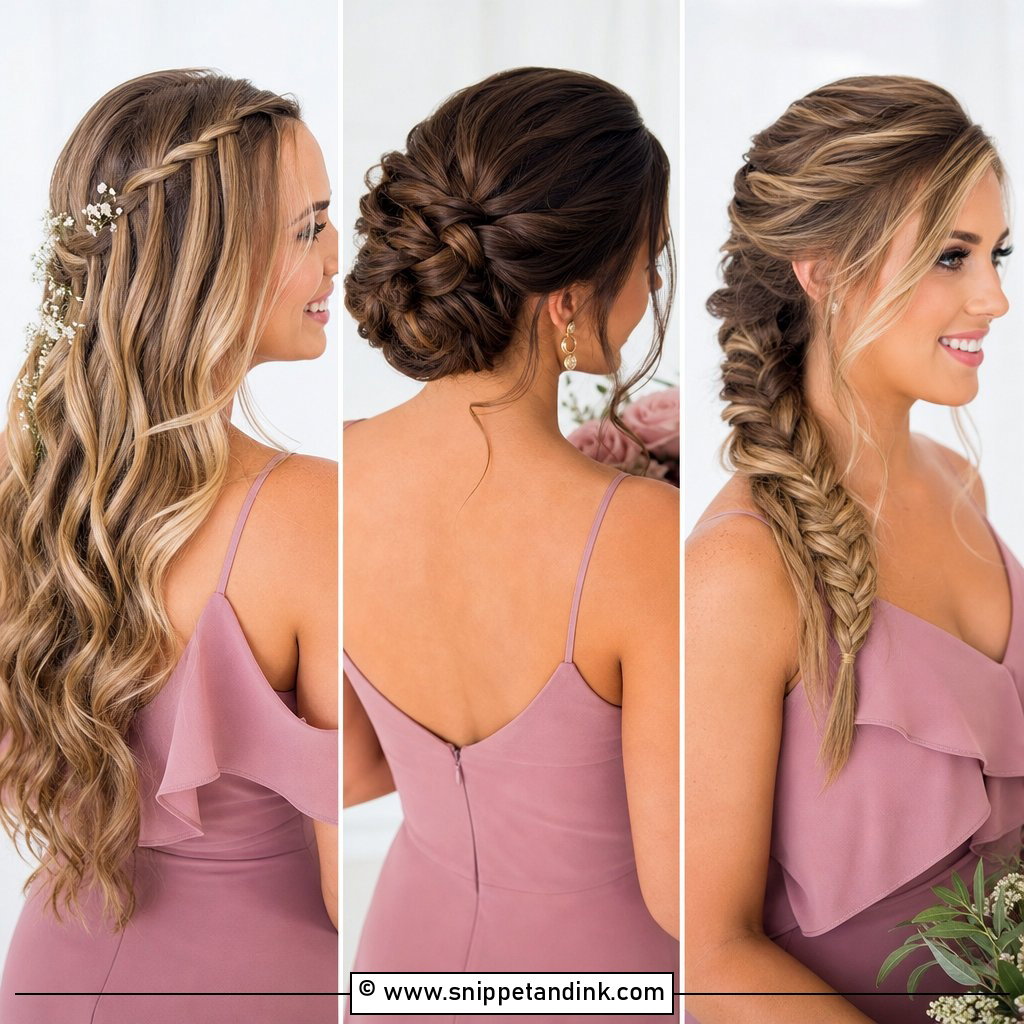
7. Bridesmaid Braided Half Up Tutorial
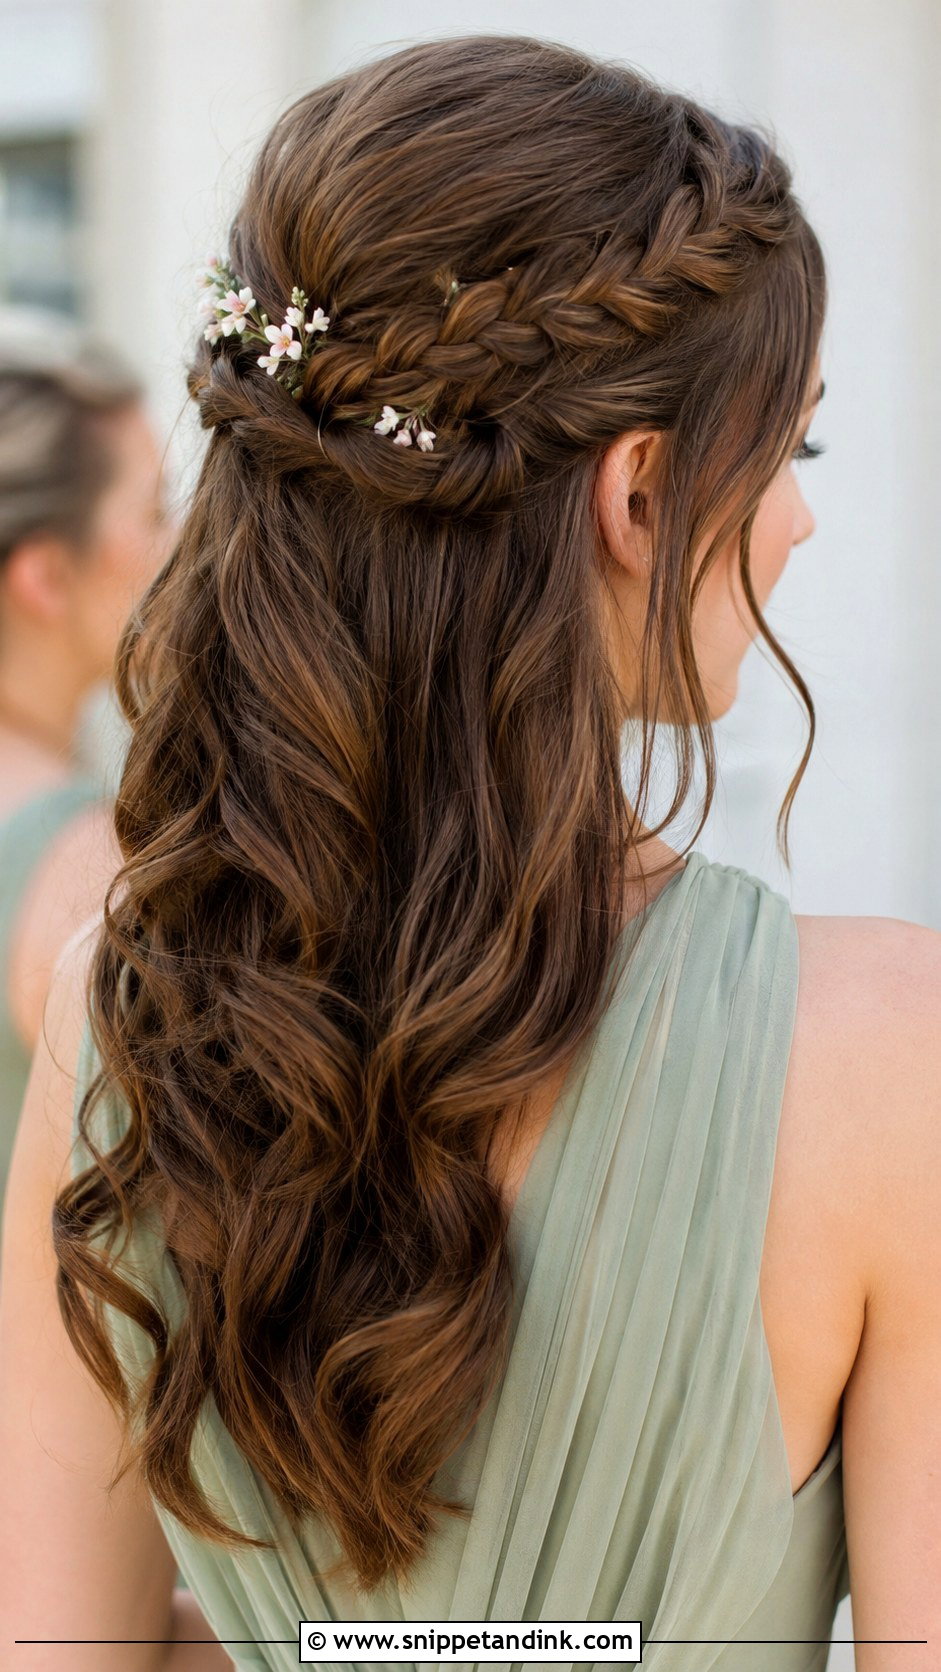
A braided half up bridesmaid hairstyle adds pretty detail without hiding the length of the hair. Start with loose waves so the finished look feels soft and full. Take a small section from each side near the temples and braid each one loosely toward the back. Pull the braid edges apart slightly to make them look thicker. Pin both braids together at the crown, letting the rest of the hair fall in waves. This tutorial is great for rustic, beach, or garden weddings. It also works well when the bridal party wants similar hair but not identical finished looks.
8. Bridesmaid Hollywood Waves Tutorial
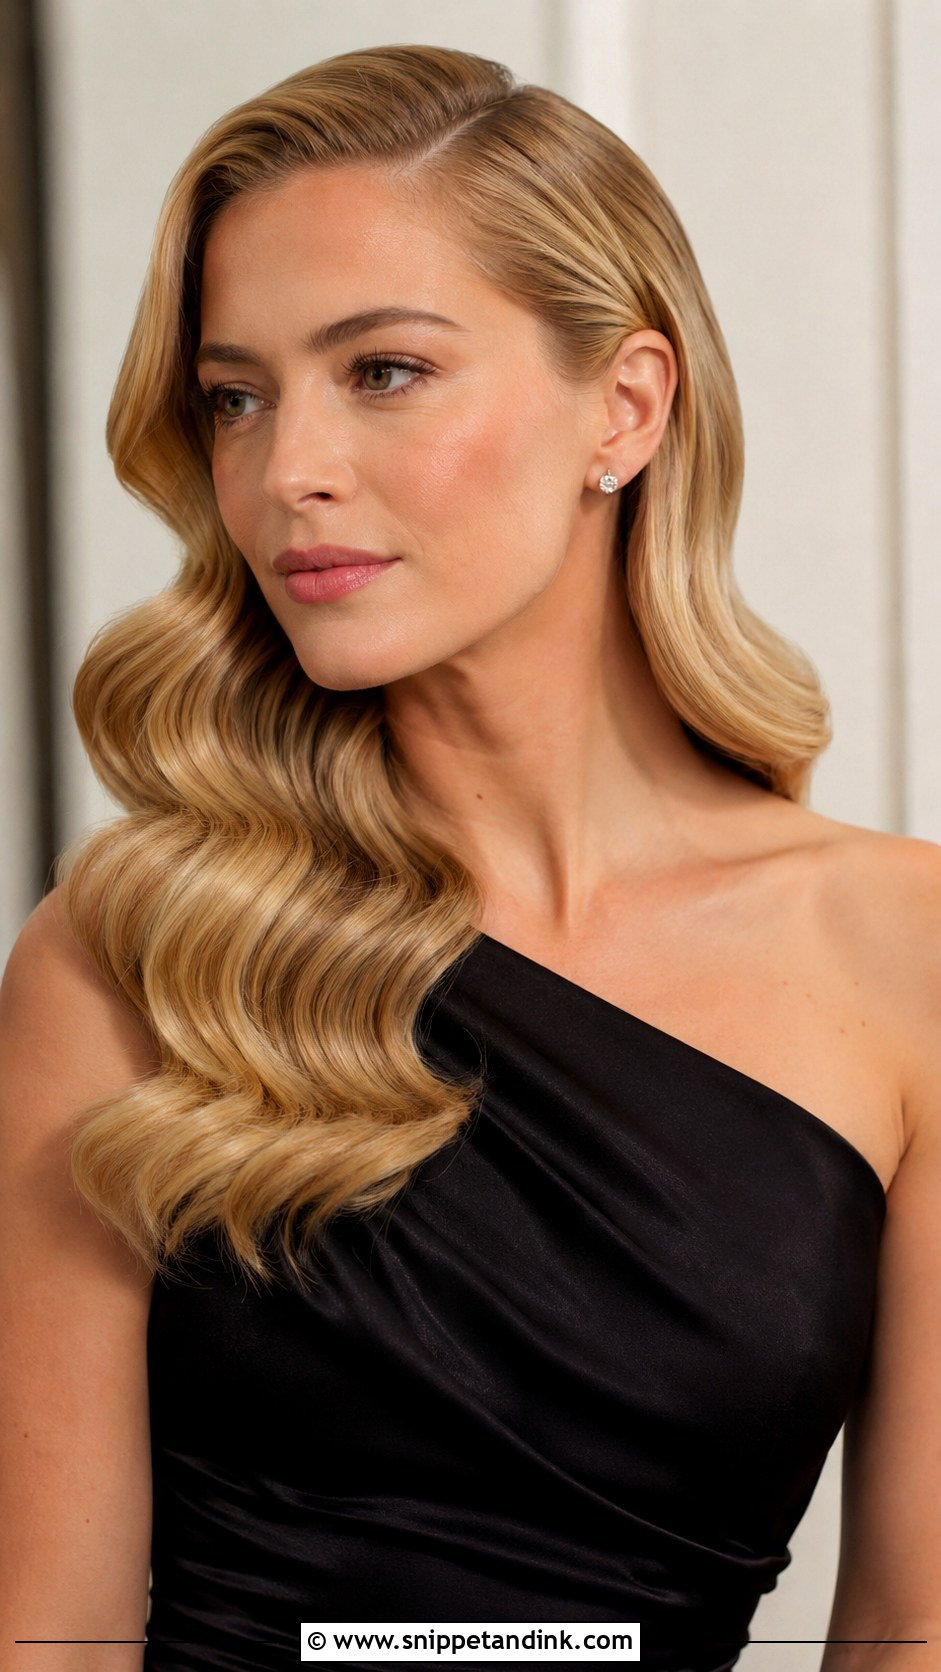
Hollywood waves are perfect for a glamorous bridesmaid look, especially with one-shoulder or satin dresses. Create a deep side part first, then curl every section in the same direction using a curling iron. Let the curls cool completely before brushing them out with a soft bristle brush. Shape the waves with your fingers and clip the bends for a few minutes if you want a more sculpted finish. Smooth the top with shine spray and tuck one side behind the ear. This hairstyle looks best when the waves are glossy, uniform, and controlled, making it a stunning choice for evening weddings.
9. Bridesmaid Loose Waves Tutorial
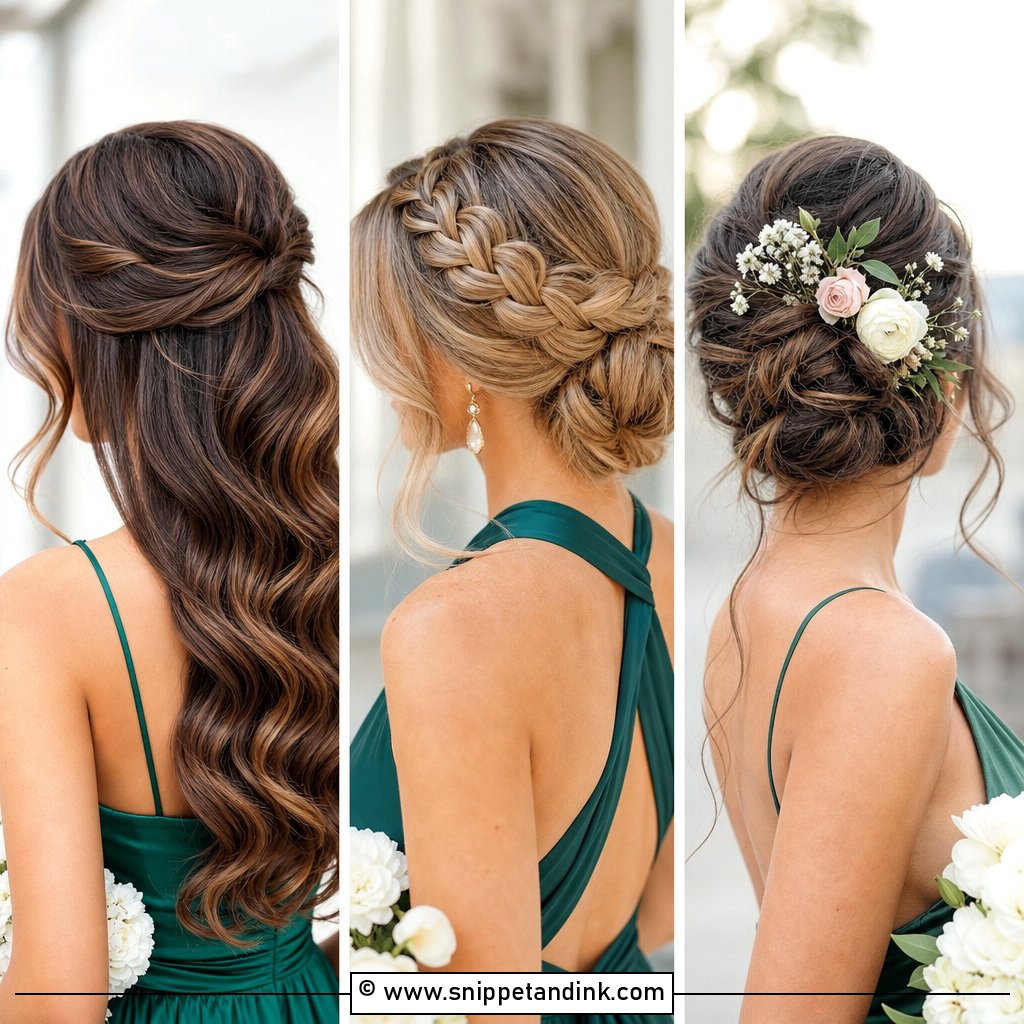
Loose waves are simple, flattering, and easy to adapt for almost every bridesmaid. Prep the hair with heat protectant and a light mousse for hold. Curl sections away from the face, leaving the ends slightly straighter for a modern finish. After the curls cool, comb through them with wide fingers instead of a brush if you want a softer texture. Add a small amount of serum to the ends to control frizz. This bridesmaid hairstyle works for outdoor ceremonies, beach weddings, and relaxed receptions. It also lets dress details shine while keeping the overall look pretty and effortless.
10. Bridesmaid Side Swept Curls Tutorial

Side swept curls feel romantic and photo-ready, especially with strapless or off-the-shoulder bridesmaid dresses. Curl the hair in medium sections, then brush through gently to blend the curls. Create a deep side part and sweep the heavier side over one shoulder. On the lighter side, pin the hair behind the ear using crossed bobby pins for extra hold. Add a decorative comb if the wedding theme allows it. Keep the curls soft around the ends, not too tight. This tutorial is a great option for bridesmaids who want length, volume, and a little drama without wearing a full updo.
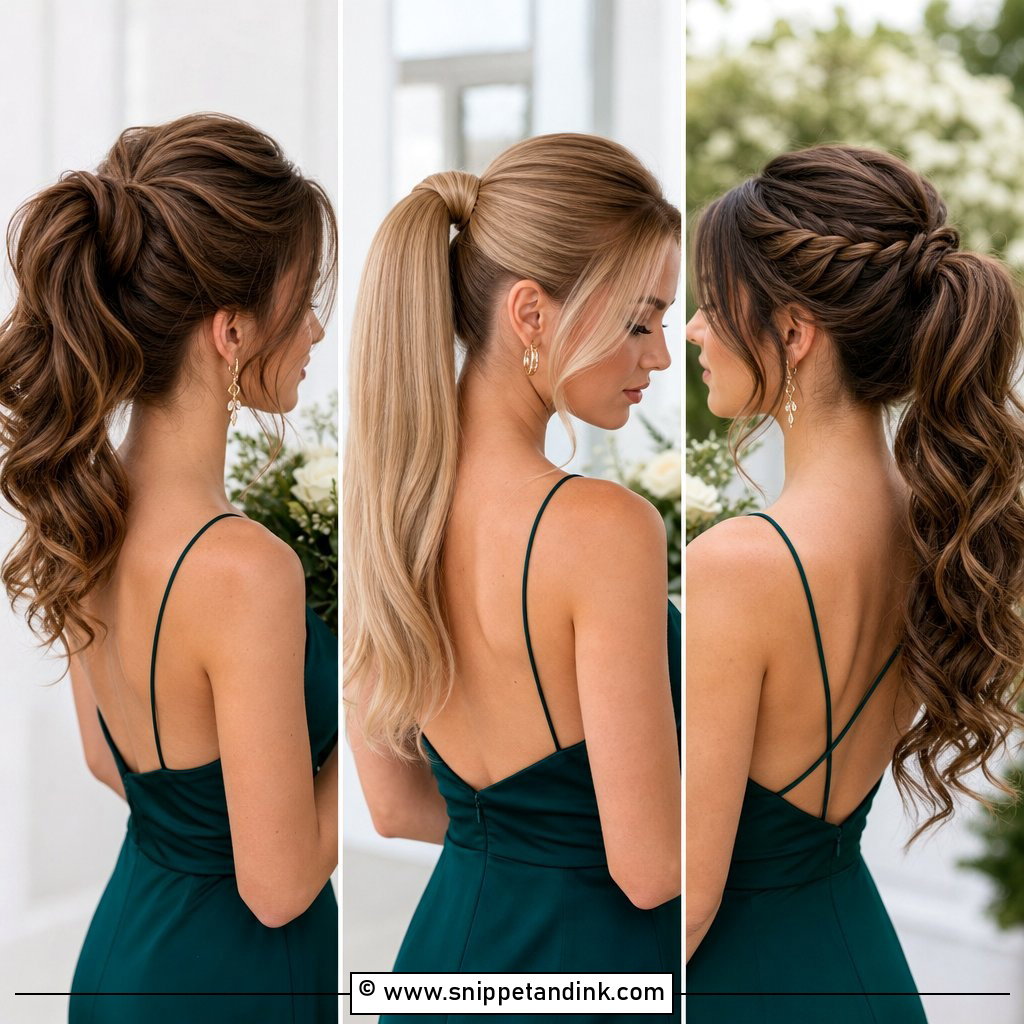
11. Bridesmaid Low Ponytail Tutorial
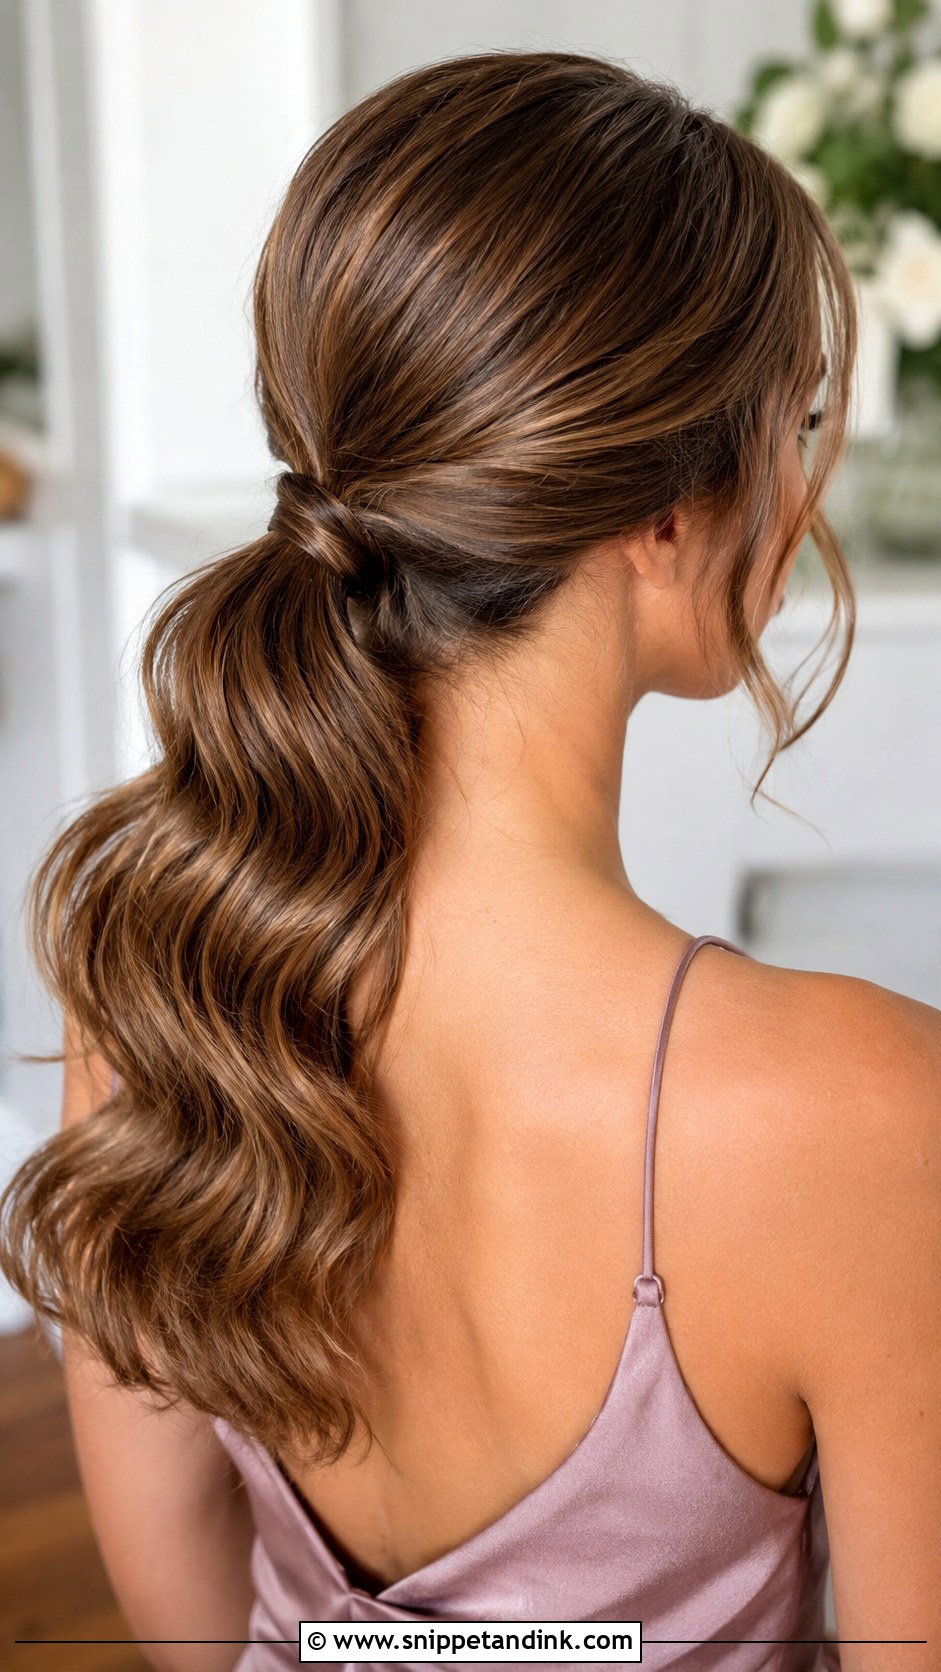
A low ponytail can look incredibly chic when the finish is intentional. Start by smoothing the roots and adding loose waves through the lengths. Part the hair in the middle or to the side, then gather it at the nape. Secure it with an elastic and wrap a small section of hair around the band to hide it. Pin the wrapped piece underneath. Pull gently at the crown for soft volume, or keep it sleek for a modern look. This bridesmaid hairstyle is comfortable, secure, and perfect for warm weather because the hair stays controlled without feeling too formal.
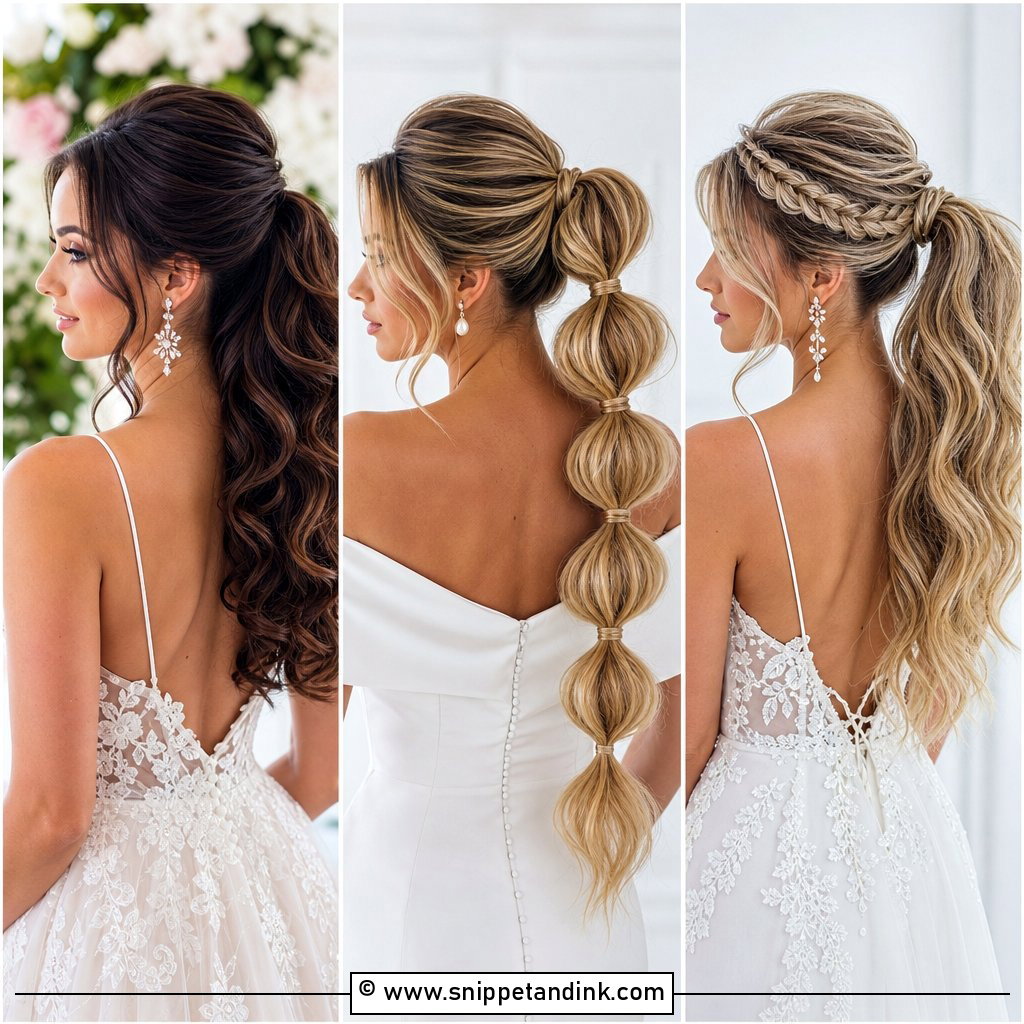
12. Bridesmaid High Ponytail Tutorial

A high ponytail brings lift, movement, and a fun polished finish to bridesmaid hair. Curl the hair first so the ponytail has bounce and fullness. Brush the top smooth, then gather the hair at the crown and secure it tightly with a strong elastic. Wrap a small strand around the base to hide the band. Tease the underside of the ponytail lightly if more volume is needed. Leave soft face-framing pieces for a romantic touch, or keep the hairline sleek for a cleaner look. This tutorial works beautifully for long hair, thick hair, and modern bridal party outfits.
13. Bridesmaid Bubble Ponytail Tutorial
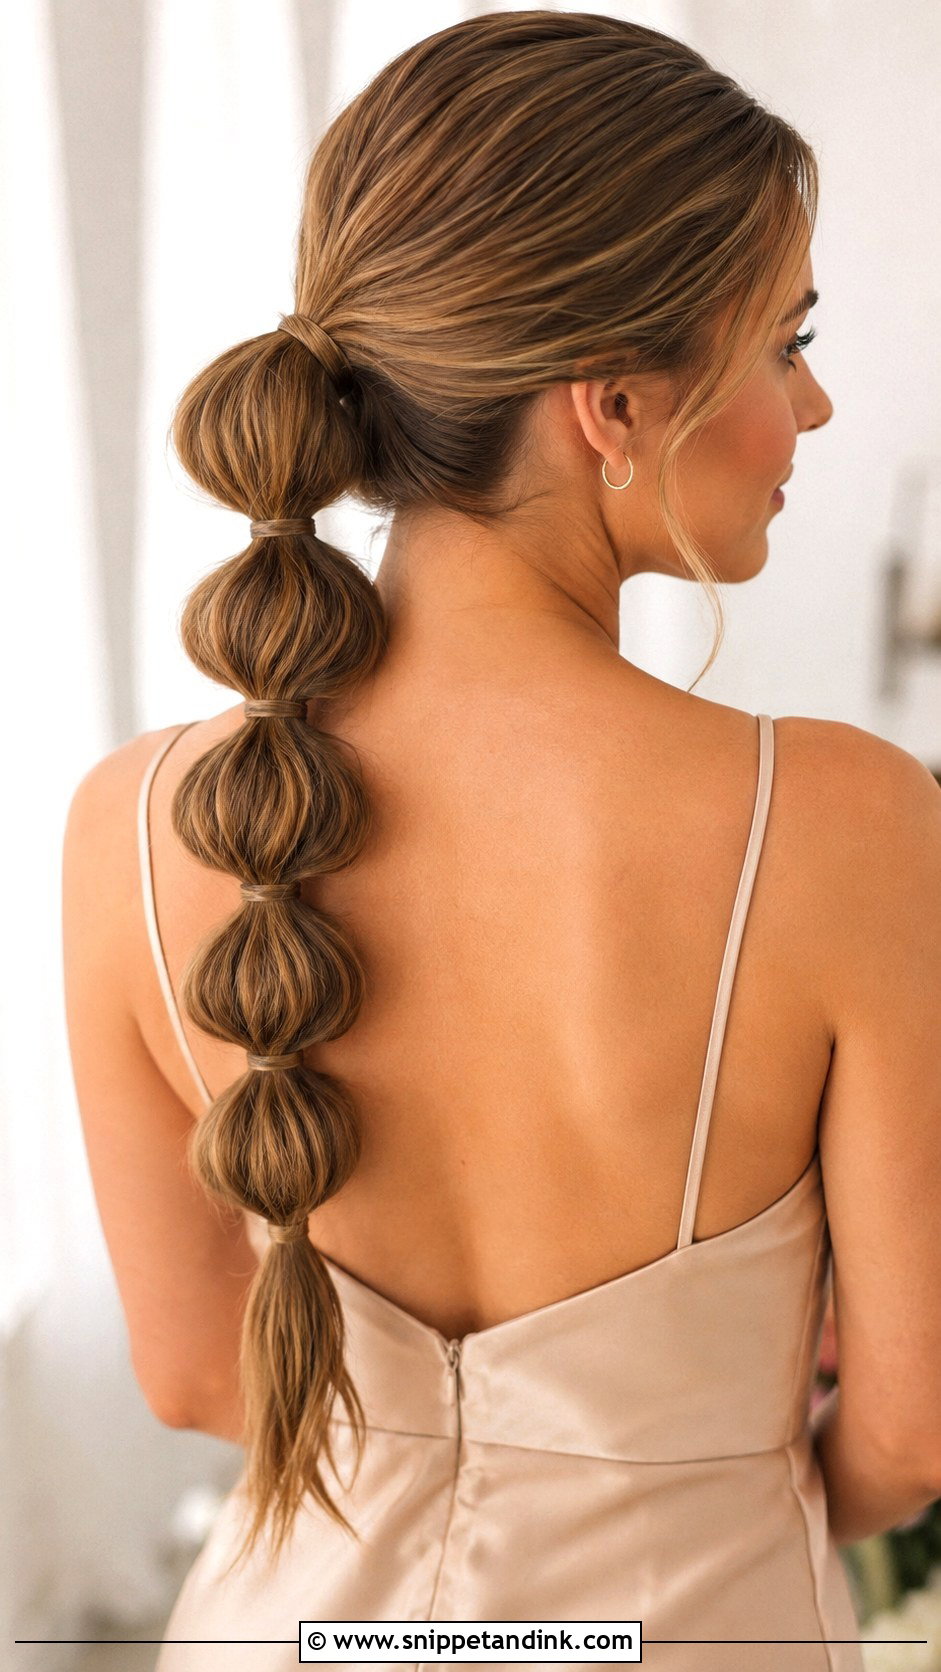
A bubble ponytail is a playful but polished bridesmaid hairstyle that works well for long hair. Begin with smooth hair and create a mid or low ponytail. Add clear elastics every few inches down the length of the ponytail. After each elastic, gently pull the section outward to create a rounded bubble shape. Keep the bubbles even, but do not make them too tight. Wrap small pieces of hair around the elastics if you want a softer, more formal finish. This tutorial is great for outdoor weddings because it keeps hair contained while still looking stylish, trendy, and photo-friendly.
14. Bridesmaid Side Braid Tutorial
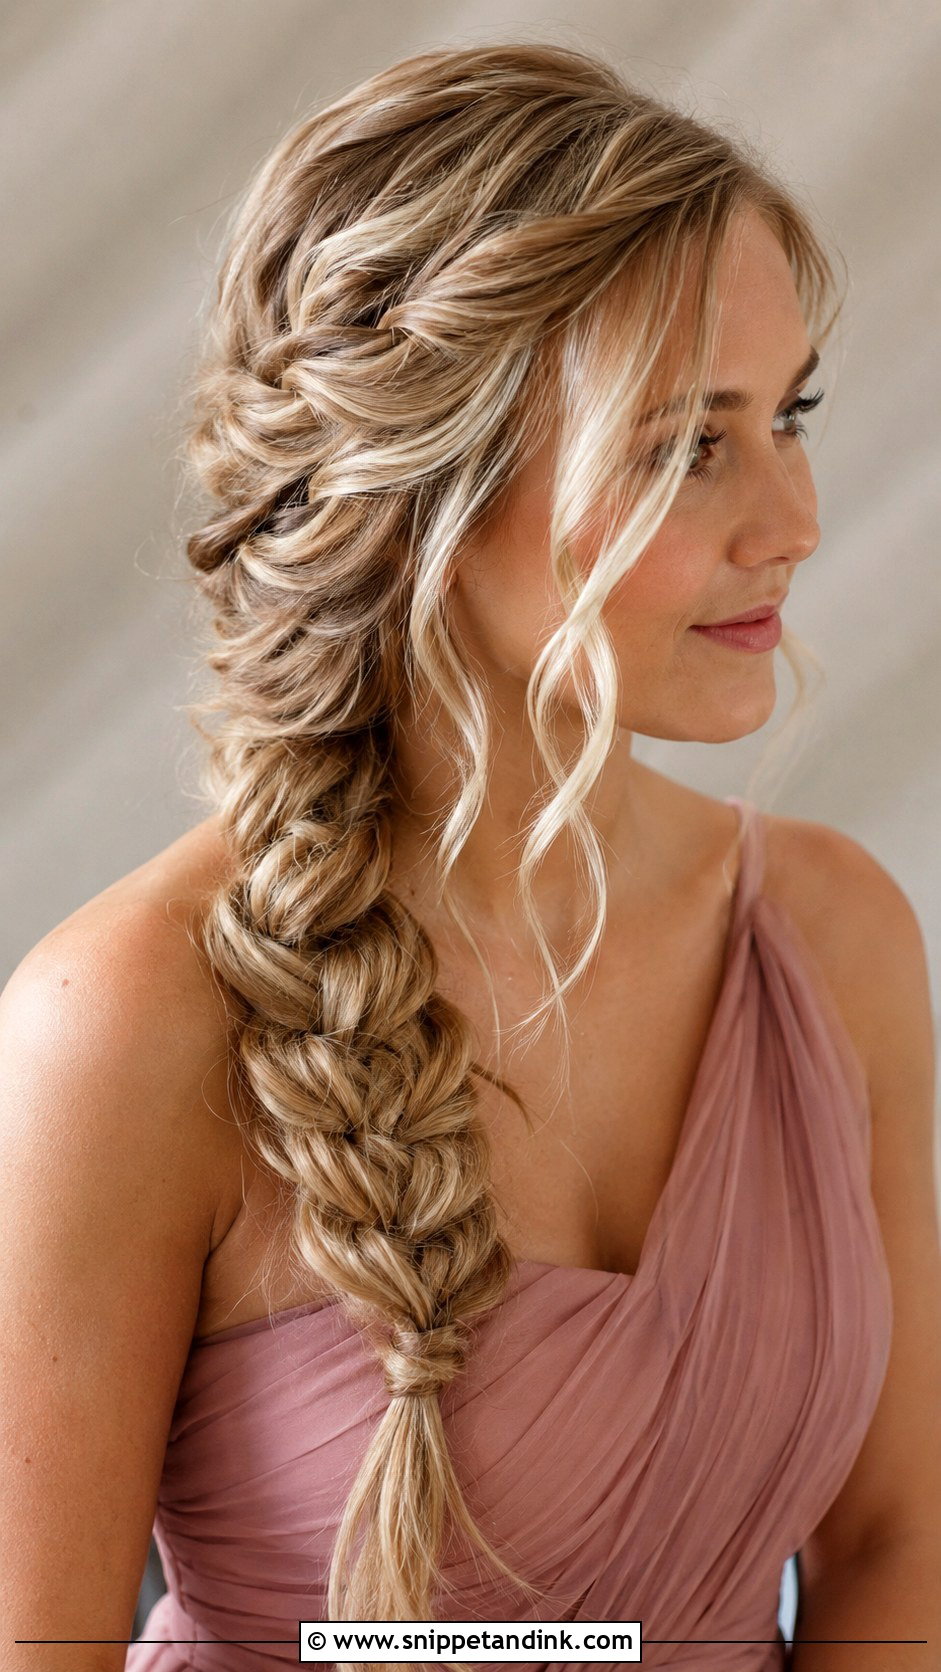
A side braid gives bridesmaids a soft, romantic look that feels secure and comfortable. Start with textured waves, then sweep all the hair over one shoulder. Create a loose three-strand or fishtail braid, depending on the level of detail you want. Secure the end with a clear elastic and gently pull the braid apart to make it look fuller. Leave small pieces around the face for softness. This bridesmaid hairstyle is especially useful for long hair and humid weather because it controls the length while still looking feminine. Add small pins or flowers if the wedding theme is natural.
15. Bridesmaid Crown Braid Tutorial
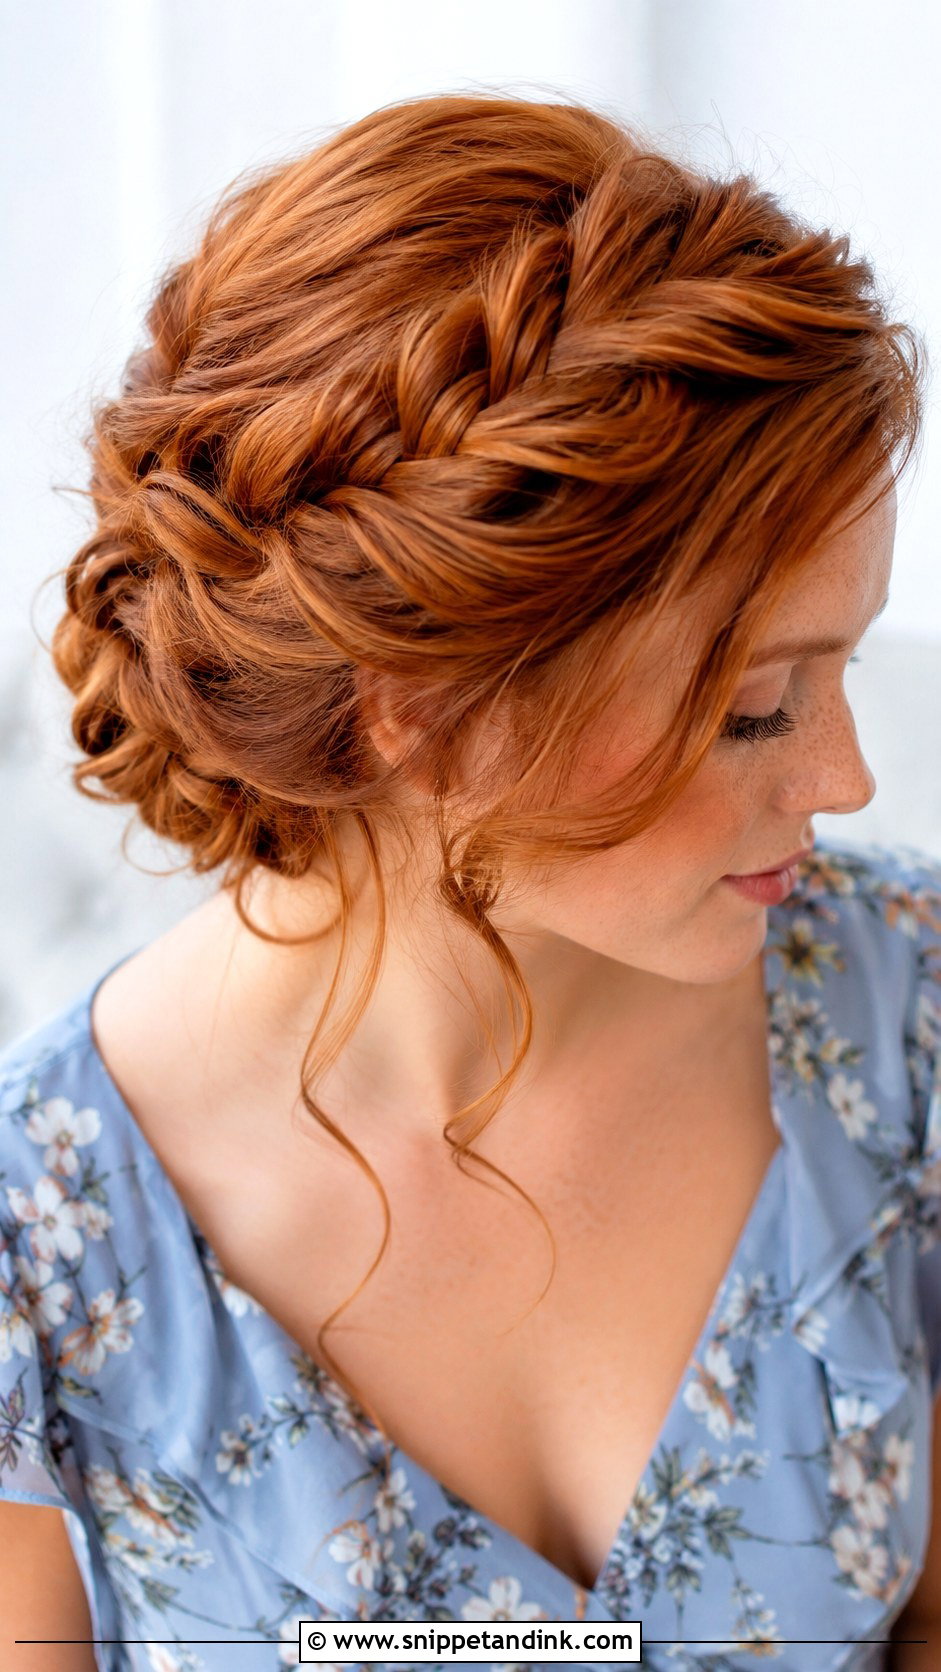
A crown braid creates a beautiful wrapped shape that keeps hair off the neck and face. Part the hair where it naturally falls, then start braiding from one side near the temple. Work around the head, adding hair as you go, until the braid reaches the opposite side. Tuck the end under the braid and pin it securely. Pull the braid slightly wider for softness and volume. This bridesmaid hairstyle works well for outdoor weddings, summer ceremonies, and dresses with detailed necklines. It also gives a sweet, romantic finish without needing heavy accessories or constant touch-ups.
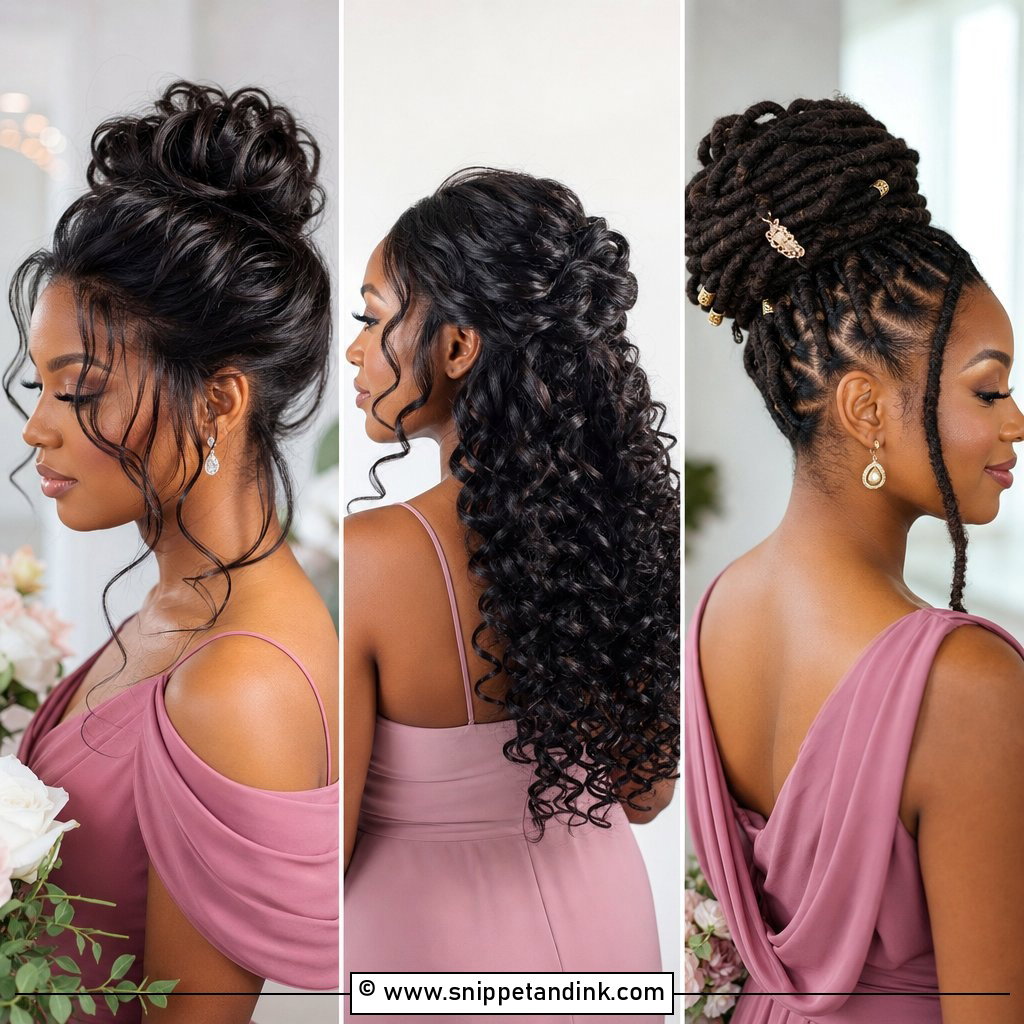
16. Bridesmaid Curly Half Up Tutorial
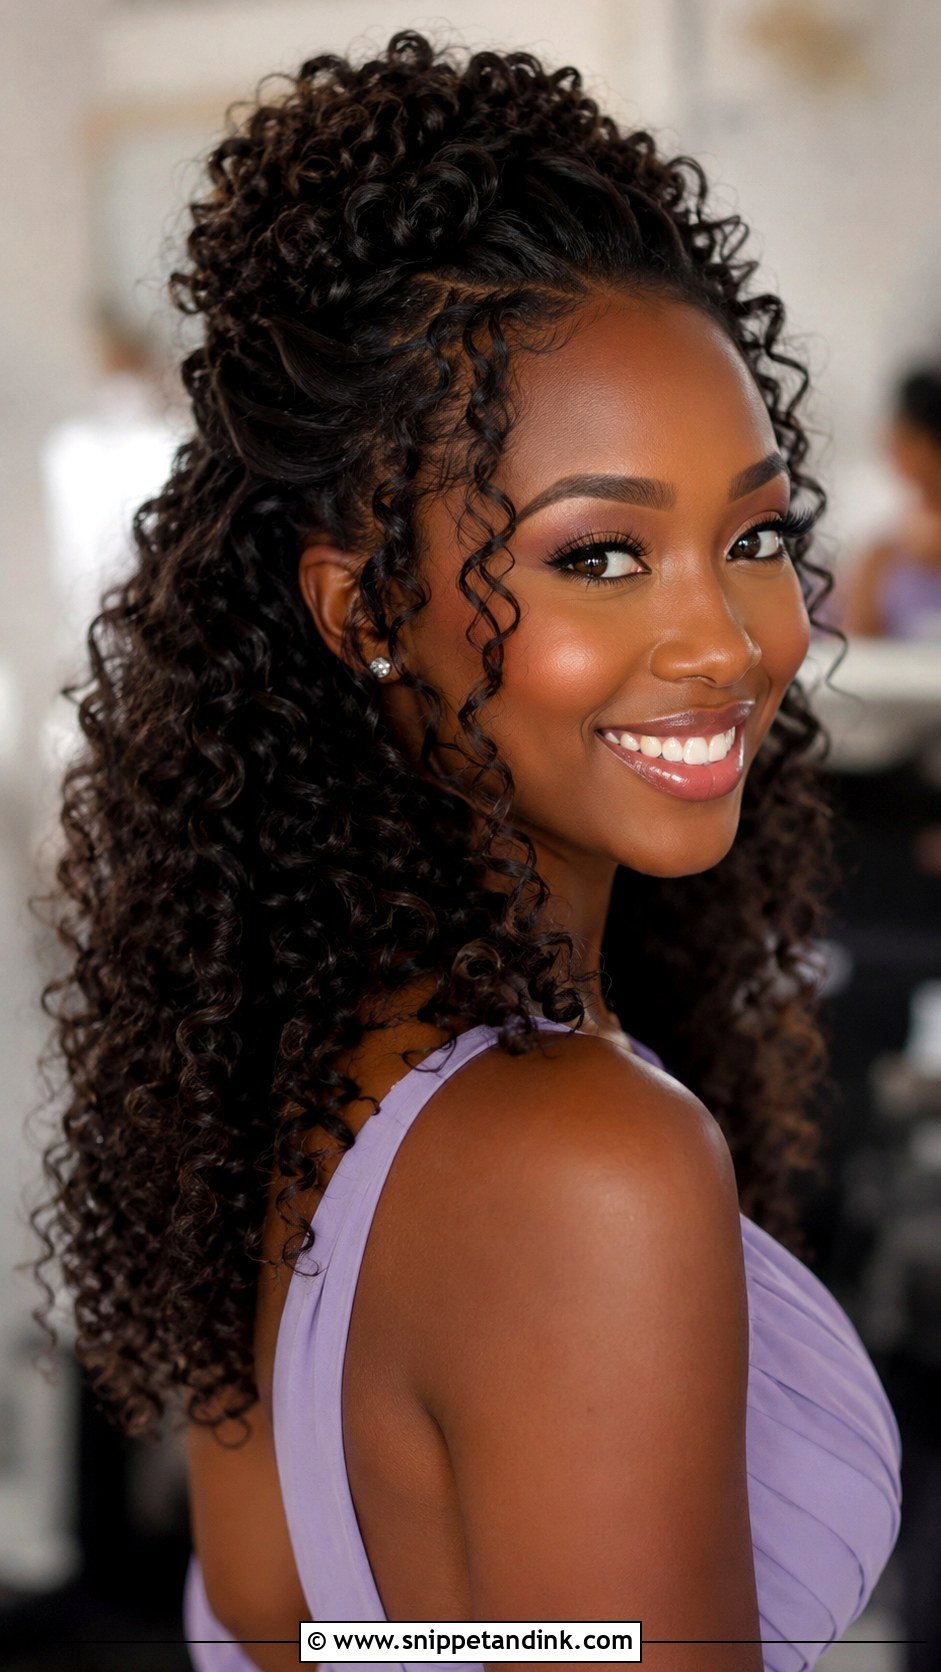
Curly half up hair is perfect when a bridesmaid wants to show natural texture while keeping the front pieces controlled. Start with hydrated, defined curls using curl cream or gel, then dry fully before styling. Take small sections from each side and pin them at the back of the crown. Avoid brushing the curls after they are set because that can create frizz. Lift the roots gently with your fingers for volume. This tutorial celebrates natural movement and looks beautiful with soft dresses, floral details, and outdoor venues. It is also comfortable because the curls stay away from the face.
17. Bridesmaid Natural Curls Updo Tutorial
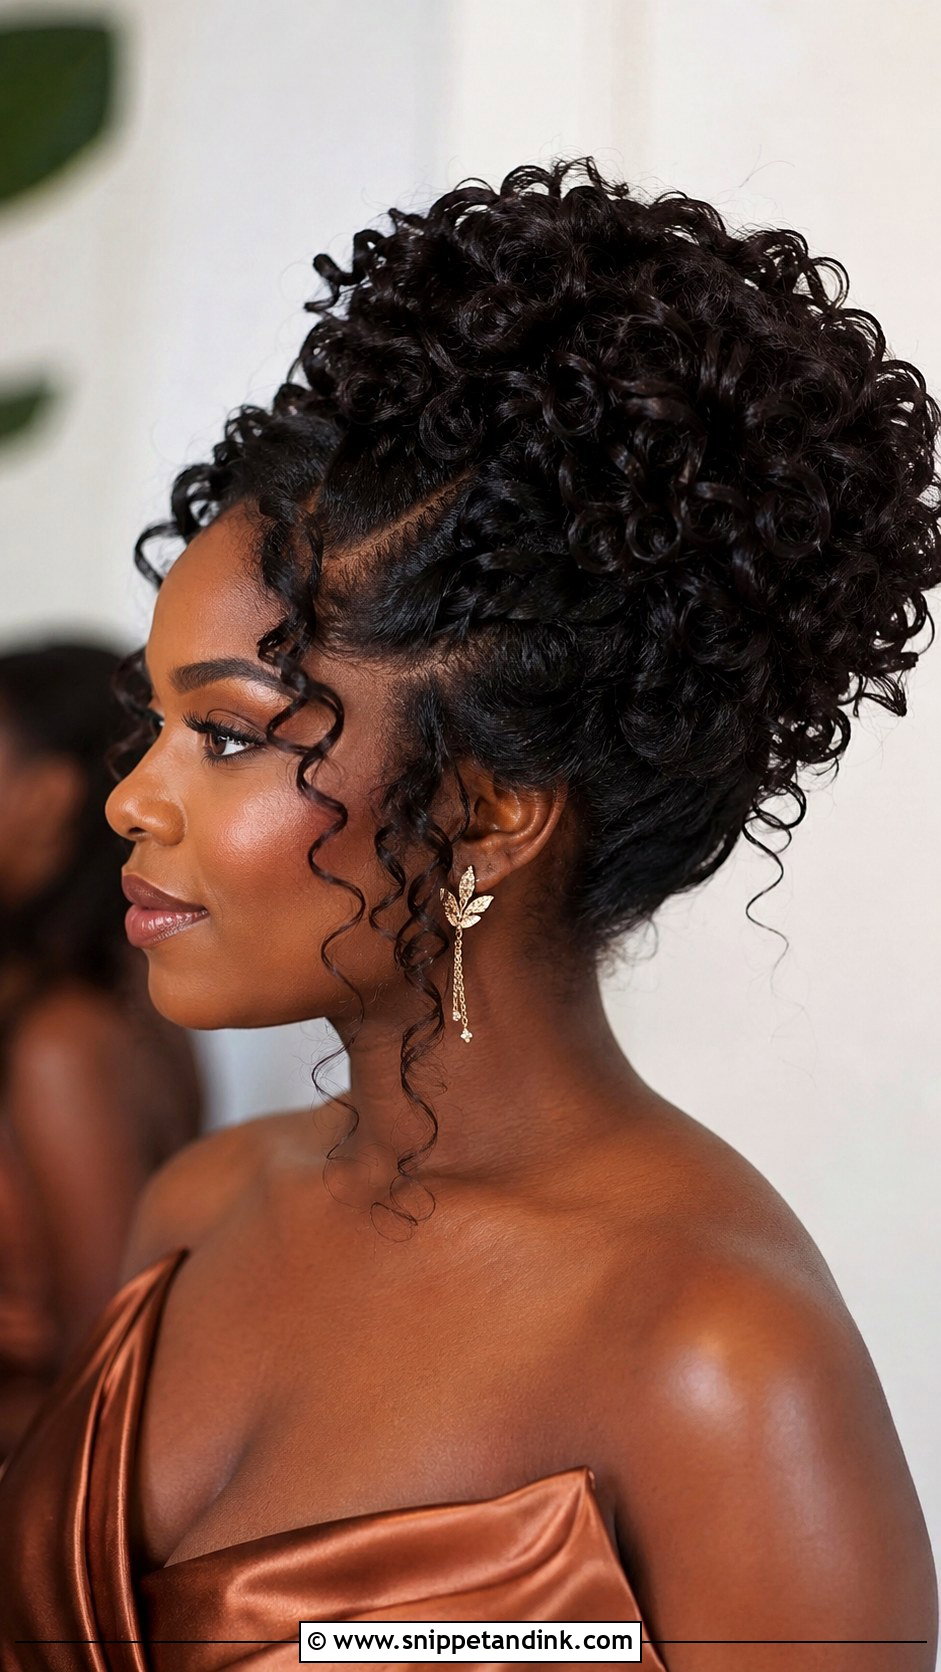
A natural curls updo gives shape, height, and elegance while protecting curl definition. Begin with moisturized curls that are fully dry. Gather the hair loosely toward the crown or back of the head, depending on the preferred shape. Pin curls in sections instead of pulling everything into one tight bun. Let a few curls fall around the face and neckline for softness. Use edge control only where needed, keeping the overall look natural and touchable. This bridesmaid hairstyle is beautiful for curly and coily textures because it shows volume while staying secure through the ceremony, photos, and reception.
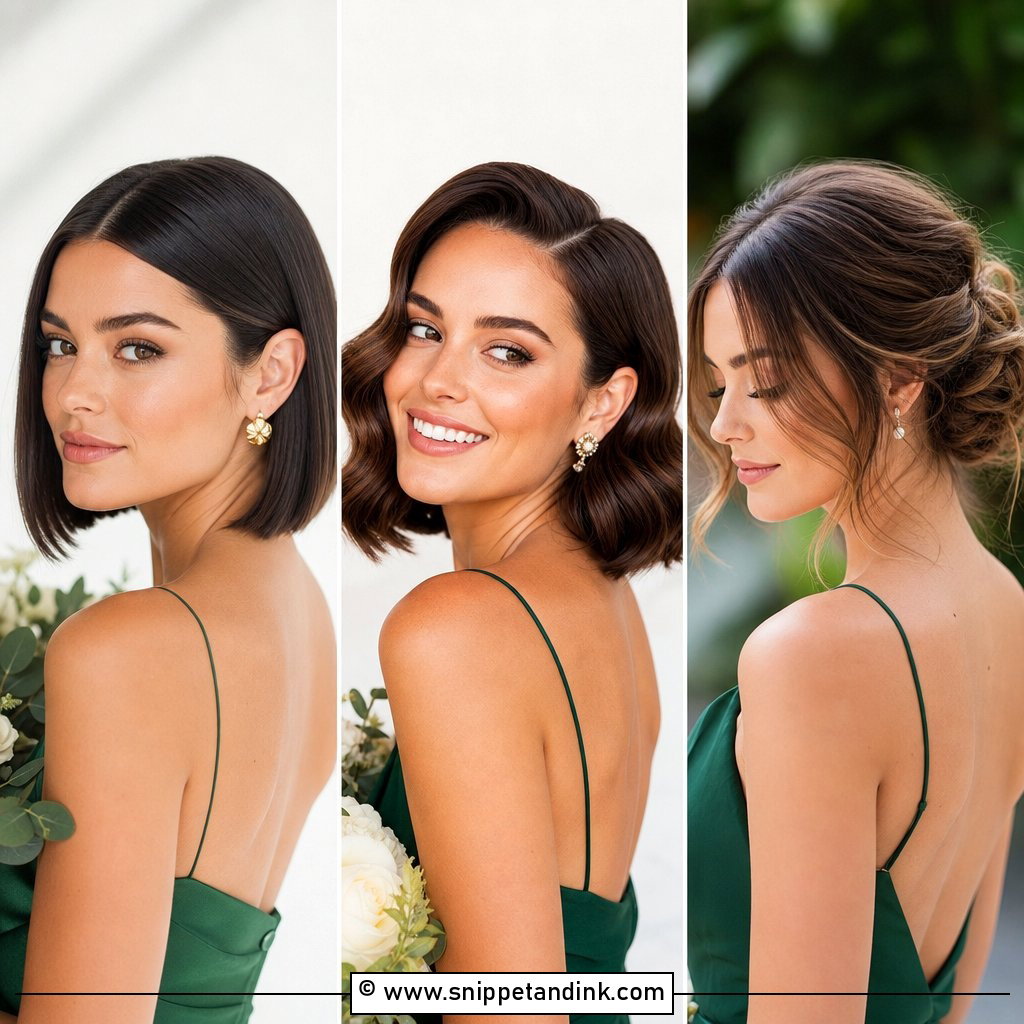
18. Bridesmaid Short Bob Waves Tutorial

Short bob waves can look just as wedding-ready as long hair when the shape is styled with care. Apply heat protectant, then curl small sections away from the face with a small barrel iron or flat iron. Keep the ends slightly relaxed so the bob stays modern. Add texture spray at the roots and gently separate the waves with your fingers. Tuck one side behind the ear with a pearl pin or small clip if desired. This bridesmaid hairstyle is perfect for chin-length to shoulder-length hair and works well with simple dresses, clean makeup, and elegant jewelry.
19. Bridesmaid Pixie Hair Tutorial
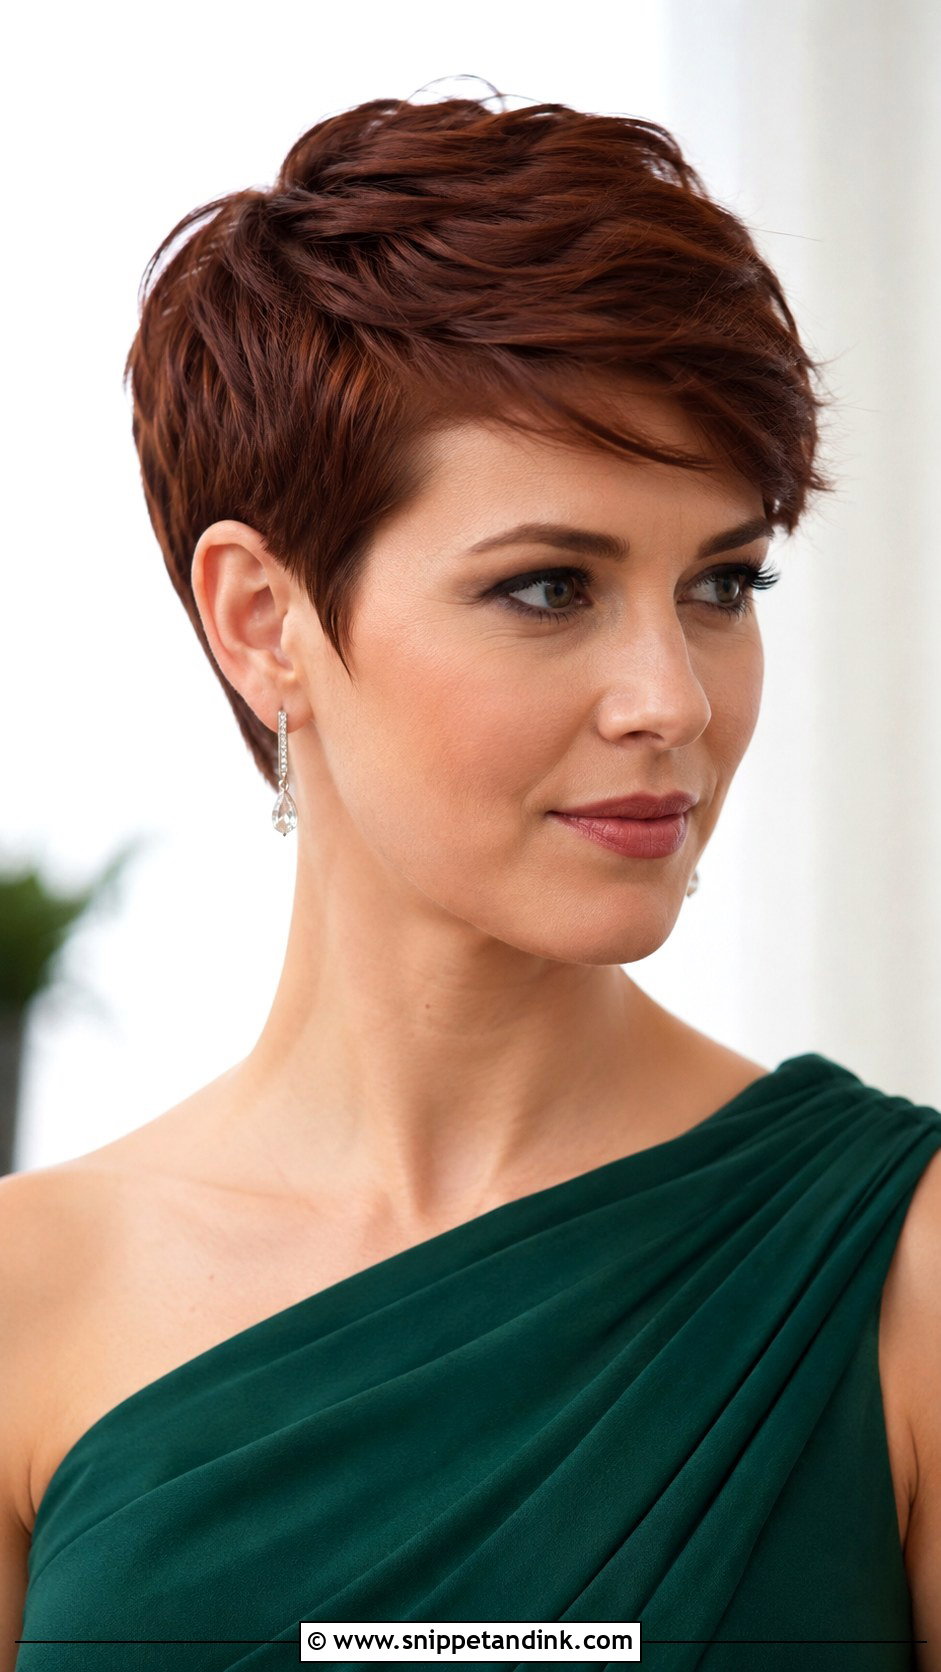
A pixie cut can feel polished and special with the right texture and shine. Start by applying a lightweight styling cream through damp or dry hair. Use your fingers or a small brush to direct the top layers into a soft side sweep, textured lift, or sleek shape. Smooth the sides close to the head for contrast. Add a tiny decorative pin only if it suits the wedding style. Finish with flexible hairspray so the pixie holds without looking hard. This bridesmaid hairstyle is quick, comfortable, and perfect for showing off earrings, necklines, and confident short hair.
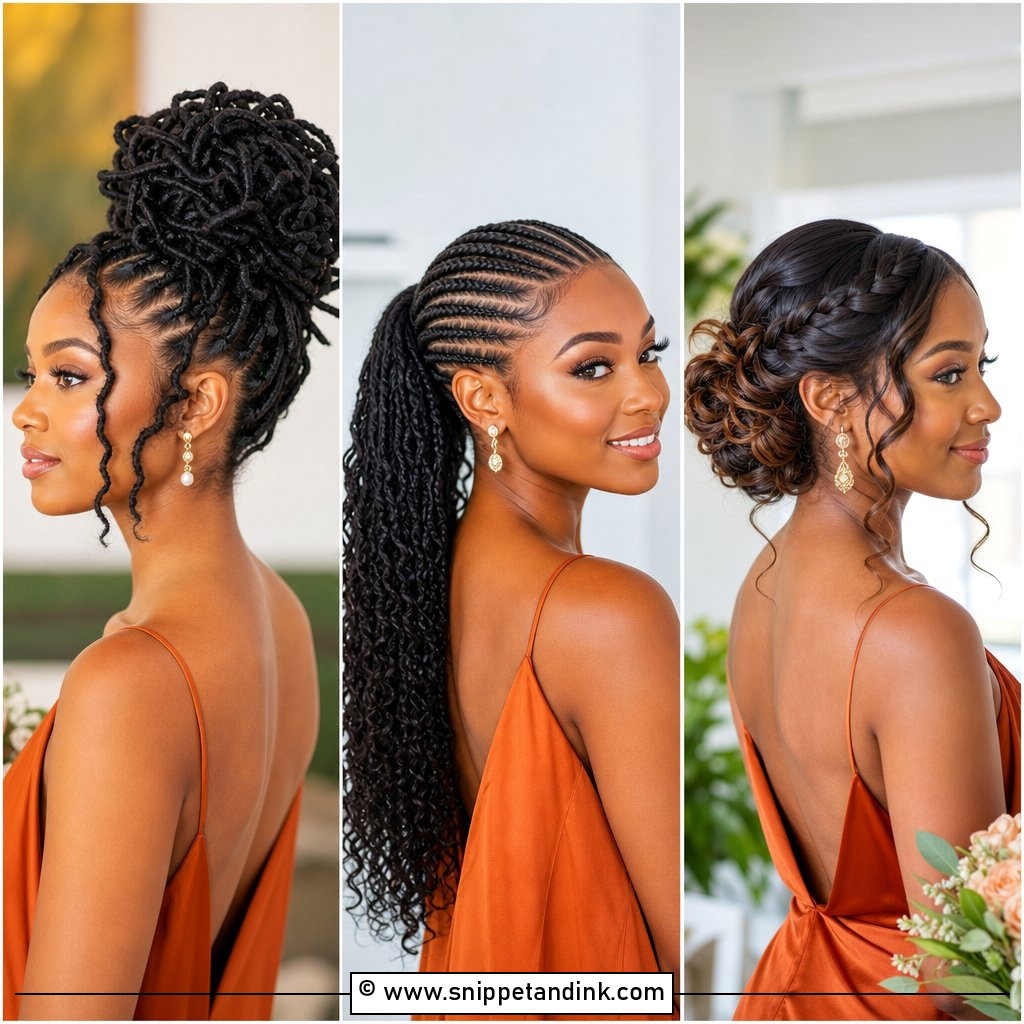
20. Bridesmaid Locs Updo Tutorial
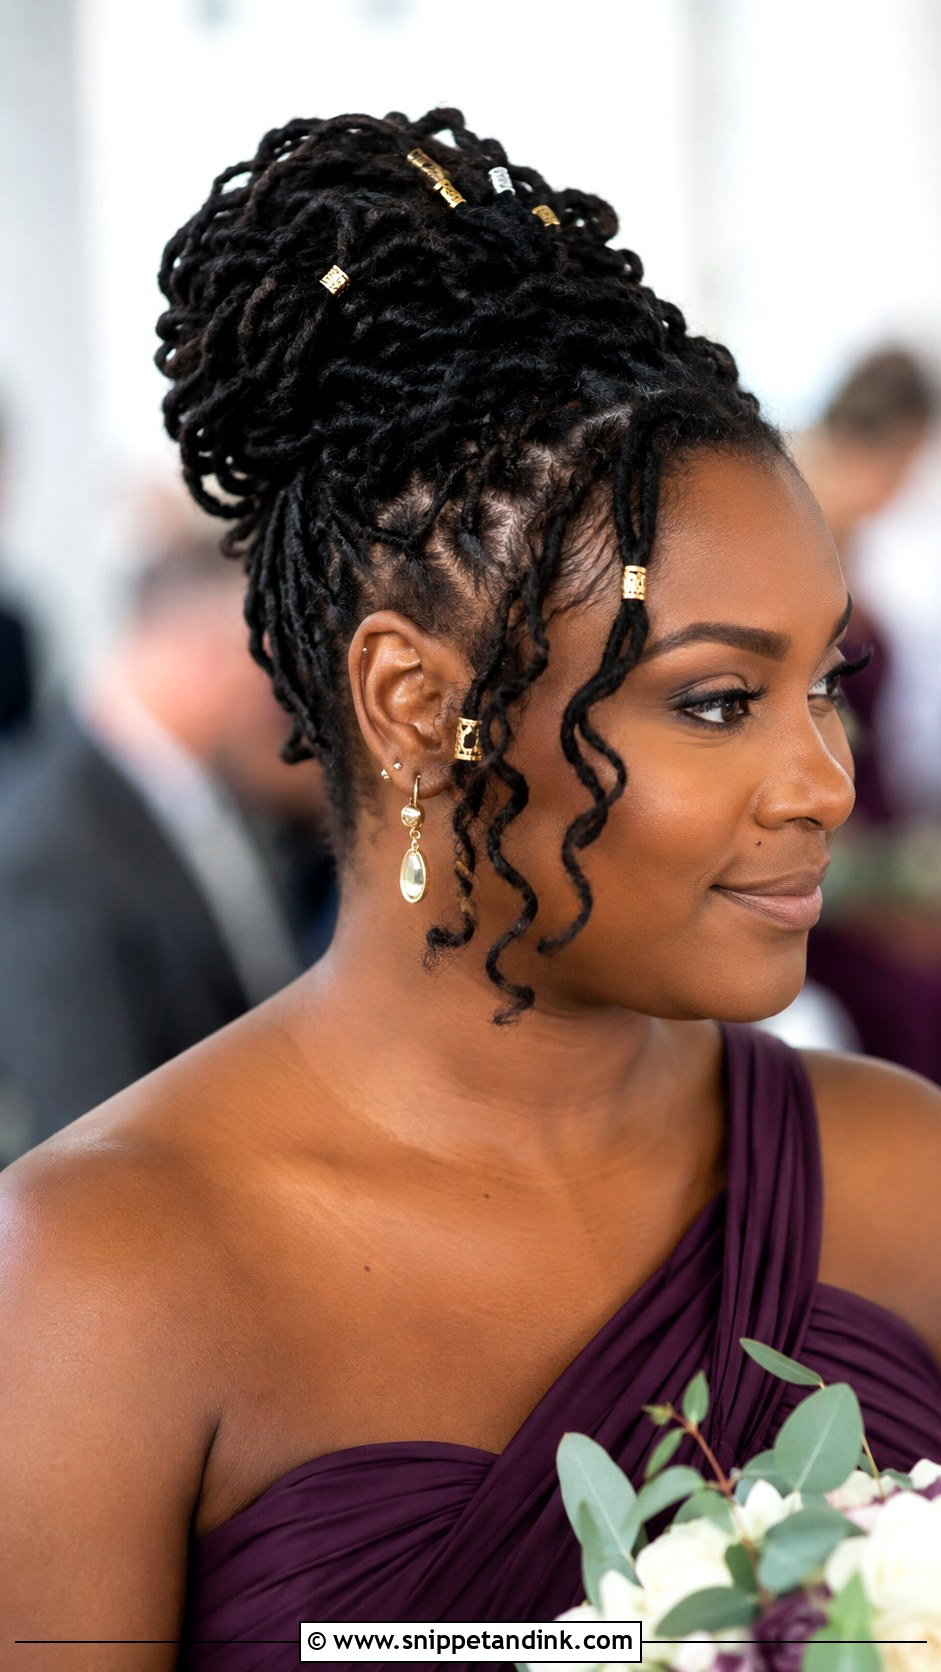
A locs updo is a stunning bridesmaid hairstyle that feels elegant, protective, and secure. Start by deciding whether the shape should sit low, high, or slightly to one side. Gather the locs gently, avoiding too much tension at the hairline. Wrap and pin sections into a bun, roll, or tucked crown shape. Leave a few locs loose around the face if a softer finish is desired. Add cuffs or delicate pins only if they match the wedding look. This tutorial works beautifully because it honors the texture, keeps the hair comfortable, and creates a graceful shape for photos.
Conclusion:
The best bridesmaid hairstyles tutorial is the one that fits the person wearing it, not just the Pinterest board. A bridal party can look beautifully coordinated with different versions of buns, waves, ponytails, braids, curls, short cuts, and textured updos. Before the wedding, test the hairstyle with the dress neckline and accessories so there are no surprises. Think about weather, hair length, hair texture, and how long the style needs to last. Soft hold products, hidden pins, and a small touch-up kit can make a big difference. With the right plan, every bridesmaid can feel comfortable, confident, and photo-ready.
You'll Like These Ideas:

Leave a Reply