
Half-up hair is one of the few wedding styles I’d happily teach a bride to do herself, or to do for a sister or bridesmaid, without years of practice. The front is lifted and pinned away from the face, the length stays loose, and there’s room for pearls, a bow, a veil or a couple of small flowers. Most brides I talk to now want romantic texture, soft volume and natural shine rather than anything stiff, and every look below fits that. Each one can be adjusted for fine, thick, curly, short or long hair. Treat these tutorial-friendly looks as step-by-step starting points, then practise the ones you like.
What to Lay Out on the Counter Before You Start
Most DIY half-up styles go wrong halfway through, when you’re holding a twist with one hand and realise the pins are in another room. I lay everything out first, in the order I’ll use it, and I’d suggest you do the same.
- A heat protectant, plus mousse or volume powder if your hair is fine or slippery.
- A 1 to 1.25 inch curling iron or wand for most lengths. Go smaller for bobs and shorter cuts.
- Sectioning clips, and a handful of flat clips for setting curls while they cool.
- Bobby pins that match your hair colour, and a few U-pins for softer, looser hold.
- Two or three small clear elastics. They give the half-up section a base that pins can grip.
- A tail comb for clean parts and a soft bristle brush for blending curls.
- Texture spray for grip, a flexible hairspray, and a light shine mist for the very end.
If you’re adding accessories, lay those out too, and check that the comb or clip actually closes on your hair thickness before the morning.
1. Half Up Wedding Hair With Curls
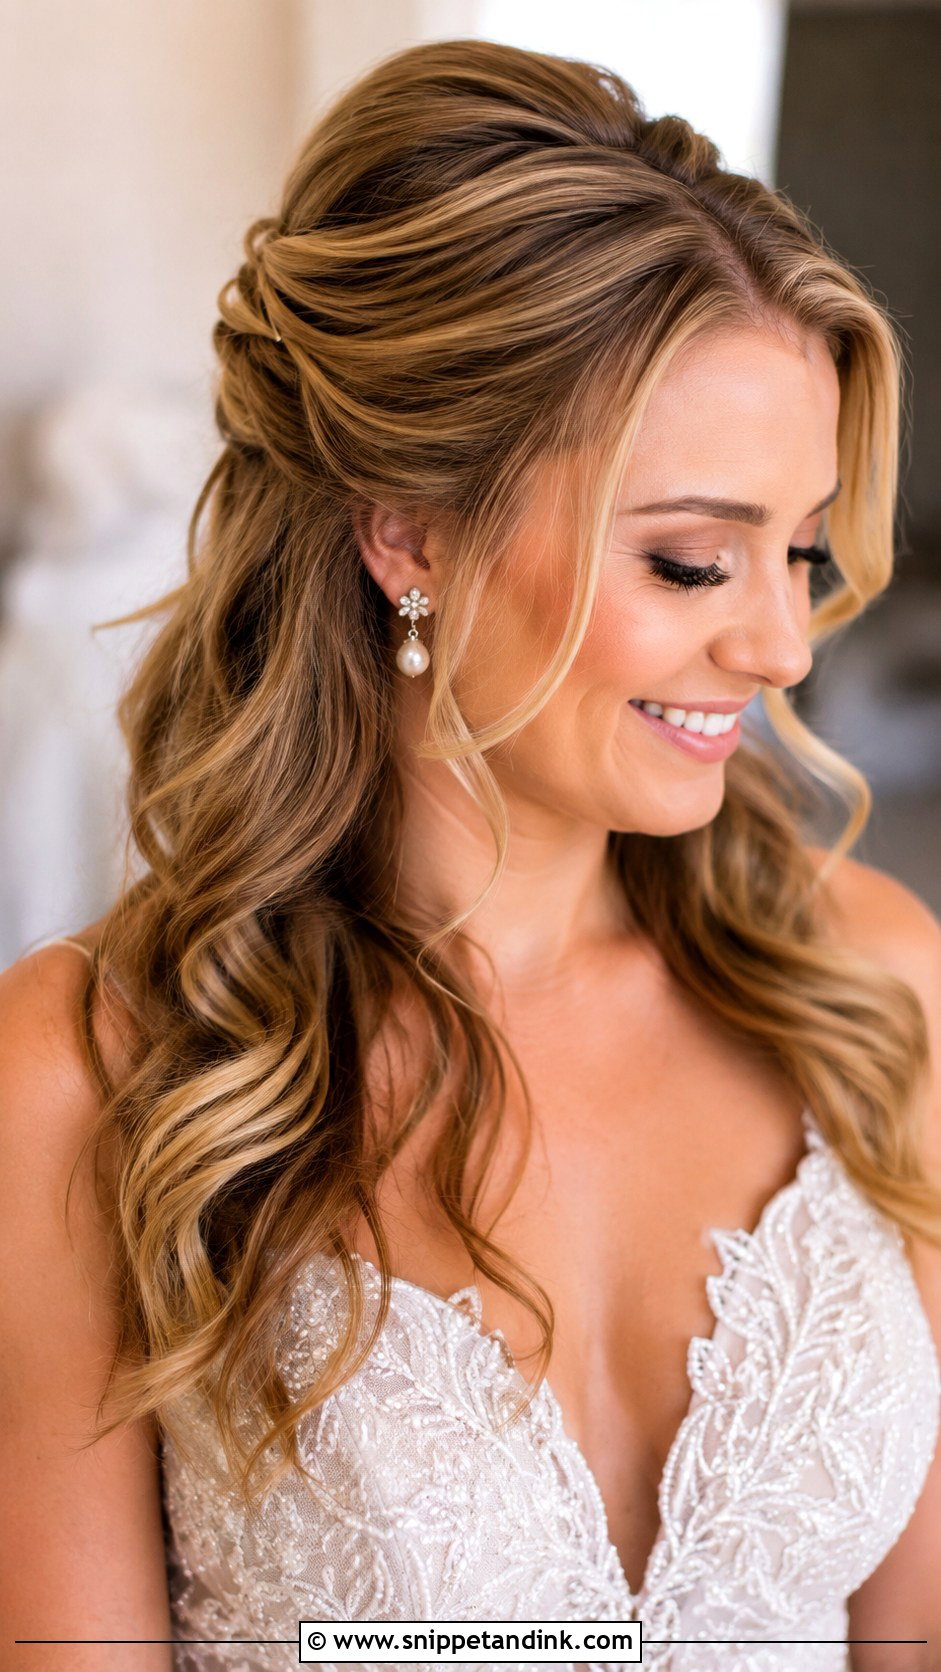
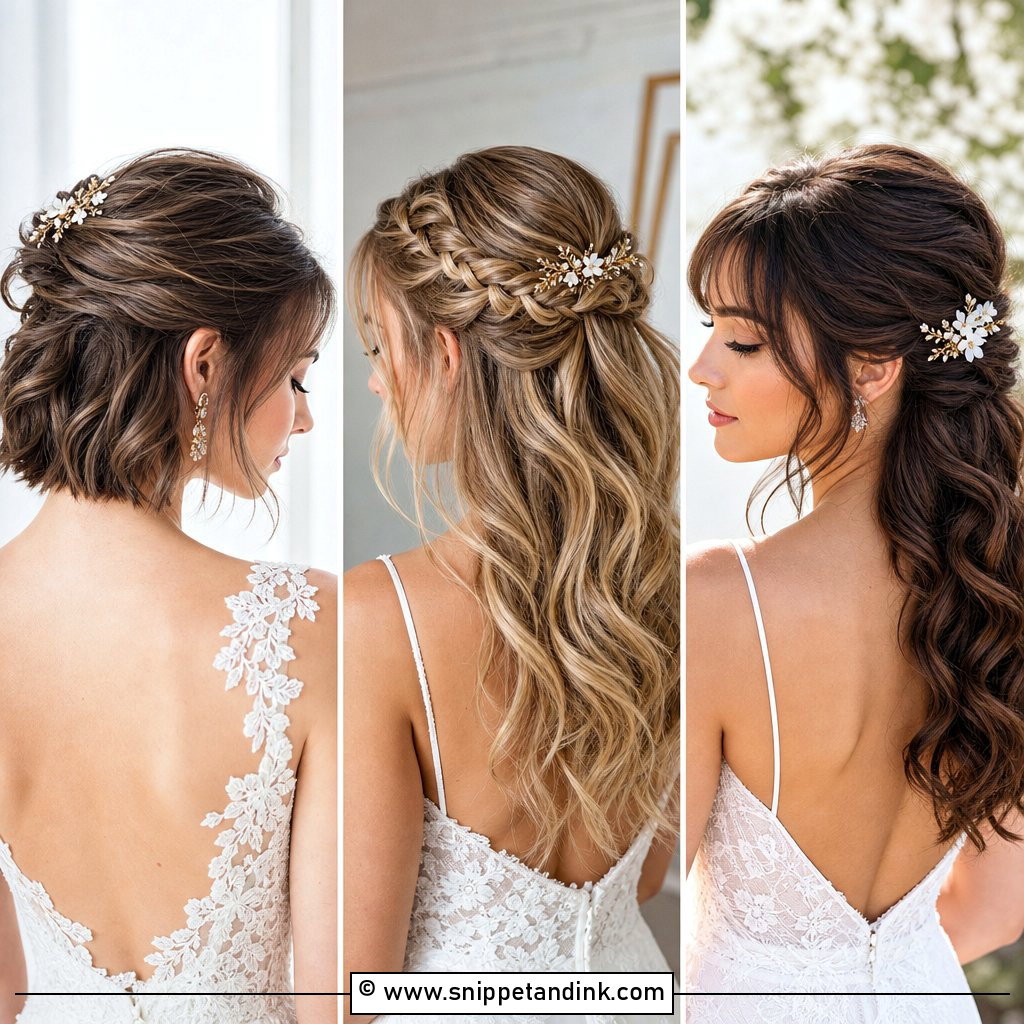
Curl the hair in medium sections first, then brush the curls gently so they melt into full, touchable waves. Take two face-framing sections from each side and pin them at the back, slightly above the crown; if you want lift, tease the crown lightly before securing. This tutorial works best with a flexible hairspray, a few hidden bobby pins and a shine mist at the end. The step people skip is letting the curls cool before brushing. Brush them hot and they fall out before you’ve left the house.
2. Braided Half Up Wedding Hair
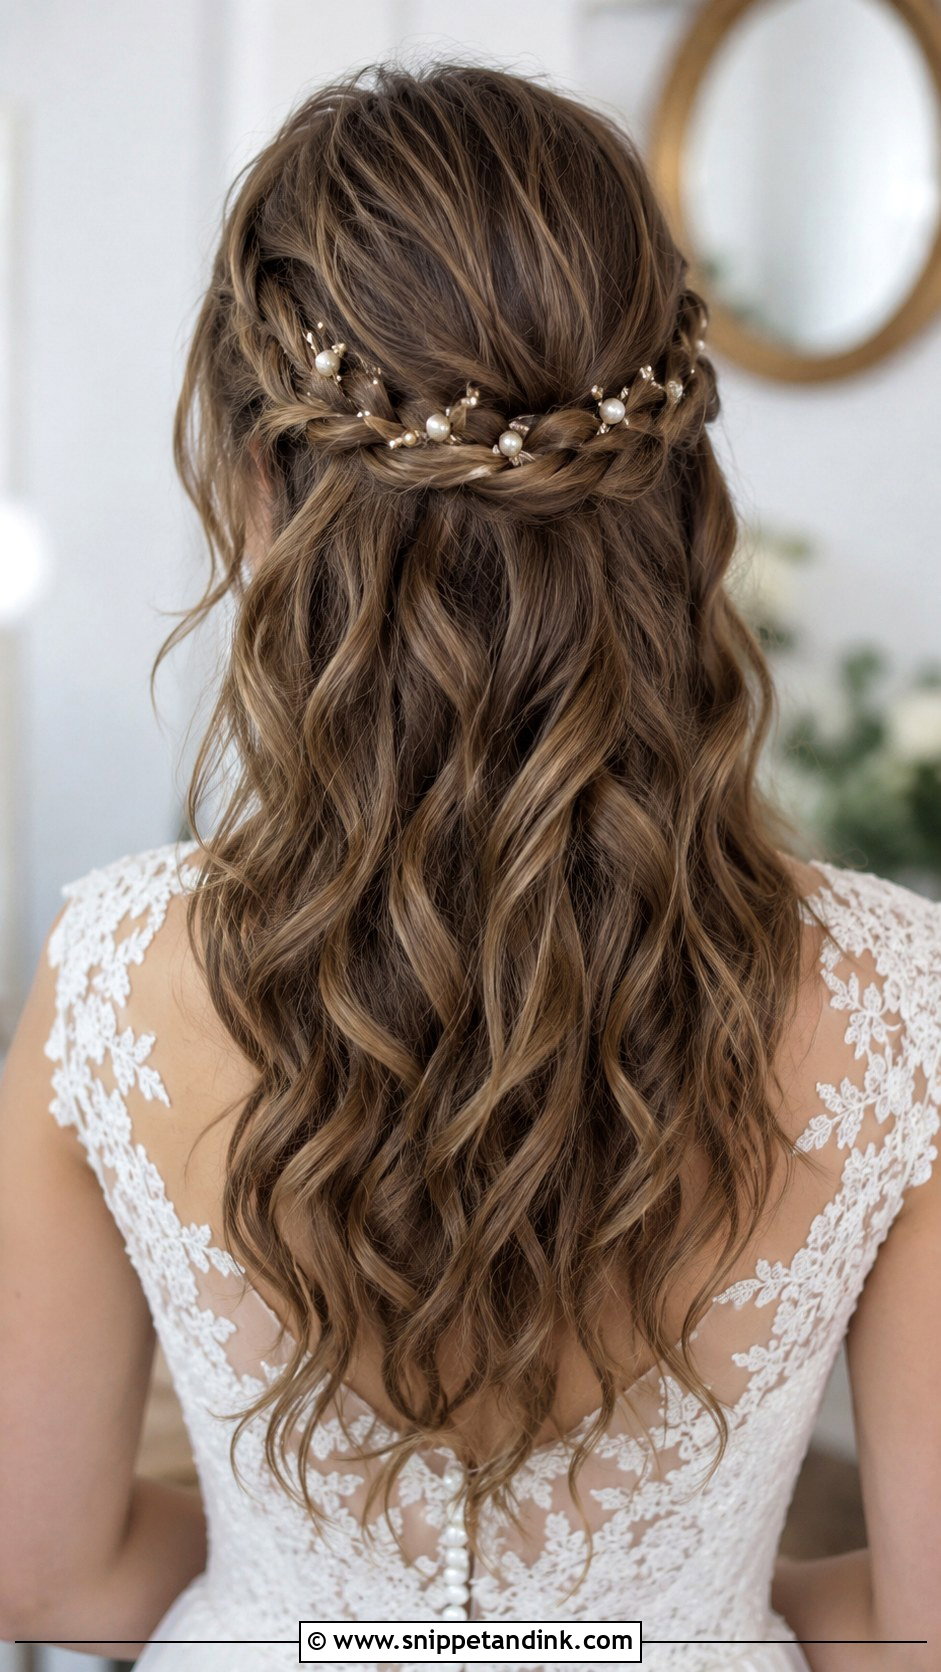
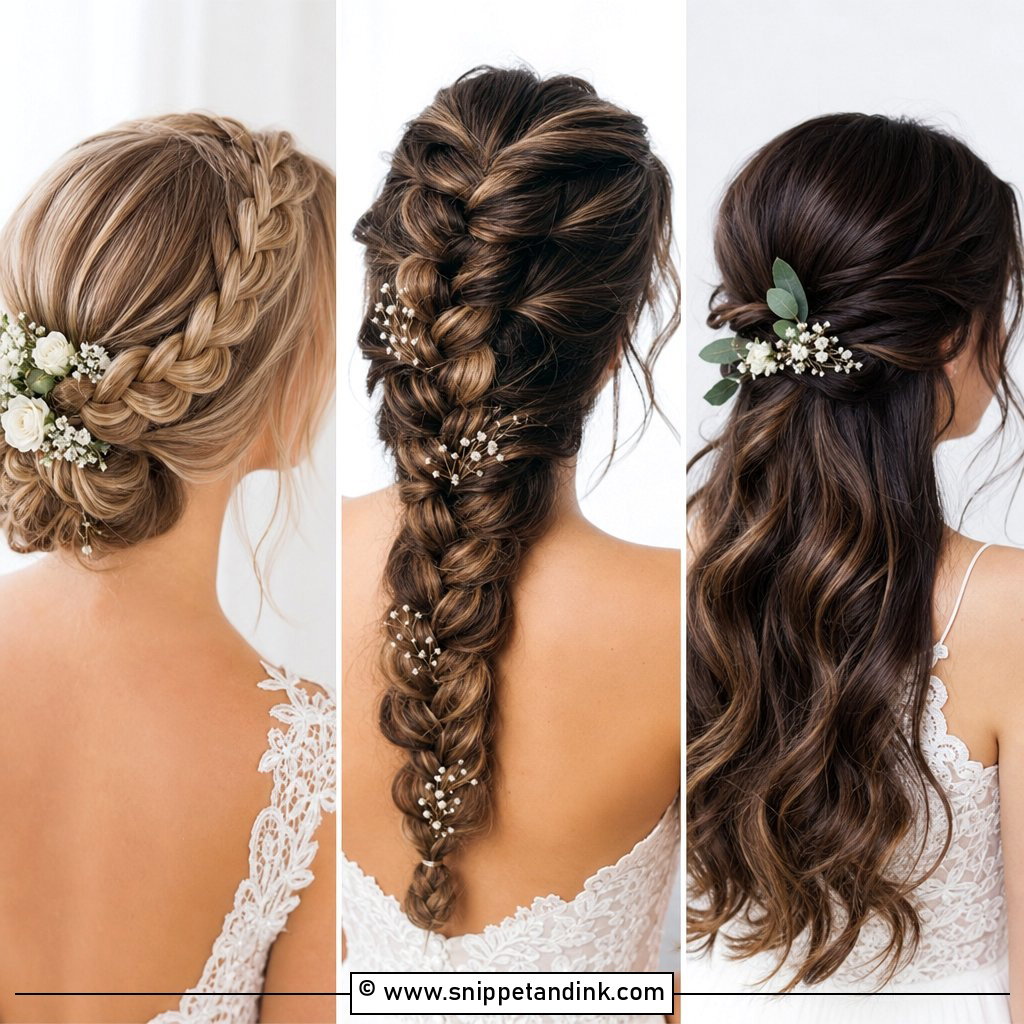
Braids need something to grip, so I start with loose curls or natural waves rather than freshly blow-dried hair. Braid one section on each side, starting near the temples, draw both toward the back and pin them together. Then loosen the braids with your fingertips, pulling a little from the outer edge of each loop. Fine hair needs texture spray before braiding, or the braid slides apart. Small pearl pins, baby’s breath or a veil tucked under the braided section all sit well here.
3. Twisted Half Up Wedding Hair
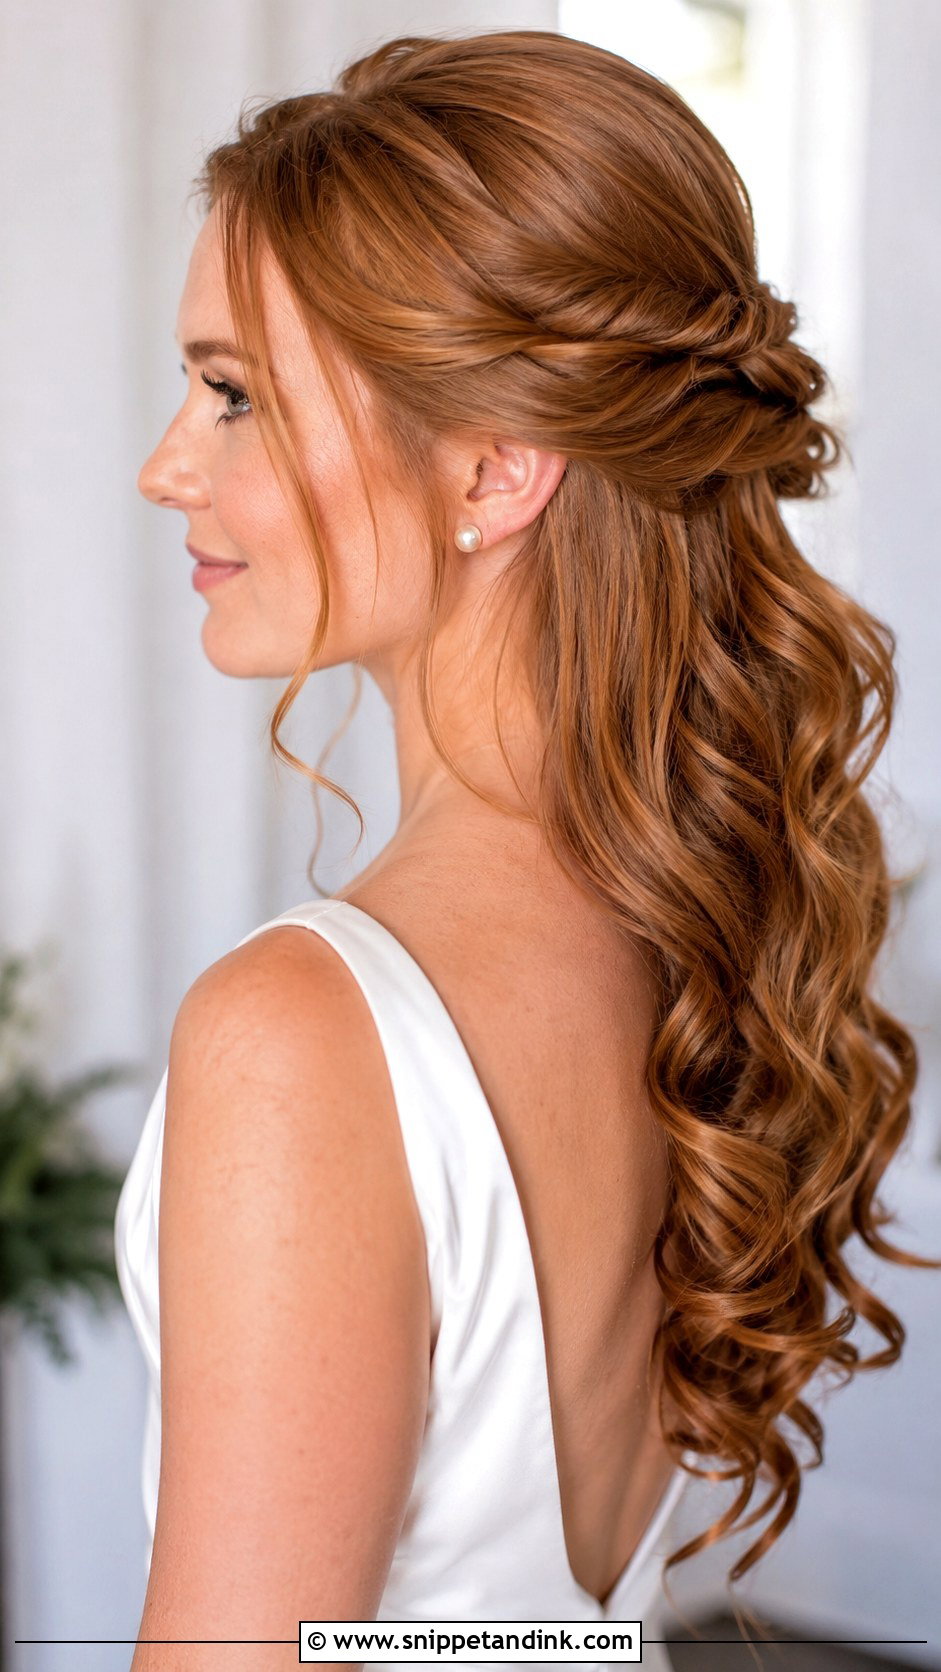
If you’ve never braided your own hair, start with this one. Take a section from each side, twist it away from the face and pin both twists at the back; add another small twist underneath for more detail and a stronger hold. I curl the rest of the hair before twisting so the whole look blends. The direction matters: always twist away from your face, because twisting toward it makes the section unravel as you pin. A little lightweight styling cream on the front pieces and a slight lift at the crown balance it against the neckline.
4. Half Up Wedding Hair With Veil
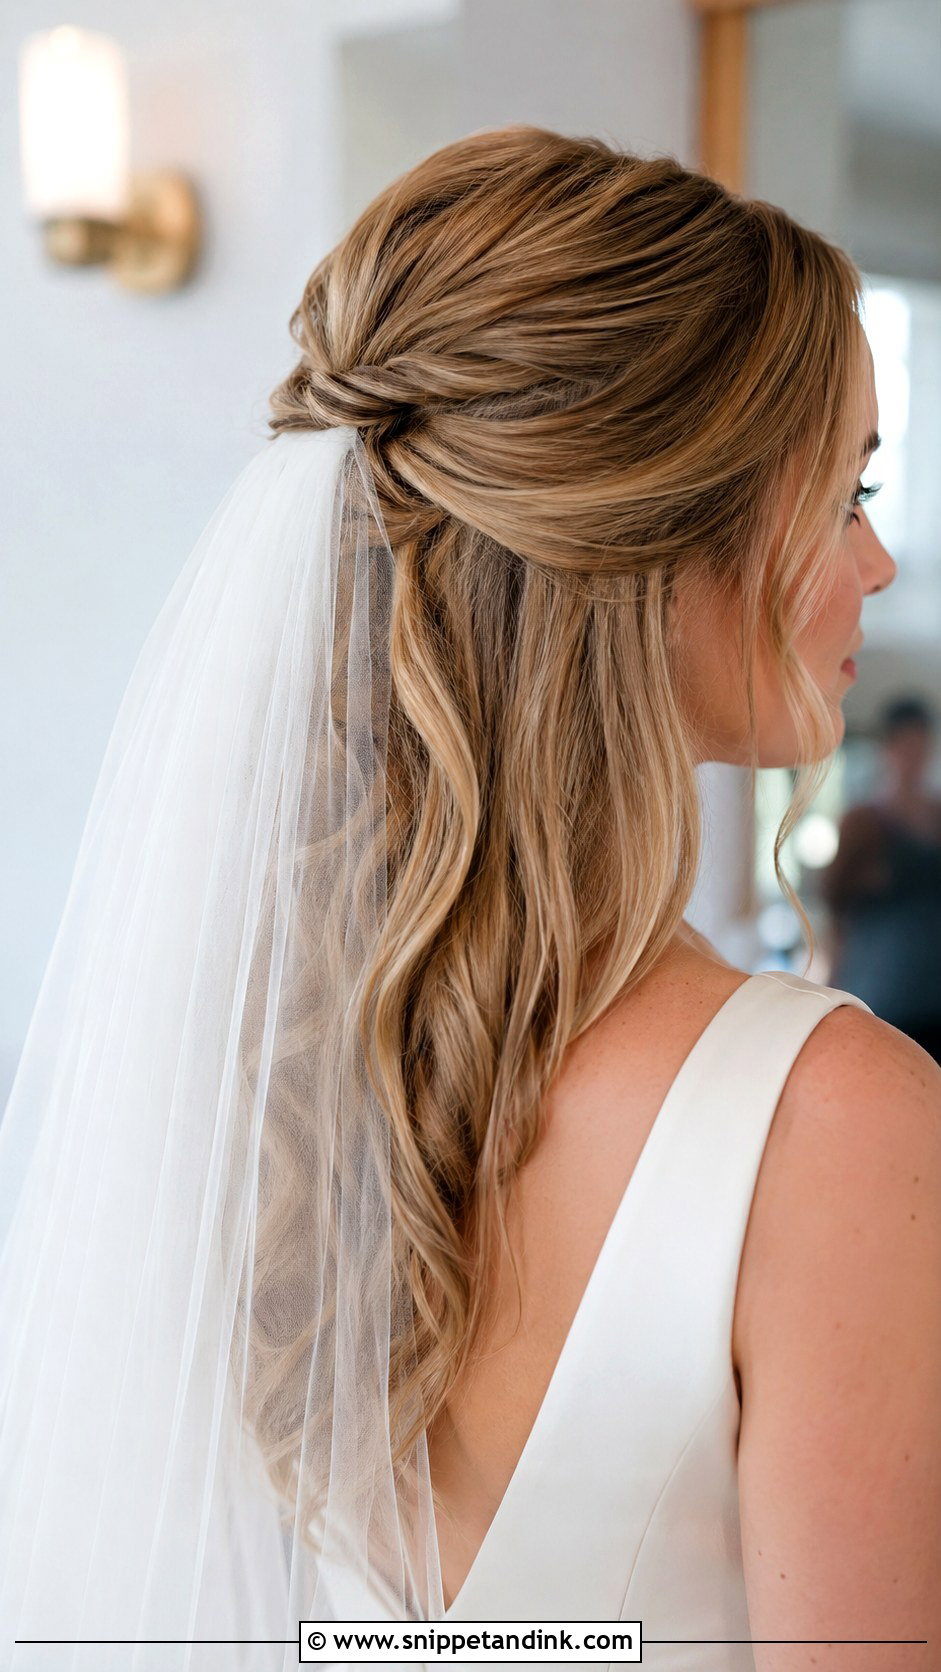
Veil placement is where DIY half-up styles most often fail, so plan this one carefully. Create soft waves first, then pin the top section at the back of the head. The veil comb can sit above that section for a traditional look or slide under it for a softer, hidden finish. Either way, cross-pin the half-up area in an X so the comb has something solid to grip; smooth hair alone won’t hold it. If you’re doing this yourself, wear the veil for at least an hour at home before the wedding, and walk around in it.
5. Half Up Wedding Hair With Pearls
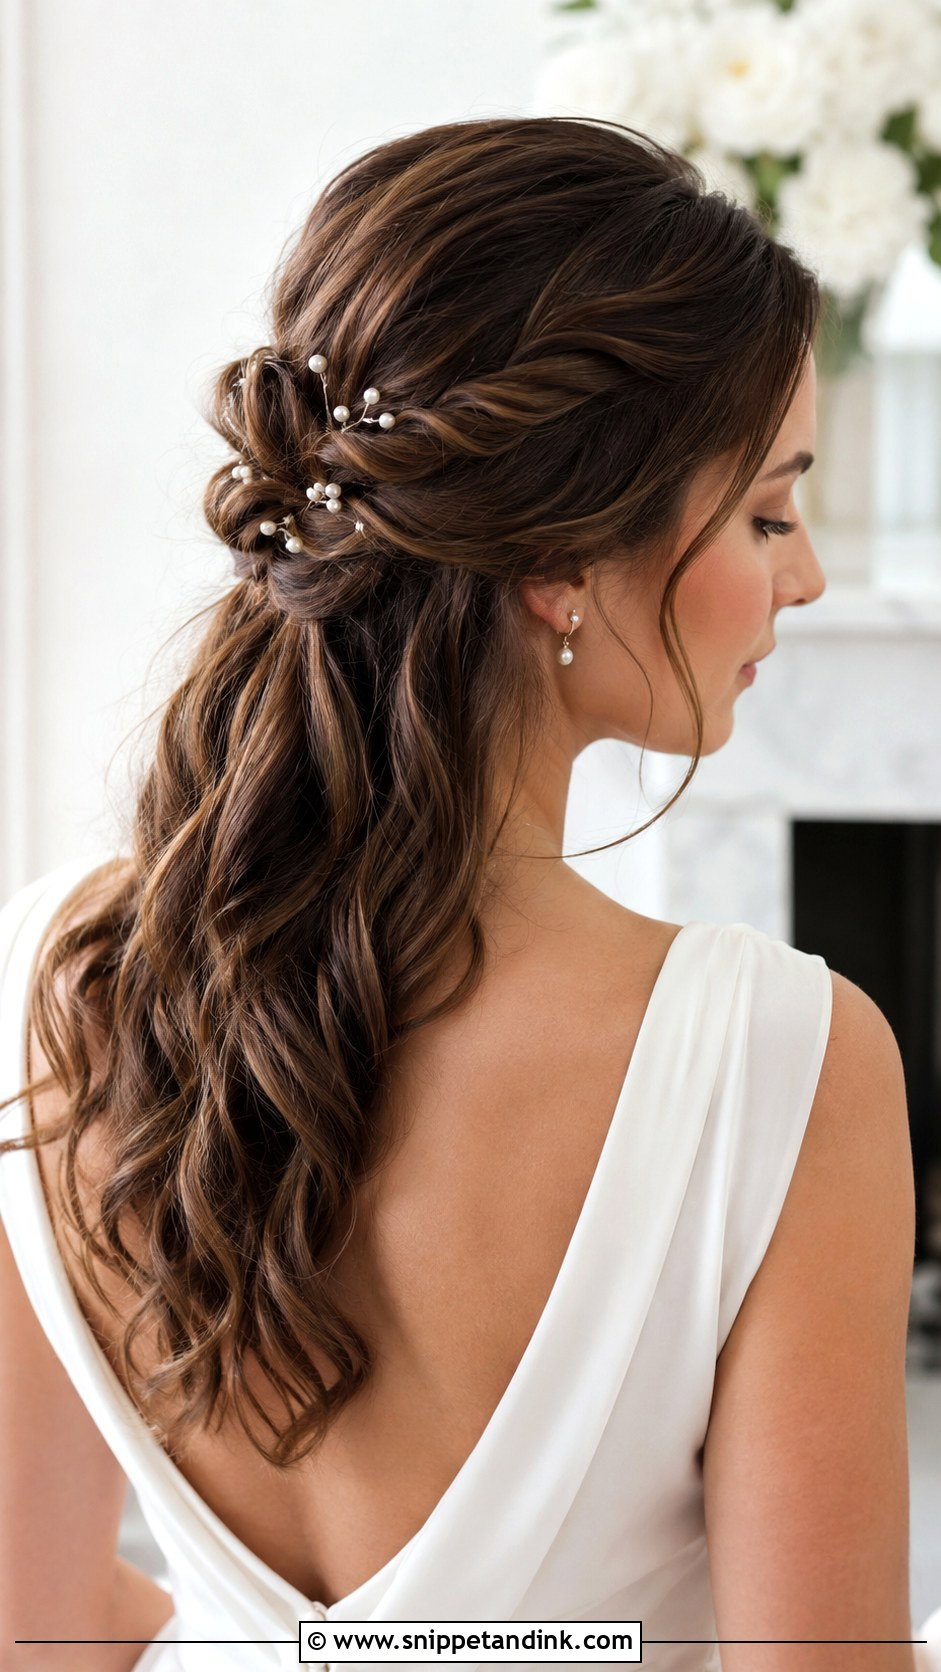
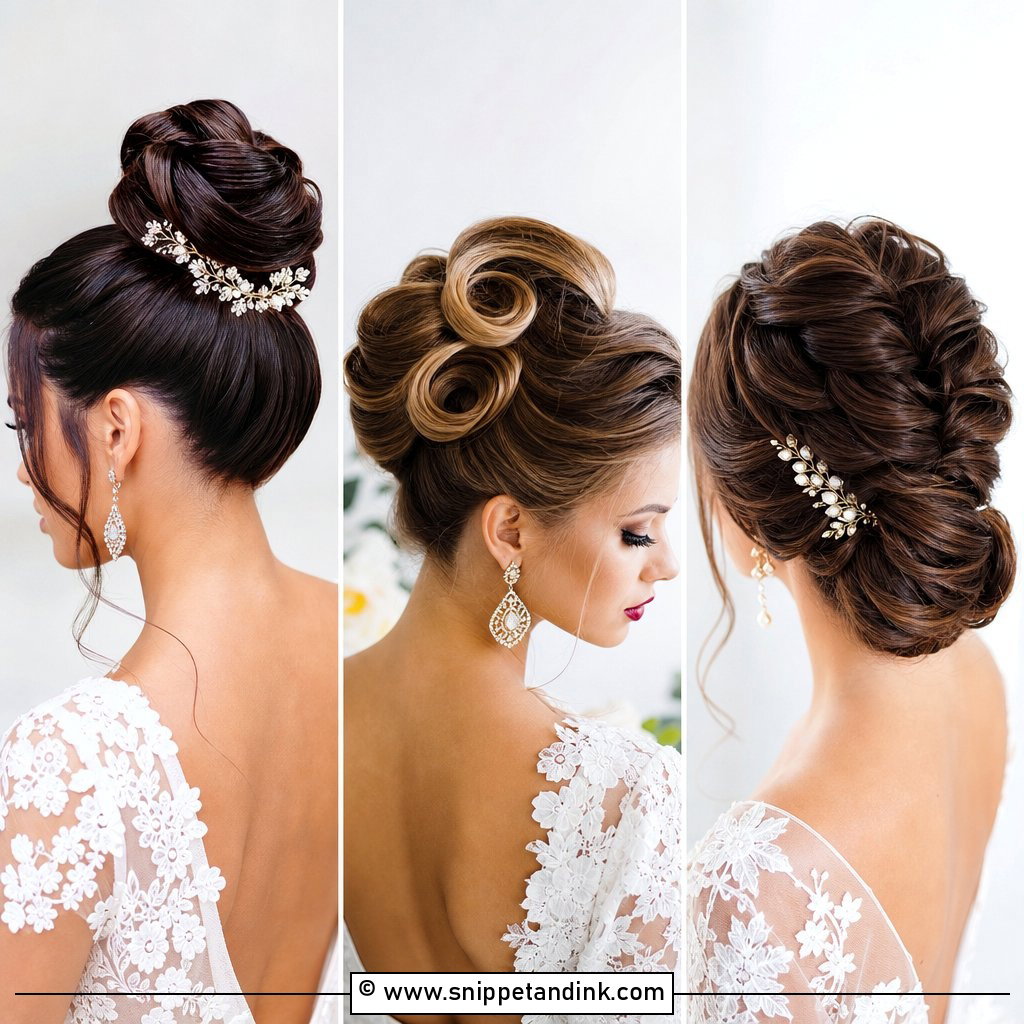
Pearls go in last. Start with a classic half-up base using curls, waves or smooth length, pin the top, and then place the pearl pins around the twist, braid or gathered section. I scatter them slightly off-line rather than in a neat row, which looks more natural from the back. Pearls near the face add interest to a simple gown. Use smaller pins for fine hair and larger pearl combs for thick hair, since a big comb in fine hair drags the section down. A light spray afterwards stops them sliding out during hugs.
6. Half Up Wedding Hair With Flowers
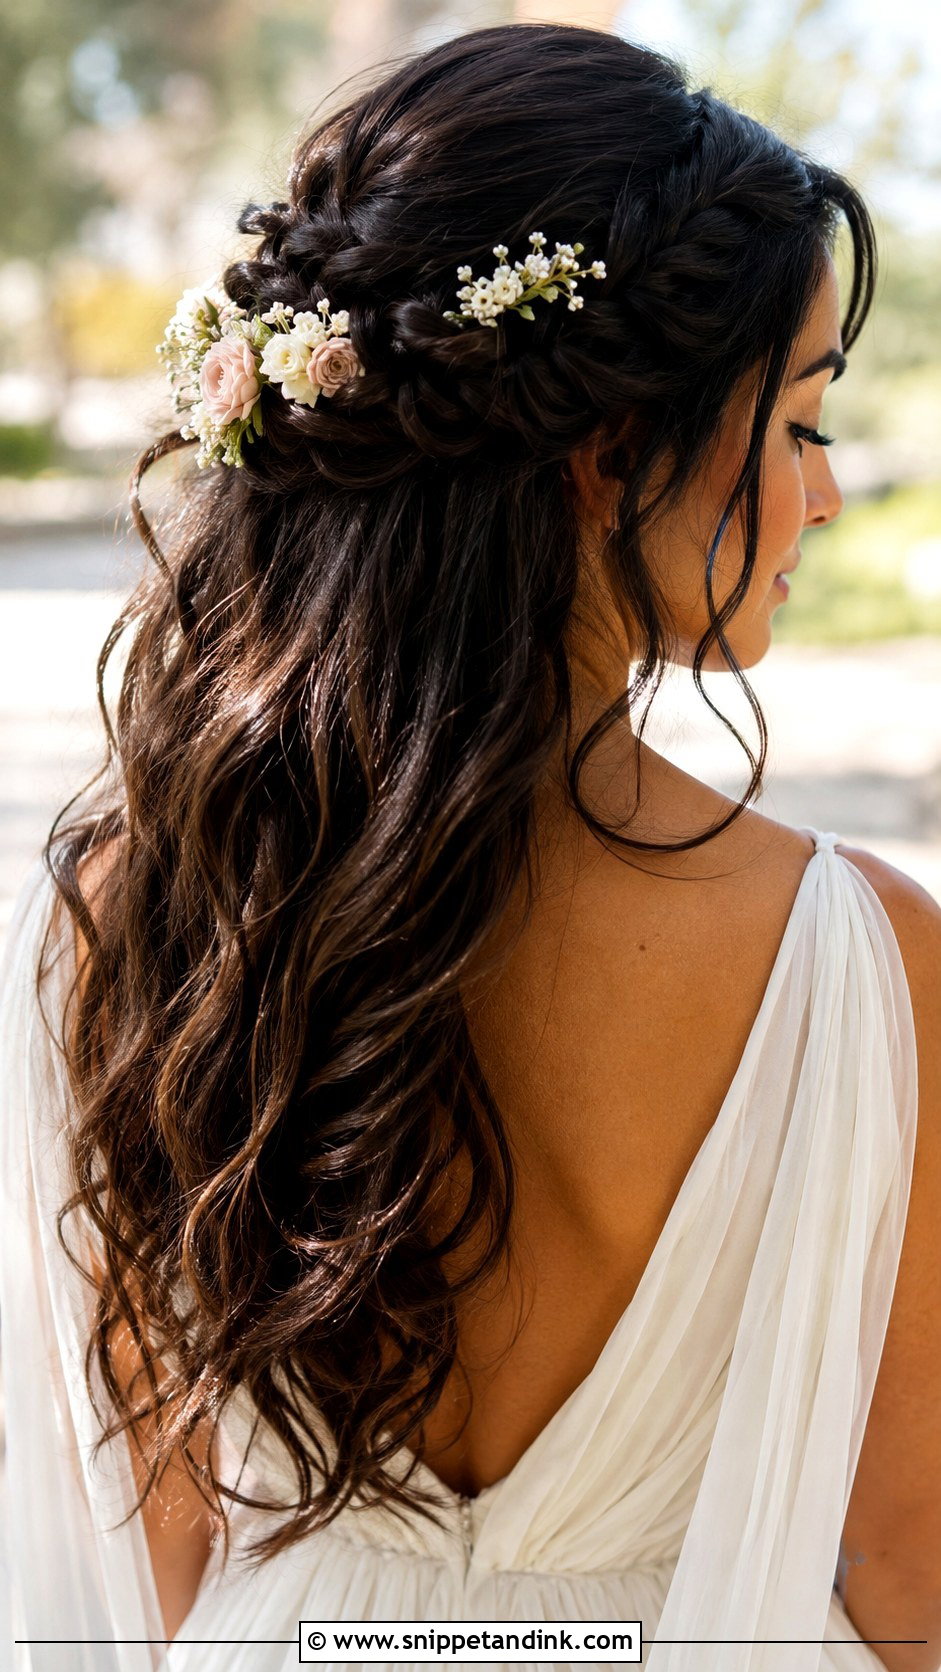
Build the waves first, then gather the top into a loose twist or braid. Instead of one large flower in the centre, tuck several small blooms along the pinned area, which looks balanced and is easier to secure. Fresh flowers should be prepared by your florist, wired and sealed, or they wilt within hours on a warm day. In heat or on a long timeline, I’d go with faux or dried blooms. Keep the front simple, since the flowers are already the main detail, and check the back view with a hand mirror before you call it done.
7. Half Up Wedding Hair For Short Hair
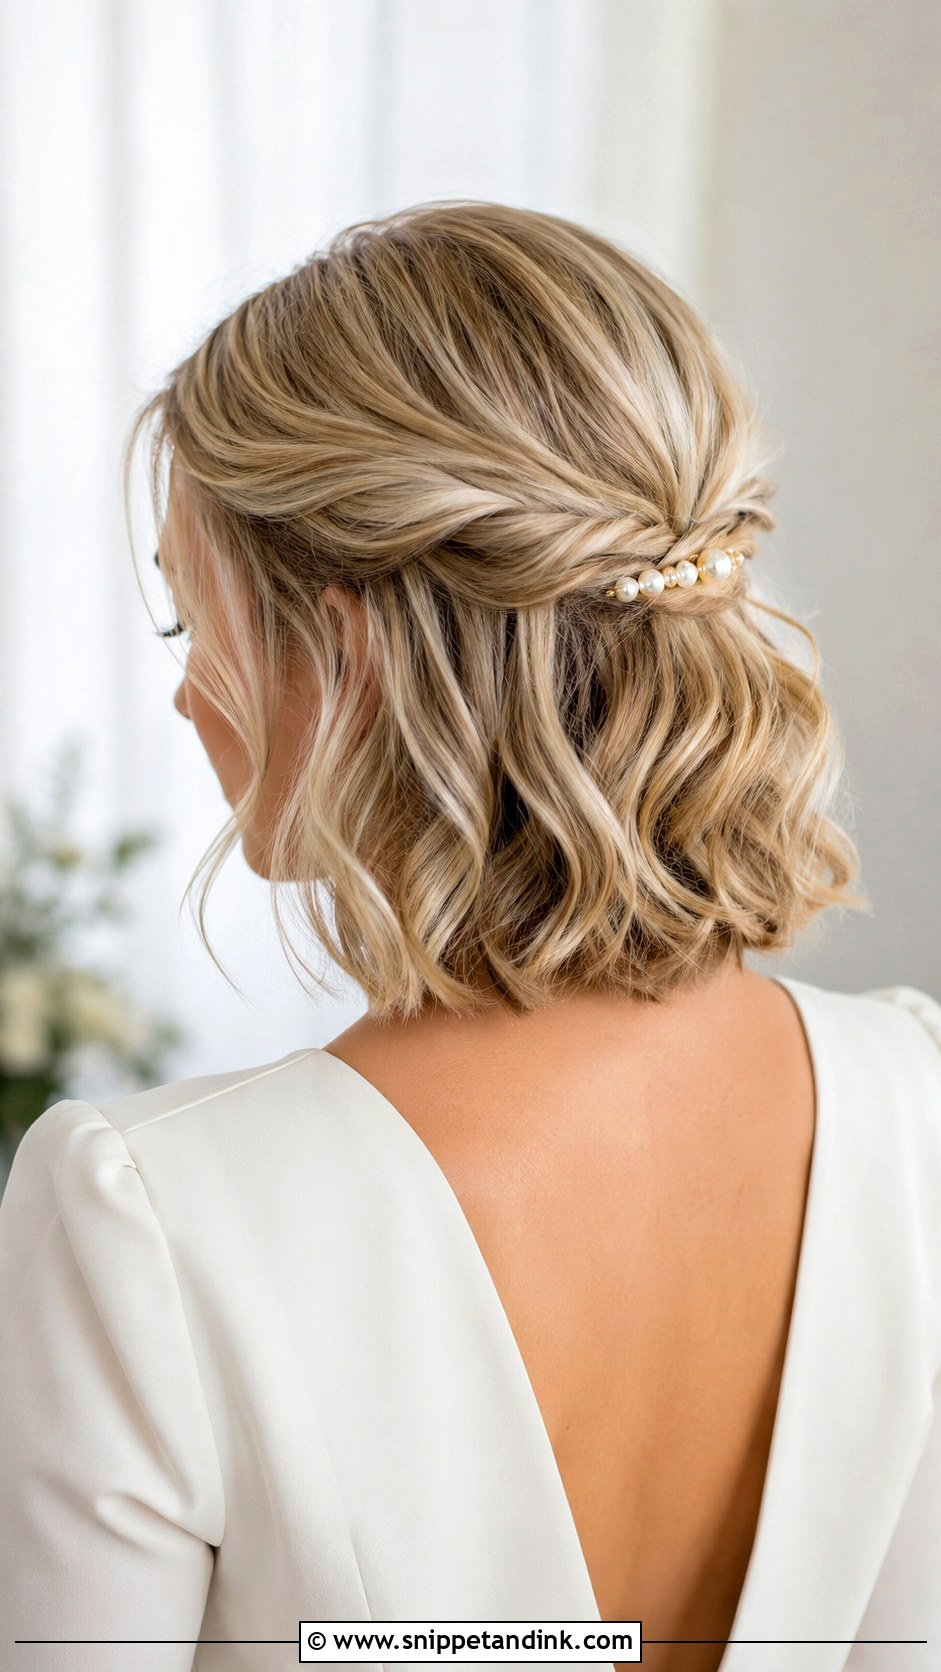
Short hair can absolutely go half up, but the shape has to be deliberate. Curl it first with a small wand or flat iron, then use texture spray to give it grip. Take small sections from the sides and pin them at the back with crossed bobby pins. On a bob, don’t pull too much from the crown, or the bottom looks thin and stringy. A small twist, mini braid, pearl clip or delicate barrette makes it feel bridal. I’d use the smallest bobby pins you can find, because standard ones show through short hair.
8. Half Up Wedding Hair For Long Hair
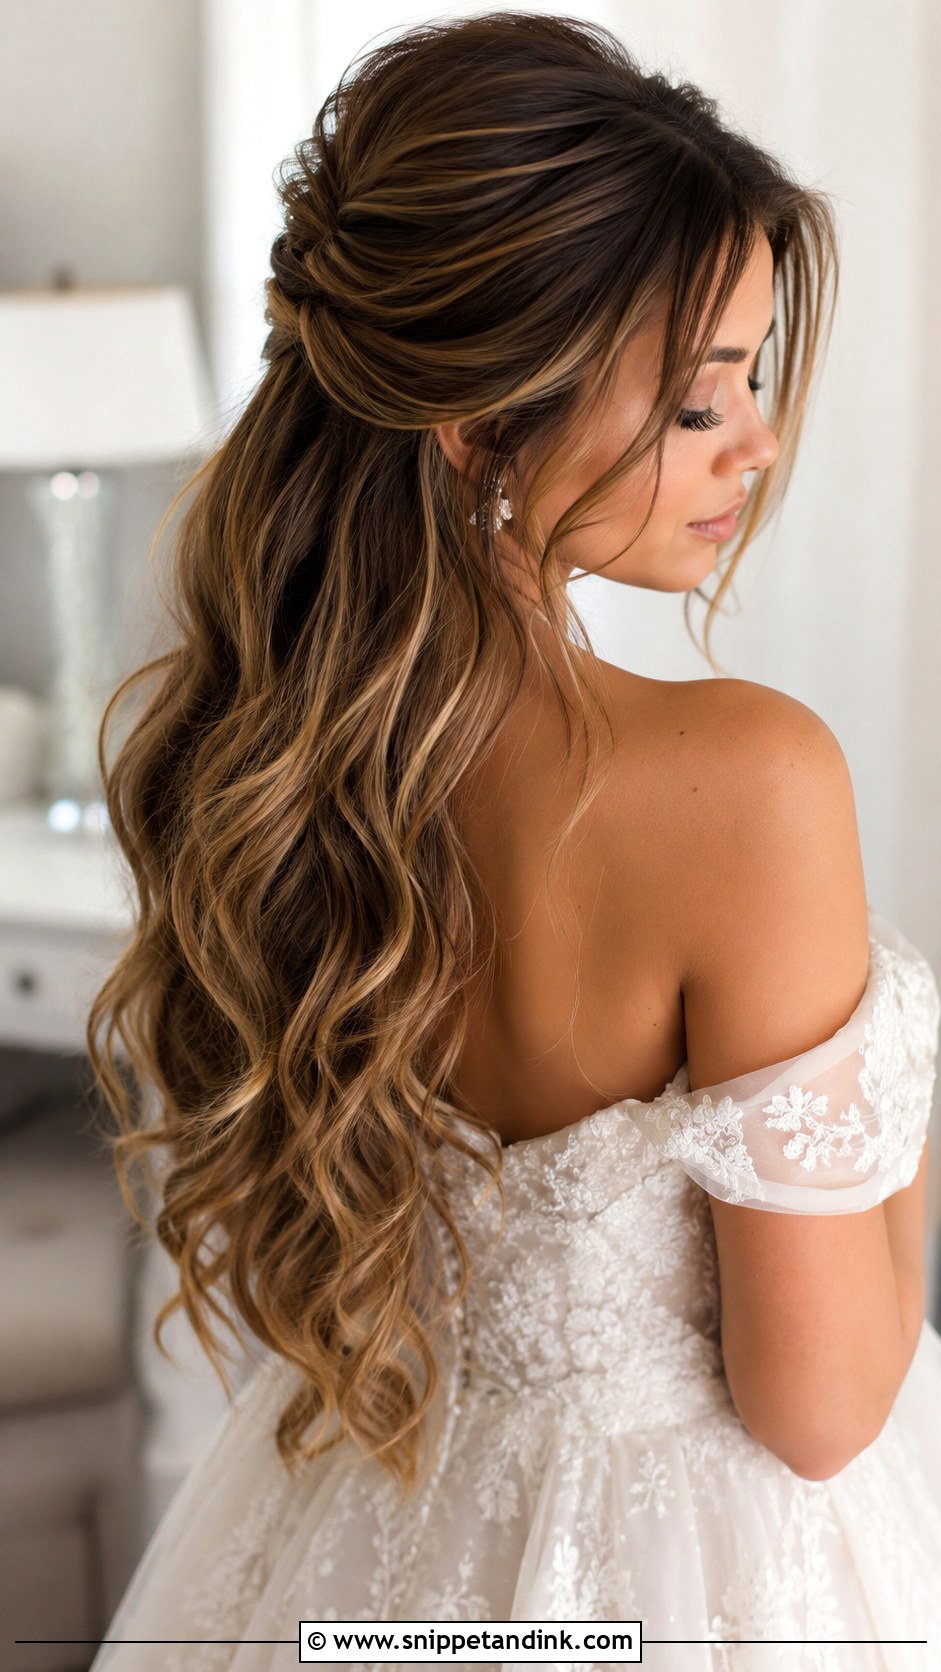
Long hair looks dreamy half up, but its weight works against you. Start with a heat protectant, then curl the hair in alternating directions for natural movement. Add volume powder or dry texture spray at the crown before gathering the top section. I secure the gathered part with a hidden clear elastic first and then pin over it, because long hair drags pins out of a section that has no base. If your hair is very long or heavy, use more pins than you think you need, and then add two more.
9. Half Up Wedding Hair For Fine Hair
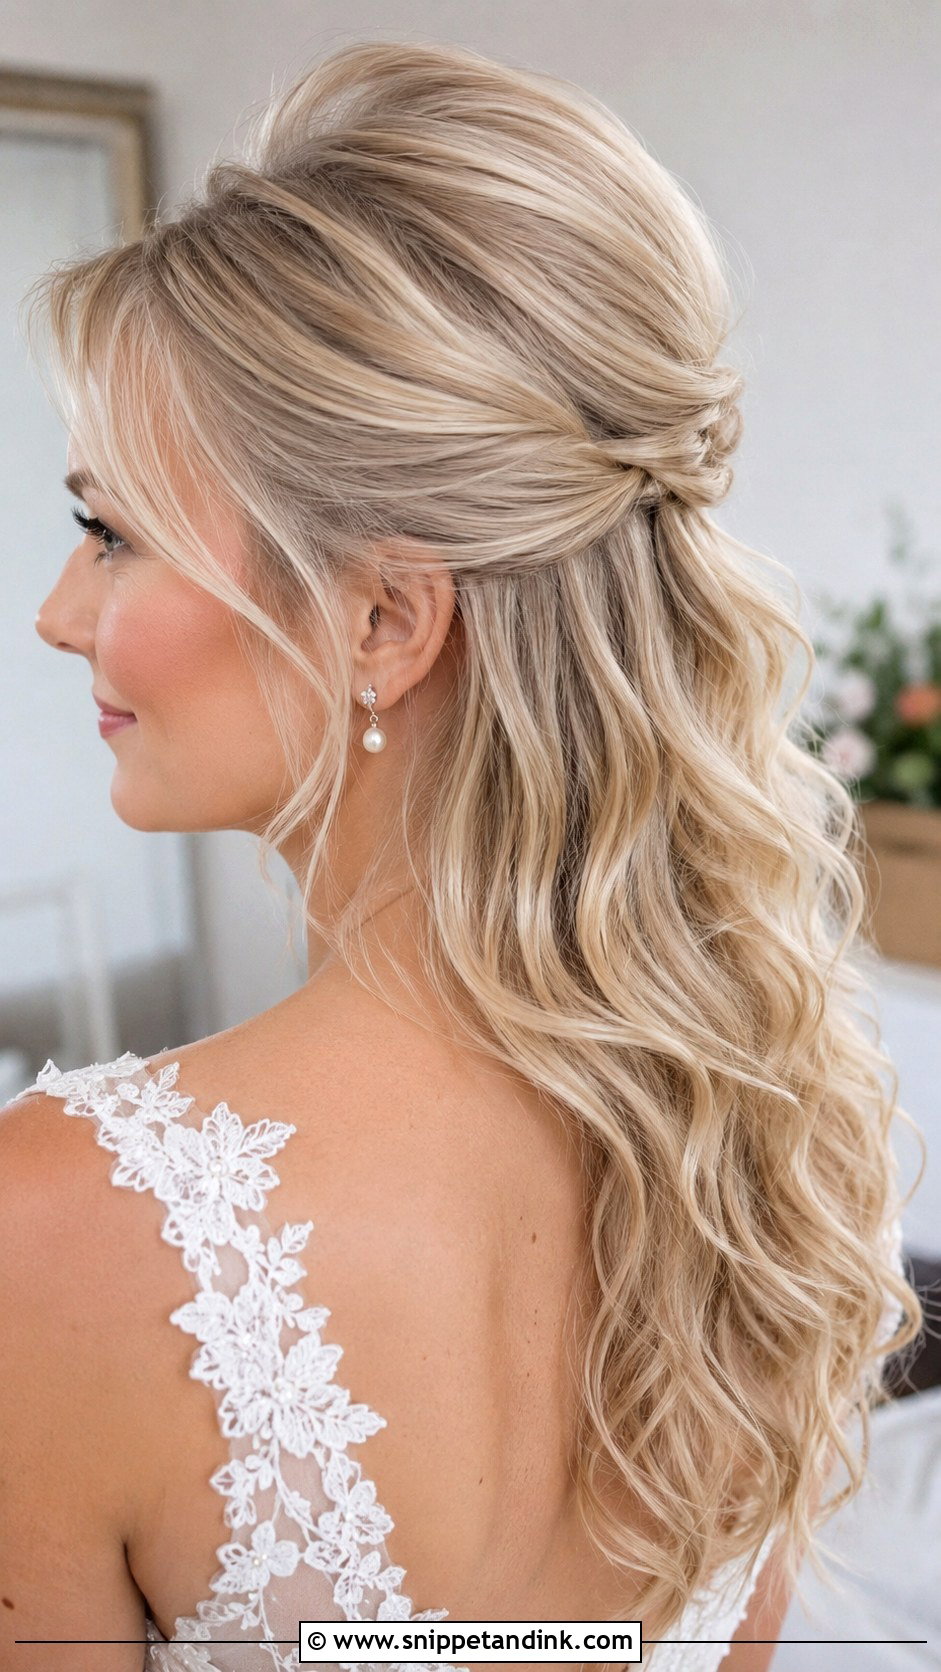
Fine hair falls flat when it’s pulled tight, so this tutorial is all about building grip and fullness. Prep with mousse before blow-drying, curl in small sections and let every curl cool completely. Lightly tease the crown and the sides before pinning the half-up section. A small braid or twist makes the hair look thicker and hides the pins nicely. Clip-in extensions can add fullness at the bottom if they’re matched well. I’d finish with texture spray rather than shine products, which weigh fine hair down within a couple of hours.
10. Half Up Wedding Hair For Curly Hair
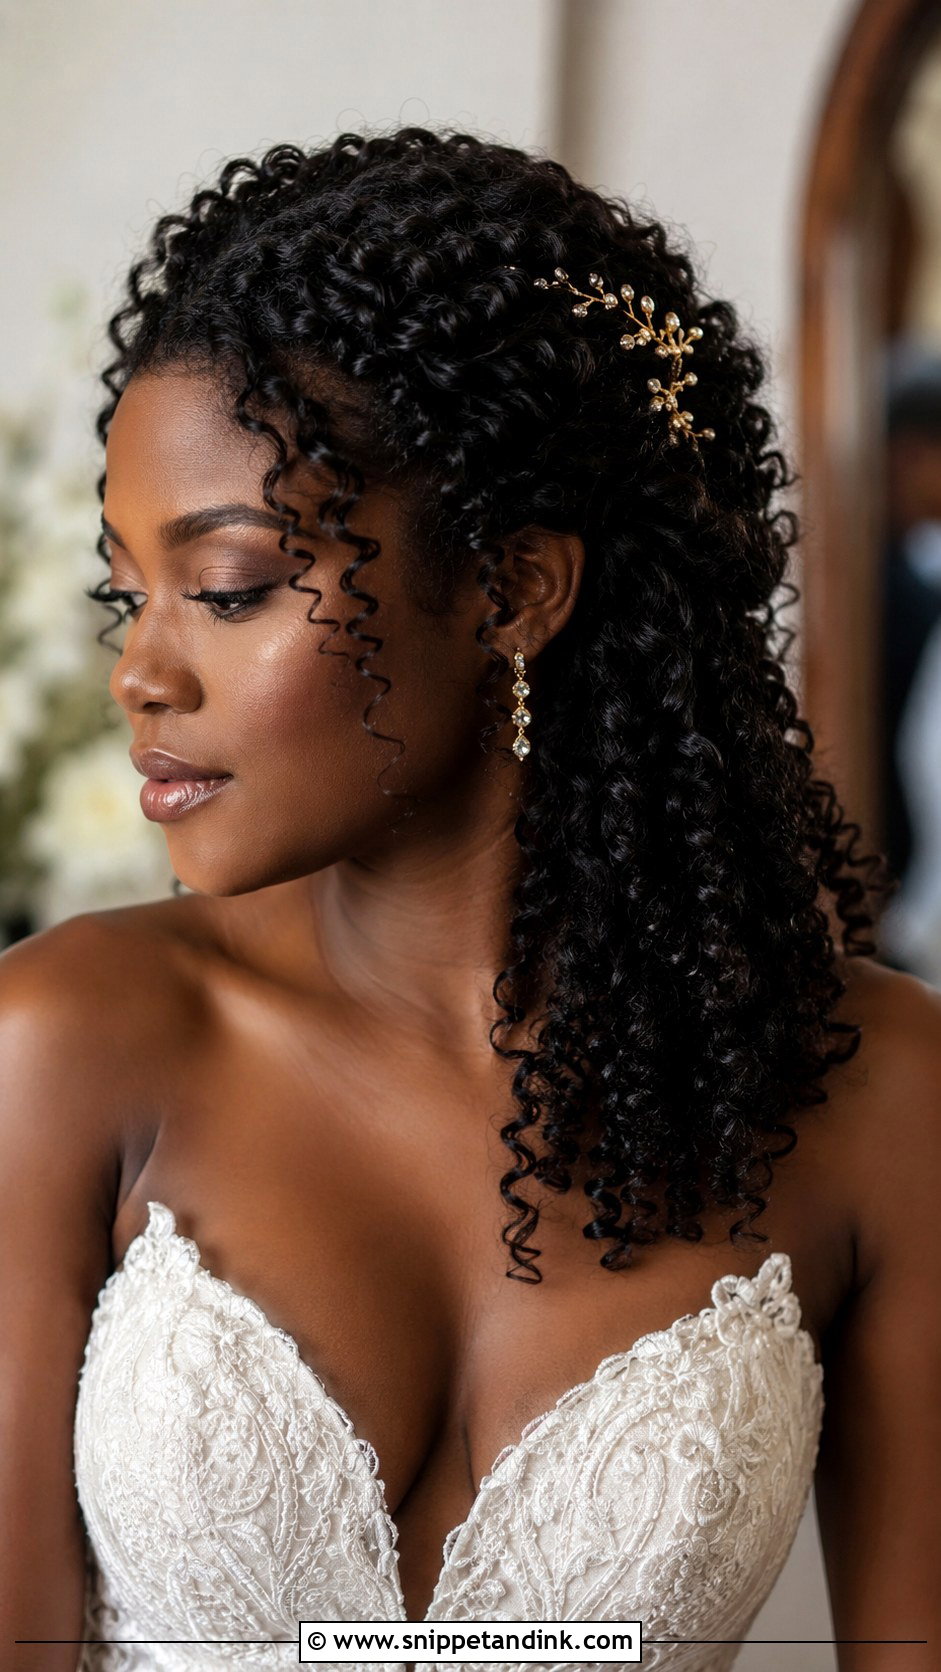
With curly hair, the biggest mistake is brushing the curls out. Start with hydrated, defined curls and make sure the hair is fully dry before pinning, because damp curls frizz as they dry under the pins. Choose the top curls you want to lift and secure them loosely at the crown or back of the head, hiding the pins inside the curl clumps. A small twist on each side adds shape, and pearl pins, gold clips or tiny flowers stand out well against curls. Use a curl-safe hairspray so they don’t turn crunchy.
11. Half Up Wedding Hair With Hollywood Waves
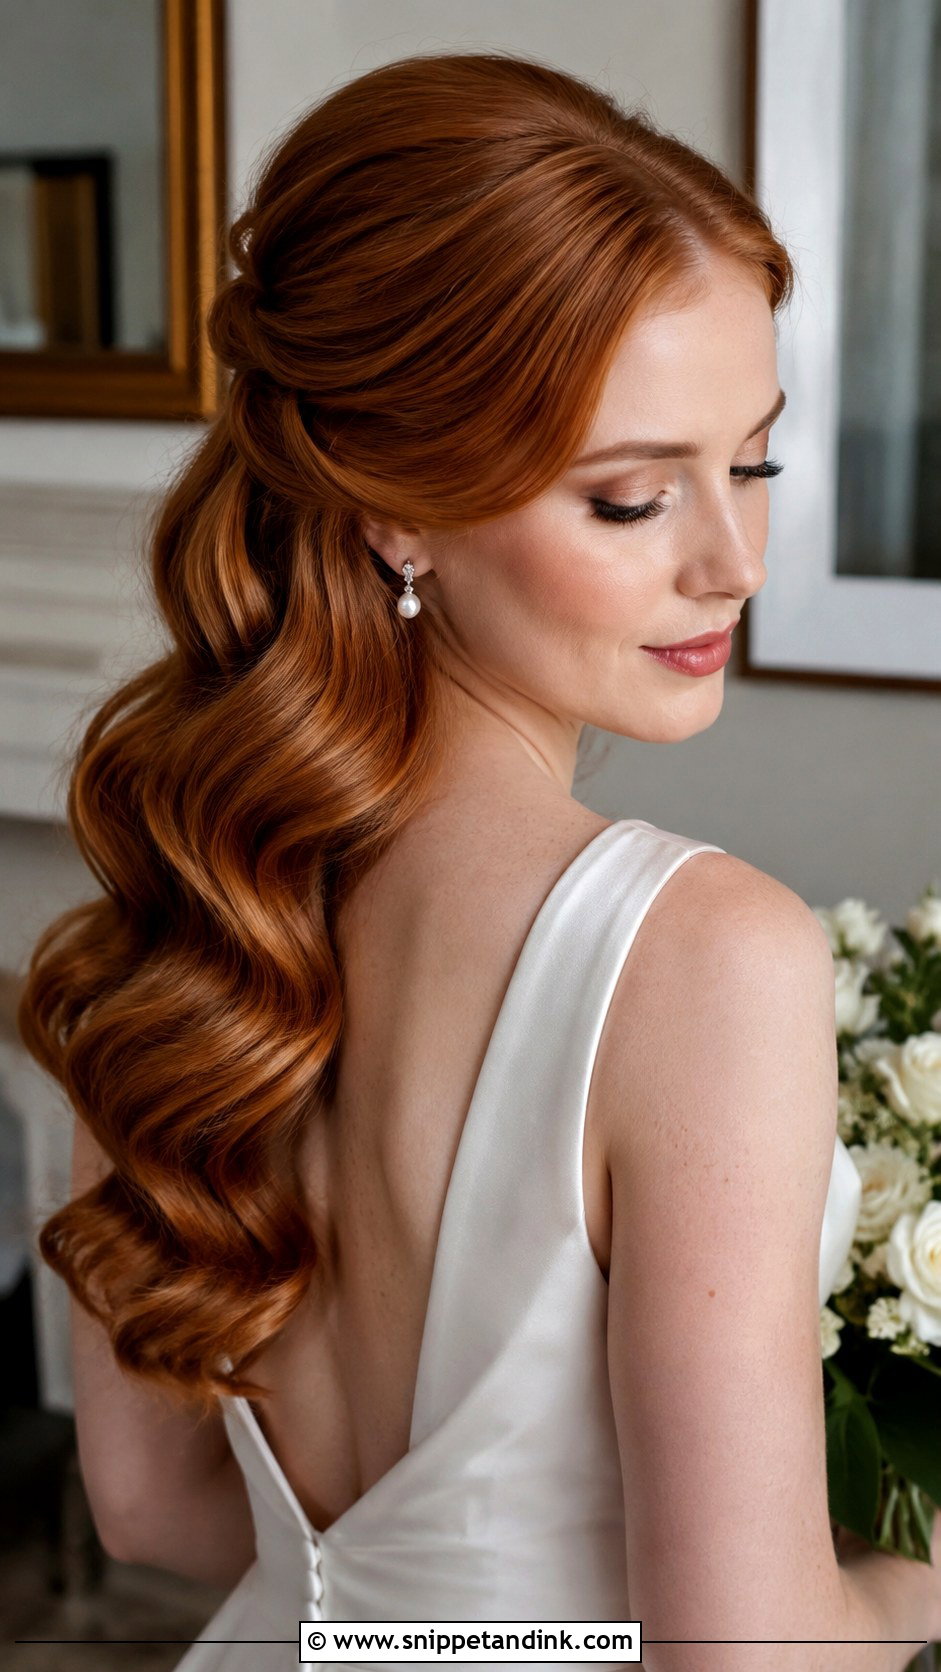
Hollywood waves are the hardest tutorial on this list, and I’d only try them yourself after a few practice runs. Curl every section in the same direction, clip each curl while it cools, then brush everything into uniform waves. Choose a deep side part or a soft centre part depending on your face shape. Draw the top section back gently, keeping the front smooth, and pin it low so the waves stay visible. You’ll need shine spray, strong setting clips and a flexible finishing spray. It pairs with satin gowns, pearl earrings and very little else in the hair.
12. Half Up Wedding Hair With Bow
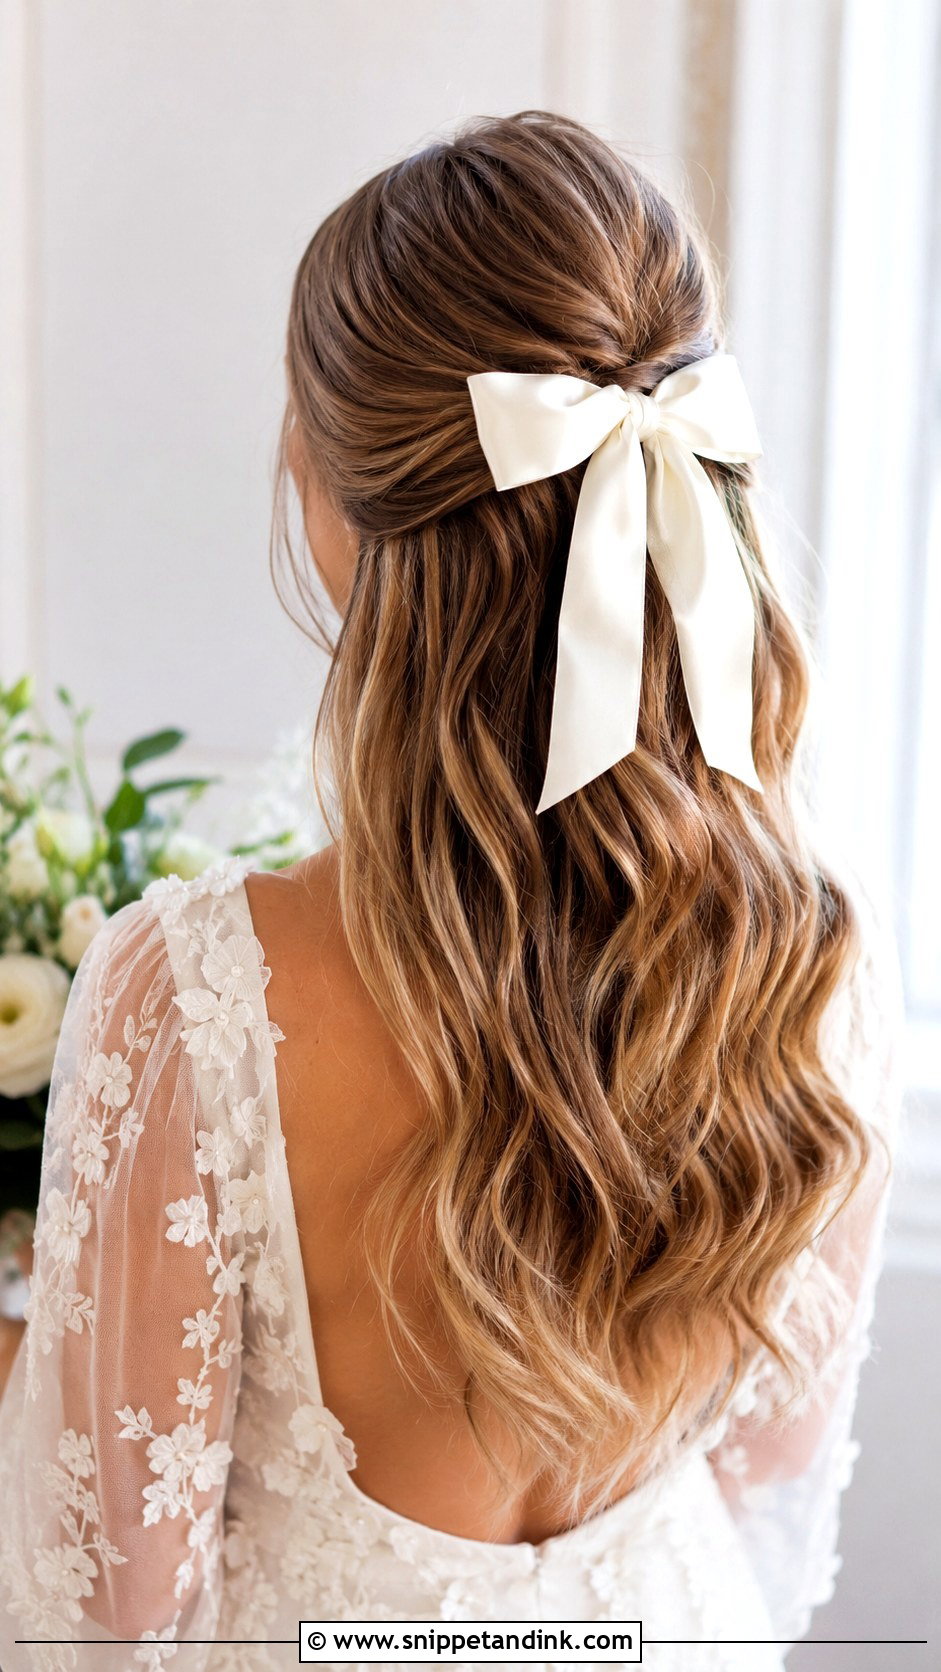
Half-up hair with bow detail is one of the quickest tutorials here. Create soft curls or waves, gather the top section at the back with a small clear elastic, pin it for support, then tie or clip the bow over the base. Satin keeps its shape, velvet looks richer in winter, and sheer ribbon moves more. I size the bow to the hair length and the dress, since a huge bow on short hair looks top-heavy. It’s also a good choice for bridesmaids who are doing their own hair. Wrap a small piece of hair around the elastic before adding the bow so nothing shows if it shifts.
13. Half Up Wedding Hair With Crown Volume
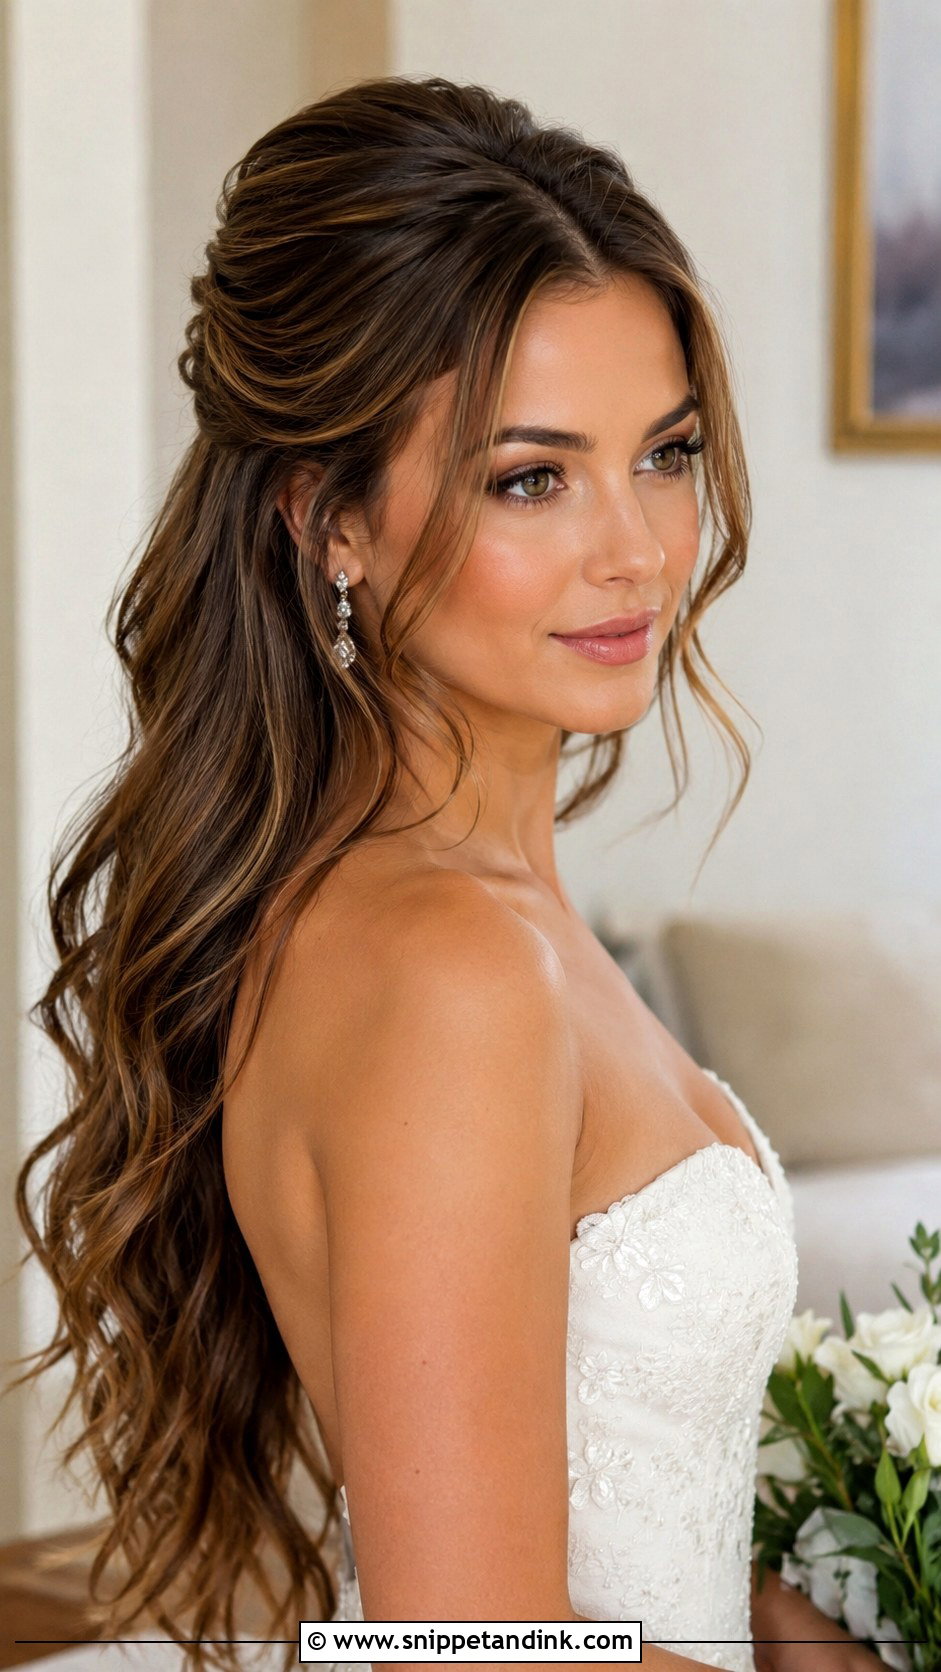
For crown volume, blow-dry the crown with a round brush first, then tease lightly underneath the top layer. Smooth the surface gently so the lift looks soft. Pull the side sections back and pin them just below the lifted crown, then curl the rest in loose waves to balance the height. Added height lengthens the face, which is why I suggest it for round and heart-shaped faces. Use firm pins and a flexible spray, but go easy on product at the root, because heavy product collapses the volume you just built.
14. Half Up Wedding Hair With Side Braid
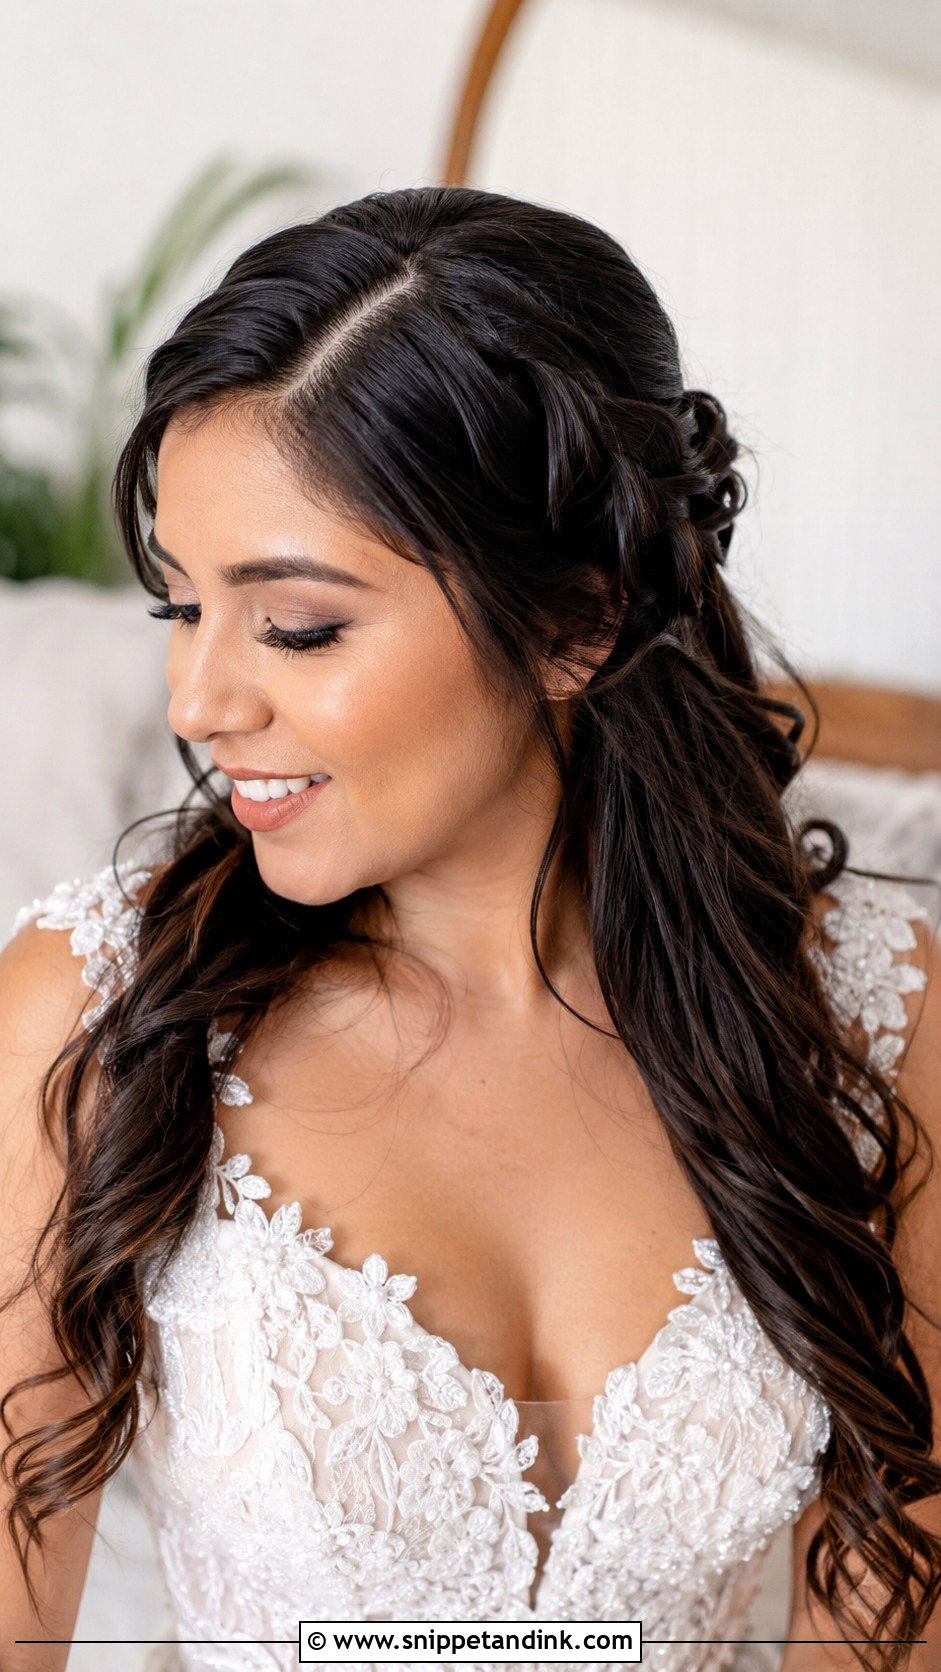
A side braid keeps the face open and adds detail you can see from the front, not only in back-view photos. Part the hair softly to one side, braid along the heavier side of the part, then pull the braid back and pin it into the half-up section, blending it with curls or waves. Loosen it gently so it looks fuller. I’d braid the heavier side because it has more hair to work with, and a braid on the thin side can look sparse. Add a few small pins or flowers near the braid, and keep everything else plain.
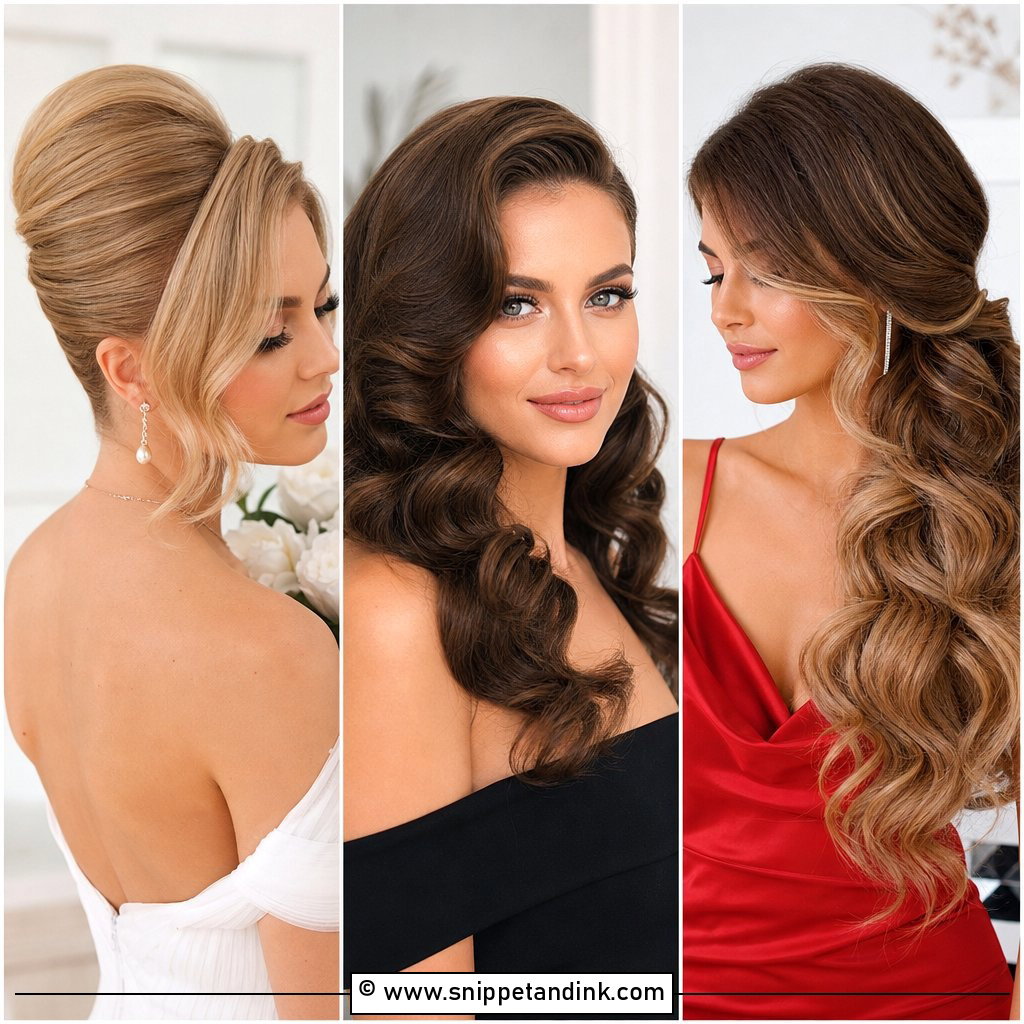
15. Sleek Half Up Wedding Hair
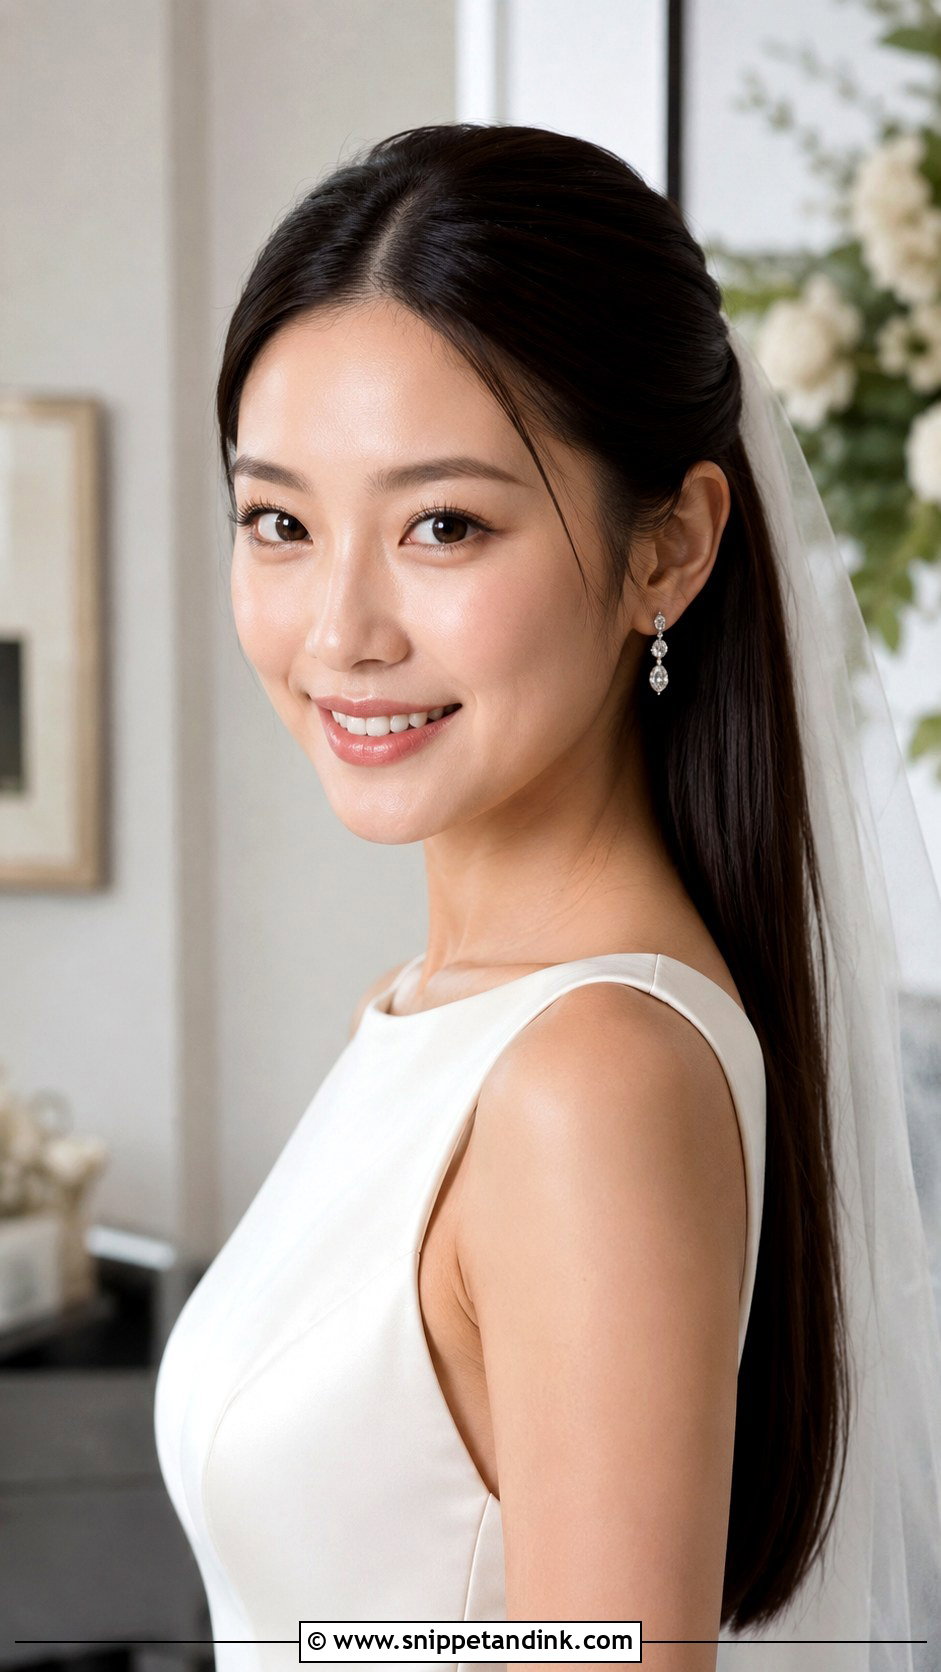
Sleek half-up hair looks simple but leaves nowhere to hide, so prep matters more than technique. Start with smooth, straightened hair or softly brushed waves, work a lightweight smoothing cream through the top section and part it in the middle or slightly to one side. Pull it back firmly enough to look neat, but not so tight that it flattens your face or gives you a headache by dinner. Secure with pins or a hidden elastic. A fine-tooth comb and a touch of shine spray take care of flyaways at the hairline. It suits minimalist gowns, structured necklines and simple jewellery.
Working Behind Your Own Head With Two Mirrors
Pinning the back of your own head is the part tutorials skip. Stand with your back to the bathroom mirror and hold a hand mirror in front of you, angled so you can see the back. It feels awkward at first because everything is reversed, so take your first few attempts slowly.
- Gather the top section with a clear elastic first. It holds the shape while you check it in the mirror.
- Slide each bobby pin in against the direction the hair is pulled, then cross a second pin over it in an X. That cross is what stops slipping.
- Lift your arms only as long as you need to. Rest them between sections, because tired arms make sloppy pinning.
- Take a phone photo of the back before spraying. It shows bumps and gaps that a hand mirror hides.
How many practice runs are enough
I’d plan for at least three. The first shows you where the style falls apart, the second is where you get it right, and the third should be timed and done with your veil or accessory in. A simple twist usually takes 20 to 30 minutes once you know it, while braided styles and Hollywood waves can take closer to an hour. Add that to your morning schedule with breathing room, since nerves slow your hands down.
Practise the Pinning, Not Only the Curls
Every one of these styles starts the same way: good prep, curls that are allowed to cool, and a top section that’s pinned properly. From there, it’s your choice whether it goes soft with curls, detailed with braids, polished with pearls, fresh with flowers or sleek and smooth. The best tutorial for you is the one that suits your length, texture, neckline and veil, and that you can repeat with shaky hands. Do a full run-through with your accessories in, take photos from the front, side and back, and fix anything that looks off then, not on the morning.
You'll Like These Ideas:


Leave a Reply