
A bridesmaid updo has a harder job than most people realise. It has to survive hugging, a ceremony in the sun, a few hundred photos and a dance floor, on hair that I usually meet for the first time that morning. The shapes I reach for most are low buns, braided chignons, twists and sleek knots, because they sit below where a breeze does damage and they adapt to almost any length. None of them should compete with the bride. What they should do is make the whole bridal party look like one group while each woman still recognises herself in the mirror.
Arriving at the Chair With Hair That Will Hold Pins
Most updo failures I see start the night before. Freshly washed, silky hair is the hardest thing to pin, and hair loaded with oil or leave-in conditioner is worse, because pins slide straight out of it. I ask bridesmaids to wash the day before, skip conditioner on the roots, and dry their hair fully. Second-day hair has enough grip that curls set and pins stay where I put them.
- Wear a button-up shirt or robe, so nothing gets pulled over a finished style.
- Bring any extensions, filler or accessories you plan to wear, already matched to your colour.
- Tell me about sore spots, migraines or a sensitive scalp before I start pinning.
- Send a photo of your dress neckline in advance; it decides the height of the bun more than anything else.
For a party of five or six, I plan roughly 45 minutes to an hour per person, longer for very thick or very long hair. Whoever has the simplest style goes last, so it is freshest for photos.
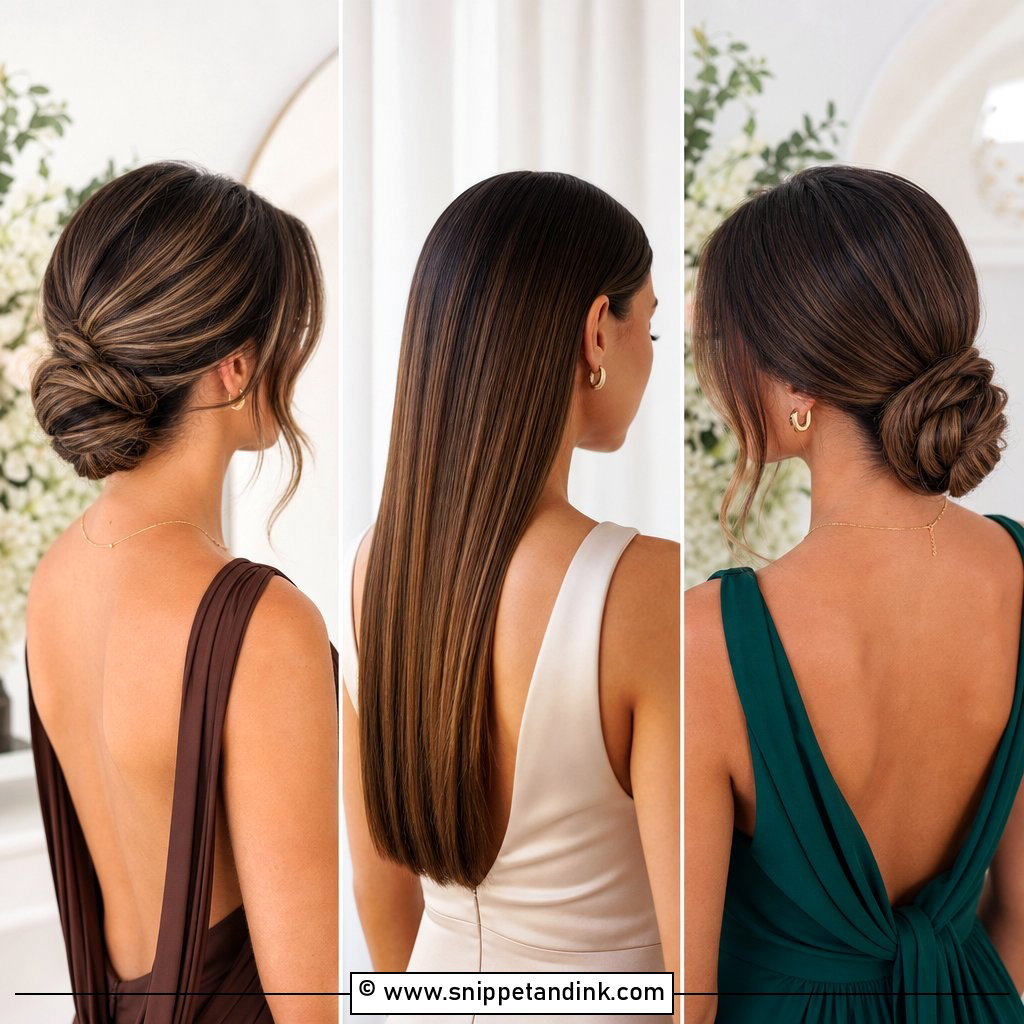
1. Wedding Low Chignon Bridesmaid Updo
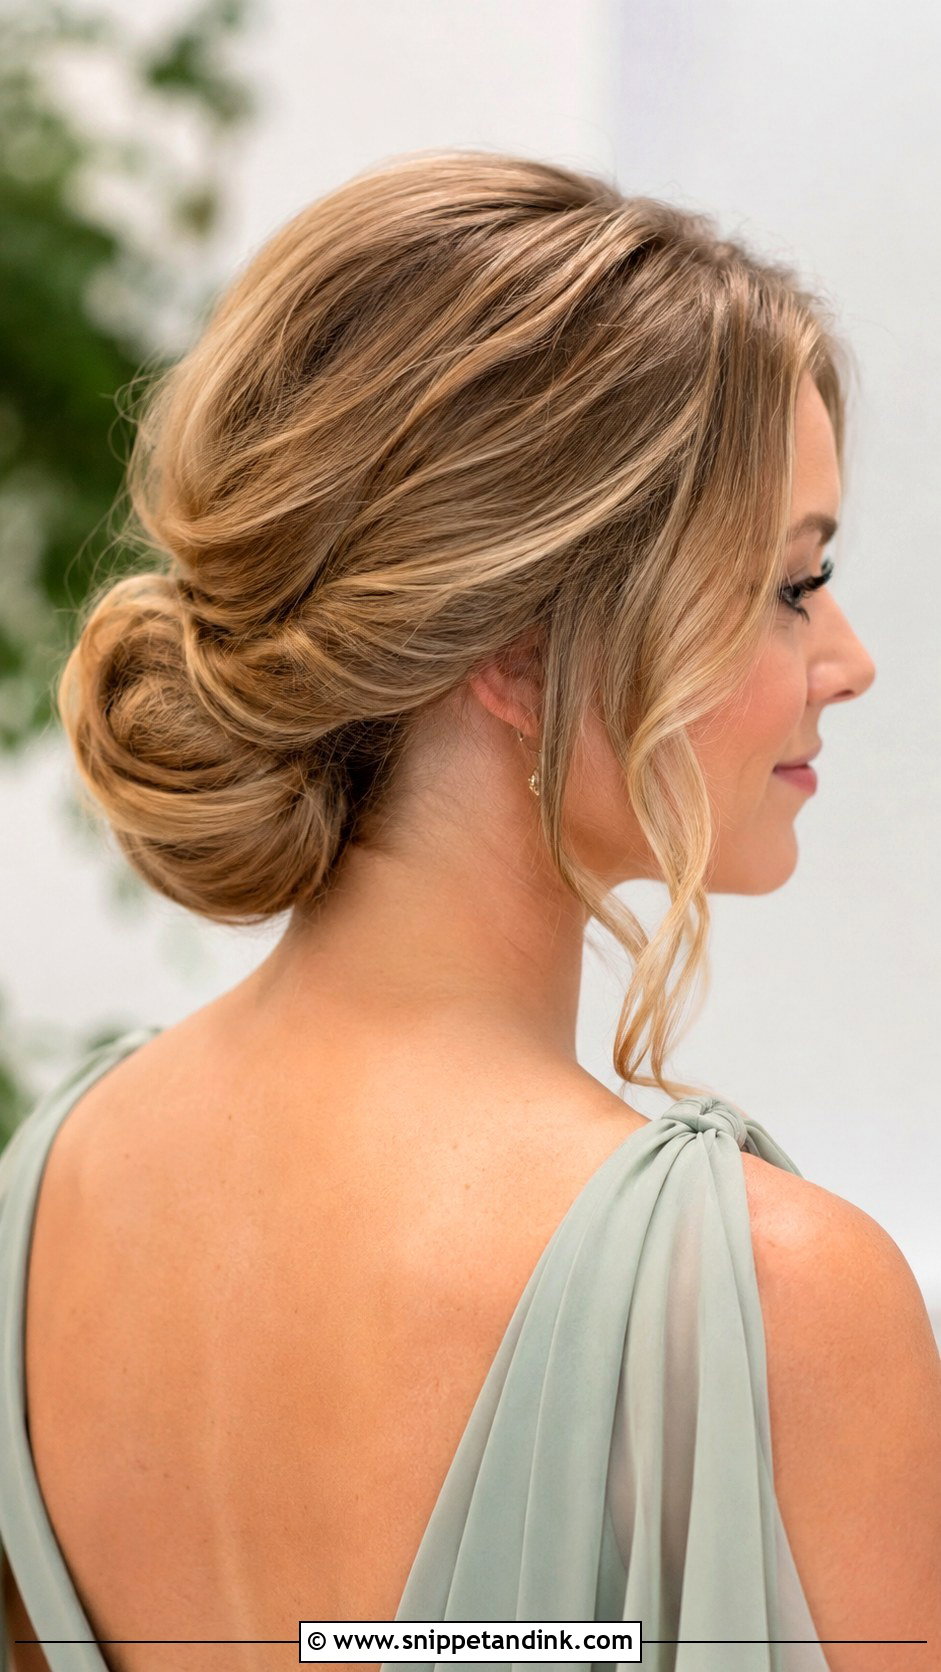
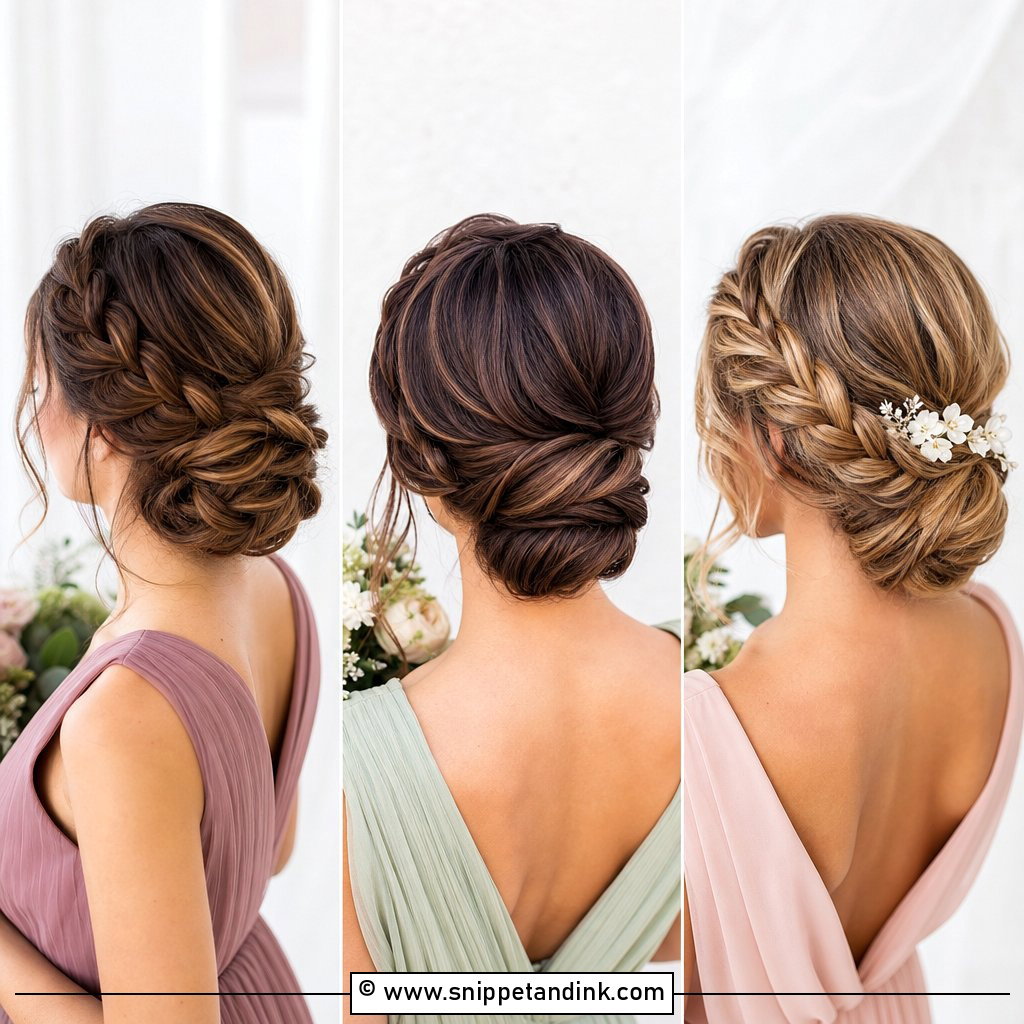
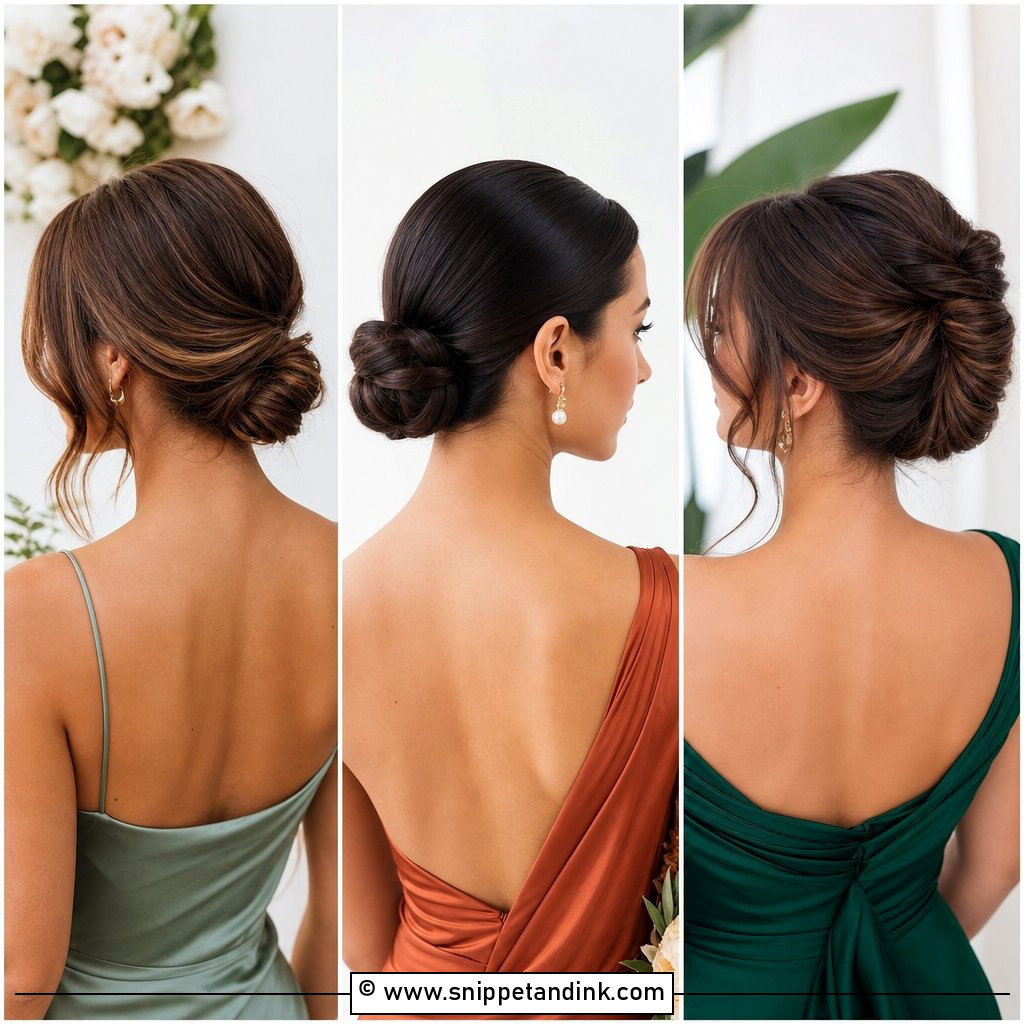
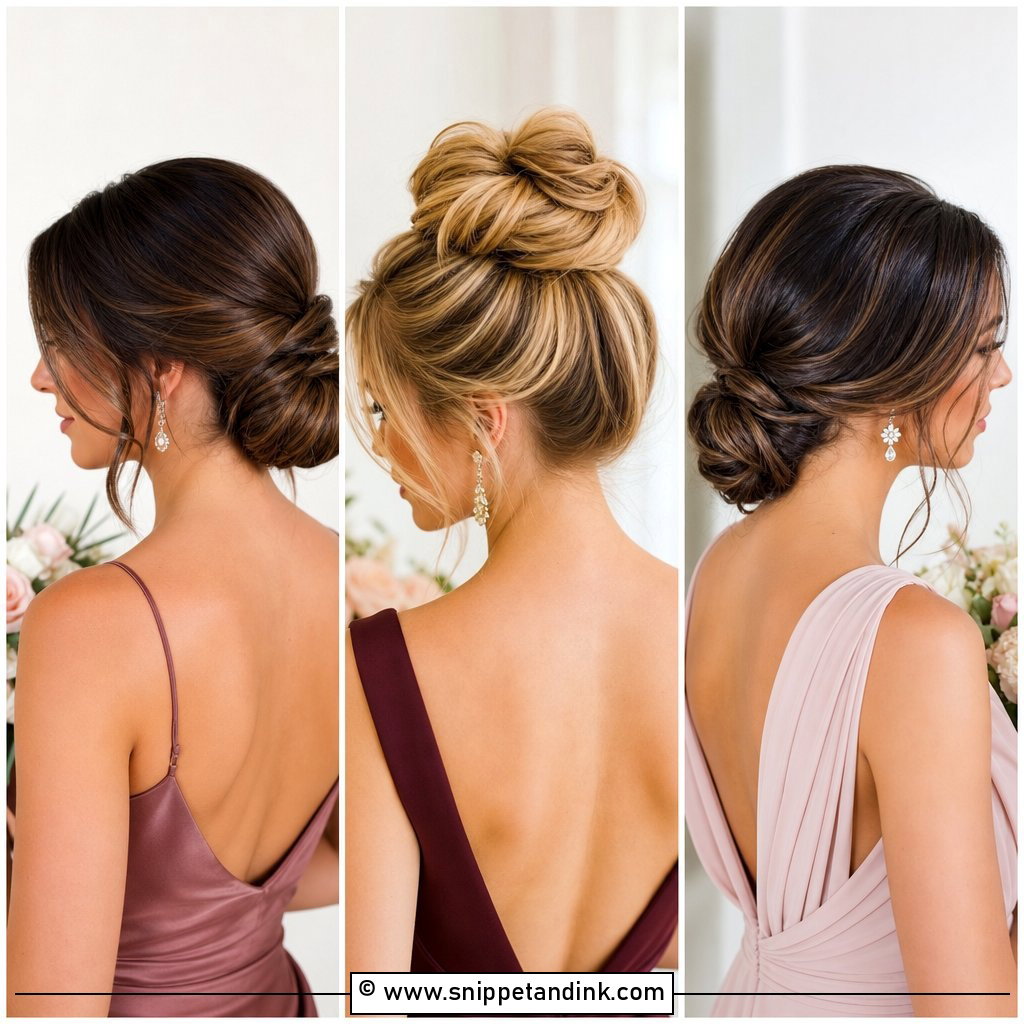
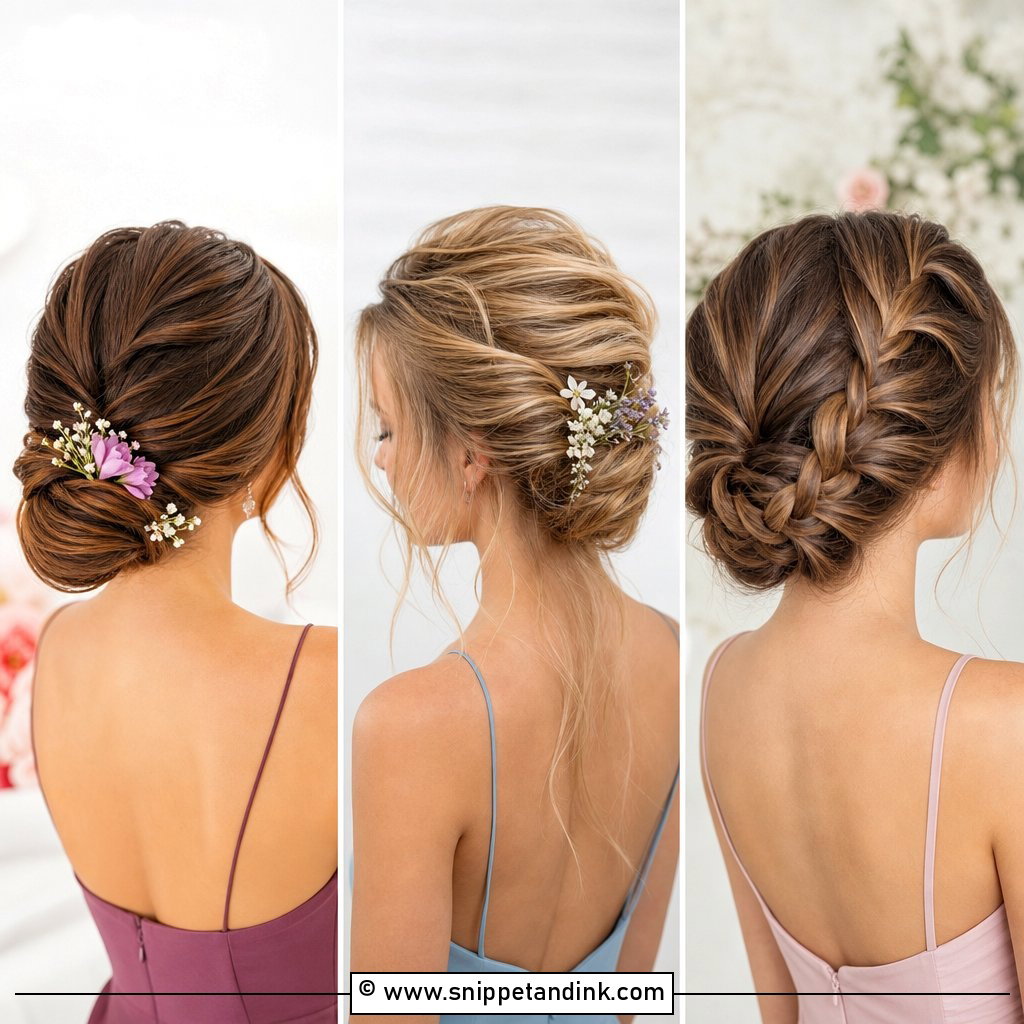
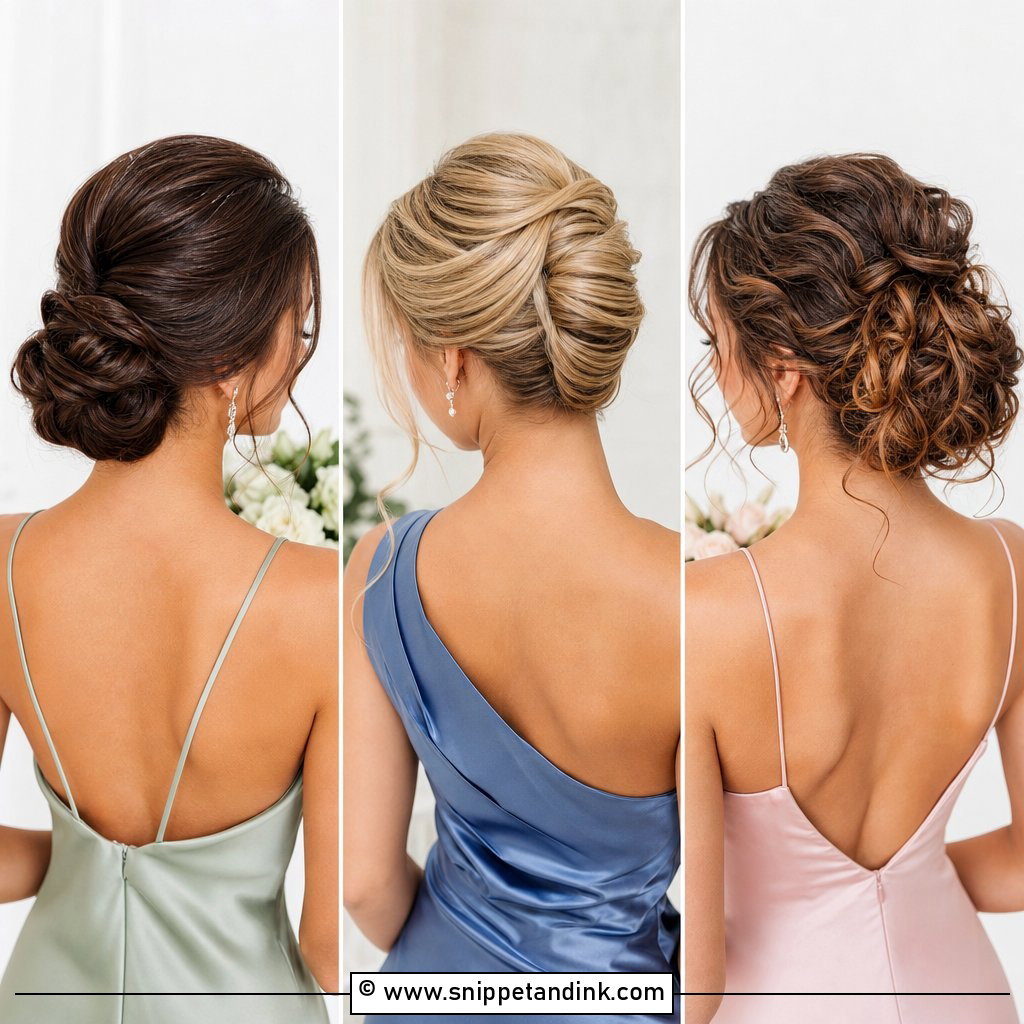
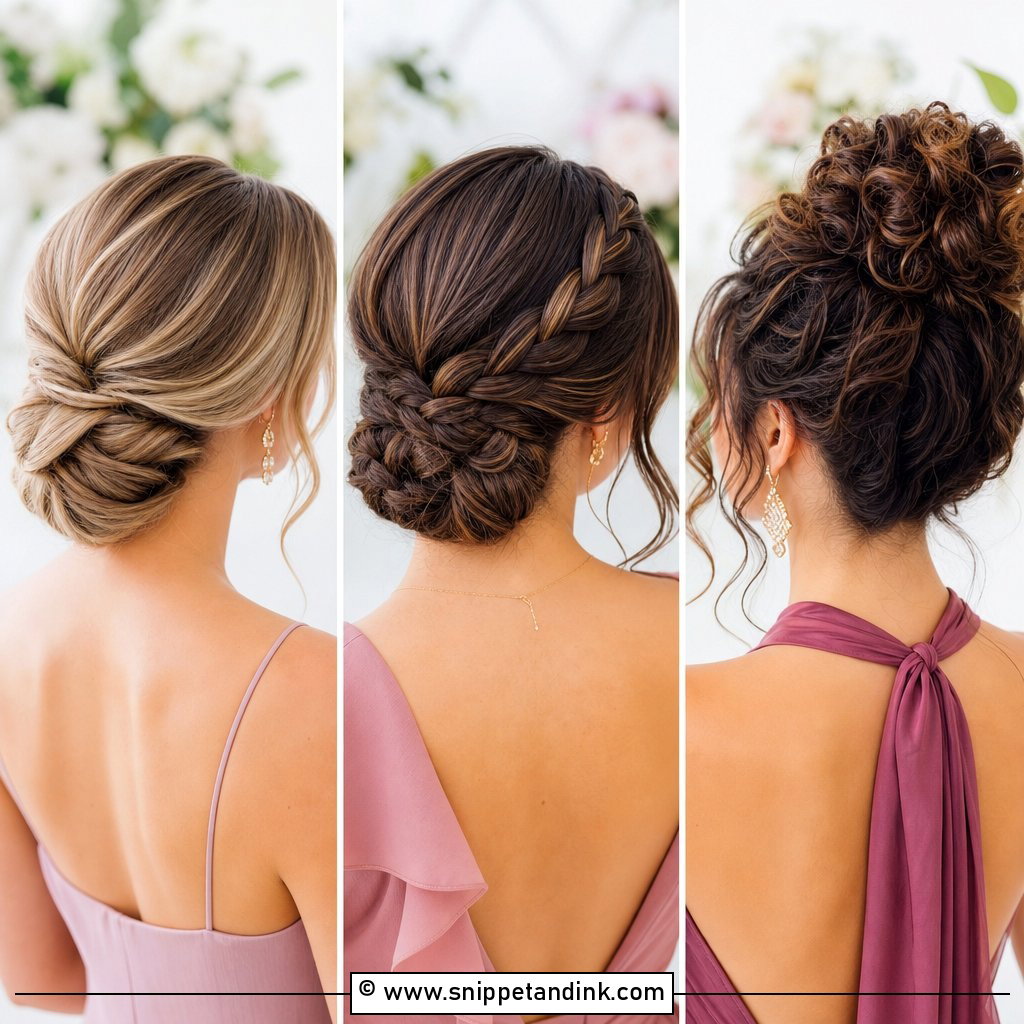
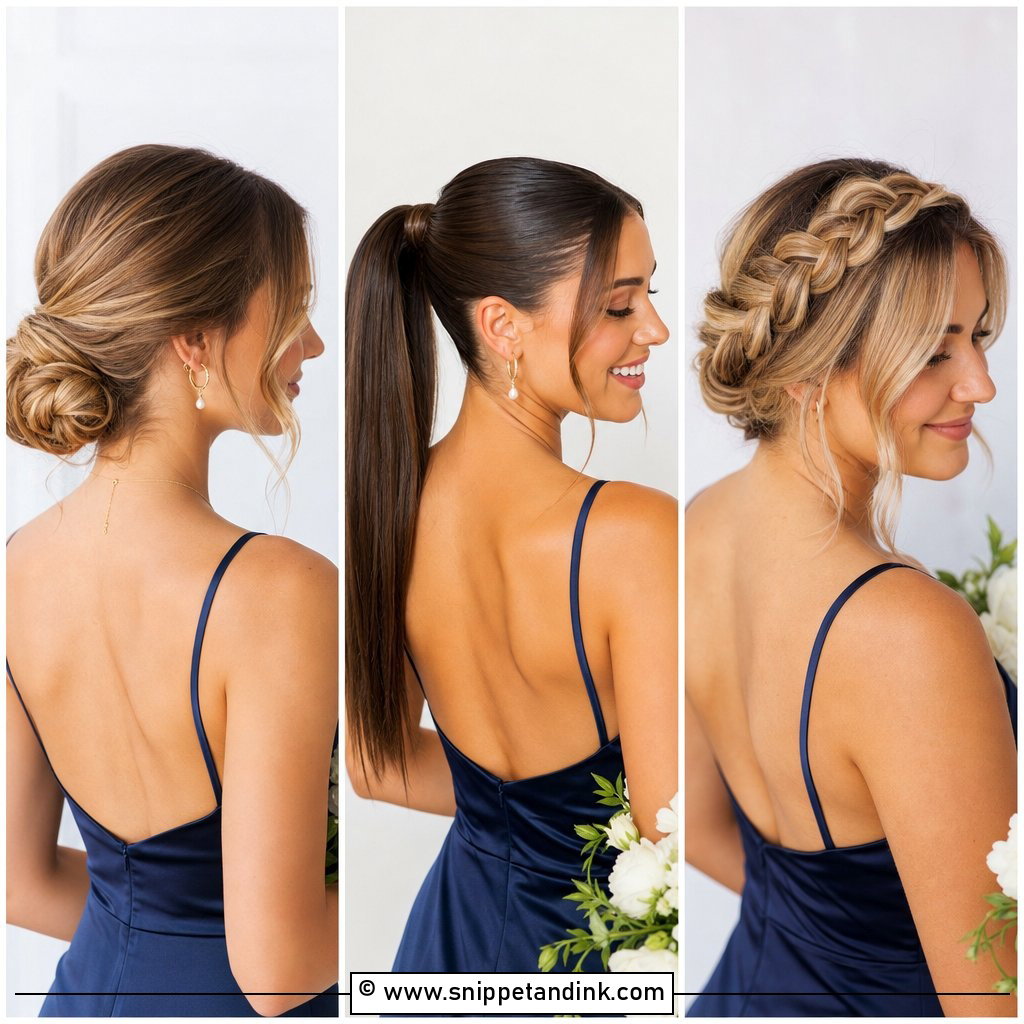
If I had to put one style on every bridesmaid without seeing their dresses, it would be the wedding low chignon bridesmaid updo. It sits at the nape, so the face and shoulders stay open and it never fights a neckline. I anchor it with an elastic base and crossed pins underneath, which is why it still looks neat at midnight. Smooth it for a ballroom; rough up the texture for a garden. On a dress with lace or ruffled straps I keep the front clean, and on a plain bodice I let a couple of face pieces fall.
2. Wedding Textured Low Bun Bridesmaid Updo
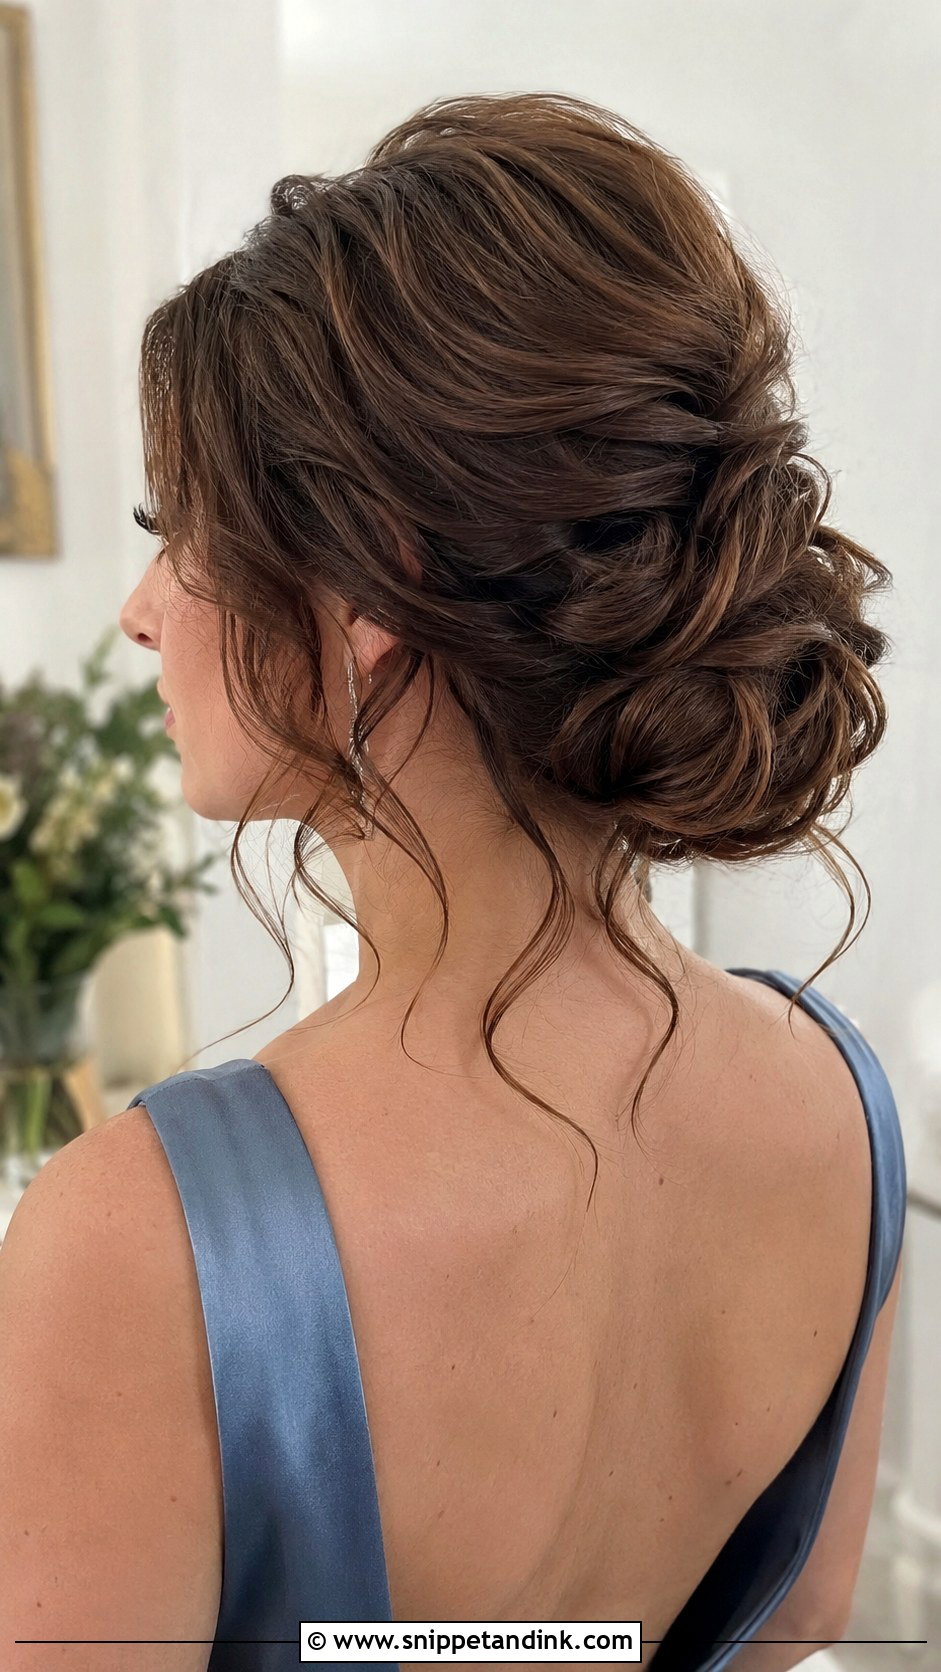
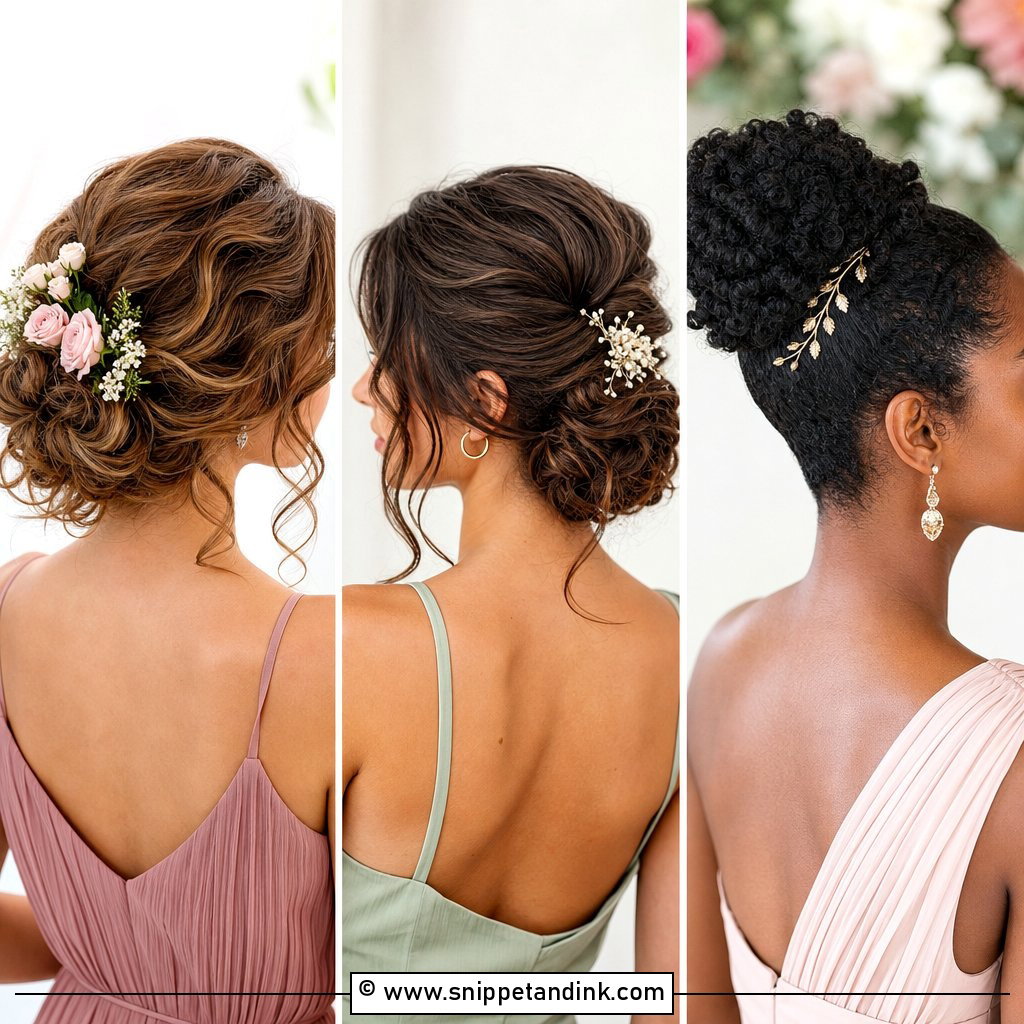
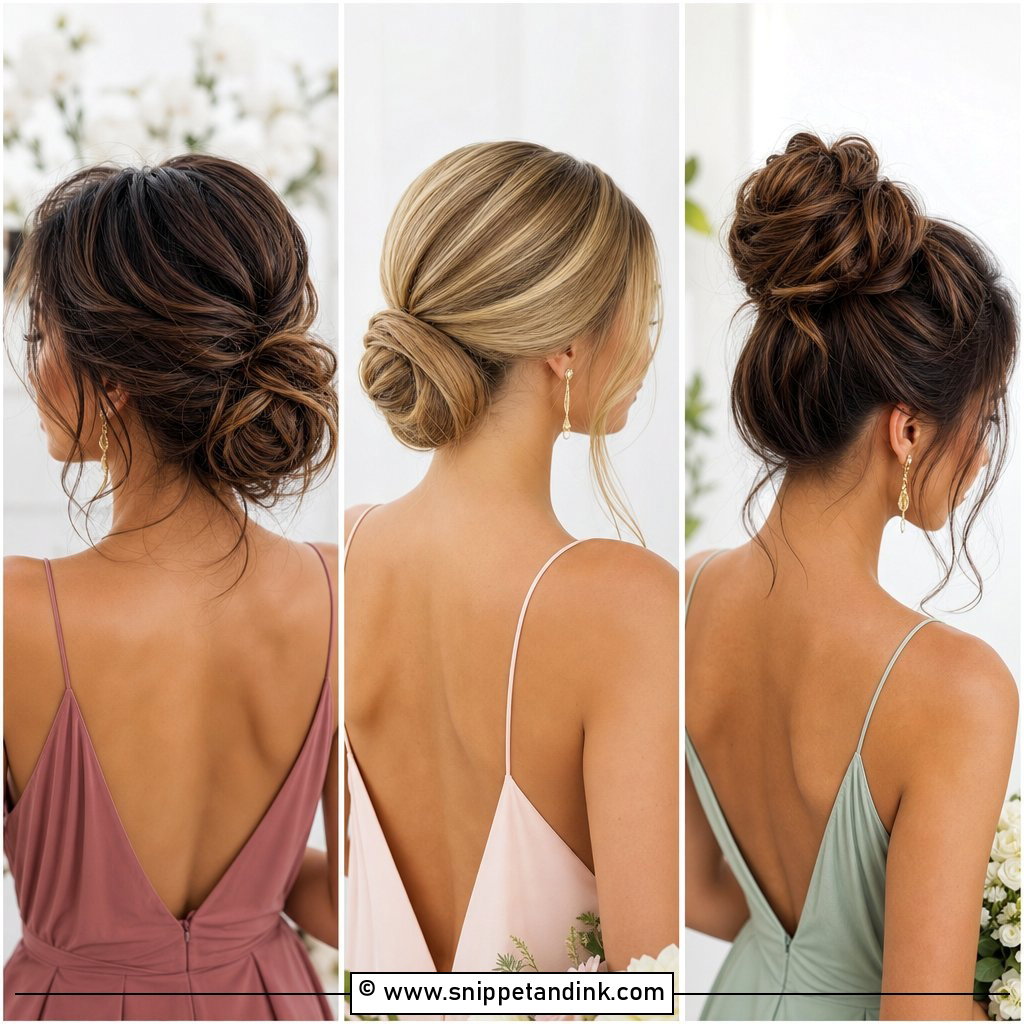
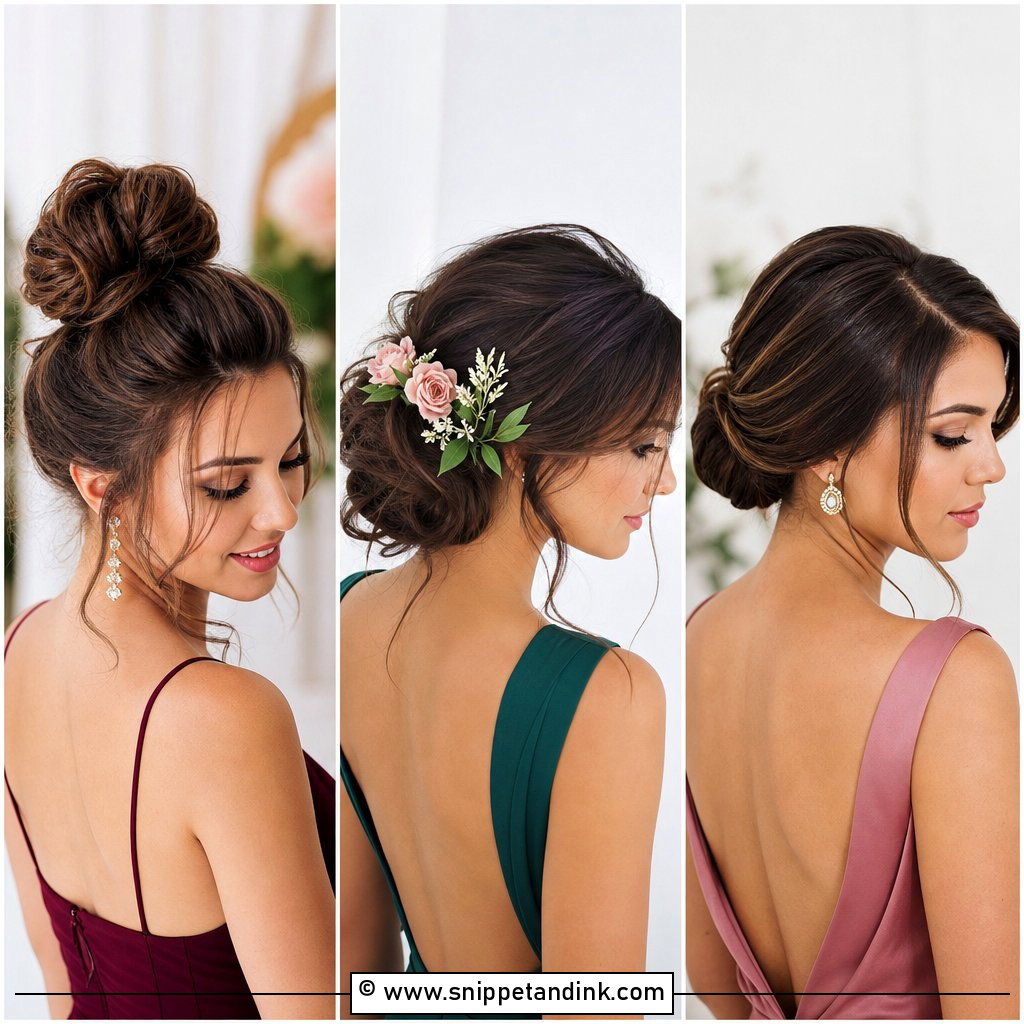
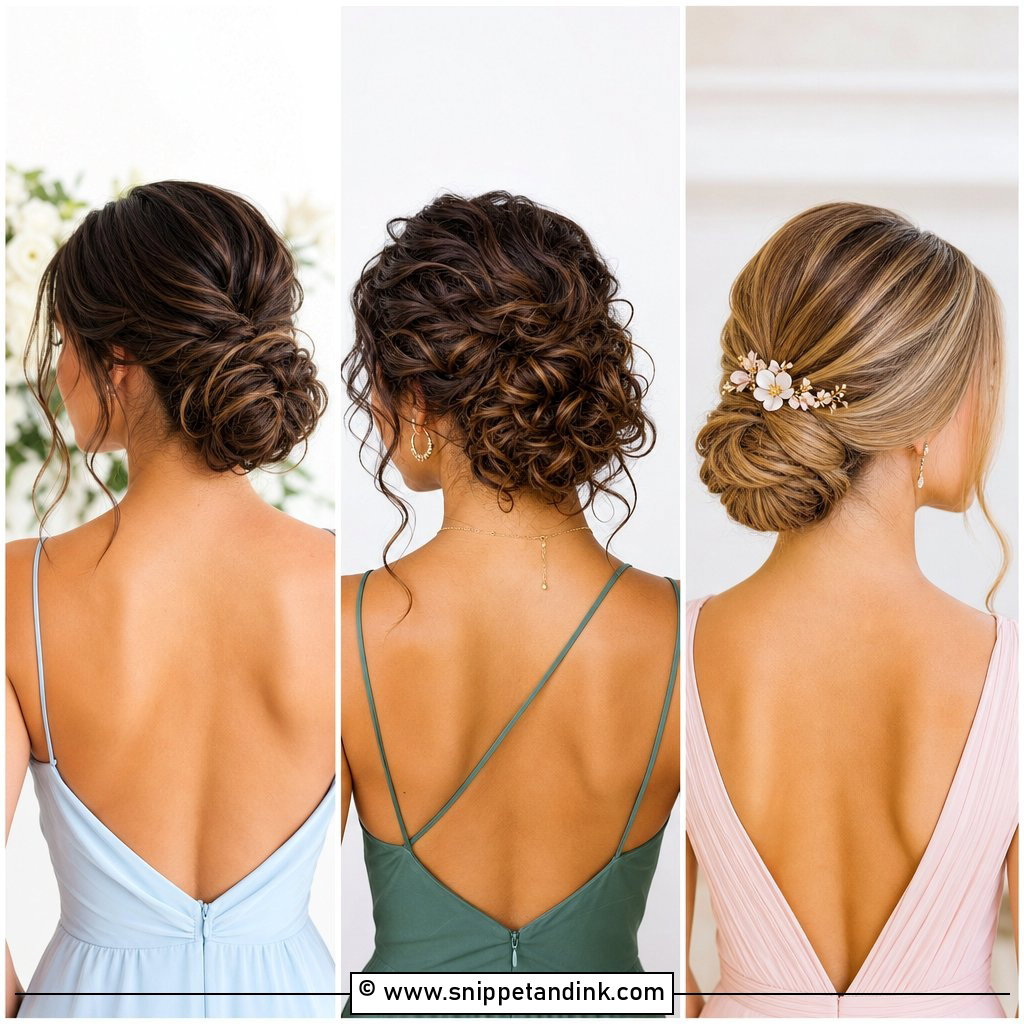
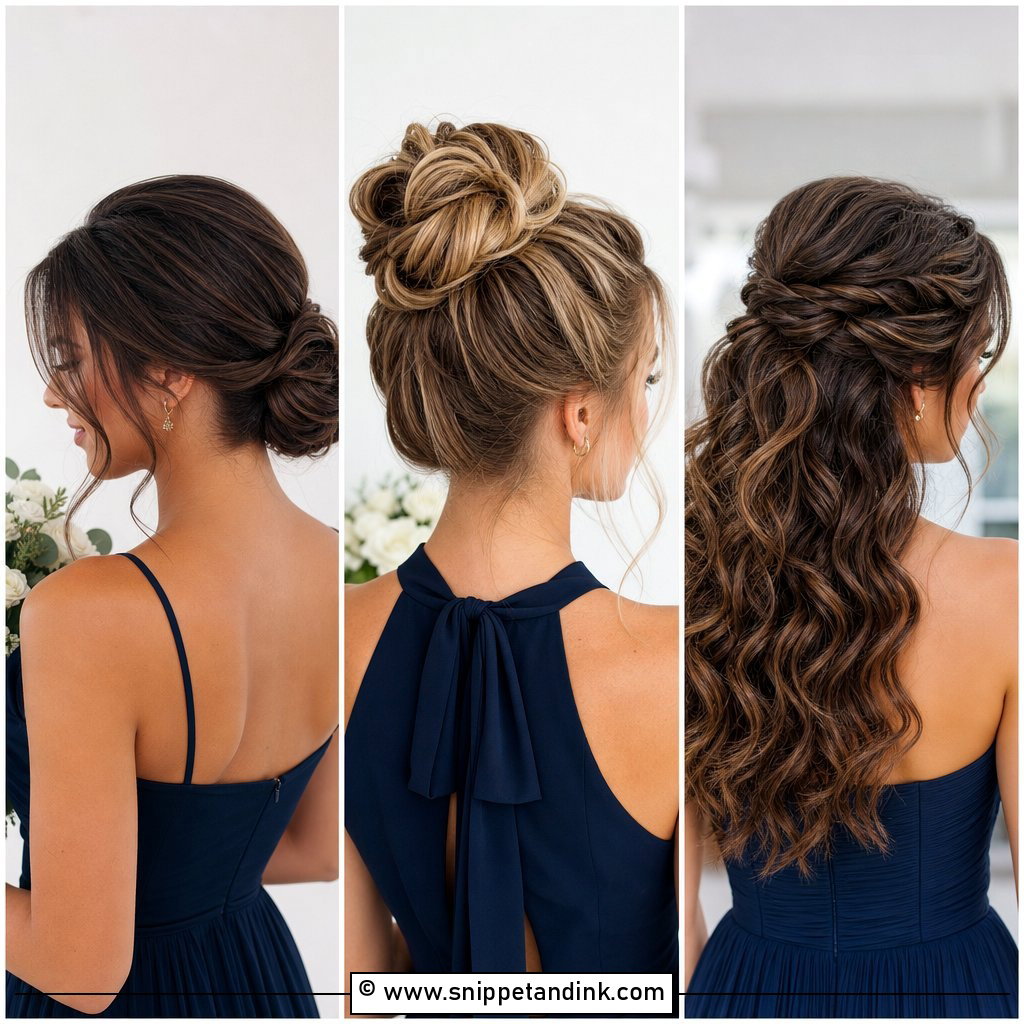
This is the low bun with the polish taken out on purpose. I curl the hair first into loose waves, brush them through, then pin the bun loosely near the nape so it looks full rather than wrapped. Outdoors that bit of movement reads as intentional. The catch is fine hair: unless I add a small filler or backcomb the base, the bun shrinks to a walnut by the reception. Thick hair goes the other way, so I pin it in sections to stop one side sagging.
3. Wedding Sleek Low Bun Bridesmaid Updo
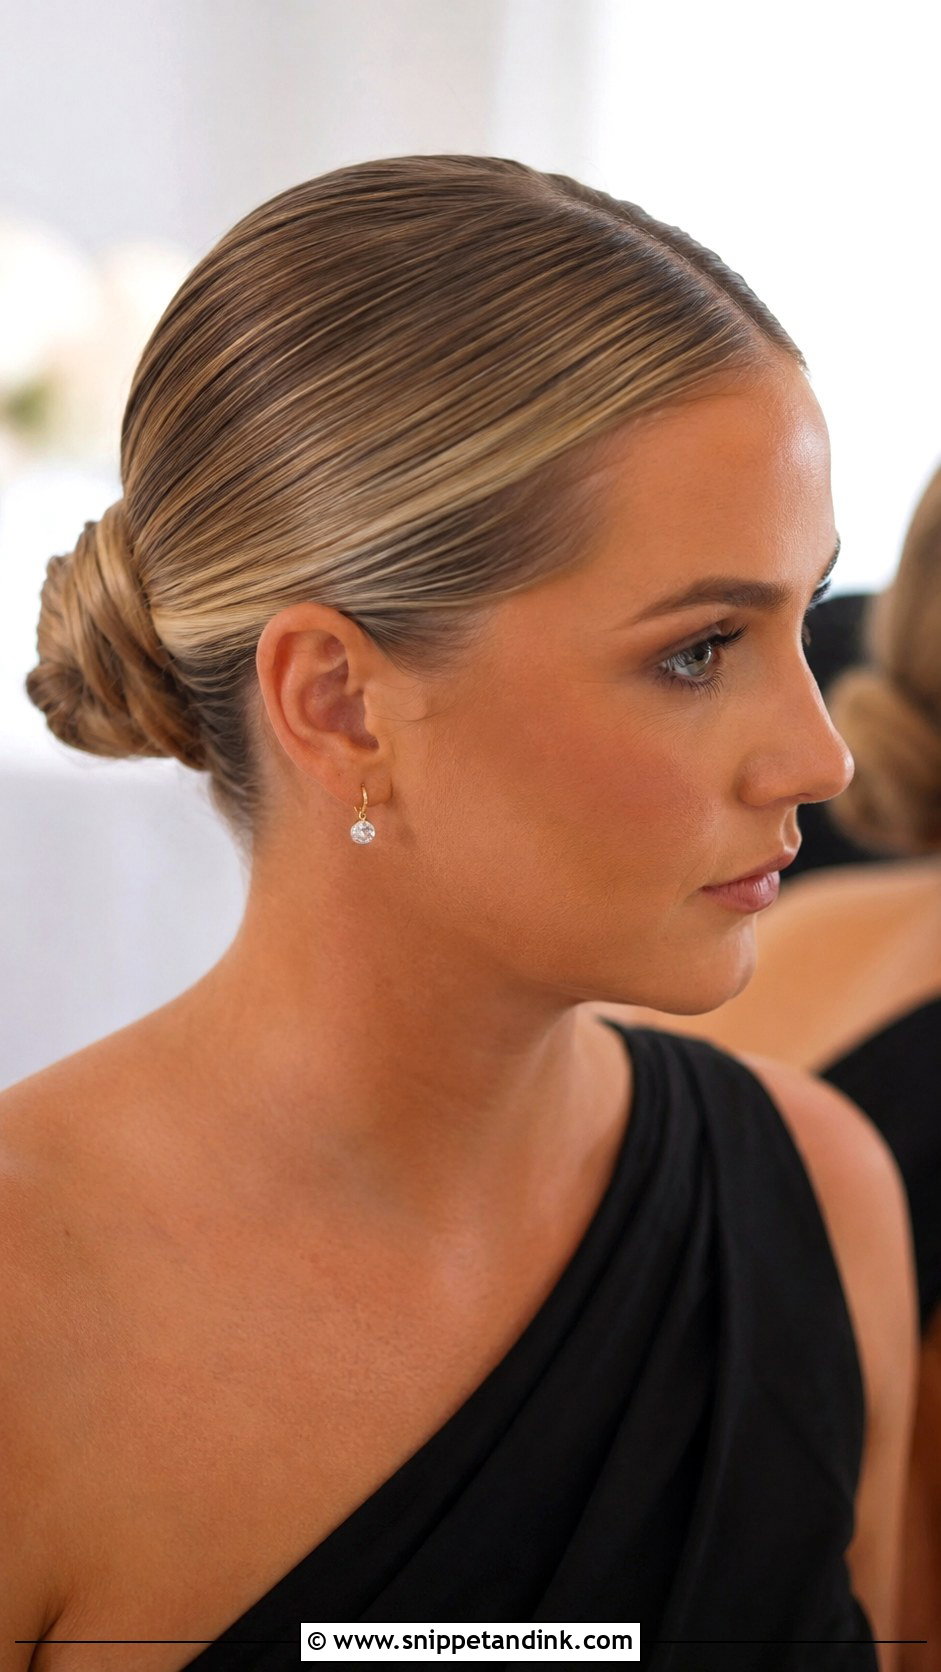
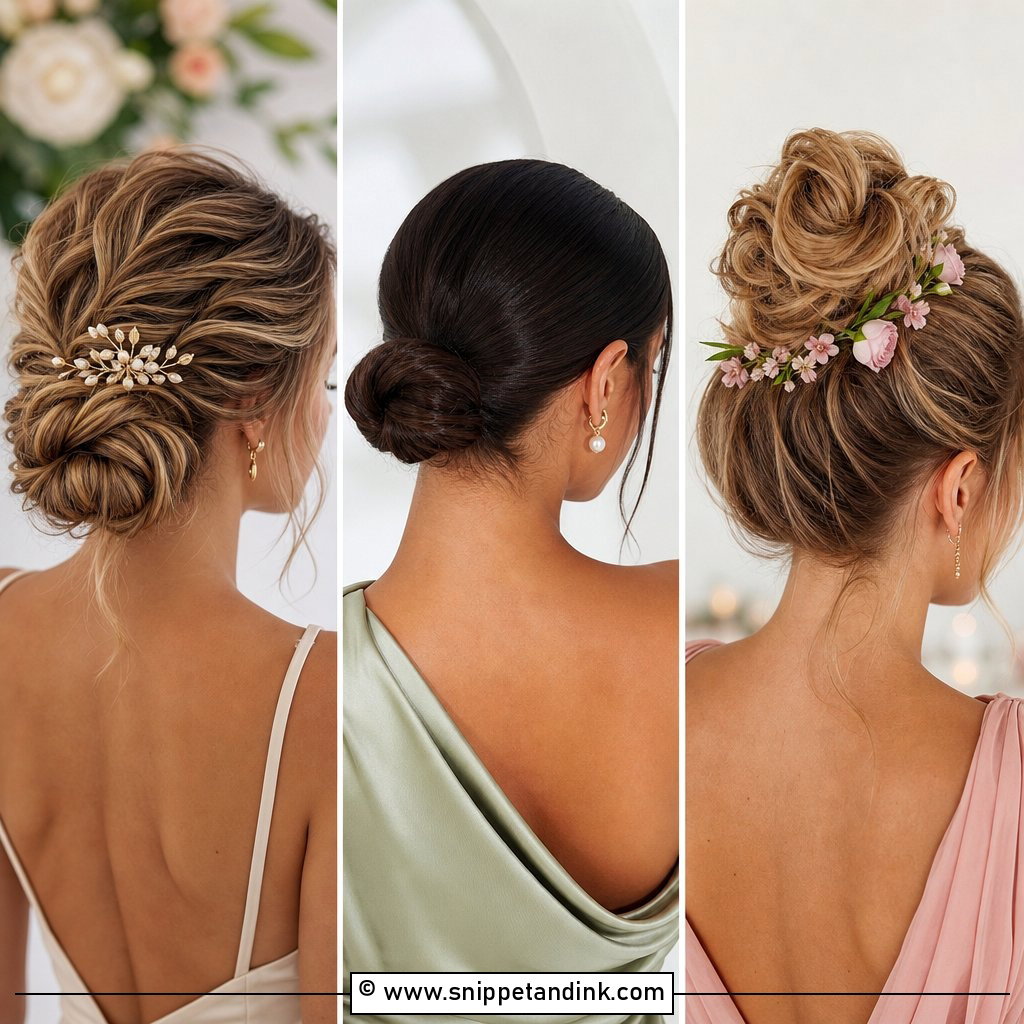
A sleek low bun is all about the prep, not the bun. I smooth the hair back with a centre or soft side part while it still has a little cream in it, set the ponytail tight, and wrap. Any bump at the crown shows in a profile photo, so I check it from the side before I spray. It suits black tie, minimalist dresses and anyone wearing statement earrings. I’d hold back on it for someone with a lot of baby hair around the hairline who hates gel, because those hairs will stand up by the speeches. Shine spray goes on from arm’s length, lightly.
4. Wedding Braided Low Bun Bridesmaid Updo
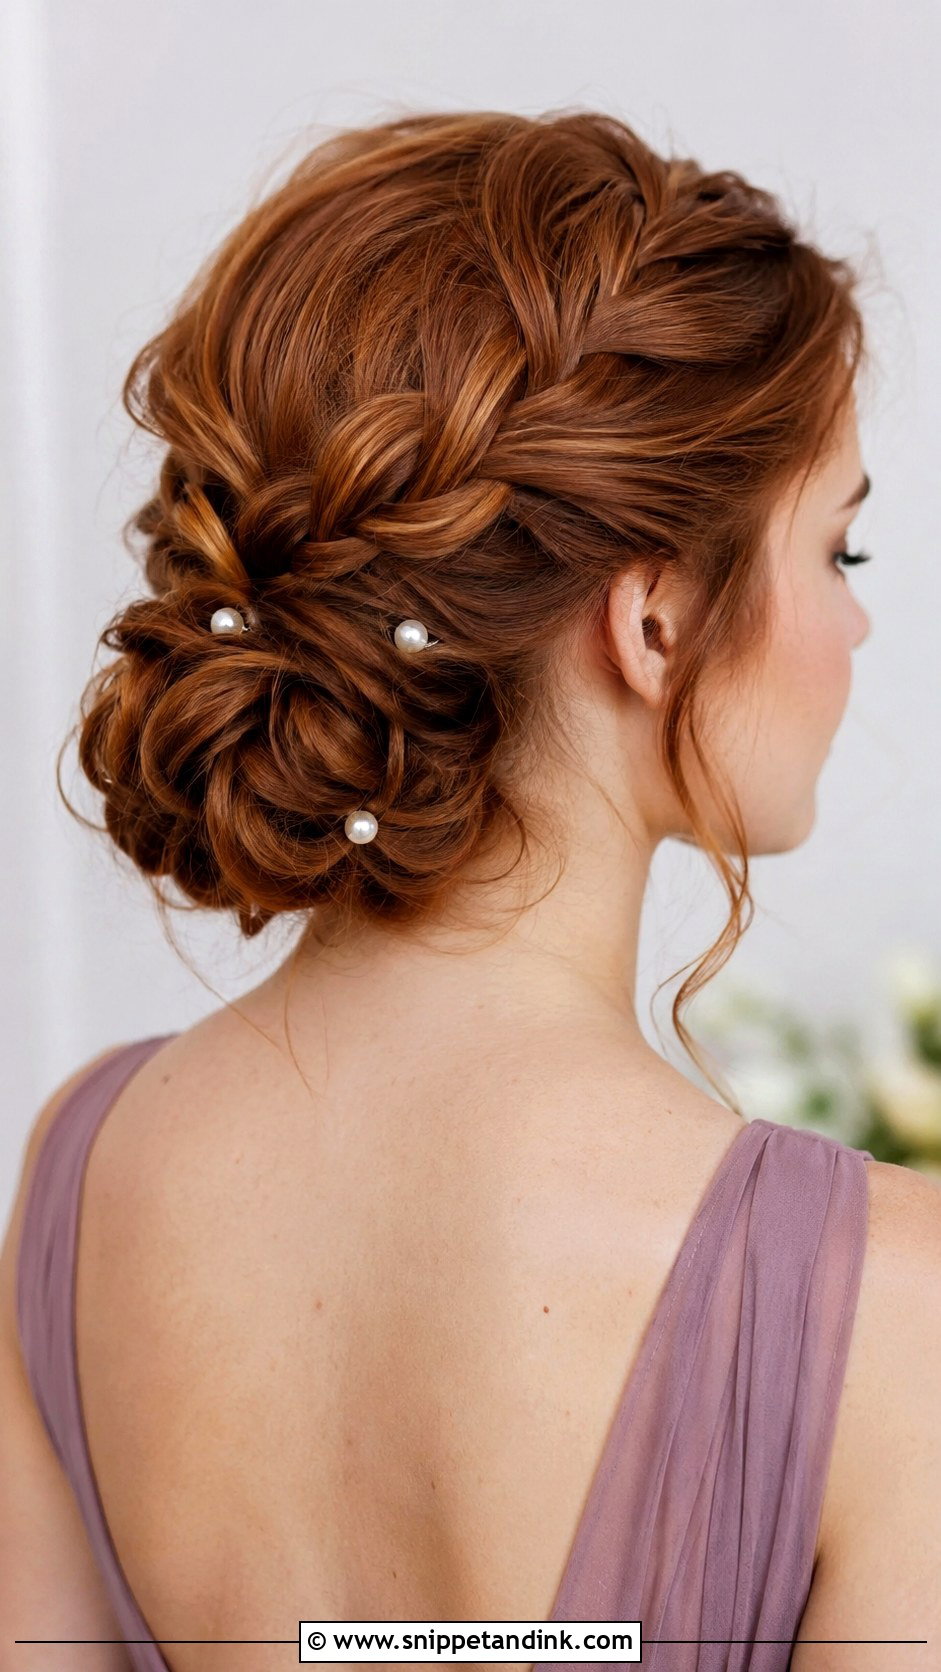
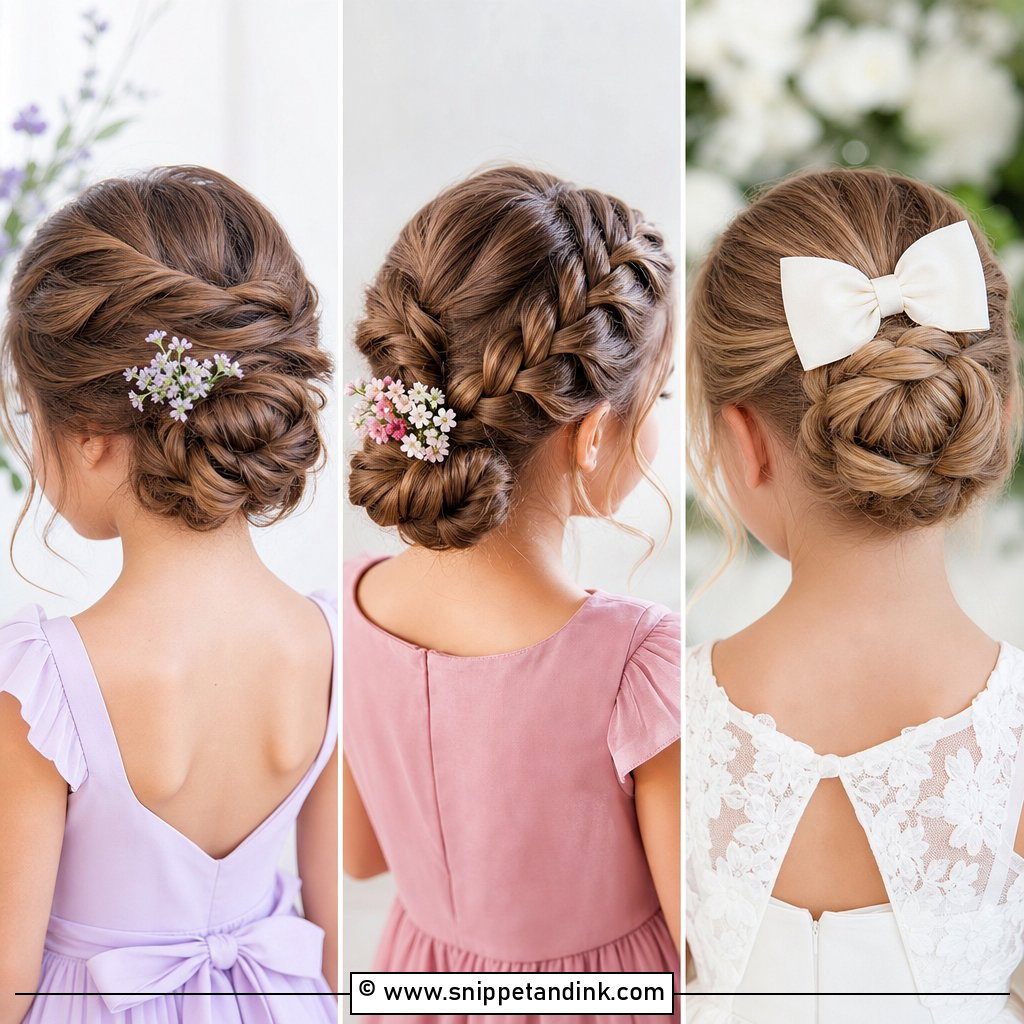
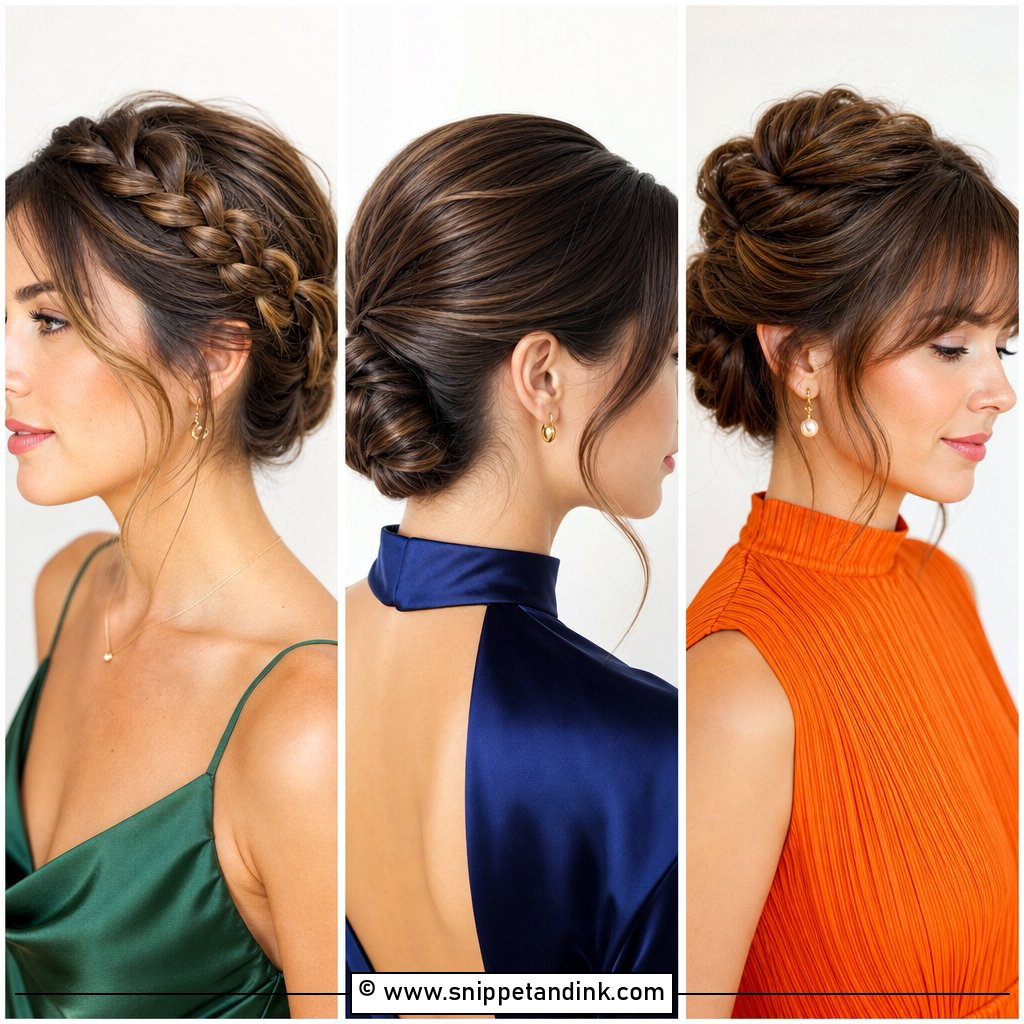
A braid gives a low bun detail without adding height or width. It can wrap the bun, cross the crown or run along one side. The practical reason I like it is layers: a braid traps short pieces that would otherwise spring loose from a plain bun during dancing. I braid fairly firm, pin, and only then pull the edges to show texture, because a loose braid at the start will not hold its shape once it is folded. A few tiny pearl pins push it toward formal.
5. Wedding Twisted Bun Bridesmaid Updo
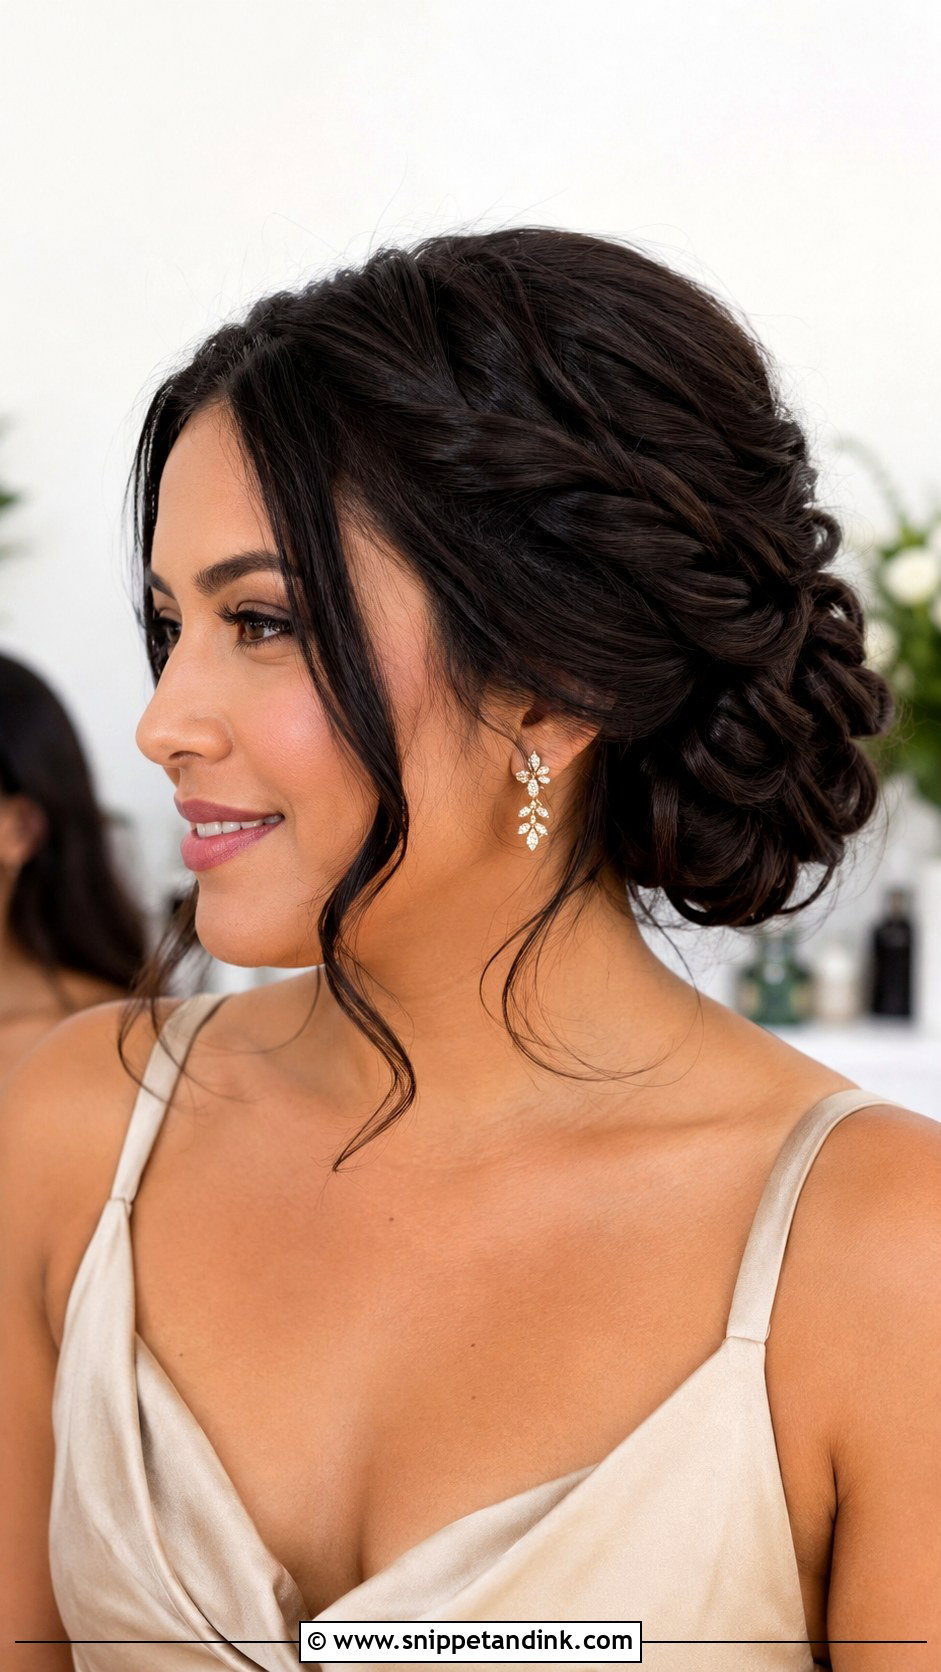
For a twisted bun, I twist sections back toward the nape and pin each one into a rounded shape instead of braiding. Twists spread the weight across the back of the head, which is why bridesmaids who get headaches from a single tight bun usually find this one comfortable. I can place the twists higher, lower or wider to suit a face, and balayage colour shows up really well along each rope. It sits in the middle ground between neat and relaxed.
6. Wedding Messy Bun Bridesmaid Updo
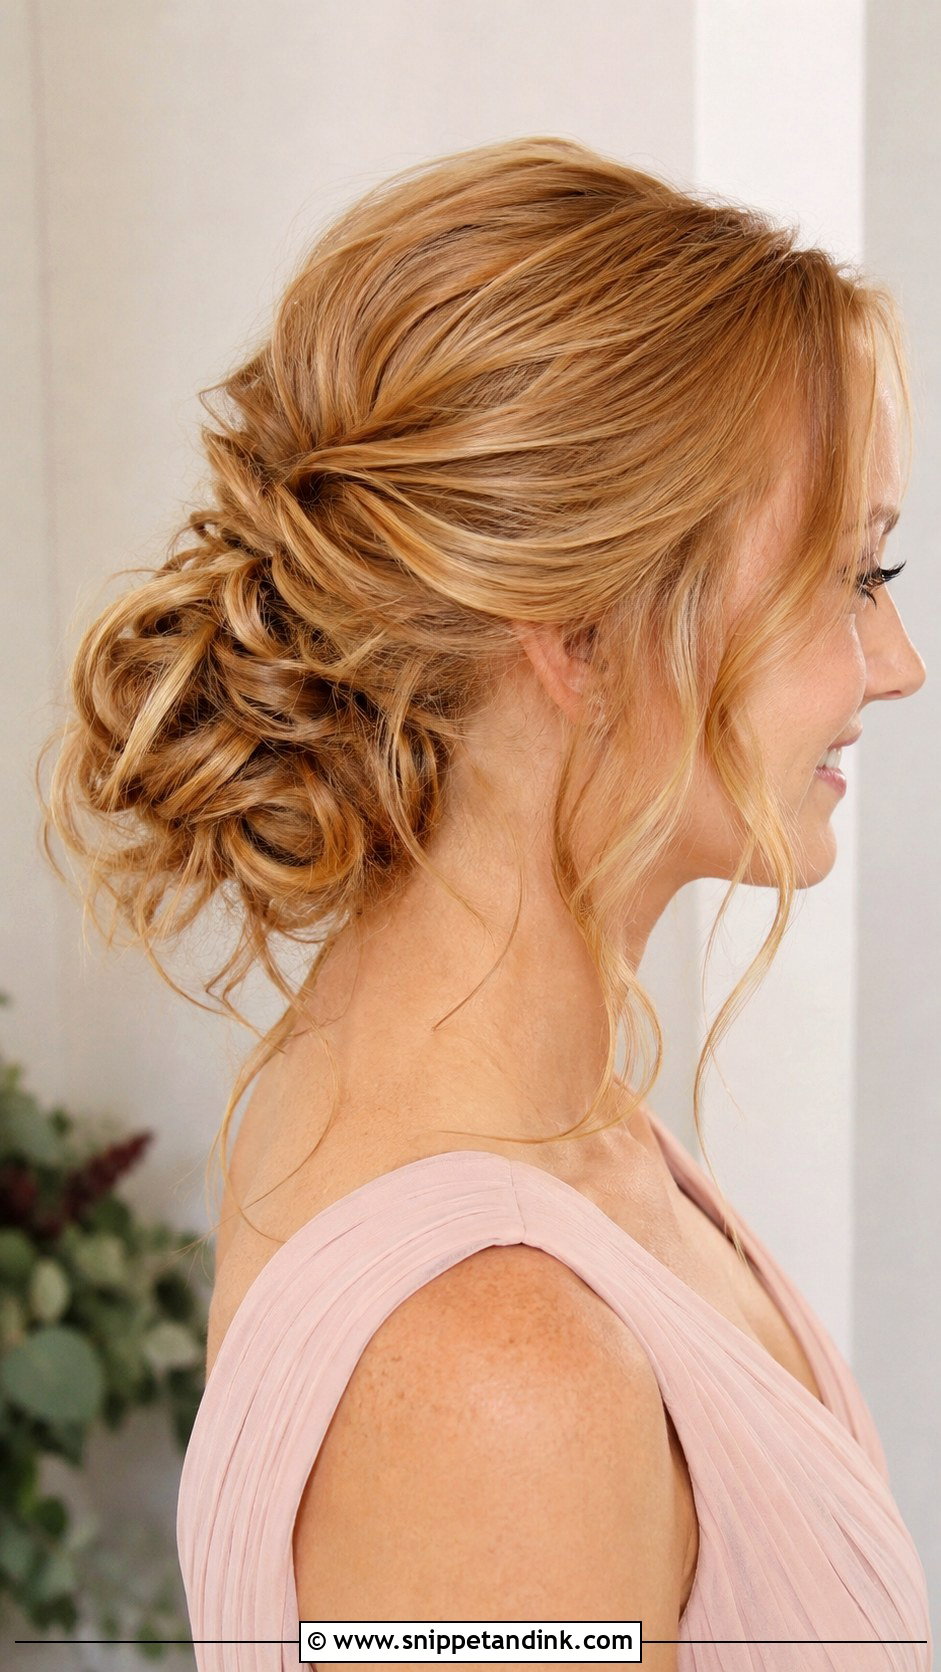
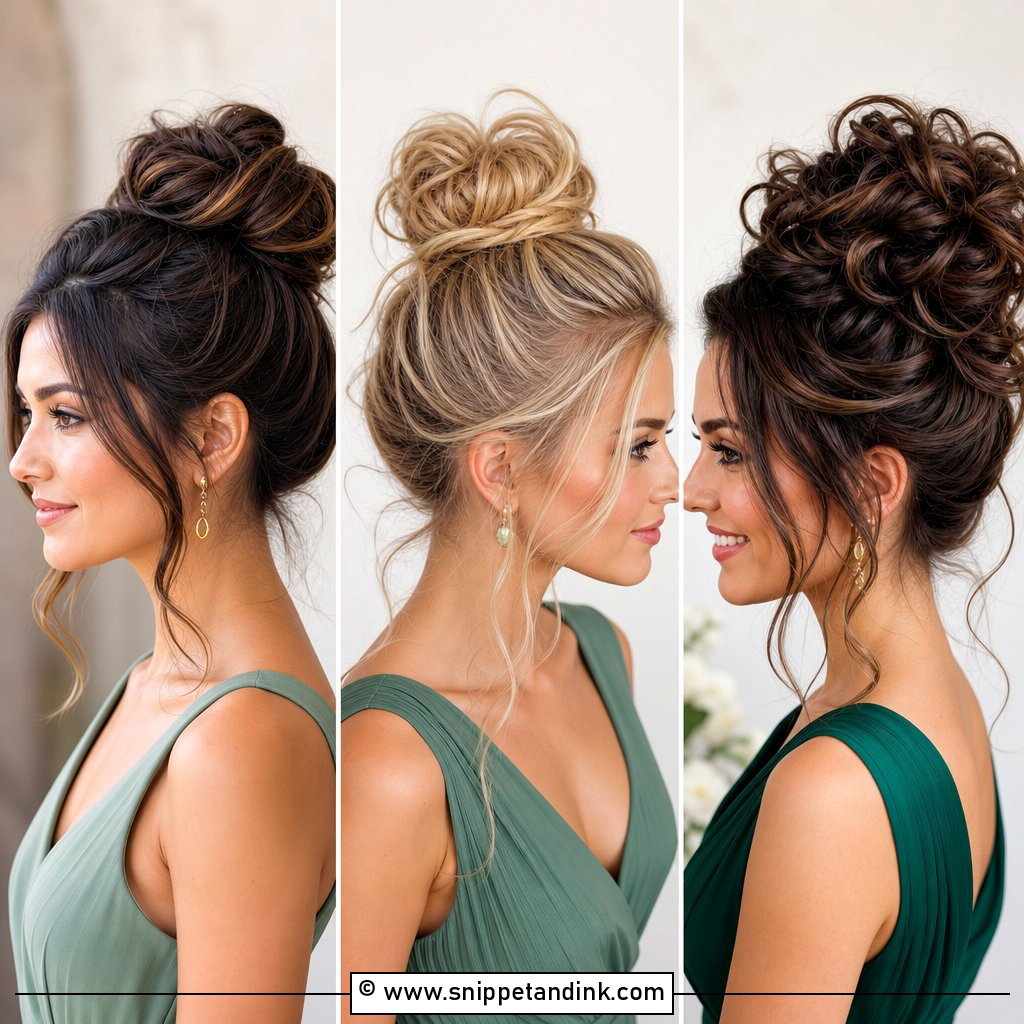
A wedding messy bun is the hardest style on this list to get right, because it should look relaxed and never rushed. Underneath the softness there are more pins than in a sleek bun. I curl everything, set the base, then build the bun in loops so I can pull it apart without it collapsing. Too many loose strands look untidy in a group photo; too much spray makes it look stiff and dated. When you book, ask for texture at the crown, a low or slightly off-centre bun and two or three face pieces, not ten. It is my default for beach and backyard weddings.
7. Wedding French Twist Bridesmaid Updo
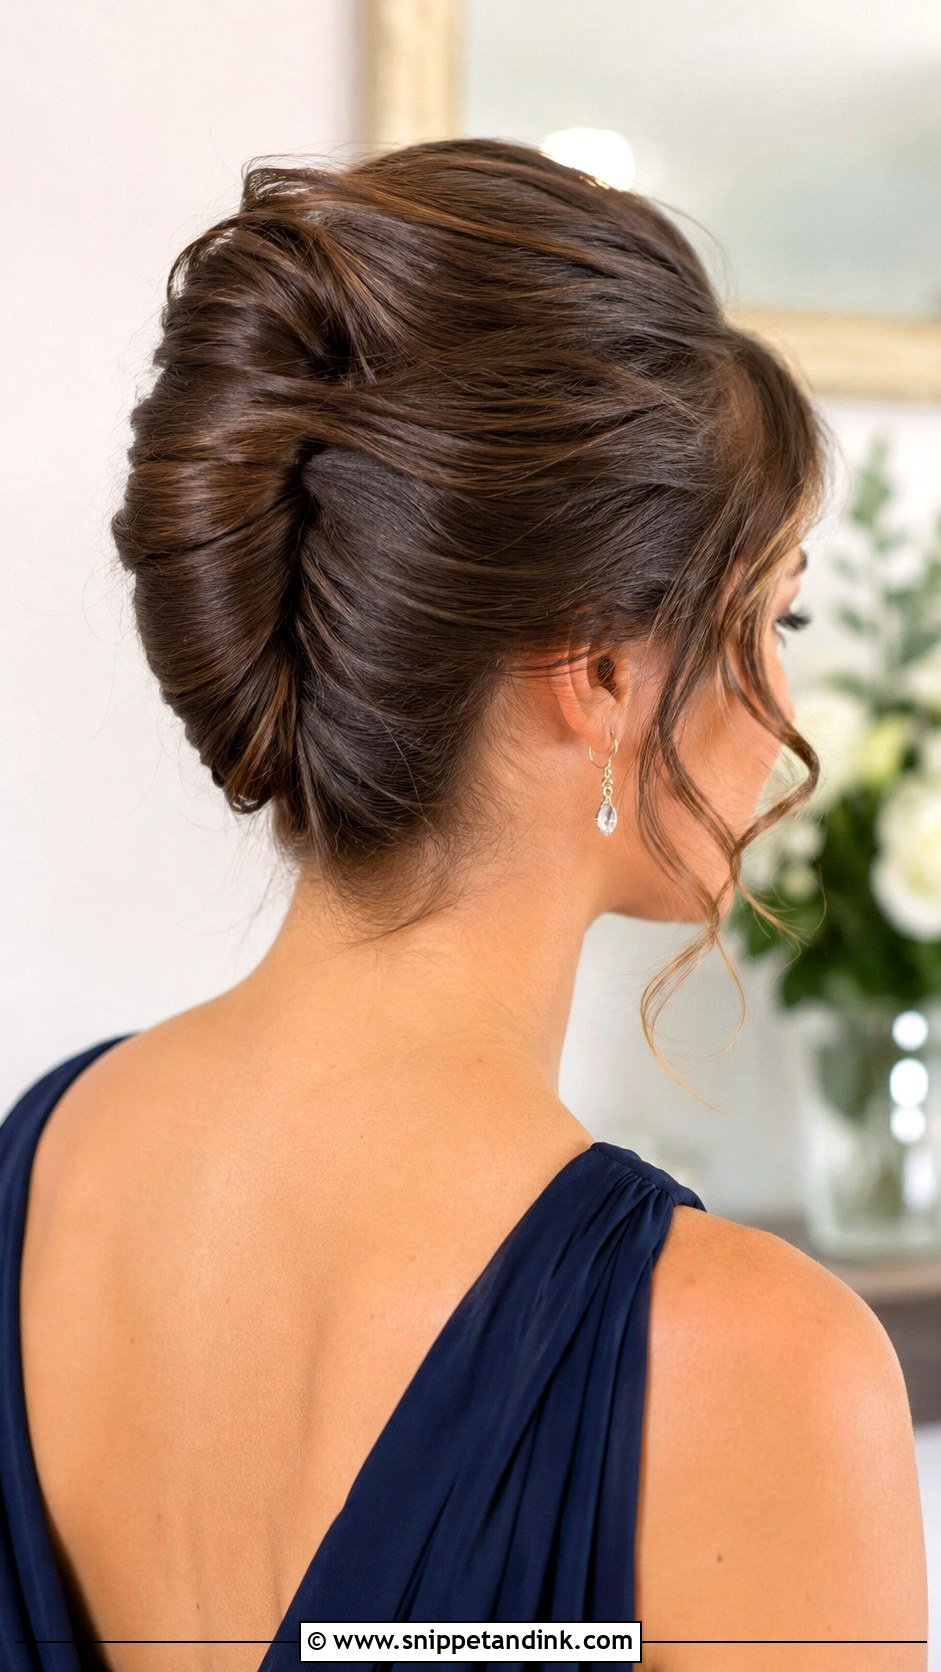
The French twist is the one I pin most carefully. The hair is gathered, folded upward and locked with a row of interlocking pins along the seam, so the shape is held from inside rather than with spray. It gives a long line that suits high necks, one-shoulder and off-the-shoulder dresses, and it keeps the neck cool in summer heat. Very layered hair fights it, since short ends poke out of the fold. To soften it for a younger bridesmaid, I leave a few pieces at the temples. Pearl pins or plain gold clips sit well along the seam.
8. Wedding Curly Bun Bridesmaid Updo
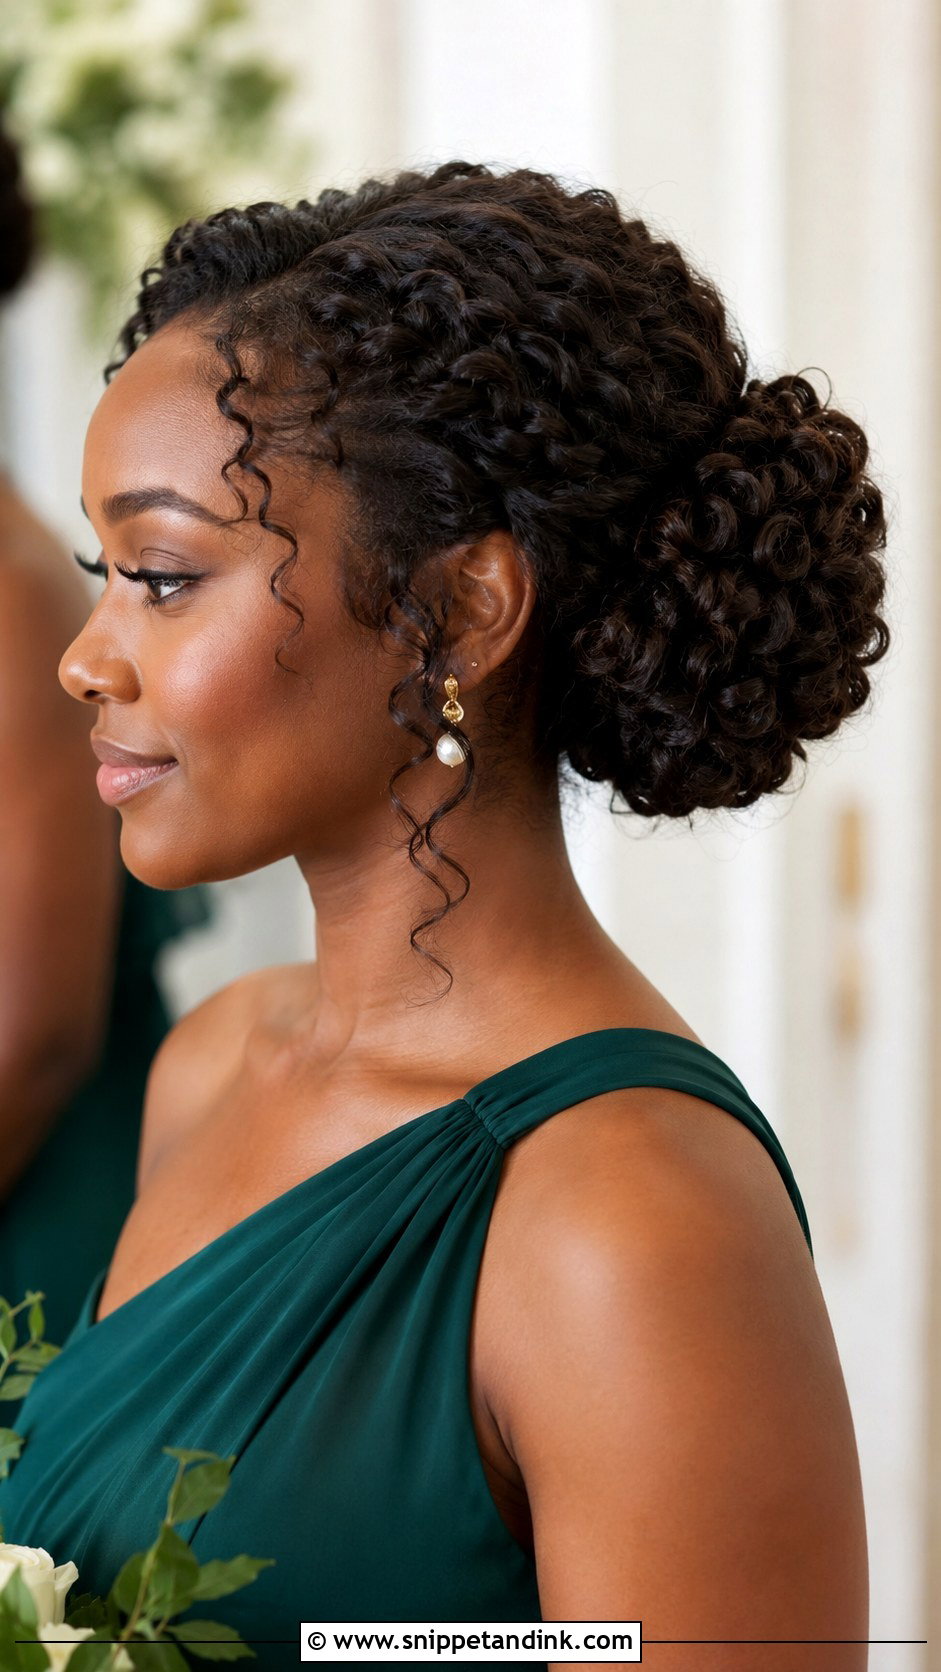
With natural curls I do not smooth everything flat, because the curl pattern is the best part. I gather and shape the curls into a soft bun and pin through the clumps, not across them. It works on natural curls, wand curls or brushed-out curls. Humidity is the real threat: I want a curl cream and a flexible hold spray in the hair before we pin, plus strong pins that grip curly texture. Keep the front soft. Pulling the hairline tight against curls tends to look severe in photos.
9. Wedding High Bun Bridesmaid Updo
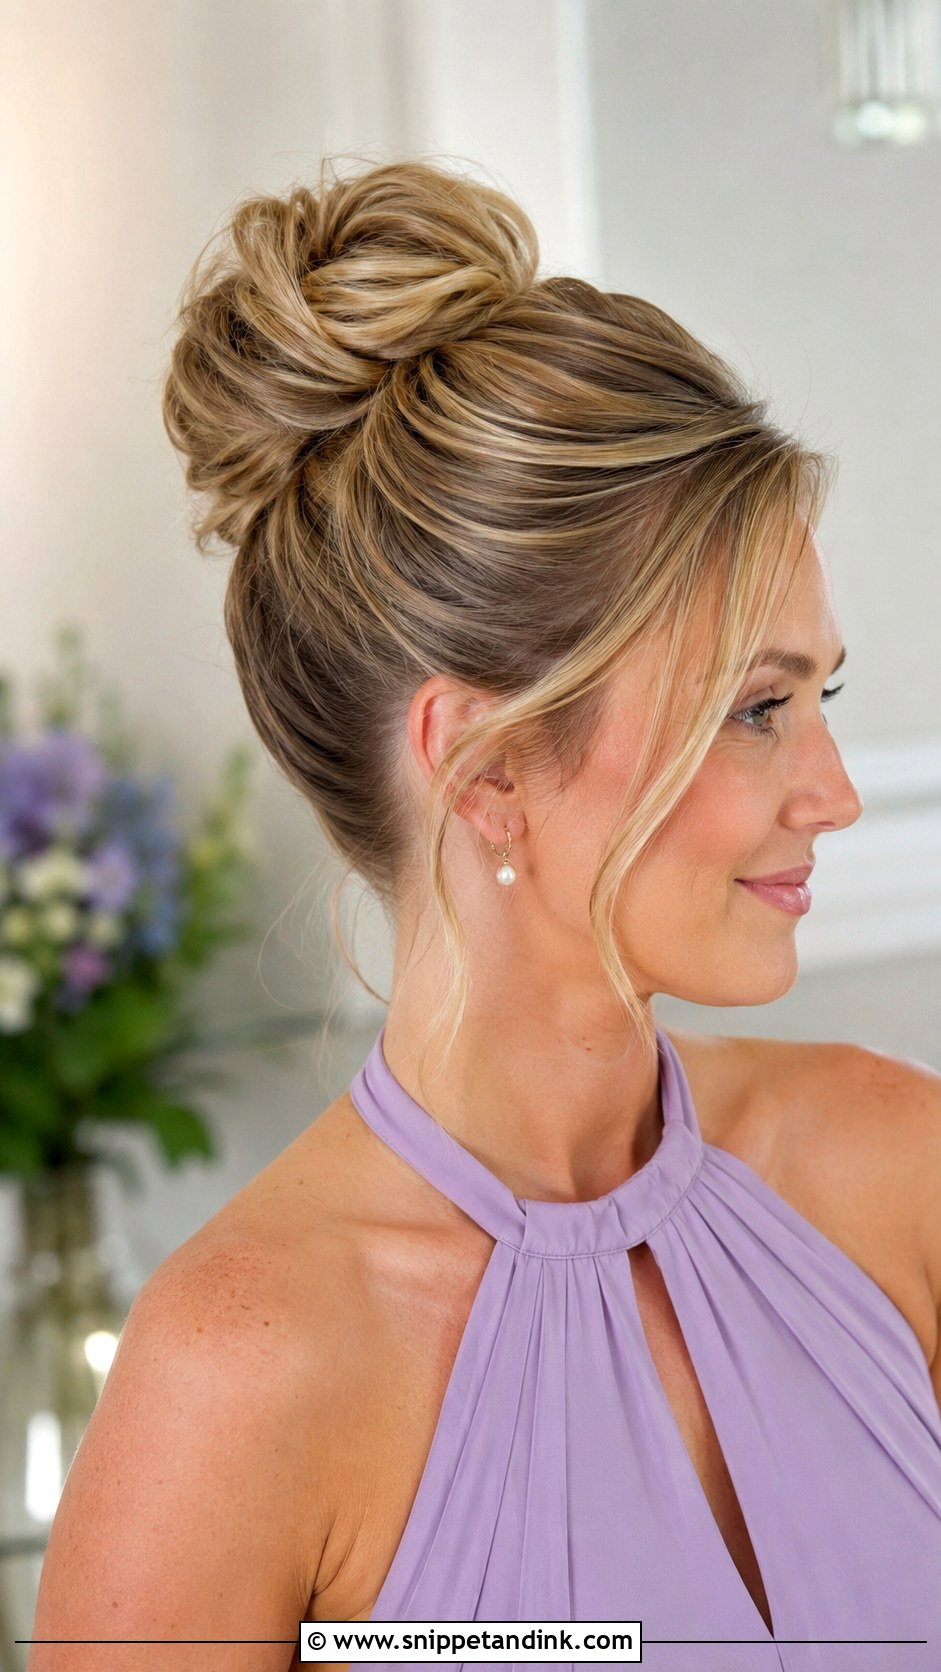
A high bun sits near the crown, lengthens the neck and makes an outfit feel more formal straight away. It is a good answer for high necklines, halters and dresses with a detailed back that you want fully visible. I build it sleek like a ballet bun or textured, depending on the rest of the party. Fine hair needs a filler to look substantial up there. Thick hair needs the opposite: a smaller, tighter bun, because a heavy one at the crown pulls on the scalp by the second hour and starts to tip.
10. Wedding Side Bun Bridesmaid Updo
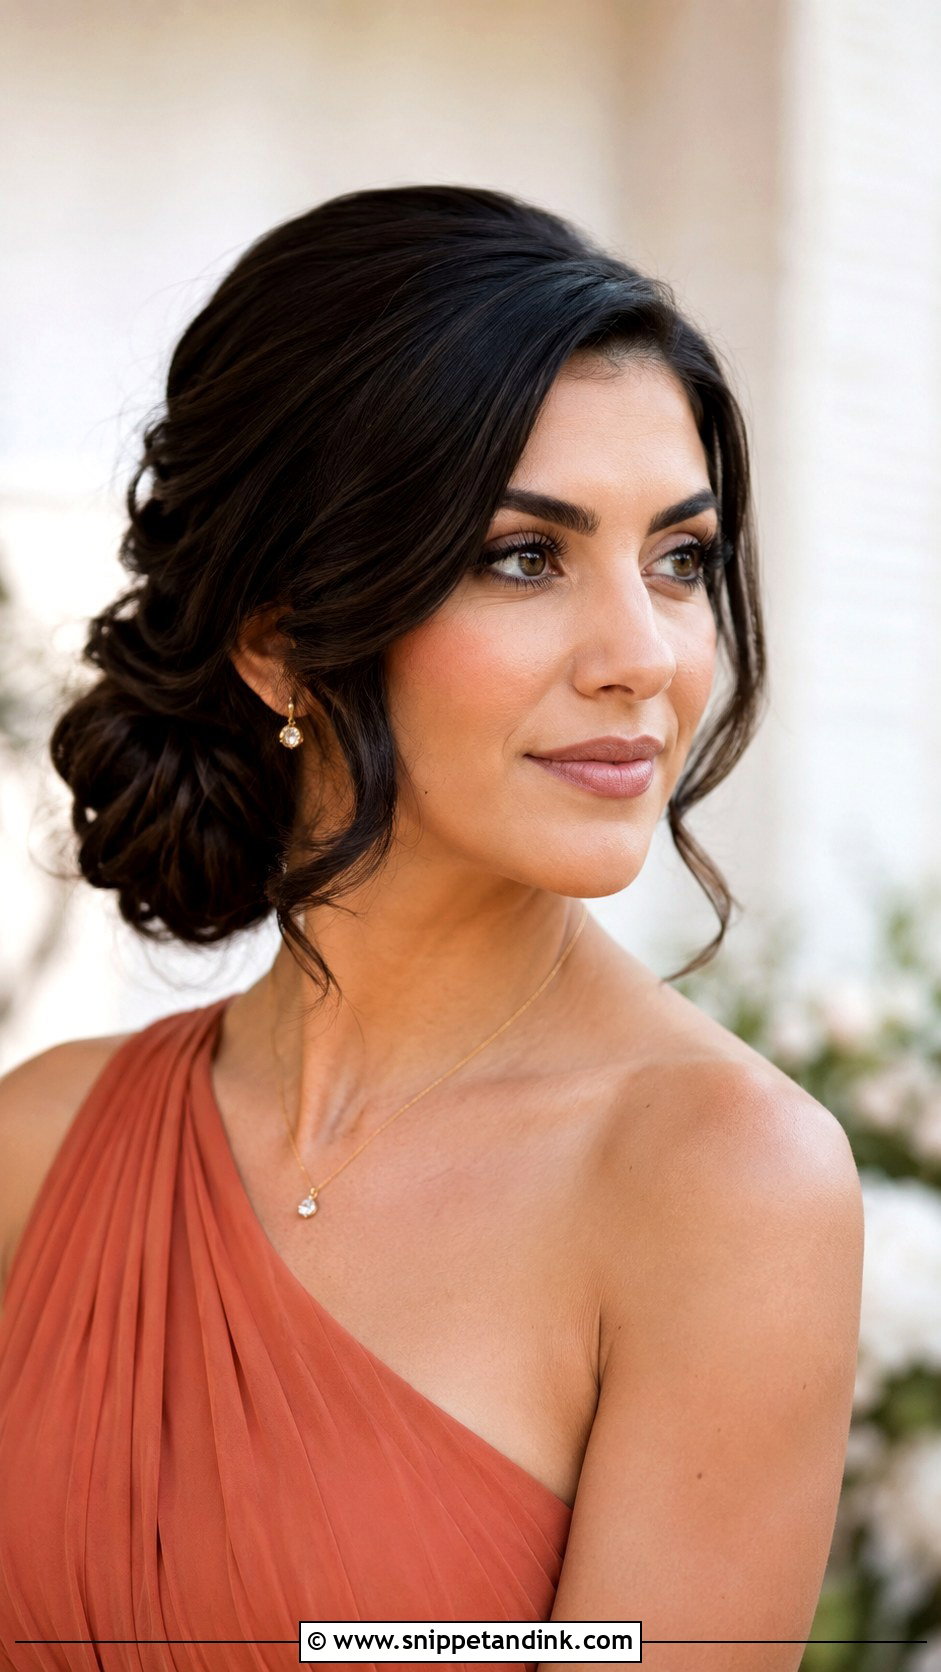
The advantage of a side bun is photographic: it sits low near one side of the nape, so it is visible from the front instead of disappearing behind the head. I pair it with a side part and soft curls, and it lines up nicely with an asymmetrical neckline when the bun sits on the opposite side to the strap. Keep it soft but not wide. One thing to settle early is which side, because in a lineup it looks better if everyone’s bun faces the same way, toward the bride. A small floral pin or pearl comb finishes it.
11. Wedding Low Knot Bridesmaid Updo
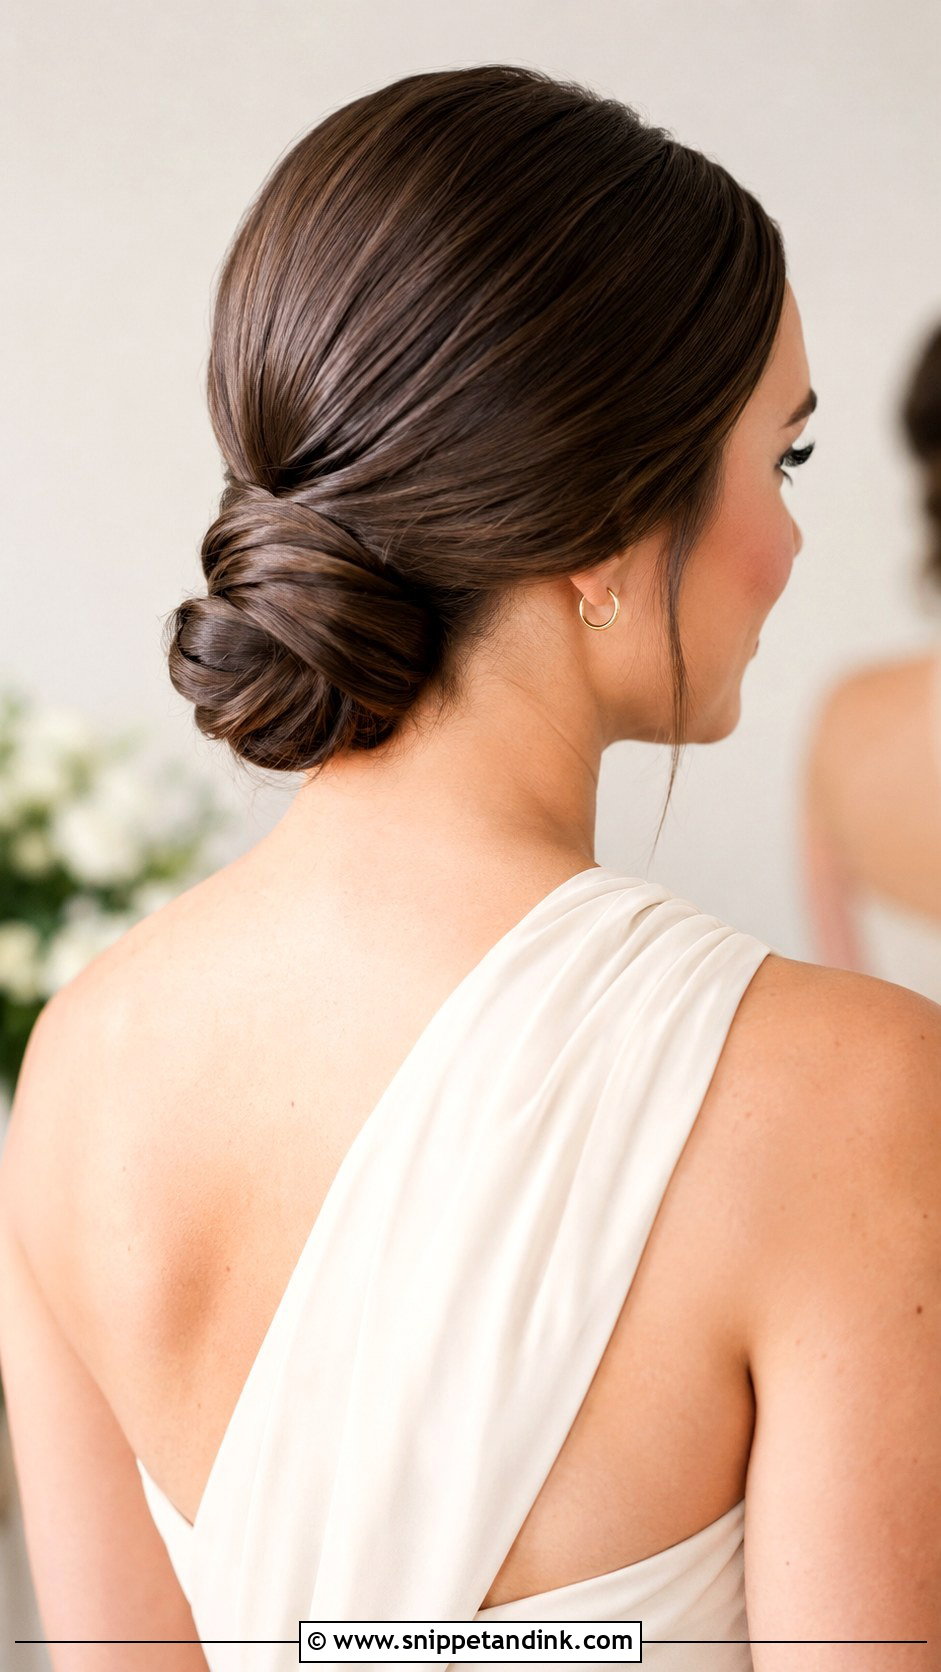
The low knot is my pick for the bridesmaid who wants neat and does not want volume. I gather the hair at the nape, twist it into a knot and pin it tight to the head, so there is almost nothing to come loose. It goes with minimalist dresses, satin and city venues. Part it in the middle for clean, or sweep it back softly for something warmer. Because it is compact, it is comfortable through a long ceremony, a car journey and hot weather, and it does not crush when she leans back in a chair.
12. Wedding Bun With Face Framing Pieces Bridesmaid Updo
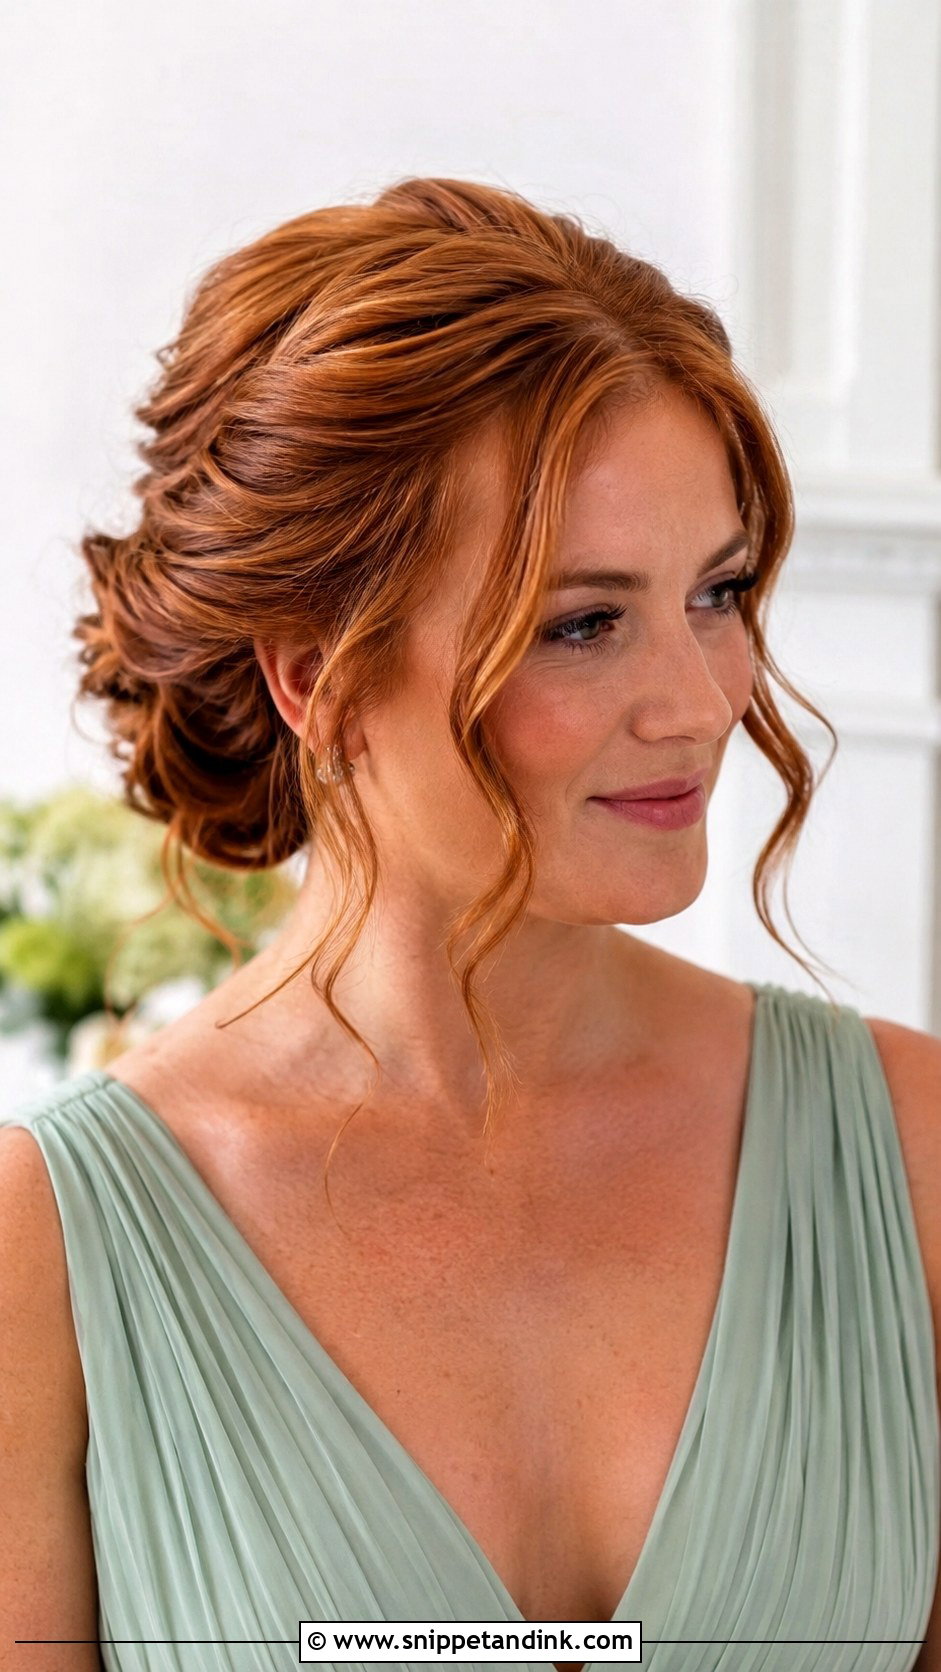
Face-framing pieces are for the bridesmaid who feels exposed with everything pulled back. The bun stays secure at the back while a few curled strands sit at the cheeks or temples. The skill is in how few: I take thin pieces, curl them away from the face and let them cool before touching them, so they do not drop straight by the first photo. They should never fall across the neckline. I add them to low buns, textured buns, twists and chignons, and they soften a structured style without loosening it.
13. Wedding Pearl Bun Bridesmaid Updo
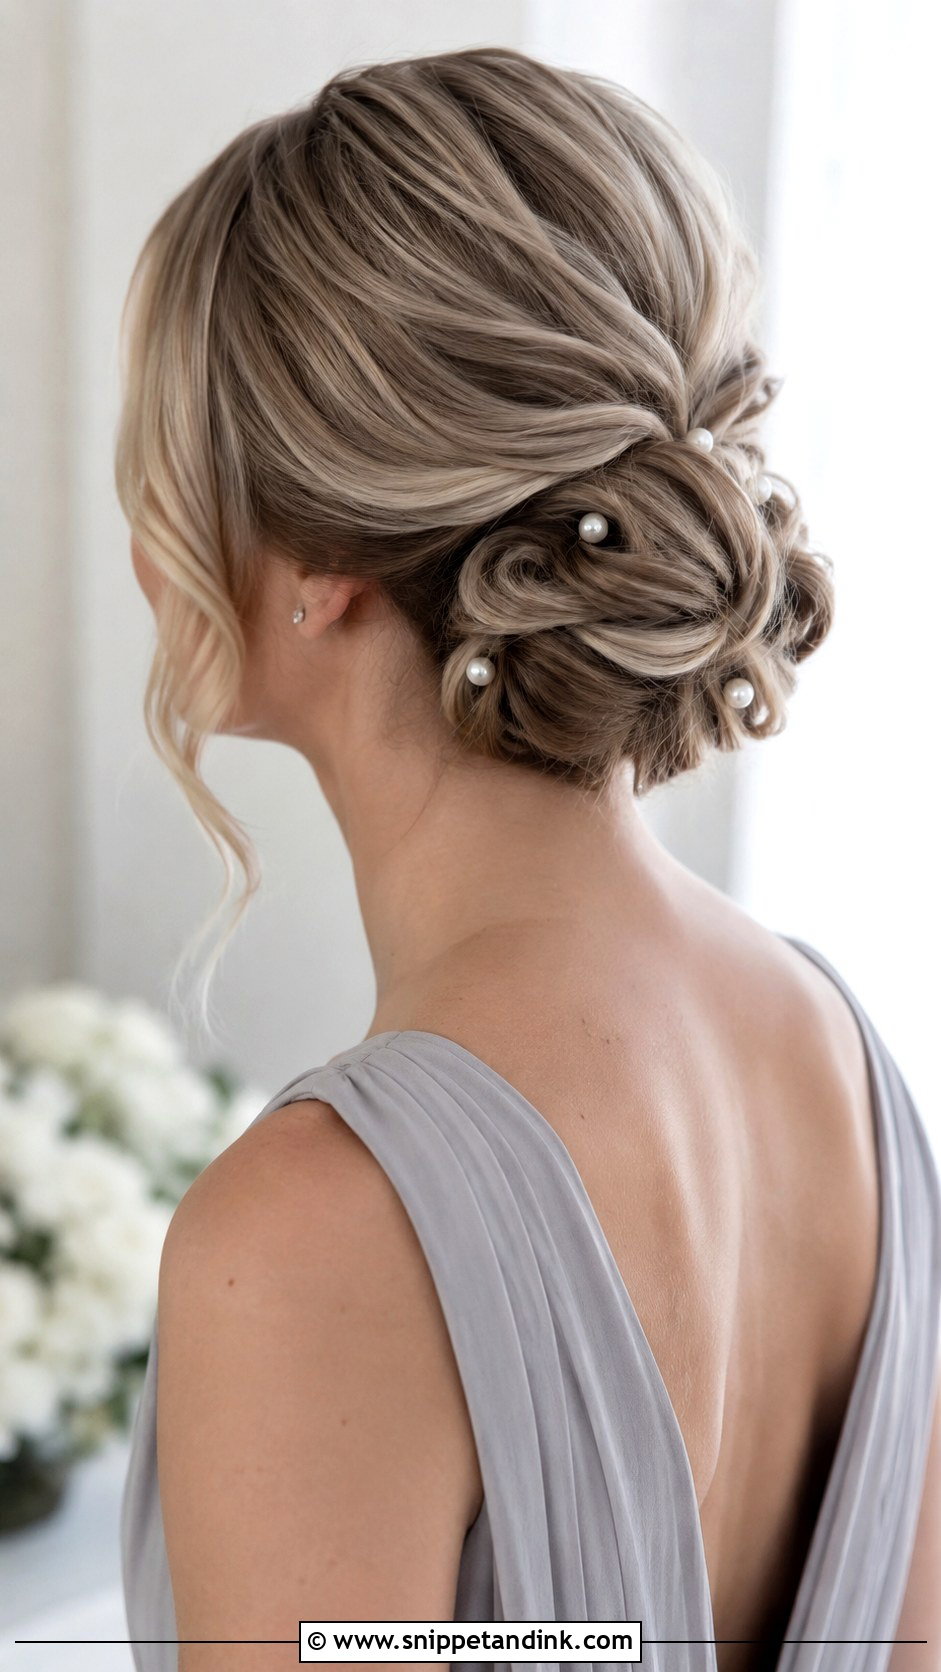
Pearls make a bun look delicate in a way flowers don’t, and they cost almost nothing in effort. I use pearl pins around a low chignon, sleek bun or textured bun. Placement matters more than quantity: around the bun or slightly to one side reads as deliberate, while pearls scattered across the head look like they slipped. If the dresses already have beading or shimmer, I go smaller. On plain dresses, a few larger pearls can carry the whole look. Push each pin in at an angle so it bites into the bun rather than sitting on top.
14. Wedding Floral Bun Bridesmaid Updo
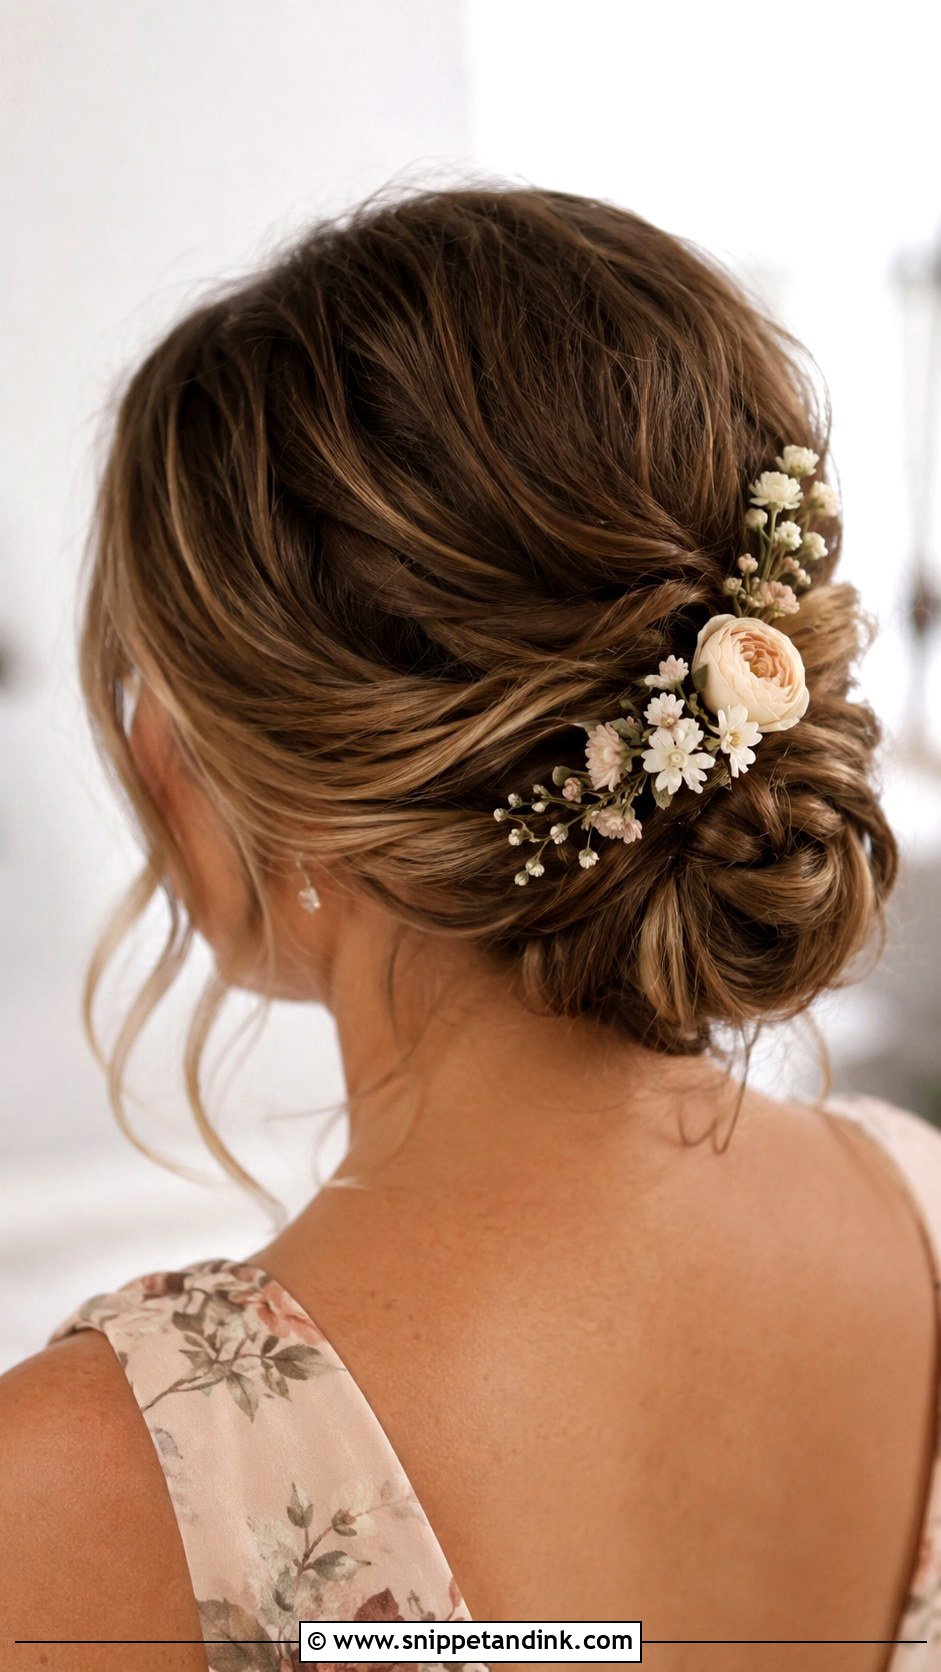
Floral buns suit spring, summer and garden weddings, and I always ask the florist for the stems early in the morning. Fresh flowers can be tucked into a low bun, braided bun or twisted updo. Small blooms like waxflower or spray roses hold up far better than a big garden rose, which wilts and gets heavy against warm hair. Matching the flowers to the bouquet ties the party together. I wire or pin them firmly and place them where the side-angle photos will catch them, since many group shots are taken slightly from the side.
15. Wedding Crown Braid Bridesmaid Updo
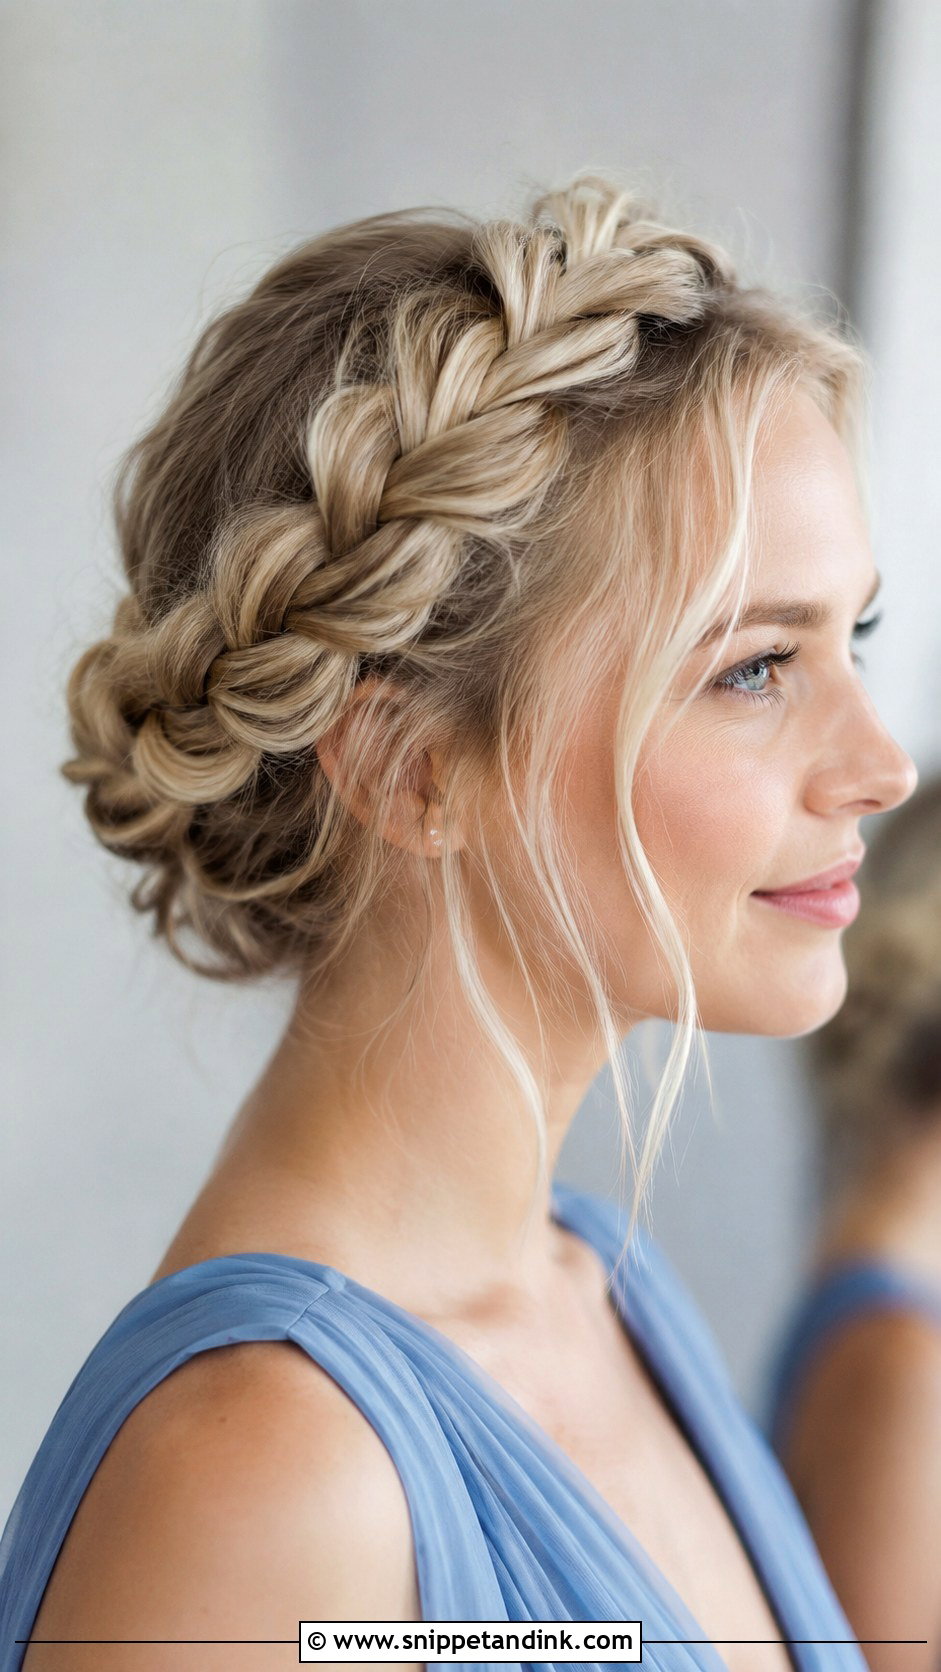
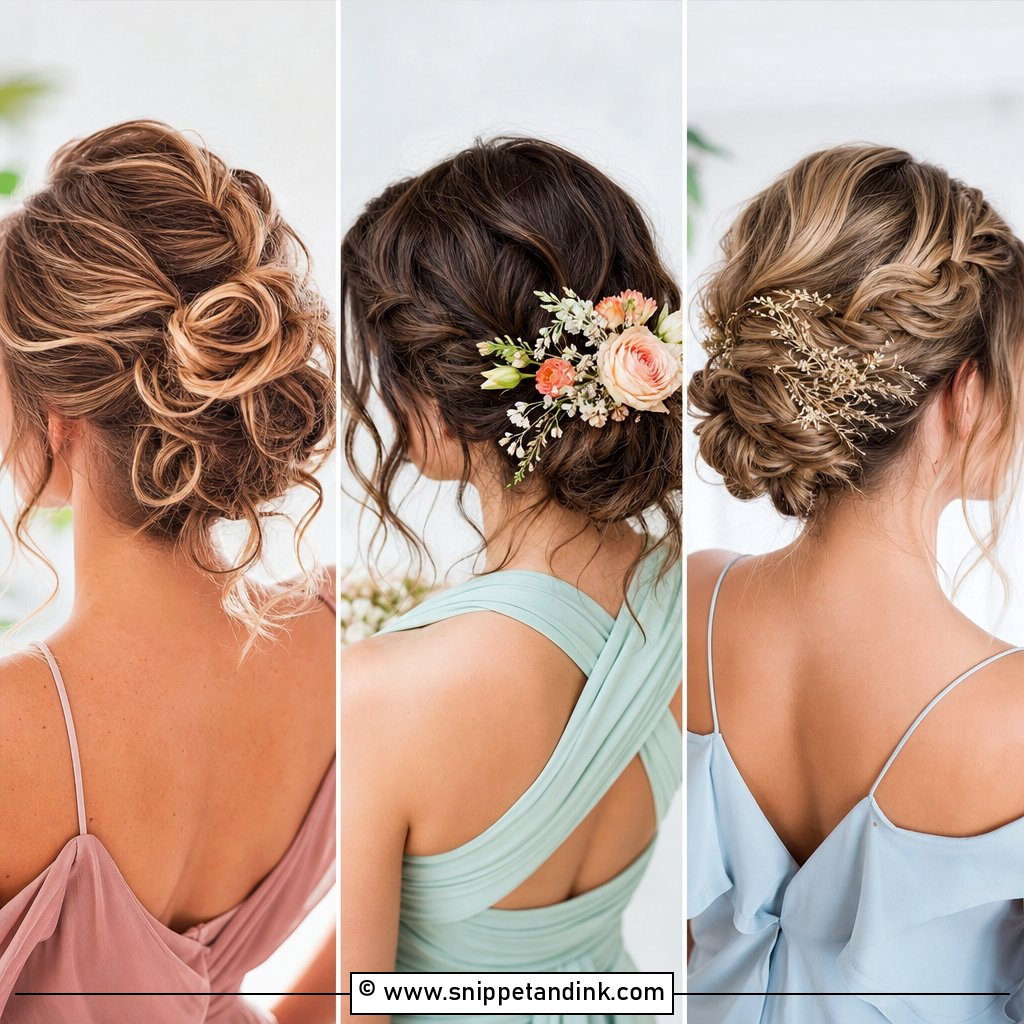
A crown braid wraps the head like a halo and is one of the most secure styles I do, which is why I suggest it for windy outdoor ceremonies. It can be full and textured or more polished. You need medium to long hair to get all the way around; with less, clip-in extensions fill the gap. On a simple dress the braid becomes the main detail. I keep the hairline slightly soft, since a crown braid pulled tight looks severe and gives some people a headache within a few hours.
16. Wedding Fishtail Bun Bridesmaid Updo
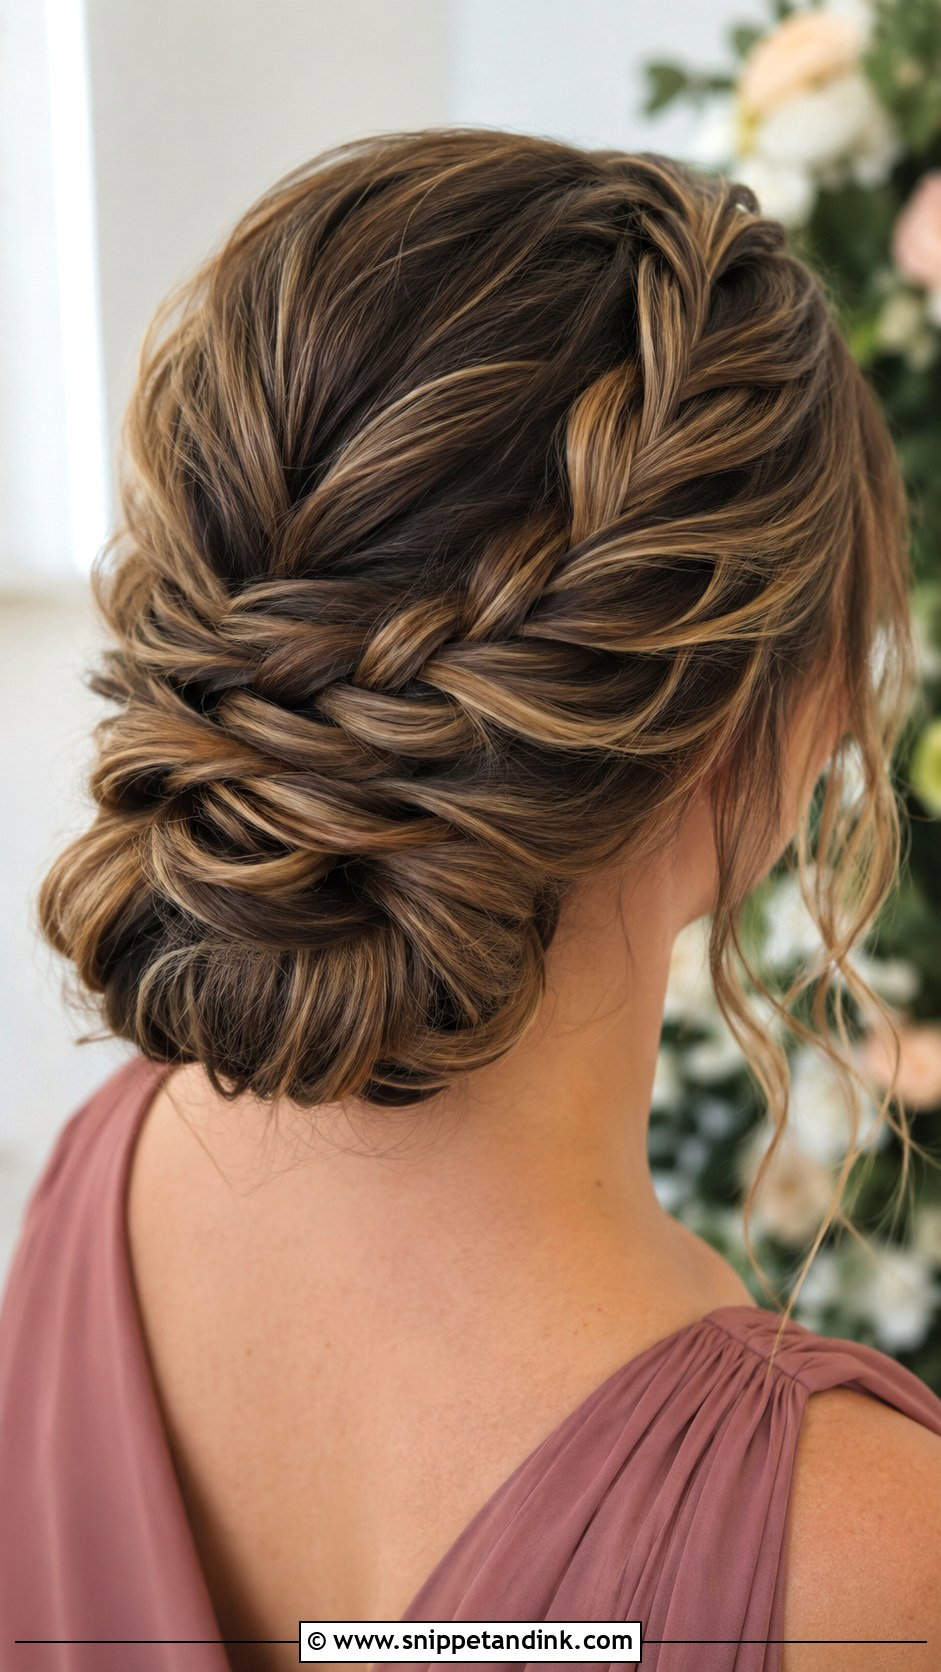
A fishtail braid has more weave than a regular three-strand, so a fishtail bun shows more detail. I work it into the bun or wrap it around. It has a handmade look that fits boho, beach and outdoor weddings, and highlights show up well in each small section. The step people skip is pulling the braid apart gently before pinning it; done afterward, it loosens the pins. Keep the bun low or mid-height so the style stays elegant rather than casual.
17. Wedding Updo For Short Hair Bridesmaid
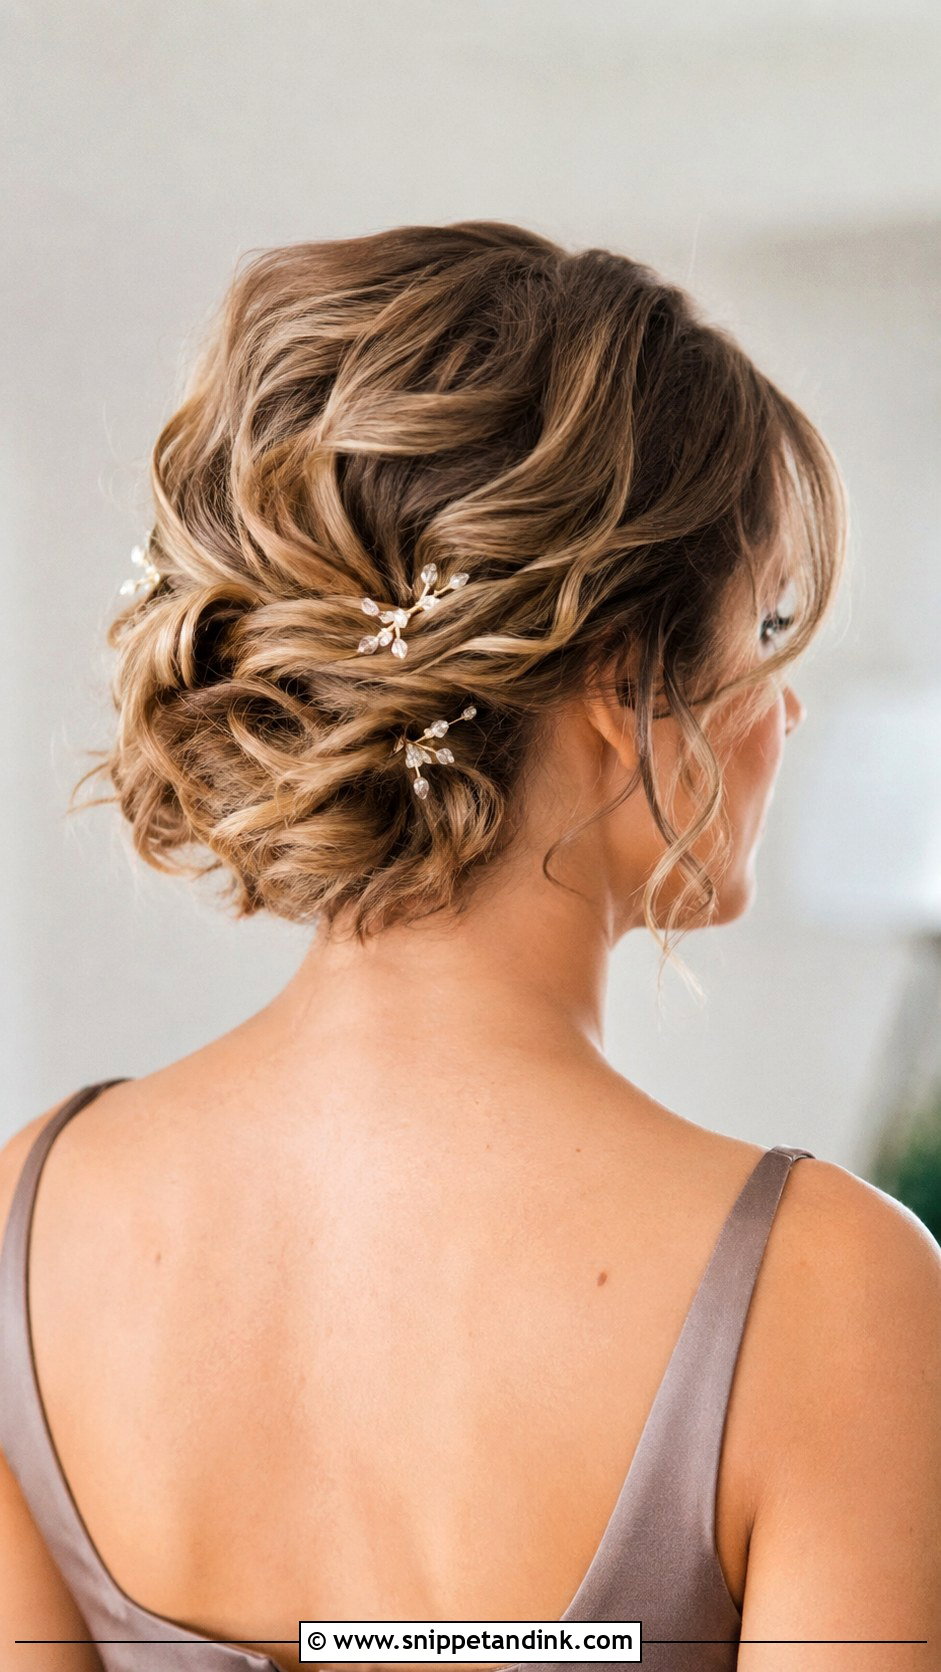
Short hair can wear an updo, but it is really a faux updo. I curl the hair, twist small sections back and pin them close to the nape so it suggests a bun without any length to wrap. It suits bob, lob, and shoulder-length cuts. Decorative pins hide the shorter ends neatly. What I won’t do is force a cut into a shape it can’t hold: if the back is shorter than about chin length, I work with the haircut and add volume rather than pinning everything up and watching pieces escape.
18. Wedding Updo For Long Hair Bridesmaid
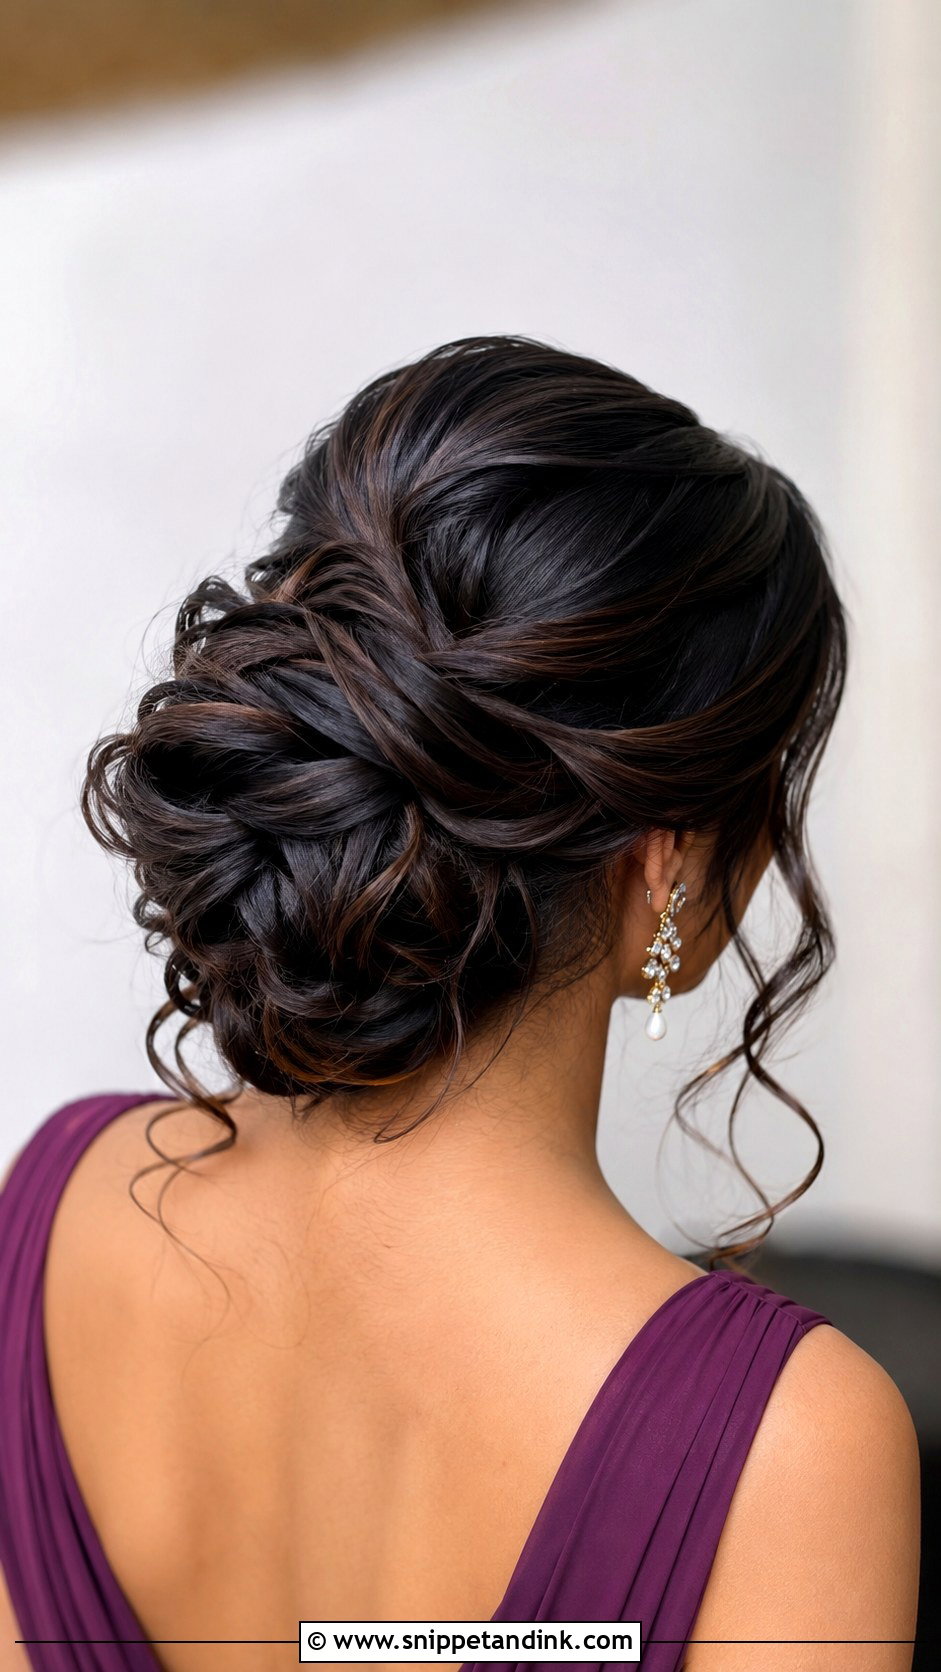
Long hair gives the most options and the most weight. Low buns, twisted chignons, braided buns and full textured updos all work, provided I section the hair and pin each section separately so no single point takes all the pull. That is what prevents the scalp ache halfway through dinner. Length shows off well in twists and loops without being left down. A low or mid-height updo usually lasts longest, because high styles on long hair slowly drag downward as the night goes on.
19. Wedding Updo For Thin Hair Bridesmaid
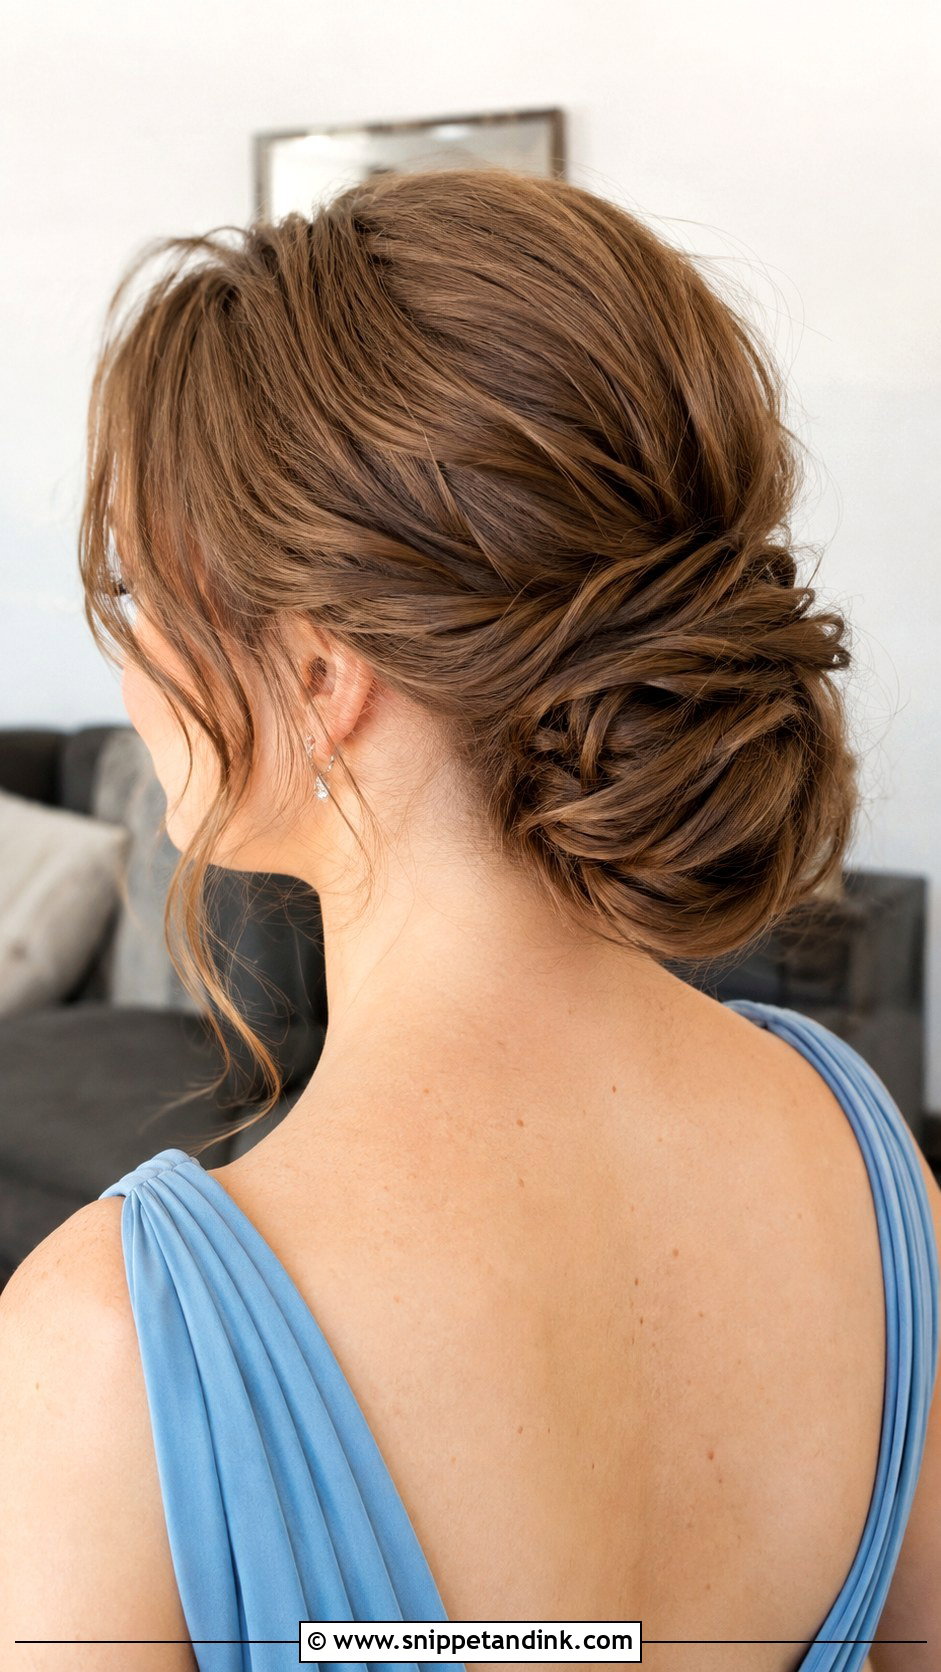
Thin hair looks fuller with texture and the right placement. A low textured bun, loose chignon or soft twist beats a tight sleek bun, which only shows how little hair there is. I add a light backcomb at the crown and waves through the lengths so the pins have something to grip. A small bun filler or clip-in pieces help if she wants a bigger shape. Product is the trap: heavy creams and too much spray flatten fine hair, so I use dry texture spray and a flexible hold.
20. Wedding Updo For Thick Hair Bridesmaid
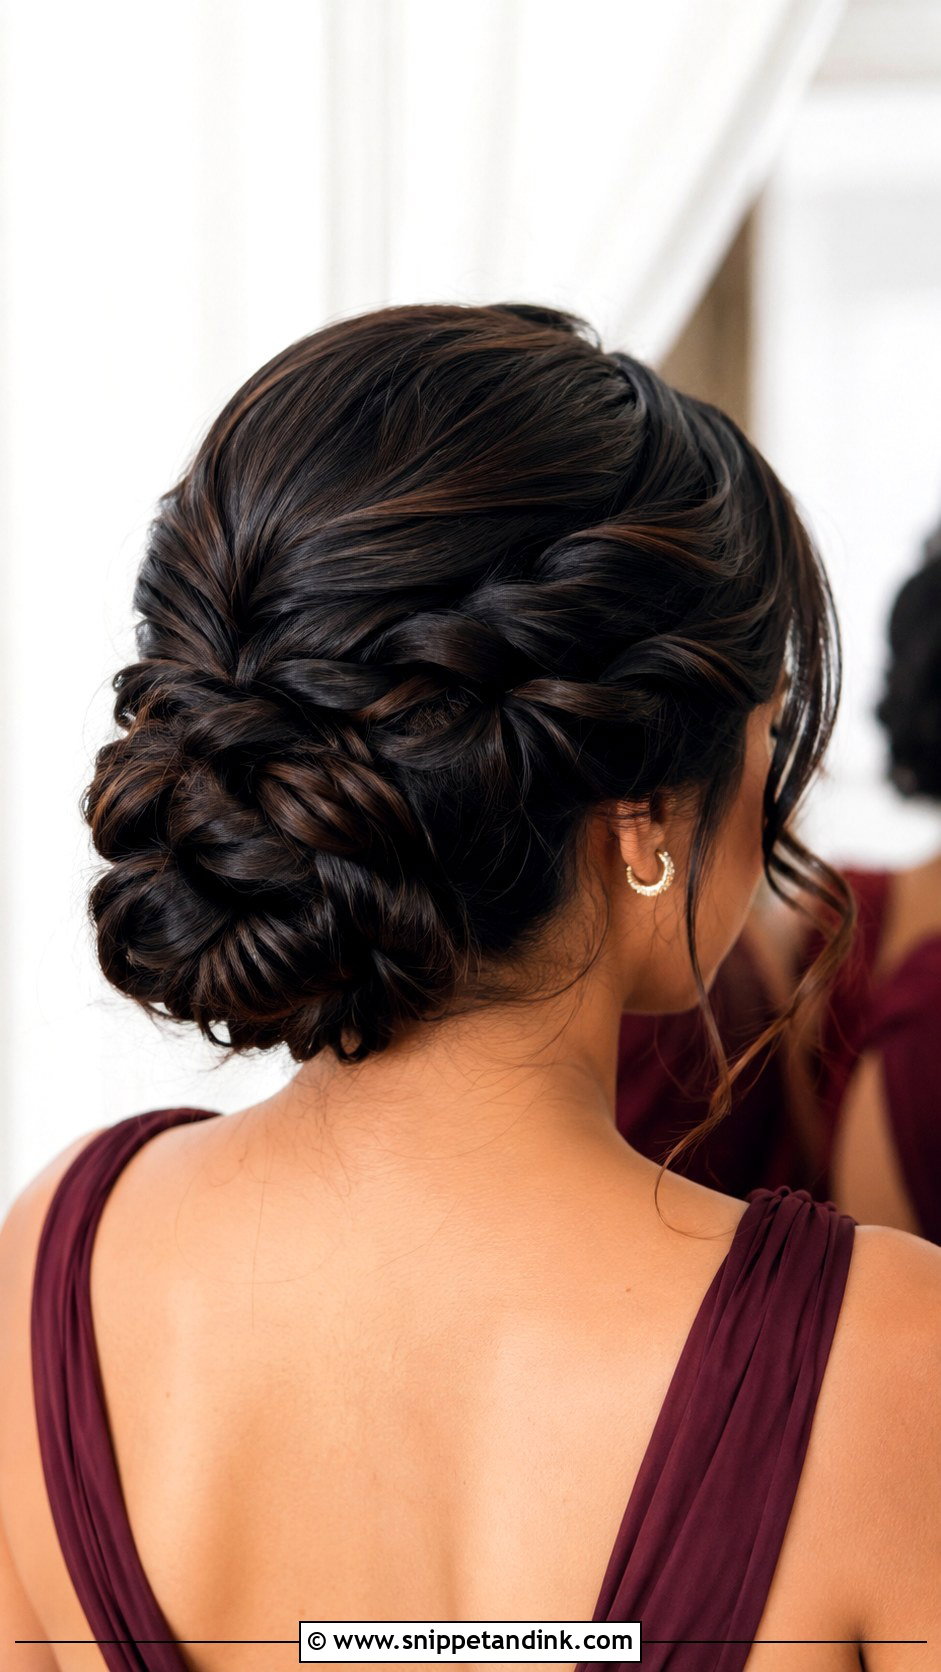
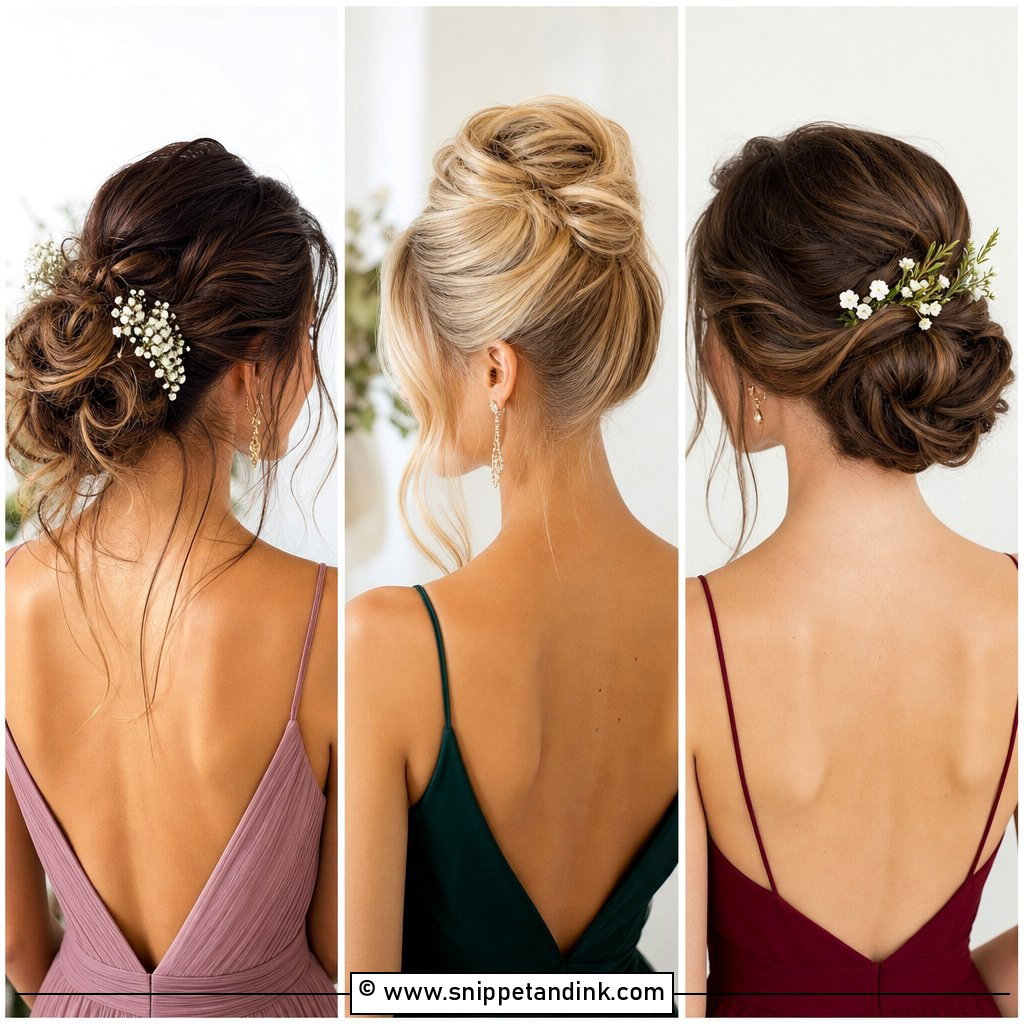
Thick hair holds an updo well but takes more time and more pins. A low chignon, braided bun, French twist or sectioned twisted bun manages the weight while still showing fullness. I divide it into smaller sections instead of forcing everything into one bulky bun, which gives a cleaner shape and lets the pins actually hold. Smoothing cream, strong pins and a flexible finishing spray do the rest. For timing, book thick hair into the earlier chairs, since it often takes longer to curl and set than anyone else’s.
Fine, Curly and Thick Hair in the Same Lineup
A group rarely shares one hair type, and the mistake is giving everyone the exact same updo. A sleek bun that looks sharp on thick straight hair can look thin on fine hair and fight a natural curl pattern all day. I match the party with three things instead: the same height on the head, the same finish (all sleek or all textured), and the same accessory.
What I adjust for each texture
- Fine hair: a textured version with a filler, so it reads as the same size as everyone else’s from a distance.
- Curly or coily hair: the curls shaped into the bun rather than straightened, with a curl cream so humidity does not frizz the edges.
- Thick hair: sectioned pinning and a slightly smaller bun, so it matches the others in size and does not ache.
- Short hair: a faux updo at the same height, finished with the shared accessory to tie it in.
In the group photo, height and finish carry the match. Nobody notices that one bun is braided and another is twisted.
Unpinning at Midnight Without Snapping Hair
An updo can have thirty or more pins in it, and pulling them out in a hurry is how hair breaks. Take it down slowly, feeling for each pin and sliding it out the way it went in. Do not brush through set, sprayed hair while it is dry. Work a little conditioner or oil through the lengths first, finger-detangle, and then use a wide-tooth comb from the ends up. If the scalp feels tender after a tight style, that is normal; it usually settles by the next morning.
Most Bridal Parties End Up Somewhere Low and Soft
Bridesmaid updos stay popular because they keep hair off the shoulders and survive photos and dancing better than hair worn down. The right one depends on the dress, venue, season, length and how much pull a bridesmaid can tolerate. A sleek bun suits a city wedding; a textured low bun or braided chignon sits better at a garden or beach ceremony. Nobody needs the identical style. Agree on one family, such as low buns, and let each person wear the version that suits her hair.
You'll Like These Ideas:


Leave a Reply