
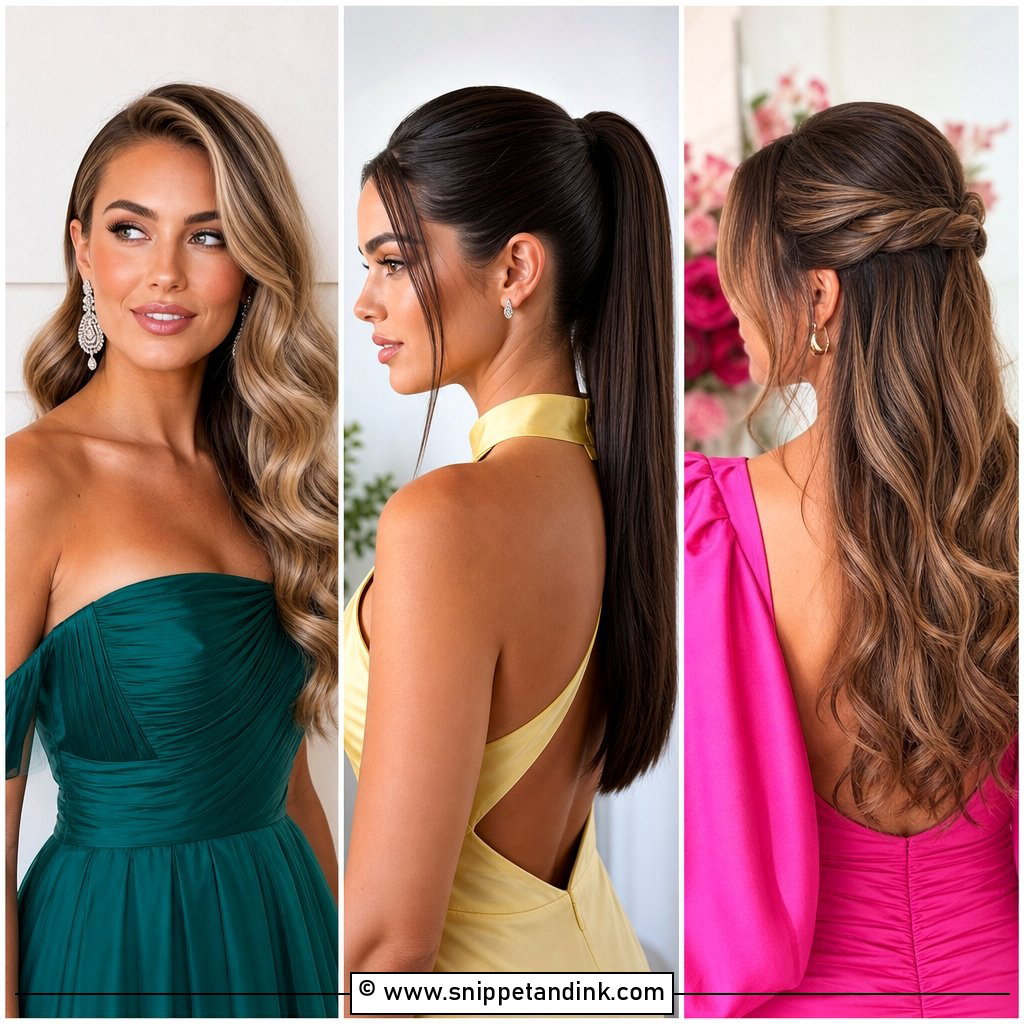
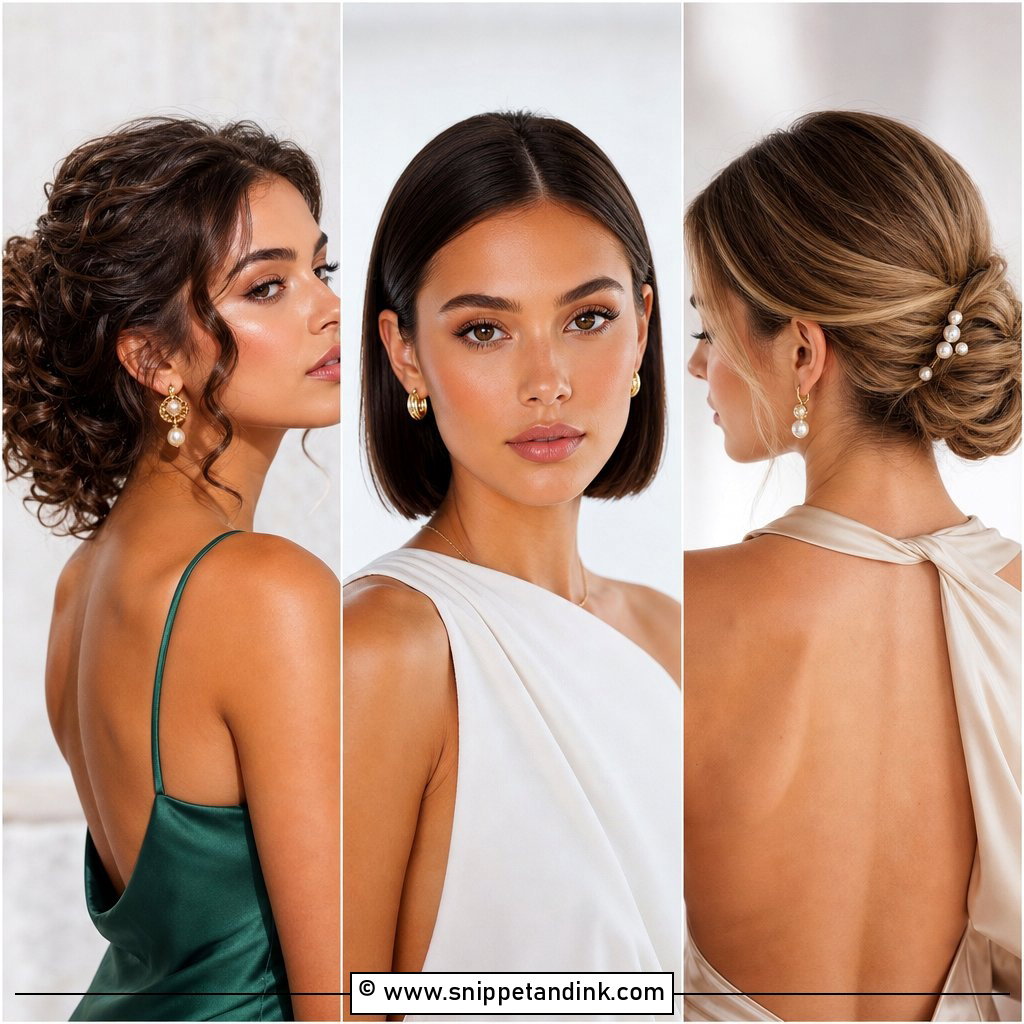
Guests rarely get a stylist. You’re usually doing your own hair in a hotel bathroom, an hour before the car arrives, and it has to survive a ceremony, a dinner and a dance floor. That’s why I point guests toward half-up styles. The top is pinned, so it doesn’t fall in your face or frizz at the hairline, and the lengths stay down, so it never feels like a formal updo you’ll be pulling pins out of at midnight. There are versions for straight, curly, fine and thick hair, from simple twists to braids and voluminous waves. Below are twenty of them, and further down I’ve sorted them by how hard they are to manage alone.
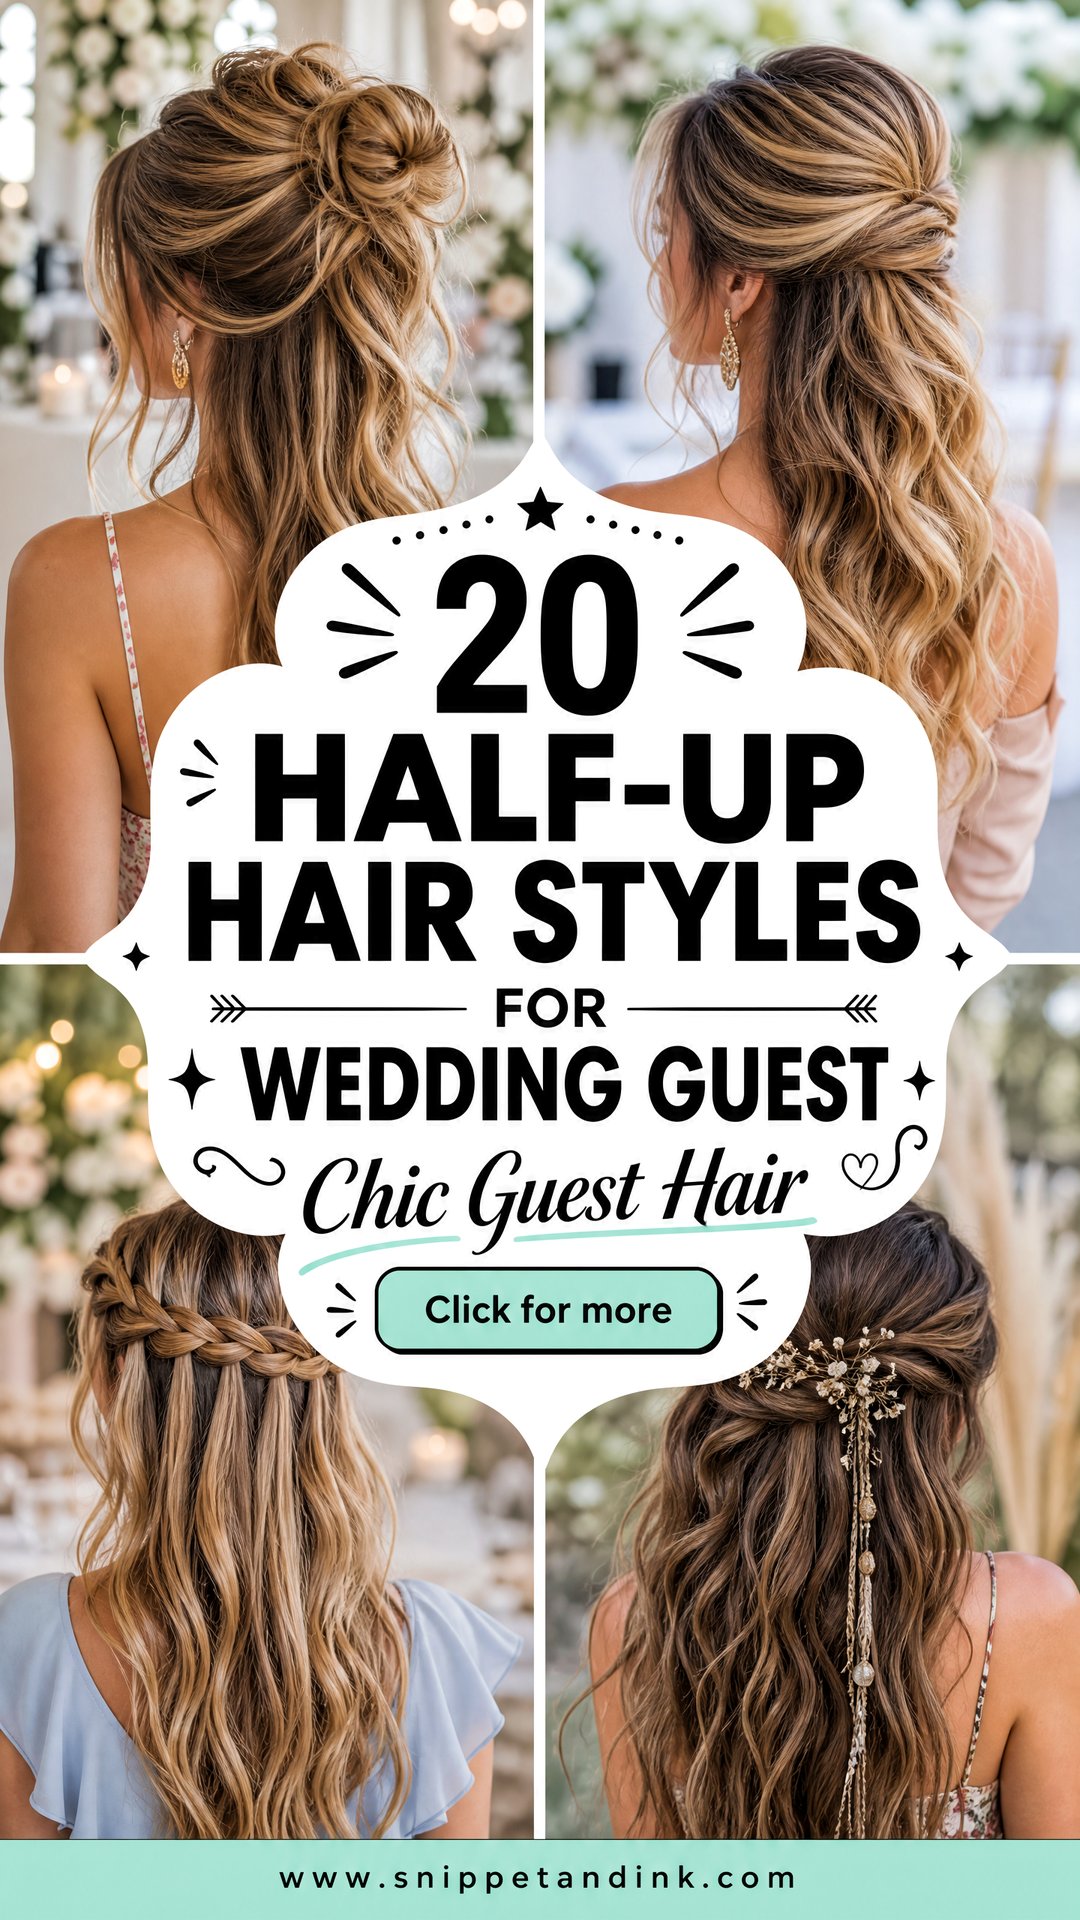
Rating the Twenty by How Hard They Are to Do Yourself
Most guests ask me the same thing: which of these can I actually manage on my own? The honest answer depends less on talent and more on whether your hands have to work behind your head where you can’t see. Here’s how I’d group them.
Ten minutes, no practice needed
Twisted sides, the twist with loose waves, the bow, the top knot, pearl pins and the sleek straight version. Each one is a gather and a few pins, and the hard work is in the curling or straightening you’d do anyway.
Worth one rehearsal
The messy bun, the knotted style, the rope braid, the fishtail, the bubble ponytail and the curled ponytail. They’re simple in principle, but the tension and the placement take a try or two to judge in a mirror.
Ask a friend
The Dutch braid crown, the crown braid and the waterfall braid all need braiding along the back of the head at an awkward angle. I’d book a quick blow-dry and style for these, or recruit someone you trust, and spend your own time on the waves underneath.
1. Half-Up Twist With Loose Waves
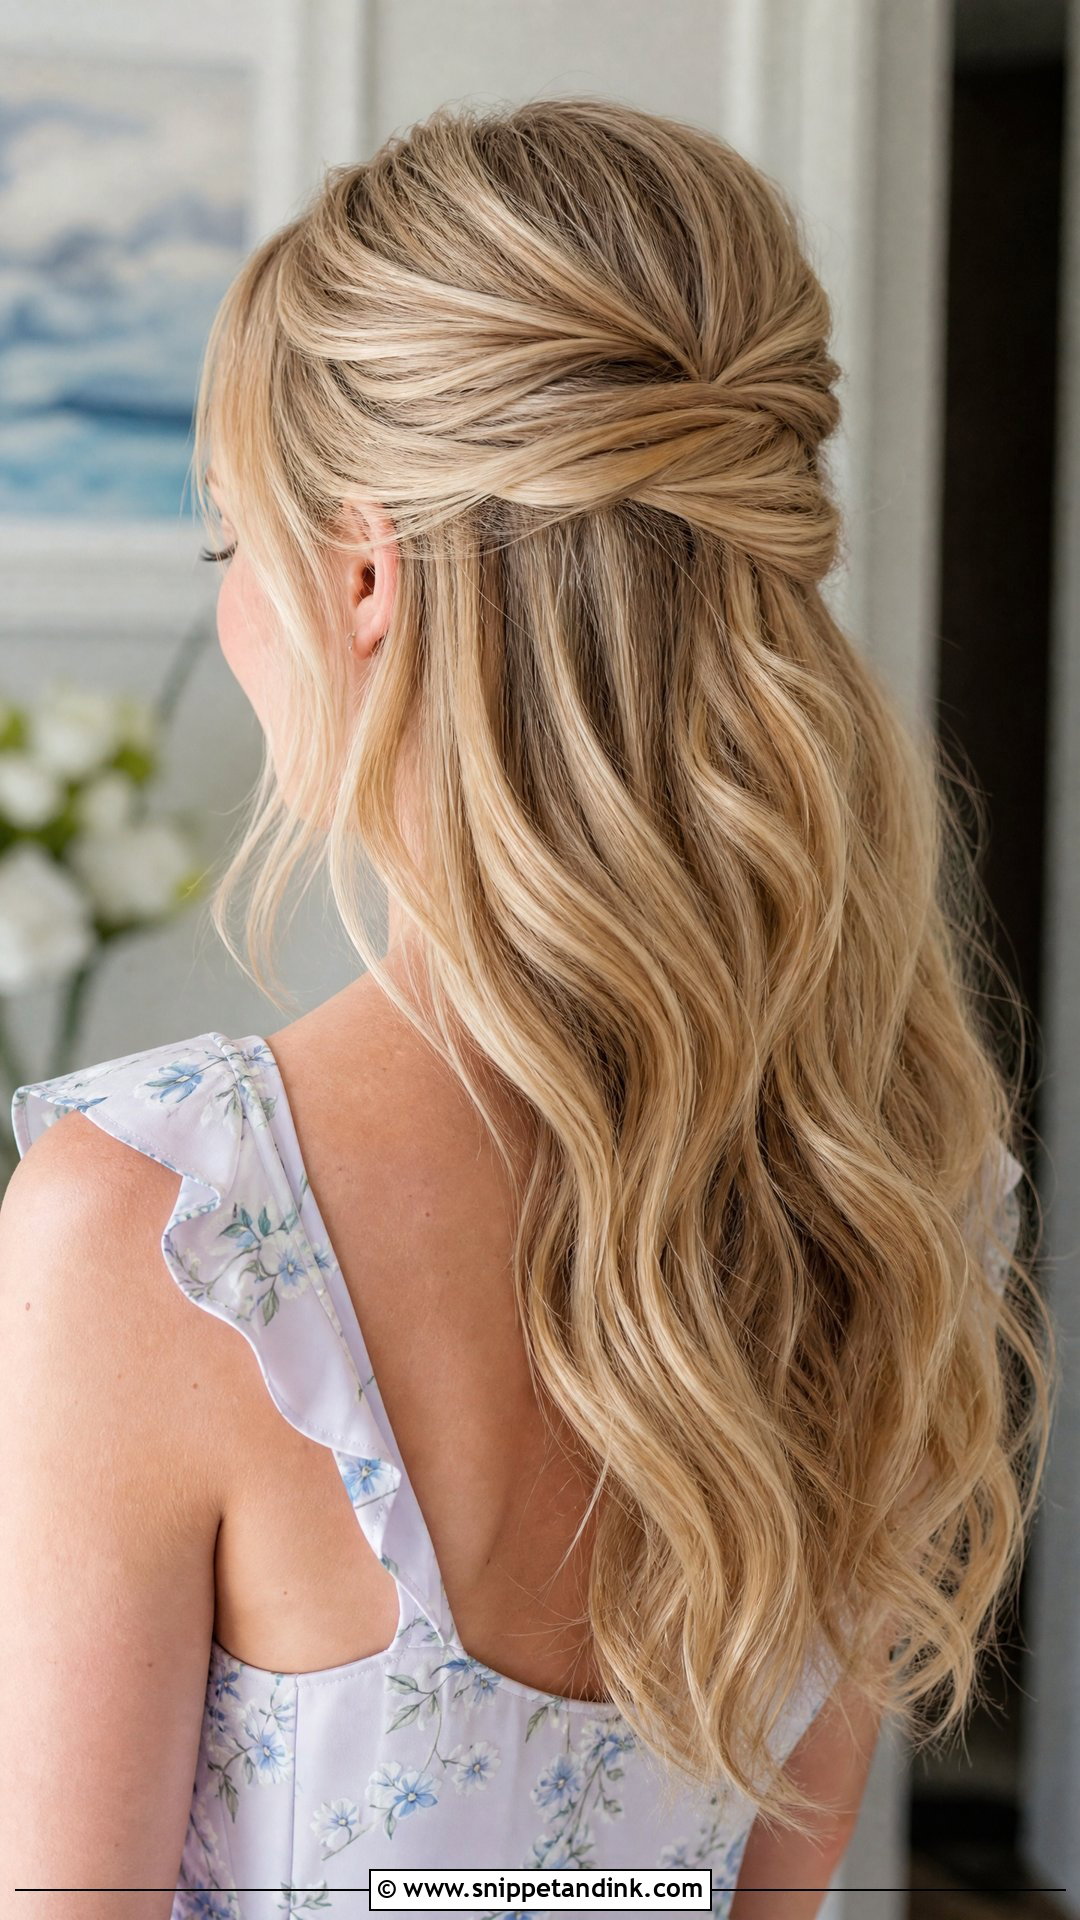
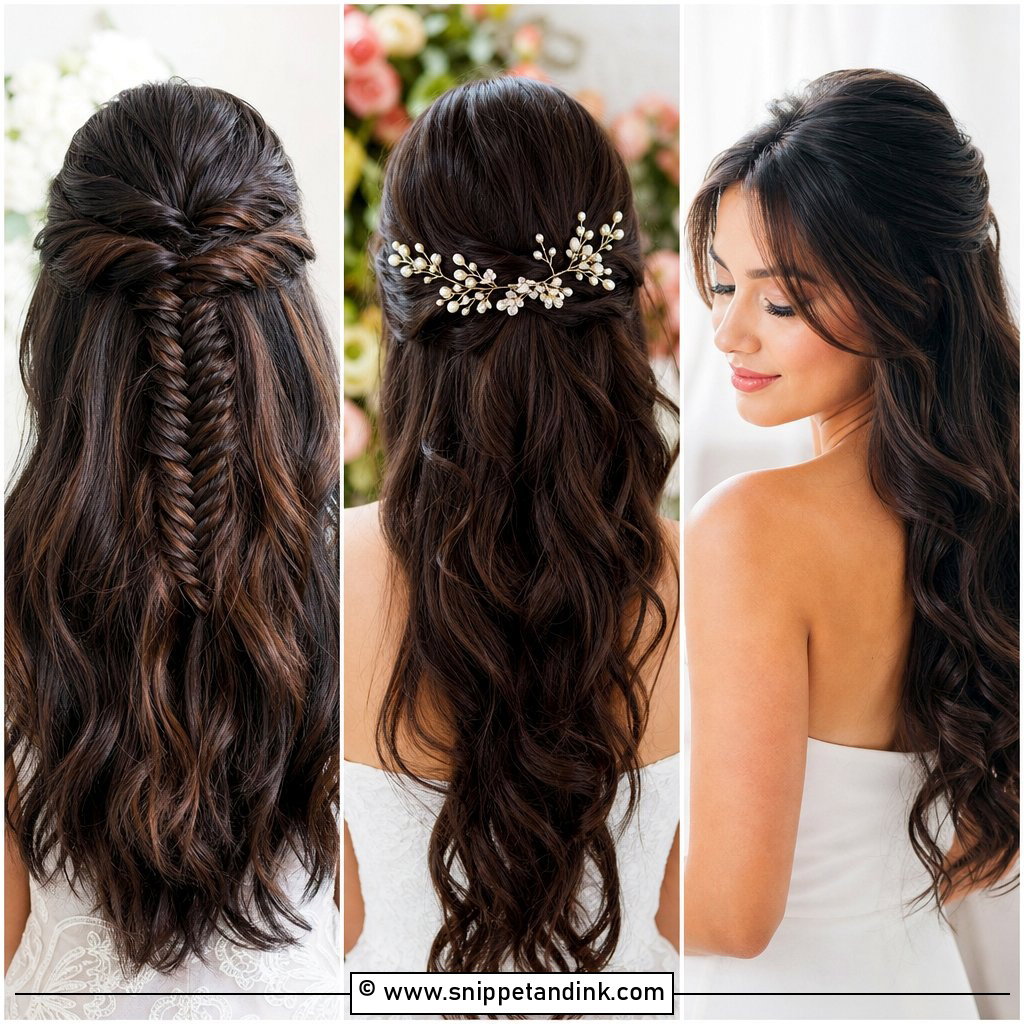
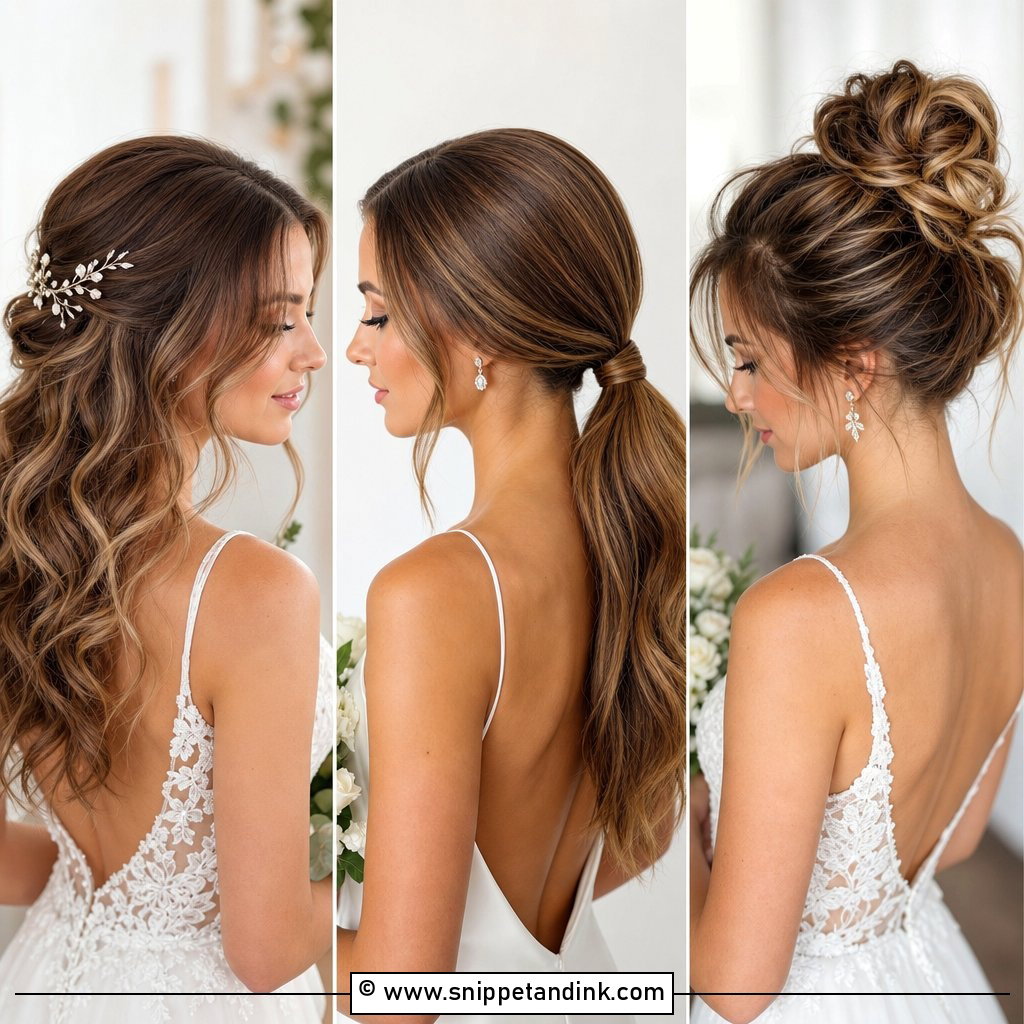
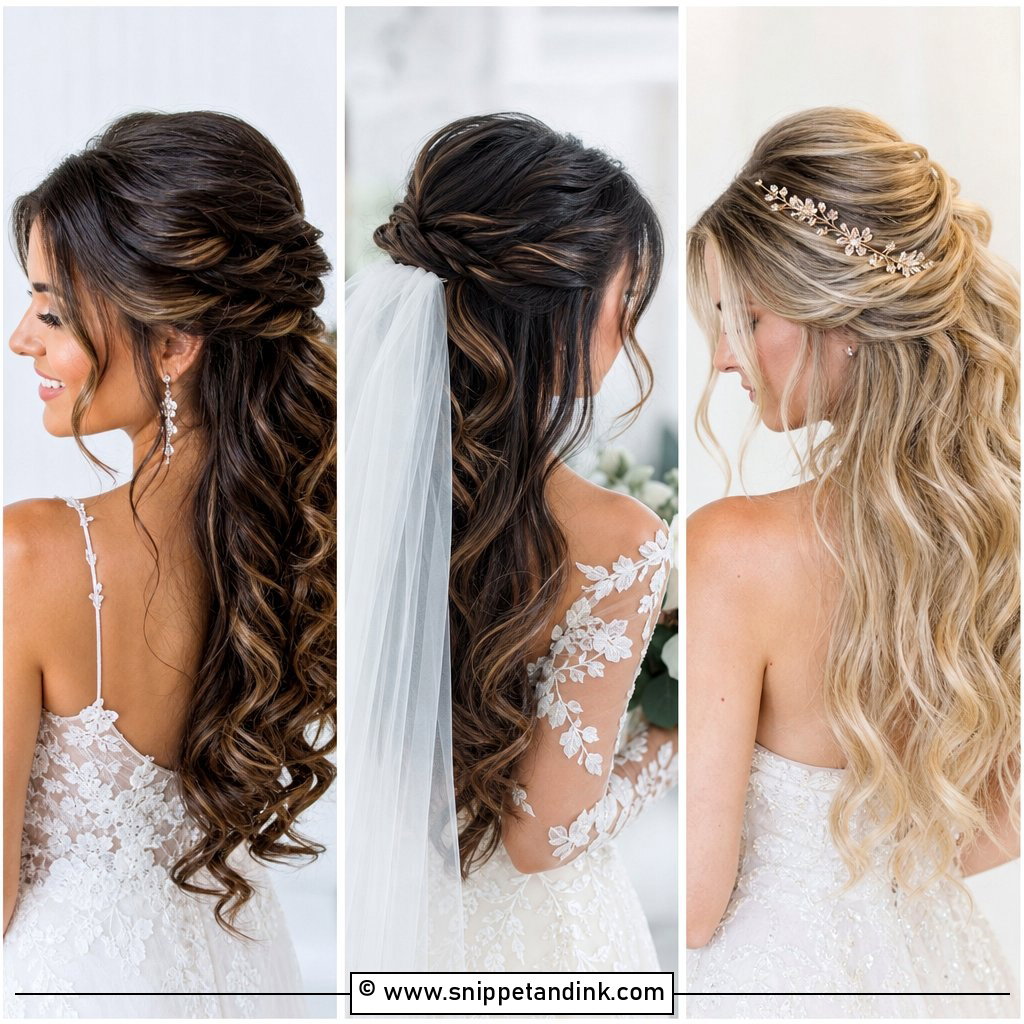
Picture soft waves cascading down your back while the front stays neatly away from your face. This is the one I’d teach any guest first. Take a section from each side above the ear, twist each one backward, away from the face, and pin the two together at the crown. The direction matters: twisting toward the face makes the section unravel within an hour. Wave the lengths below. It’s forgiving on hair that goes flat by afternoon because the twist adds height the waves don’t need to supply. One pearl pin over the join is enough decoration.
2. Half-Up Dutch Braid Crown
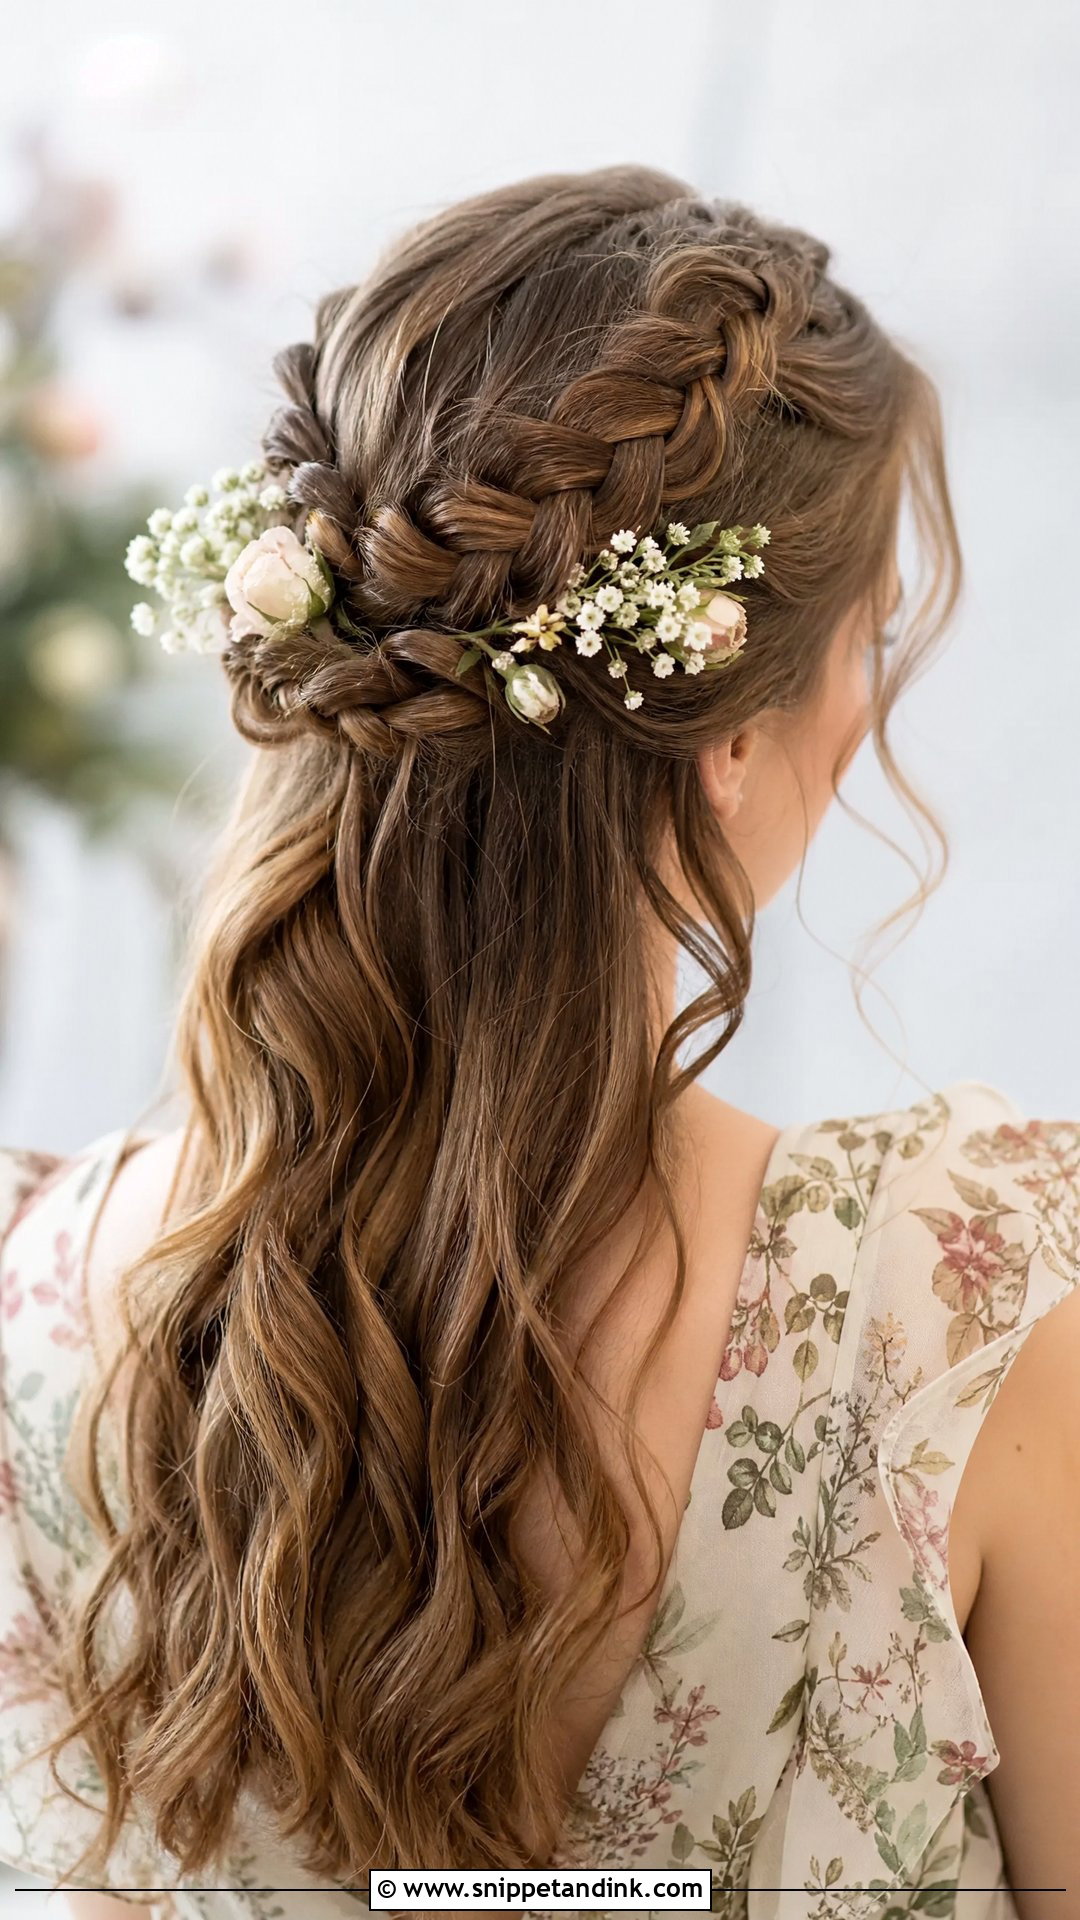
A Dutch braid sits on top of the hair rather than lying flat, because you cross the strands under instead of over. Braid two sections from the hairline back and meet them at the crown, leaving the rest straight, wavy or curled. It’s a natural match for garden and outdoor weddings. Once the braids are pinned, pull the outer loops gently to widen them. Do that slowly and evenly on both sides, since an over-pulled braid looks lopsided in photos from behind. Fresh flowers or a few gold pins tuck neatly into the plait.
3. Half-Up Messy Bun
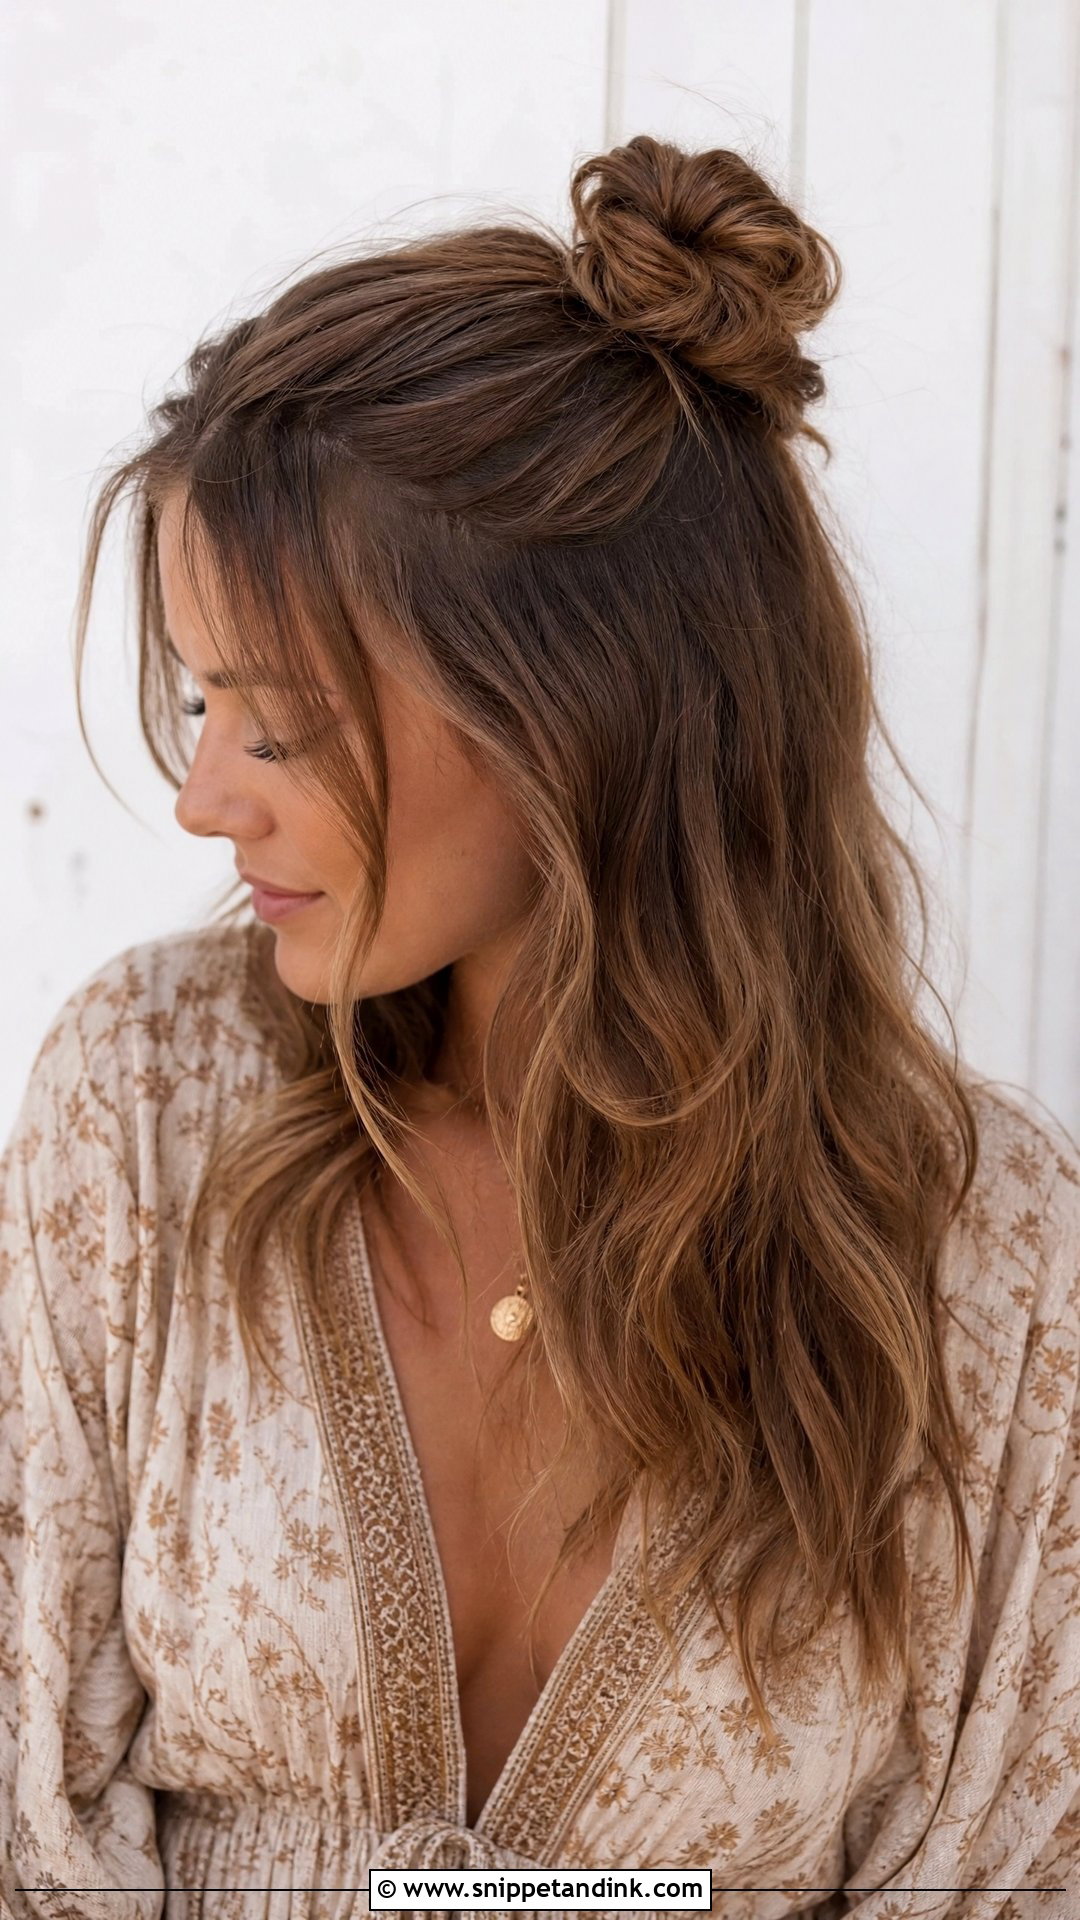
The undone look takes more control than it seems. A half-up messy bun gathers the top into a relaxed knot at the crown with a few loose pieces around the face. I’d wrap the knot around a small elastic first and then pin it, because a bun held only by pins on clean hair slides by the main course. Pull out a couple of strands at the temples. The lengths can stay straight or take gentle waves. Keep this one for casual or bohemian weddings; at a black-tie evening it can read as unfinished.
4. Half-Up With Satin Bow
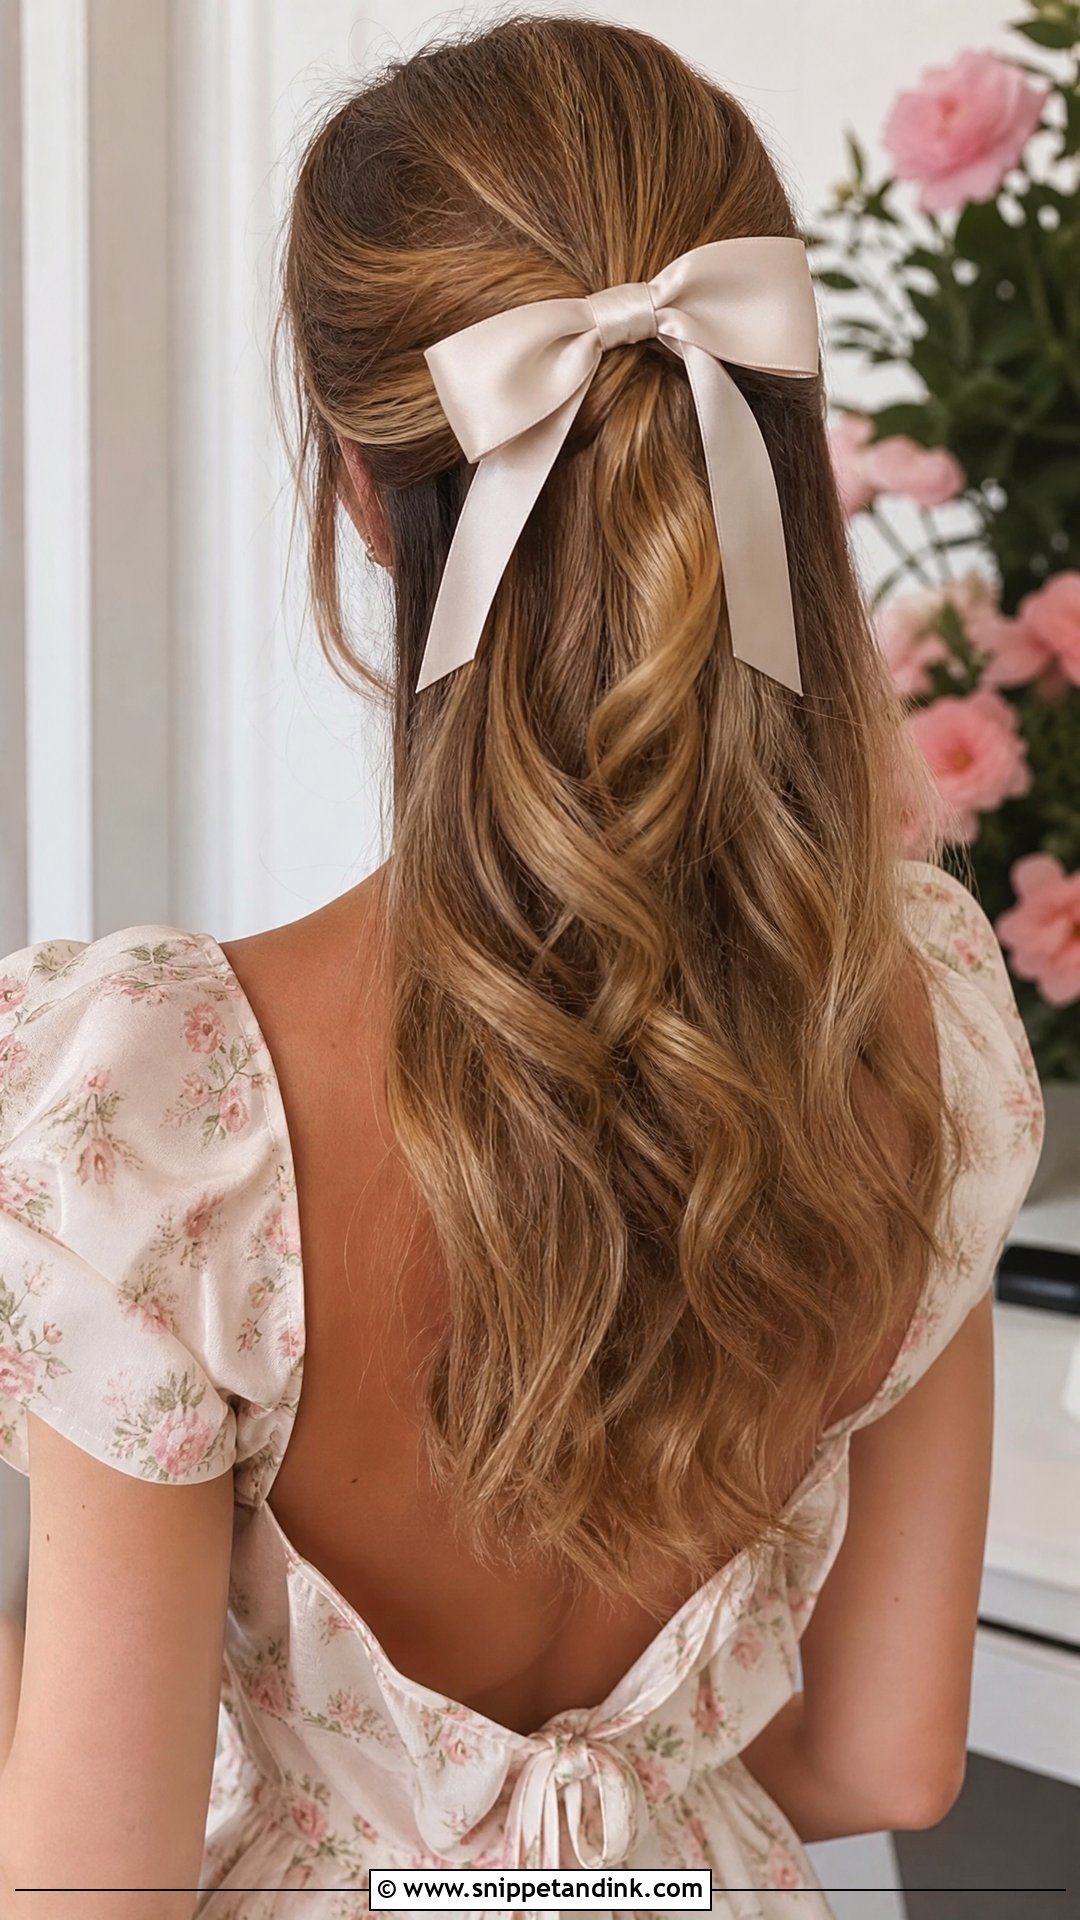
Bows are back, and on a guest they’re one of the quickest ways to look finished. Wand-curl the hair into loose waves, draw the top section back and fasten it, then clip a satin or velvet bow over the elastic. The bow is the focal point, so leave the rest simple. Pick its colour from your dress or go for one deliberate contrast. My caution is about white or ivory bows. From behind, a pale bow over long waves can look surprisingly bridal, so choose a colour.
5. Half-Up Bouffant With Volume
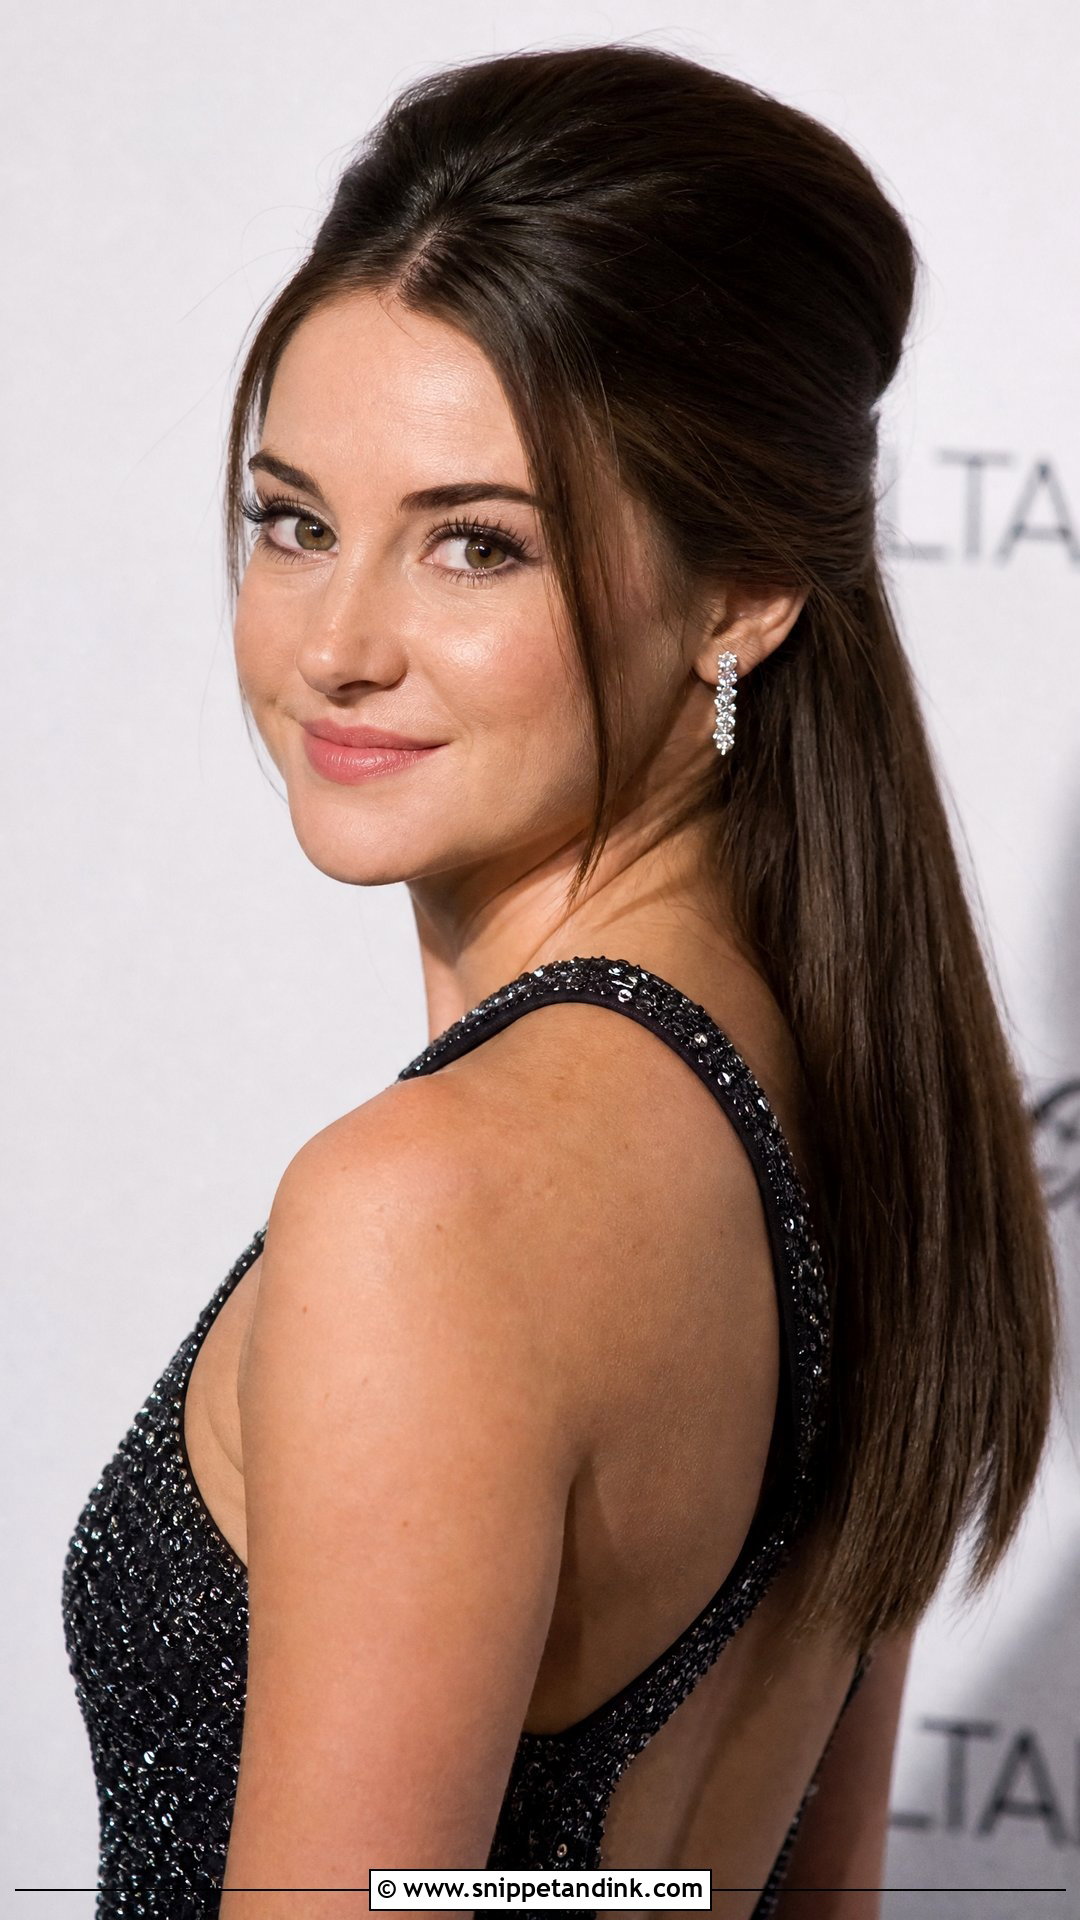
A bouffant is height done properly. Tease the crown in small sections, backcombing at the root only, then smooth the top layer over it and pin it back. The lifted shape flatters most face shapes and suits formal and black-tie weddings. Below it the hair can be sleek or softly curled. The detail that separates it from an eighties throwback is the smoothing: a fine-tooth comb to lay the surface flat and a light mist of hairspray, never a sticky helmet. If your hair is very fine, tease a little more than feels right, because the weight of the top layer will flatten it.
6. Half-Up Fishtail Braid
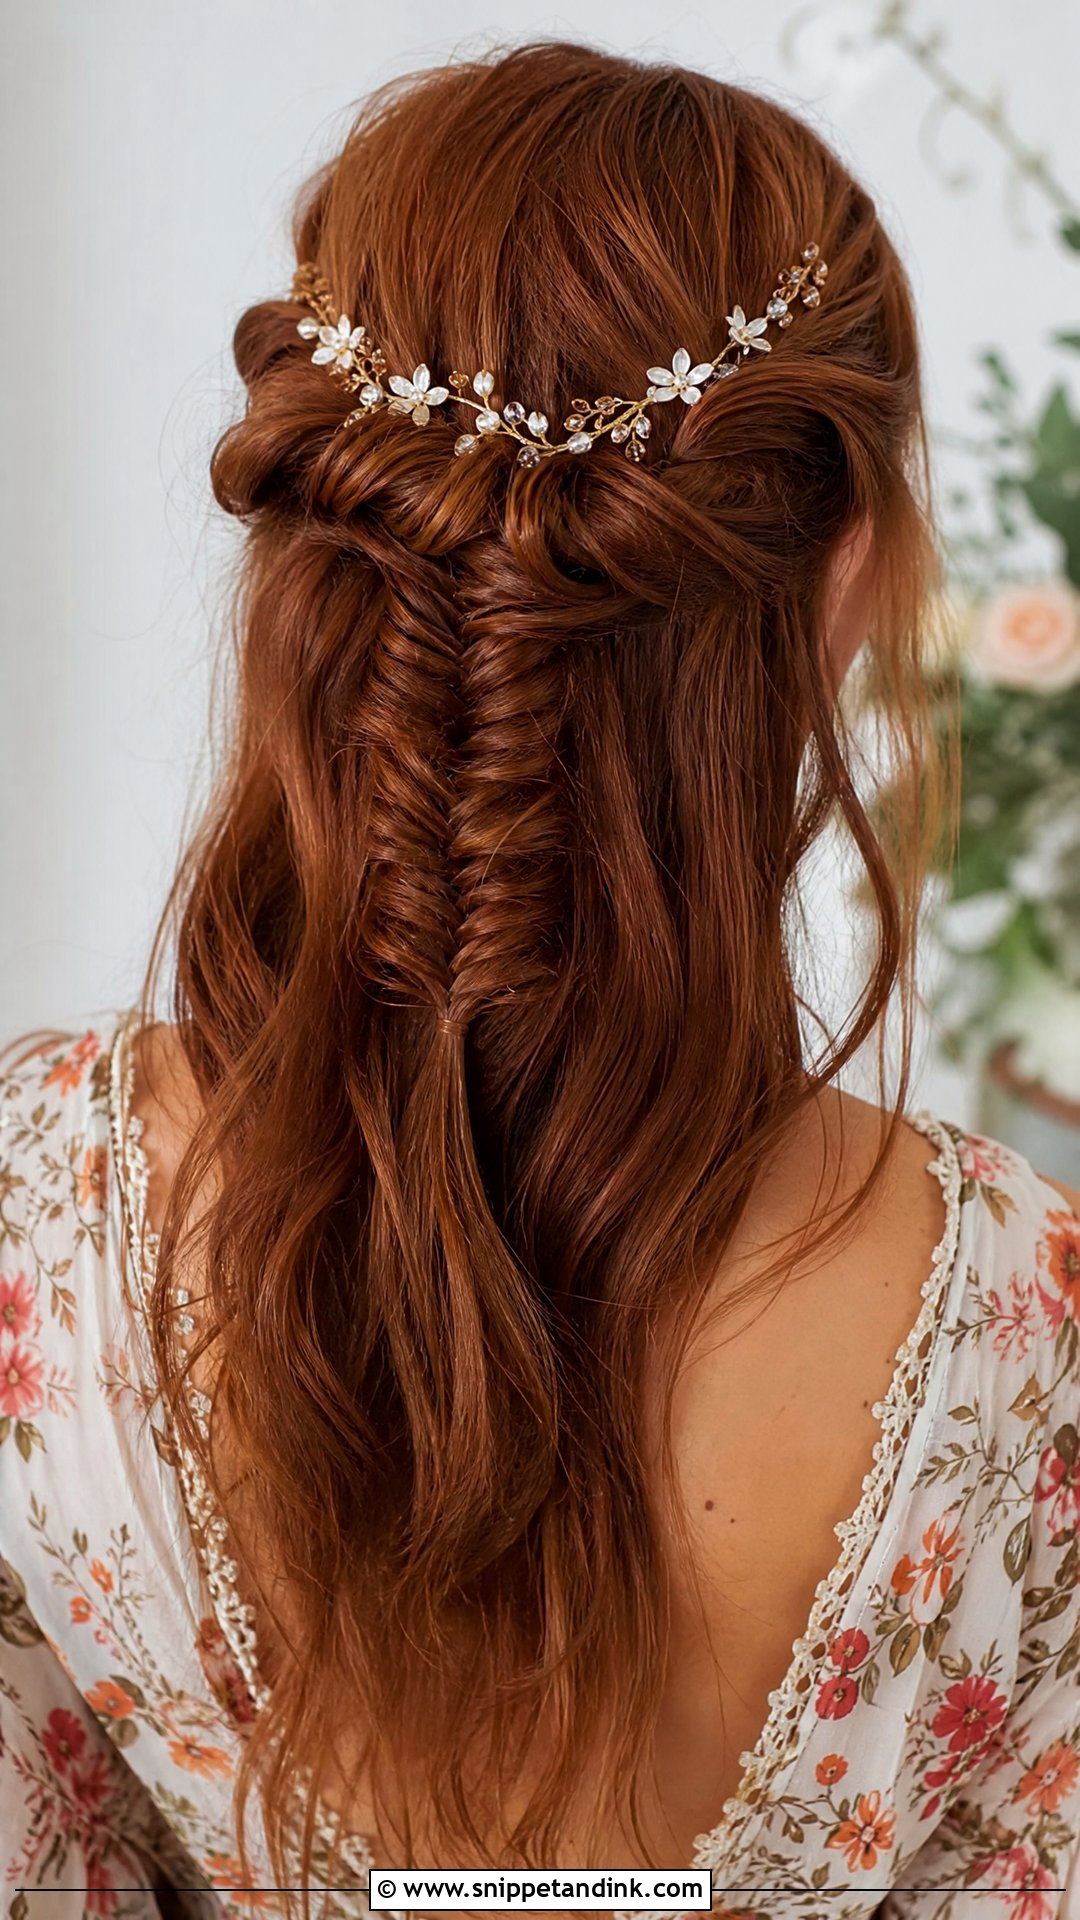
Fishtails look complicated and aren’t. You split the hair into two halves and keep passing a thin strand from the outside of one to the inside of the other, and the thinner those strands, the finer the herringbone. Use the top sections for a single fishtail and secure it at the back. Loosen the edges for fullness, and let the rest of the hair fall in waves or its natural texture. It sits well with floral dresses and outdoor venues. A few tiny blooms or a slim hair vine threaded through the weave make it look ready for a wedding rather than a weekend.
7. Half-Up With Twisted Rope Braid
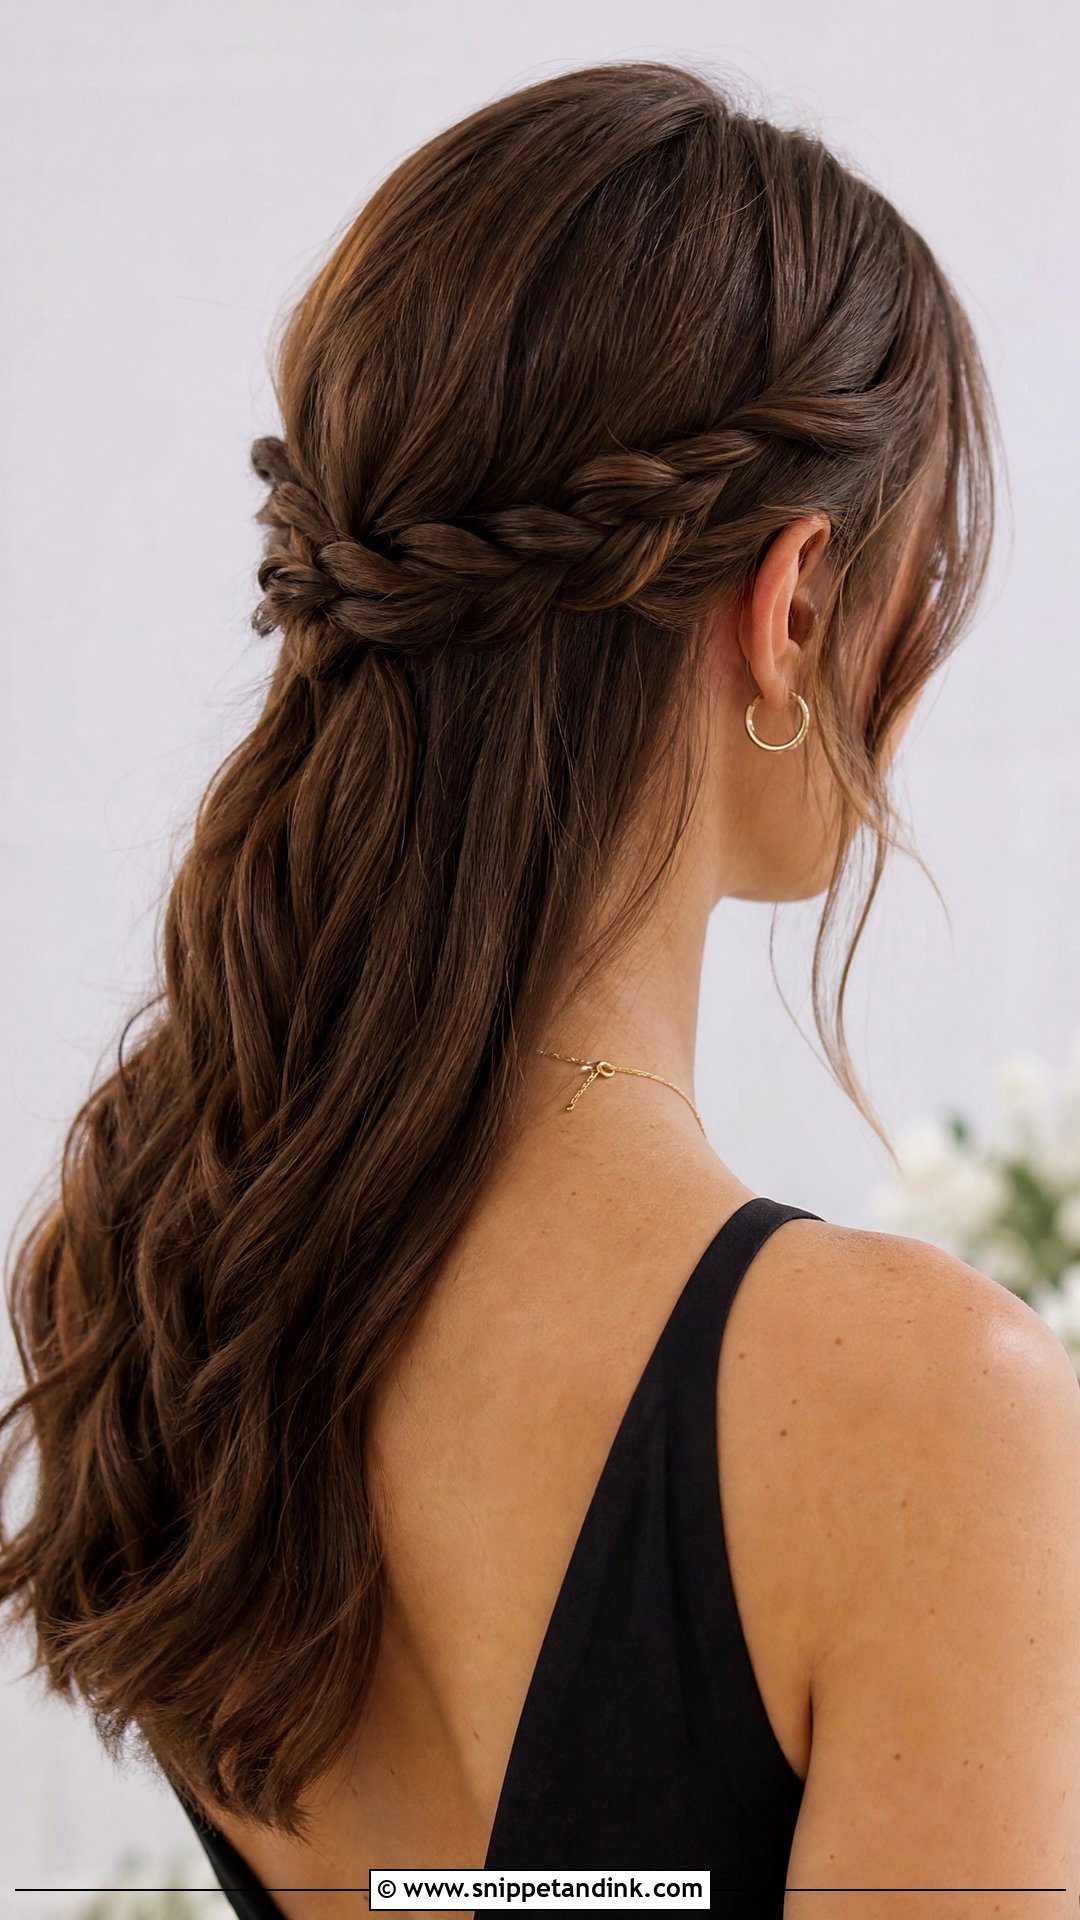
Rope braids are the sleeker cousin of the plait. Split the top section into two strands, twist each one the same way, then wrap them around each other in the opposite direction; that opposite wrap is what locks the rope. Secure it at the back where it meets the loose hair. On fine to medium hair it’s a smart choice, because the twisting builds bulk and makes the section look thicker than it is. Leave a few face-framing pieces loose. If the rope starts unwinding while you work, you’ve twisted both strands in the same direction as the wrap.
8. Half-Up Curls With Side Part
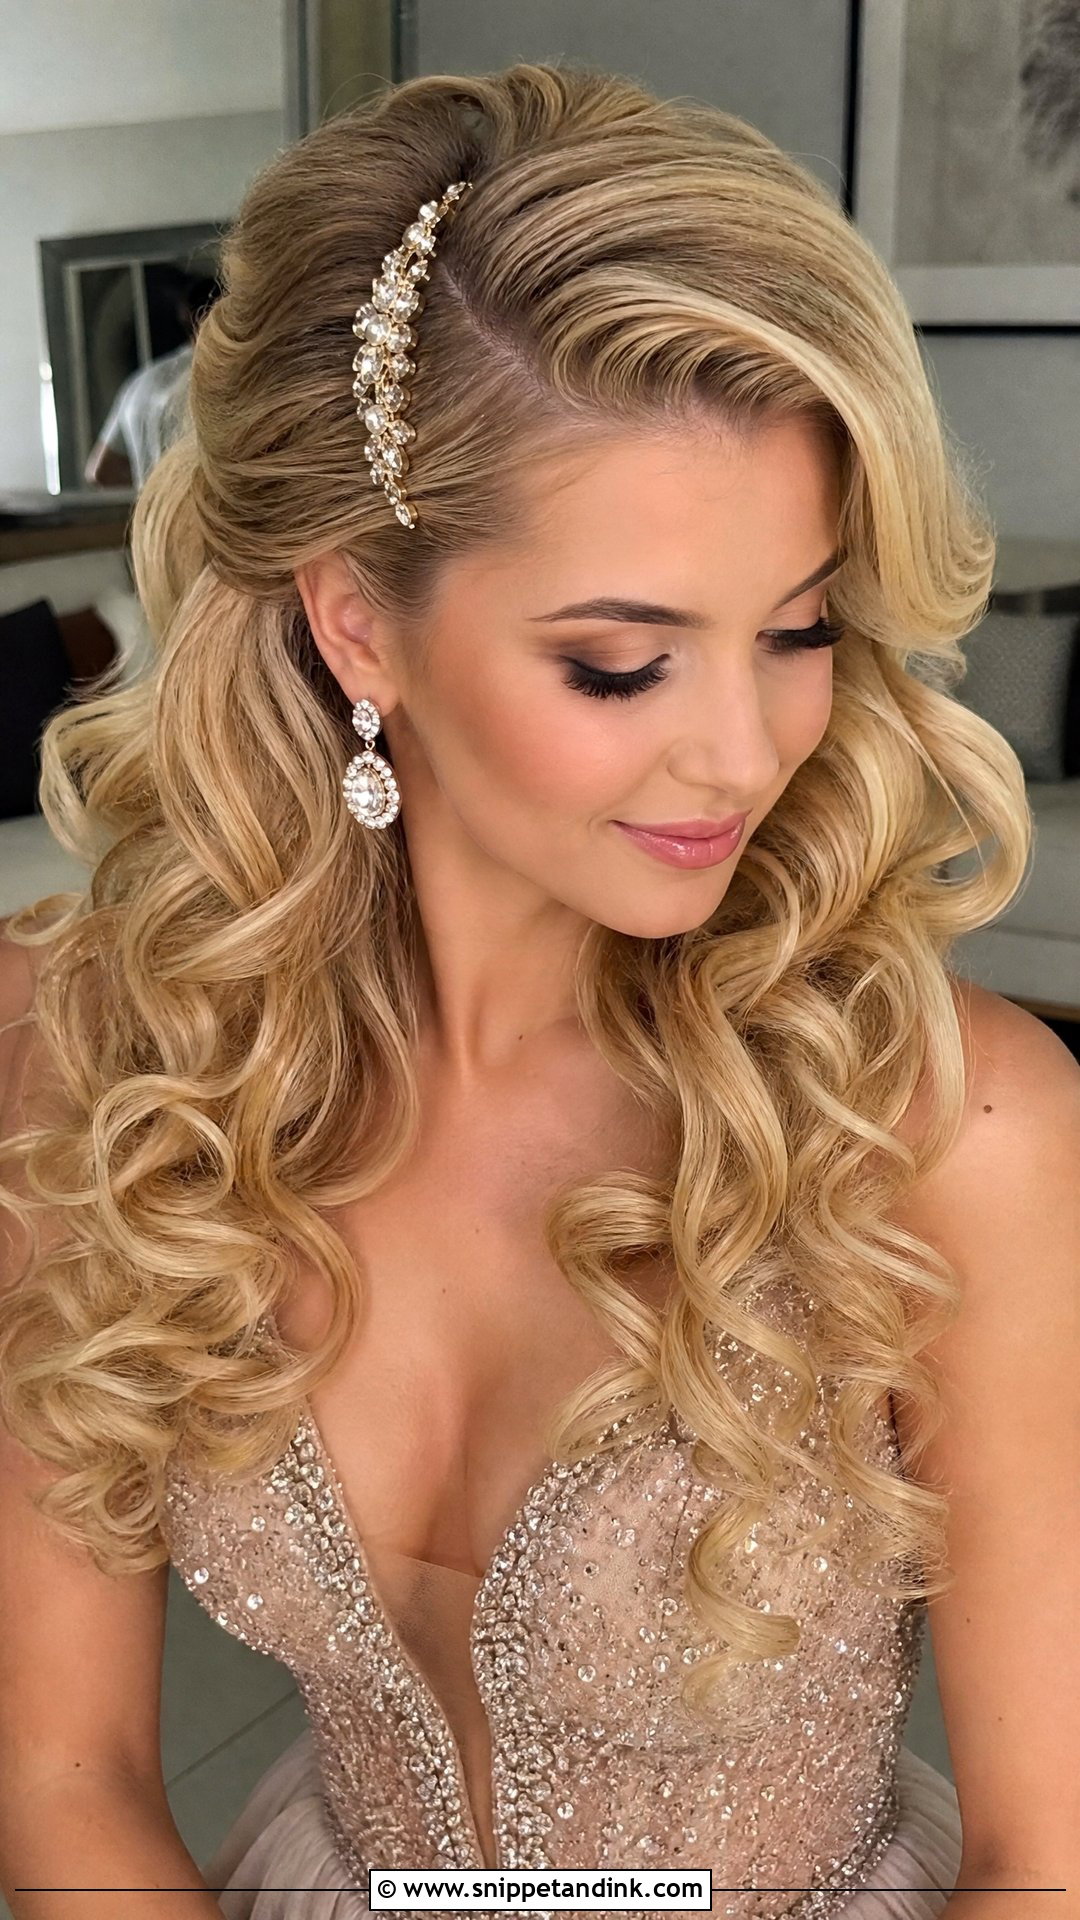
A deep side part adds instant glamour with a slightly vintage edge. Part to one side, curl everything into bouncy waves, then pull the top section back from the heavier side and pin it at the crown. The asymmetry draws the eye to your face, and it suits romantic and formal weddings equally. Brush the curls through with your fingers, not a brush, if you want them to keep their bounce. A jewelled clip along the part catches light in photos. I’d only flip your natural part if you’ve tested it, because hair that’s lain one way for years tends to fight the switch.
9. Half-Up With Pearl Hair Pins
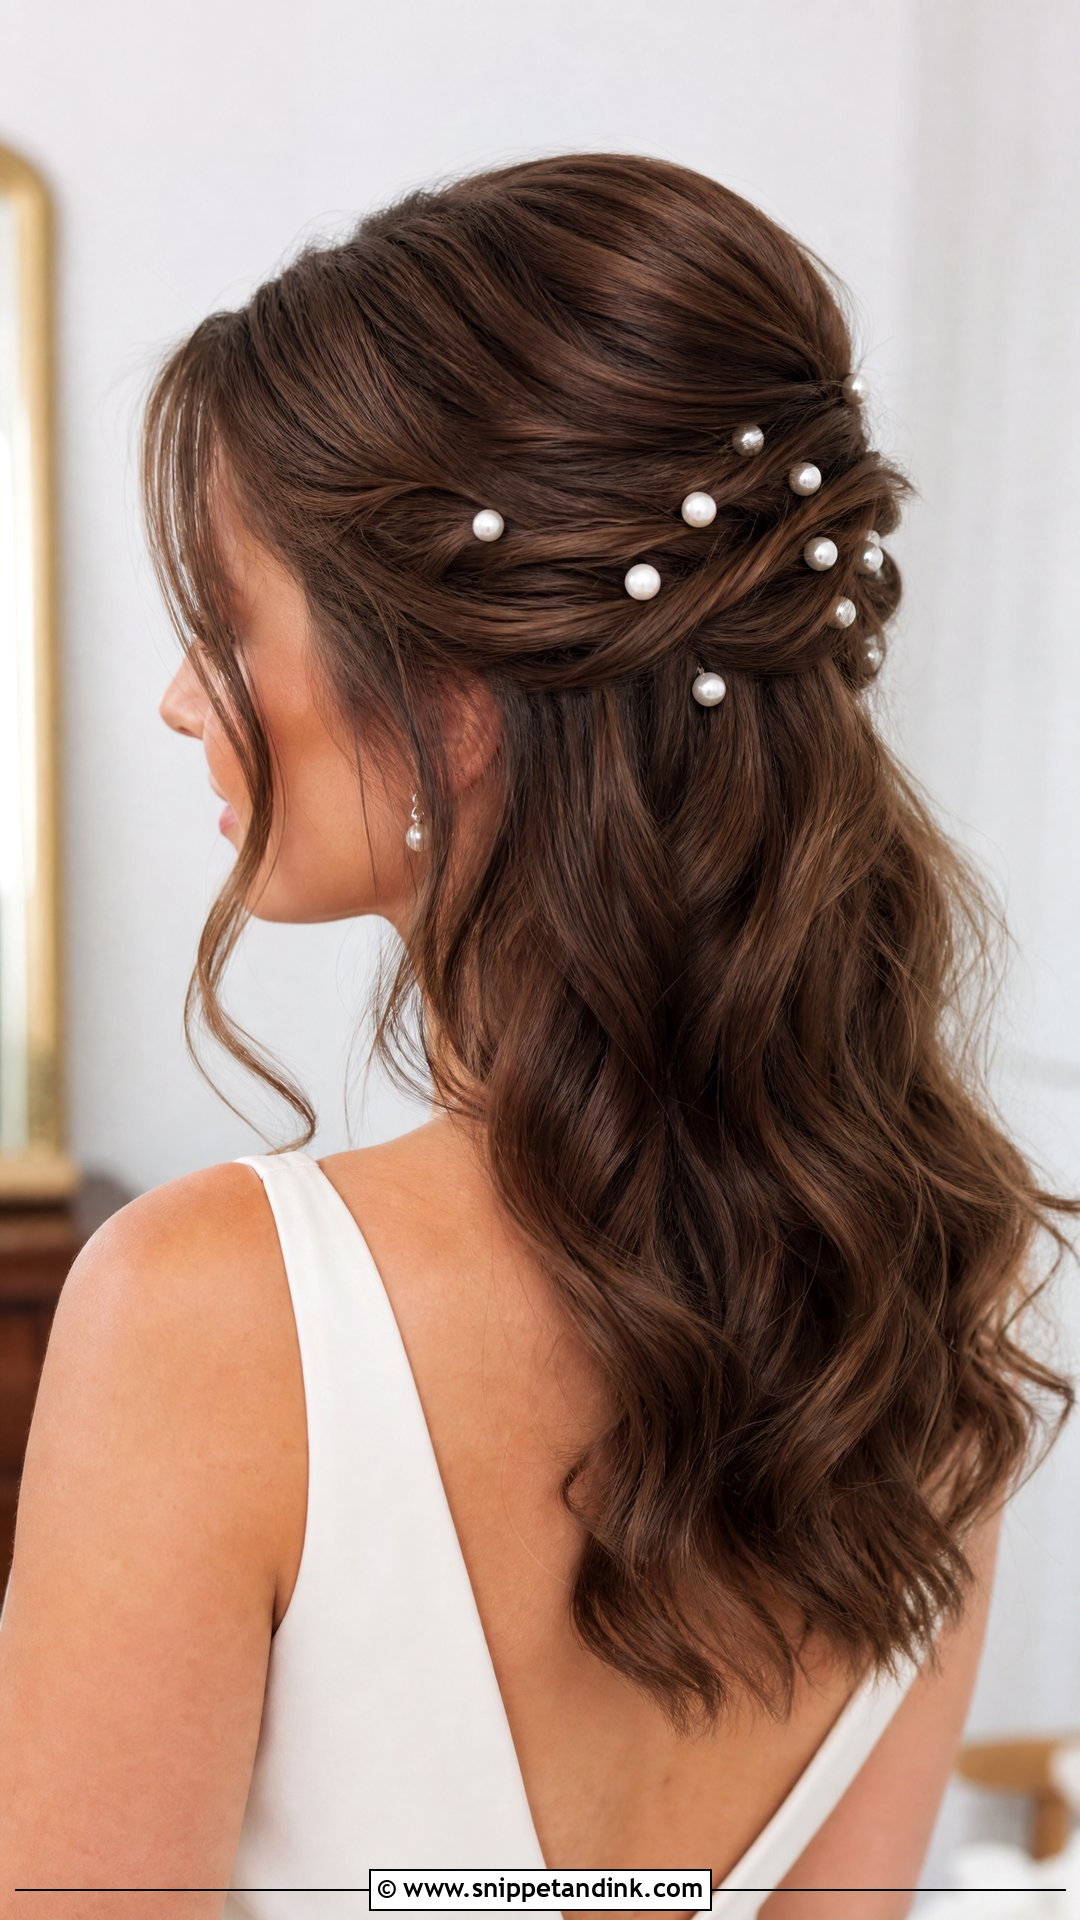
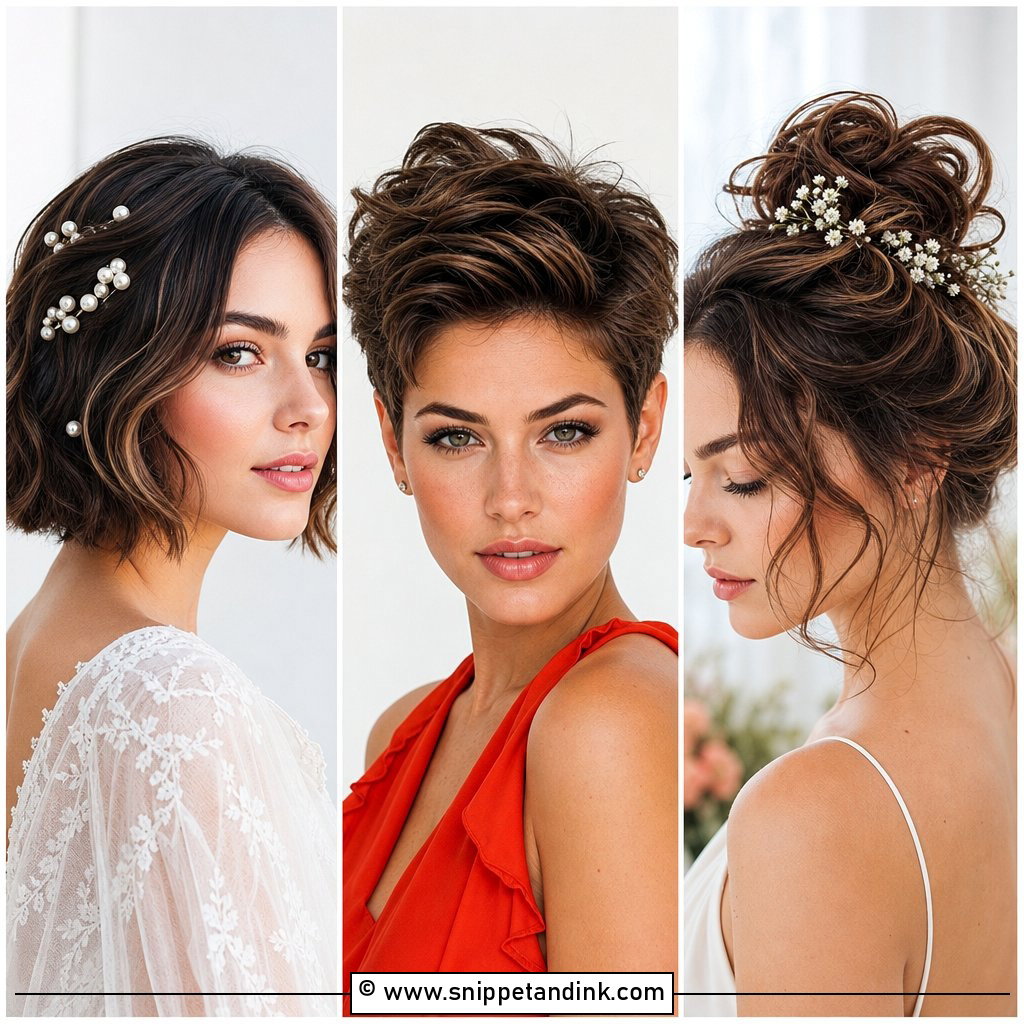
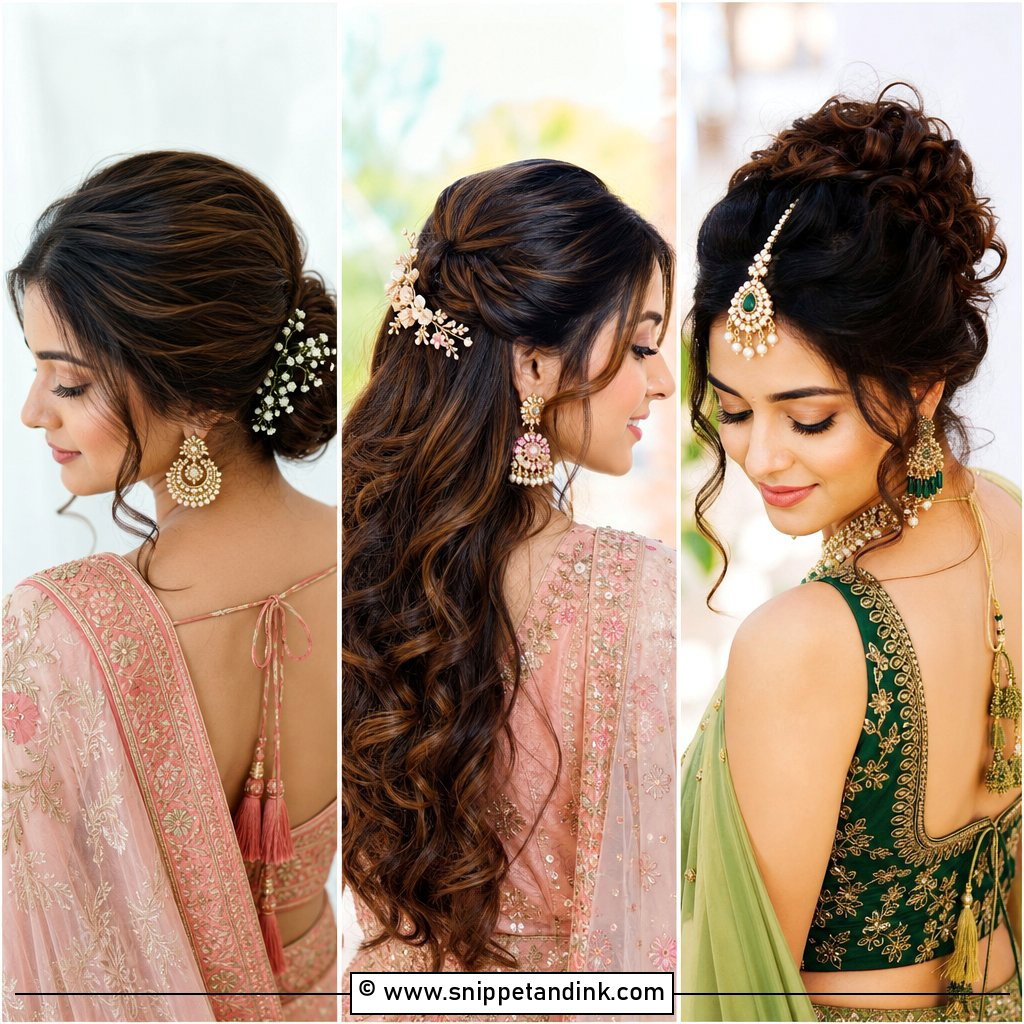
Pearls dress up any half-up base, from a simple twist to a soft gather at the crown. Scatter the pins across the pinned section rather than lining them up, which tends to look like a headband from a distance. They add a little shine without competing with the outfit, and pearl suits almost every dress colour. Waves in the lengths keep the overall look soft. Use pins with a small coil or grip on the stem; plain pearl pins in silky hair often slide out before dinner.
10. Half-Up Knotted Style
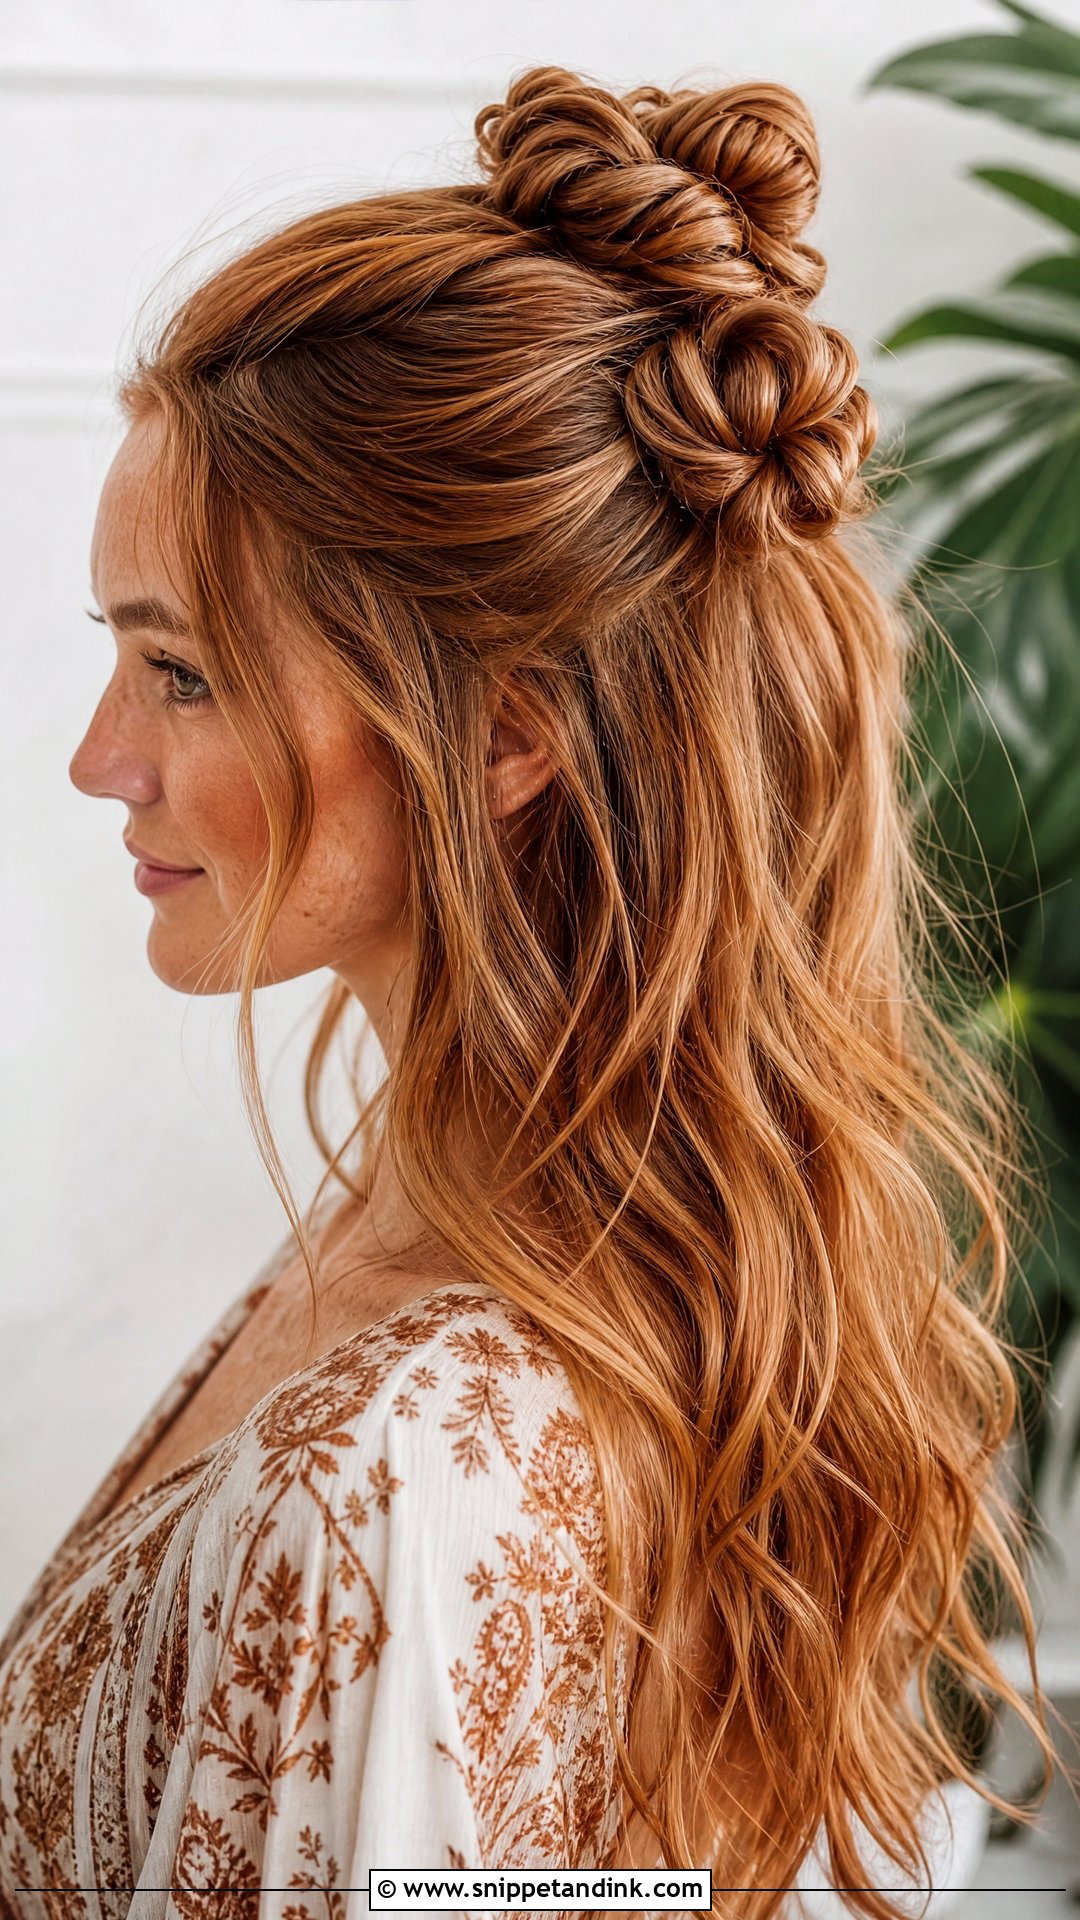
Knots are the most unexpected detail on this list. Take two sections from the top of your head, tie them in a simple knot at the crown, and hide bobby pins underneath. Stack two or three knots down the back if you want more interest. The lengths flow freely below, waved or straight. It suits boho and relaxed weddings and is easy to repeat at home. The catch is hair length: you need enough in each section to tie comfortably, so this one struggles above the shoulders.
11. Half-Up Waterfall Braid
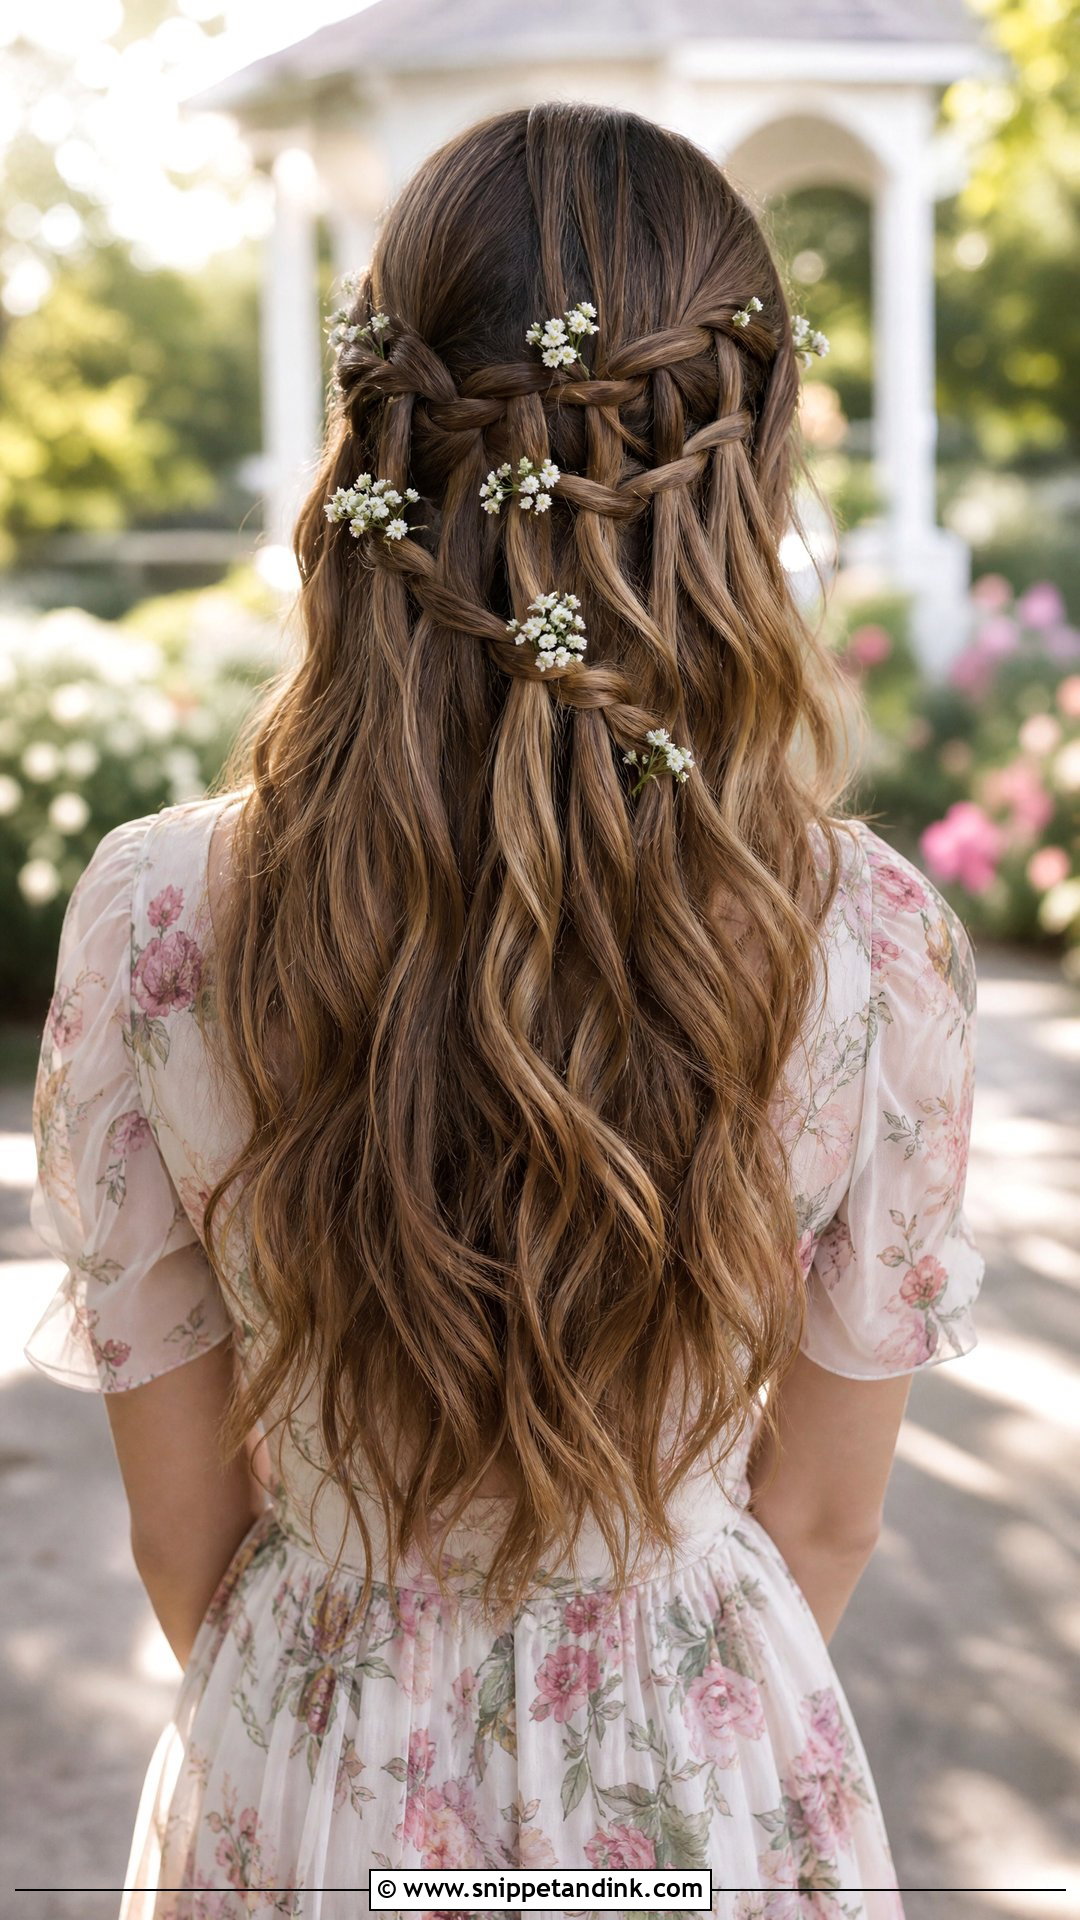
The waterfall braid drops a strand every time it crosses, so the pieces fall through the braid and join the waves below. Braid horizontally across the back of your head, letting the top strand go each pass and picking up a new one. It’s the most romantic style here and suits garden and spring weddings. It shows best on long, wavy hair where the dropped strands have room to move. Loosen it gently once pinned. I’ll be honest: braiding behind your own head across that line is hard, and this is the one to ask a friend for help with.
12. Half-Up Sleek and Straight
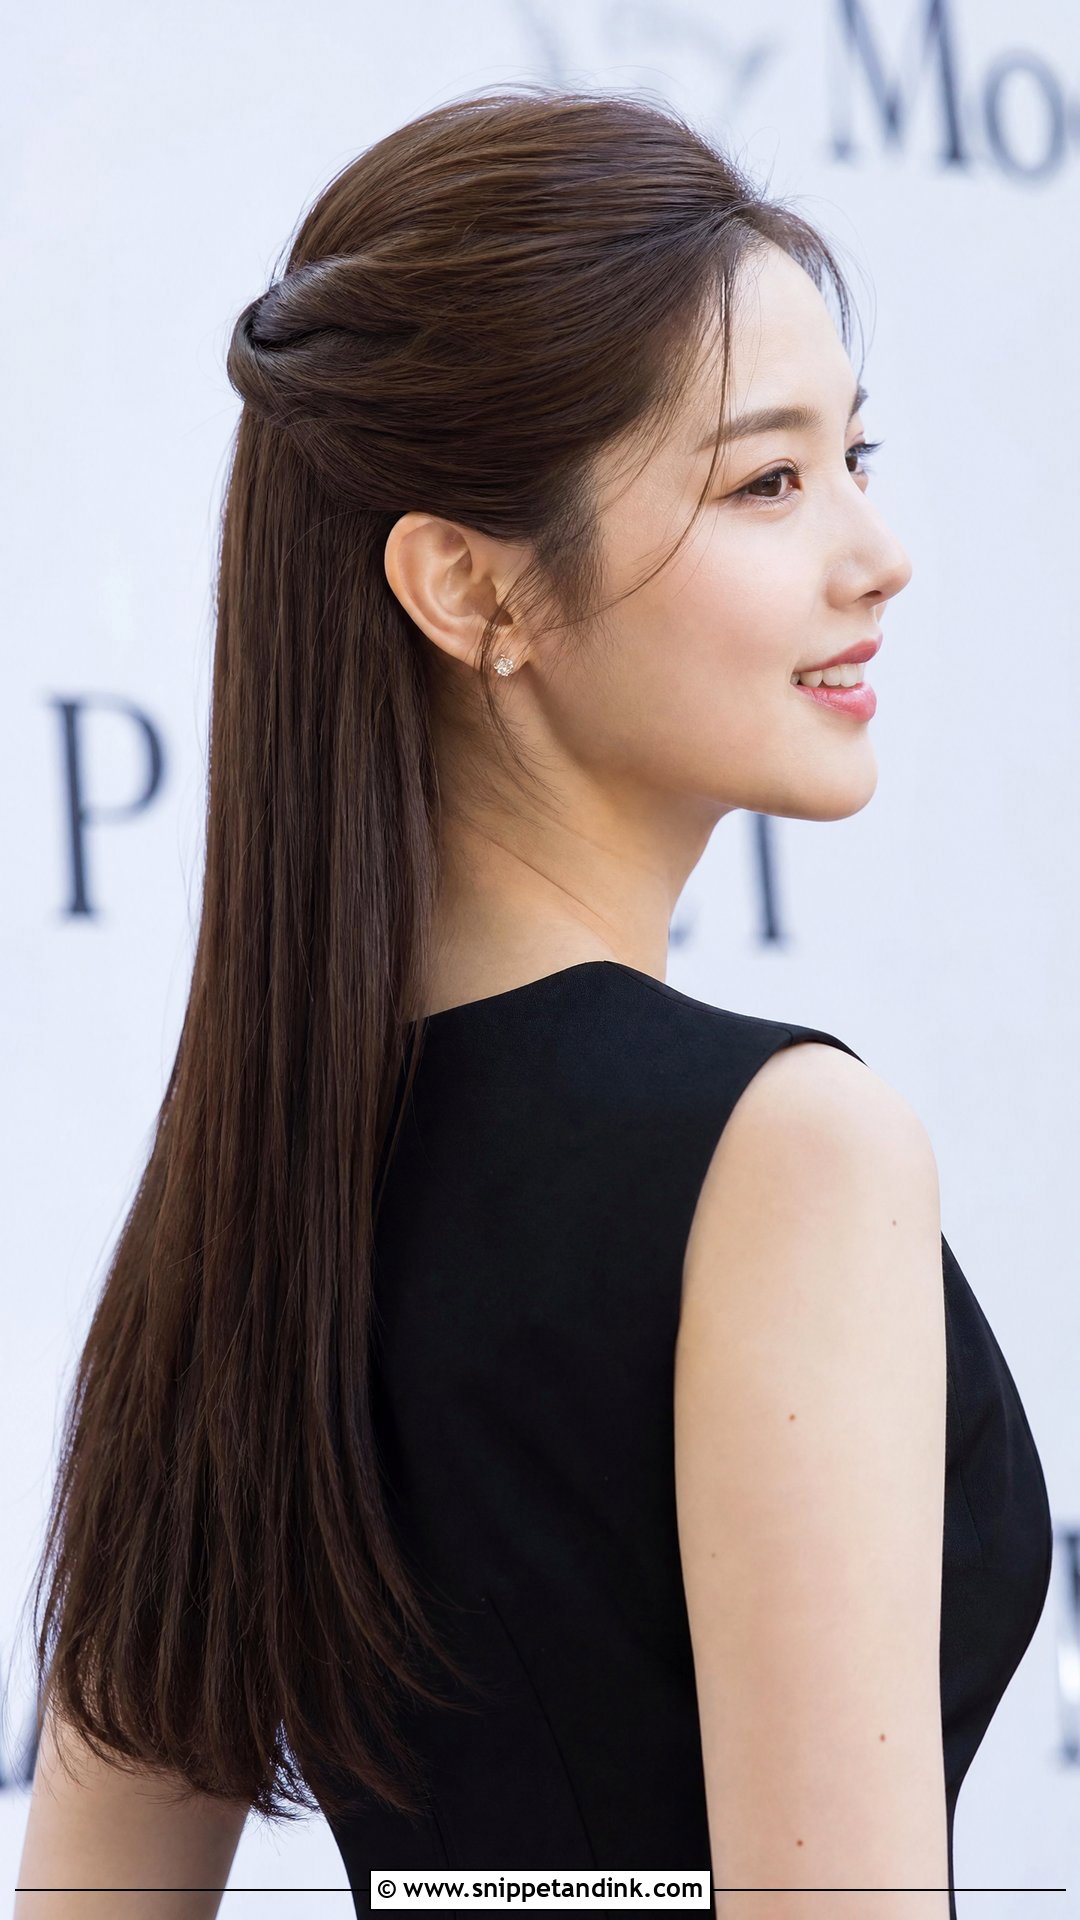
Not every wedding wants curls. A sleek, straight half-up looks modern and clean. Flat-iron the hair in thin sections until it’s glossy, then draw the top back into a neat twist or a low gather. The straight lengths keep the whole thing minimal, which suits contemporary and formal weddings, and naturally straight hair gets a style that needs no setting at all. Finish with a drop of shine serum on the ends only. Serum near the roots on fine hair goes greasy under warm reception lighting.
13. Half-Up Crown Braid
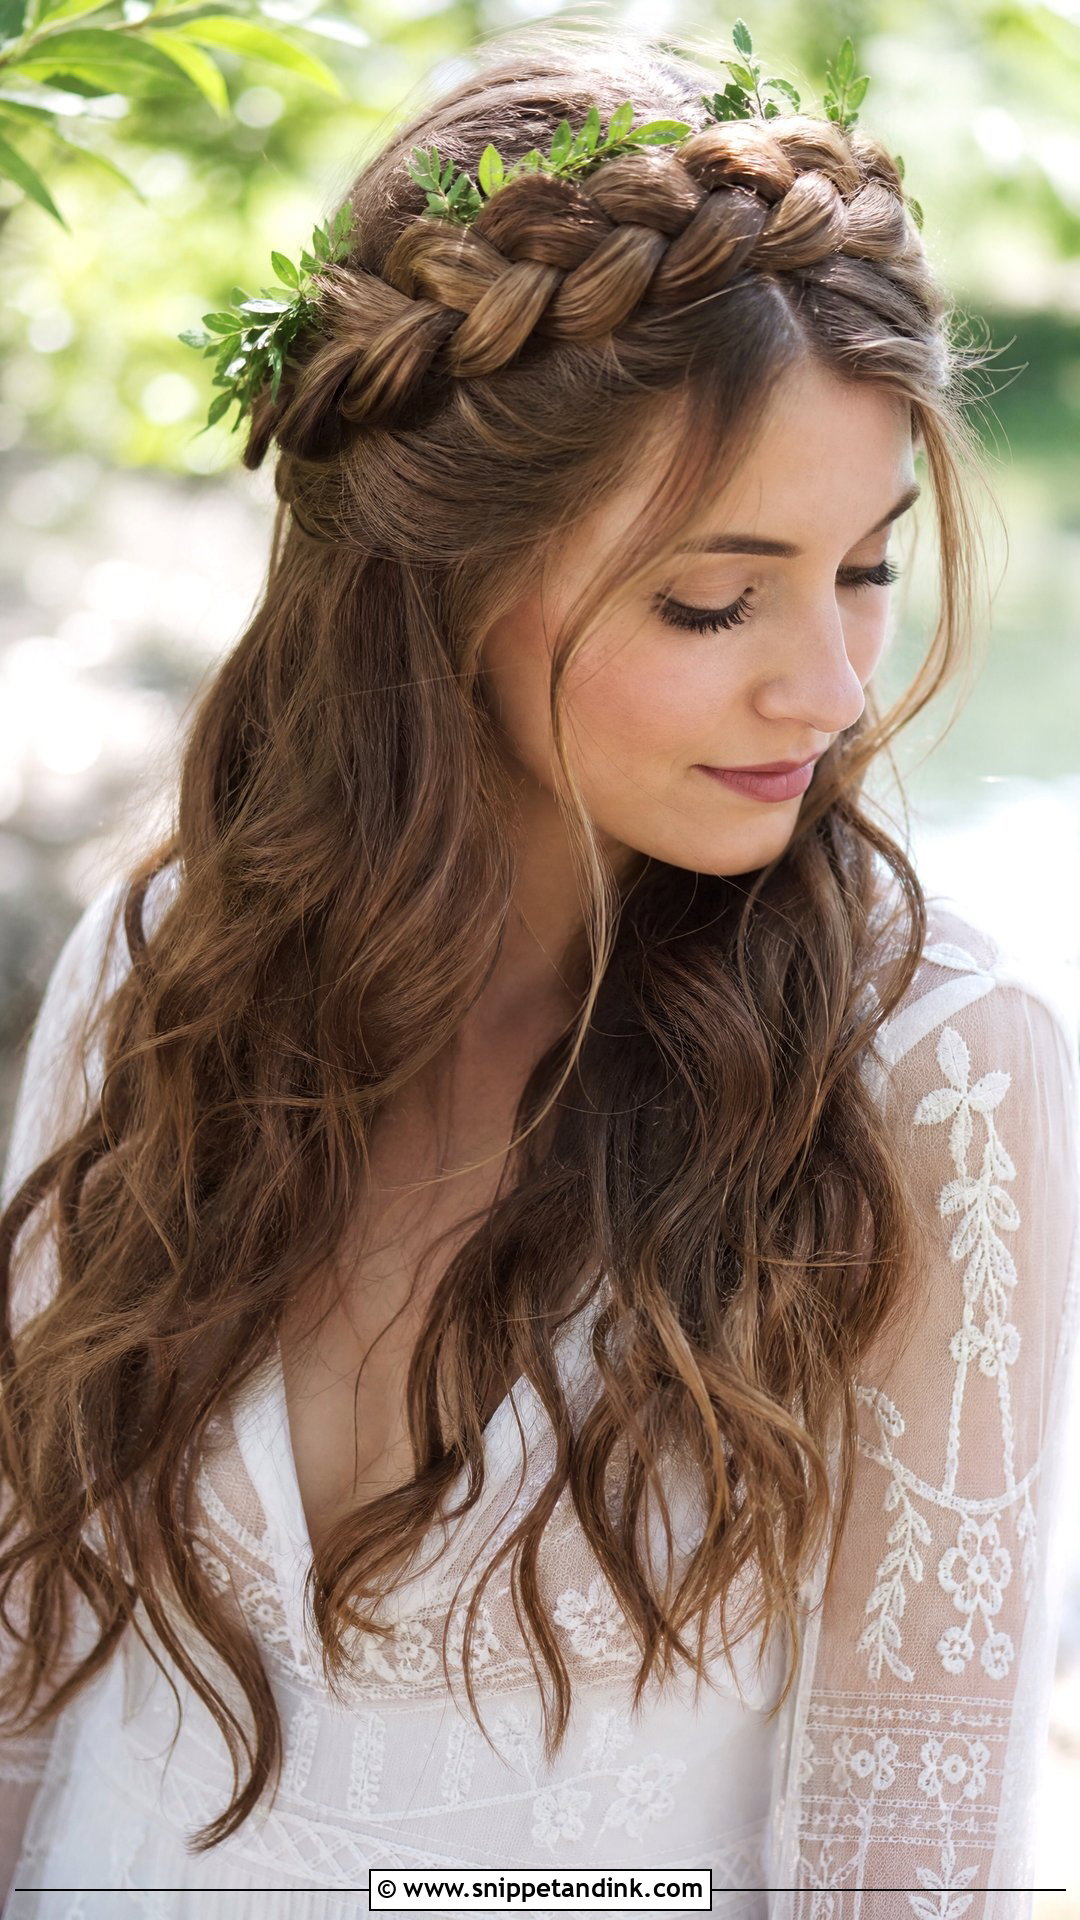
A crown braid arcs across the top of the head like a band and keeps everything off your face. Braid from one side over to the other and pin the tail out of sight, leaving the rest loose. It suits boho and outdoor weddings, and longer hair gives more movement below. It works on most textures. If you’re adding greenery or flowers, wire the stems flat first so they lie along the braid instead of poking out. Pinned properly, with the pins slid along the braid rather than straight in, it stays put through hours of dancing.
14. Half-Up With Face-Framing Tendrils
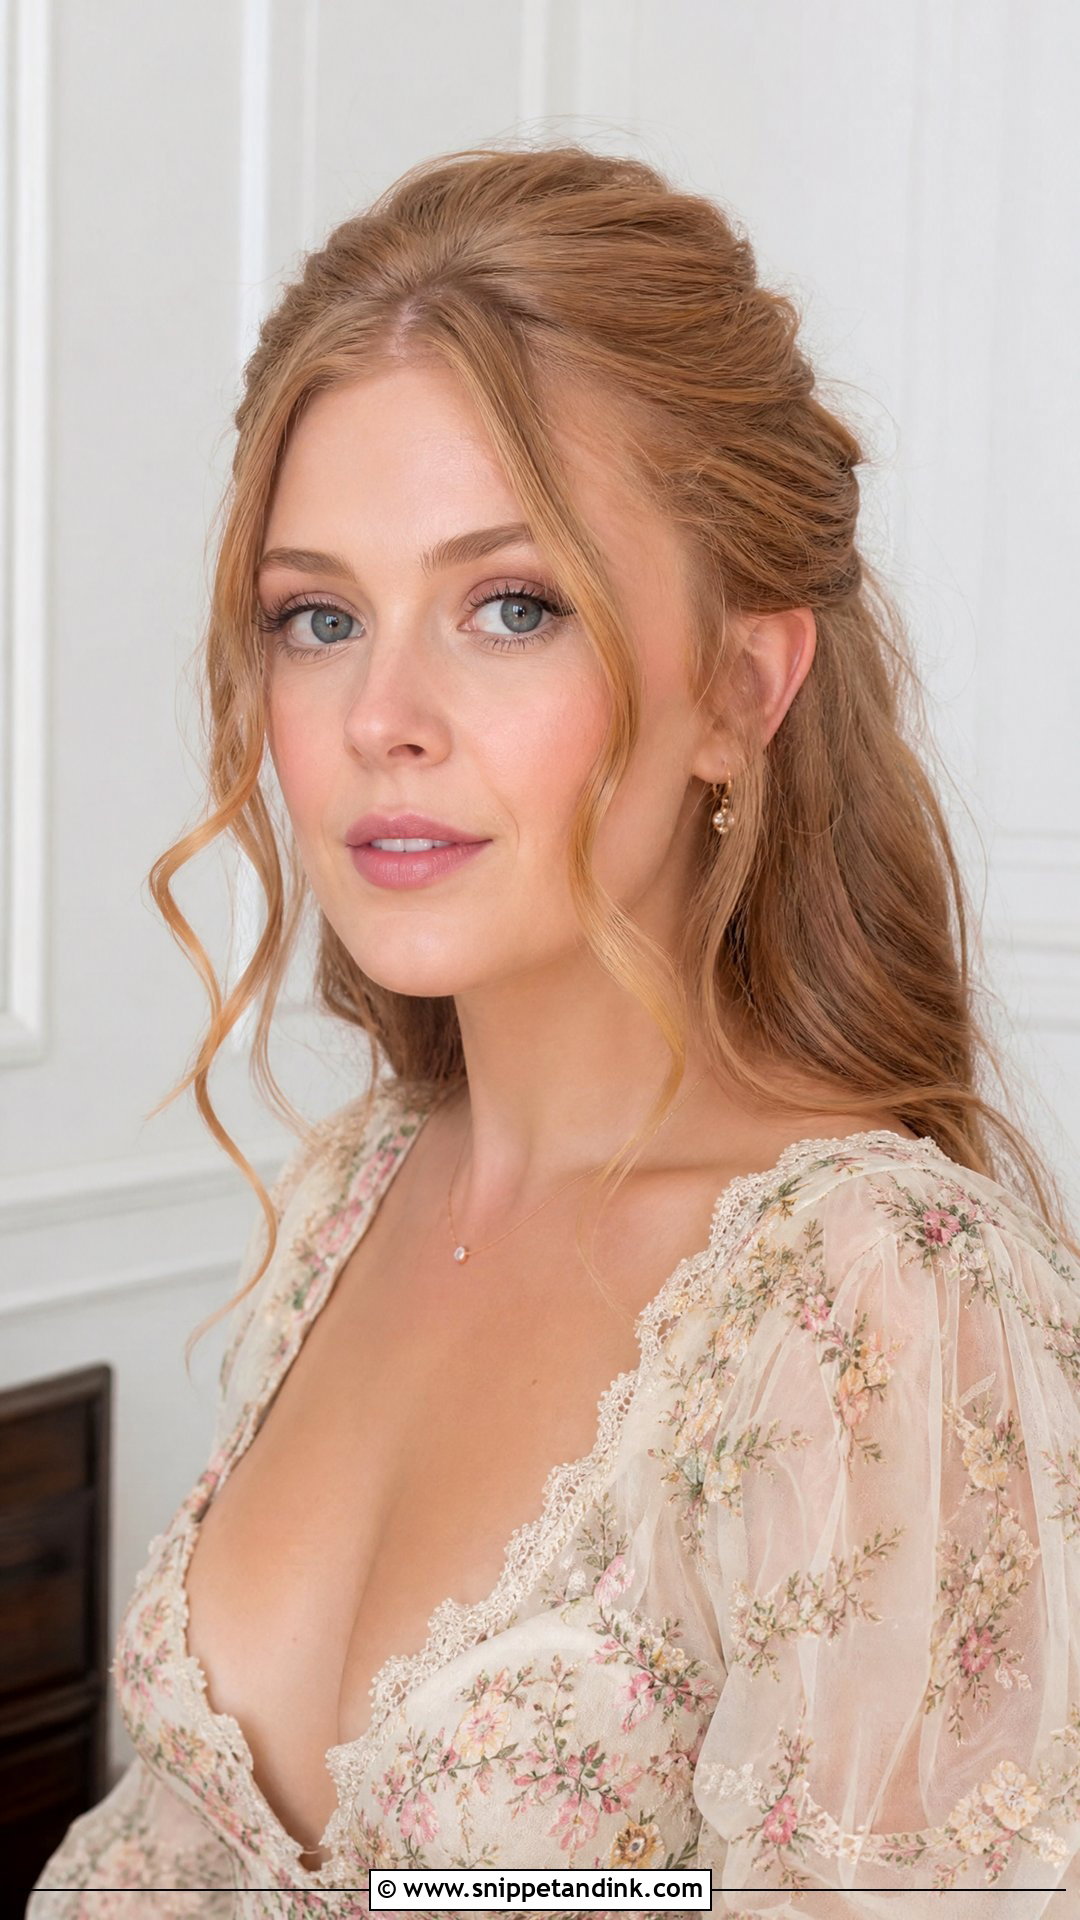
Tendrils are the difference between pulled back and softened. Make your half-up gather or twist first, then pull out a few strands at the temples and in front of the ears, and curl them away from the face with a small iron. I’d choose pieces about chin length; shorter ones spring up and look like stray hairs once the room warms up. They suit romantic and vintage-inspired weddings and keep the style from looking tight or severe. Pull the tendrils out after the style is pinned, never before, so you aren’t fighting them while you work.
15. Half-Up Top Knot
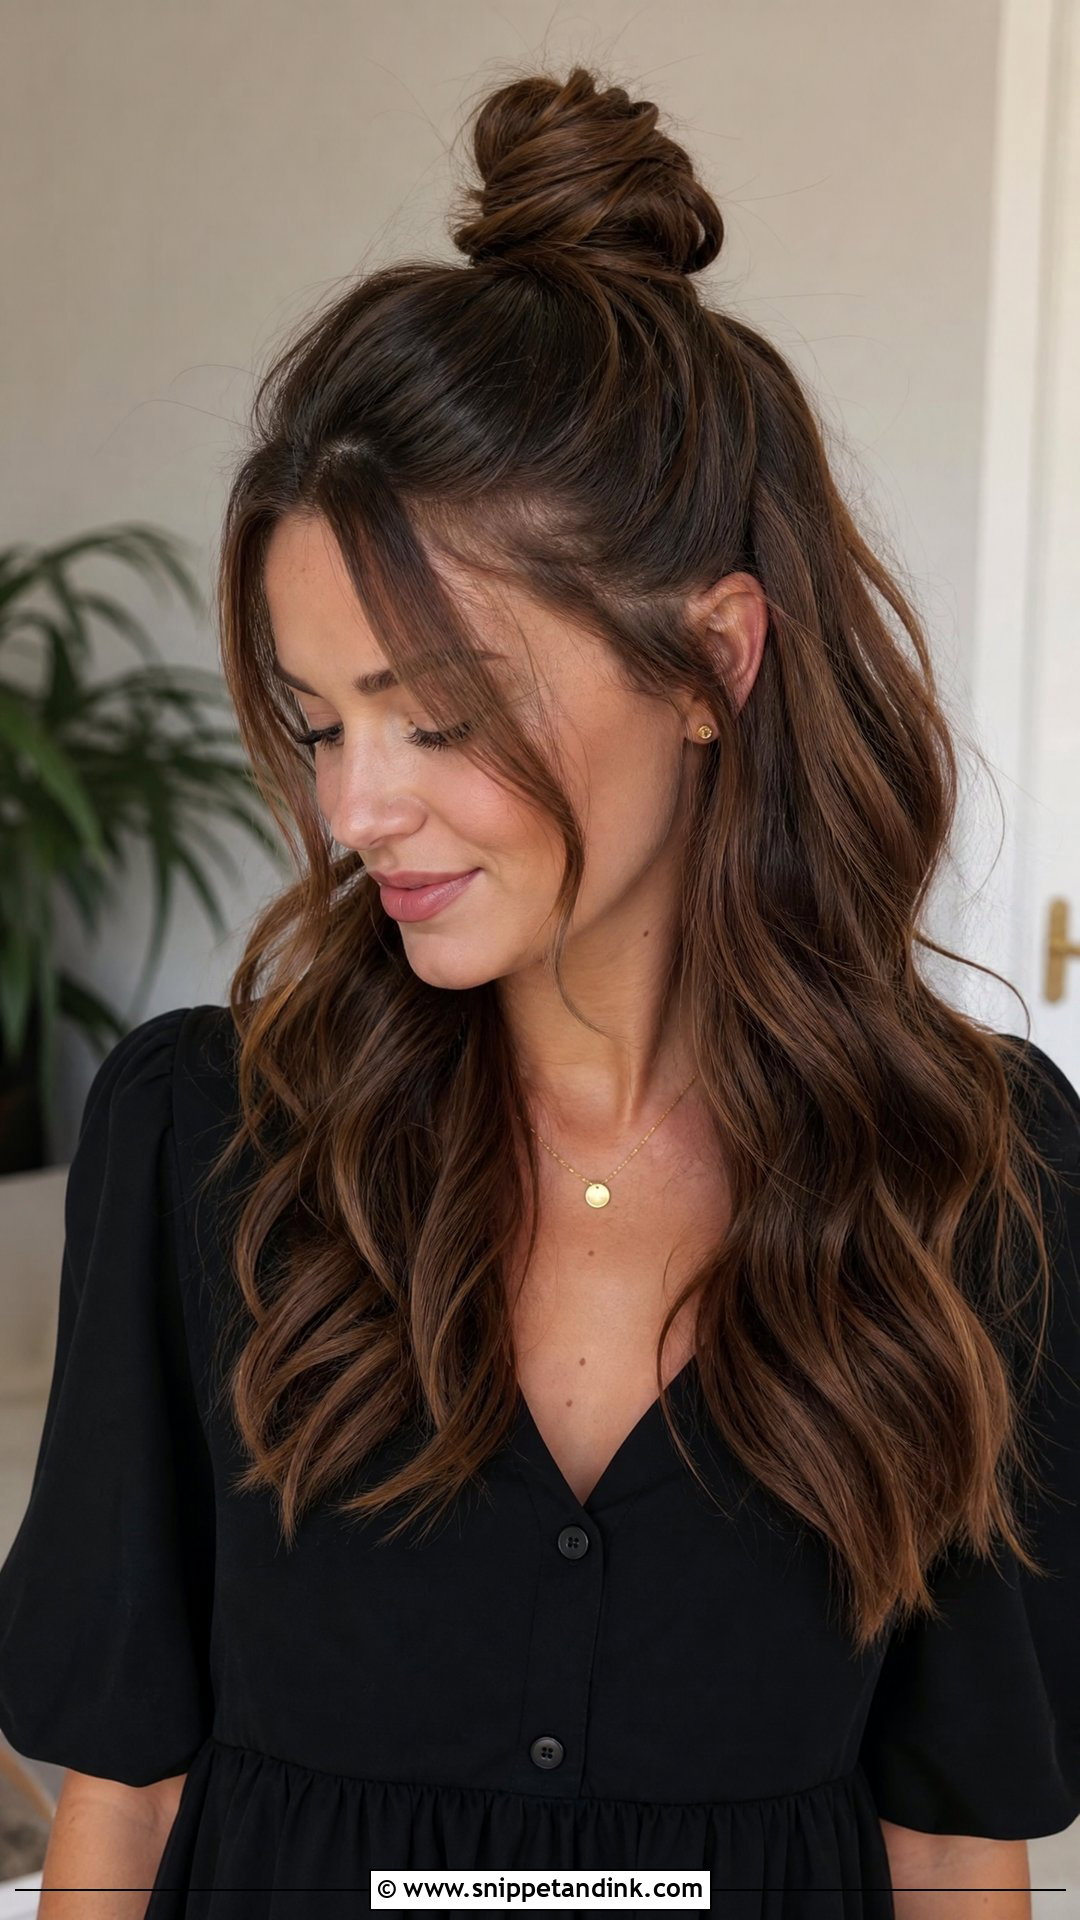
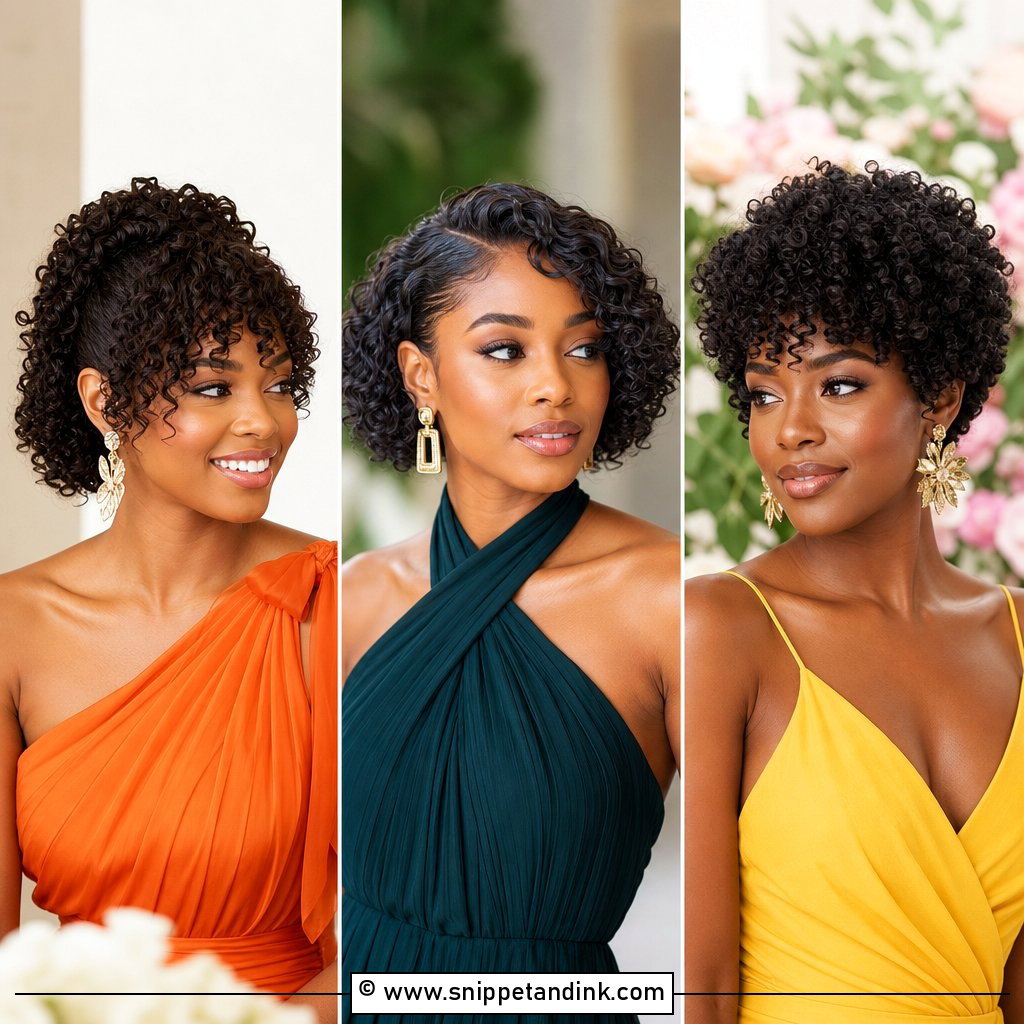
The half-up top knot is a lighter, younger look. Gather the top section high on the crown, twist it into a compact knot and pin it, with the rest falling in waves or straight. It keeps hair off your neck, which is welcome at a hot summer wedding, and it adds height that balances a round face. Best at casual and modern celebrations. Leave a couple of face-framing pieces out to soften it. Make the knot smaller than you think; a large one looks like a gym bun from across the room.
16. Half-Up With Hair Vine
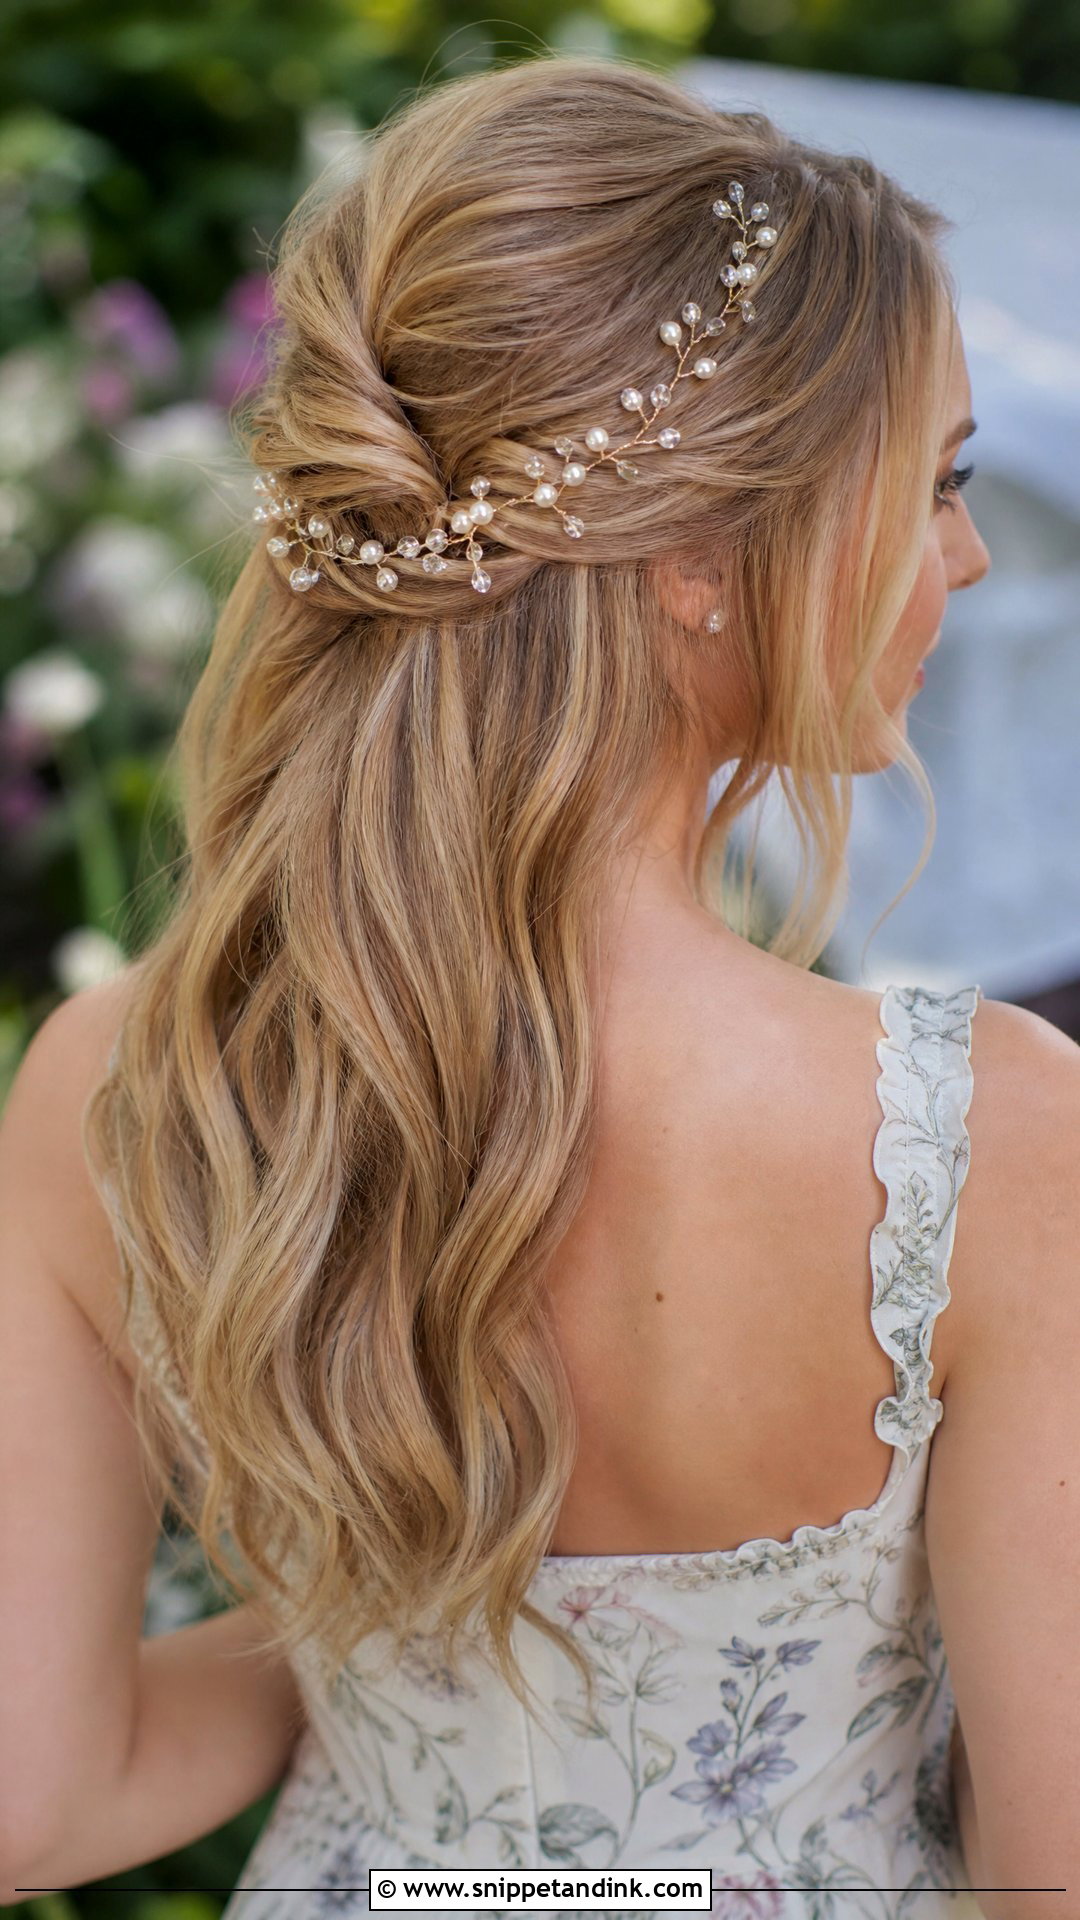
A hair vine is a flexible wire strung with pearls, crystals or tiny leaves, and it turns a plain half-up into something more dressed. Weave it through the pinned section and secure each end with a bobby pin. It suits romantic, garden and formal weddings and catches light as you move. Keep the lengths in soft waves to balance it. The thing I always say to guests is to keep the vine modest in size and in a colour other than white. A long white or crystal vine across waves can look like bridal hair, and that’s the one look a guest shouldn’t wear.
17. Half-Up Boho Waves
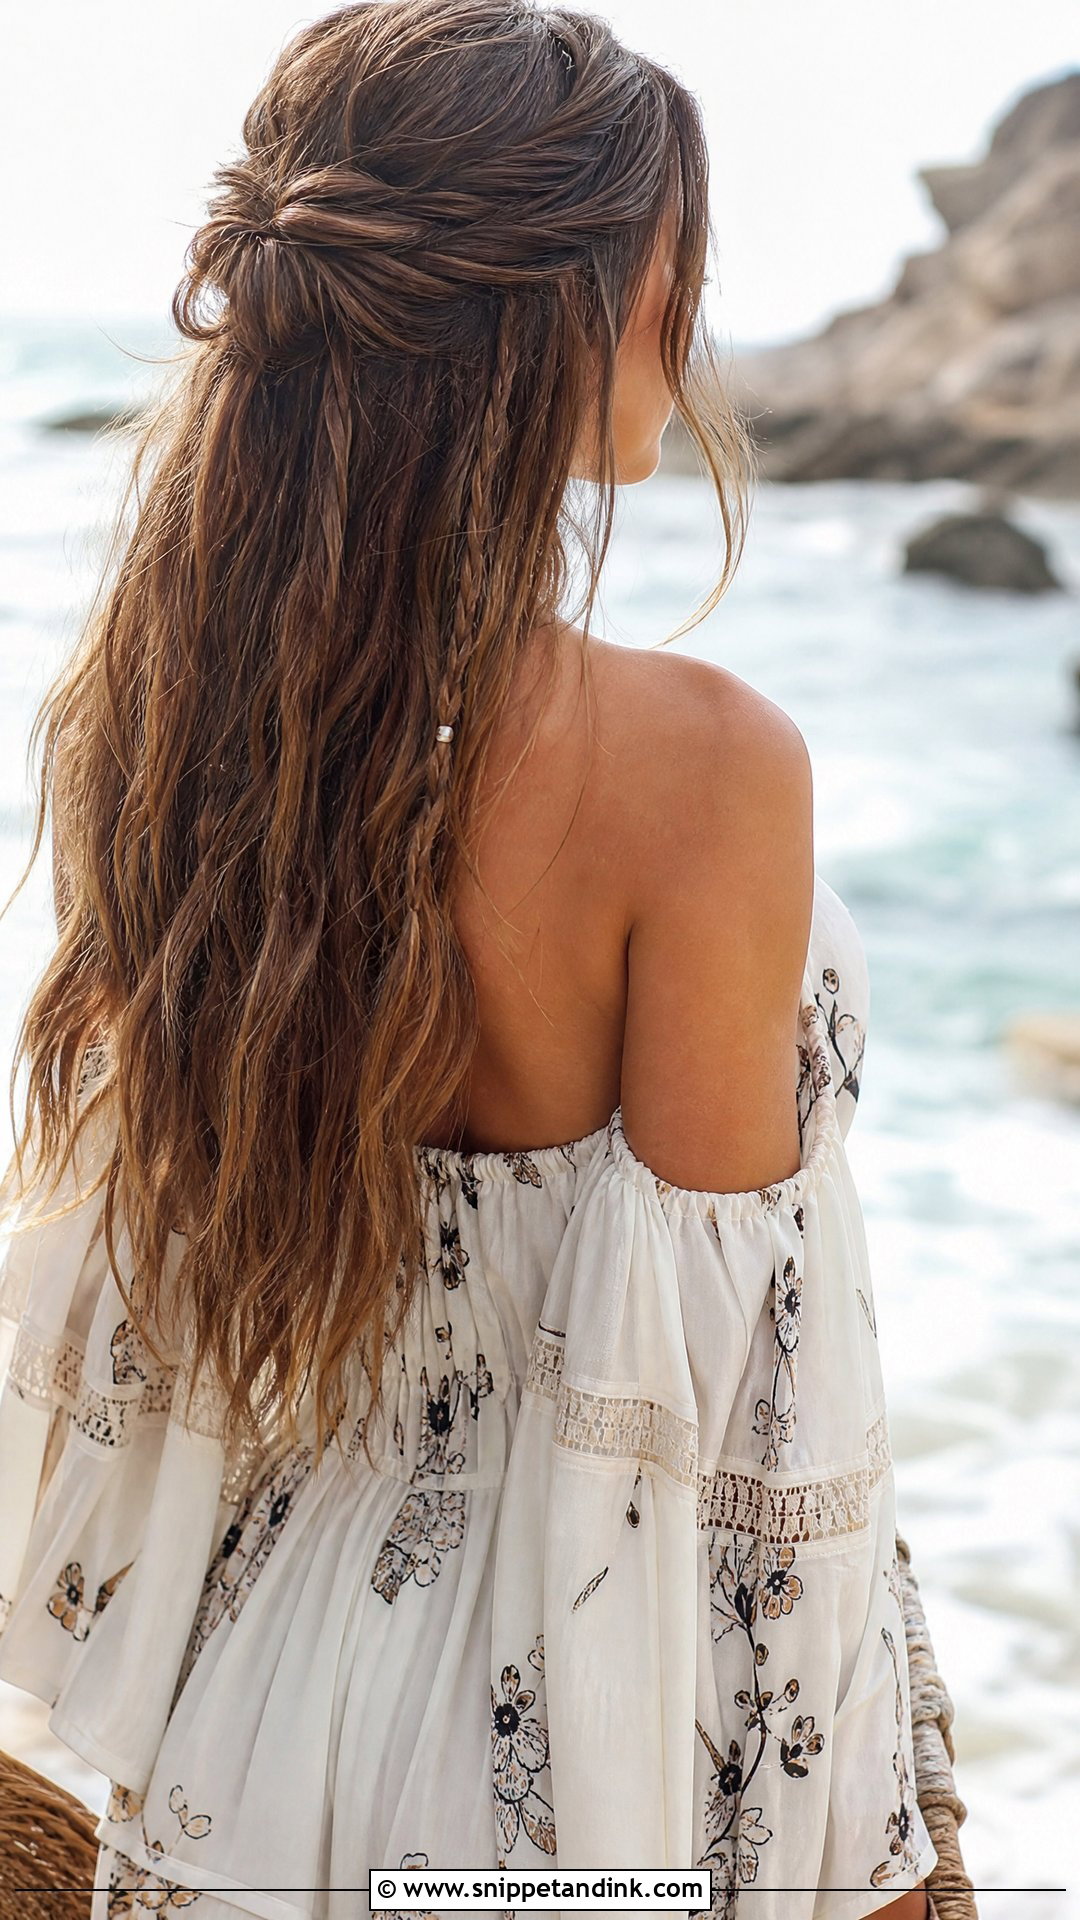
Boho waves are about texture, not perfection. Create loose waves with a wand, leaving the last inch of each section out so the ends stay straighter, then pull the top into a relaxed twist or knot. Rake through with your fingers once they’ve cooled. It suits beach, garden and bohemian weddings. A few small braids or flowers add to it if you like. This is also the most comfortable style on the list, since nothing is tight and nothing pulls at the scalp.
18. Half-Up With Twisted Sides
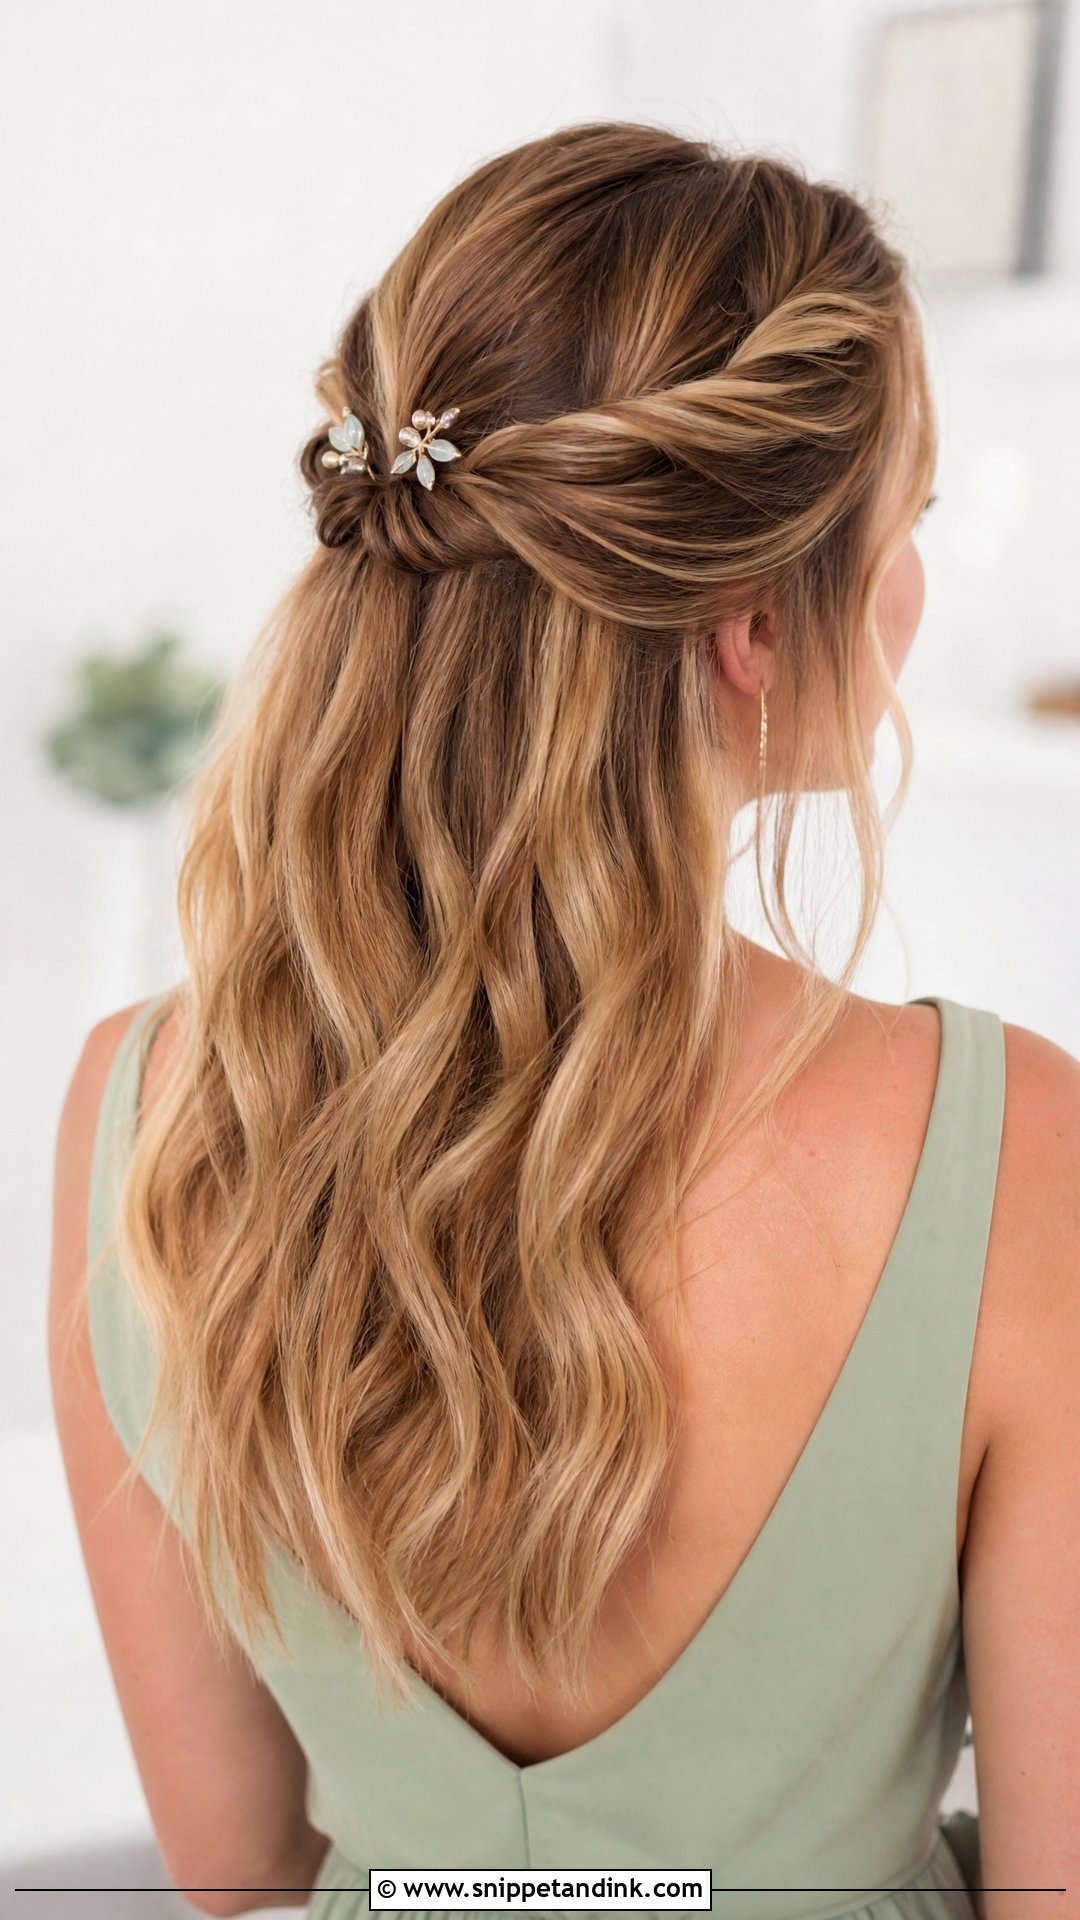
Twisted sides are the simplest way to add detail without braiding. Take a section from each side of the face, twist it back toward the crown and join the two. It frames the face symmetrically and keeps hair off your cheeks while the lengths stay waved or straight. It moves comfortably from casual weddings to formal ones. Decorative clips over the join add a little sparkle. If you have layers, start the twist further back than you’d expect, because short layers near the face pop out of a twist first.
19. Half-Up Bubble Ponytail
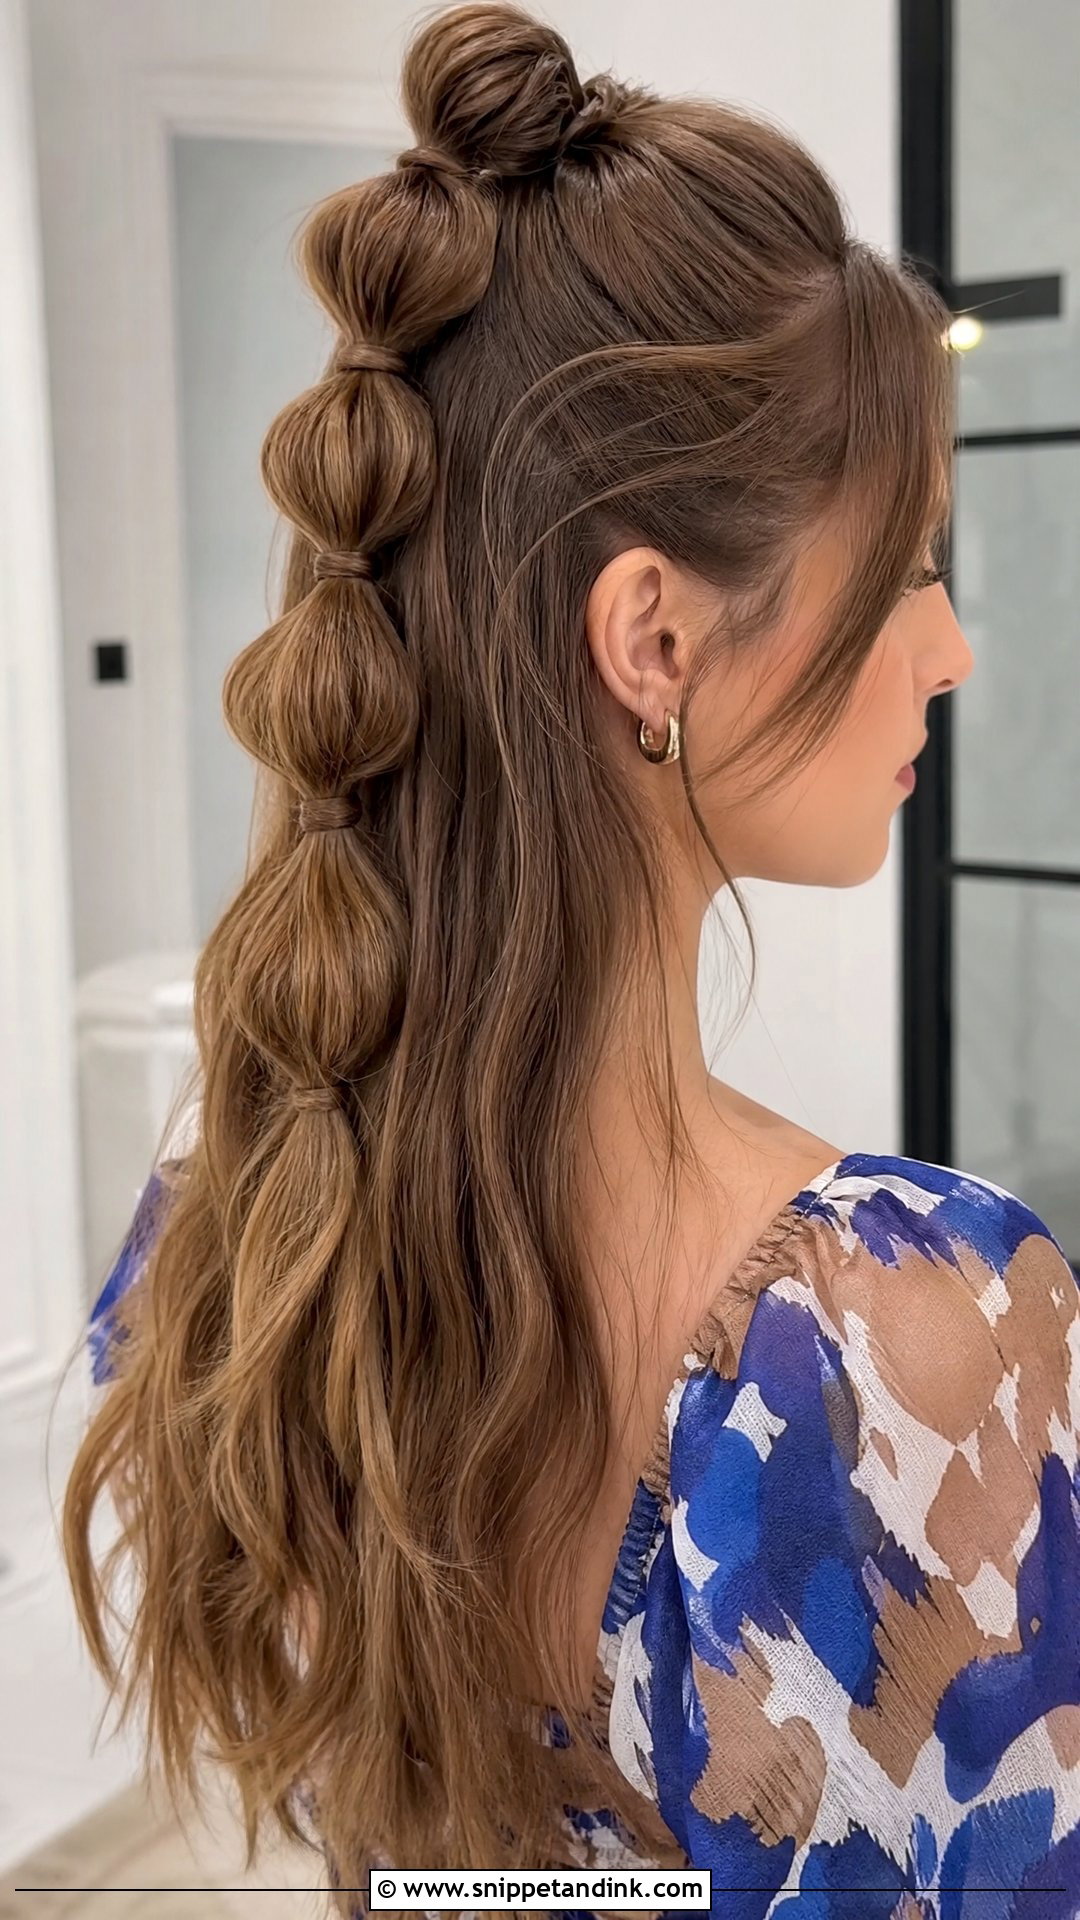
The half-up bubble ponytail is the playful one. Gather the top into a ponytail, add small elastics down its length, and gently pull each segment wider to form rounded bubbles while the rest of the hair hangs loose. It suits contemporary and casual weddings. Use clear elastics, or wrap each one with a thin strand of hair, because coloured bands make it look like a school style. A thin ribbon wound between the bubbles is a smart finishing touch. Pull the bubbles out evenly, working from the top down.
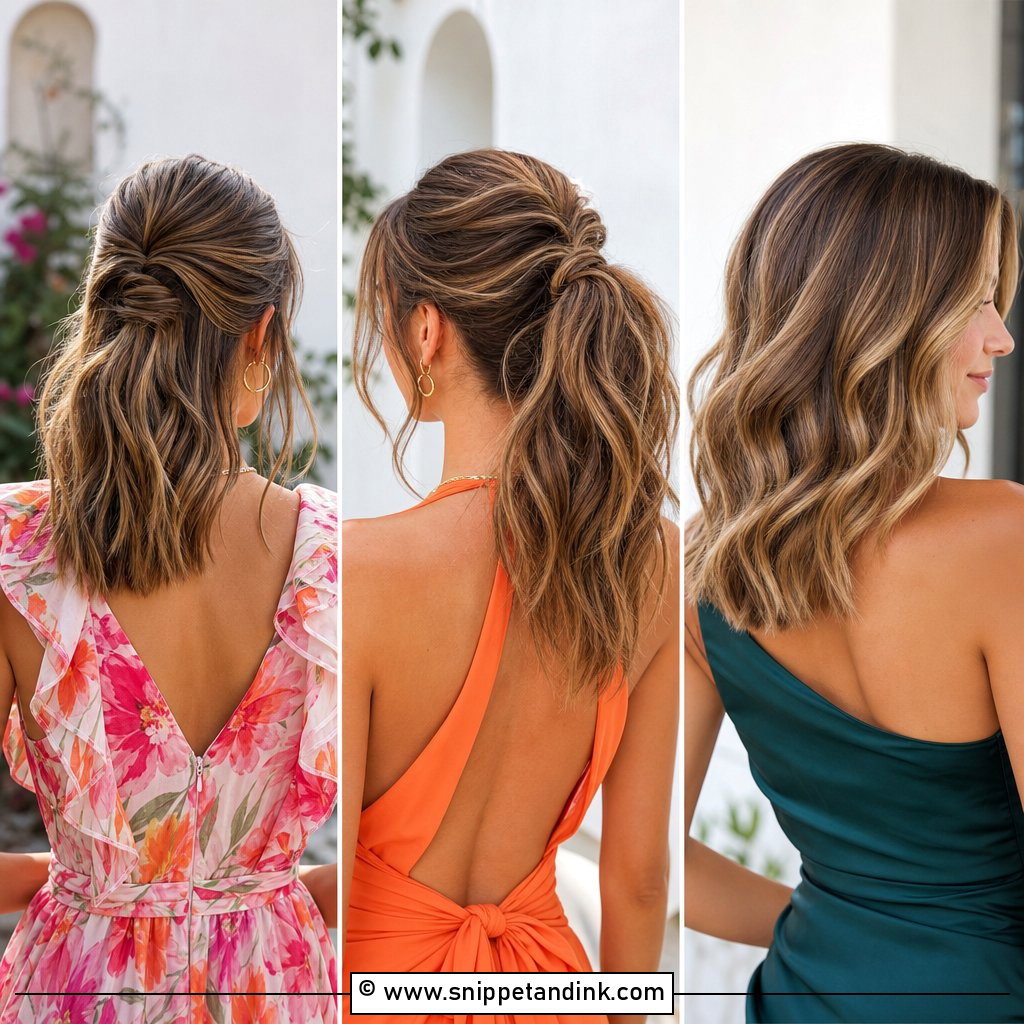
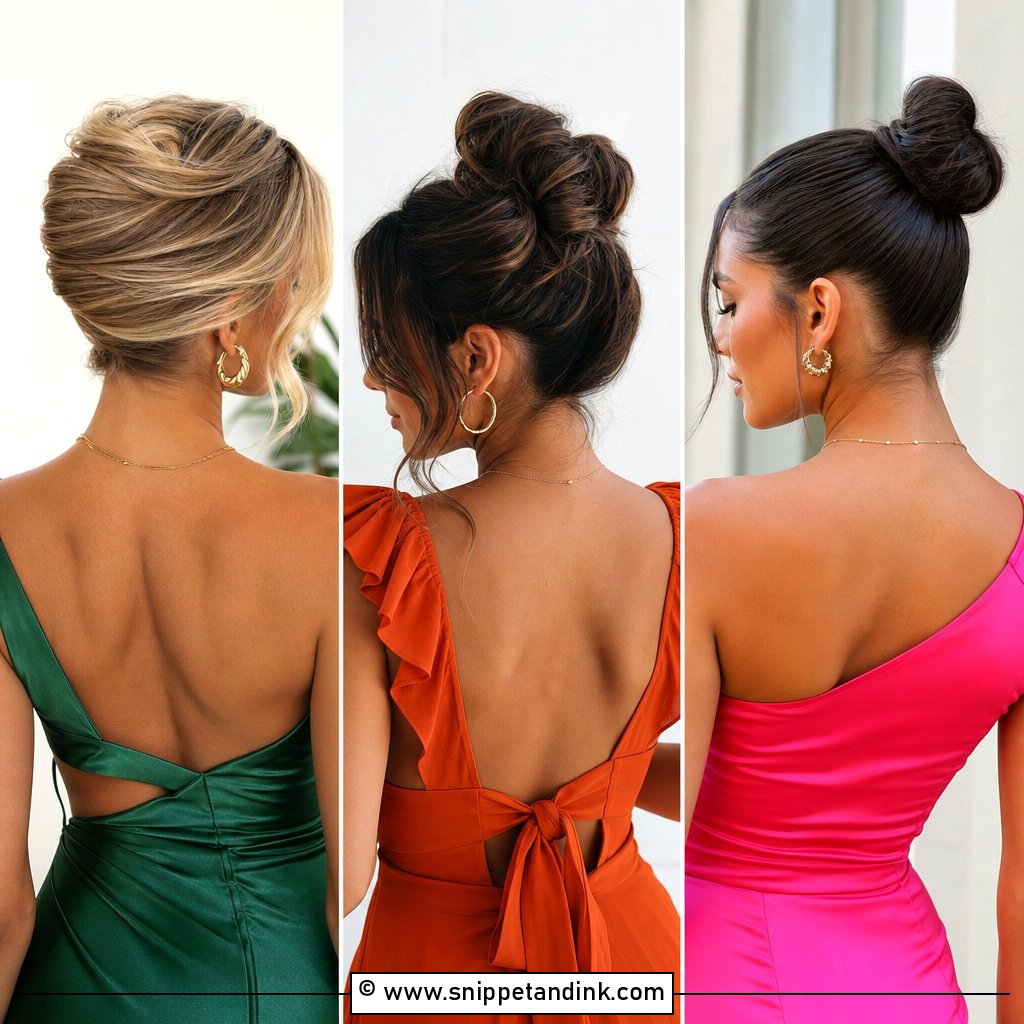
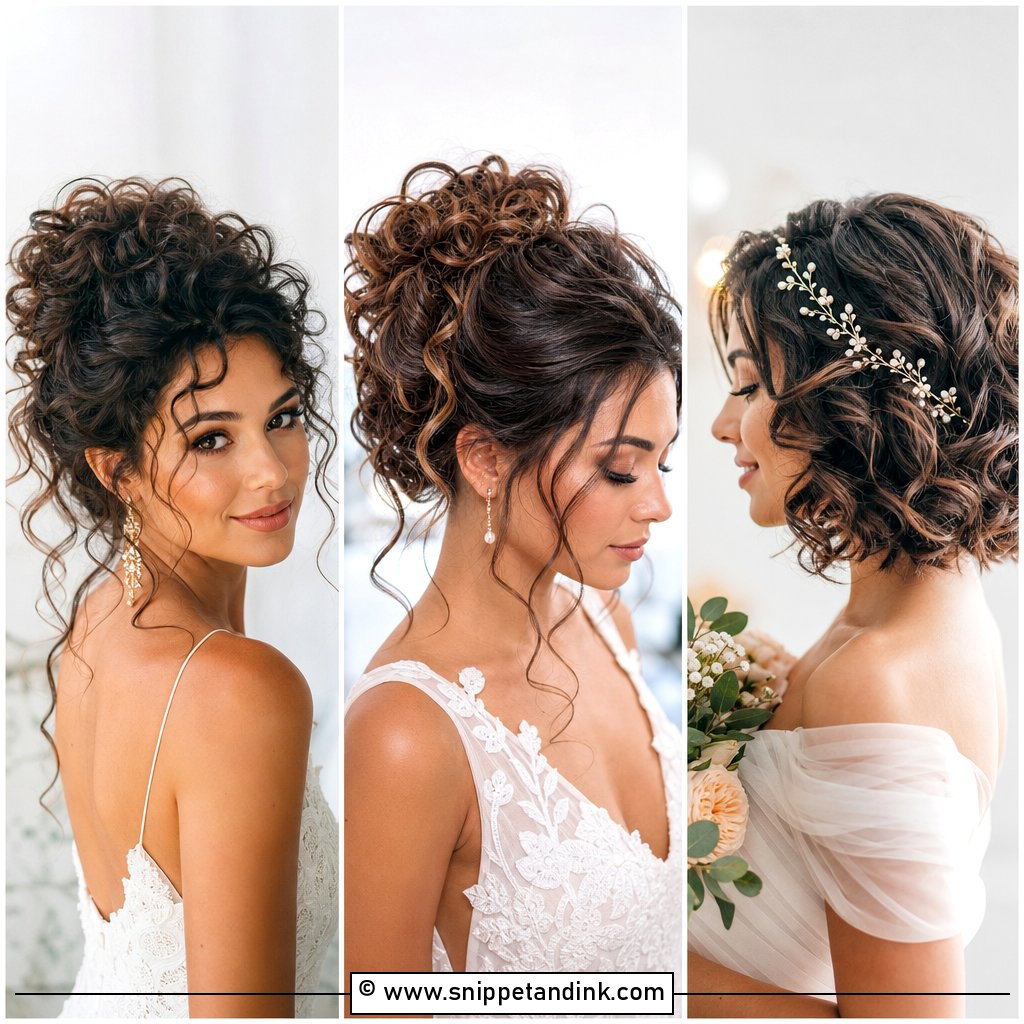
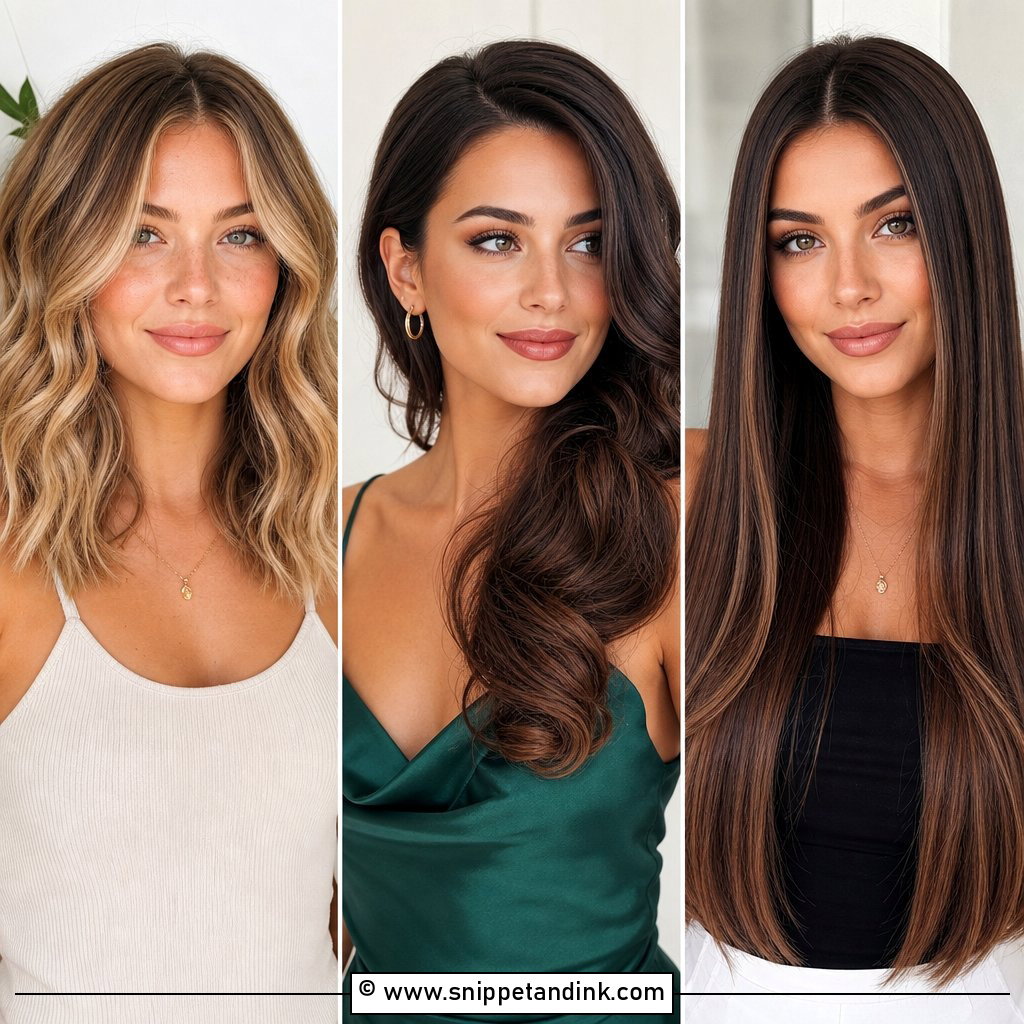
20. Half-Up With Curled Half Ponytail
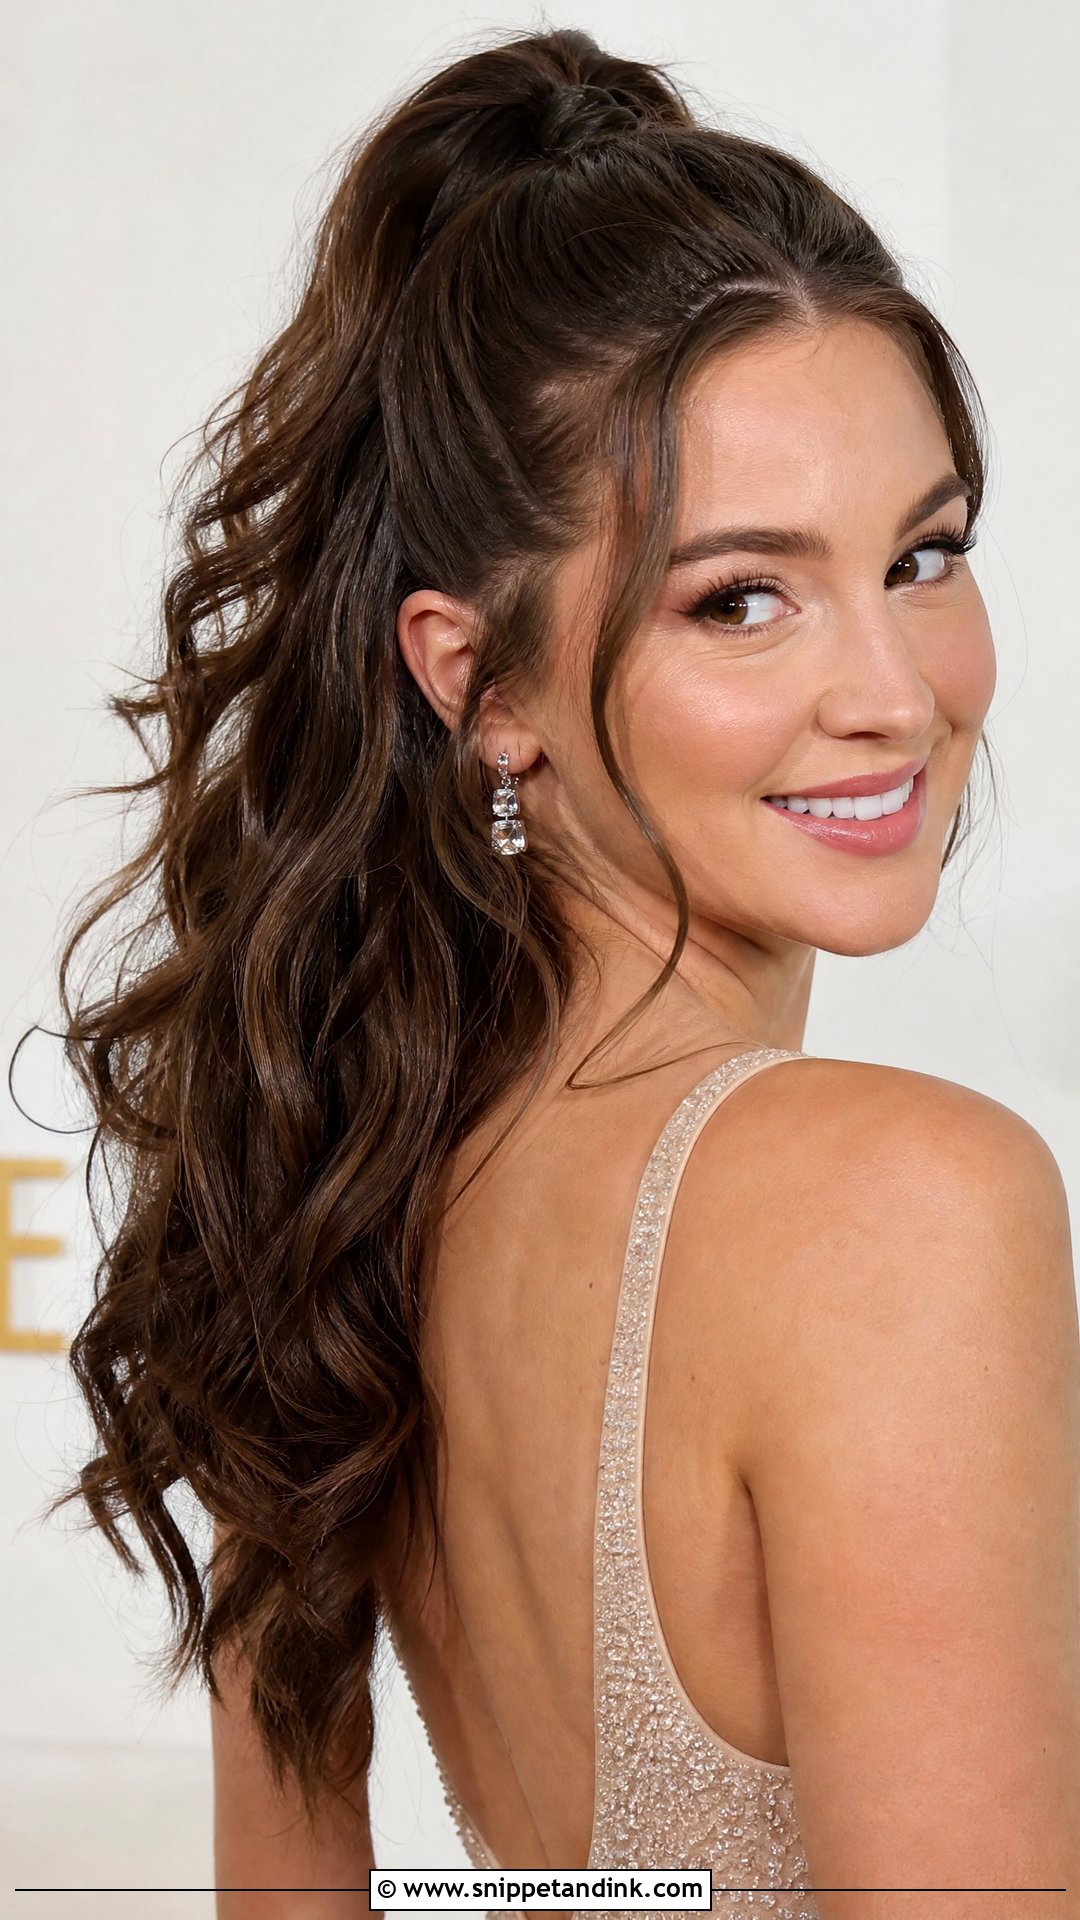
Here the half-up becomes a proper ponytail. Pull the top section into a smooth ponytail at the crown and secure it, then curl both the ponytail and the hair below into waves. You get volume, movement and a tidy front all at once, and it suits formal and glamorous weddings. Wrap a small strand of hair around the elastic and pin it underneath to hide the band. For hold, I’d put two crossed bobby pins into the base of the ponytail, pushed in toward the scalp, so the weight of the curled tail doesn’t drag it down over the evening.
Accessories That Read as Bridal From the Back Row
Guests sit behind the couple, and the couple’s family sits behind the guests, so your hair is mostly seen from behind. A few accessories that look harmless in the mirror can, from that angle, echo what the bride is wearing. I’d avoid anything that combines white or ivory with long, loose waves: a white satin bow, a long crystal vine, a full crown of pale flowers or anything resembling a tiara. Choose a colour, keep sparkle small, or go for gold or tortoiseshell instead.
If there’s a hat, a headpiece or a dress code
A fascinator or hat needs a flat, low gather, so swap the top knot and bouffant for twisted sides or a low twist and clip the headpiece into the pins. For religious ceremonies where hair is covered, a sleek half-up sits under a scarf far better than anything with height. And if the couple has asked for a colour palette, a ribbon in one of those shades is an easy, thoughtful nod.
What goes in your bag
- Six bobby pins in your hair colour, since half-ups usually lose one or two by evening.
- A travel hairspray and a small comb for the gather.
- A clear elastic, so a falling braid or twist can become a quick low ponytail without looking like a rescue job.
Run the Style Once, Then Dress for It
A half-up gives a guest the comfort of hair worn down with the tidiness of an updo, and that’s why it keeps working from ceremony to dance floor. Braids, sleek twists, bows and curls all start from the same pinned base, and pearl pins, flowers or a hair vine make them personal. Choose one that suits your hair’s texture, practise it once a week or so before, and wear it for a few hours to see where it slips. Then on the day you’ll know exactly how long it takes and which pins to reach for.
You'll Like These Ideas:


Leave a Reply