
A Halloween bridal manicure has one job most party nails don’t: it has to hold up in a close-up of your ring. That changes how I design it. The base stays clean and bridal, a sheer nude, milky white or ivory, and the seasonal part comes in as a controlled detail: a black tip, a fine web, a tiny bat, a deep red chrome. Below are twenty sets across short, almond, coffin and stiletto shapes, with notes on how each one wears and where it tends to go wrong. Pick the one that matches your dress and jewellery as much as your theme.
Dark Gel Shows Every Millimetre of Regrowth
Nude and pale bridal sets grow out kindly. Dark ones don’t. Within a week, black or burgundy gel leaves a visible gap at the cuticle, and that gap is the first thing a close-up ring shot picks up.
So the planning is a little different from a regular bridal manicure:
- Book the final set one to three days before the wedding, not a week. Matte finishes closer still.
- Do a test set a month or so ahead to check the shade, shape and length on your hands.
- Ask for a base coat under every dark colour so the natural nail doesn’t stain yellow or pink.
- Have cuticles tidied at the final appointment, not the day before it, so any small nicks have time to settle.
- If you’ll be away after the wedding, ask how the set will look at two weeks and whether a fade or French style would grow out better.
Gel generally lasts two to three weeks on healthy nails, though that varies with your nail type and how hard you use your hands. Ombre and French styles hide regrowth best because the cuticle area is already nude.
1. Black French Tip Halloween Wedding Nails
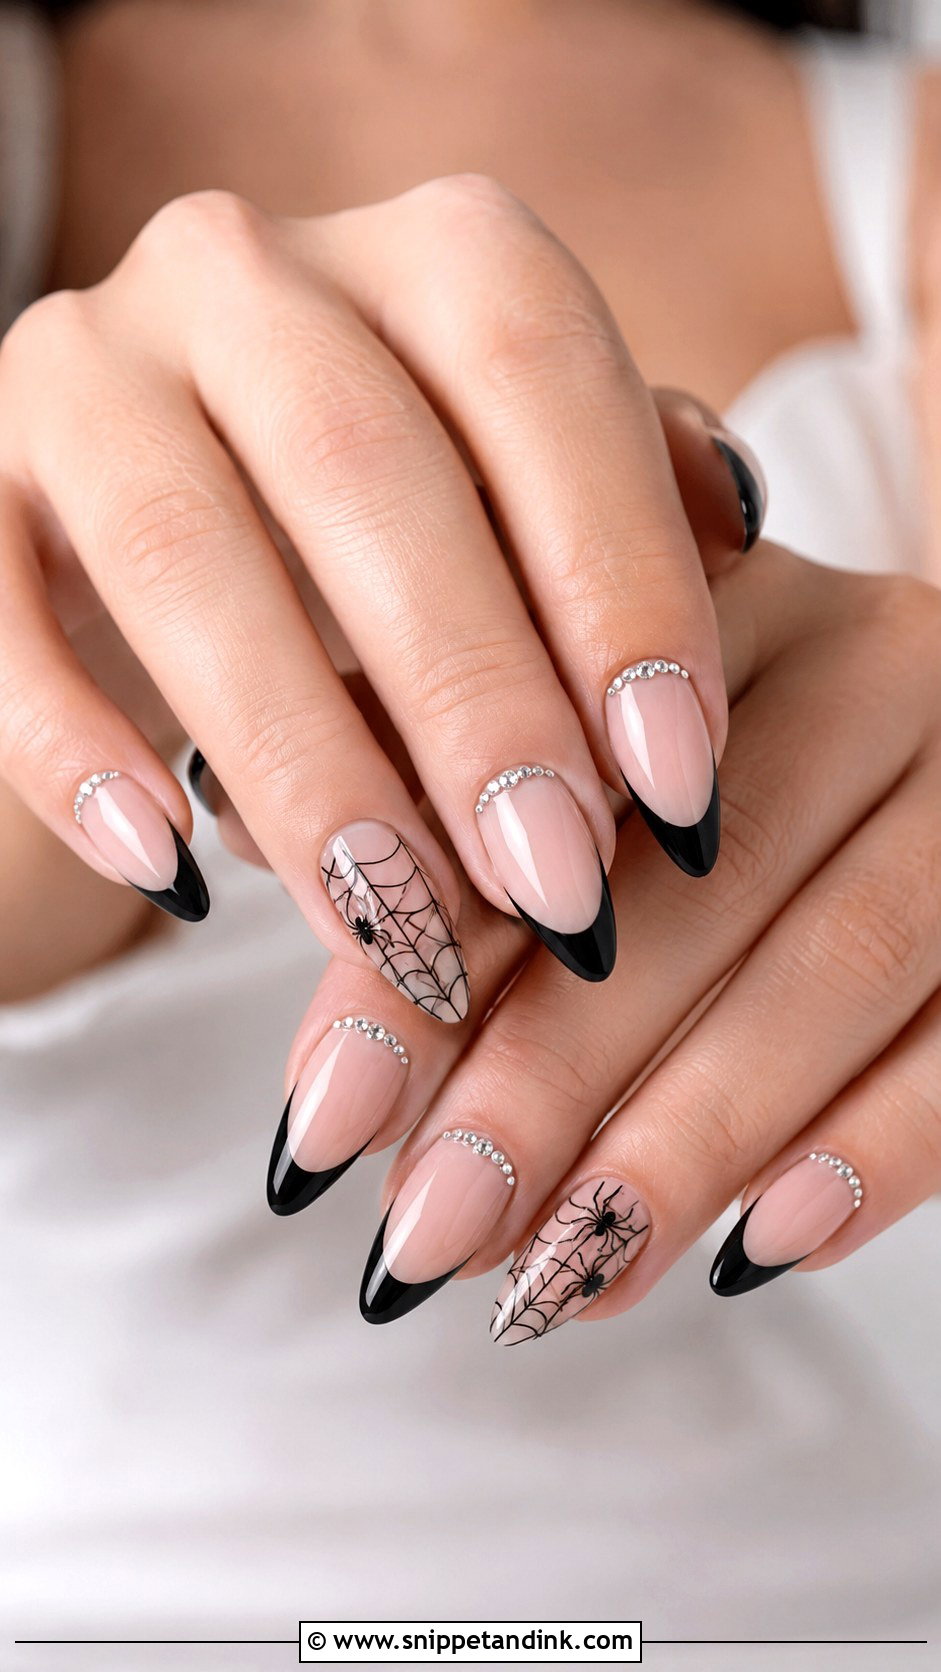
Black French tip Halloween wedding nails are the set I recommend most when a bride wants something seasonal but not loud. The line work is everything here. I paint the smile line with a long, thin liner brush and keep it ultra-fine, because a thick black tip makes the nail look shorter in photos. Almond and oval shapes suit it best; on very square nails the black corners look heavy. If you want a hint more, one tiny web on a single accent nail is enough.
2. White Ghost Halloween Wedding Nails
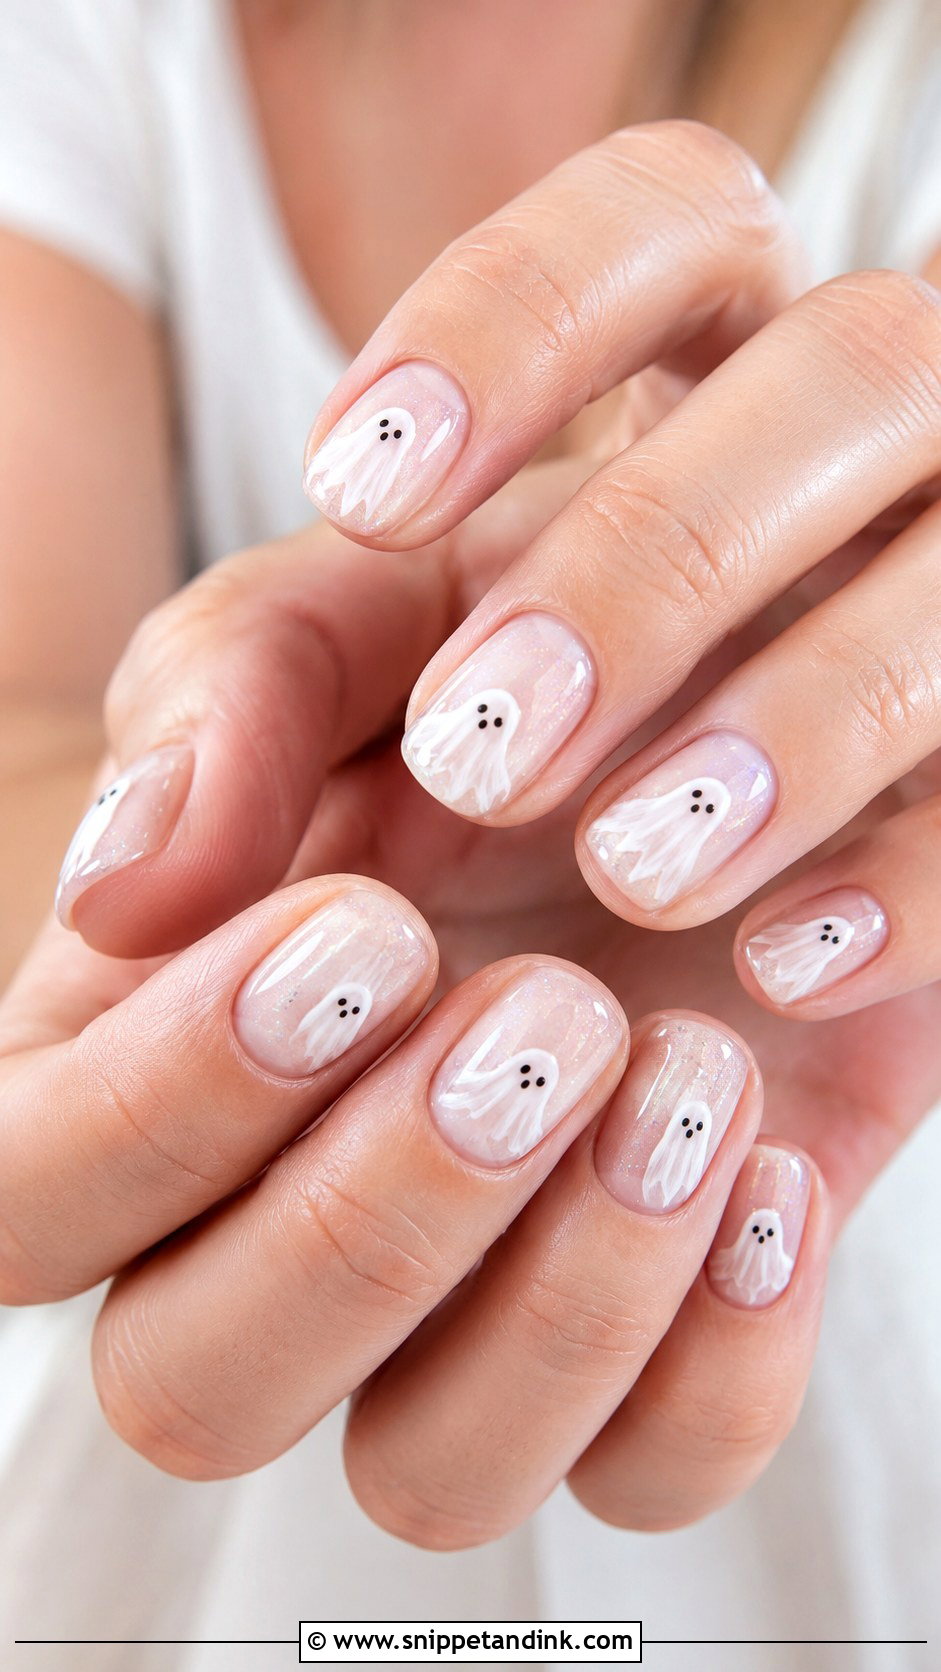
Ghosts are the cutest motif here, and the hardest to keep bridal. Size is the reason. I keep each ghost smaller than the width of a grain of rice on the nail, with just two dots for eyes, on a milky pink base. Any bigger and it starts to read as a kids’ party. A pearly top coat over the white art softens it nicely. This one suits short almond or rounded square nails, which is also handy for a wedding weekend full of packing and unpacking.
3. Black Lace Halloween Wedding Nails
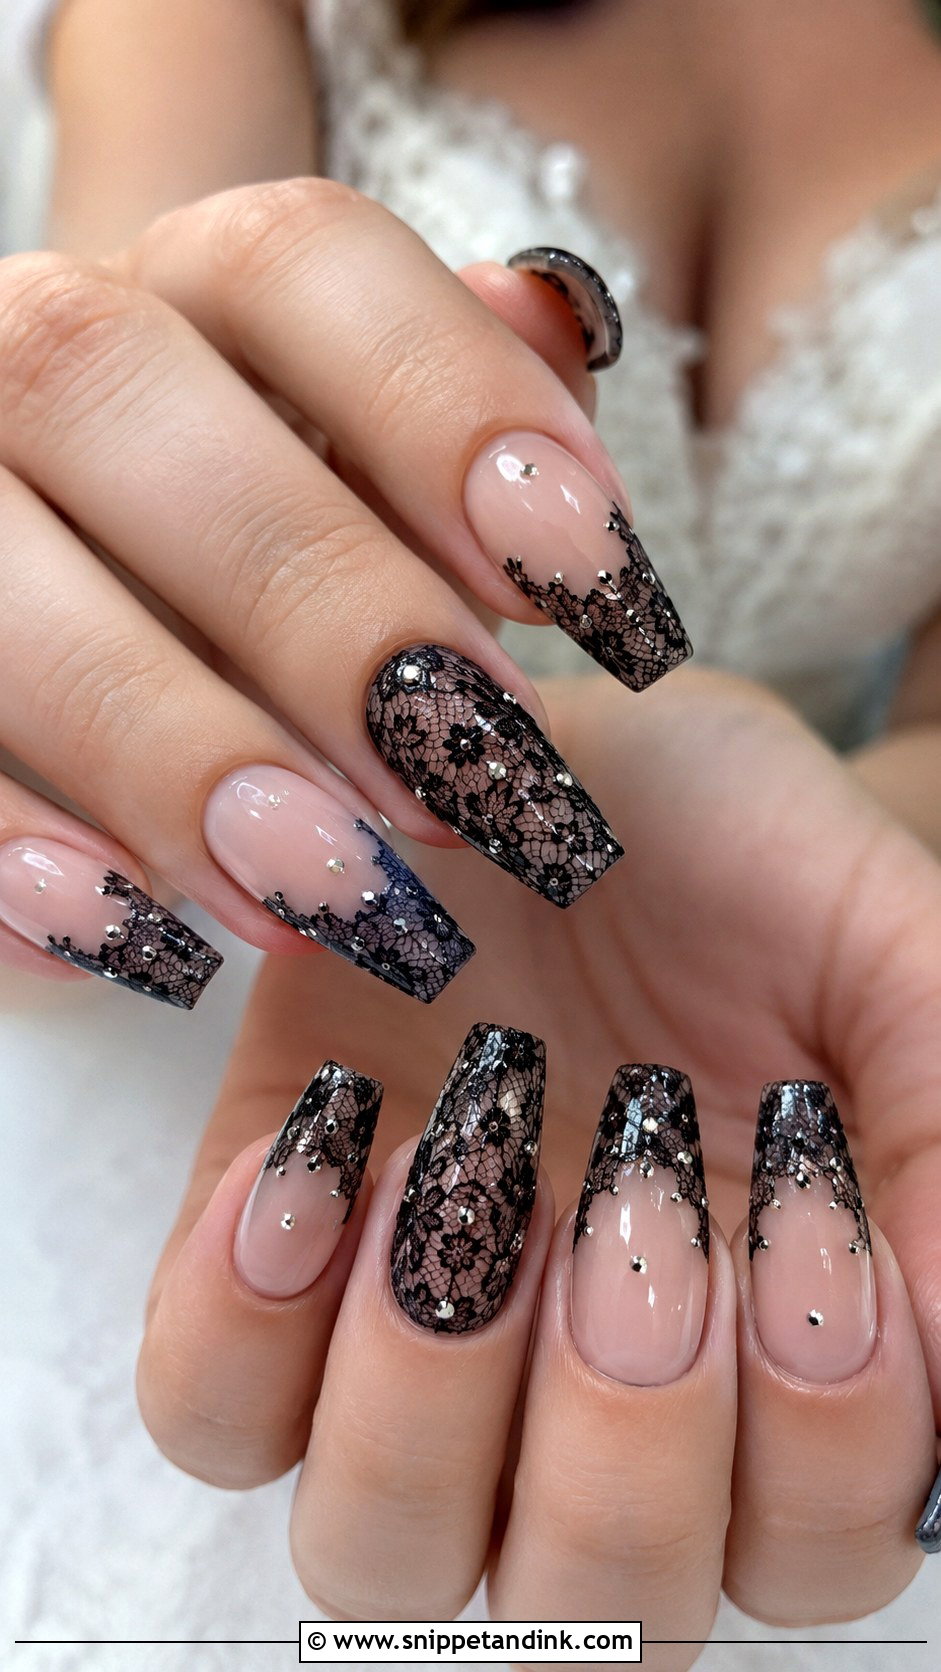
Lace art is fine-line work, so it depends on the artist’s hand more than any other set here. I build it with a striping brush and thinned black gel, curing every few strokes so the lines stay sharp instead of bleeding into each other. Blush or soft grey bases make the lace look delicate; a stark white base makes it graphic. I usually put full lace on two accent nails and lace tips on the rest, which keeps the pattern from looking busy. Ask to see a lace sample on your skin tone before booking the full set.
4. Burgundy Chrome Halloween Wedding Nails
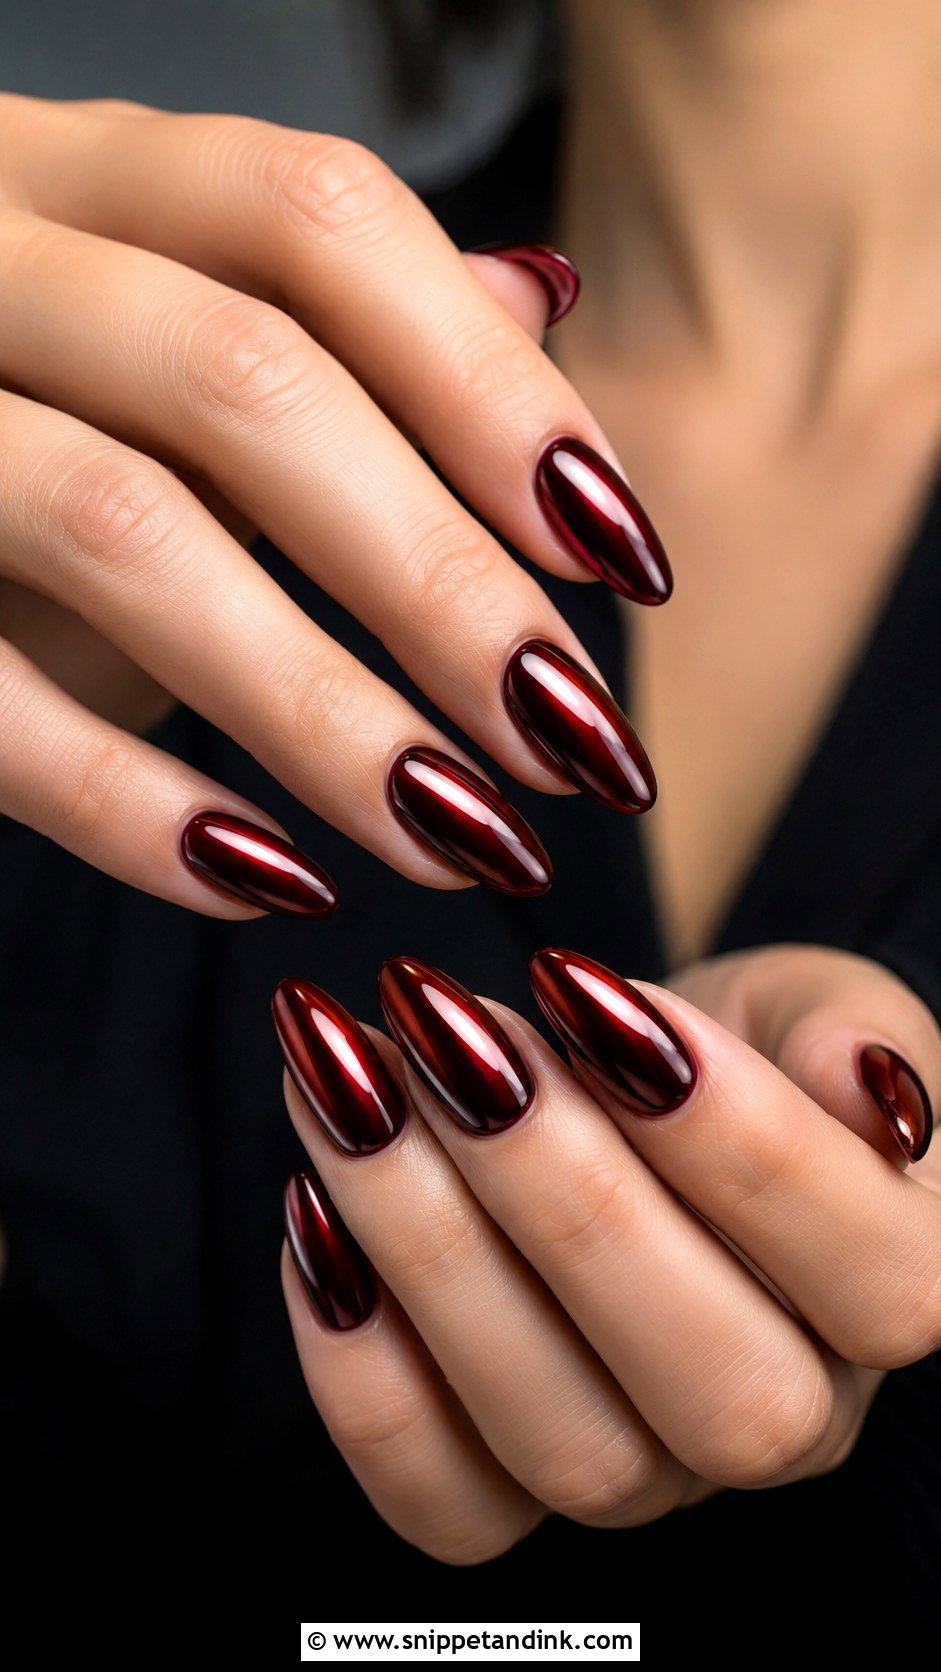
Burgundy chrome Halloween wedding nails need no artwork, which is why they work when your dress or veil is already detailed. Chrome is a powder rubbed onto a cured, non-wipe top coat and then sealed, and the edges are where it fails first. I cap the free edge carefully so the chrome doesn’t lift at the tips after a couple of days. A sheer wine chrome over a nude base is softer; full opaque burgundy underneath gives the deepest shine. Both sit well beside gold or silver rings.
5. Milky White Spider Web Halloween Wedding Nails
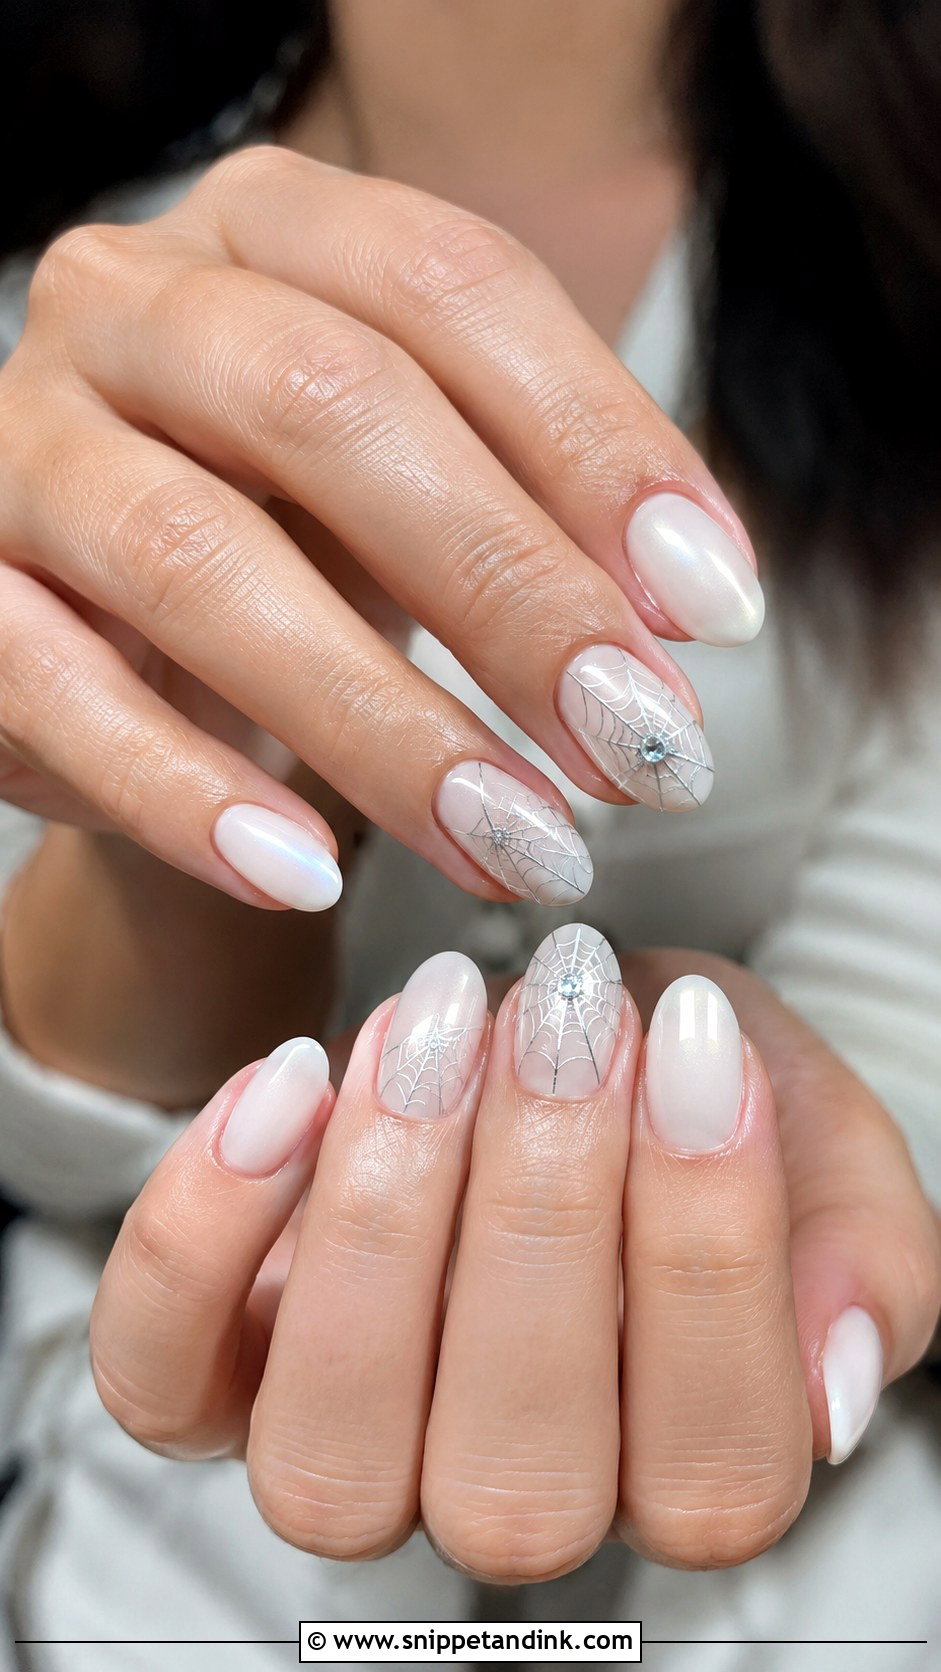
On a milky white base, a web can be white-on-white for a whisper of pattern, or silver or black for contrast. The web radiates from one corner, so I start it near the cuticle and let the lines fan out toward the free edge, which follows the curve of the nail. A single tiny crystal where lines meet is plenty. Two or three web nails per hand keeps the set calm. White-on-white webs vanish in dim reception light, so choose silver if you want them seen in the evening photos.
6. Black Ombre Halloween Wedding Nails
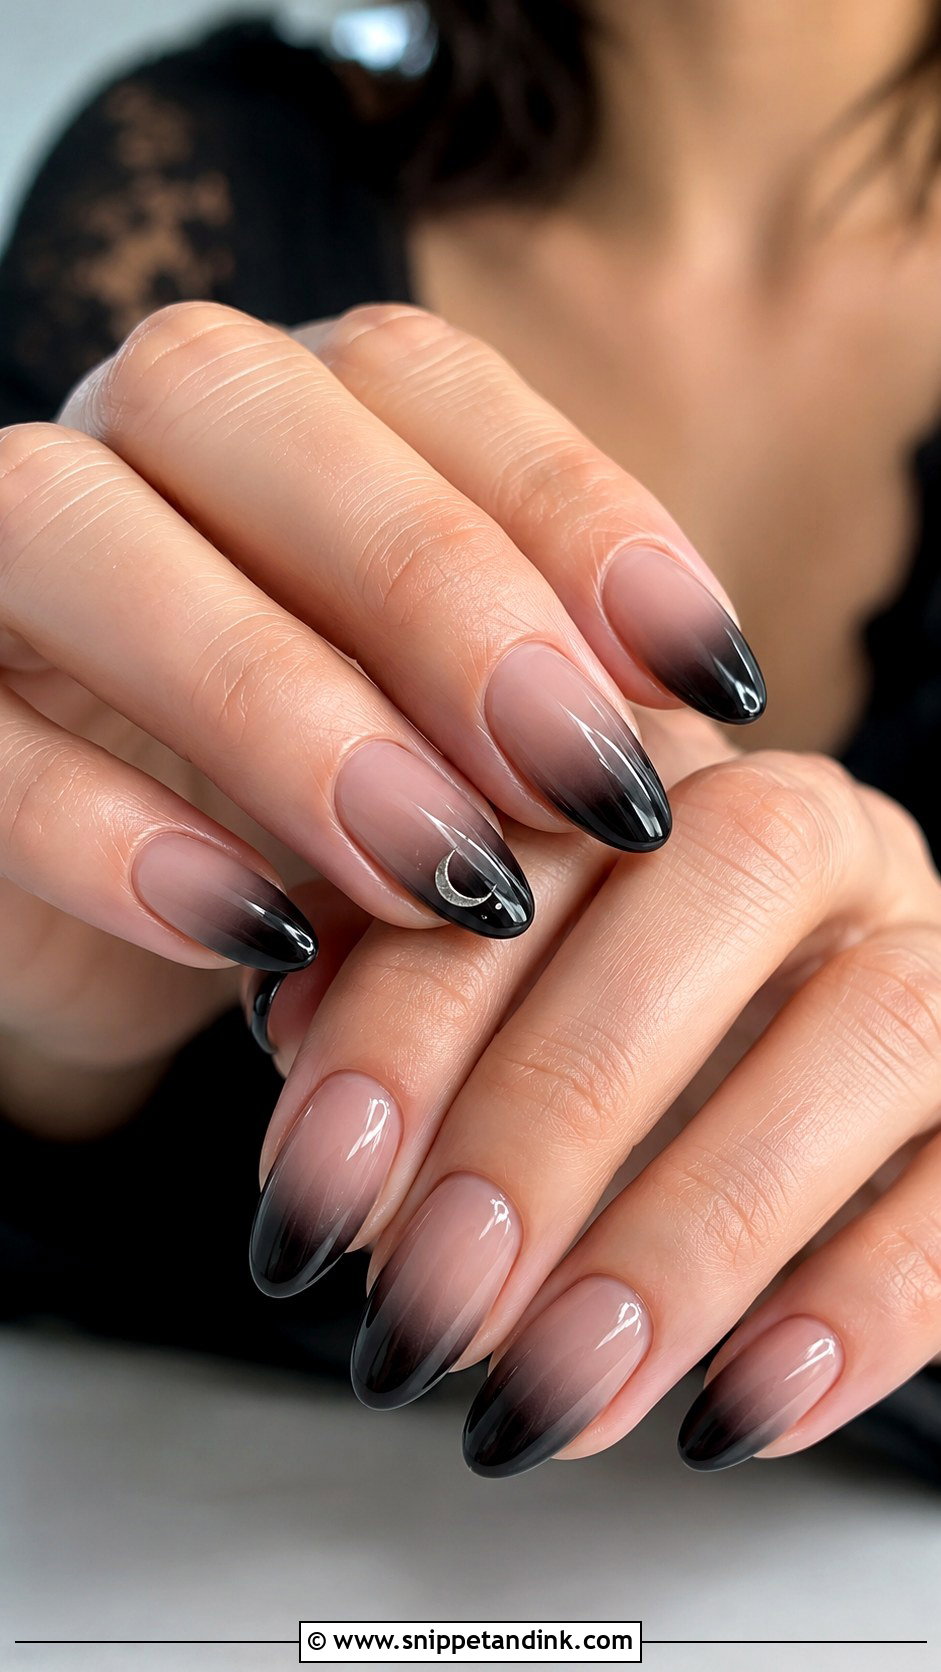
Black ombre is softer to wear than a full black set because the fade keeps the cuticle area nude. That also helps with regrowth: when the nail grows out, there’s no hard black line moving up from the cuticle. I sponge or airbrush the gradient from the free edge down, building it in thin layers so the transition stays smooth. Glossy top coat makes it sleek, matte makes it moodier. A small silver moon on one nail is about as much as I’d add.
7. Pearl Halloween Wedding Nails
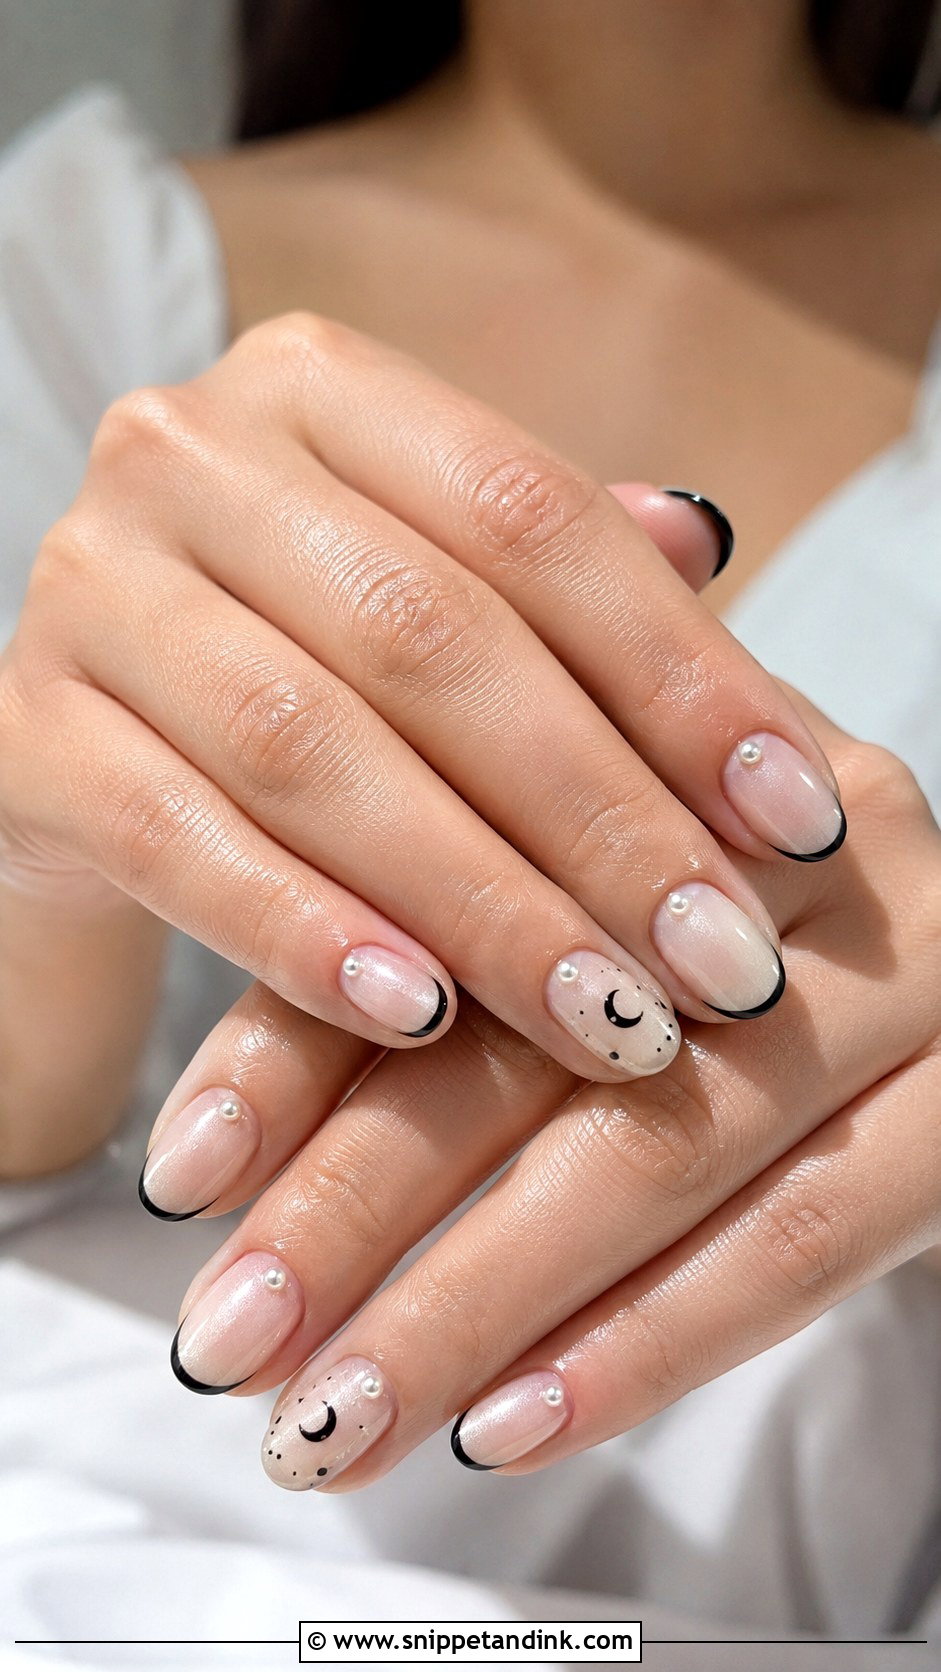
Pearls look bridal instantly, and the Halloween part comes from what sits next to them: black micro tips or a smoky grey accent. I set flat-backed pearls near the cuticle in builder gel, never just top coat, and keep them small. Raised pearls can snag a tulle veil or a lace sleeve, which I warn every bride about. If your veil is fine tulle, I’ll use painted pearl dots instead of 3D ones. They match pearl earrings or a pearl-edged veil well.
8. Matte Black Halloween Wedding Nails
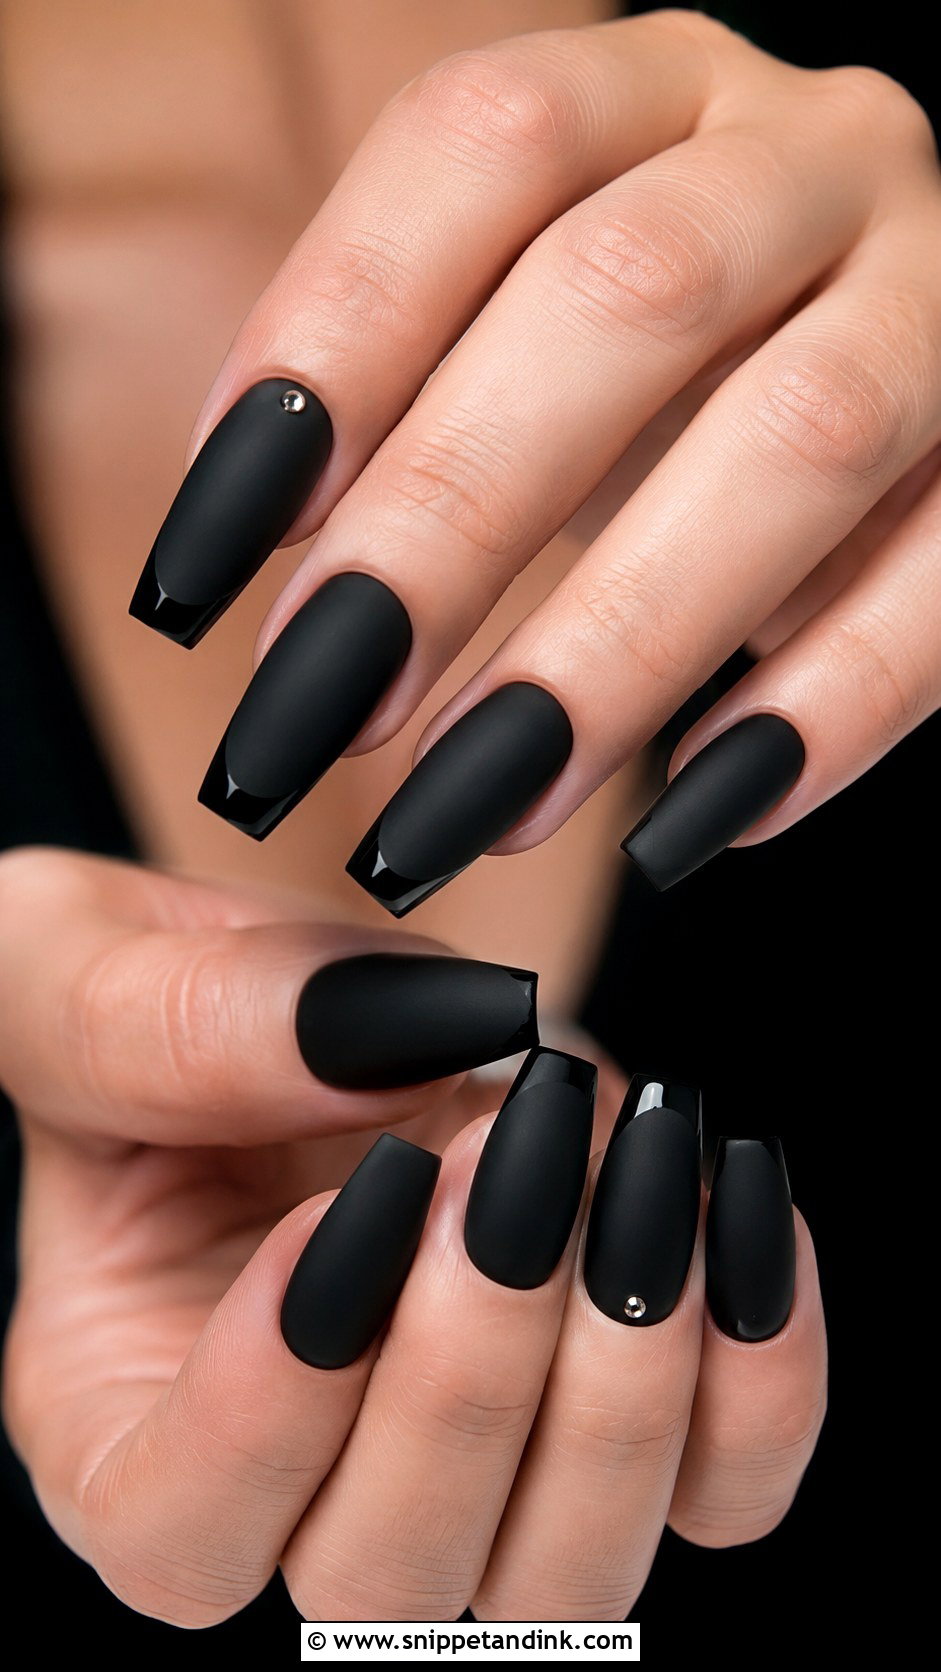
Matte black looks like velvet on the day it’s done, then picks up shine wherever you touch things most. Hand lotion, oils and constant use slowly polish the matte surface, so by day five the fingertips can look patchy. For that reason I’d book matte black no more than a day or two before the wedding. Keep the shape precise, smooth almond or coffin, and add one glossy black French accent for contrast. Mixing matte black with nude nails on alternate fingers lightens it.
9. Red Drip Halloween Wedding Nails
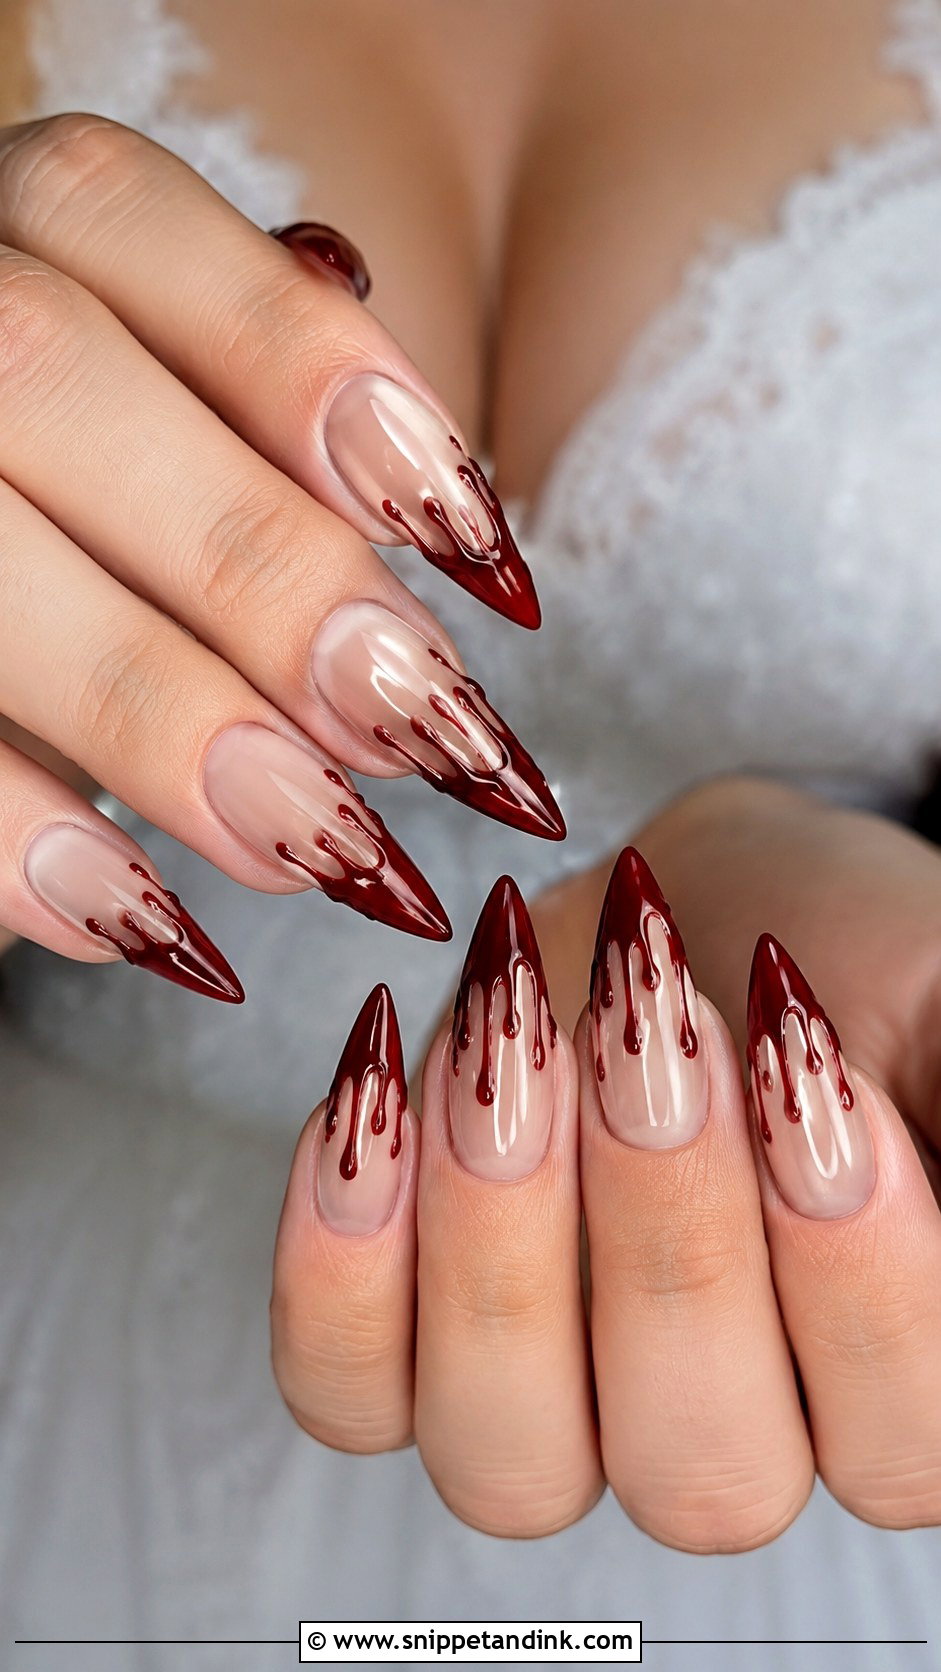
The drip effect lives at the free edge, like a melting French tip, and I paint it with gel so each drip has a slight dome, which reads as liquid. The shade decides the mood: a bright red looks costume, a deep wine red looks romantic. A sheer nude base stops the set from looking heavy. On long almond or stiletto nails the drips can be longer and more dramatic. On short oval nails I keep them tiny, which is often the better choice for a bride.
10. Moon And Star Halloween Wedding Nails
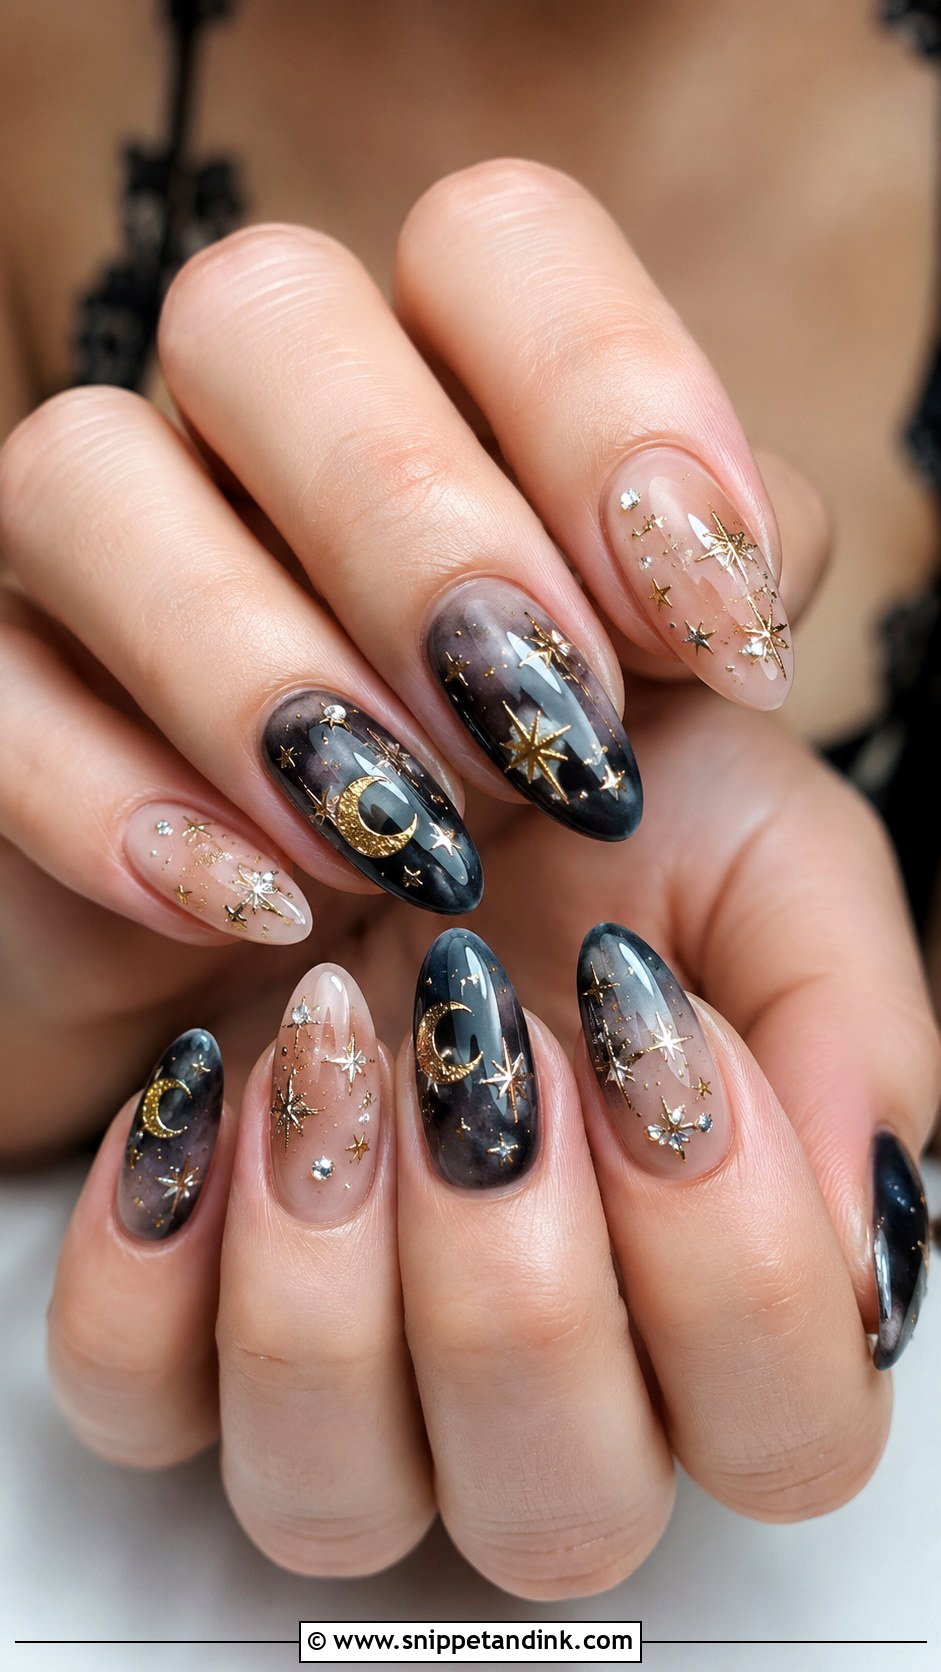
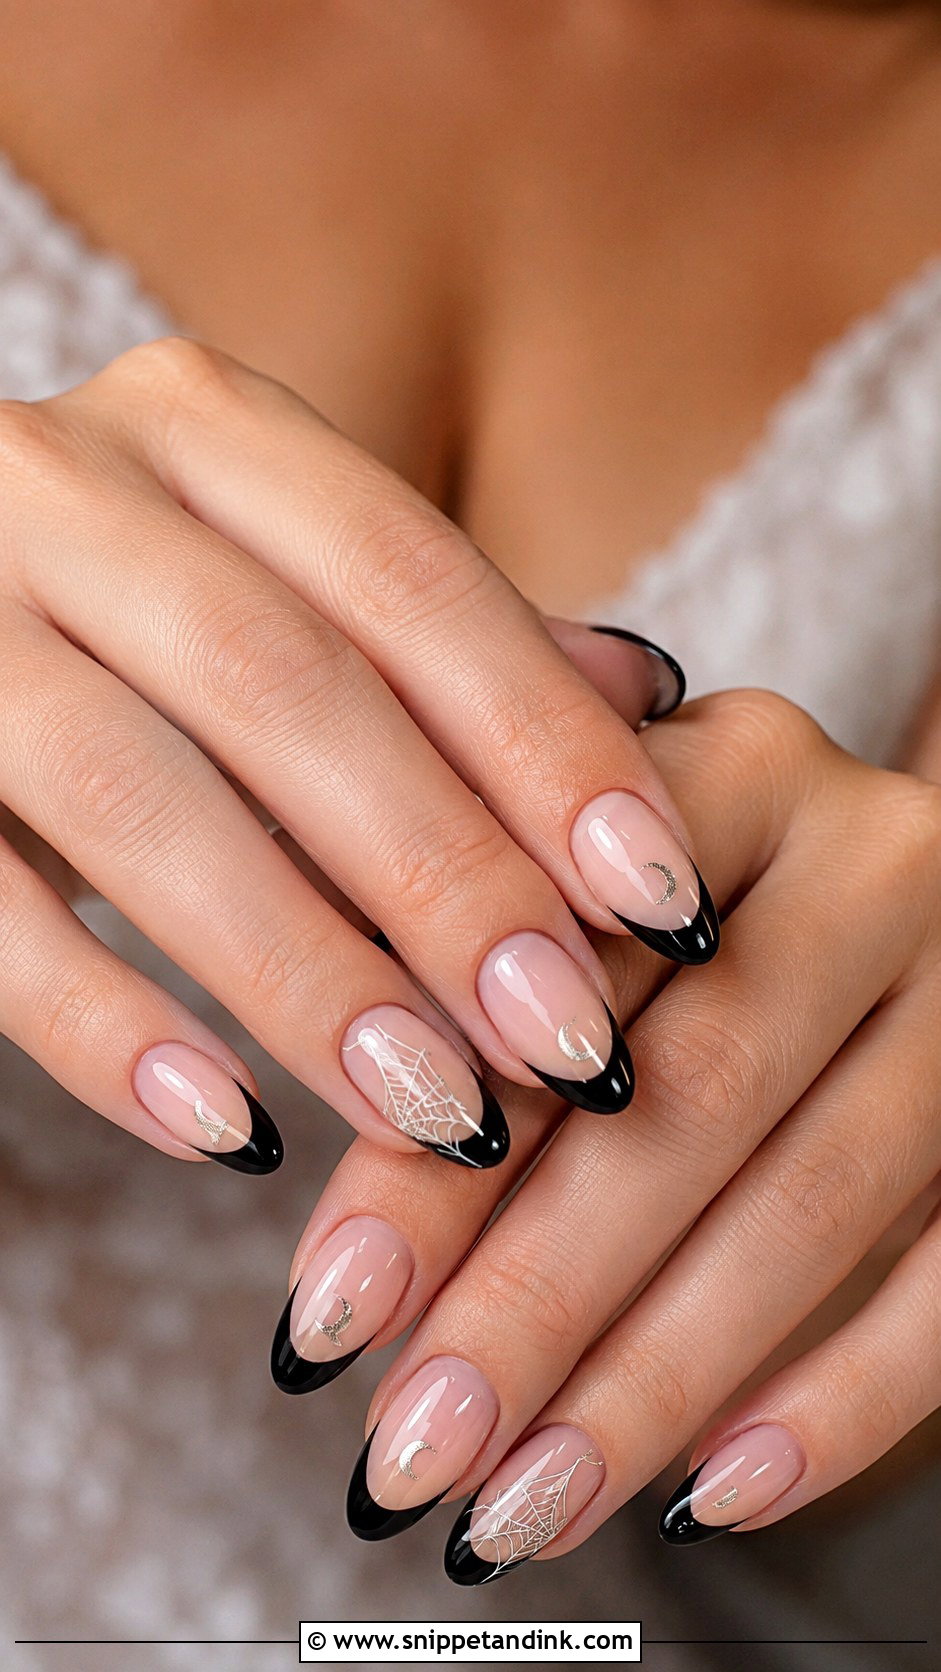
Crescent moons fit the curve of an almond nail almost perfectly, so this is the motif I’d pair with that shape before any other. Moons can be painted in gold or silver gel or placed as thin metallic stickers sealed under top coat. Smoky grey, navy or black bases make the metal pop, while sheer nude keeps it bridal. Tiny crystals scattered as stars add sparkle. Celestial art is a good route for anyone who wants an October feel without ghosts or webs.
11. Black And Nude Halloween Wedding Nails
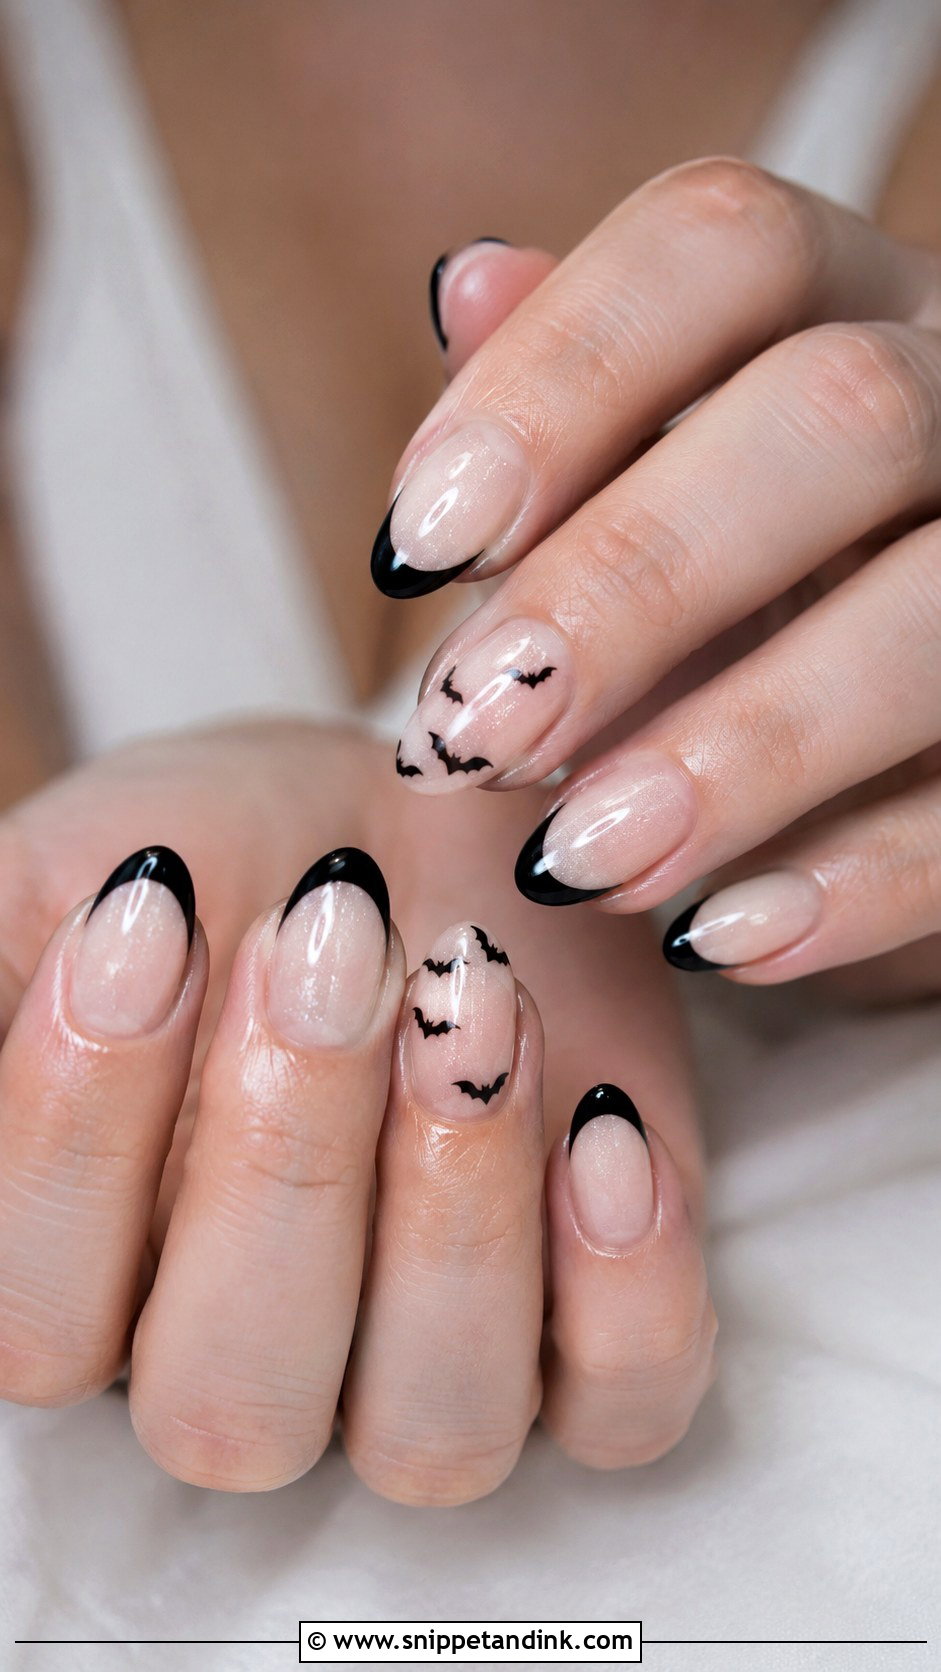
Black and nude gives you the most combinations with the least risk. French tips, half-moon cuticles, fine swirls or one bat accent all hold together because the palette is just two colours. I mix two or three of those details across the hand, never all of them. It works at any length. If your shoes, florals or ribbon are already black, this set ties in quietly and looks deliberate rather than themed.
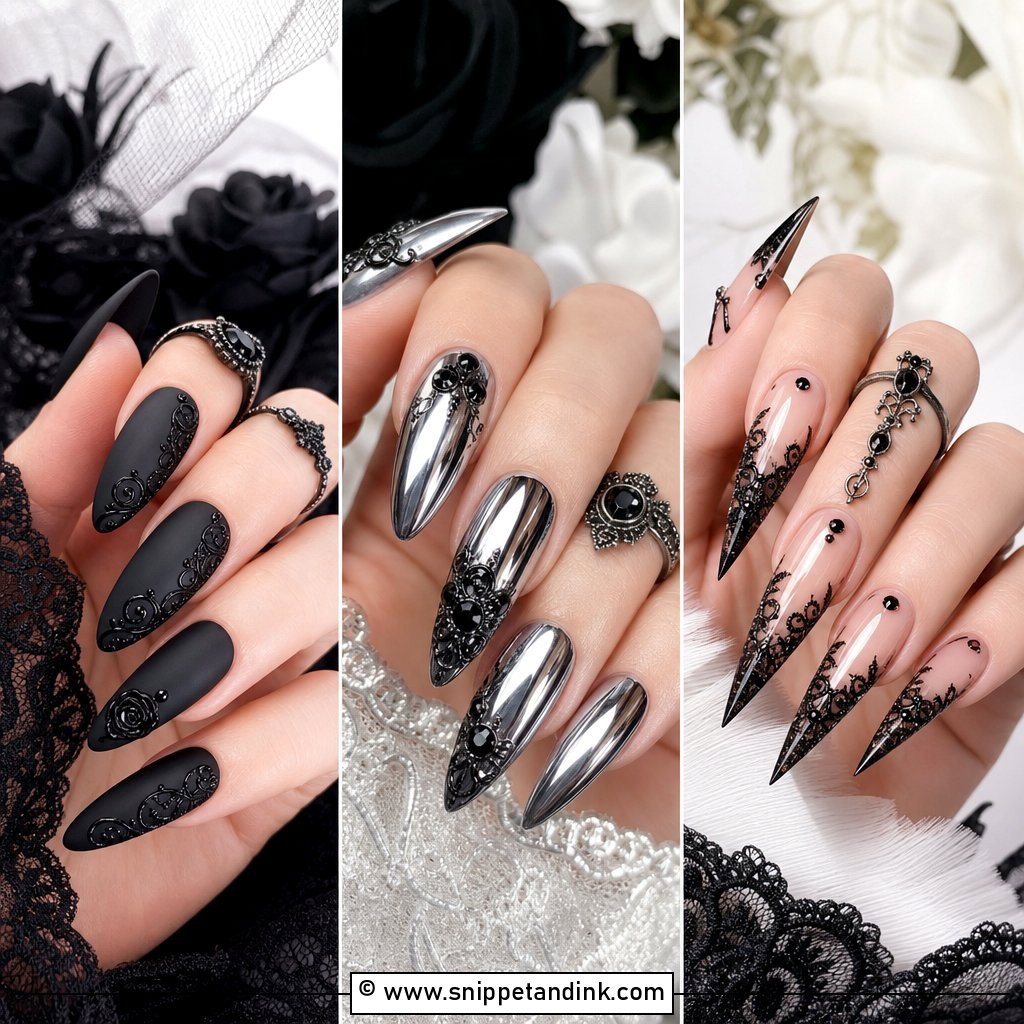
12. Gothic Coffin Halloween Wedding Nails
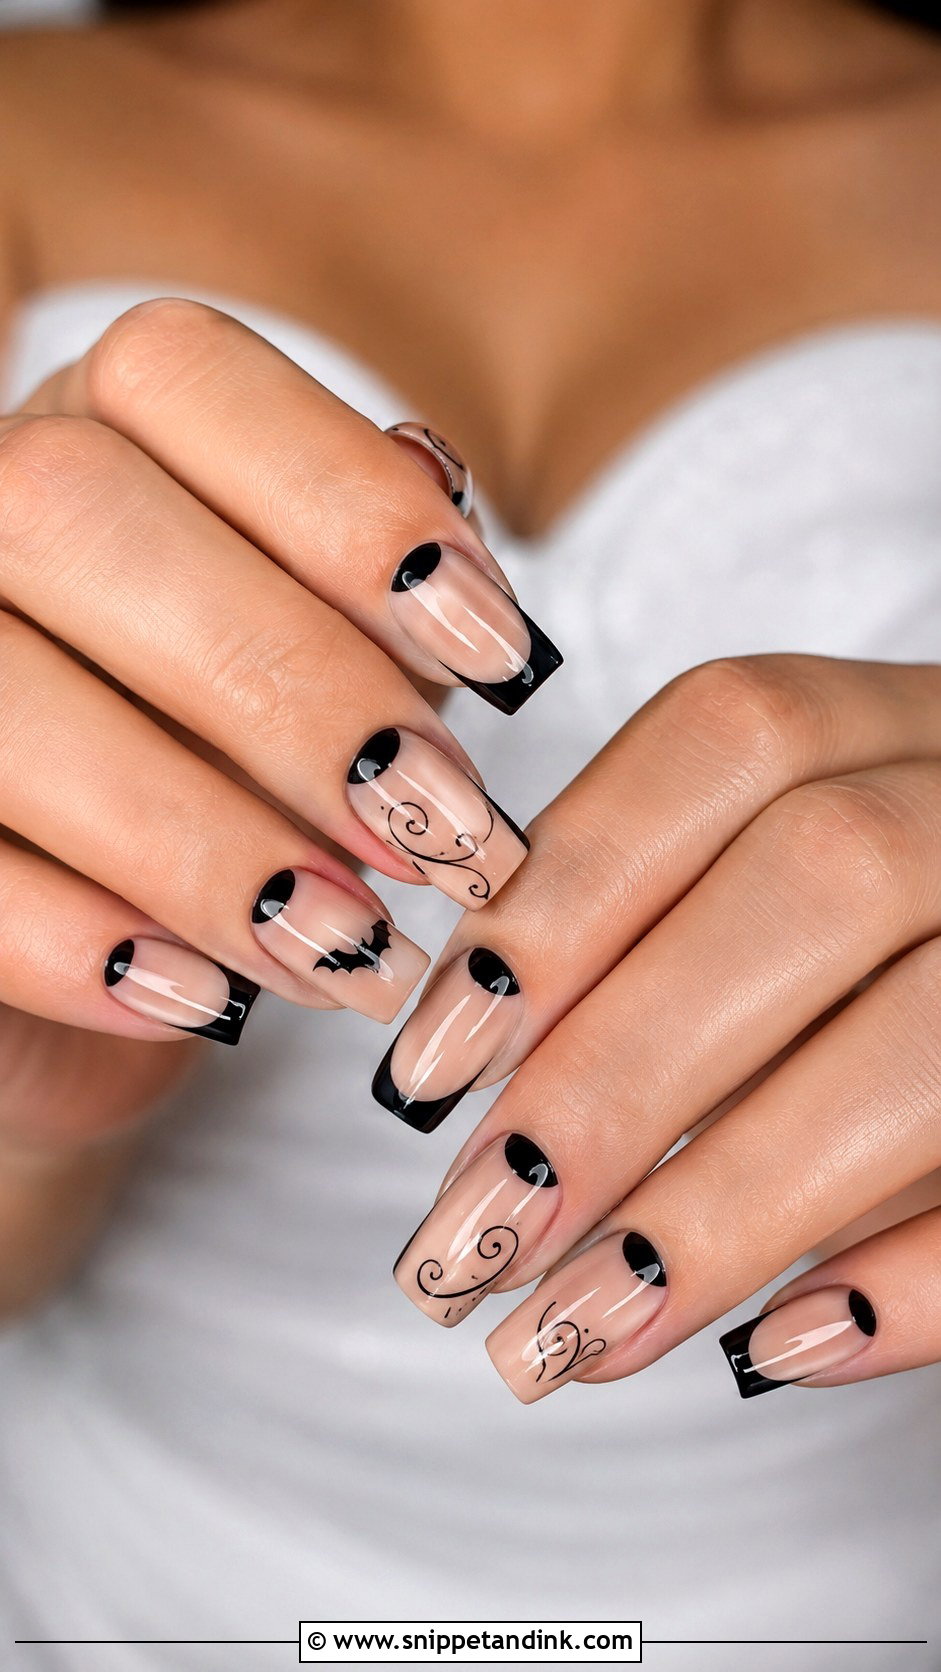
Gothic coffin Halloween wedding nails give you the most canvas, which tempts people to fill it. I limit the design to two or three elements, for example black French tips, a few small moons and one crystal accent, so the set still looks bridal. Long coffin nails lengthen the fingers in ring photos, but think about practicalities: fastening tiny dress buttons, putting earrings in and pinning a boutonniere all get harder with length. If you’ve never worn long extensions, have them done a week before the wedding to get used to them, then refresh.
13. Short Halloween Wedding Nails
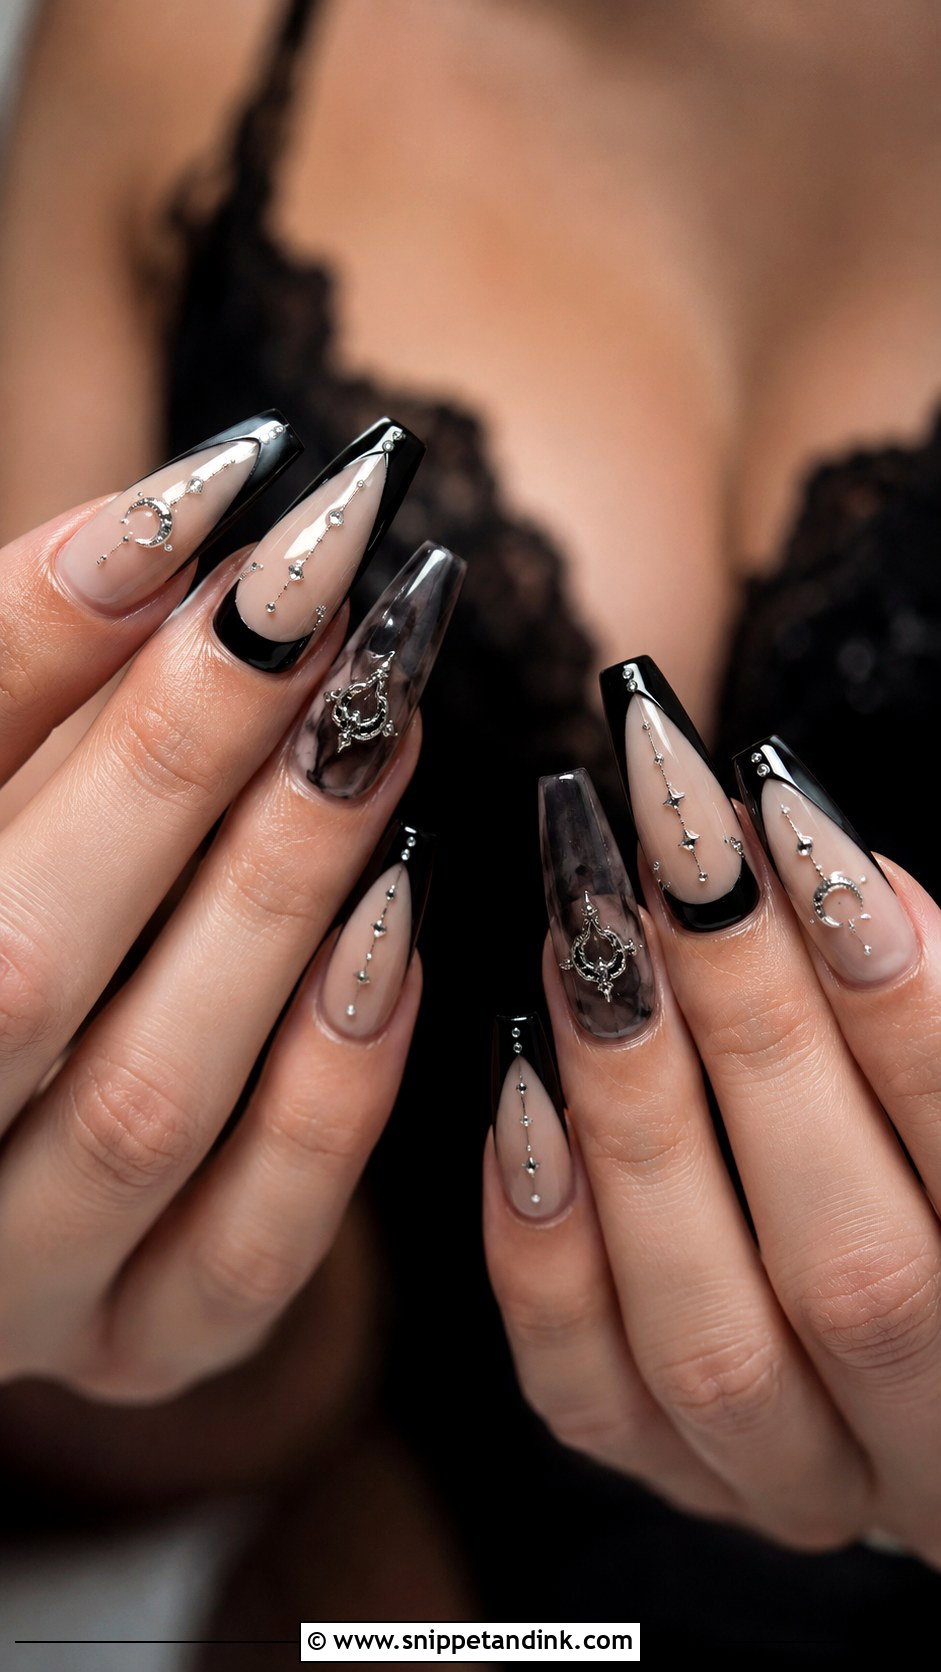
Short nails can carry plenty of design if the art is scaled down. A mini web, a single tiny ghost or a black micro French tip fits a short nail; a full-size bat won’t. Rounded square and short oval shapes are the most comfortable and the least likely to chip on the free edge. Milky pink, sheer nude, soft grey and glossy black all work as bases. Short sets are also the ones I’d recommend for bridesmaids and guests who’ll be carrying bouquets, drinks and bags all day.
14. Almond Halloween Wedding Nails
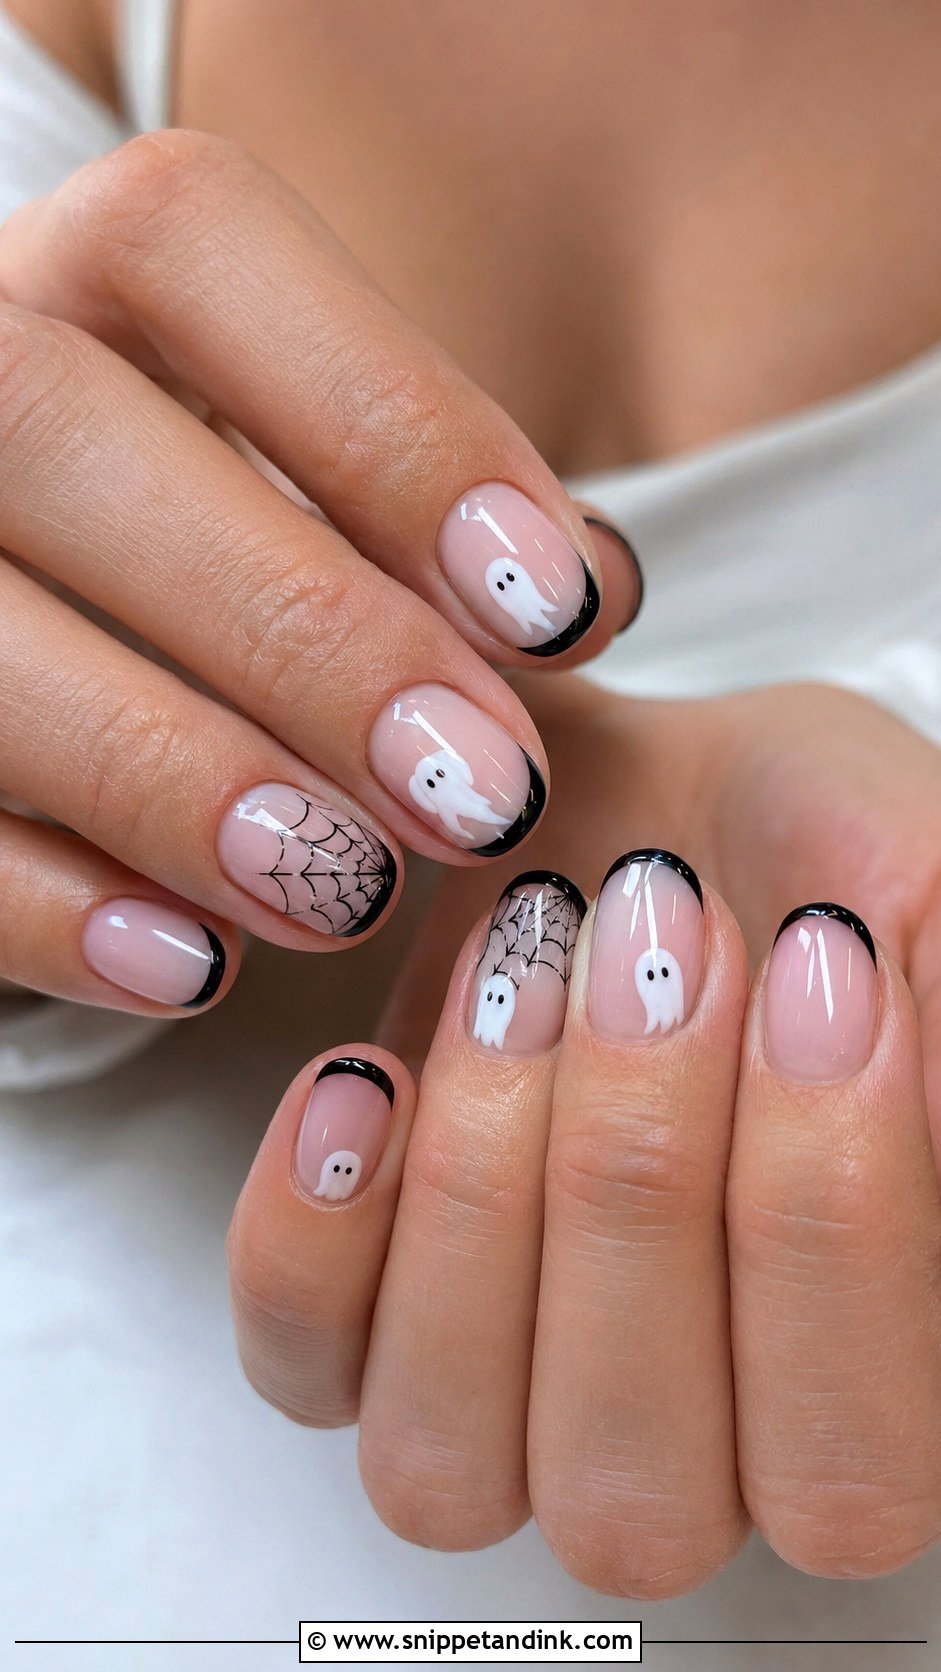
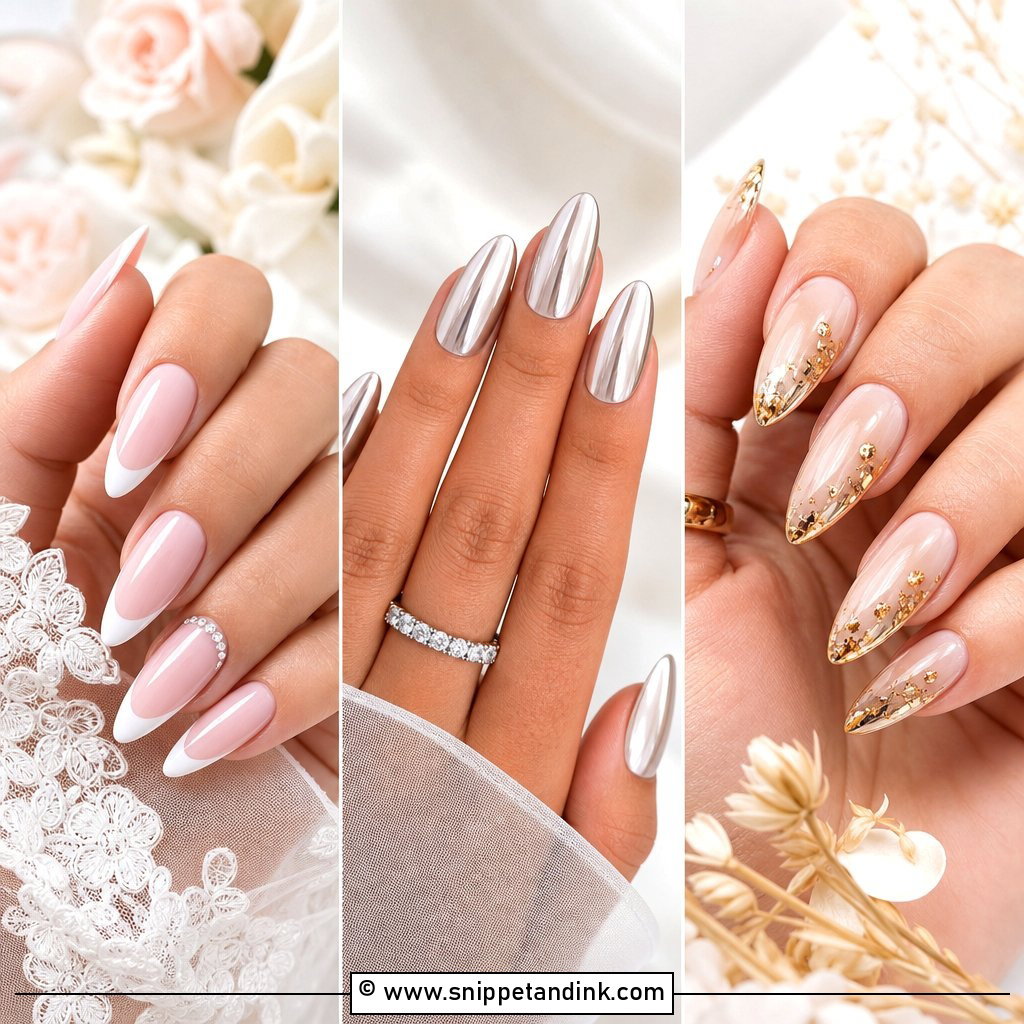
The almond shape tapers to a soft point, which slims the fingers and lets detailed art fit without looking cramped. A nude almond with black tips is the quiet version; burgundy chrome almond nails are the bolder one. Almond is also more durable than stiletto, because the tip is softly rounded rather than sharp. I’d keep one Halloween detail as the focus here, a web or a moon, and let the shape do the rest.
15. Black Glitter Halloween Wedding Nails
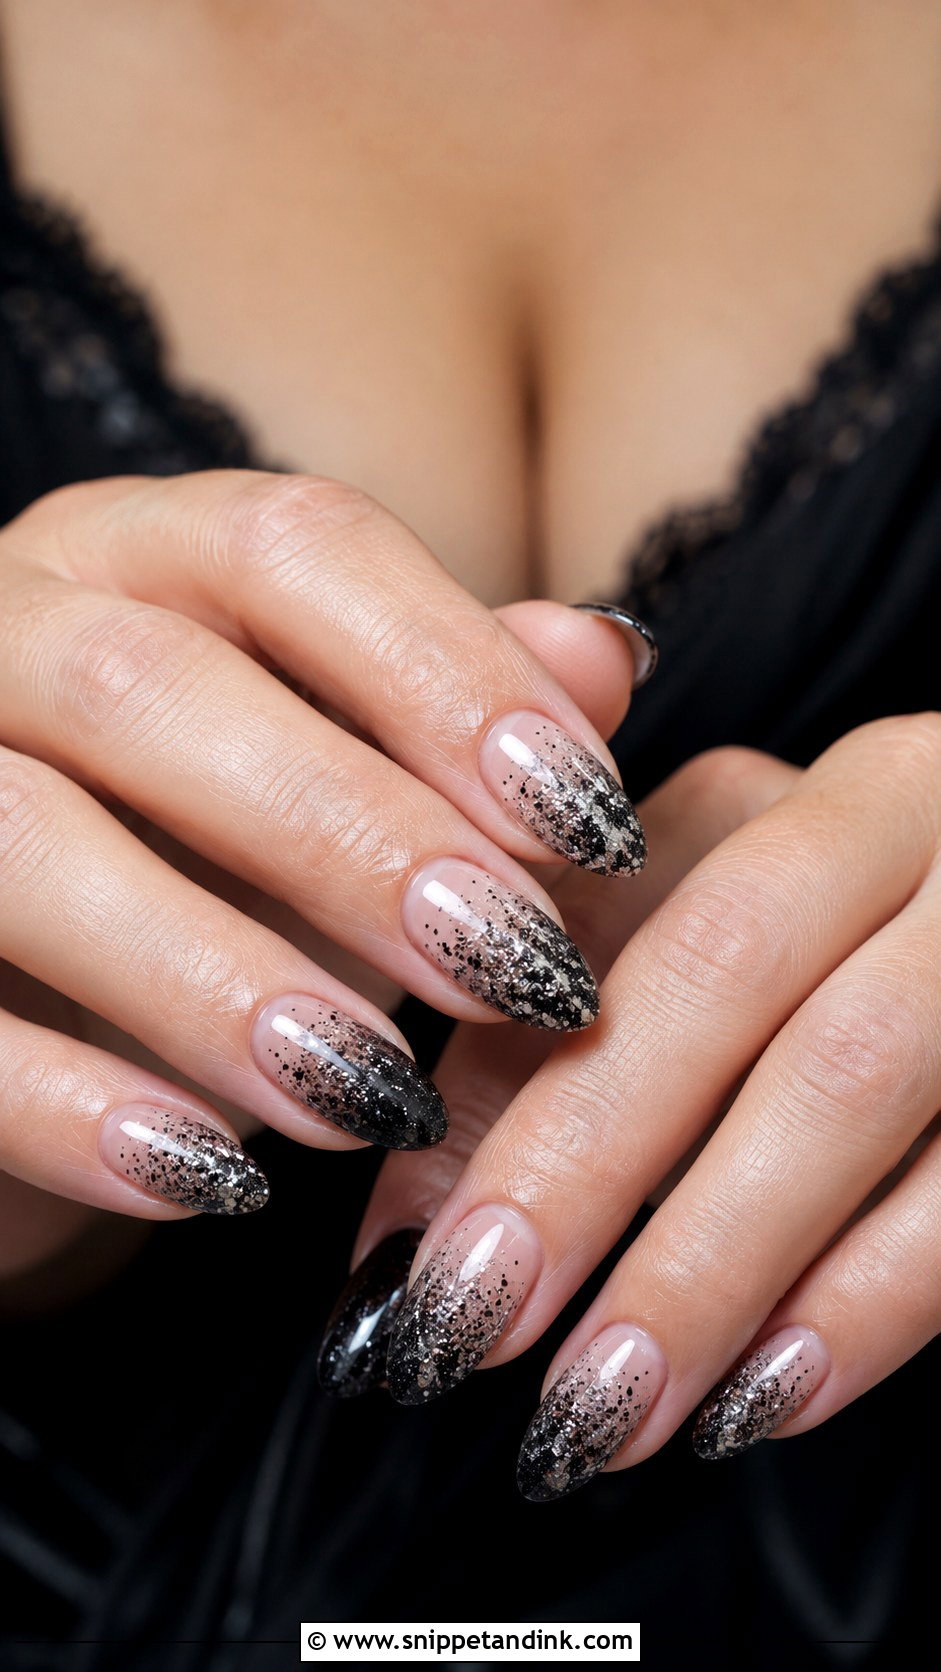
Glitter is easy to get wrong for a wedding. Chunky pieces can lift, catch on lace and look rough in close-up. I use fine black shimmer or a charcoal sparkle, often as a fade over a nude base so the cuticle stays clean. Glitter also hides small chips well, which makes it a practical choice if your nails will be working hard all weekend. Removal takes longer, so plan for a proper soak-off afterwards rather than peeling.
16. Vampire Red Halloween Wedding Nails
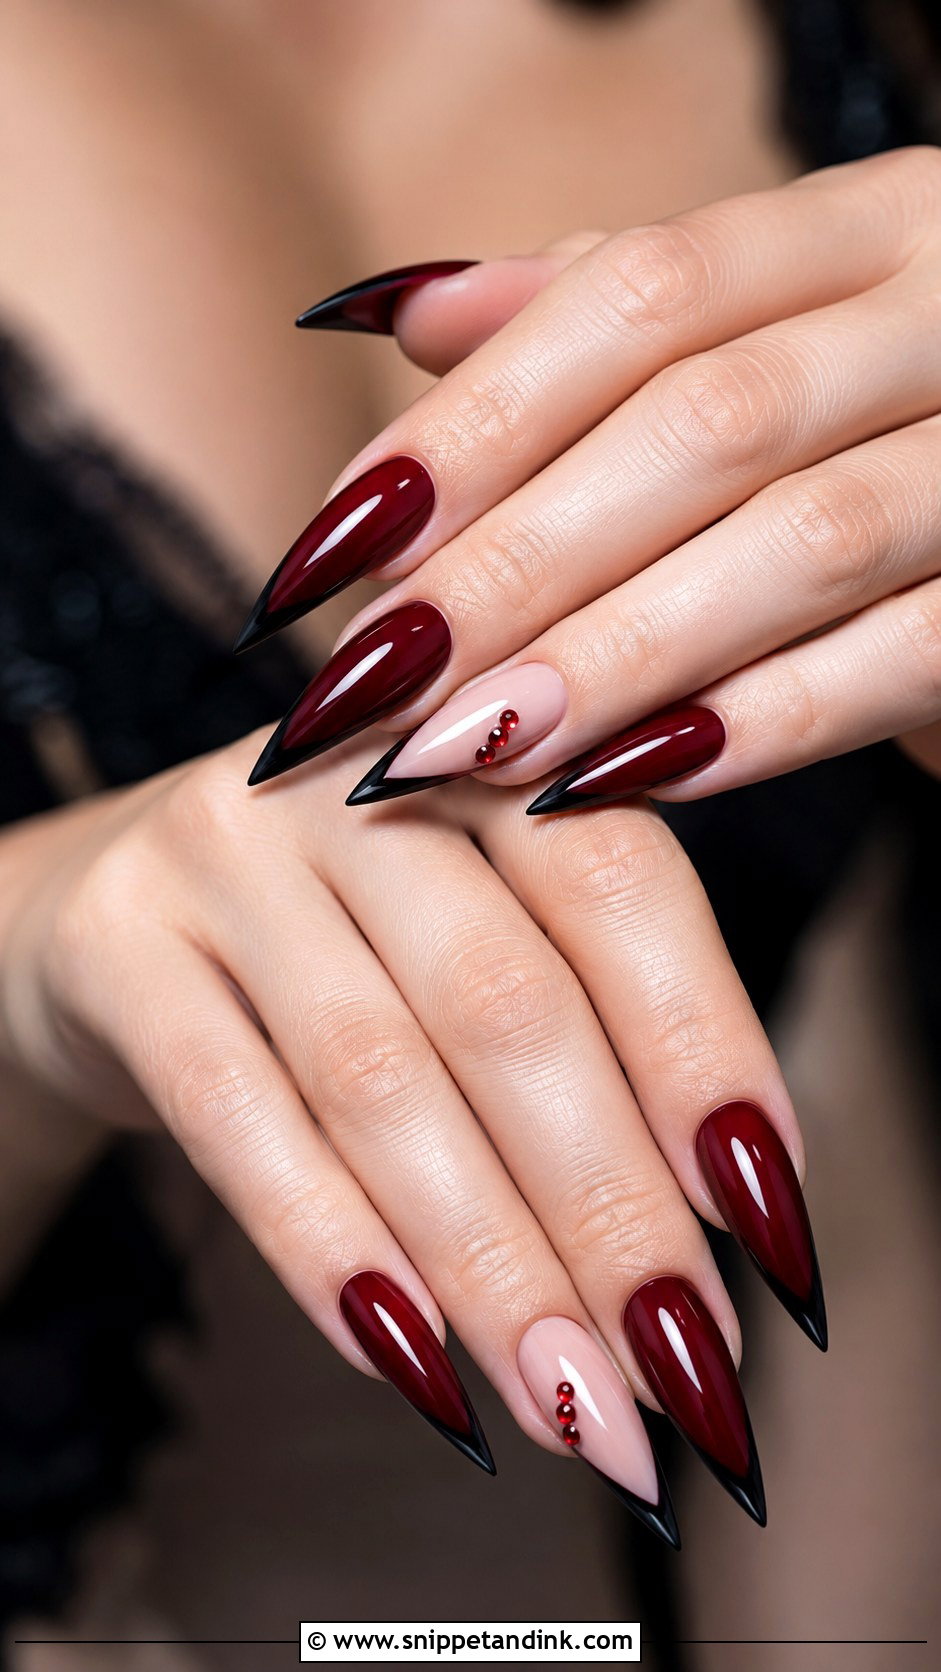
Vampire red Halloween wedding nails rely on depth of colour. Oxblood, merlot or cherry black, worn solid and glossy, look rich on almond and oval nails. Deep reds can stain the natural nail plate, especially with regular polish, so I always use a base coat underneath. Red also shows any flood at the cuticle very clearly, so the application needs to be tidy. A red chrome finish or one nude accent with a tiny red stone adds detail if you want it.
17. Smoky Gray Halloween Wedding Nails
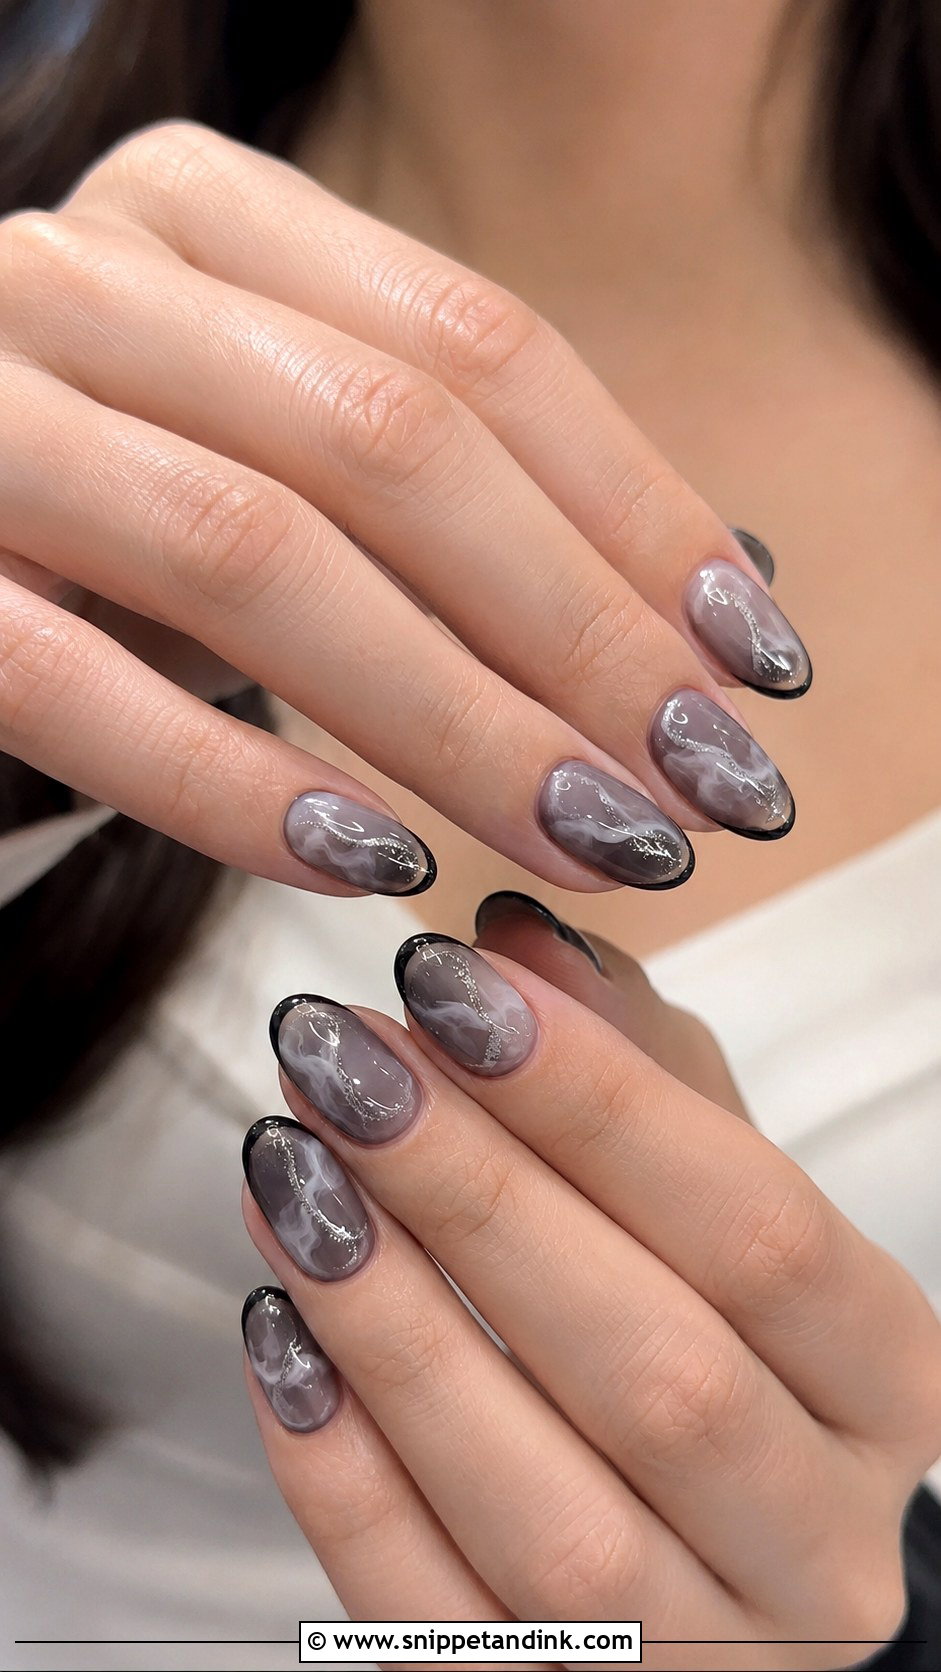
Translucent grey looks like mist on the nail, and it’s my go-to for brides who say no to black outright. I layer a sheer grey jelly gel two or three times, which gives depth you can see through. White smoke lines are painted wet into the colour and cured quickly so they stay soft. Silver shimmer or a crystal on one nail is enough decoration. It pairs with cool-toned makeup and silver jewellery and won’t compete with your dress.
18. Bat Accent Halloween Wedding Nails
Bats need placement more than size. One small bat silhouette on the ring finger or a single accent nail gives a clear theme without crowding the hand. I paint the wings symmetrical with a fine brush, since uneven wings are the first thing people notice in close-up. The rest stays simple: black French tips or glossy nude. Bat accents are sweet on short almond nails and more dramatic on long coffin shapes.
19. Black Chrome Halloween Wedding Nails
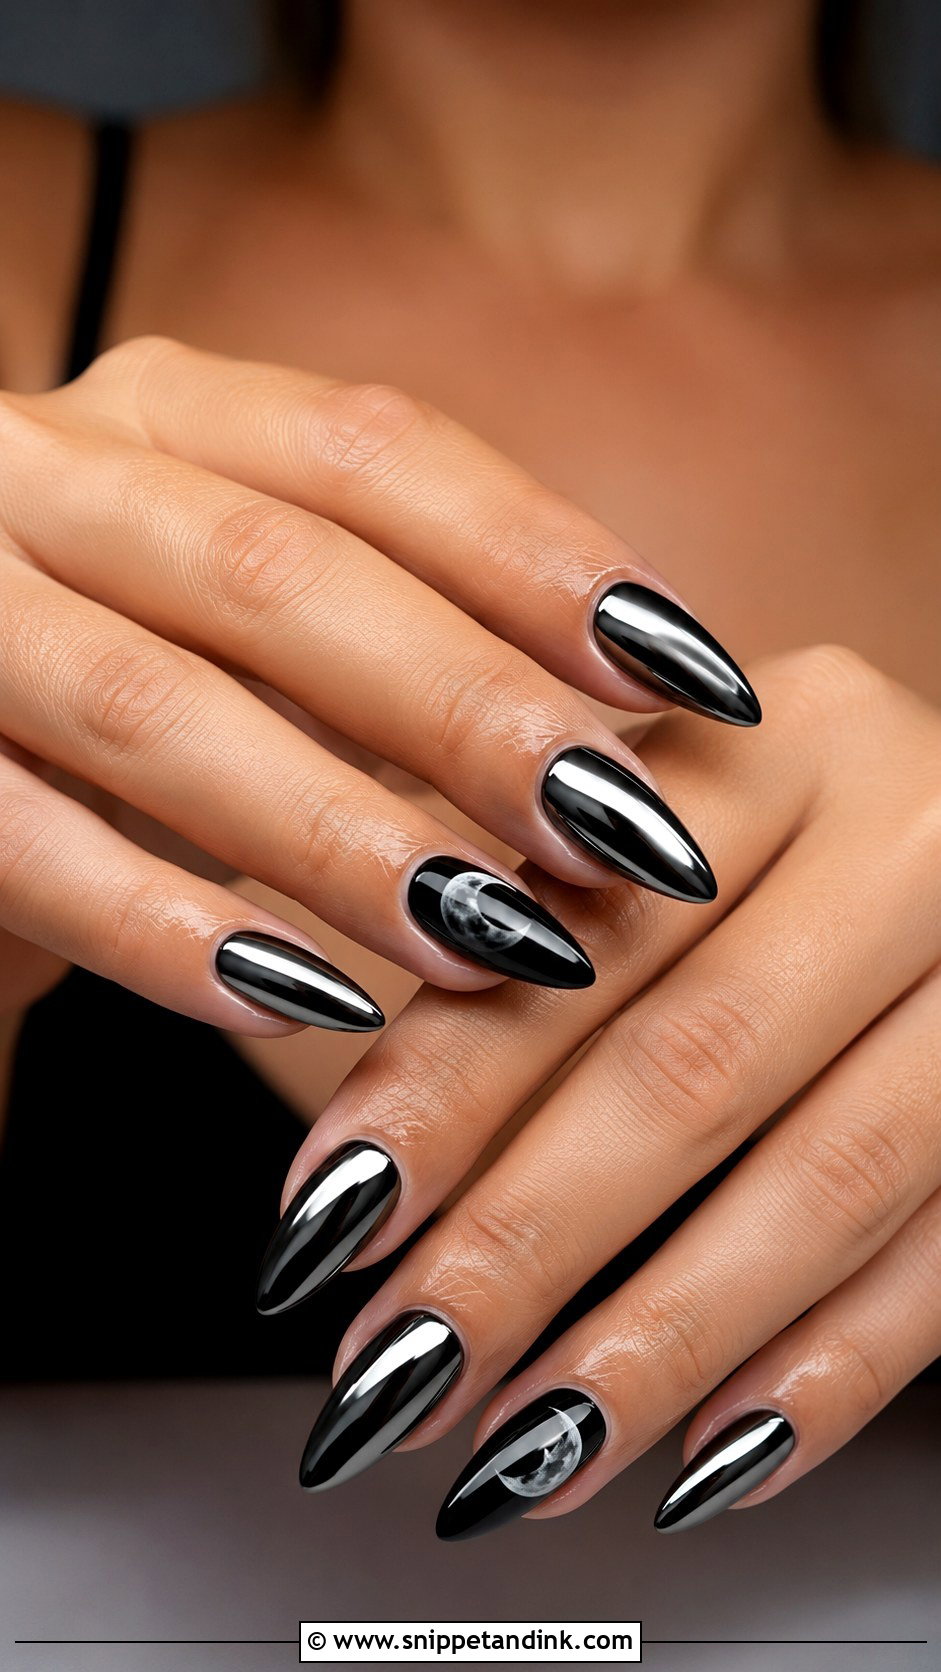
Black chrome reflects like liquid metal, which makes a solid black set look far more polished than plain gloss. The same edge-capping rule applies as with any chrome: if the tips aren’t sealed, the powder wears at the free edge first. It suits almond and stiletto shapes for a sharp finish and short square nails for something minimal. Mixing it with nude accent nails softens the overall look for wedding photos.
20. Ivory And Black Halloween Wedding Nails
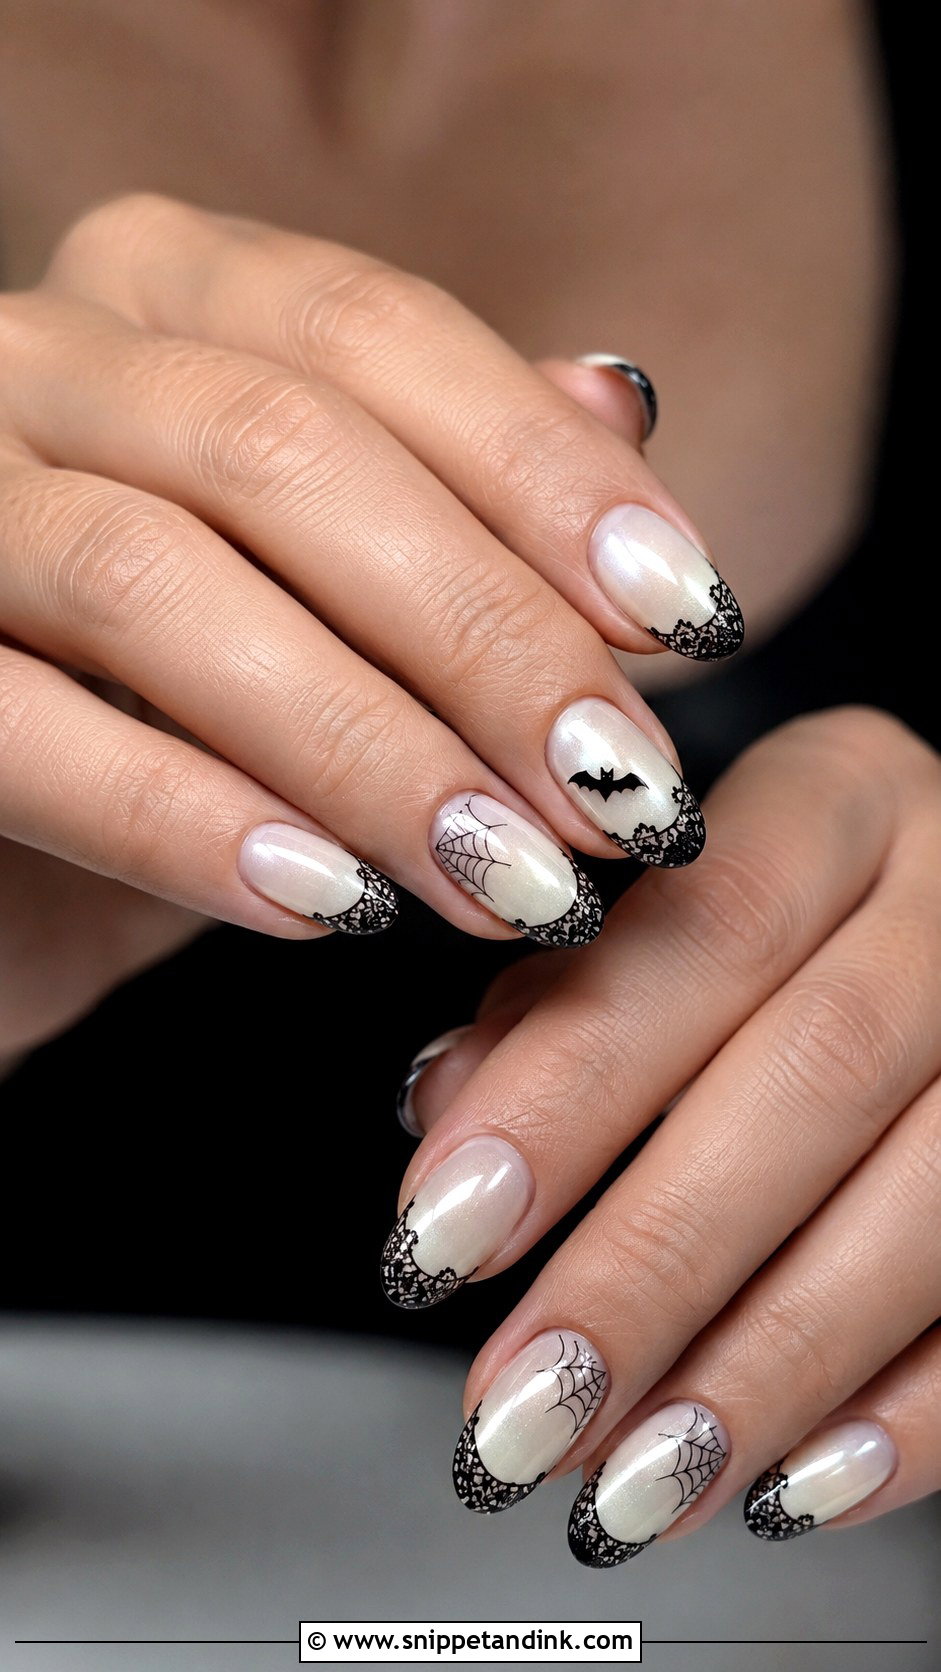
Ivory is a warmer, creamier base than stark white, and it ties the manicure to an ivory gown without looking matchy. Black lace tips, tiny webs, thin bow lines or one bat accent all read clearly against it. I check the ivory shade against a swatch of the dress fabric when the bride brings one, because creams vary a lot. A glossy finish is classic; a pearl chrome top coat makes the ivory glow.
Lace Sleeves, Tulle Veils and 3D Nail Art
This is the conversation I have with almost every Halloween bride. Raised details such as pearls, crystals and 3D bats look great in photos and then catch on delicate fabric. A fine tulle veil or a lace sleeve can snag on a single crystal edge.
If your gown or veil is delicate, I keep 3D pieces to one accent nail, set them low near the cuticle and encase them in builder gel so no edge is exposed. Painted dots and flat foils give a similar effect with nothing to catch. Long stiletto points carry the same risk, which is one more reason almond is my usual suggestion for brides.
Taking a dark set off afterwards
Black and deep red gel should be soaked off or filed down, never peeled. Peeling lifts layers of the natural nail along with the gel. If a light stain remains after removal, a gentle buff and a few days without colour usually clear it.
One Spooky Detail Is Usually Plenty
The sets that look best in ring photos tend to have one Halloween idea and a clean base around it. Milky webs, black French tips, pearls and tiny bats sit on the quiet end; matte black, vampire red, chrome and gothic coffin shapes are the louder choices. Bring a photo of your dress, your ring and your makeup plan to the appointment, and decide on length and shape first. The colour and art are easier to settle once the shape is right.
You'll Like These Ideas:


Leave a Reply