
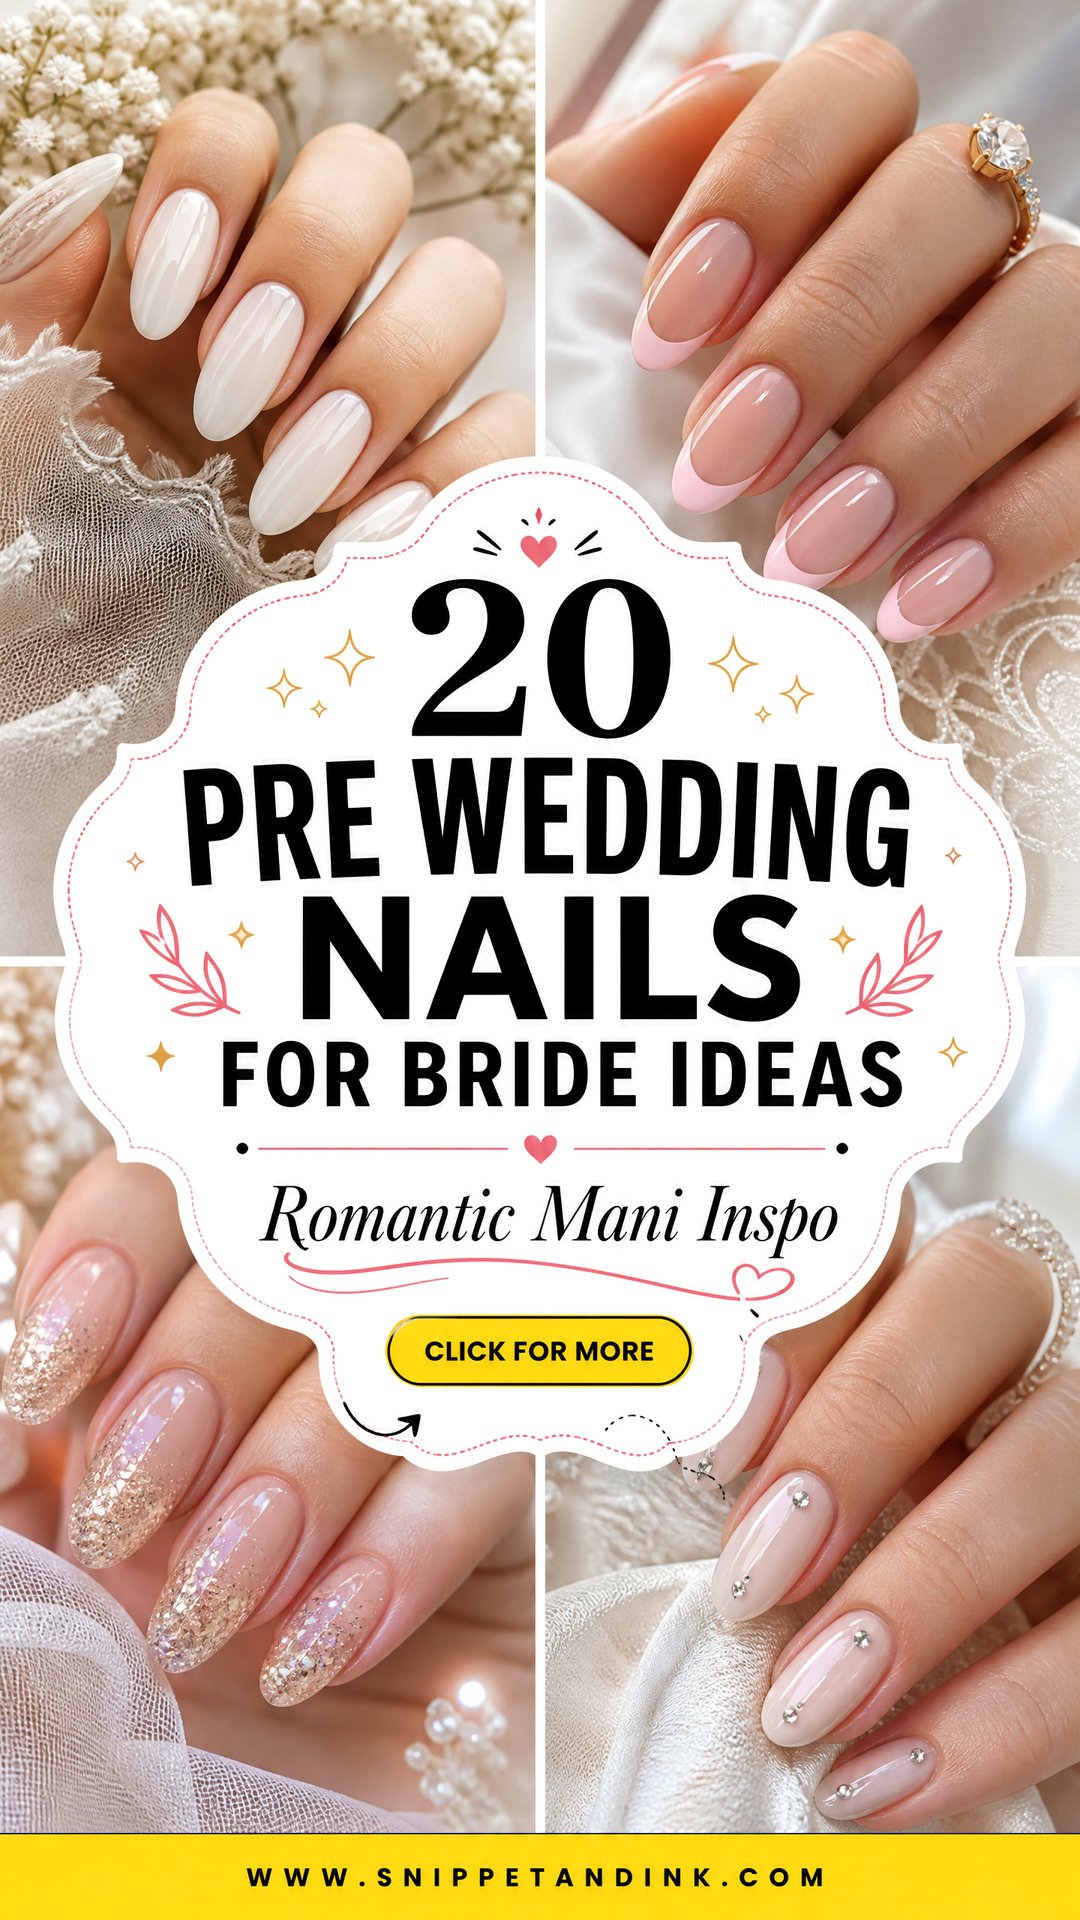
Your hands get photographed long before the wedding. The ring goes on and the close-ups start: engagement photos, the shower, dress fittings, a hundred phone pictures of the ring. A pre-wedding manicure has a harder job than people think, because it has to look bridal while you’re carrying boxes, typing emails and tying favors. The sets I suggest for this stage stay quiet and soft: sheer bases, fine tips, a little pearl or shimmer, nothing that competes with the stone. These pre wedding nail designs range from short and natural to medium almond, and I have noted where each one tends to chip or grow out badly.
A Practice Set Tells Me What Your Nails Will Tolerate
I treat the pre-wedding manicure as a trial for the wedding set. If a bride hasn’t worn gel or extensions before, this is where we find out how her nails react. Some natural nails lift at the cuticle within days; others hold gel for weeks. That tells me whether the wedding set should be gel polish, a gel overlay or something softer.
What I watch over the following two weeks:
- Where it chips first. Chipping at the free edge usually means the tip wasn’t capped or your nails flex a lot.
- Whether the shade still looks right next to your skin in daylight, not only under salon lamps.
- How the length feels when you type, open cans and do up buttons.
- Any redness or itching around the nail. That can be a sign of sensitivity to a product, and it must be raised with your nail tech before the wedding.
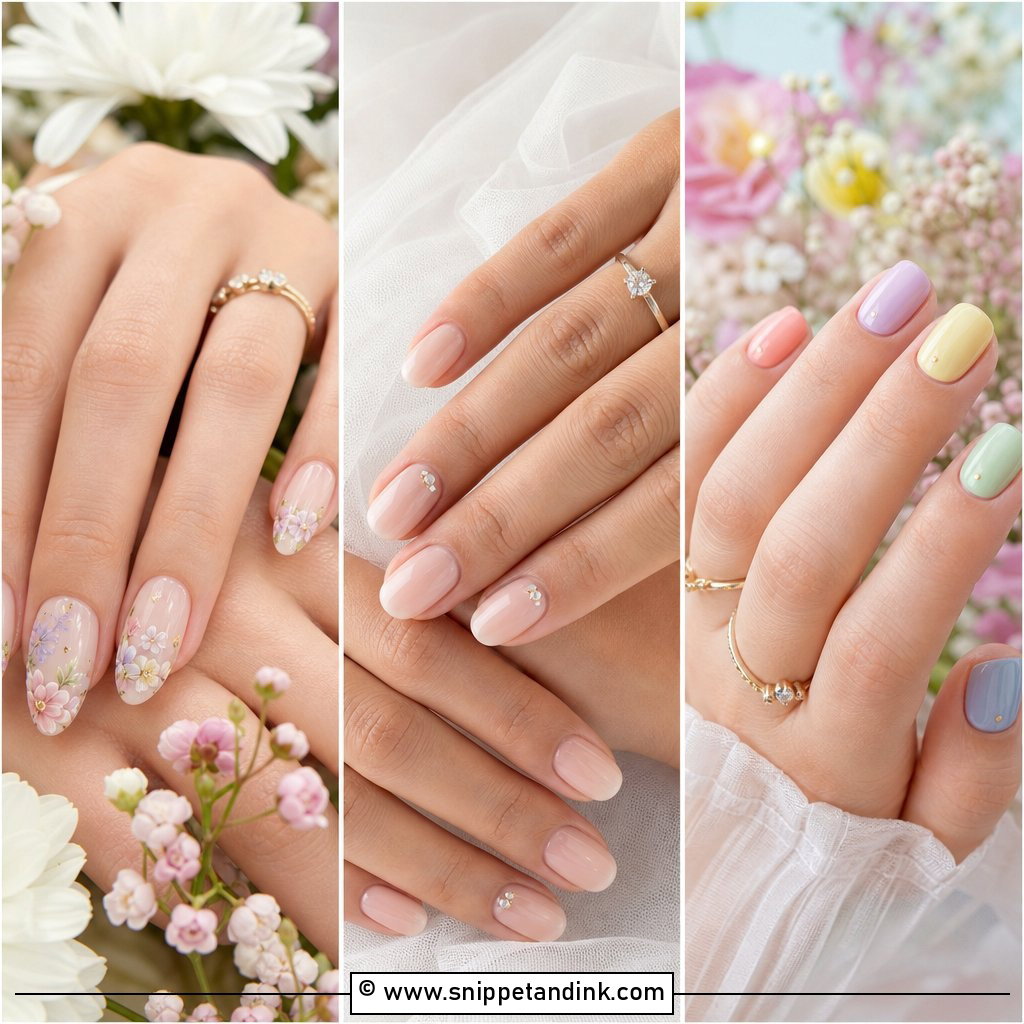
Take photos of your hands every few days. They make the conversation about the wedding set far easier.
1. Milky White Pre Wedding Nails
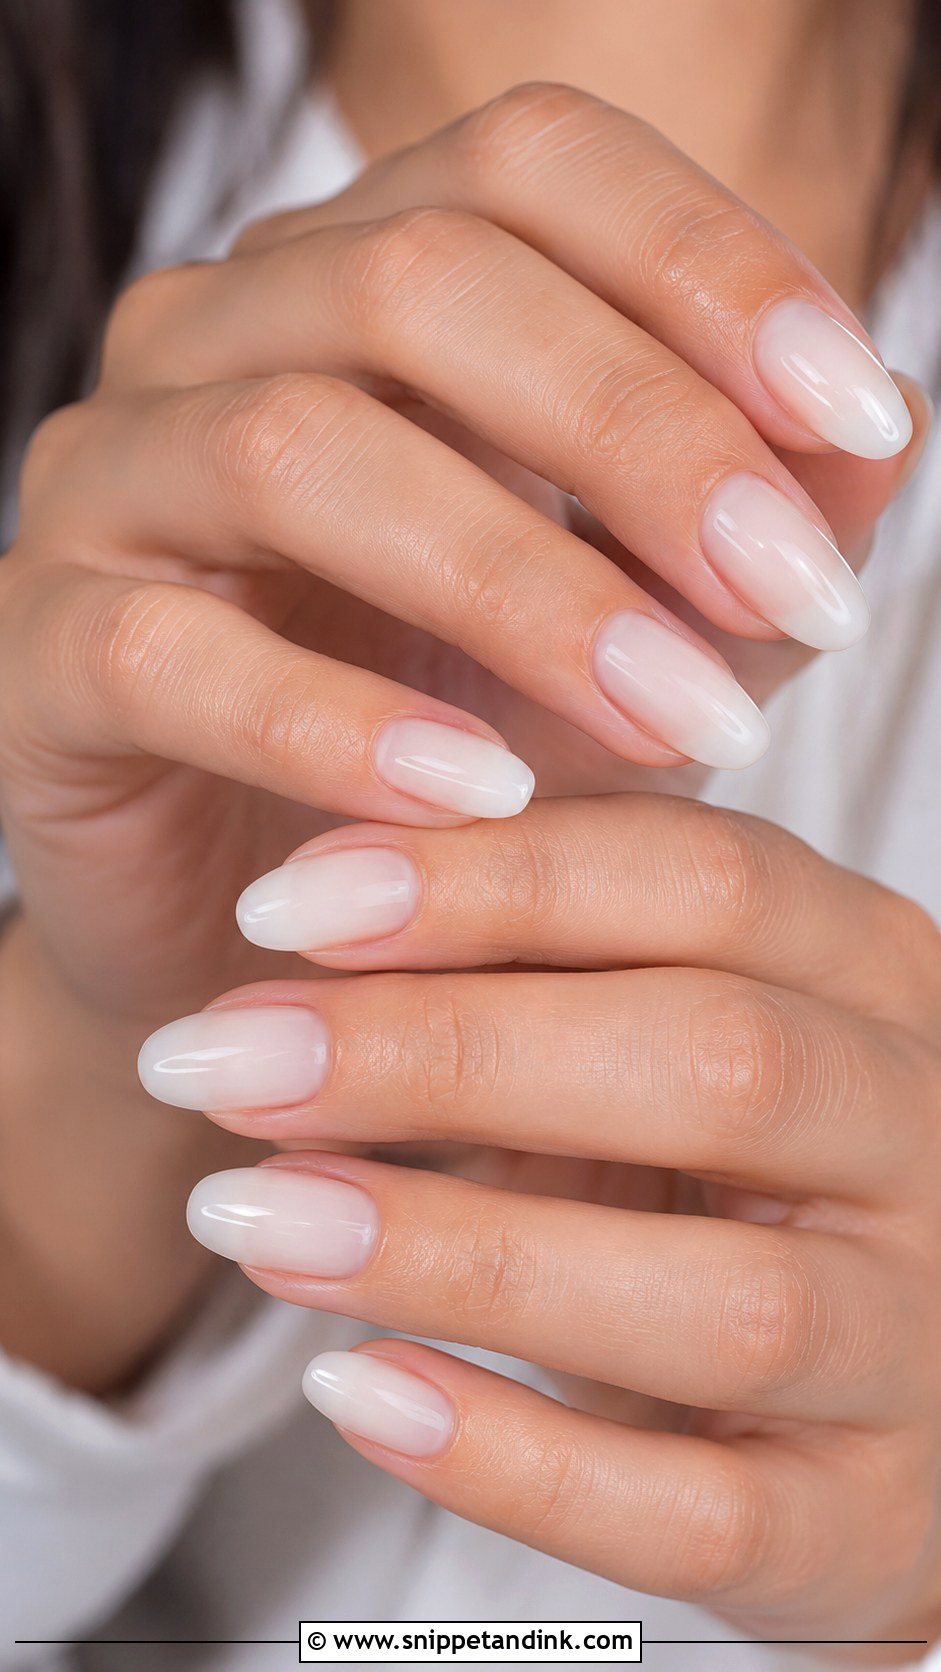
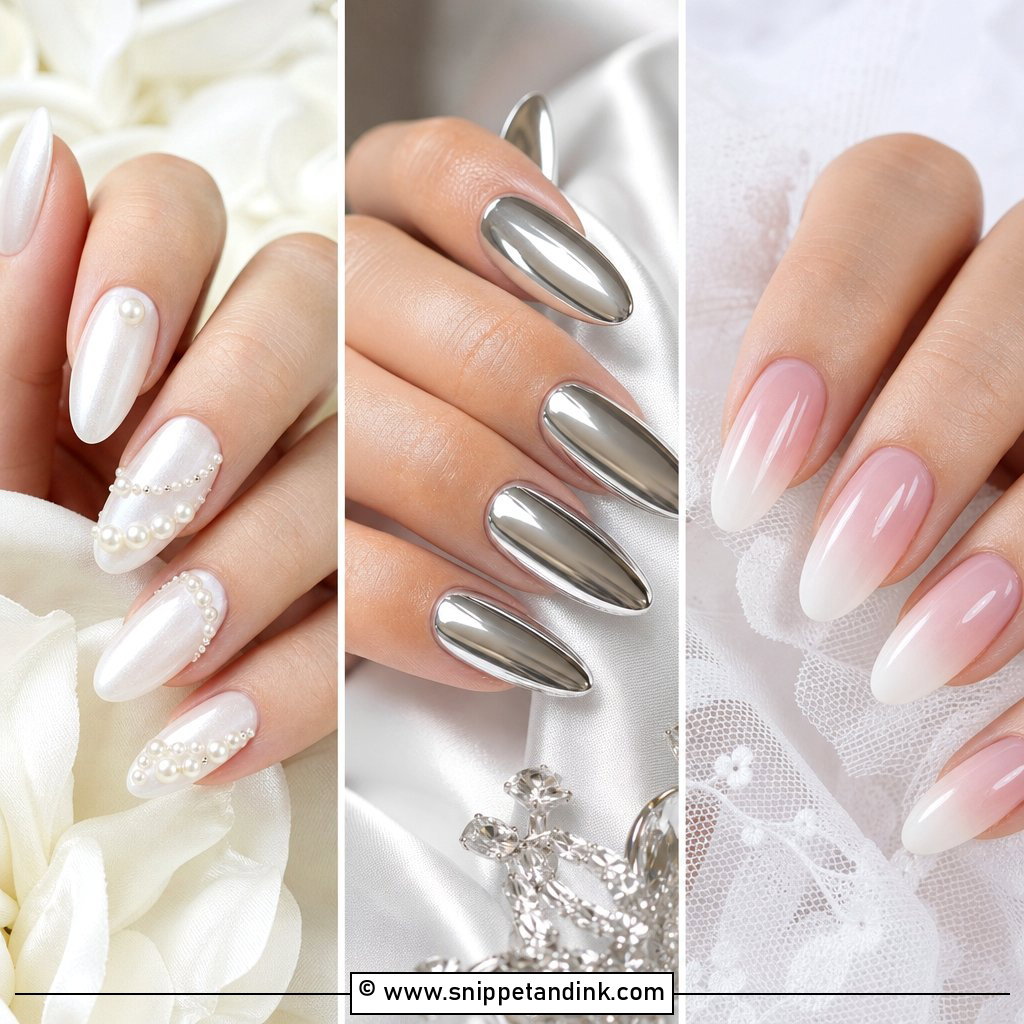
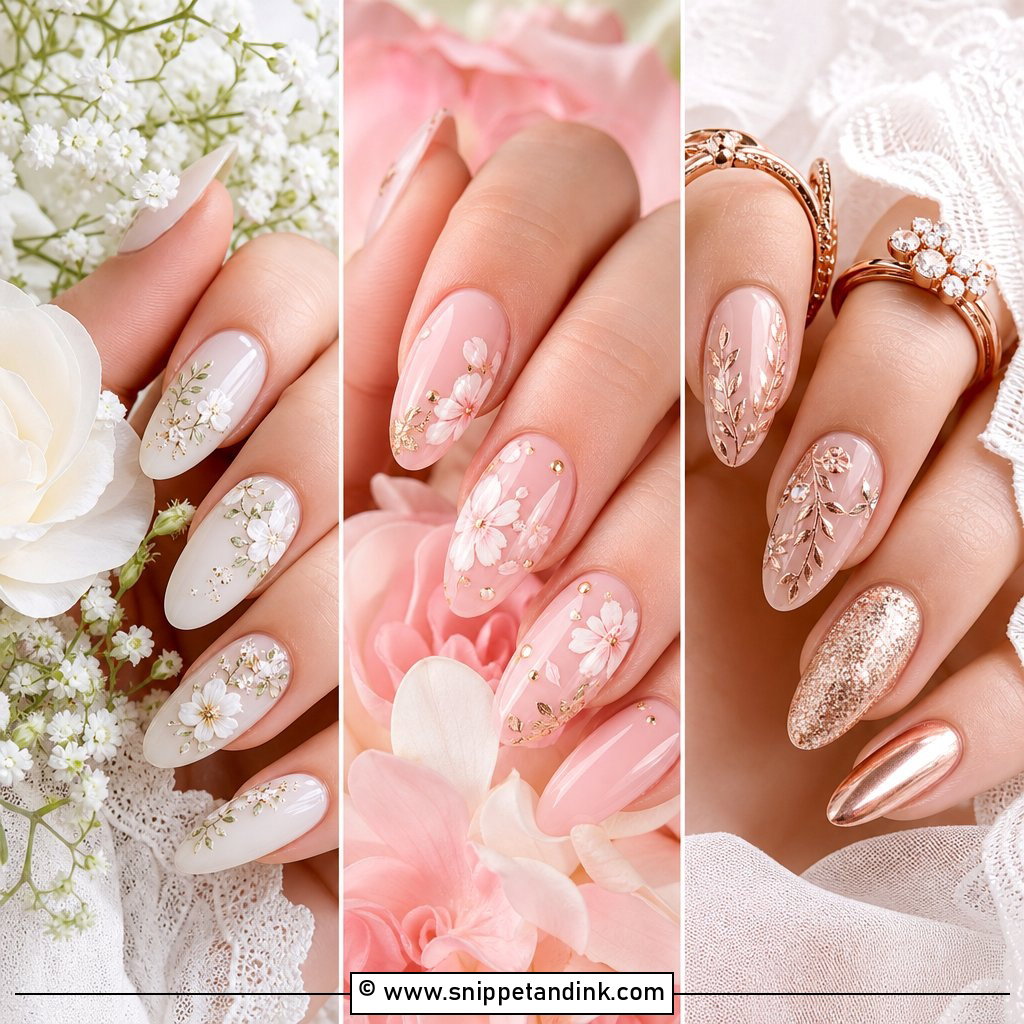
Milky white is the set I’m asked for most at this stage, and it’s one of the hardest to get right. Too opaque and it looks like correction fluid; too sheer and it streaks. I build it in two or three thin coats of a semi-sheer white so a hint of the natural nail shows through. Short square, almond and medium oval all suit it. Glossy topcoat reads clean and fresh, while a pearl topcoat softens it for photos. The color goes with almost any outfit, which helps when you have several events in a week.
2. Soft Pink French Tip Pre Wedding Nails
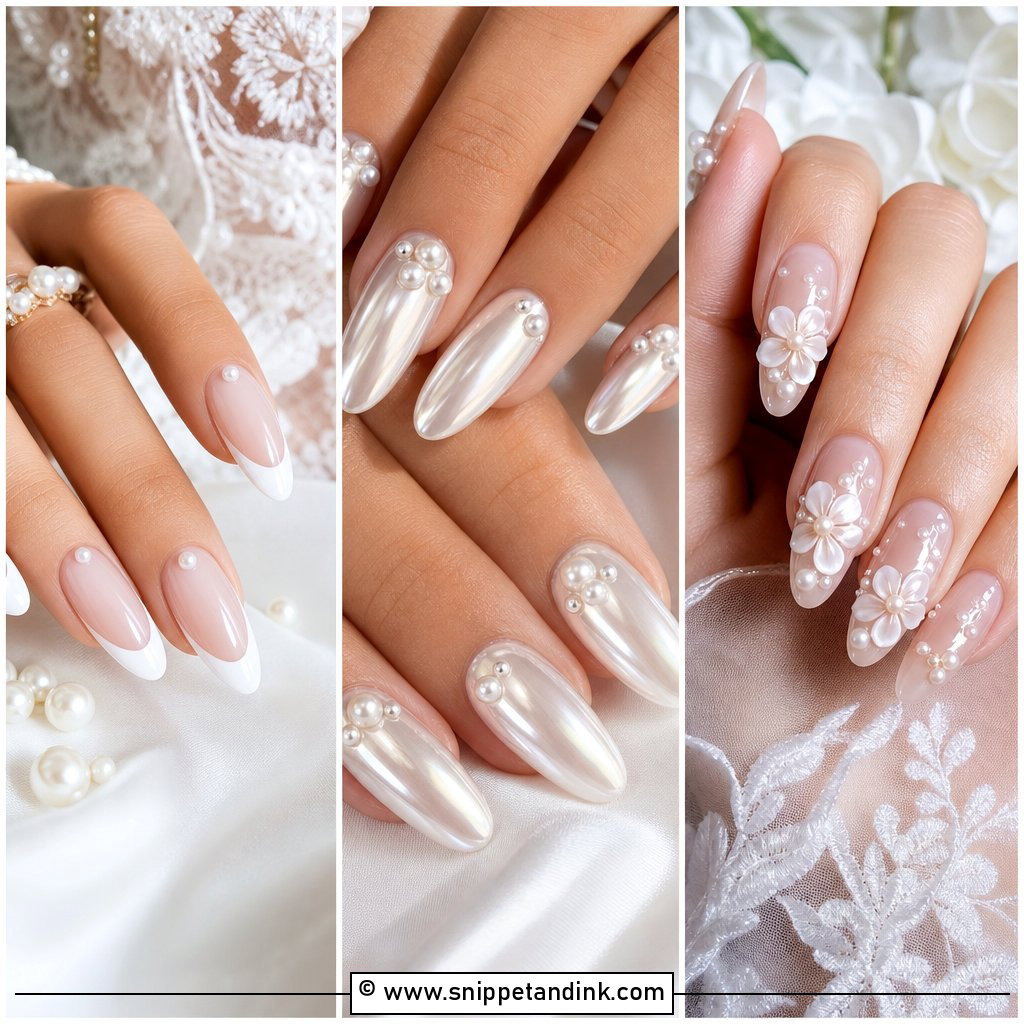
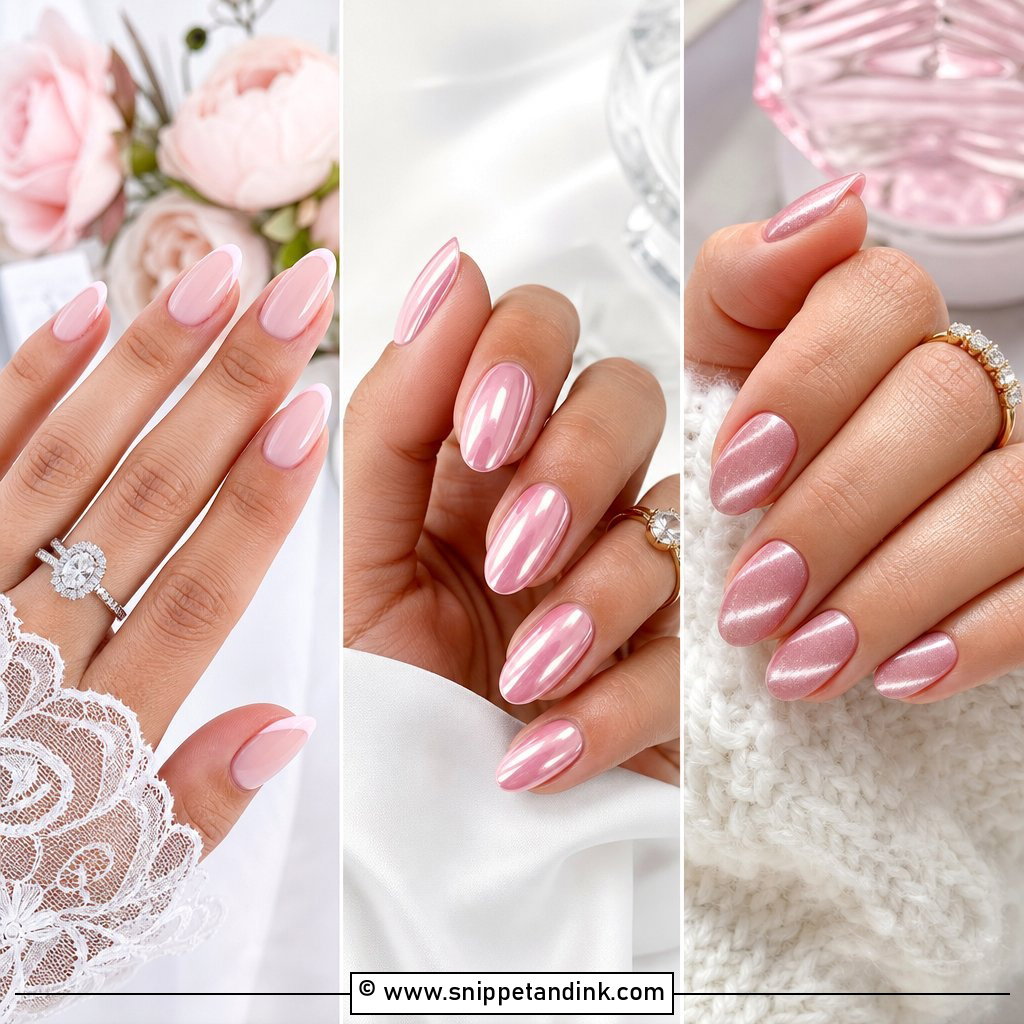
A pink-based French is warmer than the classic white-on-nude. I start with a sheer blush base and add a thin ivory or soft white tip, so the contrast is gentle. That softer line is kinder in ring close-ups, where a stark white tip can pull the eye away from the stone. The base can be adjusted lighter, rosier or more nude to suit your skin. Keep the tip thin. A thick smile line shortens the nail bed visually, especially on short nails.
3. Pearl Chrome Pre Wedding Nails
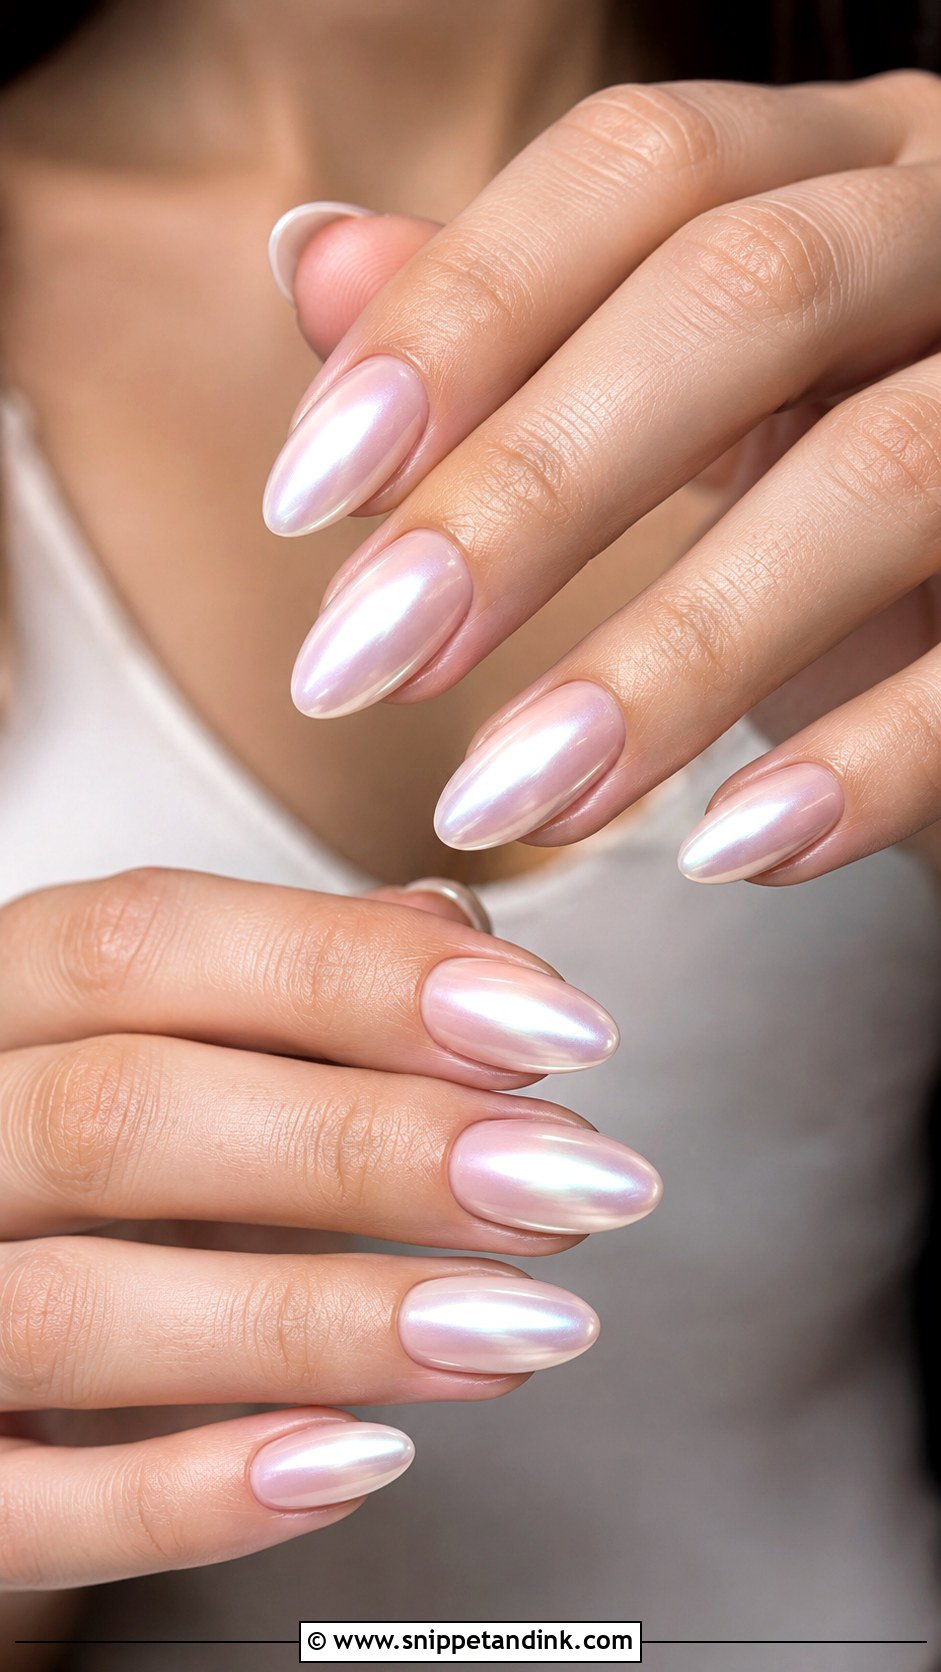
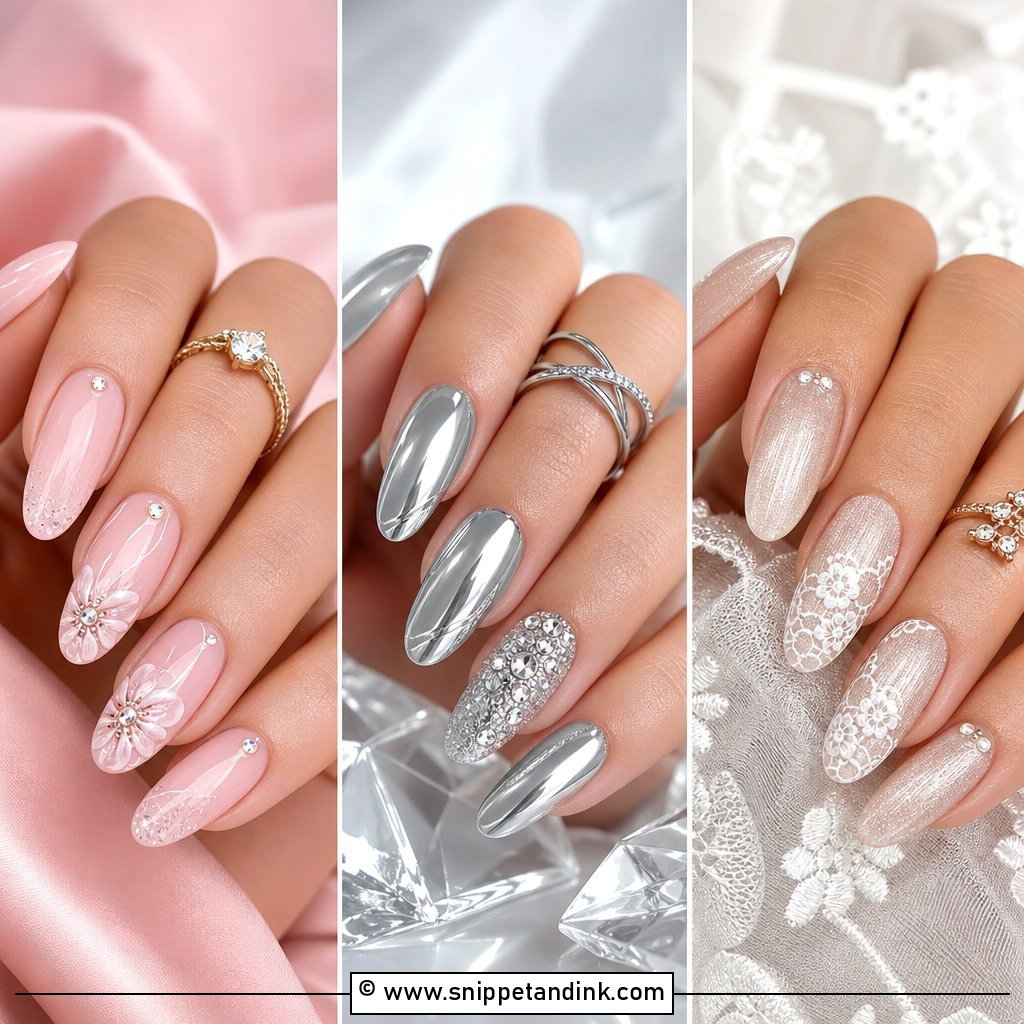
Pearl chrome is a fine powder buffed over a cured gel base, usually sheer pink, nude or milky white. It gives a glow that shifts as the hand moves. I rub it in lightly for a soft sheen; a full mirror rub looks metallic and can feel too bold for a bridal shower. Almond and oval shapes catch the light along the curve best. The powder only sits well on a no-wipe top coat, so if a salon applies it over a sticky layer, it will look patchy. Ask your tech which top coat they’re using if the first attempt looks uneven.
4. Nude Ombre Pre Wedding Nails
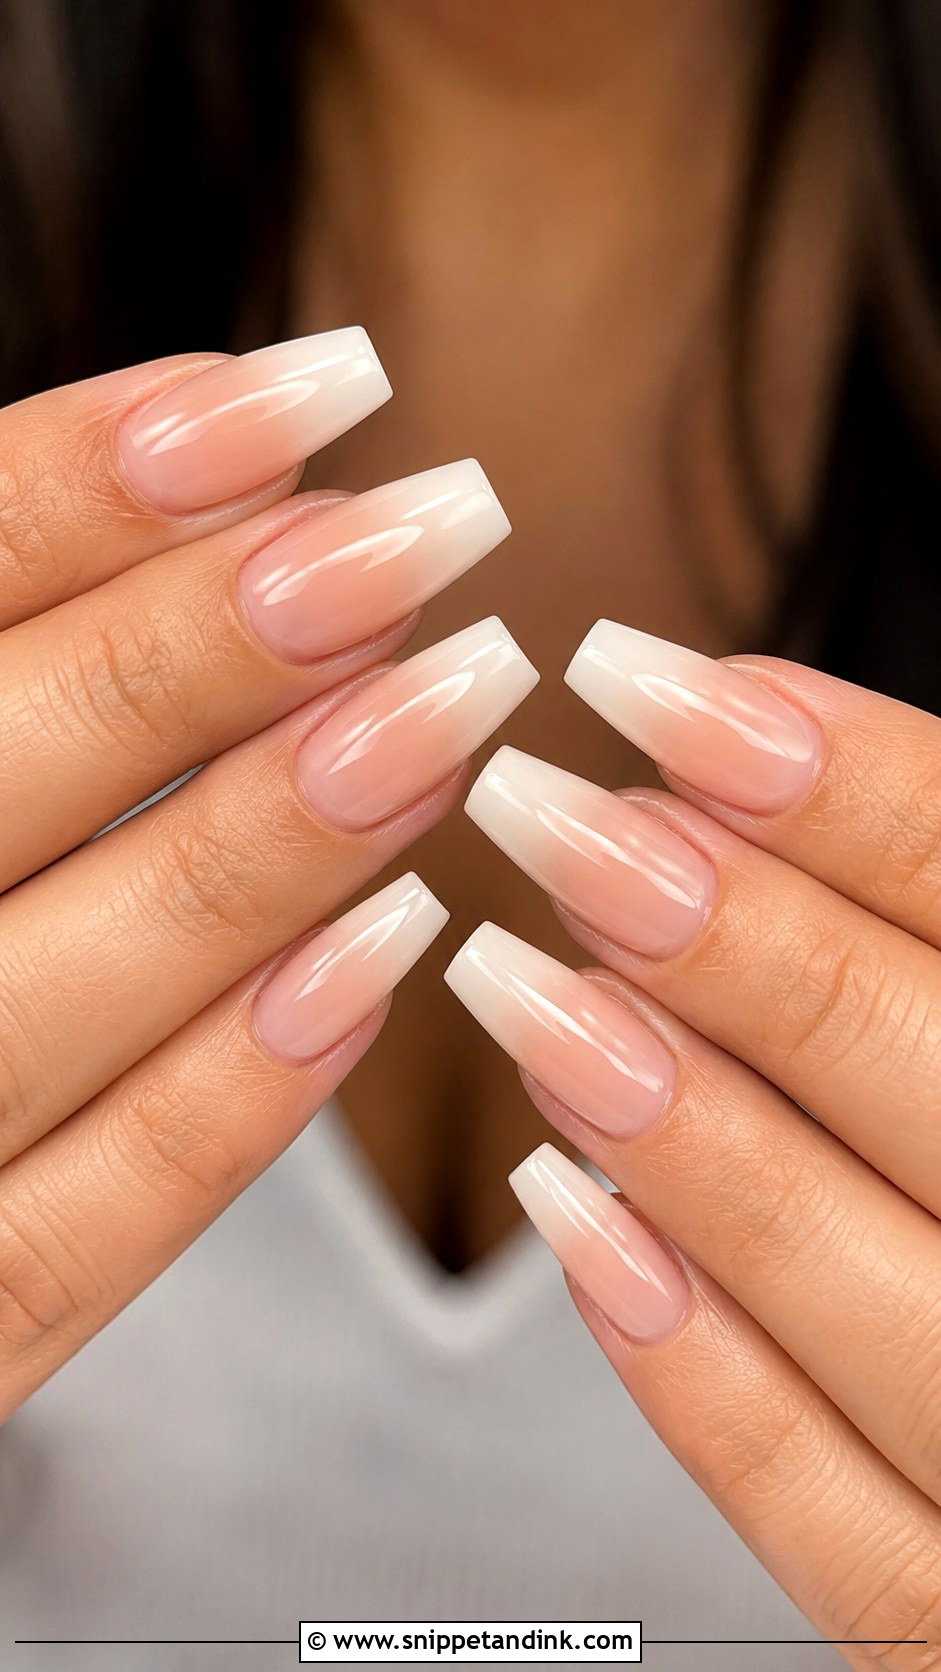
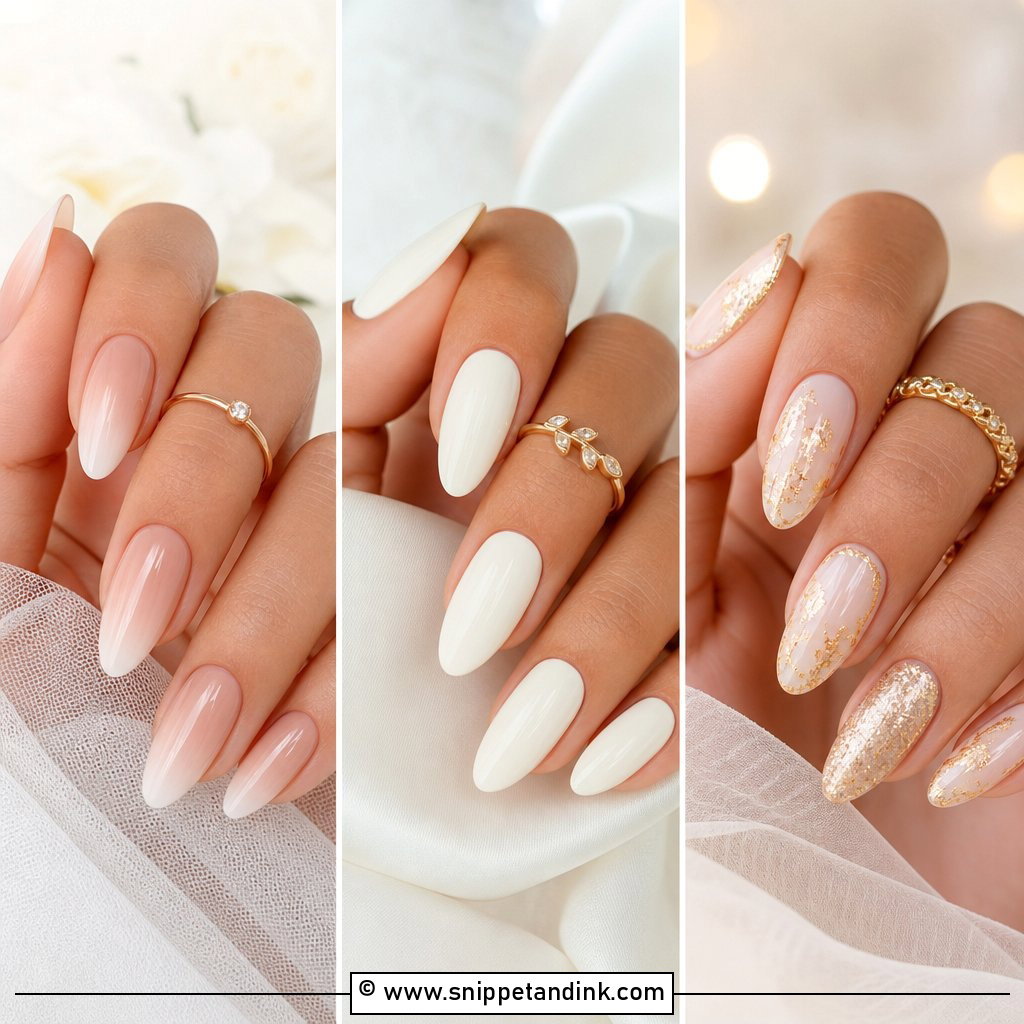
If you want a set that forgives a busy month, Nude ombre pre wedding nails are the one I’d point you to. The color fades from a natural nude at the cuticle into a creamy white tip, with no hard line. That blur makes the regrowth gap less visible as the nail grows, so the set still looks tidy after a couple of weeks. It lengthens the nail on almond, coffin and oval shapes. Match the nude to your undertone: beige on warm skin, rosy nude on cool or neutral skin. I sponge the gradient on in layers rather than spraying, which keeps the fade soft.
5. Blush Pink Pre Wedding Nails
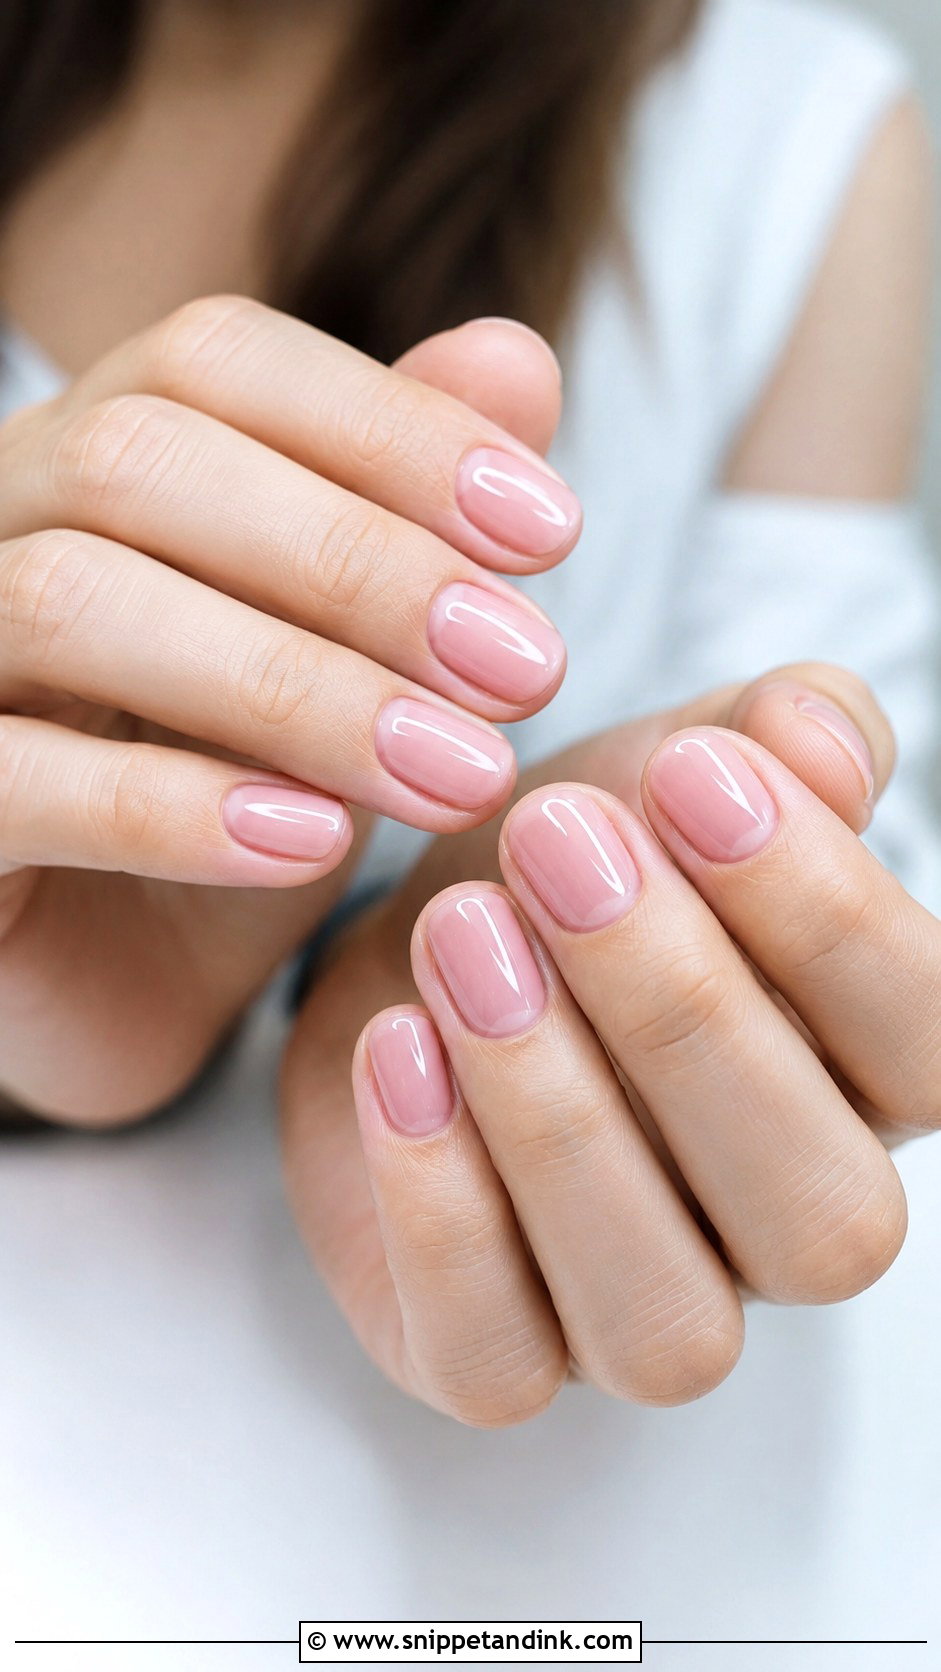
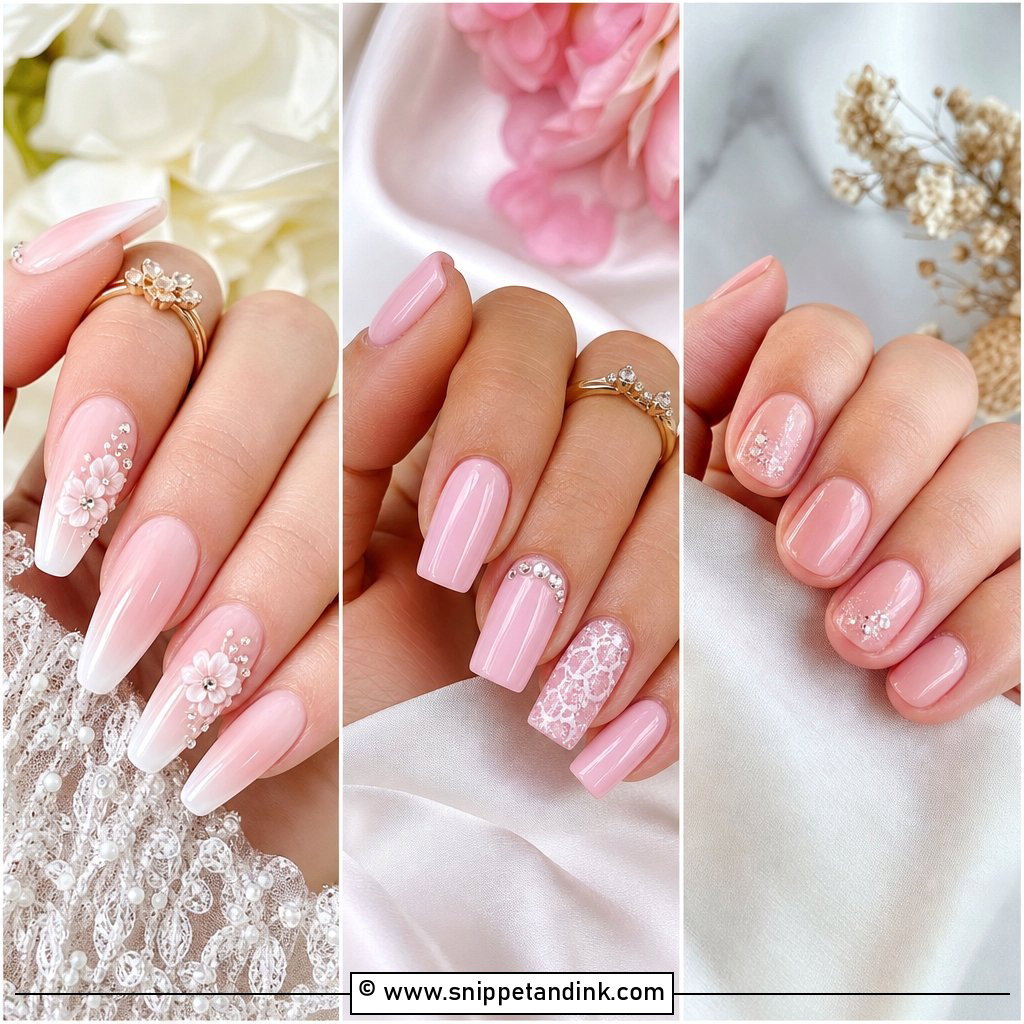
A single blush pink across every nail is about as low-risk as a bridal manicure gets. I like a jelly or sheer finish because it lets the nail’s natural tone show and hides small chips better than an opaque cream. It suits short natural nails, gel overlays and extensions. To make it a little more special, I add a sheer shimmer top coat or one tiny crystal near the cuticle on each ring finger. Soft round or oval shapes keep it gentle.
6. White French Tip Pre Wedding Nails
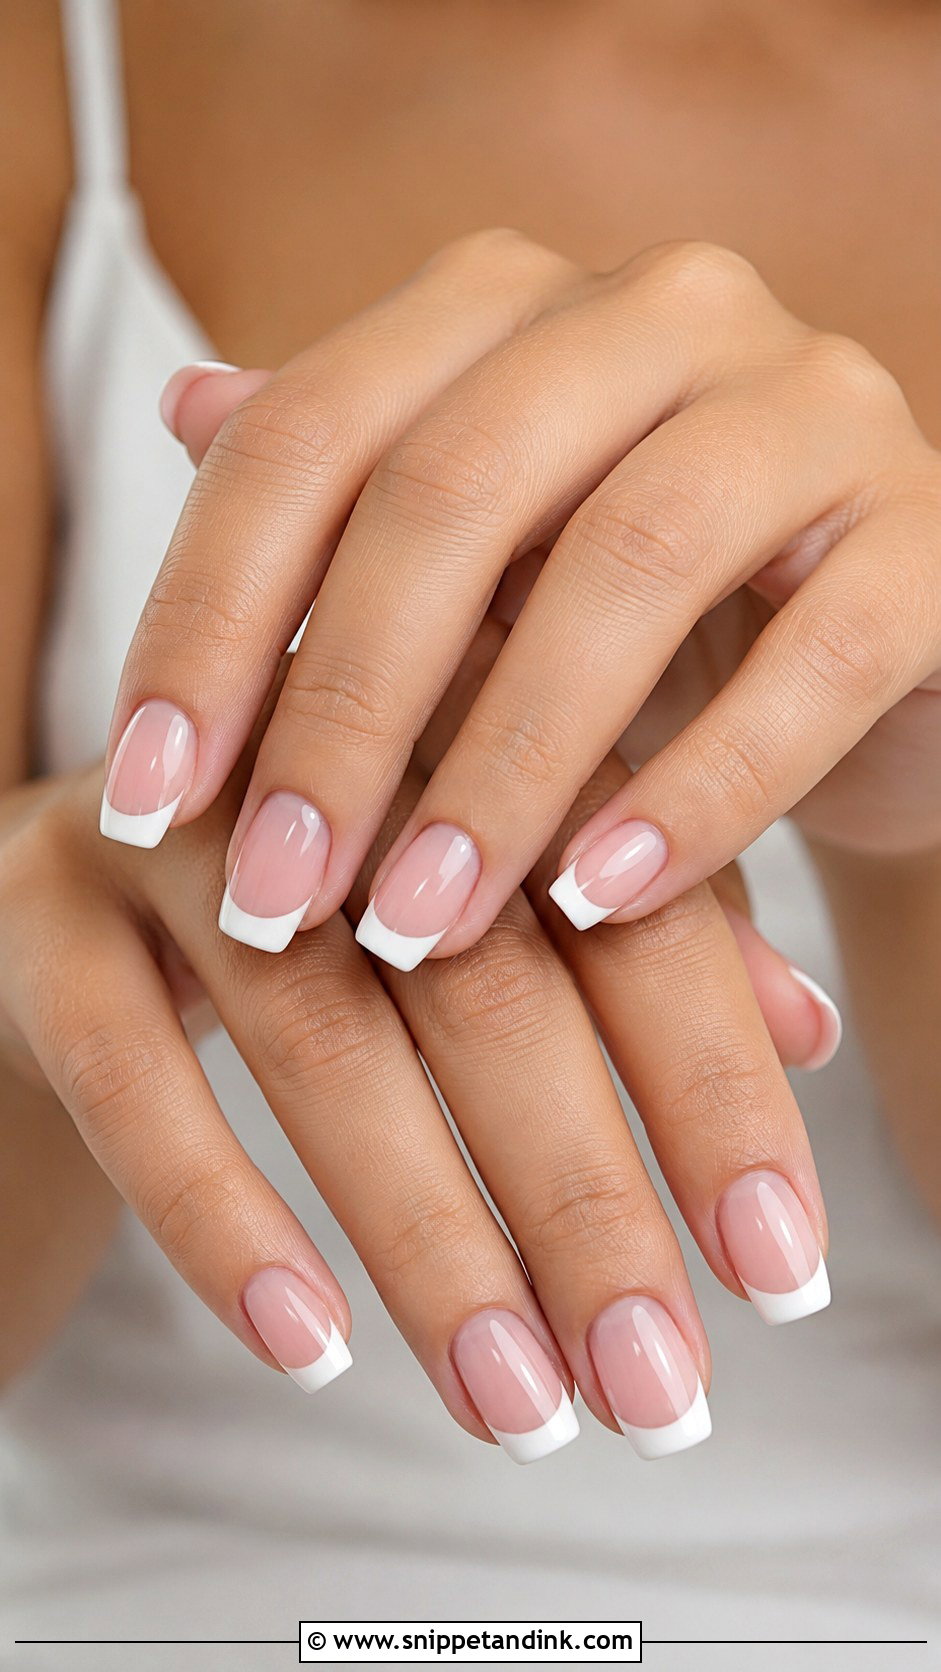
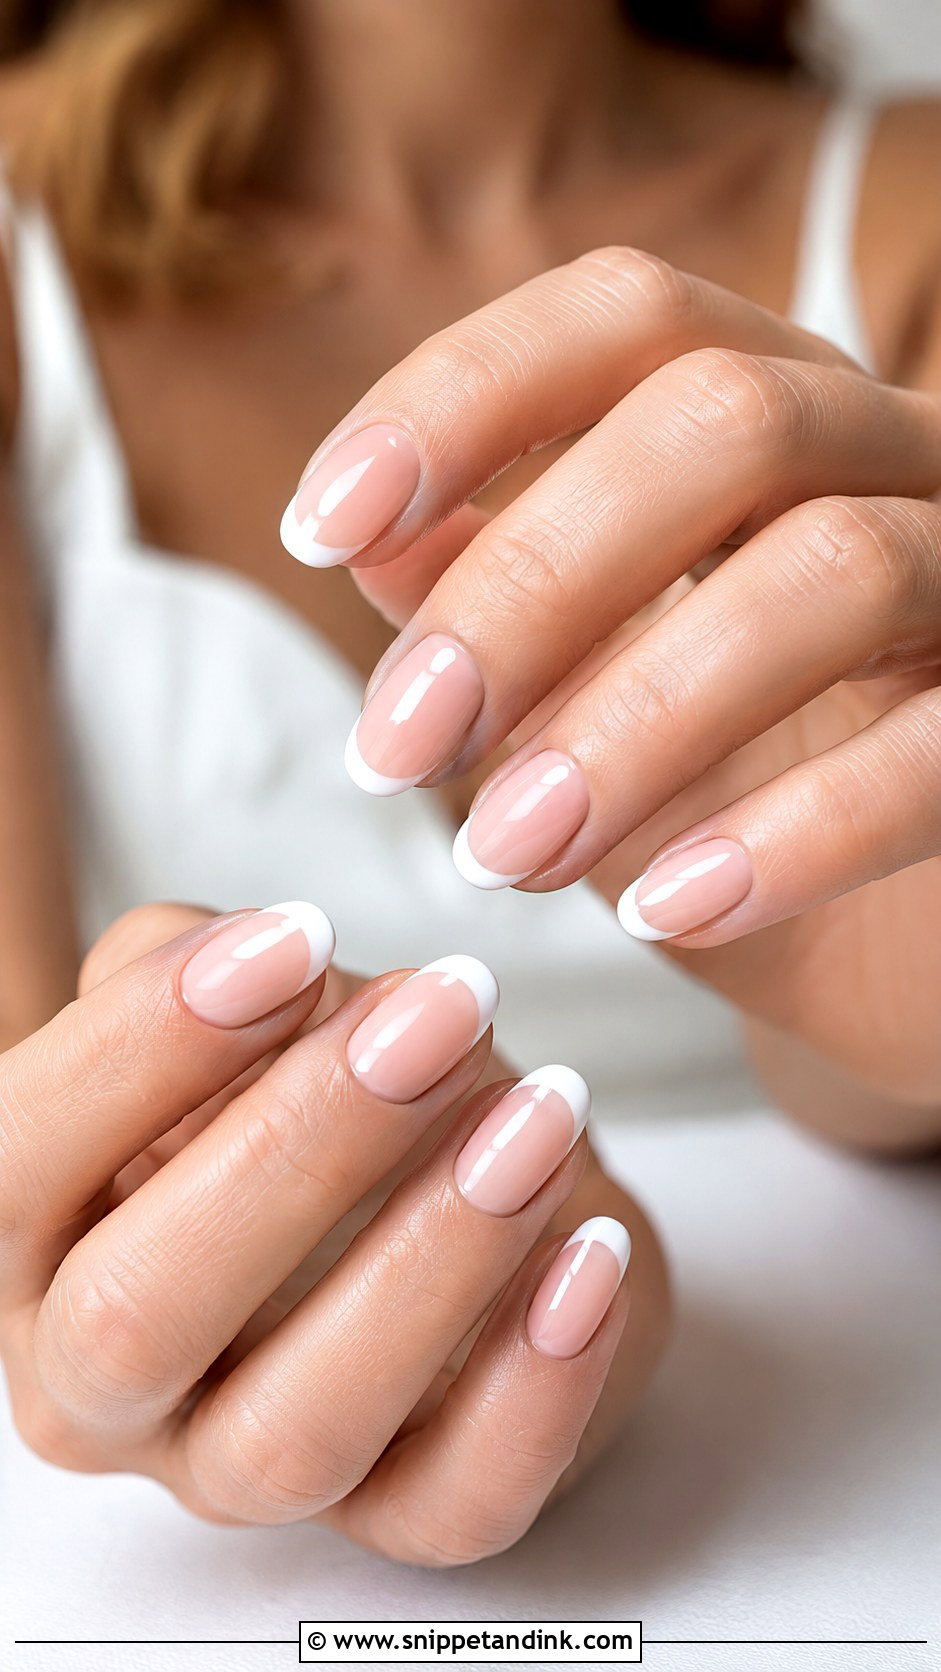
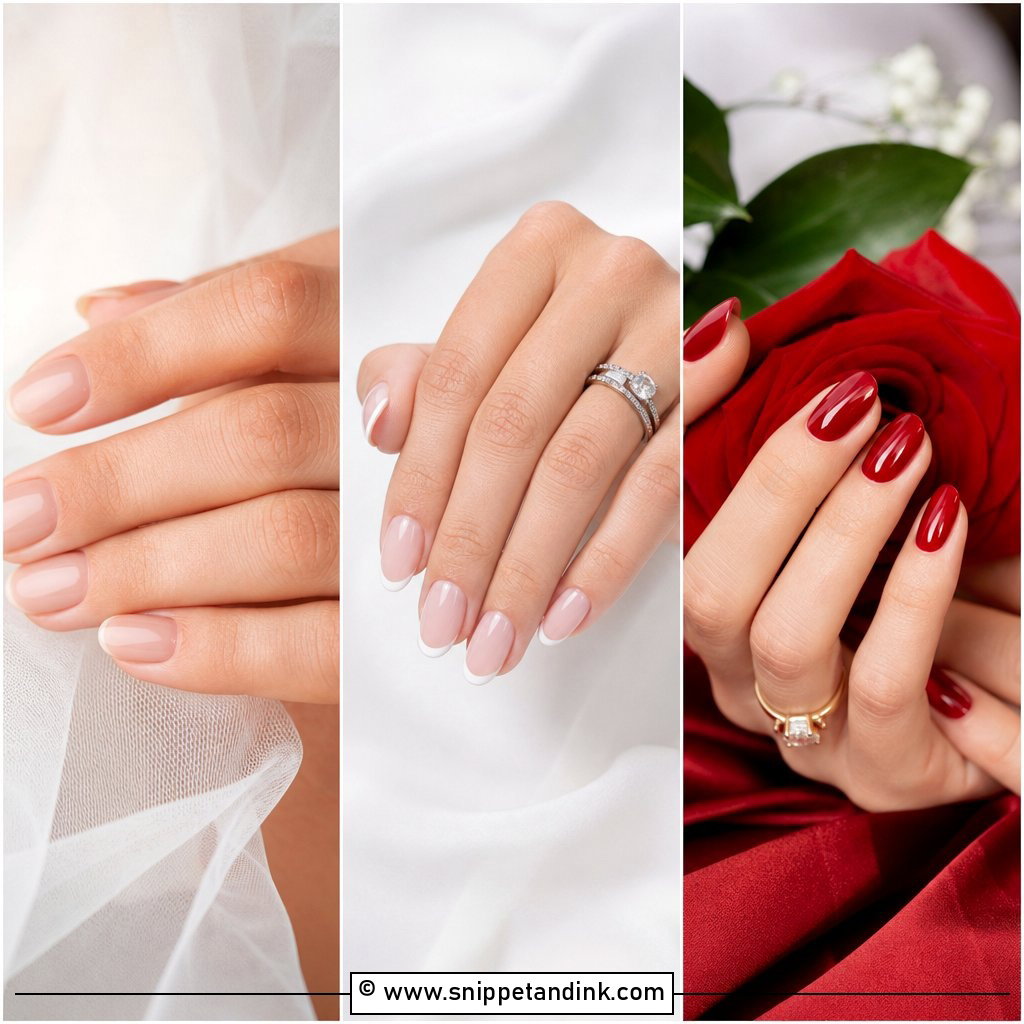
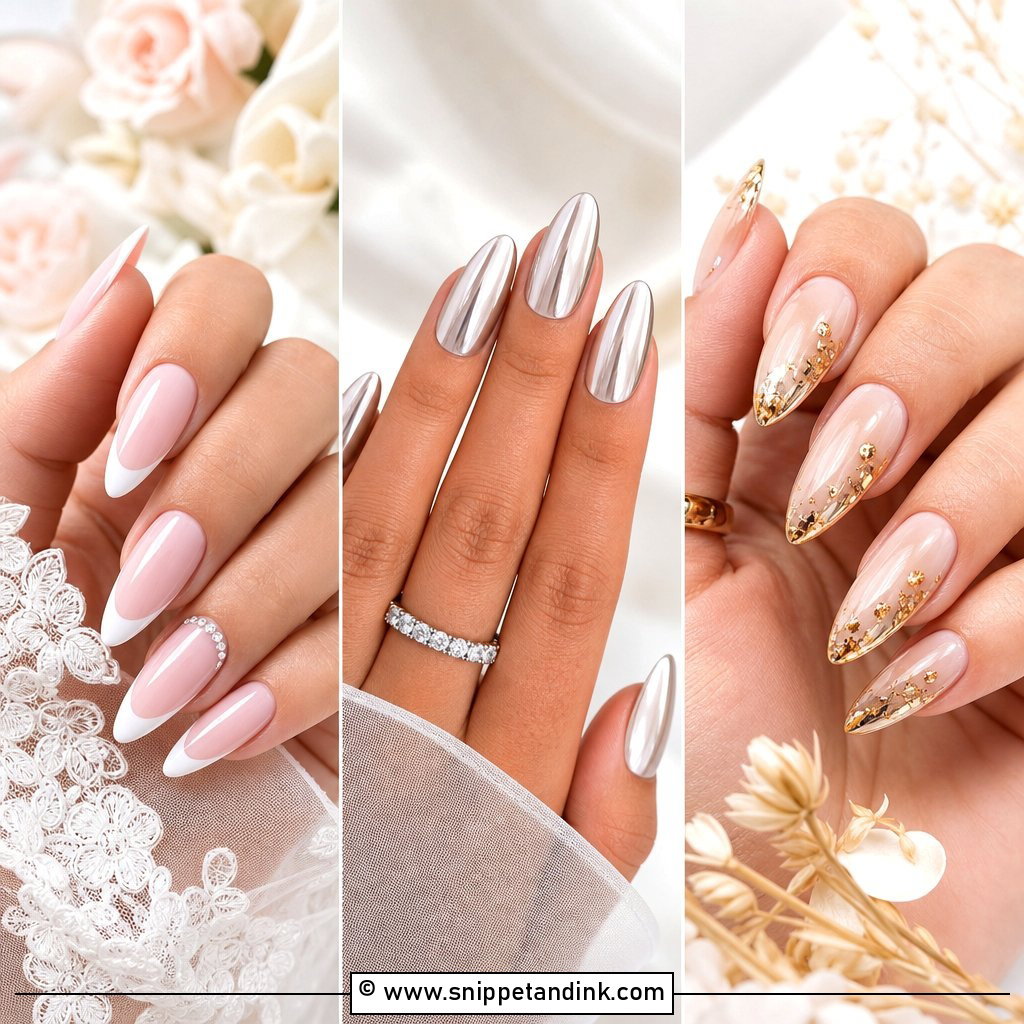
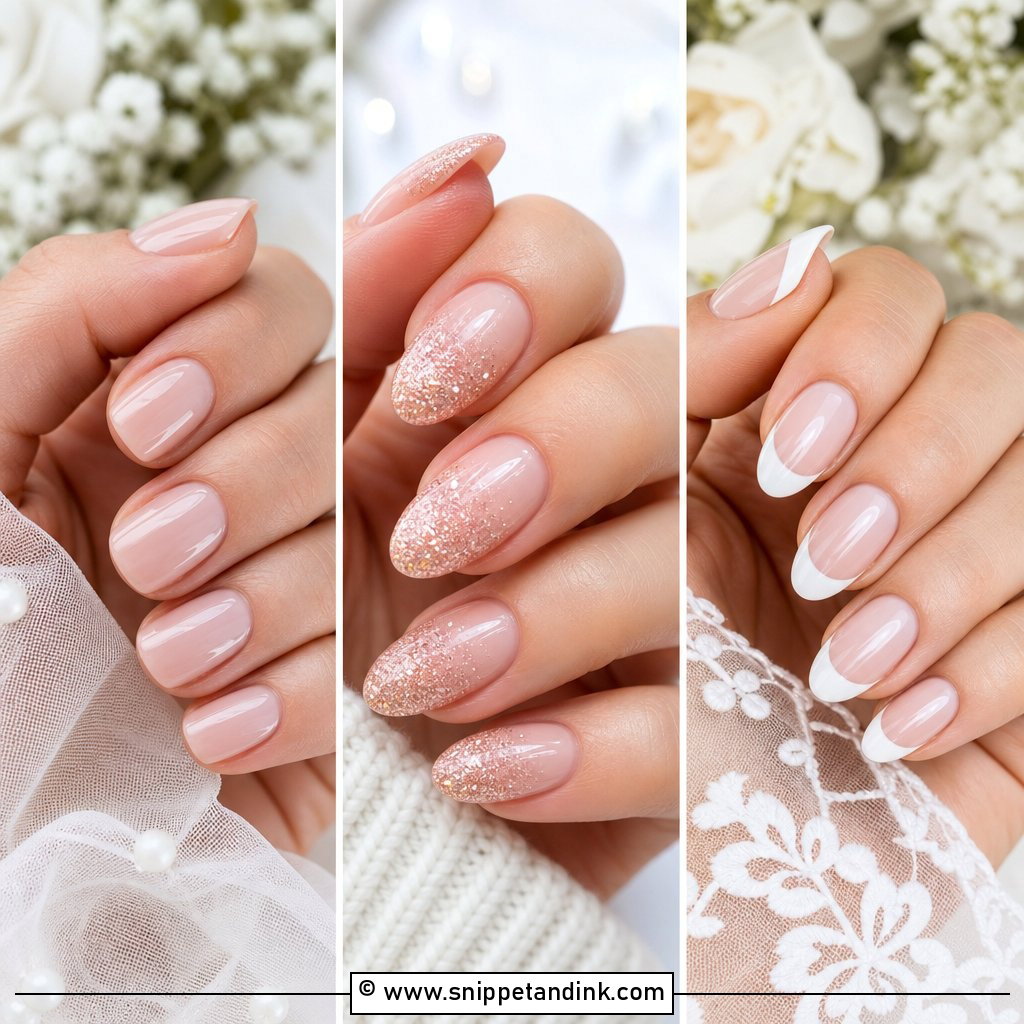
The white French has lasted because it reads as bridal from across a room. For pre-wedding wear, I keep the tips slightly thinner and softer than a dramatic salon French, which looks fresher in photos and suits short nails. Soft square gives the classic look; almond leans more graceful. If your ring has bright stones or detailed metalwork, this simple set keeps the focus on the ring. The tip line has to be clean and even on all ten nails, so I paint it freehand with a thin liner brush and check from the side.
7. Micro French Pre Wedding Nails
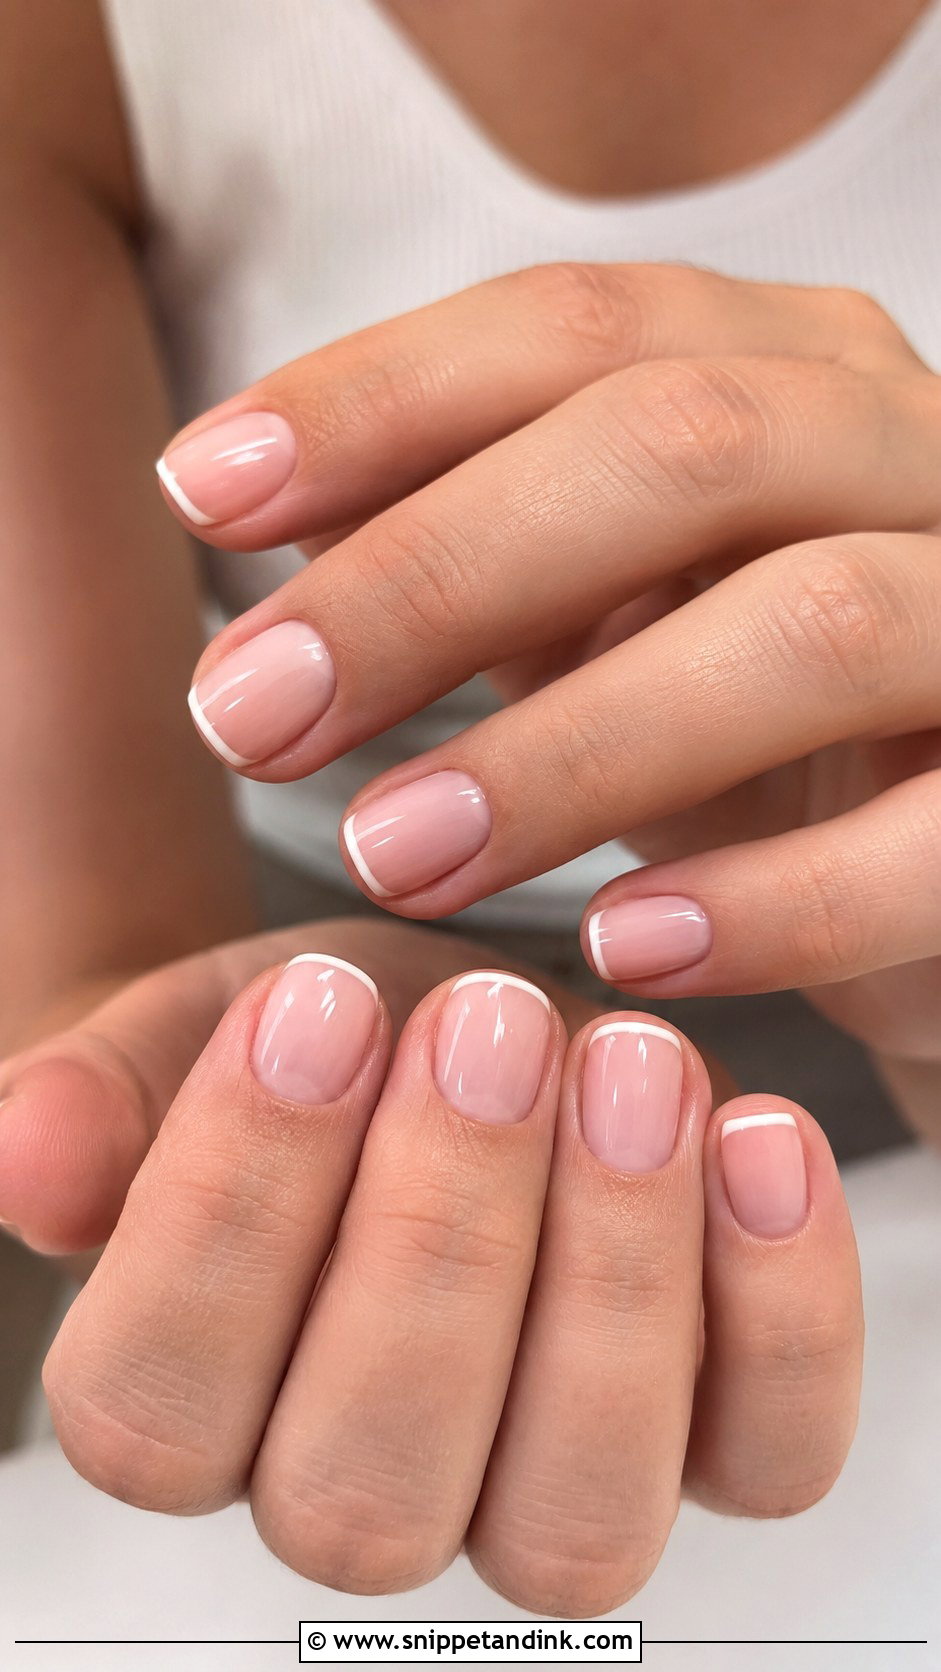
A micro French is the version I recommend to brides who never wear nail art. The tip is a hairline of white, ivory or nude over a sheer base, so the nail looks finished without looking designed. It is especially neat on short nails or soft square shapes. Because the tip is so thin, it hides wear better than a classic French, which makes it practical for everyday planning. For a slight twist, a pearl top coat goes over the base, with the tip kept fine.
8. Floral Accent Pre Wedding Nails
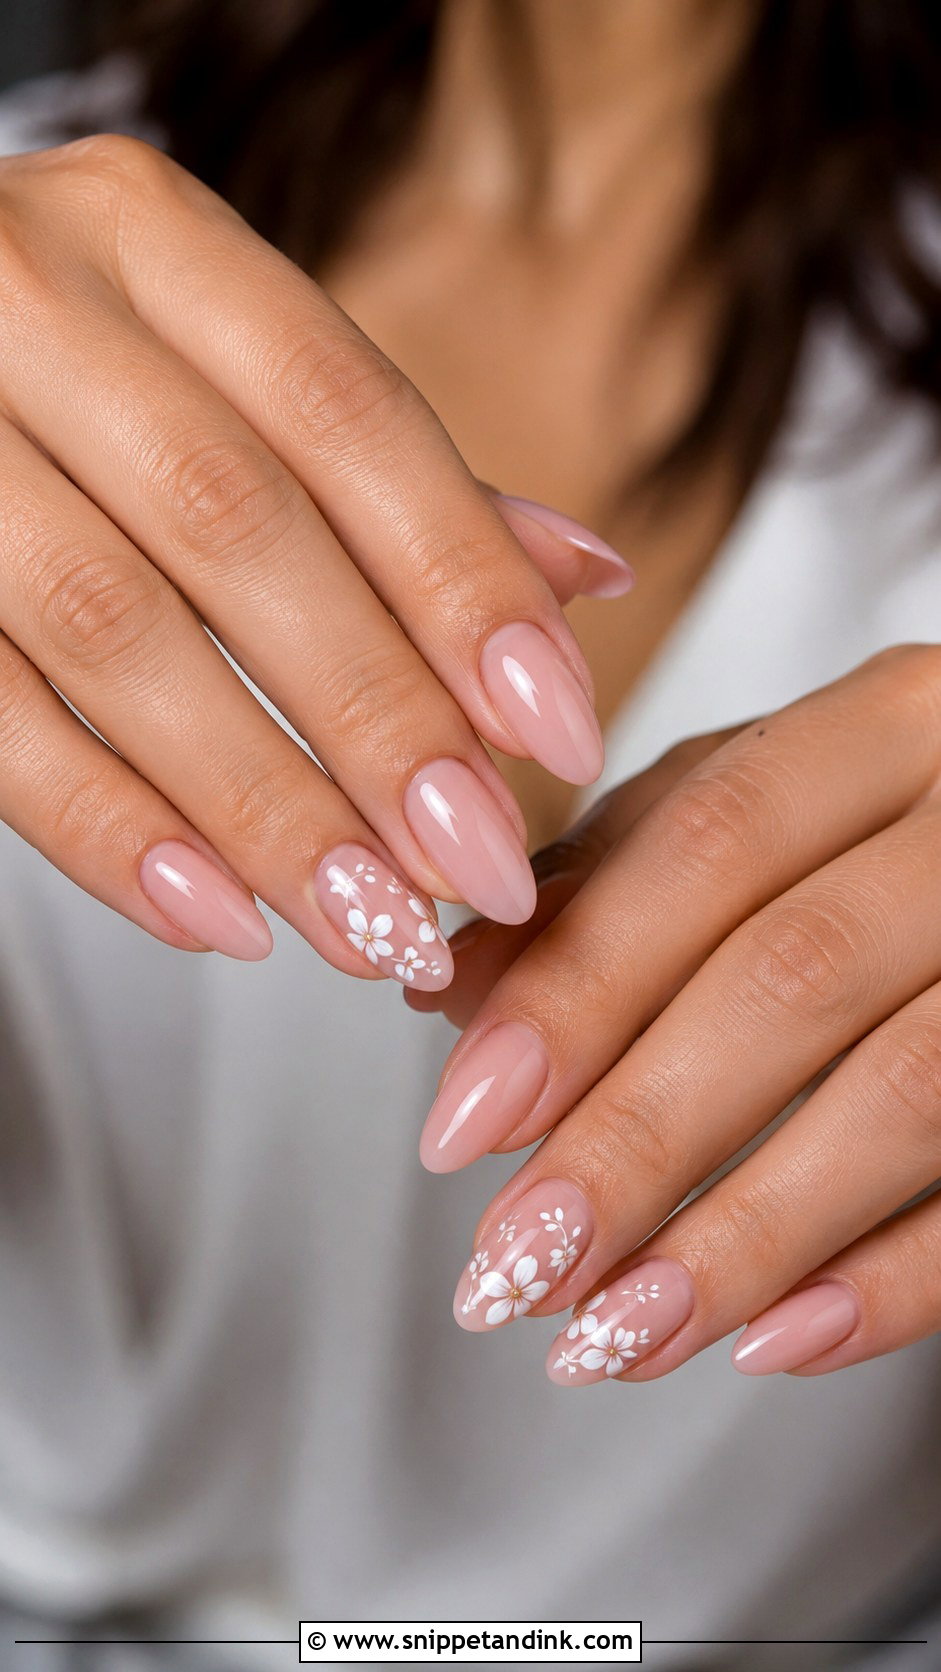
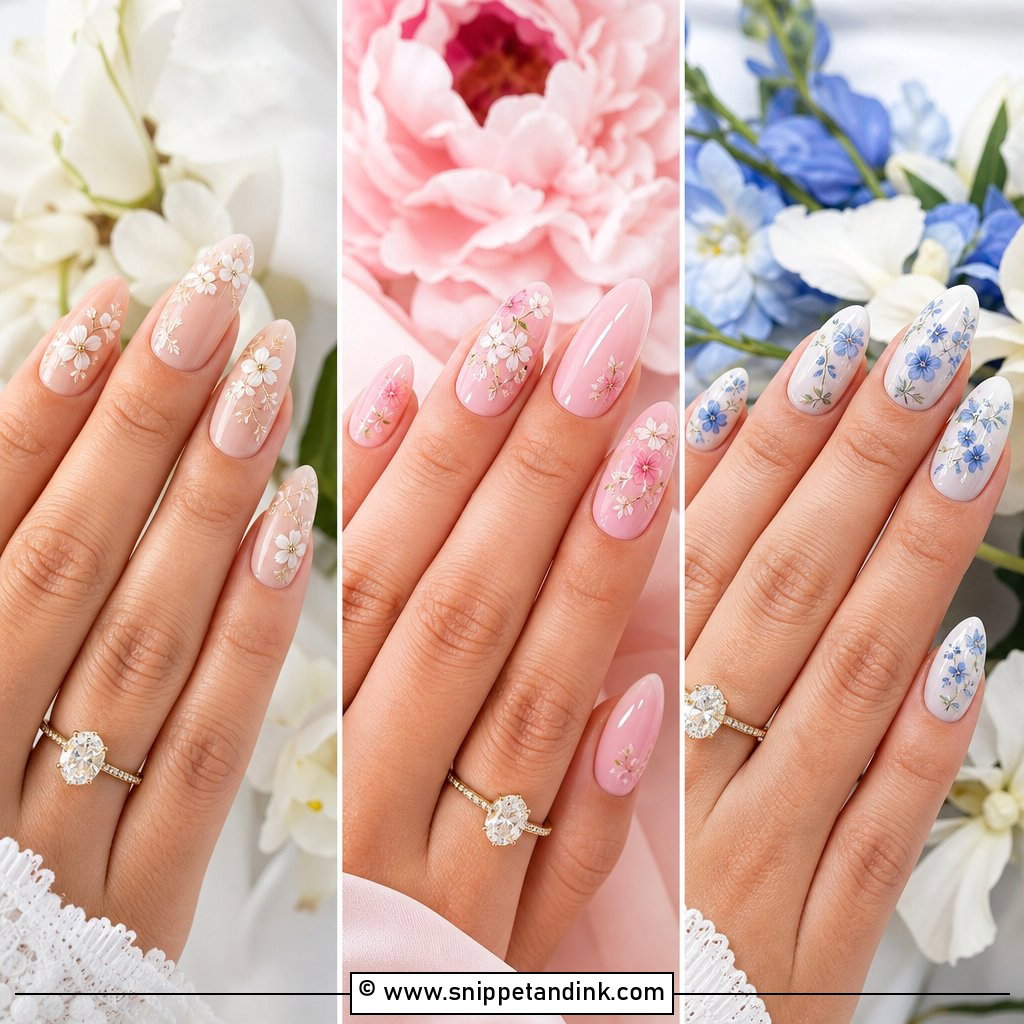
Tiny flowers on two or three accent nails are enough. I paint them with a fine detail brush on a nude, pink or milky base, keeping each flower small and spaced so the set stays calm. Pressed dried flowers are another option, but they have to be fully sealed under gel or the edges lift and catch on fabric. Garden photos and spring showers suit this best. Almond shapes give the flowers the most room. One full floral nail per hand is my usual limit before the look gets busy.
9. Pearl Accent Pre Wedding Nails
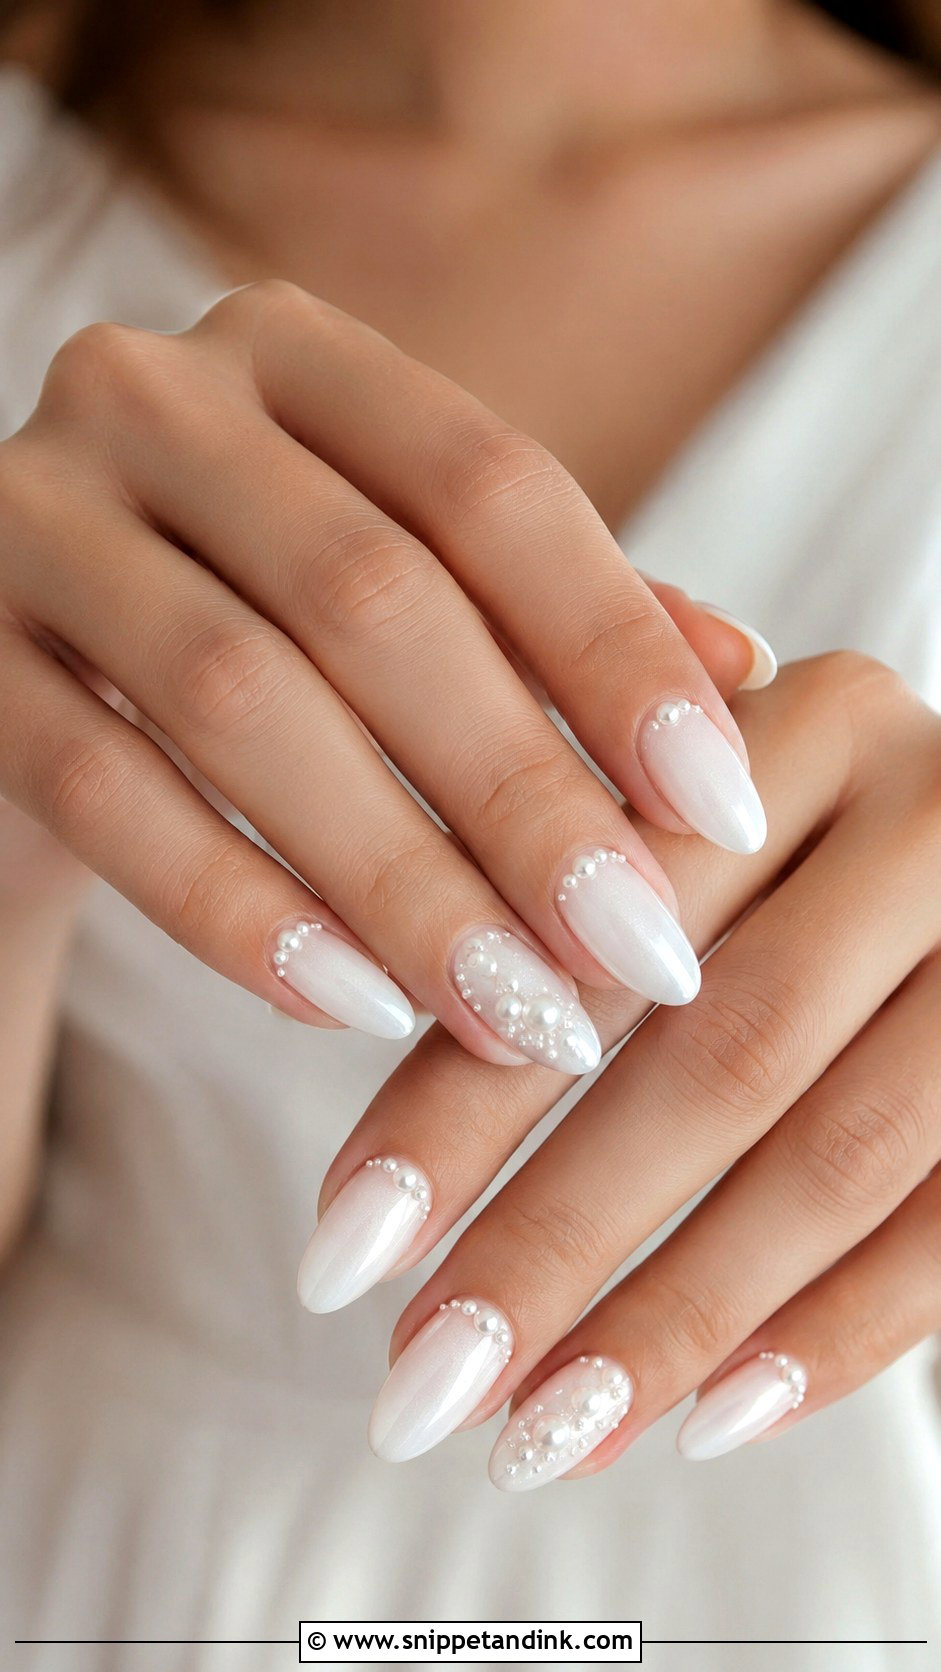
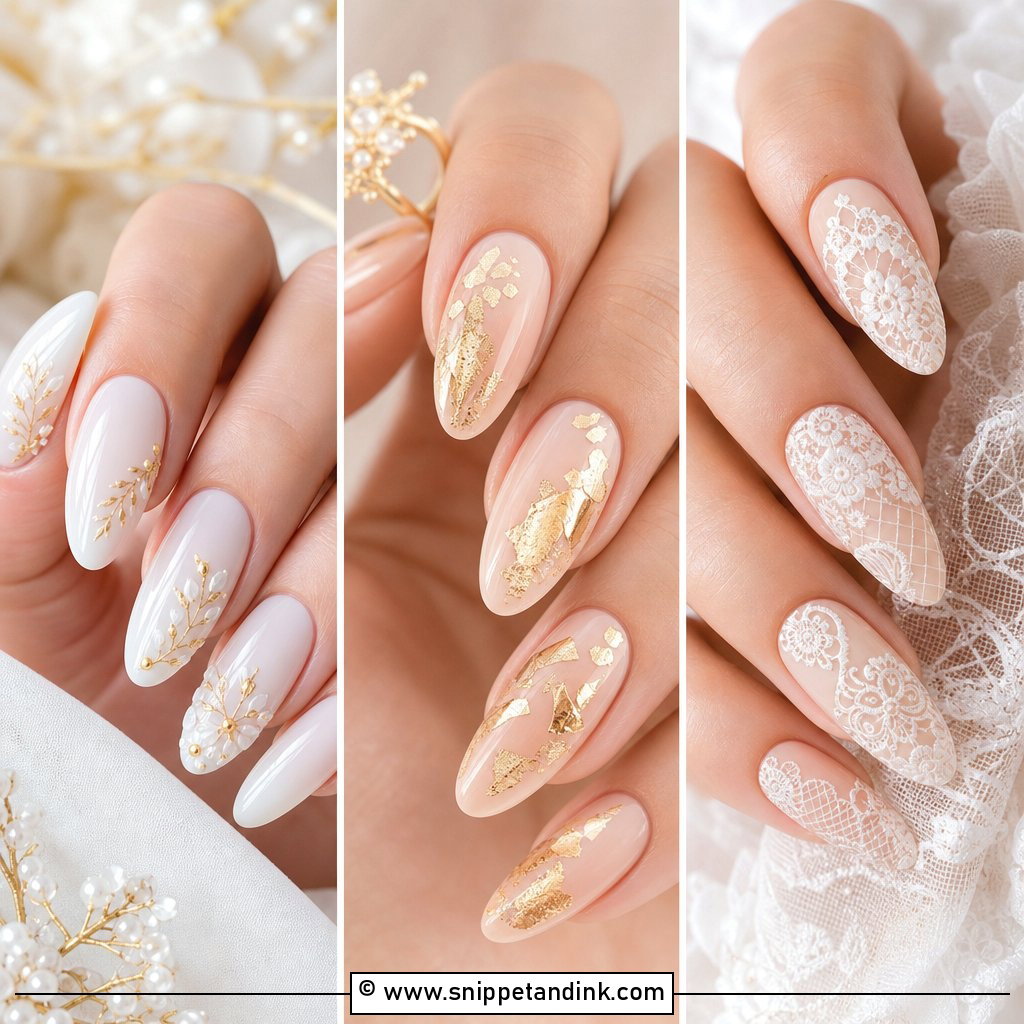
Pearl accents add texture, and texture needs balance. I place small flat-backed pearls near the cuticle or along one accent nail on a milky, sheer pink or French base. Too many feels heavy, both visually and on the hand. The pearls must be set in builder gel and capped, not just pressed into top coat, or they snag on knits and pop off within days. Pearl earrings or a beaded dress tie in nicely. Almond, oval and medium square nails give pearls enough room.
10. Glitter Ombre Pre Wedding Nails
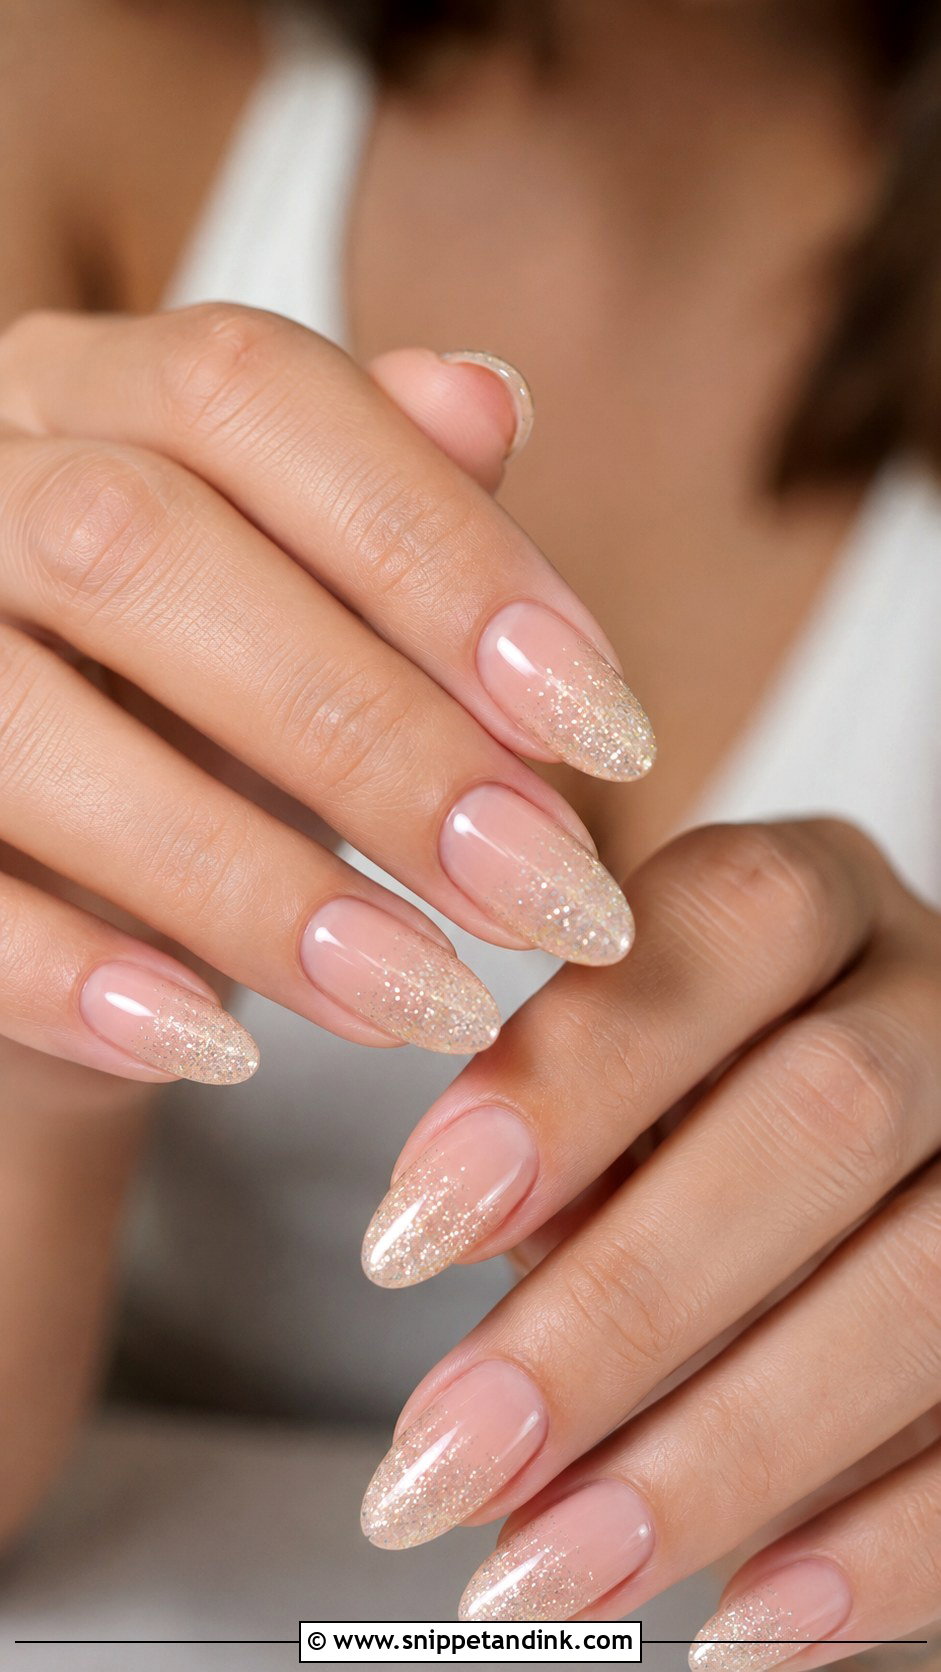
Sparkle without the mess: Glitter ombre pre wedding nails fade fine shimmer from the tip or cuticle into a nude, pink or white base. Silver glitter reads cool, while champagne reads warm and softer. I only use fine glitter for bridal work. Chunky glitter leaves a bumpy surface that needs thick top coat, and the extra bulk at the tip chips first. It suits parties and evening celebrations. Medium almond or oval shapes help the shimmer look smooth in photos.
11. Sheer Nude Pre Wedding Nails
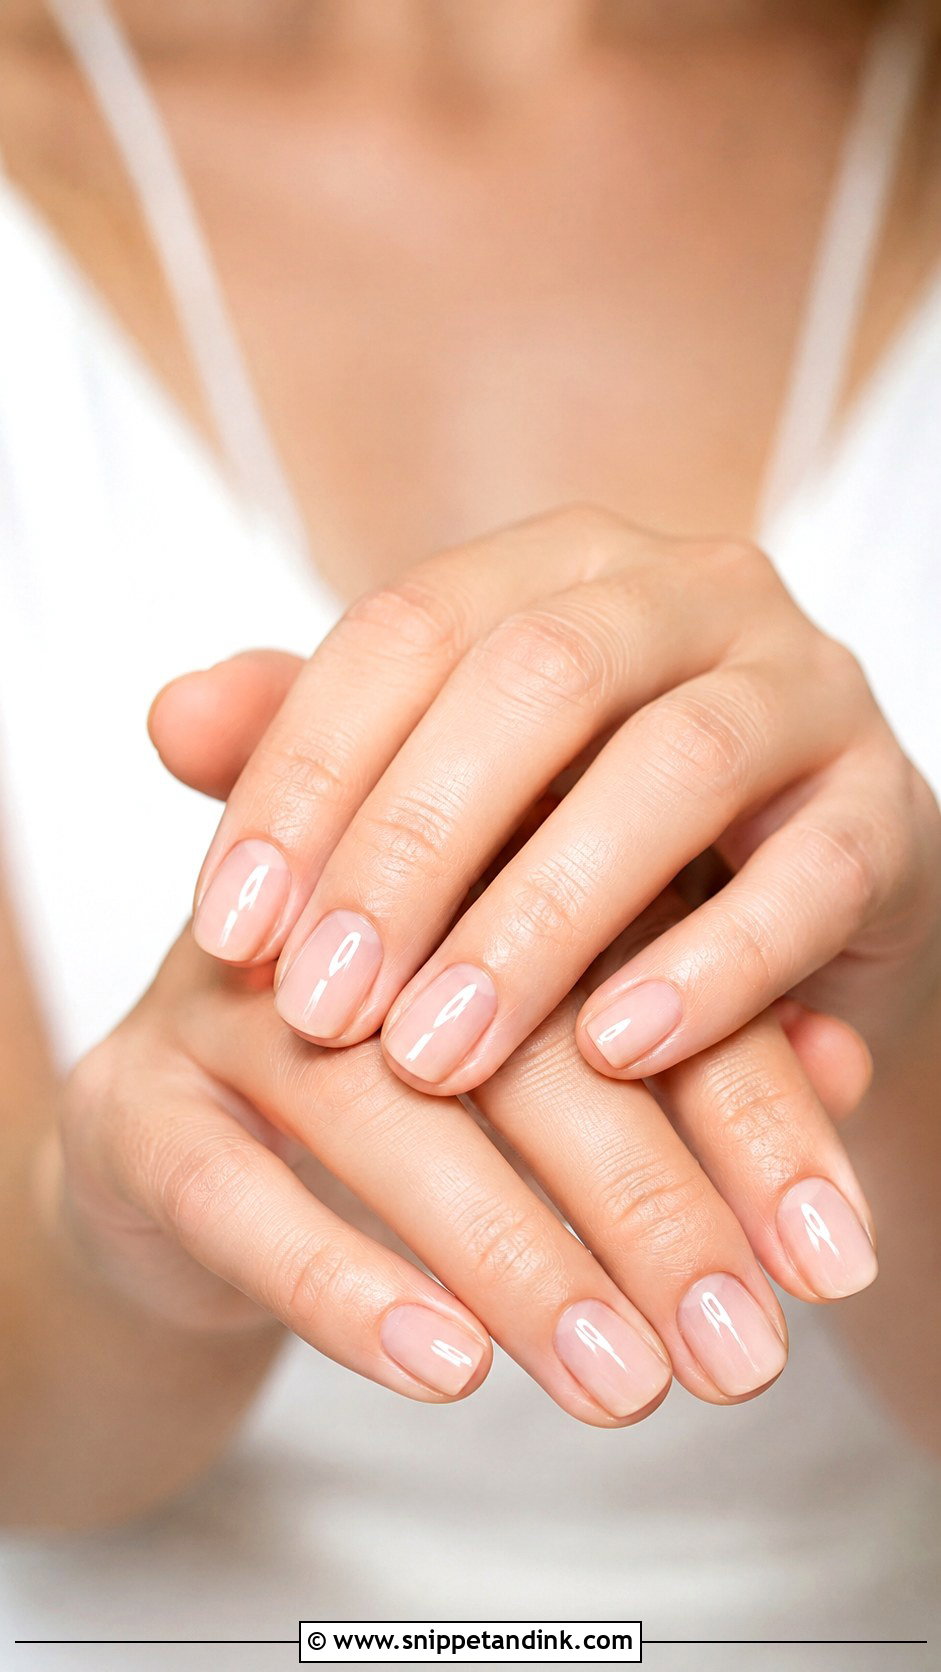
A sheer nude is the closest thing to perfect natural nails. The shade should match or slightly warm up your skin, and I always swatch a few on the nail itself, since bottle color lies. Beige nude for golden undertones, peach nude for warm skin, pink nude for cooler skin. It’s the right choice for brides with minimal jewelry and makeup. The catch is that sheer polish shows the nail underneath, so any ridges or staining need buffing and a smoothing base first. A short oval or soft square shape keeps it easy to live with.
12. Almond Pre Wedding Nails
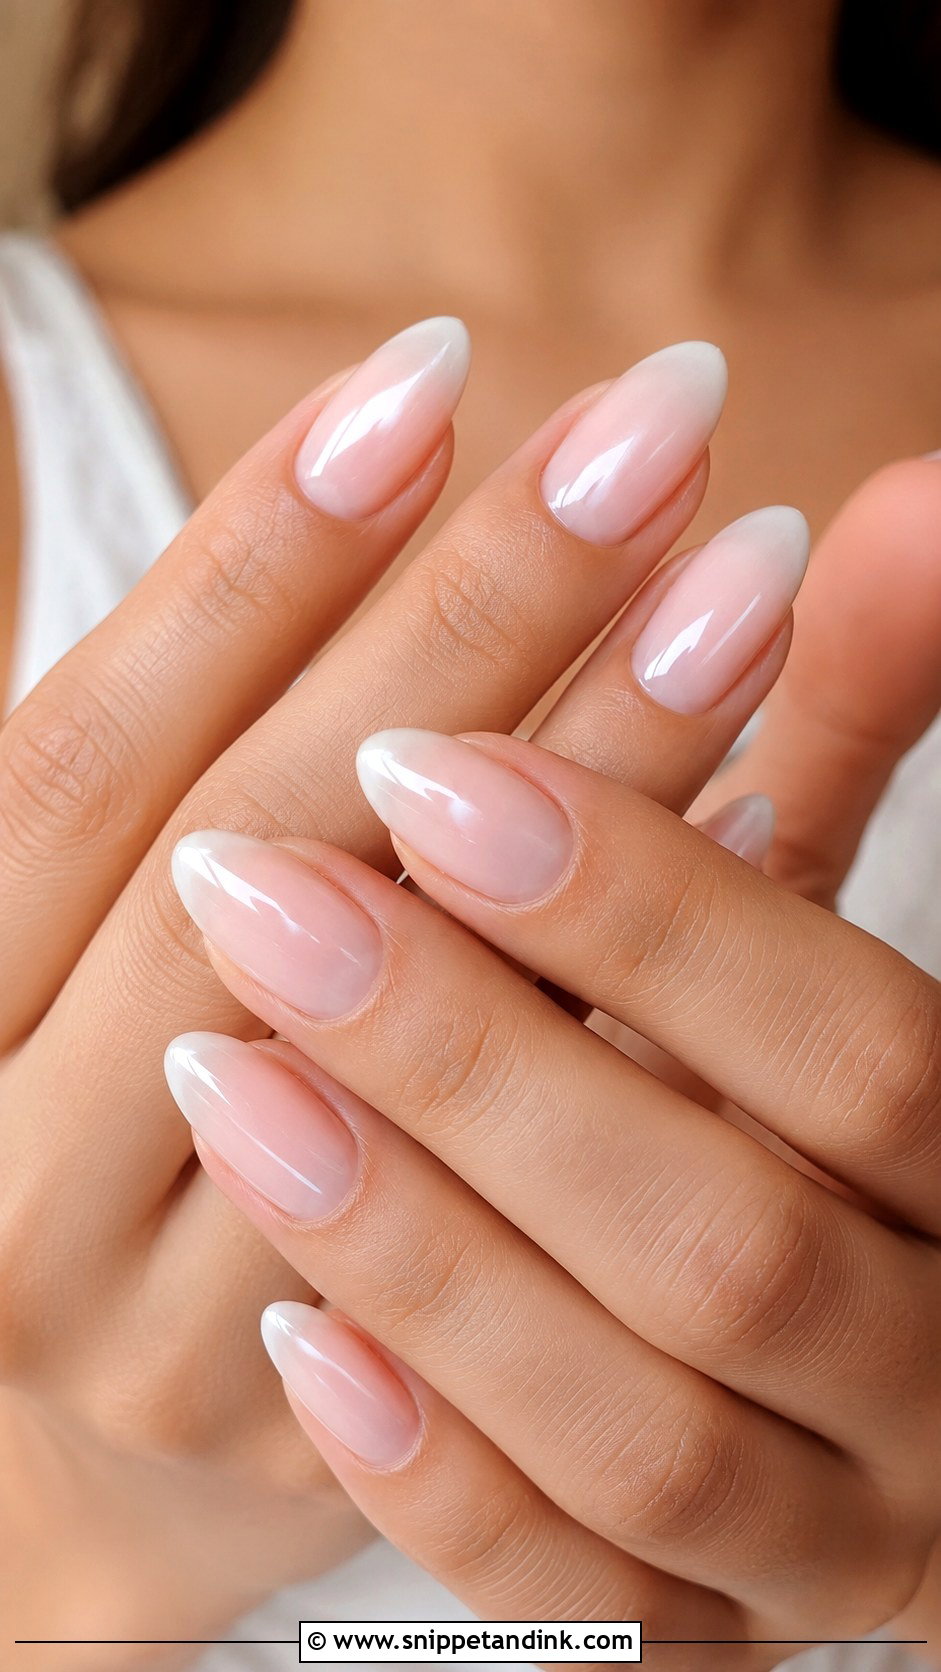
The tapered almond shape makes fingers look longer, which is why it shows up in so many bridal sets. It pairs well with a sheer pink, milky white or soft French tip. Medium length is the practical sweet spot; long almond tips are pointed enough to scratch your own skin and snag fabric during fittings. If your natural nails are thin, I’d build almond with a gel overlay for strength. Pearl chrome or tiny floral accents suit the shape.
13. Short Pre Wedding Nails
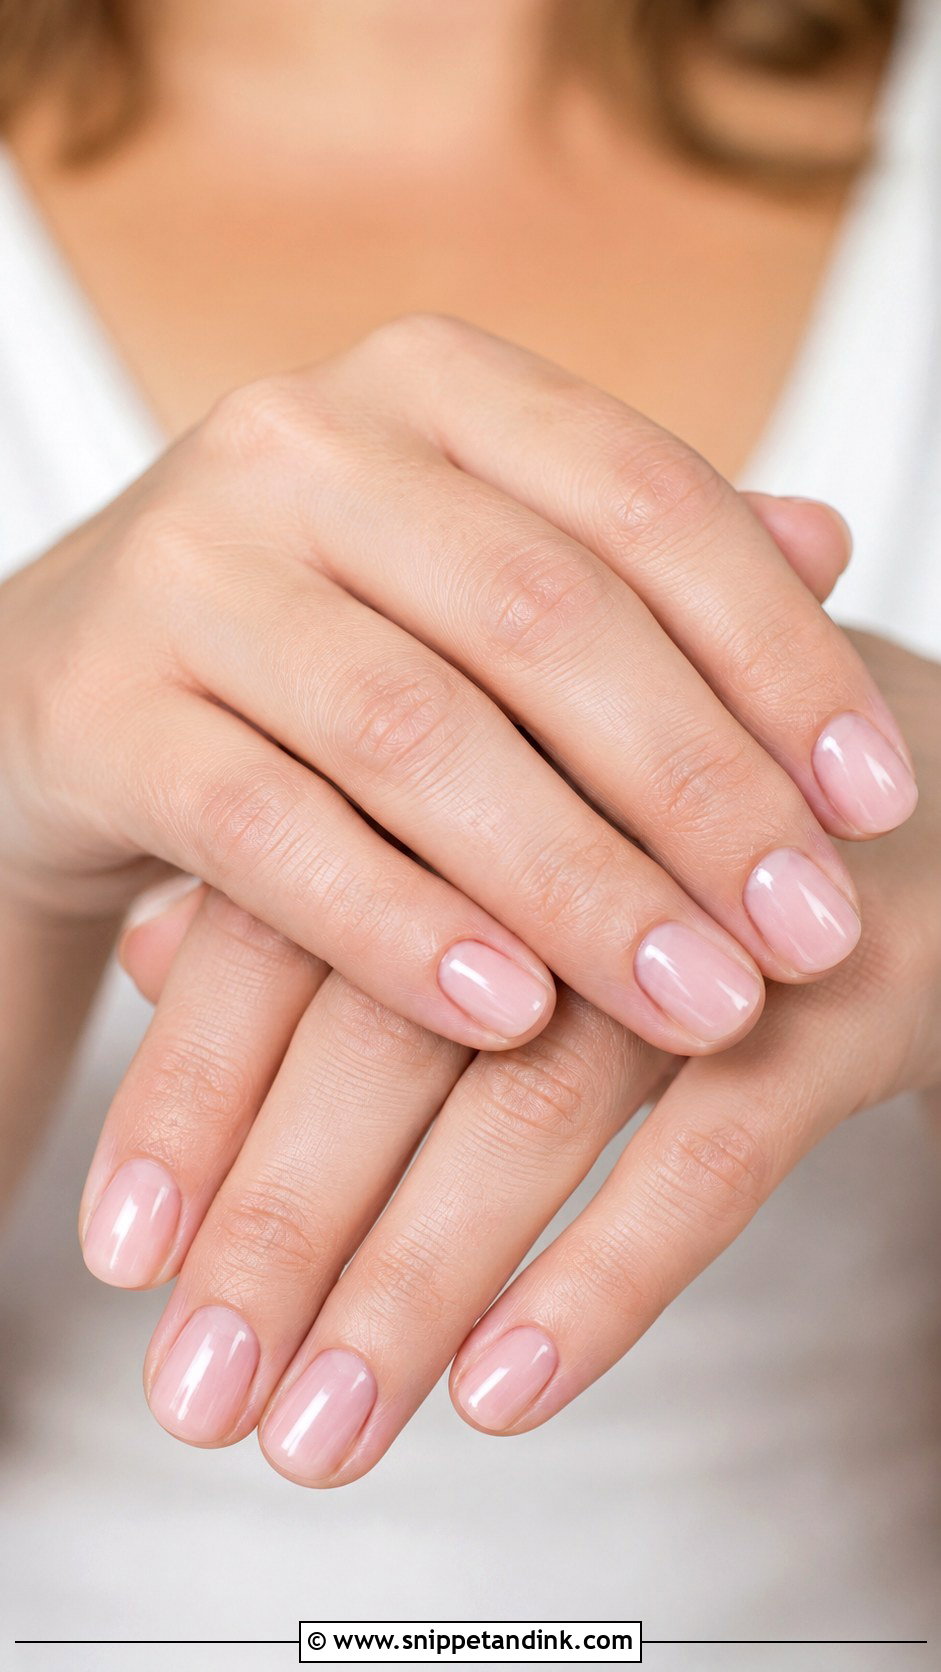
Short nails can look every bit as bridal as long ones. A short soft square or round shape works with milky white, sheer pink gel, micro French tips or nude gloss. Short nails let you keep typing and planning without changing how you use your hands. In ring photos they look neat and natural. What makes a short set look finished is prep: careful cuticle work, a smooth even edge and a high-shine top coat. That’s where I spend the time.
14. Square Pre Wedding Nails
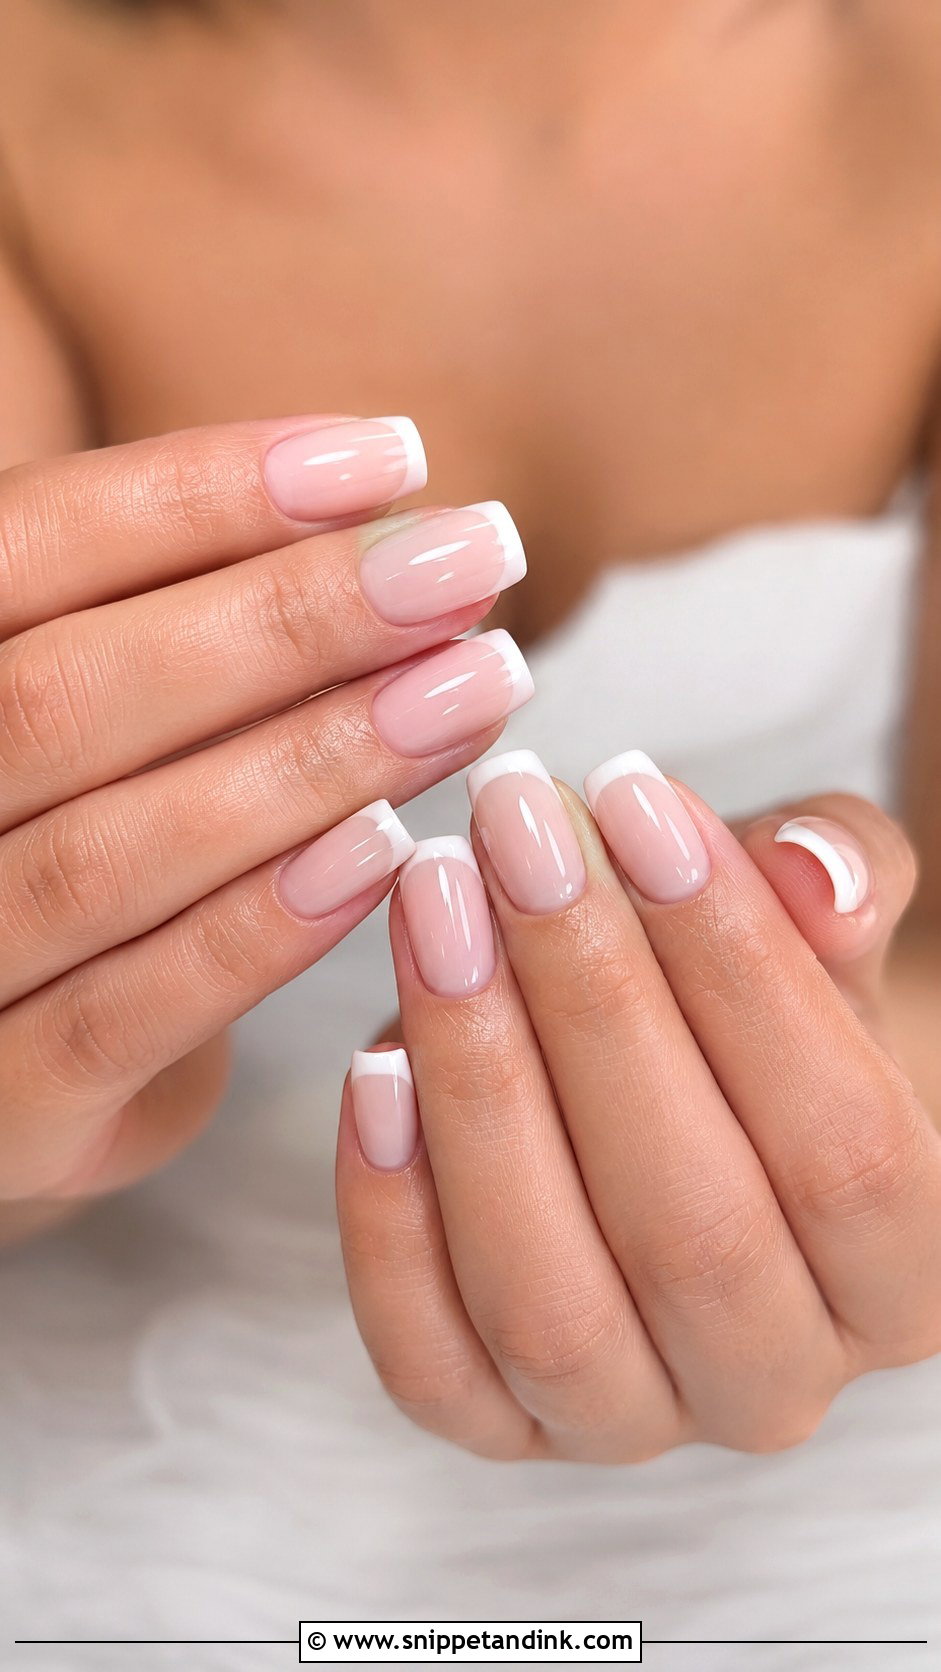
Square gives a neat, modern outline with straight sides and a flat tip. I almost always soften the corners for brides; sharp corners catch on lace and break first. It works with French manicures, nude polish and milky white gel. Square also suits nails that already grow evenly. On short, wide nail beds it can make the fingers look stubby, and I’d suggest a squoval or oval instead. A thin French tip, subtle chrome or a sheer blush base keeps it bridal.
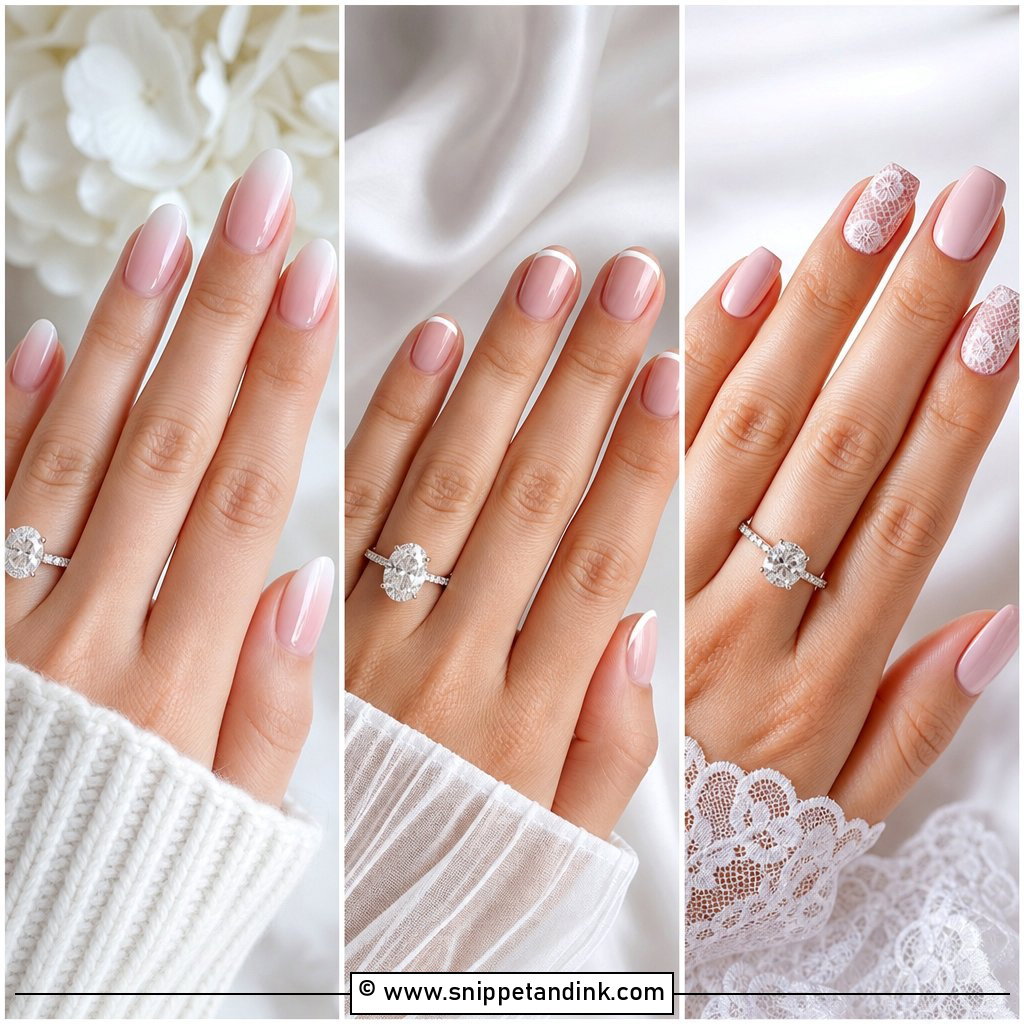
15. Coffin Pre Wedding Nails
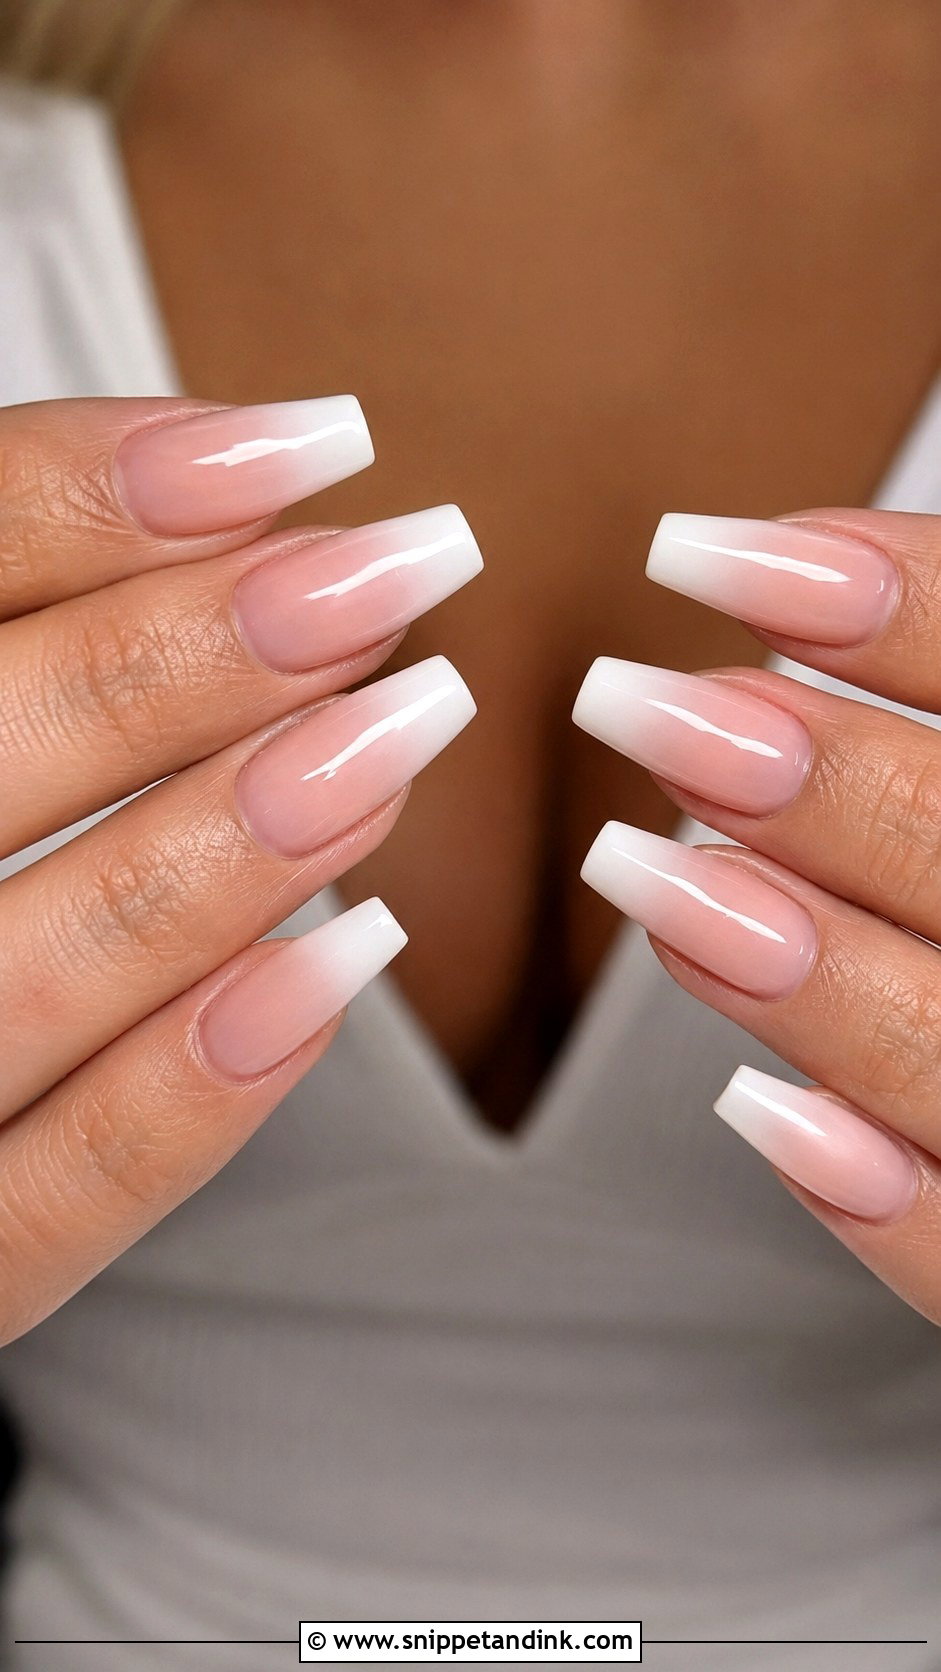
Coffin nails taper at the sides and end in a flat tip, which gives a sleek outline. Nude ombre, white French tips, pearl chrome and soft glitter fades all suit it. Medium length is more manageable for pre-wedding wear, since long coffin tips are prone to snapping at the stress point along the sides. I’d only recommend this shape on extensions or very strong natural nails. Soft colors like blush, ivory, champagne or sheer nude keep it bridal. Let the shape do the work and keep the art light.
16. Lace Pre Wedding Nails
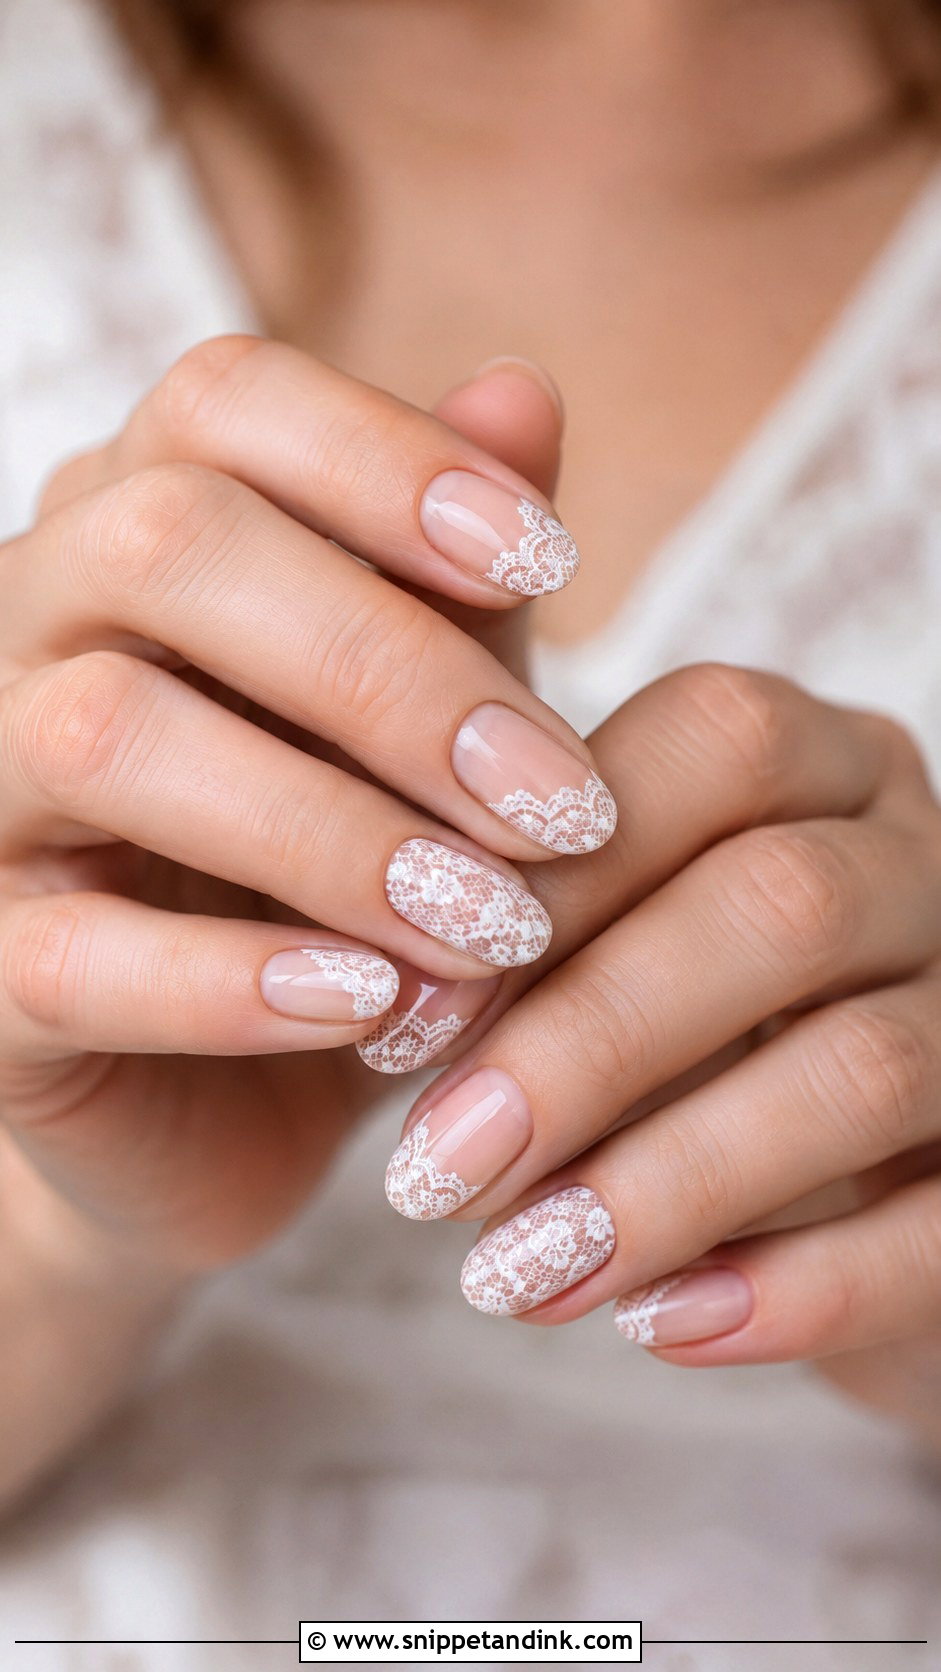
Lace art can echo the fabric of your dress, which is why I ask brides to bring a photo of the lace on their gown. I paint the pattern freehand with a fine liner brush or use a stamping plate on a nude, pink or milky base. Keep the pattern thin and airy on one or two nails per hand; a whole set of lace looks crowded. Almond and oval shapes suit the delicate pattern. A satin top coat can make the lace look more like fabric than a glossy finish does.
17. Gold Detail Pre Wedding Nails
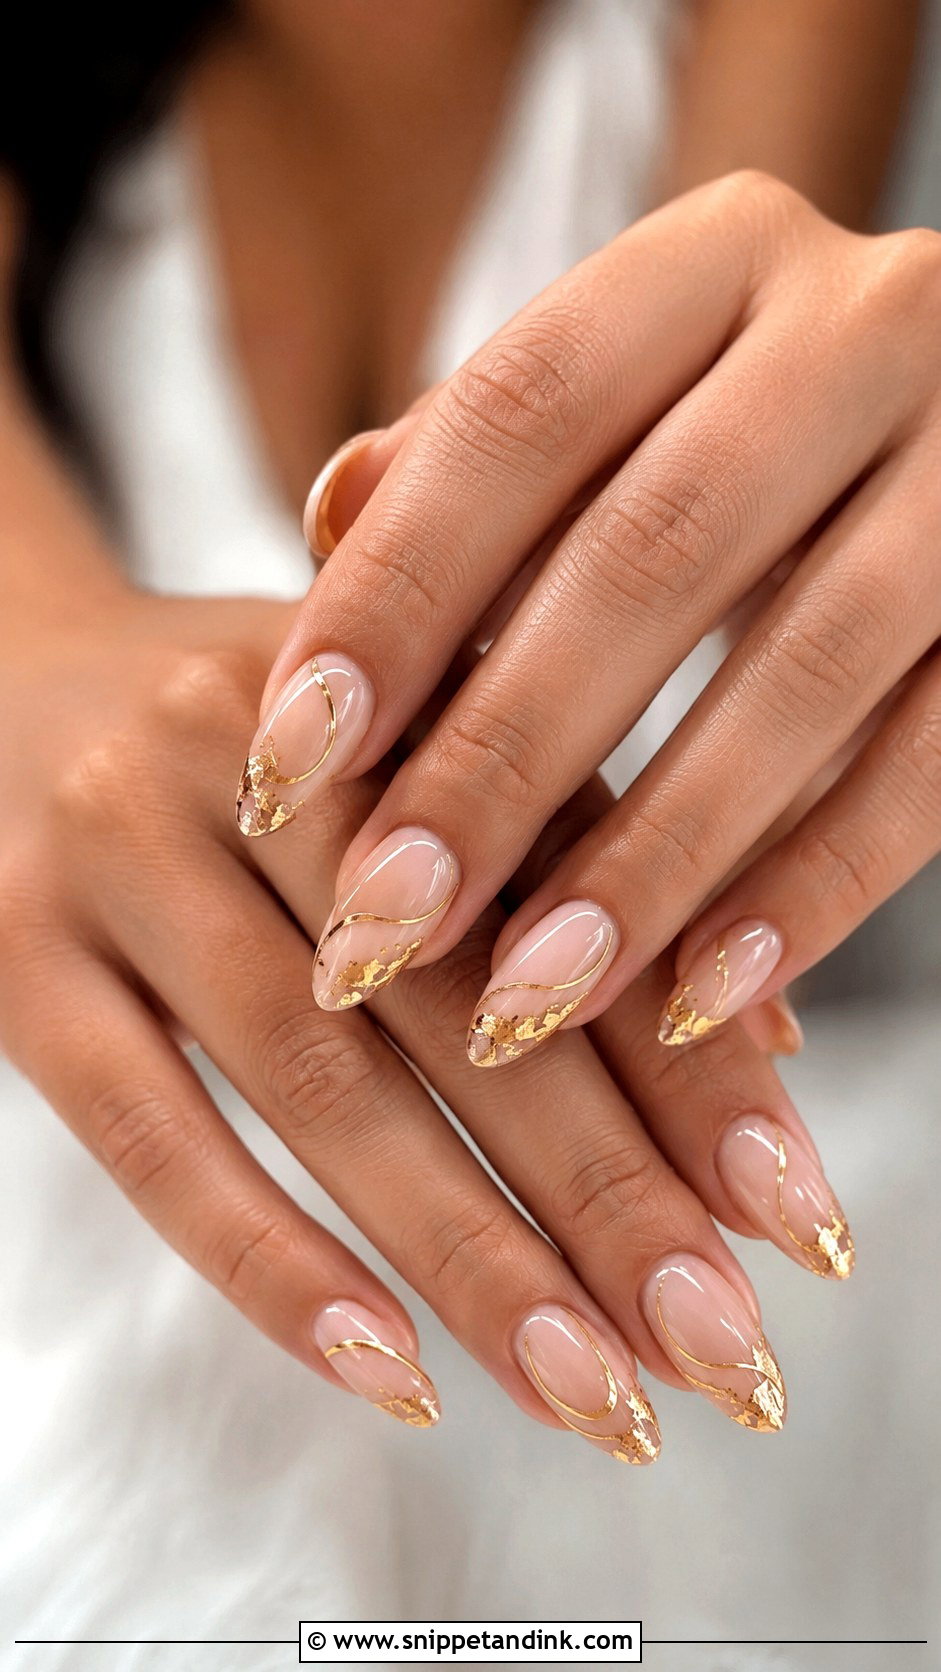
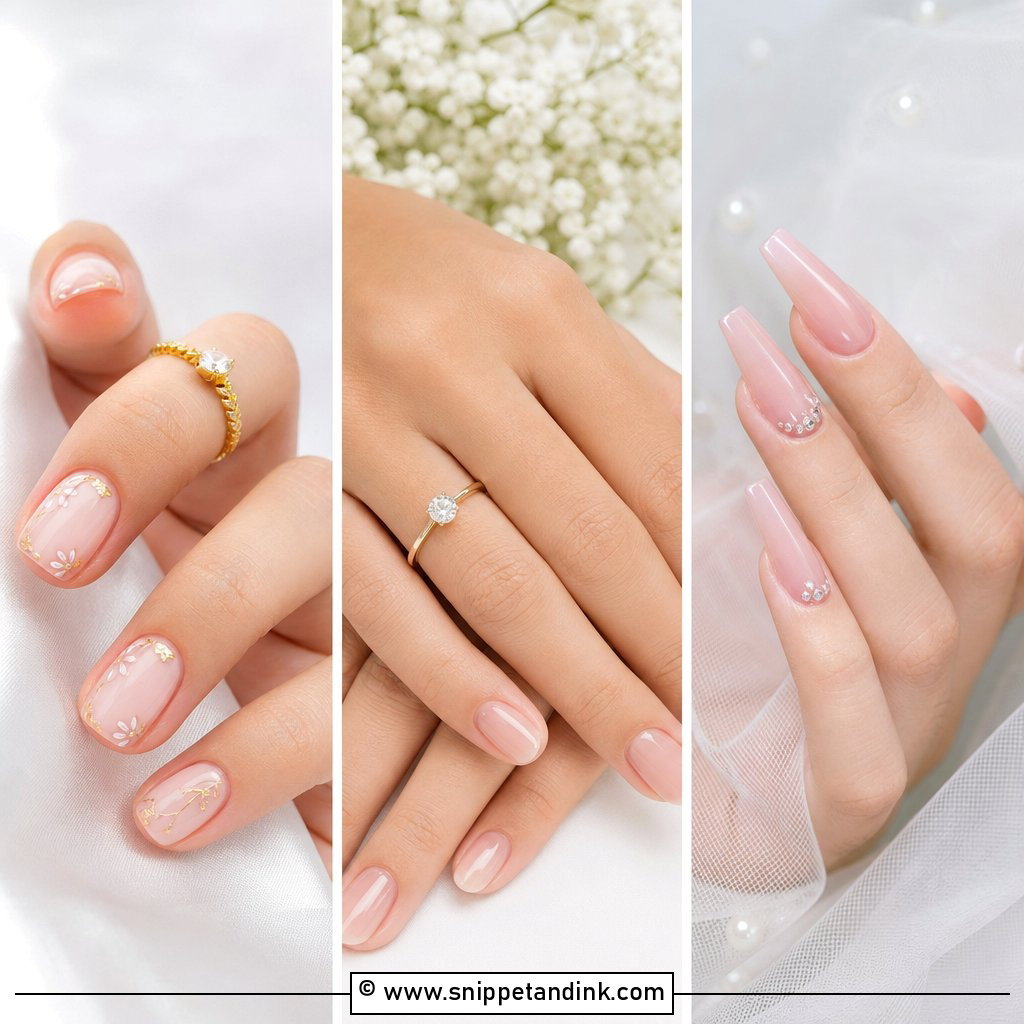
Gold details make sense when your ring or jewelry is yellow gold. On a sheer nude or blush base, I add thin gold lines, a few foil flakes or a subtle gold French tip. Gold flatters warm, olive and deep skin tones; on fair or cool skin, champagne gold is softer. Foil needs to be fully sealed with top coat, as exposed edges lift and catch. The metallic catches light gently in photos without looking flashy. Keep every line fine.
18. Silver Detail Pre Wedding Nails
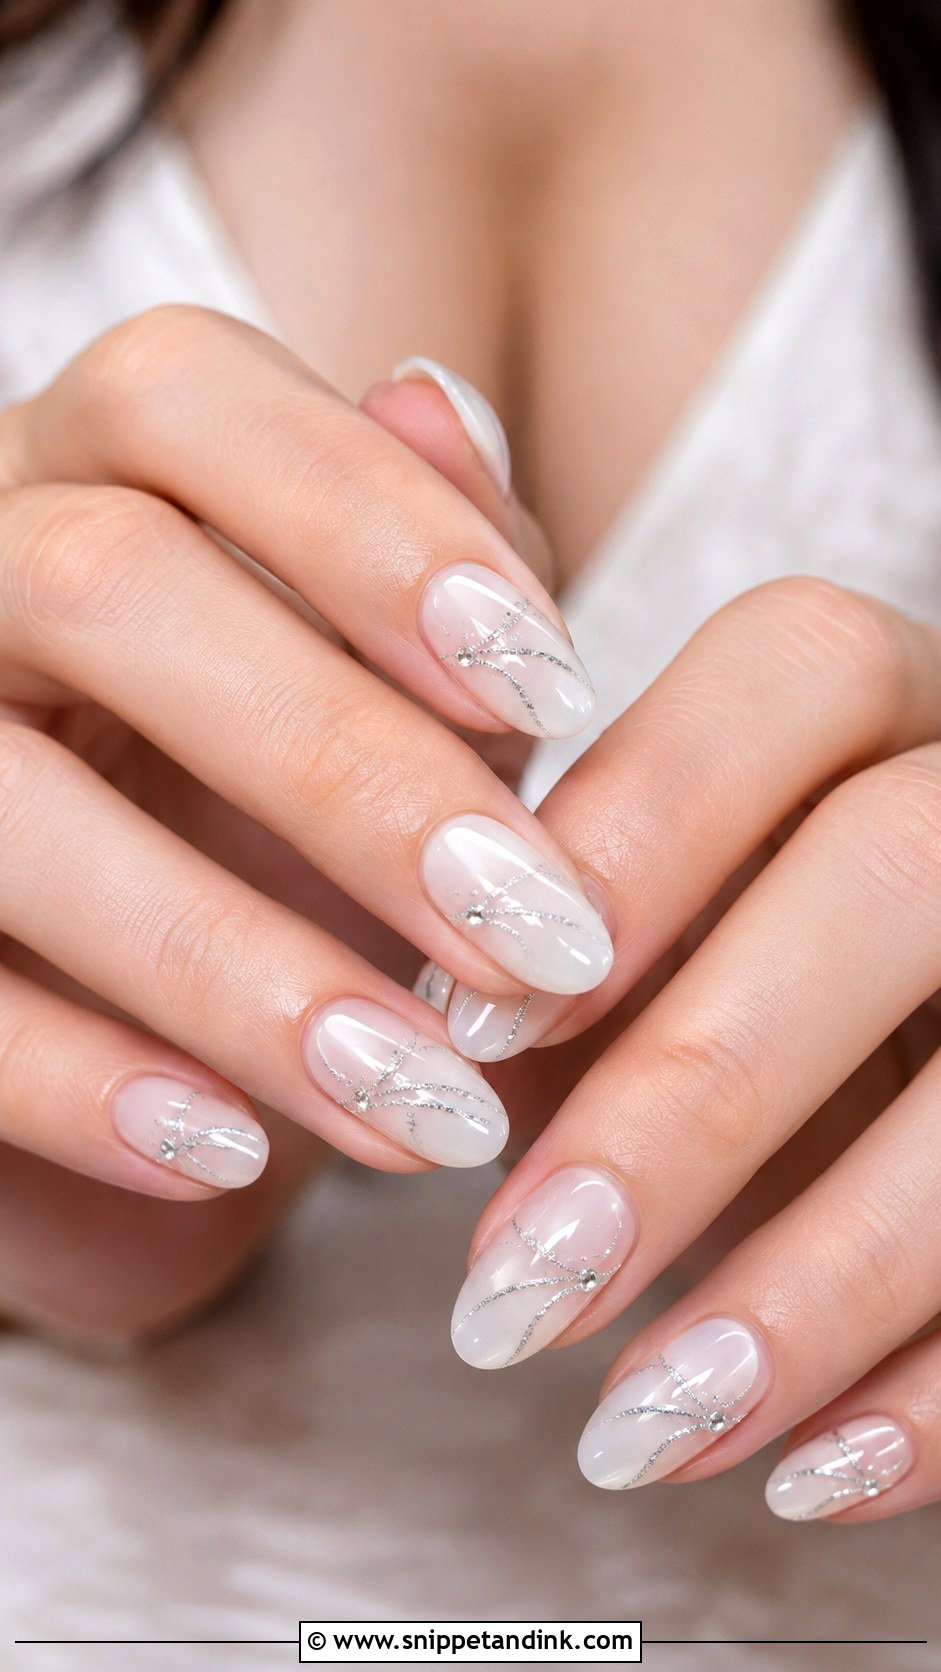
Silver suits white gold, platinum and diamonds better than gold does, which is the first thing I check: what metal is on your hand. On a sheer pink, soft nude or milky base, I add thin silver lines, tiny crystals or a fine glitter tip. Brides with cooler skin often find silver looks more natural on them than gold. It’s a good match for winter and minimal looks. Keep the placement light and balanced, and finish with a glossy top coat so the design reads smooth.
19. Baby Boomer Pre Wedding Nails
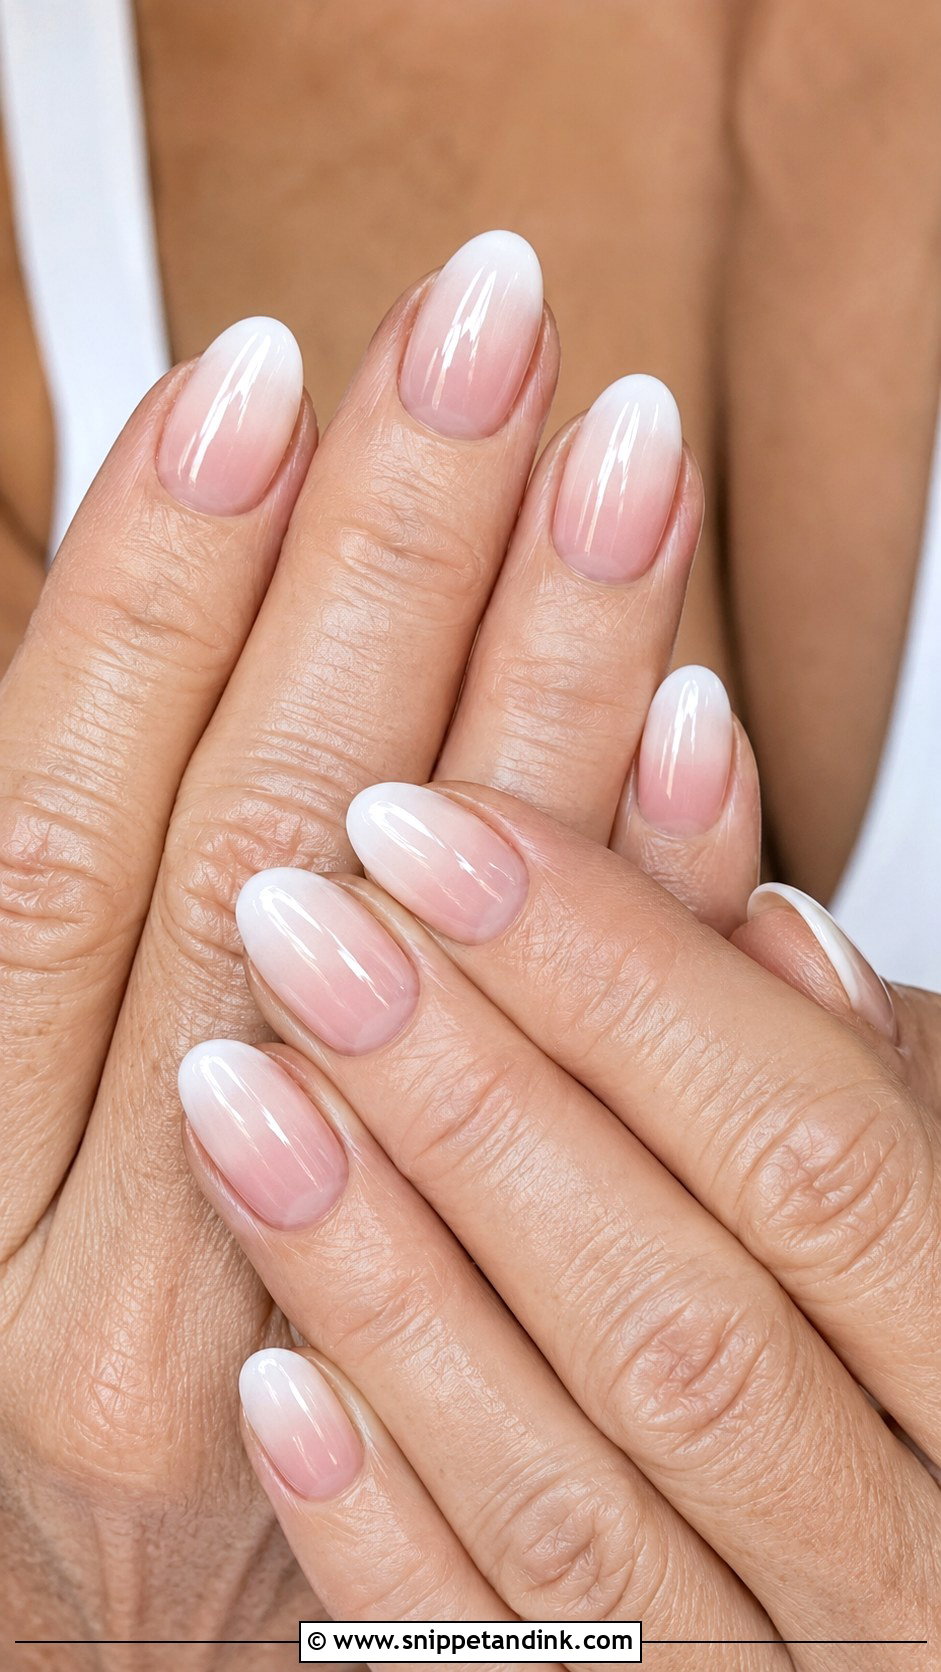
The pink-to-white fade known as Baby boomer pre wedding nails starts with a natural pink at the cuticle and blends into a creamy white at the tip. There’s no hard tip line, so the nail looks clean and longer. I build the gradient with a sponge or a soft brush between gel layers, and the blend is where the skill shows: a visible band in the middle means it was rushed. It suits almond, coffin, oval and square shapes. Pick a sheer pink for your skin tone and keep the white creamy rather than stark.
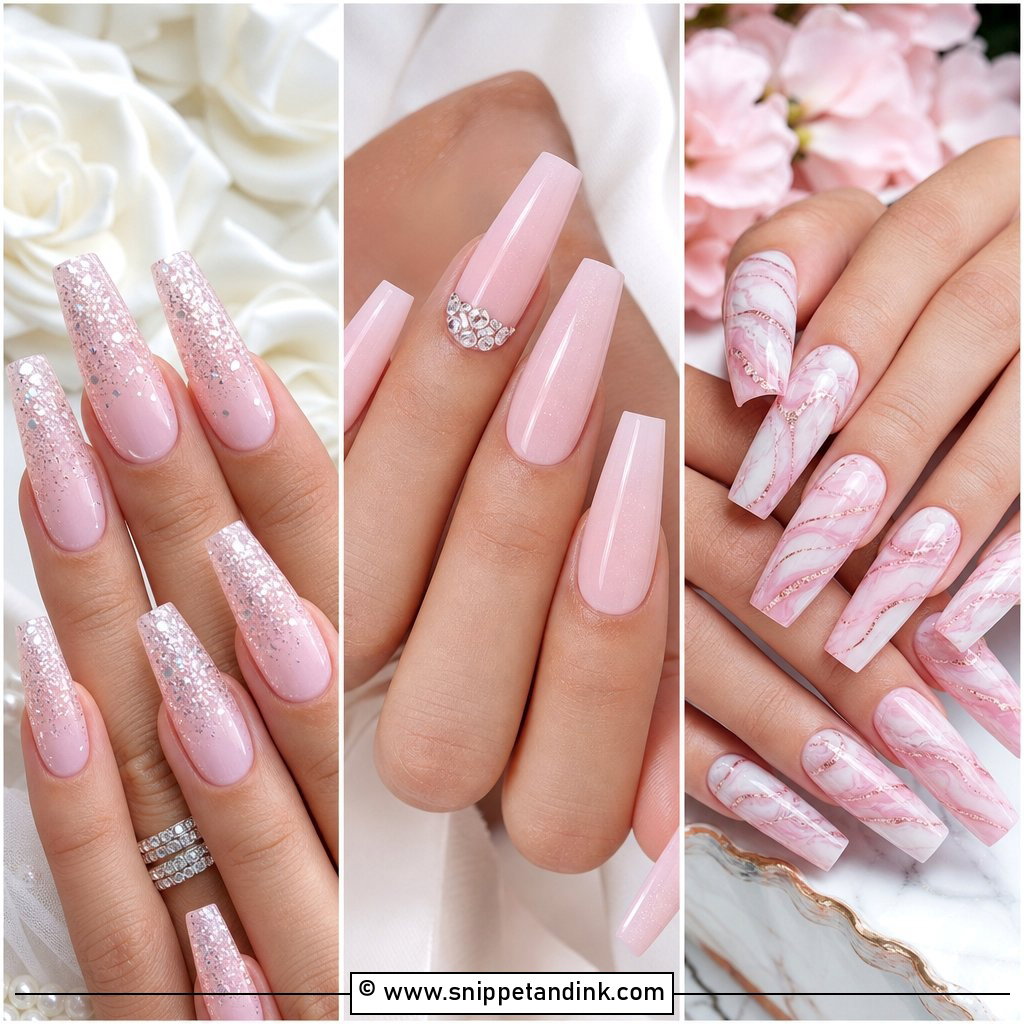
20. Minimal Rhinestone Pre Wedding Nails
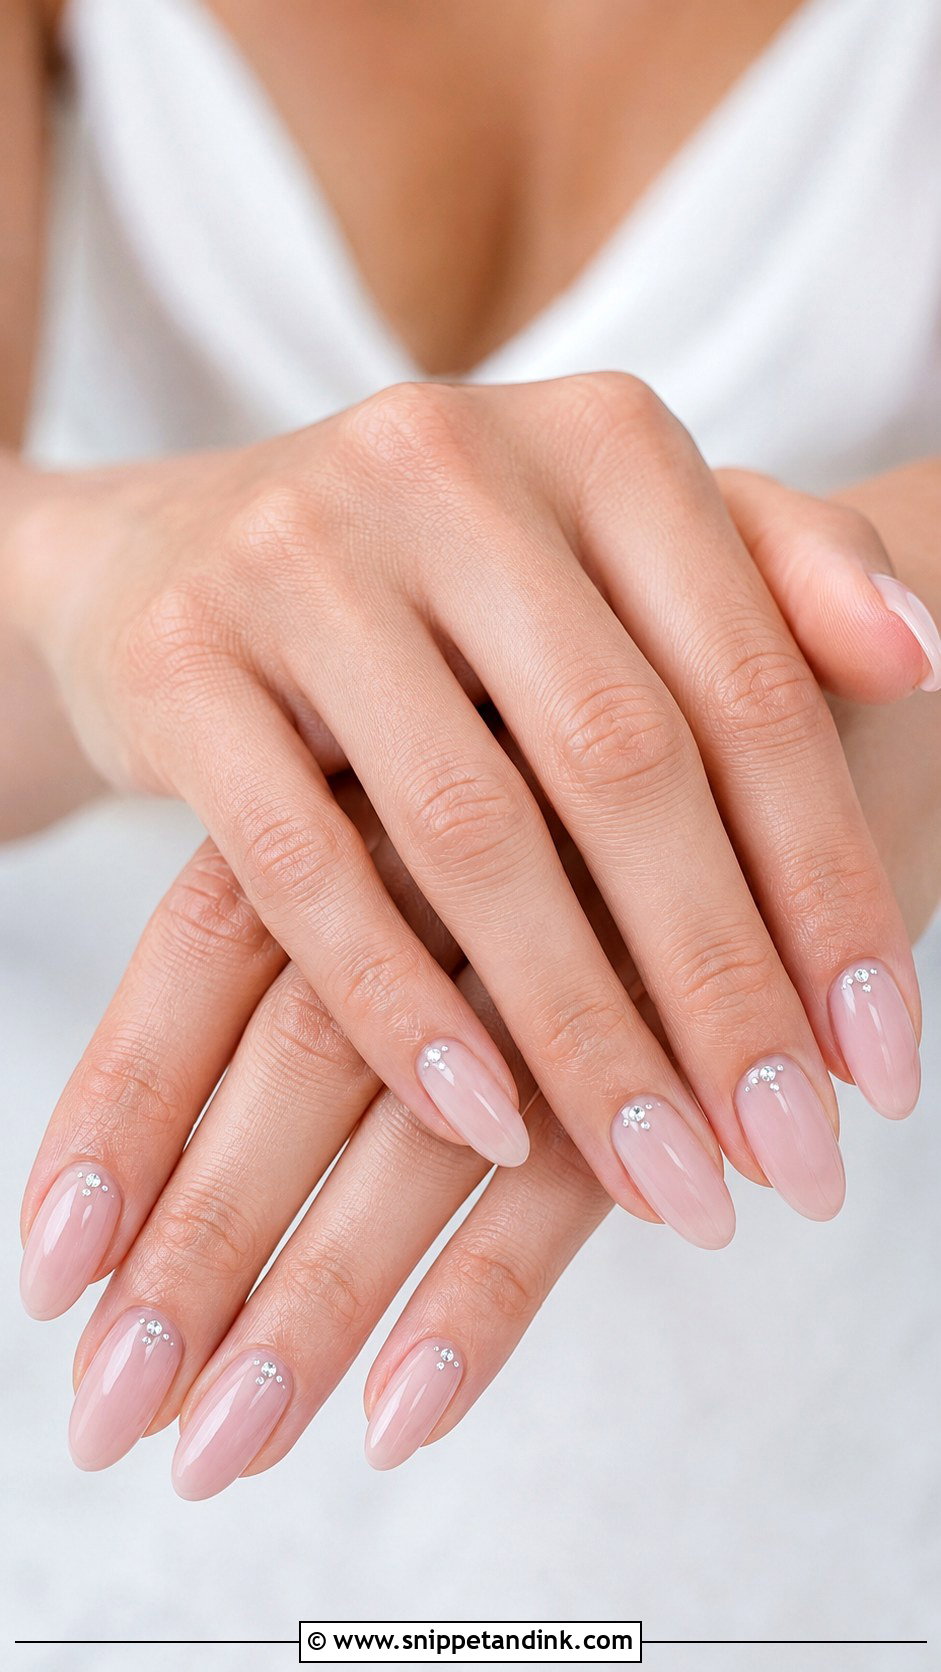
One or two small stones near the cuticle add sparkle without changing the character of a clean set. Minimal rhinestone pre wedding nails start with a nude, blush, milky or French base and keep the stones symmetrical. Clear crystals go with anything; champagne stones lean warmer. I set them in a small bead of builder gel and cap them with top coat around the edges, which keeps them from snagging hair. Placing them on the ring fingers draws attention to the ring itself.
Soaking Off Between Sets, Without Thinning Your Nails
Most brides have one manicure removed to make way for the next. Removal is where nails get damaged, not the gel itself. I file off the top coat, soak the rest in acetone with foil wraps, and push off only what has softened. Prying or peeling gel away takes layers of nail with it, and thin nails bend and break just before the wedding.
Hard gel and builder gel are usually filed down rather than soaked, which needs a careful hand. If your salon reaches for a coarse drill bit near the cuticle, ask them to slow down.
Hands in Close-Up: Cuticles, Dry Skin and the Ring
Ring shots show the skin around the nail as much as the polish. Dry cuticles and flaky knuckles show up clearly in macro photos, and no top coat hides them.
- Apply cuticle oil every night, rubbed in, not just dotted on.
- Use a thick hand cream at bedtime, with cotton gloves if your hands are very dry.
- Wear gloves for washing up and cleaning; hot water and detergent dry the skin fast.
- Clean under the free edge before any shoot. Macro lenses pick up everything.
A Set You Can Plan a Wedding In
A pre-wedding manicure should look bridal and still cope with ordinary life. Soft colors, sheer finishes, fine French details and a little pearl or shimmer all photograph well and hold up between events. If you can’t decide, choose a design that makes your natural nails look healthier rather than covering them in detail. Check it against your ring metal, your dress fabric and the length you can comfortably live with. Then use what you learn from this set when you book the one for the wedding.
You'll Like These Ideas:


Leave a Reply