
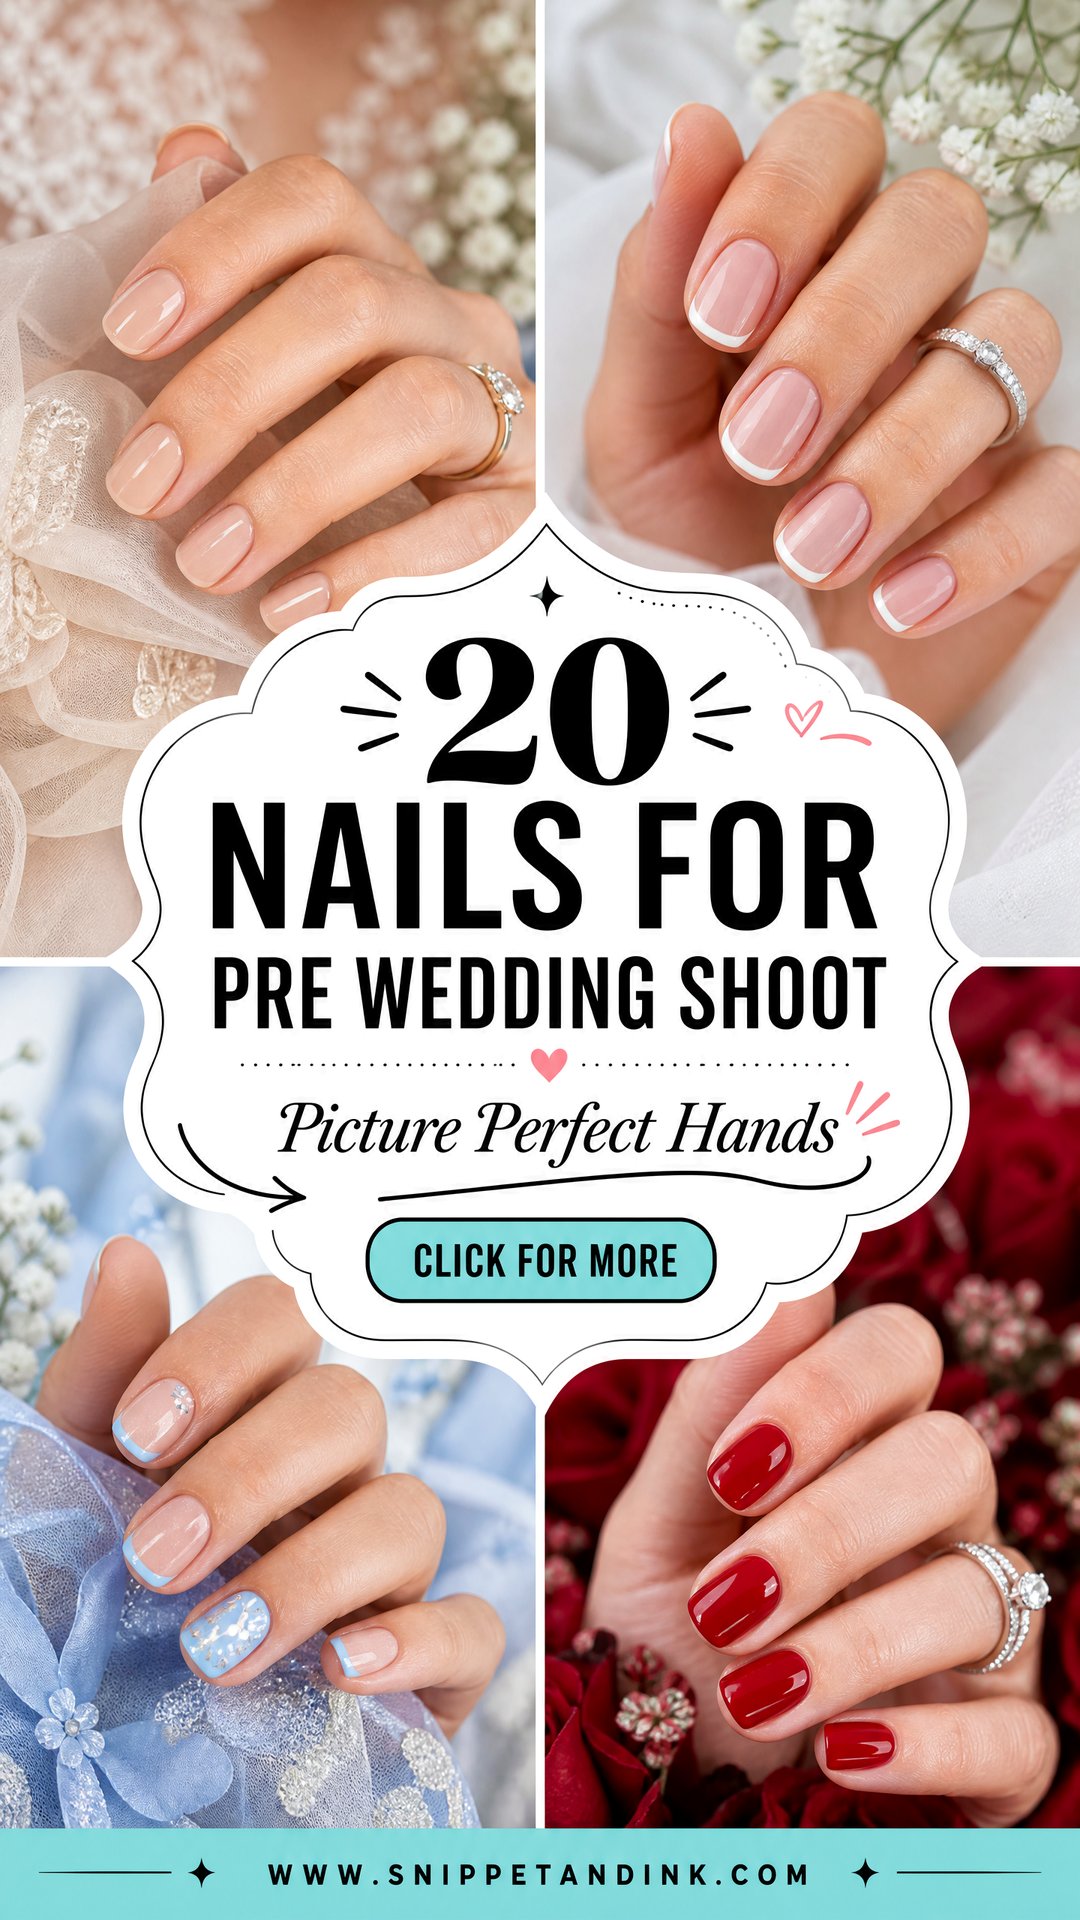
A pre wedding shoot is often the first time anyone points a lens at your hands for an hour straight. Ring close-ups, a palm resting on a lapel, fingers wrapped around bouquet stems: each frame shows your nails from a distance nobody normally sees them at. When I plan a set for a shoot, I design for that distance first. The sets below lean on milky bases, hairline French tips, pearl chrome and small florals because they read clean at arm’s length and still hold up a few inches from the lens. None of them needs long extensions, and each can be adjusted to your nail shape and the clothes you’re bringing.
Planning a Manicure Around the Macro Lens
Photographers shooting rings and hands often use a macro lens or crop in tight, and at that distance a manicure gets judged on details you’d never notice across a table. What shows: cuticles, the line where polish meets skin, any flooding into the sidewalls, an uneven free edge, dry knuckles and ridges under sheer colour. What barely shows: the tiny difference between two similar nudes. So I put most of the appointment time into prep and clean edges, not into agonising over the shade card.
When to book
I’d book gel one to two days before the shoot. Same-day appointments can leave cuticles a little pink from prep, and that redness reads on camera. Go much earlier than four or five days and you risk visible regrowth at the base and small wear along the tips. If you’re using regular polish instead of gel, paint it the evening before so it has the night to harden, and be careful with it until the shoot.
Shape and length next to the ring
Your ring is the hero of half these frames, so I look at the stone before choosing a shape. Round and oval stones sit naturally with oval and almond nails, while emerald and princess cuts look tidy beside squoval or soft square. Consistency matters more than length. Ten nails of the same length look polished; one shorter nail from a recent break pulls the eye straight to it. If one breaks the week before, I’d rather file all ten down a little than extend just one.
What to bring to the appointment
- Photos of each outfit, or a scrap of the fabric if there’s lace or embroidery to match
- Your engagement ring, so shades can be checked against the metal and the stone
- A note on the location and time of day, since studio light, garden shade and city lights at night all change how chrome and glitter behave
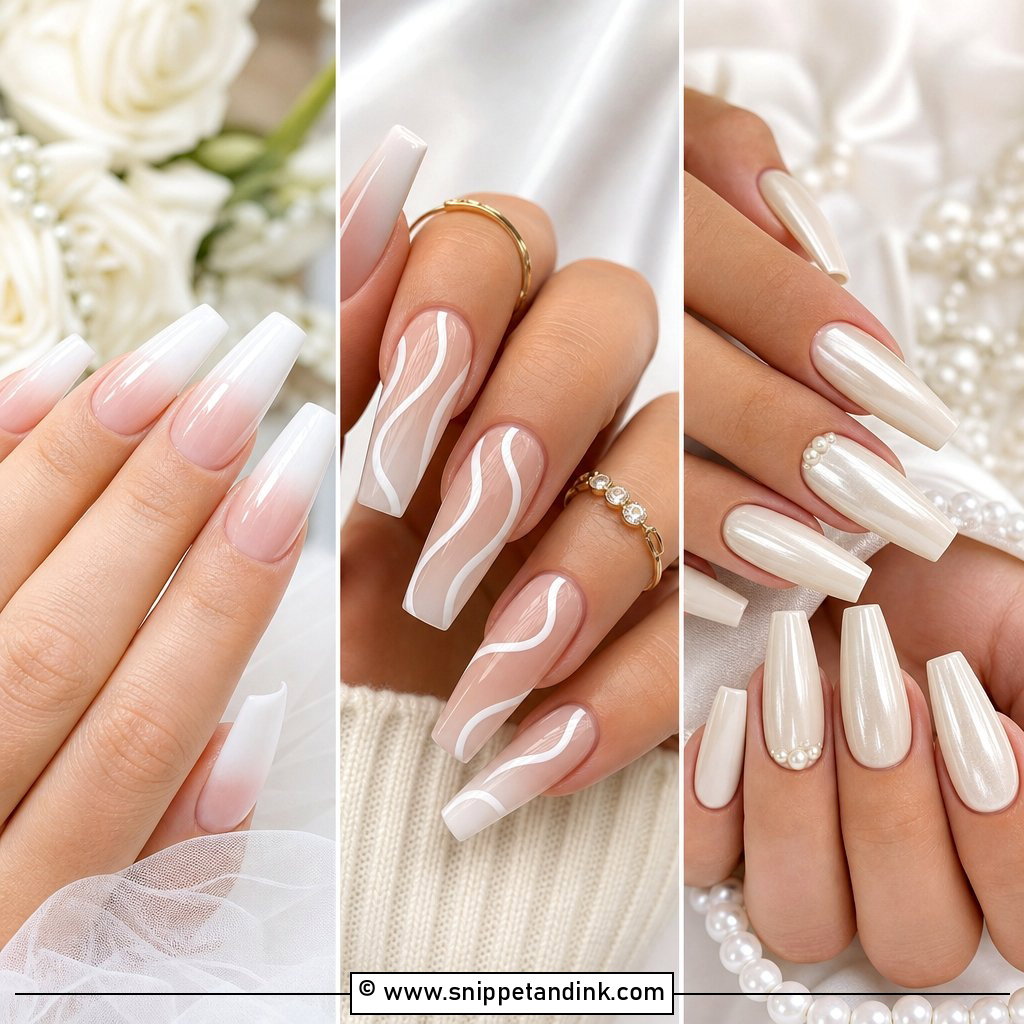
1. Milky White Pre Wedding Shoot Nails
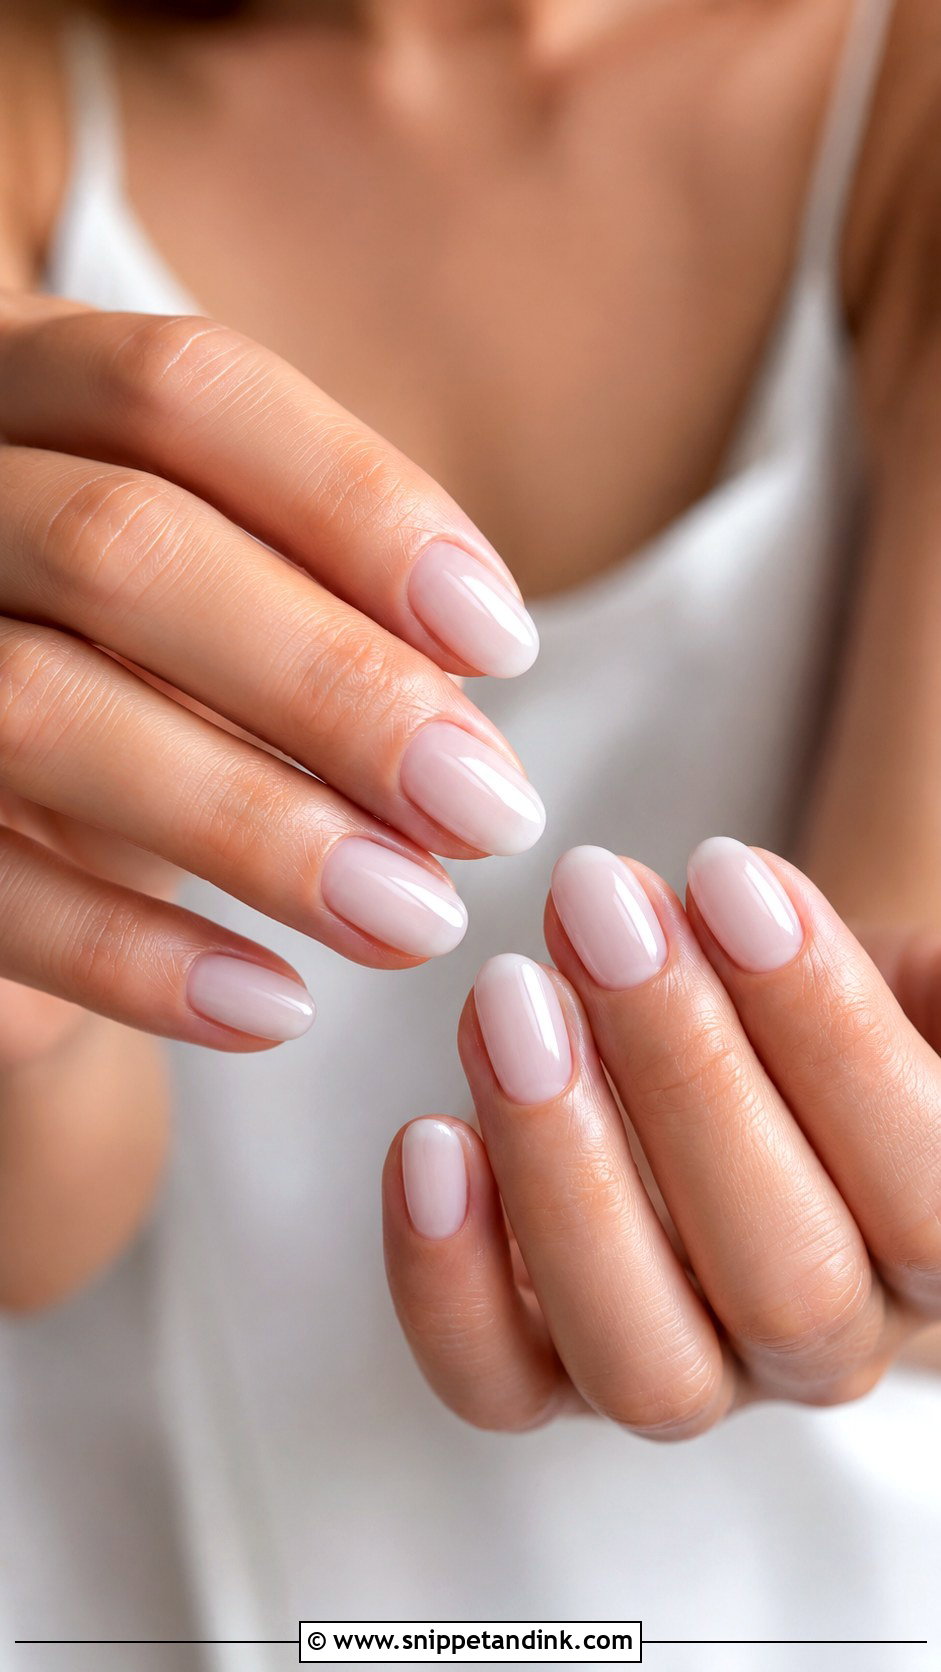
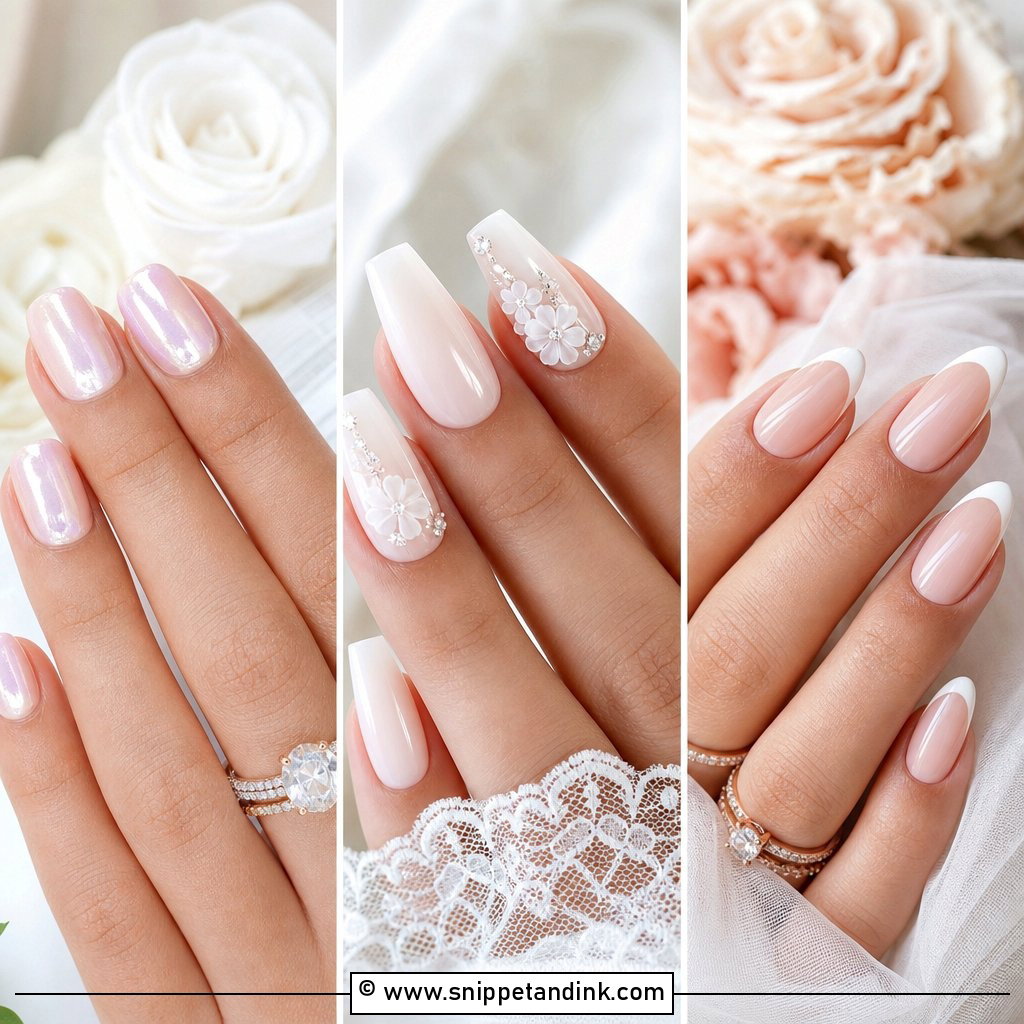
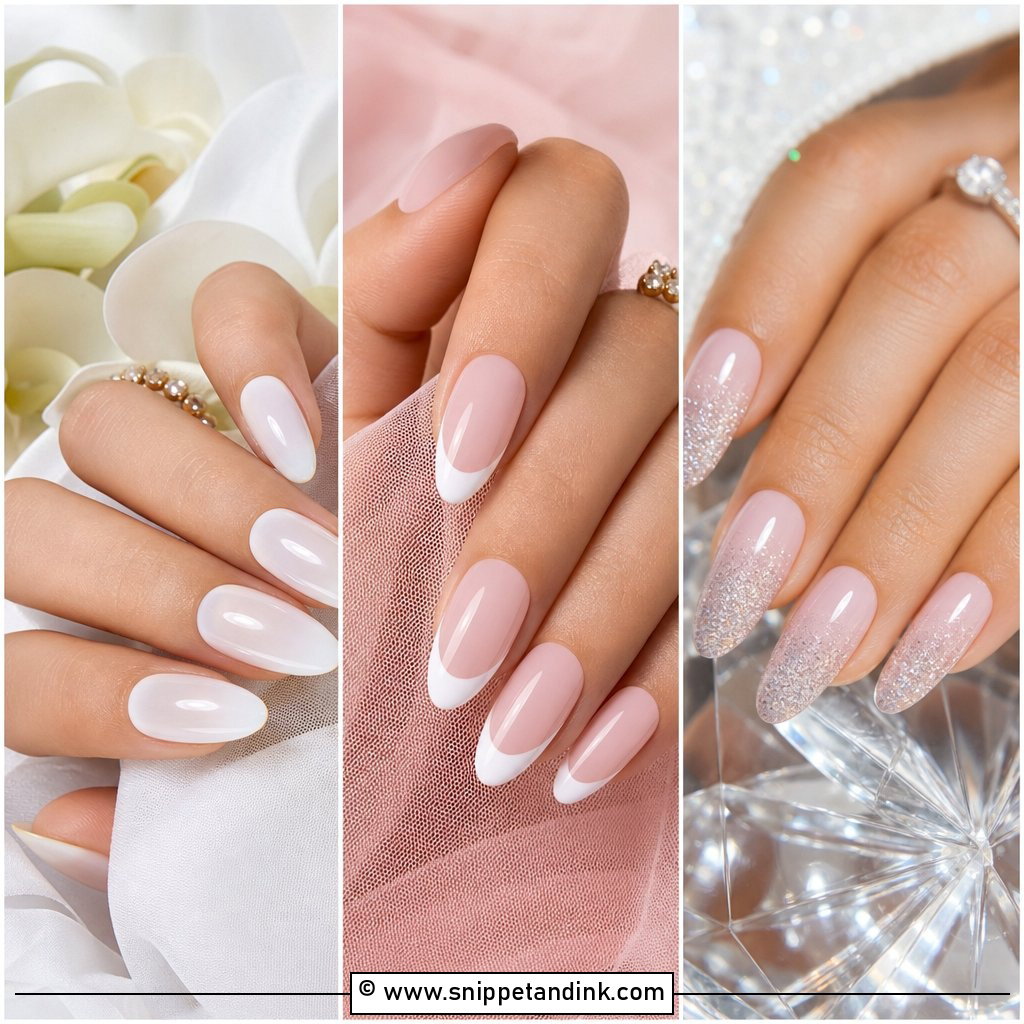
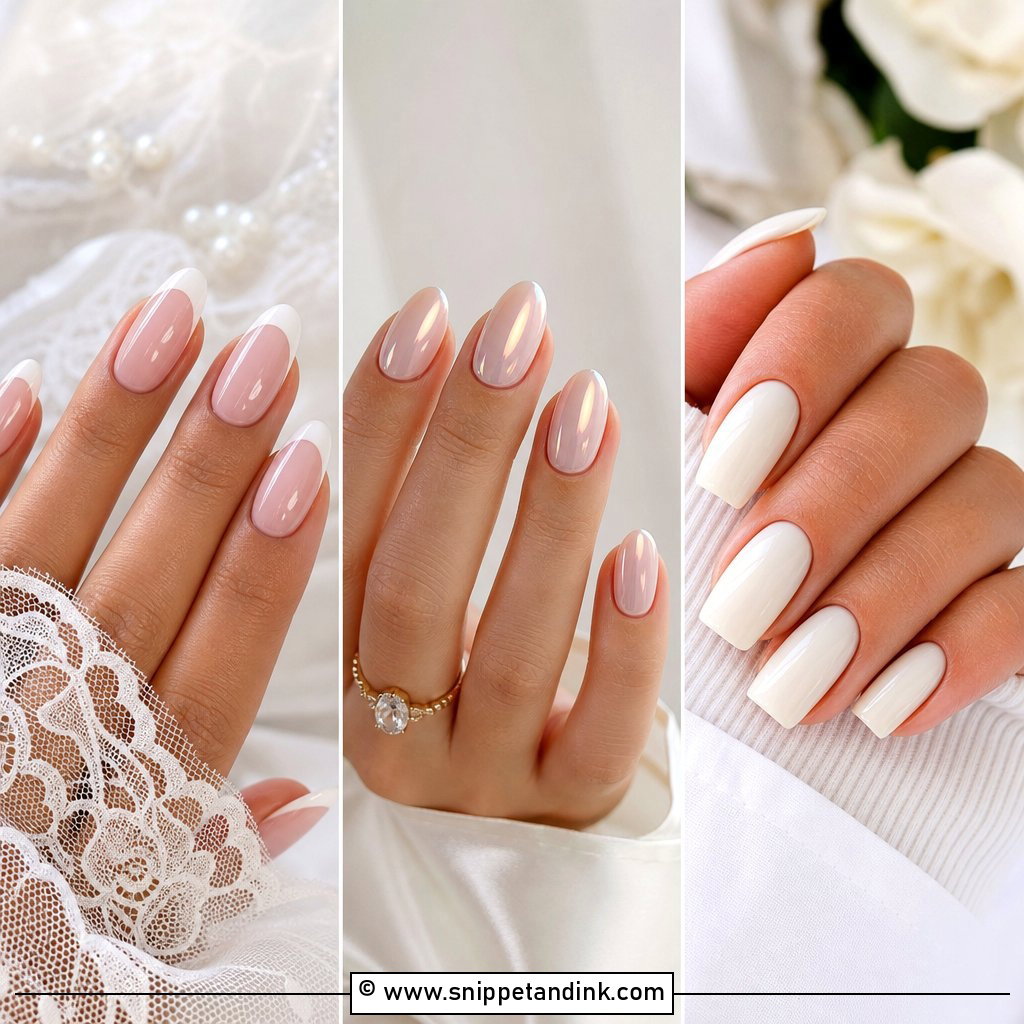
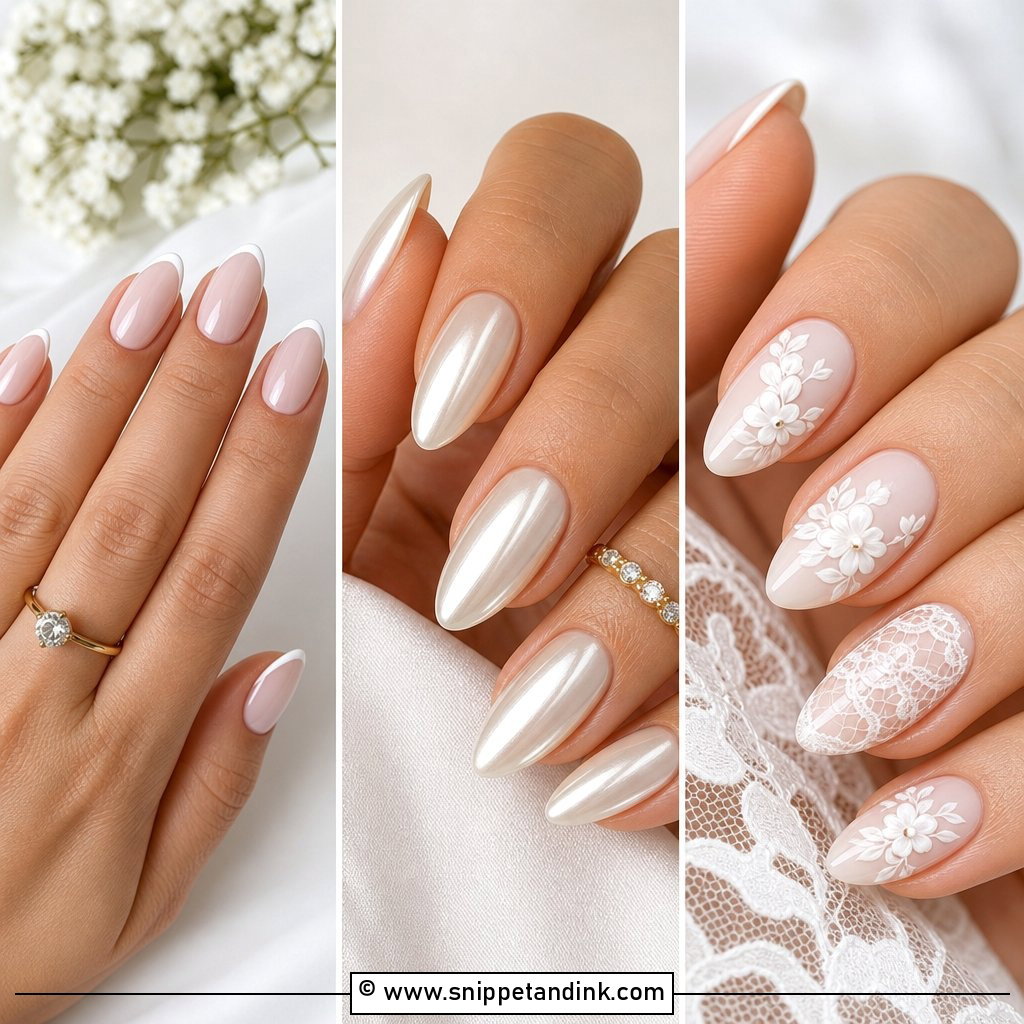
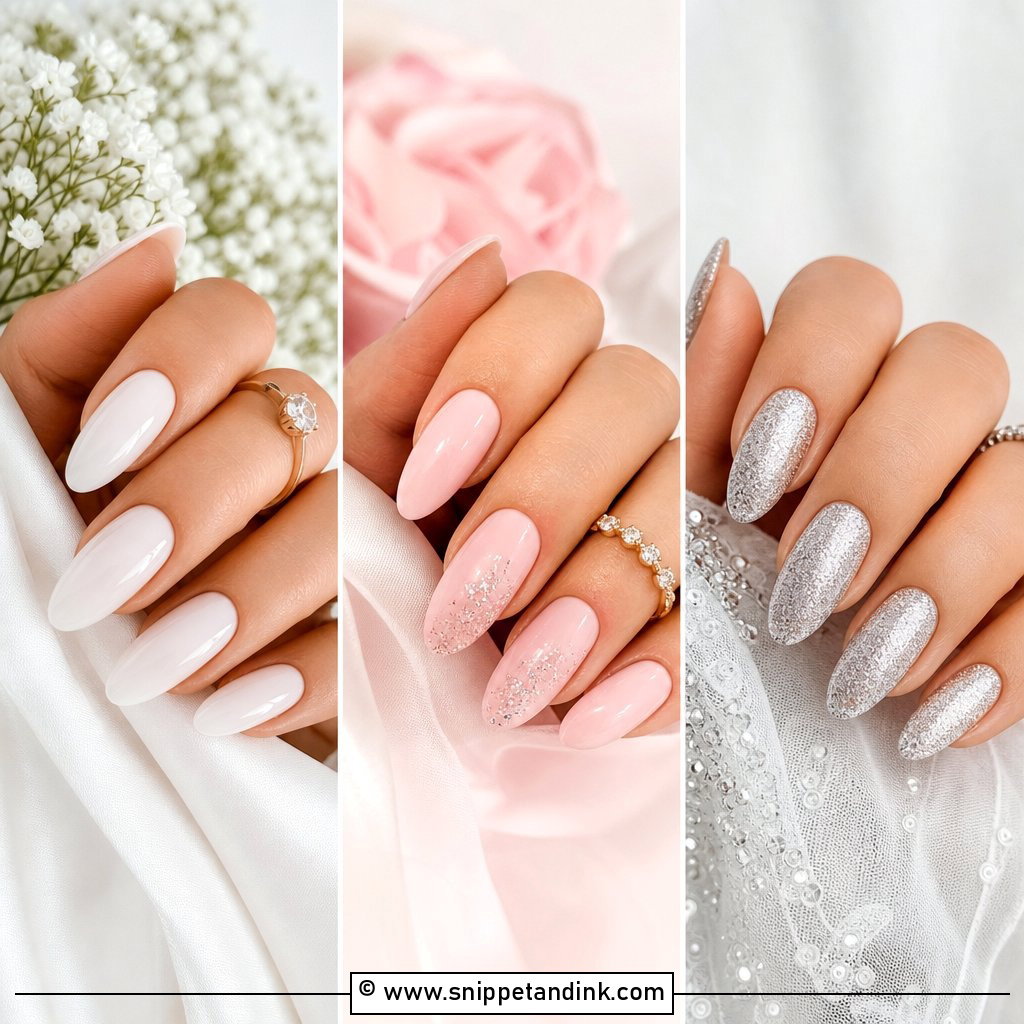
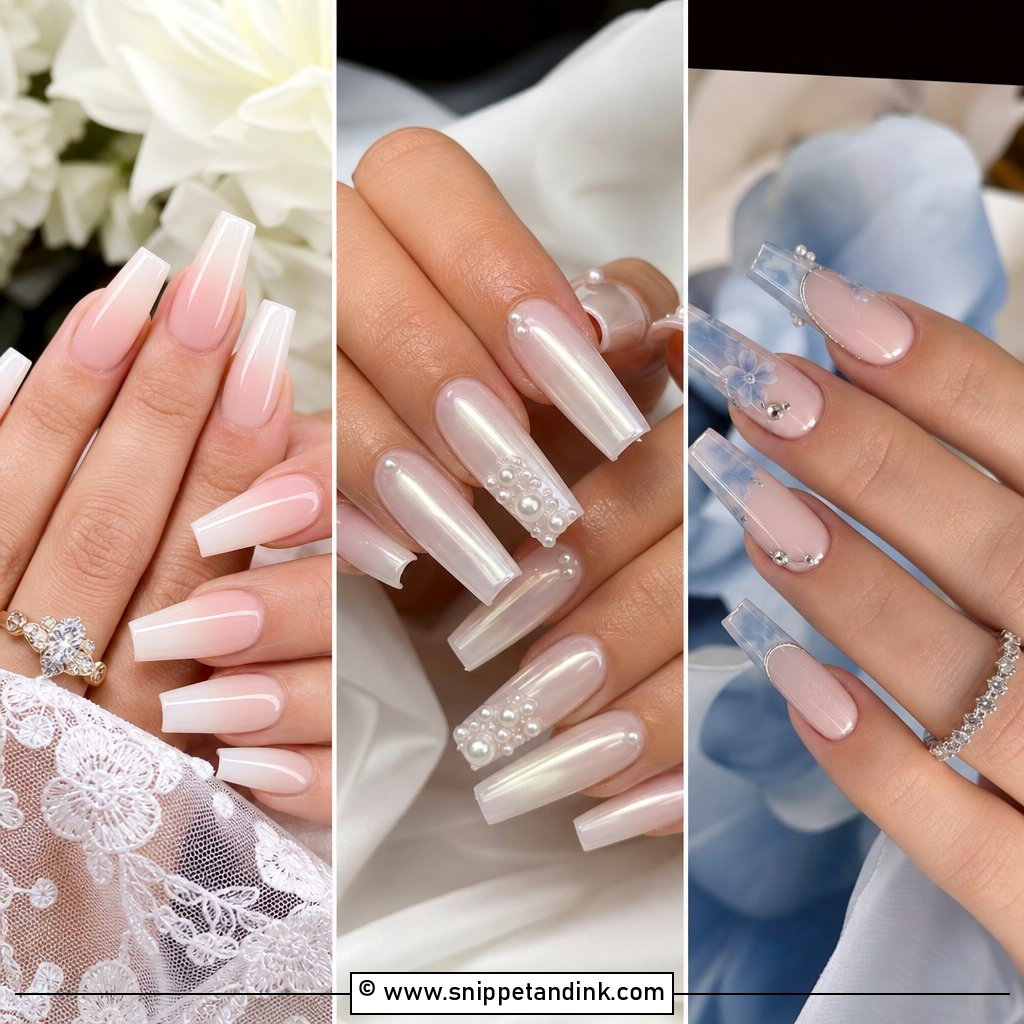
Milky white nails are the set I reach for most when someone tells me they’re changing outfits three times. A semi-sheer white lets a little of the natural nail show through, so it never looks like correction fluid against the skin the way an opaque white can under flash. I build it in two thin coats rather than one thick one, because a heavy milky layer pools at the sidewalls and the camera picks up that ridge. Short oval, almond and medium square nails all suit it. If you want one detail, a single tiny pearl on the ring finger is plenty.
2. Soft Pink French Tip Pre Wedding Nails
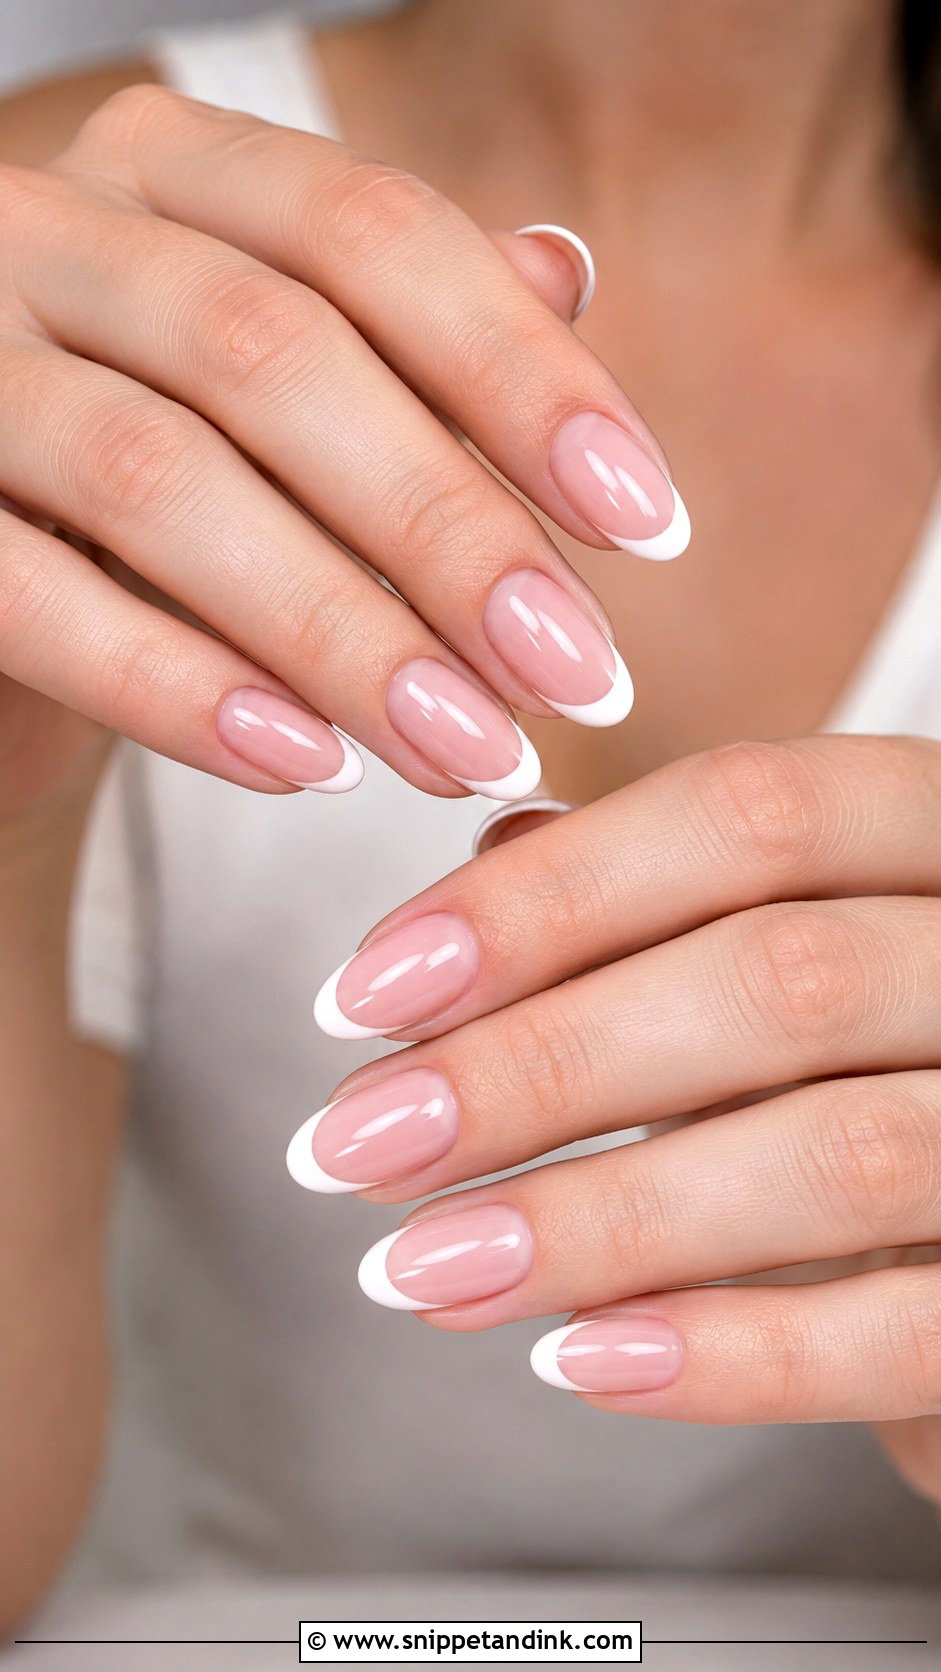
Keep the white line thin. That’s the whole trick with a soft pink French for photos, since a thick smile line looks chunky in a ring close-up and visually shortens the nail bed. I check where your free edge actually starts before painting the tip; a smile line that sits below it shows a stripe of pink, then white, then pink again when the camera gets close. The sheer pink base reads as healthy nail rather than colour, so it goes with cream, blush and deep jewel tones alike. Almond and oval shapes flatter it most, though short square nails carry it too.
3. Pearl Chrome Pre Wedding Shoot Nails
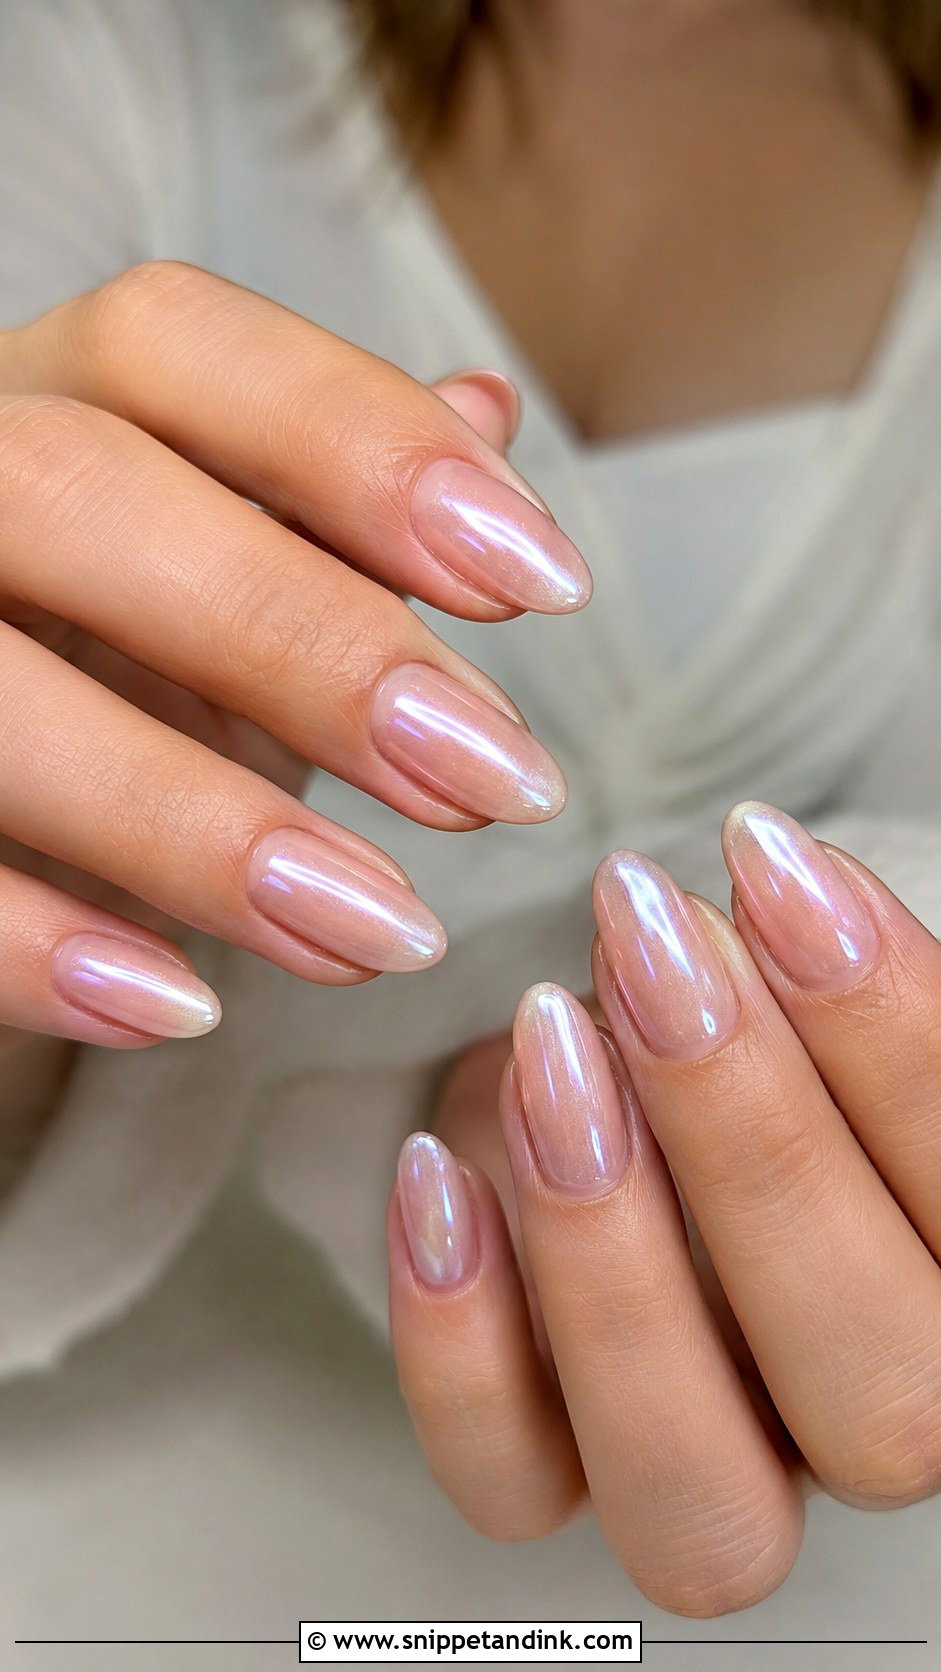
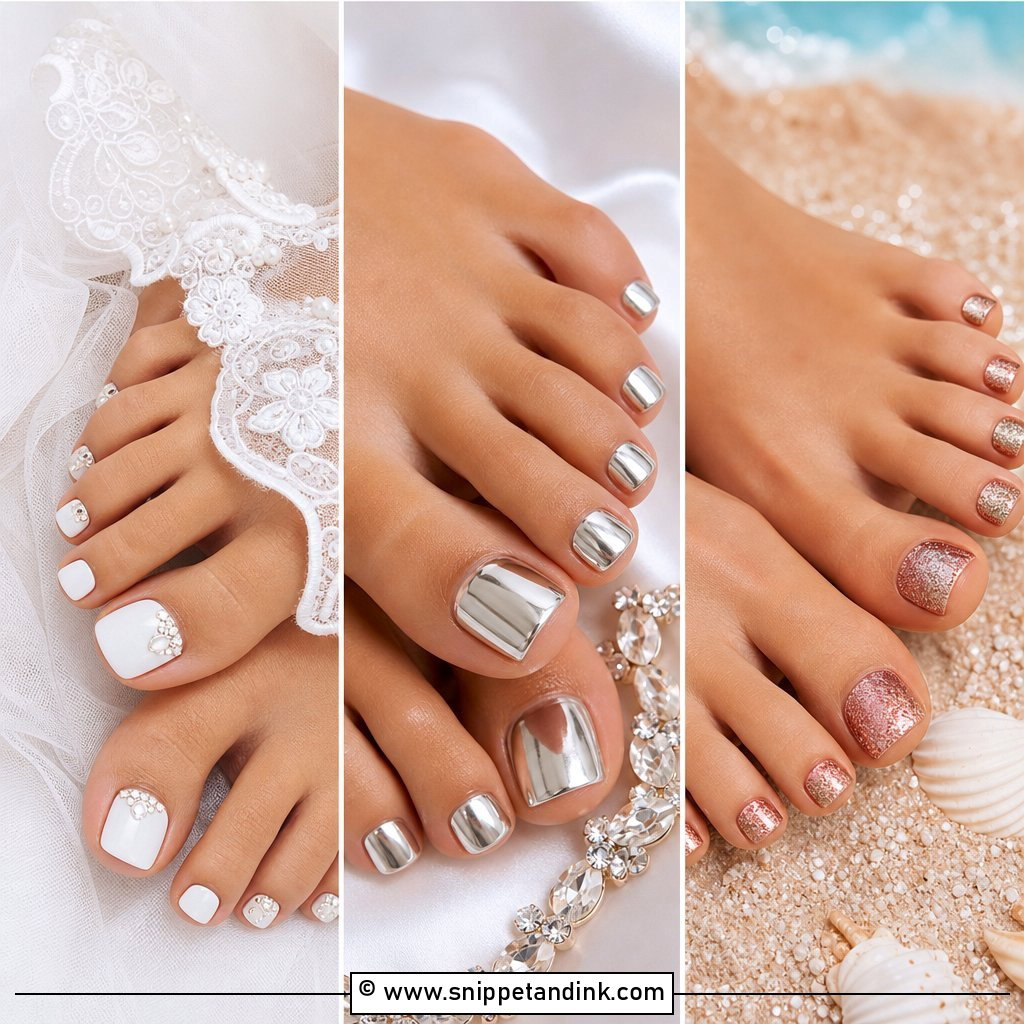
Pearl chrome is a fine powder buffed over a no-wipe top coat, and the base underneath decides almost everything. Over sheer pink or milky white it glows softly; over a darker nude it starts to look metallic, which isn’t usually what people want for a shoot. I seal the free edge carefully, because chrome is the finish most likely to show a scuff or lifted corner in a macro frame. Almond and squoval shapes show the sheen along the curve. Studio light and open shade treat it kindly, while harsh midday sun can flatten it to plain silver.
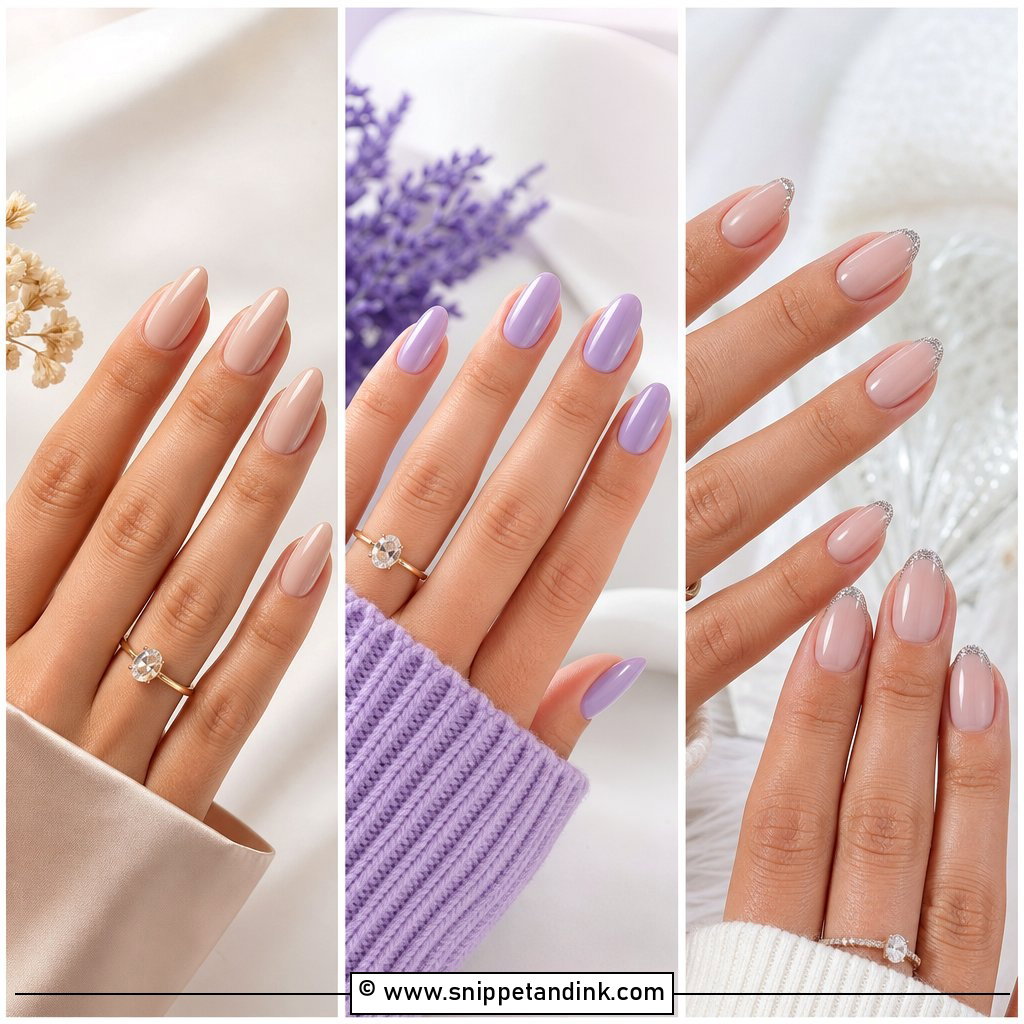
4. Nude Almond Pre Wedding Nails
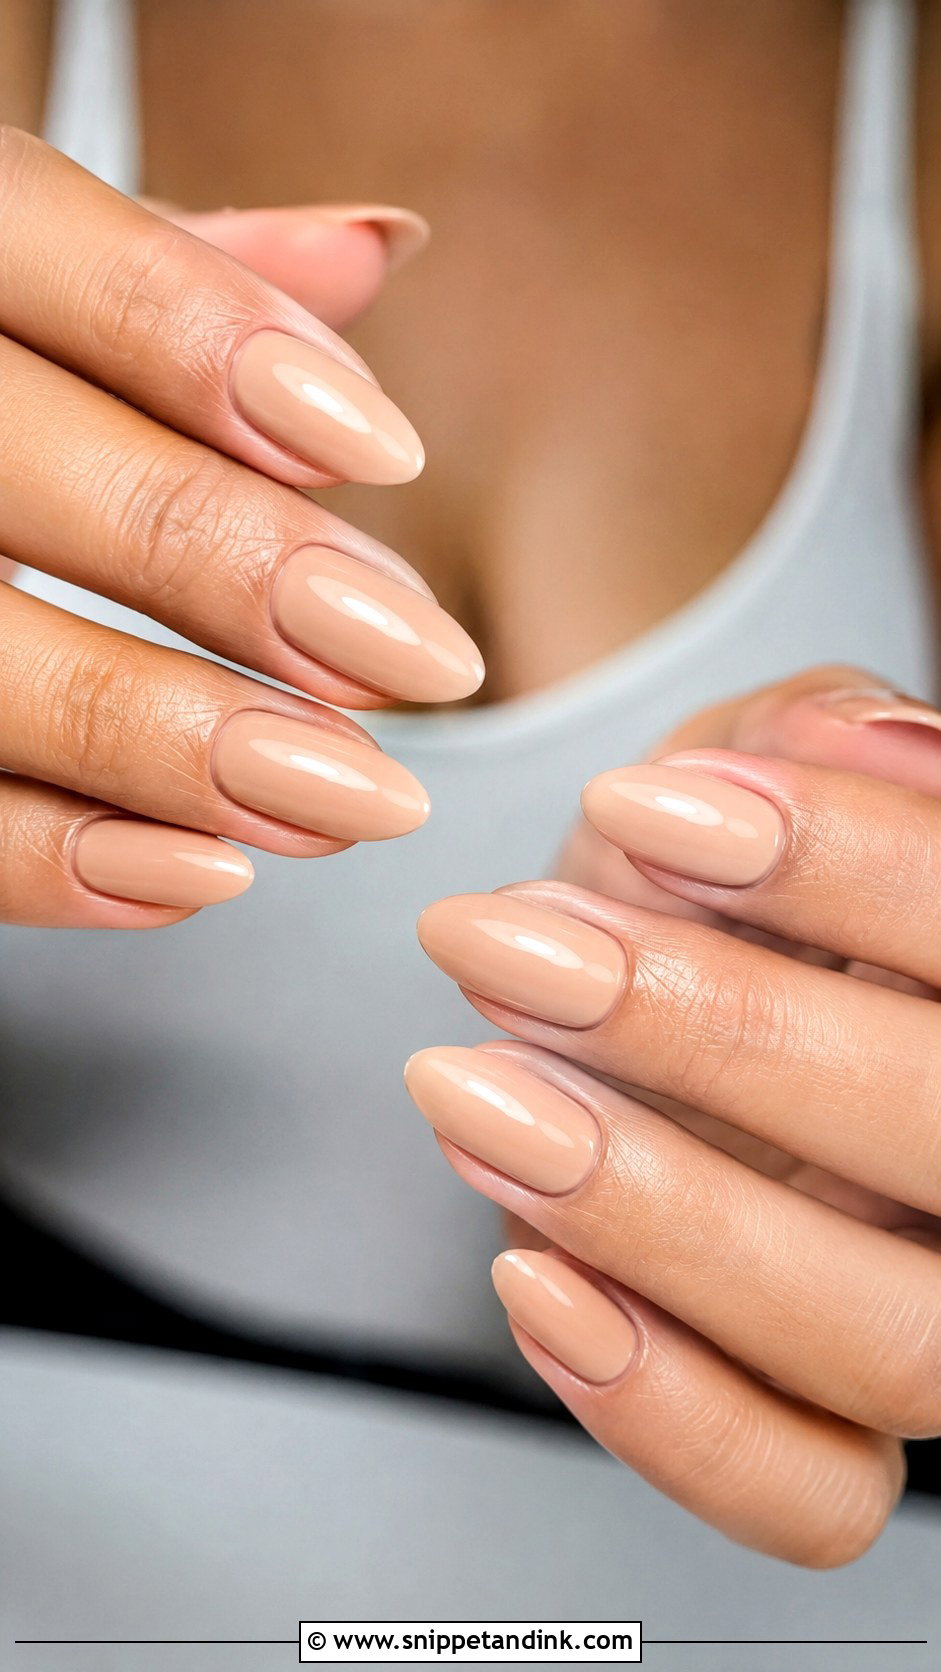
Nude only works if it’s your nude. Fair skin usually suits a pink-beige, medium skin comes alive with peachy nudes, and deeper skin looks richest in caramel or cocoa. The one I’d steer anyone away from is a nude lighter than their skin, which makes fingers look grey and chalky on camera. I swatch two or three shades on the actual nail during the appointment and look at them by a window before committing. Paired with an almond shape, which lengthens the fingers, it’s the easiest option for a shoot with several outfit changes, because nothing clashes with it.
5. Baby Boomer Ombre Pre Wedding Nails
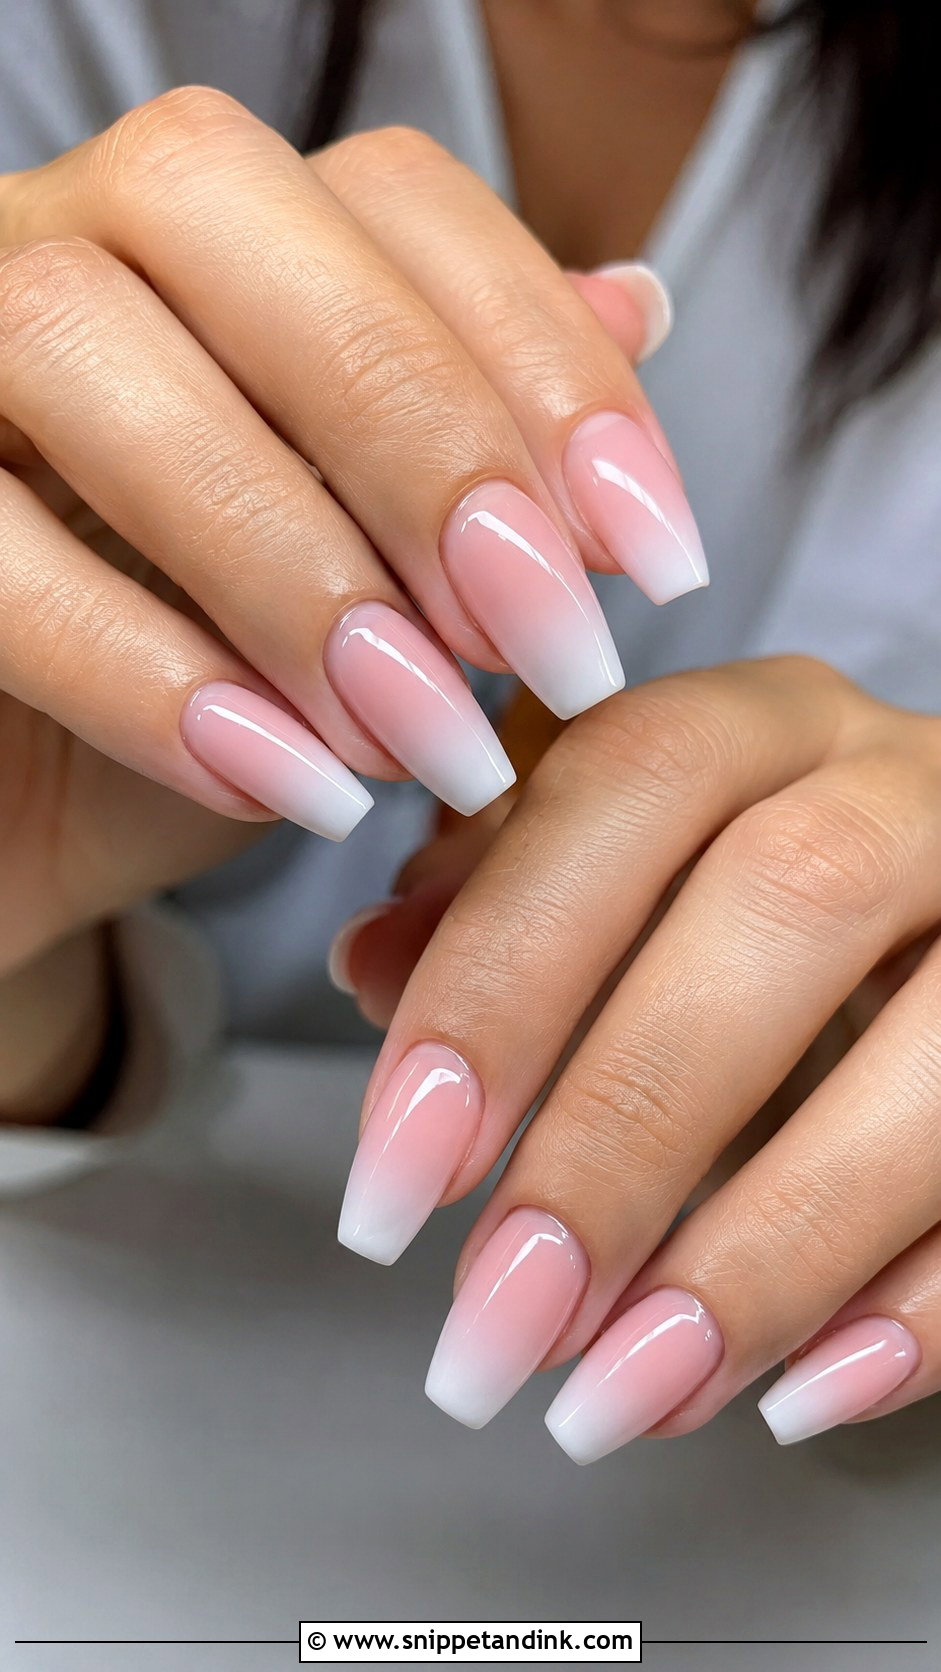
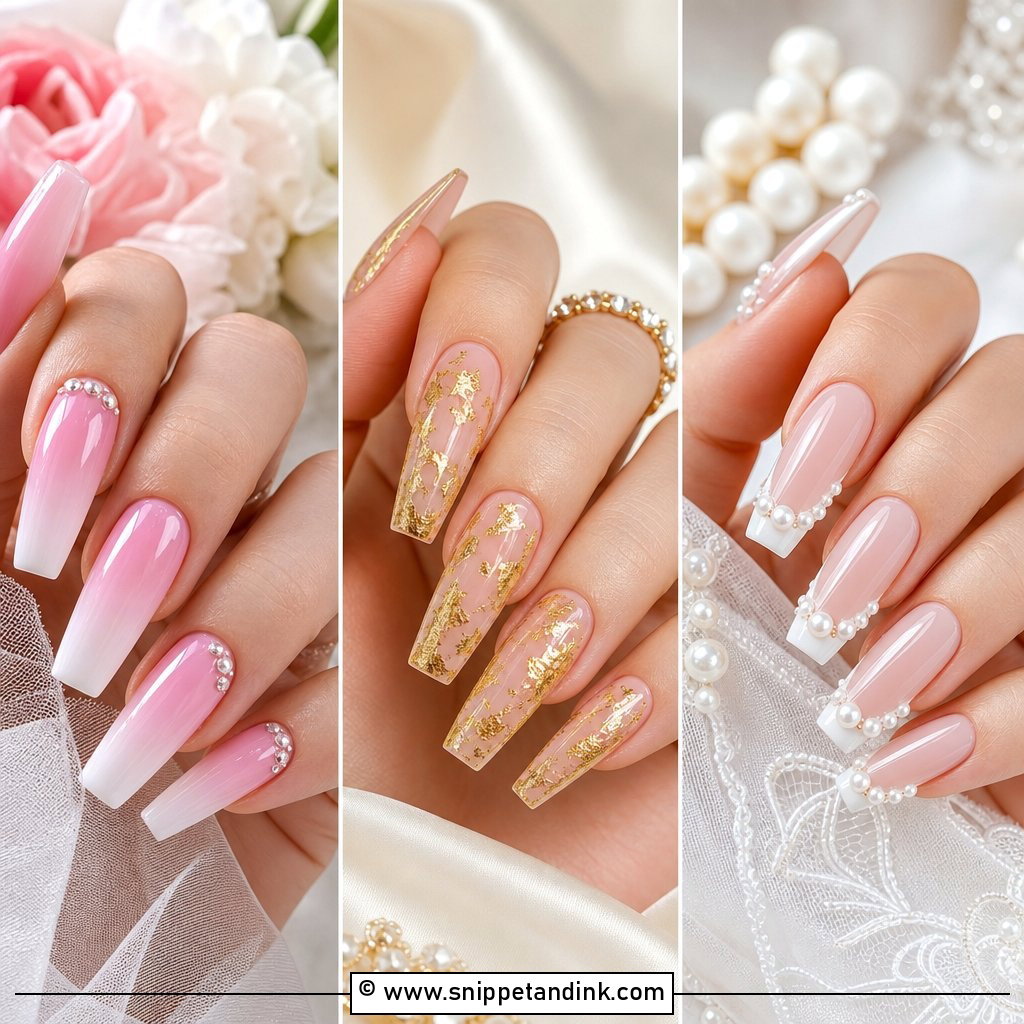
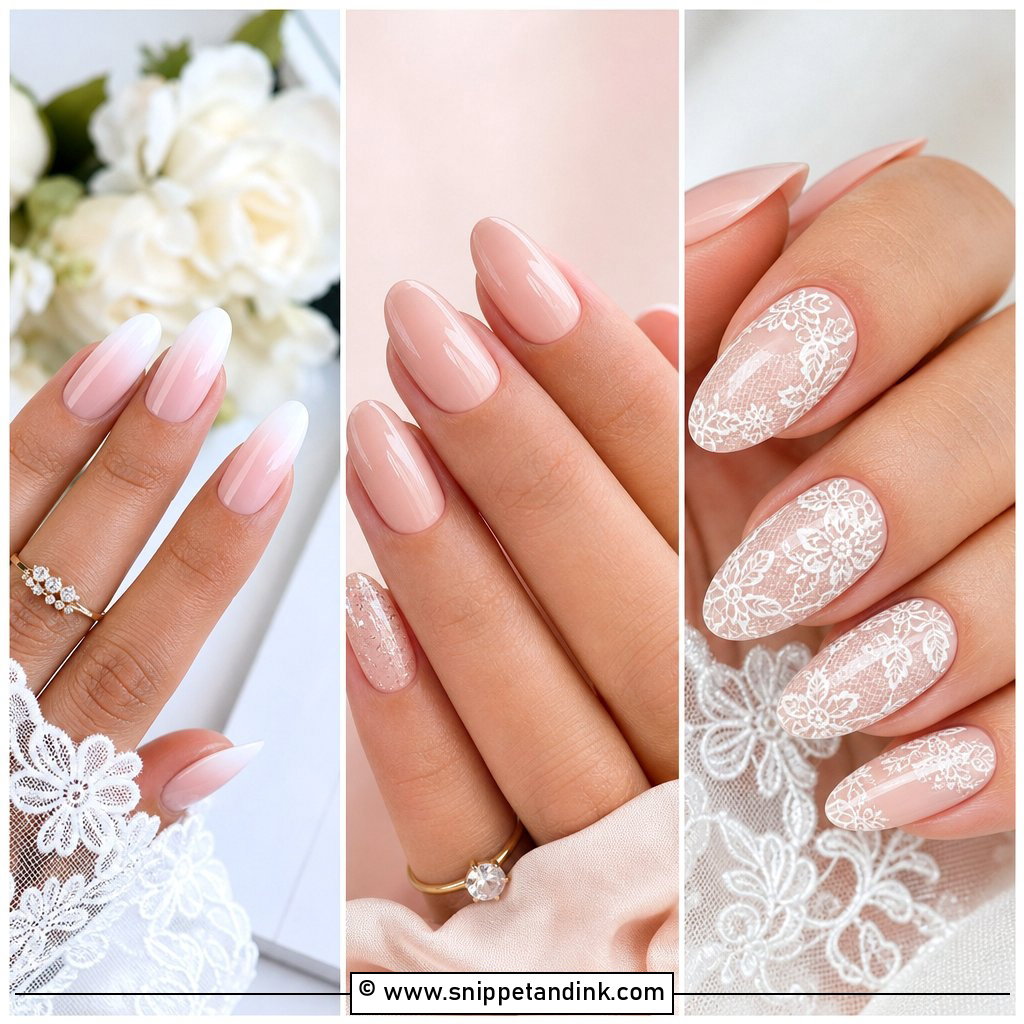
Baby boomer ombre nails blur a pink base into a white tip with no visible line, so they read as a softer cousin of the French. The fade is done with a sponge or by diffusing builder gel with a brush, and the part I watch is the midpoint: if the white creeps too far toward the cuticle, the nail looks cloudy rather than graduated. Medium almond, coffin and oval nails give the gradient room. On very short nails it compresses and can look like a smudge, so I’d choose something else there. A thin shimmer layer on top is optional and catches light during hand poses.
6. Sheer Pink Pre Wedding Shoot Nails
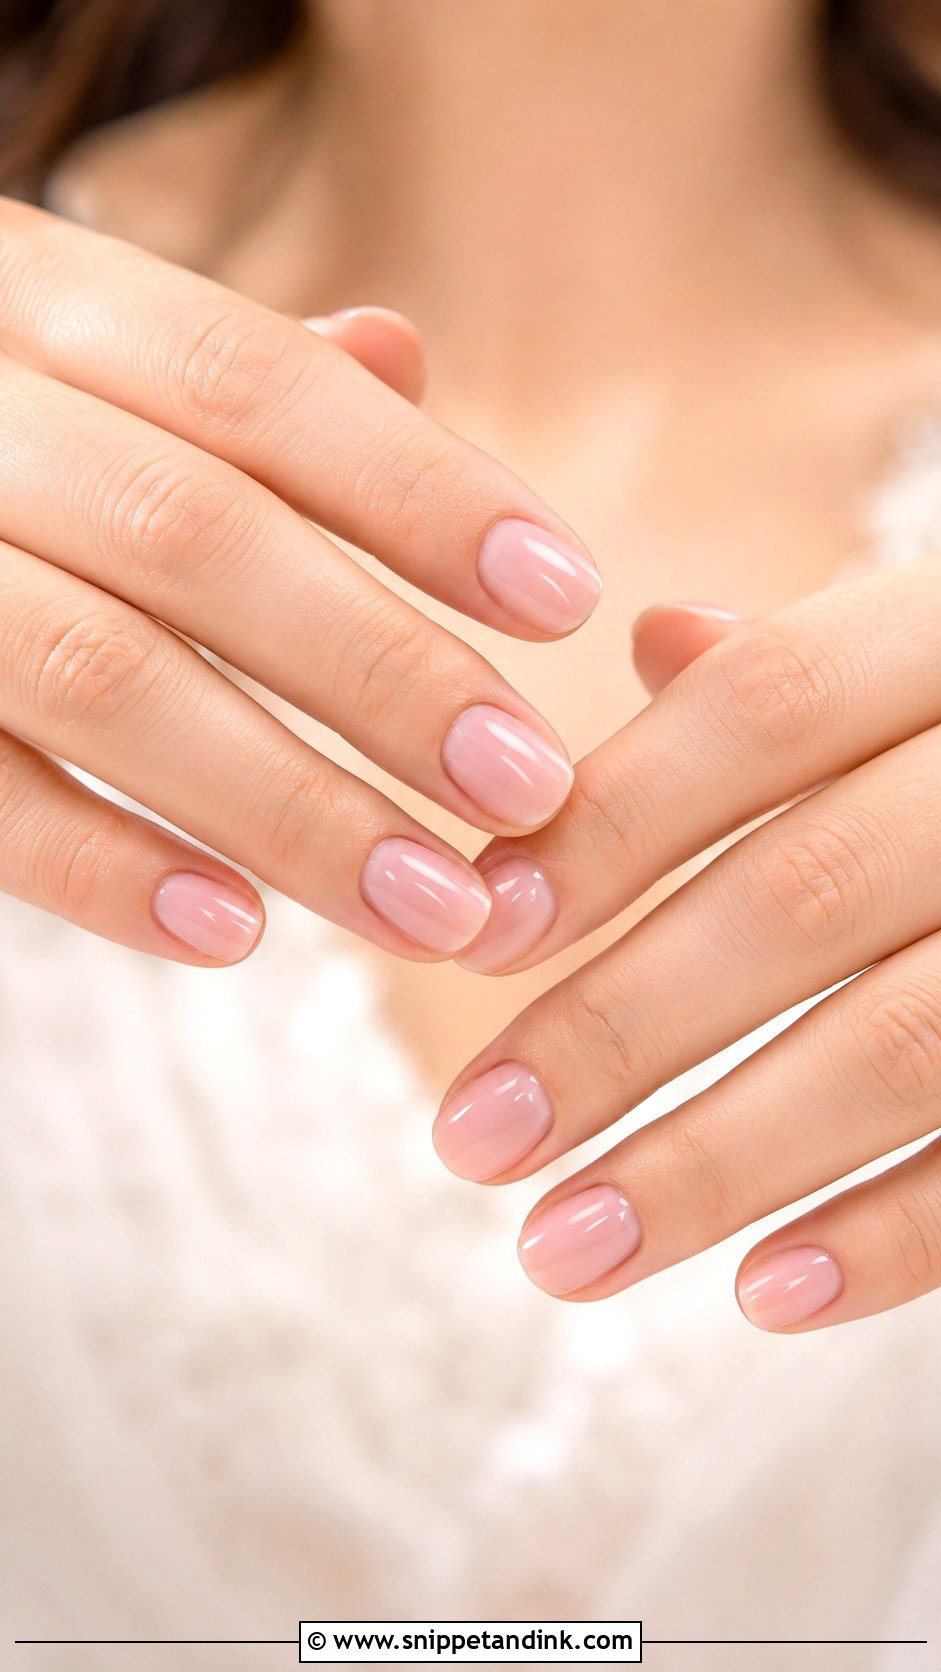
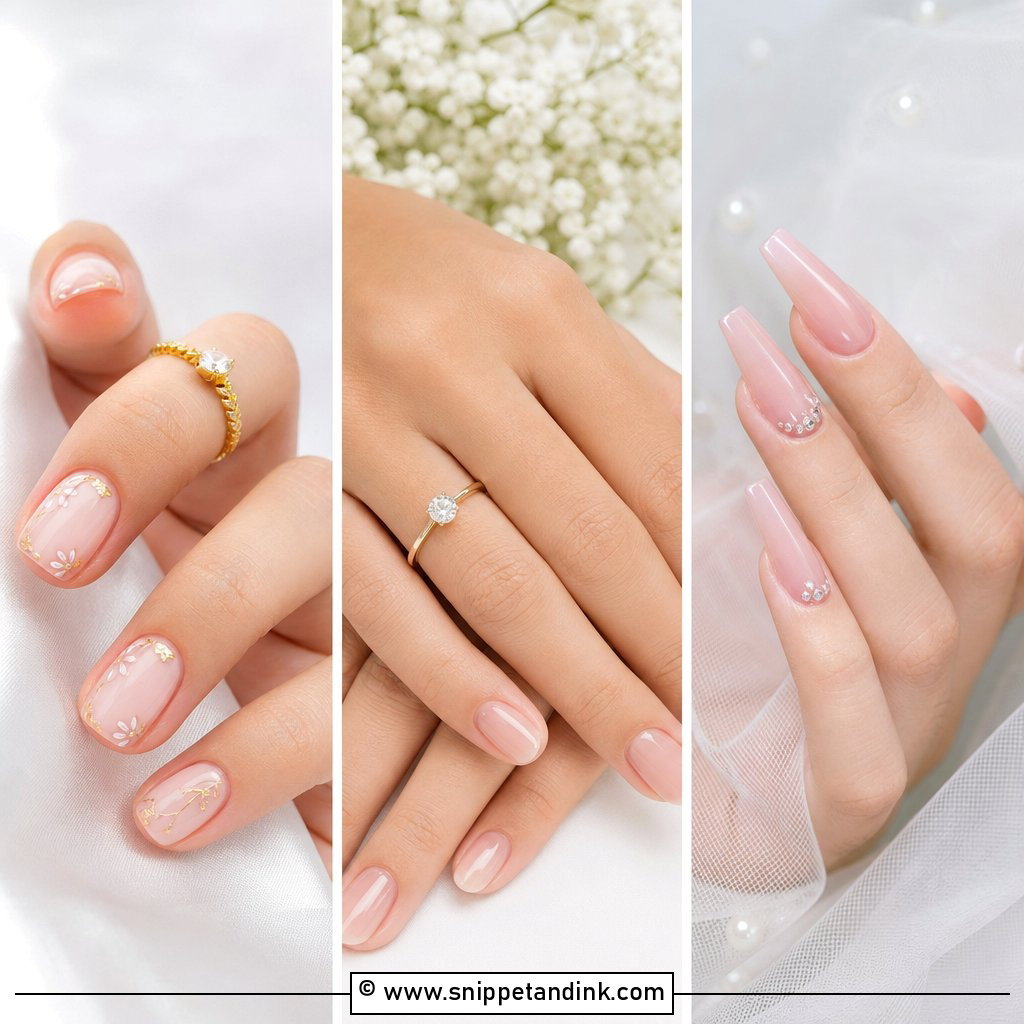
Sheer pink is the closest thing to bare nails that still looks finished. Because it’s translucent, it shows whatever sits underneath, which makes this the set where cuticle work and the condition of the nail plate matter most. I spend longer on prep for sheer pink than for anything opaque. It suits minimal shoots and ring-focused frames on short round, oval or almond nails, finished with a high-gloss top coat. It also won’t date your photos, which is a real argument for it.
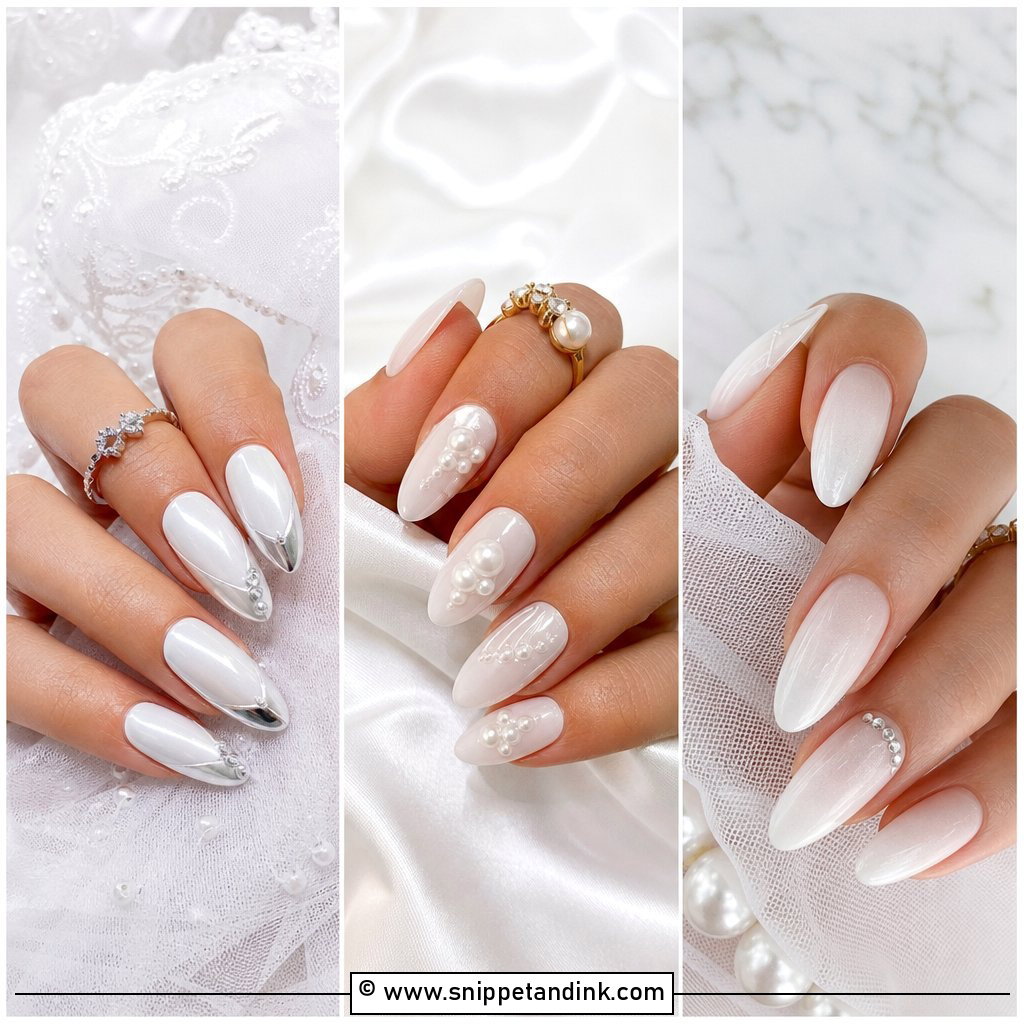
7. White Chrome French Pre Wedding Nails
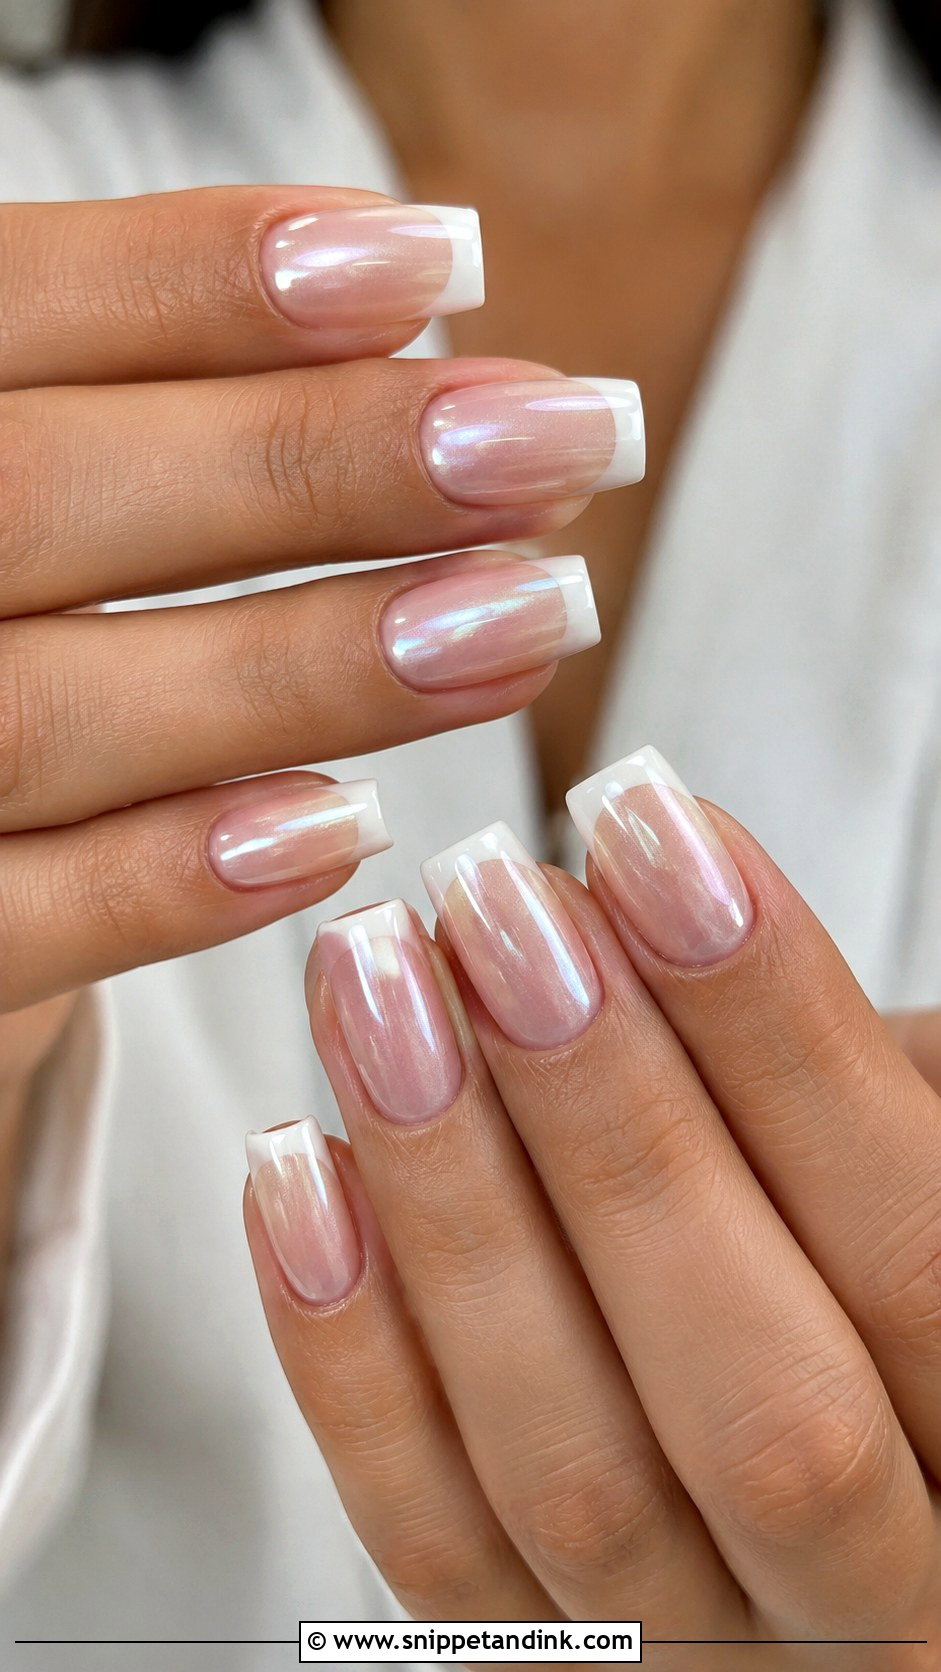
A white chrome French takes a classic tip and lays pearl chrome over it, on a sheer nude or pale pink base. It reads as a clear step up from a plain French without getting loud. Medium almond or square nails give the tip enough width to catch light, and under bright lighting the chrome shows as a soft band that looks good in ring frames. I’d only book this one with time to spare. Chrome exaggerates any wobble in the smile line, so it isn’t a design to rush.
8. Blush Pink Pre Wedding Nails With Pearls
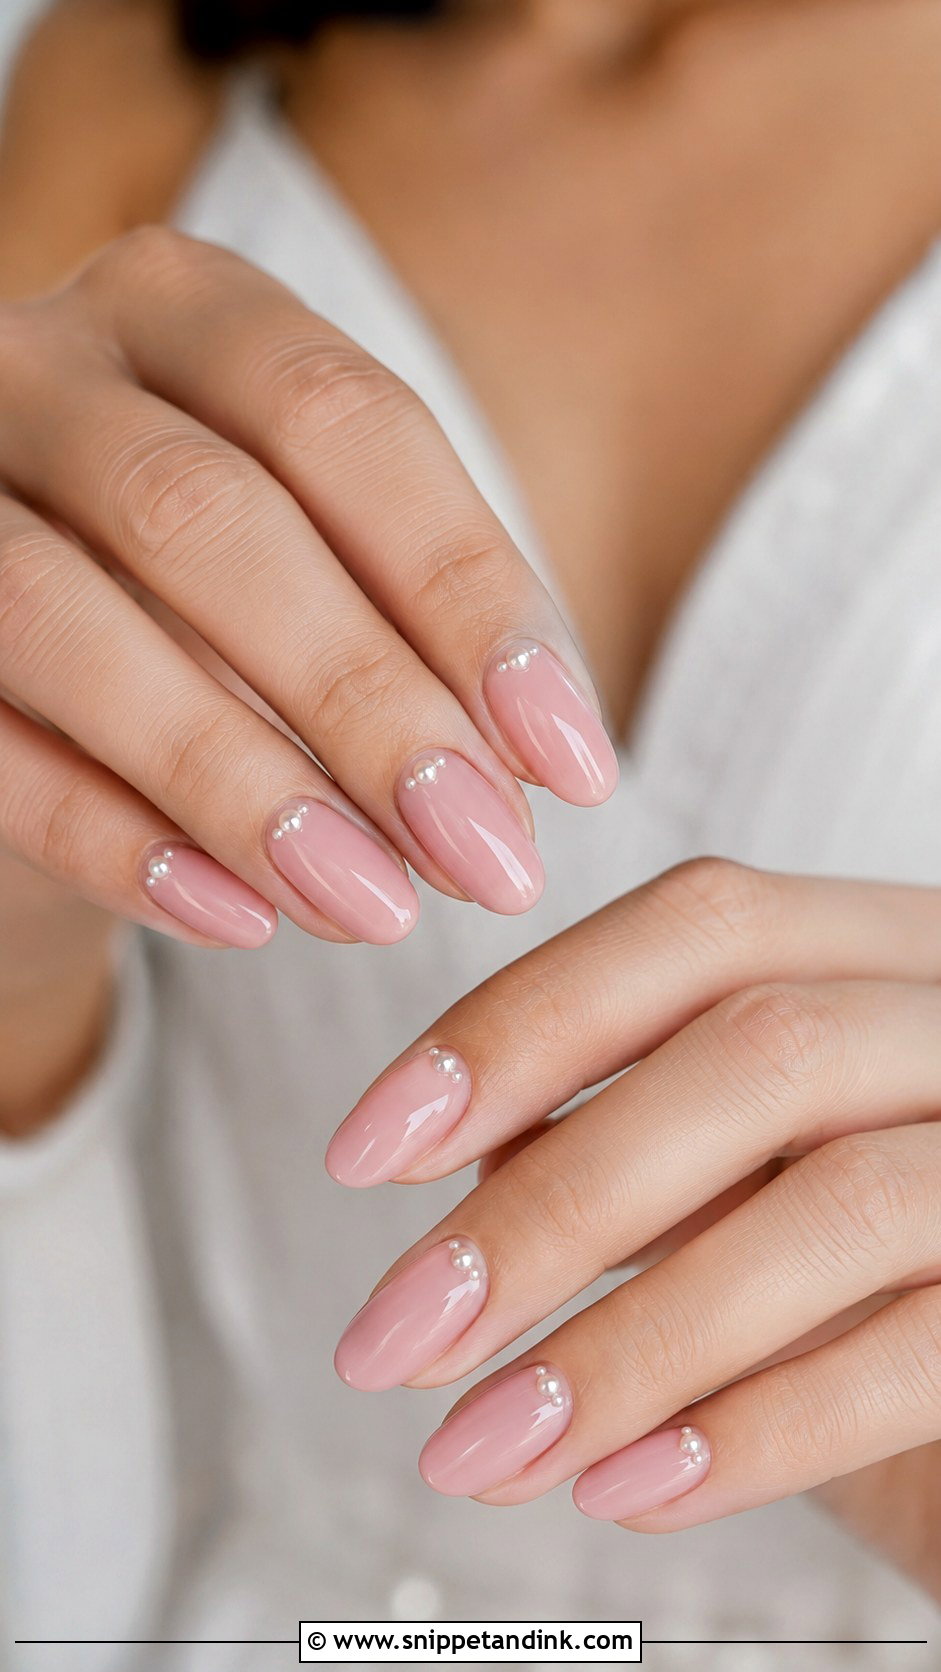
Pearls on nails are three-dimensional, and that’s both the appeal and the risk. On a blush base, one or two small pearls near the cuticle on a couple of fingers give texture you can actually see in close-ups; any more and the hand starts to look crowded. I set them into builder gel and cap them with top coat, since a pearl only pressed into the top layer can pop off when you grip a bouquet or catch it on lace. Almond, oval and short square shapes suit it, and it sits nicely against satin, tulle and pastels.
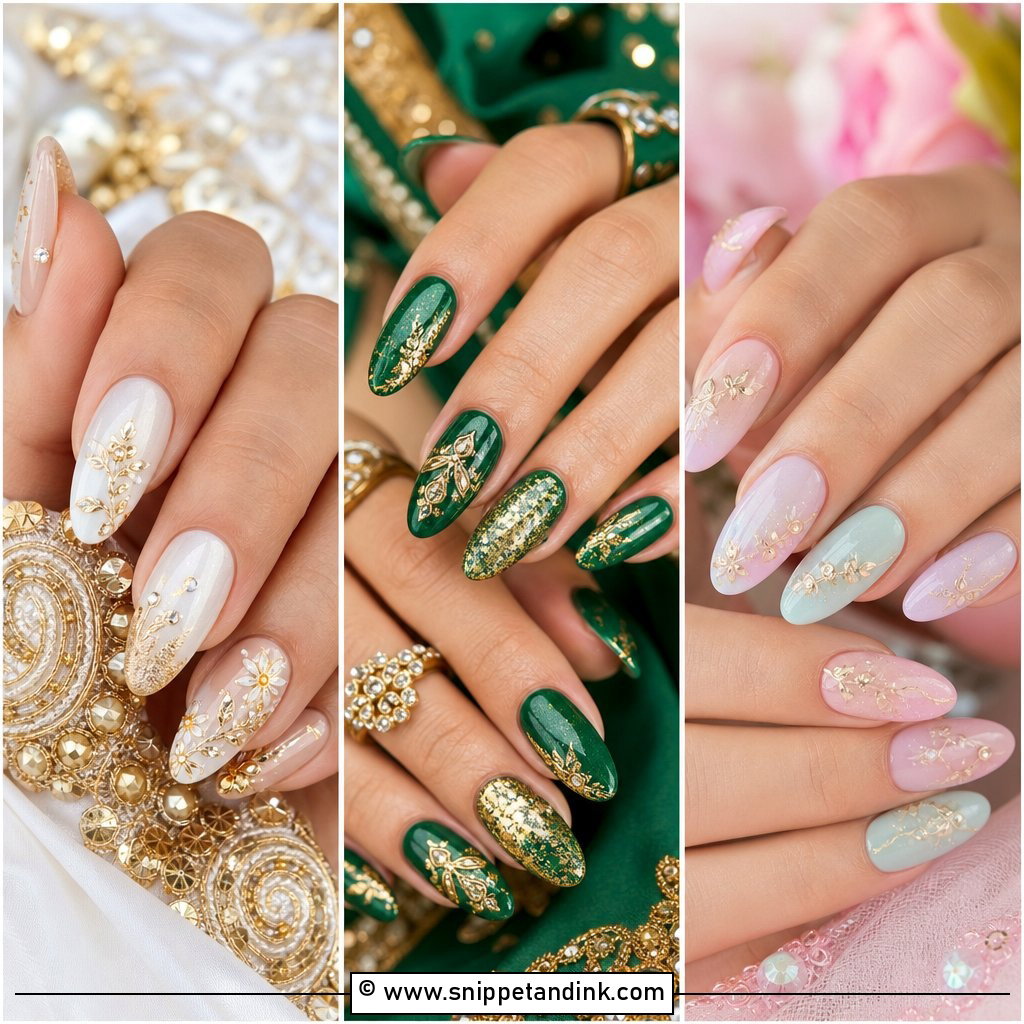
9. Minimal Floral Pre Wedding Shoot Nails
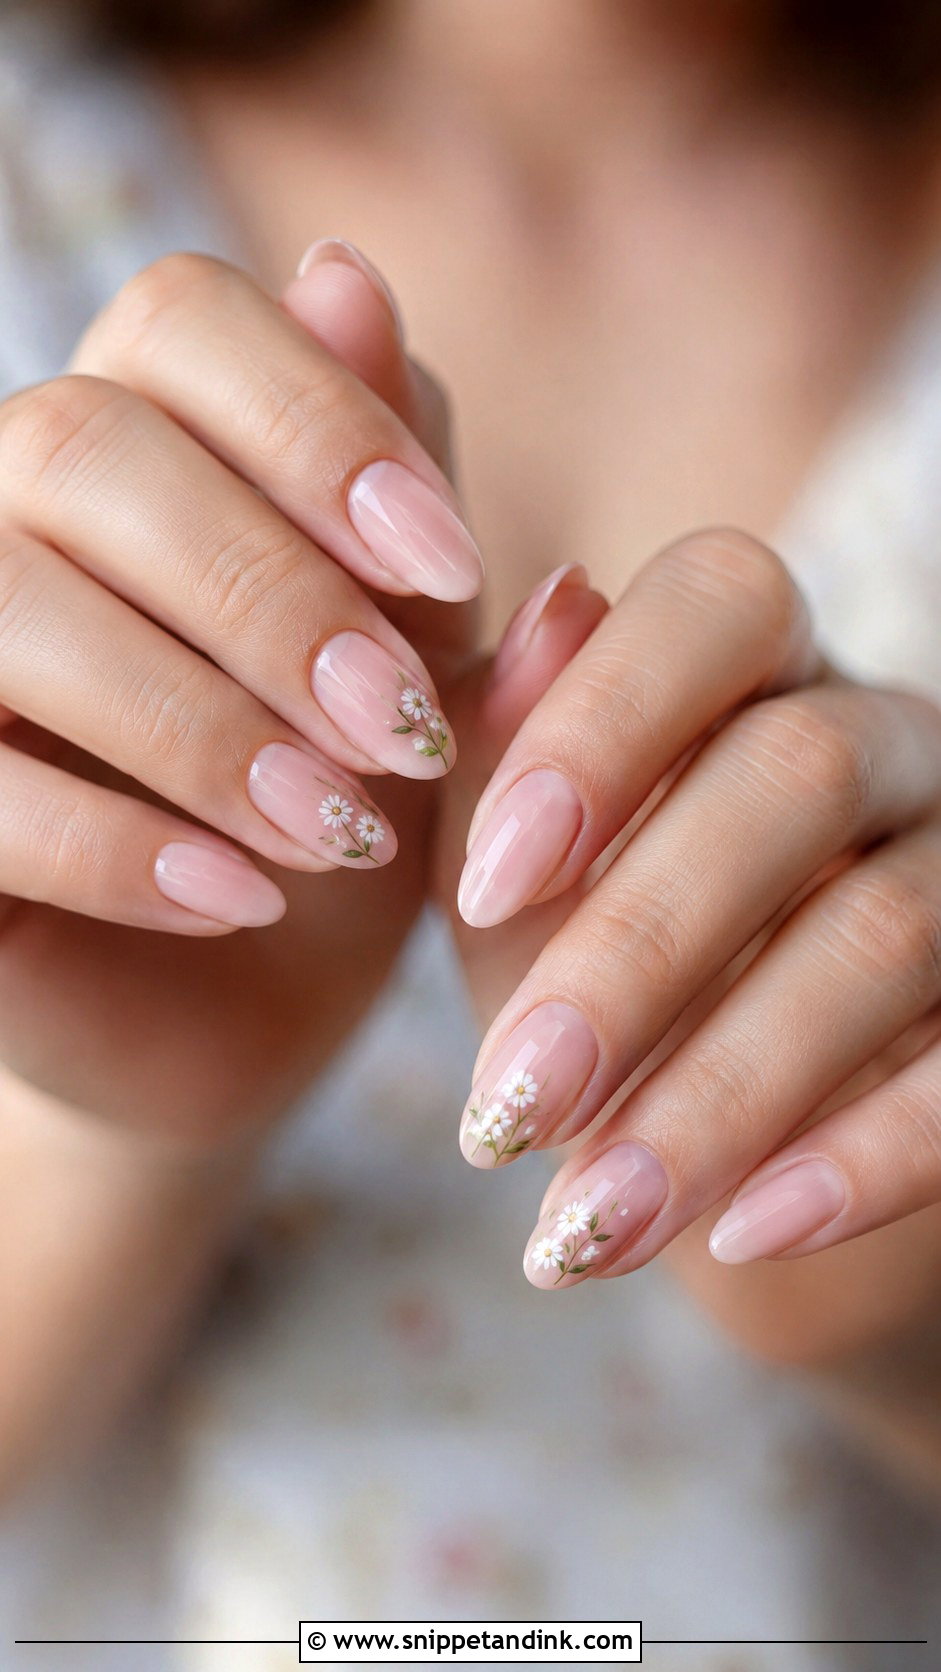
For a garden or outdoor shoot, I’d paint tiny white flowers on two or three nails over a sheer nude or pink base and leave the rest plain. Small petals, a leaf and dotted centres stay readable at a distance. Larger florals tend to look like stickers once the hand is in frame next to a printed dress. Almond and oval shapes give the motif a graceful line, and short nails keep it sweet. A glossy top coat over the art smooths the edges so they don’t catch the light unevenly.
10. Champagne Glitter Ombre Pre Wedding Nails
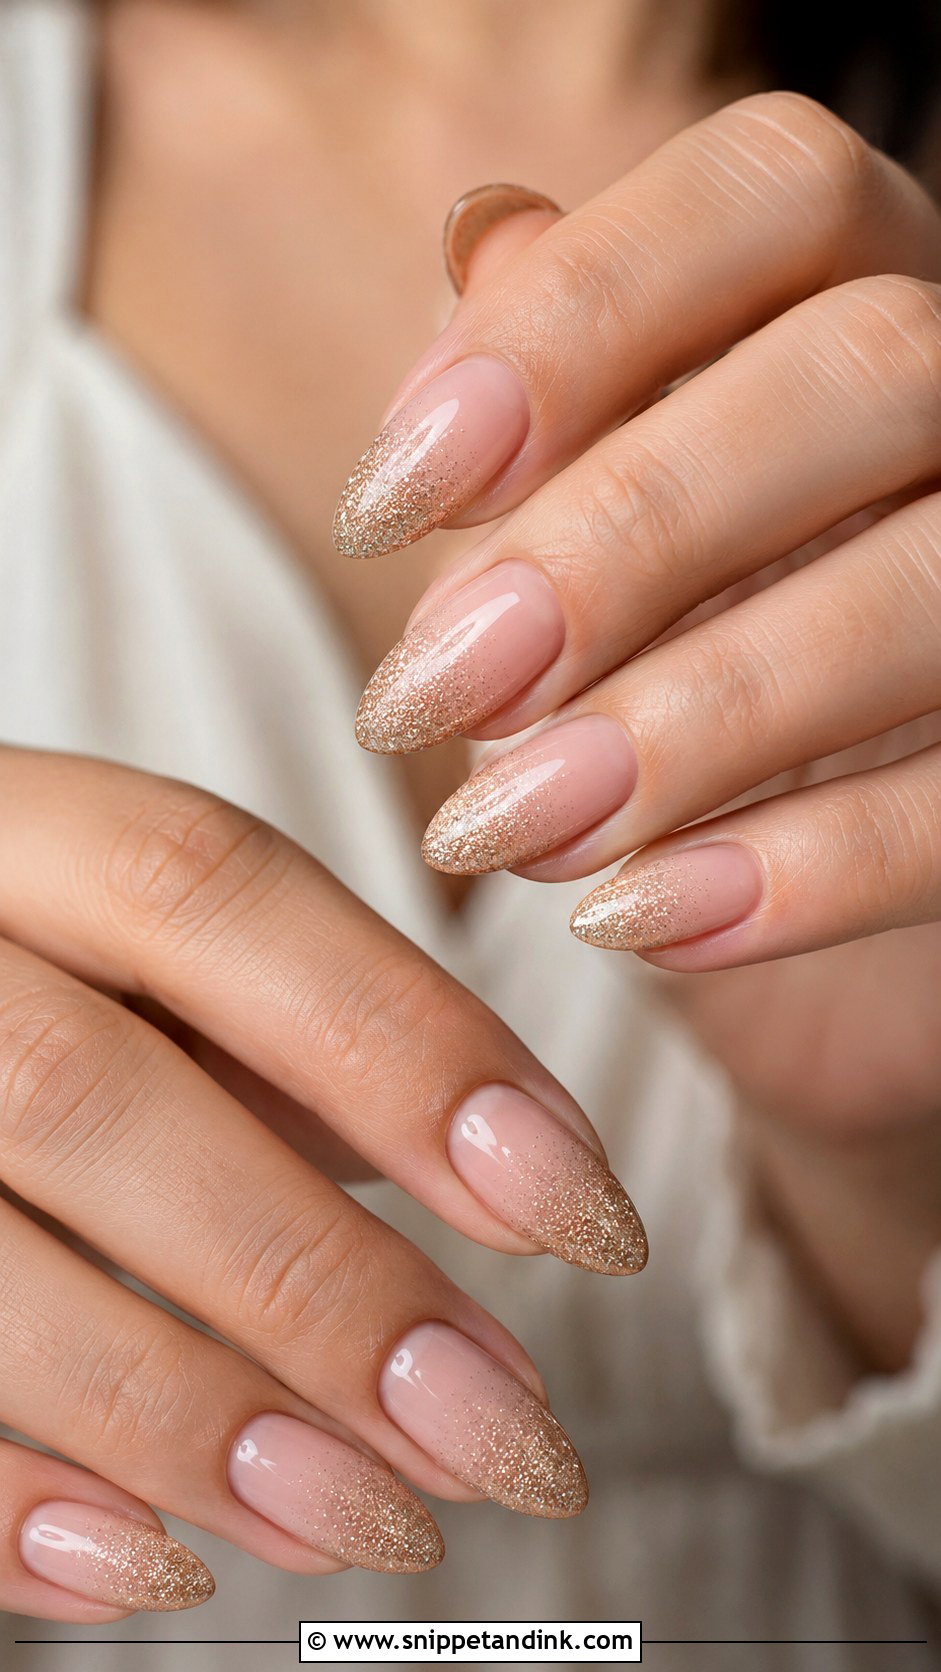
Champagne glitter ombre nails bring sparkle, but how much depends on particle size. Micro glitter fades smoothly from the tip or cuticle and reflects as soft shimmer, while chunky glitter throws bright specks that can look like dust in a close-up. I build the fade over nude, blush or sheer pink, then encapsulate it under a thicker top coat, because uncovered glitter feels rough and looks grainy on camera. Almond, coffin and squoval nails carry it well. Evening sessions, studio portraits and outfits with metallic embroidery suit it best.
11. Short Nude Pre Wedding Shoot Nails
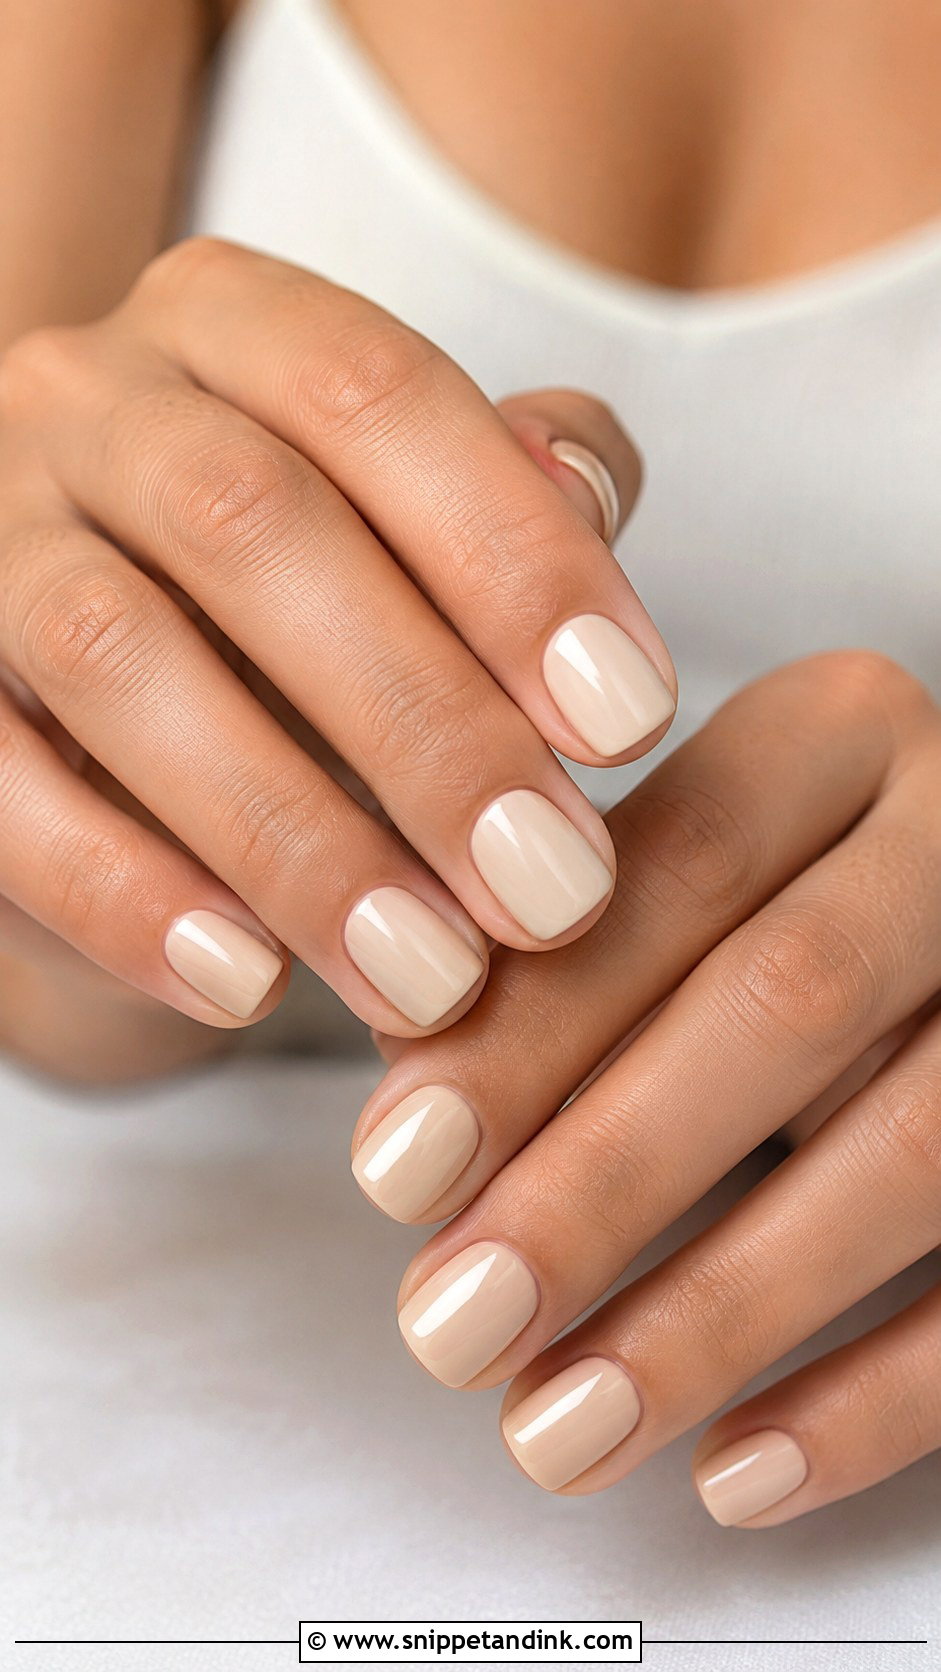
Not everyone wants extensions, and short nails photograph well when the shape is right. A rounded or squoval edge balances a short nail bed; a sharp square edge on short nails tends to make fingers look stubby. Pick a creamy nude, soft beige or pink nude close to your skin. Short is the sensible call for shoots with lots of movement, outfit changes or a walk to the location, since nothing snags on knitwear or lace. A gel top coat keeps the shine all day. Length isn’t what makes a set look done. Clean cuticles and an even free edge are.
12. Micro French Pre Wedding Nails
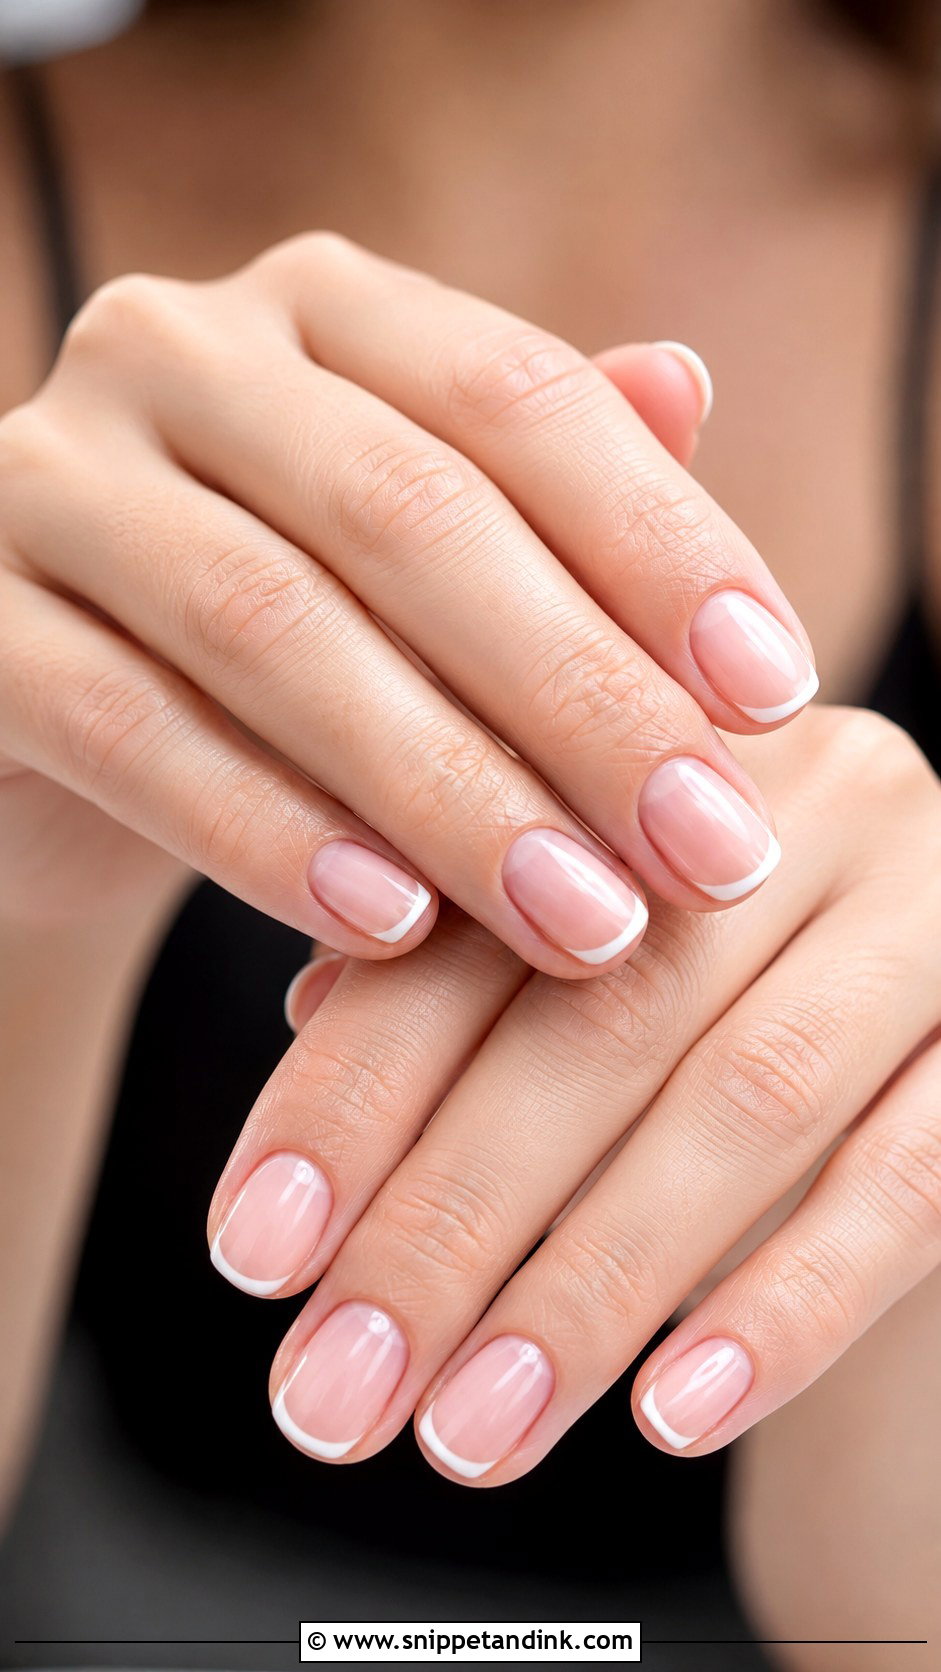
Micro French takes the tip down to a hairline, so the nail looks framed rather than painted. That’s why I like it for shoots with a lot of ring close-ups: the eye goes to the stone, not the nail. A sheer pink, nude or milky base keeps it soft, and the thin white tip adds definition. It works on short, medium, oval, almond and square nails. If bright white feels harsh against warm skin, I mix a touch of ivory into the tip colour. Of everything here, it’s the most minimal set that still reads as a deliberate design.
13. Glossy White Pre Wedding Nails
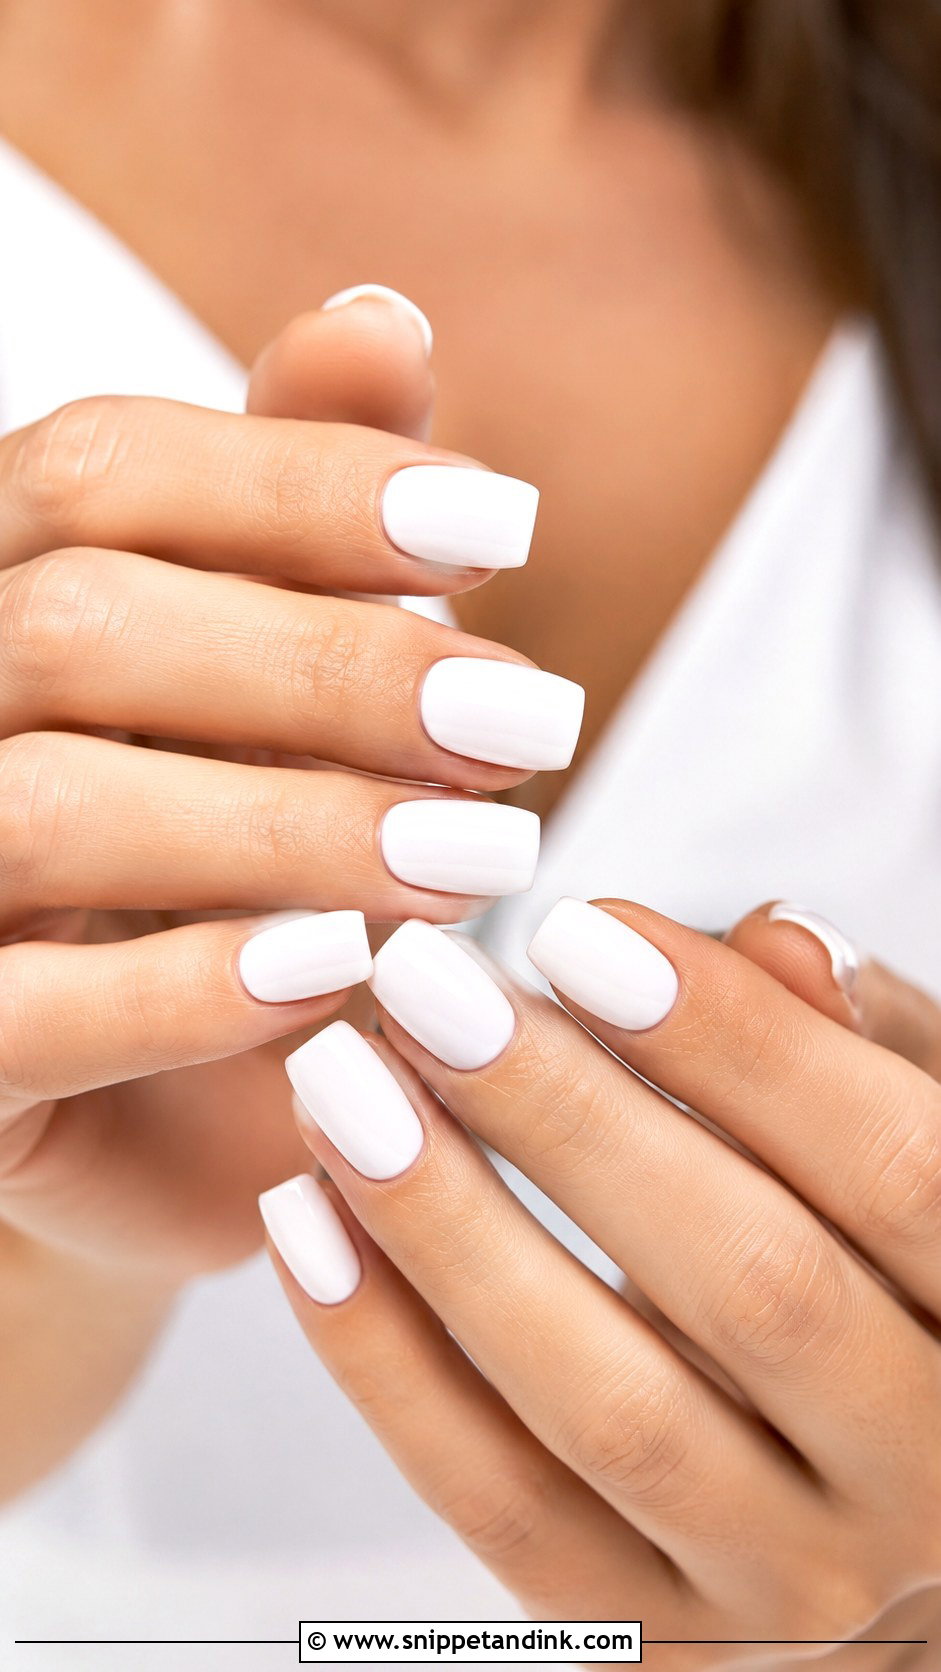
Glossy white is opaque, so it looks crisp and bright where milky white looks soft. It belongs with structured outfits, sleek hair and monochrome styling. Choose a warm white or ivory; a chalky, blue-toned white looks flat and can make hands appear redder by contrast. High-shine top coat isn’t optional here, because opaque white without it looks like paper in photos. I’d keep it to medium square, almond or coffin nails, and I’d skip it for anyone with very dry cuticles, since white shows every bit of ragged skin around it.
14. Rose Gold Pre Wedding Nails
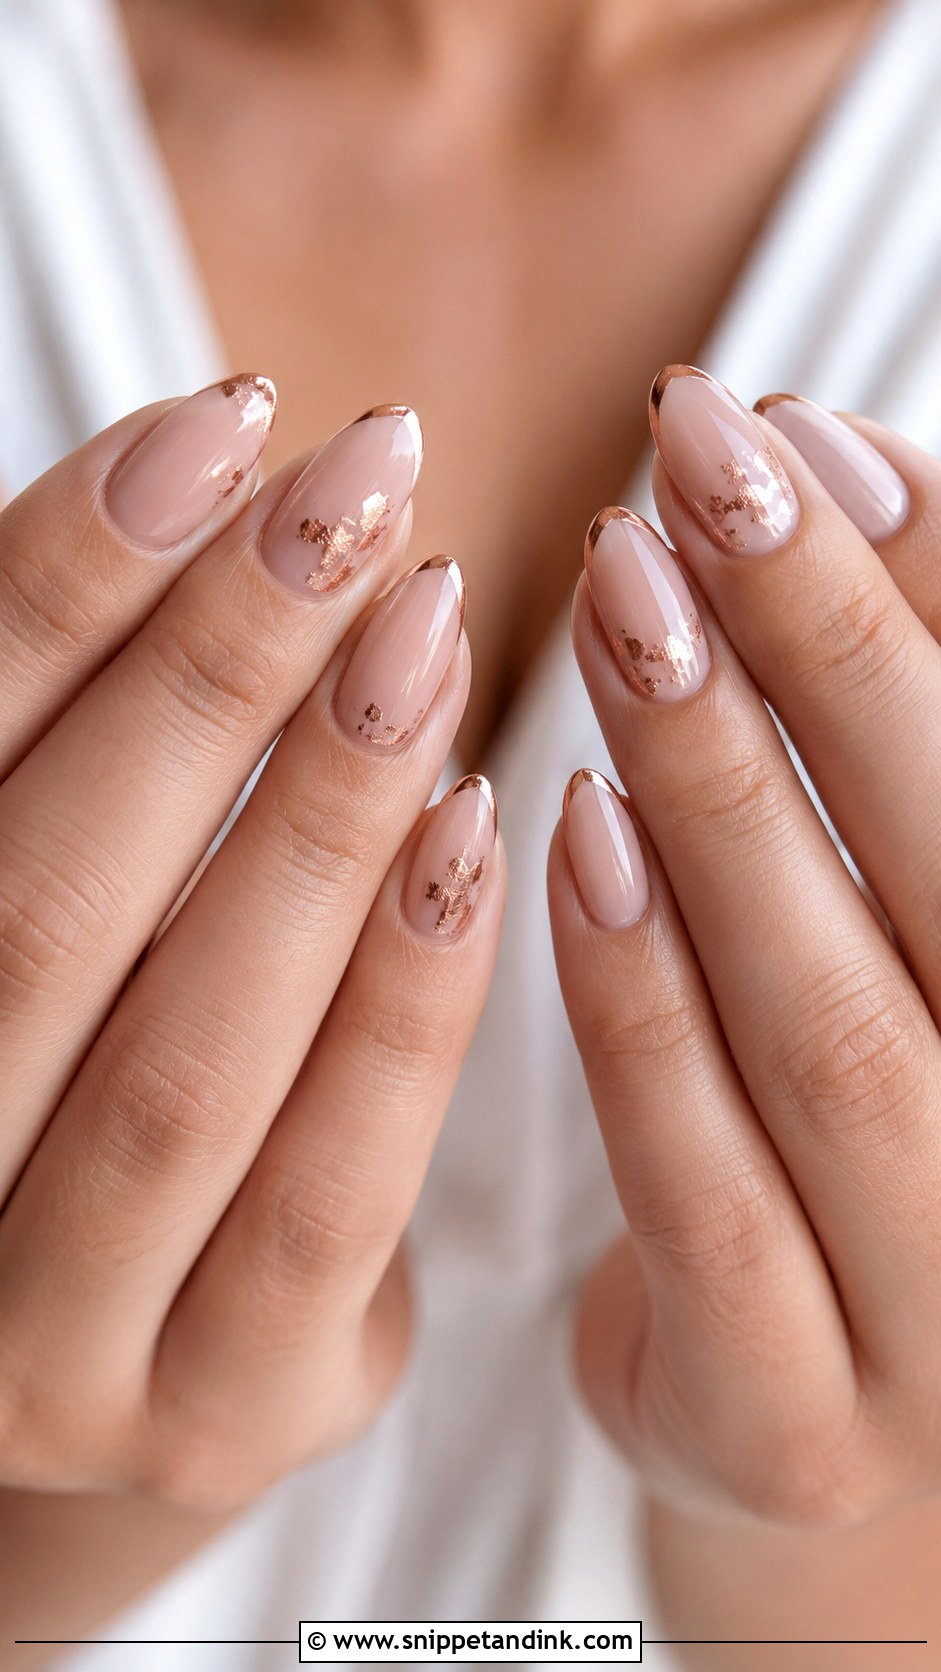
Rose gold reads warm and catches light without shouting. My preferred version for a shoot is a nude or blush base with fine rose gold foil, a little shimmer or thin metallic tips, rather than a full metallic coat, which mirrors whatever colour is nearby and can look muddy in photos. It sits best with warm skin tones, blush outfits, ivory dresses and gold jewelry. Almond and oval shapes look graceful with it, while short square looks more modern. I spread the metallic details evenly across both hands so neither one looks heavier.
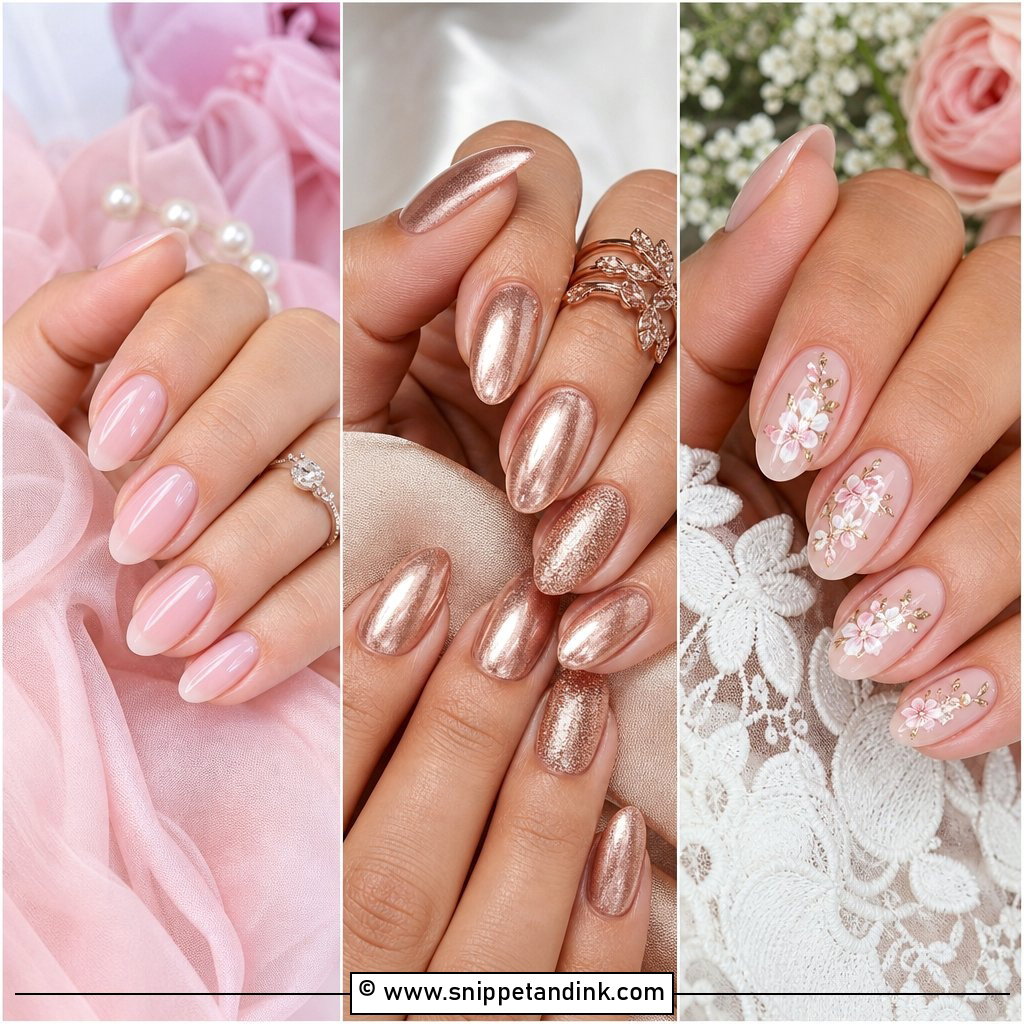
15. Lace Detail Pre Wedding Shoot Nails
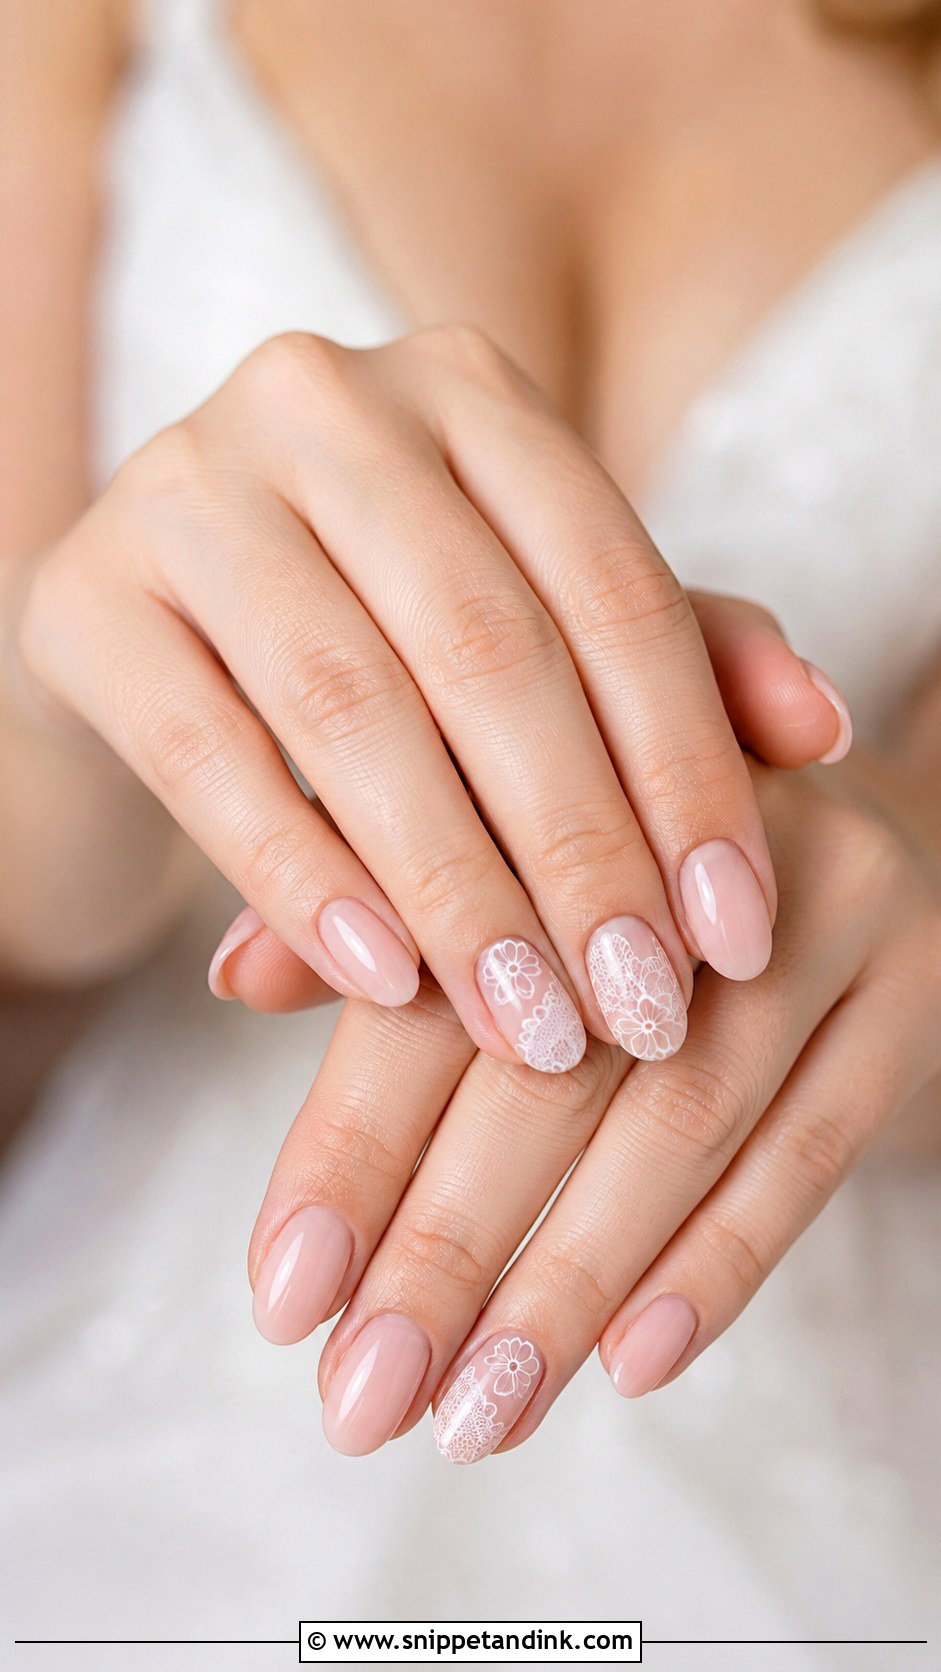
If your outfit has lace or embroidery, echoing it on one or two nails ties the close-ups together. I start with a sheer pink, nude or milky base, then hand-paint thin lines, tiny dots and small scallops with a striping brush. The rest of the set stays plain, otherwise the pattern turns busy. Almond and oval shapes suit the curved motif. Bring a photo of the actual fabric to your appointment so the pattern can be matched rather than guessed.
16. Glazed Donut Pre Wedding Nails
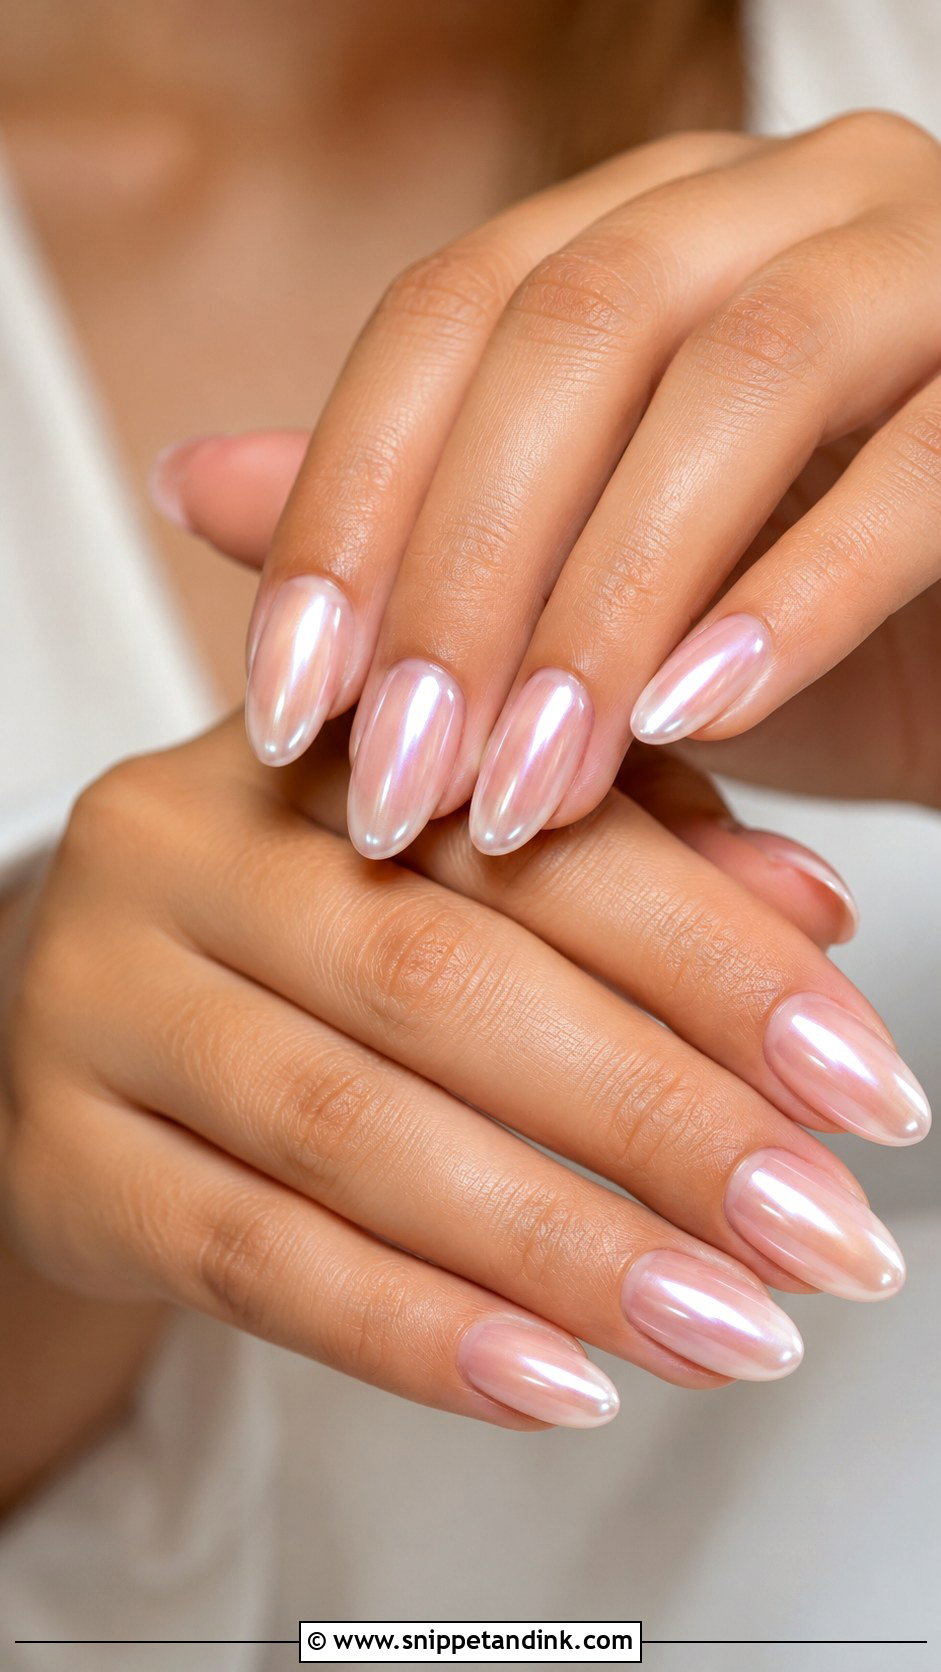
Glazed donut nails are a sheer base of nude, pale pink or milky white with soft pearly chrome rubbed on top. It’s lighter than full chrome and more luminous than plain polish, which is why it keeps coming back for bridal photos. Nearly every shape suits it, though almond and oval show the sheen along the curve best, and it handles indoor and outdoor light equally well. One caution from my side of the table: chrome shows ridges in the nail plate more than a cream polish does, so a thin builder layer underneath helps if your nails aren’t smooth.
17. Something Blue Pre Wedding Nails
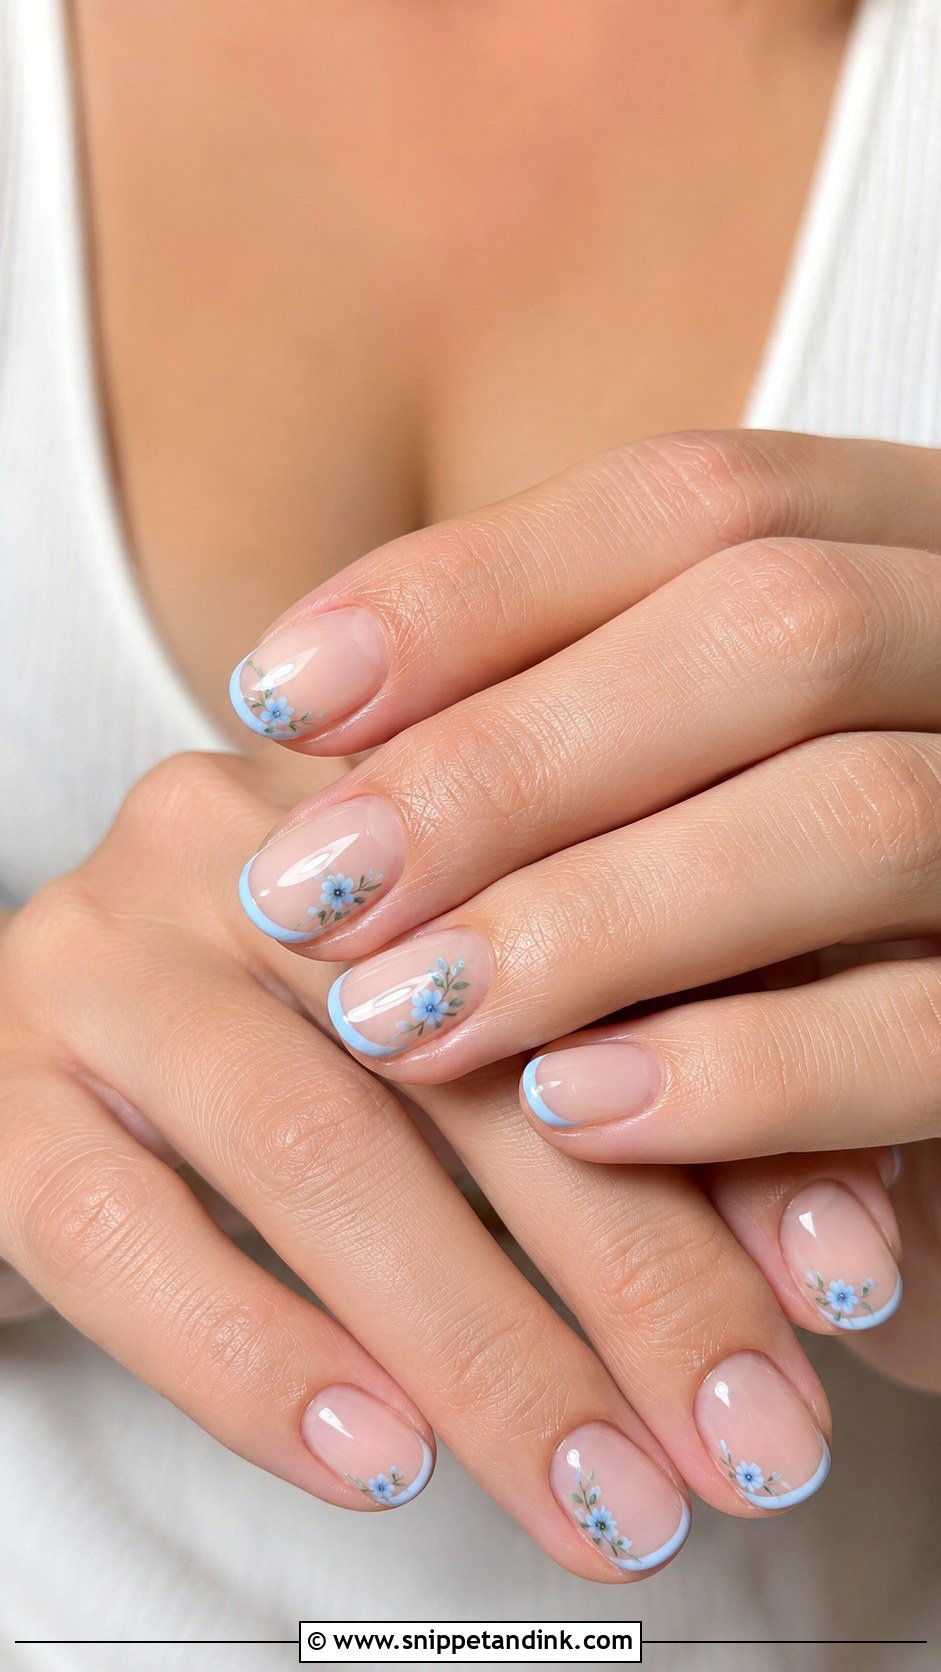
Something blue works best in small doses. A full bright blue set fights with most outfits, so I’d suggest a sheer nude base with pale blue micro French tips, a few tiny blue flowers or one small heart on the ring finger. You keep the meaning without restyling every look around it. Light blue sits comfortably next to ivory, silver, blush and pastels. Almond and short oval shapes keep it soft, finished with a glossy top coat or a faint pearl sheen.
18. Marble Nude Pre Wedding Shoot Nails
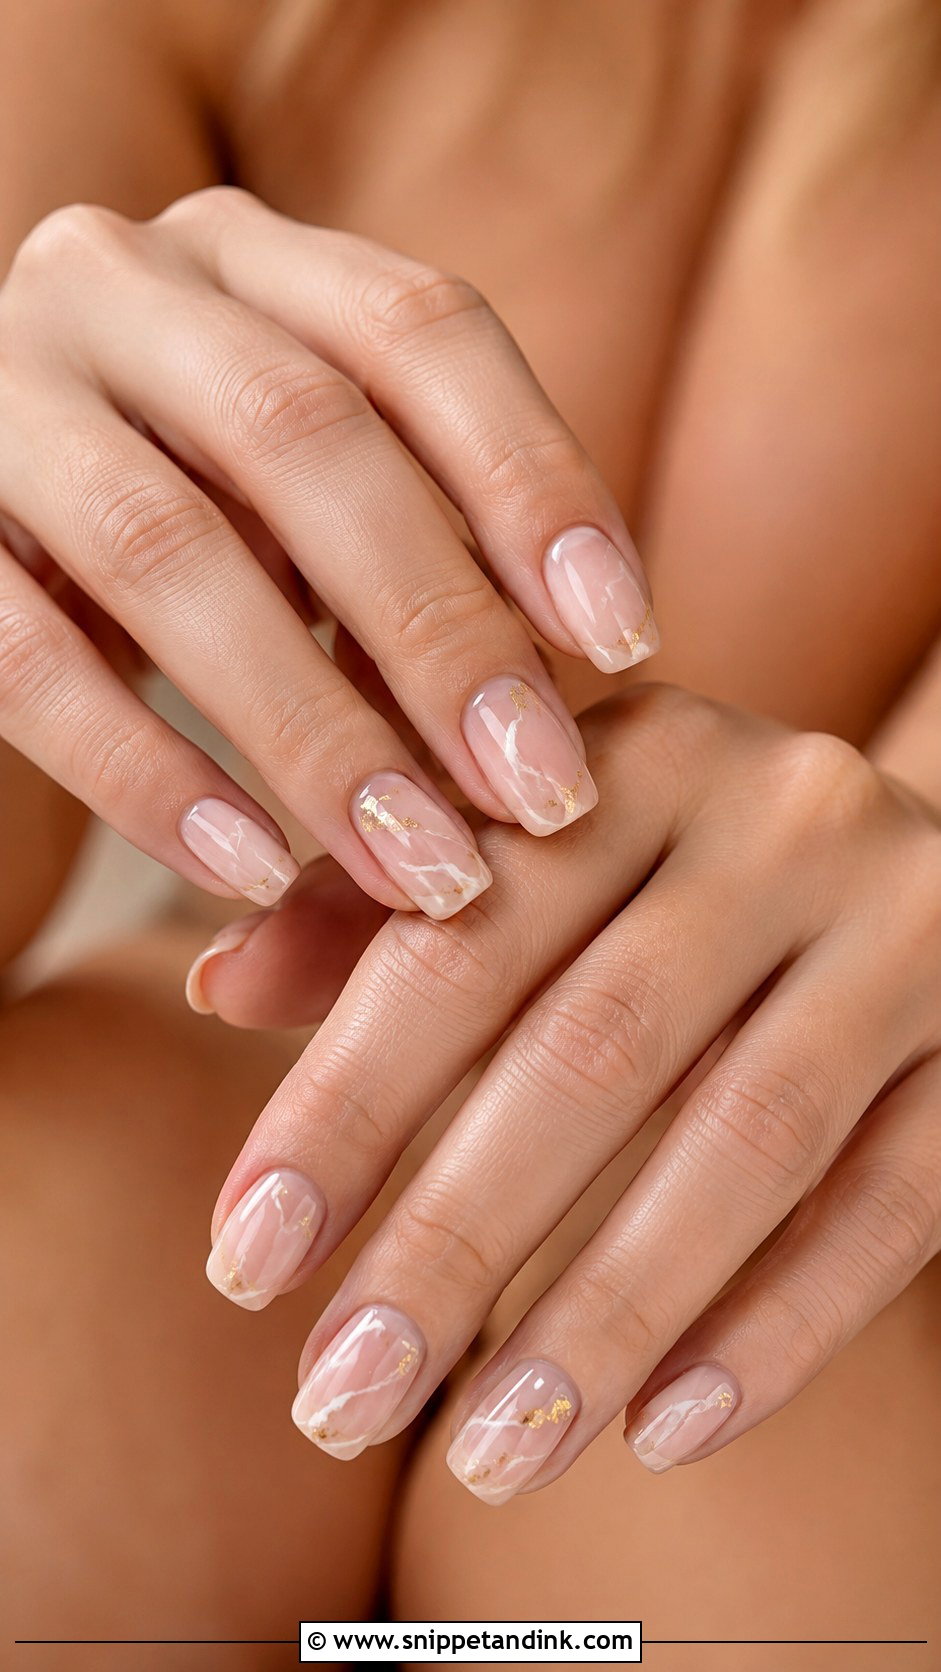
Marble only looks expensive when the veining is light. On a beige, blush or milky base, I drag fine white lines with a thin brush and soften them before curing; heavy, dark veins look like cracks in a close-up. Medium almond, coffin and squoval nails give the pattern room to move. A hint of gold foil warms it up, but keep it to a fleck or two. It goes with modern outfits, soft glam makeup and neutral backdrops.
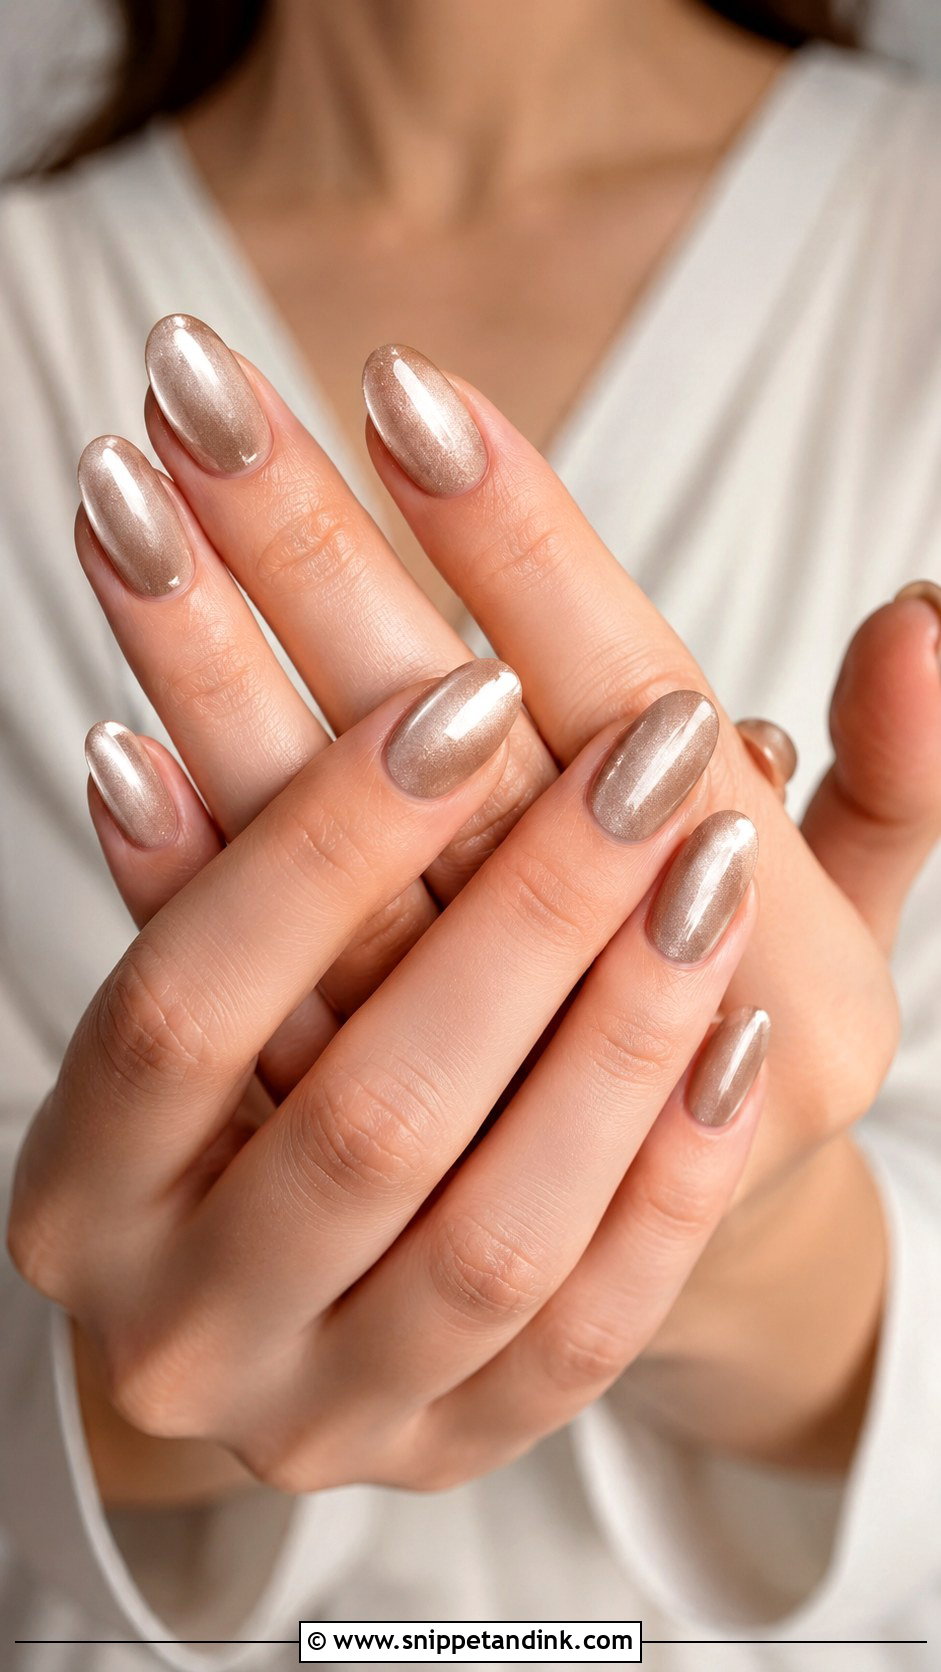
19. Velvet Cat Eye Pre Wedding Nails
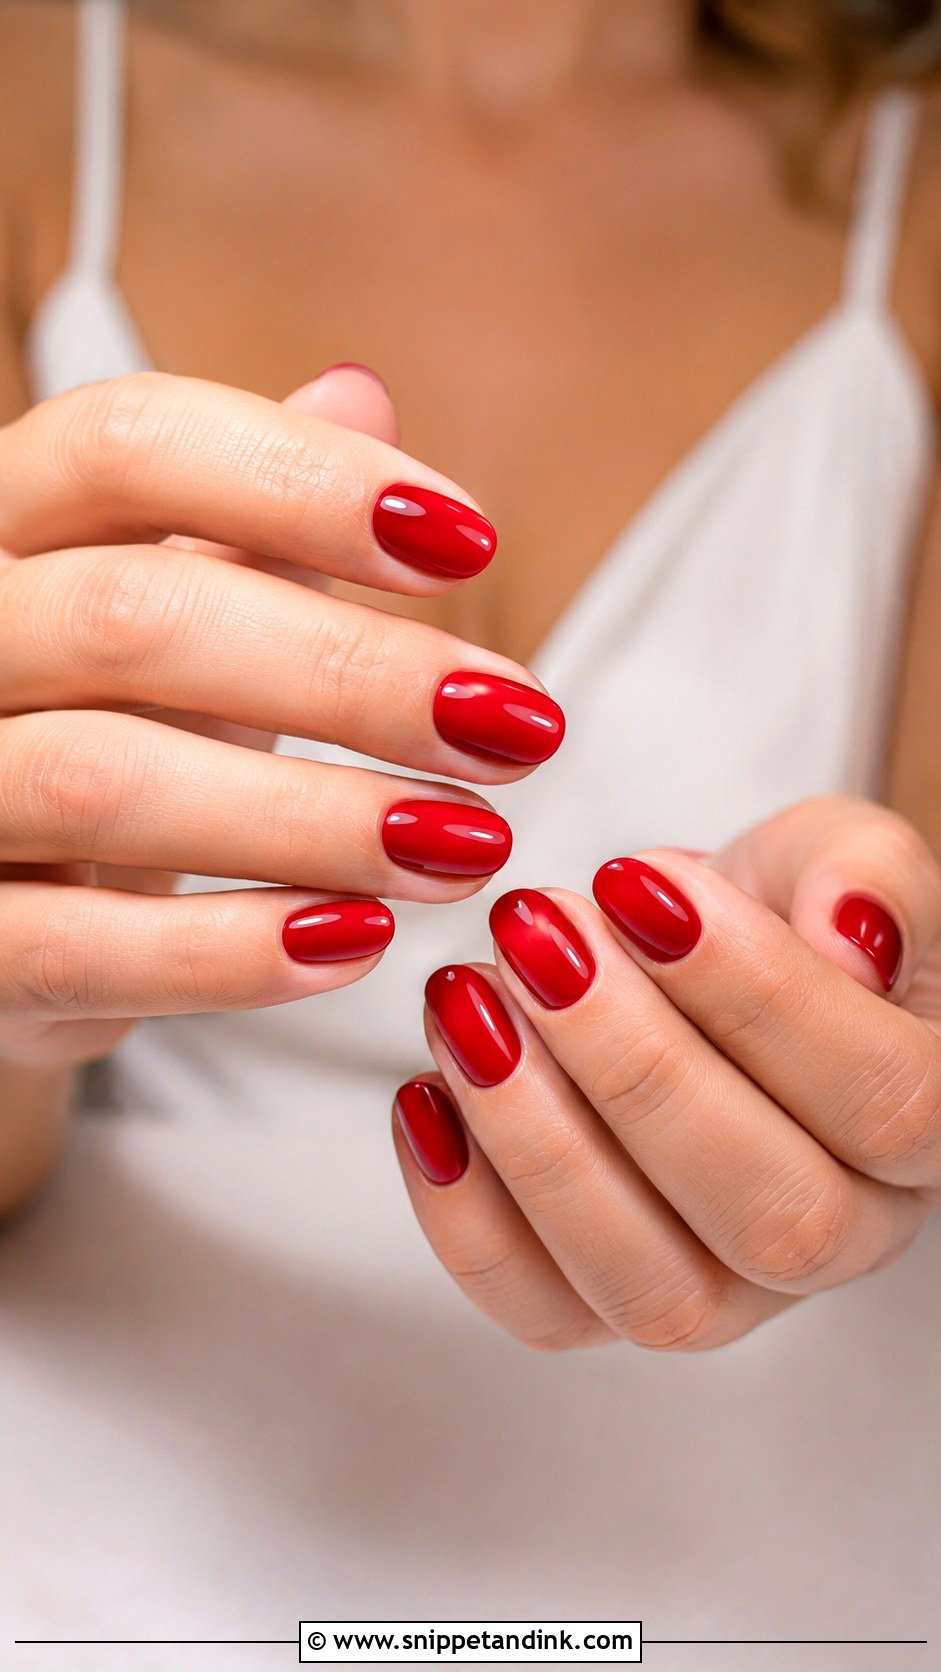
Velvet cat eye uses a magnetic gel full of tiny metal particles, and a magnet held over the uncured gel pulls them into a soft band of light that shifts as your hand moves. For bridal shades, champagne, rose beige, pearl pink and soft ivory read refined, while dark versions turn dramatic. The effect needs directional light, so it’s strongest at indoor and evening shoots and can almost disappear on a flat overcast day. Almond and oval shapes give the line a smooth curve. I test the magnet angle on one nail and snap it with my phone before doing the rest, because the band can land off-centre.
20. Classic Red Pre Wedding Nails
Red is the one shade on this list that changes the whole photo. With traditional outfits, bold makeup or plain neutral clothing, it reads confident and classic. A blue-red looks crisp; a rose-red is softer. Short oval, almond and medium square nails all carry it. Because red is so strong, I keep the set free of art and the cuticle line very tidy, since any polish flooding onto the skin shows instantly. Gloss is essential. Hold it against every outfit in the shoot first, because red next to coral or orange can clash.
Dry Knuckles, Chips and Other Things a Close Crop Catches
The nails are only part of what the camera sees. Dry skin around the knuckles and cuticles turns white and flaky in close-ups, so I tell people to use hand cream every night that week and cuticle oil morning and evening. On the day, rub the oil in about an hour before the hand shots and wipe off the excess, otherwise the nails look greasy and the lens catches the shine.
Things do go wrong. A chipped corner can be filed smooth and sealed with a dot of top coat, and your photographer can angle that hand away. A lifted pearl or stone is harder to hide, which is why glue goes in the kit. Chrome and glitter scuff when you rummage through a bag, so let someone else hold it.
What goes in your bag
- Cuticle oil and a lint-free wipe
- A fine glass file for snags
- Regular clear top coat for quick fixes, since gel needs a lamp
- Nail glue if your set has pearls, foil or stones
- Hand cream, applied early so it sinks in before the hand shots
Tell your photographer which hand wears the ring and how you feel about very tight crops. Plenty of couples are surprised by how many hand frames end up in the gallery, and it’s easier to relax into those poses when you know the nails will stand up to the scrutiny.
The Set That Works With Every Outfit You Pack
Hold your outfits, your ring and your hands up together and the shortlist usually writes itself. If the shoot has several looks, a neutral like milky white, sheer pink or micro French covers all of them. If it’s a single outfit and you want some personality, florals, rose gold, soft blue or velvet shimmer will give it. Book a day or two before the shoot so your cuticles have settled while the gloss is still fresh, and keep cuticle oil in your bag.
You'll Like These Ideas:


Leave a Reply