
Loose hair that keeps falling into your face is the reason so many brides abandon down styles halfway through the trial. You end up tucking strands behind your ear in every photo. The fix isn’t an updo. It’s controlling just the front: lifting it, pinning it, braiding it, twisting it or sweeping it back, while the length stays free. I build these styles with real hold at the crown and temples and keep the ends soft, so the face stays open through the vows, the portraits and the dancing. Here are fifteen ways to do it, and what each one asks of your hair.
Cowlicks, Baby Hairs and Short Front Layers
Keeping hair out of the face is easy on hair that is all one length. Most brides don’t have that. They have a cowlick at the front, fine regrowth along the hairline, face-framing layers that stop at the cheekbone, or a fringe they’re halfway through growing out. Those are the pieces that escape, so I plan around them before I choose a style.
Cowlicks
A cowlick decides which way the front wants to go. I blow-dry the root against it, then back with it, which relaxes it enough to work with. But I never style directly against a strong one. If it pushes left, the sweep or twist goes left too.
Short layers and fringes
Layers that don’t reach the back of the head won’t stay in a simple pinned half-up. They need to be caught in a braid or a twist that starts right at the hairline, so they’re held along the way rather than only at the end. A growing-out fringe can be swept to the side and pinned under a twist, or simply curled and left as a soft face frame.
Baby hairs
Fine regrowth around the edges will frizz in humidity. I smooth it with a tiny amount of gel or wax on a spoolie, which keeps the hairline neat without looking slicked.
1. Half Up Half Down Wedding Hair
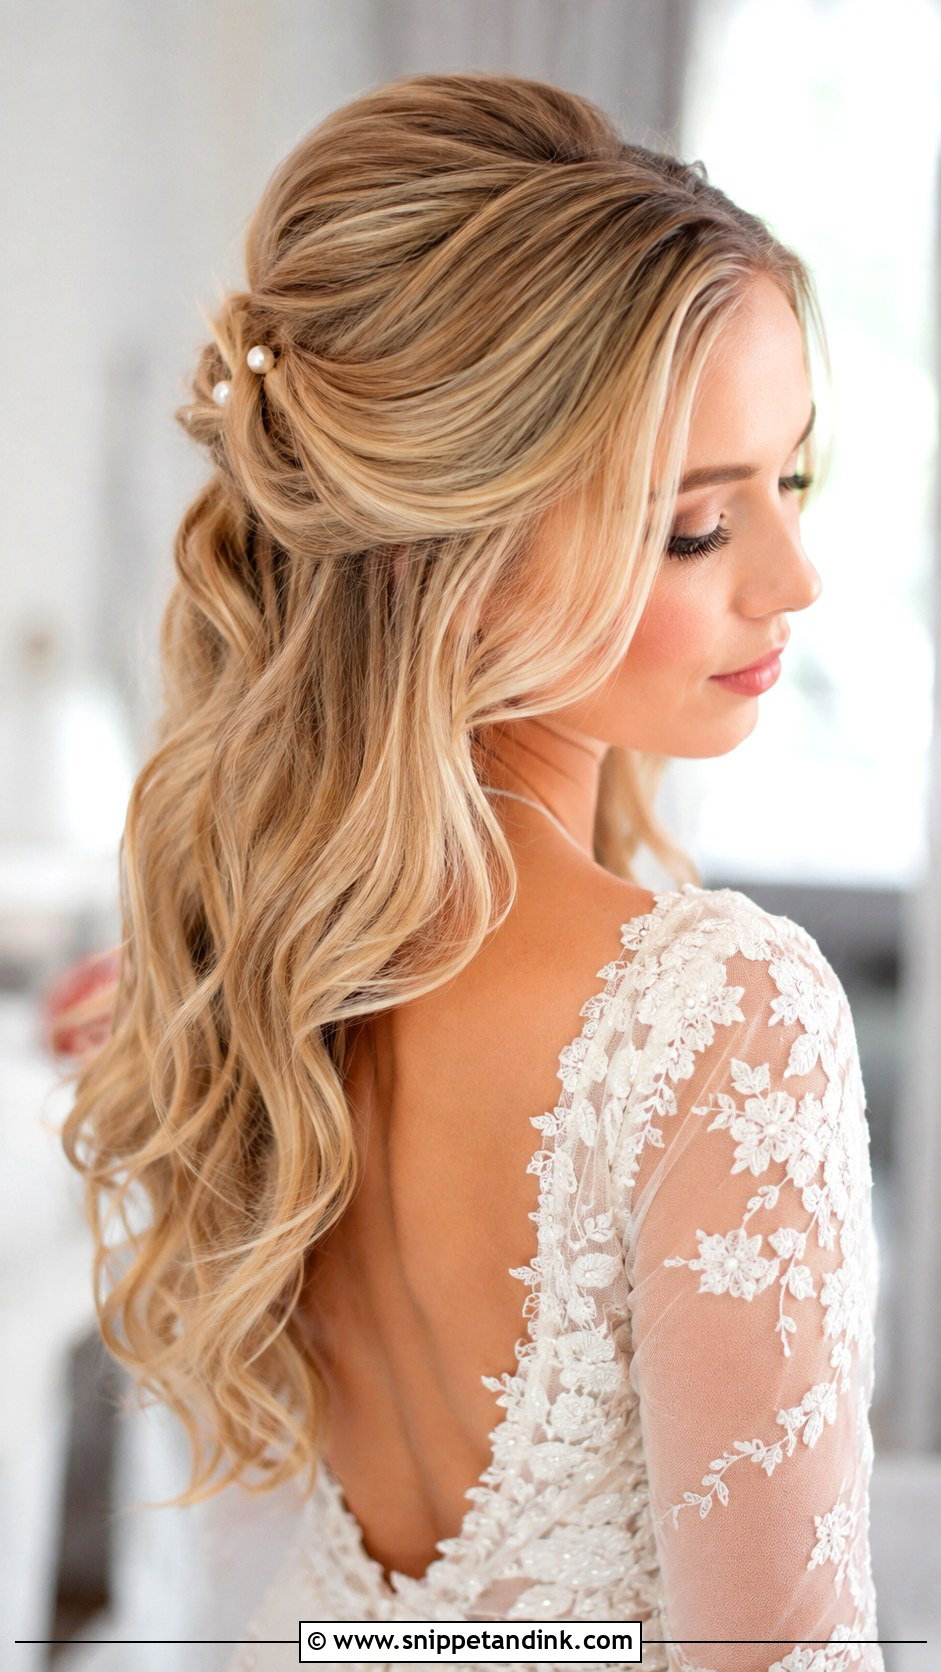
This is the default for a reason. The top section is drawn back and secured at the crown, and everything below stays curled or blown out. Because I can adjust how much hair goes into that top section, it works on fine hair (smaller section, more backcombing at the root) as well as thick hair (larger section, more pins). For a classic finish I keep the roots smooth with gentle lift and polish the waves underneath. Pearl pins, a comb or the veil sit right at the gather. If your face is long, I’d keep the crown lift modest; too much height lengthens it further.
2. Twisted Half Up Wedding Hair
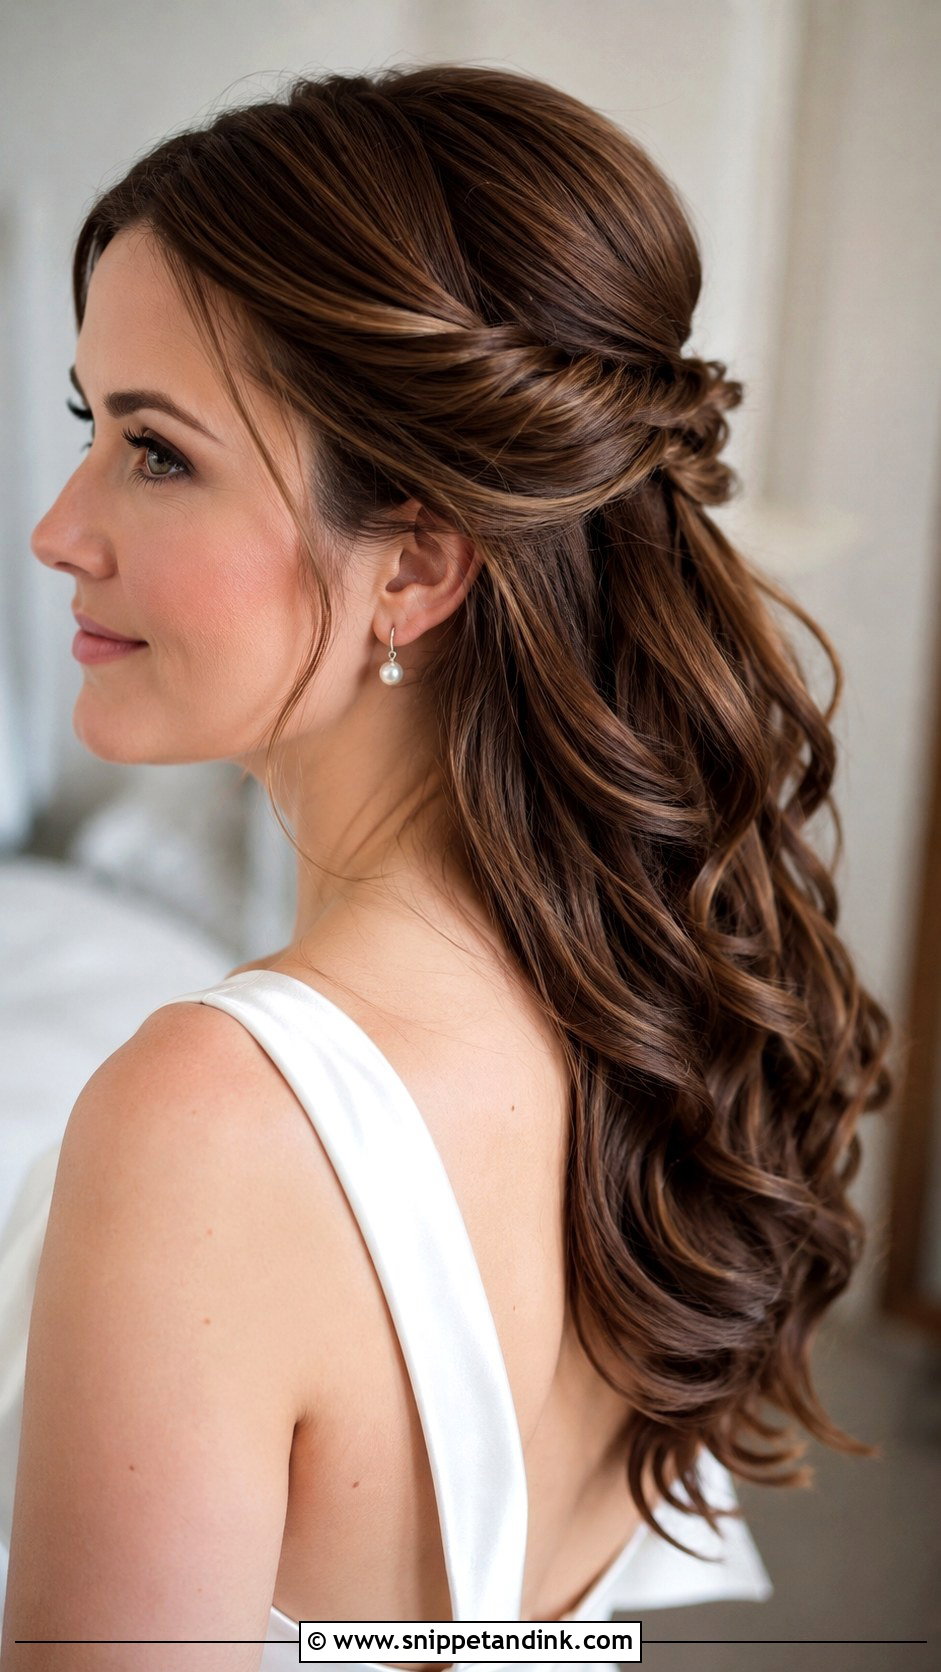
Twisting is softer than pulling back. I take a section from each temple, twist it away from the face toward the back, and pin the two twists where they meet, usually crossing them so each covers the other’s pins. The cheekbones stay open but there’s no harsh line at the hairline. Twists show texture well, so loose waves make them look fuller. Shine spray keeps the twisted surface smooth. A couple of tiny floral pins or crystal accents at the join finish the back view. On very silky, straight hair the twists can unwind, so I add a little texture spray before I start.
3. Braided Half Up Wedding Hair
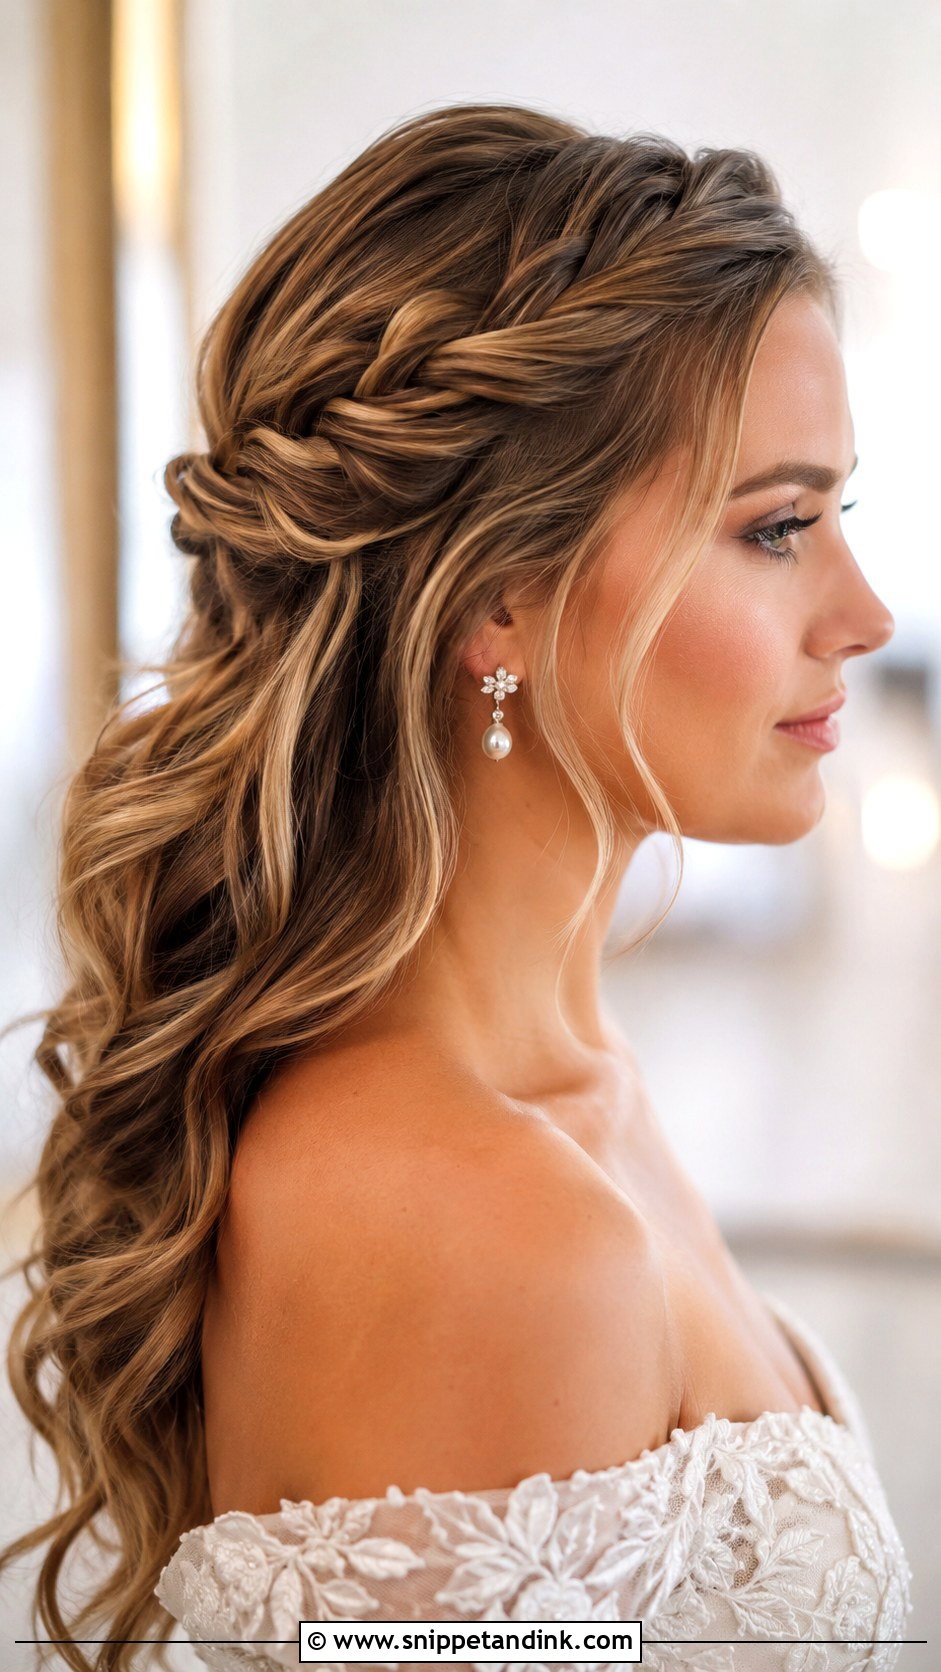
A small braid from the temple or part, swept back to the crown, holds front pieces better than almost any other method, because the braid grips them along its whole length. That’s why I recommend it for outdoor and windy venues. Kept tidy, it feels classic; loosened, it feels boho. I always pin it before pancaking, then gently pull the outer loops so it looks fuller and balanced against the length below. If your front layers are short, they’ll want to escape the braid, so a bit of pomade on the fingers while braiding helps.
4. Side Swept Wedding Hair
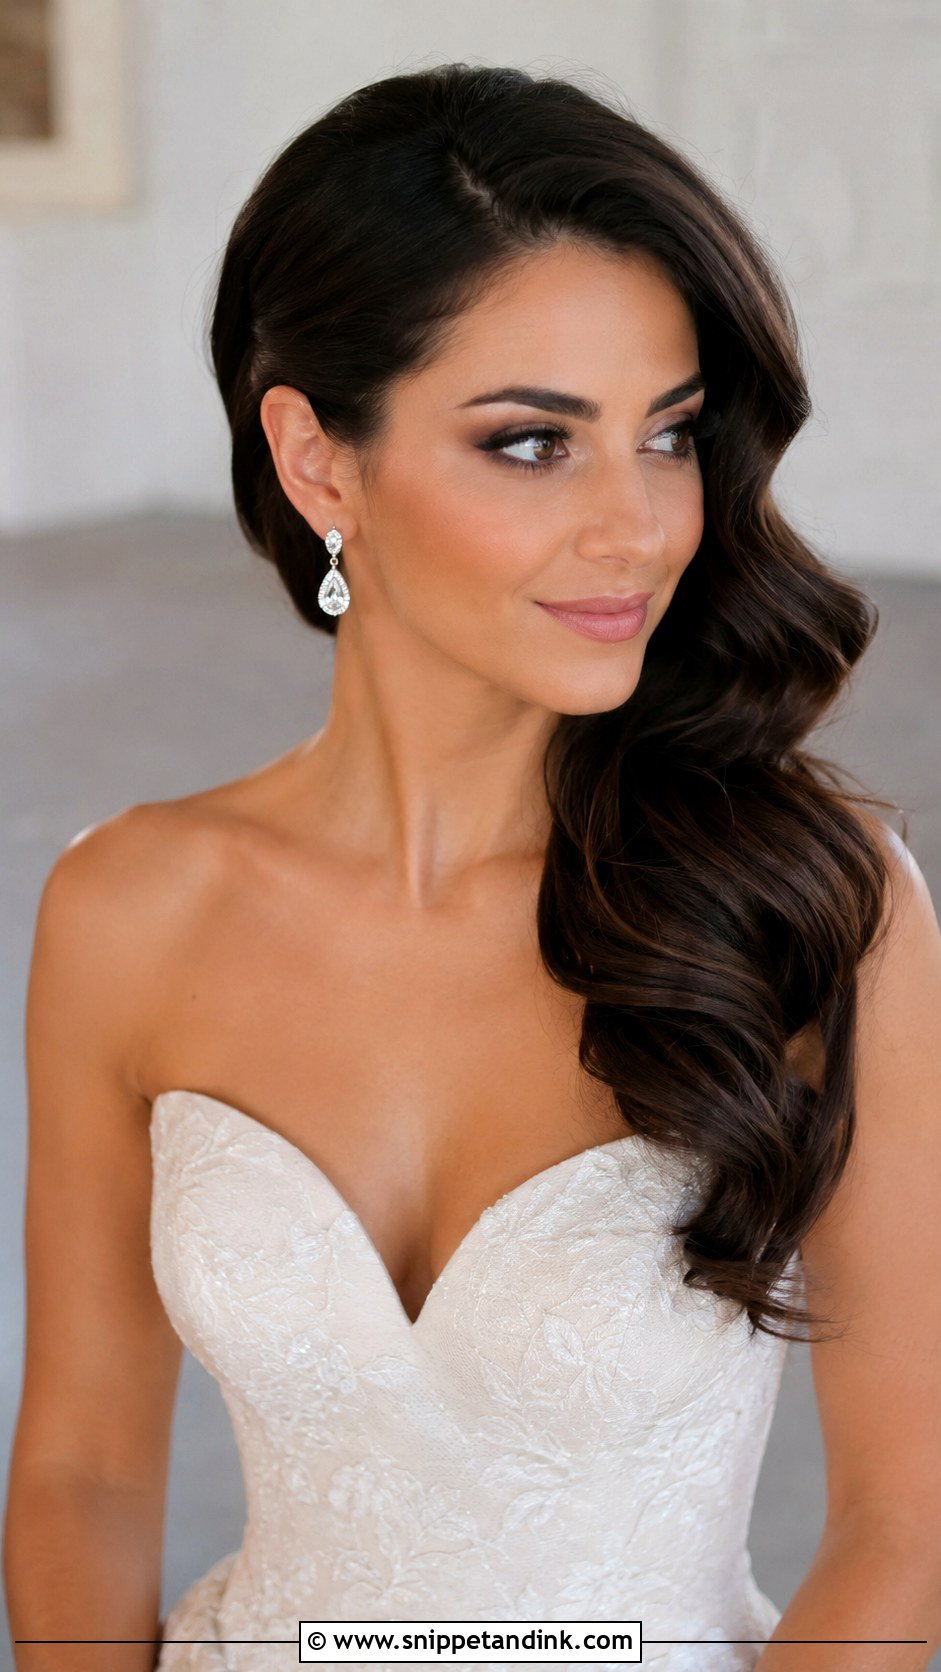
One side pinned back, the rest falling over the opposite shoulder. It suits one-shoulder gowns, strapless dresses and statement earrings, because one ear and one side of the neck are fully on show. The hold comes from hidden pins at the nape and behind the ear, crossed so the weight of hair doesn’t pull them loose. Soft waves help the sweep sit neatly. I check it from the photographer’s main angle at the trial. If the sweep falls toward the camera side at the ceremony, your face can end up half hidden in the processional shots.
5. Wedding Hair Down With Crown Braid
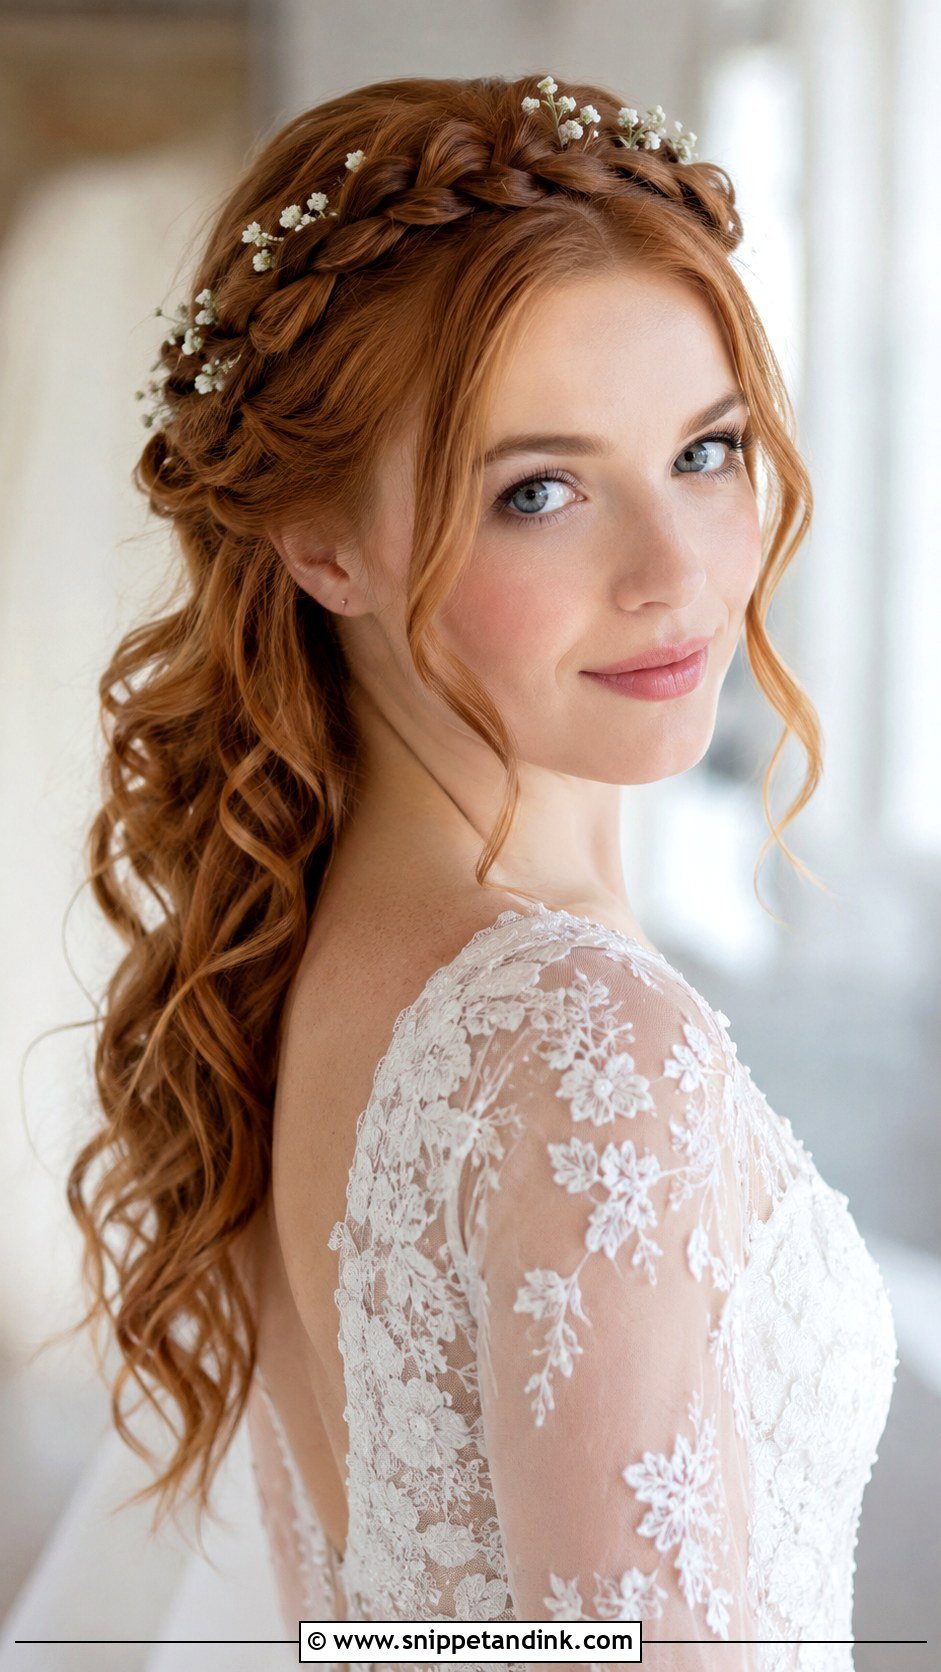
A crown braid keeps the front lifted all the way round, which is ideal if you have short layers or a growing-out fringe that won’t stay in a simple pin. The braid wraps across the top or sides of the head, and the length below stays loose. Narrow and delicate suits fine hair; fuller and textured suits dense hair. It fits garden and outdoor ceremonies especially well. I pin the veil under the braid so the braid holds the comb in place. Loose curls through the ends keep it from feeling tight.
6. Wedding Hair Down With Hair Vine
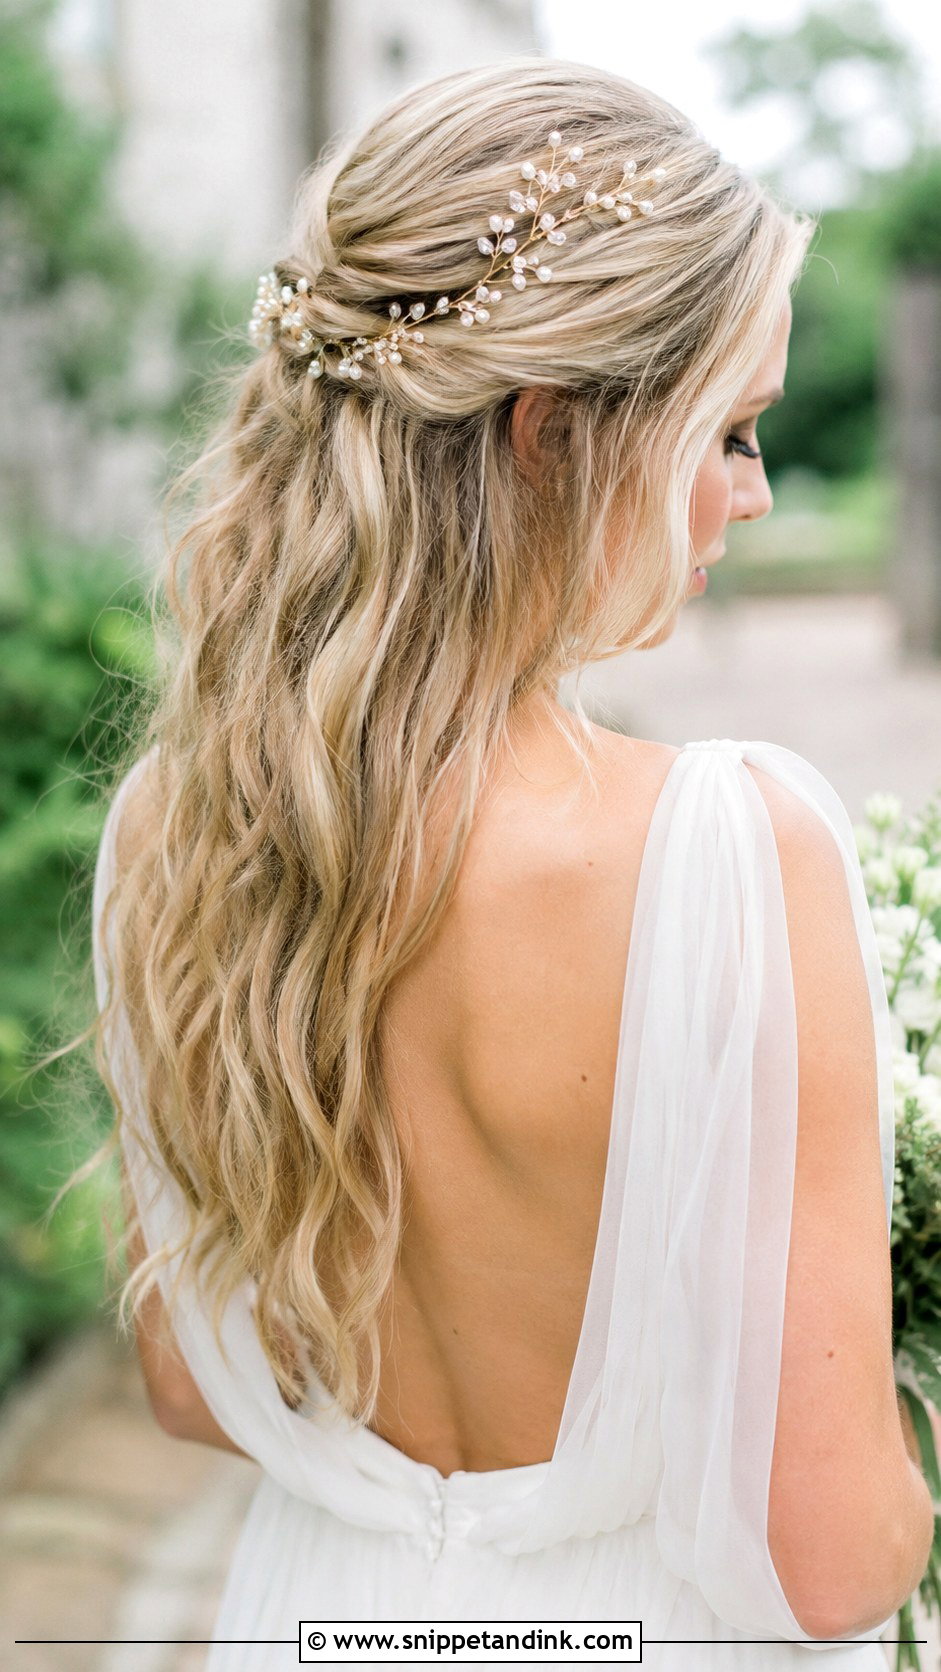
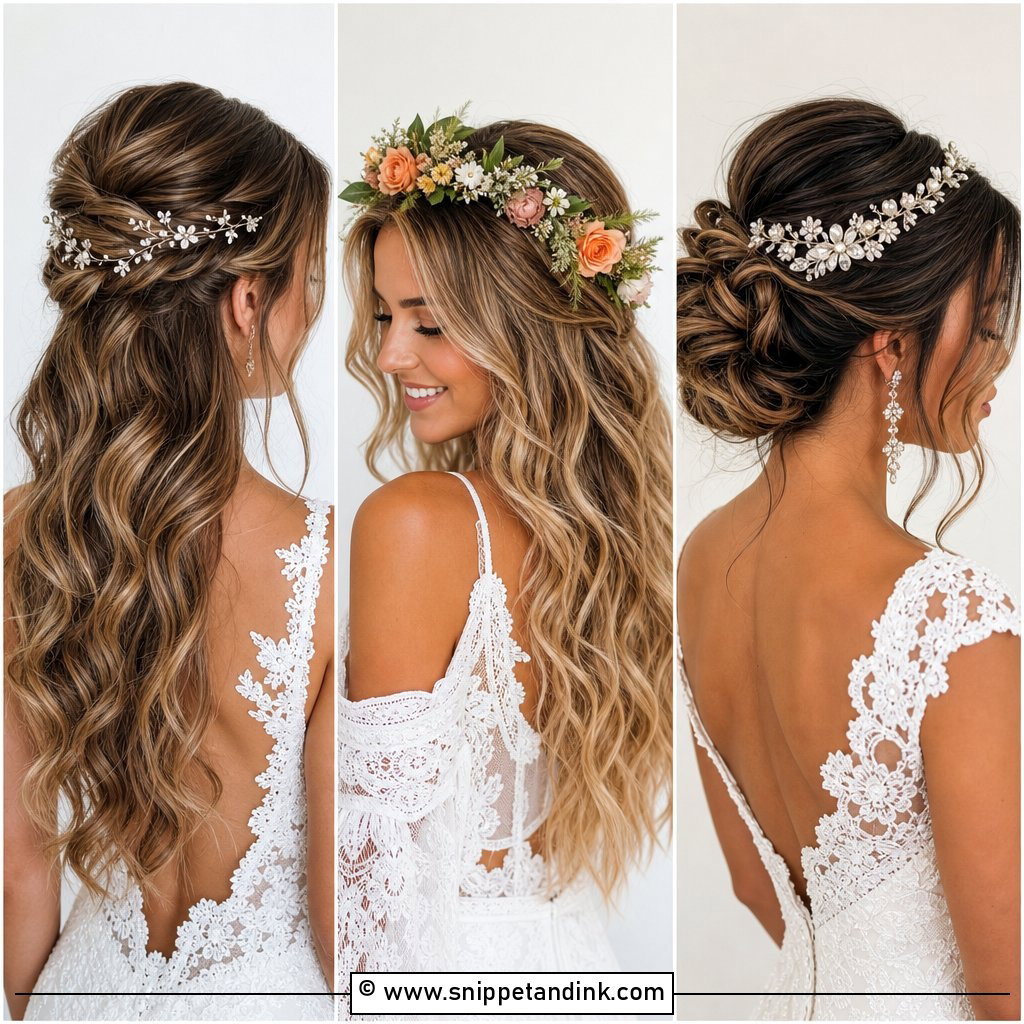
Hair vines are flexible wire with pearls, crystals or tiny flowers along them, and they can be woven through a half-up section, wrapped along a twist or laid around the crown. The wire matters: a vine that’s too stiff won’t follow the curve of your head and lifts at the ends. I bend it to shape first, then secure it with small pins every few centimetres through the loops. It works with waves because the vine follows their movement. It suits dresses with floral lace or beading, where the vine can echo the pattern. Keep the front swept back and pinned softly, so the vine reads as intentional rather than busy.
7. Wedding Hair Down With Pearl Pins
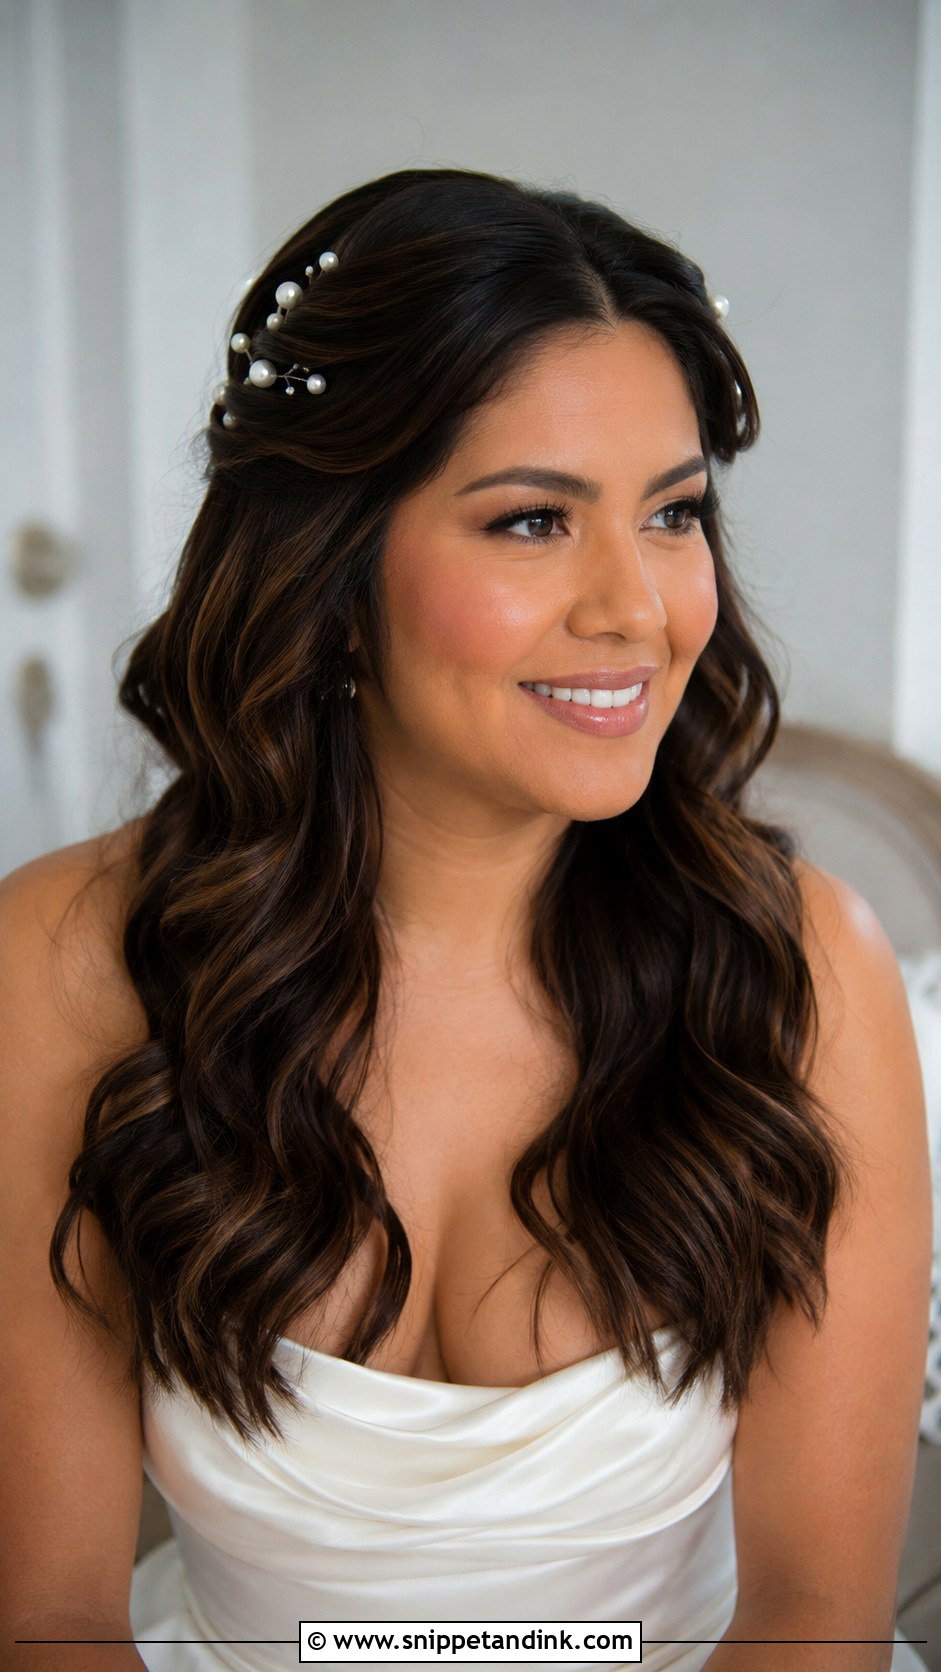
Pearl pins are the simplest way to hold the front back and add a bridal detail at the same time. They can secure both sides, tuck one side behind the ear, or gather a small half-up. I place them in uneven clusters rather than a straight row, which looks more natural and less like a school hair slide. They suit curls, brushed waves, sleek blow-outs and shorter cuts. One warning: on very fine, slippery hair a single decorative pin rarely holds alone, so I hide a plain bobby pin underneath each one as the real anchor.
8. Wedding Hair Down With Headband
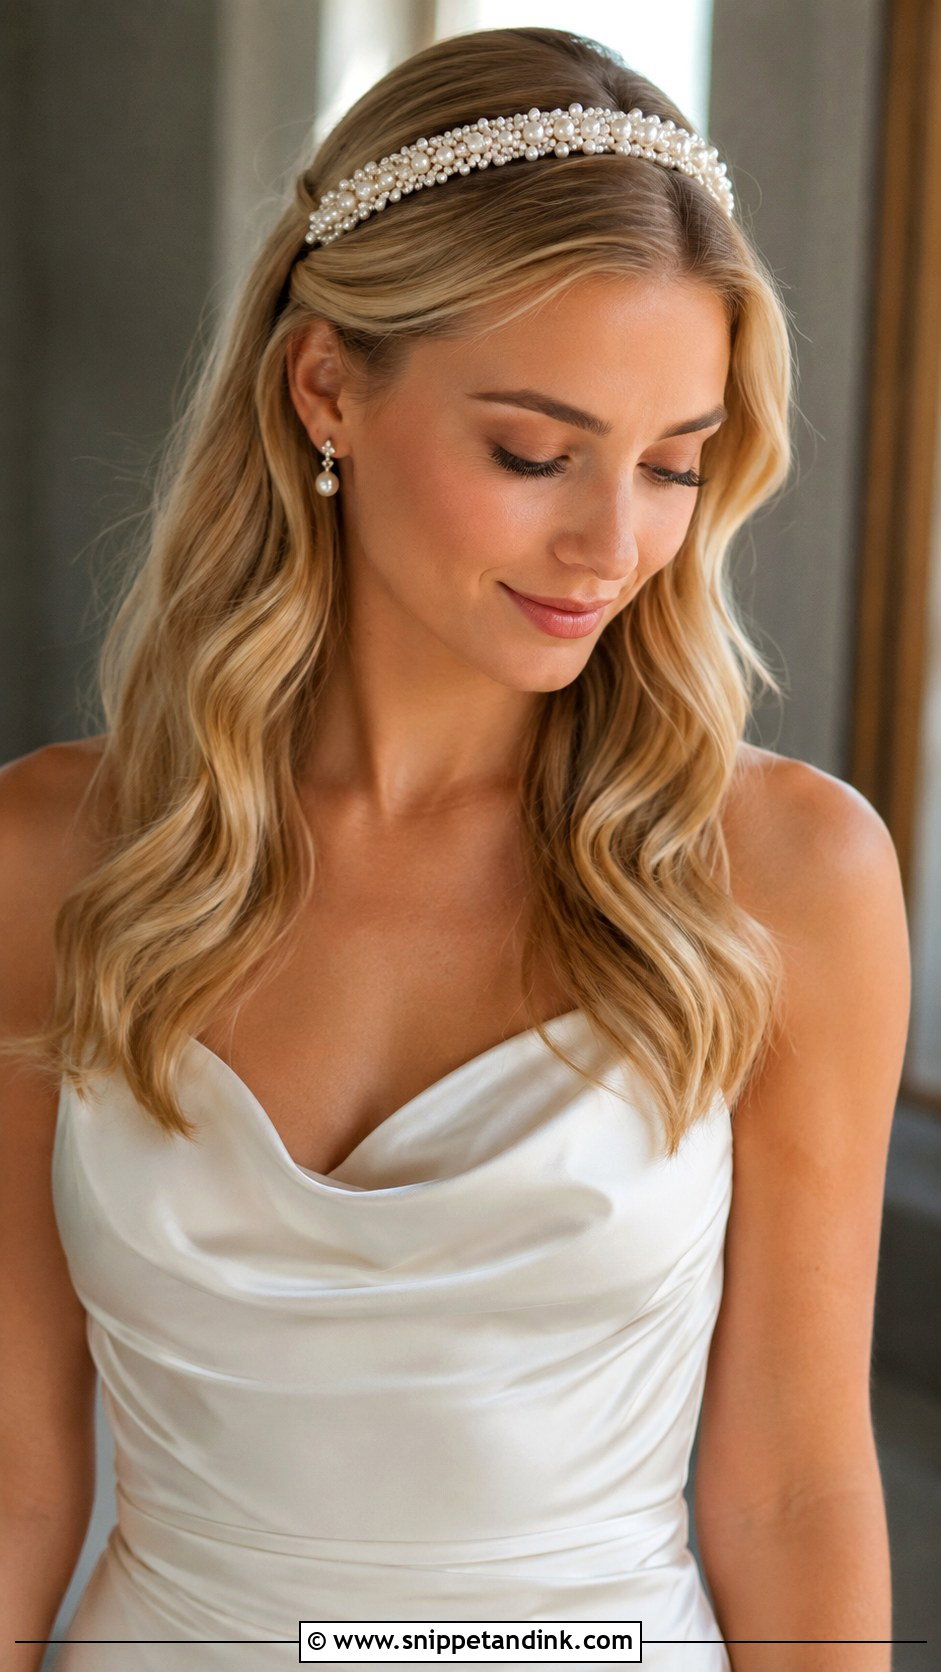
A headband holds the front back with almost no pinning, which suits brides who hate the feeling of pins in their scalp. A bridal headband can look classic with smooth waves, modern with sleek straight hair, or softer with brushed curls. A thin pearl band is subtle, padded satin is fashion-led, crystal adds sparkle. Pay attention to comfort: a tight band pressing behind the ears can bring on a headache after a few hours, so wear it around the house for an afternoon before the wedding. It also gives the top of the head a neat line for a veil.
9. Slicked Back Wedding Hair Down
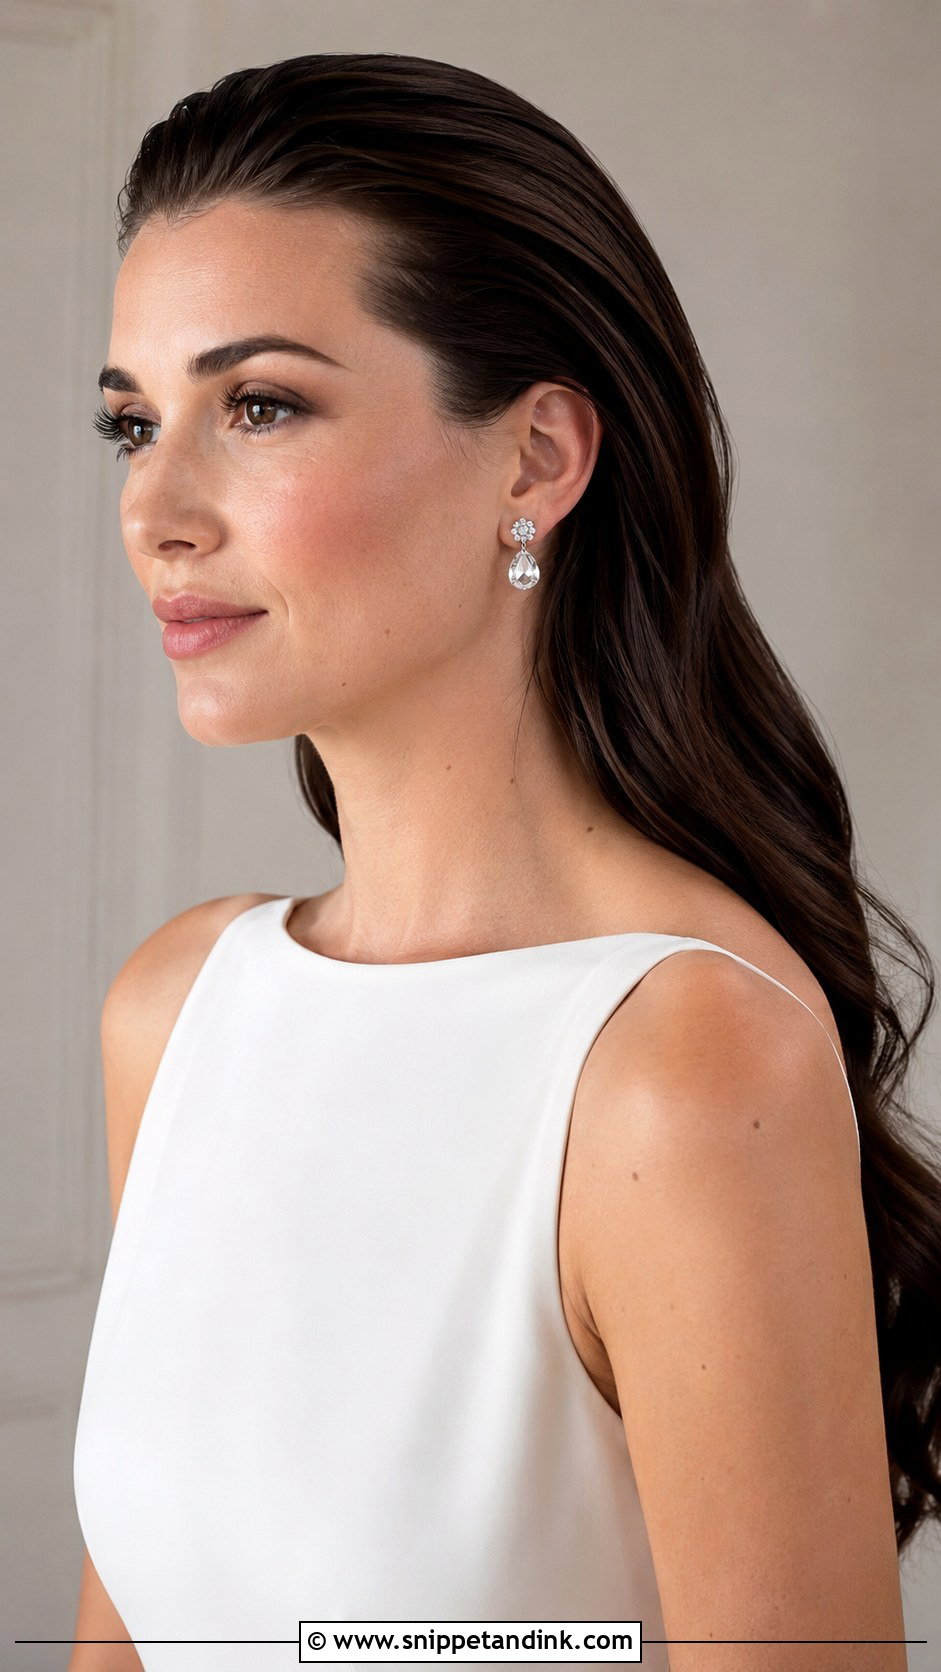
Slicked back wedding hair down is the boldest option here. The front is smoothed hard away from the face, the back and ends stay loose. It pairs with minimalist gowns, high necklines, sculpted makeup and big earrings. The skill is in the product line: I use a firm gel or cream at the front and stop it a few centimetres back, so the lengths behind still move. If the gel runs all the way through, the whole head looks wet. A flexible spray over the top holds the shape. I’d think twice if you have a strong cowlick at the front, because it will fight the slick all day.
10. Middle Part Wedding Hair Tucked Behind Ears
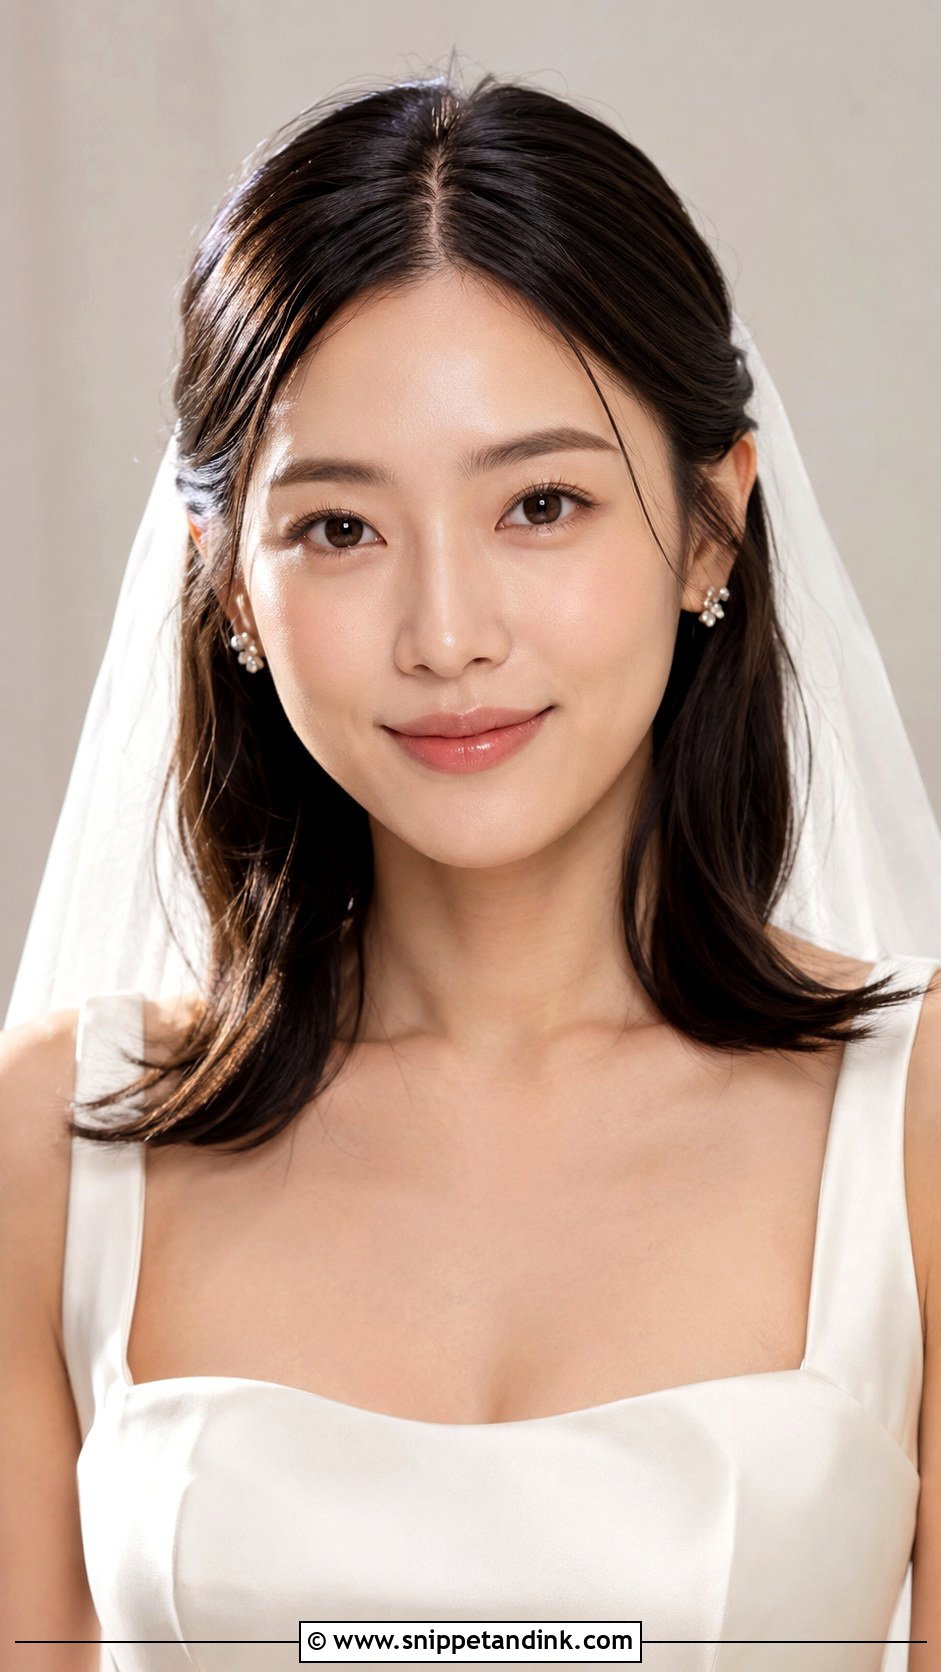
A clean centre part with the sides tucked behind the ears is one of the quietest looks here, and it leaves the makeup, earrings and neckline to do the talking. It can be straight, softly waved or curled at the ends. Tucked hair slips forward unless it’s pinned, so I hide a pin behind each ear, angled upward into hair close to the scalp. Silky and layered hair need that pin even more. A little crown volume and smooth movement through the ends stop it looking flat.
11. Wedding Hair Down With Clipped Back Sides
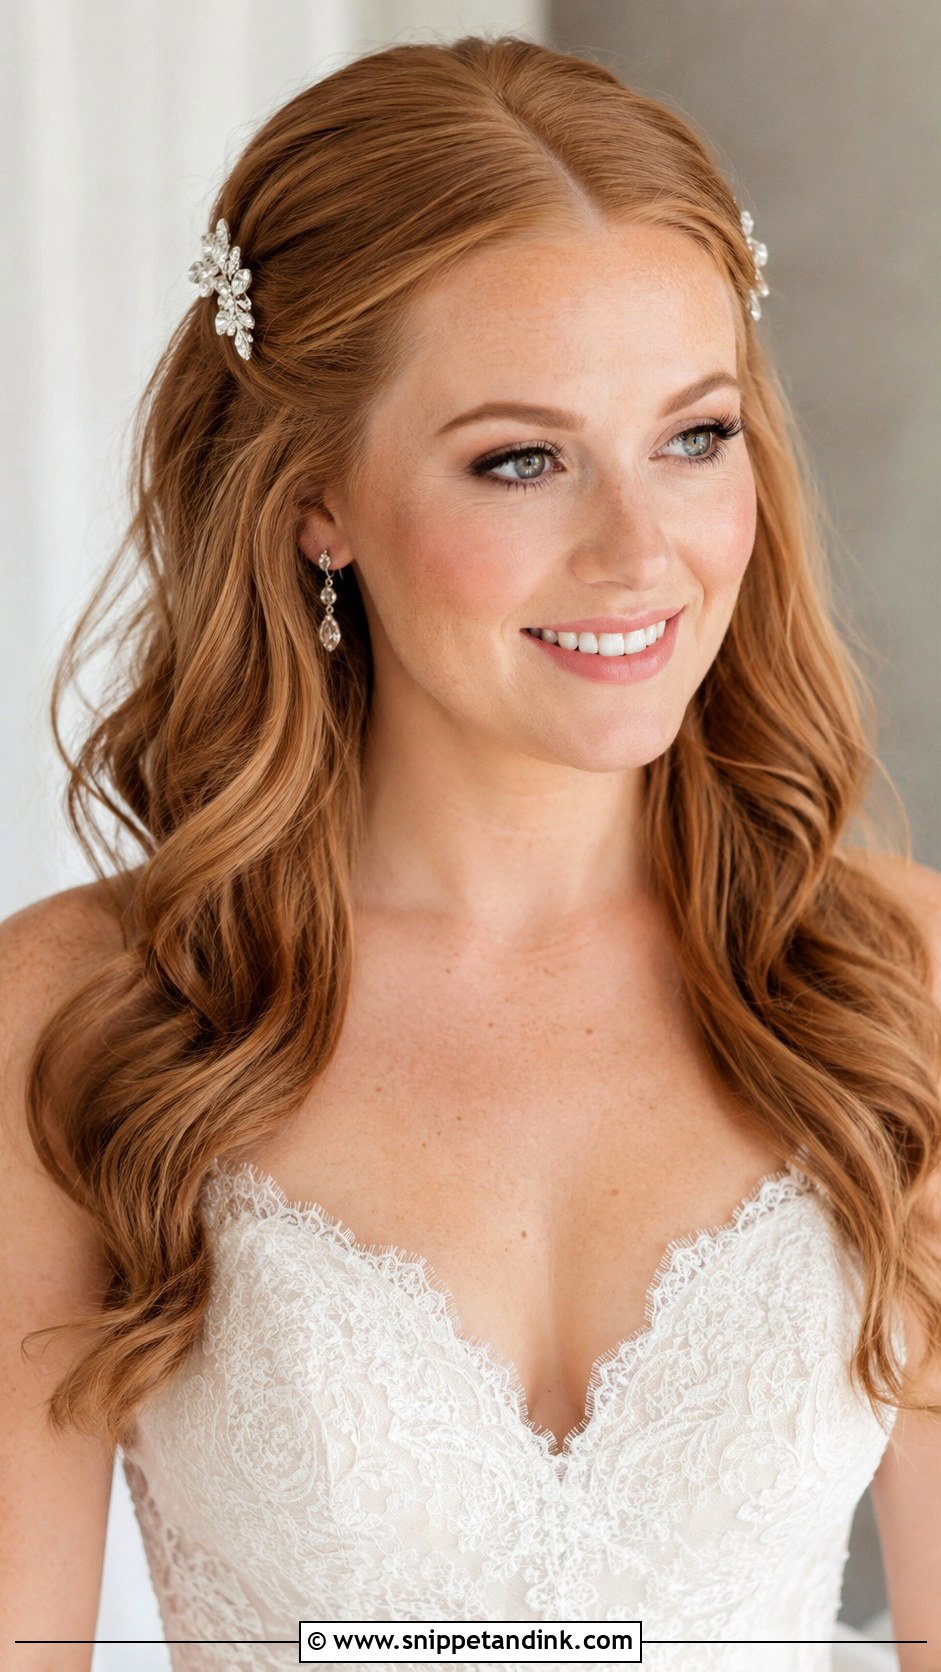
Clipping both sides back is practical and easy to wear all day. The front sections are pulled back and held with clips, combs or decorative pins while the length stays down. On thick hair it takes weight off the face; on fine hair it makes the style look finished with very little work. The clips can be hidden or shown off as the bridal detail. Soft curls or smooth waves both suit it. I’d test decorative clips at the trial, though. Heavy metal clips tend to slide down silky hair over a few hours, and a hidden pin beneath each one solves it.
12. Wedding Hair Down With Low Twist
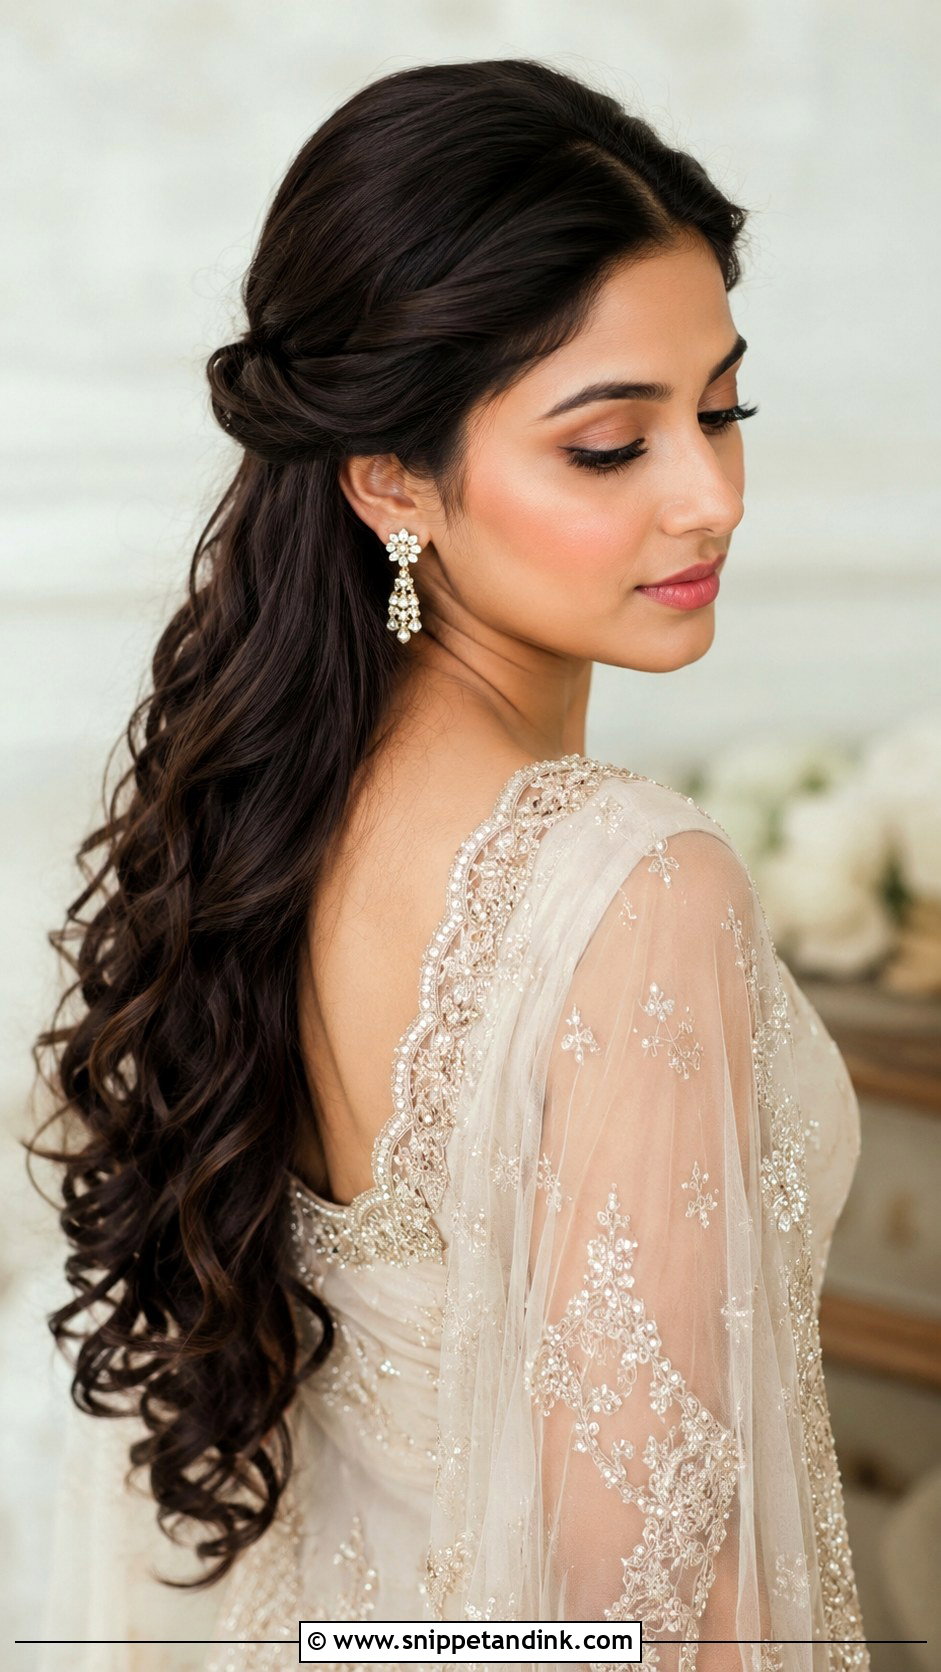
The front sections are swept back and twisted together low, near or just above the nape, while most of the length stays loose. That low gather is a natural anchor for a veil comb or a decorative pin. It’s less formal than an updo and more finished than plain waves. I like it for brides who find crown-height half-ups too top-heavy for their face. The loose hair can be curled, waved or smooth to match the dress. Seen from behind, it gives a soft gathered shape that photographs well during the ceremony.
13. Wedding Hair Down With Soft Waves
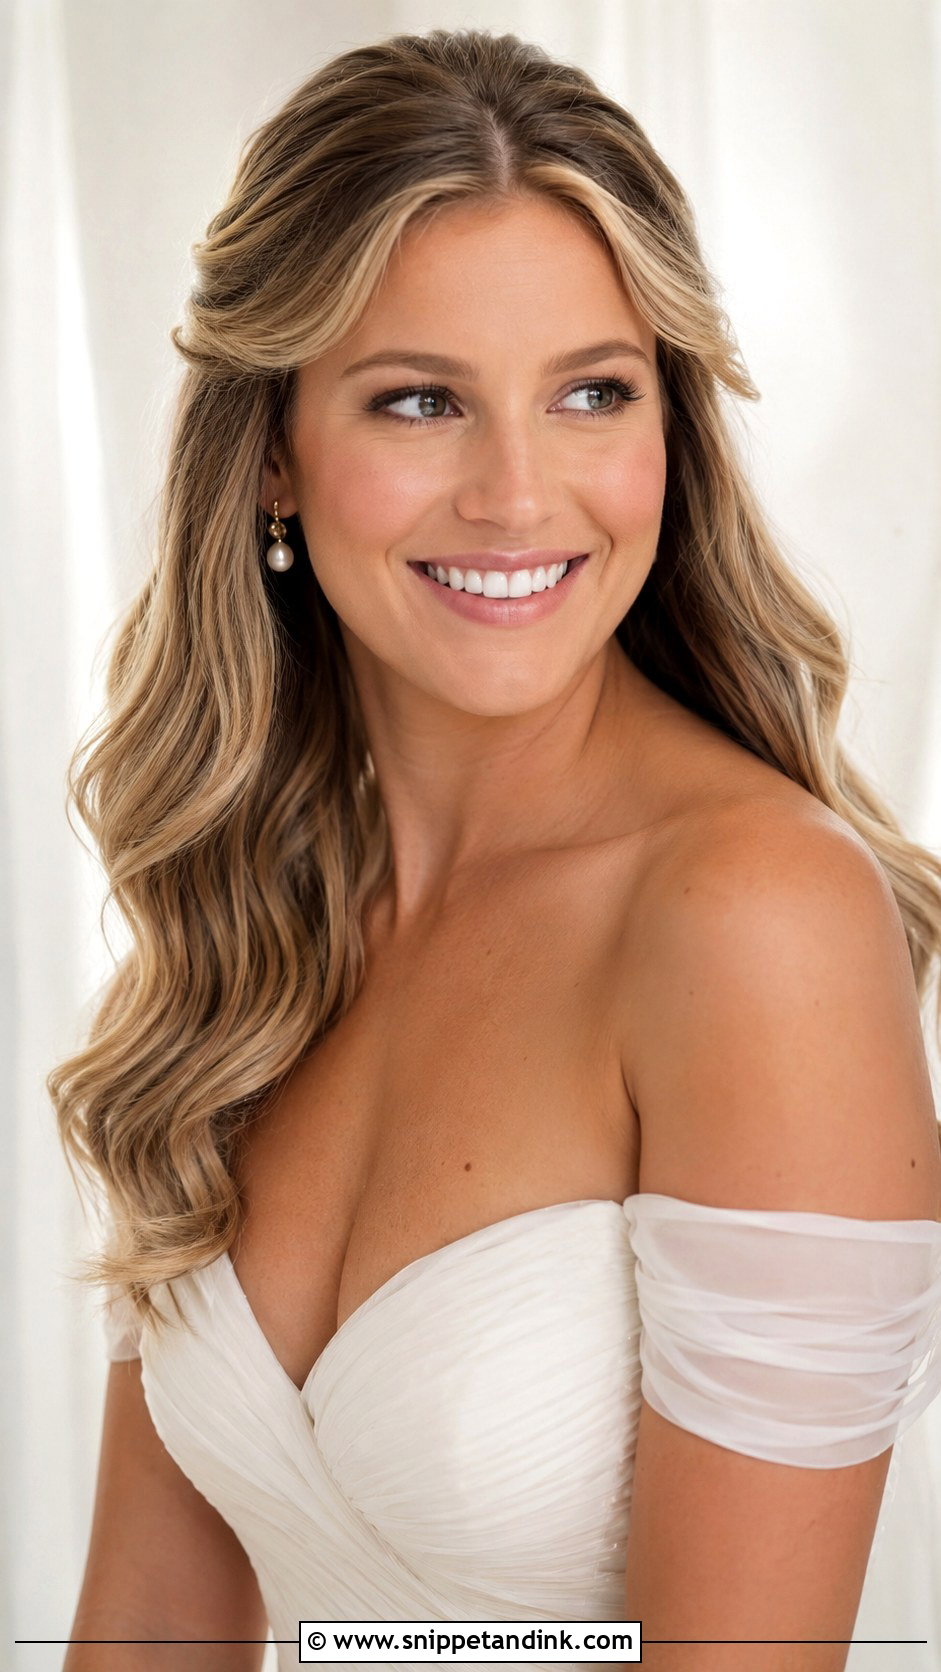
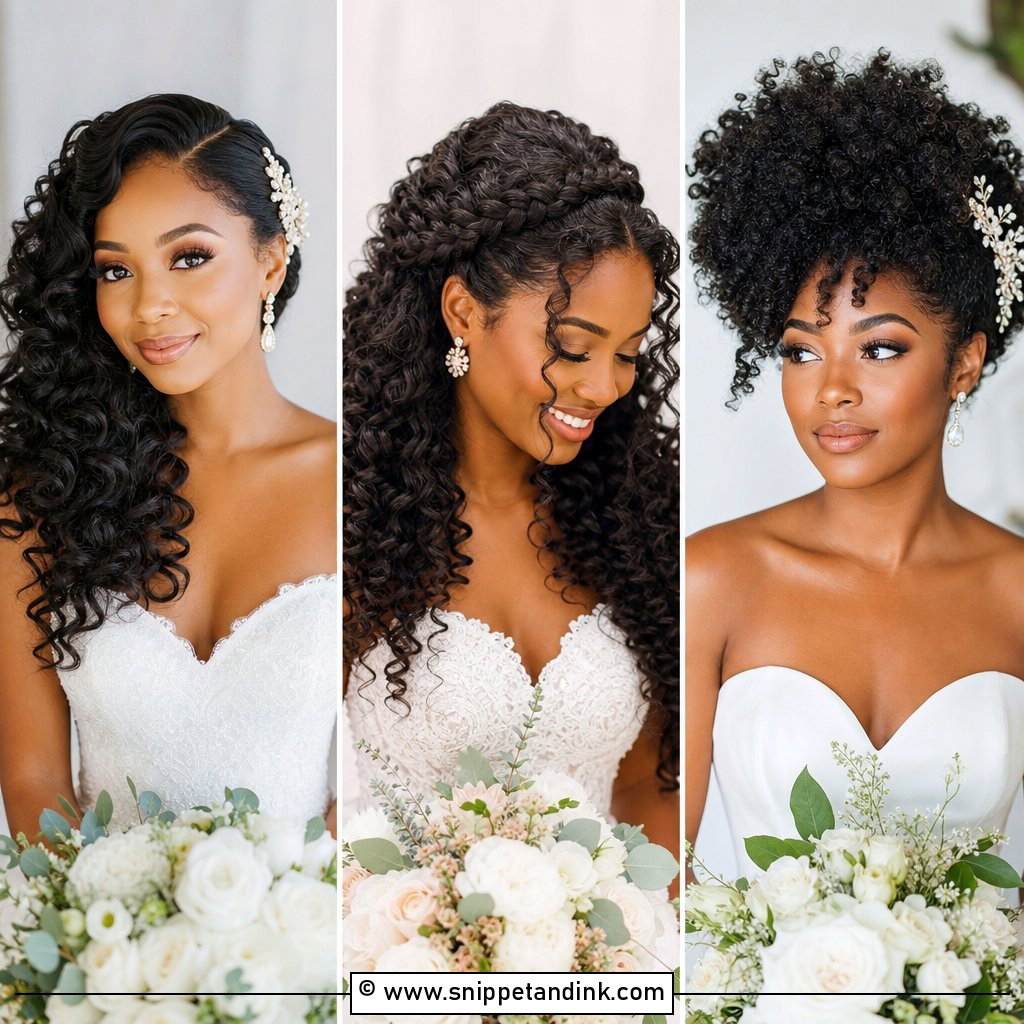
Soft waves can stay off the face, but only if they’re curled in the right direction. I curl the front sections away from the face, then brush and pin them at the temples or crown with hidden pins. Curls turned toward the face will always fall forward, however much spray goes on. The result shows the length and shine of loose hair with an open face shape. Ask for brushed-out waves, light root lift and a flexible spray. They suit veils, floral pins, pearl clips, or nothing at all.
14. Wedding Hair Down With Loose Curls
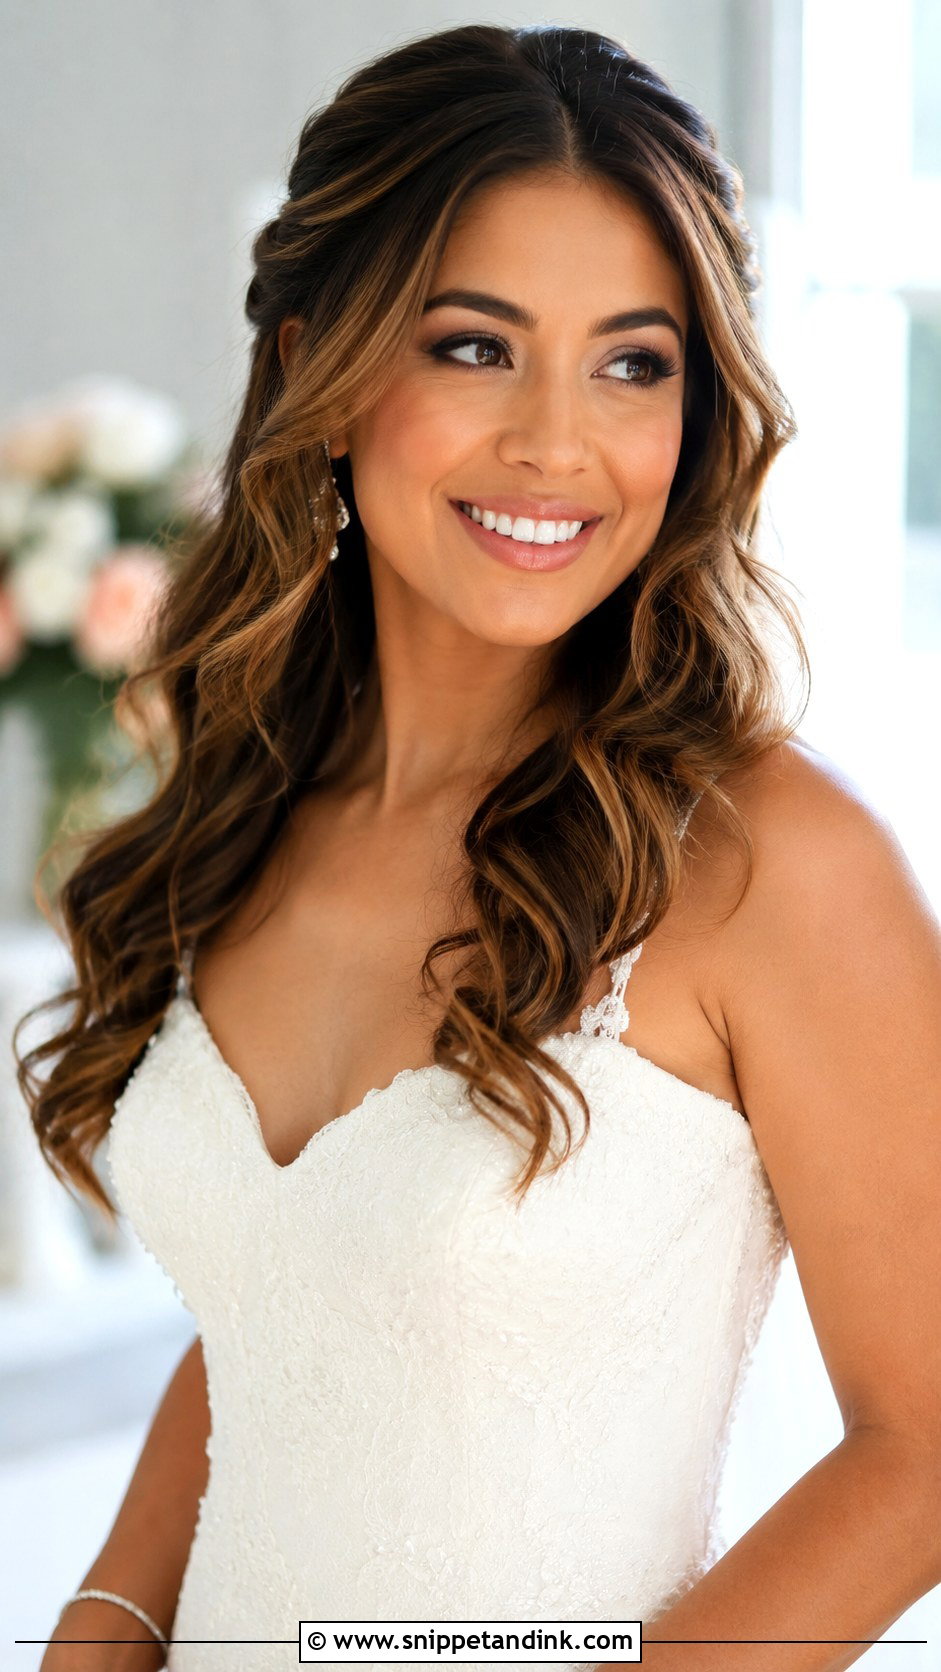
Loose curls bring bounce and volume, and keeping them out of the face is about direction and cooling. I curl the front pieces away from the cheeks and leave them pinned in loops until they’re completely cool, then pin them back or tuck them behind the ears. Brushing curls while warm is the main reason they drop by the first dance. This suits medium to long hair best, when you want something softer than structured waves. A light mist of spray helps the curls make it through the ceremony, photos and dancing.
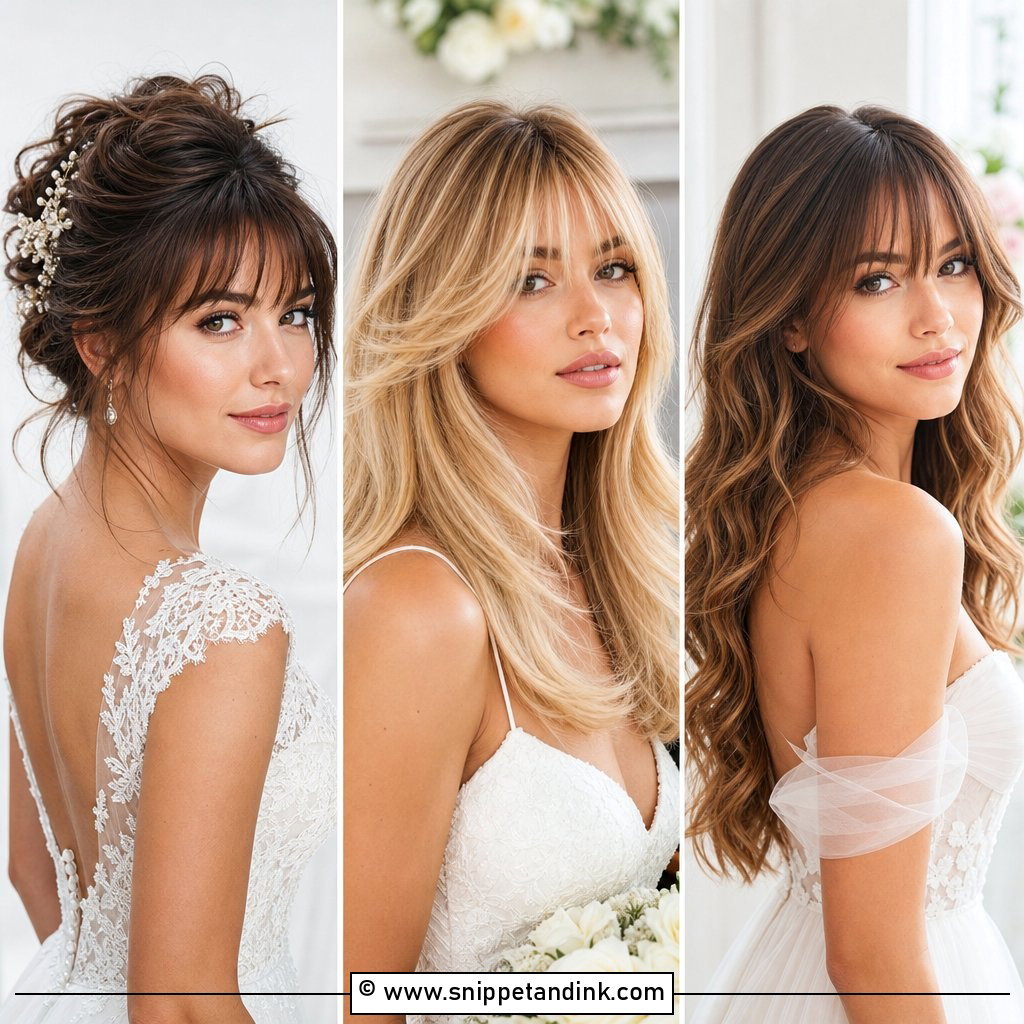
15. Wedding Hair Down With Veil
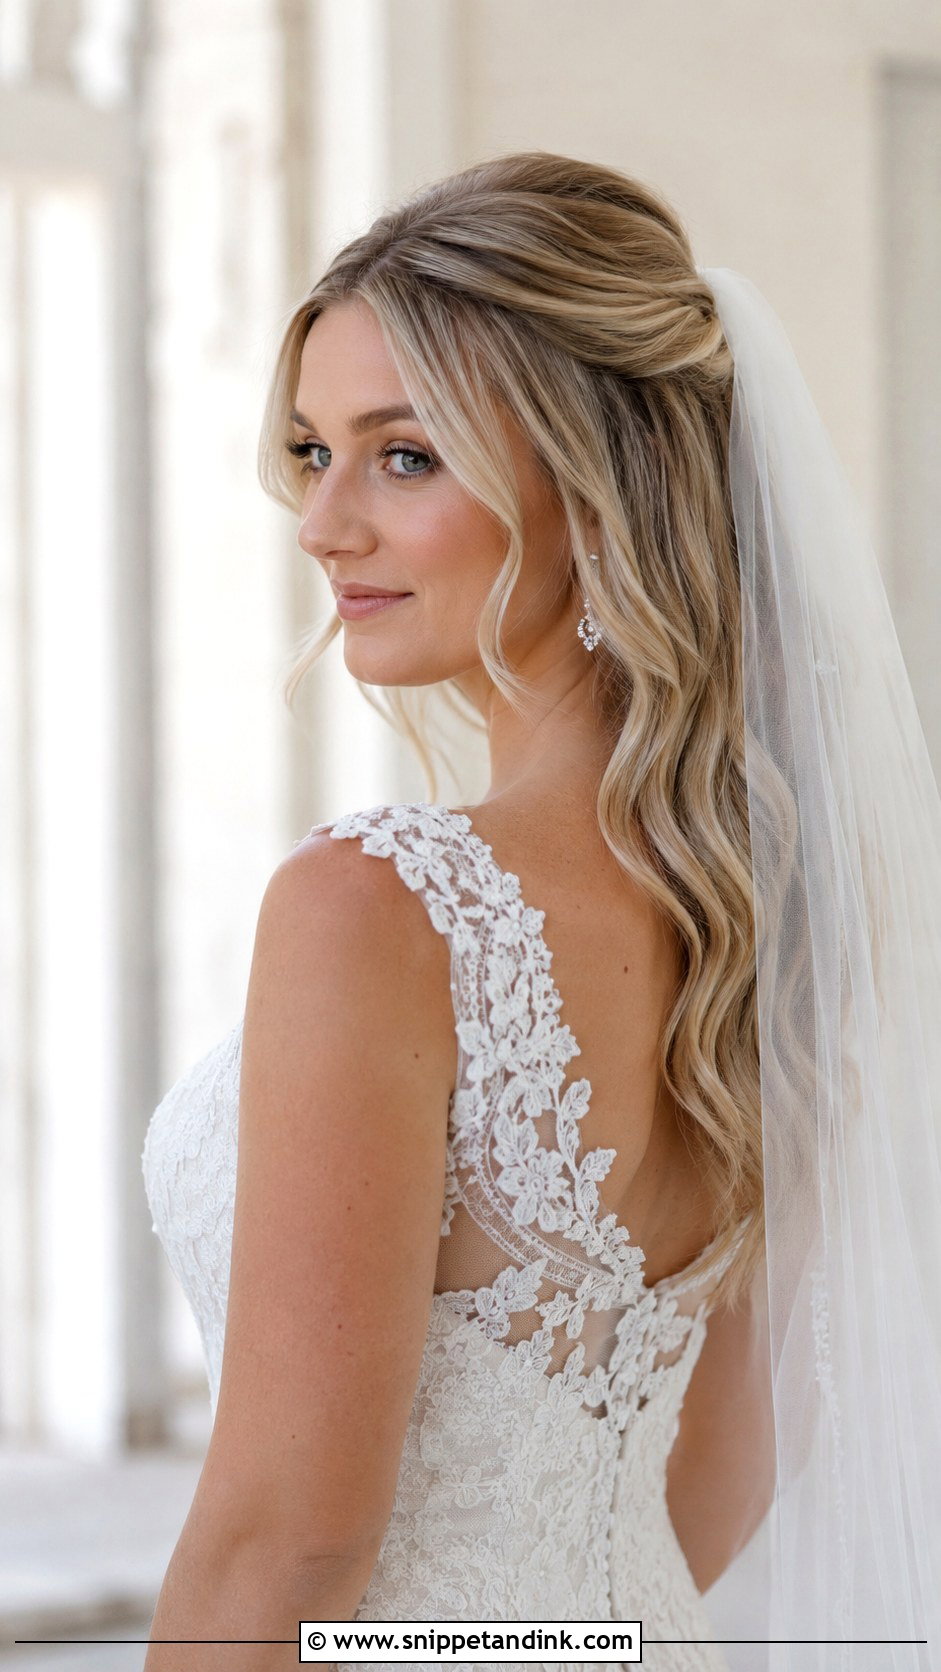
The order of work matters most for this one: Wedding hair down with veil needs structure at the crown before the veil goes anywhere near it. A half-up section, a soft twist, a braid or hidden pinning gives the comb something to grip without flattening the loose hair. The front should stay swept back so your face is clear under the veil. It works with cathedral, fingertip and simple tulle veils. For a heavy veil I add a small hidden anchor braid under the top section and slide the comb into that.
Vines, Headbands and Pins Weigh More Than They Look
Half of these styles rely on an accessory to hold the front, and accessories behave differently on loose hair than on an updo. With an updo, they sit into a solid base. In down hair, they hang from a relatively thin section, and gravity pulls on them all day.
- Bring the real accessory to your trial. A photo isn’t enough; I need its weight and shape to place the pins.
- Anchor first, decorate second. A plain criss-crossed pin goes in under every decorative comb or clip.
- Spread heavy pieces out. One heavy jewelled comb on one side will tug that section down; two lighter ones balance.
- Check comfort over time. Headbands and tight combs can press behind the ears, so wear yours for an hour before deciding.
- Plan the veil swap. If your veil comes off, the accessory that replaces it should sit at the same anchor point.
If something does start sliding during the reception, push it back up and add one more hidden pin underneath. Don’t pull it out to restart; you’ll usually bring the twist or braid out with it.
Pin It Back, Then Shake Your Head
Every style above does the same job: loose length, front under control. Which one suits you depends on your dress, veil, hair texture, venue and how much hold your hair needs. At your trial, bring photos of both the front and the back of looks you like, so the exact placement of the pins can be tested. Then give it a proper test. Shake your head, hug someone, bend down to pick something up. If the front stays where it was put, it’ll last the day.
You'll Like These Ideas:


Leave a Reply