
Hands end up in more wedding photos than most brides expect: the ring exchange, the bouquet held at the waist, the close crop of two hands on a table at dinner. Acrylic is the system I reach for when a bride wants length and a shape that stays put for a whole weekend, because a cured acrylic overlay is harder than gel and holds a sharp sidewall without flexing. It carries you from the ceremony to the honeymoon send-off if it’s applied well and not too thick. Below are twenty sets I’d actually build for a bride, from plain French to pearl and gold work, with notes on who each one suits and where it tends to go wrong.
Timing a Fresh Acrylic Set So Nothing Lifts at the Altar
Acrylic grows out from the cuticle, and after a week there’s a visible gap that shows in a close-up. That’s why I schedule the wedding set one to three days before the ceremony, never a week ahead. Any closer than a day and you have no time to come back if one nail pops or the shape is wrong.
- Trial set four to six weeks out. It tells me how your nails react to the product, whether the shape suits your hands, and whether you can work with the length.
- Stop cutting or picking cuticles from the trial onward. Torn skin around the nail can sting when product touches it, and it makes the cuticle line uneven.
- Final set one to three days before. I prep with gentle push-back, a light buff and dehydrator so the acrylic grips without lifting.
- Cuticle oil twice a day after the appointment. It keeps the skin around the nail soft for photos and helps the overlay stay flexible.
If you’ve got a spray tan booked, do the tan first and the nails after, or ask the tanning artist to barrier the nails. Tanning solution stains white tips and milky colors, and it’s very hard to clean out of a fresh French line.
1. Classic French Acrylic Nails For Bride
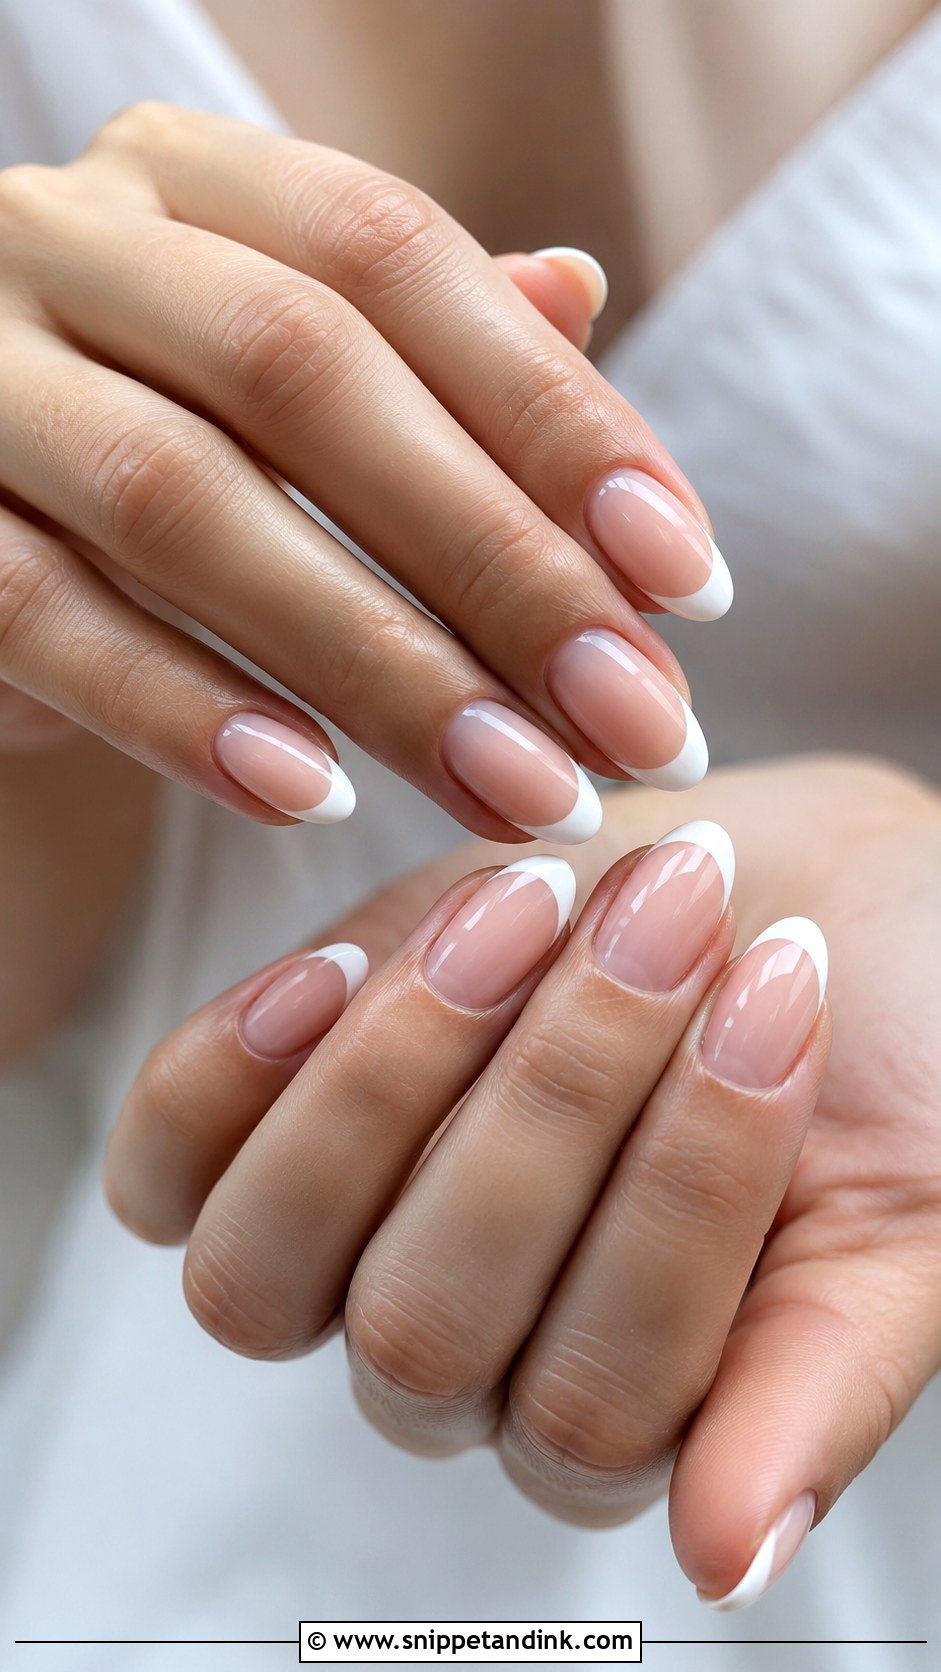
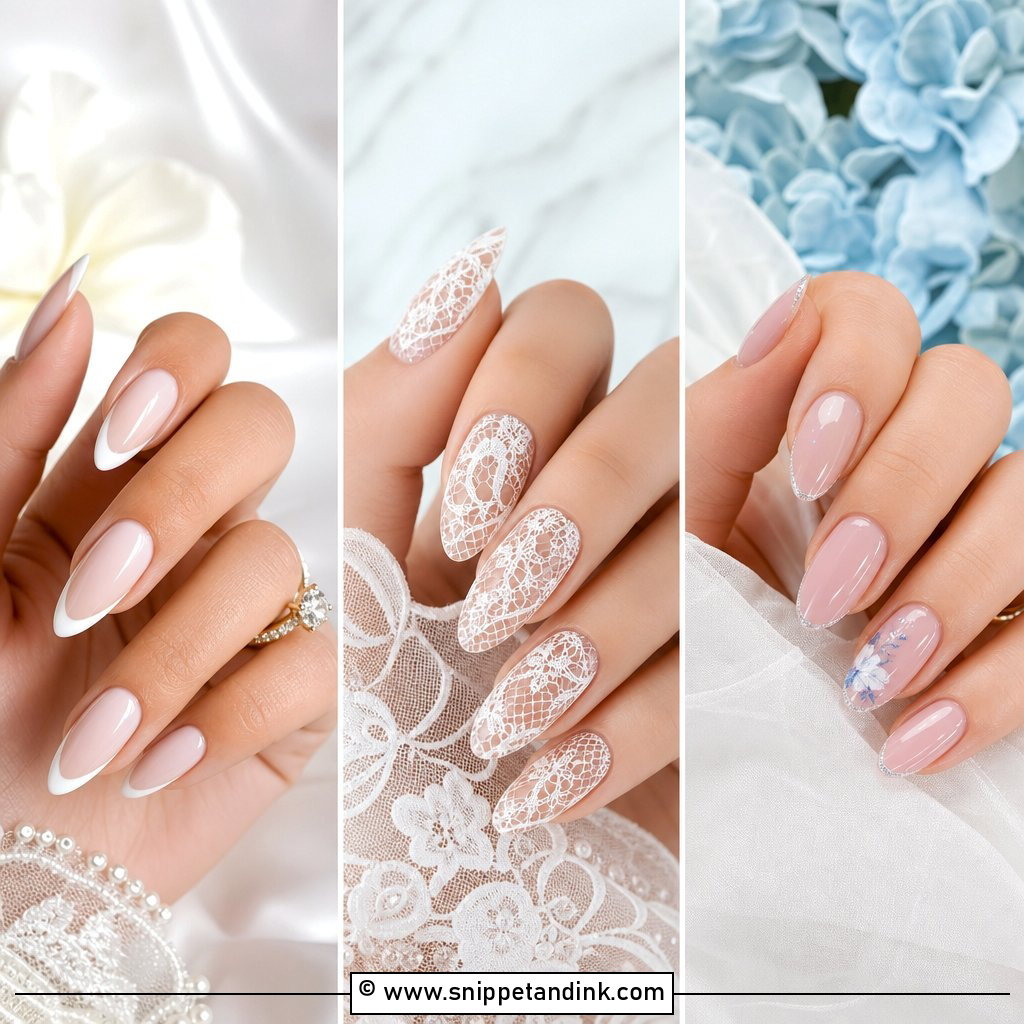
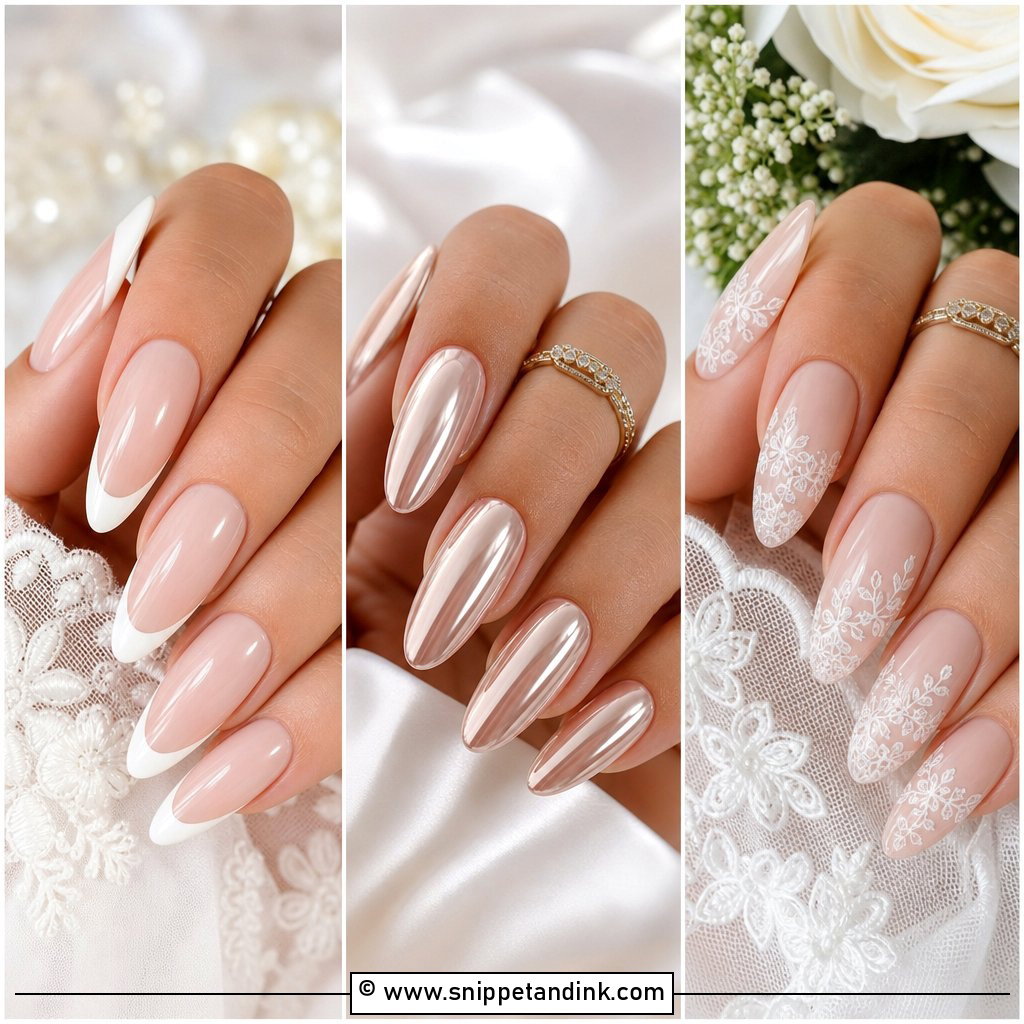
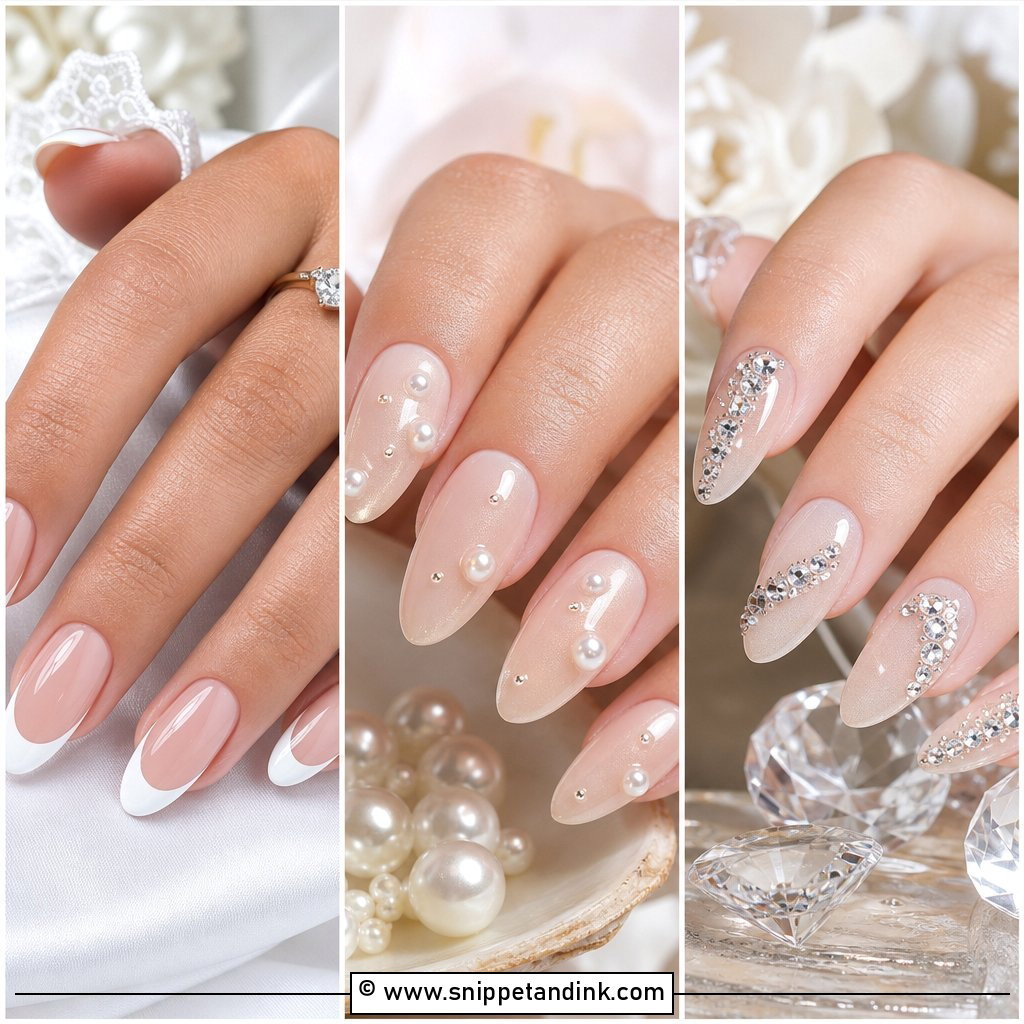
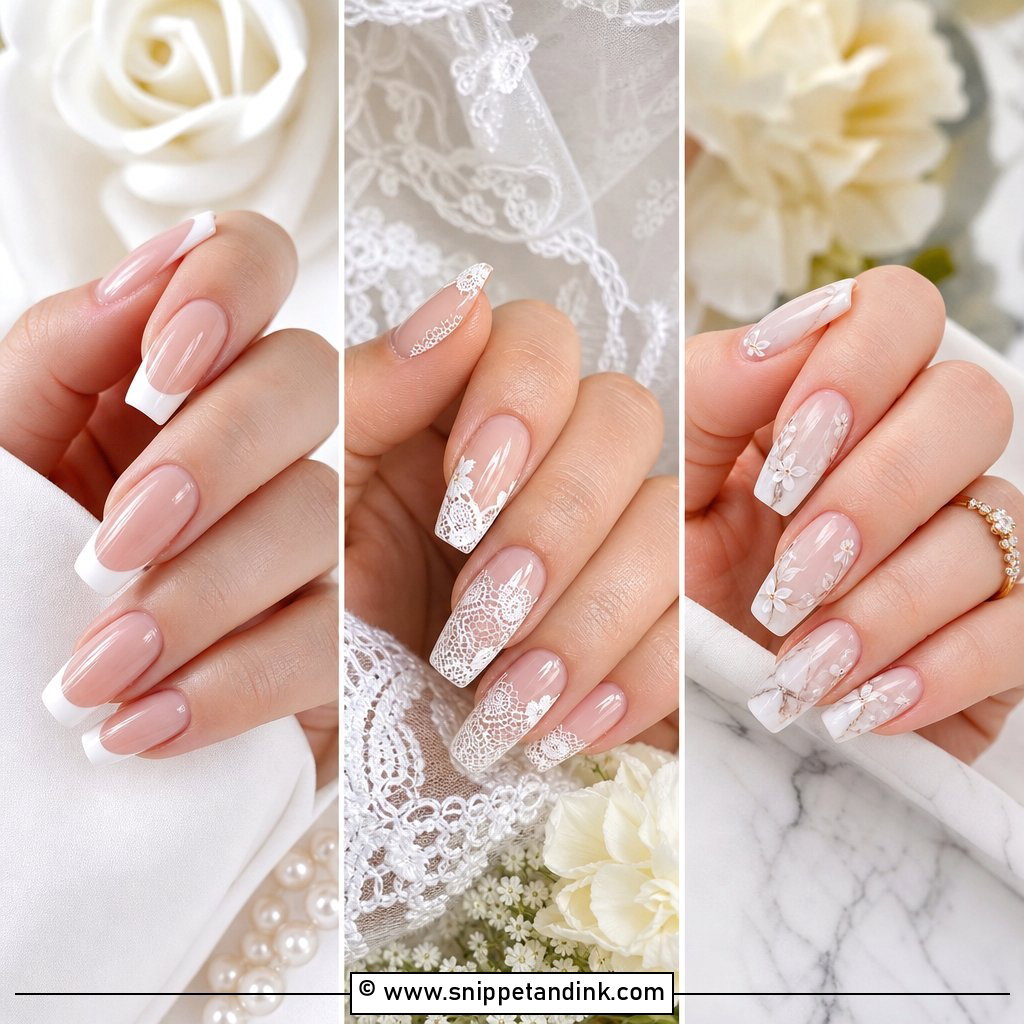
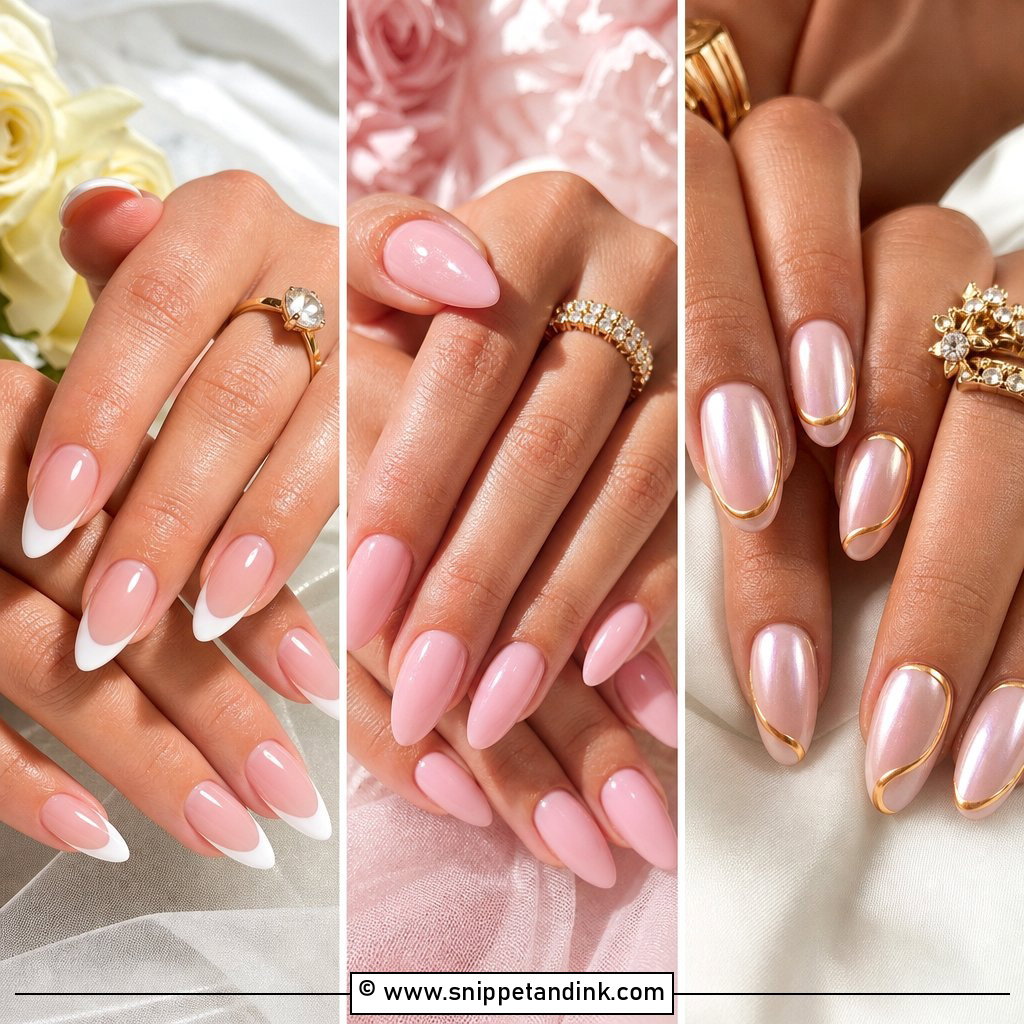
A French set is the one I’m asked for most, and it’s also the one that shows sloppy work fastest. The smile line has to sit at the same depth on all ten nails, so I map it to the shortest nail bed, not the longest. A sheer pink or nude base under thin white tips keeps it modern; a thick chalky band reads dated in a ring close-up. Medium almond or soft square both hold the line well. If your nail beds are very short, ask for the smile line drawn slightly lower so the nail looks longer rather than cut in half.
2. Milky White Acrylic Nails For Bride
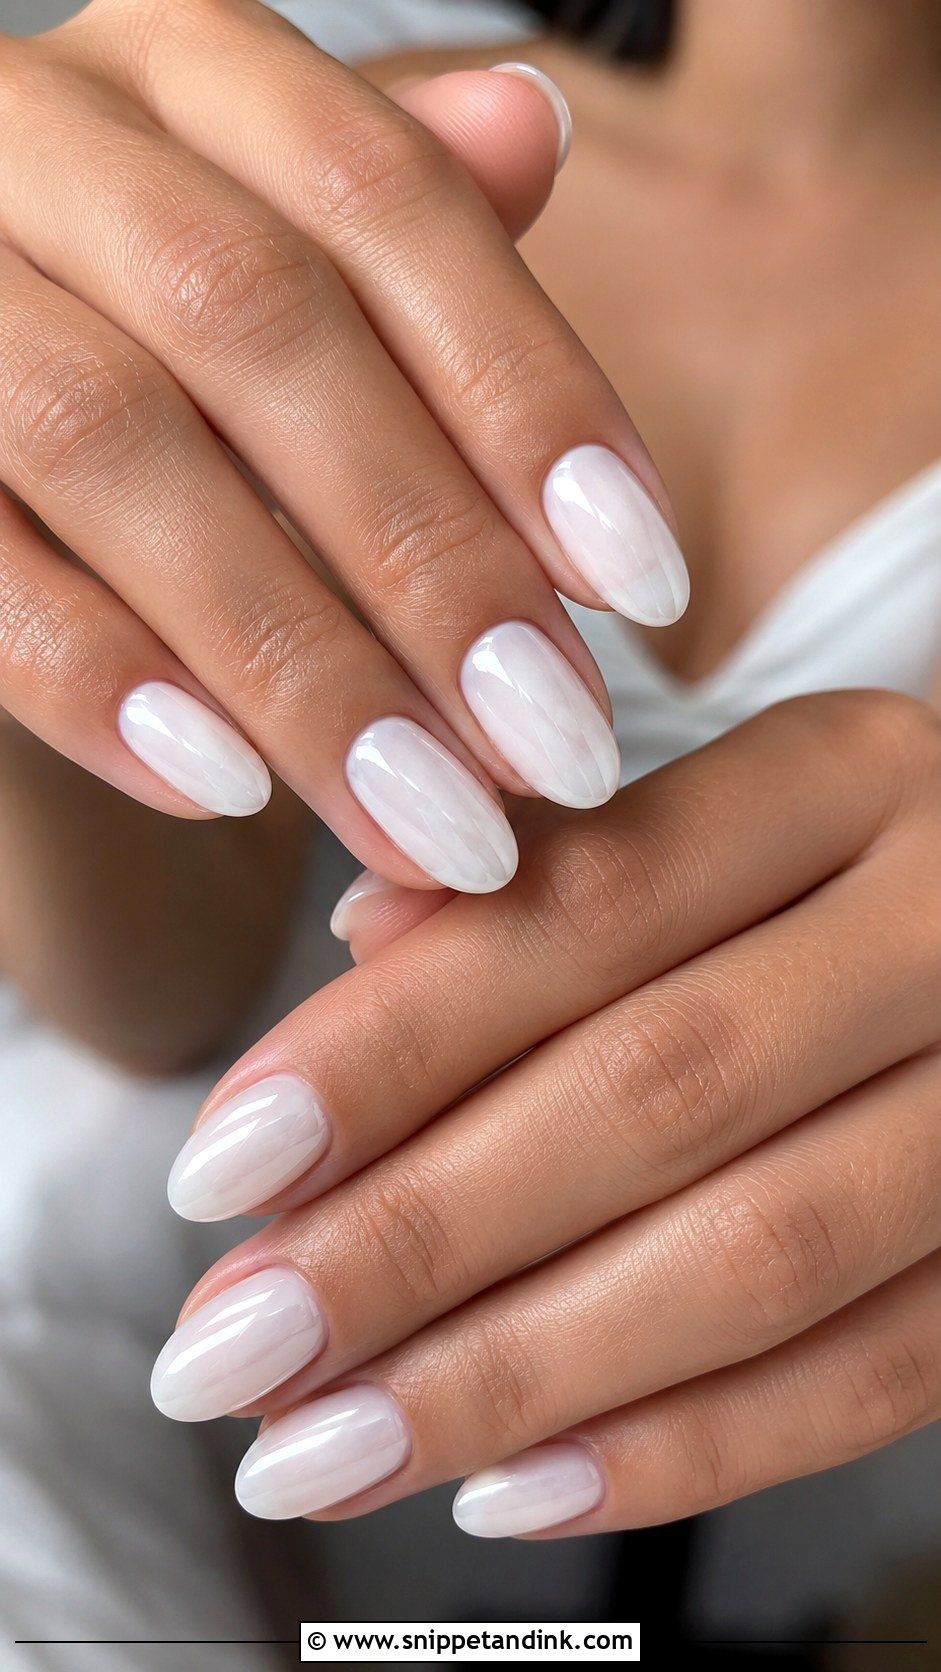
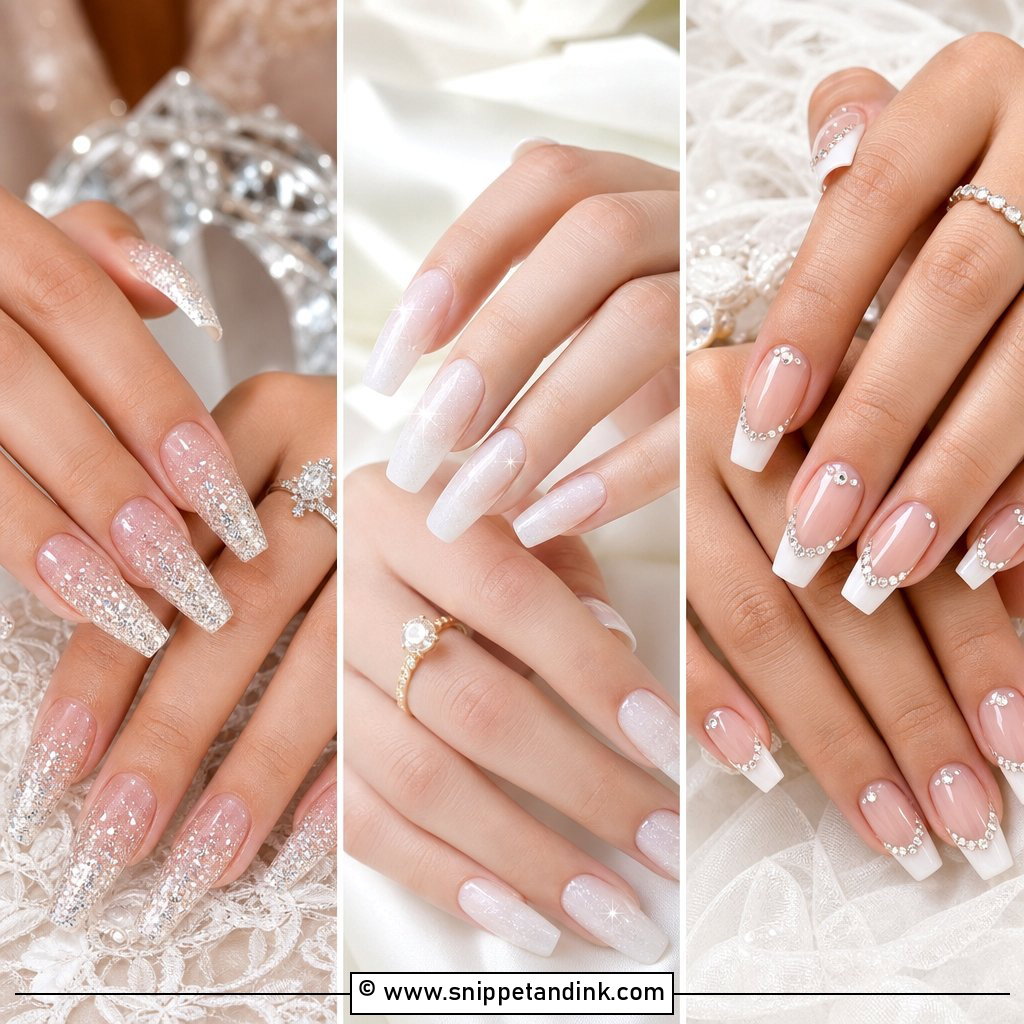
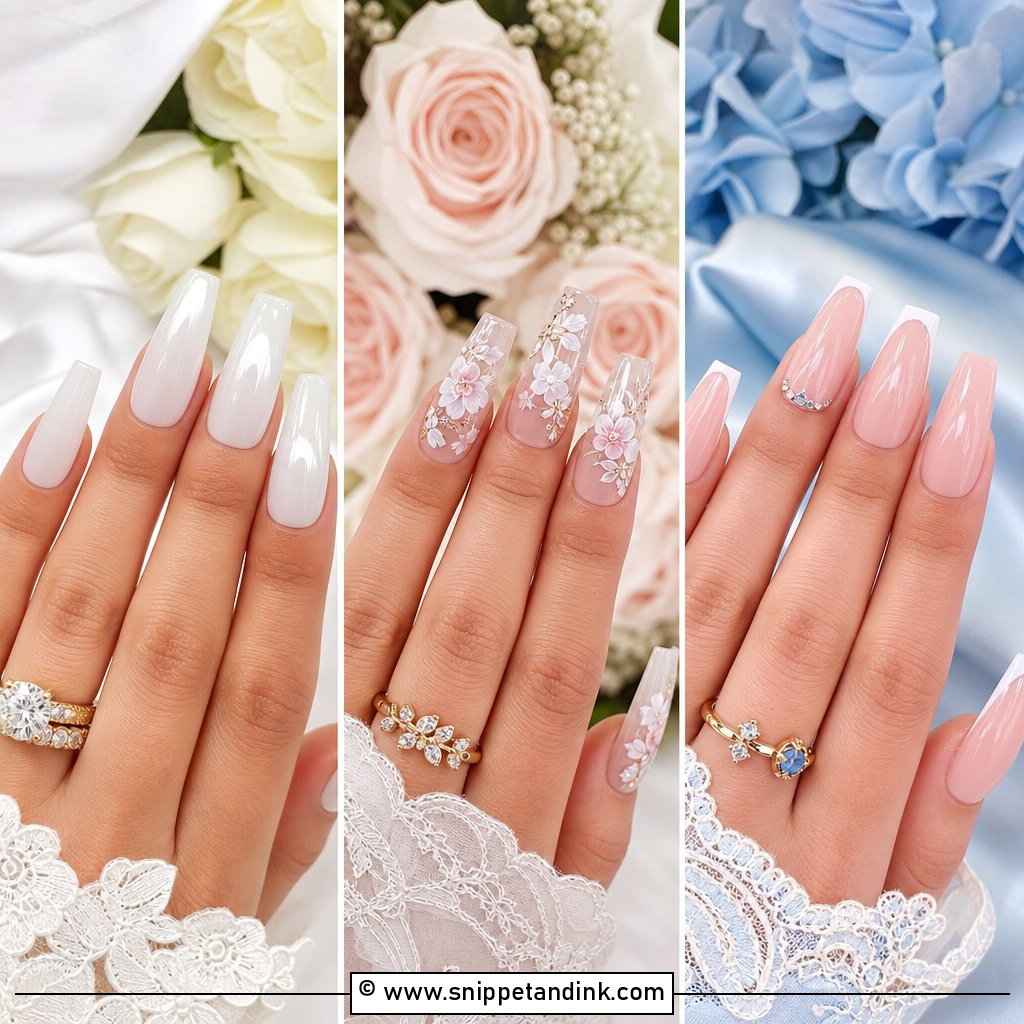
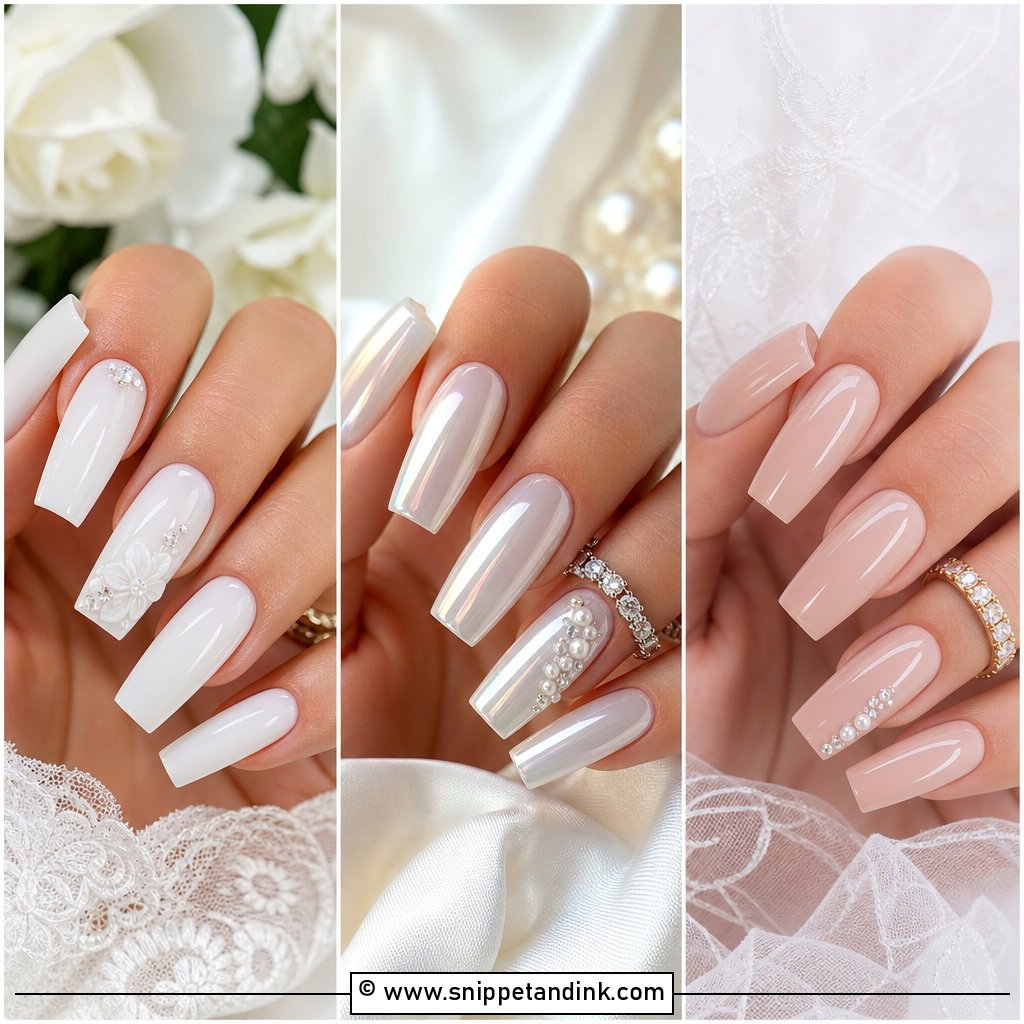
Milky white acrylic nails are built from a semi-sheer white powder or a milky gel over the acrylic, so you see a little depth instead of correction-fluid white. The cloudiness is what makes fingers look longer on almond, oval and coffin shapes. The thing I watch is opacity: too chalky and the nails look thick and flat in flash photos, too sheer and any bubbling in the acrylic shows through. I usually test two shades on one nail at the trial. A high-gloss top coat finishes it; matte milky white looks grubby by day two.
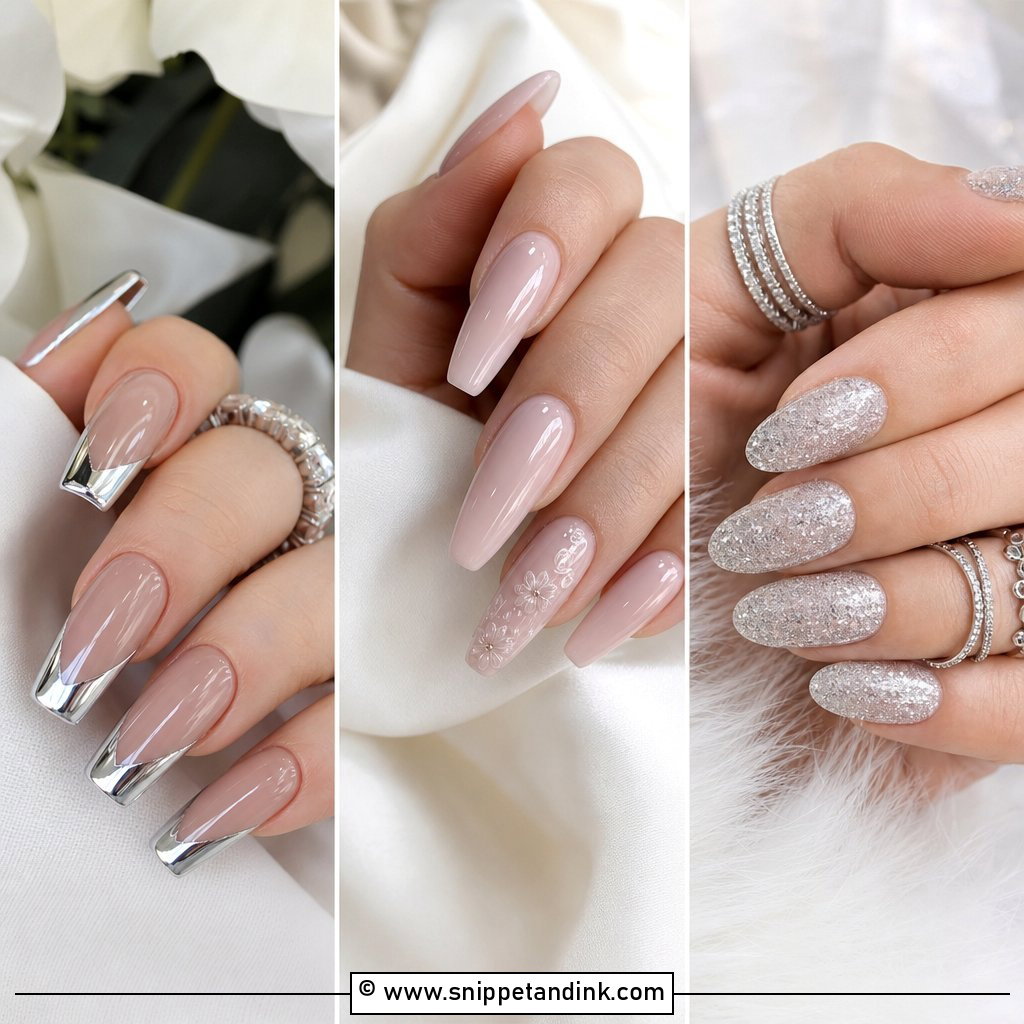
3. Nude Pink Acrylic Nails For Bride
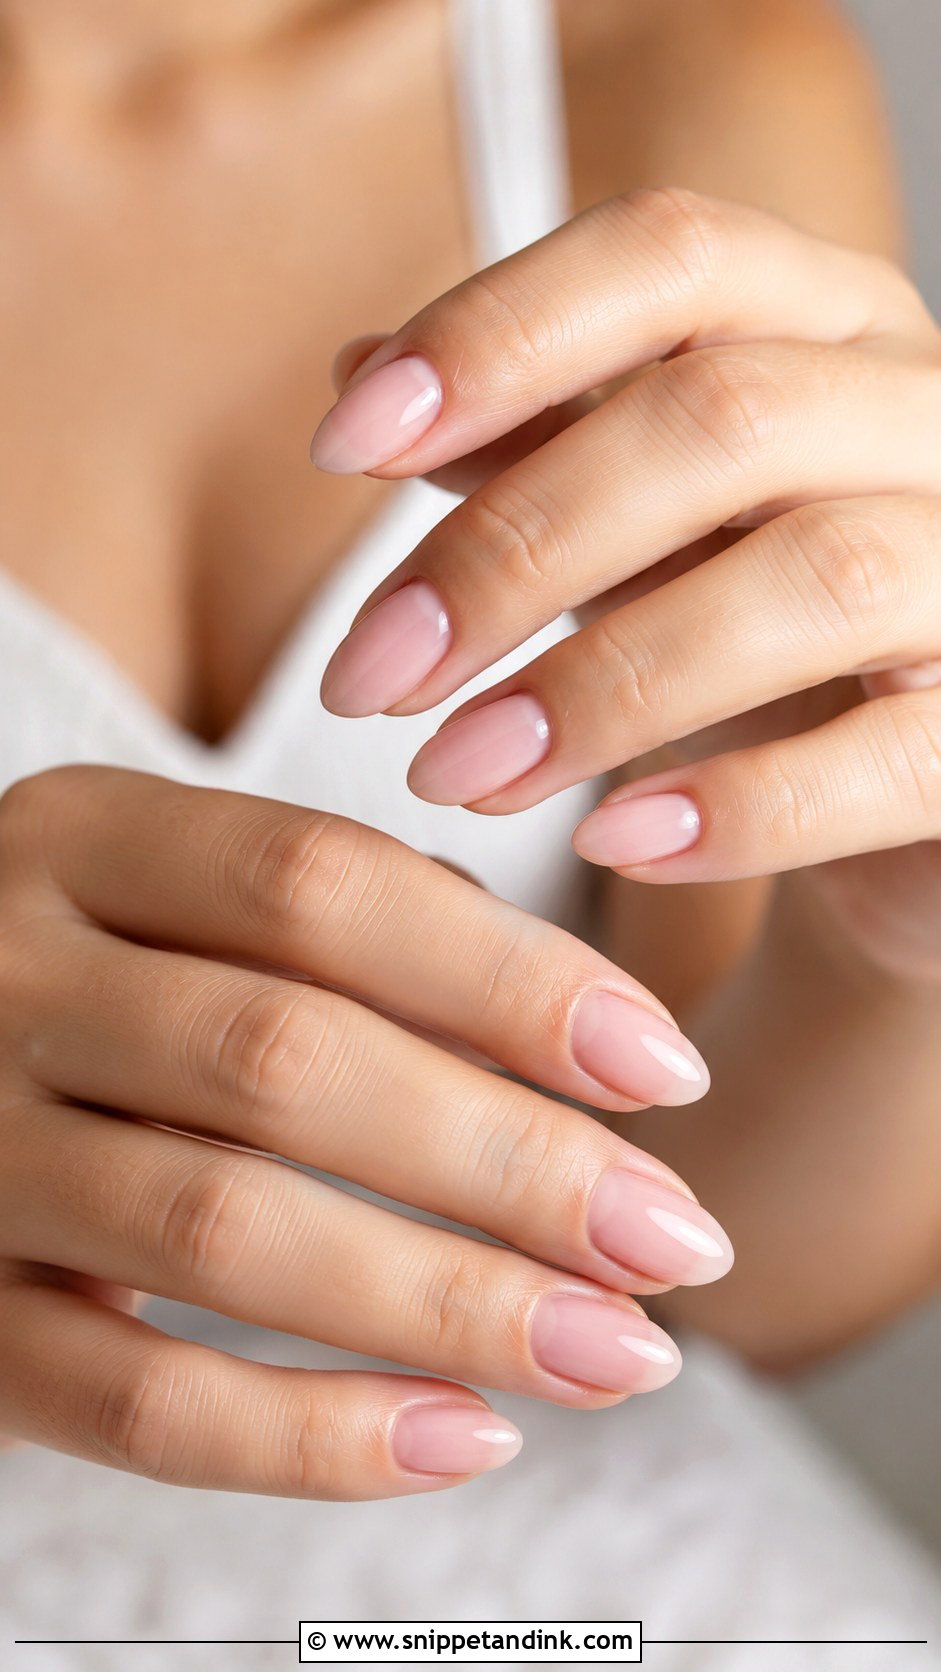
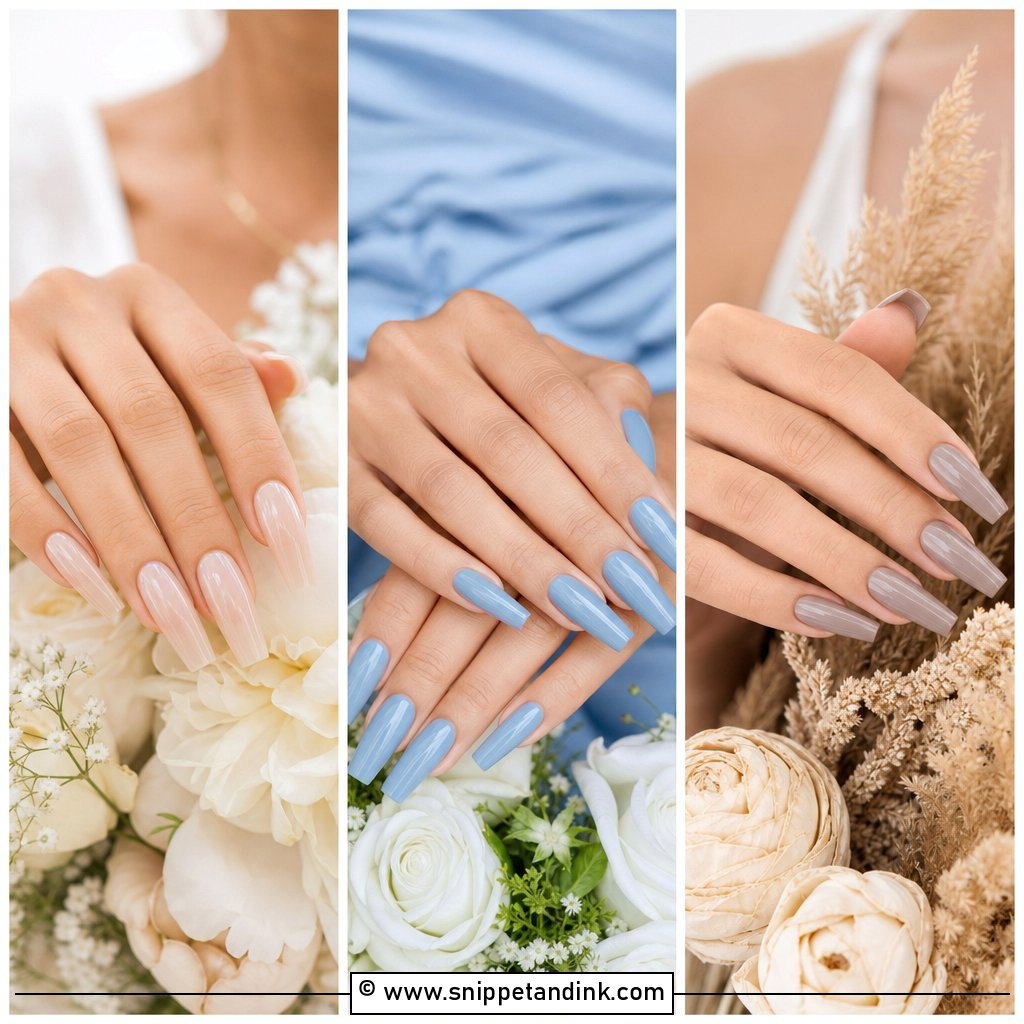
I use a pink-toned nude when a bride has uneven or broken nails a few weeks before the wedding, because the acrylic evens out the length and the color hides old ridges. Match the nude to the skin on the back of your hand, not to your face foundation; the hand is often warmer or redder. Short to medium almond keeps it soft. It sits happily next to ivory, champagne or blush gowns, and gloss matters here more than with any other color, since a dull nude looks unfinished.
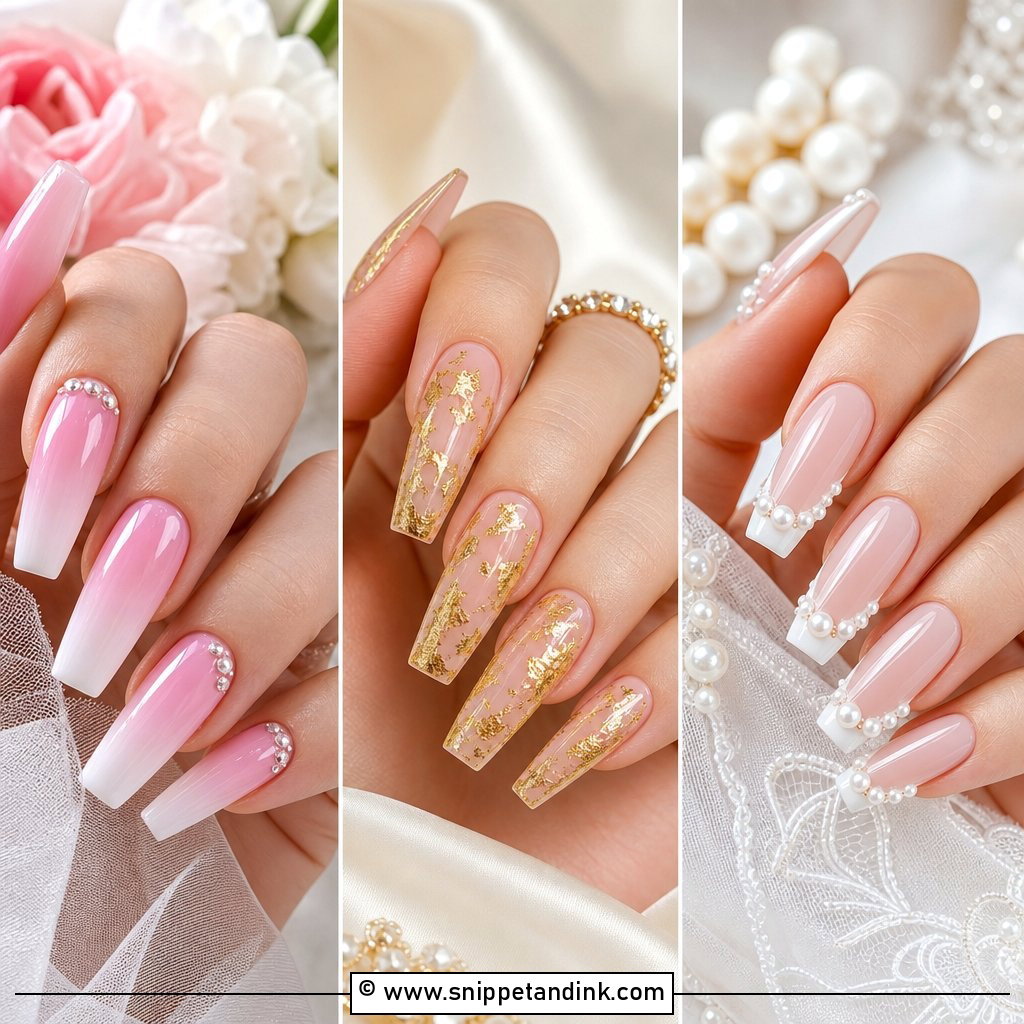
4. Baby Boomer Acrylic Nails For Bride
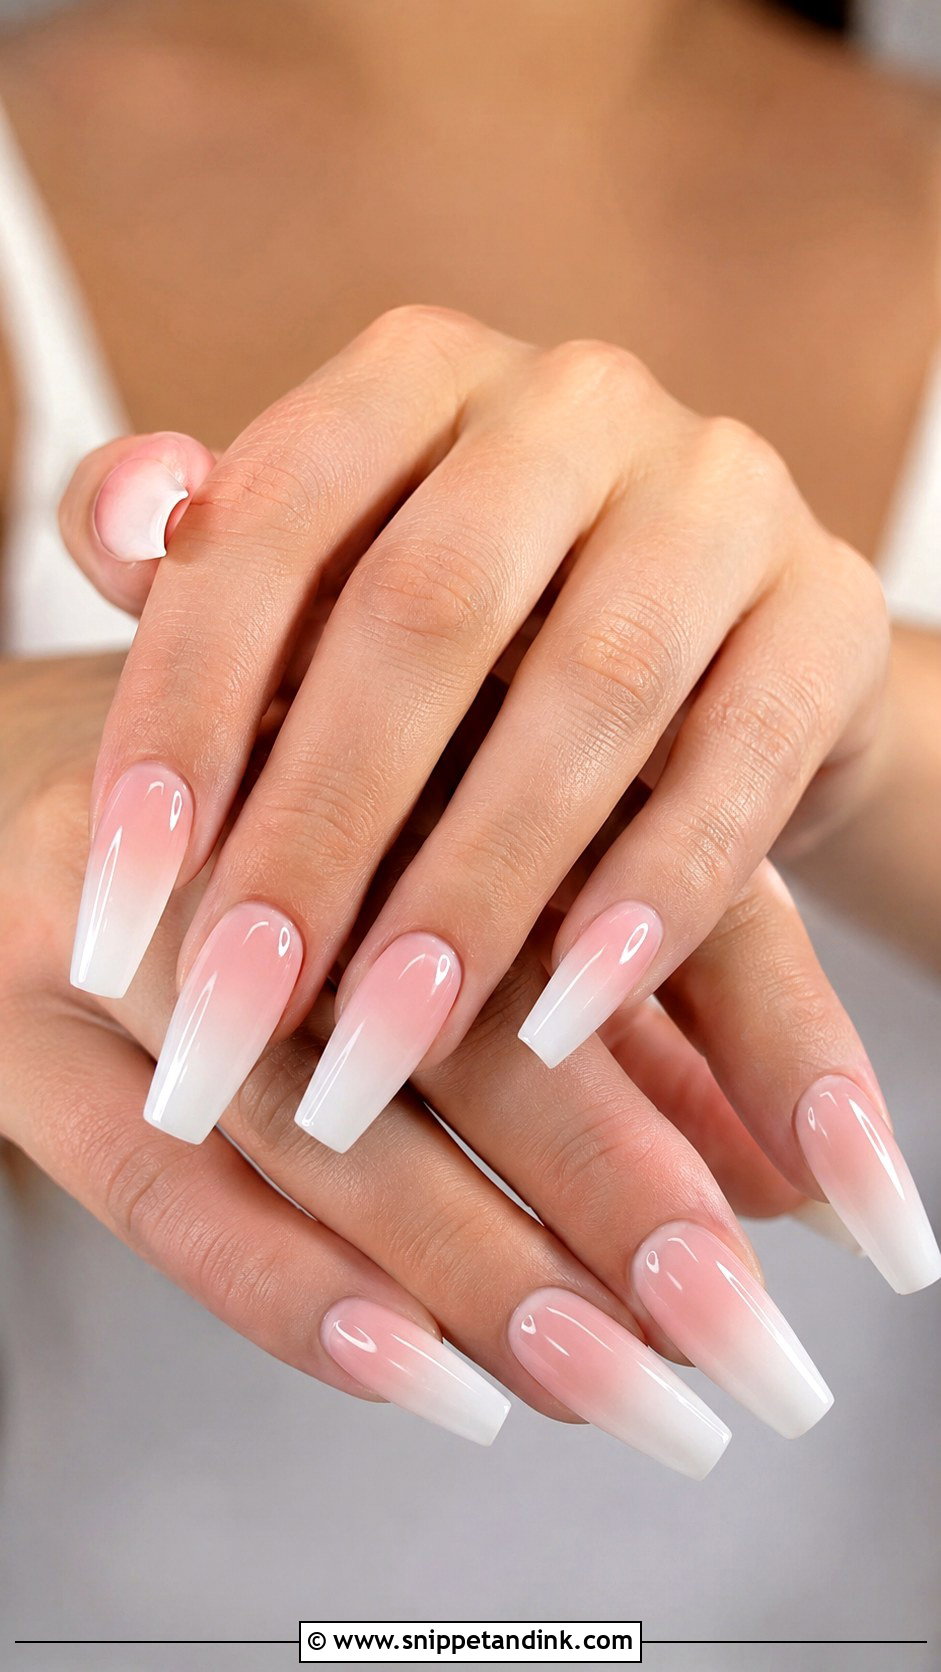
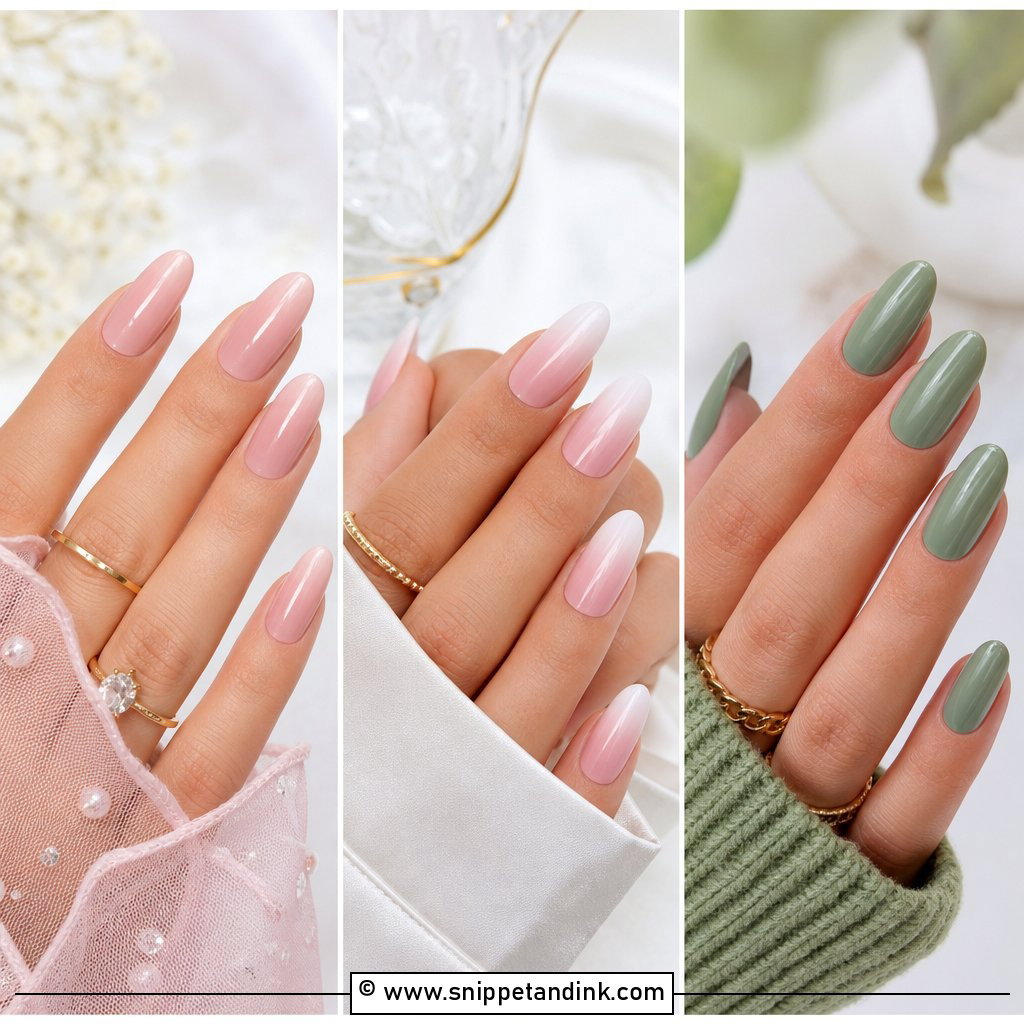
Baby boomer acrylic nails, also called French ombre, fade a pink or nude base into white at the tip. With acrylic, I build the fade into the product itself by pressing white powder into pink at the free edge, so the gradient doesn’t rub off the way a sponged polish fade can. It’s softer than a hard French line and far more forgiving as it grows out, which is useful if the set has to last through a honeymoon. Medium coffin or almond gives the fade enough room to look gradual rather than blotchy.
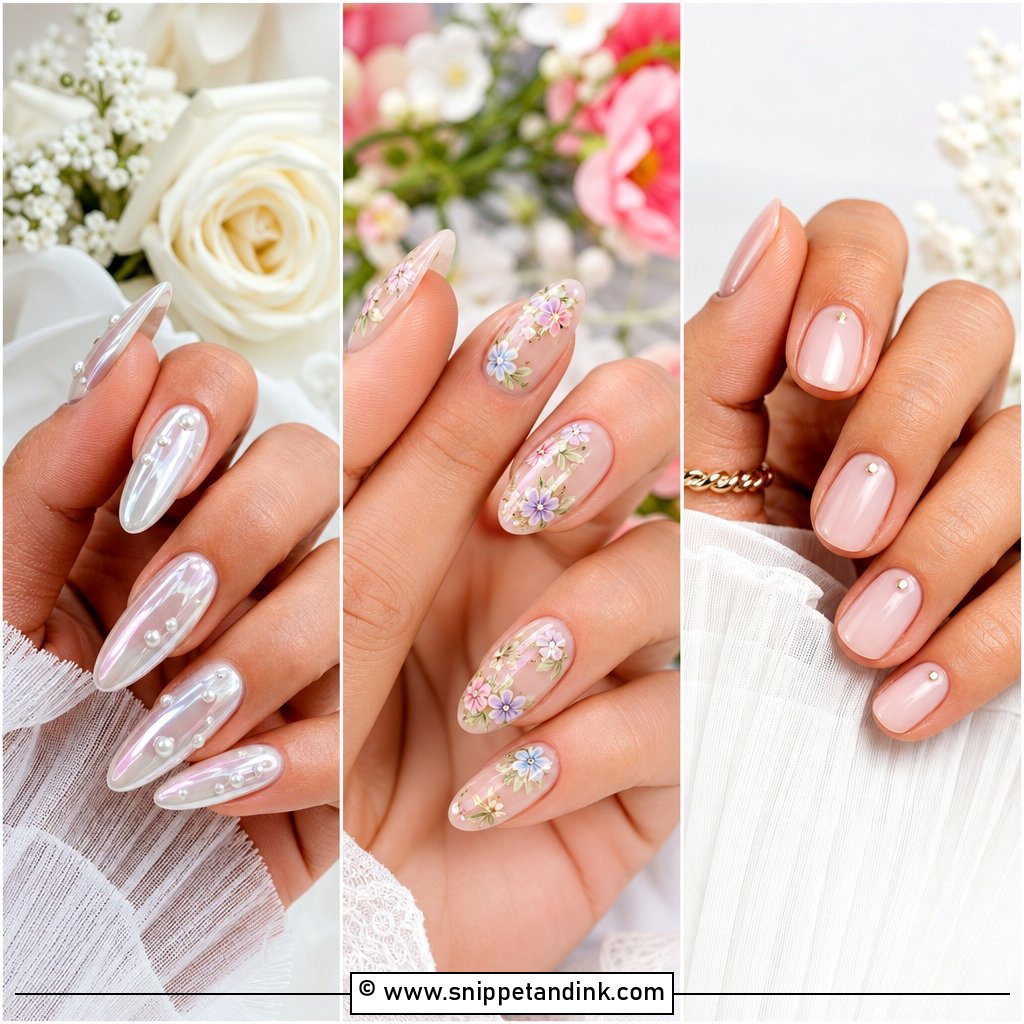
5. Pearl Chrome Acrylic Nails For Bride
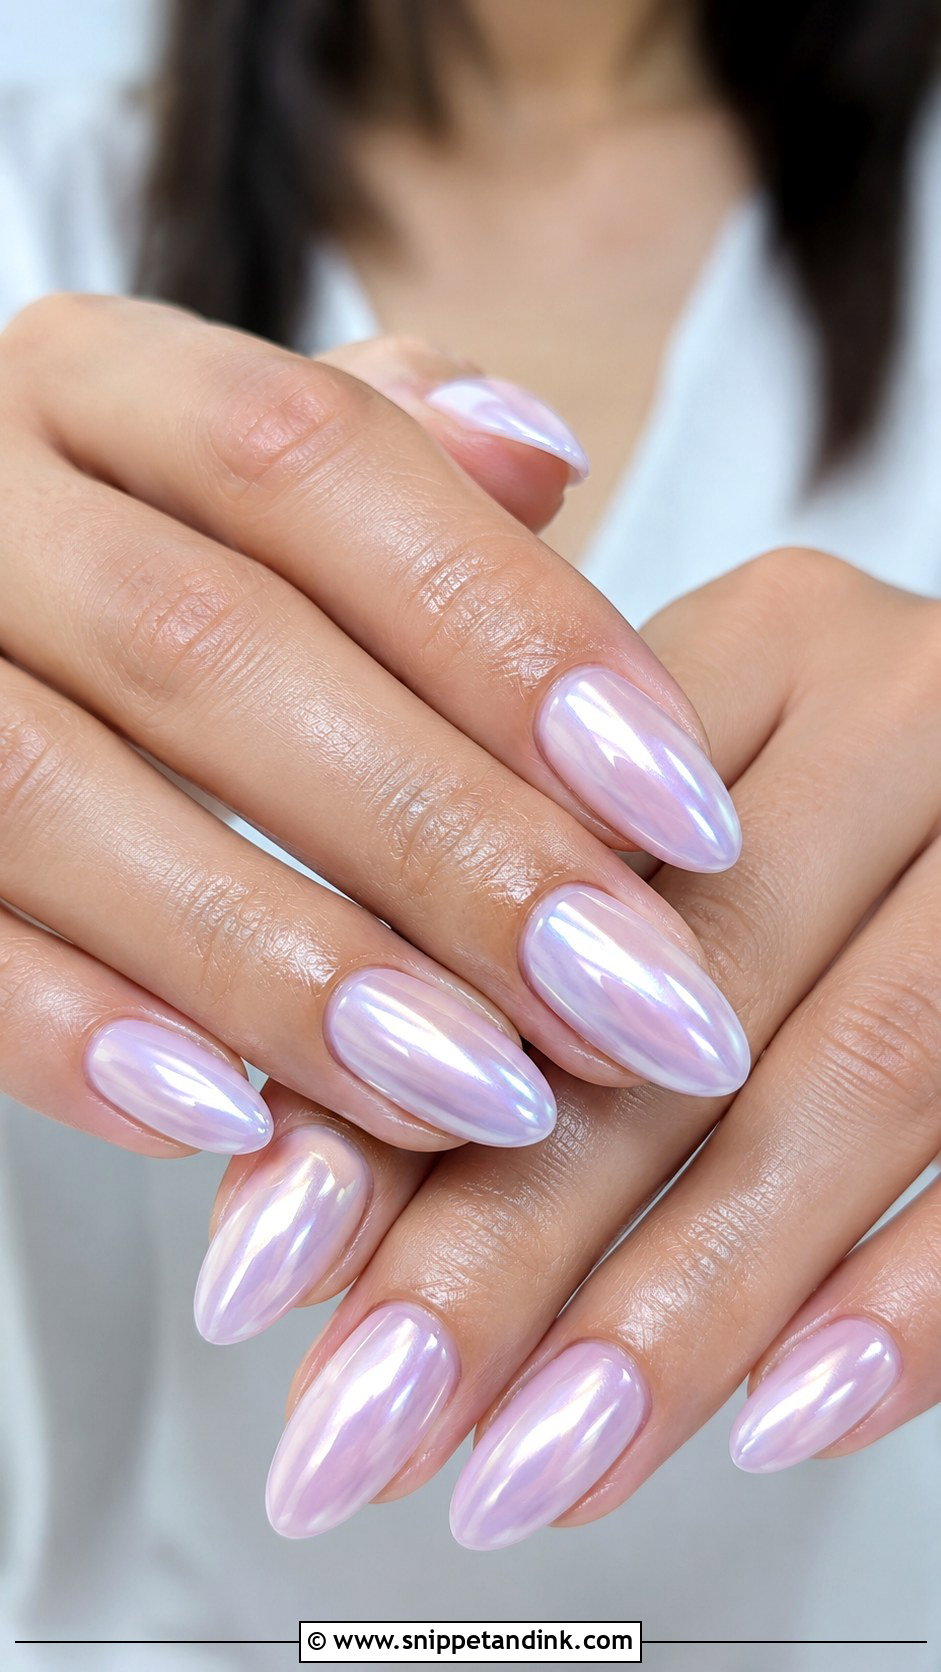
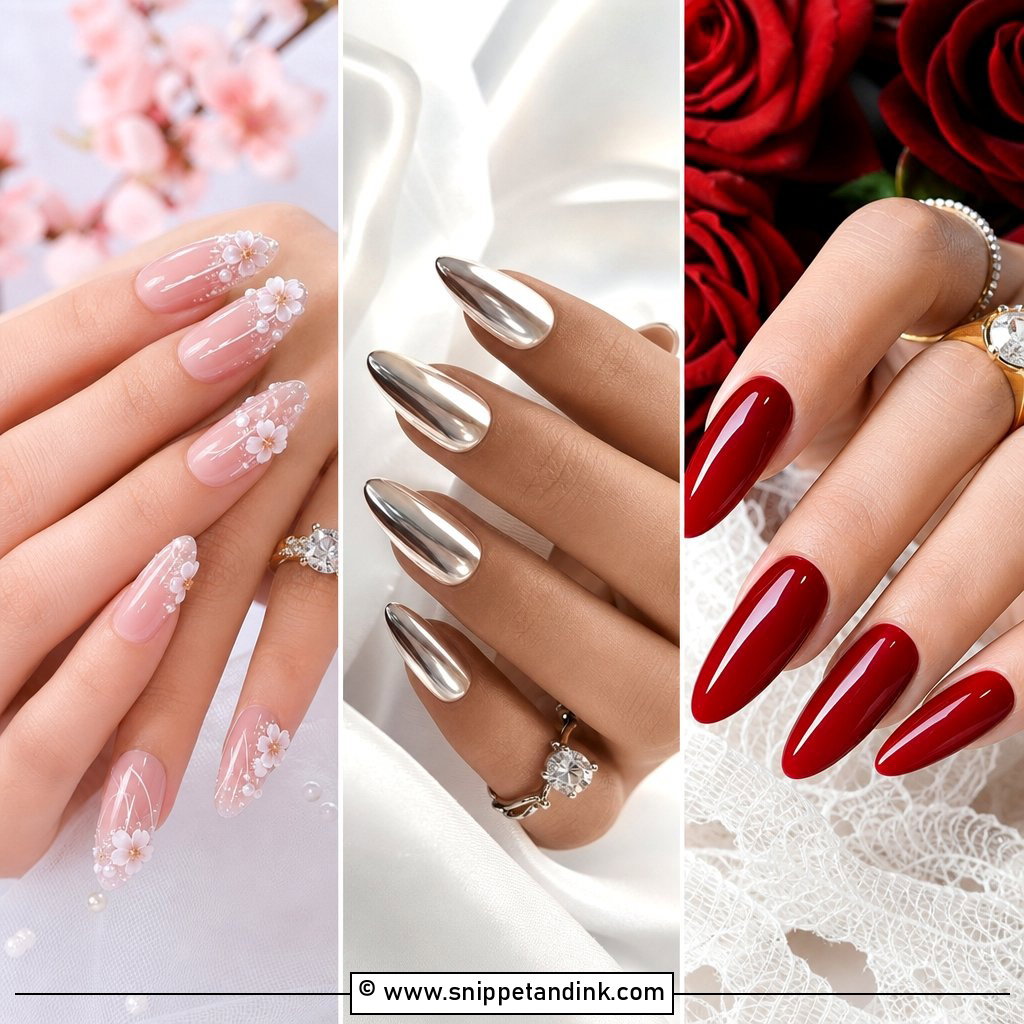
Pearl chrome is a fine powder buffed onto a cured no-wipe top coat, so the base color underneath decides the whole mood: soft white goes icy, pale pink goes warm, sheer nude goes almost invisible with just a sheen. I’d pair it with pearl earrings or a satin gown, where the shine echoes the fabric. Keep the shape simple. On a long stiletto the chrome turns into a mirror and starts competing with the ring. One honest caution: chrome edges can wear at the tip by day five or six if you type a lot, so I seal the free edge carefully.
6. White Chrome Acrylic Nails For Bride
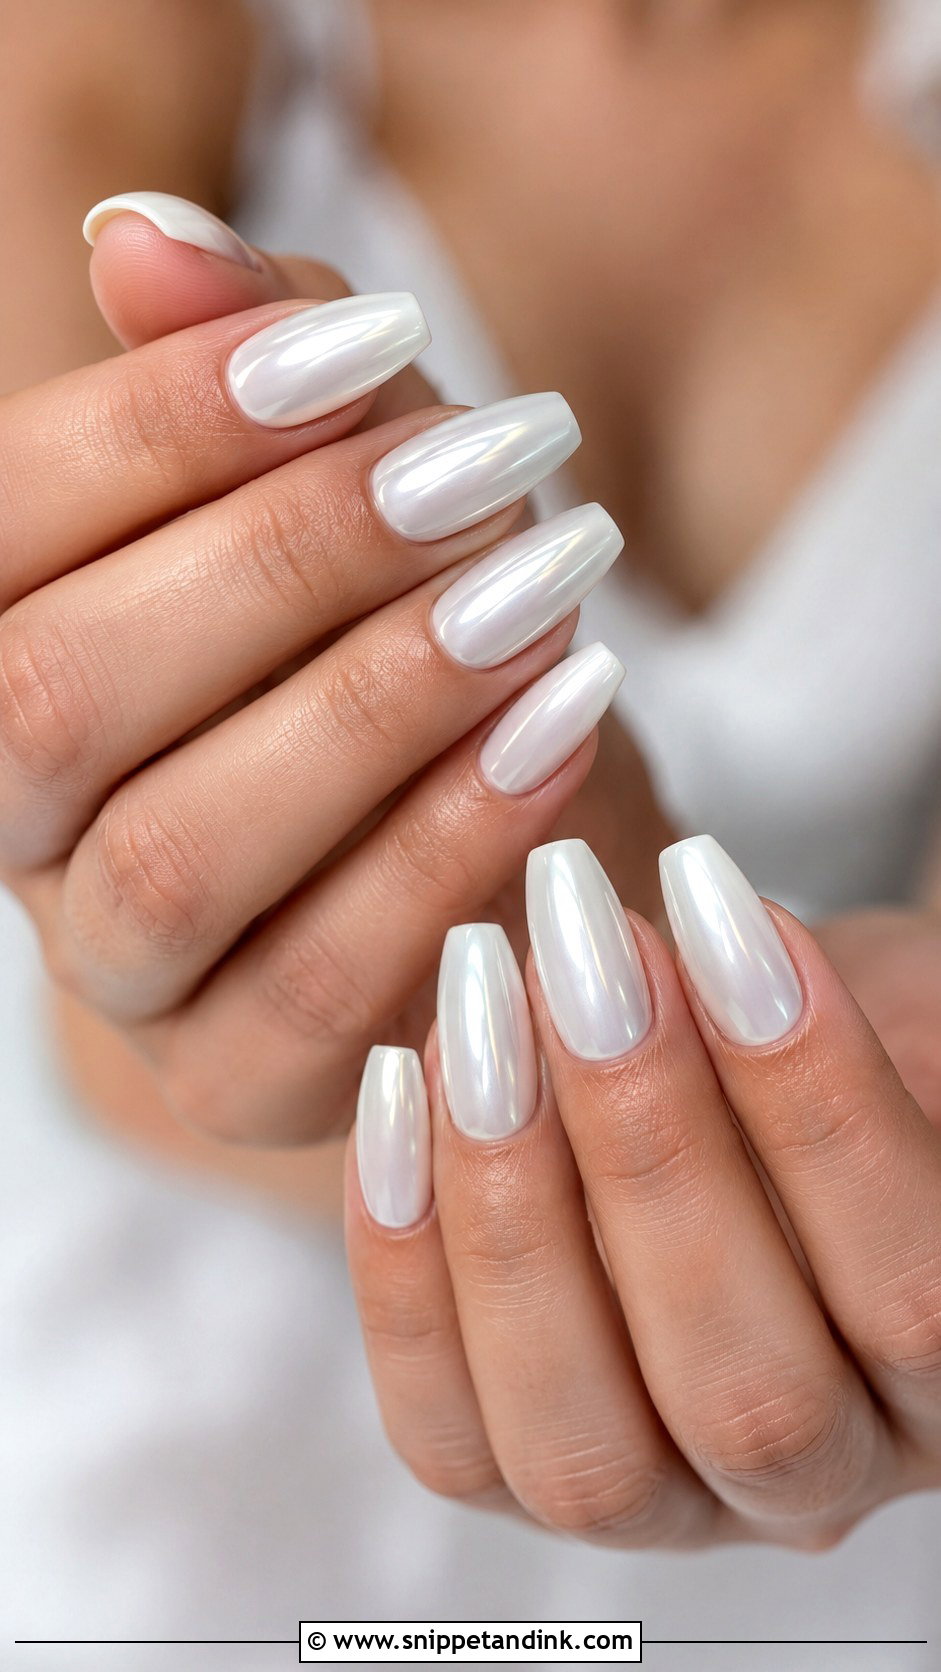
White chrome sits brighter than milky white and more modern than plain white polish, a glazed finish that reflects in close-up. It reflects best on medium almond, ballerina or oval because the curve spreads the light instead of throwing one hard stripe like a flat square. I steer brides away from a fully opaque white base under it; on camera that can look like plastic. Ask for a soft white first. It looks right with silver jewelry and plainer gowns, and it can look cold next to a warm ivory dress, so hold the swatch against your fabric.
7. Soft Blush Acrylic Nails For Bride
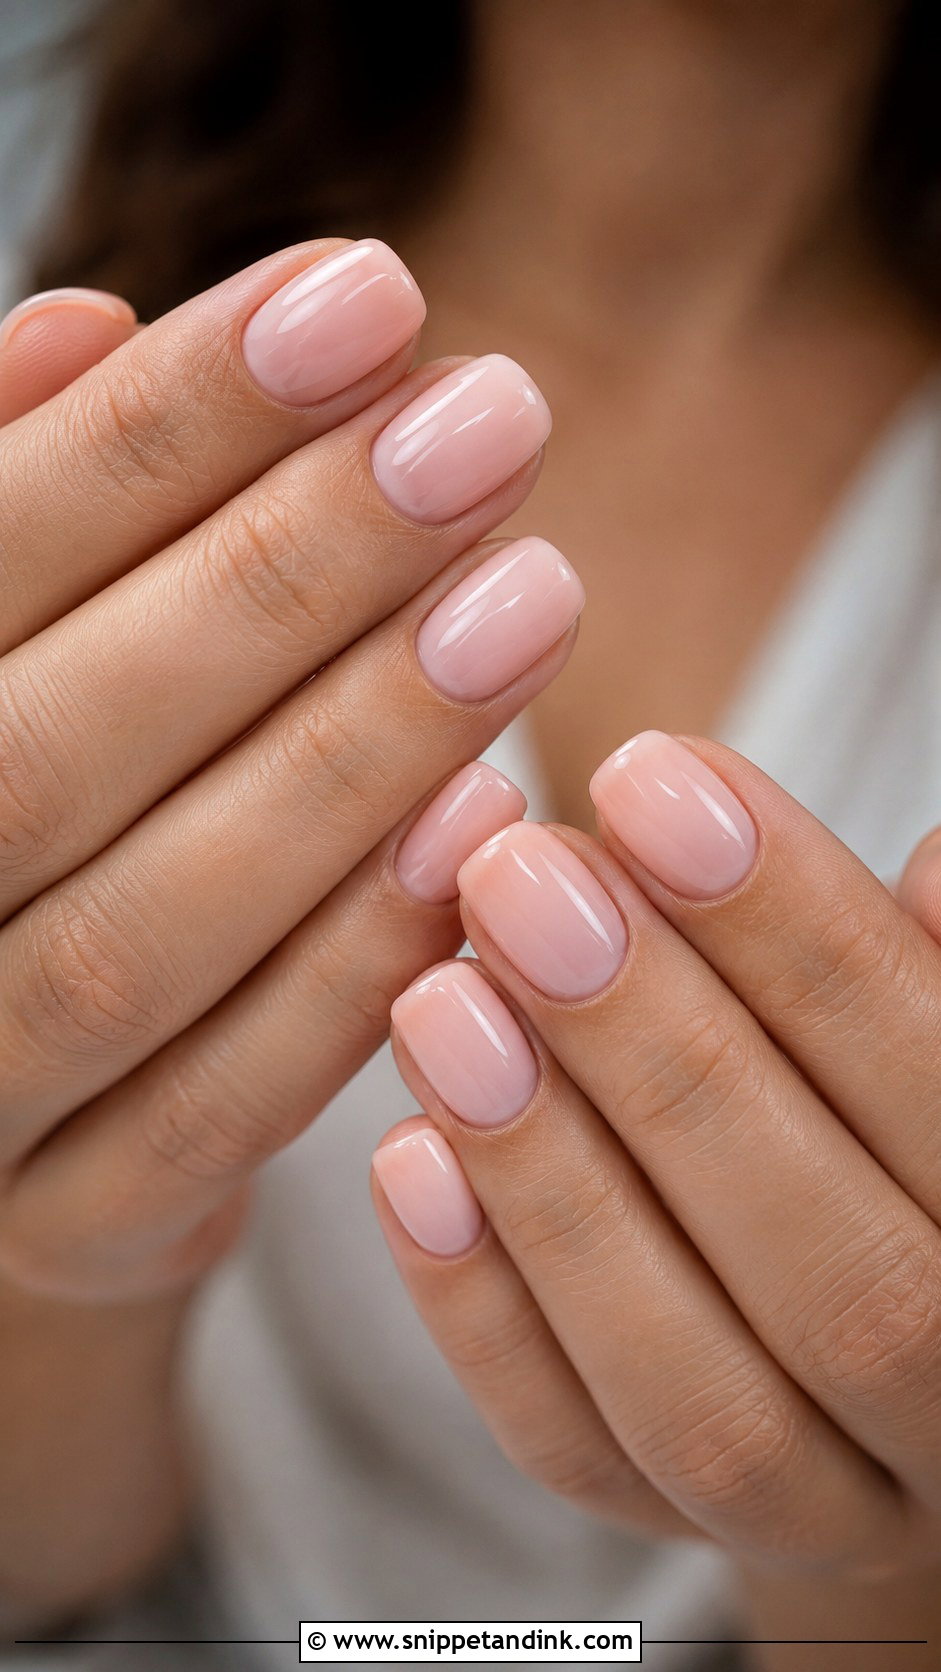
Blush is easier to wear than people think because I can shift it cooler, warmer, lighter or deeper to suit the skin. A dusty rose suits olive and deeper skin; a sheer cool pink suits very fair hands that flush red. The acrylic gives a smooth surface so the color goes on even. Short square or medium almond both work. Gloss keeps it clean, and a whisper of shimmer is fine, but heavy shimmer in blush tends to look pinkish-grey in indoor reception light.
8. Lace Acrylic Nails For Bride
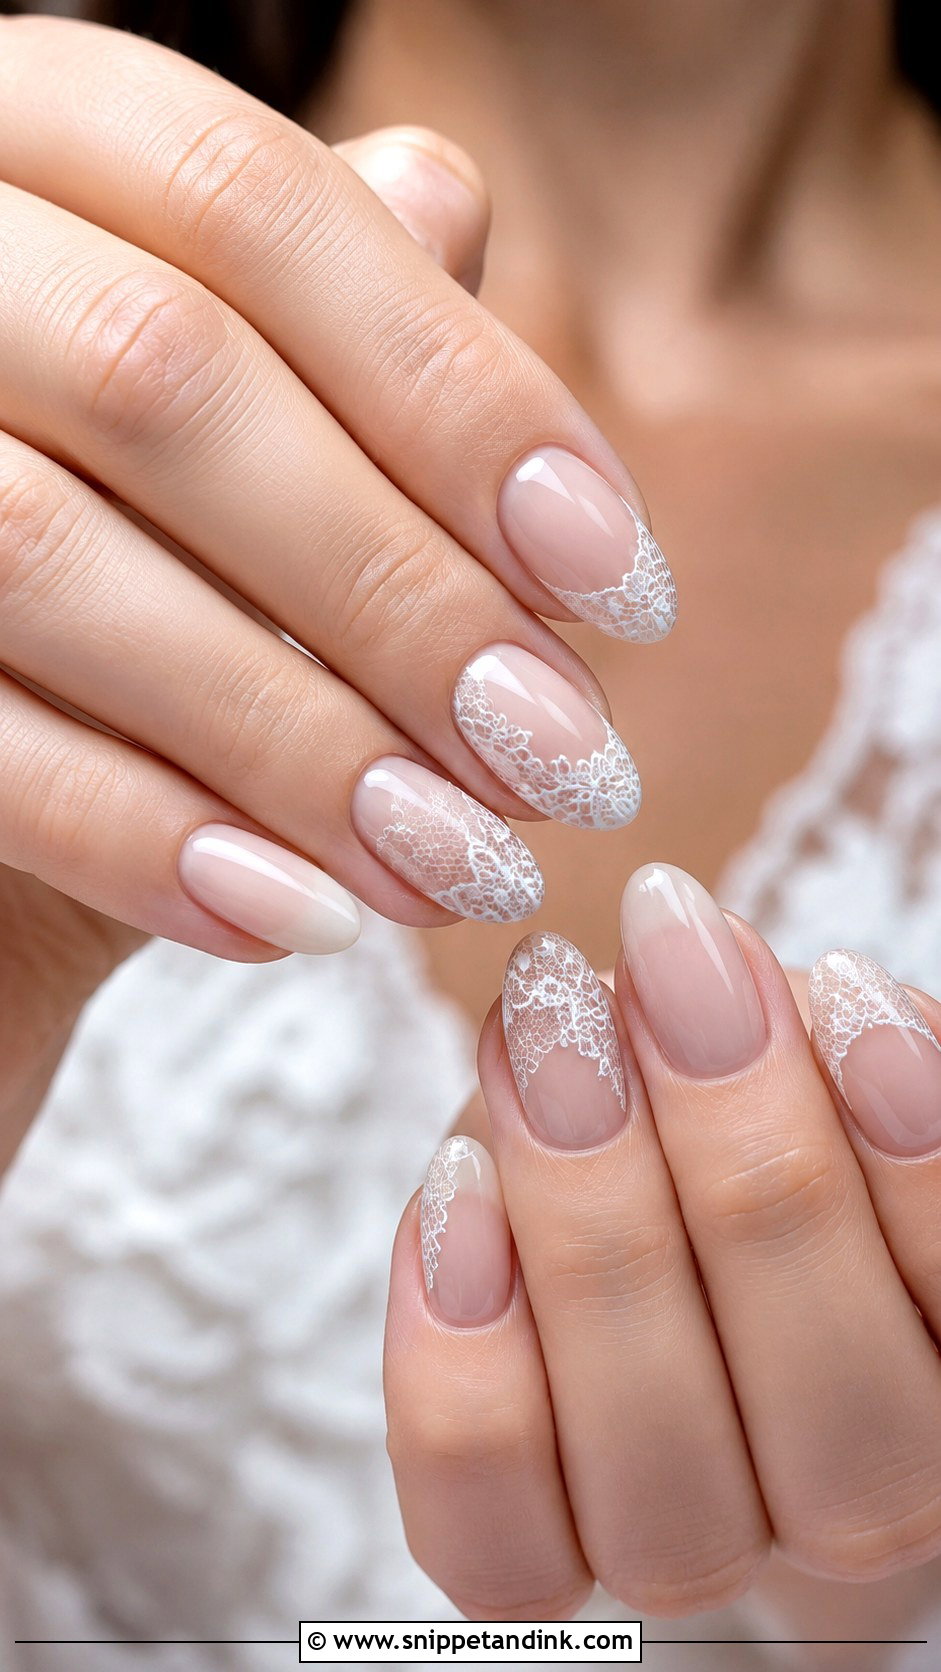
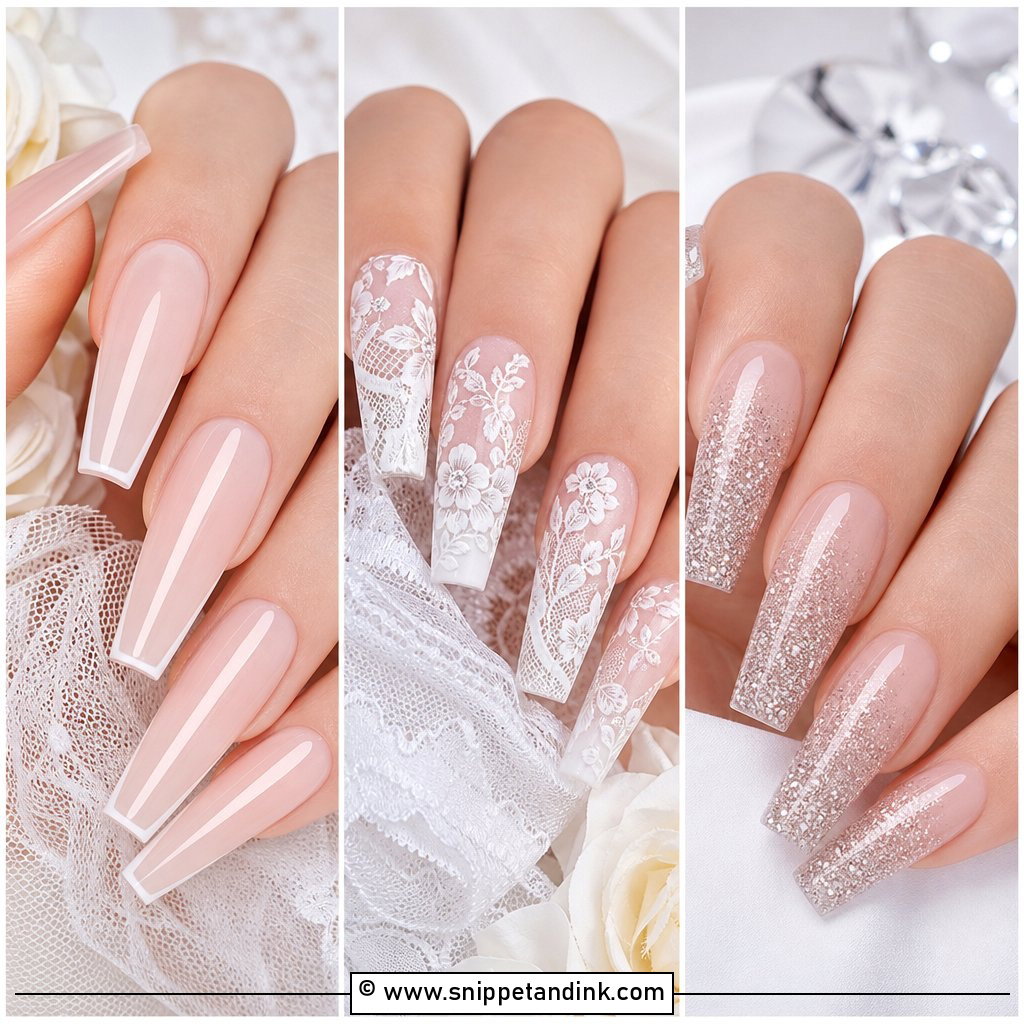
Lace art is hand-painted with a fine liner brush in white over a sheer or milky base, and it takes time, so I plan for a longer appointment. If your dress has a particular lace motif, bring a photo or a scrap; I’d rather echo the real pattern loosely than paint generic scallops. I keep it to one or two accent nails on each hand. Ten lace nails look busy and blur in photos. Almond and oval give the pattern a curve to follow, which is why the lace reads delicate rather than stamped.
9. Floral Acrylic Nails For Bride
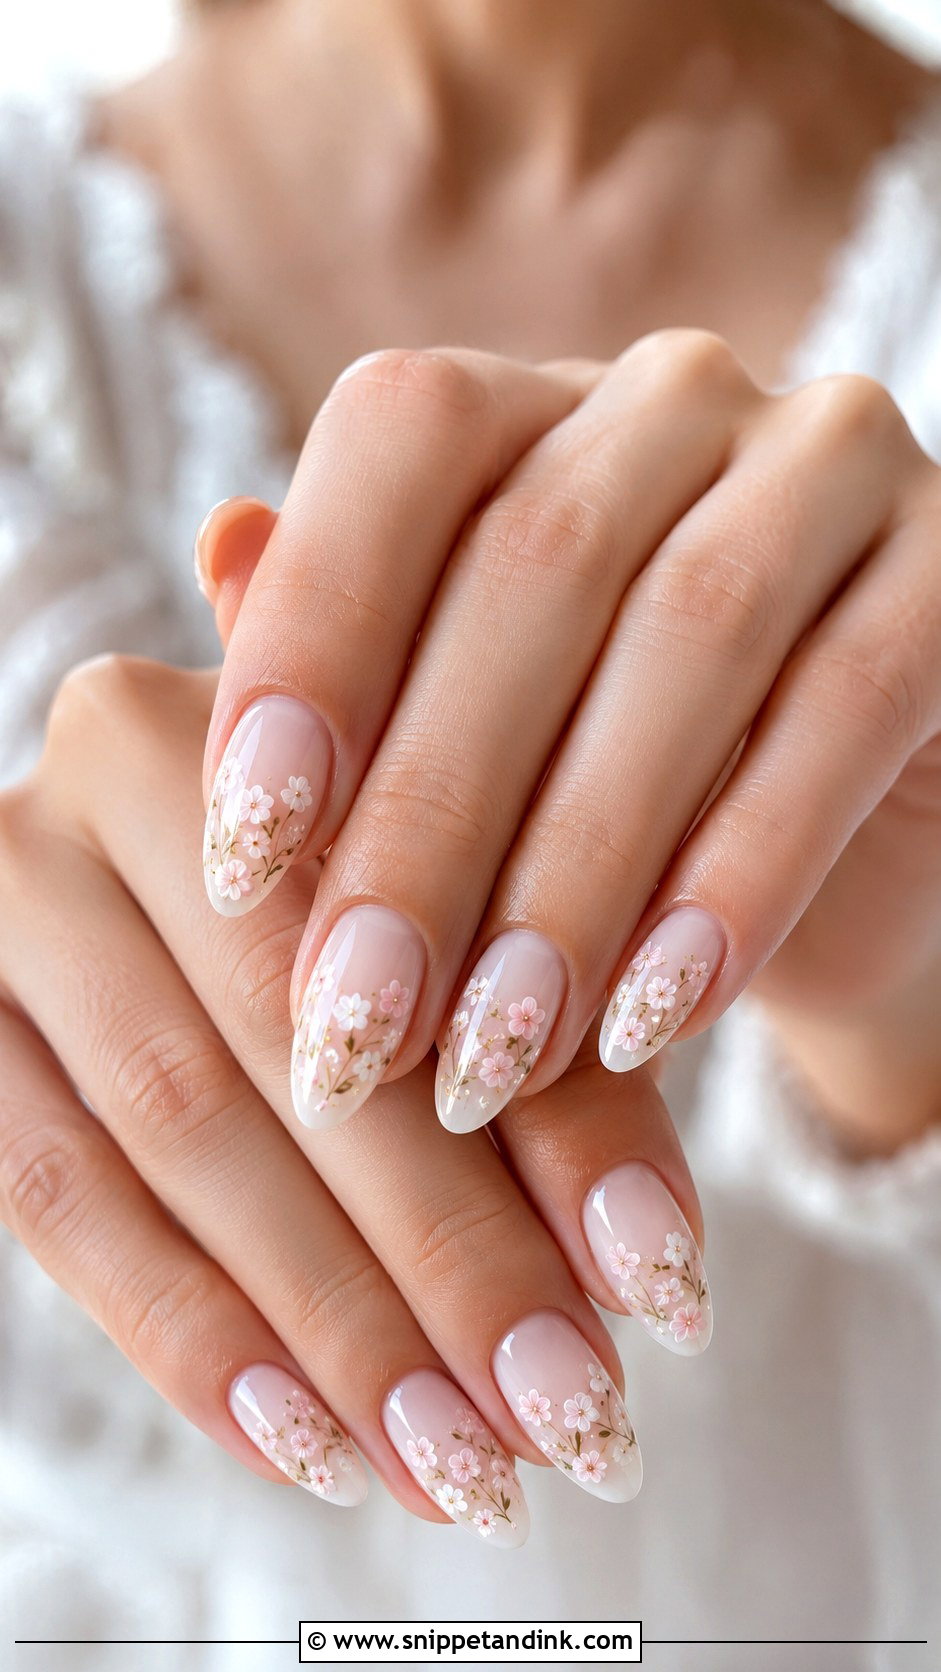
For floral nails I work small: tiny white five-petal flowers, a pale pink petal or two, sometimes real pressed flowers sealed under gel. Big colorful blooms fight with the bouquet in every photo where your hands hold it. Pressed flowers need a thicker top layer to sit flush, so the nail will feel slightly heavier. A white, ivory or muted beige palette keeps it calm. This set reads best at a spring or garden ceremony, and a good glossy seal stops the petals catching on veil tulle.
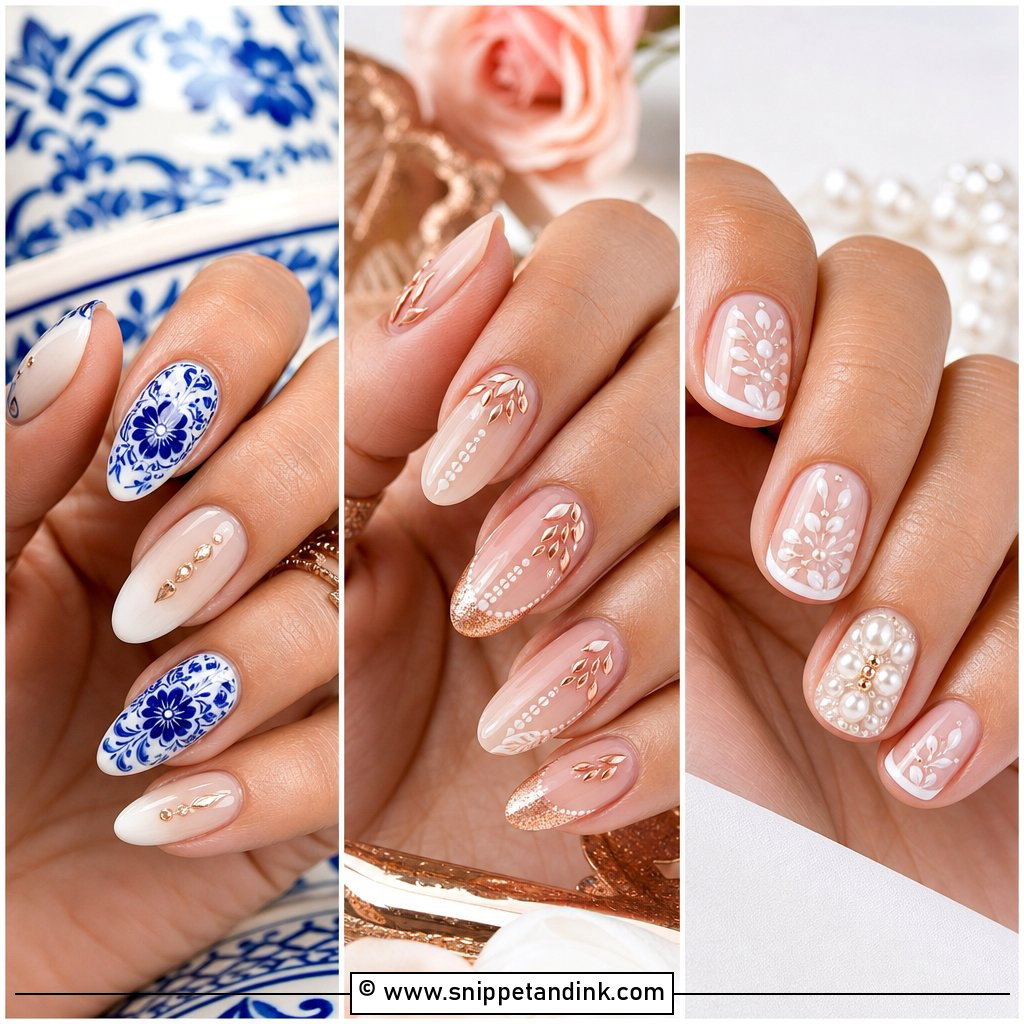
10. Pearl Accent Acrylic Nails For Bride
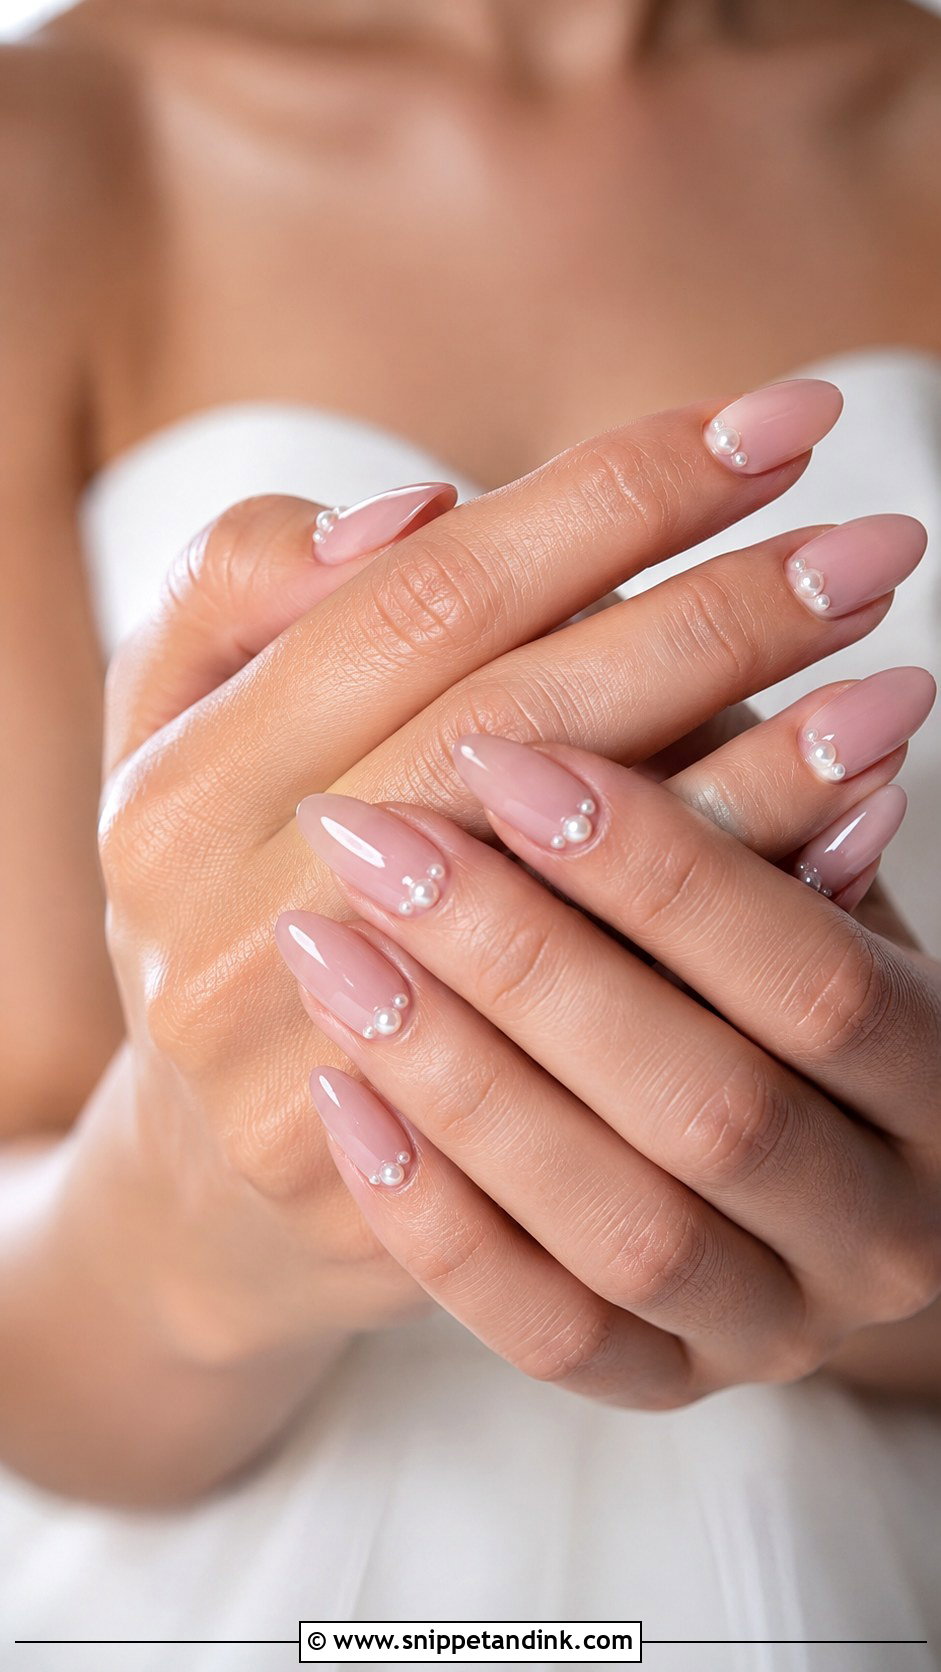
Pearl accents act like tiny jewelry on the nail. I place flat-back mini pearls near the cuticle or along the tip on one or two accent nails, set into gel and capped, because round-back pearls snag hair, tights and lace. The acrylic gives them a firm, durable surface to hold through a long day. Medium almond or coffin gives enough room. If your dress has pearl beading, this is a quiet way to tie the two together, but I’d skip it if you’re wearing a fine-gauge knit or a lace veil you’ll be adjusting often.
11. Rhinestone Acrylic Nails For Bride
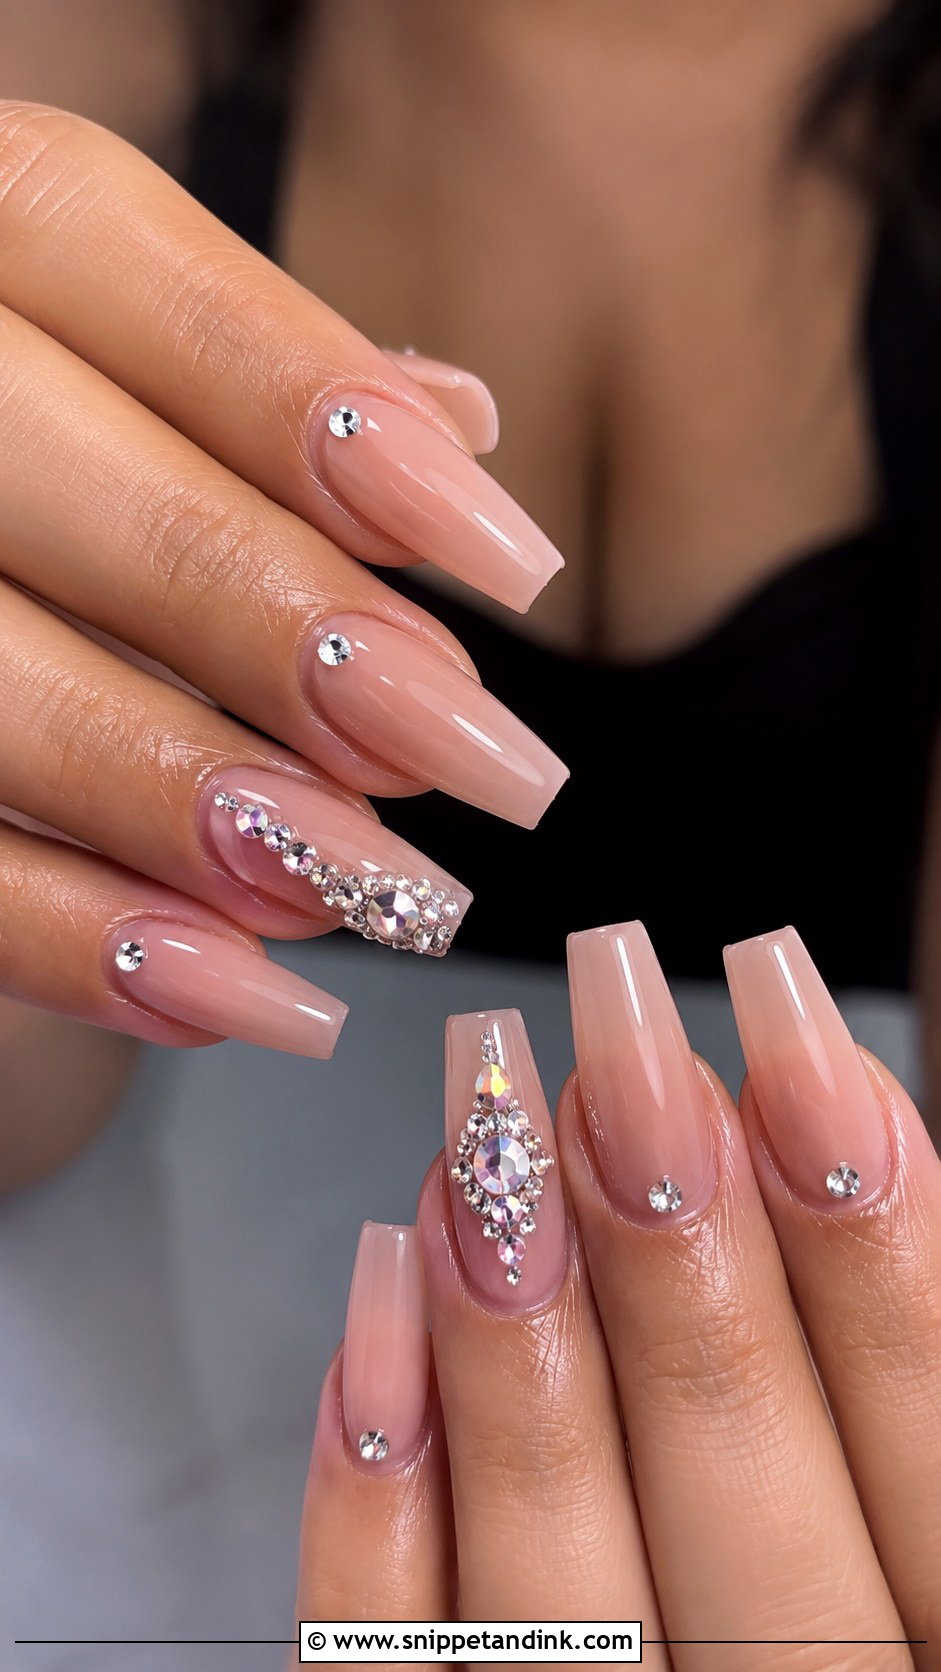
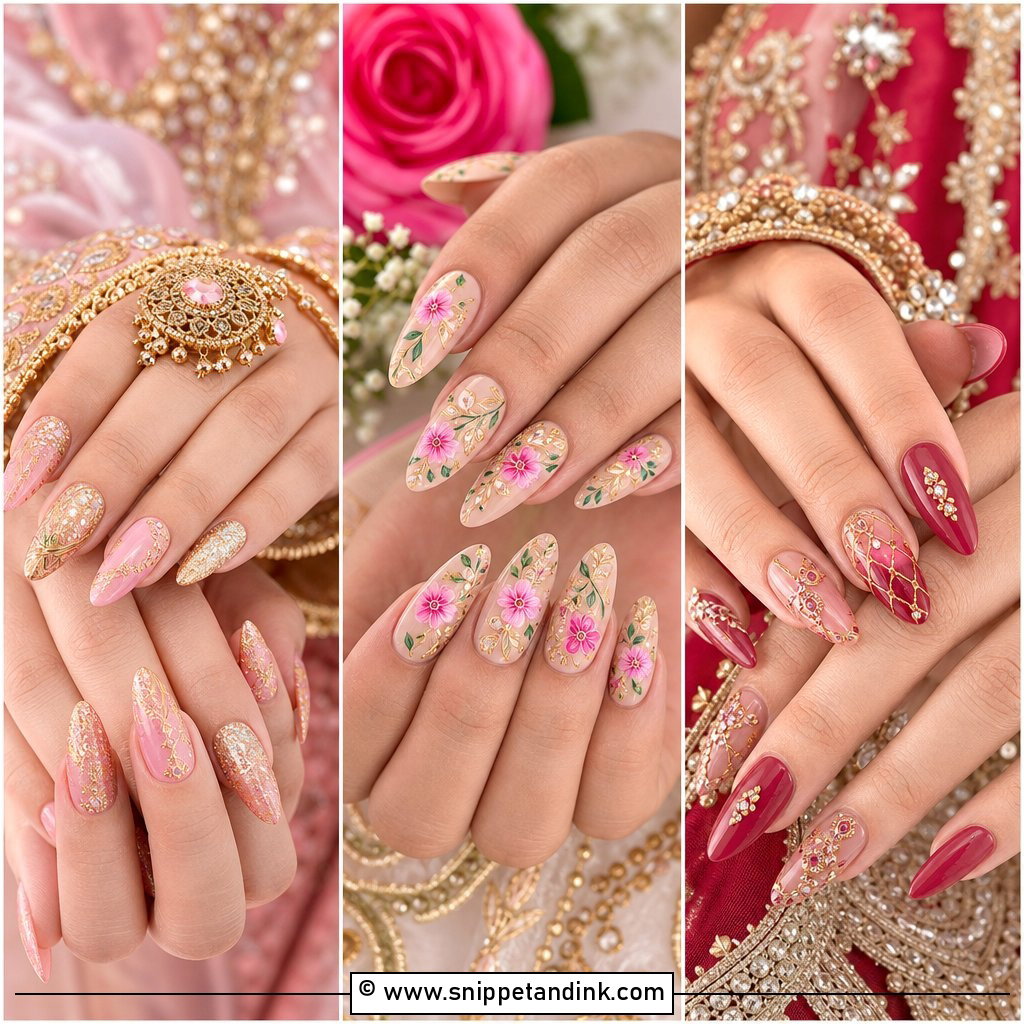
Rhinestones need restraint and placement more than quantity. My usual bridal version is a short line of clear stones at the cuticle, one stone per nail, or one accent nail with a small cluster, all set in builder gel so the edges are covered. Exposed stone edges are what catch on lace and pull threads. A nude pink, French or milky base keeps them refined. If you’re new to long nails, keep the length modest; rhinestone sets on long tips are where most snags happen when brides dress and bustle.
12. Glitter Ombre Acrylic Nails For Bride
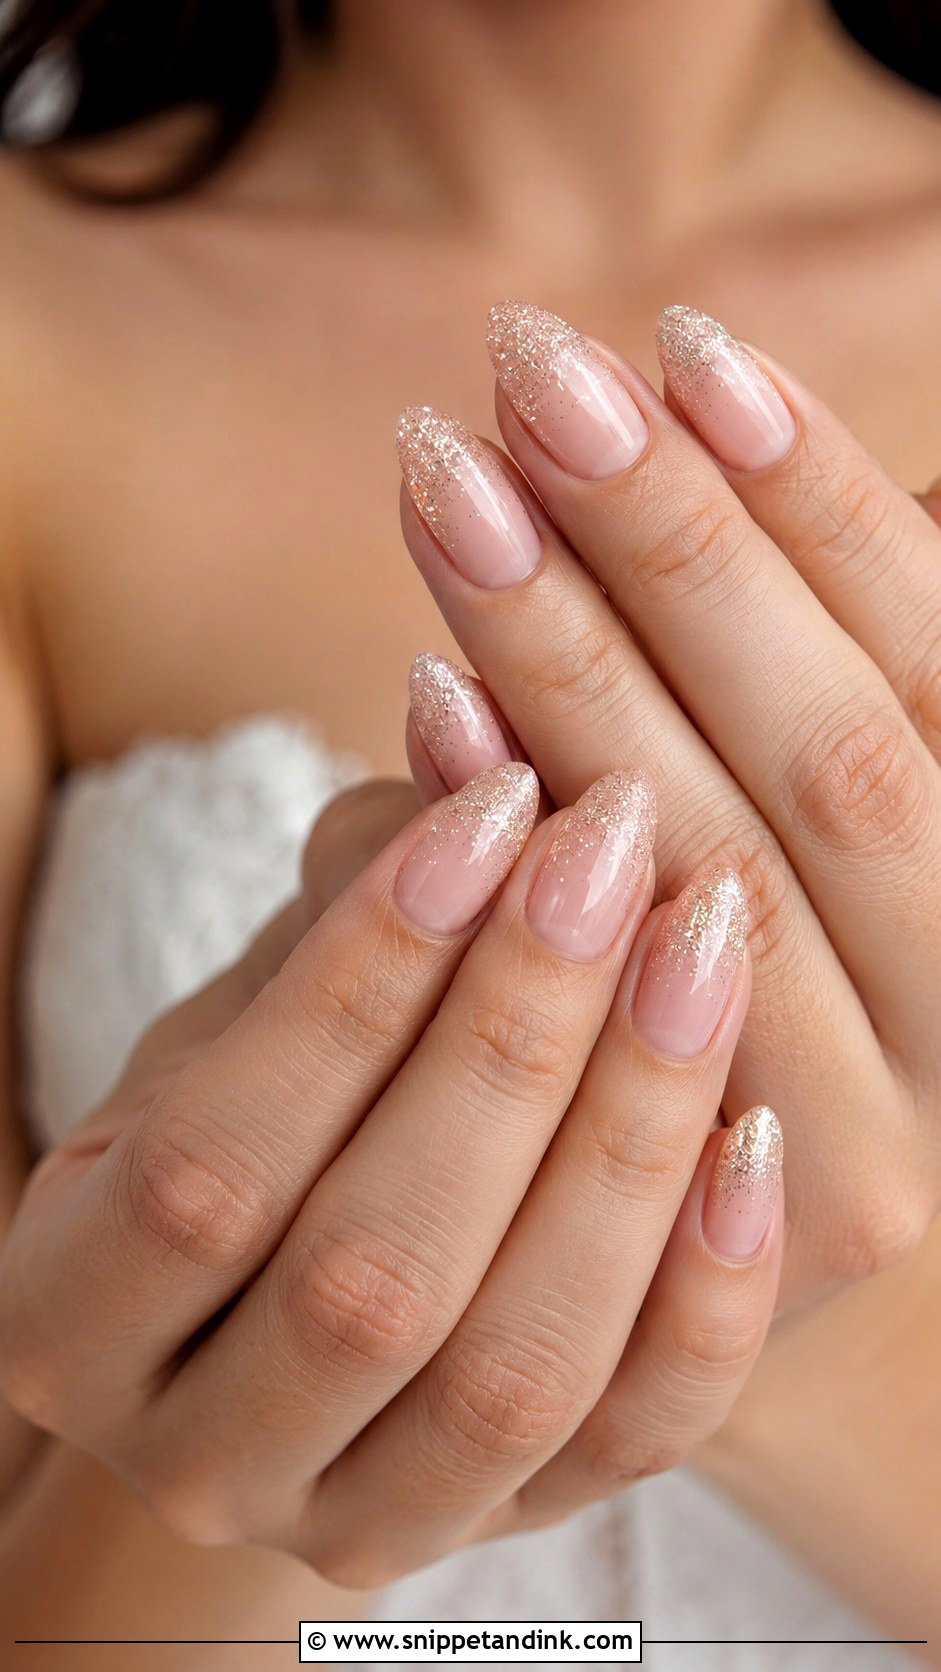
Glitter ombre acrylic nails fade fine silver, champagne, pearl or rose gold glitter from the tip or cuticle into a nude or pink base. In acrylic I can blend the glitter powder straight into the product, so it’s encapsulated rather than sitting on top, which keeps the surface smooth and stops shedding. Use fine glitter only; chunky pieces show texture under a top coat and catch the flash unevenly. This set comes alive under evening reception lighting and next to a beaded gown. Almond, coffin and oval all carry it.
13. Marble Acrylic Nails For Bride
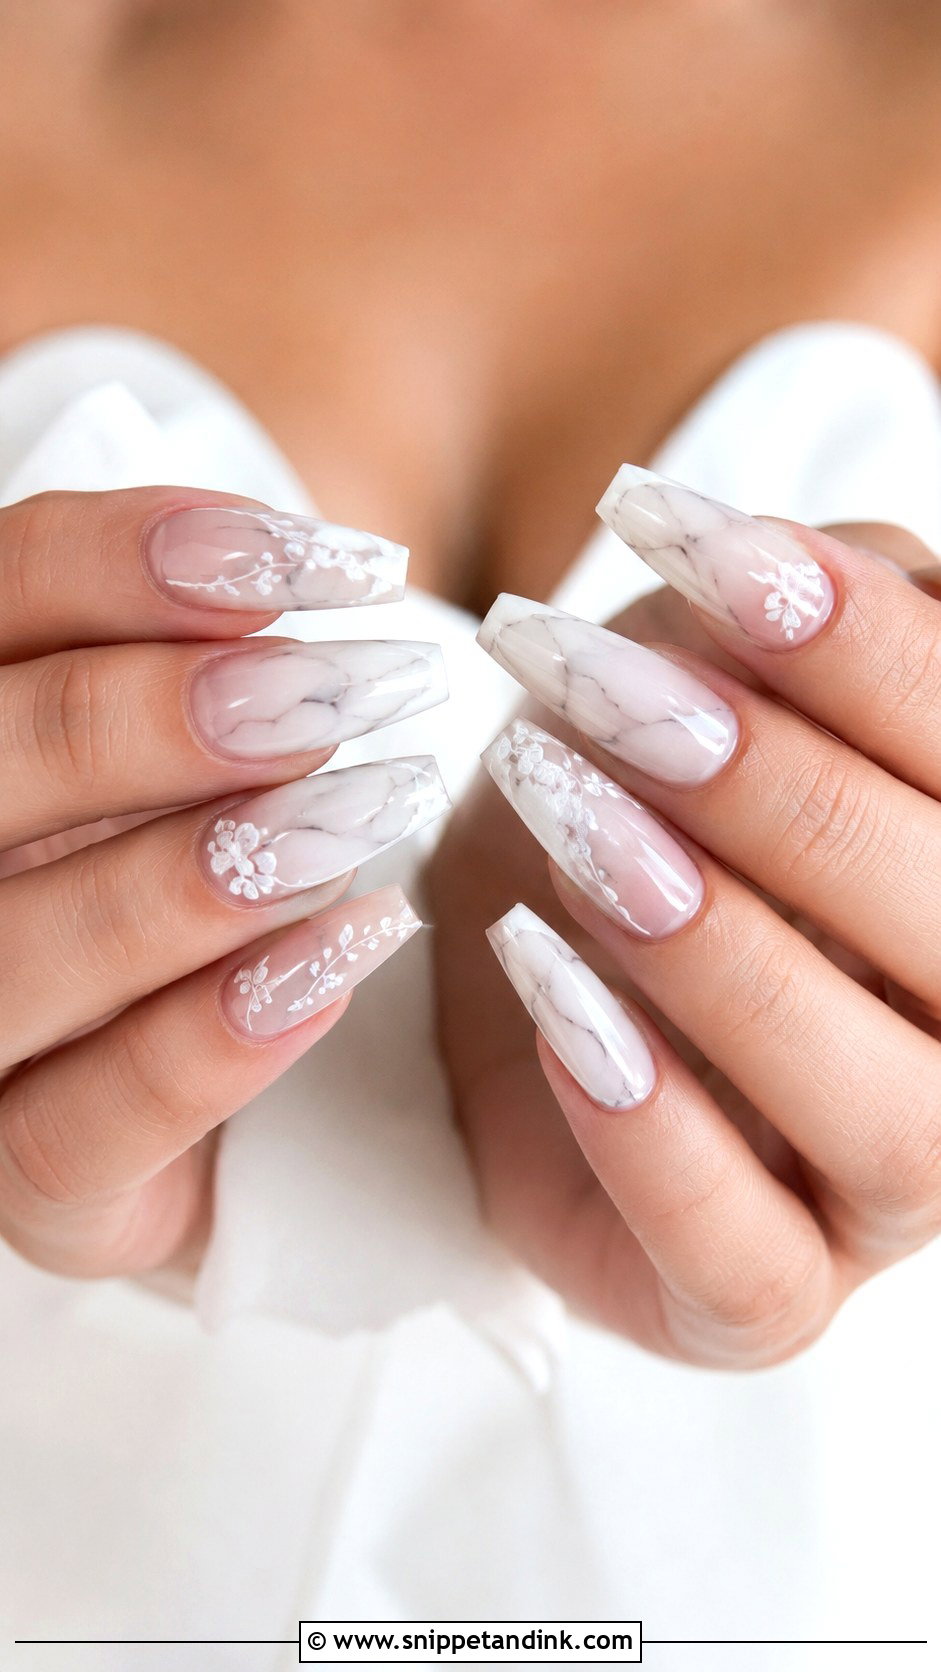
Marble on a bridal set should be quiet: fine grey, beige or silver veins over white, ivory, sheer pink or nude. I drag the veins wet-on-wet with a thin brush so they fade at the ends like real stone. Hard, solid lines look like a sticker. Two or three marble accents with plain nails around them keep it soft. A medium almond or coffin gives enough surface for the veining to show, and a thick glossy top coat gives it the polished-stone depth.
14. Short Acrylic Nails For Bride
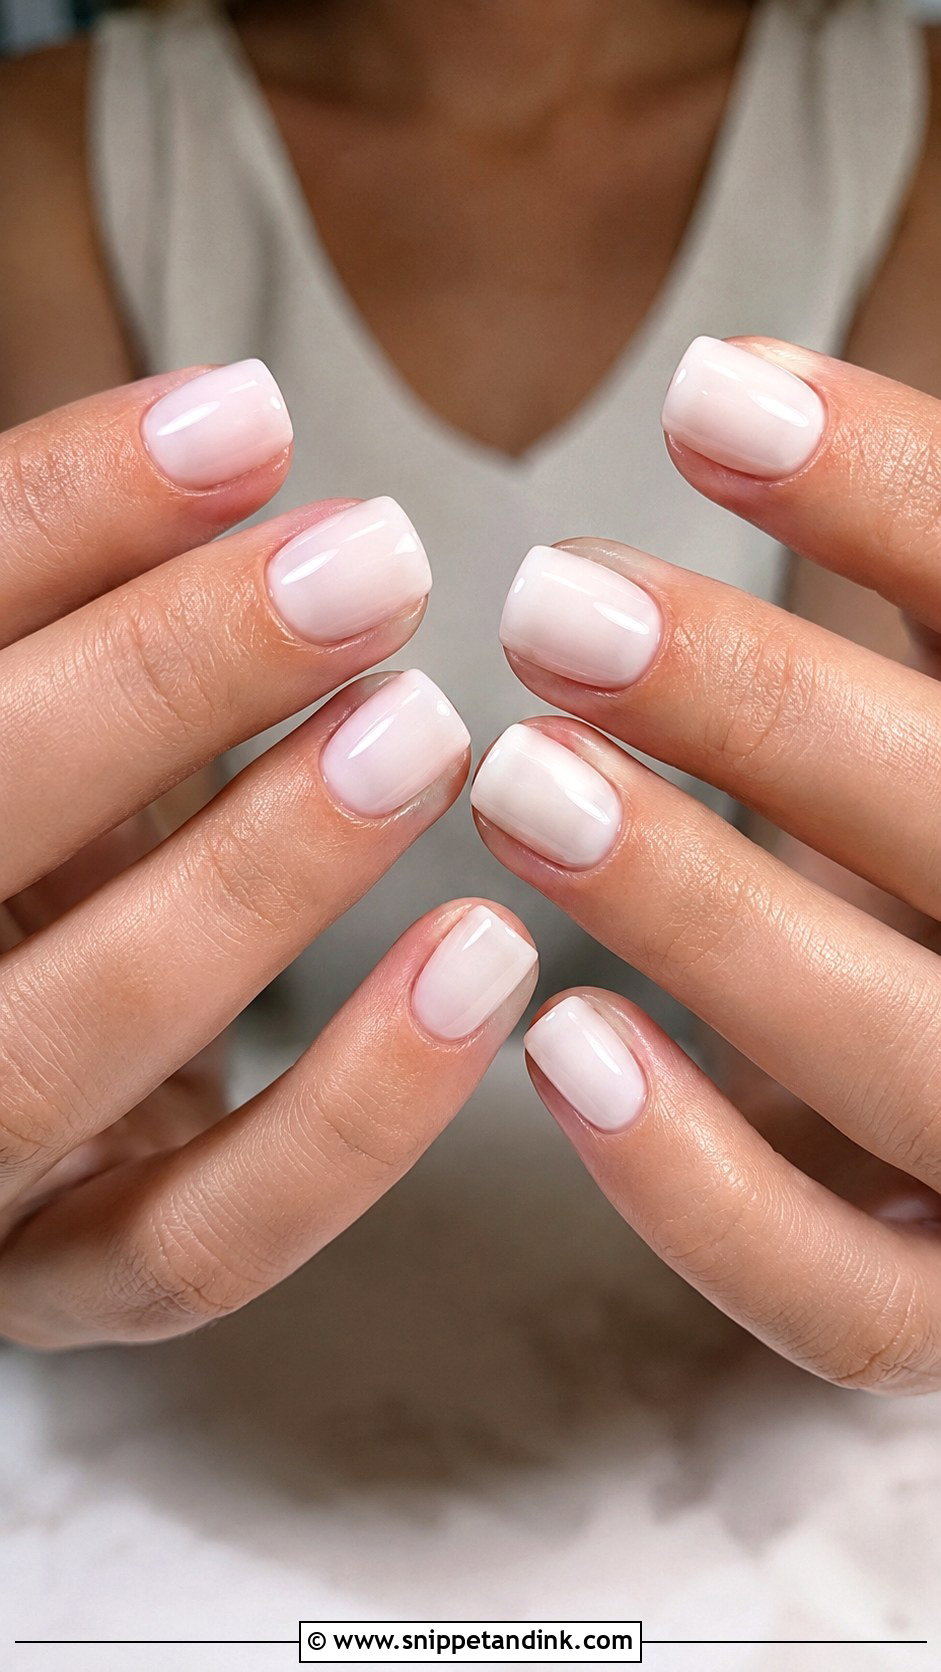
Short acrylics are what I recommend to brides who have never worn extensions. You’ll be holding a bouquet, fastening earrings, signing a register and possibly changing outfits, and an extra few millimeters makes all of that harder than expected. Short doesn’t mean plain: milky white, nude pink, micro French, pearl chrome and small accents all work at this length. A soft square or rounded shape is neat and less likely to snag lace or a zipper.
15. Almond Acrylic Nails For Bride
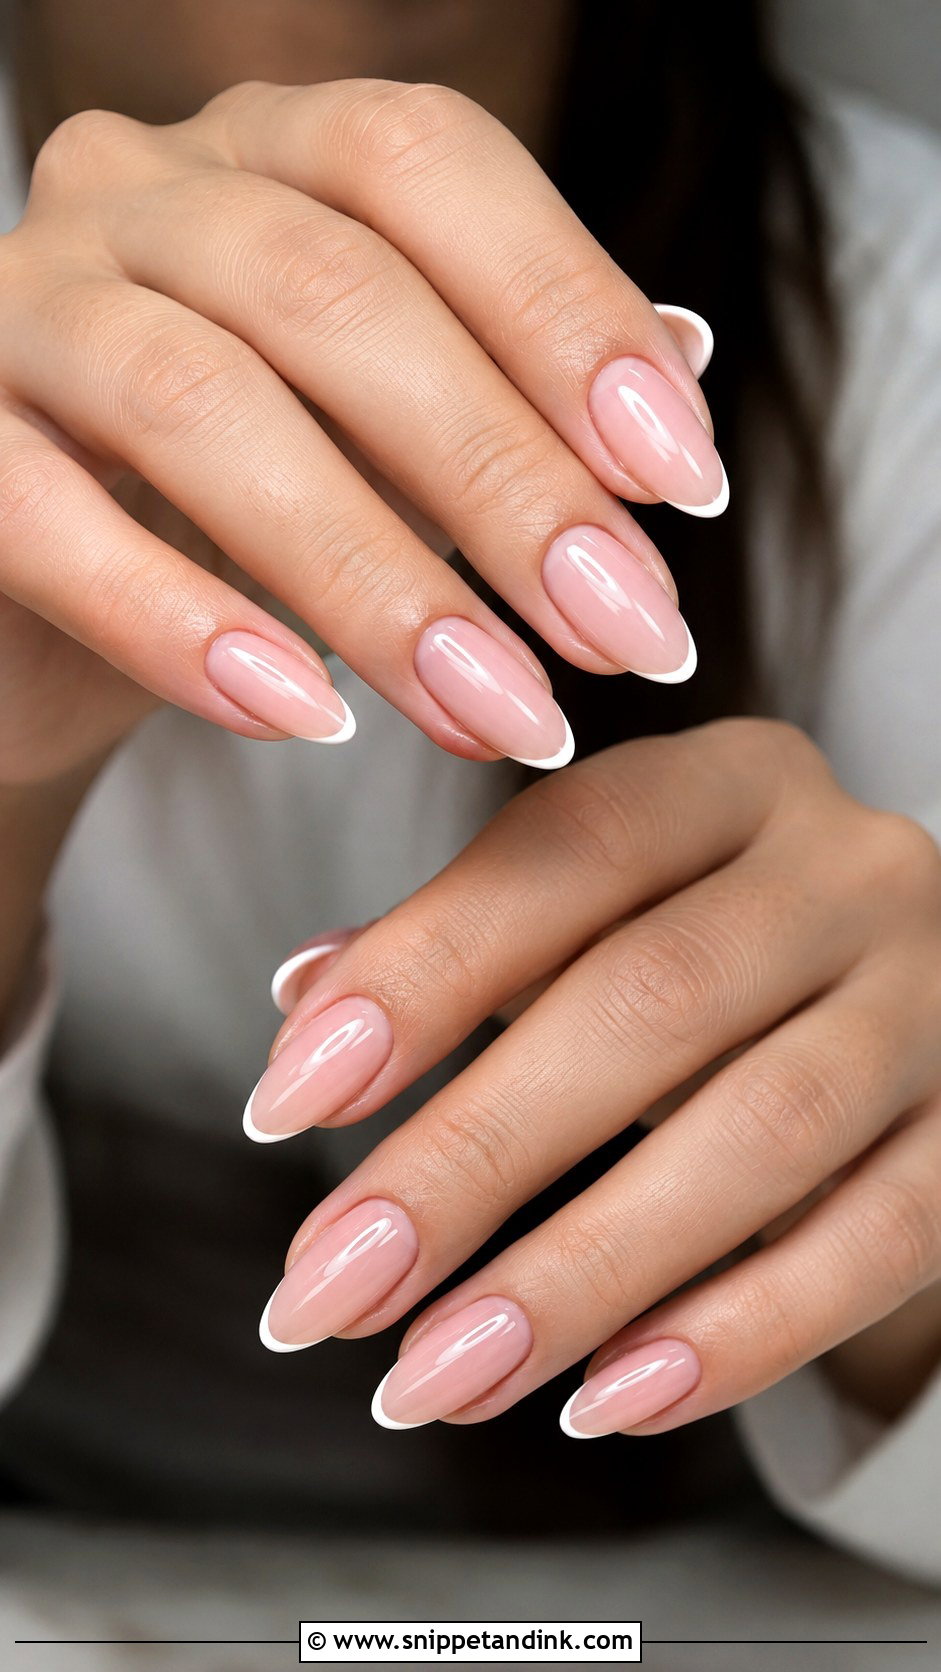
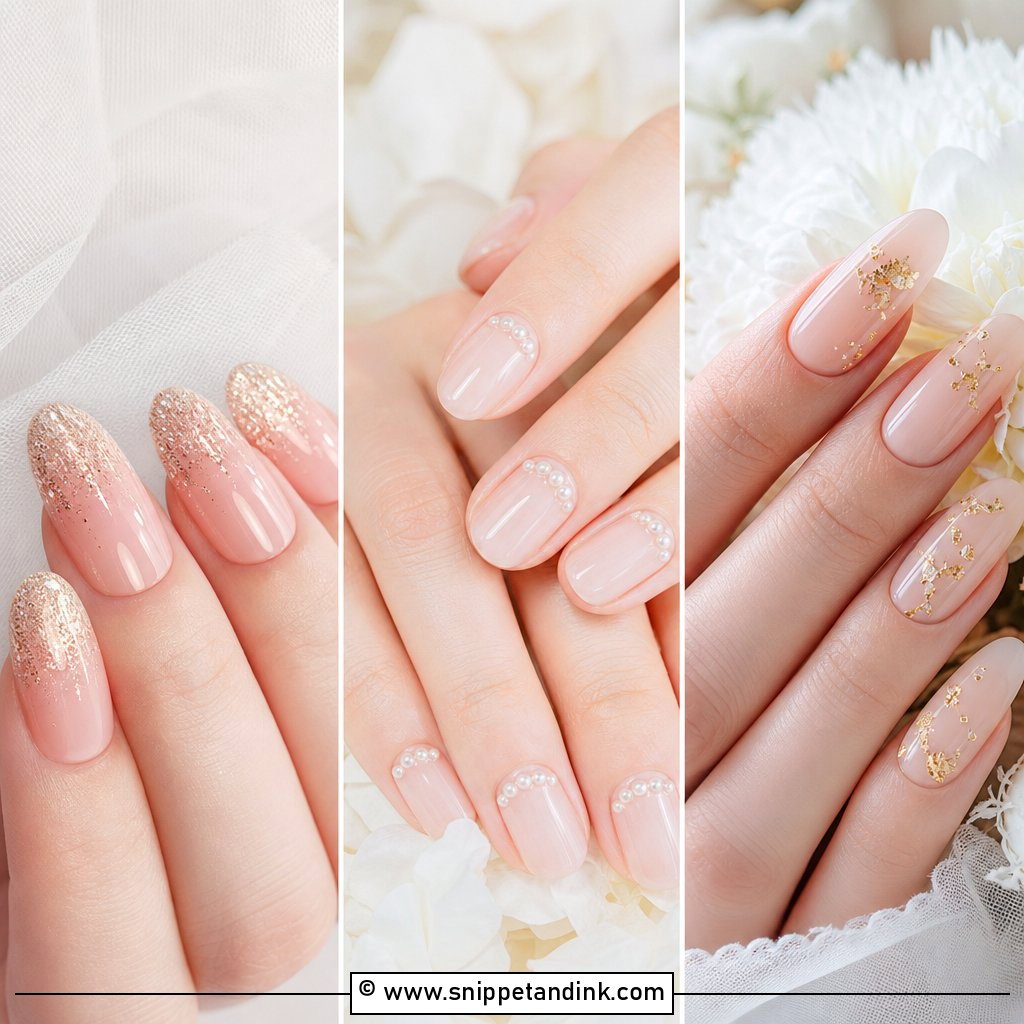
Almond tapers at the sides and rounds at the tip, which narrows the fingers visually, and that’s why it suits most hands I see. It takes almost any design, from French and milky white to chrome, blush, florals and a few stones. Acrylic lets me build a balanced almond even when natural nails are short or one nail is broken. Keep it medium. A long almond starts to look pointed in profile and gets awkward when you try to lift a ring off a cushion.
16. Coffin Acrylic Nails For Bride
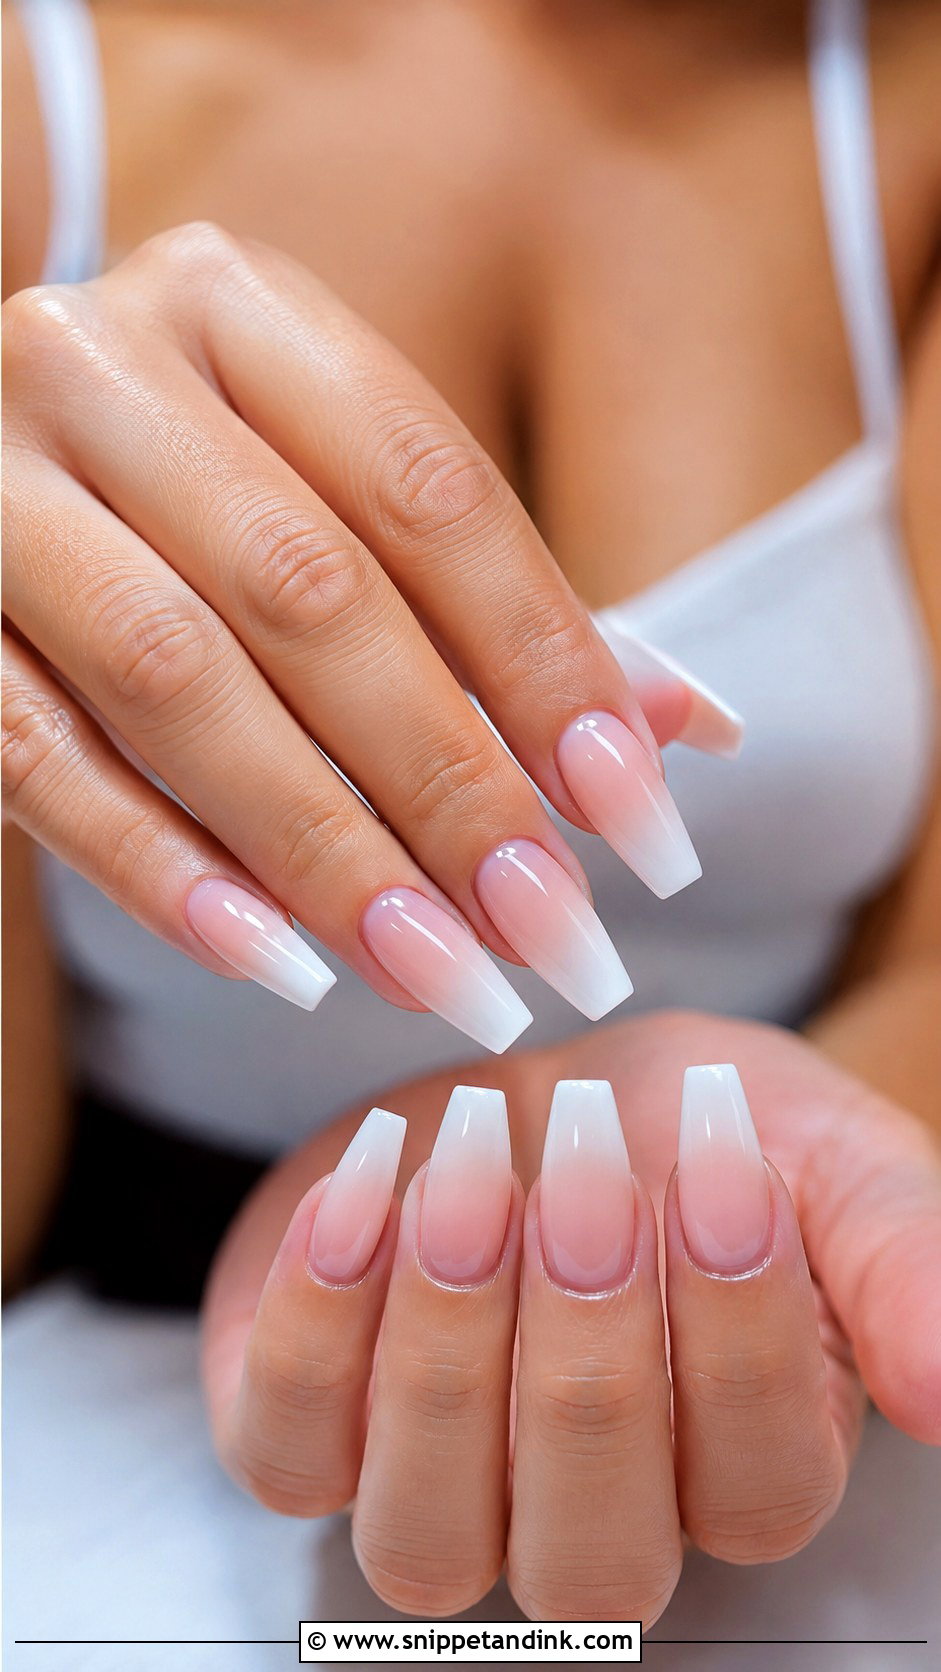
Coffin gives a modern, structured outline: tapered sides with a flat, squared tip that looks clean in ring shots. The shape relies on strength at the stress point, so acrylic is the right system for it; a coffin in soft gel can bend at the corners. For a wedding I keep the decoration soft, like milky white, nude pink, ombre, pearl chrome or a fine glitter fade, so the shape carries the look. Medium length is the sweet spot. Long coffin nails are a commitment, and I’d only build them for someone who already wears that length.
17. Square Acrylic Nails For Bride
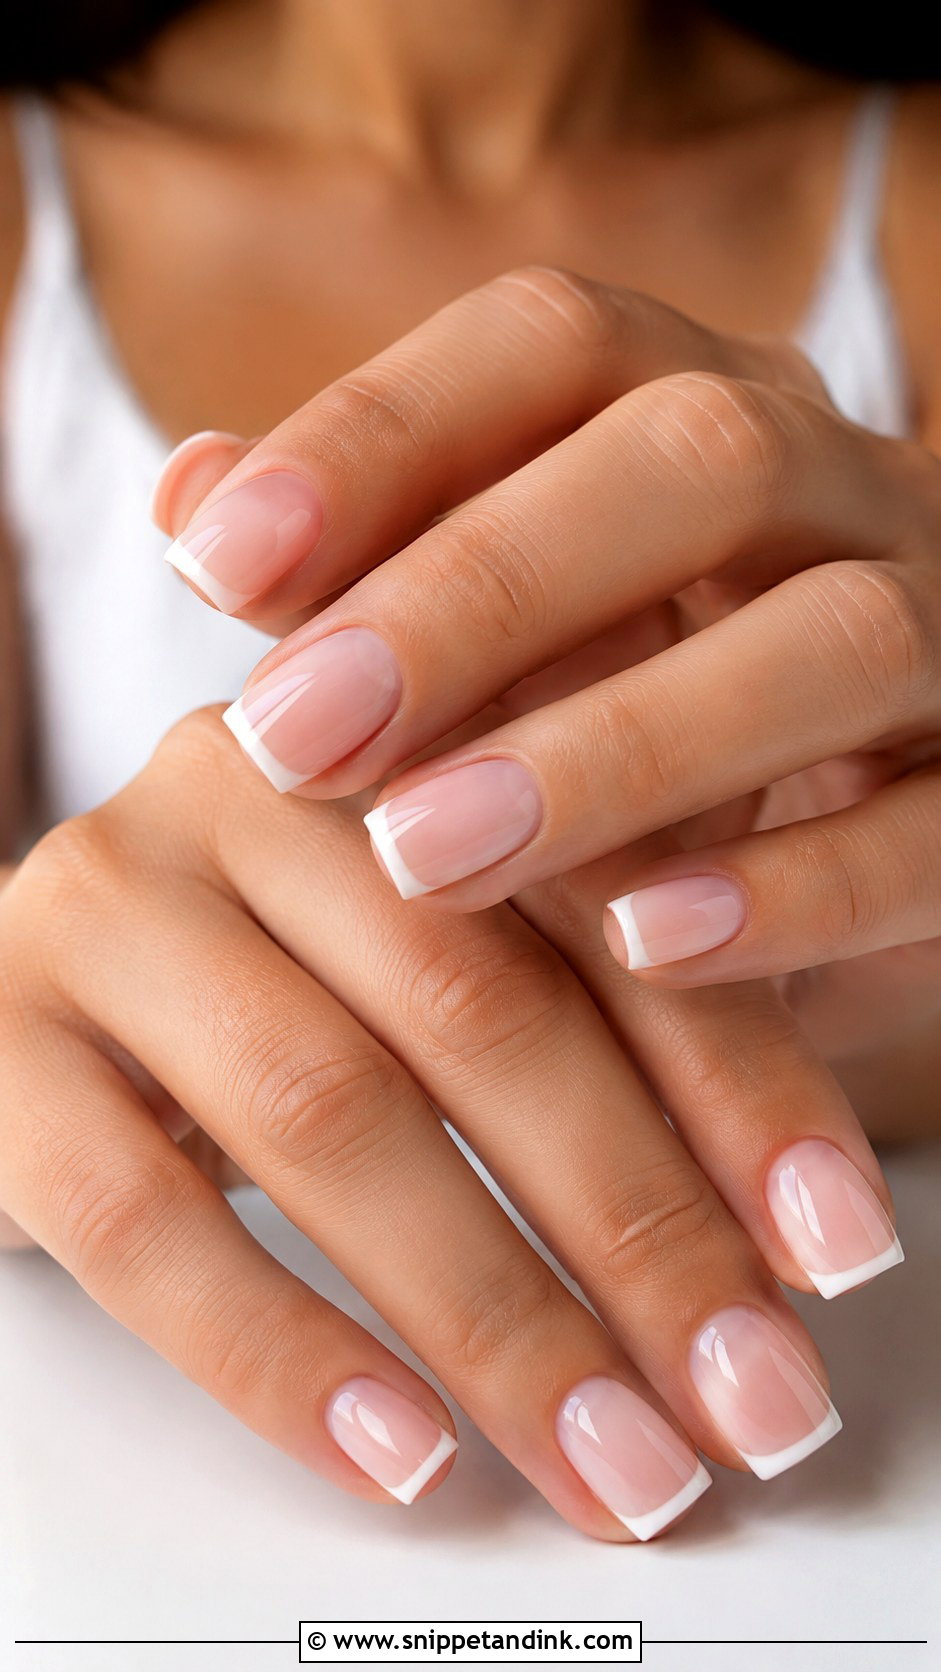
Square is the most practical shape I do for brides. The straight free edge looks tidy and even, and acrylic keeps every nail the same width. It takes French tips, nude pink, milky white, soft chrome or a pearl accent. I almost always soften the corners slightly, a squoval, because sharp square corners chip first and catch on fine fabrics. Short to medium square suits a bride who wants neat hands that don’t draw attention.
18. Oval Acrylic Nails For Bride
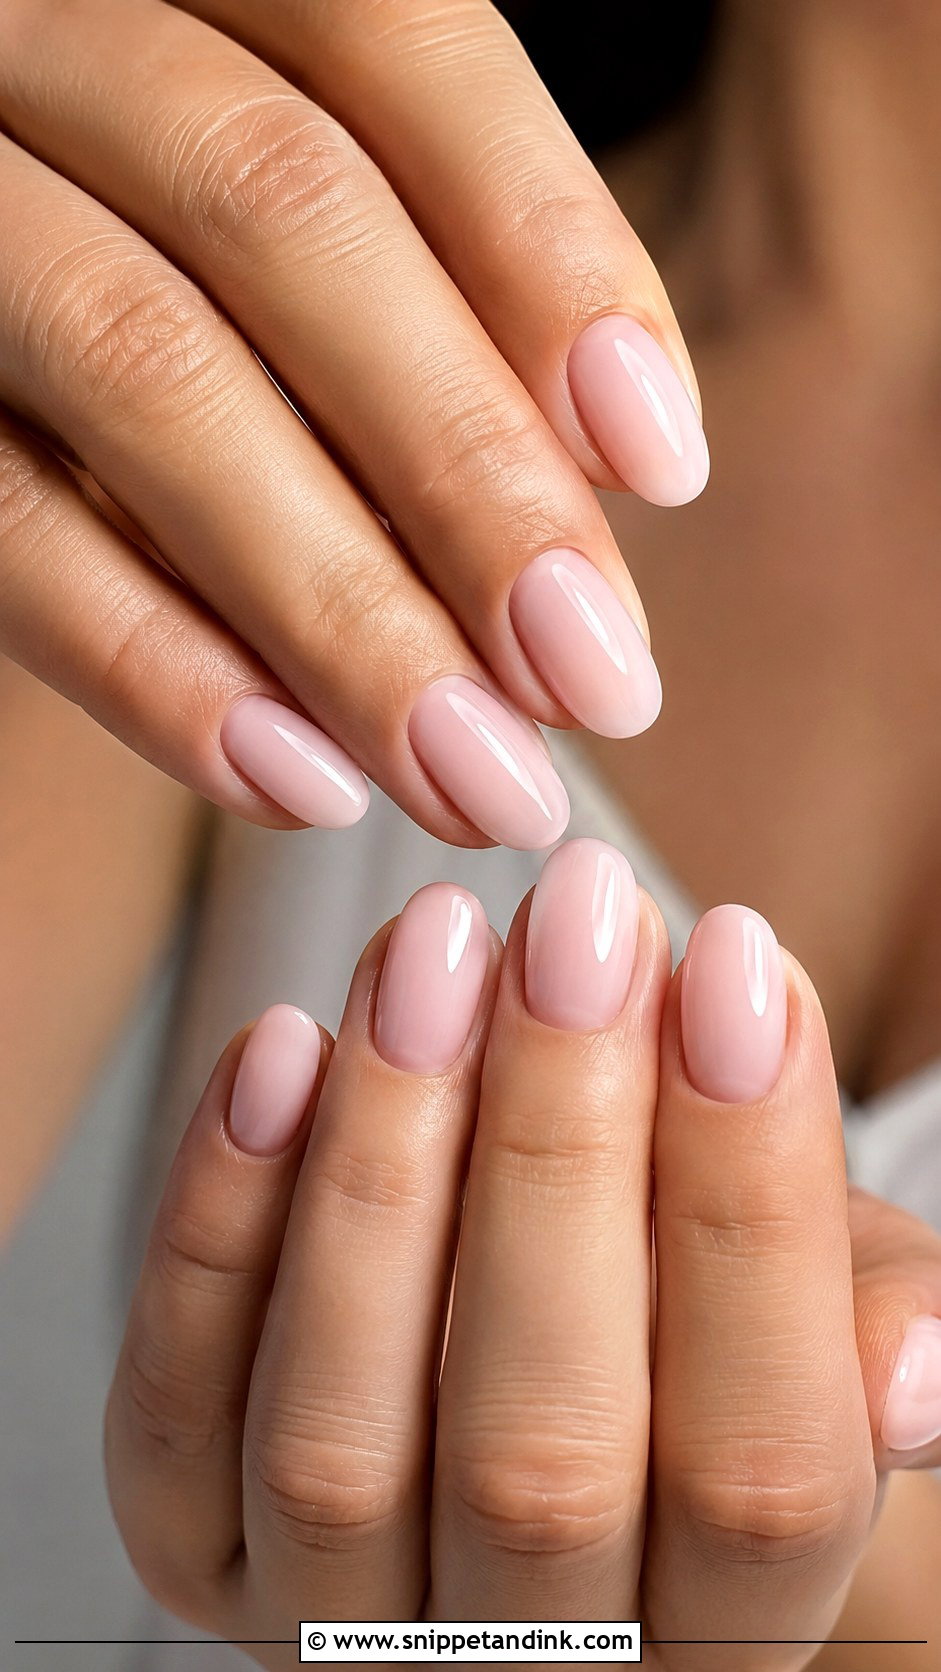
Oval is the softest shape on the list and the most forgiving, with no corners to chip and no point to snag. It’s my default for simple wedding nail designs because the rounded tip makes a natural-looking extension of the finger. Milky white, sheer pink, blush nude, pearl chrome, small florals and micro French all sit comfortably on it. Acrylic adds just enough length and strength. If your nail beds are wide, oval is the shape I’d test first.
19. Gold Accent Acrylic Nails For Bride
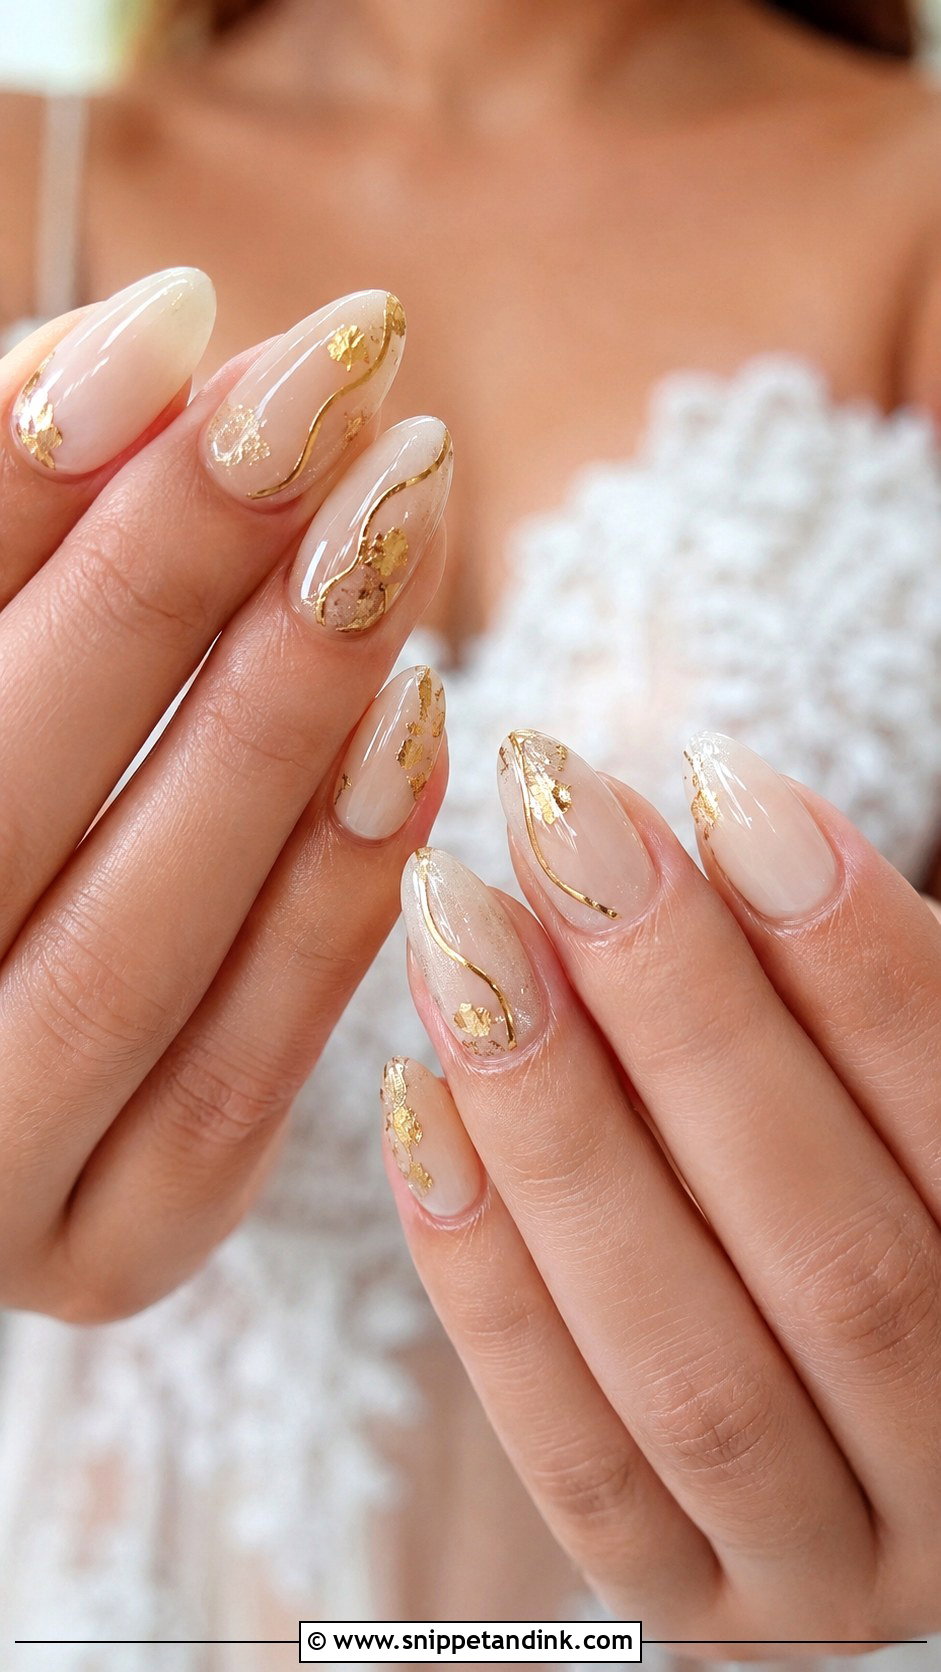
Gold works when it is thin: foil flakes, a fine striped line or a tiny metallic dot over a nude, blush, ivory or milky base. I seal foil under top coat with care because exposed foil lifts and tarnishes after a few hand washes. Match the gold tone to your ring; yellow gold foil next to a rose gold band looks off. This set suits champagne dresses, warm makeup and cream bouquets, and it sits best on almond, oval or short square.
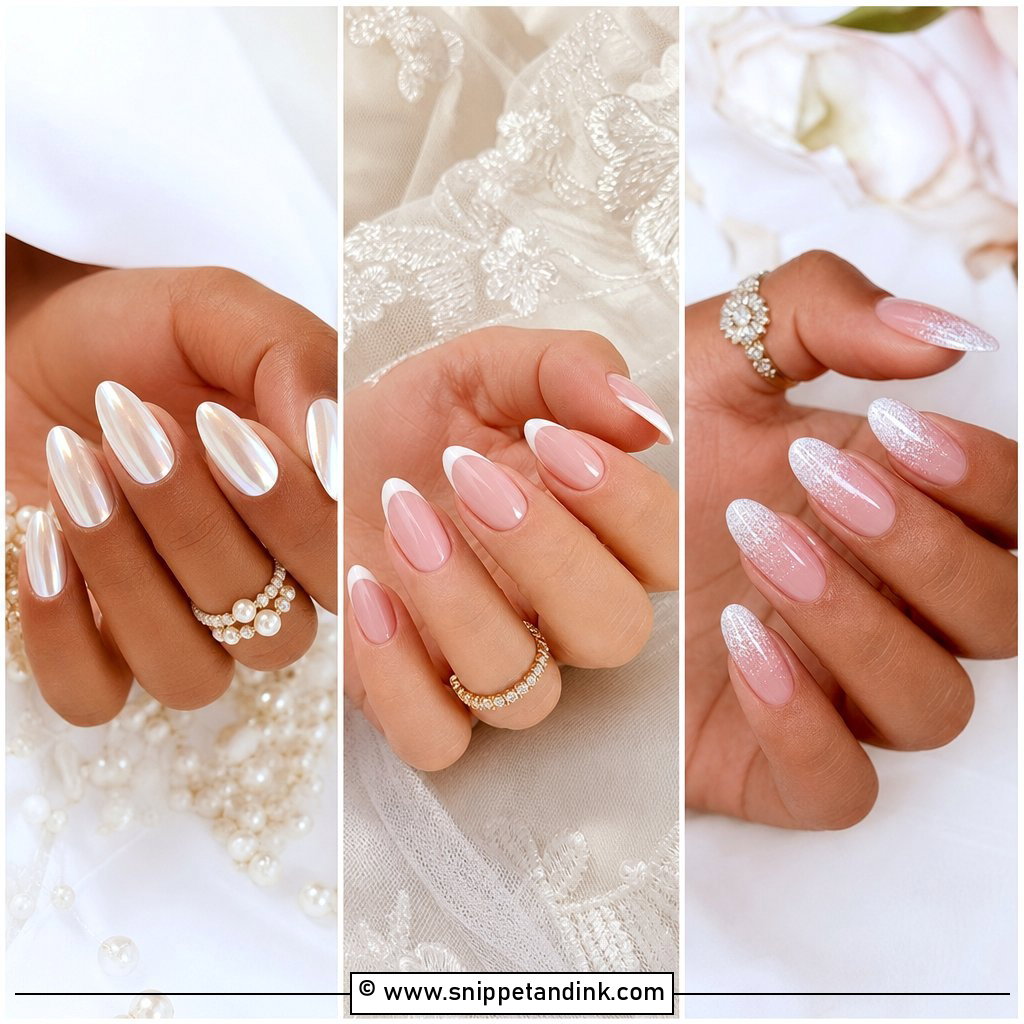
20. Minimal Acrylic Nails For Bride
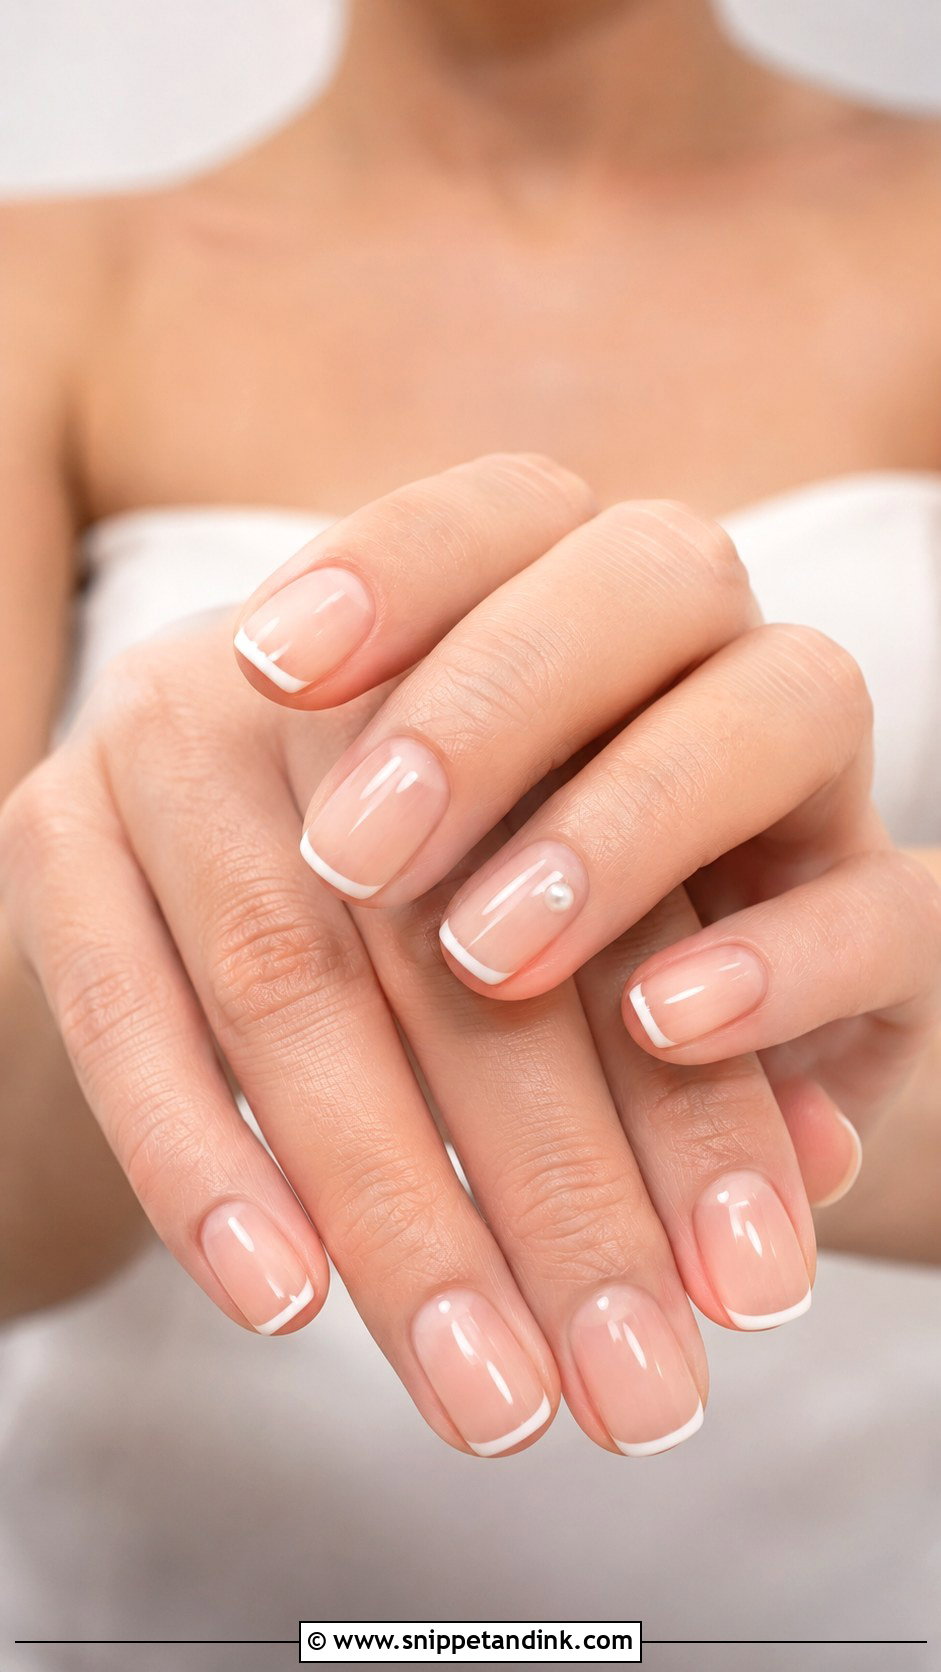
A minimal set is mostly about prep and shape, which is why it’s harder to do well than it looks. With no art to distract, every uneven sidewall and thick cuticle area is visible in a ring close-up. I’m thinking sheer nude, micro French, milky pink, a glossy oval or a single pearl. Kept short to medium and thin at the cuticle, it never competes with the dress, ring or bouquet, and it still looks right in photos years later.
What Feels Different on the Day If Acrylic Is New to You
If this is your first set, expect a short adjustment period. The nails feel slightly heavy and you’ll tap things before your brain catches up with the length. I give first-timers a few small warnings so nothing catches them off guard.
- Earring backs and necklace clasps are fiddly with extensions. Practise with your actual wedding jewelry the night before, or ask someone to help.
- Contact lenses get tricky with long tips. Short or oval shapes help, and you can put lenses in before the appointment if it’s the same day.
- Bustle hooks, buttons and zips: let your maid of honor do these. Nails are the most likely things to snag lace loops.
- If a nail cracks, a small dab of nail glue and a buffed edge will hold it until the next morning. I’d pack a mini file and glue with your touch-up kit.
Taking the Set Off After the Honeymoon Without Wrecking Your Nails
Damage from acrylics almost always comes from removal, not wear. Never pick or pry them off; that peels the top layers of your natural nail away with the product. I file off the top coat and bulk, then soak in acetone until the acrylic softens, and push it away gently. Afterward, keep nails short for a couple of weeks, use oil daily, and let them recover before your next set.
Ten Nails, One Ring, and a Very Long Day
Whichever set you land on, comfort and fit decide how you’ll feel by the end of the night. Some brides will always want a clean French; others lean toward pearl chrome, floral art, glitter ombre or plain milky white. Book a trial if acrylic is new to you, bring a photo of the dress fabric and your ring, and pick a length you can live with for a week. If the set feels thick or tight on day one, say so at the appointment rather than waiting it out.
You'll Like These Ideas:


Leave a Reply