
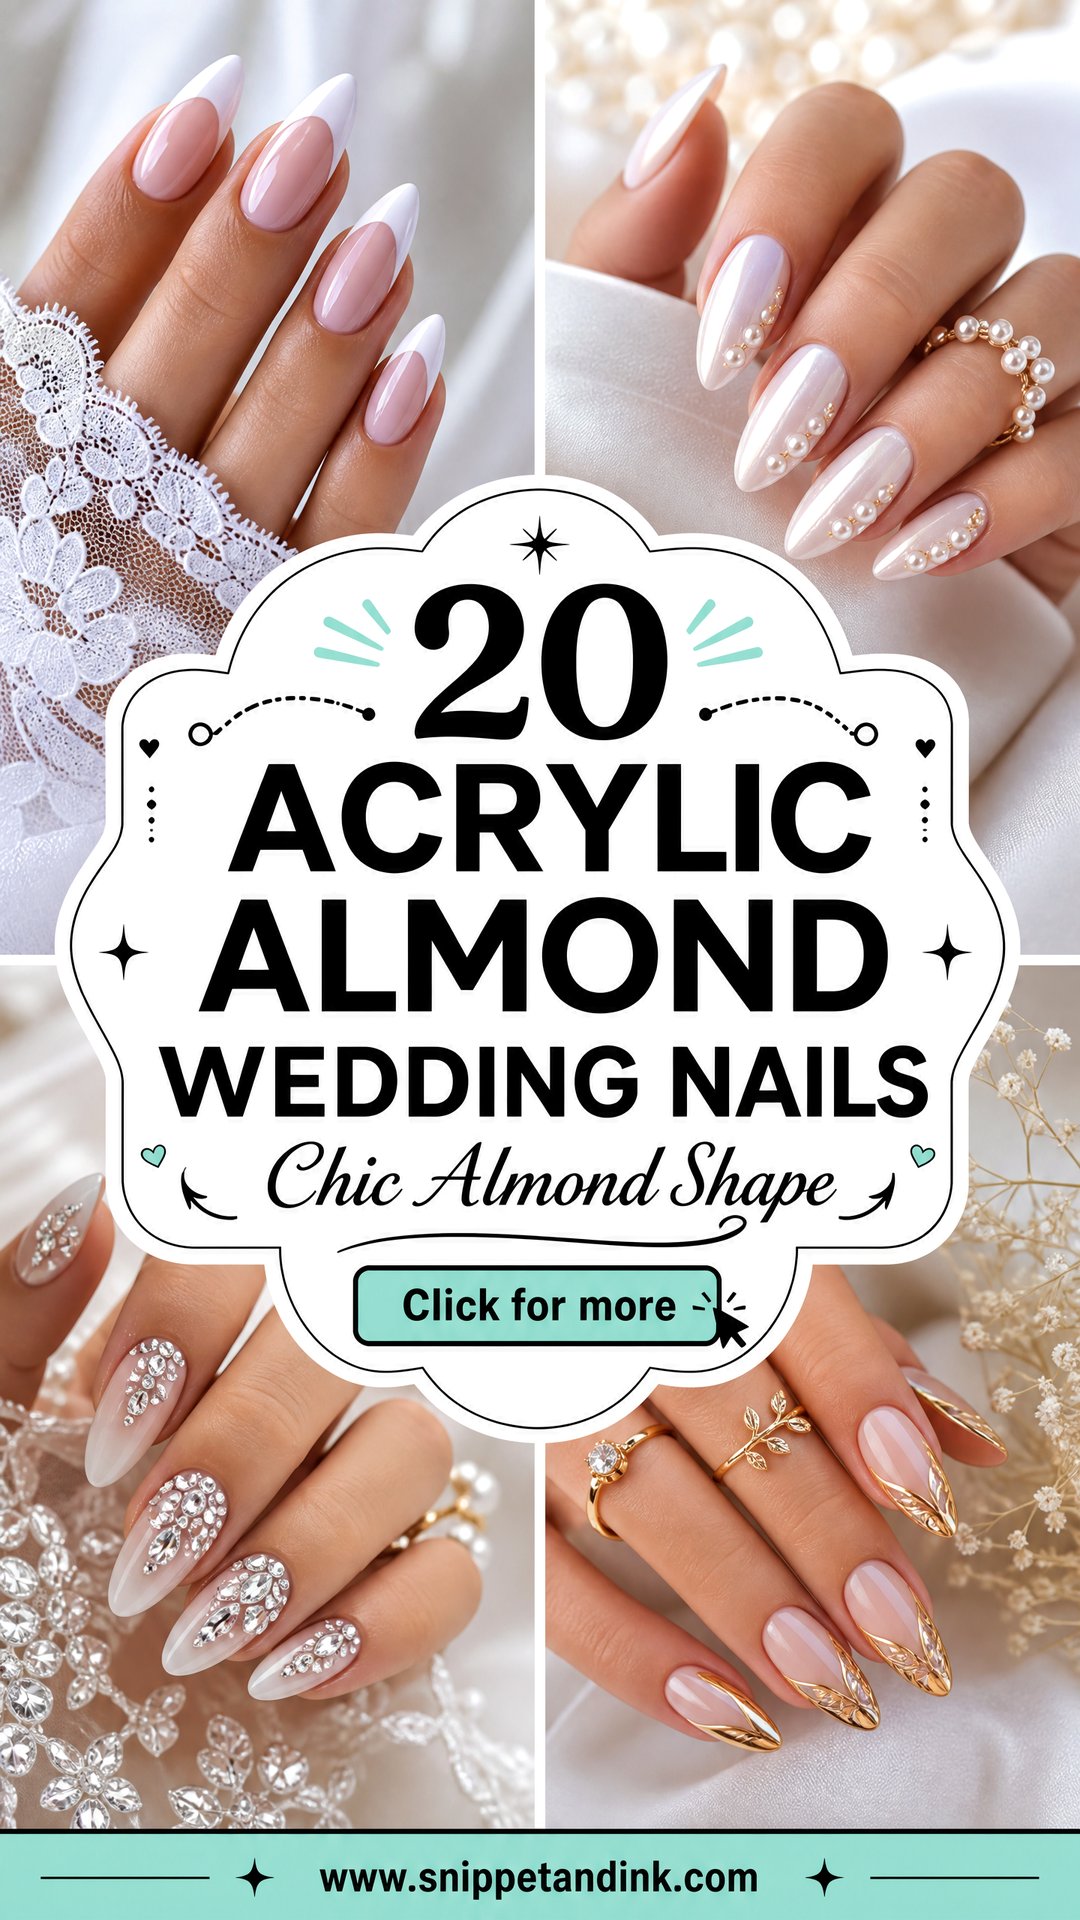
Almond is the shape I file most for brides, and acrylic is often the reason it works. The sides taper and the tip rounds off, so fingers look longer without the stiletto point that snags veils and tights. Acrylic lets me build that shape on short or uneven natural nails and gives the strength to carry pearls, chrome or fine art through a day of hugging, signing and holding a bouquet. For wedding day nails, the designs that age well tend to be quiet: sheer pinks, milky whites, French tips, soft chrome, a little sparkle. Below are the almond sets I’d actually put on a bride, with notes on where each one tends to go wrong.
An Almond Sized for Your Hands and Your Week
Before we talk colour, I sort out length and width, because an almond that’s too long or too narrow is what makes brides regret acrylics. The tapered sides make the free edge thinner than on a square or oval, so I place the thickest part of the acrylic, the apex, where your natural nail leaves the finger. That’s where a nail takes the most stress when you grab a car door or a bouquet stem.
- First time in acrylics: start short to medium. You’ll still get the lengthening effect, and you can handle earrings, contact lenses and buttons.
- Wide nail beds look best with a softer, slightly rounder almond. A sharp taper on a wide nail looks pinched at the tip.
- Short fingers gain the most from almond, but the tip should not extend past the fingertip by more than about half the nail bed’s length, or it looks borrowed.
- If you’ll be wearing gloves, skip raised 3D details. They catch on the lining every time you pull them on.
A trial set a few weeks before the wedding is worth it here. Live with it for a few days and tell your tech what annoyed you, and the final set gets adjusted around that.
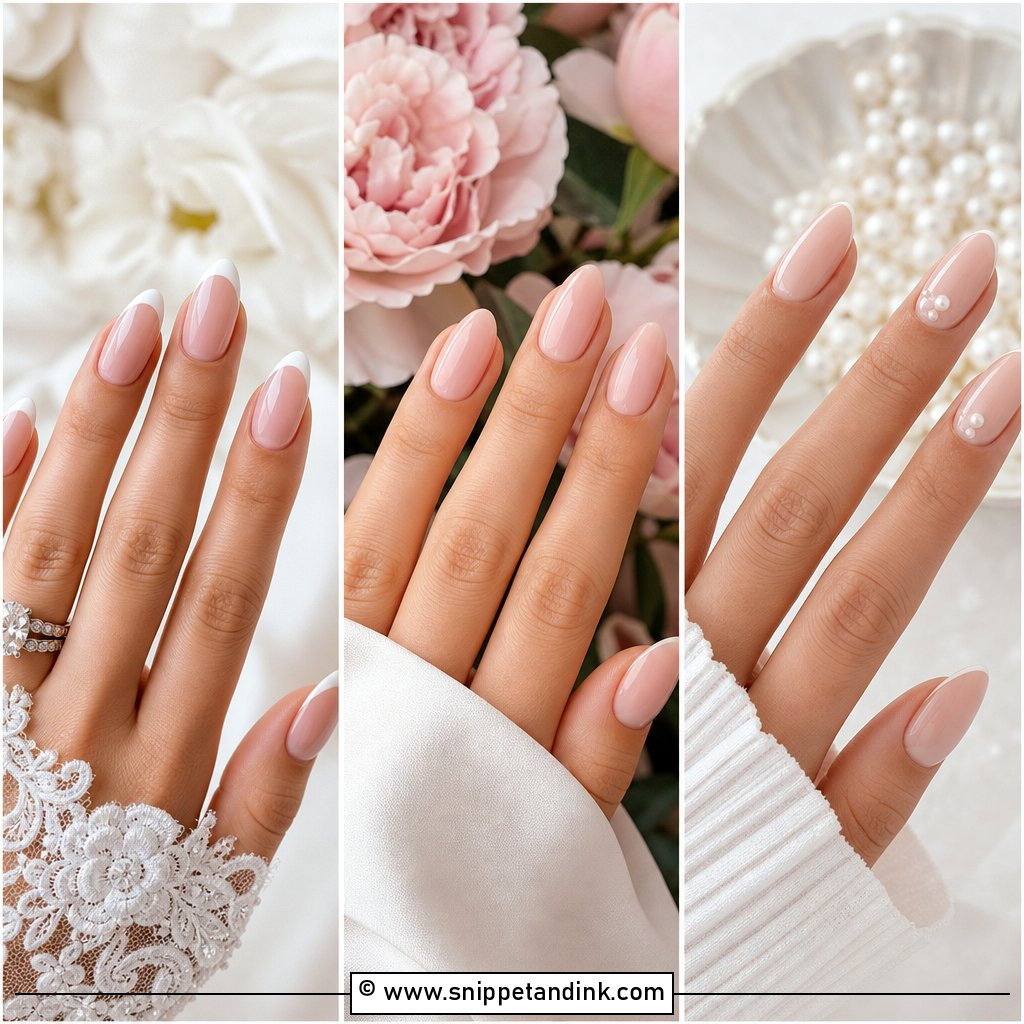
1. Classic French Acrylic Almond Wedding Nails
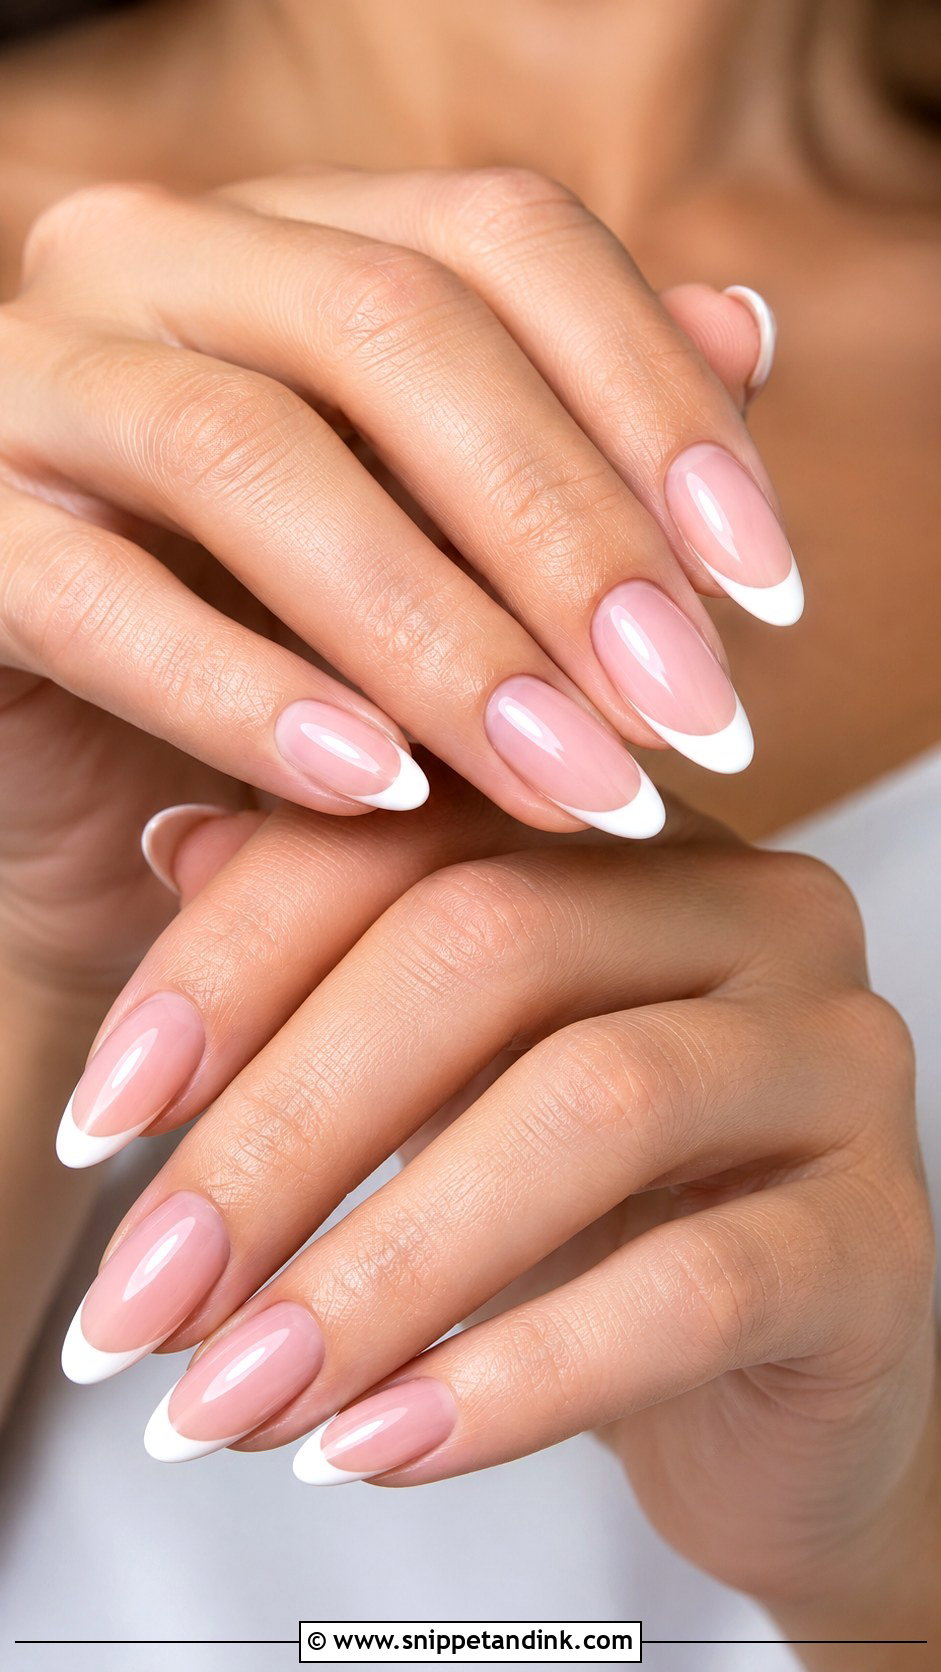
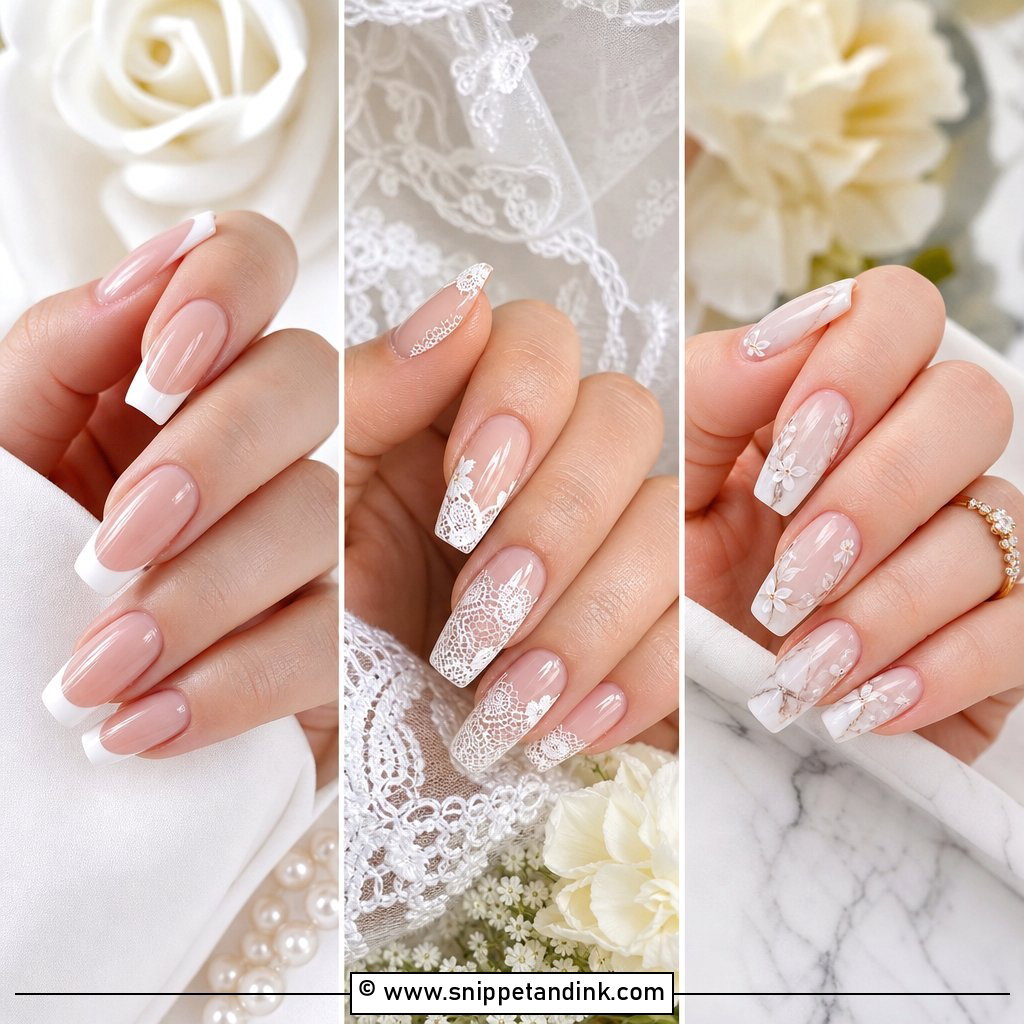
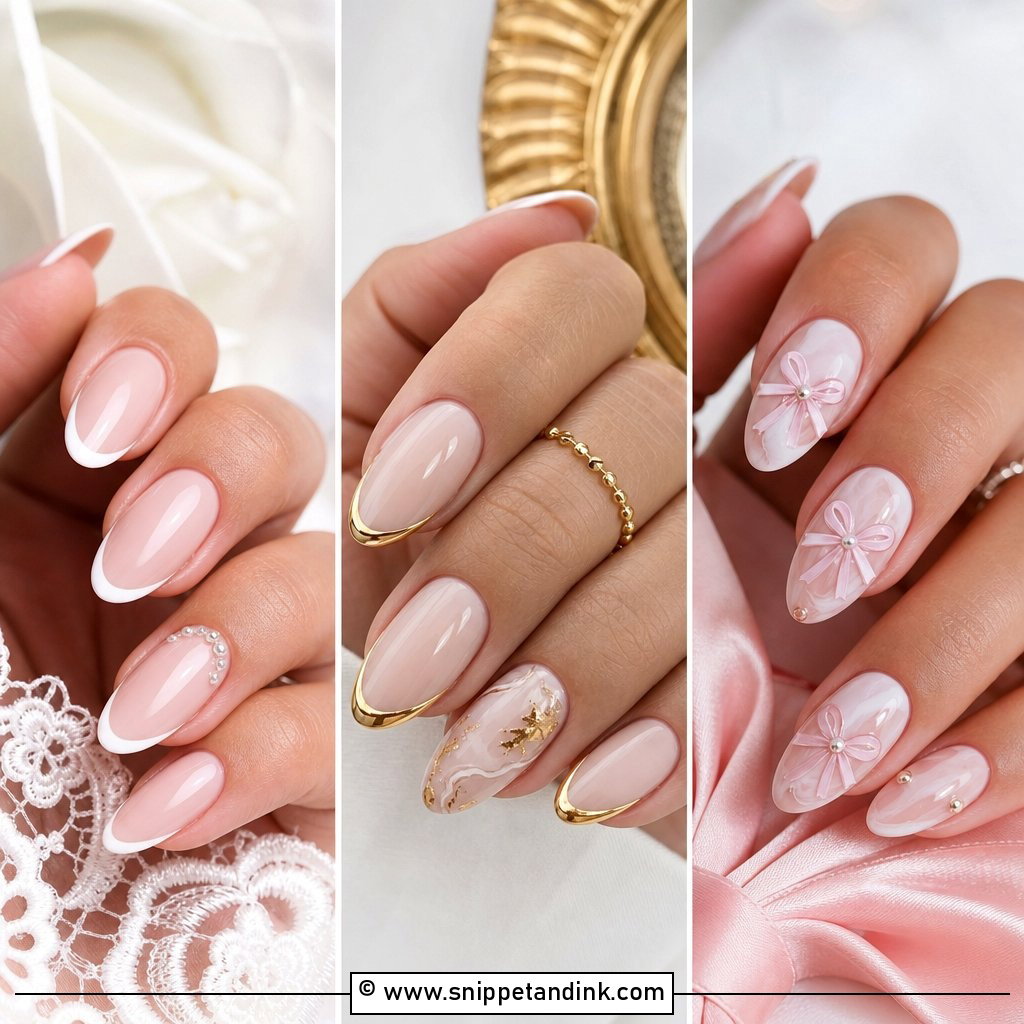
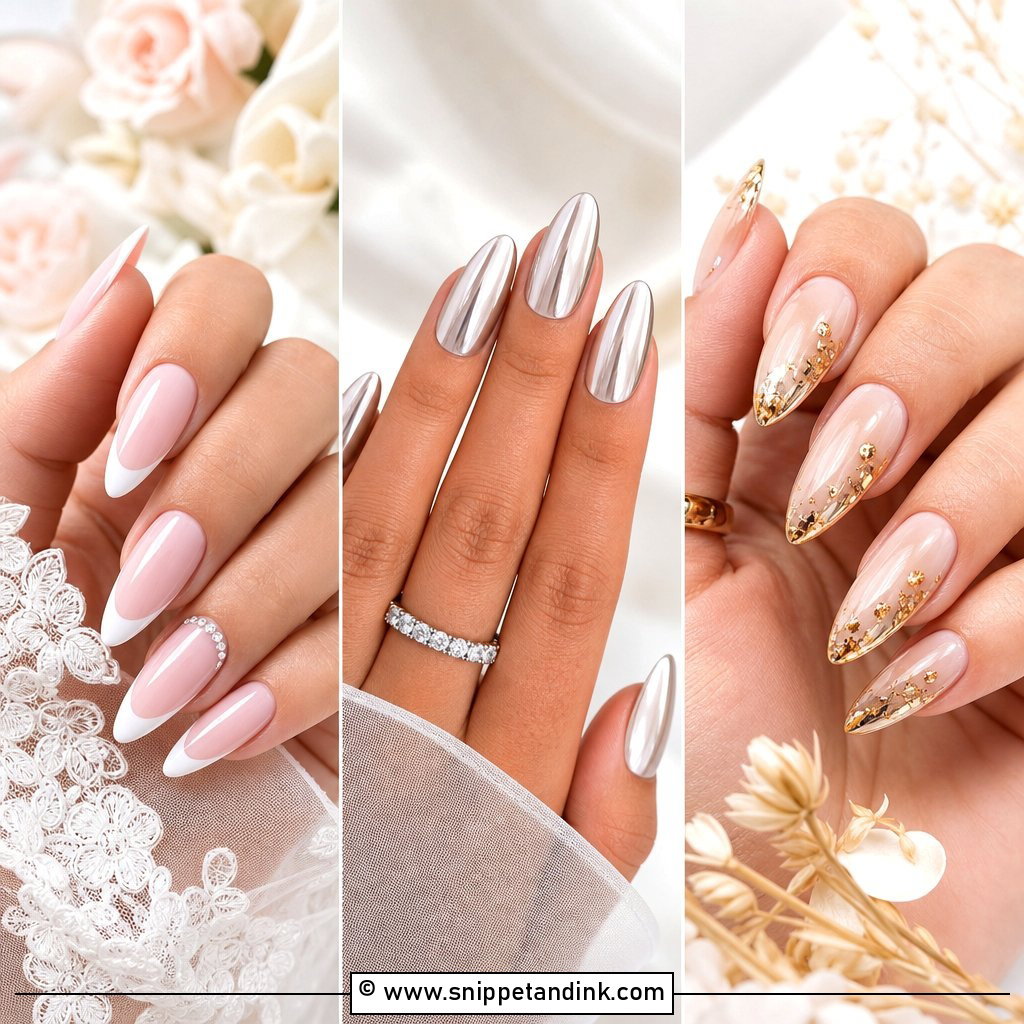
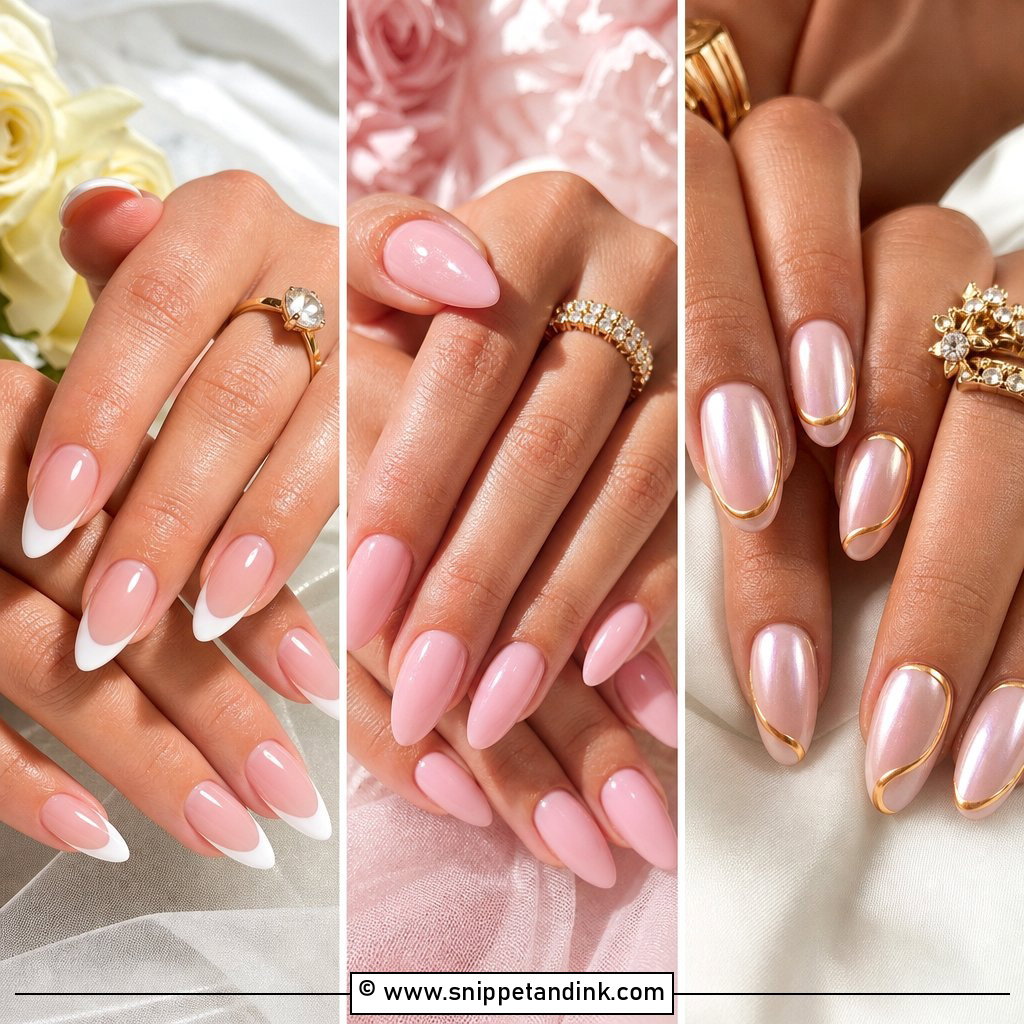
The French tip lives or dies on the smile line. On an almond, I curve it deeper at the sides so it follows the taper; a straight line across an almond tip makes the nail look stubby. The base should be a pink or nude that hides your free edge underneath, otherwise a second white line shows through. Medium length is the comfortable choice for most brides, long enough to look elegant in ring shots and short enough to do up your own earrings. It suits satin and lace equally, and nobody looks back at a French set and winces.
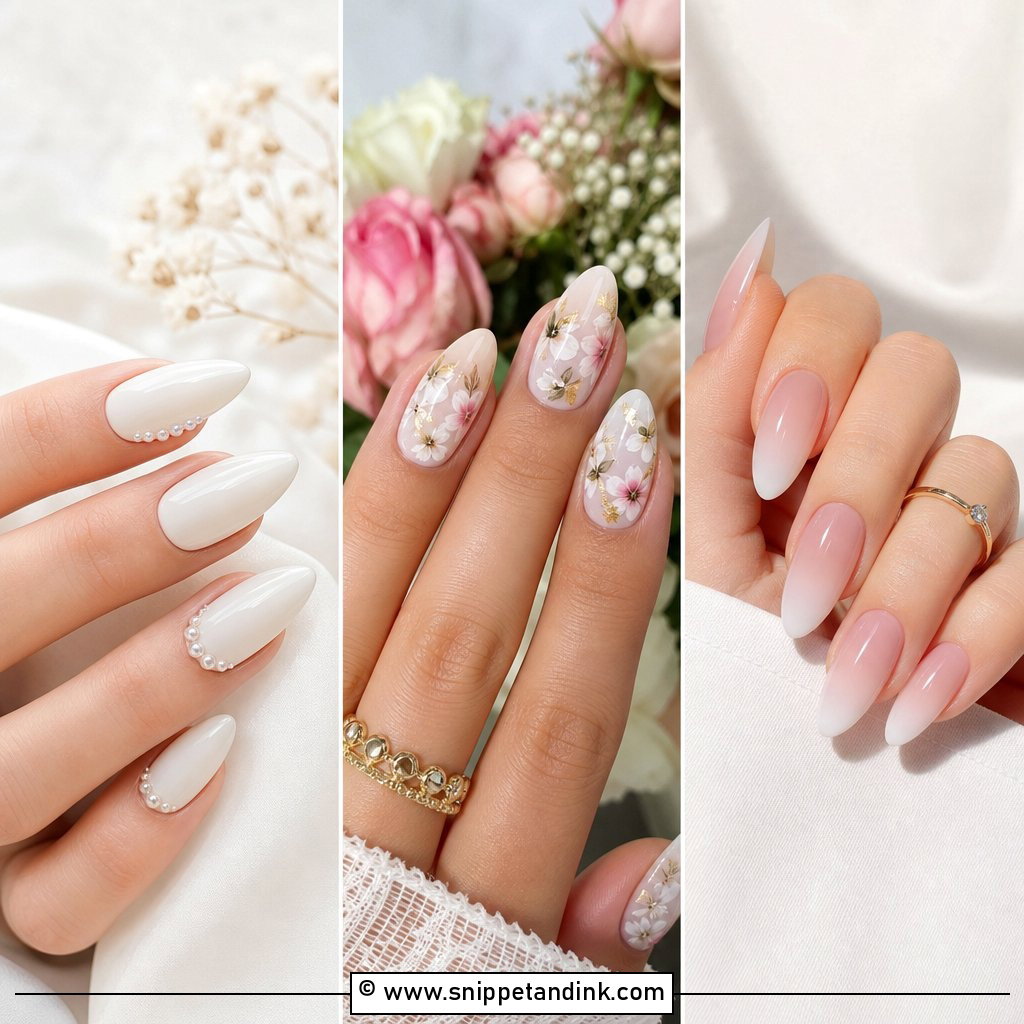
2. Milky White Acrylic Almond Wedding Nails
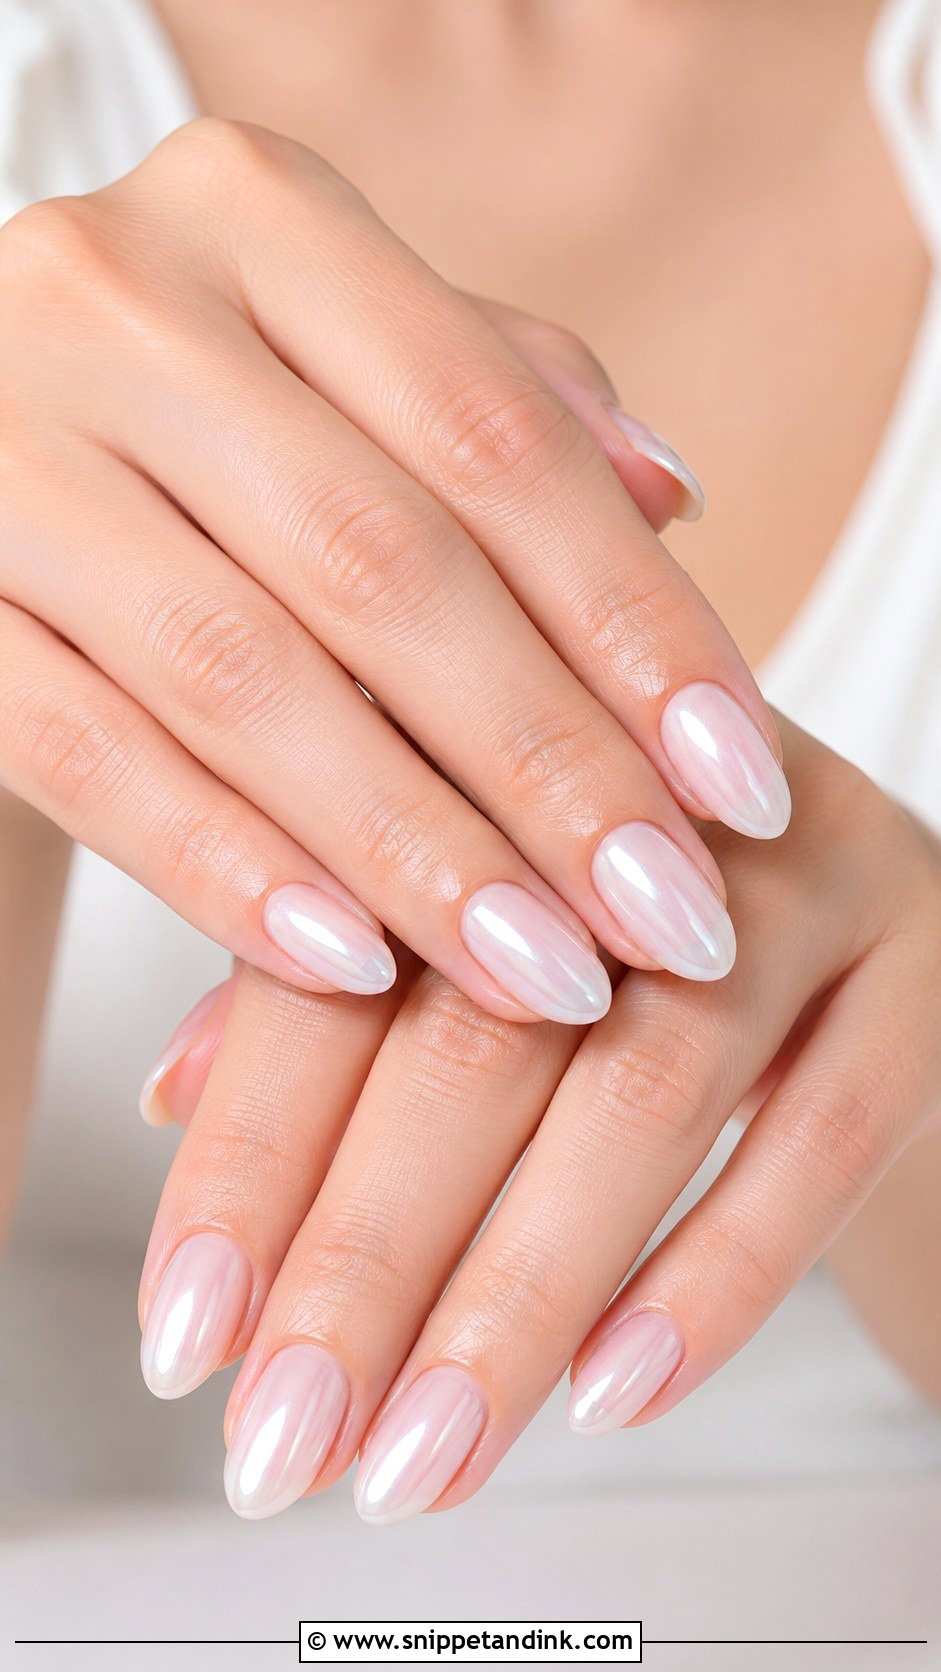
Milky white sits between sheer white and cream, and the hardest part is the opacity. Too sheer and it looks streaky; too thick and it turns chalky, like correction fluid. I aim for one even, slightly translucent layer over a well-shaped acrylic, then a glossy top coat. A very fine shimmer can go on top for some extra glow. It pairs with white, ivory, champagne and pearl-toned gowns. Ask to see it in daylight before you commit, because milky white under salon lamps looks warmer than it will at an outdoor ceremony.
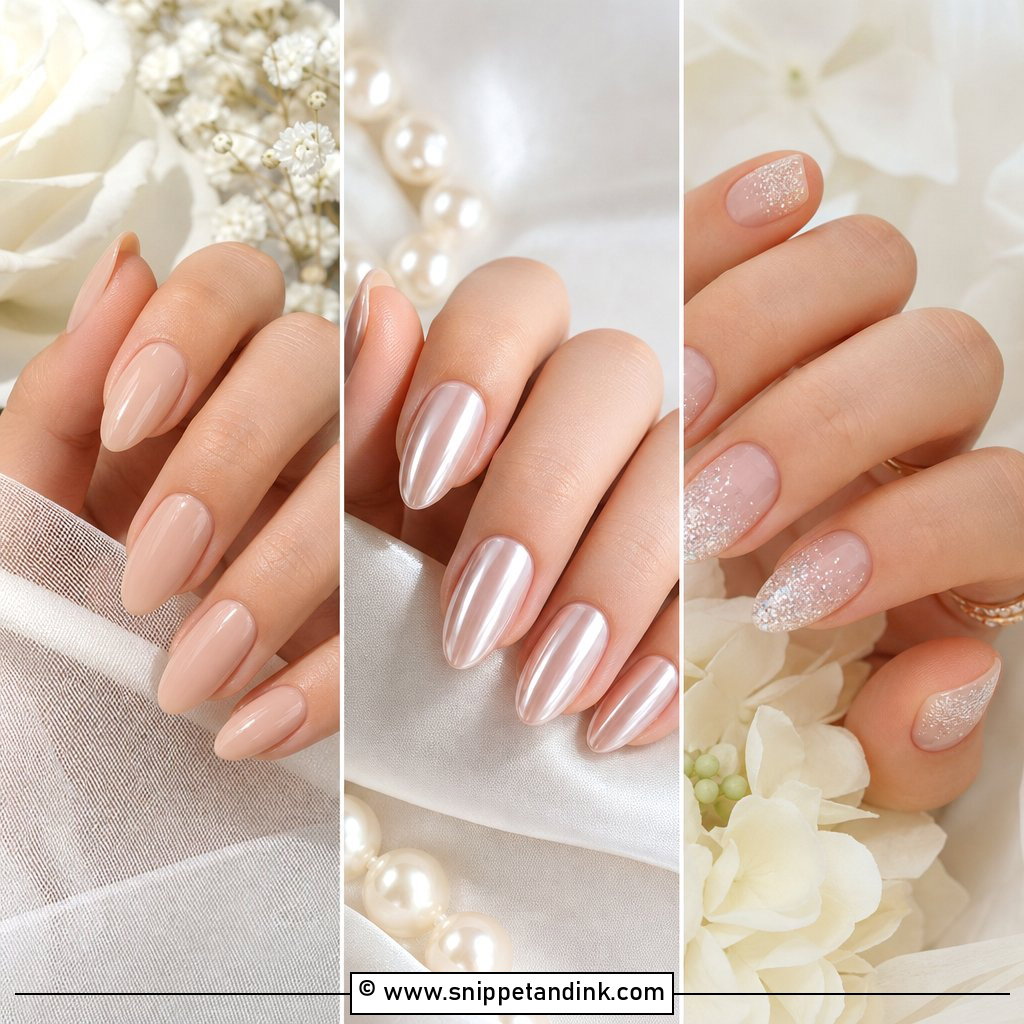
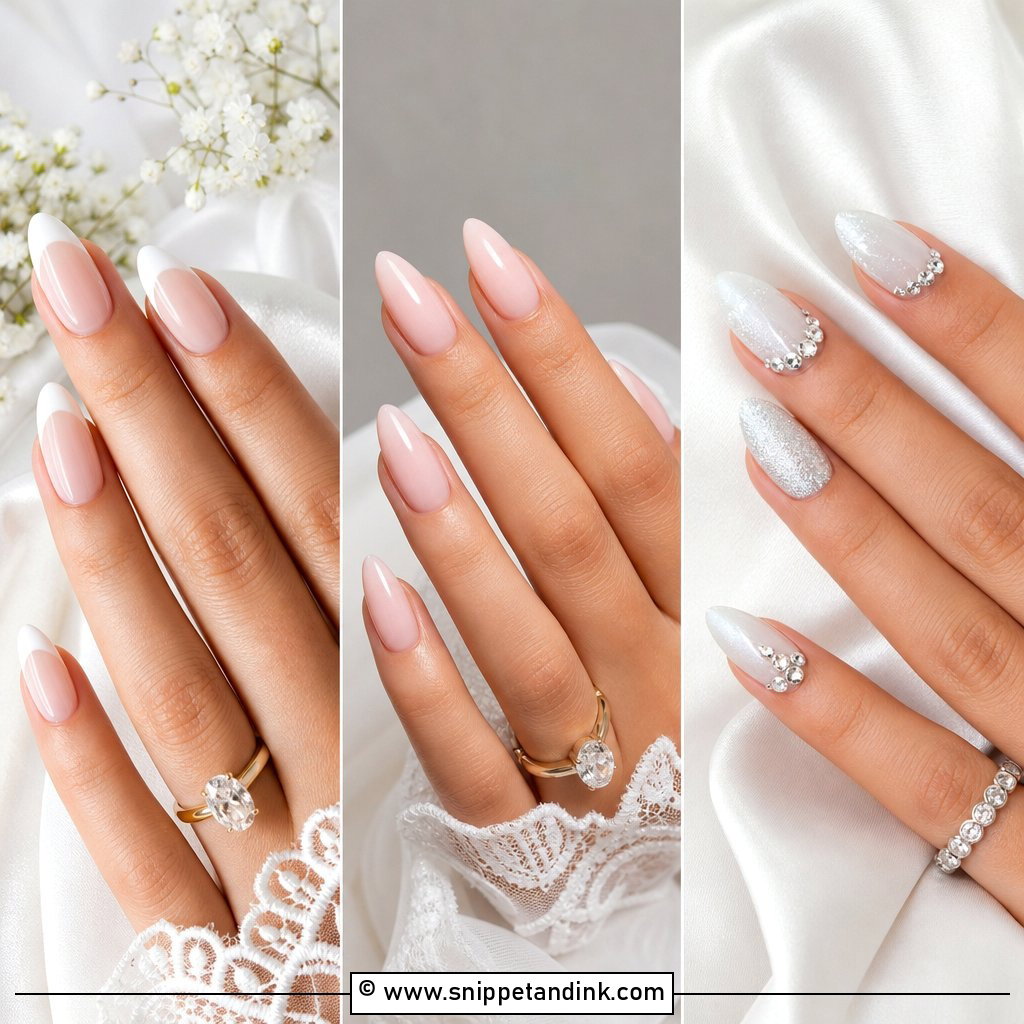
3. Nude Pink Acrylic Almond Wedding Nails
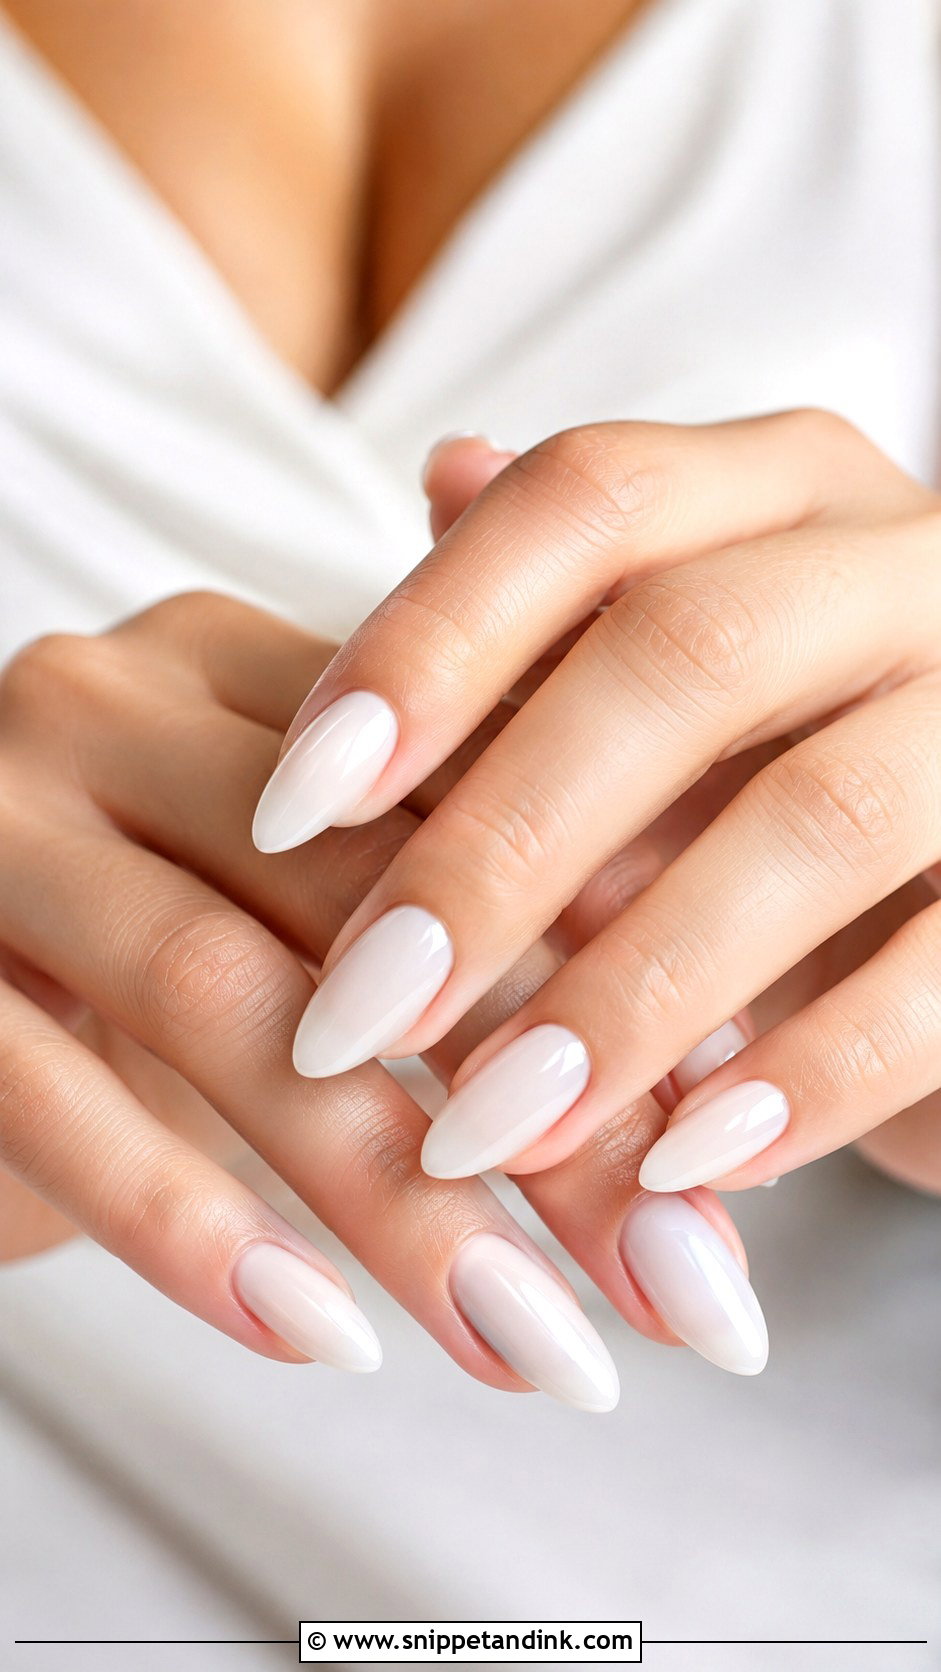
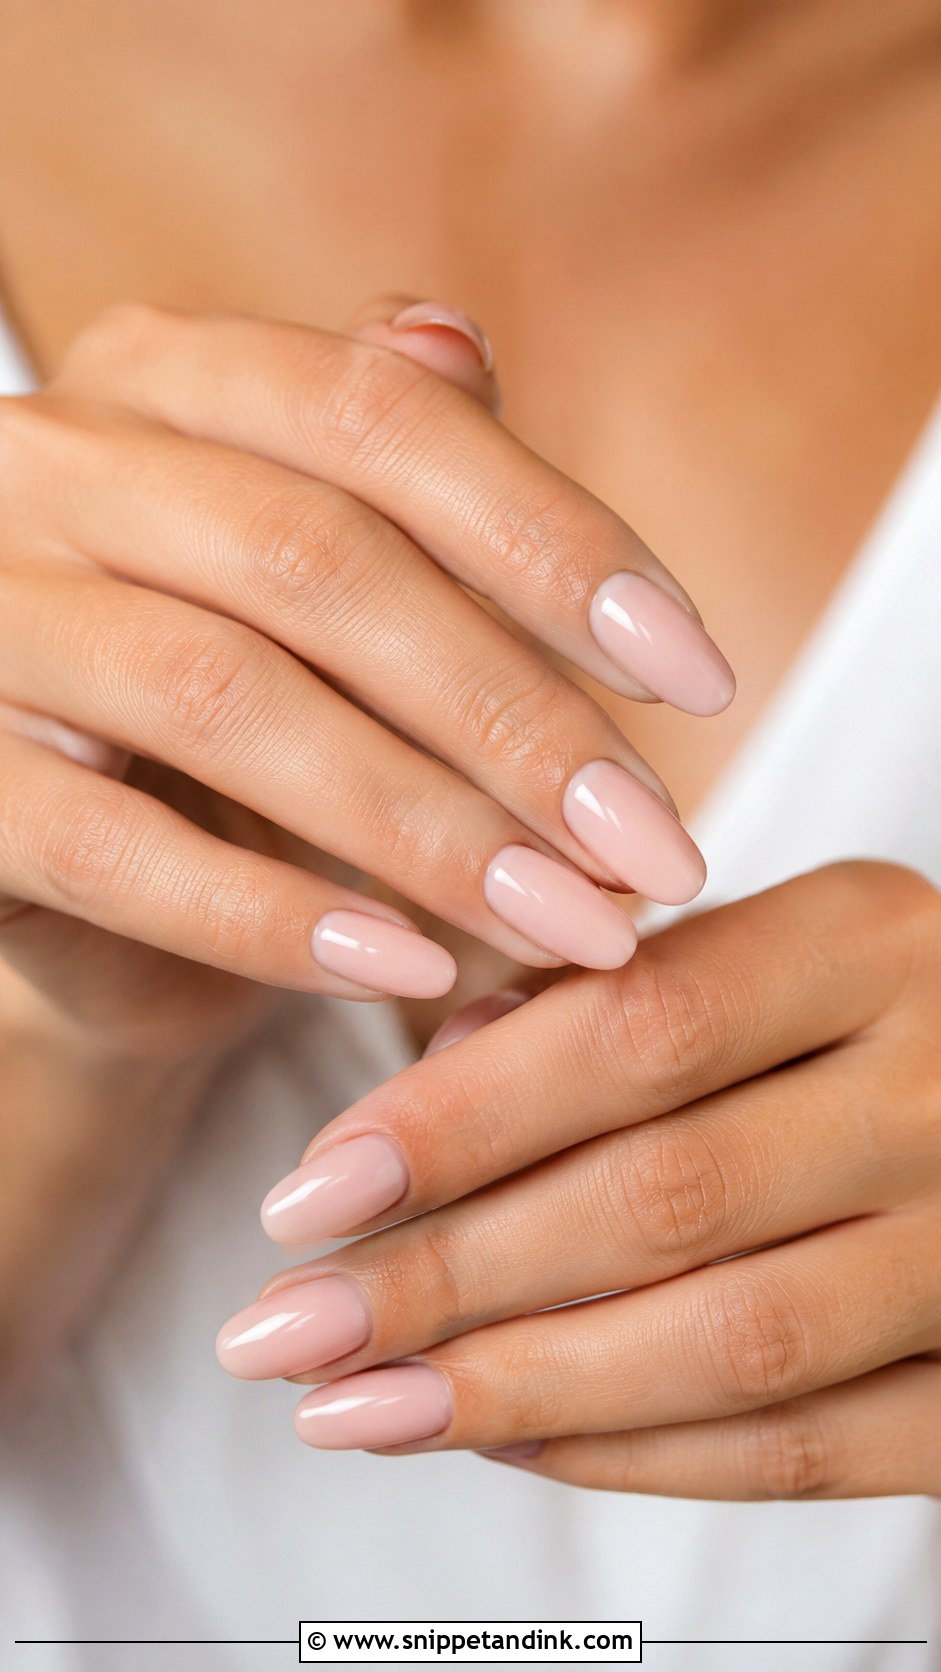
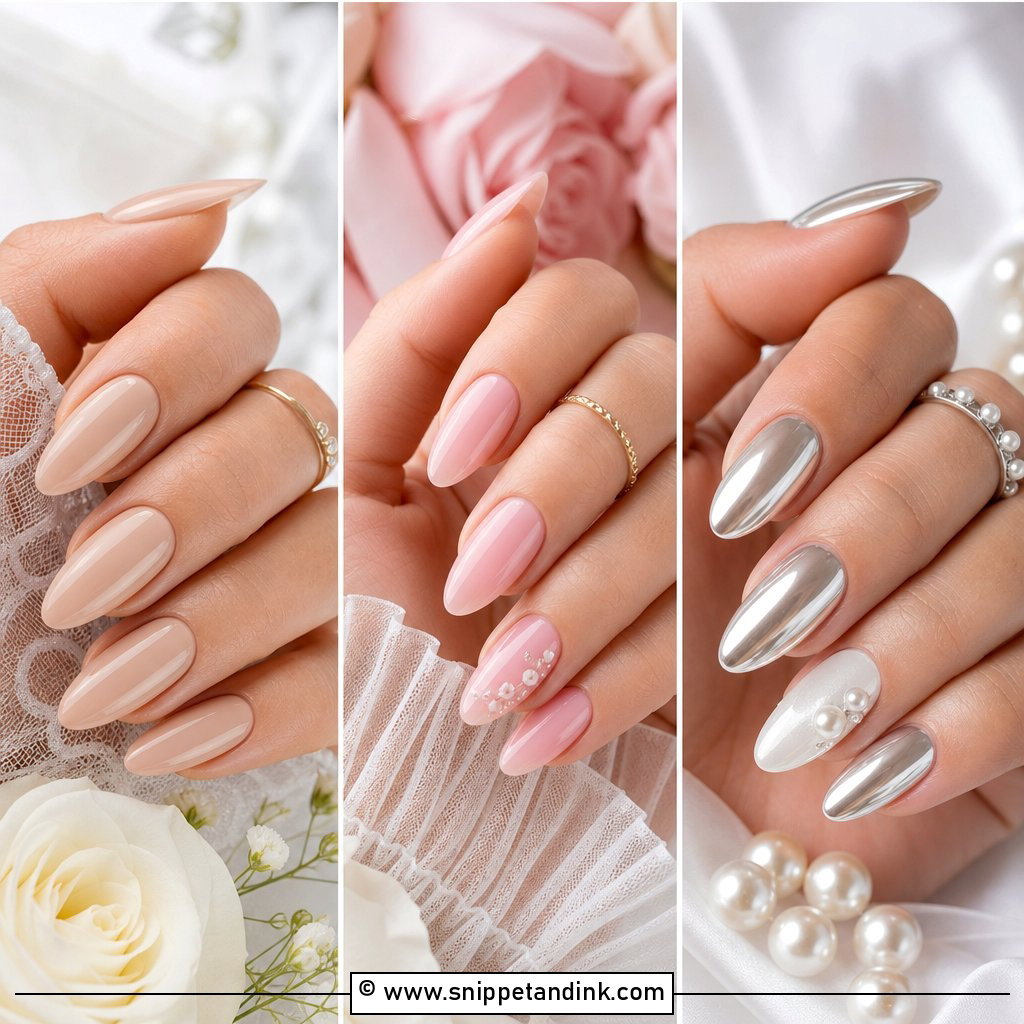
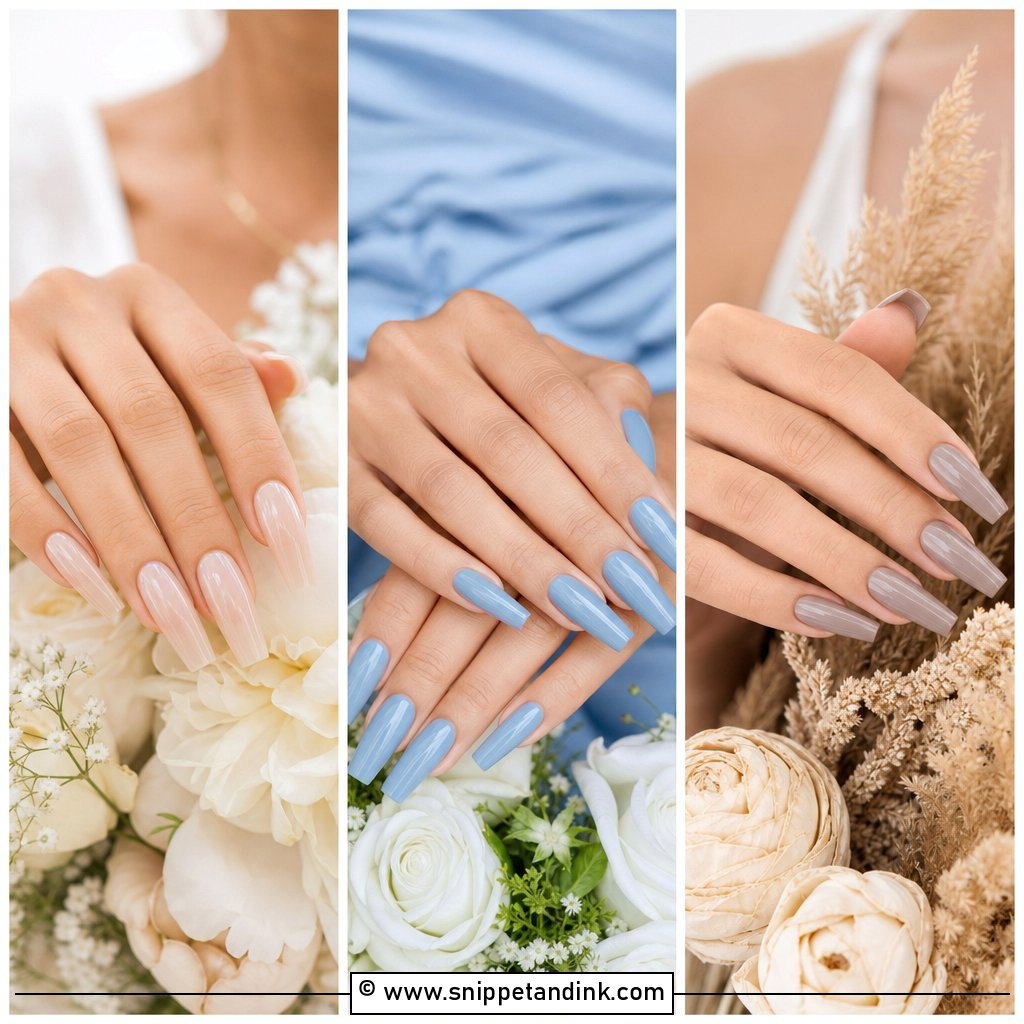
A nude pink only works when it suits your undertone, and that’s what I spend the most time on at a trial. I swatch three shades on the actual nails and hold the hand next to the face. As a rough starting point, fair skin usually takes blush pinks, medium skin rose nudes, and deeper skin caramel-pink or mauve-nude. A shade that’s too pale makes fingertips look grey in photos. The almond shape adds length so the colour reads as an extension of the finger, and a glossy finish keeps it looking healthy. It sits naturally beside pink in the bouquet or makeup.
4. Pearl Chrome Acrylic Almond Wedding Nails
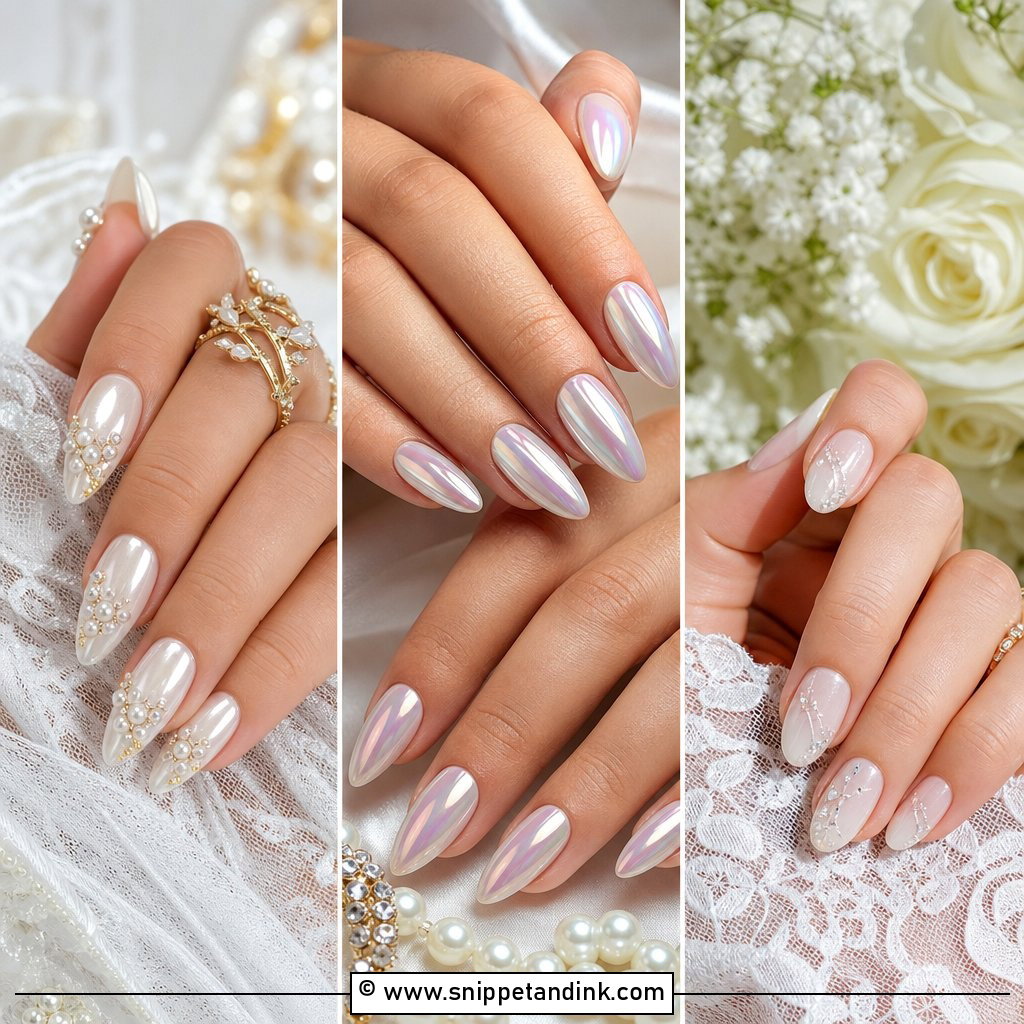
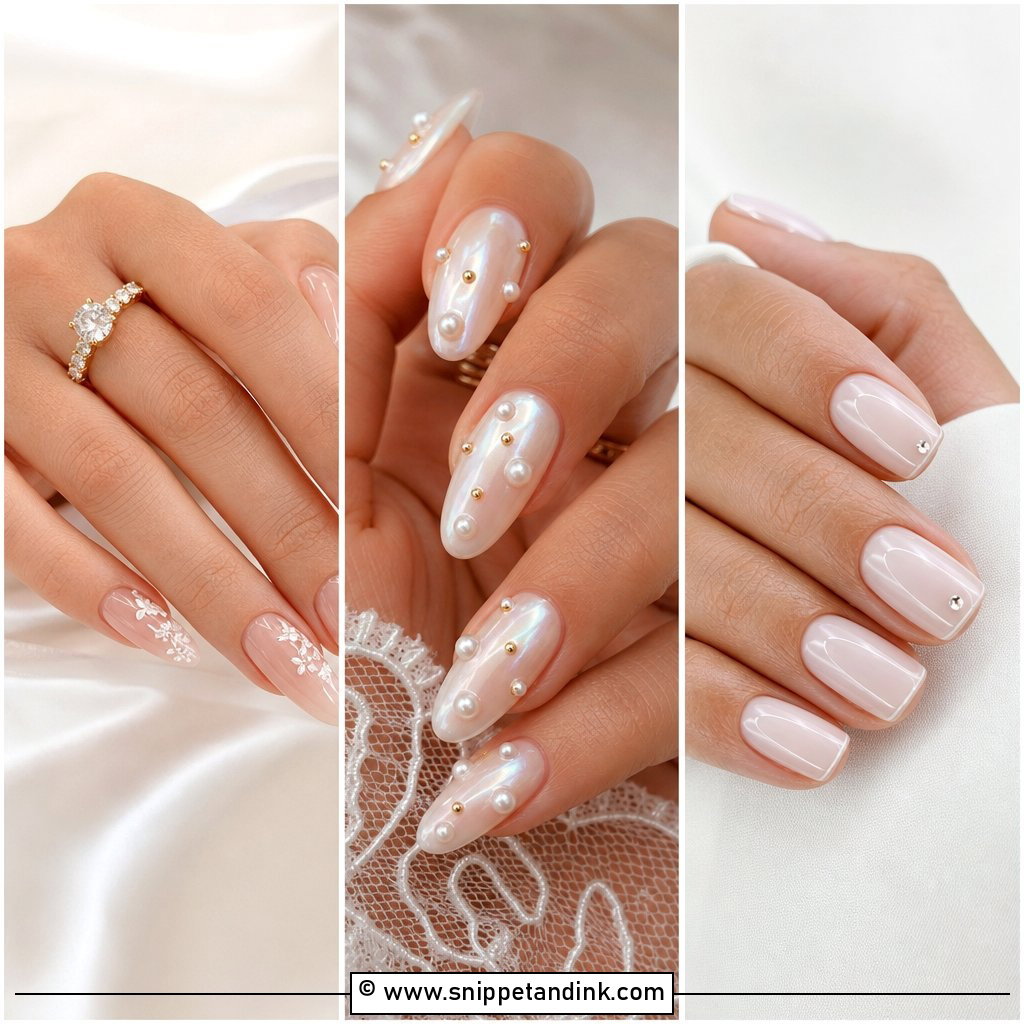
Pearl chrome acrylic almond wedding nails give a soft glow without going metallic. Chrome powder needs a gel top coat to grip, so even on acrylic the finish is a gel layer, buffed with powder and sealed. Over milky white, pale pink or sheer nude, a fine pearl powder looks like a veil of light. The smooth curve of an almond reflects it evenly, while flat or uneven acrylic shows every ripple under chrome, so shaping has to be clean first. Ask for a sheer pearl rather than silver mirror chrome. It sits right beside pearl earrings and satin.
5. Baby Boomer Acrylic Almond Wedding Nails
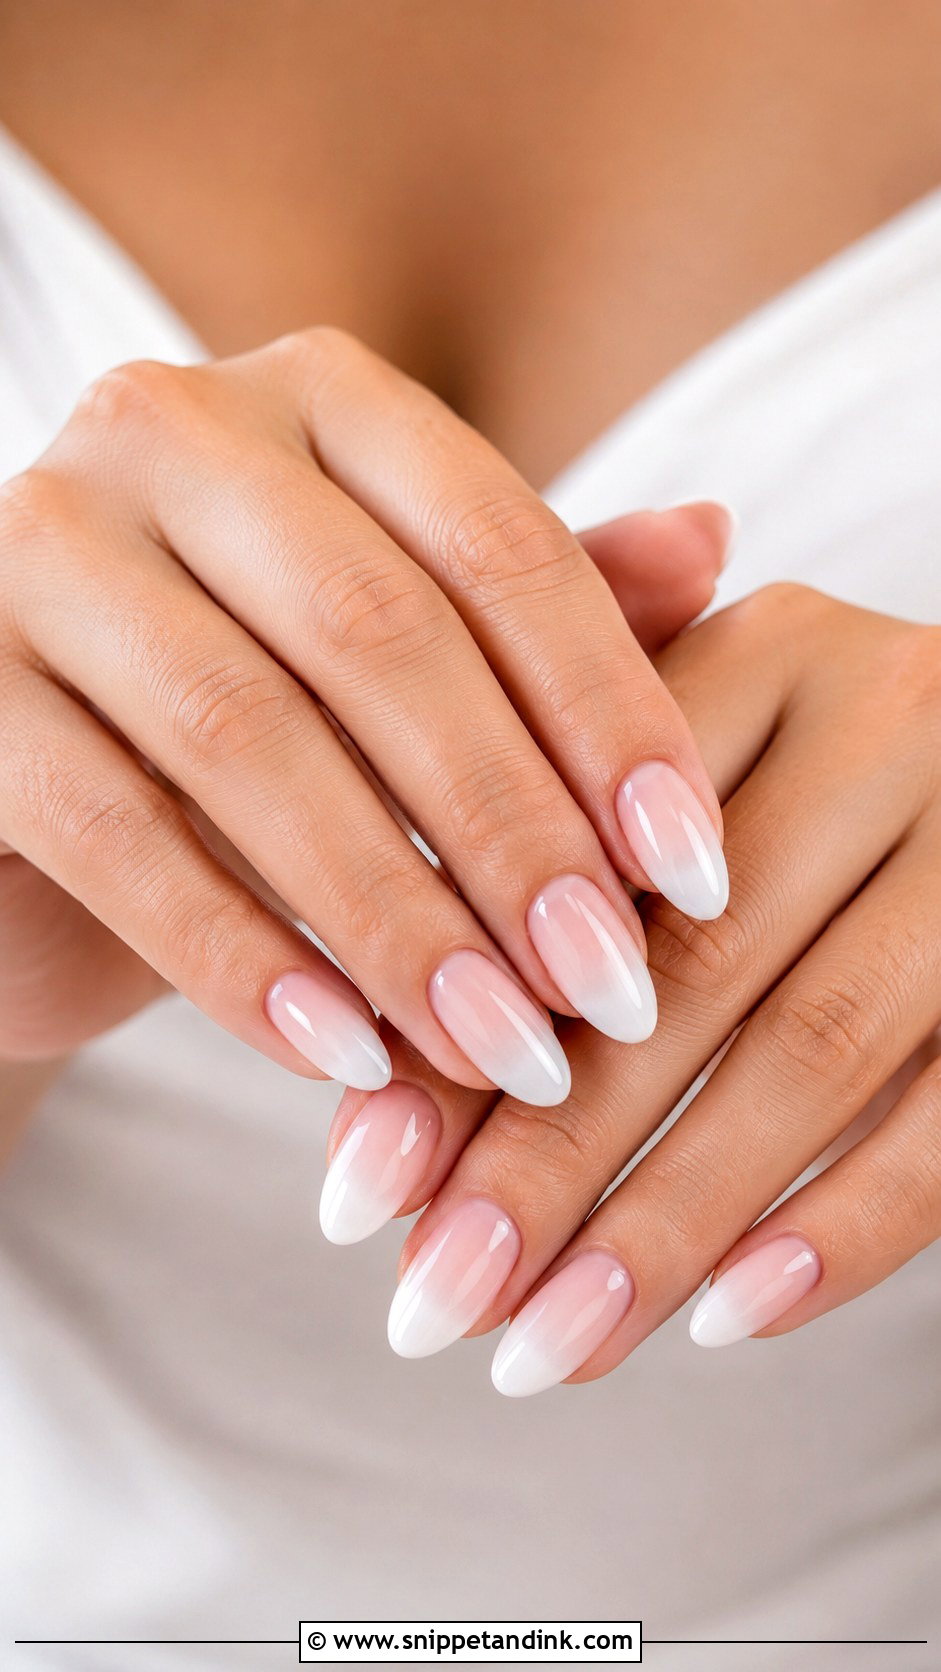
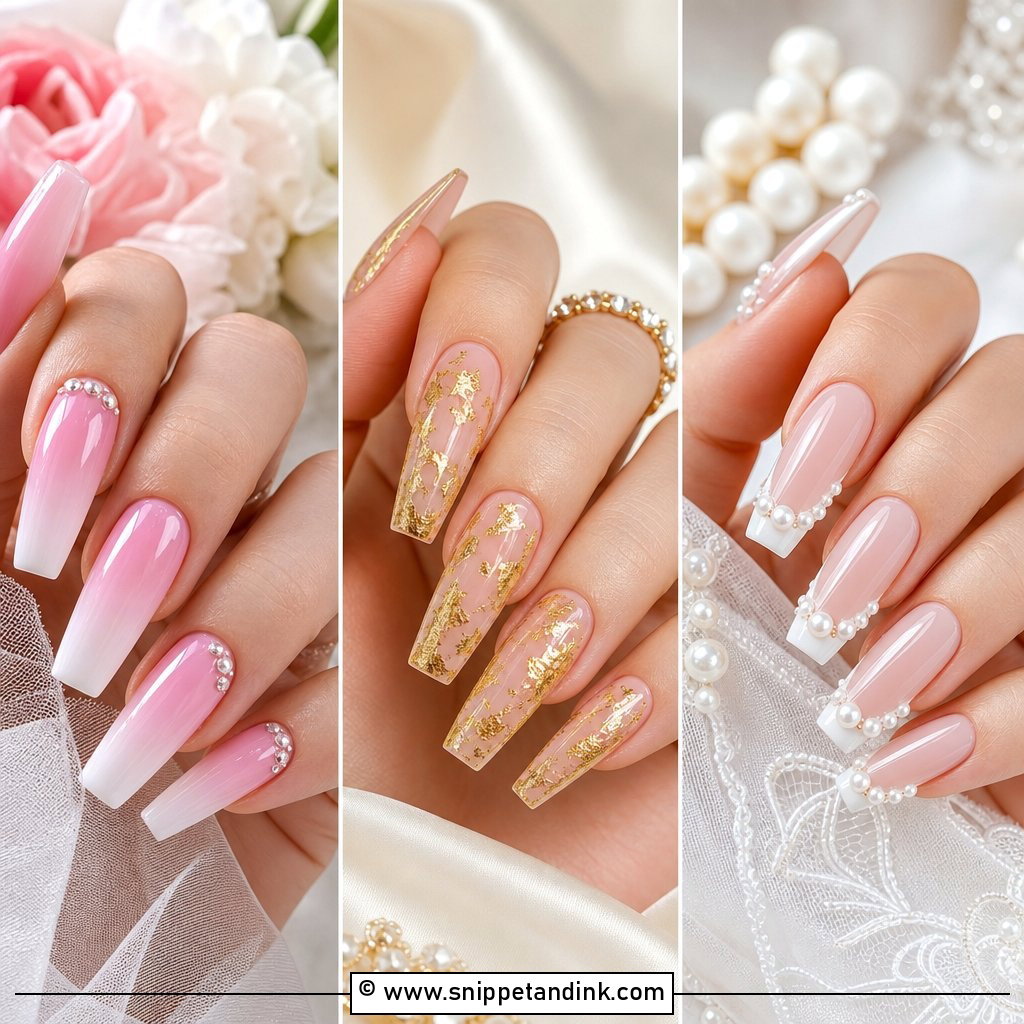
Baby boomer is the blended cousin of the French manicure: nude or pink at the base fading into milky white at the tip. On acrylic I usually build it right into the powder, using clear or pink powder near the cuticle and white at the free edge, so the fade sits inside the nail rather than painted on top. The almond’s rounded tip has no corners to break the gradient. Close-up, it’s forgiving, and because the base is close to your natural nail colour, a few days of growth barely shows. Good for honeymoon wear afterwards too.
6. White French Tip Acrylic Almond Wedding Nails
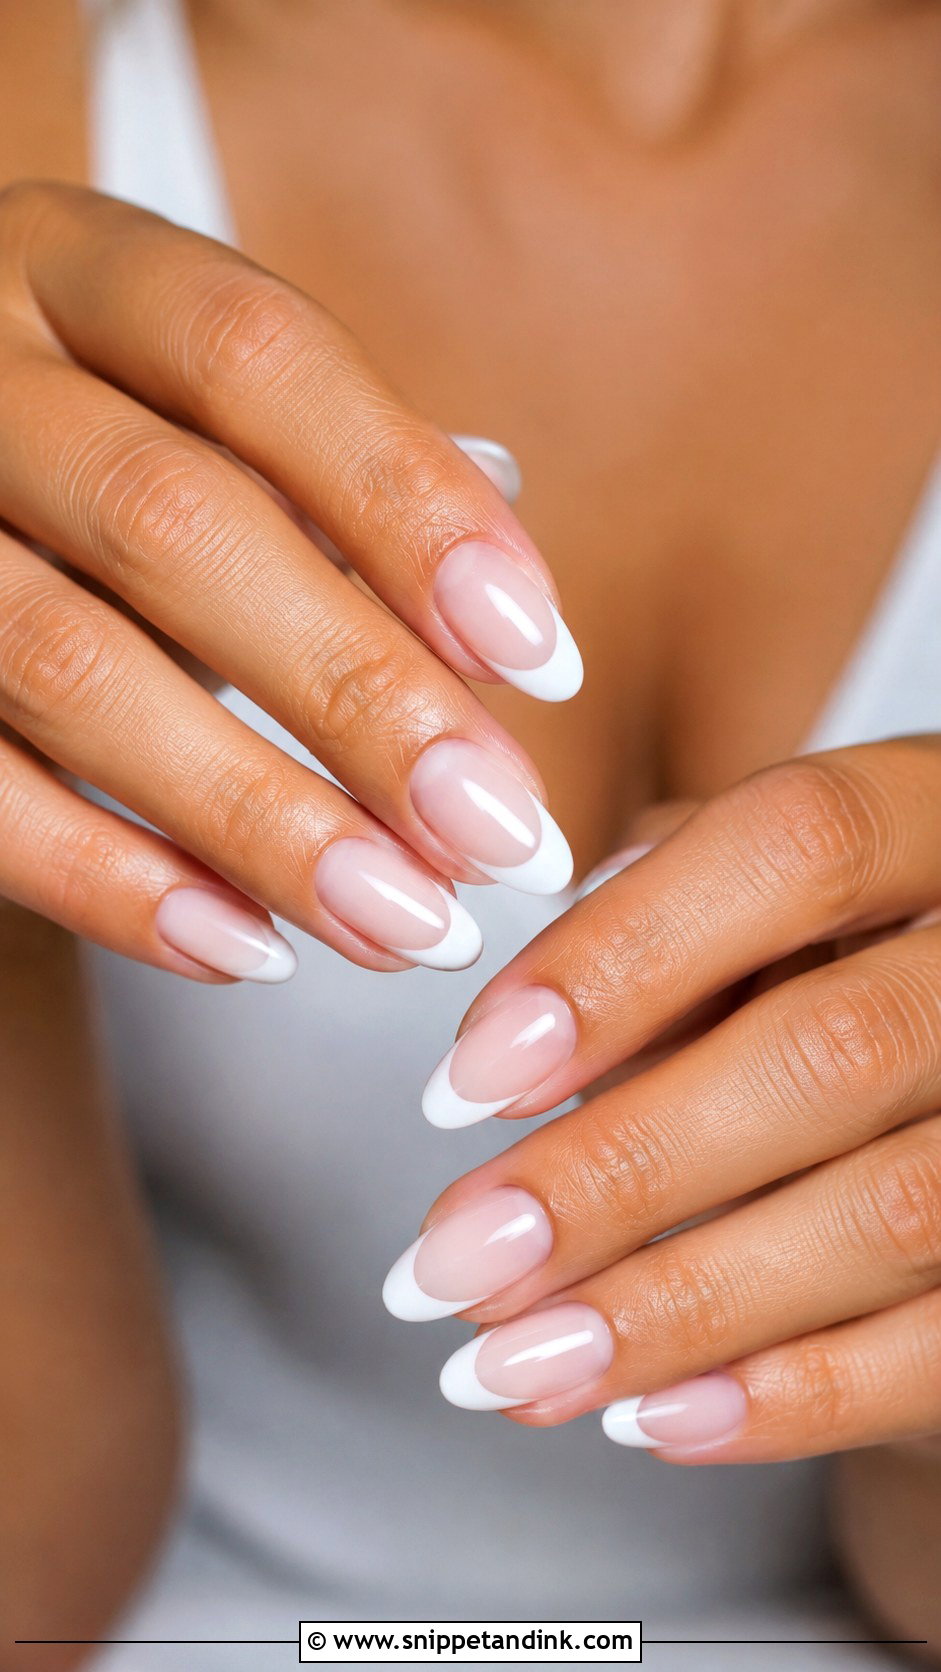
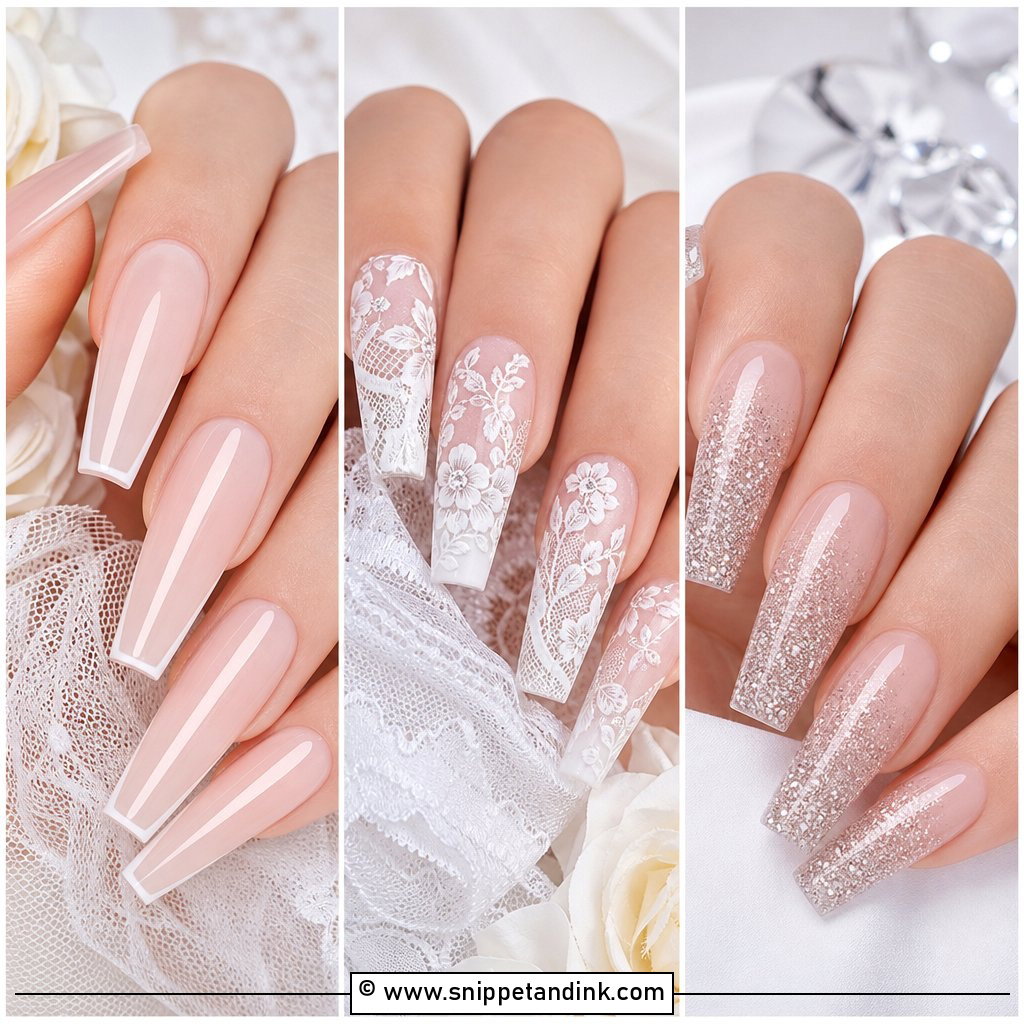
A brighter white tip is the version that shows up clearly in ring shots, and almond gives it a soft point. I can sculpt the white in powder, which stays whiter longer than painted polish, or paint it for a thinner, crisper line. Thin tips look minimalist; medium tips read more traditional. Keep the base sheer pink to stop the white from looking stark. The thing I’d watch is a tip that’s too square for the shape. Match the curve of the tip to the almond, or the nail looks like two shapes stuck together.
7. Glitter Ombre Acrylic Almond Wedding Nails
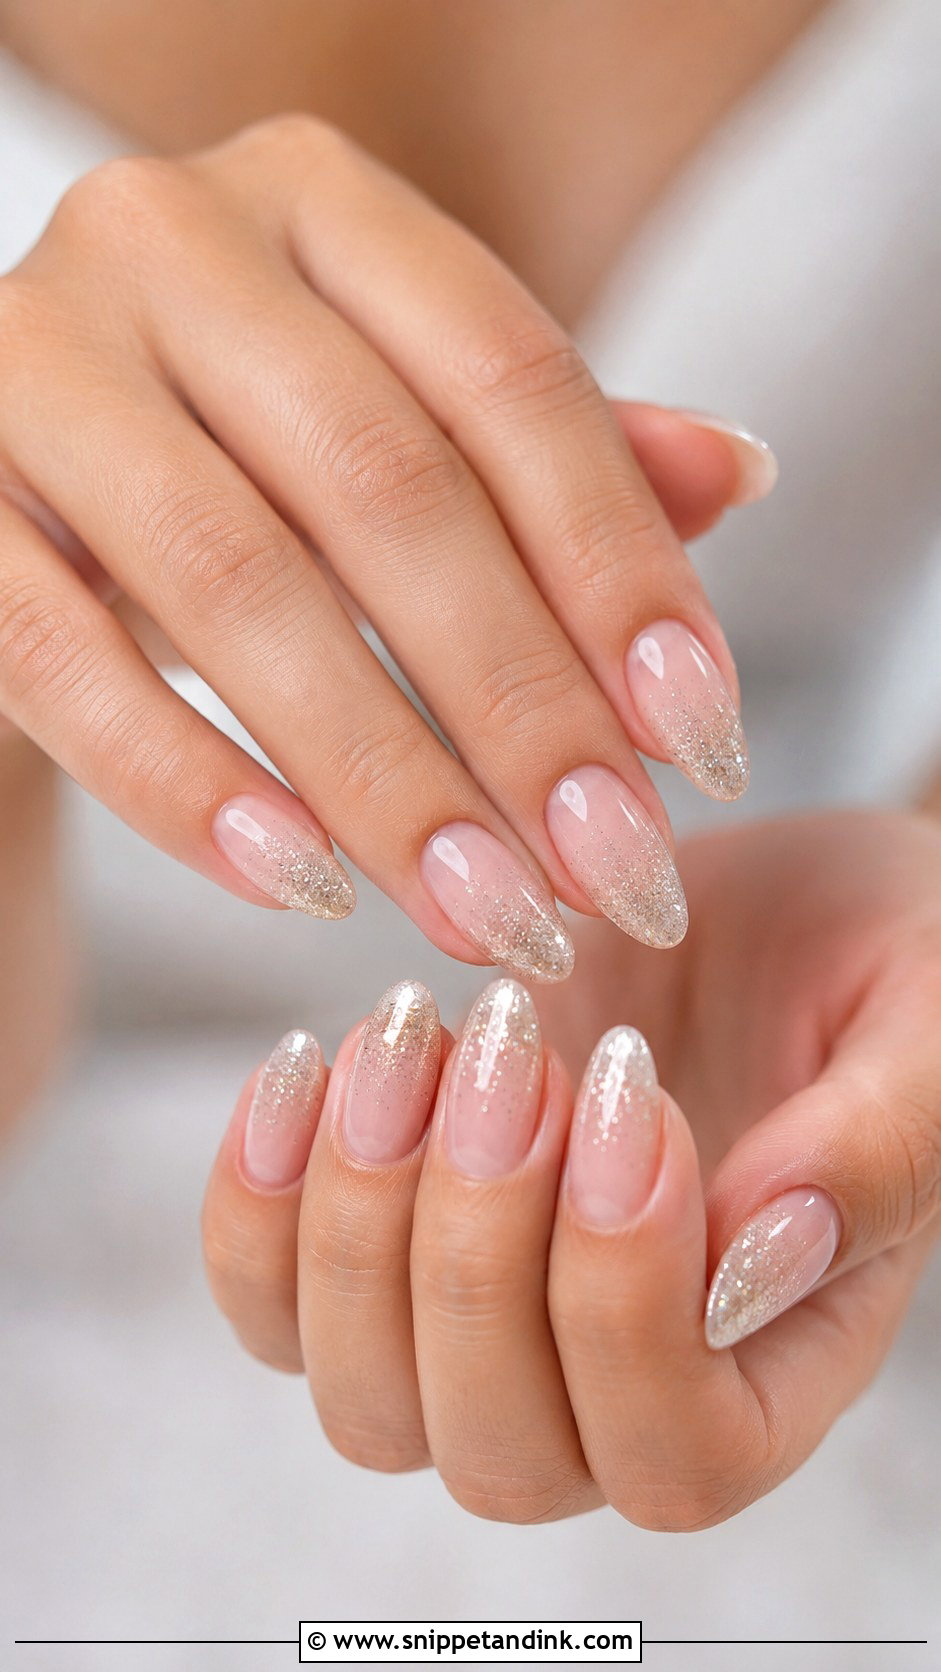
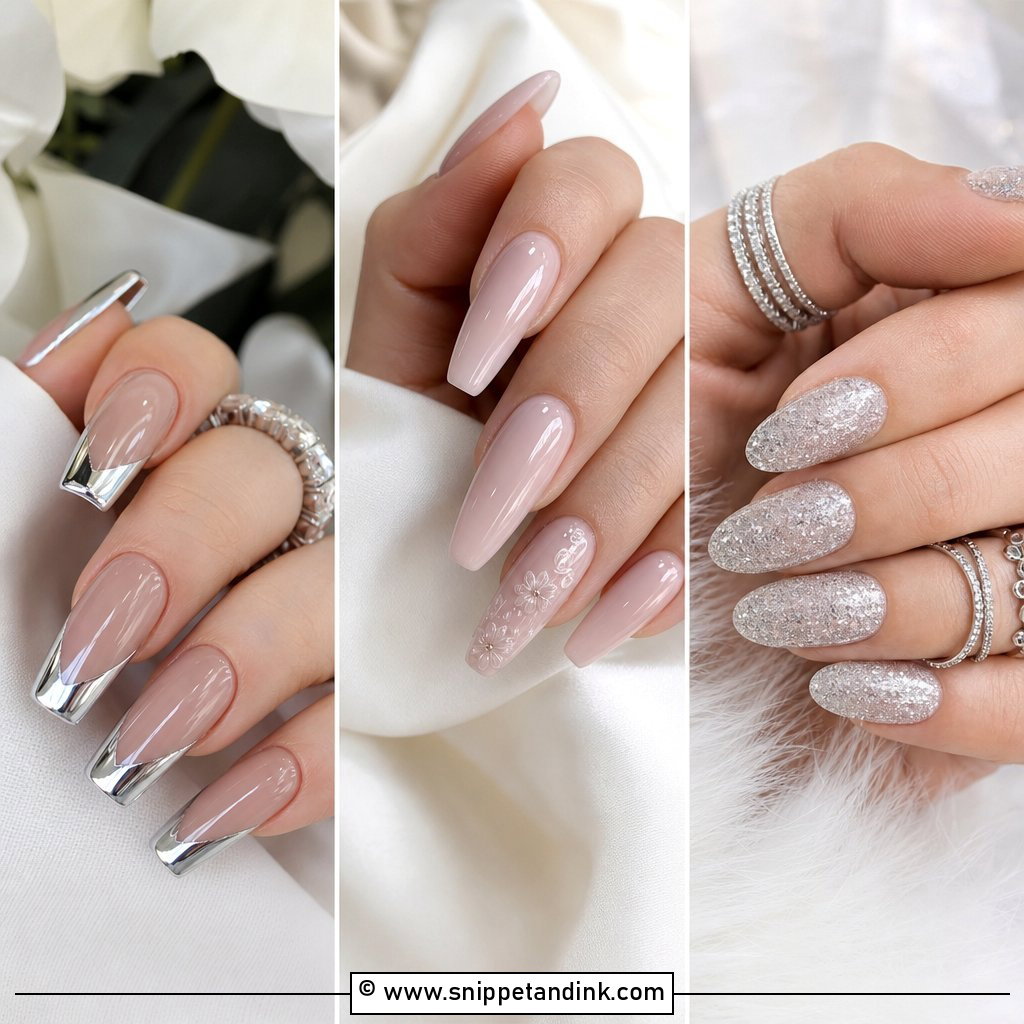
Glitter ombré acrylic almond wedding nails suit a bride who wants sparkle without a full glitter set. I start from a sheer nude, soft pink or milky white base and fade fine silver, champagne or pearl glitter down towards the tips, so the sparkle follows the taper and adds length. Fine glitter reads as shimmer in photos; chunky hex glitter photographs as spots. Glitter encapsulated in acrylic or under gel is also harder to chip, which helps on the day. It catches candlelight well and pairs with beaded gowns.
8. Pearl Accent Acrylic Almond Wedding Nails
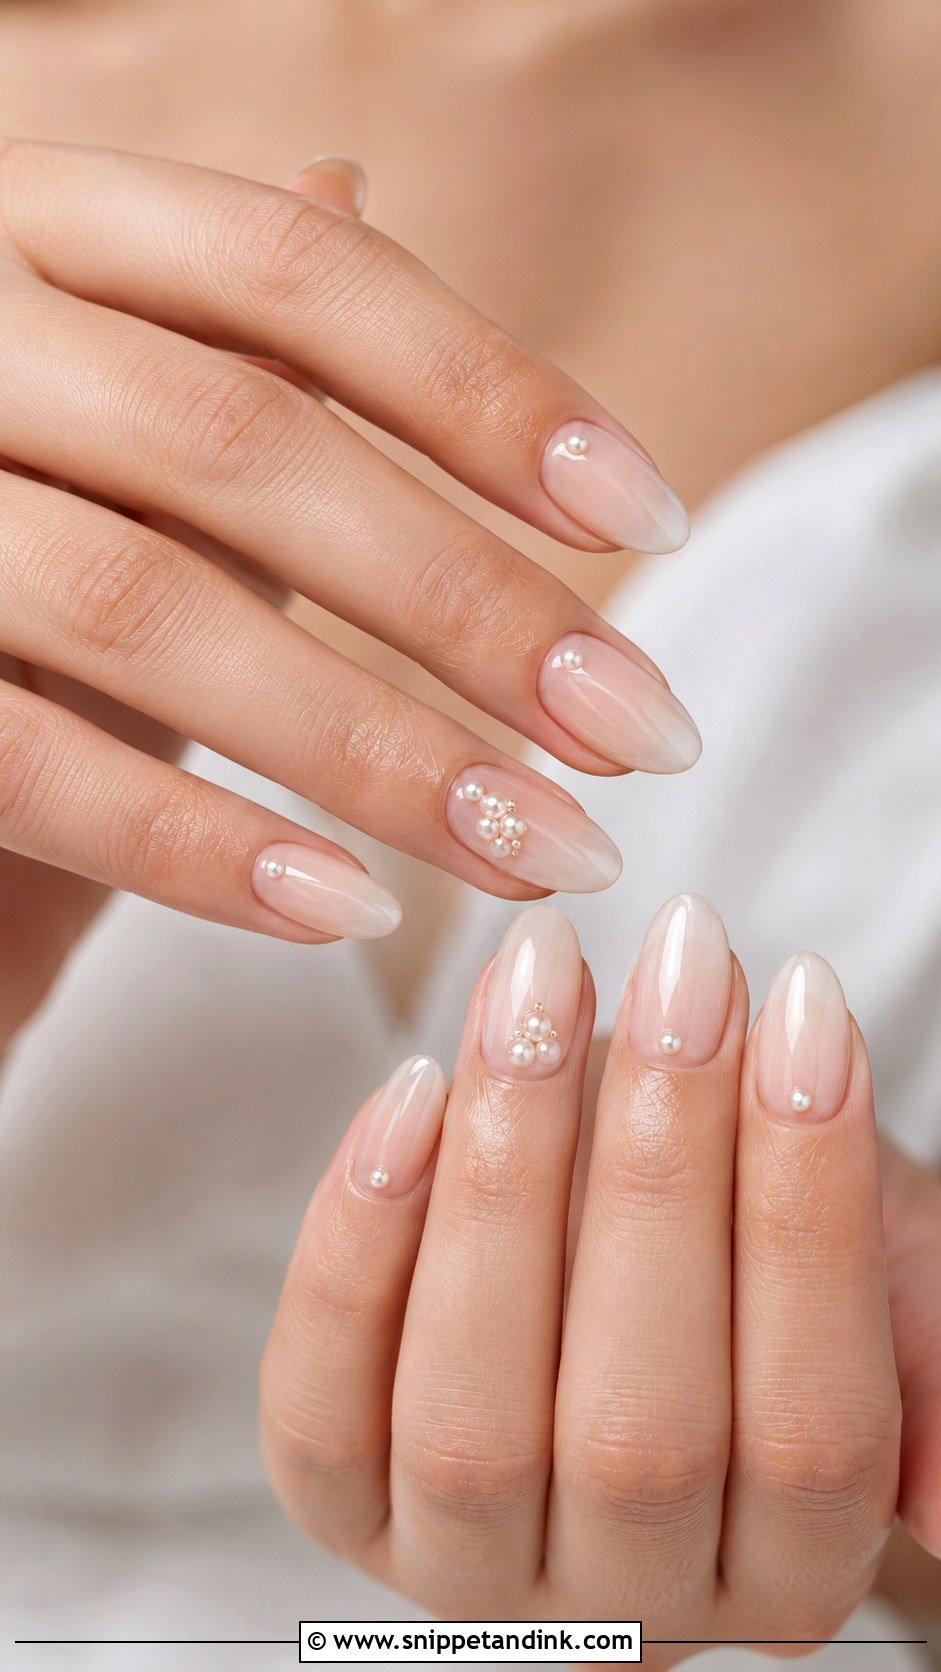
Tiny 3D pearls are lovely on a nail and annoying in a glove or a hair-up. I set them in gel on a sheer pink, nude or milky white base, near the cuticle, along a French line or on one or two accent nails, and I cap the edges so they don’t snag fabric. Oversized pearls catch on lace and tulle constantly, so I keep them small and close to the nail surface. Placement should look balanced across both hands, since your left hand gets photographed with the ring and the right is usually holding flowers. Pearl jewellery and beaded veils echo it nicely.
9. Floral Acrylic Almond Wedding Nails
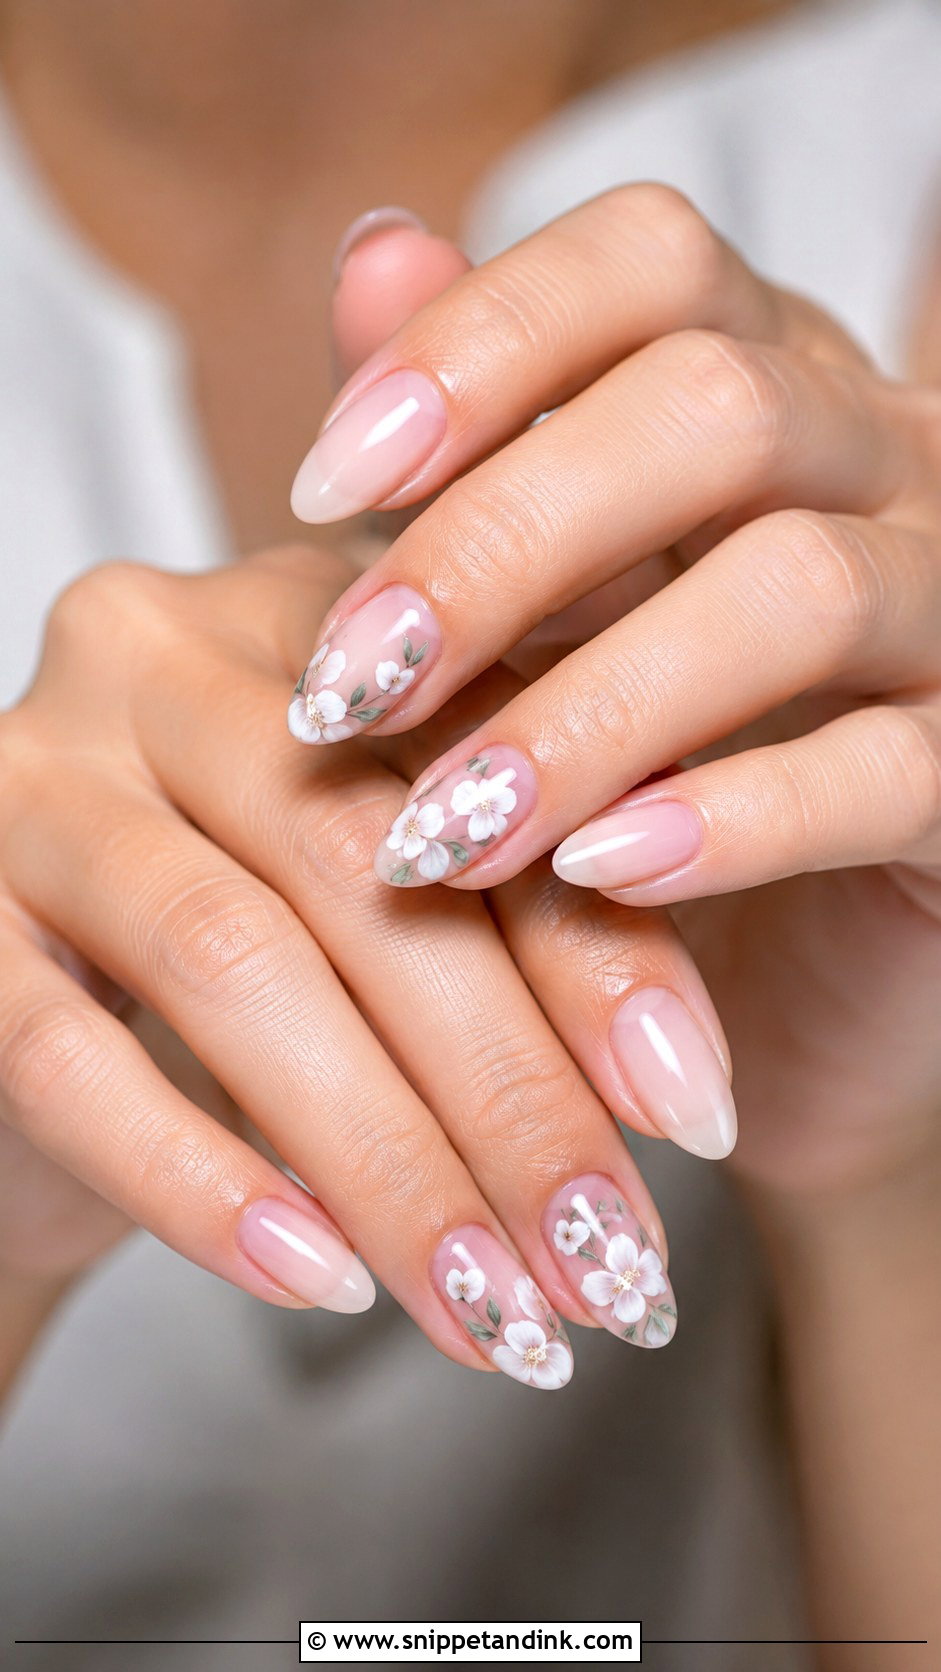
Floral art on an almond works best when it’s small. I paint white, blush or cream petals with a fine liner brush over a sheer nude or pink base, adding thin leafy strokes, and keep most of the set plain with flowers on one or two accents. Thick, opaque petals look crafty up close; fine-line petals look drawn by hand, which they are. Almond gives enough room for a small bloom without needing extra length. It ties into garden ceremonies and floral lace. A high-gloss top coat stops the art from looking flat.
10. Lace Acrylic Almond Wedding Nails
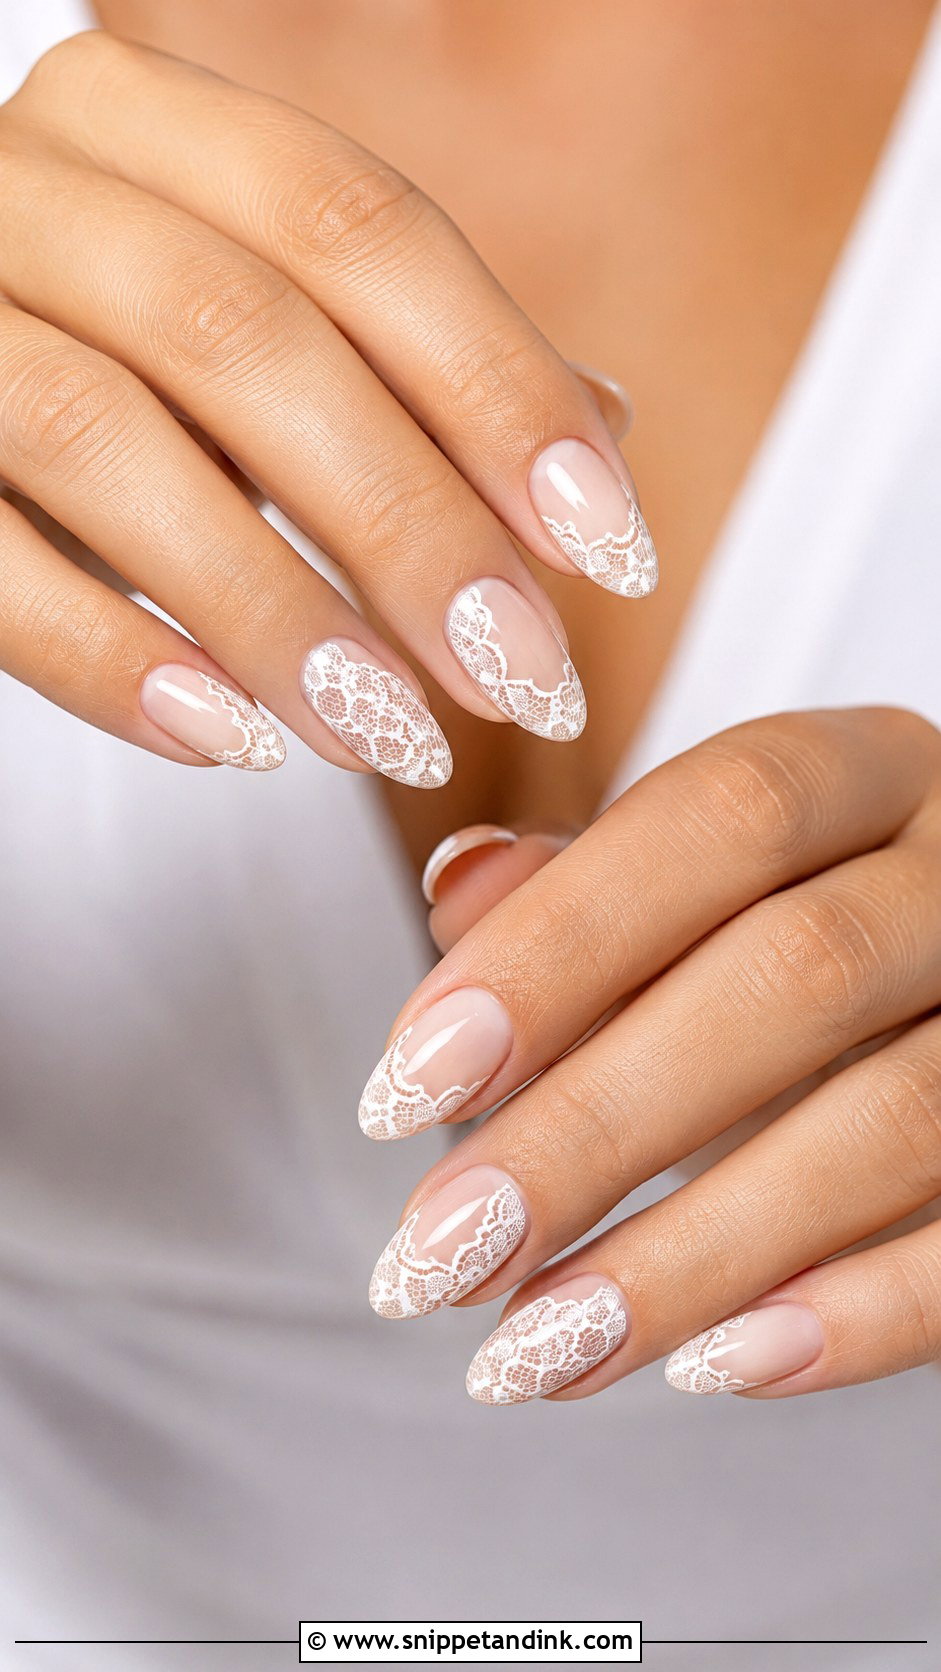
Lace nails make the most sense when there’s real lace on the dress. I start with a sheer nude, blush or milky base and paint or stamp fine white patterns onto one or more nails. Stamping gives crisper repeat detail, freehand allows me to copy a motif from your actual sleeve, which is why I ask brides to bring a fabric swatch or a close photo. Keep the pattern airy; lace across every nail gets busy fast. It combines well with a French tip or a couple of tiny pearls.
11. Rhinestone Acrylic Almond Wedding Nails
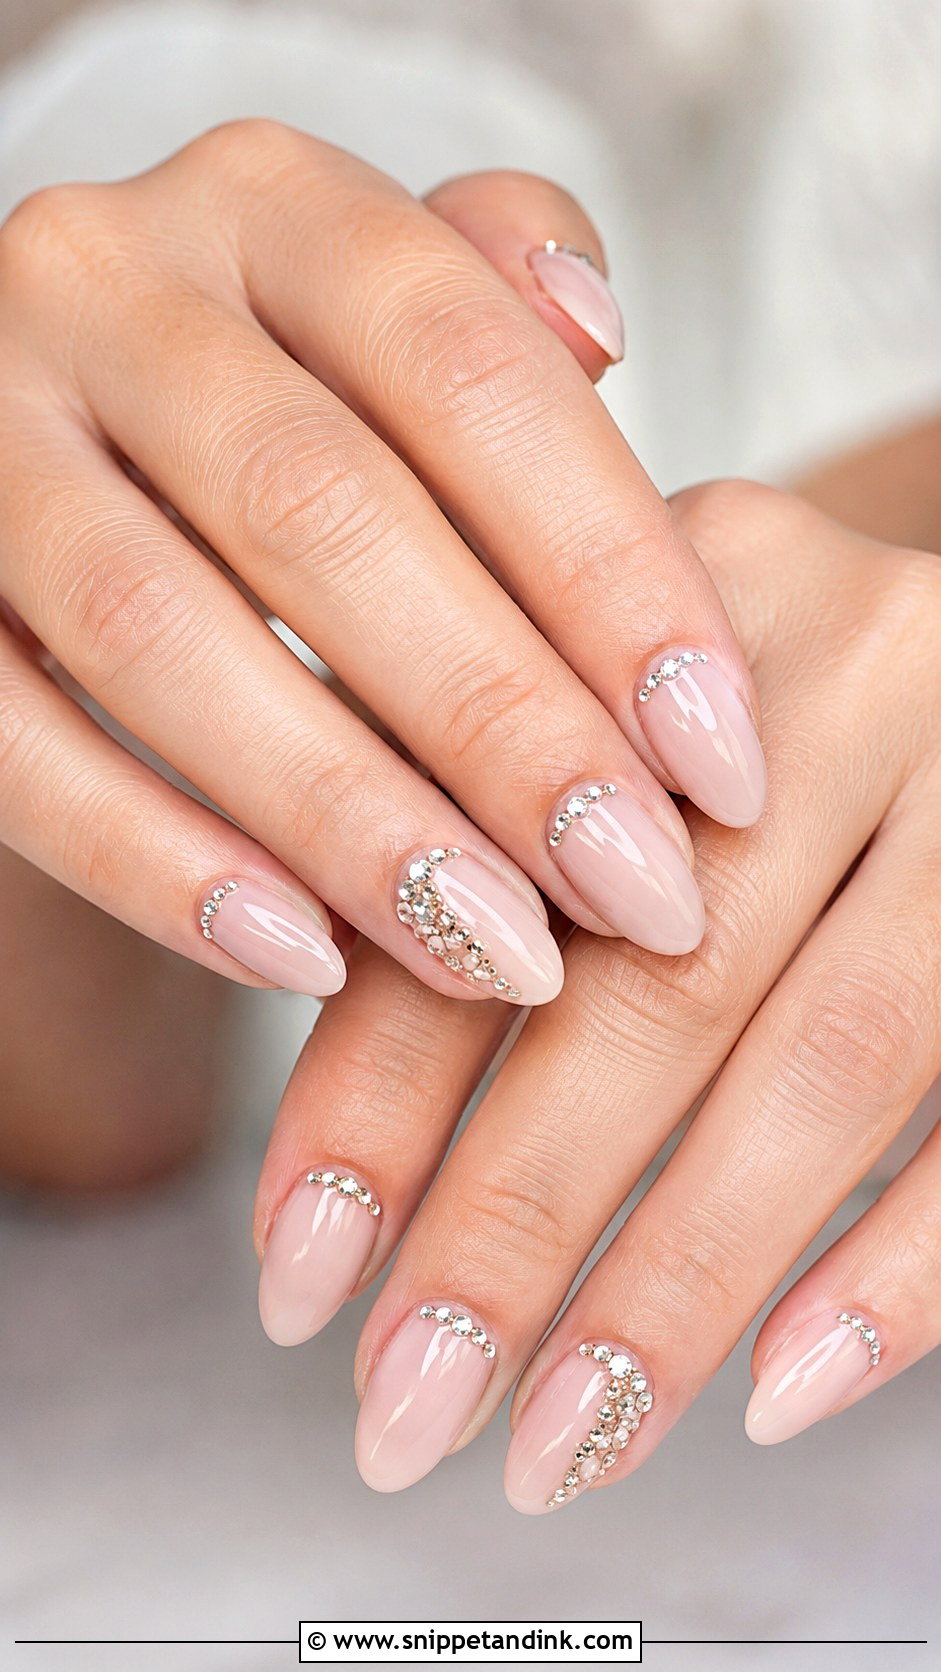
Rhinestones look bridal only when they’re small and well placed: a few crystals near the cuticle, or a line on one accent nail, over nude, sheer pink or soft white. Acrylic gives a strong base for embellishment, and I set the stones in gel and seal around them. Clear, silver and champagne crystals sit best in photos. Too many and the hands look busy beside a bouquet. The real problem with stones is snagging on hair and fabric, so I flatten them into the product and keep them away from the free edge. Crystal hair pieces or a plain dress pair well with it.
12. Blush Pink Acrylic Almond Wedding Nails
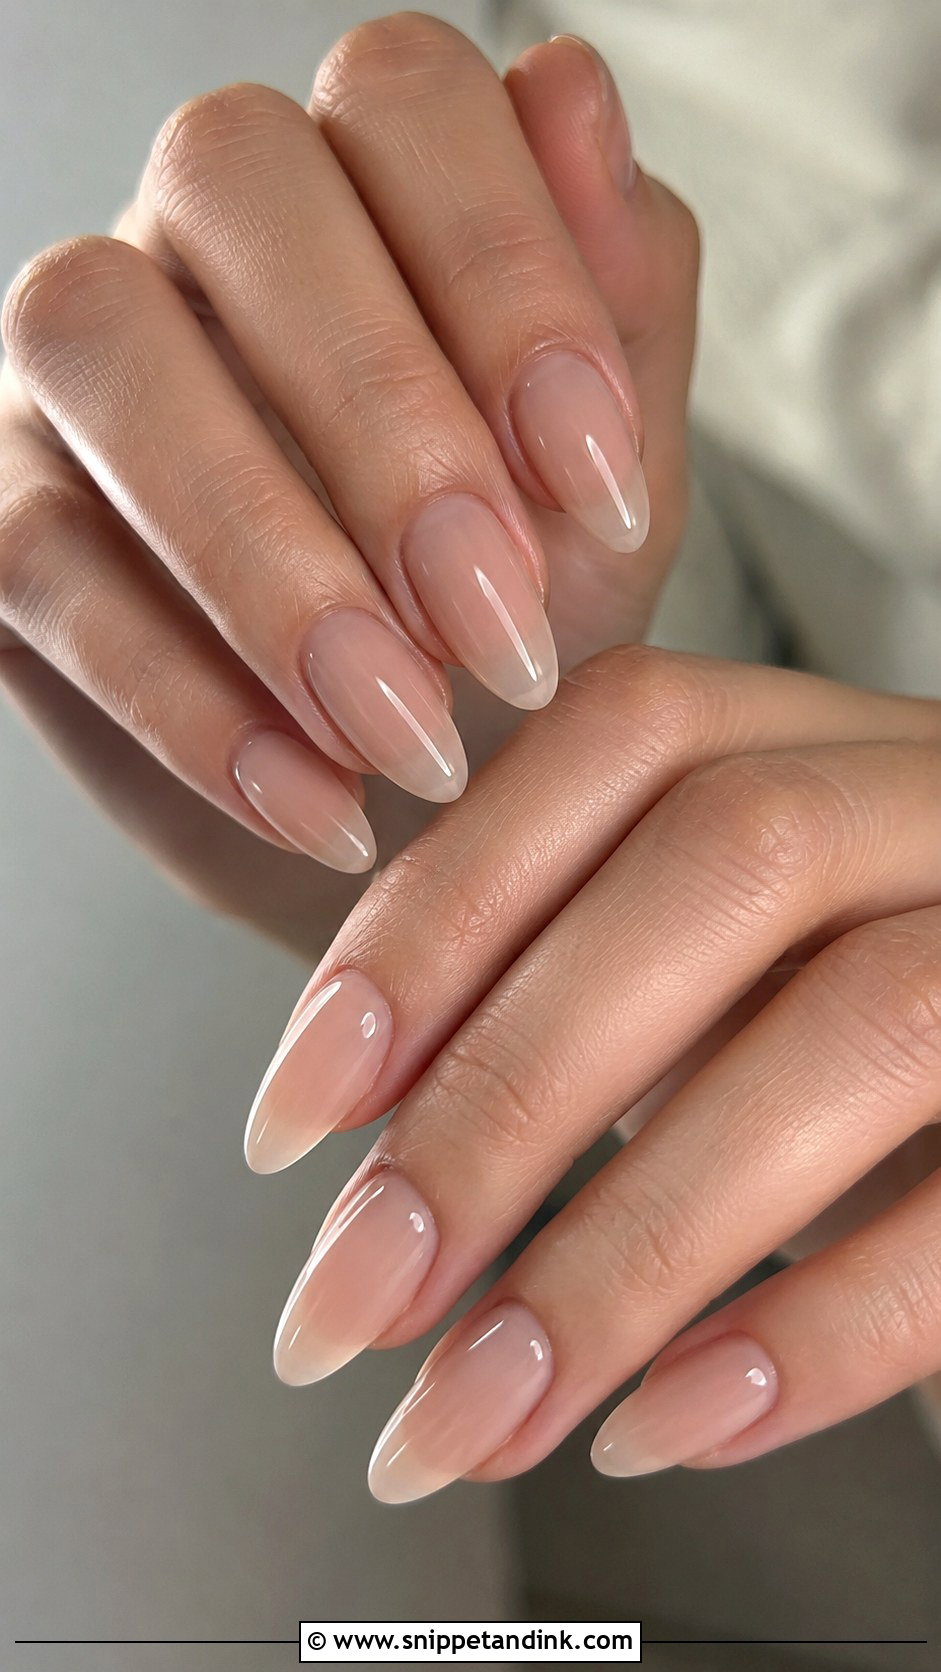
Blush pink is the shade I’d call hard to get wrong. It gives the nails a healthy flush without looking loud, and the rounded almond tip keeps it gentle. Sheer blush looks most natural; a creamier pink gives fuller coverage and hides the white free edge. A glossy top coat keeps it fresh, and a faint pearl shimmer is there if you want a bit more. It sits well against white, ivory and champagne fabric, and it’s the set I’d suggest to a bride who’s never worn acrylics and is nervous about something bold.
13. Ivory Acrylic Almond Wedding Nails
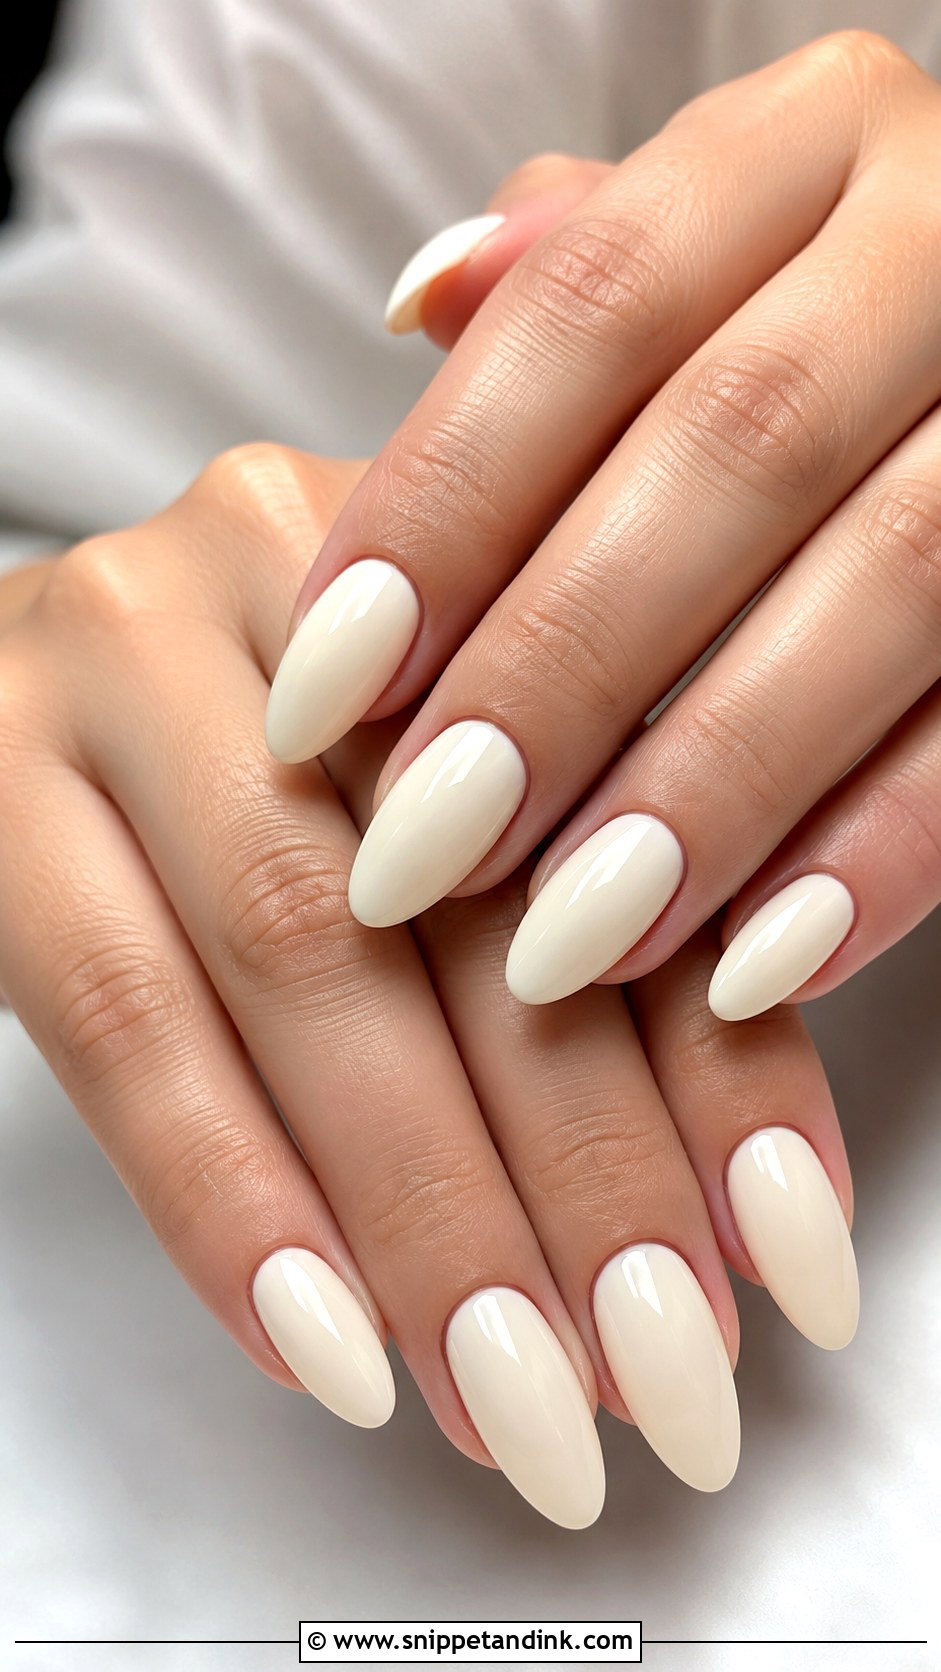
Ivory is softer than bright white and makes sense next to a warm-toned gown. The colour has to be checked against the dress itself: some ivories look yellow next to a pure ivory silk, others look grey. Bring a swatch to the appointment. On almond acrylic, ivory reads sleek and slightly vintage, and a sheer pearl chrome over it adds glow. If stark white looks harsh on your hands, which is common on fair skin with visible redness, ivory gives the bridal brightness in a gentler way.
14. Sheer Nude Acrylic Almond Wedding Nails
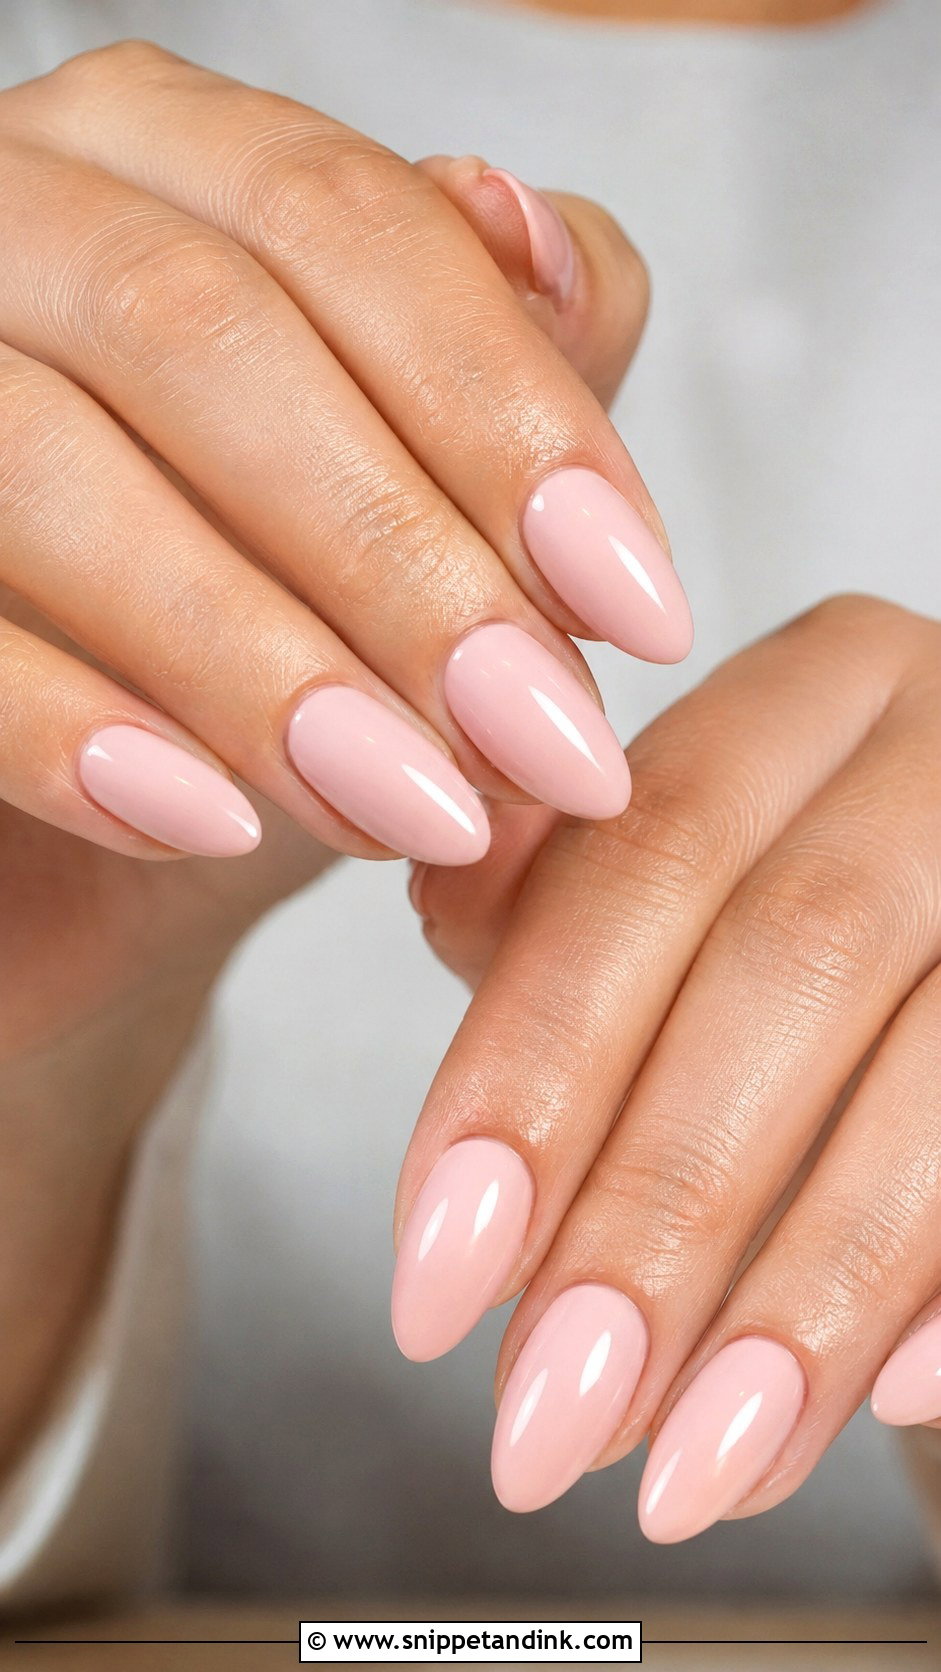
Sheer nude is the ‘your nails but better’ set. A transparent nude over shaped acrylic shows a smooth, even nail, and on an almond it lengthens the finger in ring shots. Because it’s sheer, the structure underneath is on display, so this is the set where clean prep and a balanced apex matter most; any bump in the acrylic shows through. Match the nude to your undertone, whether beige, rosy, peach or brown. A high-gloss top coat is what makes a simple colour look intentional rather than unfinished.
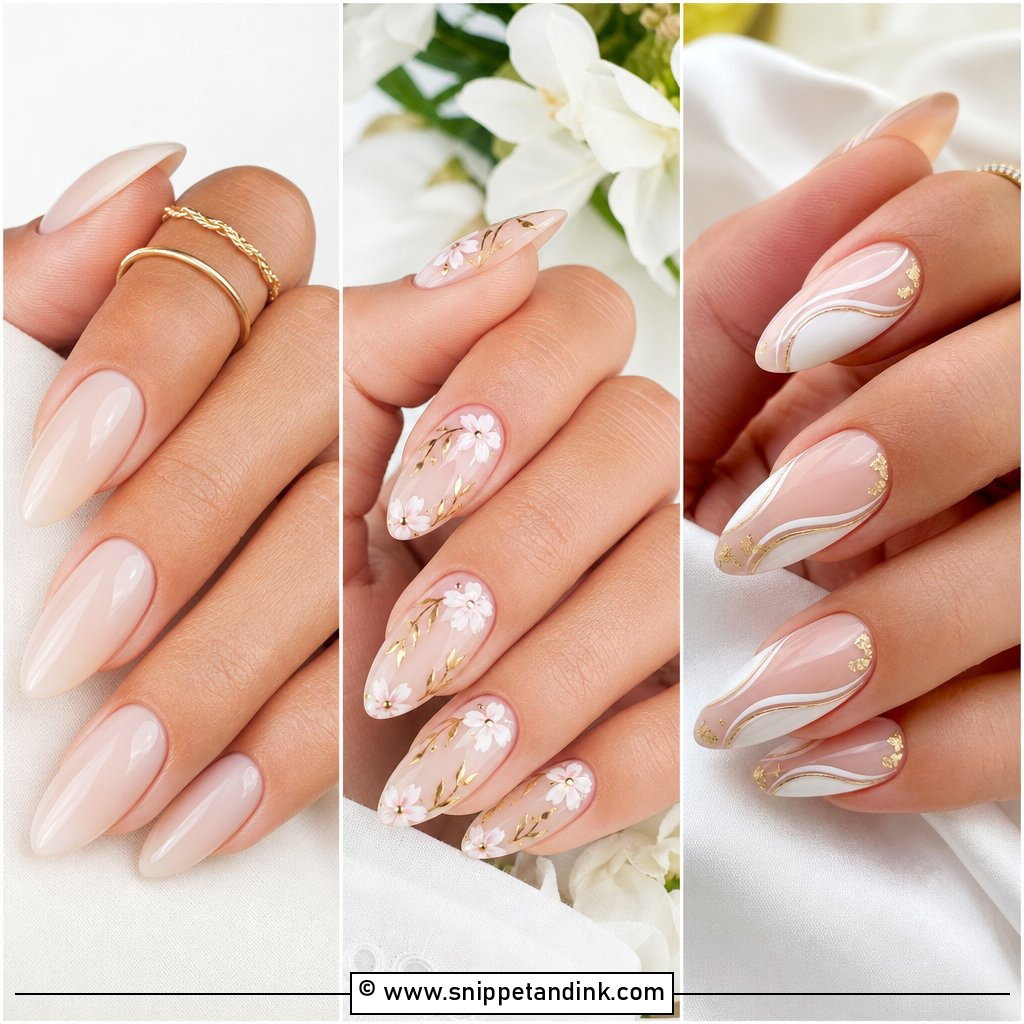
15. Gold Detail Acrylic Almond Wedding Nails
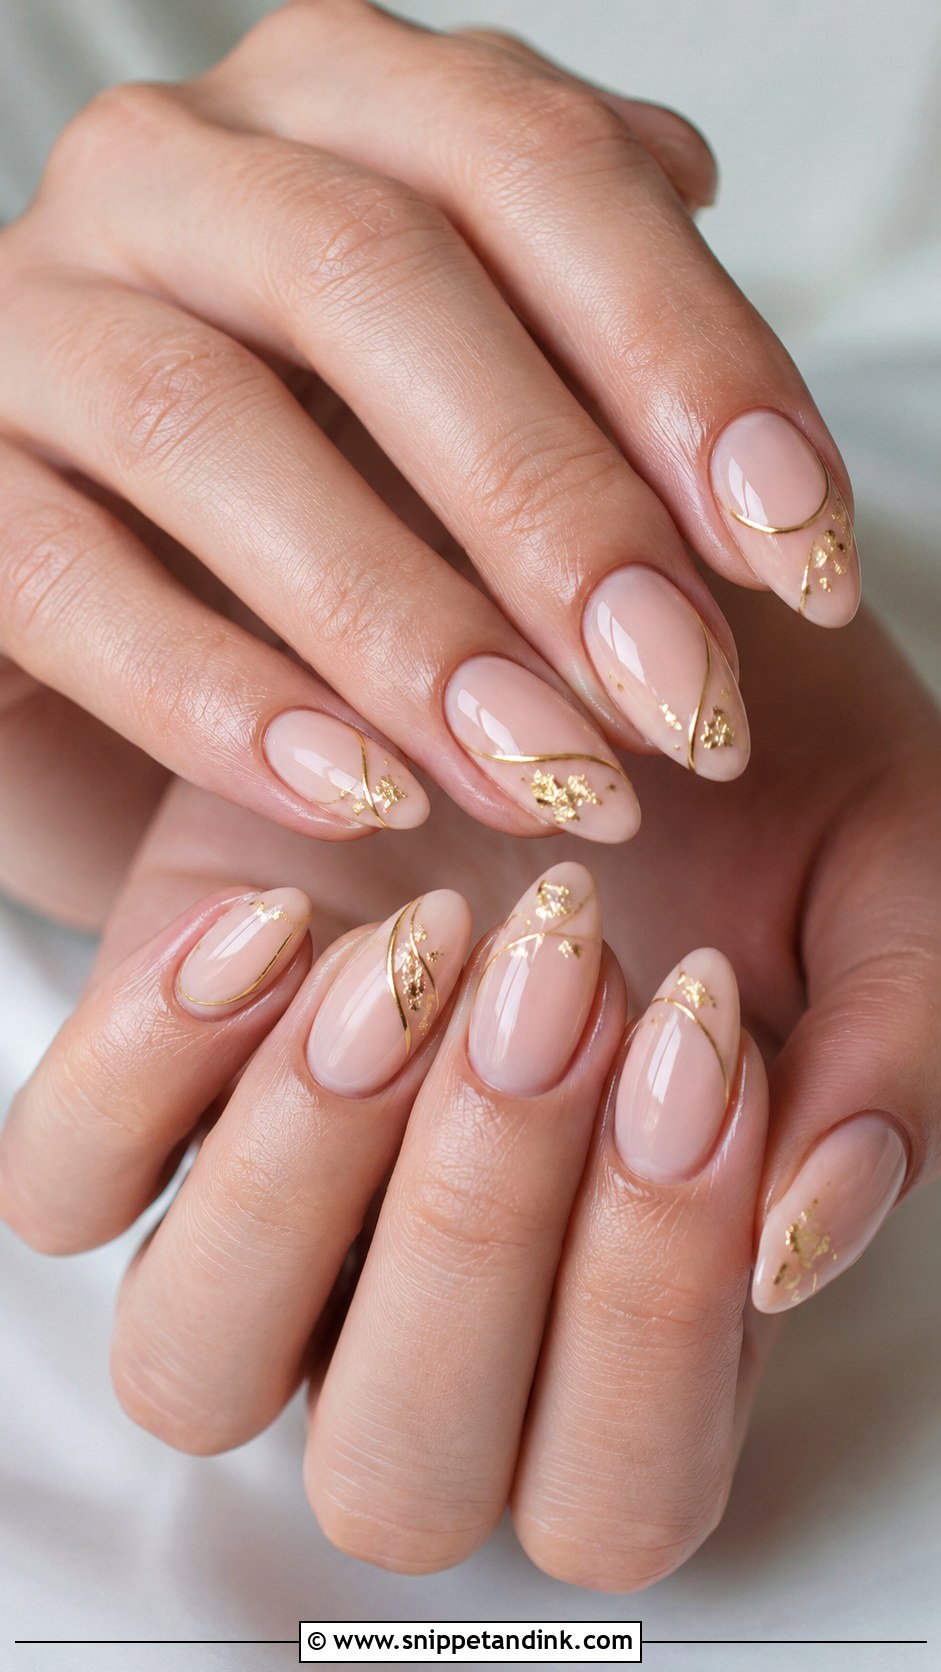
Gold details make sense when your jewellery is yellow gold. Over nude, blush, ivory or milky white, I add thin gold lines, small foil flakes or a gold French tip. Restraint matters: one or two touches per nail look considered, while gold on every surface competes with the ring. Foil also wears at the free edge faster than paint, so I keep it away from the tip where possible and seal it twice. Warm skin tones and golden-hour outdoor weddings suit it best.
16. Silver Detail Acrylic Almond Wedding Nails
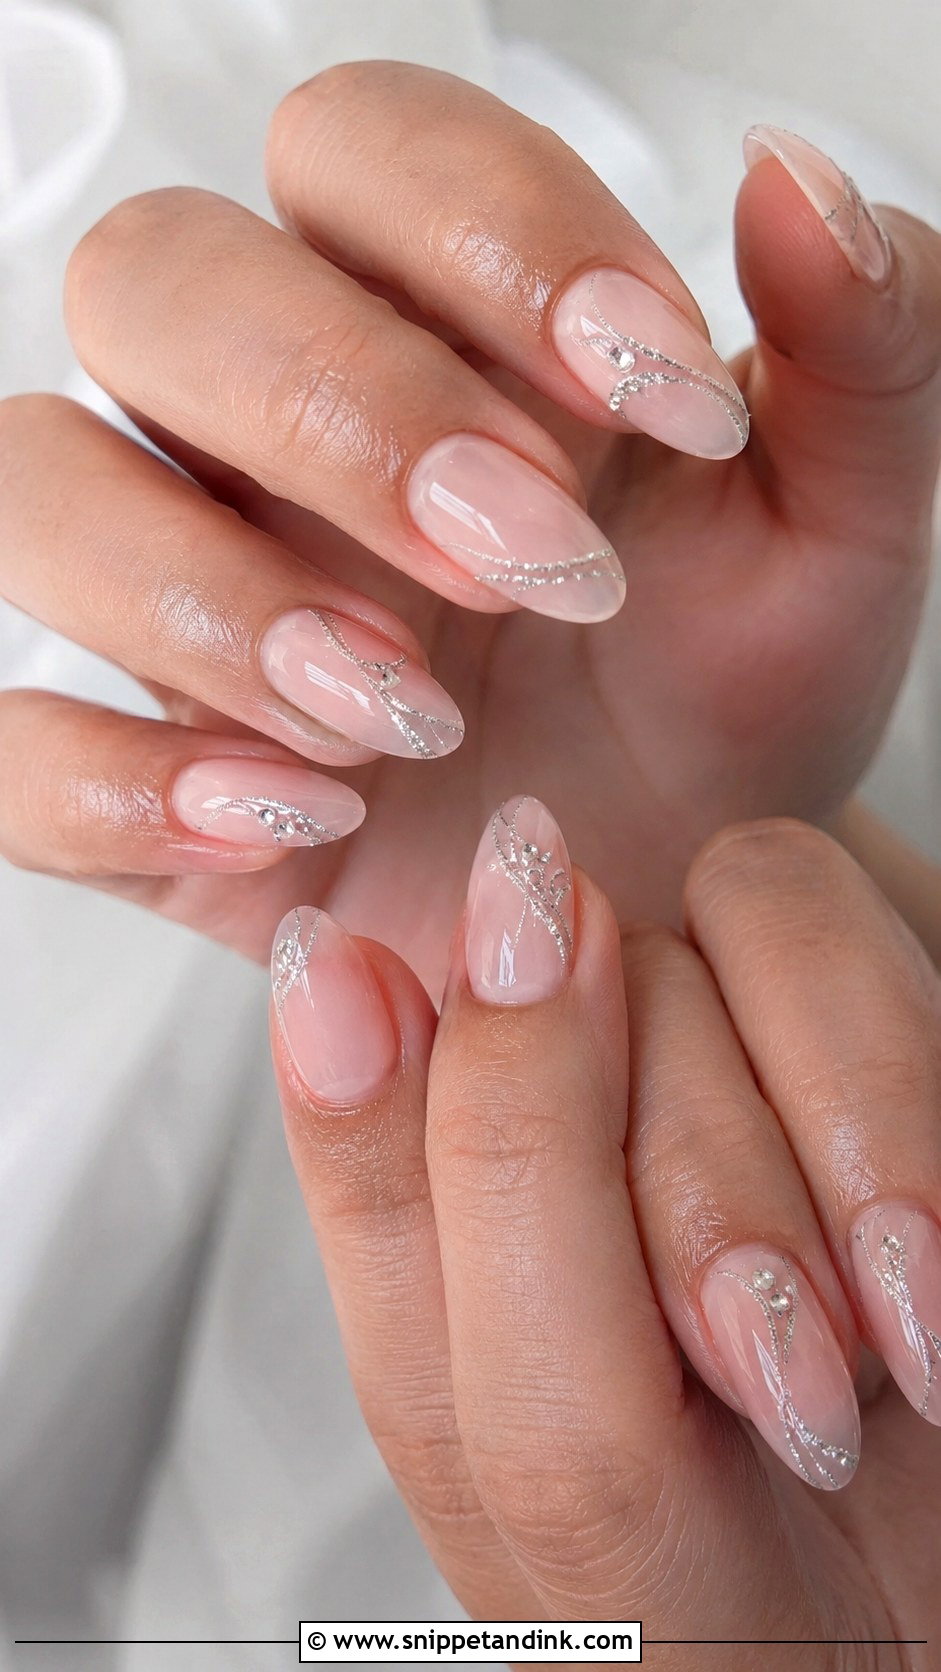
Silver details belong with platinum, white gold or diamonds. A sheer pink, soft white or nude base, then thin silver accents, fine glitter lines or a few small crystals. The almond shape gives silver a soft frame, so it reads elegant rather than icy. It also echoes cool white fabric and silver or crystal beading on a gown. I keep the lines slim. Thick silver striping looks like hardware in close-up photos, and fine lines catch light far more gracefully.
17. Marble Acrylic Almond Wedding Nails
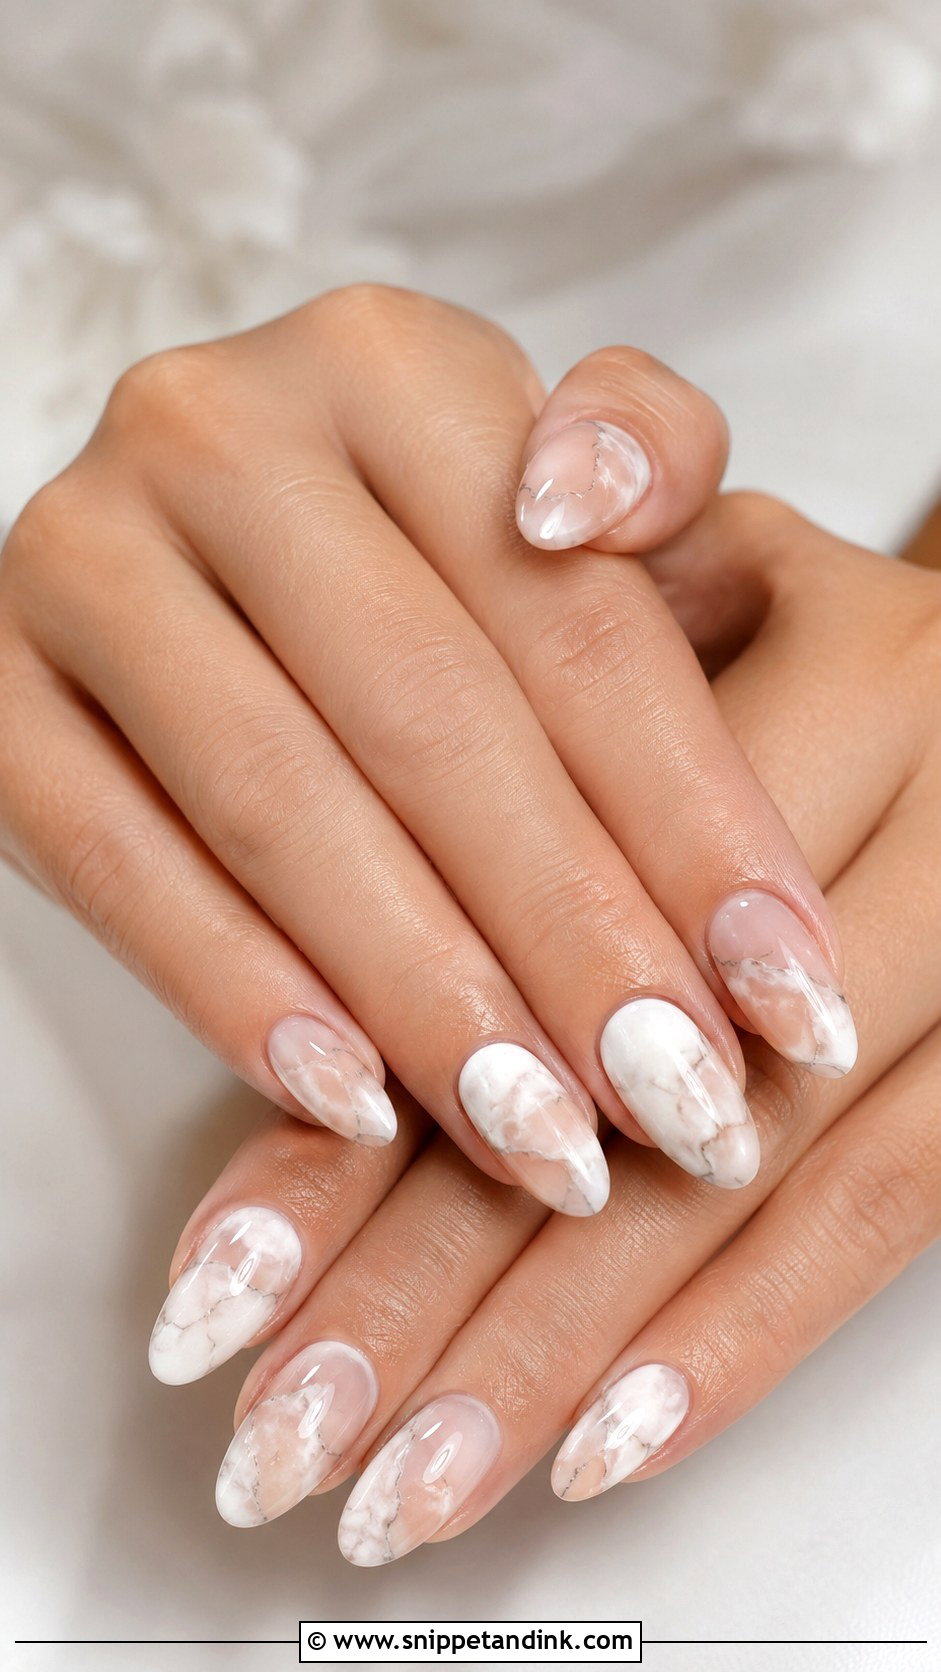
Marble gives a little movement without strong colour. Soft white, ivory or blush with thin grey, pearl or beige veins is the bridal version; dark, heavy veining looks like a kitchen counter. I build the effect wet-on-wet in gel so the veins blur softly, then seal it. Wear it across every nail for a modern set, or on two accents with a nude base. Minimalist gowns and sleek hair suit it, and so do modern venues with stone and glass.
18. Matte Acrylic Almond Wedding Nails
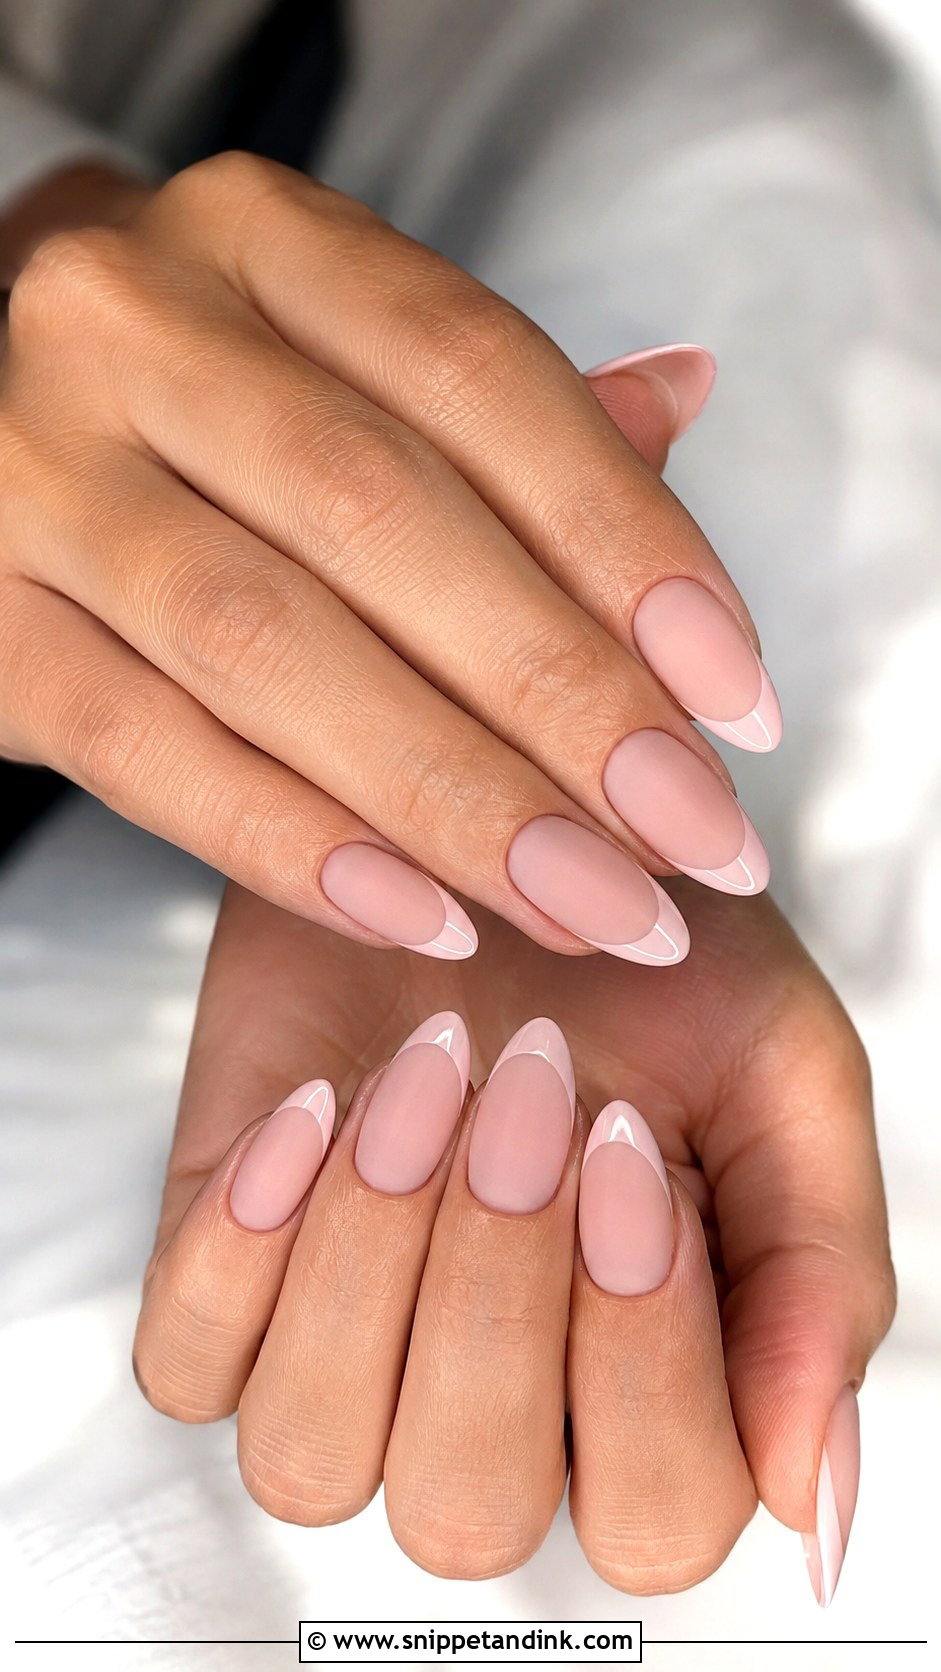
Matte is a chic change from gloss, though I’m always honest about its weakness. A matte top coat picks up oils, makeup, fake tan and denim dye more easily than gloss, and those marks are hard to clean. That’s why I’d avoid it for a bride who’s applying self-tanner the night before. In nude, blush, ivory or milky white it looks velvety, and a glossy French tip over matte gives a quiet contrast. A well-filed, balanced almond matters even more here, since matte shows shape rather than shine.
19. Minimal Line Art Acrylic Almond Wedding Nails
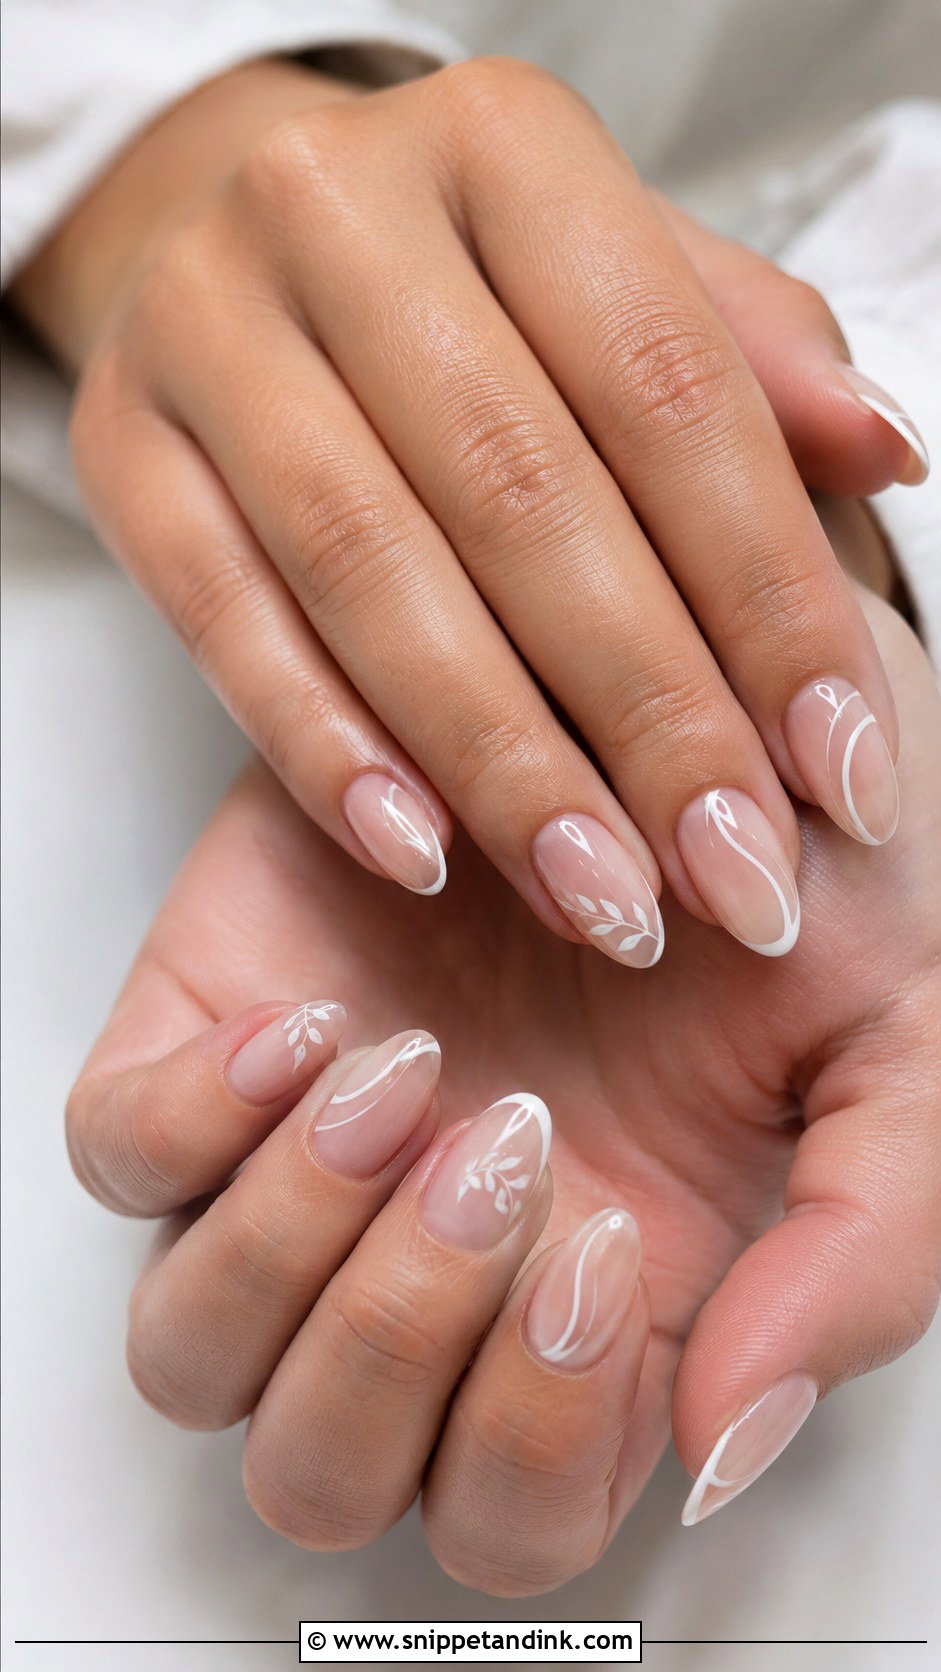
Line art keeps the base sheer nude, pale pink or milky white and adds thin white, gold or silver curves, tiny leaves or abstract strokes. An almond already has a natural flow for lines to follow. I’d space the art out over a few nails so it reads bridal rather than graphic. Gel liner holds the finest lines, and the hand has to be steady, so I always ask for a few extra minutes at the end of a wedding appointment rather than rushing it. Simple gowns and modern weddings are its natural home.
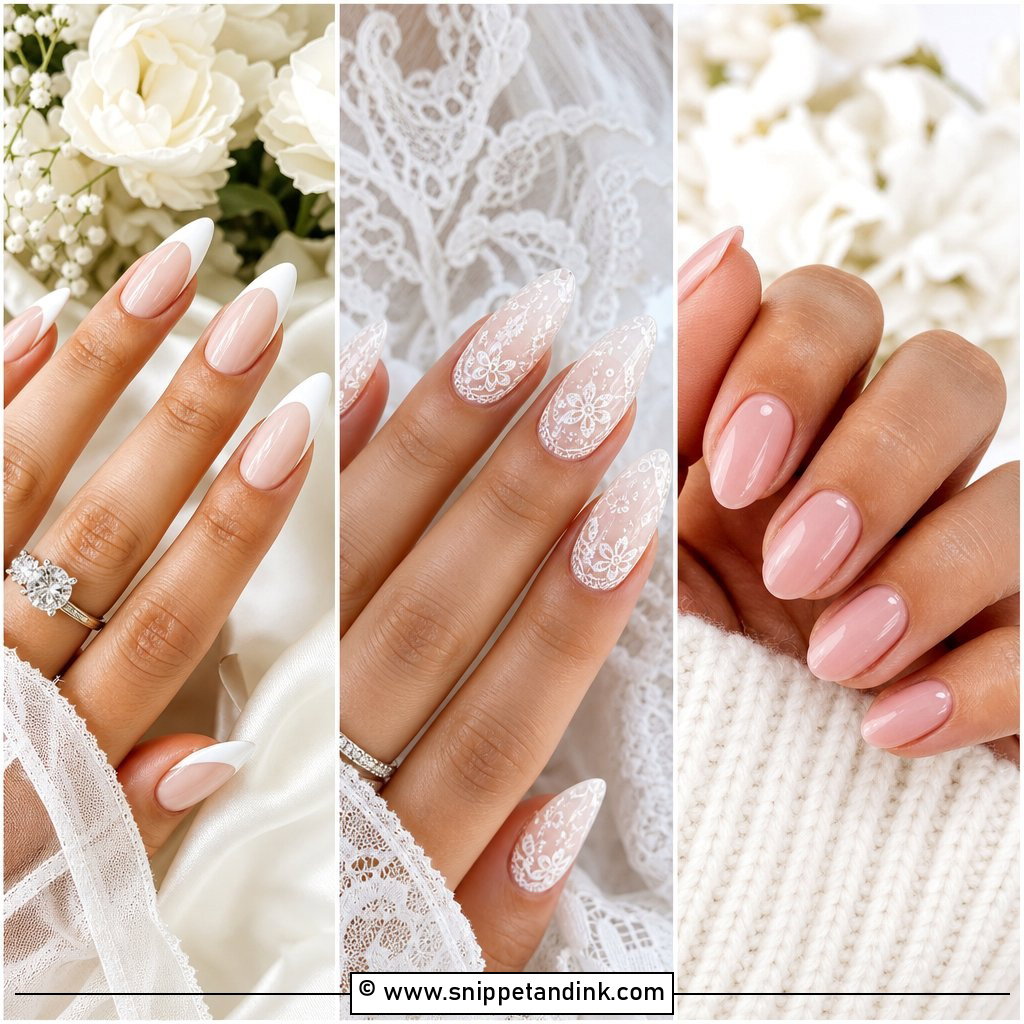
20. Soft White Chrome Acrylic Almond Wedding Nails
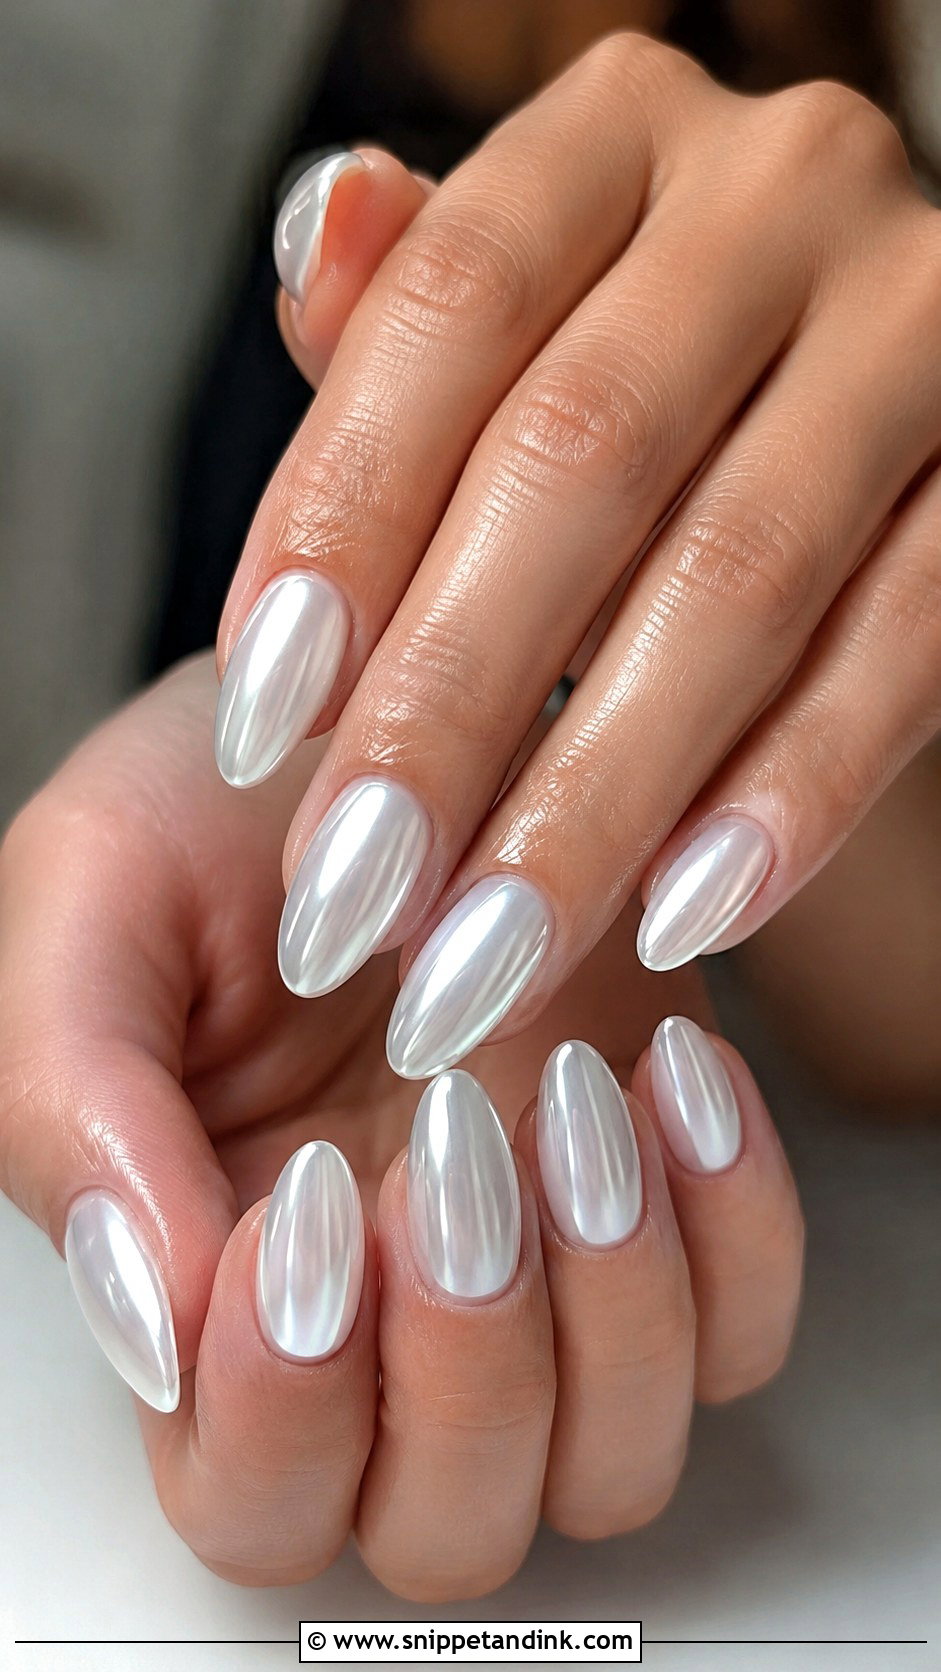
Soft white chrome sits between nude and flat white. A white or milky white base gets a sheer chrome powder over gel, creating a smooth, pearl-like sheen that catches light along the curved tip. I’d ask for soft chrome, not mirror chrome, which reads metallic and dated in bridal photos. It works with almost any fabric, especially satin, silk, tulle and pearl details. One caution: chrome powder shows every flaw in the nail surface, so this set needs the most careful shaping and buffing underneath.
When the Final Set Should Go On
I put the wedding set on one to three days before the ceremony. Any sooner and you risk a visible gap at the cuticle in close-up ring shots; any later and there’s no time to fix a nail that breaks or lifts. If you already wear acrylics, plan your last fill about two weeks before, then the final set or rebalance in that short window so the colour and art are completely fresh.
Skip hand cream and cuticle oil for a few hours before the appointment. Oil on the nail plate is one of the main causes of lifting at the cuticle, and lifted acrylic both shows in photos and lets moisture in underneath. Once the set is done, oil every evening so the skin around it looks smooth on the day.
If One Pops Off Between the Vows and the Cake
It happens, usually from catching a nail on a door or a seat belt. Put a small kit in the clutch: brush-on nail glue, a fine file and a press-on in your shape and colour that your tech has matched in advance. If the acrylic comes off whole, a thin layer of glue on a clean, dry nail holds it for the evening. Don’t glue over a nail that is only half lifted, since that traps moisture under it. Go back to your tech afterwards and have it removed or soaked off properly, never pried off at home.
The Almond Set I’d Book If I Were Undecided
Almond acrylics give strength, length and a graceful line, which is why French tips, milky shades, pearl chrome, small florals and fine sparkle all sit so well on them. If you’re torn, let your dress fabric and jewellery tone decide, then let your daily habits decide the length. A trial a few weeks out tells you more than any picture, because you’ll find out whether you can type, put in contacts and do up a zip with the set on. Whichever you choose, your bridal manicure should feel like your own hands, just more finished.
You'll Like These Ideas:


Leave a Reply