
Medium hair, roughly the stretch between your chin and your collarbone, is the length I find easiest to put up for a wedding. There’s enough to wrap into a bun or roll, and not so much weight that the pins start dragging by the speeches. Most of the twenty styles below can be done at home with a curling iron, a box of pins and a hand mirror behind you, and I’ve said where a second pair of hands helps. Brides, bridesmaids and guests can all borrow from this list; the difference is mostly how polished you make the finish.
Prep That Gives Collarbone-Length Hair Something to Grip
Most updos that fall apart on medium hair fail before the first pin goes in. Hair this length has less weight to settle into a shape, so if it’s freshly washed and silky, a twist simply unwinds. I ask brides to wash the day before, go light on conditioner through the lengths, and arrive with completely dry hair.
Then I build grip. A light texture spray or dry shampoo goes through the mid-lengths, and I curl everything with a 1 inch or 1.25 inch iron, even for the sleek styles, because a set curl gives pins a bend to hook into. Let the curls cool fully before brushing them out, or they relax before you’ve finished pinning.
What I keep in a home updo kit
- Bobby pins that match your hair colour, ridged side down against the scalp
- U-shaped hairpins for buns and rolls, which hold shape without flattening it
- Two or three small clear elastics
- A texture spray and a firm-hold finishing spray
- A rat-tail comb for clean partings and tucking stray ends
1. Low Messy Bun Updo
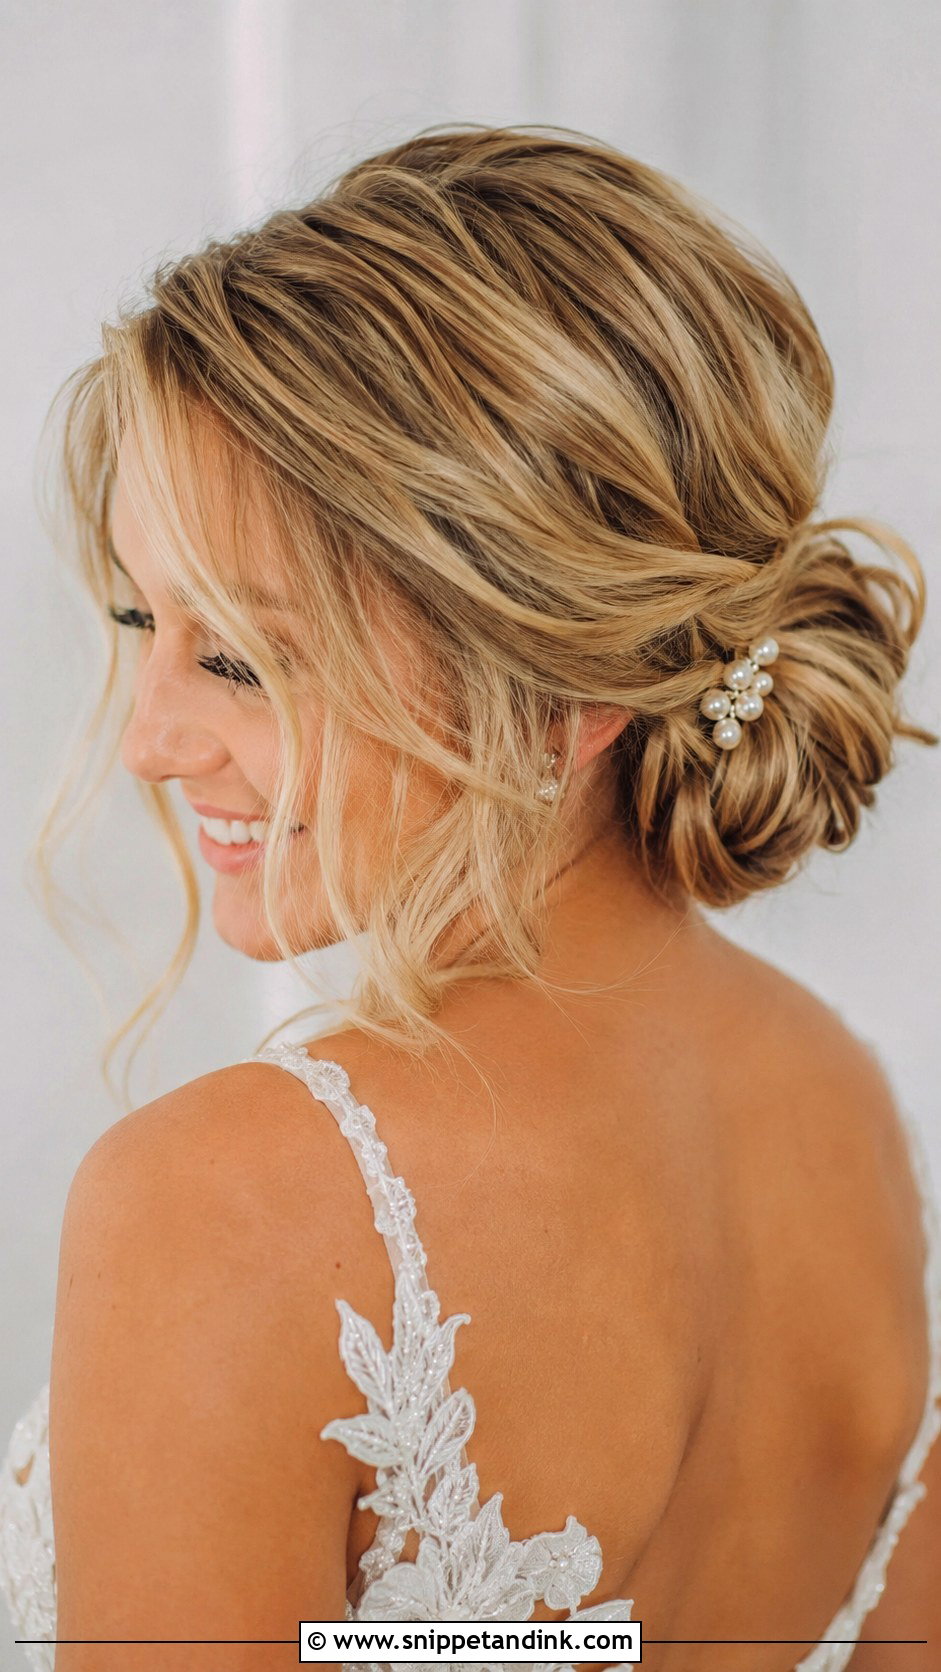
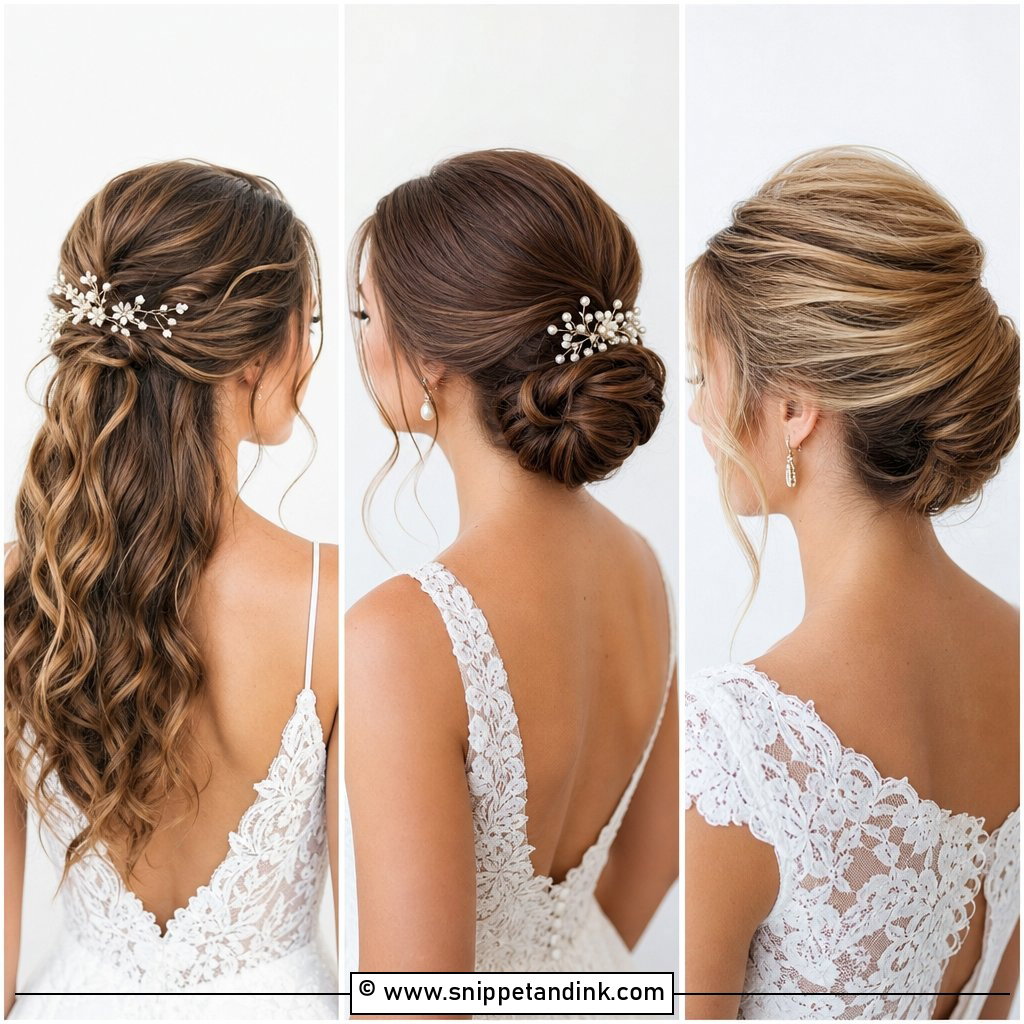
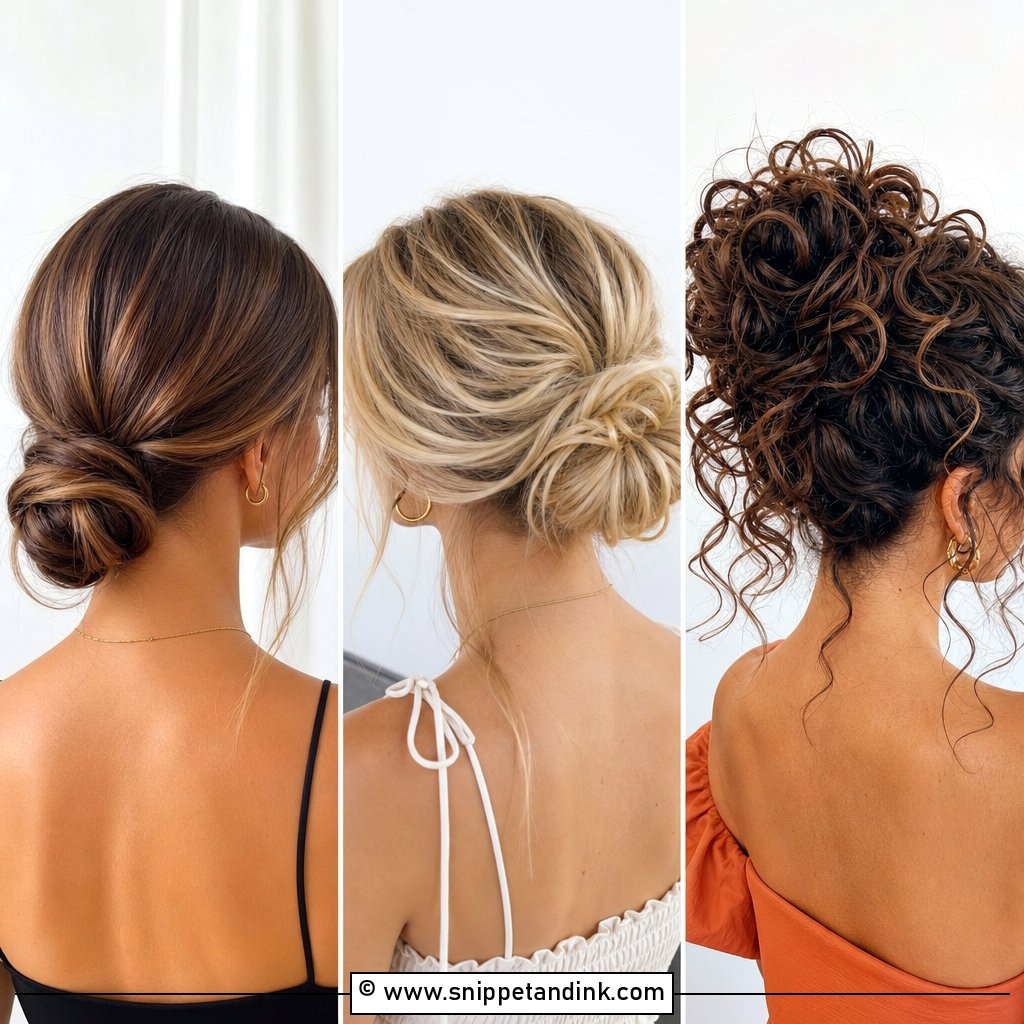
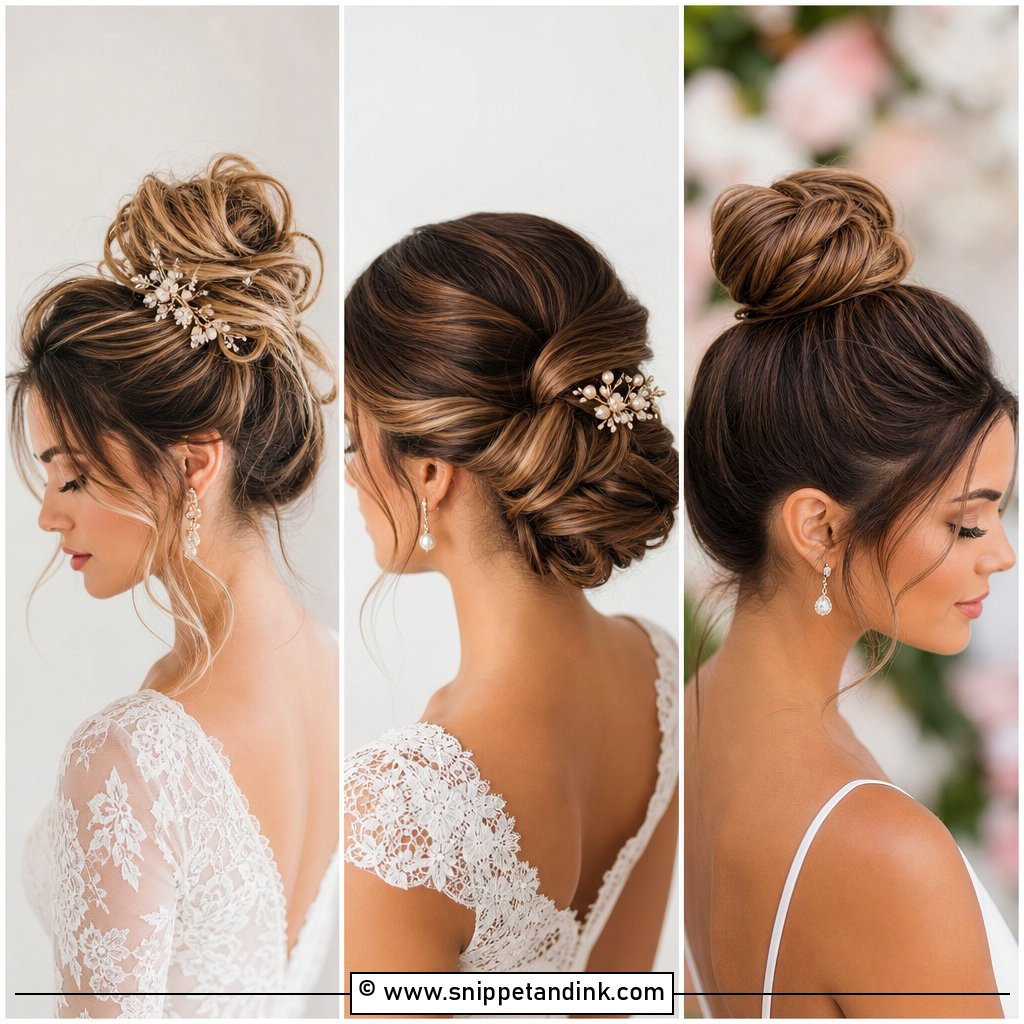
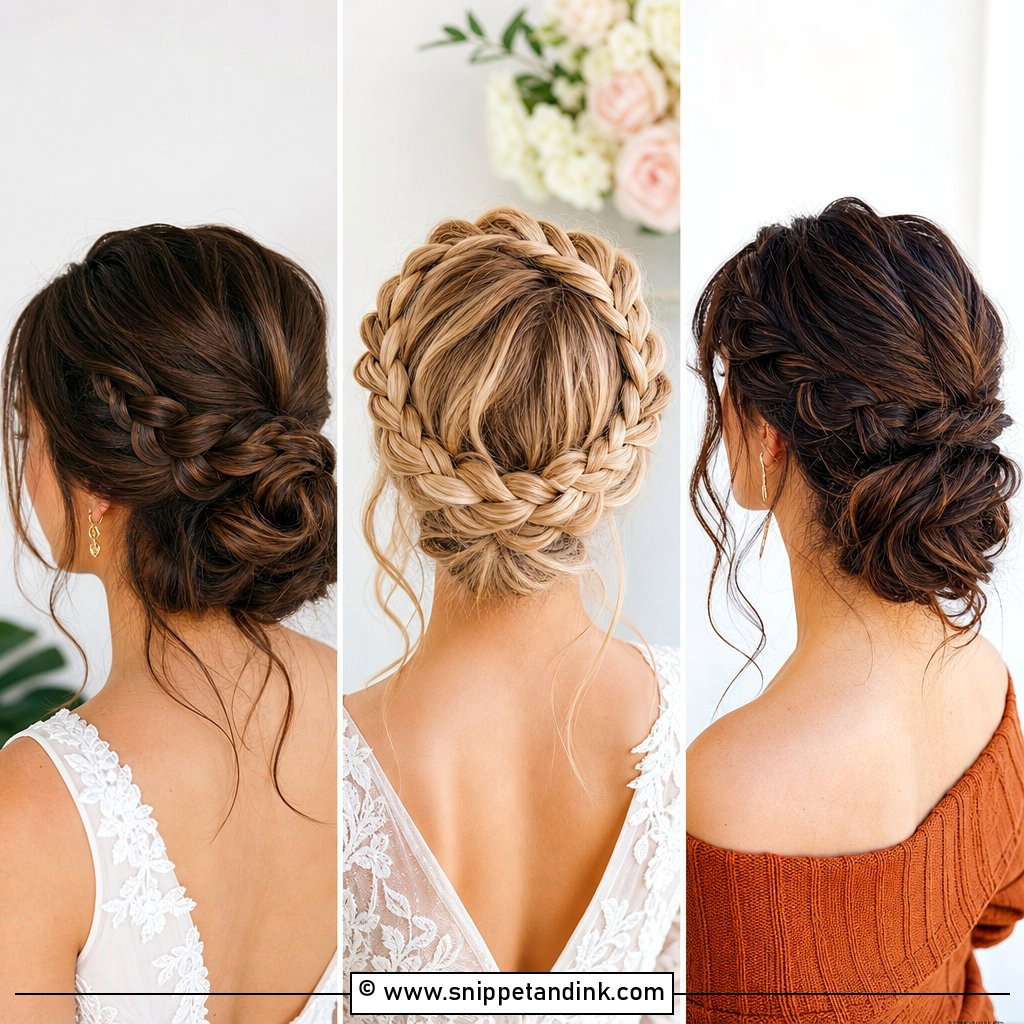
Of all the updos here, this is the one I’d hand to a nervous first-timer. Gather the hair loosely at the nape, twist it into a bun and pin it, then pull out a few face-framing pieces. The catch with a messy bun is that the mess has to be built: I curl the hair first and rough it up with texture spray, because straight, freshly washed medium hair just slides out of a loose twist. A sparkly pin or a single fresh flower is enough decoration. It’s low enough to work under a veil comb and doesn’t fight a modern or a classic gown.
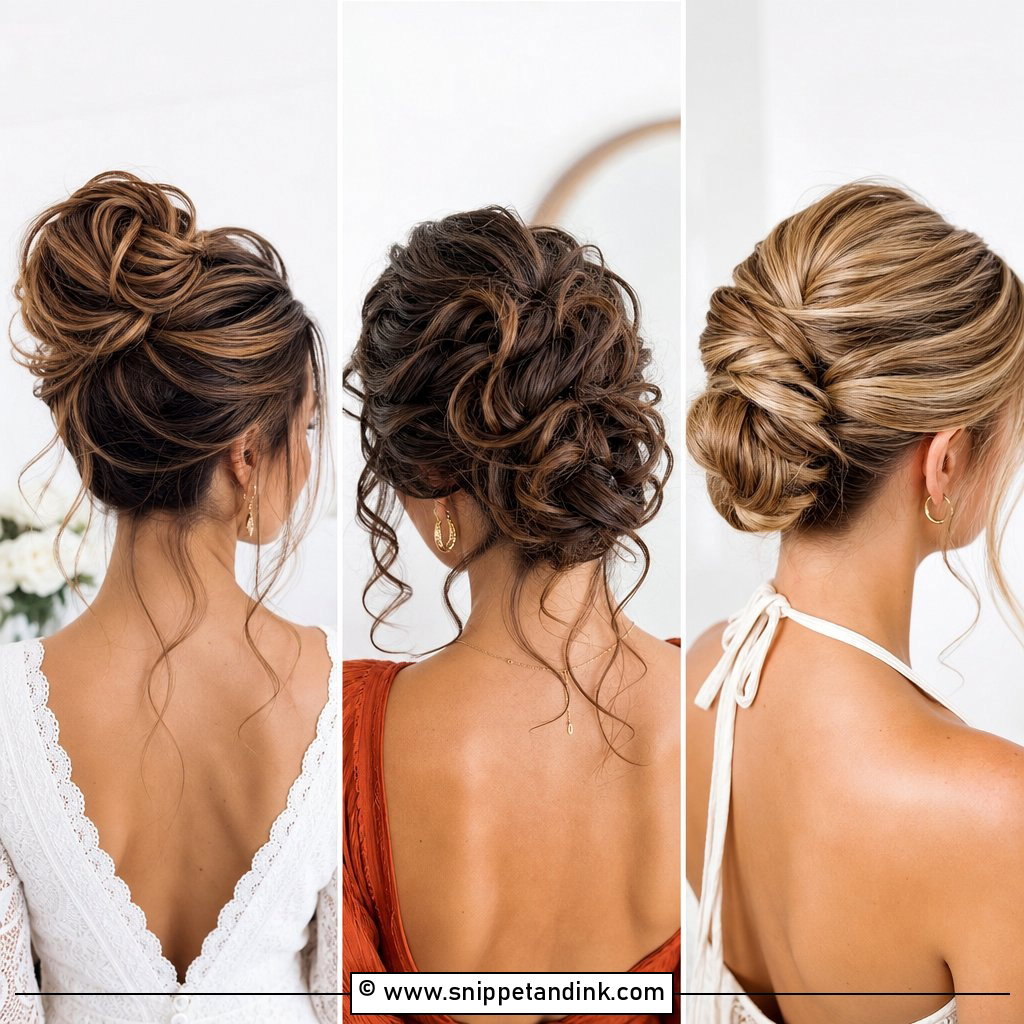
2. Classic French Twist
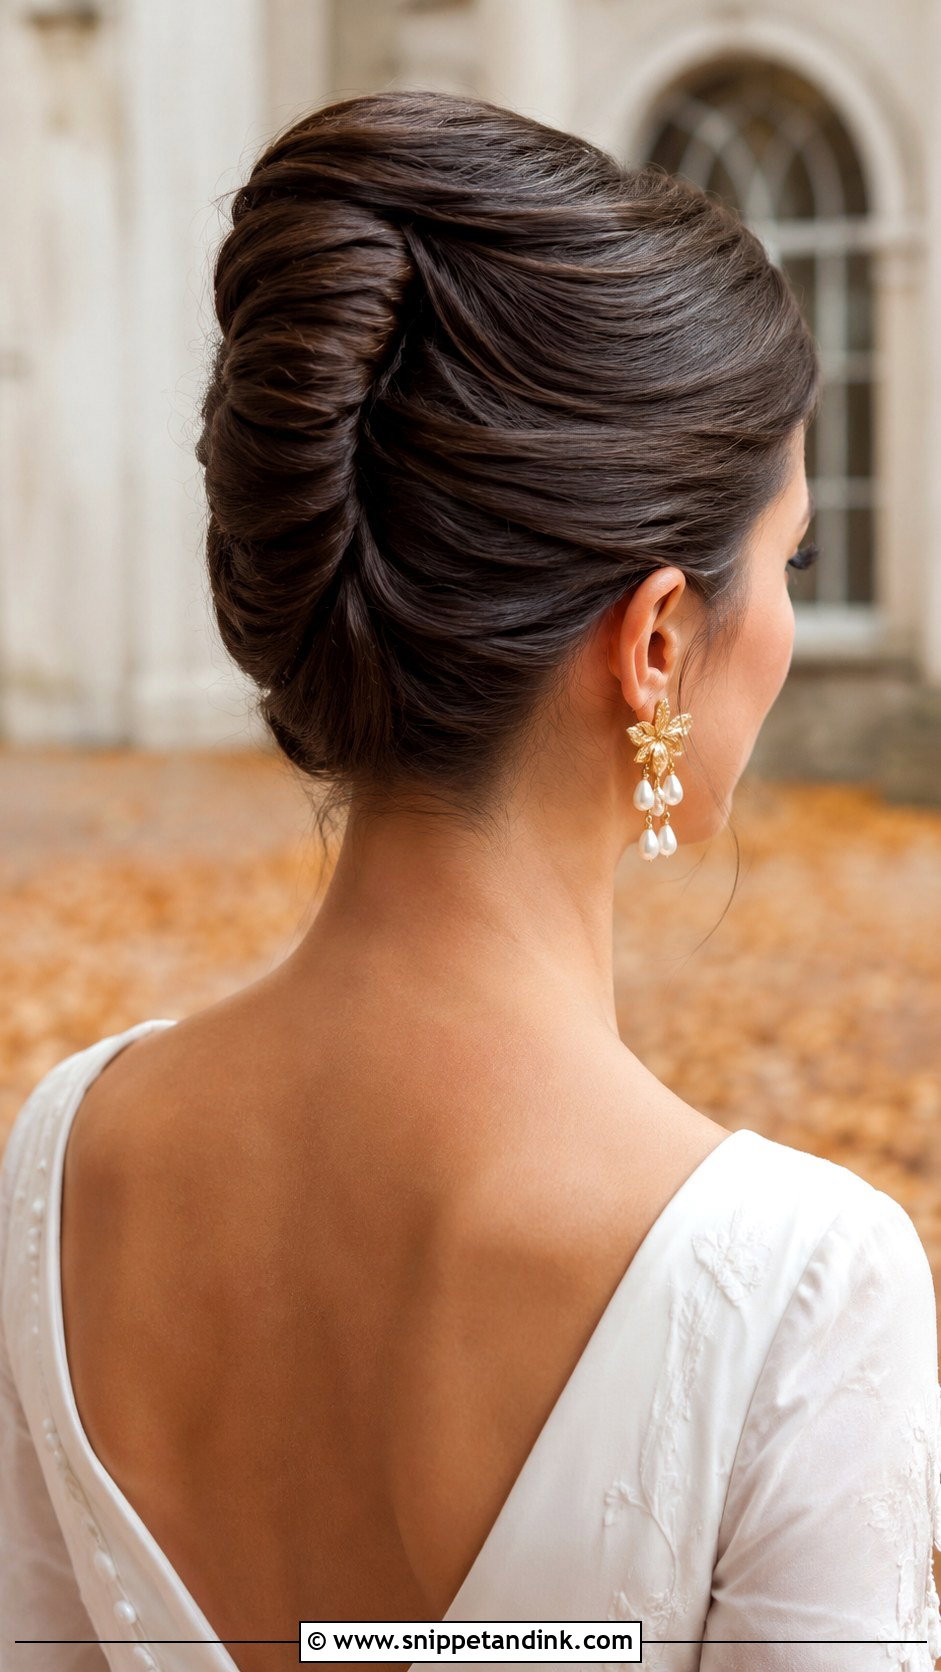
A French twist needs structure more than length, which is why medium hair handles it so well. Sweep the hair to one side, twist it vertically toward the center of the head, tuck the ends inside and pin along the seam. I put my pins in sideways, catching both the twist and the flat hair underneath, and I tease the roots lightly before twisting so there’s something for them to grip. Hair that barely reaches the shoulders often leaves ends poking out at the top of the roll; tuck those under with a spin pin. Keep it smooth for a formal ceremony or leave the crown softer for a more current shape. Statement earrings sit well against it because the neck and ears are completely clear.
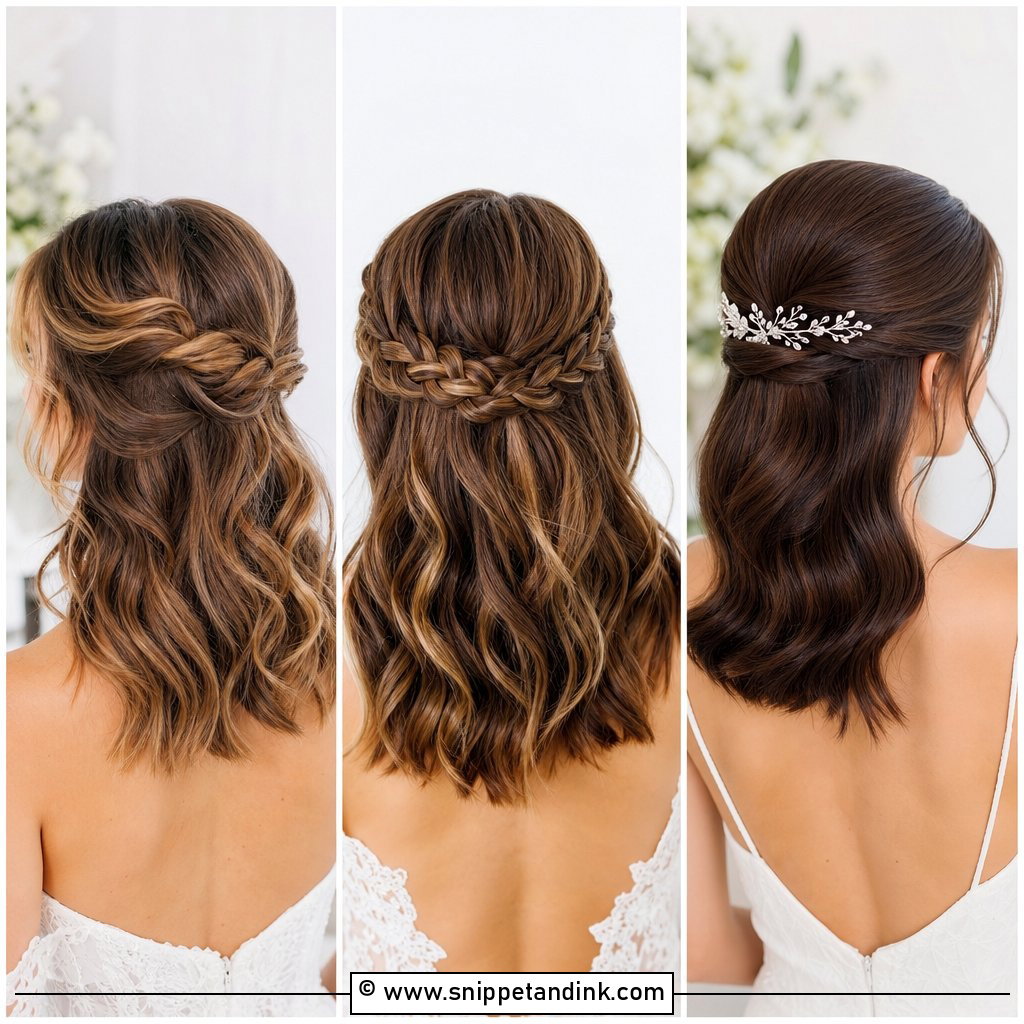
3. Twisted Half-Up Half-Down
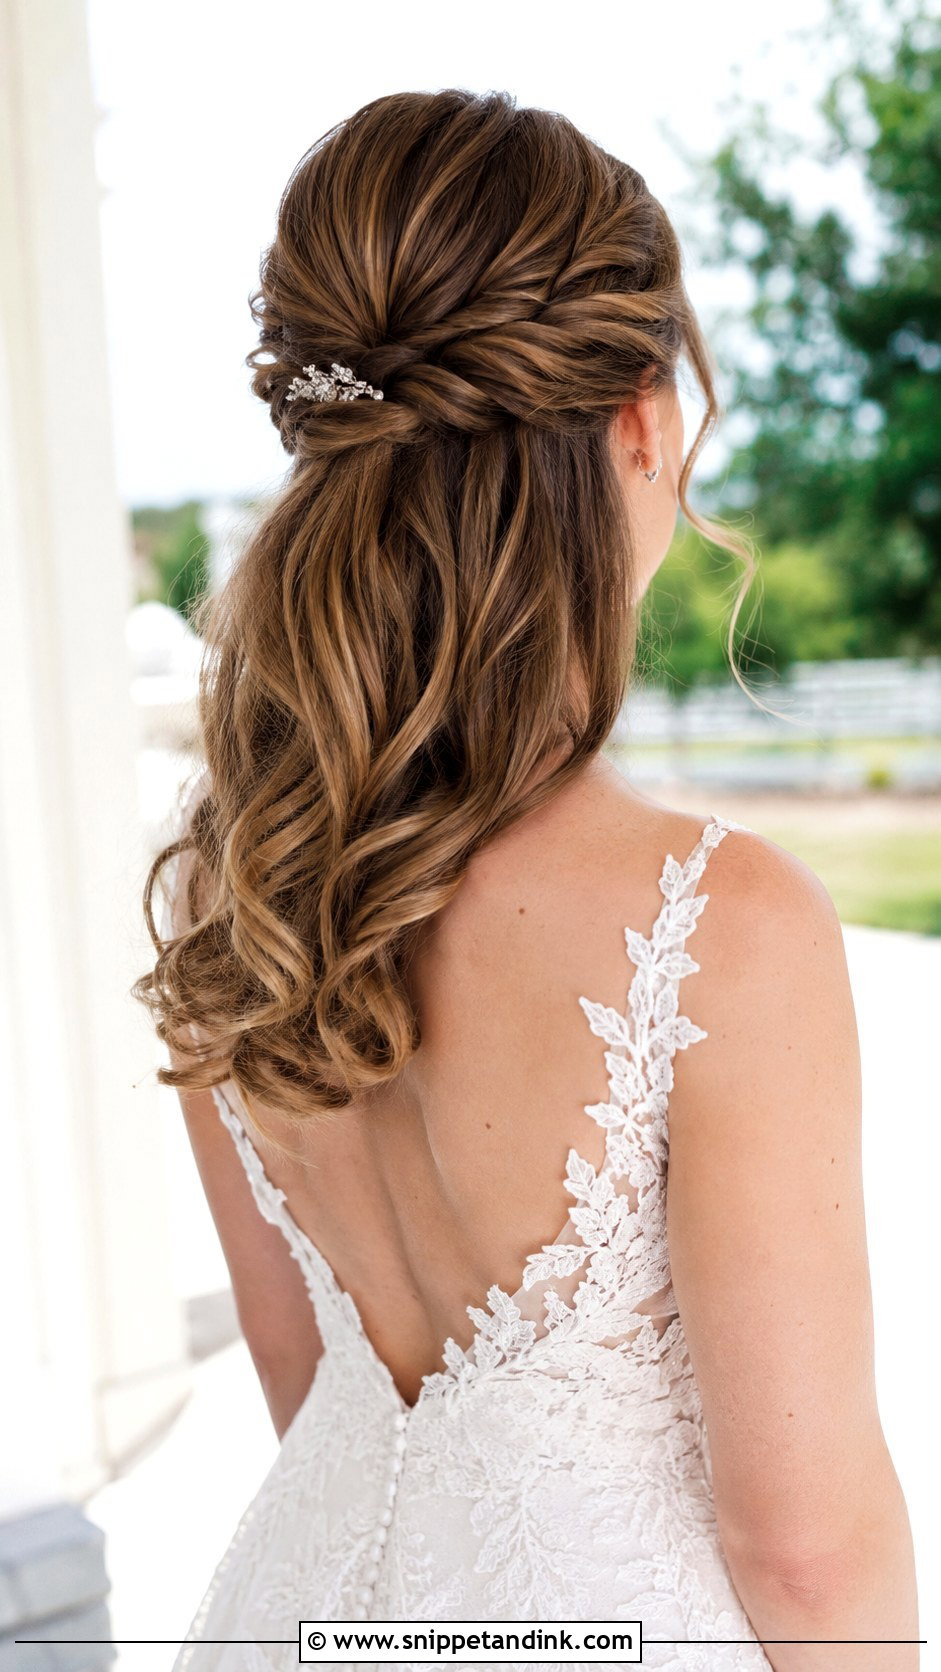
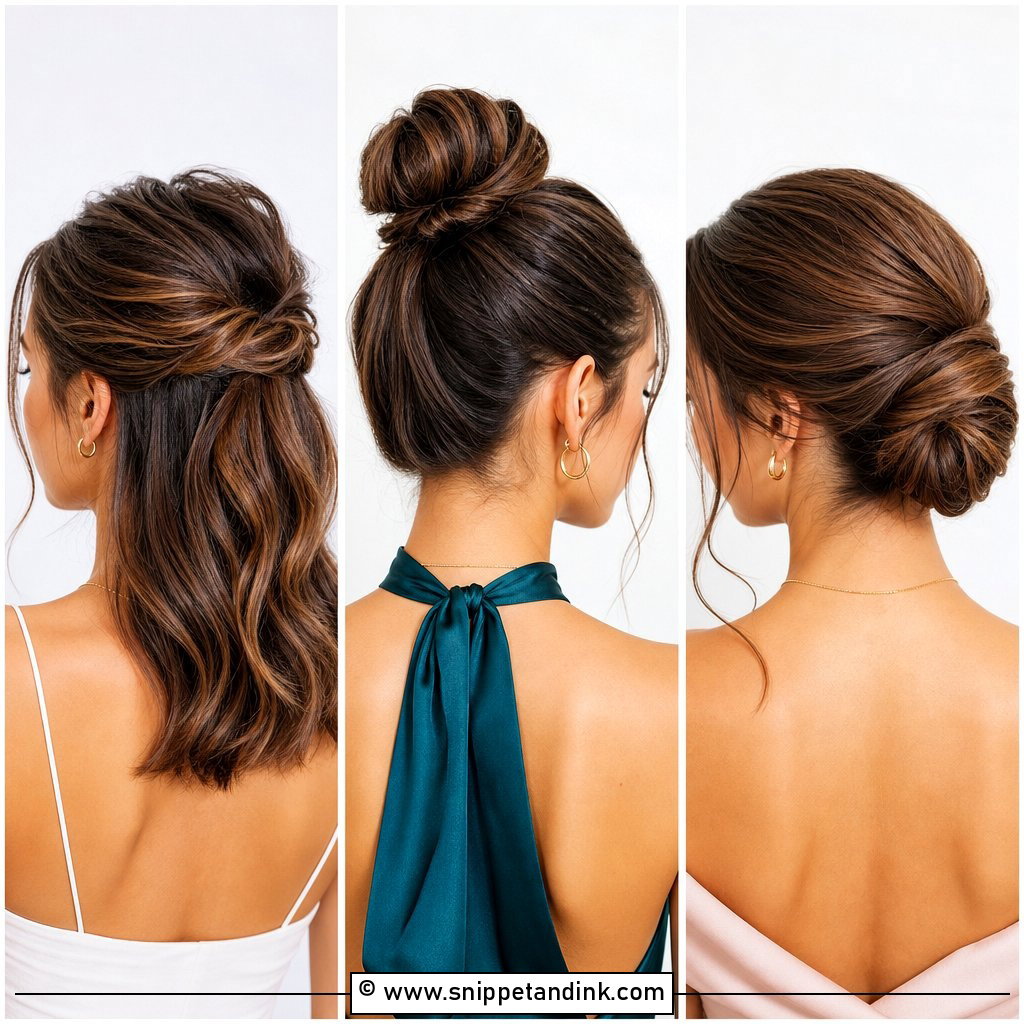
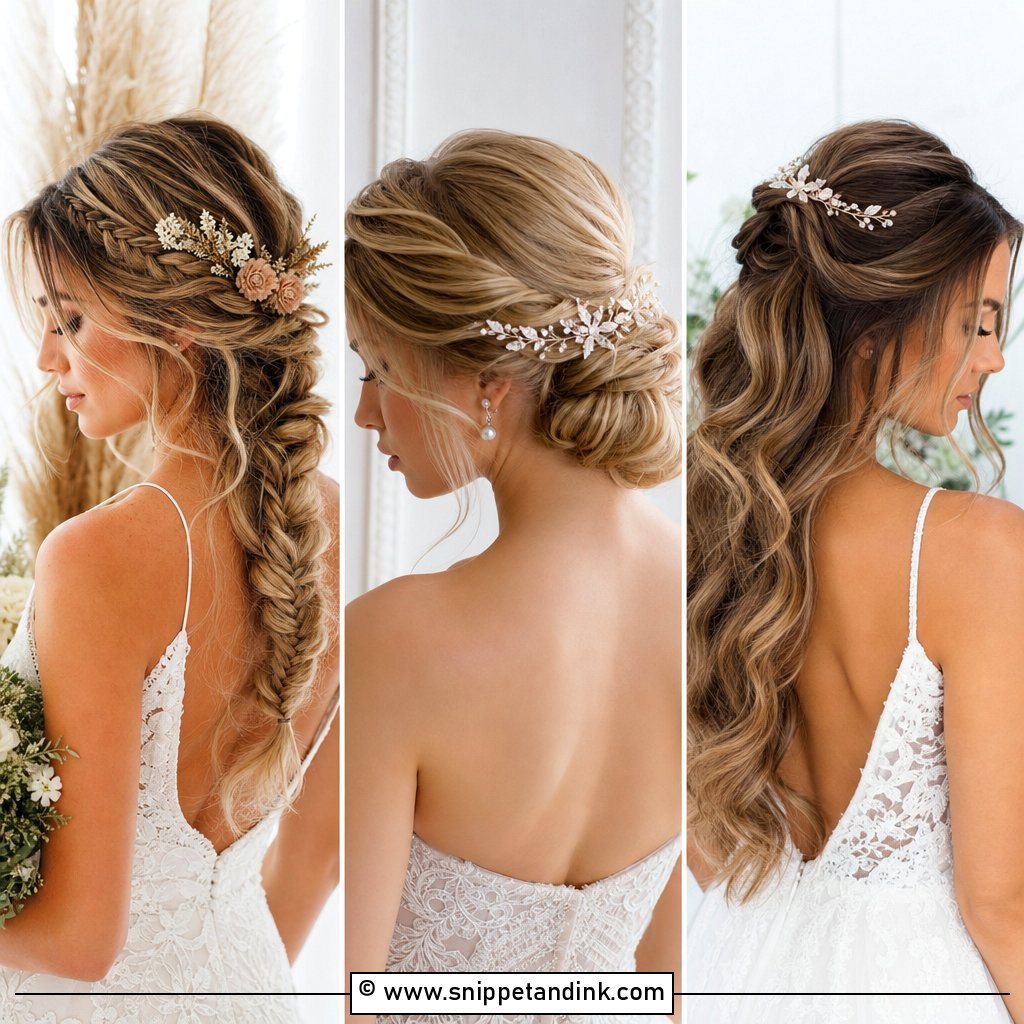
Can’t settle on up or down? This one does both. Take two sections from each side, twist them toward the back and pin them together, leaving the rest loose in waves. The weak point is always the meeting place at the back. I cross two bobby pins in an X there, because a single pin slides once the loose hair starts moving against it. Curl the lengths below with a medium barrel so they still have some bounce by evening, and on very fine hair, tease each section before twisting or the twists look thin.
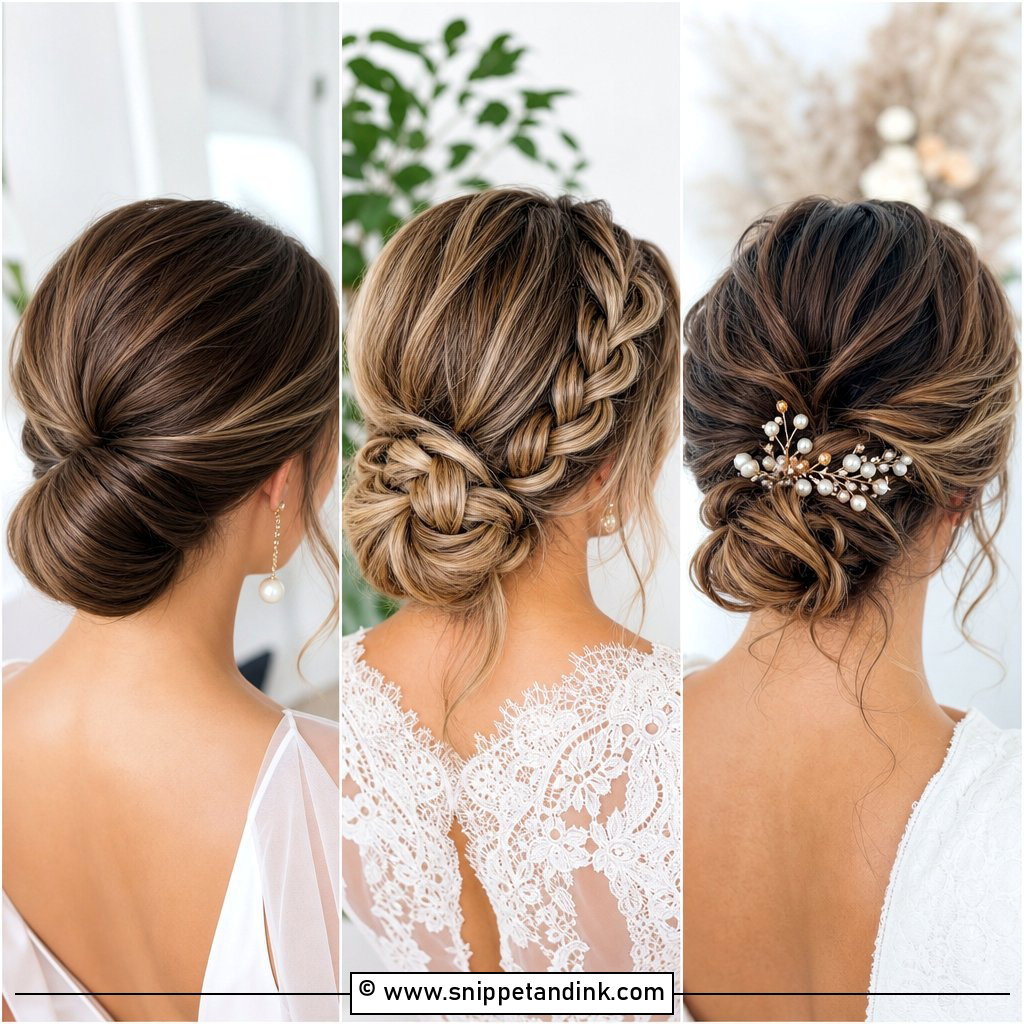
4. Romantic Low Chignon
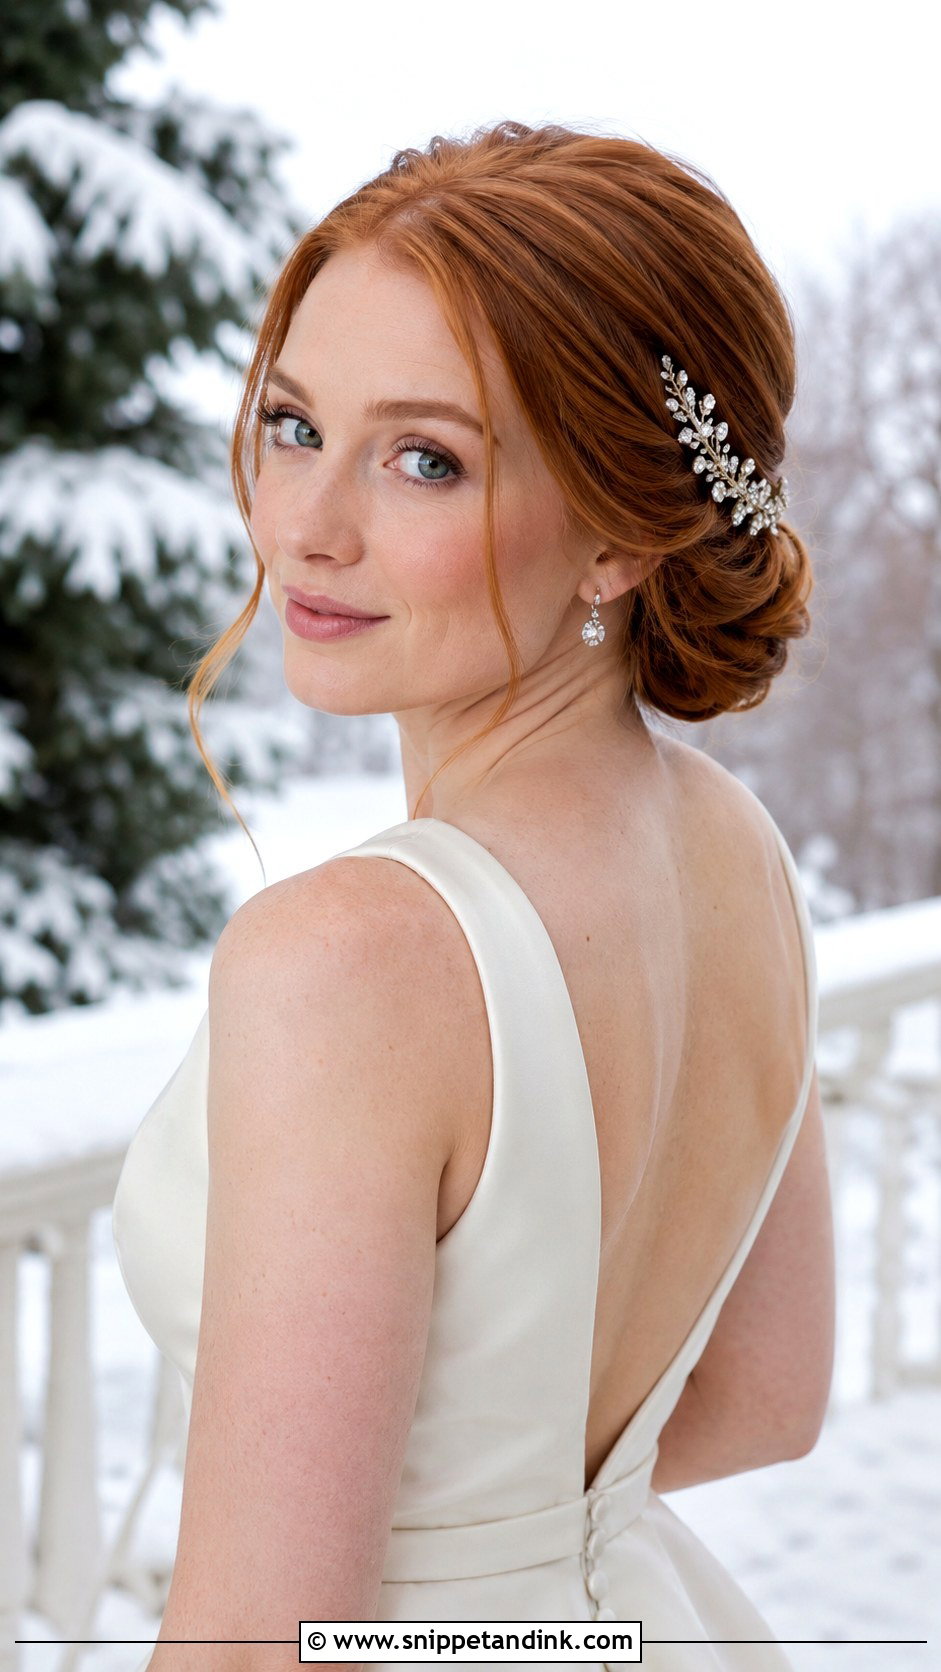
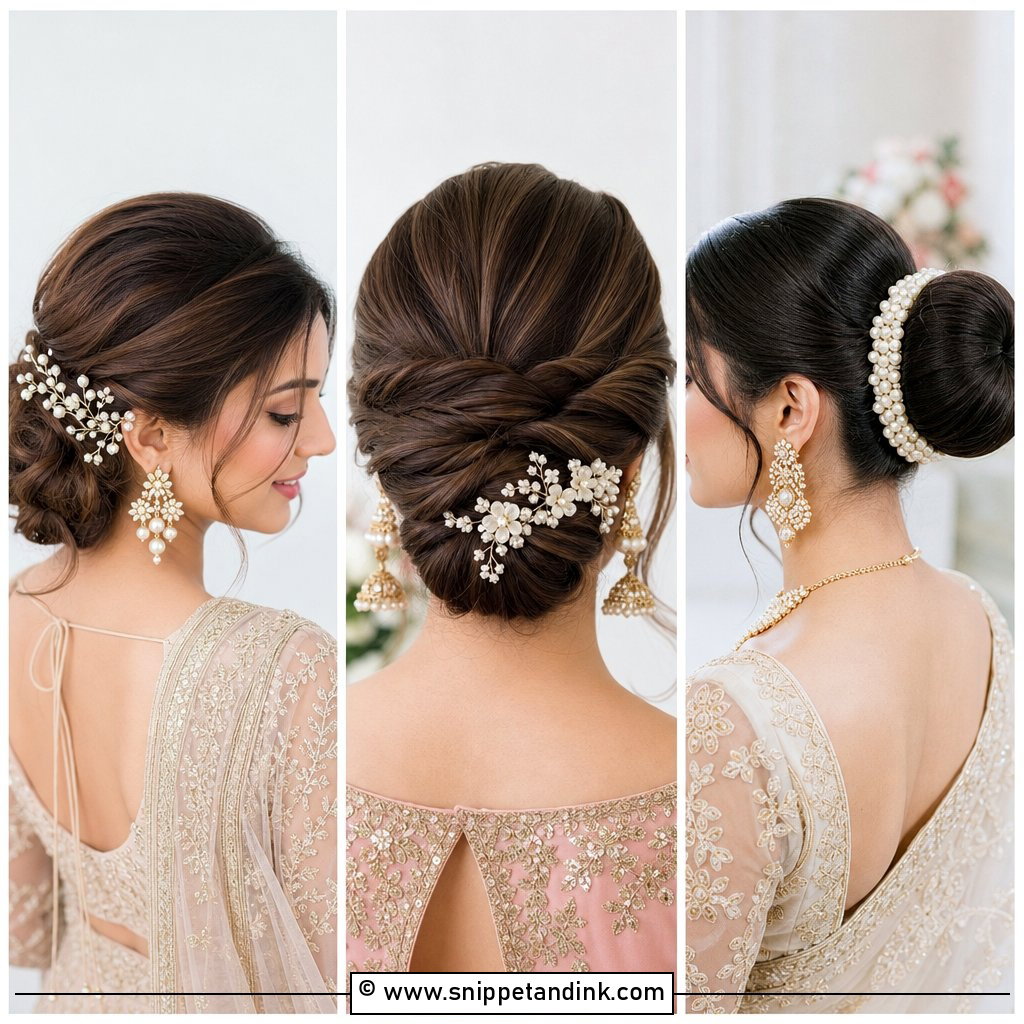
A low chignon is the shape I’m asked for most at trials, and this smooth rolled bun shows why: it looks tidy from every angle a photographer might catch. Gather the hair into a low ponytail, twist it, tuck it under into a coil, pin it and smooth the flyaways. With medium hair the coil comes out smaller than inspiration photos suggest, so if you want a fuller bun, a doughnut pad or a few clip-in wefts is the honest answer. Leave two tendrils at the front and nothing more. A veil comb slides in neatly just above the coil.
5. Braided Crown Updo
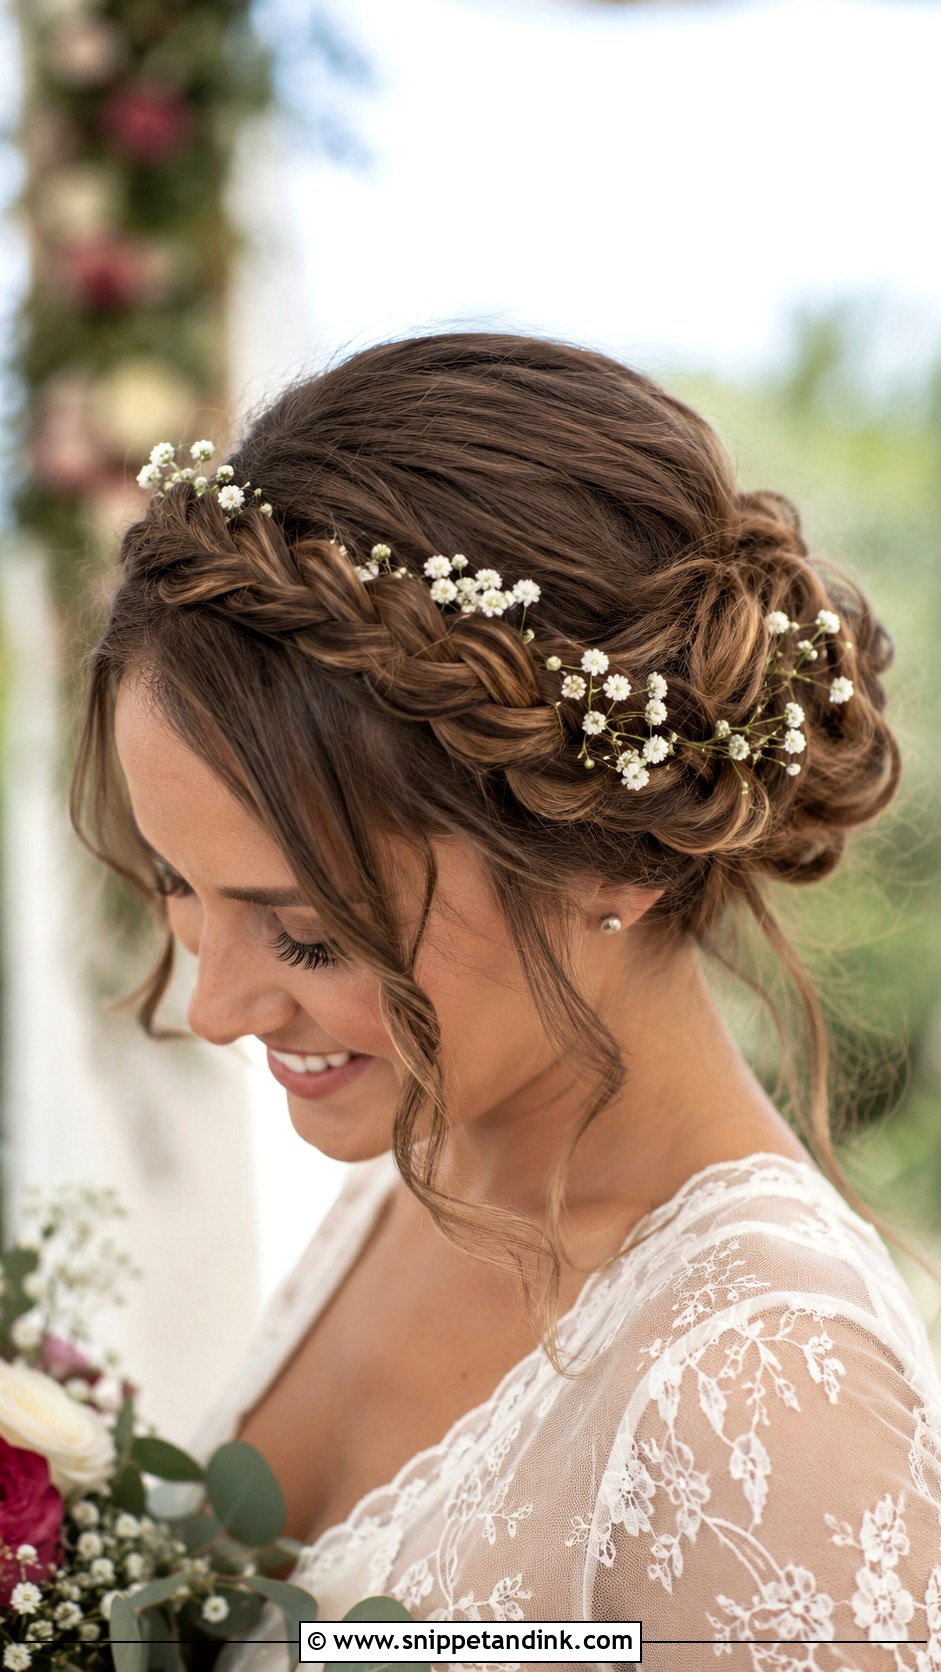
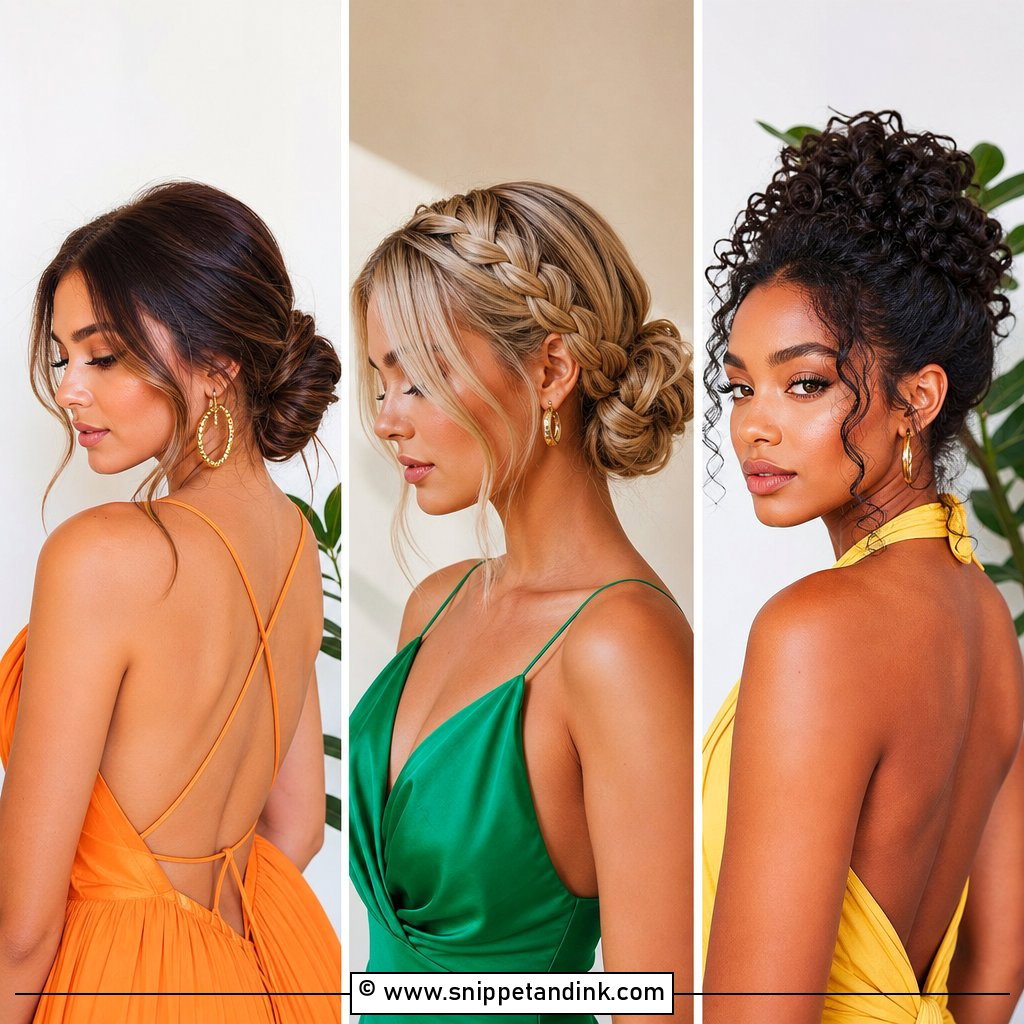
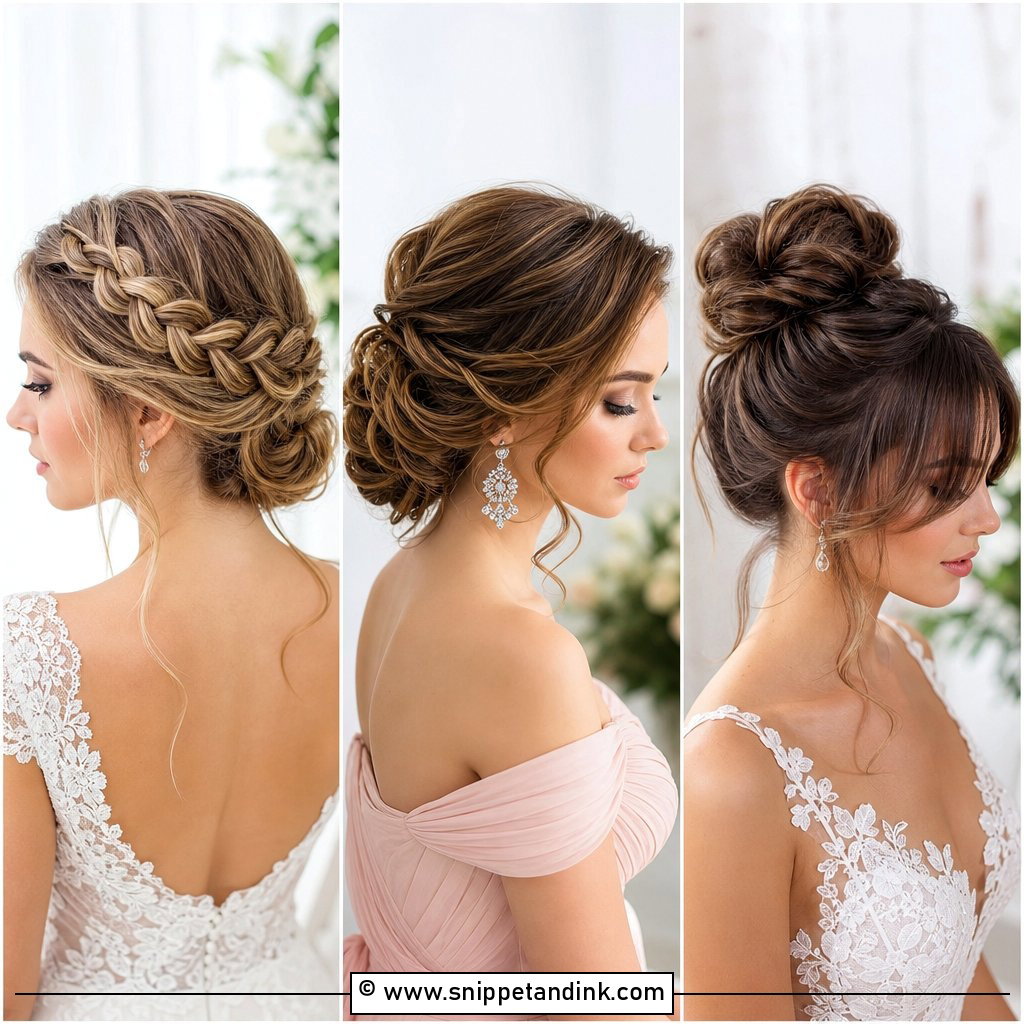
This bohemian-inspired style wraps braids around the head like a halo, and medium hair can manage it without extensions as long as you braid from both sides rather than one. Make a braid on each side, carry them across the back and pin them where they overlap. I pancake the braids by gently pulling the edges outward, which makes thinner hair look like twice as much. Pin along the outer edge, where the braid meets the scalp, so the crown doesn’t sag above the ears. Baby’s breath tucks into the gaps easily, and because the weight is spread around the head, it stays comfortable for hours.
6. Twisted Low Bun With Tendrils
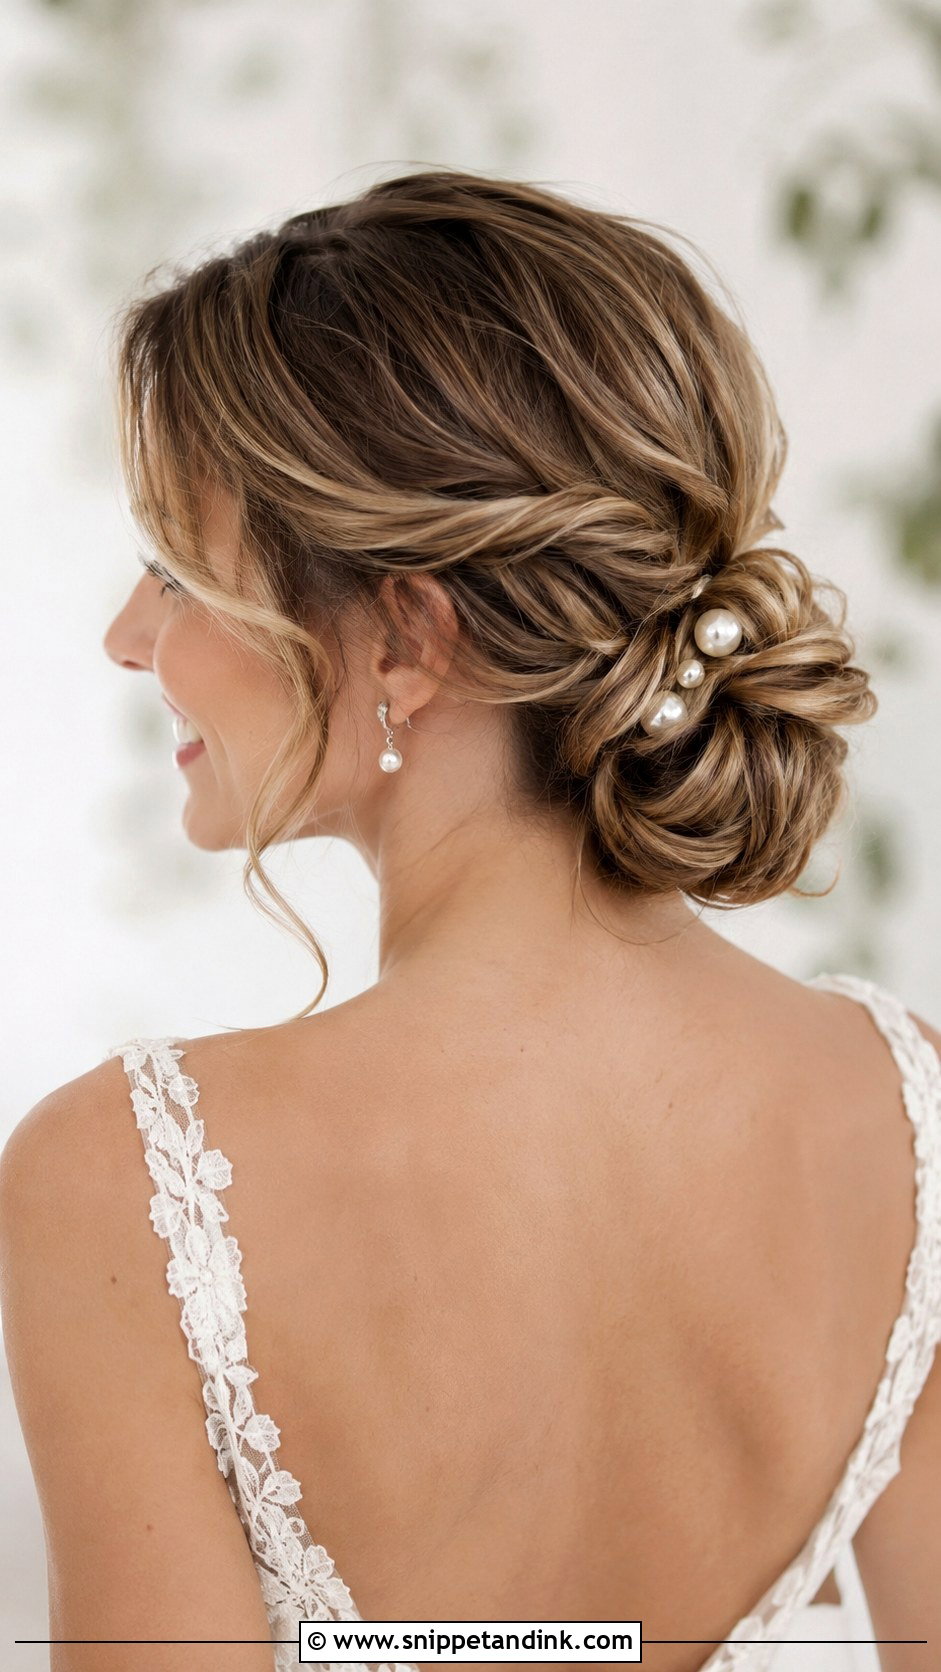
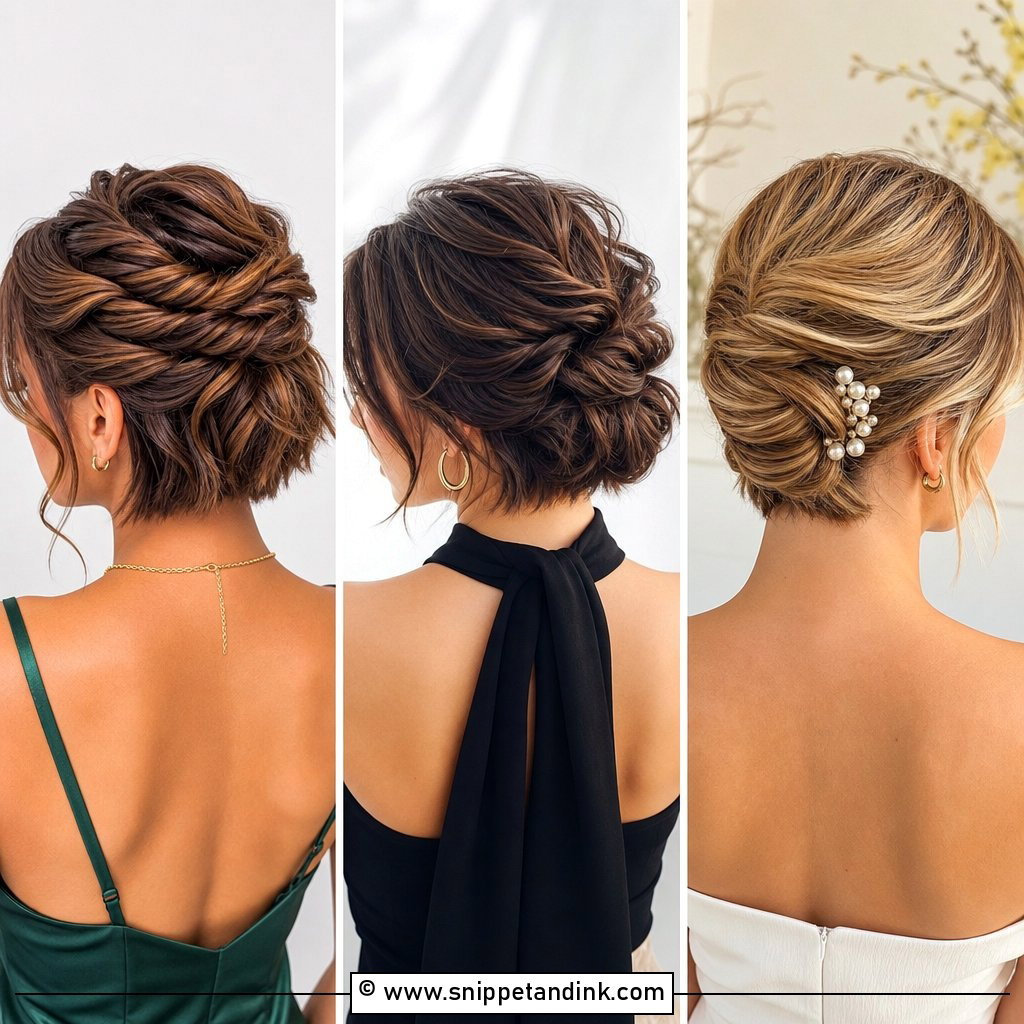
Here the texture comes from small twists rather than a braid. Twist narrow sections and pin each toward the center, then wrap everything into a soft bun at the neck and pull out a few wisps. Small twists are more forgiving than braids if your layers are uneven, since a short piece can simply end inside the twist and get pinned. Tendrils are where this style goes wrong: cut them too thick and they look like leftovers. I take pieces no wider than a pencil and curl them away from the face. Pearl pins in the twists suit brides and guests equally.
7. Side Swept Updo
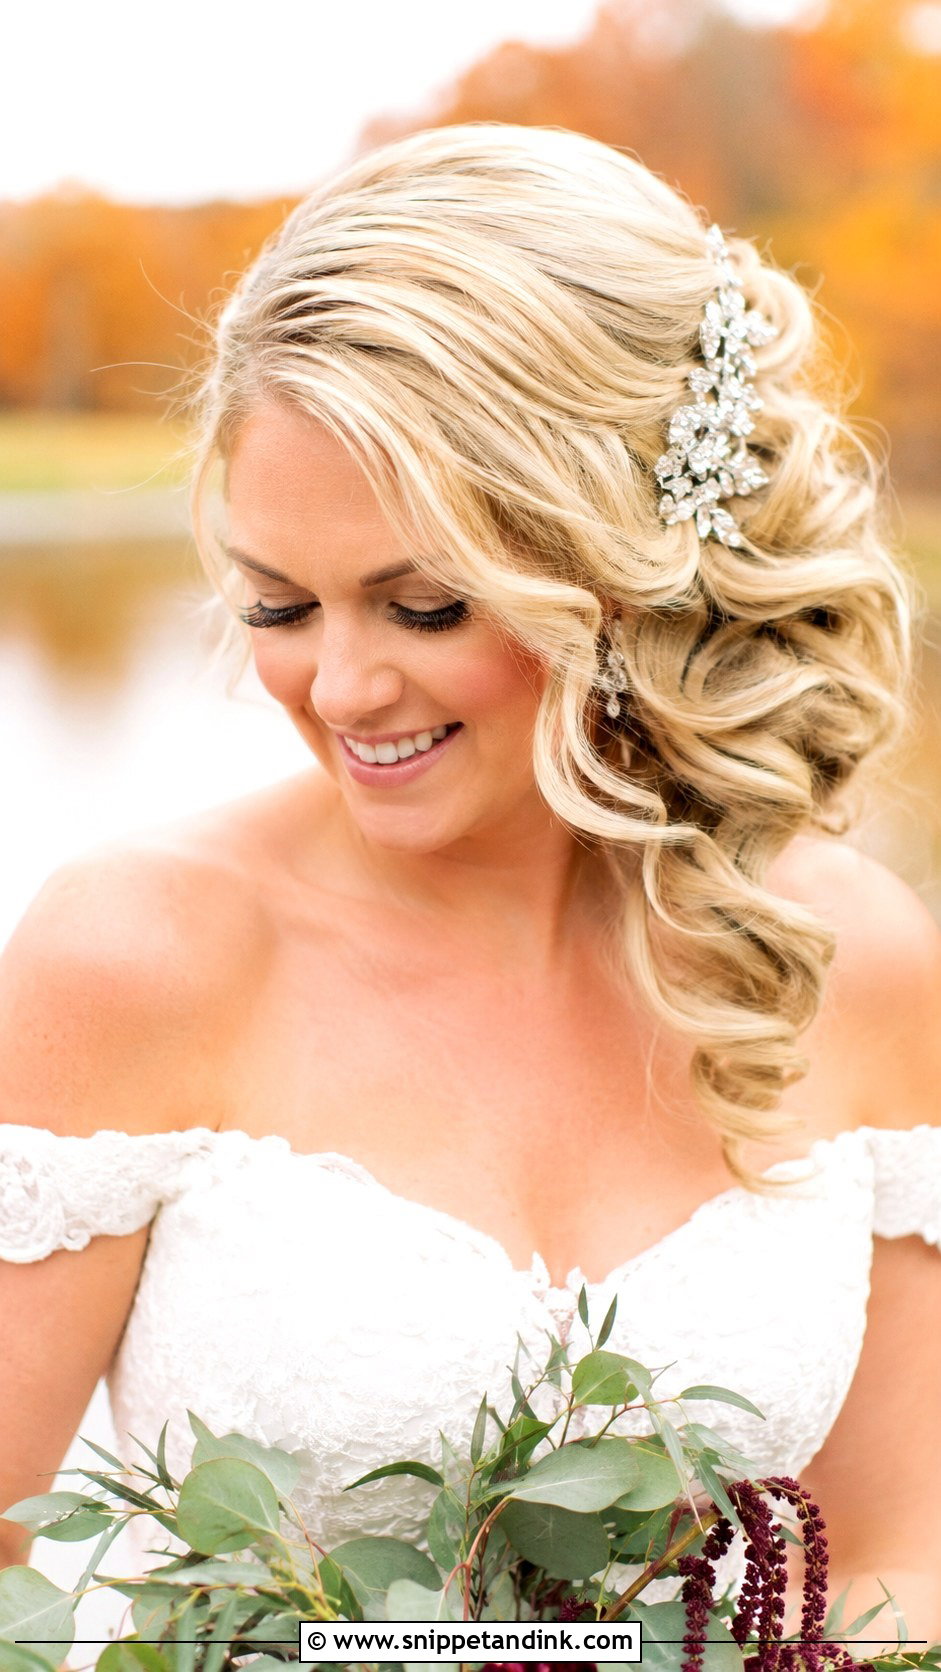
Sweeping everything to one side gives you an asymmetrical shape with an old Hollywood feel. Curl first, sweep the hair over one shoulder and pin it into a soft bun or twist just behind the ear. Check which side you’ll be standing on at the ceremony before you commit; I like the bun facing the guests so it’s visible during the vows. The shape flatters off-shoulder and one-shoulder gowns, where the bare shoulder balances the volume. Put sparkly clips or a comb on the swept side. With a strapless sweetheart neckline it can look lopsided, so try it with the dress at a fitting.
8. Pearl Adorned Chignon
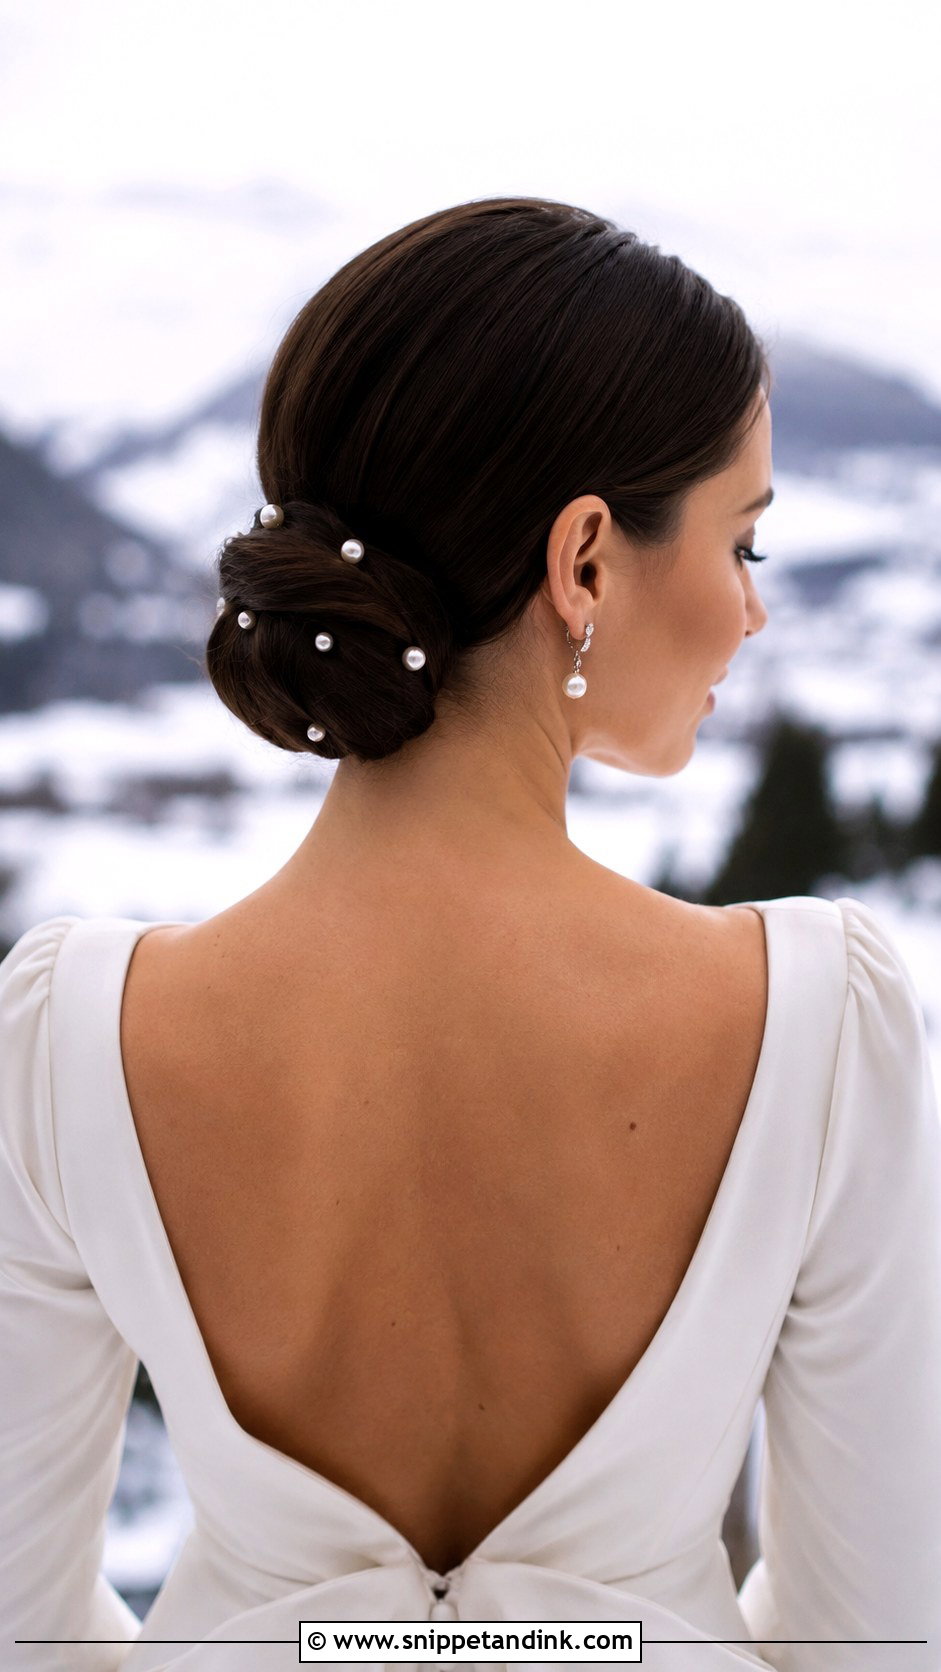
Pearls on a smooth low bun are the simplest upgrade there is. Make a chignon at the nape, then scatter pearl pins through it. The detail I’d point out is spacing: an odd number of pins in a loose curve looks placed, while pins in a straight row look like a barrette. Pearl pins are short, so they need to catch the outer layer of the bun rather than rest on the surface. Matching pearl earrings finish it for a formal ceremony.
9. Messy High Bun
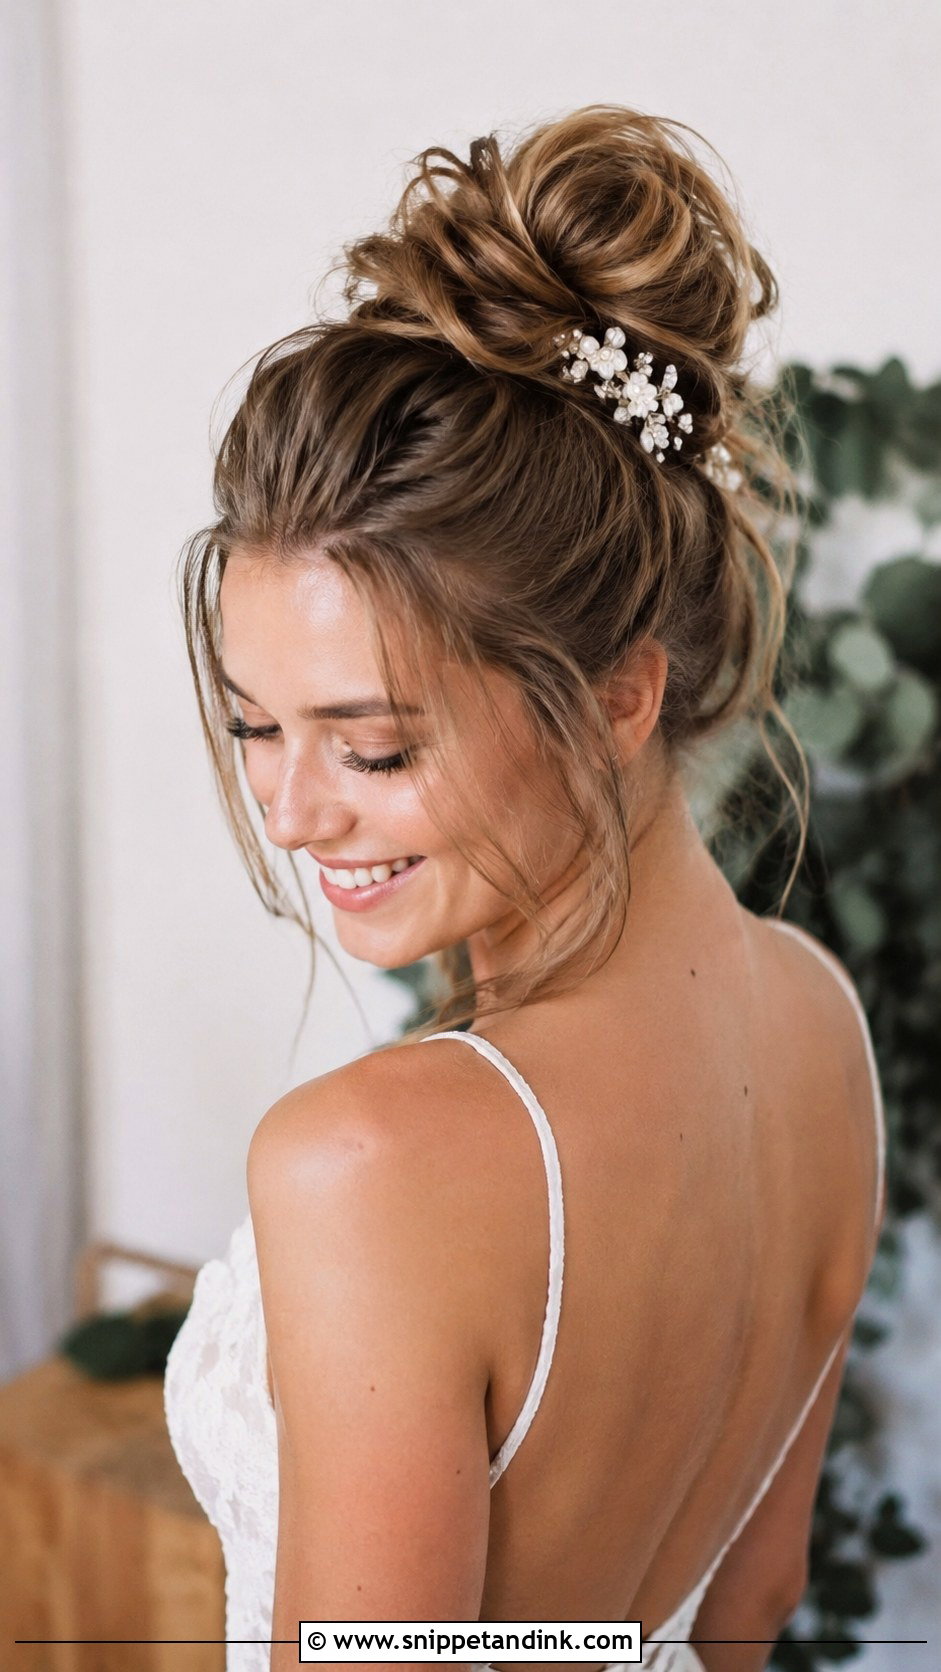
A high bun reads younger and more playful than the low styles above. Gather a high ponytail, twist it loosely and wrap it into a bun, letting a few pieces fall. On medium hair the nape is the trouble spot, because short hairs at the back of the neck won’t reach the crown; I either smooth them and pin them flat with matte pins or leave them loose on purpose. It’s also the one style here I’d question with a veil, since the bun sits right where the comb wants to go. In heat, though, it’s the most comfortable thing on this list.
10. Twisted Updo With Braids
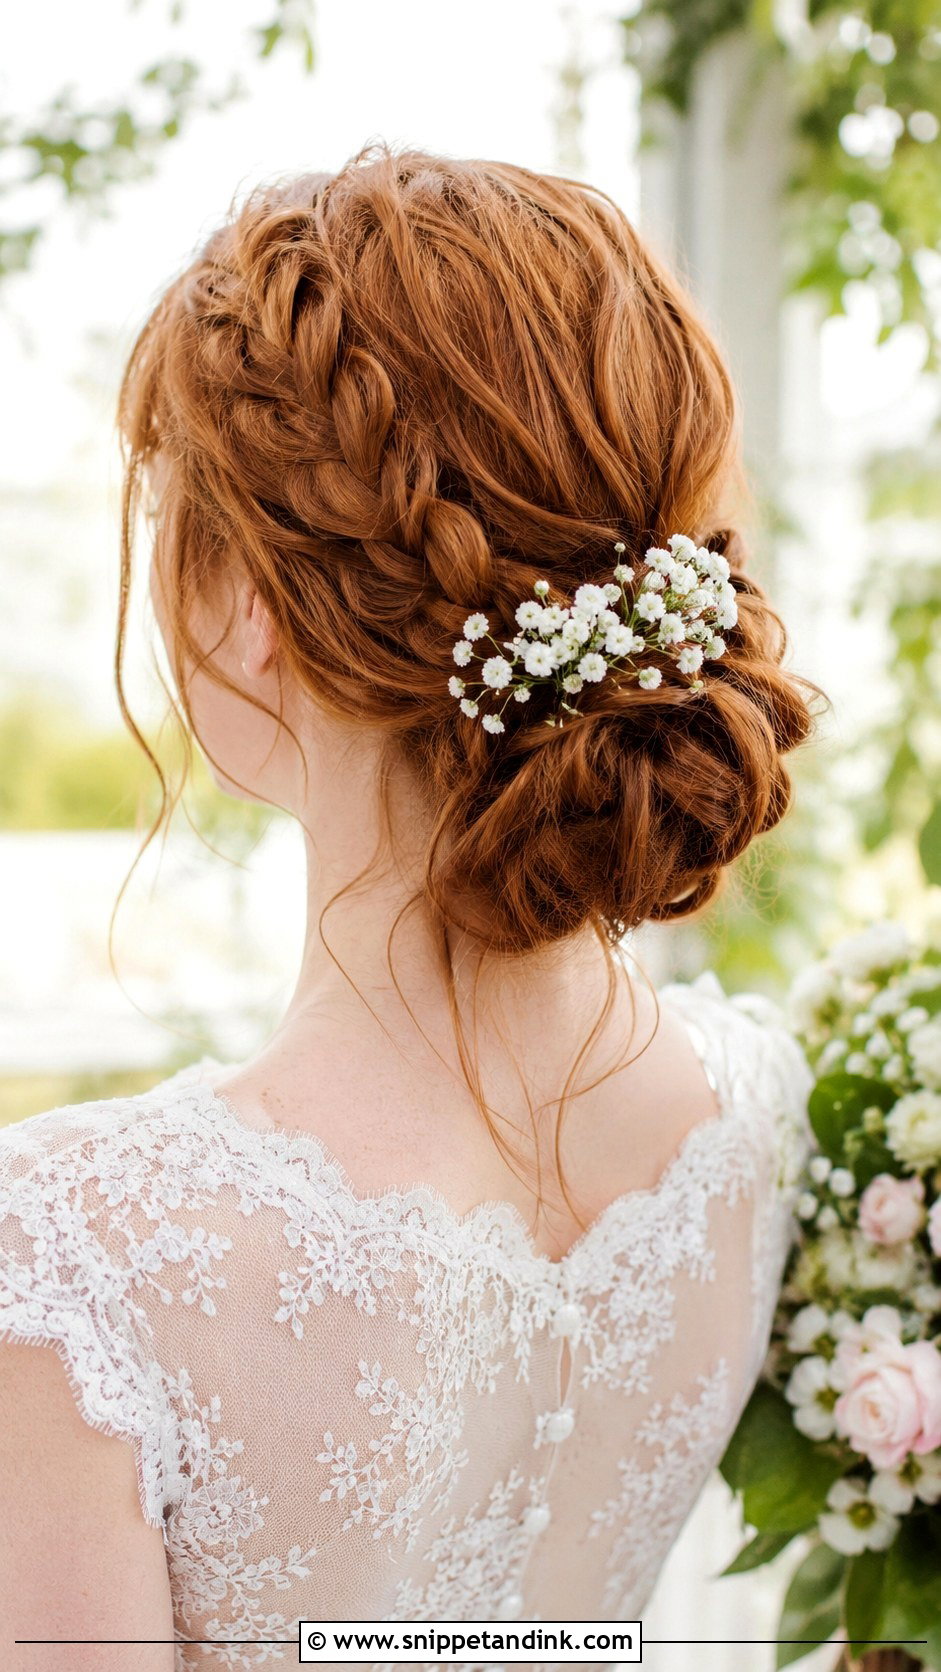
Mixing braids and twists gives an intricate result that’s still realistic at home. Braid a few small sections, twist the rest and pin everything into a low bun or knot. I keep it to three or four thin braids, because too many on medium hair eat up the length you need for the bun itself. Loosen them a little once they’re pinned, and tuck tiny flowers between the twists if you like. This kind of detail is what shows up in close-up portraits, which is where it earns its extra time.
11. Low Knotted Bun
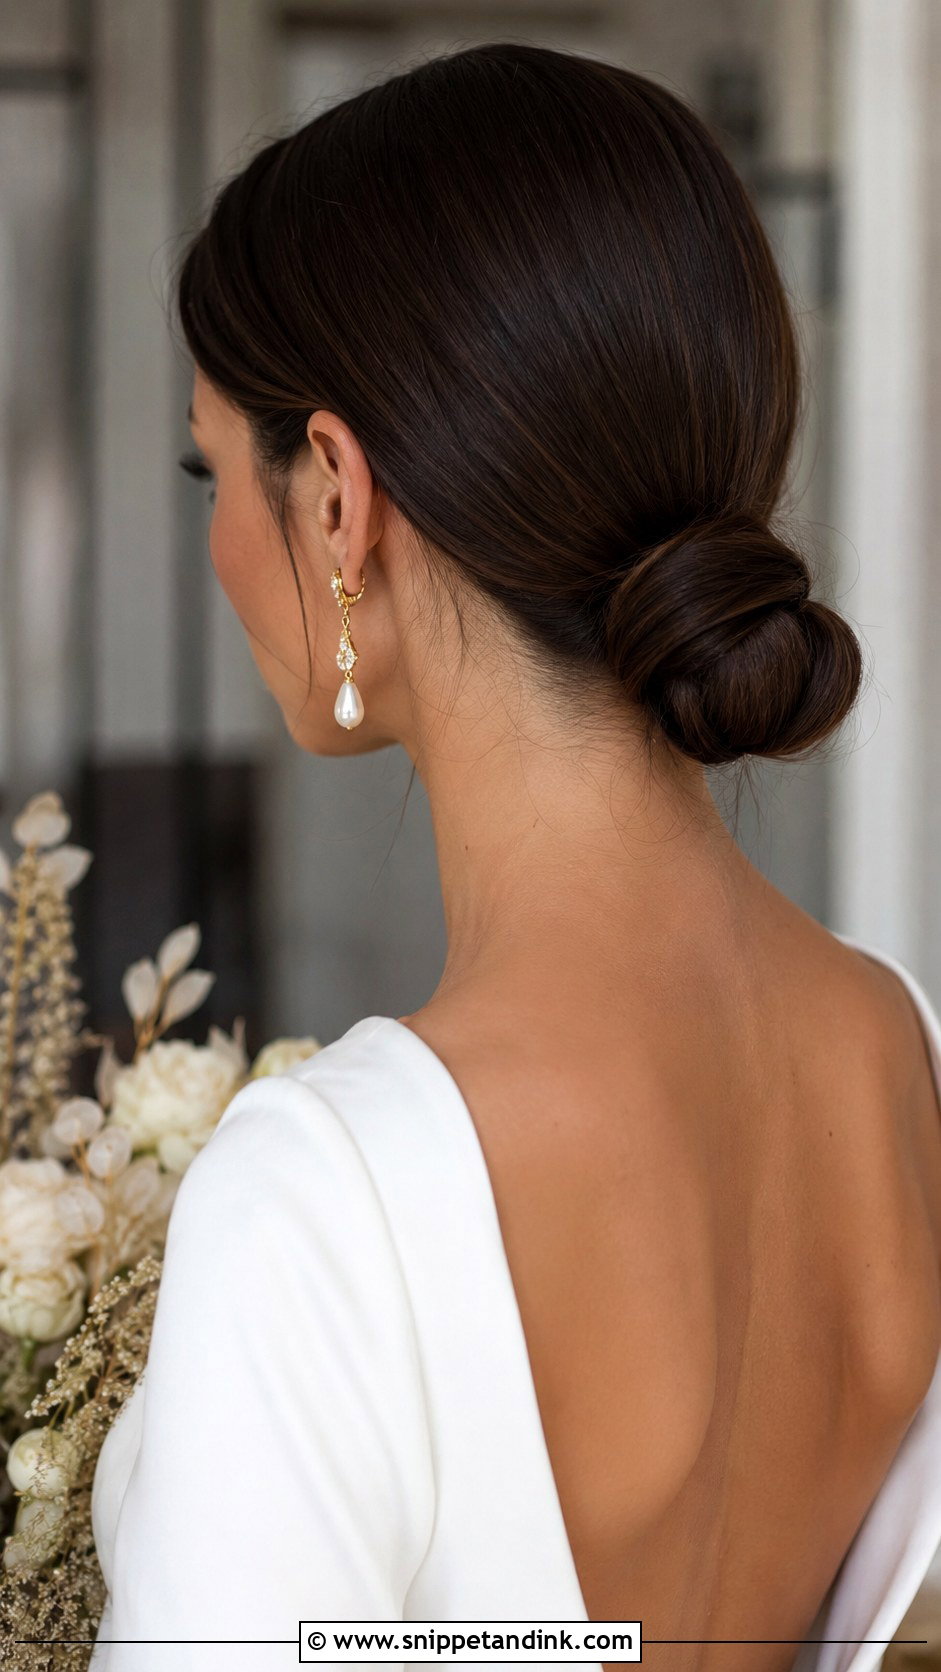
A low knotted bun is the clean, modern option. Split the hair into two sections, tie them into a knot, then wrap and pin the ends into a neat bun. The knot only stays tight if the hair has some grip, so I work a little dry shampoo through first. Heavily layered hair struggles here, because the shorter layers pop out of the knot as soon as you turn your head. Keep it sleek with a minimalist gown and strong jewelry, or loosen a couple of front pieces to soften it.
12. Half-Up Bun With Curls
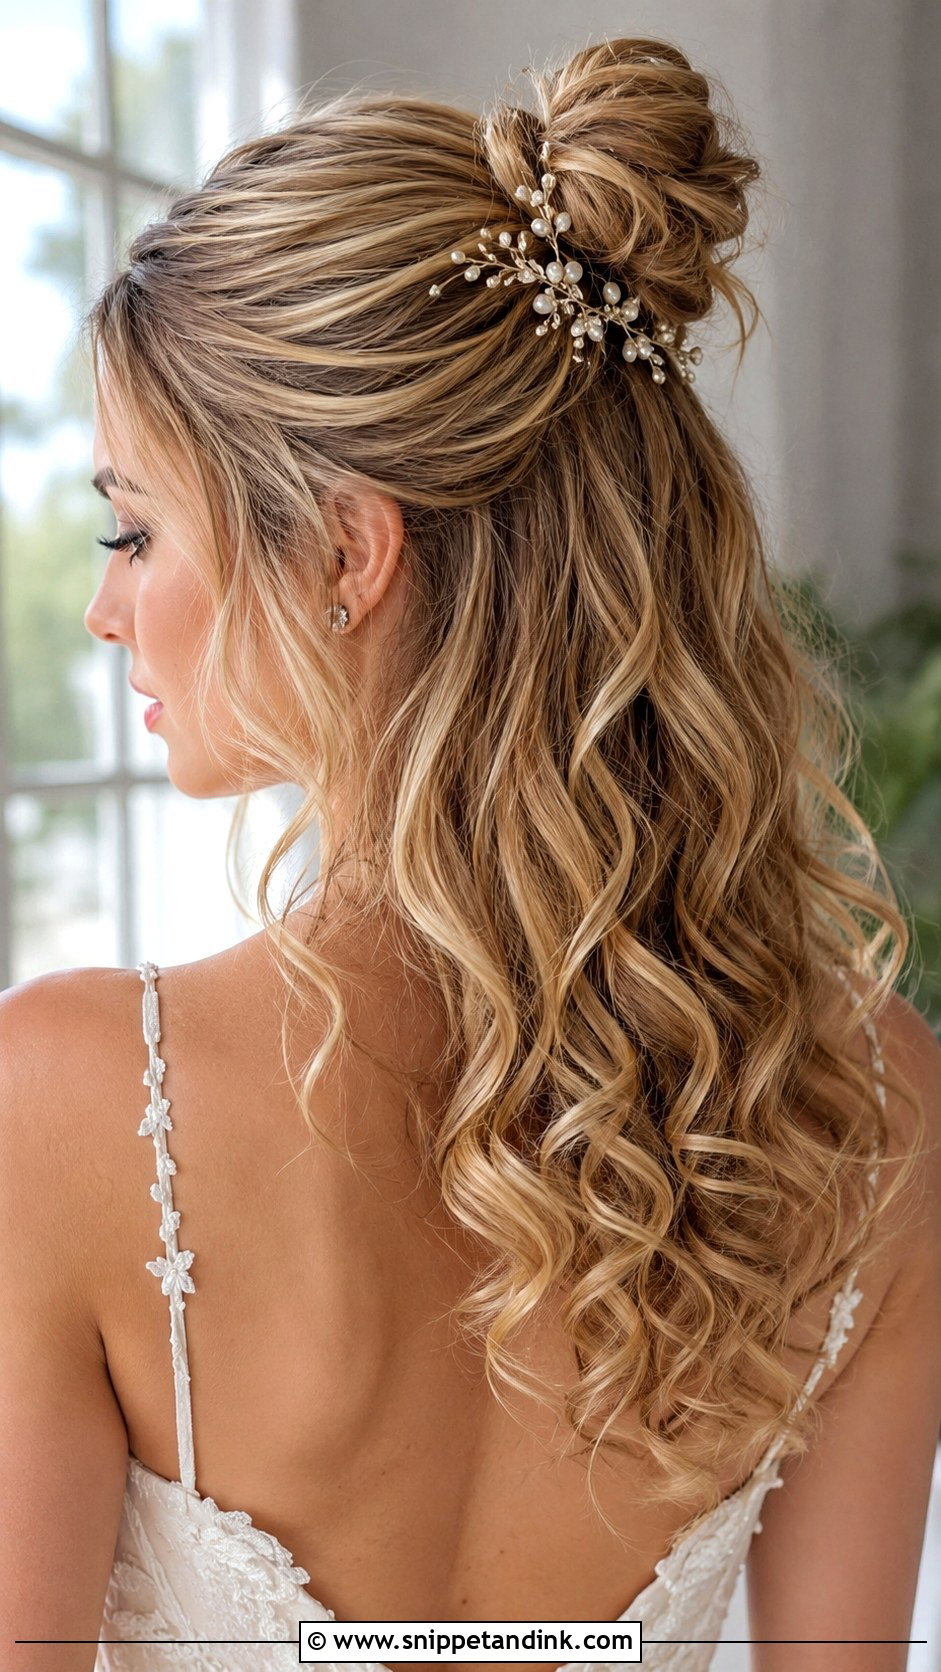
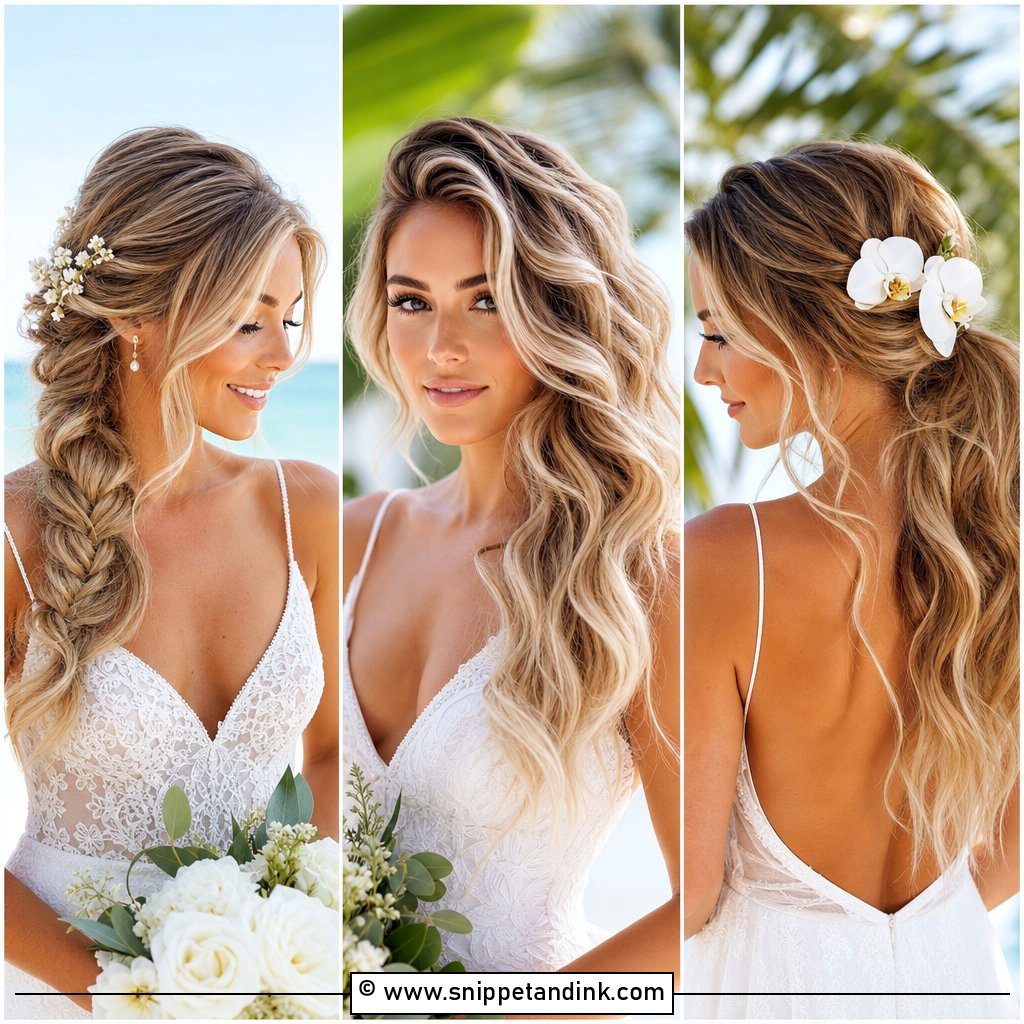
The small top bun with curls underneath is the casual end of this list. Gather the top section, twist it into a bun and pin it, then curl the remaining length. I size that bun to the face: a small knot on a petite frame, slightly larger on someone with a strong jaw. Curls drop in humidity, so for a summer wedding I set them with a firmer spray than I’d use on a full updo. One small accessory beside the bun looks better than one perched on top of it.
13. Sleek Low Ponytail
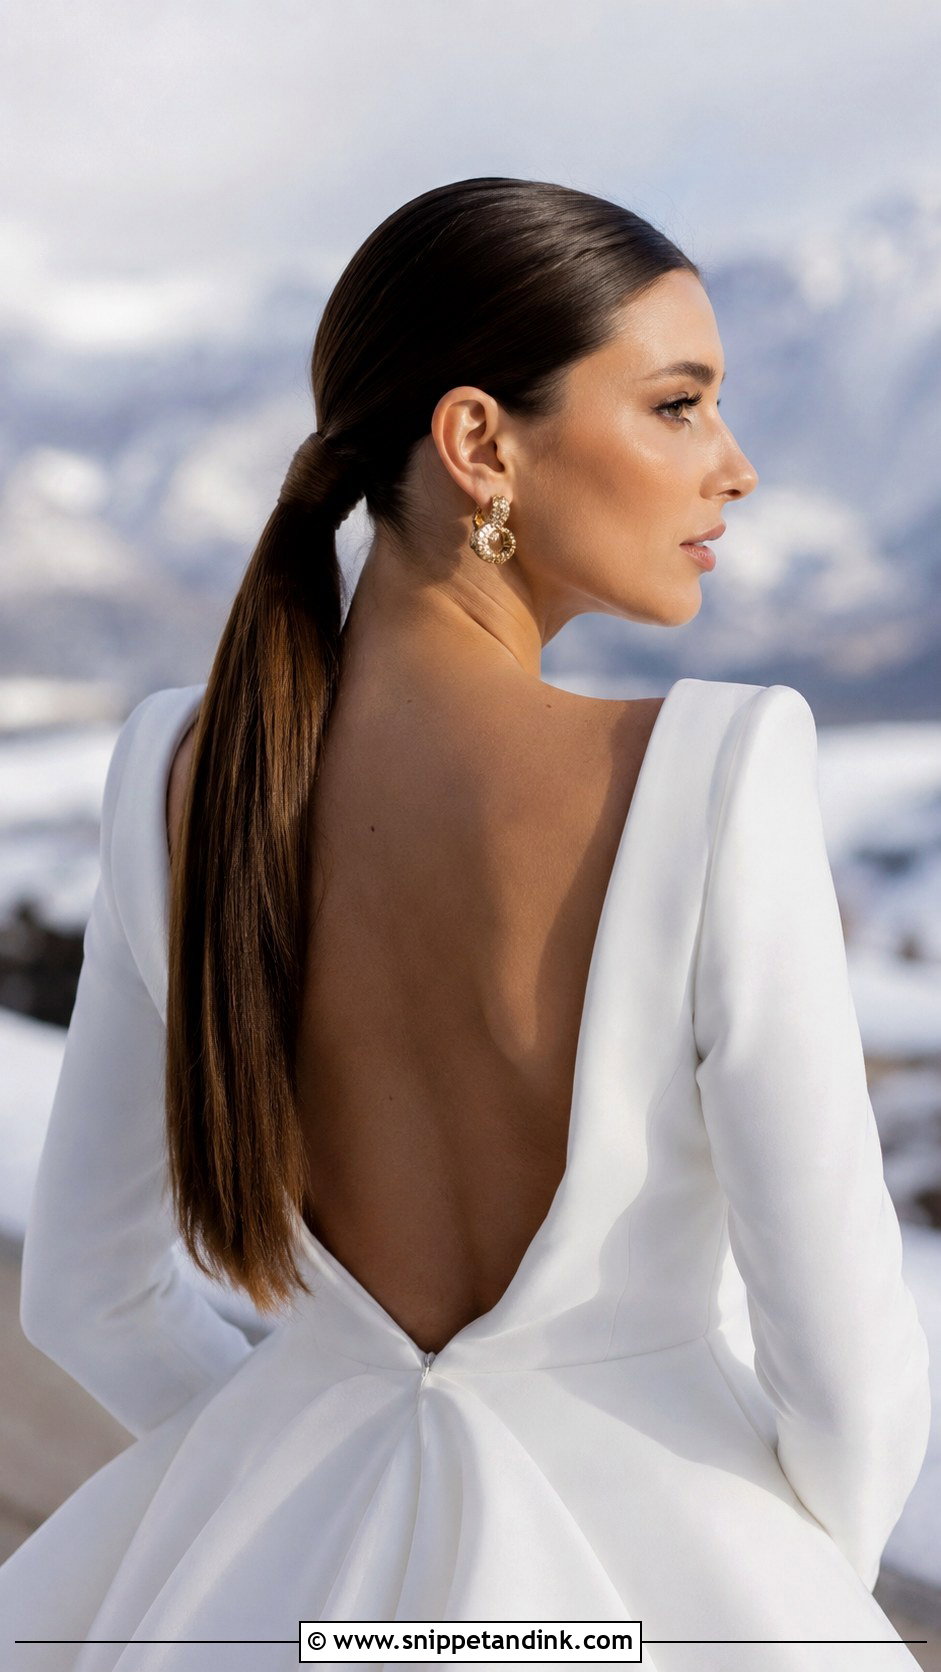
Don’t write off a low ponytail. With the right finish it looks as considered as any bun. Smooth the hair back to the nape, secure it tightly and wrap a small section around the elastic, pinning the end underneath. The sleekness depends on prep: I blow-dry straight with a paddle brush and use a light shine spray rather than oil, because oil turns medium hair stringy by the reception. Bold earrings and a structured gown suit it best.
14. Floral Bun Updo
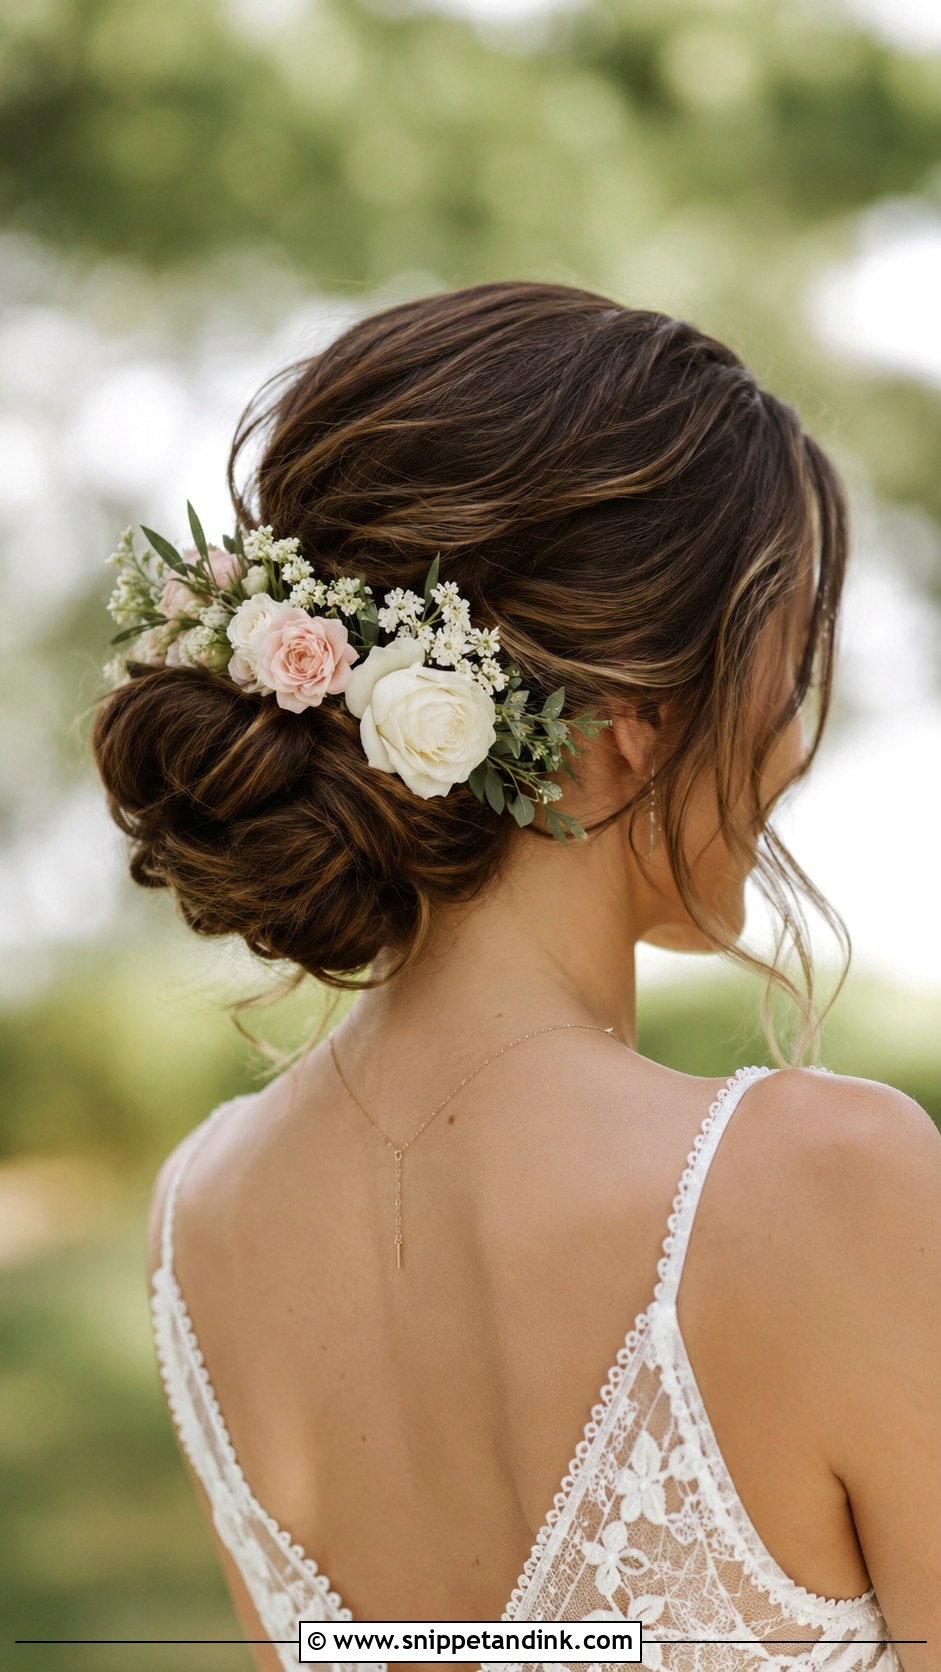
Flowers tucked into a bun feel natural at a garden or spring wedding. Make a low or mid bun, then tuck small blooms around it. Fresh flowers wilt out of water, so I’d ask your florist for hardy ones such as spray roses or wax flower, wired and taped, and add them as late as possible. Faux flowers are the safer choice in real heat. Keep the stems short so they sit inside the bun instead of poking out, and repeat a bloom from your bouquet to tie the two together.
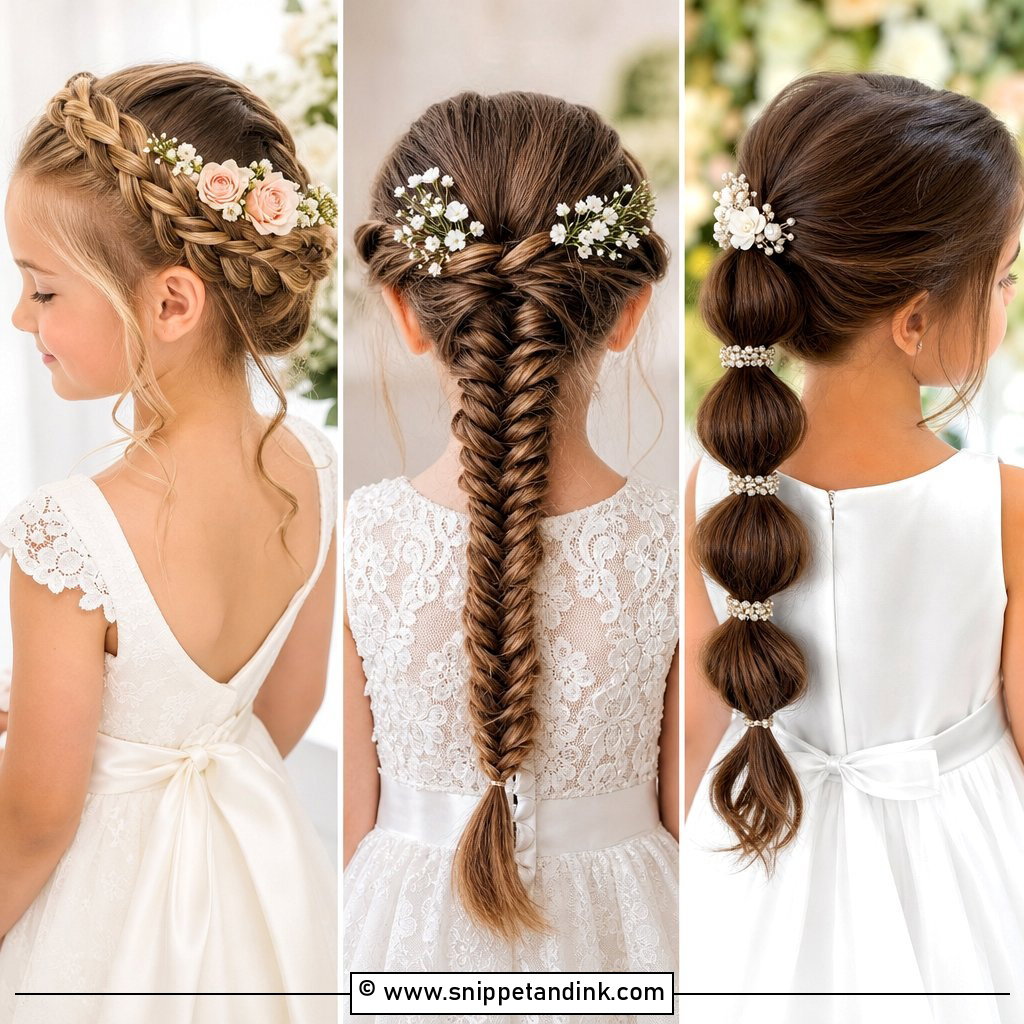
15. Twisted Rope Braid Updo
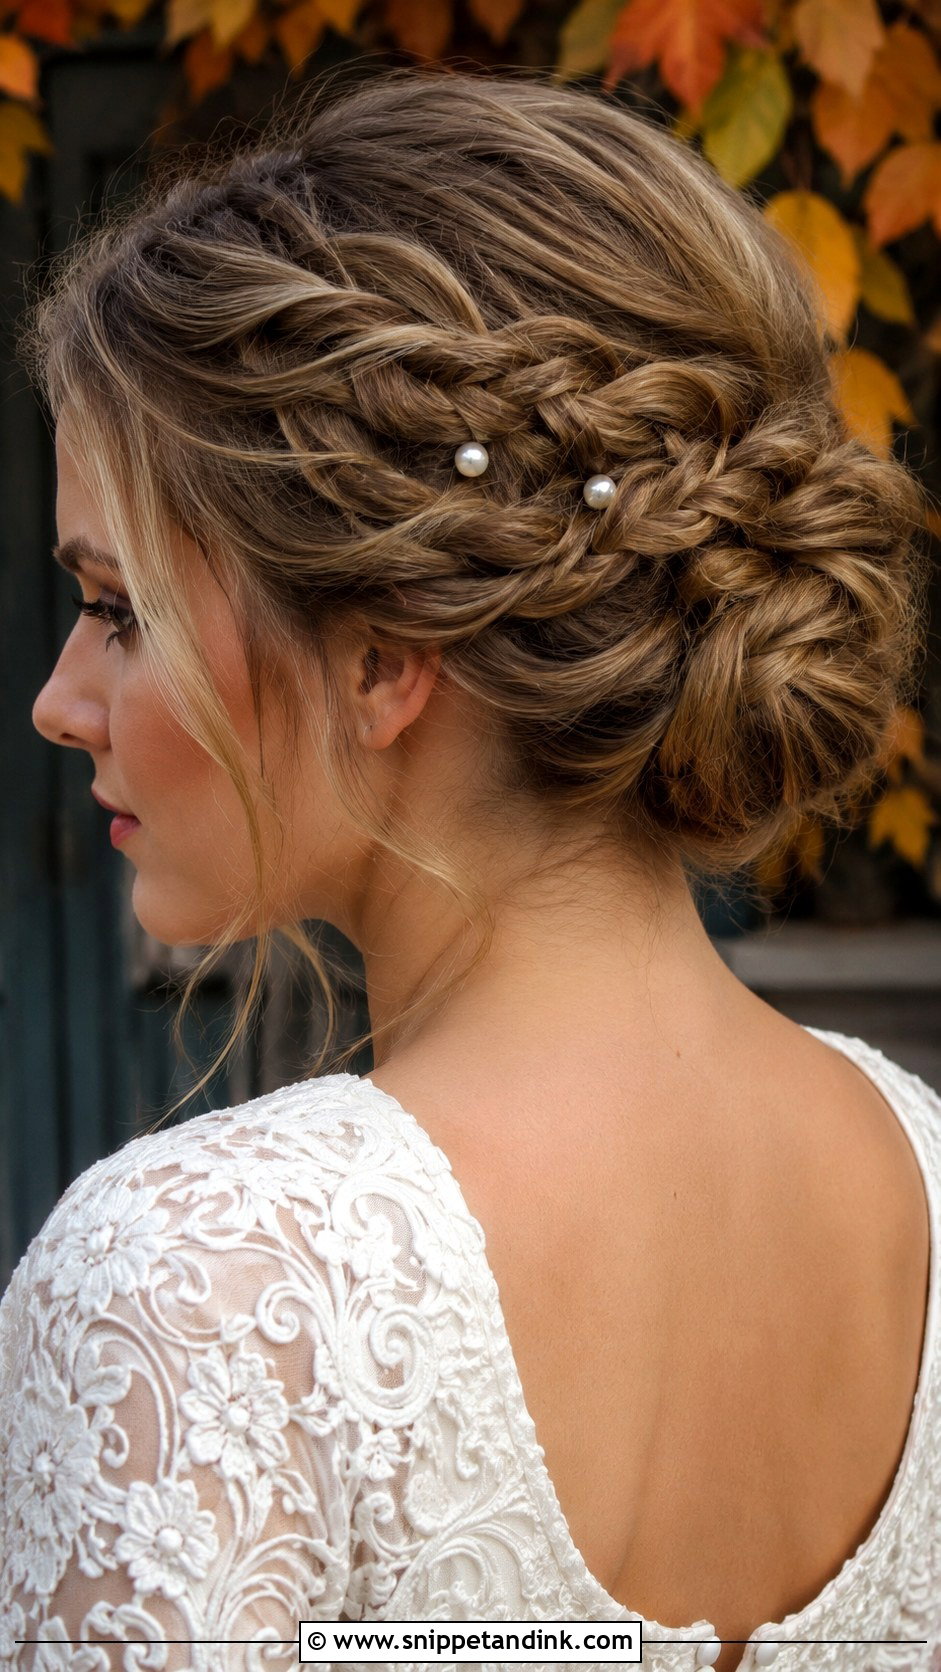
The rope braid looks harder than it is. Split a section into two, twist each piece in the same direction, then wrap them around each other in the opposite direction; that counter-twist is what stops the rope from unravelling. Pin it into a low bun or coil at the back. On medium hair the rope comes out just long enough to coil into a compact bun. A few small pins or pearls along the coil finish it.
16. Curly Updo With Volume
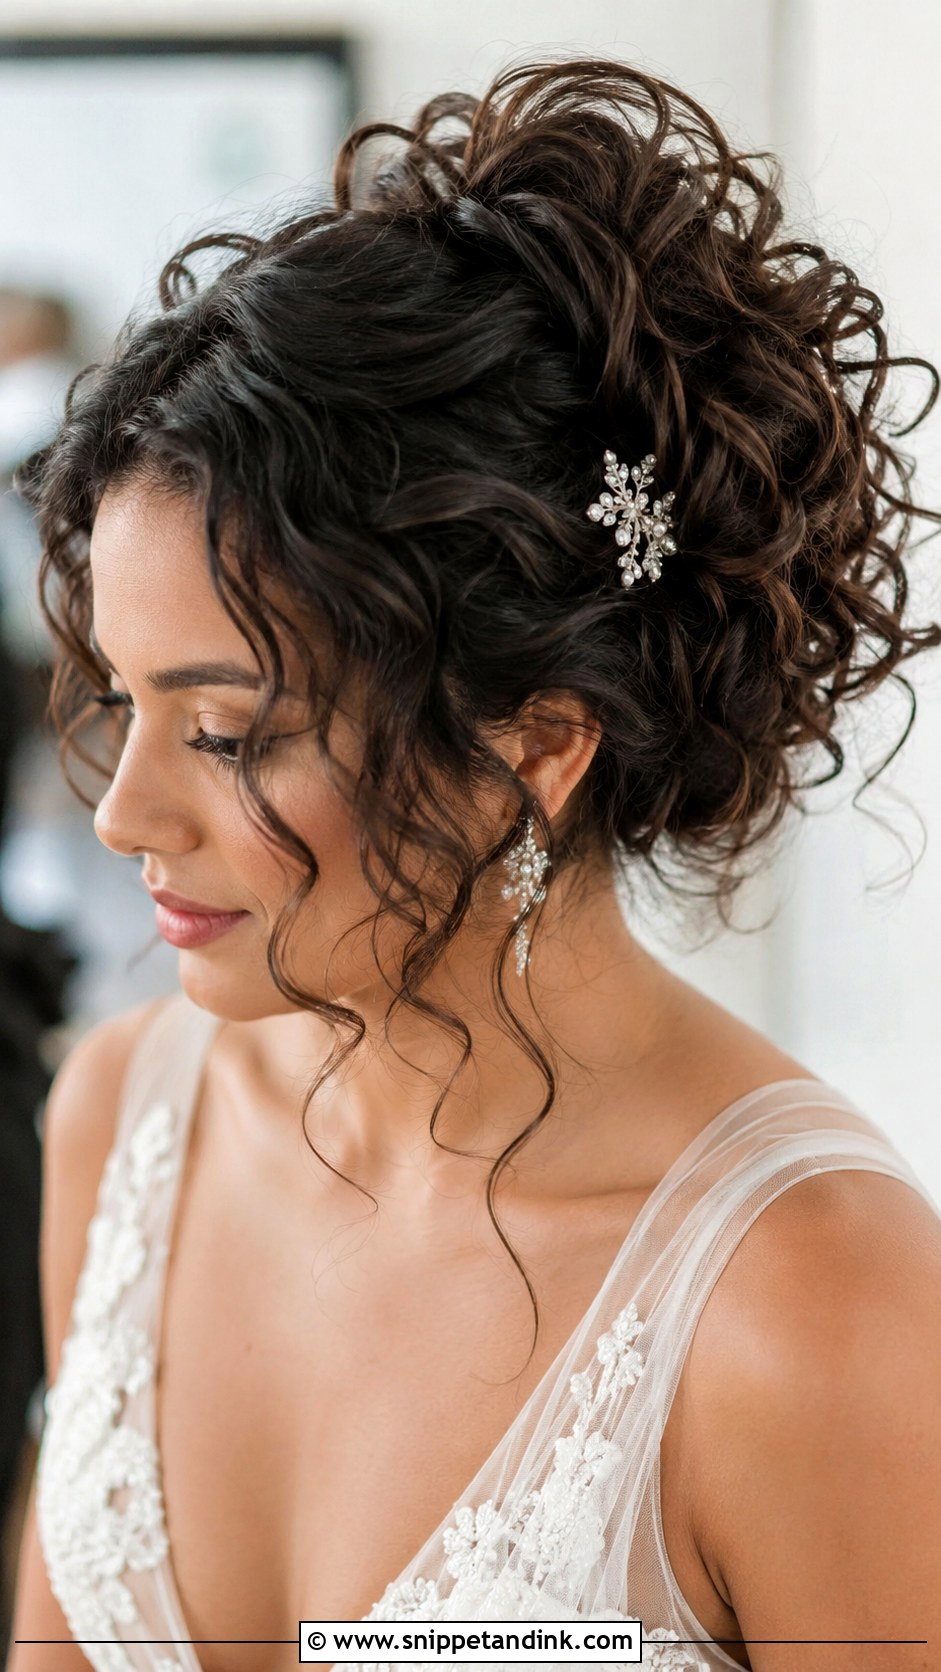
Natural curls give this updo its volume, so there’s no reason to straighten them and curl them again. Pin the curls loosely toward the back and let a few frame the face. I work with curls in their set state, never brushed out, and I use pins that match the hair colour closely, because pins show more in curly hair than in sleek styles. Wash and condition two days ahead rather than the morning of, so the pattern has settled. A sparkly clip or a flower at the side is plenty, and you’ll look like yourself in the photos.
17. Vintage Roll Updo
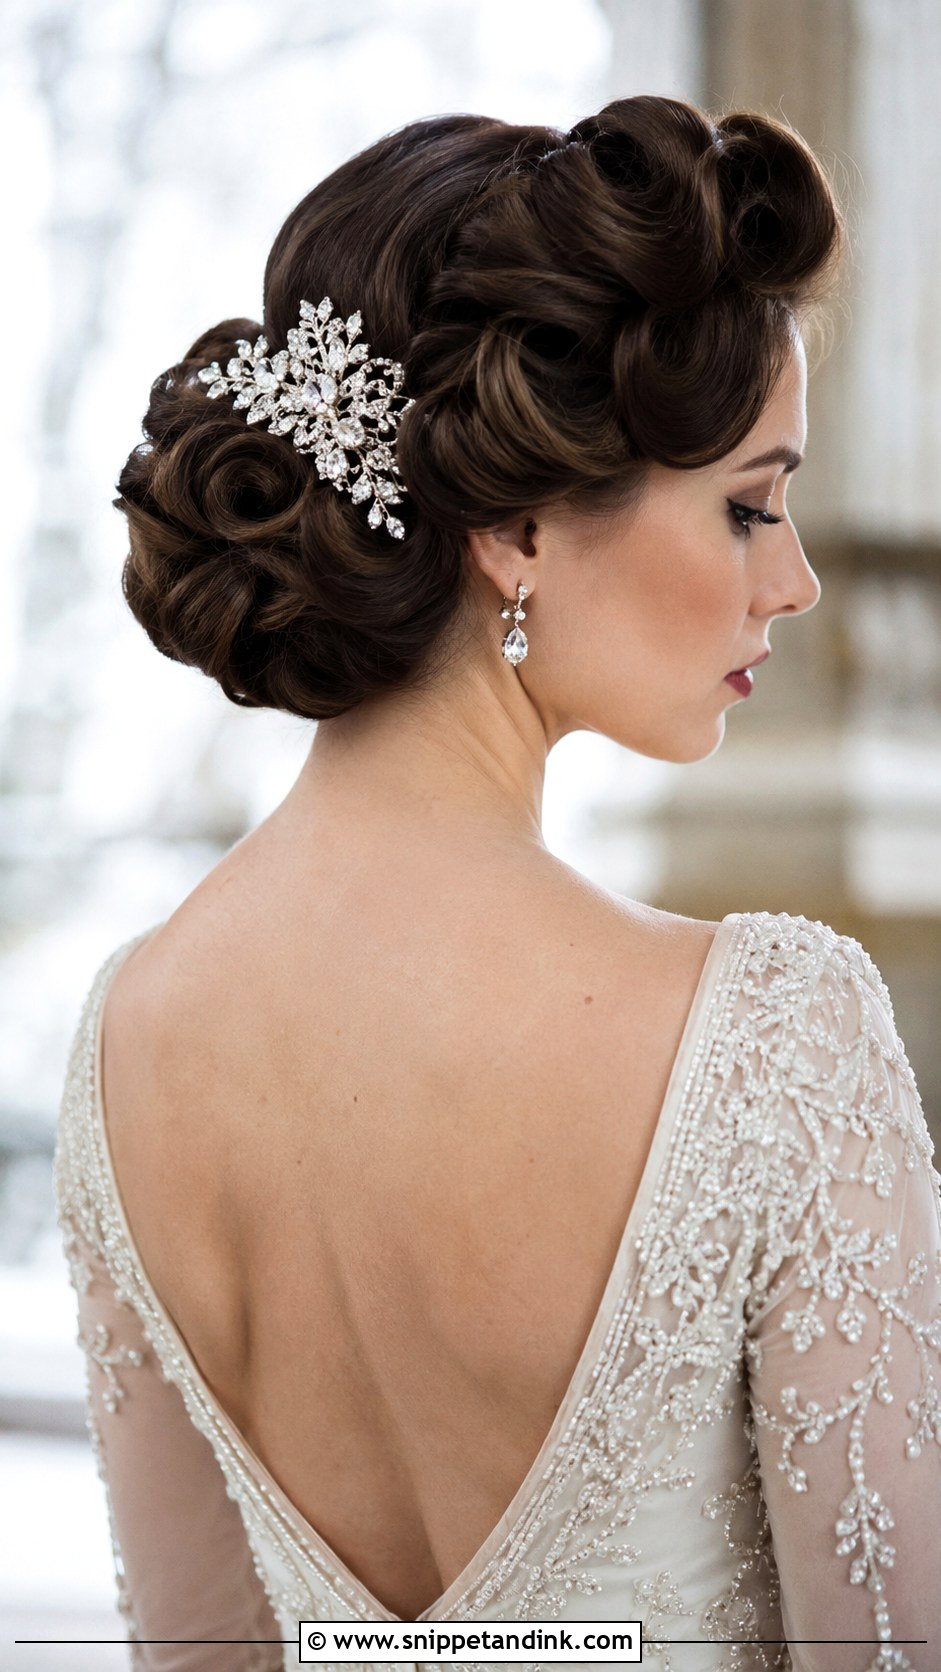
Rolls are the old Hollywood option, and medium hair is honestly the ideal length for them. Roll sections under or upward and pin them into a structured shape. I set the hair first with hot rollers, because rolls made from freshly washed hair collapse within the hour. The pins go inside the roll, angled into its base, so none of them show. A decorative comb or a jeweled pin suits a plain dress. This style needs practice more than any other here, so I wouldn’t try it for the first time on the morning.
18. Knotted Half-Up Style
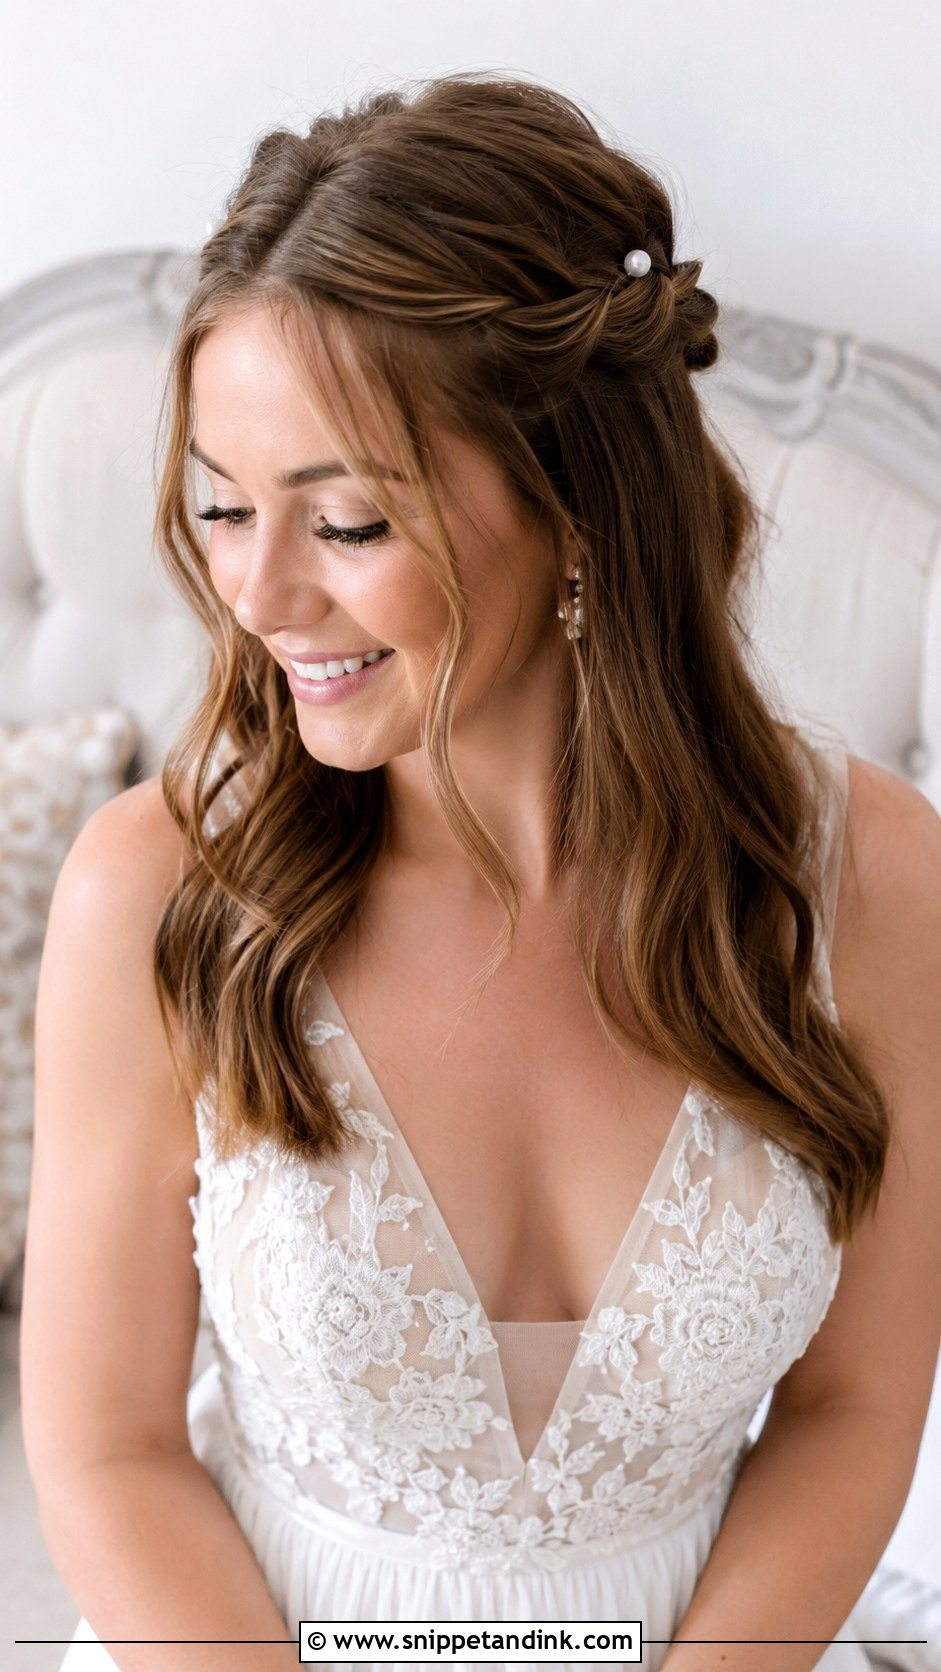
Small knots across the back give a simple half-up some detail. Take a piece from each side, tie them into a knot and pin it, then leave the rest in loose waves. A knot sounds unstable, but it actually holds better than a twist, provided you pin straight through its middle. Two or three knots stacked down the back look more finished than one. Tiny flowers or pearl pins between them suit a relaxed celebration.
19. Loose Braided Bun
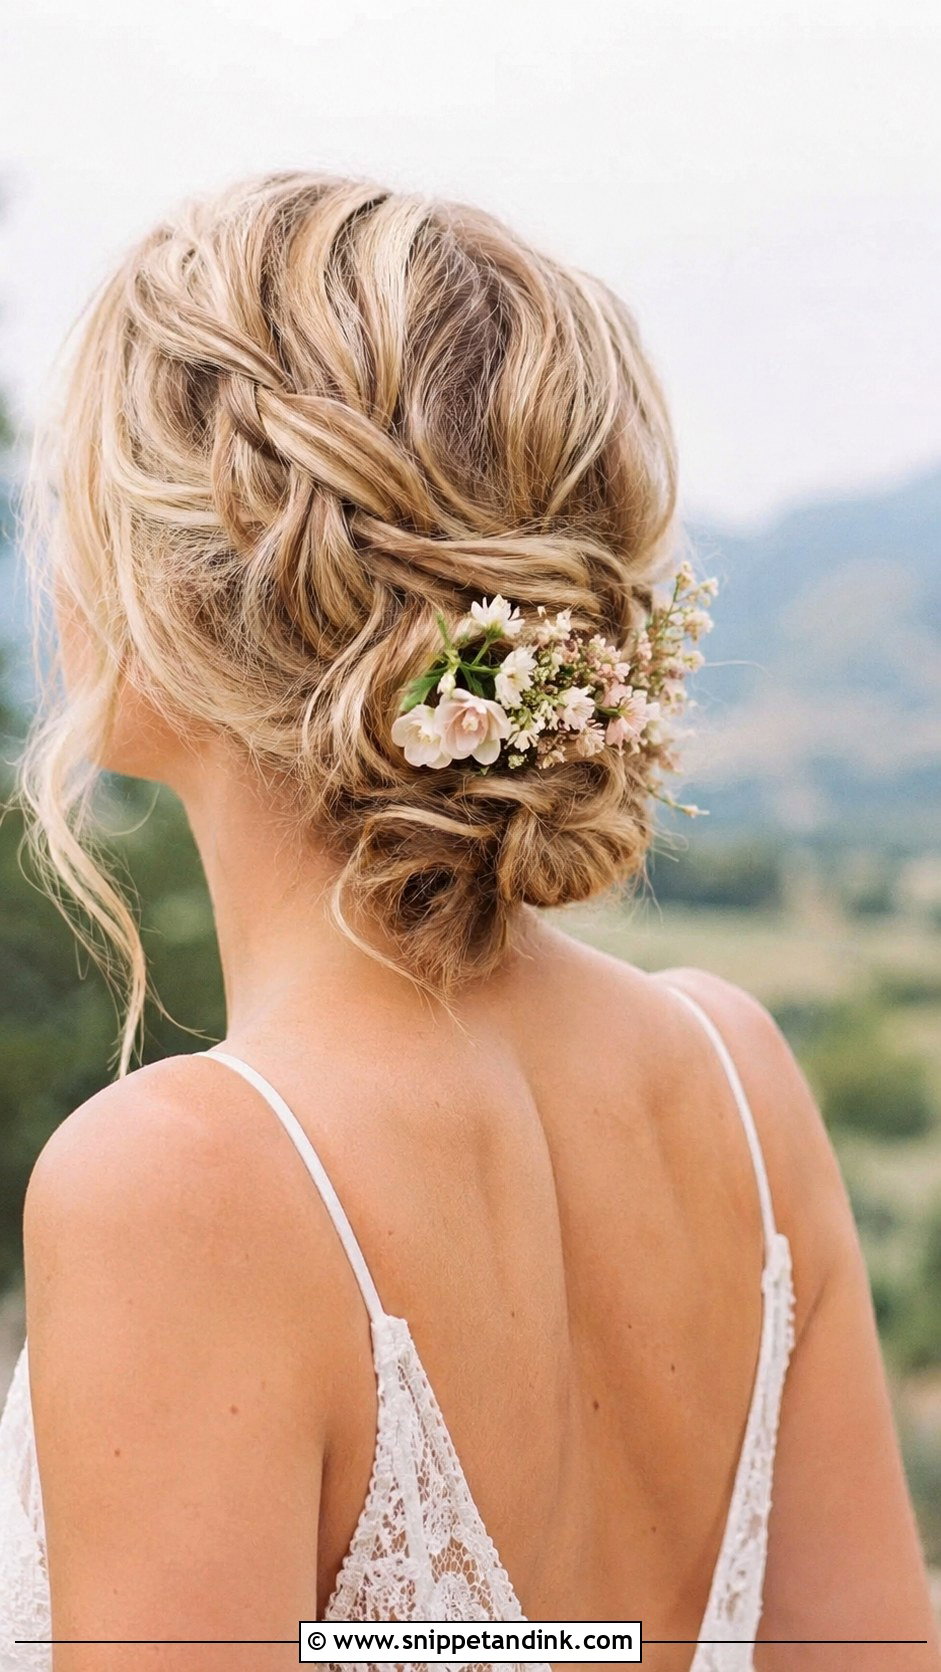
A braid coiled into a bun gives you texture without much skill. Braid loosely, coil it at the back and pin it, then pull the braid apart a little for fullness. I pin through the outer loops of the braid rather than its center, which keeps it from collapsing flat against the head. Boho and outdoor weddings suit it, and small flowers sit well in the gaps. It’s comfortable enough for hours of dancing and right at home with relaxed bridal moments.
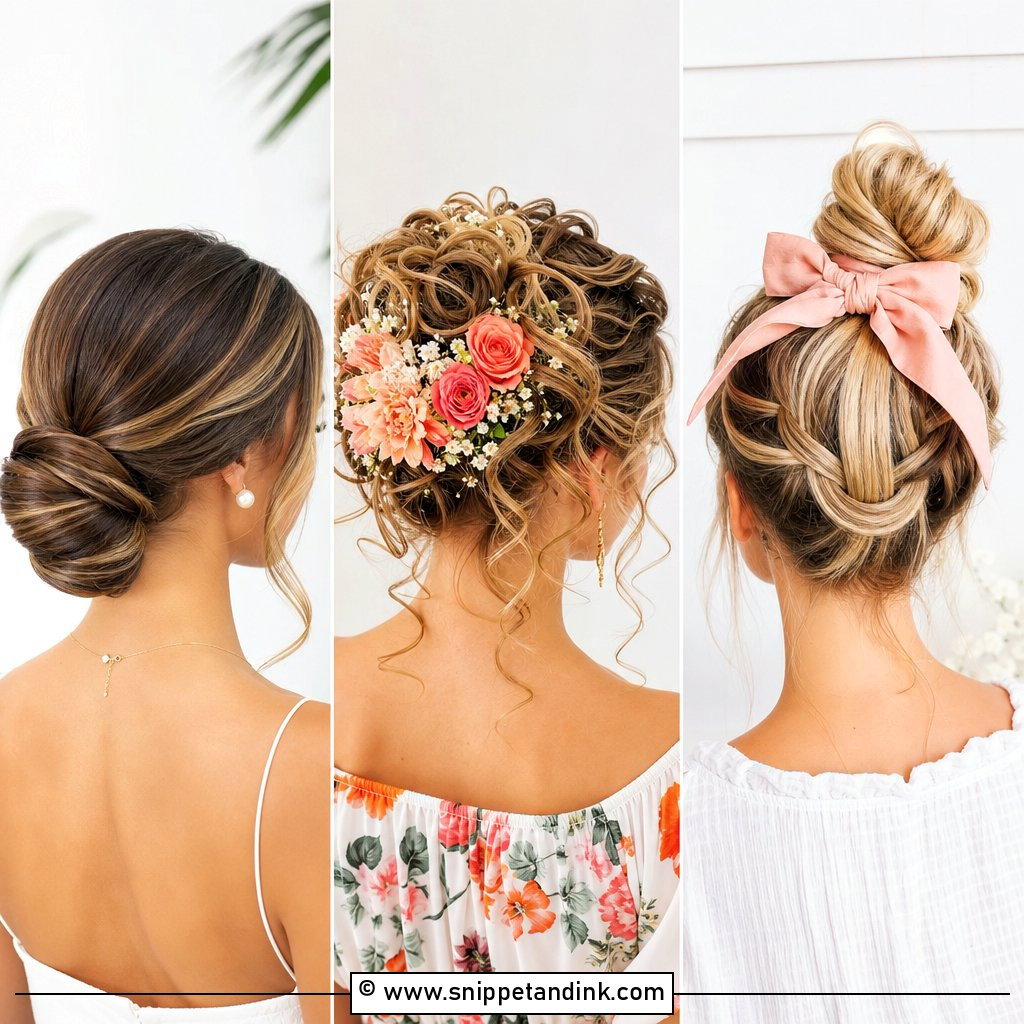
20. Twisted Updo With Side Bangs
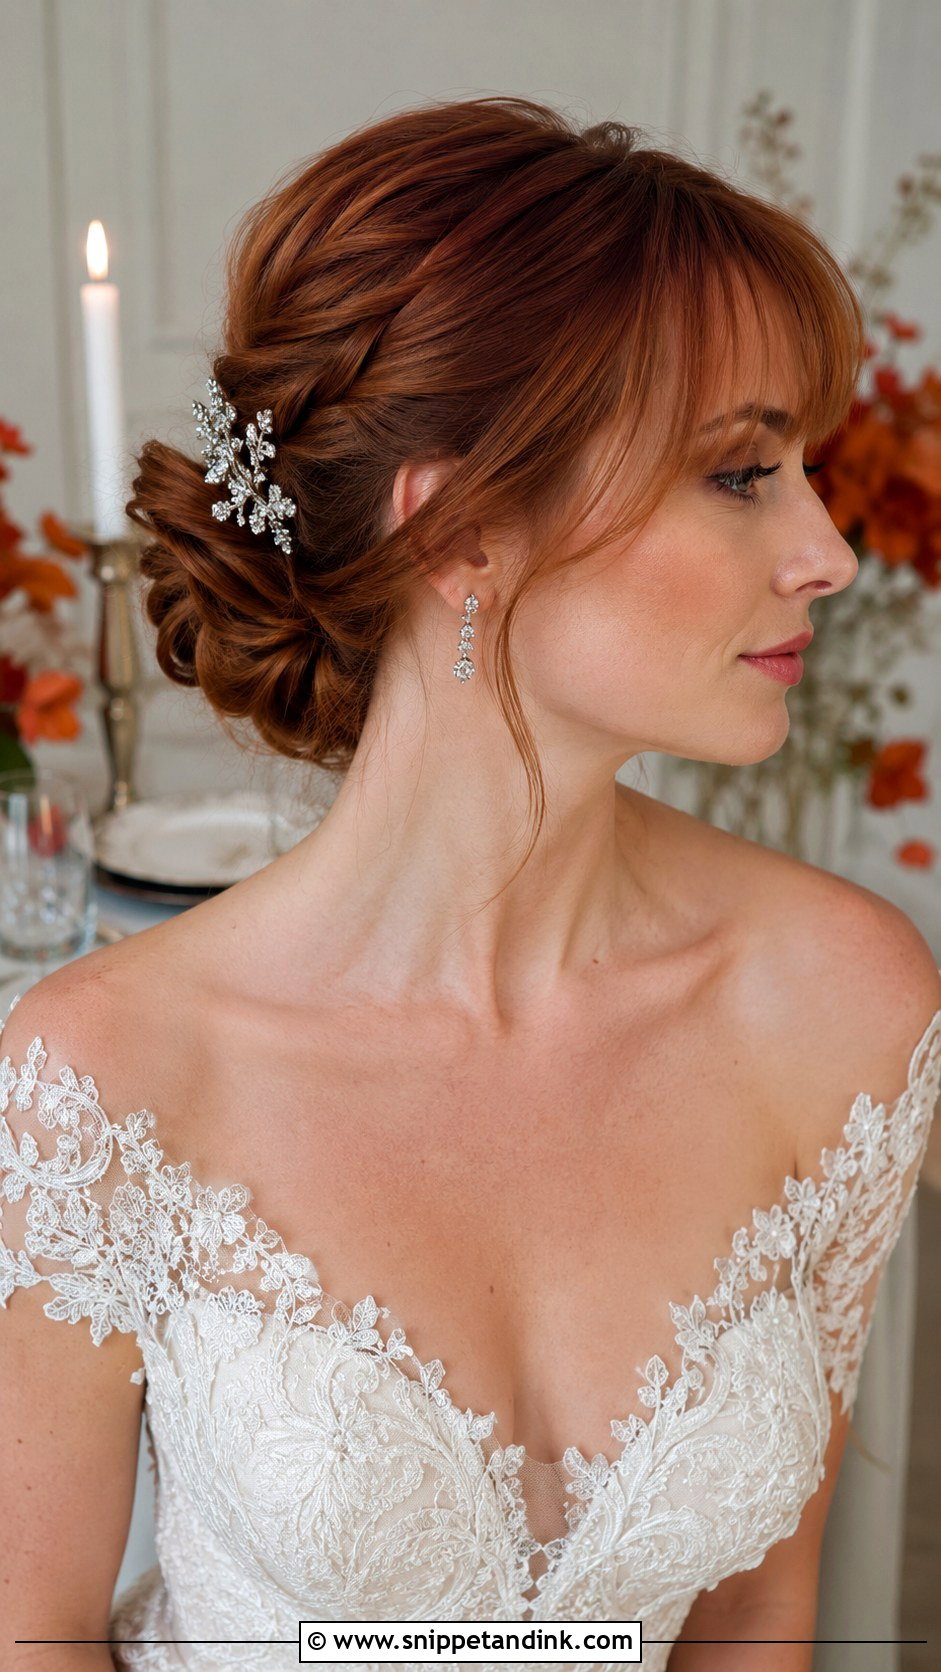
Pairing a twisted back with soft side bangs softens the whole face. Twist the hair toward the back into a low bun or knot, leaving the bangs and a few face-framing pieces free. If you don’t already wear side bangs, don’t cut them the week before the wedding; a long front piece curled away from the face gives a similar effect with no risk. I blow-dry bangs in the direction they’ll be worn and set them with a little spray. Finish with a sparkly clip near the twists.
Layers, Nape Wisps and Other Escape Artists
Medium cuts are often layered, and layers are the main reason a bun looks frayed by mid-afternoon. The shortest pieces can’t reach the center of the shape, so they spring out the moment you move. I deal with them in one of two ways: I twist them into small sections and pin them before building the bun, or I accept them and curl them so they look intentional.
The nape is the other weak spot. Fine hairs along the neckline won’t stay in a high style, and they show in every photo taken from behind. A small amount of pomade on a clean toothbrush smooths them; anything heavier makes them look wet.
If it starts slipping during the reception
Don’t pull pins out to fix it. Slide a fresh pin in at an angle through the loose section and into the hair underneath, then mist it. Give your maid of honour four pins and a mini spray; that’s usually all the repair a medium-length updo needs.
Practise Twice Before the Wedding Week
If you’re doing your own hair, try your chosen style at least twice, ideally two or three weeks out, and wear it for several hours each time. That tells you which pins dig in, whether the bun drops when you lean back in a chair, and how the shape sits with your veil or headpiece. Take photos from the back and both sides, since a mirror flatters symmetry. If a style still isn’t holding by the second attempt, swap to a simpler one from this list rather than practising the night before.
Your Length Is Easier to Pin Than You Think
Medium hair is long enough to hold a bun, twist or roll, and short enough that the pins aren’t fighting heavy weight all evening. Shortlist two or three styles, try each once at home with your actual accessories, and photograph them from the back and side. Personal touches like fresh flowers, pearl pins or a clip that belonged to your mother are worth adding. What matters most is that it still feels comfortable and like you once the dancing starts.
You'll Like These Ideas:


Leave a Reply