
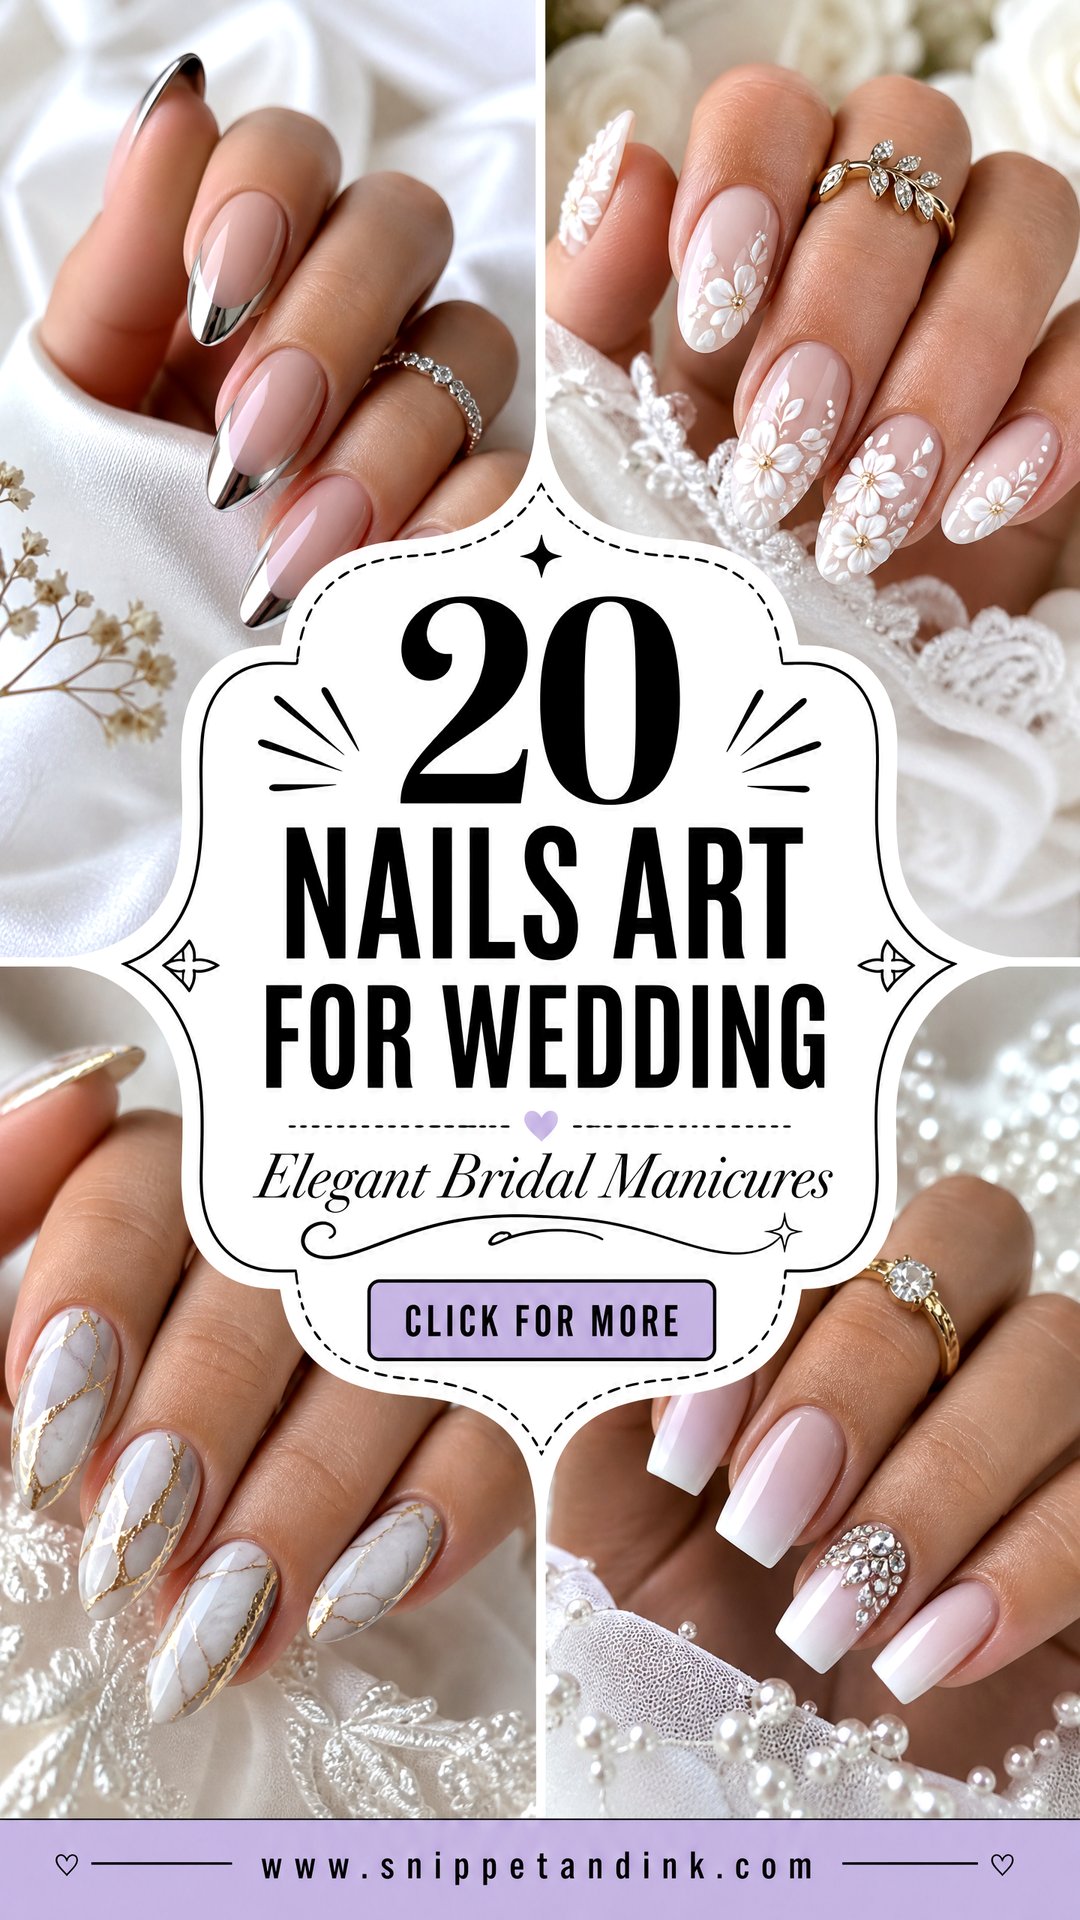
A wedding manicure gets looked at more closely than almost anything else you wear. Guests reach for your left hand, the photographer shoots the ring at a few centimetres, and you’ll be holding a bouquet stem for hours. So the sets below are the ones I’d actually put on a bride: soft French work, milky and chrome finishes, pearls, lace, floral painting and a little sparkle, each with a note on how it wears and who it suits. Most of them translate easily for bridesmaids or a mother of the bride, too, usually by keeping the base and dropping the accent nail.
What Your Bridal Set Should Be Made Of
Before we talk designs, decide what the set is made of, because that decides how much of the art survives. Regular polish is fine for a guest, but on a bride I wouldn’t trust it past a day or two; the tips wear down from handwashing and packing alone.
- Gel polish on healthy natural nails lasts around two weeks and is my default for anything sheer, milky or French.
- Builder gel overlay adds strength and a smoother surface. I’d use it under chrome, pearls and rhinestones, or on nails that peel and split.
- Extensions are worth it only if you’ve worn length before. A first-time set the week of the wedding is how people end up with a lifted nail on the day.
- Press-ons are a decent backup in your emergency kit, sized and filed beforehand, but they’re rarely as secure through a full day of hugging and lifting.
For timing, I book the final appointment two or three days before the wedding. Gel is fully settled by then, any small lift has time to show up and be fixed, and the cuticles have calmed down after being pushed back. The day before is risky. If something goes wrong, there’s no room left to correct it.
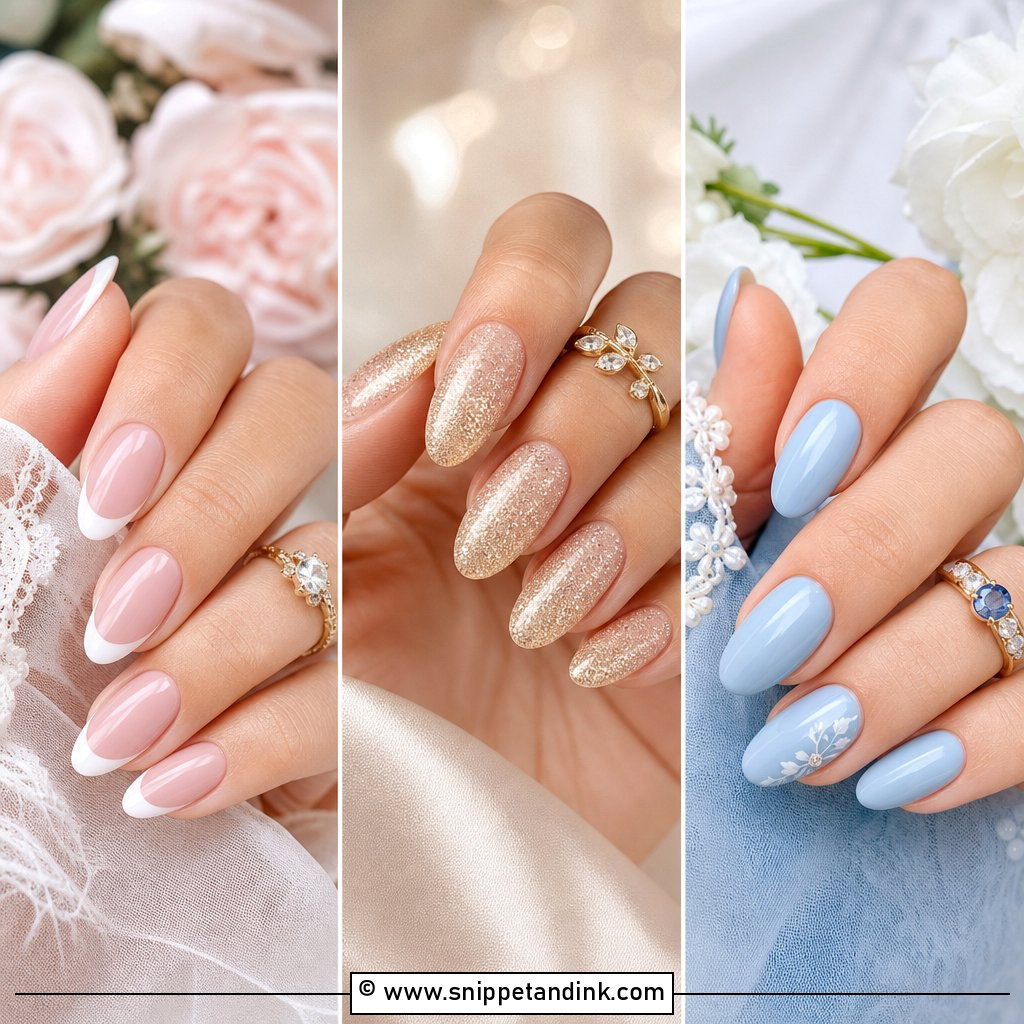
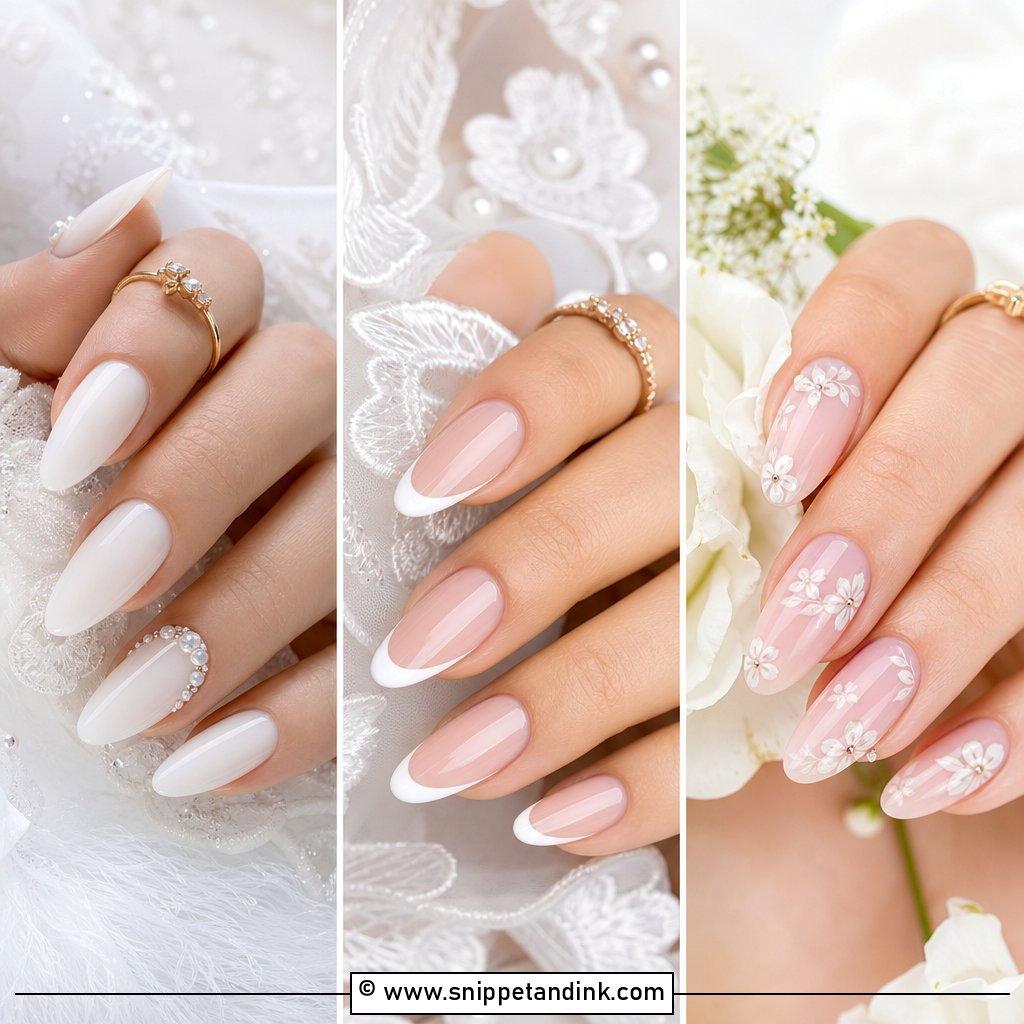
1. Classic French Wedding Nails
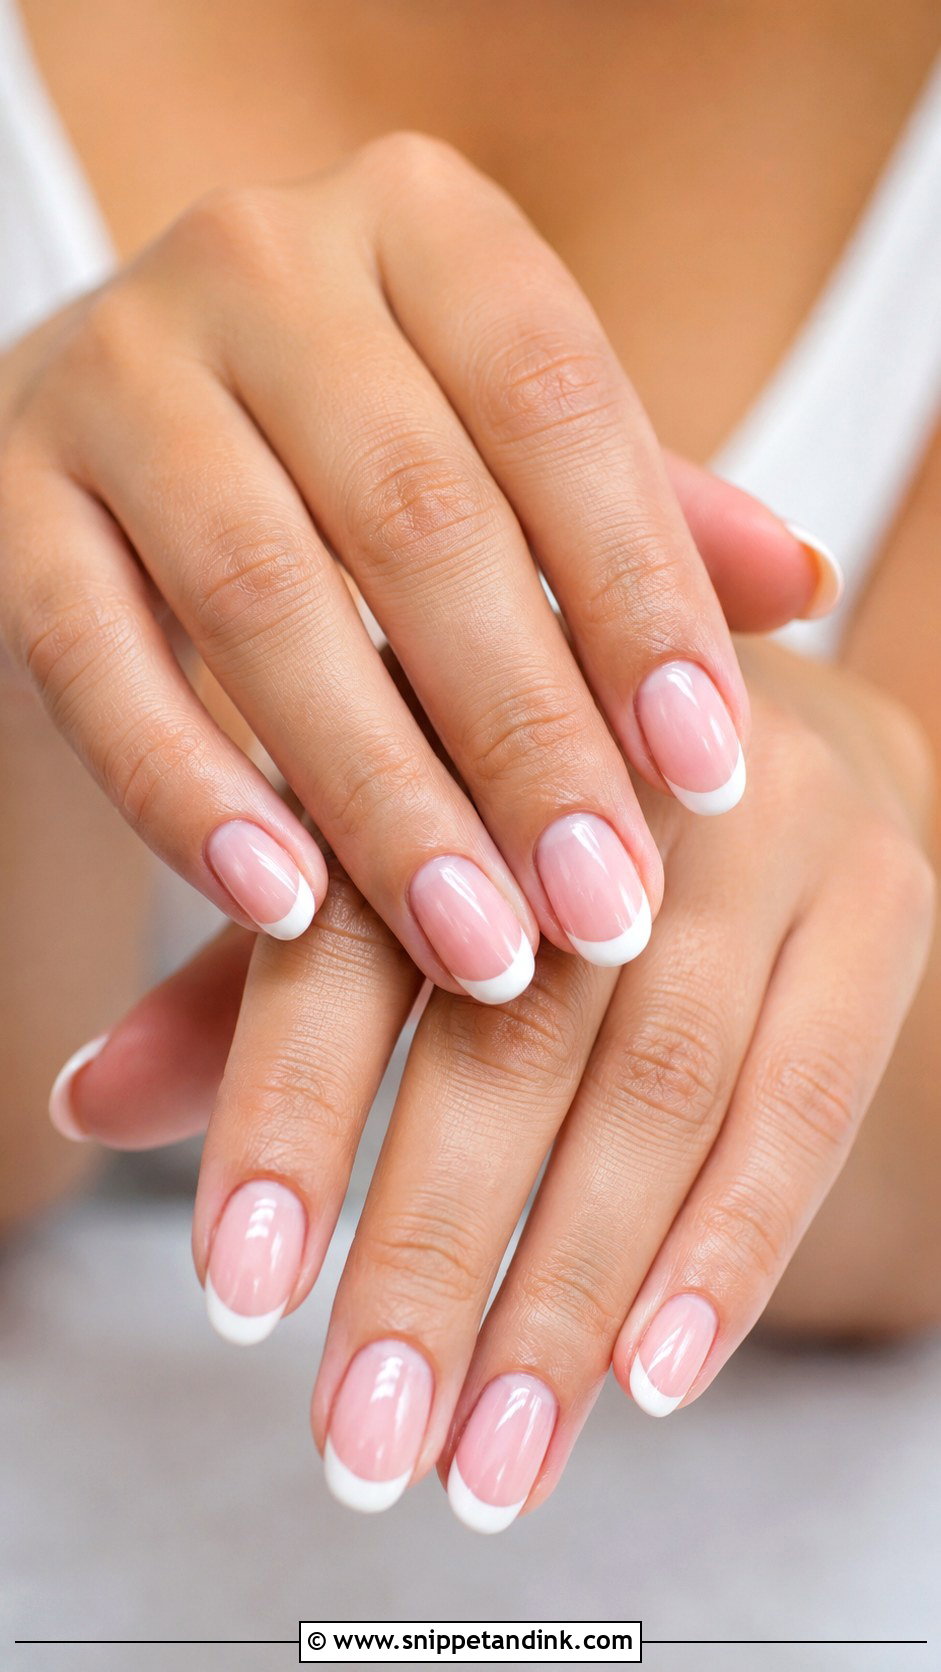
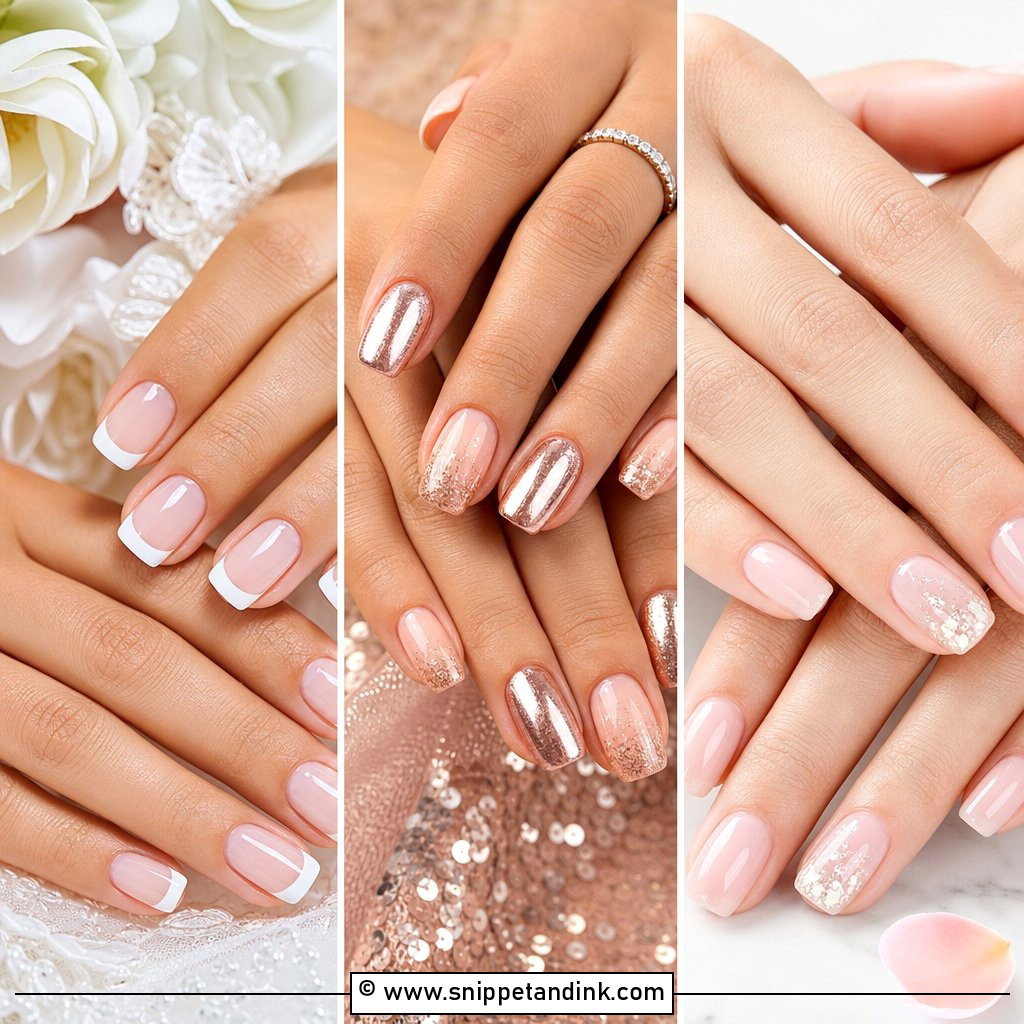
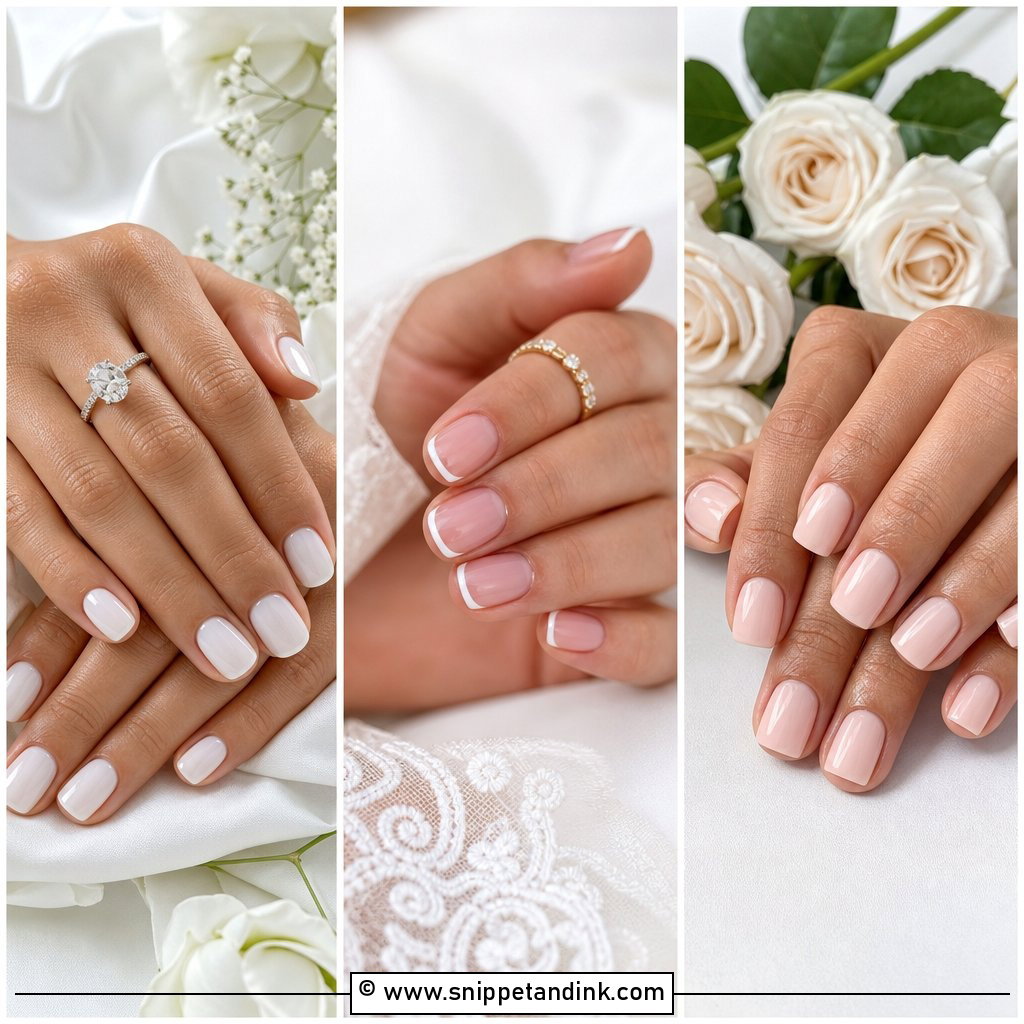
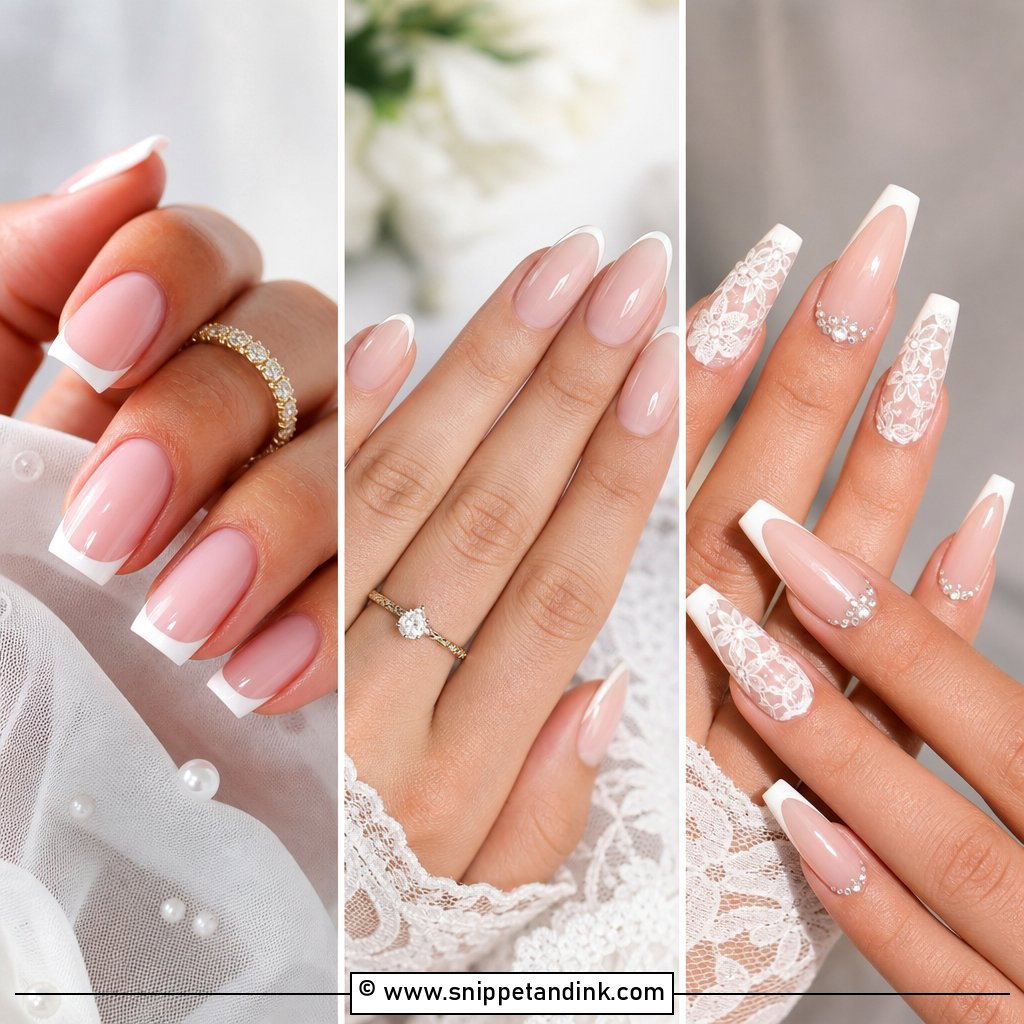
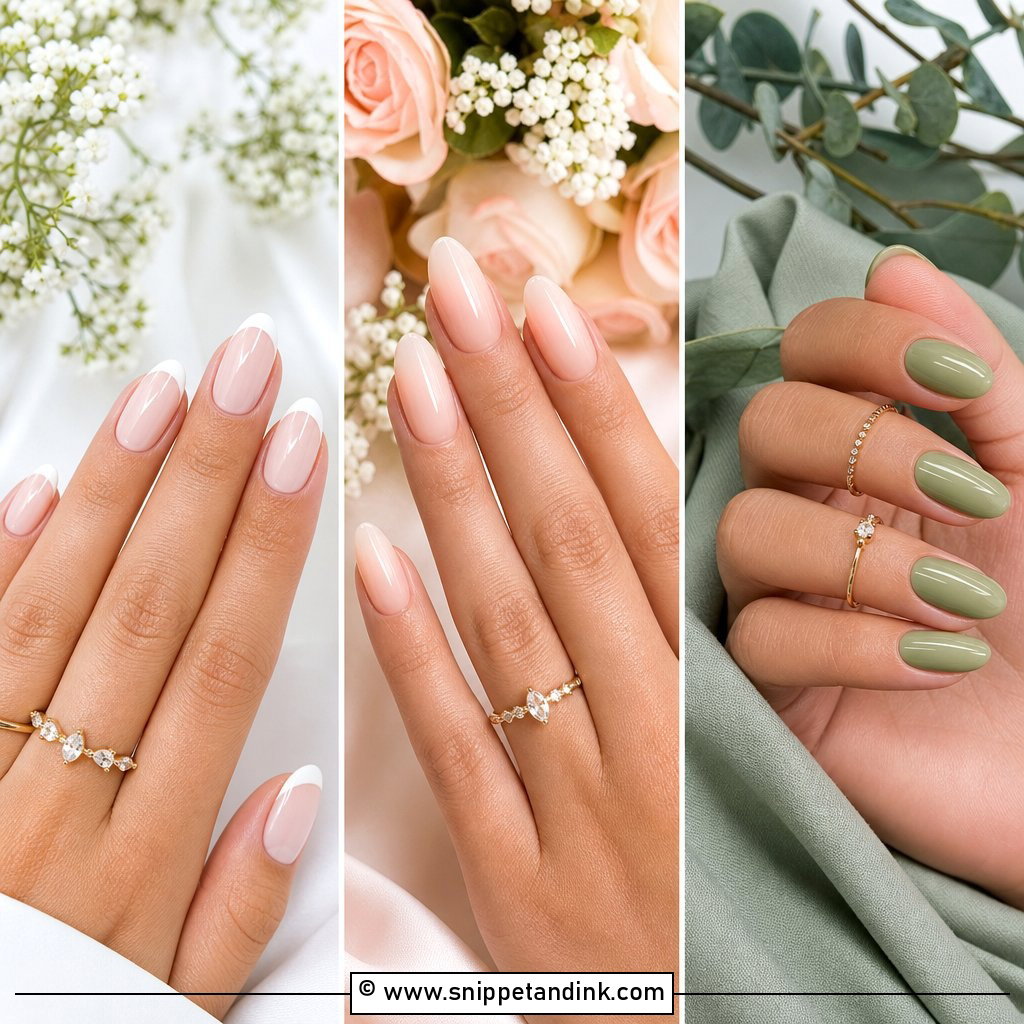
The French is still the set I’m asked for most, and the smile line is where it lives or dies. On a short nail bed I paint the white lower and thinner so the pink section reads longer; a thick tip on a short nail makes the whole finger look stubby. If you want it softer, ask for a slightly diffused line rather than a razor edge, which also forgives a bit of regrowth by the end of the week. Oval, almond and squoval all carry it, and it sits quietly next to almost any ring.
2. Milky White Wedding Nails
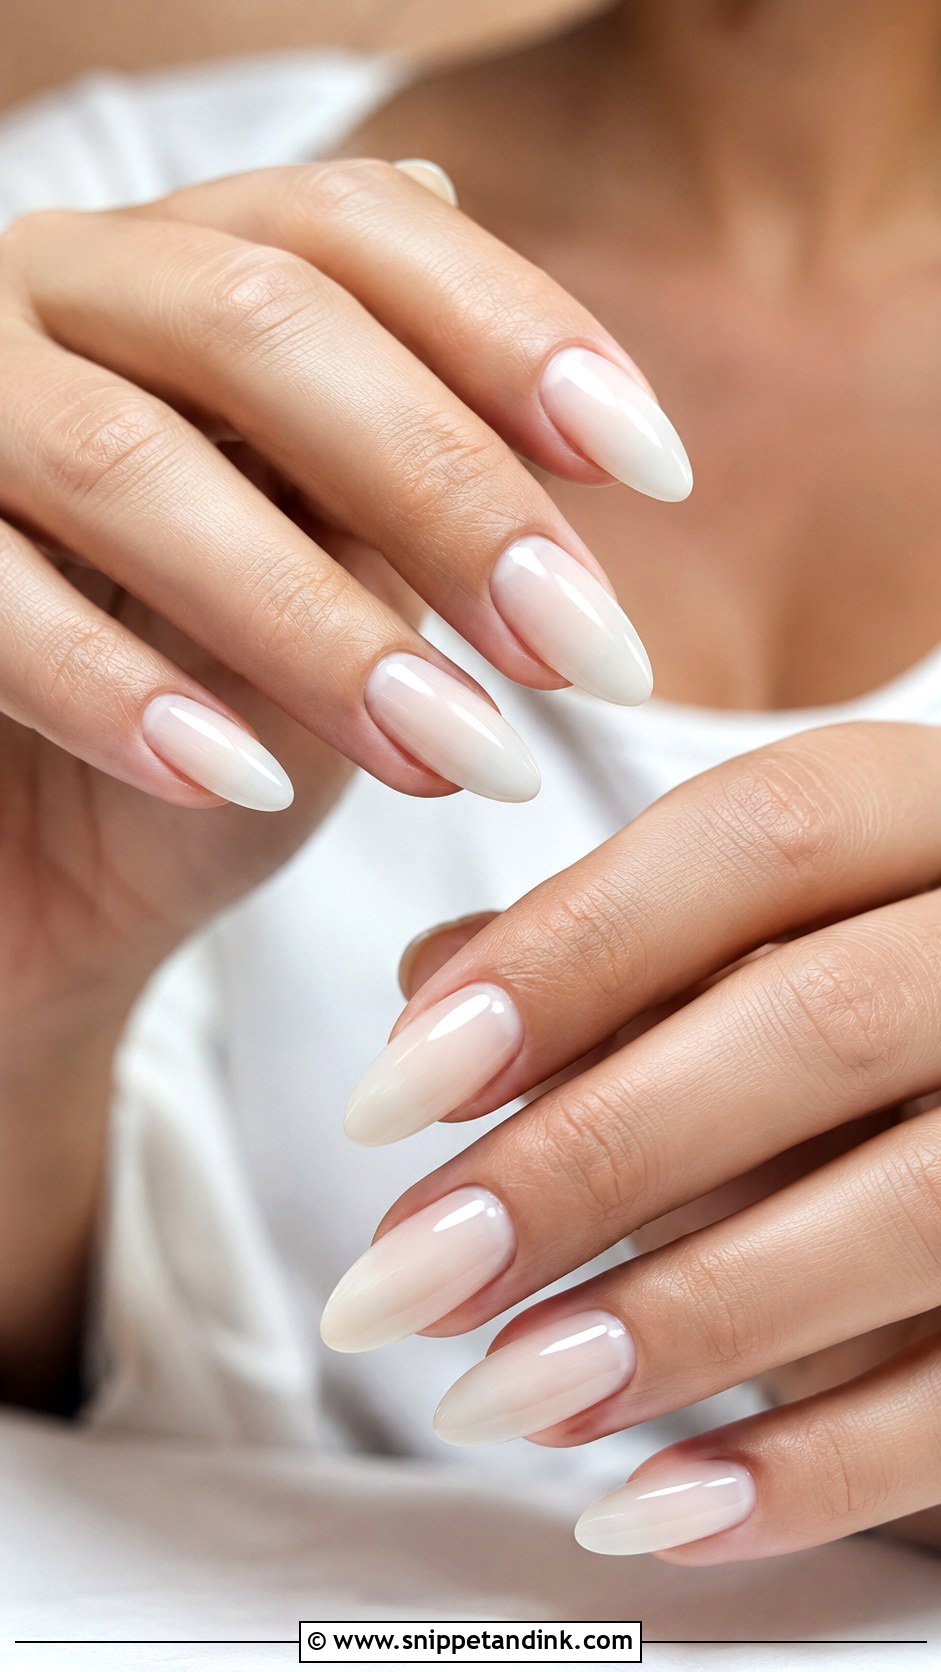
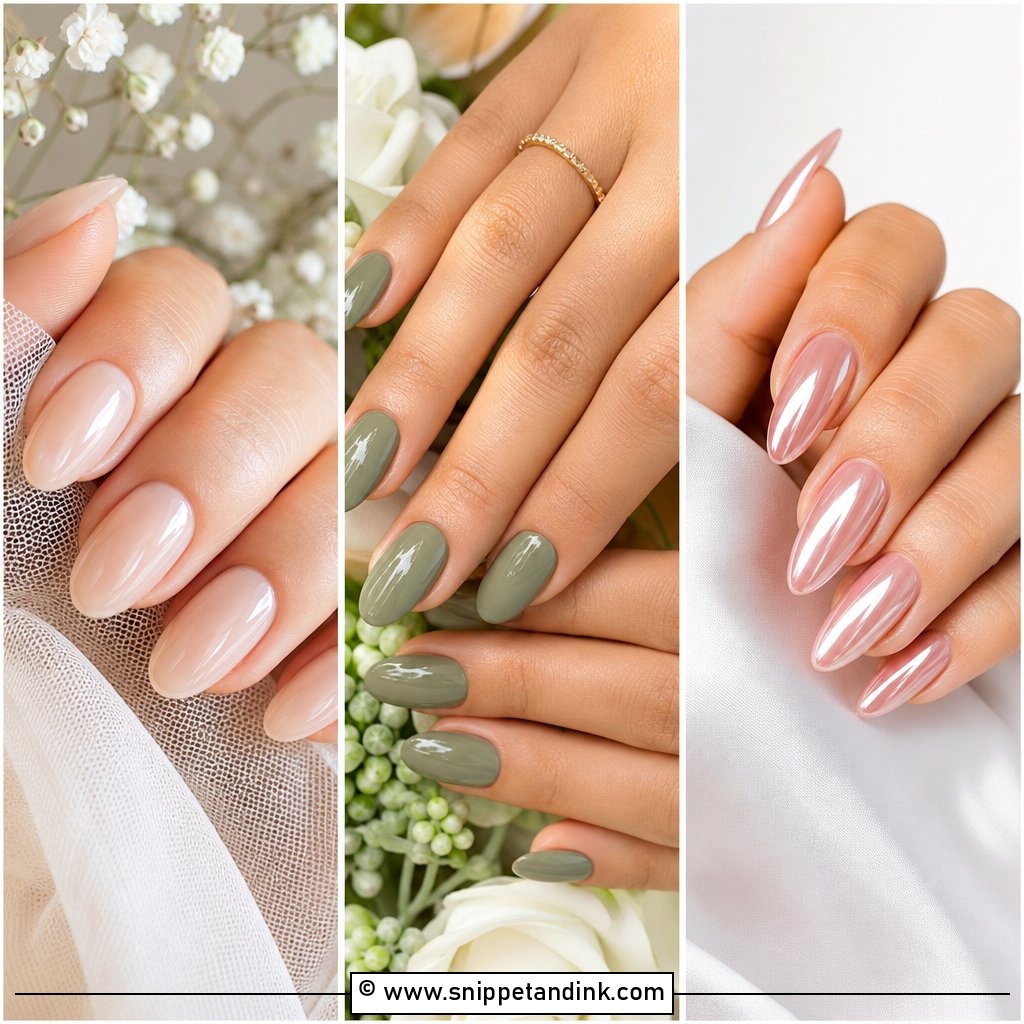
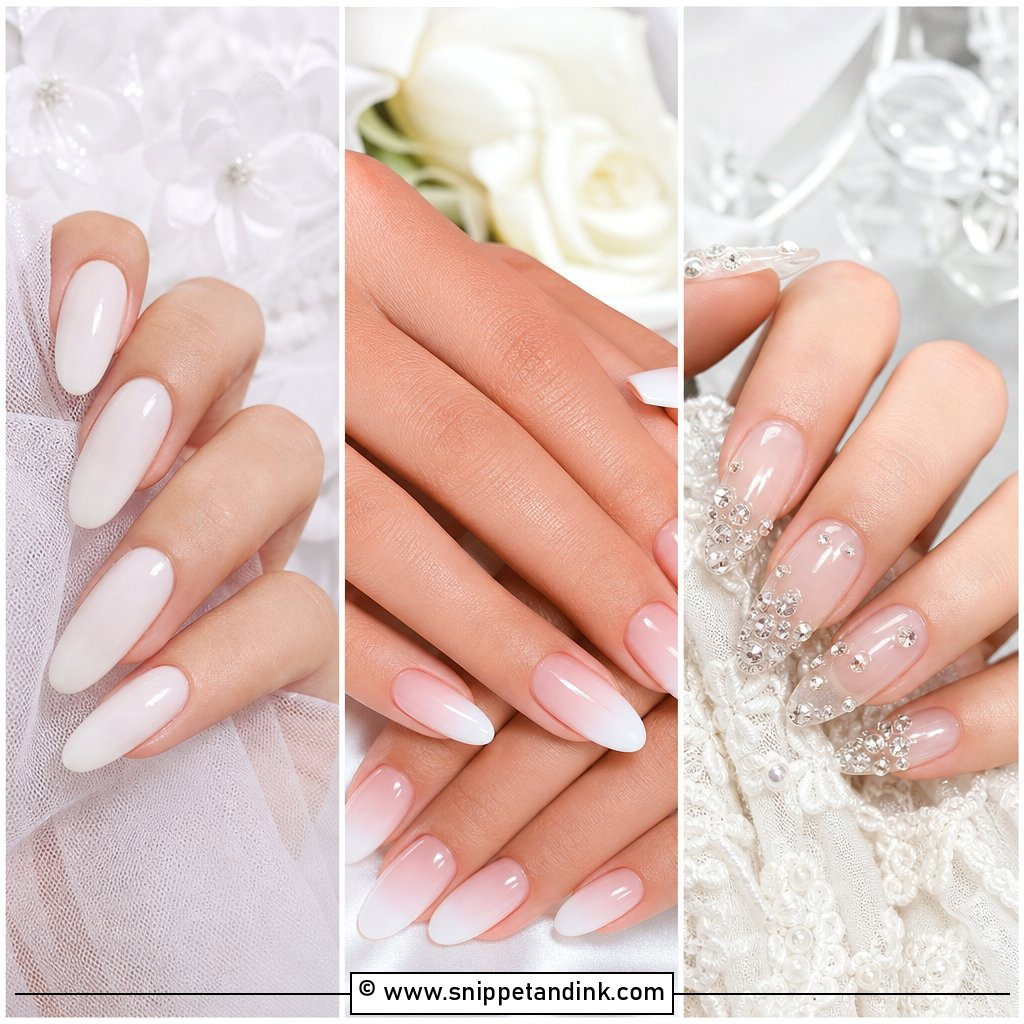
Milky white is sheer enough that you still see a hint of the nail underneath, which is exactly why it looks soft instead of like correction fluid. I build it in two or three thin coats; one thick coat goes streaky and pools at the sidewalls. Check it against your actual dress fabric before you commit, because next to a warm ivory gown a cool milky white can look slightly blue. It suits short nails well, since it doesn’t need length to look finished.
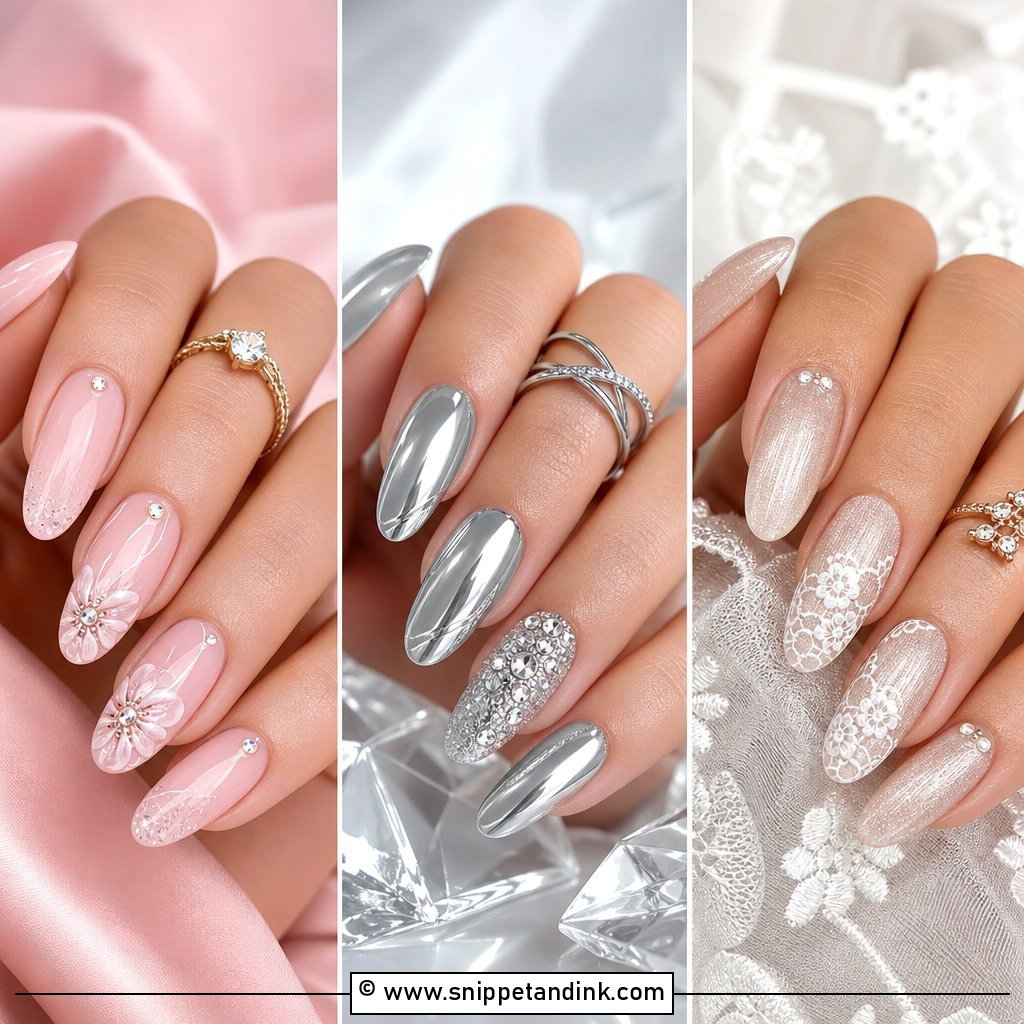
3. Pearl Wedding Nails
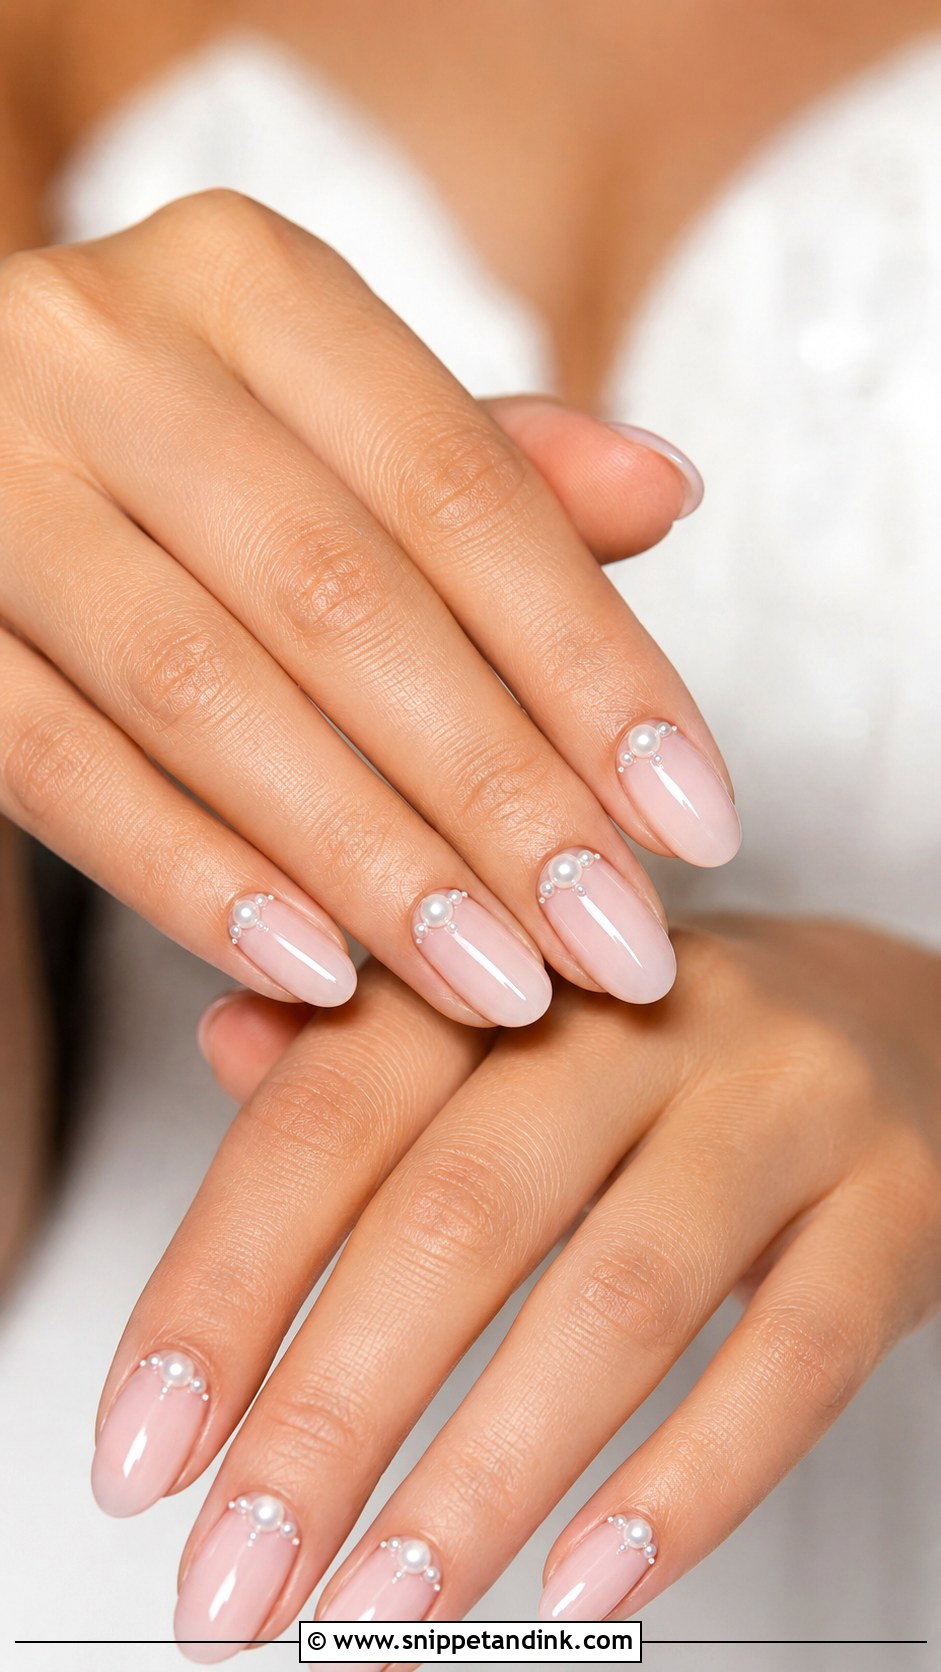
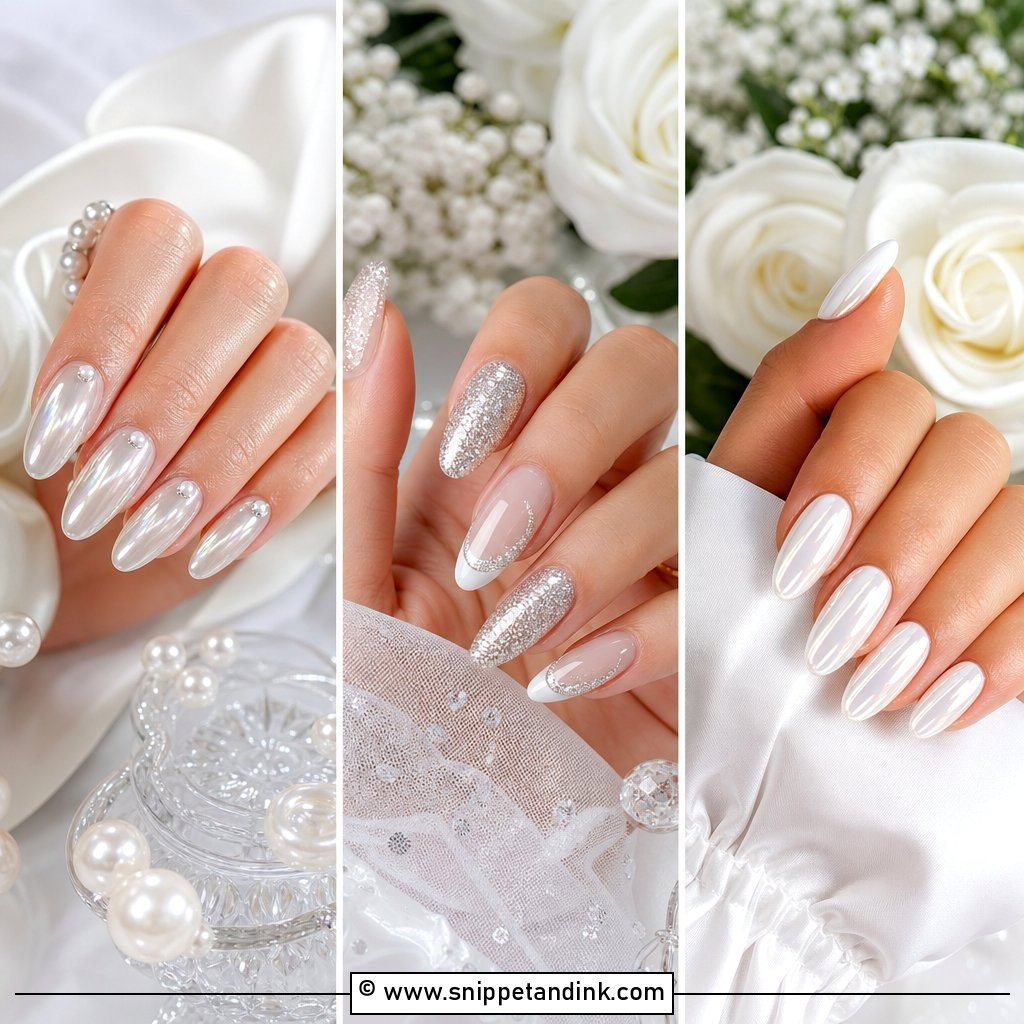
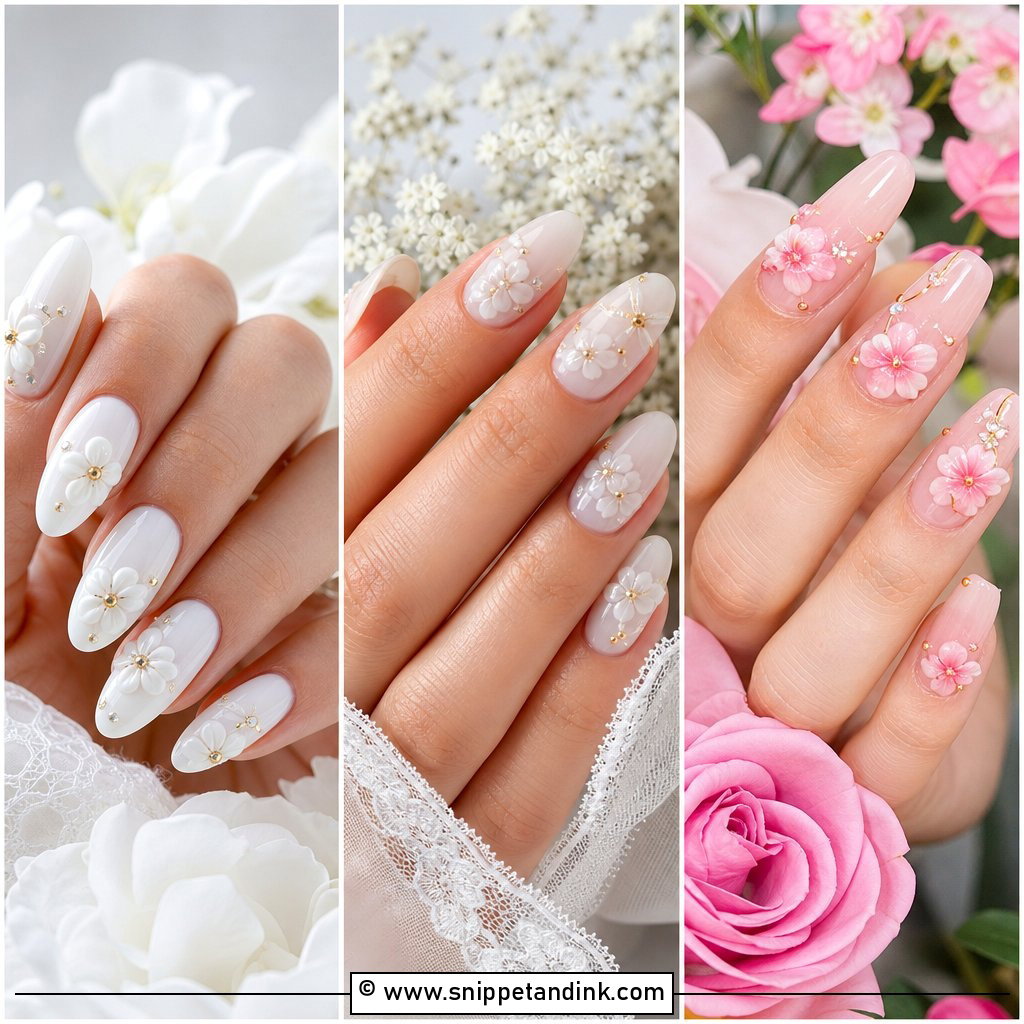
Pearl work starts with a quiet base, usually sheer nude or milky white, and then one or two nails get tiny half pearls near the cuticle or along the tip. Restraint matters here. Five pearled nails look like costume; two look like jewellery. I set each pearl in builder gel and cap it so there’s no edge to catch on lace or a veil, and I’d still keep them off your ring finger if your engagement ring has a raised setting that knocks against the neighbouring nail.
4. Chrome French Wedding Nails
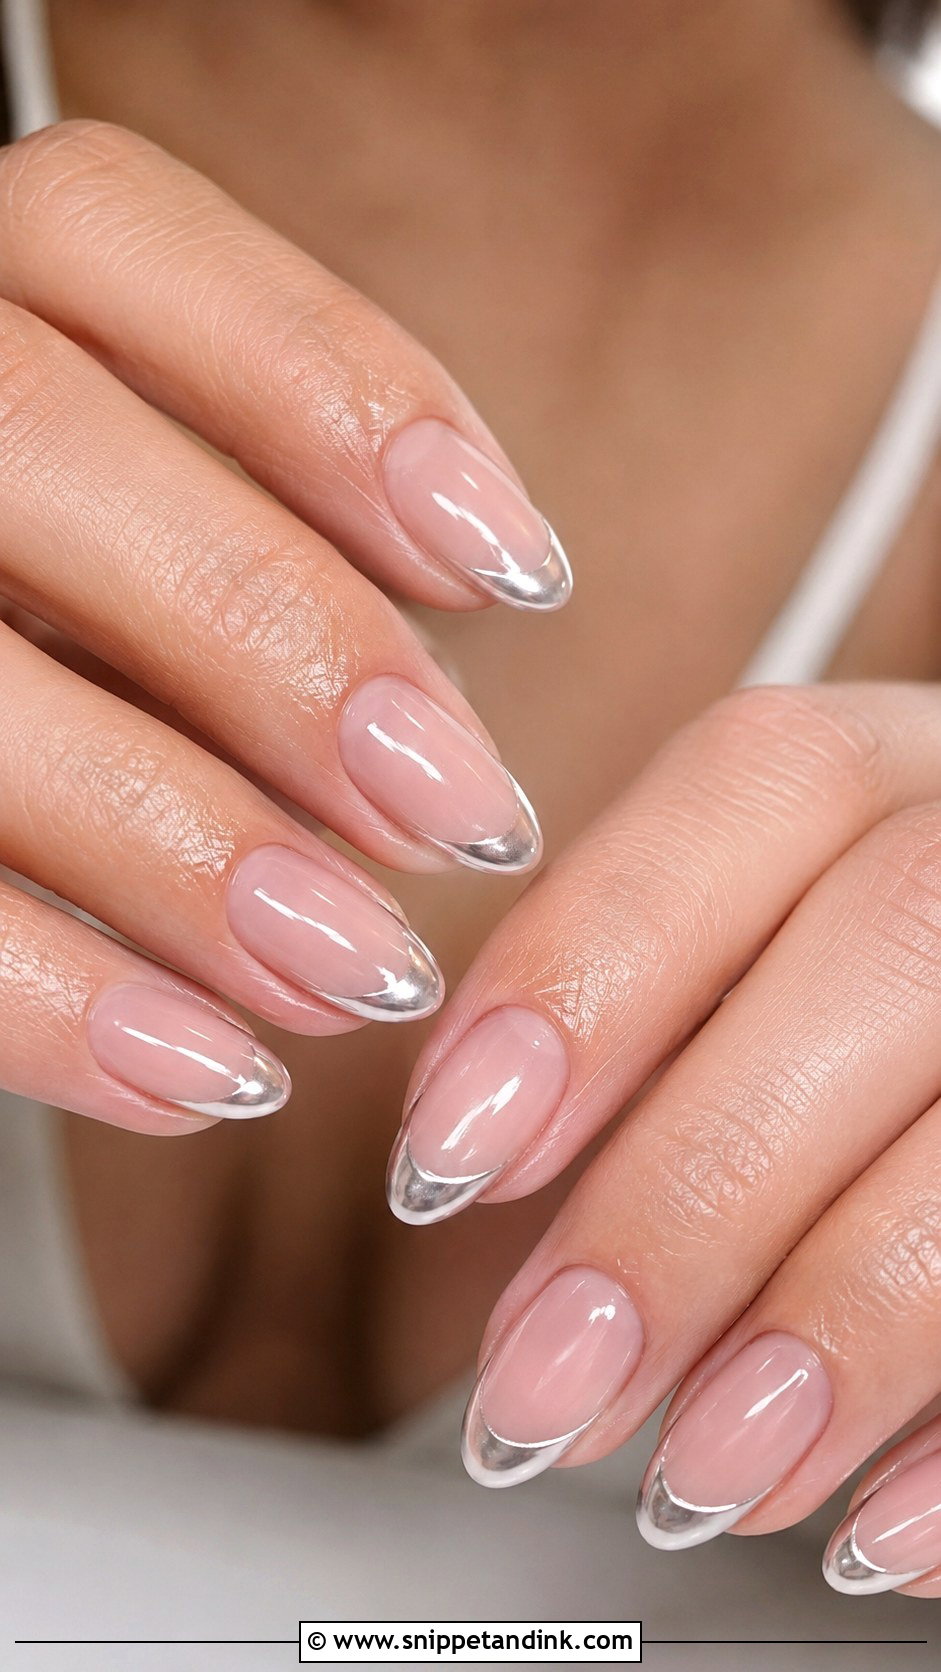
Chrome French wedding nails swap the white tip for a band of chrome powder, so the edge catches light instead of sitting flat. The trick is the no-wipe top coat underneath: chrome only burnishes properly onto a cured, tack-free surface, and if that layer isn’t fully cured you get patchy, dull tips. Pearl chrome is the gentlest version for a white dress. Silver and champagne chrome follow your metals, so I match the tip to whichever jewellery you’re wearing on the day.
5. Blush Ombre Wedding Nails
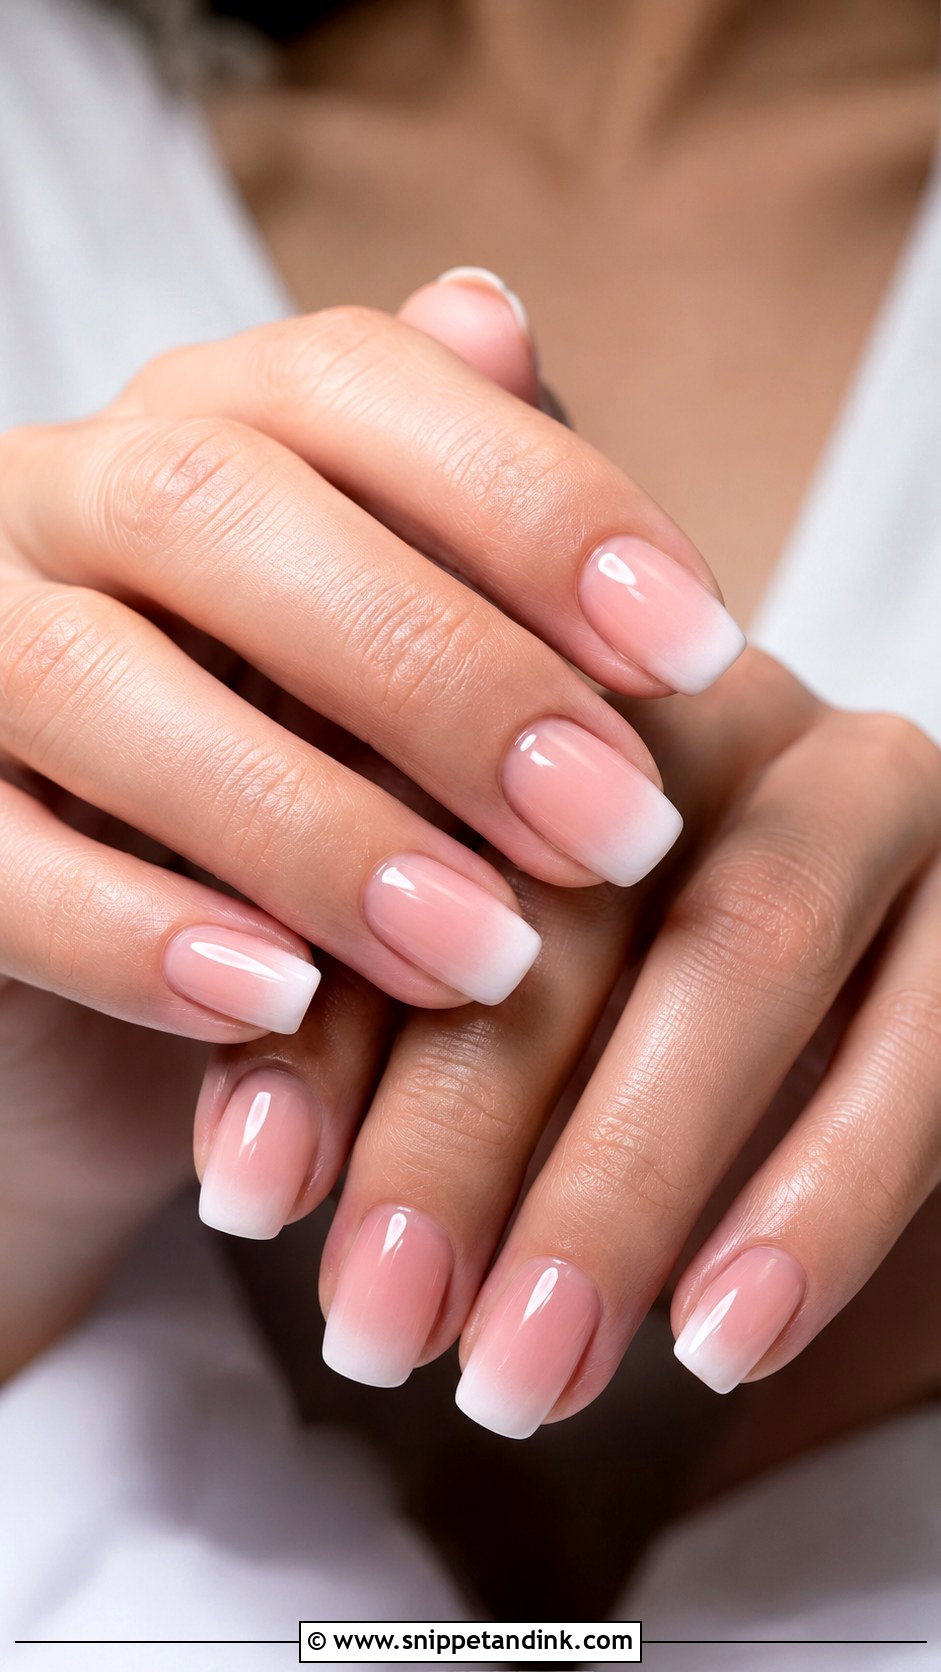
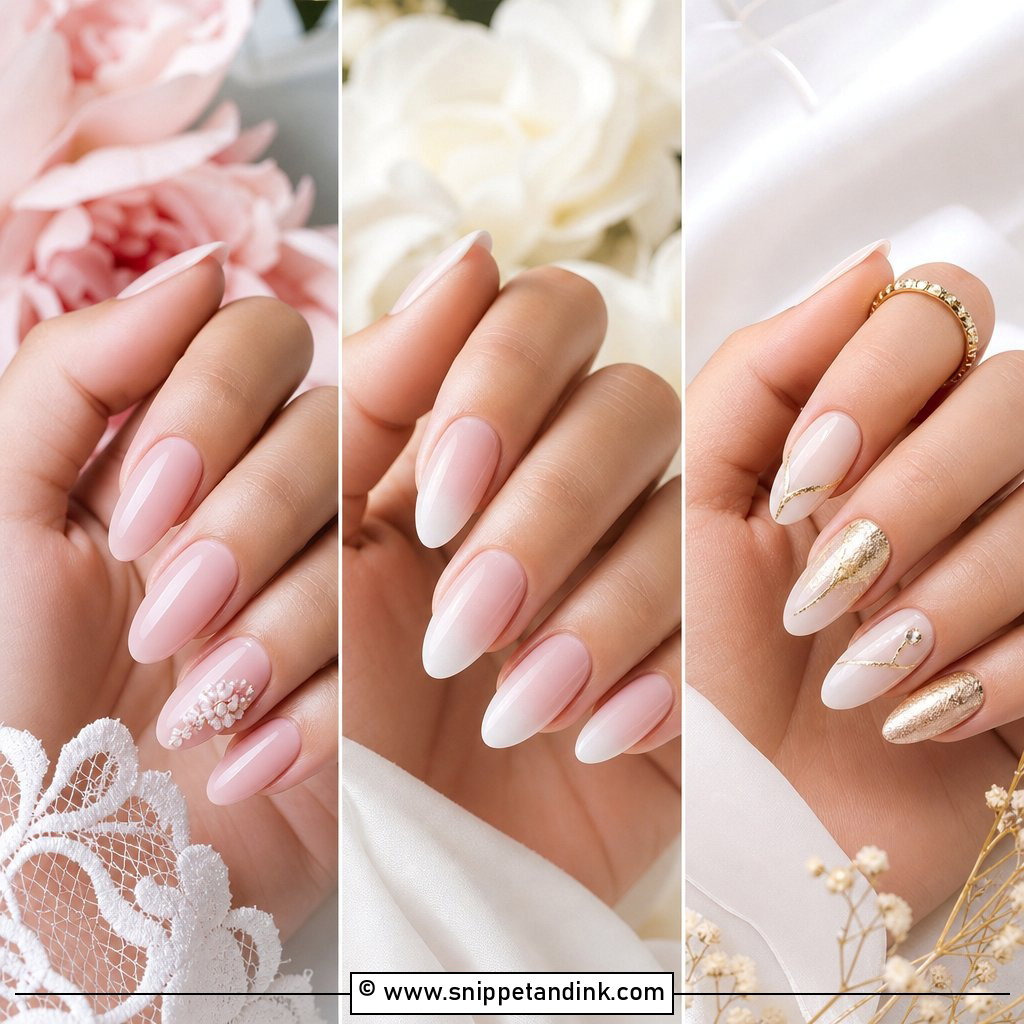
Blush ombre wedding nails, often called baby boomer nails, fade a pink or nude base into a white tip with no hard line at all. I usually blend with a sponge or a soft brush and a little extra gel, and the blend zone should sit in the middle third of the nail; push it too far down and the whole nail looks washed out. Because there’s no crisp edge, small chips at the free edge are much harder to spot, which makes this a forgiving pick for a long wedding week.
6. Lace Wedding Nails
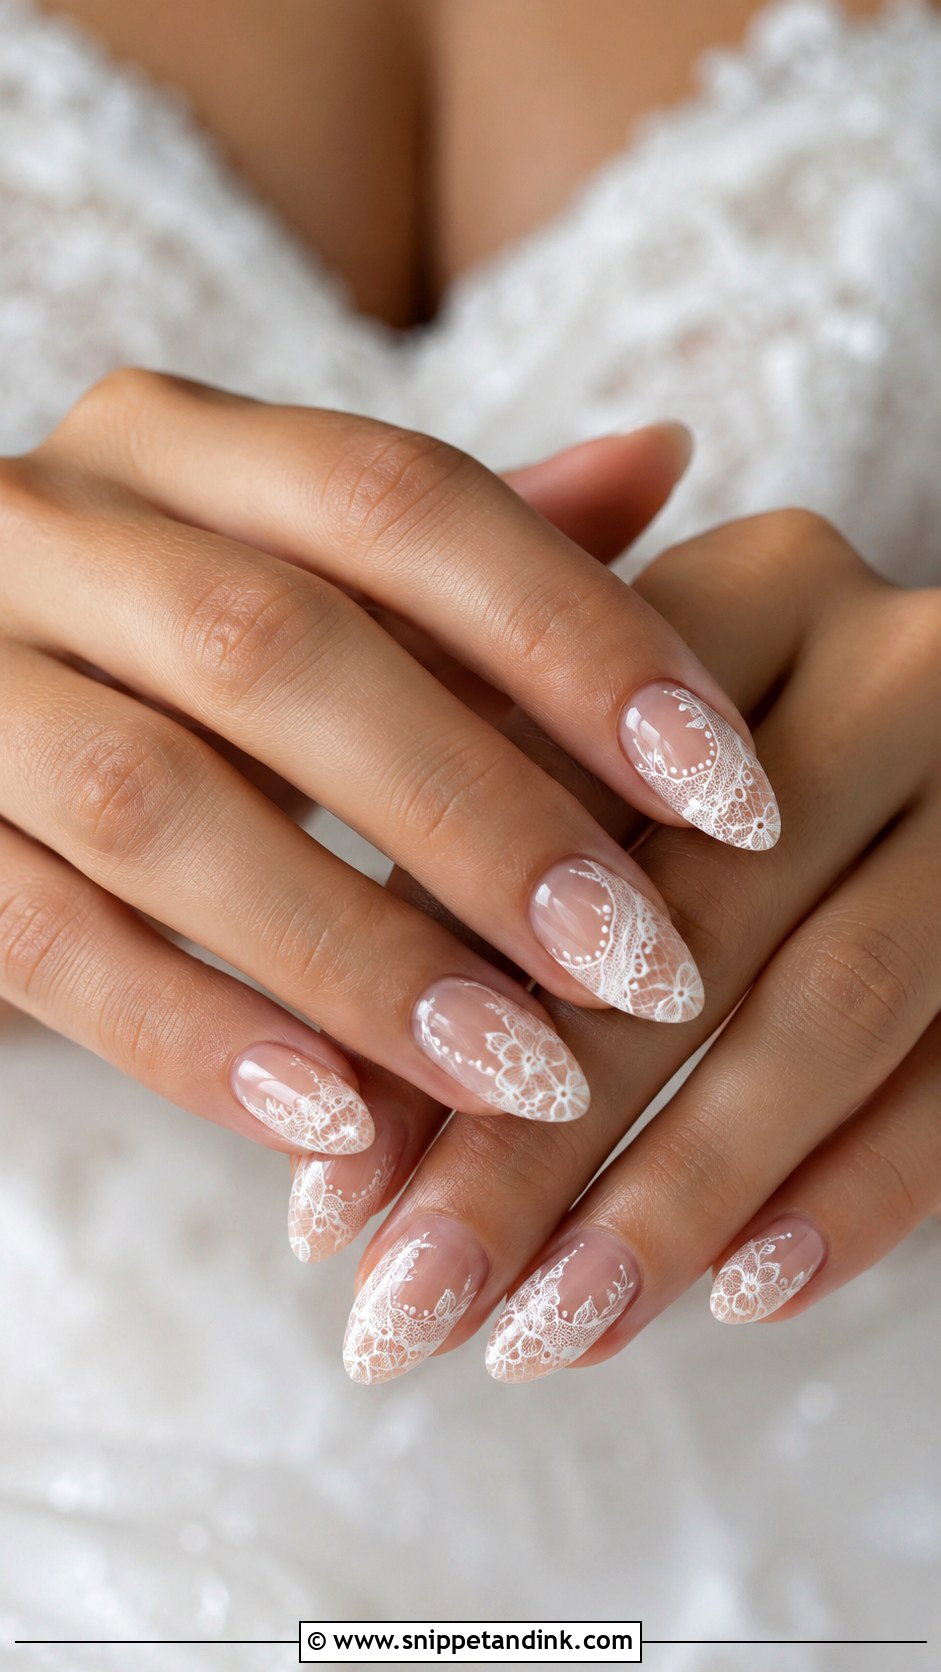
Lace art is fine-liner work, and the brush and the gel consistency decide how good it looks. I use a long, thin striper and a slightly thicker paint so the lines don’t spread before I flash-cure each section. Repeating the lace on every nail can get busy, so most brides I’d point toward two accent nails with the rest left milky. If your gown has a specific lace motif, bring a photo of the fabric; copying the actual scallop or leaf shape is far more personal than a generic pattern.
7. White Floral Wedding Nails
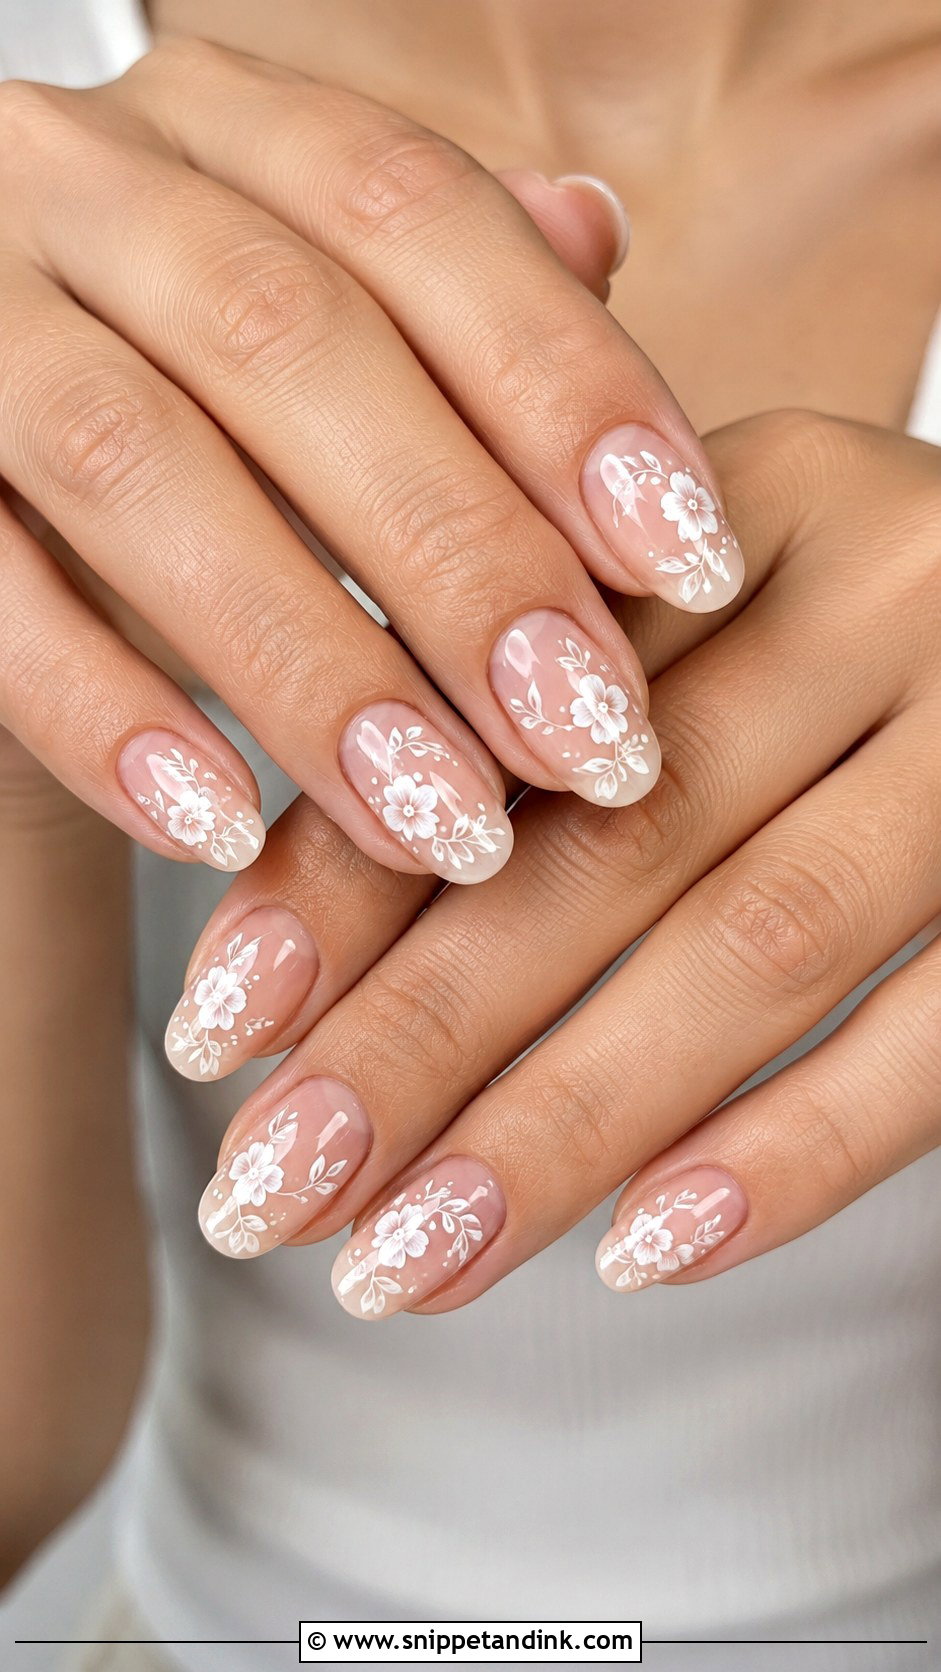
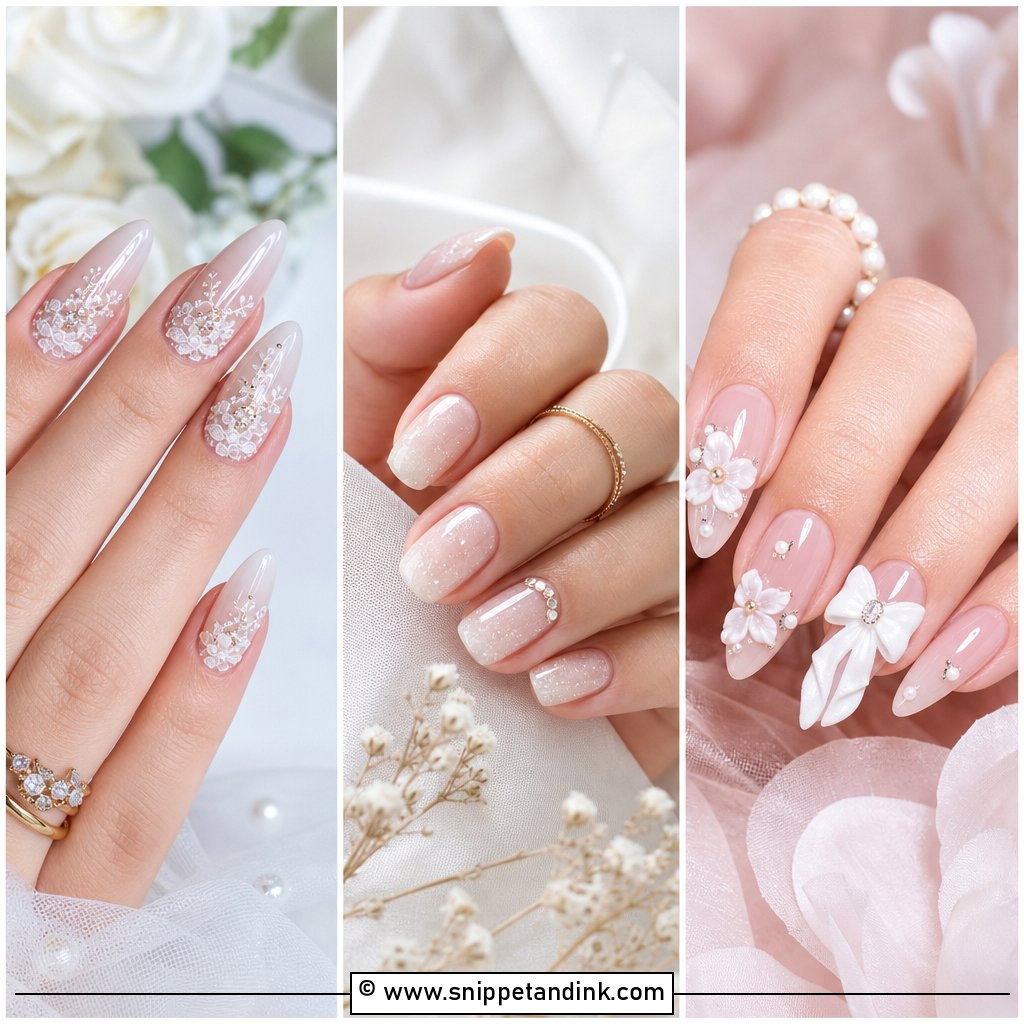
Small white flowers on a sheer or clear base read fresh in spring and summer, though I’ve painted them for winter weddings too. The size of the flowers matters more than the number. If your dress already carries embroidery or beading, keep each bloom to about the width of a grain of rice so the hands don’t compete with the bodice. White paint can look grey if it’s applied thin, so I lay it in two passes to keep the petals bright under a glossy top coat.
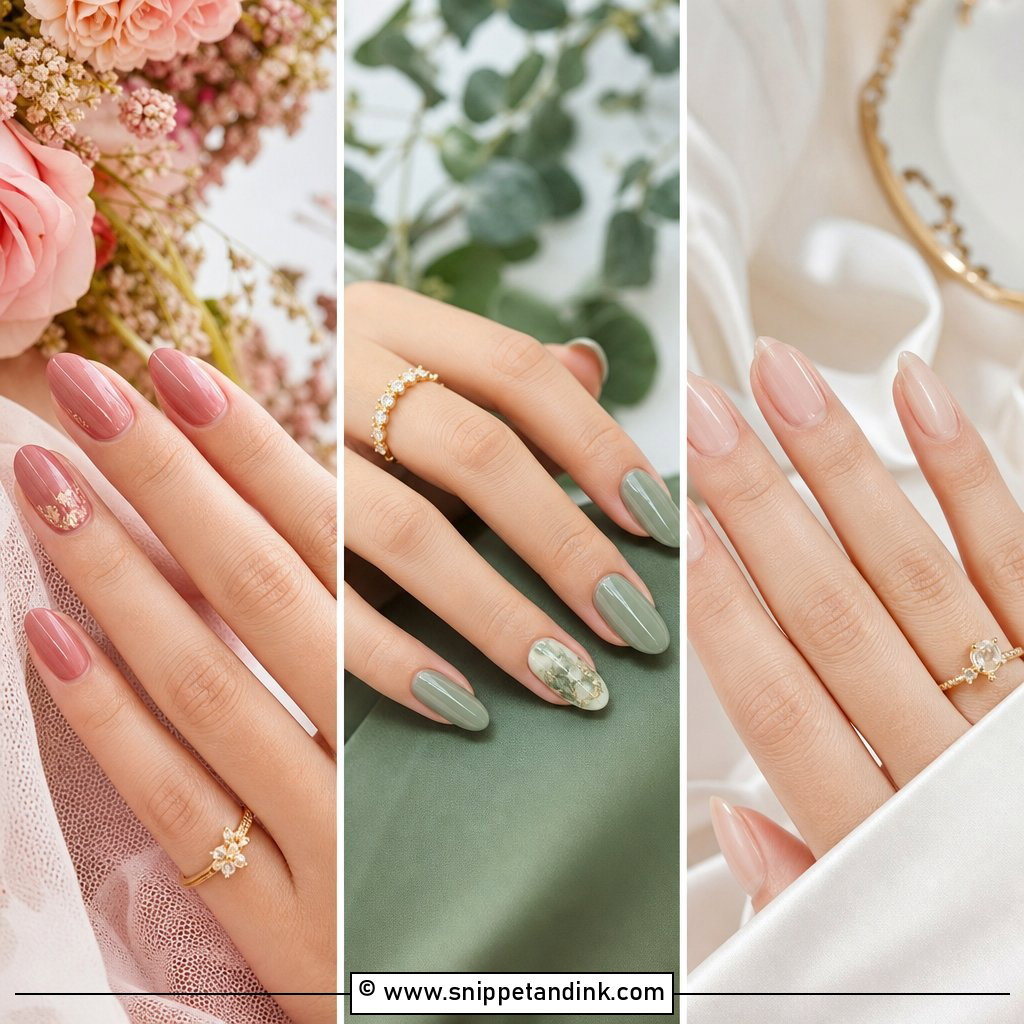
8. Nude Gold Foil Wedding Nails
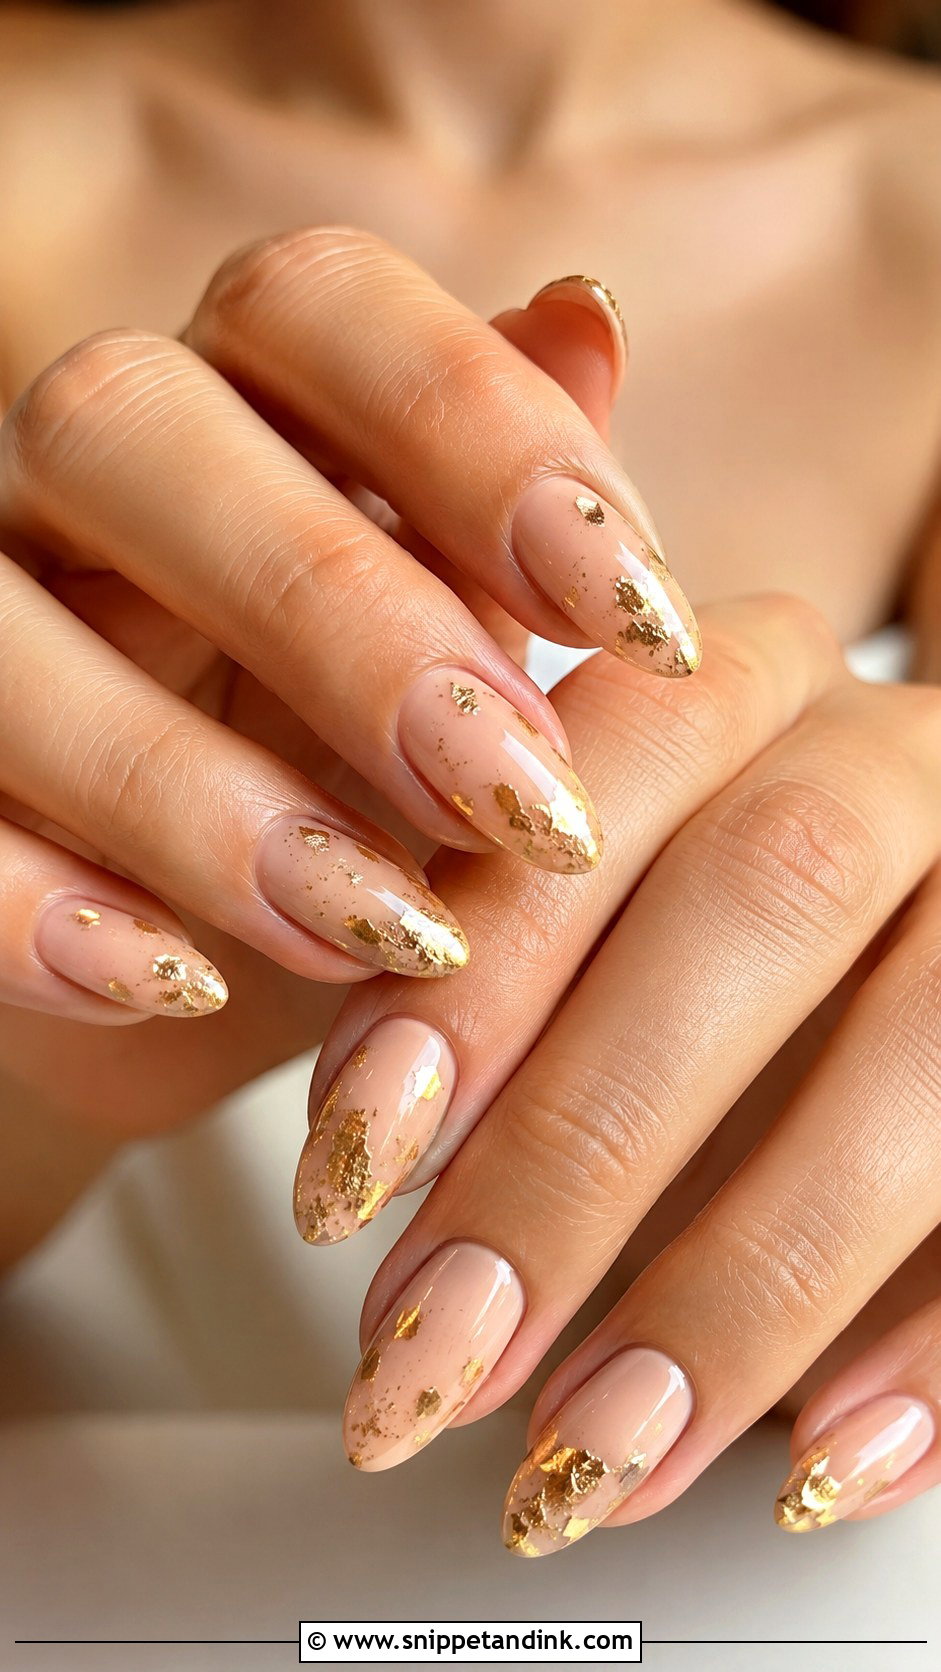
Gold foil goes on in irregular flakes over a tacky foil gel, then gets sealed so the edges lie flat. The base shade should come from your skin, not the trend: beige and caramel nudes on warmer skin, a sheer peach or pink on fairer or cooler tones. Keep the foil sparse and asymmetrical, mostly toward the tips or down one side. Heavy coverage wrinkles and catches light unevenly in close-ups, while a few broken pieces look deliberate next to gold jewellery and a champagne dress.
9. Glazed Donut Wedding Nails
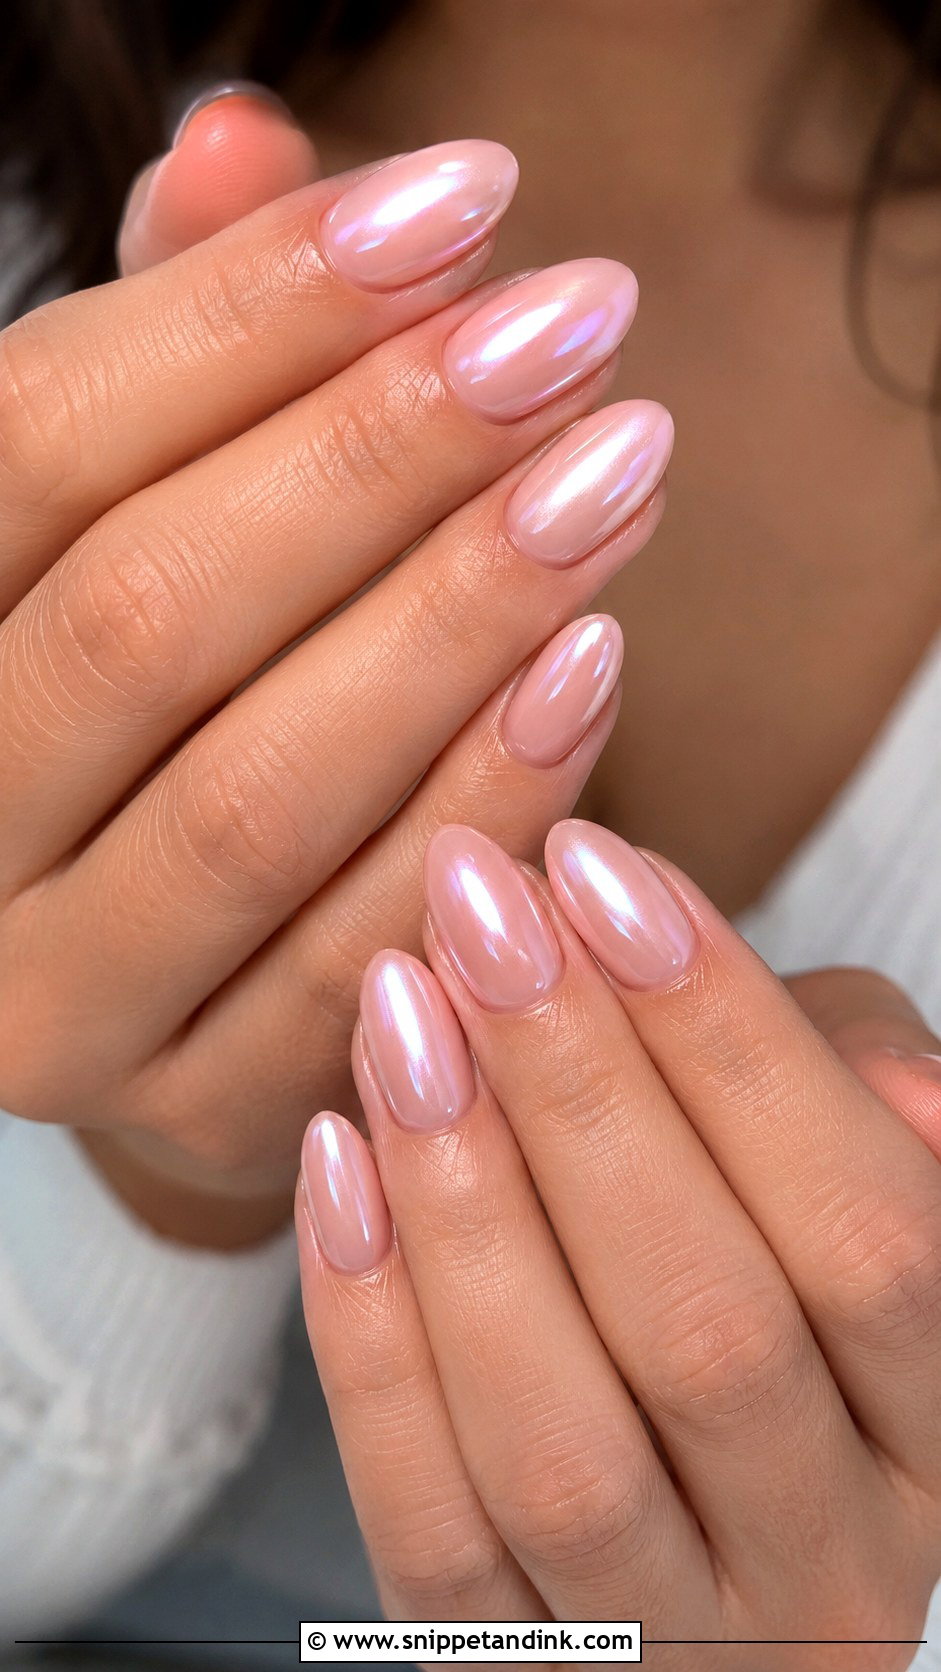
Glazed donut nails are a sheer base finished with pearl chrome rubbed in over the top coat, and the result is that wet, lit-from-within shine. It’s one of the most flattering finishes in ring close-ups because it reflects light softly instead of throwing glitter sparkle. I like it on short natural nails as much as on long almonds. The only real catch is that the glaze shows a bumpy surface, so the base has to be levelled carefully first.
10. Champagne Glitter Wedding Nails
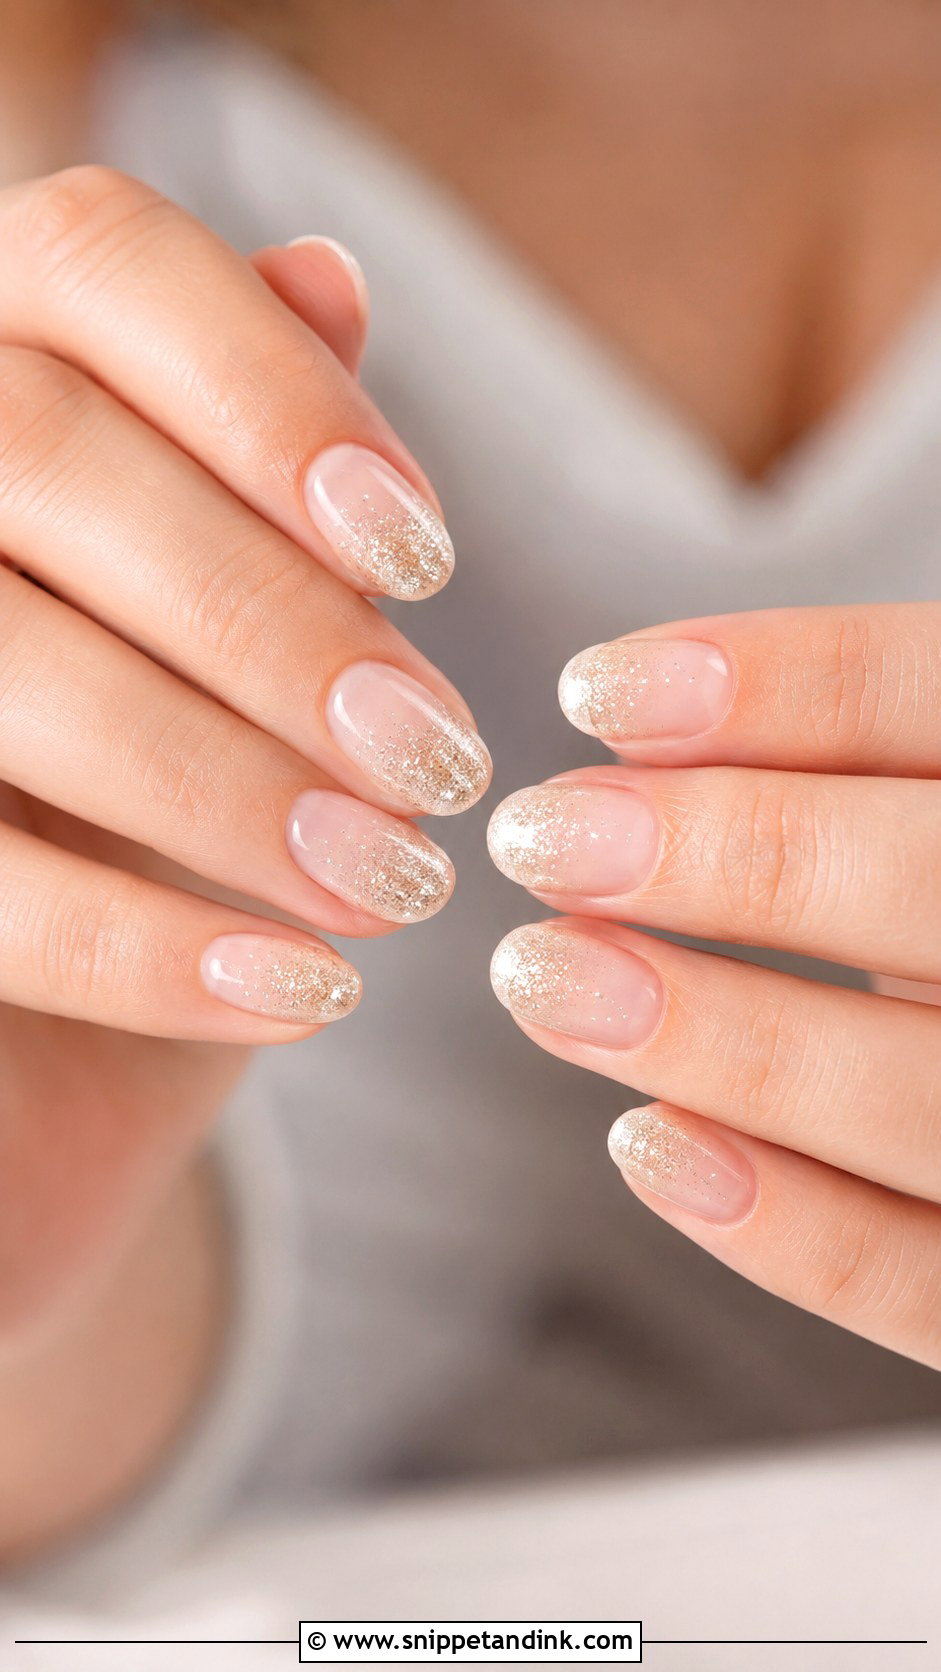
Champagne glitter is the sparkle I reach for when a bride says silver glitter feels too much. It’s warm and fine, so it sits comfortably beside ivory, gold and blush. My usual placement is a gradient from the tips or the cuticle on a sheer nude rather than full coverage, which keeps the set light. Glitter is also the most honest finish for an evening ballroom reception, because candlelight is exactly where it comes alive. Removal is slower, so factor that in if you’re planning a different colour for the honeymoon.
11. Minimal Micro French Wedding Nails
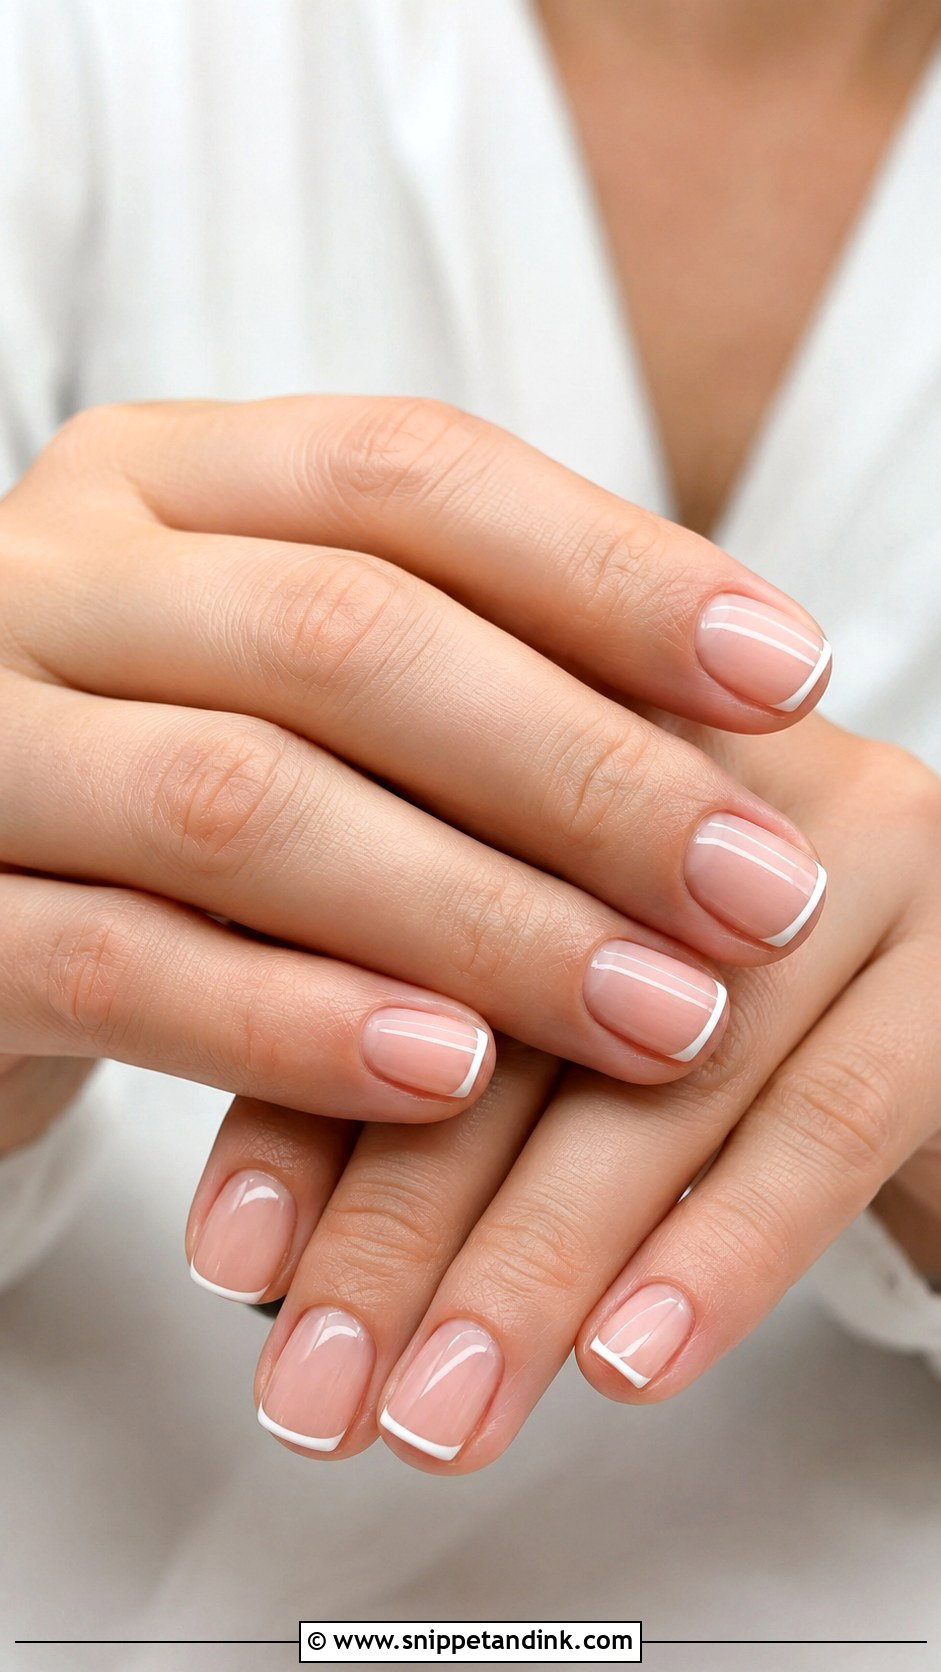
A micro French uses a hairline of white at the very edge instead of a full tip. It’s my first suggestion for short nails, because the thin line doesn’t eat into the visible nail bed the way a classic tip can. It also hides growth well: when the cuticle grows out a little by the reception, nobody’s eye is pulled toward it. If plain white feels expected, the same thin line works in ivory or a soft gold.
12. White Chrome Wedding Nails
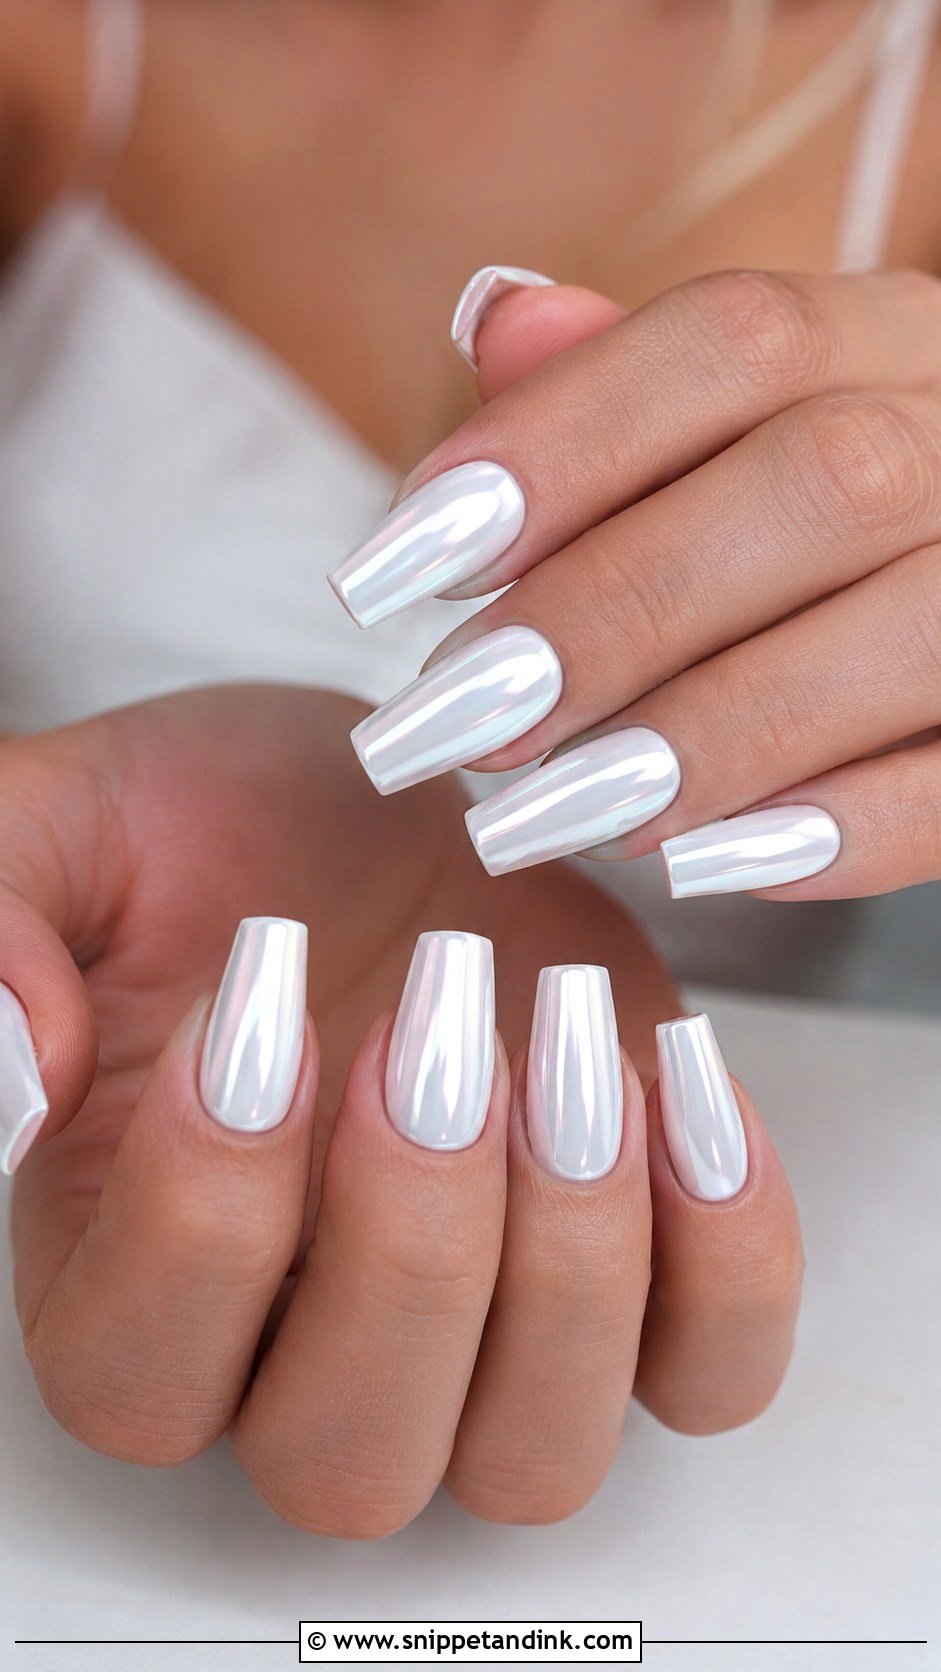
White chrome gives a clean bridal manicure a polished, almost porcelain finish. It’s bolder than a glaze, and it’s brutally honest about prep: chrome sits on the surface like a mirror, so every ridge, uneven cuticle line or lumpy apex shows. I spend more time shaping and levelling for this set than for most others on this list. On almond or coffin length it’s a strong, modern look with structured gowns and silver jewellery; on short square nails it’s neater and much easier to live with.
13. Pink Pearl Wedding Nails
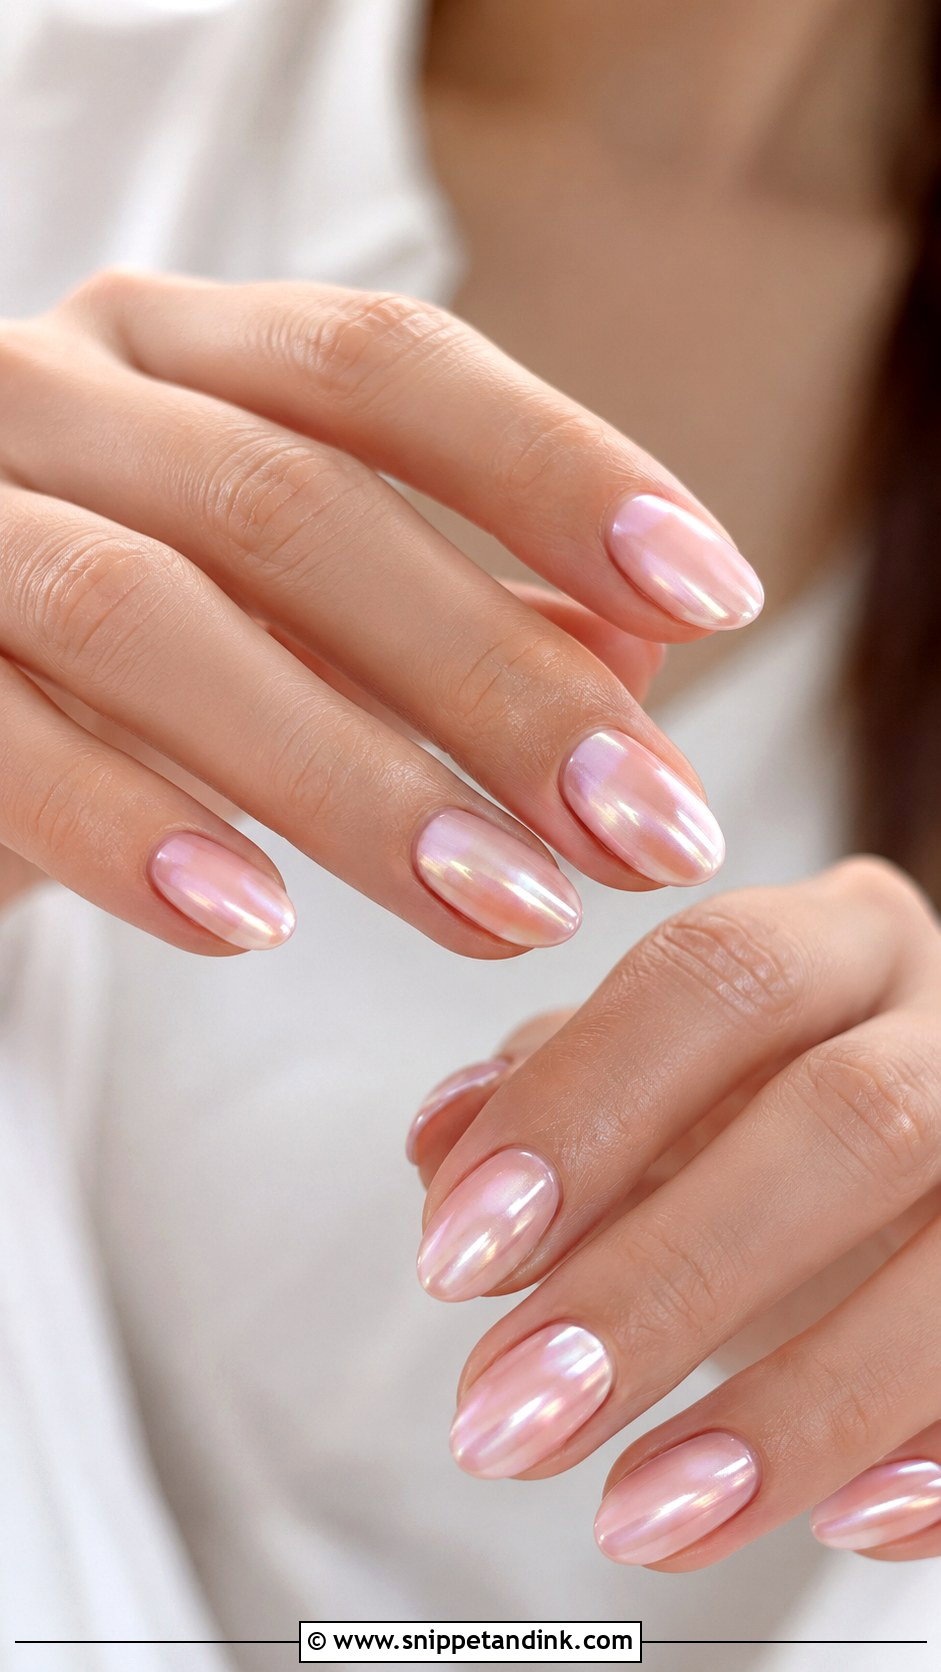
Pink pearl is my answer when bright white looks harsh against someone’s skin. A soft pink base with a pearly shimmer or chrome over it warms the hand up and still reads bridal in photos. Sheer pink keeps it natural; a more opaque pink makes it look done. It’s also an easy set to repeat on bridesmaids because it coordinates without competing, and it sits well with rose gold rings and blush flowers.
14. Marble Wedding Nails
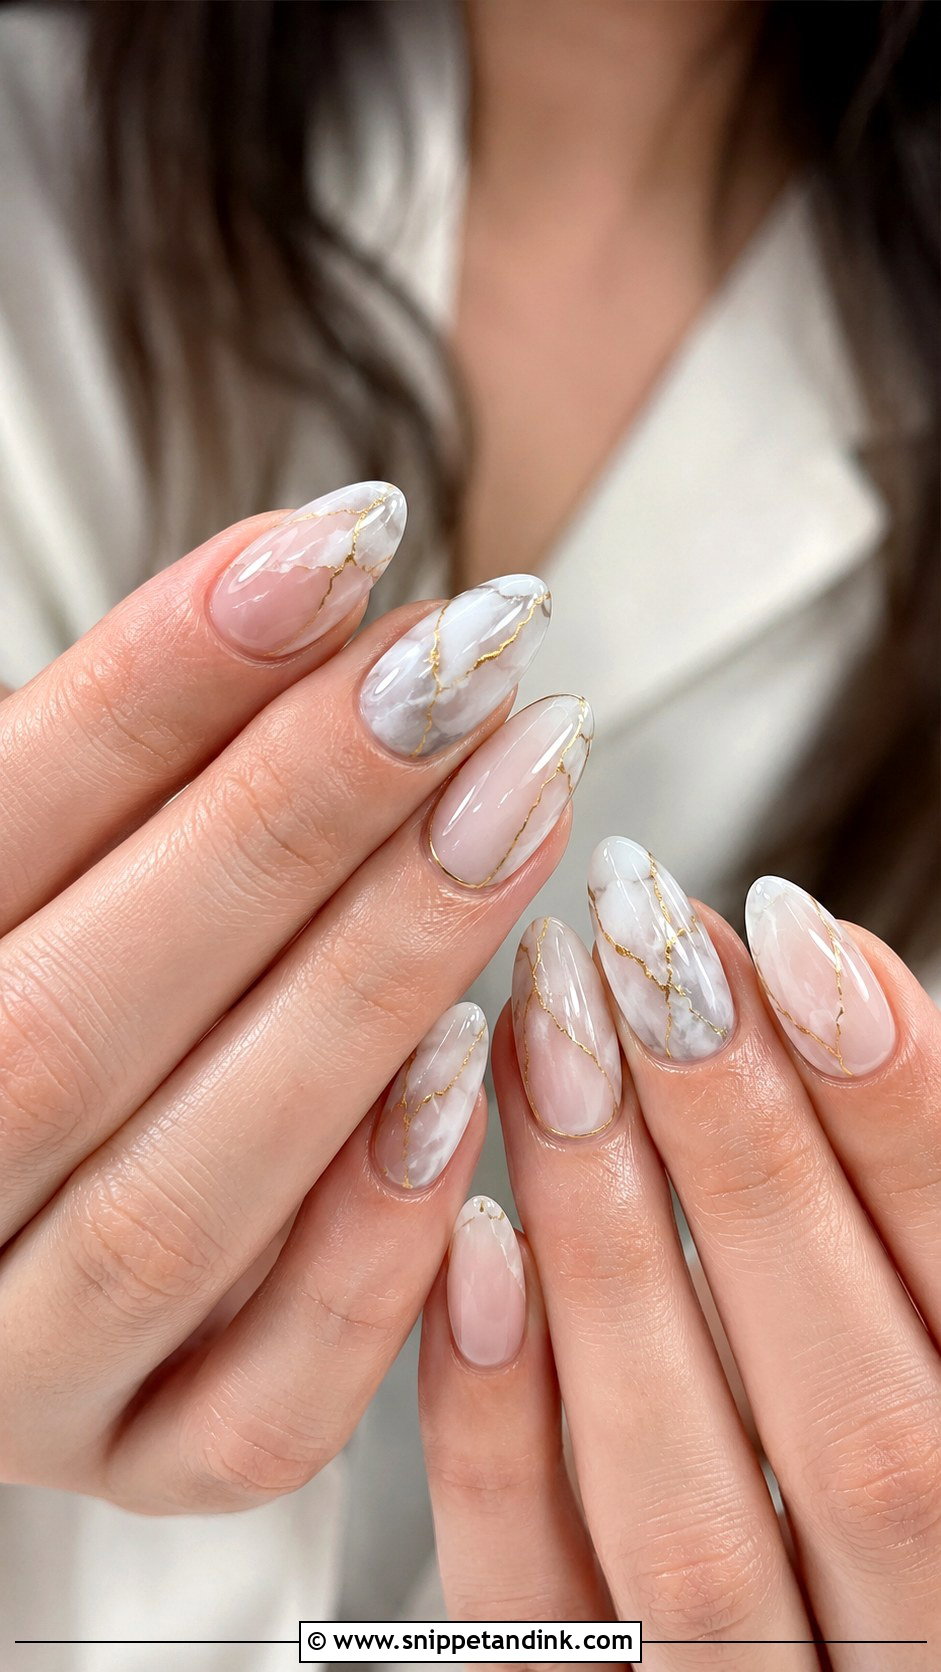
Good marble is mostly about restraint with the veining. I drop a thin grey or gold line into wet gel and let it bleed softly, then cure before it spreads too far; dark, thick veins make the nail look like a kitchen counter. One or two marble accents with the rest milky is the balance most brides end up loving. It suits modern venues and sleek gowns, and the glossy top coat matters because marble without shine looks flat in photographs.
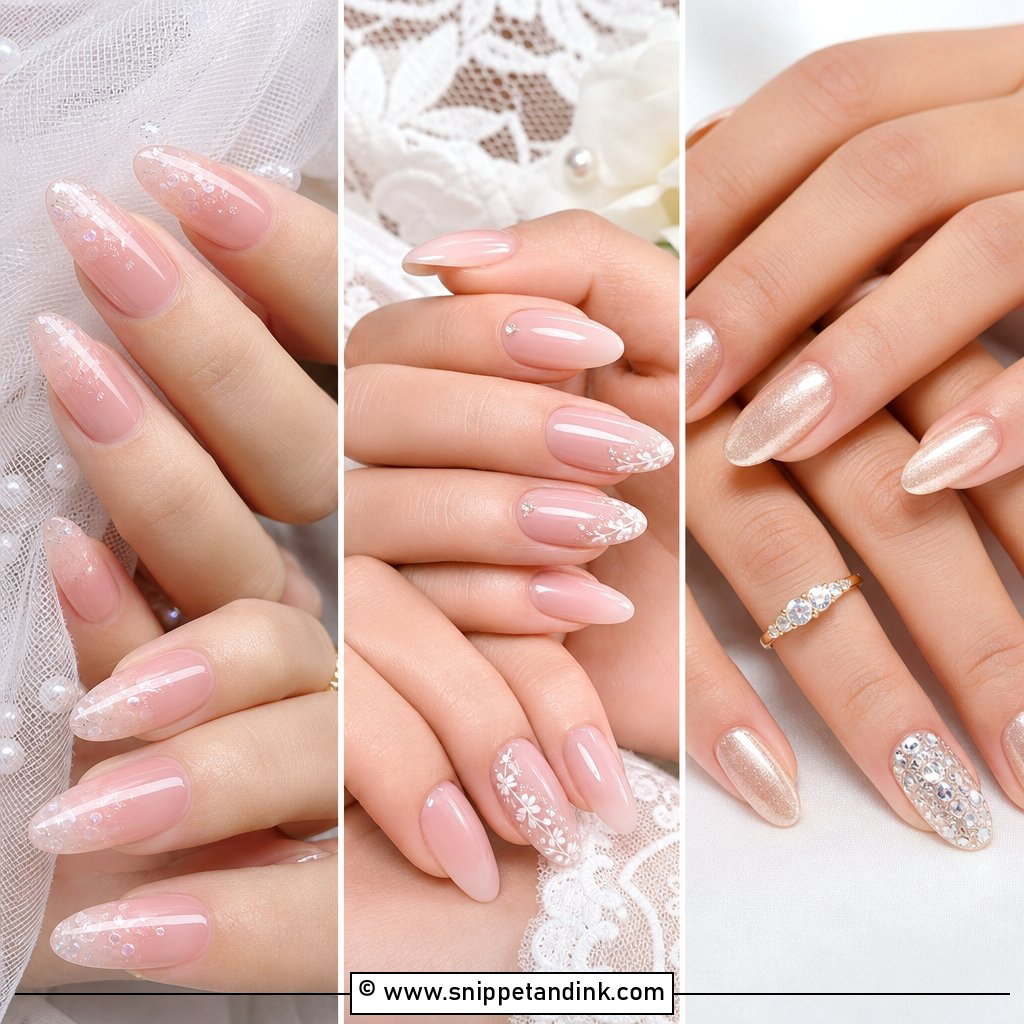
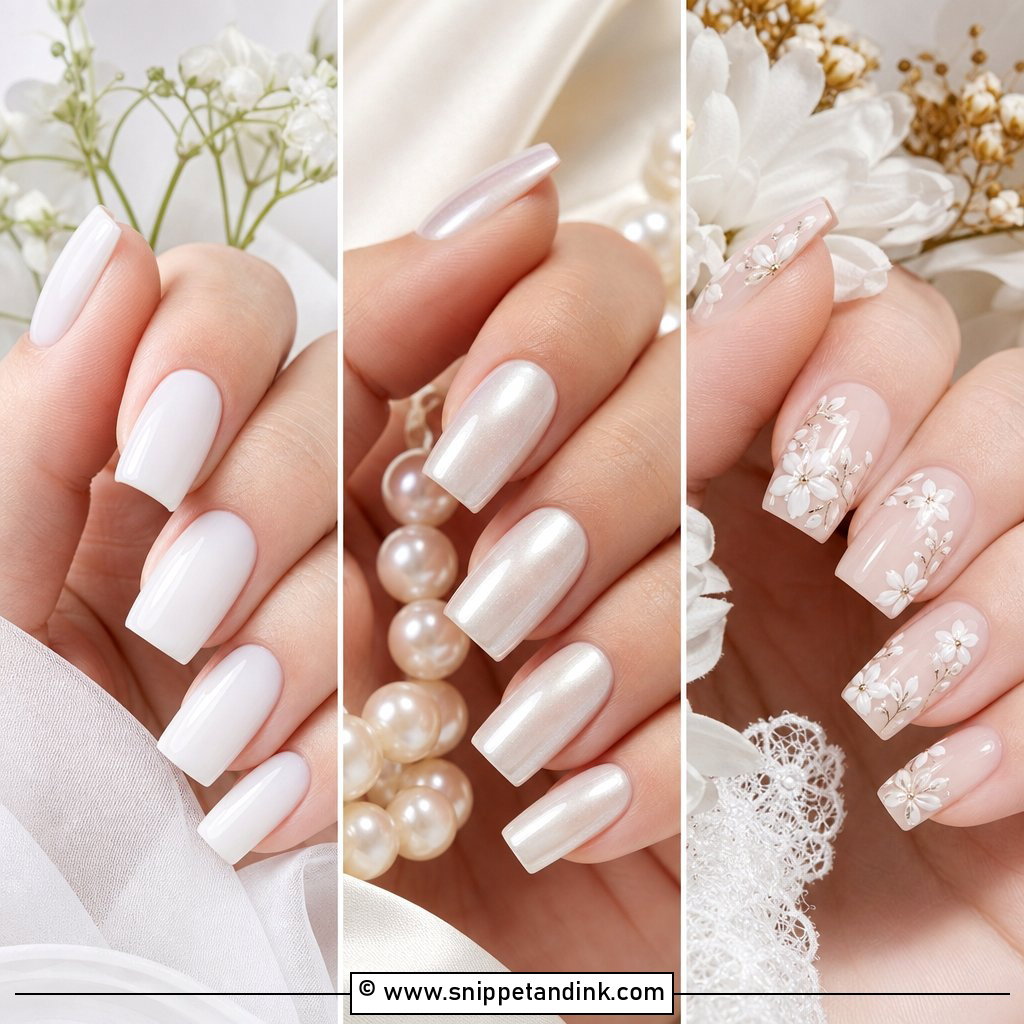
15. Wedding Nails With Rhinestones
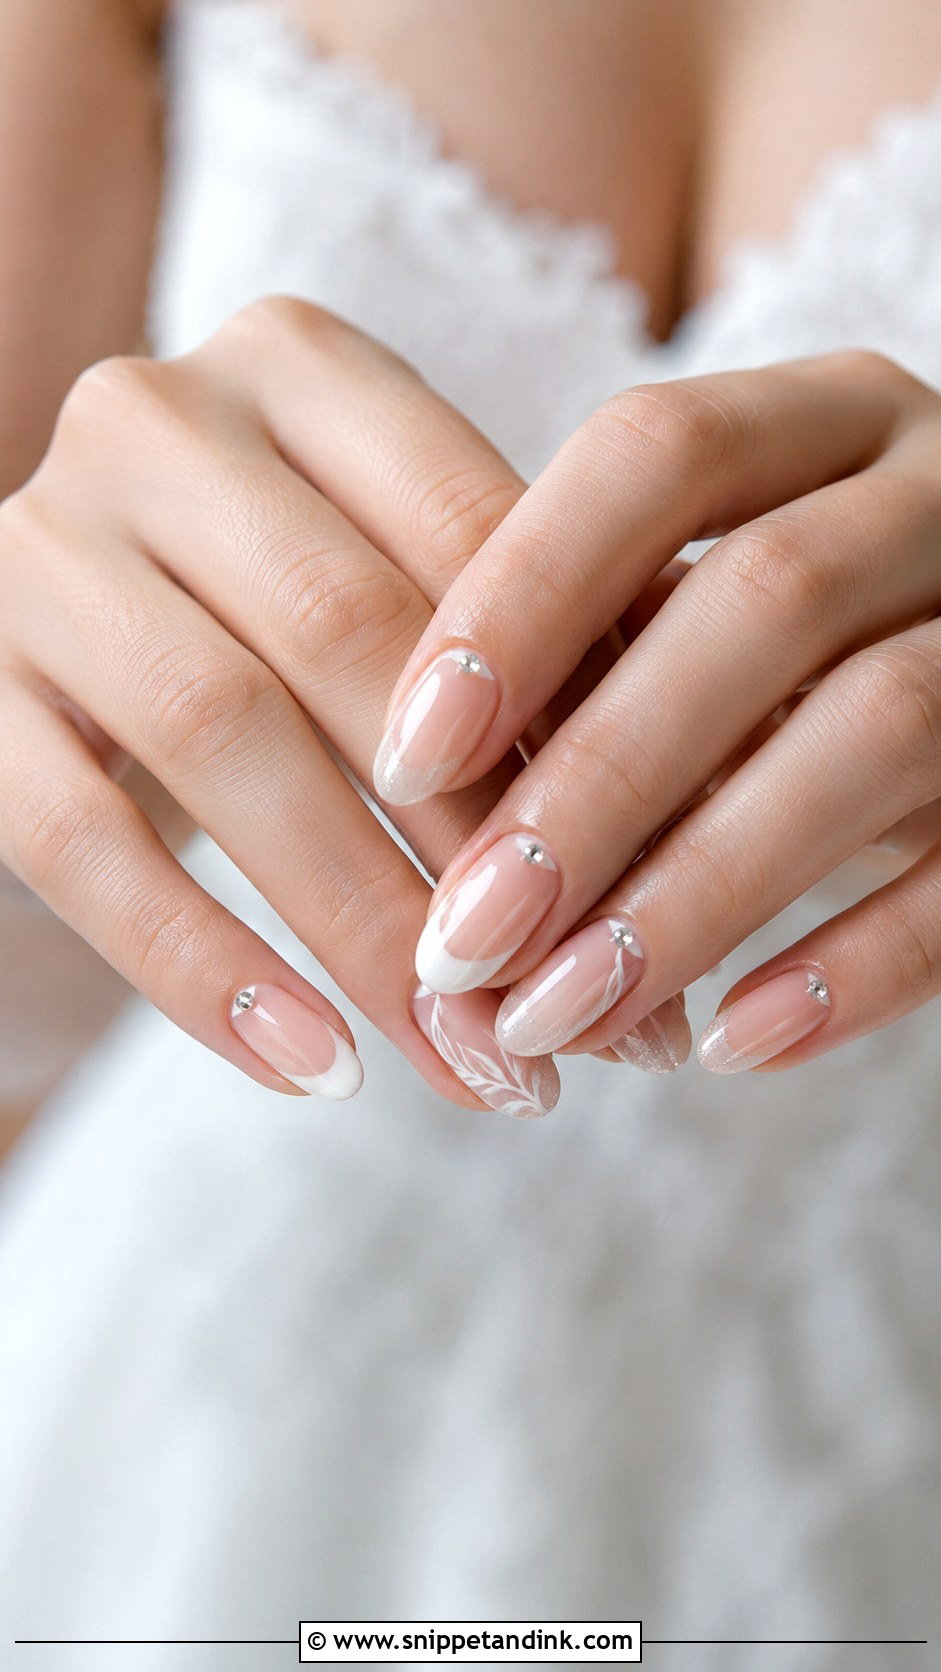
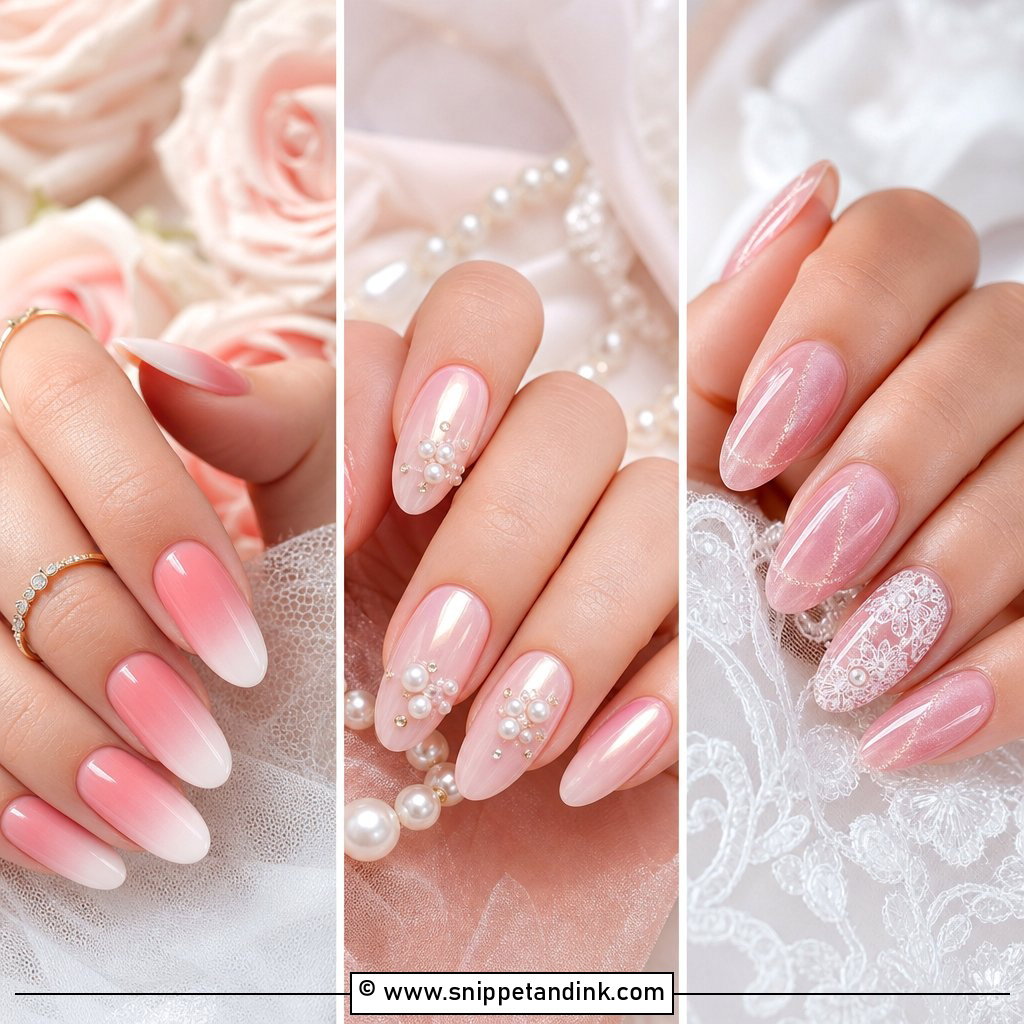
Rhinestones look bridal when they behave like jewellery: small, clear and placed with intent. A sheer nude, blush, milky white, or French base keeps the attention on the stones, which I set near the cuticle, along the tip, or on a single accent nail. Use flat-back crystals and have them encapsulated in gel, otherwise they will snag on tulle, beading and hair the first time you fix your veil. If you already wear a large diamond, I’d keep the crystals off the ring finger so the two aren’t fighting.
16. Short Wedding Nails
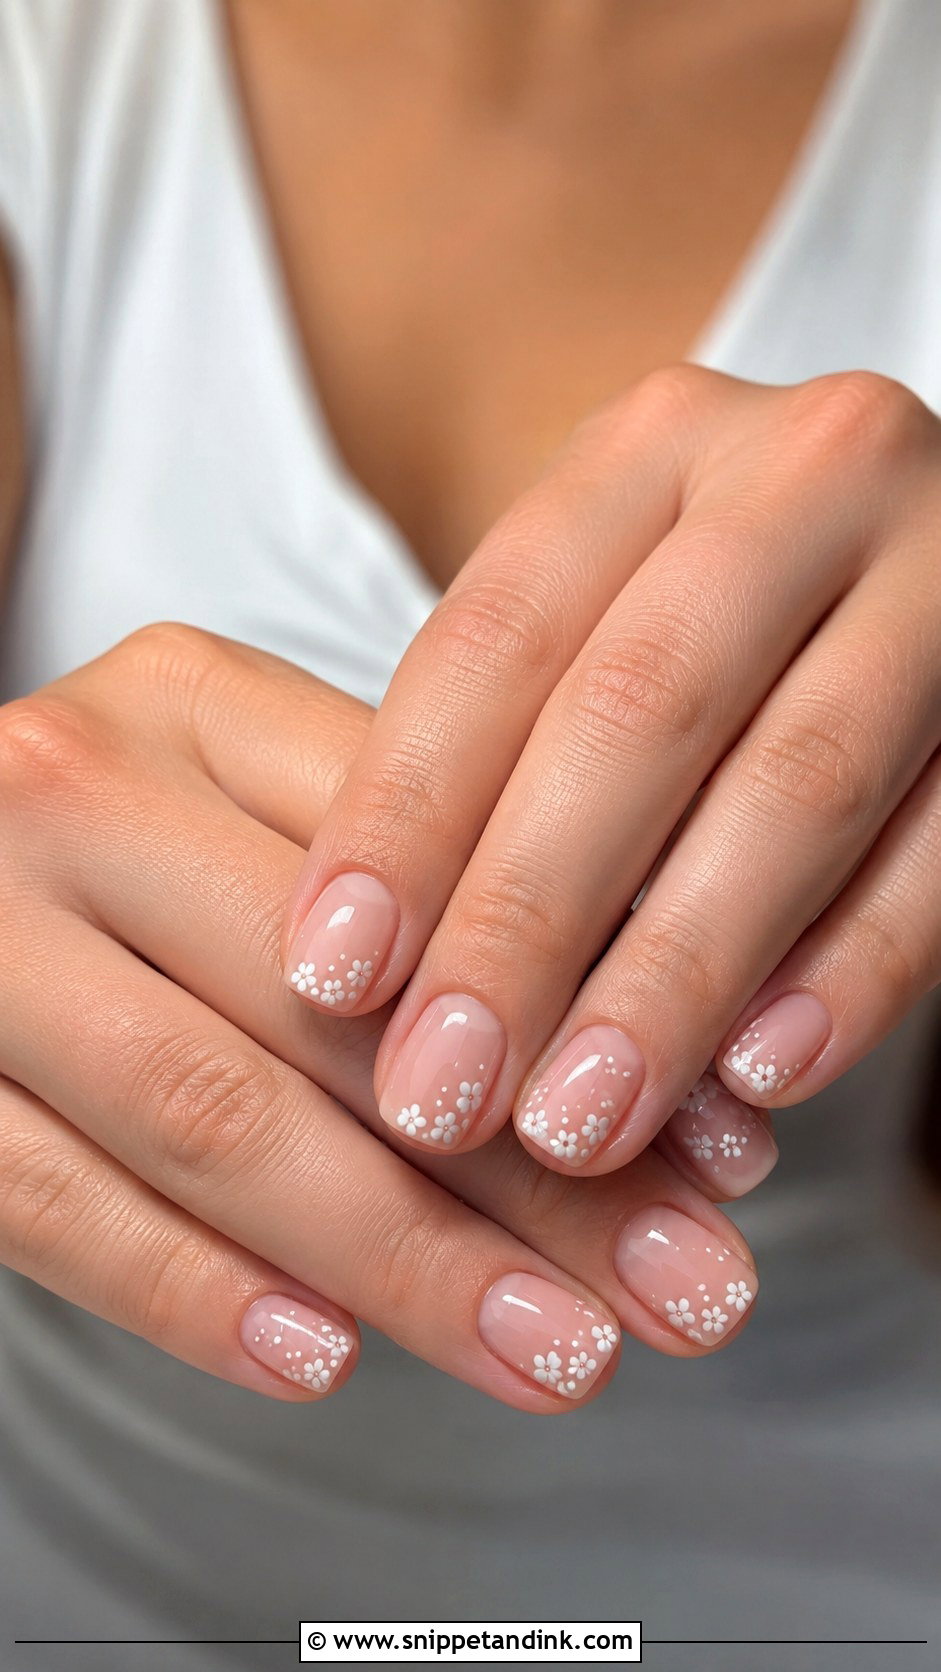
Short wedding nails look intentional when the shape and the cuticle work are spot on. Soft square, squoval and short oval are the shapes I’d use, finished in milky white, sheer pink, a micro French or a glaze. Short is also the sensible choice if you never wear length; brides who suddenly go long often spend the day struggling with zips, earring backs and phone screens. Hydrated cuticles and a thick glossy top coat do more for short nails than any amount of art.
17. Almond Wedding Nails
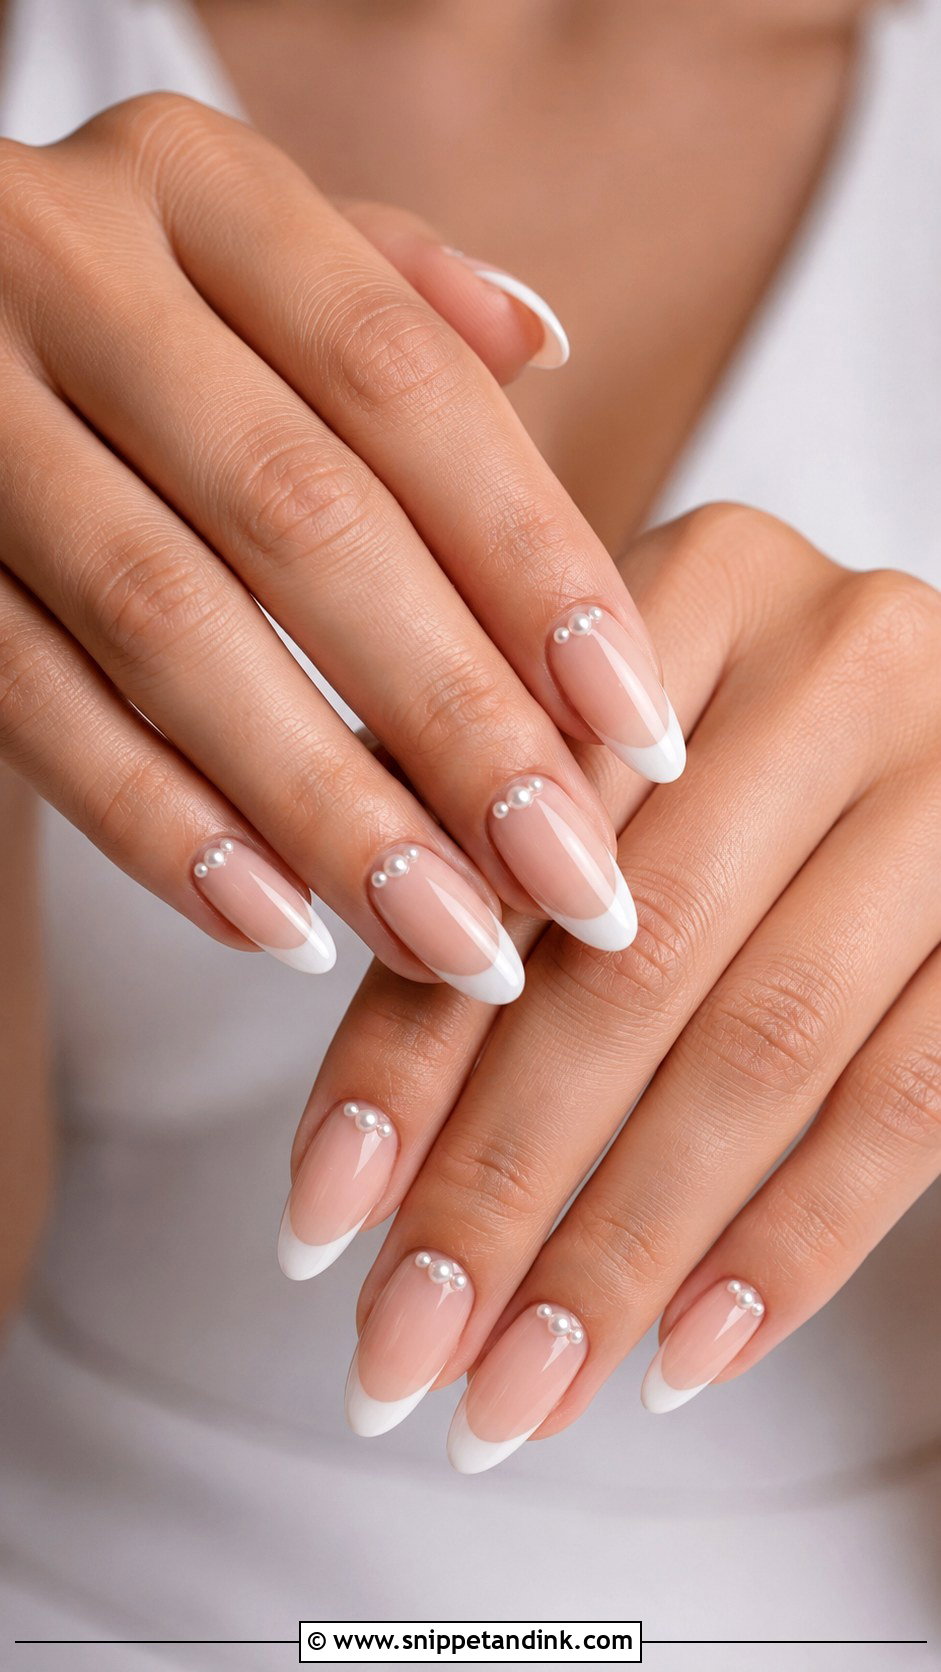
Almond wedding nails lengthen the fingers because the tapered sides draw the eye toward the tip. That taper is also a weak point on thin natural nails, so I usually add a structured overlay to stop the sides cracking. Medium length is the sweet spot: enough room for French work, pearls or lace, without nails that get in the way of buttons or pinning a corsage. Almost every design on this list sits comfortably on an almond.
18. Square Wedding Nails
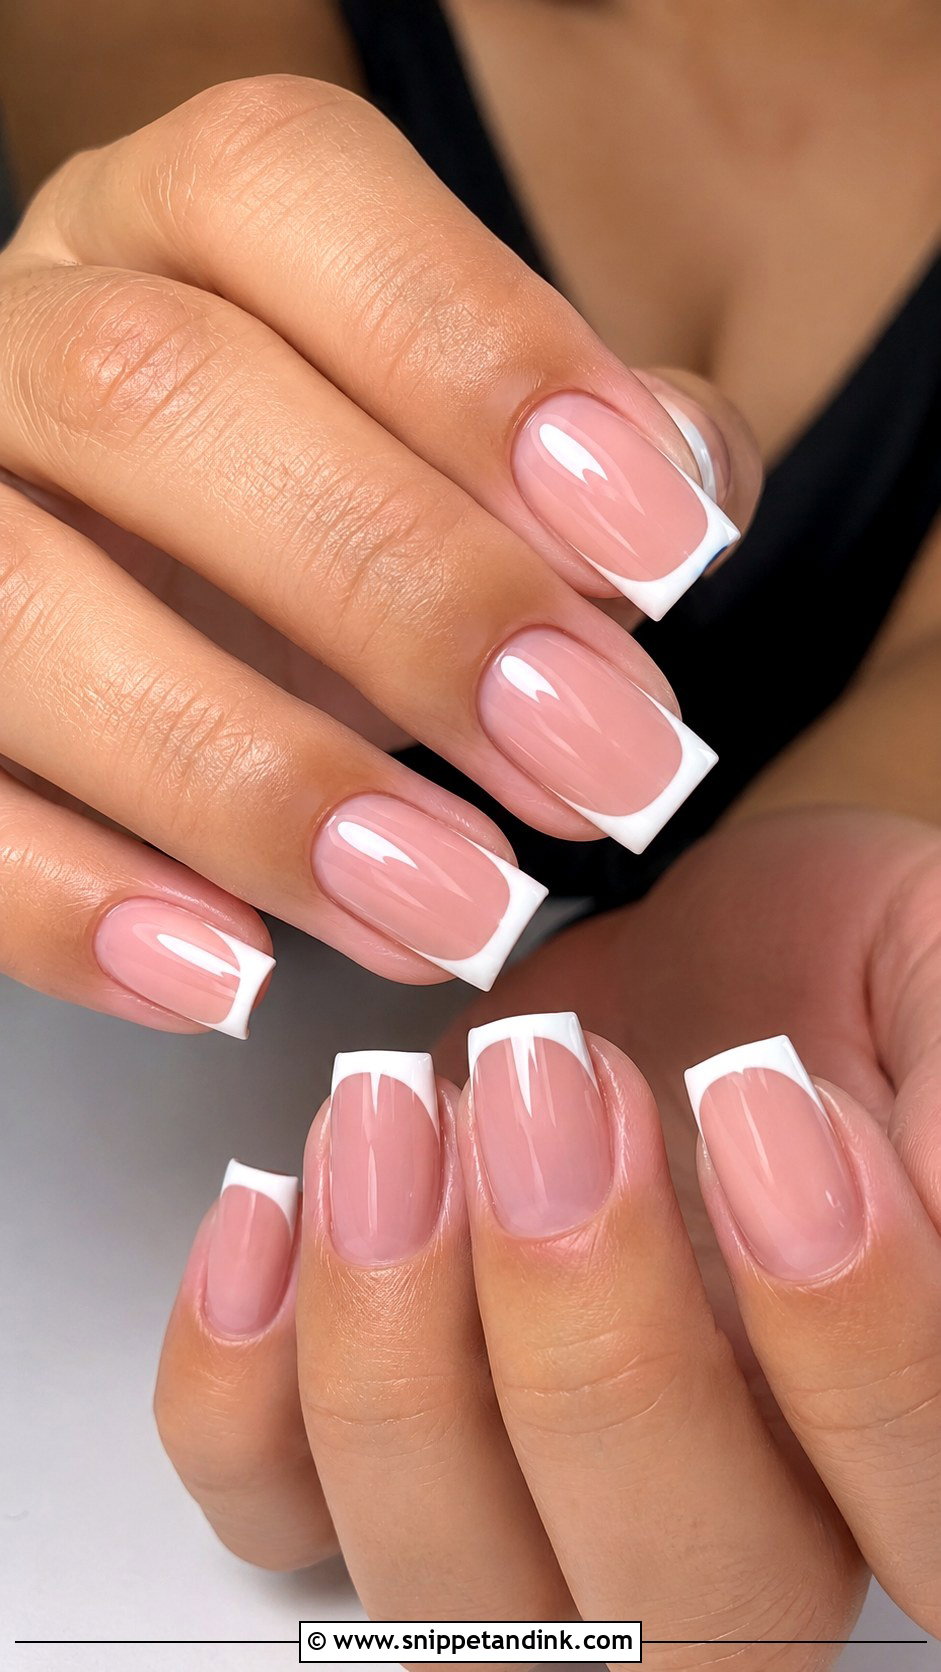
Square nails give a crisp, graphic edge that suits structured gowns and sleek hair. Keep them short to medium for a wedding; long square tips catch on fabric and chip at the corners, which is why I almost always soften those corners slightly. A sheer pink with white tips is the classic route. If you’d rather lean current, milky white chrome on a short square is clean and very wearable.
19. Something Blue Wedding Nails
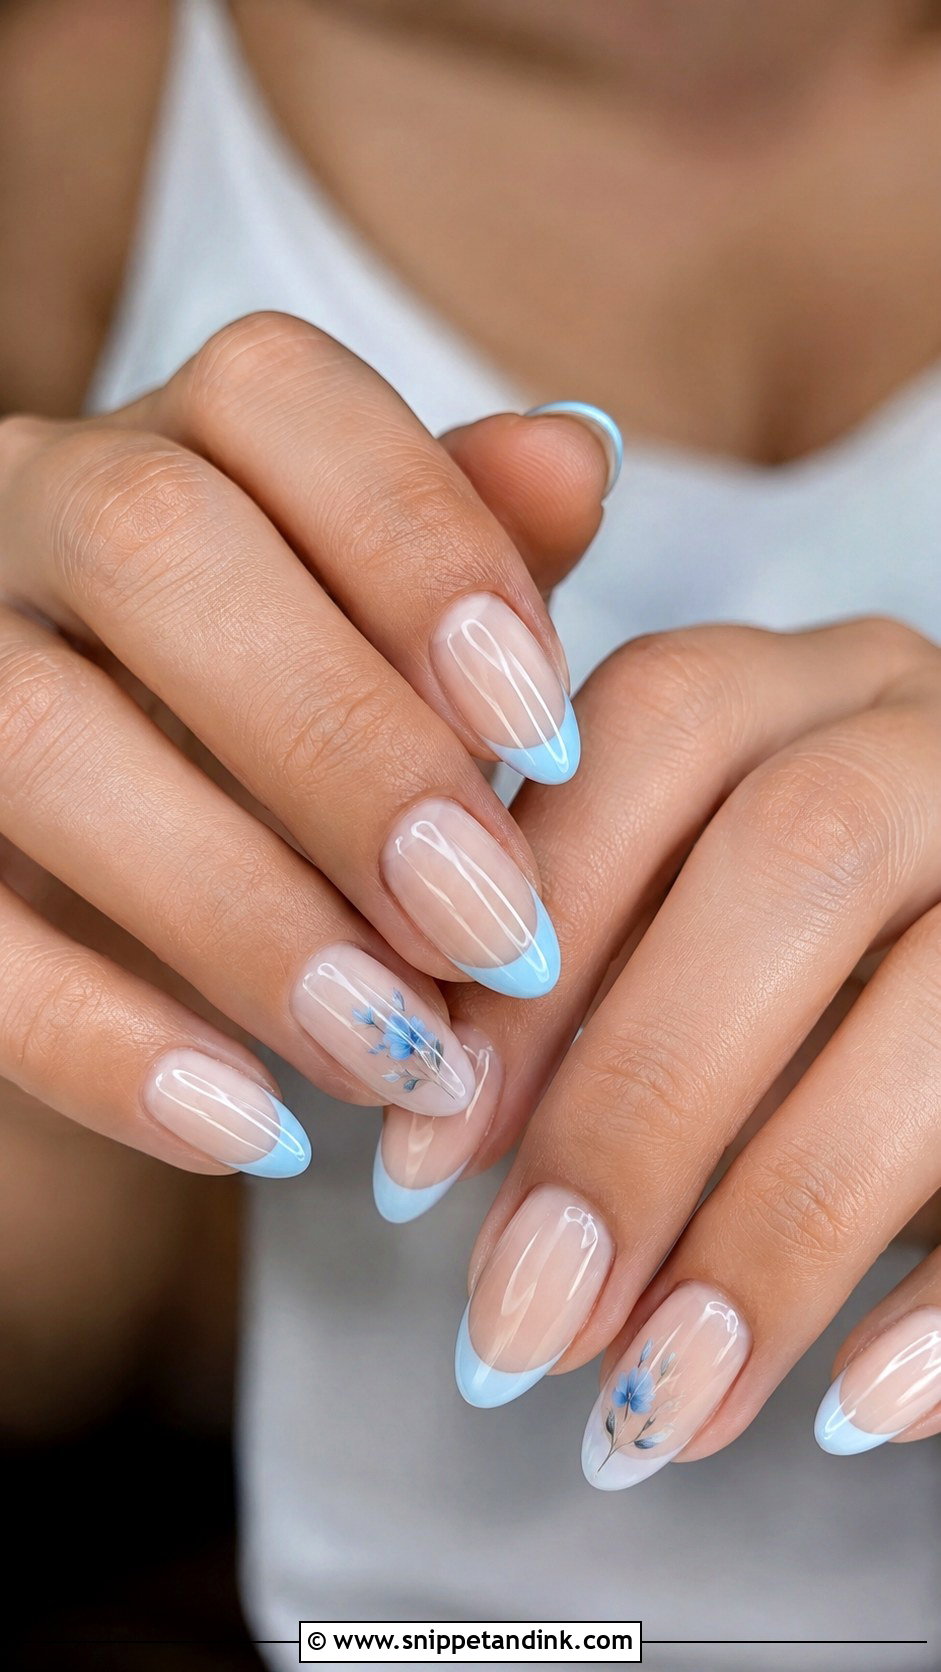
Something blue doesn’t have to be loud. A pale blue tip, one tiny blue flower or a single blue crystal on the ring finger is plenty, set against a sheer nude or milky base so the rest still reads bridal. Blue pigments can look grey or greener under warm indoor light, so I swatch the shade on a tip and check it near a window and under a lamp before painting. It’s a sweet hidden detail for beach and spring weddings especially.
20. Bow Wedding Nails
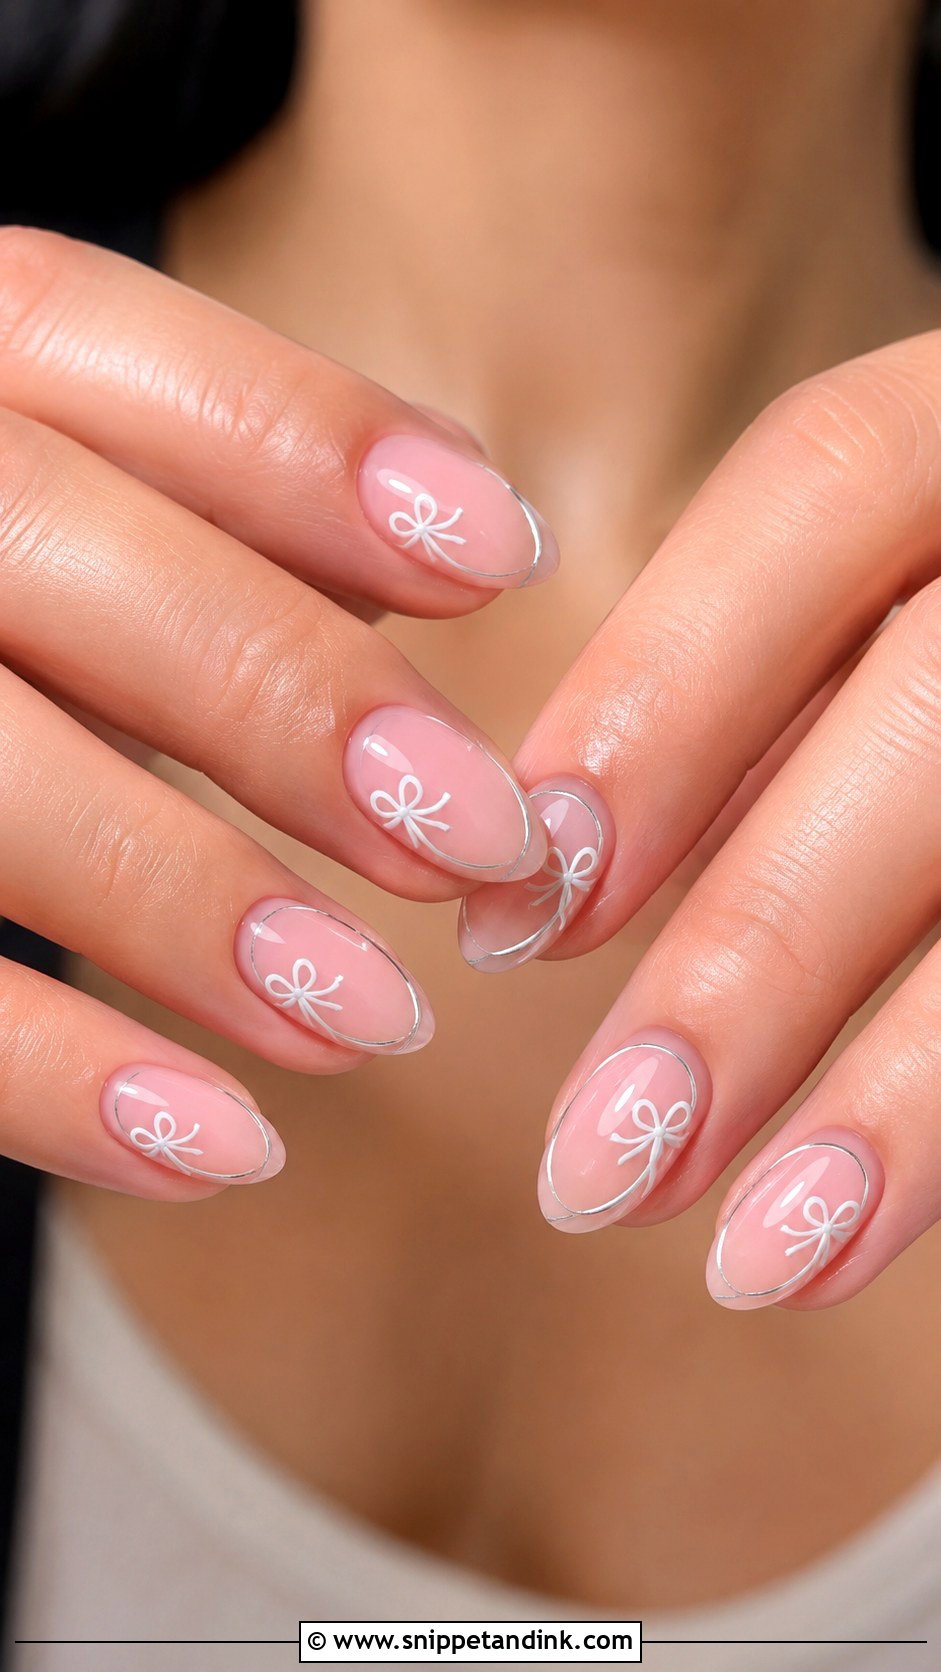
Bows work best small and sparing, painted in white or outlined in fine chrome on one or two nails over a sheer base. Tiny 3D bows are charming, but they stand proud of the nail, so I only use them on accent nails and never on the hand that will be adjusting a veil all day. It’s an easy match for ribbon details, tulle and satin. An oversized bow on every finger quickly tips from bridal into costume.
How the Set Survives Until the Last Dance
Most damage I see happens in the 48 hours before the ceremony, not during it. Brides tie favour ribbons, peel stickers off place cards and scrub off fake tan, and nails take the hit. Wear rubber gloves for anything wet, and use a coin rather than a fingertip to open packaging.
Cuticle oil once or twice a day keeps the skin around the nail from looking dry in close-ups. Leave it off the morning of the wedding, though, because oil on the nail surface dulls chrome and smears onto the dress.
A small kit for your maid of honour
- A clear glossy top coat to refresh a scuffed nail before the ring shots
- Nail glue and one or two spare pressed tips sized to your nails
- A fine buffer to smooth a chip or a snag before it catches lace
- Lint-free wipes and a little alcohol to clean off hand cream
What the Ring Shot Actually Shows
Photographers shoot rings with macro lenses, and at that distance a dry cuticle or a slightly crooked smile line looks enormous. That’s why I nearly always spend more time on cuticle work and shape symmetry than on the art itself for a bride. Glossy finishes reflect the flash softly; matte top coats can look chalky. If you want matte somewhere, keep it to an accent nail and leave the ring finger glossy.
Bring Your Dress Fabric and Your Ring to the Appointment
Most of the decisions on this list get easier with two things on the table: a scrap or photo of your dress fabric and the ring you’ll wear. White, ivory and nude shades shift against both, and seeing them side by side settles it in seconds. Pick a shape you already know you can live with for a week, choose one detail you love, and keep the rest quiet. A neat, glossy set with a single considered accent will look right in every photo, including the ones taken at midnight.
You'll Like These Ideas:


Leave a Reply