
Brides with a fuller, rounder face often arrive at a trial apologizing for their cheeks. Please don’t. A round face is soft and youthful on camera, and my job isn’t to hide it. What I do is balance it: a little height at the crown, a part that breaks the symmetry, and a few pieces near the face that create a vertical line. Get those three right and almost any style works, from loose curls to a low chignon. Below are twenty I’d happily put on a round-faced bride, with notes on where each one needs adjusting.
Is Your Face Really Round, or Just Full at the Cheeks?
Plenty of brides who call their face round actually have a square or heart shape with full cheeks. It matters, because the fix differs. Pull your hair back and look straight into a mirror.
- Round: the face is roughly as wide as it is long, with a soft, curved jaw and the widest point at the cheeks.
- Square with full cheeks: the jaw has corners. You want softness around the jaw too, so waves or tendrils that land there help.
- Heart with full cheeks: wider forehead, narrower chin. Side-swept bangs suit you, and too much crown height can make the top heavier.
- Oval with soft features: most of these styles will work, and you can ignore the rules more freely.
Then think about your neck. A shorter neck looks longer with the hair up and off the shoulders, while a long neck can carry lower, fuller styles without trouble. These two facts narrow the list faster than any trend photo.
Where I Put Volume, and Where I Take It Away
A round face already has width at the cheeks. Anything that adds more width at that same level, like big curls starting at the cheekbone or a full bun pinned behind the ears, widens it further. So I move volume up to the crown and down below the jaw, and keep the sides at cheek level close to the head.
Tendrils follow the same logic. One long, thin strand that falls past the chin creates a vertical line. Three short curly ones at cheek height frame the widest part of the face like brackets. When a bride tells me she doesn’t like how tendrils look on her, it is nearly always the short ones.
1. Side Swept Curls Wedding Hairstyle
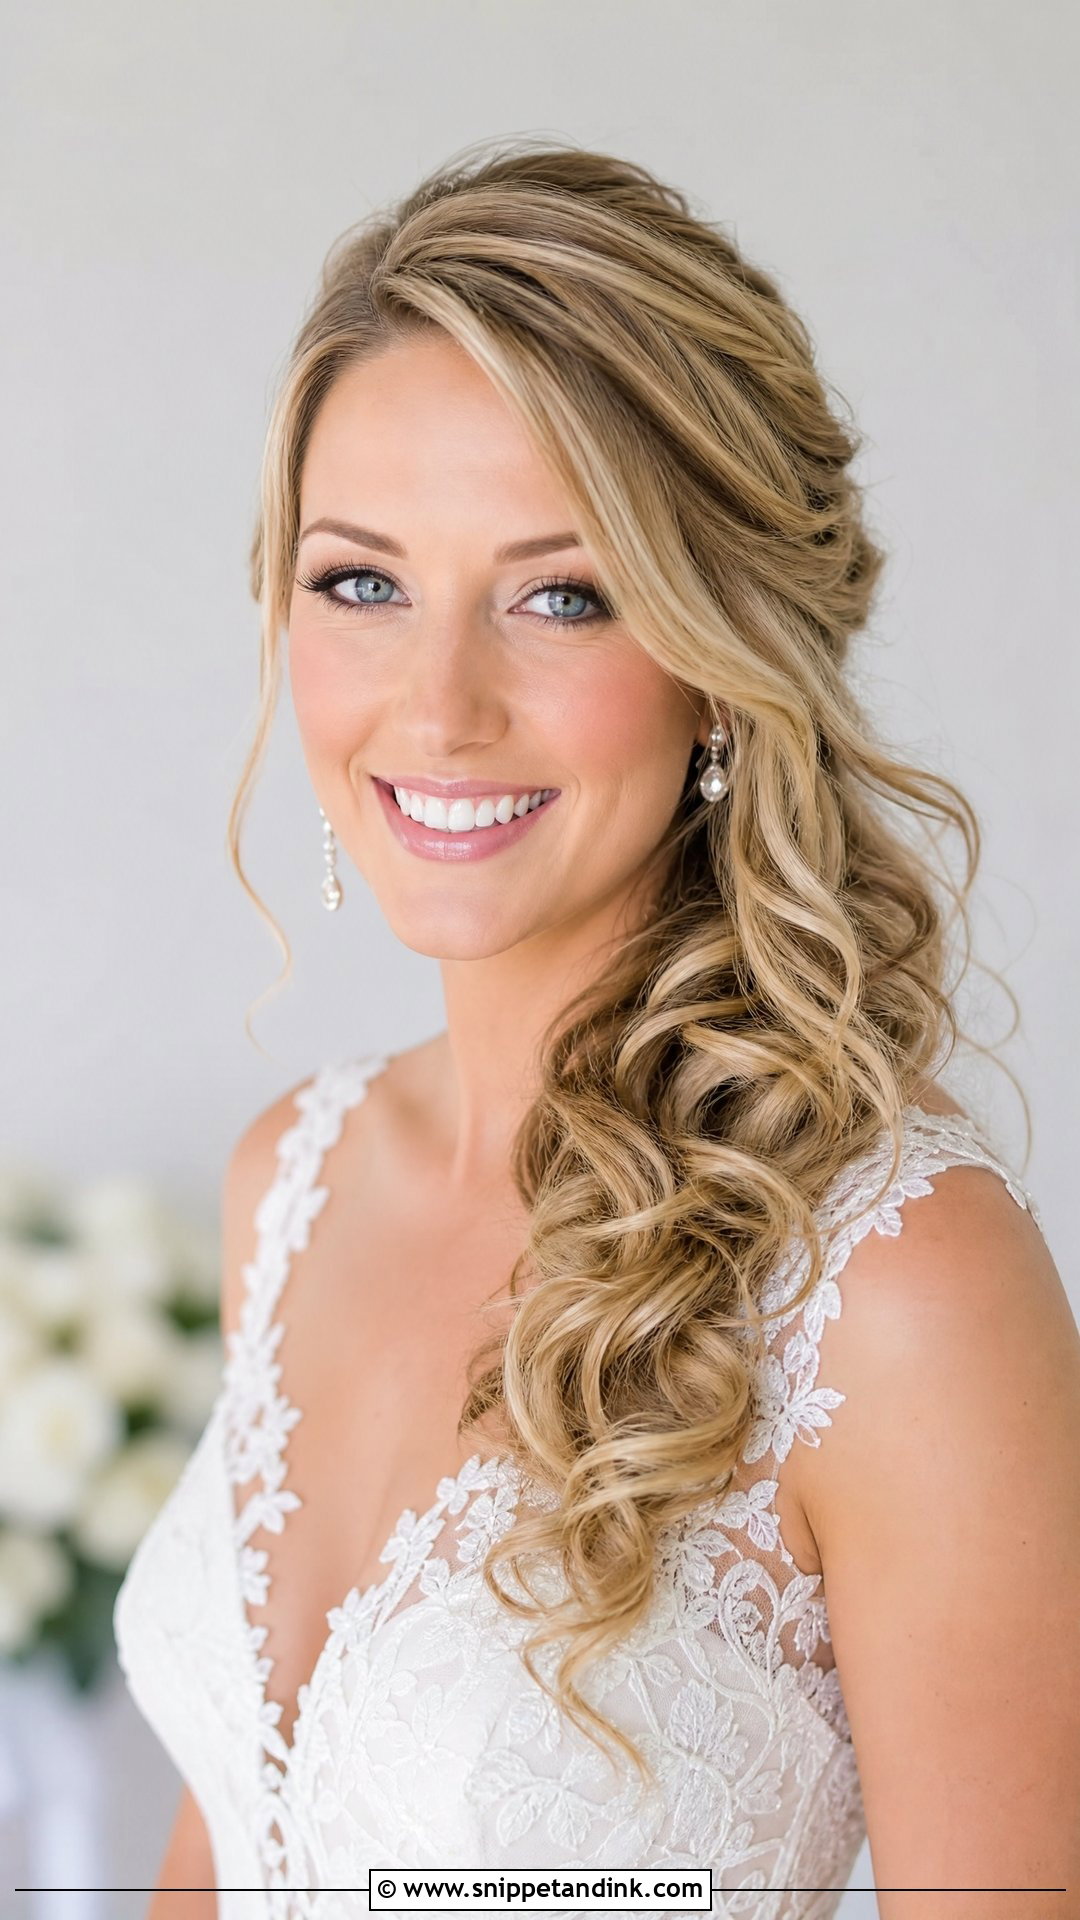
Sweeping everything over one shoulder creates a diagonal line from the part to the collarbone, and that diagonal is what lengthens the face. I pin the hair at the back of the head on the far side so the sweep doesn’t slide back during the ceremony. Two crossed bobby pins under the curls do it. Pair it with a deep side part, and keep any hairpin on the swept side so everything travels in one direction. The one place I’d hesitate is an outdoor ceremony with wind coming from the swept side.
2. Low Textured Chignon for Round Face
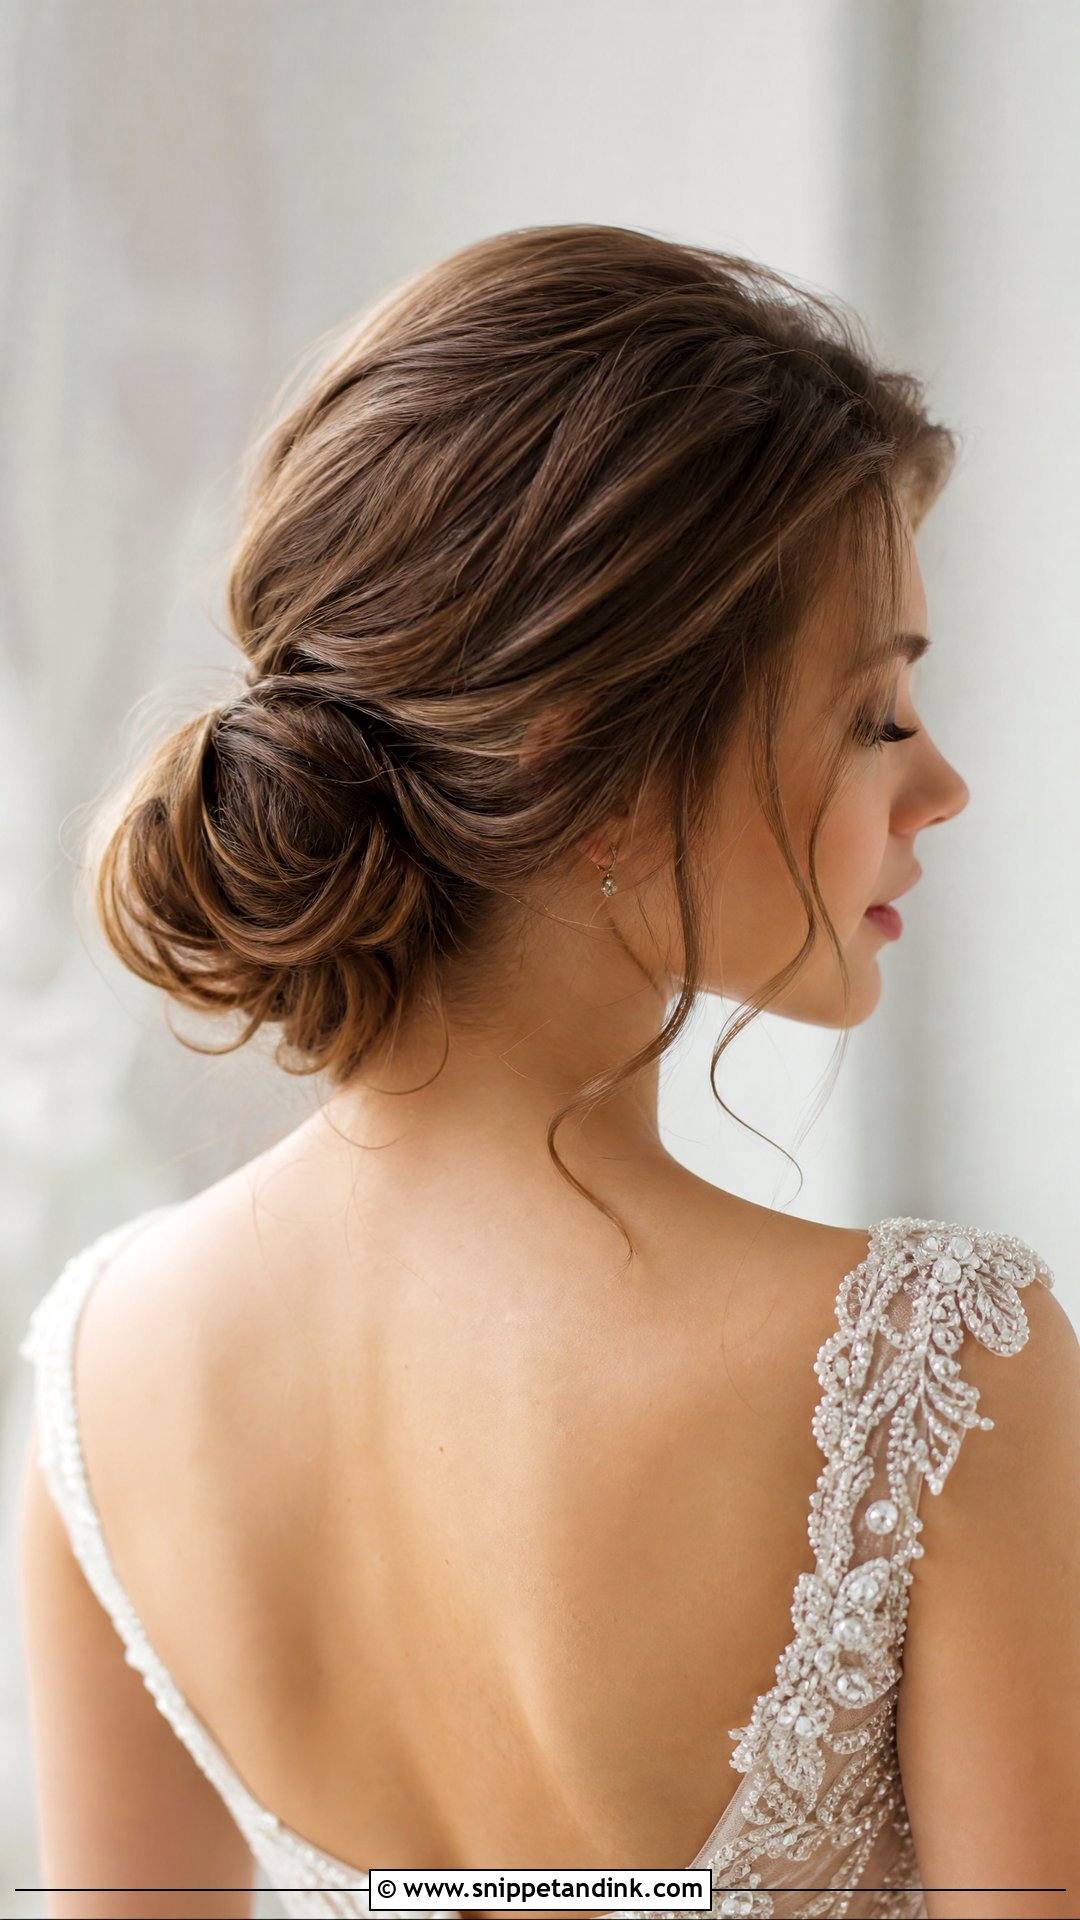
A low textured chignon clears the cheeks without the tight, scraped look that makes a round face look wider. I tease a little at the crown before gathering the hair, which gives height without anyone noticing it’s there. The wispy tendrils matter here, but keep them thin and long, falling past the jaw. Short tendrils that stop at the cheek draw a horizontal line right where you don’t want one. Pearls or baby’s breath tucked in on one side finish it.
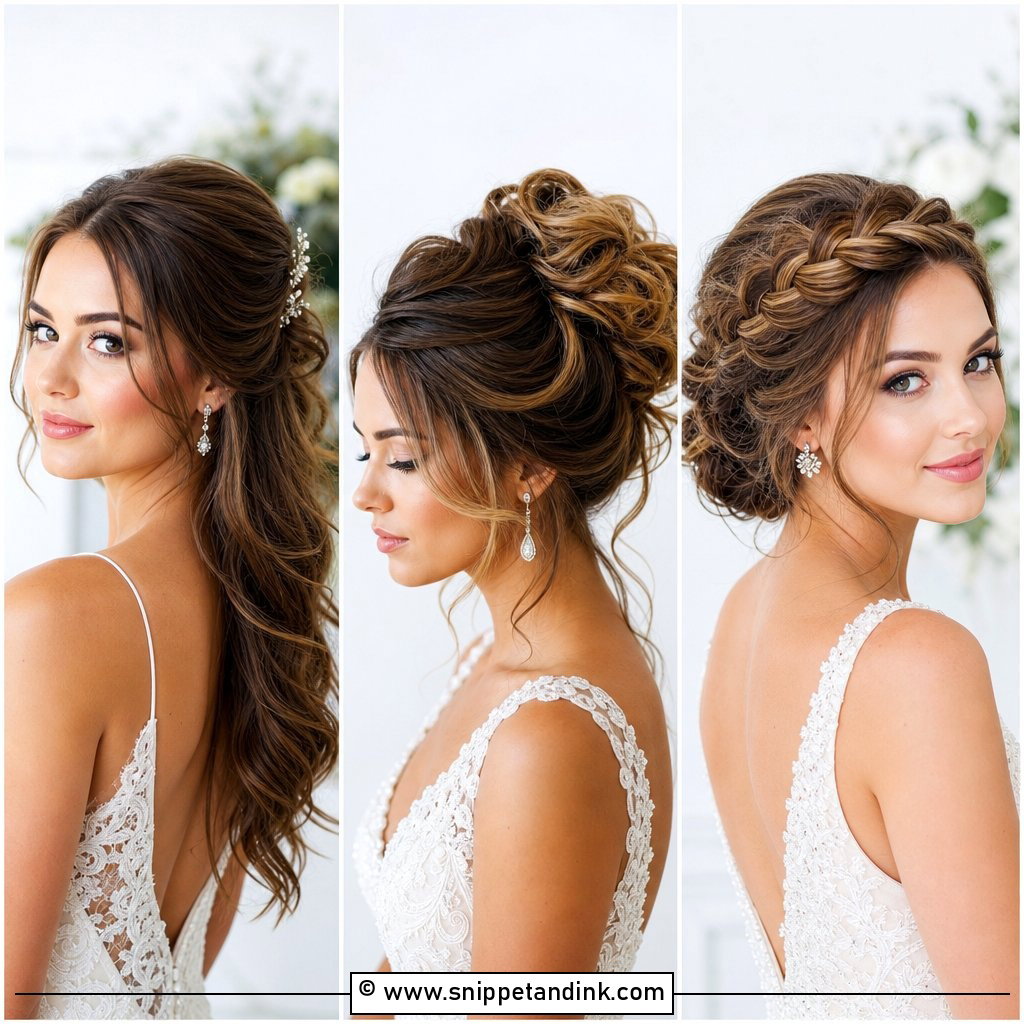
3. Half Up Half Down With Loose Waves
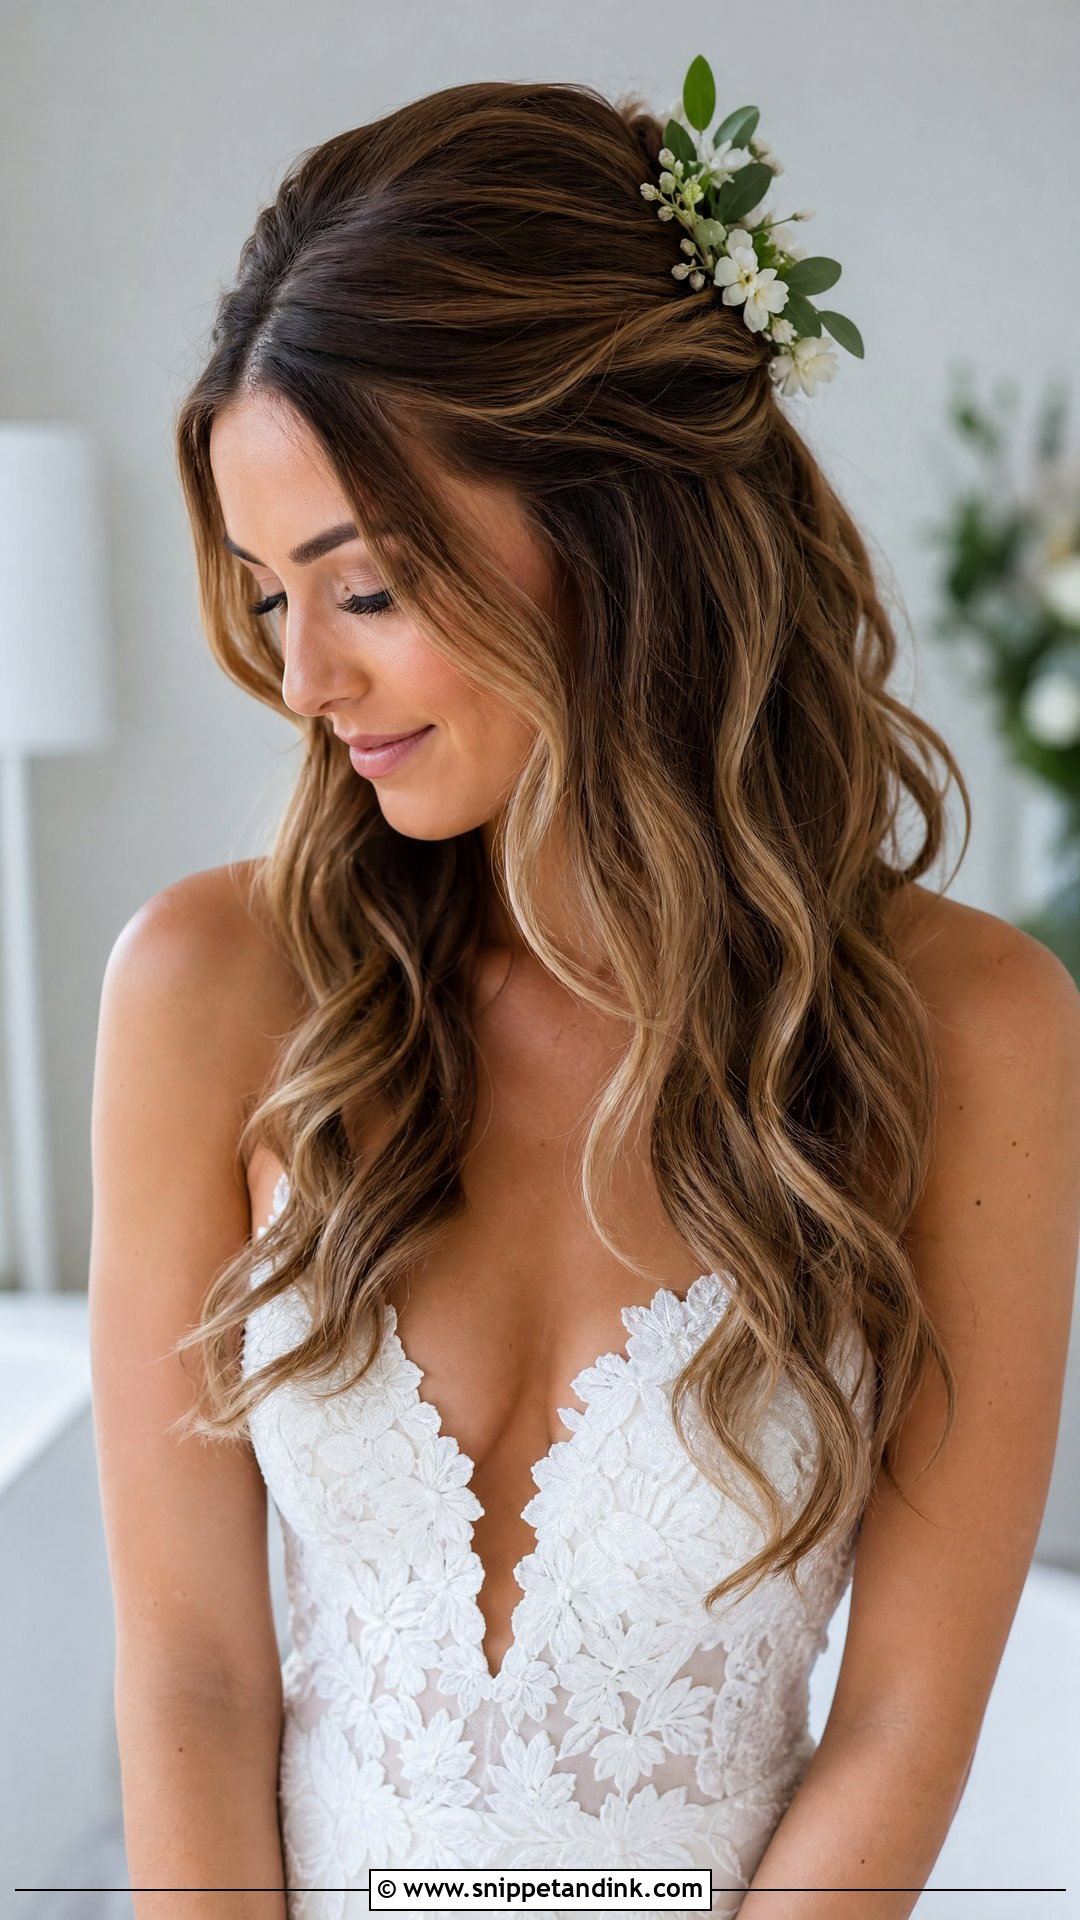
Half up, half down gives height and length at once, which is why I suggest it so often for round faces. The top section should be lifted, not flattened: backcomb at the roots, smooth the surface, then pin it high enough to add an inch or so at the crown. Waves below should start around the jaw rather than at the cheekbone, so the width sits lower. It suits rustic, ballroom and everything in between, and a small hairpiece over the pinned section hides the anchor.
4. Side Swept Bangs Bridal Updo
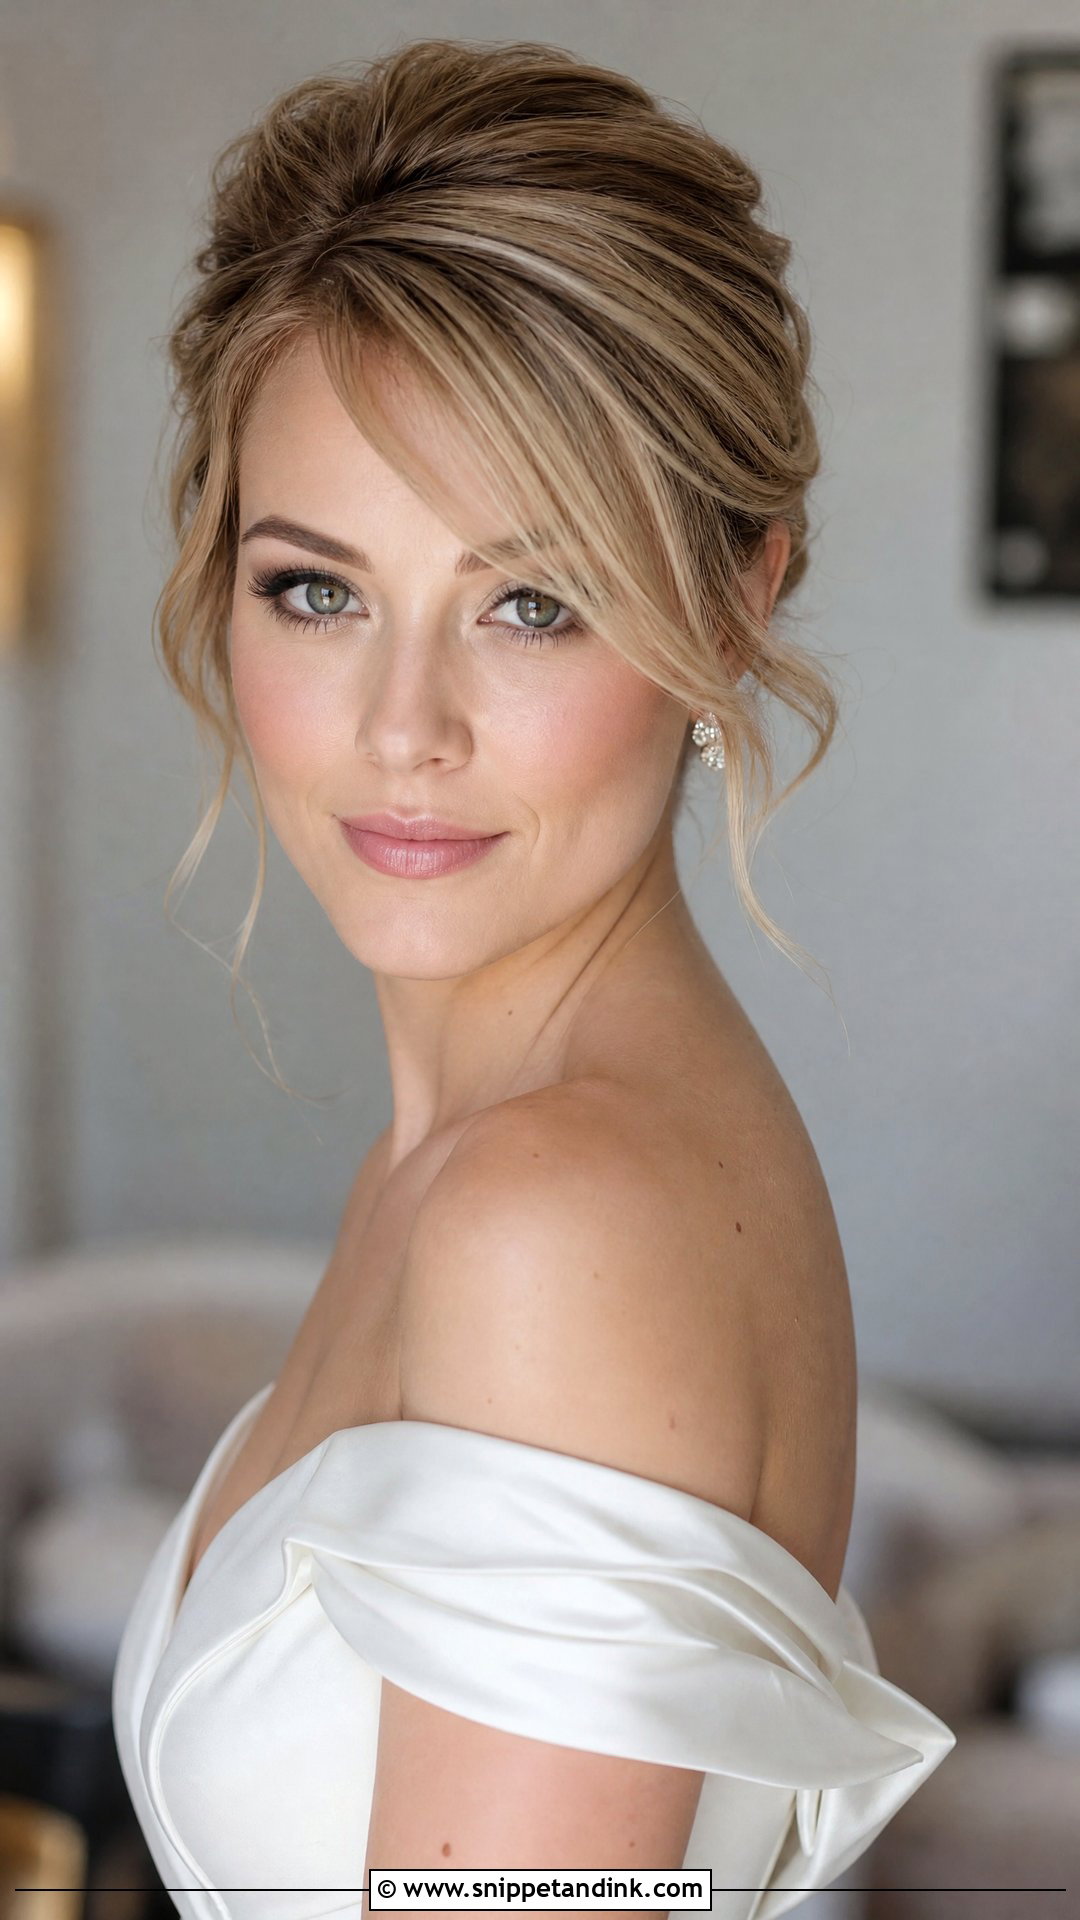
Side-swept bangs cut a diagonal across the forehead, and that alone makes a round face read longer. Wispy, angled fringe works; blunt, straight-across bangs do the opposite and box the face in. If you’re cutting bangs for the wedding, do it six to eight weeks ahead so they’ve grown into a length that sweeps rather than sticks out. I pair them with a soft updo, keeping volume at the crown and the back loose enough to look relaxed.
5. Voluminous High Updo for Chubby Face
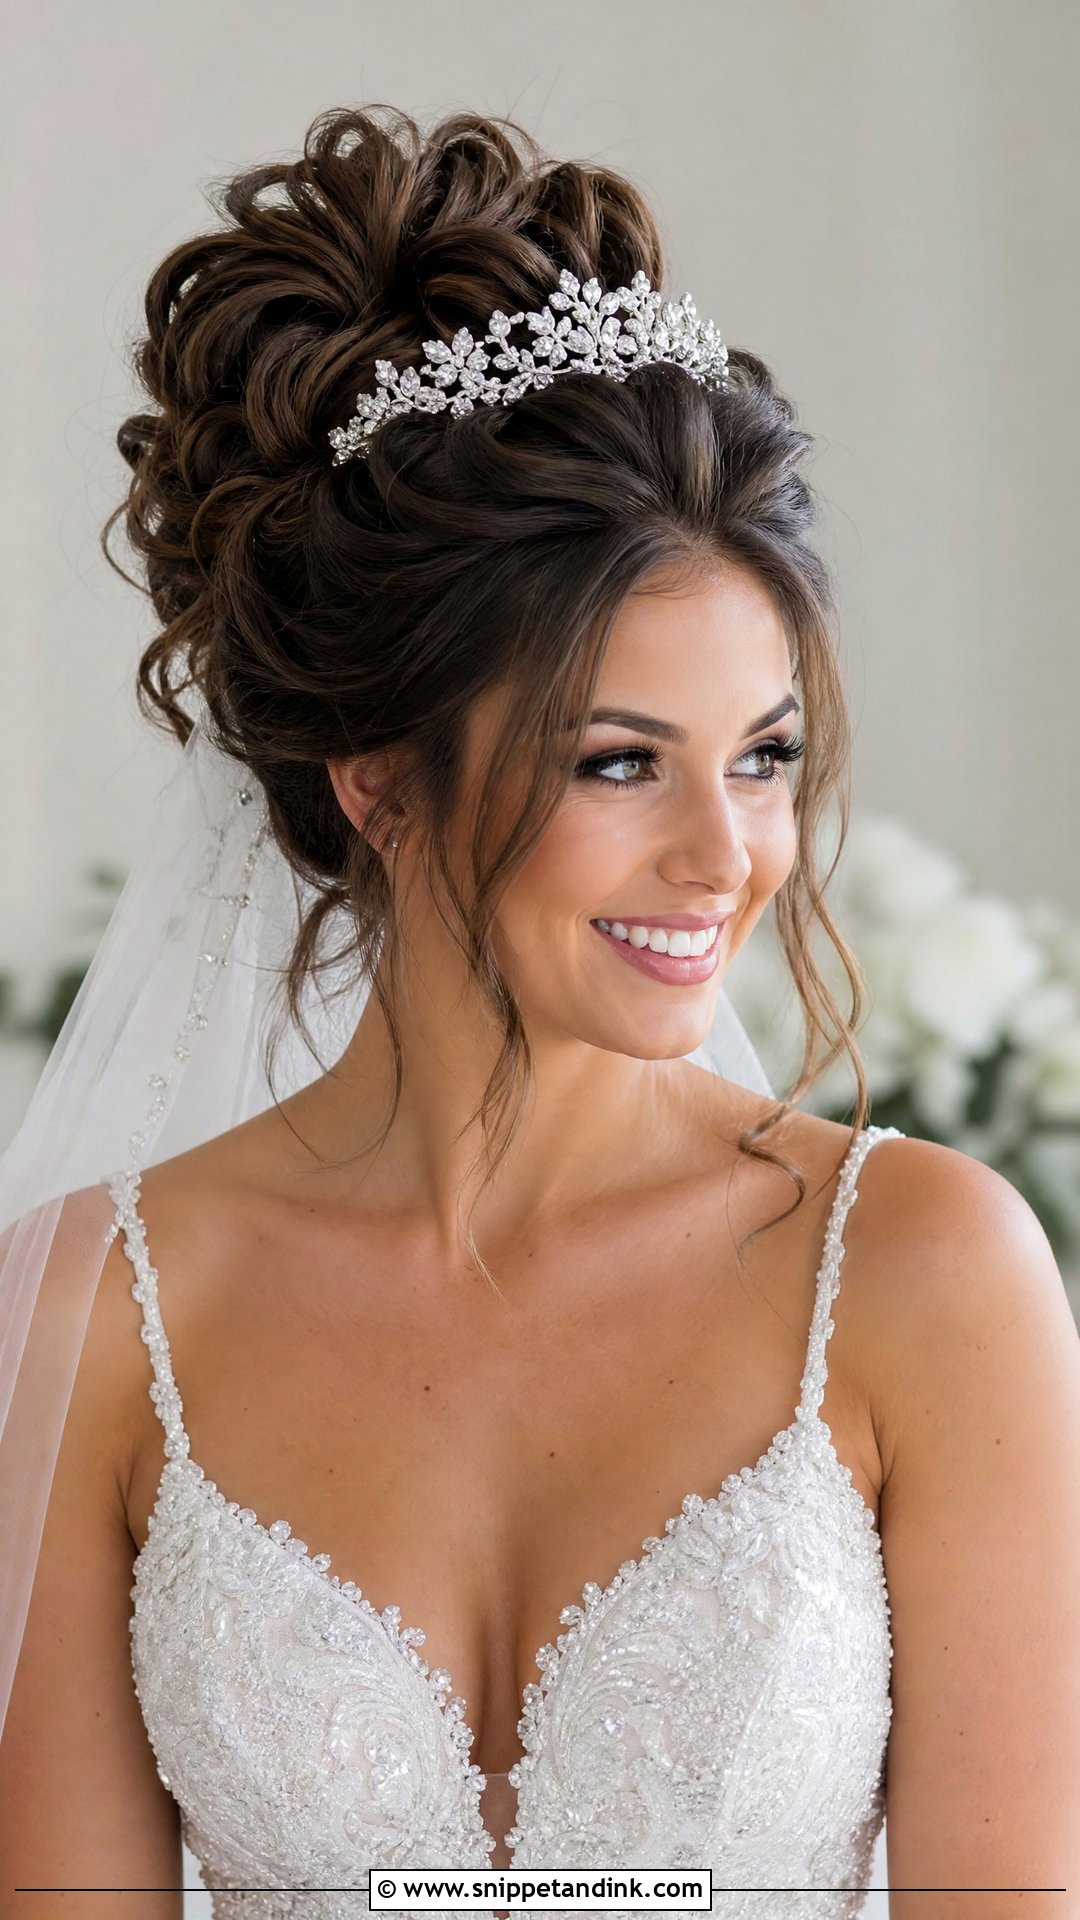
Height is the most direct trick for adding length, and a voluminous high updo uses it fully. I build the volume from a teased base and pad it if the hair is fine, then pin the shape so it rises without leaning forward. Too tight and too sleek, it can look severe, so I always leave a couple of soft strands at the temples. A tiara or tall comb adds a little more height. It belongs at a formal wedding and suits a neckline with some structure.
6. Loose Boho Braid Wedding Hairstyle
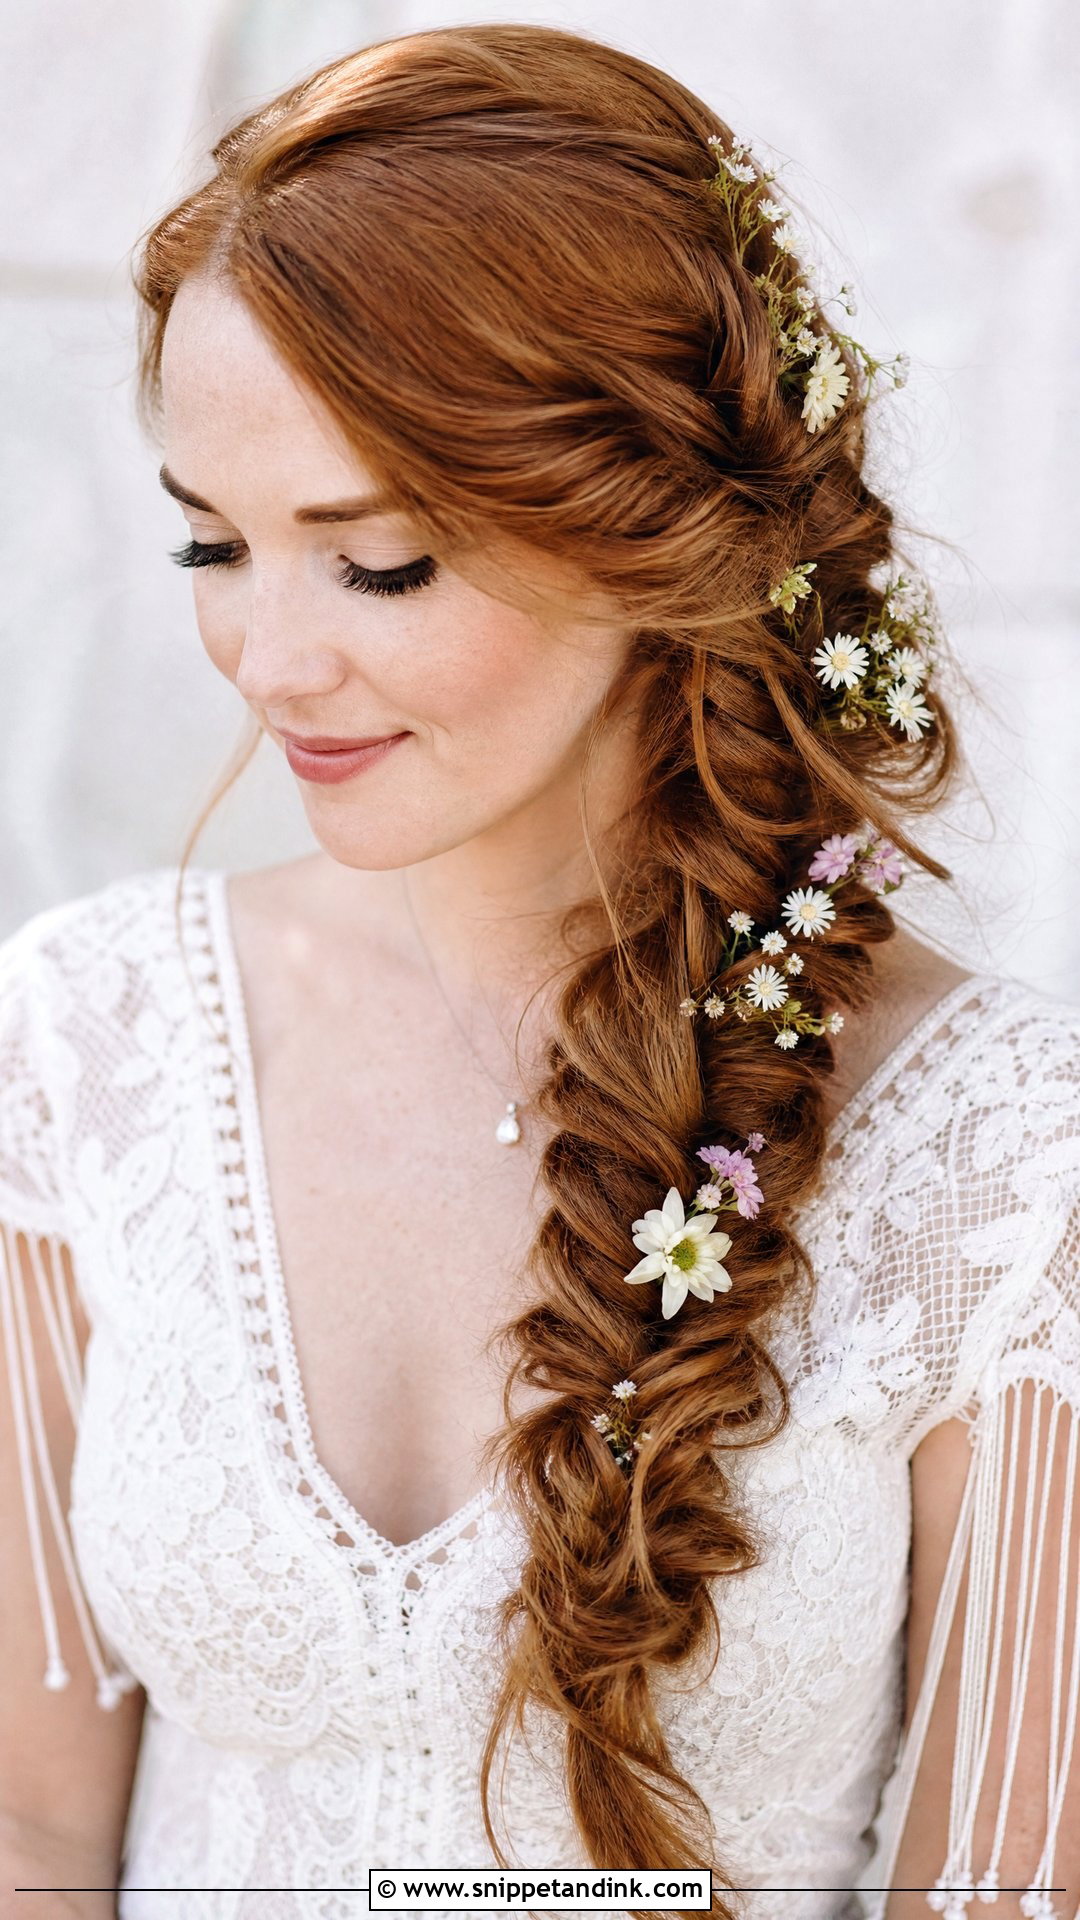
A boho braid only flatters a round face if it’s loose. A tight braid pulled back from the face exposes the full width of the cheeks, so I pancake every stitch and pull the braid wider than it wants to go. Worn over one shoulder, it gets the same diagonal as the side-swept curls. Flowers or ribbon woven through suit garden and rustic weddings. If your hair is fine, I’d add a clip-in weft before braiding, because a skinny braid next to a full face looks unbalanced.
7. Deep Side Part Tousled Low Bun
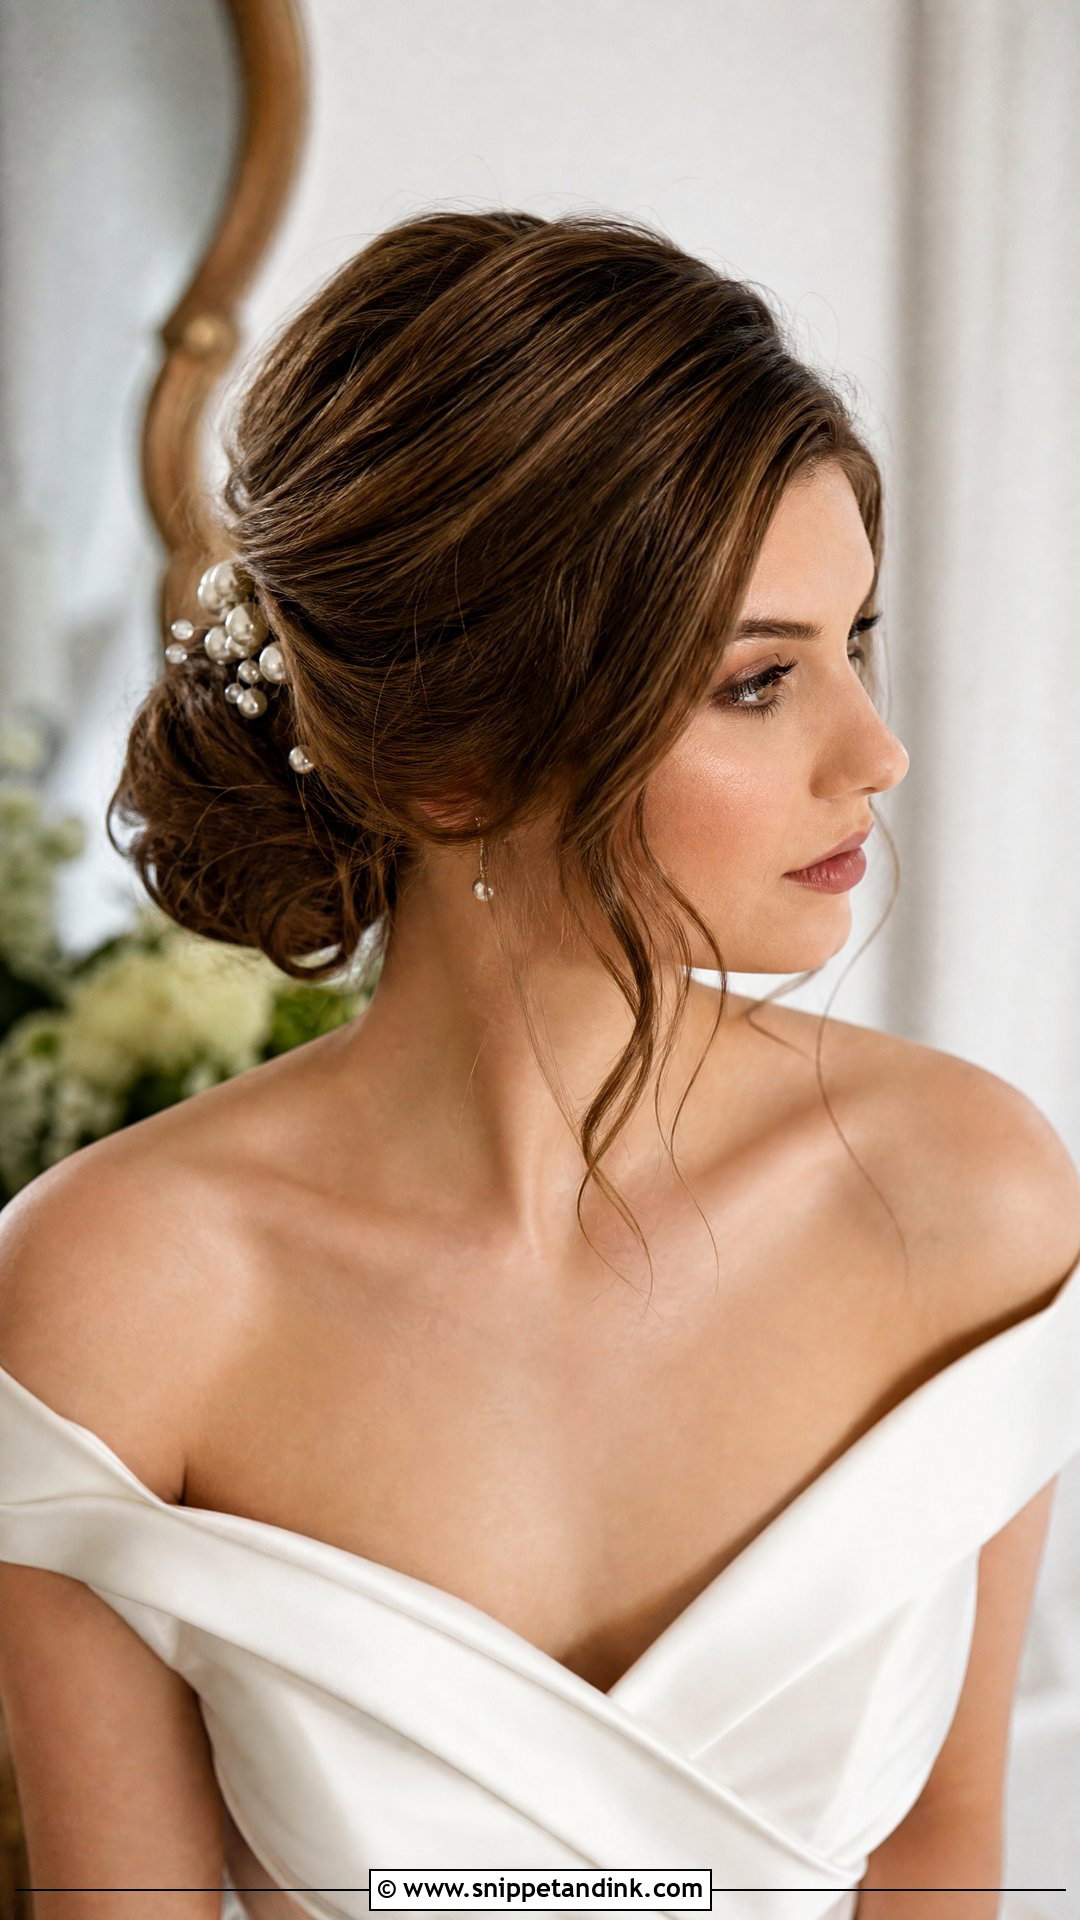
Moving the part is the cheapest flattering change I can make. A deep side part, set roughly above the arch of one eyebrow, gives the face an off-center line and lifts the crown on one side. Paired with a tousled bun at the nape, it reads lived-in rather than prim. A few loose pieces on the heavier side of the part break the line of the cheek. Finish with a small pearl pin in the bun, and set the part while the roots are still warm so it doesn’t creep back to center.
8. Long Layered Waves With Face Framing
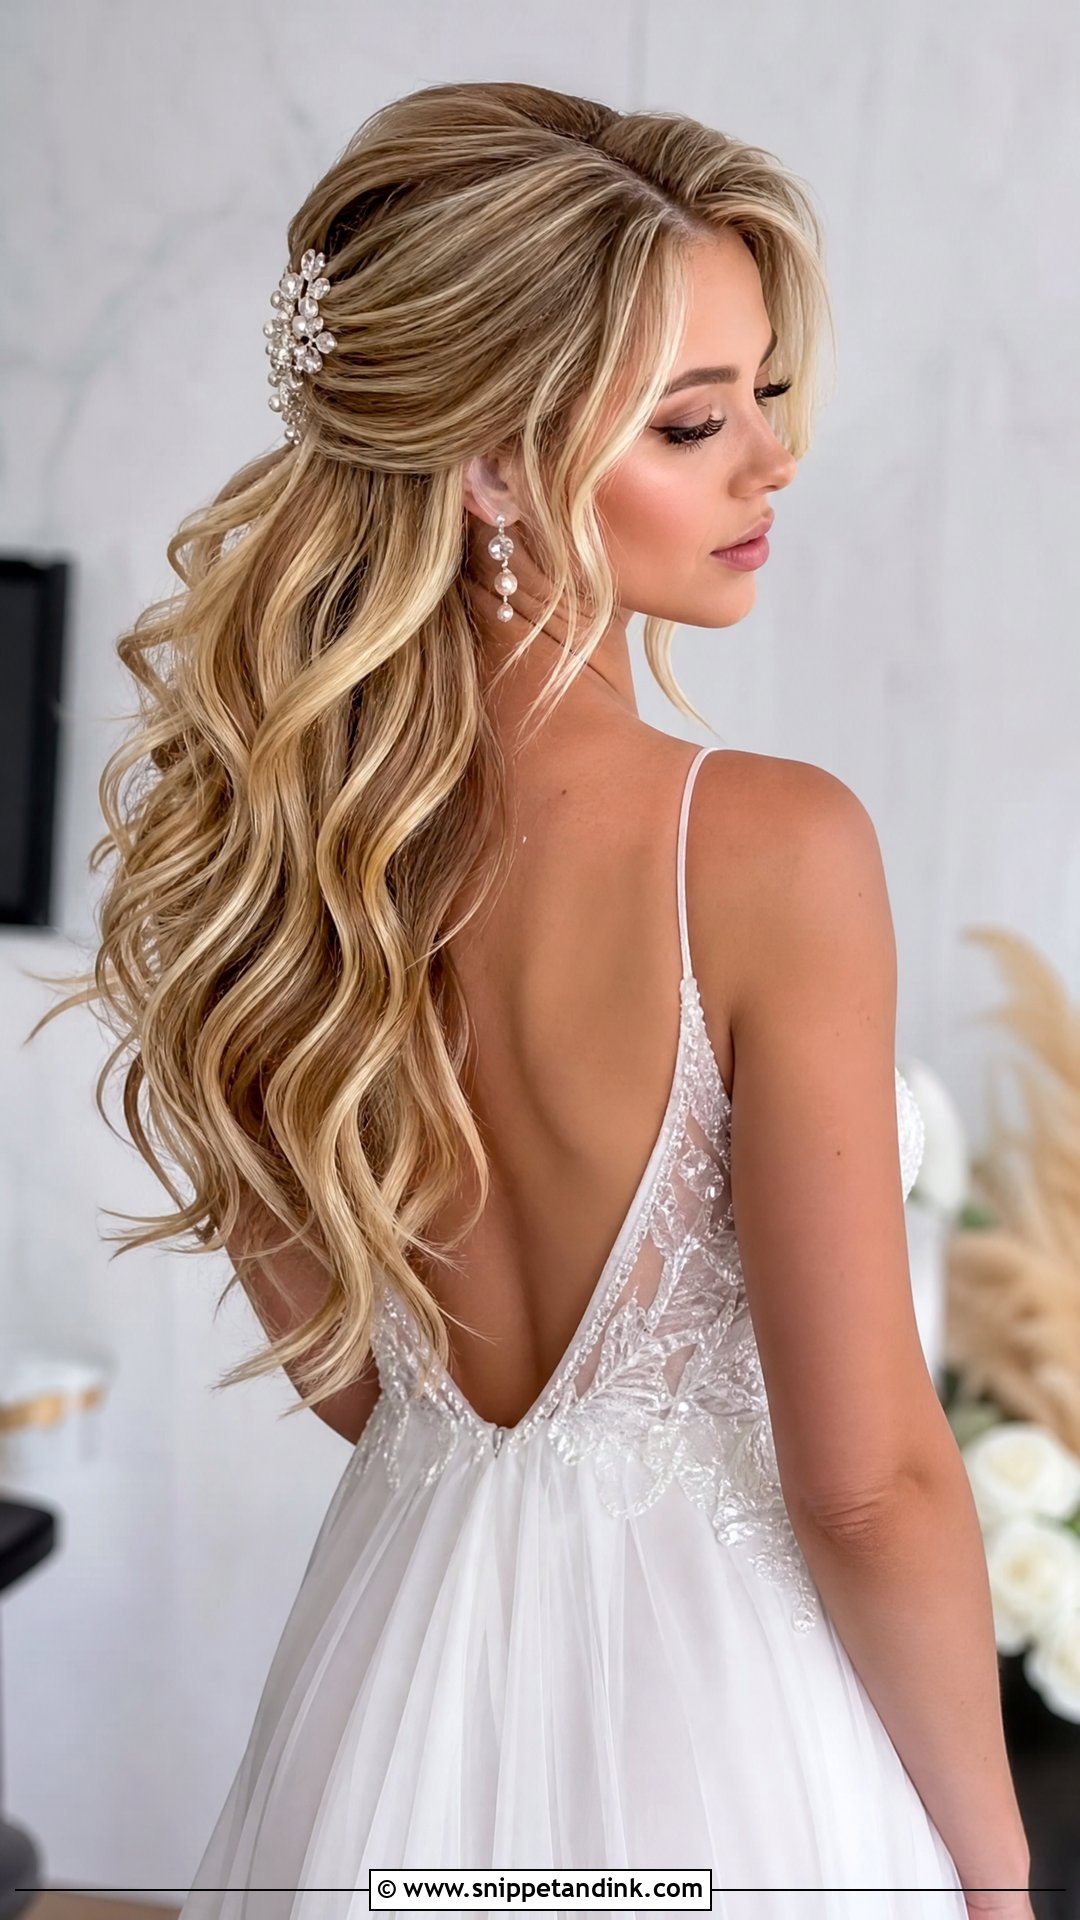
Long layers take weight off the sides so the hair doesn’t puff out at cheek level, which is the most common problem I see with round faces and long hair. The face-framing layer should start at or below the chin. The cascading waves then pull the eye downward. A side part helps again here. If you’re booking a cut before the wedding, ask for the layers about a month ahead so the ends have softened by the day.
9. Side Swept Vintage Hollywood Waves
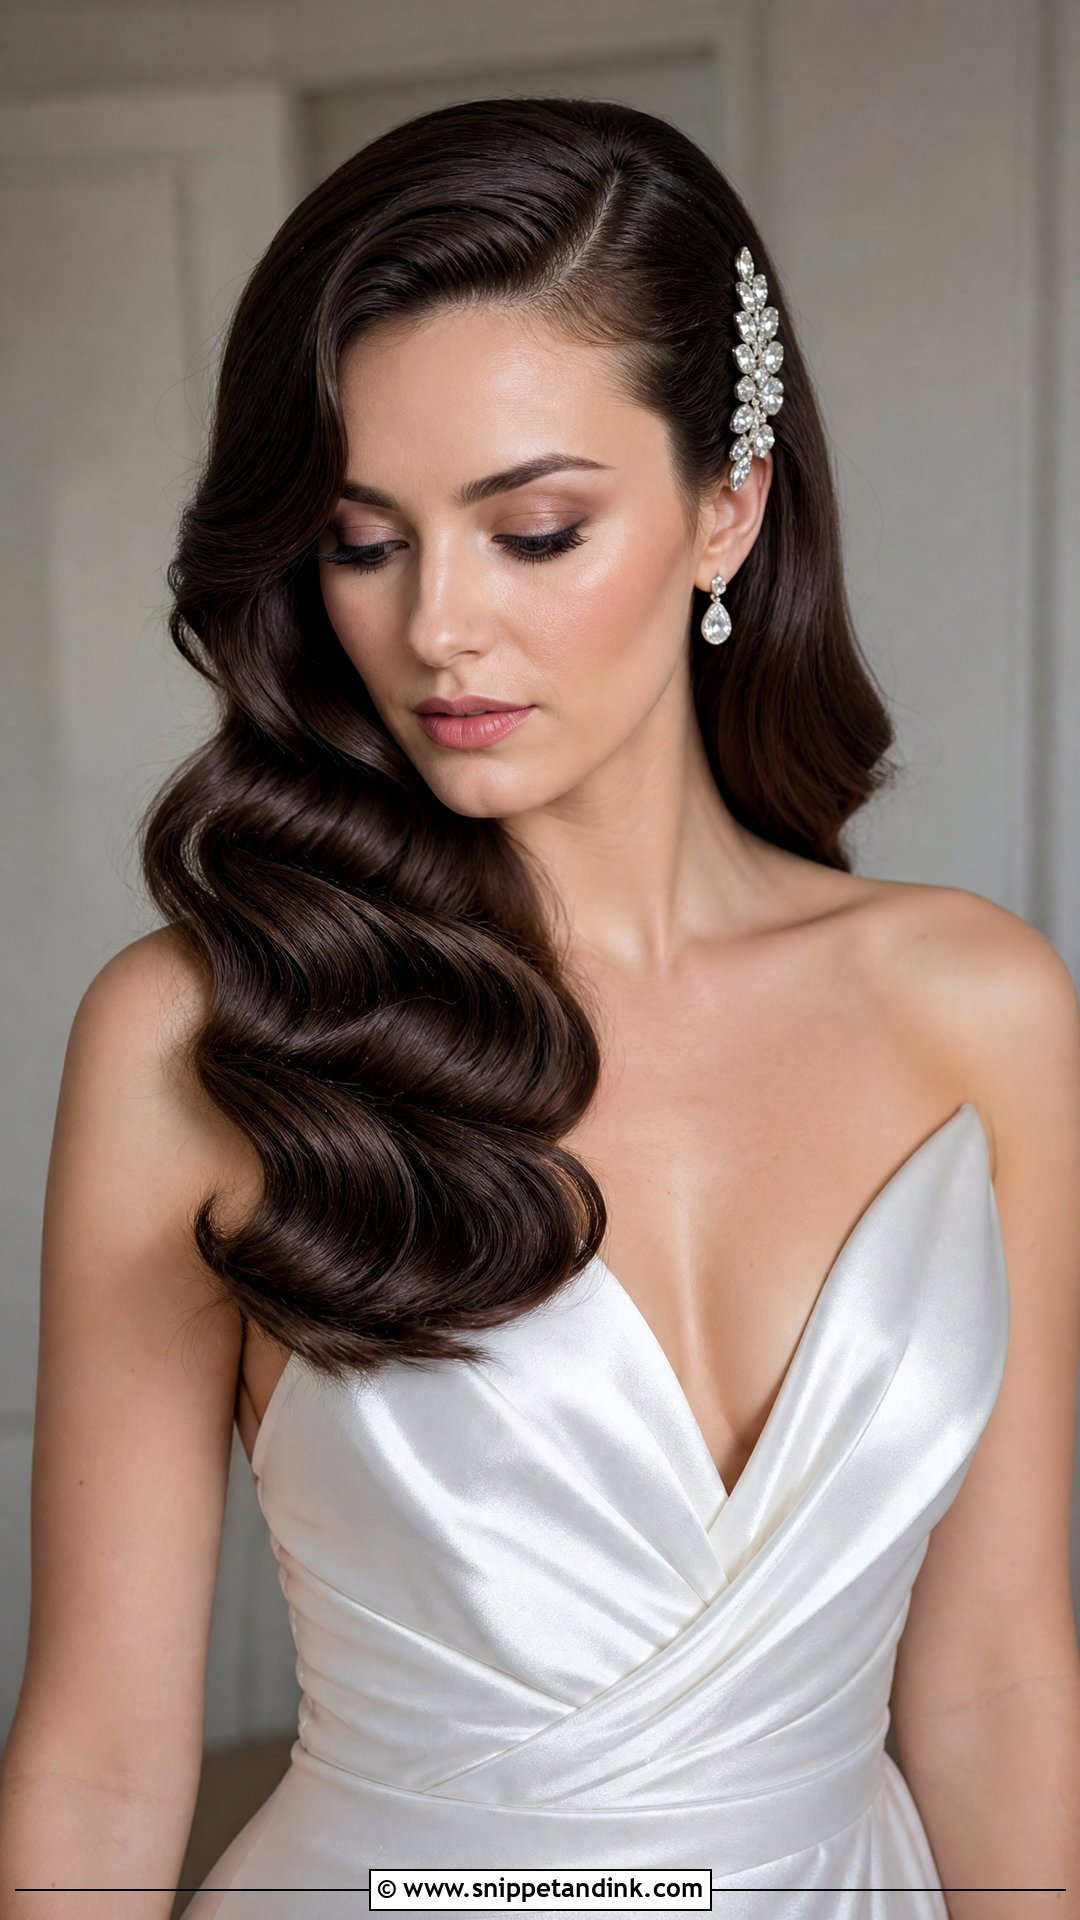
Hollywood waves on a round face only work with a deep side part and with the waves swept firmly to one side. Center-parted, they frame both cheeks evenly, which tends to emphasize width. I set the waves in pin curls, brush them into one continuous ridge, and let one wave fall forward over the cheekbone on the swept side. That single wave does a lot of the balancing. A vintage comb behind the ear on the opposite side keeps everything in place.
10. Soft Curly Updo With Crown Volume
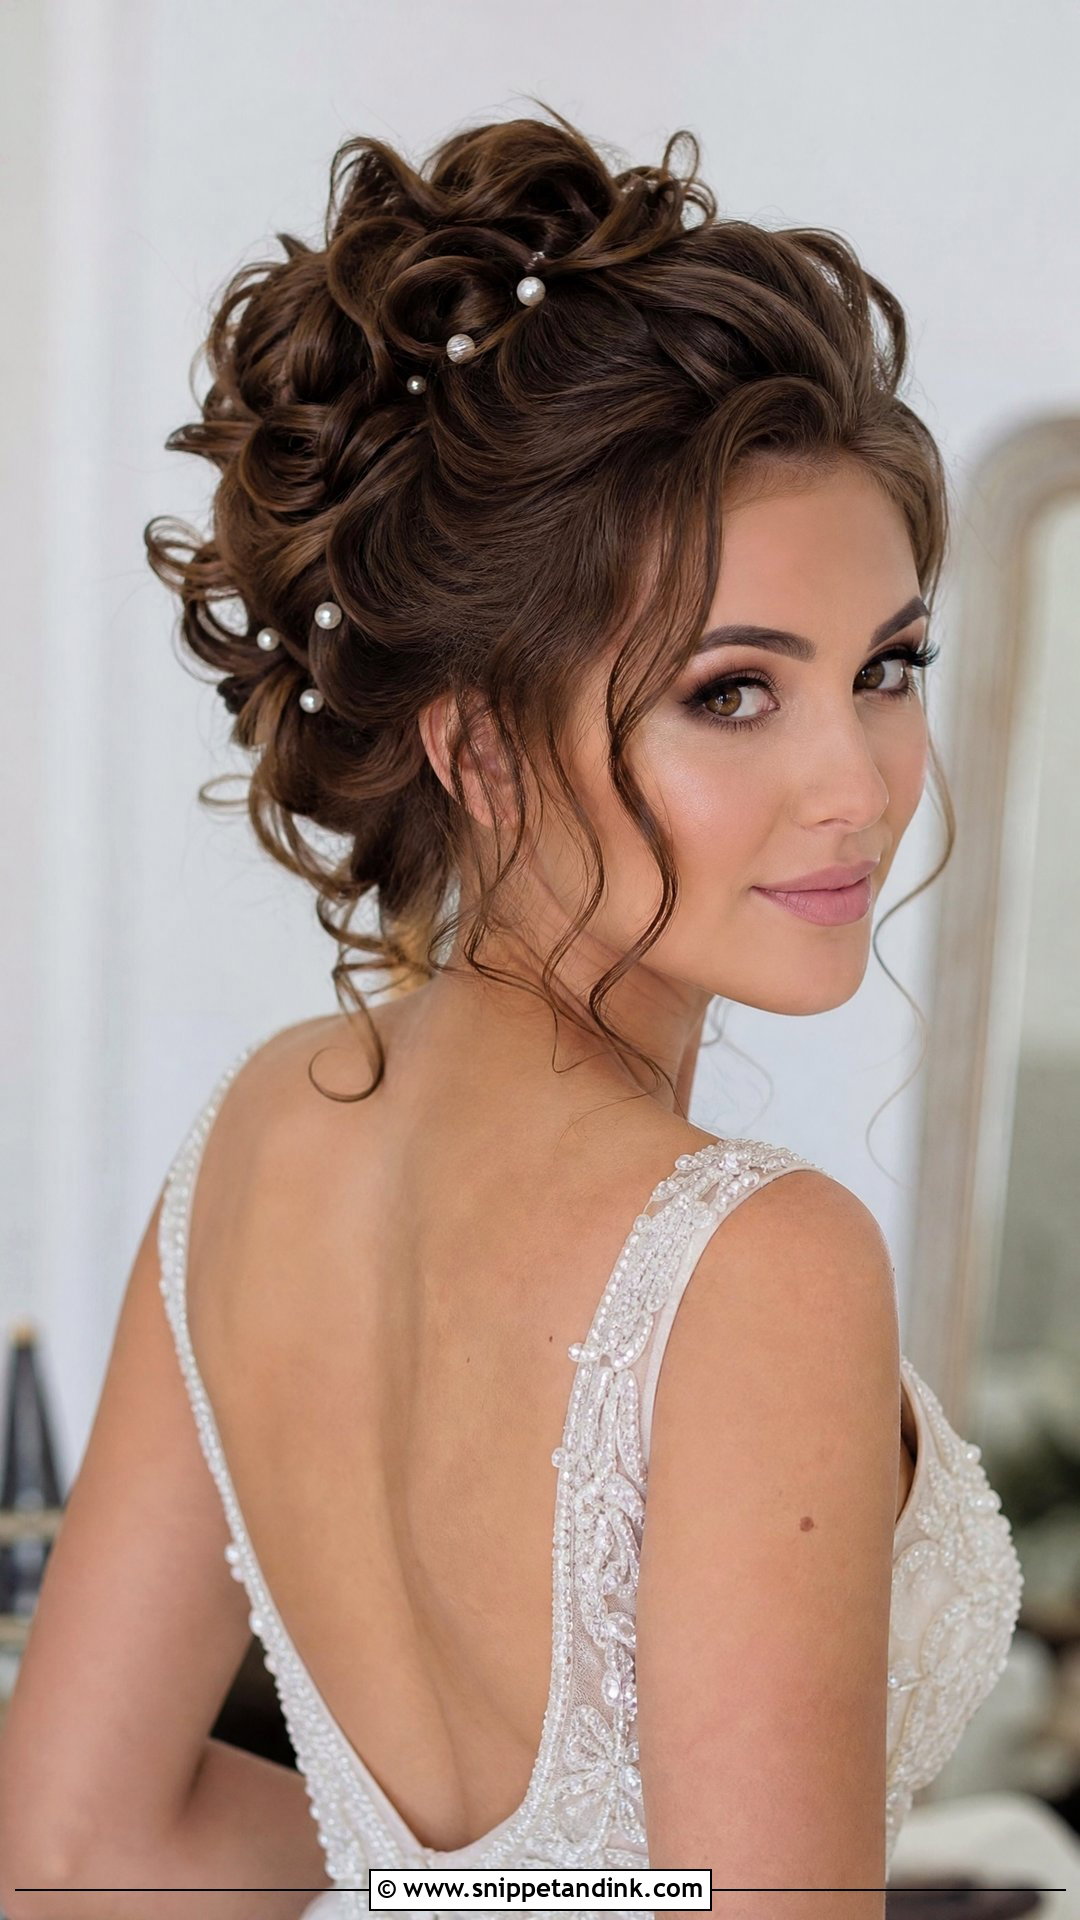
Curly hair has built-in volume, so the job is to put that volume on top, not at the sides. I gather the curls high and loose and leave the sides closer to the head, which gives a longer shape. Curls are defined before I pin anything, and I work with fingers so they don’t frizz. A few curly tendrils in front, from the hair’s own pattern rather than ironed ringlets, keep it soft. Small pearls scattered through the curls show up well.
11. Messy Bun With Loose Tendrils
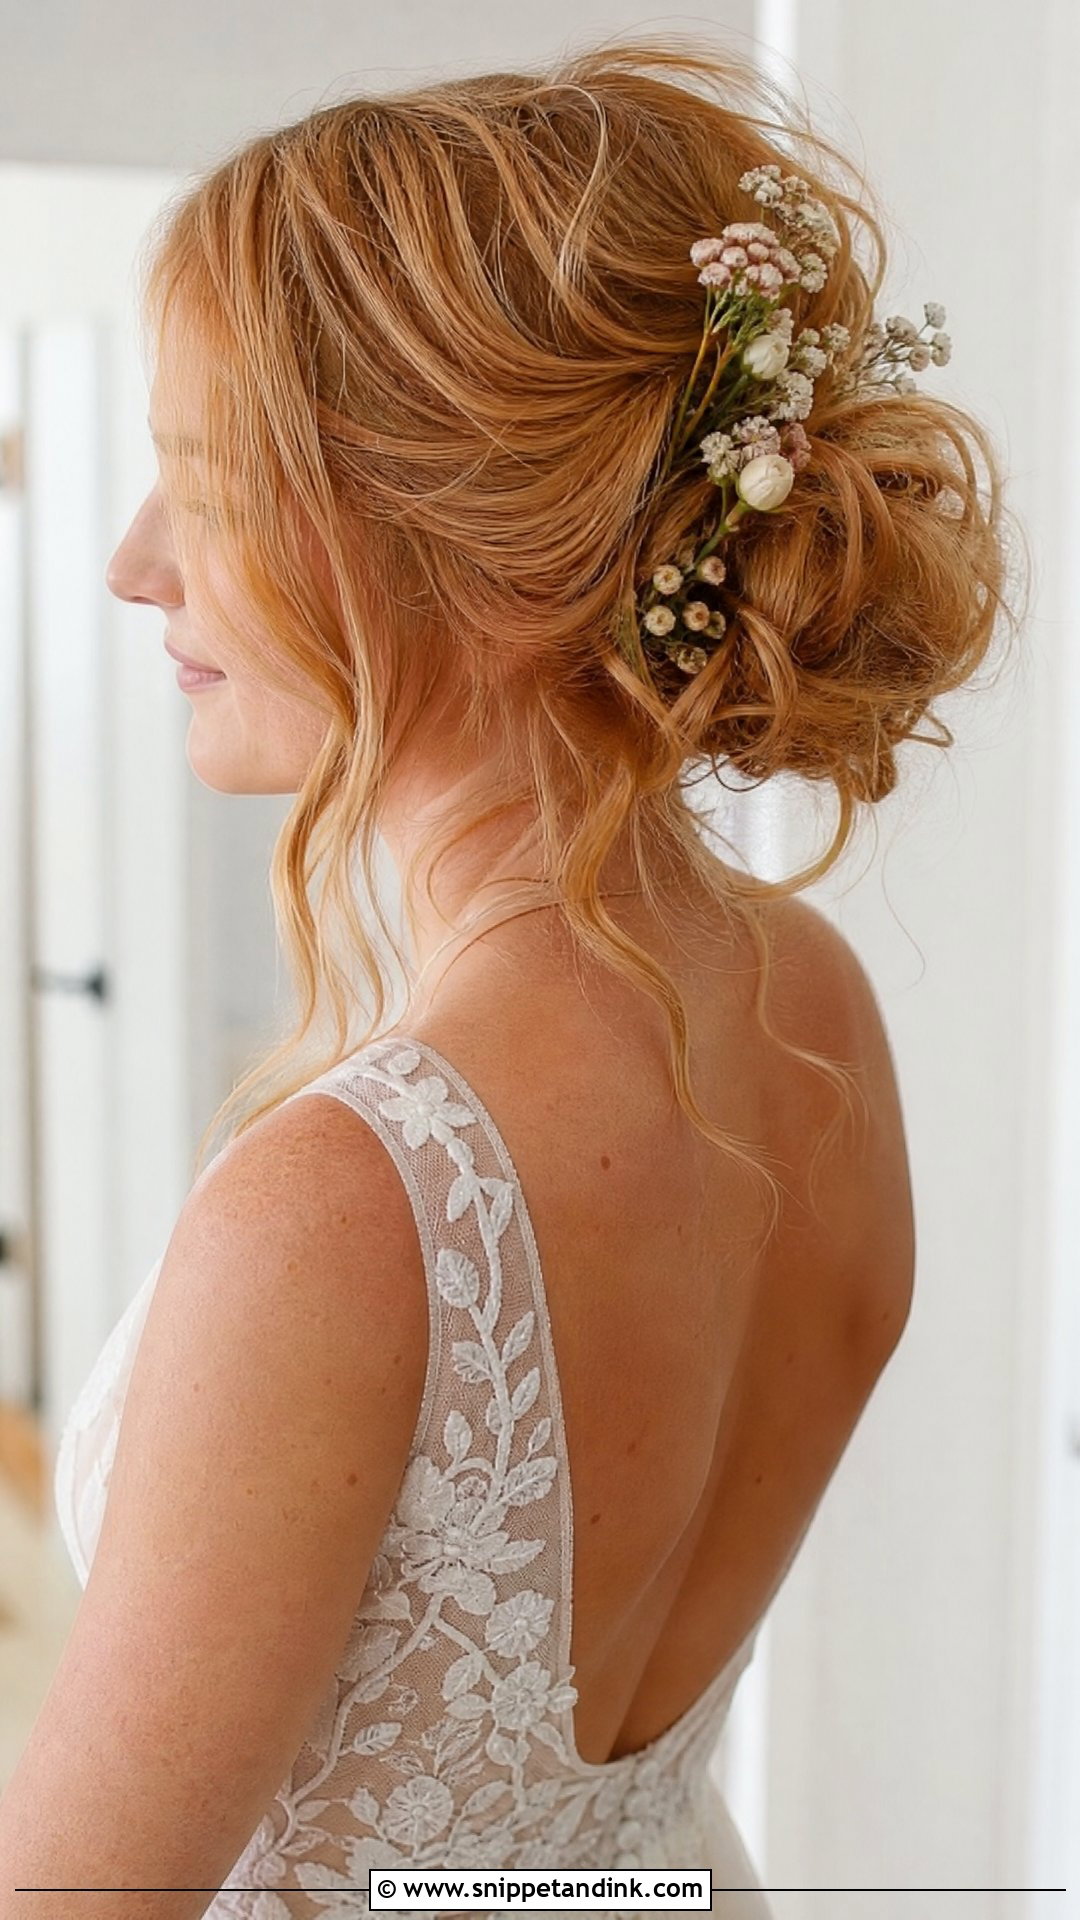
Messy buns are forgiving, which is why relaxed brides like them, and the bun height is your lever. Set higher, it lengthens the face; set low, it’s more elegant but adds less height. I usually split the difference for a round face and place it at the back of the crown. Loose tendrils are the trap. Pull out too many and the face disappears inside a frame of fluff. Two or three thin pieces are enough. Garden and boho weddings suit it, and a couple of small flowers finish it.
12. Twisted Updo With Side Tendrils
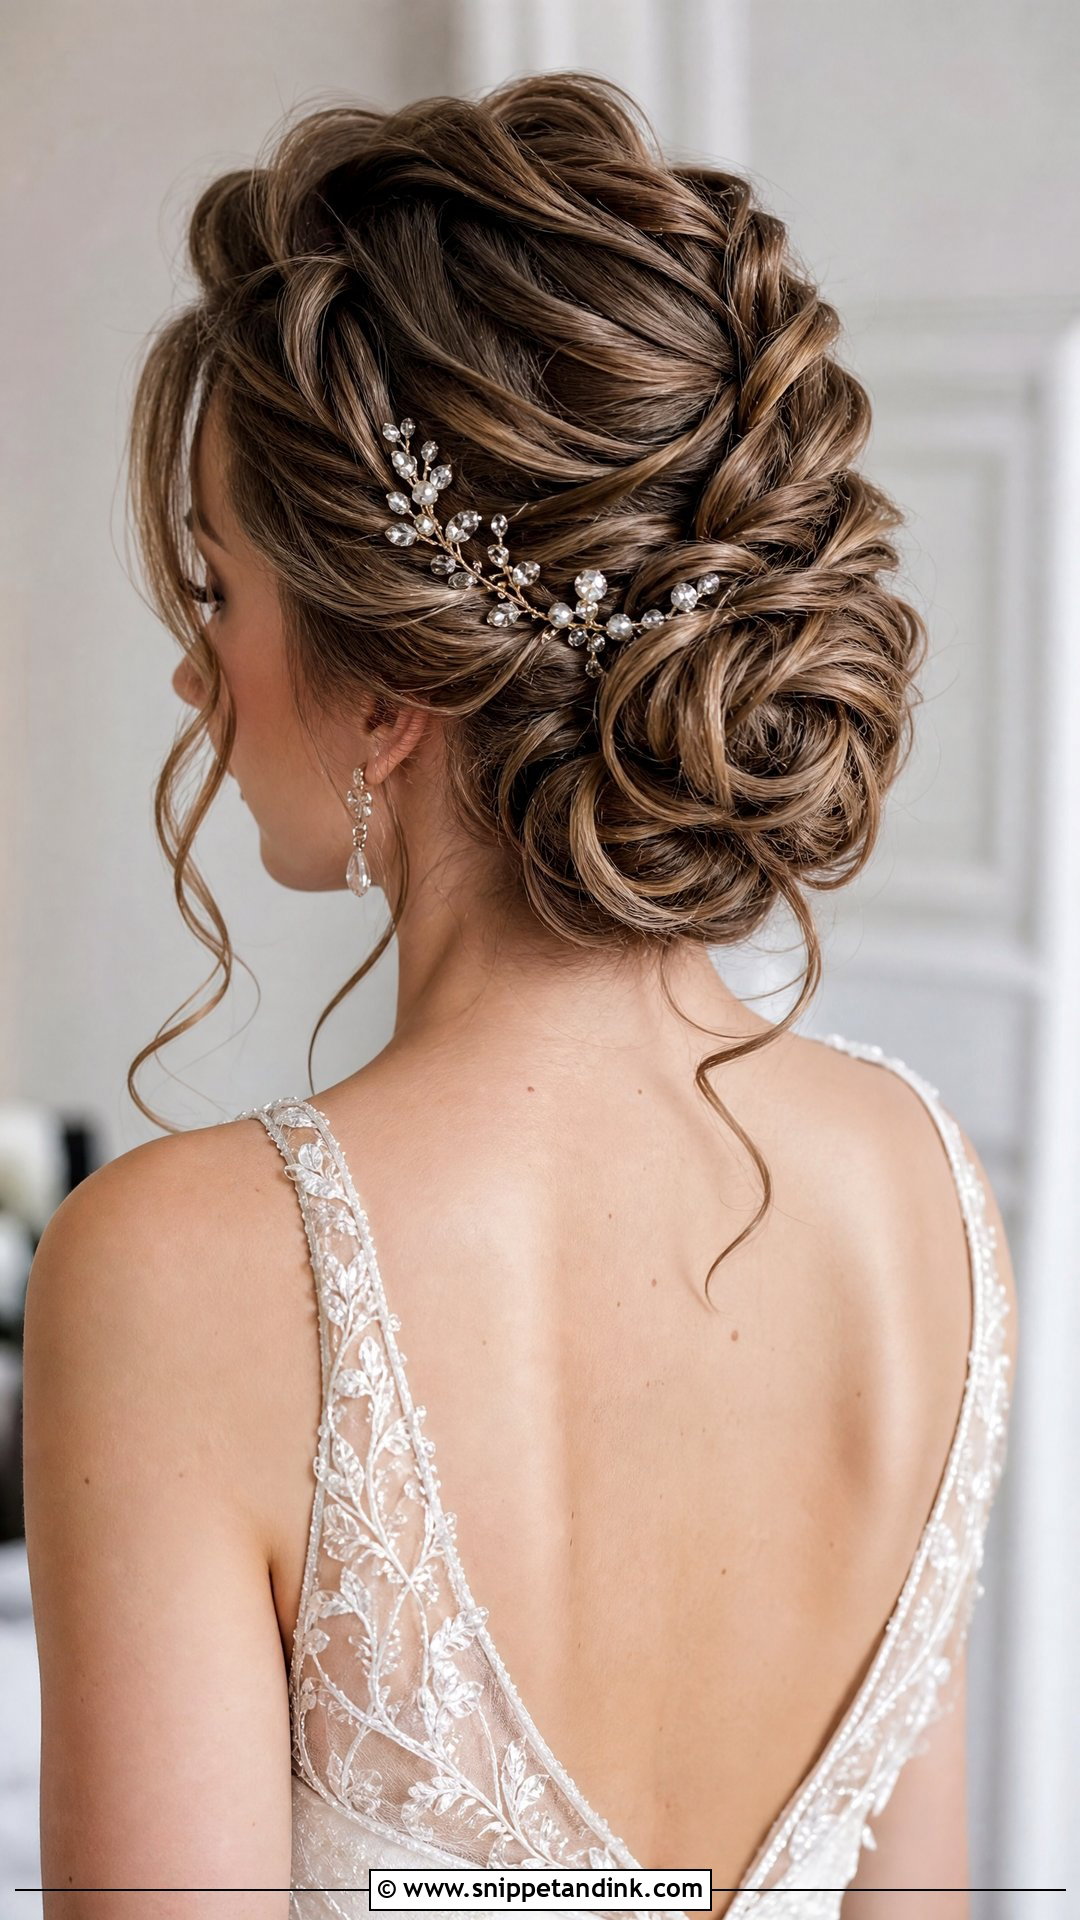
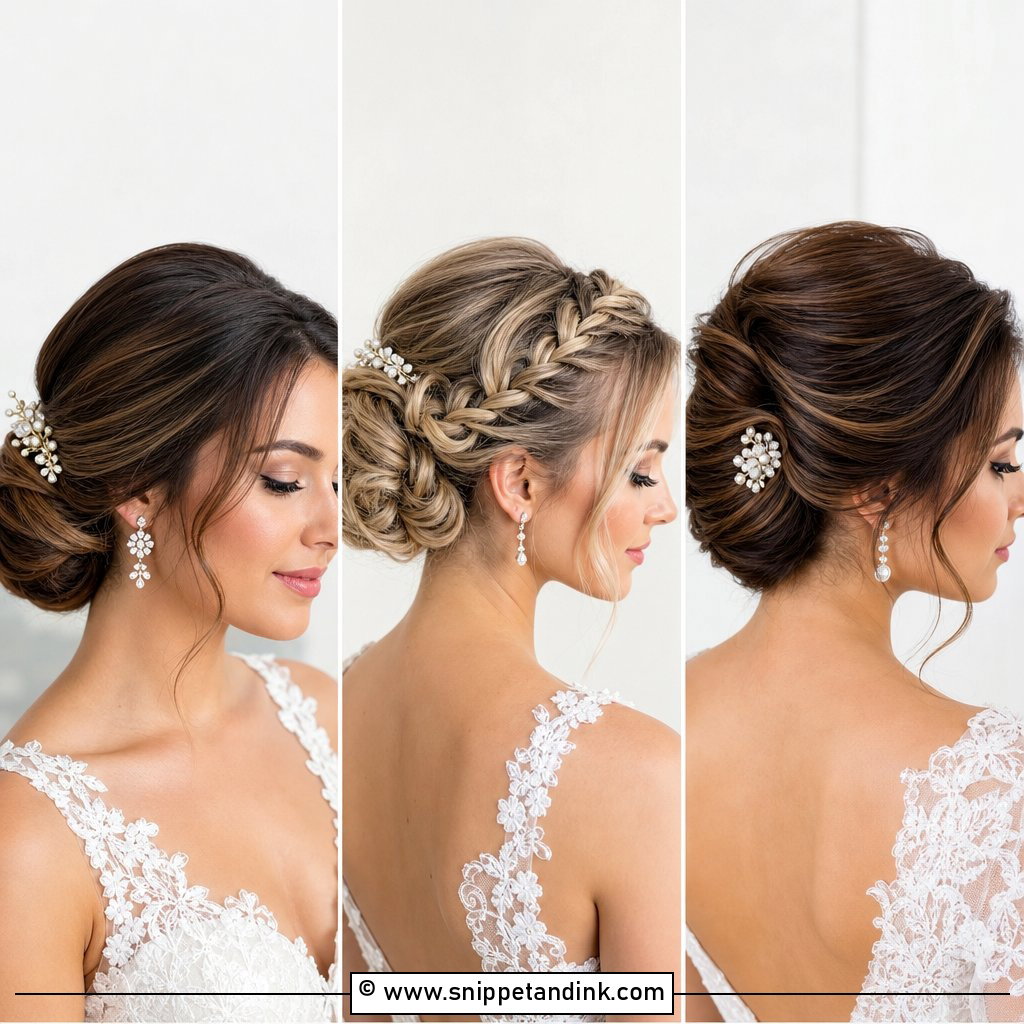
Twists add height and texture without the bulk a braid can bring. I twist sections up and back from the hairline toward the crown, so every twist points upward, then pin them into a loose cluster. That upward direction carries the eye up. Keep the twists slightly loose or the style looks stiff in close-ups. A few side tendrils soften it, and small jeweled pins along the twists catch the light at a formal or semi-formal wedding.
13. Side Ponytail With Soft Curls
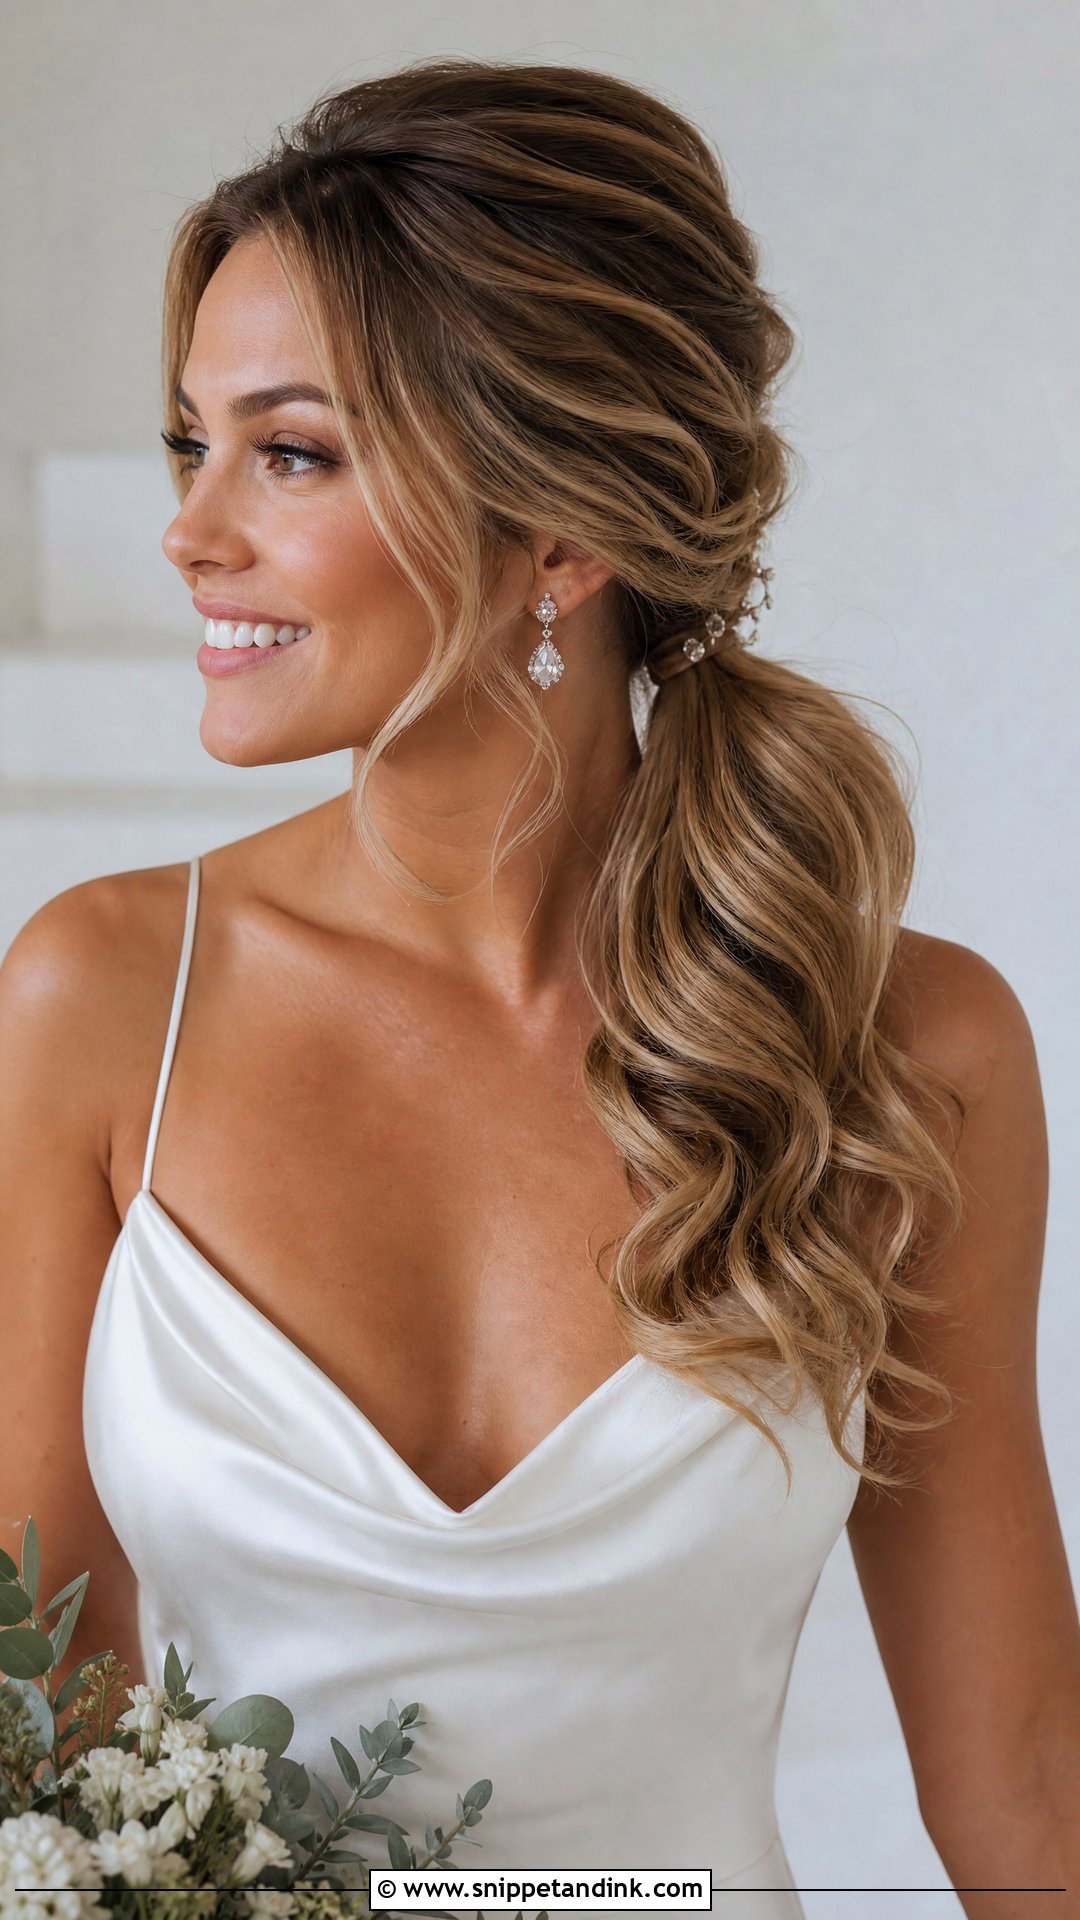
A side ponytail does the diagonal trick with almost no effort. I set it low, behind and just below the ear on one side, and add a little lift at the crown before gathering it, so the whole shape slants from top to shoulder. Wrapping a strand around the elastic hides it, and a hidden pin through the wrap stops it unwinding. Curl the length for movement. This holds up well for indoor and outdoor weddings, as long as you don’t set it so low that it drags against the dress straps.
14. Braided Crown Updo for Round Face
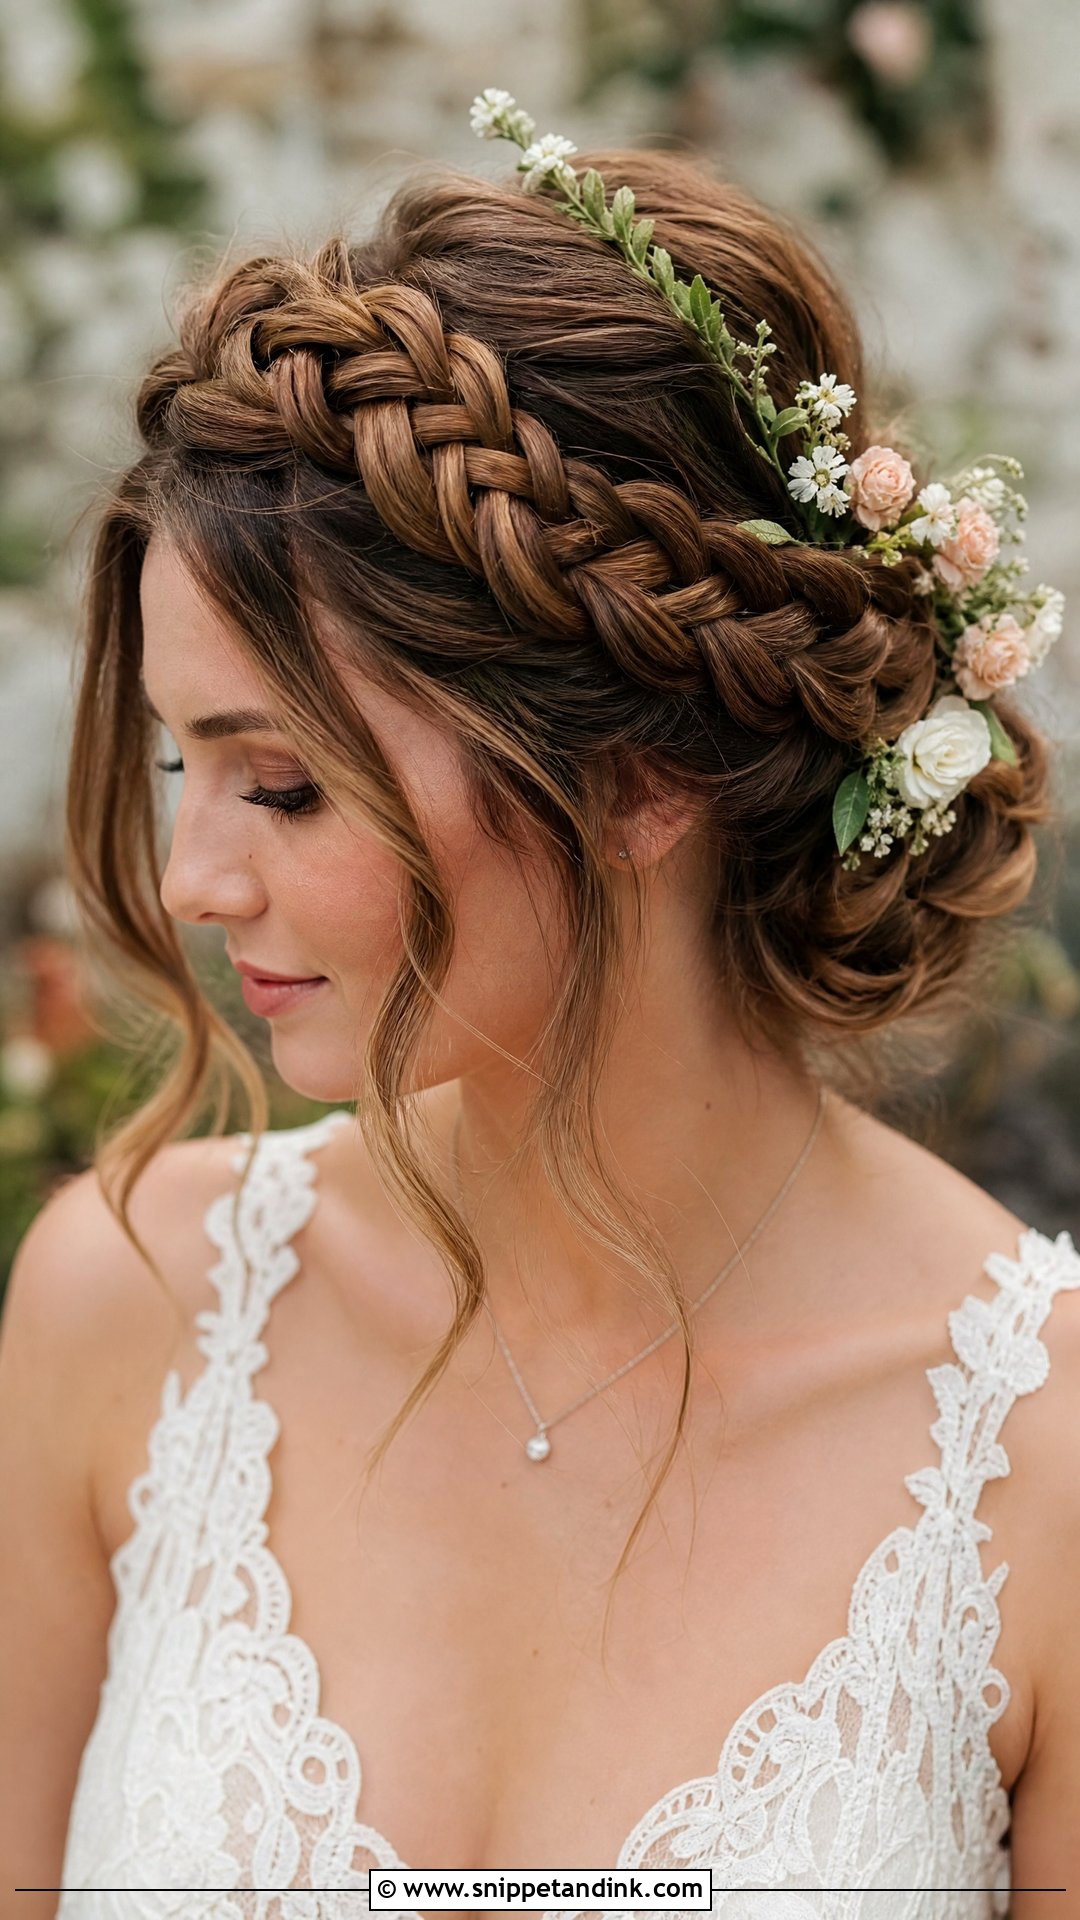
Crown braids give height and keep the hair completely off the face, which sounds risky for a round face but works if the braid sits on top of the head rather than around the forehead. Placing it high is the point. Soft pieces left out at the temples keep the face framed. Woven flowers suit garden settings, and with delicate earrings it’s an easy, comfortable style for a long outdoor day. Fine hair needs the braid pulled wide to avoid a thin band.
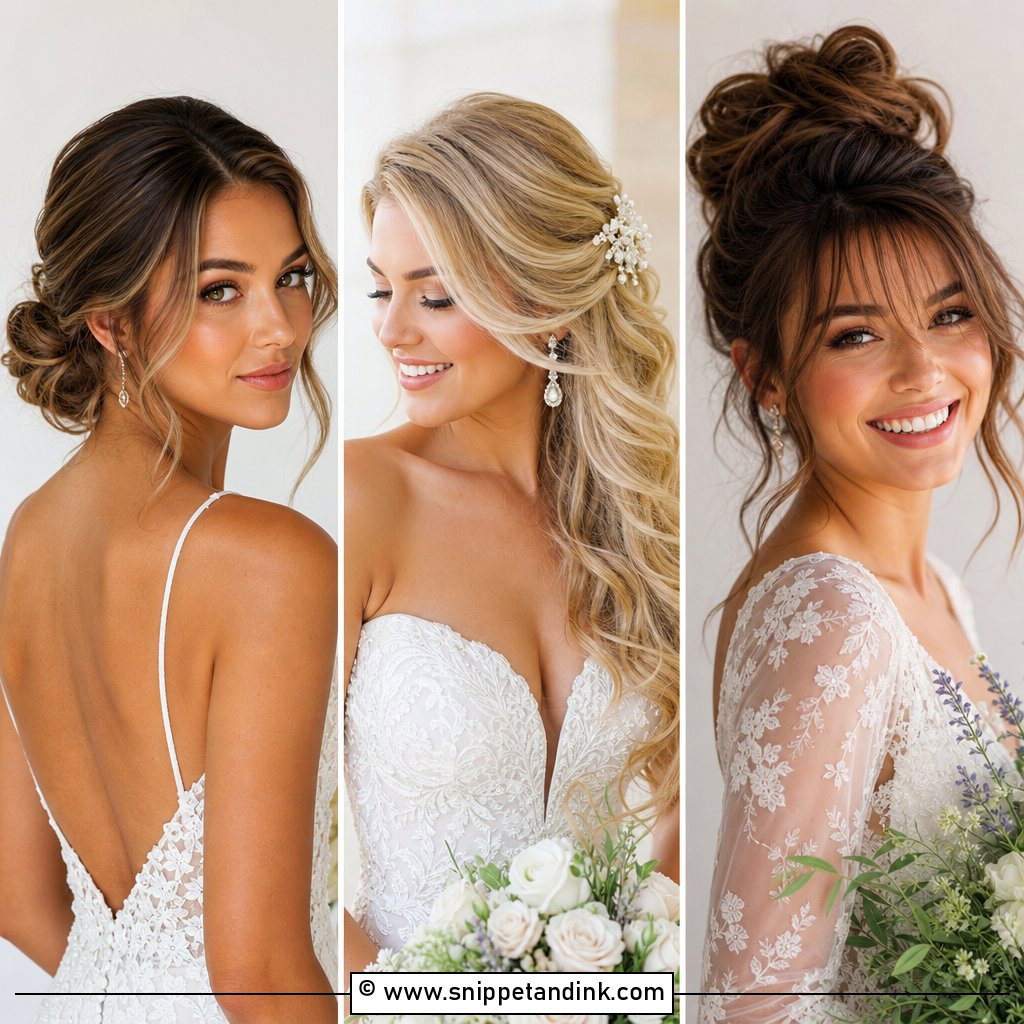
15. Sleek Low Bun With Center Volume
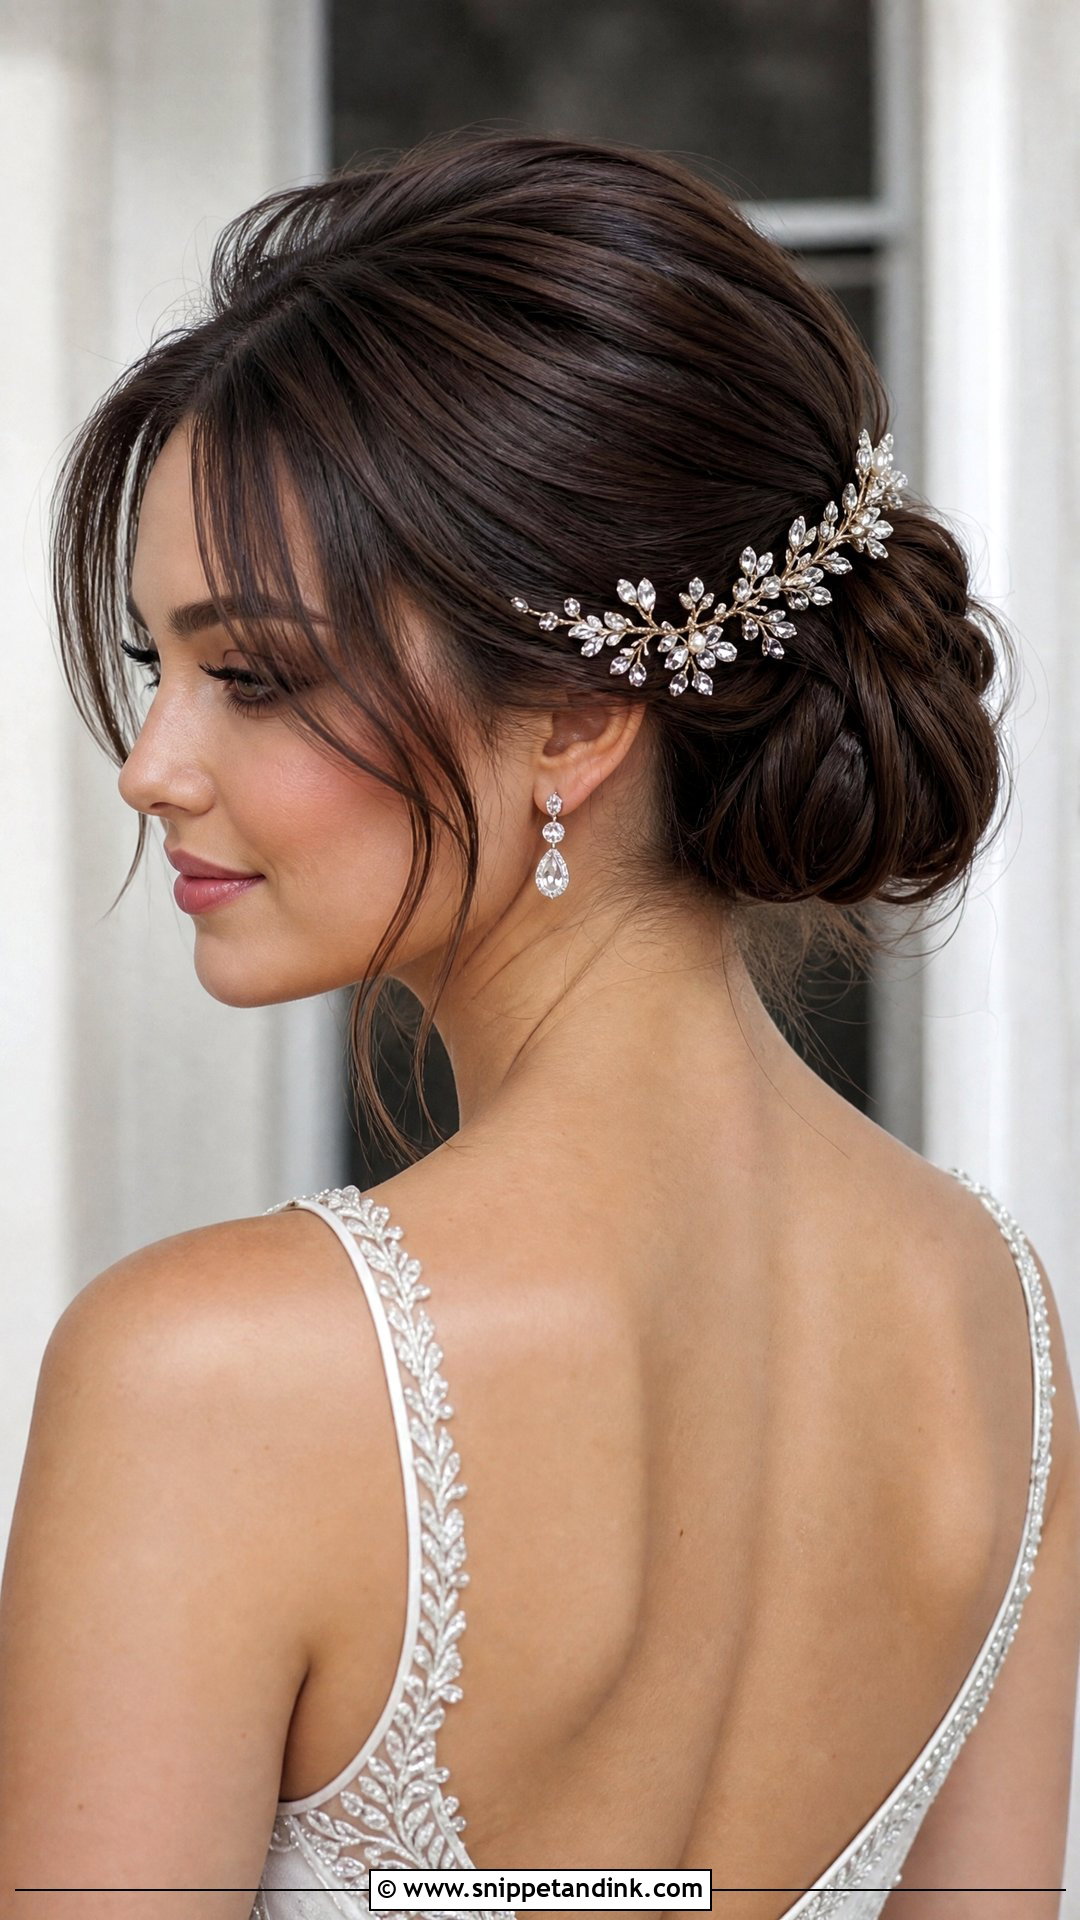
Slicked-back styles are usually the ones I talk round-faced brides out of, but a sleek low bun can work if I cheat a little. I backcomb at the crown first and smooth the top layer over it, so the bun is sleek but the head has height. A soft fringe or one face-framing piece then breaks the width. It’s a modern, formal look. Expect to need a trial, because the amount of crown lift is a matter of half an inch either way.
16. Half Up Bun With Cascading Waves
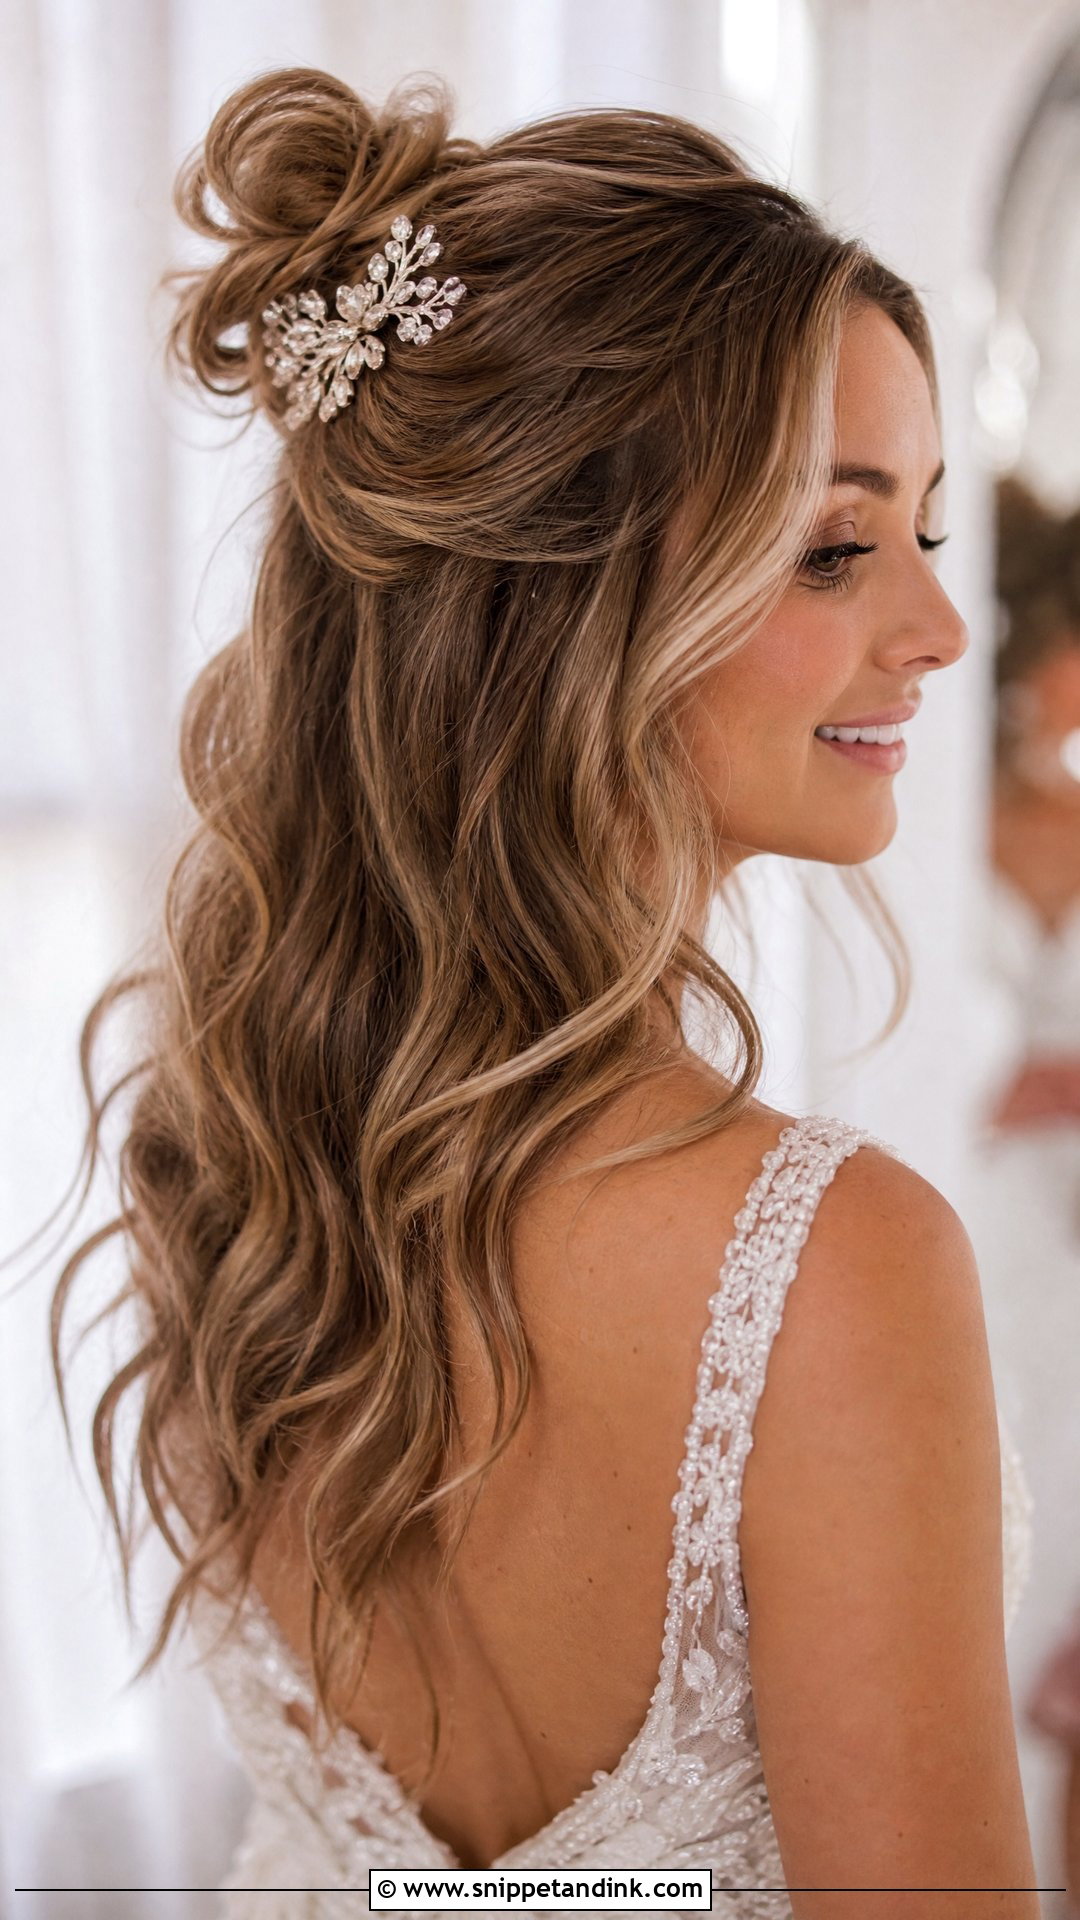
The half-up bun is playful and adds height without taking all the hair off the face. I build the small bun at the crown, slightly back, and tease underneath it so it stands up rather than collapsing. Waves below should start around the jaw. Loose front pieces finish it. It suits younger, more relaxed weddings best; at a formal black-tie event, I’d steer you toward the low chignon instead. Flowers or a clip around the bun dress it up.
17. Curly High Ponytail With Volume
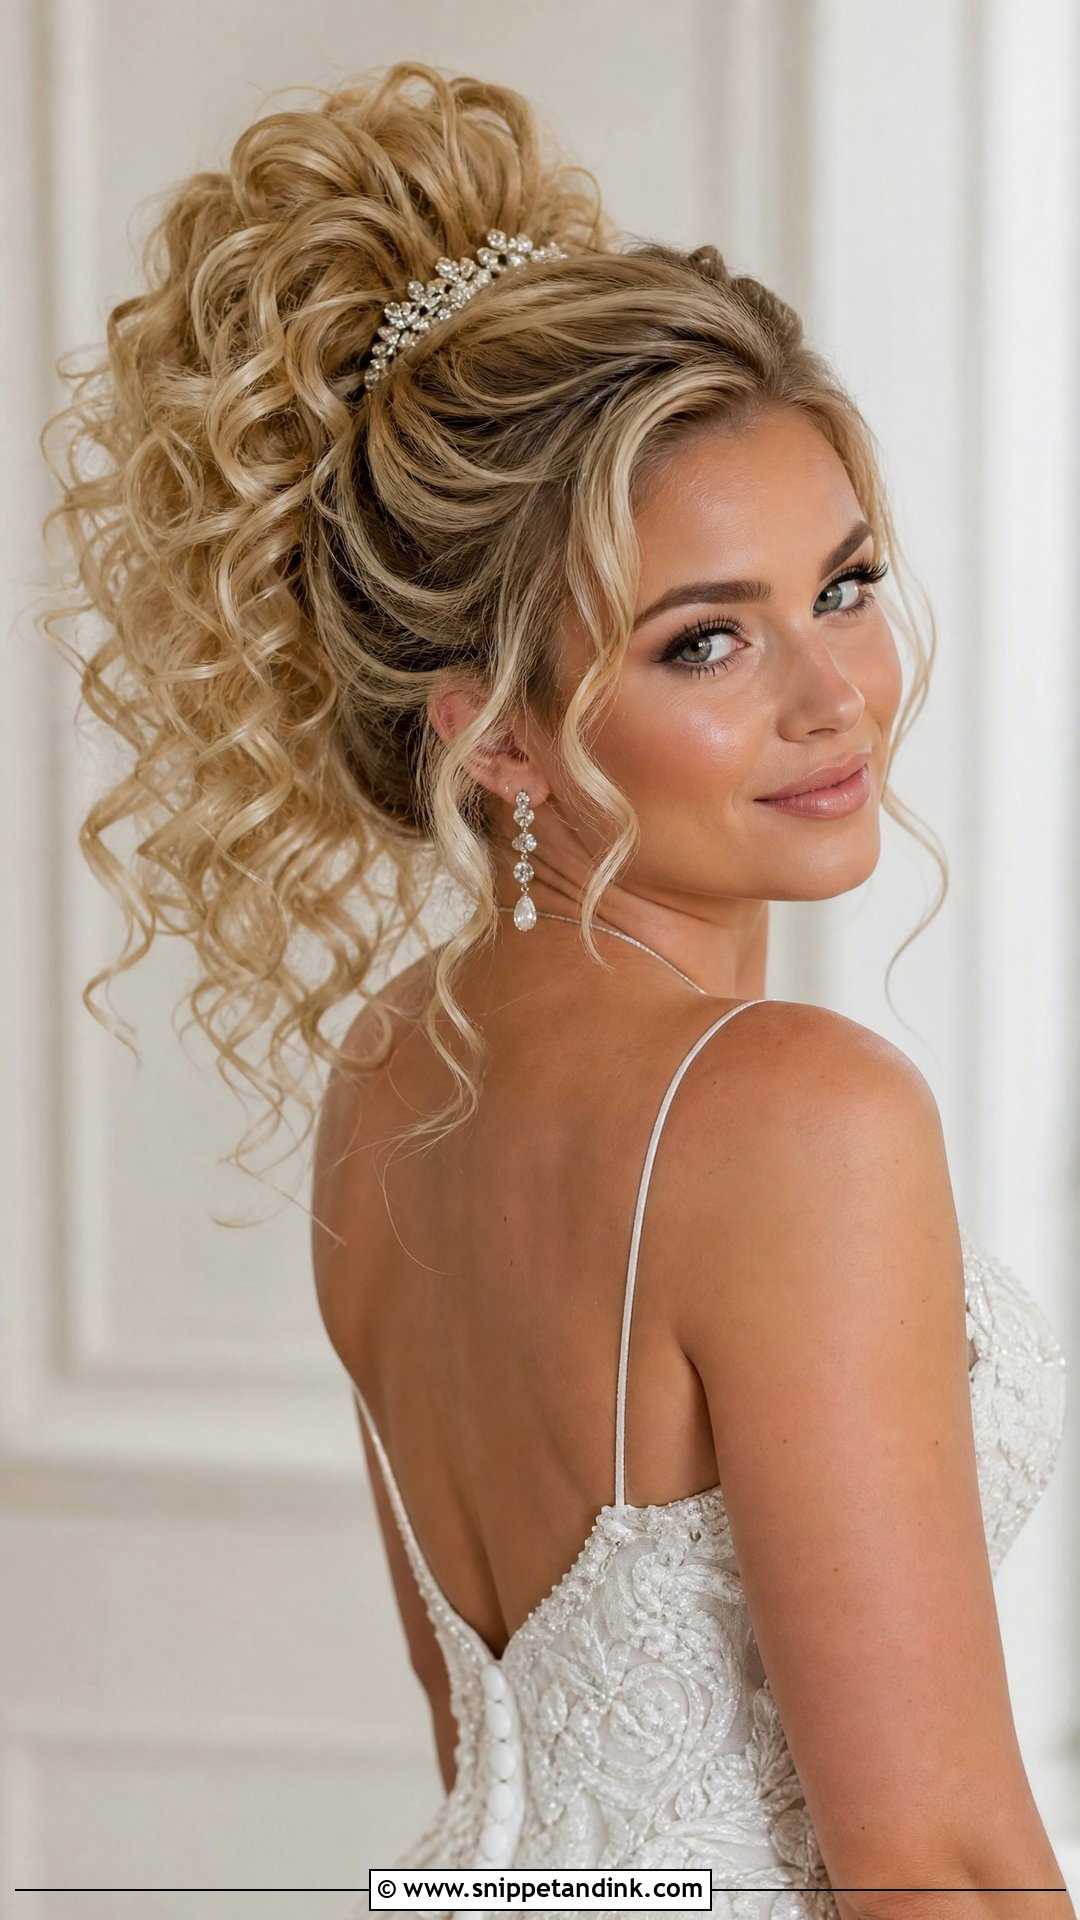
A high curly ponytail gives the most height on this list. I set it at the back of the crown, high enough to see from the front, curl the length, and wrap a section around the elastic, pinned through so it doesn’t loosen. Thick hair is heavy in a high ponytail, so I add two crisscrossed pins under the base to take the weight off the elastic. It’s made for a dance-heavy reception. One soft tendril per side is plenty.
18. Romantic Updo With Wispy Bangs
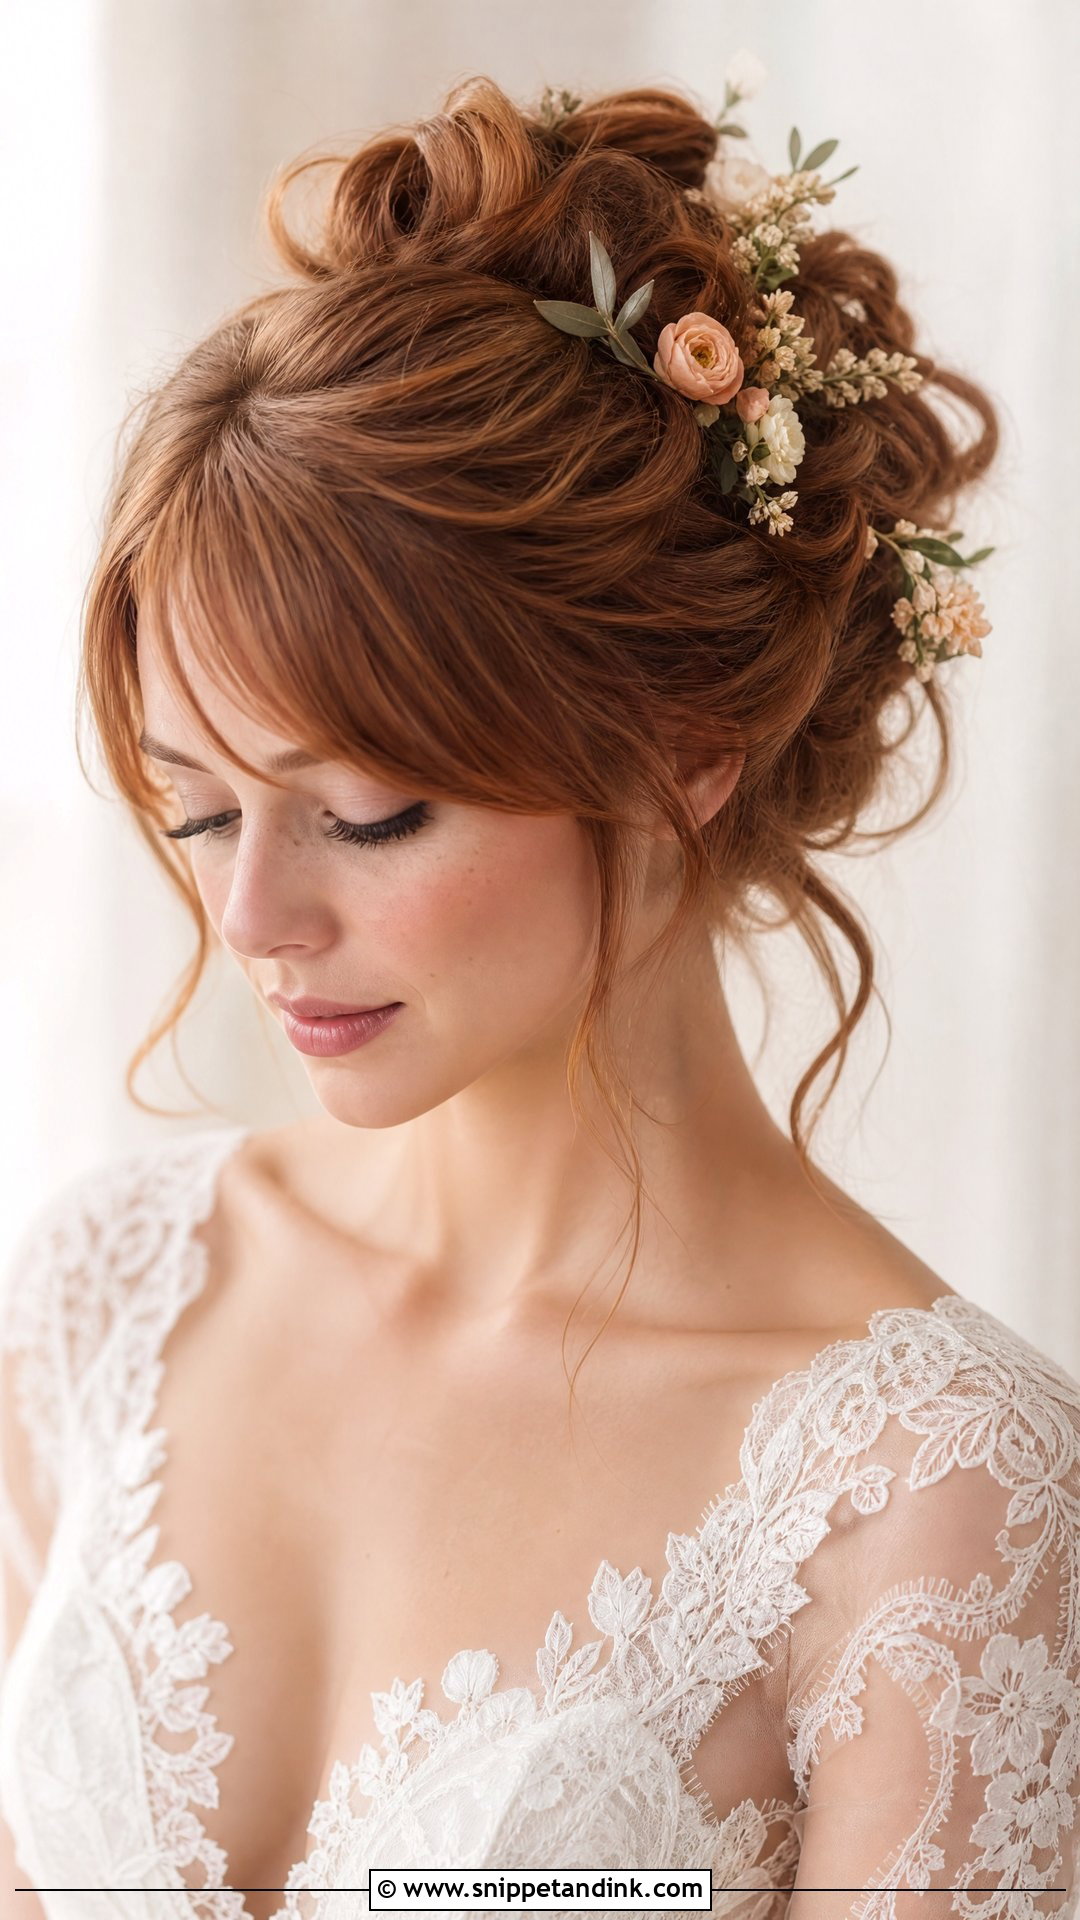
Wispy bangs cover part of the forehead and shorten its width visually, which helps a round face read longer. Sweep them slightly to one side for the diagonal. The updo behind should be soft and lifted at the crown, never tight. I trim wispy bangs very lightly at the trial, if at all, since they’re easy to take too short. Scattered pearls or tiny blooms through the updo suit a romantic dress.
19. Loose Side Braid With Volume
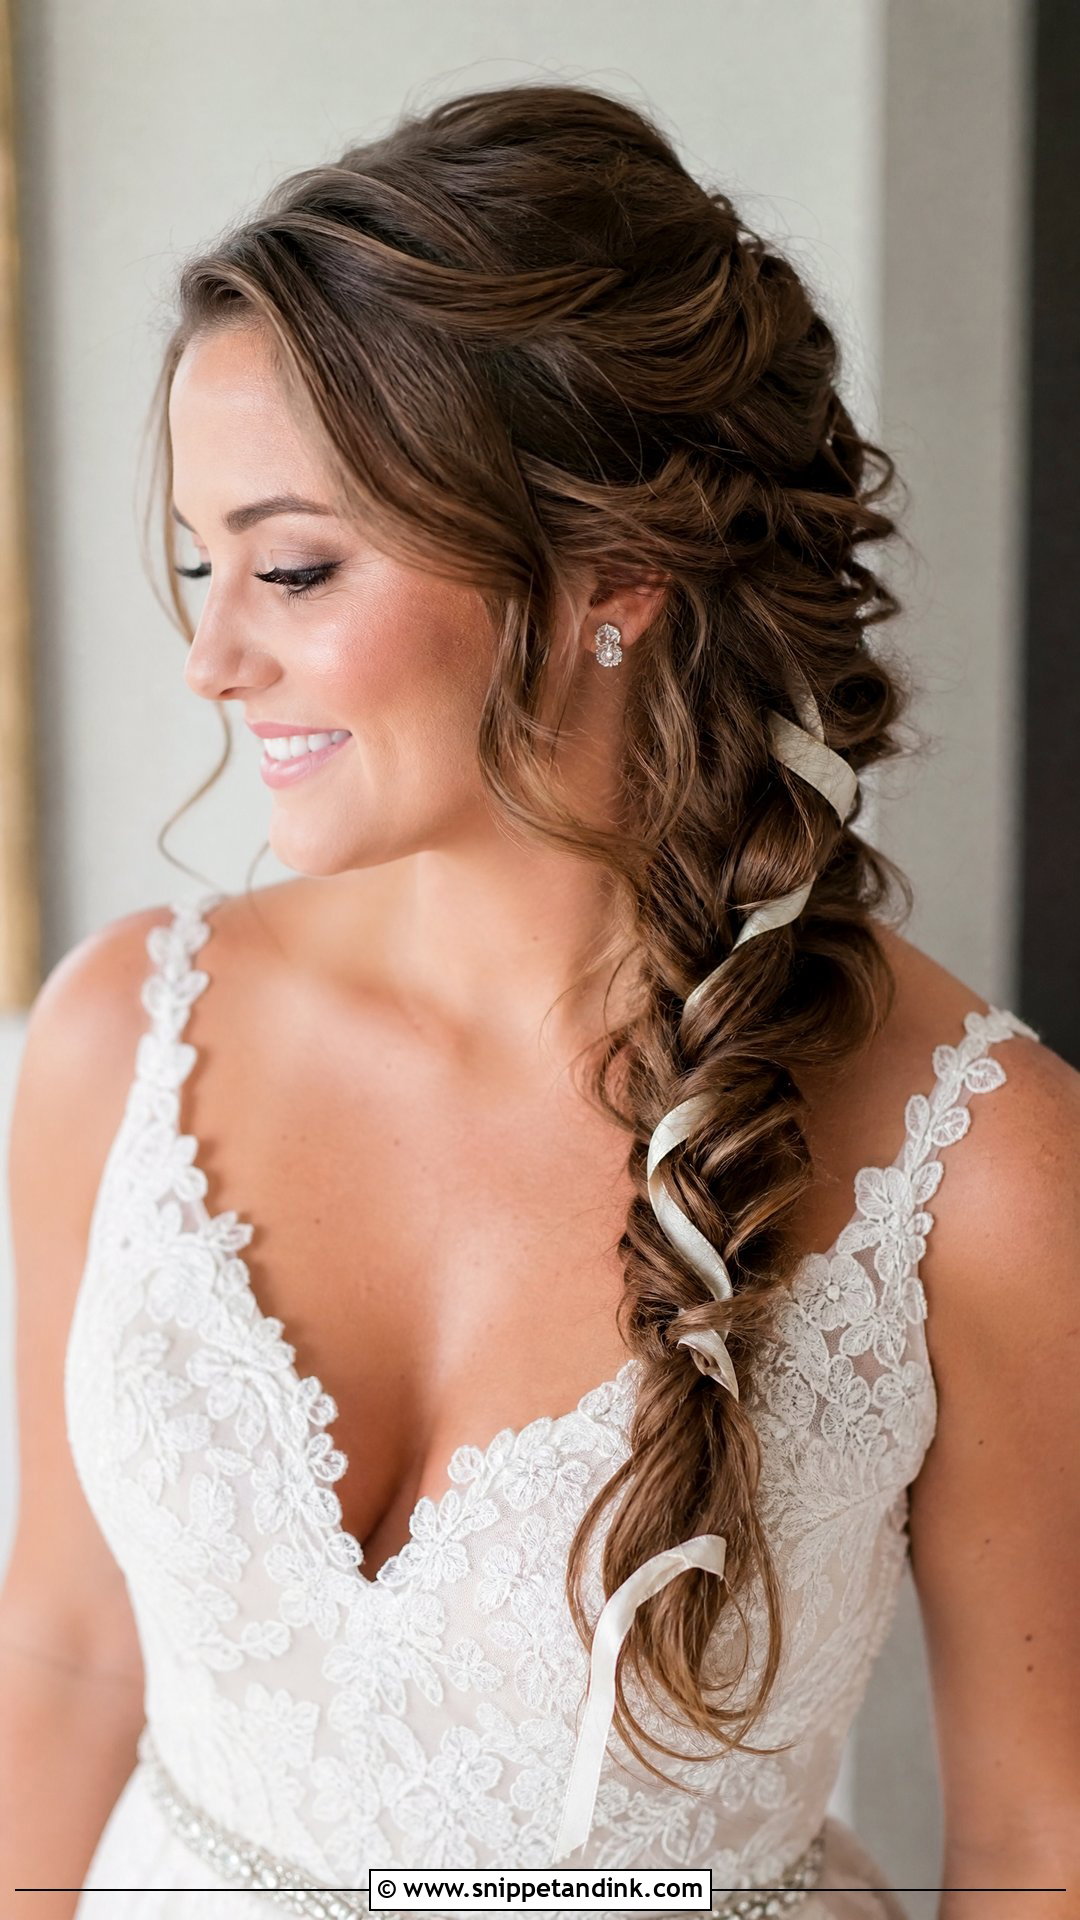
A side braid draped over one shoulder gives the same diagonal as the side ponytail, with more texture. I braid loosely, then pull the edges of each stitch outward for width. Lift at the crown before braiding is what turns it from casual to bridal. Let one or two pieces fall at the cheek on the braid side only. It’s comfortable and holds for hours, which makes it a good pick for rustic or garden weddings with long days.
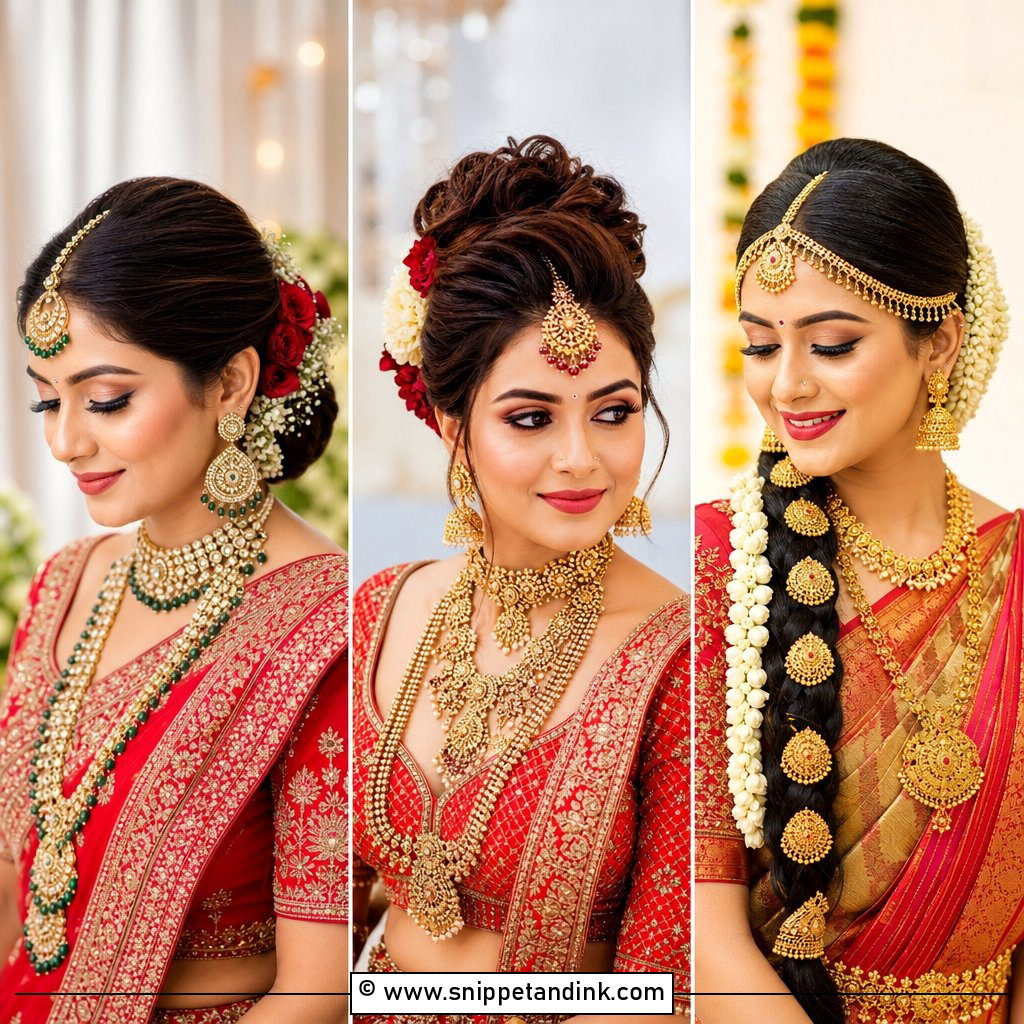
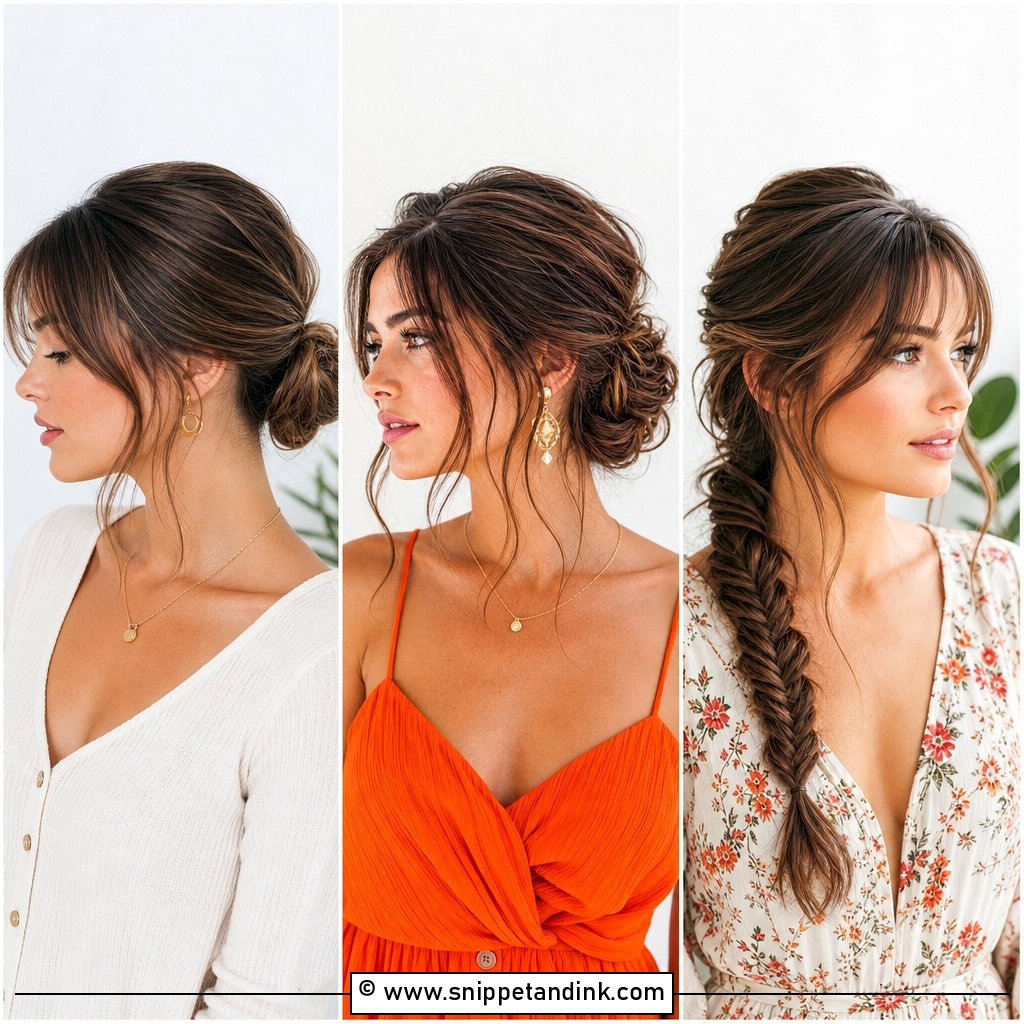
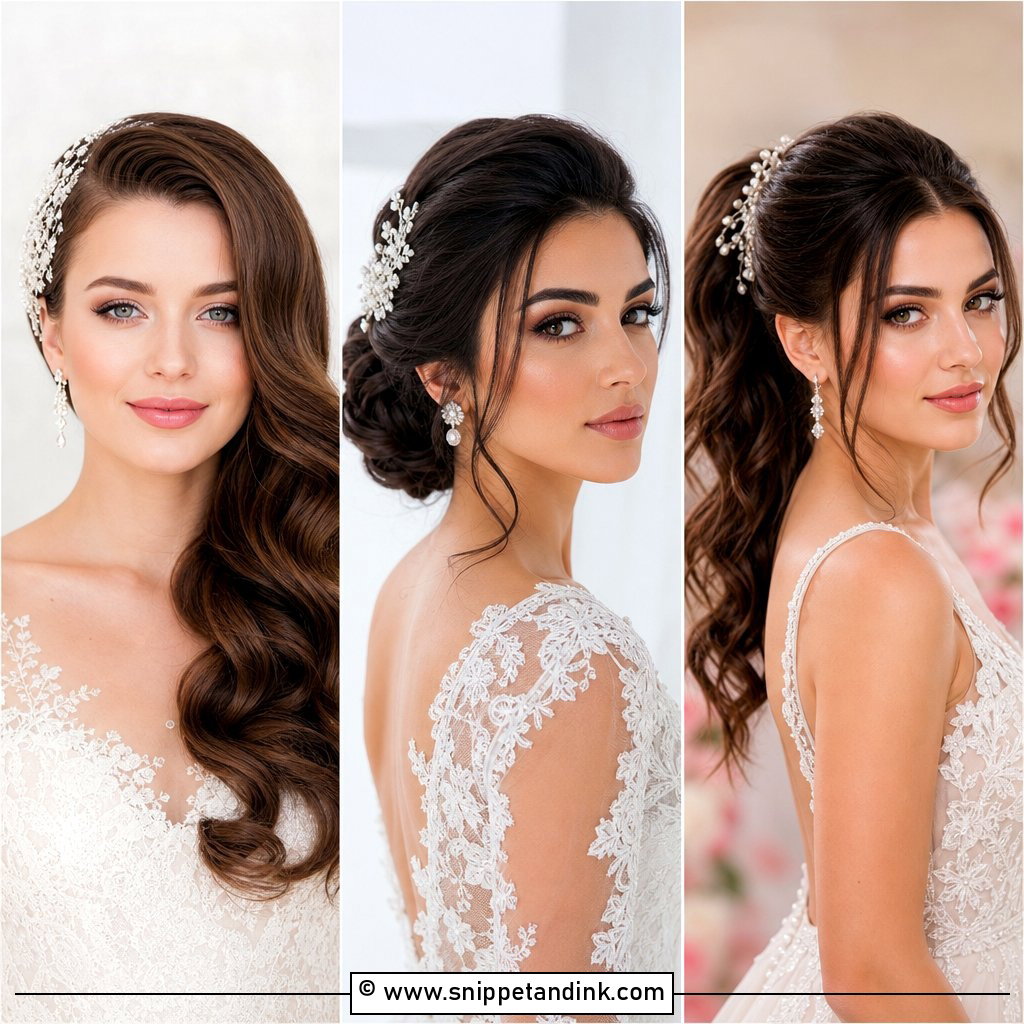
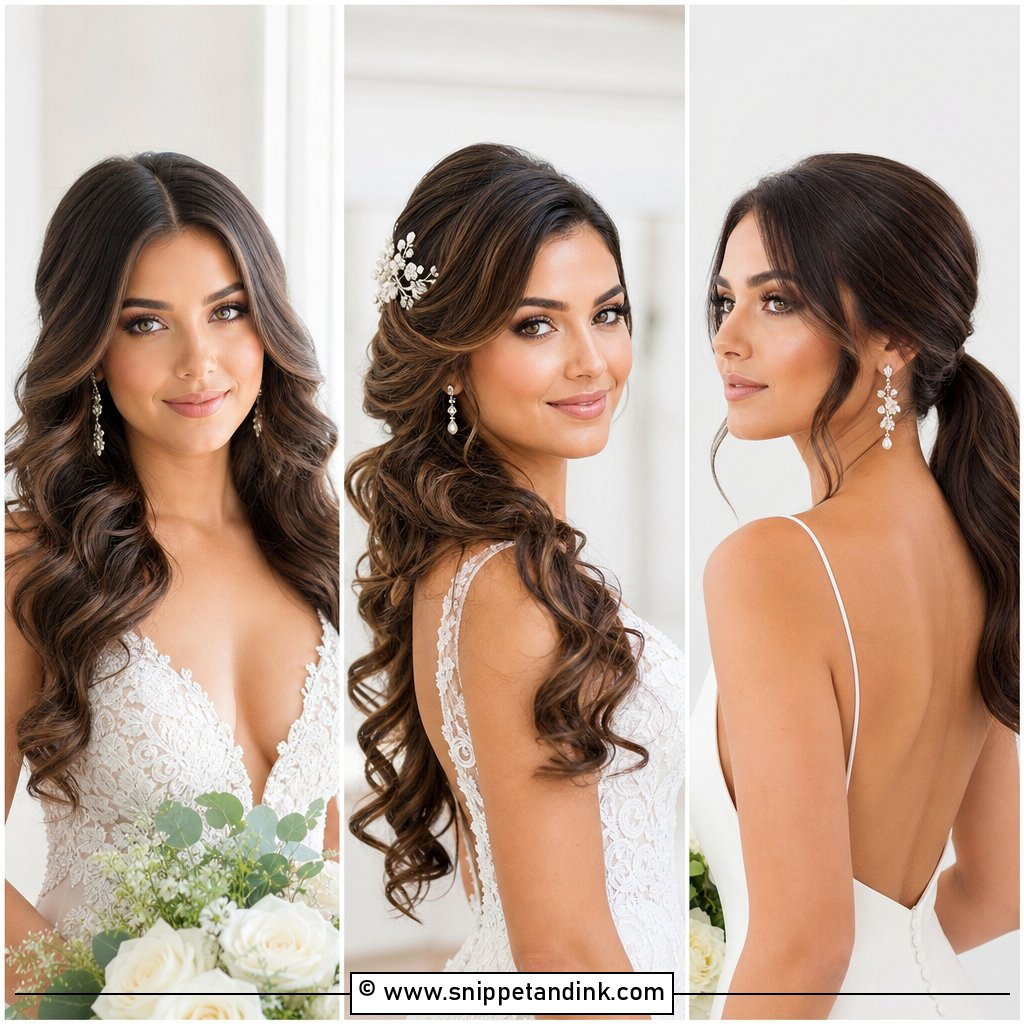
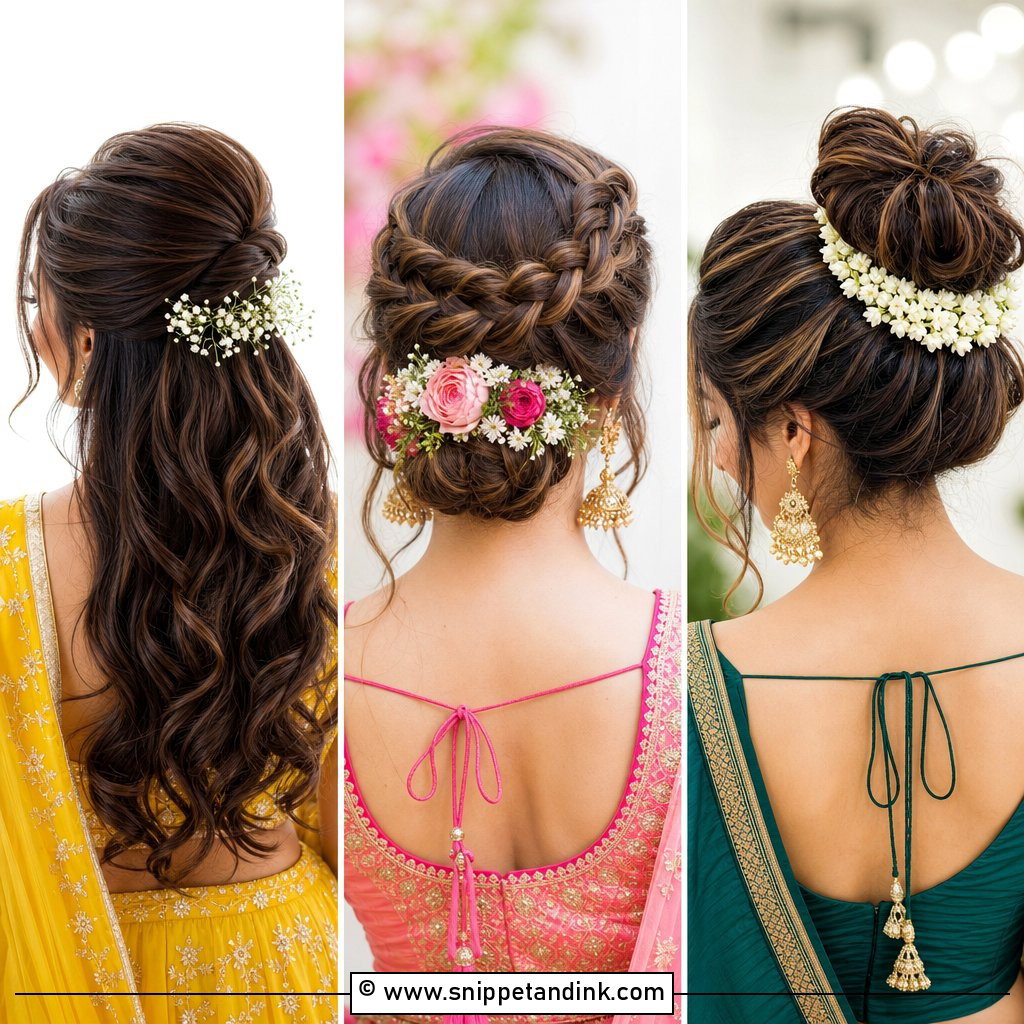
20. Tousled Low Chignon With Side Fringe
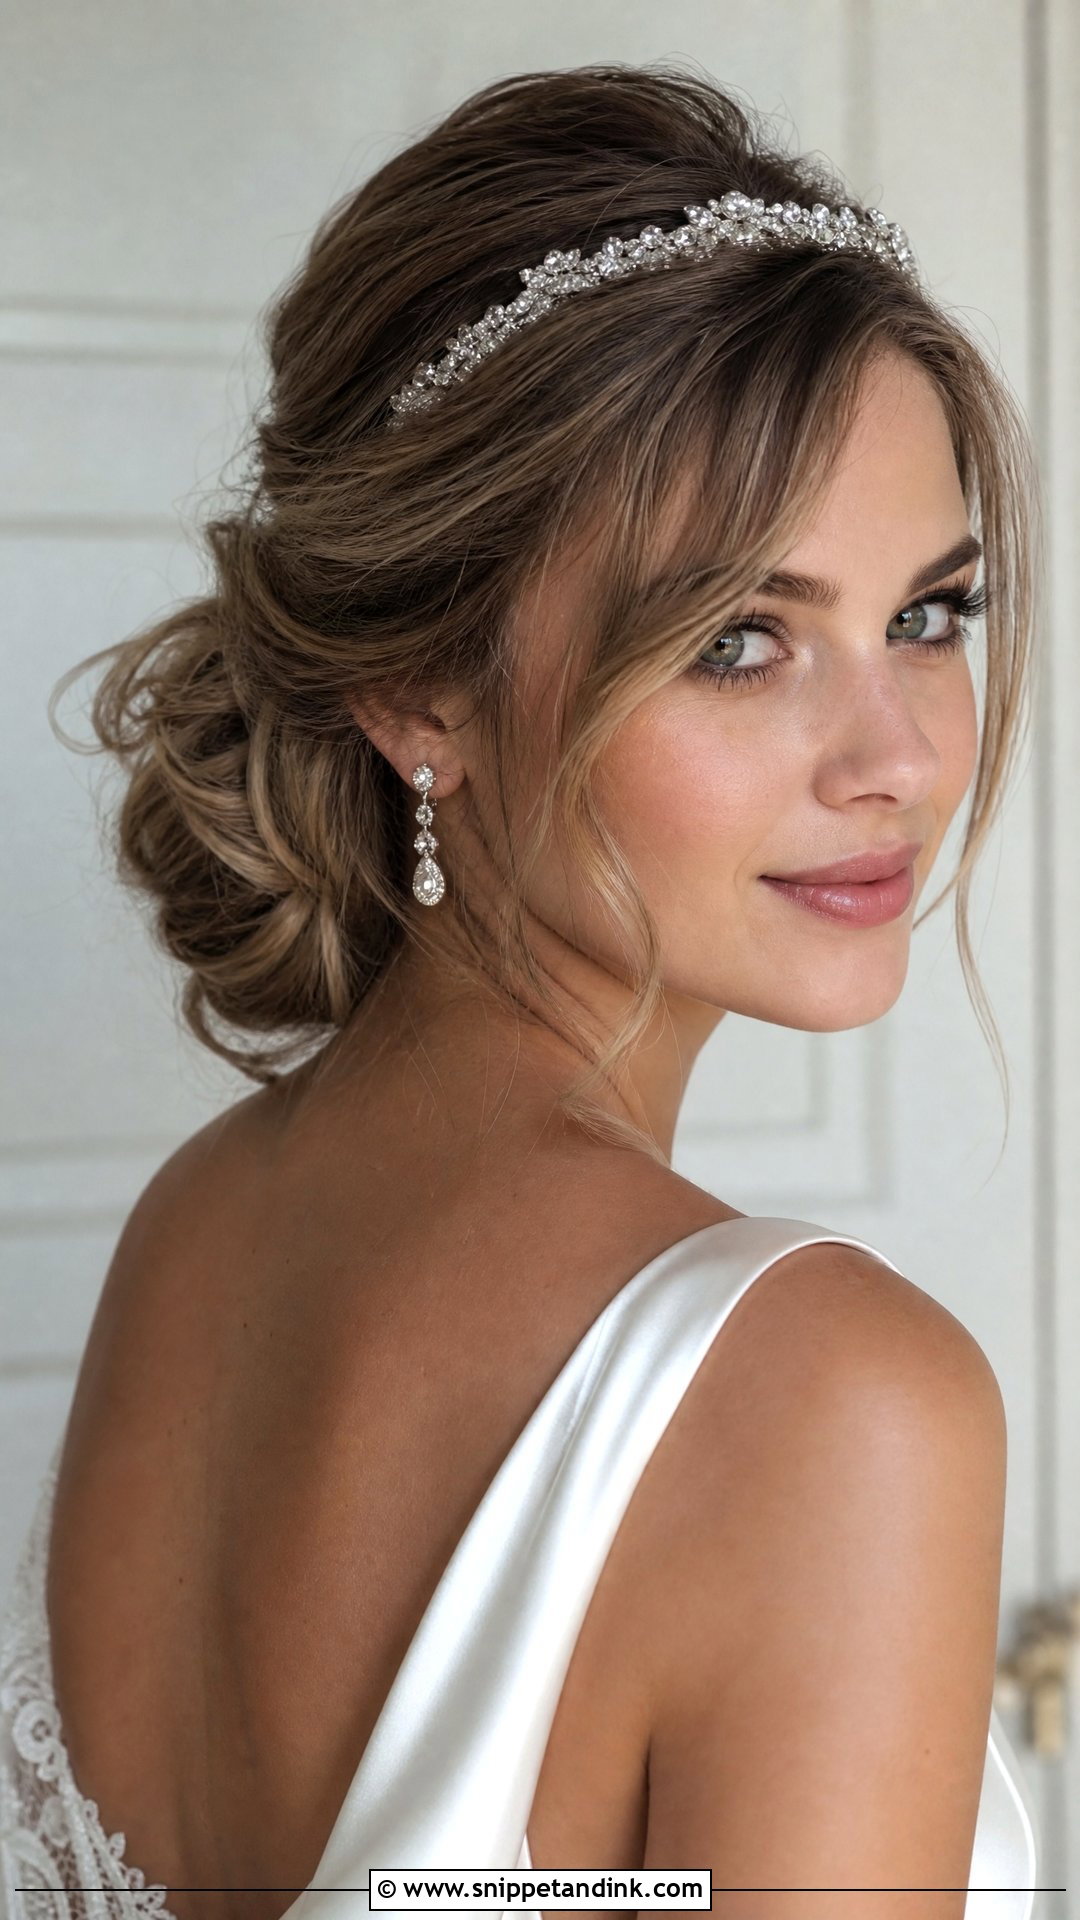
This tousled low chignon with side fringe combines most of the techniques above, so I often use it at a trial to test what a bride likes. The chignon clears the cheeks, the fringe adds the diagonal and a little crown lift adds length. I keep the chignon loose. A jeweled headband or hair vine across the front can work, but place it behind the crown lift, not over it, or it flattens the height you’ve built. It suits nearly any wedding style.
The Photographer Holds Half the Answer
Hair does a lot, but posture and camera angle do just as much, and they’re free. Photographers working with round faces usually shoot from slightly above eye level, which naturally lengthens the face. Ask yours to do so for portraits.
- Push your forehead slightly toward the camera and lower your chin a touch. It feels odd and looks great, because it defines the jaw.
- Turn your body a little away from the lens and look back. Straight-on shoulders read wider.
- If your hair is swept to one side, stand with that side away from the camera, so the clear side of your face leads.
- At the trial, have someone take photos from these angles in daylight. A mirror only ever shows you straight on.
Bring a picture of yourself from a past event that you loved and one you disliked. Between the two, I can usually see whether it was the hair, the angle or the lighting that made the difference.
Height, a Diagonal and Something Near the Jaw
Every style above comes back to the same few moves: lift at the crown, a part or sweep that breaks the symmetry, and face-framing pieces that fall past the jaw rather than stopping at the cheek. Once you know them, you can adapt almost any bridal look you like. Book a trial and take photos from the front, the side and slightly above, because that’s how you’ll be photographed on the day. Then trust what you see in those photos, not the angle you’re used to in the bathroom mirror.
You'll Like These Ideas:


Leave a Reply