
Most fascinator problems I fix at weddings aren’t about the headpiece at all. They’re about the hair under it: too soft, too slippery or too freshly washed to hold a comb at an angle for eight hours. Get the base right and almost any fascinator will sit where you put it. Below are 25 guest styles I’d happily send someone to a wedding in, from low chignons and French twists to curls worn down and short cuts, each with notes on how the headpiece anchors and what kind of hair it suits.
Combs, Clips, Bands and Elastic: How Each Fascinator Holds On
Before I pick a hairstyle, I turn the fascinator over and look at how it attaches. That tells me more than the front does.
- Comb: needs backcombed or textured hair to bite into. On clean, silky hair it slides out unless I add crossed grips under it as an anchor.
- Clip or slide: the best friend of short hair and bobs. A clip with a little silicone or velvet lining holds far better than bare metal.
- Headband: holds itself, so it suits fine or slippery hair. The downside is pressure behind the ears over a long day.
- Thin elastic: worn under the hair at the back, it keeps a larger piece steady in wind. I hide it by letting a layer of hair fall over it.
Traditionally it sits on the right side of the head, tilted slightly forward, but your parting matters more than tradition. I place it on the fuller side of the part so the headpiece and hair work together. Heavier designs always need a firmer base, so a big sinamay disc and loose waves are rarely a good match.
1. Low Chignon With Side Fascinator
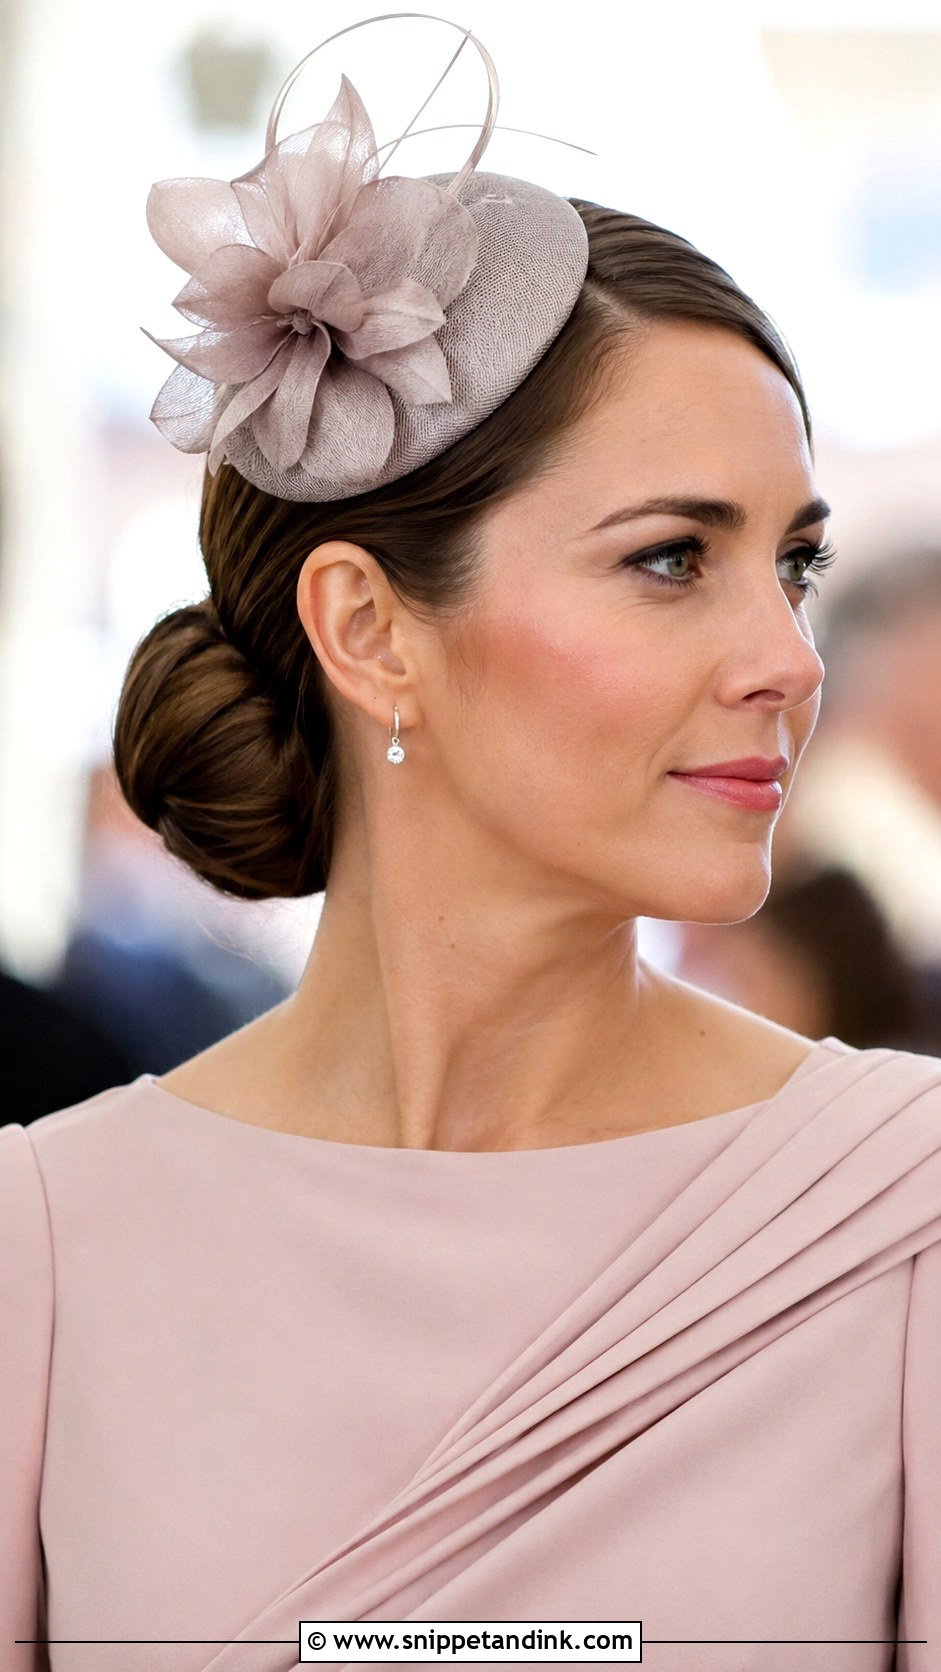
If a guest isn’t sure what to do, this is where I start. A low chignon at the nape gives a fascinator a solid, flat surface above the ear, and it doesn’t compete with a large headpiece. I smooth the hair back with a little gel, twist it into a neat bun and lock it with crossed pins so it can’t rotate. The fascinator goes just above one ear, tipped slightly forward. On very fine hair I add a small padded donut inside the bun, otherwise it shrinks to almost nothing under a big headpiece. A few loose strands by the ears soften the face if the line feels too strict.
2. Voluminous Half-Up With Feather Fascinator
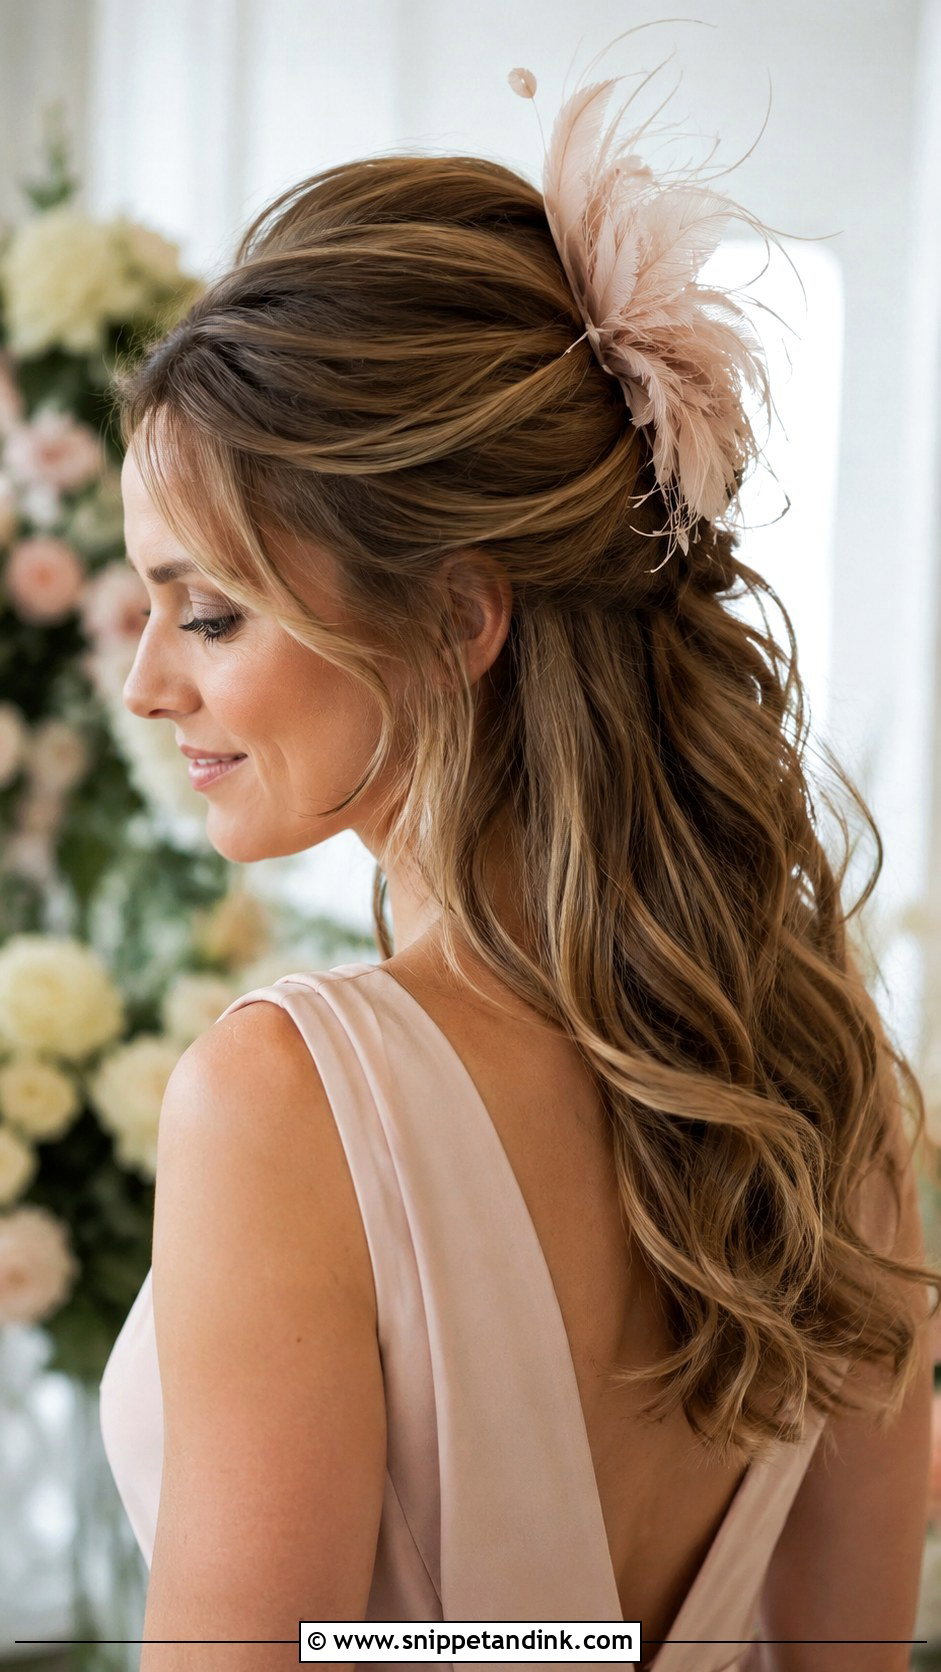
Height without a full updo comes from the crown section. I tease it at the roots in small sections, spray each one, then pin it back so there’s a firm cushion of hair rather than a puffed layer that collapses. The lower half stays loose in waves. A feather fascinator slots into that teased cushion and holds because the comb has something to bite. It needs length to look balanced, so layered, long or extension-filled hair carries it best. On blunt shoulder-length cuts the volume can look top-heavy.
3. Hollywood Curls With Pillbox Fascinator
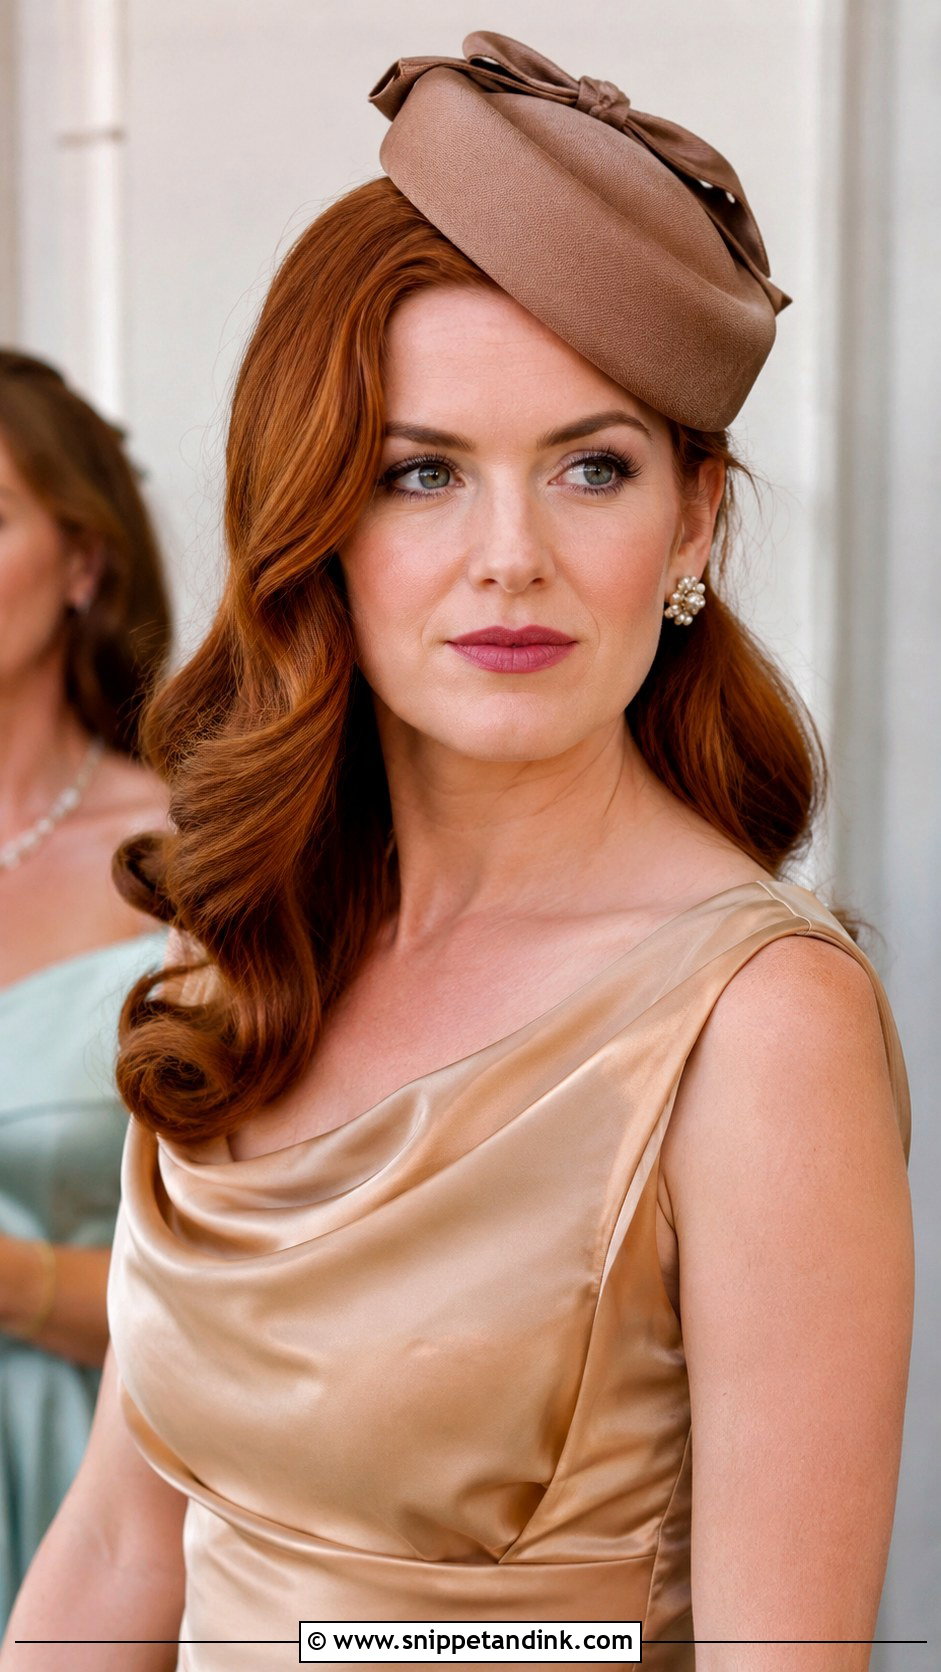
Old Hollywood curls are set, not just curled. I put the hair in large rollers or wrap it around a wide iron, let it cool completely, then brush it through so the curls merge into one smooth wave that falls in a single direction. A deep side part gives a small pillbox its natural resting spot on the fuller side. The catch is humidity: on fine or straight hair the wave can drop flat by evening, so I set it with a firmer mousse at the roots and never brush it out until it’s fully cold. Medium to long hair suits it best.
4. Sleek Low Bun With Clean Fascinator
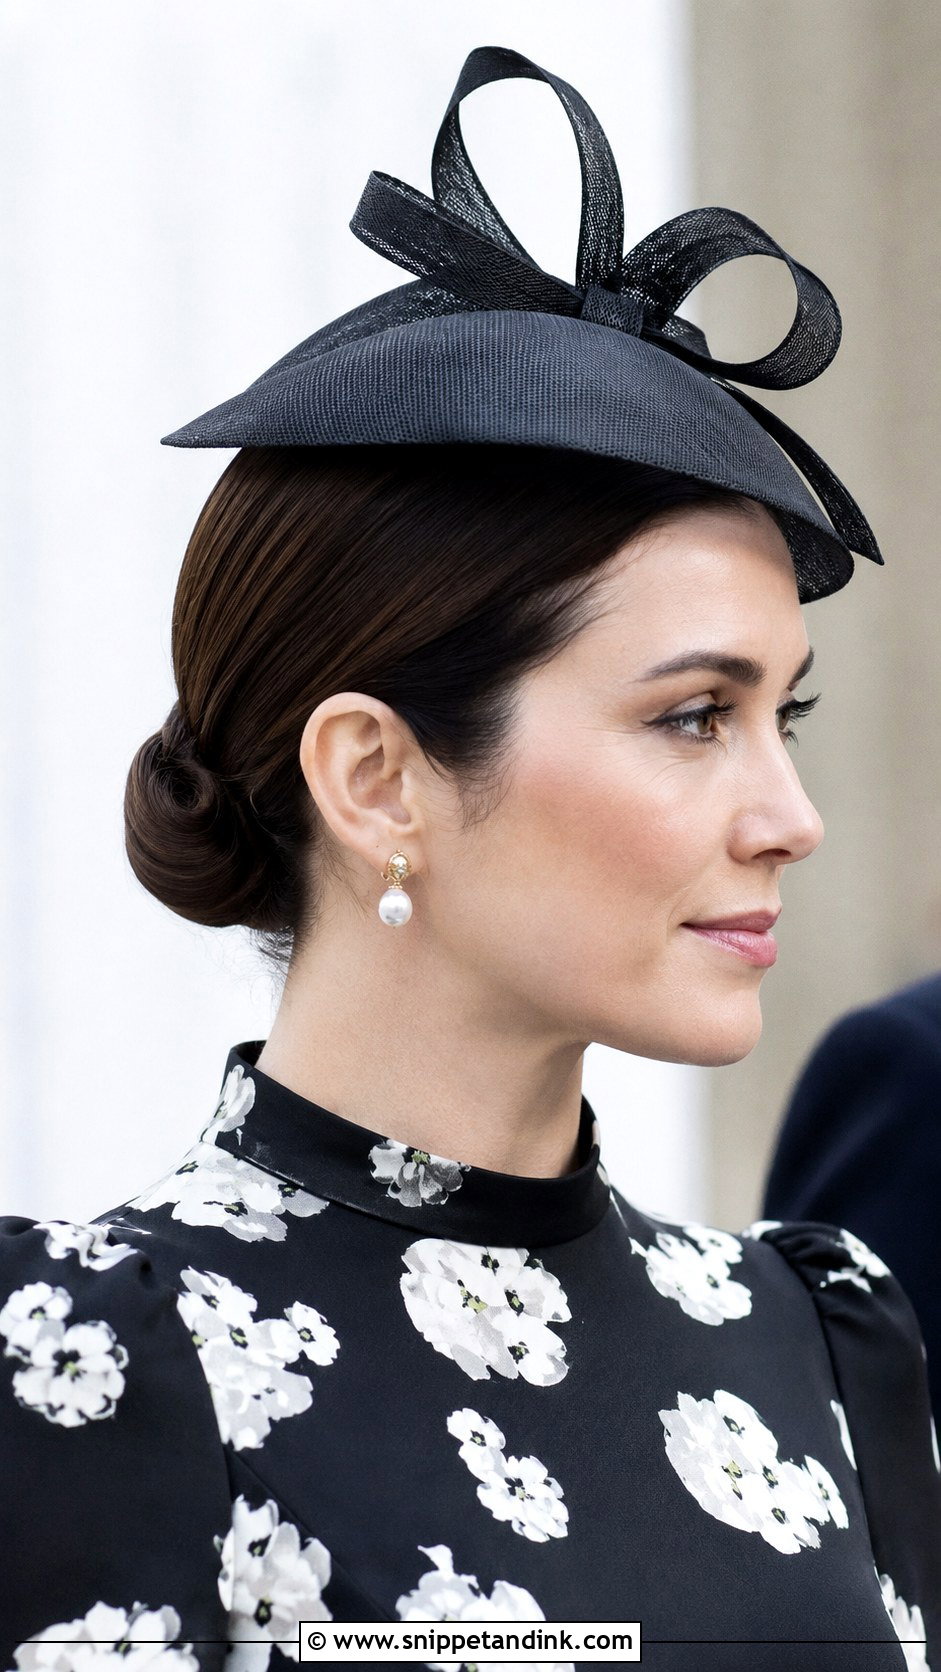
A sleek low bun is the cleanest backdrop there is for a simple, structured fascinator with no feathers or flowers. I brush the hair flat with a smoothing serum, gather it low and tight, and check the head shape from the side because any bump at the crown shows. With nothing fussy competing, the headpiece reads as a deliberate choice. It’s a good partner for high necklines, which can feel crowded with hair down. The one thing I’d avoid is pulling too tight on a long day; tension headaches are real, and a bun this slick shows every re-pin.
5. French Twist With Sculptural Fascinator
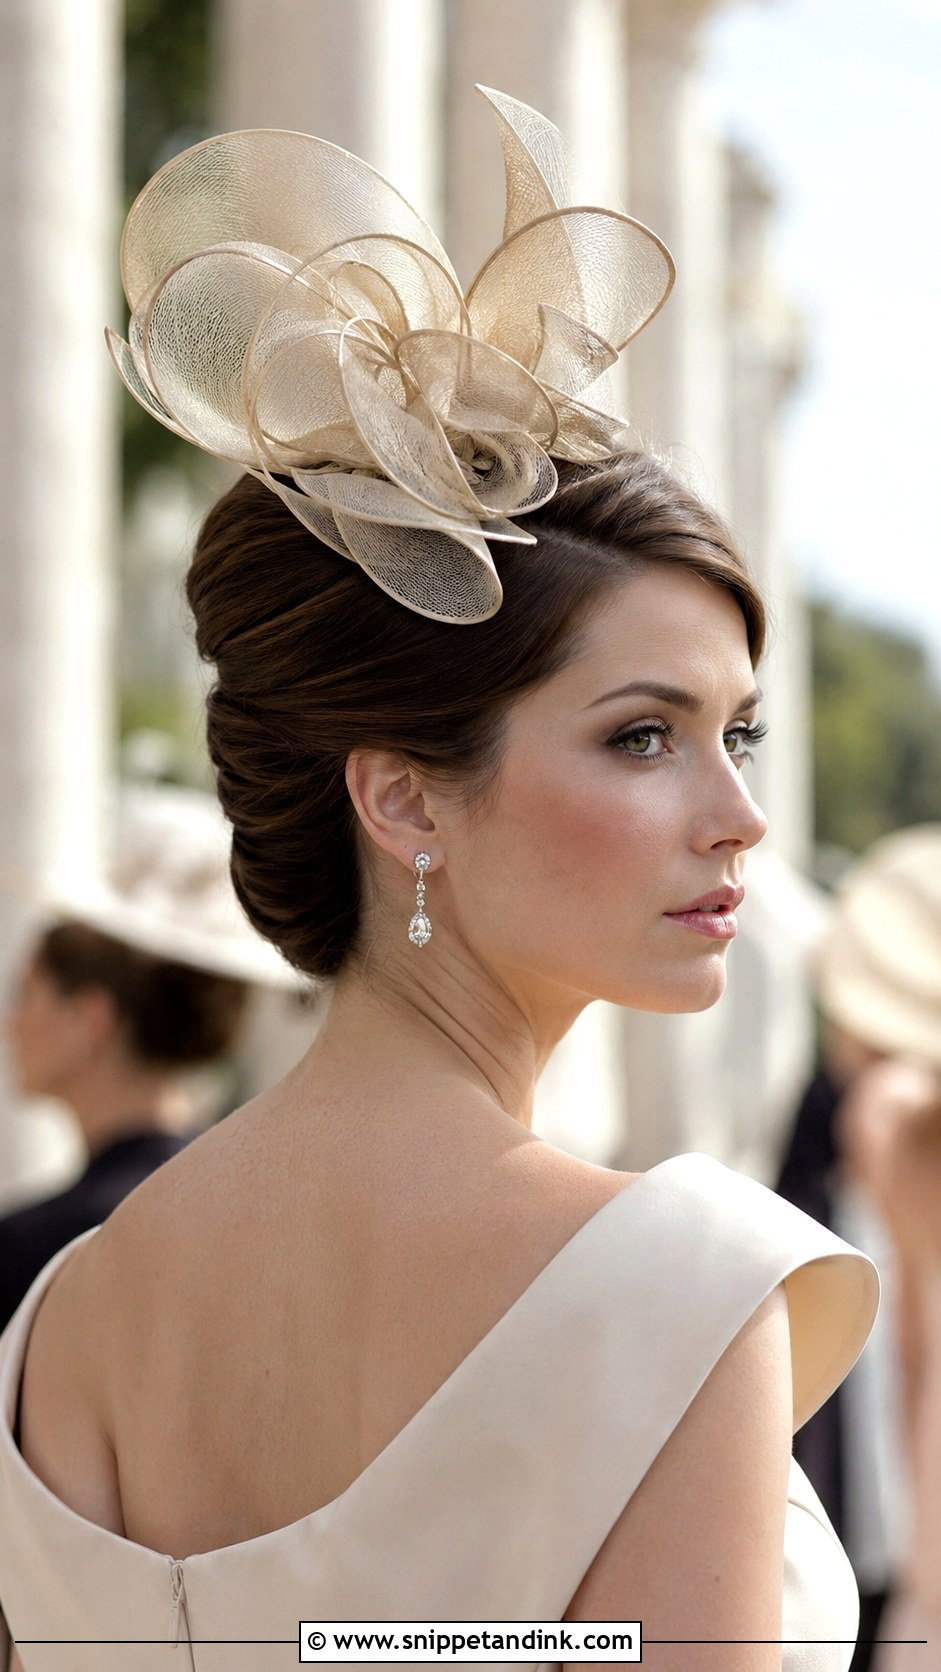
The French twist earns its reputation because it locks itself in. I sweep the hair to one side, pin a vertical row of crisscrossed grips down the back, then fold and twist the hair over them and tuck the ends. That row of pins is what gives a sculptural fascinator the sturdy base it needs, and the smooth column of hair sets off an architectural shape. I place the headpiece toward the crown or to the side, away from the seam of the twist so the comb doesn’t loosen it. It needs at least shoulder-length hair, and it suits longer faces well.
6. Messy Bun With Lightweight Fascinator
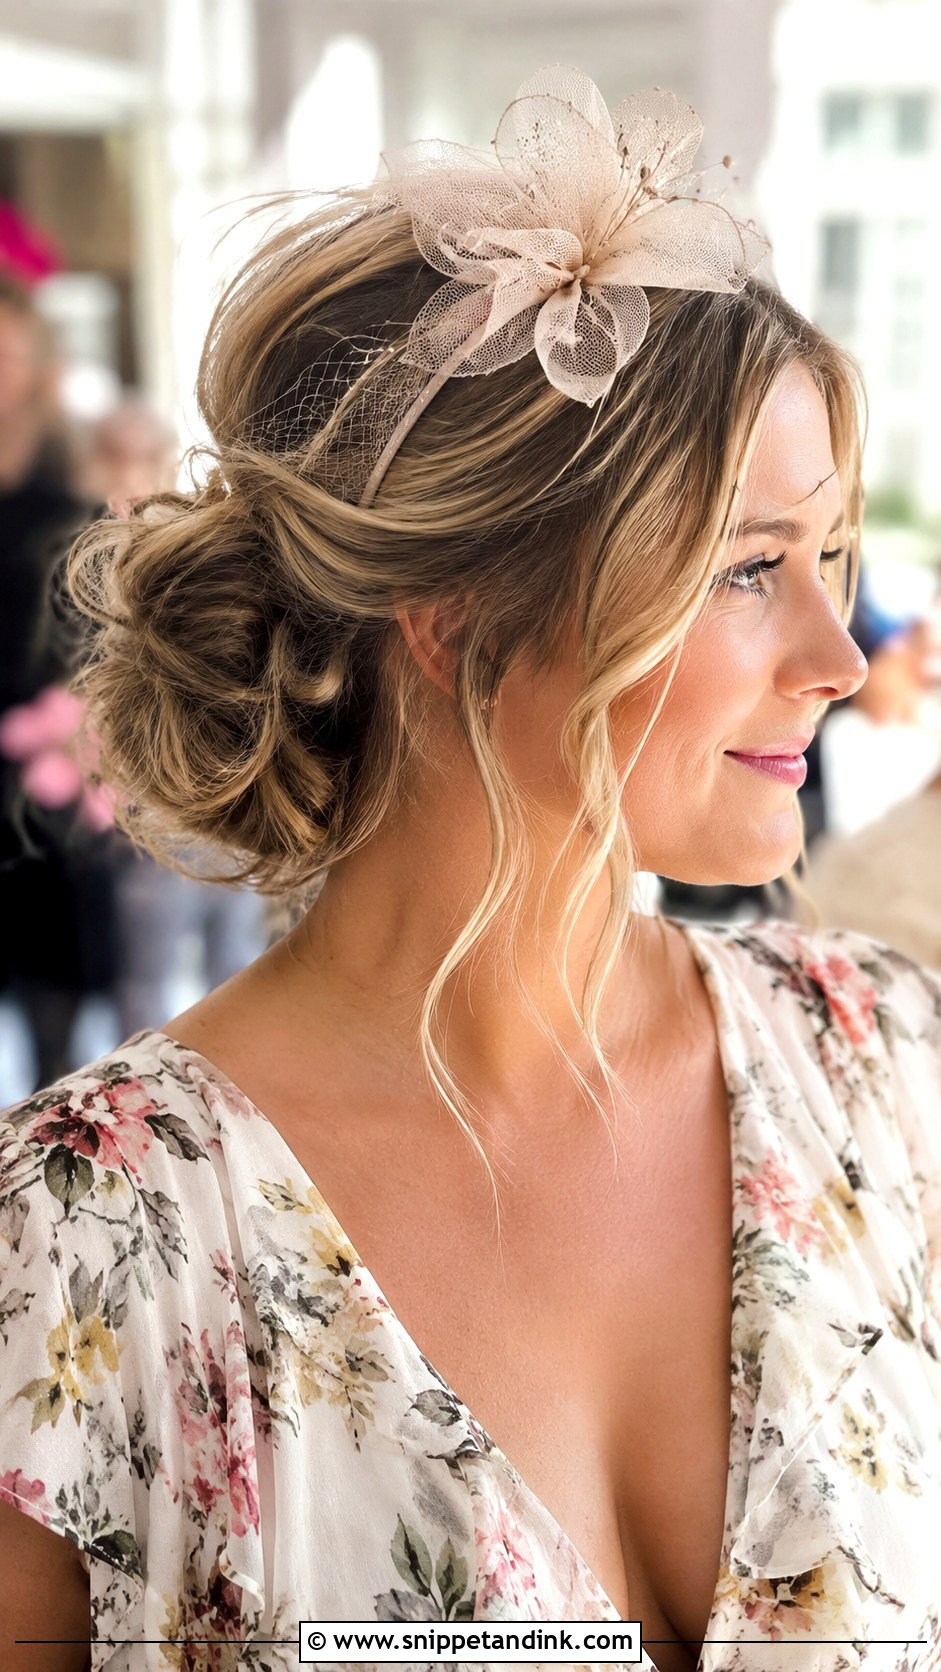
Garden weddings and relaxed parties don’t always call for polish. A messy bun is twisted loosely, with a few pieces pulled out around the face, and the slight imperfection keeps it young. The trade-off is grip: loose hair can’t hold much weight, so I keep the fascinator small and pin it into a firm part of the bun rather than the airy outer layer. Above or slightly beside the bun works, or toward the front if the headpiece is very light. A heavy sinamay hat-style piece would just slide off this.
7. Deep Side Part With Soft Waves
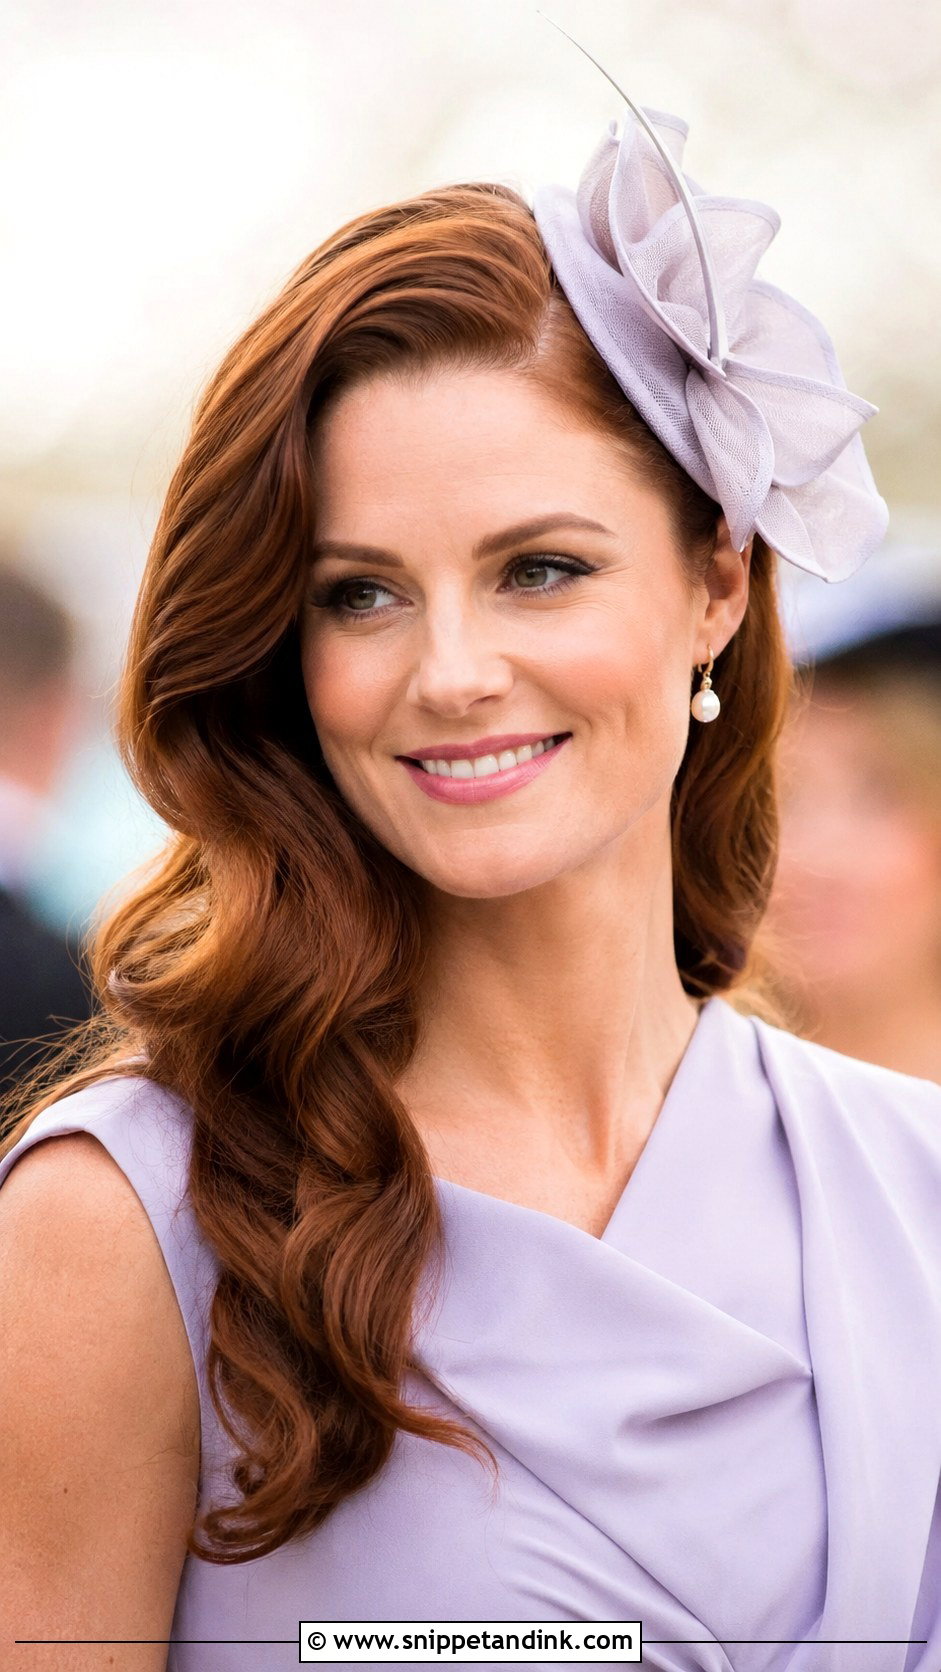
This is the simplest look on the list and the one I’d give to someone who hates having their hair up. A deep side part creates a fuller side that acts as a natural ledge. I backcomb that section at the root, mist it with hairspray and let it set before the fascinator goes on. Soft brushed-out waves finish it. It works on long, medium and short hair, and even on a pixie if the part is strong enough. On very silky hair I add a dry texture spray first, or the comb will work its way out by the toasts.
8. Braided Crown With Flower Fascinator
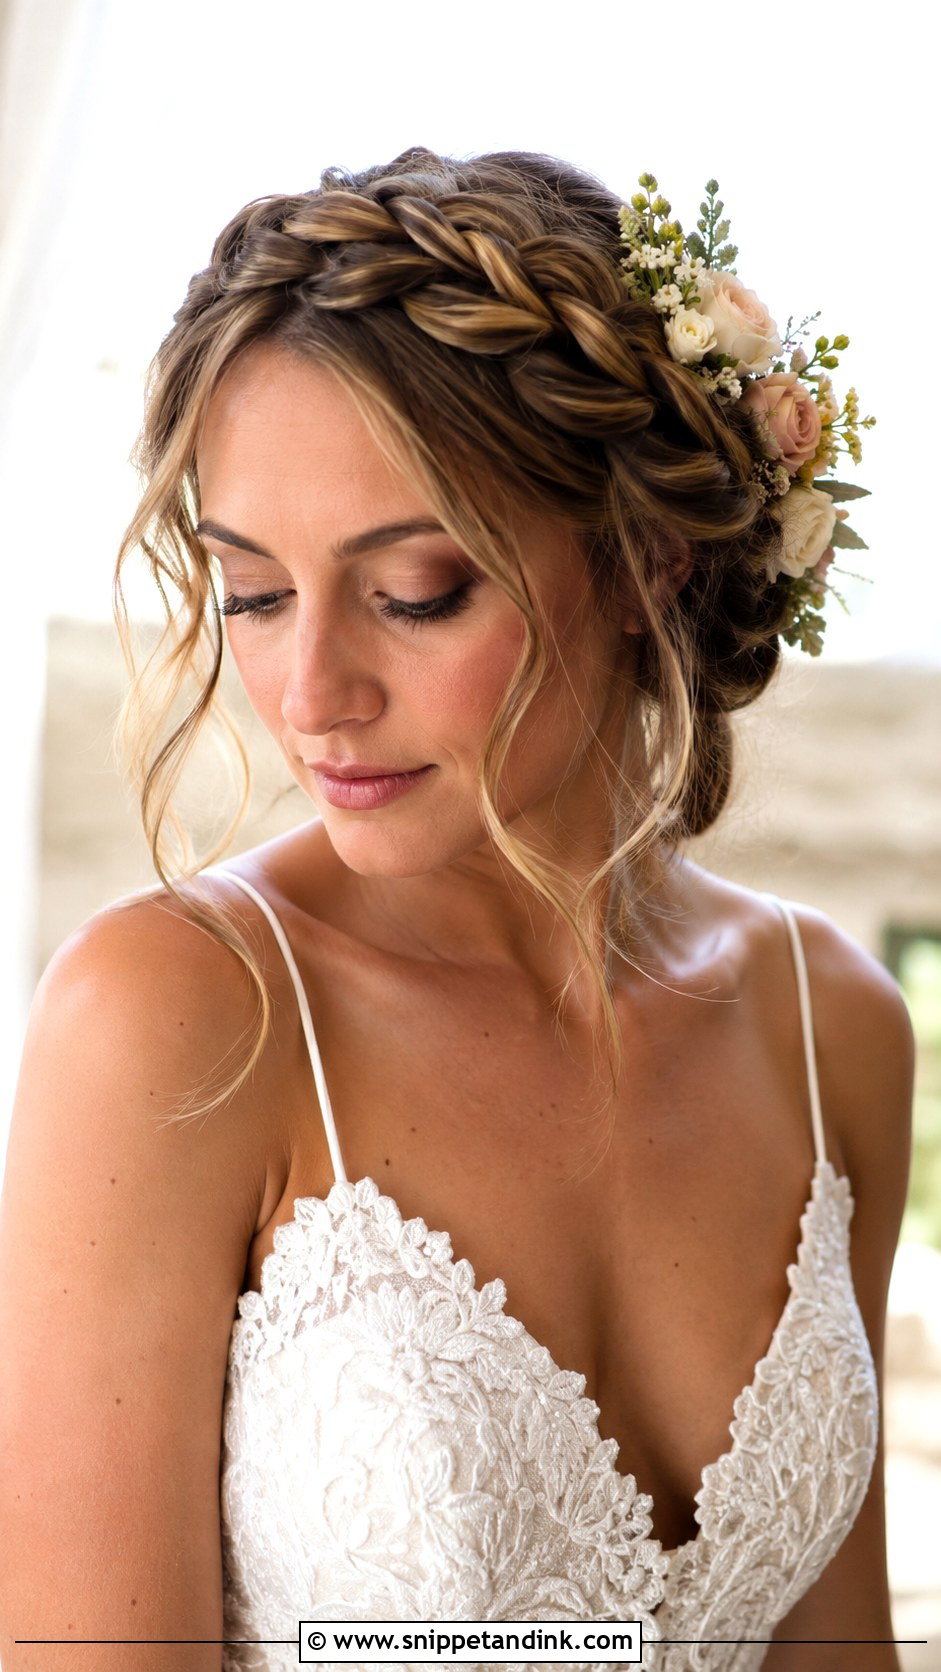
Two braids, one from each side, wrapped up and over to meet at the back like a halo: that’s the whole structure. I pin them where they cross and then gently pull at the plaits to widen them. The woven texture gives a flower fascinator lots of places to tuck in, which is why this combination holds so well. Outdoor and boho weddings are its natural setting. It does need enough length for each braid to reach across the head; on shoulder-length hair I use a single braid with hidden extensions instead.
9. Half-Up Twist With Delicate Fascinator
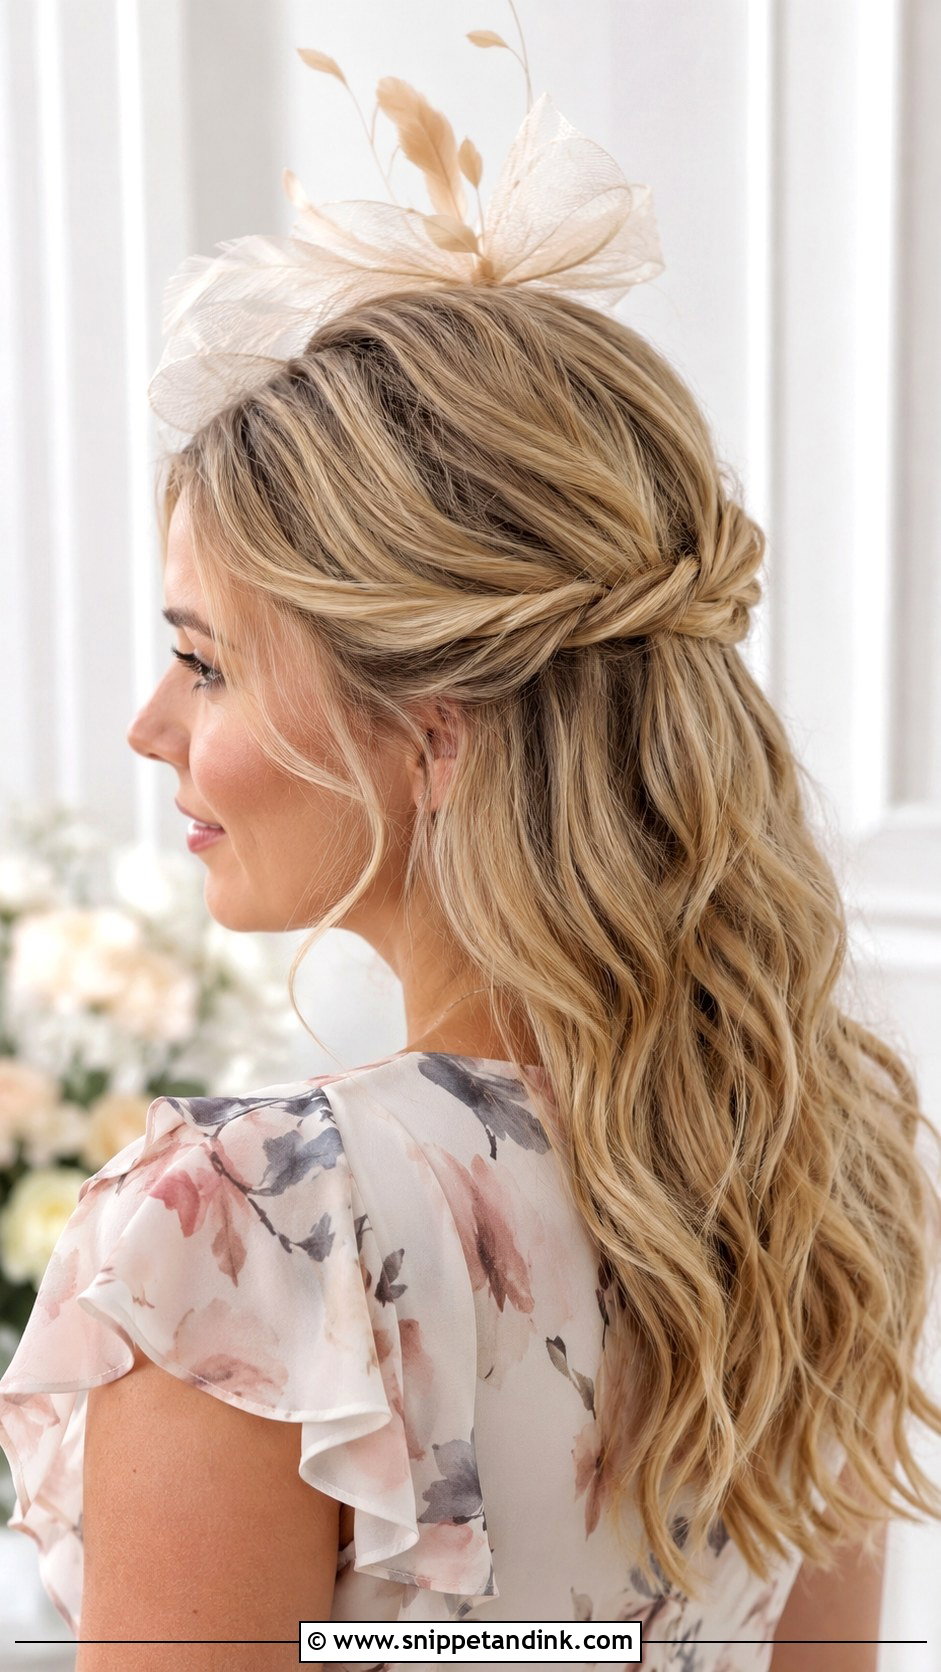
When hair needs to be off the face but shouldn’t go all the way up, a half-up twist is my answer. I take two sections from the front, twist them back and pin them together at the crown, letting the rest fall in waves. The point where the twists meet is the anchor for a delicate fascinator. It keeps hair out of the eyes through a long day and shows off length. Medium and long hair suit it, and bridesmaids who don’t want a formal updo often ask for it. Heavier headpieces need a firmer base than this offers.
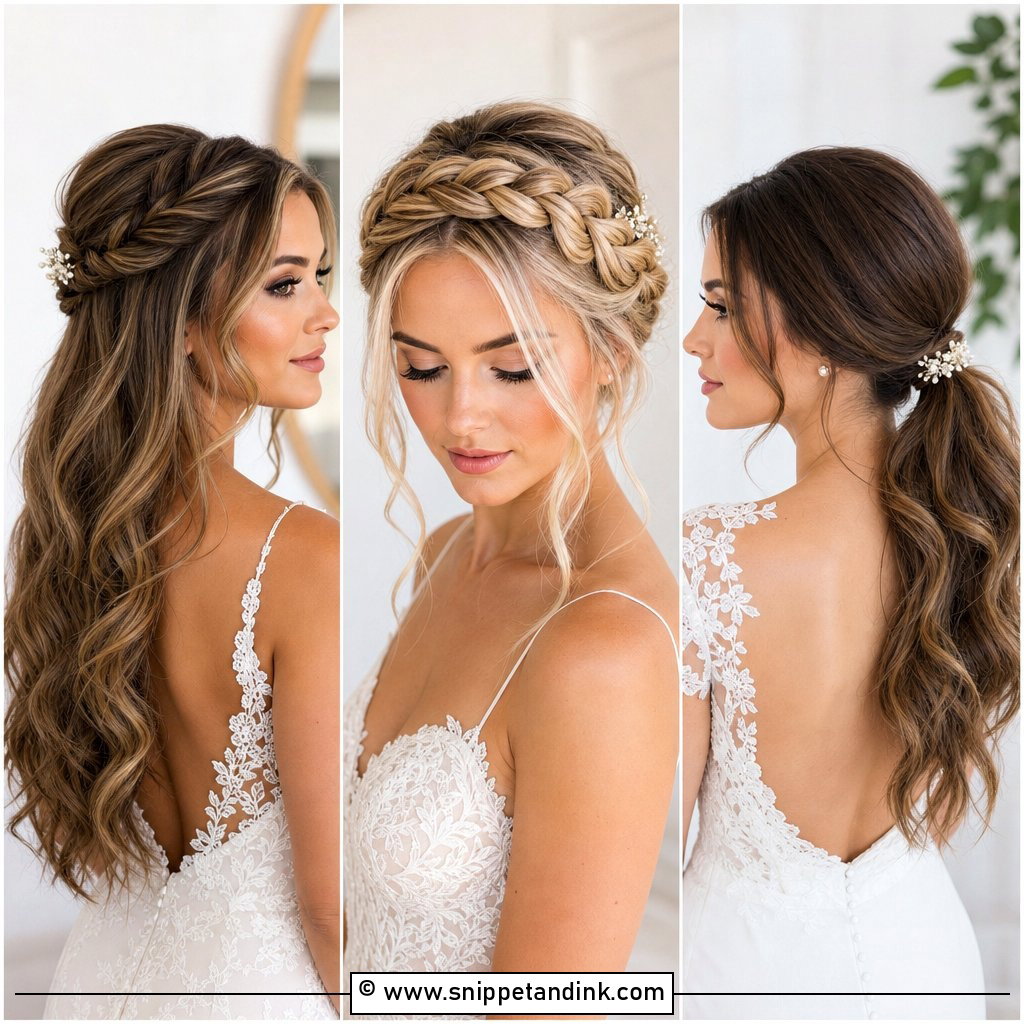
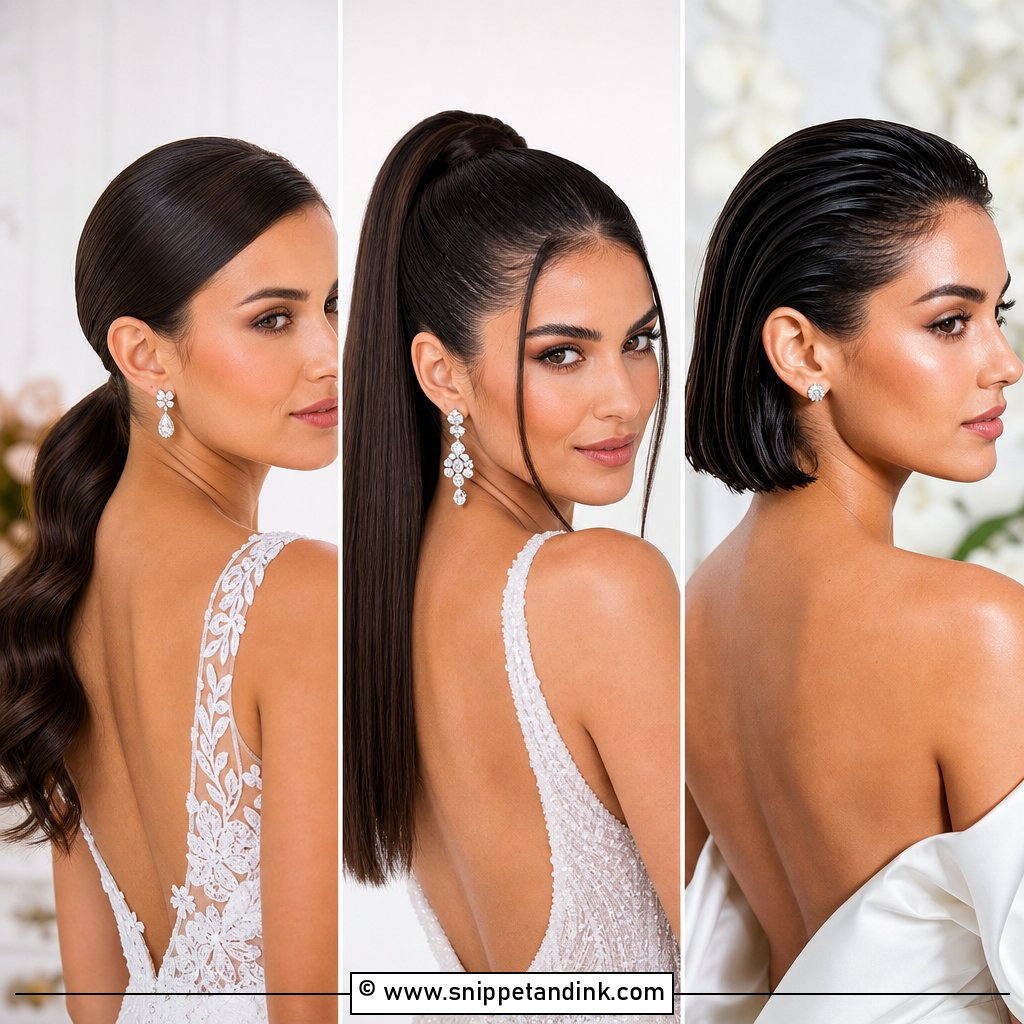
10. Sleek High Ponytail With Side Fascinator
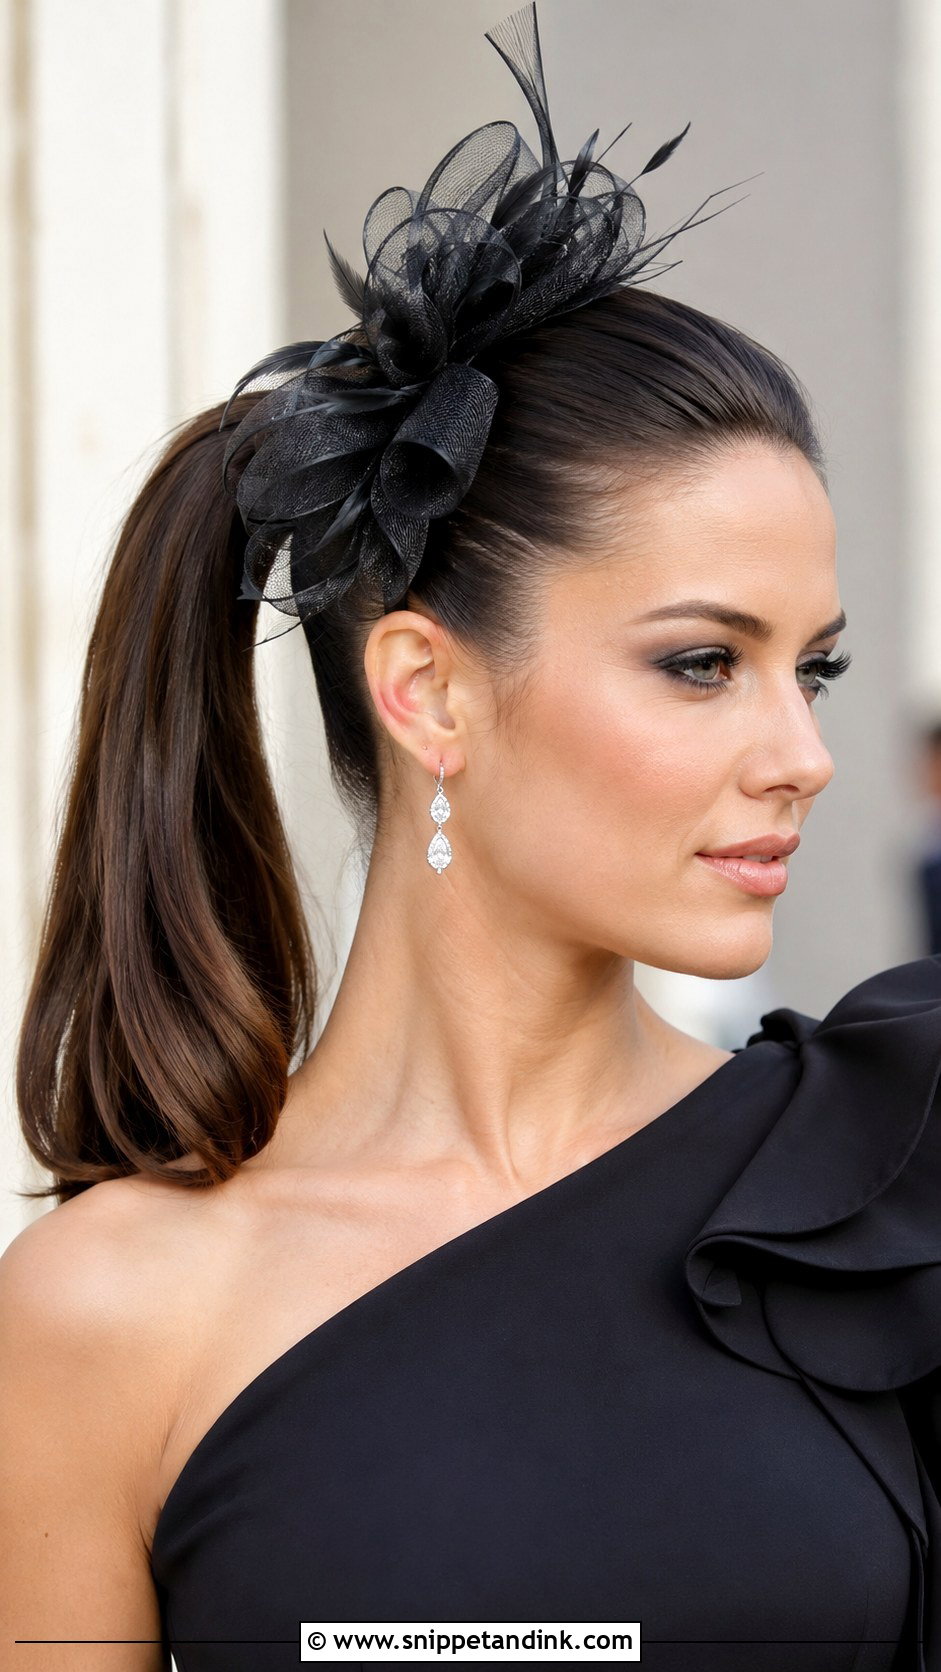
A high ponytail is more polished than people expect, provided the base is solid. I use two elastics, one to gather and one to tighten, then wrap a strand around to hide them and pin it underneath. The lifted line draws attention up and lengthens the neck. A side fascinator sits near the crown or just above one ear. I’d steer guests with fine or short hair toward a lower pony, since a high one needs weight and length to swing rather than look sparse, and clip-in extensions help a lot here.
11. Vintage Finger Waves With Pillbox Fascinator
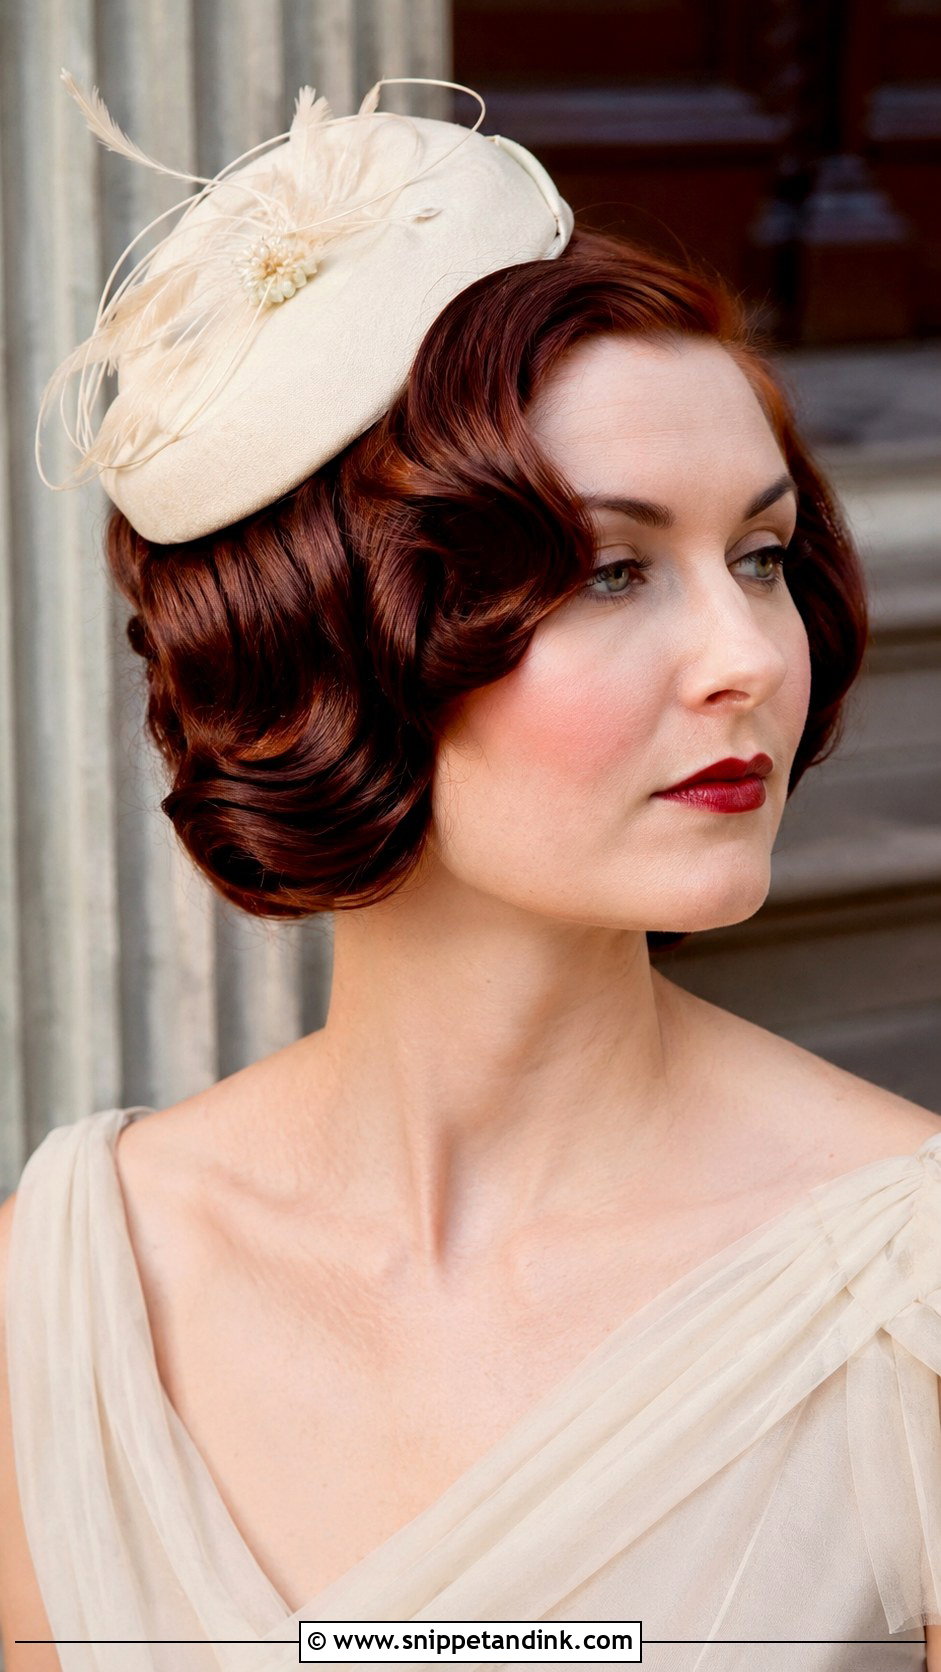
Finger waves are sculpted, not curled. I work setting lotion through damp hair and press the S-shapes in with a comb and fingers, then let them dry fully, under a hood dryer if I can, before touching anything. A structured pillbox fits the retro mood, set toward the side or the front. Short to medium hair is ideal, and themed weddings or 1920s-loving guests are the obvious fit. Honestly, it’s hard to do on yourself the first time; I’d practise at least once or book a stylist who’s done them before.
12. Loose Boho Waves With Flower Fascinator
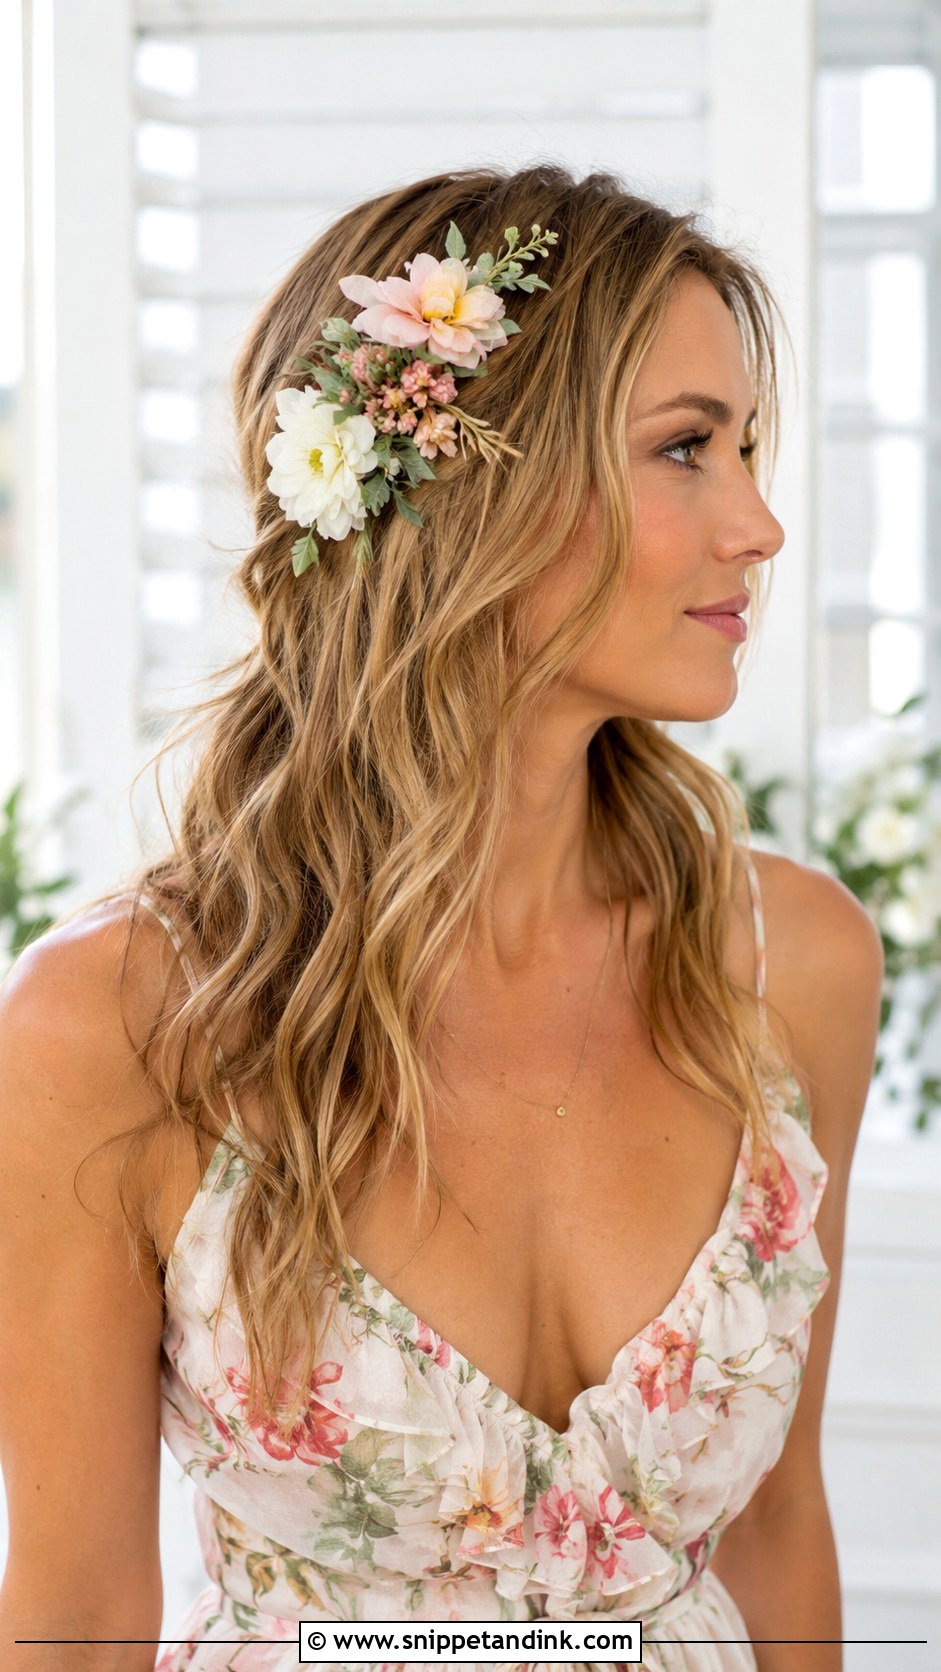
Boho waves need a large wand and a light hand. I curl in alternating directions, leave the ends out straight, and break everything up with fingers once it’s cool. Left down, the hair gives the look its loose, beachy feel. A flower fascinator tucks into the waves on one side, with a little backcombing underneath so it stays. On slippery hair I add a pair of small grips crossed under the comb, since loose hair offers nothing to hold. Spring, summer and seaside ceremonies suit it.
13. Twisted Low Bun With Feather Fascinator
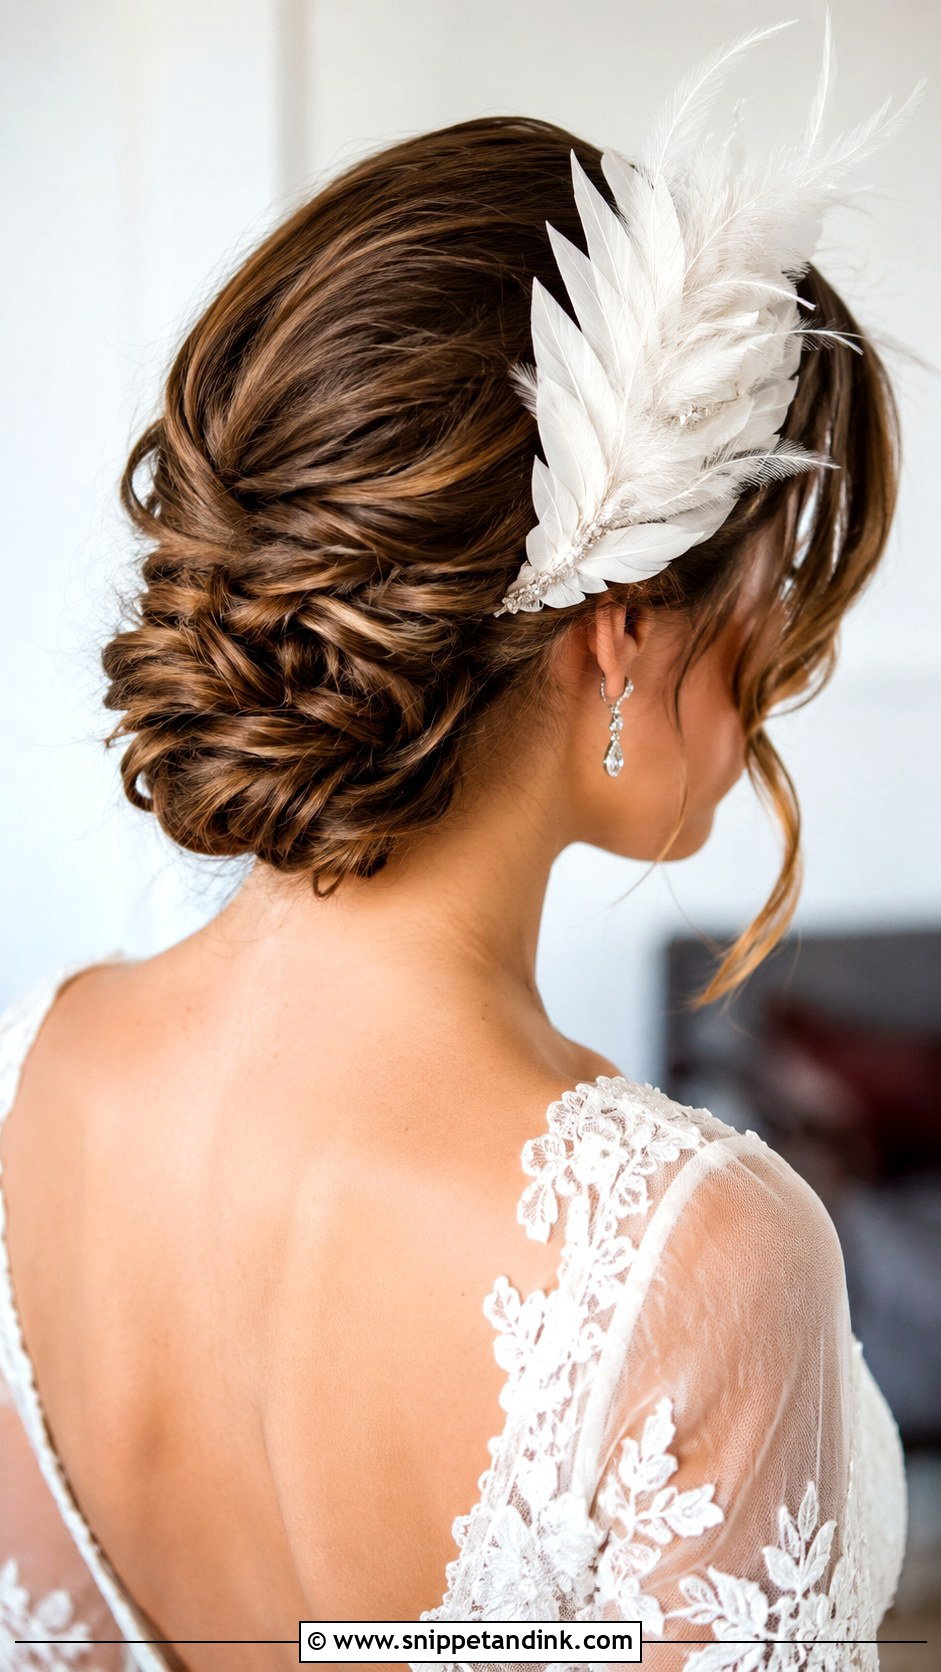
Twisting sections before wrapping them into the bun gives depth without much effort. I divide the hair into three or four parts, twist each one and coil them together low at the nape. The texture hides pins well, which makes it a secure home for a feather fascinator set slightly to one side so it frames the bun instead of sitting on top of it. Thick and medium hair suit it best; on very fine hair the twists look stringy, so I’d backcomb each section lightly before twisting.
14. Curly Updo With Jeweled Fascinator
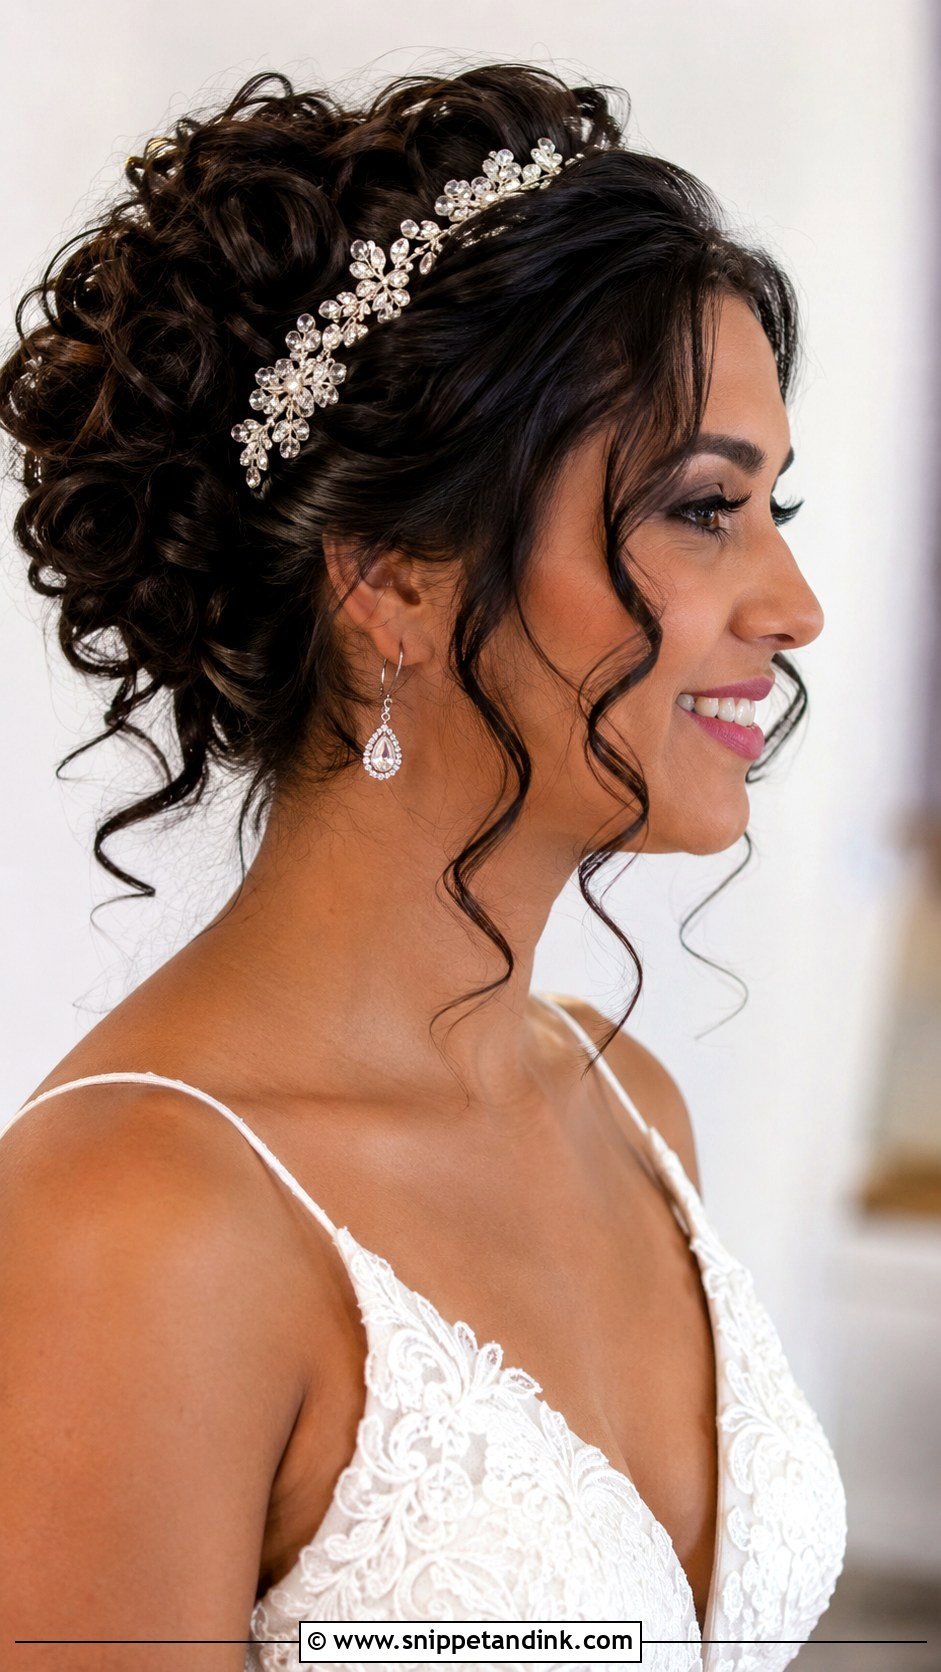
Curly hair has a built-in advantage: it grips. I gather the curls loosely at the crown and pin them in place with large U-pins, leaving a few spirals around the face. The volume gives a full shape, and a jeweled fascinator catches light nicely tucked into the side, where the curls make a sturdy anchor. I never brush curls dry for this; I refresh them with water and a little curl cream, because brushing turns defined spirals into frizz. Keeping the hair off the neck also helps on warm days.
15. Side-Swept Curls With Small Fascinator
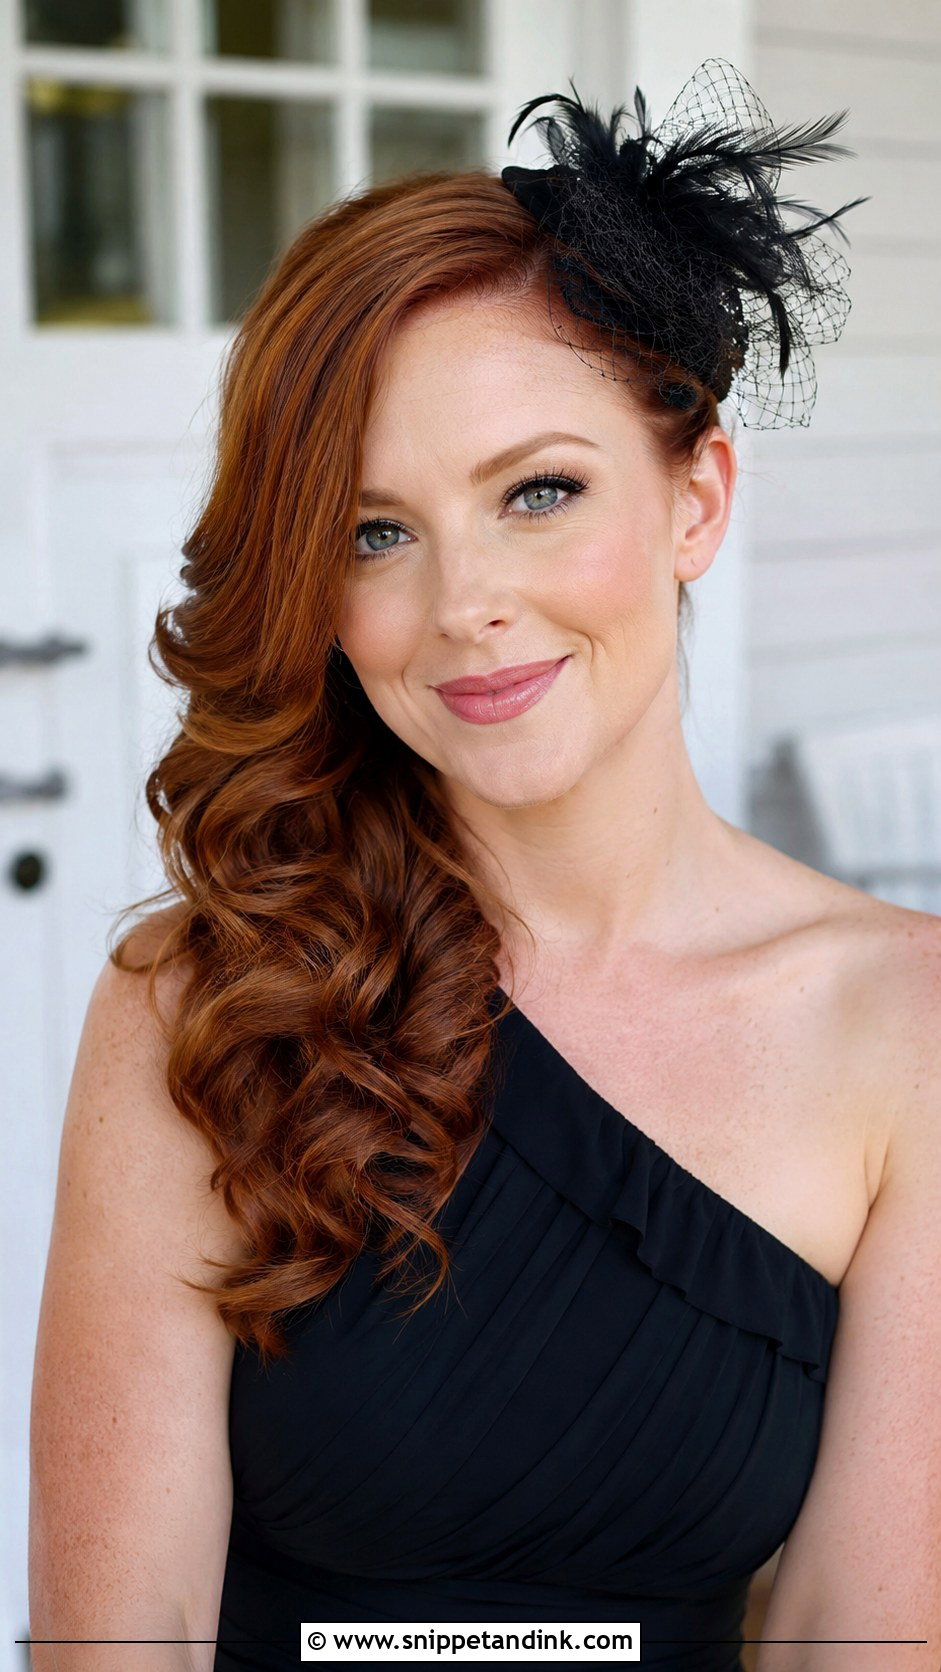
Sweeping everything over one shoulder leaves the opposite side bare, and that bare side is where a small fascinator belongs. I pin the hair at the back so it can’t drift back across, then curl it into soft, cascading curls. The fascinator goes just above the ear on the swept-back side. Strapless and one-shoulder dresses are a natural match because the neckline stays visible. It needs long or medium hair, and those pins at the back are the part people skip and regret.
16. Sleek Bob With Clip Fascinator
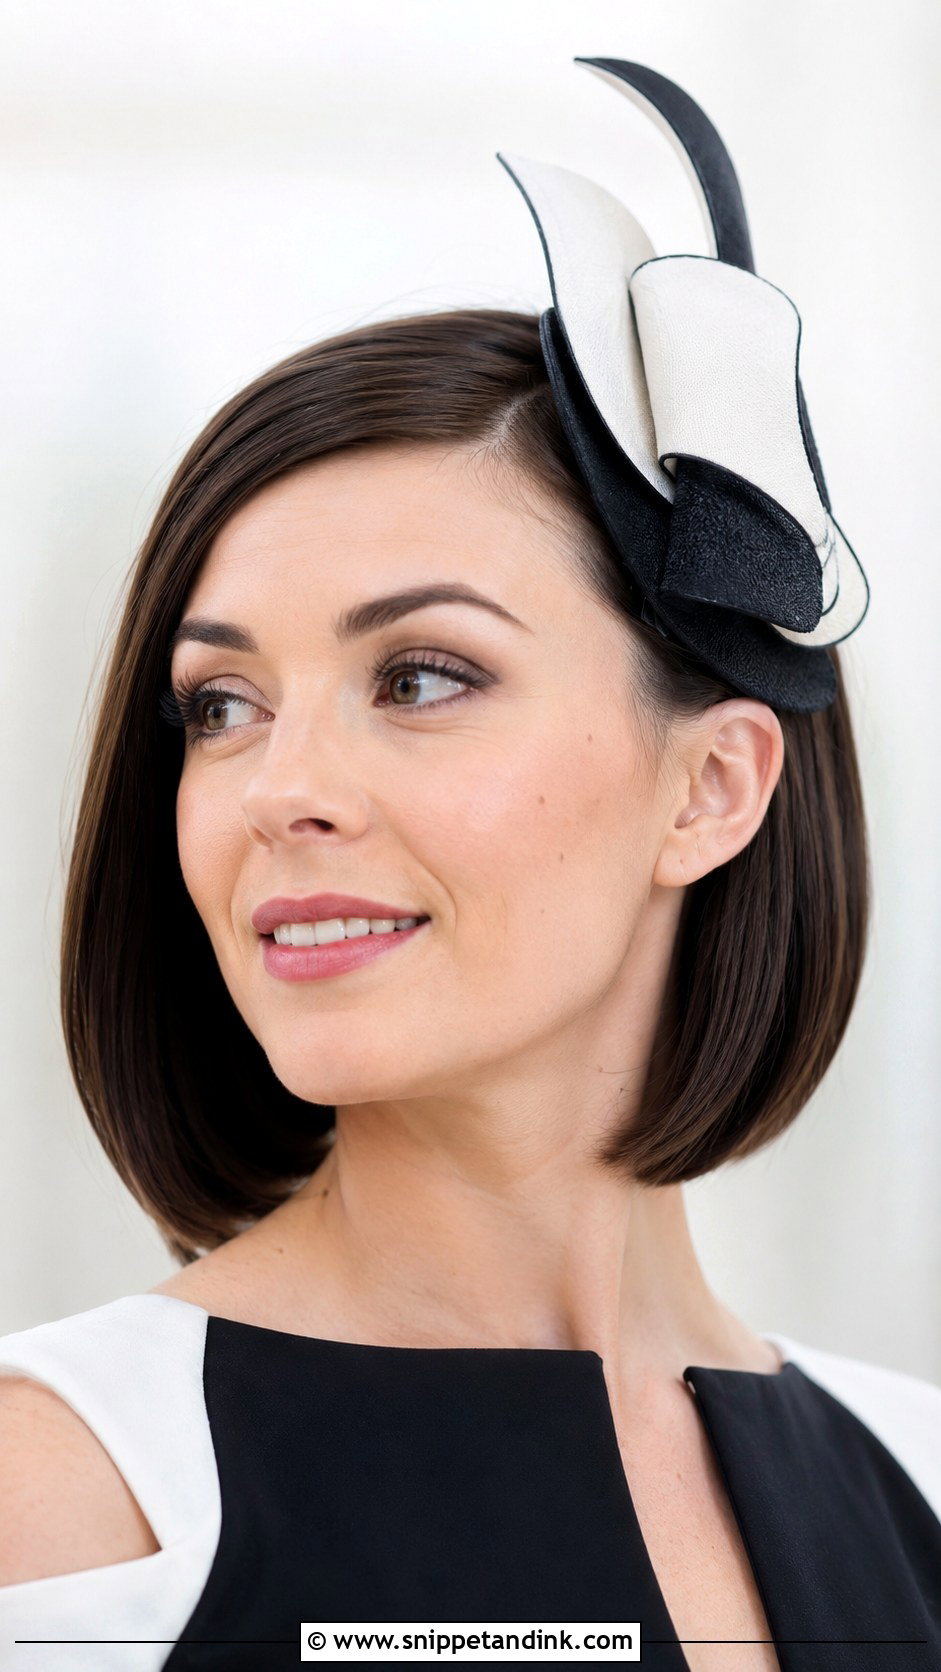
Short hair can carry a fascinator easily; it just needs the right attachment. A sleek bob, straight or with a subtle bend, gives a smooth surface, and a clip-style headpiece sits securely above one ear. I’d always choose a clip or a small comb over a headband with a bob, since a band can push the hair forward. A small or structured design looks deliberate against those clean lines. Before the clip goes in, I put a tiny grip underneath as a base, which keeps it from sliding down smooth, freshly blow-dried hair.
17. Pixie Cut With Petite Fascinator
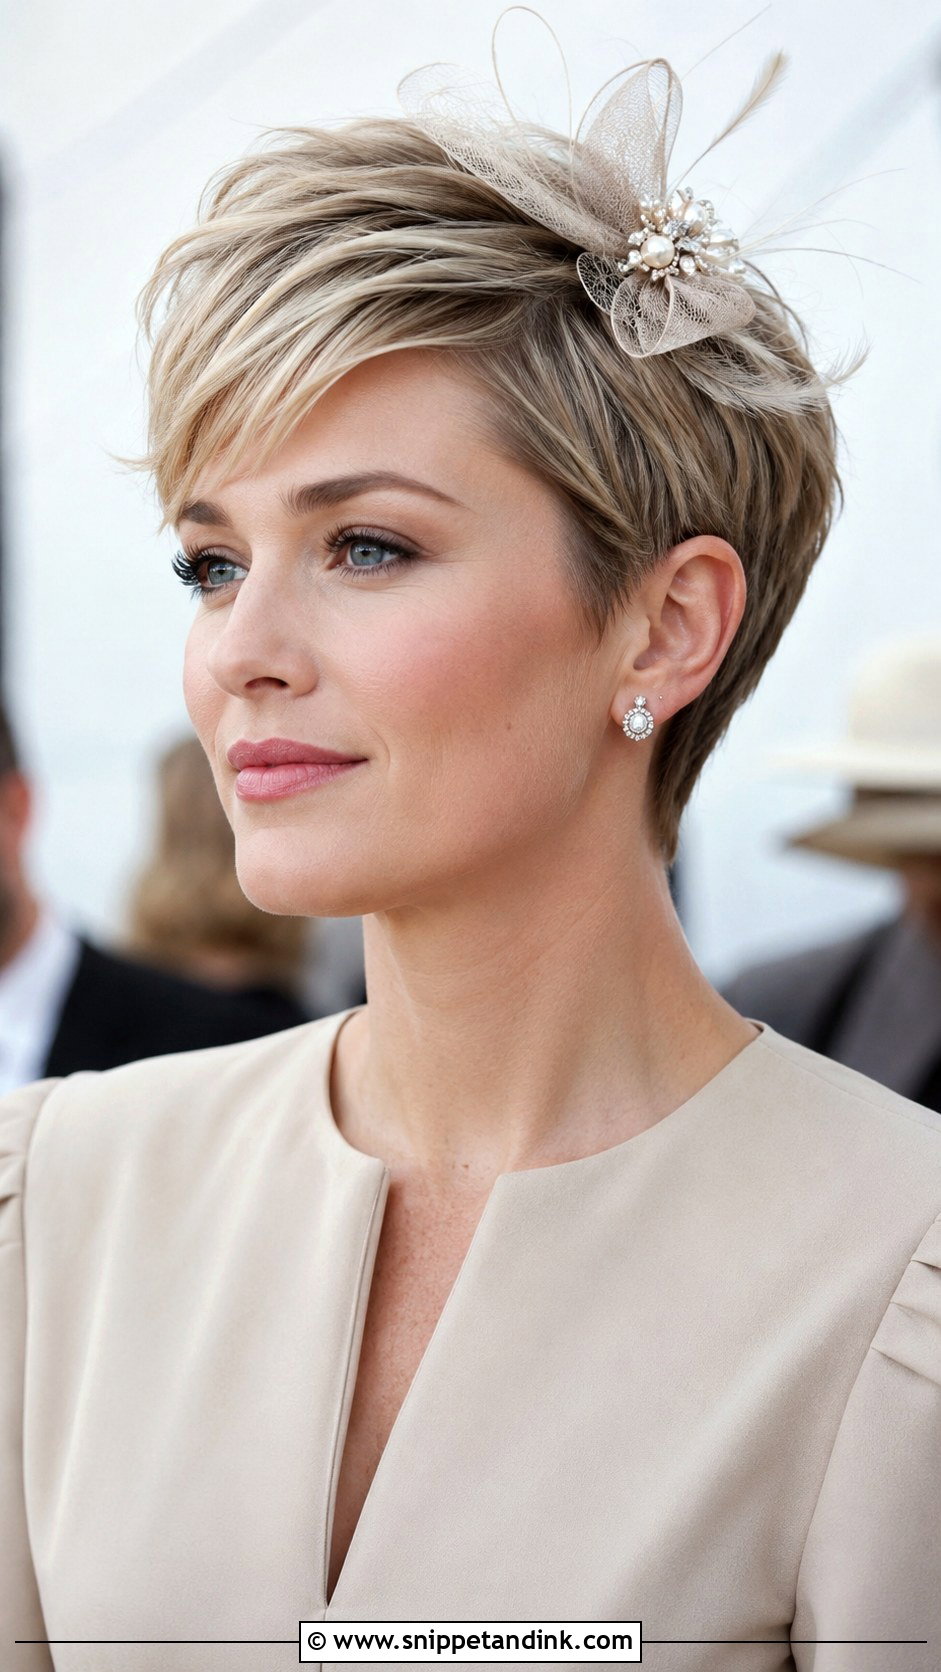
Pixie cuts actually show off a headpiece better than long hair, because nothing competes with it. I style the pixie with a deep side part and a little texture paste, then tuck a small comb or clip into the fuller side. The headpiece needs to stay delicate; anything wide overwhelms the cut. Short hair doesn’t have much to grip, so a fascinator on an elastic band or a clip with a silicone strip holds far better than a plain comb.
18. Romantic Updo With Trailing Flowers
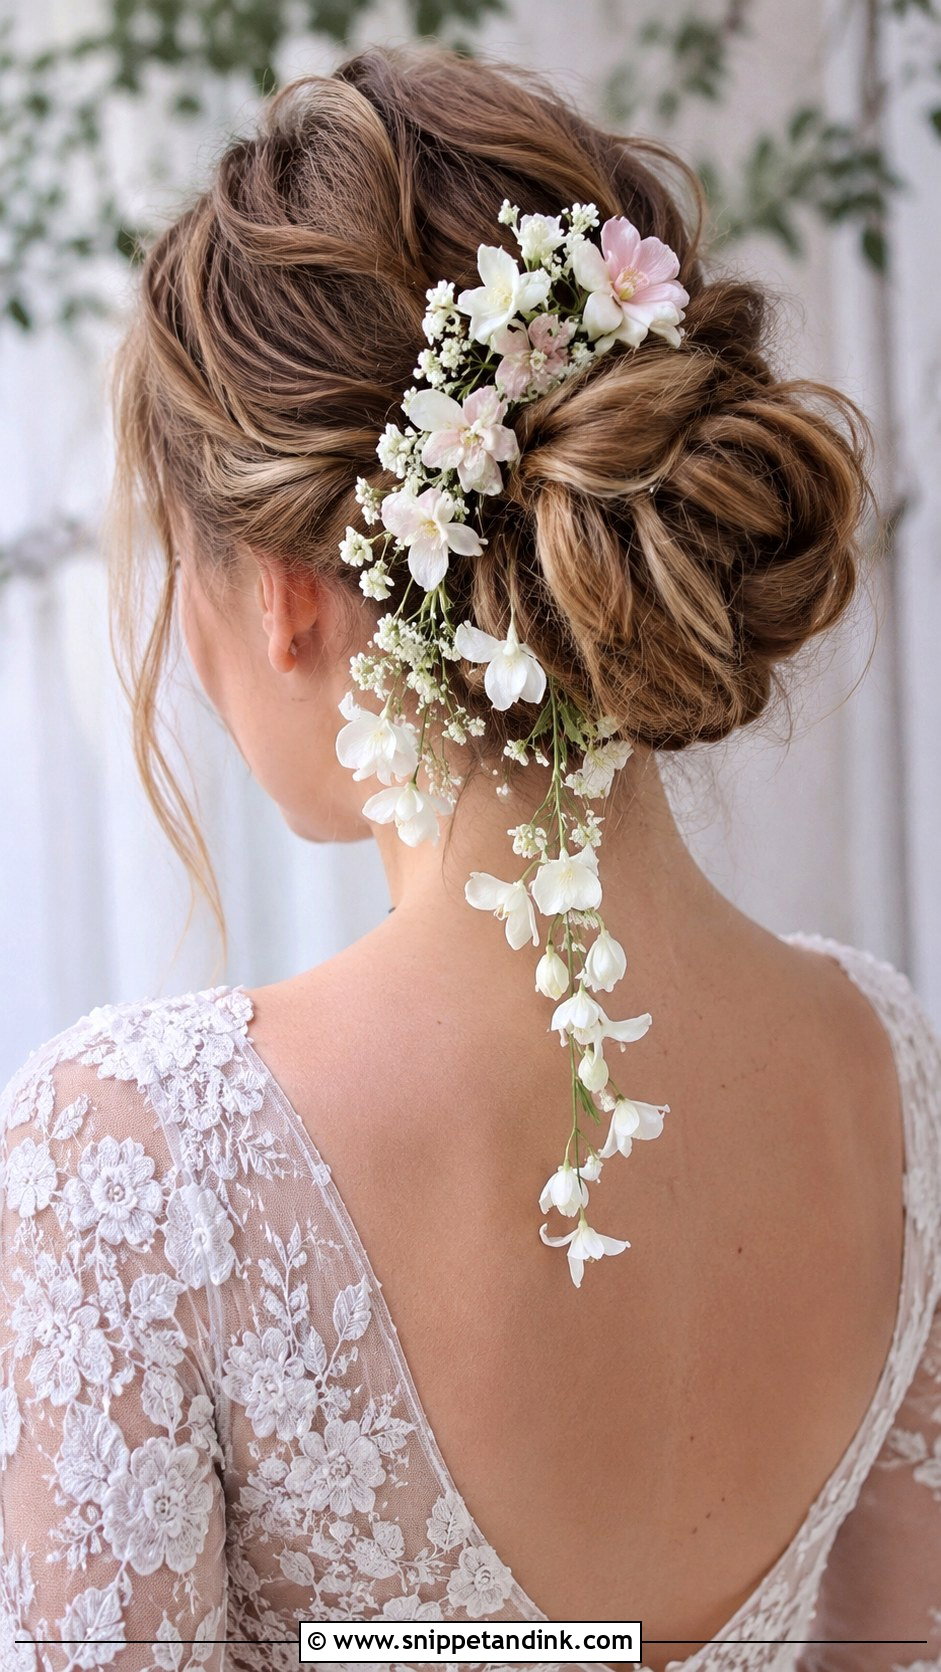
A loose, textured bun with a few face-framing pieces works almost anywhere. I build it with prep spray and pin it softly so it looks relaxed rather than set. A fascinator with trailing flowers adds an organic touch and sits best tucked into the side, where the pins give the comb something to grip. The trailing stems need room, so I keep the hair on that side smooth so they don’t tangle into it. Medium to long hair suits it, and it’s at home at spring and summer weddings.
19. Slicked-Back Bun With Bold Fascinator
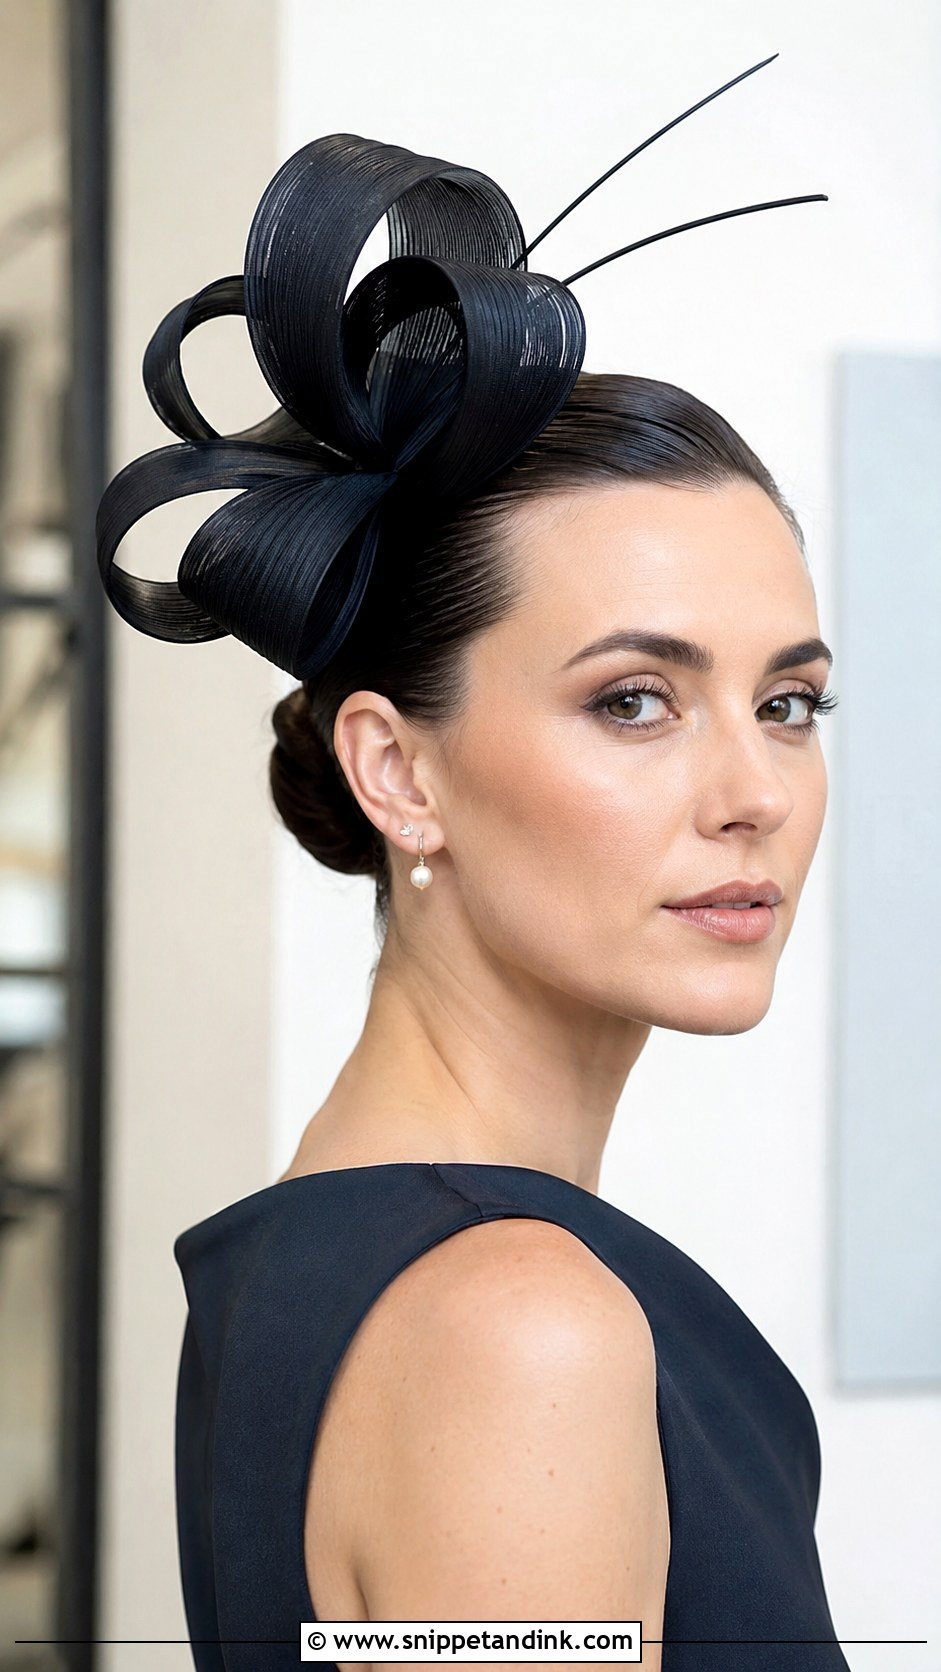
A slicked-back bun is as bold as hair gets. I comb gel through to the ends for a wet finish, gather everything into a tight bun and spray down any flyaways. The clean silhouette leaves plenty of room for a large or sculptural headpiece set to one side. It suits strong features and structured dresses, and modern minimalist weddings especially. I’d caution against it if your hairline is thinning or uneven, because nothing is hidden, and I’d always wash the gel out the same night to avoid dryness.
20. Half-Up Bun With Curtain Bangs
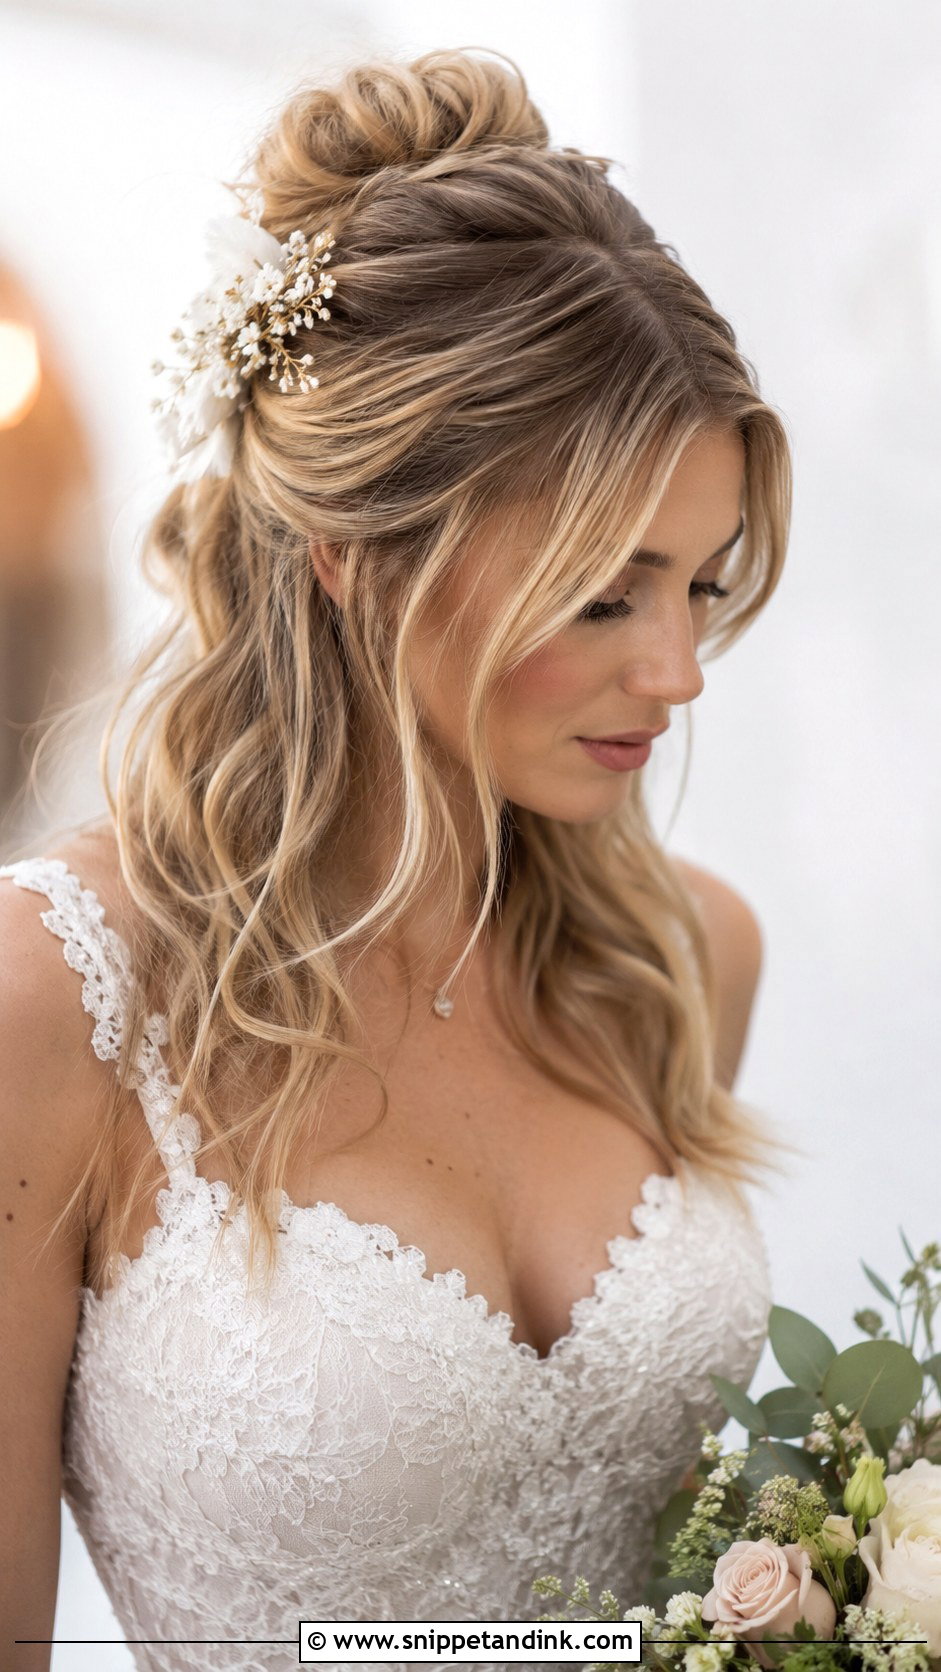
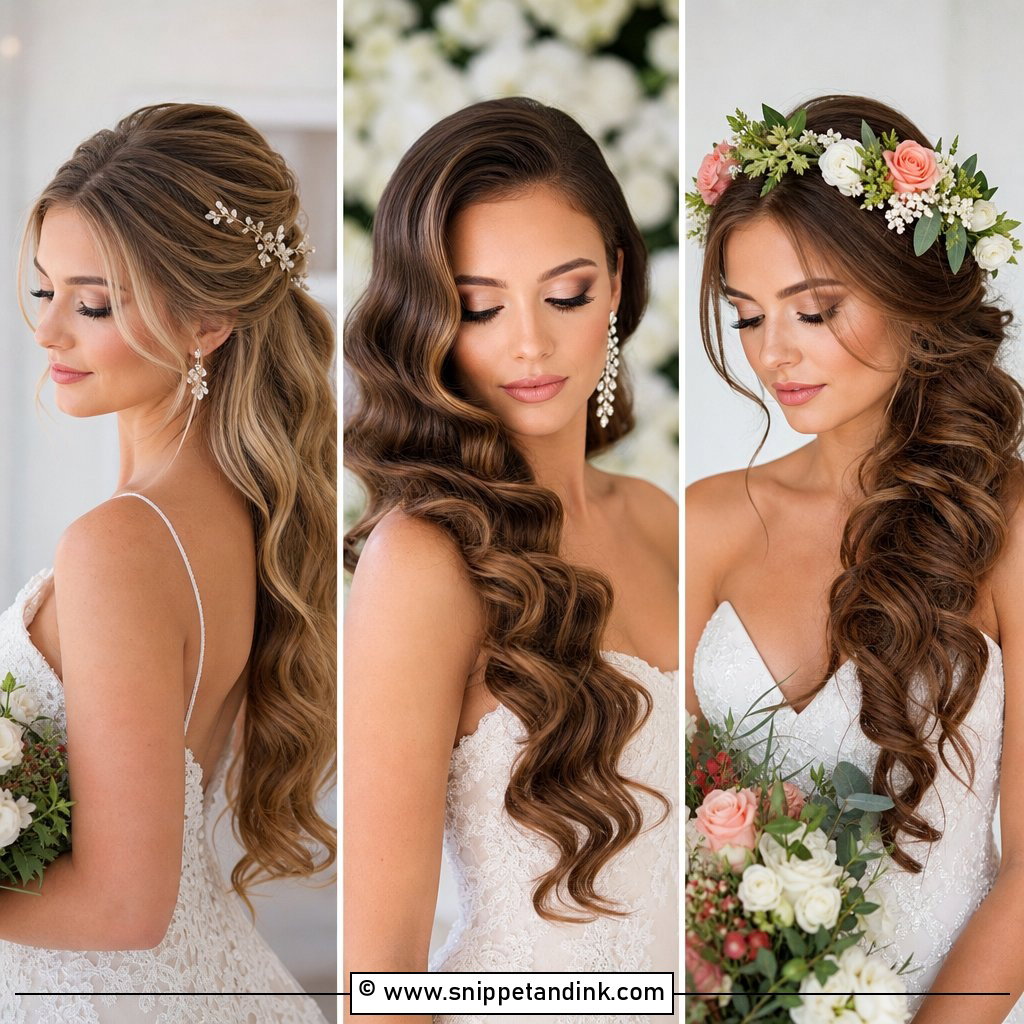
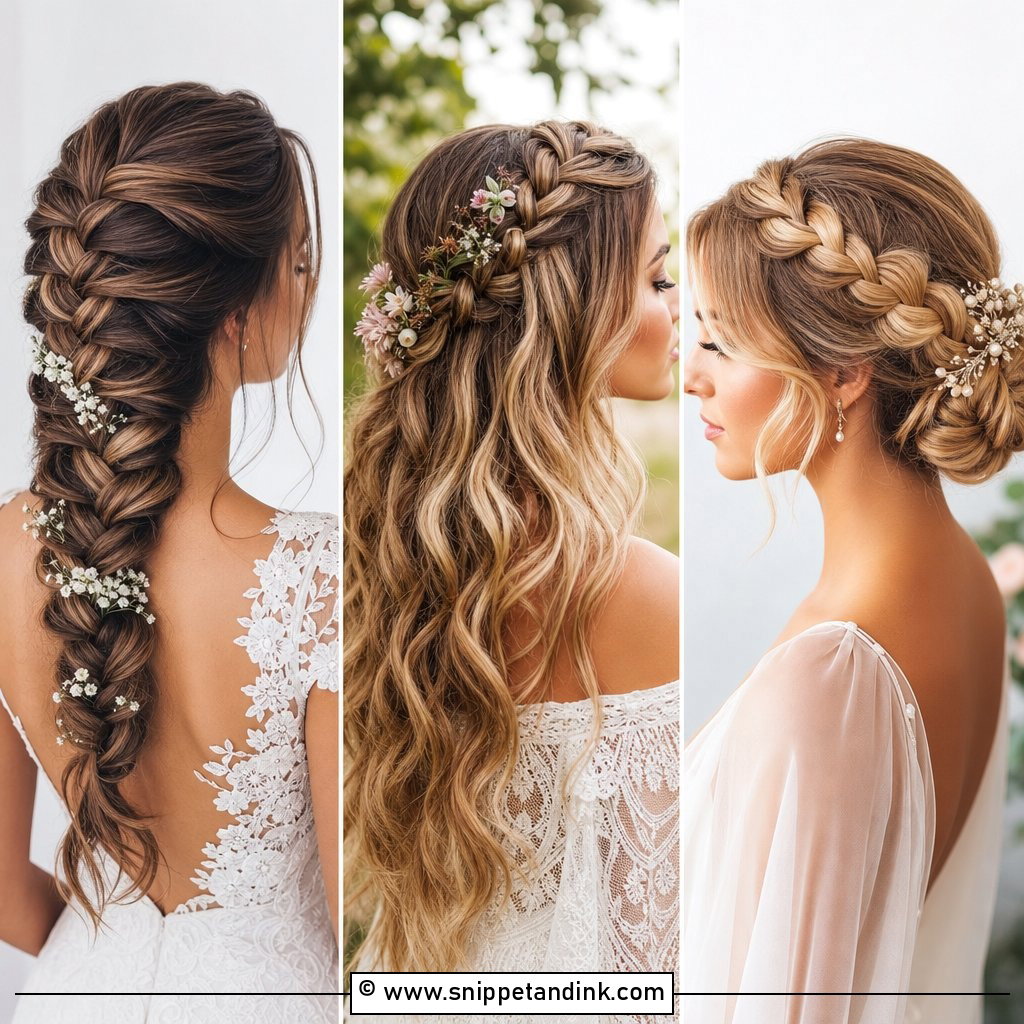
Curtain bangs plus a small bun at the crown is a young, easy combination. I pull the top section into a little bun and leave the rest down, then blow the bangs out with a round brush so they split away from the face. The bun doubles as the anchor for a small to medium fascinator near the crown. Any bigger and it looks top-heavy on such a small base. It works for medium and long hair at garden weddings and dressier parties alike.
21. Textured Low Ponytail With Side Fascinator
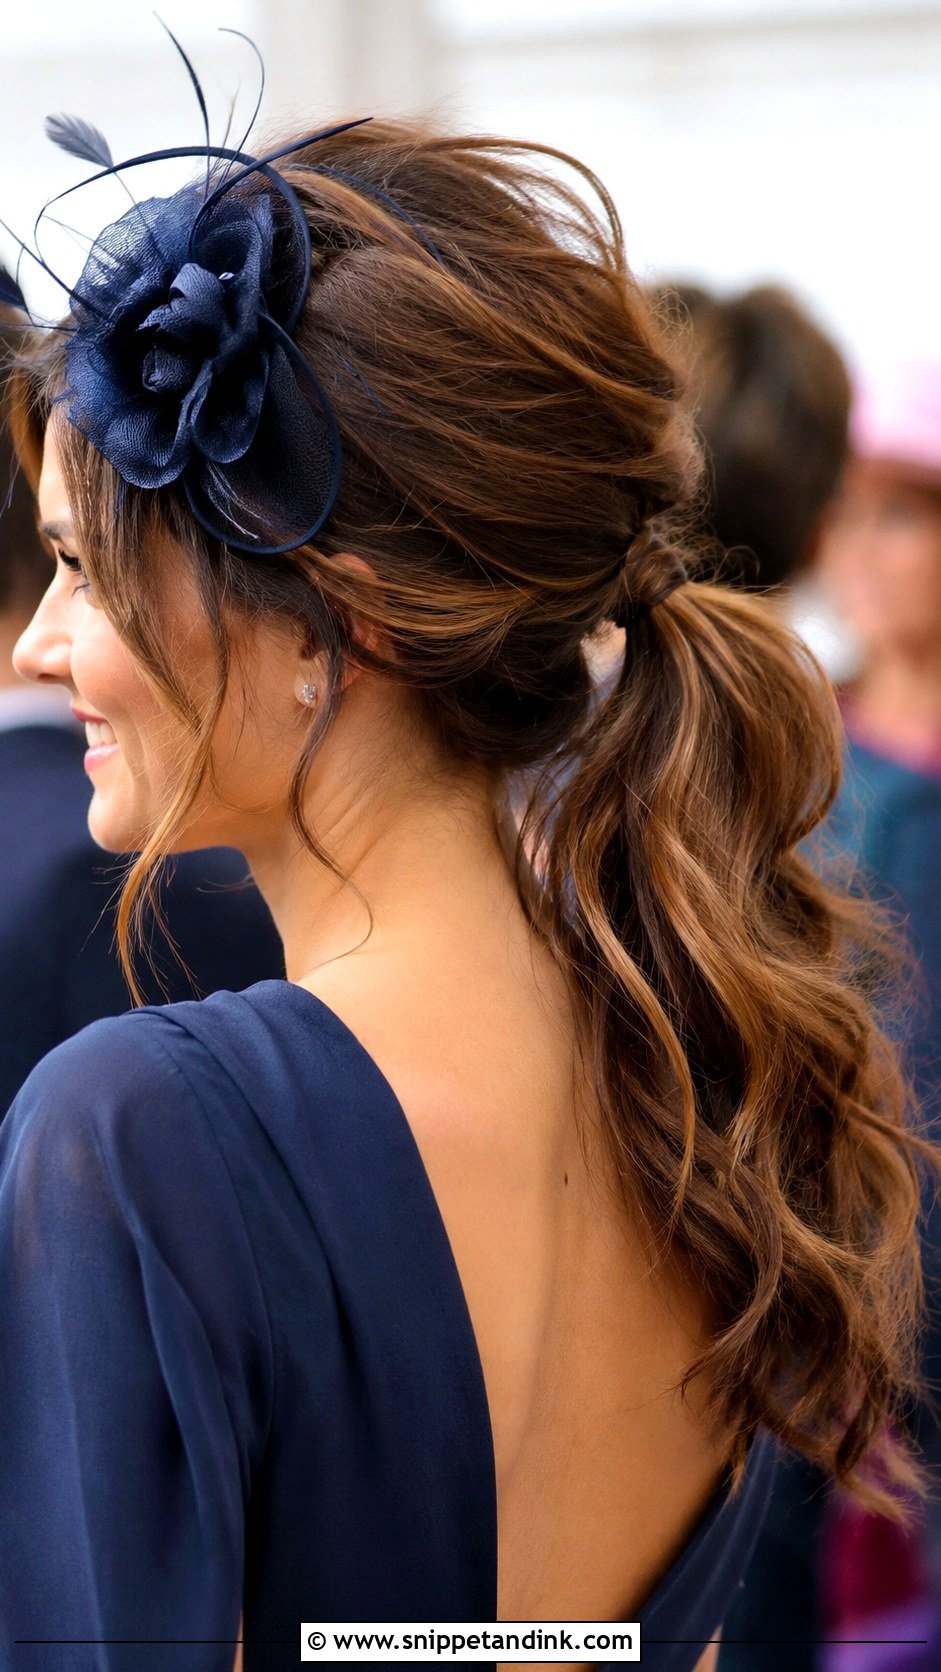
A low ponytail looks dressed up once it has some texture. I gather it loosely, gently tug at the crown for volume, add waves through the length and wrap a strand around the elastic. A side fascinator near the crown finishes it. It’s comfortable for a whole day and simple to fix if it loosens. On very straight, heavy hair, waves fall out fast, so I set them with a strong-hold spray and let them cool in pin curls before brushing.
22. Classic Updo With Birdcage Veil Fascinator
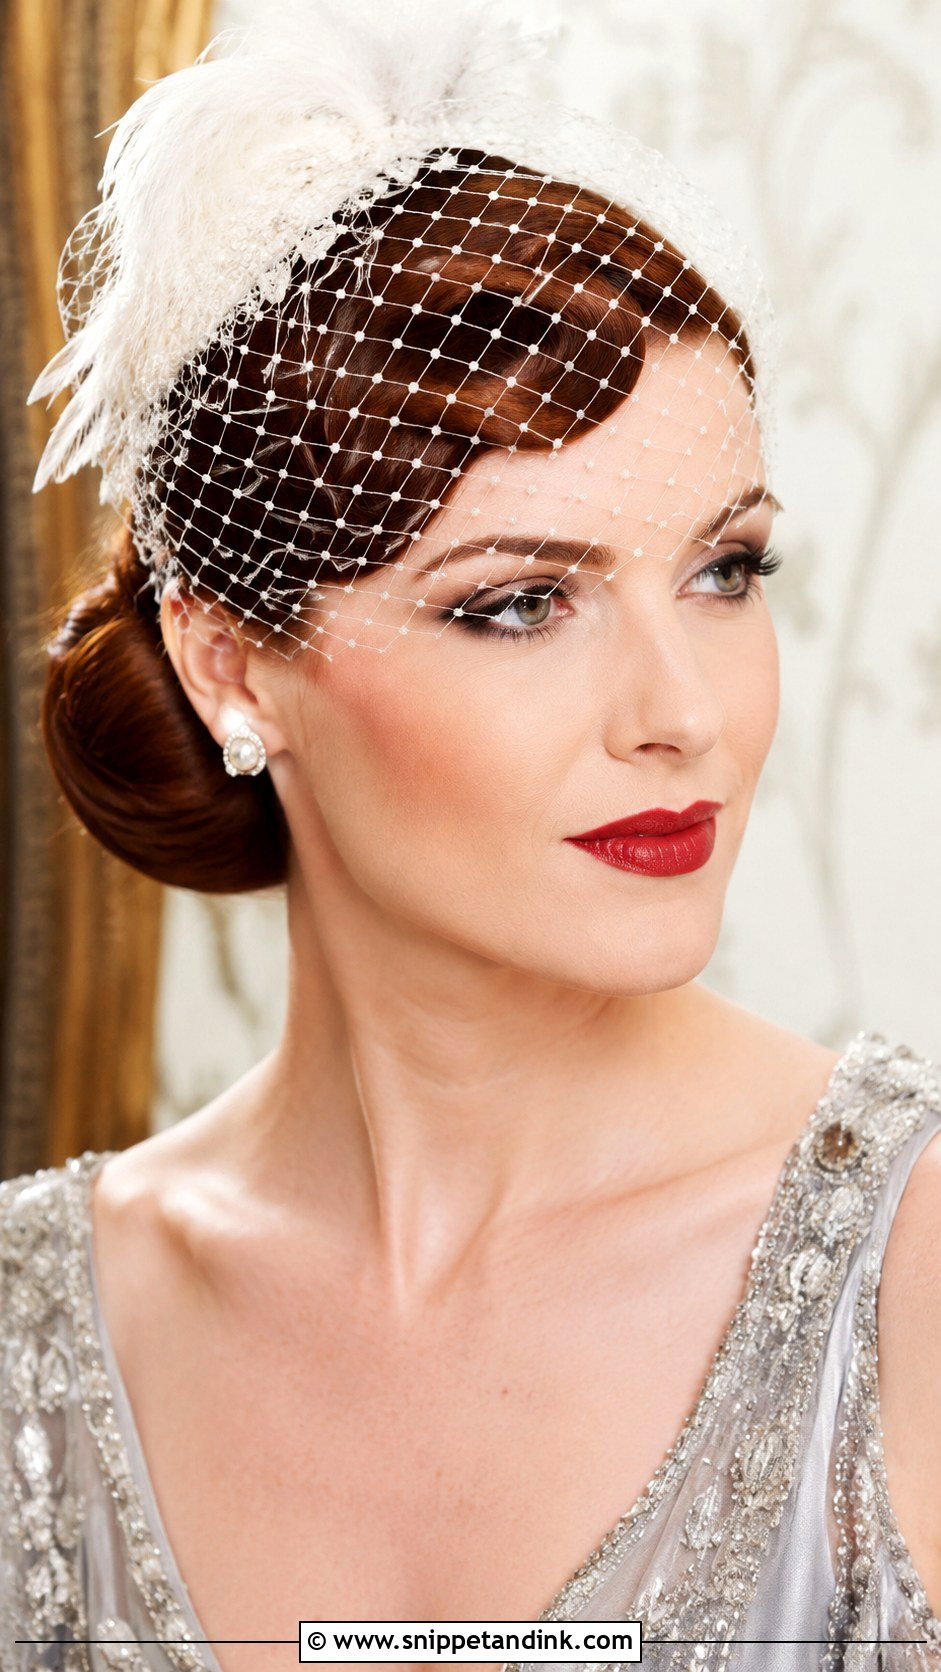
A birdcage veil fascinator needs a smooth, solid bun or chignon underneath, because the netting falls across the face and any bumps in the hair show through it. I position the headpiece at the front or slightly to one side and check that the netting sits just above the eyes, not over them, so it doesn’t catch on lashes. The look has a retro, mysterious quality and suits formal weddings. One honest note: some couples feel a birdcage looks bridal, so I’d ask yourself whether it might read as competing with the bride.
23. Loose Updo With Wispy Tendrils
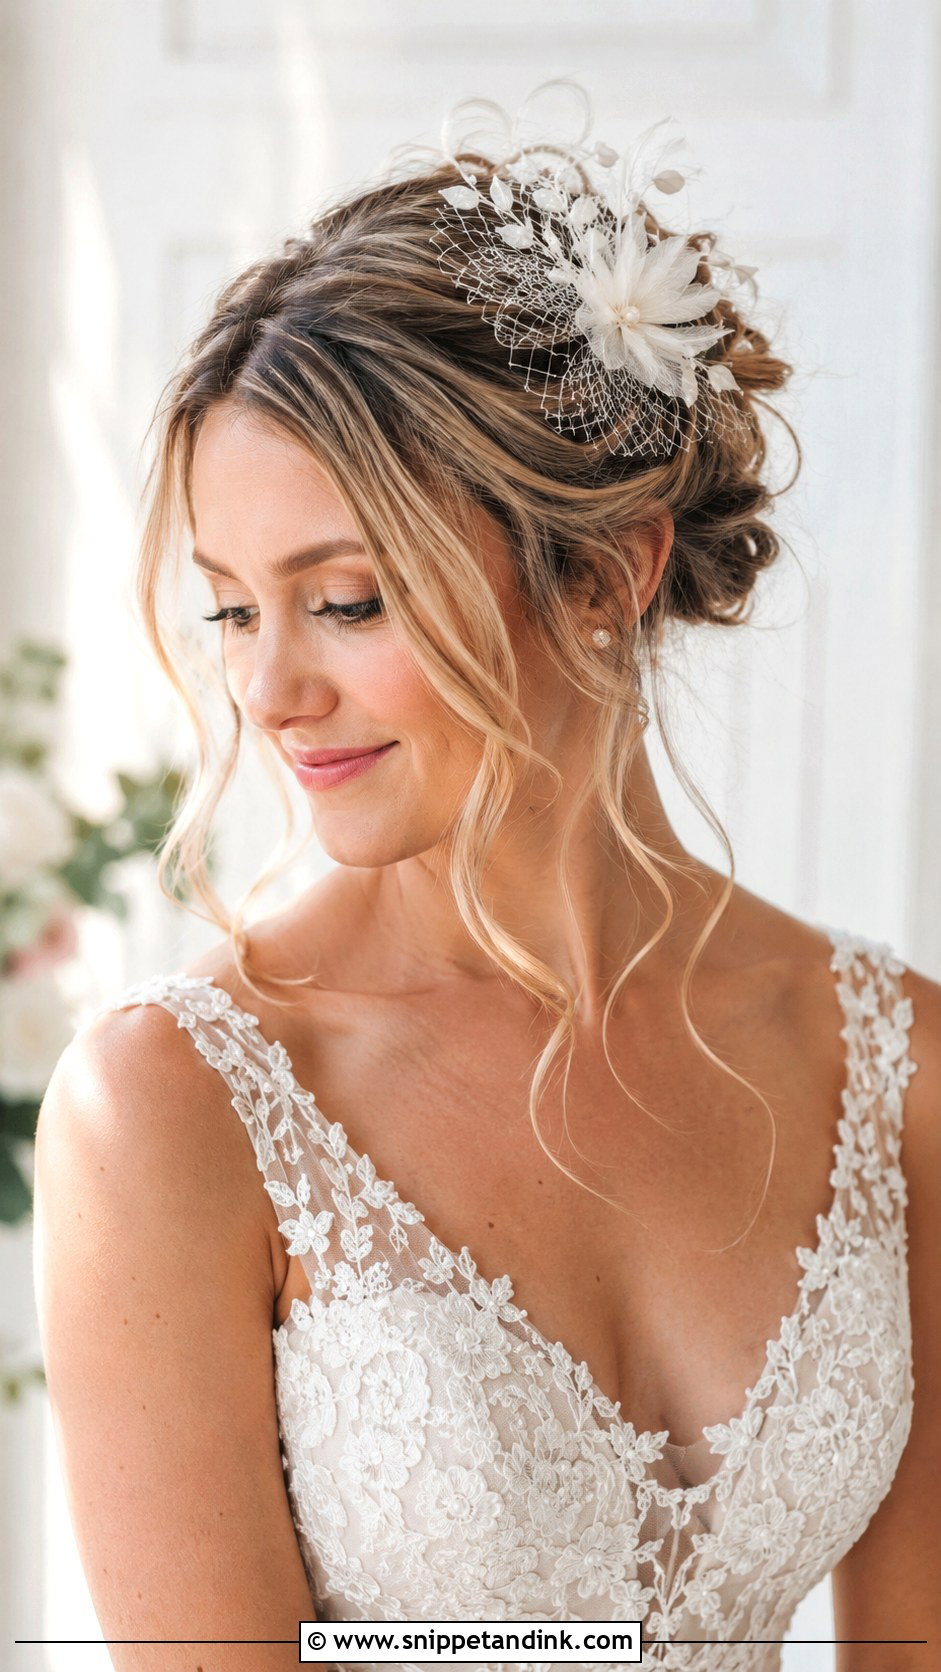
Soft wisps around the face and neck make an updo look romantic rather than strict. I pin the hair up loosely and then pull out tendrils with the end of a tail comb, curling a few so they don’t look like they escaped by accident. The fascinator anchors near the crown or side, and I’d keep it lightweight to match the airy hair. Medium and long hair suit it, and it’s a natural choice for outdoor and spring weddings. The tendrils can frizz in humidity, so I treat them with a little serum.
24. Straight Sleek Hair With Headband Fascinator
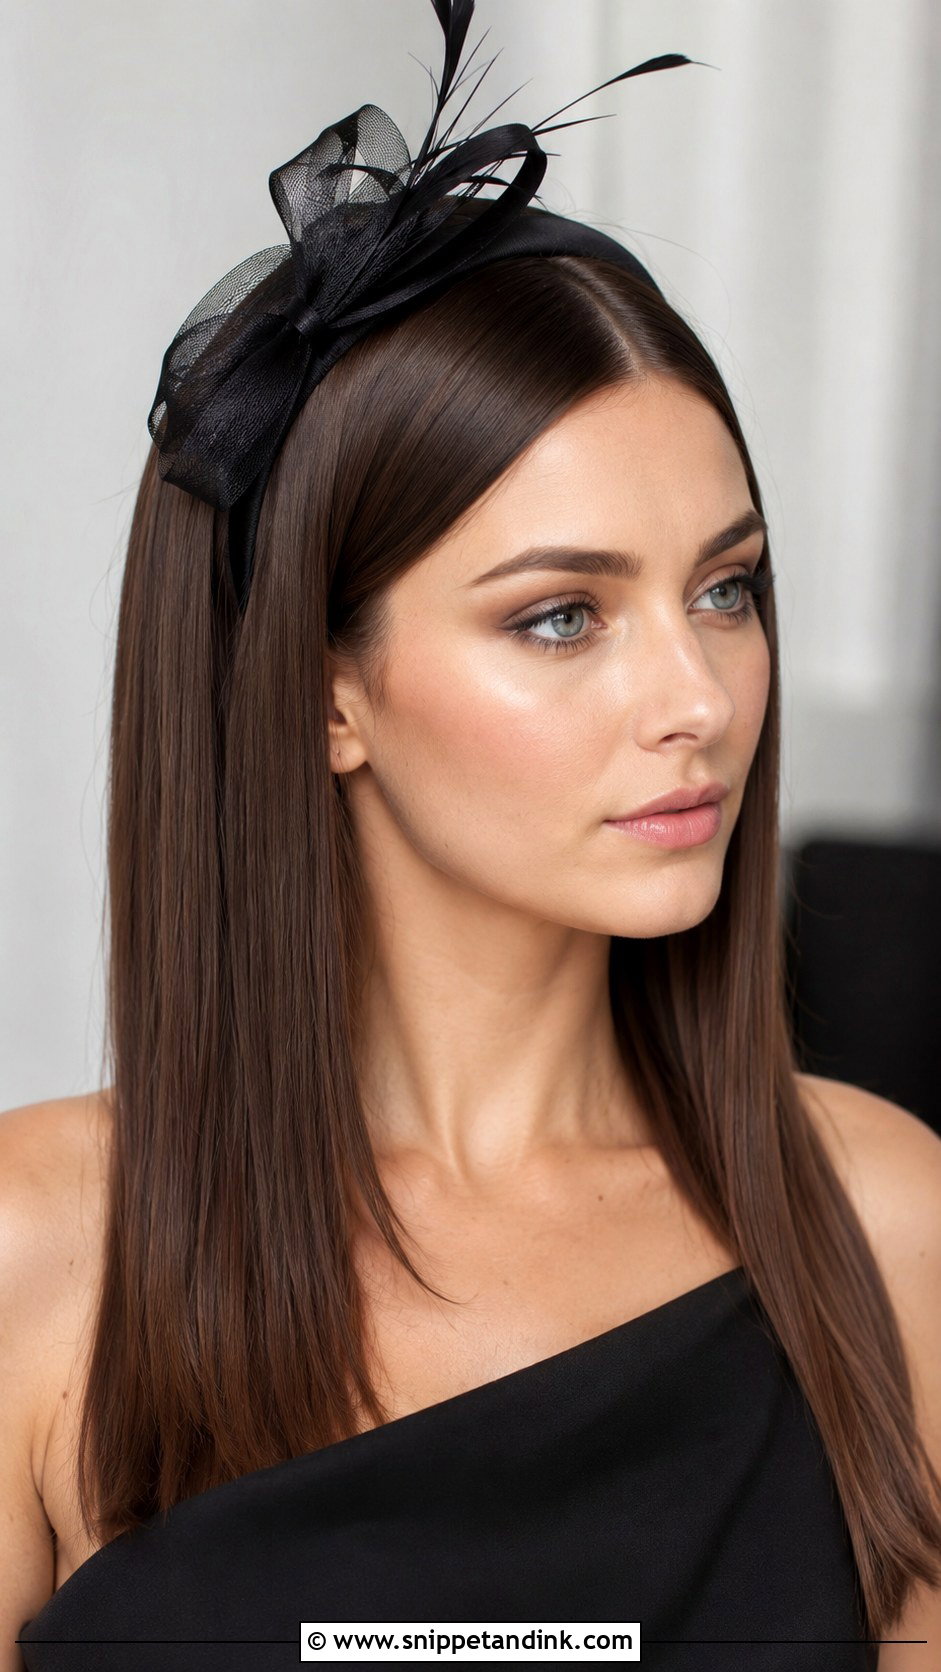
Sleek, straight hair with a headband-style fascinator is the easiest pairing on this list to wear. I flat-iron the hair in small sections with a smoothing serum, then slide the band on. The band does the holding, so there’s no need for pins. That makes it the best choice for guests who will dance a lot or who hate the feel of grips. A tight band can press behind the ears by evening, though, so I’d wear it around the house for an hour beforehand. Long and medium hair suit it, day or evening.
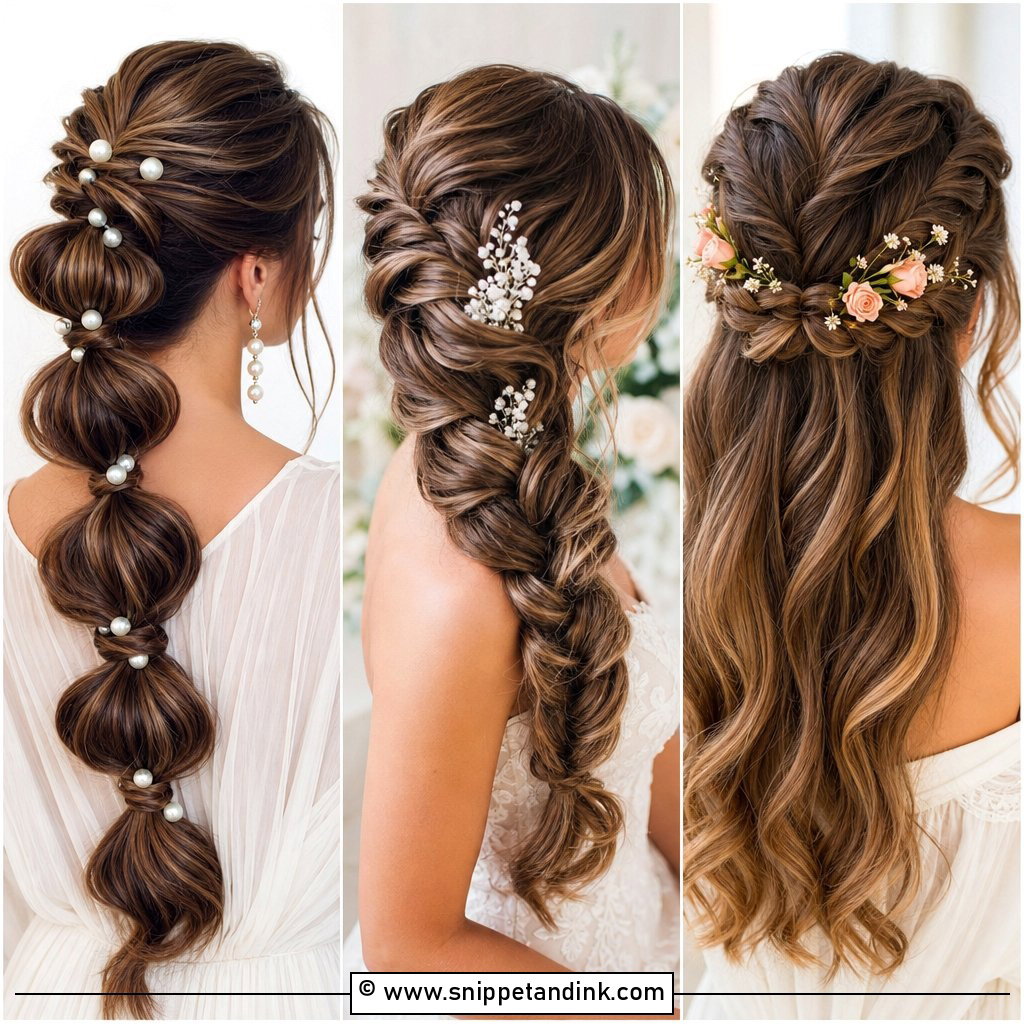
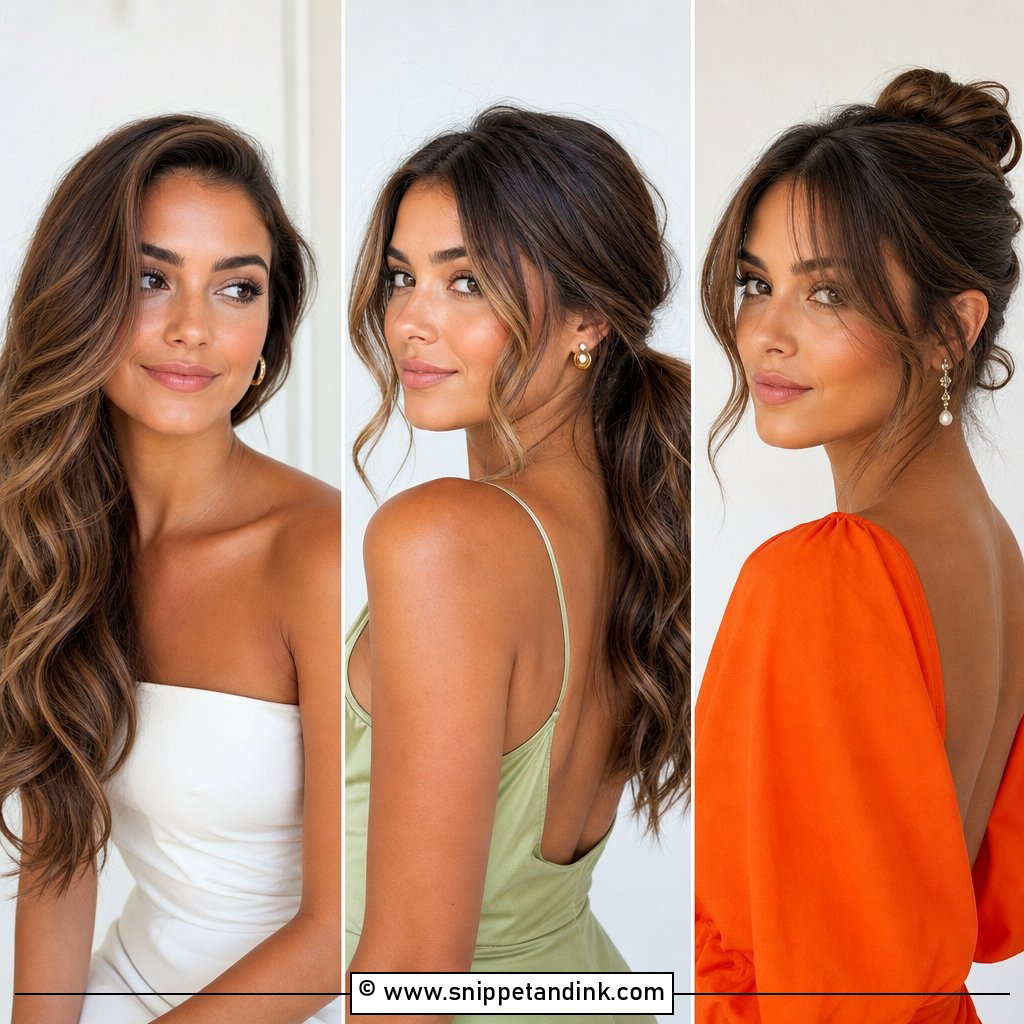
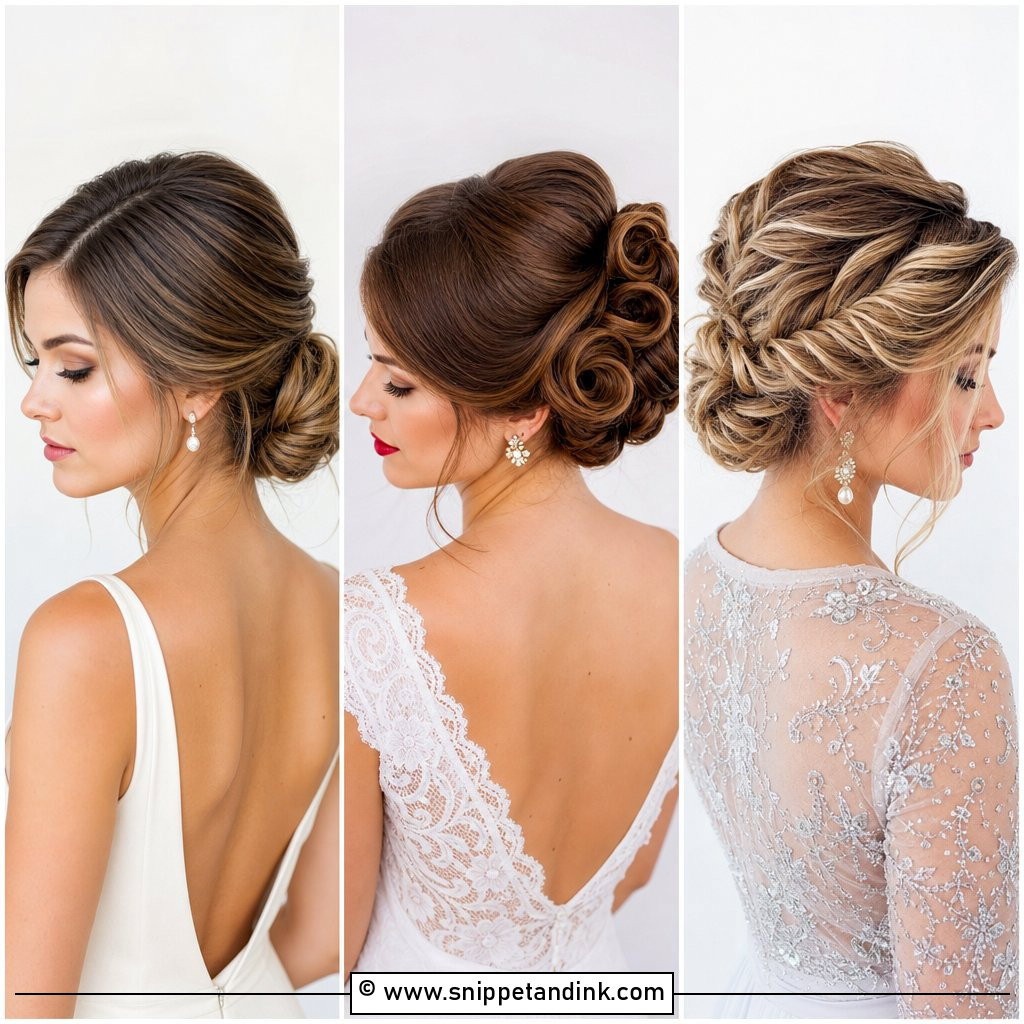
25. Soft Curls Down With Comb Fascinator
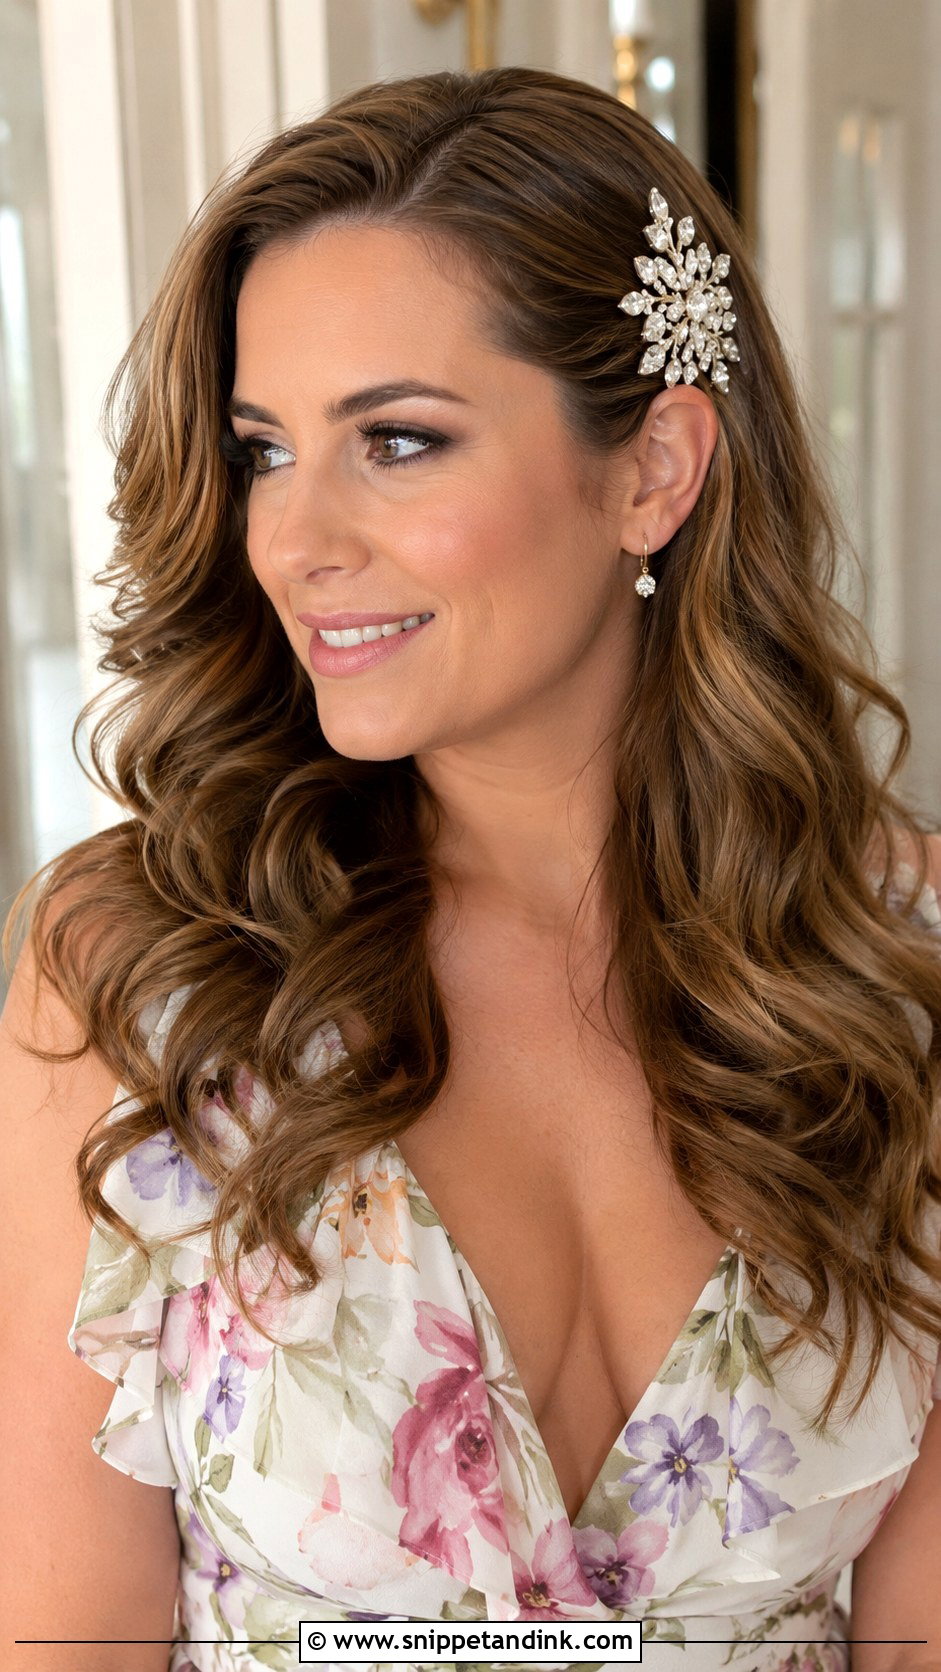
Curls worn down suit almost everyone, which is why I end here. I curl with a medium barrel, let the curls set, and brush them through gently so they soften into one flowing shape. A comb fascinator slides into the side just above one ear, with the area backcombed first so the teeth grip. It works for long and medium hair and for guests of any age. On fine hair the curls loosen over a long day, so I’d pin them up while you get dressed and release them at the last minute.
Daytime, Evening and the Bride’s Own Headpiece
Fascinators have always been a daytime accessory, and they look most at home at morning and afternoon ceremonies, church weddings and garden parties. At a black-tie evening wedding, a small jeweled comb or a slim band fits better than feathers and netting. I’d also take a quick look at what the bride is wearing if you can. White or ivory headpieces, birdcage netting and anything shaped like a veil can feel too bridal, so I’d lean toward color.
If it starts slipping halfway through
I tell guests to carry four or five bobby pins that match their hair color. Take the fascinator out, cross two grips firmly into the spot where it sat to make a fresh anchor, then push the comb back in under them. It takes a minute in front of a restroom mirror and saves the rest of the evening. And if it’s windy, remove it for the outdoor photos and put it back inside; that’s better than holding it on with one hand in every shot.
The Base Matters More Than the Headpiece
Your hair type and your dress decide more than any trend. Updos like chignons and French twists give larger headpieces a secure base, while curls and half-up styles take lighter pieces. Short hair works well with a clip or band. Whatever you choose, backcomb the spot where the fascinator will sit, spray it and let it set first. Then place it slightly forward, above one ear, and look at it from the side before you leave. Get those steps right and you’ll stay comfortable and put together at every wedding you attend.
You'll Like These Ideas:


Leave a Reply