
Short hair has one real advantage on a wedding morning: there’s less of it to go wrong. The do it yourself wedding hairstyles I’d trust on a bob, lob or pixie are the ones that use the length you actually have instead of faking a ponytail you don’t. Waves, pinned twists, a tucked faux bun, a glossy sleek bob, a row of pearl clips, a tiny braid. None of them needs a professional, but every one needs hair with some grip and at least one practice run before the day. Freshly washed, conditioned hair is the enemy here; second-day hair or a good texture spray is your friend.
Pinning the Back of Your Own Head Without Seeing It
The hardest part of DIY short hair isn’t the curling. It’s the back. You’re working by feel, arms up, on hair that’s only a few inches long, and that’s where pins slip and twists unravel. A little setup makes a surprising difference.
- Sit rather than stand, with a hand mirror angled behind you so you can check the nape between sections.
- Buy matte pins that match your hair color, and buy more than you think. Short twists can take two or three pins each.
- Mist the pins with dry shampoo or texture spray before using them. A slightly gritty pin grips fine short hair far better than a shiny one.
- Cross pins in an X over each twist instead of pushing a single pin straight in. The X locks against itself.
- Work in small sections. A thumb-width twist stays put; a fistful of short hair springs out within the hour.
Time yourself on the practice run. Most of these looks take twenty to forty minutes once you know them, but the first attempt is usually double that, and you want to know the real number before you build a wedding-morning schedule around it.
1. Short Half Up Wedding Hair
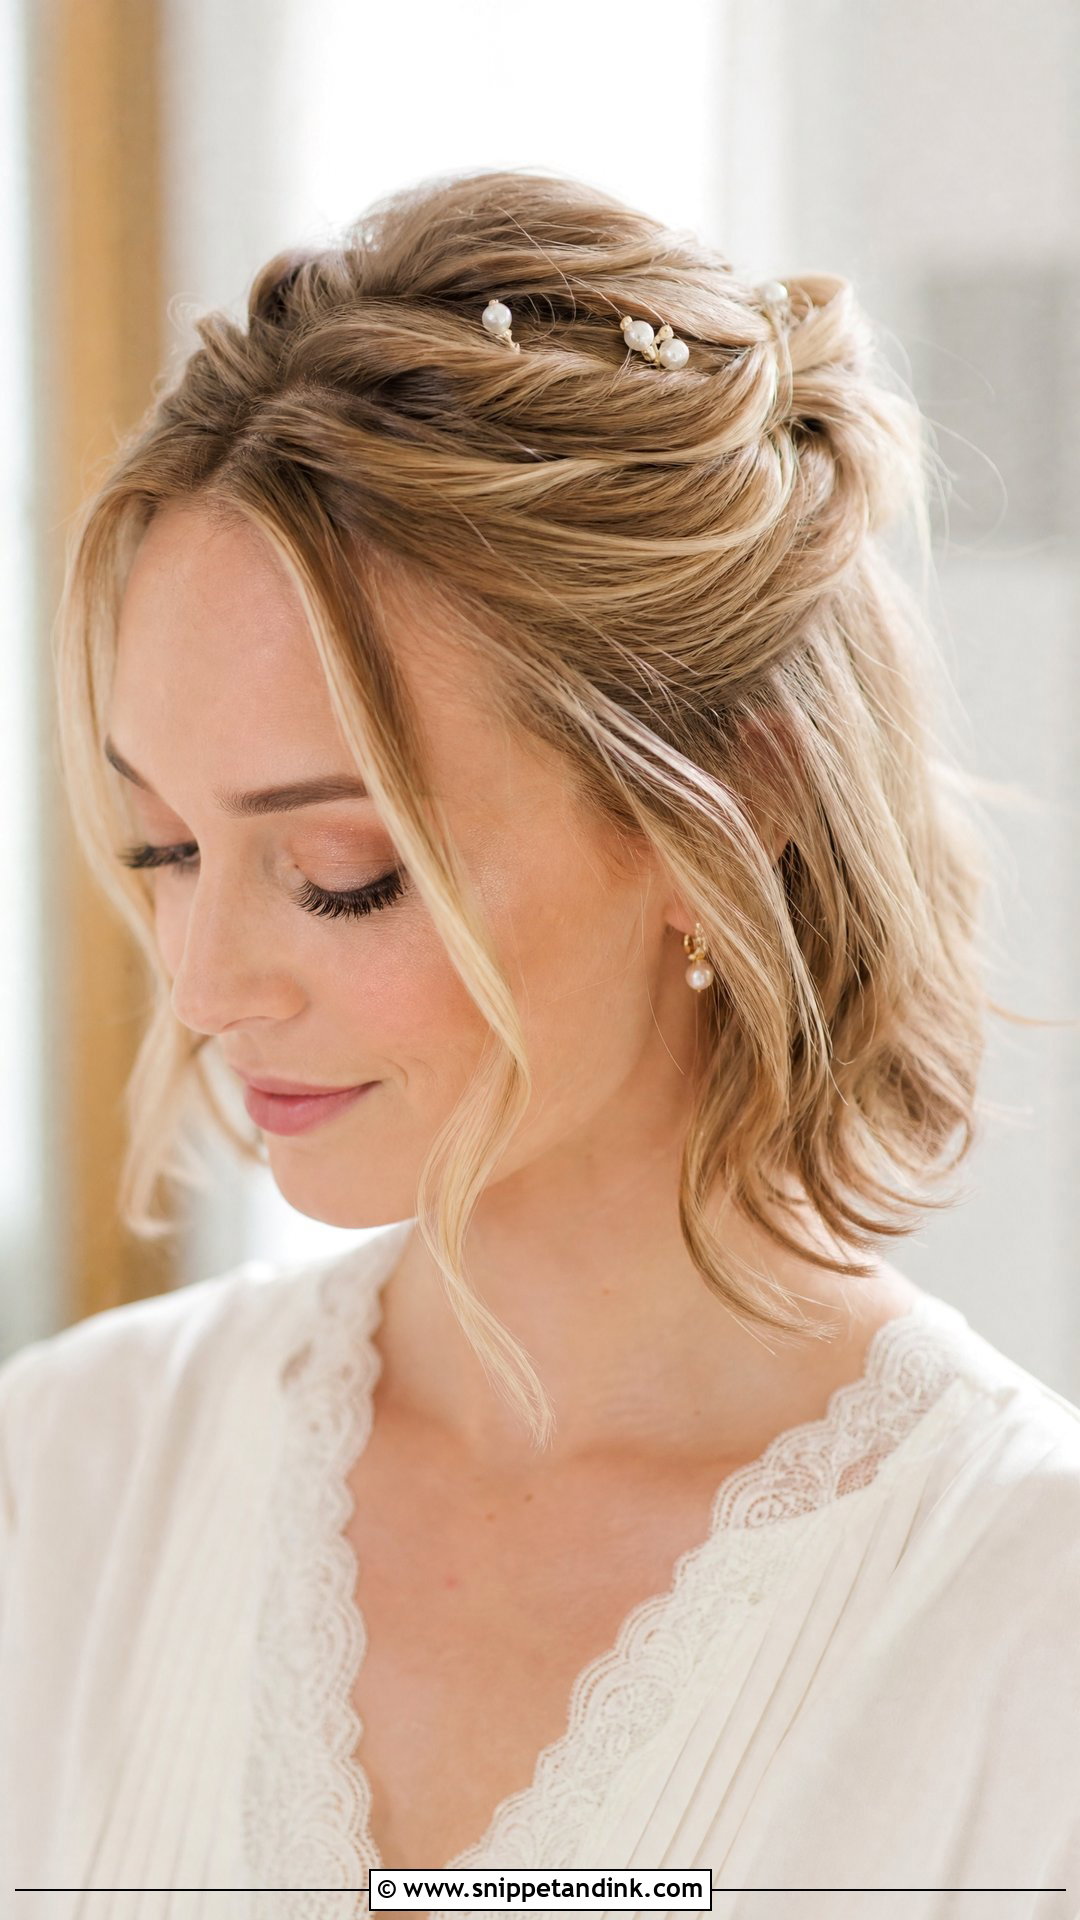
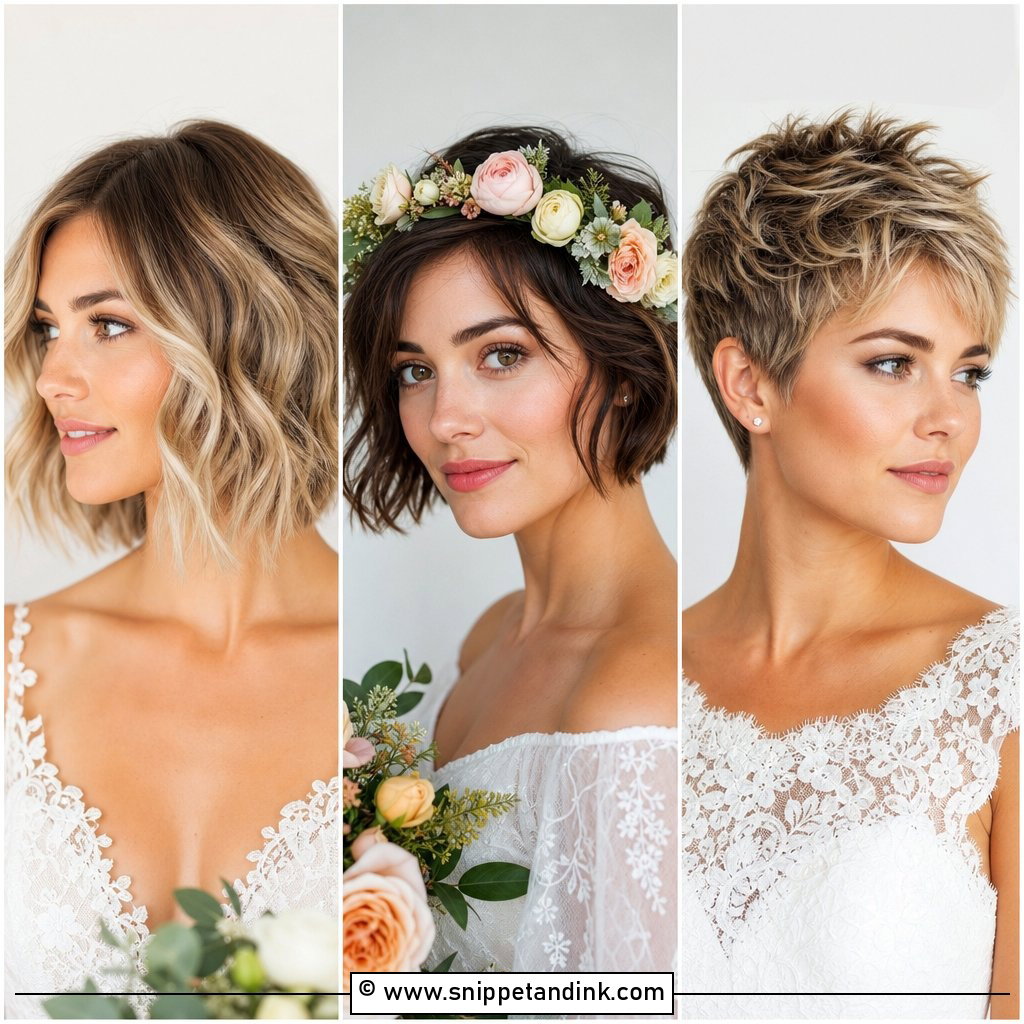
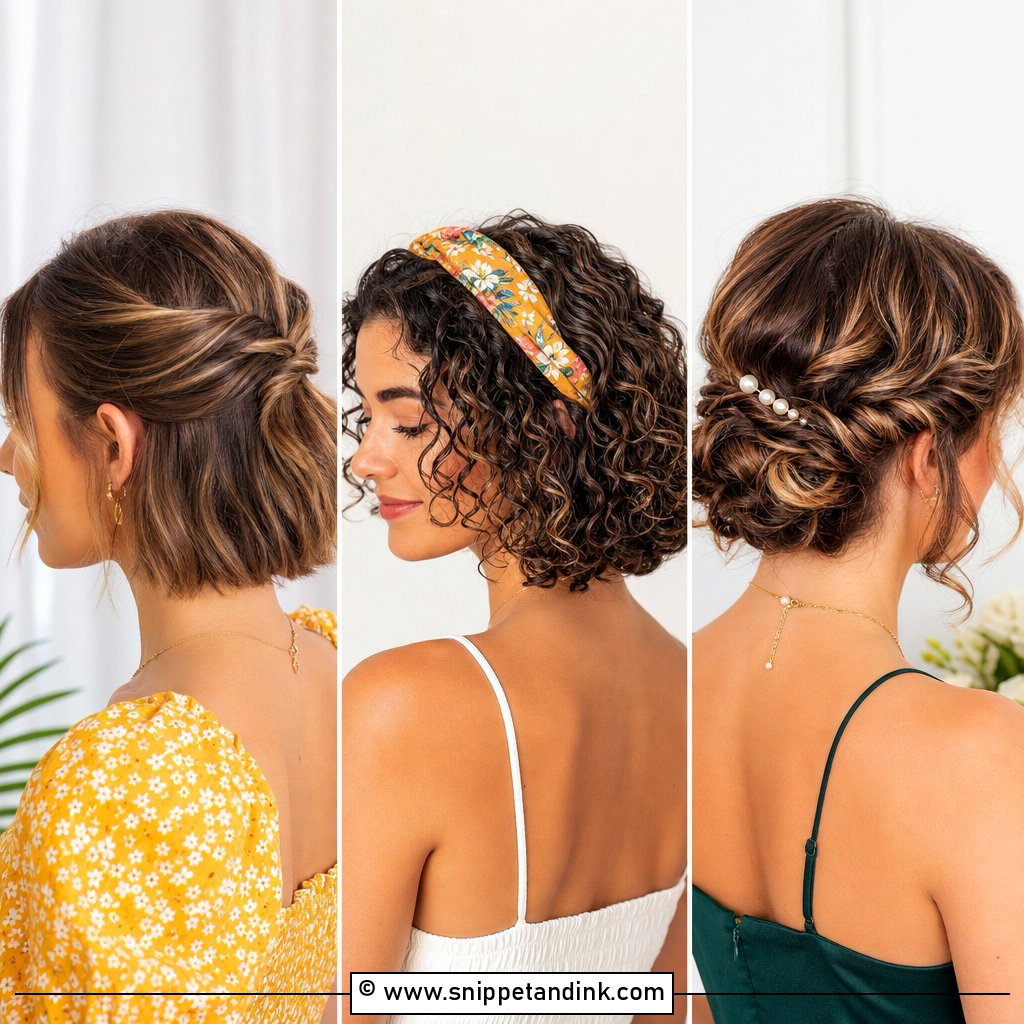
Half up is where I’d start most short-haired brides, because it gives shape at the crown without asking the ends to reach anything. Curl your bob or lob with a small or medium barrel and leave the curls alone until they’re completely cool, or they’ll drop by the first photo. Take two small front sections, twist them back and cross two pins where they meet at the crown. Then pull the twists gently with your fingertips to loosen them; short hair looks thin when twists are left tight. That pinned meeting point is also the strongest spot on your head for a comb or a light veil.
2. Short Wavy Bob Wedding Hair
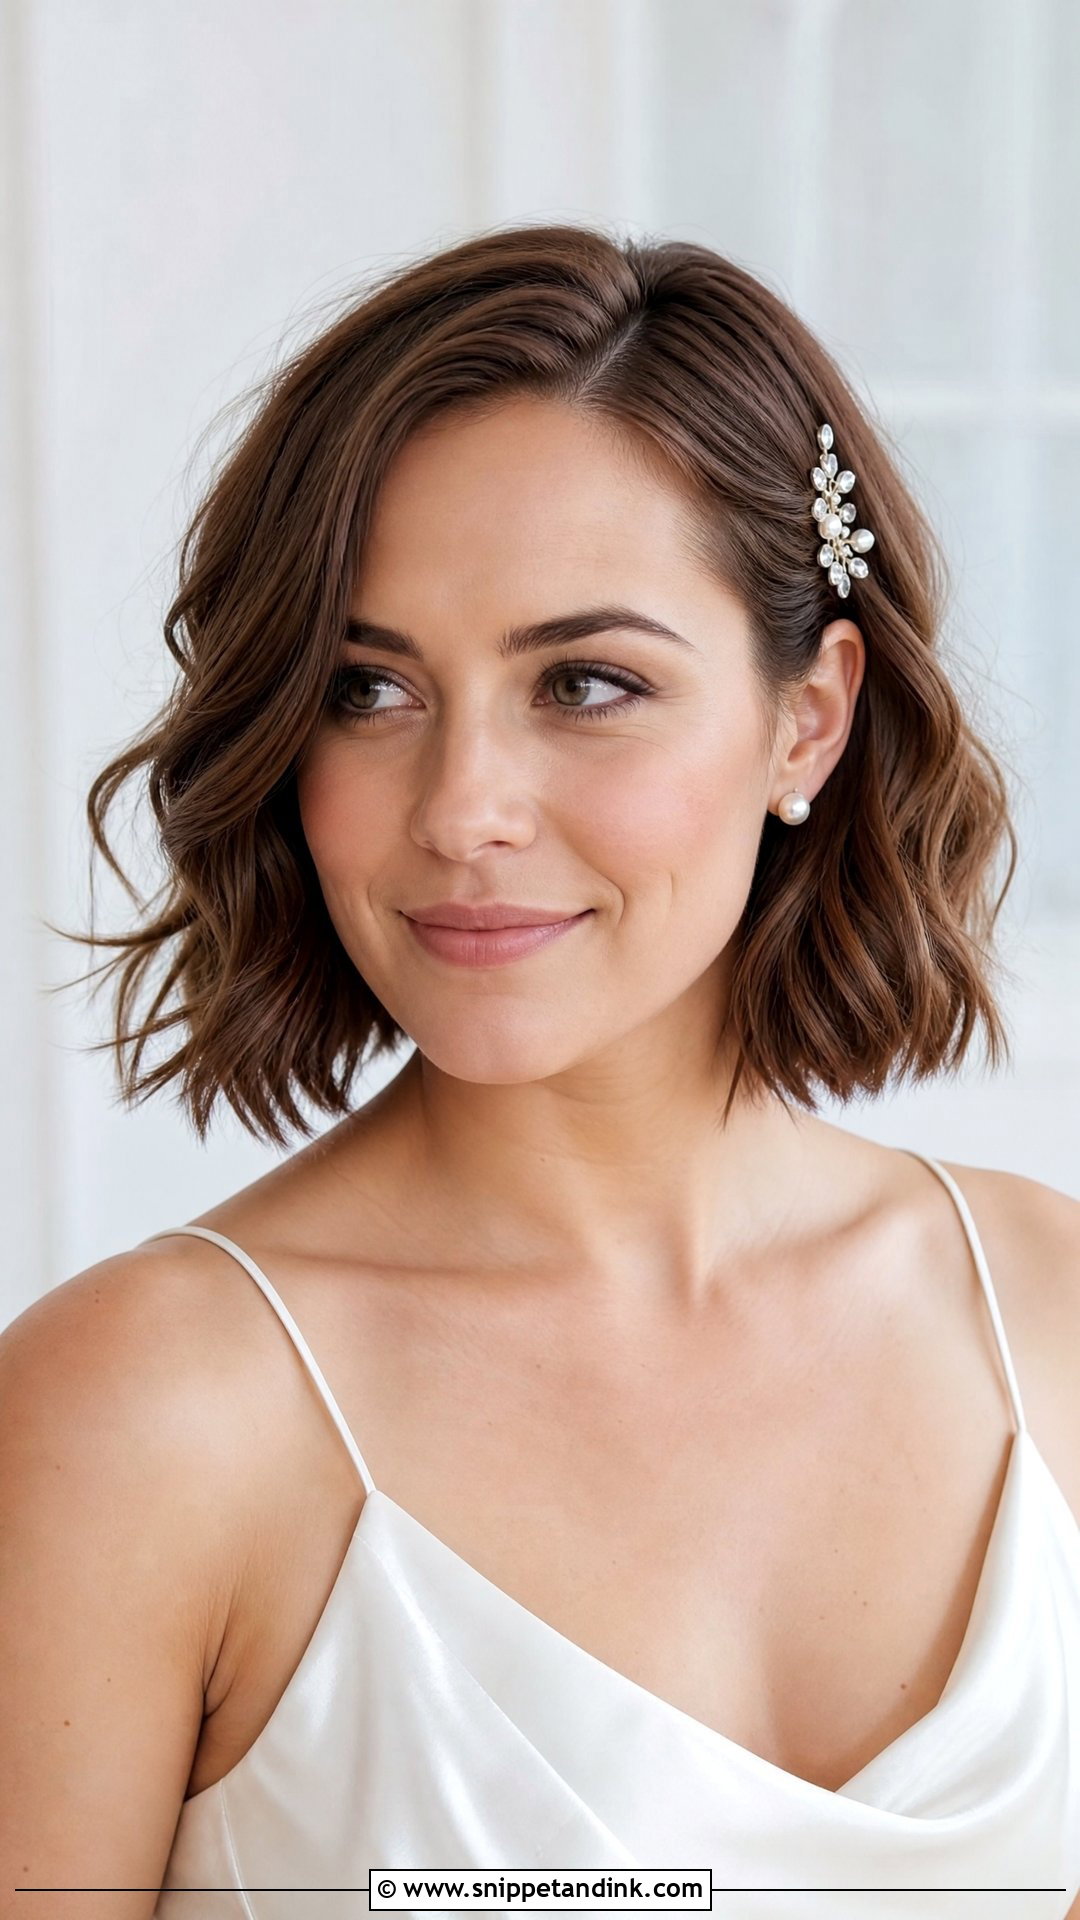
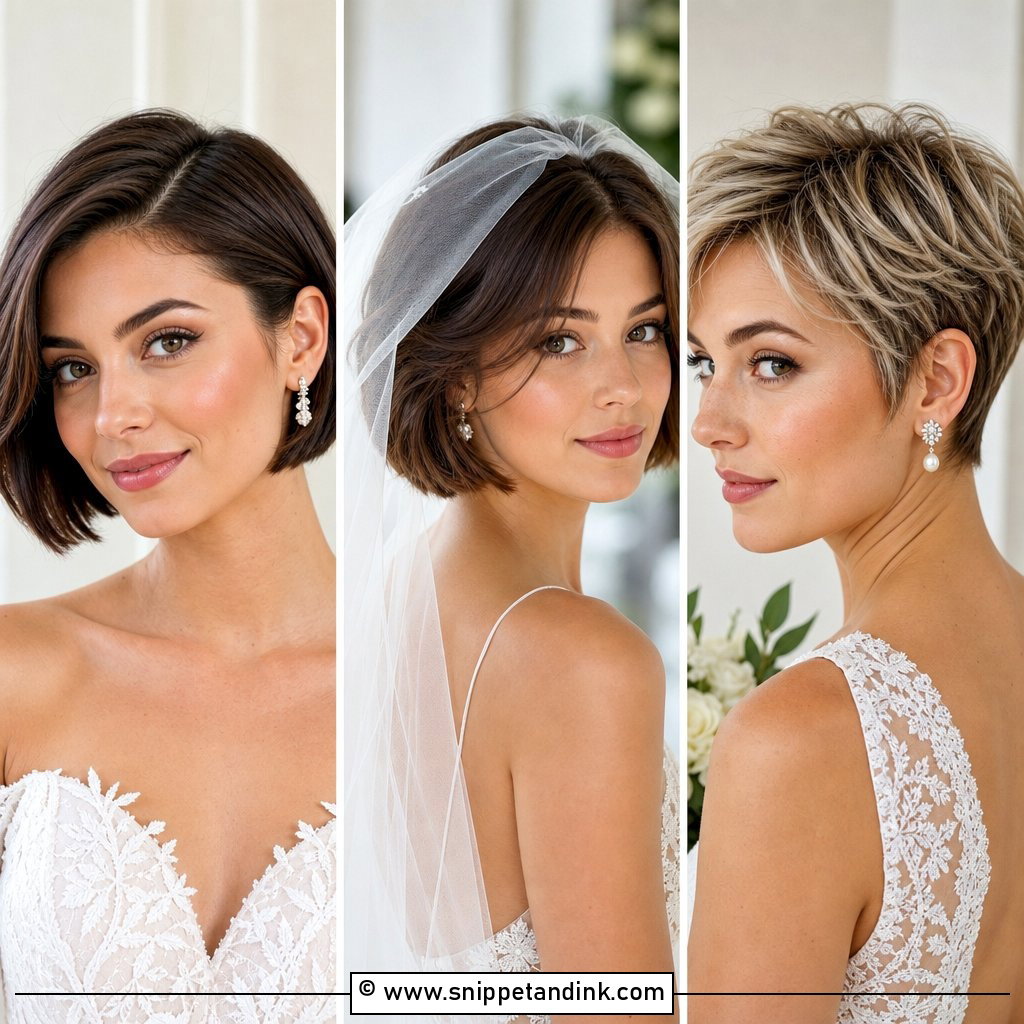
The thing that makes a short wavy bob wedding hair look modern rather than prom-ish is leaving the last inch out of the iron. Use heat protectant, curl small sections away from your face, and stop before the ends so they stay slightly straight. Once the waves have set, break them up with your fingers, not a brush, and mist lightly. I tuck one side behind the ear on most bobs because it shows the earring and keeps the wave from collapsing onto the cheek during a long ceremony.
3. Short Low Bun Wedding Hair
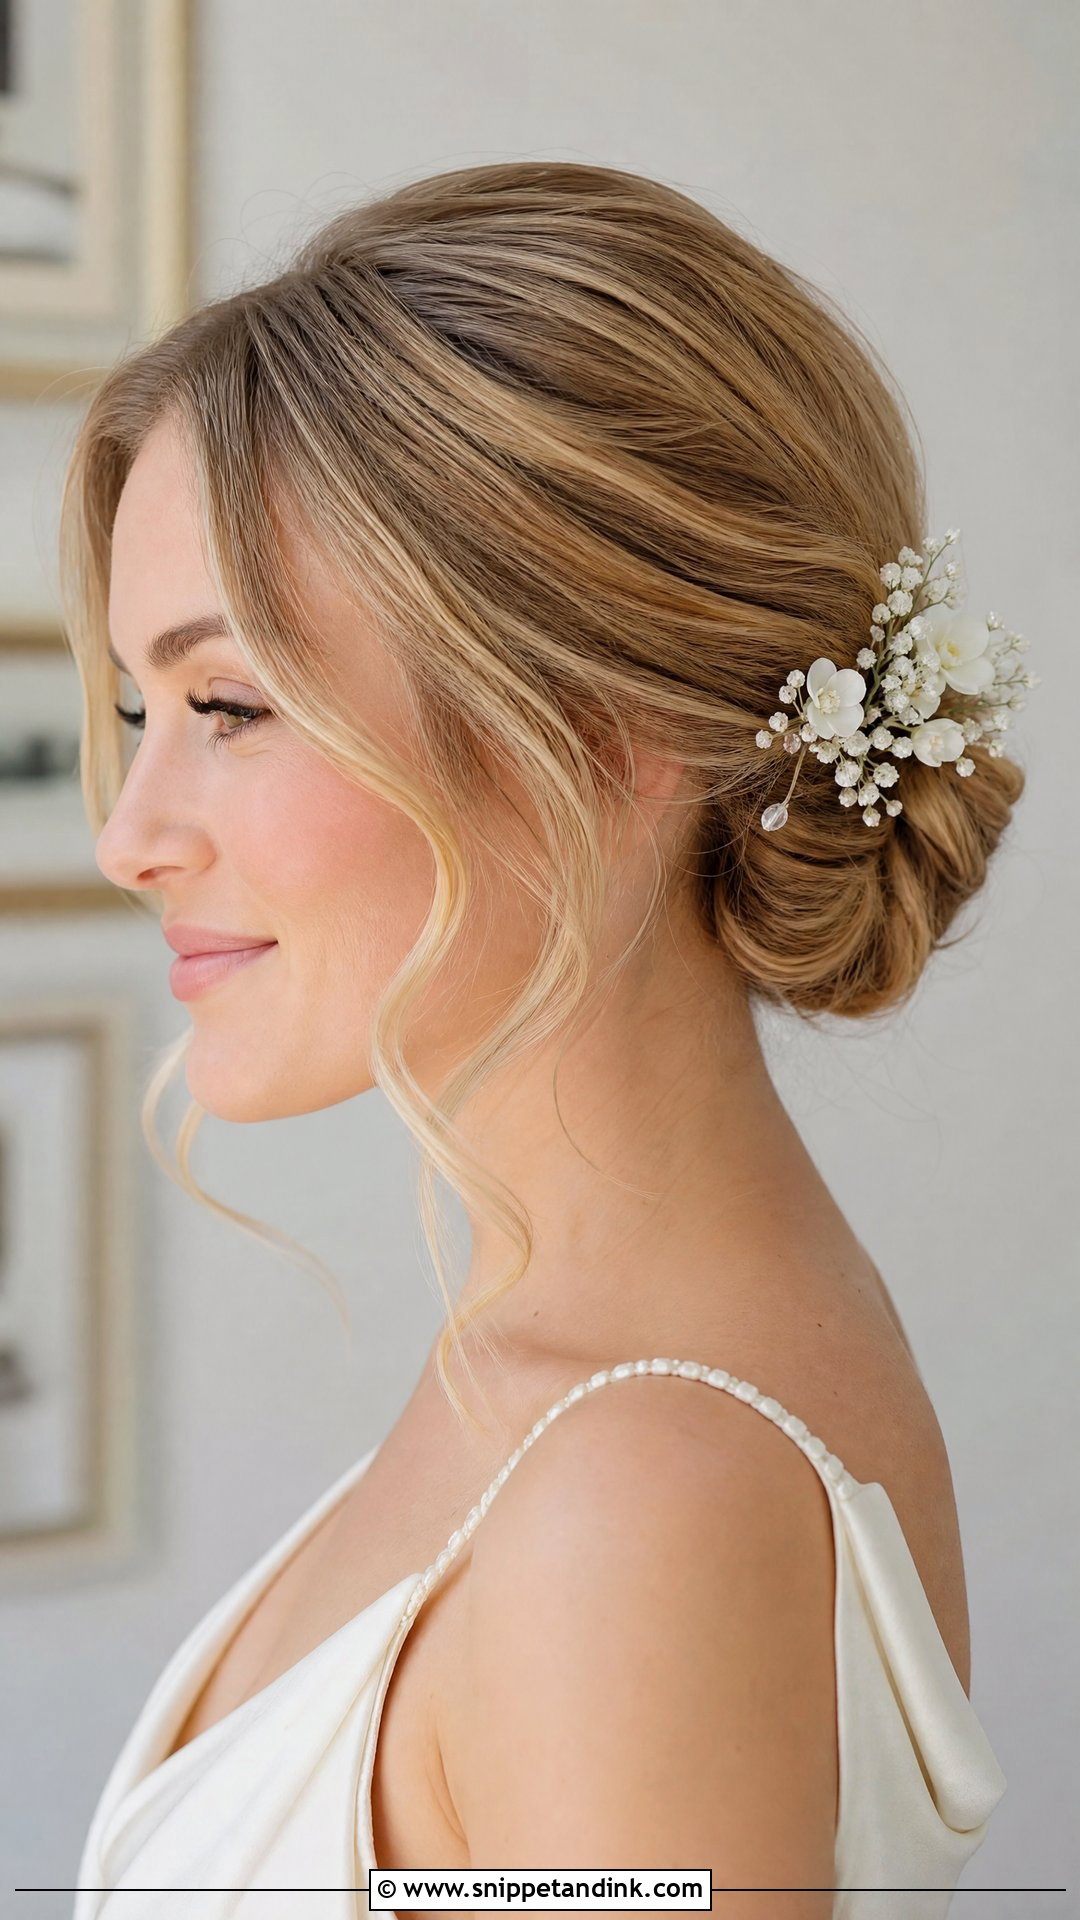
Hair that barely reaches the nape can still give you a low bun; you just build it from small pinned pieces rather than one wrapped knot. Spray texture through the back first so the hair has grip. Gather it low, twist it inward, and pin little sections under each other, layering upward like roof tiles until the shape reads as round. The ends that keep escaping at the bottom are normal on a bob. Hide them under a small floral comb or a pearl pin rather than fighting them, and you’ve got a firm base that holds a veil comb better than most loose styles.
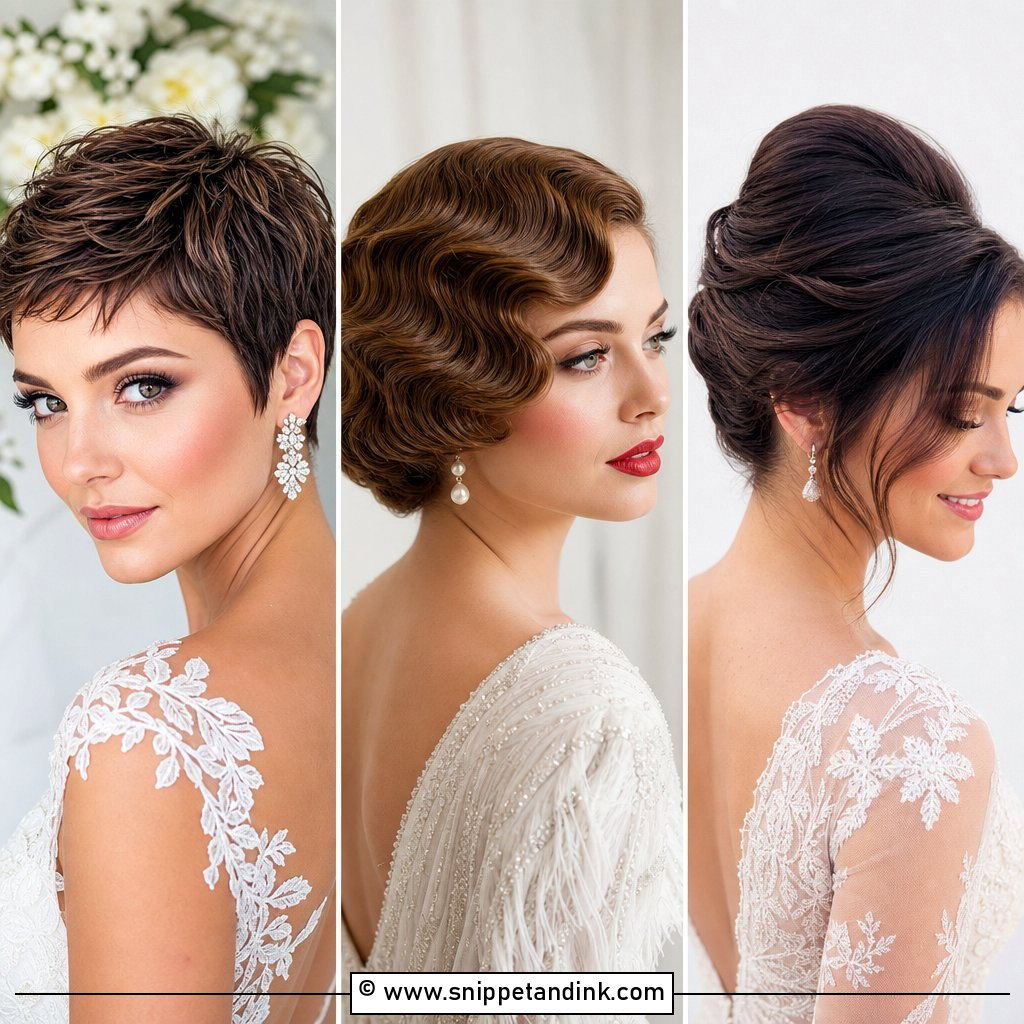
4. Short Pixie Wedding Hair
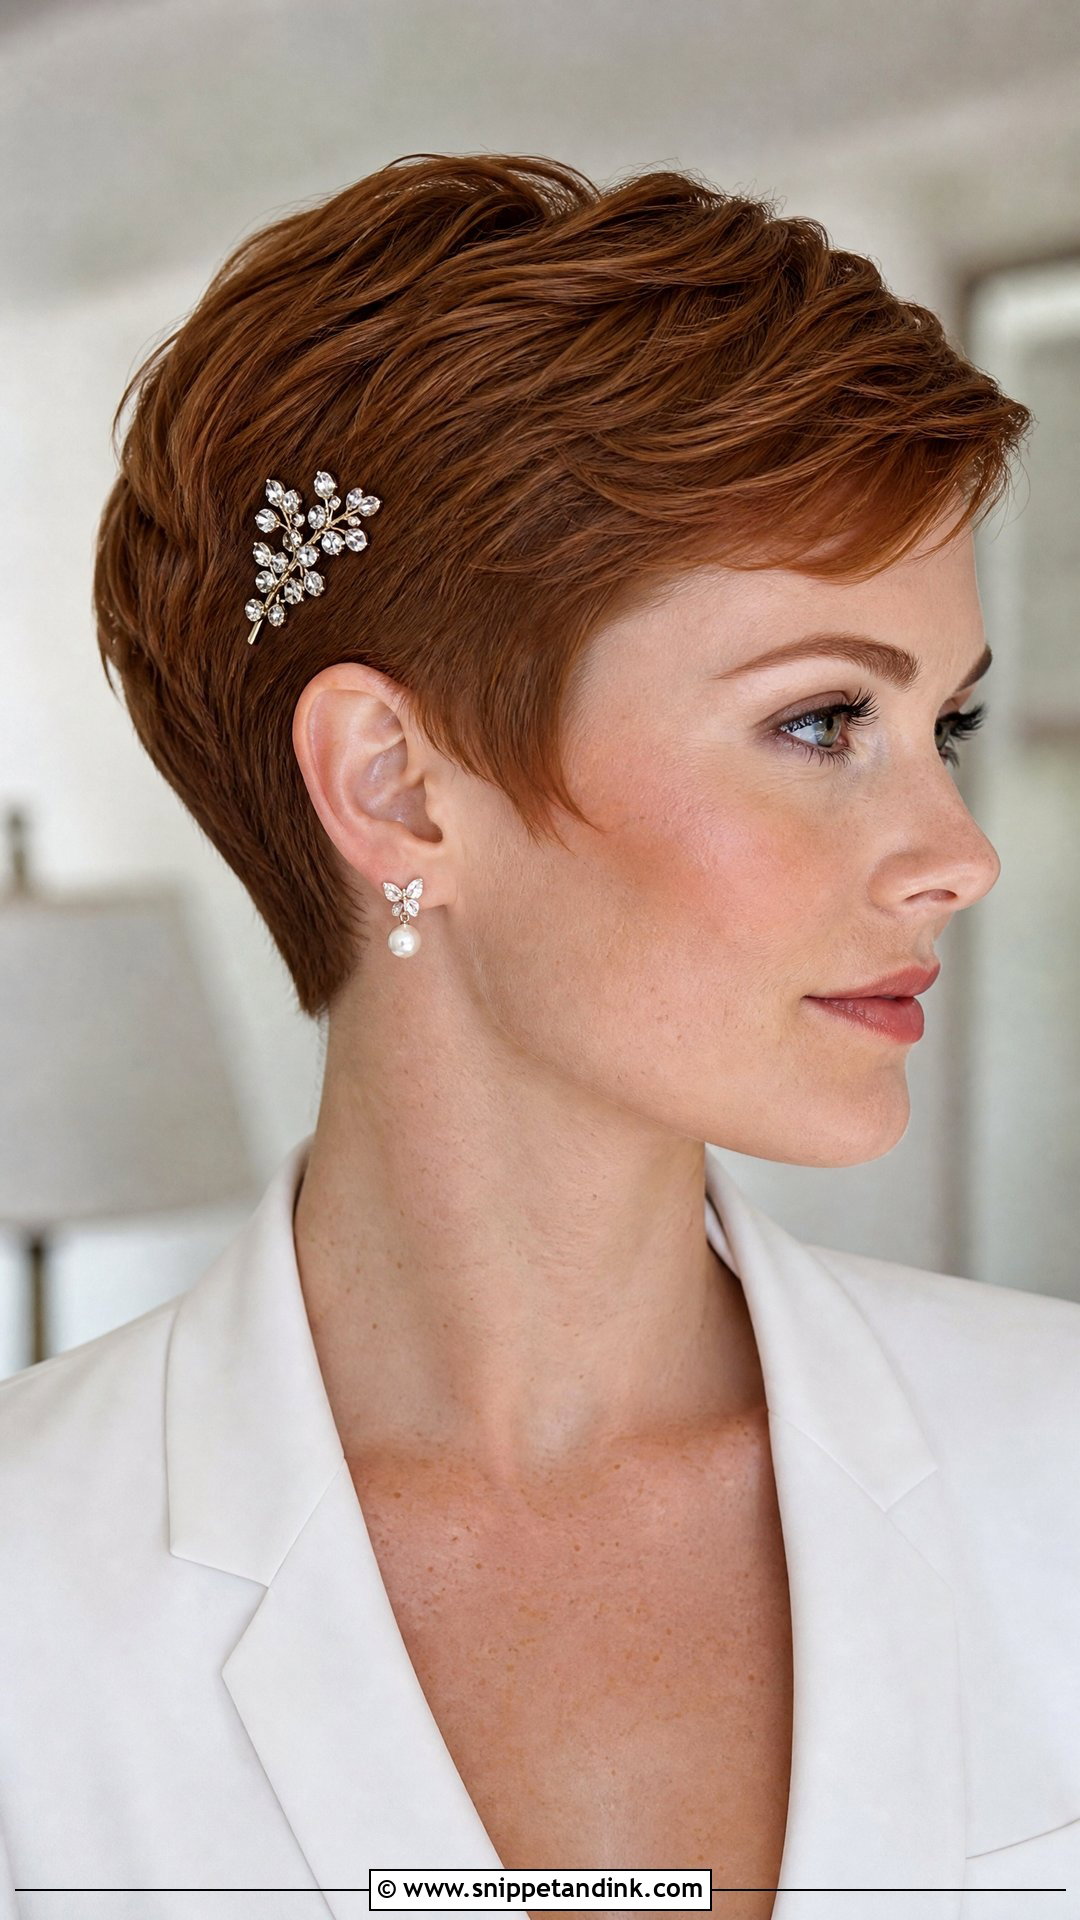
Short pixie wedding hair is all about the finish, because there’s no length to distract from it. On a cropped pixie I smooth the sides close to the head and put the lift on top, using a pea-sized amount of cream worked through with fingers or a mini flat iron. A side part reads more formal; piecey texture keeps it current. Go easy on product, since too much makes a pixie look wet in flash photos. A slim pearl headband or one jeweled pin above the ear is enough, and it leaves your earrings and neckline doing the talking.
5. Short Curly Wedding Hair
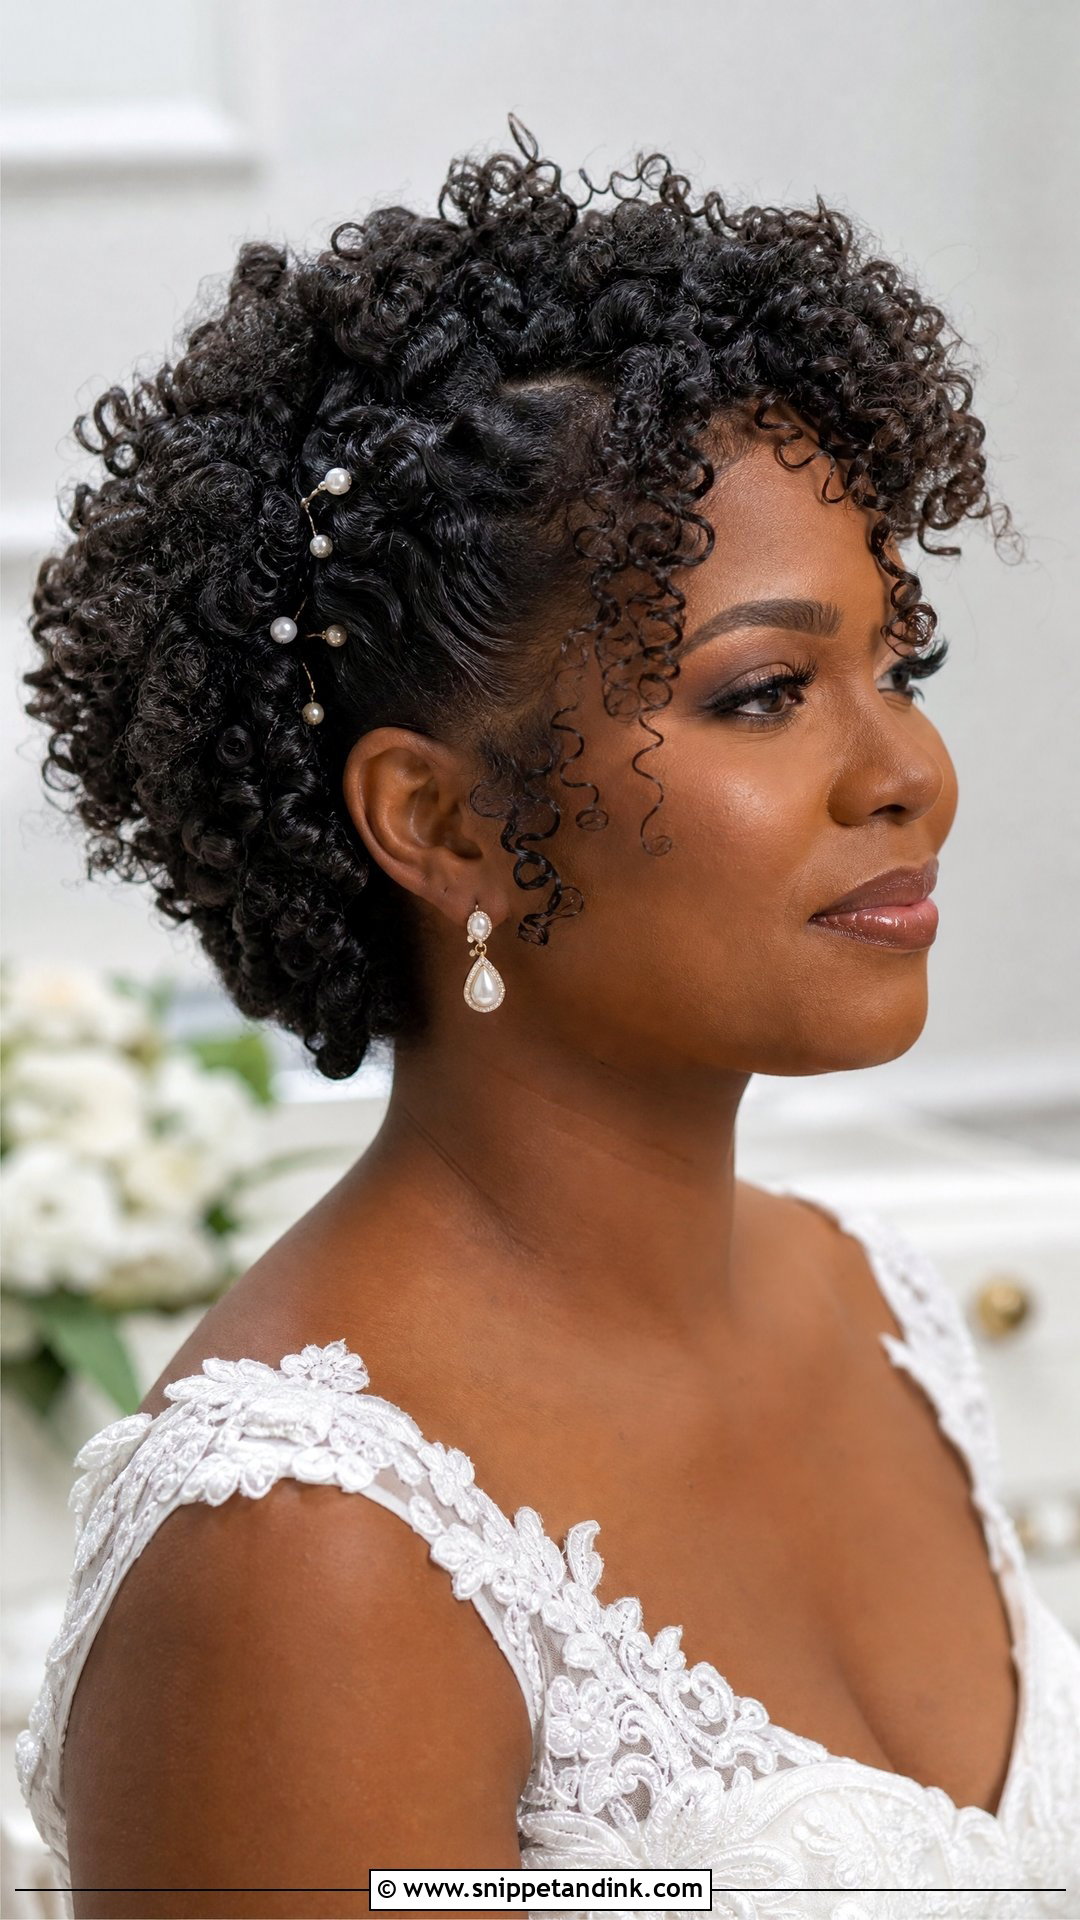
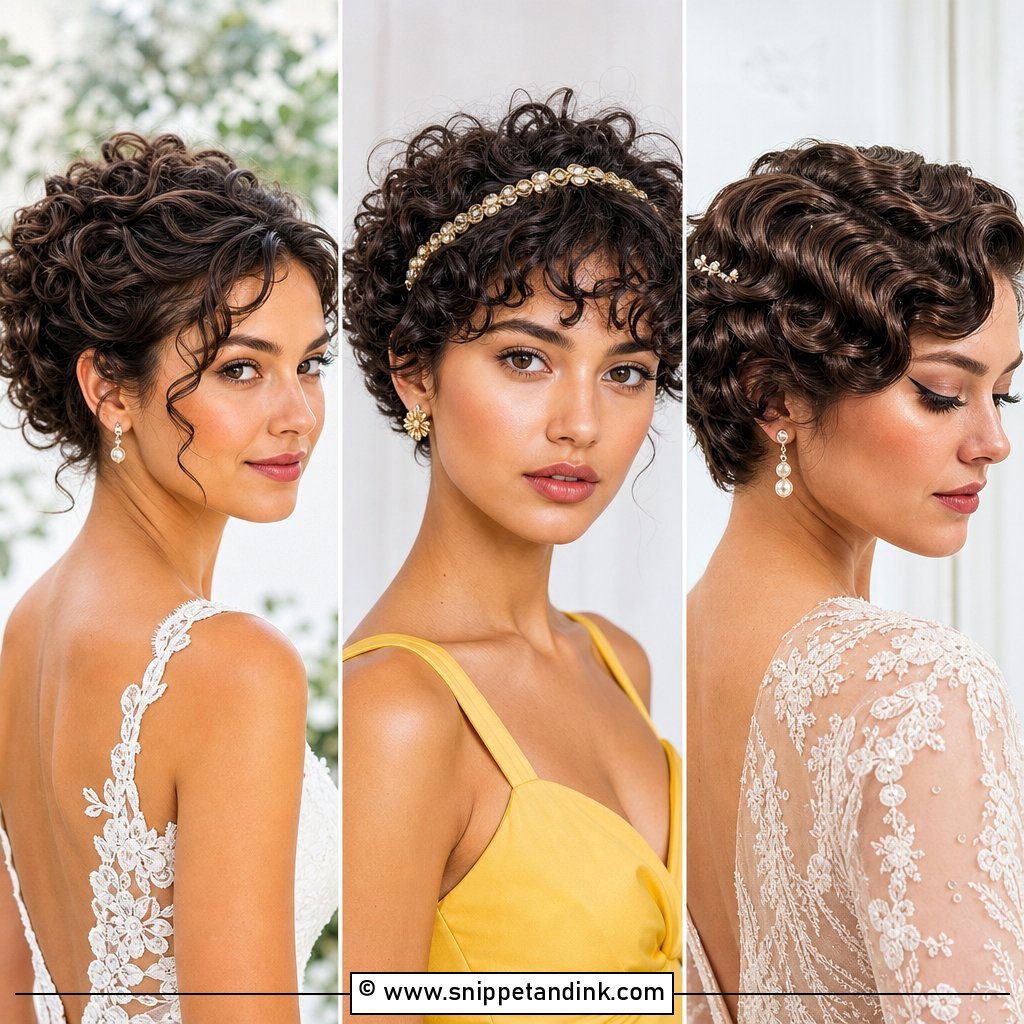
Curls hate being fussed with after they dry, so with short curly hair most of the work happens while it’s still damp. Rake curl cream or mousse through, then diffuse on low or let it air-dry fully. Only once it’s bone dry should you separate a few curls around the face and pin one side back to open the neckline. If a couple of top curls are limp, touch just those with a small wand; curling the whole head usually loosens your natural pattern. Never brush. A few pearl pins tucked into the pinned side make it bridal without hiding the curls you’re keeping.
6. Short Braided Wedding Hair
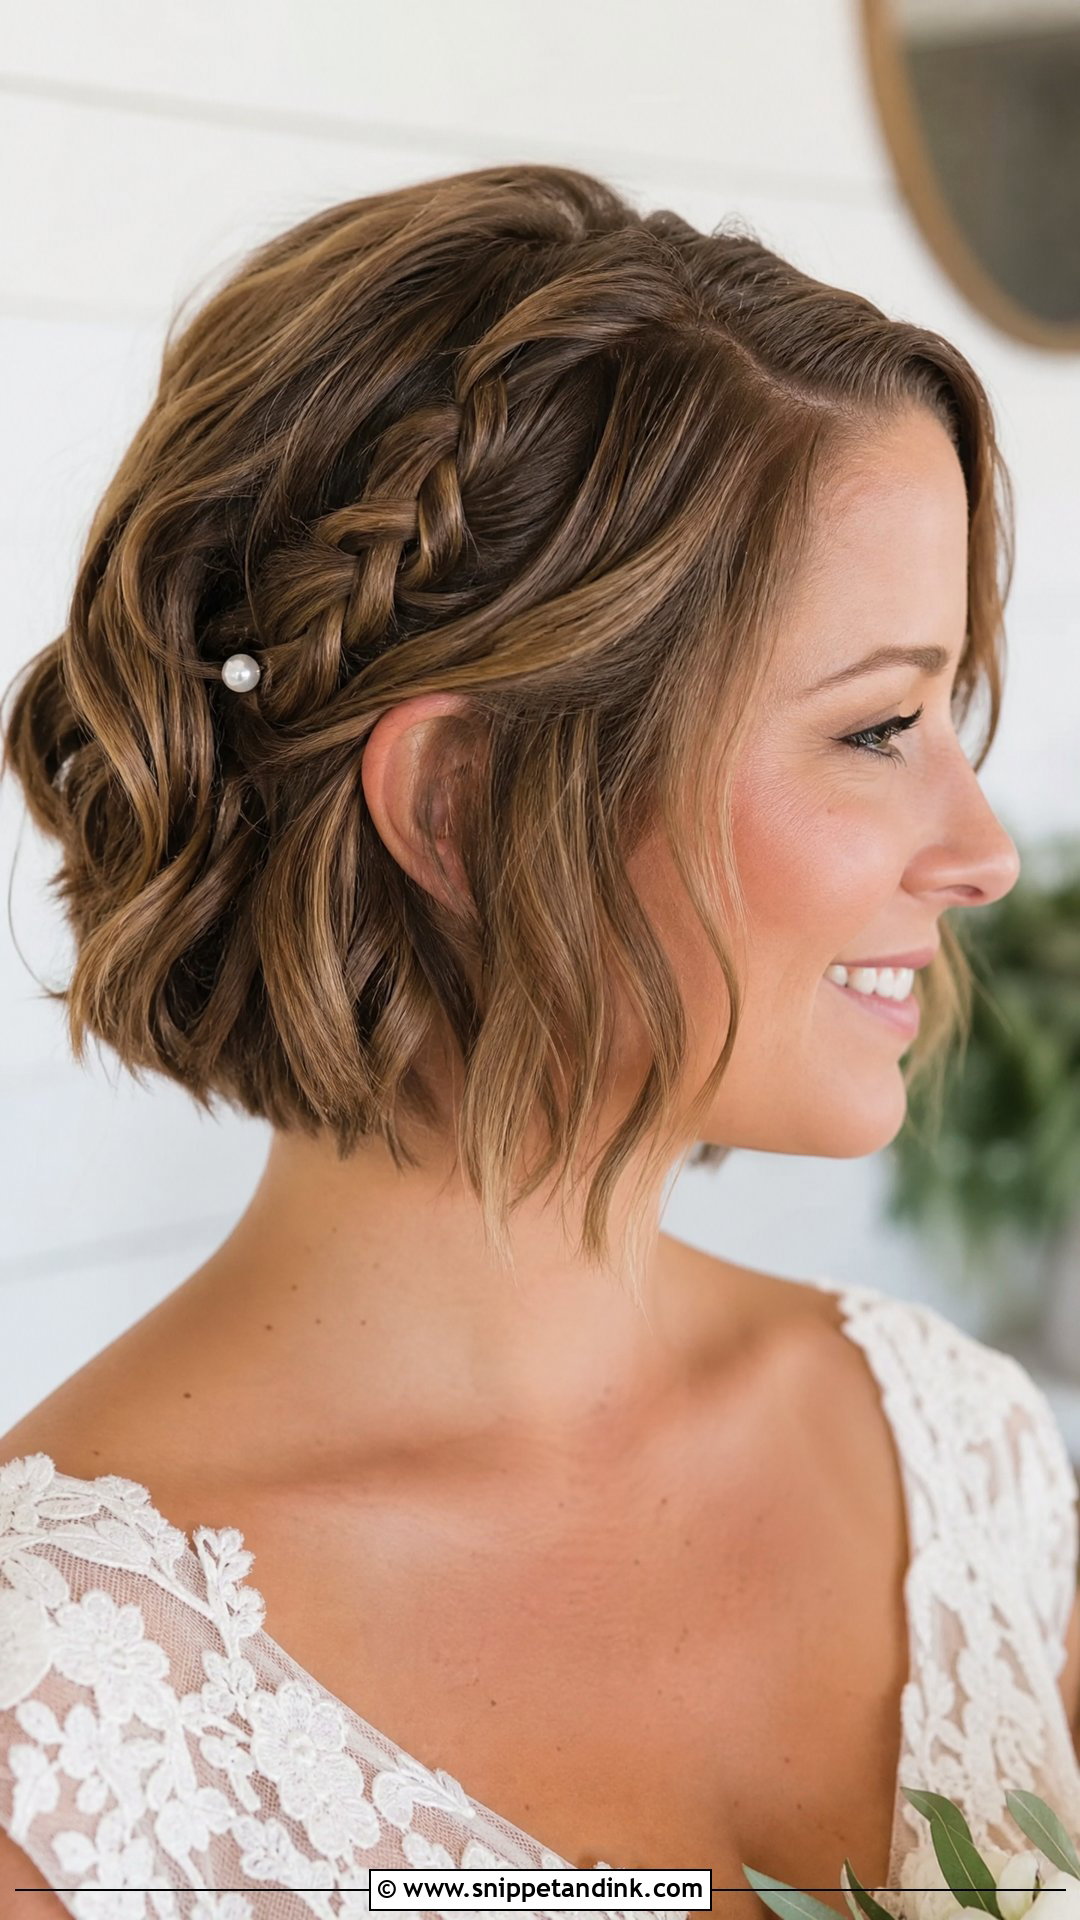
A side braid is a smart DIY detail on bob-length hair because it only needs one small section to work. Part deeply, then braid the heavier front section back toward the ear, close to the scalp so it can’t flop forward. Secure it with a clear elastic and hide that end under the waves with a pin. Pull the outer loops of the braid gently to fatten it; short-hair braids look skinny otherwise. I like this one for outdoor ceremonies, since a breeze can’t push the braided side into your face.
7. Short Side Swept Wedding Hair
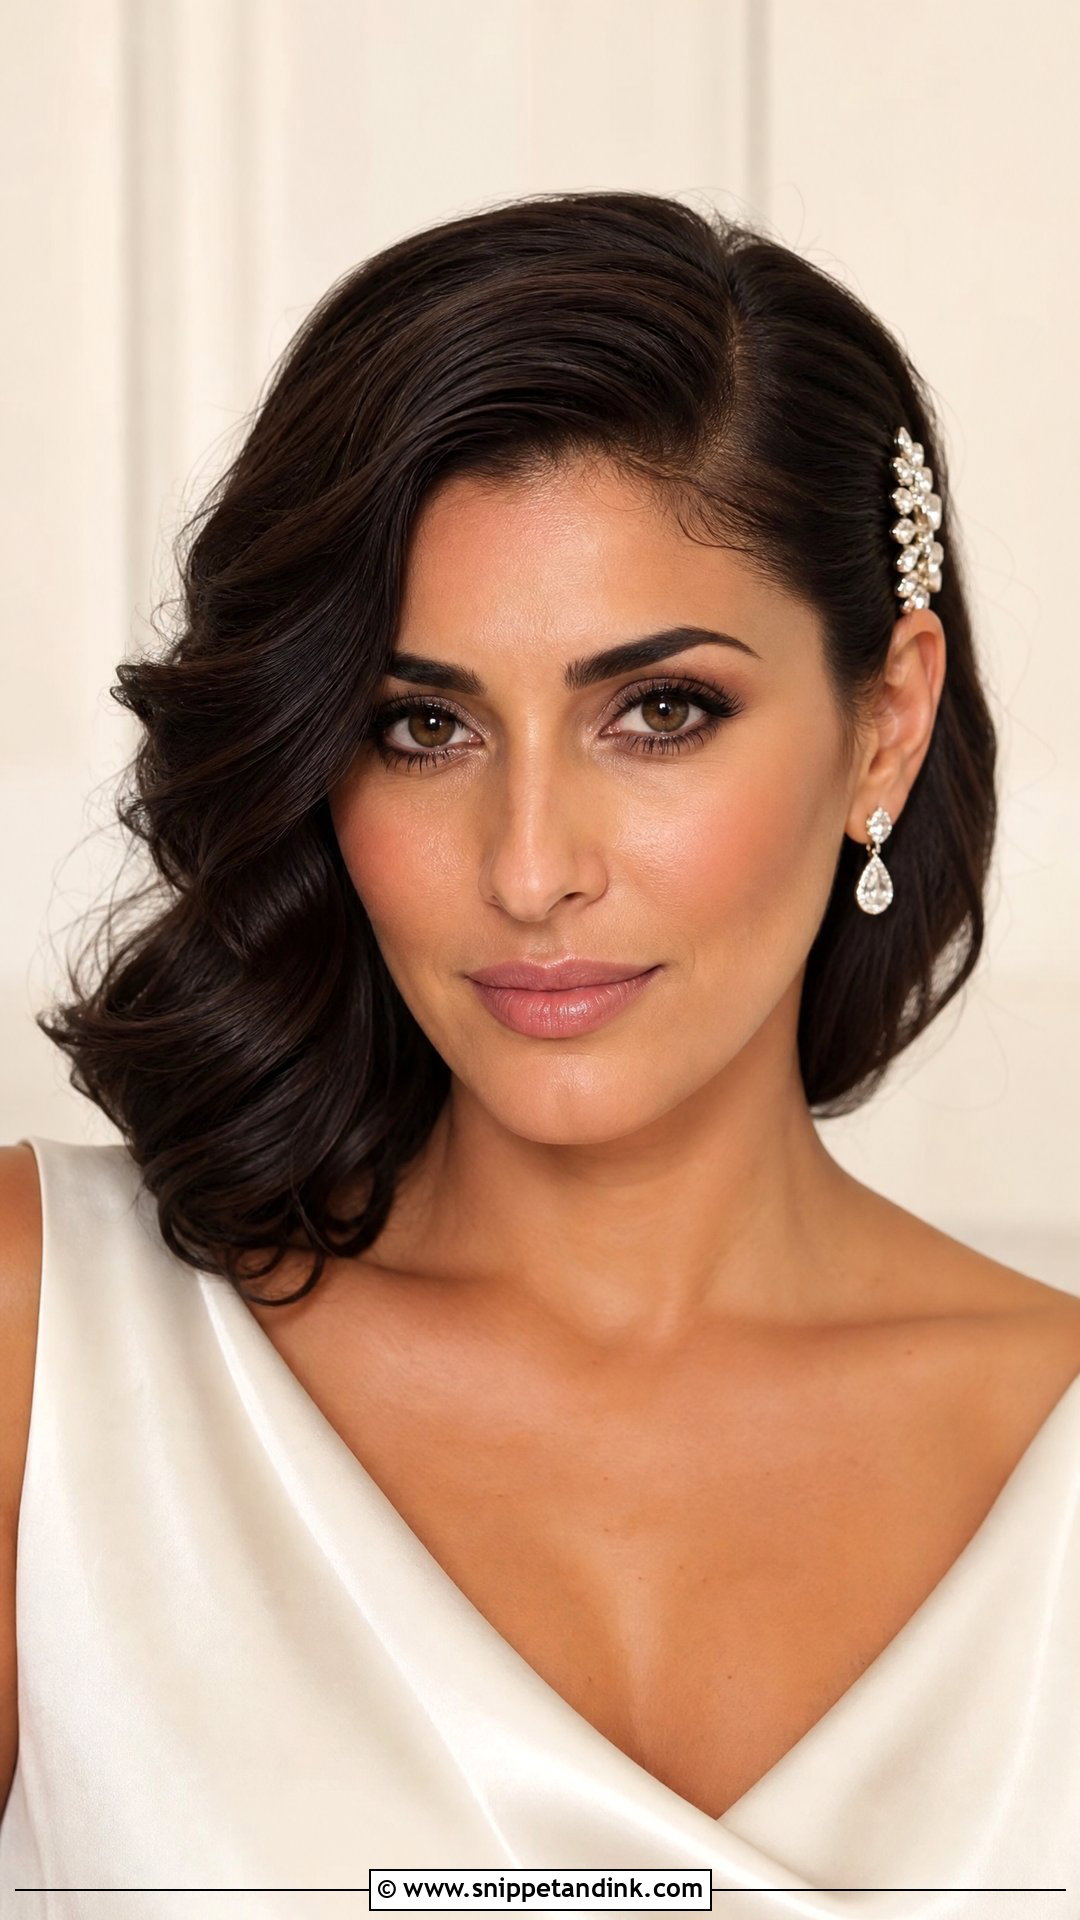
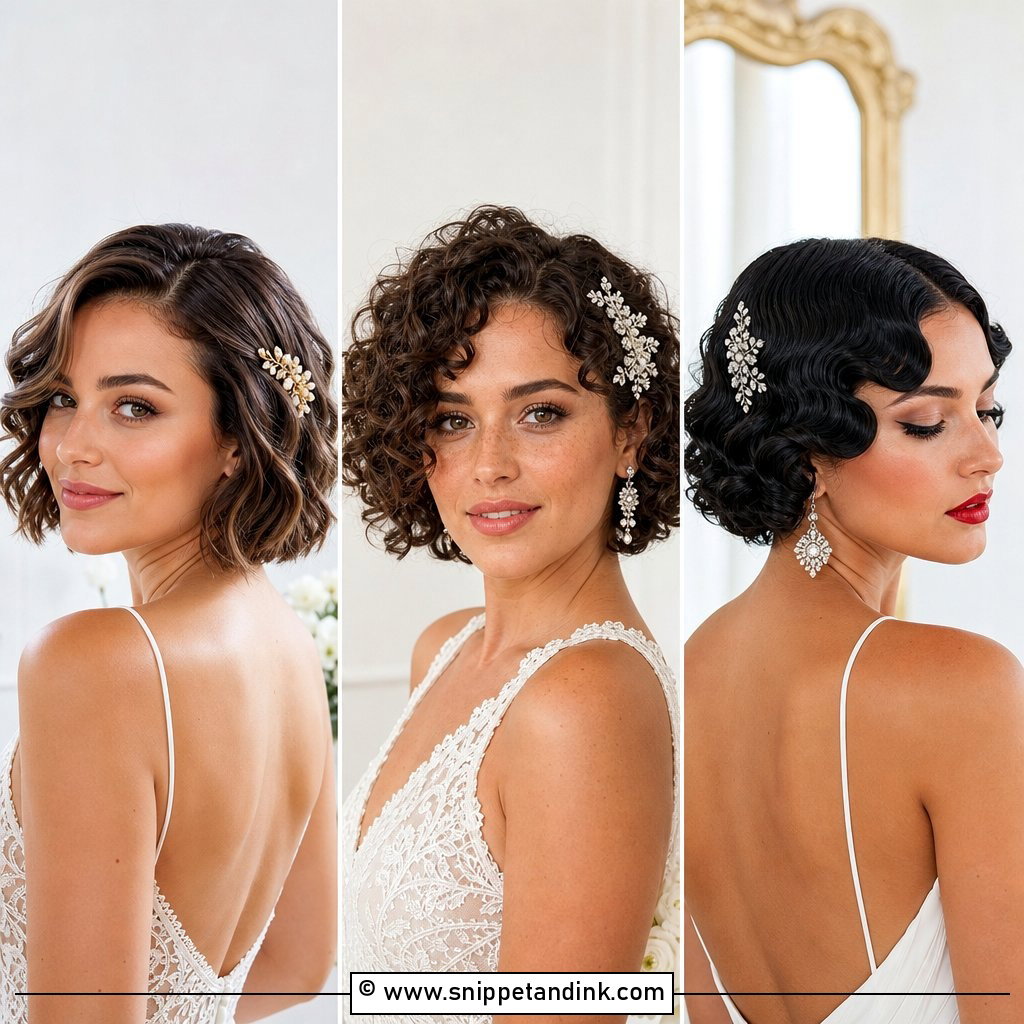
Going deep with the side part is what turns a plain cut into something with drama. Create a strong part, curl the hair in soft waves, then sweep the heavy side across the forehead and let it fall. Pin the light side neatly behind the ear with two crossed pins. Use a smoothing cream for flyaways and a flexible spray rather than a stiff one, because the swept side needs to move a little when you turn your head. A jeweled clip on the pinned side balances the weight visually. It suits bobs, lobs and grown-out pixies; on a very short crop the swept side won’t have enough length to fall.
8. Short Vintage Wave Wedding Hair
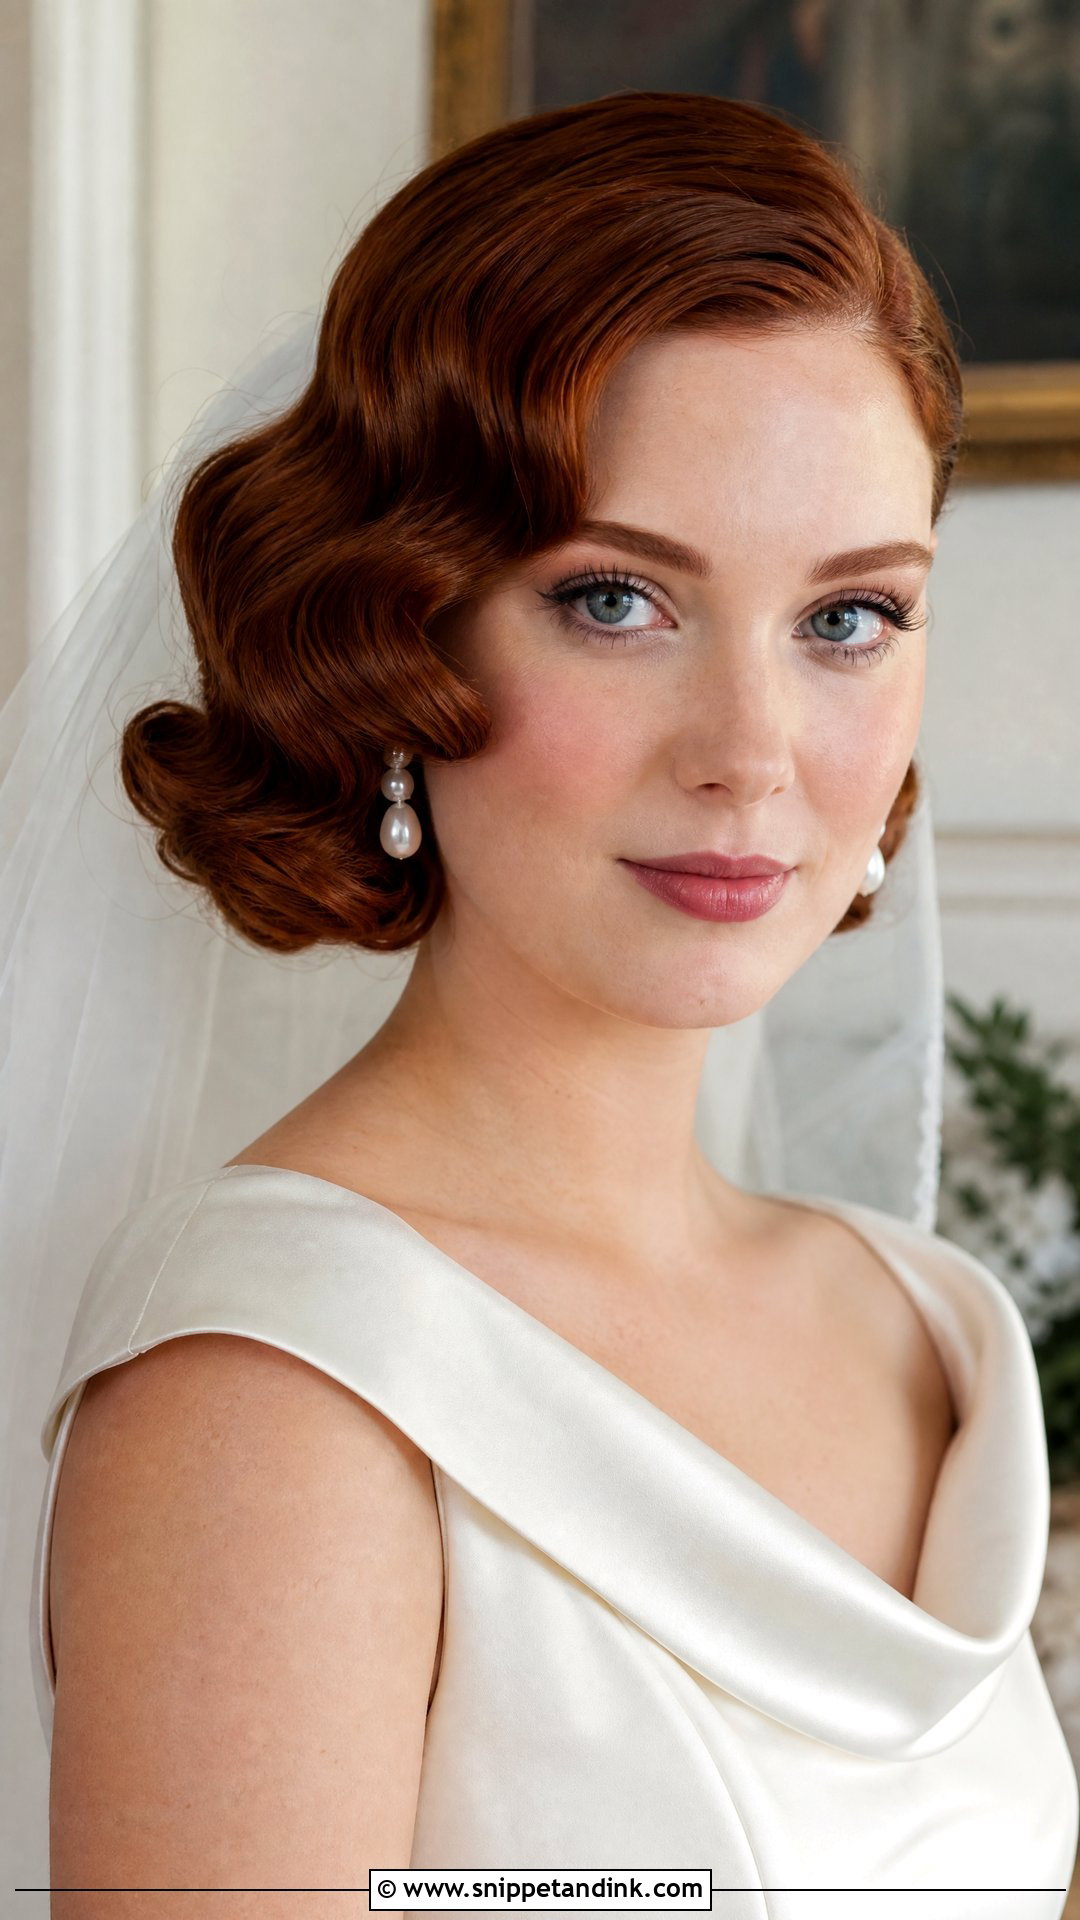
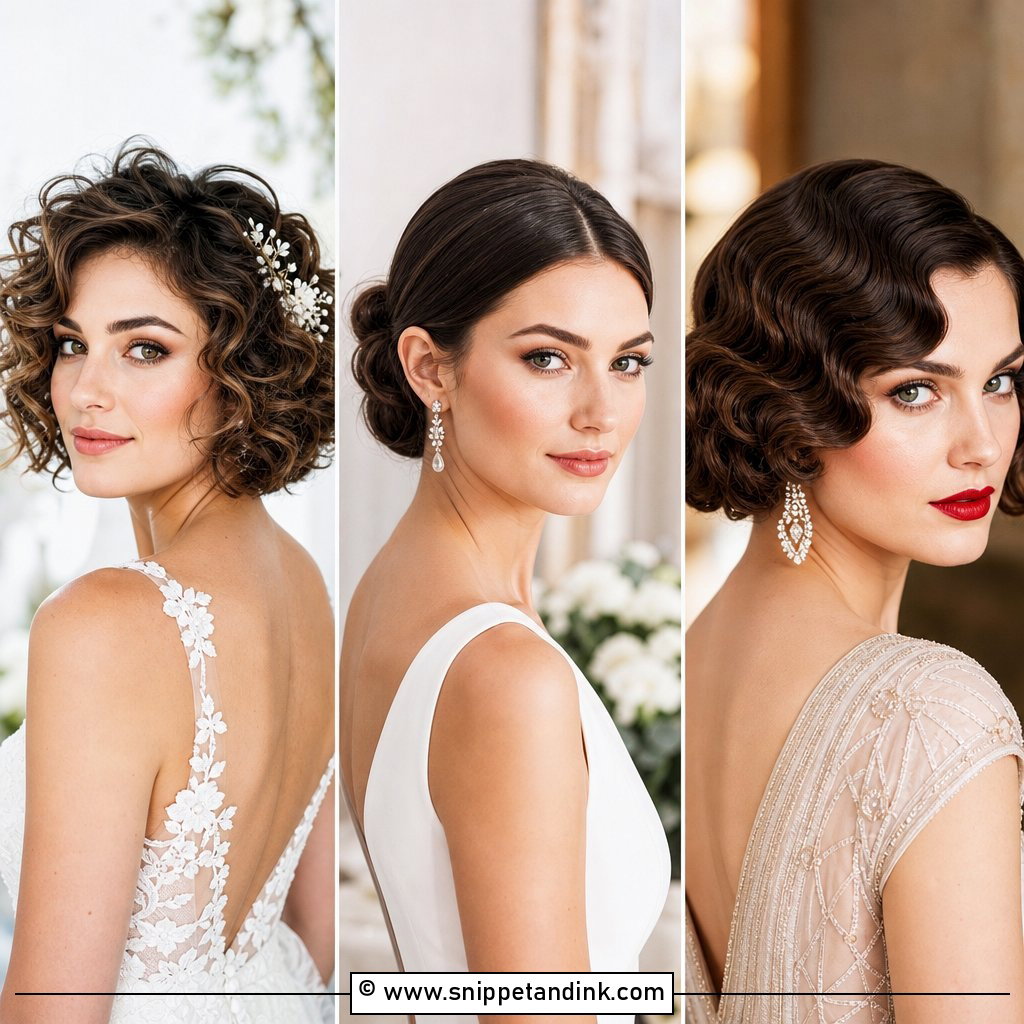
Short vintage wave wedding hair needs a bob, cropped bob or long pixie with enough front length to hold an S-shape. Set a deep side part and curl every section in the same direction; that consistency is what lets the waves link up when brushed. Let the curls cool completely, then brush them into ridges and clip each ridge in place while you spray. Leave the clips in for ten minutes or so before removing them and finishing with shine spray. This is the most technical look on the list, so practise it twice. Red lipstick and pearl earrings are its natural partners.
9. Short Twisted Wedding Updo
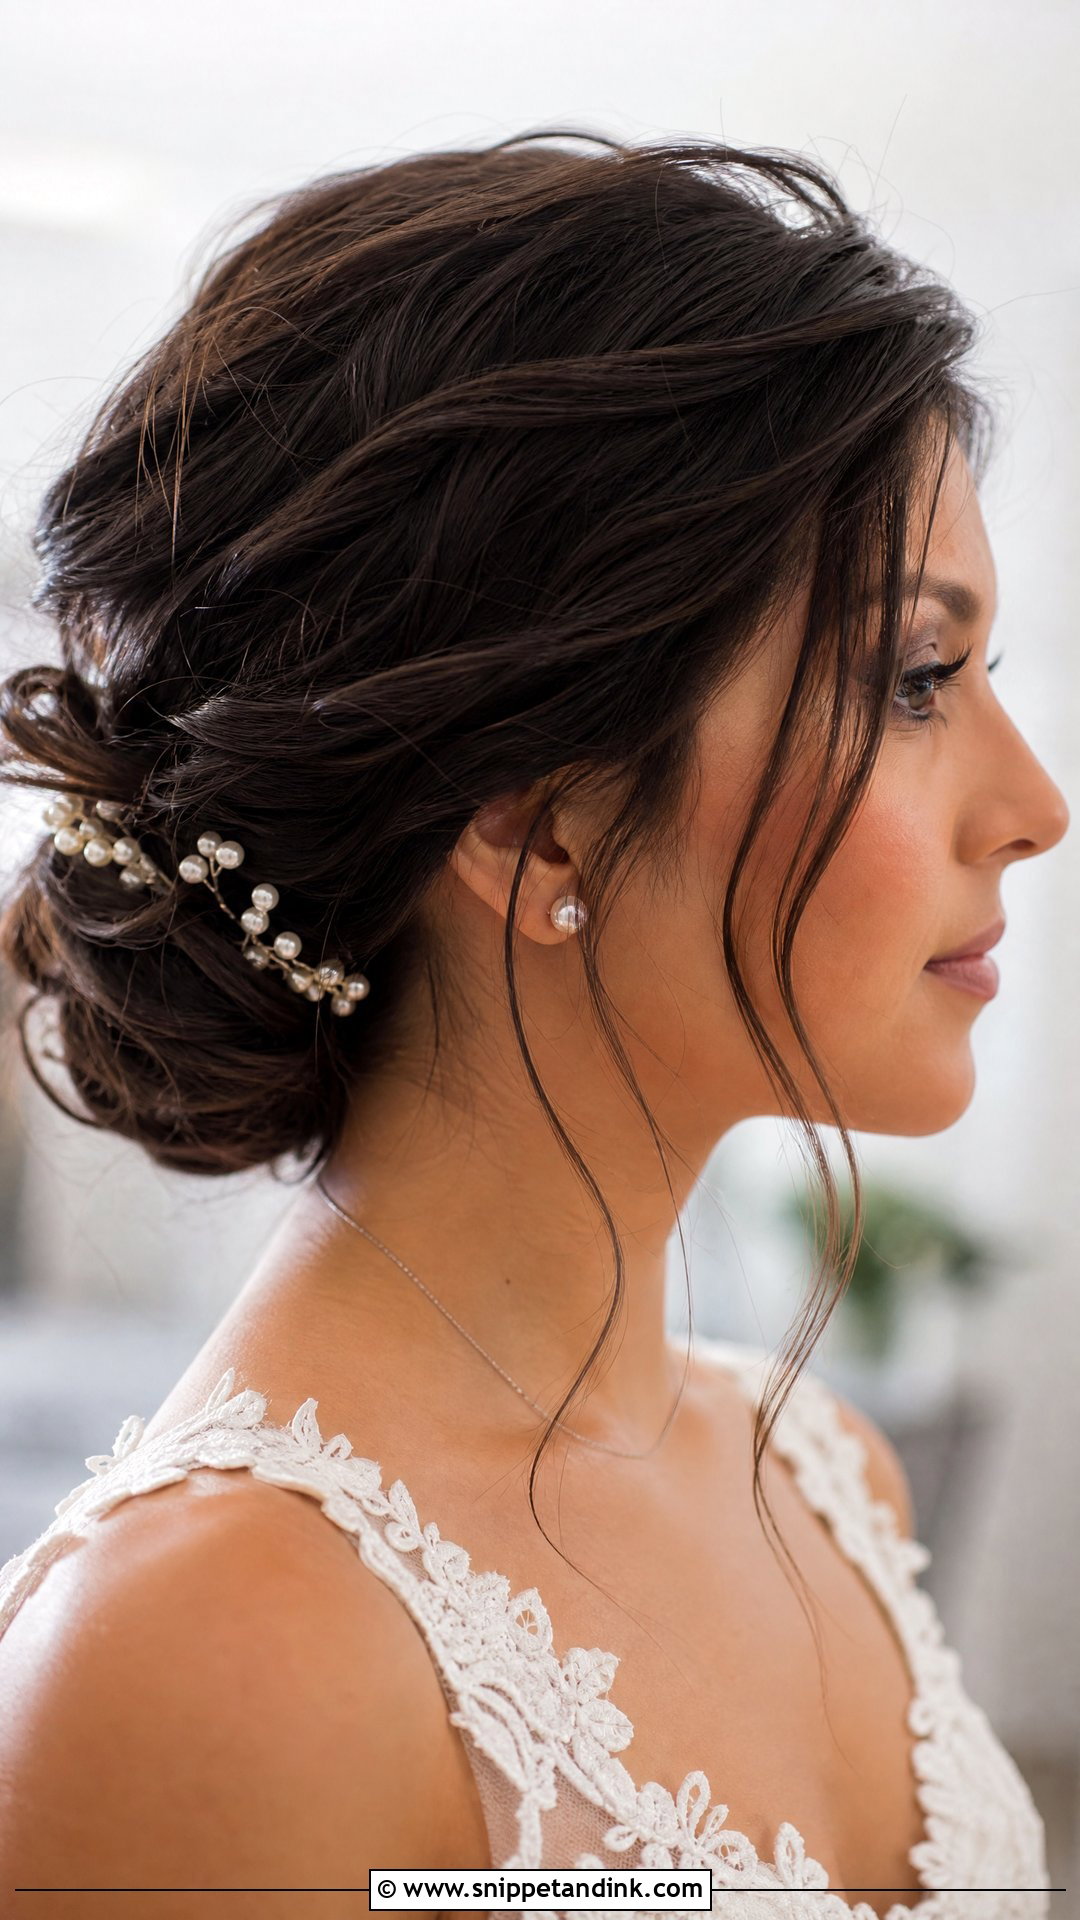
This updo looks complicated but it’s built entirely from small twists, which is exactly why it suits short layers that would slide out of a normal bun. Prep with texture spray, then take thumb-width sections from each side and twist them back. Pin each twist low at the nape, overlapping the ends of the previous one so no short tail is left exposed. Keep going until the back looks full, and leave a couple of pieces out at the face. It’s forgiving: if one twist sits a little higher than the others, nobody reads it as a mistake.
10. Short Bob With Pearl Pins
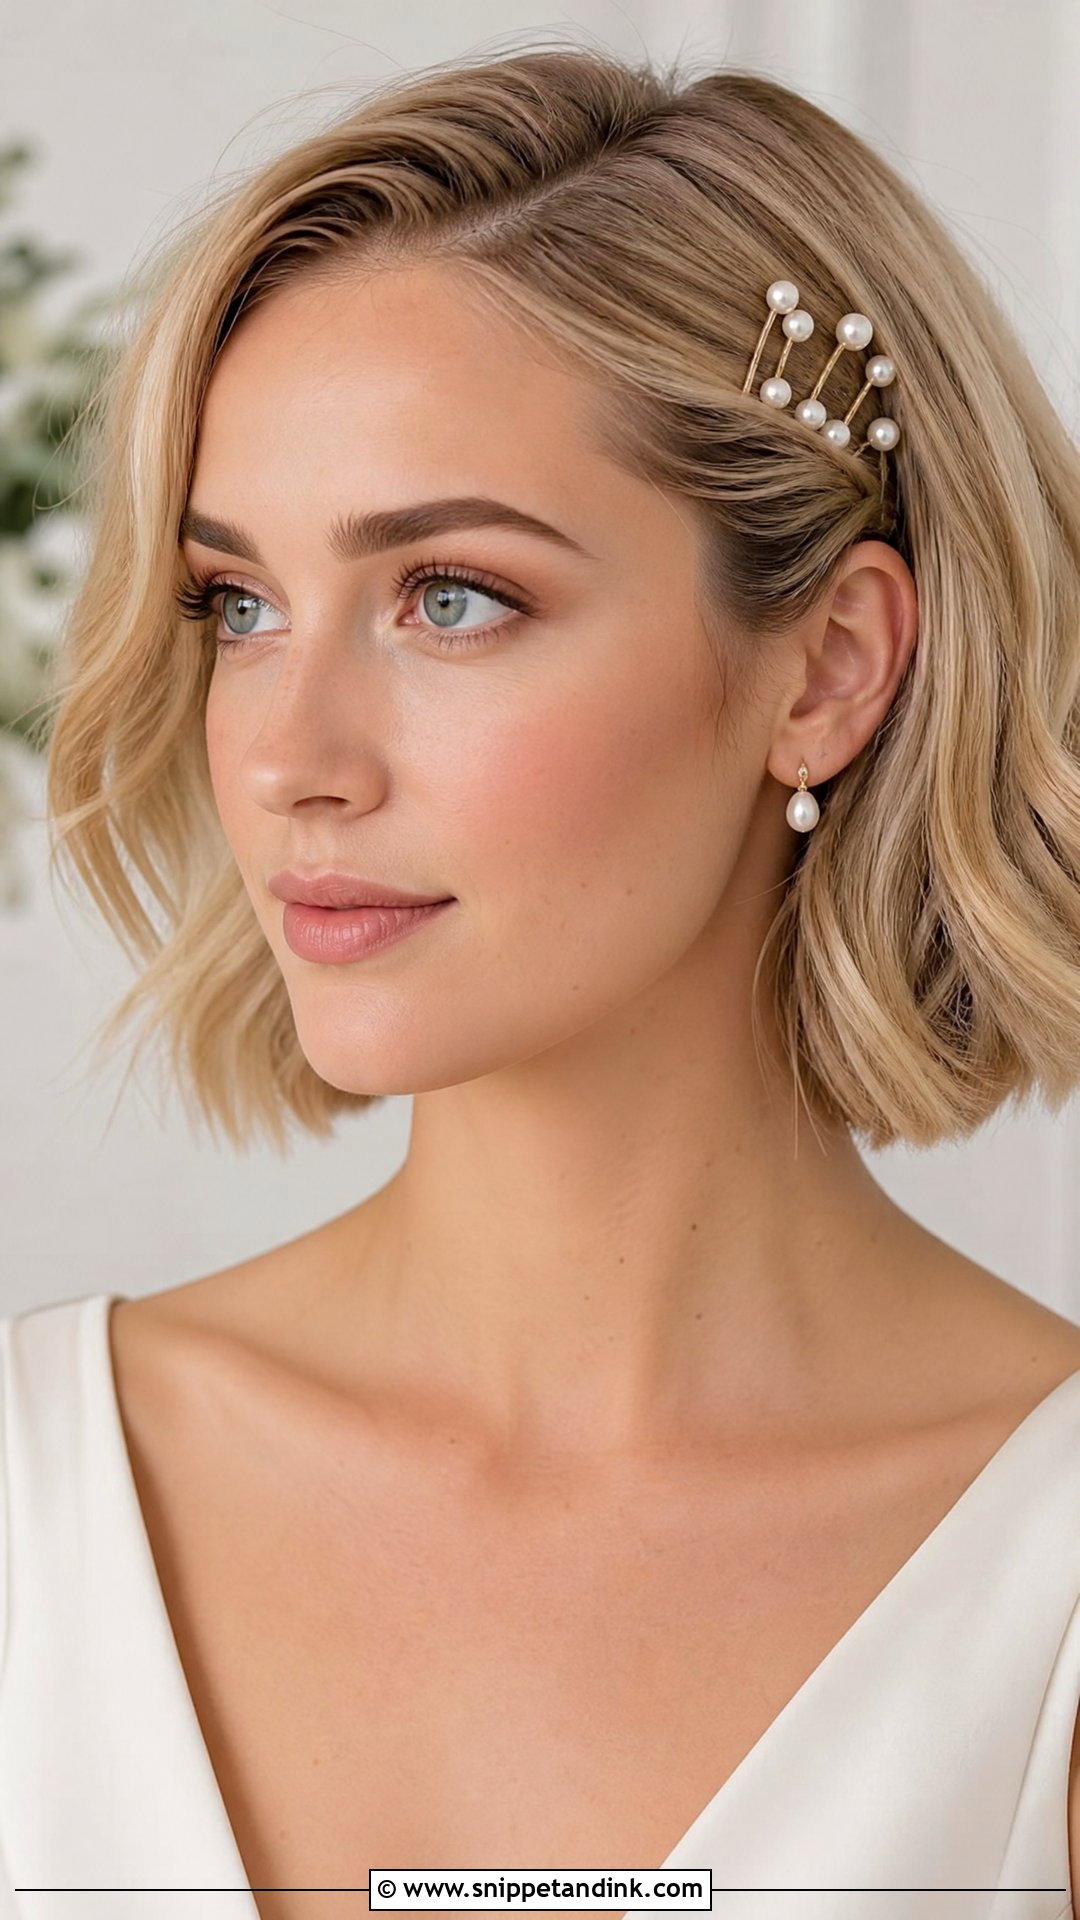
Pearl pins are the fastest way I know to make an everyday bob feel like wedding hair. Wear the bob sleek, waved or tucked behind one ear, then place the pins along one side near the temple. A straight line looks polished; a slightly scattered cluster looks softer. Slide each pin in against the direction of the hair and then turn it back so the teeth catch, otherwise slippery pins work their way out by the speeches. A light spray keeps the hair movable. Minimal styling, but the pearls catch the light in every close-up.
11. Short Messy Chignon Wedding Hair
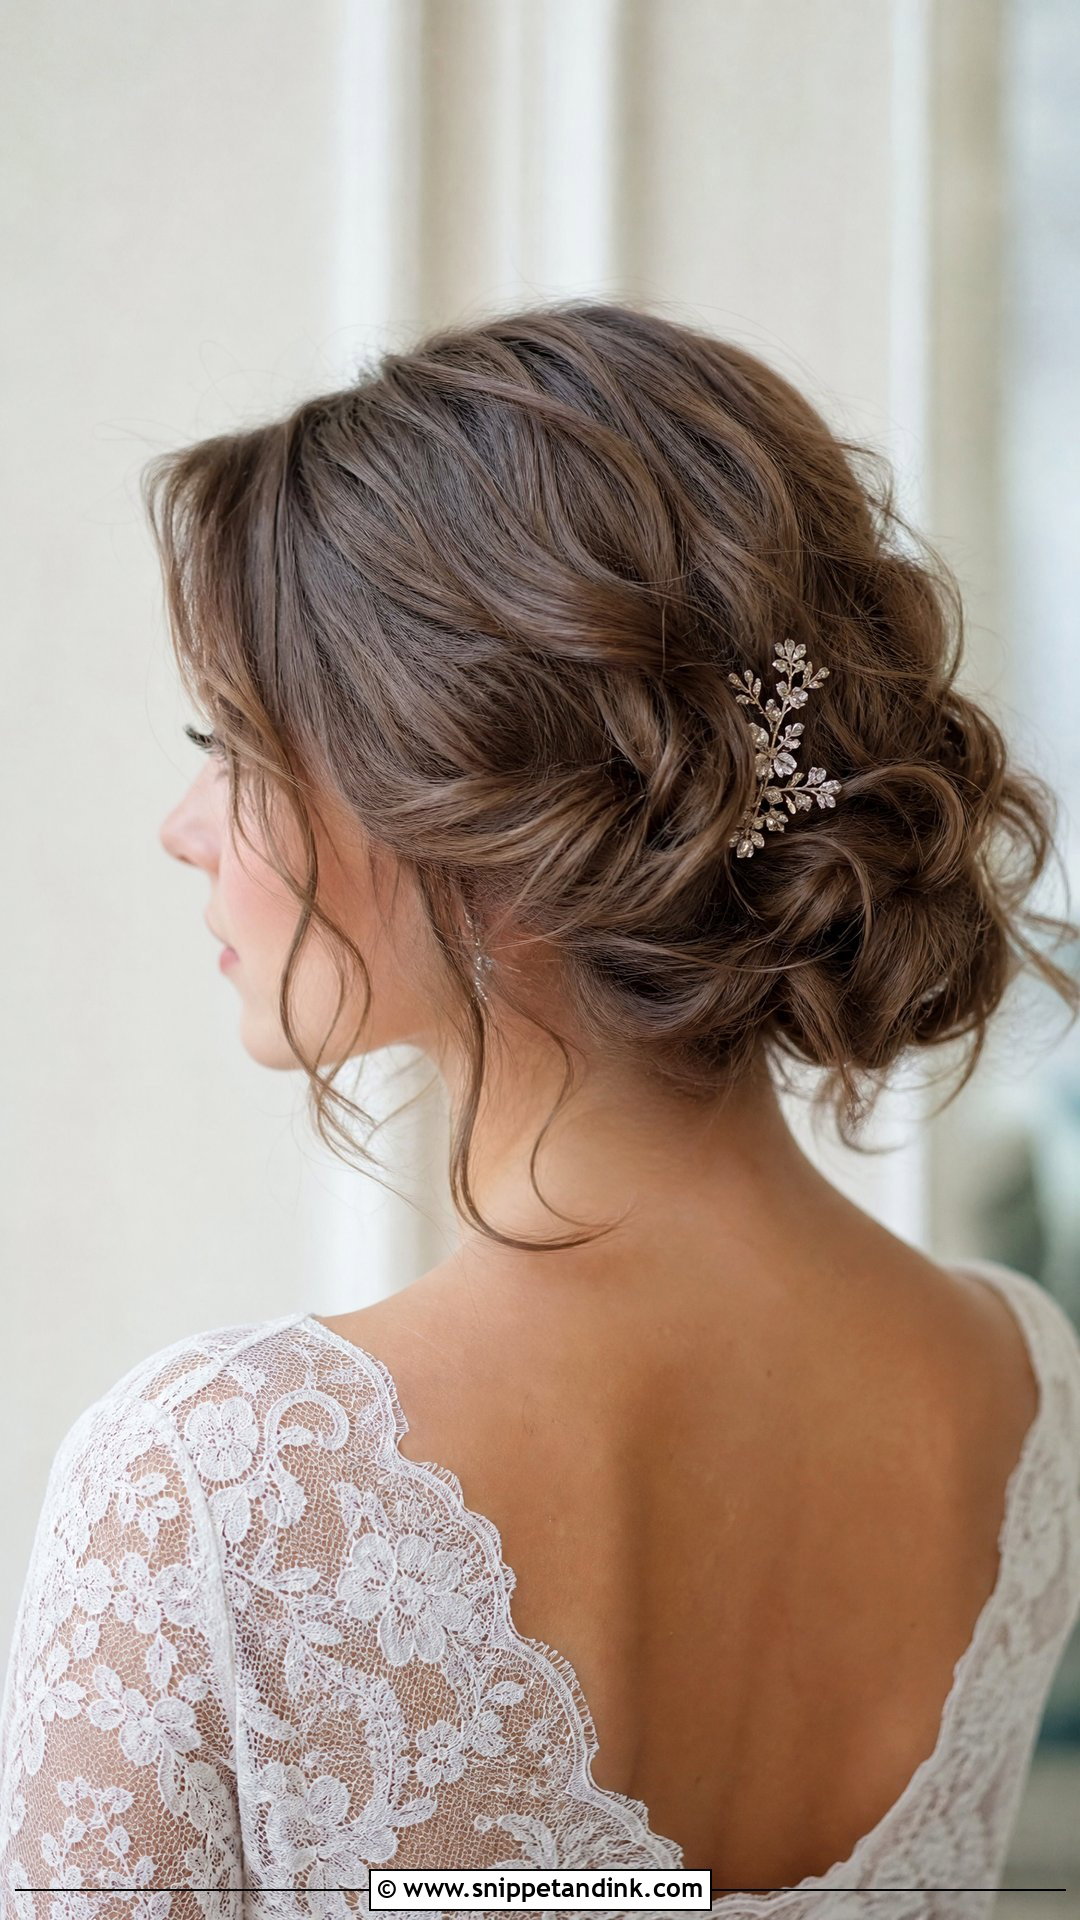
A messy chignon is the updo I’d suggest for chin-length layers, since the messiness hides the short pieces instead of exposing them. Curl everything first to give it bend and volume. Gather the back loosely at the nape, then twist small sections and pin them into a rounded shape. Overlaps and uneven bits are part of the look, so don’t redo it every time a piece sits higher. Pull out two small face-framing pieces, curl them lightly, and finish with flexible spray. A small comb or a veil slots straight into the pinned mass.
12. Short Sleek Bob Wedding Hair
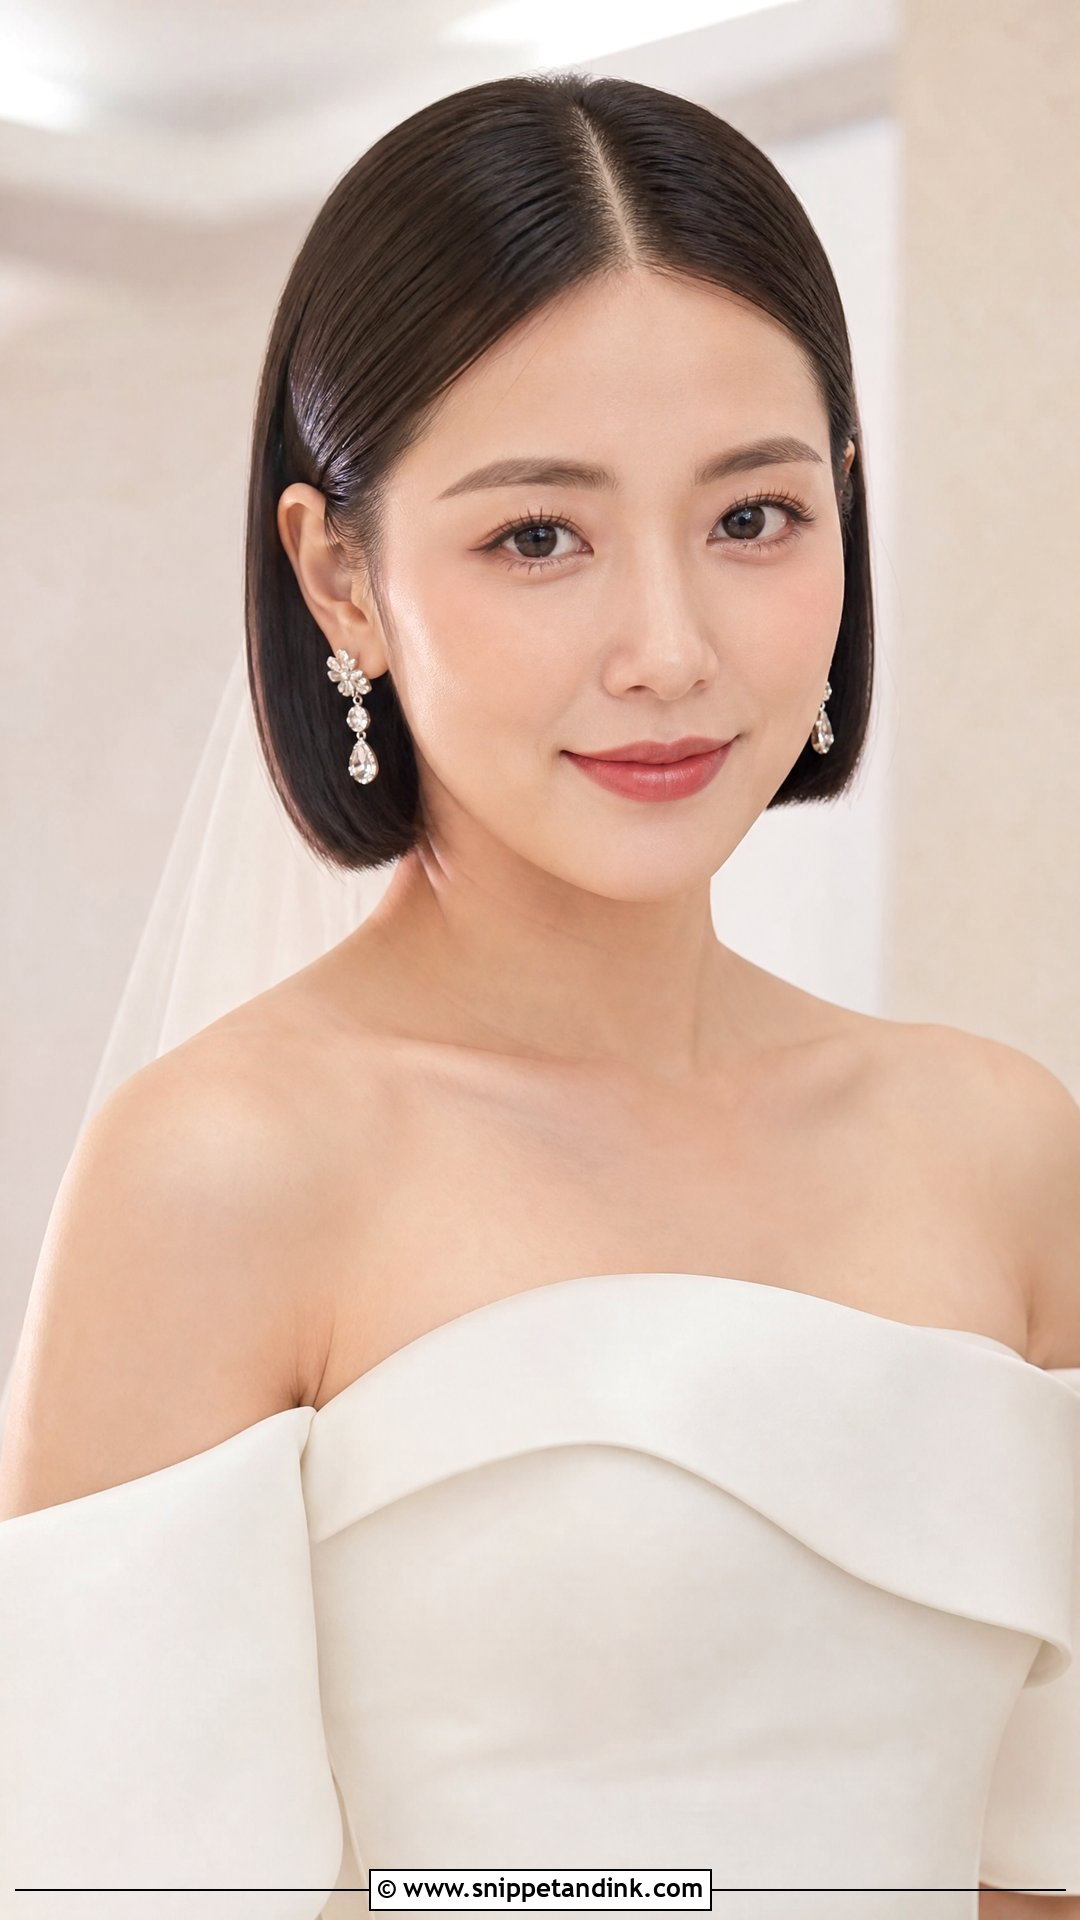
A sleek bob is the cleanest option here, and it’s easy at home if your cut already has a strong line. Blow-dry with a round brush or smoothing brush, then run a flat iron through small sections for gloss. Bend the ends under slightly or leave them dead straight depending on your neckline. A center part feels fashion-led, a side part softer. Keep shine spray to the mid-lengths and ends so the roots don’t go flat. The one thing I’d warn about is humidity: a sleek bob shows every frizzy strand, so bring an anti-humidity spray if the venue is outdoors.
13. Short Hair With Headband Wedding
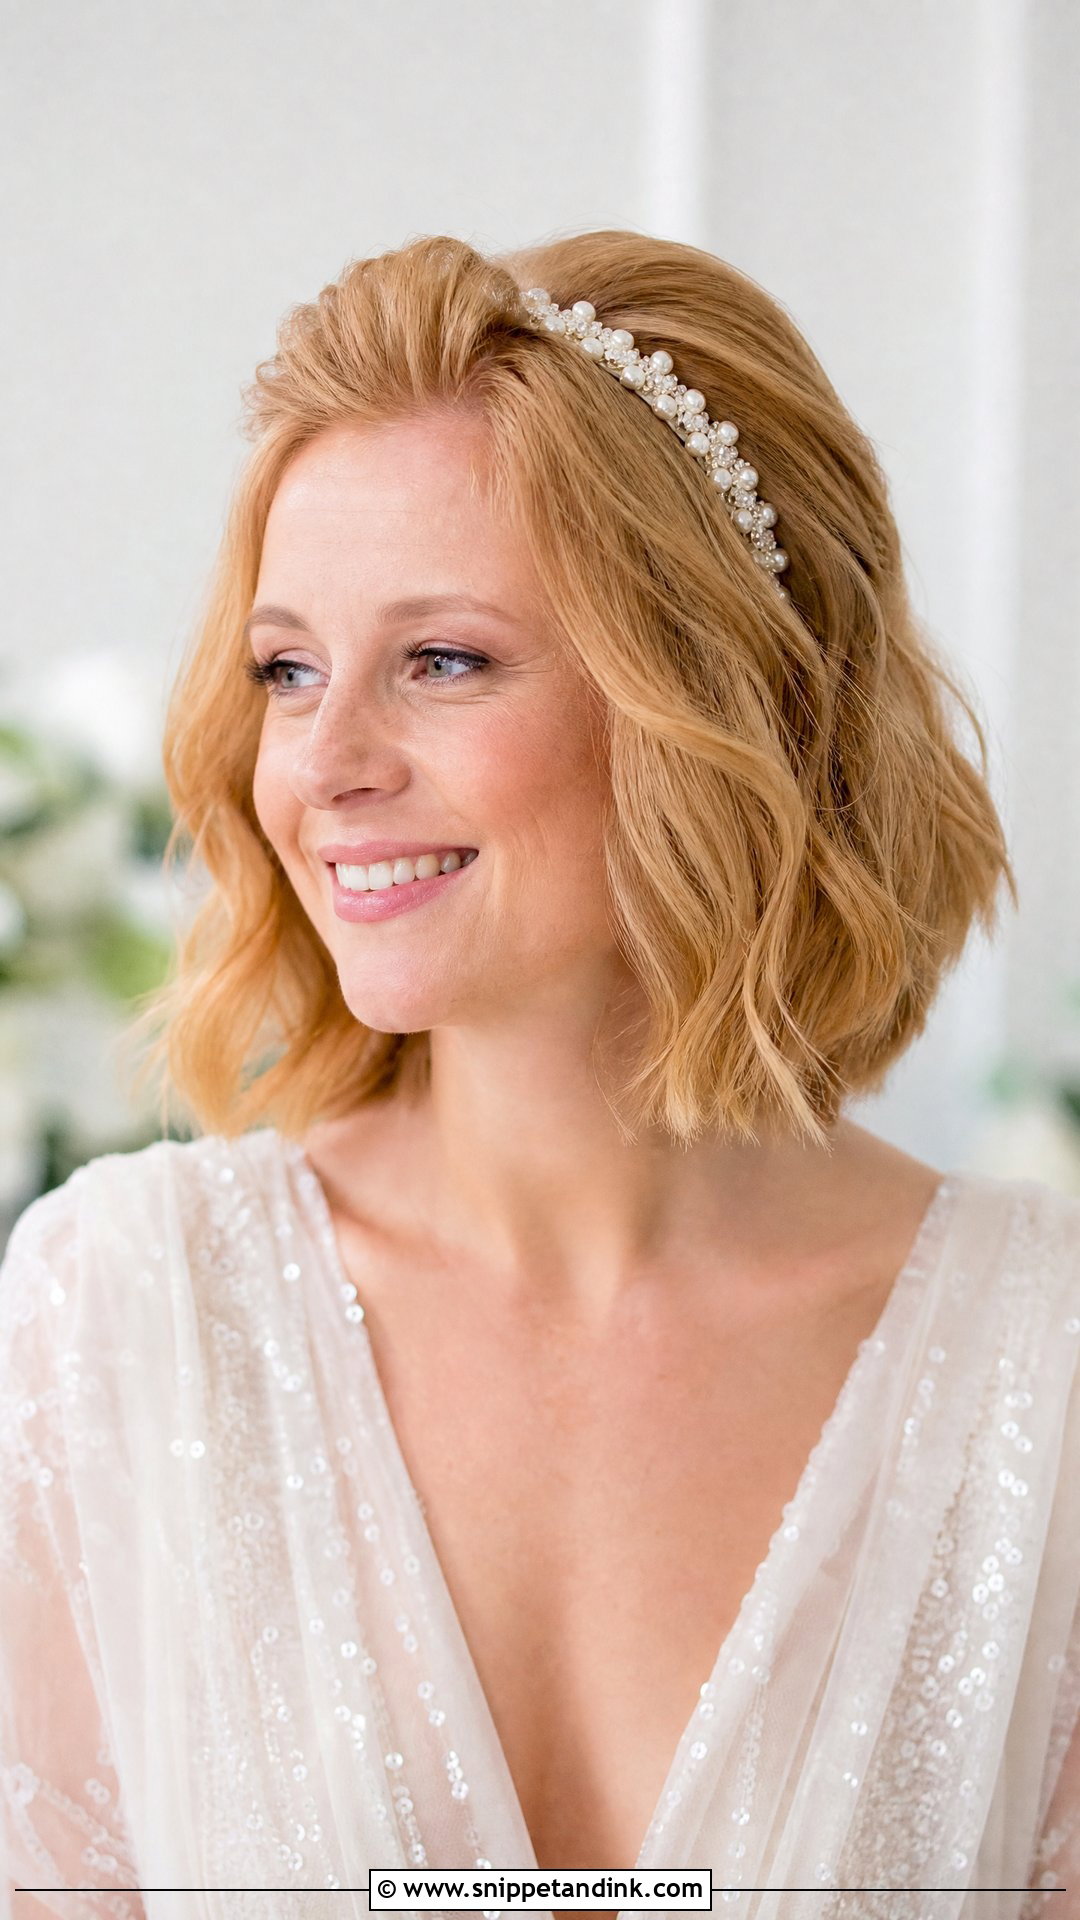
With a headband, the accessory does most of the work and your hair only has to frame it. Start with waves, curls or a smooth blowout, then place the band slightly behind the hairline rather than right on it, which looks more natural and stops it sliding forward. Lift the crown with your fingers so the top isn’t flattened. On very short hair, a little styling cream along the sides keeps the band from squashing them. Wear it for an hour on your practice day; some bands press behind the ears, and you’d rather find that out in advance.
14. Short Faux French Twist Wedding Hair
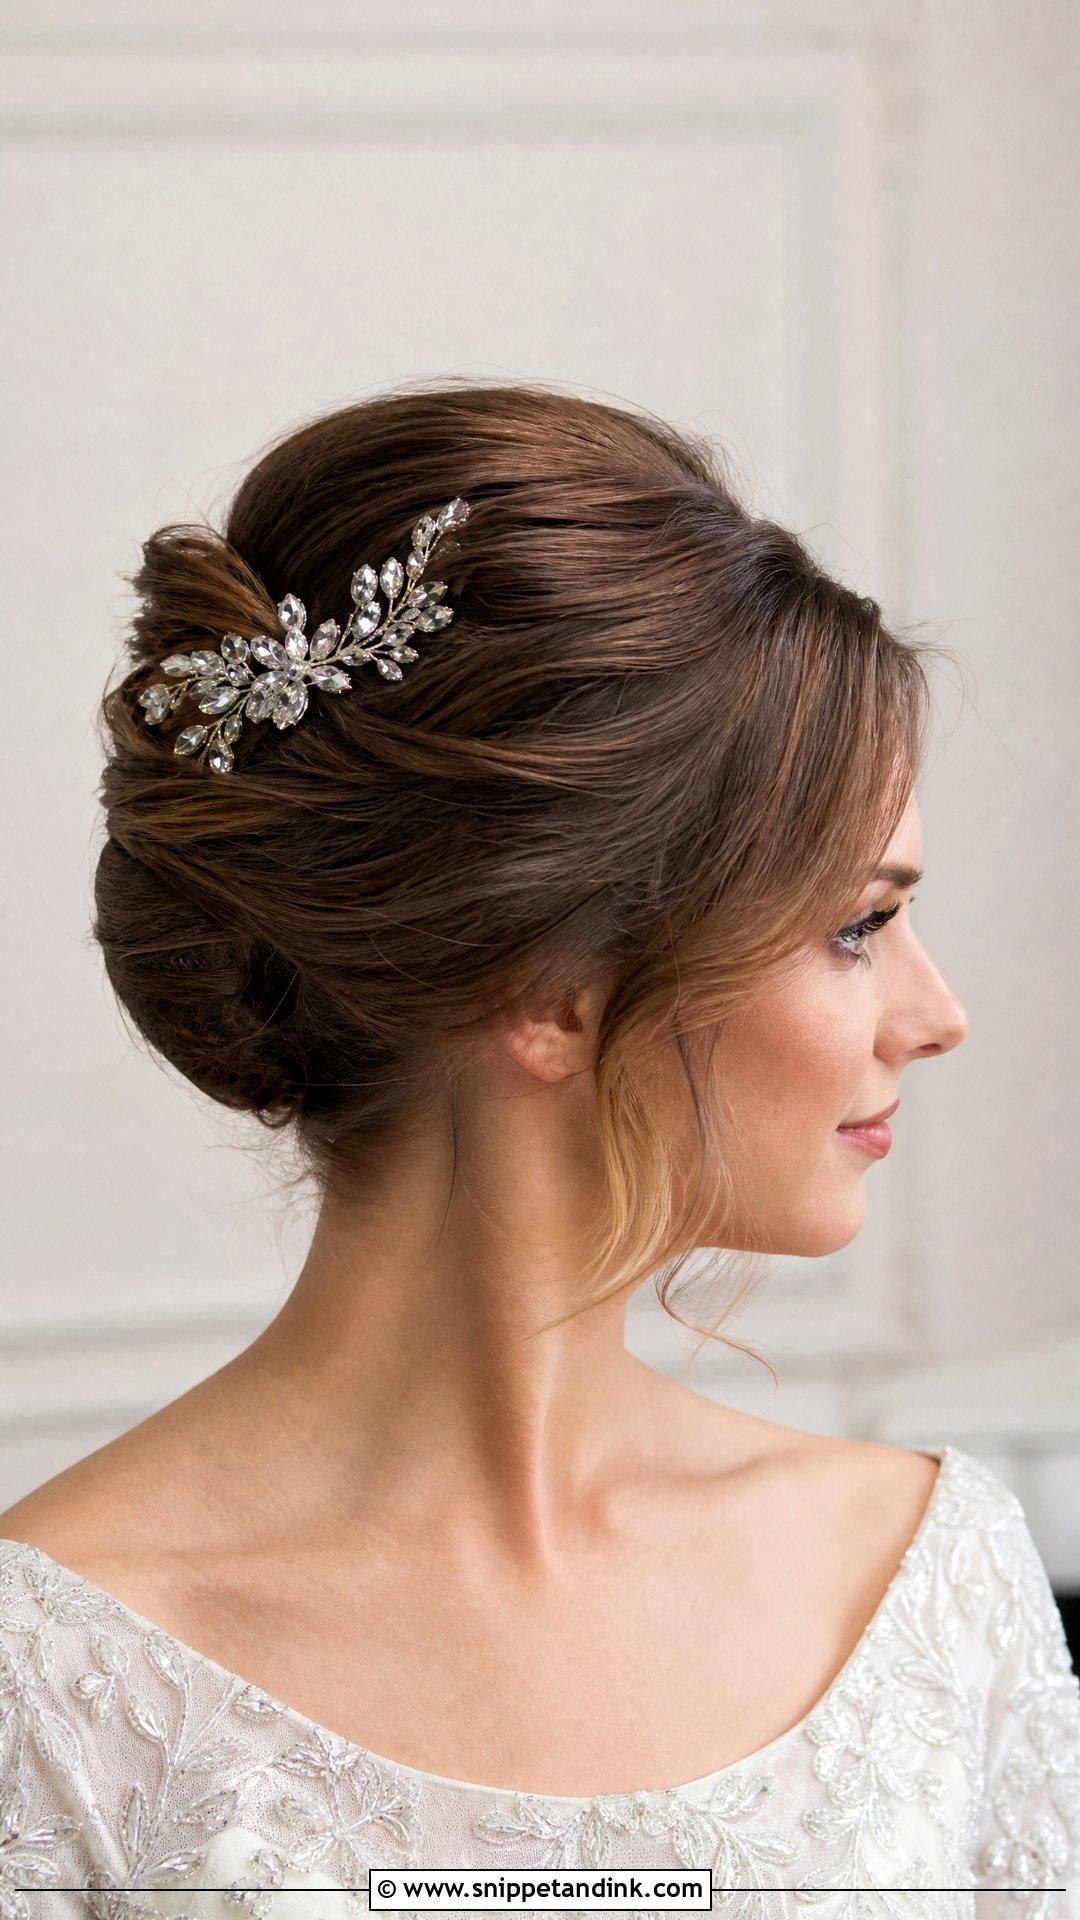
You can fake a French twist with surprisingly little length. Add texture spray, sweep the back hair toward one side and pin it in a vertical line of crossed pins. Then fold the loose ends back over that line and pin them into the shape. Short pieces at the nape can be tucked in or left soft. Curl the front before pinning it back for a gentler finish. The side and back profile is what makes this worth doing, since that’s the angle guests and your photographer see for most of the ceremony.
15. Short Tousled Wedding Hair
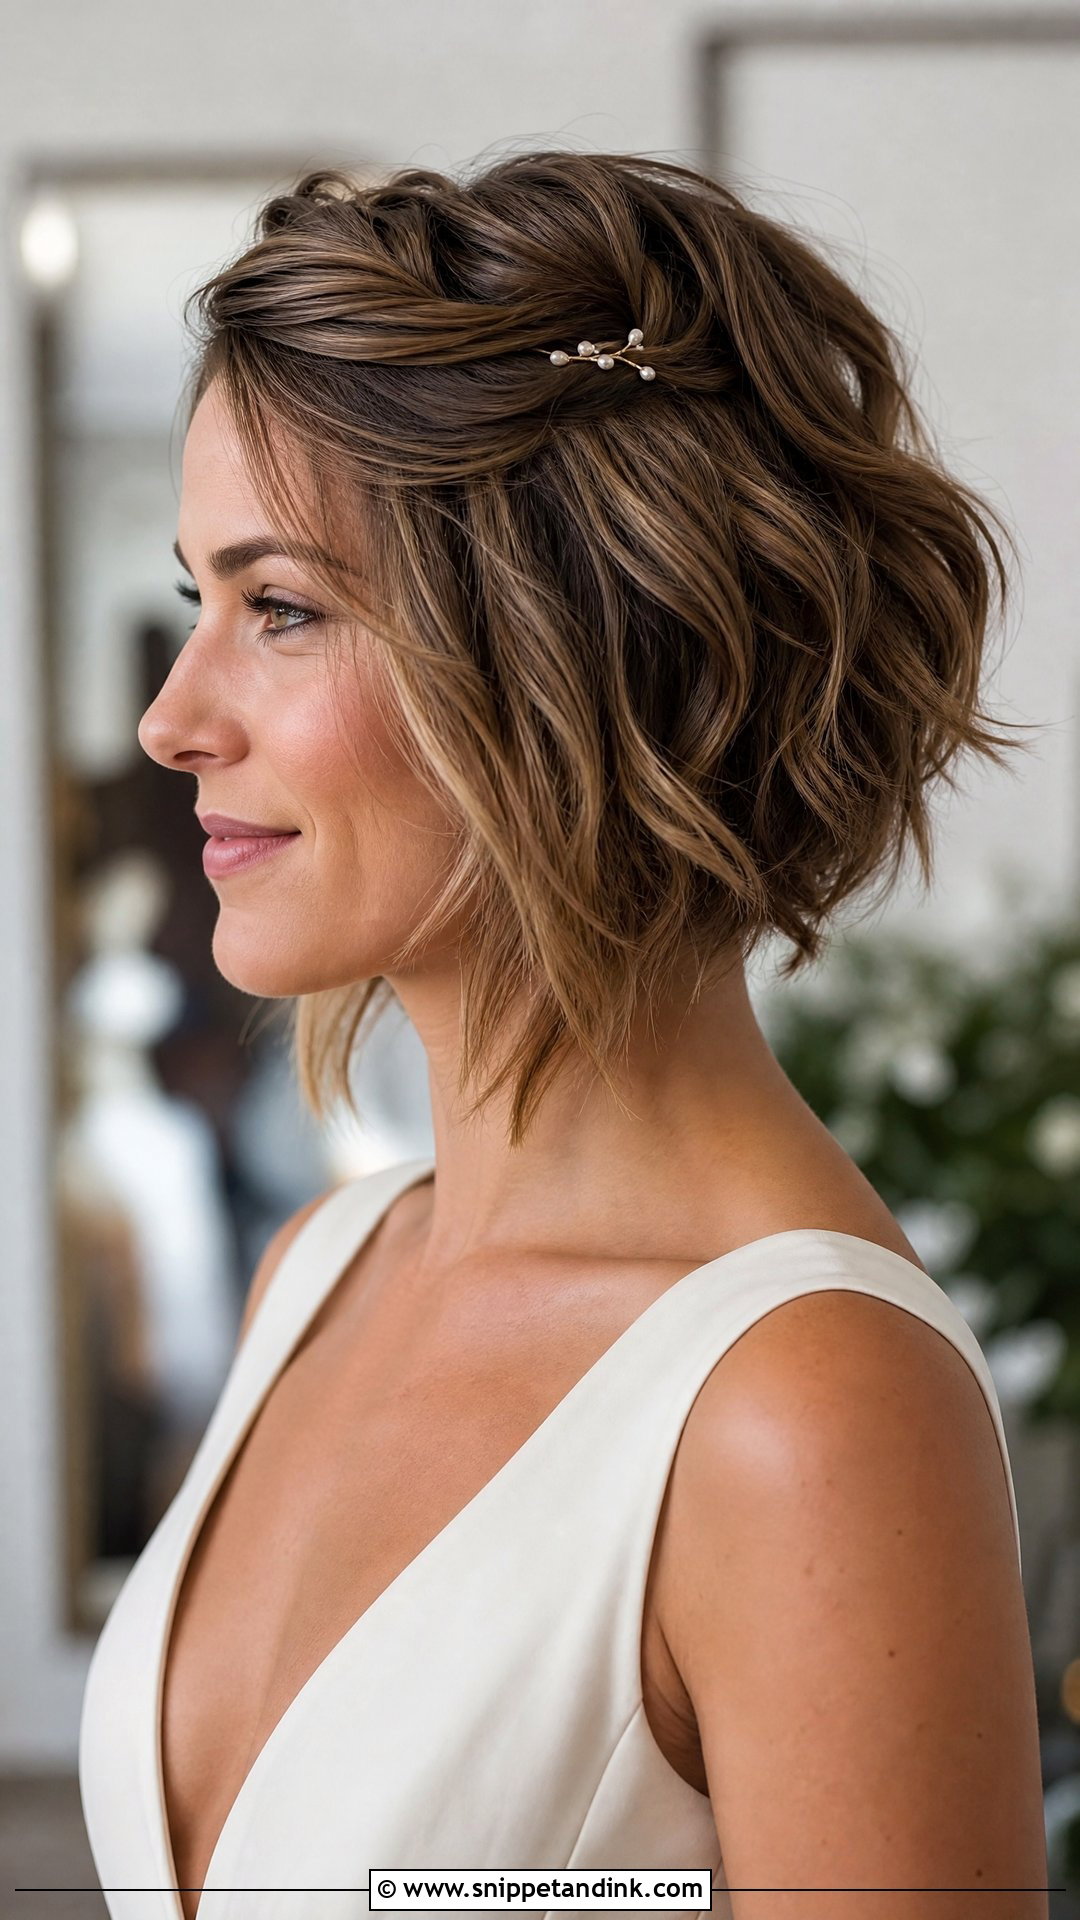
Tousled hair is meant to look unfinished, and that makes it the most forgiving DIY choice on the list. Apply mousse or texture spray, then curl random sections in alternating directions and leave the ends out. Once the curls cool, shake them through with your fingers and add dry texture spray at the roots. Pin back one small front piece if you want your face more open. It suits beach, garden and backyard weddings, though in real wind it can end up messier than you planned, so keep a couple of clips in your bag.
When to Get the Cut Before a DIY Wedding Look
Short hair changes faster than long hair. Half an inch barely shows on long layers, but it’s the difference between a bob that tucks behind your ear and one that won’t. That makes the timing of your last cut part of the hairstyle.
For a pixie, I’d book the cut about two weeks out, so it looks fresh without the stiff, just-cut edge around the ears. For a bob or lob, two to four weeks gives the ends time to soften, which actually helps twists and faux buns hold. Avoid a new shape or a big change of length within a month of the wedding. You’d be practising on a cut you don’t know yet.
If the Shape Drops by the Reception
Short styles rarely fall apart completely. What usually happens is the crown goes flat and a twist or two loosens after the hugging line. Spray a little dry texture spray at the roots and lift with your fingers. Re-pin any loose twist with a fresh crossed pair rather than shoving the old pin back in. And if a side really won’t behave, tuck it behind your ear and add the spare clip from your kit. Nobody at the party will know it wasn’t the plan.
A Practice Run Tells You Which One Is Yours
You don’t need long hair or a stylist to have wedding hair that feels bridal. Pick the look that suits your cut and texture, then do it once on an ordinary weekend with the same products and pins you’ll use on the day. Take photos from the front, side and back in daylight, because that’s where you’ll spot the gap or the flat crown you can’t see in the mirror. Pack a small kit with pins, clear elastics, texture spray and a mini comb, and hand it to whoever is staying close to you. After that, the morning itself is mostly about staying calm while the curls cool.
You'll Like These Ideas:


Leave a Reply