
Ask ten brides for a messy bun and you’ll get ten different pictures in their heads. Some mean a soft knot at the nape, others a high, lived-in twist with curls falling everywhere. The common thread is texture: a bun with some air in it, pinned so it can move without collapsing. I’ve grouped twenty versions below by where they sit and what they’re dressed with, and for each I’ve noted the hair it suits and the hair it fights.
Bun Height Starts With the Back of Your Dress
Before we talk texture, I look at the dress. The height of the bun should work with the neckline and the back, because that’s what people see during the ceremony.
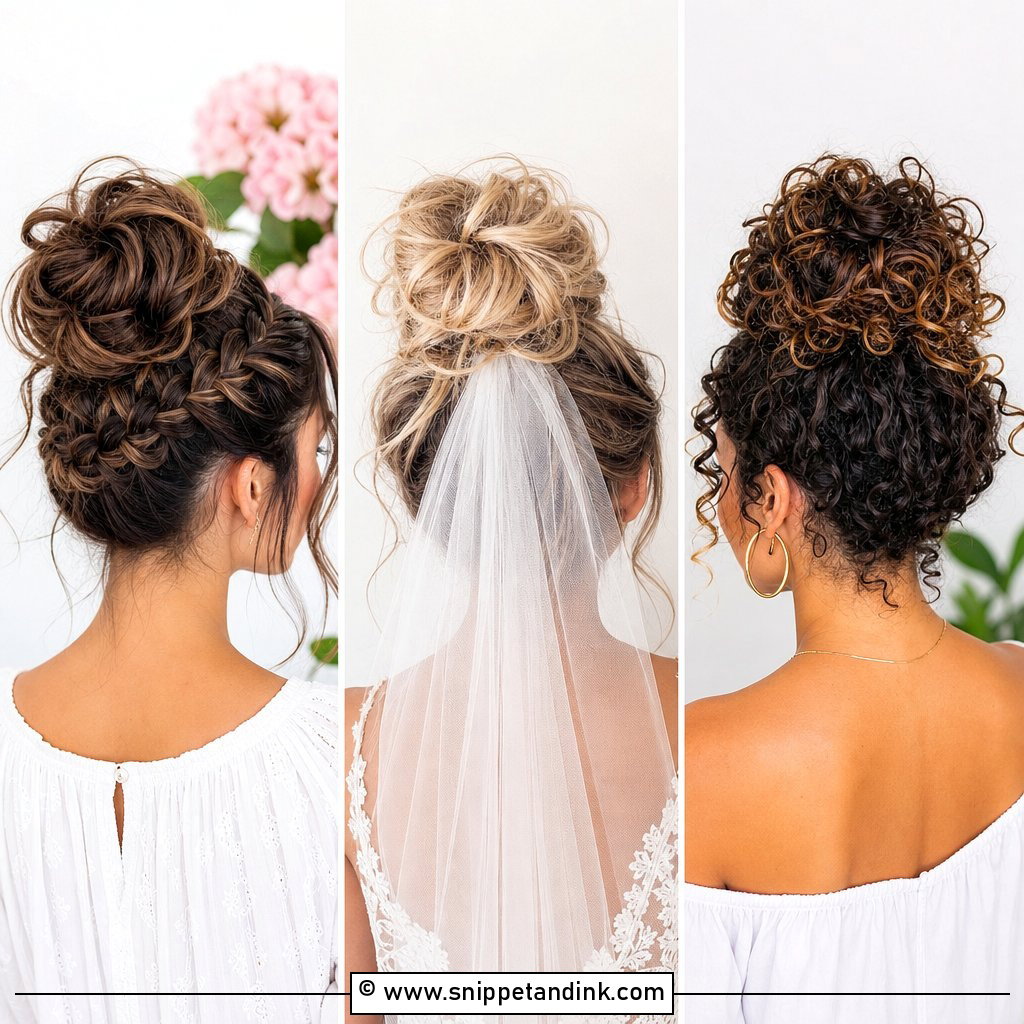
- Open or low back: a low bun keeps the line of the back clear and draws the eye down. A high bun can leave the back looking empty.
- High neck or illusion lace: go higher, at or above the crown, so the hair doesn’t sit on the collar and crush.
- Off-shoulder or strapless: almost any height works, though a mid-height bun balances bare shoulders well.
- Long veil worn under the bun: the bun needs to sit high enough for the comb to fit beneath it.
I’d also think about the chair. Low buns get pressed against a high chair back at dinner, so if you’ll be sitting for a long meal, slightly higher is kinder.
1. Low Messy Bun for Brides
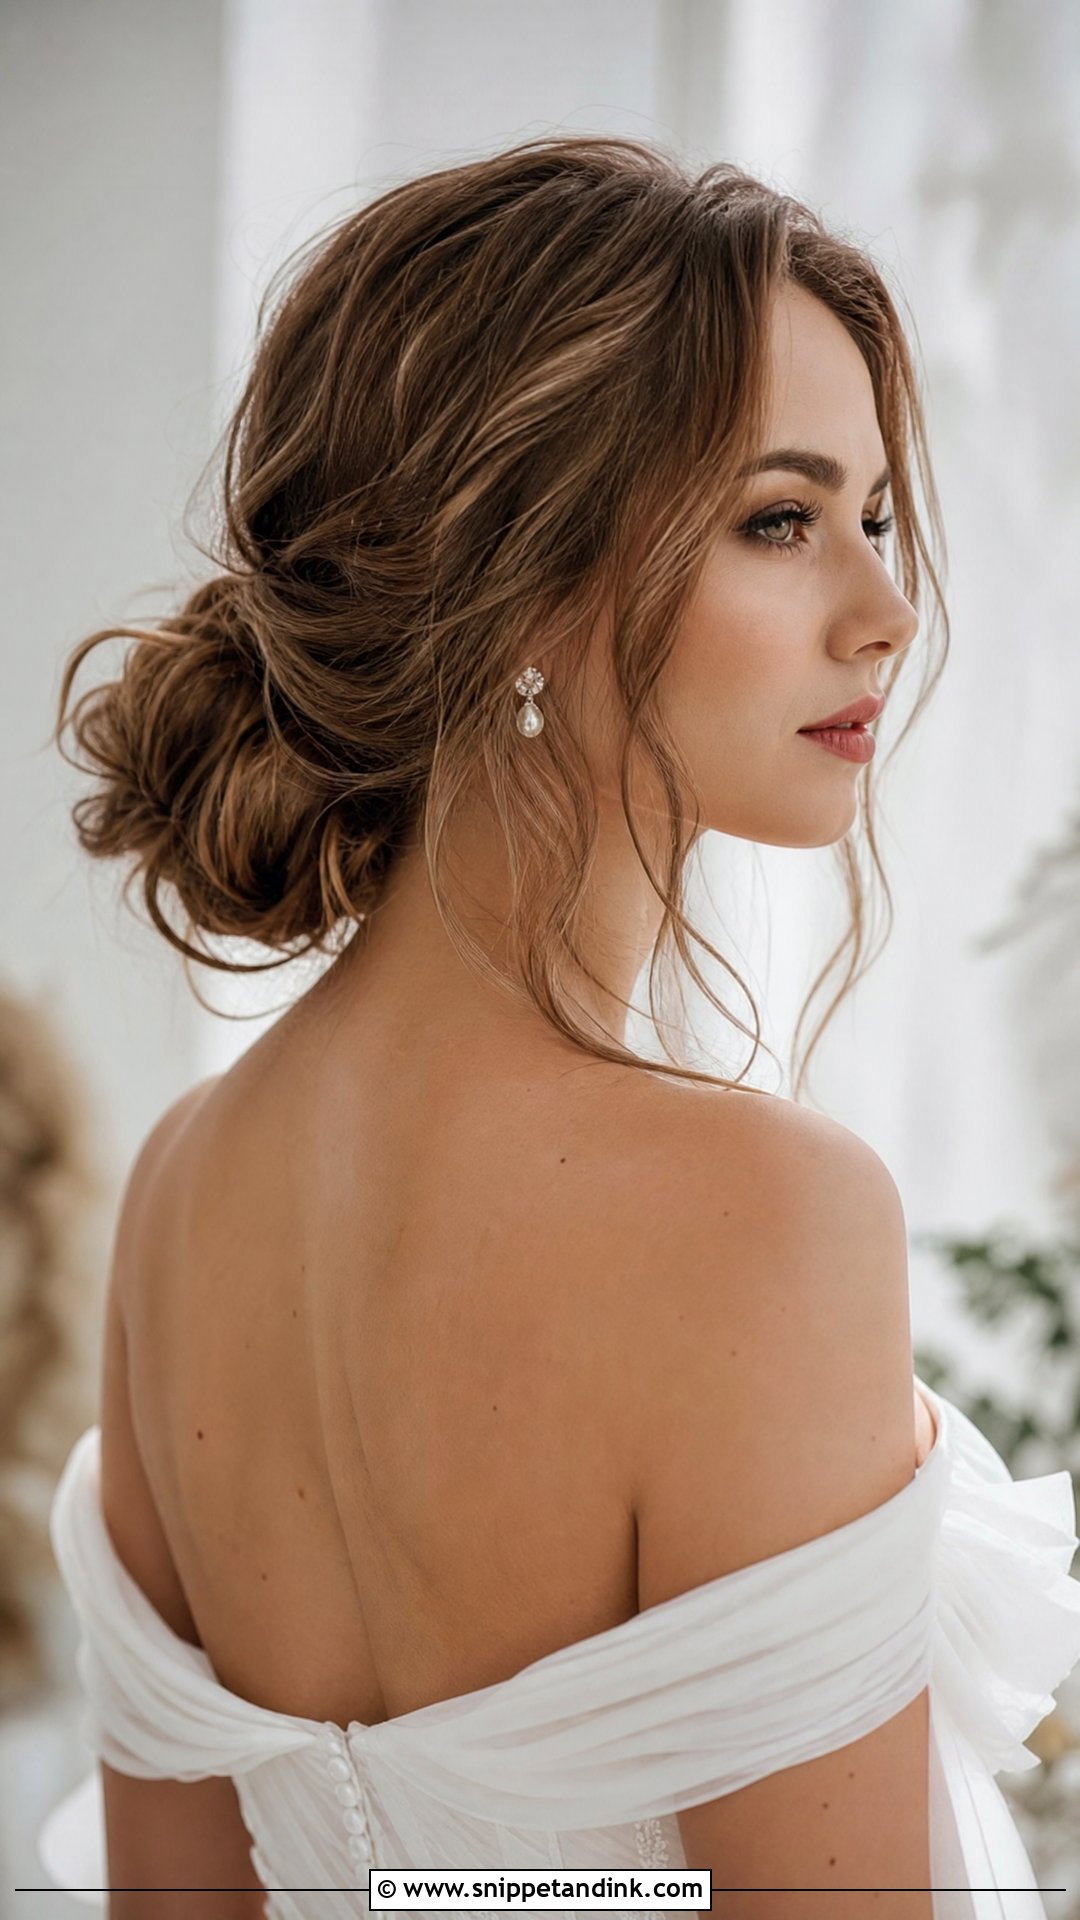
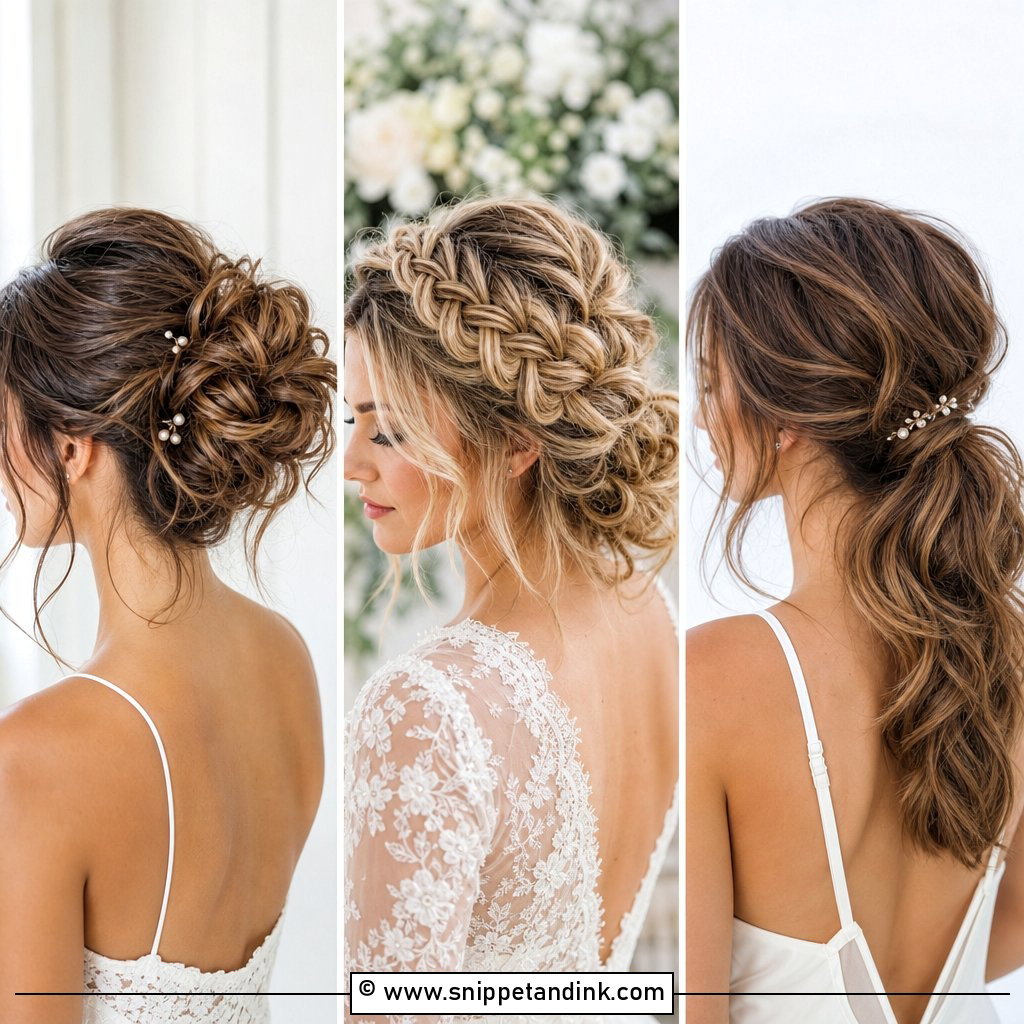
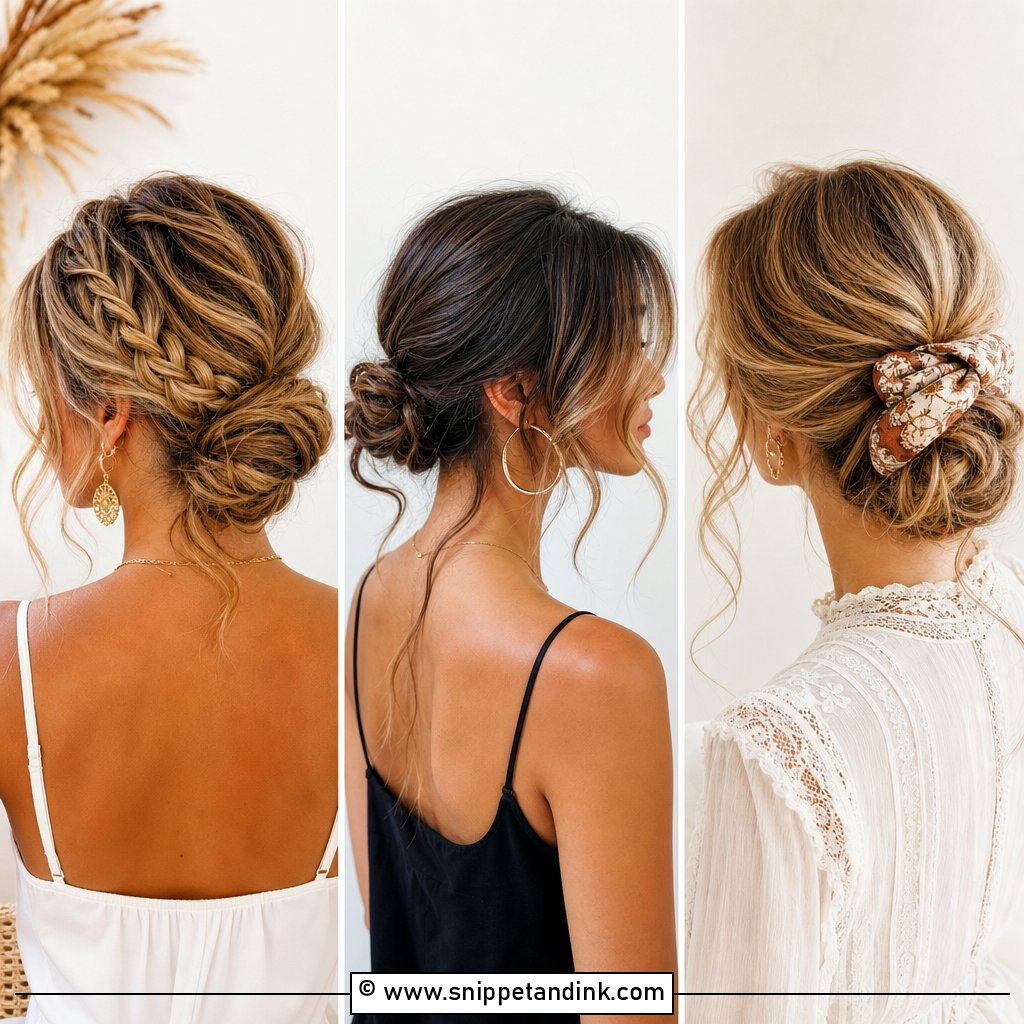
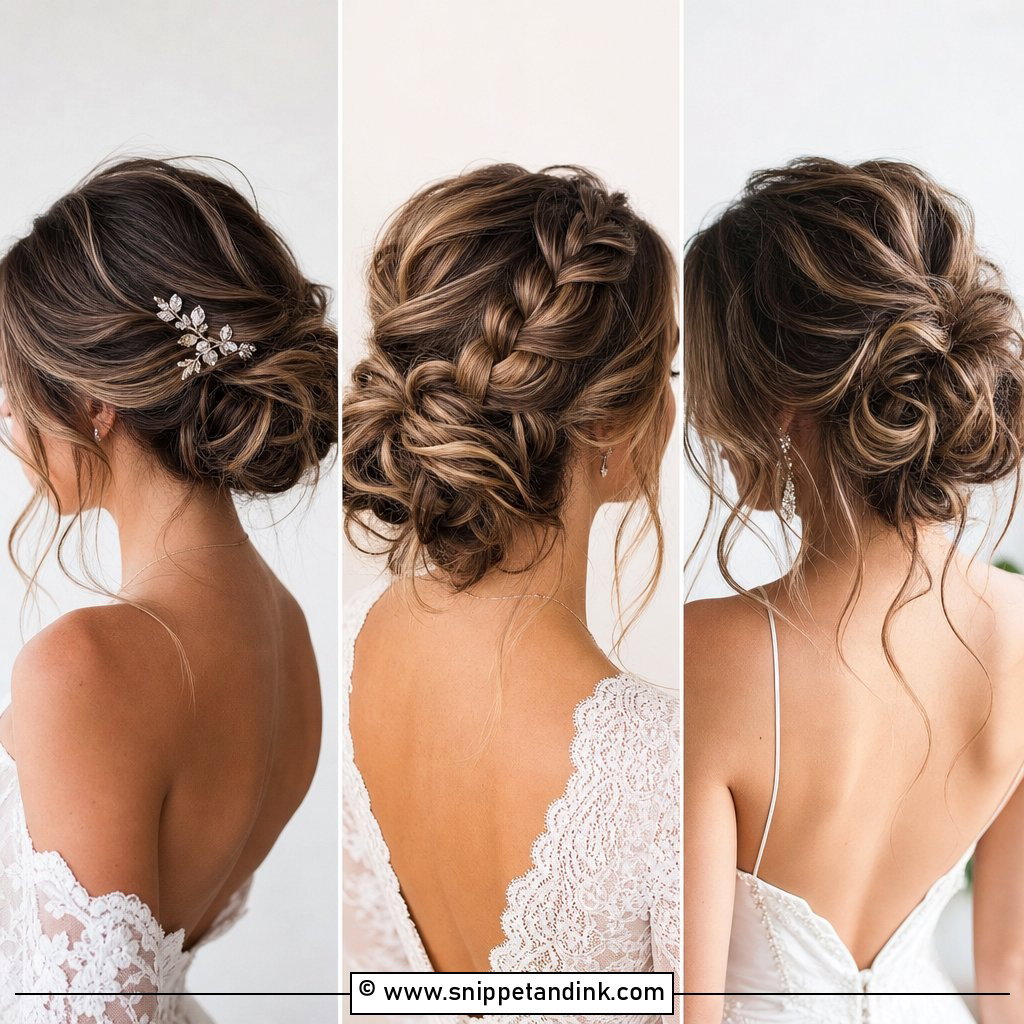
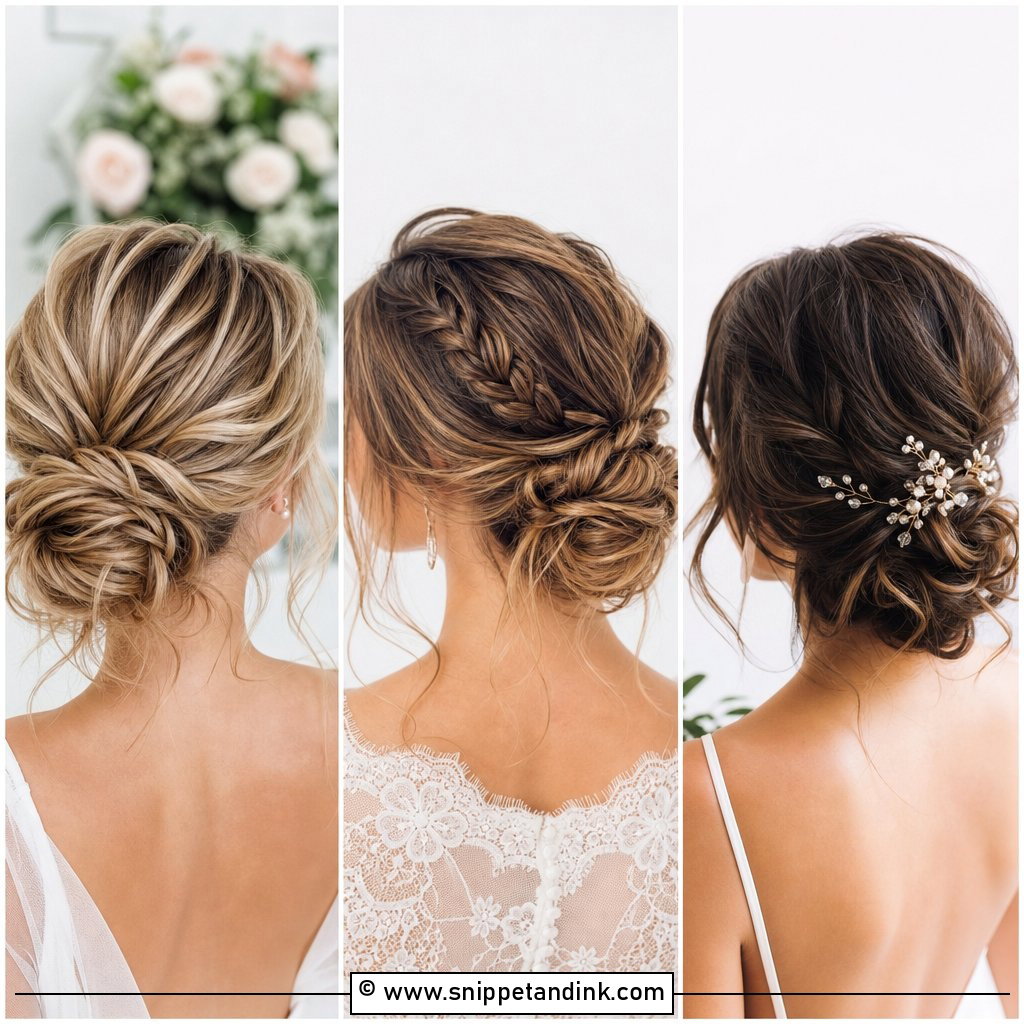
The low bun is the safest bet on this page. Its weight sits close to the head, so it barely moves through hugs, photos and a long dinner. I wave the hair first, twist it into a soft knot just above the nape, then loosen the knot with my fingertips before the final pins go in. It anchors veils and delicate headpieces without any fuss, and it sits clear of both open backs and high necks.
2. Messy Bun With Loose Curls
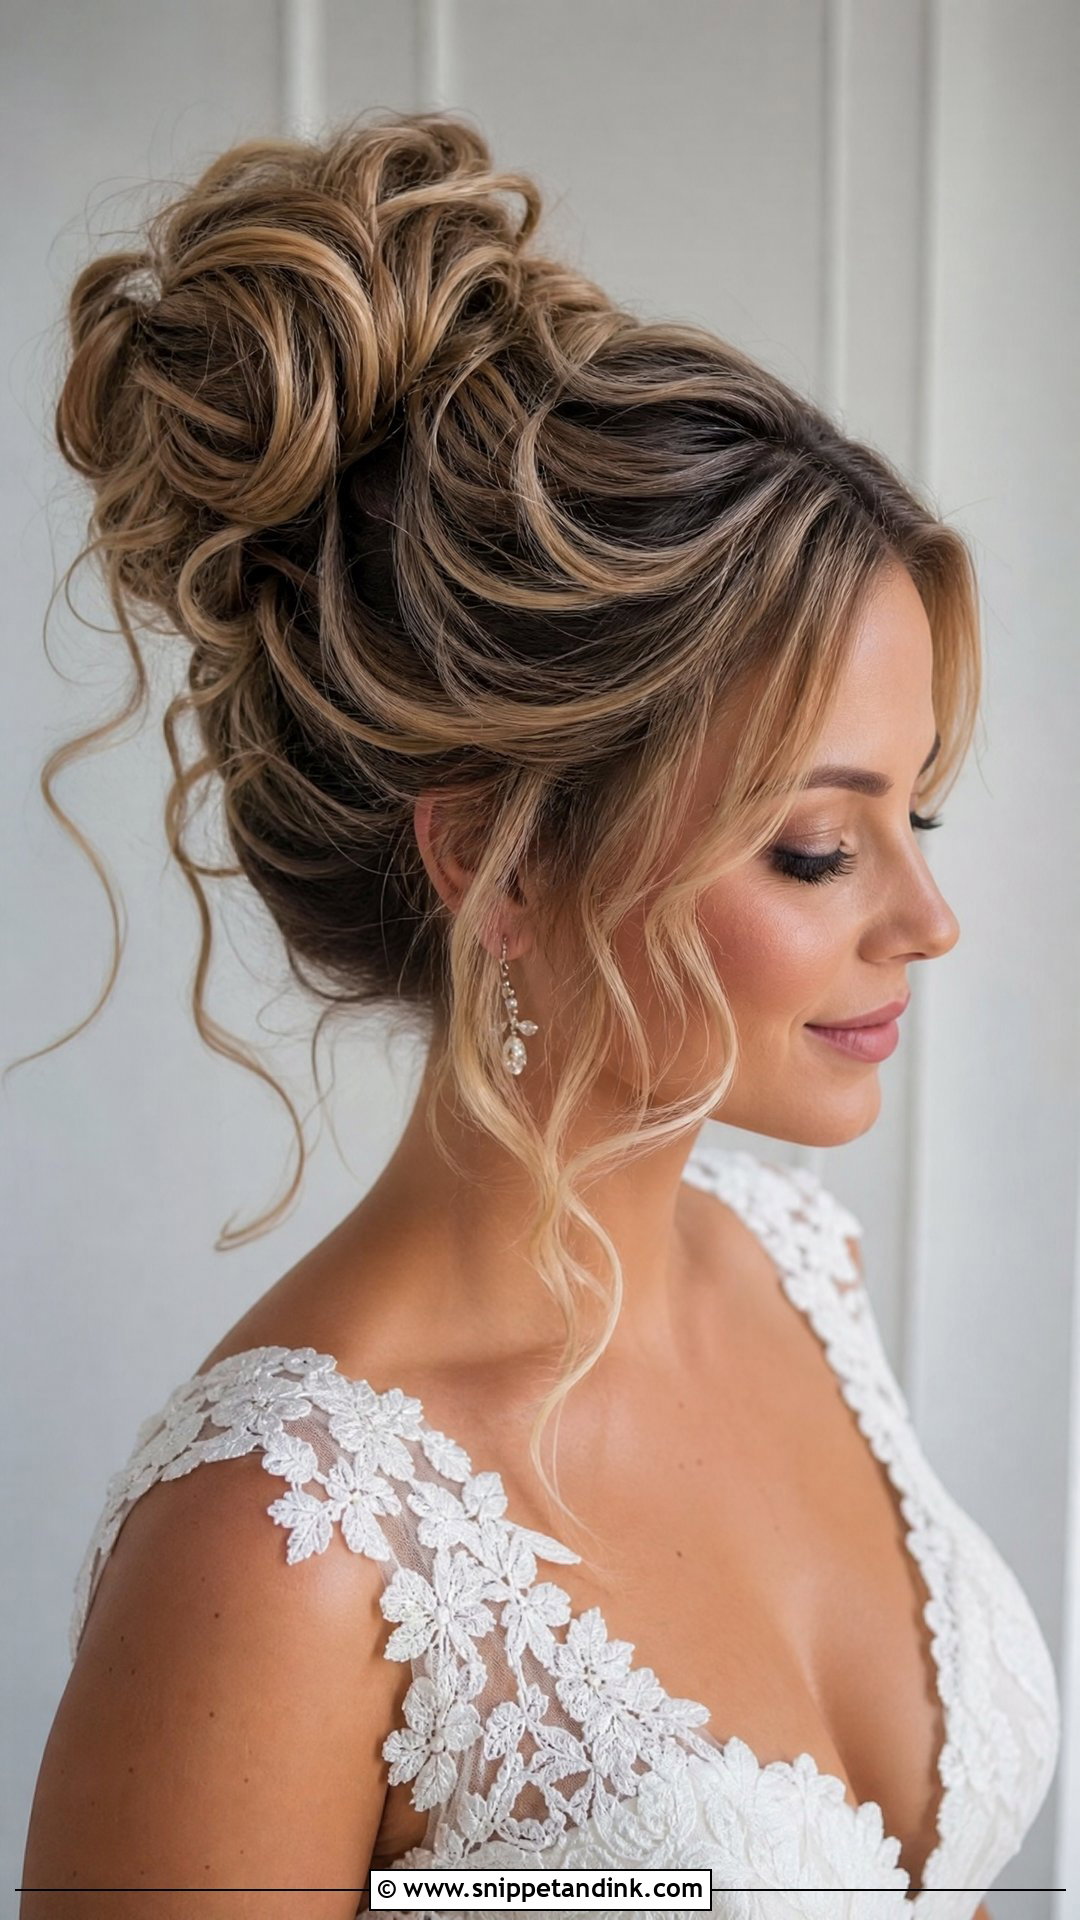
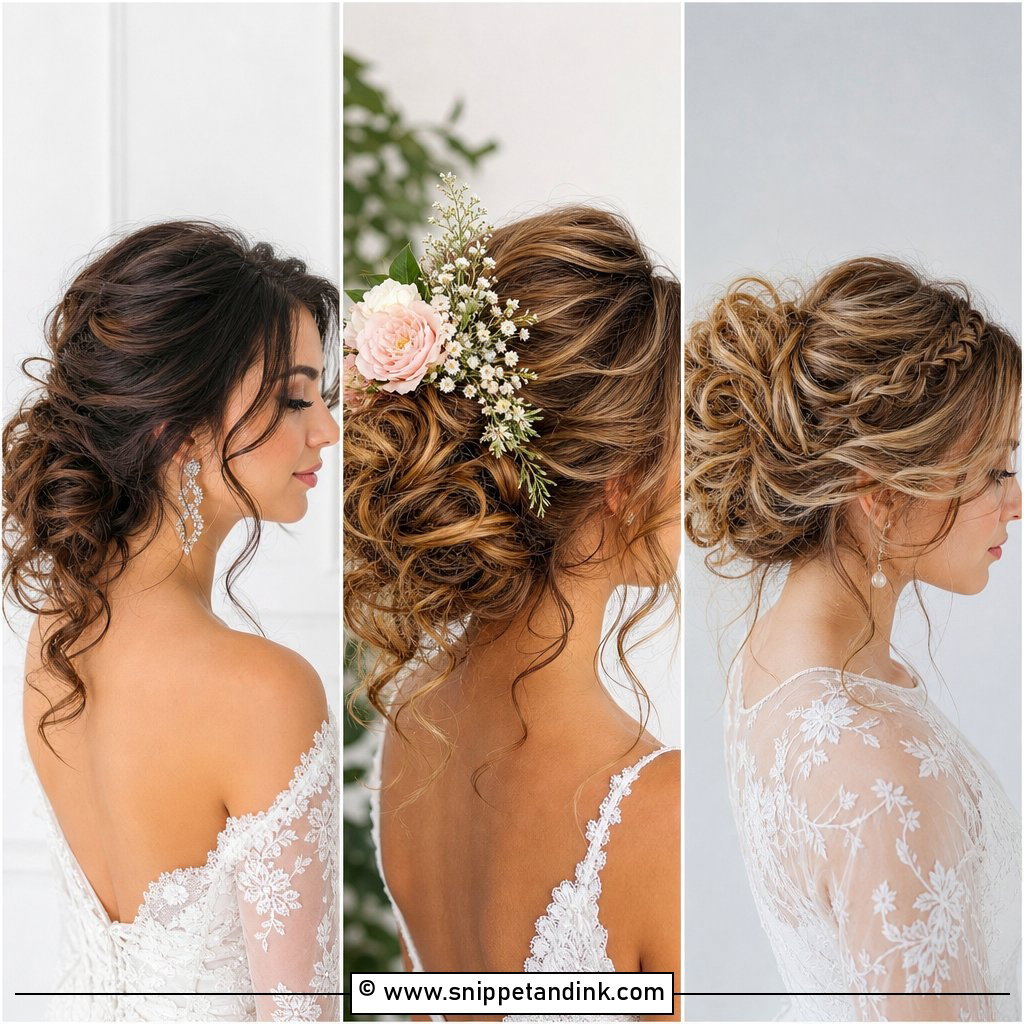
Loose curls around a bun are pretty, but they’re the first thing to give up in damp air. My fix is to curl in smaller sections than you’d think, pin each curl to set while it cools, and only release the face pieces once you’re dressed. The bun itself is just the gathered curls, loosely pinned. Brides with naturally wavy hair get the most out of this one, since their texture is already there; straight hair needs a wand and a bit more patience.
3. Braided Messy Bun
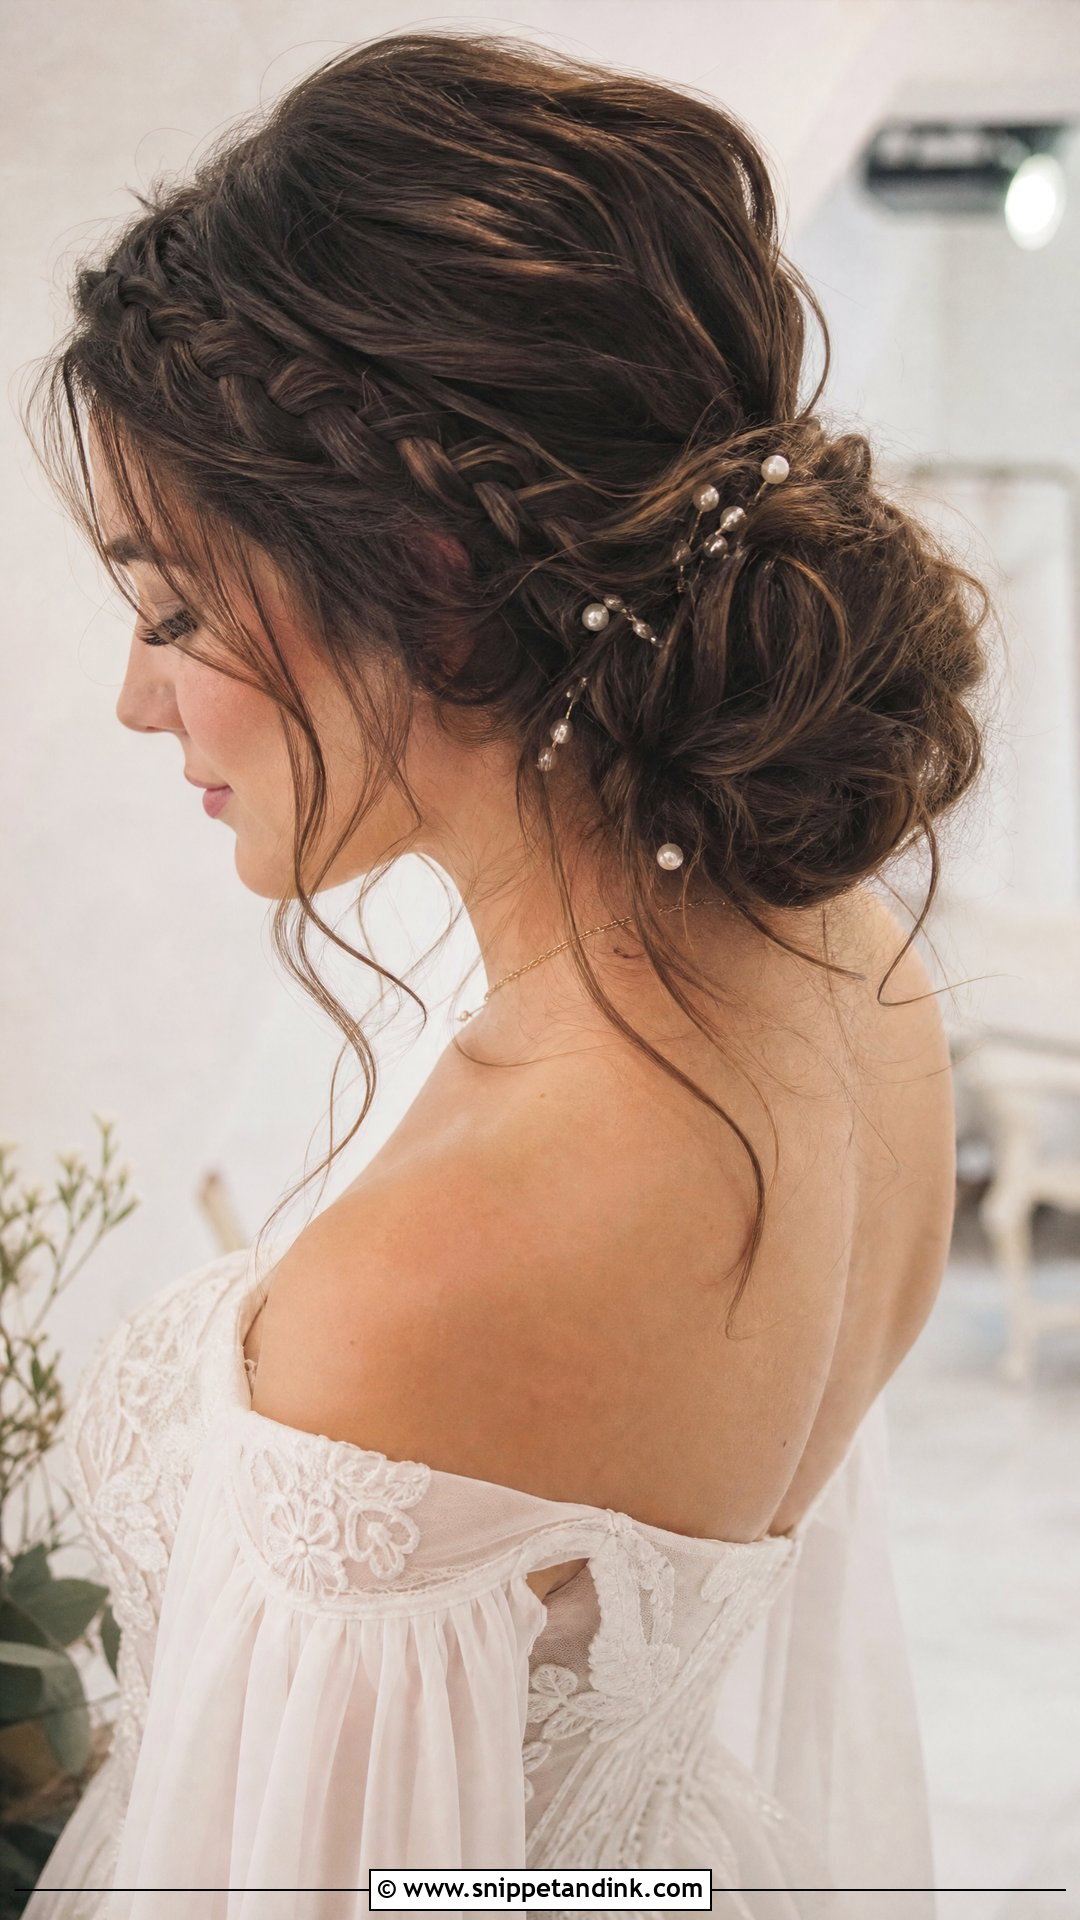
A braid gives a messy bun a spine. I usually run a loose Dutch braid along one side and wrap its tail around the base, which hides the elastic and gives the pins something firm to grip. The braid brings a bohemian touch without needing much loosening anywhere else. Tiny pearls slip neatly between the plaits. On layered hair, expect short ends to poke out of the braid, which honestly suits the look.
4. Messy Bun With Face-Framing Pieces
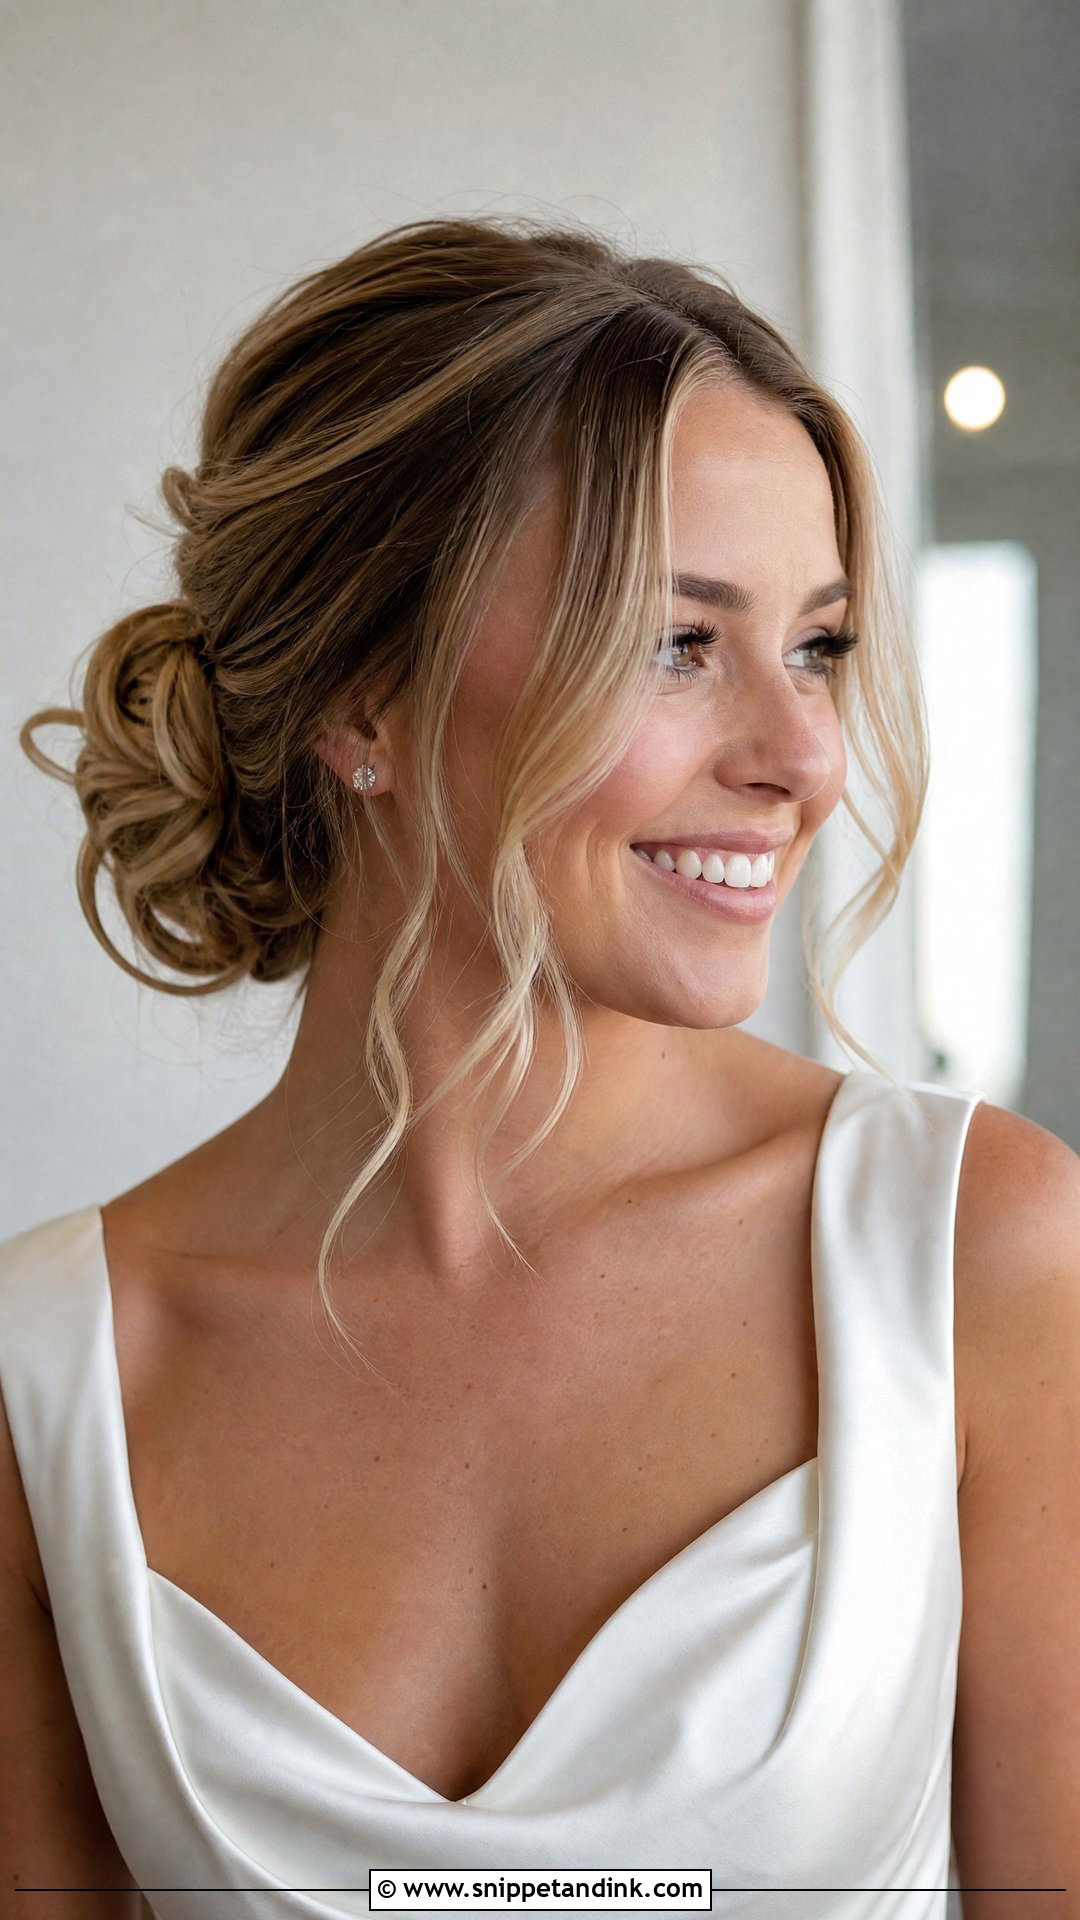
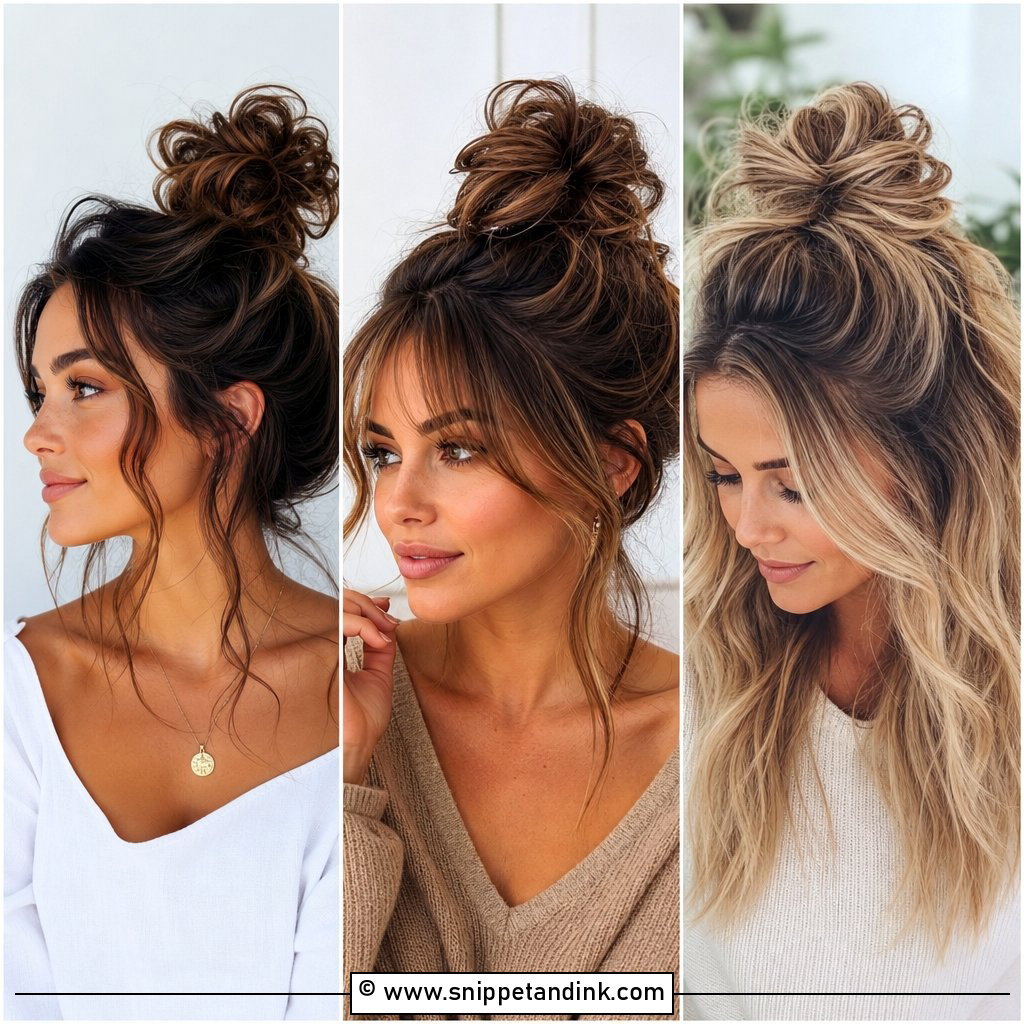
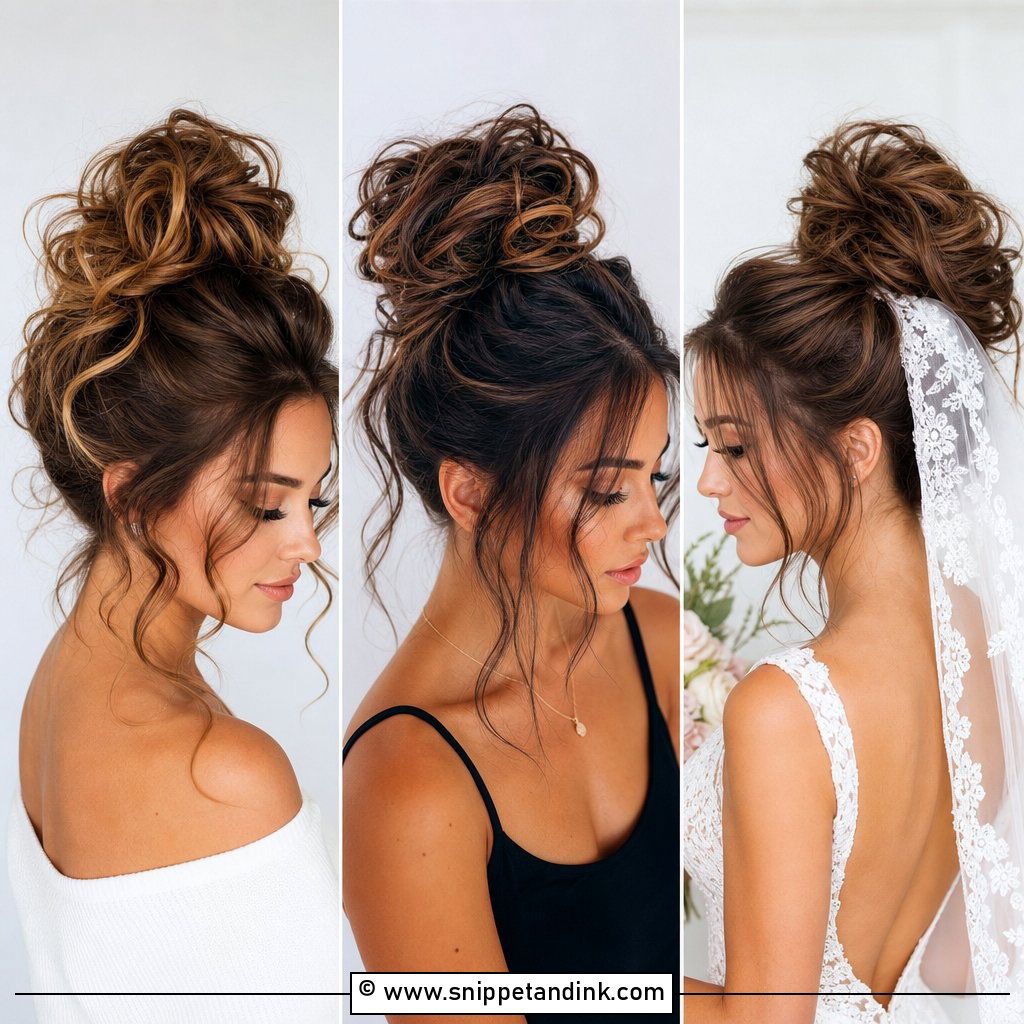
Face-framing pieces are the detail clients notice last and photographers notice first. I take them from the hairline at the temple, never from the middle of the forehead, so they curve toward the cheekbone instead of hanging over the eyes. Keep them thin. Thick pieces look like a style that has already started falling down, and in heat they turn straight and heavy within an hour.
5. Messy Bun With Pearl Pins
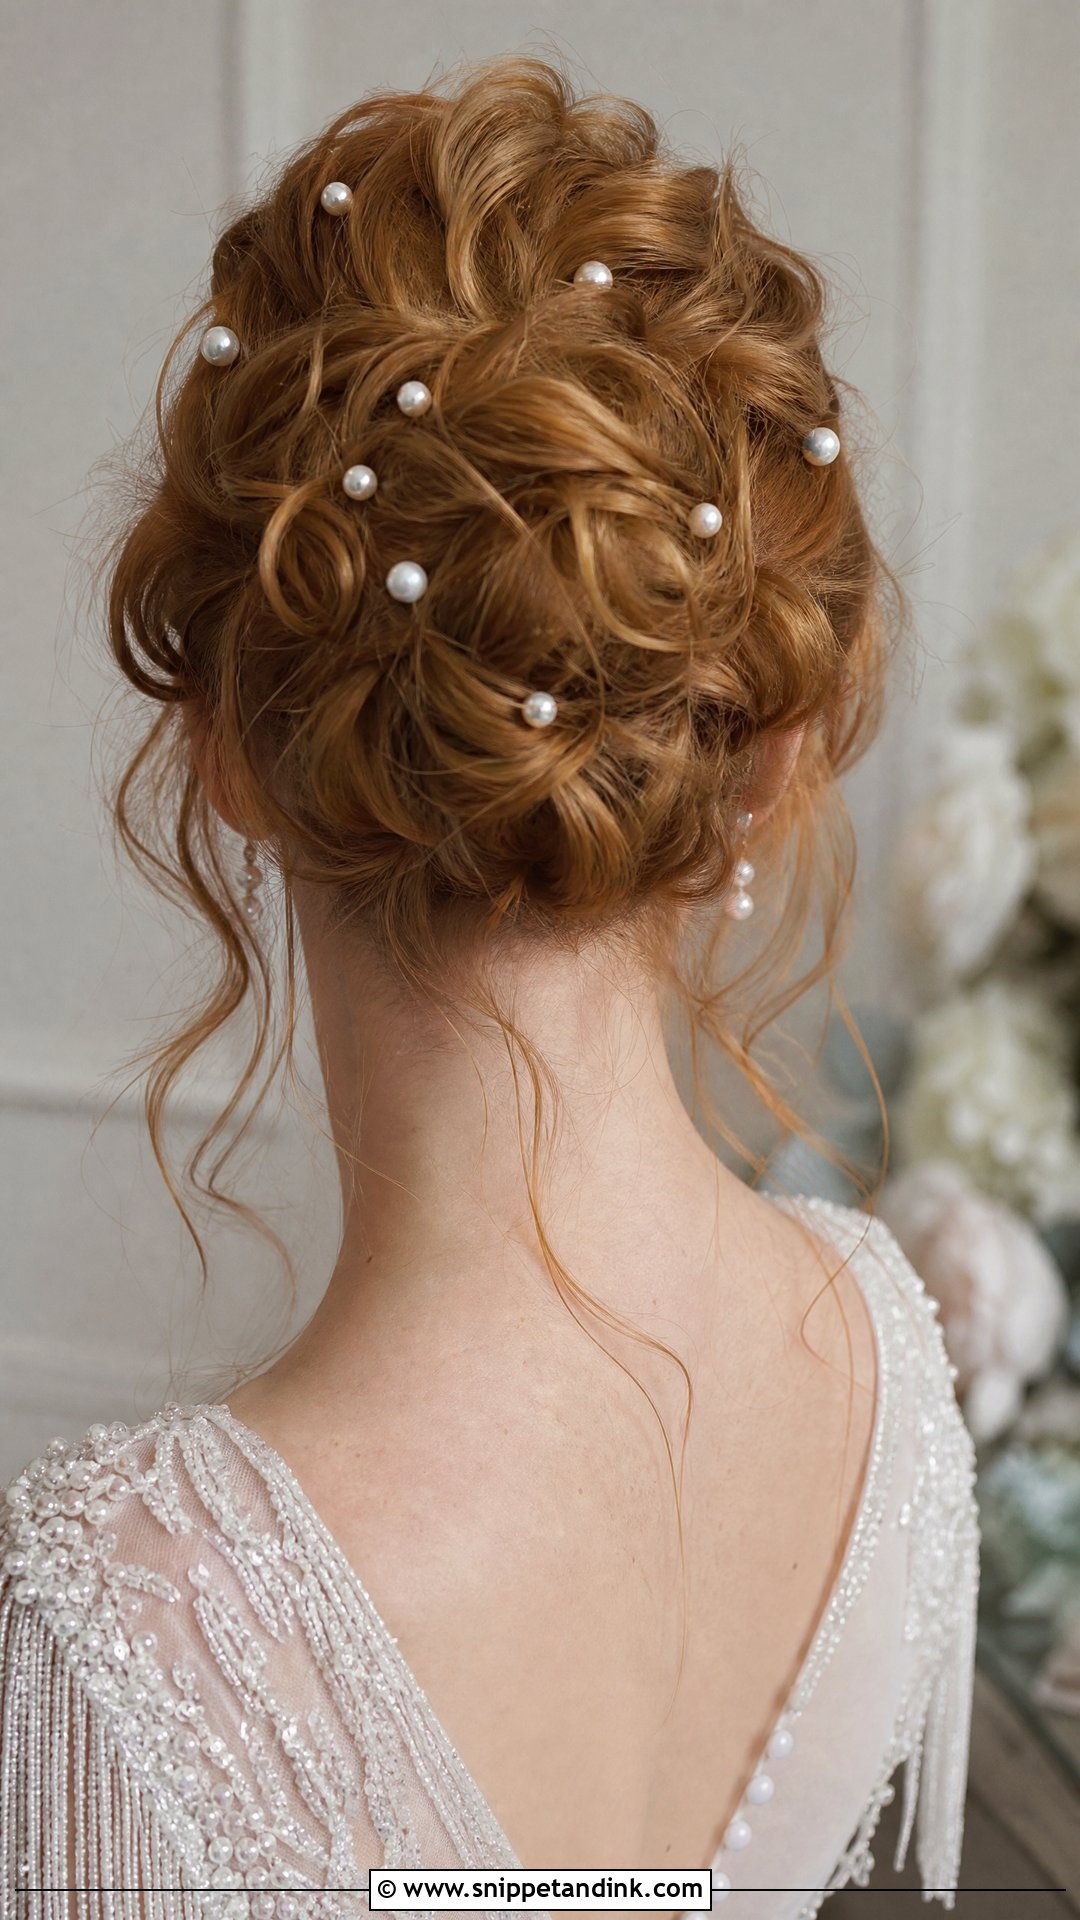
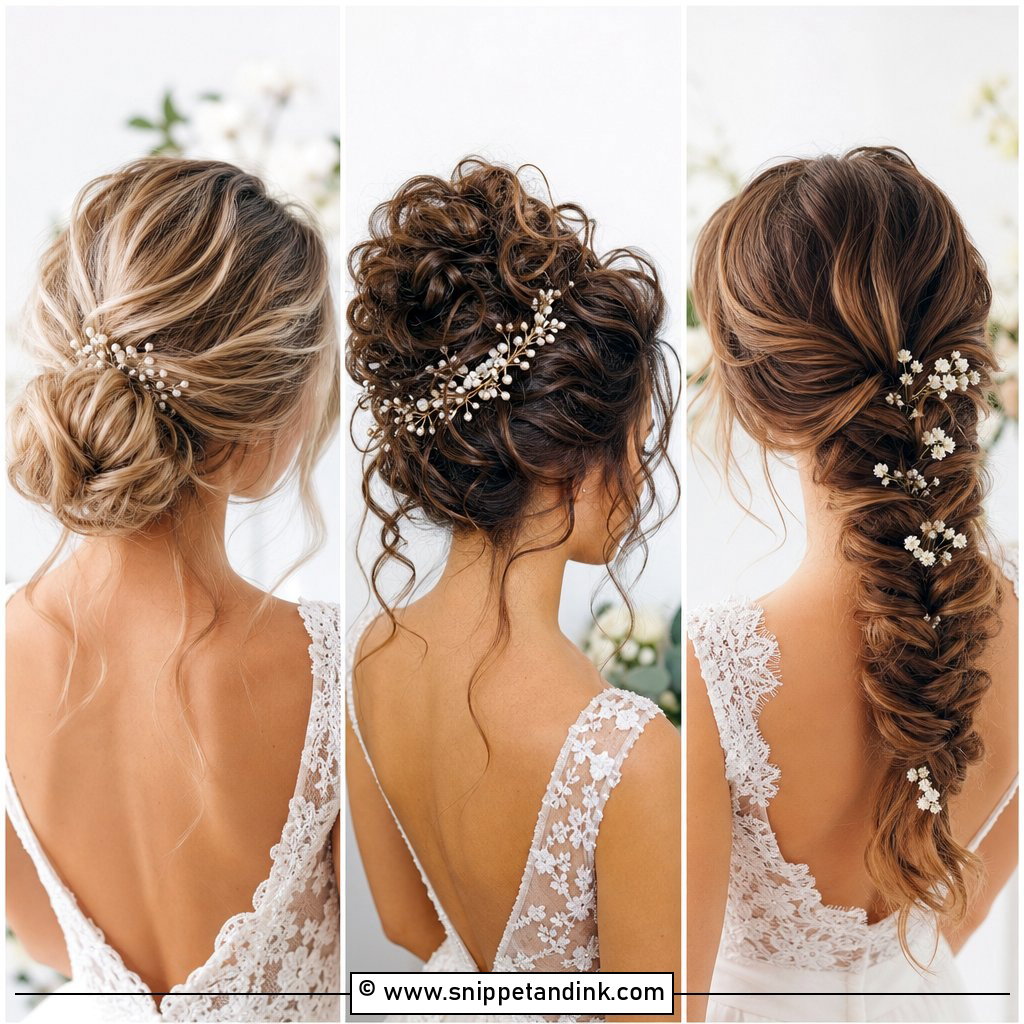
Pearls are the accessory I’d hand to any bride who’s unsure. A few pins scattered unevenly around the bun and into the loose strands read as finished without looking dressed up. You only need a handful; five to seven usually does it. I push them in at a slight angle so they hook under a twist, because pearl pins have smooth shafts and slide out of soft texture more easily than a bobby pin.
6. Boho Messy Bun With Flowers
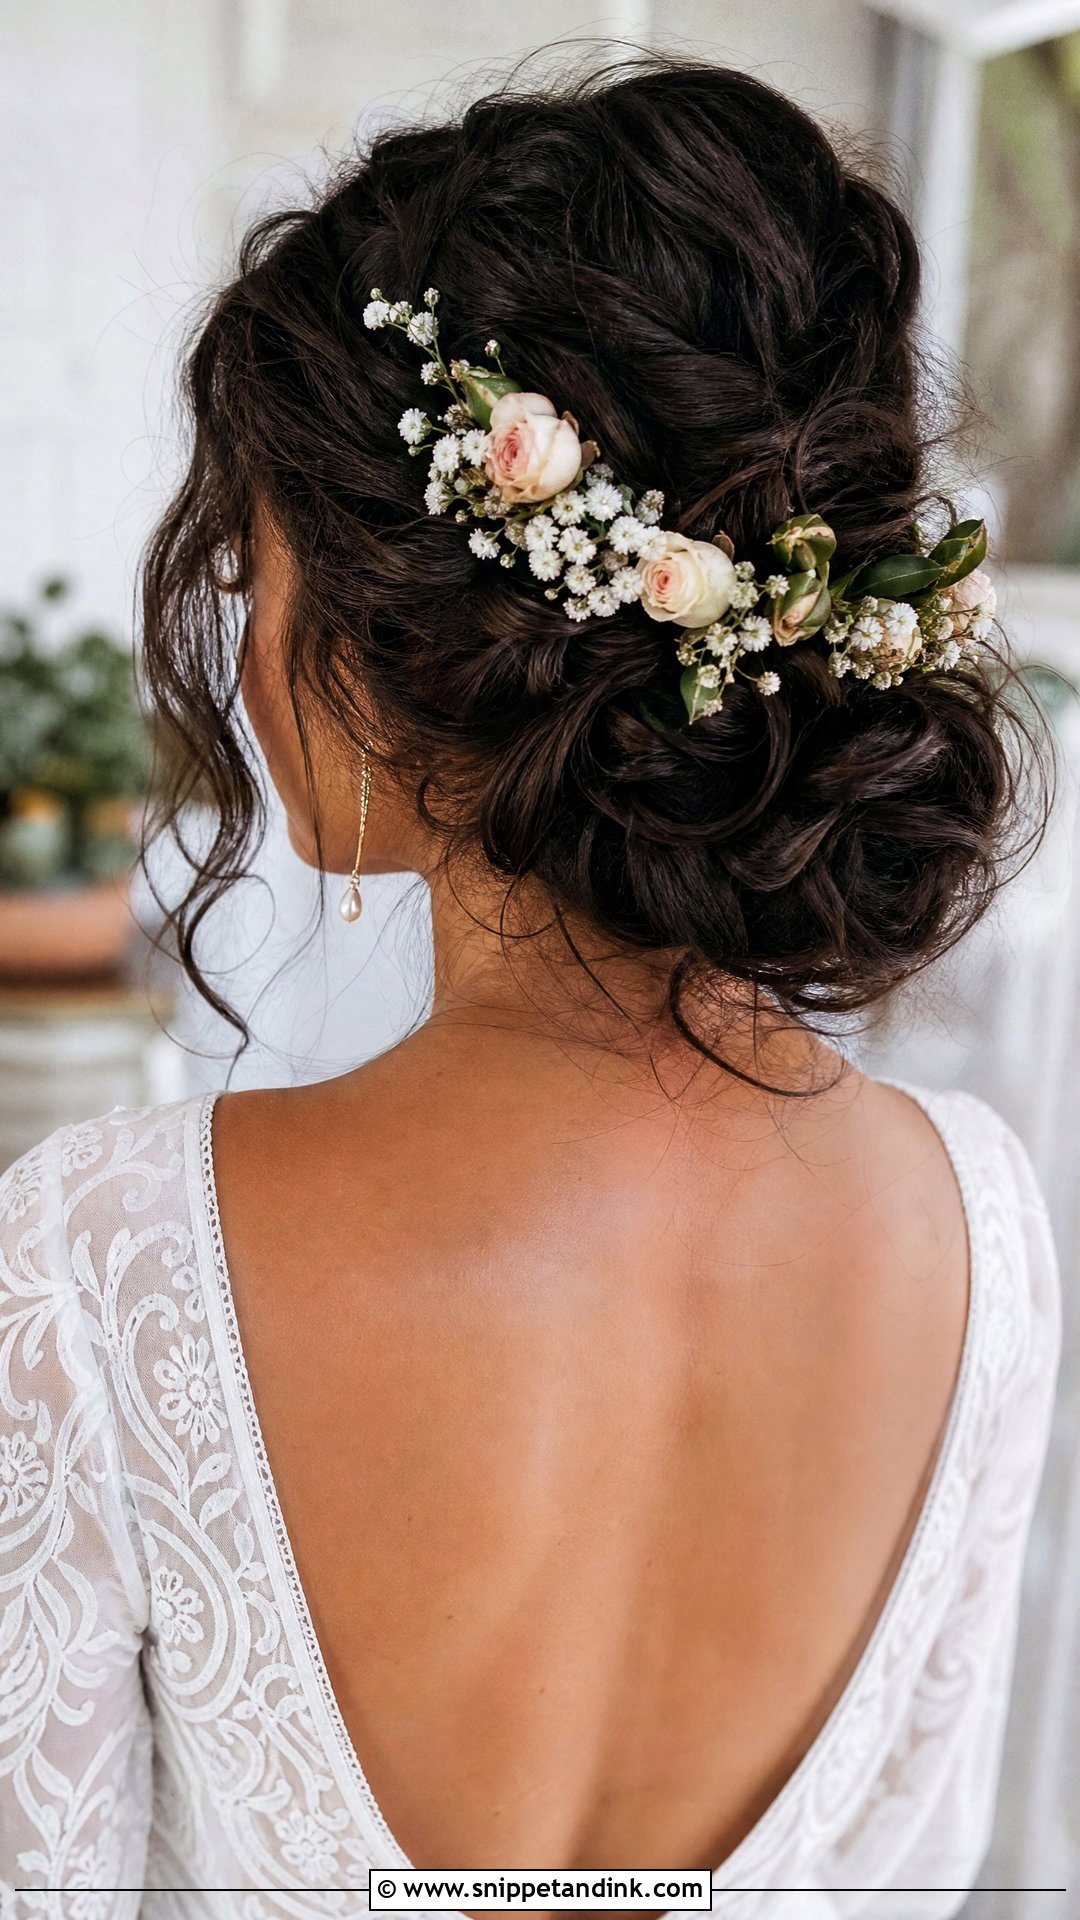
Flowers in a boho bun should look like they landed there. I build the bun first, then work stems in around the base and a couple higher up through the waves, keeping them off center. Baby’s breath, small roses and sprigs of greenery cope with a long day far better than soft garden flowers, which bruise under pins. Dried flowers are worth a thought for a summer wedding, since they don’t wilt at all.
7. Messy Bun With Veil
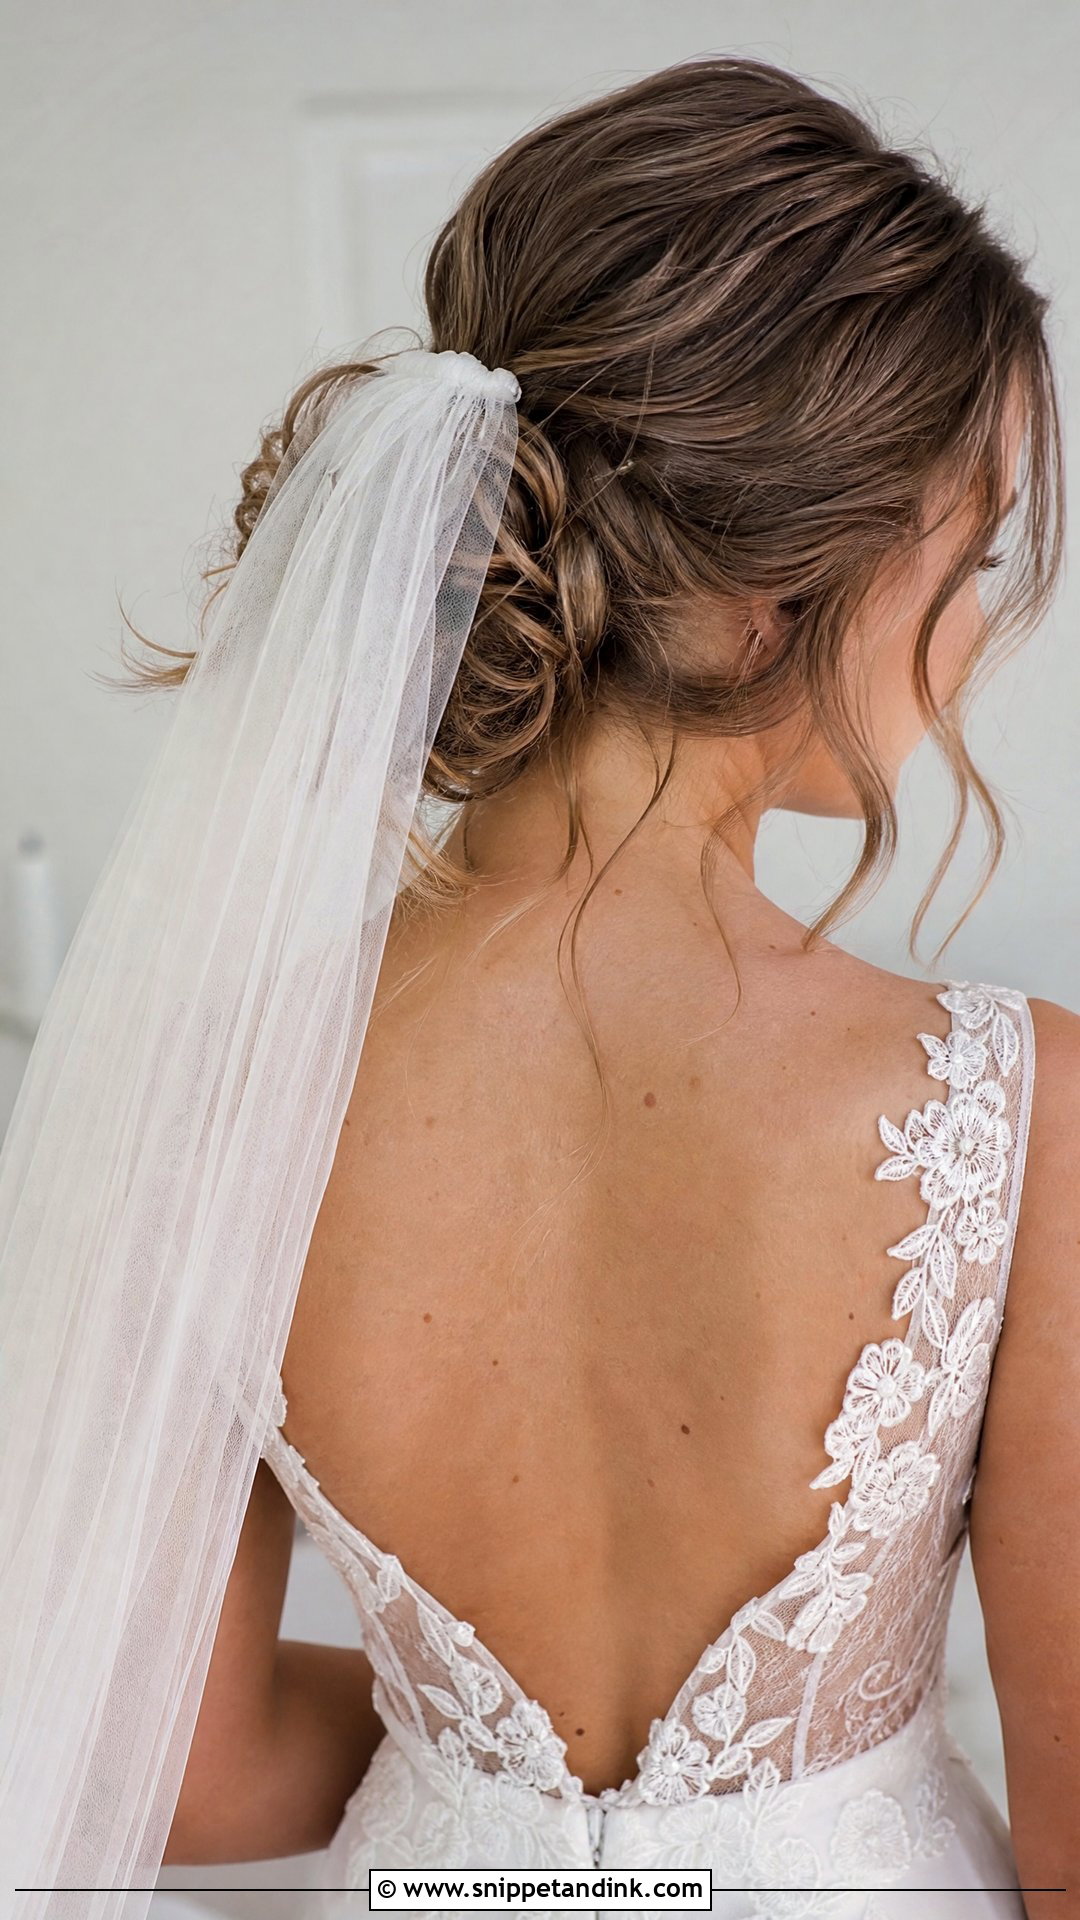
With a veil, the bun has a second job: holding a comb steady for the walk down the aisle. I make a firm, smooth pocket just where the comb will sit, above or below the bun, and keep the messy texture everywhere else. Loose strands at the face still show under sheer tulle. When the veil comes off later, ease the comb out downward so the bun survives intact for the reception.
8. High Messy Bun for Weddings
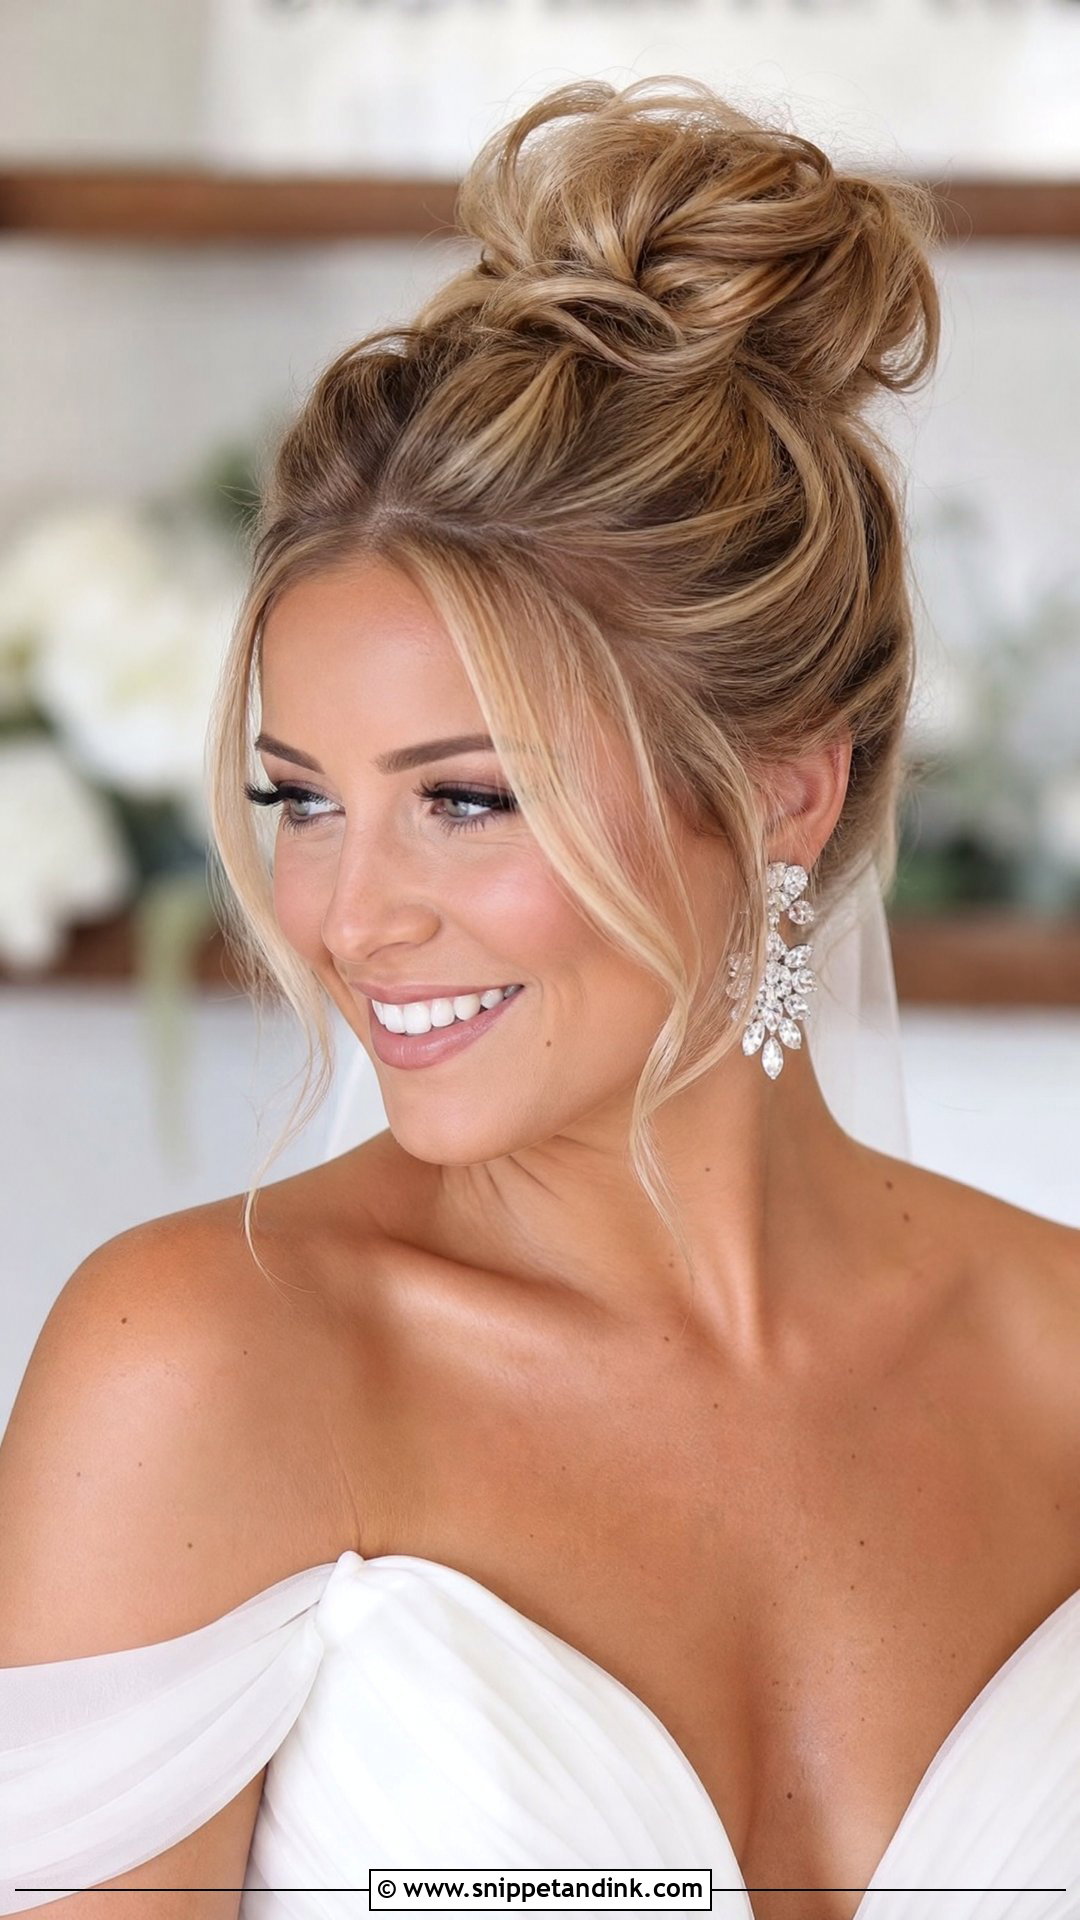
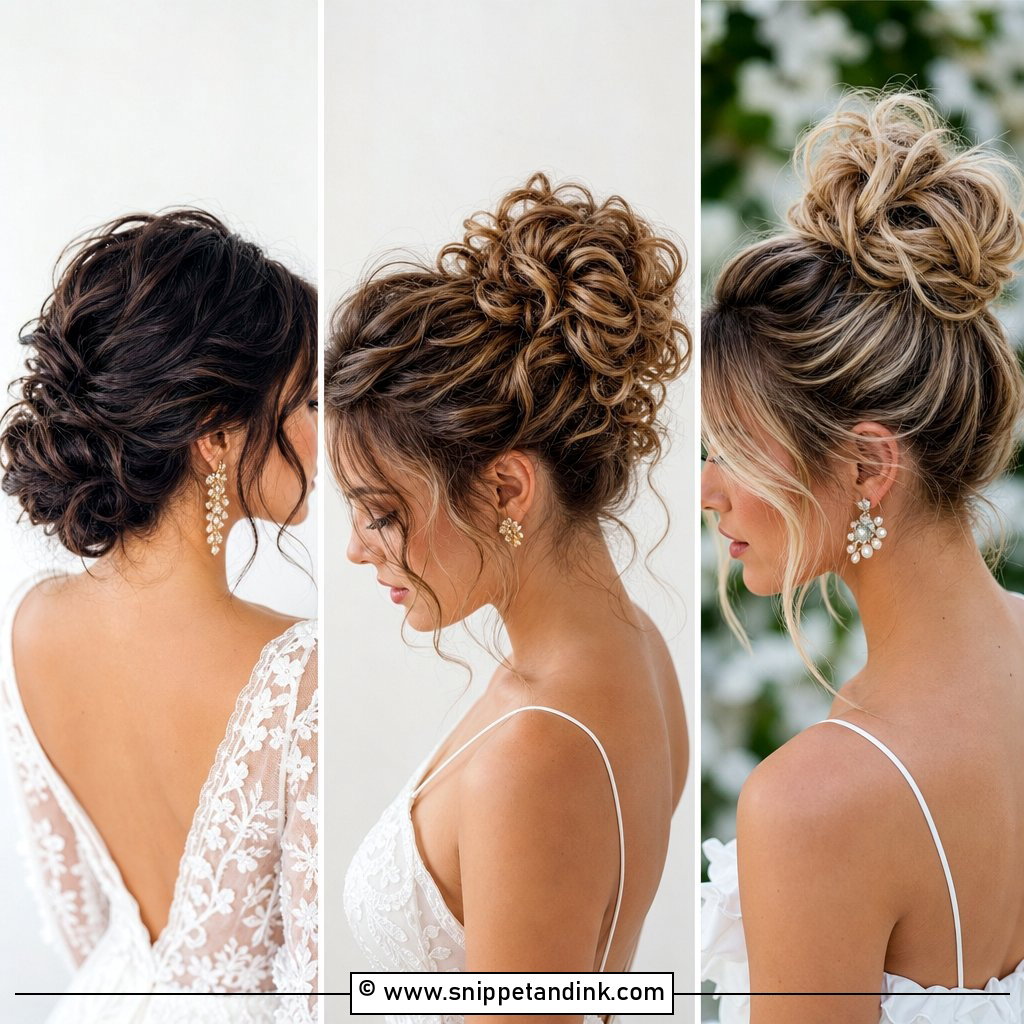
A high bun lifts the whole face and shows off earrings and a bare neckline, which is why it’s popular for summer. I’d think carefully if you’re tall and marrying someone shorter, as the height adds a couple of inches. Building it on a small teased base at the crown keeps it from tipping backward. It also suits brides who hate hair touching their neck in heat.
9. Messy Chignon for Brides
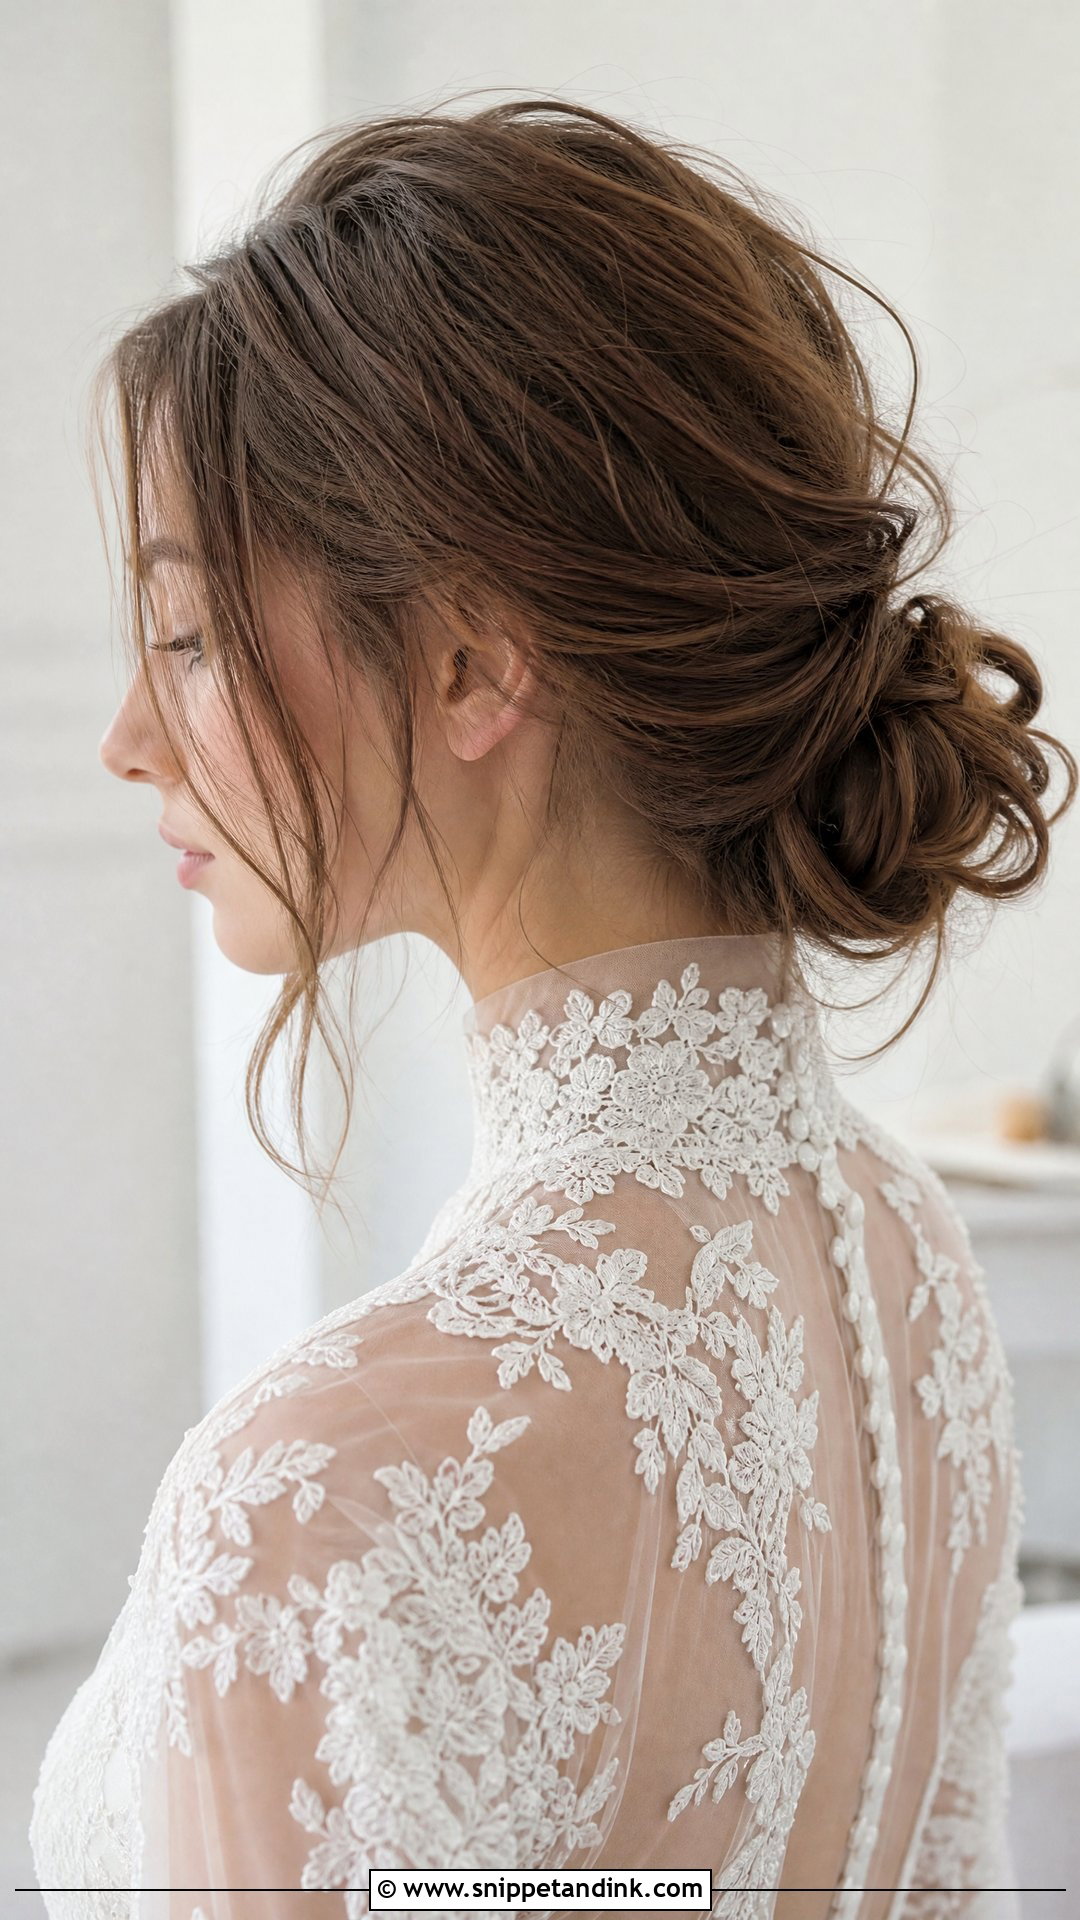
A messy chignon is basically a softer, lower, more rolled version of the classic bun. I twist the hair loosely and tuck it under itself at the nape, securing with pins pushed in toward the center so the roll can’t unwind. Tendrils at the ear stop it looking severe. It sits close to the head, so it suits most necklines and almost any headpiece, and it handles most lengths from shoulder down, though very short layers will slip out at the nape.
10. Messy Bun With Side Braid
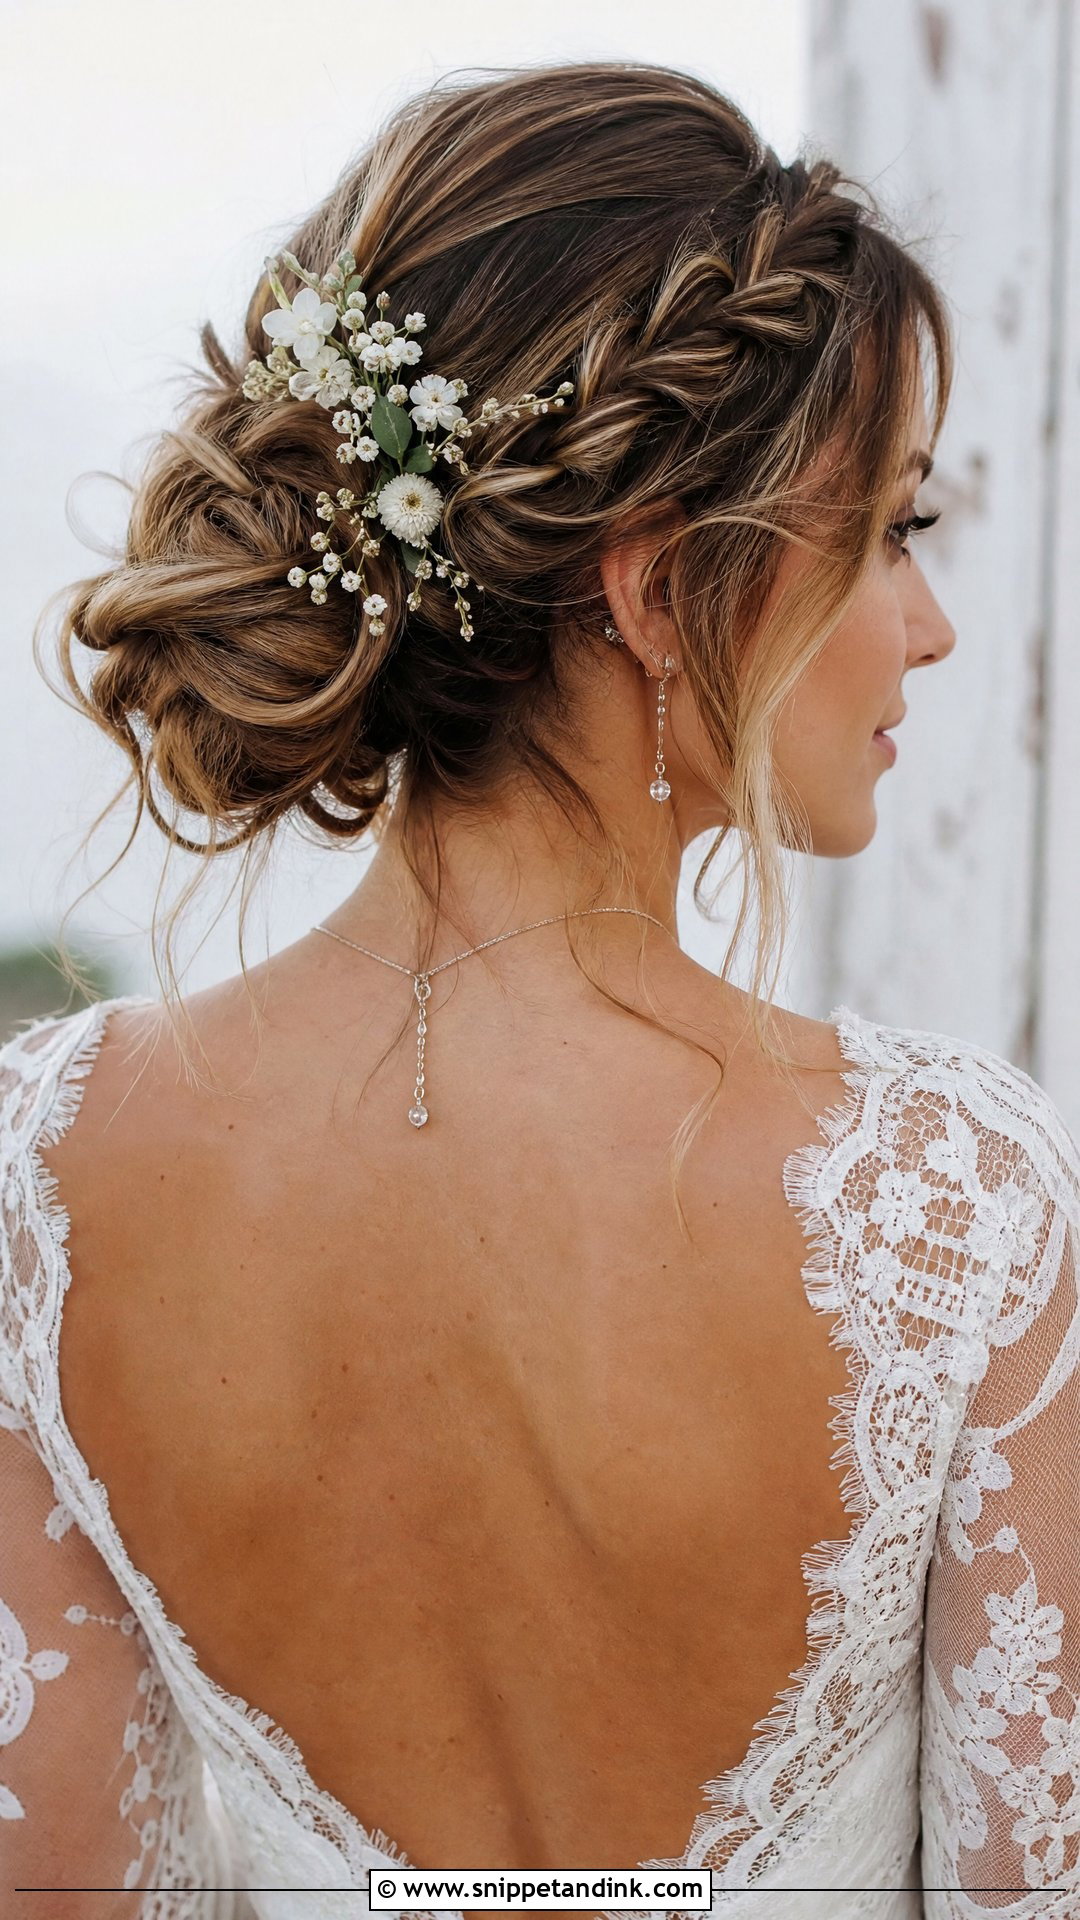
The side braid here starts near one temple and travels back into the bun, so the braid frames the face rather than sitting at the back. Placement matters: I start it on the side that faces your guests during the vows, because that’s the side your ceremony photos see. Pull the braid apart gently after pinning, not before. Tiny flowers can sit along it for an outdoor wedding, though a plain braid is just as pretty.
11. Textured Messy Bun for Fine Hair
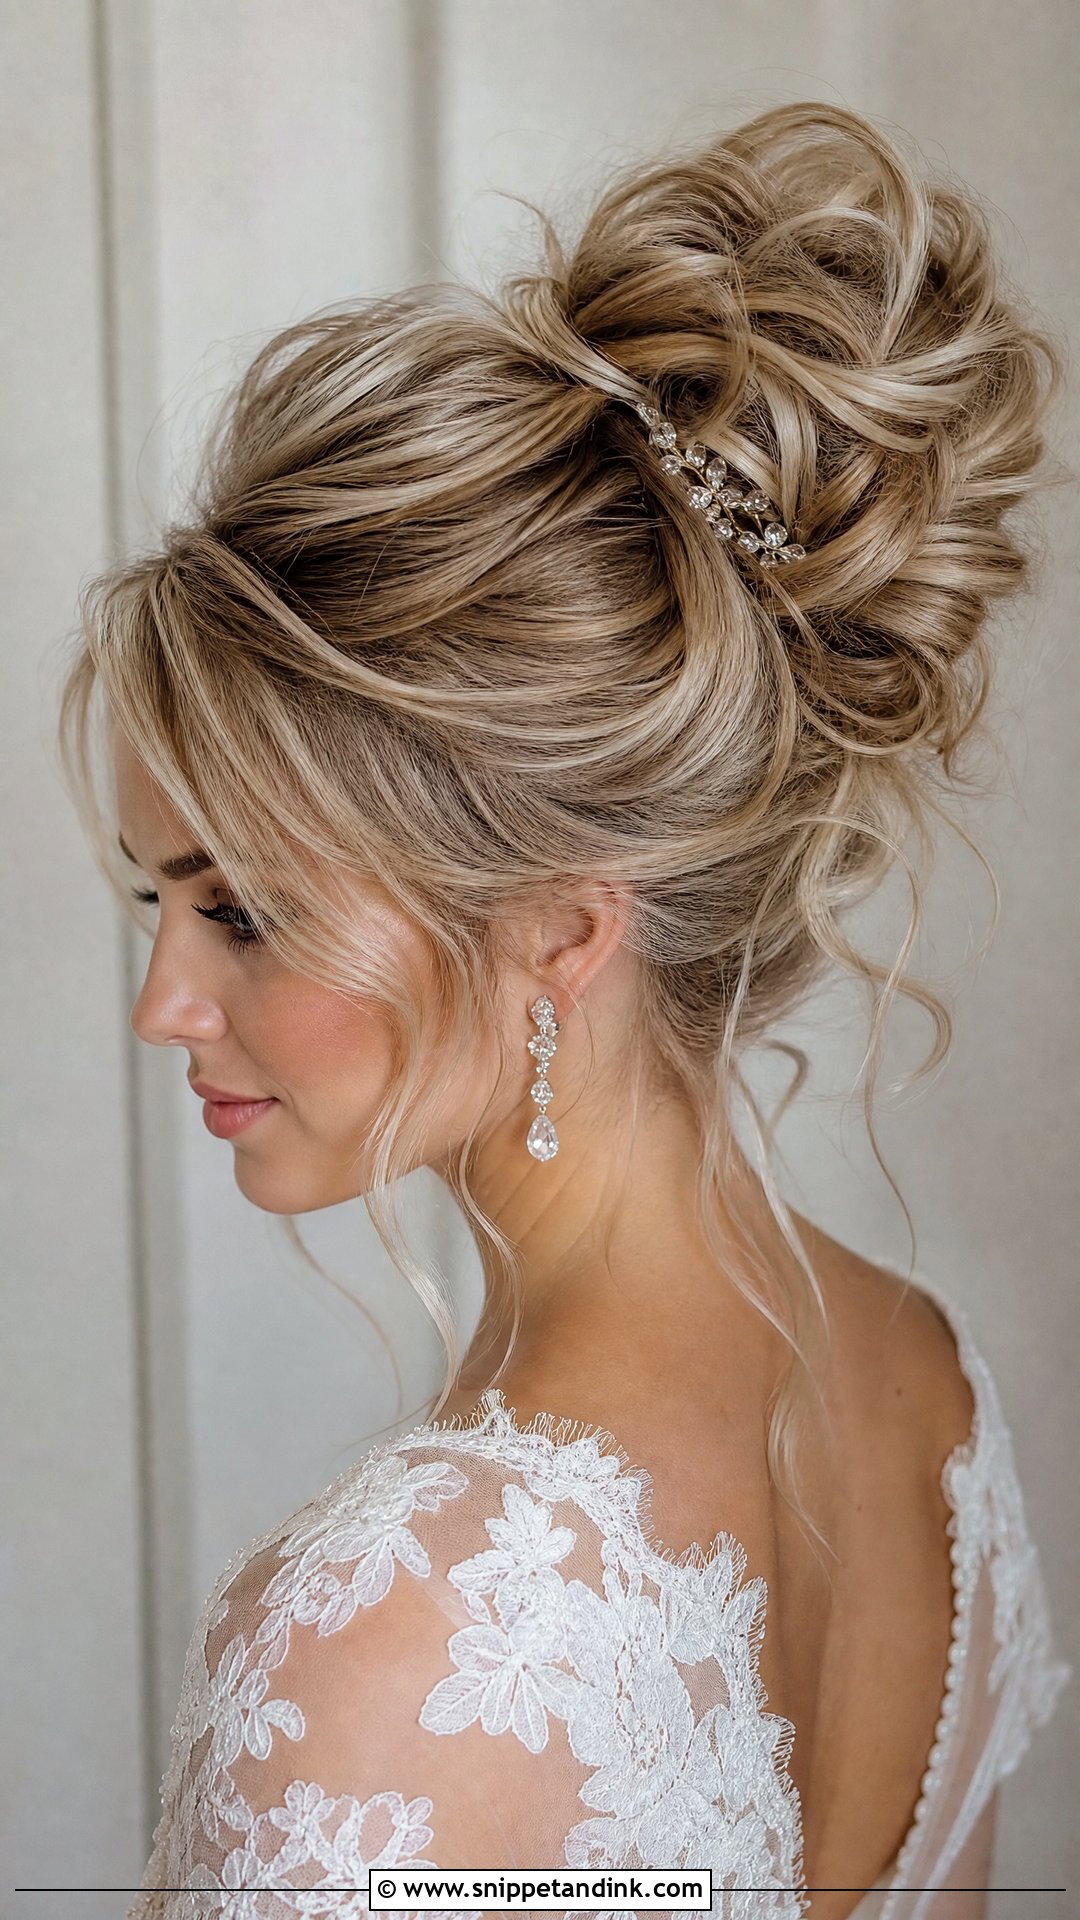
Fine hair is the hair I plan most carefully for. It looks full for the first hour and then flattens, so I prep with a volumizing mousse at the roots, curl everything, and tease the underside of each section rather than the top. A small padding or a clip-in weft inside the bun gives bulk that teasing alone can’t. Then I pull pieces outward to make it look thicker. Done this way it holds up just as well as a thicker bun.
12. Curly Messy Bun for Natural Hair
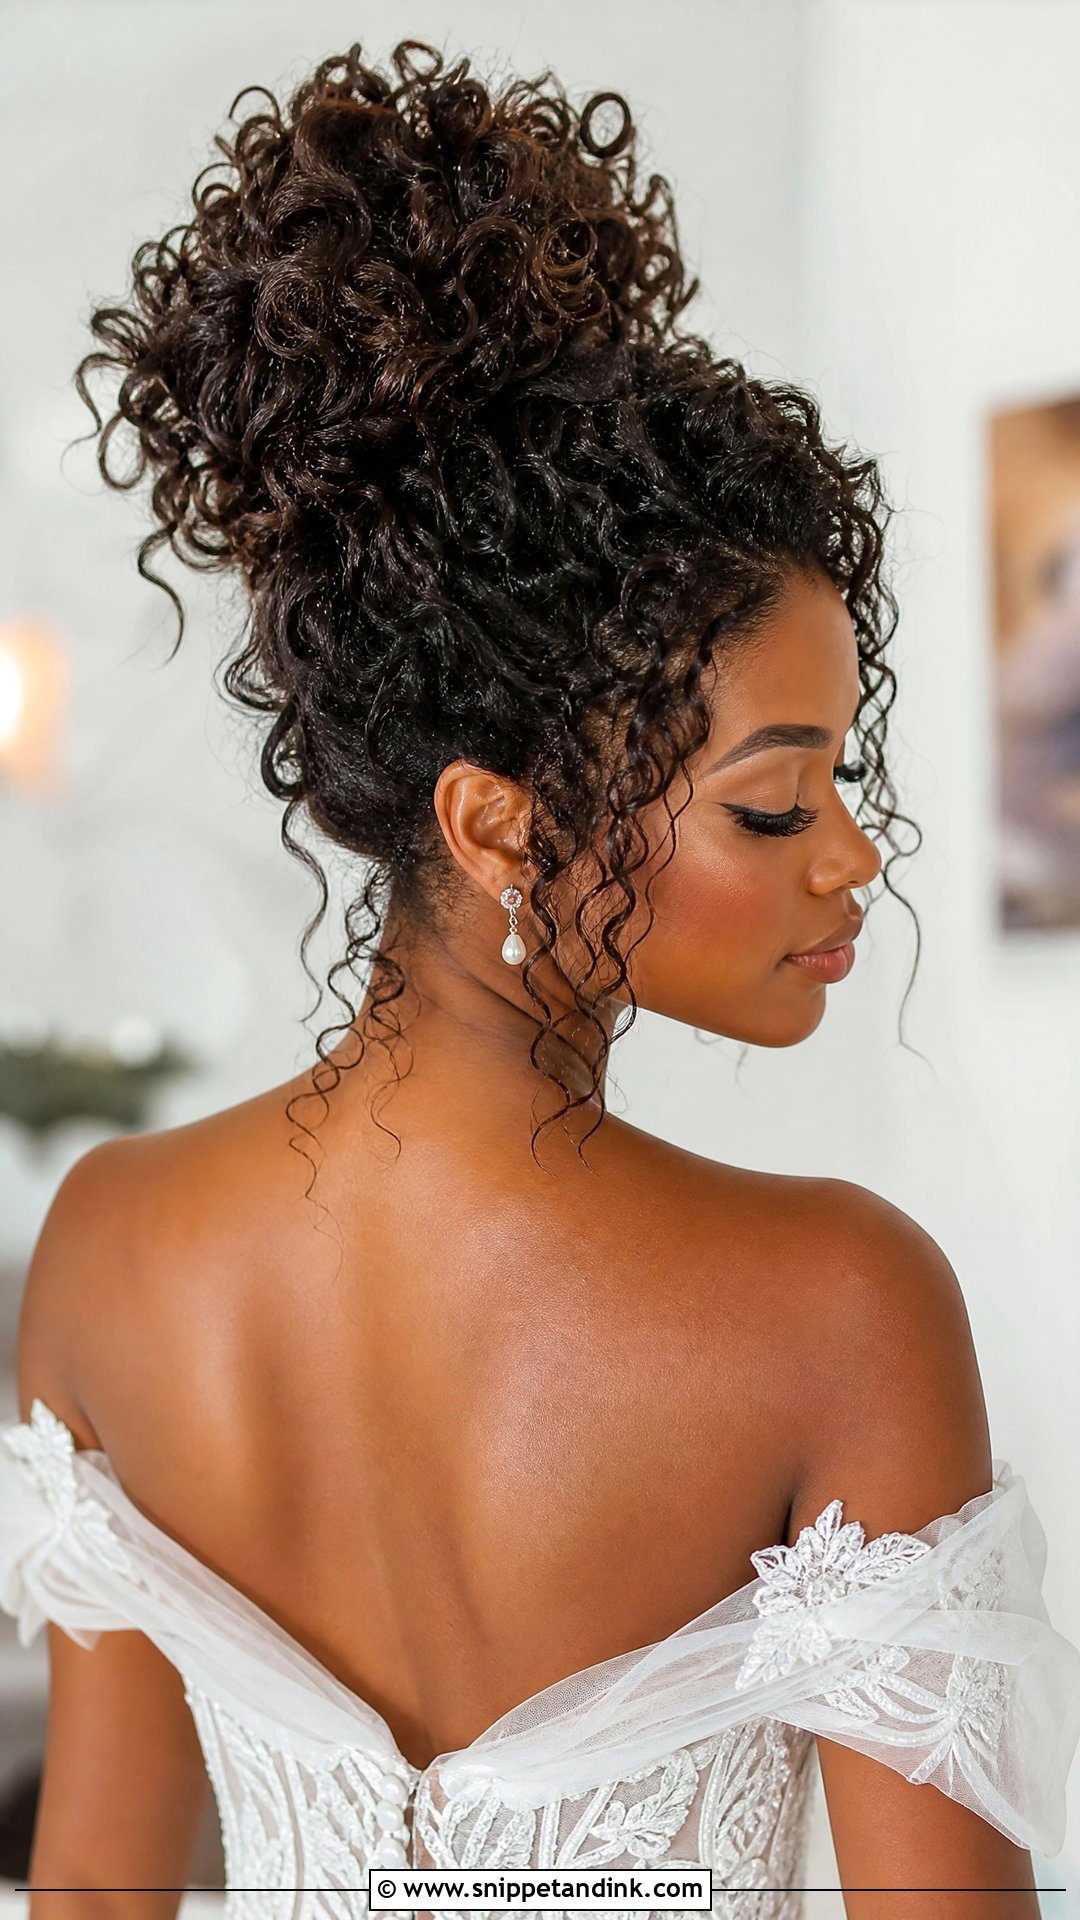
Natural curls make some of the fullest buns I do, and they need very little teasing. I gather them toward the back with a soft brush or fingers, never a fine comb, then secure them with large U-pins that sit inside the curl clusters. Coils from 3c to 4c hold pins well, so the bun stays put; the risk is shrinkage making the bun smaller than you pictured at your trial. Let a few curls fall at the temple. Pearl pins or small flowers show up nicely against dark curls.
13. Messy Bun With Headband
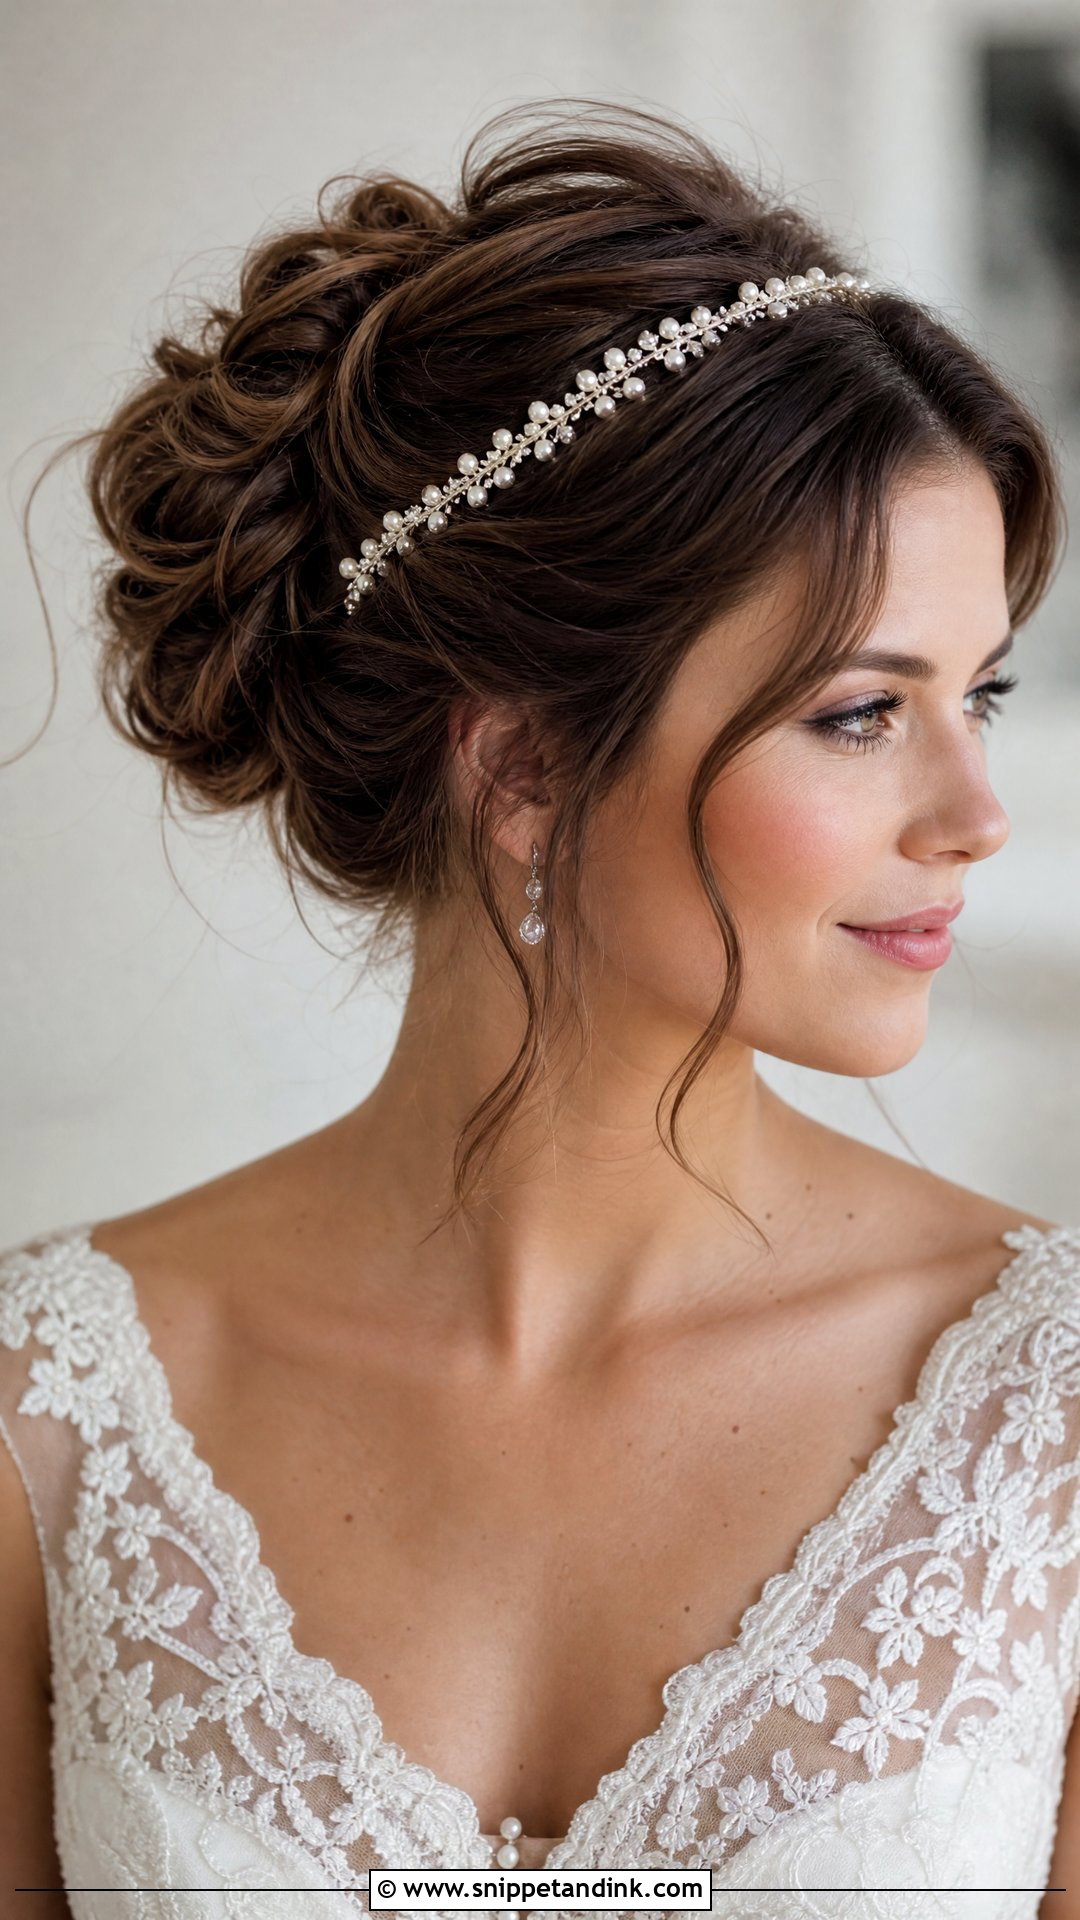
A delicate headband does more than decorate: it holds back the short layers that would otherwise fall forward. I put the bun in first and slide the band on after, pinning it at both ends behind the ears so it can’t creep backward. A metal band can press after a few hours, so wear it for an afternoon at home before the wedding. Choose a band that echoes your gown’s beading or lace, rather than one that adds a new detail.
14. Twisted Messy Bun
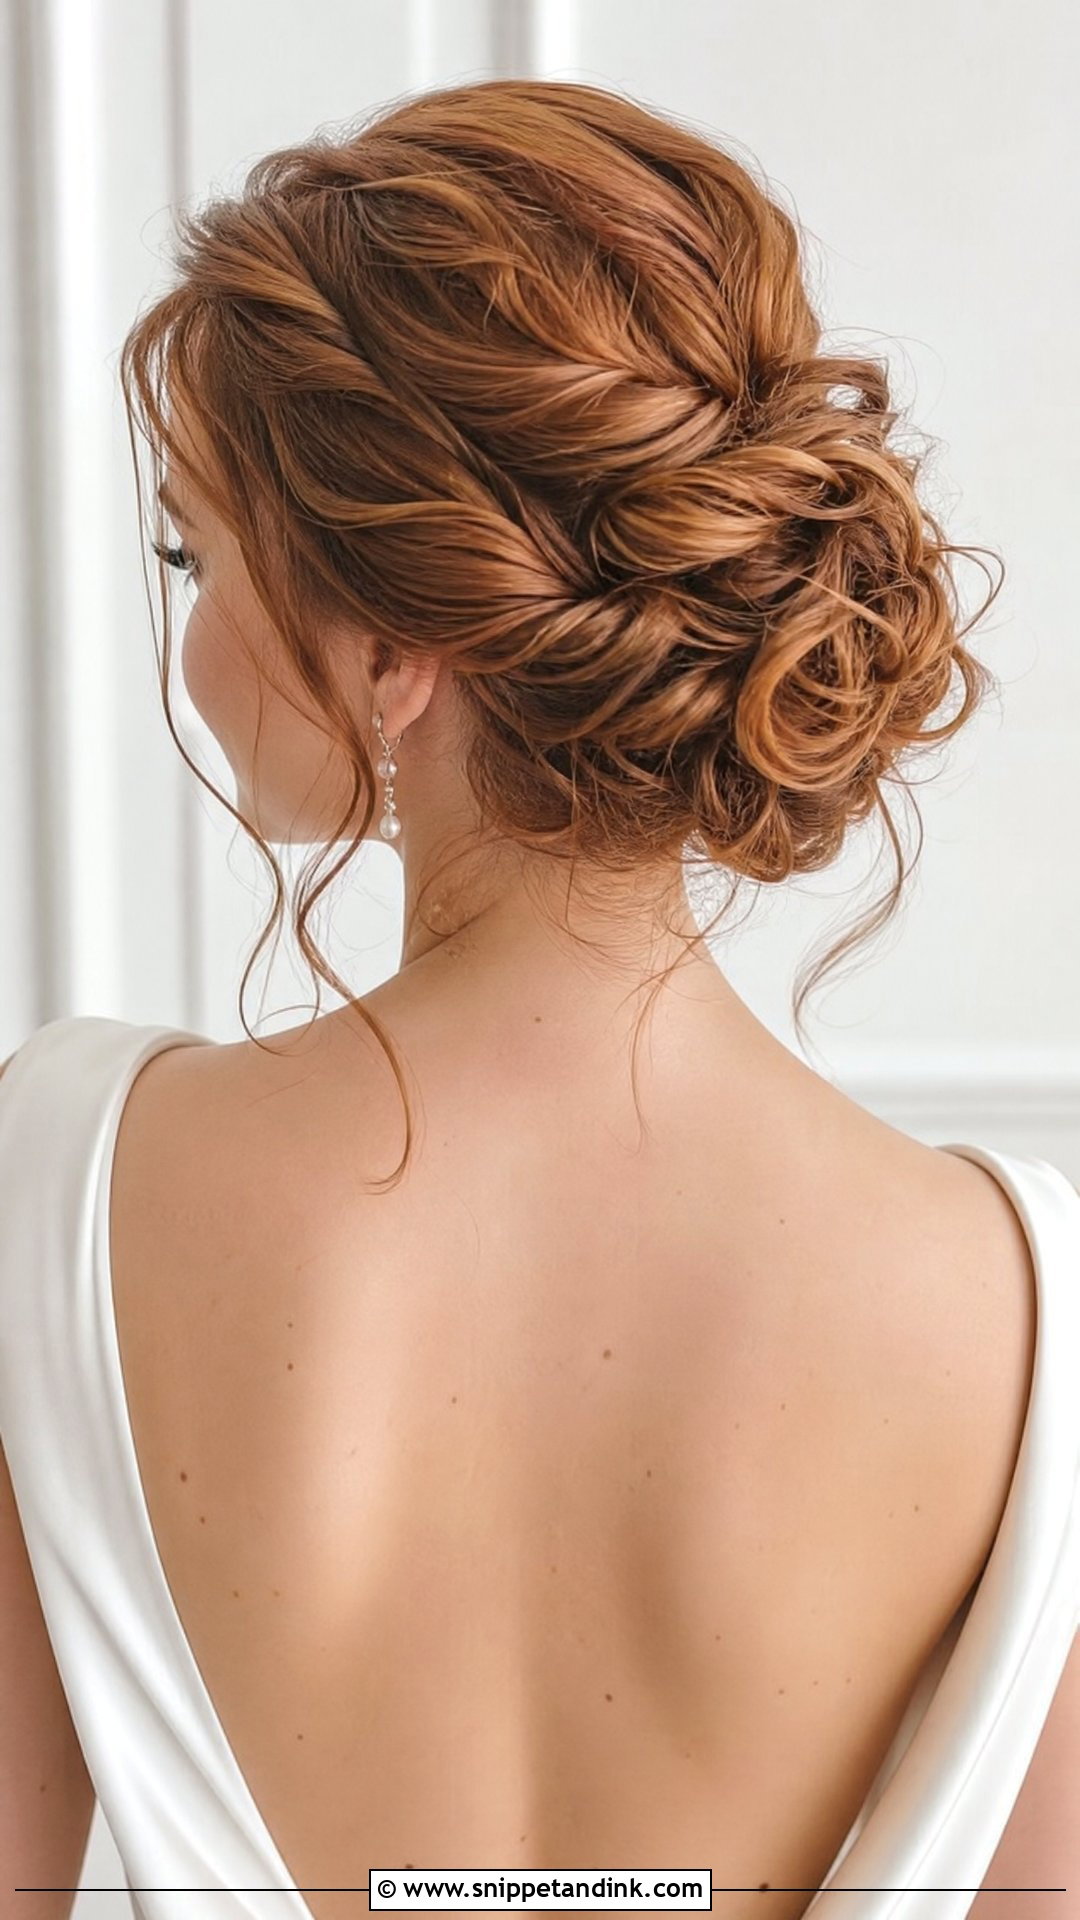
Twists hold better than you’d expect. Each section gets twisted loosely and pinned around the base of the bun, so the bun is really a cluster of small anchored pieces rather than one knot. I prefer this for heavy hair, as the weight is spread across many pins instead of one point. Leave two or three strands out at the end. A twisted bun looks good from every angle because there’s no single front to it.
15. Messy Bun With Tendrils
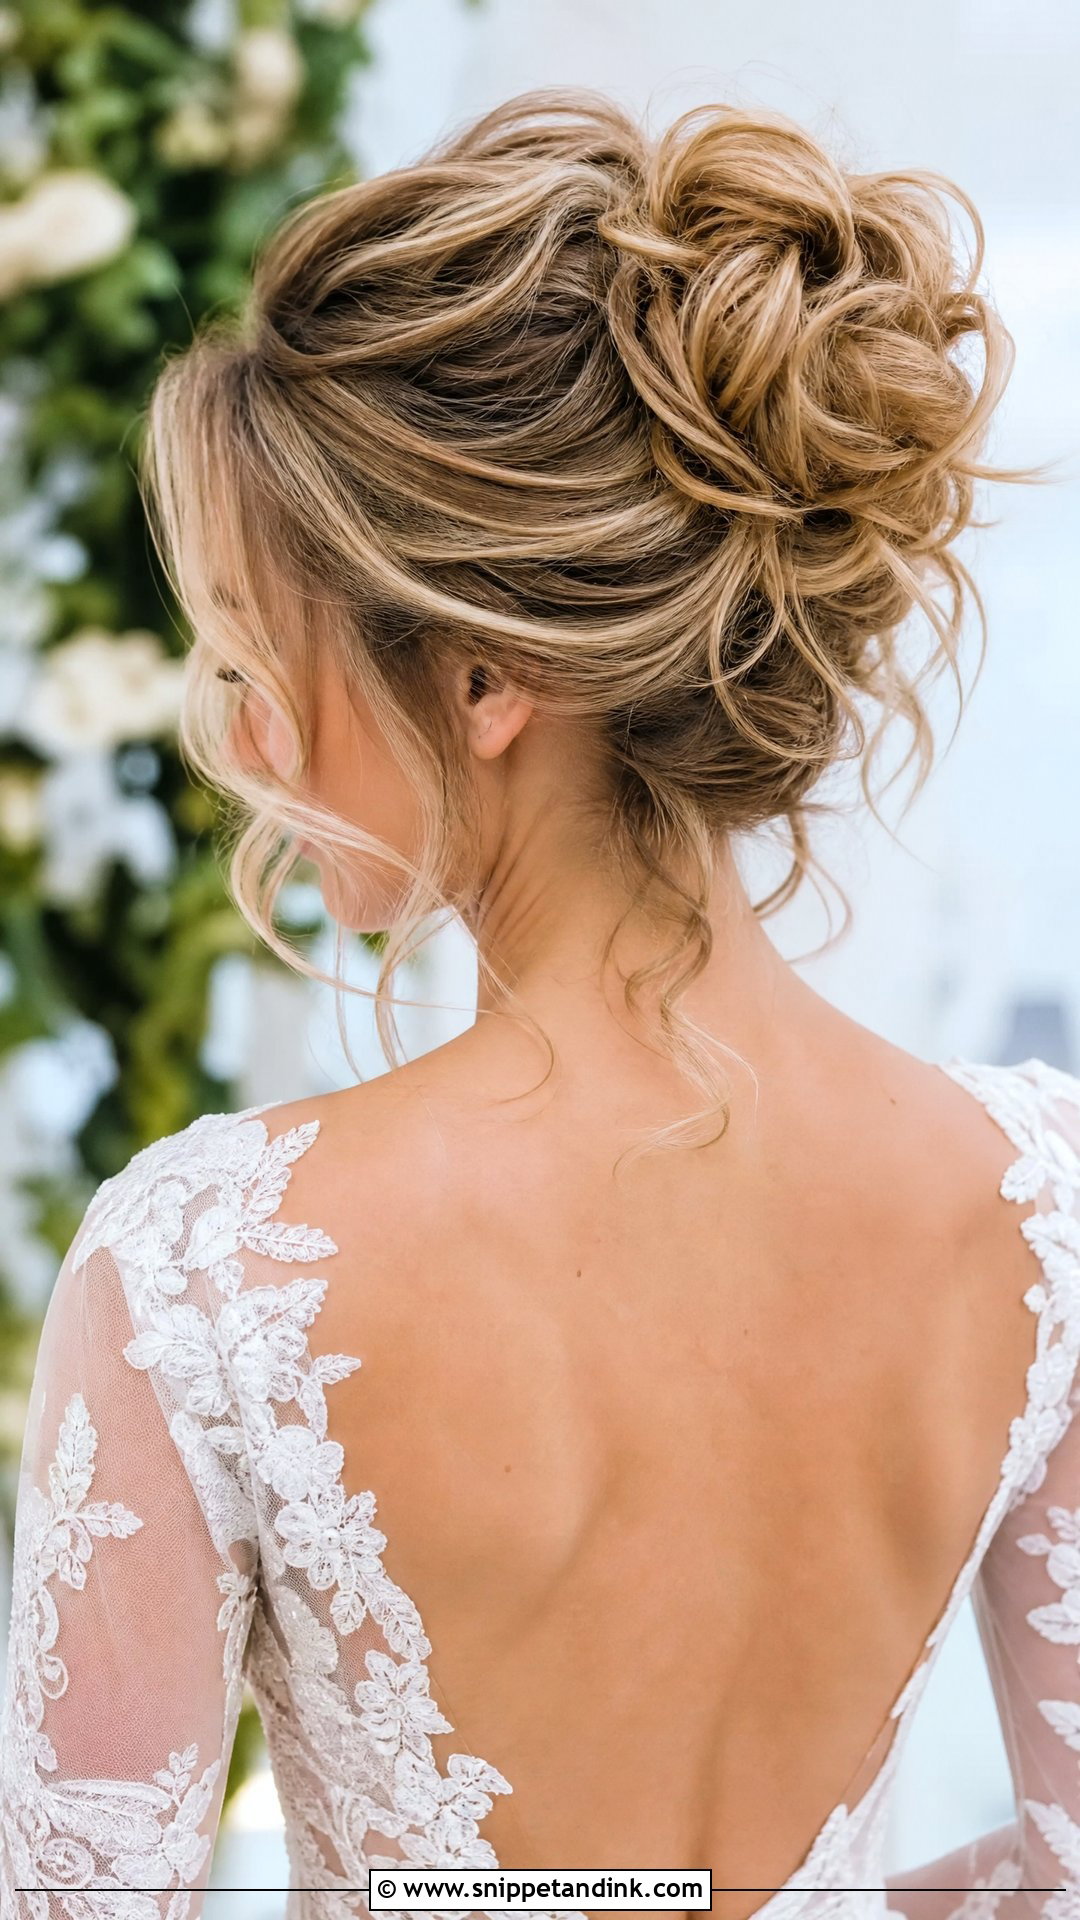
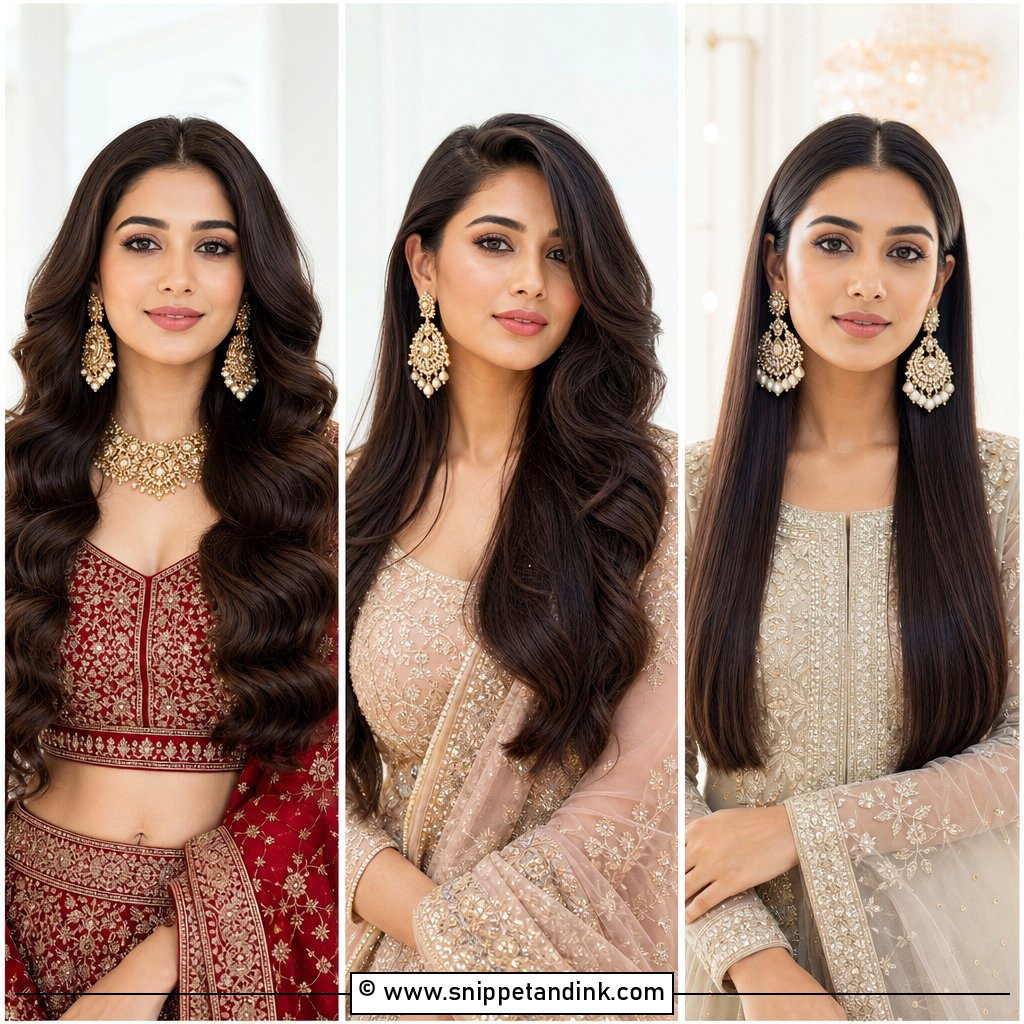
Tendrils at the neck are a different job from those at the face. At the nape I pick two or three fine pieces, curl them small, and leave them a little longer than looks right, because curls shrink and lift as they cool. They move in a breeze, which outdoor ceremony photos love. Skip them if your hair goes frizzy at the hairline in humidity; they’ll be the first thing to go.
16. Half-Up Messy Bun
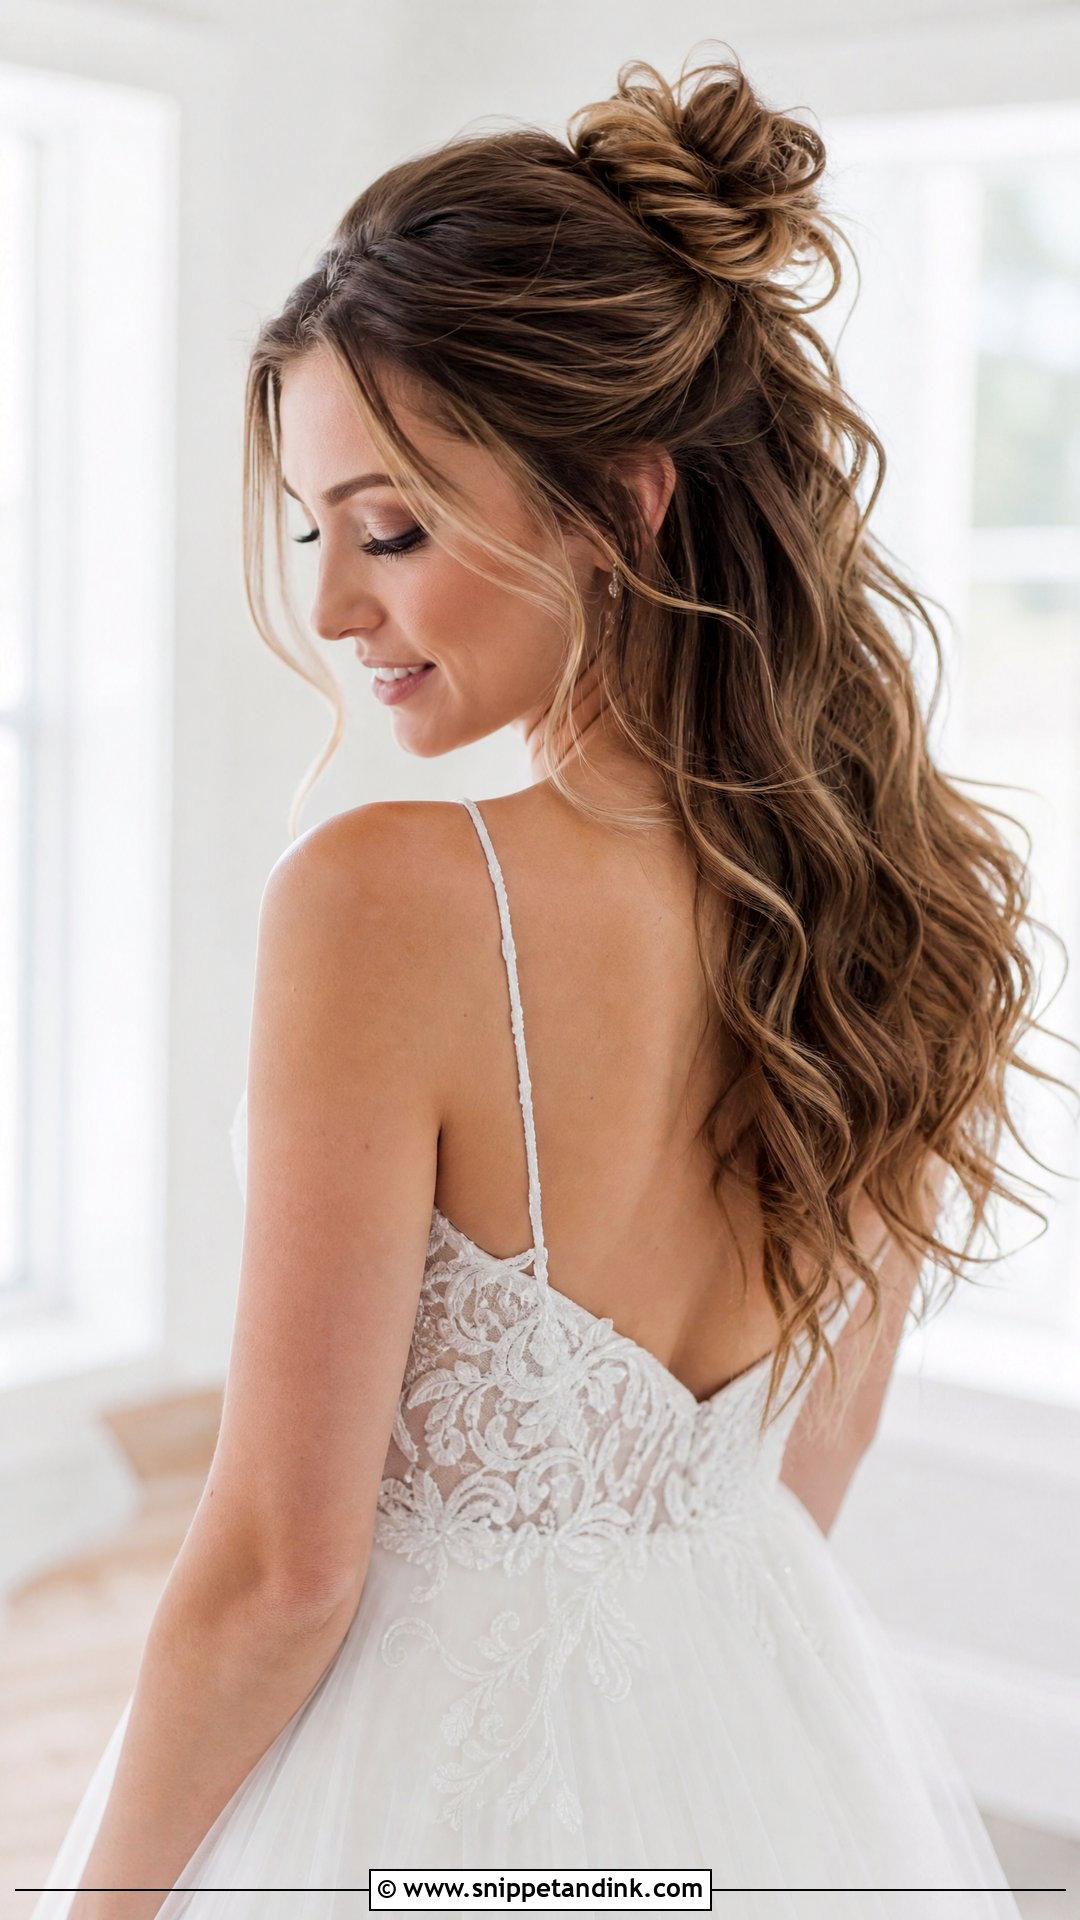
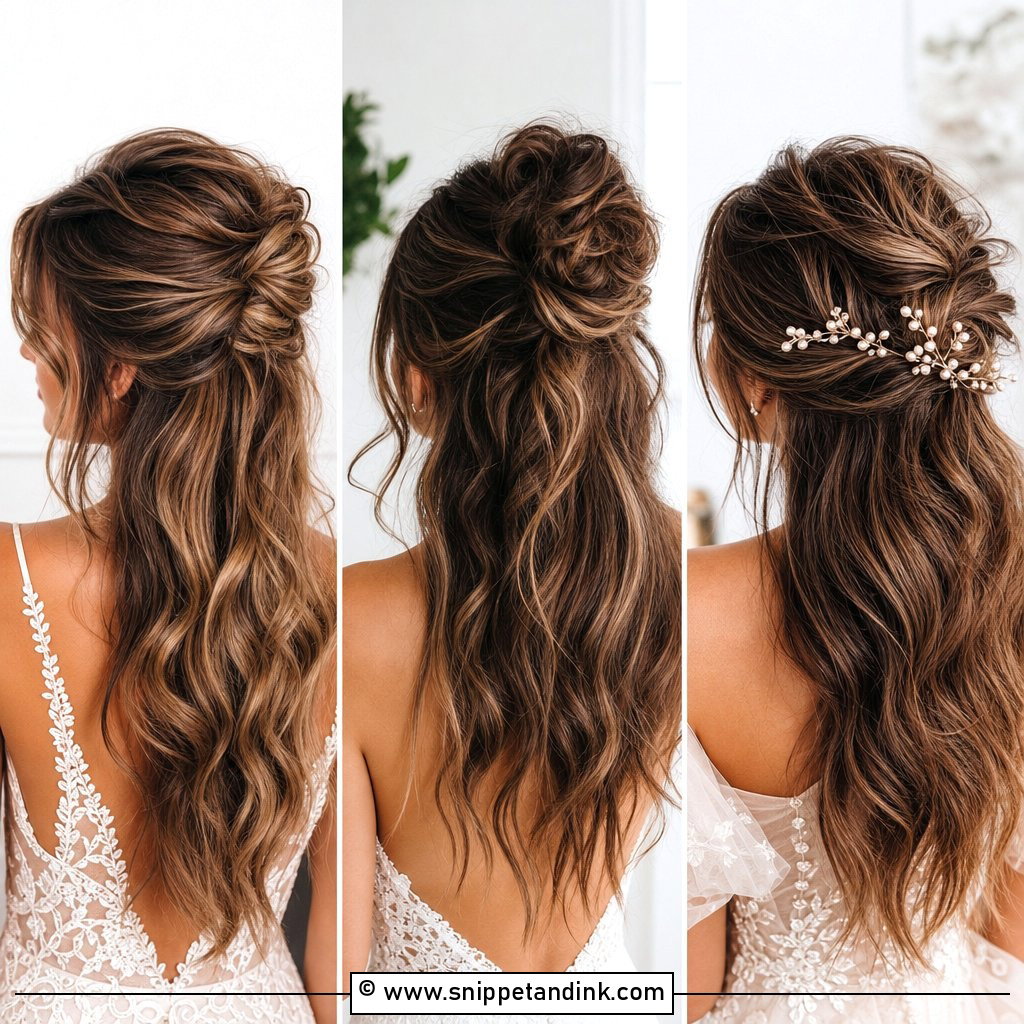
Half up with a bun on top gives you an updo and loose waves at the same time. I take a small section from the crown, twist it into a loose knot, and curl everything underneath so the two parts look like one style. Very fine hair can look thin below the bun, which a weft or two fixes. It works for the bride who isn’t ready to commit to a full updo, and a veil comb slides neatly beneath the knot.
17. Messy Bun With Crystal Hairpins
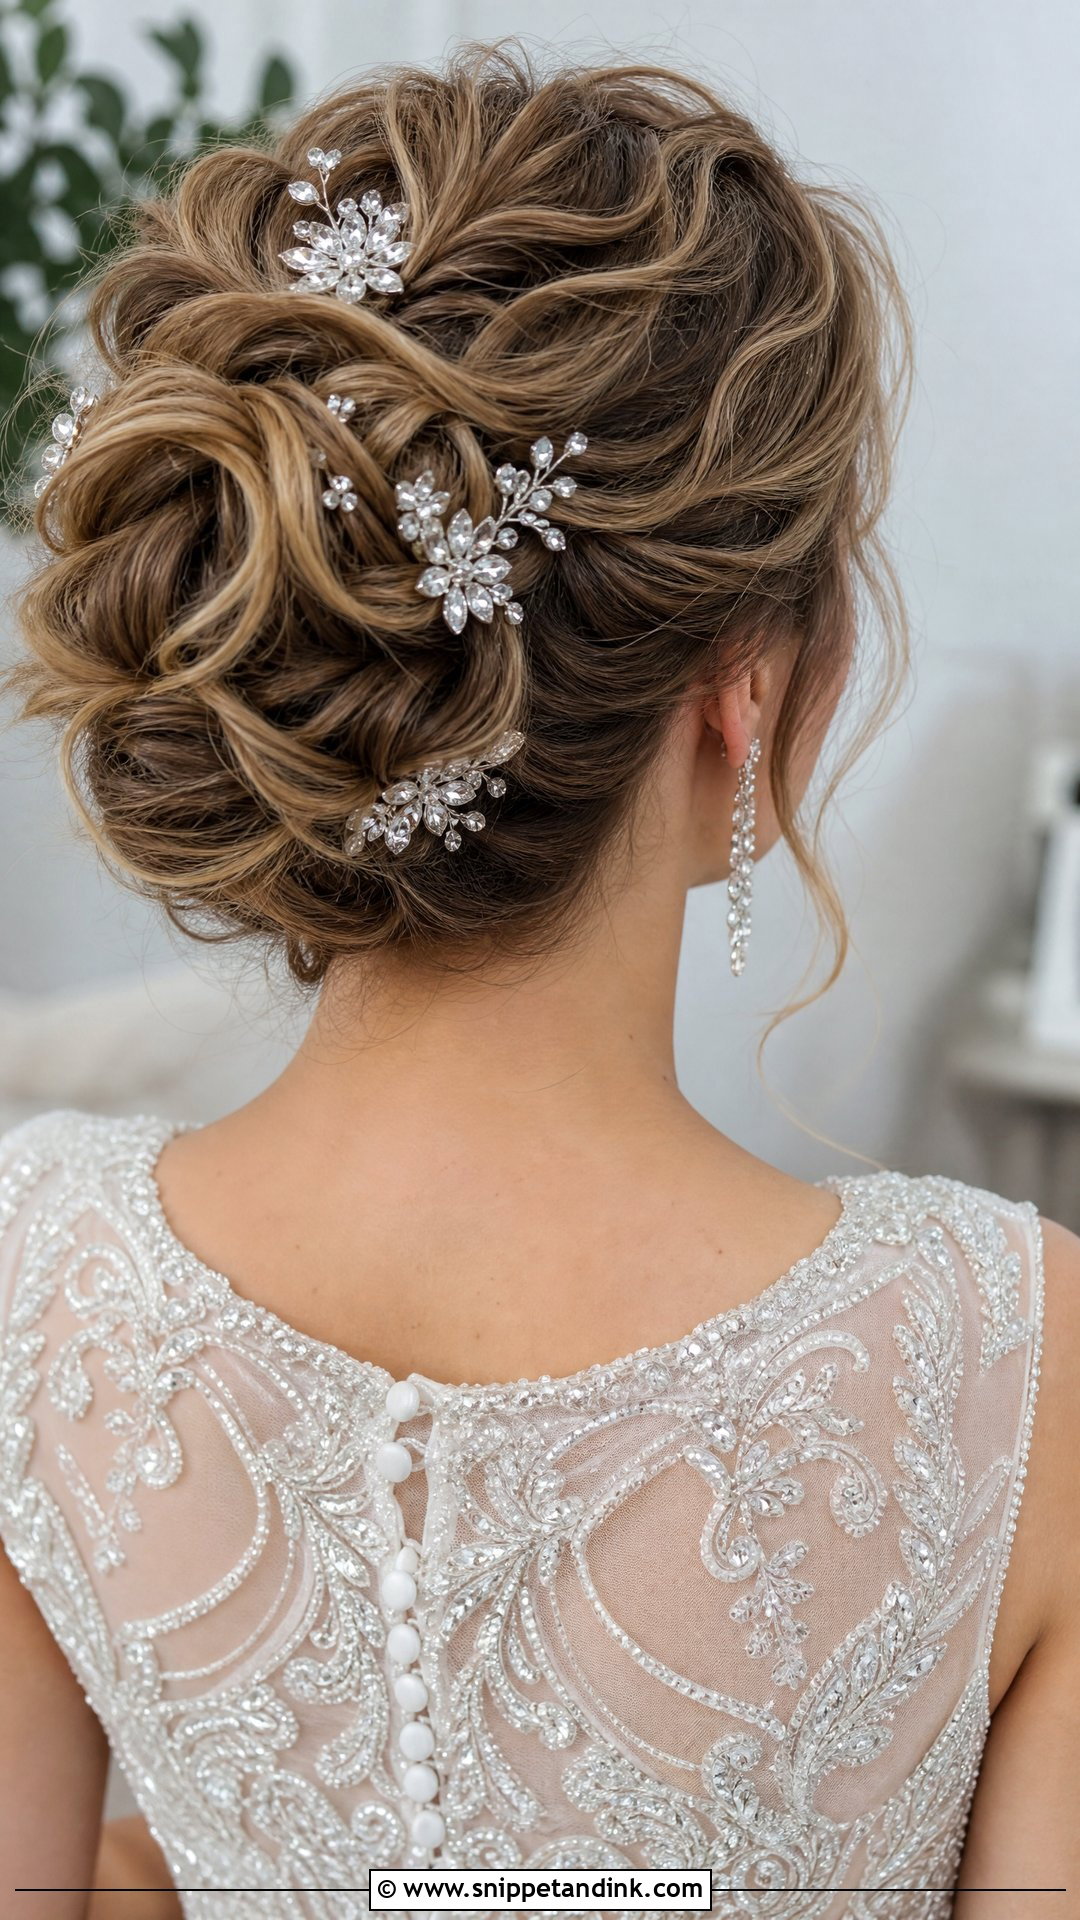
Sparkling crystal hairpins work best when they’re used in small numbers. I scatter them through the knot and a couple near the face strands, angled so the stones face outward rather than up. A tight cluster reads as more dramatic; spreading them out looks gentler. Under evening lighting crystals throw sparkle that pearls don’t, so they suit a reception that runs late. Keep the earrings simpler if the pins are bold.
18. Messy Bun for Long Hair
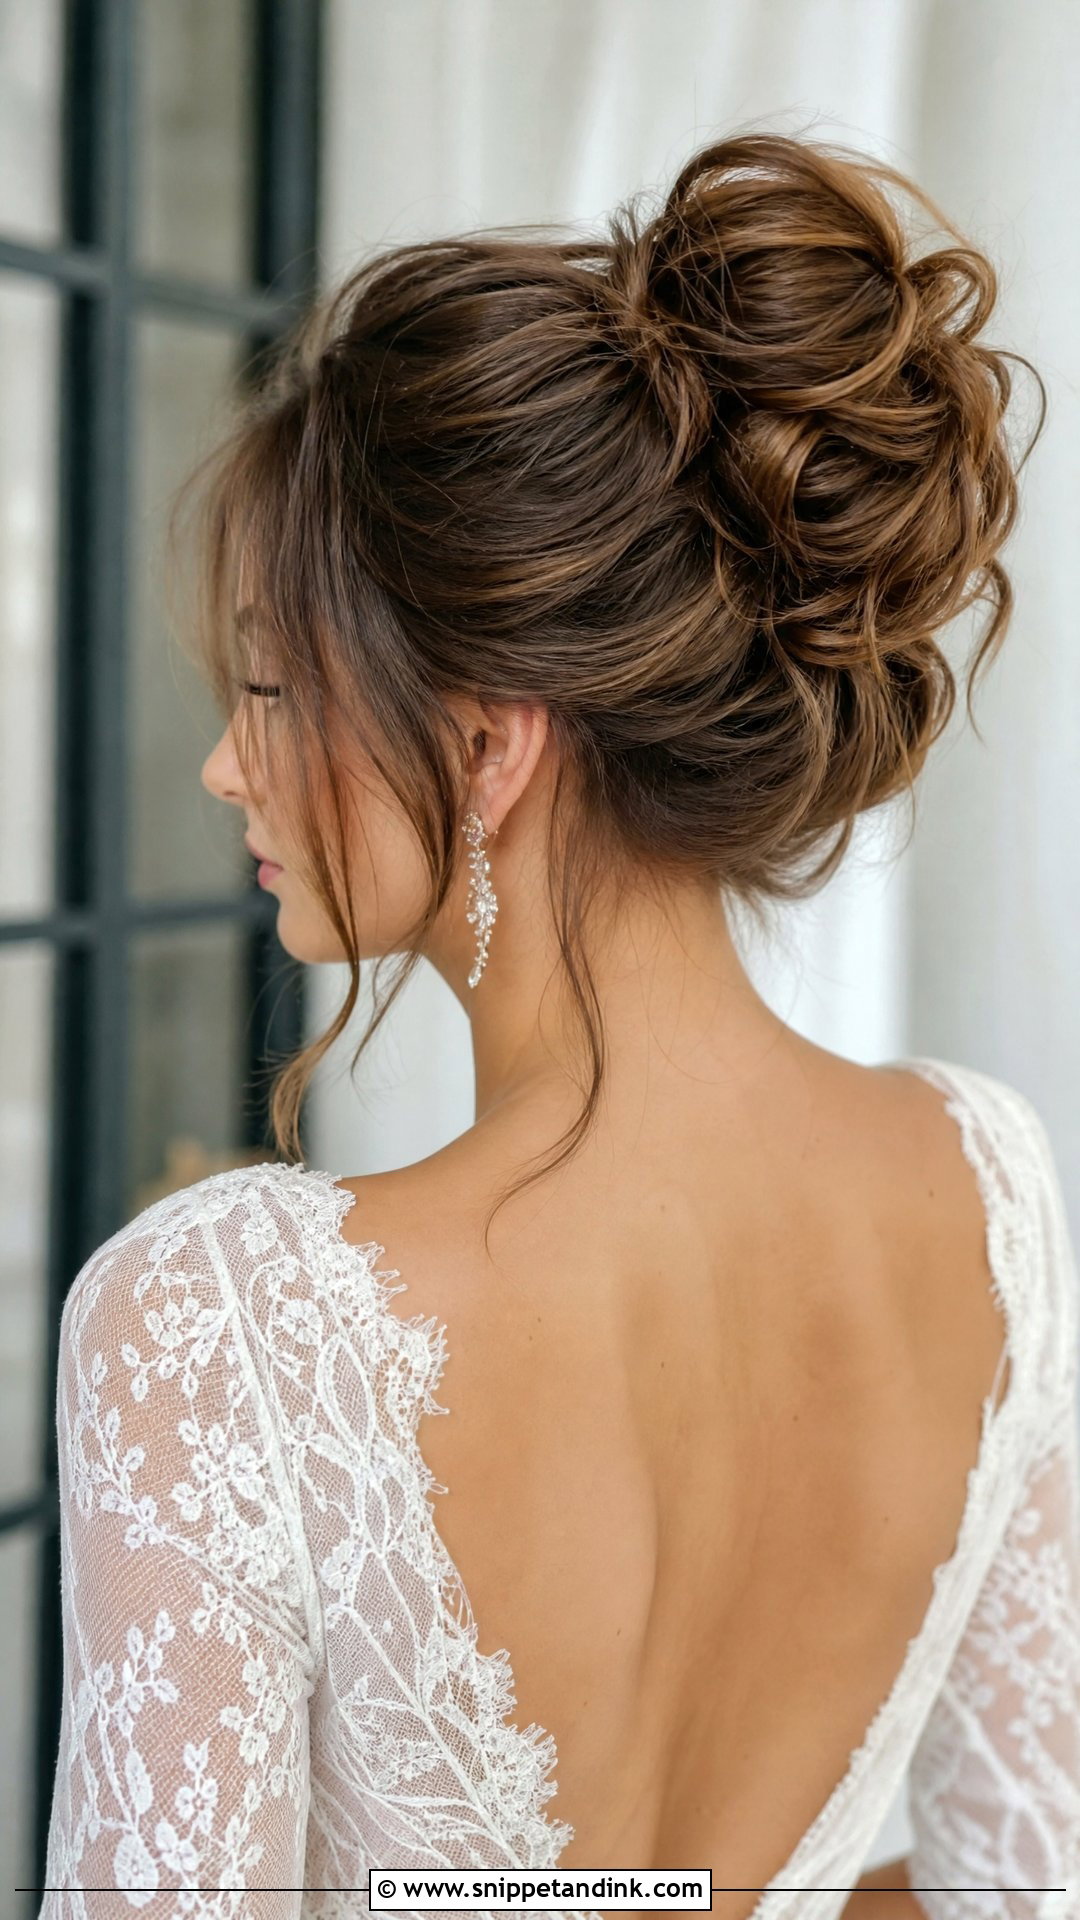
Long hair gives a big bun, but it also gives weight. I split very long hair into two or three sections and pin each into the bun separately, so no single pin carries everything. Otherwise the bun drags down by evening and can give you a headache. Twist loosely, pin firmly, then pull the surface apart for texture. Long hair is the easiest to make look full, but it does need that hidden support.
19. Romantic Messy Bun With Greenery
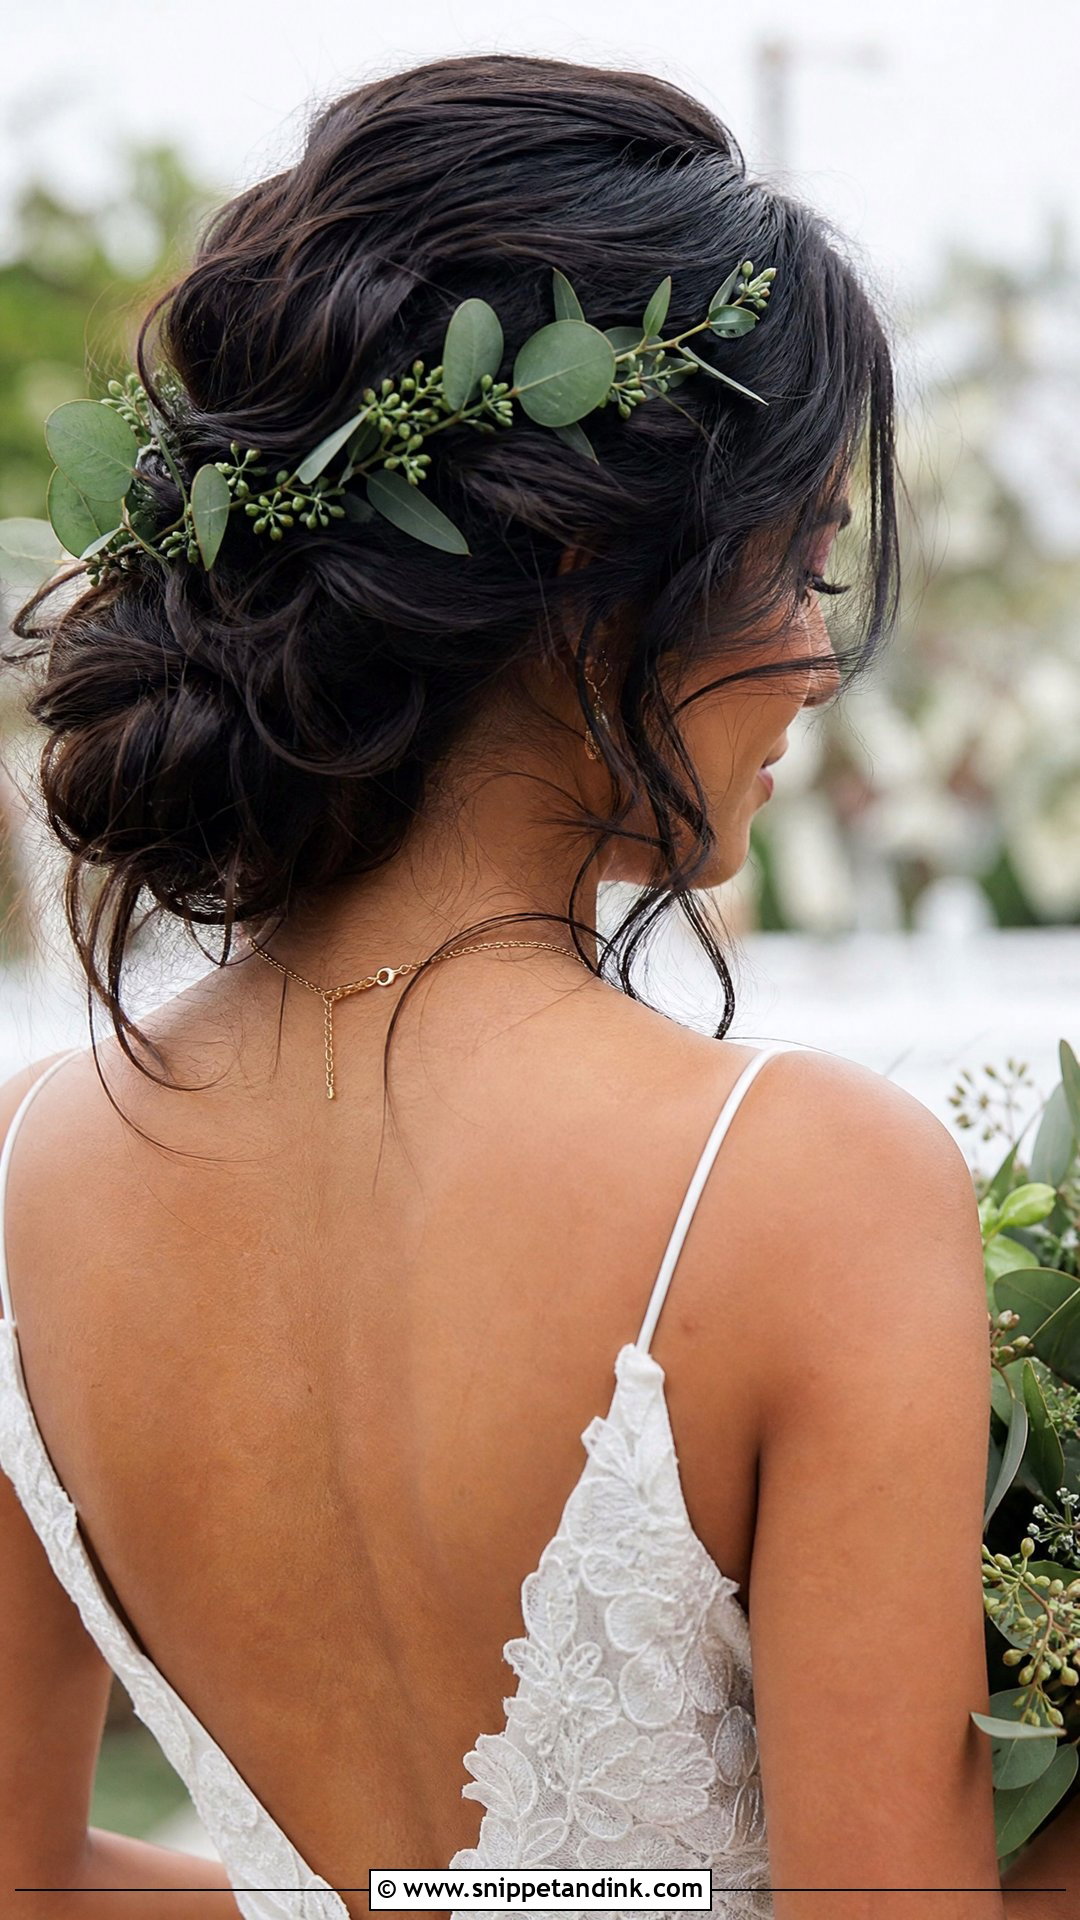
Greenery is kinder to hair than flowers because it’s lighter and lasts longer out of water. Eucalyptus, ruscus and small fern fronds hold their shape for hours, while softer leaves curl fast in warmth. I tuck the sprigs in around the base and through the waves once the bun is finished. Ask your florist to make the hair pieces separately and keep them chilled until I’m ready. Rustic and garden settings suit it best.
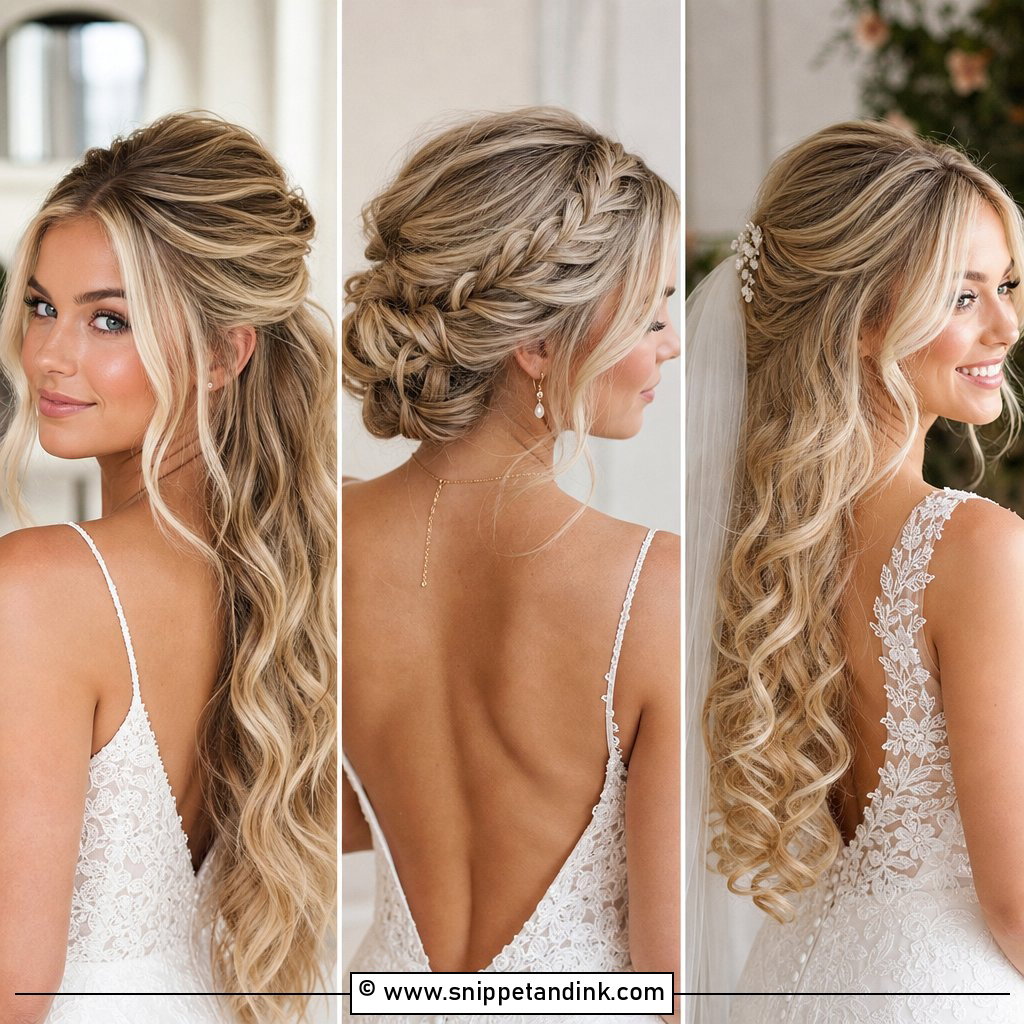
20. Sleek-to-Messy Bun
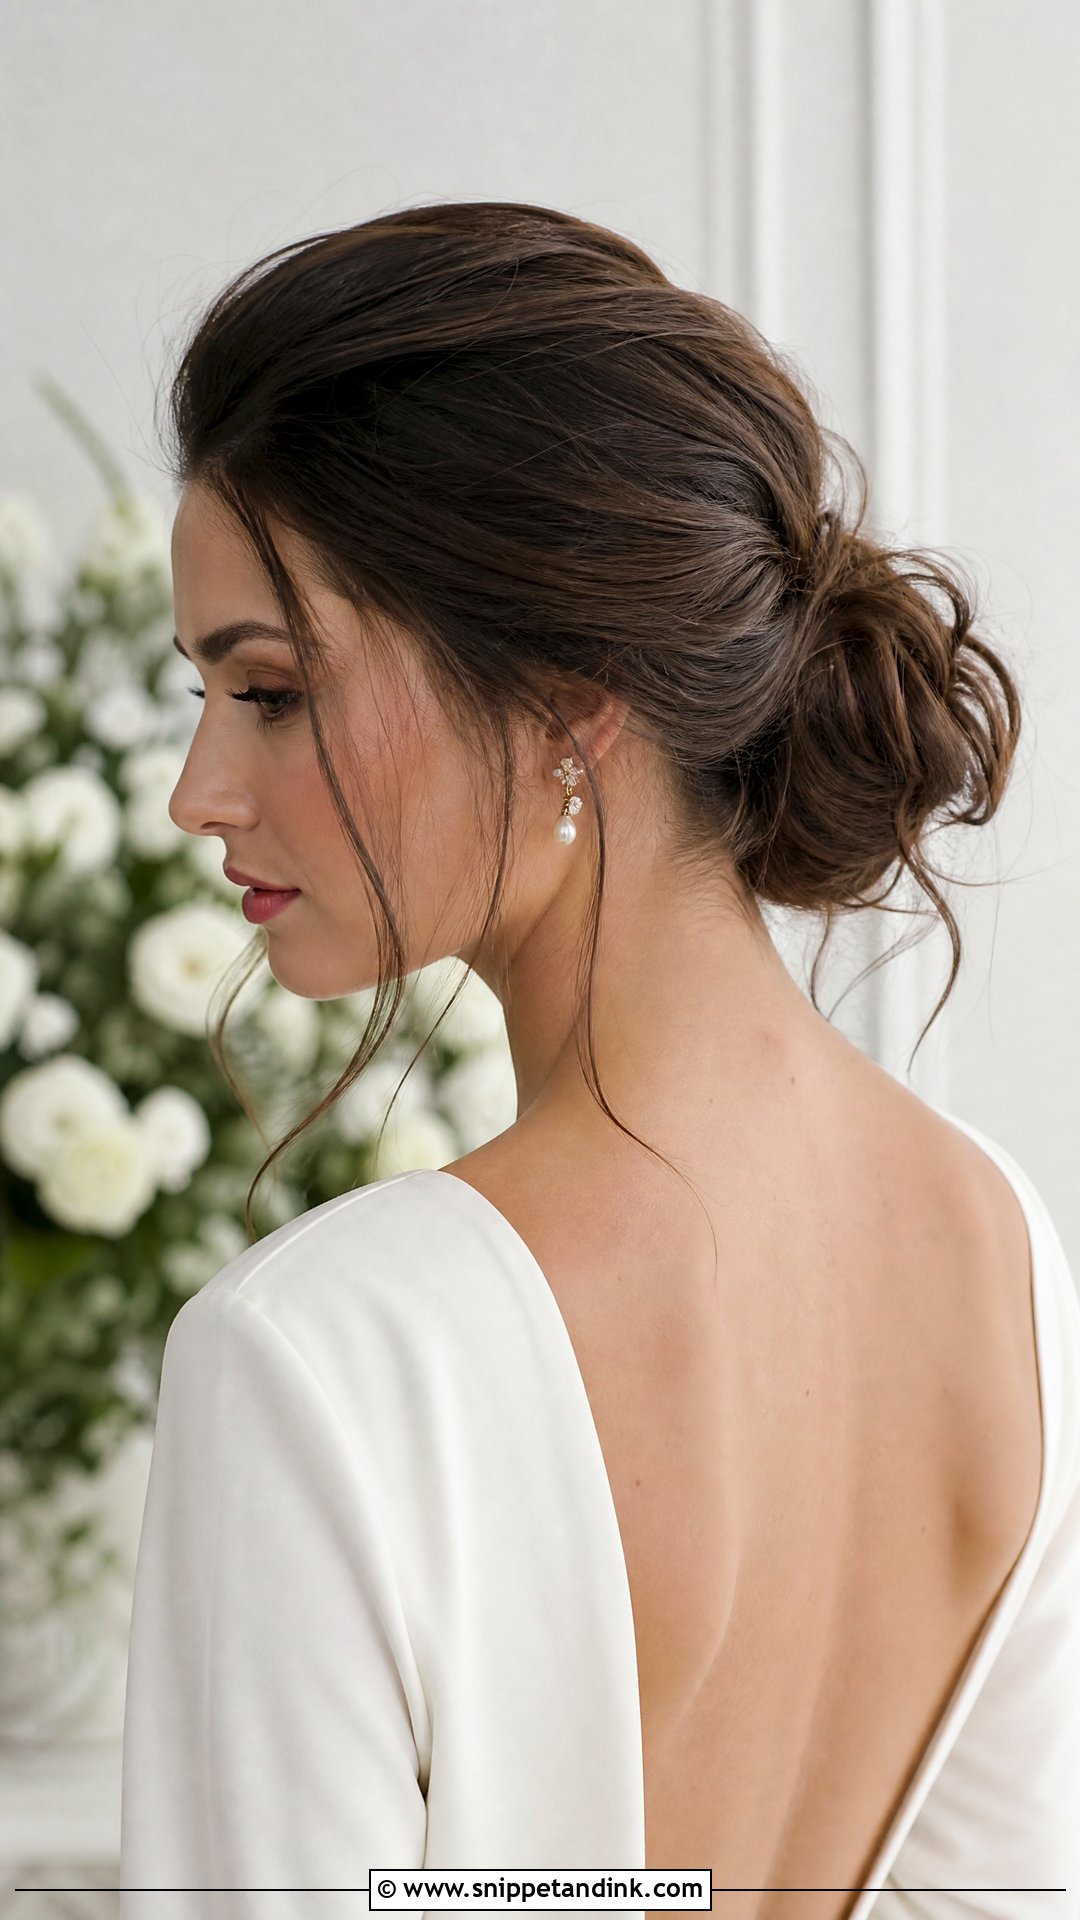
This is the modern option: smooth at the crown and sides, messy only at the back. I set the front with a little smoothing cream and a fine comb, then gather it into a loose knot so the contrast is clear. It’s the least forgiving of these buns, since any frizz at the hairline shows. If you have a lot of flyaways, a light spray on a toothbrush tames them. Leave the front strands pinned back for a sharper finish, or pull one or two free for a softer one.
Pinning Your Own Messy Bun on the Morning
Plenty of brides do their own hair, and a messy bun is the most realistic style to do yourself. Practice it at least three times before the wedding, ideally once wearing the dress or a similar neckline.
- Wash the day before, not the morning of, and skip conditioner at the roots.
- Mist dry texture spray through the lengths and curl with a one-inch iron. Let the curls cool fully.
- Gather the hair into a loose ponytail at the height you want and secure it with a clear elastic.
- Twist the tail, wrap it around the base, and pin it in sections. Push each pin through the bun and into the hair at the base.
- Pull small pieces outward to loosen the surface, then spray lightly.
- Free a few strands at the temples and nape, and curl them small.
Kit worth packing
Bobby pins in your own shade, a few large U-pins for the bun, a clear elastic, a travel spray and a small mirror. If the bun loosens late in the evening, pull one pin out and push it back in at a fresh angle; that usually locks it again.
Which Messy Bun Will Your Hair Actually Hold?
Most brides end up loving a bun because it lasts. Start with the shape you’re drawn to, then check it against your hair type, your dress and your veil. Bring photos, the headpiece and your dress details to your trial, and let your stylist adjust the placement until it feels right. Add pearls, flowers or crystals once the base is solid, never before.
You'll Like These Ideas:


Leave a Reply