
Gel is what I put on most brides, and not because it’s fashionable. It cures hard under the lamp in seconds, so you leave the appointment with nothing to smudge, and it keeps its shine through ring photos, bouquet handling and a long day of hugging people. The bridal gel manicures I’m proudest of are rarely the busiest ones: a sheer pink, a milky white, a fine French or a whisper of pearl chrome, matched to the shape of the hand and the fabric of the dress. Below are the sets I’m asked for most, with what I’d watch for on each.

What Your Own Nails Can Carry Under a Gel Set
Before we talk color, I look at the nails themselves. The same design behaves very differently on thin, bendy nails than on strong ones, and the product underneath decides how long it lasts.
Gel polish on natural nails
Soft gel polish is painted on like regular polish and cured under a lamp. It suits healthy nails at short to medium length and is the gentlest option to remove. On a nail that flexes, though, the gel can crack at the stress point or lift at the edges within days.
Builder gel overlay
Builder gel is thicker and is shaped with a slight arch, called an apex, that adds strength. I recommend it when nails peel or bend, or when a bride wants an almond or coffin shape from her own length. Most of it has to be filed down rather than simply soaked off, so book removal with a technician.
Extensions
If you want real length and your nails are short, soft gel tips or sculpted extensions are the honest route. Have them done at the trial too, so you know how they feel when you’re fastening jewelry or putting in contact lenses.
Whichever route you take, prep is what makes a set last: cuticles pushed back and cleared off the nail plate, the surface lightly buffed and dehydrated. Gel applied over leftover cuticle is the most common reason a set lifts early.
1. Milky White Wedding Gel Nails

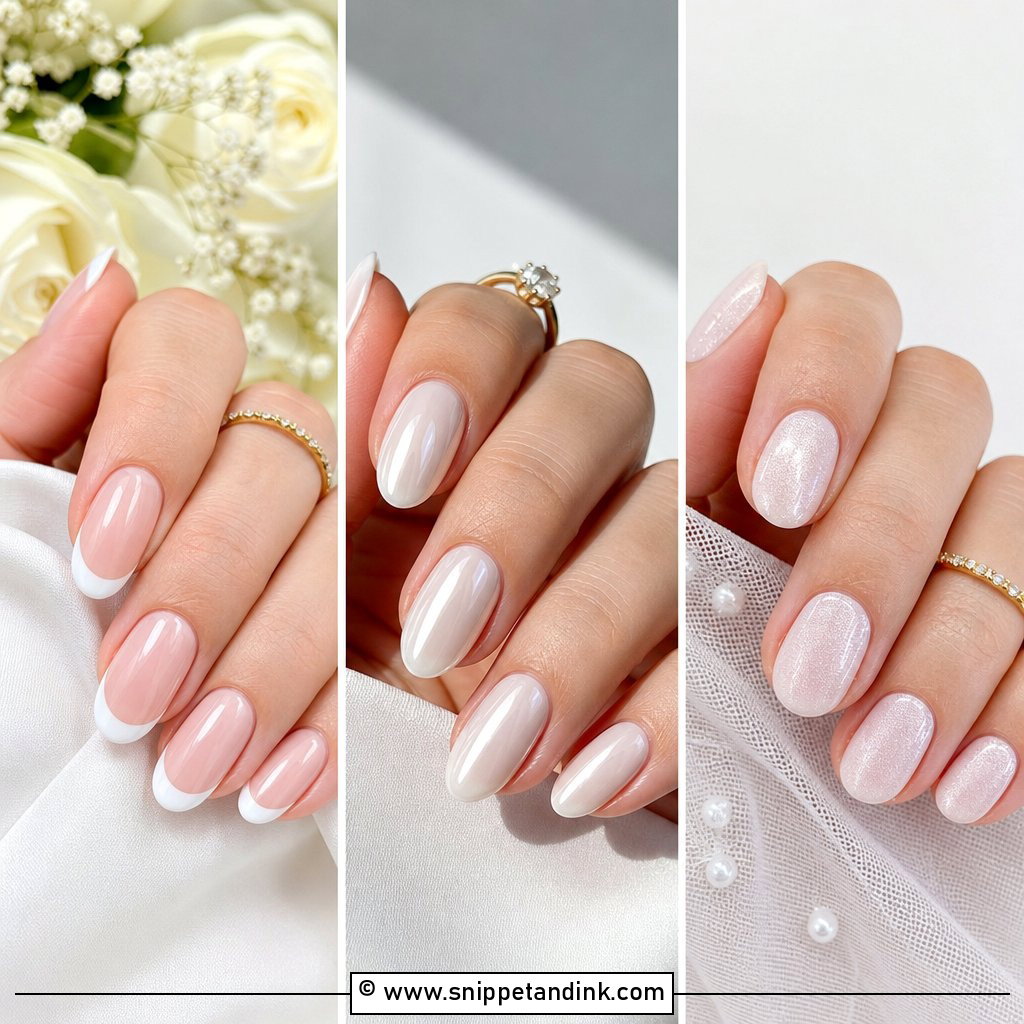
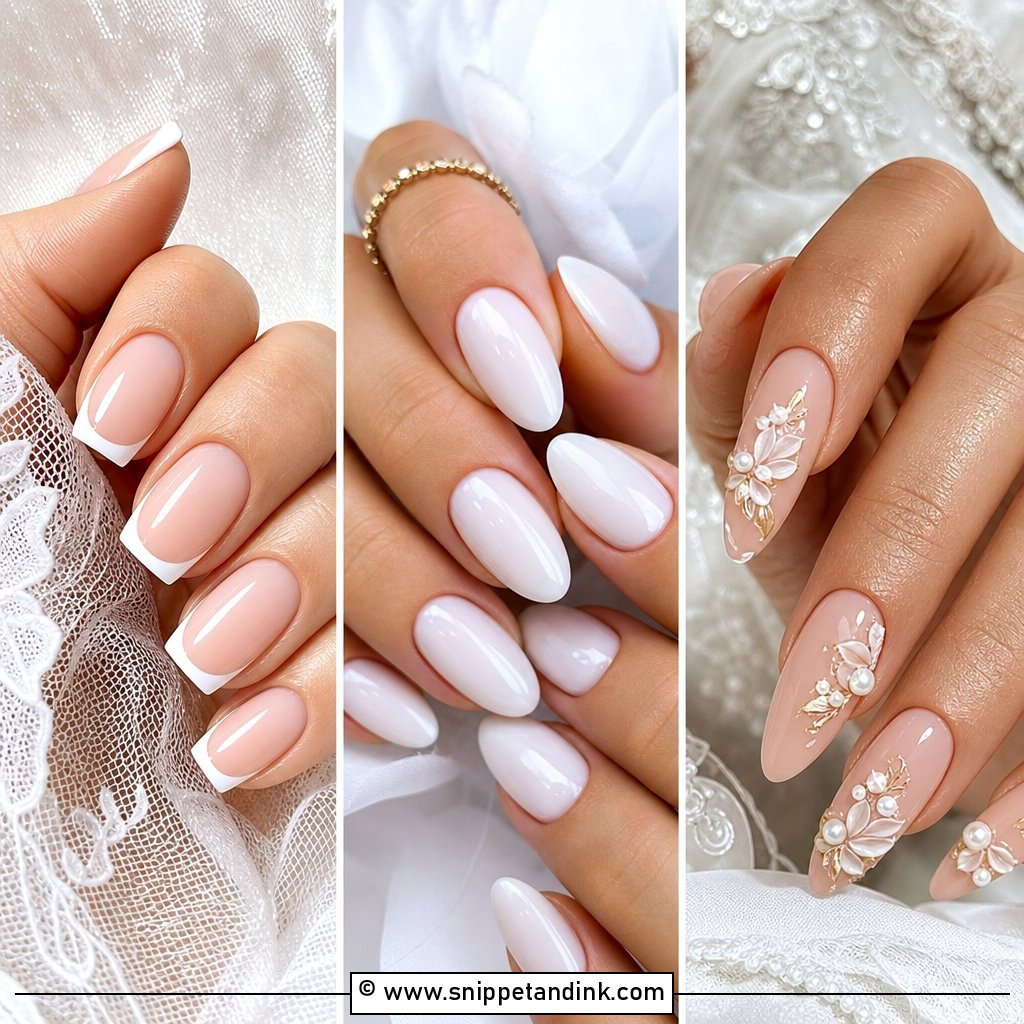
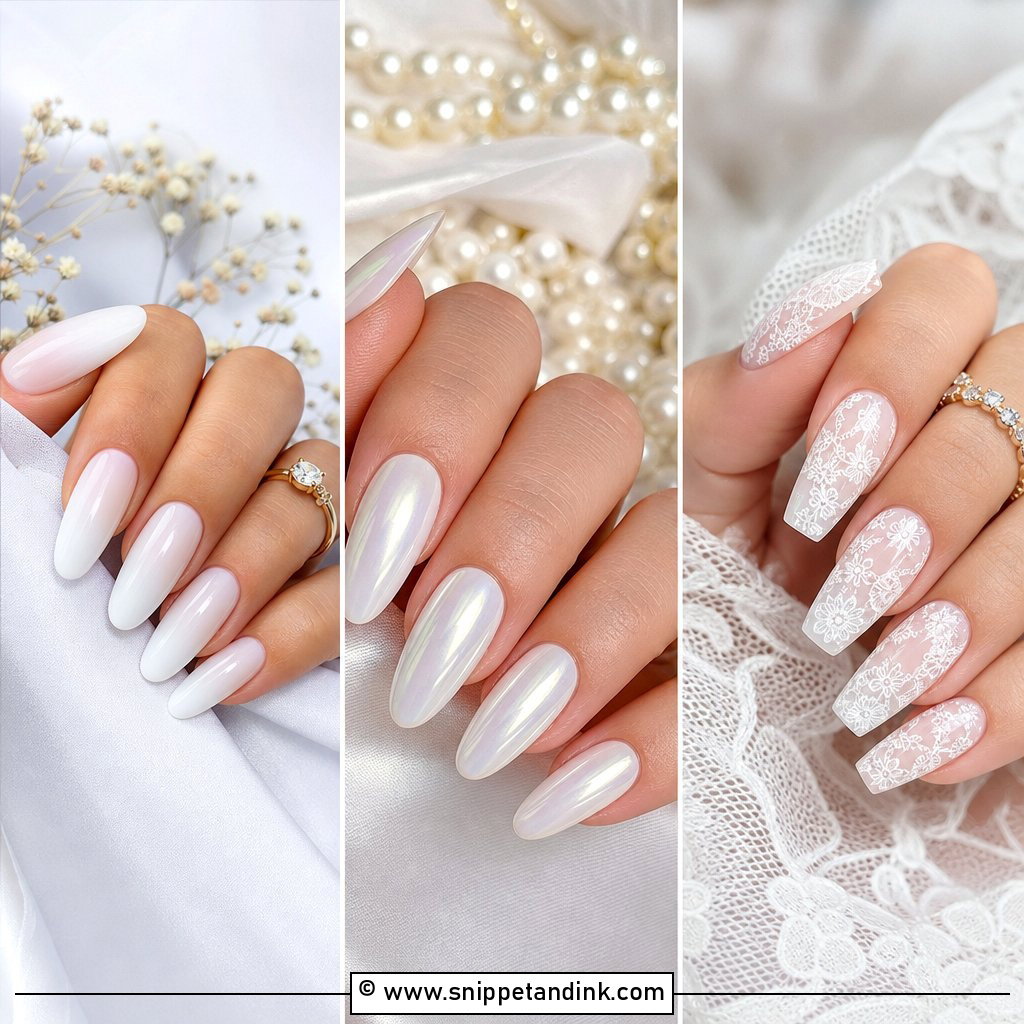
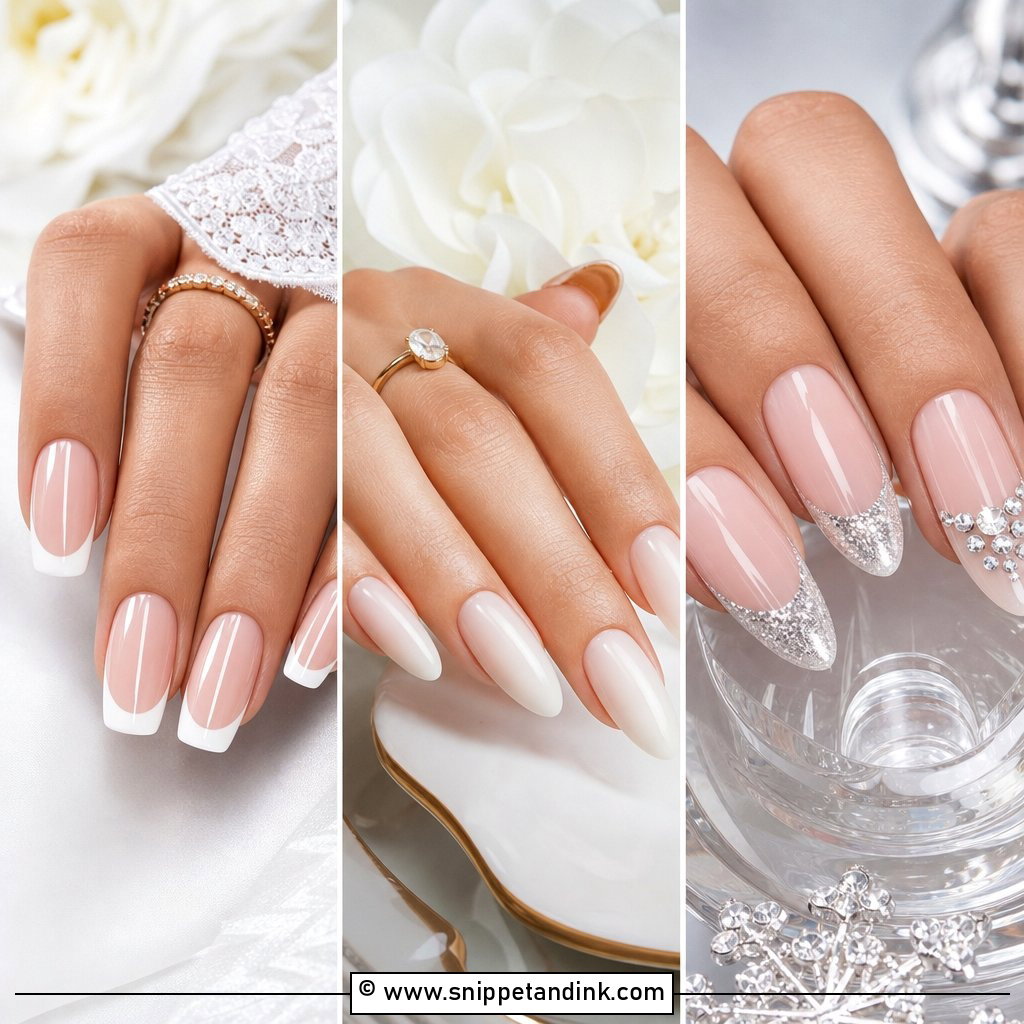
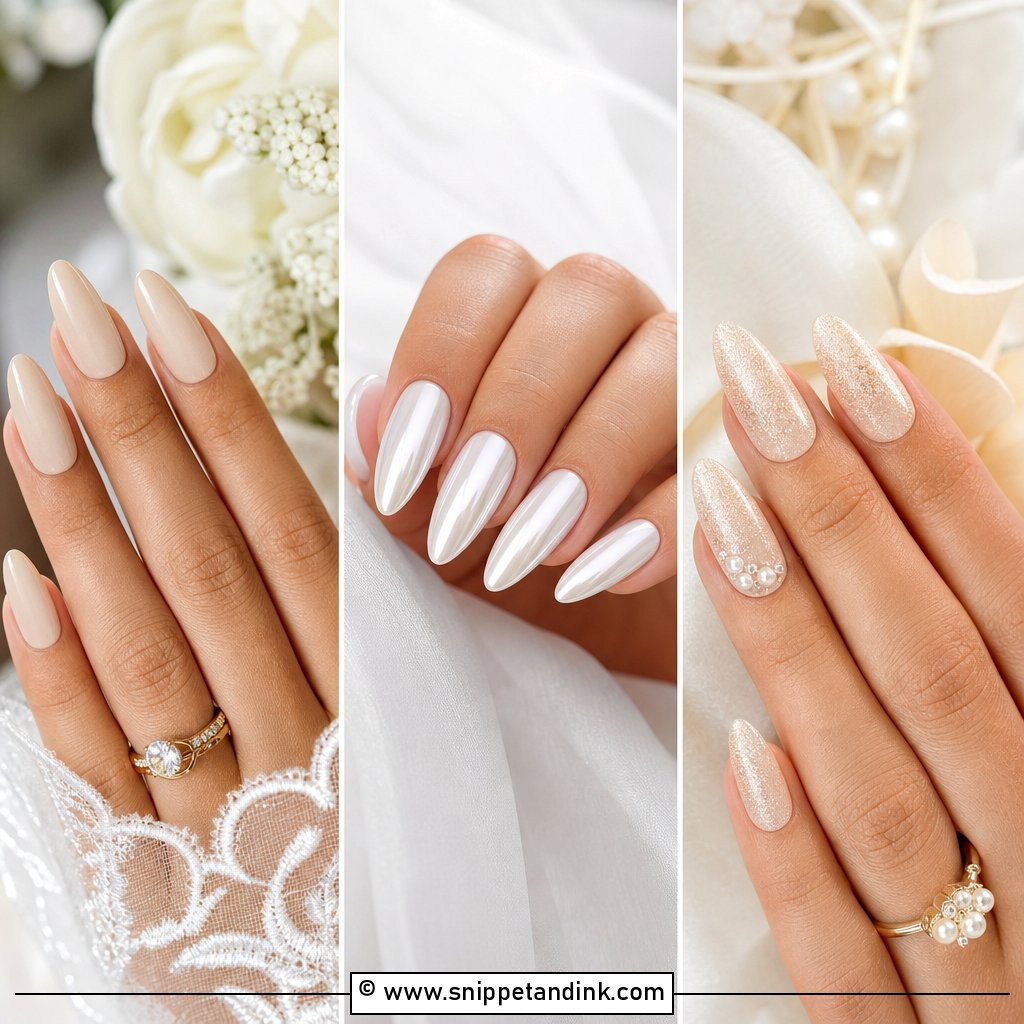
Milky white is the set I’d book for a bride who can’t decide, but it’s also the one that exposes a rushed technician. Sheer whites go streaky when they’re laid on thick, so I build two or three thin coats and cure each one until the nail looks like skimmed milk rather than correction fluid. It softens the look on almost any skin tone and suits almond, oval and squoval shapes. One caution: light gel can pick up an orange tint from spray tan and self-tanner, so get tanned first and have your nails done after. Next to lace, satin or pearls it melts into the outfit, which is the point.
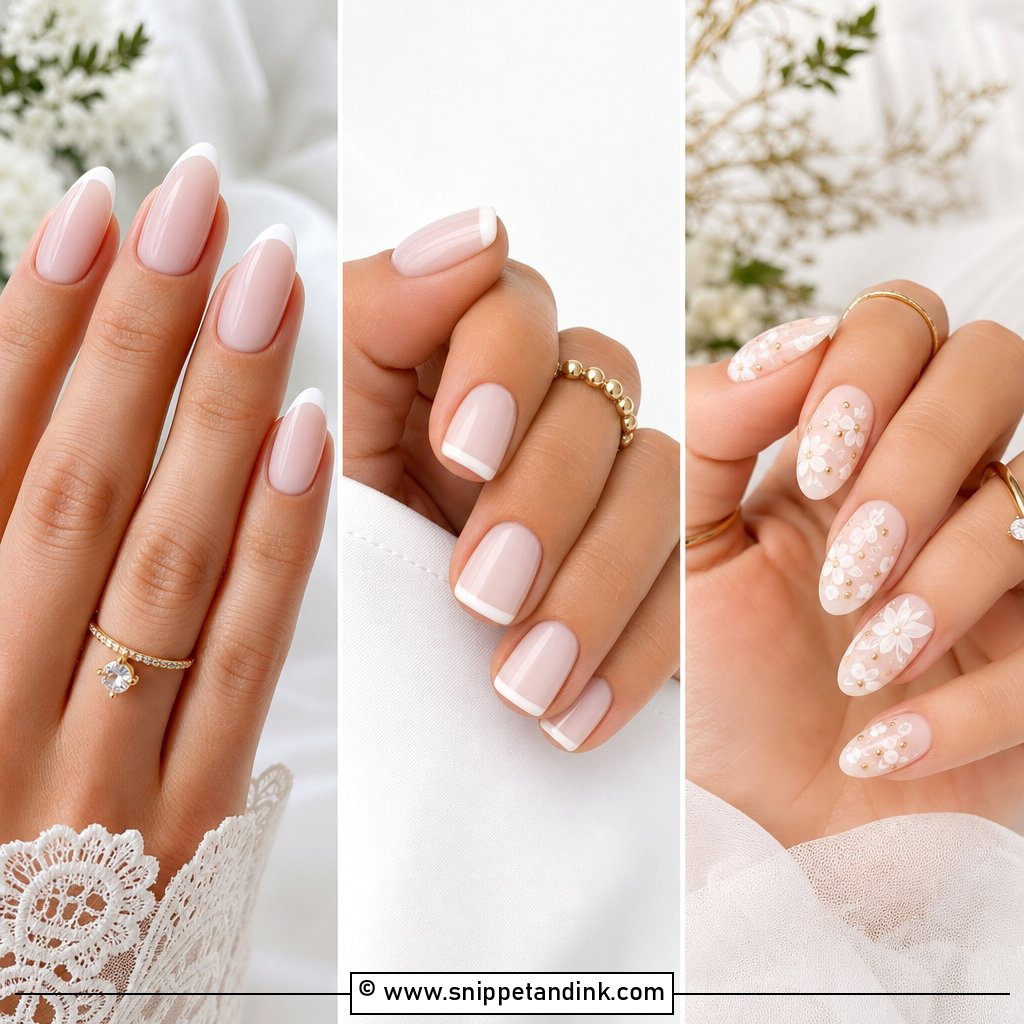
2. French Tip Wedding Gel Nails

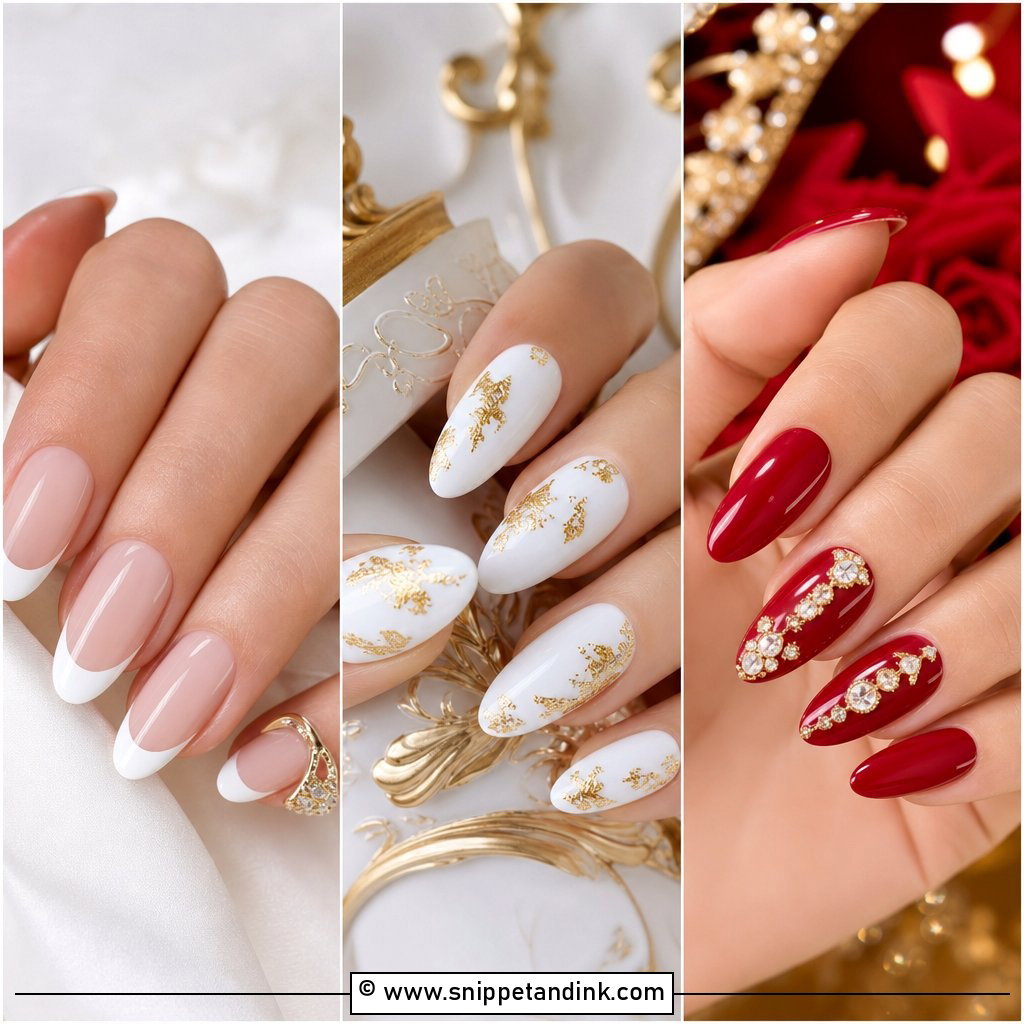
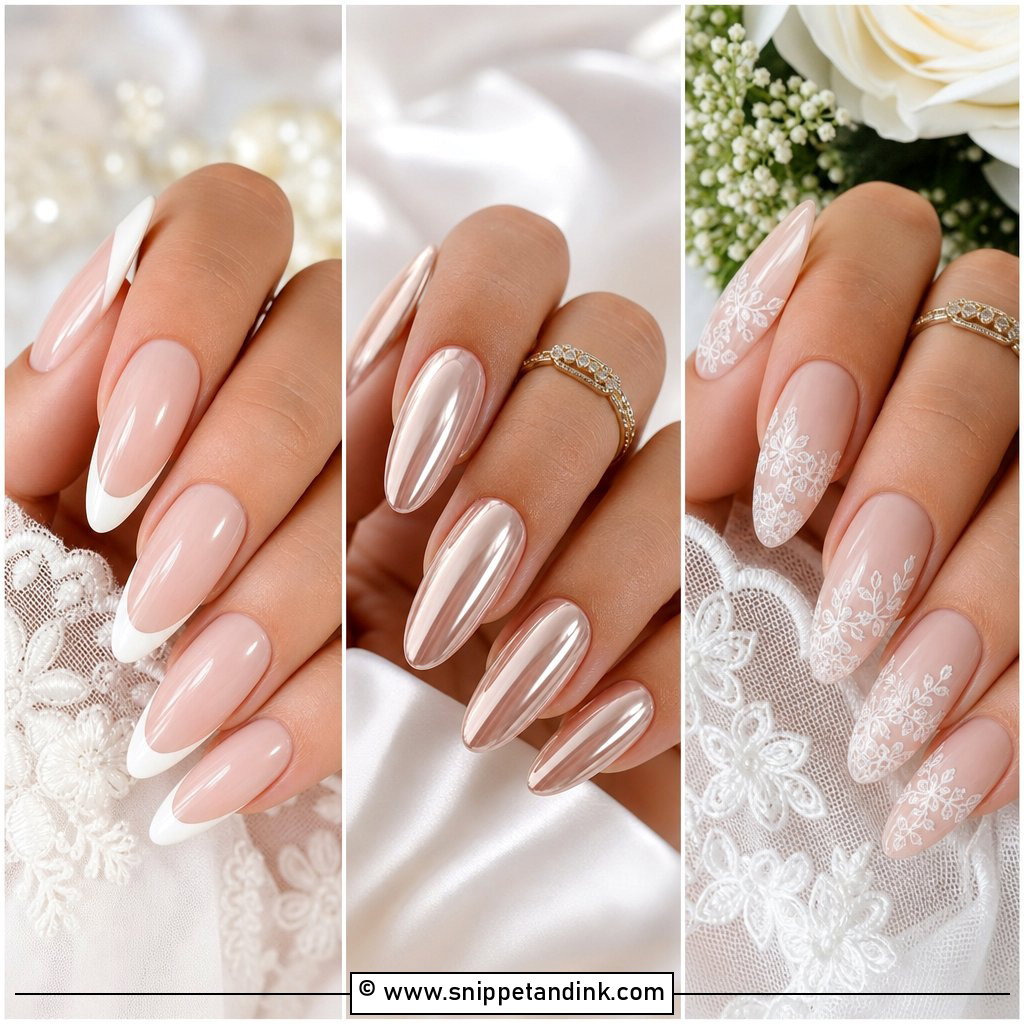
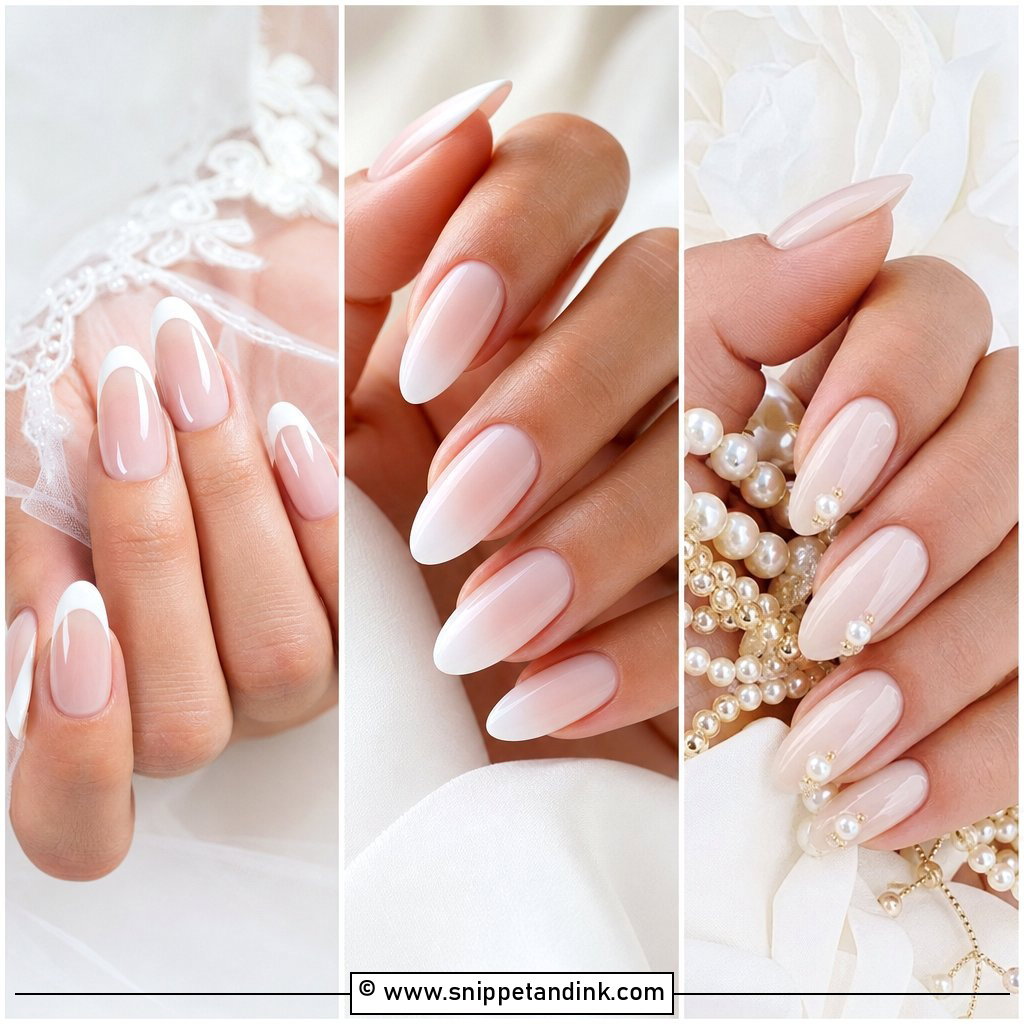
A fine French is still what I’d choose for close-up ring photos, because a crisp tip makes the whole hand look groomed. The modern version is a sheer nude or soft pink base with a white line no thicker than a couple of millimeters; a deep smile line visually shortens the nail. I paint the tip freehand with a thin liner brush and cure it before the top coat so it can’t drift. Medium almond reads graceful and short squoval reads practical, and both sit happily next to a plain crepe gown or heavy embroidery.
3. Pearl Chrome Wedding Gel Nails

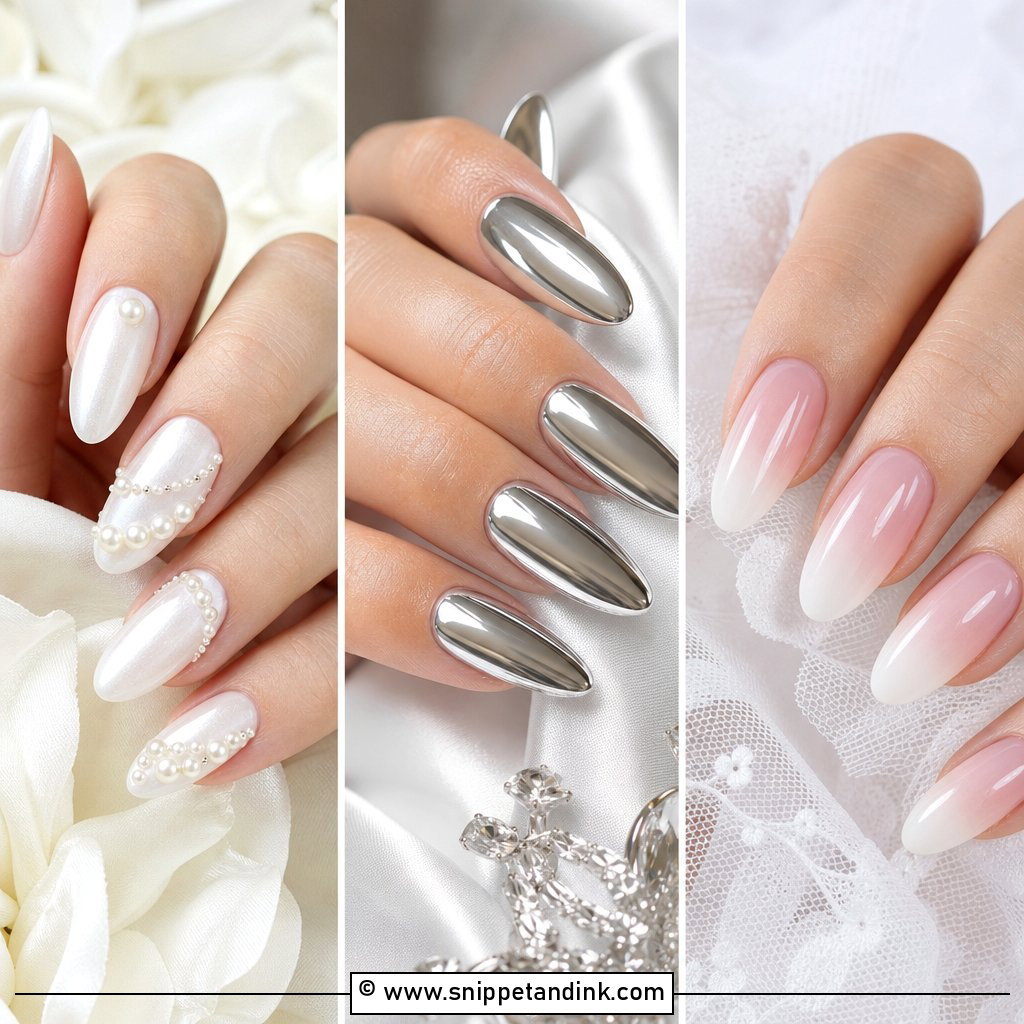
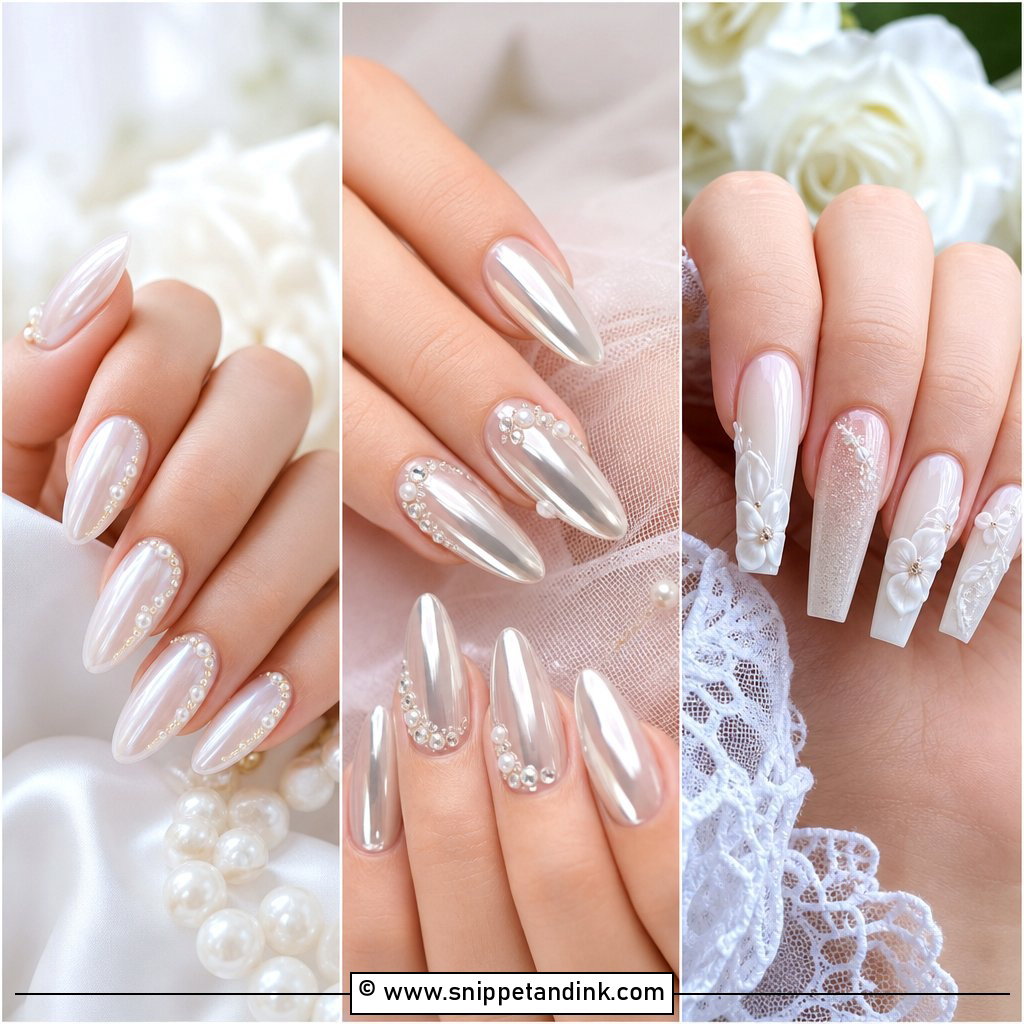
Pearl chrome is a powder, not a polish. I rub it onto a cured no-wipe top coat over a sheer white, blush or nude base, and the result is a soft glow that shifts as the hand moves. It works hardest when it echoes something real, like pearl earrings, a satin skirt or a shimmer highlight on the cheekbones. I keep the shape clean and leave chunky glitter out of it entirely, since the two finishes fight. The weak spot is the free edge: if the chrome isn’t sealed over the tip, it rubs off there first, so I cap every edge carefully.
4. Blush Pink Wedding Gel Nails

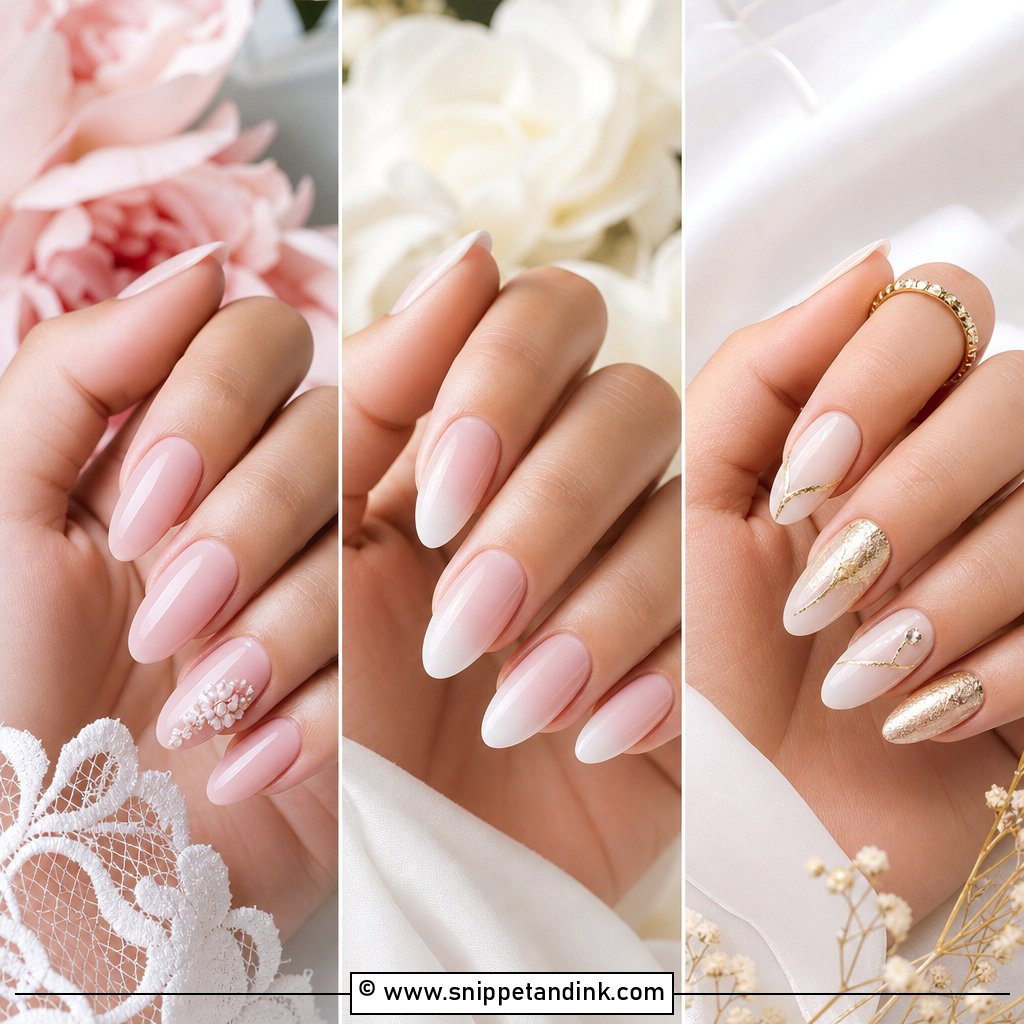
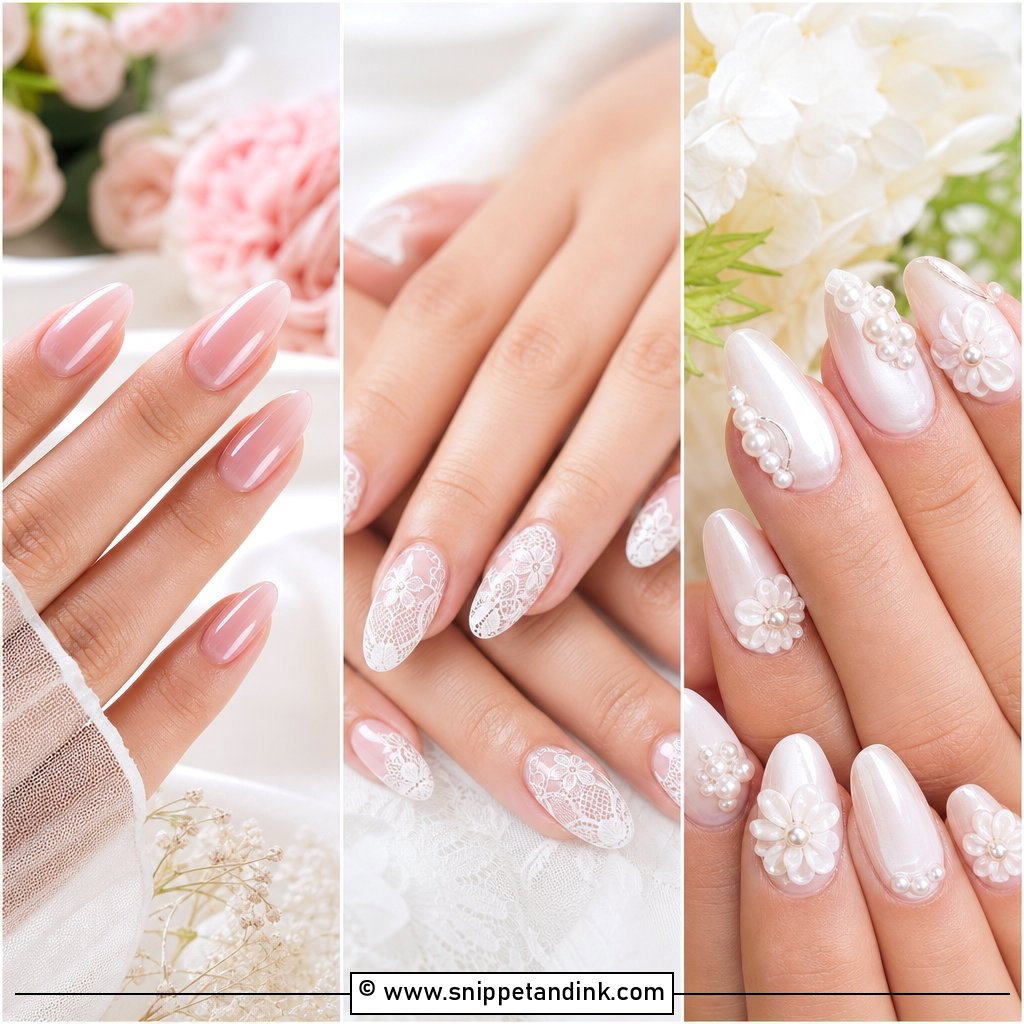
Brides who never wear nail art usually end up here, and I think they’re right to. A sheer or jelly blush evens out the nail bed and makes the hand look rested without anyone clocking a manicure. If your nail beds are uneven or have white spots, a creamier pink covers better than a jelly, which shows everything underneath. Any length works. The gloss of the top coat does most of the work, so I’d never swap it for matte on a wedding set.
5. Nude Ombre Wedding Gel Nails

A fade from nude into pale white or cream gives the impression of a longer nail. Some salons call it baby boomer nails, and it’s a gentler alternative to a sharp French line. I blend it with a sponge between thin layers, and the trick is matching the nude to your skin closely enough that the start of the fade can’t be seen. Almond and coffin shapes show the gradient best. On very short nails the white portion takes over, so I’d keep the fade faint or pick another set.
6. Short Wedding Gel Nails

Short nails are not the compromise people assume. A short squoval in sheer pink, milky nude or soft white looks very bridal, and you can still pin a veil, fasten a bracelet and hold a glass without thinking about your hands. With so little length, shaping is everything: I file the sidewalls straight and keep the free edge even across all ten, because one slightly longer nail shows instantly. A tiny French, a single pearl or a light chrome is enough detail. Brides who work with their hands right up to the wedding are the ones I’d point here.
7. Almond Wedding Gel Nails

Almond is the shape I file most often for weddings, because it lengthens the fingers without looking sharp. Medium is the comfortable middle: long enough to taper, short enough to type, cook and fasten tiny dress buttons. Almost every design on this list sits well on it, from a French to pearl chrome. The shape does need some free edge, so if your nails are short and break easily, a little builder gel underneath helps the taper hold. Wrapped around bouquet stems or turned for a ring shot, it flatters the fingers rather than drawing attention to the nail.
8. Square Wedding Gel Nails

Square nails give clean lines that suit sleek gowns and minimal styling. A sharp corner catches on everything, though, from lace to hair, and corners are where gel chips first. So I soften them slightly into a squoval, which keeps the structured look but wears far better over a long day. A thin French on that shape looks very neat. Short to medium lengths are best; long square nails tend to look heavy on smaller hands.
9. Floral Wedding Gel Nails

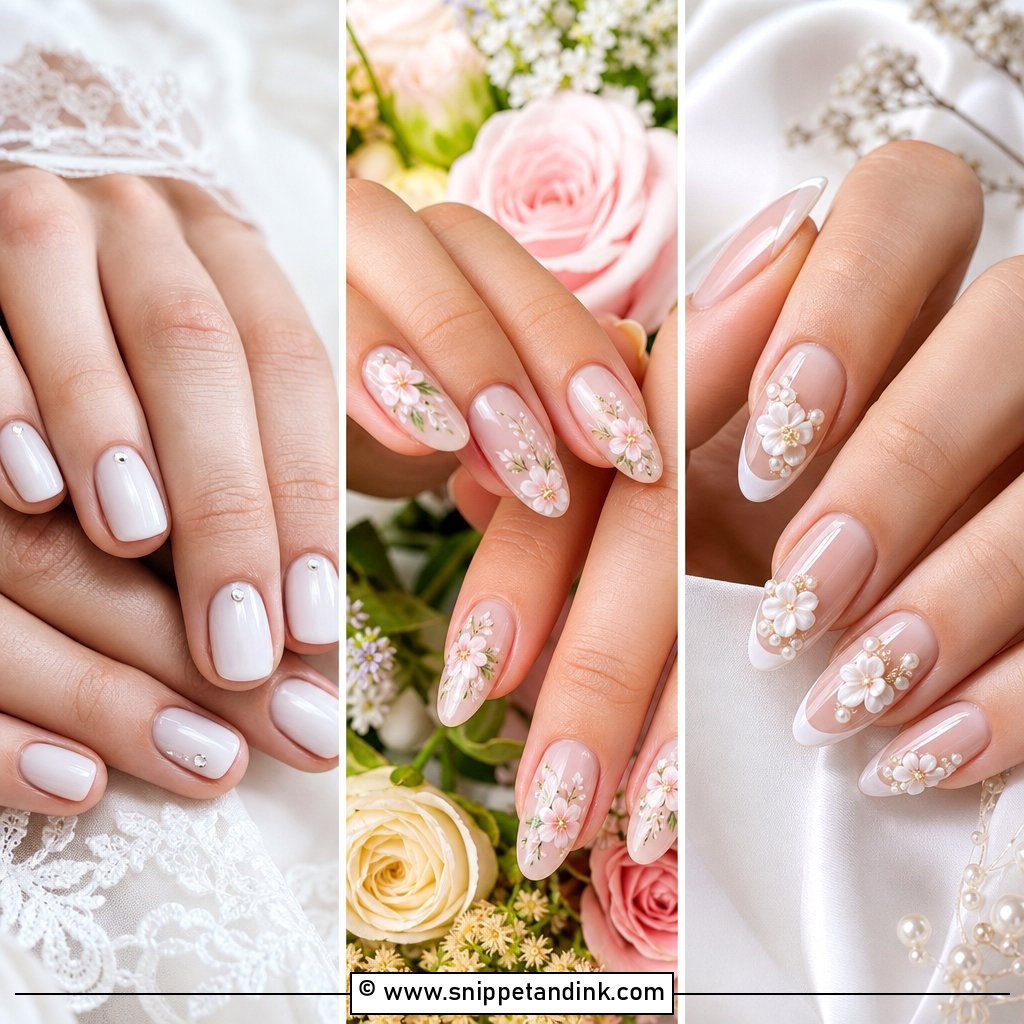
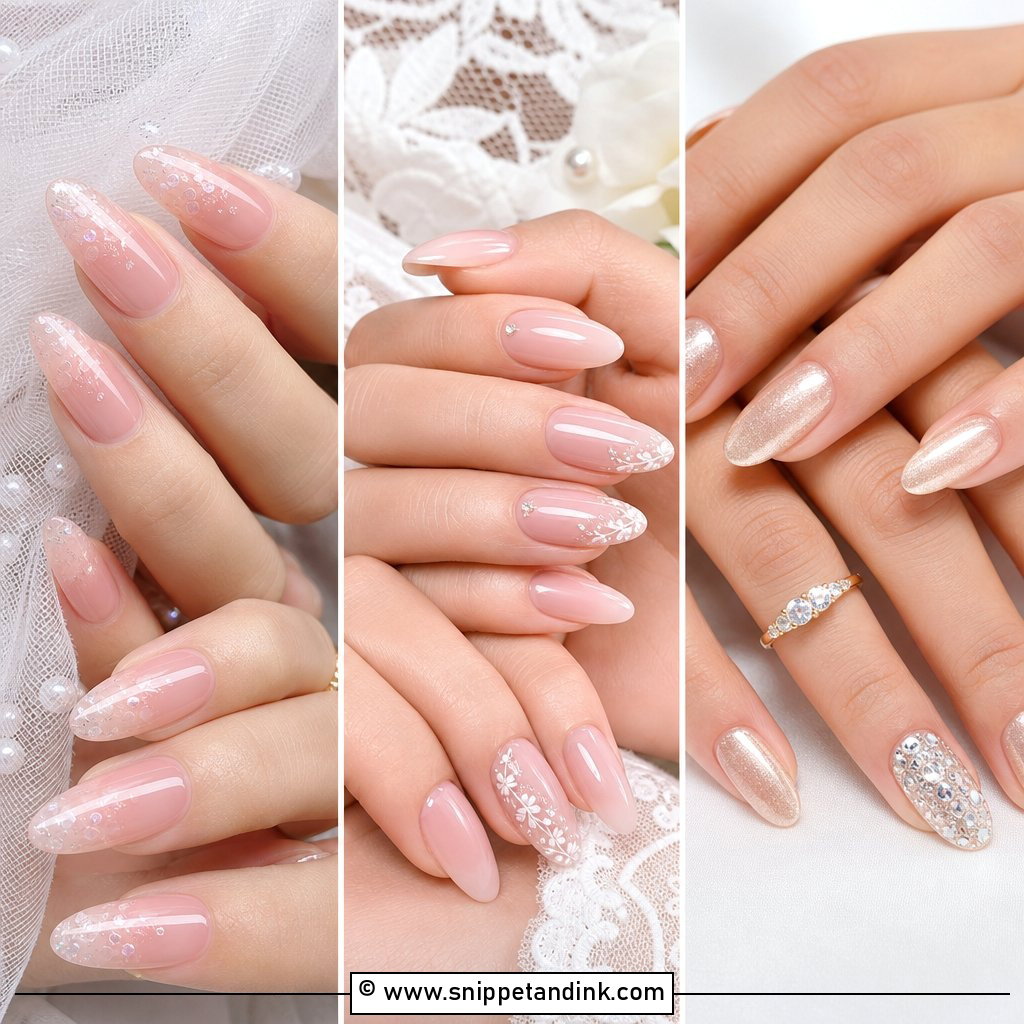
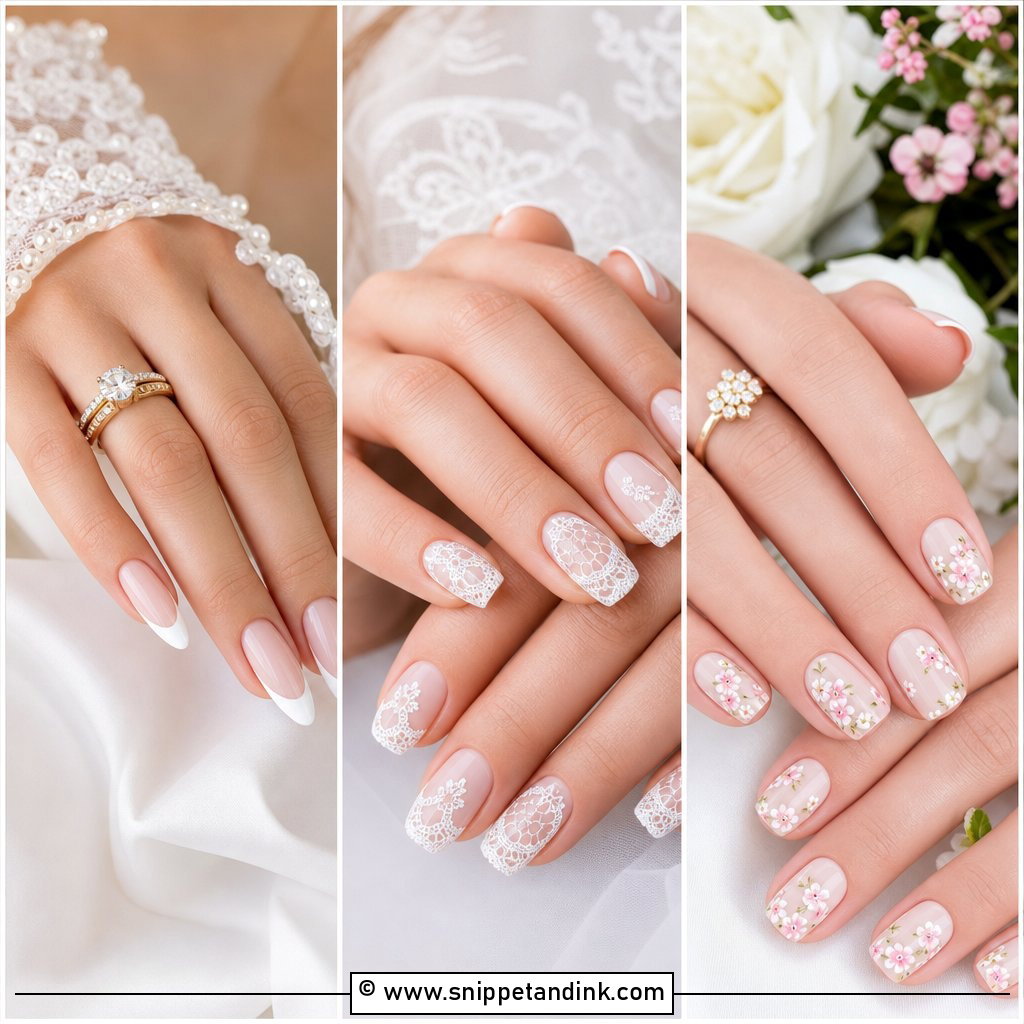
Floral art works best when most of the nails stay quiet. I keep the base sheer nude, blush or milky, and hand-paint tiny flowers on two or three accent nails in soft white, pale pink or muted green. Petals painted with a fine detail brush look lighter than decals, which can show an edge under the top coat. If your bouquet has a distinctive bloom, bring a photo and I can echo its shape. Garden venues and lace dresses suit this set; with a stark minimalist gown it can look like a separate idea.
10. Lace Wedding Gel Nails

Lace nails make the most sense when the dress has lace you can actually copy. Bring a close photo of the sleeve or hem, and I’ll pull a motif from it with a liner brush in white gel over a sheer nude or blush. The usual mistake is too much. Lace covering every nail looks busy from a distance and blurry in photos, so I put the detail on one or two nails per hand and leave the rest glossy. Oval and almond shapes give the lines room to curve.
11. Glitter Ombre Wedding Gel Nails

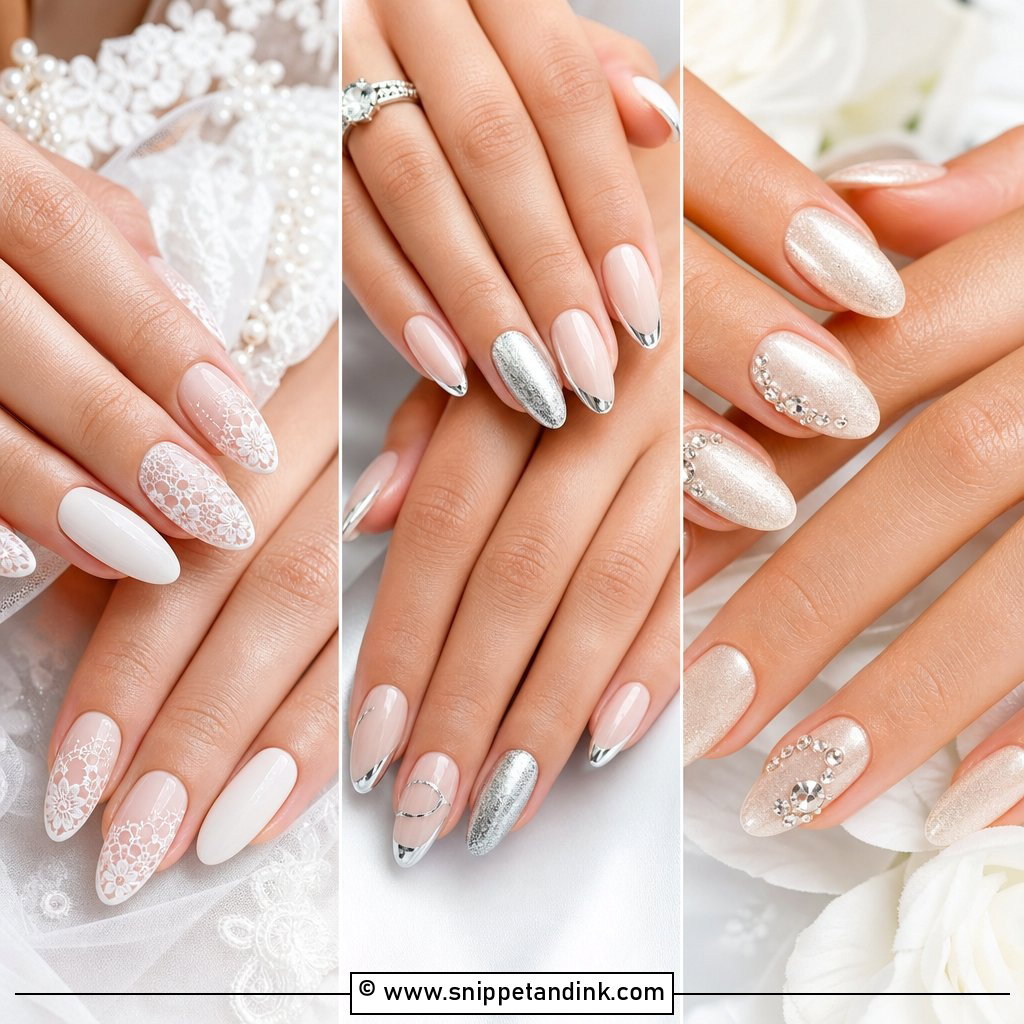
Sparkle doesn’t have to mean full coverage. Glitter ombre wedding gel nails fade fine shimmer from the tip or cuticle into a sheer nude, pink or milky base, so the nails move with the light without overpowering the dress. Fine silver, champagne or pearl glitter looks refined under reception lighting, while chunky pieces poke through the top coat and feel rough. I add an extra layer of top coat over glitter so the surface is completely smooth to the touch. Glitter gel is also the slowest kind to soak off, worth knowing if you plan to remove it right after the honeymoon.
12. Gold Accent Wedding Gel Nails

Gold detail suits warm skin tones, yellow-gold rings and champagne or ivory fabrics. Placement matters more than quantity: a foil fleck at the tip, a fine line near the cuticle or a sliver down one side looks expensive, while large metallic blocks look like costume. The base can be nude, blush, milky white or soft beige. Foil has to be sealed completely under gel top coat, or its edges lift and catch on knits and lace.
13. Silver Accent Wedding Gel Nails

Silver suits white gold, platinum and crystal accessories, and it can match a cool-toned engagement ring precisely. It’s brighter than gold under flash, so I keep it to fine lines, tiny foil pieces or a faint shimmer over sheer pink, a soft grey nude or milky white. On short square, oval or almond nails it looks polished rather than flashy. Brides who find plain nude a little too plain often land here. If your skin is very warm-toned, hold a silver swatch beside your hand at the trial first, because it can make some skin look sallow.
14. White Chrome Wedding Gel Nails

Where pearl chrome glows, white chrome is brighter and closer to glass. White chrome wedding gel nails start with a sheer white or soft ivory base and a fine powder burnished on top, and they suit brides who like a crisp, fashion-forward finish. Overworking the powder turns it frosty and metallic, so I apply one thin layer and stop. Almond, coffin and oval shapes carry it well. With a structured gown and modern jewelry it looks deliberate rather than trendy.
15. Sheer Nude Wedding Gel Nails

A sheer nude is the “your nails but better” manicure, and it’s harder to get right than it looks. The shade has to sit close to your undertone, which might mean a beige, pink, peach or neutral brown nude. Too light and the fingers look chalky; too pink and the hand looks flushed in photos. I test two or three shades on a single nail before committing. On short and medium lengths with a high-gloss top coat, it leaves the ring and the dress to do the talking.
16. Baby Boomer Wedding Gel Nails

This is the most diffused version of the fade, where pink or nude melts into white with no visible line at all. It differs from the nude ombre above mainly in softness: the white is milkier and starts lower on the nail. Long almond, coffin and oval nails show it best, and on shorter nails it only works if the white stays faint. I match the base to your natural nail bed so the blend reads as your own nail glowing toward the tip. Two thin top coats keep the transition smooth.
17. Pearl Accent Wedding Gel Nails

Pearl nails depend on restraint. I set tiny flat-backed pearls near the cuticle, along a French tip or on a few accent nails, over a sheer nude, blush or milky base. Anything raised can snag a tulle veil or a lace sleeve, so I keep them very small and embed them in builder gel rather than top coat alone, which holds them far longer. If you’re wearing pearl earrings or pins, the echo is subtle. Medium almond or oval shapes suit it.
18. Minimal Line Wedding Gel Nails

Line art is my suggestion for brides who like modern nails but still want a bridal base. Minimal line wedding gel nails keep the base soft and sheer, then add fine white, silver or gold strokes that curve along the nail or frame the tip. Negative space is what makes them work, so I leave most of each nail bare. Lines this thin need a steady hand and a striping brush, and a wobble is very visible on a pale base. Short square, almond and oval shapes all take it well, especially alongside a sleek dress and simple jewelry.
19. Soft Pink Chrome Wedding Gel Nails

Pink chrome sits halfway between blush polish and a glow. It’s warmer than silver chrome and gentler than pure white chrome, so it works with ivory, champagne and blush dresses alike. On almond and oval nails the shine follows the curve and lights up the center of each nail. Ask for a sheer pink gel base with a delicate powder layer; a thick metallic version reads more party than wedding. If you’re unsure, try it on one nail at your trial and look at it in daylight and under warm indoor light.
20. Coffin Wedding Gel Nails

When a bride asks me for length and a defined shape, I start with a medium coffin. Coffin wedding gel nails taper to a flat tip, which gives structure to a French ombre, milky white, pearl chrome or soft glitter fade. Very long coffins look striking on a moodboard but make zips, hair pins and contact lenses awkward on the day, so I usually stop at medium. Extra length means extra leverage on the nail, which is why longer coffins generally need extensions or builder gel underneath. Keep the colors gentle and let the shape carry the look.
A Countdown for Your Nails in Wedding Week
- Four to six weeks out, book a trial in the shape and color you’re considering, and wear it for a few days to see how it chips and how it feels.
- Spray tan or self-tan first, nails second. Fresh tan can stain light gel and the skin around the cuticles.
- One to three days before the wedding, have the final set done. Earlier and regrowth shows at the cuticle in close-ups; later and there’s no time to fix a chip.
- From then on, use cuticle oil morning and night. It keeps the skin around the nail looking healthy in ring shots and helps the gel stay flexible.
- Skip long hot baths, and wear gloves for cleaning products in those last days, since soaking and solvents encourage lifting.
If a nail chips or lifts before the ceremony
Don’t peel it, and don’t glue it down. Peeling gel takes layers of your nail plate with it. Pack a fine file, a clear glossy top coat and cuticle oil in your day kit. A small chip at the tip can be filed smooth and sealed with regular top coat well enough for photos, and your technician can repair it properly afterward.
Taking it off after the honeymoon
Gel generally holds for two to three weeks. When it’s time, have the top coat filed and the gel soaked in acetone, or book a proper removal. Then give your nails a week or so of oil and rest before the next set, especially after builder gel or extensions.
The Sets That Age Best in Wedding Photos
The sets brides still love in their photos years later tend to be the quiet ones: sheer nude, milky white, a fine French, a little pearl chrome. Gel gives you shine and durability through the whole celebration. If you’re trying a new shape, length or technician, book a trial a few weeks out so nothing on the day is a surprise. Go with what your hands feel comfortable in, because you’ll be looking at them all day.
You'll Like These Ideas:


Leave a Reply