
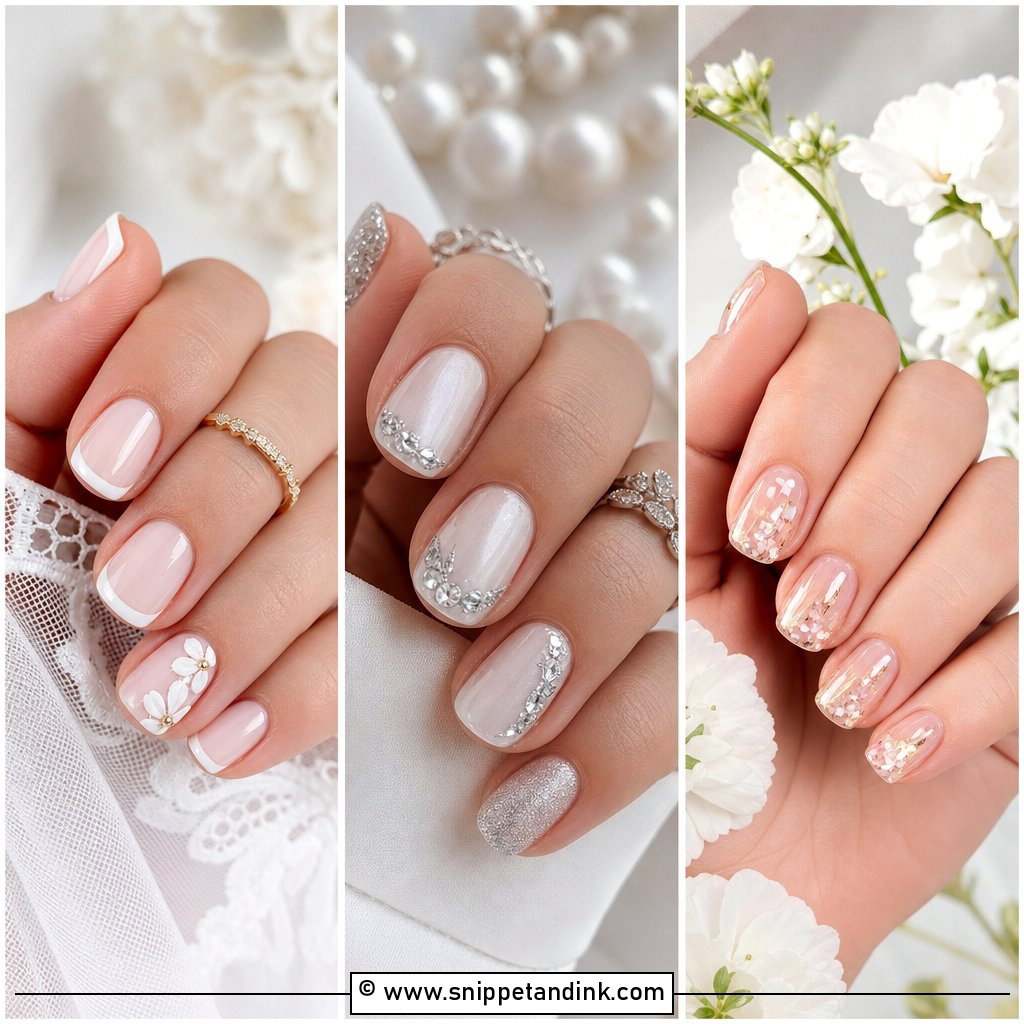
Your hands end up in more close-up photos than almost any other part of you: the ring shot, the vows, the bouquet, the first toast. That’s why I steer brides toward gel for the wedding itself. Bridal gel nails are cured under a lamp, so they stay glossy through fittings, travel and a long day of hugging people, where regular polish can chip by the reception. The sets I’m asked for most right now are quiet ones: milky color, sheer blush, pearl chrome, micro French tips, a little lace or a tiny flower. Below are twenty I’d happily do, with the details I’d check before painting each one.
When to Have the Final Gel Set Done
I schedule the bridal set one to three days before the wedding. Gel looks its best in the first week; after roughly ten days, regrowth starts to show as a gap at the cuticle, and that gap is very visible in a ring close-up. Go too early and you’ll be photographed with it. Go the morning of, and any smudge or lifting has no time to be fixed.
If you’ve never worn gel before, don’t make the wedding set your first. Some people react to the acrylates in gel products, with itching or redness around the nail, and you want to find that out at a trial, not the day before. A trial three to four weeks out also lets us check the color against your dress in daylight.
- Stop picking or biting for a few weeks beforehand so I have a clean cuticle line to work with.
- Don’t cut your cuticles at home in the final week; small nicks sting under prep and can bleed.
- If you’re having a spray tan, book it before your nails; tanning solution can tint a pale gel yellowish.
- Bring your engagement ring so we can judge length and color against the stone.
1. Milky White Bridal Gel Nails
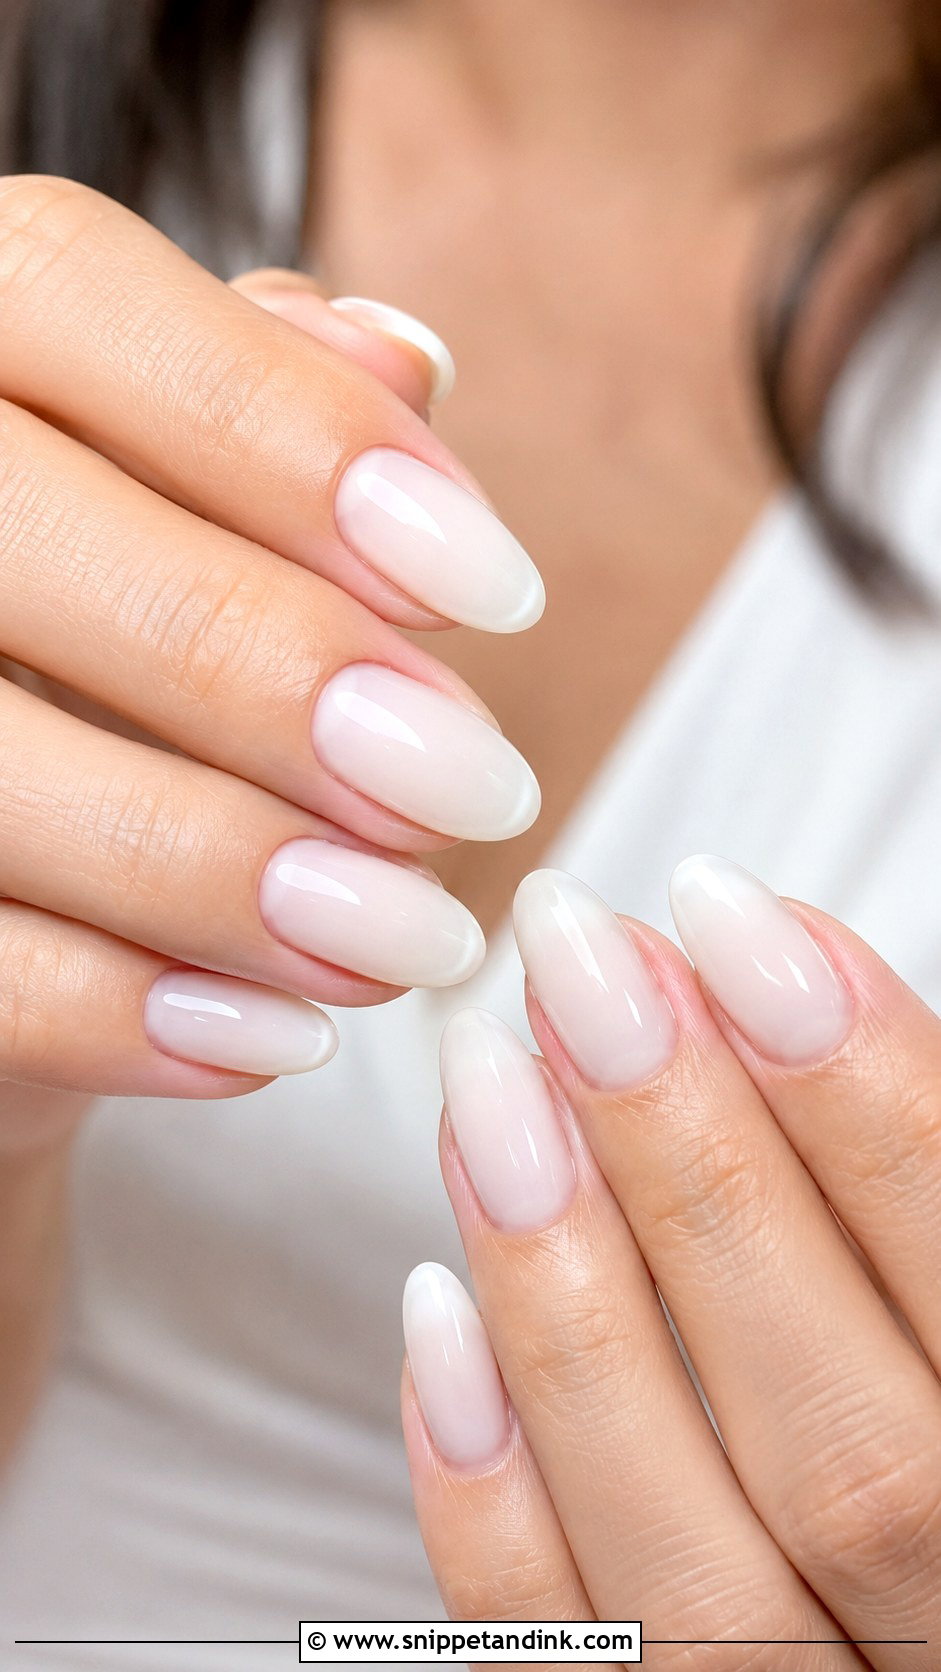
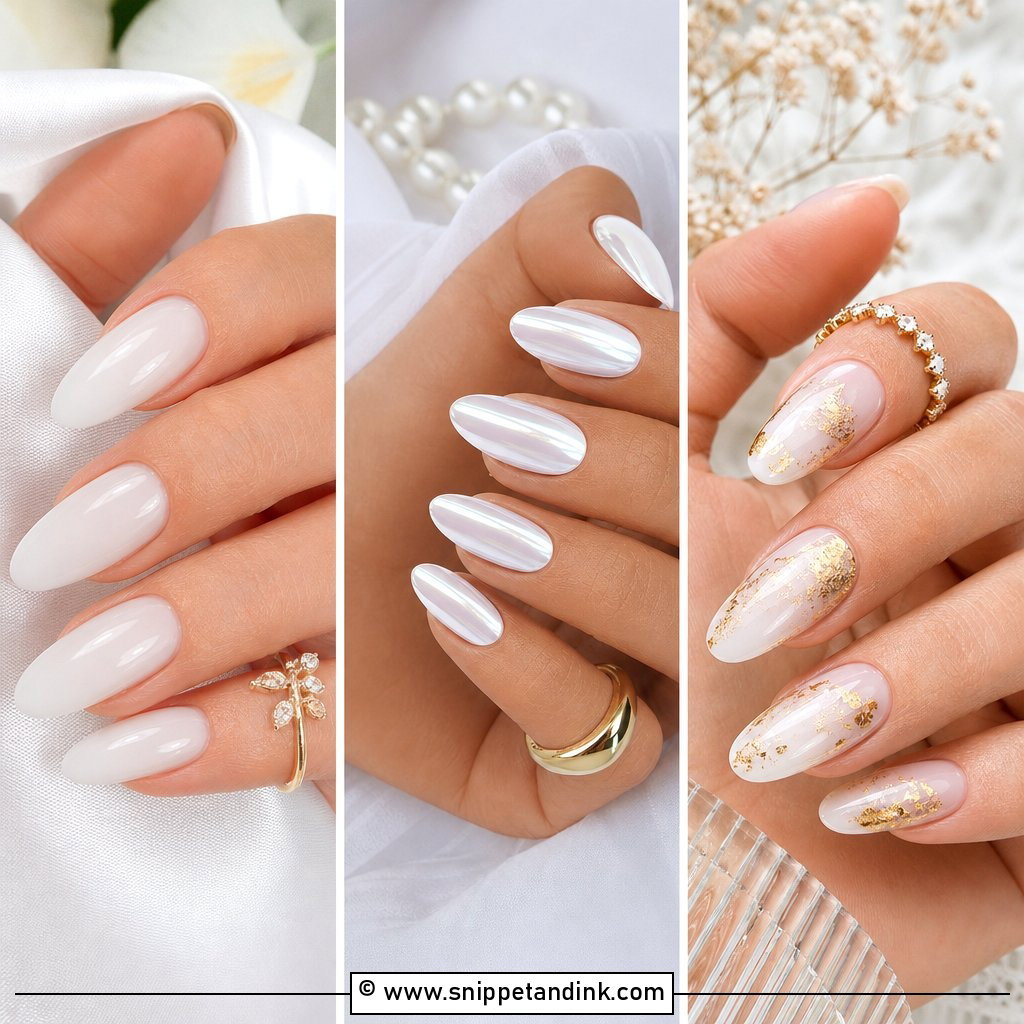
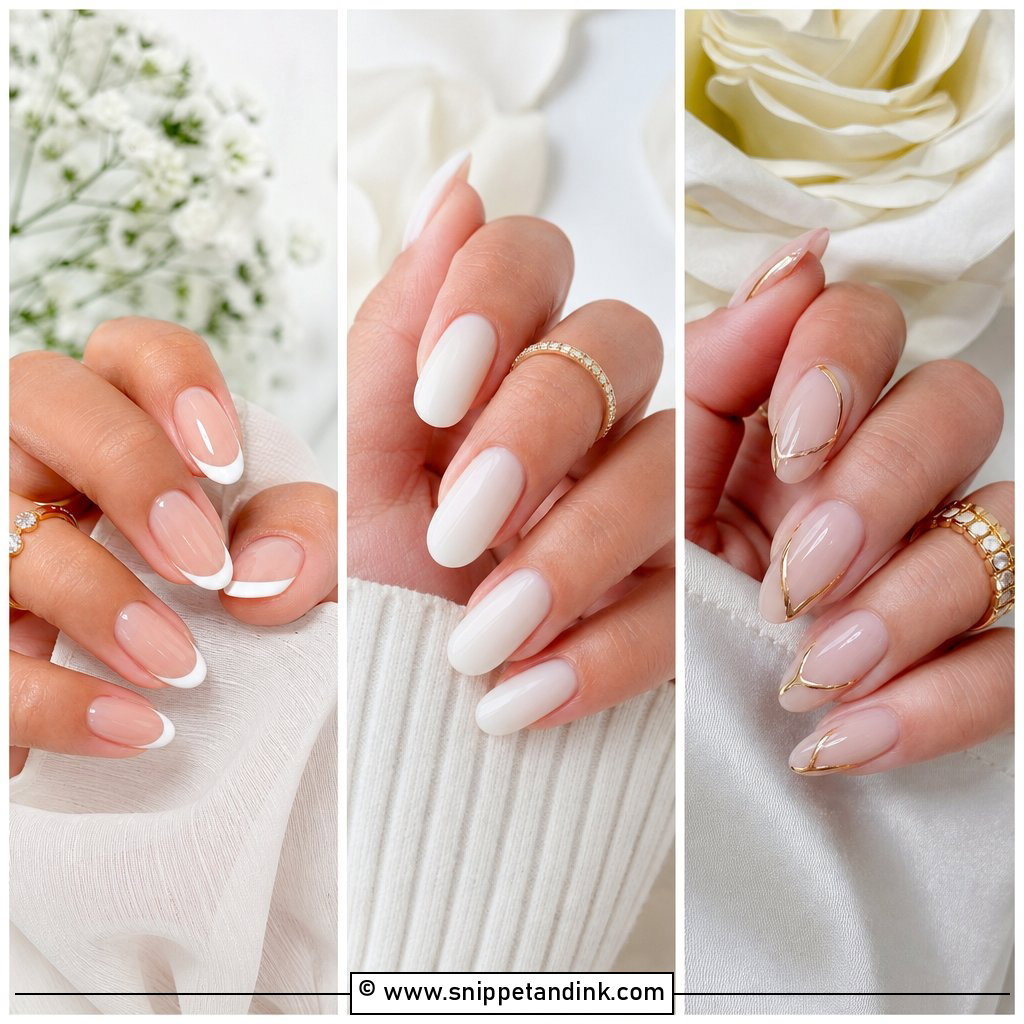
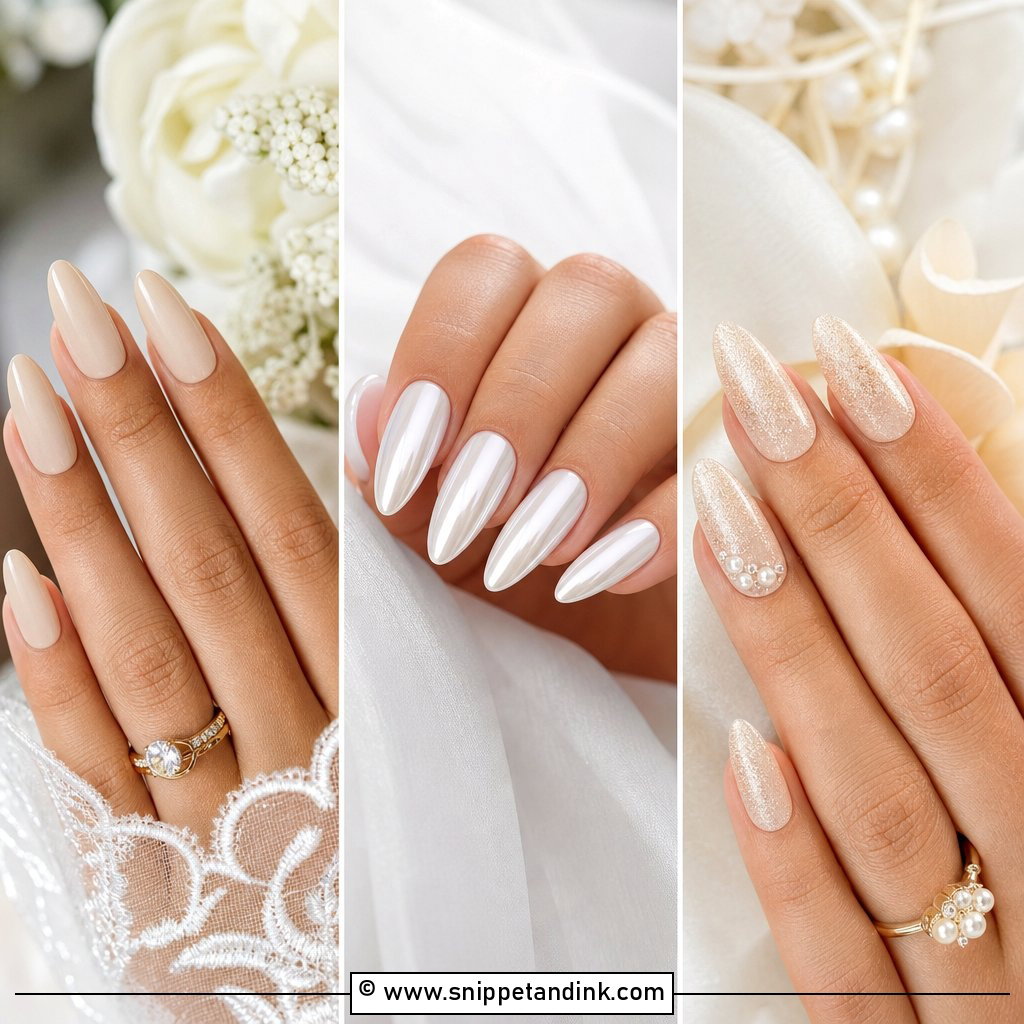
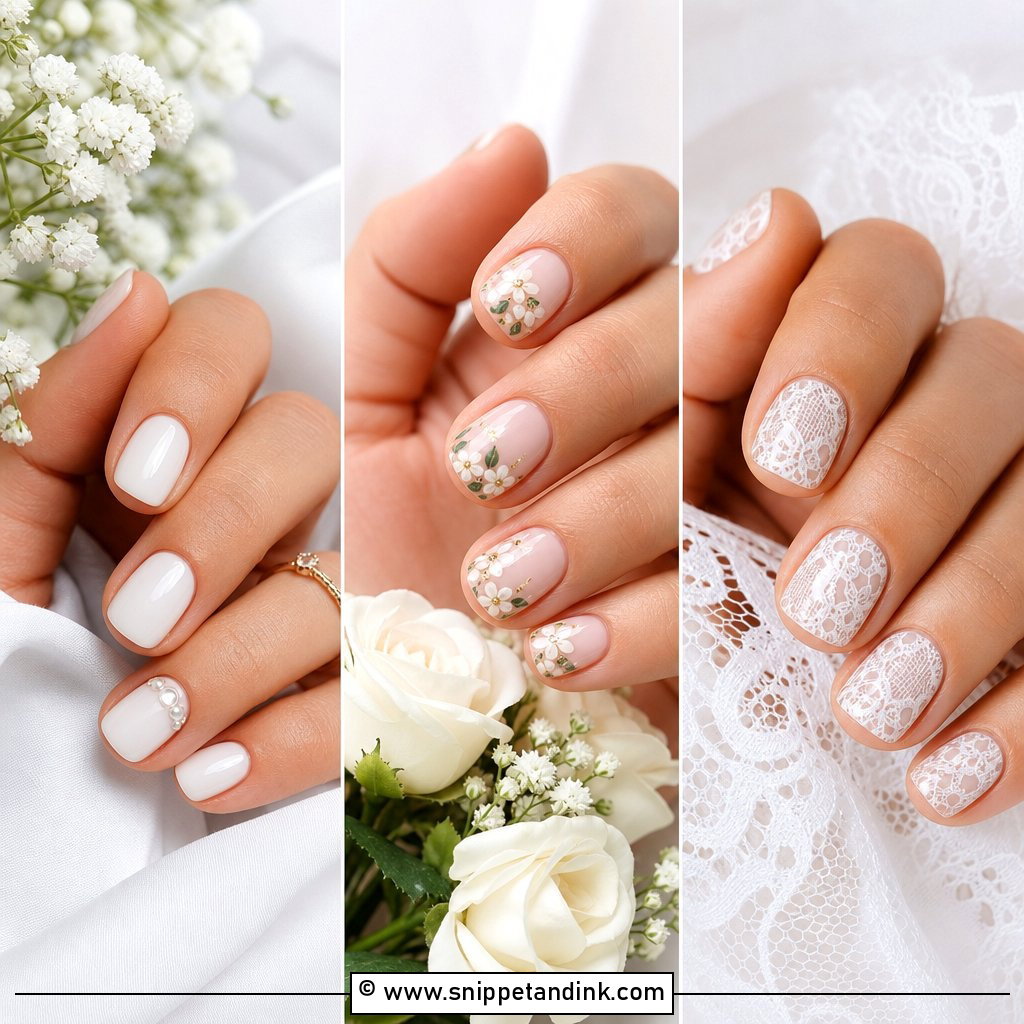
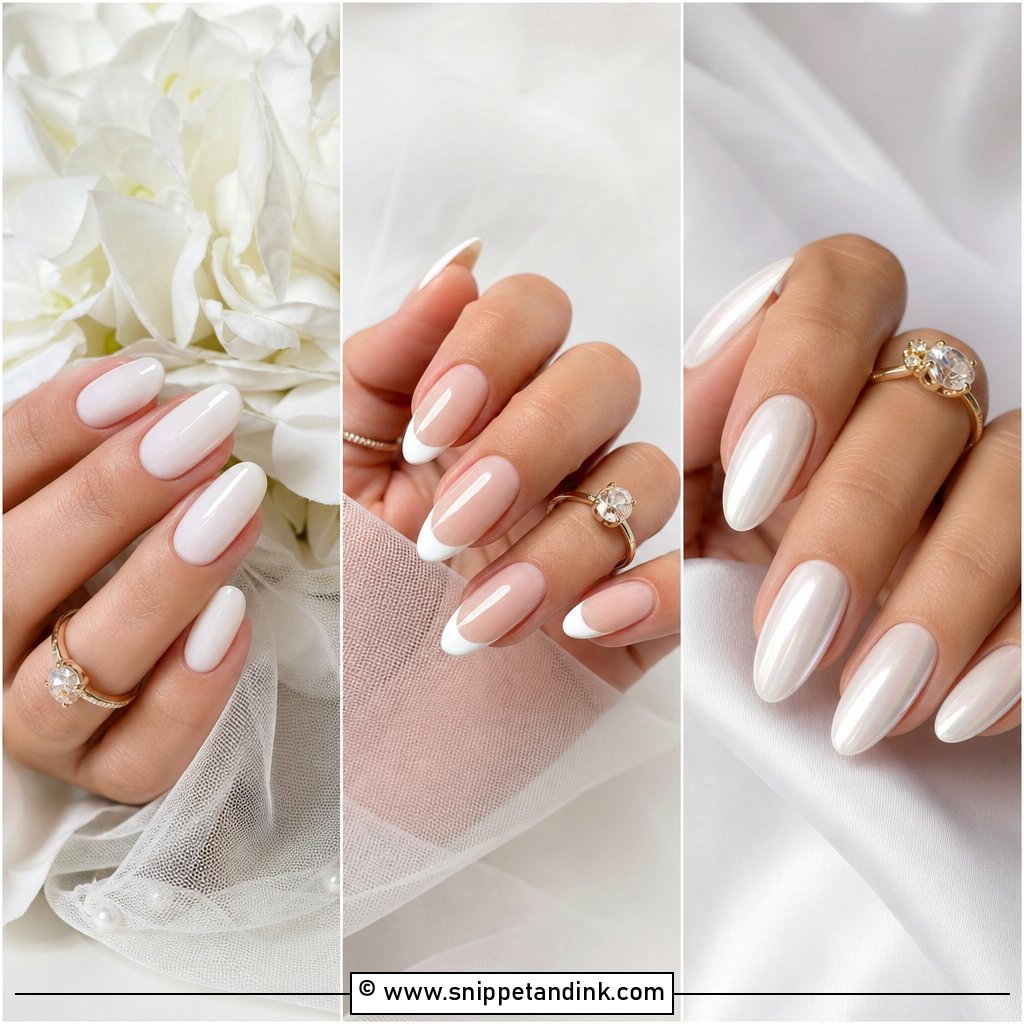
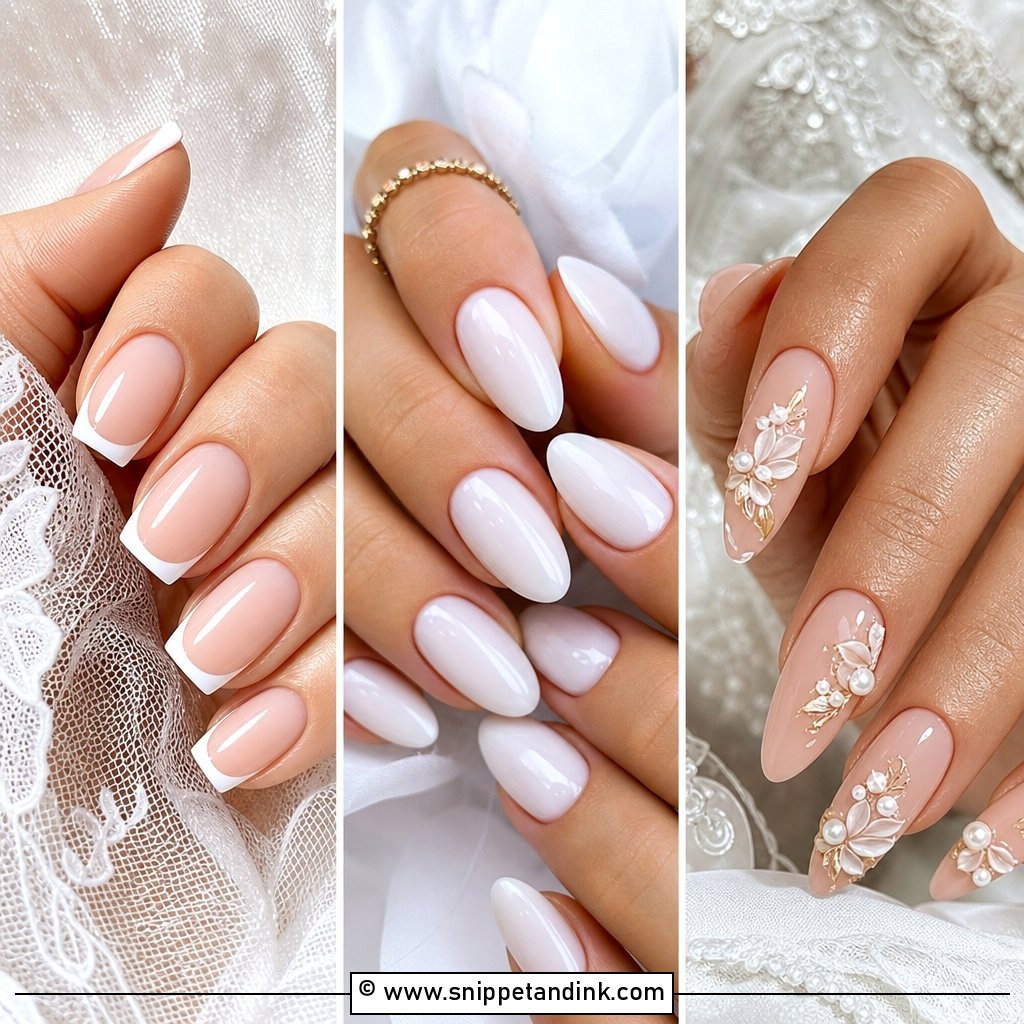
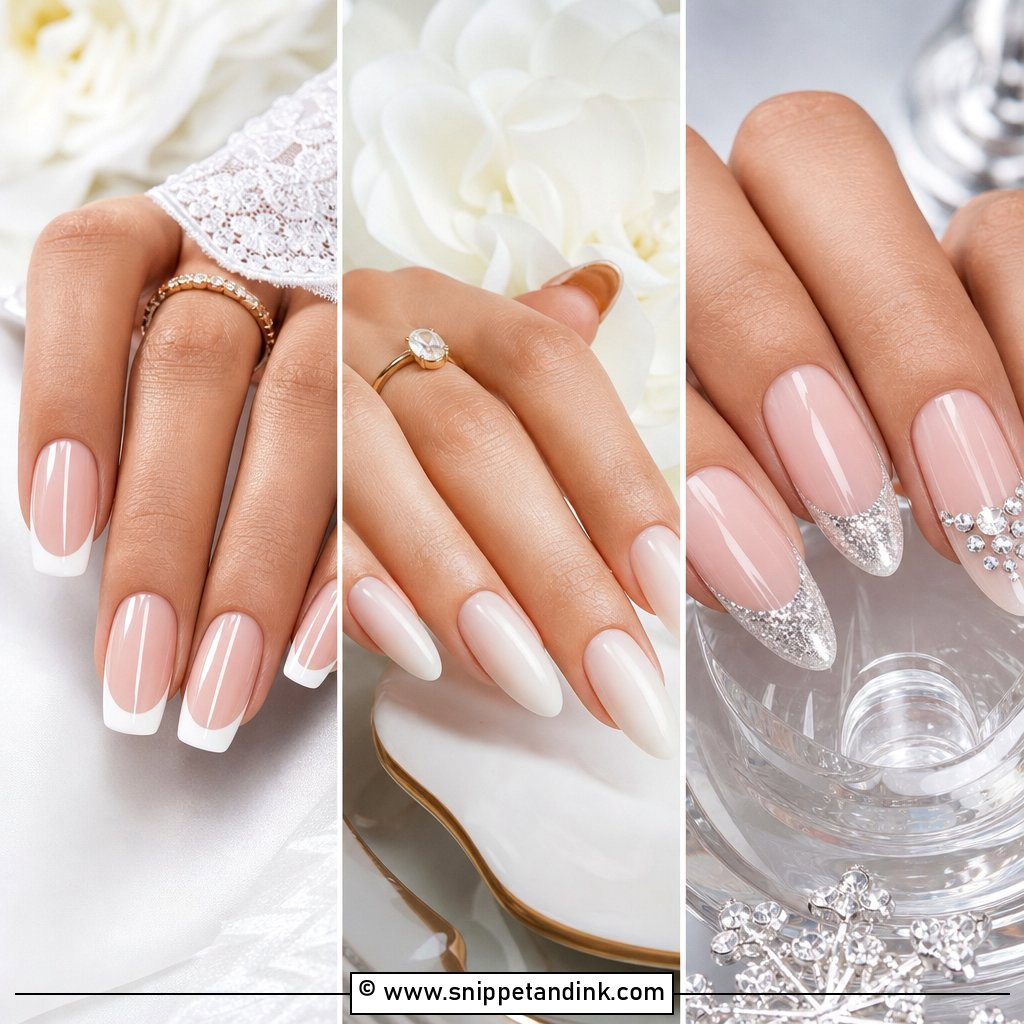
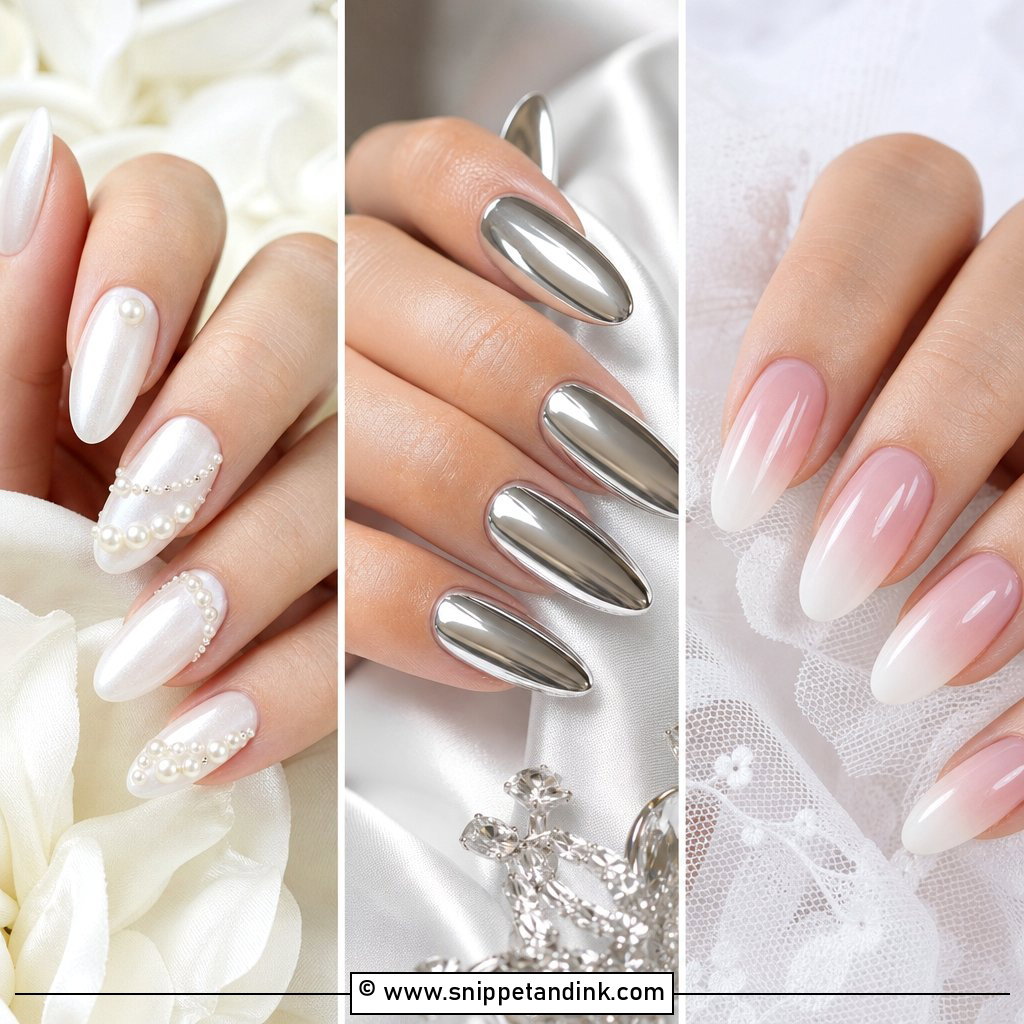
Milky white sits between sheer cream and opaque white, and getting that balance right is the whole job. Too opaque and it looks like correction fluid next to an ivory dress; too sheer and it reads streaky. I usually build it in two or three thin coats of a semi-sheer gel and finish with a high-gloss top. It flatters short ovals, almonds and medium squares, and I can push the tone warmer or cooler to suit your skin. Milky white bridal gel nails are the set I’d recommend to anyone torn between options, especially with satin or pearls.
2. Blush Pink Bridal Gel Nails
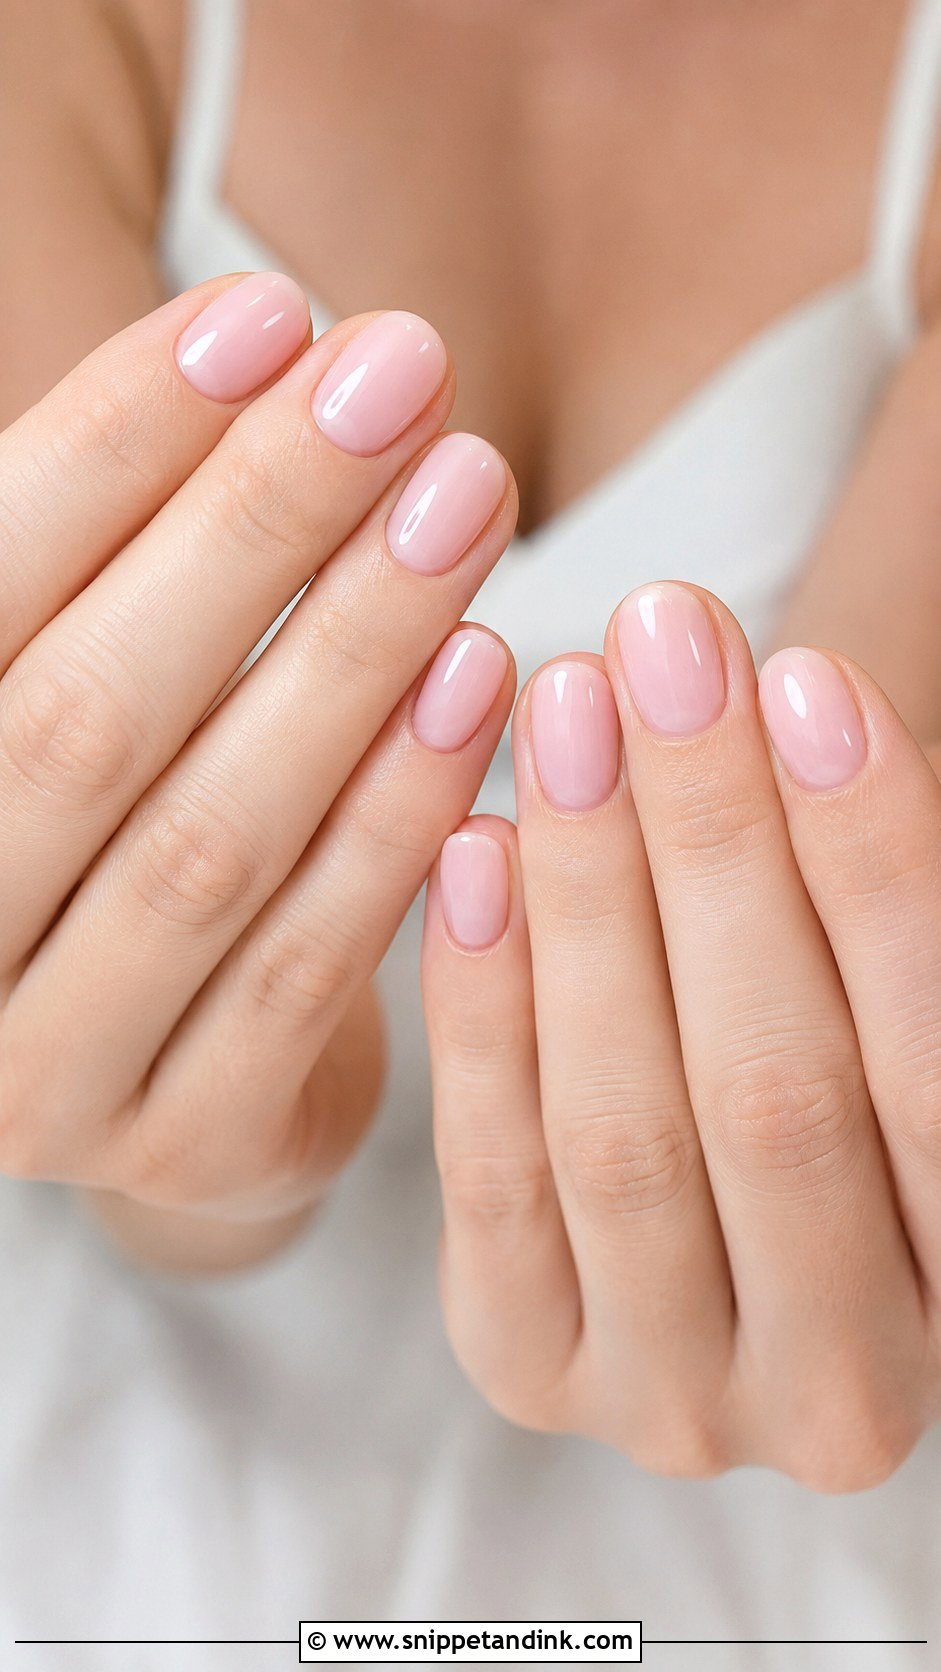
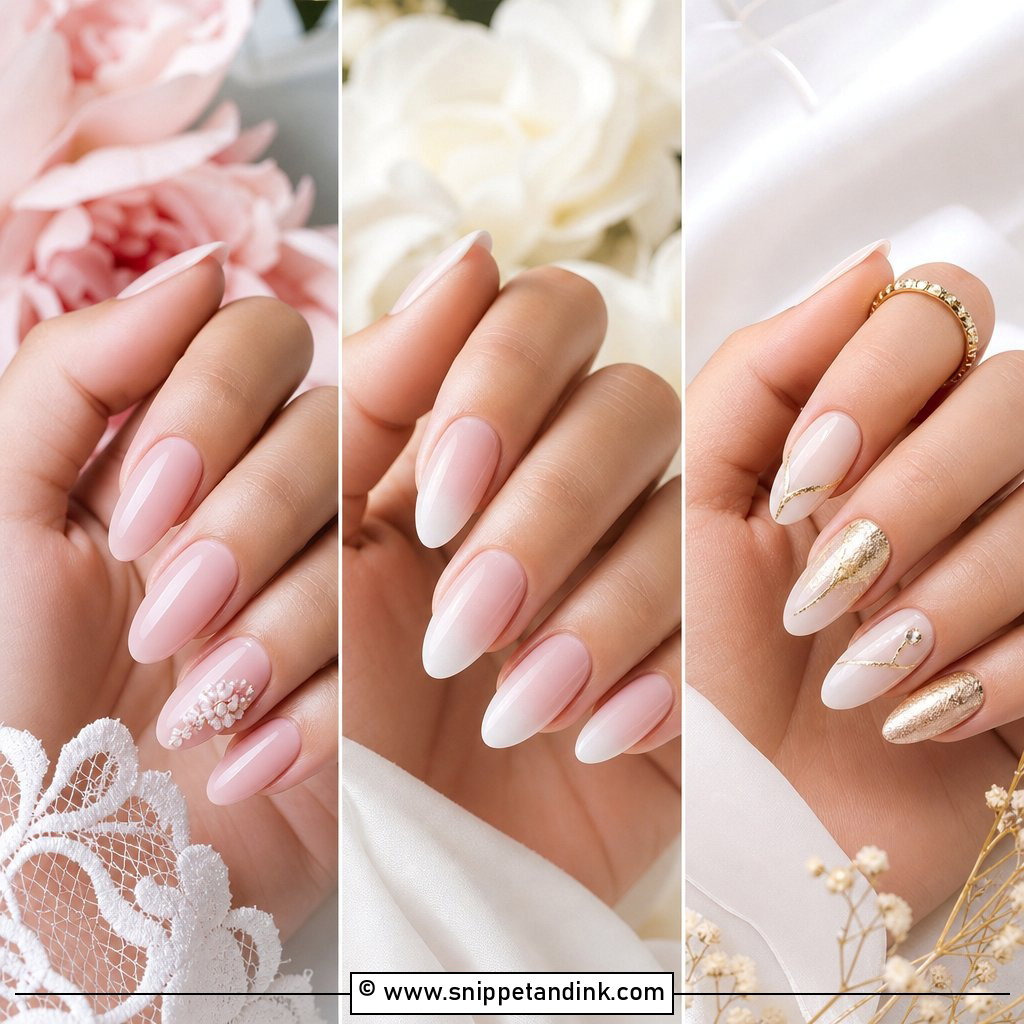
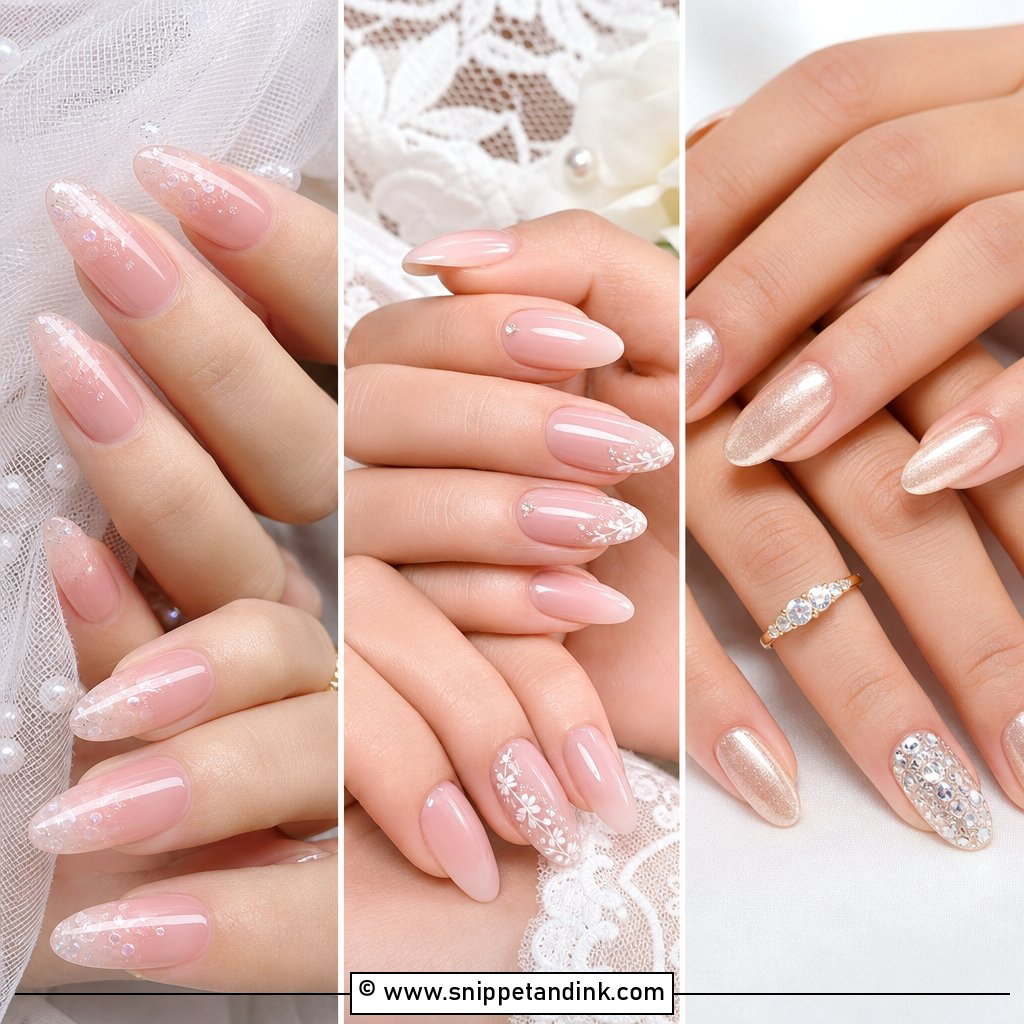
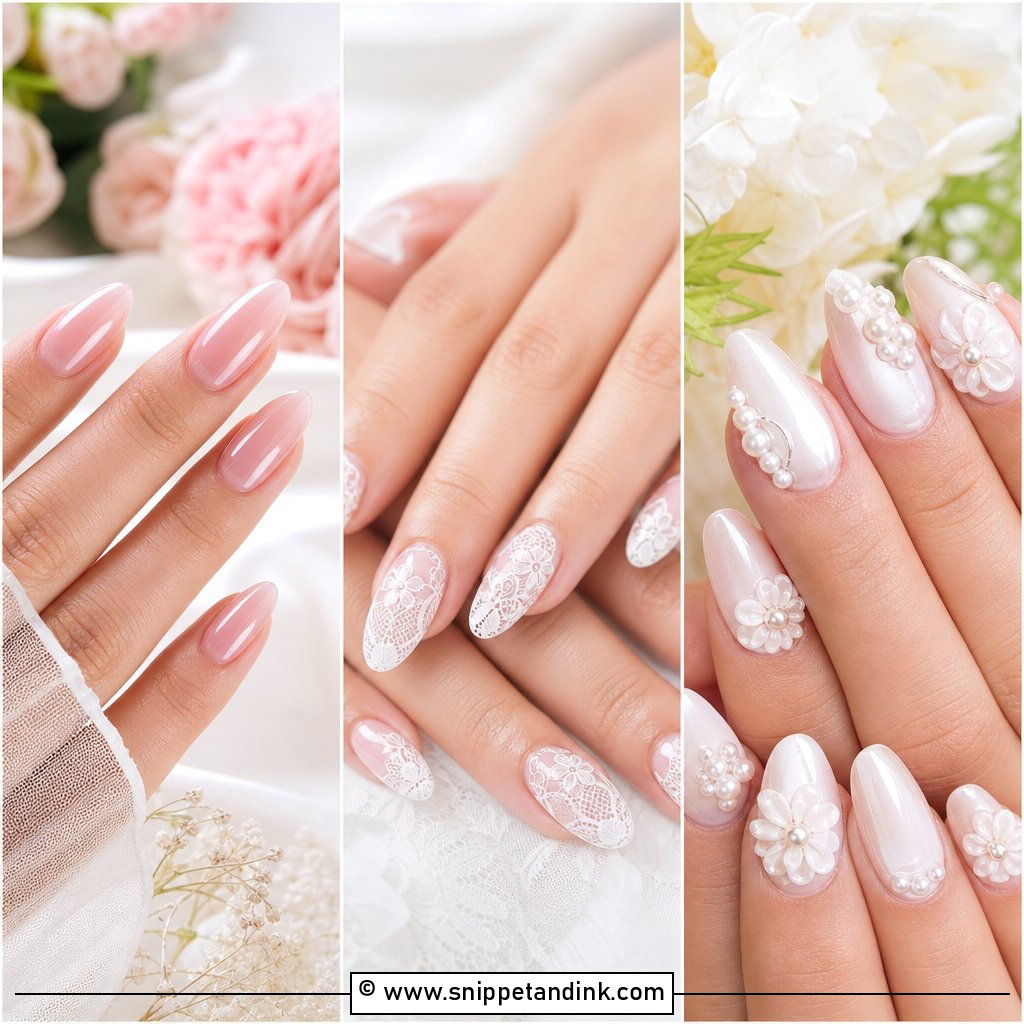
The mistake with pink is picking it from the bottle. An opaque bubblegum looks loud on camera, so I use a sheer or jelly pink that lets a little of the natural nail show through and gives the fingers a healthy flush. Rounded almonds or ovals keep it soft. If you rarely wear nail art, this is a comfortable step up from a plain nude, and it sits easily beside rose gold jewelry and pale florals.
3. French Tip Bridal Gel Nails
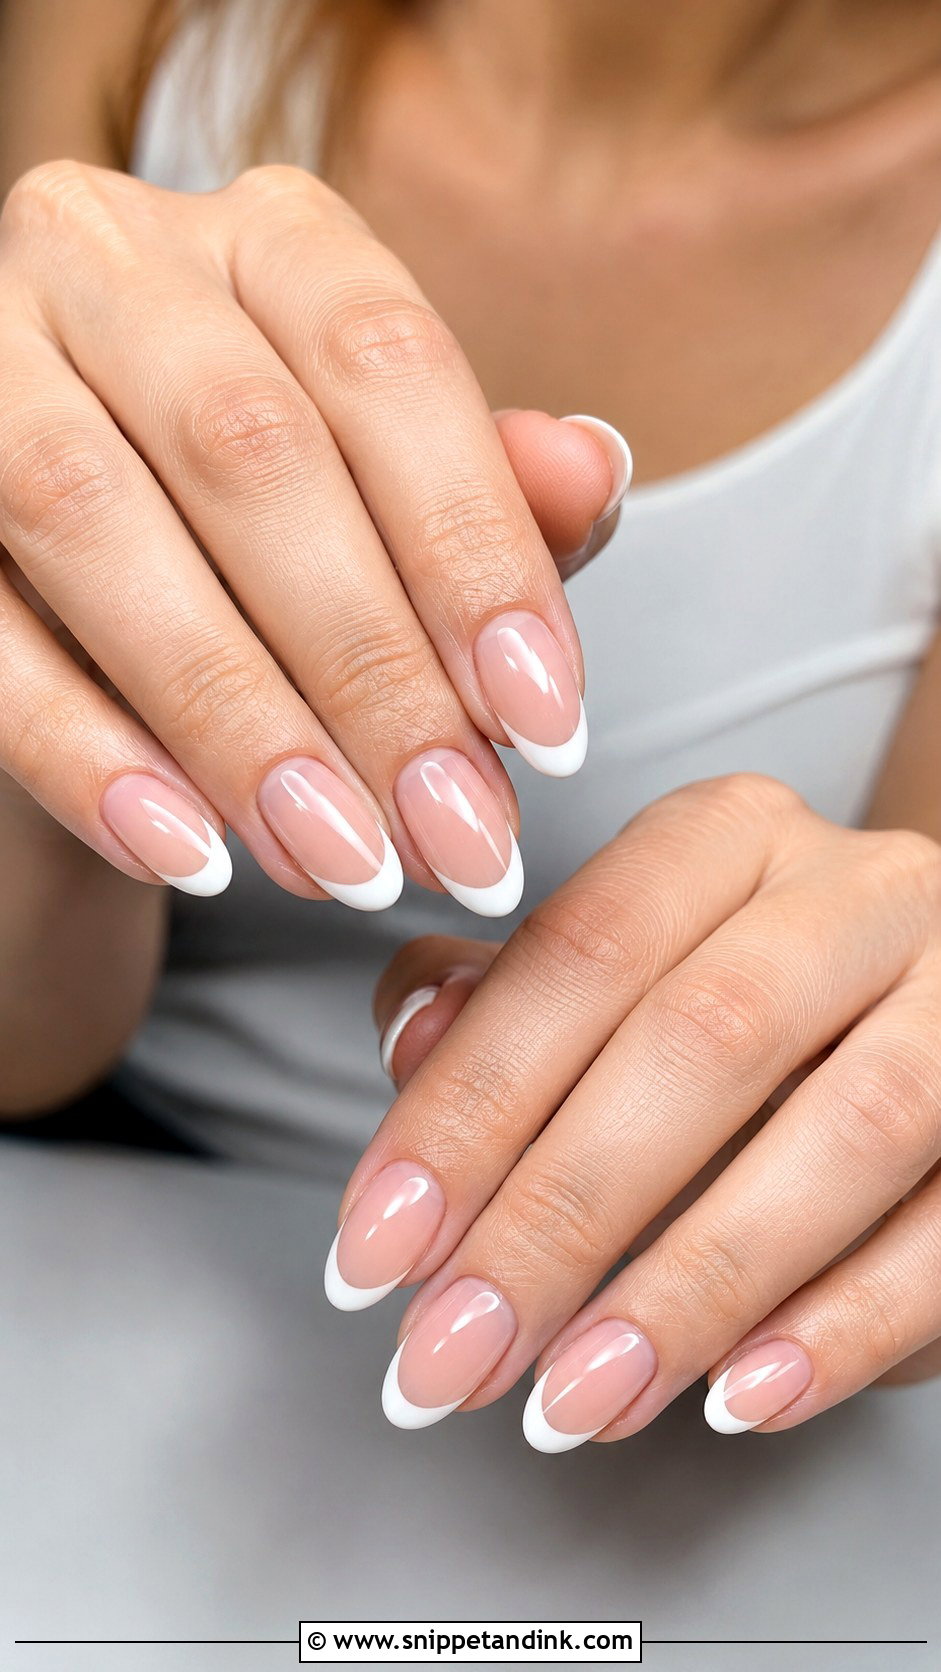
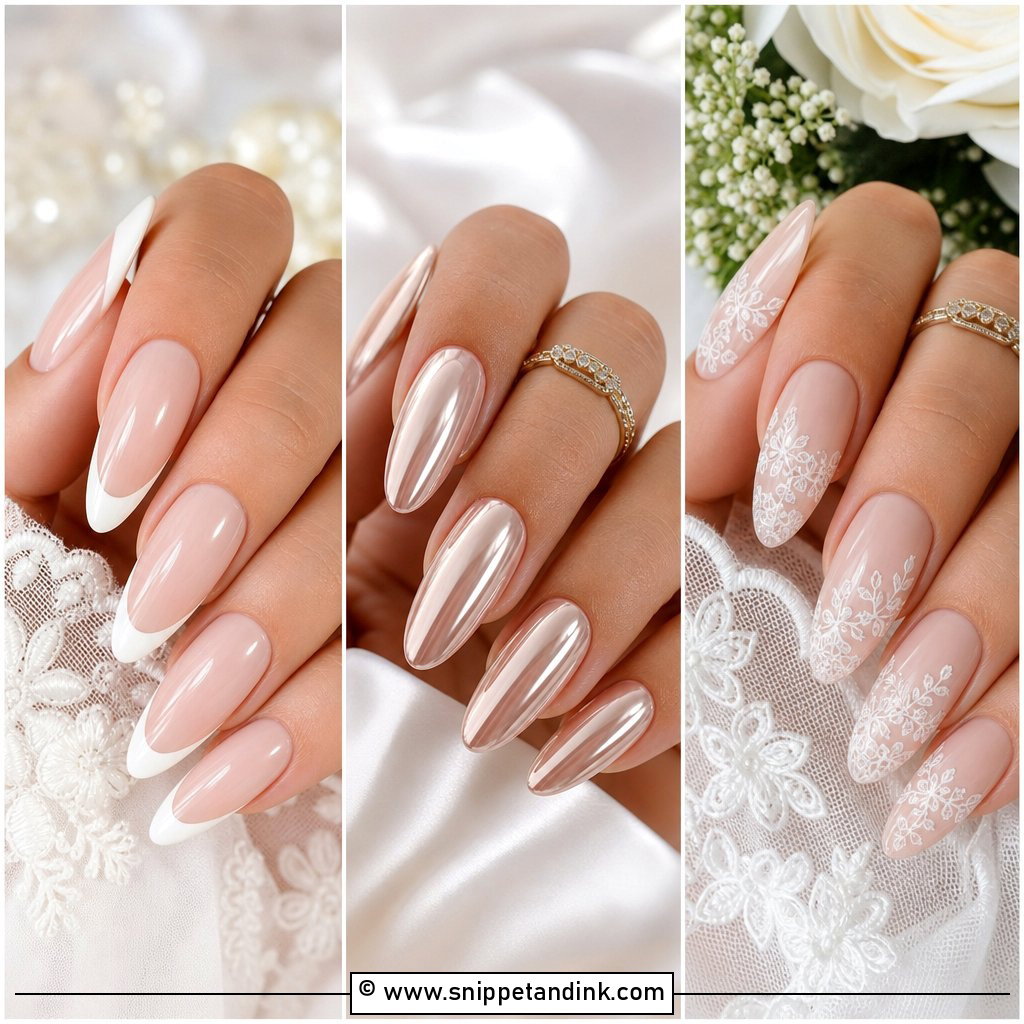
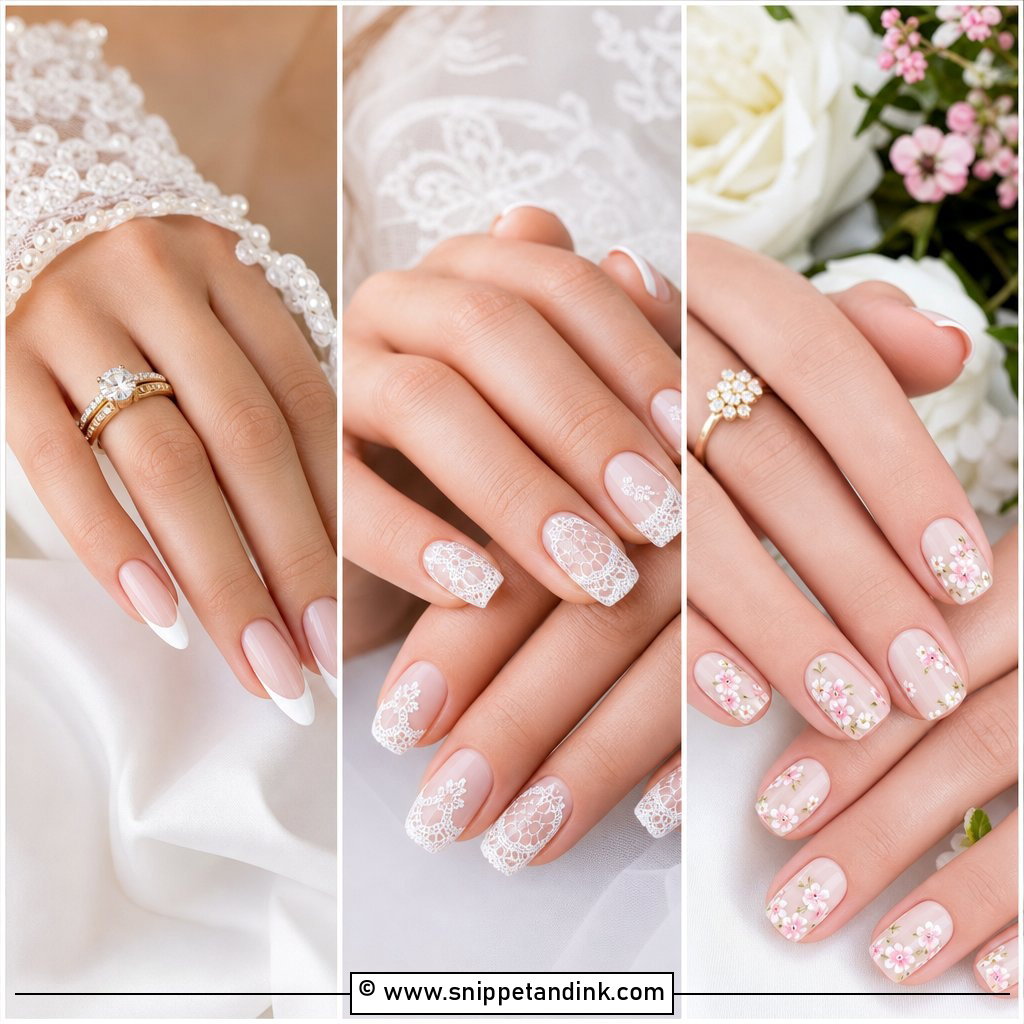
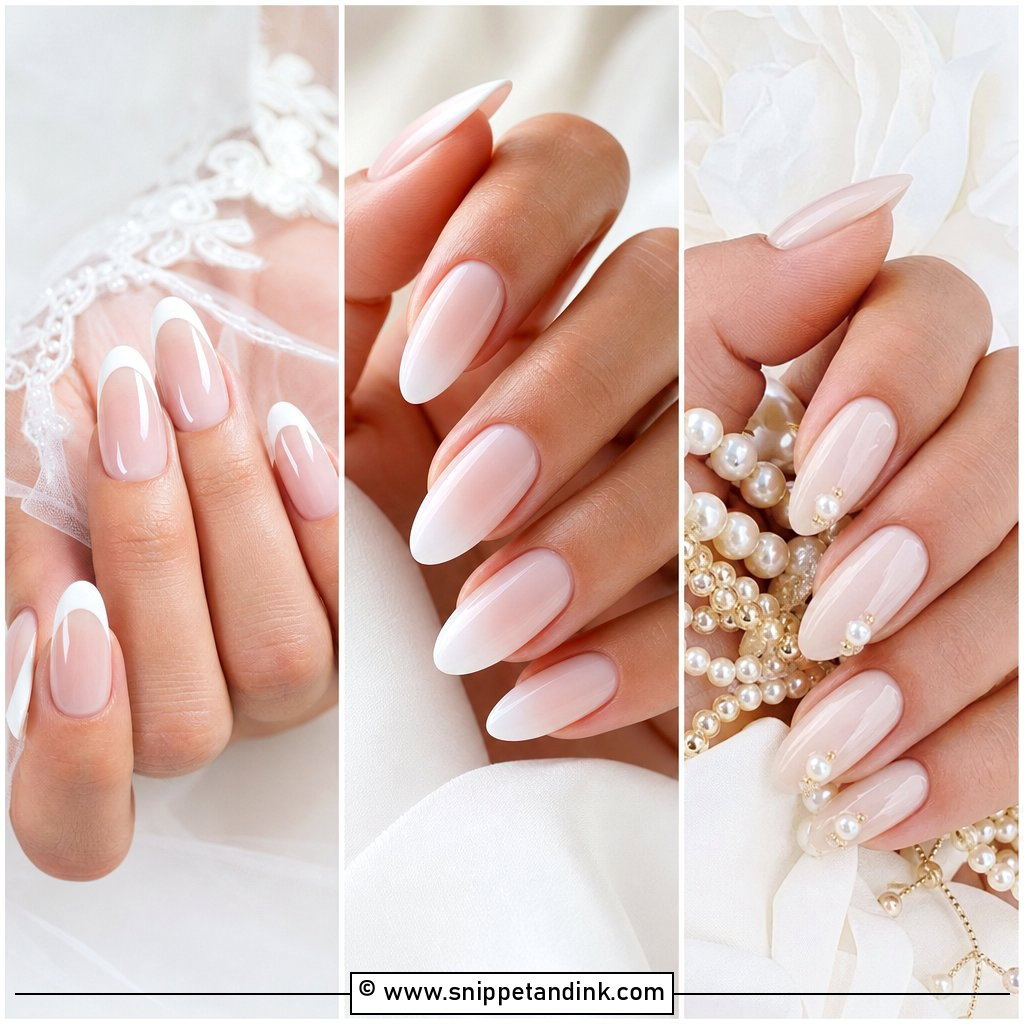
French tips last because they frame the nail and make the hands look tidy from any distance. For a bride I keep the base sheer pink or nude and paint the white smile line to follow her own nail curve rather than a straight stencil line, which looks stamped on. Medium almond reads graceful; short square looks traditional. Gel keeps that white crisp through a full wedding weekend, where a polish tip starts wearing at the edge after a day or two of handwashing.
4. Micro French Bridal Gel Nails
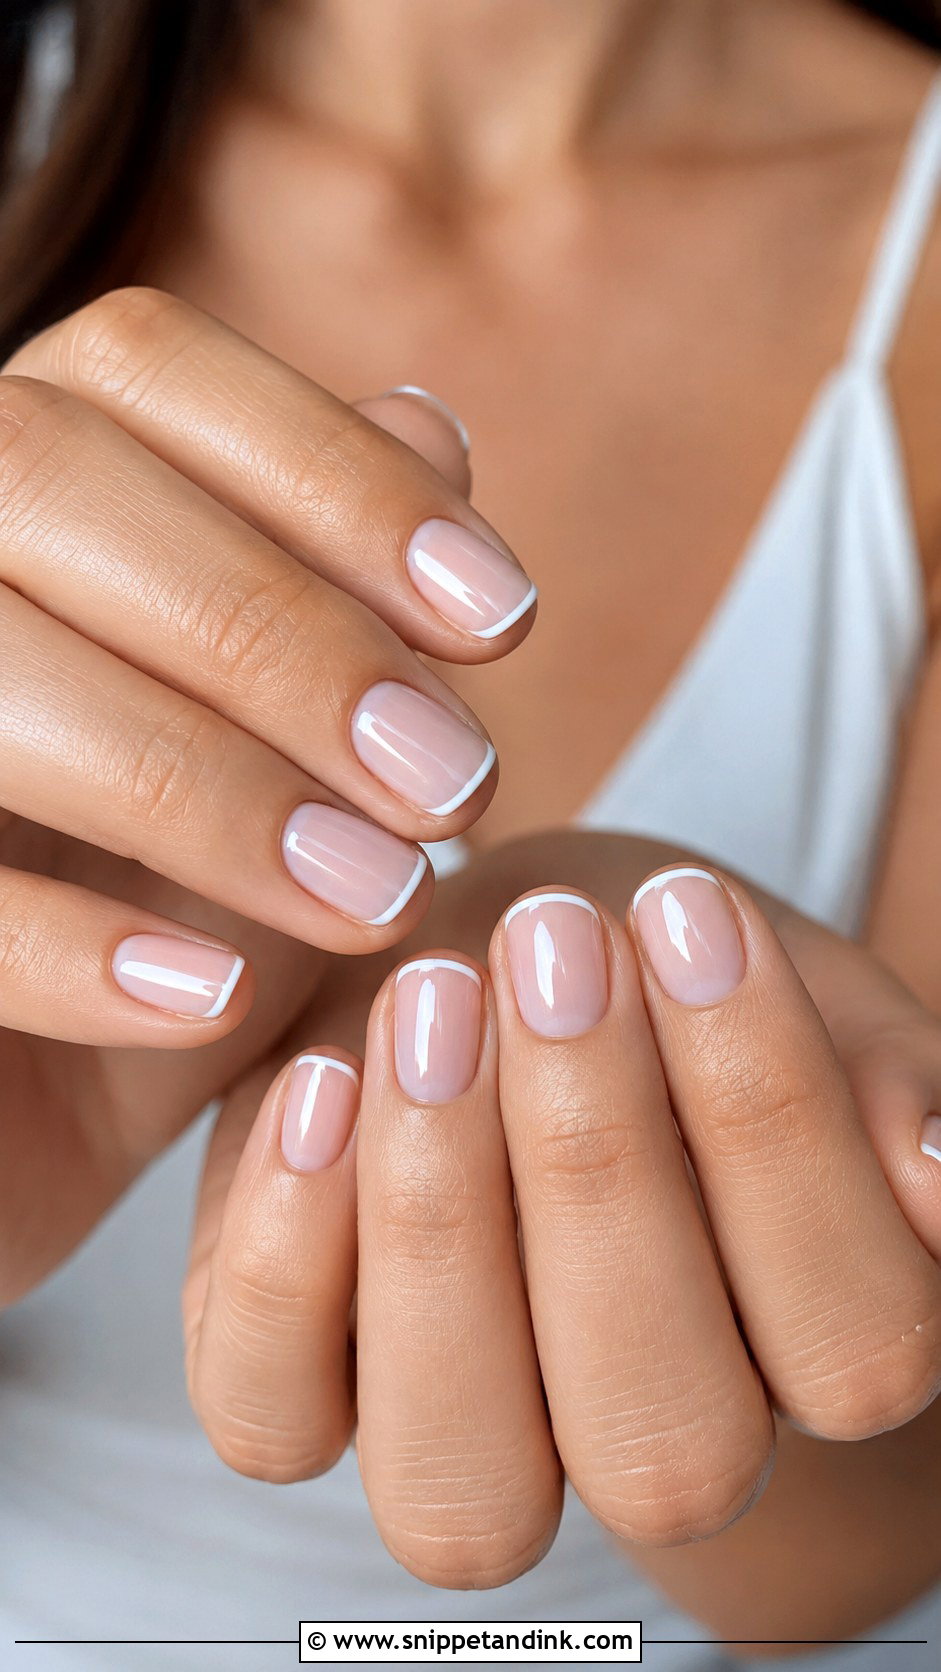
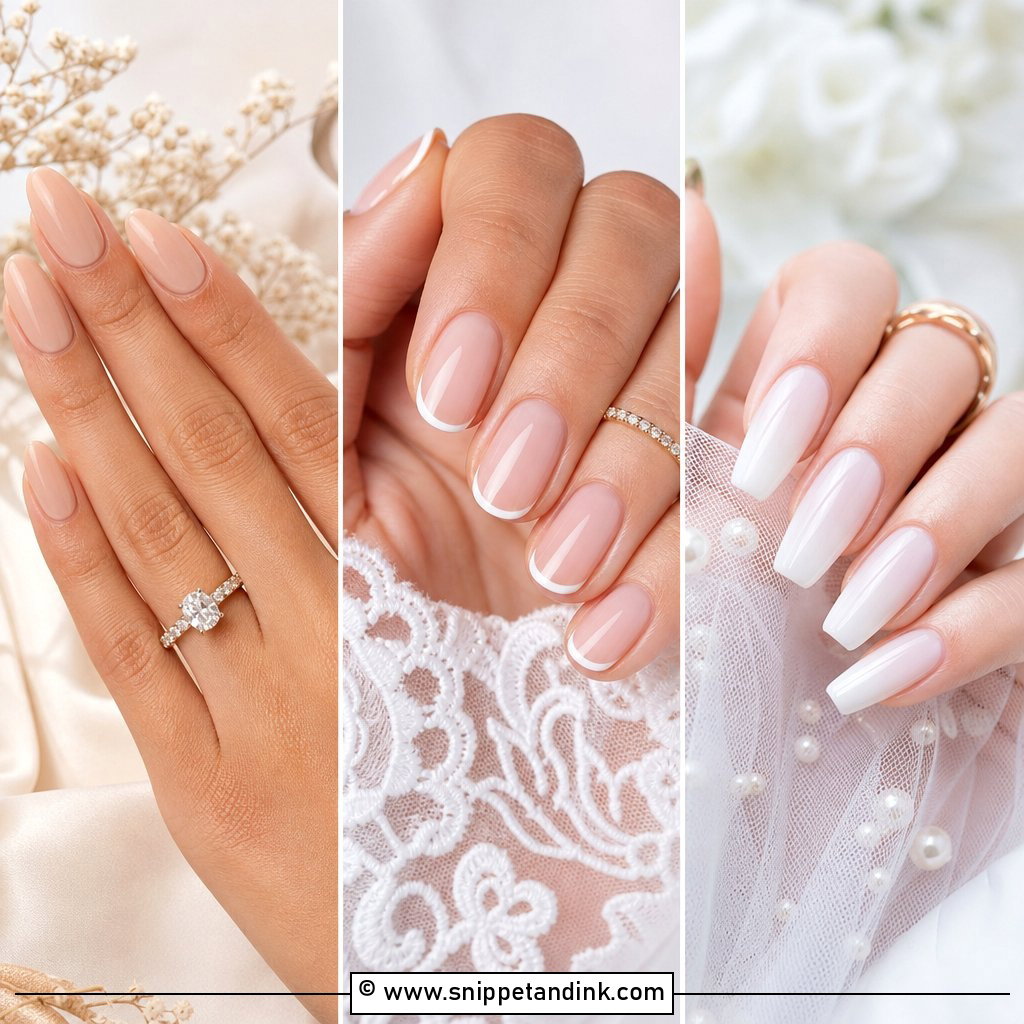
Micro French bridal gel nails swap the thick tip for a hair-thin line at the free edge. On short nails that’s a real advantage, since a full-width tip eats most of the visible nail and makes it look stubby. I paint it with a long, fine striper brush and check every finger from the side, because a line that thickens at one corner is obvious in a ring close-up. Keep the base sheer nude, pale pink or milky so the ring stays the focus.
5. Pearl Chrome Bridal Gel Nails
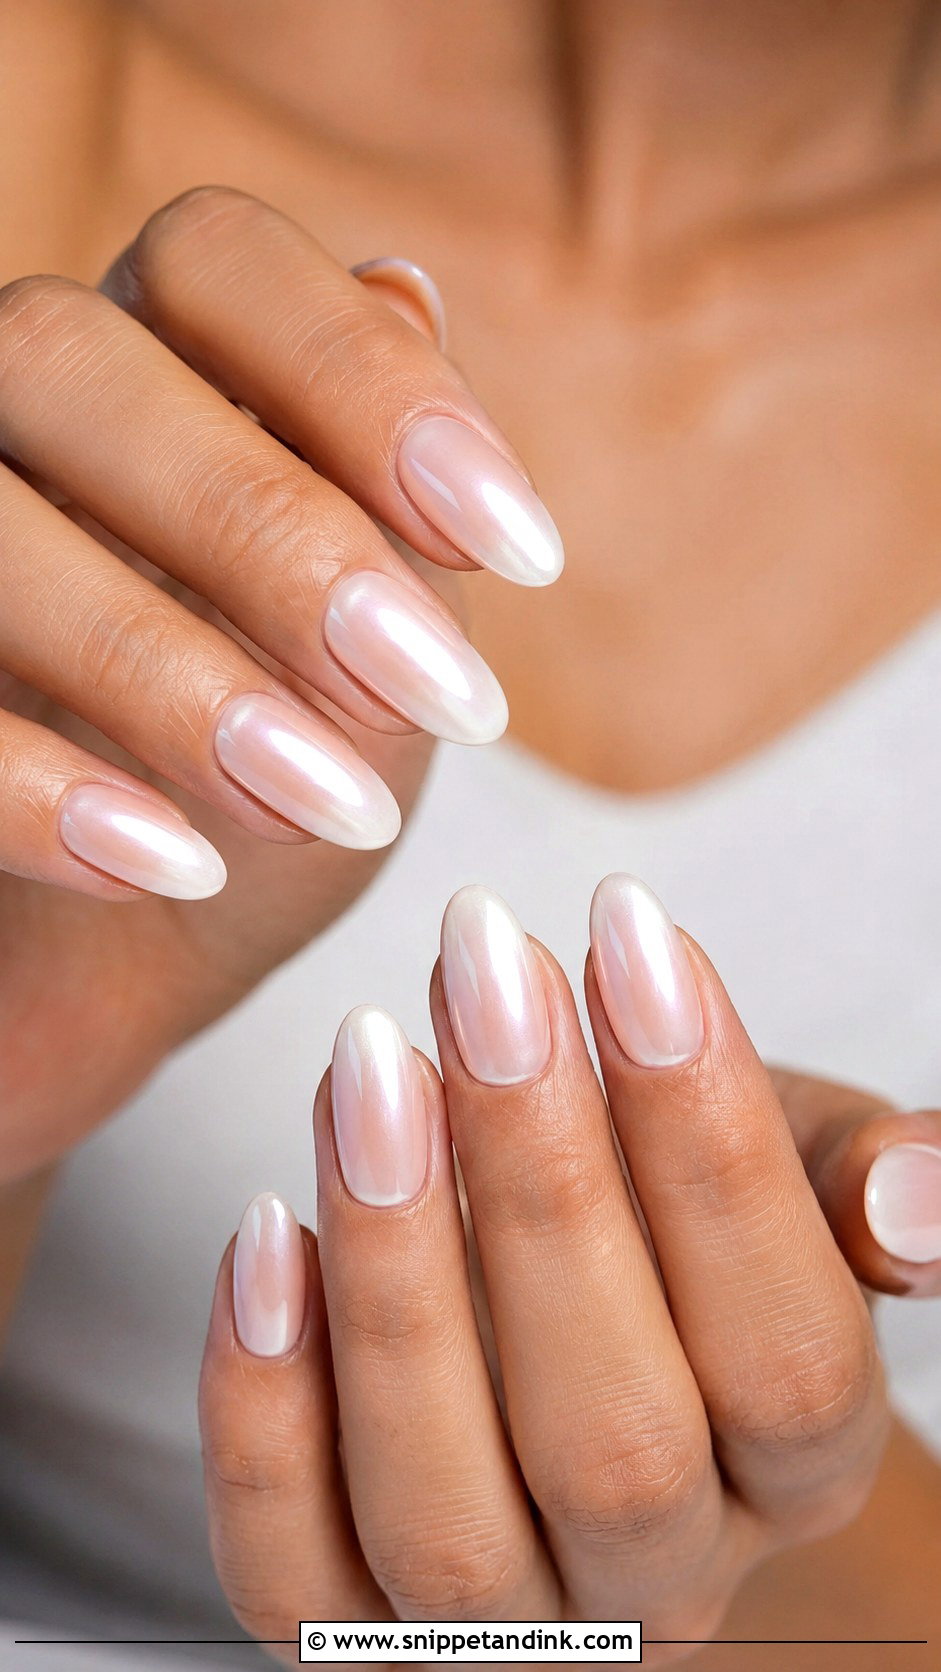
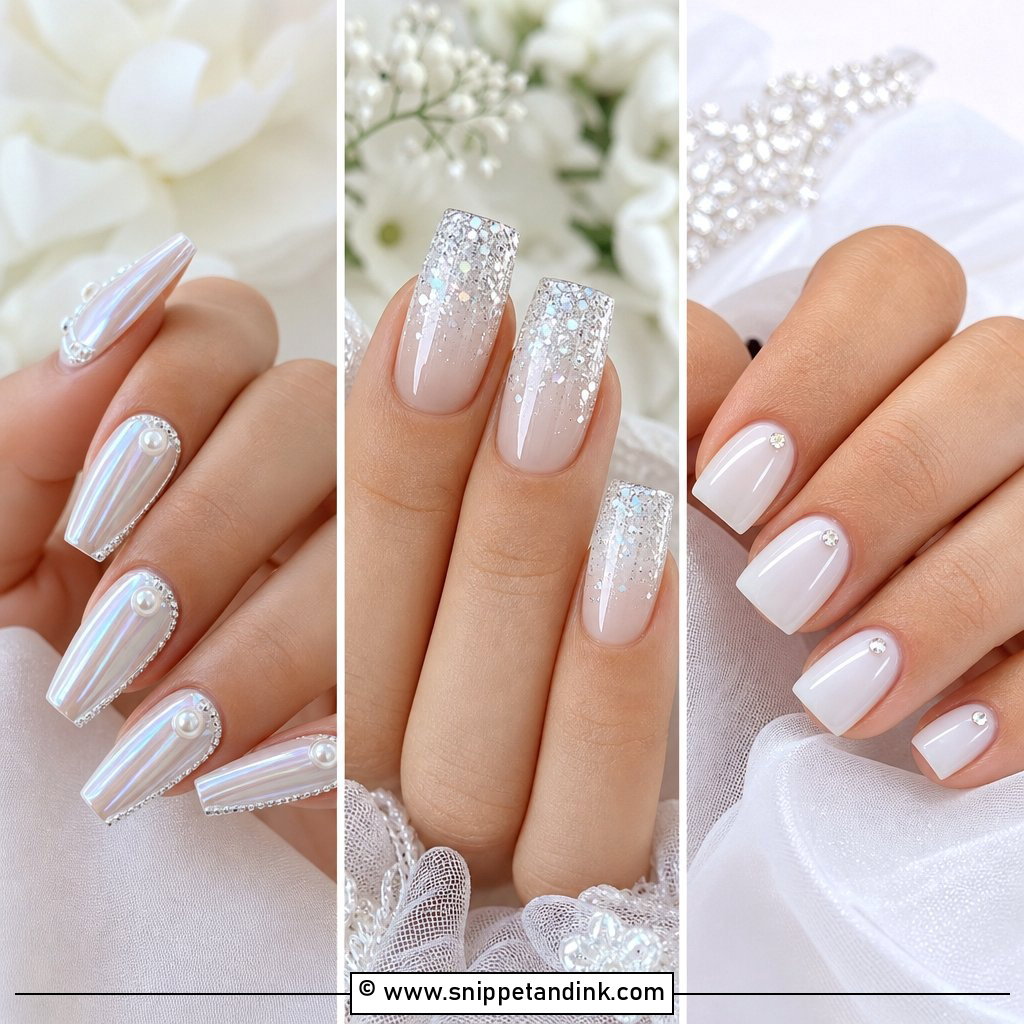
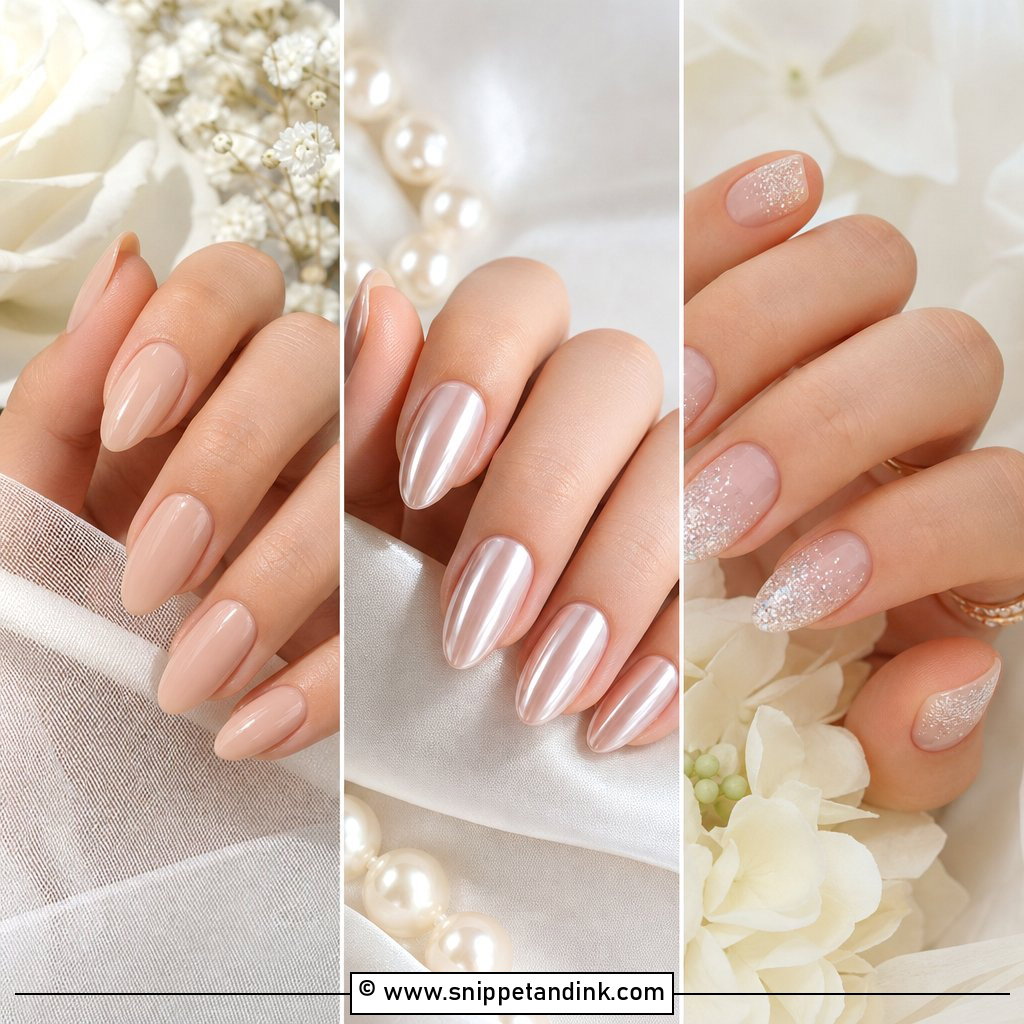
Pearl chrome bridal gel nails rely on the base for most of the effect: milky white, sheer pink or nude, then a fine pearl powder buffed over a no-wipe top coat. I keep the powder light. Rubbed in too heavily it tips from pearly into metallic, and under flash it can look grey. Almonds and ovals show the glow best, and it suits pearl jewelry, beaded gowns and satin. Ask specifically for pearlescent, not silver chrome, so we’re picturing the same finish.
6. Glazed Bridal Gel Nails
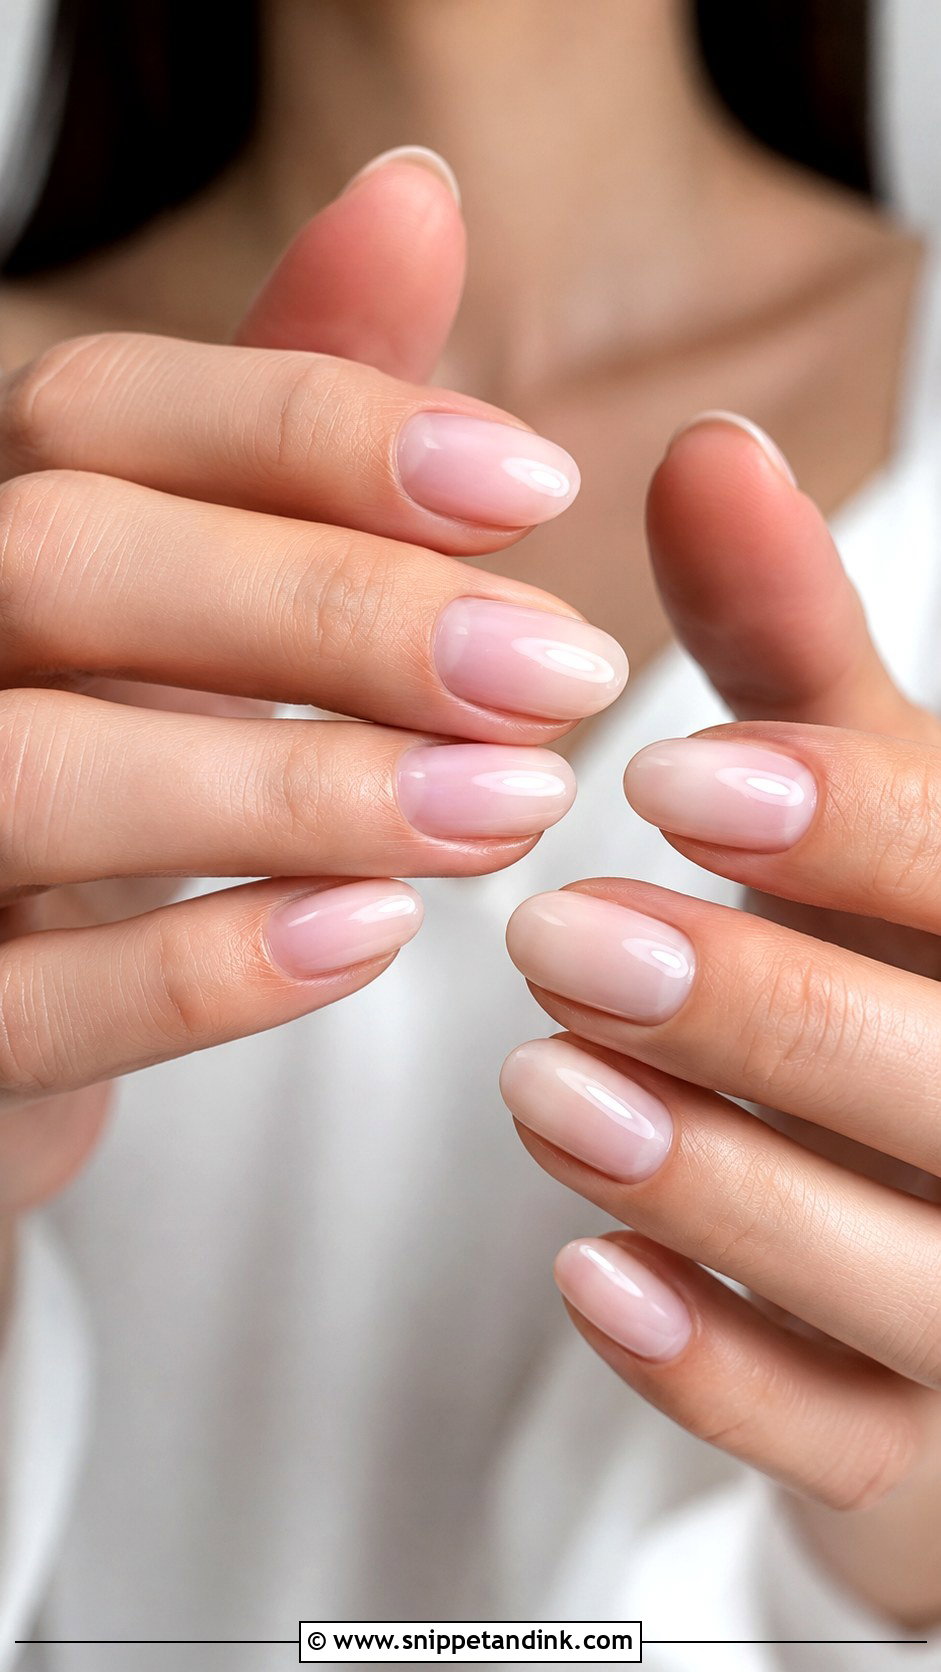
Glazed nails are basically a sheer cream base with a soft reflective sheen on top, a little like a glossy veil over the nail. It suits brides who want shine without art. Pale nude, milky pink or ivory underneath all work. I find it hides small ridges better than a flat cream would, because the light skims across the surface, so it’s forgiving on nails that aren’t perfectly smooth. Equally at home at a city venue or a garden ceremony.
7. Nude Bridal Gel Nails
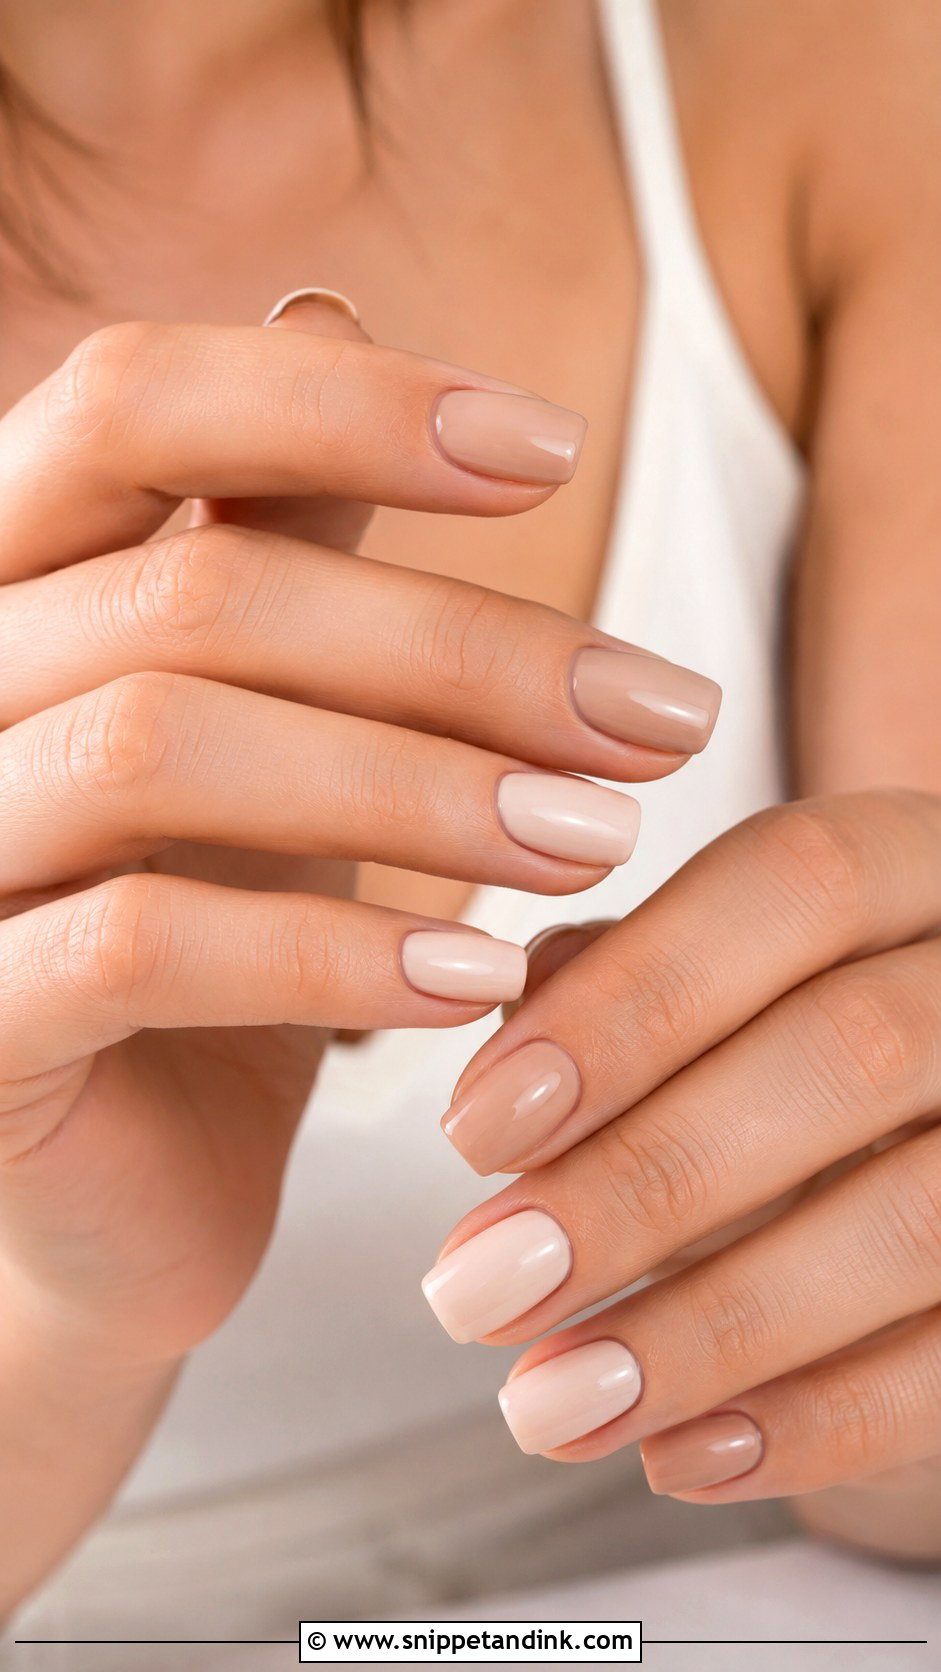
Nude is only simple if the shade suits your skin. A flat beige can make hands look washed out, so I swatch two or three on your nail before deciding. Fairer skin usually takes a sheer pink-nude, medium skin a peachy nude, and deeper skin looks rich in caramel, mocha or rosy brown. A glossy top keeps it from looking dull. It’s what I’d suggest under a heavily detailed dress, and it grows out softly, which helps on a honeymoon where you won’t want a salon visit.
8. Ombre Bridal Gel Nails
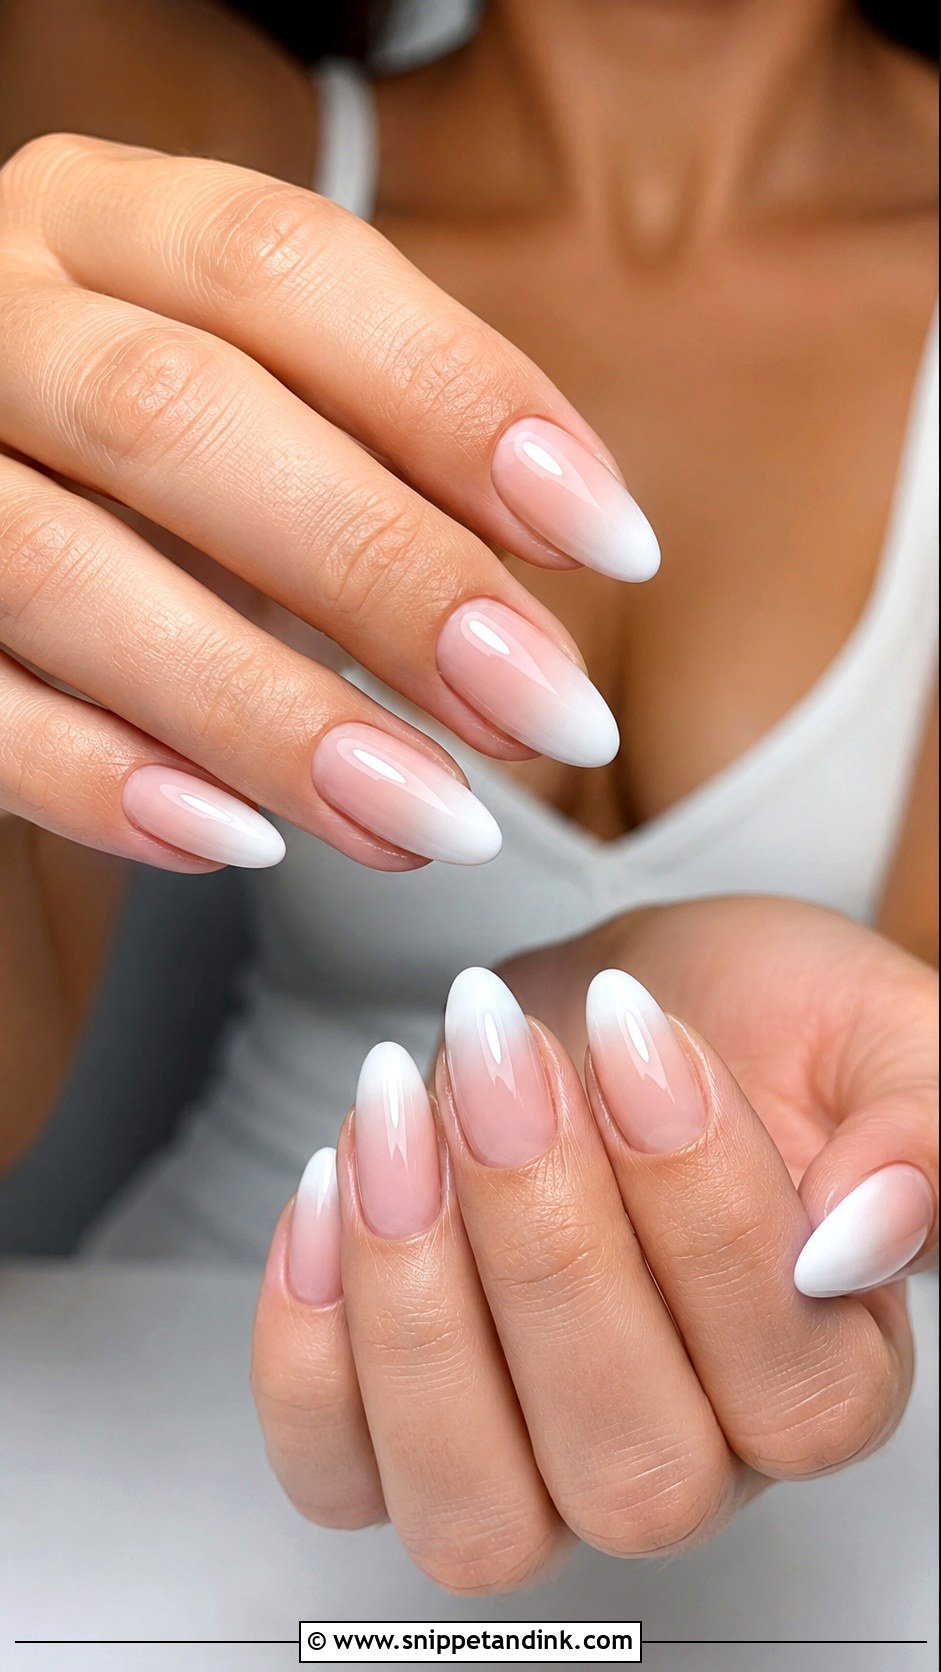
This is the soft fade from nude or blush into white, often called baby boomer. The challenge in gel is that the gradient has to be sponged or brushed before each cure, so a rushed job leaves a visible band where the two colors meet. I build it up over a couple of thin layers. Keep the contrast gentle; a stark white edge undoes the point of fading it. Almond, coffin and oval shapes carry it well.
9. Lace Bridal Gel Nails
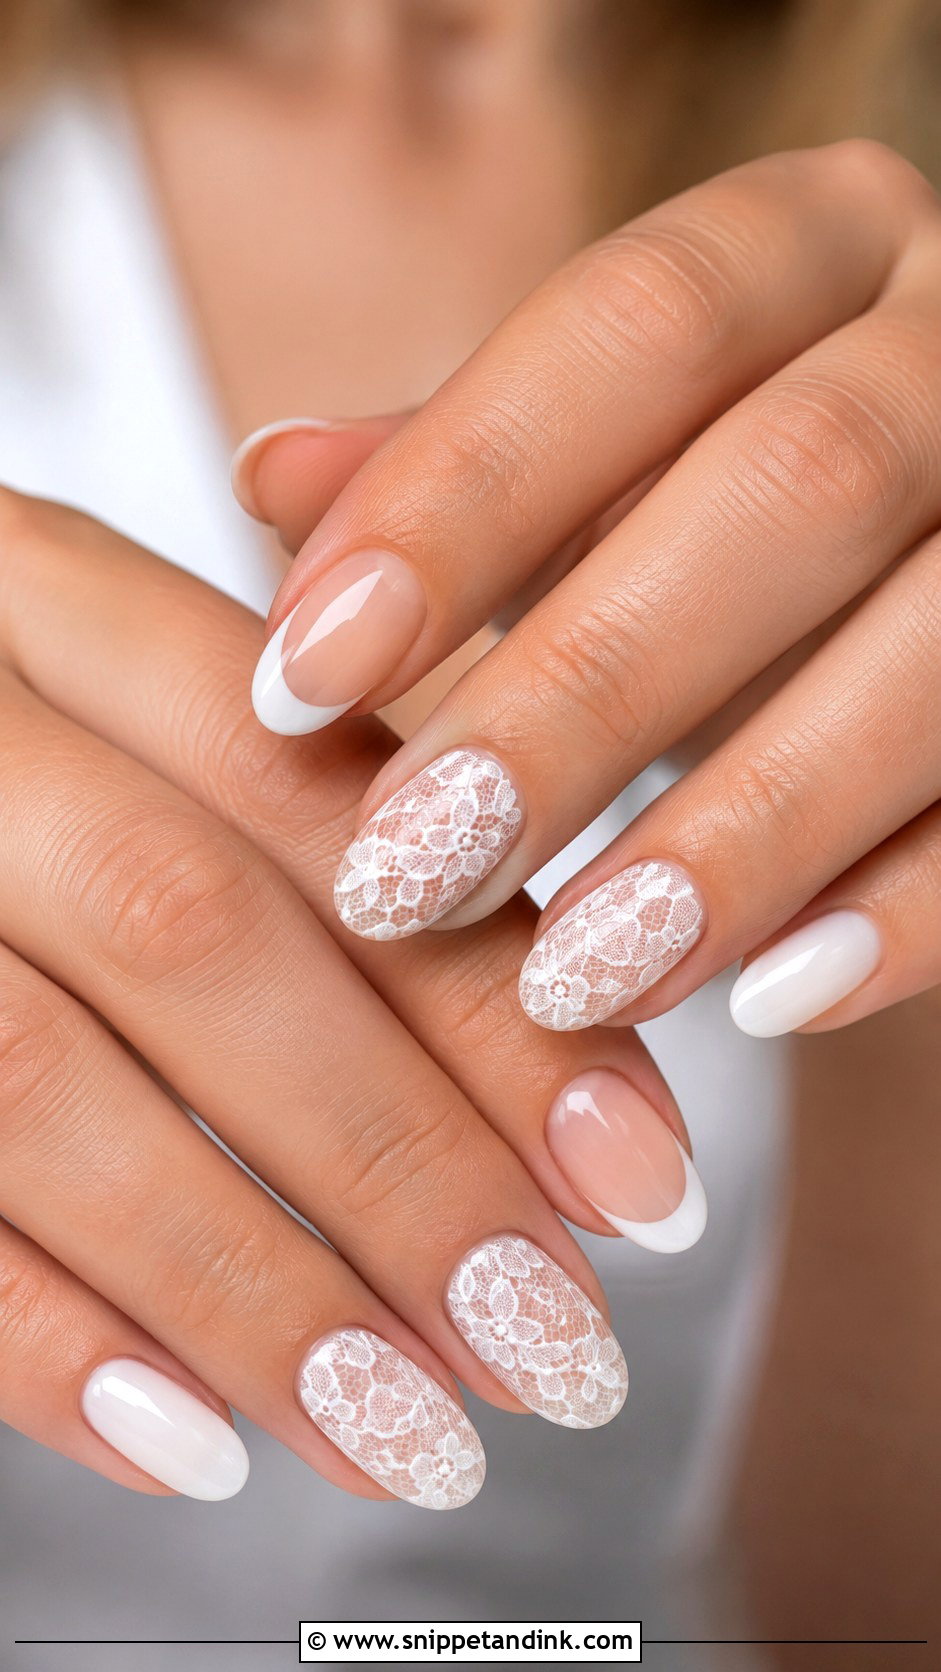
Lace art can echo the texture of your gown, but I’d keep it to two or three nails and leave the rest glossy and plain, otherwise the set looks busy from arm’s length. Painting lace freehand takes real time and a very fine brush; stamped or decal lace is quicker and still looks neat under a top coat. A sheer nude, blush or milky base lets the white pattern stand out. Bring a fabric swatch or close-up photo of your dress if it has lace sleeves or embroidery.
10. Floral Bridal Gel Nails
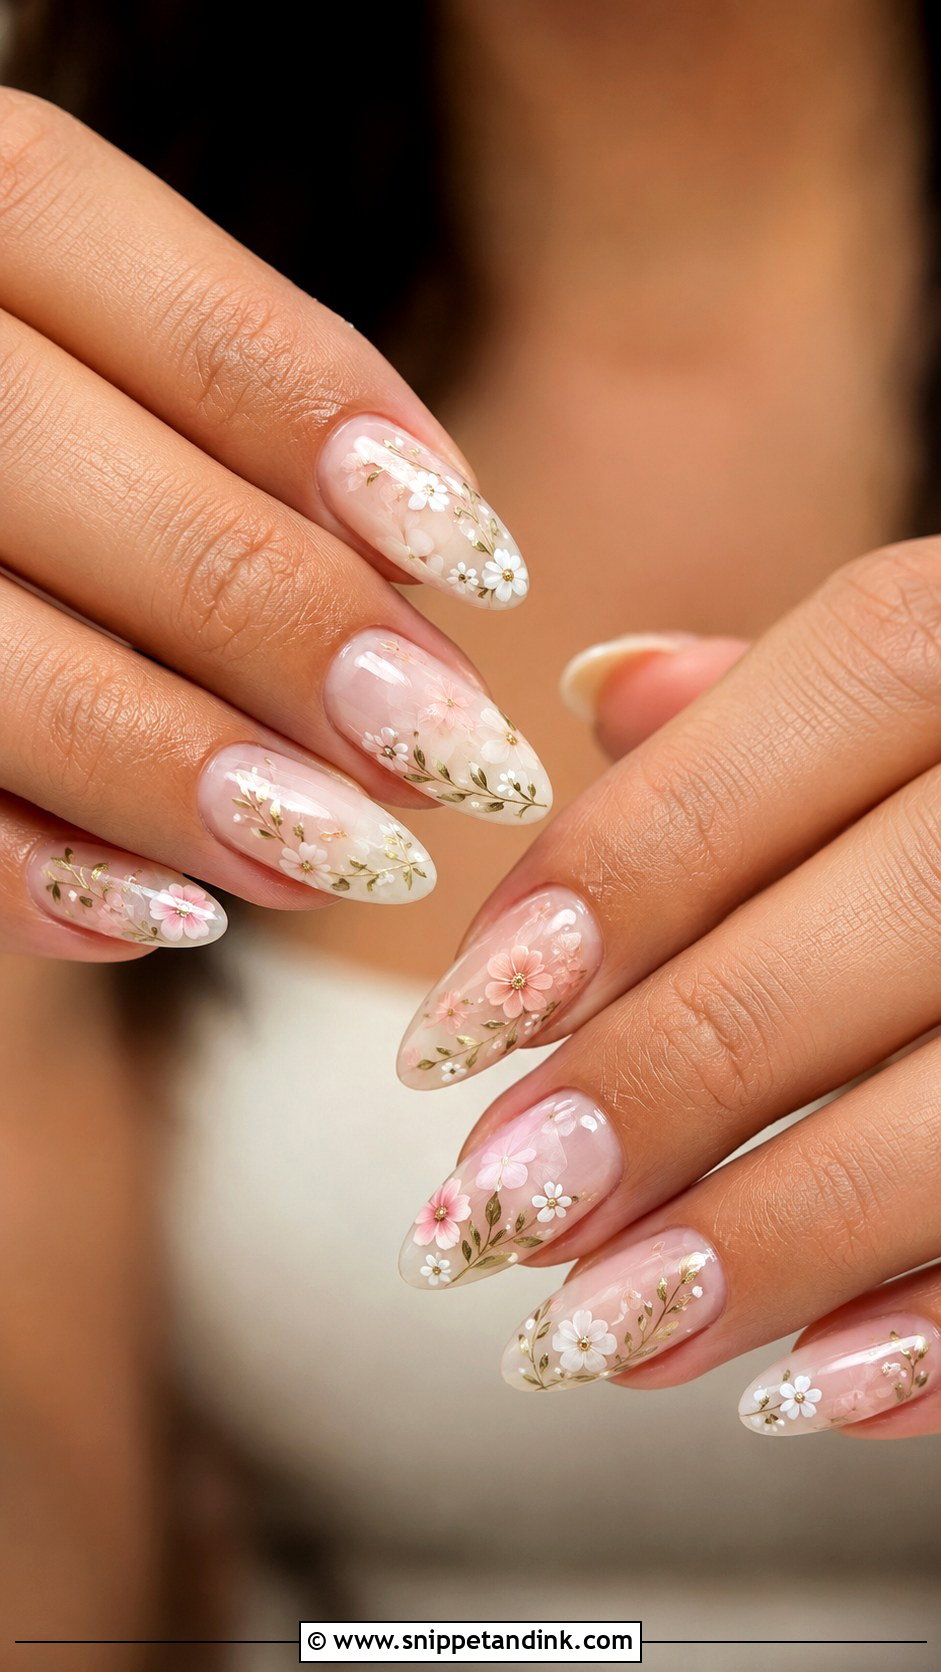
Tiny flowers suit spring and summer and outdoor ceremonies, as long as they stay tiny. I paint them in white, pale pink, ivory or muted nude on a sheer base so they look airy. Hand-painted petals, pressed-flower effects and fine botanical line work are all options. Most of the set should stay plain so the floral nails look deliberate. If your bouquet has baby’s breath or garden roses, I’ll borrow the shape from it.
11. Pearl Accent Bridal Gel Nails
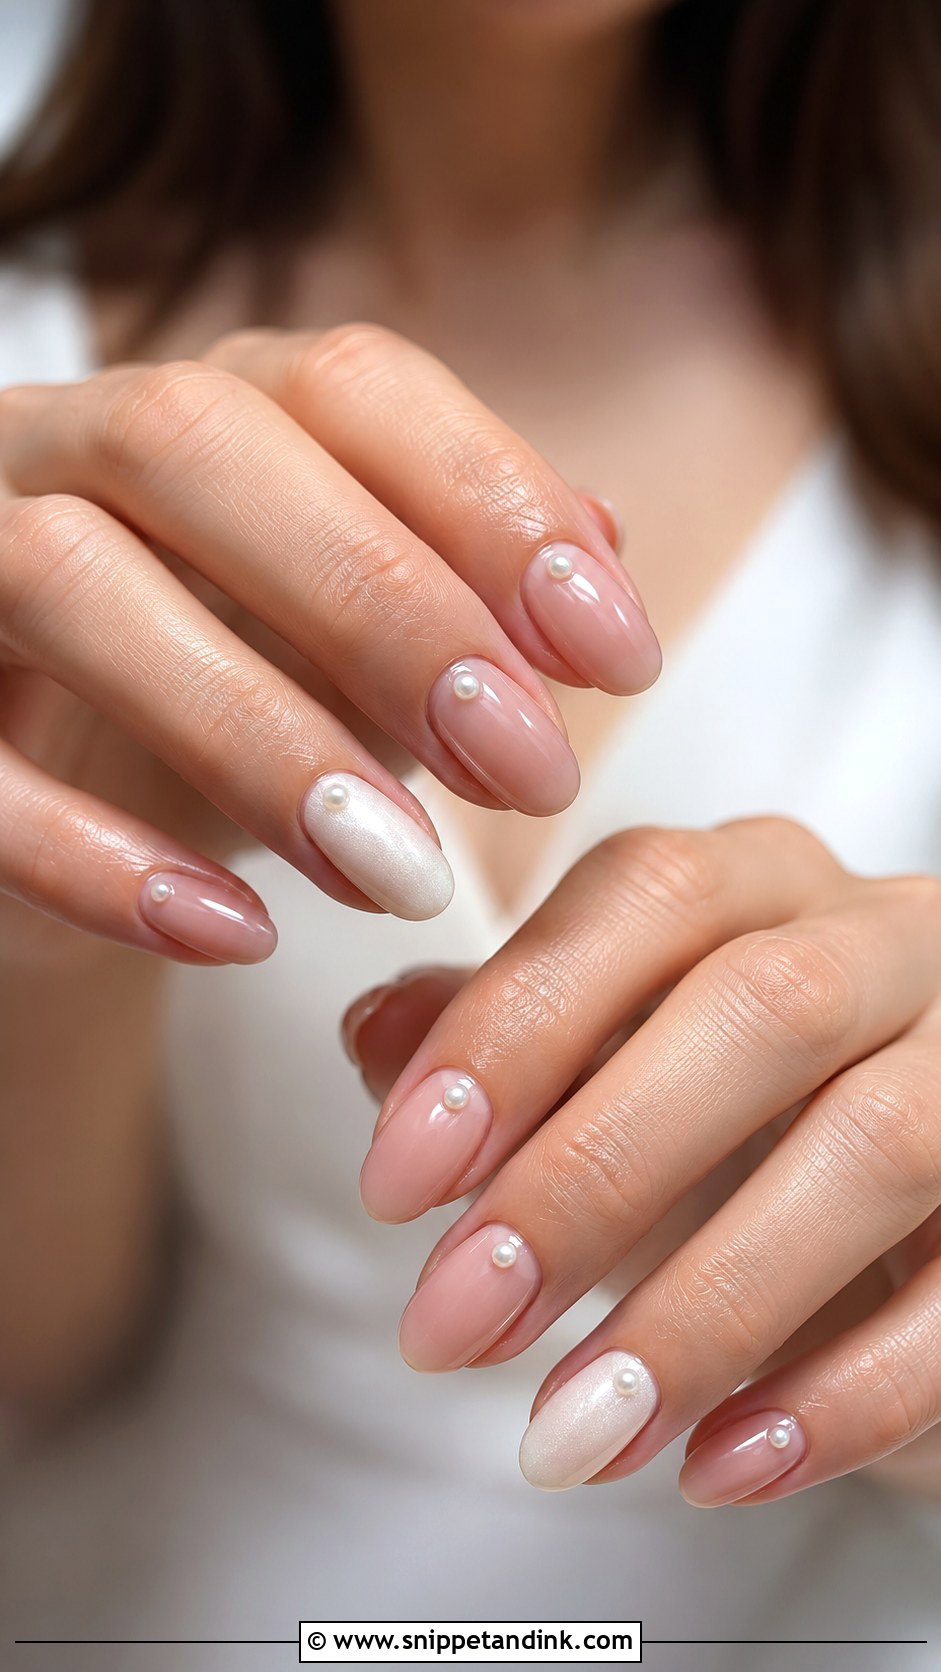
Pearl accents are tiny flat-back pearls set into the gel near the cuticle, along a French line or on one feature nail. Placement matters more than quantity. Anything near the free edge catches on veils, hair and knit fabric, so I set them low on the nail and cap them with builder gel so they don’t pop off. Keep them small and they’ll match pearl earrings or a subtly beaded gown without feeling bulky.
12. Glitter Ombre Bridal Gel Nails
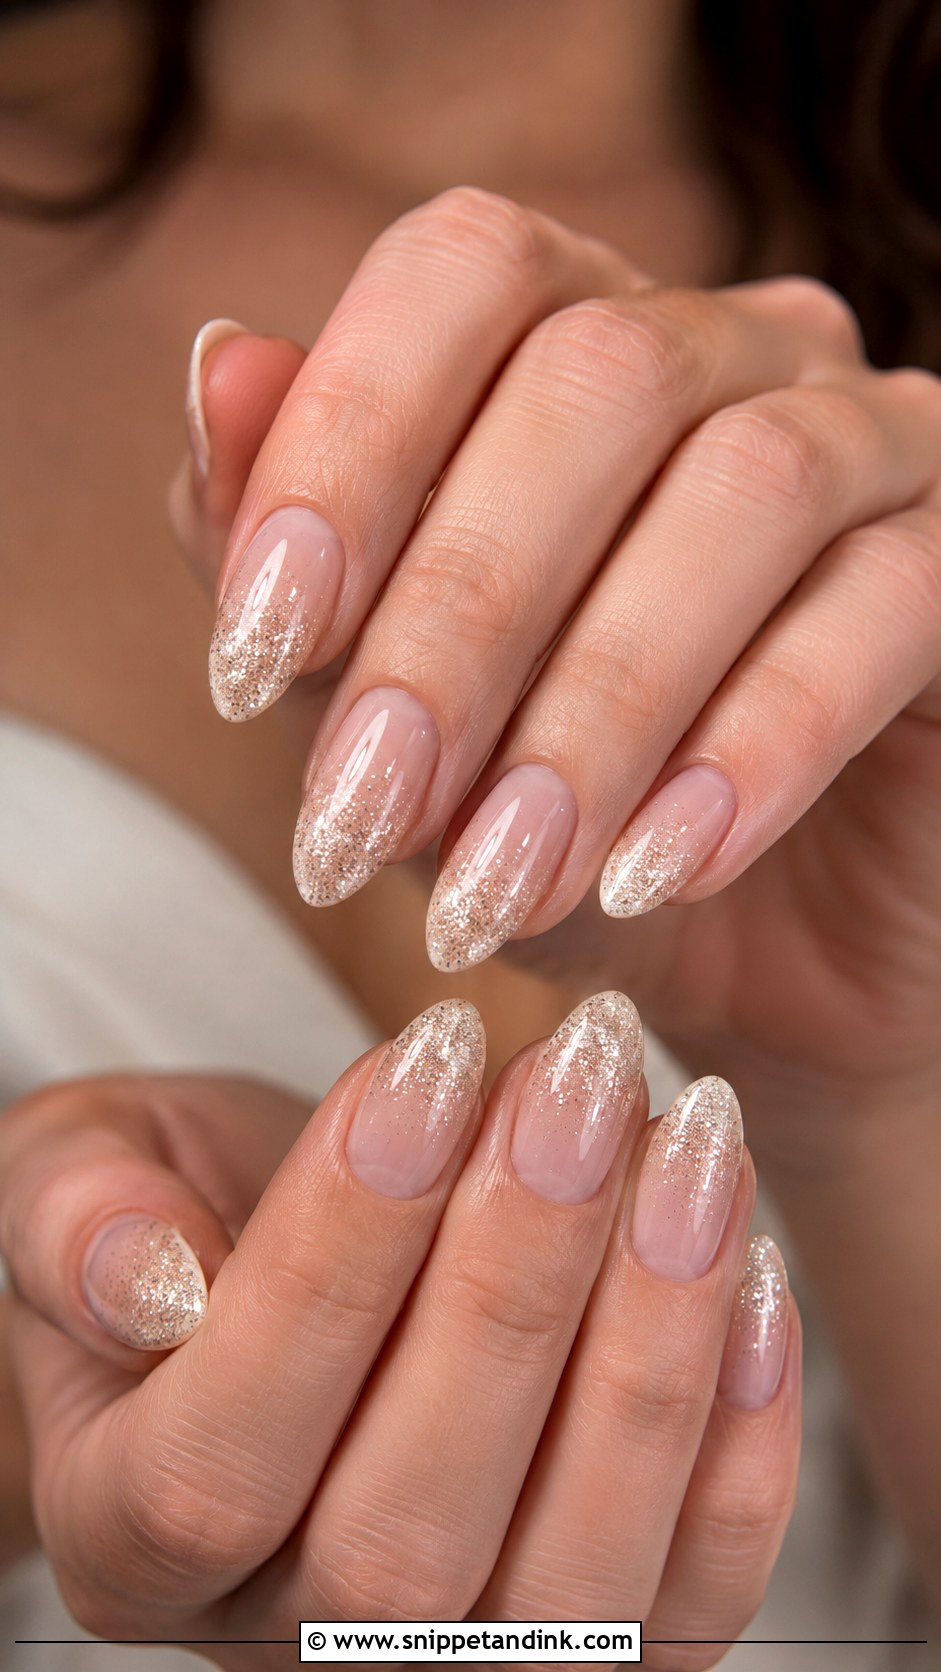
Sparkle works at a wedding when it’s fine-grained. Glitter ombre bridal gel nails are where I use champagne, silver or soft rose glitter fading from the tip or cuticle into a sheer nude base, then seal it with a thick enough top coat that the surface feels completely smooth. Chunky glitter left under a thin top coat feels gritty and snags tights and lace. Almond, oval and soft square shapes suit it, and it really comes alive under reception lights.
13. Champagne Bridal Gel Nails
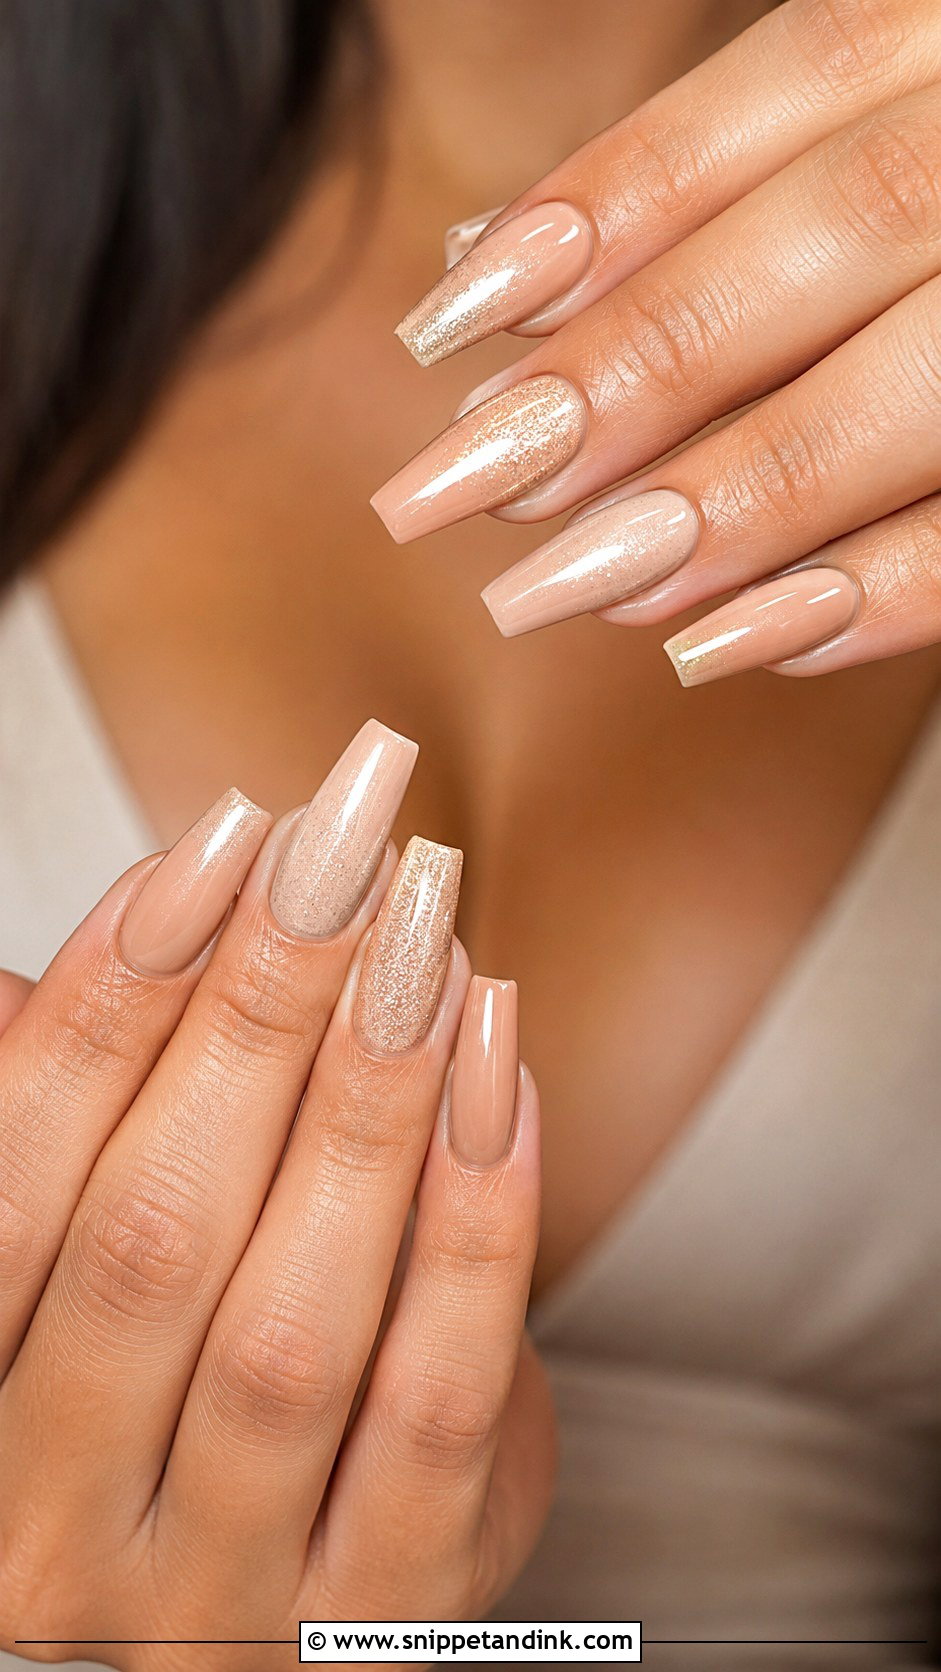
Champagne is softer than gold and warmer than silver, which makes it easier to wear with an ivory dress than either. I use it as a shimmer alone, blended into an ombre, or as a sheer wash over nude. On medium and deep skin tones it glows; on fair skin I thin it down so it doesn’t look brassy. It pairs with gold jewelry and candlelit rooms. Keep the shape clean and the length sensible.
14. Soft White Chrome Bridal Gel Nails
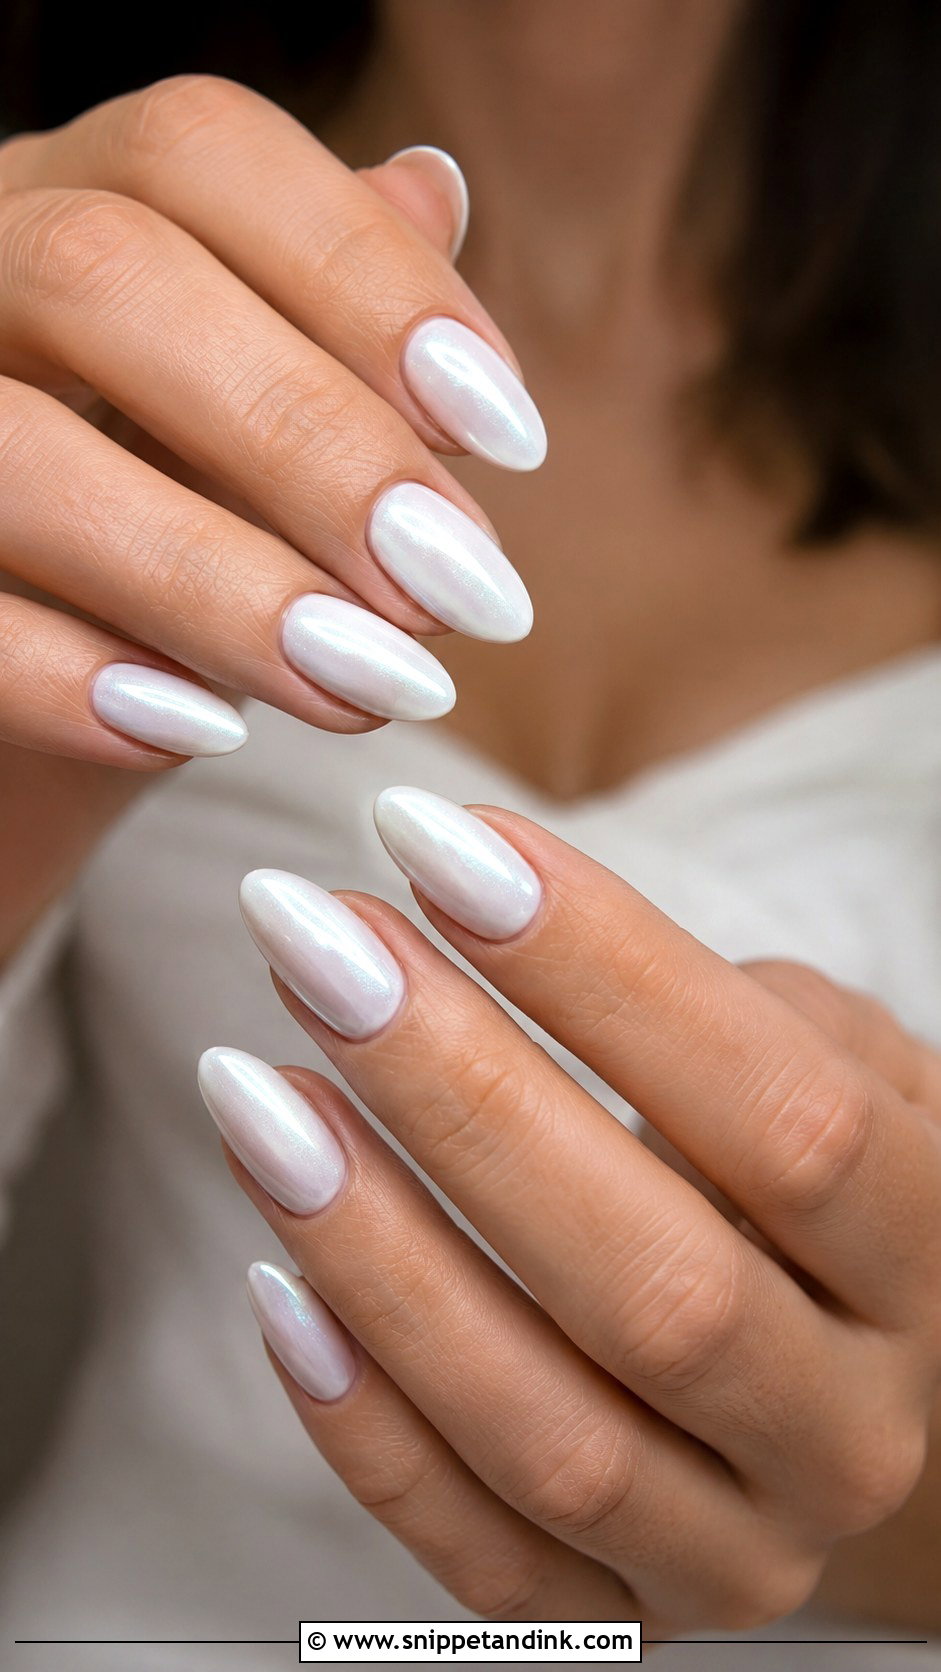
Soft white chrome is brighter than pearl but softer than a silver mirror finish. It starts with a white or milky gel, then a fine chrome powder. The thing I watch is undertone: some white chromes lean grey once buffed, which looks cold next to a warm ivory gown, so I test a swatch on one nail first. Almond and coffin shapes show the reflection most smoothly. Finish with a glossy top so it doesn’t look dusty.
15. Sheer Pink Bridal Gel Nails
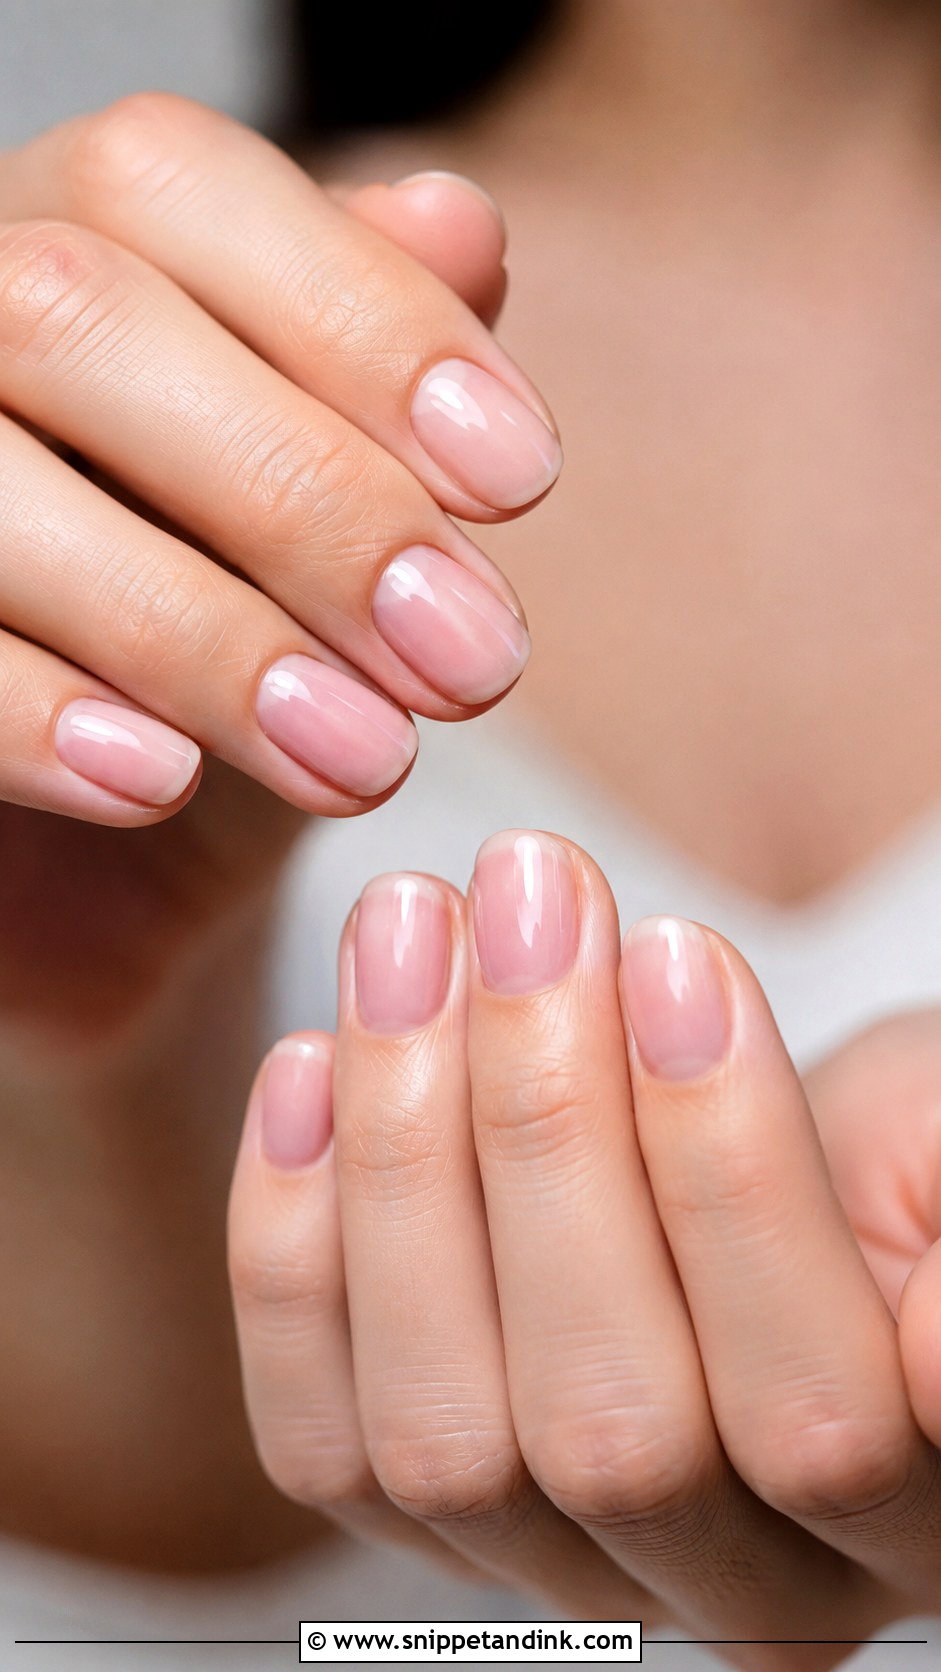
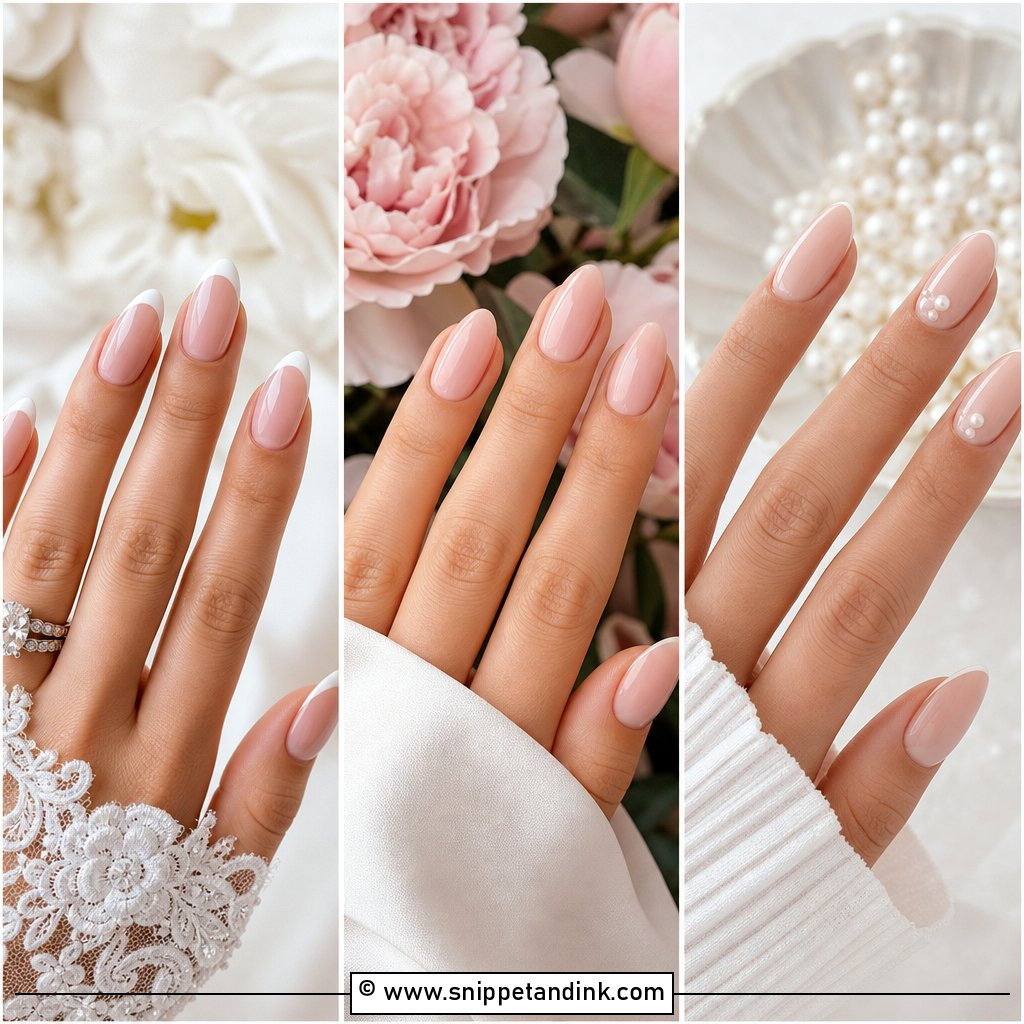
A sheer pink is the nearest thing to your own nails, only healthier. It evens out the nail bed rather than covering it, which also means it shows every bump, so I spend longer on cuticle prep and buffing for this one than for an opaque shade. Short ovals and rounded squares keep it practical. Wear it alone or add a tiny white tip or one accent. It won’t clash with any bouquet or jewelry you choose.
16. Almond Bridal Gel Nails
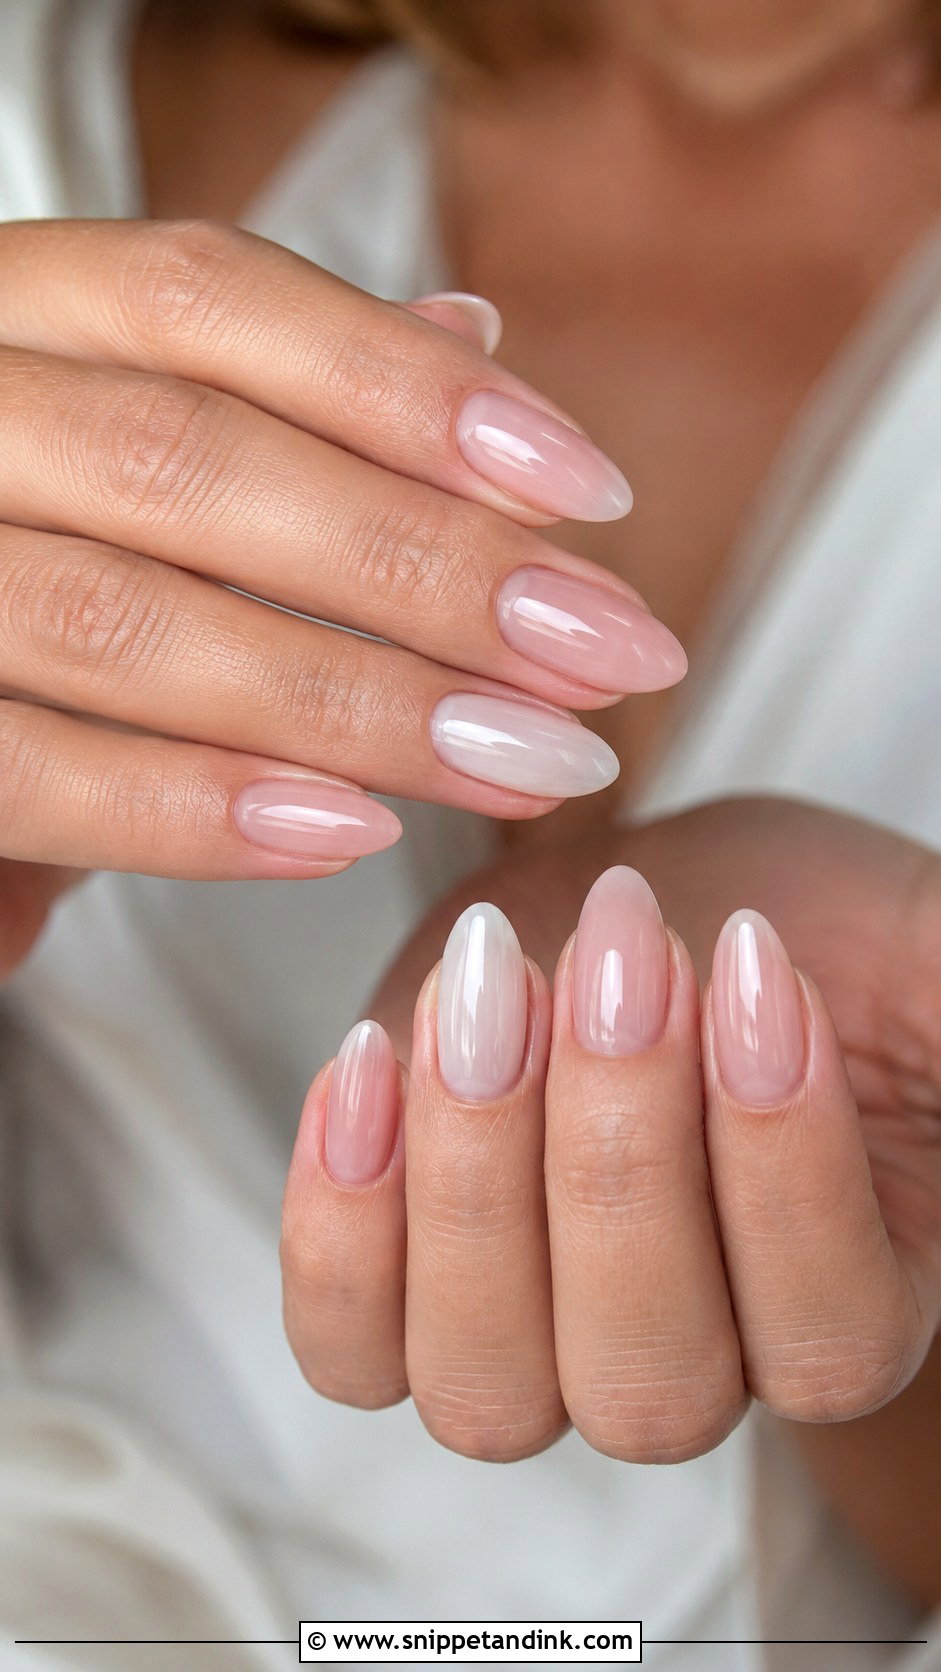
Almond tapers at the sides and rounds at the tip, which visually lengthens the fingers. It’s the shape I’m asked for most at bridal appointments, and it carries nearly every design here. Medium length is the practical sweet spot: long enough to look graceful, short enough to manage ring fittings, bouquet wiring and the tiny buttons up the back of a dress. Keep the design soft so the shape does the talking.
17. Short Bridal Gel Nails
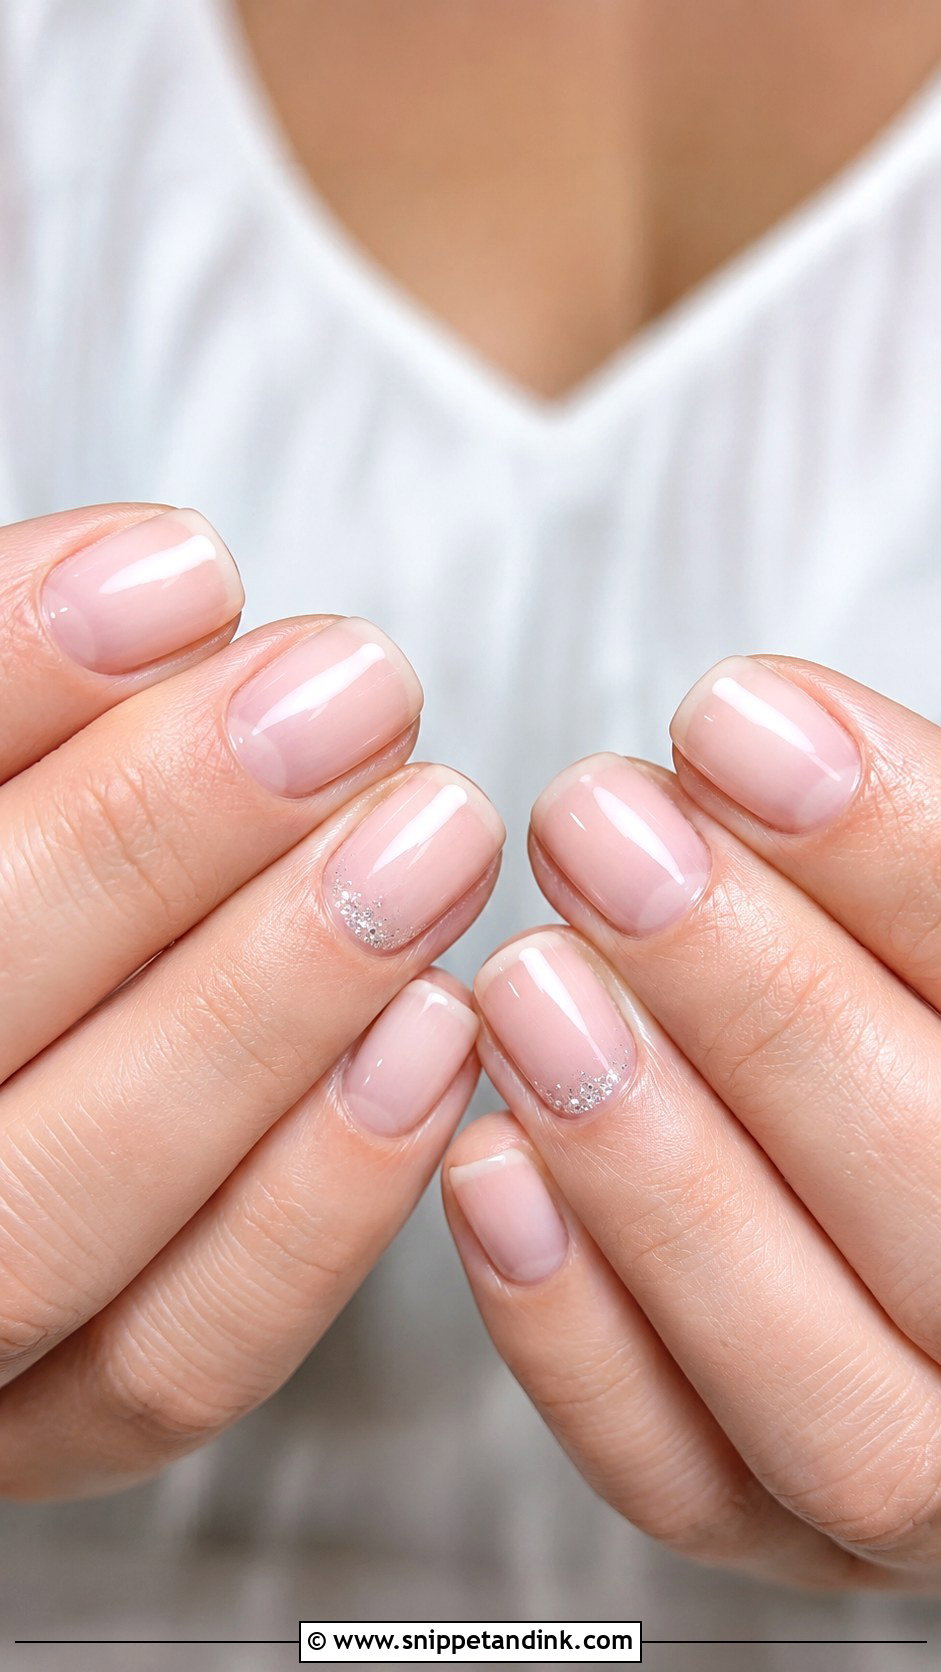
Short nails look polished when the details are right: neat cuticles, even shaping, and a glossy finish. A short oval, squoval or soft round keeps the hands comfortable, which matters if you’ve never worn extensions and don’t want to learn on your wedding day. Milky white, sheer pink, nude and micro French all suit short lengths. Shorter nails also snag fabric less, and they survive travel without needing a repair.
18. Coffin Bridal Gel Nails
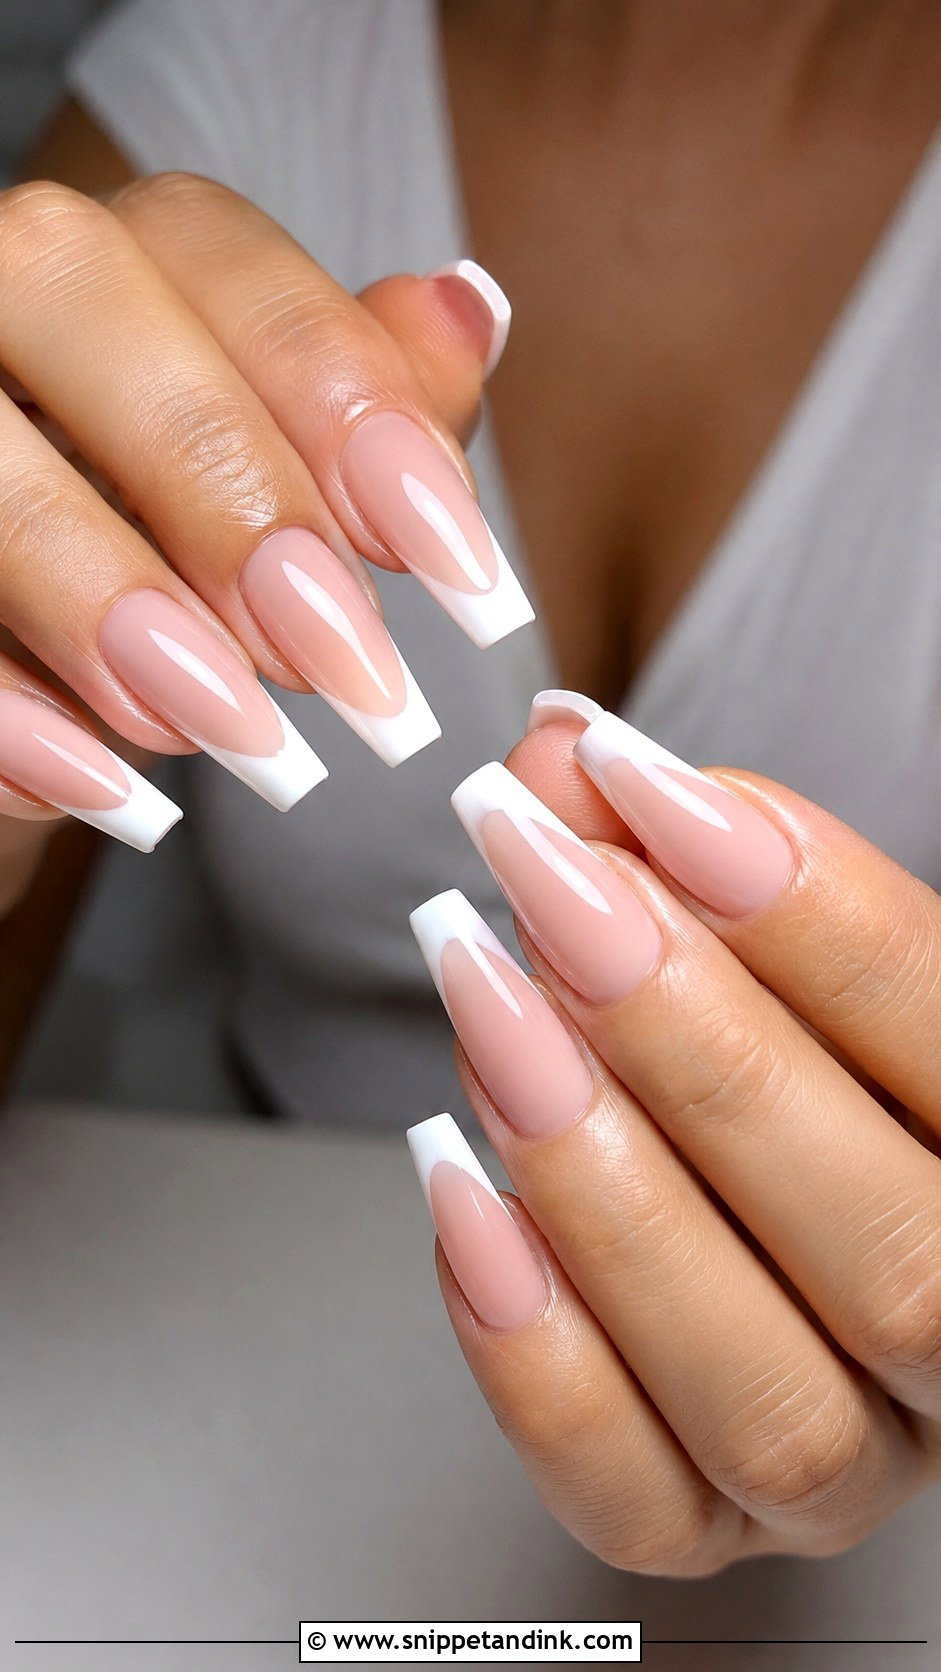
Coffin has tapered sides and a flat tip, so it needs medium to long length to read properly. On a bride I keep the color soft, nude, blush, milky white or pearl chrome, and a French tip, ombre or fine glitter all suit coffin nails. That flat tip is also the weak point. The corners take knocks, so I reinforce the stress area with builder gel. I’d only suggest it if you already wear longer nails and know how to live in them.
19. Square Bridal Gel Nails
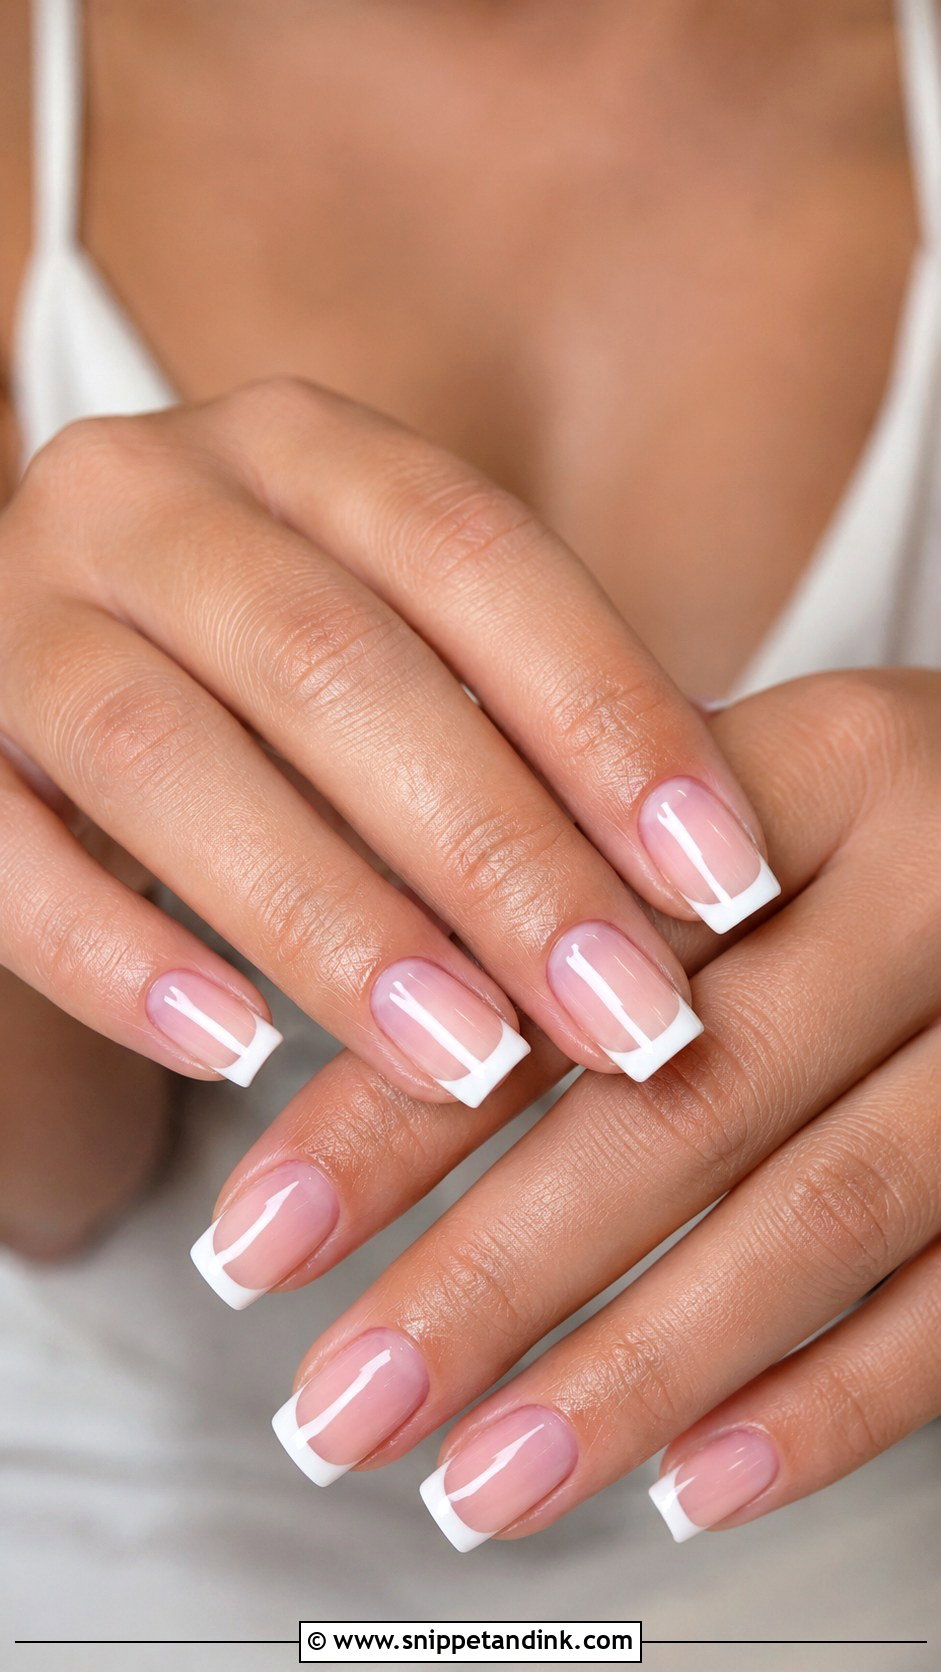
Square nails suit brides who like crisp edges. They look sharp with French tips, micro French lines, sheer nude or soft pink. I usually soften the corners slightly; true sharp corners catch on lace and can chip with one bump against a car door. Short or medium length is easiest to wear. It pairs naturally with a simple gown, a bridal suit or minimal jewelry, and gel keeps the edges clean through the day.
20. Rhinestone Bridal Gel Nails
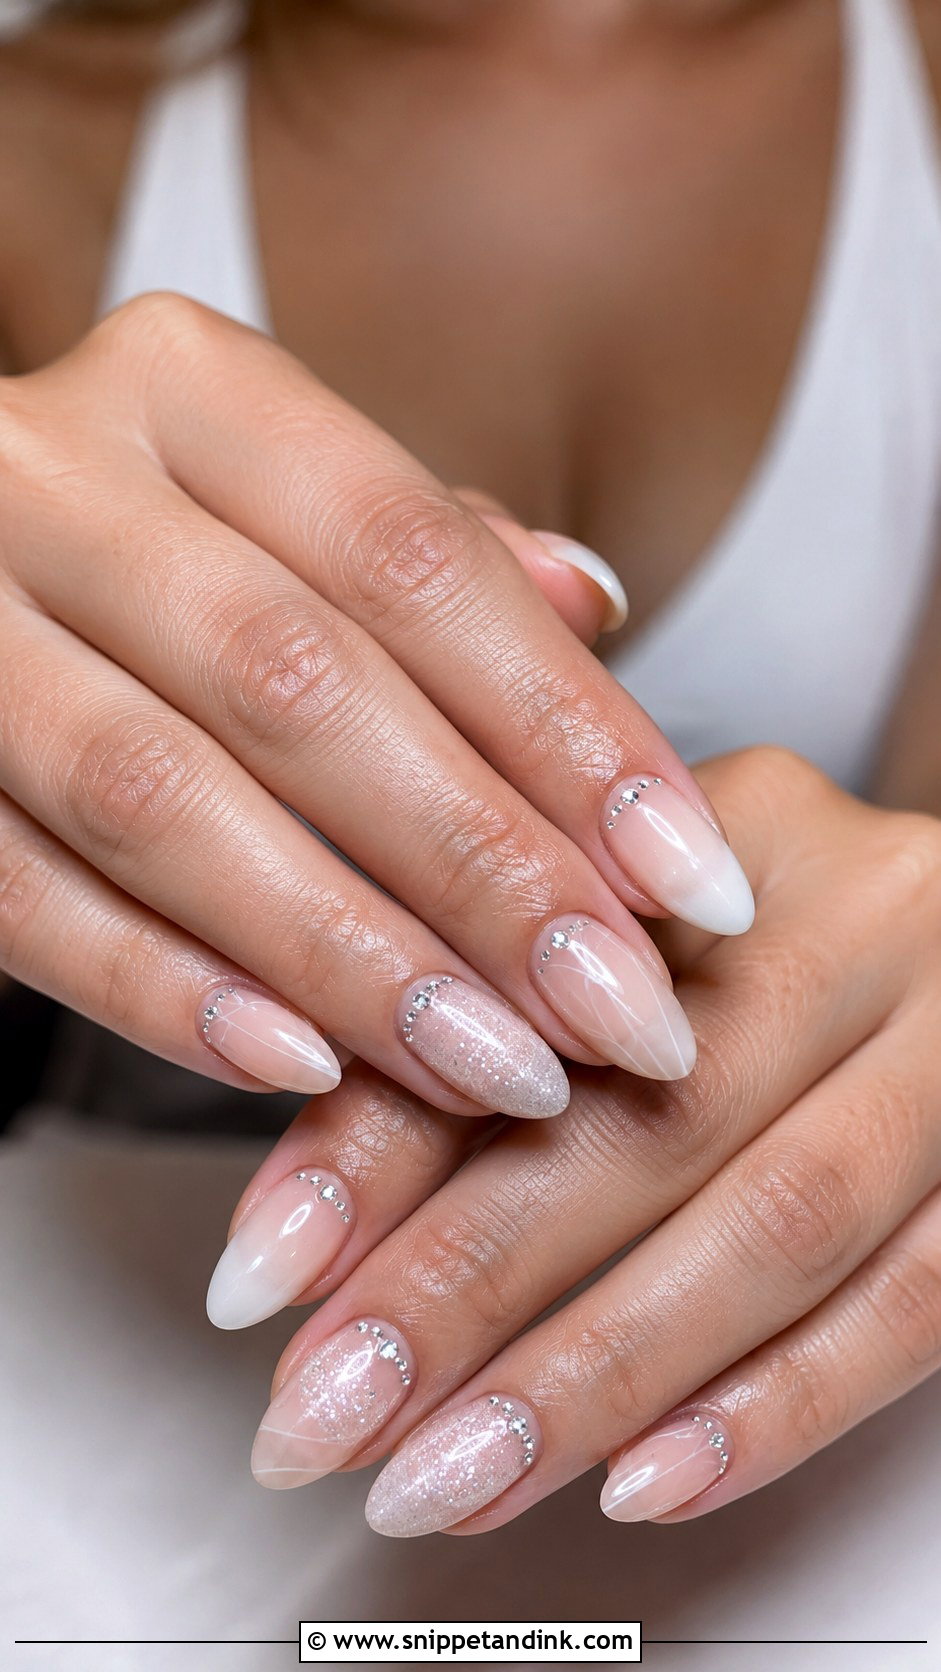
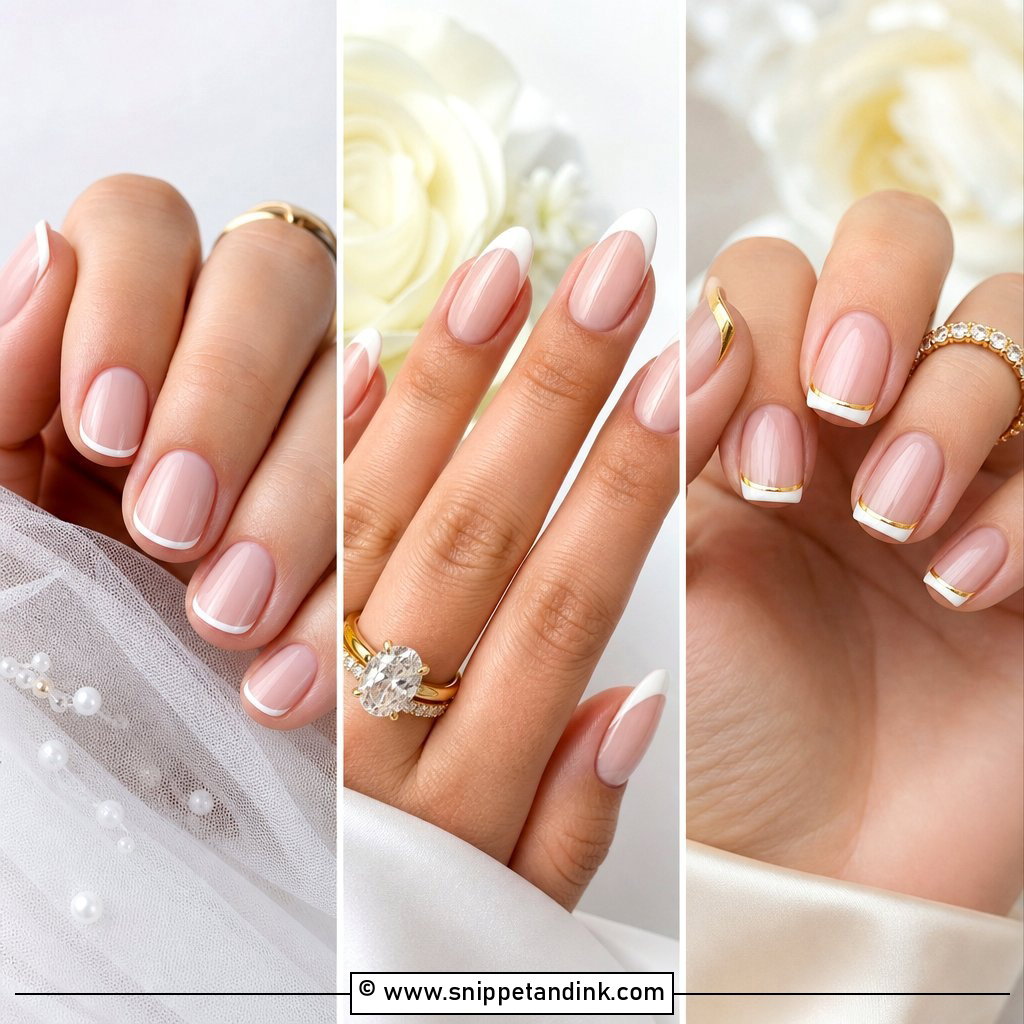
Rhinestones look bridal when there are only a few. I’d place tiny crystals near the cuticle, along a French tip or on one or two accent nails, over a sheer nude, blush or milky base. Each stone is set in gel and sealed around its edges; stones that sit too proud catch hair and fabric and come off at the worst moment. Pick this if your hair accessories, beading or shoes already have sparkle, and keep the stones small and clear.
A Nail Lifts the Night Before: What I’d Do
It happens. A door, a suitcase zip, a box of favors, and suddenly one edge is lifting. The worst move is peeling it off, because cured gel pulls away the top layers of nail with it and leaves a rough, thin patch.
- Call your nail tech first. Most will squeeze in a single-nail repair for a bride.
- If that’s not possible, gently file only the lifted edge flush so it can’t catch.
- Slip a tiny drop of nail glue under a lifted corner and press for thirty seconds.
- Seal over it with a clear top coat or a sheer polish close to your shade. In photos, nobody will spot one nail.
Taking It Off After the Honeymoon
Have the set soaked off or carefully filed down by a professional when you’re back. I buff away the shiny top layer, wrap each nail in acetone, and gently push off the softened gel. Your nails may feel slightly thin for a couple of weeks afterward; cuticle oil and a short break before the next set help them recover.
Bring Your Ring, Your Dress Swatch and Your Hands to the Trial
Every set on this list works because it supports your hands rather than competing with the dress or the ring. Milky whites, sheer pinks, French tips, pearl chrome, florals, lace and fine shimmer all do that when they’re kept soft. Save a few photos, decide on shape and length, and think about your jewelry and gown details before you book. A trial a few weeks out is worth it, especially for chrome or nail art, so we can see the color in daylight and adjust. Then the final set goes on close to the date, and you can stop thinking about your nails entirely.
You'll Like These Ideas:


Leave a Reply