
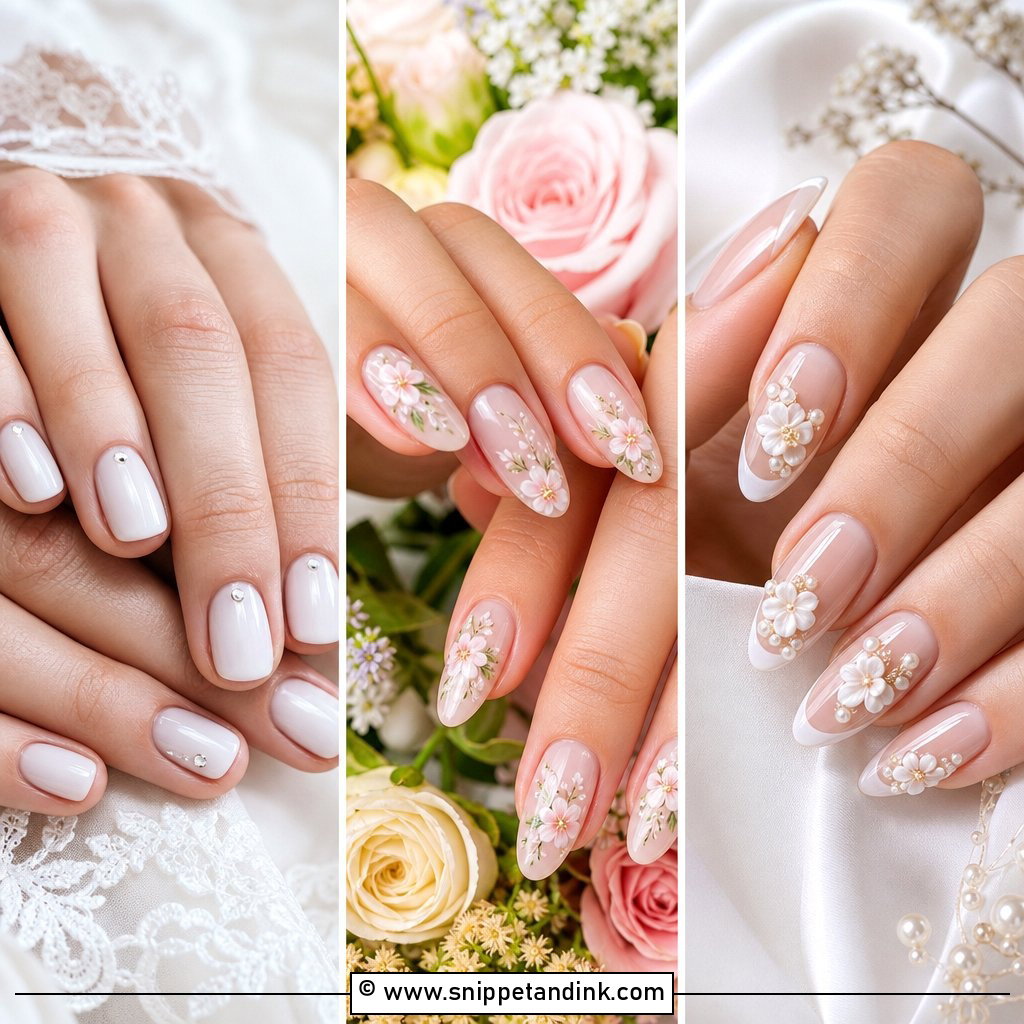
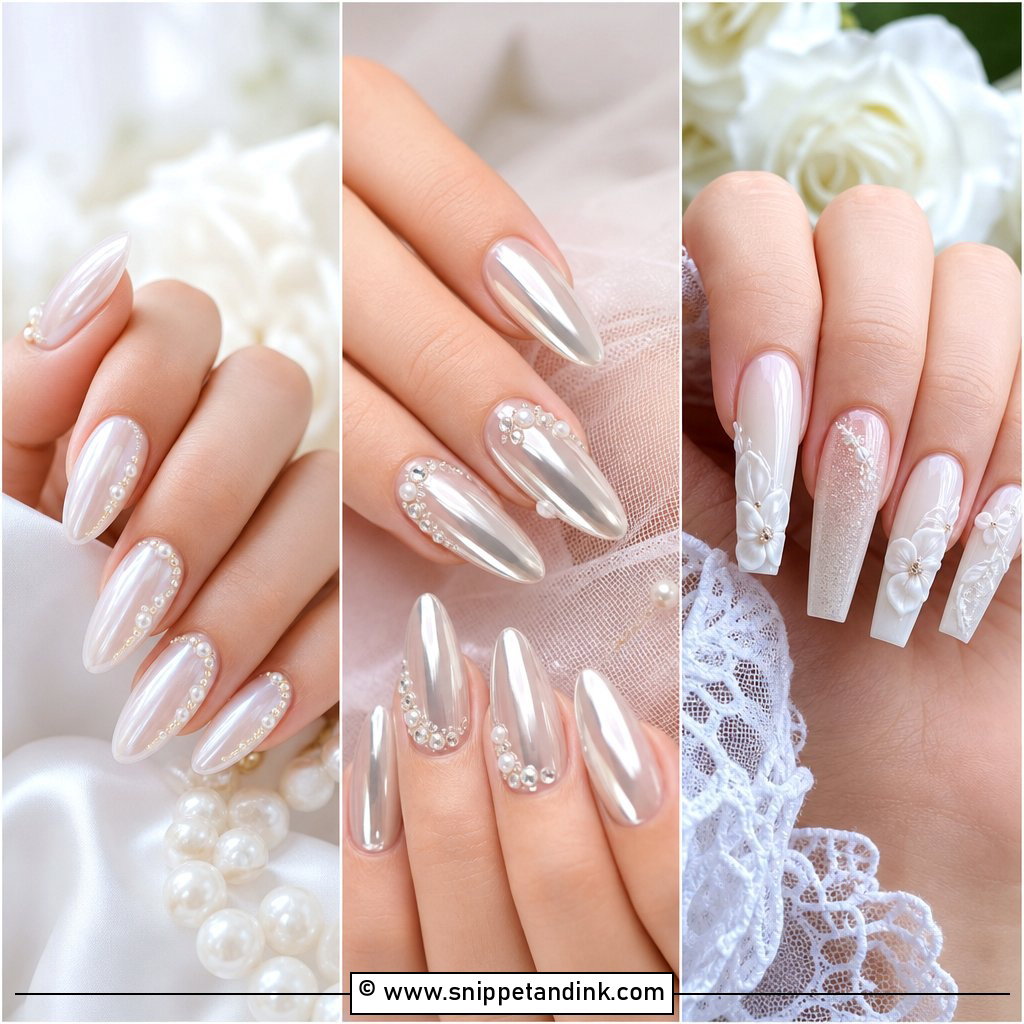
A bridal manicure gets photographed closer than almost anything else you wear. The ring shot puts your hands a few inches from the lens, so I care far more about clean cuticles and an even free edge than about clever art. The sets brides ask me for most right now are quiet ones: sheer pinks, milky whites, slim French tips, glazed finishes and short natural shapes, sometimes with one tiny accent. Short square, classic oval or elegant almond nails all suit them, and below I’ve noted what each one asks of your natural nails, your skin tone and your dress.
Timing the Manicure Around Your Wedding Week
A simple set is unforgiving of bad timing, because there’s no art to distract from a chip or a gap at the cuticle. This is the schedule I give brides.
- Four to six weeks out: a trial. Wear it for a few days and photograph it in daylight and with your phone flash, next to something the color of your dress.
- From the trial onward: cuticle oil every night and gloves for washing up. Skin around the nail improves slowly, so this is the part you can’t cram into the last week.
- One to two days before: gel or builder gel. That lets the cuticle area settle after prep and still leaves a couple of weeks of wear for the honeymoon.
- The day before at the latest for regular polish. It feels dry within minutes but stays soft enough to dent for hours, and a crease from a duvet or a suitcase zip shows clearly in a ring shot.
- Nothing involving an acetone soak on the morning itself. It dries the skin around the nail just when that skin is about to be photographed.
If you’re booking a spray tan, have it done before the manicure or ask your tanner to protect the nails. Tanning solution can stain the edges of a milky or sheer polish a yellowish orange, and on pale finishes there’s no hiding it.
1. Milky White Wedding Nails
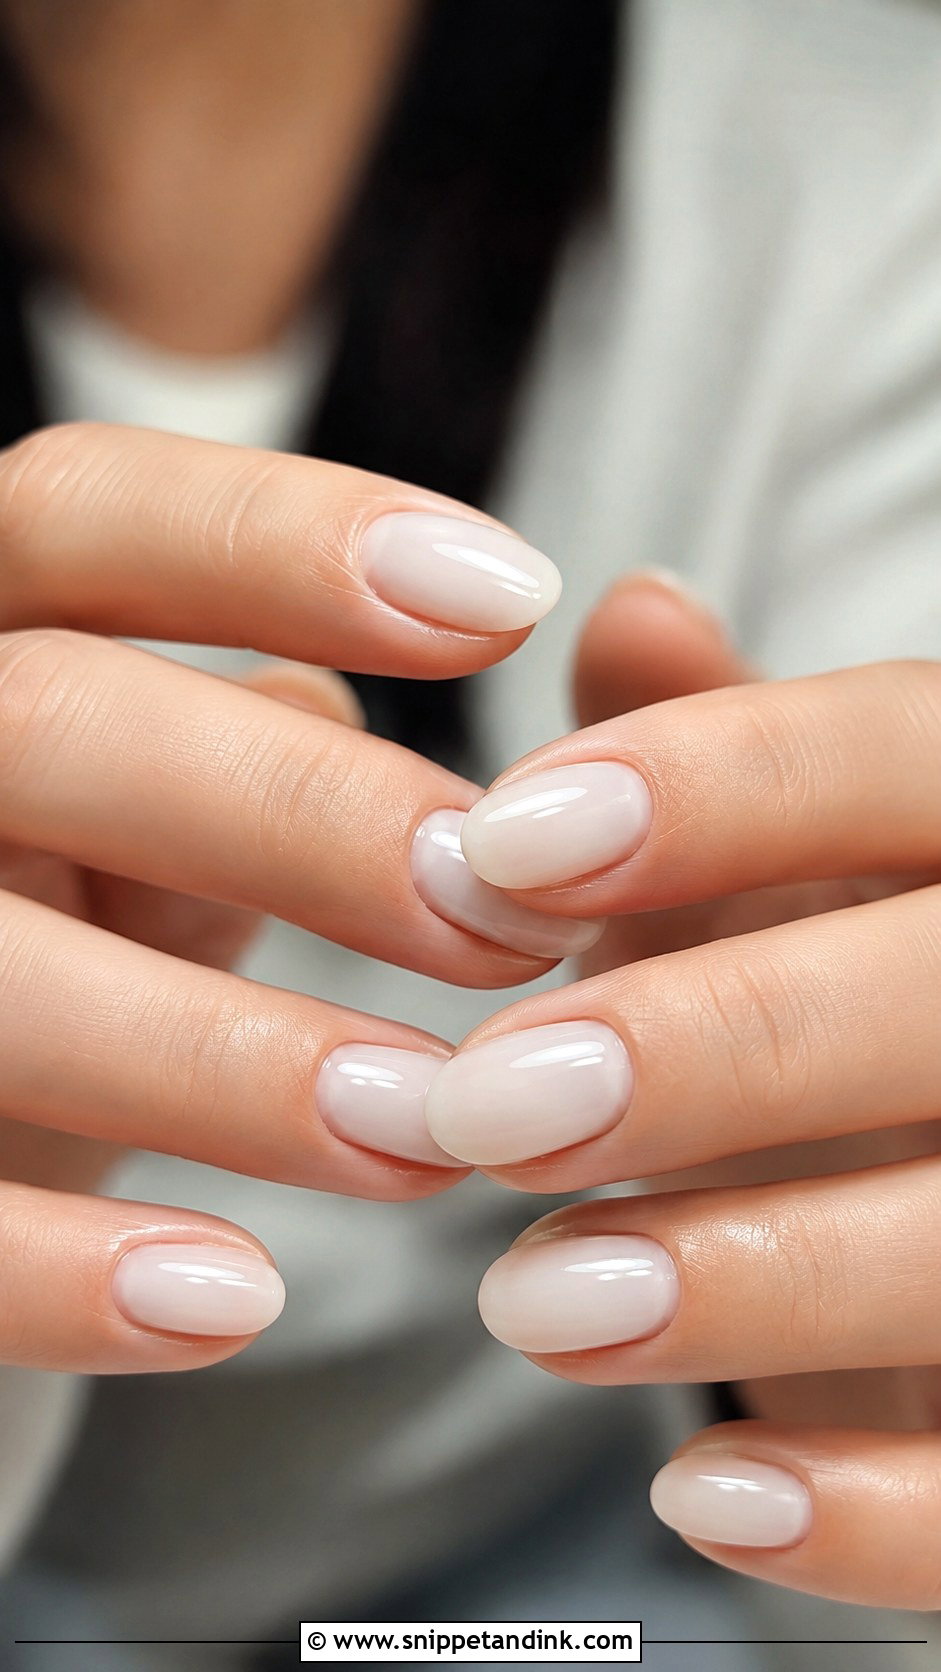
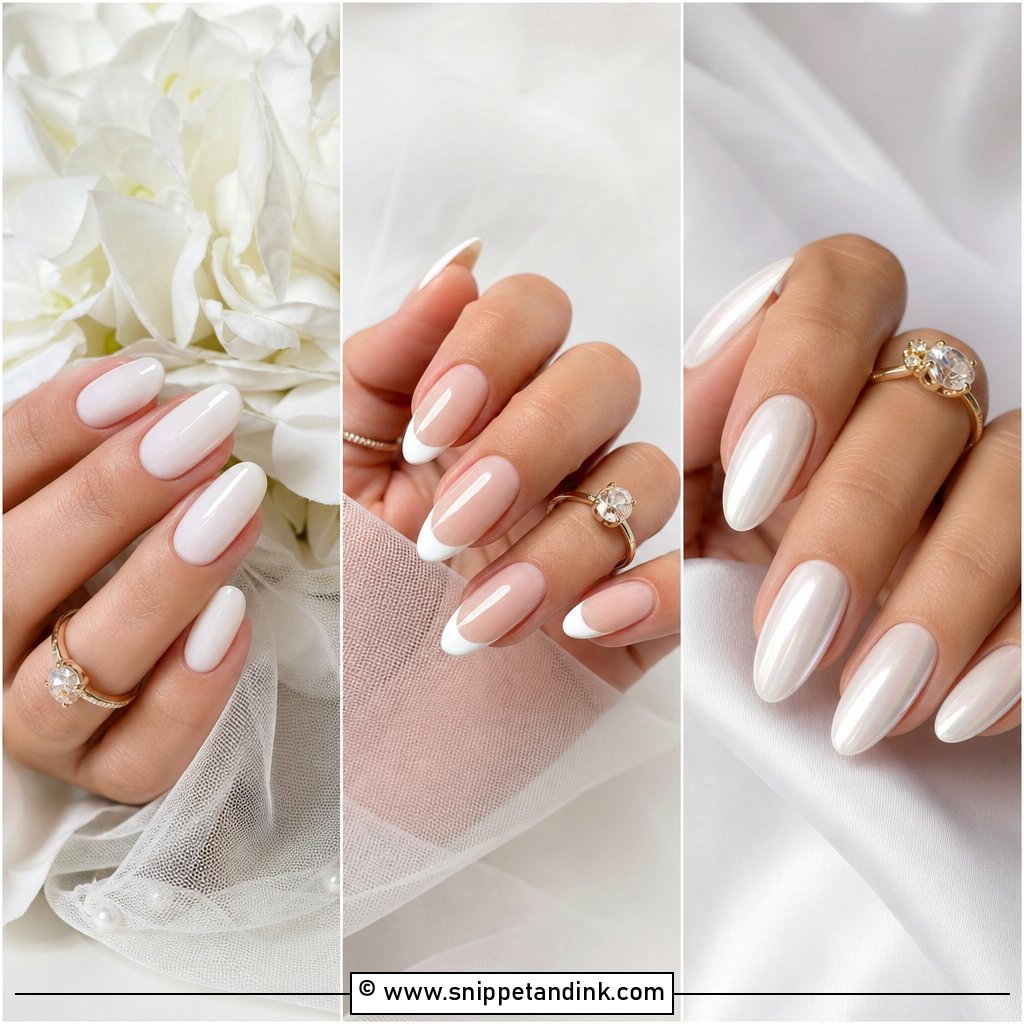
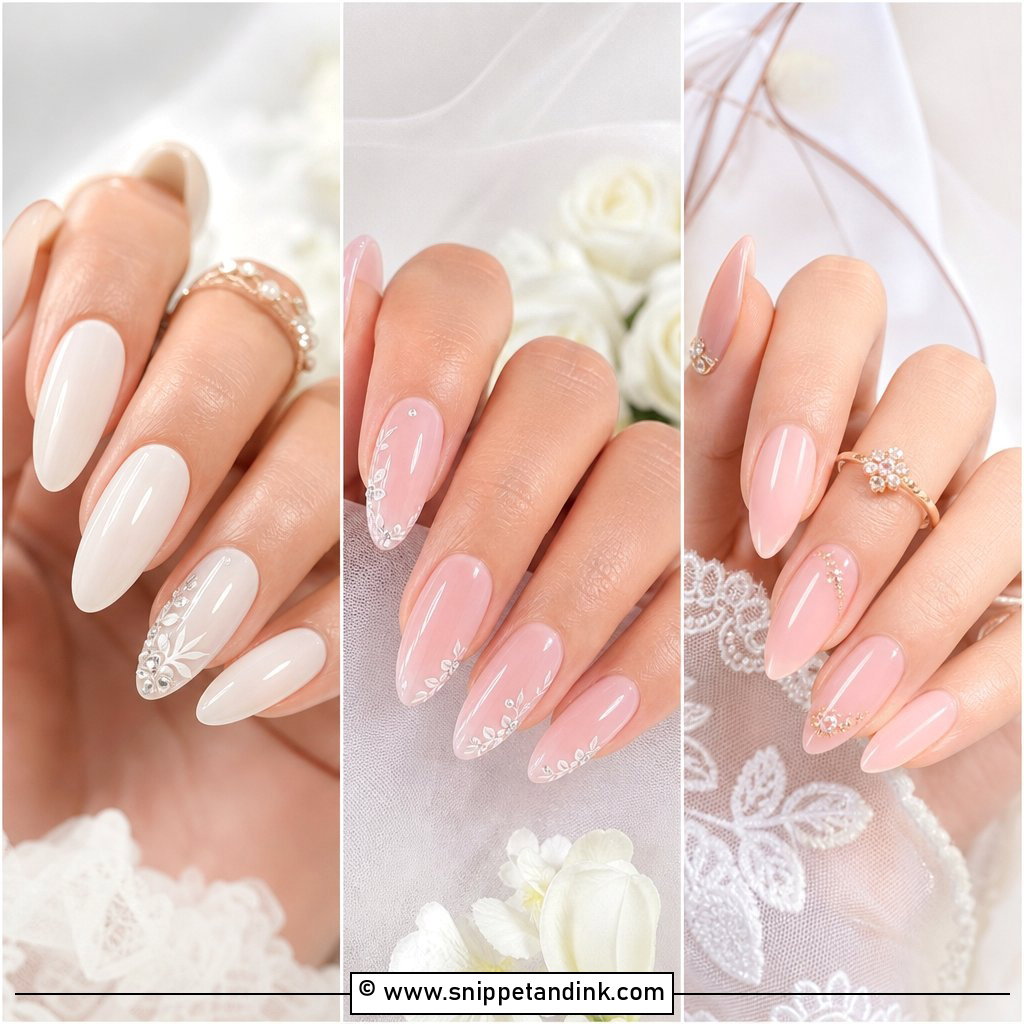
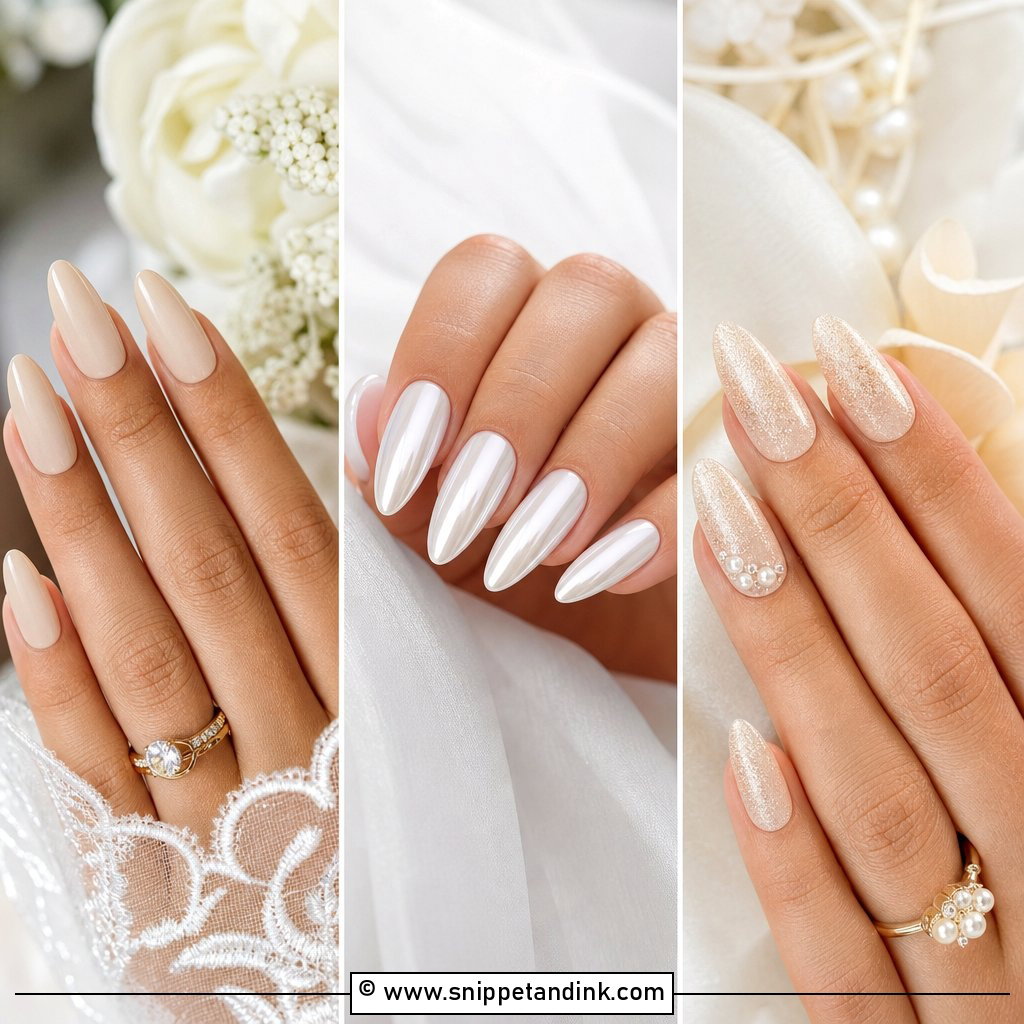
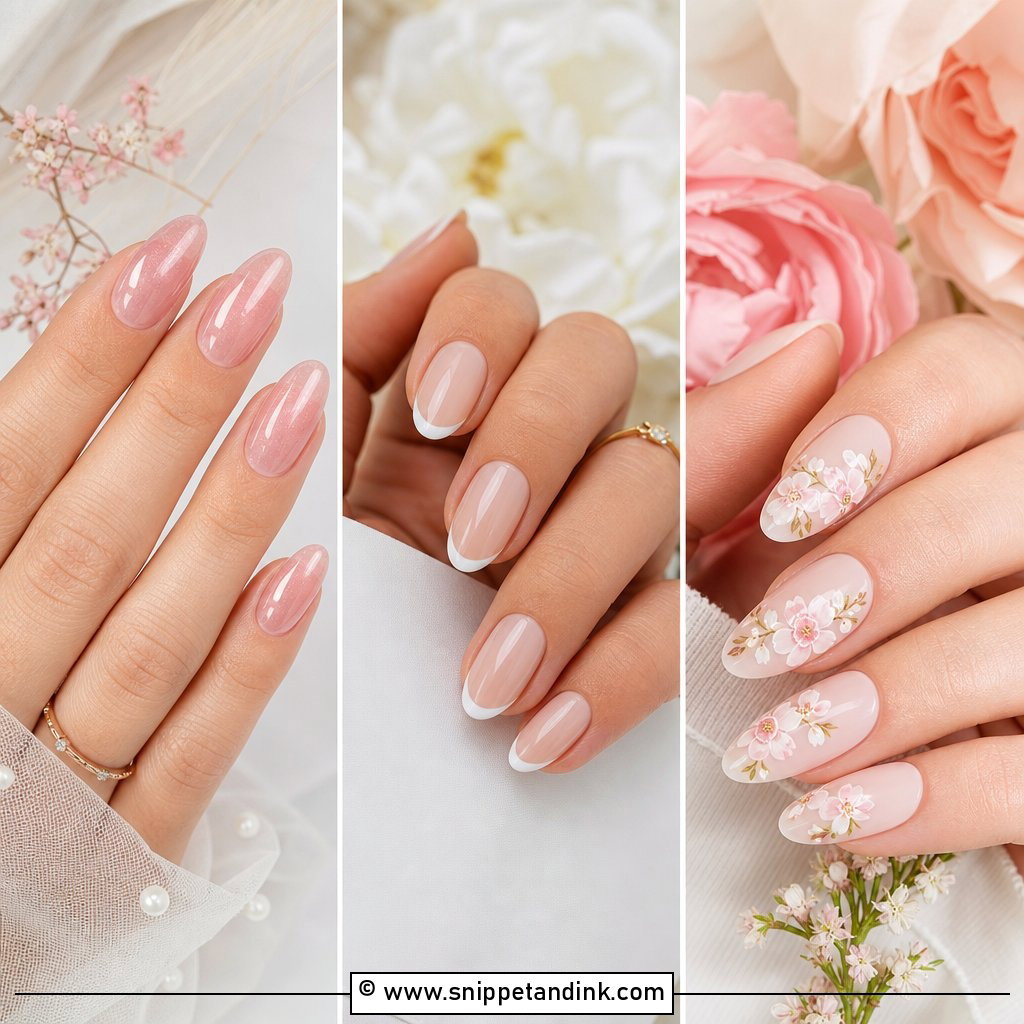
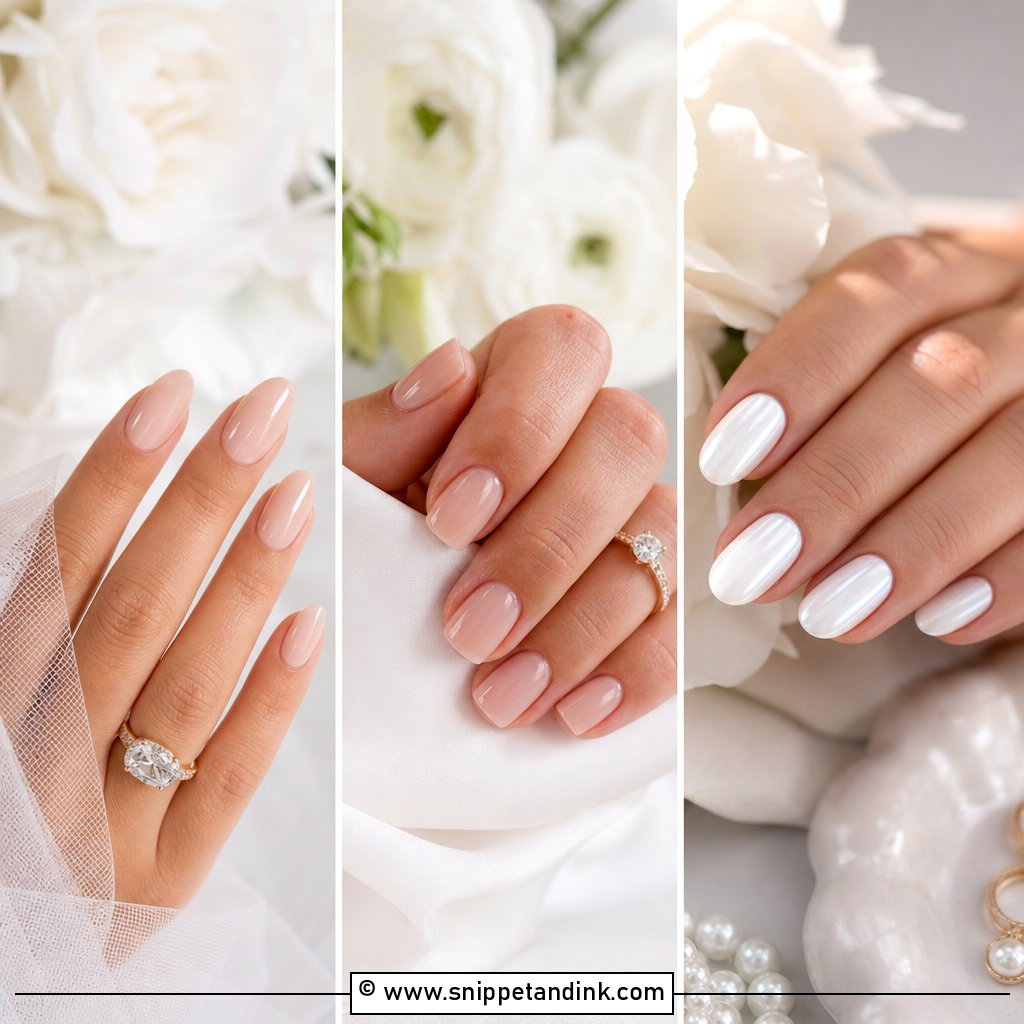
Milky white is a sheer white, not the flat, chalky correction-fluid white that looks harsh against skin. I build it in thin layers: two coats stay translucent, three get you close to solid, and I stop there, because a thick white coat streaks and pools at the sidewalls. It suits short oval, almond, or squoval nails and adds a little visual length to the fingers. One thing to know: under direct flash it reads brighter than it does in daylight, so with an ivory gown I lean the shade slightly warmer.
2. Sheer Pink Wedding Nails
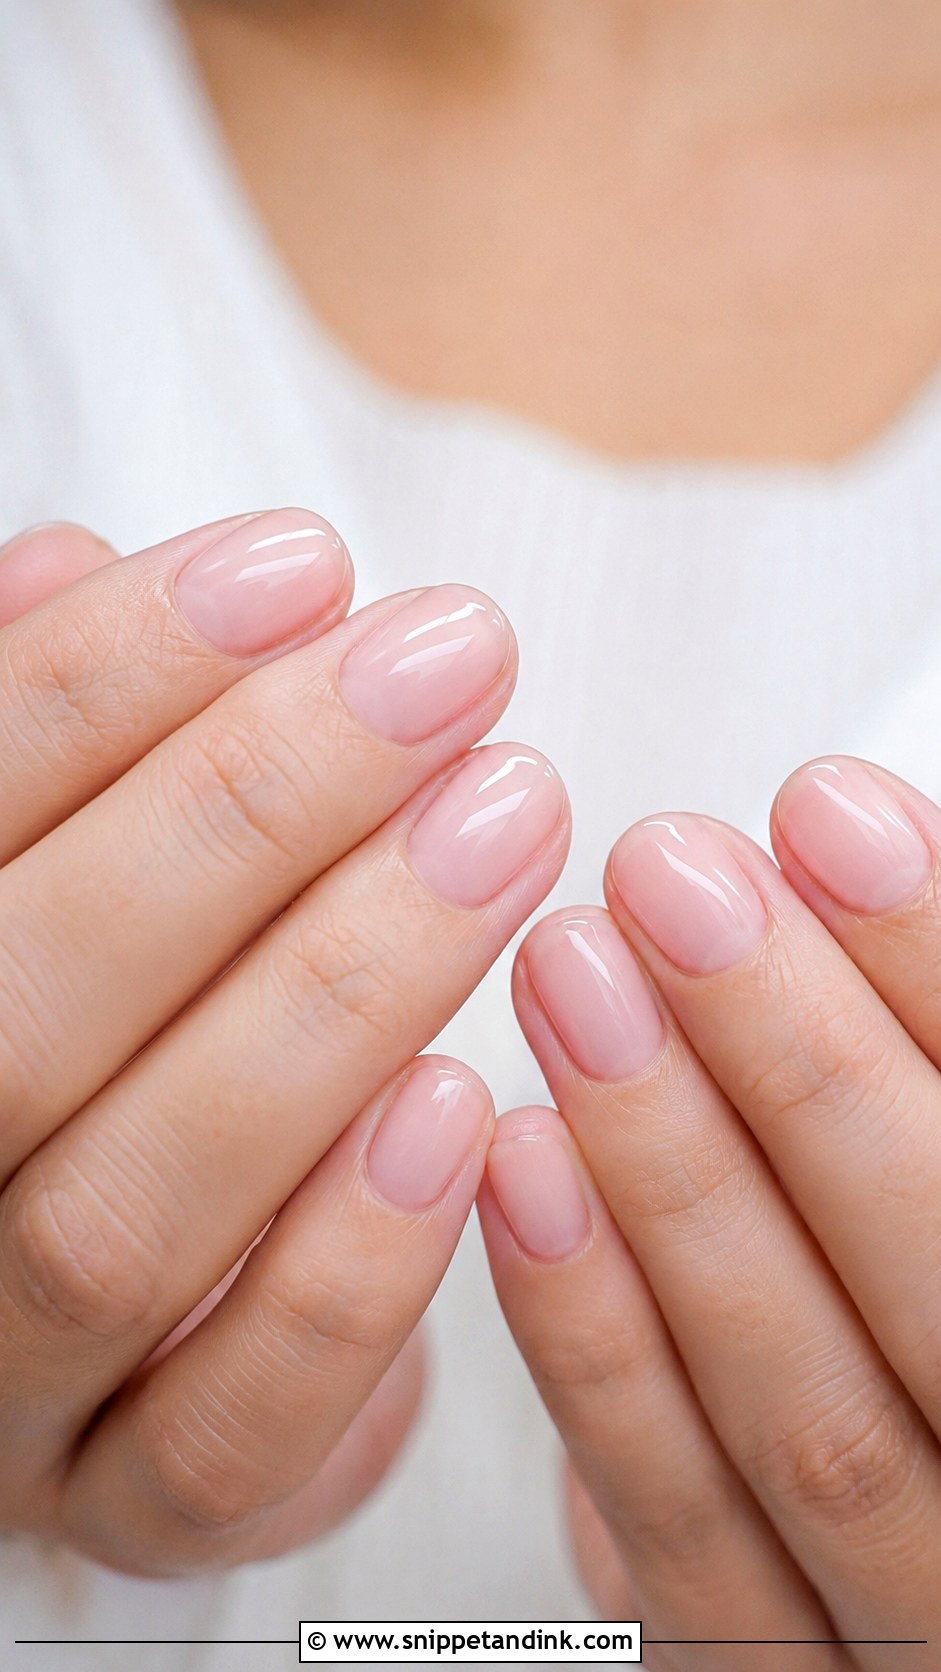
If you rarely wear polish, start here. A sheer pink evens out the nail bed so it looks healthy, and it grows out kindly. I match the tint to the fabric: a cooler baby pink beside bright white, a warmer blush beside ivory, champagne or cream, because a cool pink next to a warm gown can make hands look faintly grey. Short round nails keep it natural, almond reads a little dressier, and a glossy top coat gives you that “your nails but better” finish.
3. Classic French Wedding Nails
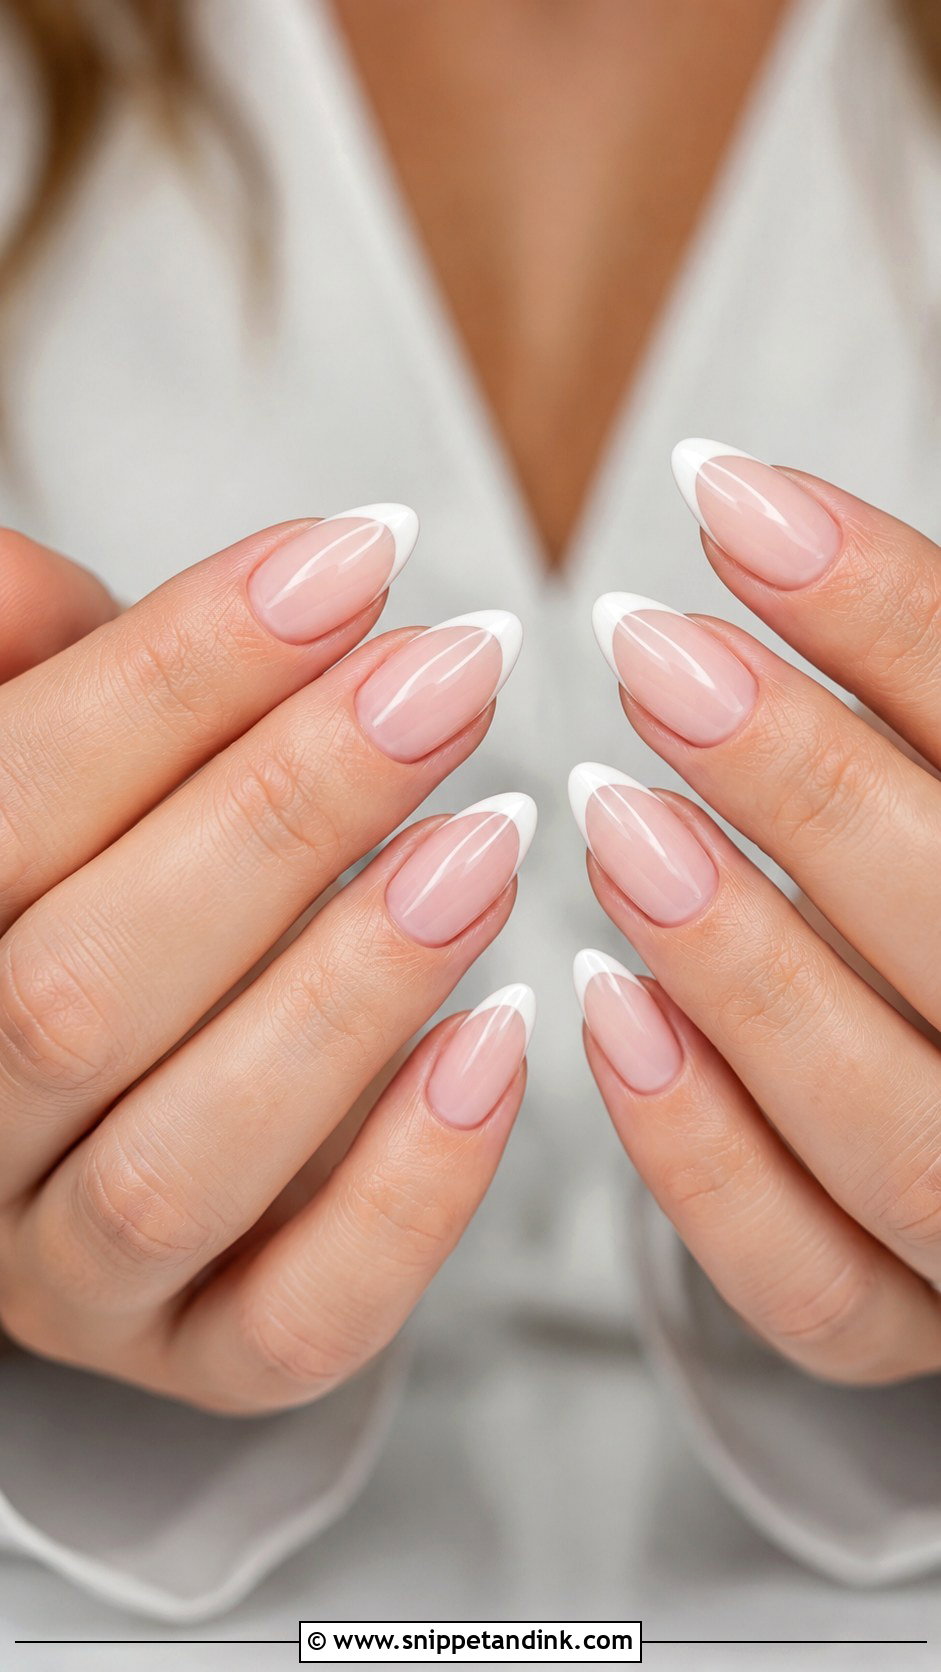
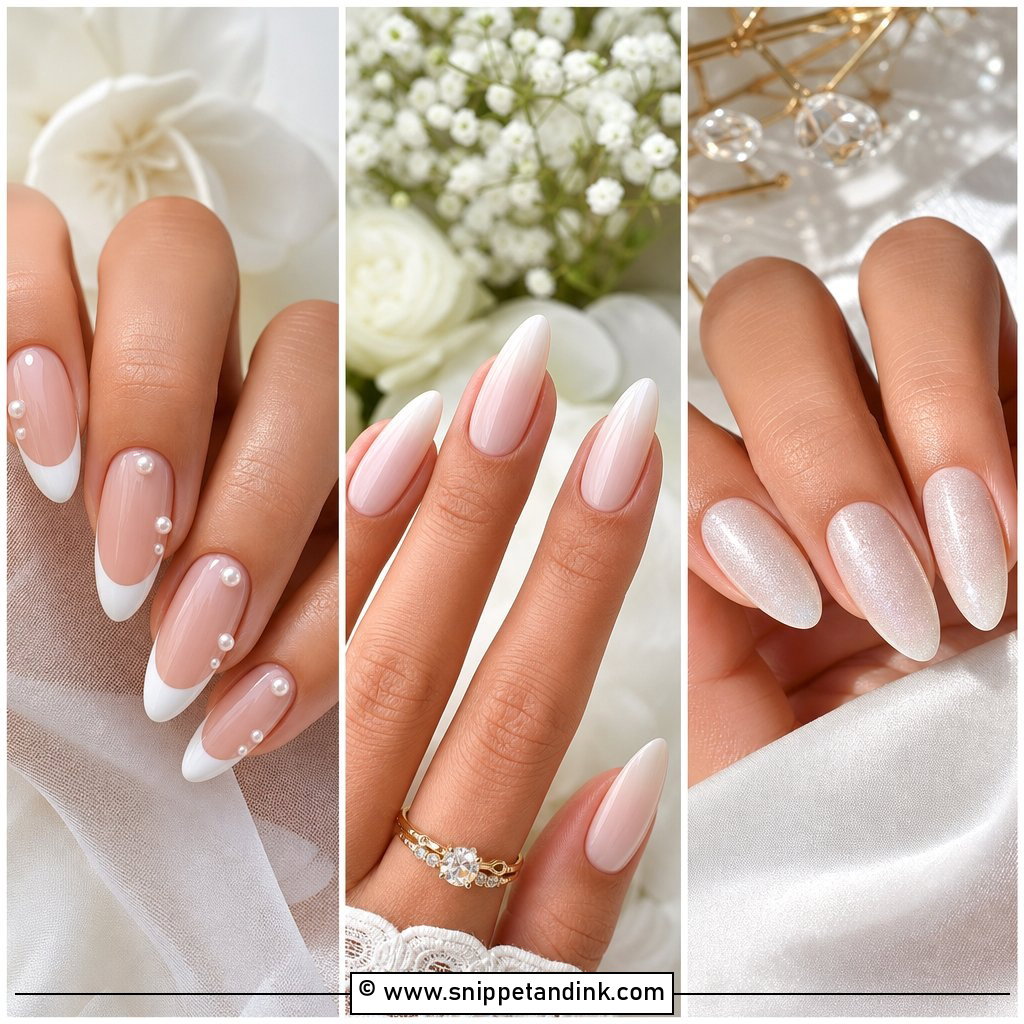
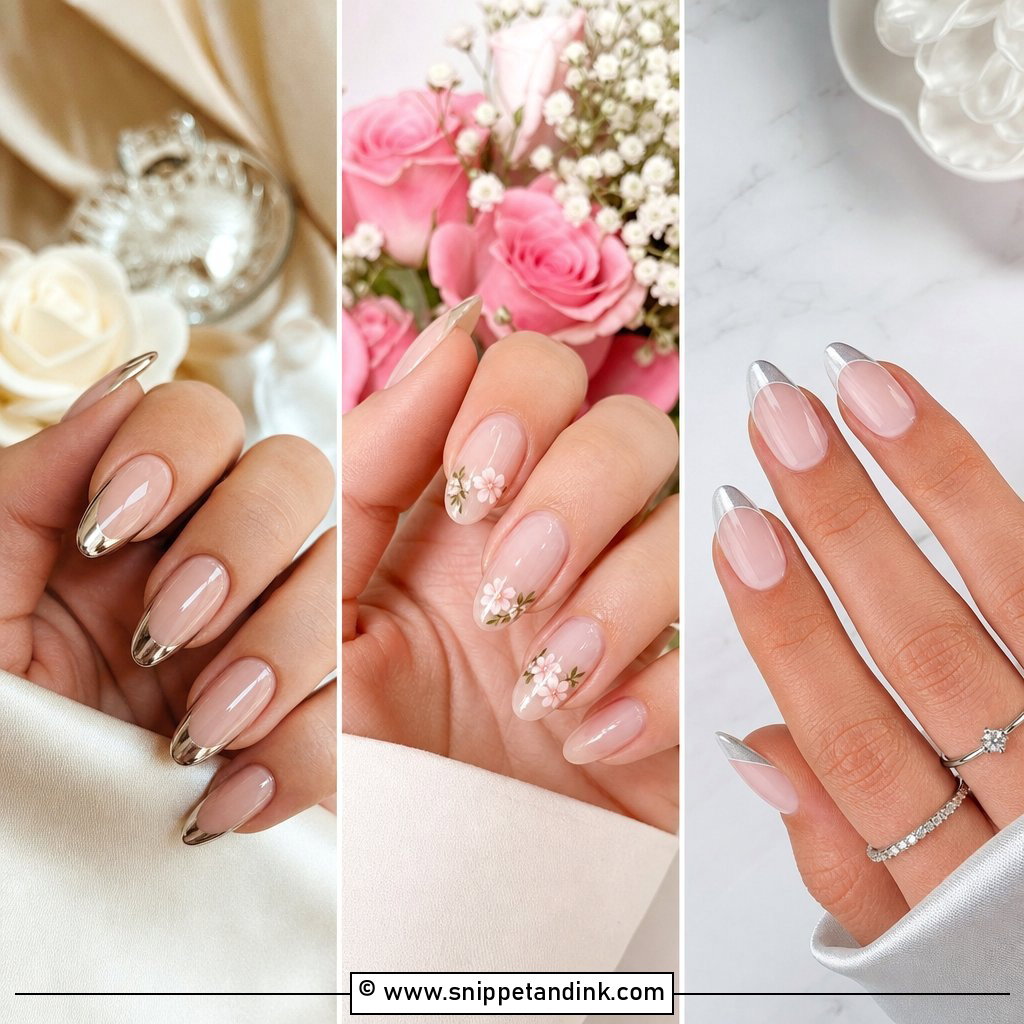
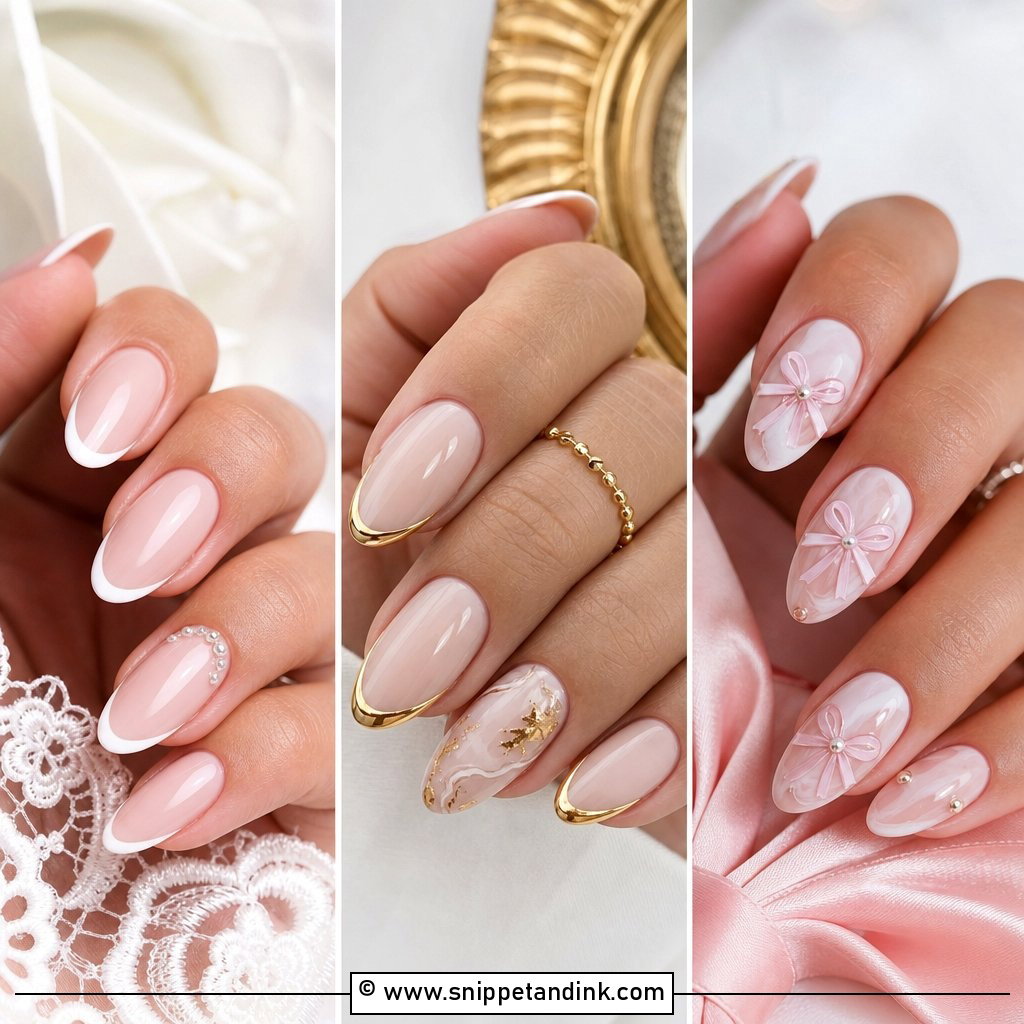
Classic French suits almost any venue, from a courthouse to a ballroom, which is why I still paint so many of them. The modern version has a slimmer white tip than the thick bands of years past, over a soft nude or sheer pink base. My real job here is the smile line. It has to sit at the same height on all ten nails, or the camera picks up the difference immediately. Oval and almond make the tips look graceful, short square keeps them classic, and the set will still look right when you open the album decades from now.
4. Micro French Wedding Nails
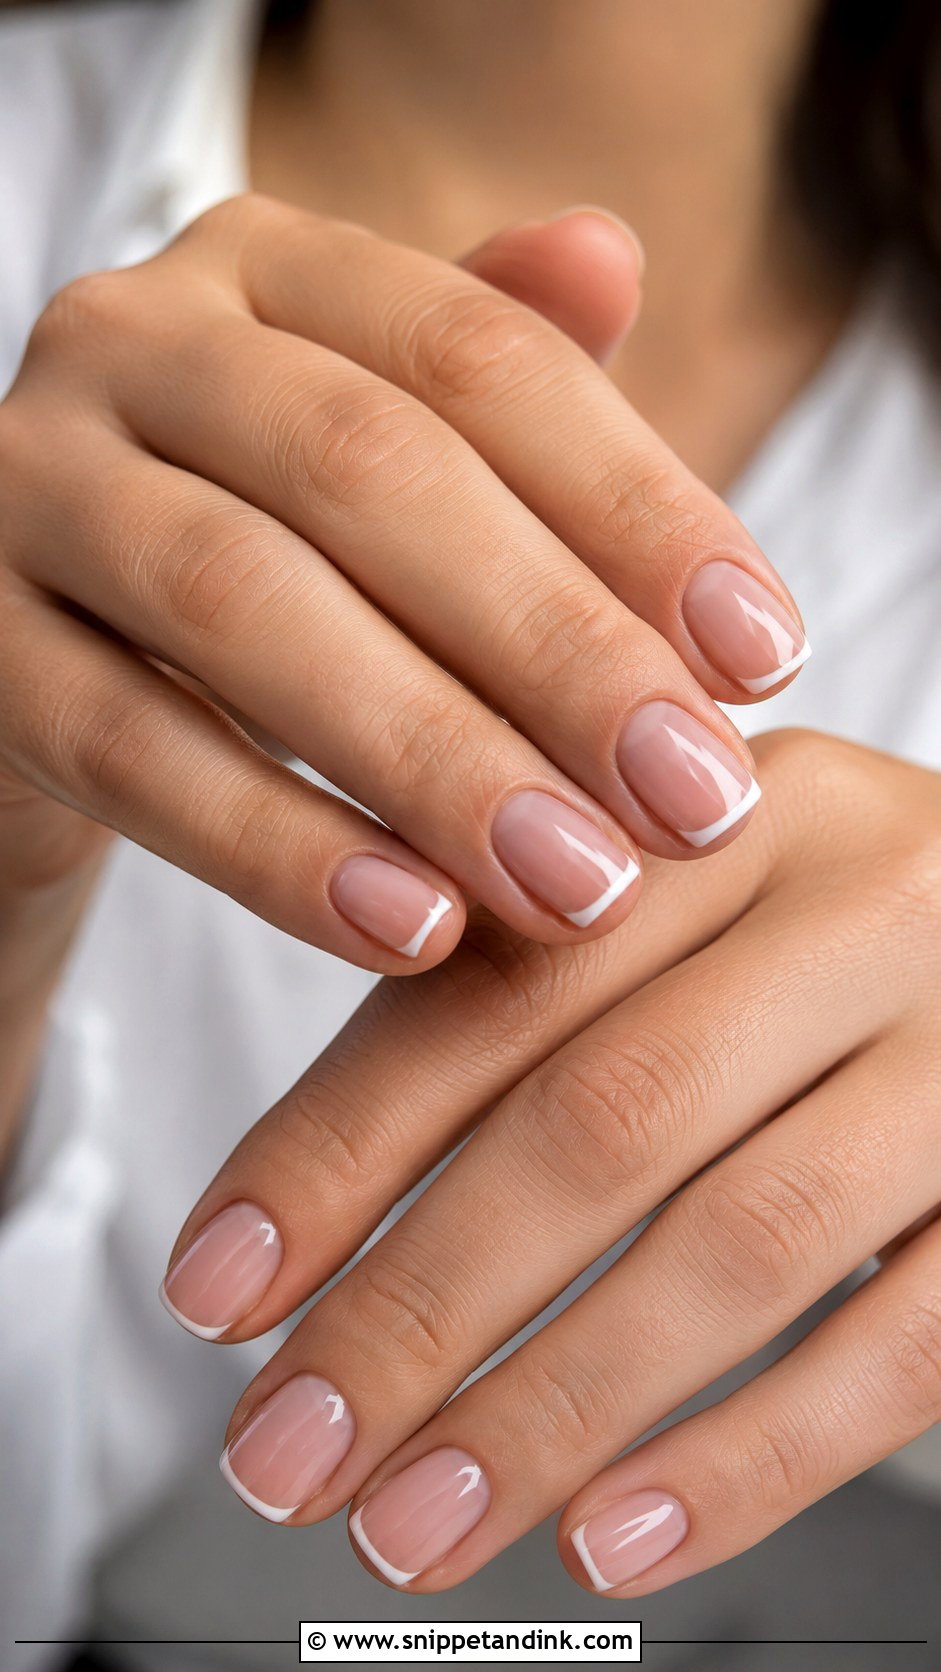
For short nail beds I usually suggest Micro French wedding nails rather than a full French. The tip is a hairline of white over sheer pink, nude or milky beige, so it defines the edge without visually cutting the nail shorter. It takes a steady liner brush and a slow hand, and I’d rather redo a wobbly line than leave it. Soft square, oval and almond all keep it clean.
5. Nude Wedding Nails
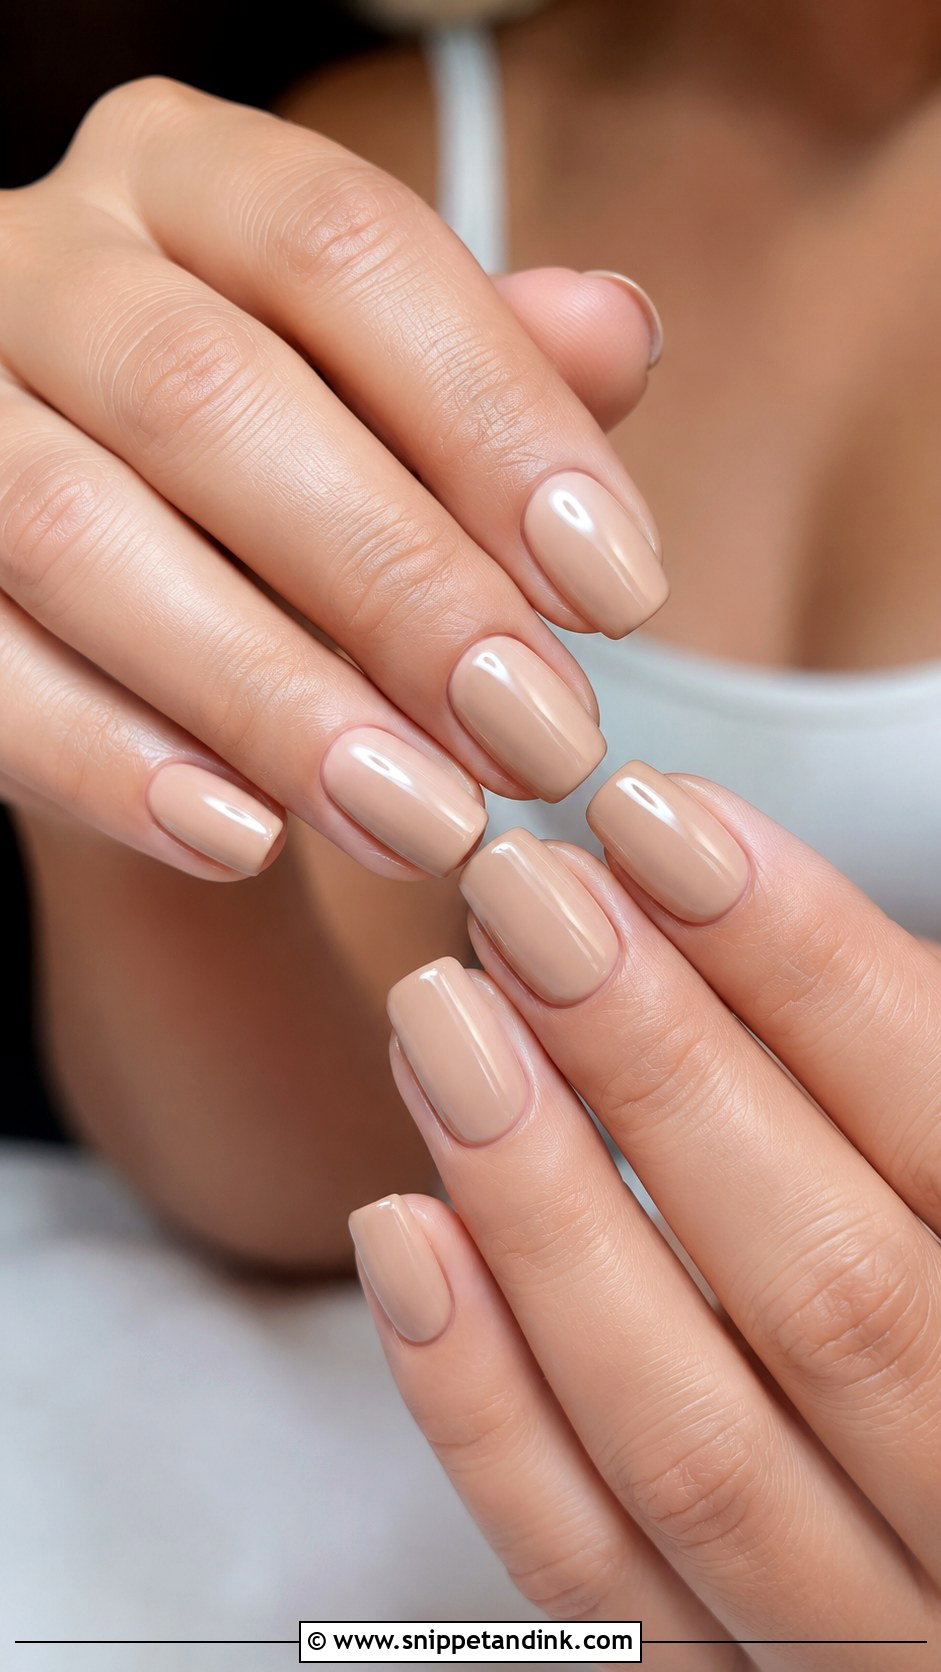
The whole trick with nude polish is undertone. Too pale and fingers look chalky; too grey and they look tired. Fair skin usually takes beige pinks, medium skin warms up in peachy nudes, and deeper skin tones glow in caramel, mocha and warm taupe. At a trial I swatch two or three shades across the actual nail instead of trusting the bottle, because a nude that looks right in the glass can vanish or turn muddy on the hand. Any length works, and it’s one of the easiest colors to touch up.
6. Blush Pink Wedding Nails
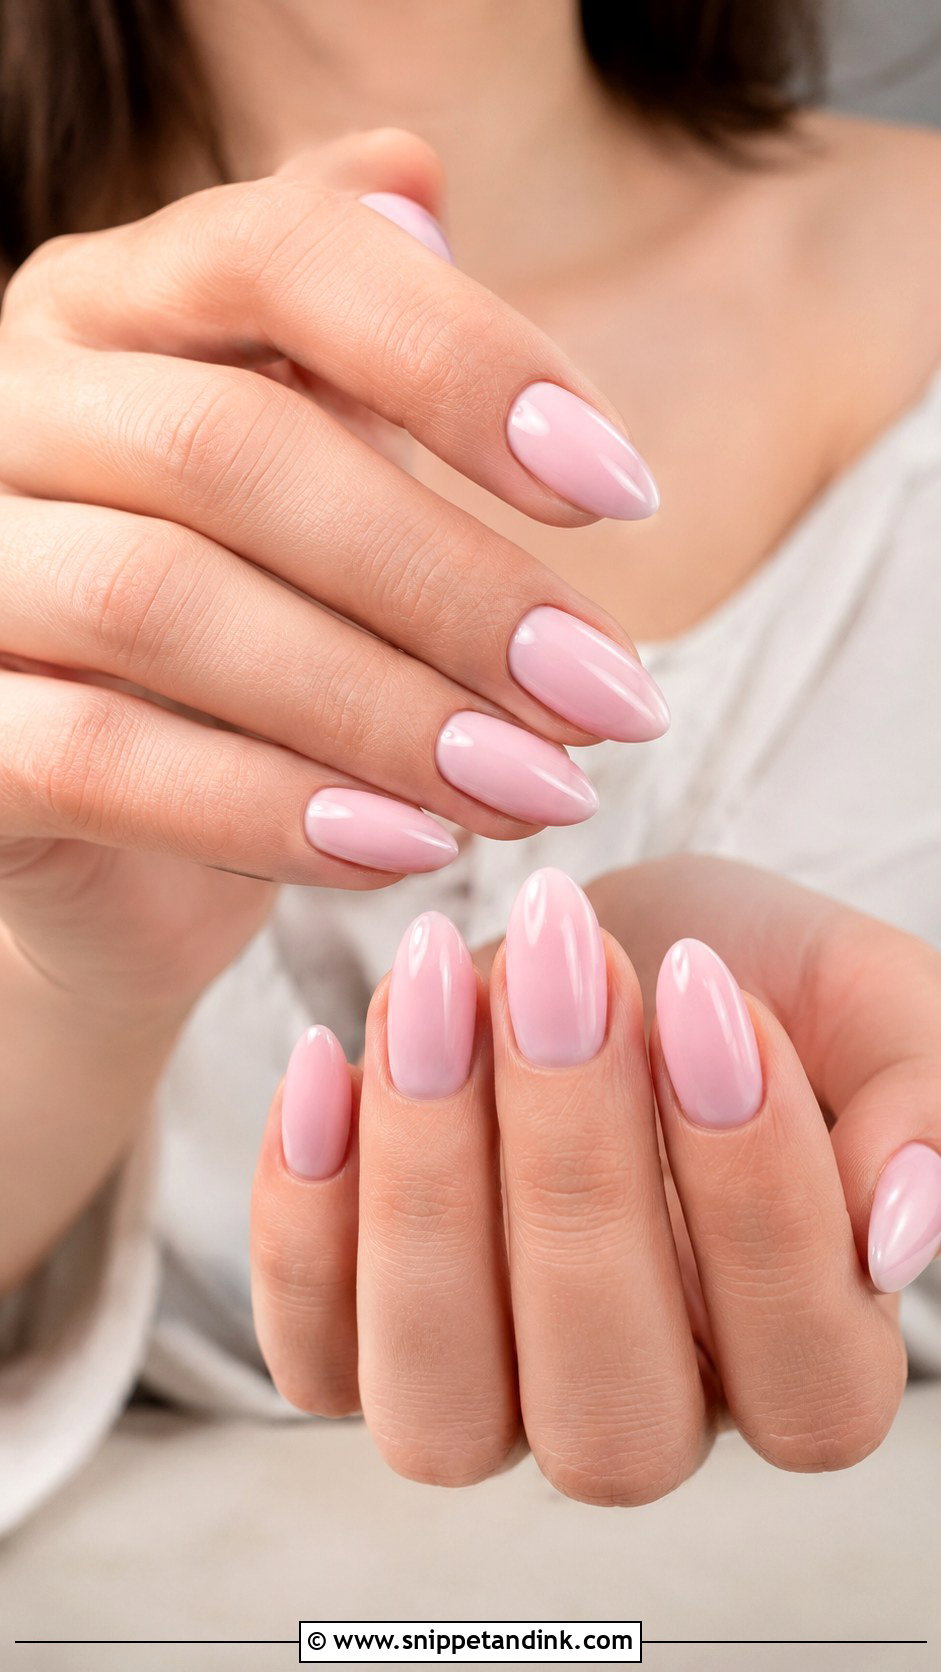
Blush carries more color than a sheer pink, so it stays visible in photos taken from across the room, not only in close-ups. It sits comfortably with rose gold, pearls and soft makeup. I keep all ten nails in one shade and, at most, float a whisper of shimmer over the top. Short oval reads sweet; medium almond reads more refined.
7. Ivory Wedding Nails
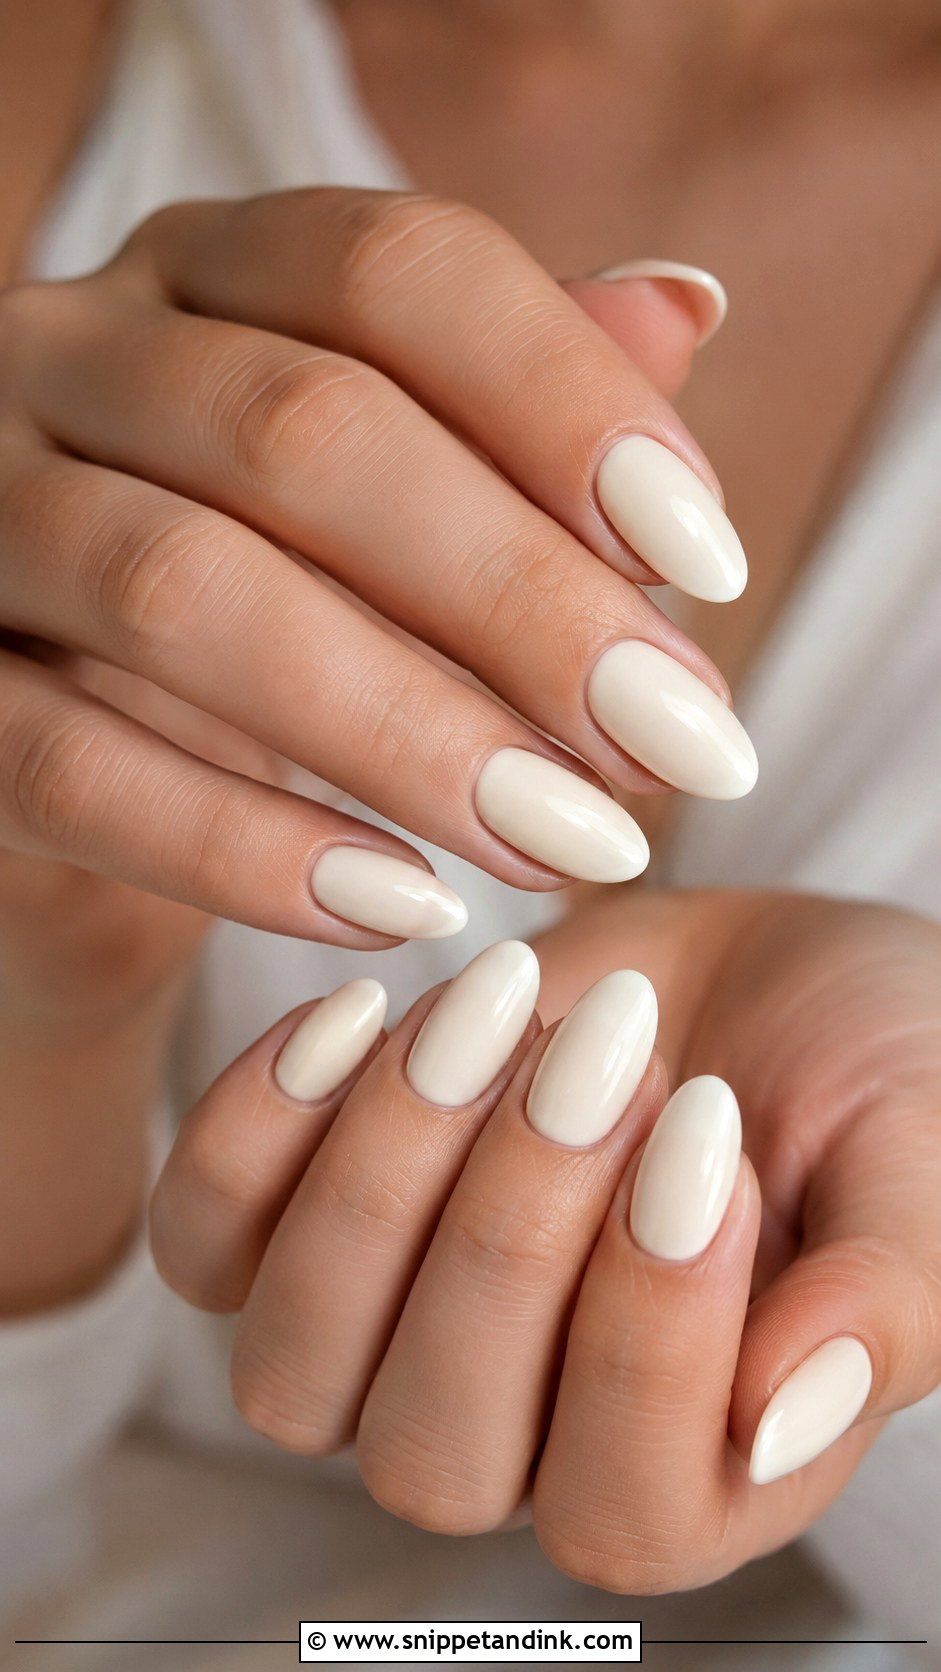
Bright white polish beside a cream gown can make the dress look dingy, and that is exactly where ivory earns its place. Its softer undertone matches warm white, champagne and vintage fabrics, and it loves gold jewelry. I can apply it as a sheer wash or build it opaque; the opaque version needs very thin coats, since creamy pigments streak if you load the brush. Skip heavy art and let the color carry it. Rounded or almond shapes keep it soft, while a short square gives a crisper edge.
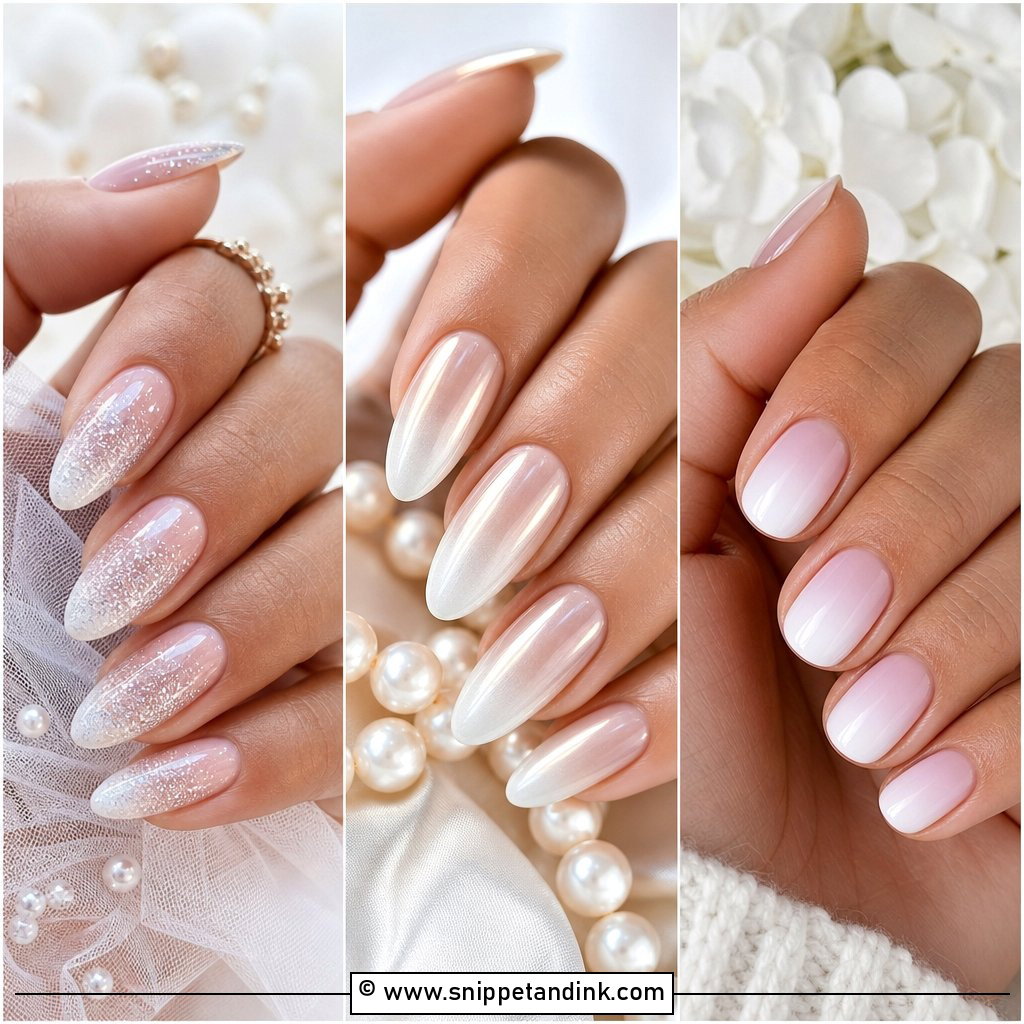
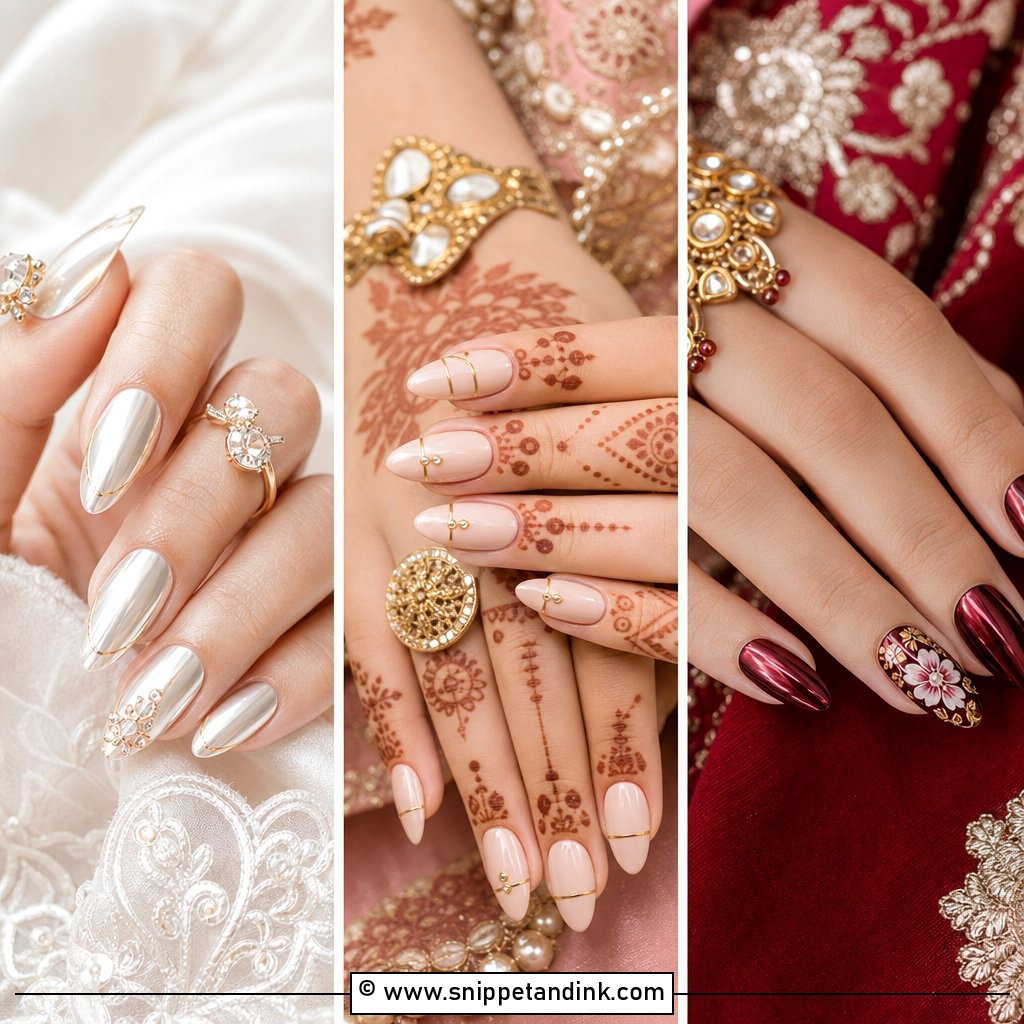
8. Pearl Chrome Wedding Nails
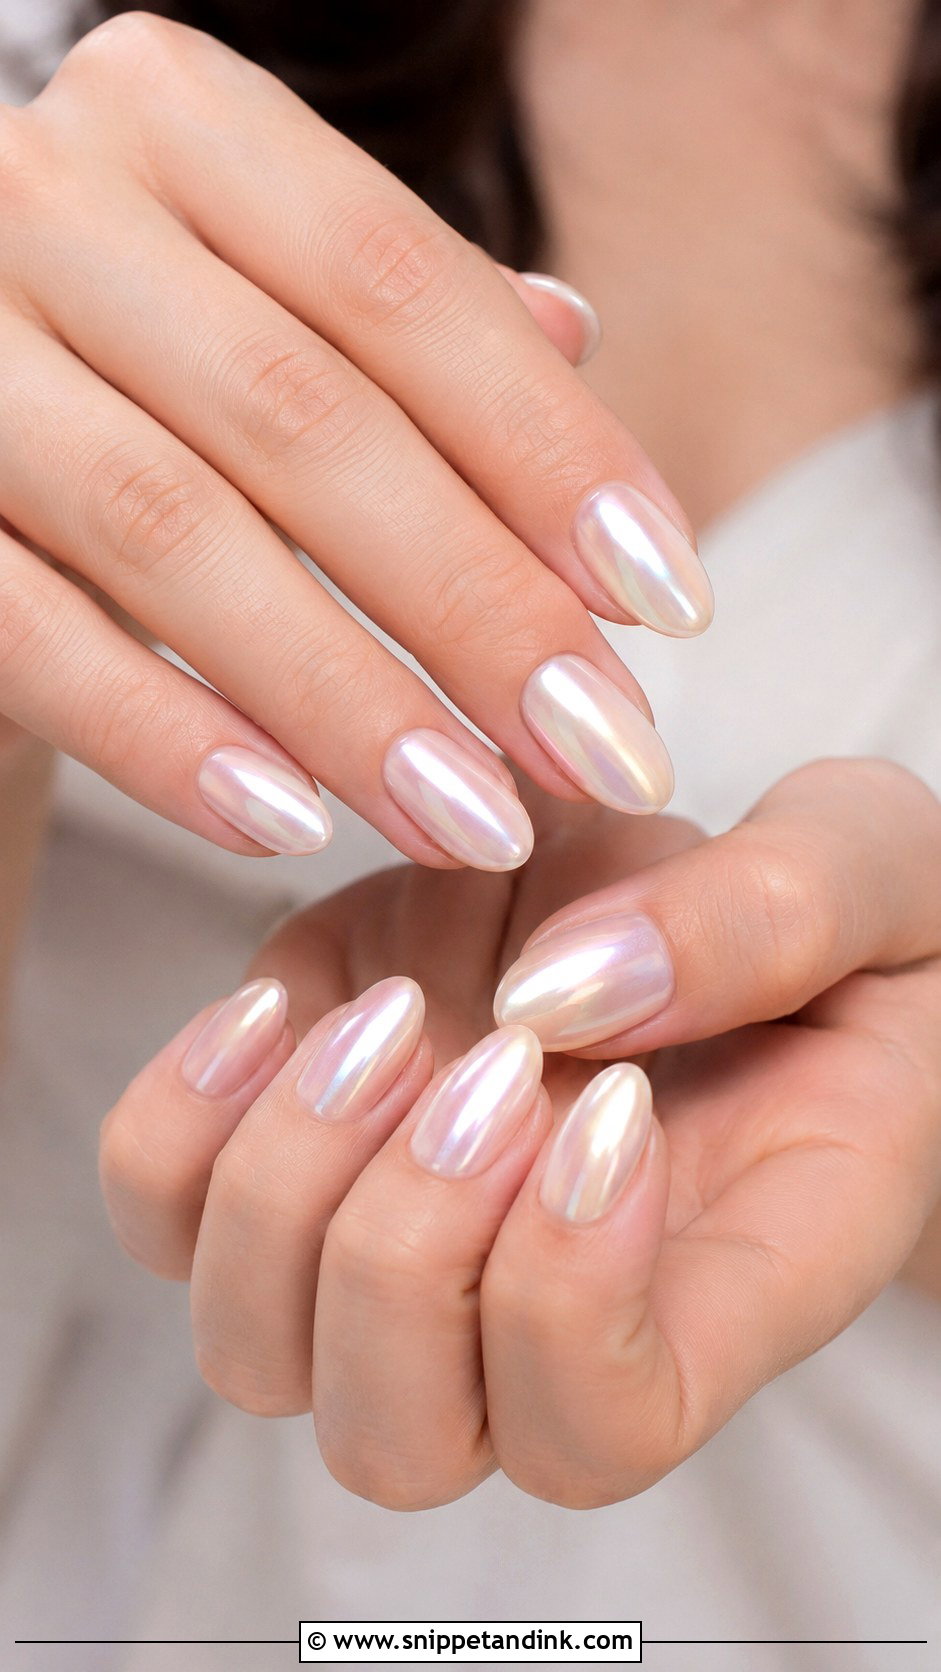
Pearl chrome is a fine powder buffed over a cured gel top coat, usually on a sheer white, pale pink or nude base. It glows rather than sparkles, shifting as your hands move. Because the powder only behaves properly on gel, I don’t offer it over regular polish, and I cap the free edge carefully, since chrome tends to wear at the tips first. Keep the length short to medium so it stays delicate. Oval and almond flatter it most, and it sits naturally beside pearl earrings and satin.
9. Glazed White Wedding Nails
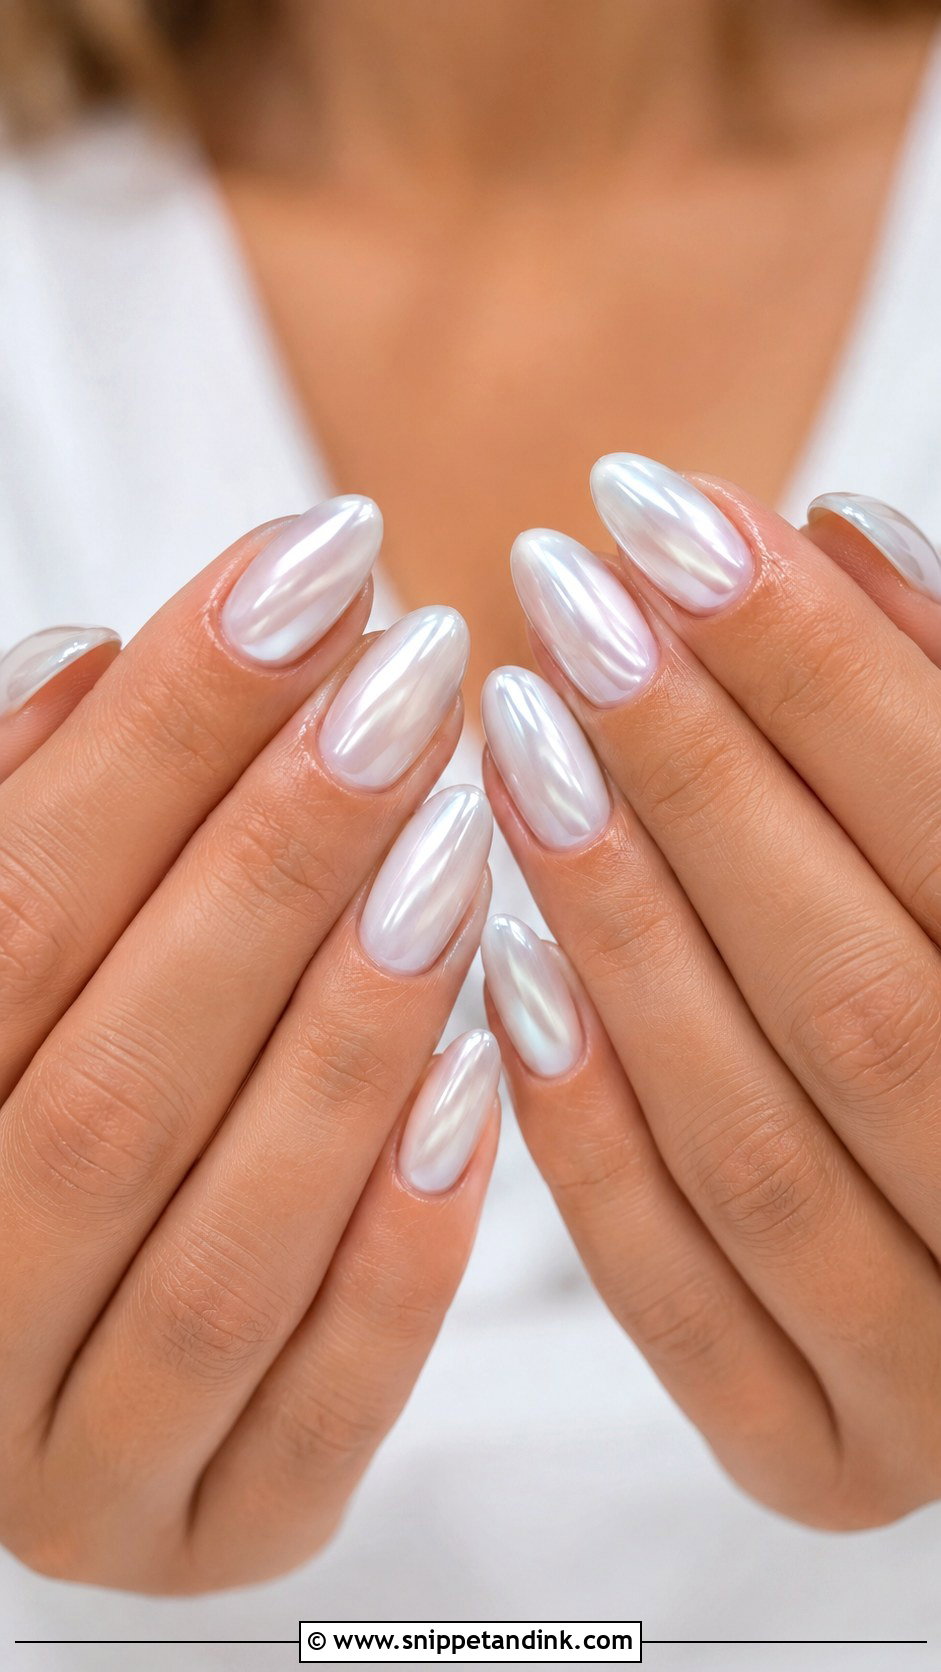
A glassy, reflective sheen over white is what makes Glazed white wedding nails look current rather than plain. It’s brighter than pearl chrome but still gentle. I pick the base by the gown: milky white for bright white fabric, creamy white or sheer ivory for warmer tones. Ask for a thin chrome layer, because a heavy rub turns the finish metallic, which is a different look altogether. Almond, oval and squoval all suit it.
10. Baby Boomer Wedding Nails
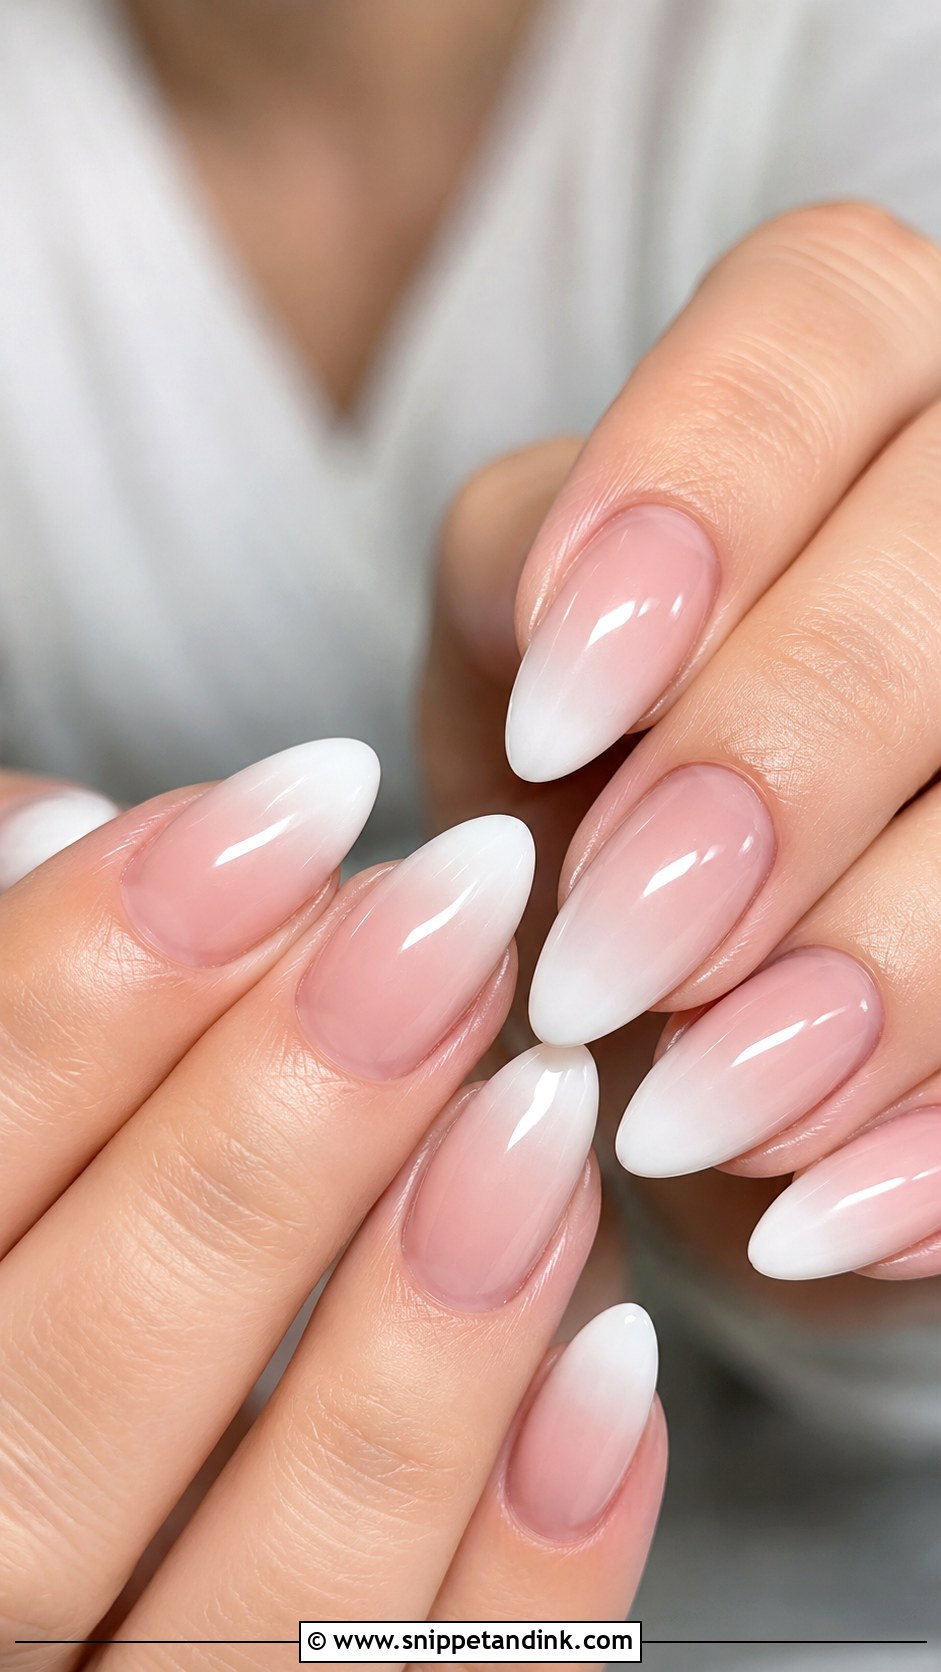
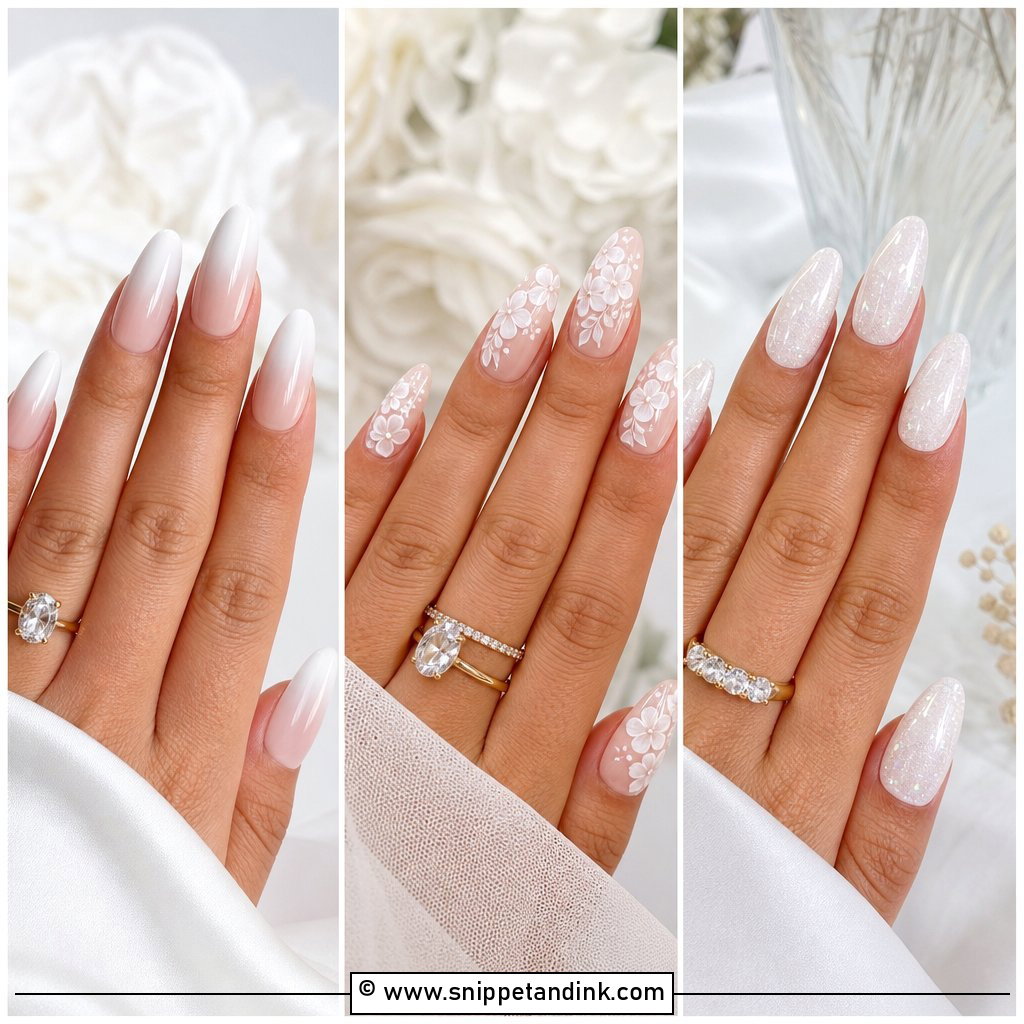
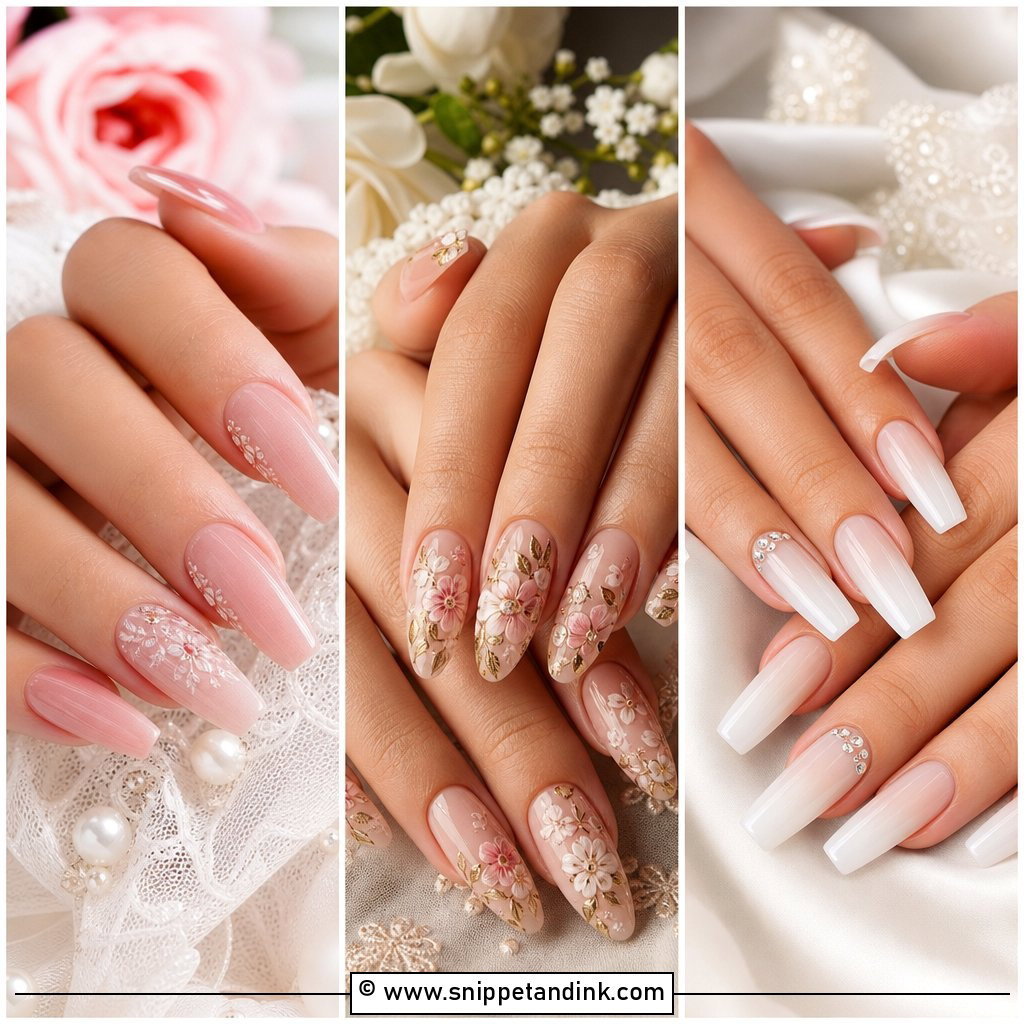
Picture a French manicure with the line blurred out. That is what Baby boomer wedding nails are: nude or pink at the cuticle, fading into white at the tip. I blend it in gel with a sponge or a soft brush, and the fade has to be gradual, with no visible band where the colors meet. Because there’s no hard line, small differences in nail length are far less obvious, which helps in close-up hand photos on almond and oval shapes. Gloss keeps it classic; a faint shimmer warms it up.
11. Pink And White Ombre Wedding Nails
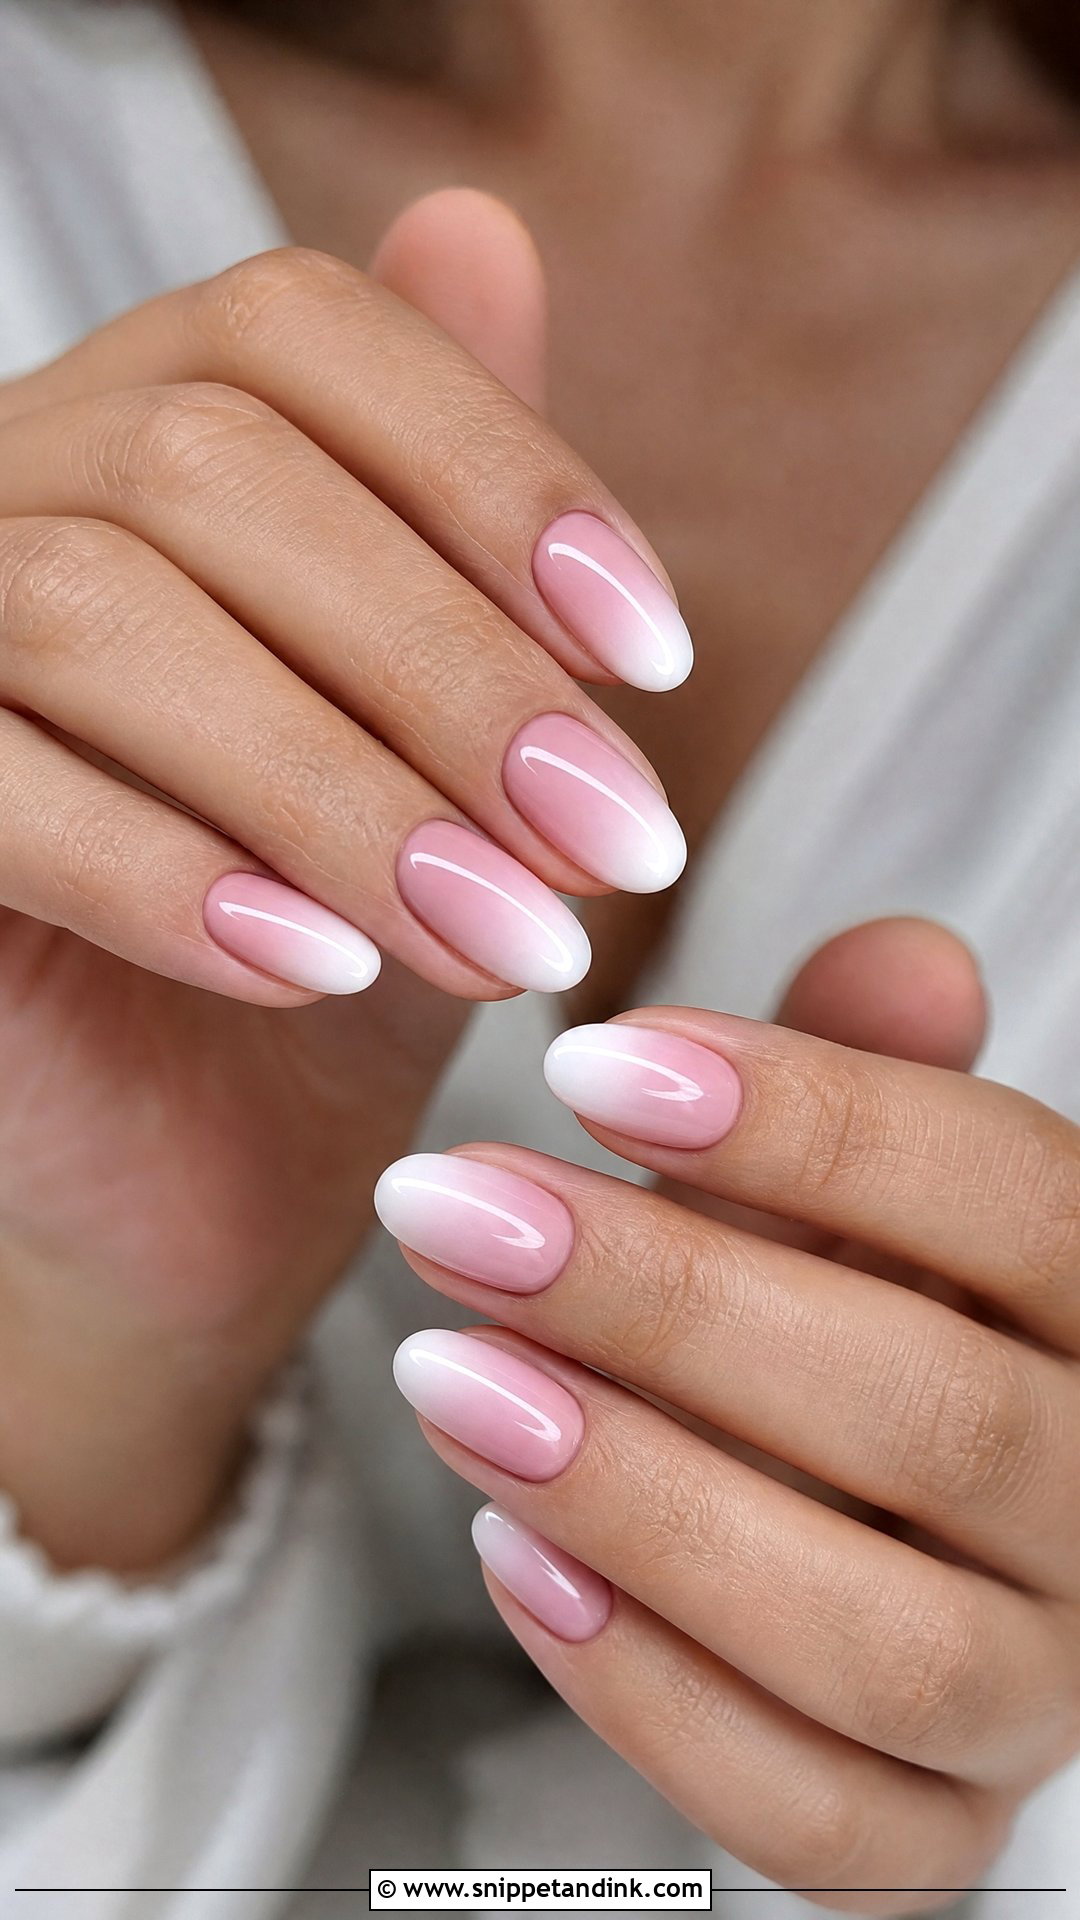
Think of this as the softer cousin of the baby boomer: more pink in the body of the nail and only a delicate white fade at the tip. Where a classic French looks formal, this feels relaxed. My usual caution is the white. Too much of it and the nails look heavy and chunky, especially on short beds. Medium almond carries the fade best, short oval works too, and a high-gloss top coat finishes it.
12. Short Square Wedding Nails
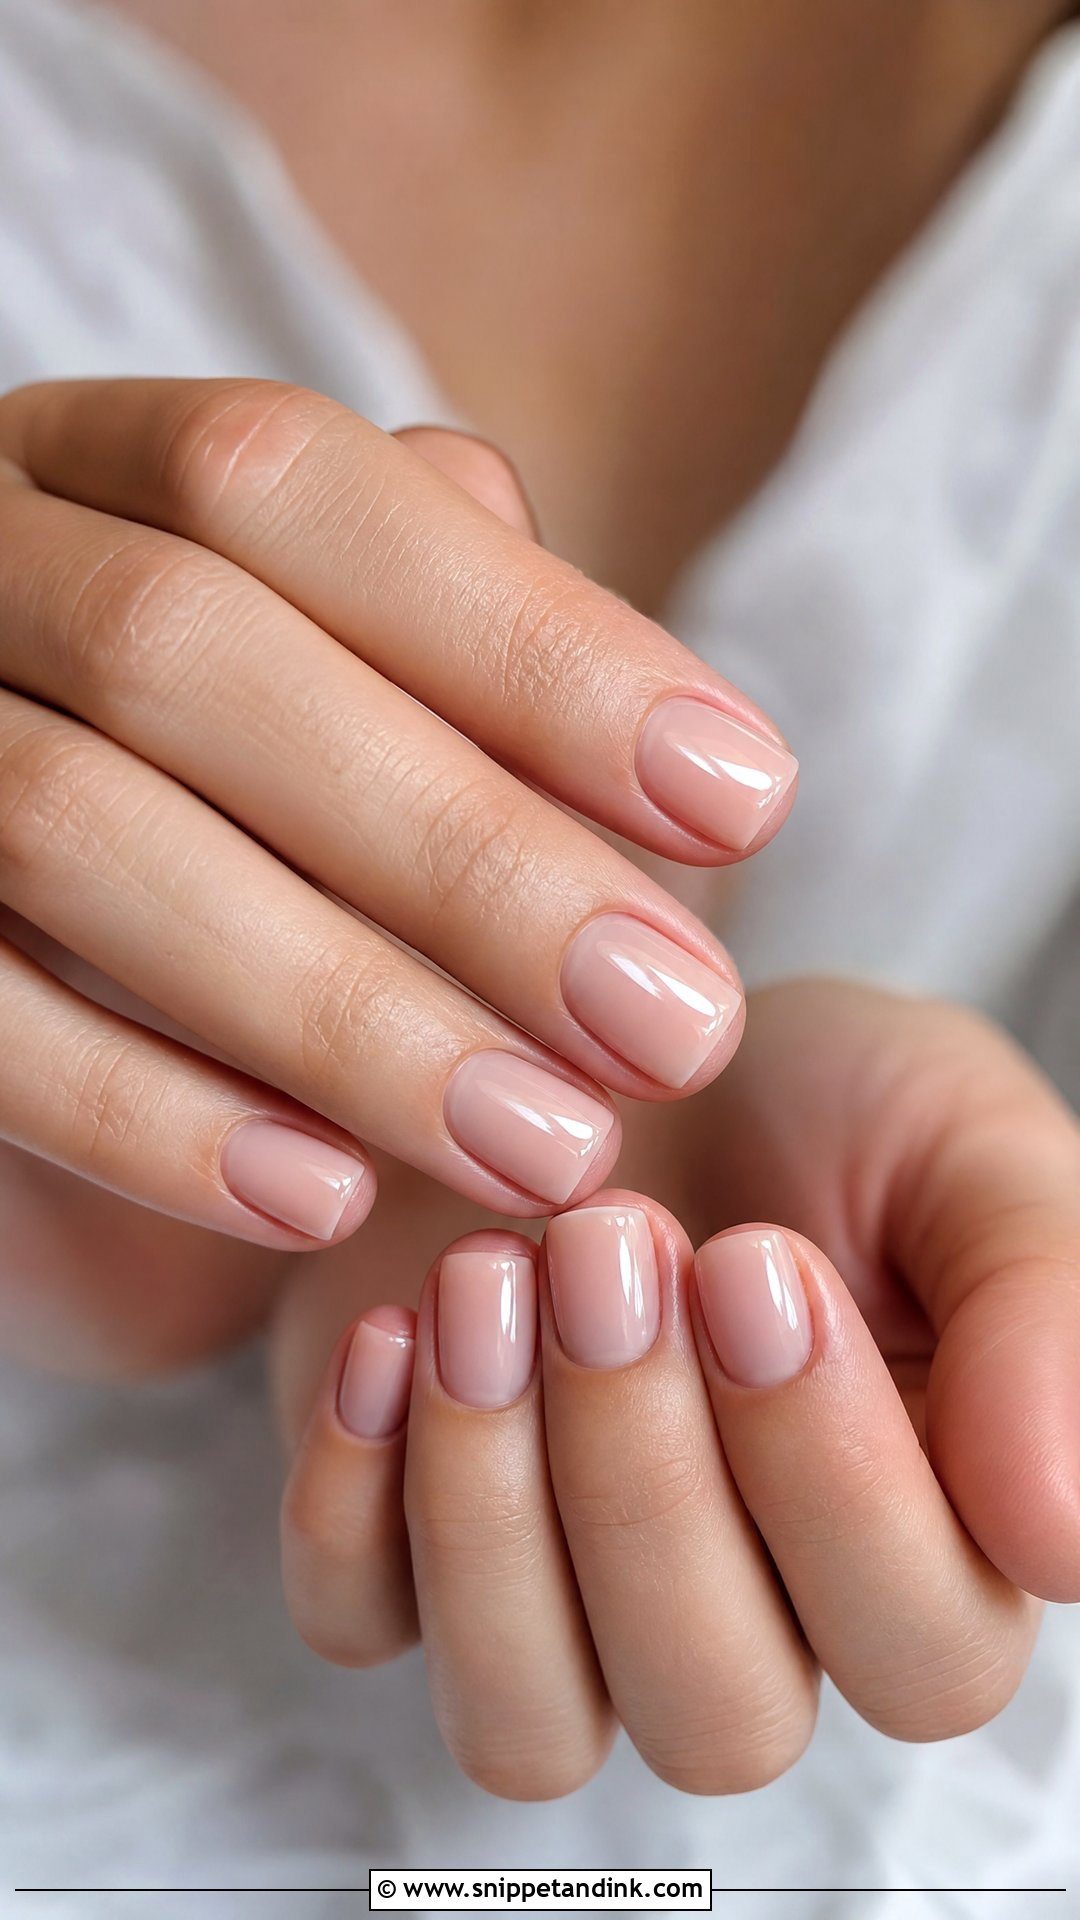
Short square is my answer for brides who type, garden, lift small children or simply hate length. I always soften the corners slightly, because sharp square corners snag lace and veil tulle and tend to chip first. It takes sheer pink, nude, milky white or a slim French equally well. And it still looks neat on the honeymoon, which longer sets often don’t.
13. Short Oval Wedding Nails
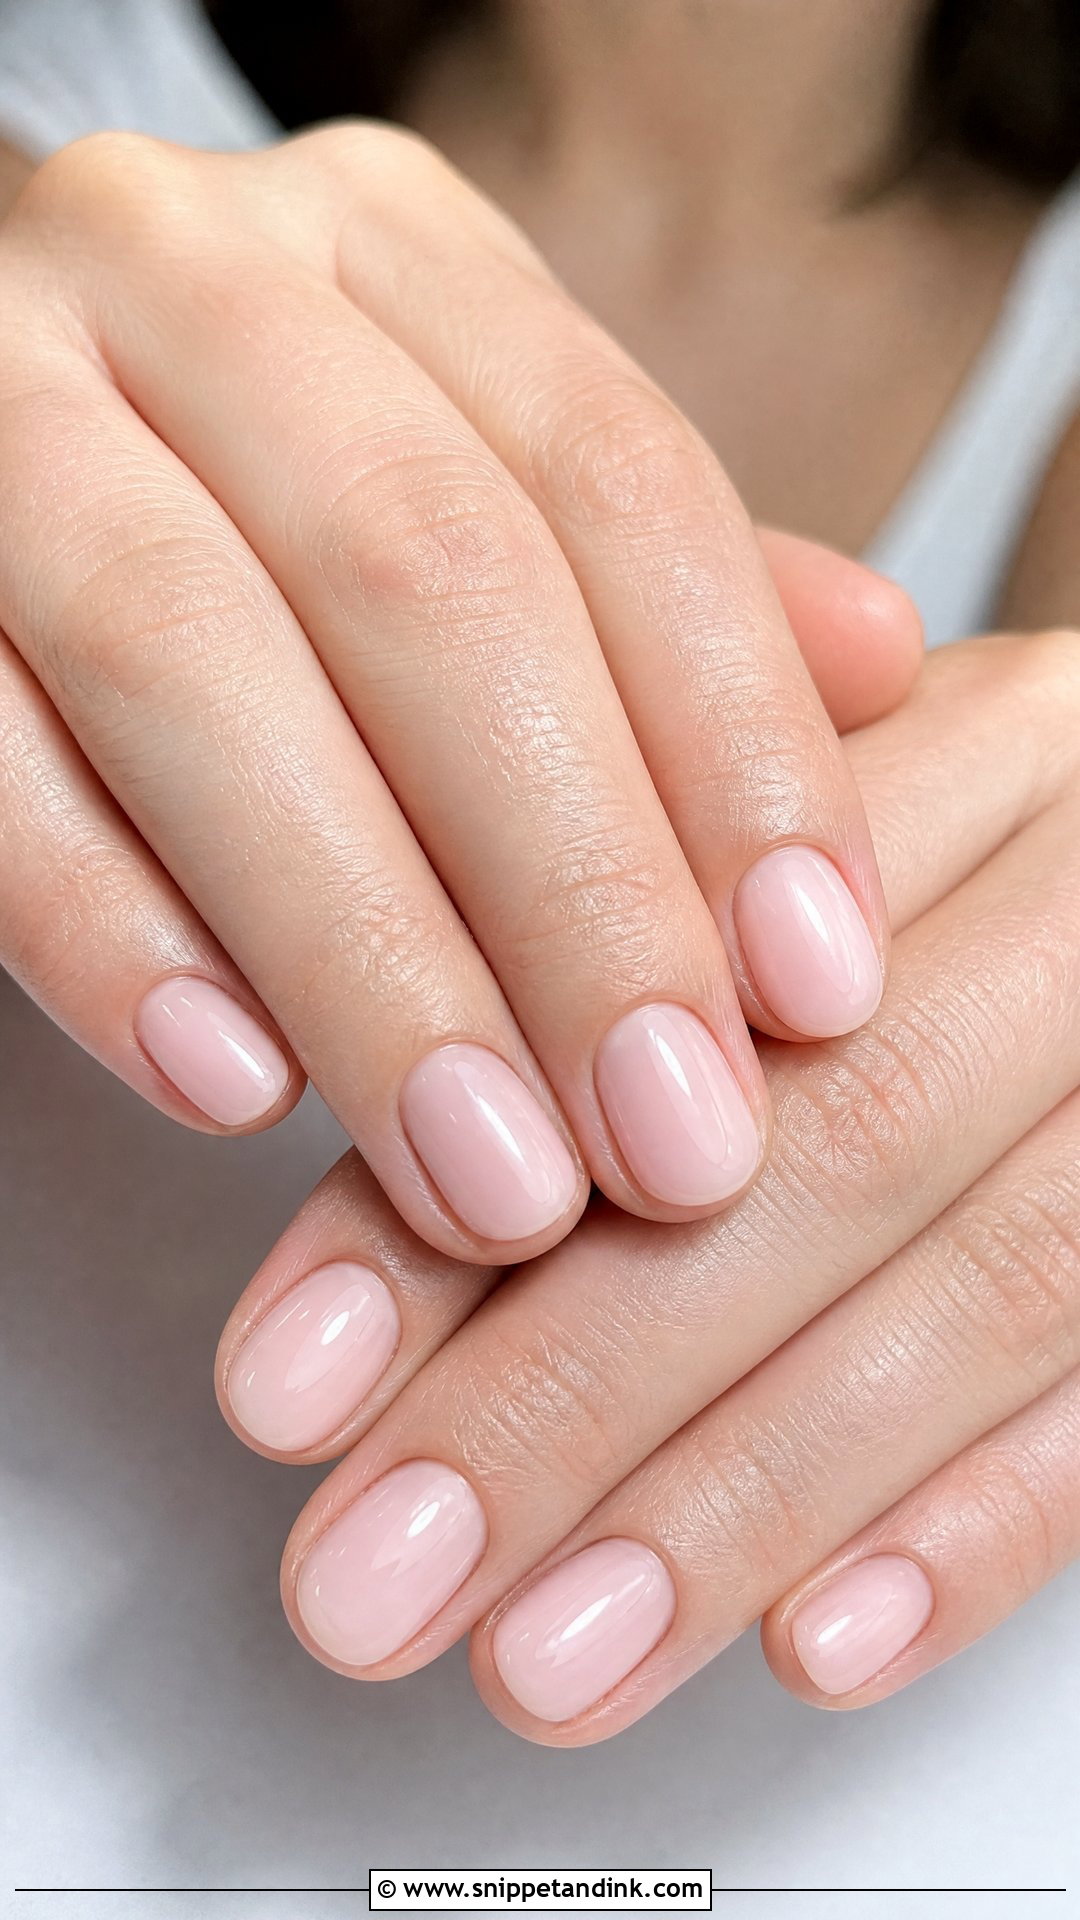
A short oval follows the curve of the fingertip, which is why it suits nearly every hand I see. It doesn’t add length; it makes natural nails look healthy and finished in sheer pink, nude, ivory or milky white. Prep does the work here. Tidy cuticles and thin polish matter more than the shade, because a short oval leaves nowhere for a ragged sidewall to hide.
14. Almond Wedding Nails
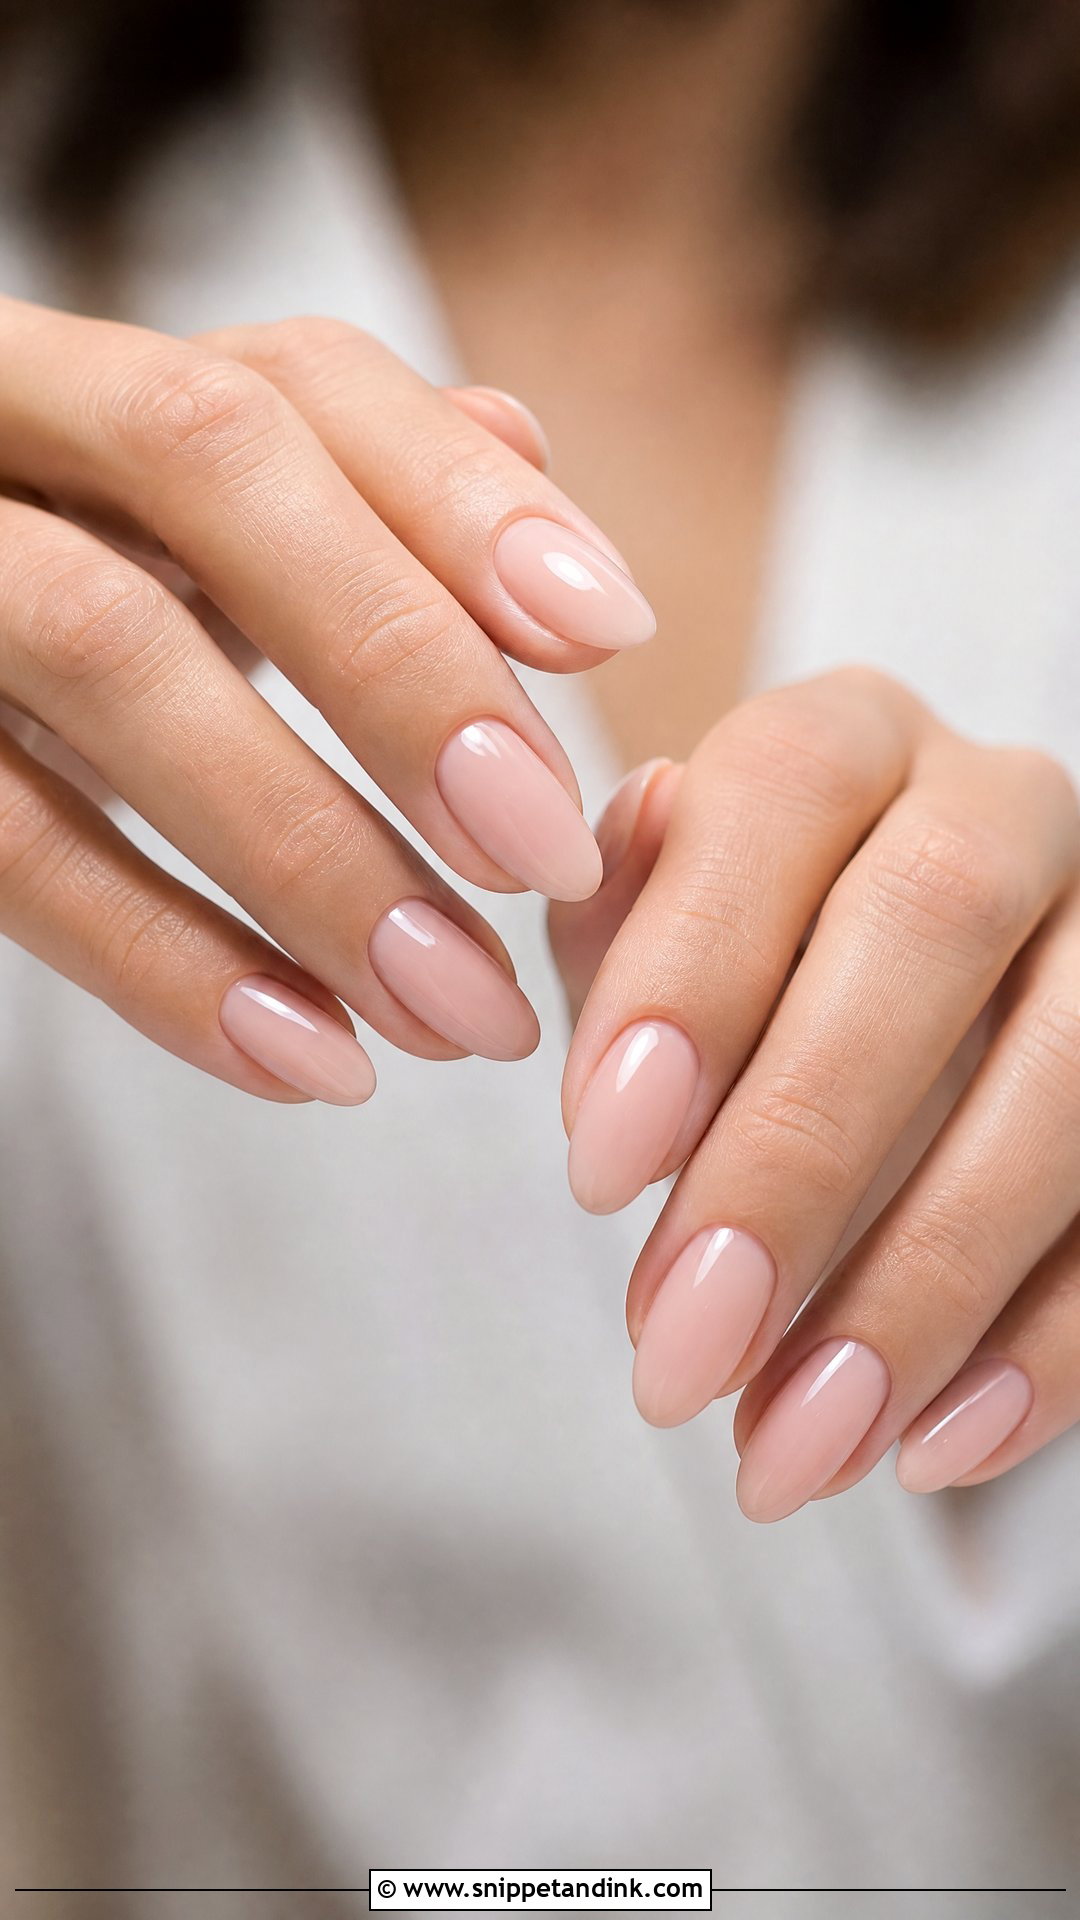
The tapered tip of an almond lengthens the fingers by itself, so the design can stay plain. For a bridal set I keep it medium with blush pink, milky white, beige nude or sheer ivory, finished in gloss or a pearl chrome top. If you’ve never worn extensions, don’t try a long almond for the first time on your wedding day. You’ll be fastening buttons, signing the license and pinning a boutonniere, and length takes a few days to get used to.
15. Soft Square French Wedding Nails
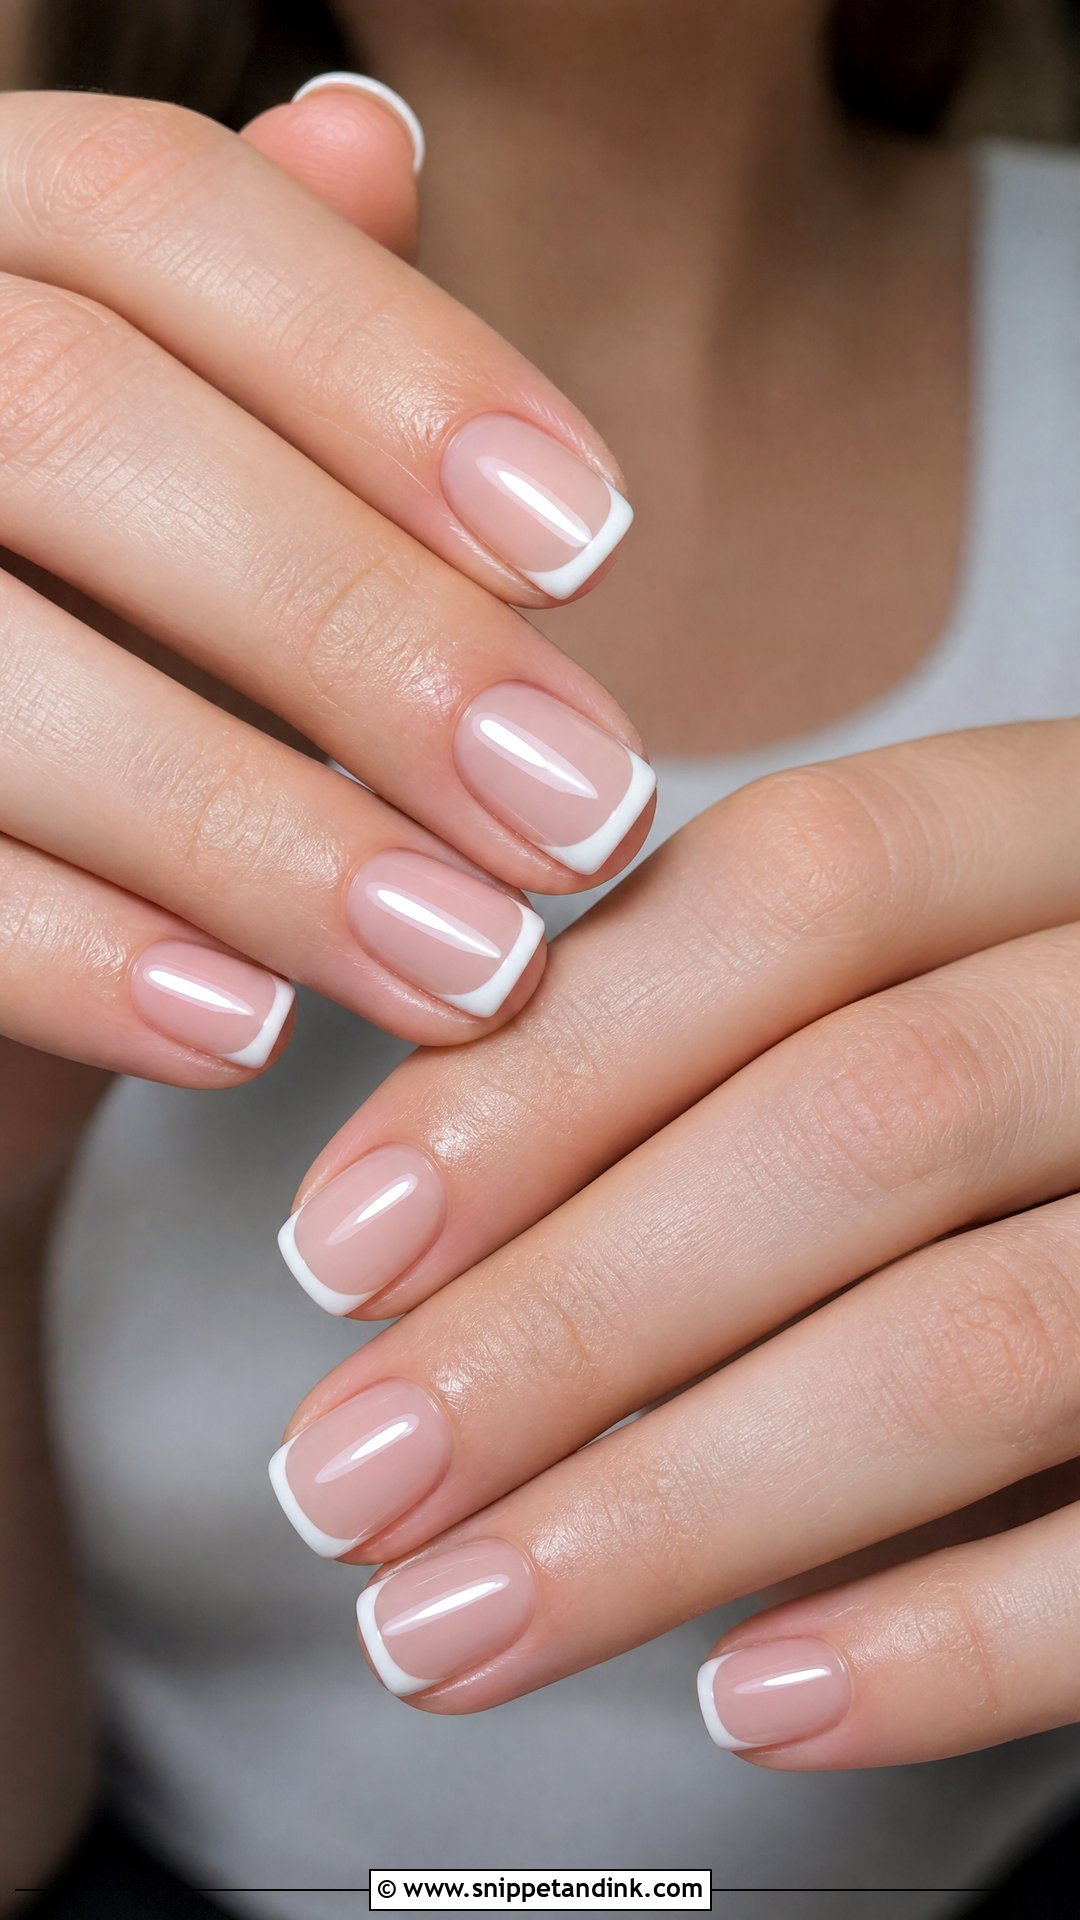
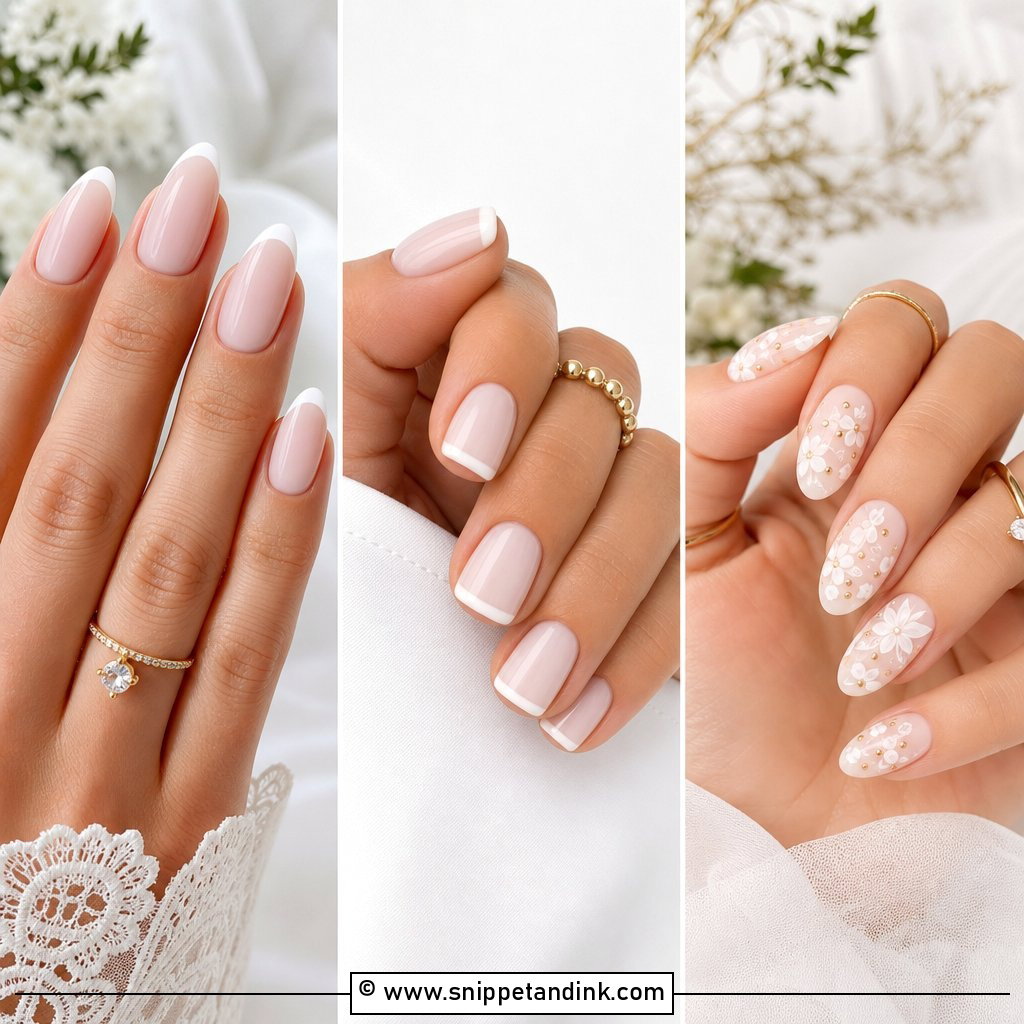
The square keeps its shape but loses its sharp corners, and the white tip follows your own nail’s curve instead of running straight across. That curve matters: a straight tip on a curved free edge looks clumsy, while one painted to your natural smile line looks crisp. I keep this on short to medium nails over a sheer nude or pink base. It’s traditional without being fussy, and gloss keeps the white edge sharp in photos.
16. Natural Wedding Nails
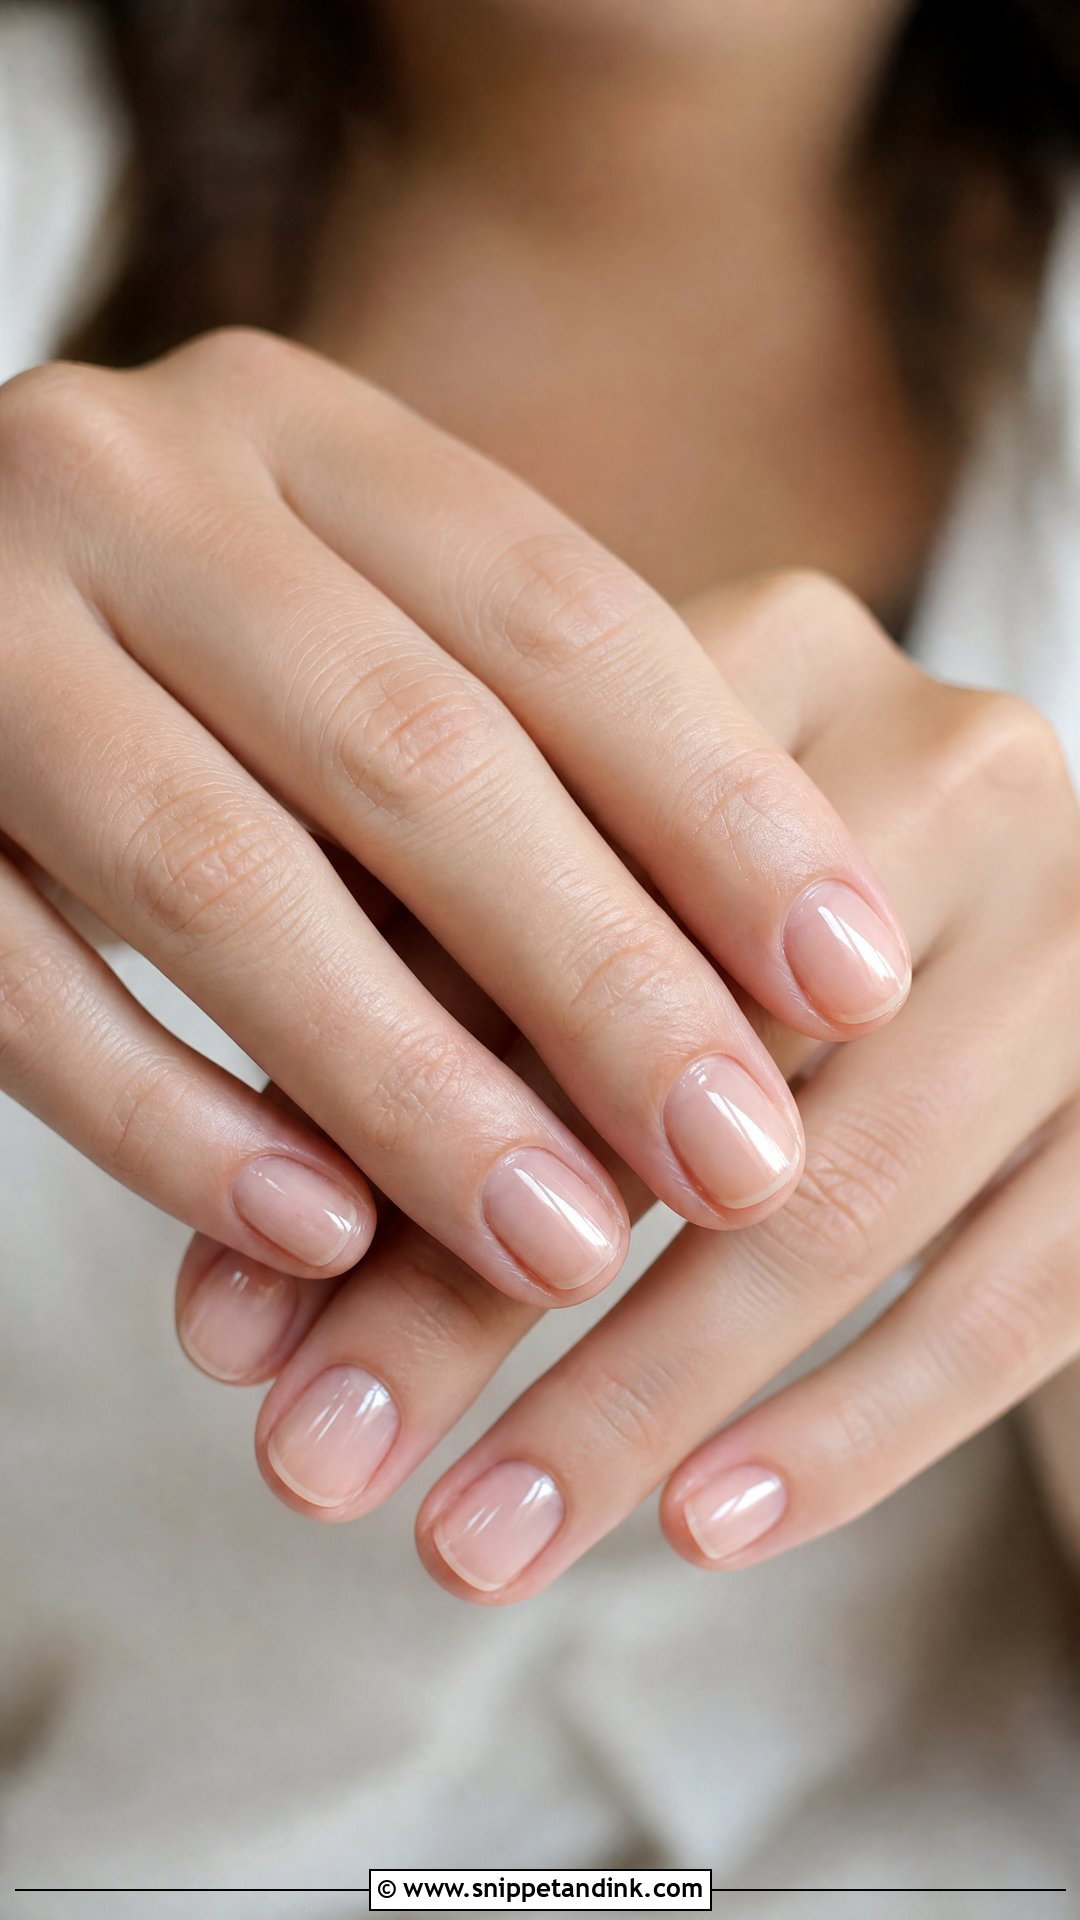
Natural nails are really a manicure rather than a polish choice. I spend the appointment on cuticle work, shaping and evening out the lengths, then finish with clear gloss, a sheer nude, pale pink or a tinted strengthening gel. Start daily cuticle oil a few weeks before the wedding; it makes a visible difference to the skin around the nail in close-ups. Short round or oval shapes suit it, and it grows out gently afterward with no regrowth line.
17. Clear Gloss Wedding Nails
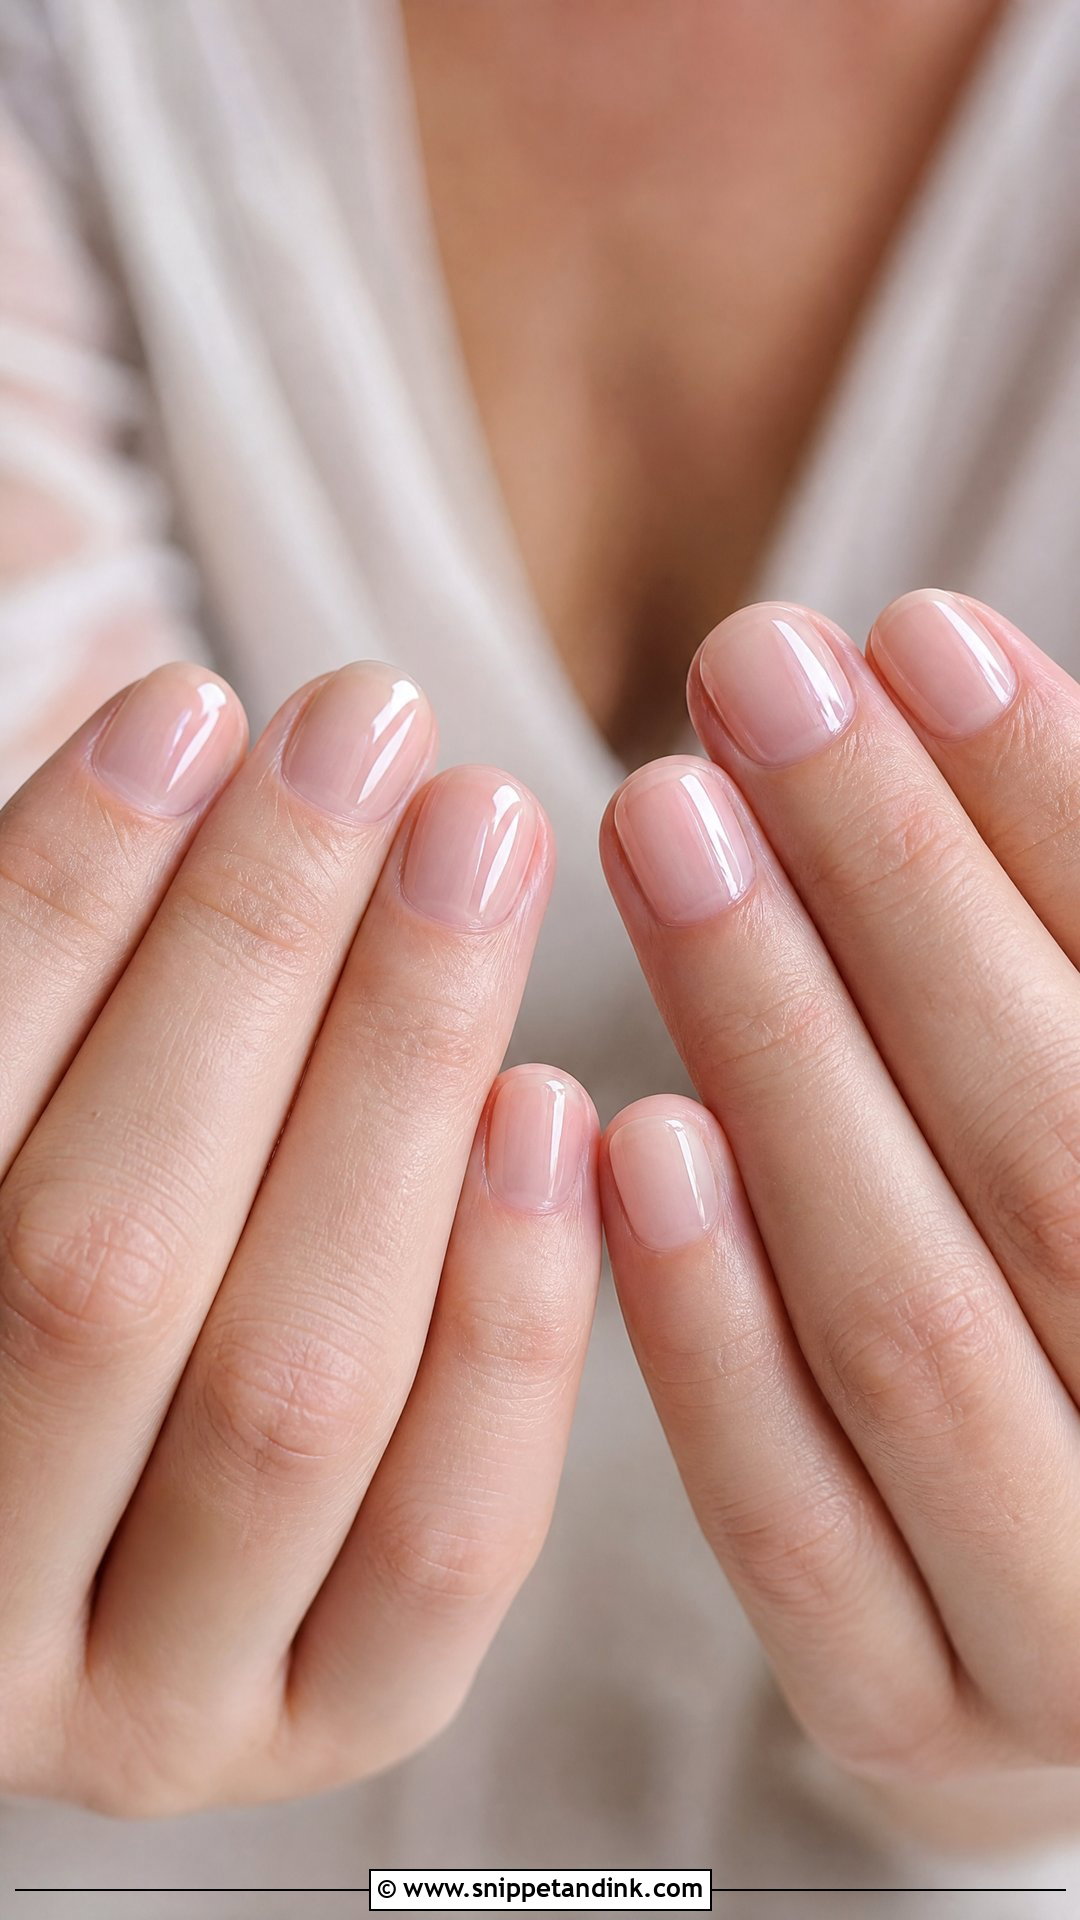
Clear gloss hides nothing, so I only recommend it when the nail plate is in good shape: no deep ridges, no yellow staining left by dark polish. When it is, the result looks fresh and surprisingly polished. I’d book a clear builder gel overlay rather than ordinary clear polish, since it levels minor ridges and holds up far better against chips. Very short, natural oval or soft square all work.
18. Sheer Nude Wedding Nails
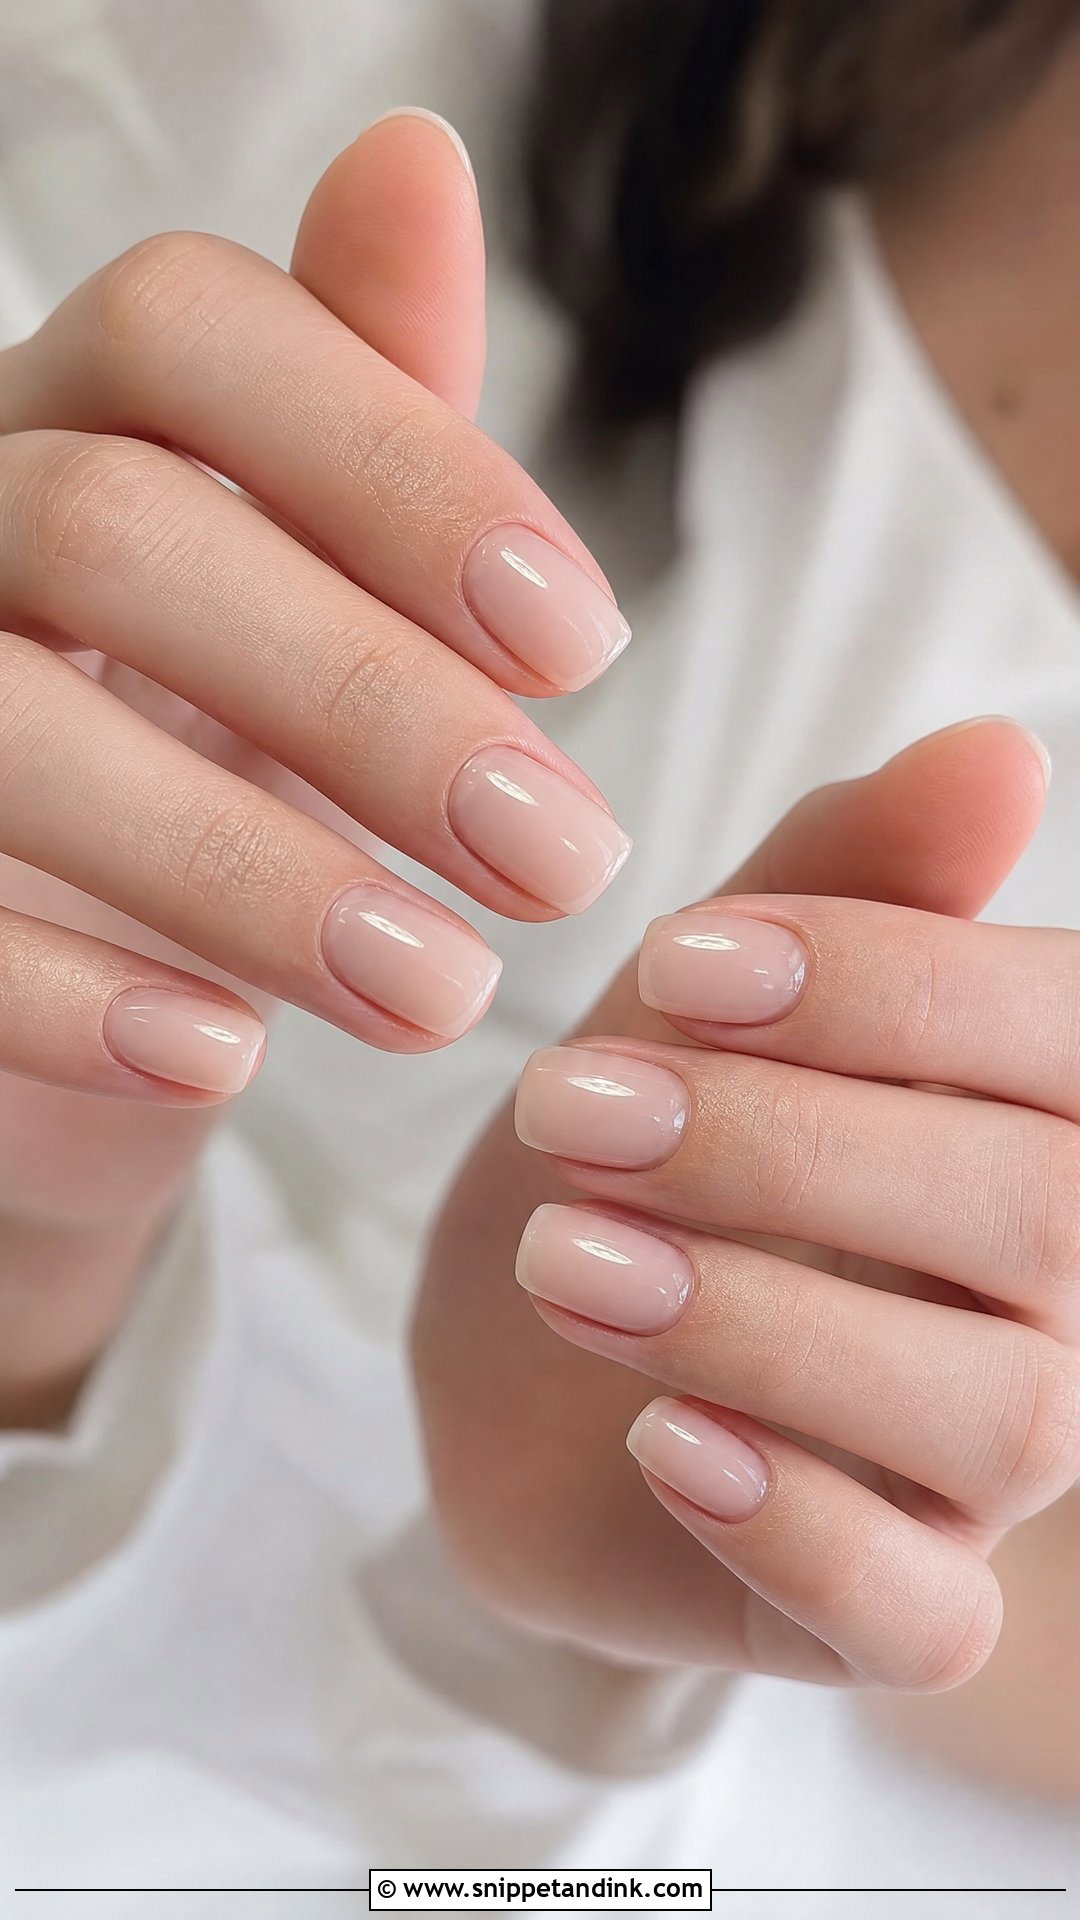
Sheer nude gives a little coverage while letting the natural nail show through, so it looks lighter than an opaque nude. Undertone decides it again: peachy sheers warm the hands, pinky ones read romantic, beige reads classic. The practical bonus is that chips and regrowth barely show, which matters if one manicure has to last from the rehearsal dinner through the honeymoon. Short oval, squoval and almond all suit it with a glossy top coat.
19. White Tip Wedding Nails
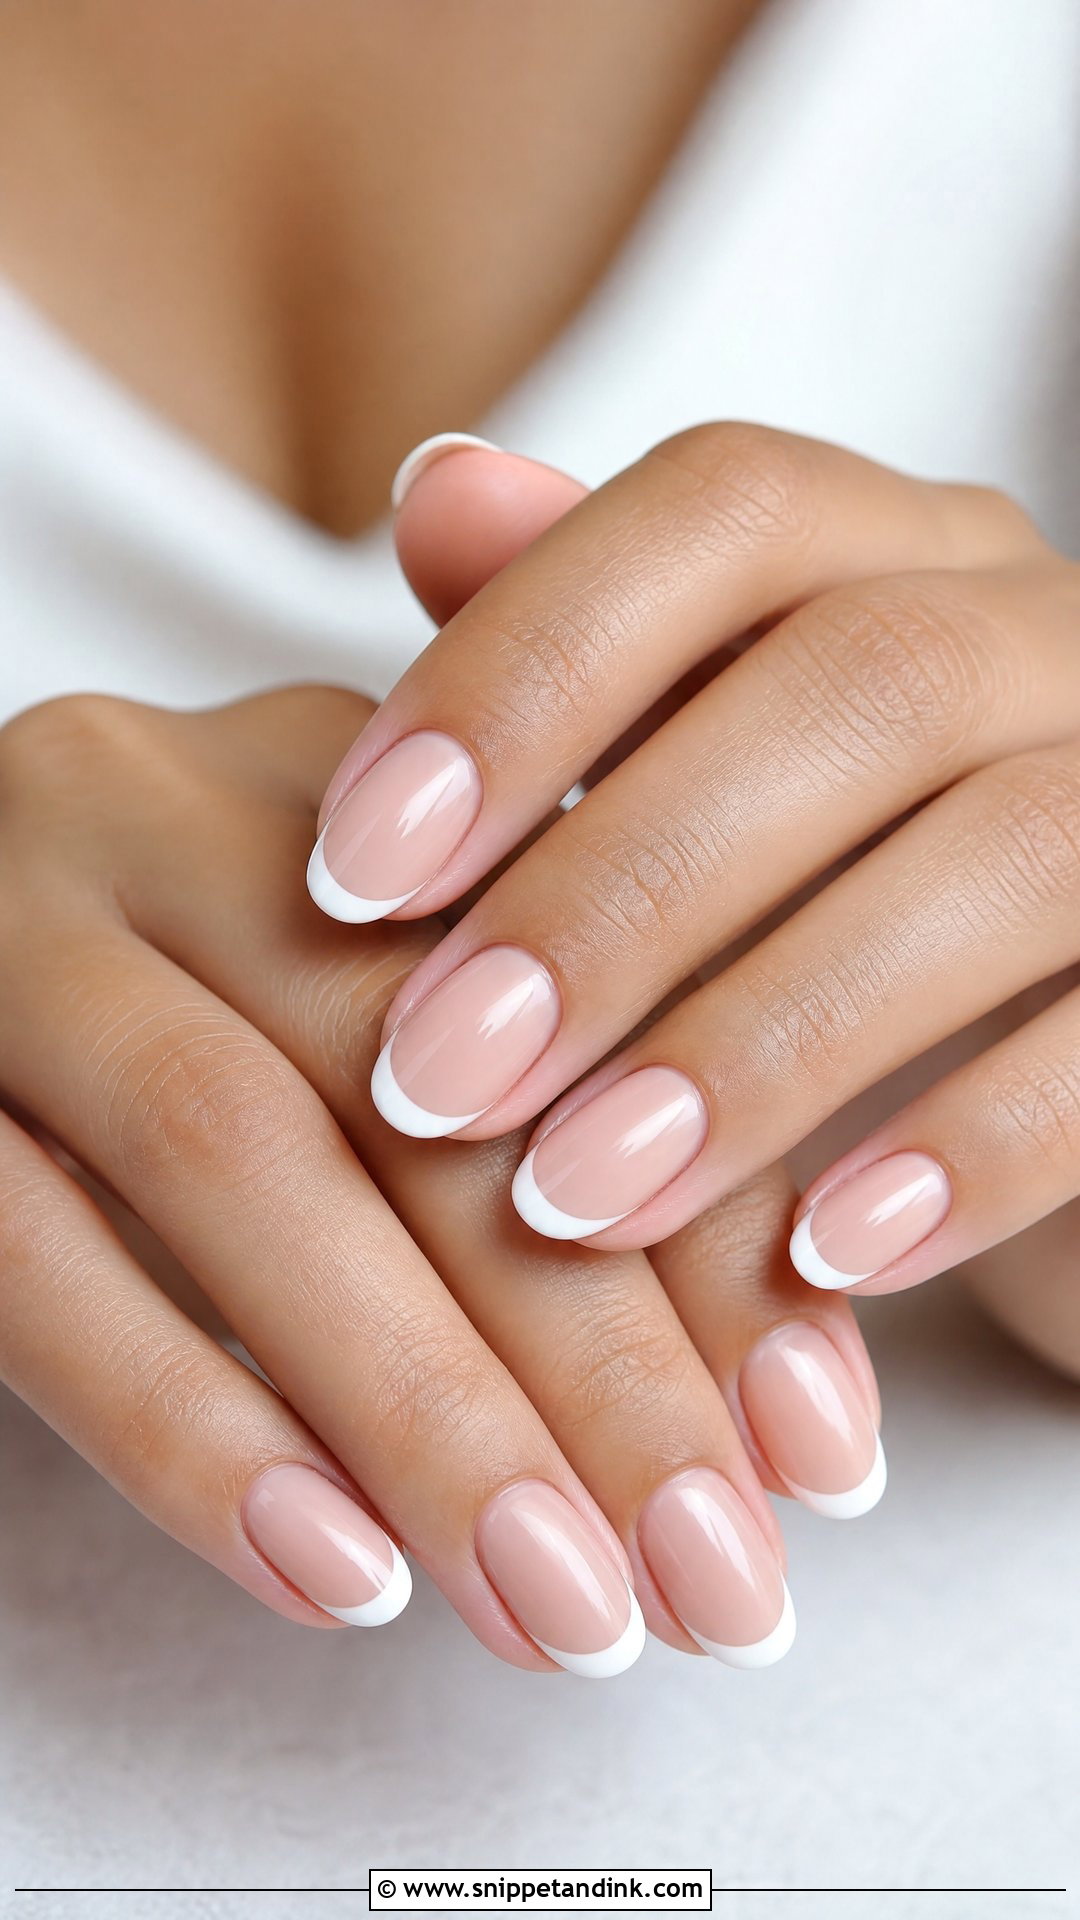
How thick the tip is painted changes this look more than anything else. A narrow white edge over sheer pink or nude feels minimal, while a wider one moves toward a full French. On short nails I keep it very narrow so the nail bed doesn’t look cropped, and on almonds I curve it to follow the shape. Gloss and a smooth surface do the rest.
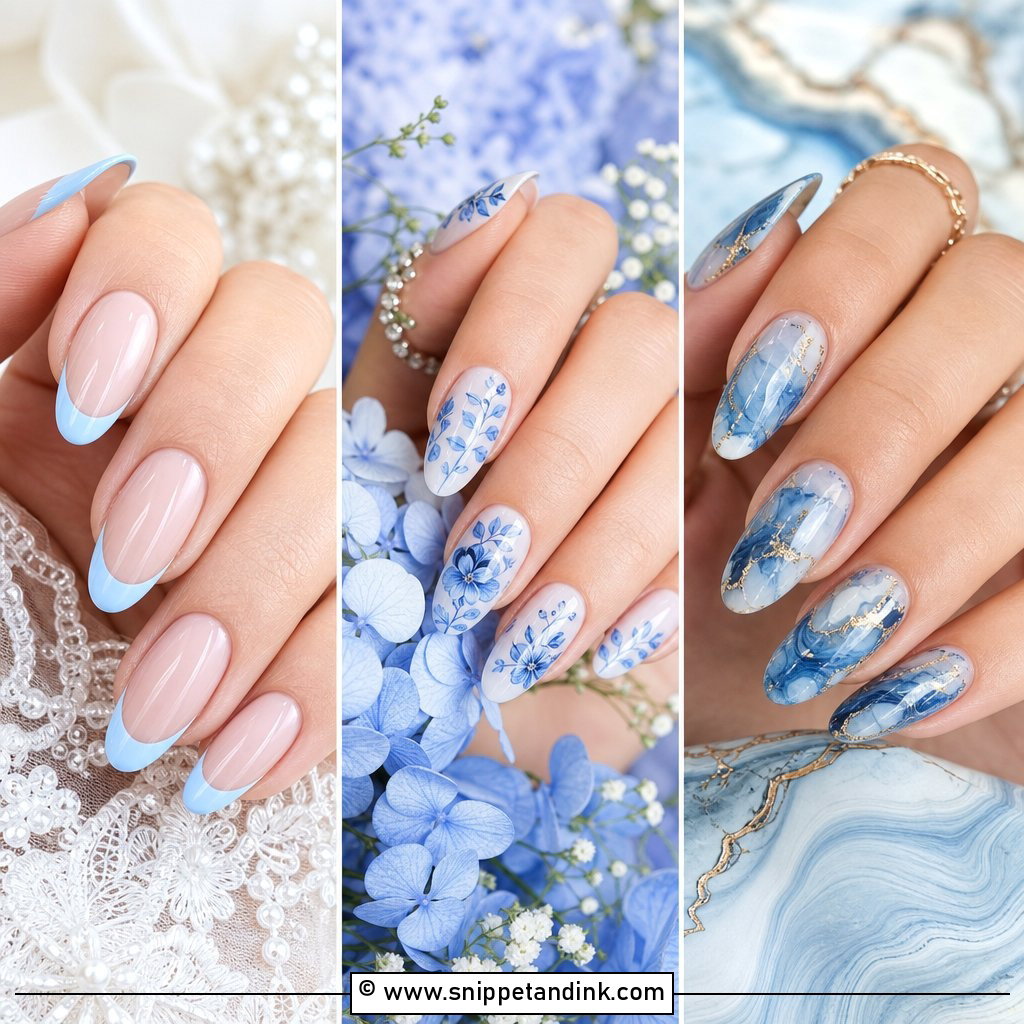
20. Pearl Accent Wedding Nails
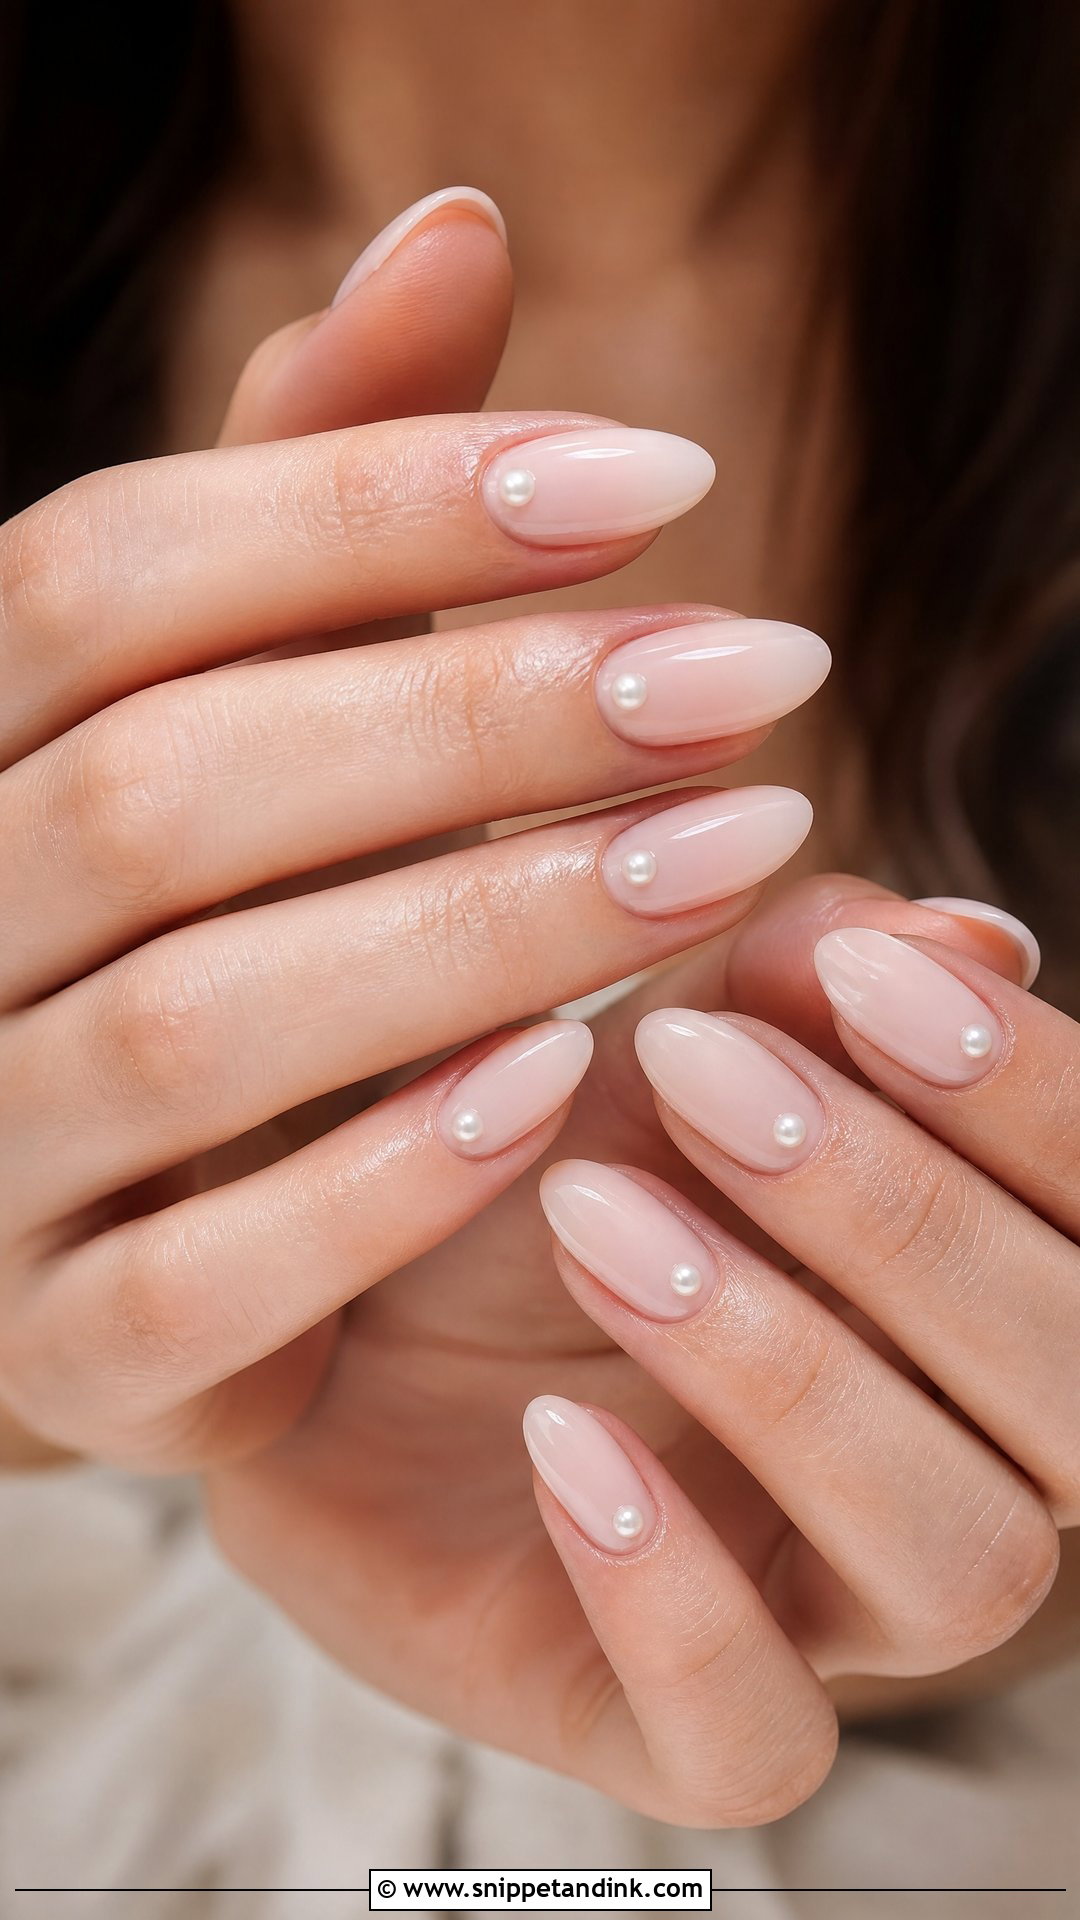
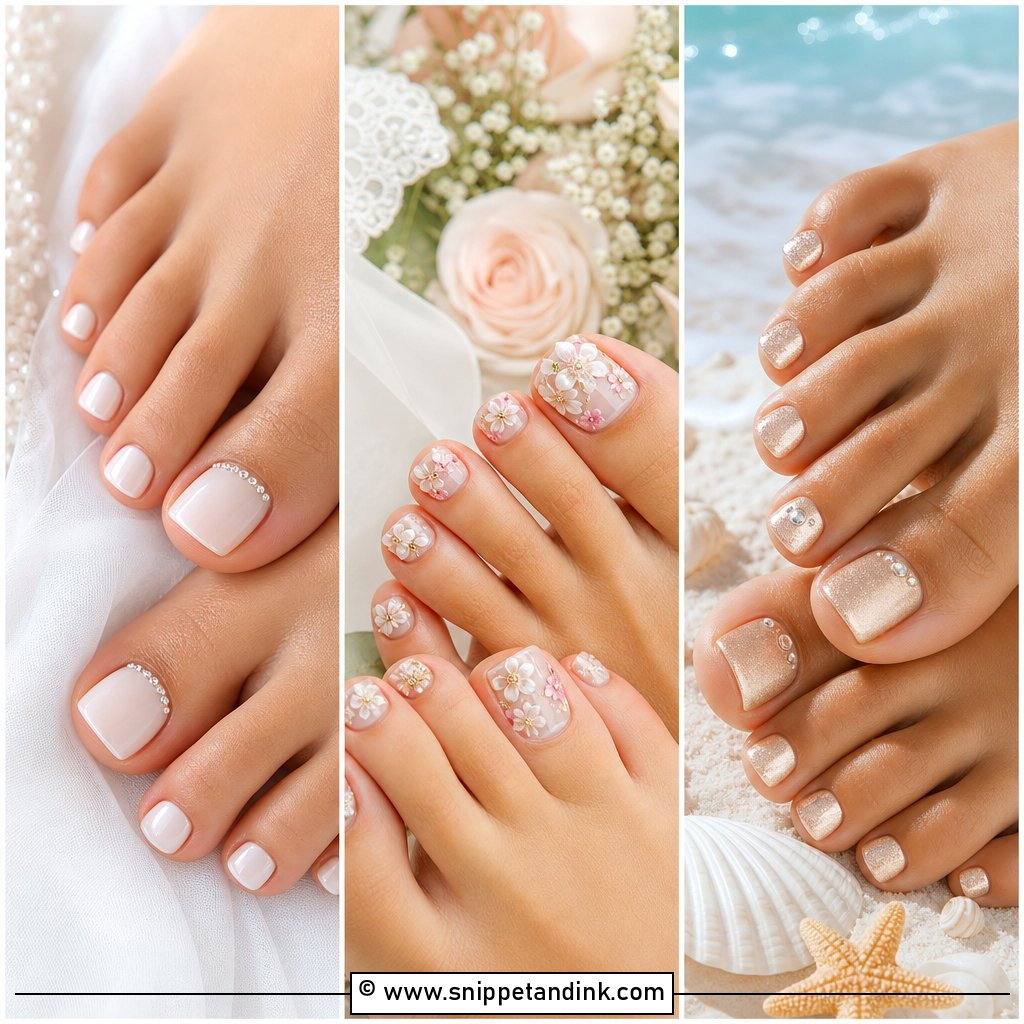
I set the pearl in gel, usually one tiny flat-backed bead near the cuticle of each nail or only on the ring fingers. Size matters more than you’d expect. A domed pearl catches on lace, knit wraps and hair, so I go small and flat and build top coat around its base so it can’t snag or pop off. It’s a natural pairing if your dress or earrings carry pearls, and short oval, almond or soft square shapes hold it best.
21. Tiny Rhinestone Wedding Nails
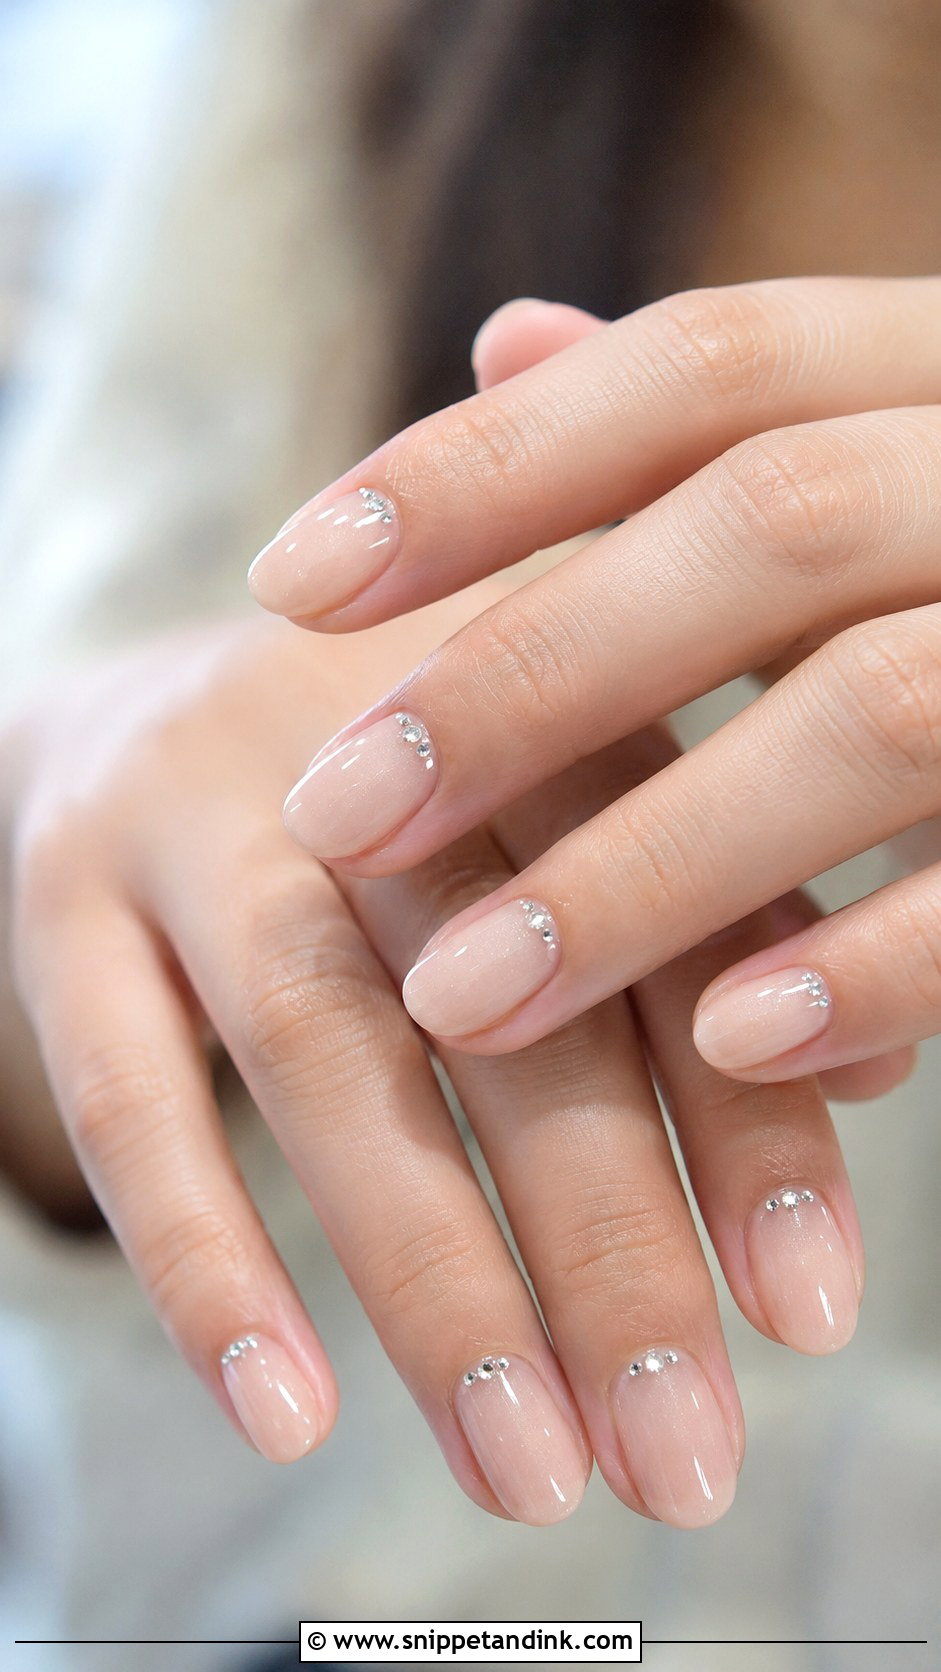
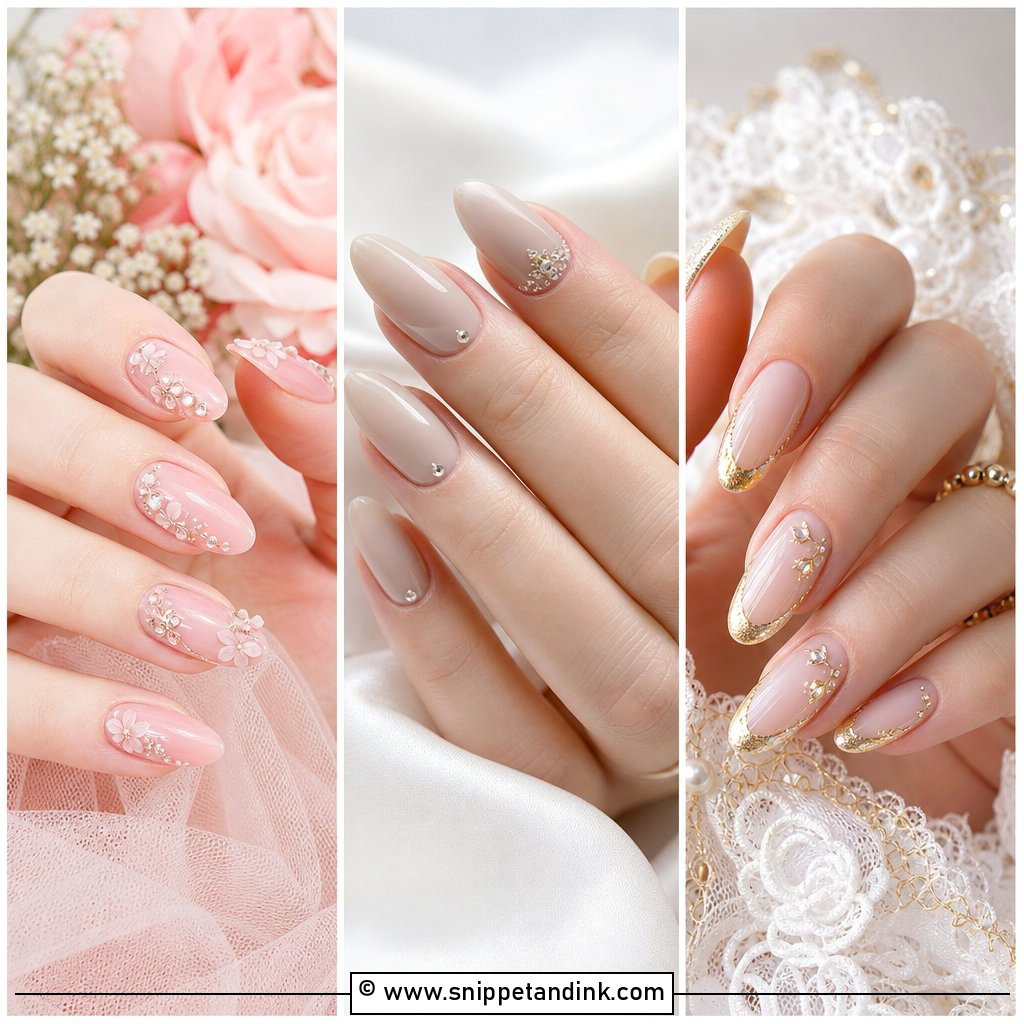
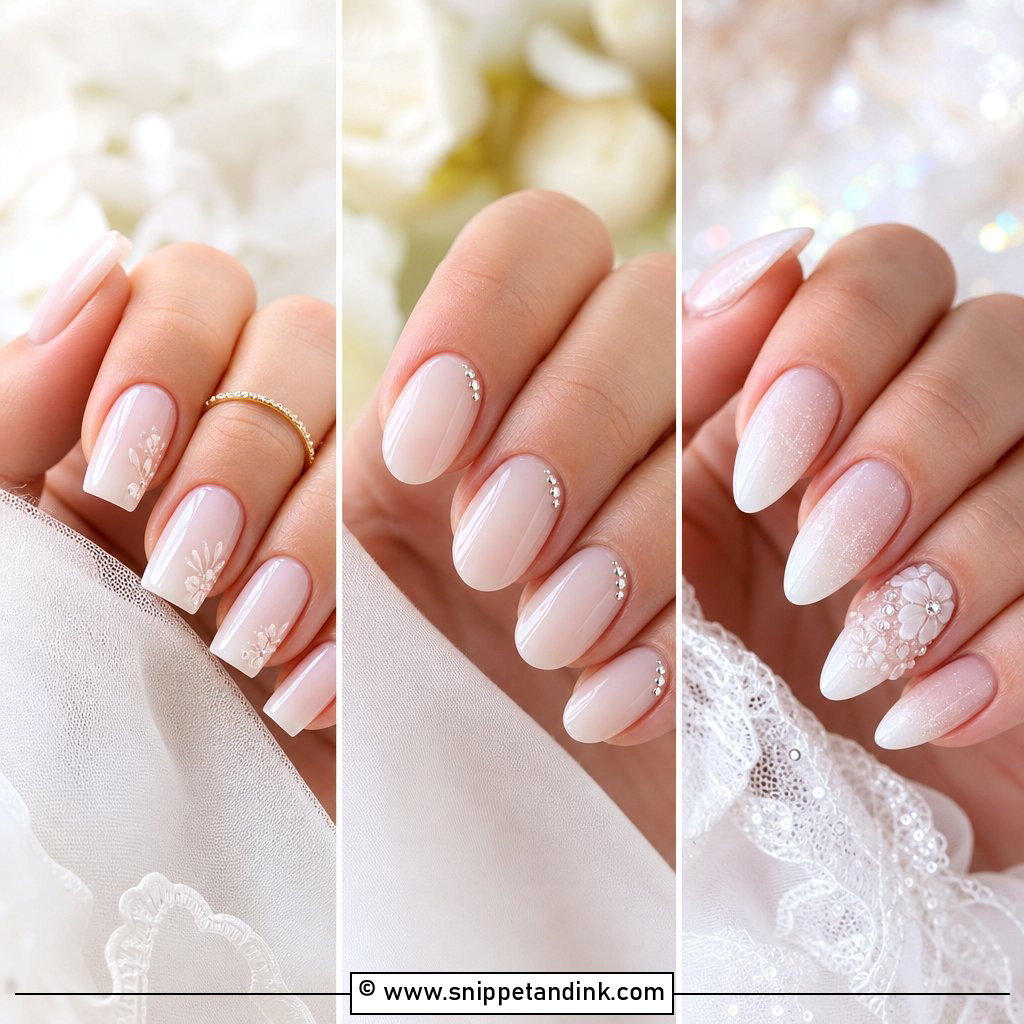
Restraint is the whole point of Tiny rhinestone wedding nails: one small crystal near the cuticle, or a single accent on each ring finger, over sheer nude, blush or milky white. Clear or pearl-toned stones look the most bridal. My worry with any stone is hair. If your hair is being styled after your nails, a raised crystal can catch strands, so I set them low and seal them in. An oval or almond shape keeps the sparkle refined rather than busy.
22. Fine Glitter Wedding Nails
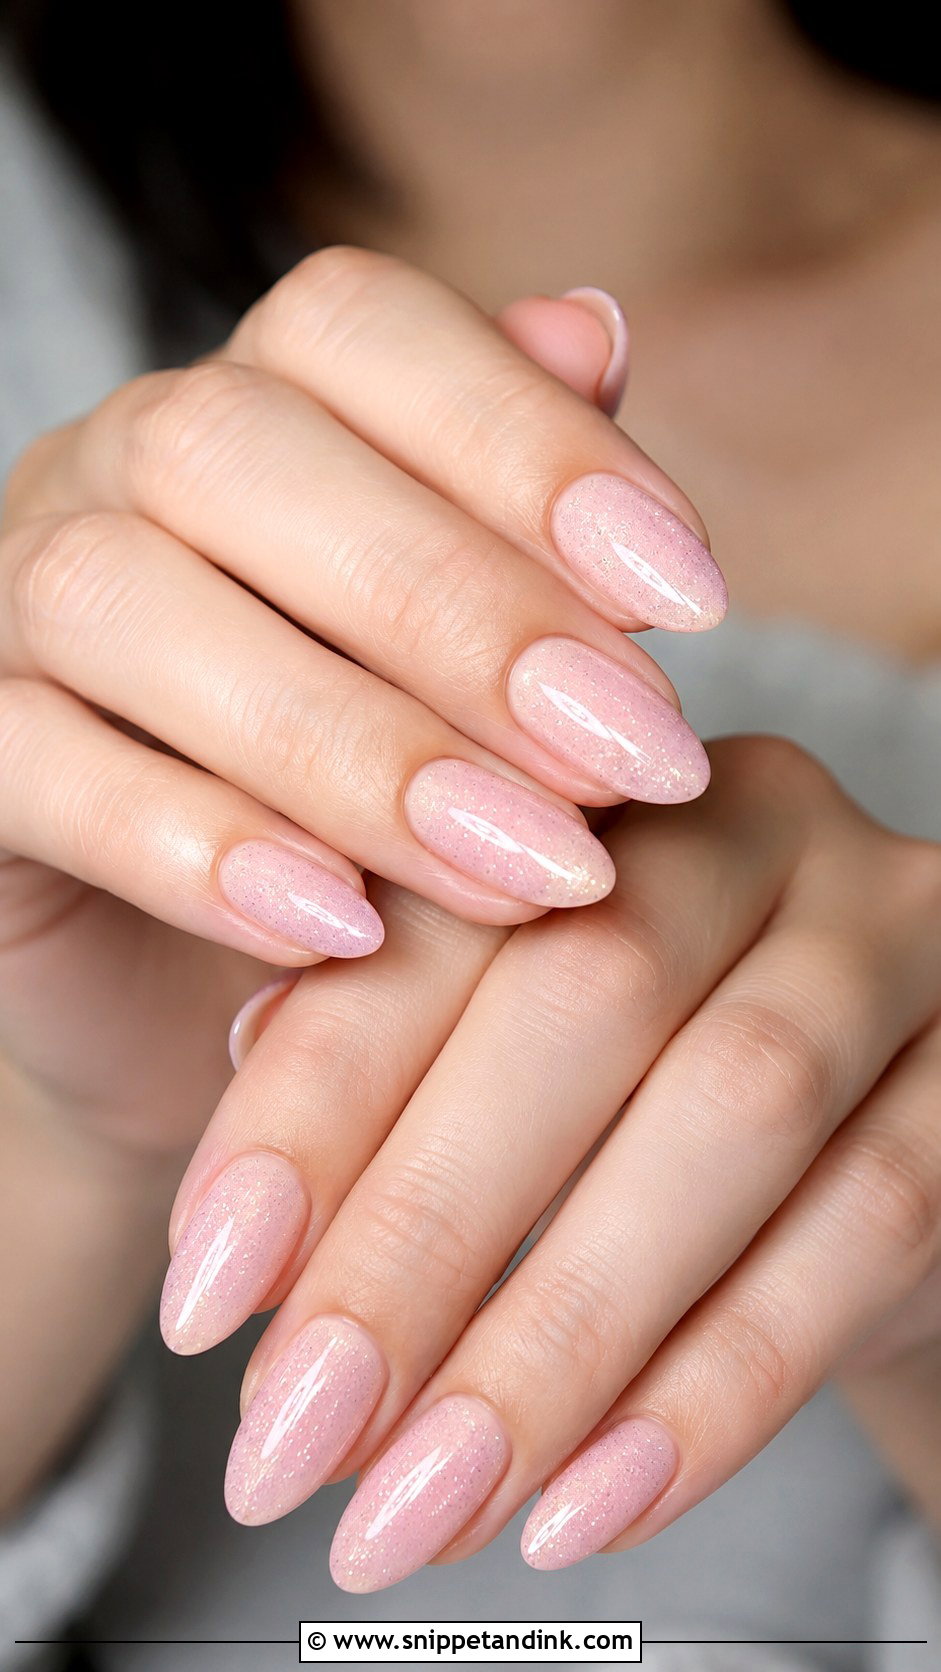
Fine glitter here means a micro-shimmer layered over sheer pink or nude, not chunky flecks. One thin layer catches the light without making the surface bumpy, and it comes into its own at evening receptions under candles and warm venue lighting. The trade-off is removal: glitter gel takes longer to soak off than a plain shade, so book that appointment for after the honeymoon. Short oval reads sweet, almond more elegant.
23. Glitter Ombre Wedding Nails
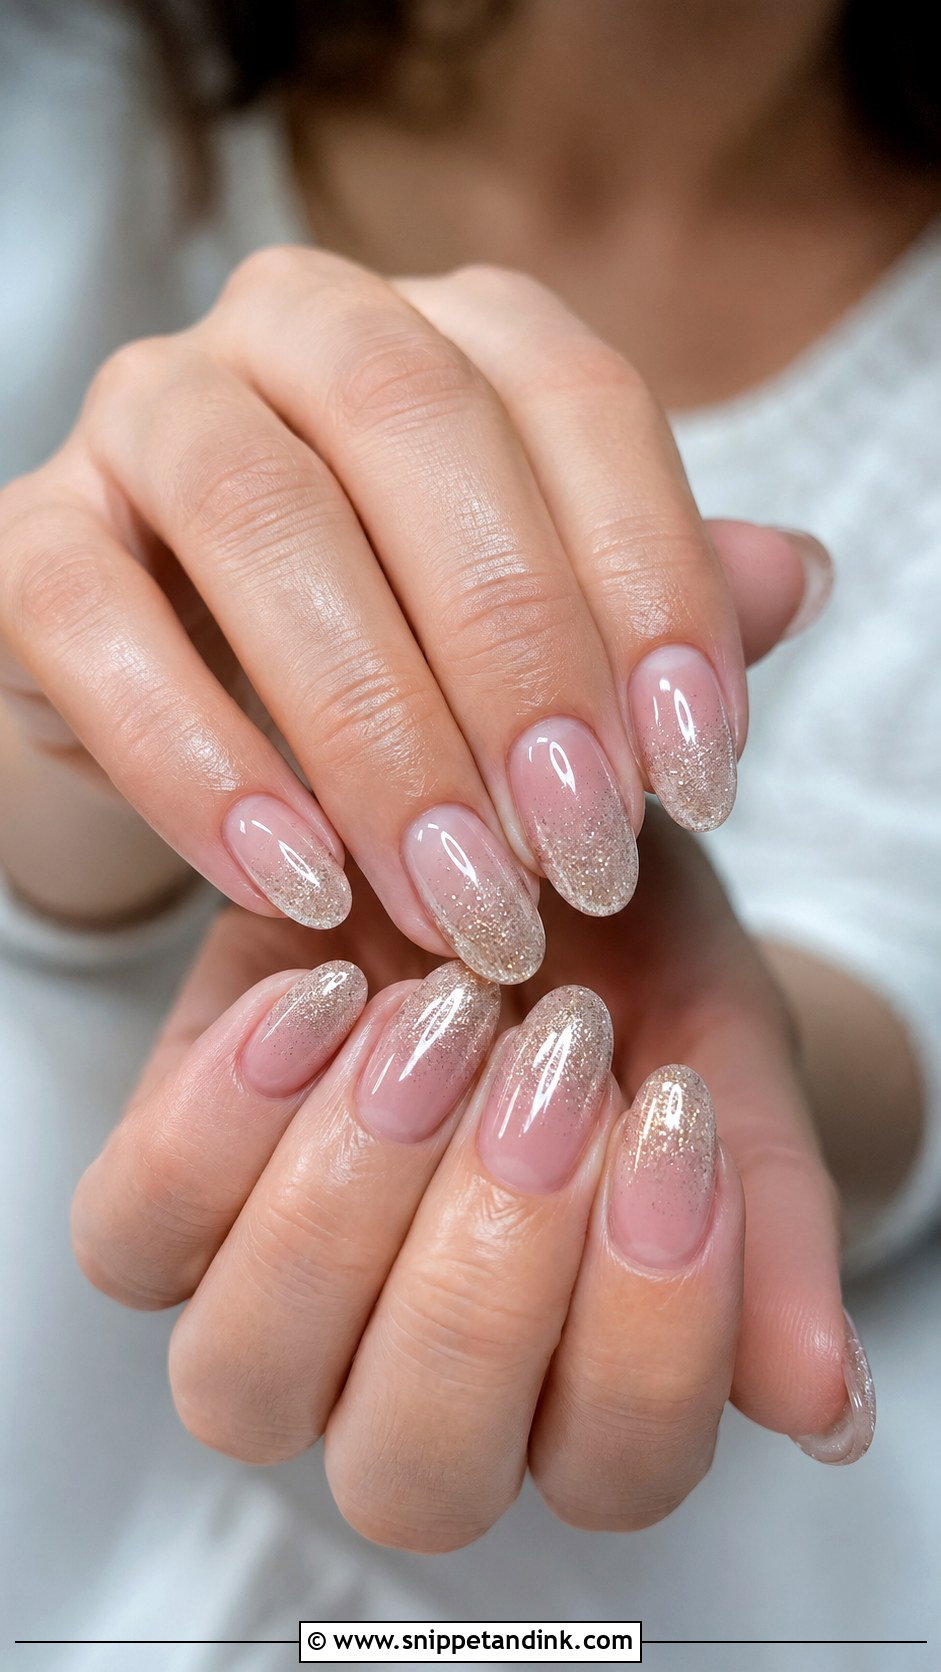
The glitter is packed at the tips and fades toward the middle, or sits at the cuticle for a reverse ombre. Fine silver, champagne or pearl glitter keeps it bridal; large pieces start to look like a party set. Glitter’s rough texture needs a generous top coat to smooth it, otherwise the tips feel gritty and catch on fabric. Over a sheer pink, nude or milky base, it’s festive and still restrained.
24. White Floral Wedding Nails
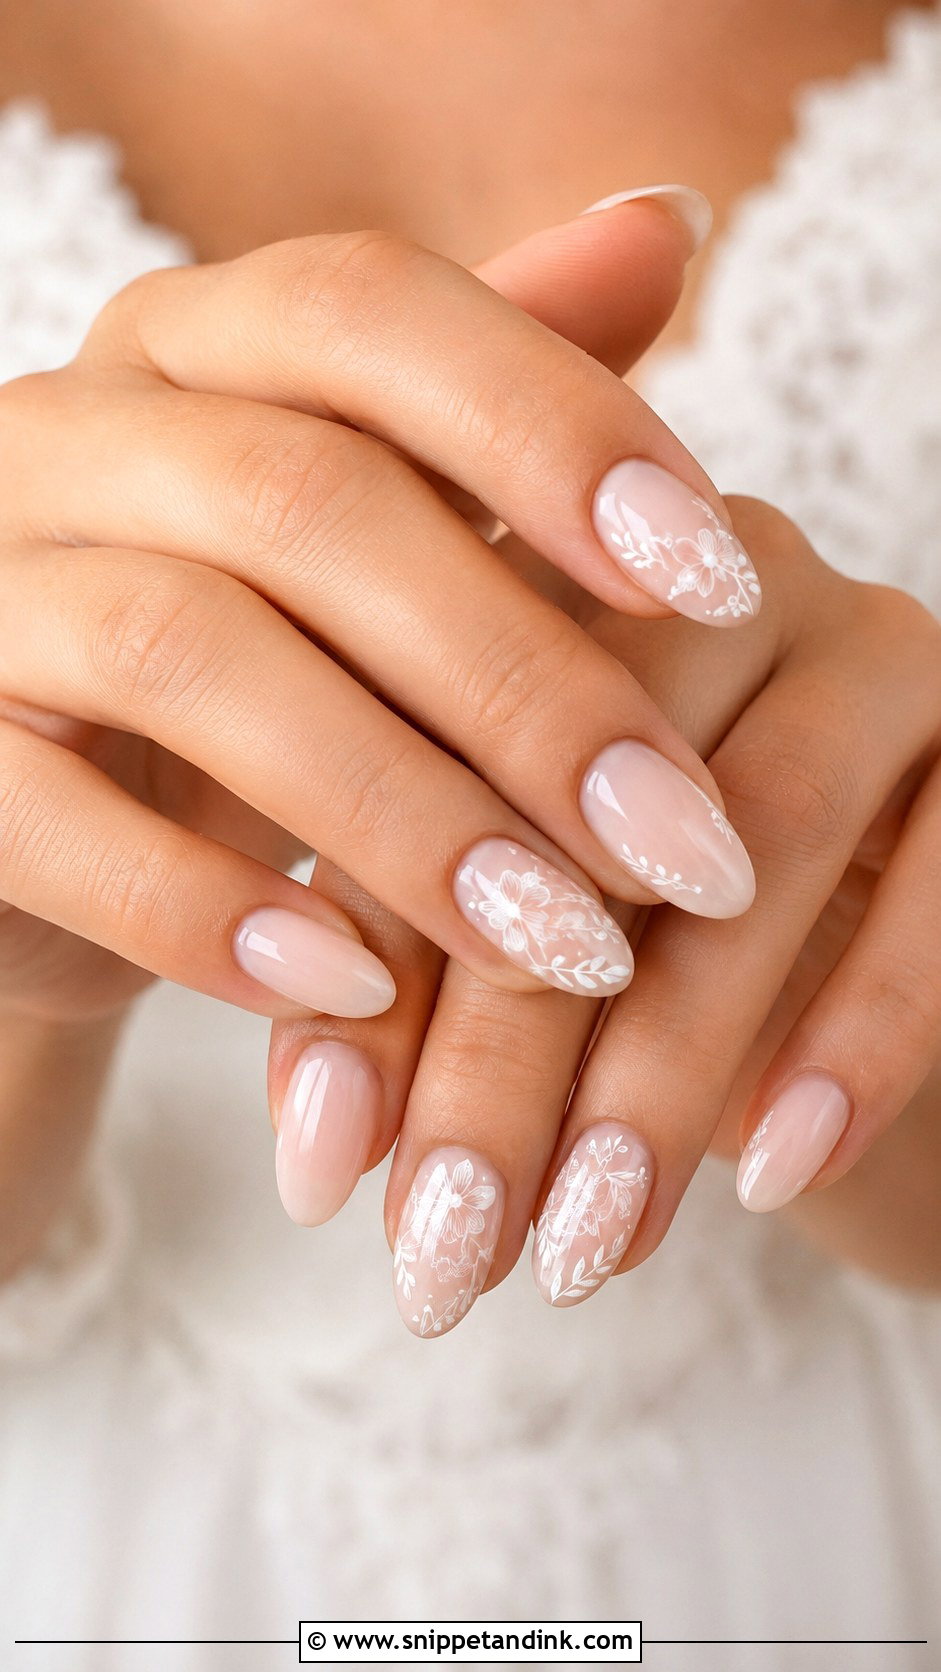
Small, airy flowers keep this romantic without turning into a garden scene. I paint delicate white petals on one or two accent nails over sheer nude, blush or a milky base, using a fine detail brush and a light hand, more sketch than painting. It pairs naturally with lace gowns and bouquets of white blooms. For a quieter version, ask for semi-sheer petals instead of opaque ones; they look as if they’re sitting inside the polish.
25. Nude Floral Wedding Nails
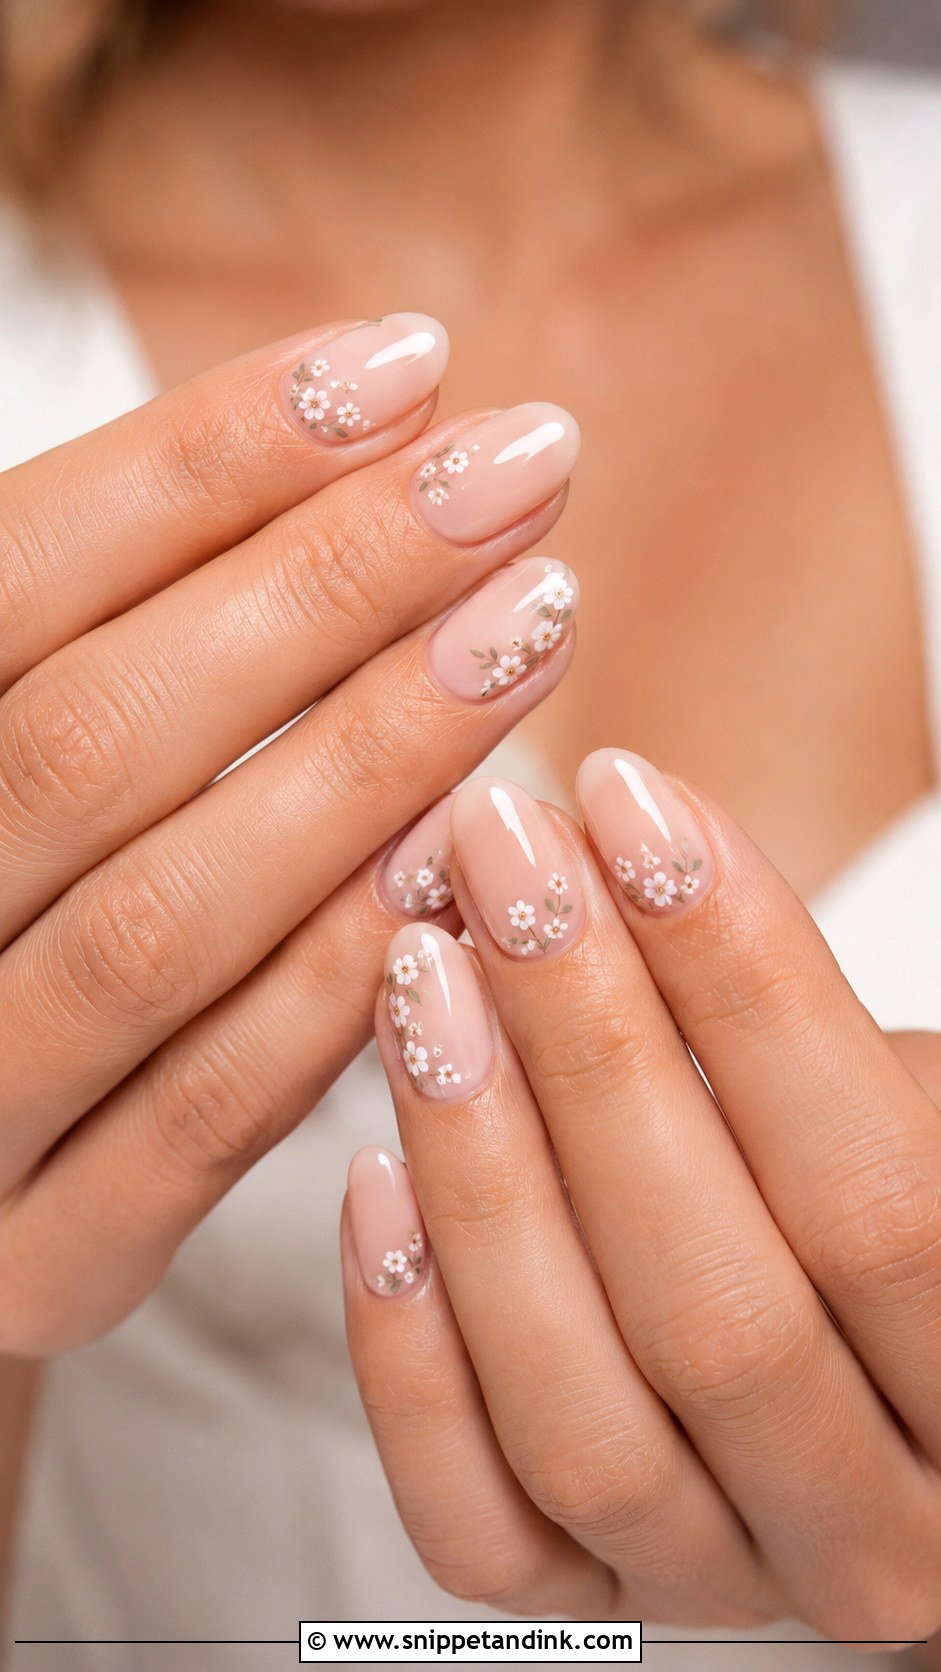
The flowers are tiny white or pale cream shapes over beige, blush nude or warm pink, so the contrast is low and the art almost melts into the base. That low contrast is why it works year-round and not only in spring and summer. I either keep it to two or three nails or scatter very small flowers across all ten; anything in between tends to look unfinished. Gloss keeps the details fresh.
26. Lace Wedding Nails
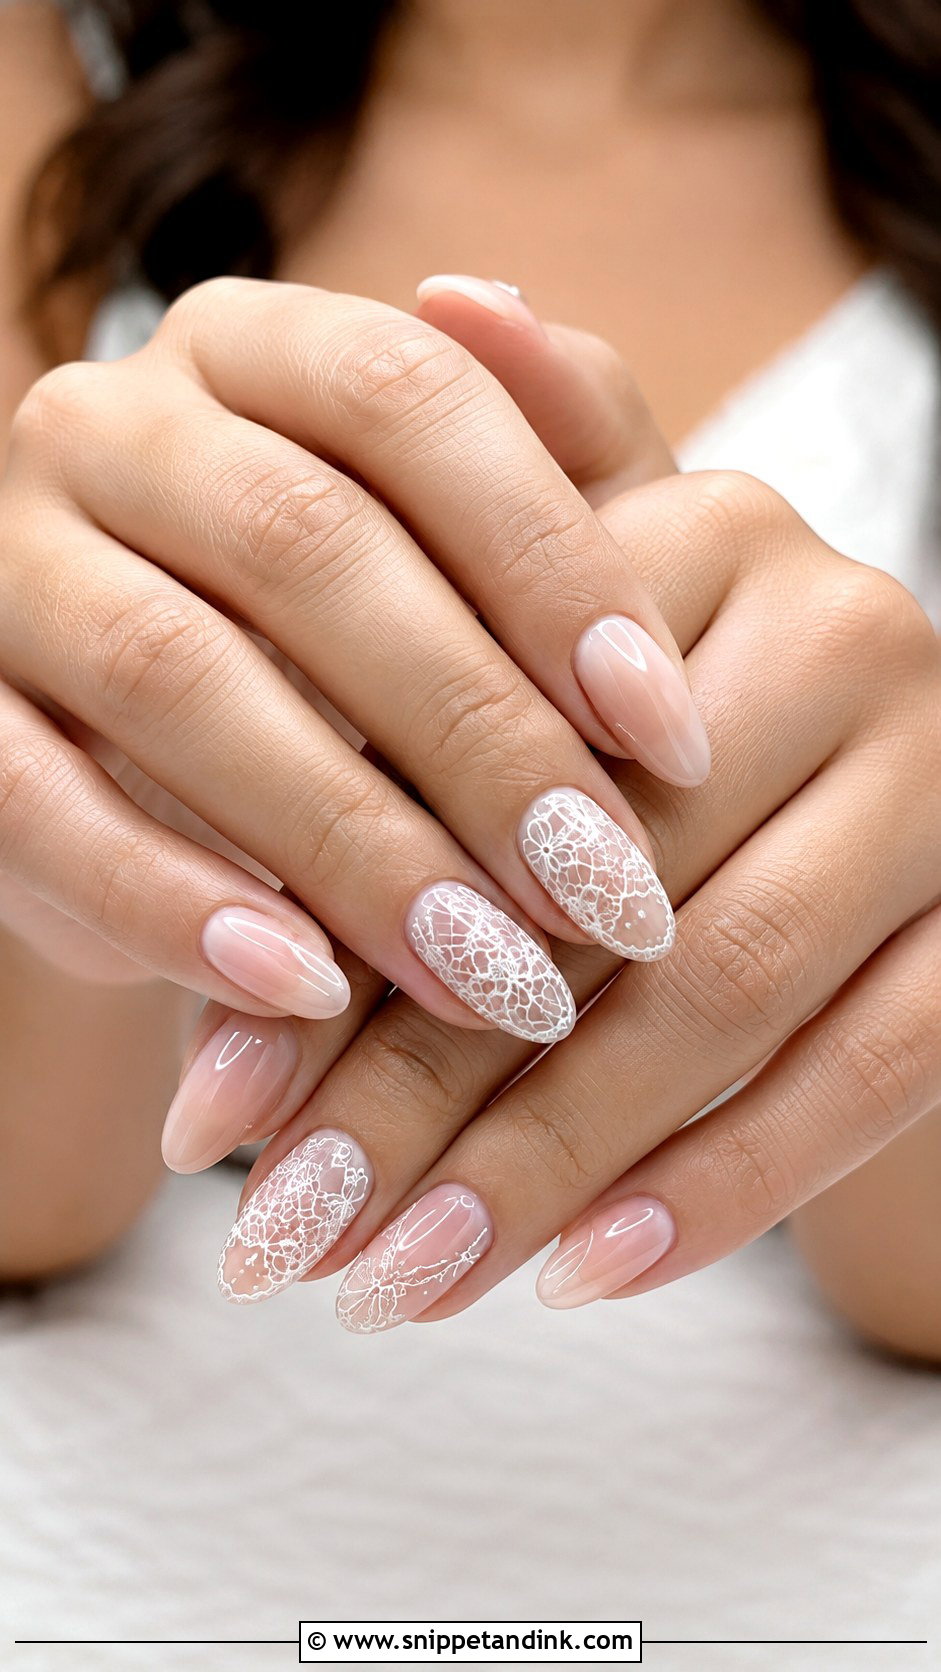
I treat lace nails as a reference to the dress, not a copy of it. Bring a photo of your sleeve or bodice and I’ll pull one motif from it, then paint it in fine white or off-white lines over sheer pink or nude on one or two nails. The lines must stay thin and well spaced, or the pattern becomes a smudge from more than a foot away. Almond and oval give the motif room to curve.
27. White Swirl Wedding Nails
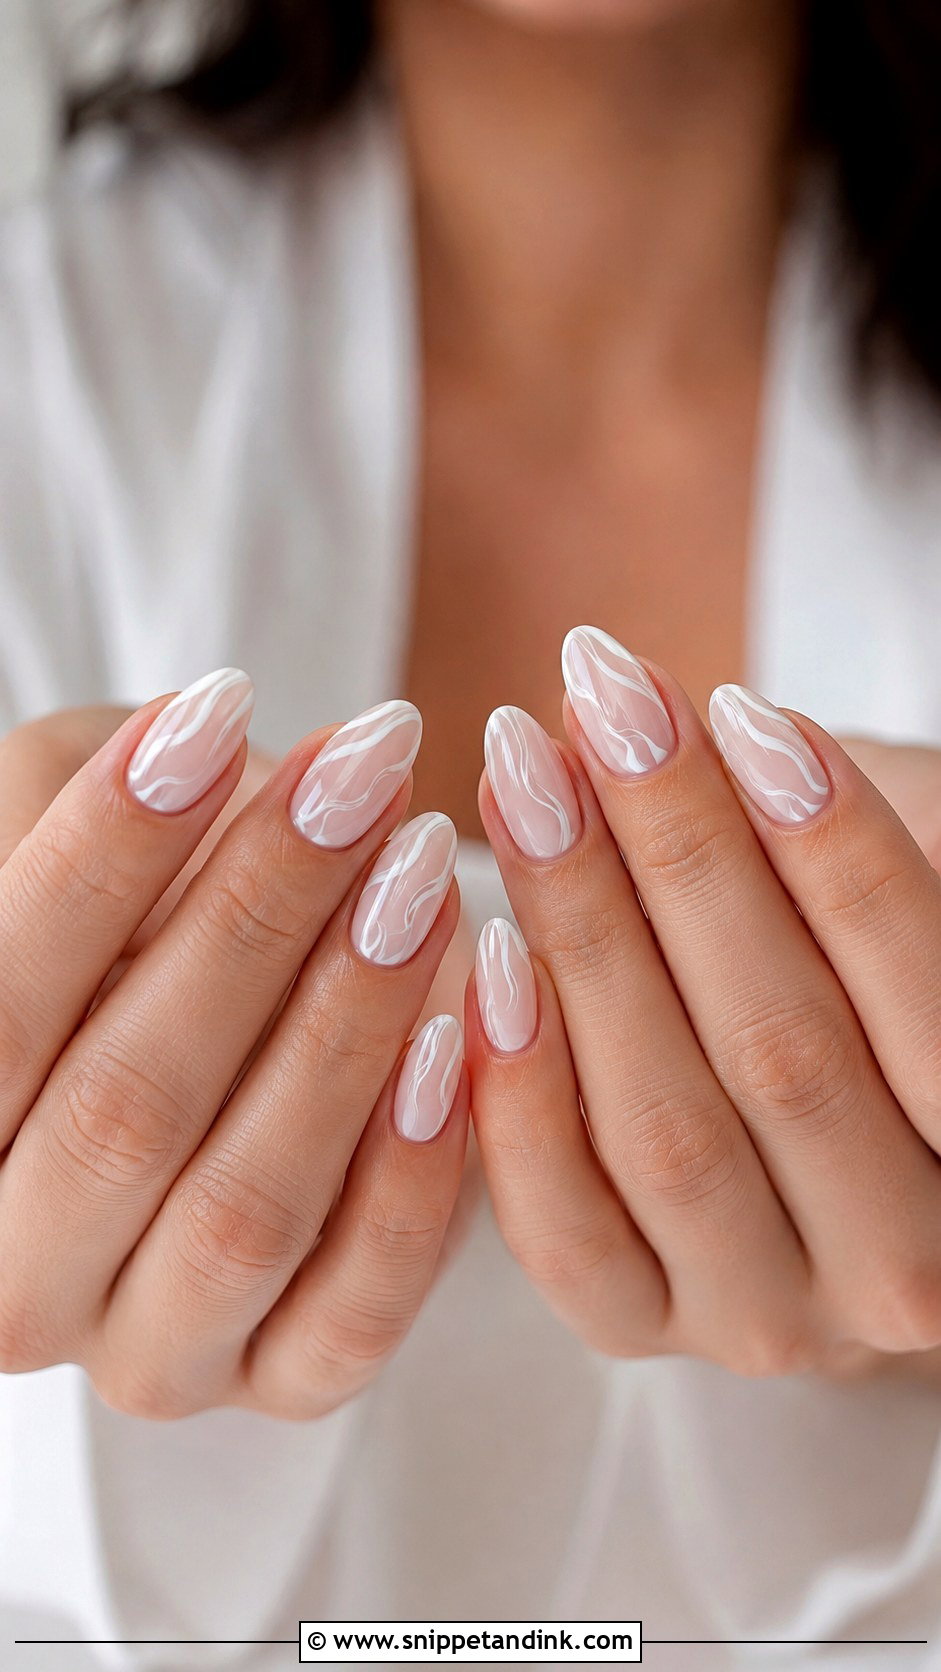
Swirls give movement without glitter, gems or heavy art, and they look more current than a classic French. I start with a sheer nude, pink or milky base and pull each curved white line in a single stroke, because a line that’s been corrected twice always shows it. Leave plenty of open space between them. On almonds the swirls look graceful; on short ovals they feel soft and easy to wear.
28. Gold Line Wedding Nails
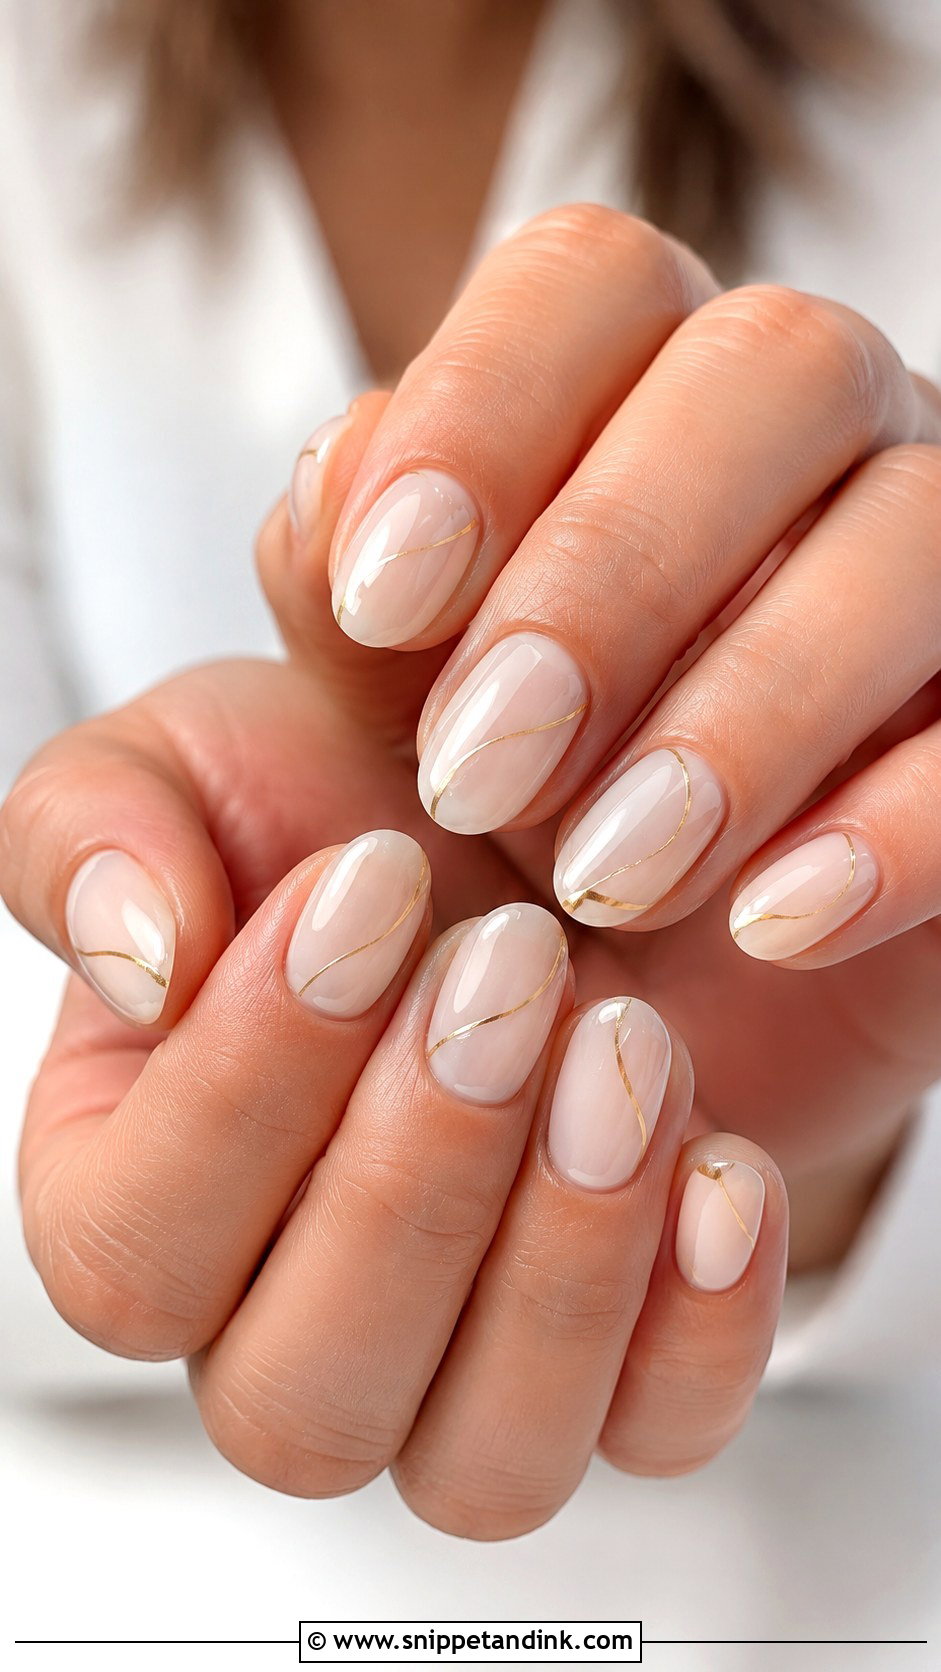
A single fine gold line, near the cuticle, across the tip or down the center, warms up a neutral base of nude, blush, ivory or milky white. I match it to your metal: a yellow gold line with yellow gold rings, never beside platinum or white gold. It suits champagne and ivory gowns and warm makeup. Keep it fine so it doesn’t compete with your ring, and seal it under gloss so the metallic doesn’t wear away.
29. Matte Nude Wedding Nails
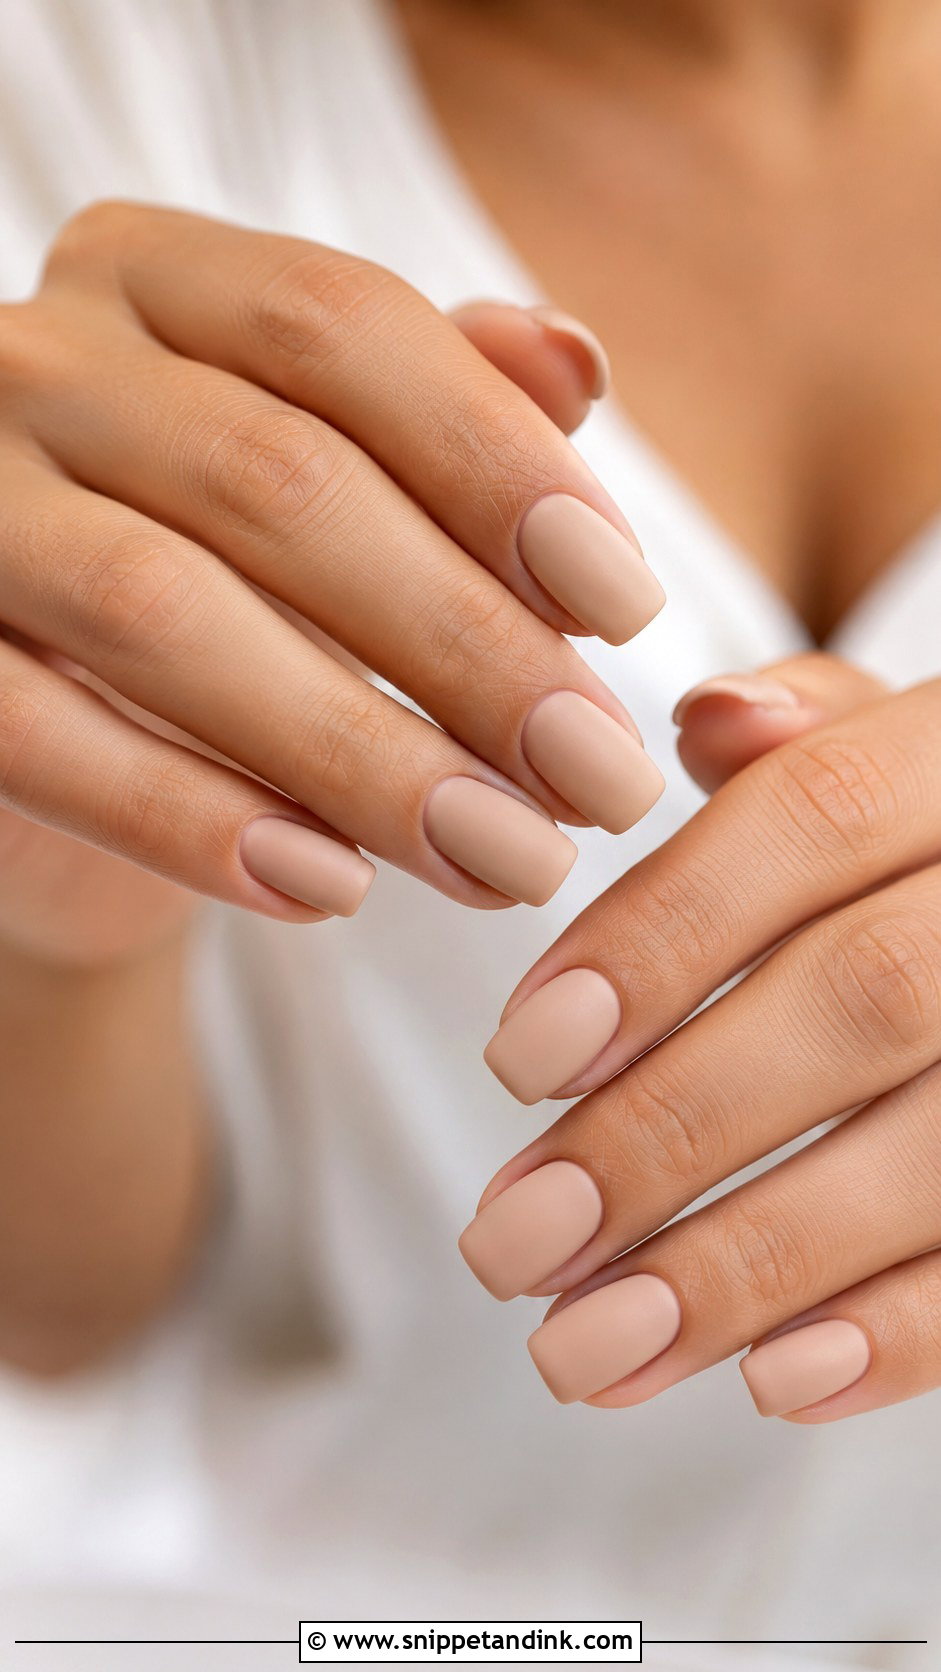
A matte top coat turns nude polish soft and velvety, but it also mutes the color, so pick a shade a touch warmer than you’d wear glossy. I’m honest about the downside: matte picks up hand cream, oils and makeup marks more readily, and it makes dry cuticles look drier. Moisturize well in the days before, and wash your hands before the ring shots. For a small bridal detail, a glossy French tip over the matte base gives a quiet contrast. Short square, oval and almond all suit it.
30. Soft Shimmer Wedding Nails
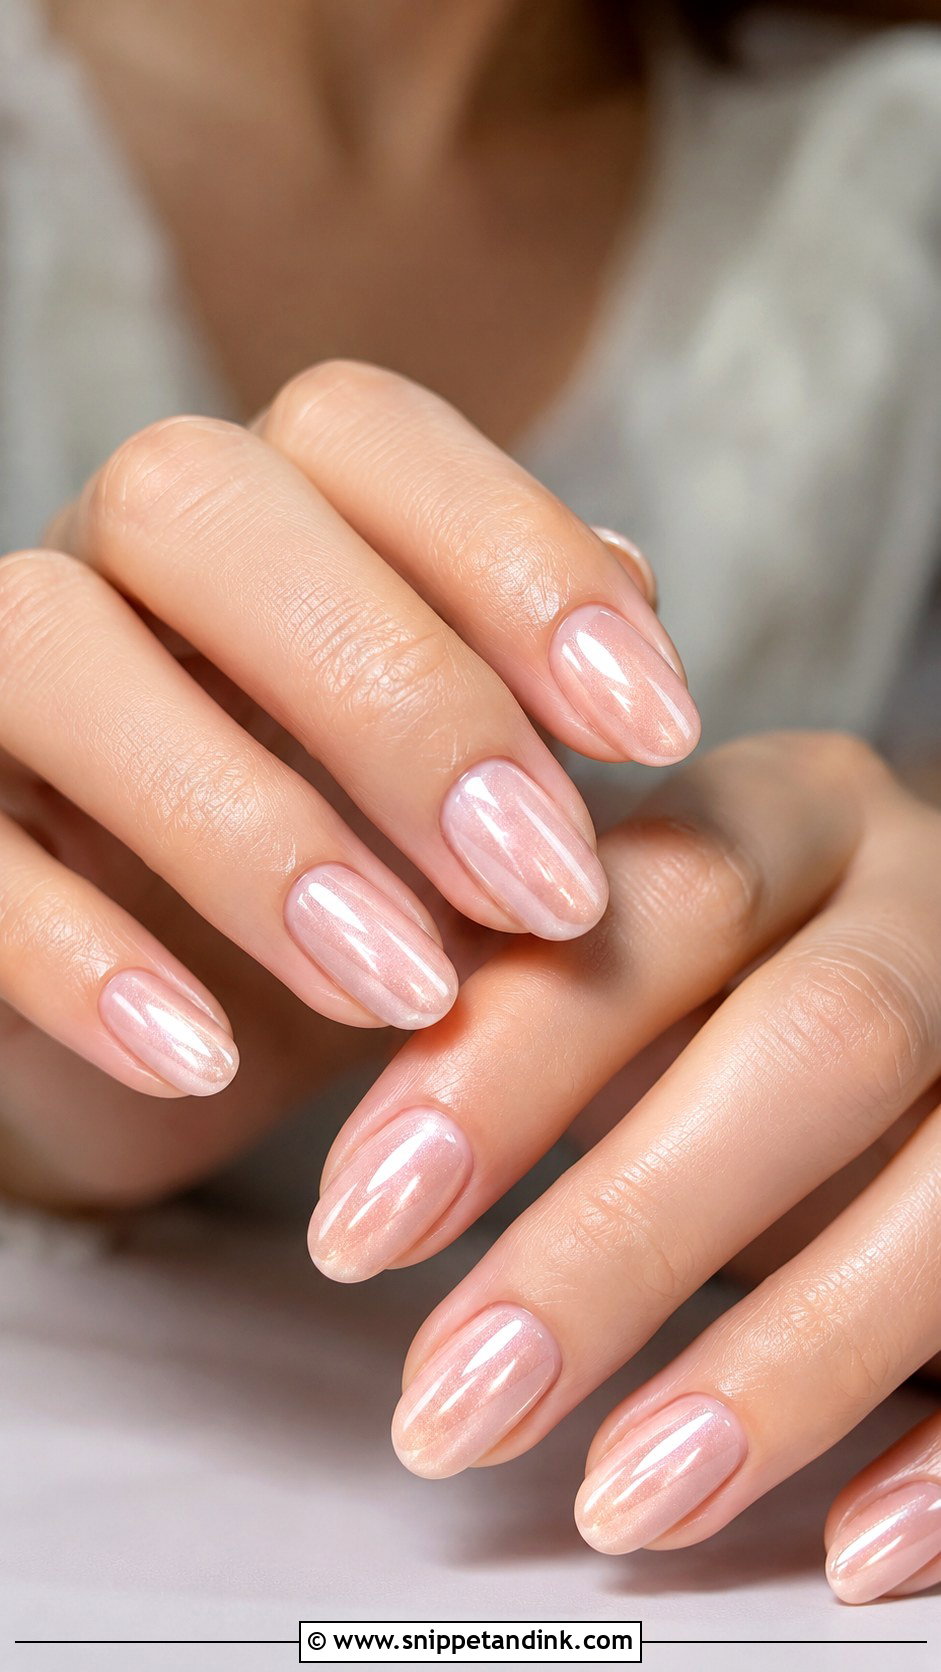
Soft shimmer is the forgiving option. Sheer pink, milky white, champagne nude or pale ivory with fine shimmer suspended in it catches light as you move, and the shimmer disguises small surface flaws a creme finish would show. It goes with short natural nails, almonds and soft squares, and with a plain gown as easily as a beaded one. When you look at bottles, ask for a diffused shimmer, not a frosty one; frost shows every brushstroke.
Why Sheer Polish Shows What’s Underneath
Milky white, sheer pink, sheer nude and clear gloss all let the nail plate show through. That’s their charm, and it’s also why they reveal ridges, white spots, staining from old dark polish and free edges of uneven length. An opaque shade covers all of that; a sheer one frames it.
When I see a bumpy plate, I don’t buff it flat, because heavy buffing thins the nail and makes it bend and peel. I’d rather level it with a thin layer of builder gel and put the sheer color over that. Staining only grows out, so stop wearing deep reds and navy a couple of months before the wedding and always use a base coat. If your nail beds are very short or uneven, I’ll suggest a slightly more opaque milky shade instead of a true sheer; it keeps the soft look and hides more.
A Chipped Nail on the Morning: What to Pack
Even a well-cured gel can chip if you catch it on a car door. Give your maid of honor a small pouch with:
- the exact polish shade, or a photo of the bottle label so someone can buy it
- a fine glass file for snags, because clipping or peeling a lifted edge makes it worse
- nail glue or a dot of gel glue for a lost pearl or crystal
- a clear top coat, cuticle oil pen and a few lint-free wipes
For a small gel chip, file the broken edge smooth, then dab matching regular polish into the gap and seal it with clear top coat. It won’t last a week, but it will easily last the day, and nobody will spot it in photos.
Shape First, Shade Second
None of these needs to be dramatic. Sheer pink, milky white, nude, a French tip, pearl chrome or soft shimmer will all read well in close-ups as long as the prep underneath is good. Settle the shape by how you use your hands every day, then the shade by your dress, jewelry and skin tone. And if you can, book a trial. It’s the only way to see how a color behaves on your own nails and in your own photos while there’s still time to change it.
You'll Like These Ideas:


Leave a Reply