
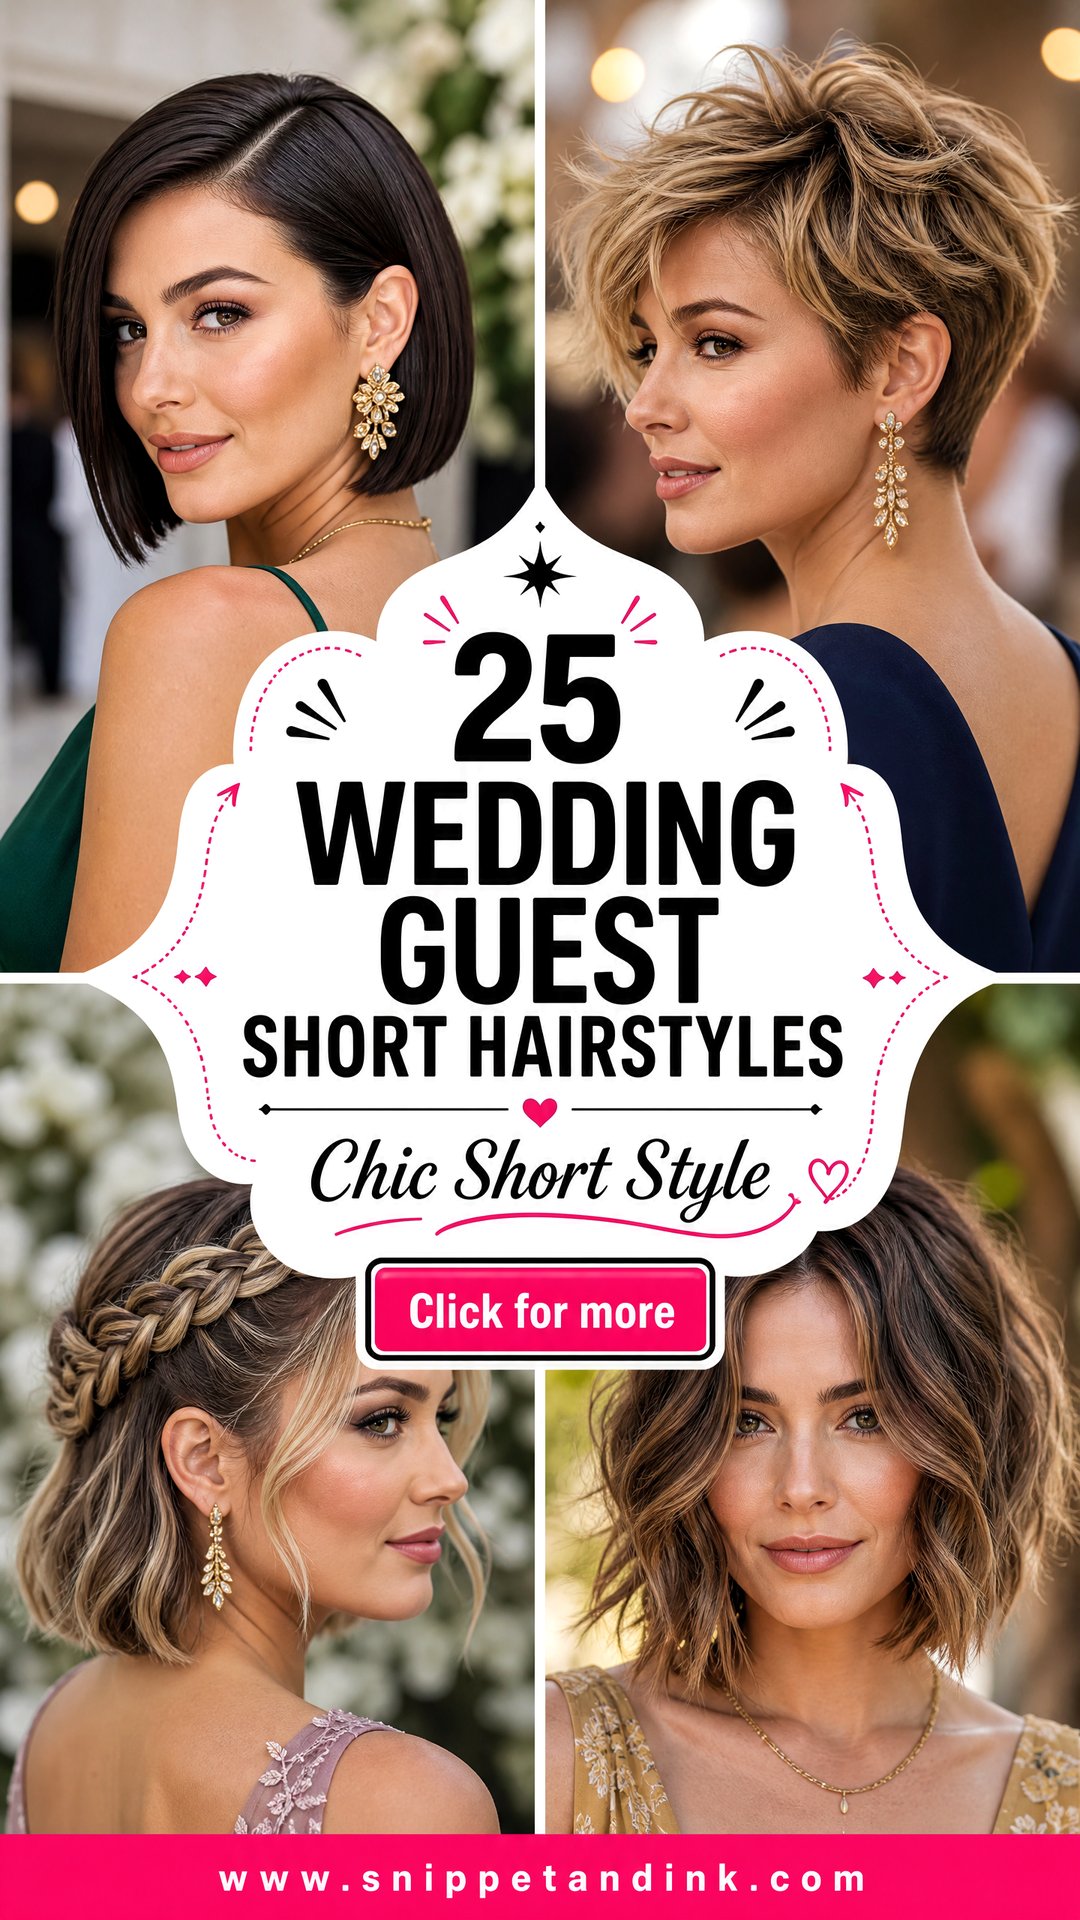
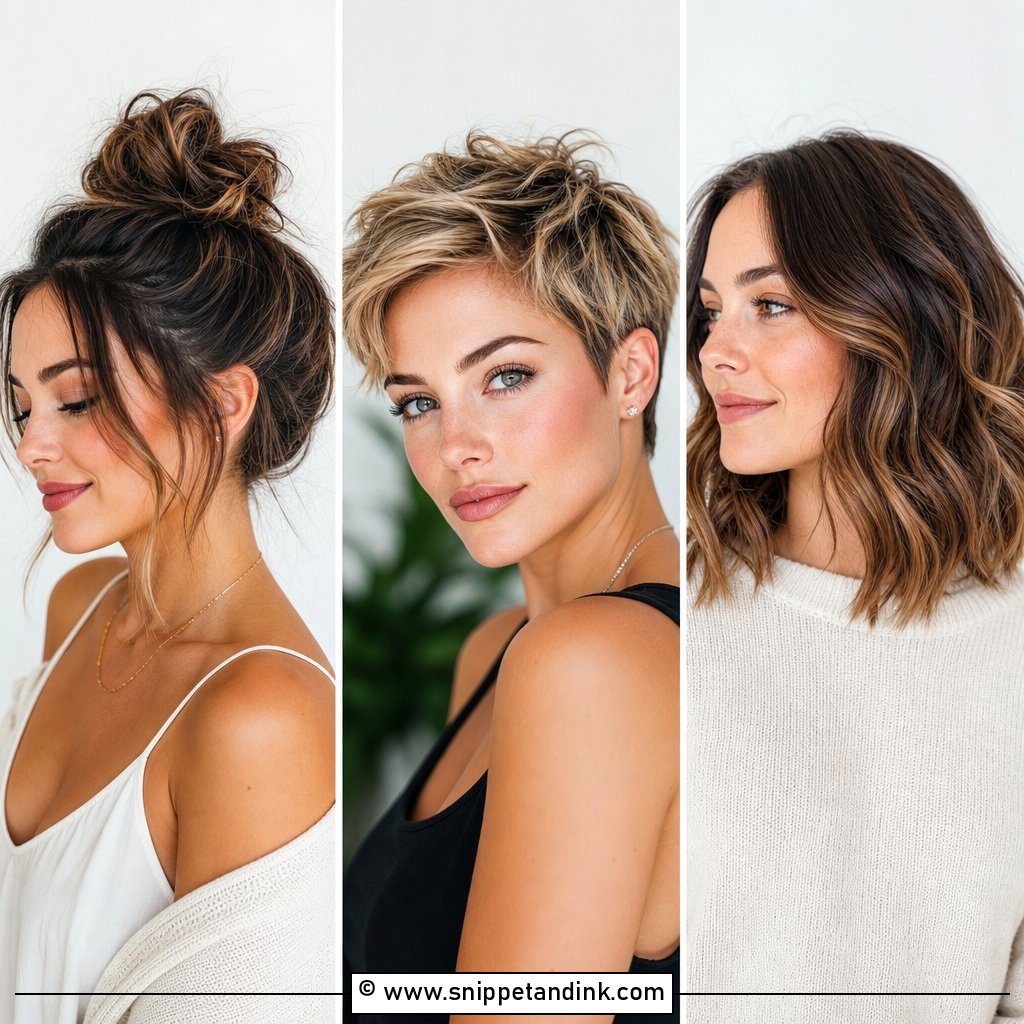
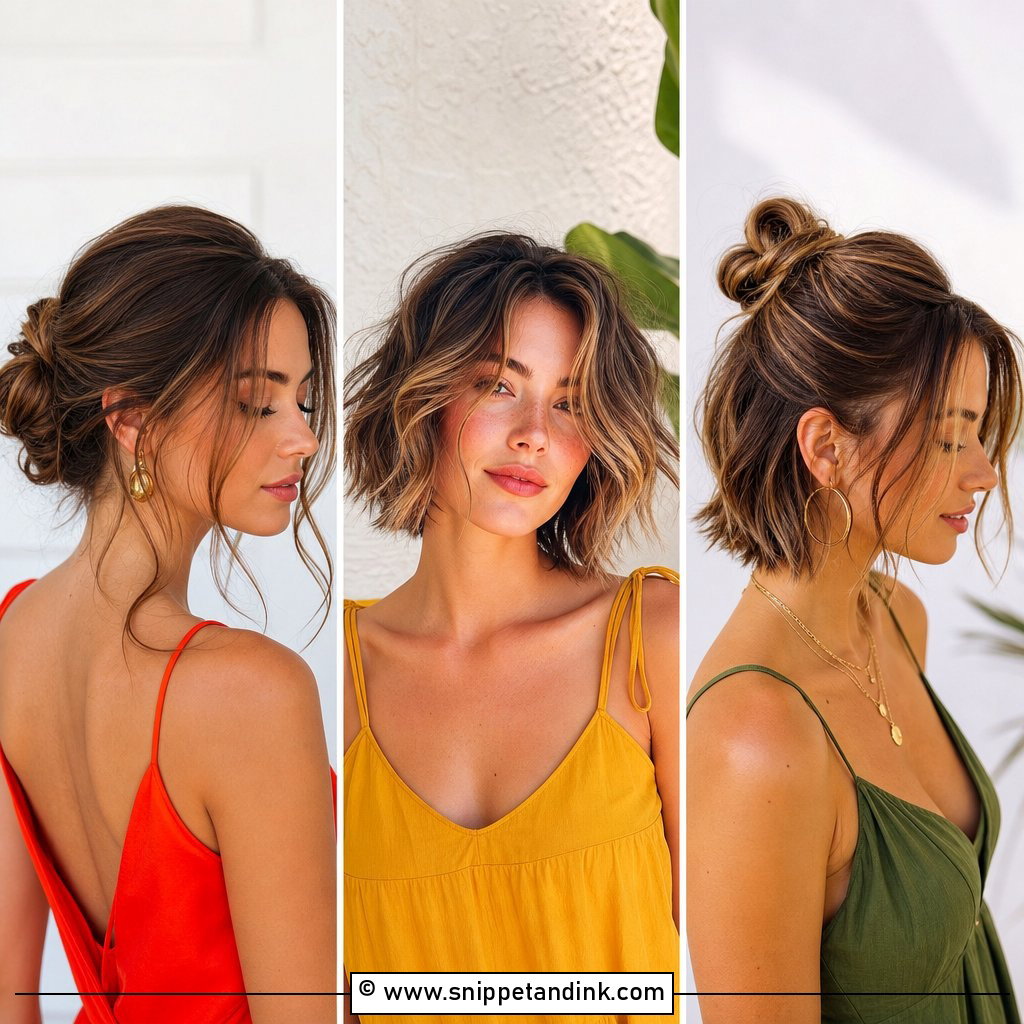
Guests with short hair often sit in my chair a little apologetic, as if there’s nothing to work with. There’s plenty. A bob or a pixie shows off the face, the neck and the earrings in a way long hair can’t, and it takes finger waves, twists and jeweled pins better than most people expect. The real challenge is grip: short lengths don’t have the weight to hold pins on their own, so the prep matters more. These wedding guest short hairstyles run from cropped pixies to lobs just past the chin, with my notes on how each is set, what product it needs and which cuts it suits.
Getting Pins to Grip Hair That’s Only a Few Inches Long
Most of these styles fail for one reason: the pins slide out of short, silky hair within an hour. A few small habits fix it.
- Create grip before anything else. A dry texture spray or a light dusting of dry shampoo at the roots gives pins something to bite.
- Use the pin the right way up. The ridged side of a bobby pin goes against the scalp, and the pin slides in against the direction the hair is lying.
- Cross them. Two pins in an X lock each other in place, while a single pin works loose as you move your head.
- Size down. Mini bobby pins and small U-pins disappear into short hair where standard ones stick out.
- Match the color. On a pixie, pins show. Choose pins close to your hair color, or make them part of the look with pearls or crystals.
1. Sleek Side-Parted Bob
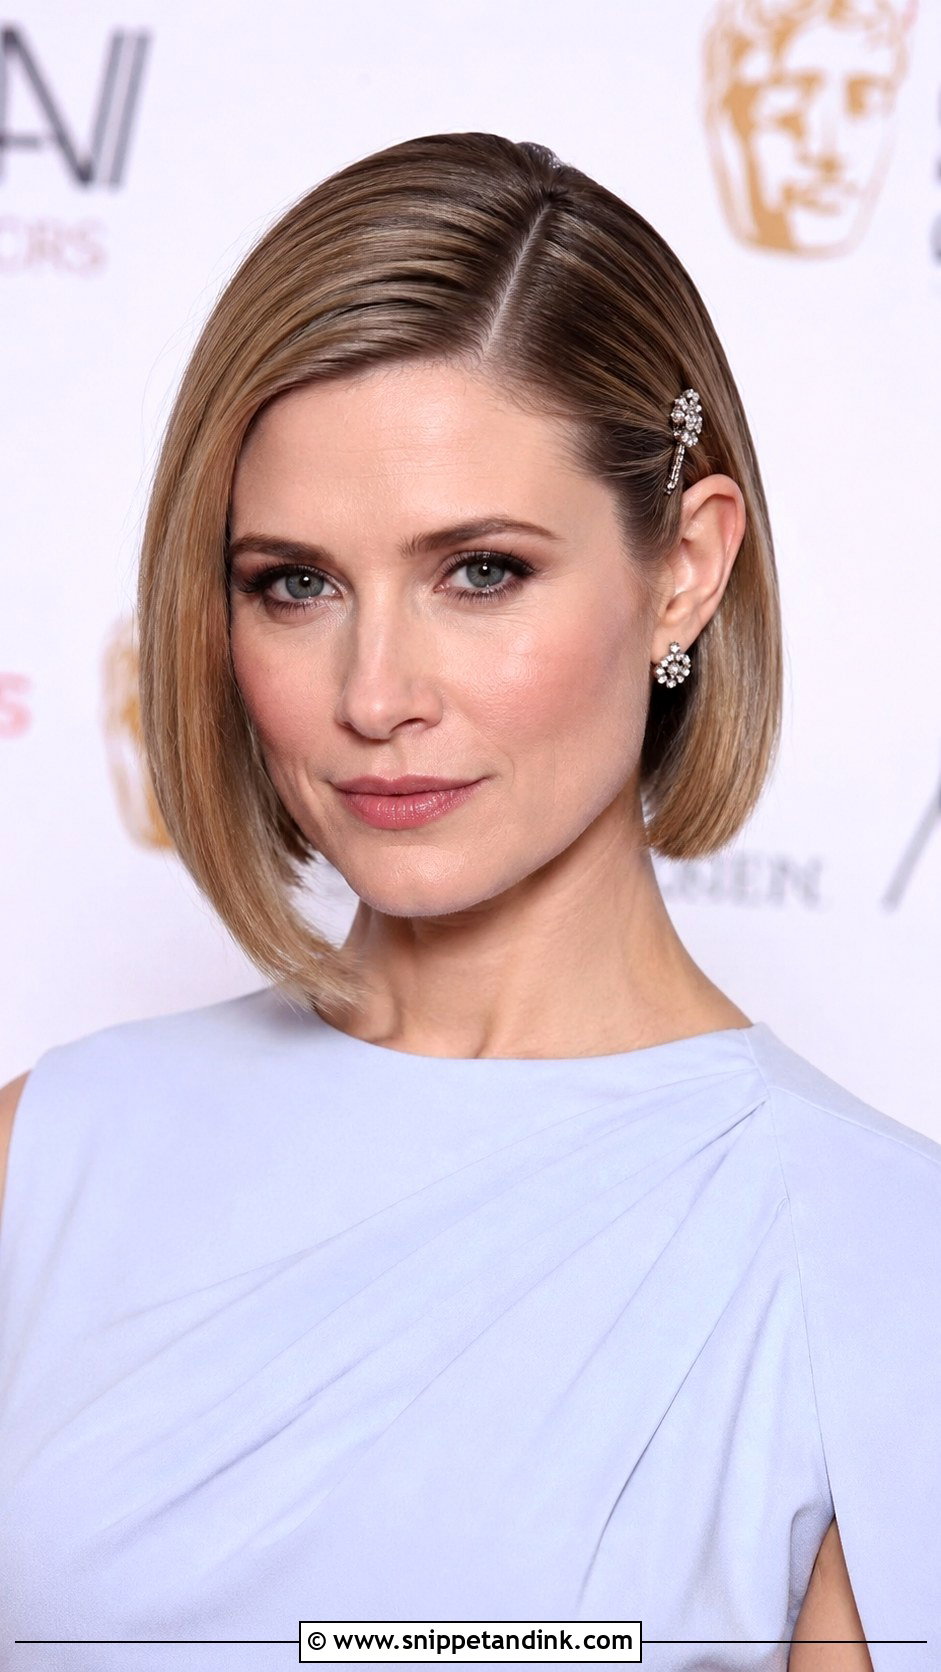
A sleek side-parted bob is the style I’d choose for a formal wedding when you want very little to go wrong. I blow-dry it with a paddle brush pointing down so the cuticle lies flat, then press the ends with a flat iron rather than the whole length, which keeps some movement. A drop of serum, a deep side part, and one side tucked behind the ear with a small jeweled pin. It suits straight or naturally smooth hair; on very curly hair the amount of heat needed is hard on the ends.
2. Tousled Pixie With Volume
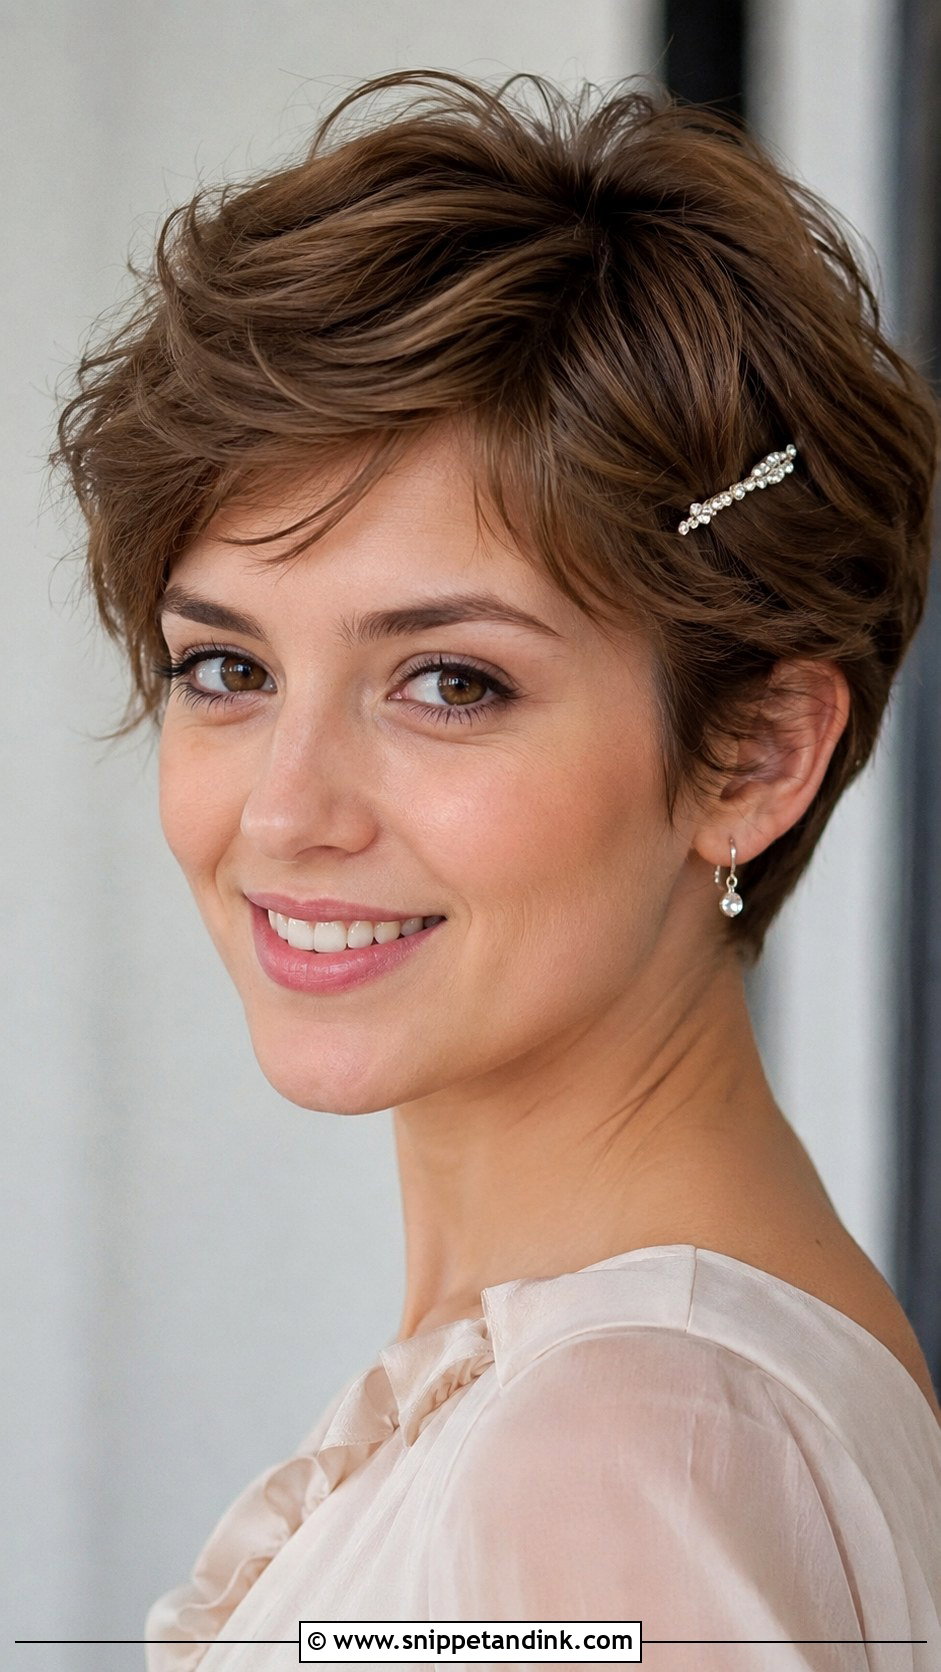
A pixie at a wedding needs height at the crown, or it can look like everyday hair. For a tousled pixie with volume, I put a lightweight mousse at the roots, blow-dry the top against its natural direction, then flip it back and twist the top layers with a little paste so they separate into pieces. That separation is what keeps it from looking flat by evening. A sparkly pin along one side is plenty of decoration.
3. Vintage Finger Waves
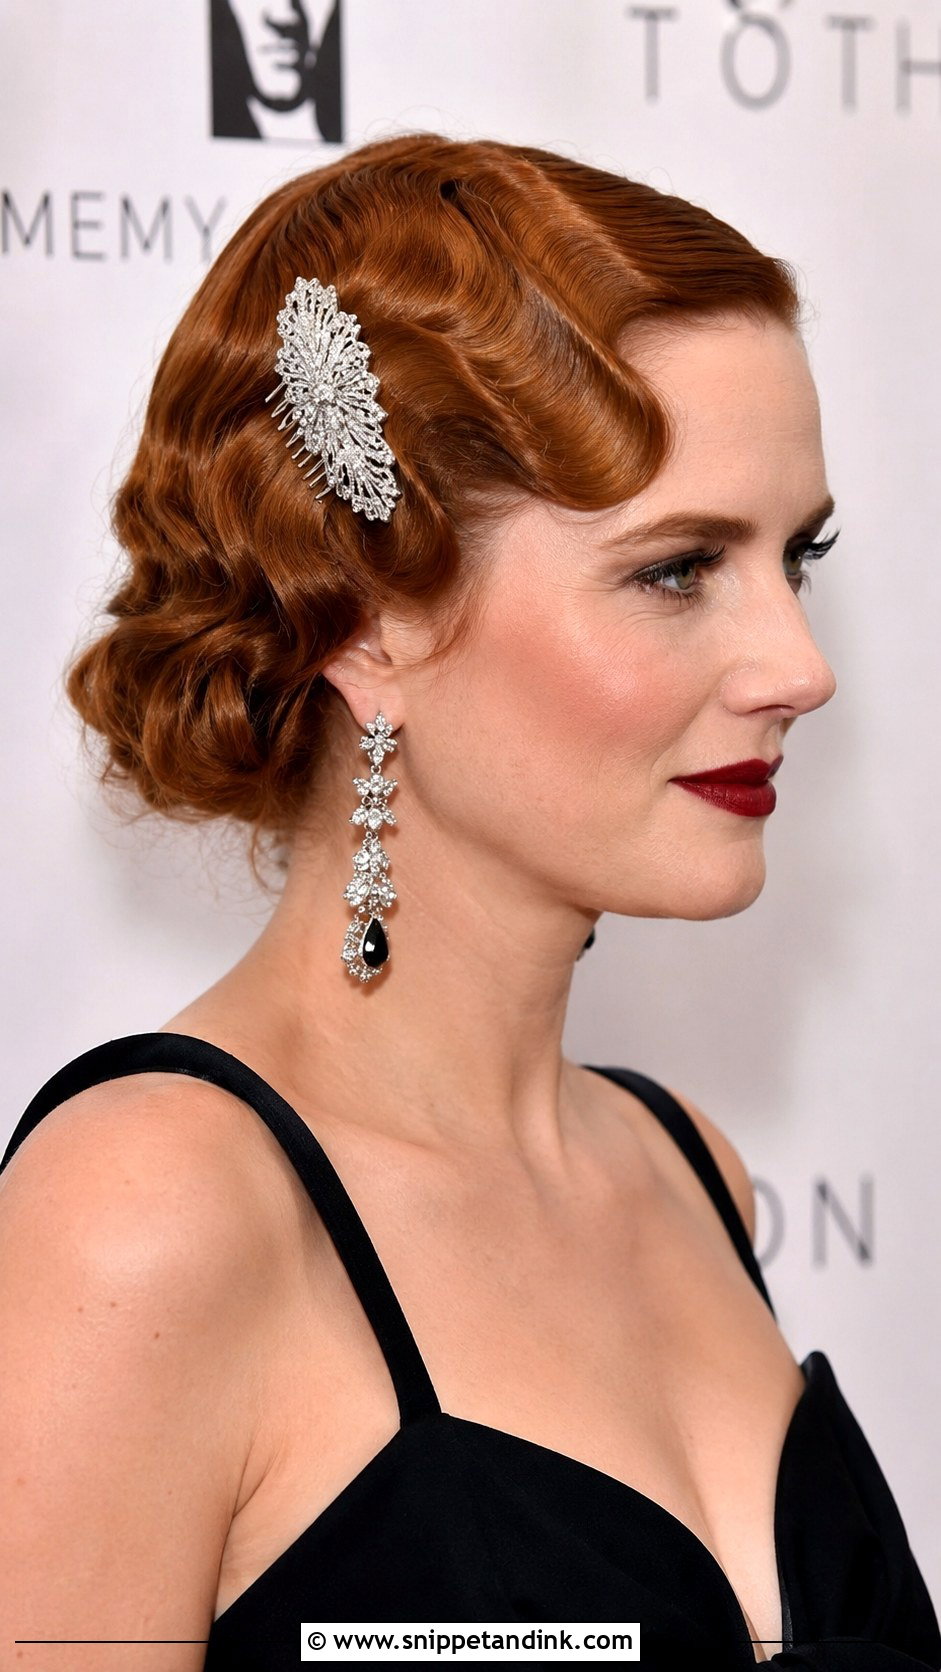
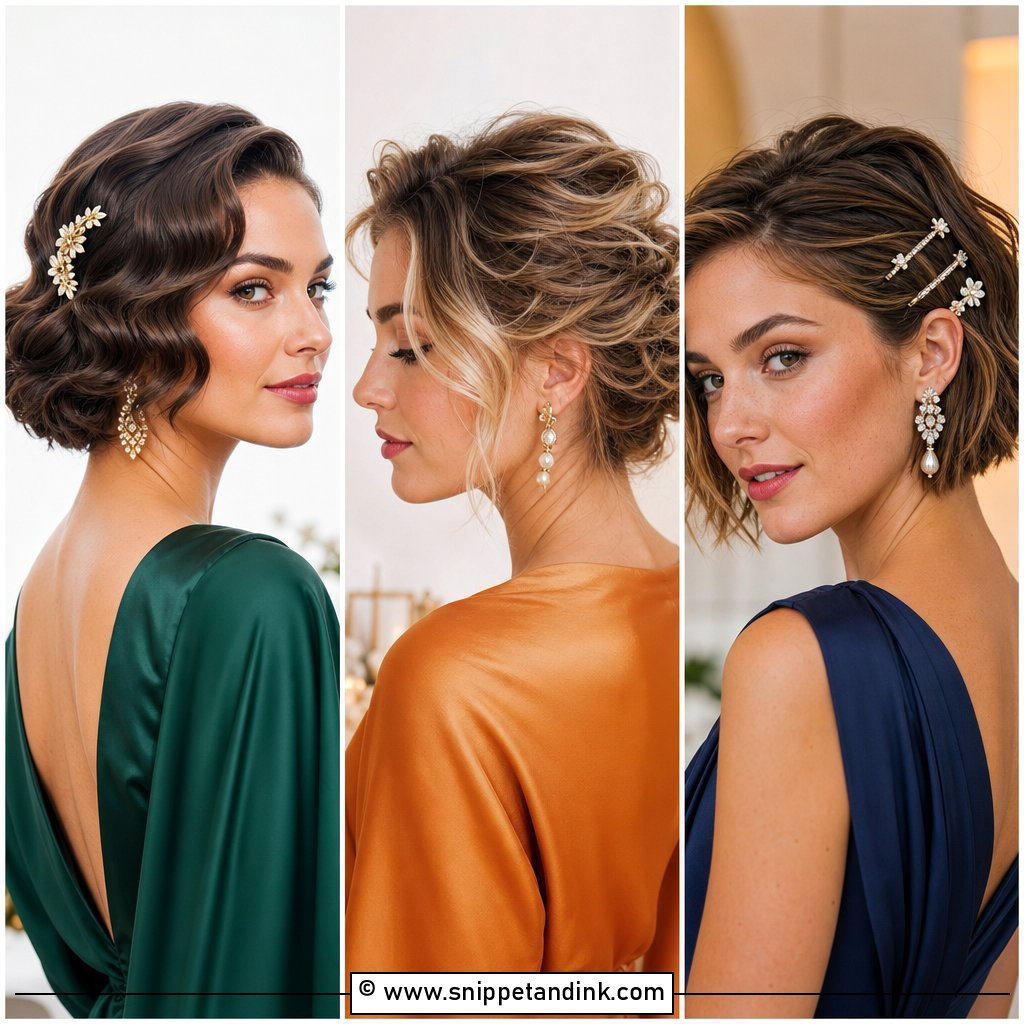
Finger waves are a commitment, but nothing looks more glamorous on a bob. I apply a strong-hold setting gel to damp hair, then press each ridge in place with my fingers and the teeth of a comb, alternating the direction to form the S-shape, and leave it to dry completely without touching. A hood dryer speeds that up; rushing it with a hand dryer blows the ridges out. They suit bobs and longer pixies, formal and black-tie weddings, and a crystal comb at the temple.
4. Half-Up Twisted Crown
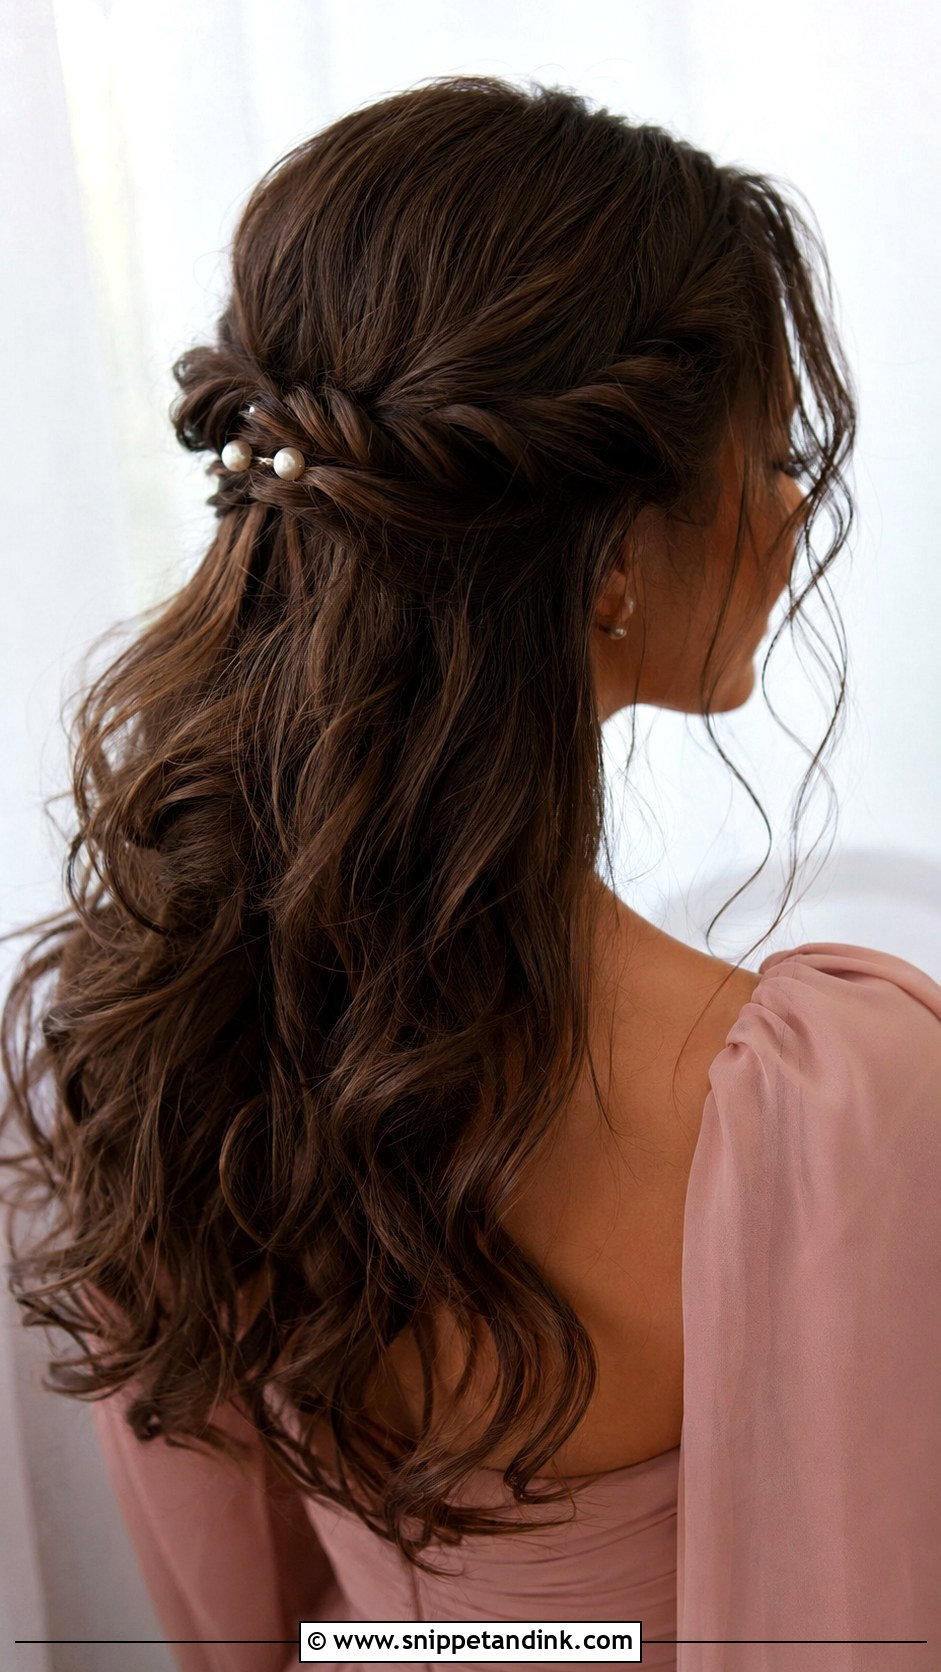
Twisting small sections from each side and pinning them at the back gives a crown effect without any need for length. On a bob, I twist toward the back and slightly downward so the twists lie flat against the head instead of sticking out. Loosen a few pieces at the face, and add a few tiny pearl pins or a single fresh flower where the twists meet. It works on bobs and grown-out pixies, leaving the lower layers free to move.
5. Sleek Straight Bob With Headband
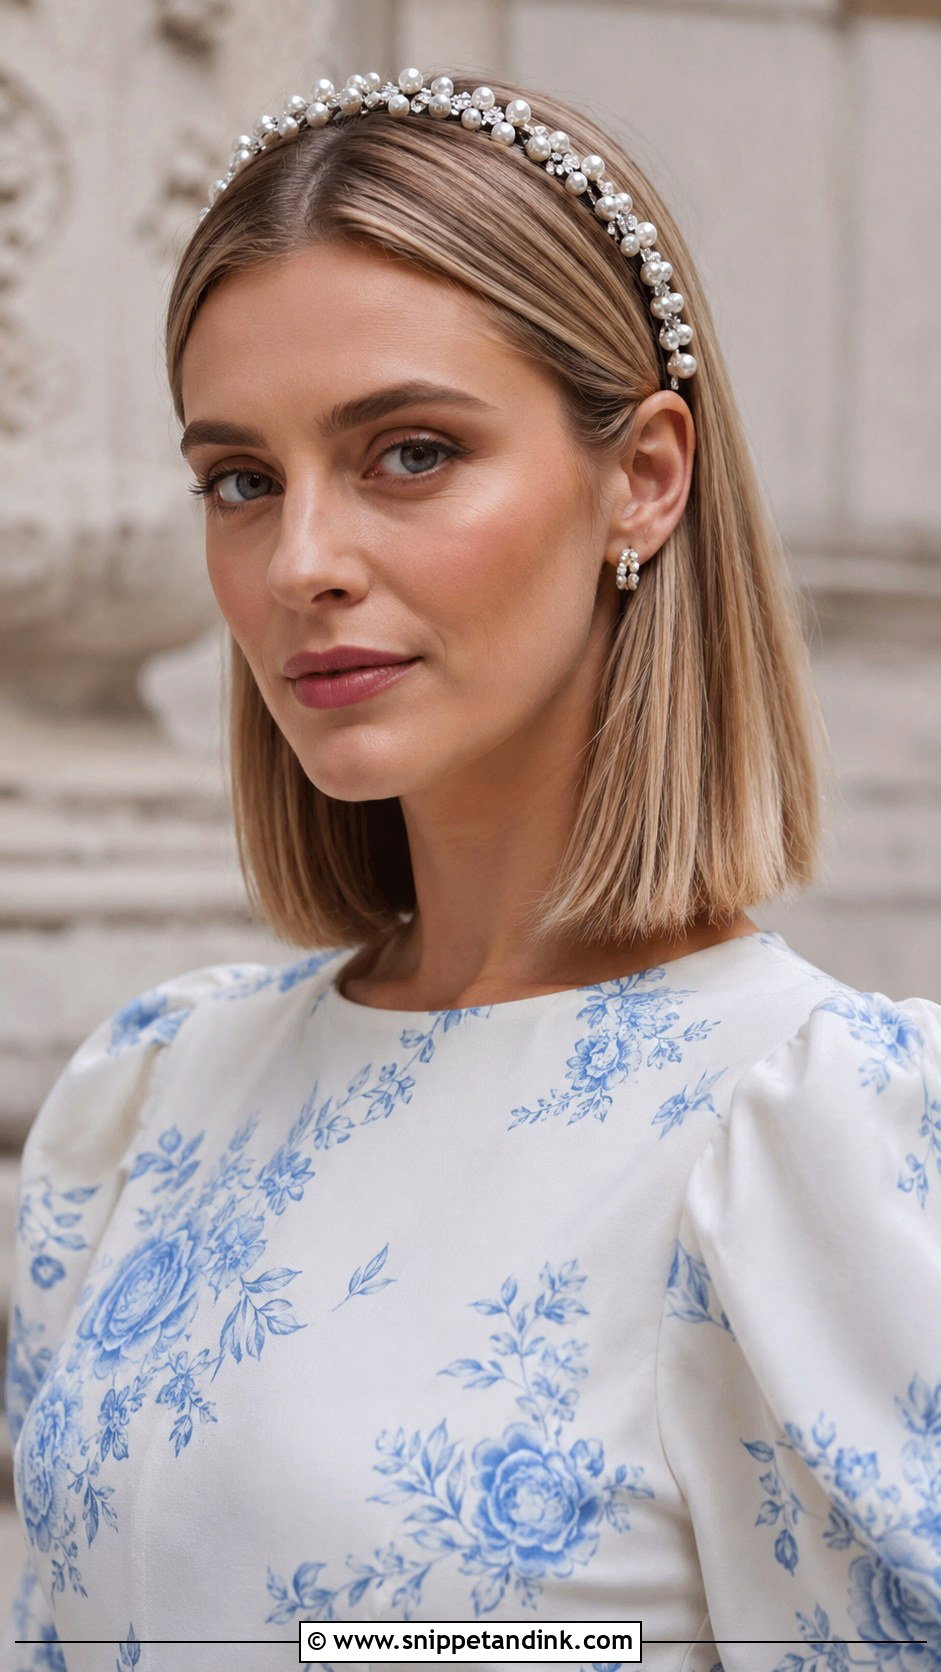
A pearl or crystal headband on a smooth, straight bob does most of the styling for you. I press the hair straight with a flat iron, then slide the headband in about an inch behind the hairline. Placed right at the edge, it pushes the front hair up into a bump. Headbands can press behind the ears after a few hours, so wear yours around the house for an afternoon first. It’s a good choice for daytime and garden weddings.
6. Soft Curled Bob
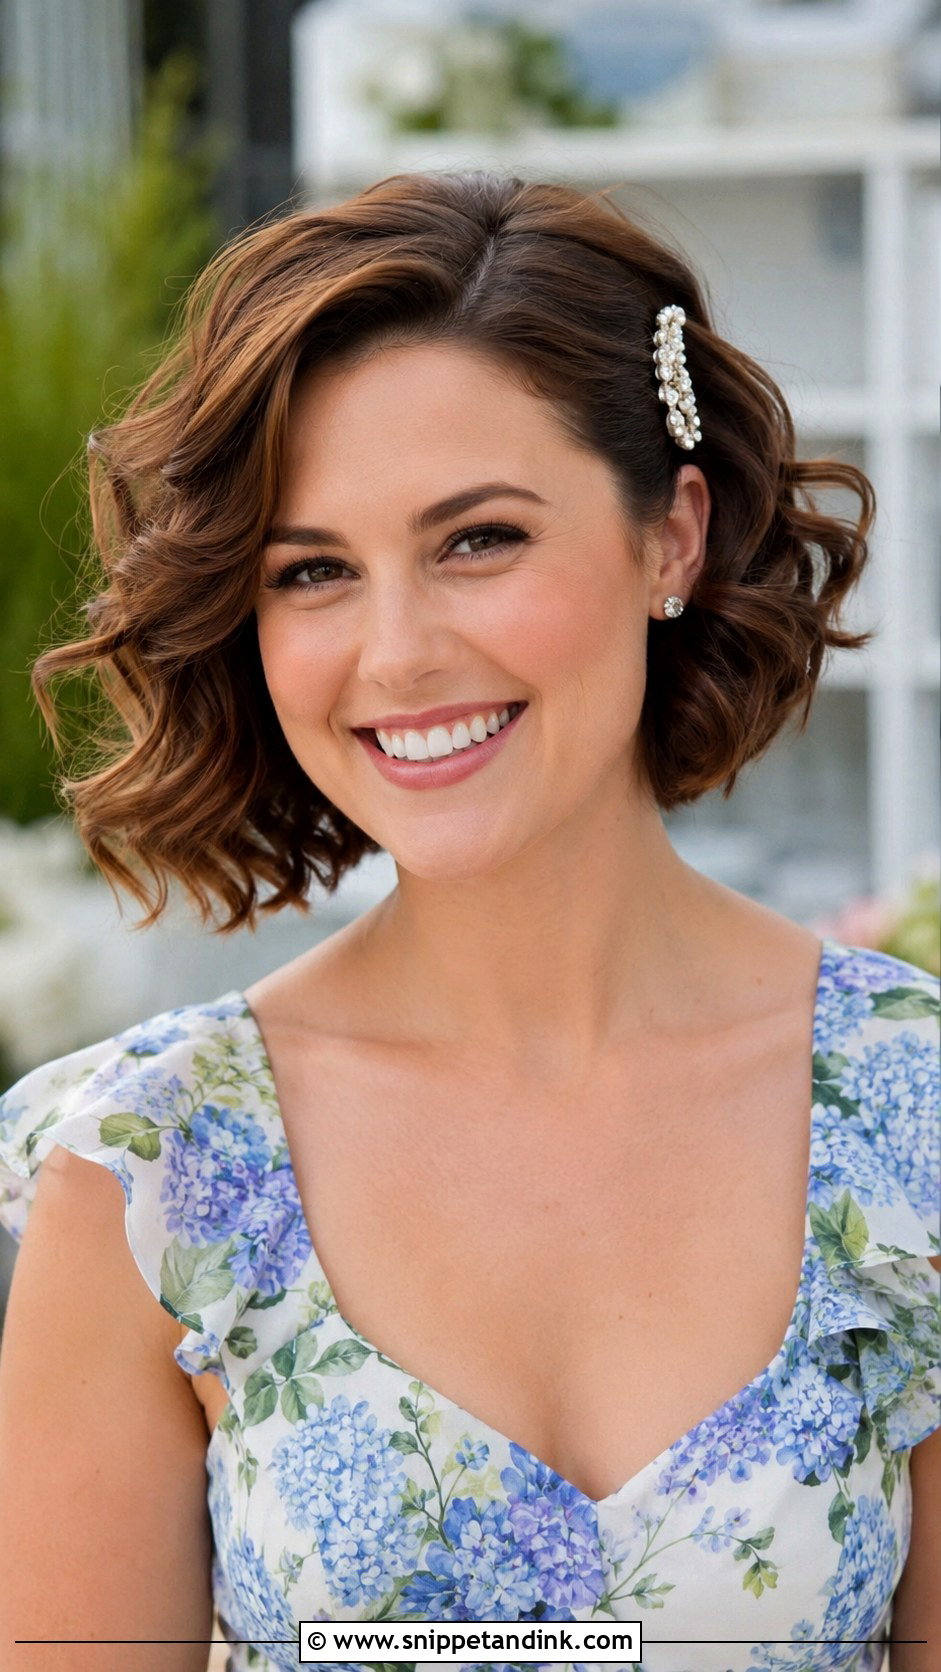
Loose curls give a bob body and movement. I use a medium barrel and curl the middle and ends only, leaving the root smooth, because curls that start at the scalp make a short bob look round. Run your fingers through once they’ve cooled. It works for most face shapes and suits spring and summer weddings. Tuck one side behind the ear with a sparkly clip if you want detail.
7. Low Twisted Chignon
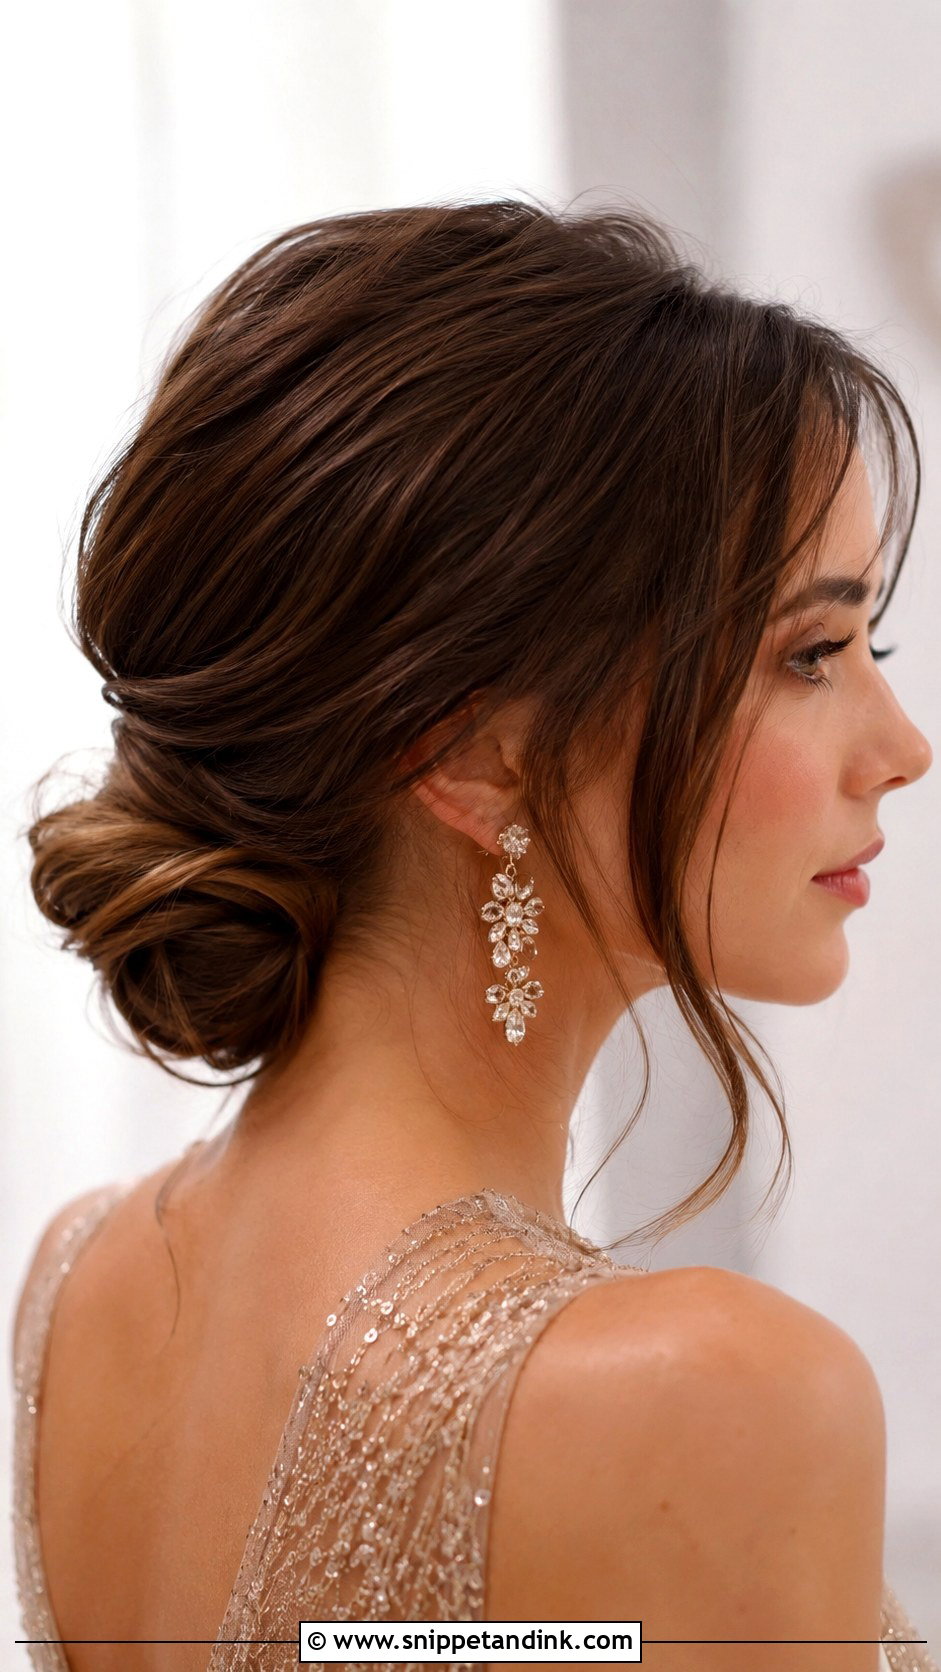
A low chignon on short hair is possible if the hair reaches the nape. I gather it into a low, small knot and anchor it with U-shaped pins, which grip shorter hair better than bobby pins. Layers that don’t reach get twisted and pinned in toward the knot. Leave a few wispy pieces at the face. It’s an elegant choice for formal evening weddings and long necklines, and a light hairspray seals it.
8. Pixie With Jeweled Hairpins
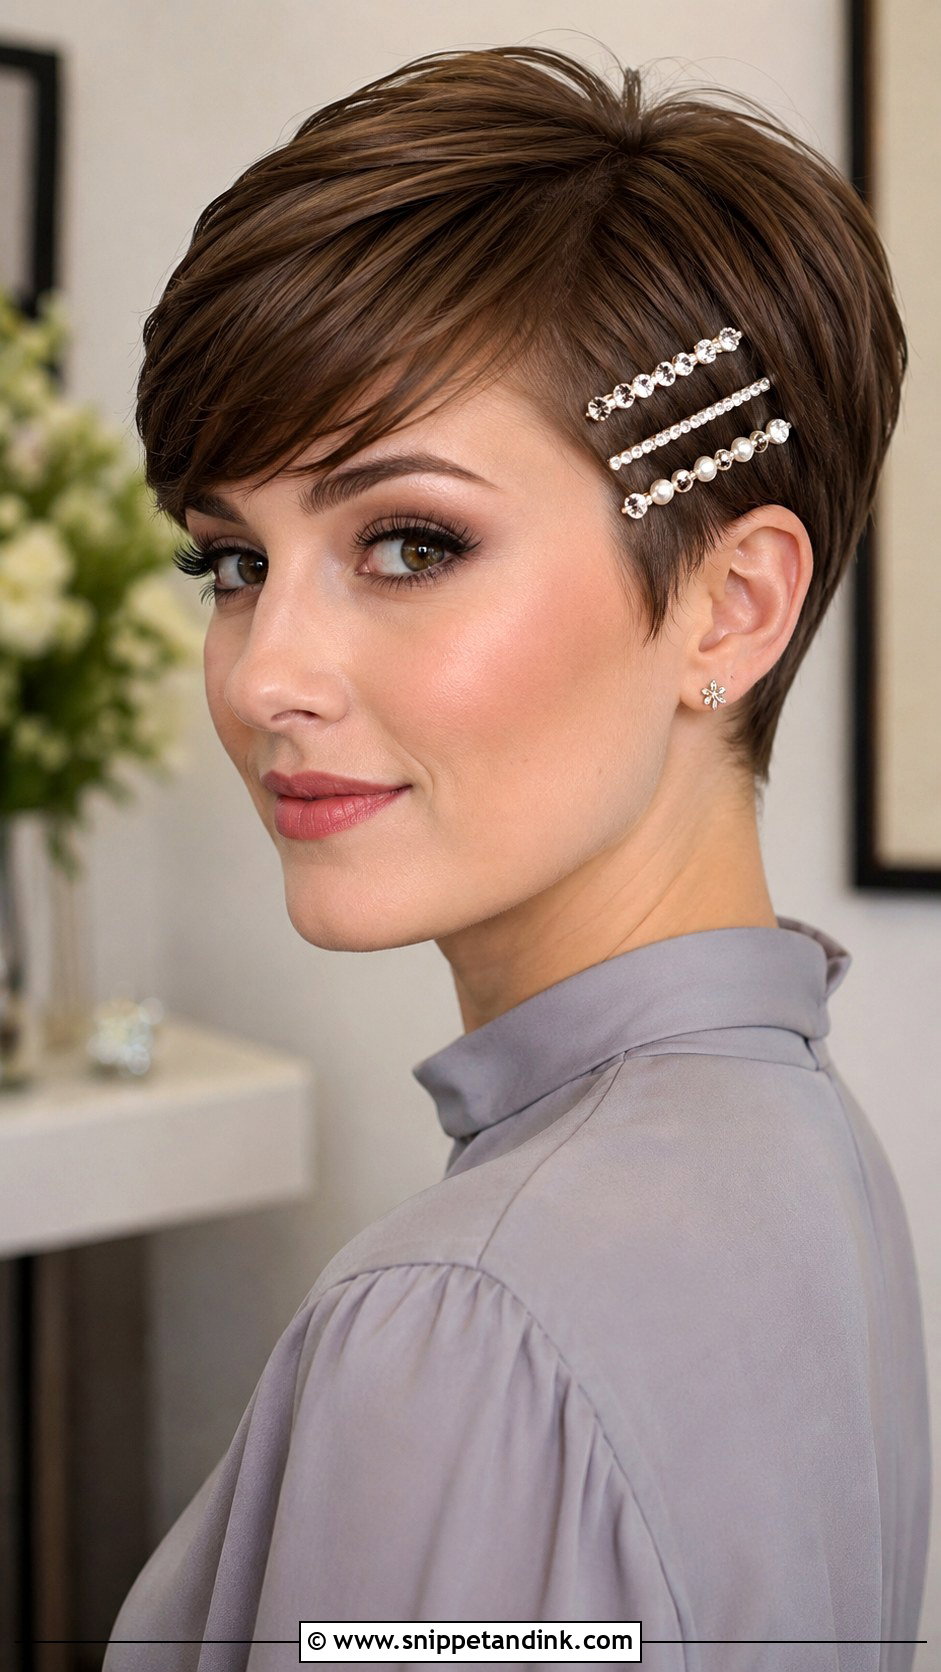
Two or three crystal or pearl pins in a diagonal line near the temple turn a pixie into a dressed style in five minutes. I sweep the hair to one side, smooth the top with a small amount of pomade, and slide the pins in against the direction of the hair so they grip. They suit any face shape. If your pixie is very fine, a tiny bit of texture spray at the pin points stops them from sliding.
9. Textured Lob With Waves
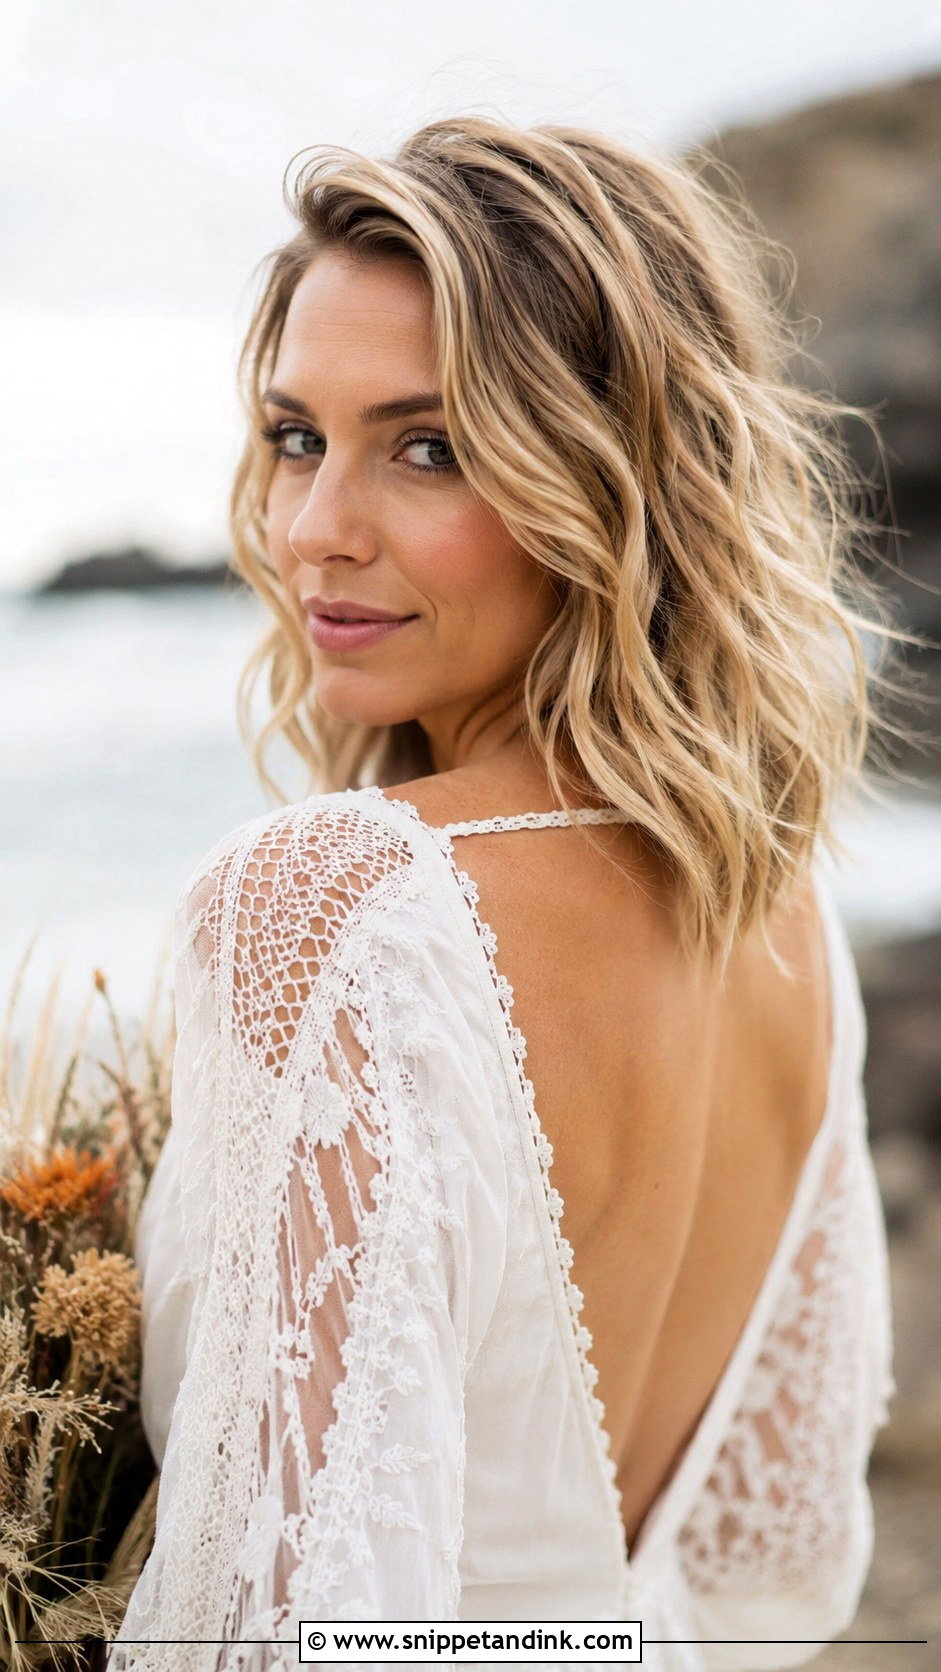
A lob just past the chin has enough length for loose waves. I use a curling wand and leave the last inch straight, which gives a modern bend rather than a ringlet, then work in texture spray. Center or side part depending on your face. It’s a natural fit for relaxed outdoor and boho weddings. In damp weather, beachy waves can fade into frizz, so I set them with a little more spray than usual.
10. Sleek Slicked-Back Pixie
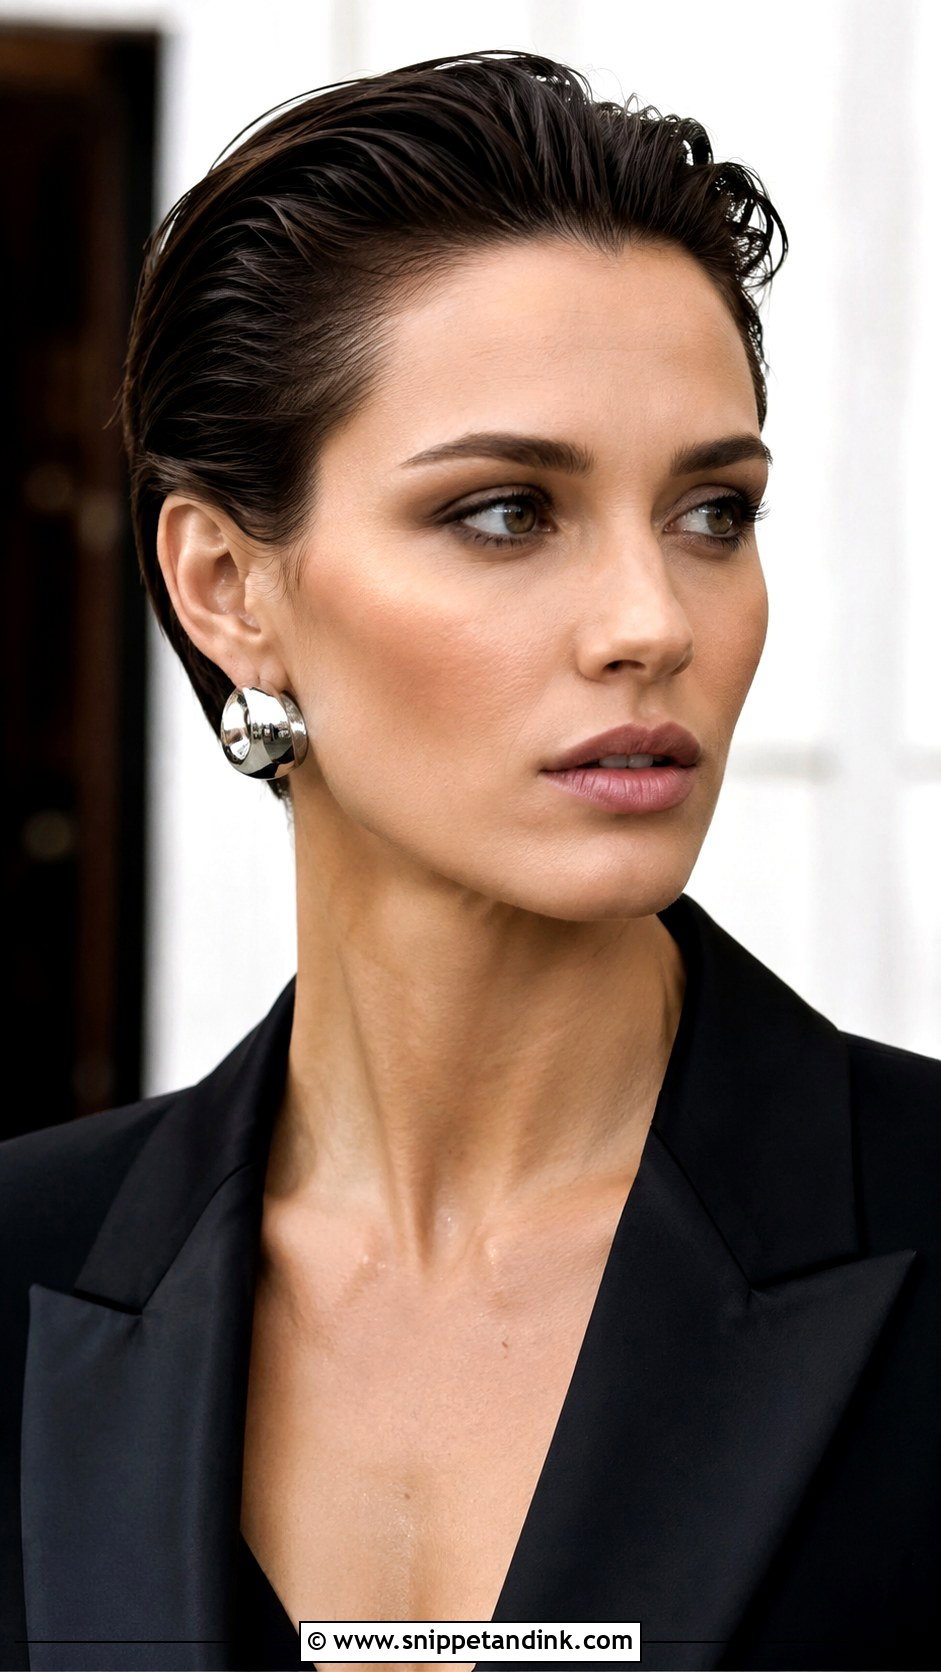
A sleek slicked-back pixie takes the most nerve and the least effort. Strong-hold gel or pomade, combed straight back from the hairline, gives a wet-look finish that shows off cheekbones and earrings. It’s for contemporary, fashion-led weddings. The gel holds through dancing and outdoor ceremonies without touch-ups. Go easy on product at the nape, because heavy gel there can mark a dress collar.
11. Braided Crown Bob
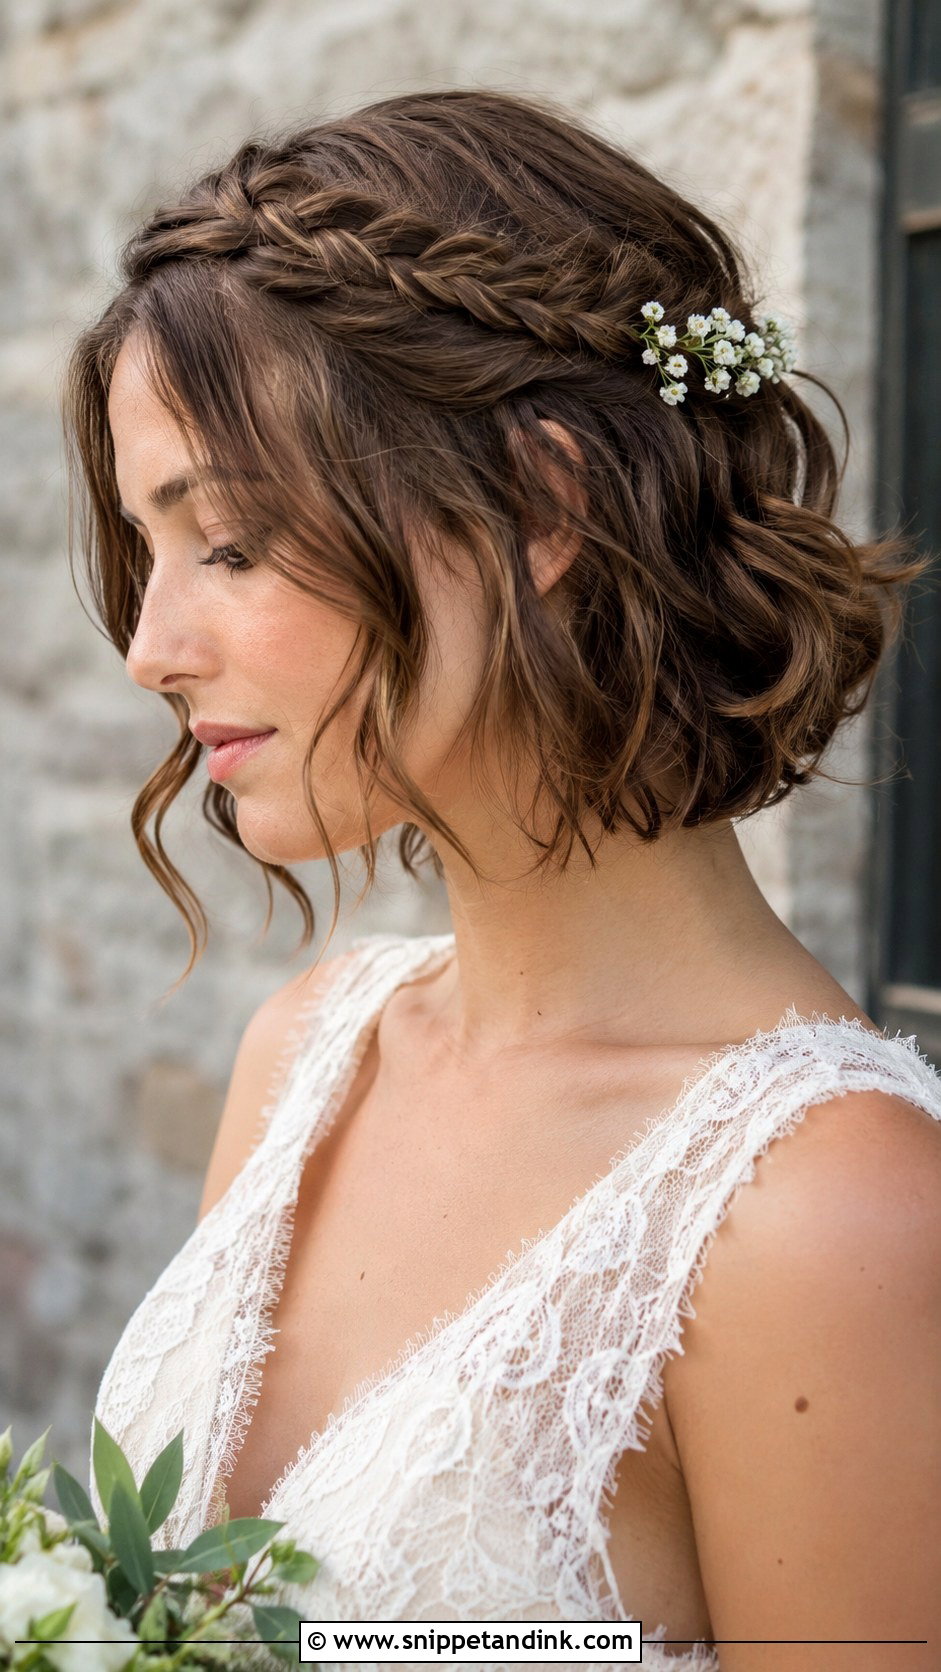
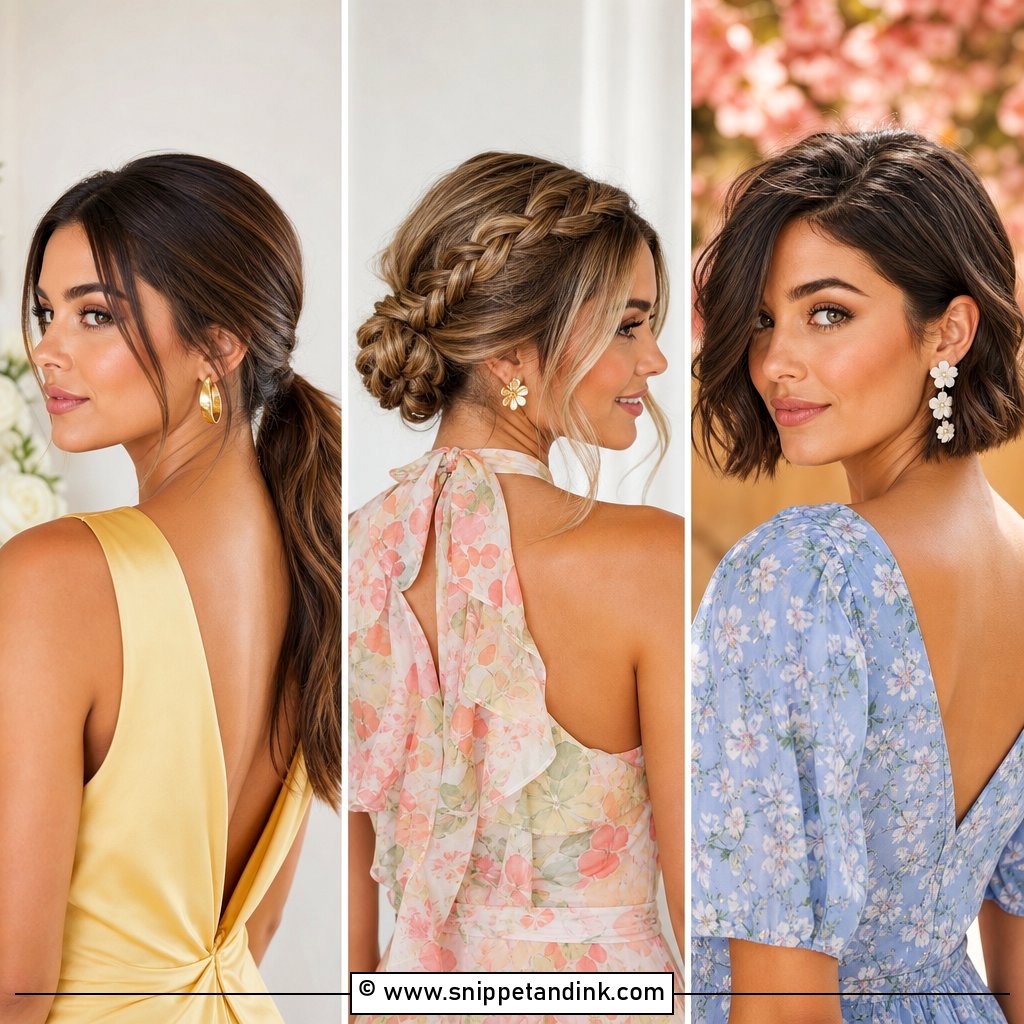
Even a bob can carry a braided crown if the braids start at the front. I braid small three-strand sections from each temple and pin them across the top of the head. Short layers will poke out, so I braid them in tight first and only loosen it afterward. A small flower or pearl pin tucked into the braid suits garden and rustic weddings.
12. Curled Pixie With Side Part
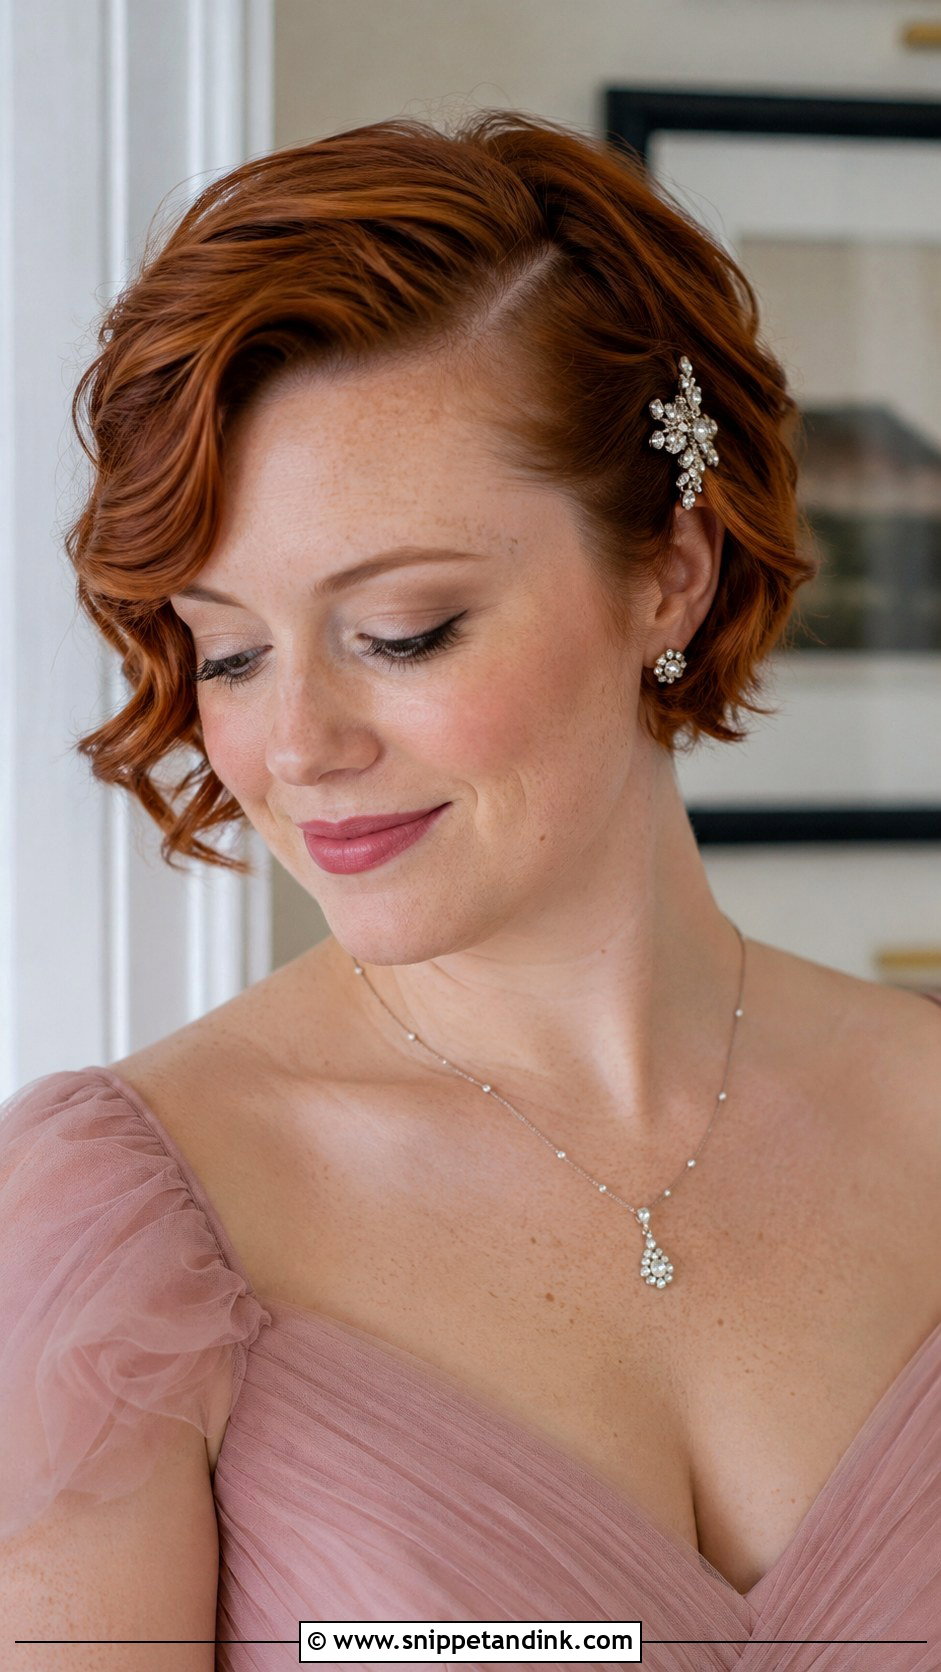
Soft curls on the top layers of a pixie add volume and movement. I use a small curling iron, about half an inch, on the longest pieces and sweep them to one side with a deep part. Larger irons don’t grip pixie lengths. Set with flexible hairspray so the curls move, and add a sparkly pin along the part.
13. Half-Up Bob With Pearl Pins
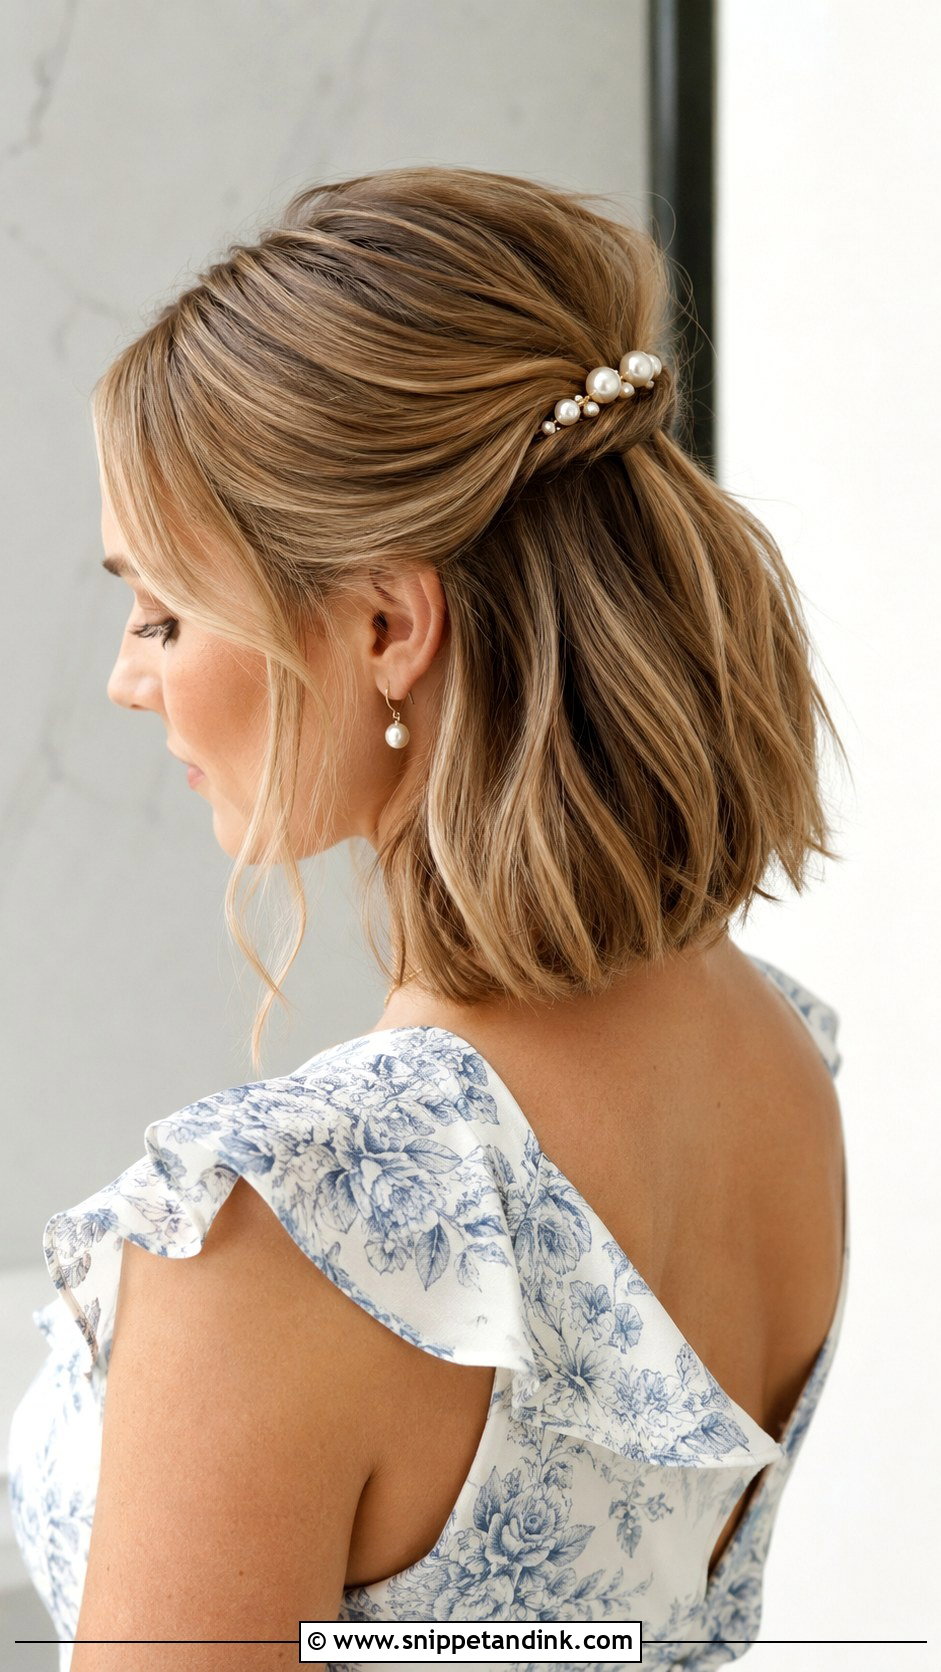
Half up on a bob keeps hair off the face while the lower layers fall naturally. I tie the top section with a small clear elastic, cover the elastic with a twist of hair, and arrange a small cluster of pearl pins over it. On a shorter bob, I’d keep the half-up section narrow; taking too much hair leaves the bottom layer looking thin. Soften a couple of front pieces.
14. Glossy Blunt Bob
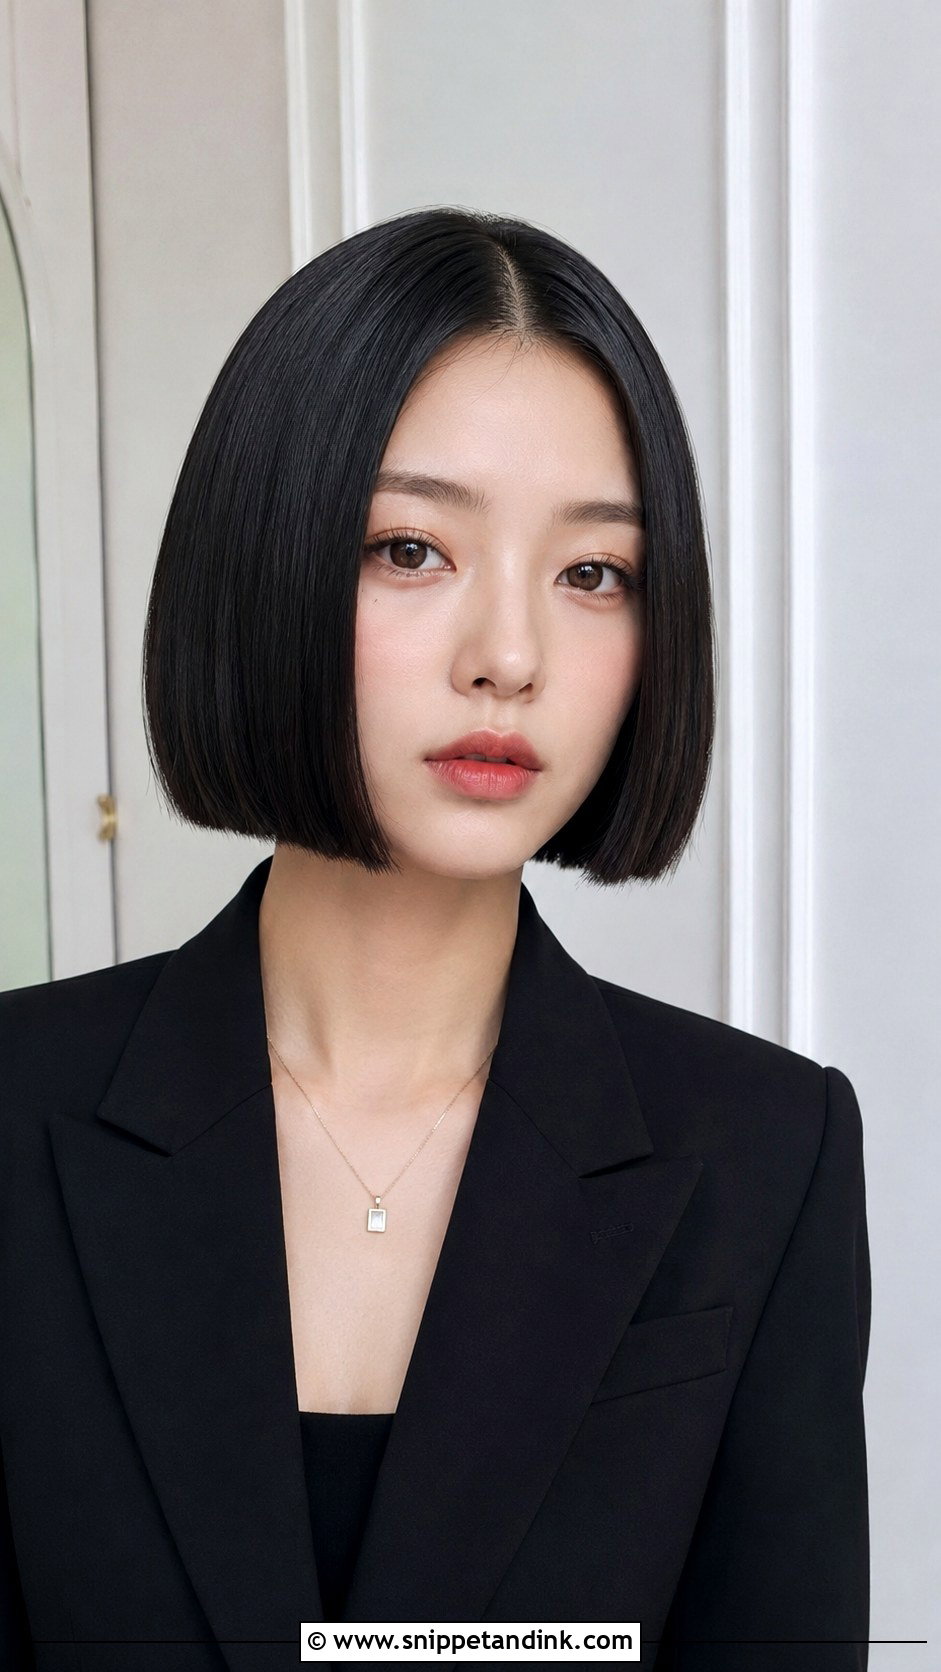
A glossy blunt bob delivers modern polish because of its clean, even hemline. The cut needs to be fresh for this one; a blunt line that’s grown out a few weeks starts to flick and loses the sharp look. Flat-iron it straight and finish with shine serum. Center part for symmetry, side part to soften. It suits a strong jawline and minimalist weddings.
15. Tousled Wavy Lob
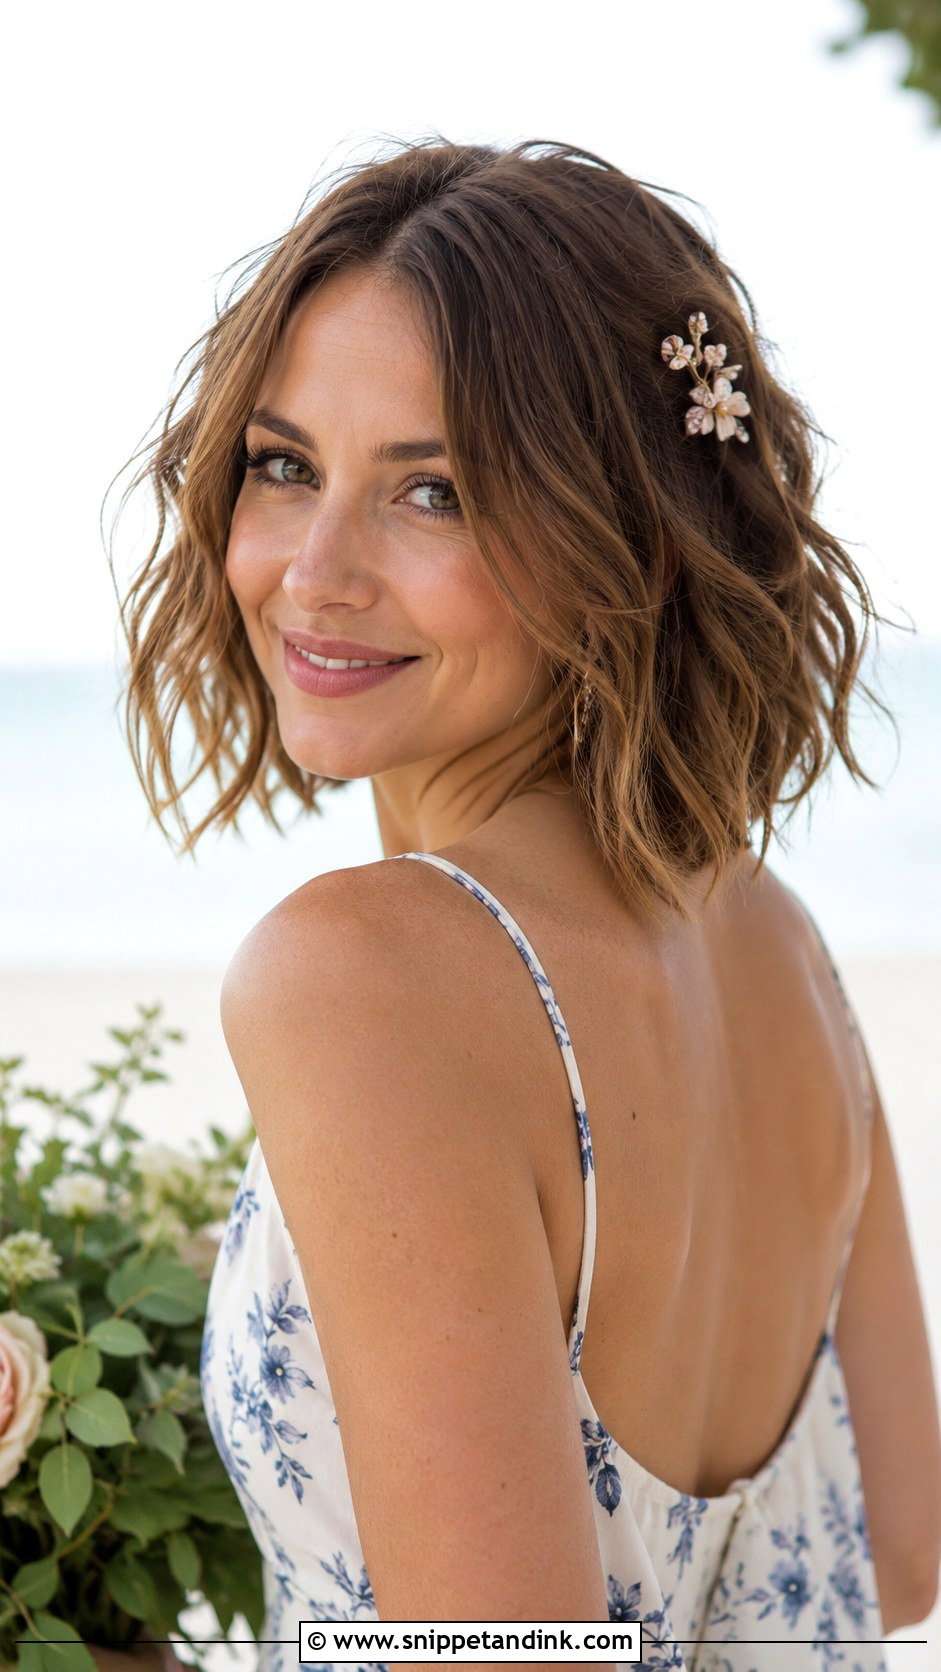
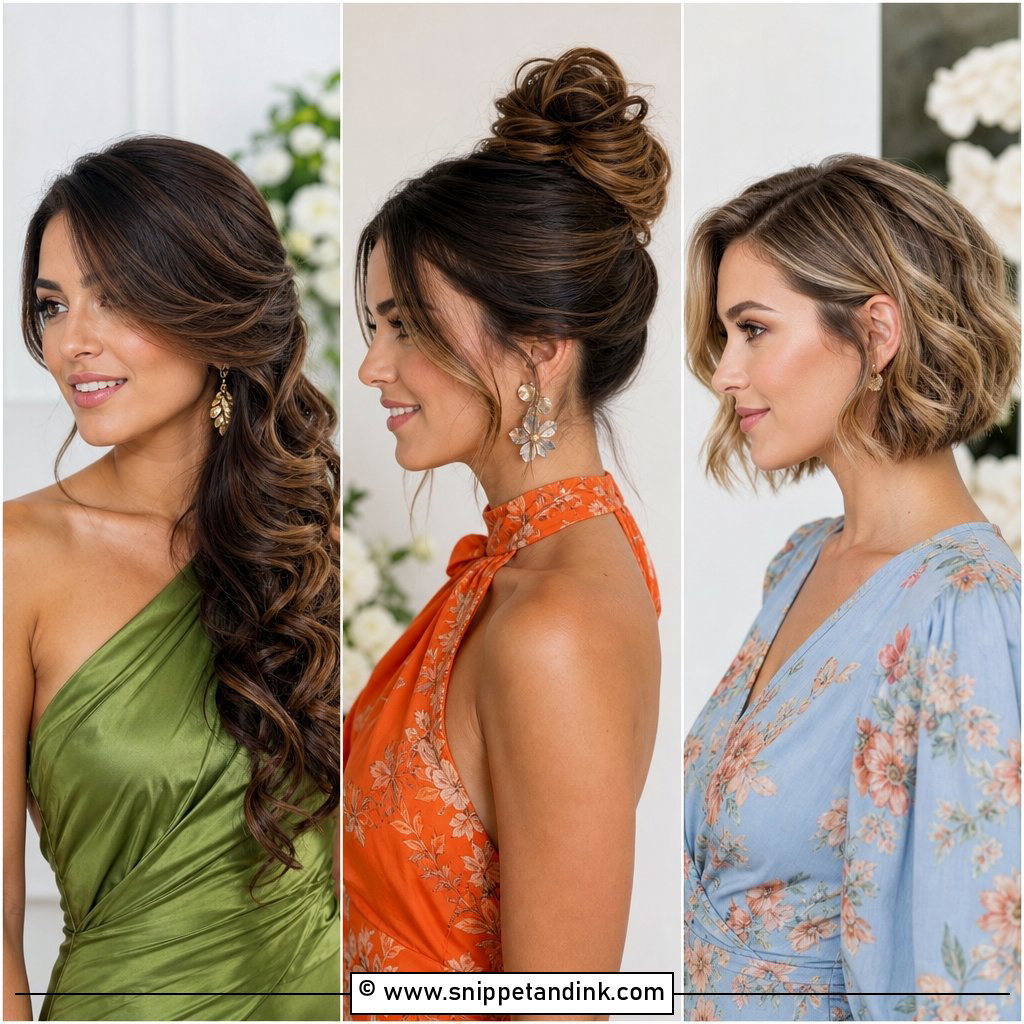
A shoulder-grazing lob with undone waves suits boho, beach and outdoor weddings. I curl sections in different directions and with different sizes so the waves look irregular, then break them up with fingers and texture spray. A soft center part keeps it modern. A small floral pin is the only accessory it needs.
16. Pixie With Floral Crown
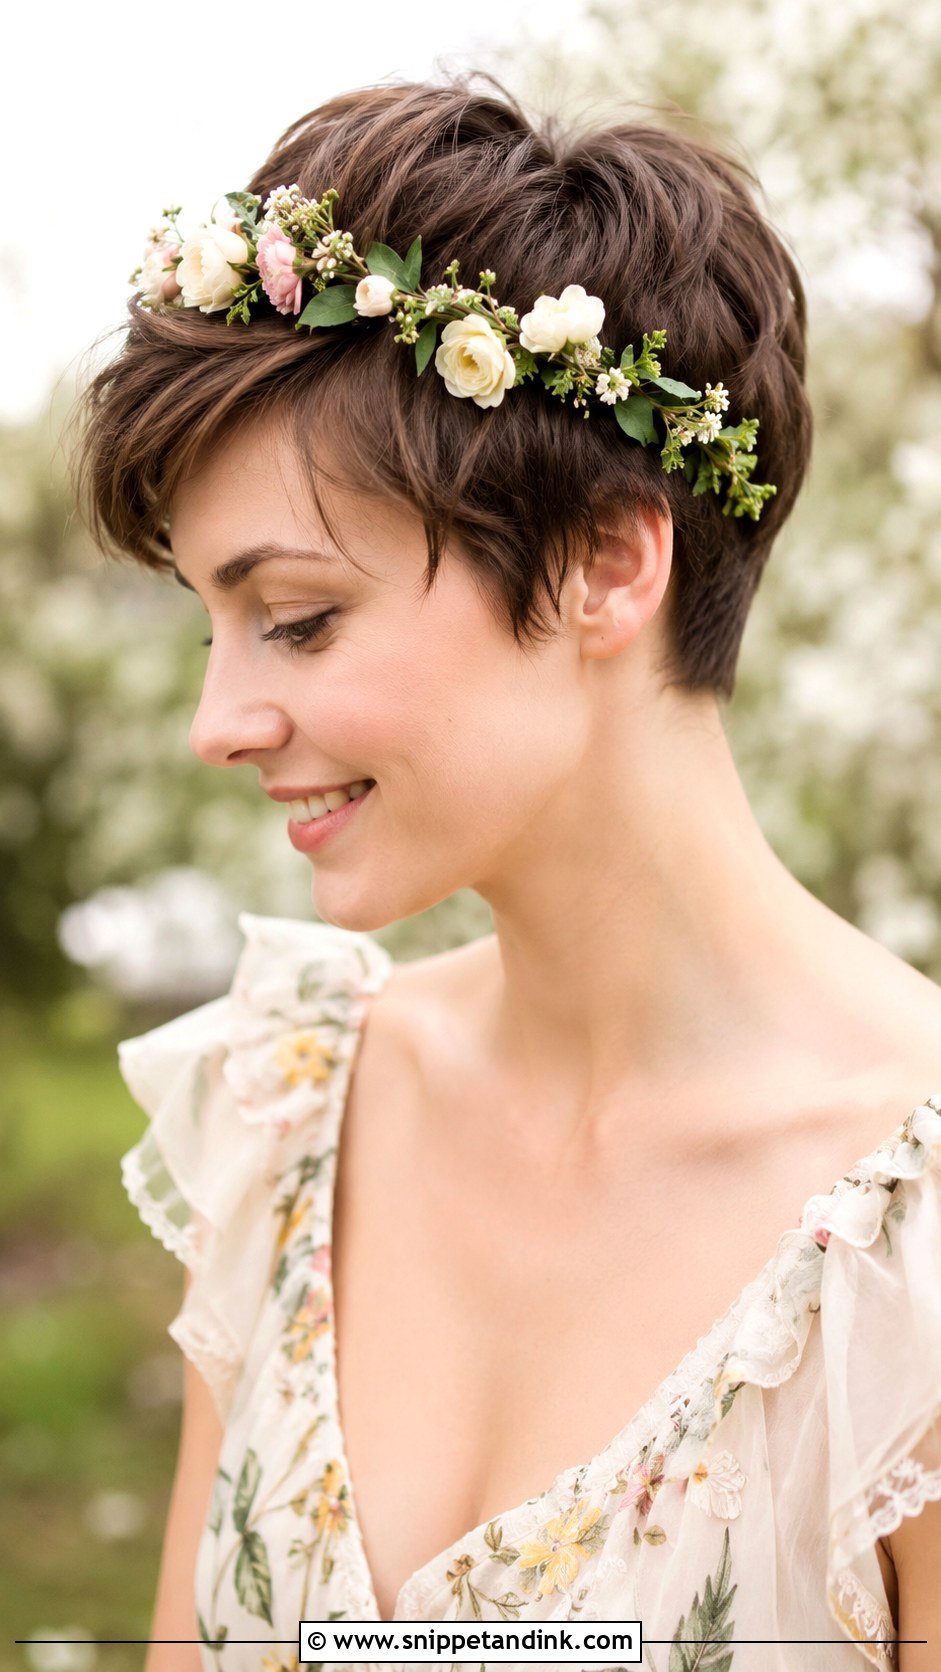
A flower crown sits more securely on a pixie than people expect, because the short texture gives the pins something to bite into. I add texture spray first, then pin the crown at four points through its wire base. Choose blooms that match your outfit or the wedding palette, and pick hardy flowers or quality silk ones if the day is hot. It’s for spring and bohemian weddings.
17. Sleek Tucked Bob
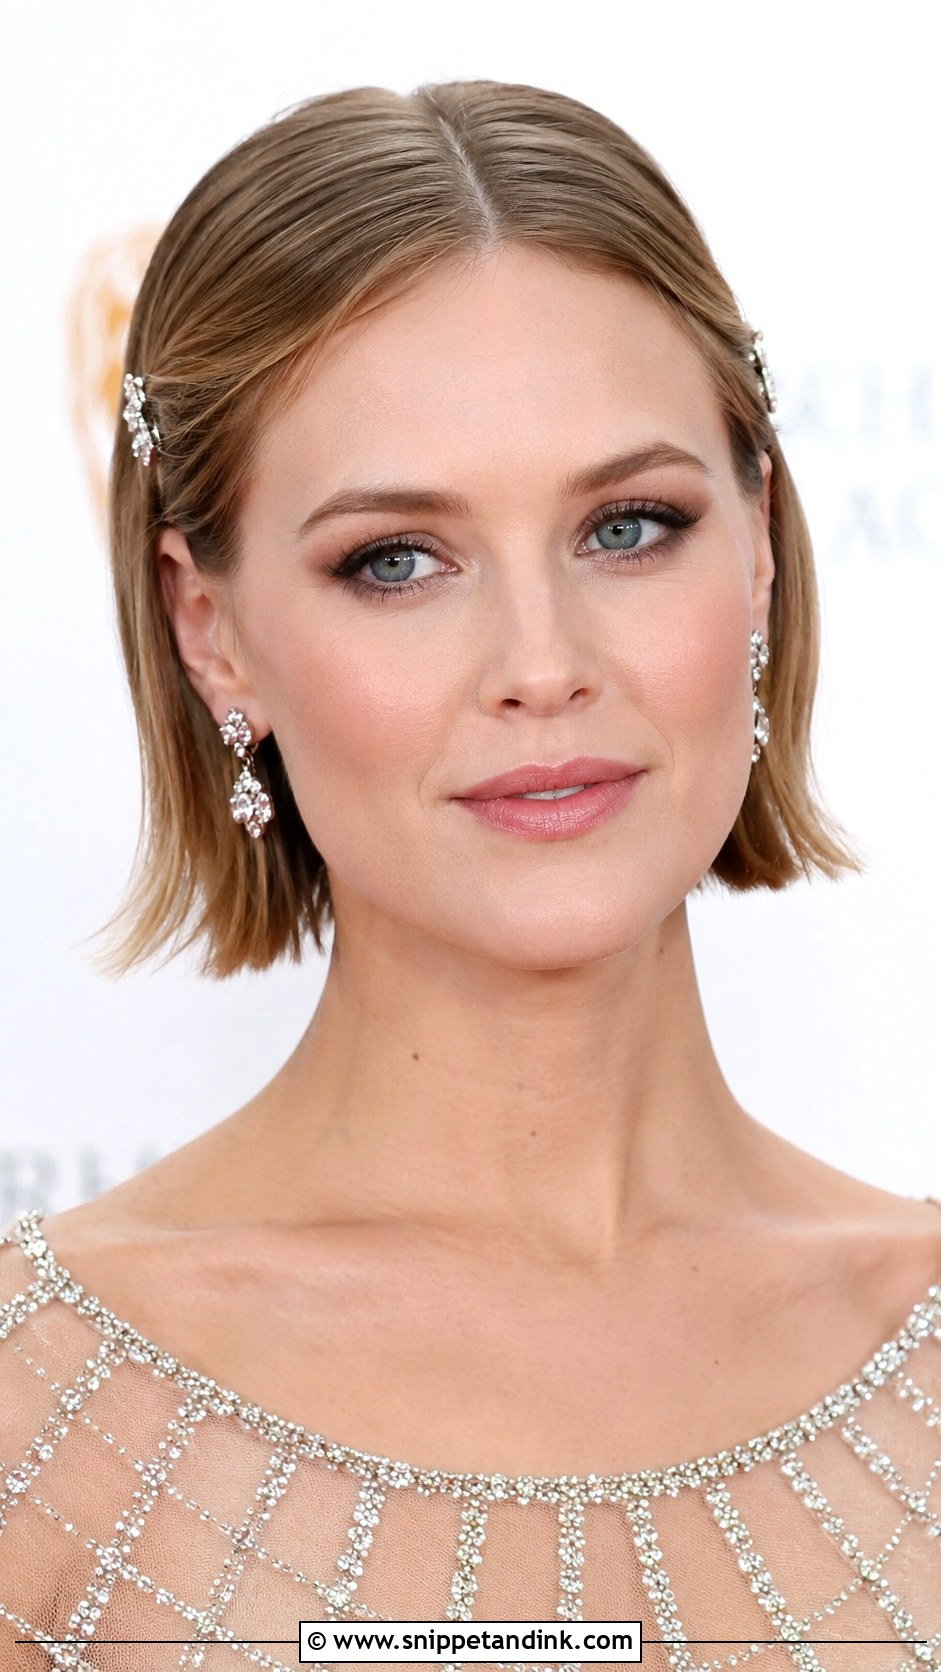
Tucking one or both sides of a smooth bob behind the ears shows earrings and the jawline. I flatten the tuck with a pin hidden behind each ear, crossing the pins so the hair doesn’t spring loose. A glossy serum finishes it. It works for daytime and evening weddings and is one of the simplest styles to do yourself.
18. Retro Pin Curls
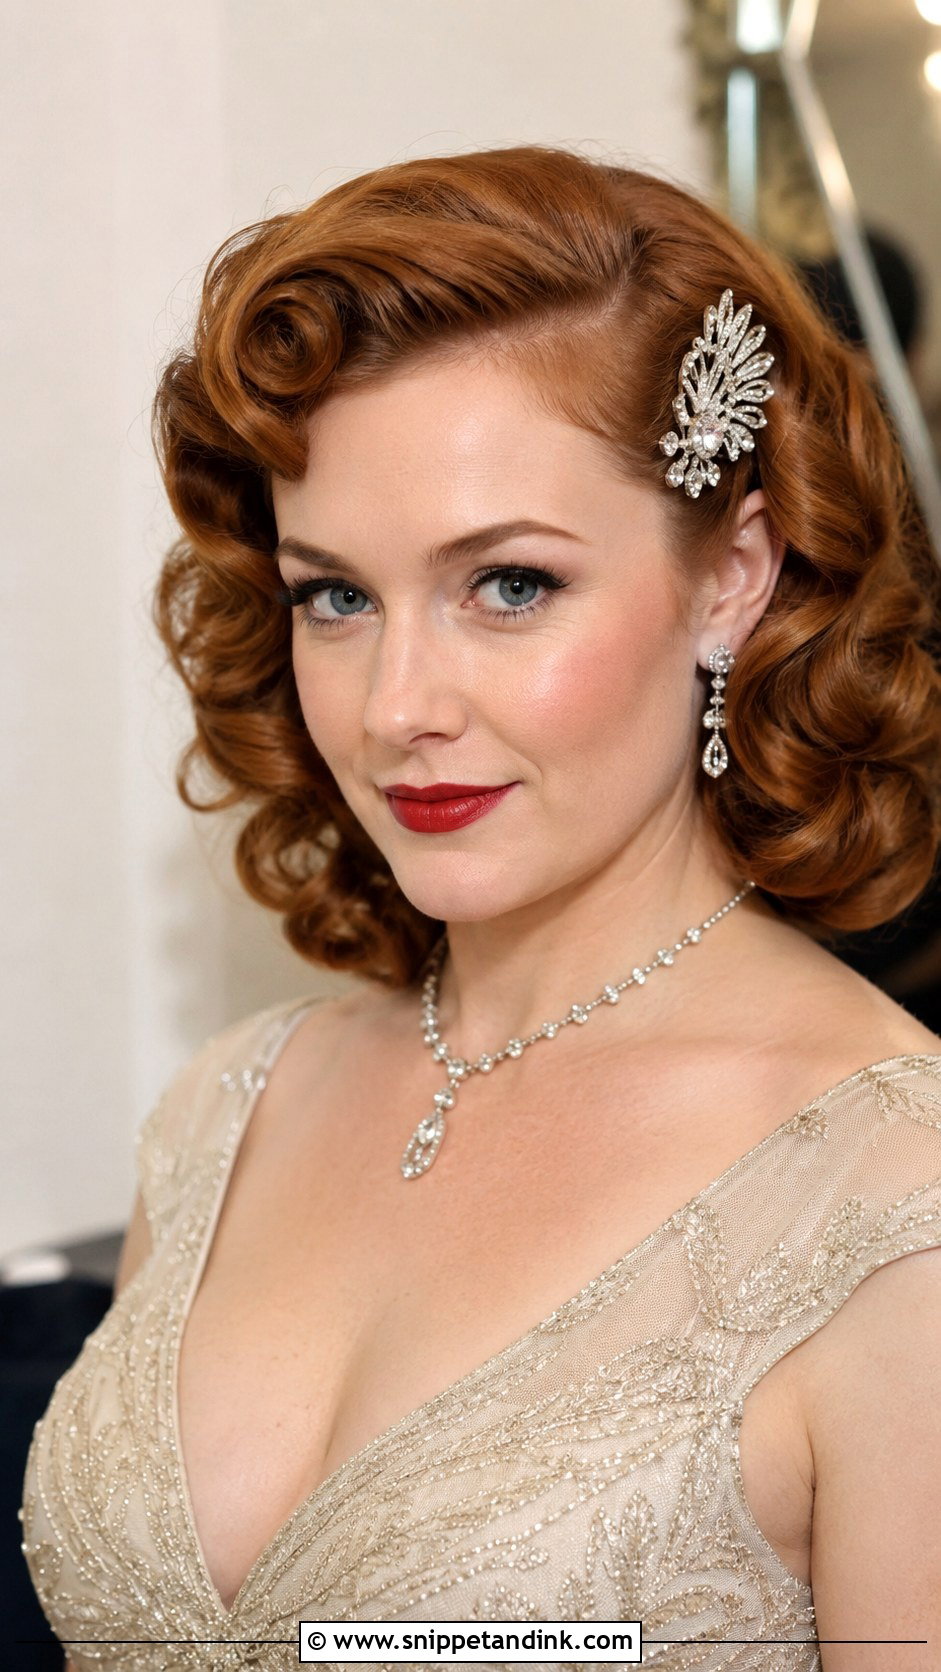
Pin curls are set, cooled, then brushed into sculpted waves. I roll small sections flat against the head, secure each with a clip, and leave them as long as possible, ideally until fully cool or overnight. Brushing them out too early is why vintage sets drop. They suit formal and themed weddings, bobs and longer pixies. Sweep one side back with a jeweled comb.
19. Side-Swept Wavy Pixie
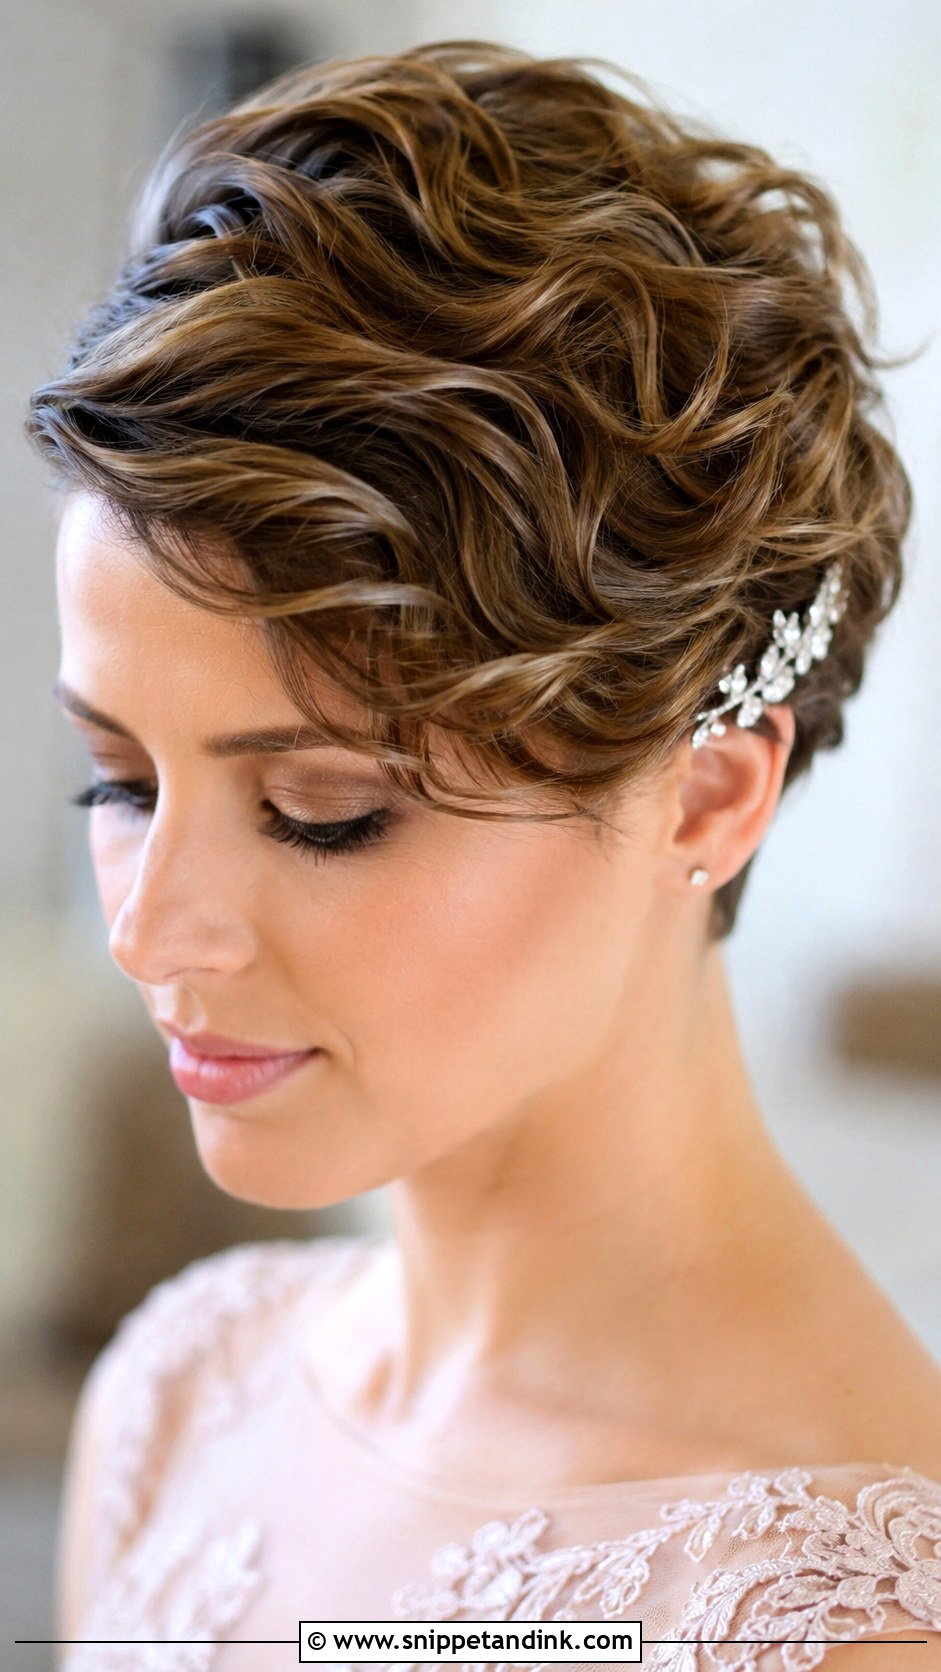
Waves swept to one side give a pixie volume and a soft asymmetric shape. I curl only the top layers, then brush everything over in one direction and lock it with a little hairspray. A sparkly pin behind the opposite ear balances it. It flatters most face shapes, and it’s a good middle ground if a slicked-back pixie feels too severe.
20. Low Bun With Face-Framing Pieces
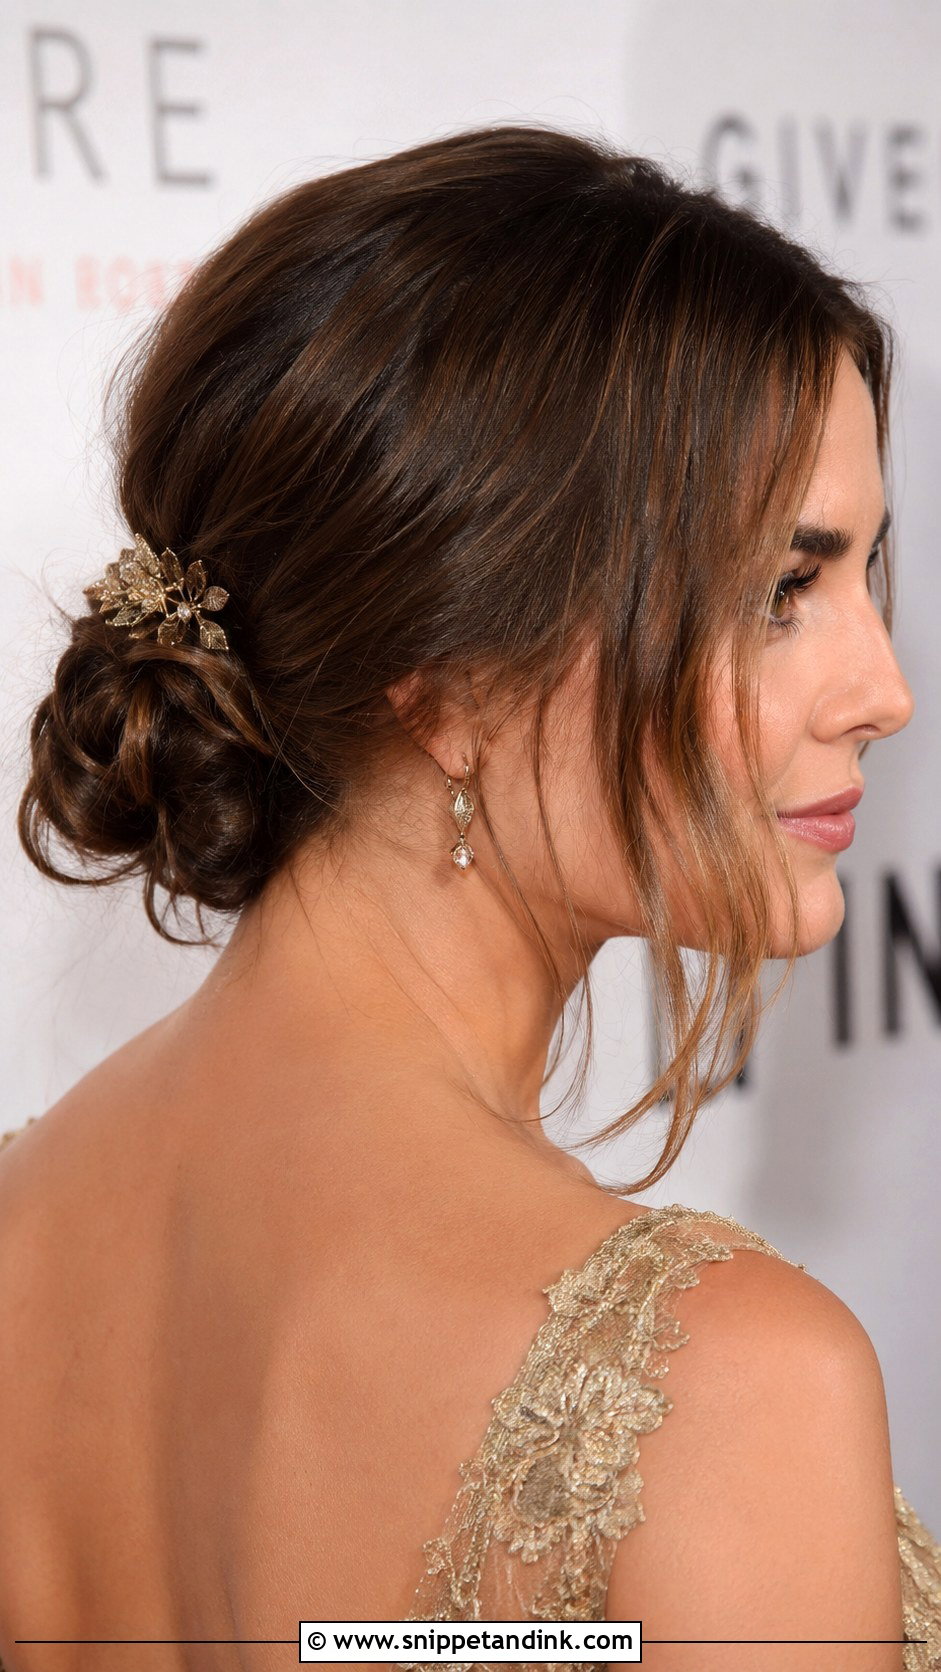
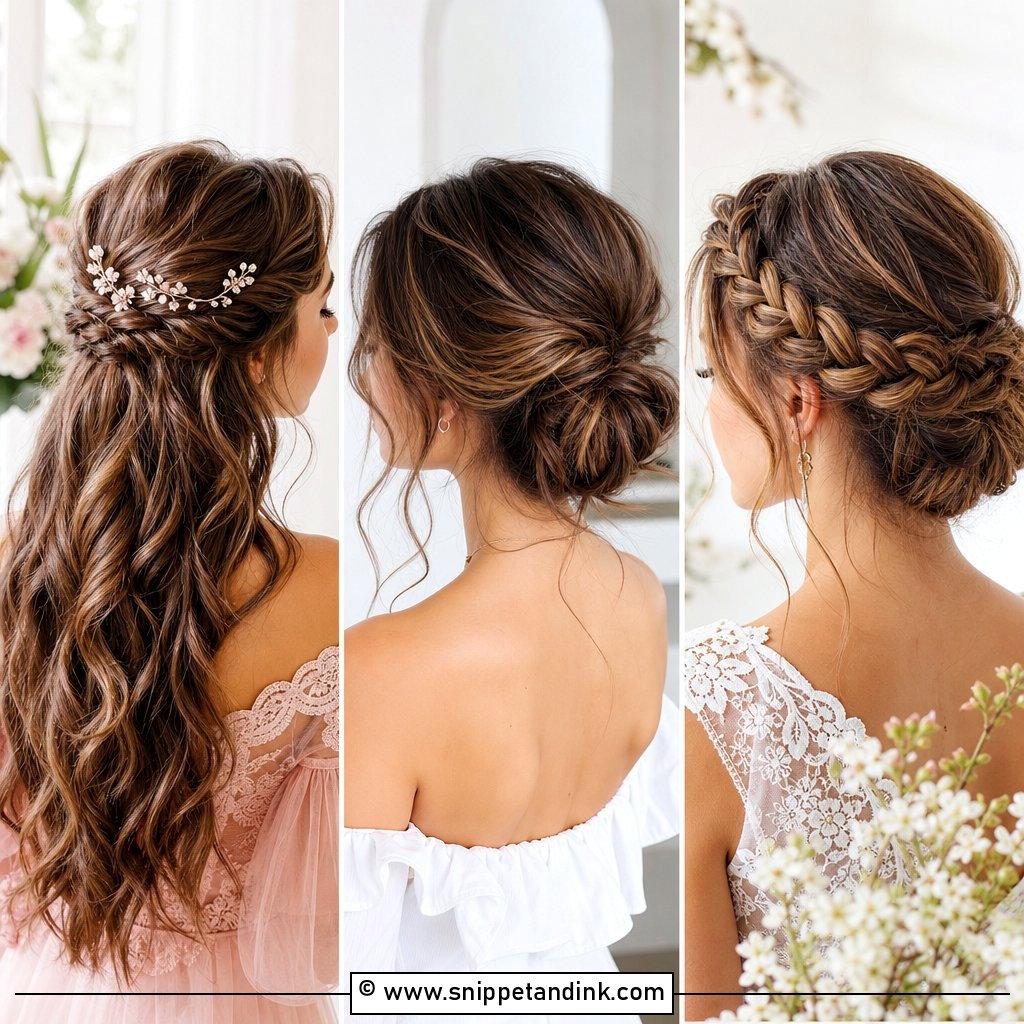
For longer bobs, a low bun at the nape with loose pieces at the face is the classic evening option. The hair must reach the nape; if the back is shorter, I make two small twists rather than one bun. Pins go in at a slant toward the center of the bun. A small comb or sparkly pin finishes it, and it shows earrings and neckline well.
21. Bob With Deep Side Part and Waves
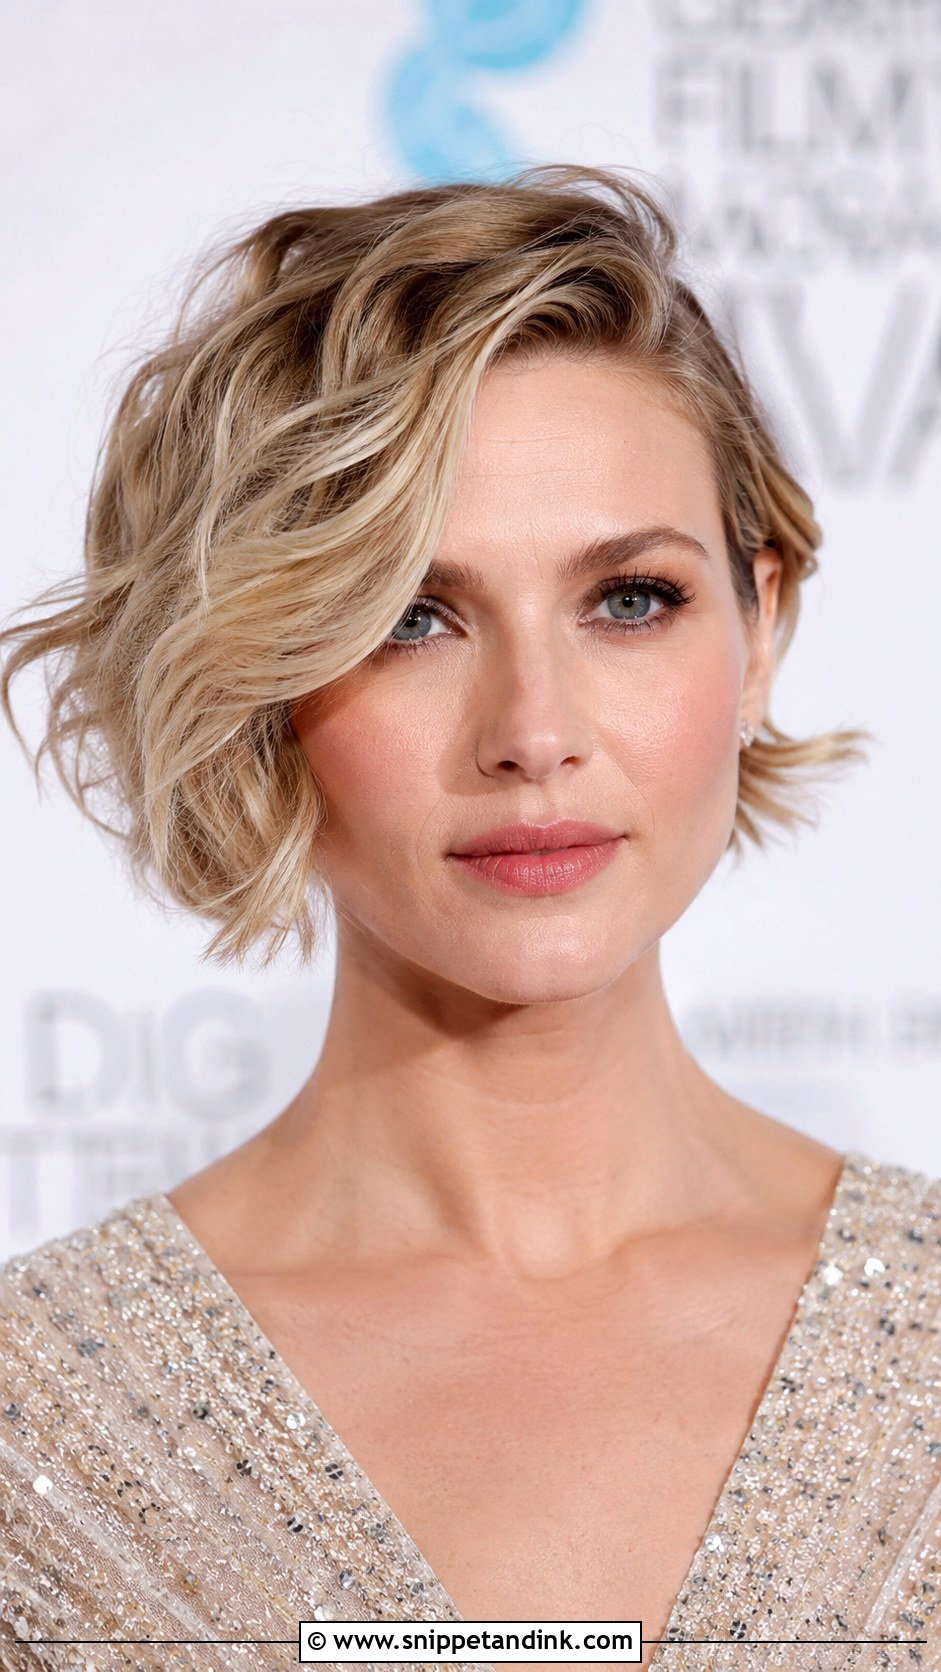
A deep side part with loose waves gives a bob more volume on one side and a strong sweep across the forehead. I wave with a curling wand, then brush gently so the waves join. Shine spray finishes it. It works for daytime and evening. A deep-parted wavy bob suits most face shapes, though a very low part on a cowlick can fight you all day.
22. Pixie With Sparkly Headband
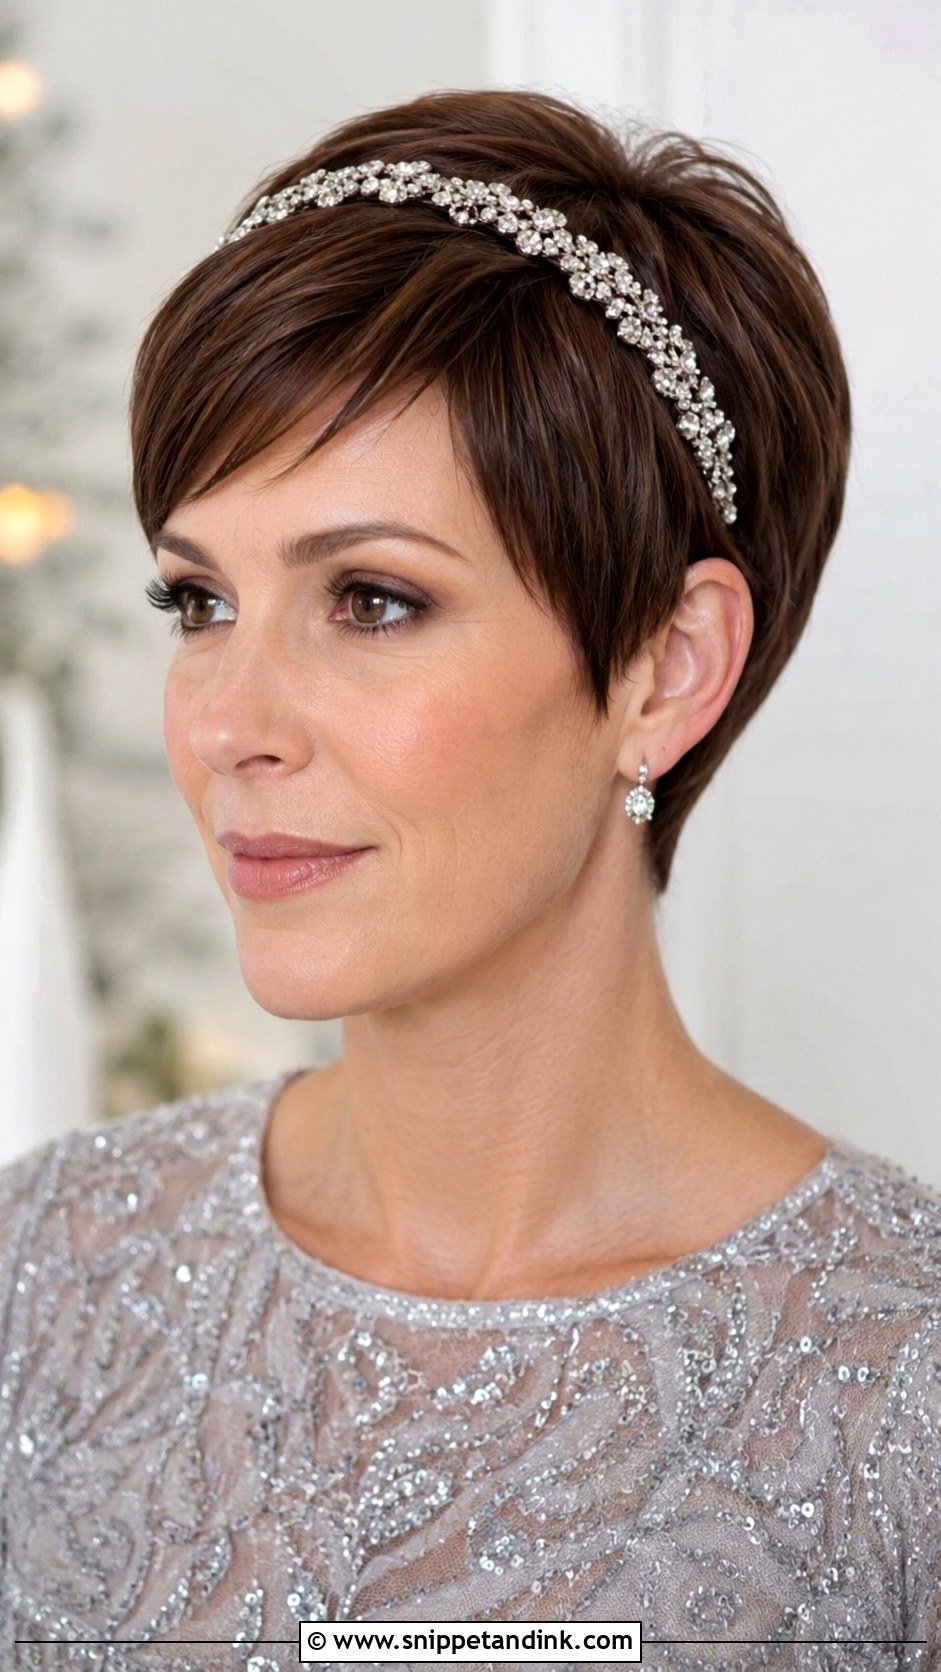
A crystal or pearl headband on a smooth pixie is the fastest dressed-up style here. It frames the face and works on sleek or textured finishes. Pixie hair is short enough that a headband can slip backward, so I choose one with small teeth on the inside or pin it at each side behind the ears. Choose one that complements your outfit.
23. Romantic Curled Lob
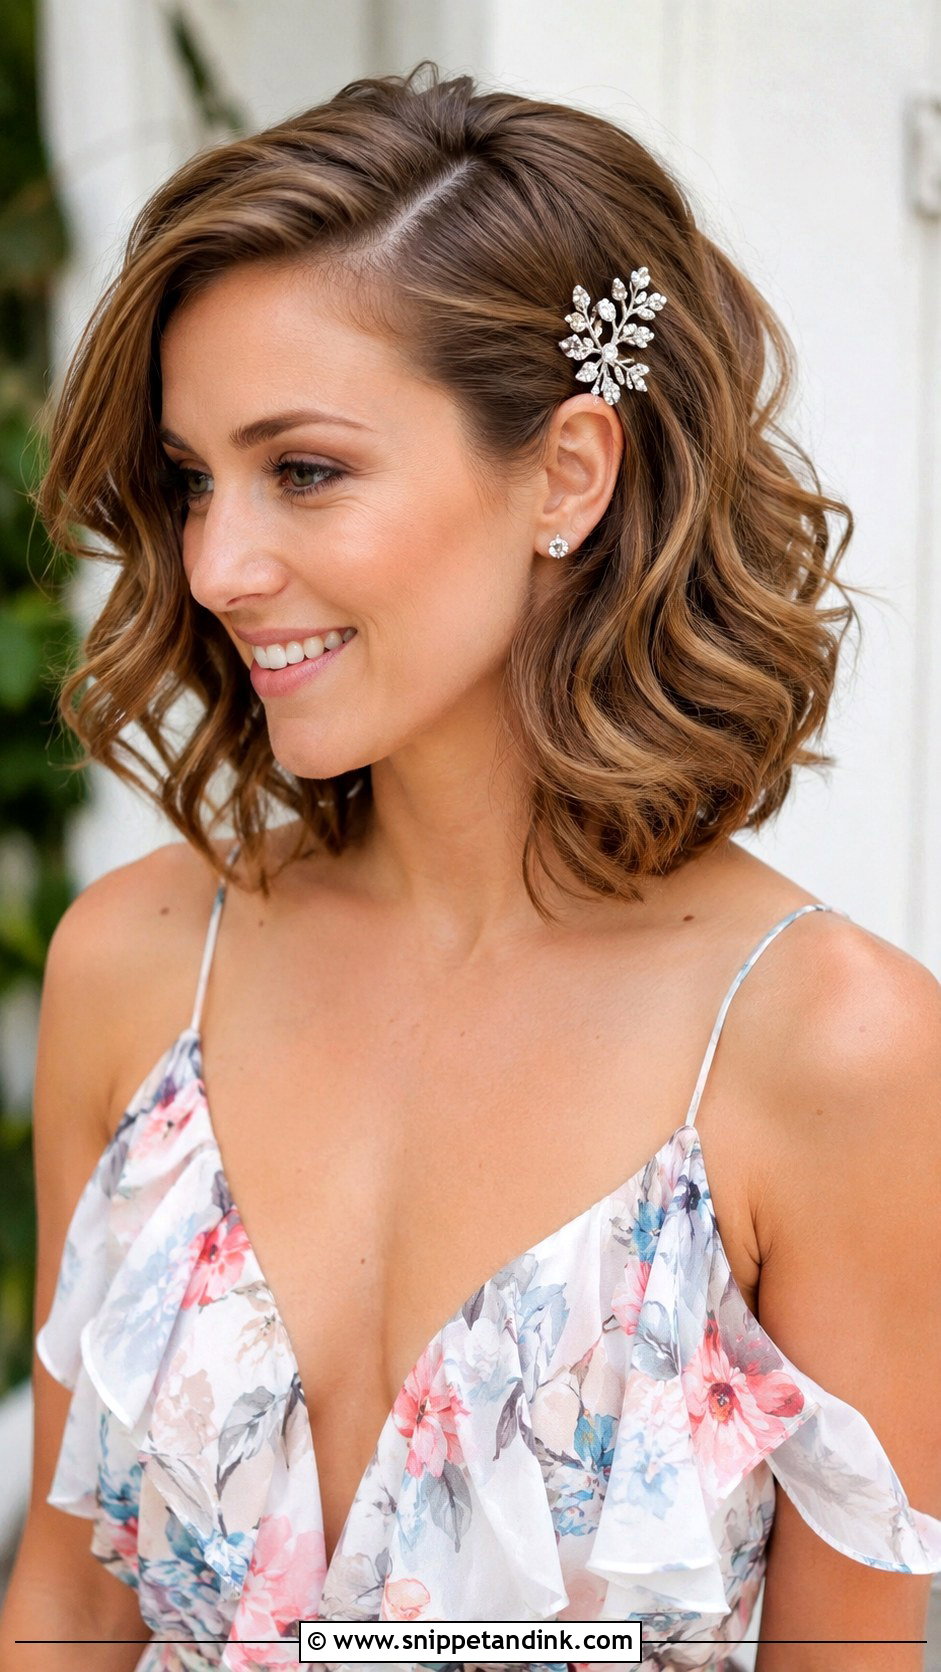
Large barrel curls, loosened with the fingers, give a medium-short cut body and an airy shape suited to spring and summer weddings. I pin each curl up to cool before releasing it, which makes the curls last longer. Side part, a few curls tucked behind one ear with a pin. A romantic curled lob suits most face shapes.
24. Sleek Asymmetrical Bob
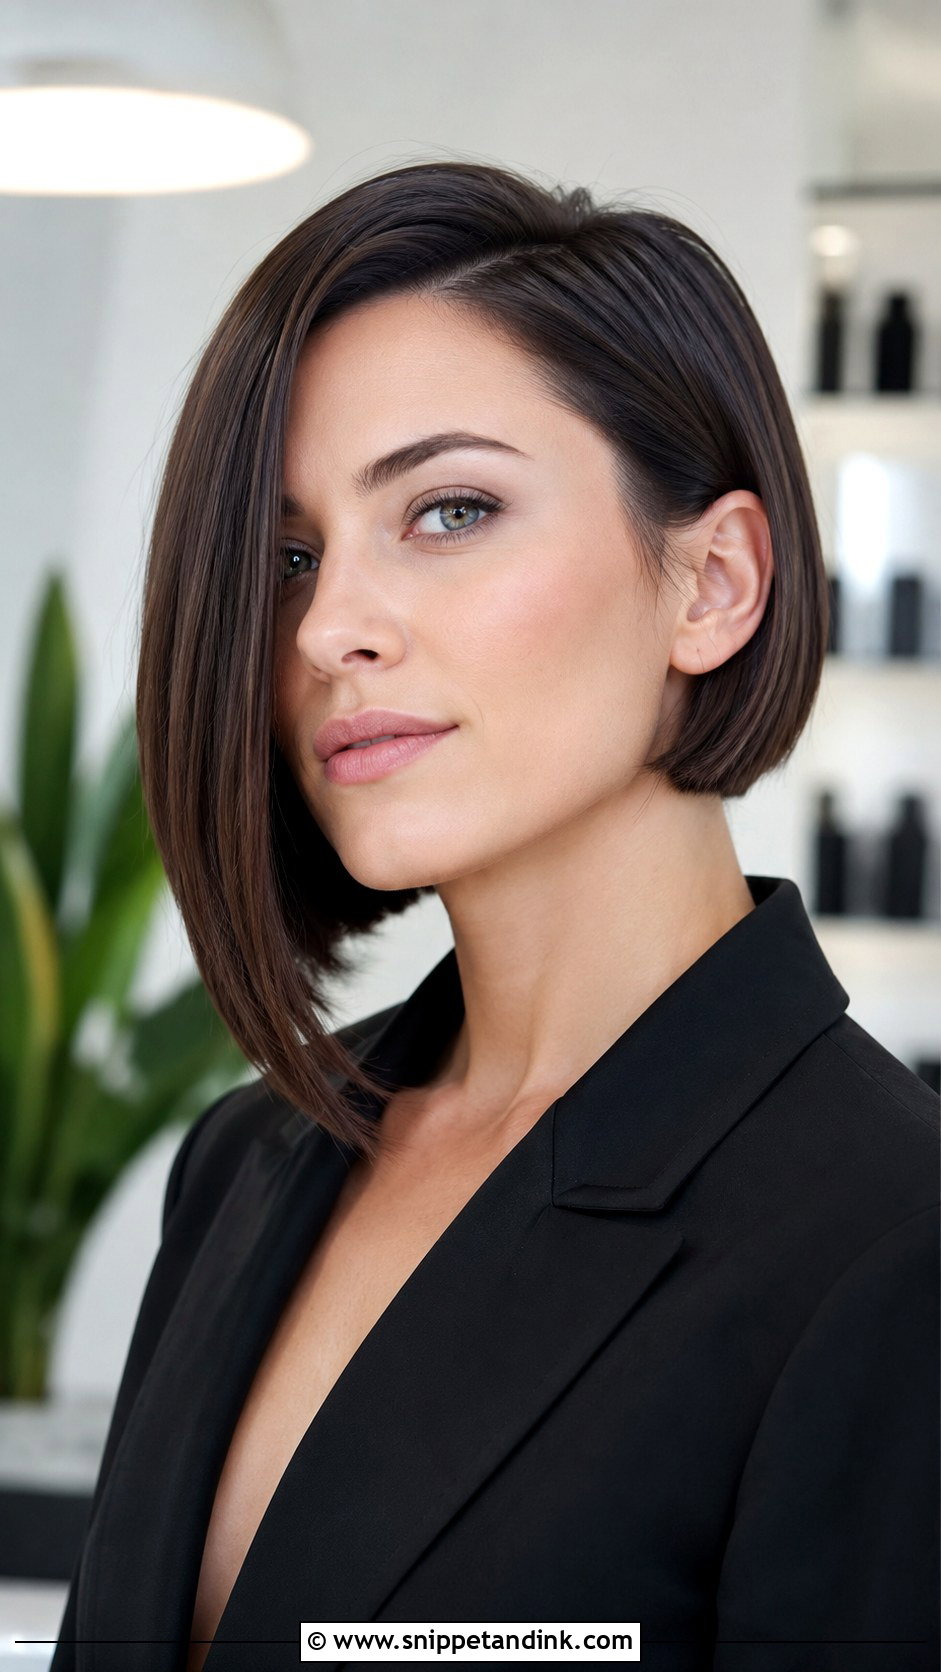
An asymmetrical bob already has a strong shape, so it needs very little styling. Flat-iron it and add shine serum, and wear a deep side part on the longer side to exaggerate the angle. It suits contemporary weddings. The longer side tends to swing forward, so I tuck it behind the ear for the ceremony and let it fall afterward.
25. Half-Up Pixie With Twists
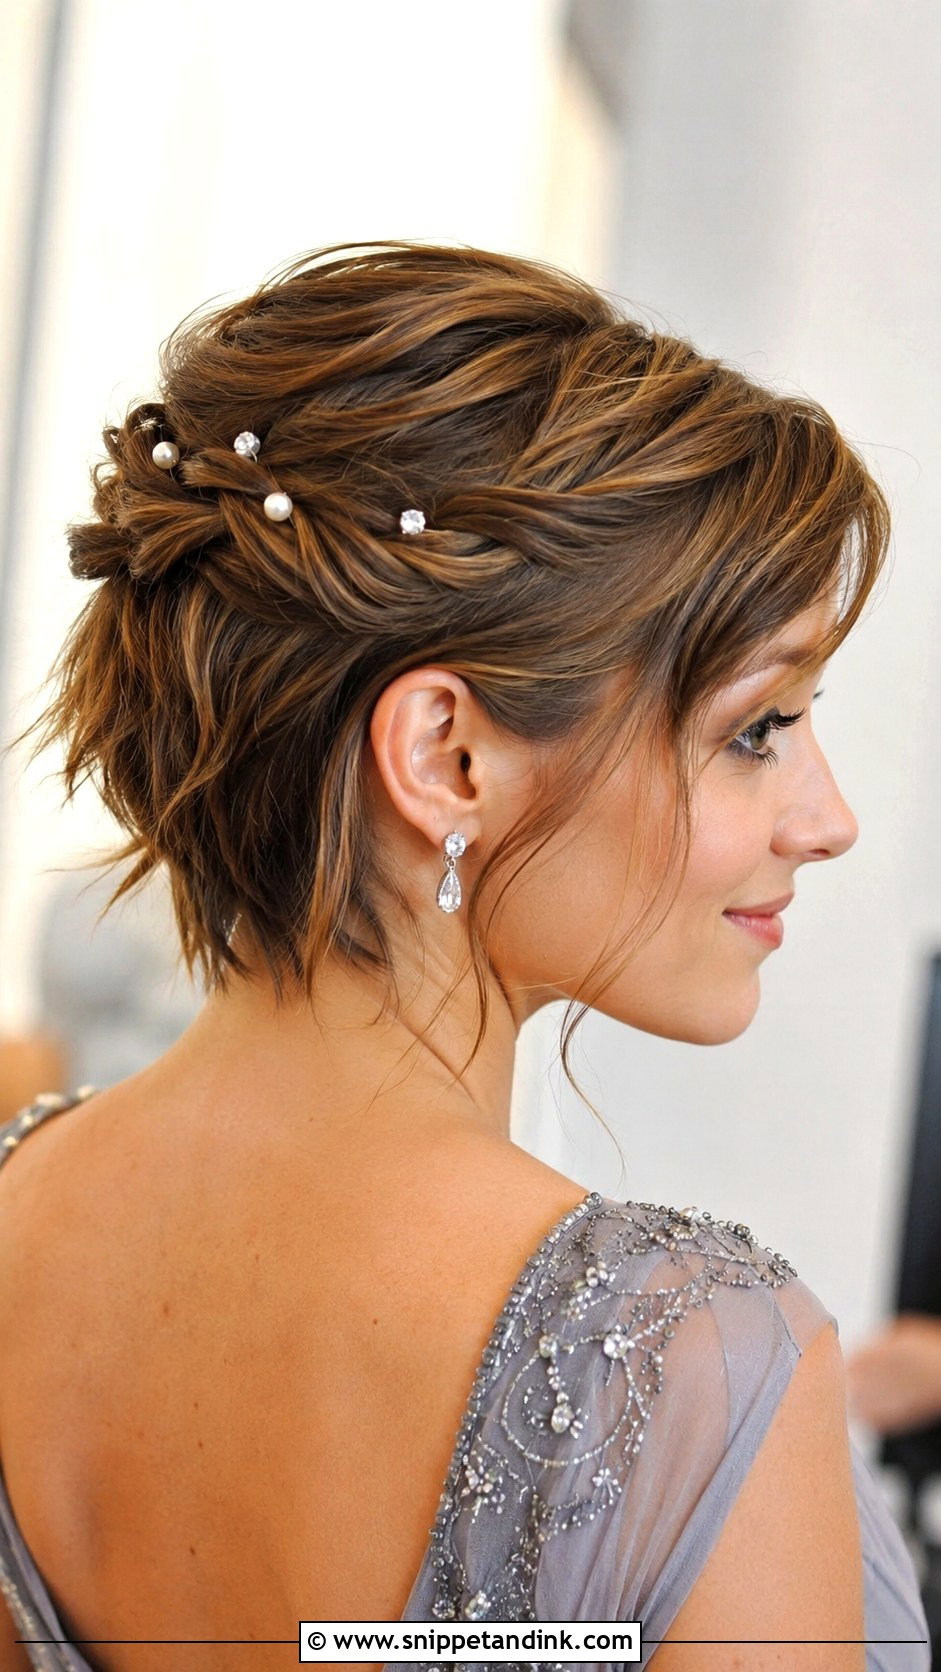
Small twists pinned back from the top and sides give a pixie a half-up look and show off the texture of the cut. I twist each section tightly and pin it with mini bobby pins, which are short enough to disappear into a pixie. Leave a few wispy pieces out, and add pearl or crystal pins to the twists if you want.
When to Cut and Color Before the Wedding
With short hair, the cut is half the style, and a fresh one shows. A pixie or a blunt bob looks crispest about a week after cutting, once the lines have relaxed slightly. Earlier than that, the neckline can look shaved; much later, the shape softens and the sides start to puff over the ears. If you’re coloring, book it a week or two ahead so the tone settles and any patches can be corrected.
Don’t change your cut drastically right before the wedding. A new shape needs a couple of weeks for you to learn how it falls and which side your part prefers.
Heat, Humidity and an Outdoor Ceremony
Short hair reacts to weather quickly. Sleek bobs puff and pixies lose their lift in humid air, and curls set with heat relax faster than on long hair. For an outdoor or summer wedding, choose styles that rely on product rather than heat: slicked-back, finger waves, twists or tucked sides. Use an anti-humidity spray before you leave, and keep a mini comb and a few spare pins in your bag. A quick re-pin in the bathroom before the speeches is often all it needs.
Length Was Never the Limit
Short hair gives you plenty of choice for a wedding: sleek bobs, finger waves, half-up twists, a jeweled pixie. Choose the style that feels like you and suits the dress code, then plan your grip, since that’s what decides whether it lasts. A pearl pin, a headband or a single flower is usually enough decoration. Walk in with a style you trust and you won’t think about your hair again until the last dance.
You'll Like These Ideas:


Leave a Reply