
Wedding invitation on the fridge and no idea what to do with your hair? Most guests are in the same spot. What you need is a style that holds through the ceremony, dinner and a few hours on the dance floor, and that you can actually do in your own bathroom mirror. The wedding guest hairstyles below are the ones I’d happily teach a friend in a single sitting: low buns, ponytails, braids, waves and a couple of sleek short options. For each one I’ve added what actually makes it hold, and who should probably skip it.
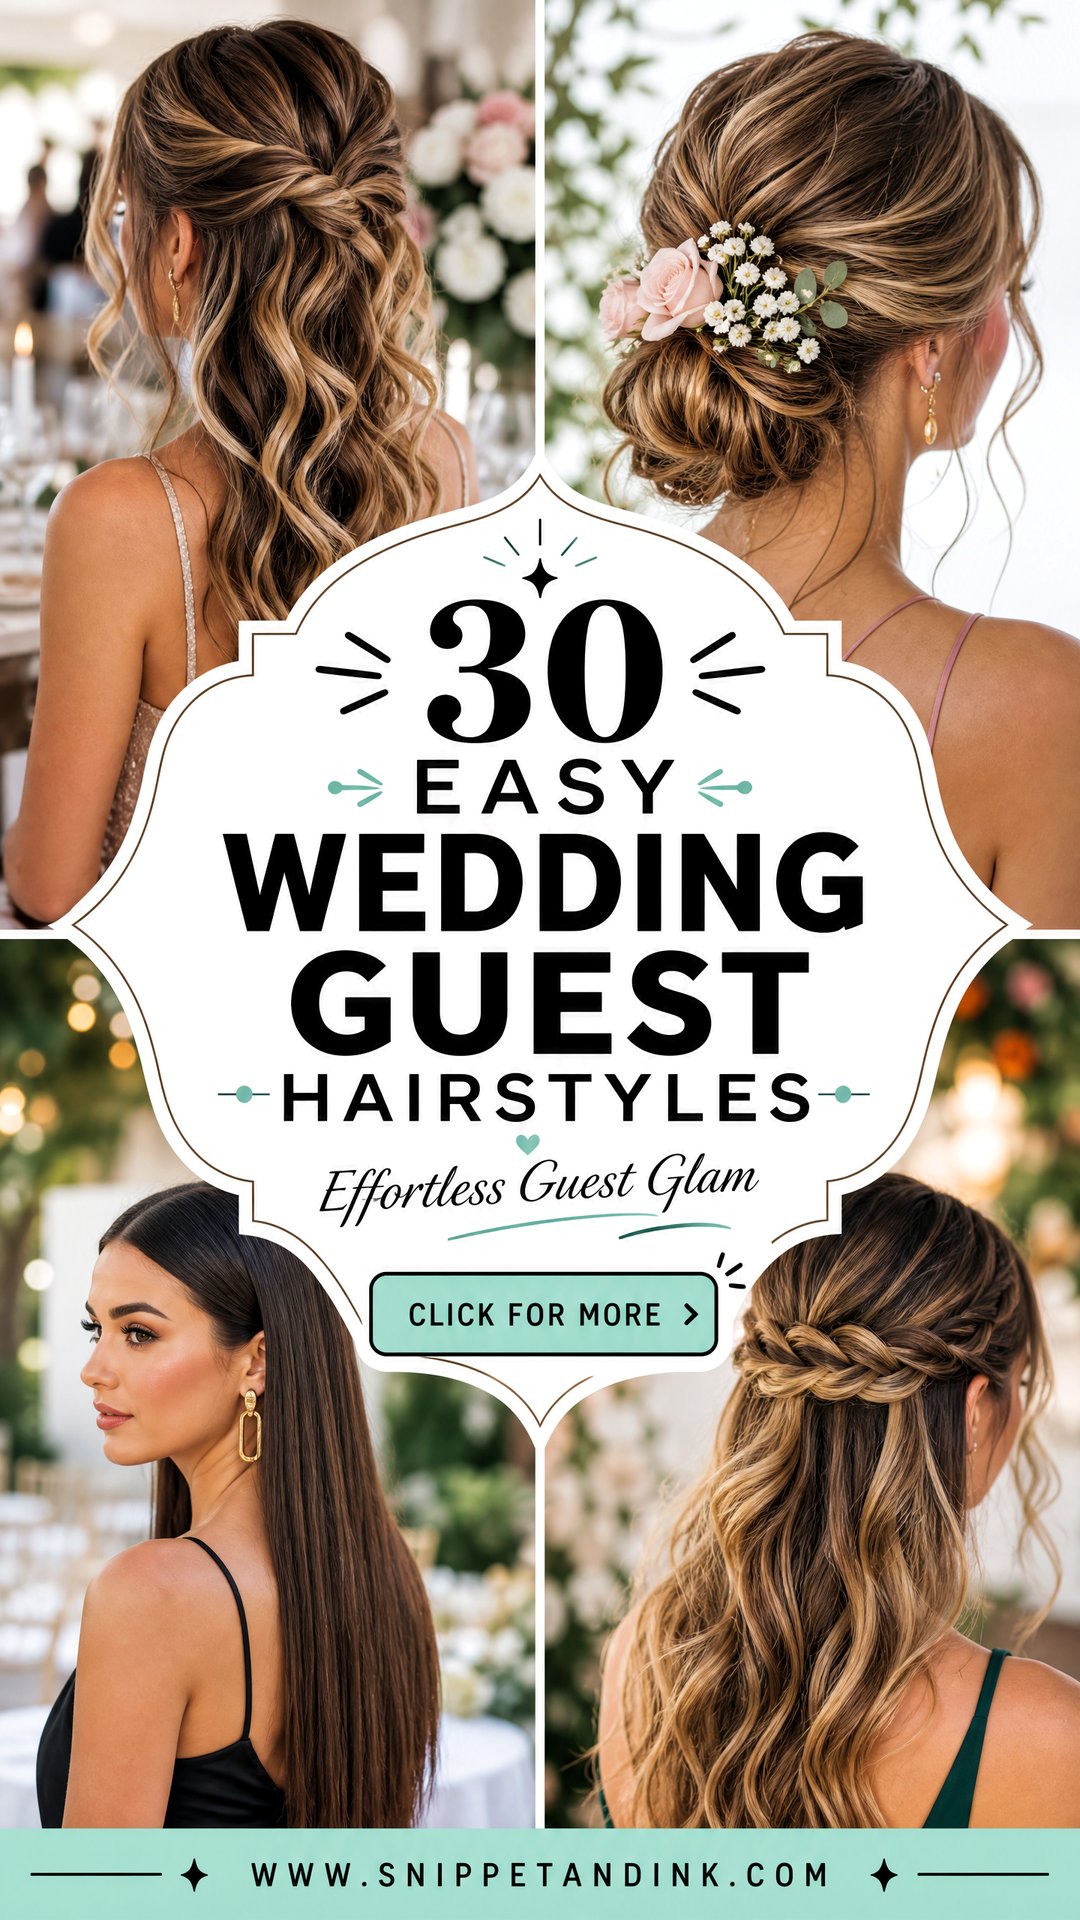
A Practice Run the Weekend Before the Wedding
Even an easy style goes wrong when you try it for the first time with forty minutes before the car arrives. I tell every guest who asks me to do one full practice run a few days ahead, wearing the same earrings and, if you can, the same neckline, so you see how it all sits together.
What to have on the counter
- Bobby pins that match your hair colour, plus U-pins for buns and twists
- A curling iron or wand sized to your length: wider for long hair, narrower for shoulder length
- Texture spray or dry shampoo for clean, slippery hair
- A flexible hairspray for the finish
- Clear elastics, which disappear far better than black ones in light hair
Wear the style for a few hours during the practice. Sit in a car, lean back against a chair, put on a jacket. That tells you more than the mirror does: whether a high bun gives you a headache, whether the curls drop by lunchtime, whether a clip digs in behind your ear.
Why second-day hair holds better
Freshly washed hair is soft and slippery, which is the opposite of what pins need. For updos and braids I’d wash the night before rather than the morning of, and let the hair’s own oils give it some grip. If your roots get oily fast, dry shampoo gives you the same grip without the shine.
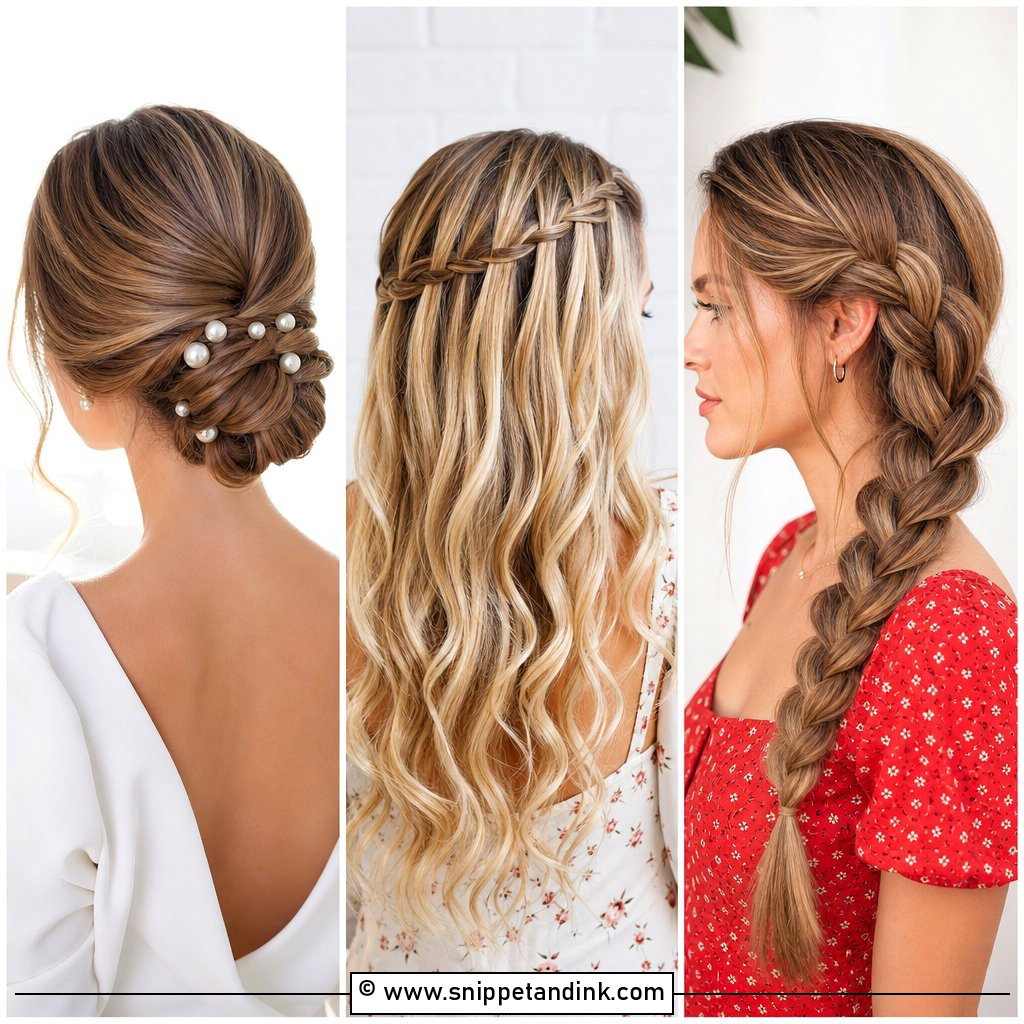
1. Low Textured Bun
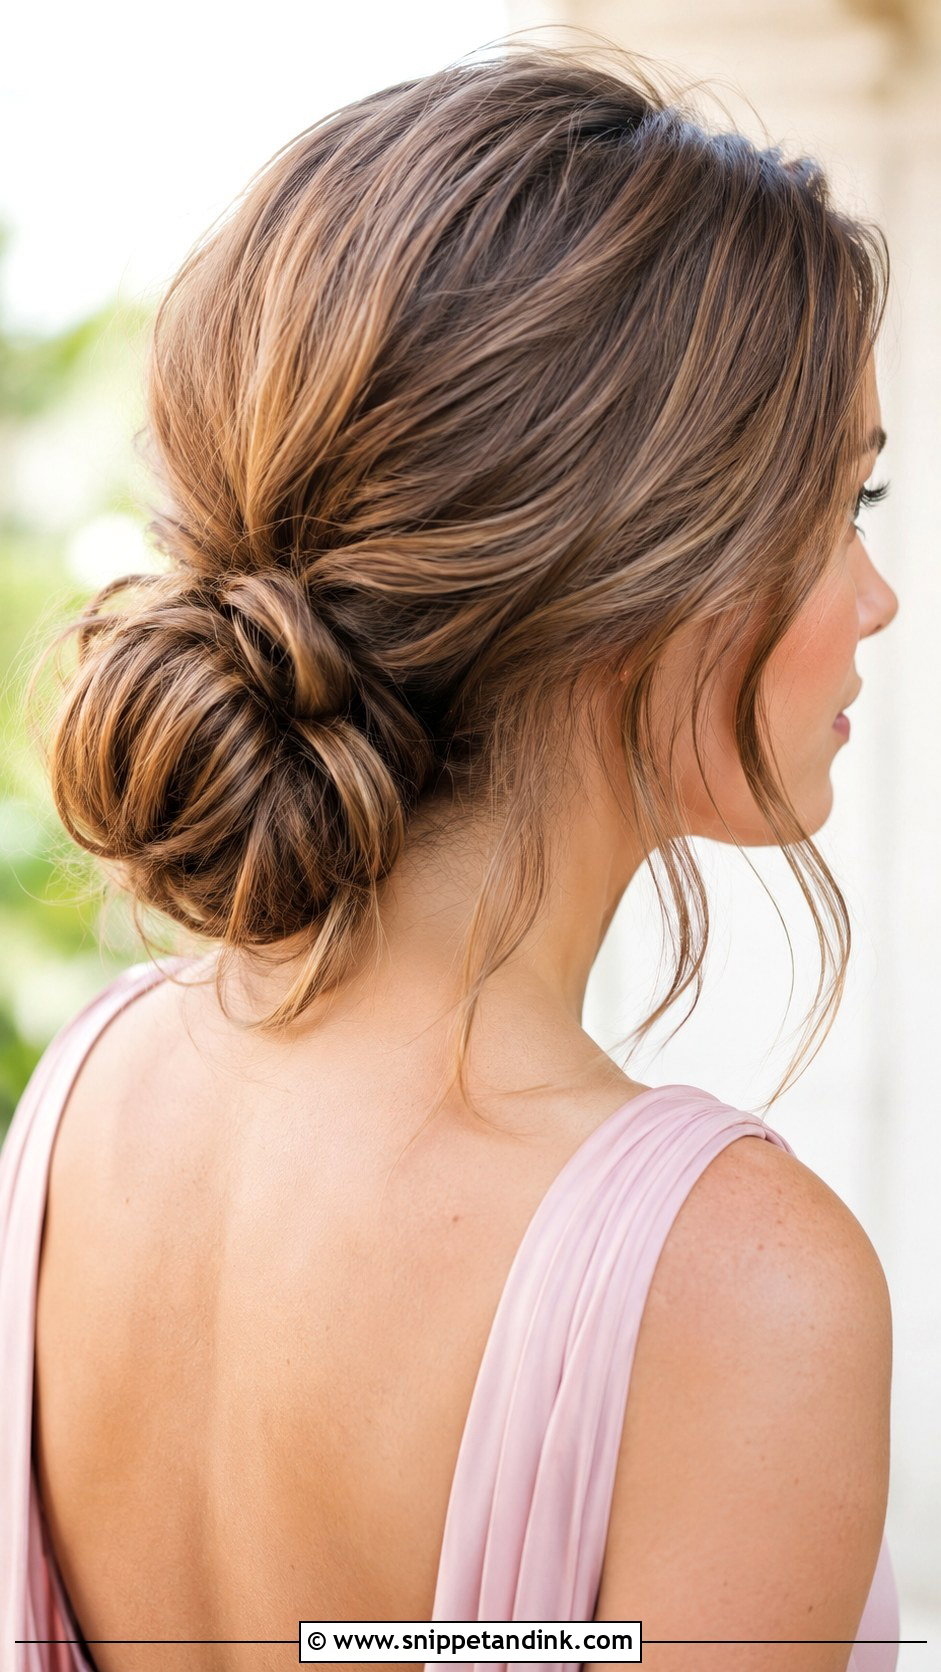
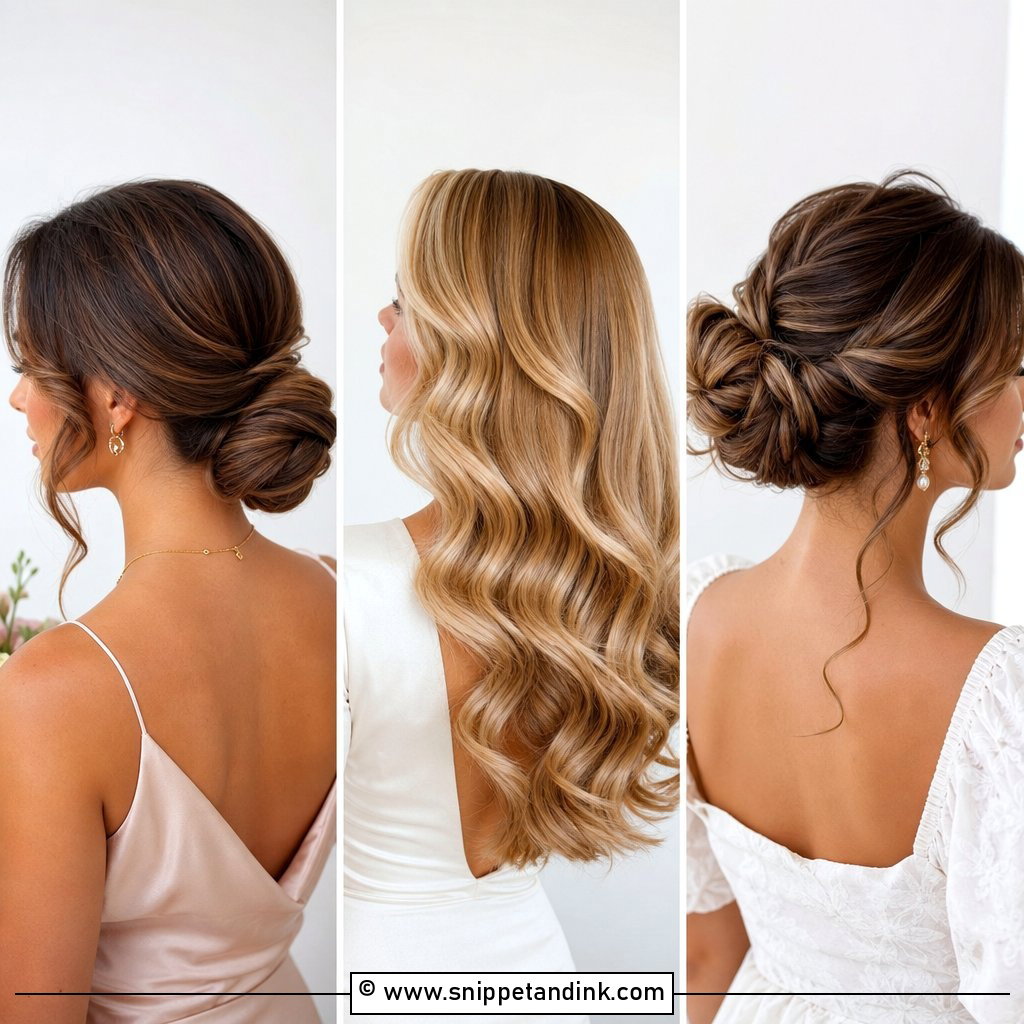
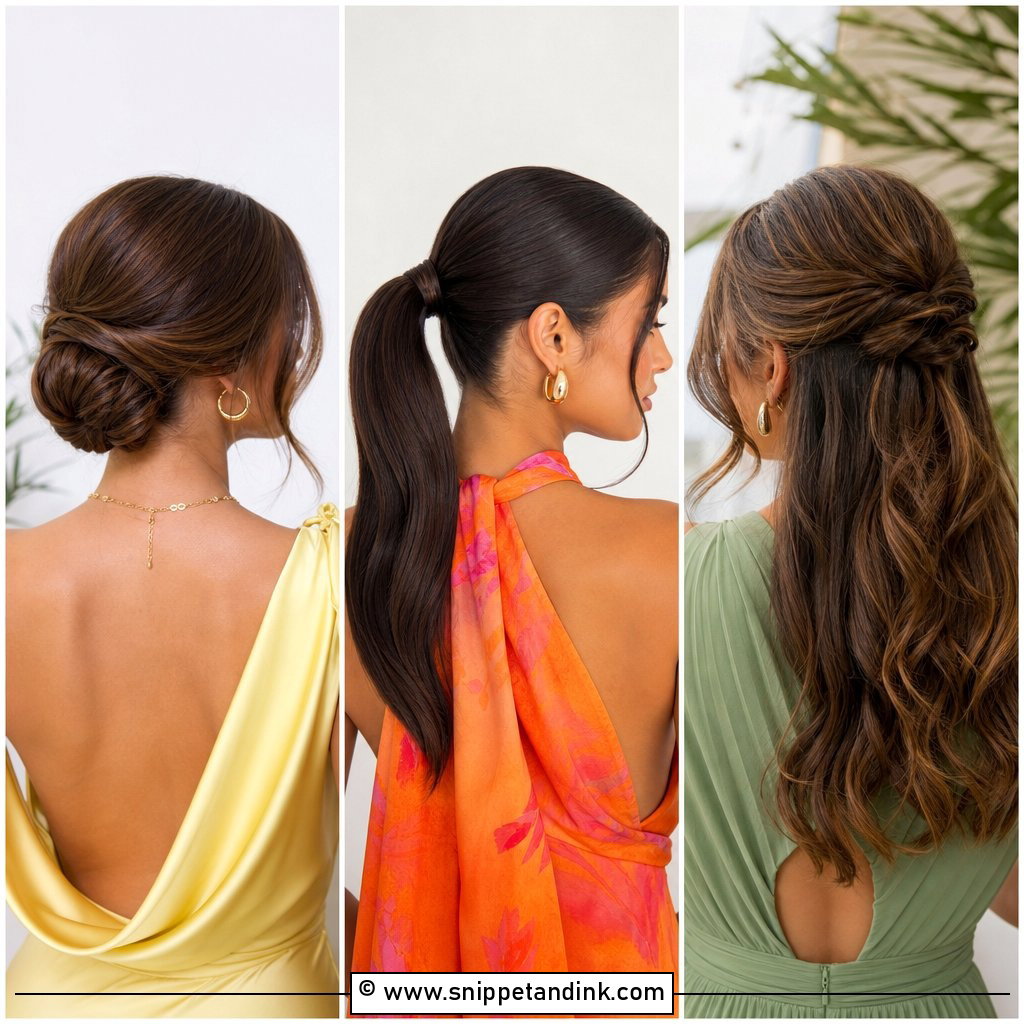
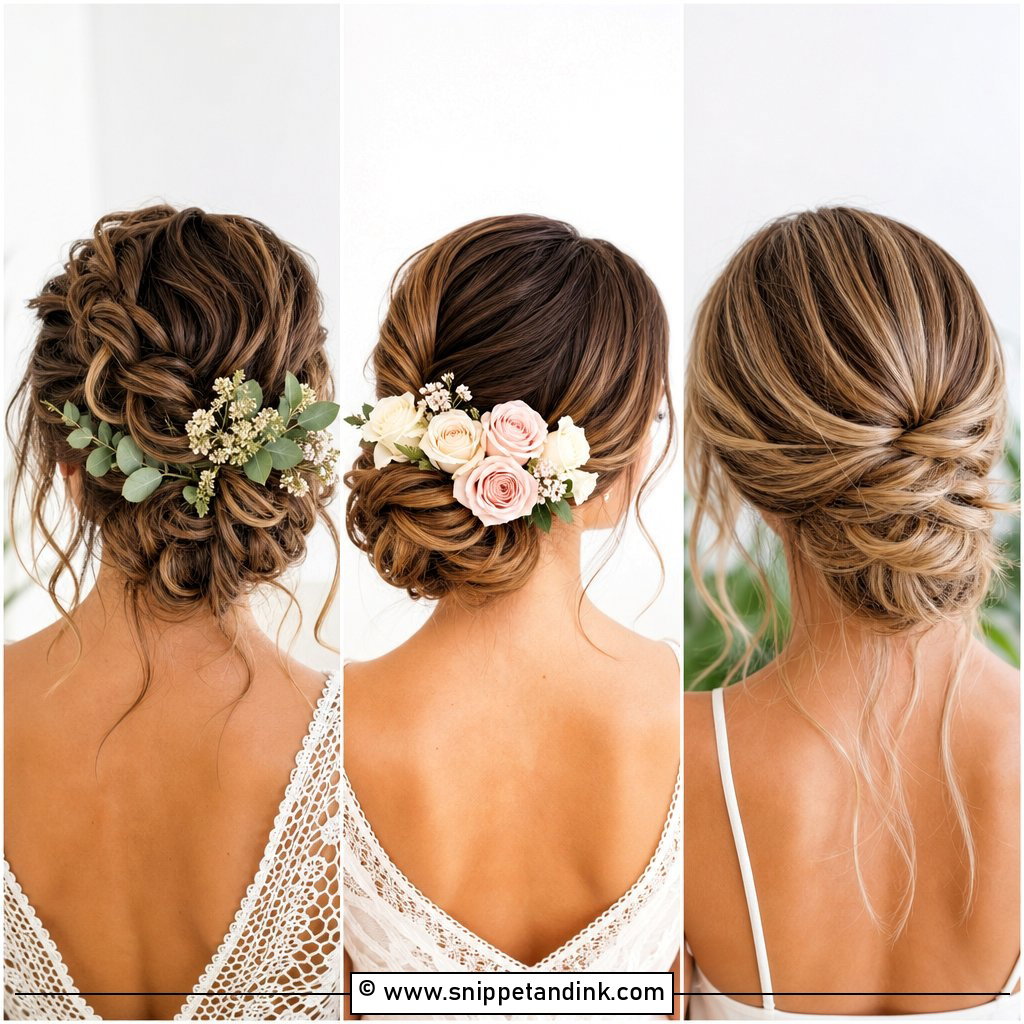
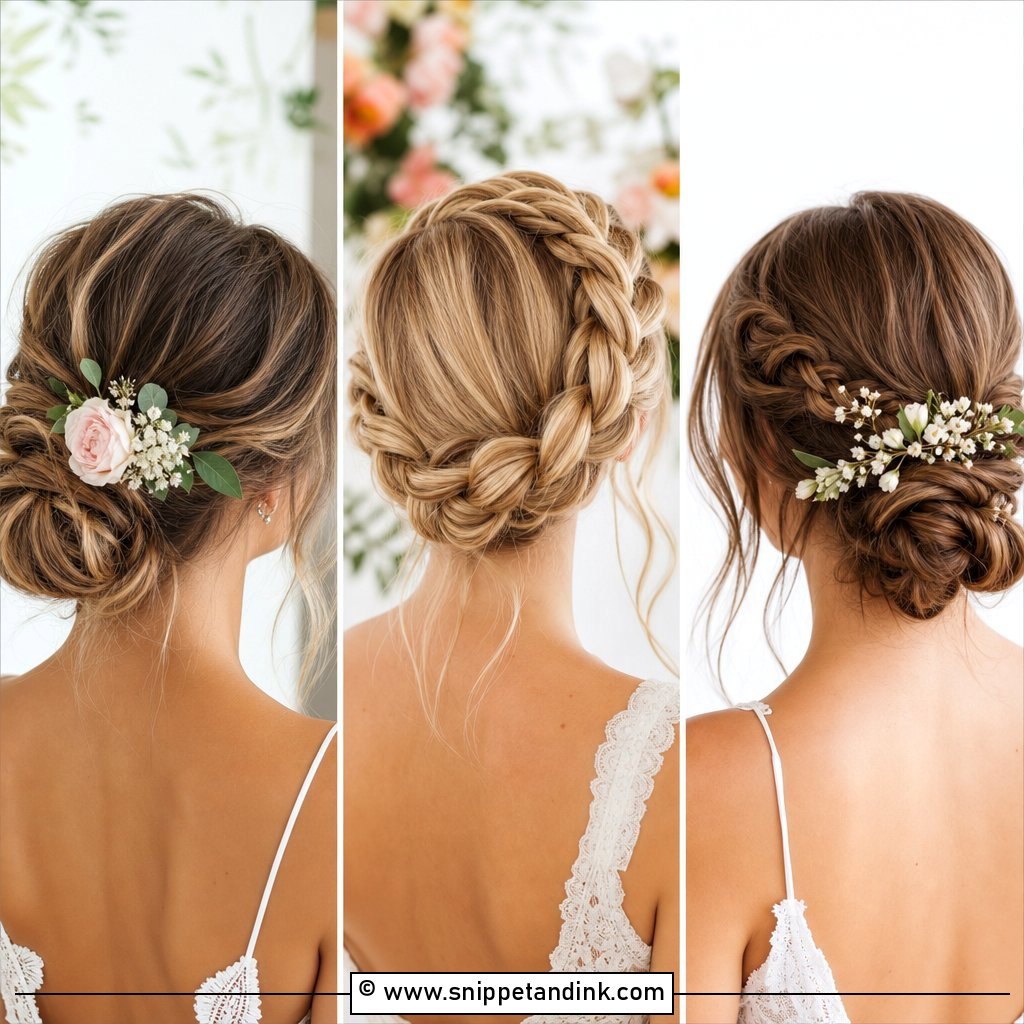
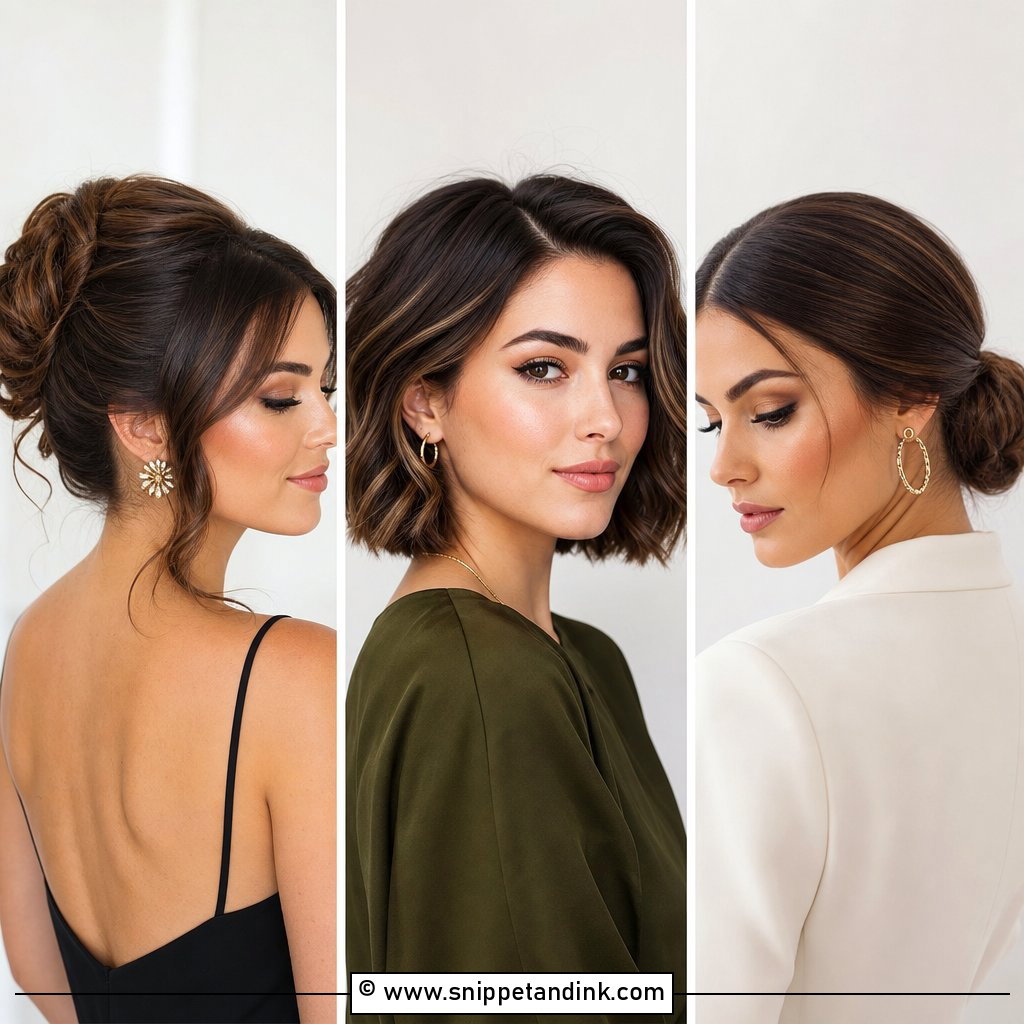
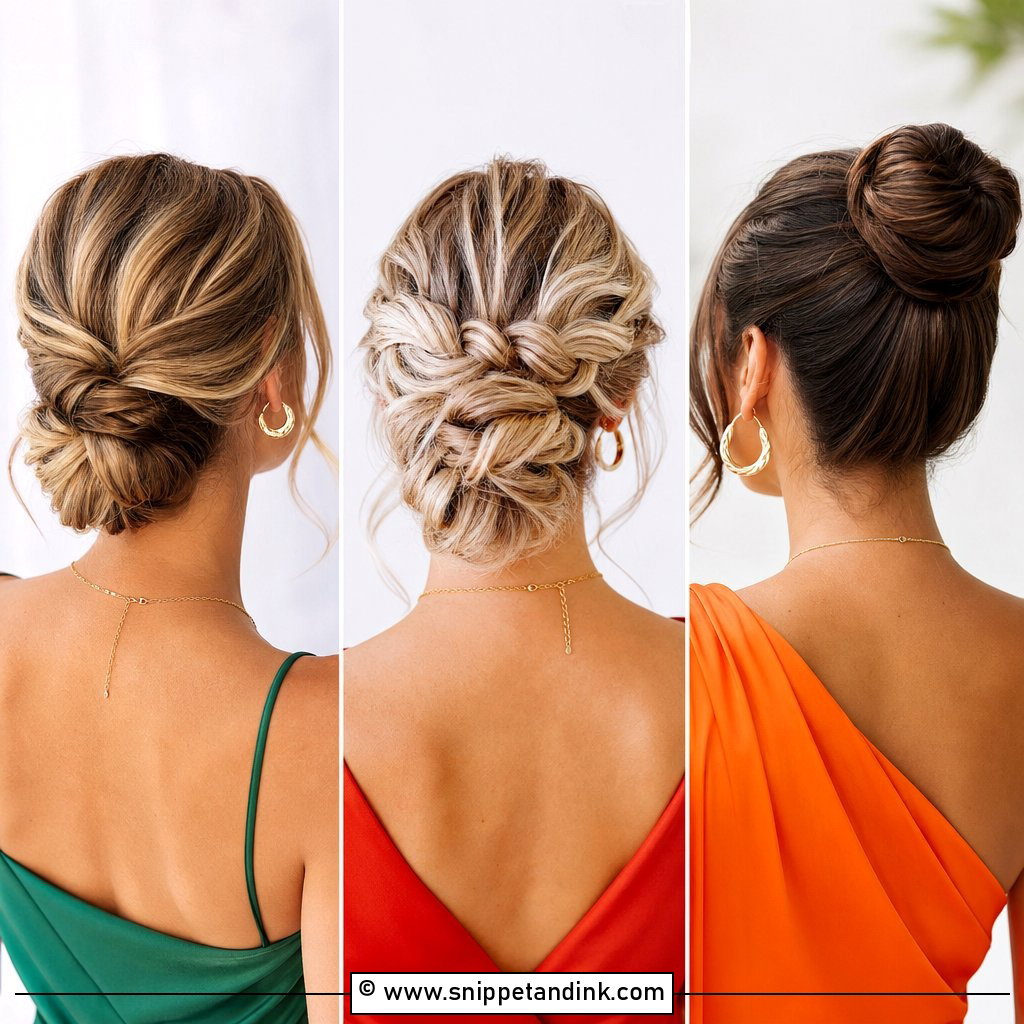
A low textured bun is the style I suggest most often to guests, because it forgives uneven layers and sits comfortably against a chair back through a long dinner. Gather your hair into a loose knot at the nape, then pin it with U-pins pushed in toward the head rather than straight down; they grip without that tight, scraped feeling. Pull a few strands loose around the face and tug the bun gently for volume. On very clean, silky hair it will slide by evening, so I work a little dry shampoo or texture spray through first. A pearl pin or small clip finishes it.
2. Sleek Low Ponytail
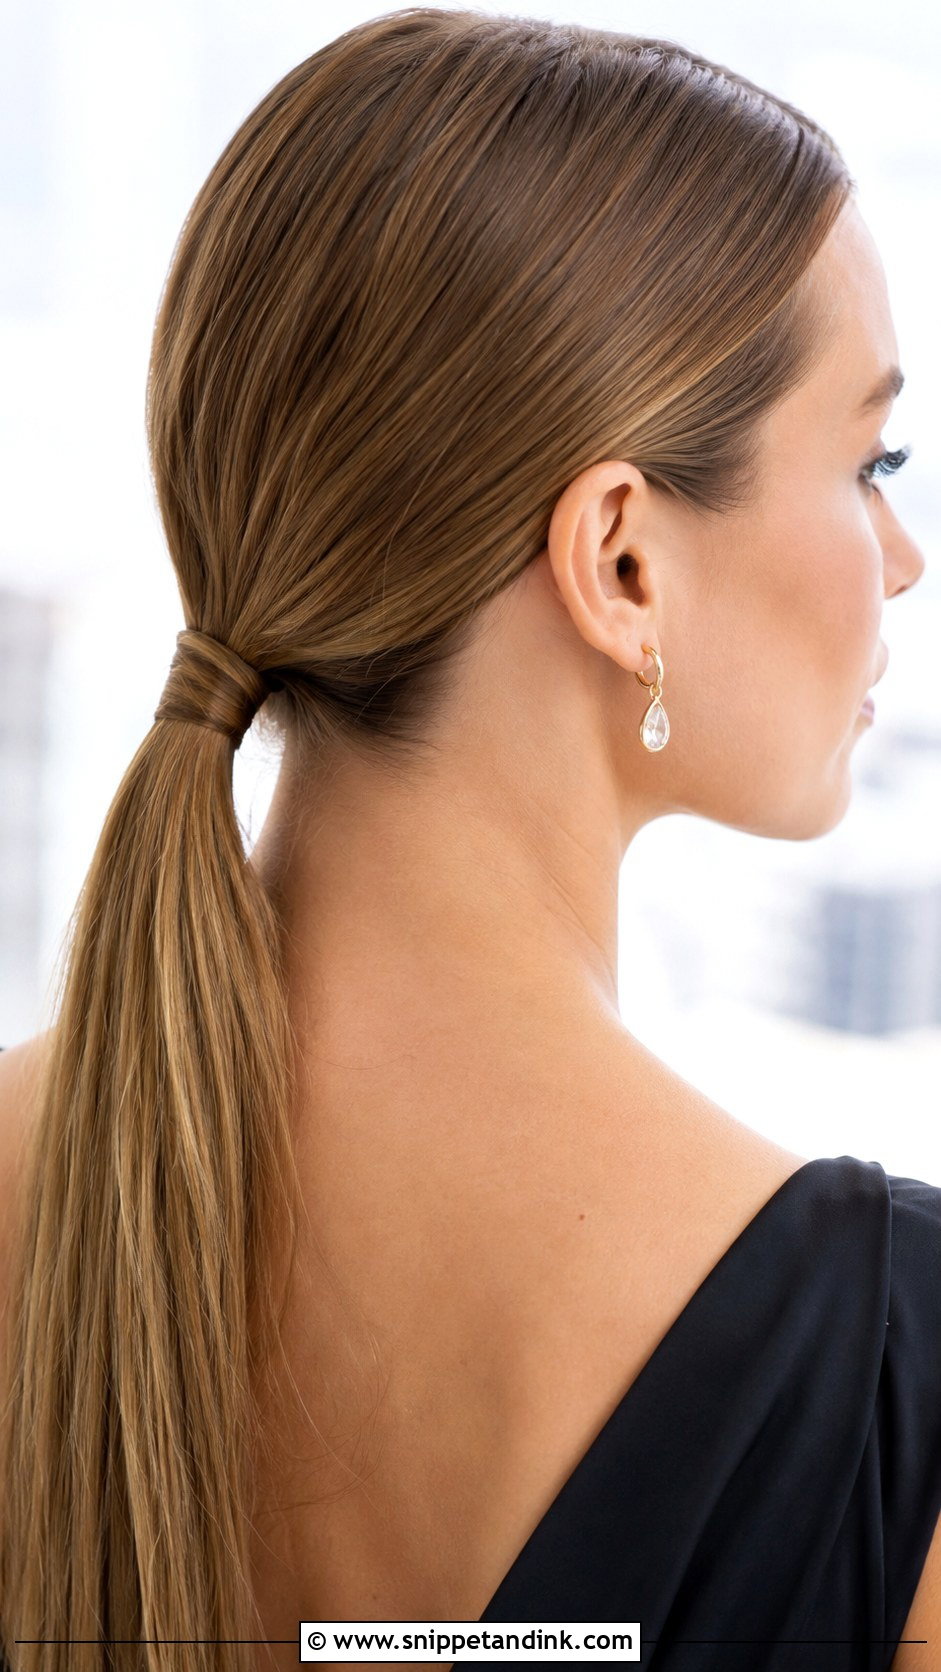
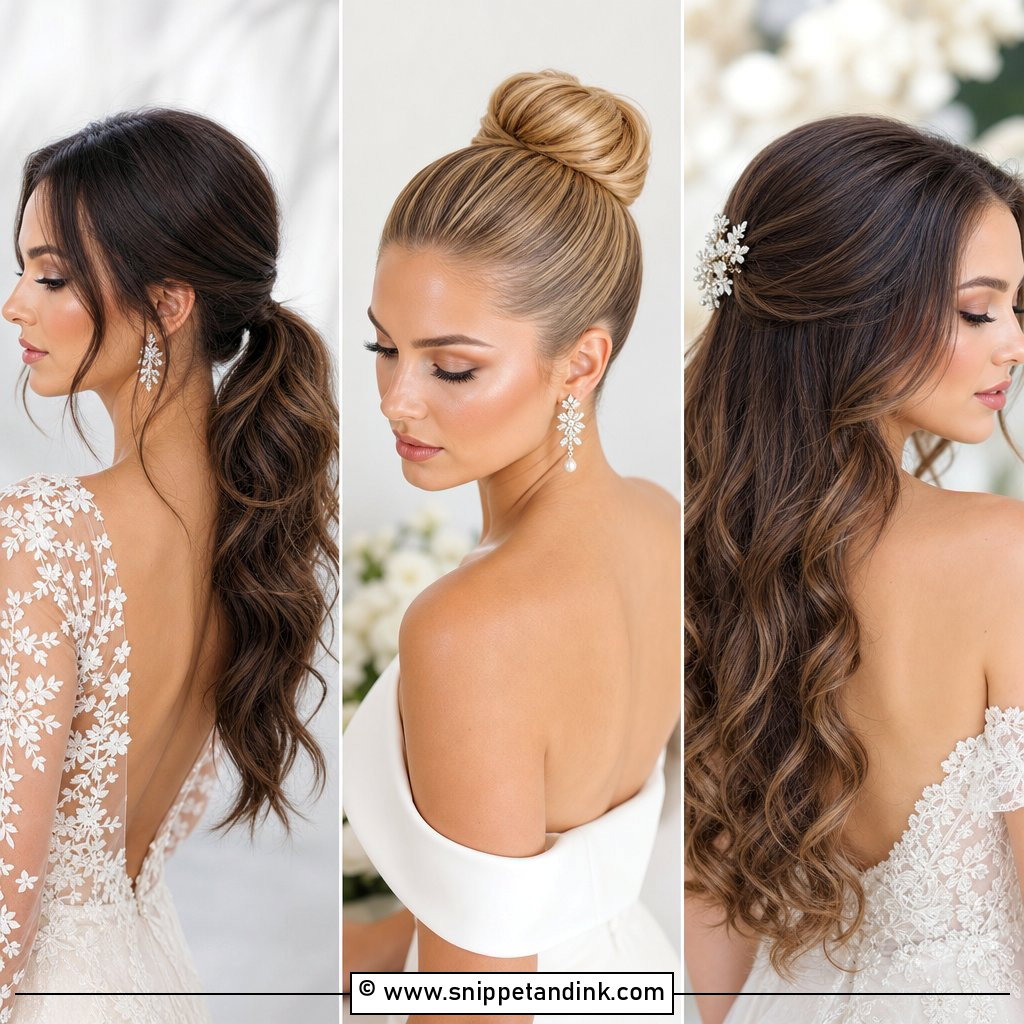
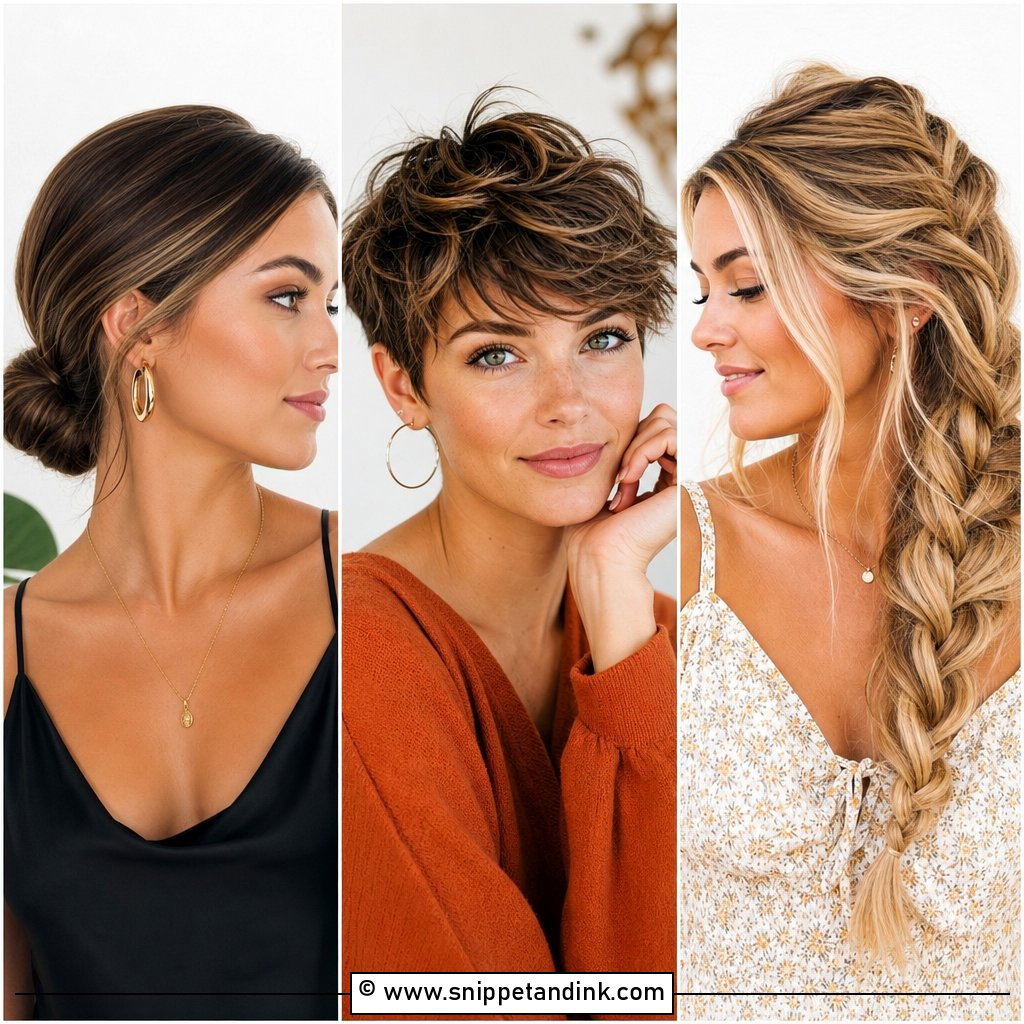
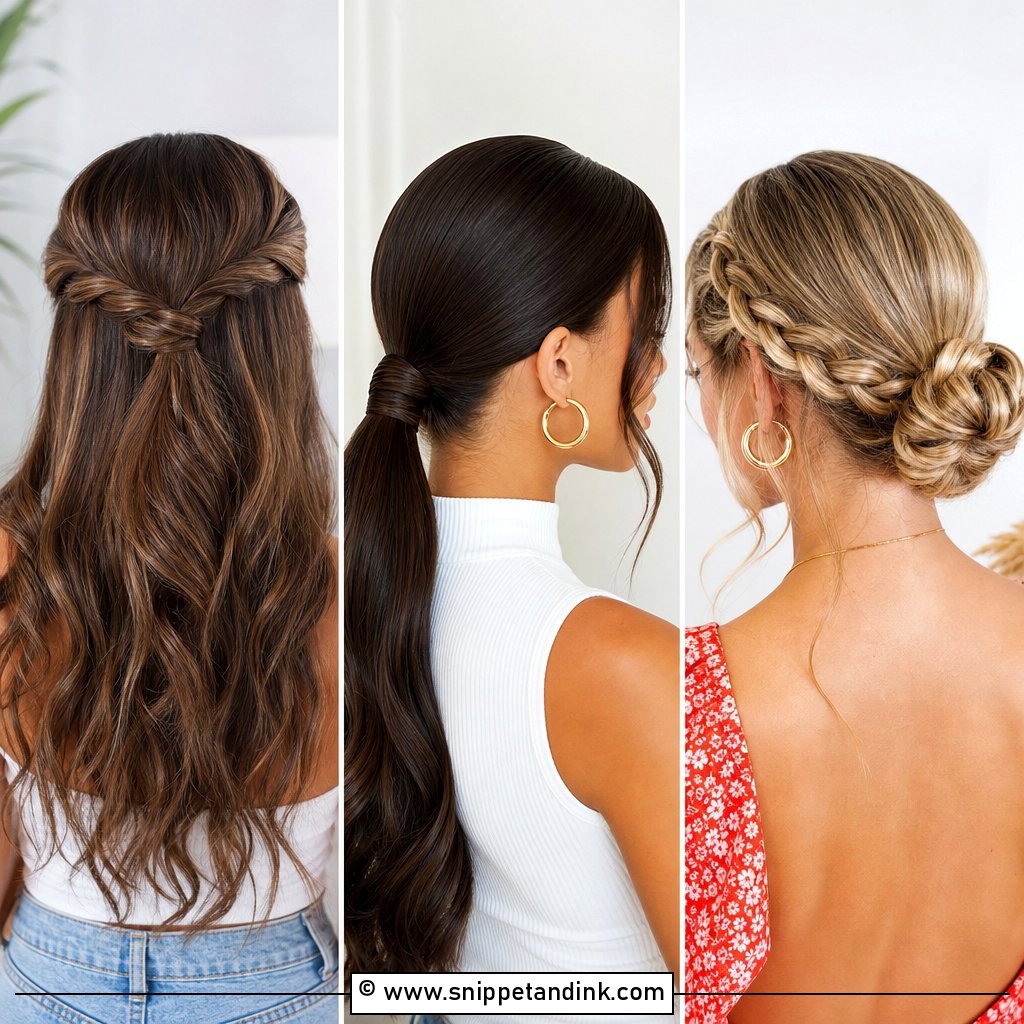
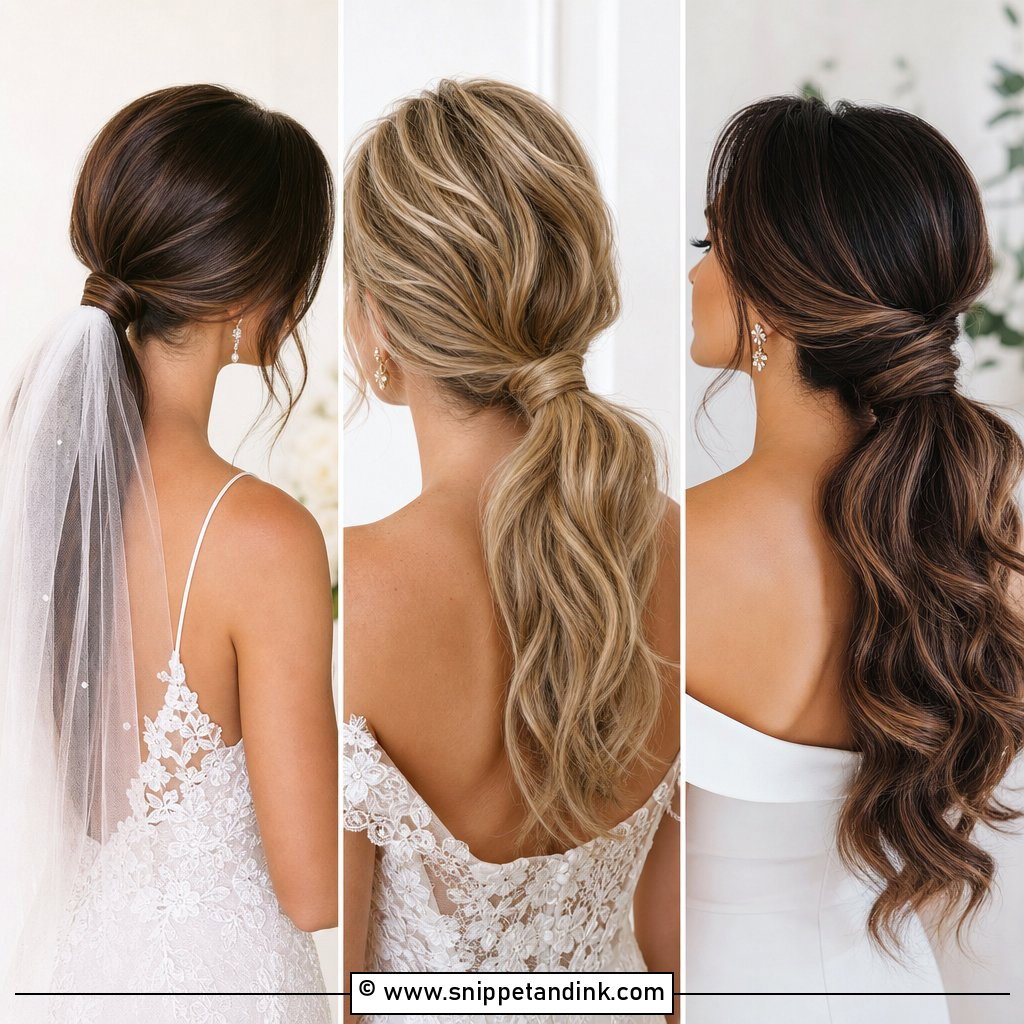
Smooth your hair back with a touch of shine serum, secure it at the nape, then wrap a small section around the elastic and pin the end underneath. That wrap is where most home versions fail: if the section is too thick, it unwinds within an hour. Take a piece no wider than a finger and tuck the end through the elastic itself before pinning. A center part reads sharp and modern, while a few face-framing pieces soften it. On a hot day it keeps hair off your neck, and it suits straight hair and gentle waves equally.
3. Half Up Half Down Curls
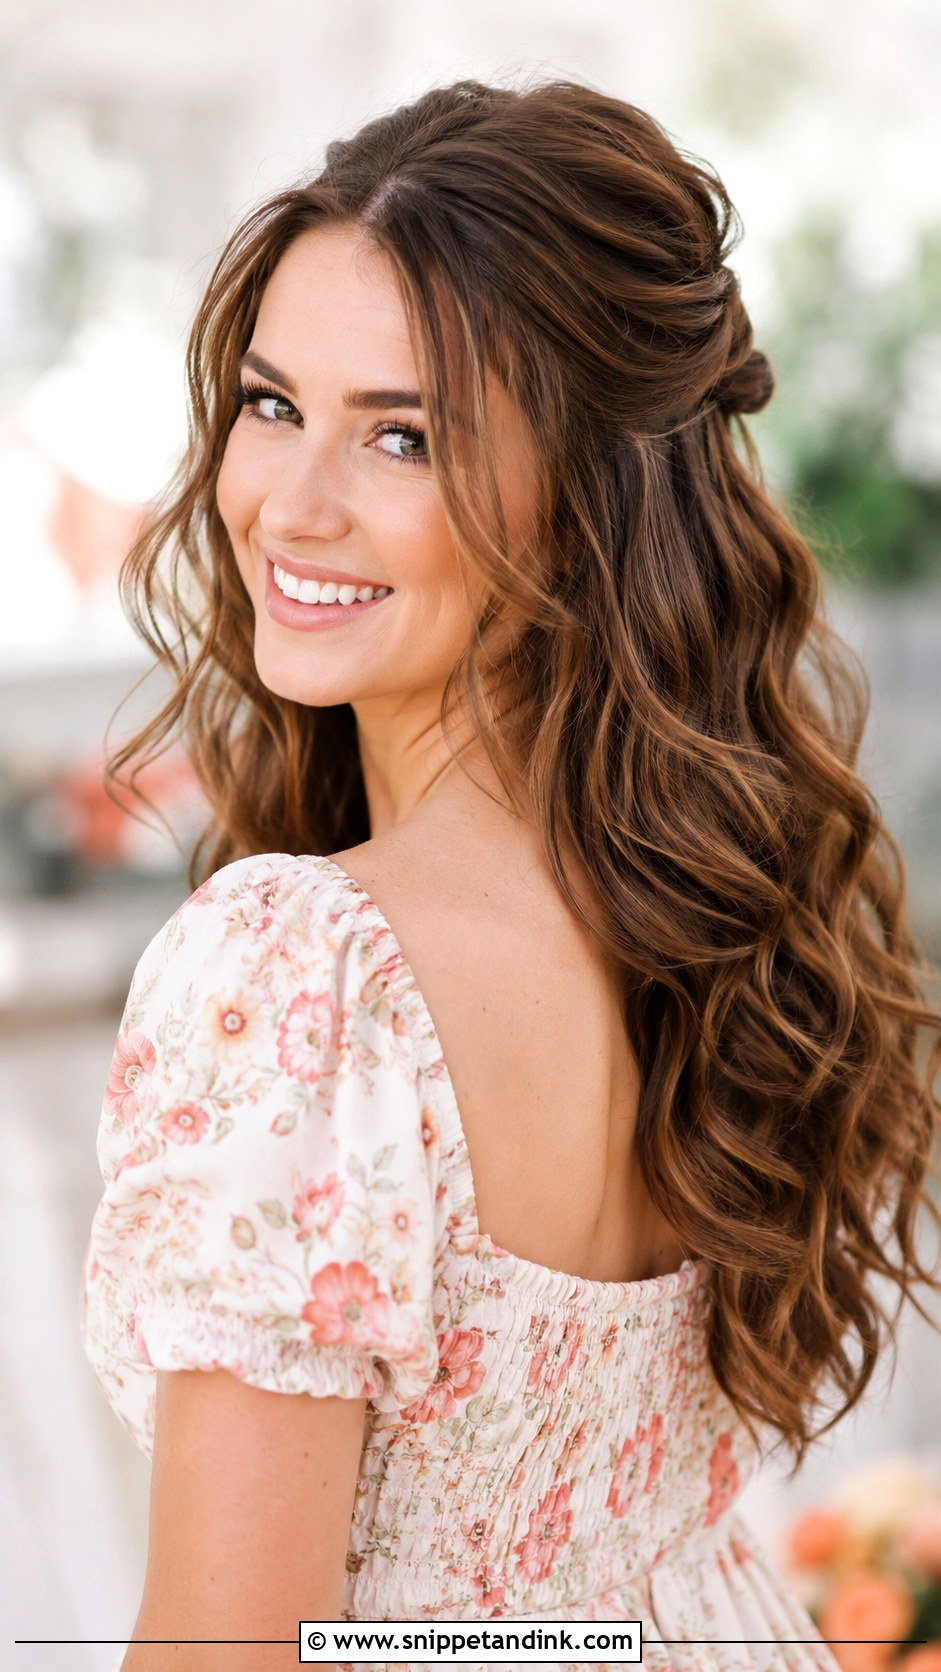
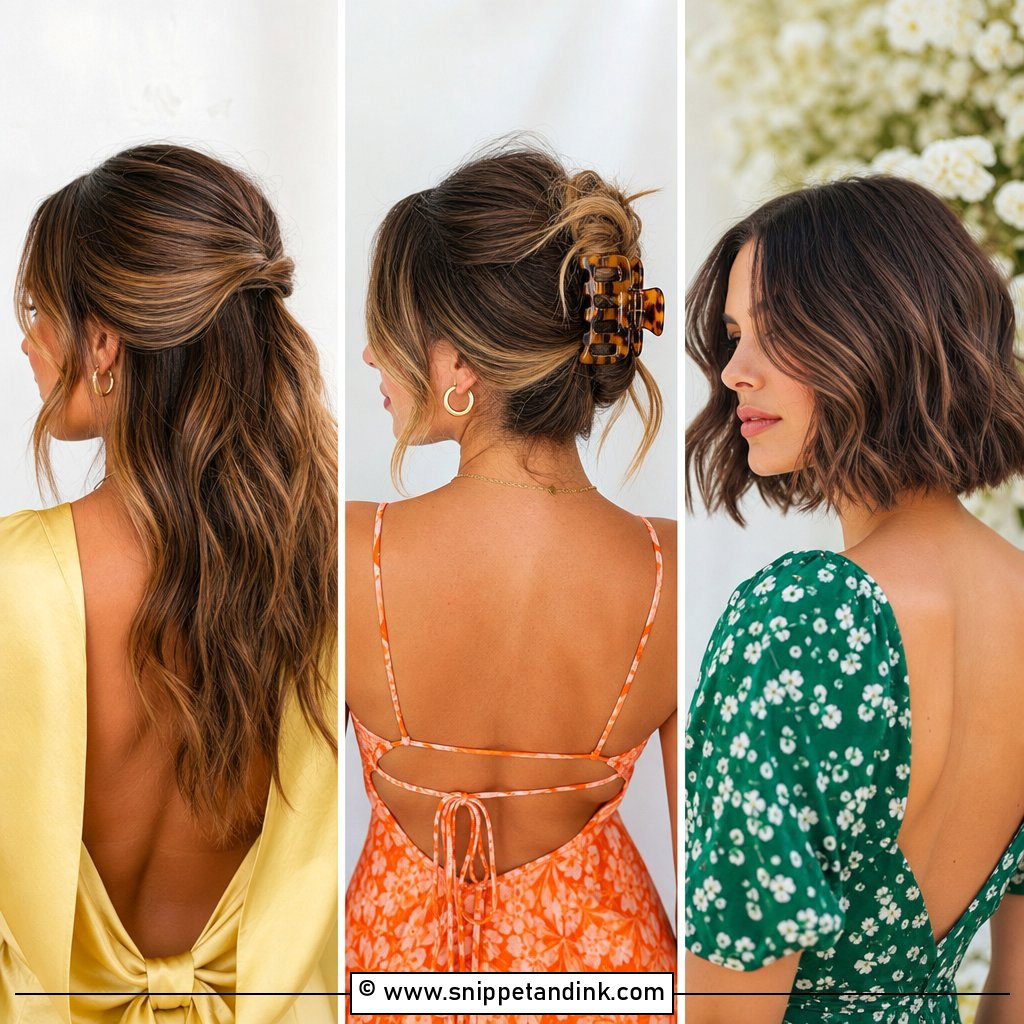
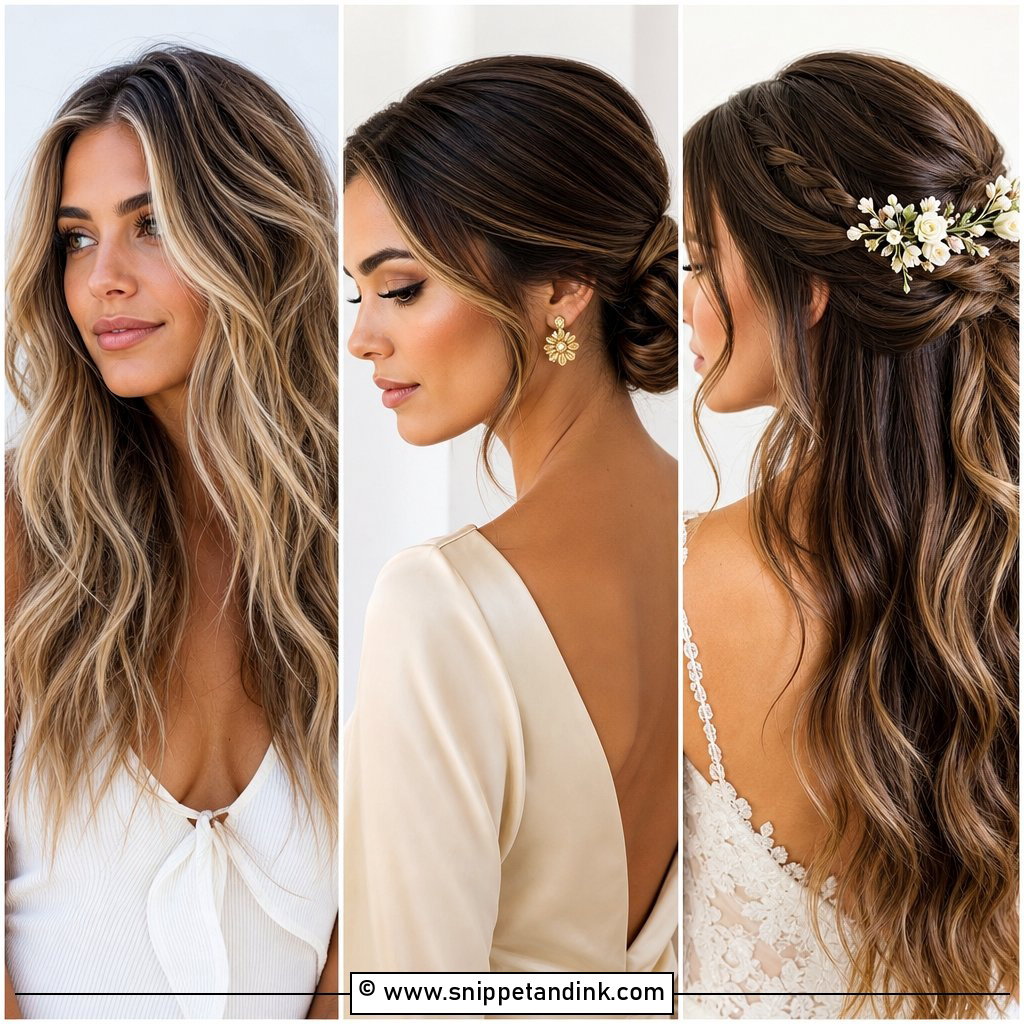
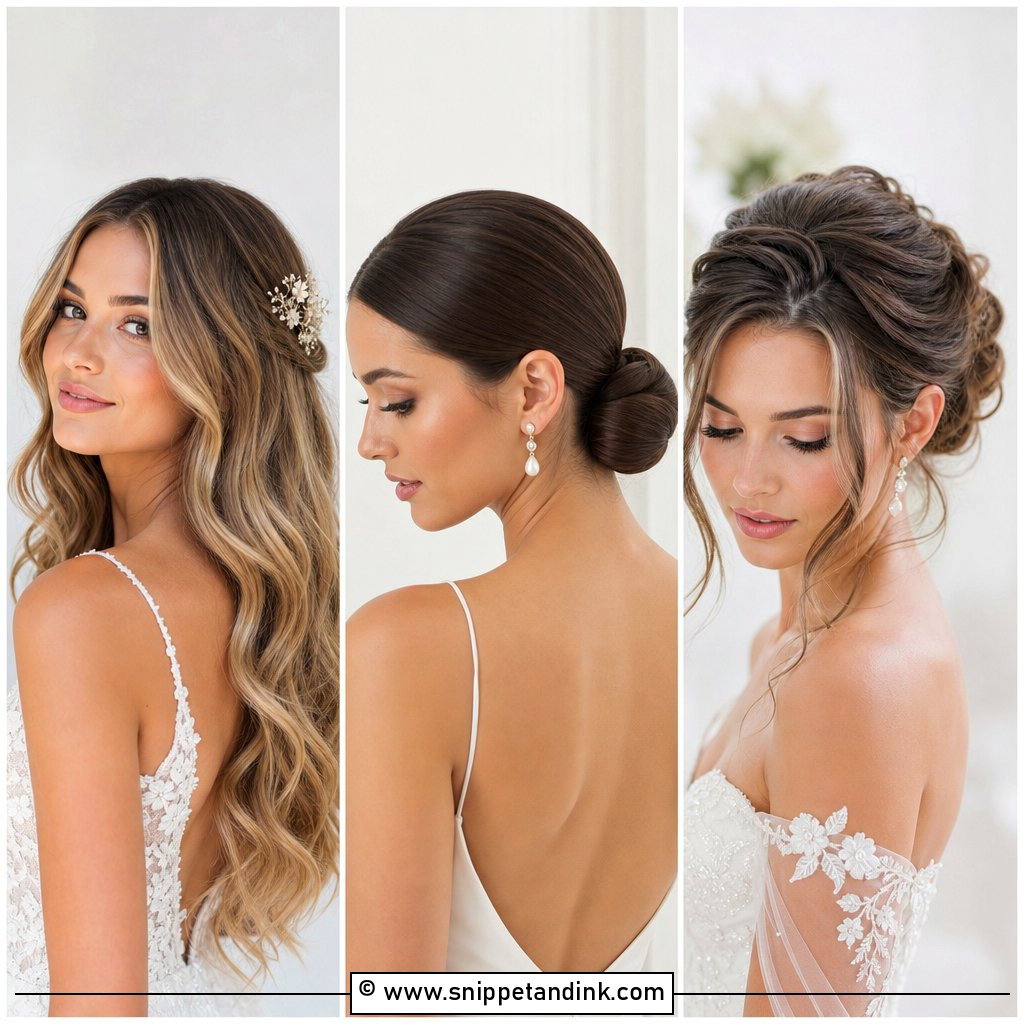
Half up, half down gives you the shape of an updo and the softness of loose hair. Curl the whole head with a wide-barrel iron and let each curl cool in your palm before you drop it, since a warm curl falls far faster than a cooled one. Then pull the top section back and secure it with a clip or small elastic, letting the rest fall over your shoulders. Fine, straight hair is the type I’d warn about: the loose length can be flat by the speeches unless you set it with a light hairspray before brushing out. A decorative pin or small bow at the join dresses it up for an evening wedding.
4. Sleek Ballet Bun
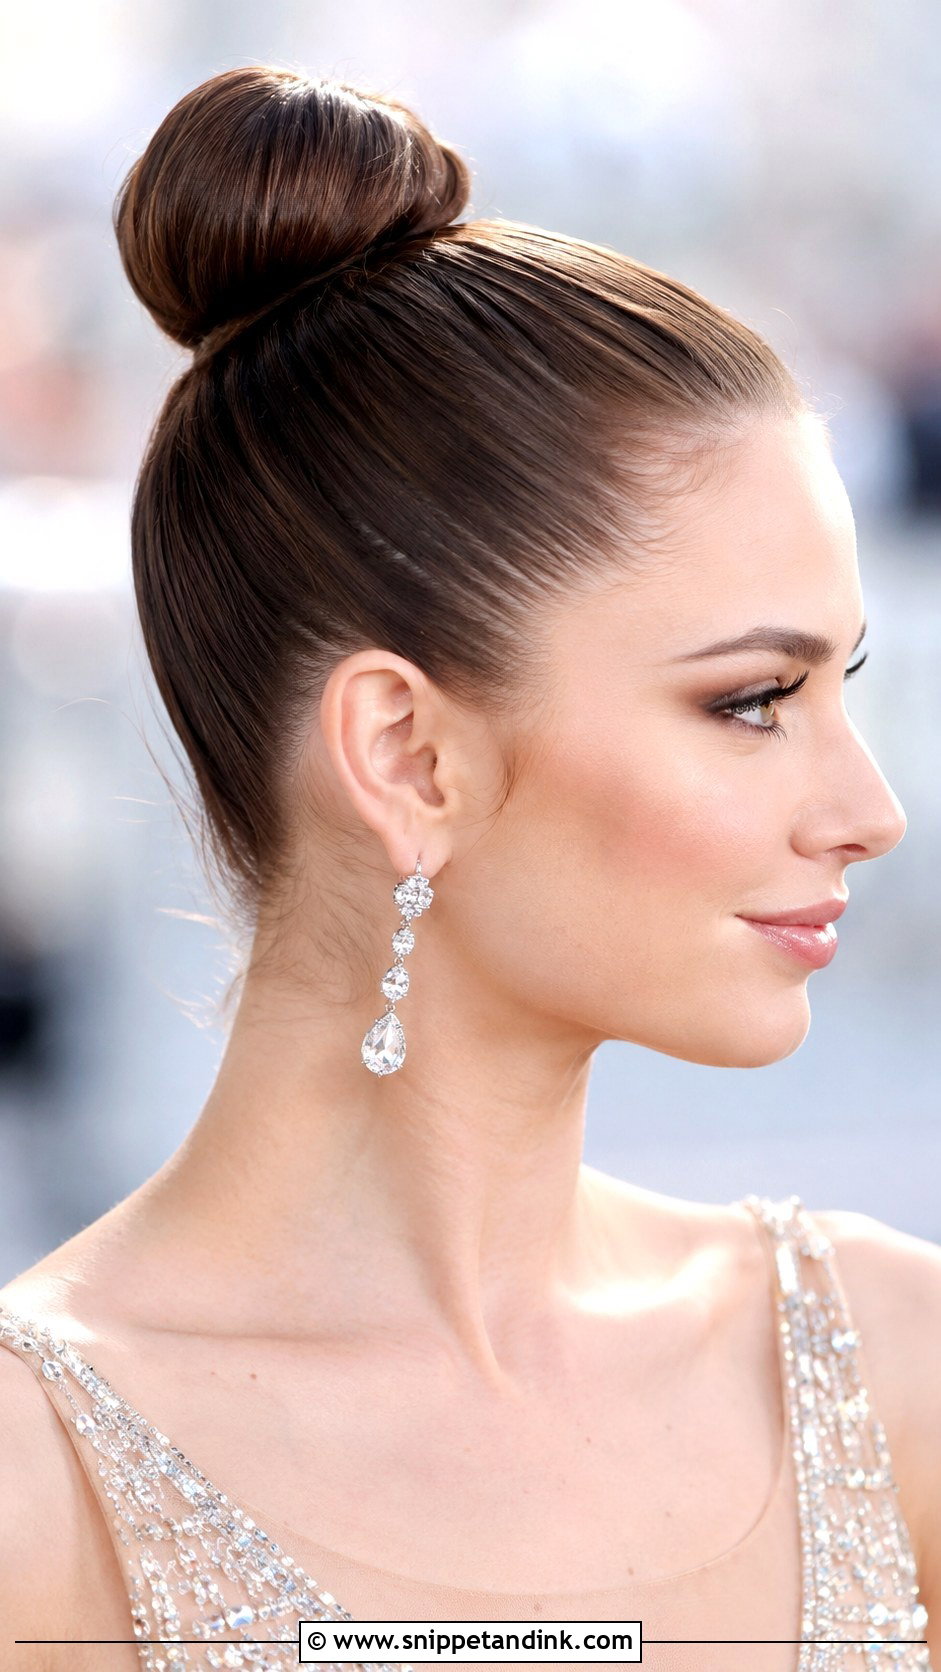
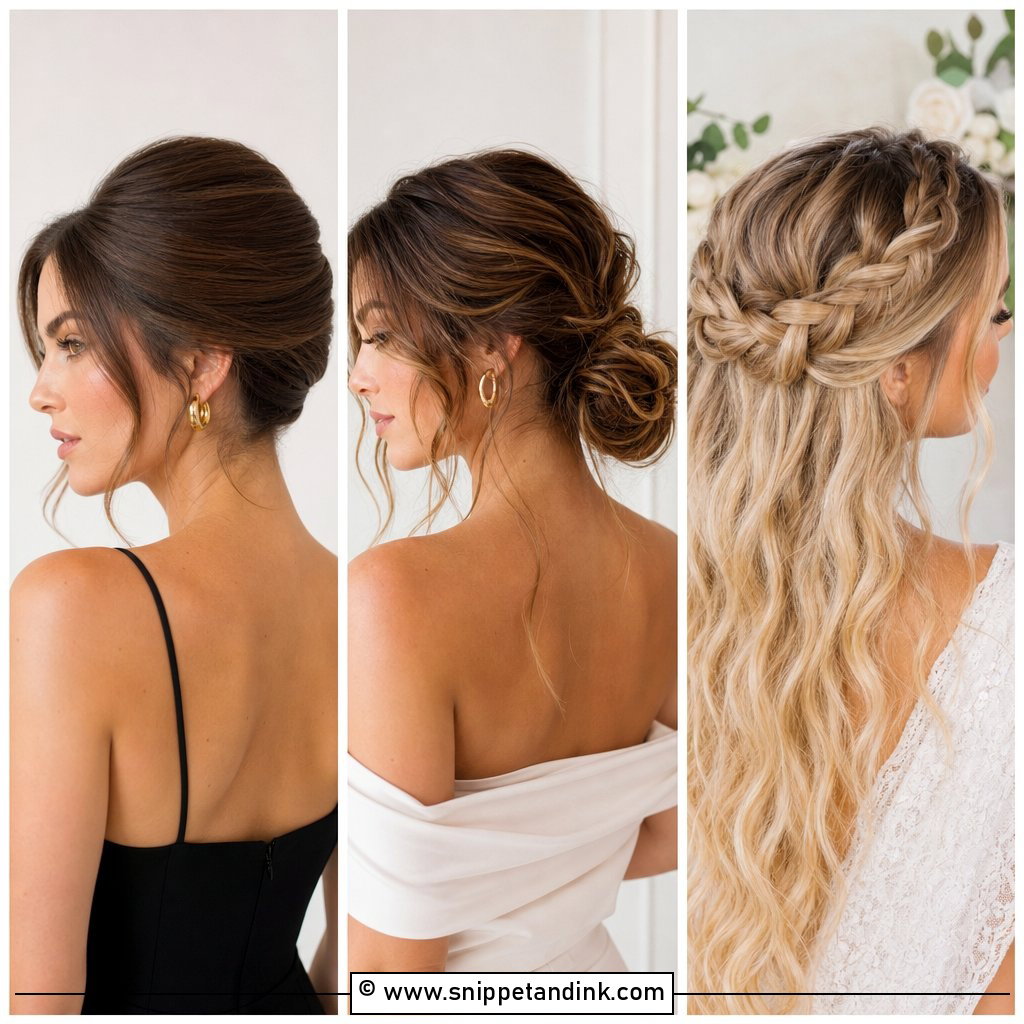
This is a dancer’s knot, high and smooth at the crown. Brush the hair back firmly, gather it into a high ponytail, twist and wrap it into a tidy bun, and use a strong-hold gel or pomade to flatten flyaways. I’d test it for comfort before the day, because a high, tight bun pulls on the scalp and some people get a headache within a couple of hours. If that’s you, drop it a few centimetres lower. It shows off statement earrings, suits a black-tie dress code and genuinely won’t move all night.
5. Old Hollywood Waves
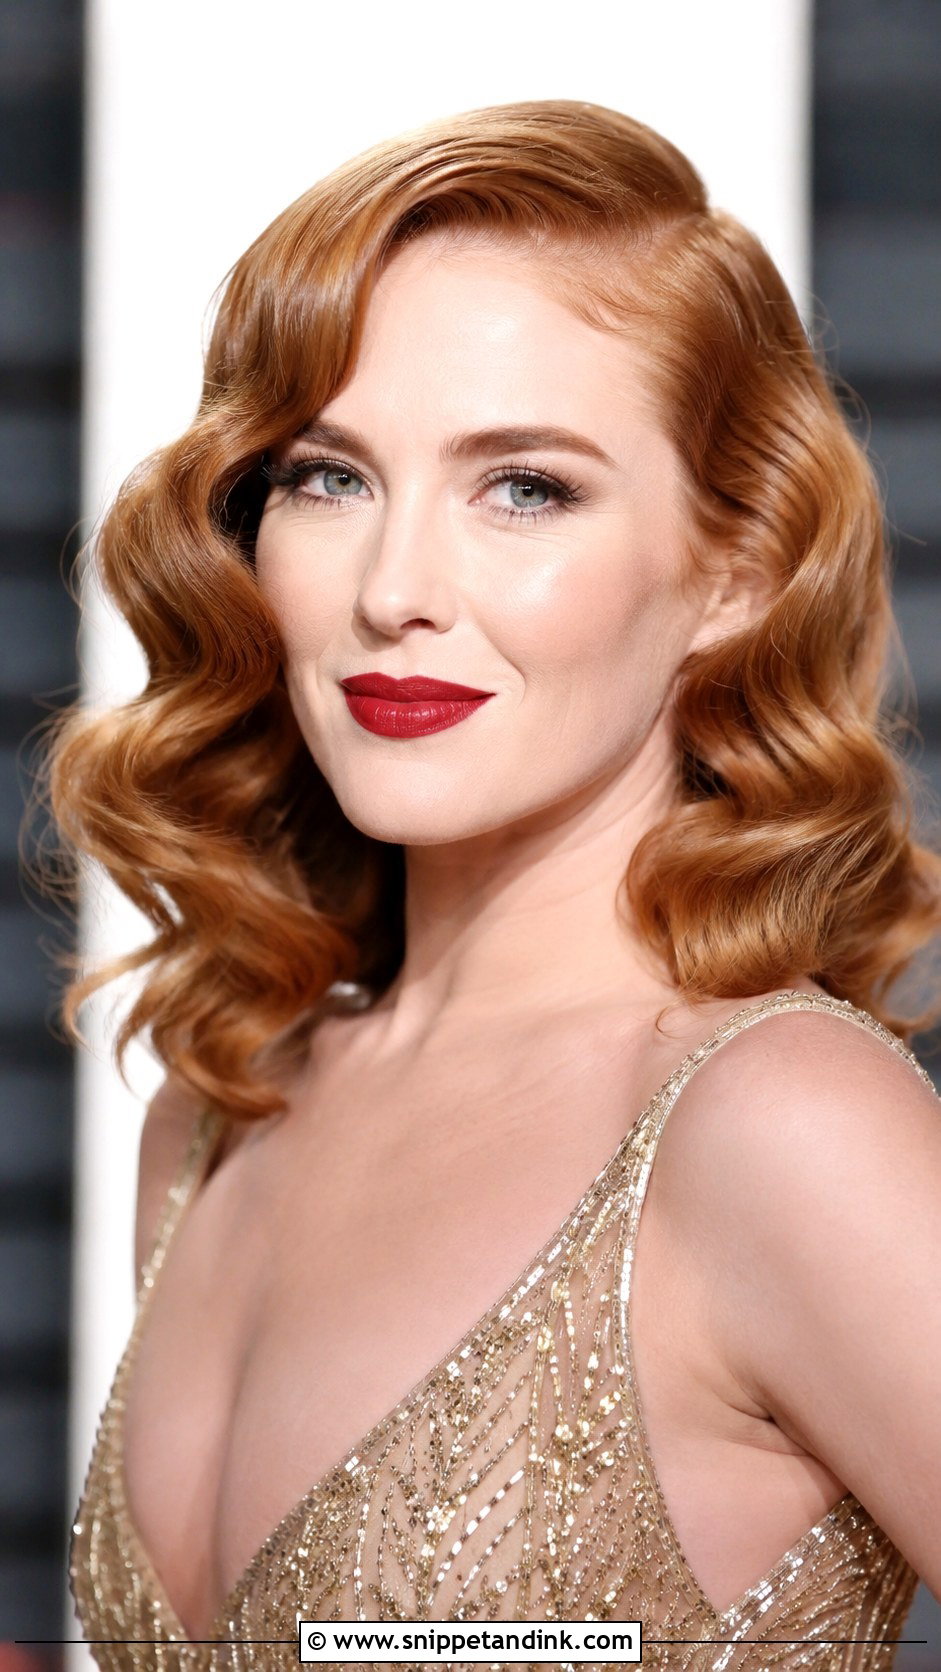
Old Hollywood waves are deep, glossy S-shapes that all travel together. Direction is the whole trick: curl every section on each side the same way, so the waves line up rather than crossing each other. Pin the curls while they cool, then brush through with a soft bristle brush until they merge into one ribbon, and finish with shine spray. Medium to long hair suits it best. It takes practice, so if you’ve never done it, try it a week ahead rather than the morning of an evening wedding.
6. Braided Crown
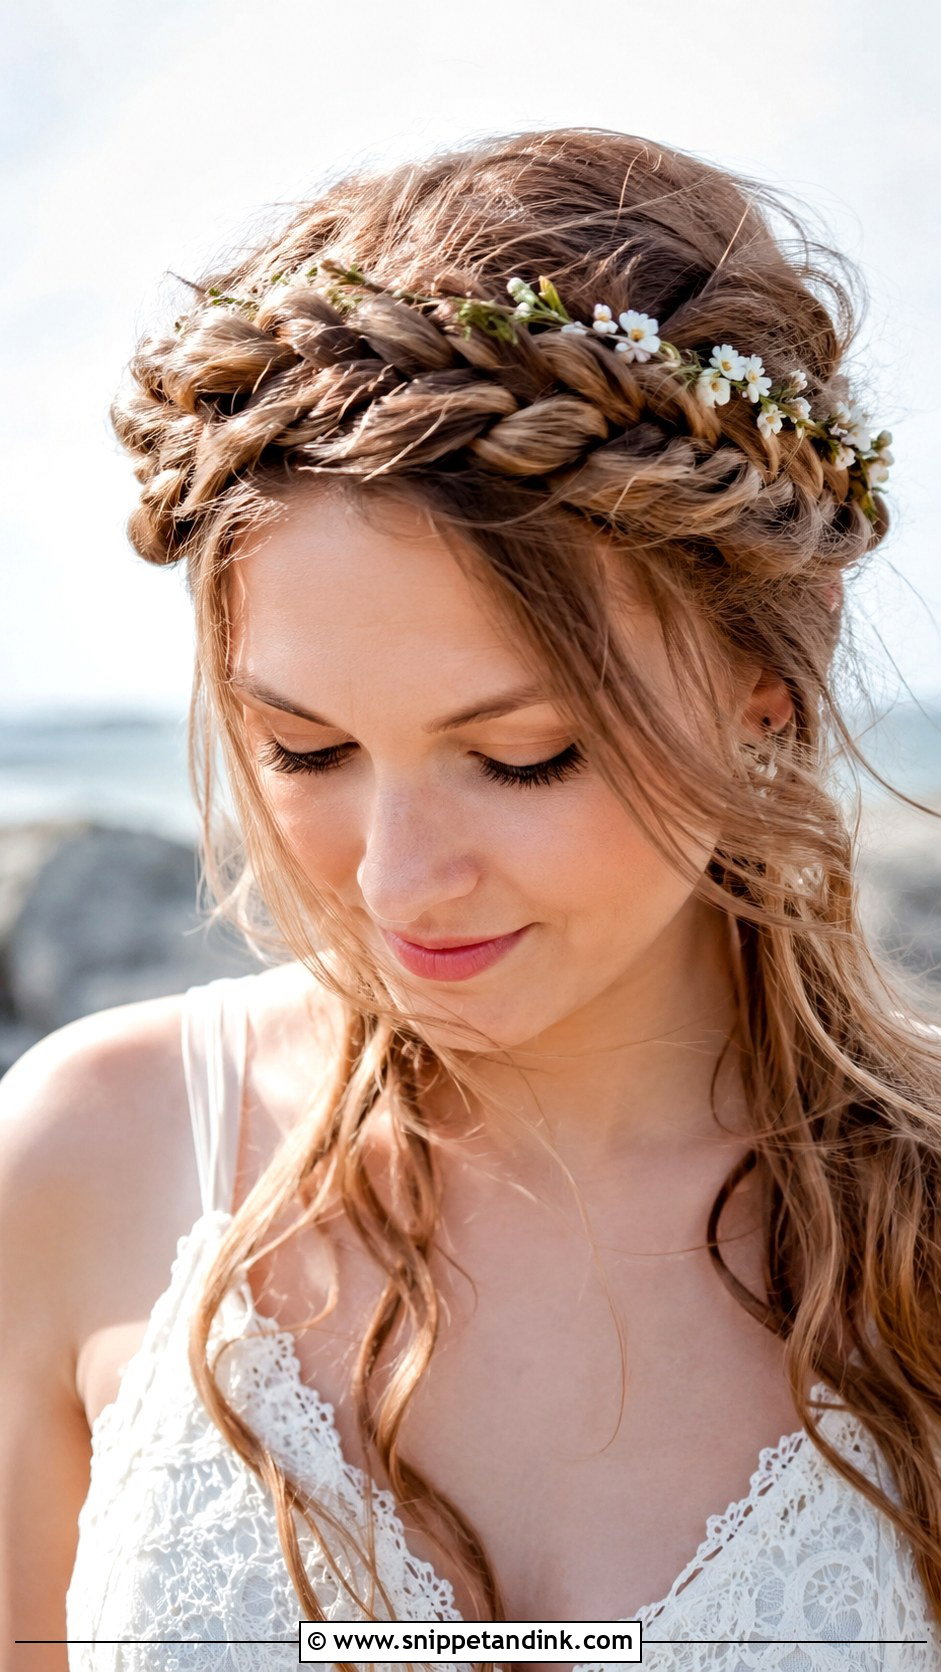
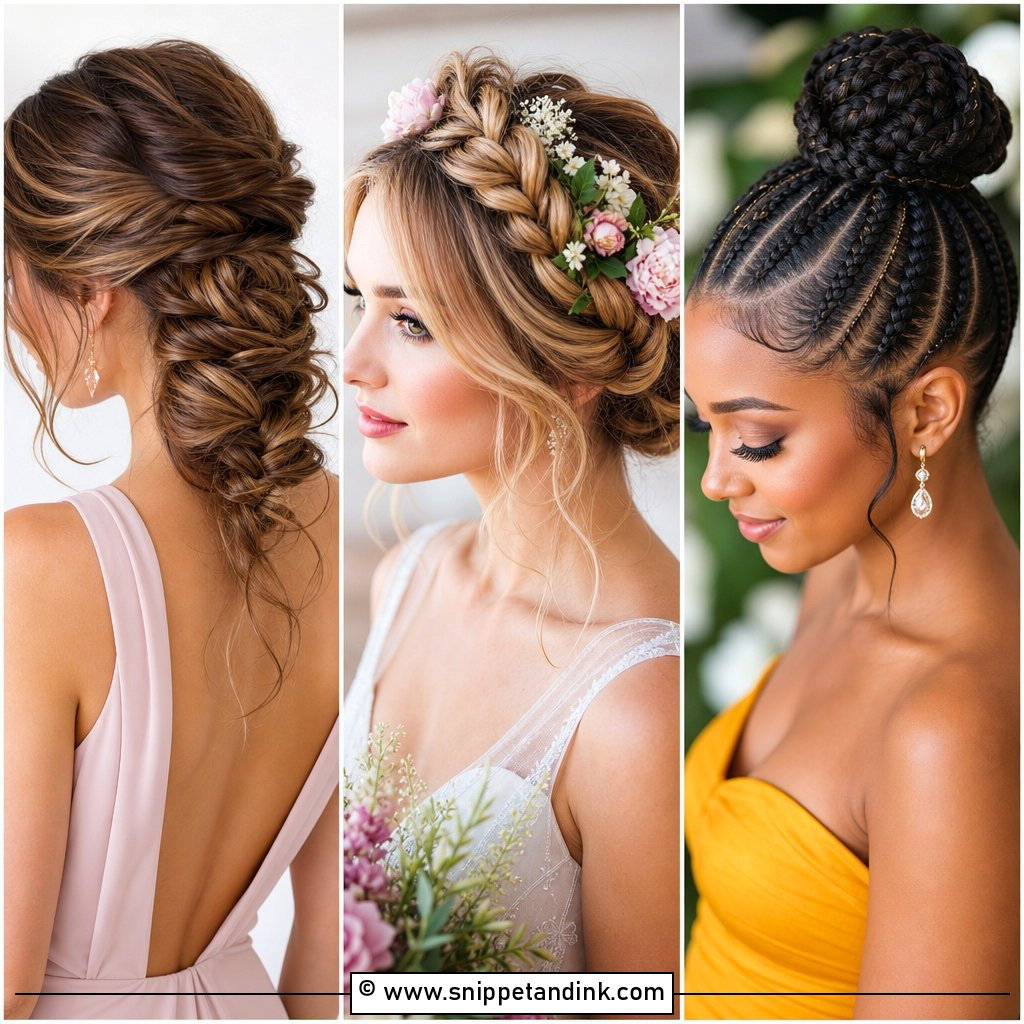
A braided crown wraps hair around the head like a halo, and it is far easier with two braids than one. Braid each side, cross them over the crown and tuck the ends underneath, pinning where the braids overlap. Pull the edges gently to loosen them. Long and medium hair works; shoulder-length hair rarely has enough length to meet across the top, so pin the ends behind the ears instead. It keeps hair off your face at an outdoor or garden wedding, and tiny flowers tucked into the plait suit a spring or summer date.
7. Twisted Half Updo
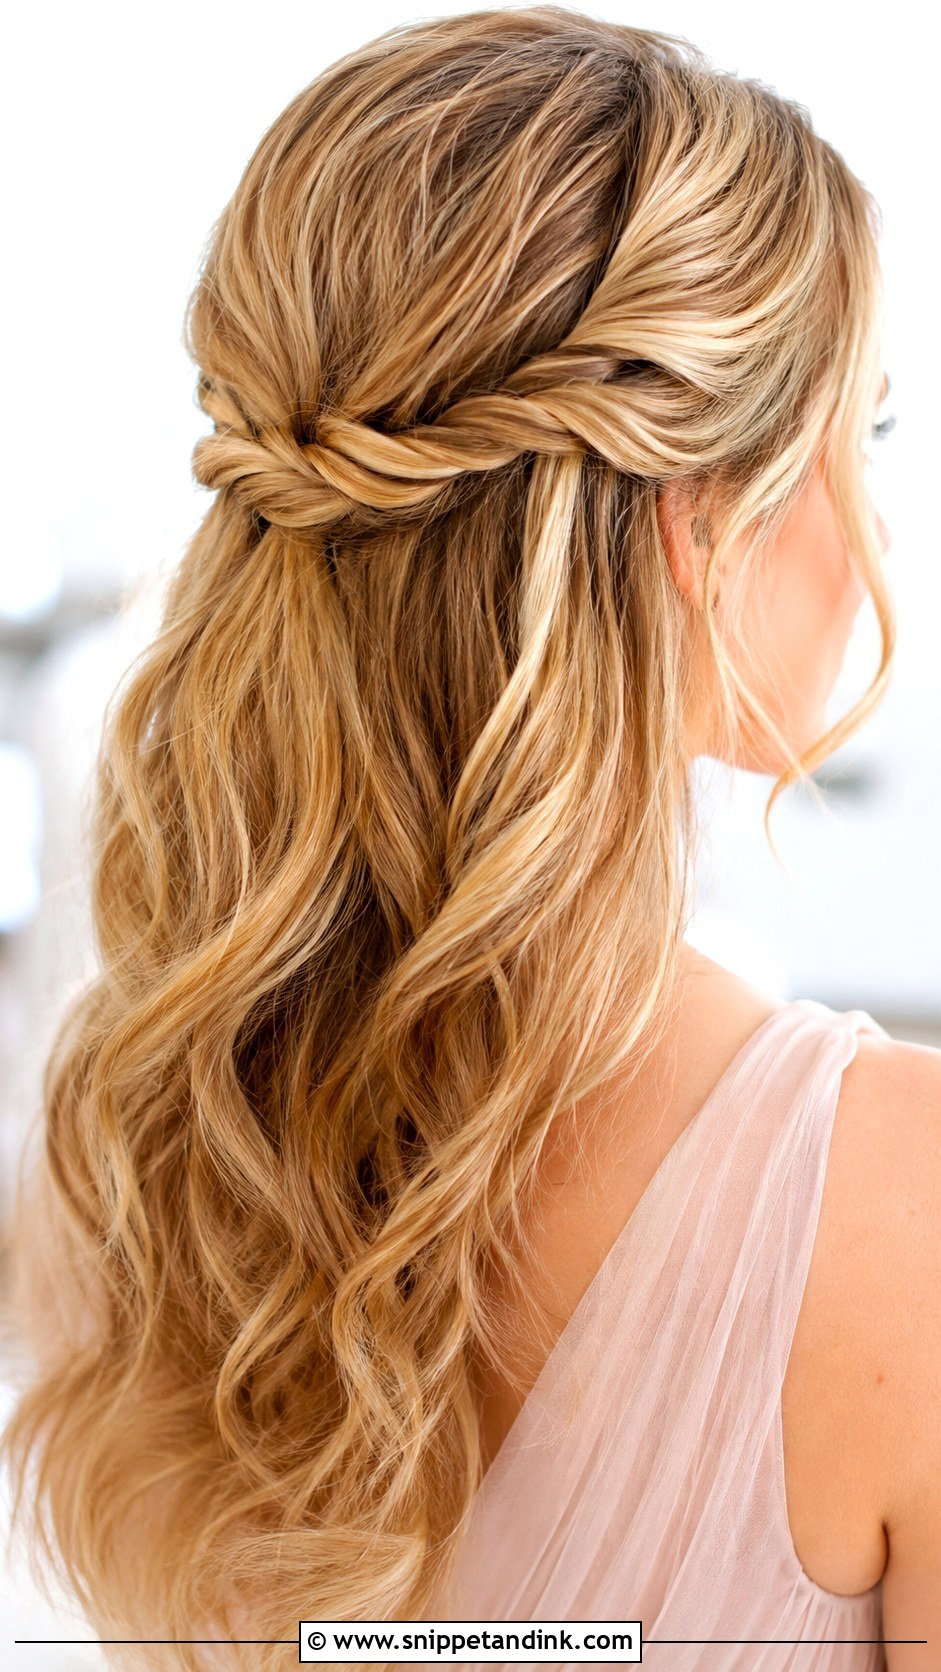
Twist a section from each side toward the back and join them with a small elastic or pin, leaving the rest loose. It looks detailed, yet it is one of the quickest styles here. Twist away from the face so the twists lie flat; twisting the other direction makes them puff up and unravel. On slippery hair I add two bobby pins crossed over the elastic so it can’t slide down. Pull the twists a little for fullness. It flatters nearly every face shape on medium to long hair.
8. Loose Beach Waves
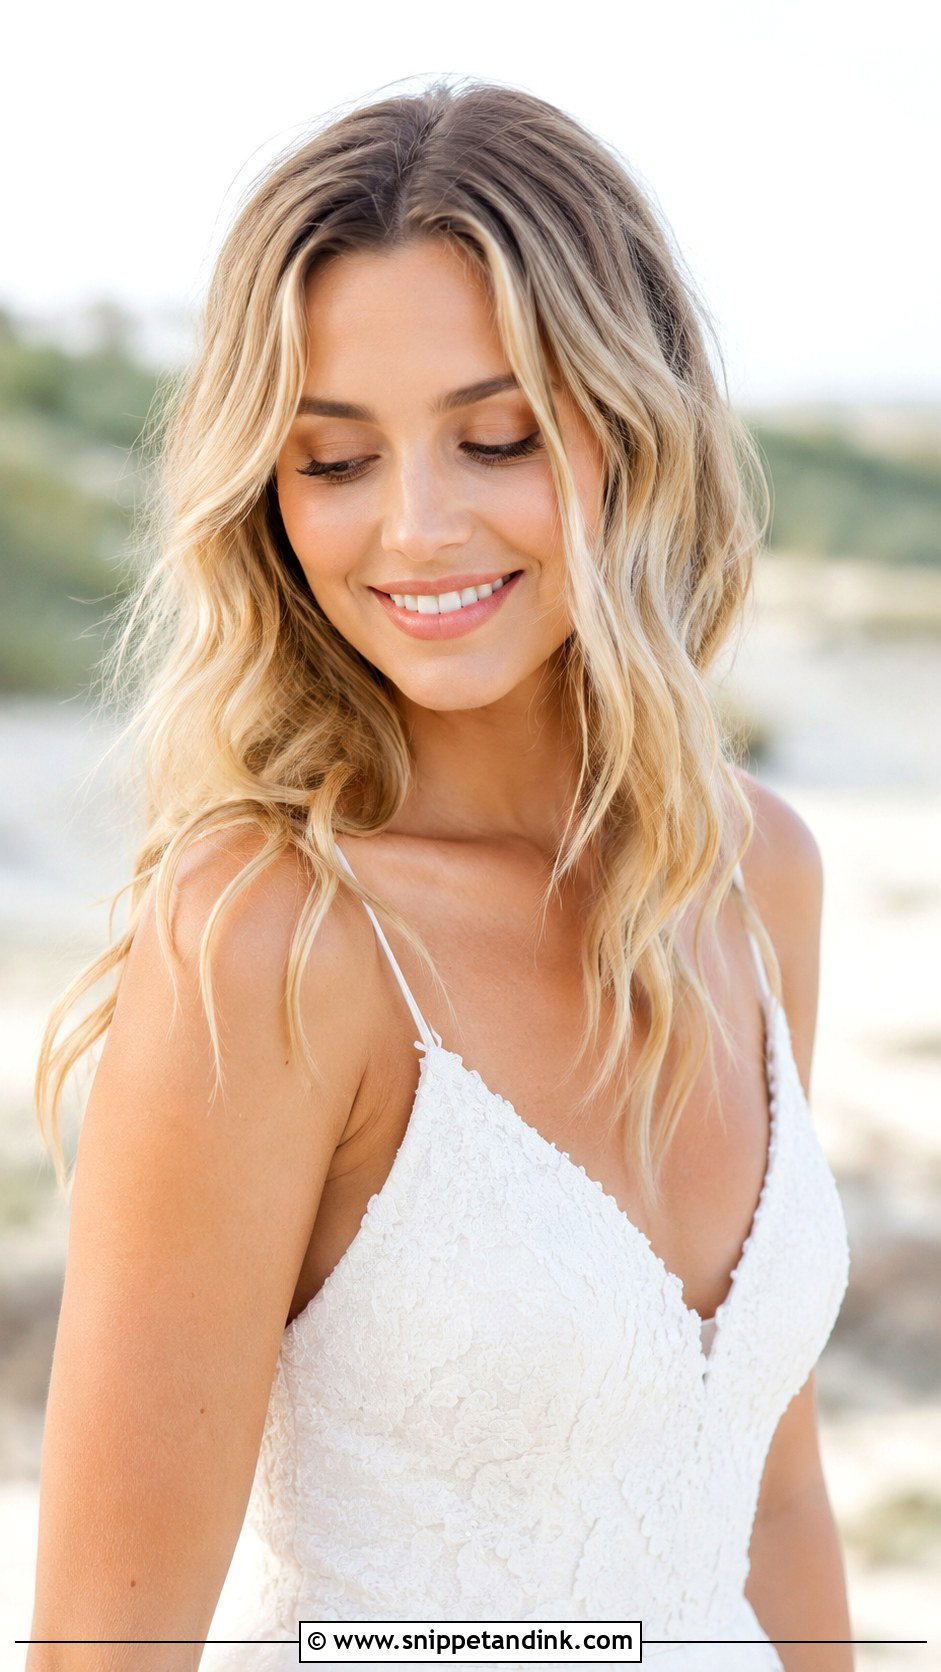
Soft, tousled beach waves are about the fastest look on this list. Wrap sections around a curling wand, leaving the last few centimetres out, then rake through with your fingers and mist with texture spray. Humidity is the catch. At a beach or garden wedding the waves relax by evening on fine hair, so I’d set a few with hairspray and pack a mini texture spray. On medium-length hair it takes minutes, and it belongs at a casual or outdoor wedding far more than in a formal ballroom.
9. Low Floral Bun
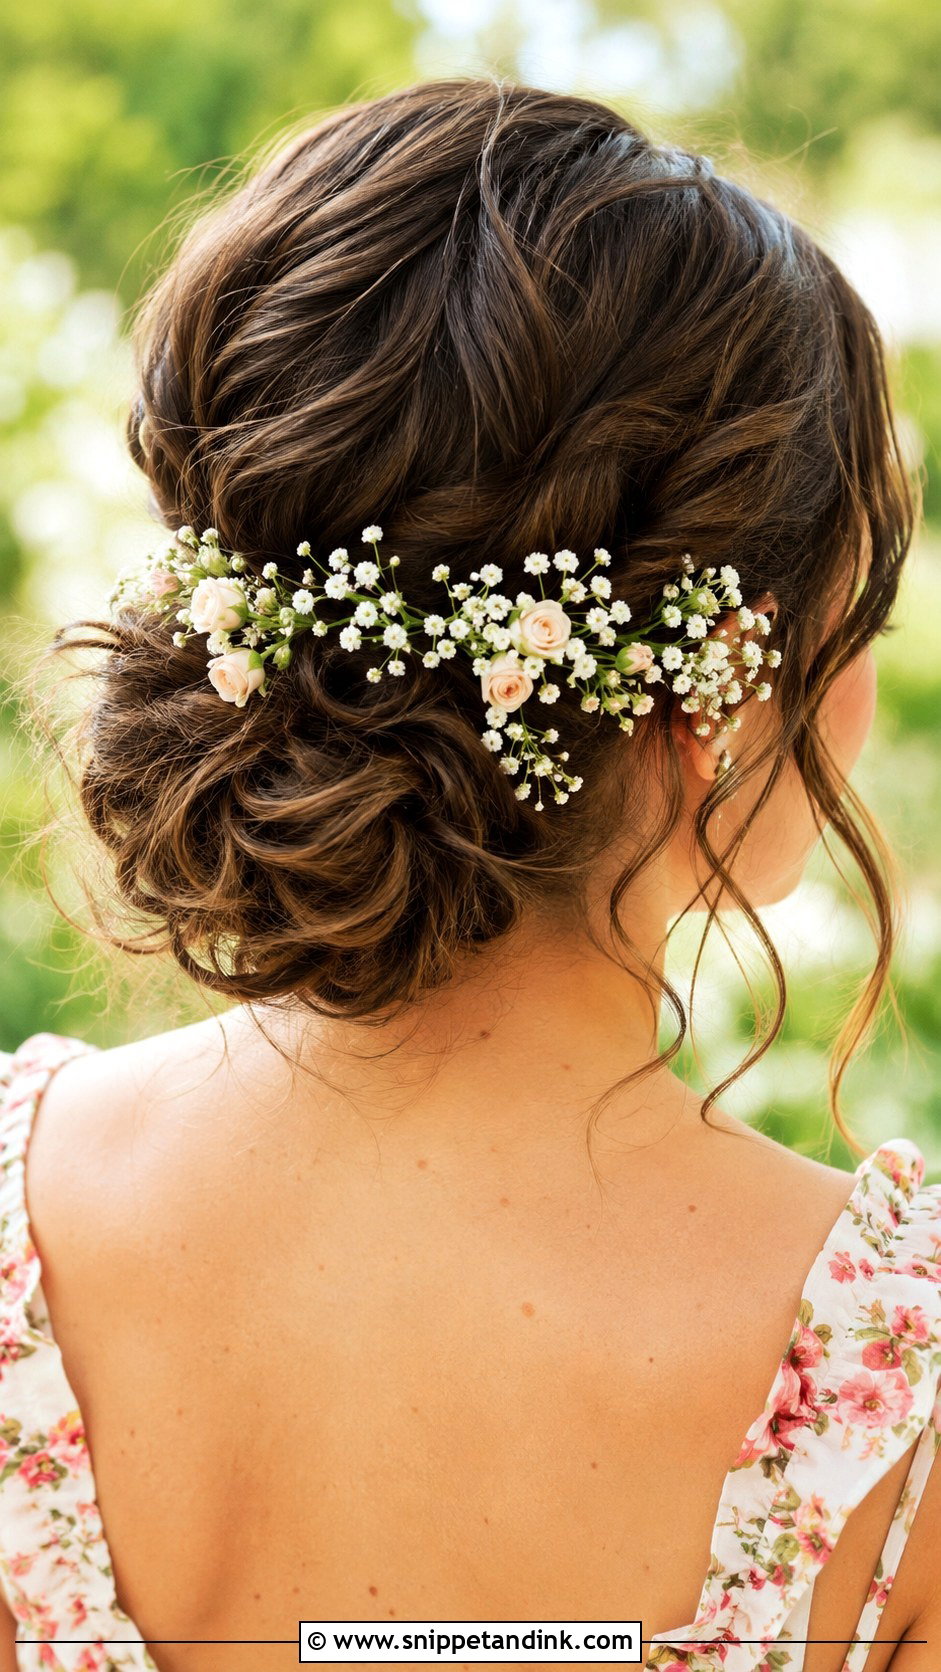
A loose knot at the nape with small blooms tucked around it has been one of the most asked-for guest styles recently. Baby’s breath and tiny spray roses are the easiest flowers to use because their stems are thin and strong. Fresh flowers wilt quickly against warm skin, so cut the stems short, pin them in last and keep them in water until you leave. Silk flowers remove the worry at an all-day summer wedding. It also reads well from behind, which matters more than guests expect, since the ceremony camera sees the backs of a lot of heads.
10. High Ponytail With Volume
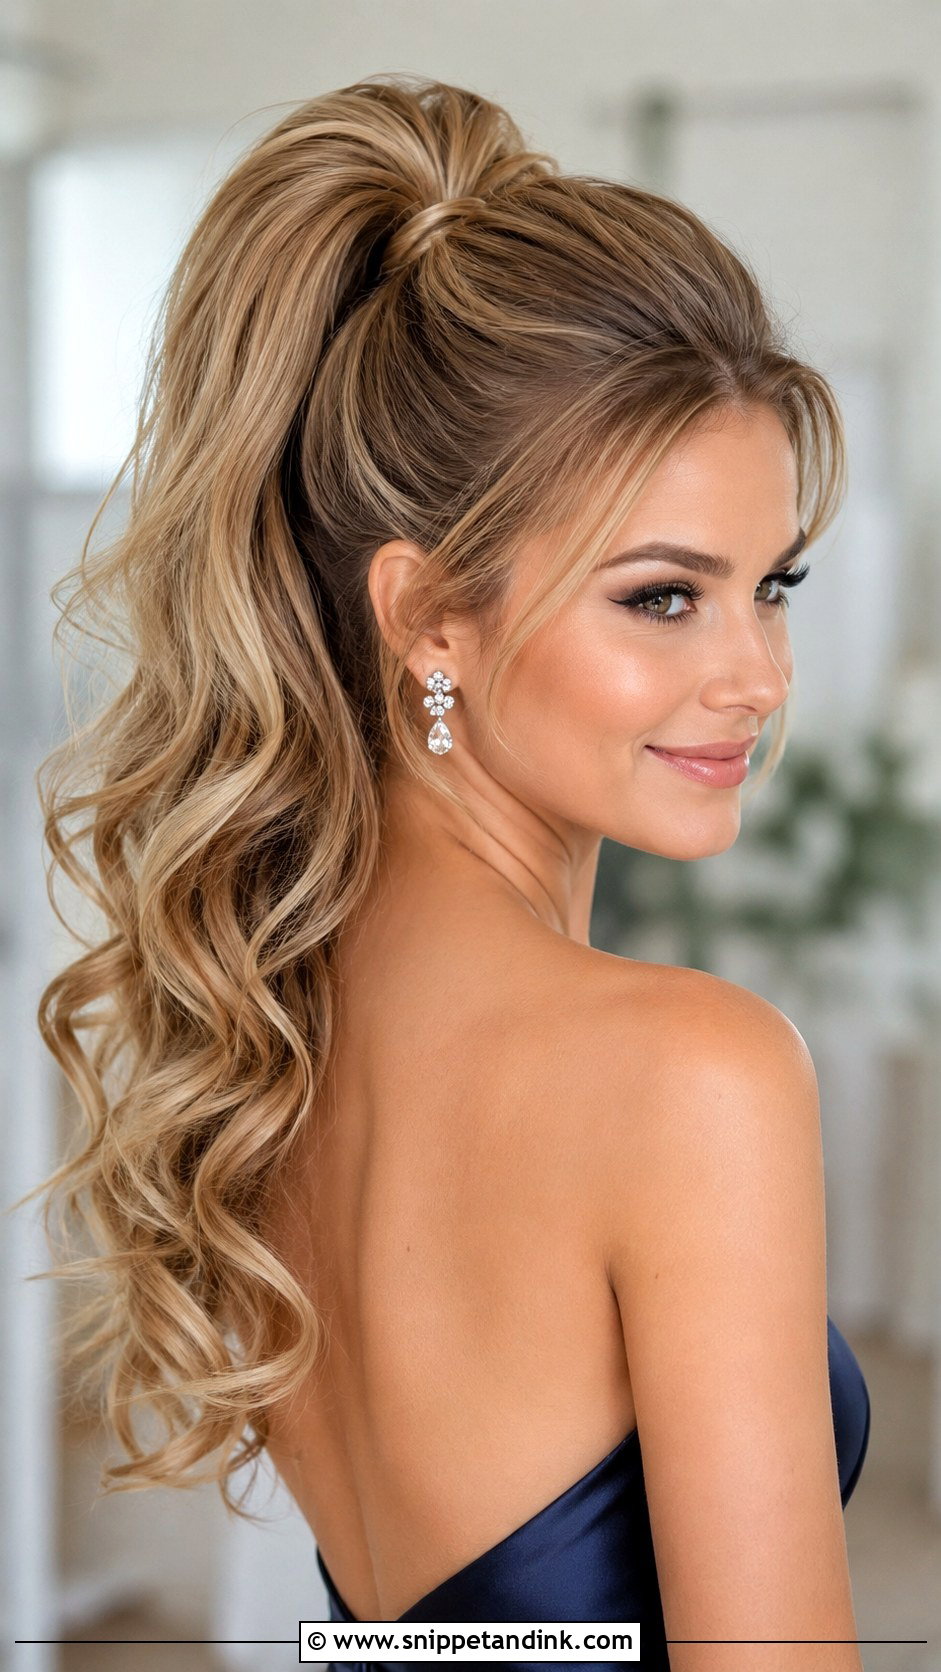
A high ponytail lifts the features and keeps you cool on the dance floor. Gather the hair high on the crown and secure it tightly, tease the underside of the ponytail slightly for volume, and hide the elastic with a wrapped strand. I always use two elastics, one tight base and a second over it, because a single band on heavy hair sags within an hour. Straight and wavy textures both suit it, and a loose curl through the length makes it dressier.
11. Pearl Adorned Chignon
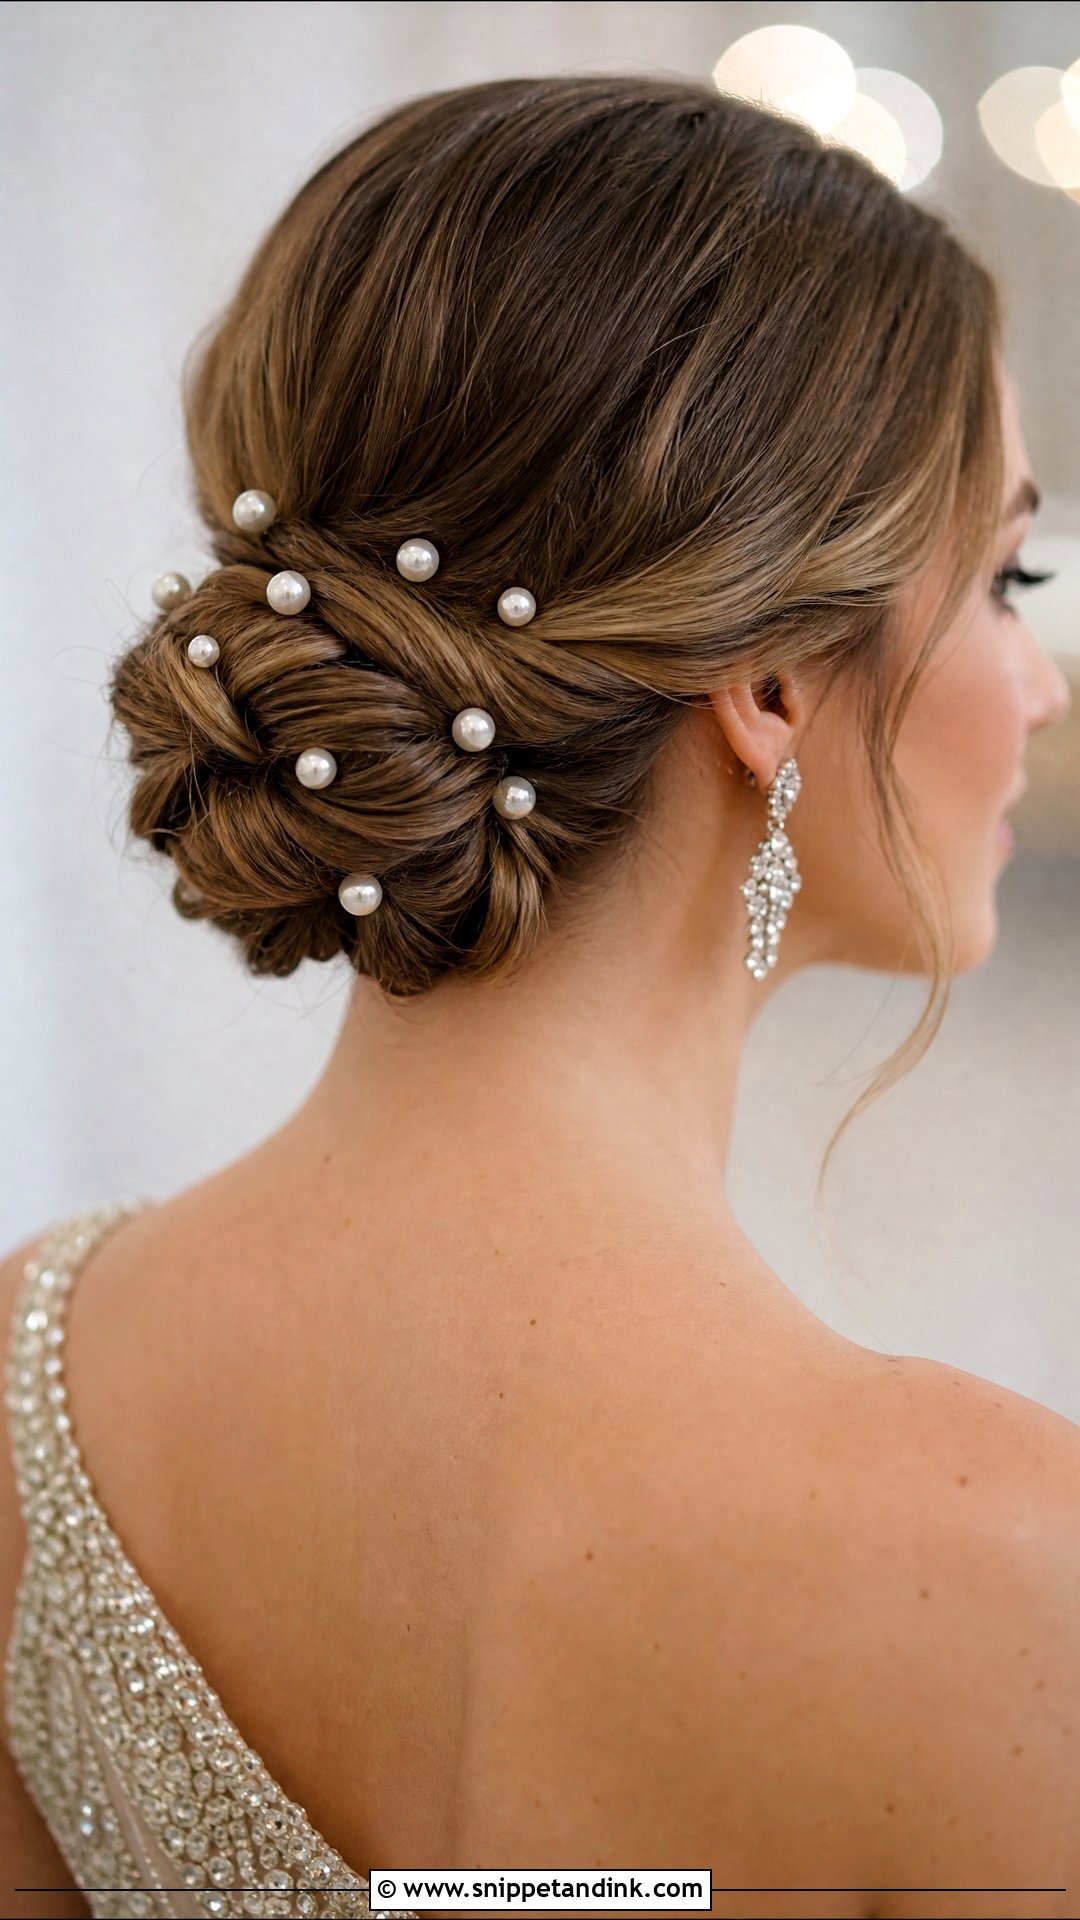
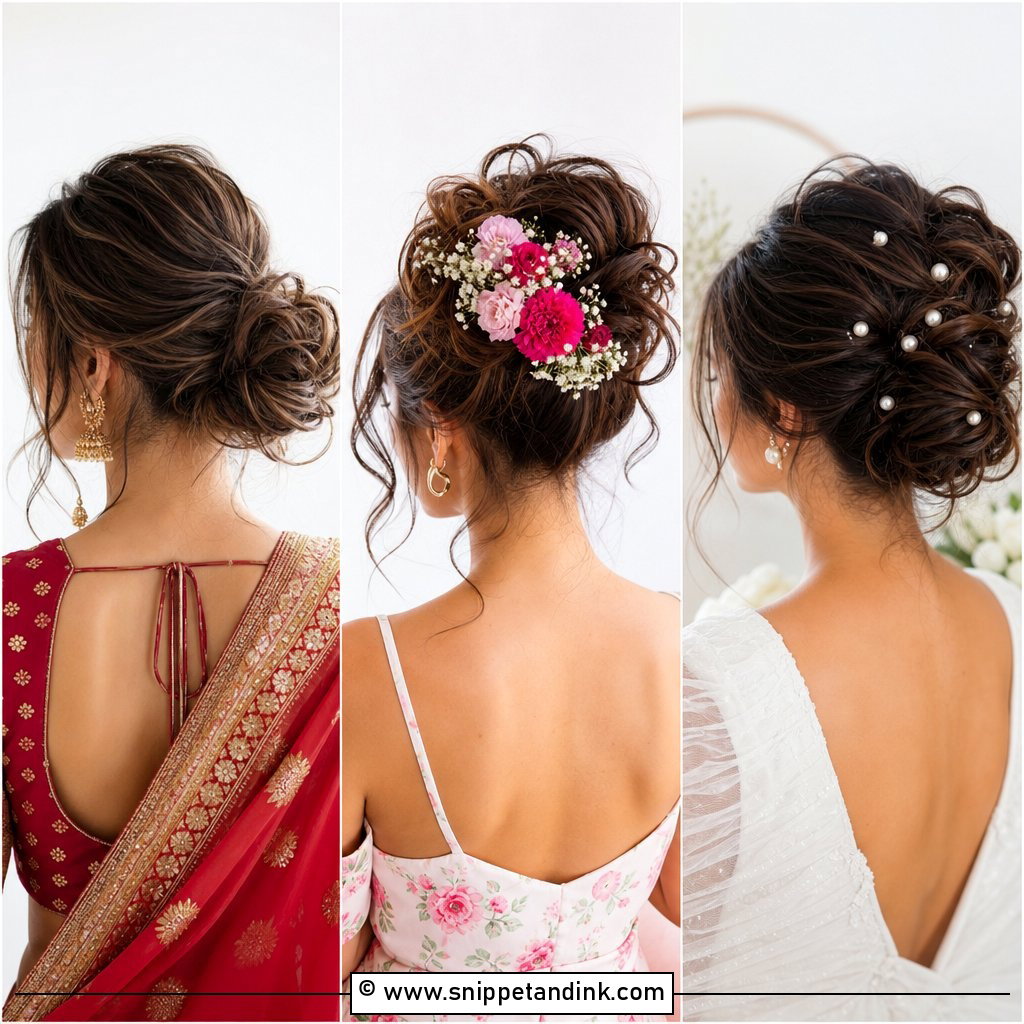
Pearls scattered through a low chignon turn a plain updo into something festive, and they have been one of the most requested details lately. Twist the hair into a low chignon at the nape and secure it, then slide in pearl pins at varied heights so they don’t line up like a row of buttons. Pins with a slight bend in the shaft grip better than straight ones. It suits evening and formal weddings, stays sleek all night, and pairs well with drop earrings.
12. Waterfall Braid
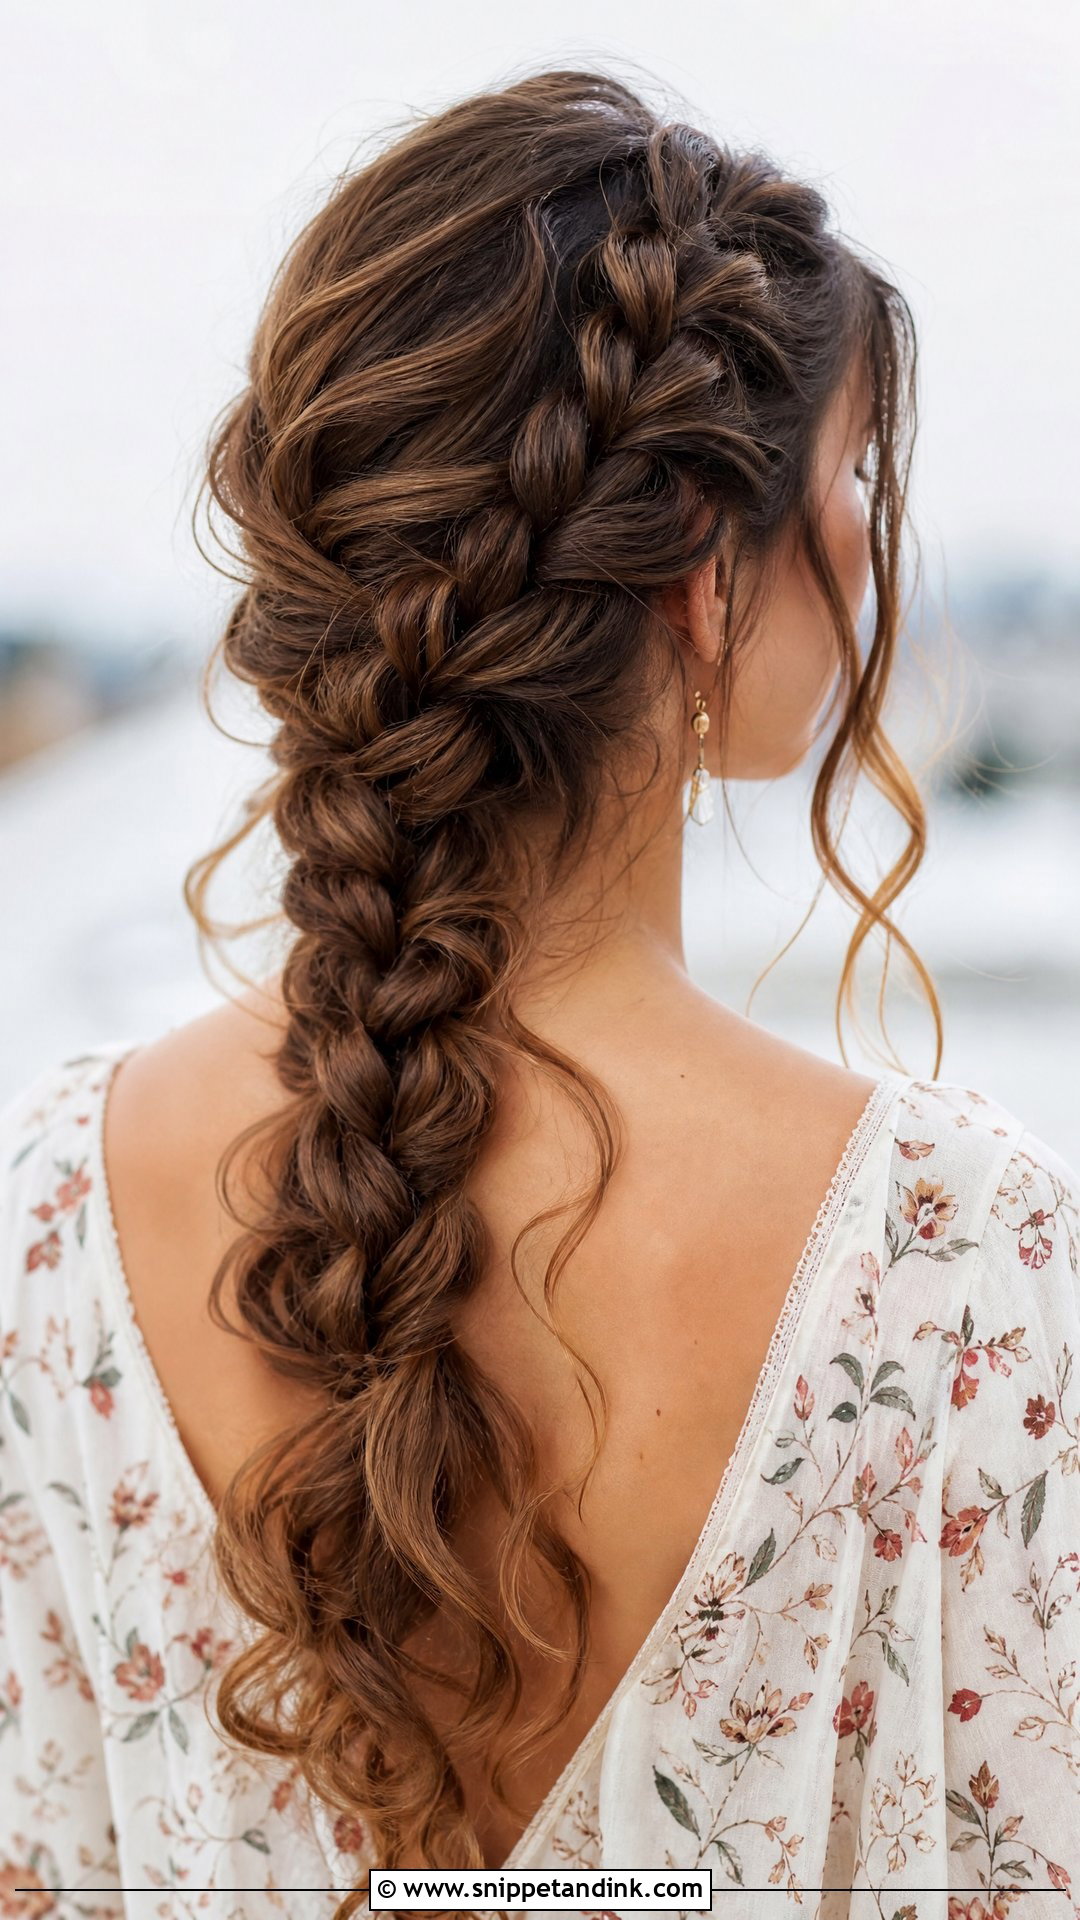
A waterfall braid drops a strand after each crossing, so loose pieces fall through the braid as it travels across the back of the head. Start near the temple. The usual stumble is losing track of which strand to drop; it is always the one that has just crossed over the top. Medium and long hair suits it best, and curling the dropped strands stops them looking limp. I’d pin the end under the opposite ear rather than braiding all the way round, since that is where it loosens first.
13. Messy Bun With Face Framing Strands
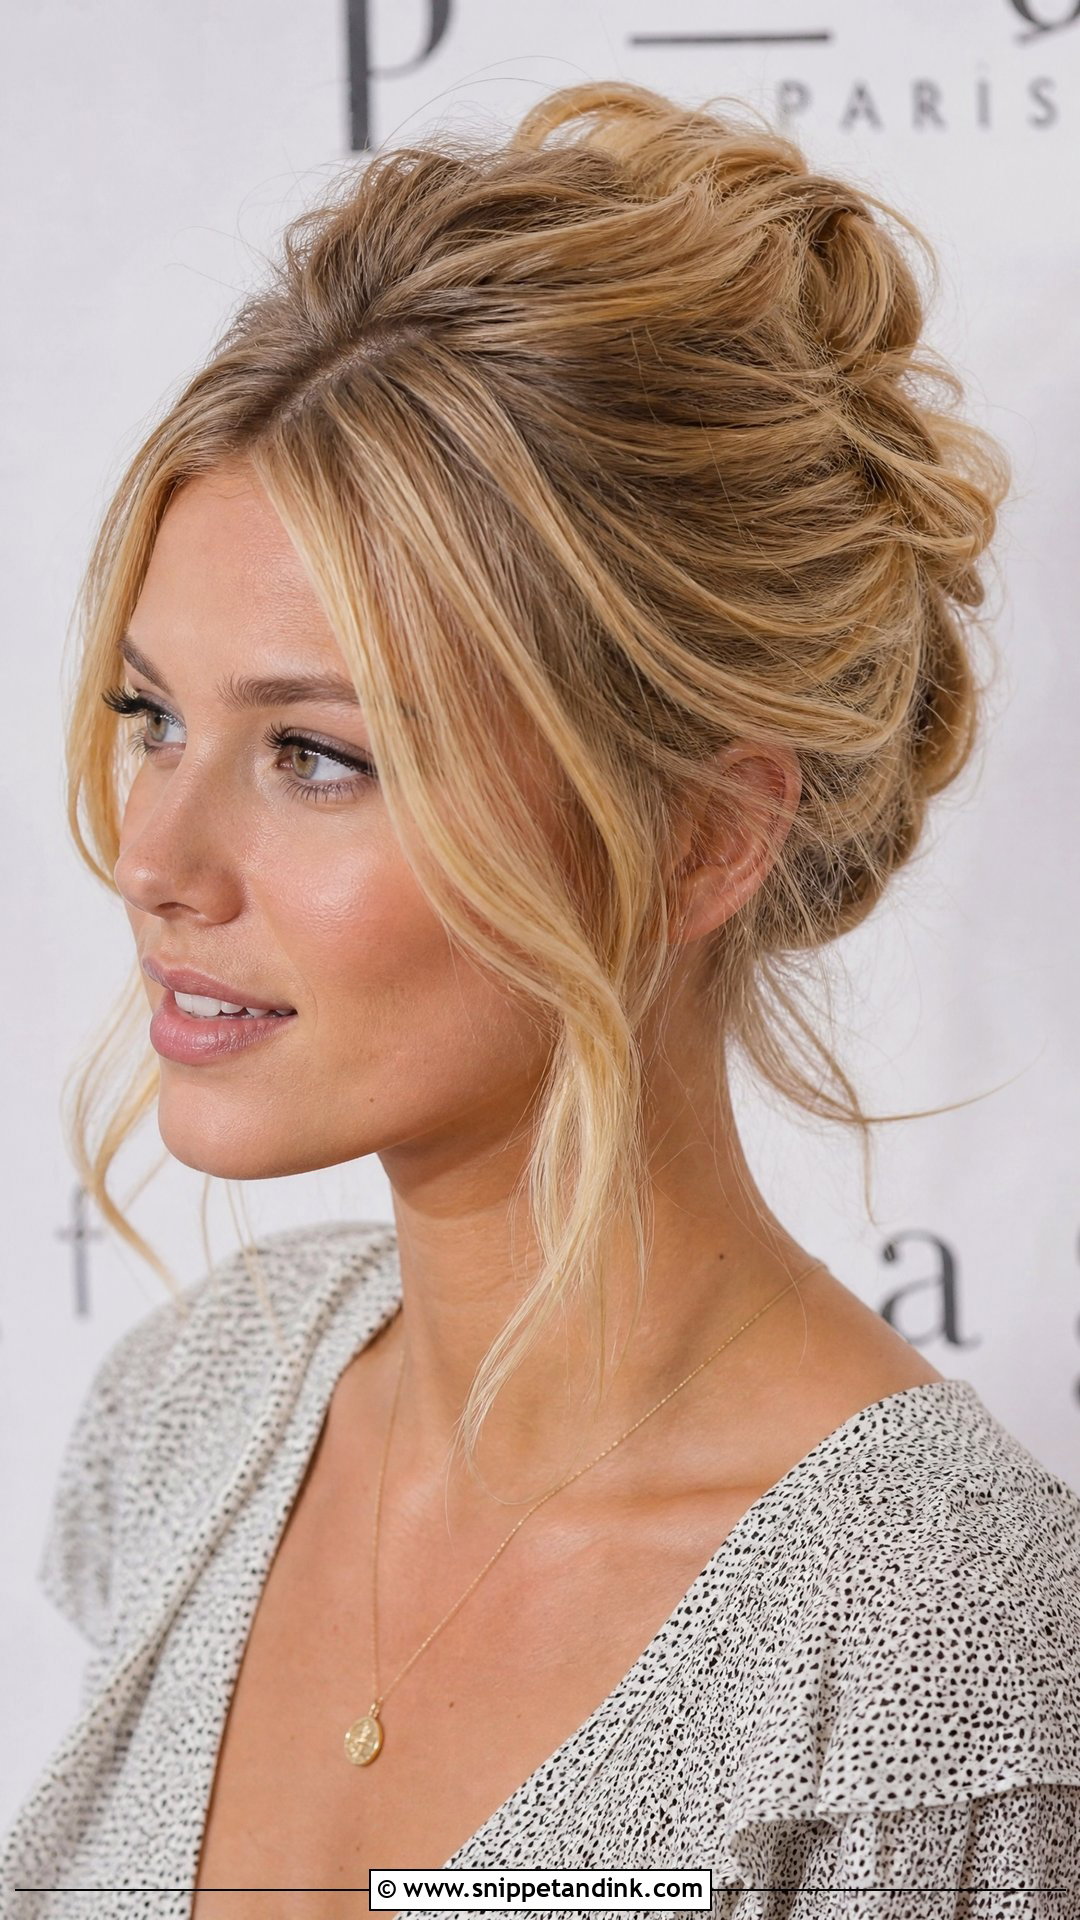
A messy bun with face-framing strands is the most forgiving updo here. Pile the hair into a loose bun near the crown, let some soft pieces fall at the face and pull strands for fullness. Don’t chase neatness; slightly undone is the point. My one rule is that the base must be secure even when the bun looks loose: a firm ponytail underneath, then the messy wrap pinned onto it. Without that base it collapses during the first fast song. Casual and semi-formal weddings suit it, on most lengths and textures.
14. French Twist
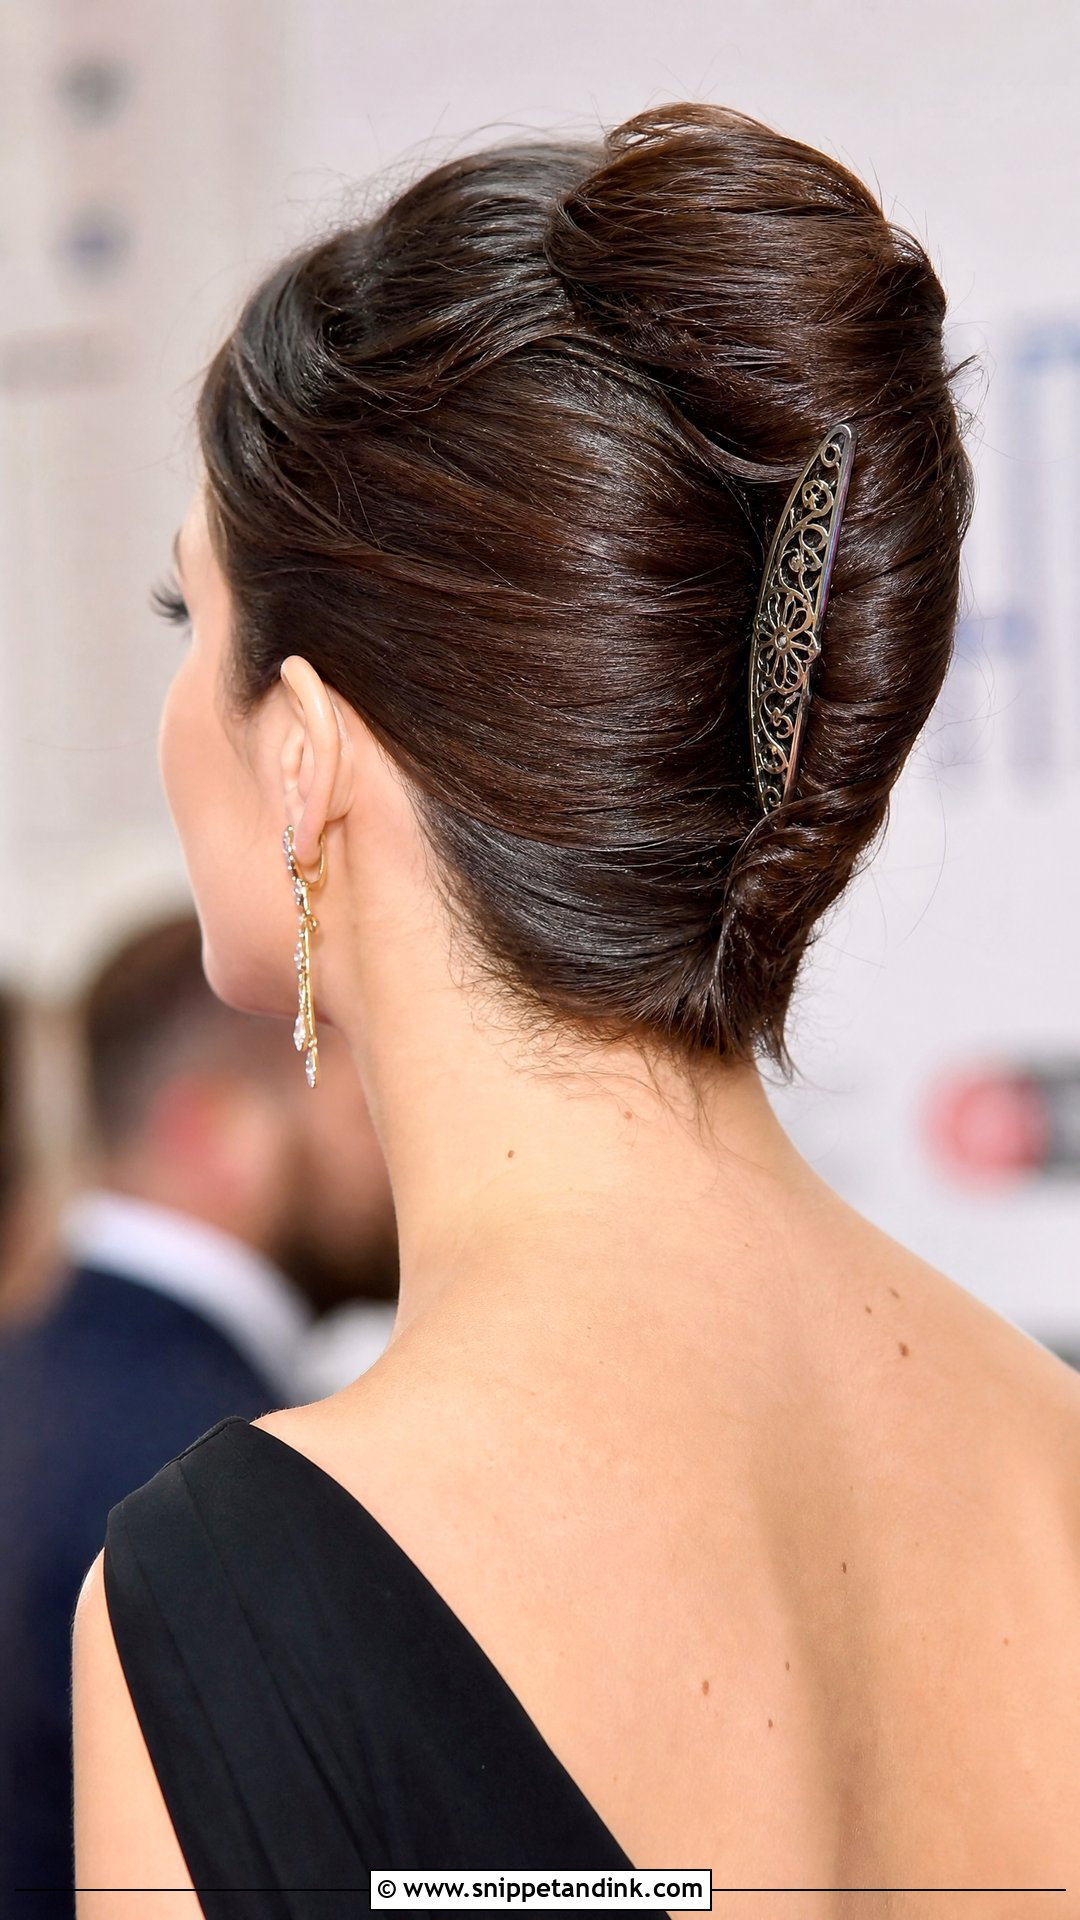
A French twist folds the hair into a sleek vertical roll at the back of the head. Gather the hair to one side, twist it upward, tuck the ends inside and pin along the seam. Push the pins in sideways, catching hair from the base, or the roll lifts away from the scalp by the reception. Second-day hair holds the shape better than freshly washed hair. It has been a formal staple for decades and suits medium to long lengths at a black-tie event, with a decorative comb to hide any visible pins.
15. Half Up Bow
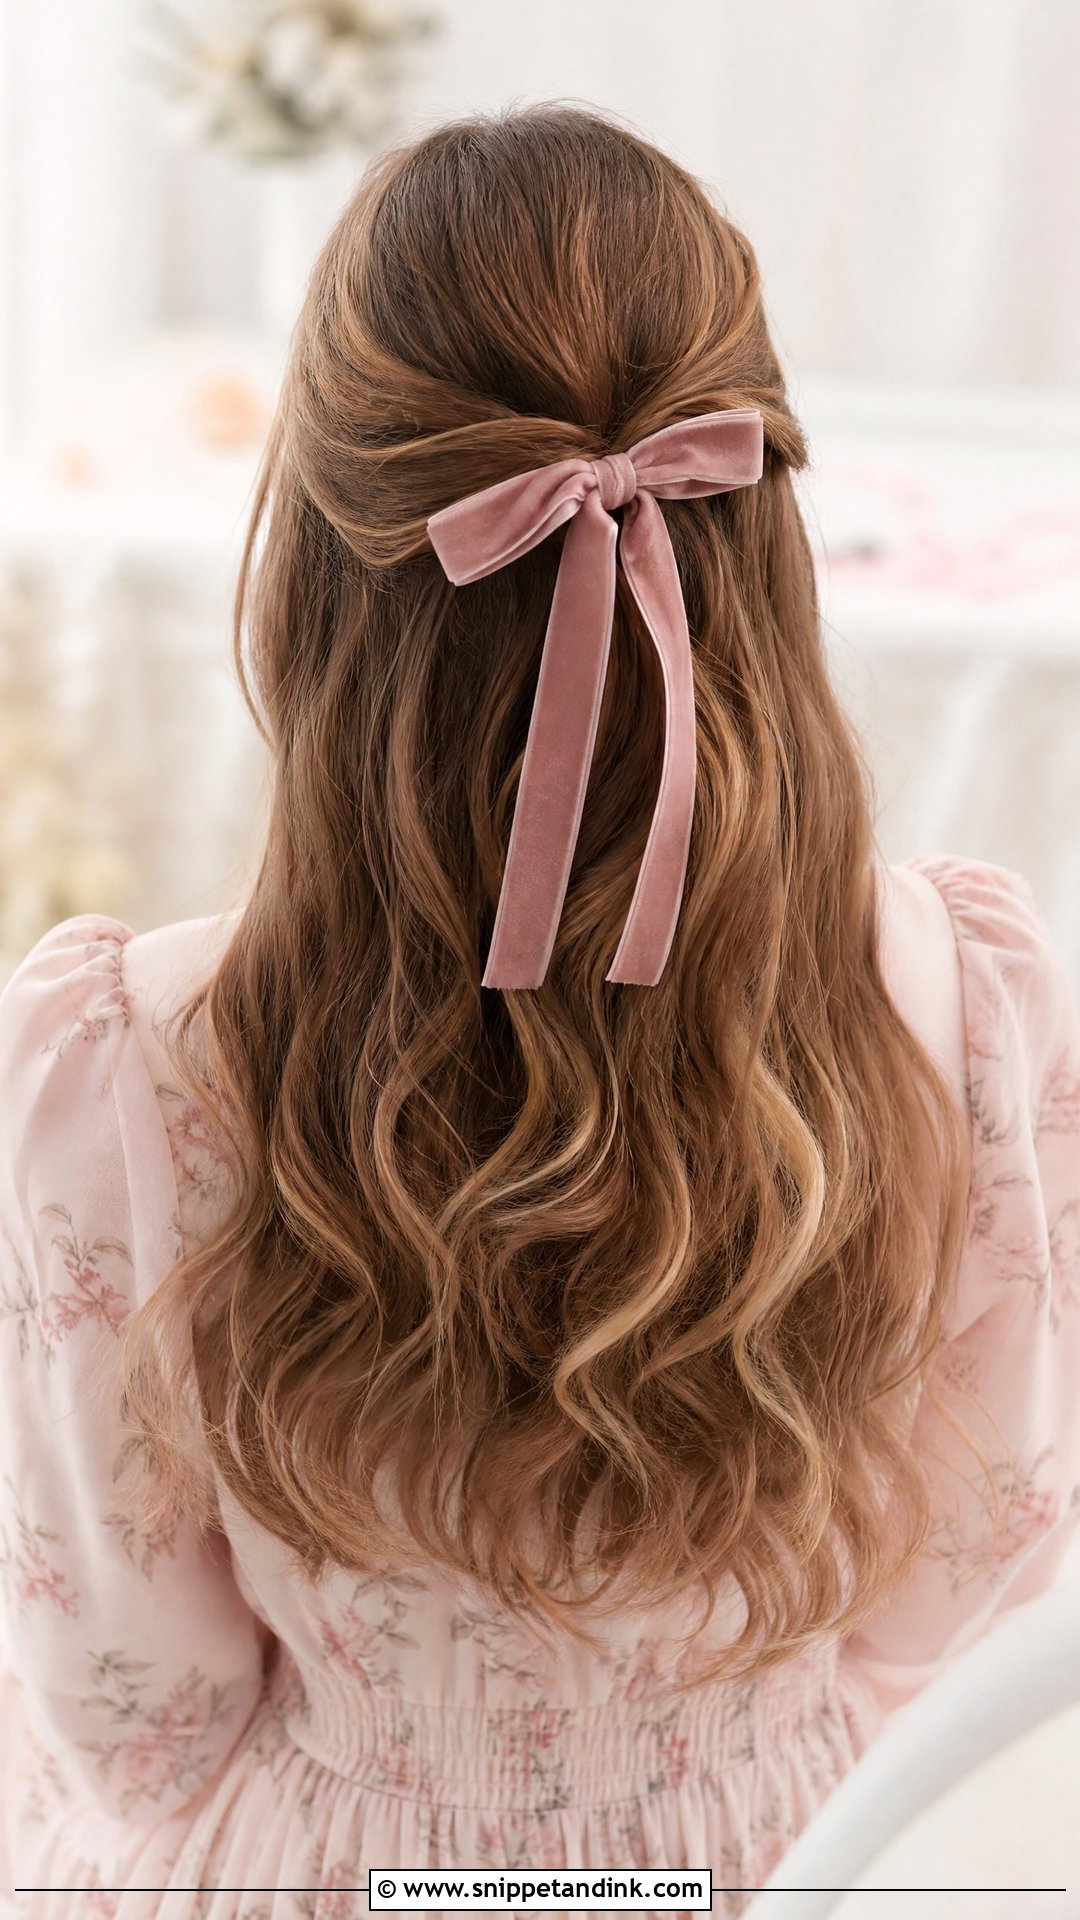
Bows are back, and a ribbon tied over a half-up section is the easiest way to wear one. Pull the top section back, secure it with an elastic, then tie a velvet or silk ribbon over it. Velvet grips and holds a crisp bow; silk slips, so I’d knot it twice or tie the bow in advance and clip it on. Leave the rest in soft waves. It works day or evening. If you know the bridesmaids’ colour, avoid matching it, or you may look like you joined the wedding party.
16. Sleek Straight Hair
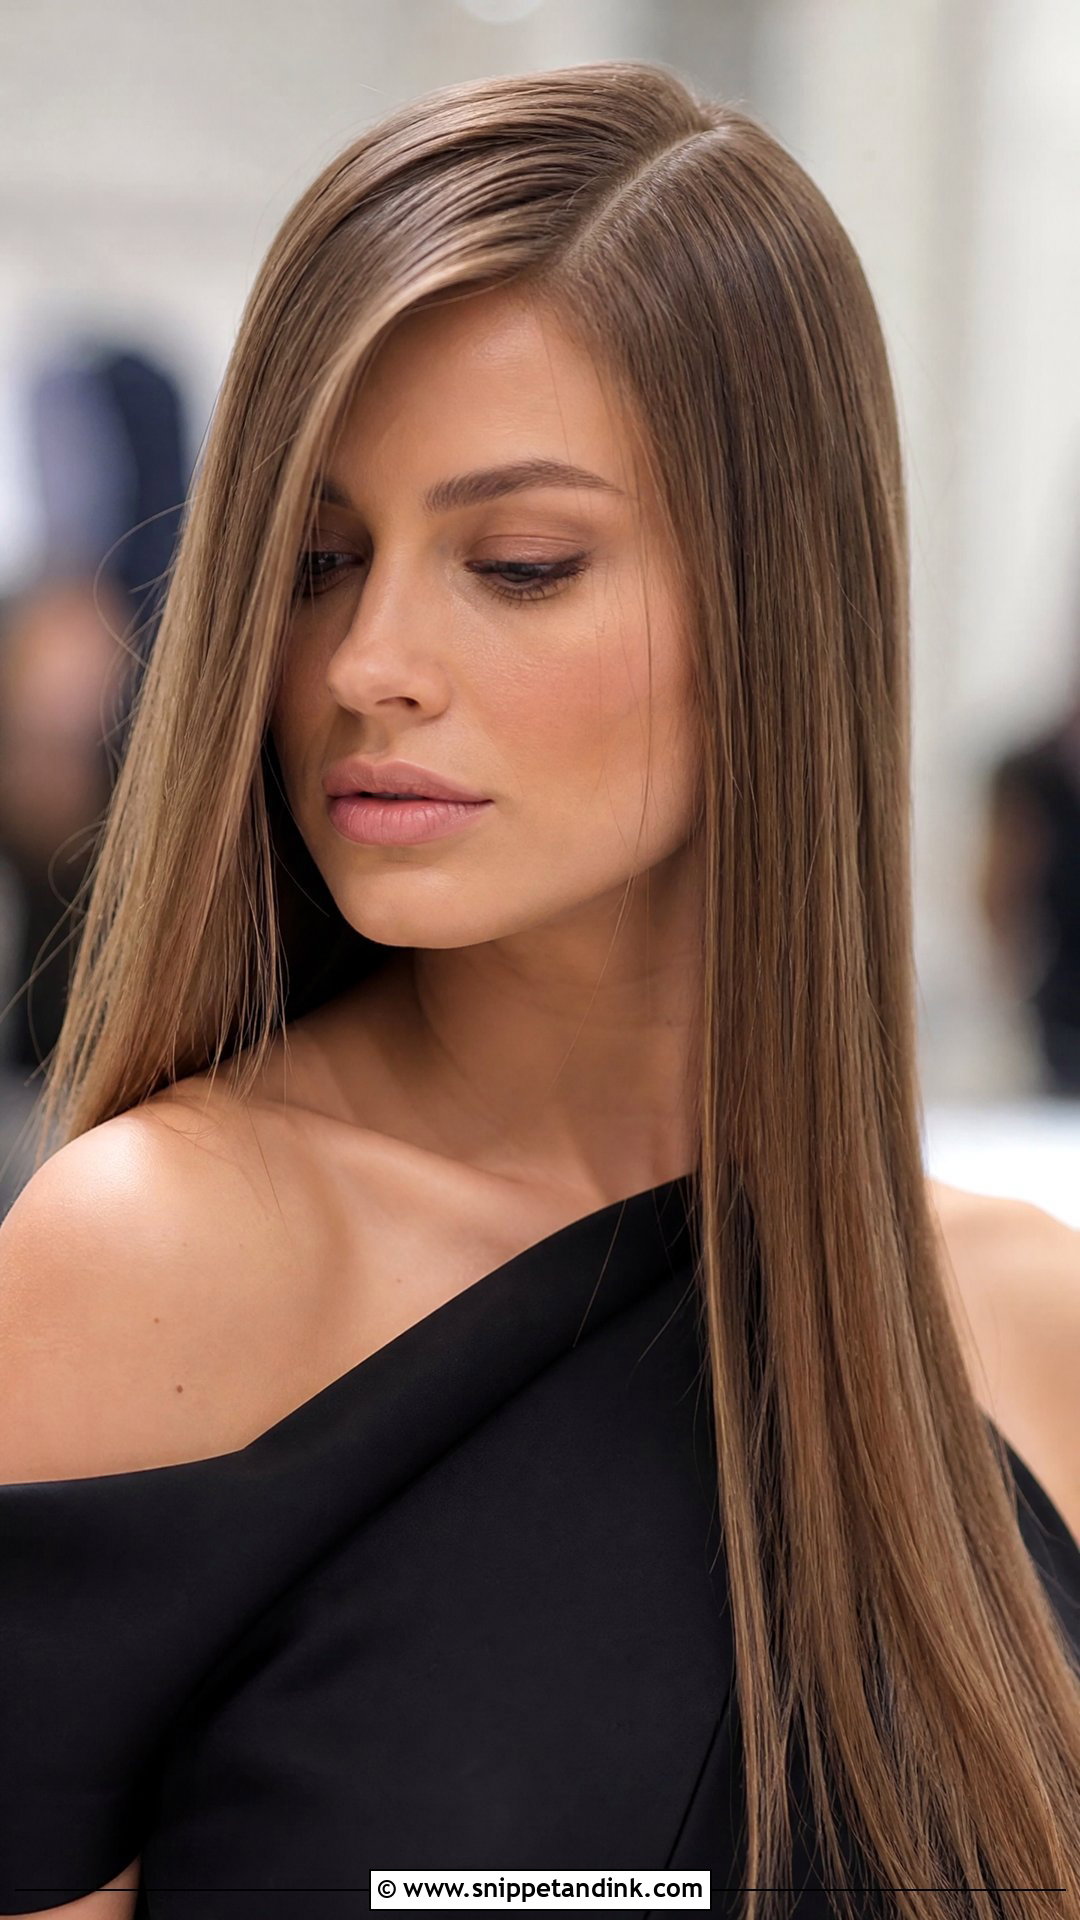
Sometimes the simplest finish is the sharpest. Flat iron from root to tip in small sections, then work a drop of shine serum through the lengths only, never the roots, or it turns greasy by dinner. A center or deep side part completes it, and the smooth surface shows off colour and shine on medium and long hair. The risk is humidity: naturally curly or wavy hair that has been straightened can frizz back within an hour outdoors, so I’d keep this one for indoor or cooler weddings if that’s your texture.
17. Side Swept Curls
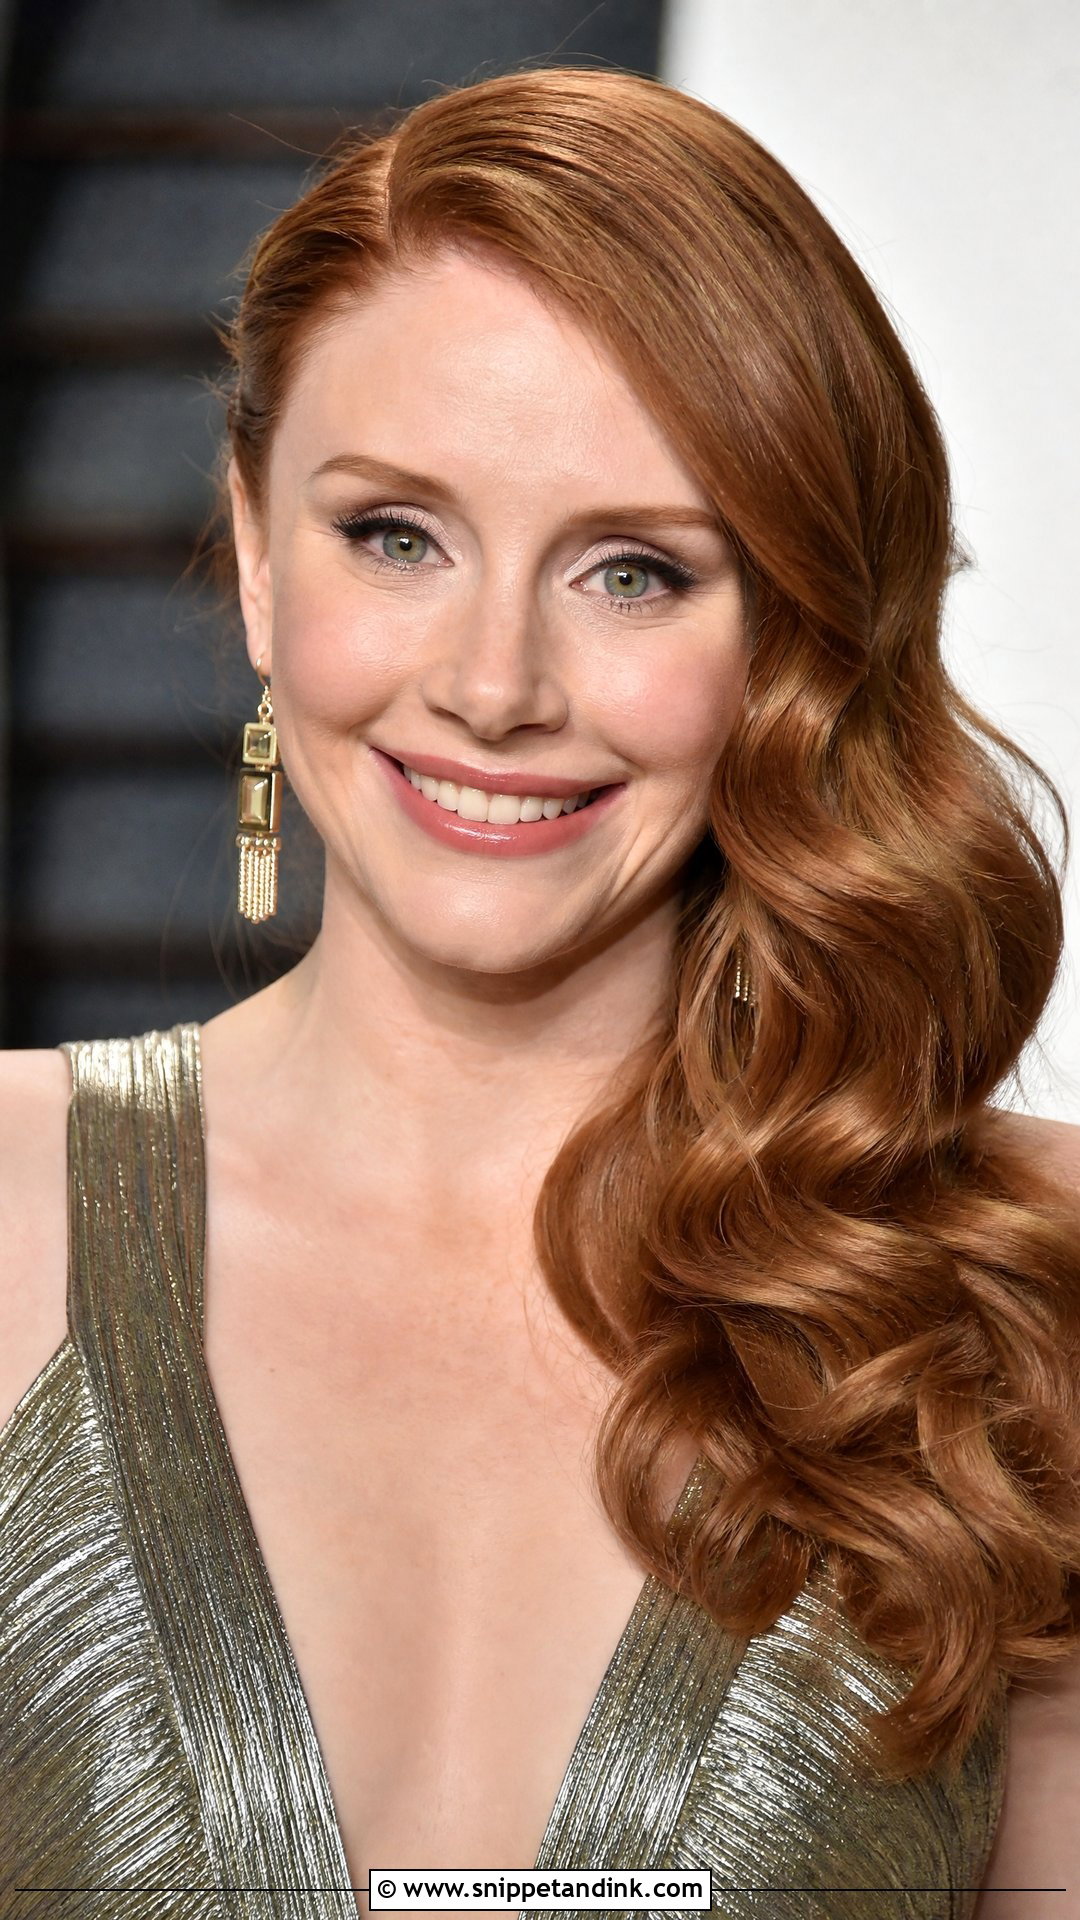
Side-swept curls gather everything over one shoulder and leave one earring on show. Curl with a medium-barrel iron, sweep the hair across and pin the opposite side behind the ear with two bobby pins crossed in an X; a single pin won’t hold the weight of the whole head pulling sideways. Medium and long hair suits it, especially for an evening wedding. Finish with hairspray so the curls keep their bounce, and check you can turn your head comfortably, since you’ll be doing that all through the ceremony.
18. Dutch Braid Updo
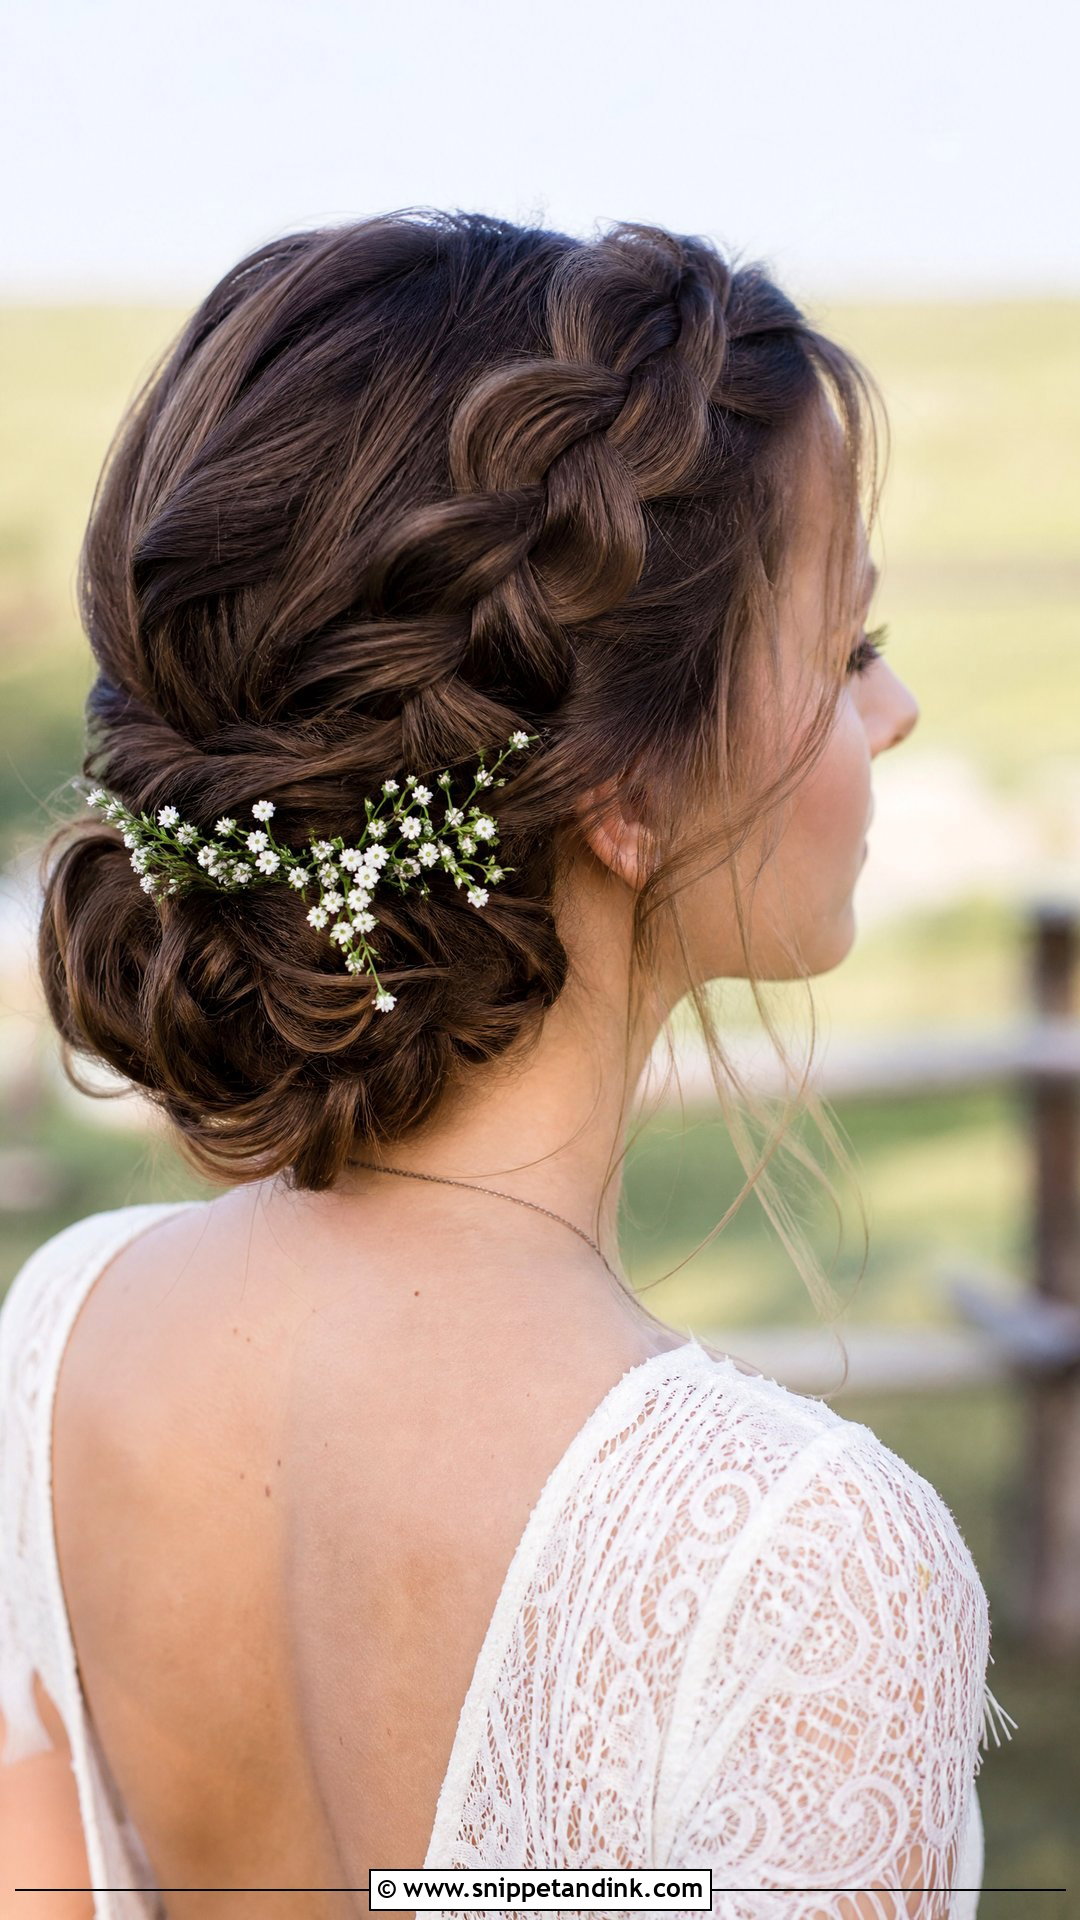
A Dutch braid crosses strands underneath, so the braid stands out from the head rather than lying flat. Start at the hairline, braid back, then tuck the tail into a low bun or roll and pin it. Pull at the outer loops to widen the braid. Because every section is locked in, it is one of the most secure styles here for dancing, heat and wind. It suits medium and long hair at a boho or outdoor wedding, and small flowers sit neatly in the loops.
19. Low Chignon With Center Part
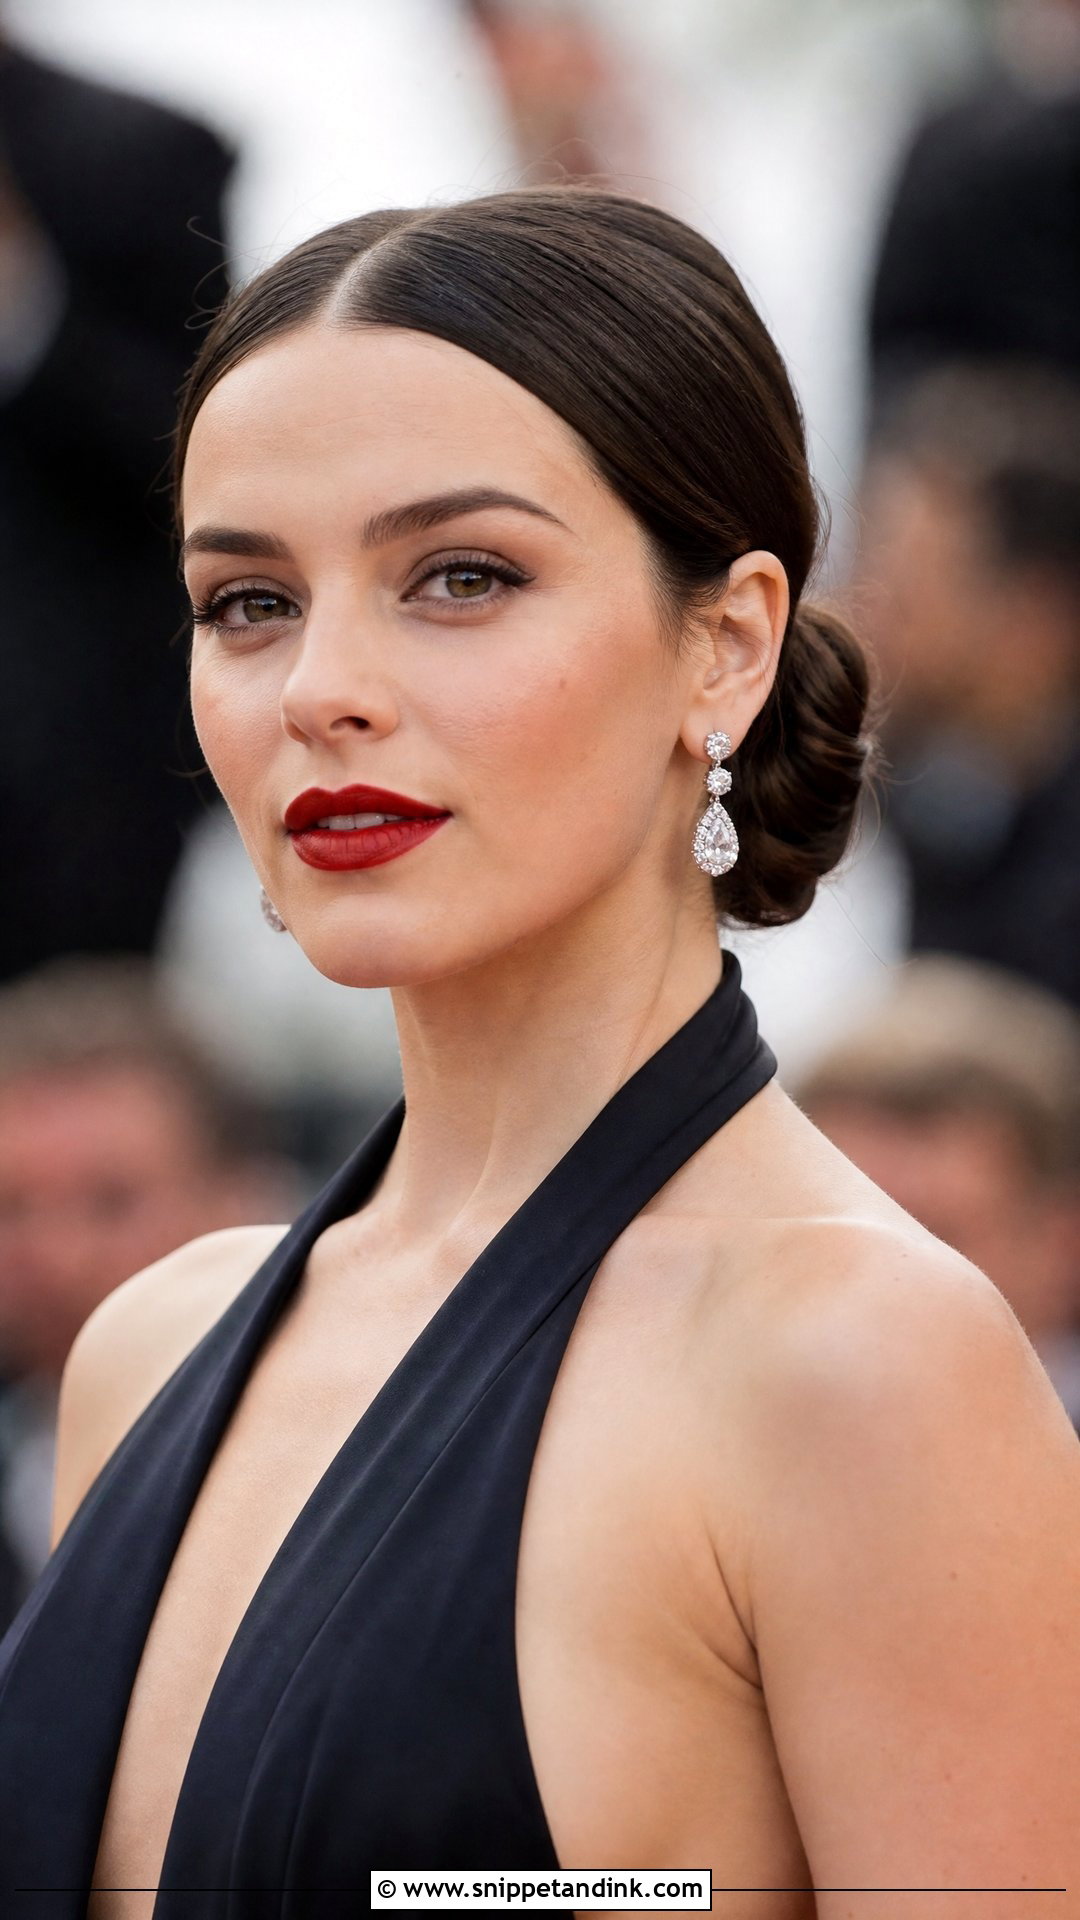
A clean center part with a low twisted bun at the nape is pared back and modern. Part the hair, smooth it back with a little serum, twist it into a low bun and pin. The part carries the whole look, so I draw it with the tail of a comb in one line from forehead to crown rather than in short jabs. It stays secure all evening at a formal wedding. Pair it with a bold lip or statement earrings; nothing else in the style competes with them.
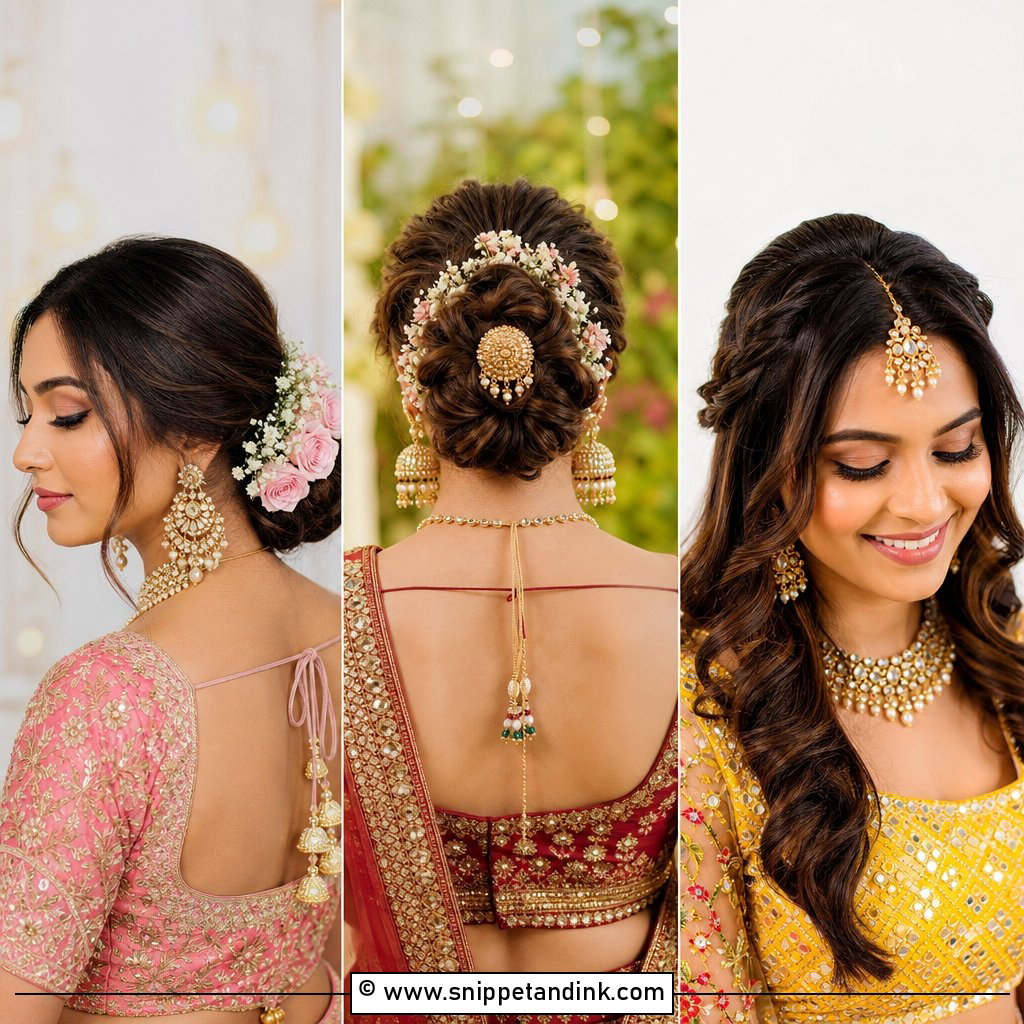
20. Twisted Low Ponytail
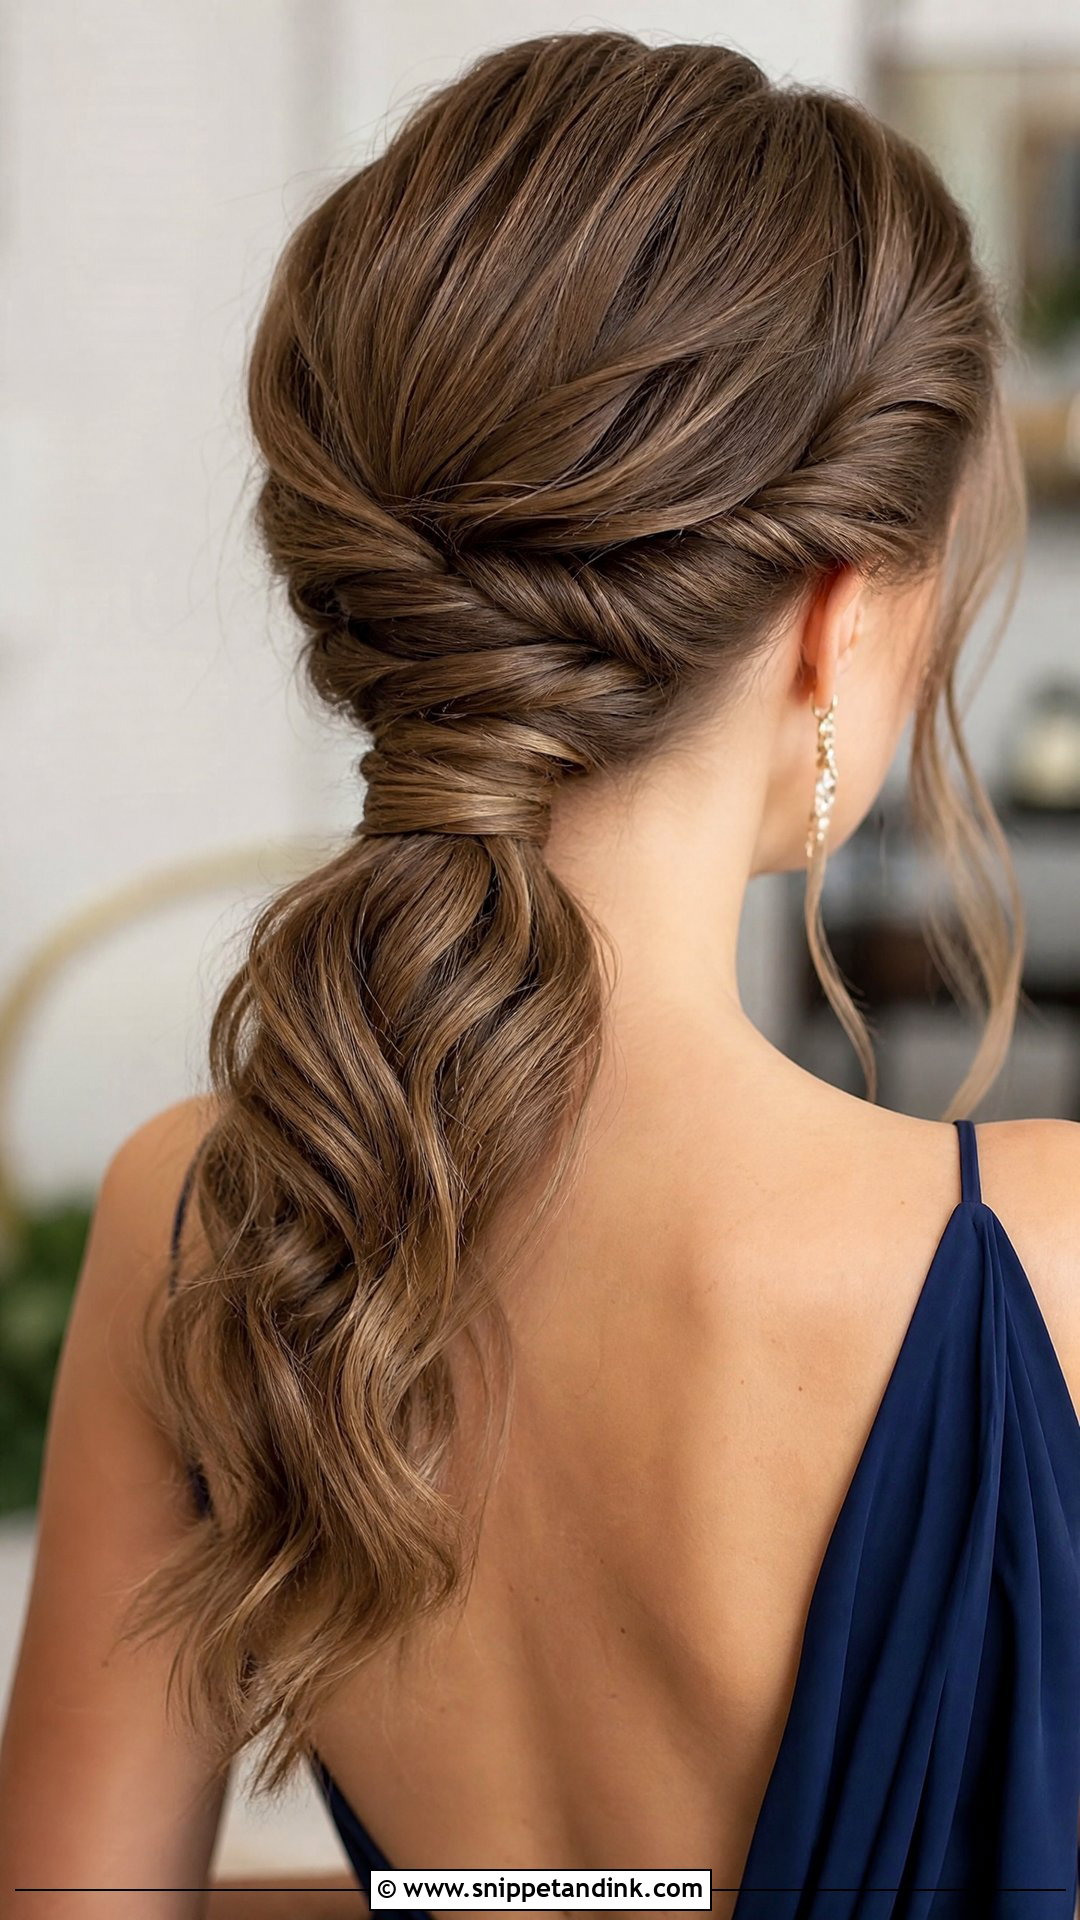
Twisted sections around the base, or a rope twist down the length, give a plain low ponytail some detail. For a rope twist, split the ponytail in two, twist each piece the same way, then wrap the two around each other in the opposite direction. That opposition is what stops it unravelling. Secure the end with a clear elastic. It suits formal and semi-formal weddings on medium to long hair, and gently pulling the twists softens it.
21. Loose Curls With Deep Side Part
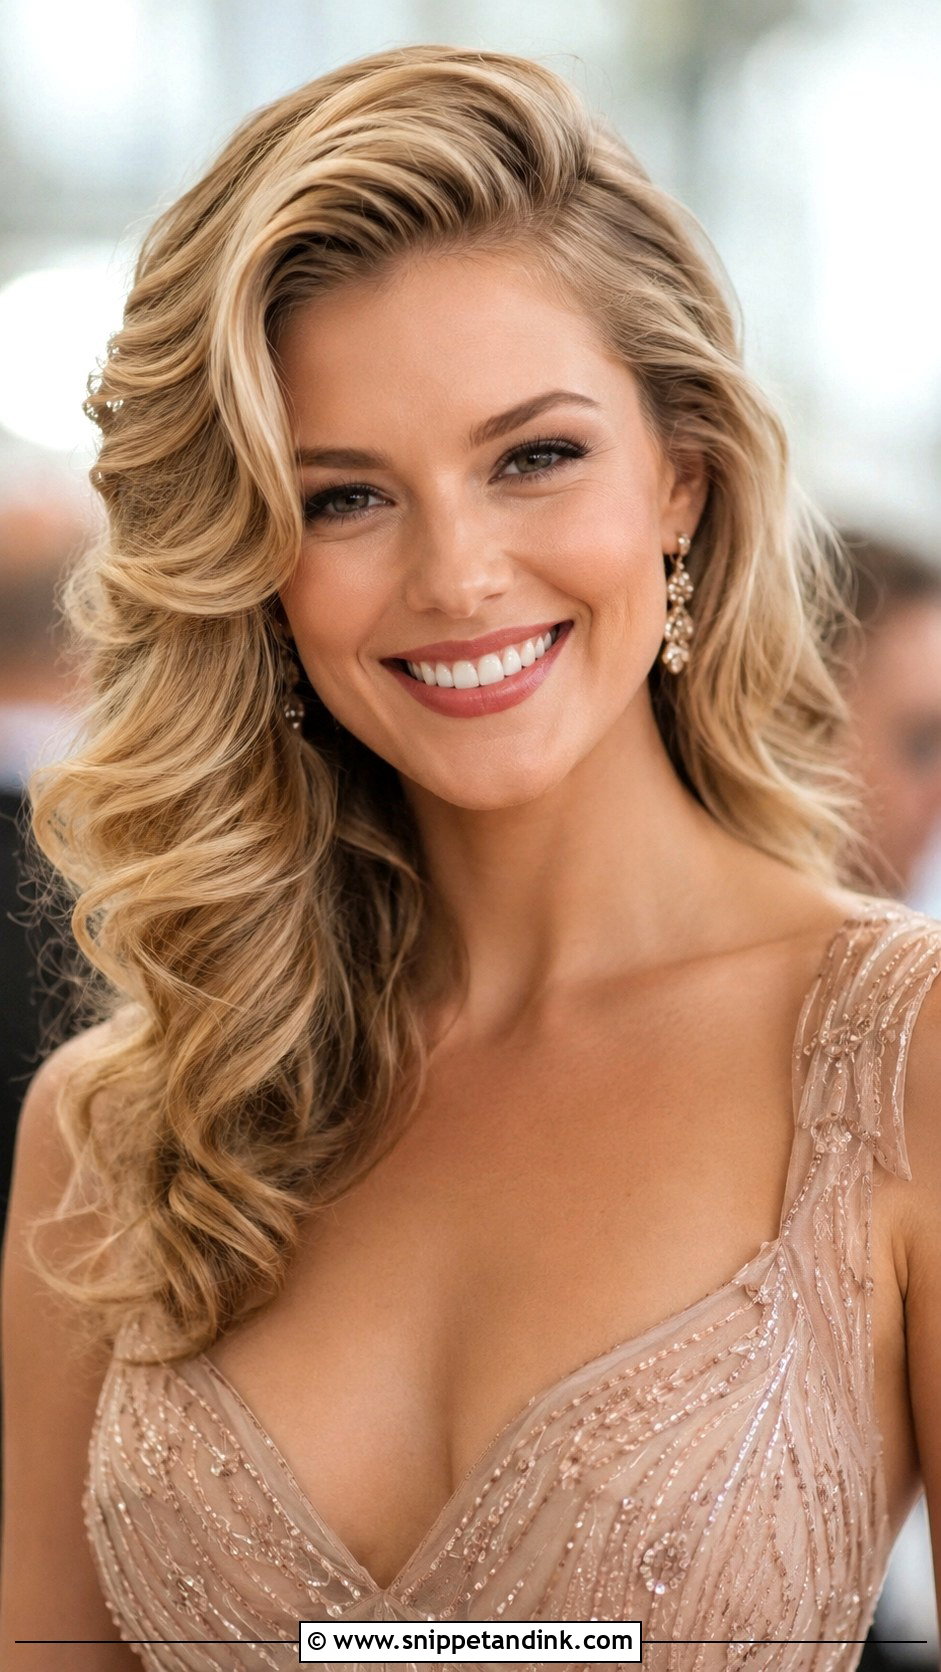
Deep side parts give instant lift at the roots and a touch of vintage shape. Make the part above the arch of one brow, curl with a large-barrel iron and brush through gently. If your hair is used to a center part it will try to flip back, so I clip the root on the heavy side for ten minutes while makeup goes on. Finish with flexible-hold hairspray to keep the curls moving. Day and evening weddings both suit it.
22. Braided Half Updo
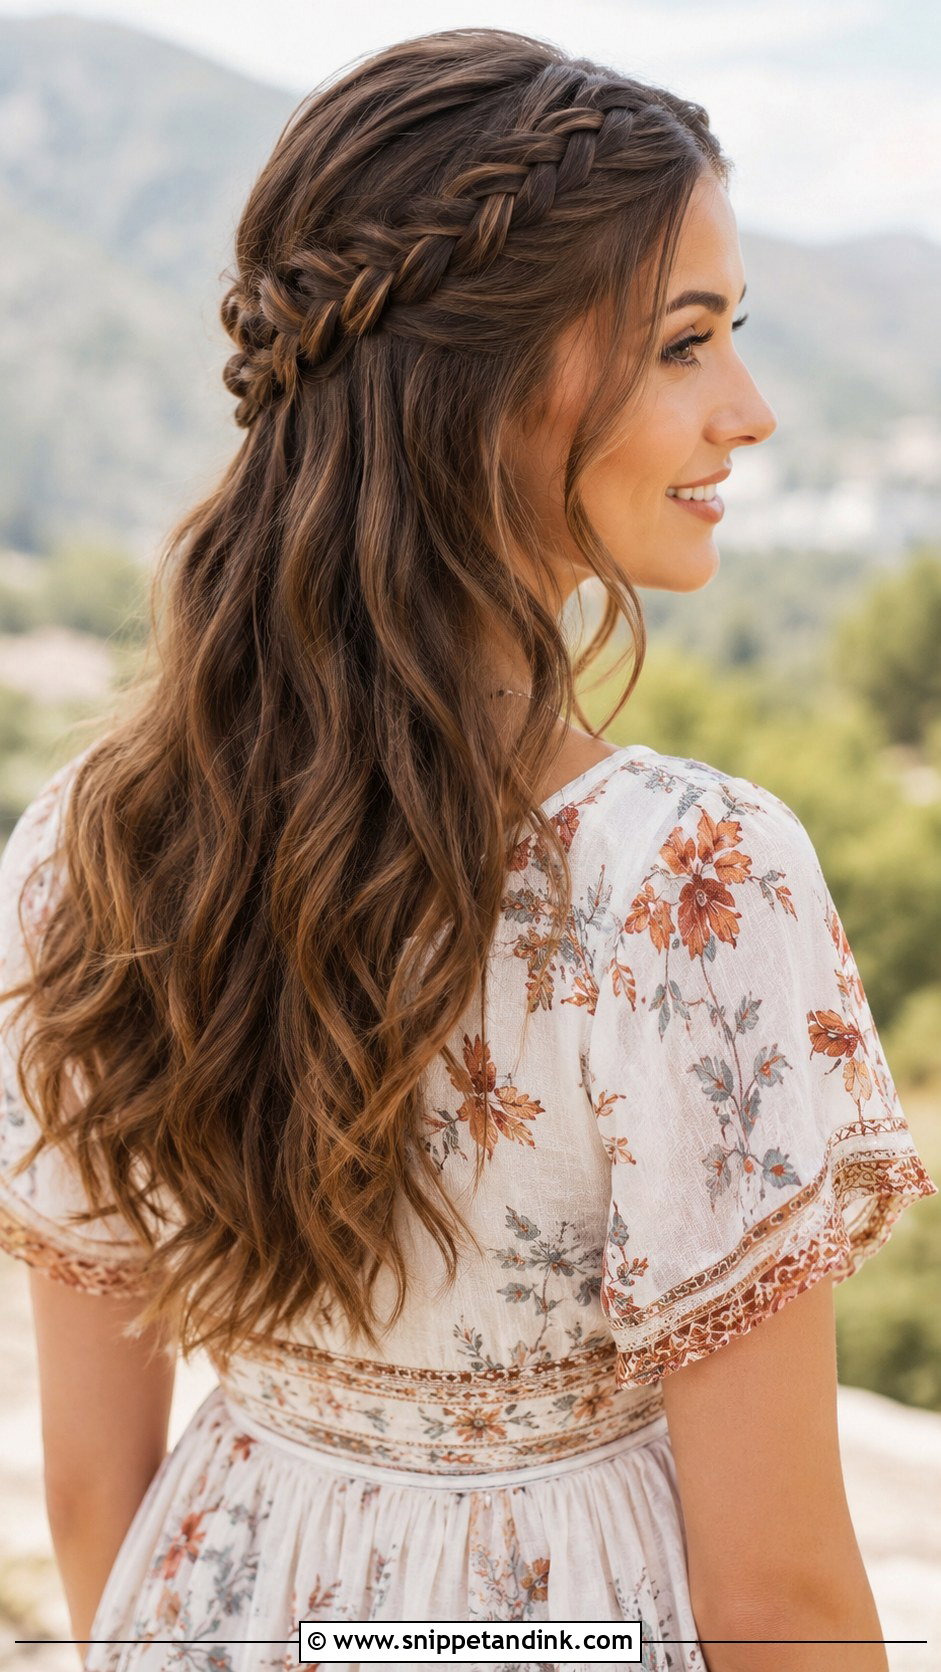
One or two braids from the front sections, joined at the back with a small elastic, with everything else loose in waves. You get hair off the face without committing to a full updo. I braid slightly loose and then pull the edges, because a tight braid pressed against the head looks severe next to soft waves. Boho and outdoor weddings suit it, on medium and long hair.
23. Tousled Updo With Tendrils
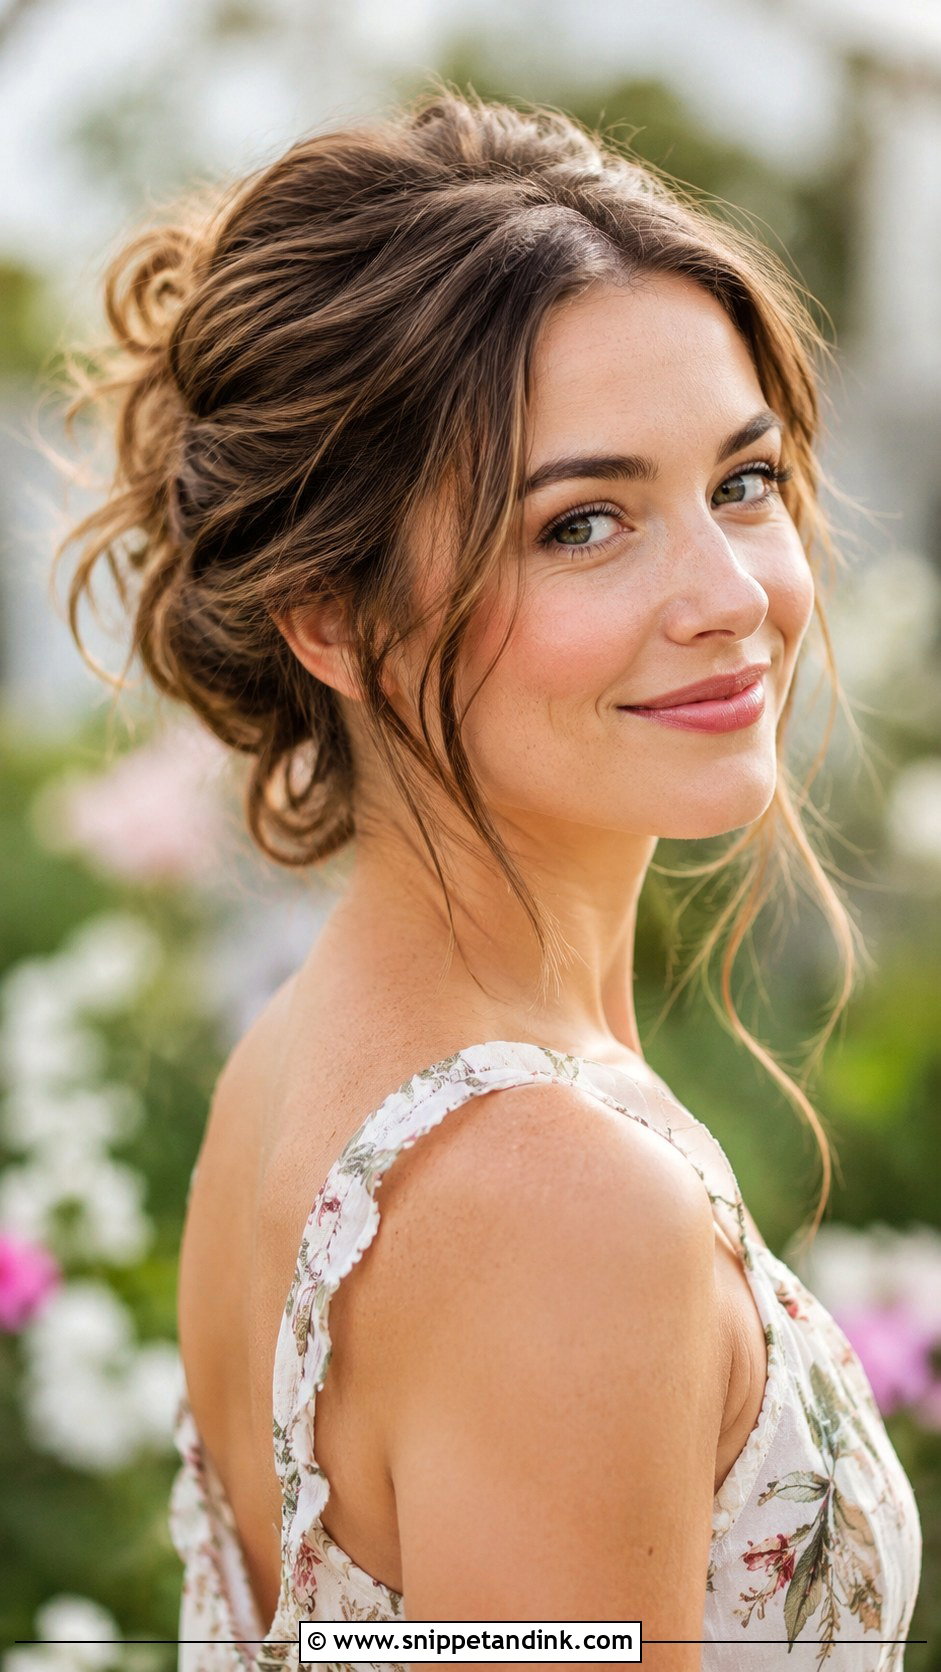
A tousled updo with soft tendrils is meant to look a little undone. Sweep the hair into a loose textured updo at the back, pull out tendrils around the face and nape, and tease a few sections for volume. Tendrils are the part that misbehaves. Curl them separately with a small iron; otherwise they hang straight and look like hair that escaped by accident. It suits garden weddings and casual celebrations, and almost any face shape or texture.
24. Slicked Back Bun
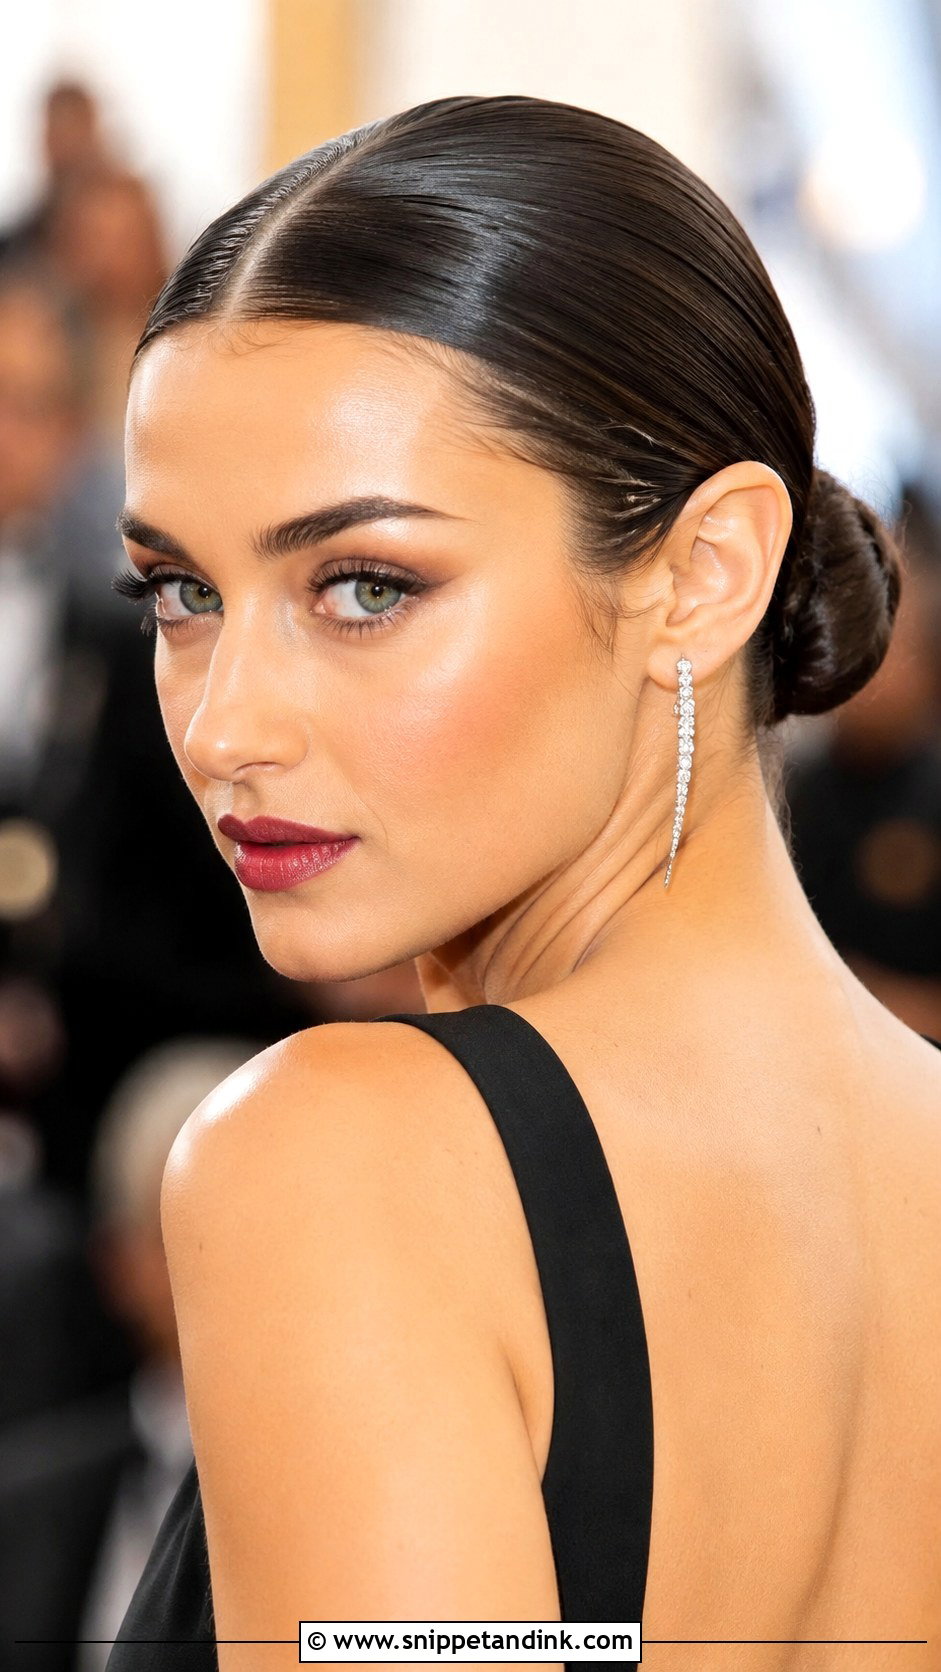
A slicked-back bun pulls every strand away from the face. Work gel or strong-hold pomade through slightly damp hair, brush it flat with a boar bristle brush, then twist it into a low or mid bun and pin. Applying product to damp hair gives the wet-look shine without the crunch. It shows off earrings and a neckline and stays flat all night at a formal or contemporary wedding. I’d skip it if a tight pull at the hairline is uncomfortable for you, or if your edges are fragile from braids or extensions.
25. Fishtail Braid
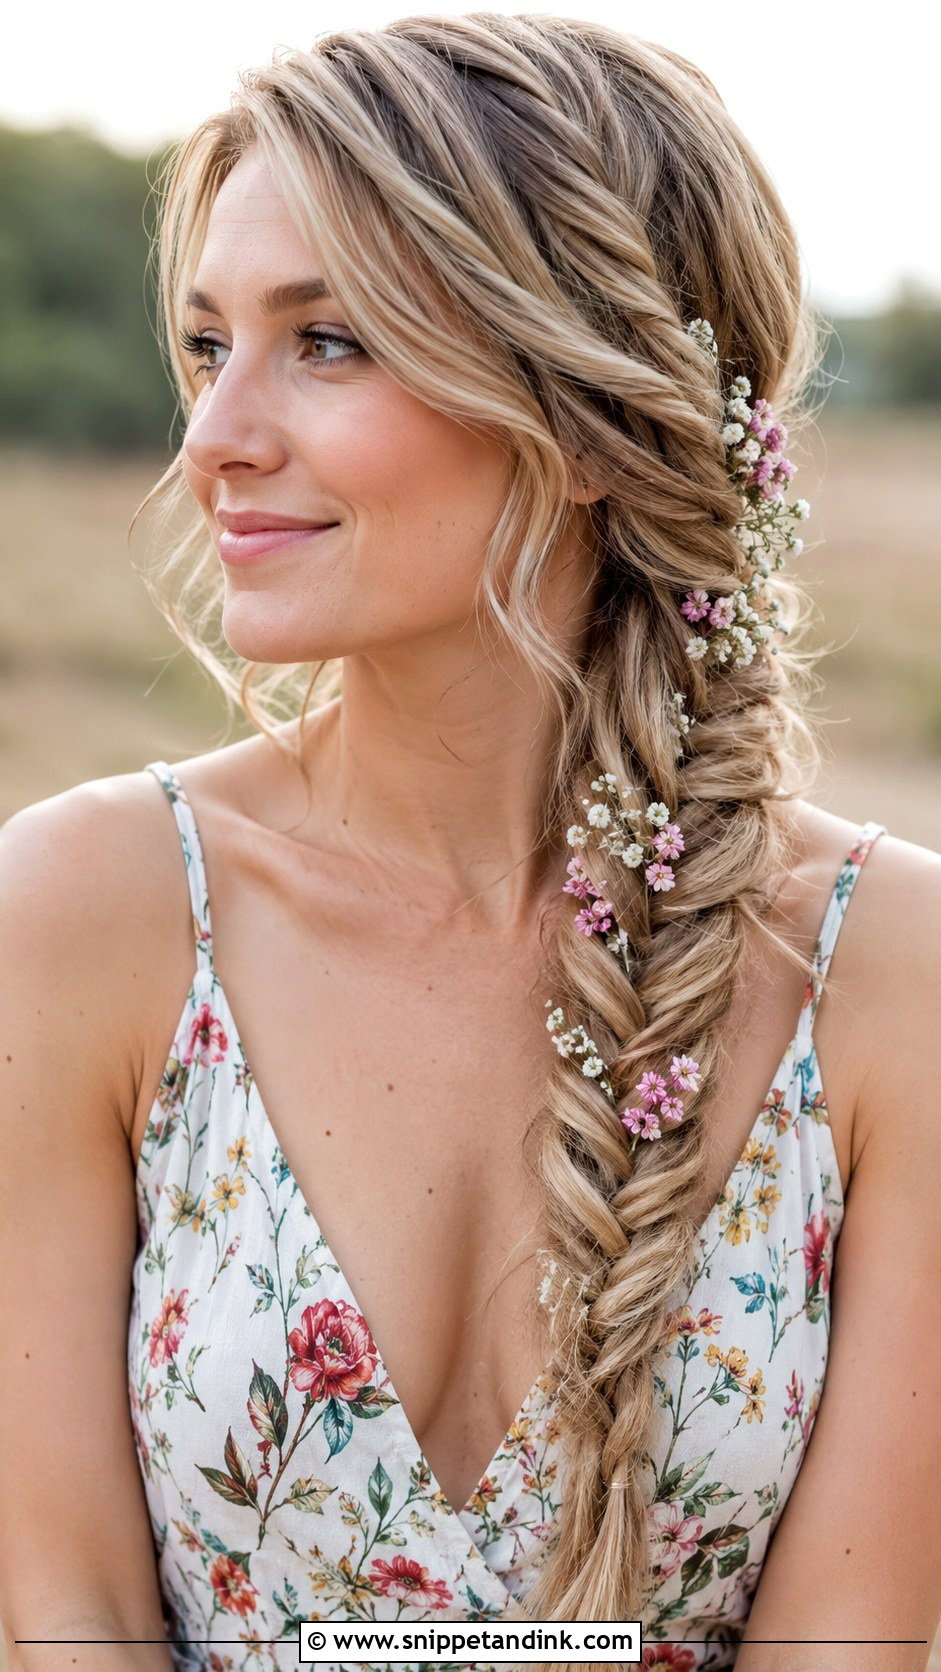
A fishtail uses two sections instead of three: cross a thin piece from the outside of one side over to the other, then repeat from the opposite side. Thin pieces make the fine woven pattern; thick ones turn it into a lumpy plait. Secure with an elastic, then pull the edges apart for width. Worn over one shoulder or down the back, it suits casual and outdoor weddings on medium and long hair. It looks complicated, but it is really just patience and repetition.
26. Half Up Top Knot
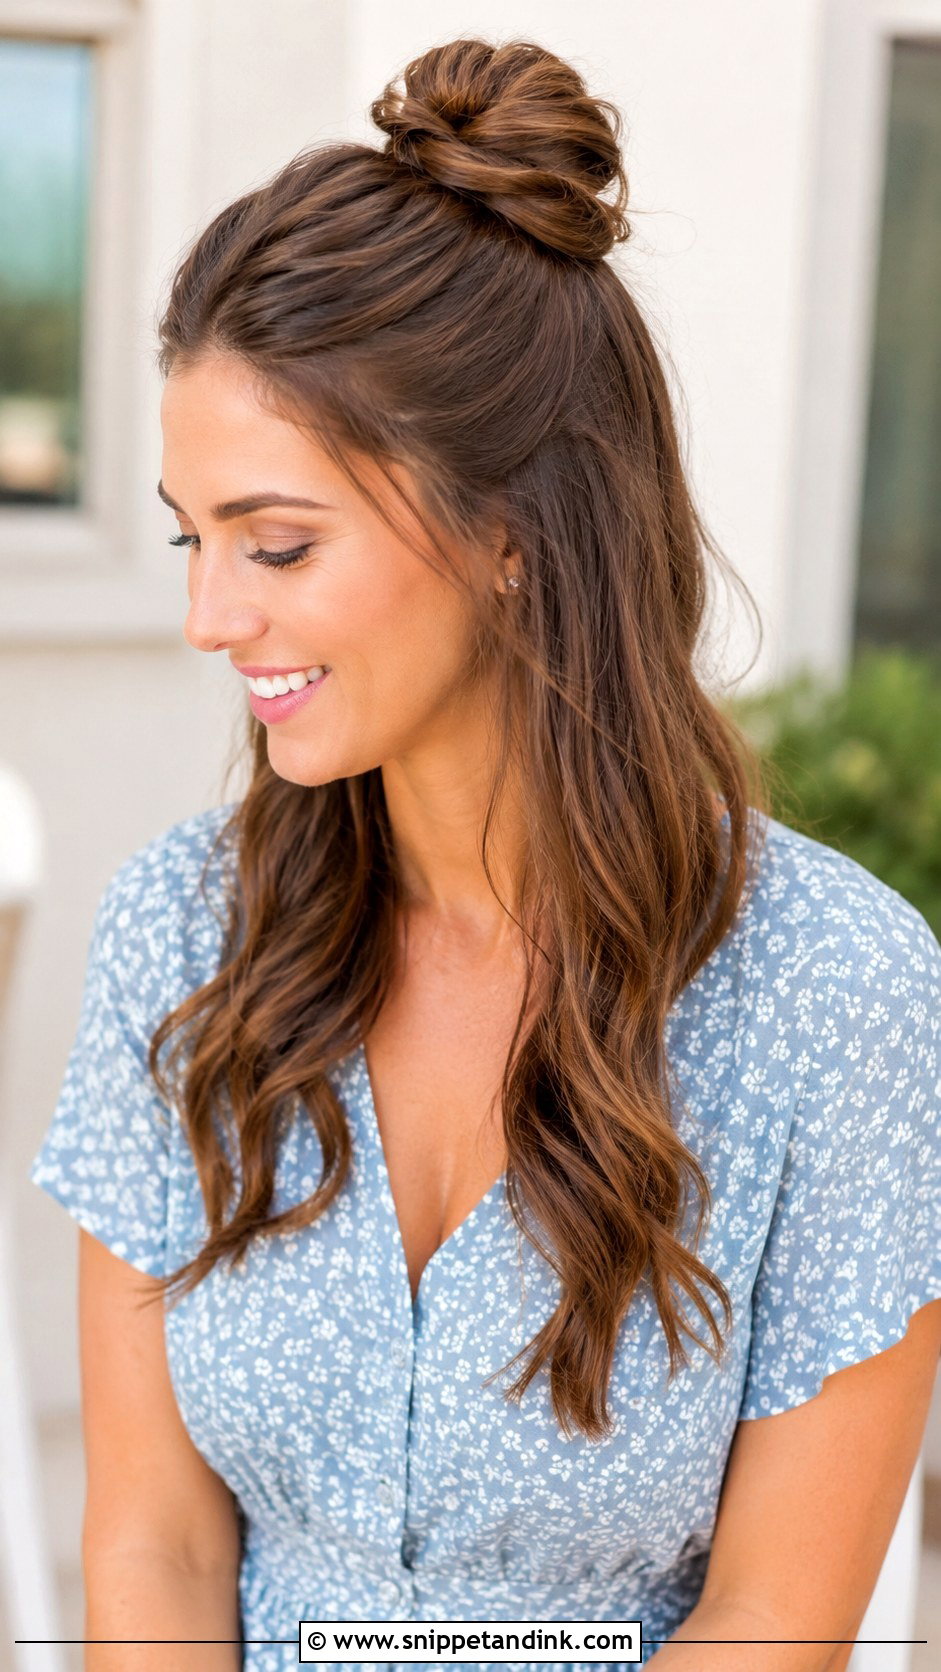
A small bun at the crown with the rest of the hair down in waves. Gather the top section, twist it into a knot and pin it, then add texture spray to the loose lengths. It keeps hair off the face and shows off length, and it feels young and playful. Keep the knot small. A large top knot on a half-up section starts to look like gym hair rather than something for a semi-formal wedding.
27. Curly Updo
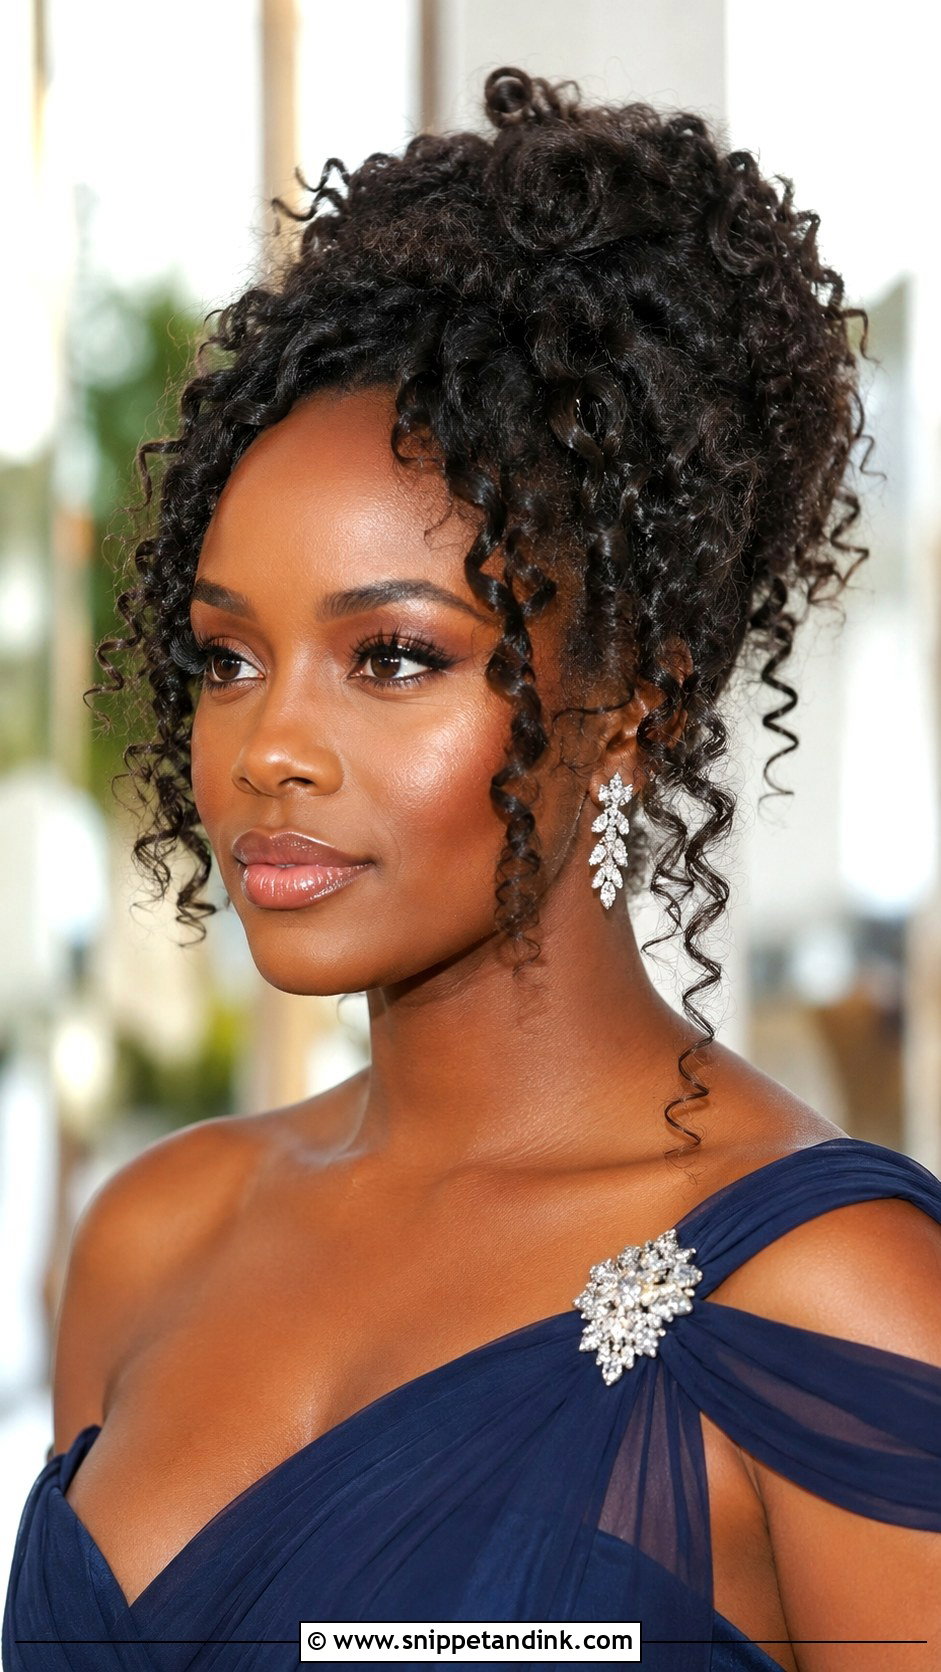
Curly and coily hair can go into an updo without being straightened first, and I’d always encourage that. Gather the curls into a loose high or low updo, pin sections in place while keeping the shape full, and let a few curls escape around the face. Prep with a leave-in or curl cream on damp hair instead of brushing dry curls, which turns definition into frizz. Large U-pins slide into the volume without flattening it. Sparkly pins or fresh flowers finish it for a formal or outdoor wedding.
28. Twisted Crown With Loose Hair
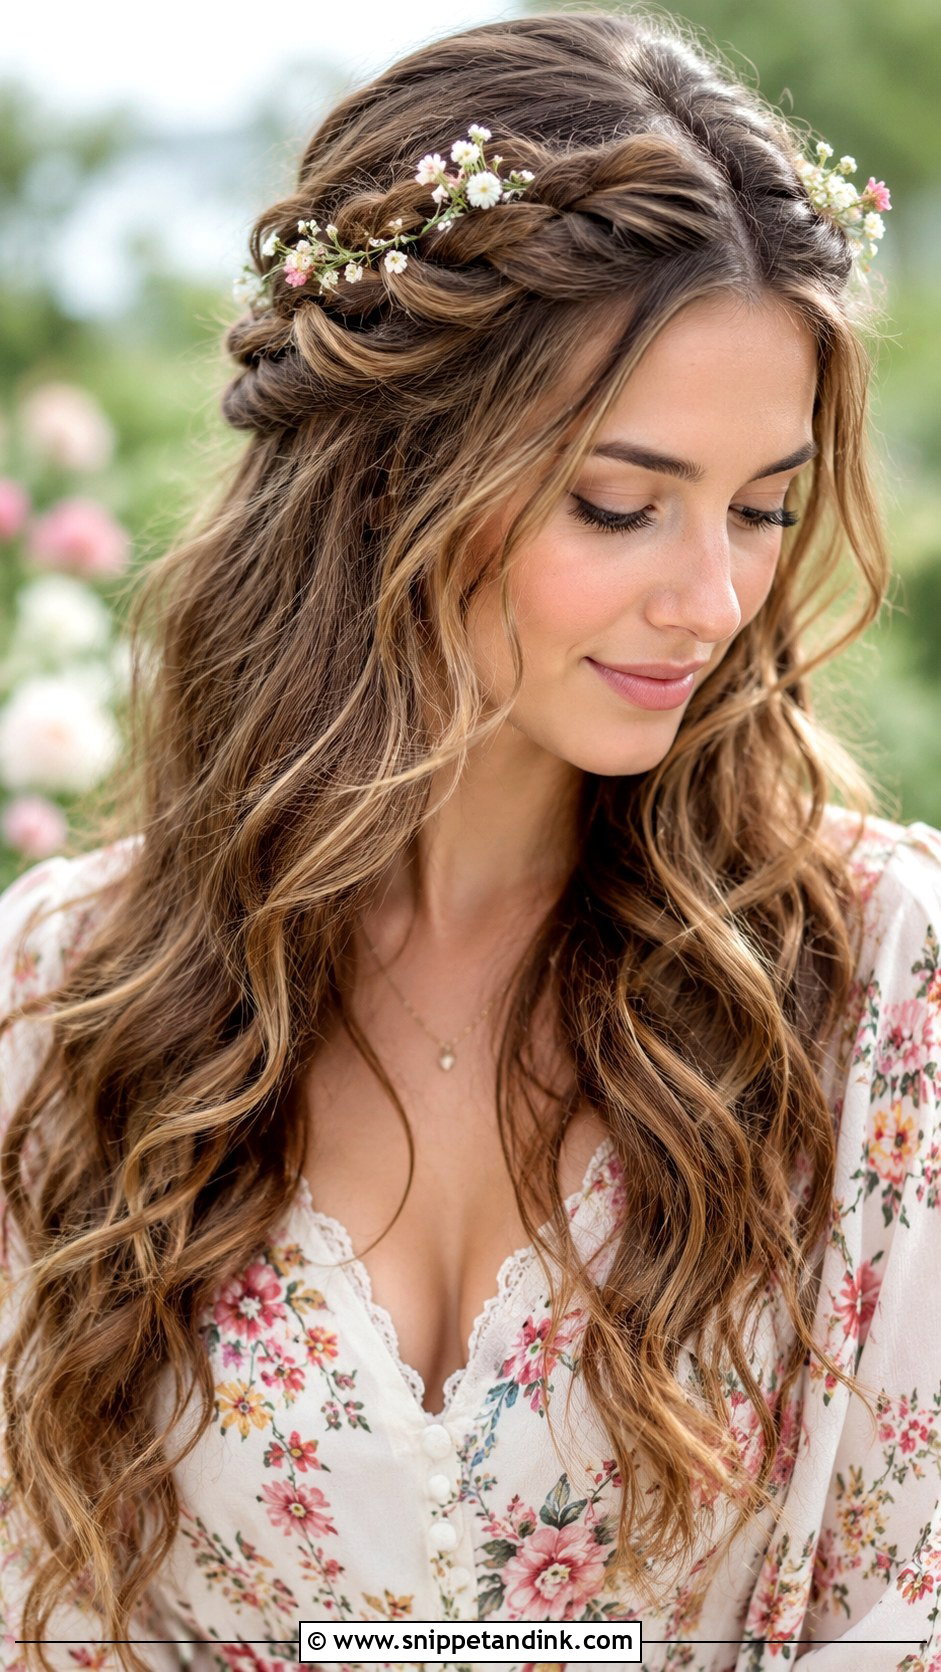
This is the softer cousin of the braided crown. Twist sections from each side back and pin them across the top, then leave the rest down in waves. Twists are faster than braids if you never learned to plait, but they untwist when the pins only catch the surface, so push each pin through the twist and into the hair beneath. Loosen the twists a little for a lived-in feel. Garden and boho weddings suit it, with tiny flowers if you like.
29. Sleek Bob With Side Part
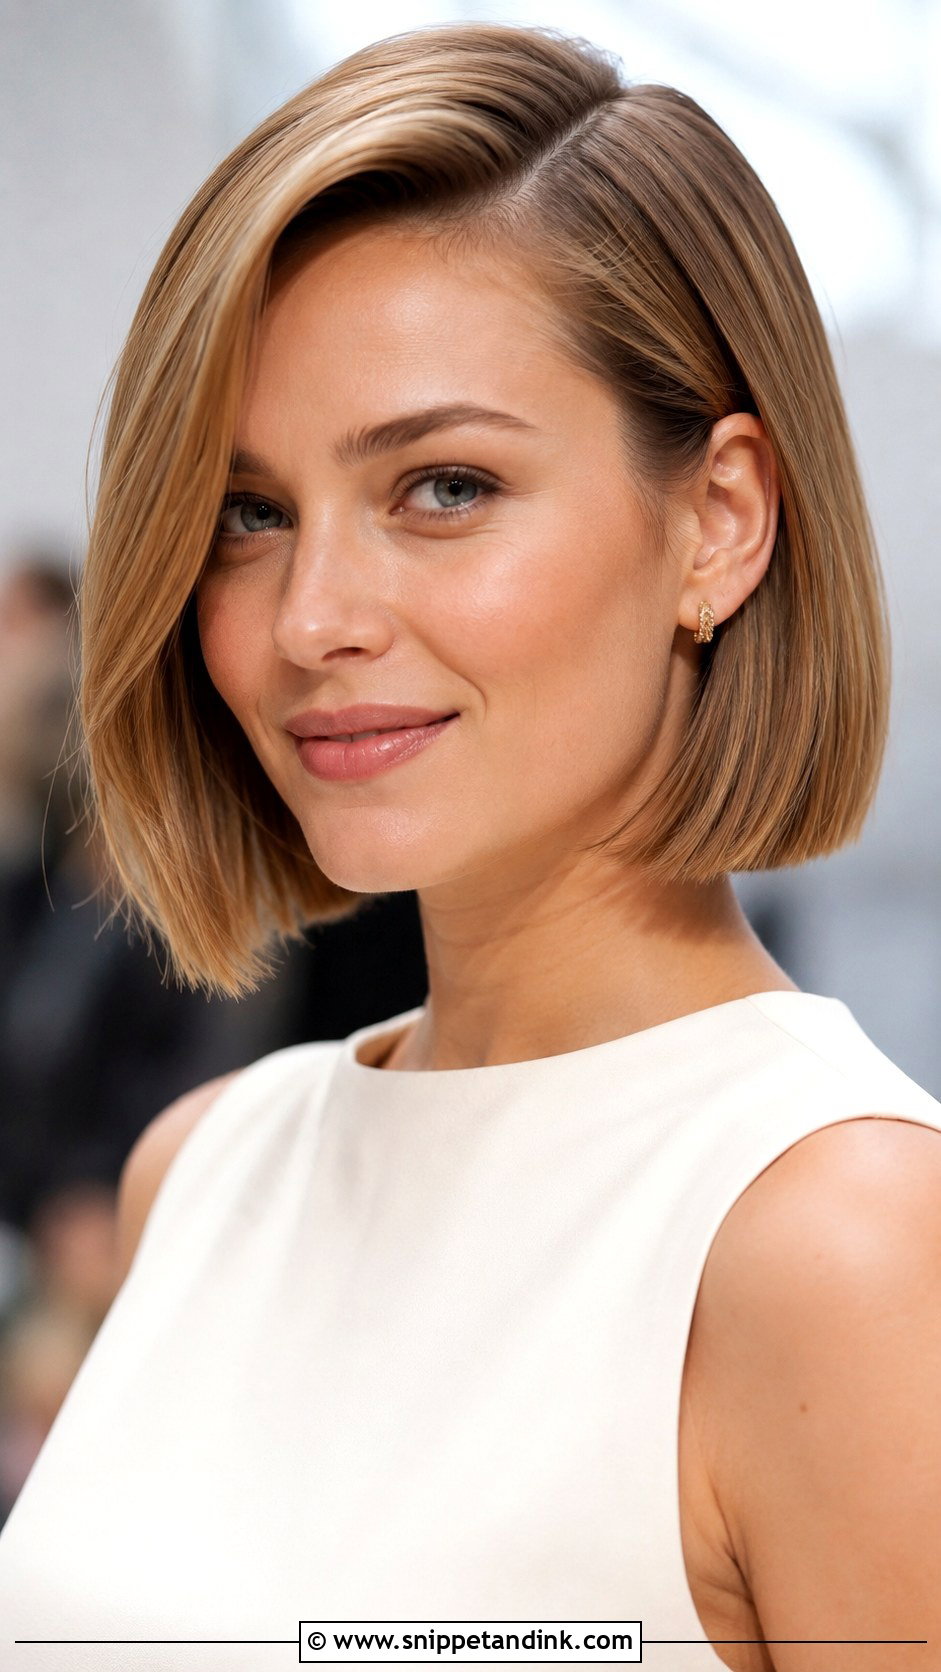
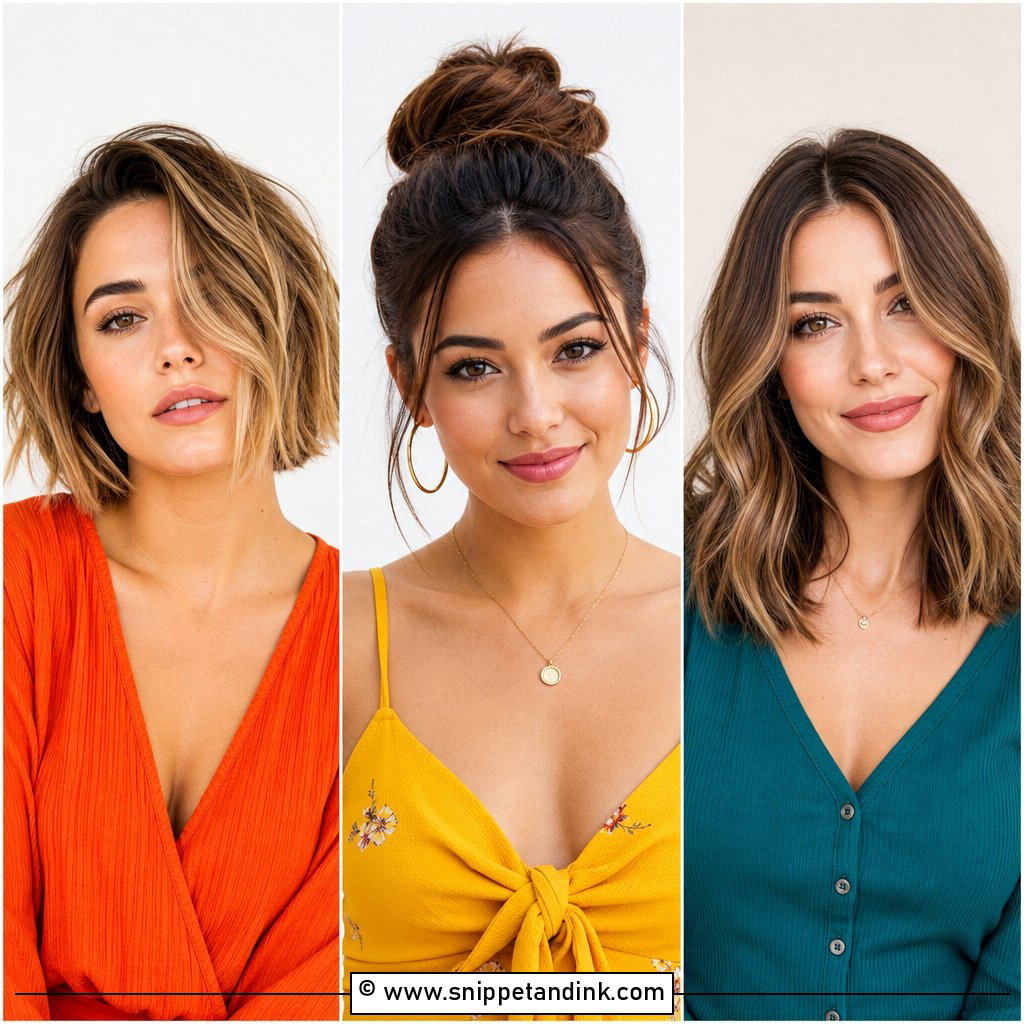
Short hair has fewer options at a wedding, and a sleek bob with a side part is my favourite of them. Flat iron until glossy and straight, then place a deep side part and tuck one side behind the ear to show an earring. A bob shows every kink, so I iron the ends with a slight inward bend rather than poker straight; a dead-straight end tends to flick out by evening. A drop of shine serum finishes it for a formal or contemporary wedding.
30. Soft Waves With Pinned Back Sides
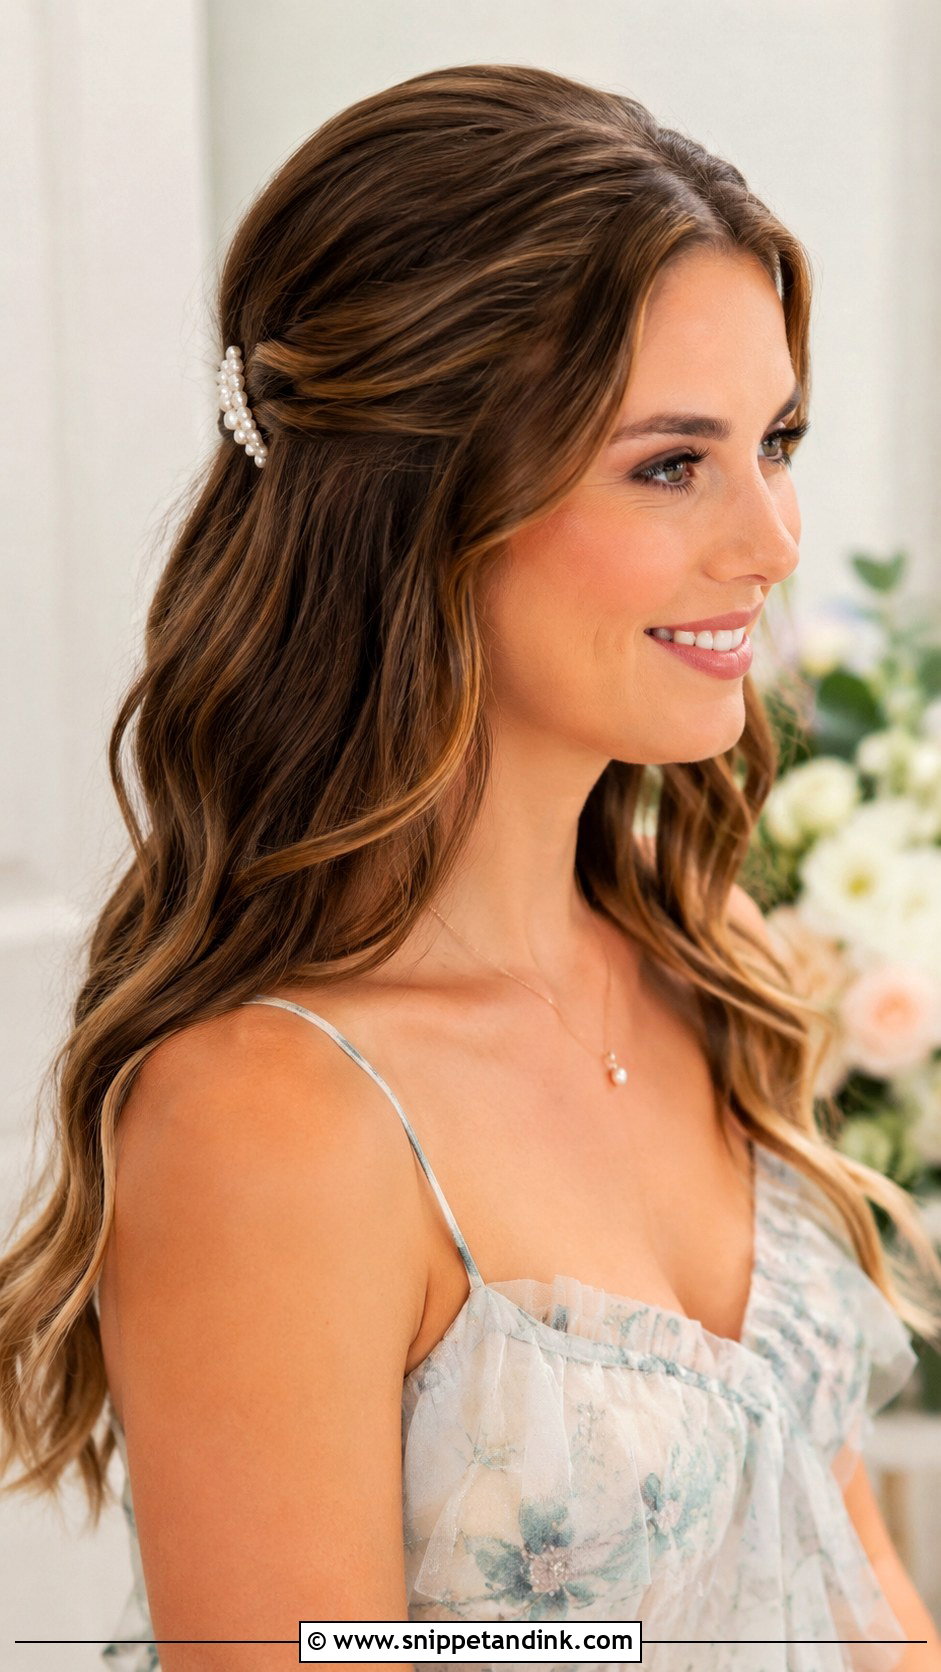
Waves with the sides pinned back keep hair off the face while still showing length. Curl loose waves with a wide-barrel iron, then pin both sides behind the ears with decorative clips. Place the pins slightly above the ear rather than right at it, or they press against glasses arms and earring backs. The pinned sides look finished without a full updo, day or evening, on medium and long hair. Pearl or floral pins suit it.
From Ceremony Breeze to Dance Floor Heat
A wedding is a long day for hair. You might stand outside in wind for the ceremony, sit for two hours at dinner and then dance in a warm room. Each stage finds a different weakness in a style.
Outdoors and in the wind
Wind loosens anything that is resting rather than anchored. Braided styles and pinned buns ride it out; loose waves and half-up curls tangle. If the ceremony is on a beach or a hilltop, I’d pick from the braids or buns and save loose waves for an indoor reception.
Humidity and a warm room
Moisture in the air drops curls on fine hair and puffs up straightened hair that is naturally curly. Use a heat protectant, let every curl cool fully before you touch it, and spray the finished style from arm’s length so the hairspray dries as a light film rather than wet patches.
A small kit for your bag
- Six bobby pins and two clear elastics
- A travel-size hairspray
- A folding brush or wide-tooth comb
- Blotting papers for the hairline on a hot dance floor
If a style does give up, fall back on the simplest rescue: twist everything into a low bun and pin it. Almost every look above converts into one in a couple of minutes, and nobody at the party will know it wasn’t the plan.
Thirty Styles, One Practice Run Each
Most of these styles need a brush, an iron, some pins and a little practice, and many take just a few minutes once your hands know the steps. Match the style to your length and to the dress code on the invitation, rehearse it once, and tuck a small kit into your bag. Then you can stop thinking about your hair and enjoy the wedding.
You'll Like These Ideas:


Leave a Reply