
Guests ask me for hair help almost as often as brides do, and the request is nearly always the same: something that looks done, survives dinner and dancing, and doesn’t need a salon chair. Most of the styles below can be done at home with a curling iron, a handful of pins and a bit of practice. From waves and low buns to braids that look harder than they are, simple wedding guest hair is really about choosing the right style for your length and then setting it properly. I’ve added notes on what each one needs to last, and who it won’t suit.
Prep That Makes a Ten-Minute Style Actually Hold
Most guest hair that collapses by the first dance didn’t fail because of the style. It failed in the prep. Freshly washed, conditioned hair is slippery and pins slide right out. I’d wash the night before, or at least the morning before, and add dry shampoo or a texture spray at the roots before you start, even on clean hair.
- Use an elastic as the anchor for any bun or ponytail; pins shape, elastics hold.
- Cross two pins in an X where you need real hold, rather than adding more single pins.
- Let curls cool completely before touching them, then brush out.
- Finish with a flexible hairspray from a distance, not a heavy mist close to the head.
Do a full practice run at least once, ideally a few days ahead, wearing the earrings you plan to wear. That’s when you’ll find out if a style needs more length, more texture or more time than you thought.
In your bag, carry a few bobby pins in your hair color, a spare elastic and a travel-size dry shampoo. Those three fix most of the problems I see by late evening: a slipping bun, a fallen braid end or flat roots after a sweaty dance floor.
1. Soft Romantic Waves
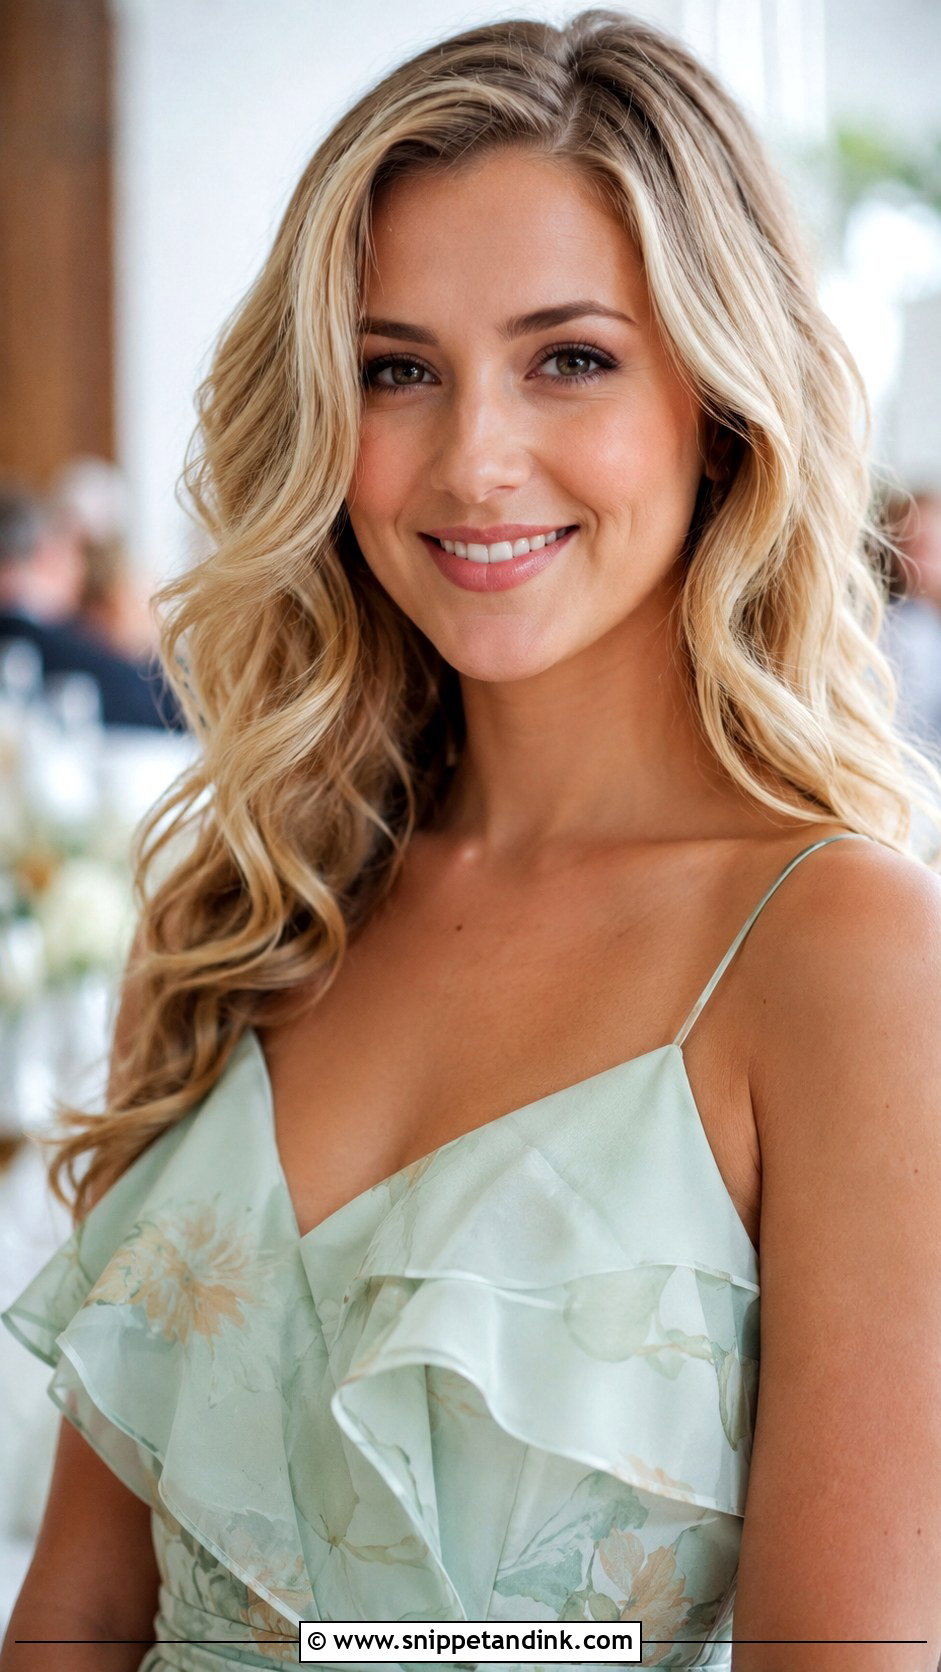
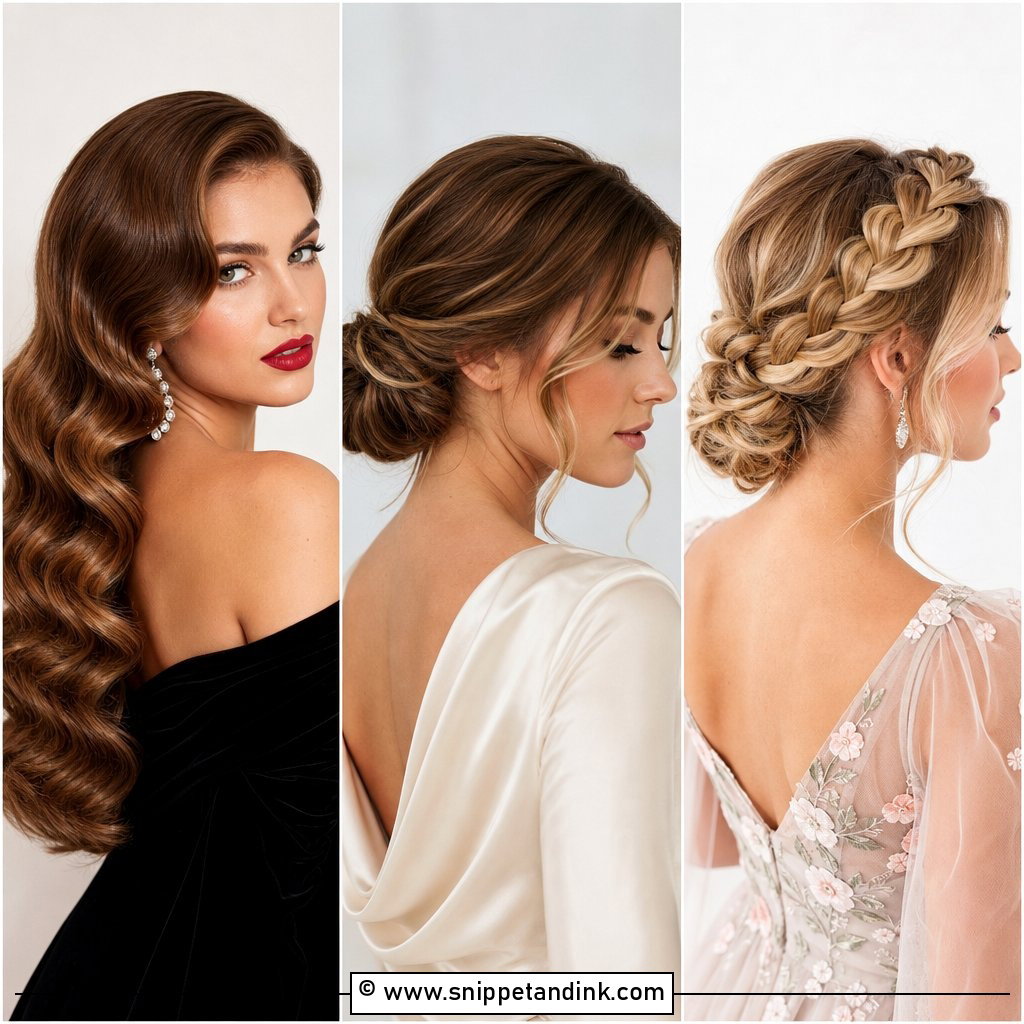
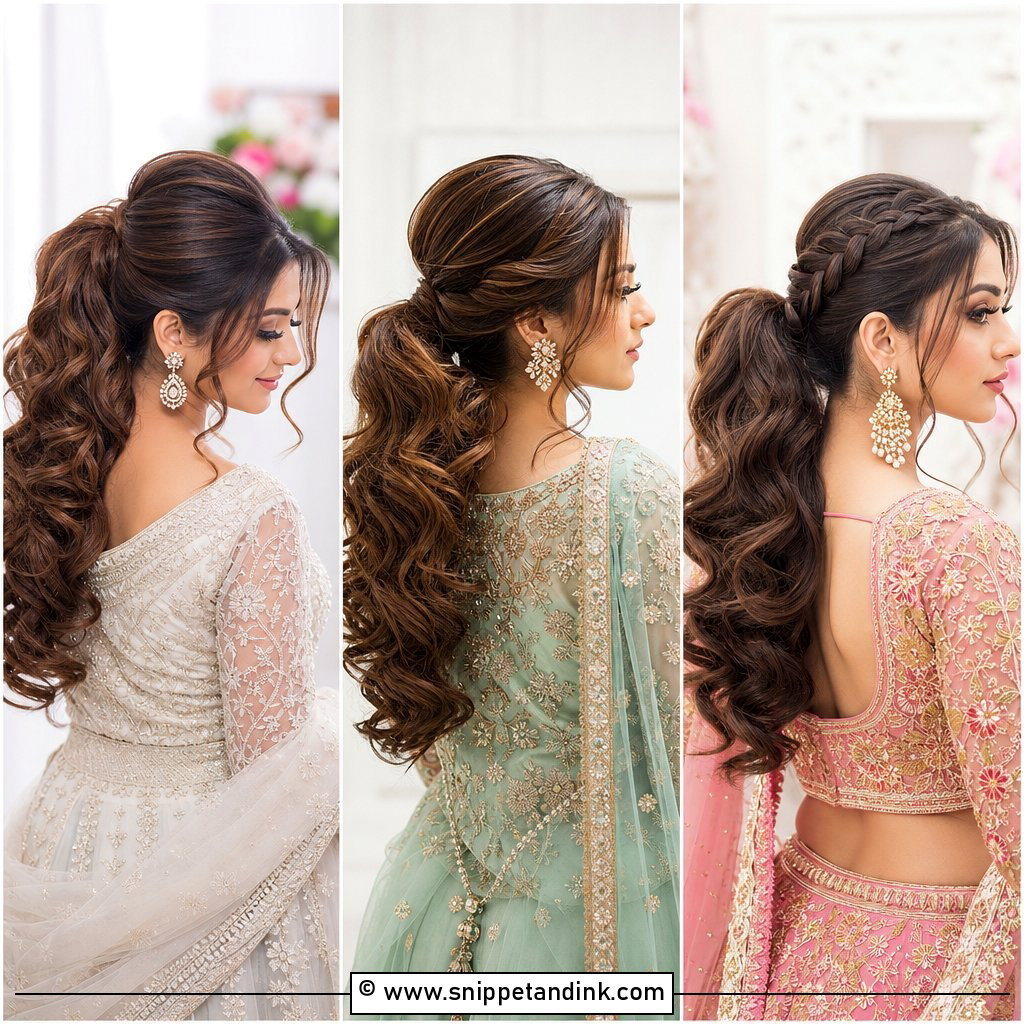
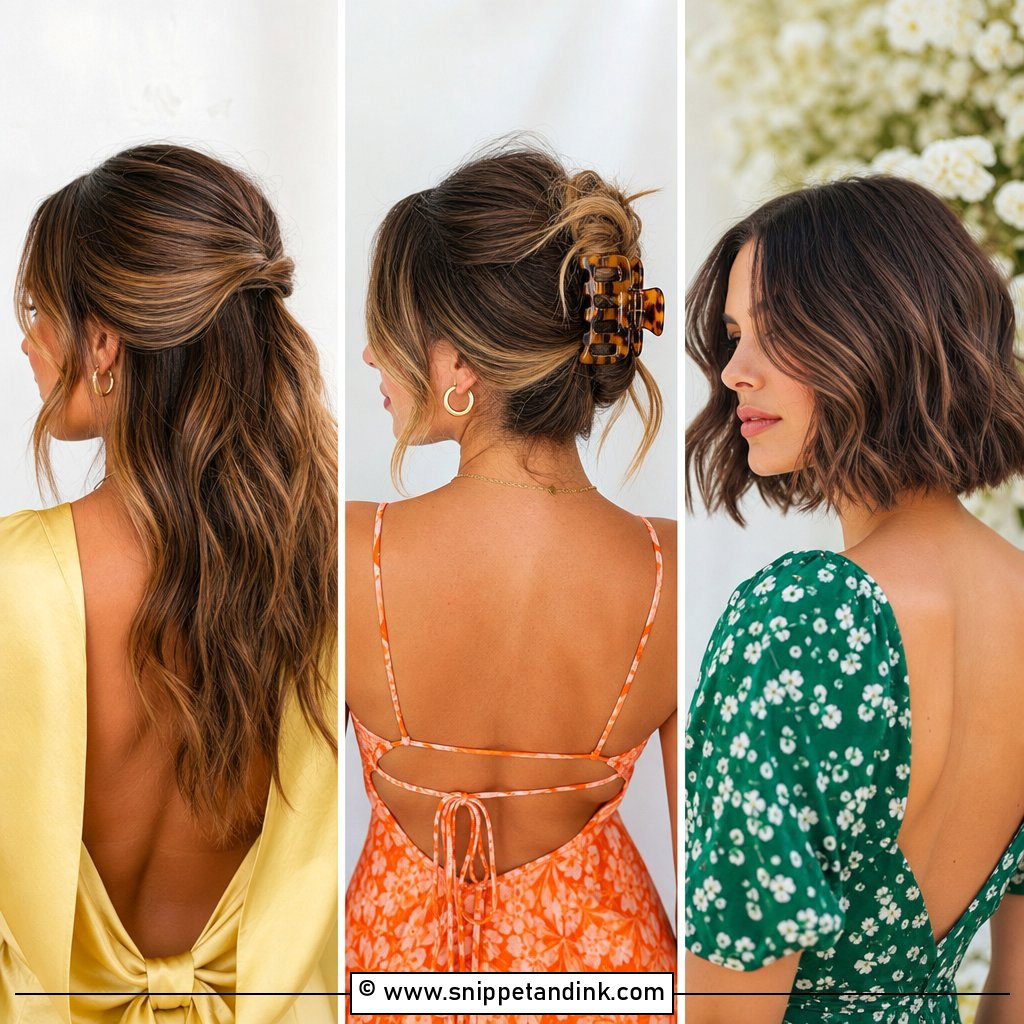
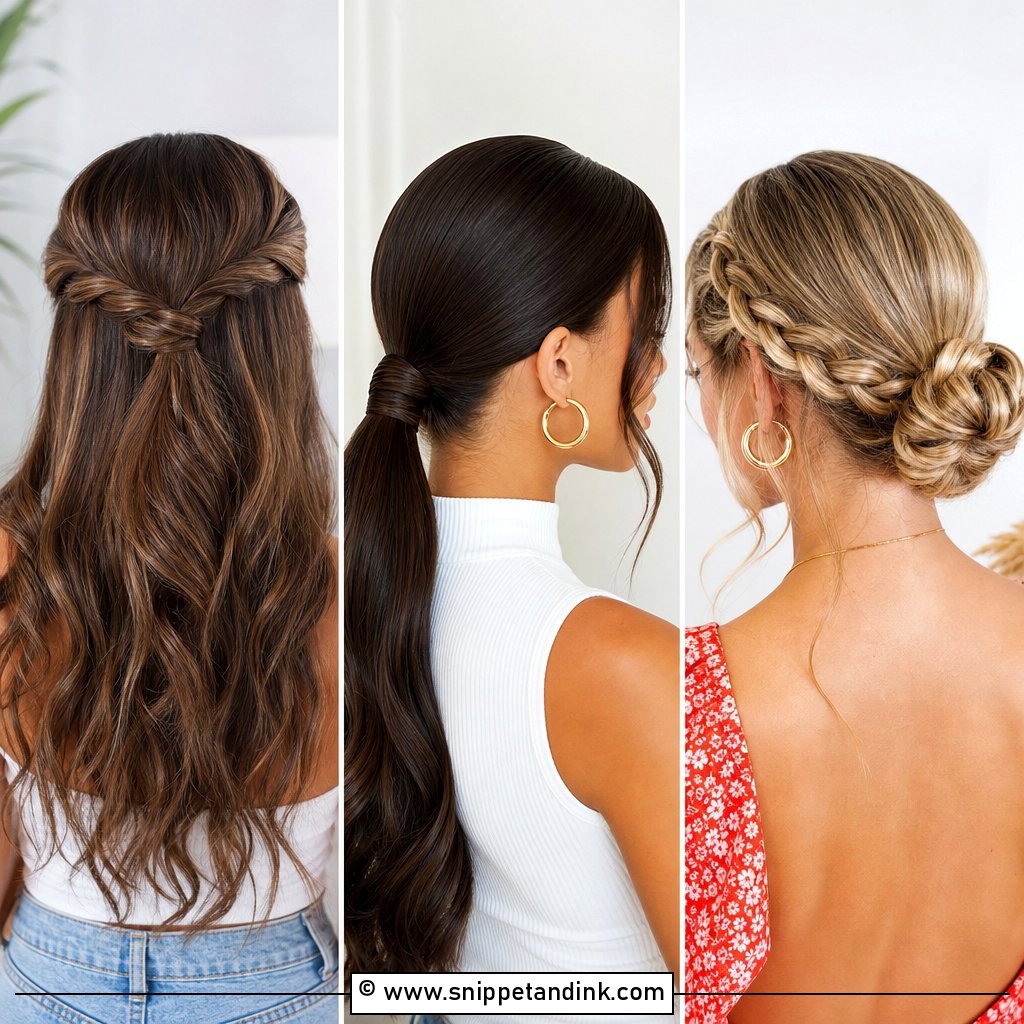
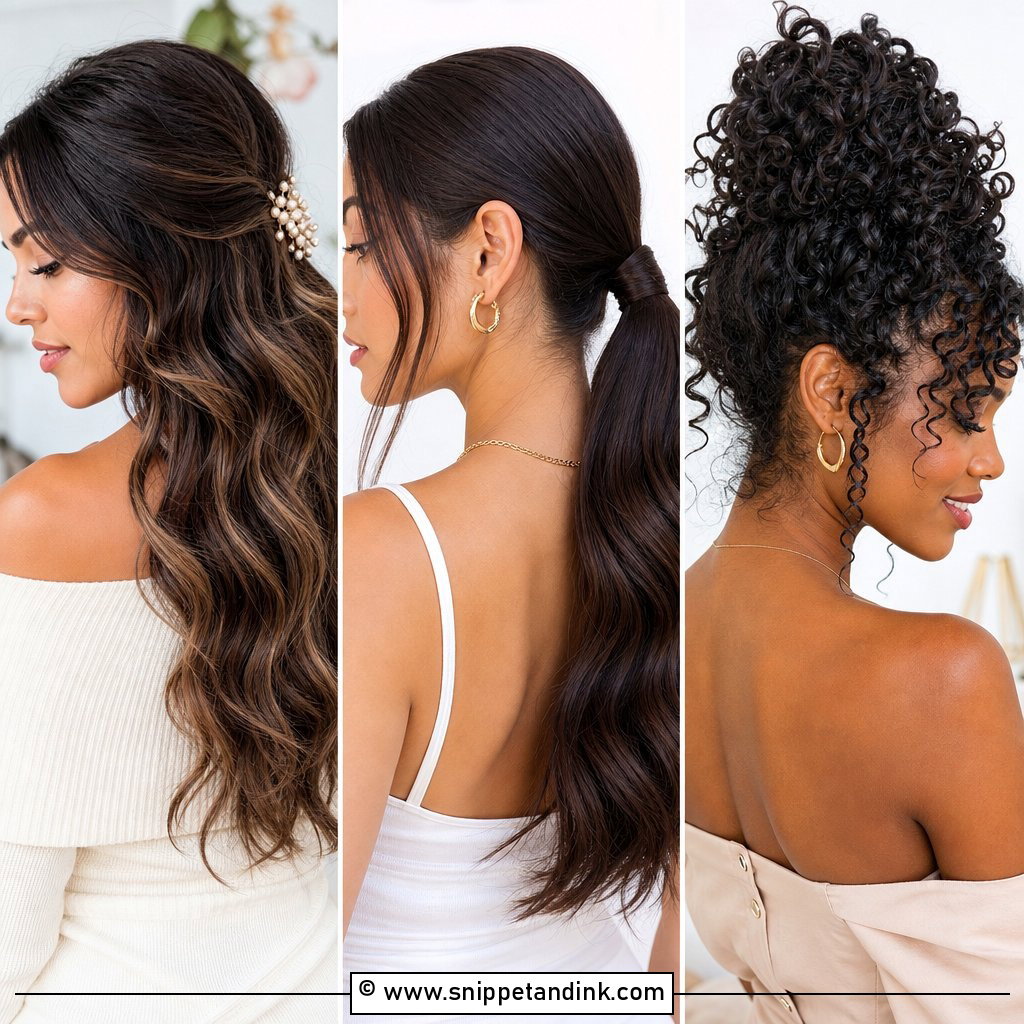
Loose waves are the style I get asked to recreate most, and also the one most likely to fall out by the speeches. The fix is patience: curl away from the face with a large barrel, let each curl cool completely in your hand or pinned in a loop, and only brush them out once everything is cold. Hot curls that are touched straight away lose their shape within the hour. A light texture spray gives grip without crunch. On very fine or freshly washed hair, I’d add a mousse at the roots first or choose an updo instead.
2. Sleek Low Bun
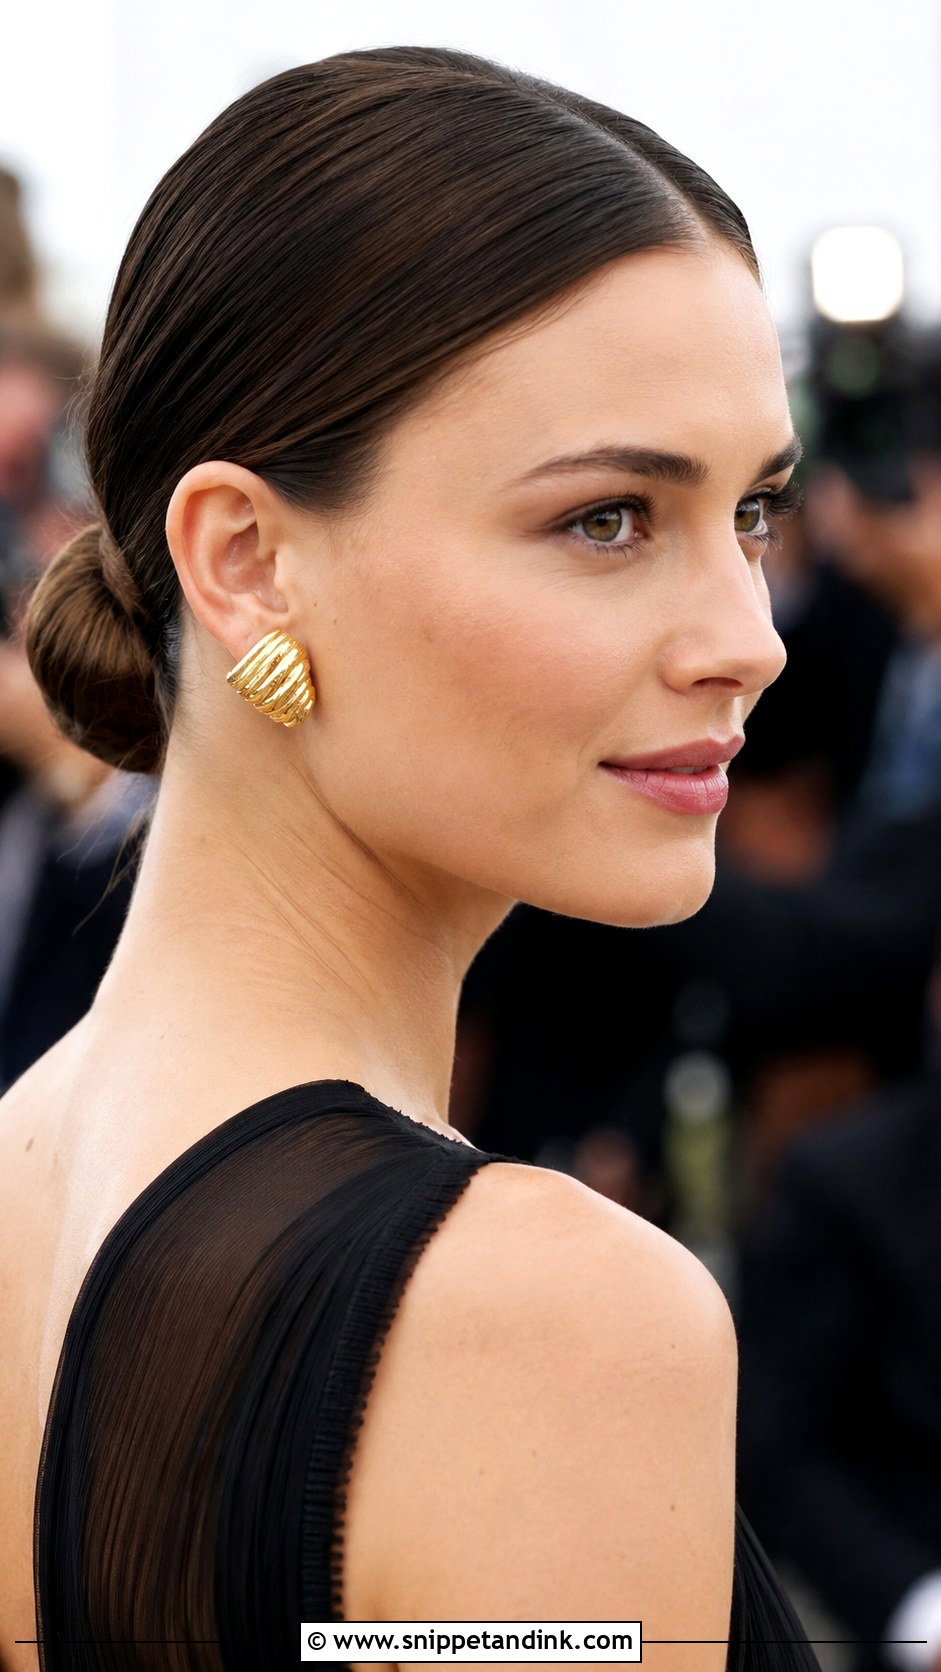
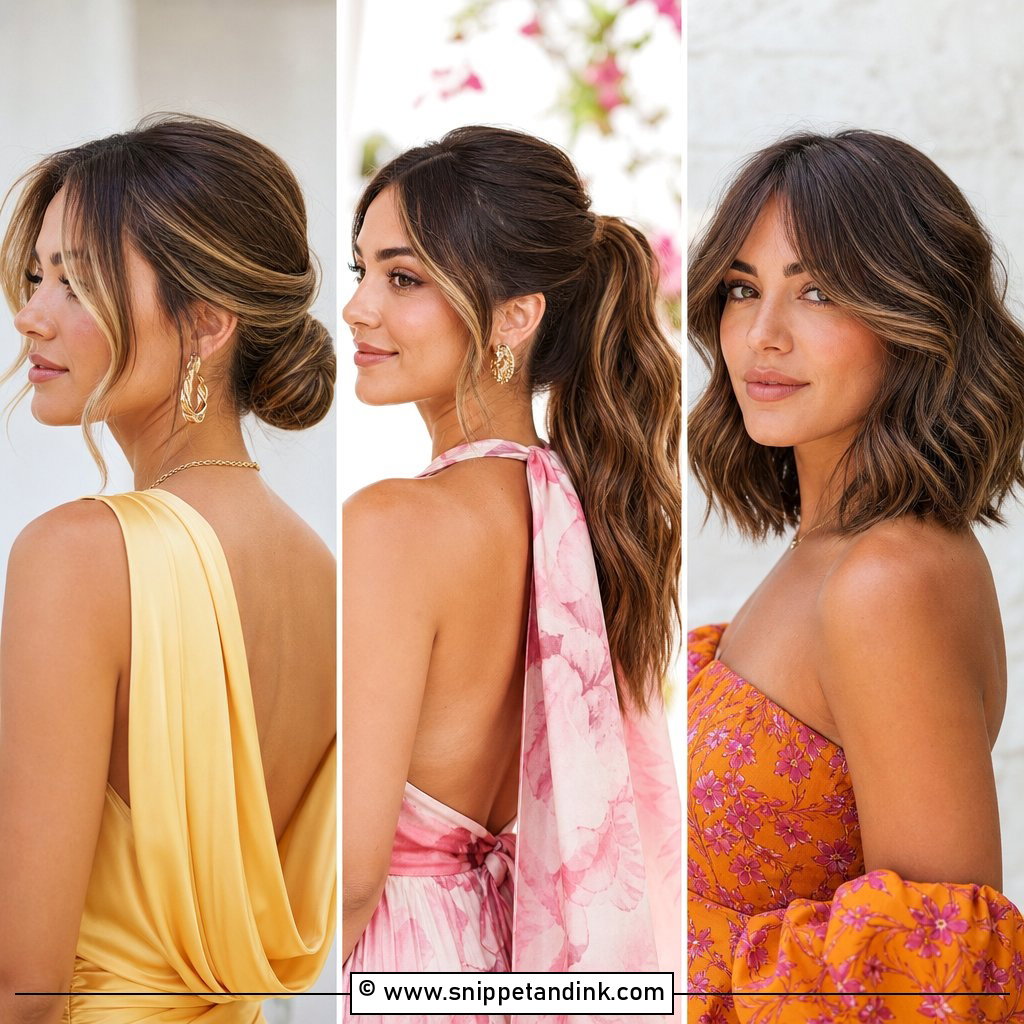
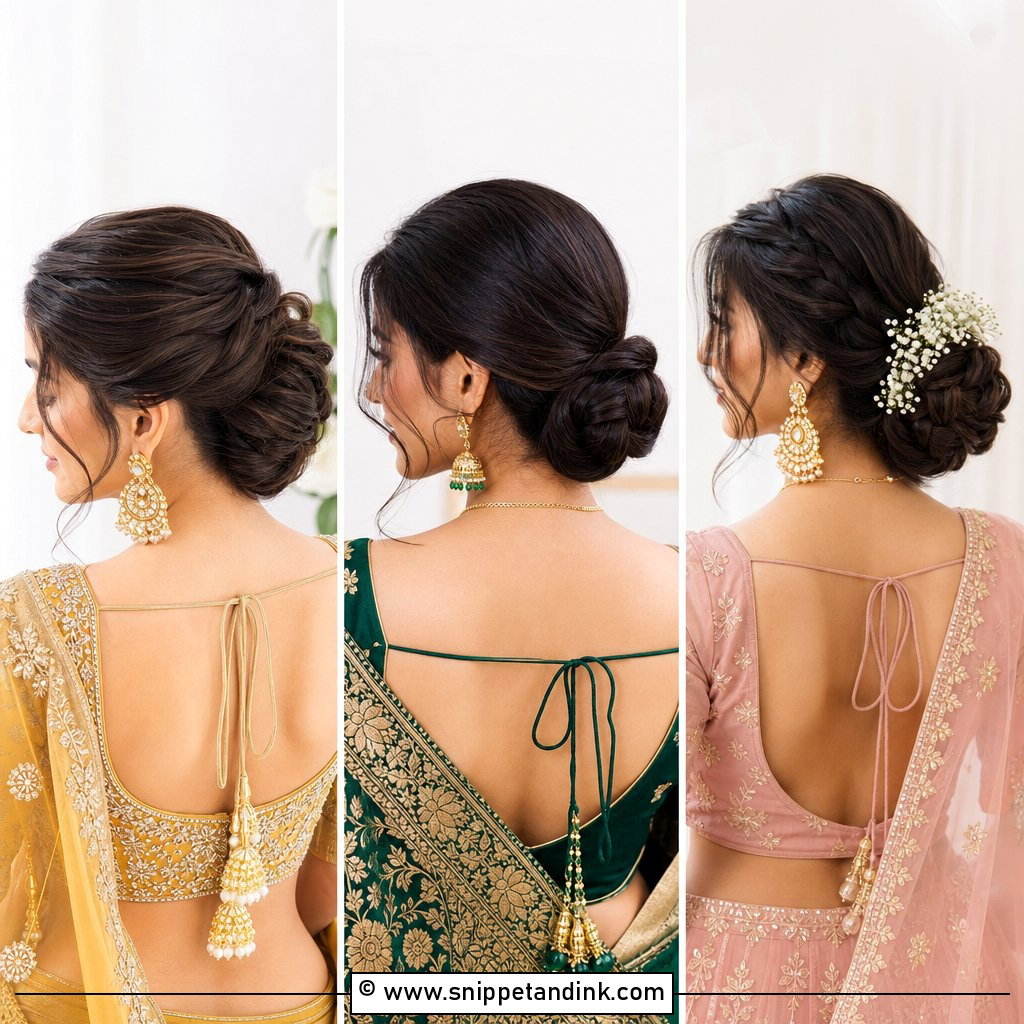
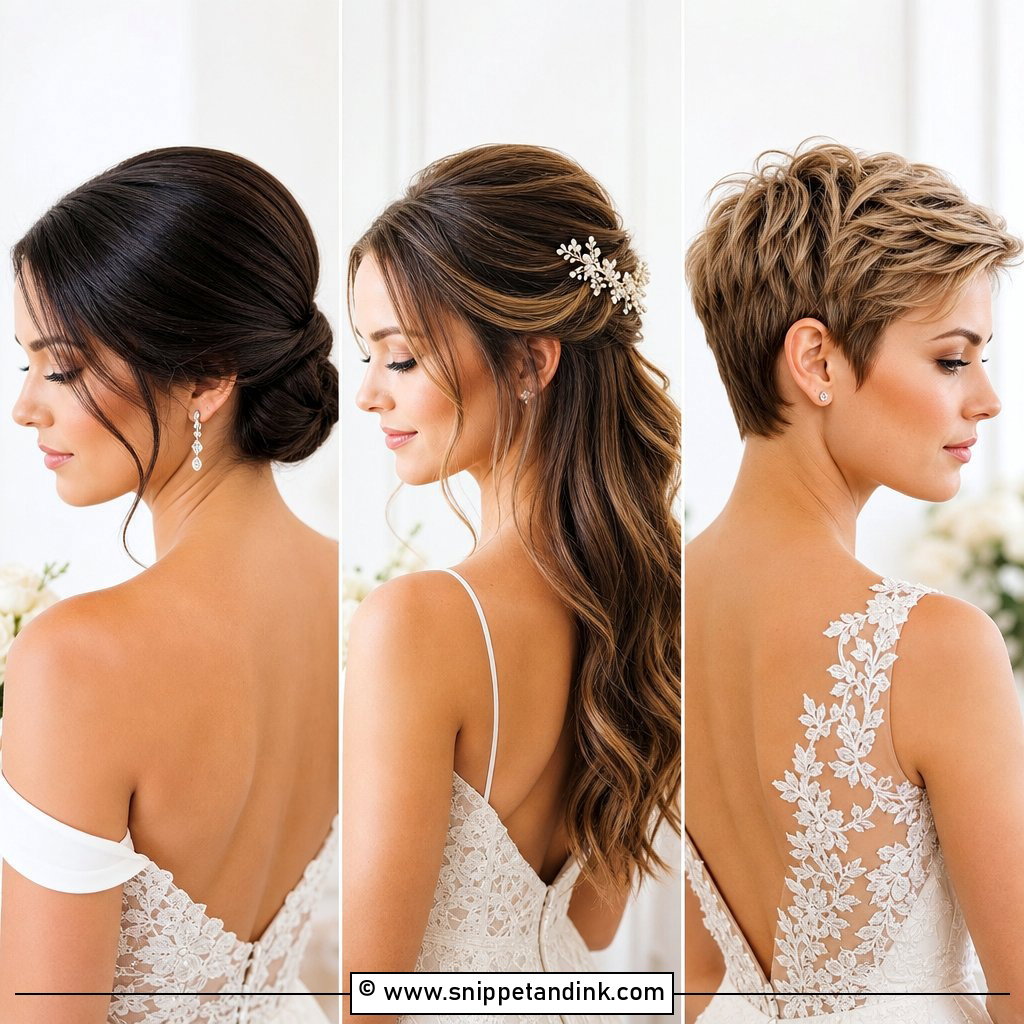
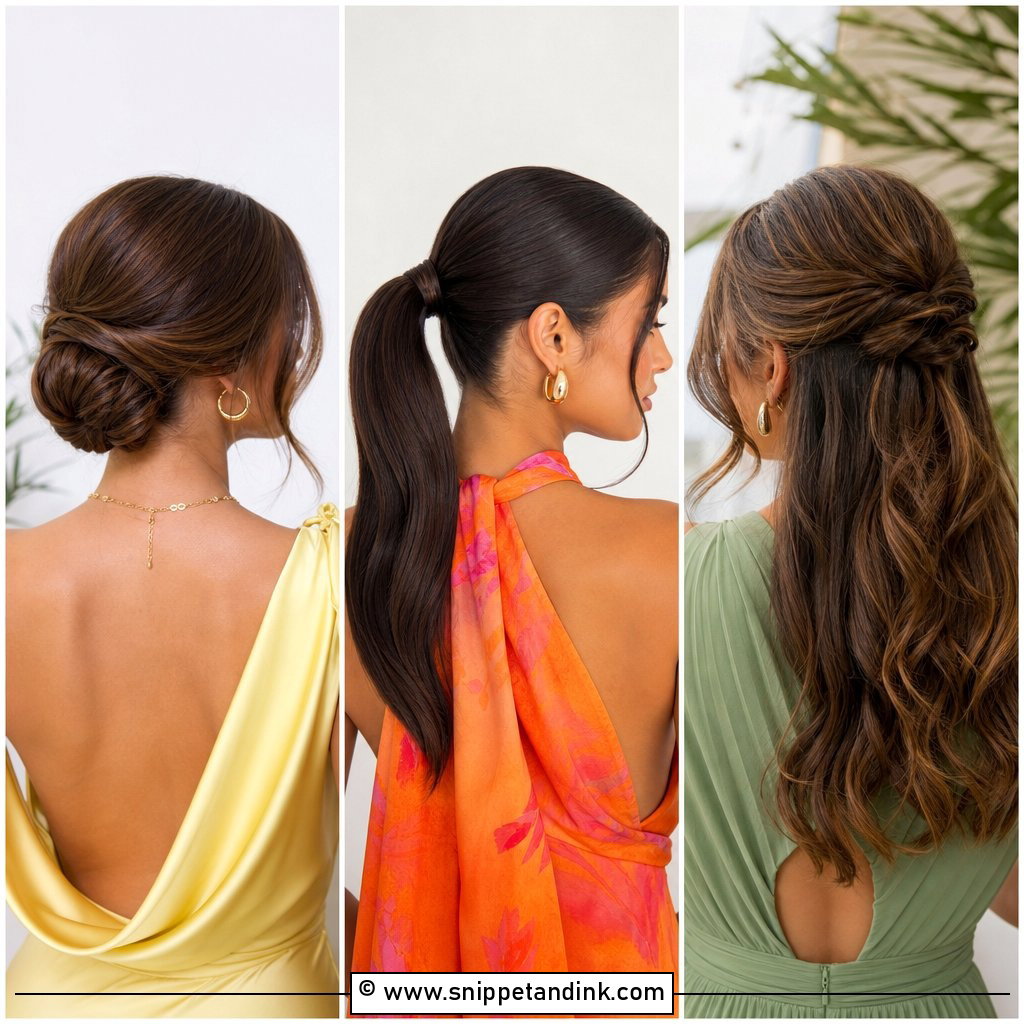
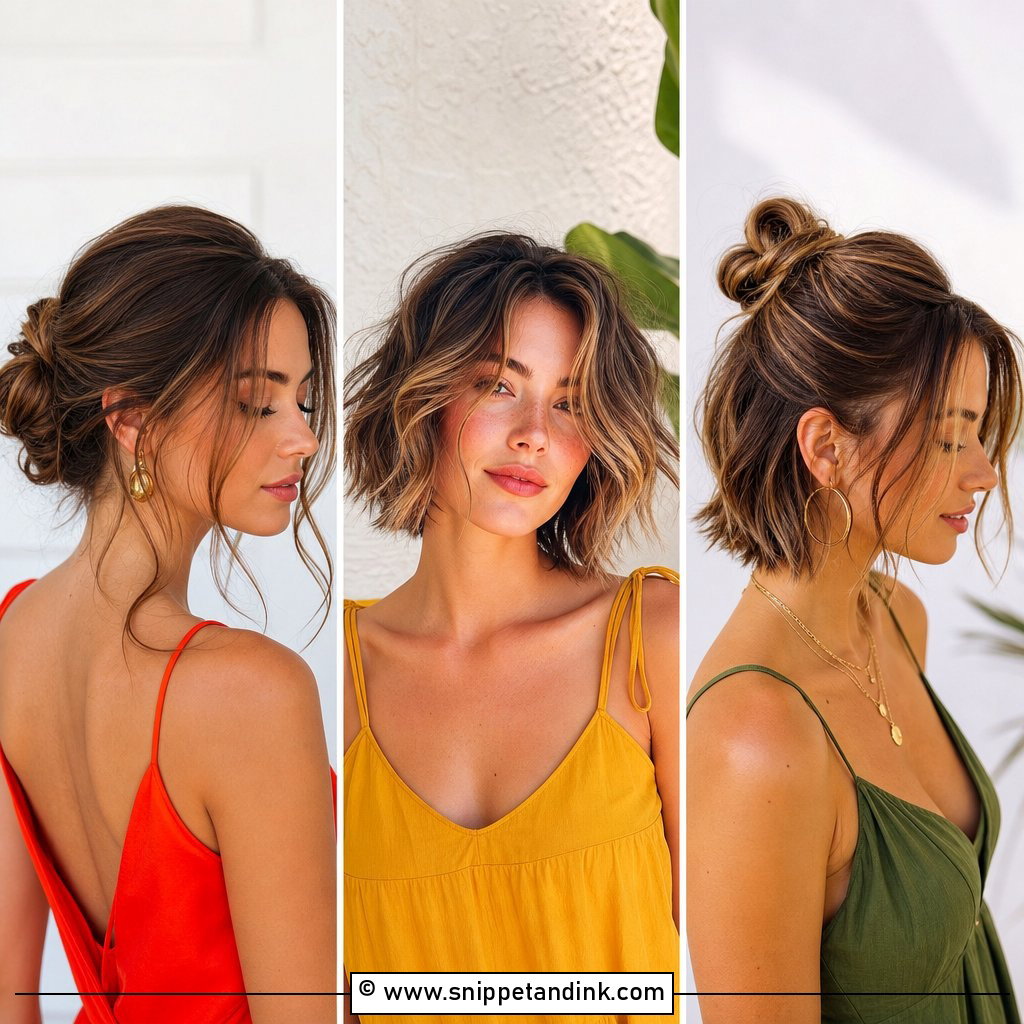
A low bun is my go-to for wind, humidity and long days, because once it’s anchored it barely moves. Take your part, gather a ponytail at the nape and secure it with a strong elastic before you twist; the elastic does the holding, the pins only shape. Pin the bun into the base of the ponytail rather than just into the outer hair. A drop of serum on your palms smooths flyaways. This is the style I’d choose for an outdoor venue with unpredictable weather.
3. Half Up Half Down
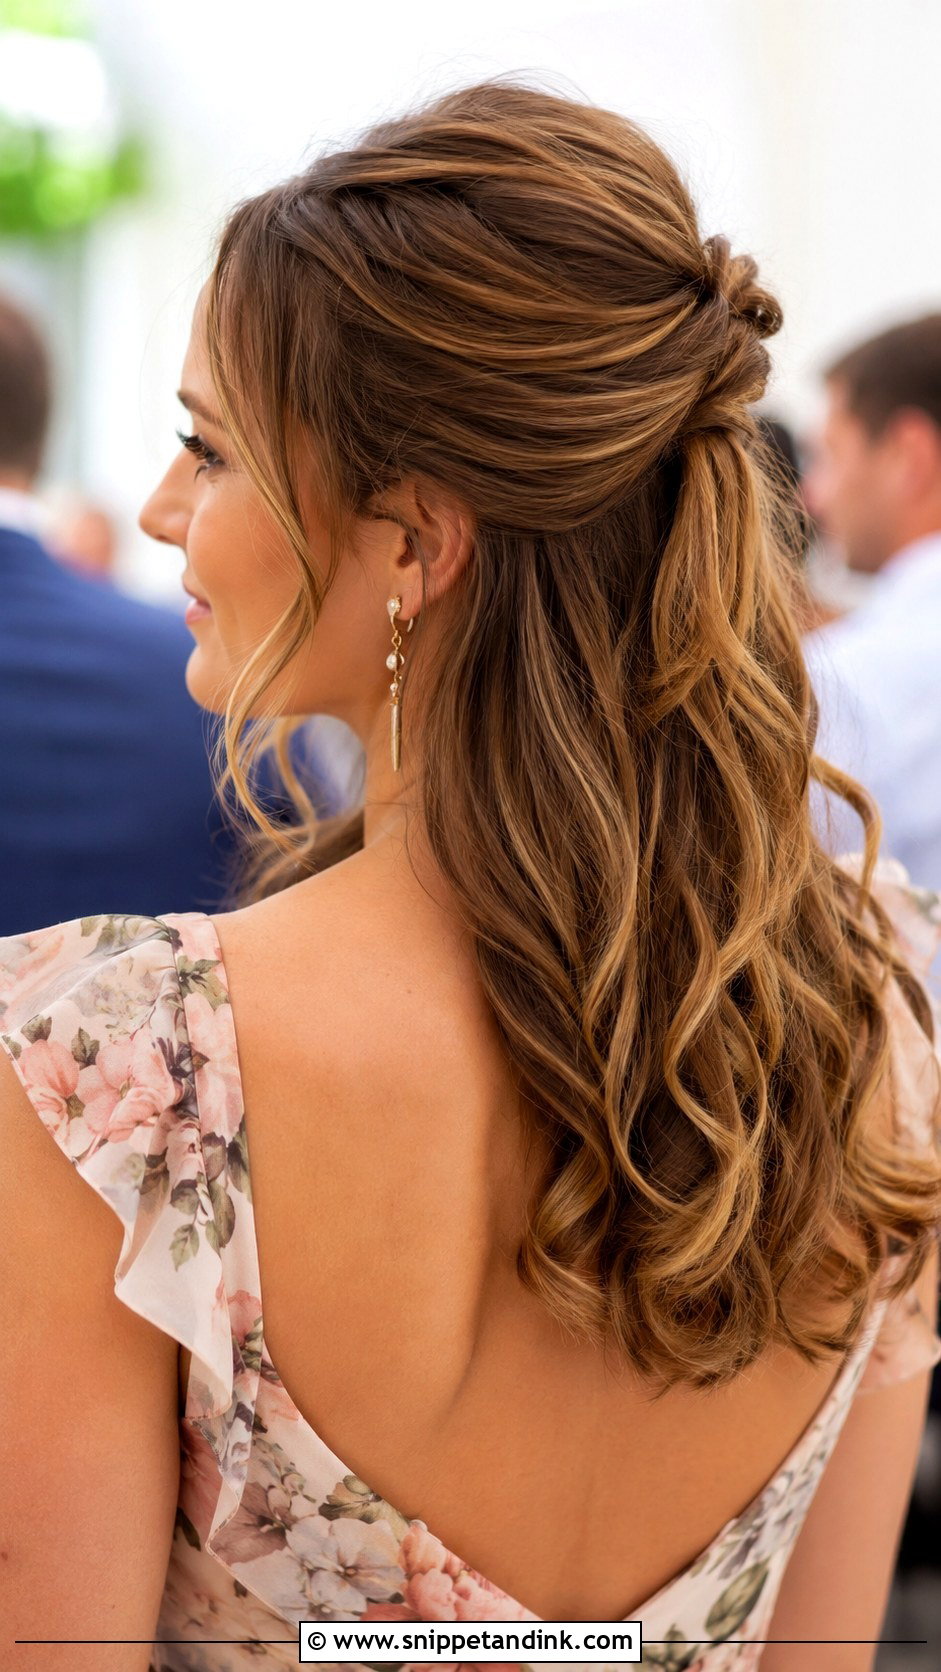
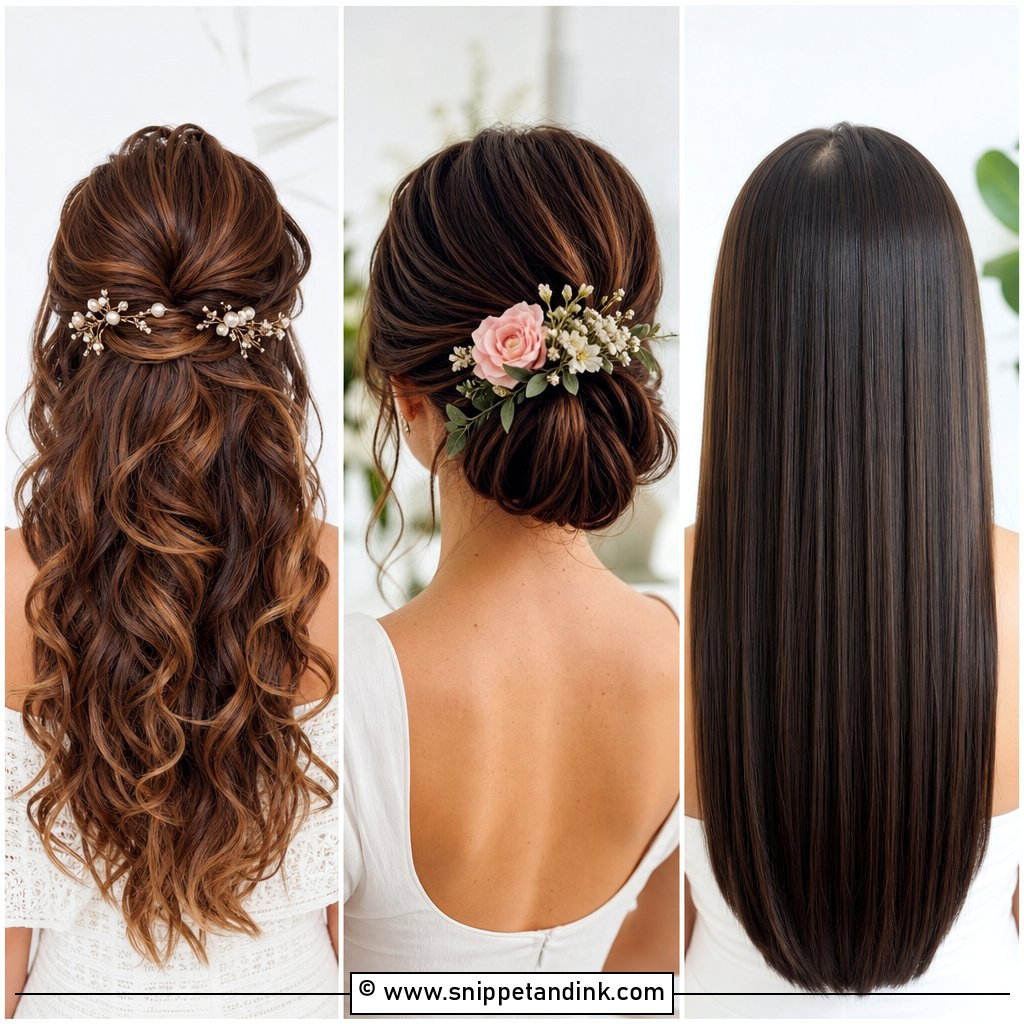
Half up, half down splits the difference when you can’t decide. Gather the top section and secure it at the crown, and here’s the step most people skip: tease the hair underneath that section lightly first, so the clip or pins have something to grip. Curl the loose lengths for shape, or twist or braid the top for detail. It’s the friendliest style for medium and long hair, though if your hair drops curl quickly, the loose half will show it first.
4. Low Chignon
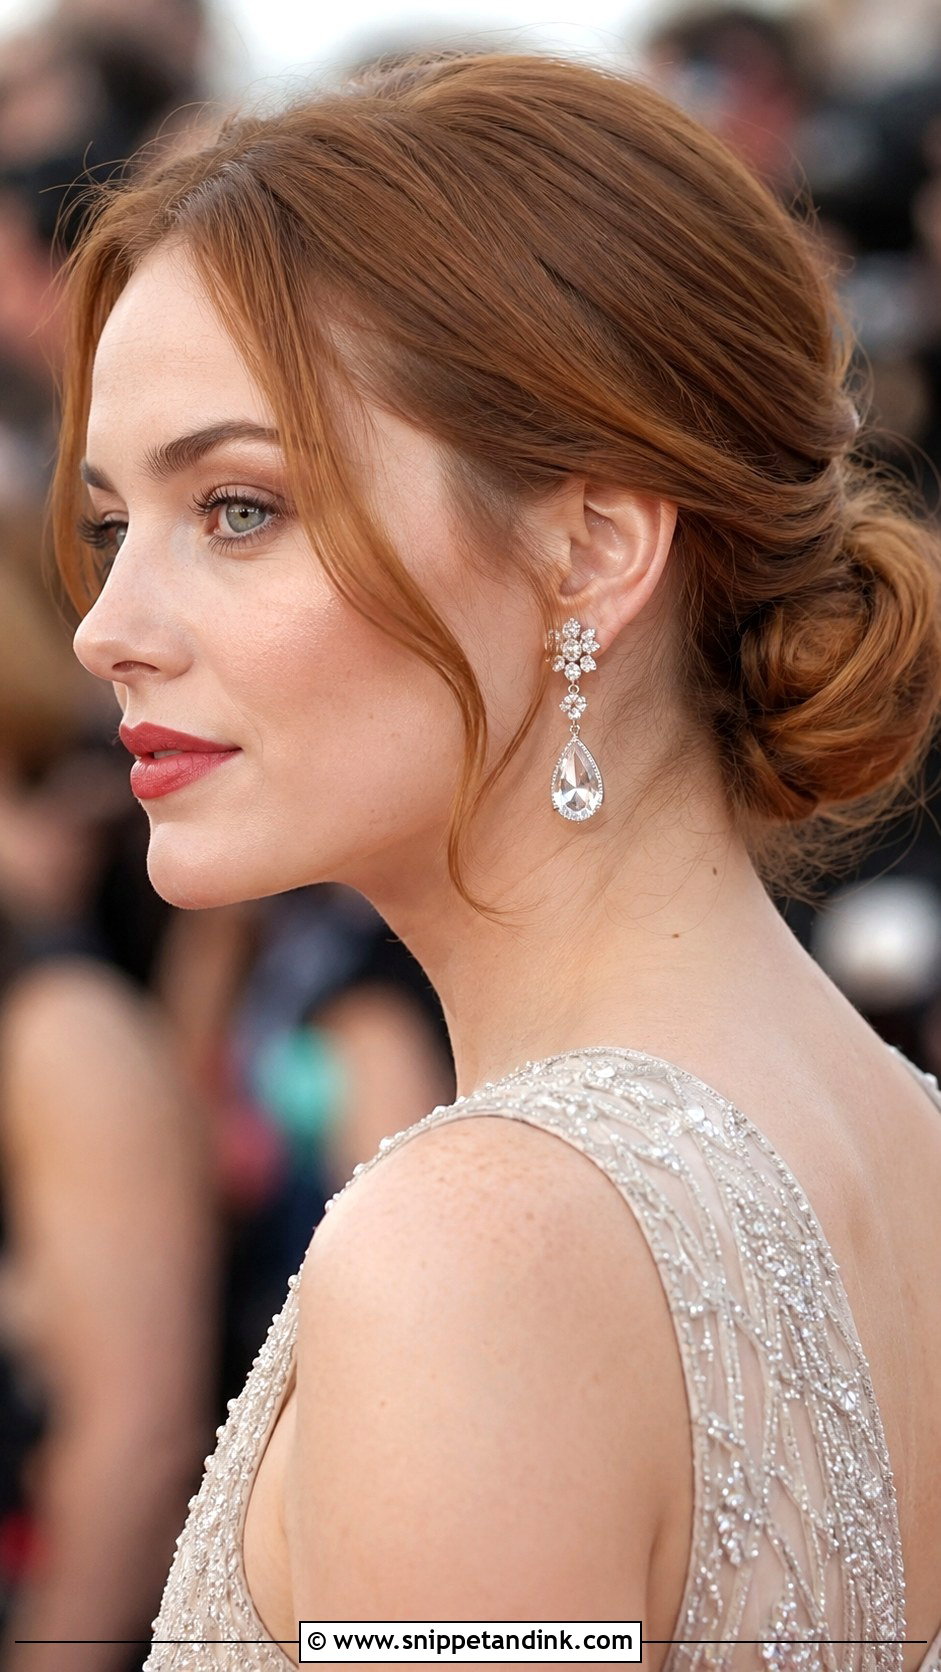
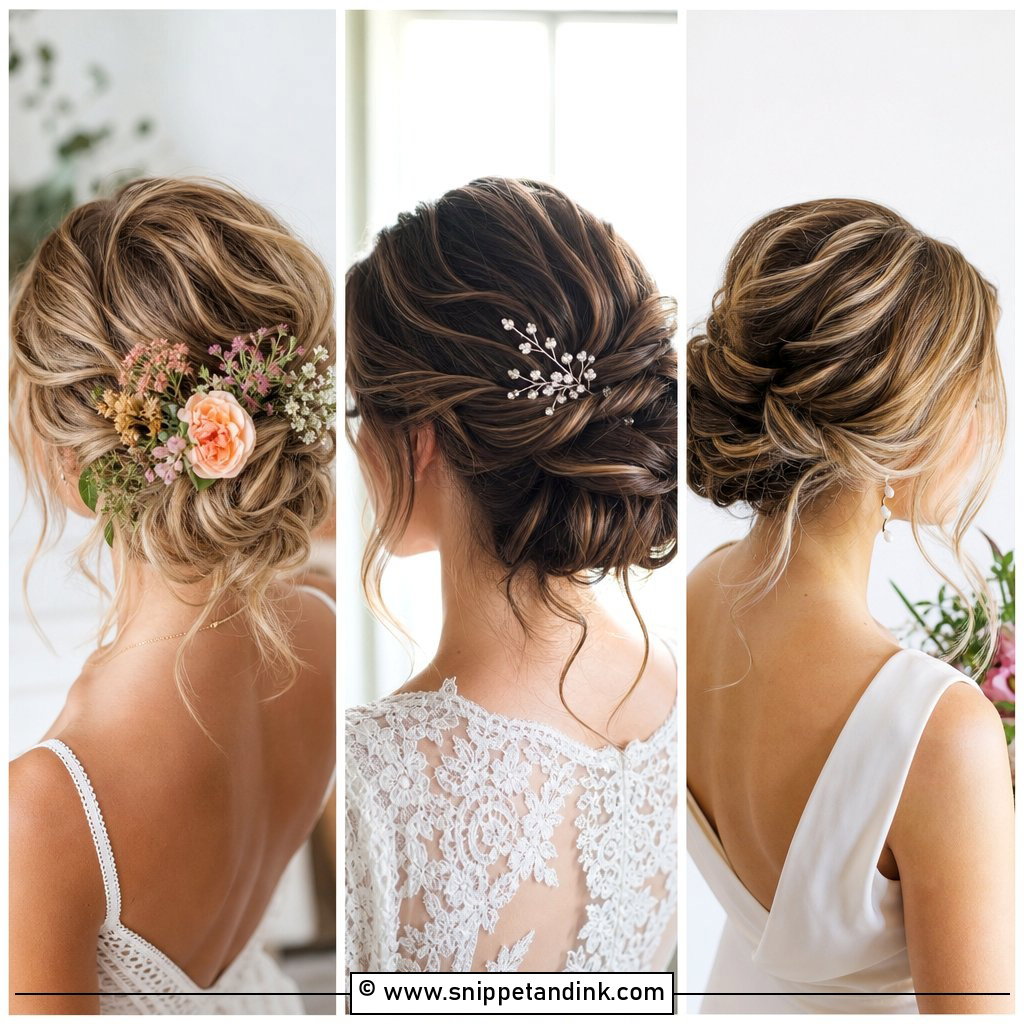
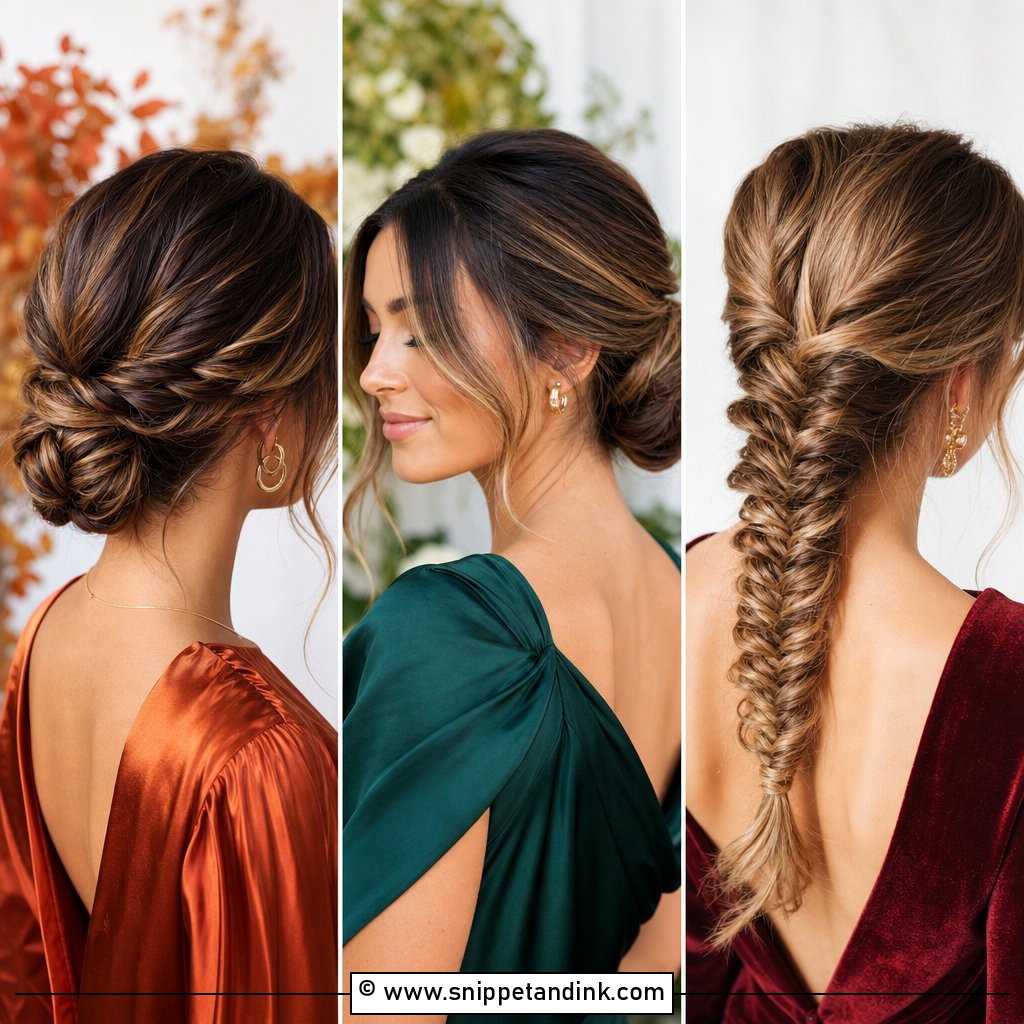
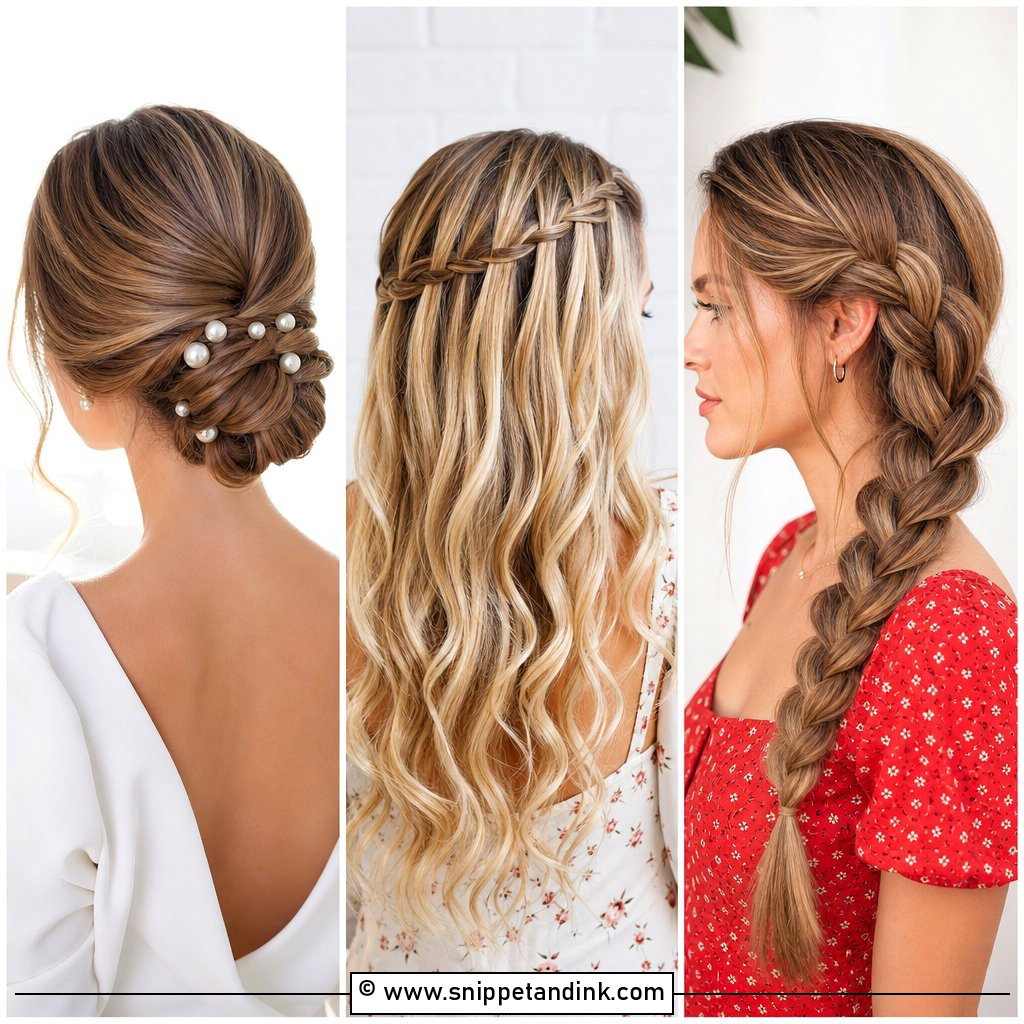
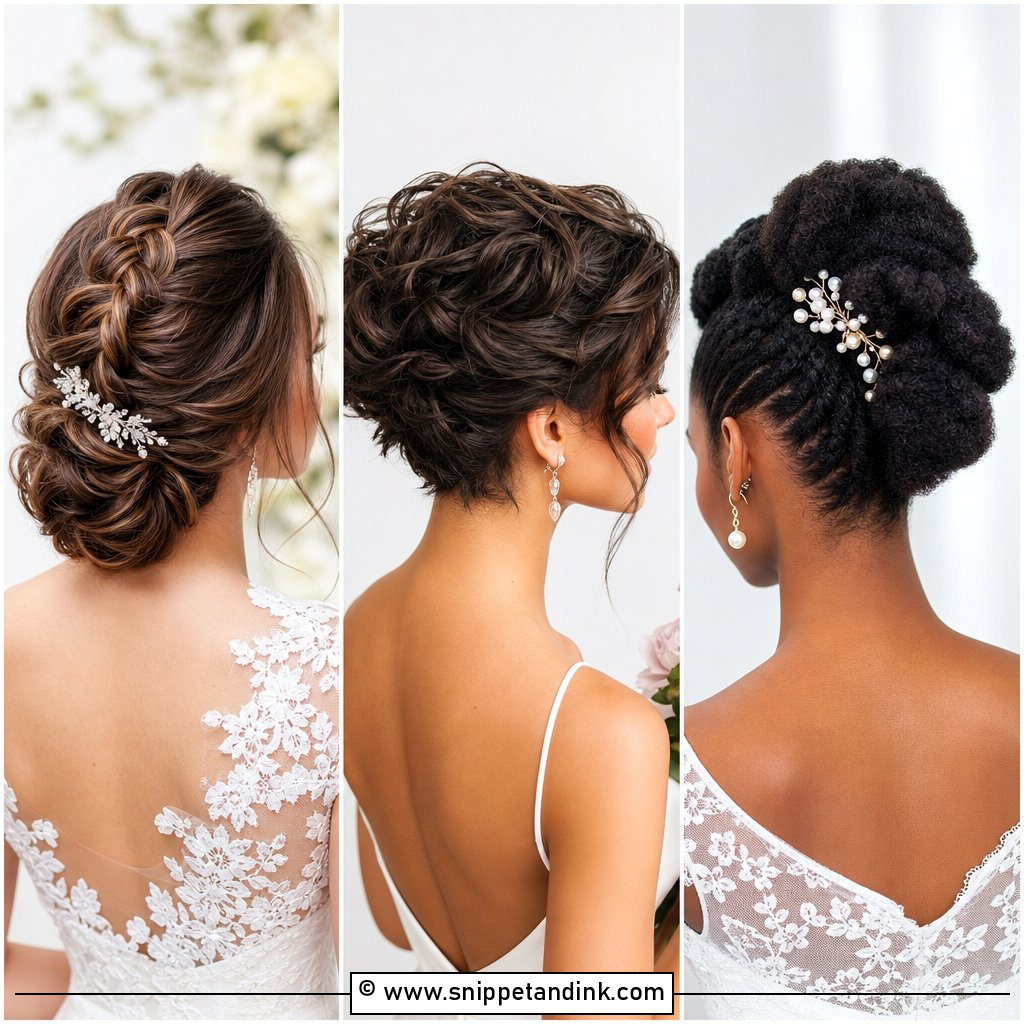
A chignon looks polished out of proportion to the work it takes. Make a low ponytail, roll the length under and tuck it into itself, then pin all the way around the roll, pushing each pin in against the direction of the twist so it locks. Pull out a couple of face-framing pieces if a fully smooth shape feels severe on you. It sits well with statement earrings and formal dresses, and it’s the style I’d reach for at a church ceremony or black-tie evening. A decorative pin at the side is plenty of extra detail.
5. Textured Low Ponytail
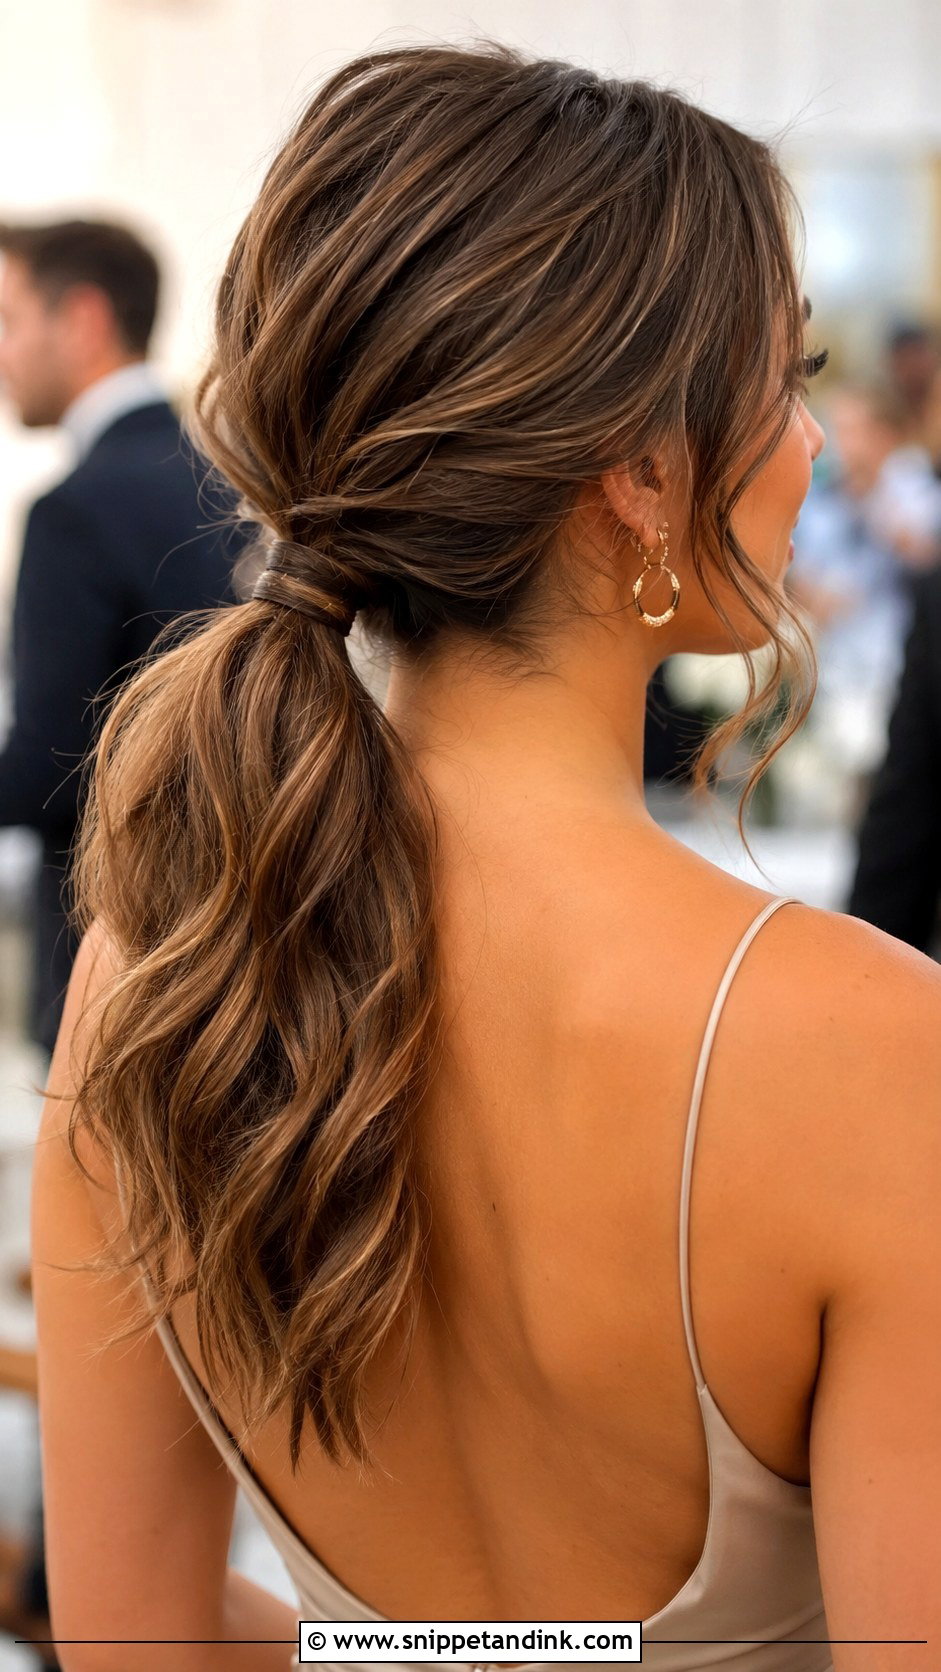
Don’t underestimate a low ponytail with some texture in it. Prep with a texturizing spray before you gather it, so the hair has grip and the tie doesn’t slide. Wrap a small strand around the elastic and pin it underneath to hide it, then add loose waves through the length. On thick hair I use two elastics, one on top of the other, because a single one can droop by evening. It’s one of the few styles that works on most lengths and hair types and stays comfortable all night.
6. Braided Crown
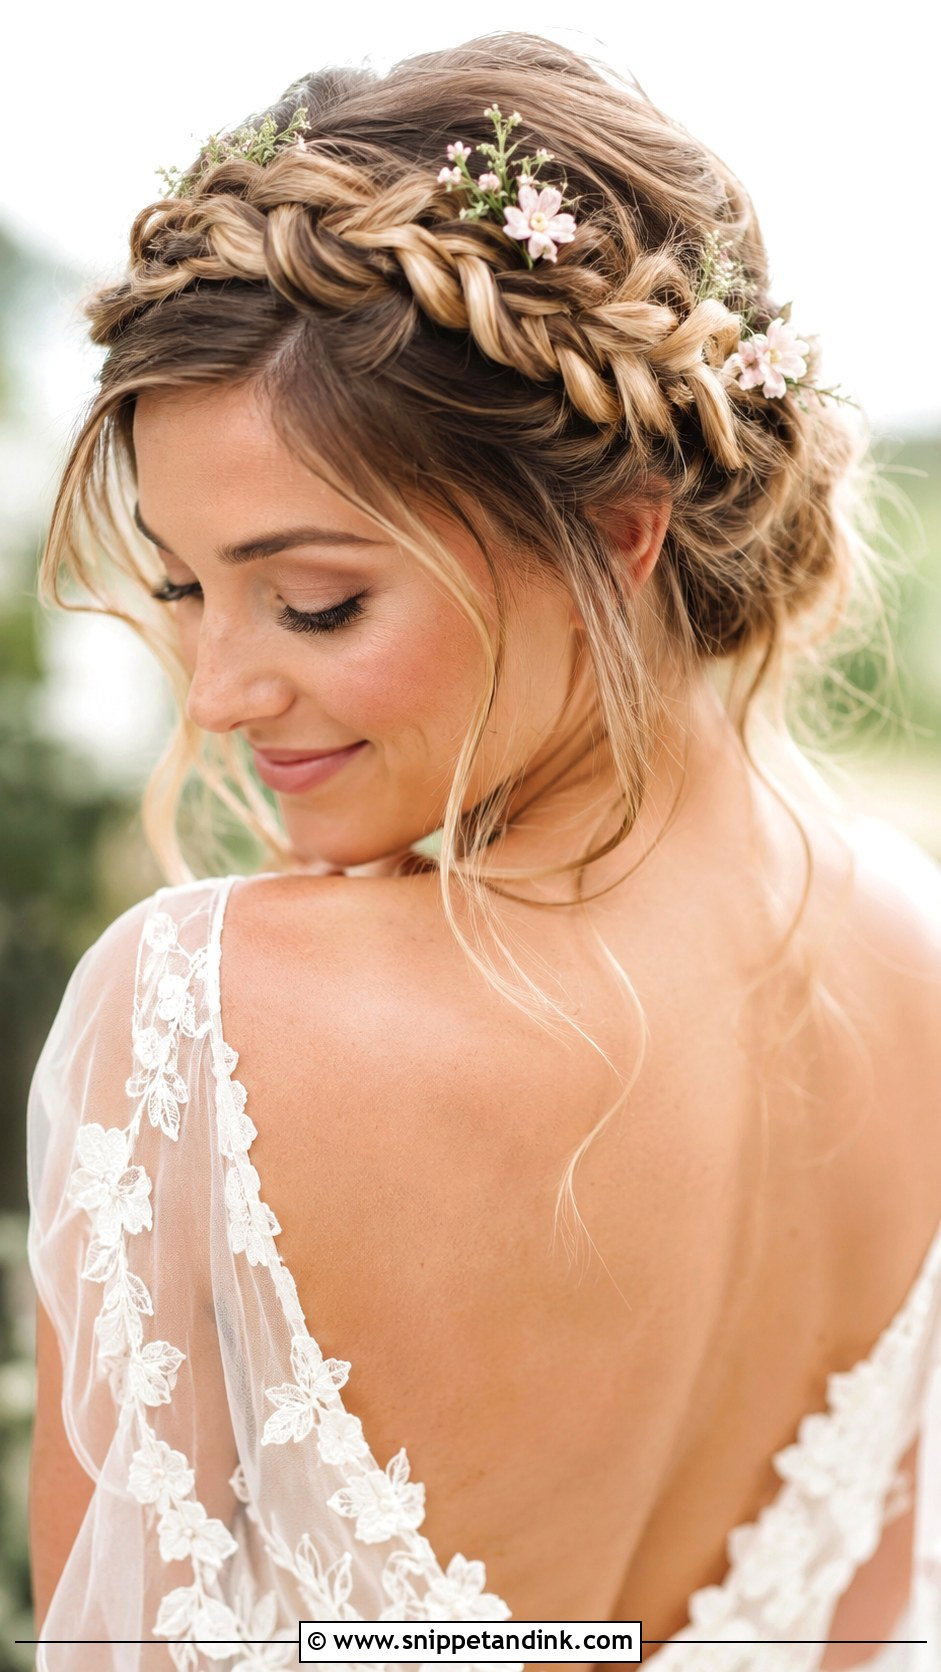
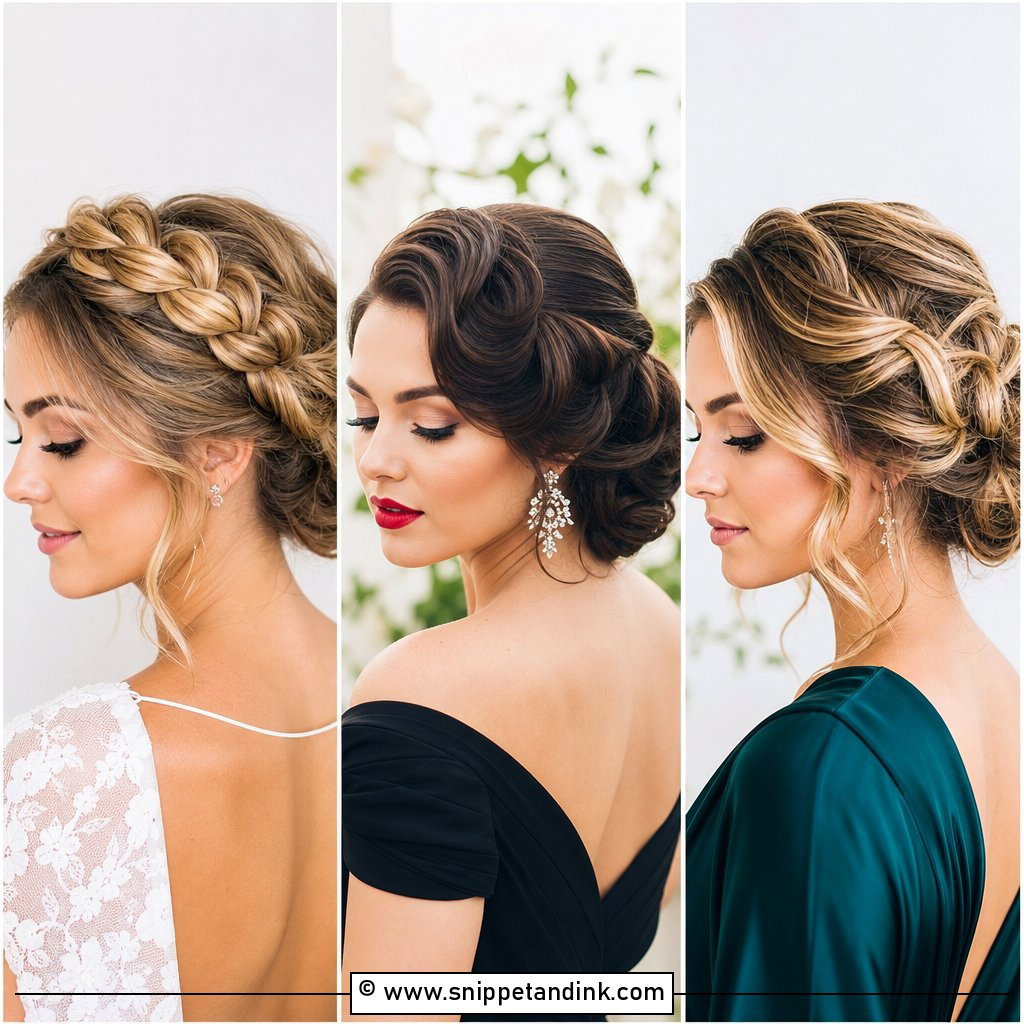
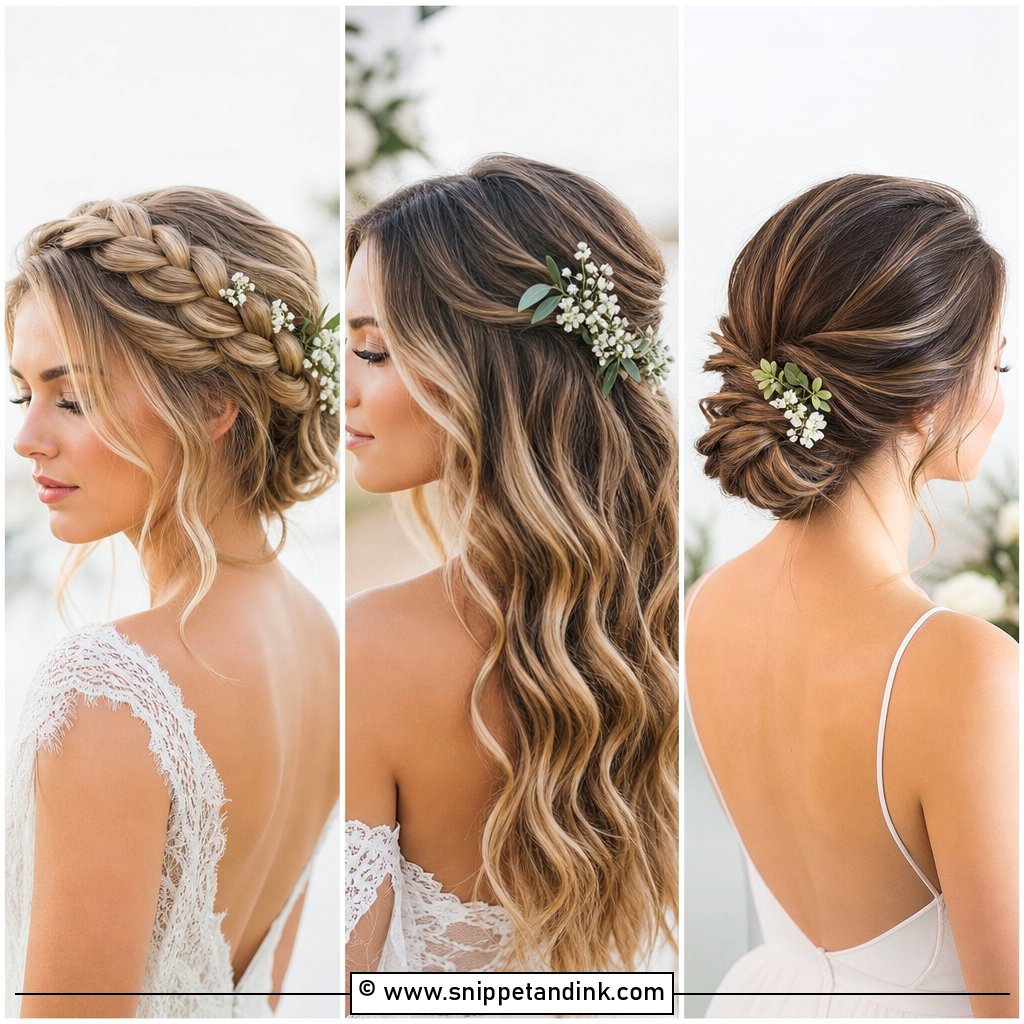
A braided crown looks far more intricate than it is. Braid each side, cross the braids over the top of your head and pin them where they meet, tucking the ends under. Gently pulling the outer loops of each braid makes them look fuller, which matters on fine hair where a tight braid can look thin. A few wispy strands softened around the face stop it feeling too neat. It needs medium to long hair, and it’s a natural match for rustic and garden weddings in daylight.
7. Messy Bun
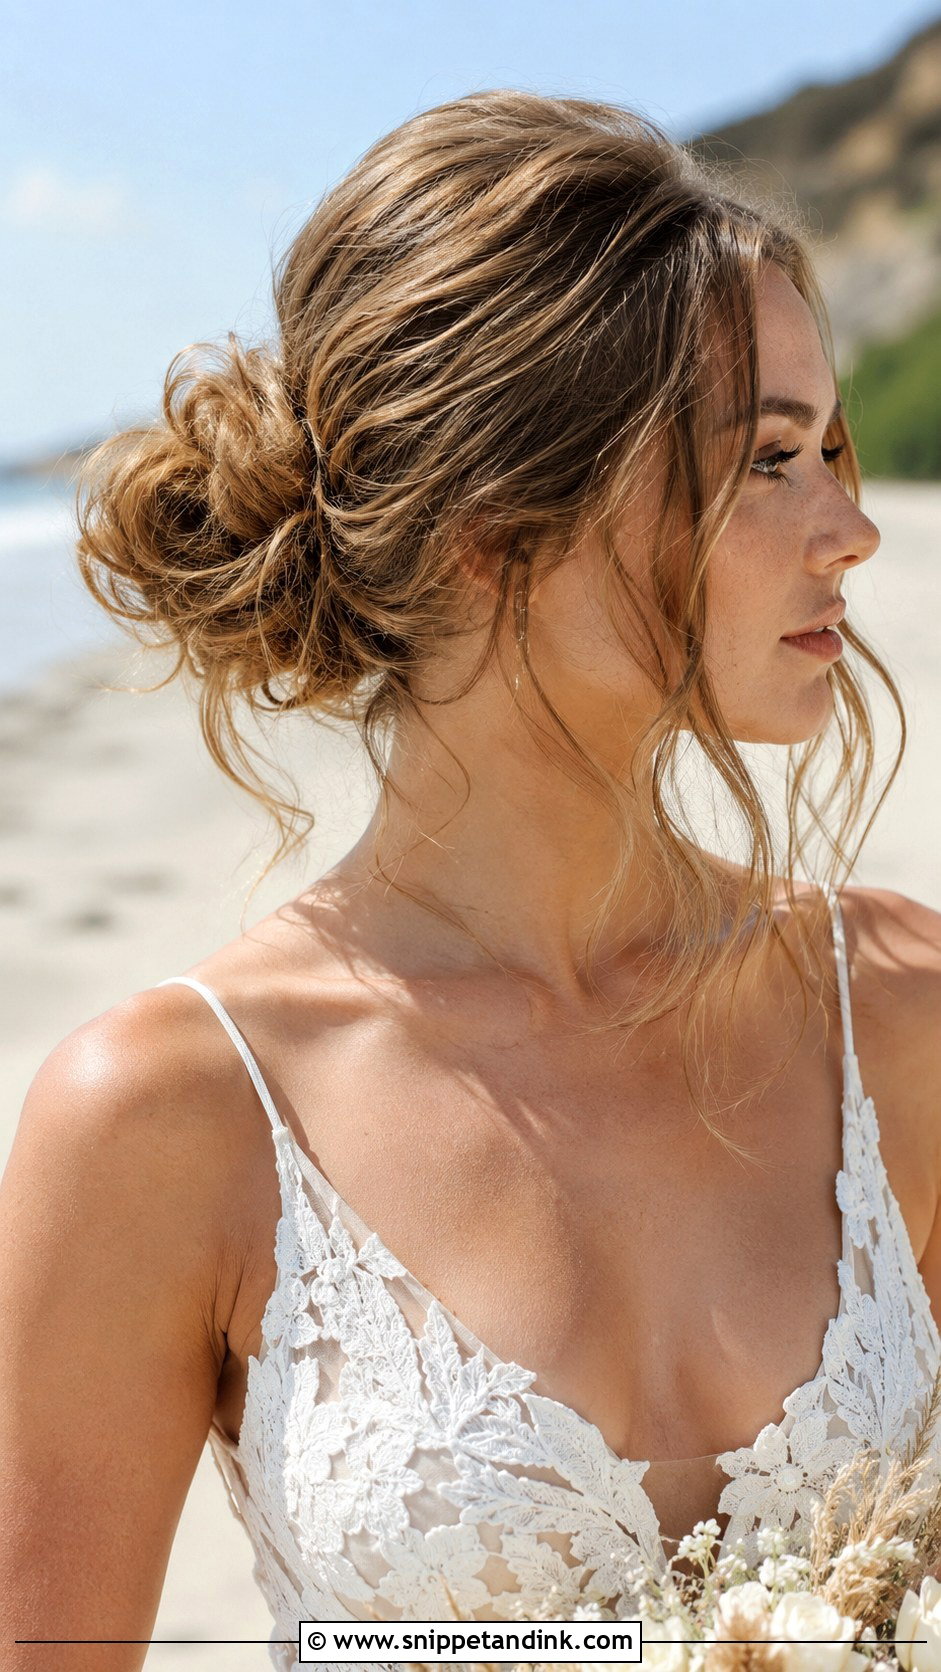
Messy buns are only messy on purpose, and the deliberate part is what makes them last. Gather your hair without brushing it smooth, secure it with an elastic first, then wrap the length loosely and pin. Pull out a few pieces around the face. Second-day hair is actually better here than clean hair, because it holds texture and pins grip it more firmly. I’d use this for a beach ceremony or a casual reception, not a black-tie dinner.
8. Fishtail Braid
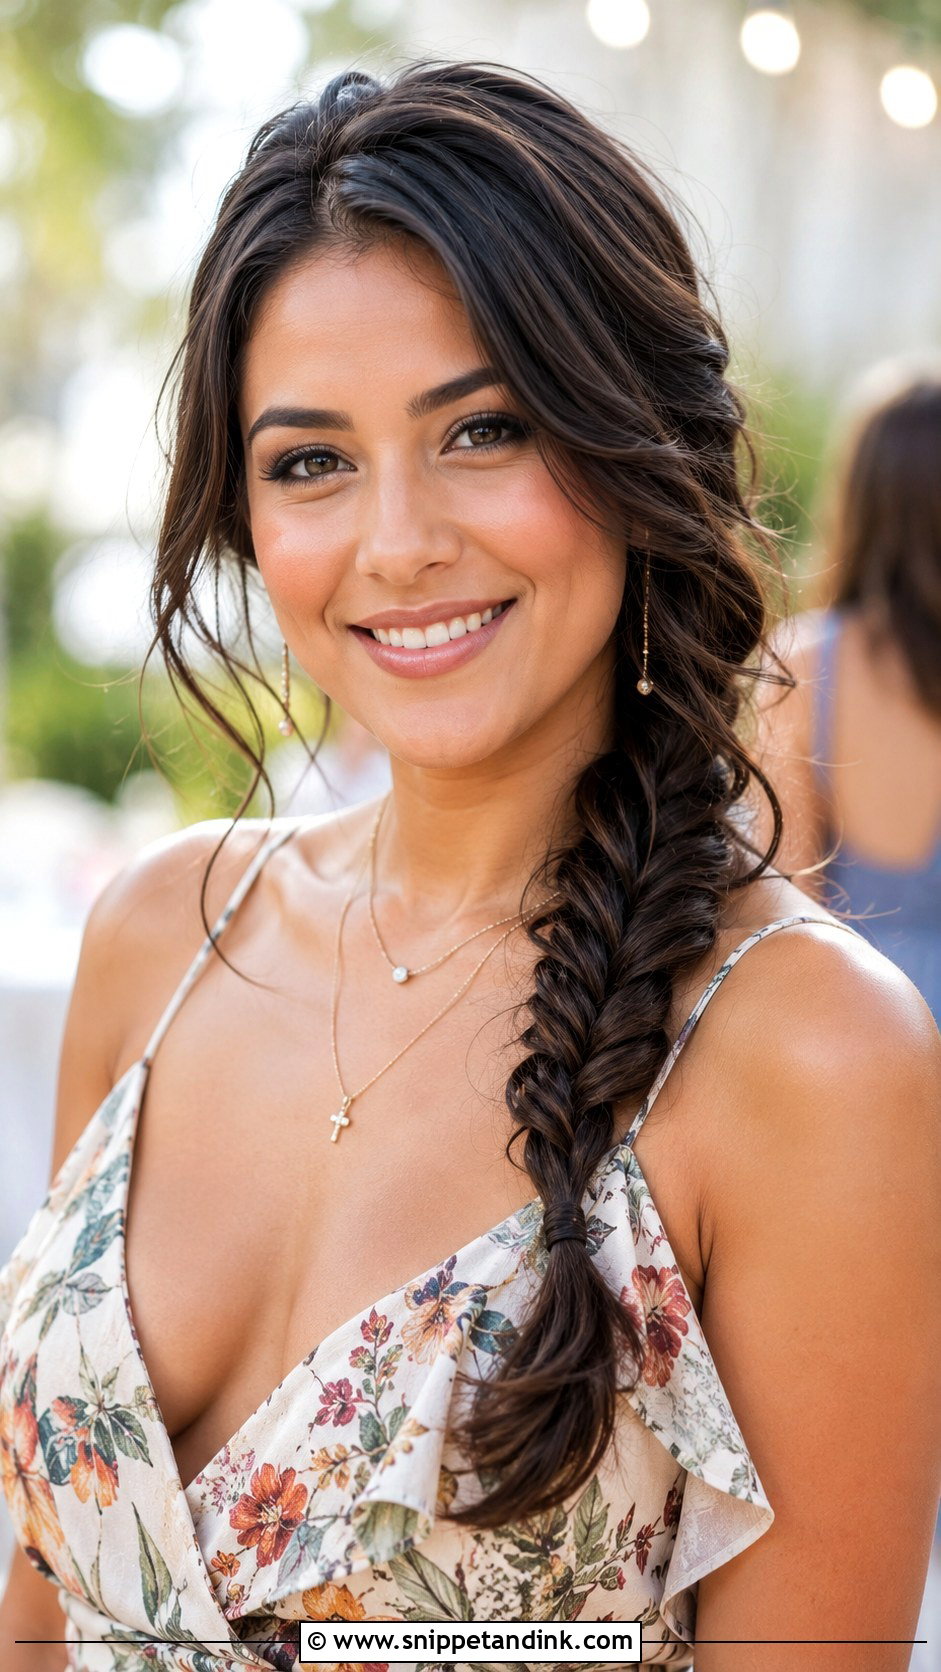
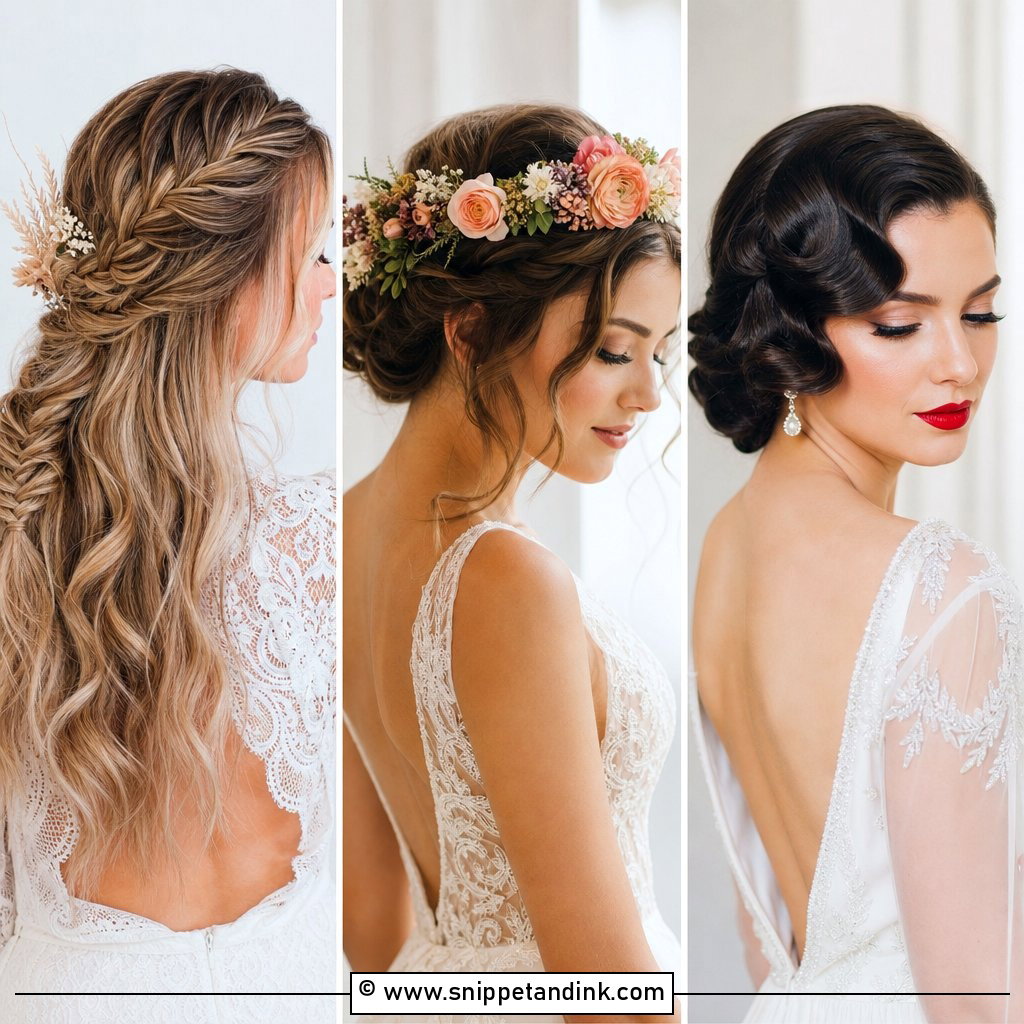
Fishtails look complicated but only use two sections. Cross a thin strand from the outside of one section to the other, then repeat on the opposite side all the way down, and secure the end with a clear elastic. Thinner strands give a finer, more polished braid; thicker ones look looser and more boho. Once it’s done, pull gently on the edges for fullness. It works down the back or over one shoulder, best on medium and long hair, and suits beach and boho themes especially.
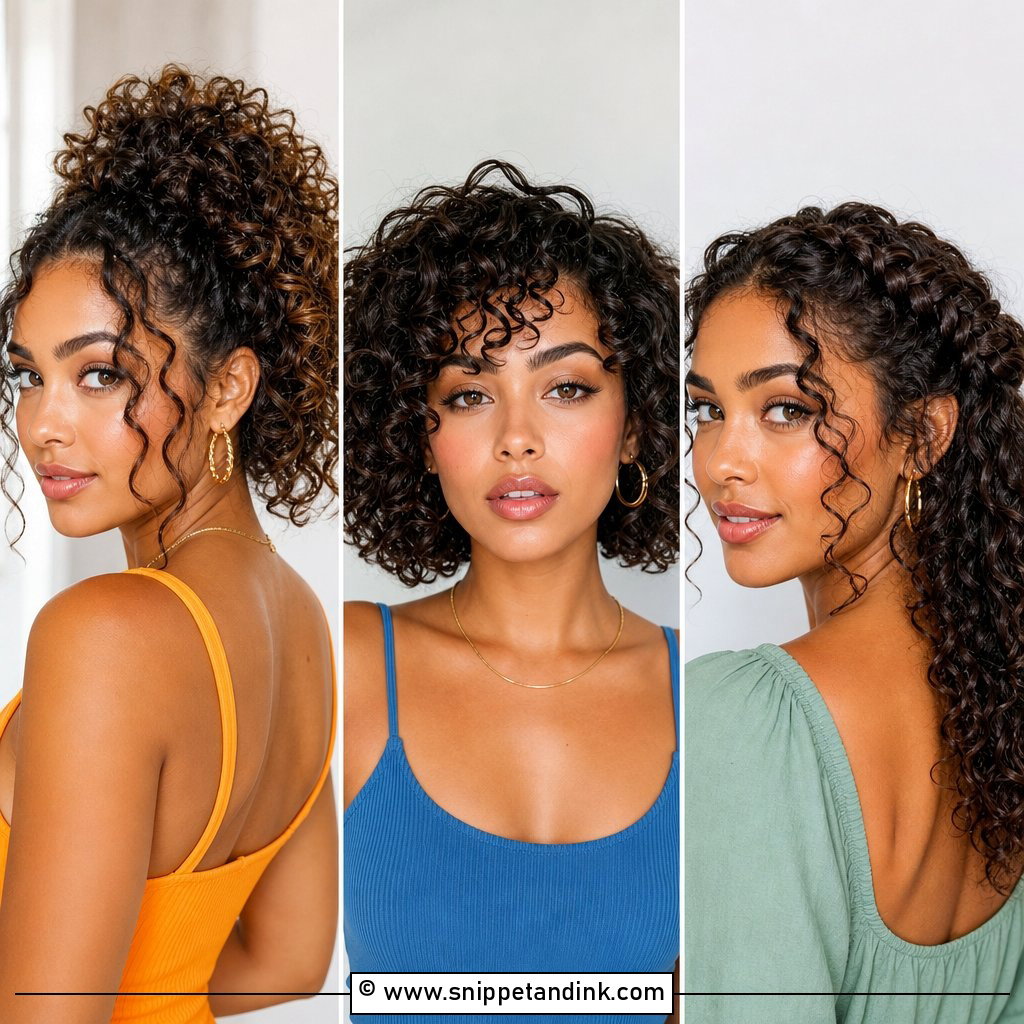
9. Curly Half Updo
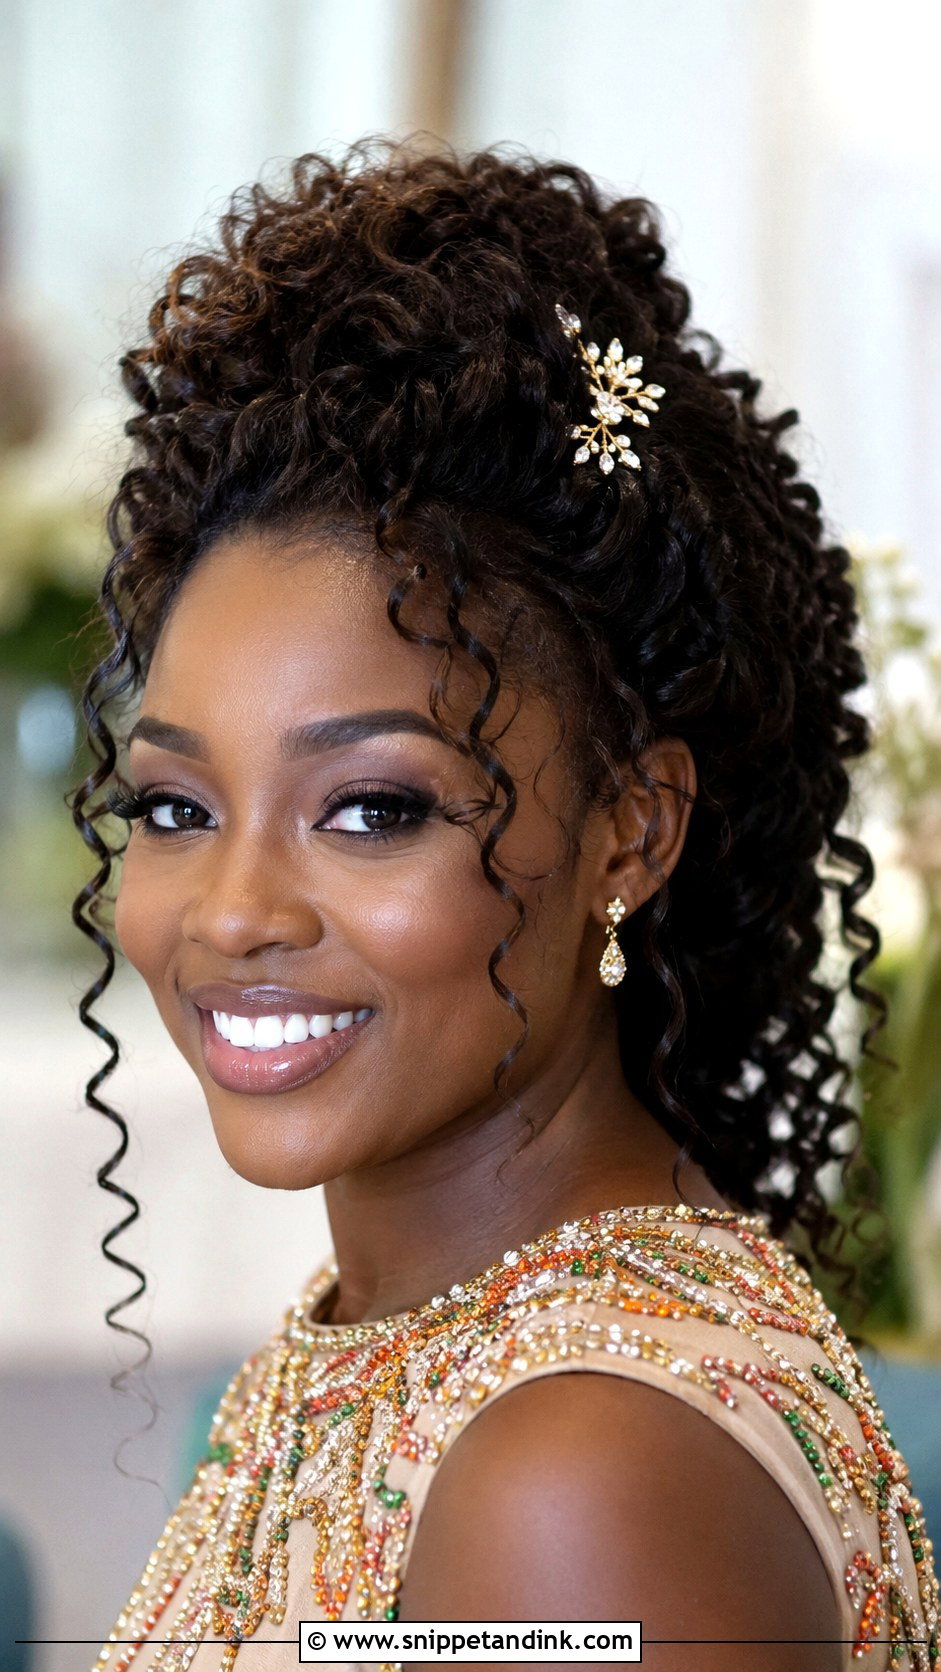
Curly hair should be styled with its curl pattern, not against it, and this half updo does exactly that. Pull the top section back and secure it with a claw clip or pins at the crown, leaving the rest of your curls loose. I’d refresh the curls with water and a little leave-in before you start, rather than brushing, so you don’t lose definition. It works across curl types, from loose waves to tight coils, and a decorative pin is all it needs for a wedding.
10. Side Swept Waves
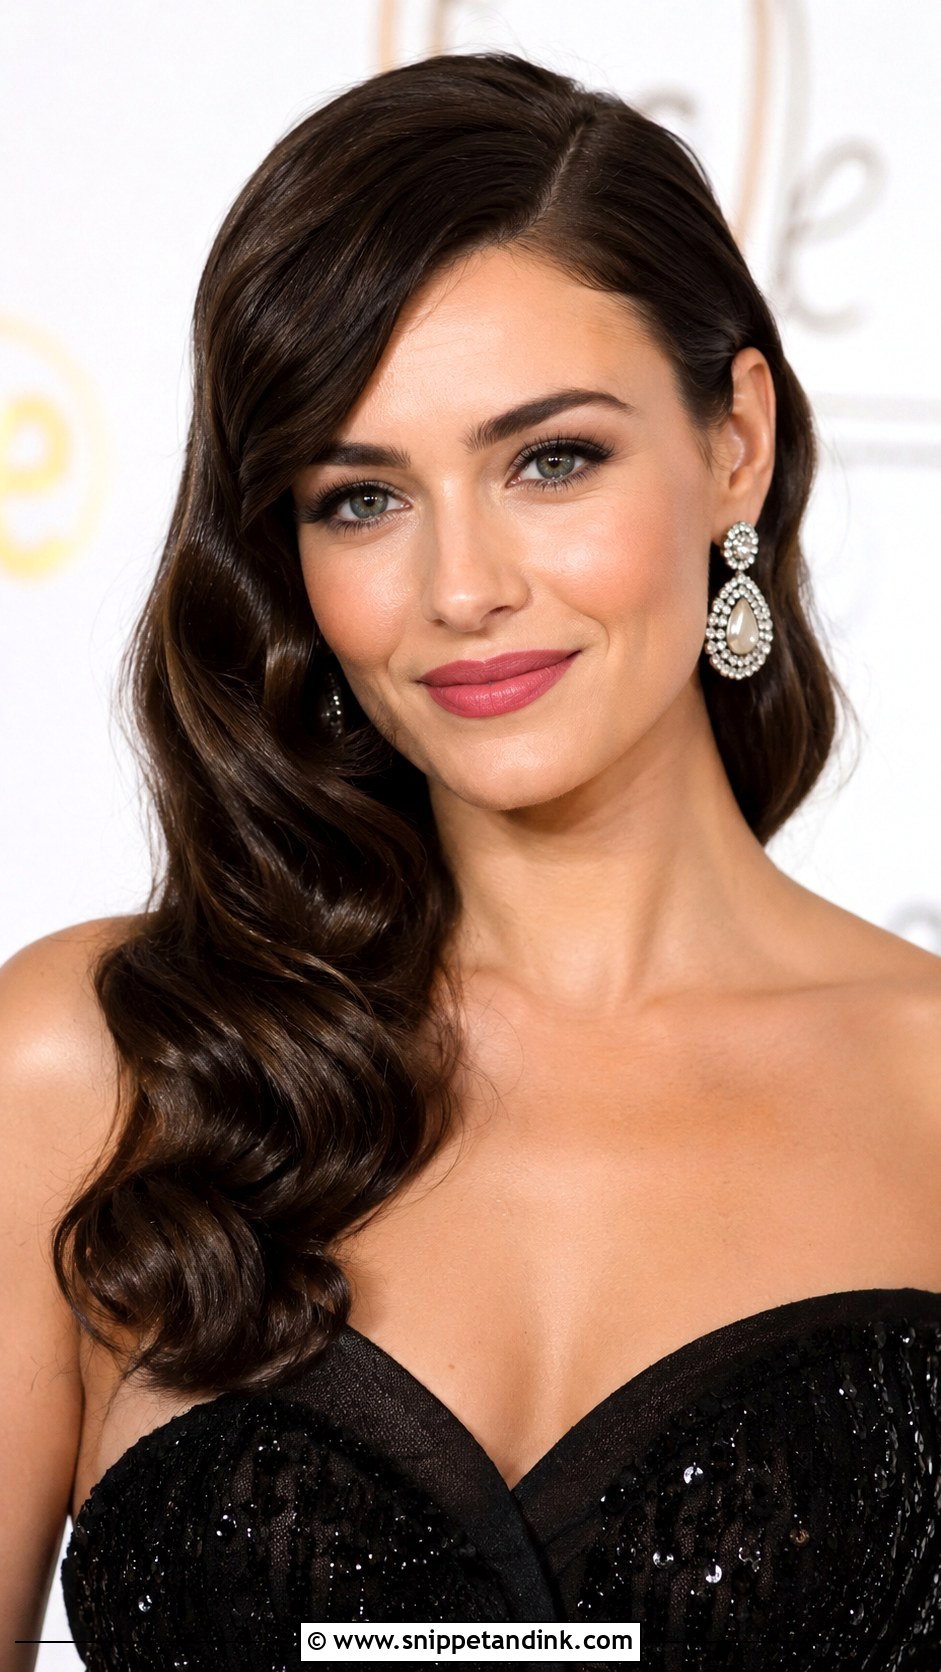
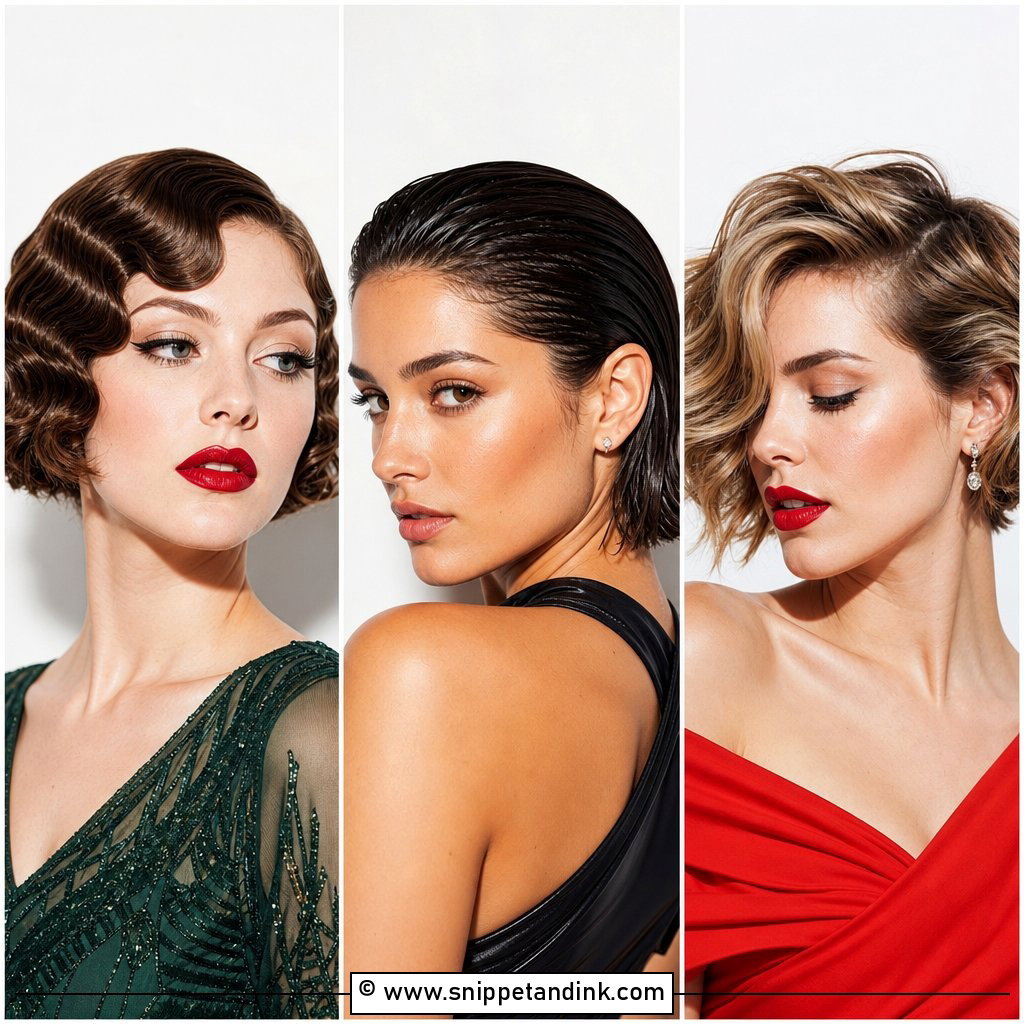
The one-shoulder sweep has a real Old Hollywood feel. Curl in even sections all in the same direction, which is what lets them fall together into one wave pattern when you brush. Sweep everything to one side and cross two pins behind the opposite ear to hold it. Keep the top smooth and the ends soft. It draws the eye to earrings and a neckline, so I’d save it for formal and evening weddings. On short hair it won’t have enough length to sweep, so choose something else.
11. Twisted Updo
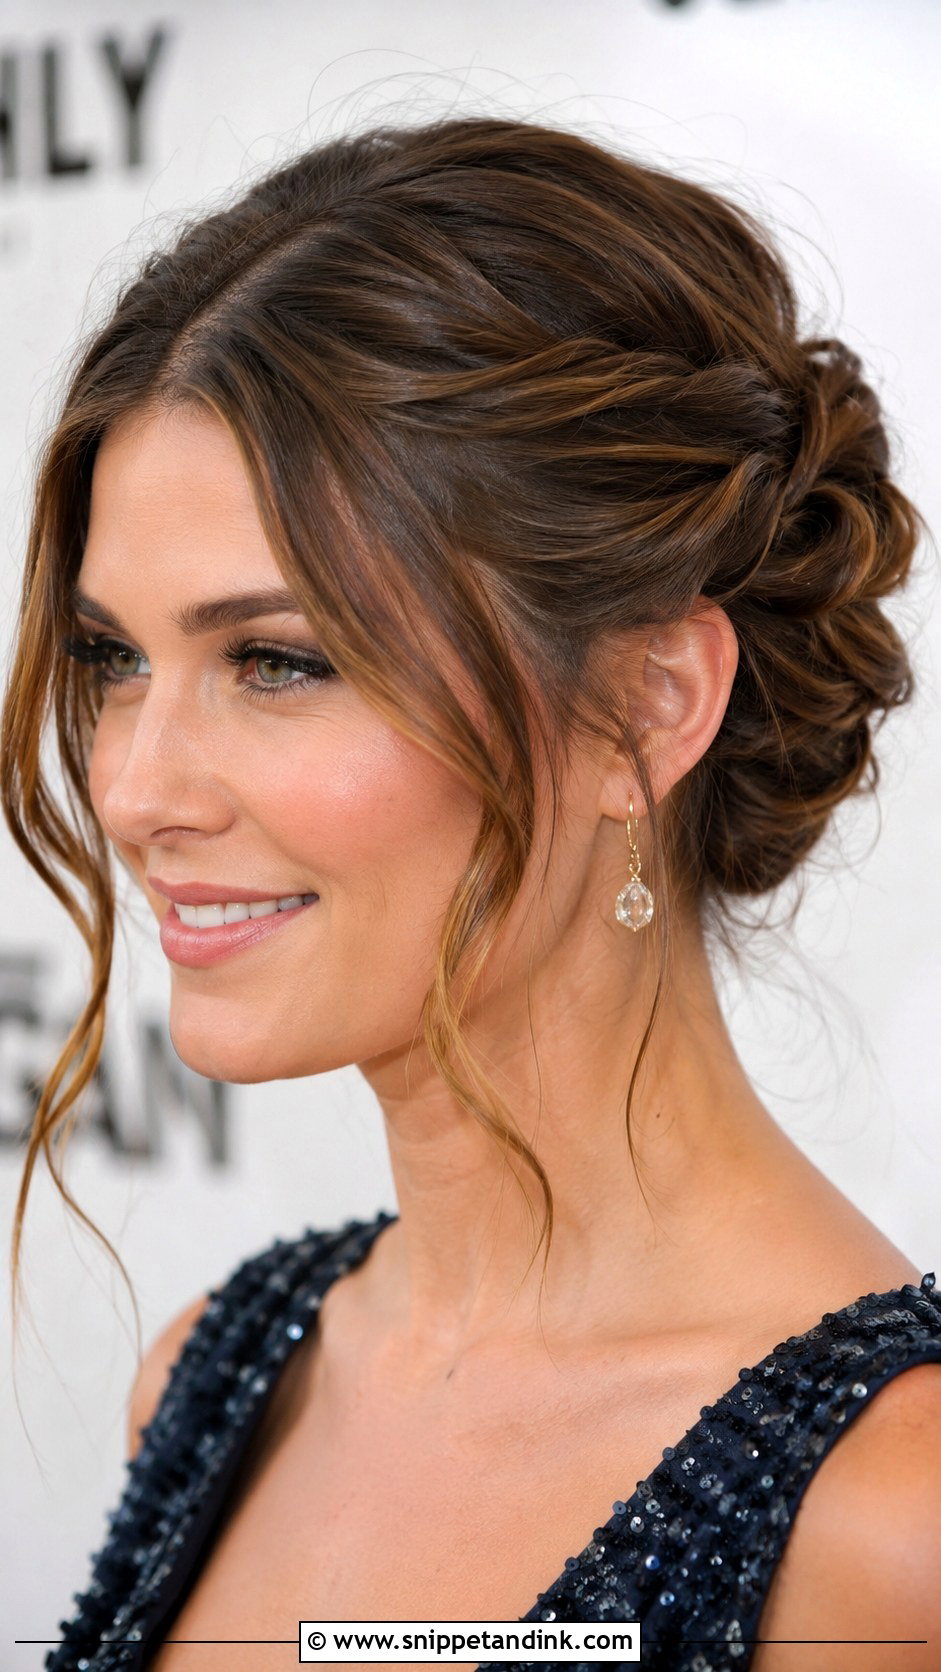
Small twisted sections pinned toward the back add texture without needing braiding skills. Twist each piece, pin it, then move on to the next until all your hair is gathered. Leave a few strands loose around the face for softness. This is one of the sturdiest guest styles because every section is anchored on its own, so if one slips the rest still hold. It sits comfortably at formal and semi-formal weddings and looks good from any angle. Add a sparkly pin or two if it’s an evening reception.
12. Pixie Cut Styling
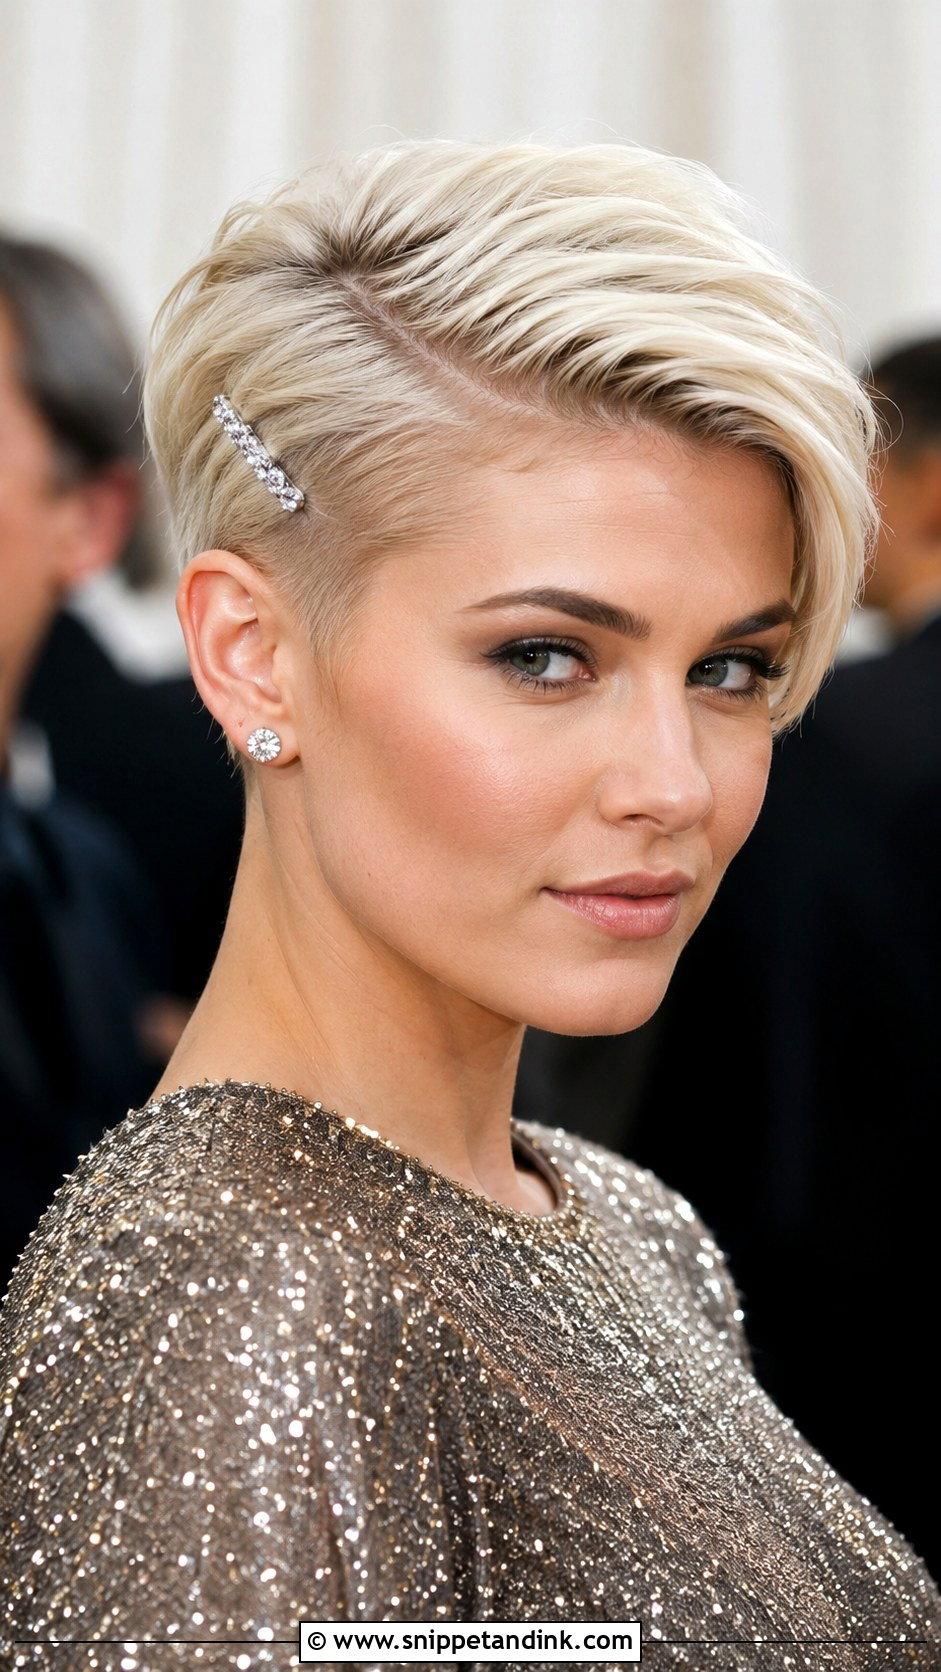
Short hair has more options than people think. With a pixie, the aim is shape and shine: a deeper side part for lift, a small amount of pomade or wax worked through to define pieces, and one side tucked behind the ear. I warm the product between my fingers first so it doesn’t sit in clumps. If you’d like more height, blow-dry the top with a small round brush before adding product. A delicate clip or sparkly pin above the ear dresses it up.
13. Bubble Ponytail
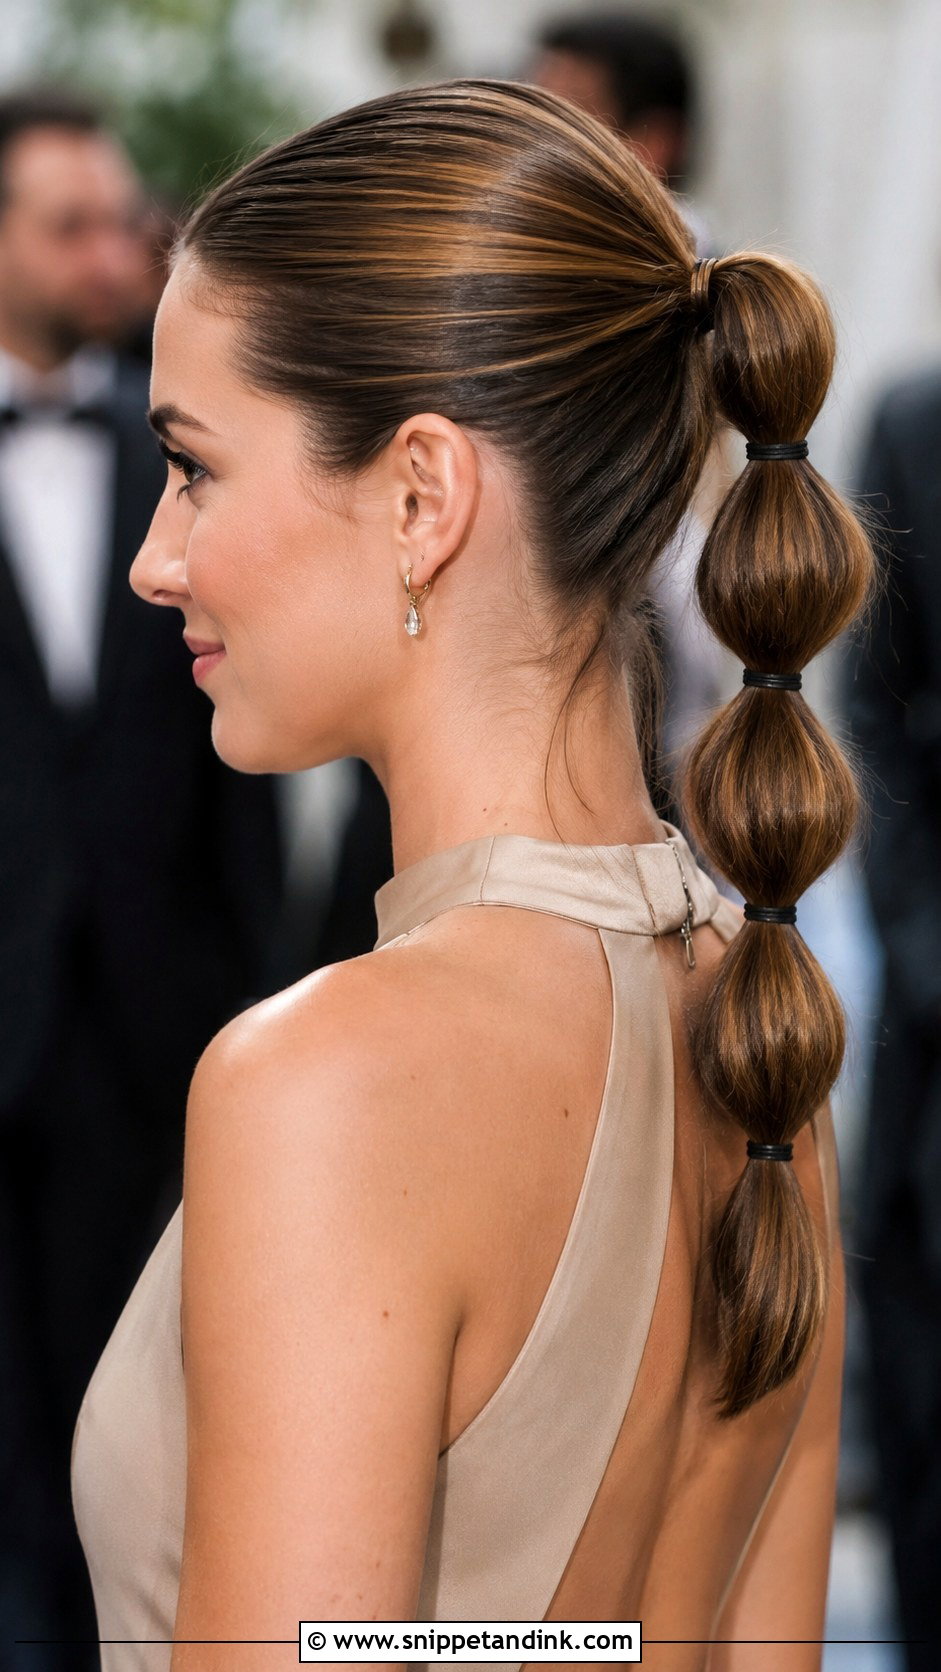
Bubble ponytails are playful and surprisingly secure. Make a regular ponytail, place small clear elastics down the length at even intervals, and gently pull each section out to puff it. Spacing matters: closer elastics make smaller, neater bubbles. It photographs well from behind, which suits candid dance-floor moments, and it suits a modern or fashion-led wedding better than a traditional one. You’ll need long hair for it to read properly.
14. Waterfall Braid
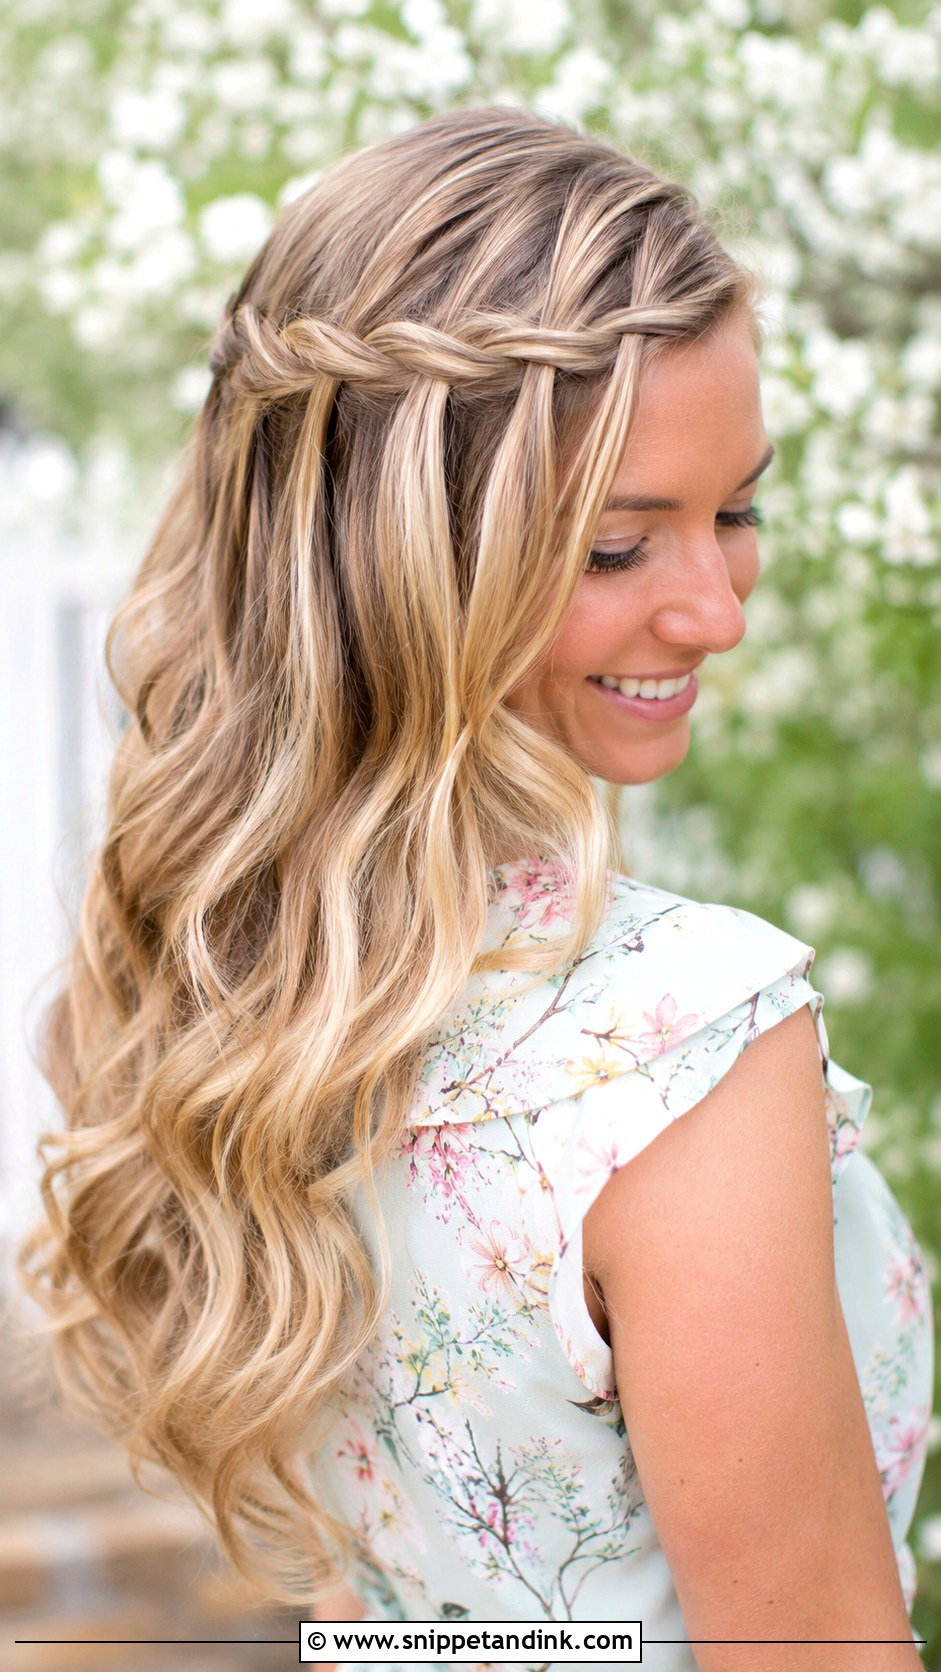
A waterfall braid drops a strand with each stitch, so you get detail across the head while most of the hair flows down. Start a regular braid near your temple, then let the top strand fall each time and pick up a new one from above. Carry it across the back and pin the end hidden under the hair. It looks best over loose waves on medium to long hair. I’d practice it twice before the day, since the dropped-strand step is easy to lose track of.
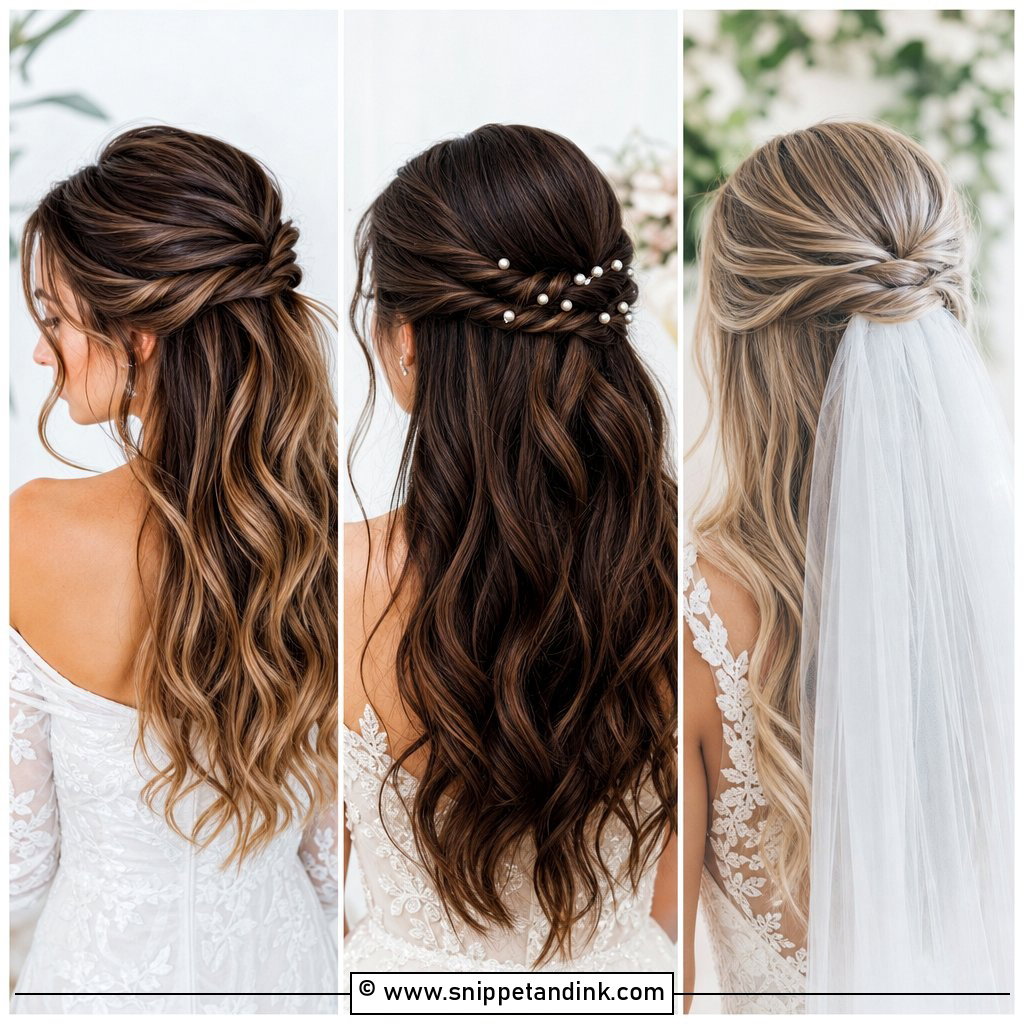
15. Slicked Back Bun
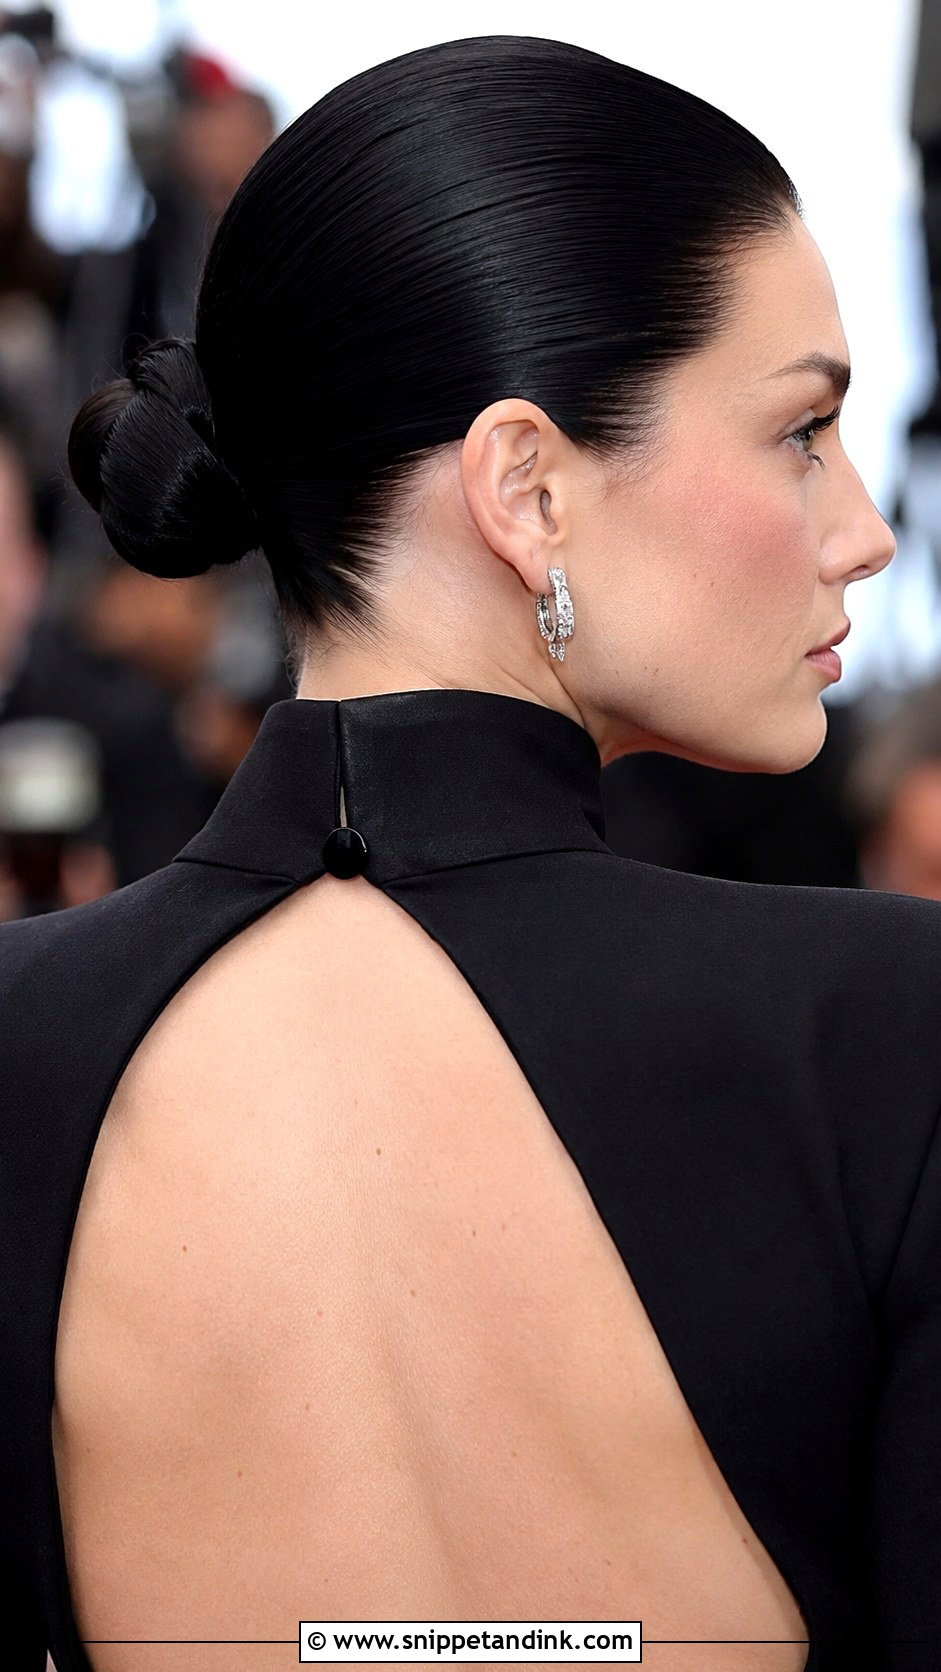
For something more editorial, the slicked-back bun makes a strong impression with very little effort. Work gel or a smoothing cream through damp hair, comb it straight back and gather it at the crown or nape. A fine-tooth comb and a soft brush give the glossy finish; a toothbrush with a bit of hairspray tames the last strands at the hairline. It’s cool in summer heat and suits contemporary and formal weddings. It does show every bump, so give yourself an extra ten minutes.
16. Loose Side Braid
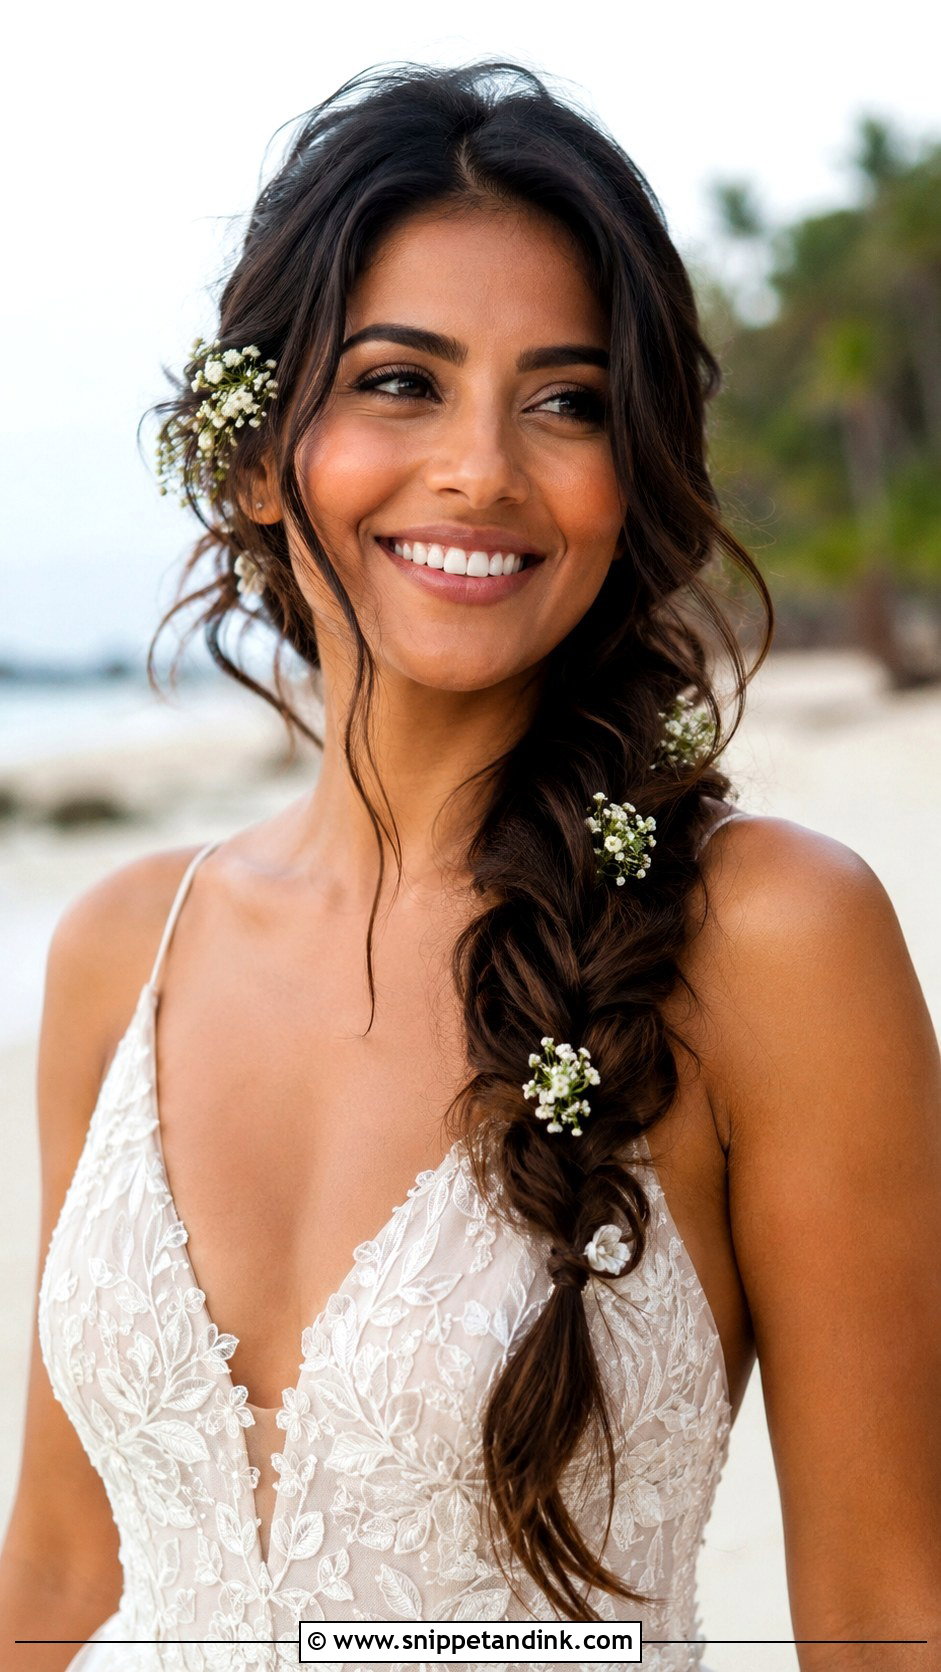
A loose side braid is the relaxed cousin of the fishtail. Sweep everything to one shoulder, do a soft three-strand braid and pull the edges gently for fullness. Secure the end with a small clear elastic and leave a few pieces out around the face. Long hair suits it best. On a windy beach, though, I’d pin the top of the braid in place behind the ear, otherwise it tends to drift around to your back during photos. Tiny flowers or a delicate pin add a boho touch.
17. Tousled Bob
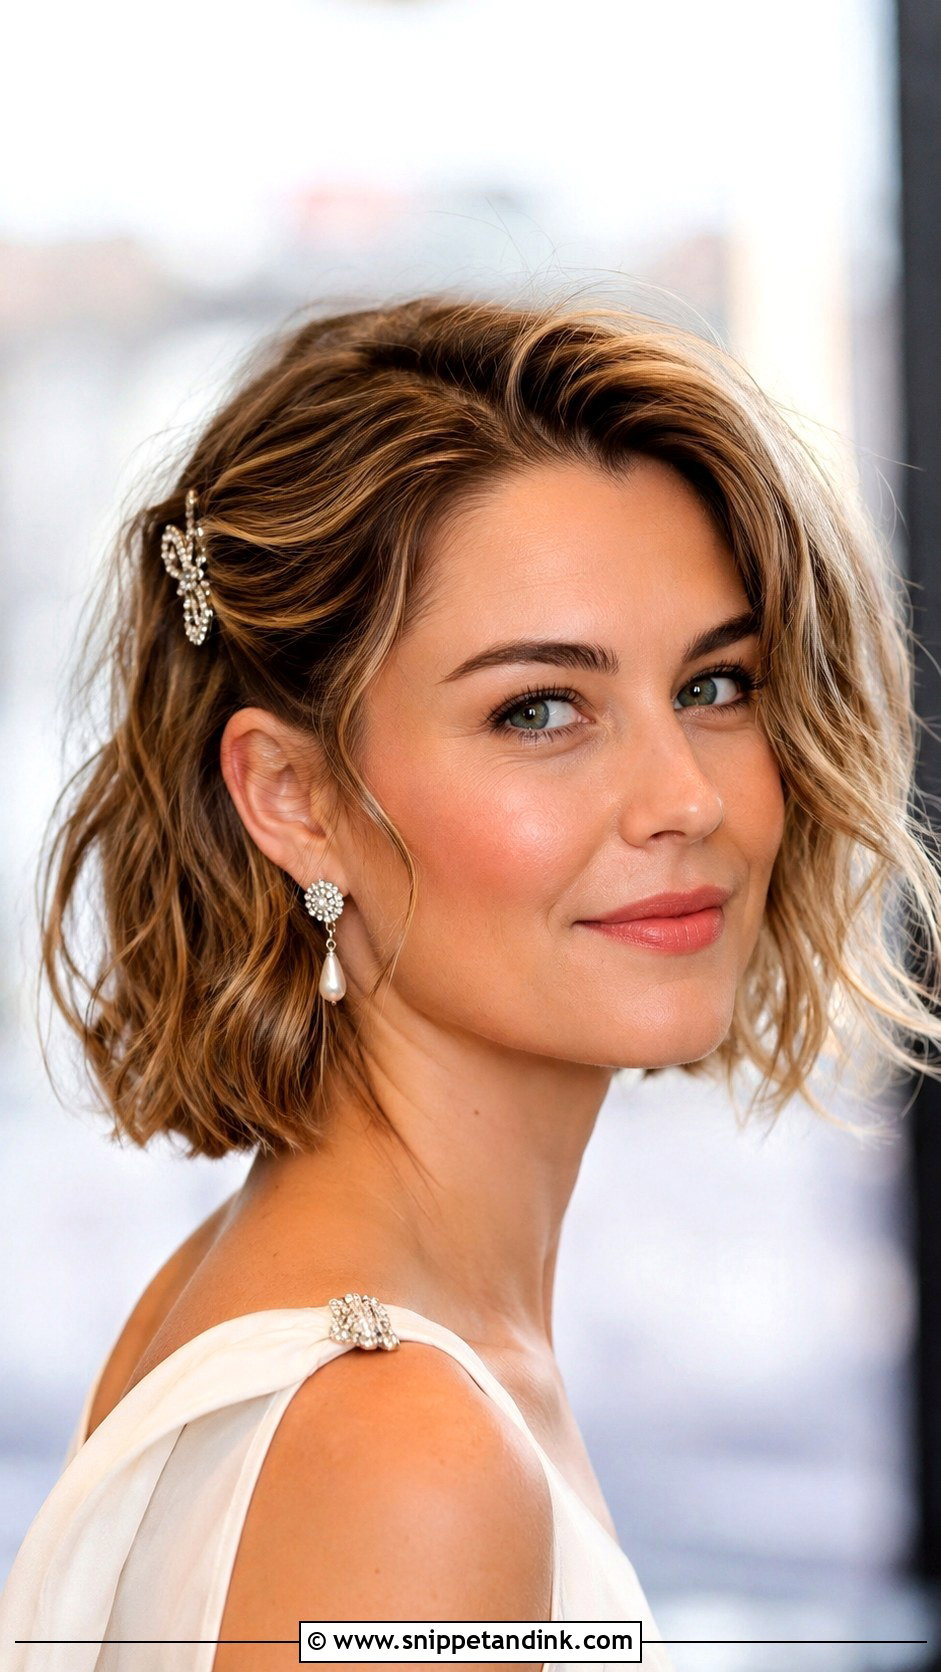
A bob doesn’t need length to look wedding-ready. Make soft bends with a flat iron or small wand, leaving the ends straight so it looks current rather than curly. Tousle with your fingers and mist a texture spray for grip, then tuck one side behind your ear. The trick with short hair is not over-curling, which can make it look shorter. A sparkly clip lifts it for an evening reception.
18. Twisted Half Up
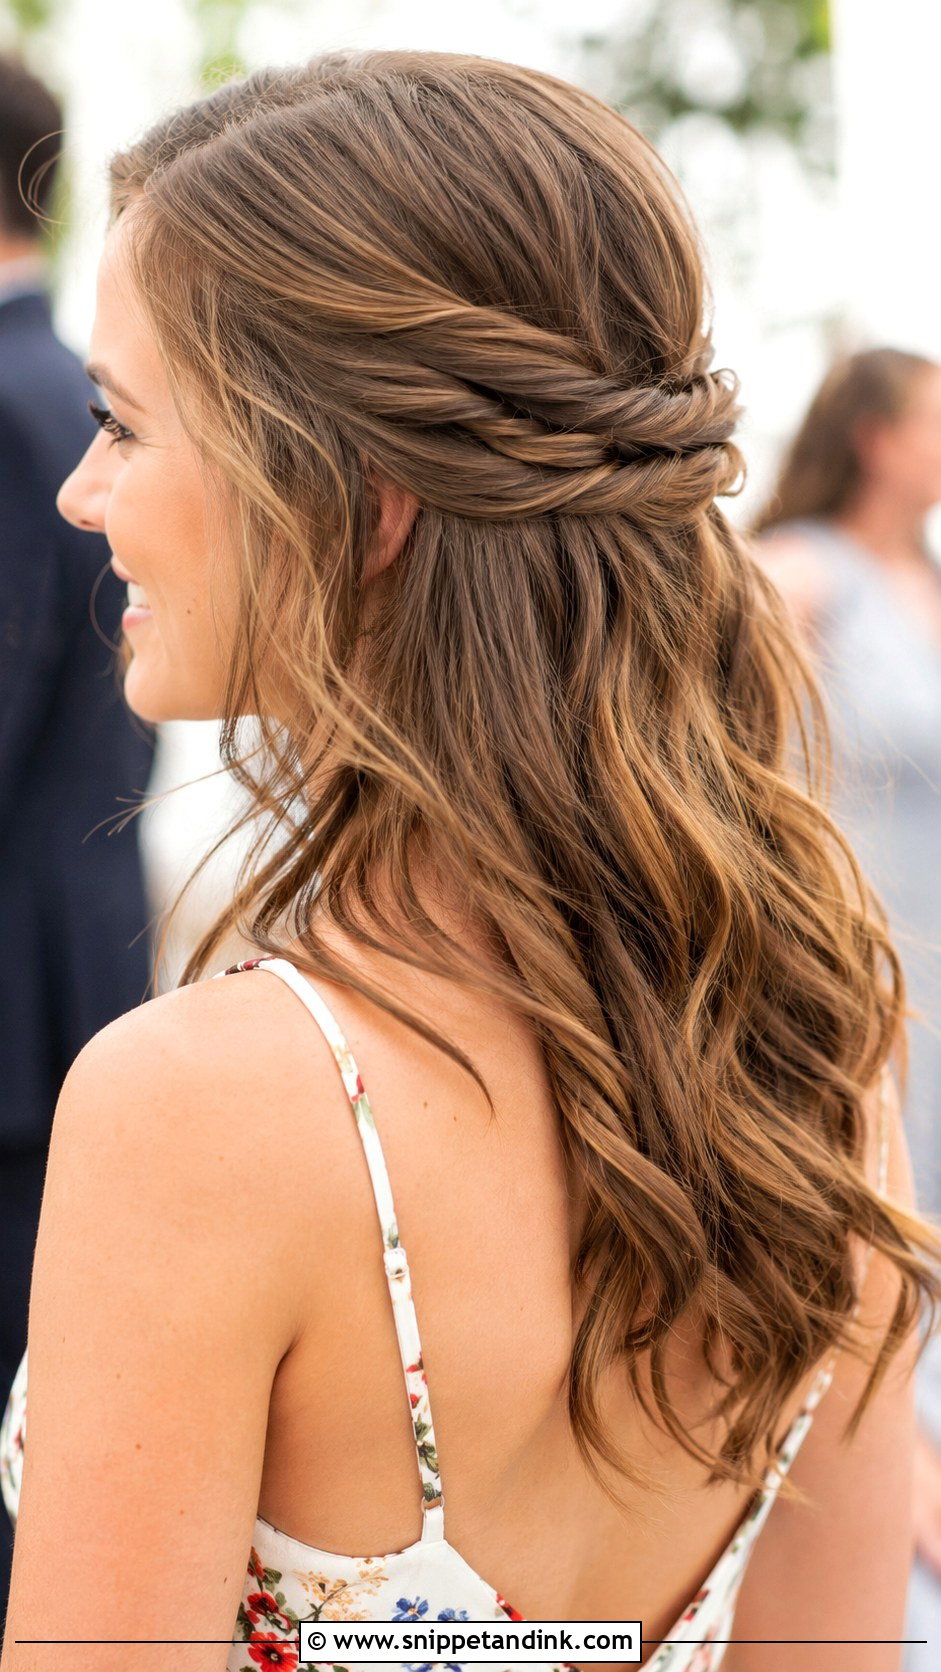
Two twisted sections pinned together at the back are the easiest detail you can add to loose hair. Take a small section from each side, twist both away from the face and cross-pin them where they meet. Let the rest fall in soft waves. Twisting away from your face is what keeps the strands tight; twist the other way and they unravel within the hour. It suits medium to long hair and spring or summer weddings.
19. Voluminous Blowout
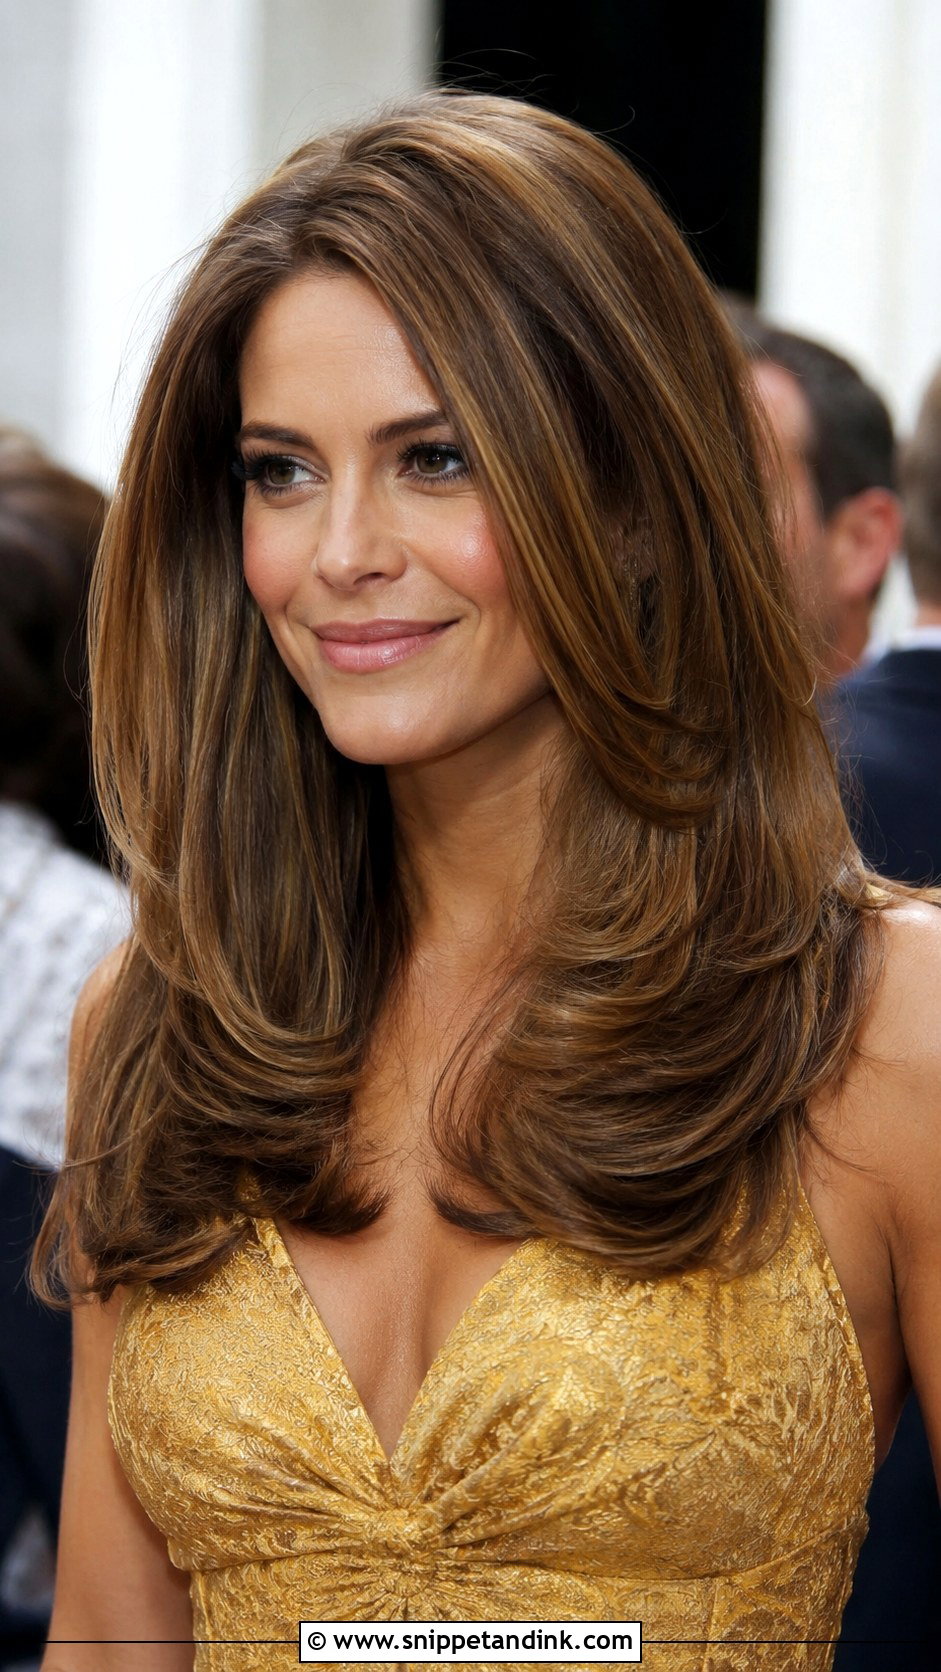
Sometimes the best guest hair is just a really good blow-dry. Lift at the roots with a round brush, aim the dryer nozzle down the hair shaft to keep it smooth, and turn the ends slightly under. A shot of cool air on each section sets the shape. A voluminous blowout makes sense when you have healthy medium or long hair and want it worn down, but in heavy humidity it won’t keep its volume, so pack a small brush and some dry shampoo.
20. Floral Accented Updo
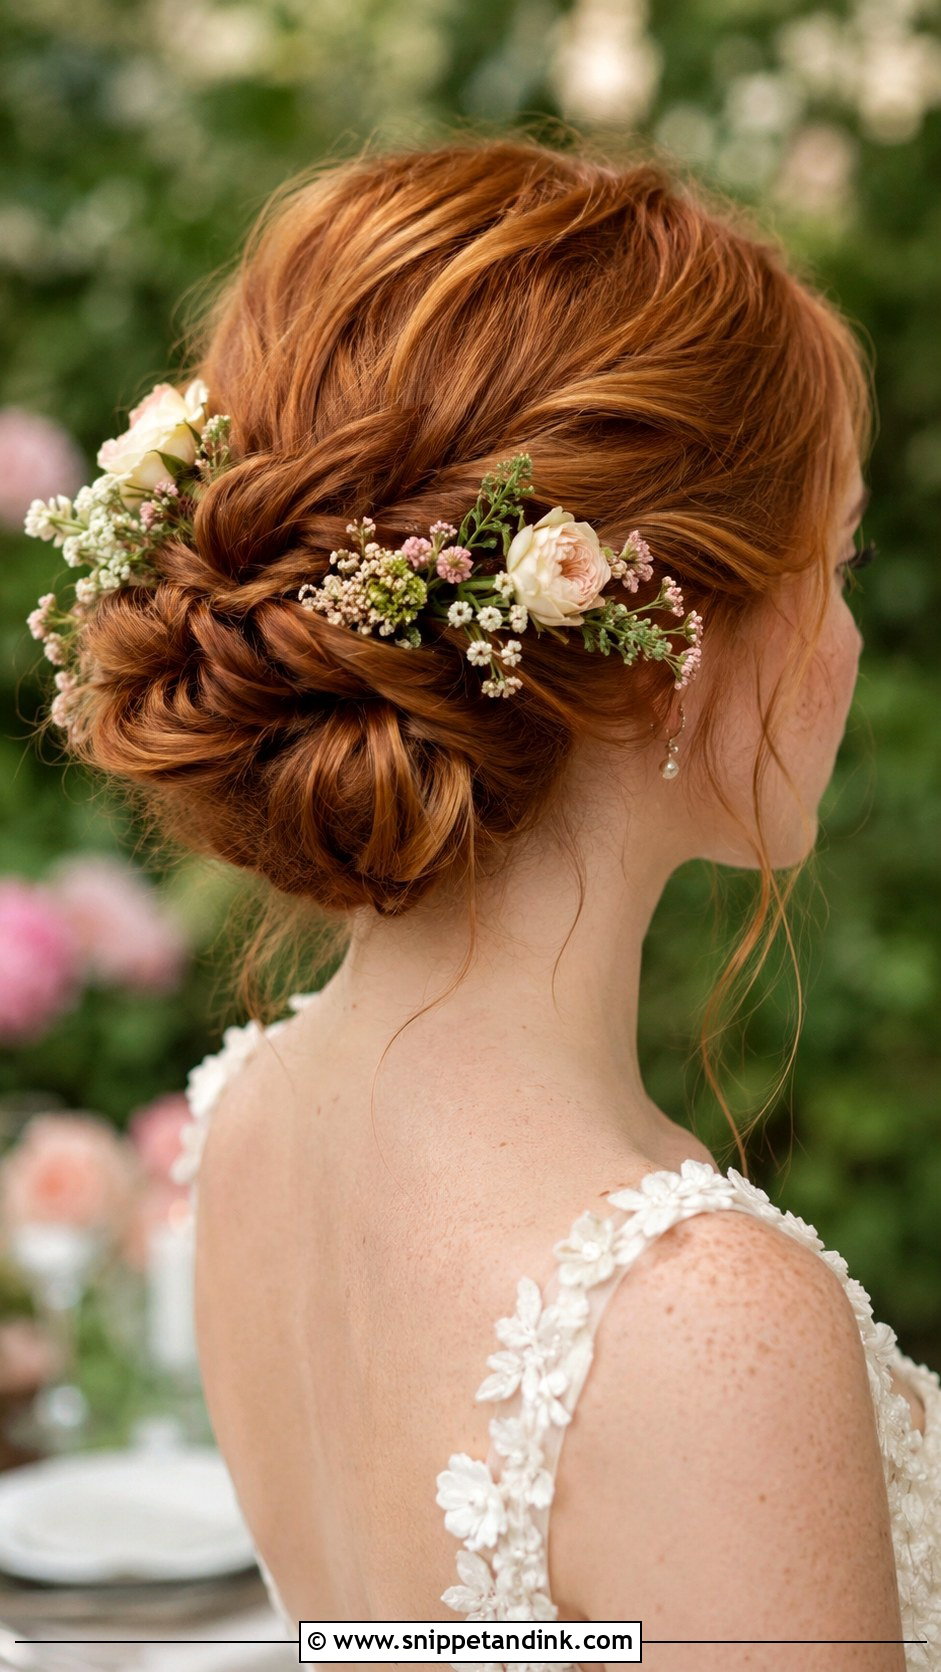
Fresh or faux flowers make any simple updo feel finished. Build a low bun or twisted updo first, then tuck small blooms into the base where the pins can grip their stems. Fresh flowers wilt in heat, so for an outdoor summer wedding I’d choose hardy stems like spray roses or wax flower, or go with good faux ones. Pick colors from your outfit. As a guest, I’d avoid a full white floral crown, which can read as bridal.
21. Sleek Straight Hair
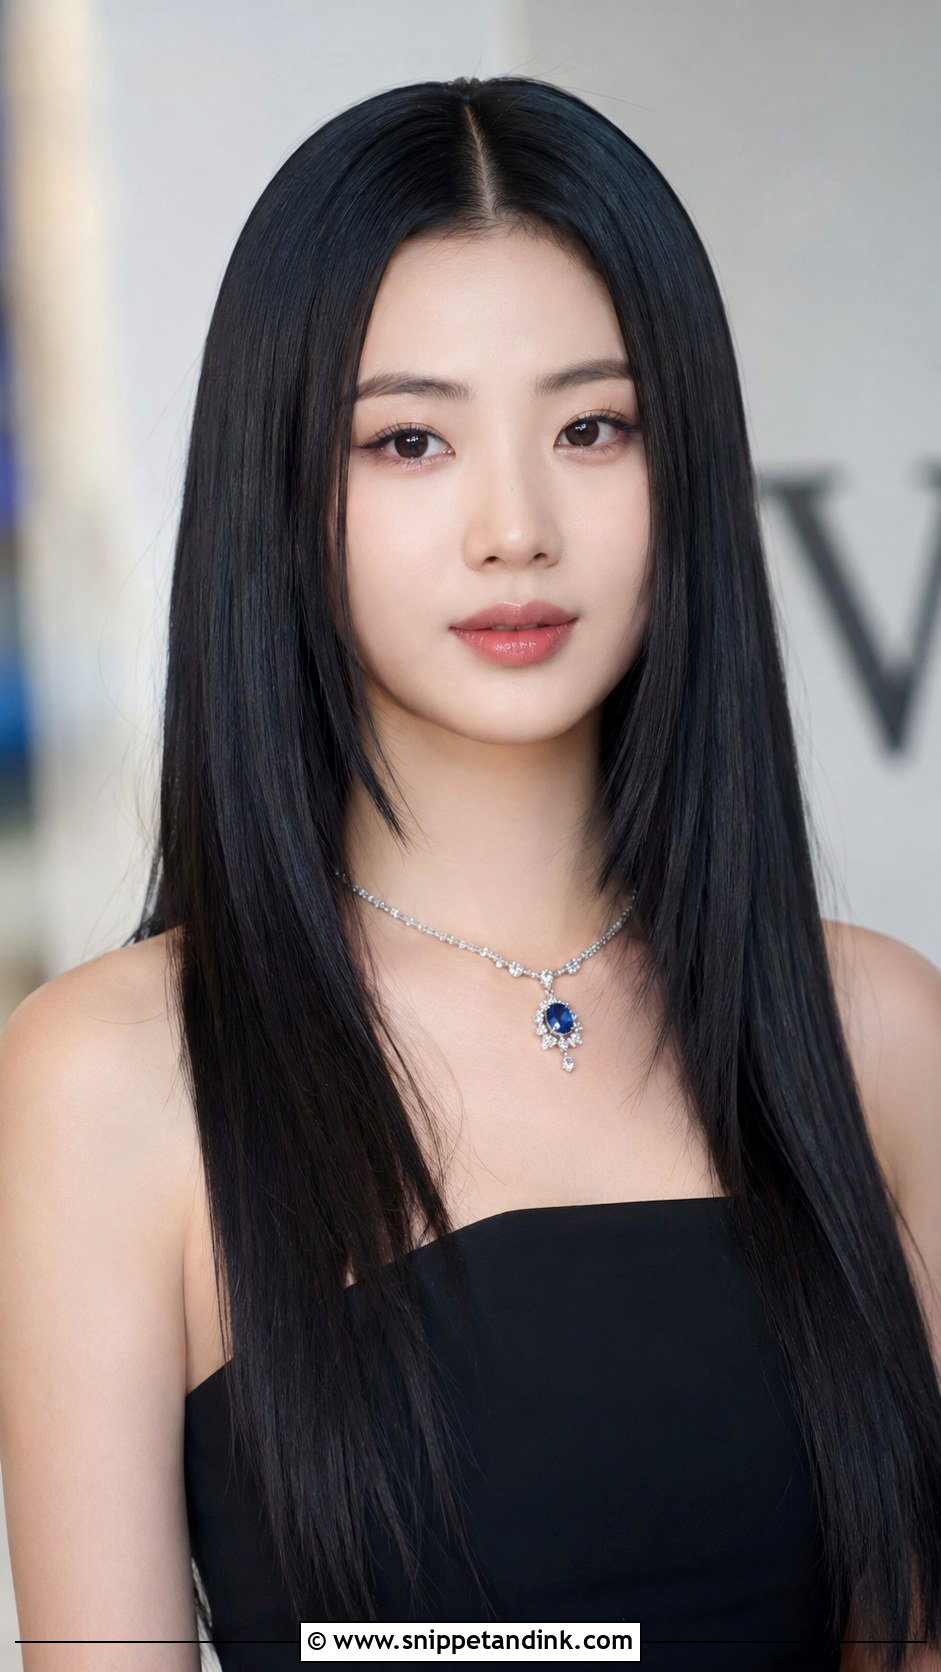
Sleek straight hair looks simple and only works when the prep is done right. Use a heat protectant first, then flat iron in small sections, finishing with a drop of shine serum on the lengths. Center or side part both work. It pairs well with statement jewelry and strong necklines. On curly or very thick hair, it takes longer than people expect and can frizz back by evening in humidity, so it’s better saved for dry weather or an air-conditioned venue.
22. Rolled Updo
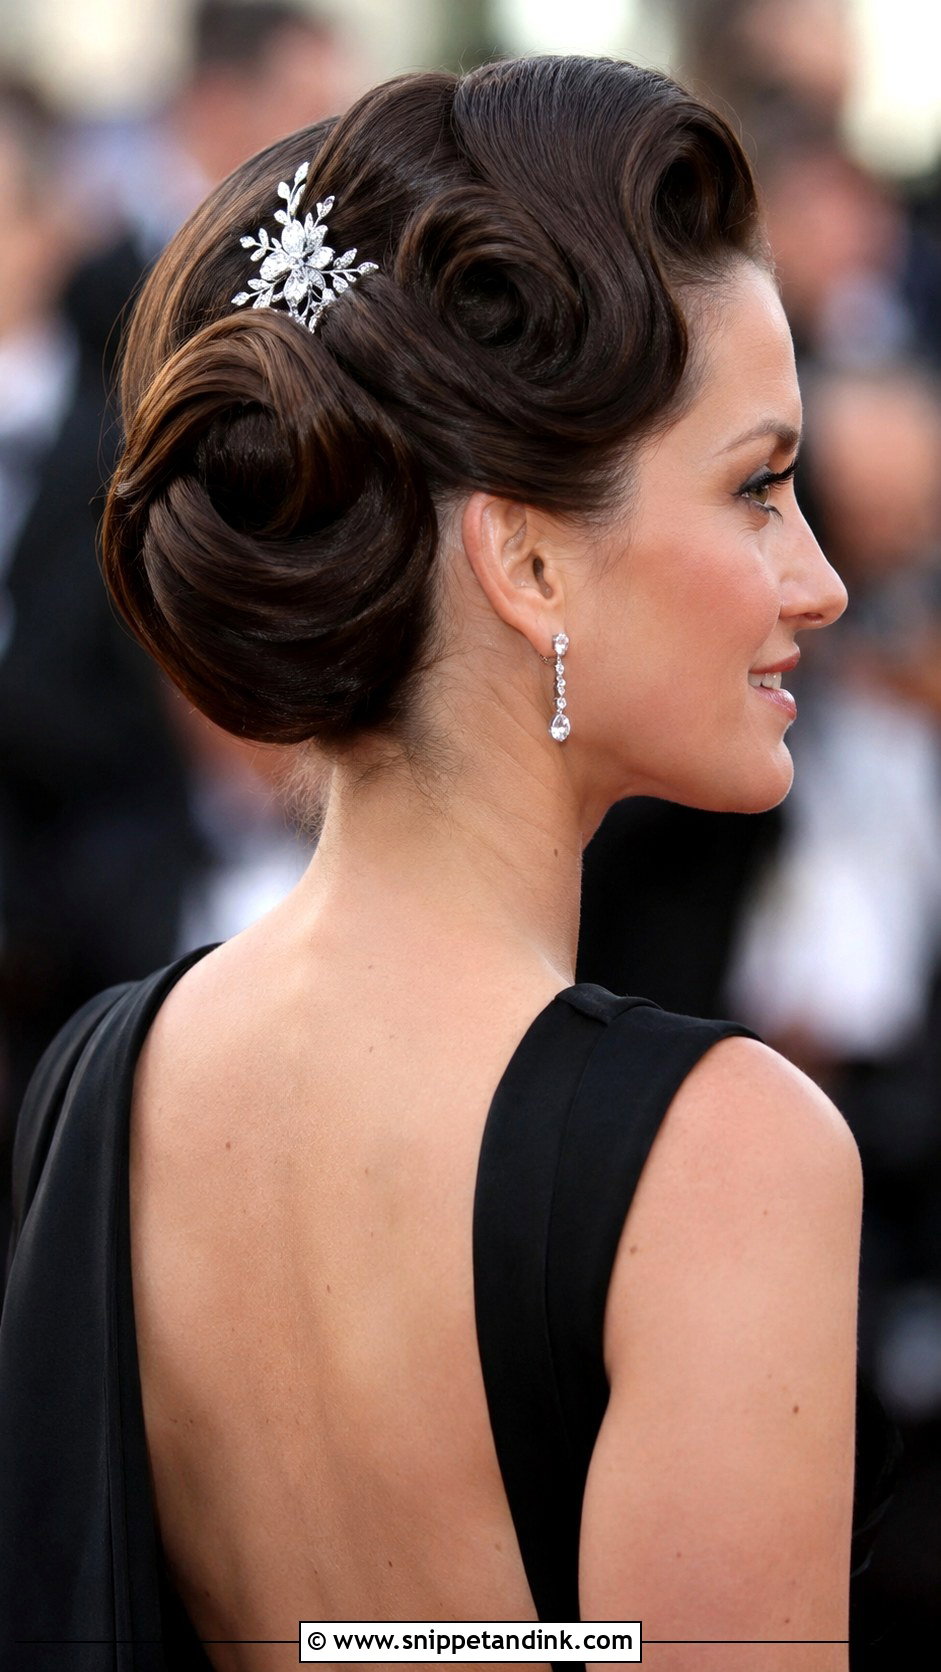
Rolled updos come from vintage set styles. Section your hair, roll each piece under and pin it flat against your head, then repeat until everything is gathered. A light hold spray on each section before rolling gives it body; on very silky hair, I add dry shampoo too so the rolls don’t slip. Tuck the loose ends in. It suits formal and black-tie weddings, and a decorative comb finishes it. You’ll need medium to long hair.
23. Beachy Textured Waves
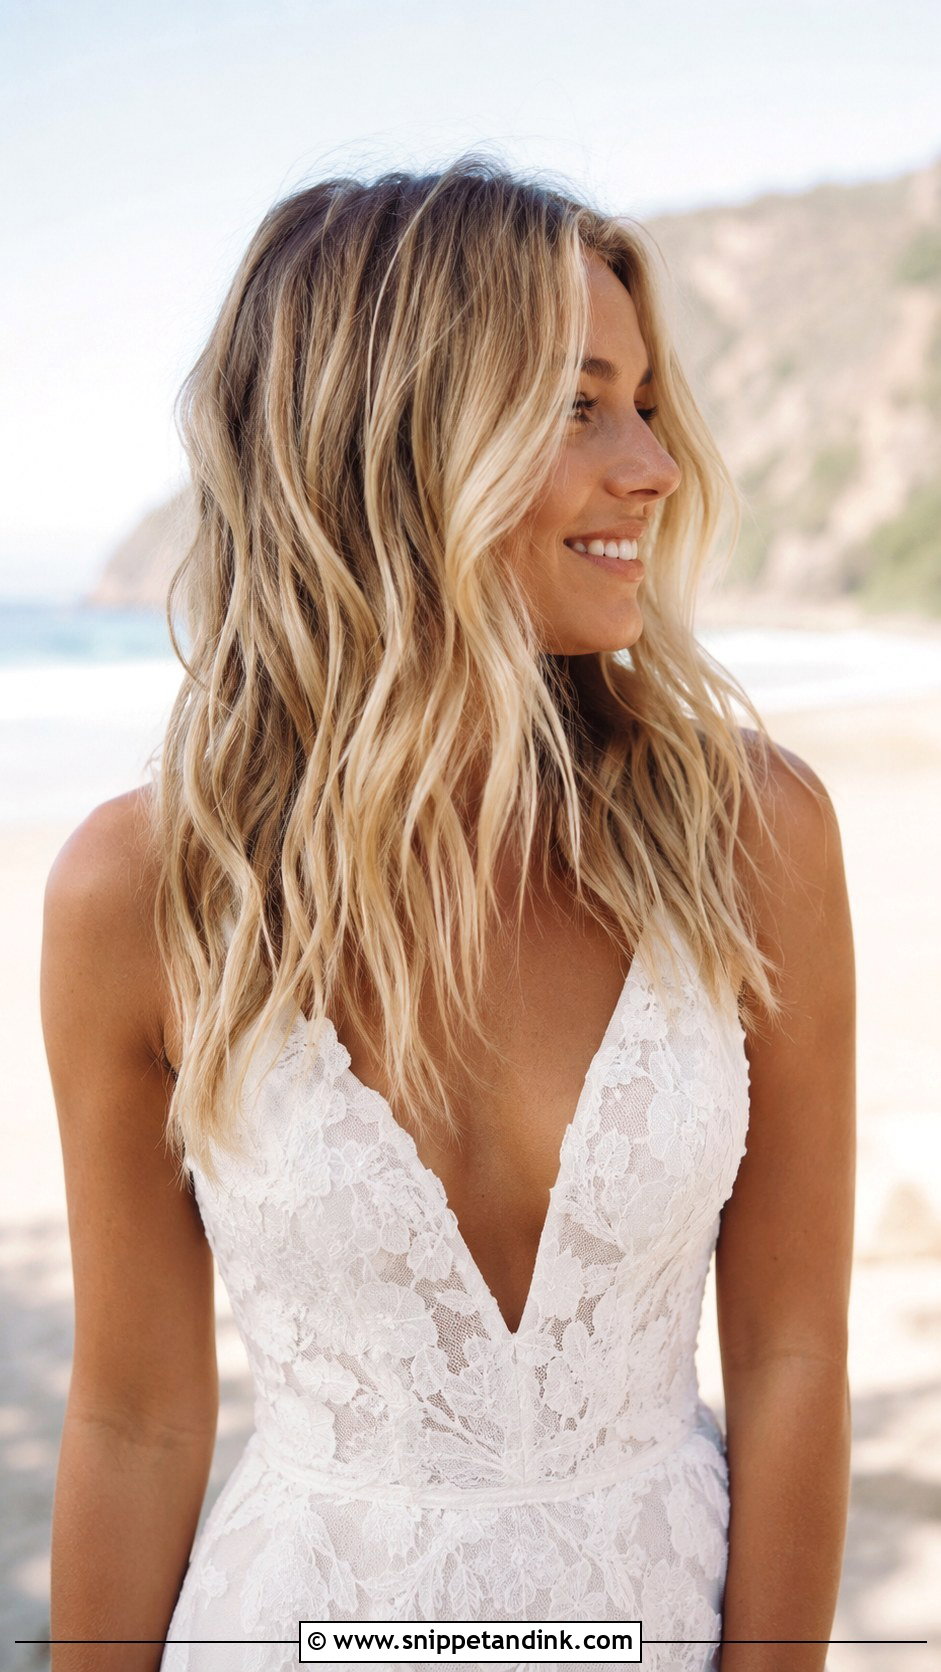
Beachy texture starts with damp hair and a sea-salt spray, scrunched as it dries. Add a few loose bends with a wand for shape, then tousle with your fingers. Beachy waves suit medium to long hair and outdoor daytime weddings. One honest caution: salt sprays can make dry or color-treated hair feel rough, so on that hair type I’d use a texture spray with less salt.
24. Top Knot
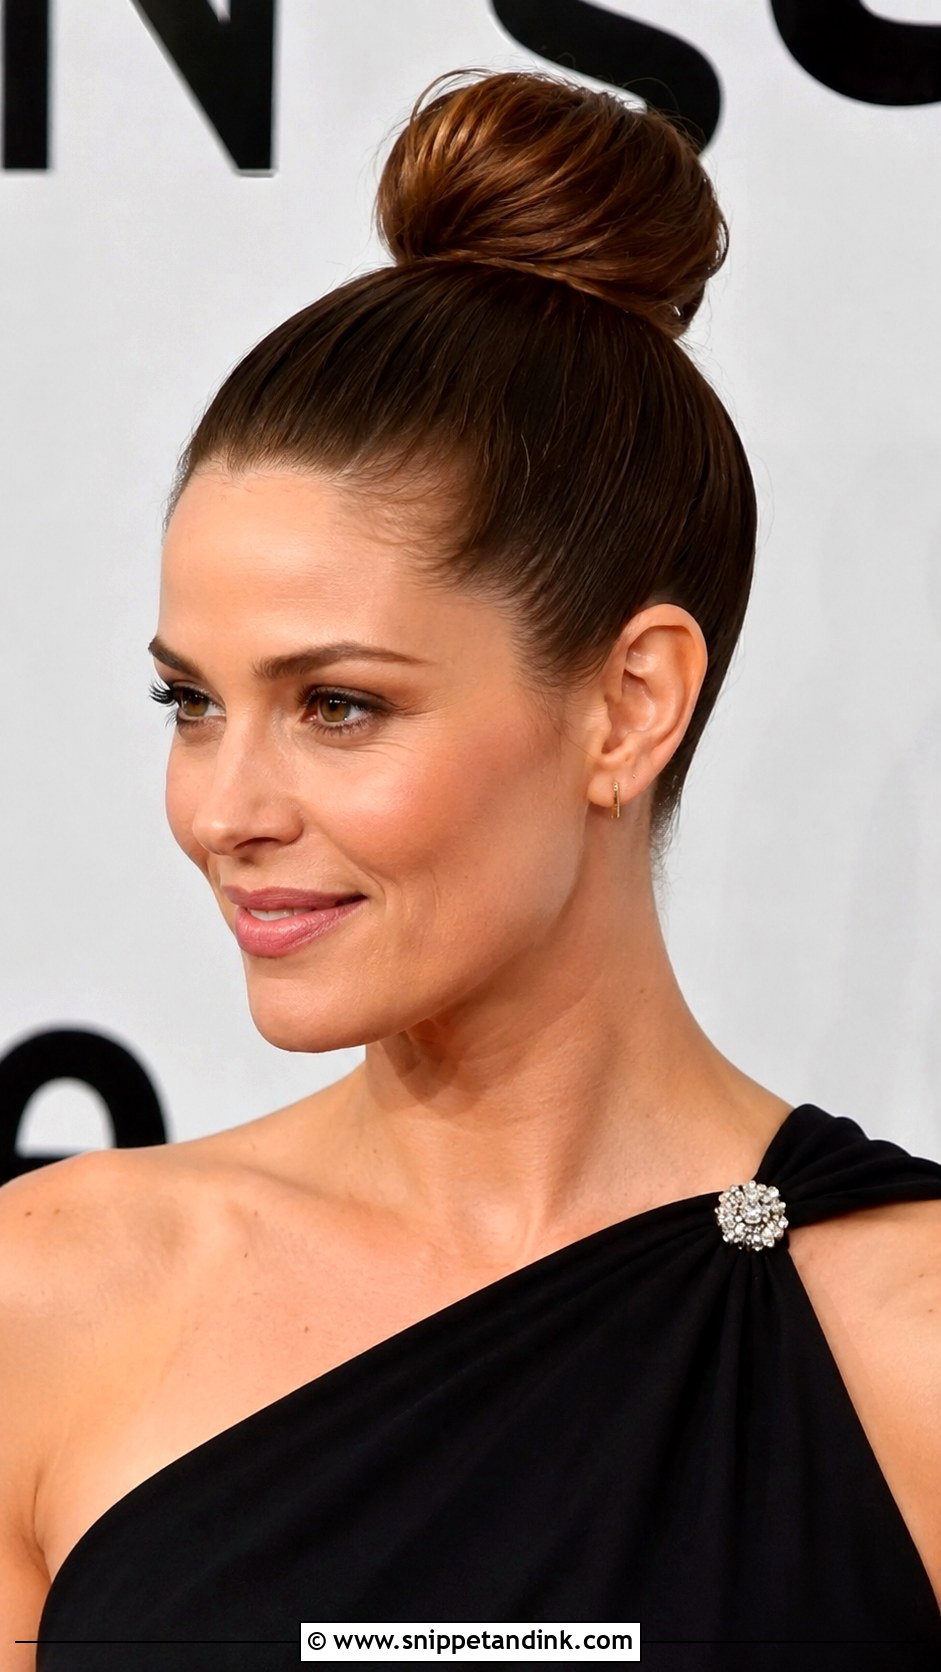
A top knot keeps you cool and off your neck at a summer wedding. Gather all your hair high on the crown, secure it with an elastic, then twist and pin. Smooth the sides for a sharper finish or leave some pieces loose. It suits medium to long hair, though very heavy hair can drag a high knot down by evening, so pin it into the elastic base generously. A sparkly pin dresses it up.
25. Braided Ponytail
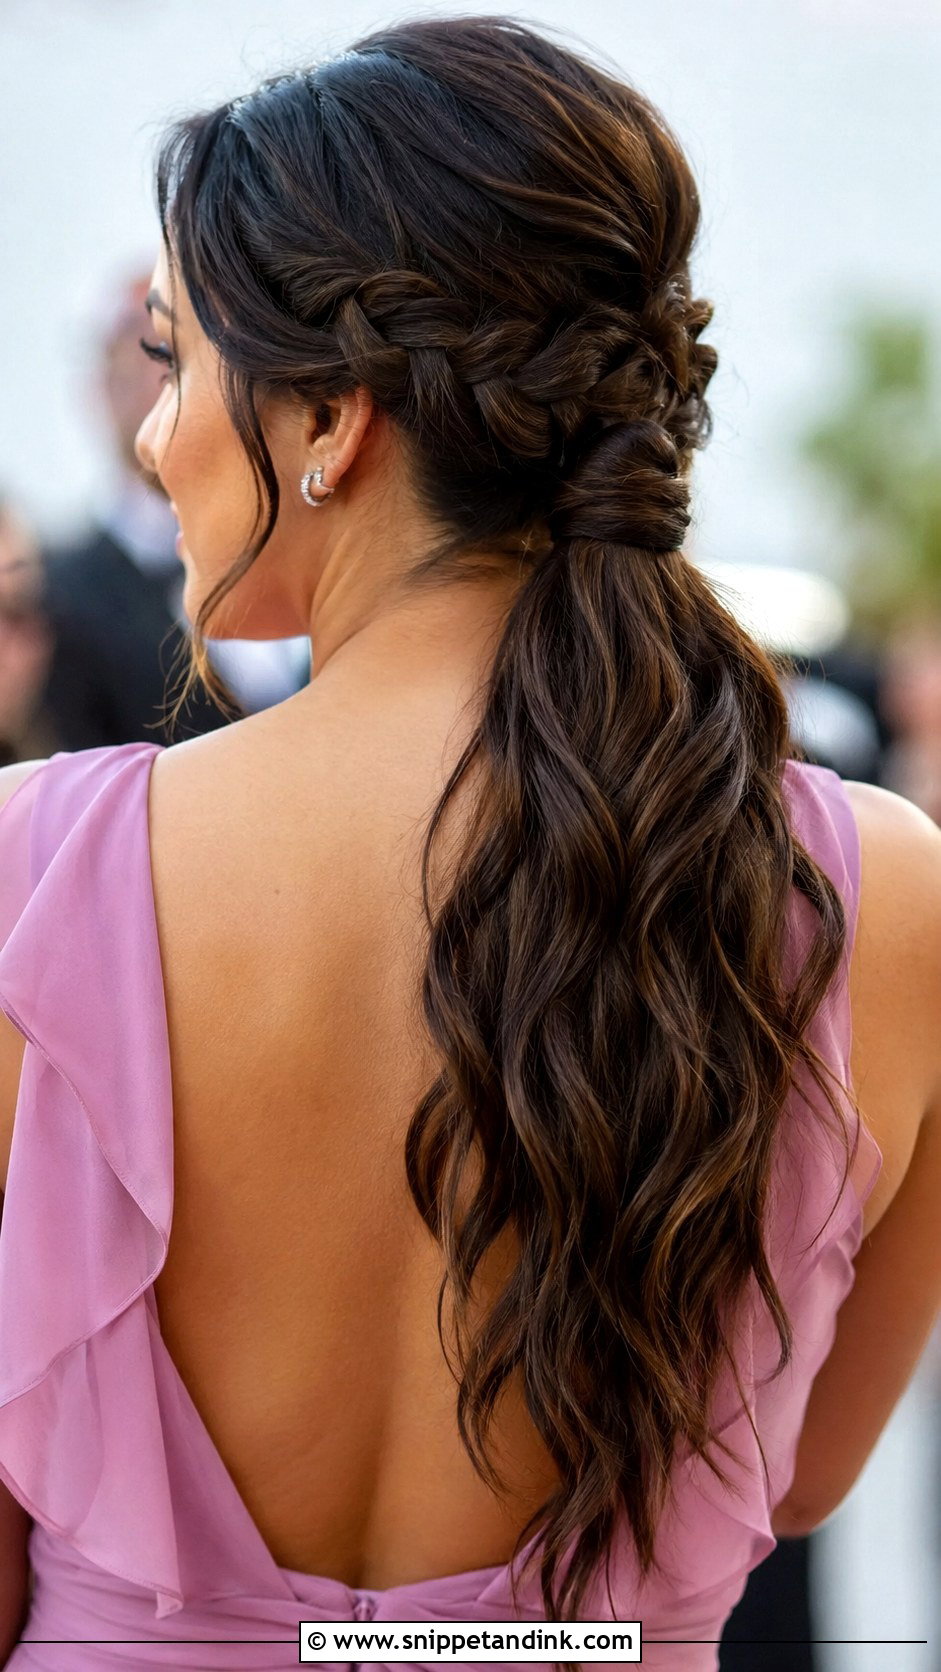
Braiding the length of a ponytail keeps it secure through hours of dancing. Gather the ponytail, braid down the length and secure the end, then wrap a strand around the base to hide the elastic. Loosen the braid gently for fullness. It’s sturdy, simple and suits medium to long hair. I recommend it to guests who’ll be on the dance floor all night or chasing small children.
26. Curtain Bangs With Waves
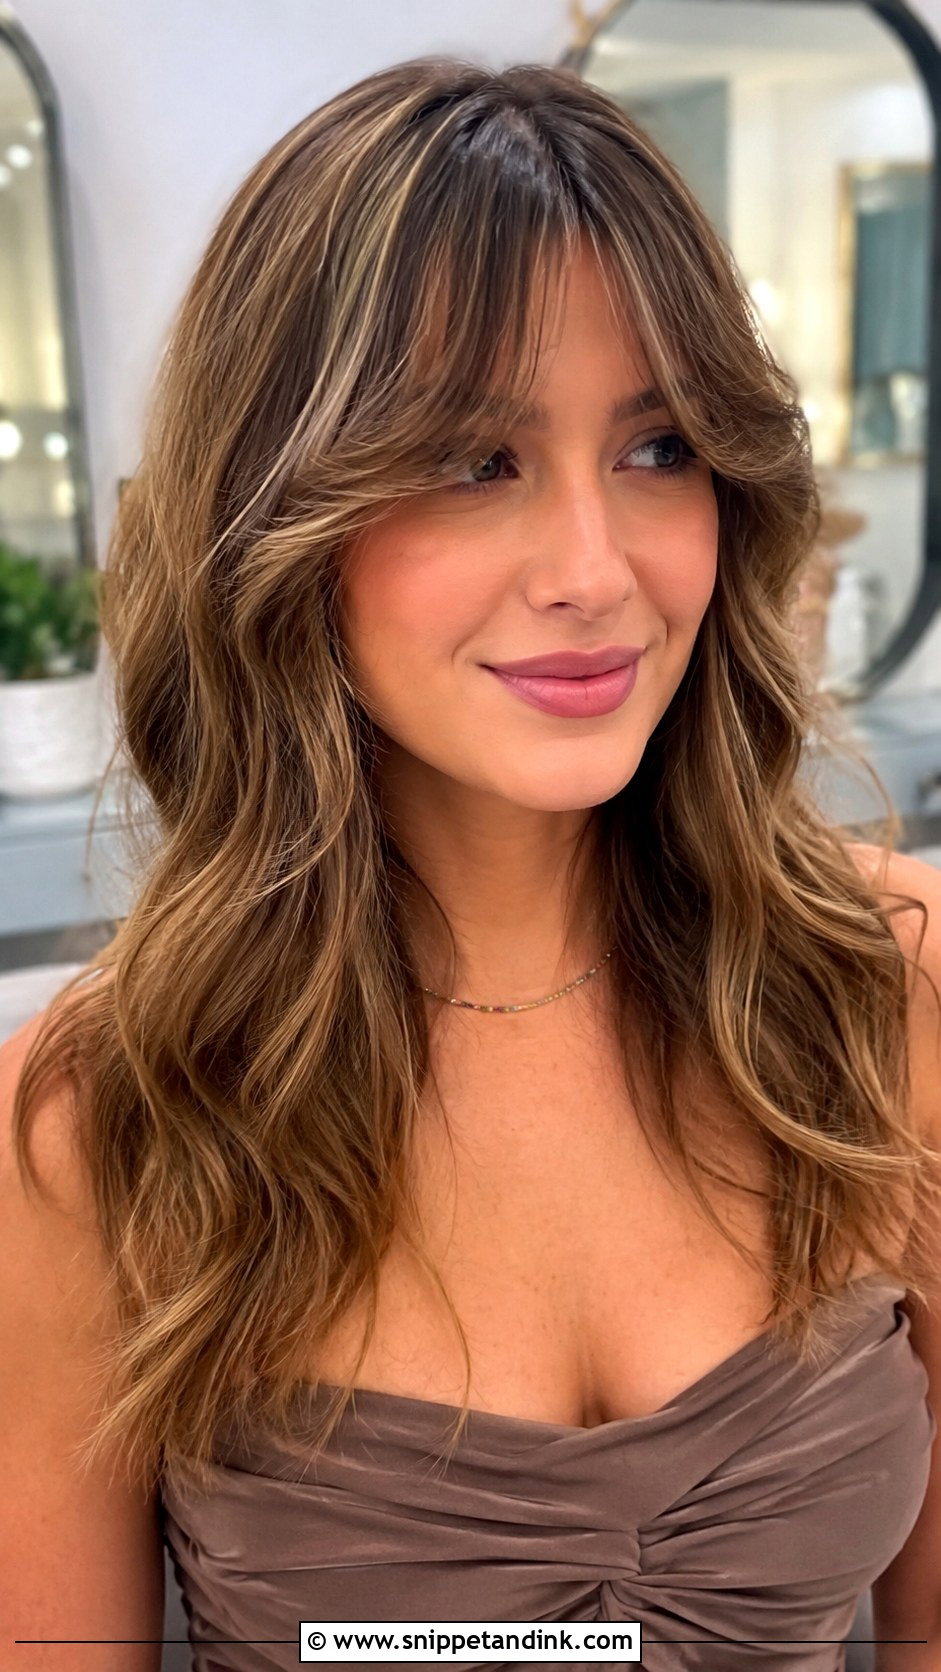
Curtain bangs need shaping more than curling. Use a small round brush and blow-dry each side down and then back, away from the face, so they part naturally in the center. Add loose waves through the rest of the hair. The bangs frame the eyes and cheekbones. If yours are freshly cut, try them out a week before the wedding, as new bangs take some practice to style evenly.
27. Twisted Crown Braid
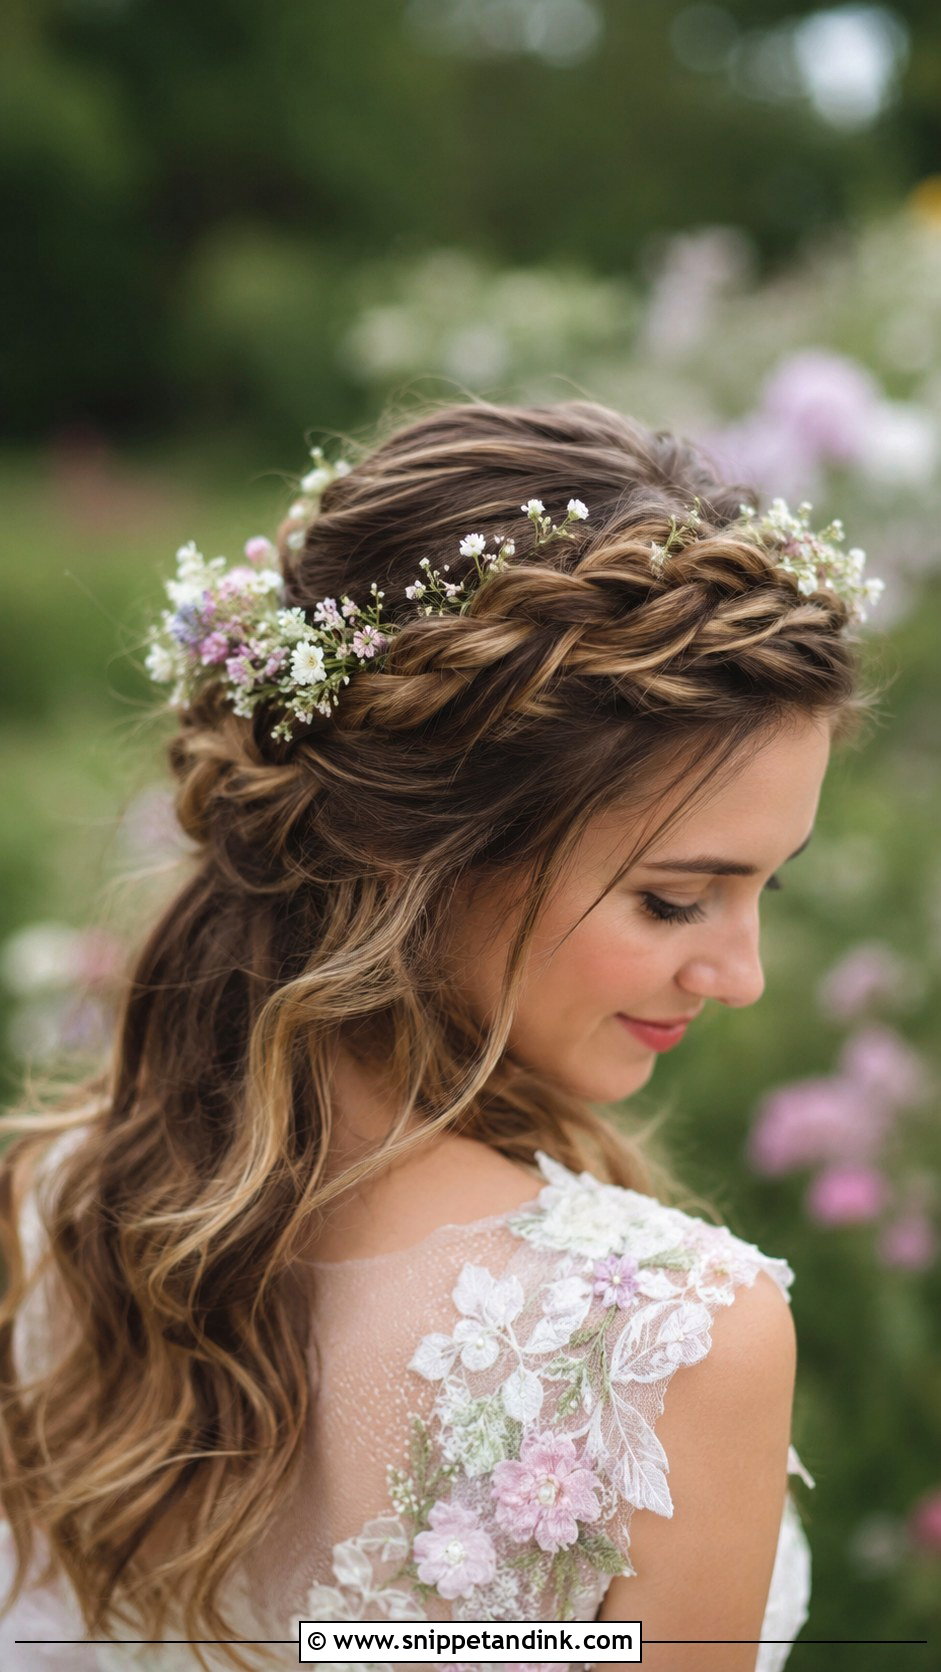
Twists across the crown give the same halo effect as a braided crown, without needing to braid. Twist two sections on either side, cross them over the top and pin. Let some soft pieces fall loose. It’s quicker than braiding, but twists loosen faster, so pin them in more places than you think you need. It suits medium to long hair, and tiny flowers or sparkly pins finish it.
28. Wavy Lob
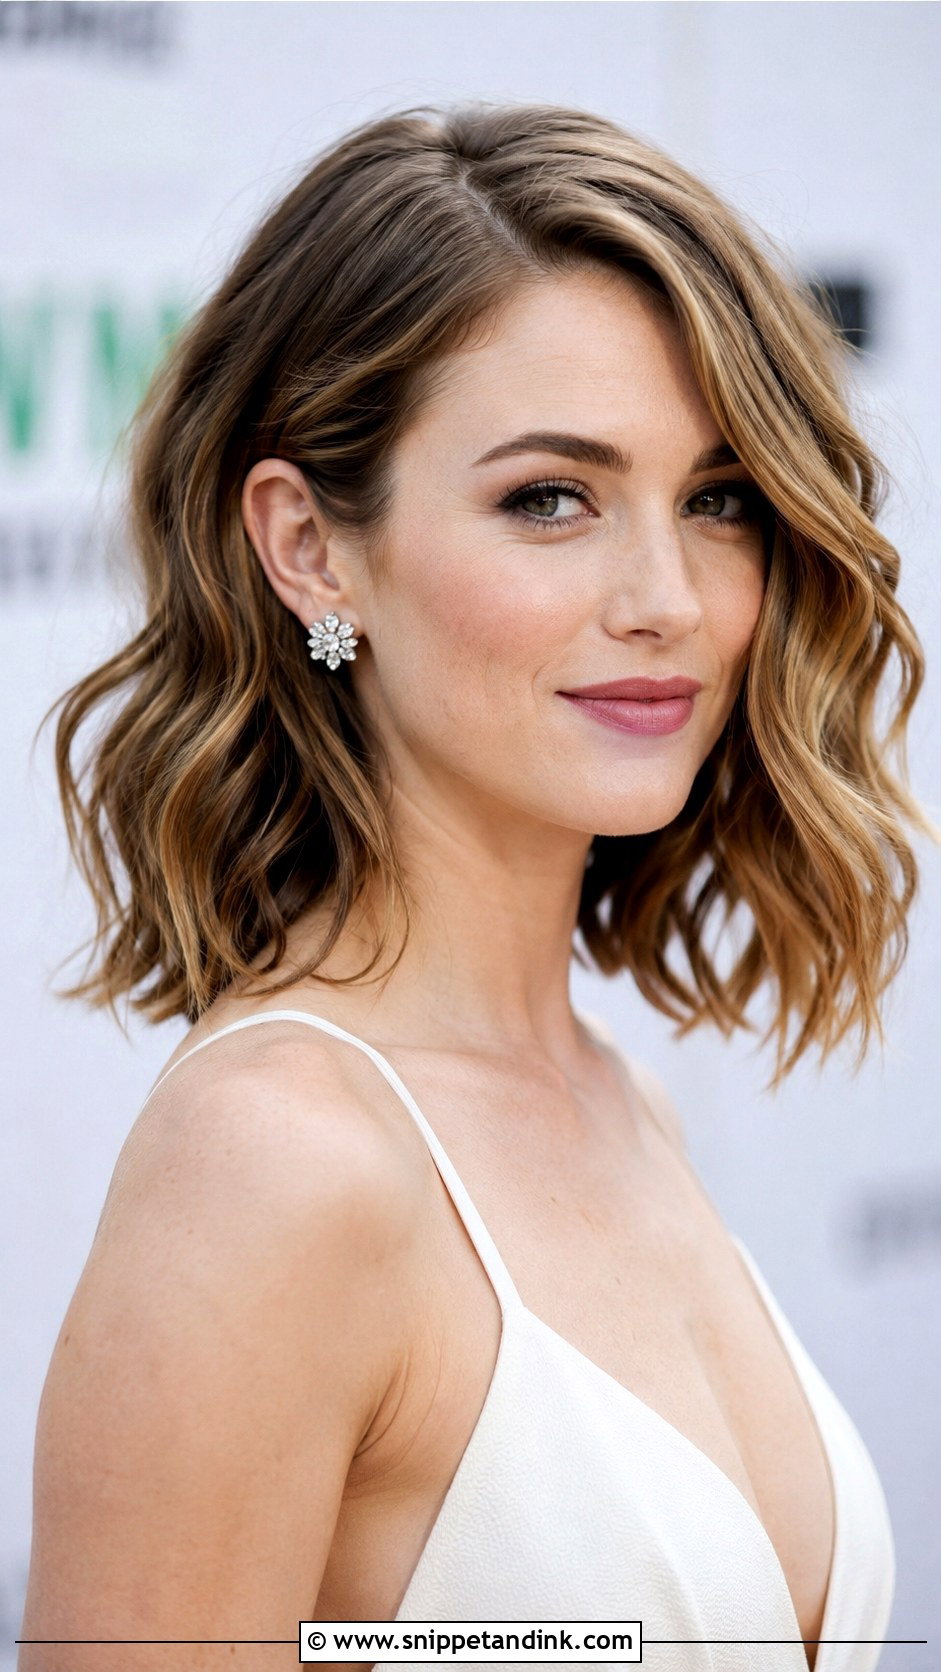
A lob is versatile and quick to style. Curl sections away from your face with a medium barrel, then tousle with your fingers and add a texture spray for grip. Tuck one side behind your ear for polish. A wavy lob feels modern and suits most face shapes. With shoulder-length hair, the ends tend to flip out against the shoulders by evening, so curl the bottom inch away from your neck.
29. Knotted Half Up
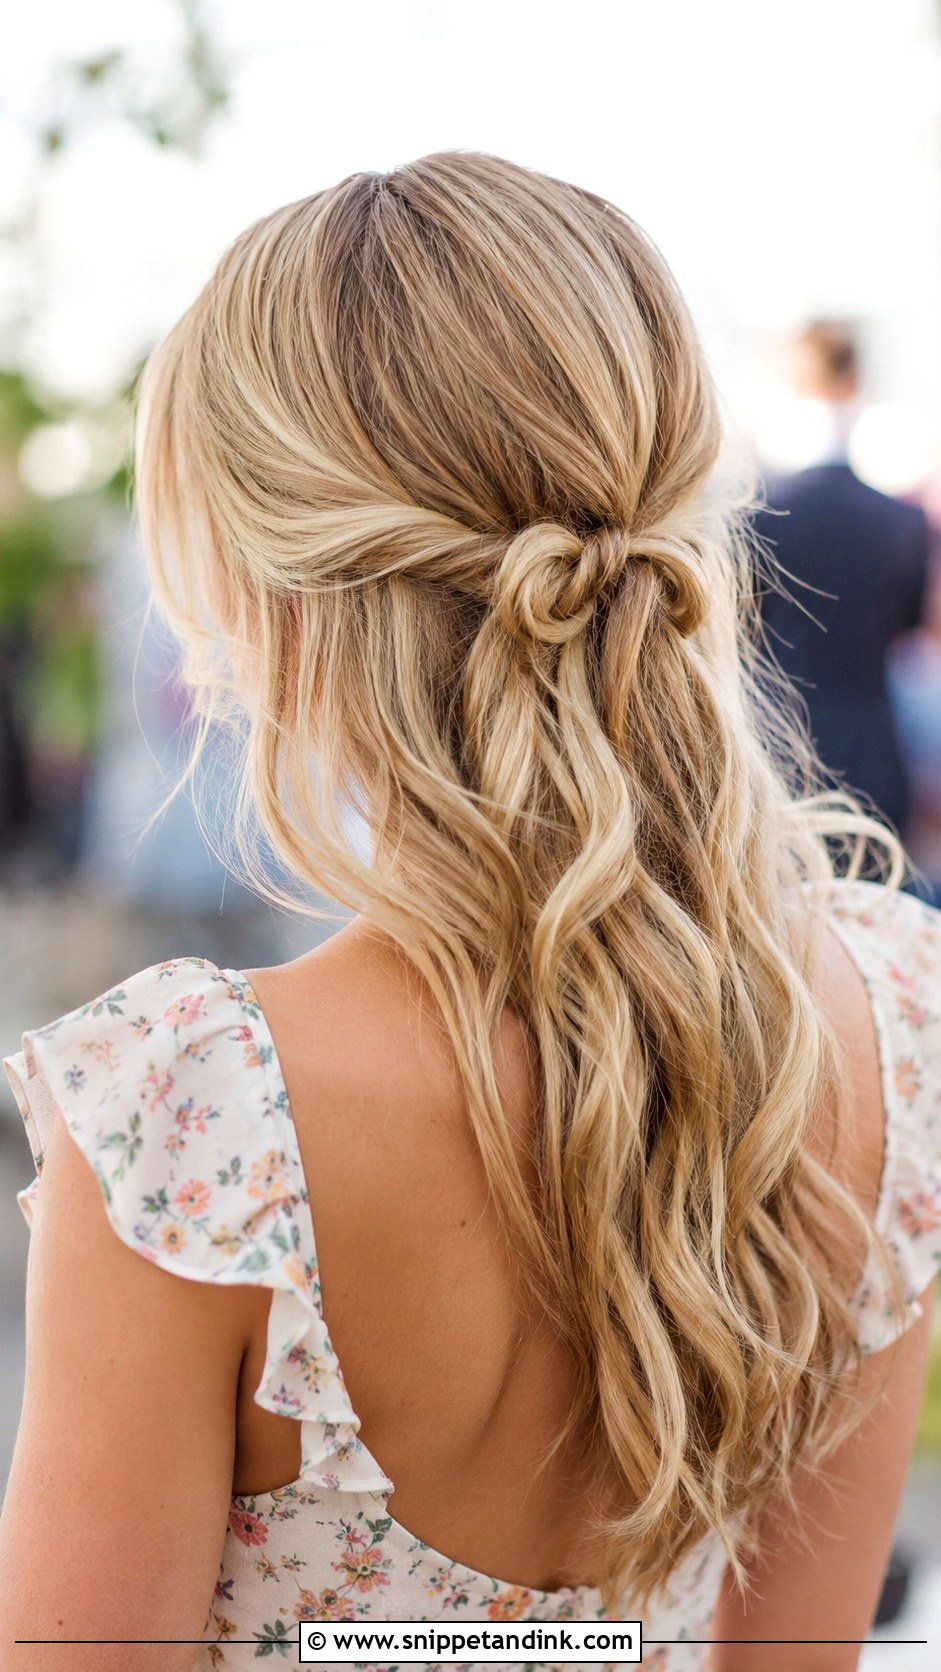
Instead of twisting the side sections, tie them in a simple knot at the back and pin it. Add a second knot below for more detail. It’s playful, needs no braiding and suits medium to long hair. The knot needs some texture to hold, so on slippery hair I’d mist with dry shampoo or a texture spray before tying. It works well at spring and summer weddings.
30. Polished Side Part Waves
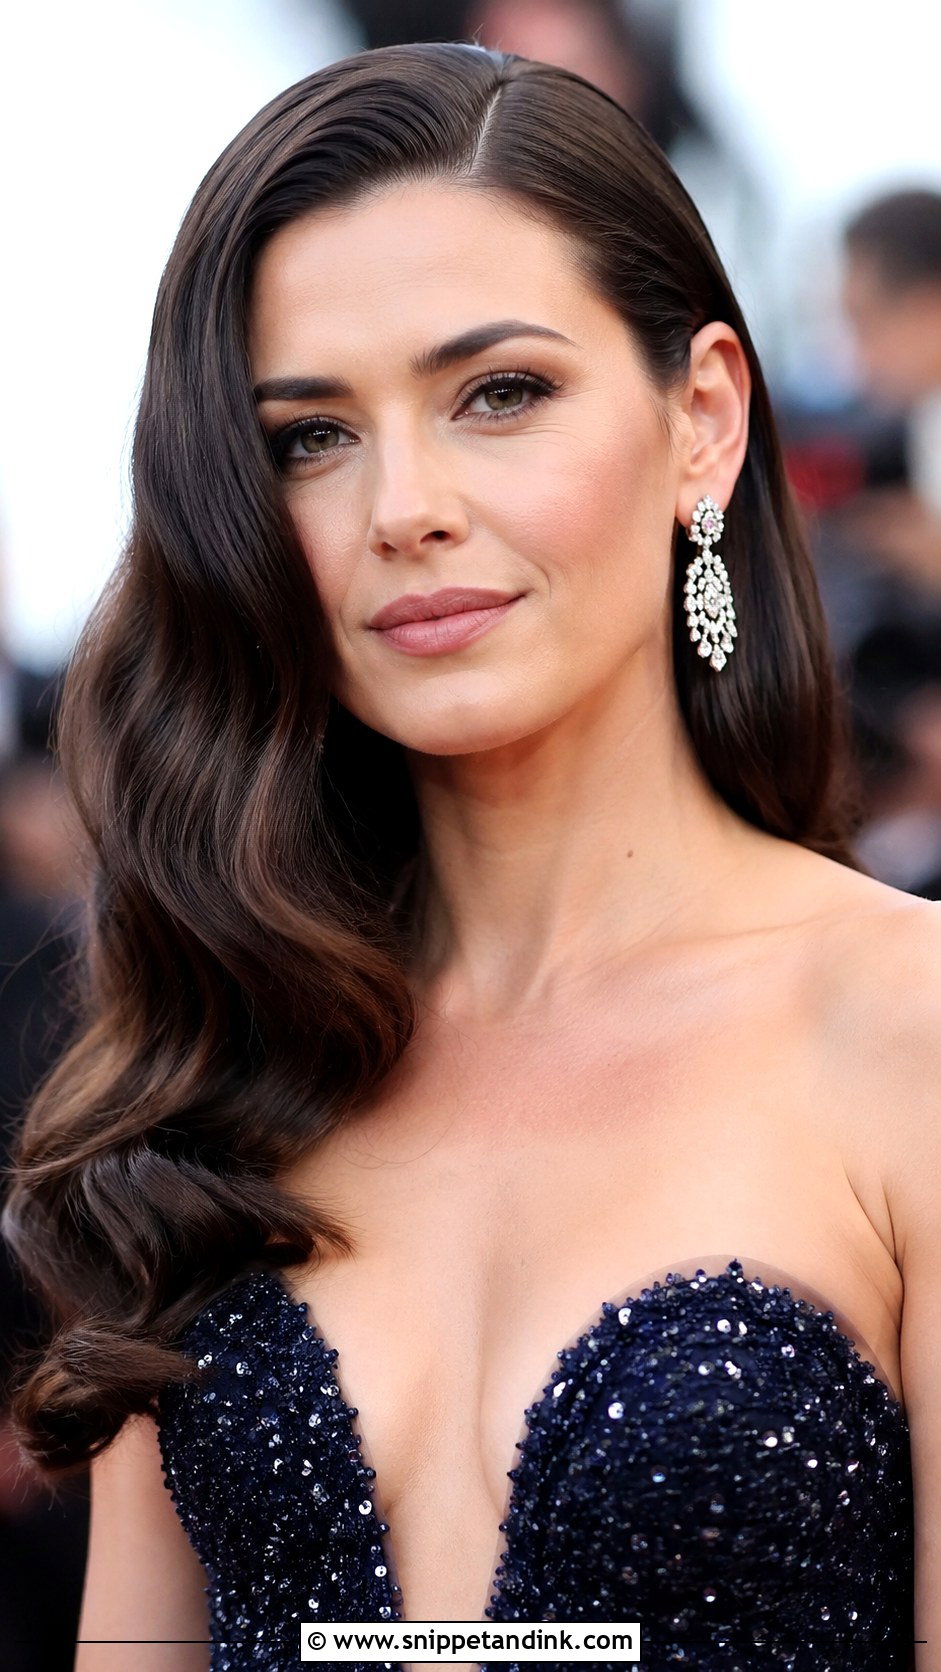
A deep side part turns ordinary waves into something more glamorous. Set the part, curl in loose even waves, then brush through gently for a smooth finish. Sweep the shorter side behind your ear and secure it with a pin hidden in the hair. It flatters formal weddings and pairs well with statement earrings. A few weeks of parting your hair on that side beforehand trains it to sit flat.
Humidity, Hats and a Little Etiquette
If the wedding is outdoors in summer, your hair will lose some curl and gain some frizz; that’s just moisture in the air. Updos and braids hold up far better than loose waves in that weather. If you love wearing it down, I’d curl it a bit tighter than you want, so it drops into the right shape rather than flat. An anti-humidity spray helps, though nothing makes curls fully weatherproof.
Hats and fascinators change the brief completely. They sit best on low styles, a low bun or smooth chignon, and need to be pinned into the hair rather than balanced on top. Try the headpiece on with your style before the day, not after.
Leaving room for the bride
A guest look should be polished, not bridal. I’d skip anything that reads as a veil or a full white floral crown, and keep sparkle to one or two pins rather than a tiara-style band. If you’re unsure about the culture or formality of the wedding, a neat low bun is right almost everywhere.
Pack Six Pins and Go Enjoy the Party
Most of these styles need ten to twenty minutes once you’ve practiced them. Match the style to your venue and outfit, do a run-through at least once before the day, and keep a few spare pins in your bag. A sparkly pin or small flower is all the extra you’ll need. Then put the mirror away and go enjoy the celebration.
You'll Like These Ideas:


Leave a Reply