
Guests ask me for hair help almost as often as brides do, and the request is nearly always the same: something that looks dressed up, survives the ceremony, dinner and dancing, and doesn’t need a salon chair. Most of the styles below you can create at home in minutes once you’ve practised them once. I’ve grouped buns, waves, braids and ponytails, and for each one I’ve added the detail that decides whether it lasts, plus who I’d steer away from it. Short, long, straight or curly, there’s something here that will hold.
Prep the Night Before Decides How Long It Lasts
Most guest styles that fall apart by the speeches were doomed before the first pin went in. Squeaky clean hair is slippery, and pins and curls slide straight out of it. I’d wash the night before, or the morning of for very oily hair, and dry it completely; damp roots under an updo stay damp all day.
- Use a heat protectant before any curling or straightening. It also gives the hair a little grip.
- Dry shampoo or texture spray at the roots before you start, even on clean hair, gives pins something to hold.
- Bobby pins go in wavy side down. Crossing two pins in an X locks a section much better than one pin alone.
- Let every curl cool fully before brushing or pinning it. Heat shapes the hair; cooling sets it.
- Spray at the end, from a distance, in a light mist. Too much spray makes hair heavy and it drops faster.
1. Sleek Low Bun
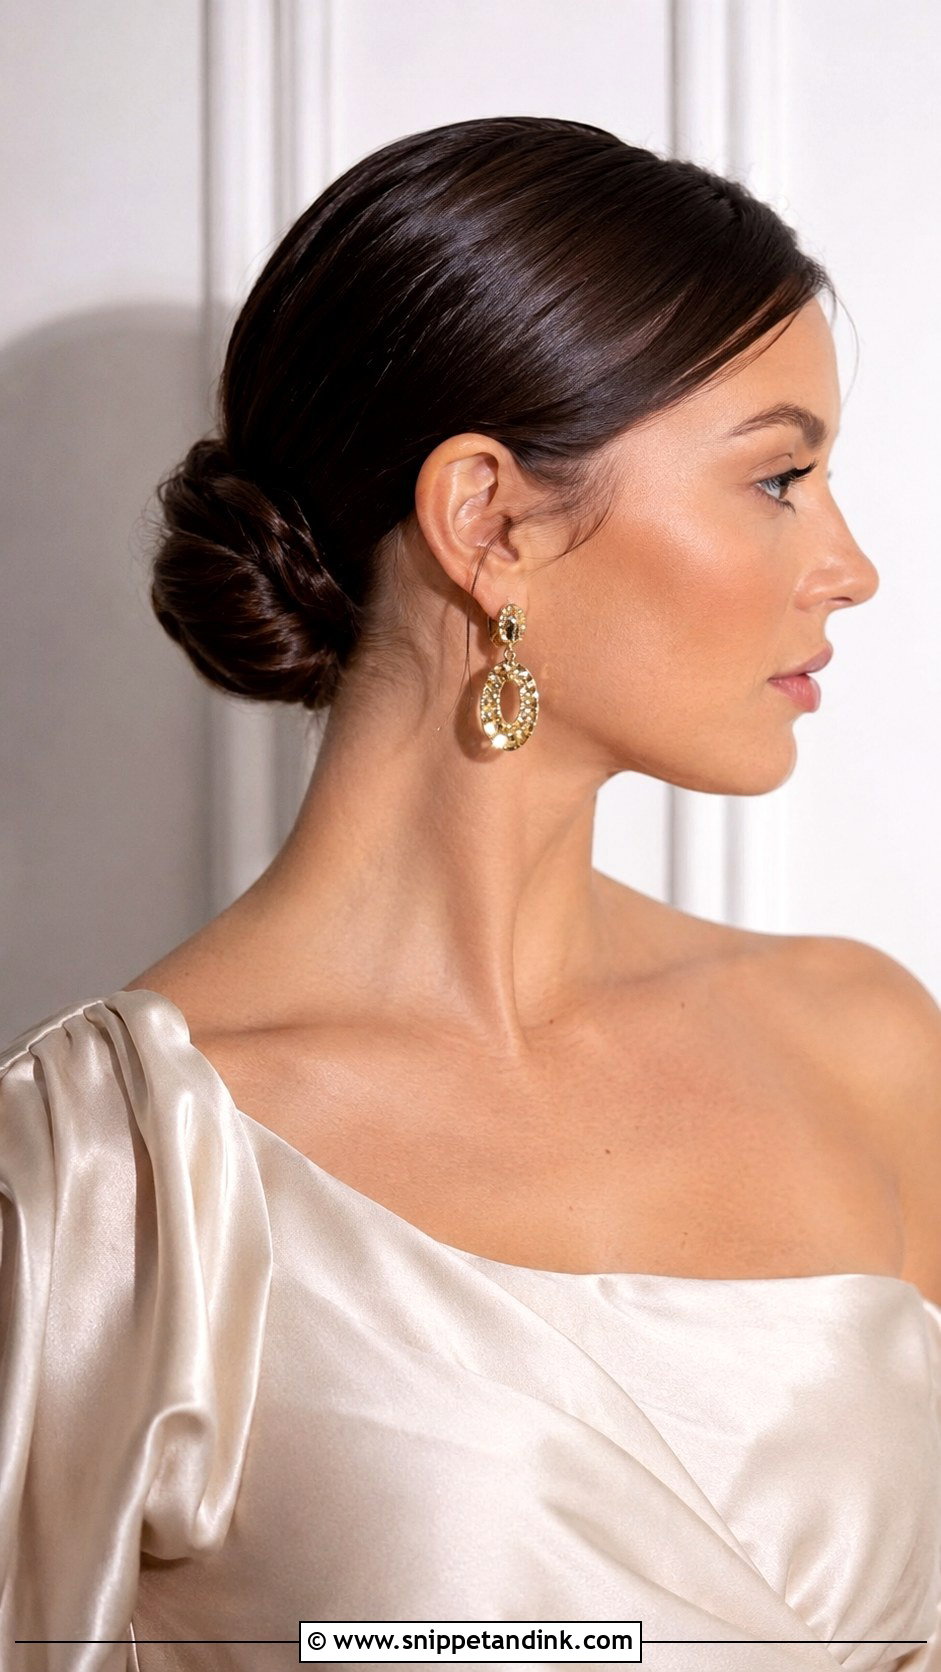
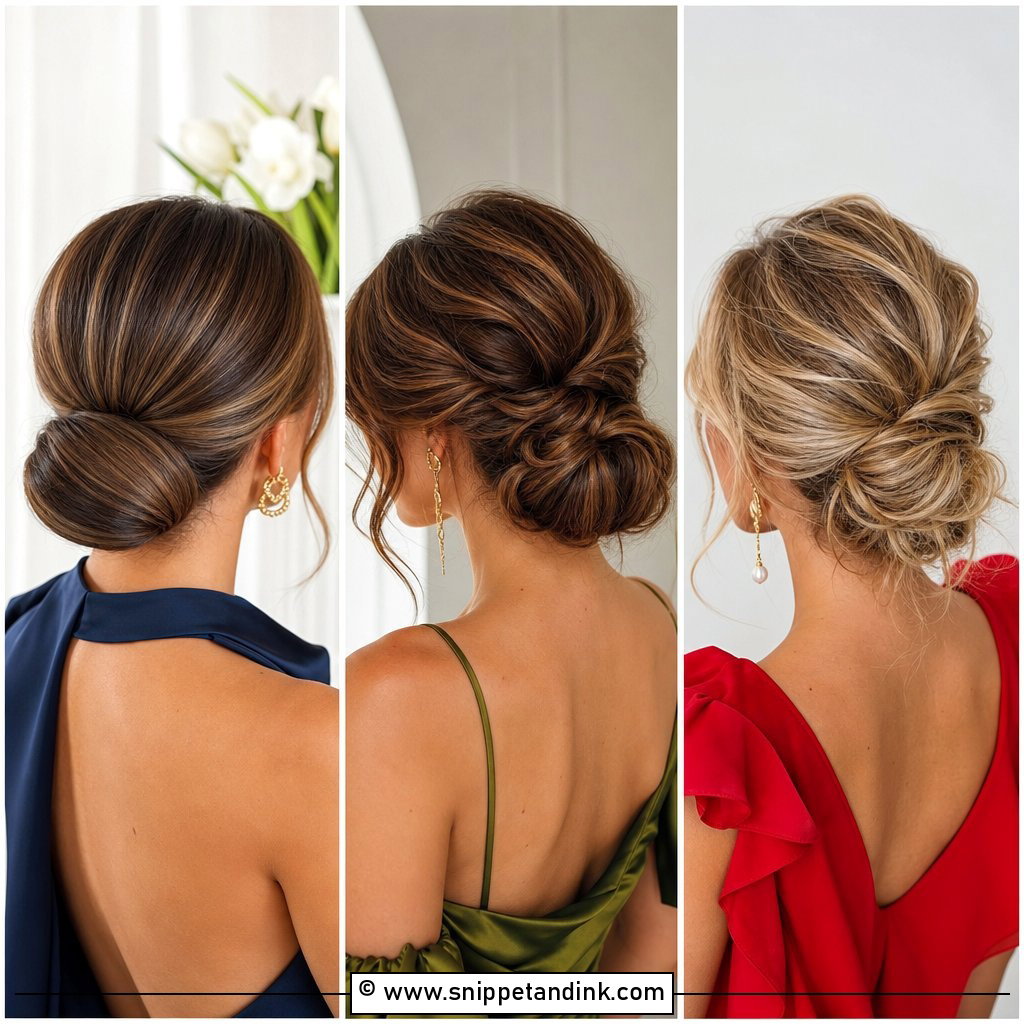
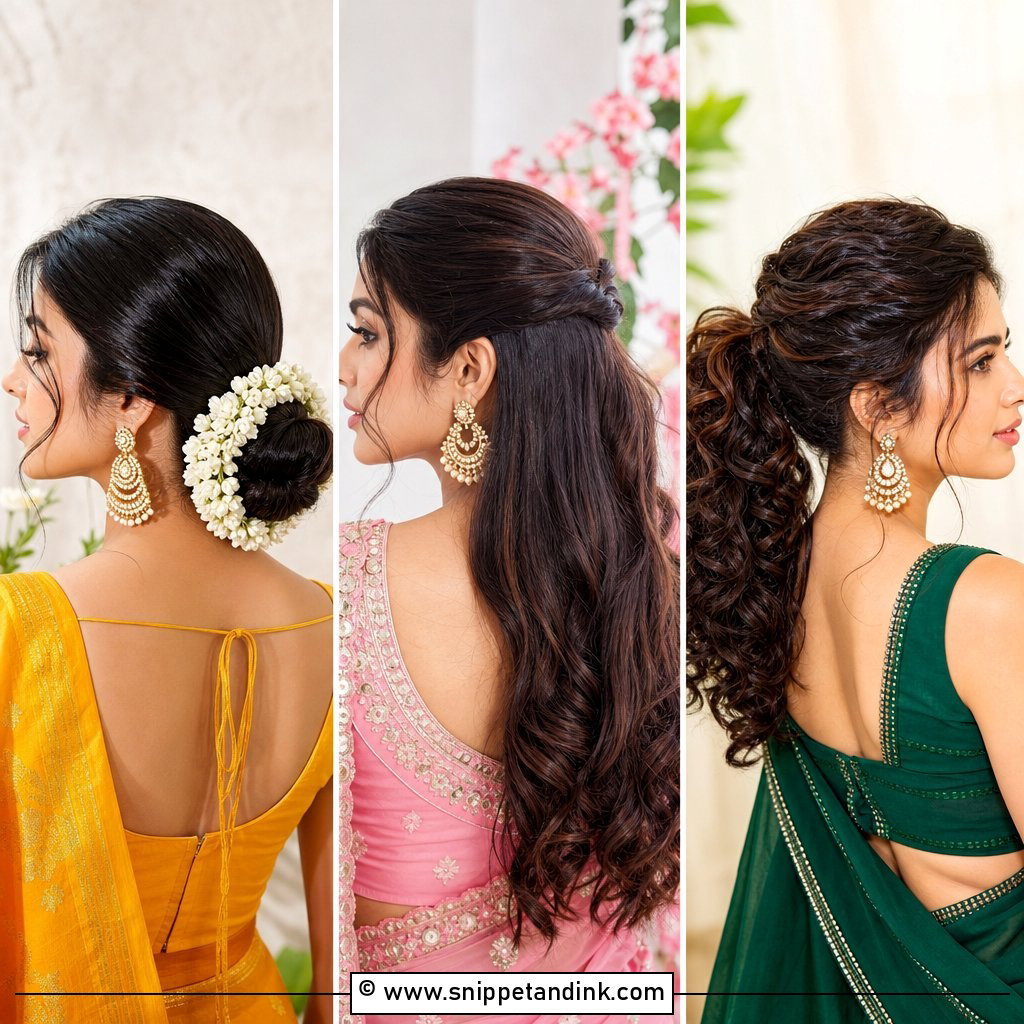
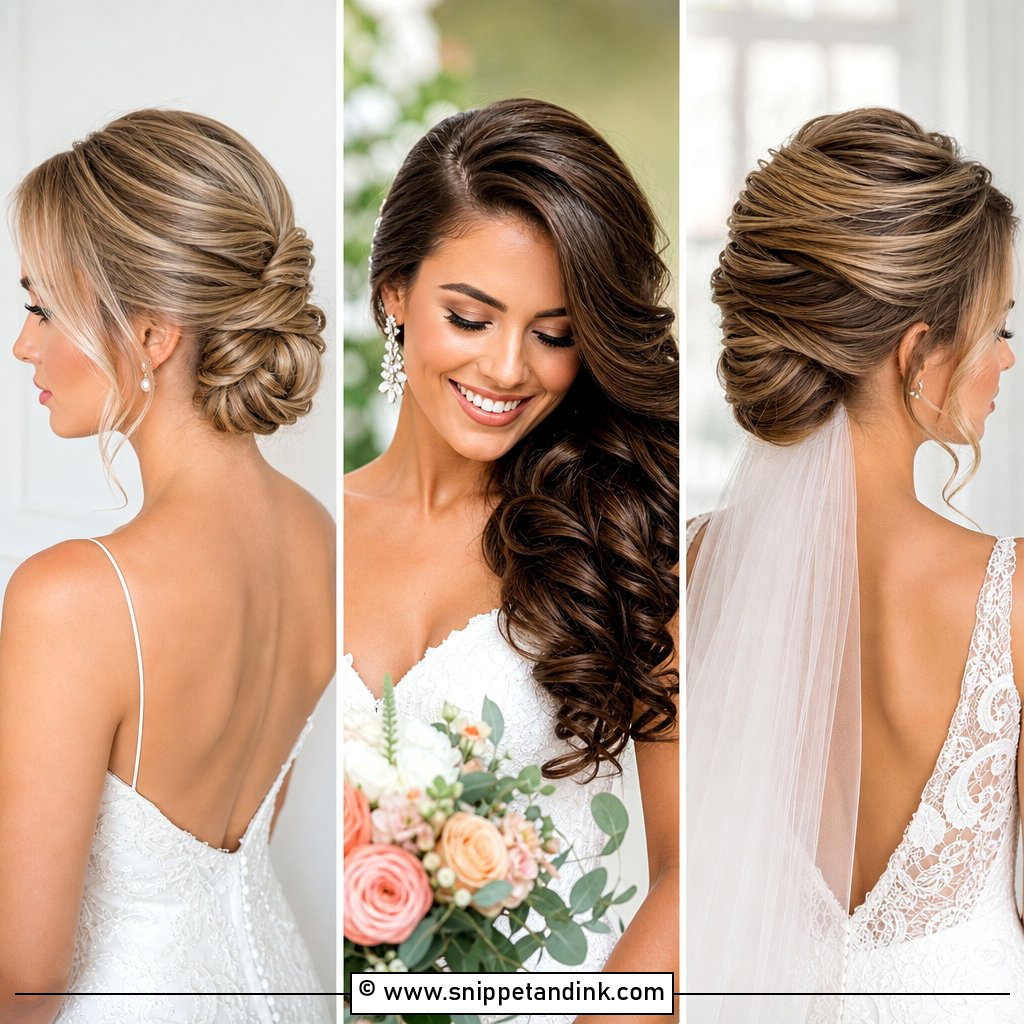
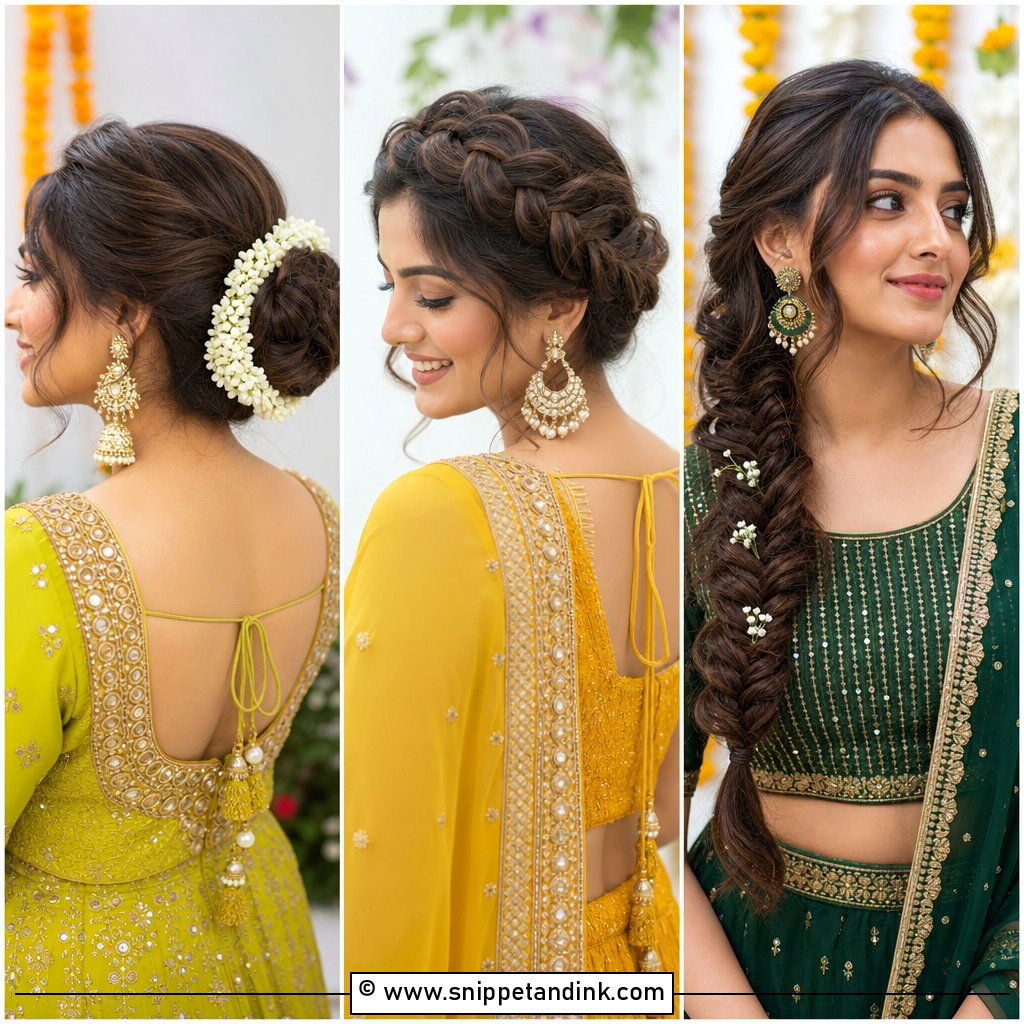
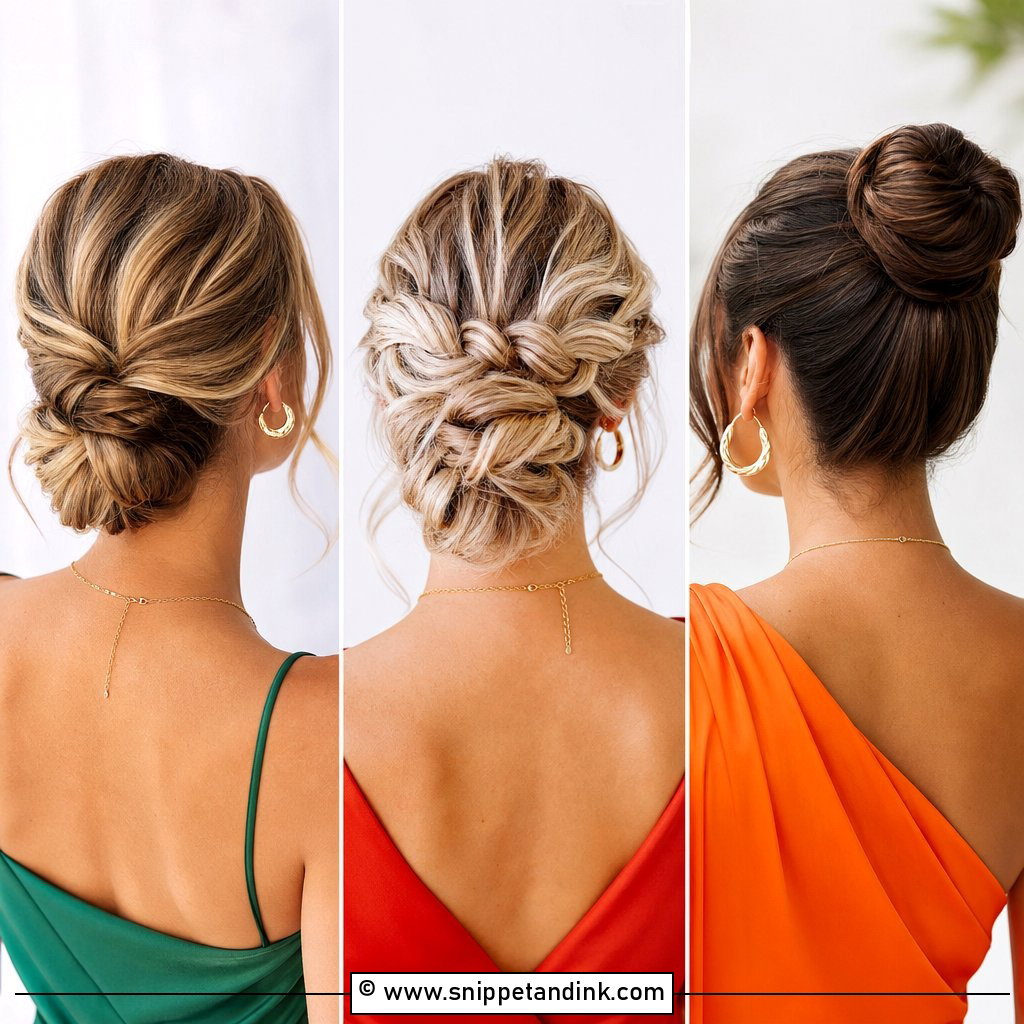
If I could only teach one guest style, it would be this. Brush everything back into a low ponytail at the nape, twist the length into a coil, wrap it round the base and pin it with the pins angled into the elastic, not just into the coil. That’s what stops it sagging by the speeches. A pea-sized amount of smoothing cream on a toothbrush handles flyaways better than spray. It needs shoulder-length hair or longer and suits an open-back dress or big earrings.
2. Soft Loose Waves
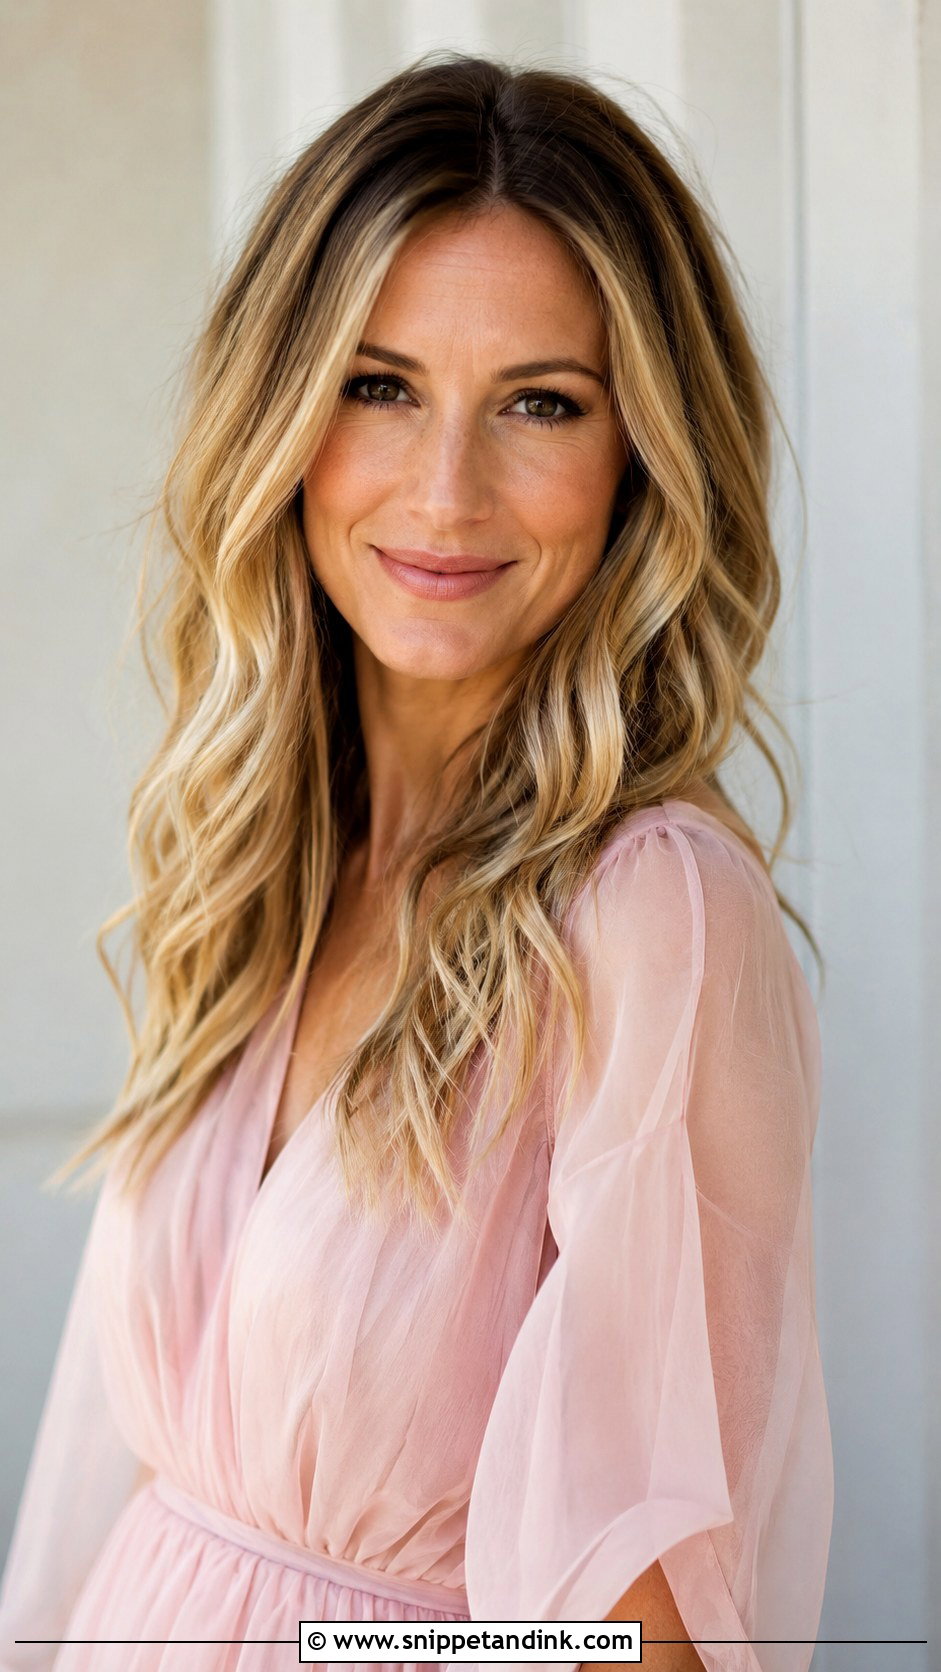
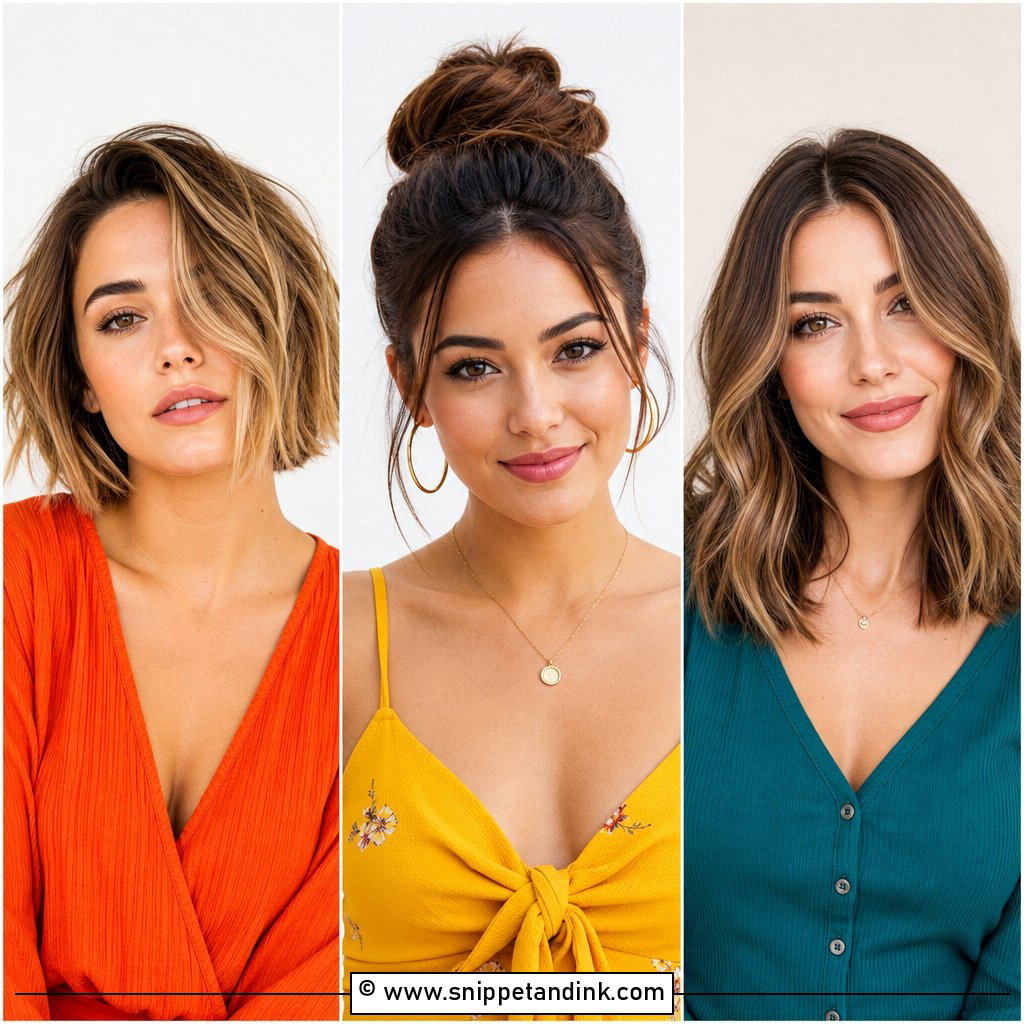
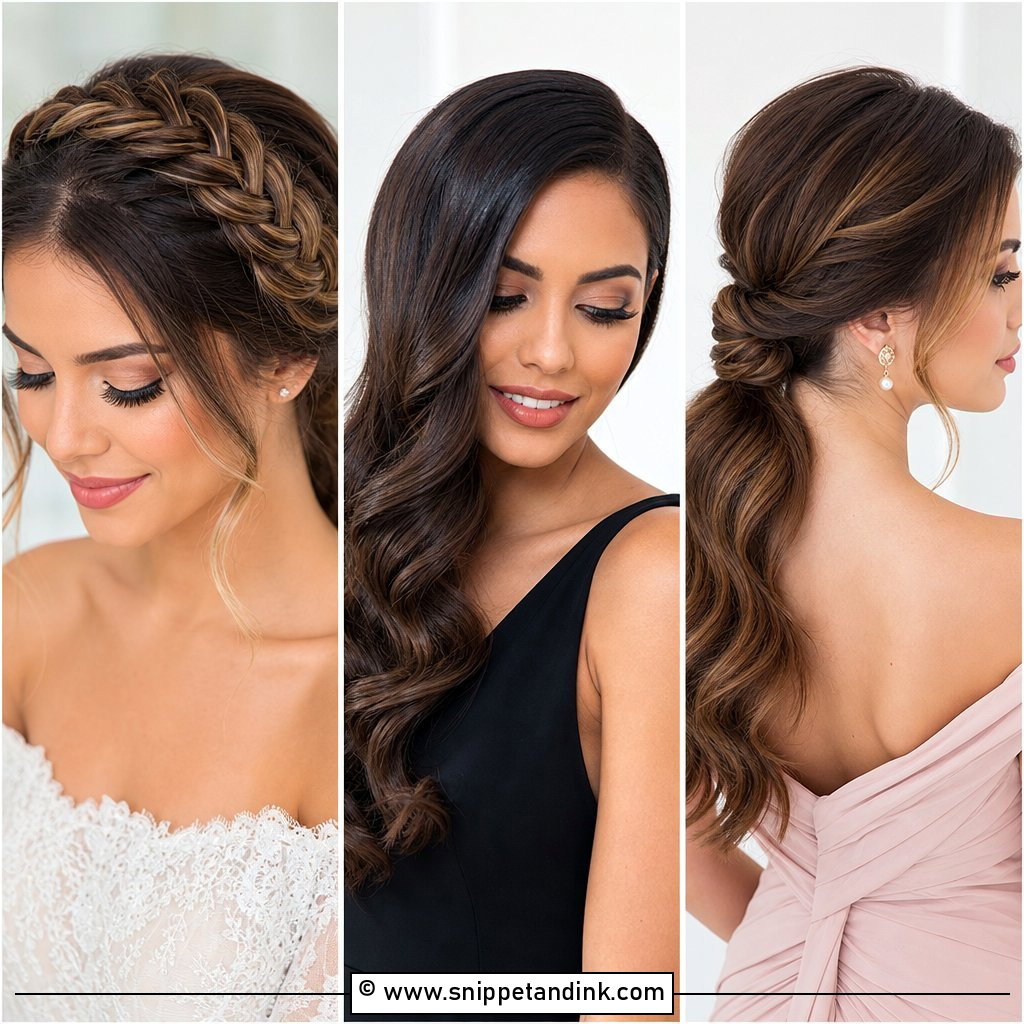
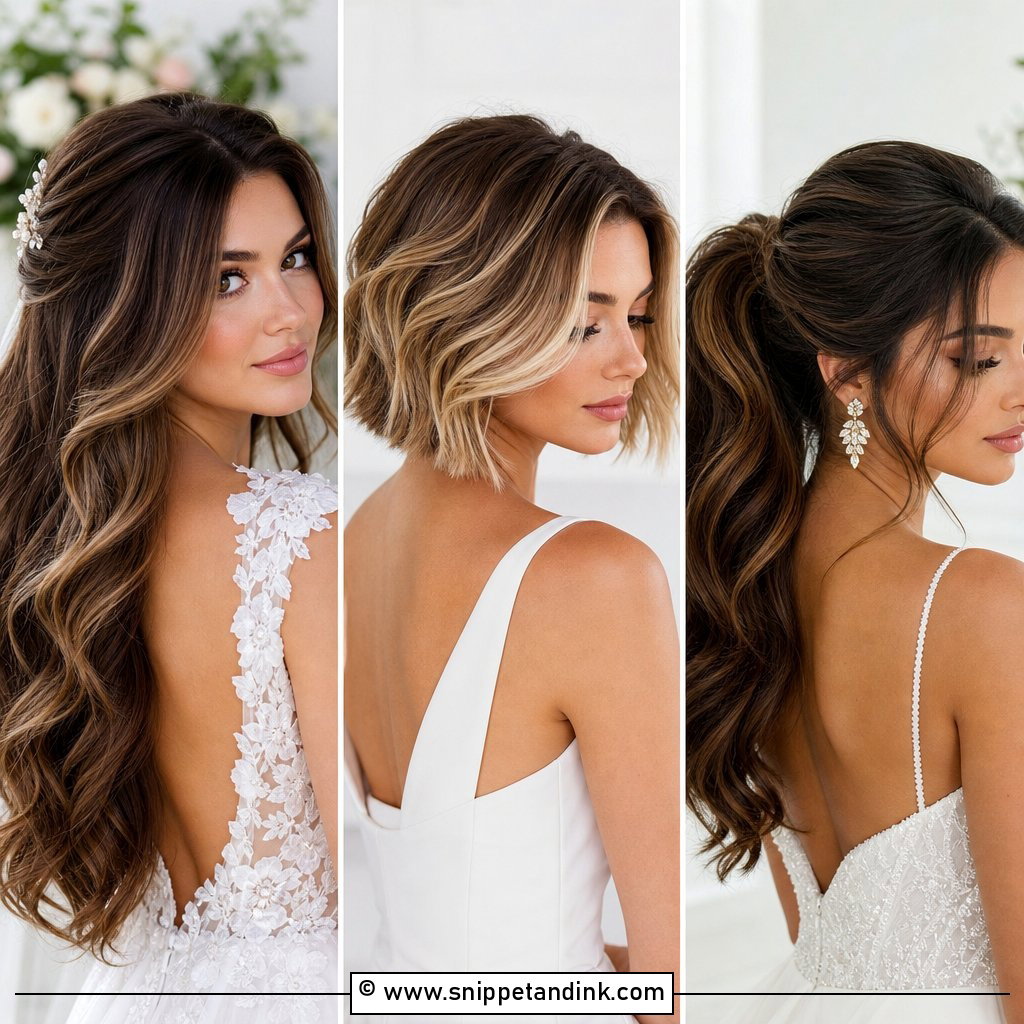
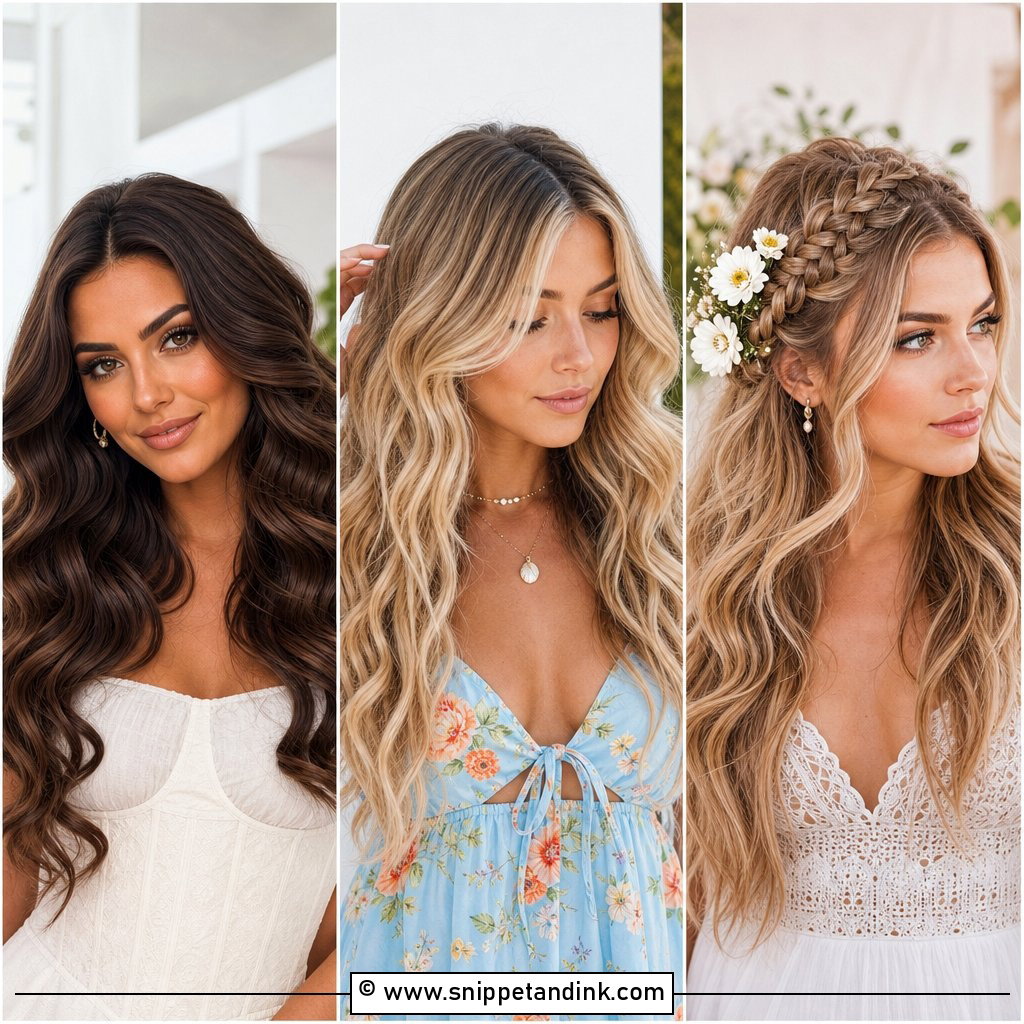
Waves are the style people expect to be easiest, and they drop fastest. I curl in 1-inch sections with a wand, away from the face, and let every curl cool completely before I touch it. Brushing them out while warm is why waves fall flat by the first dance. Once cool, rake through with fingers and mist with a flexible spray. Very fine or freshly washed hair struggles to hold a bend, so curl it the day after washing if you can. Outdoors, accept a little movement; that’s the look.
3. Twisted Half-Up Half-Down
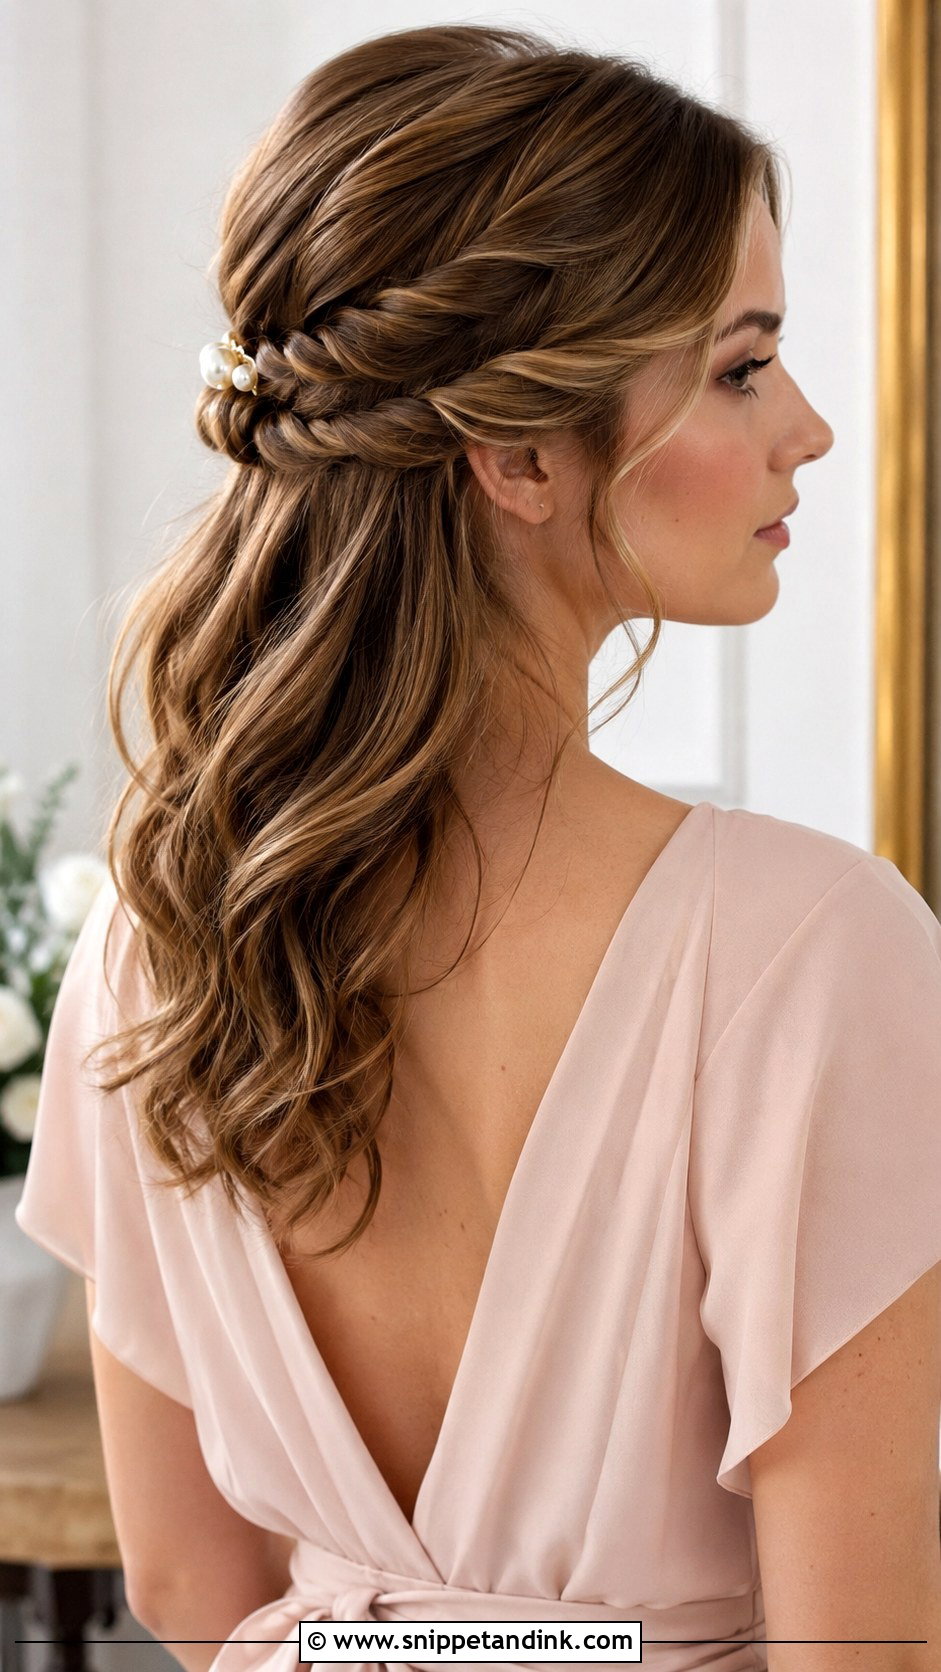
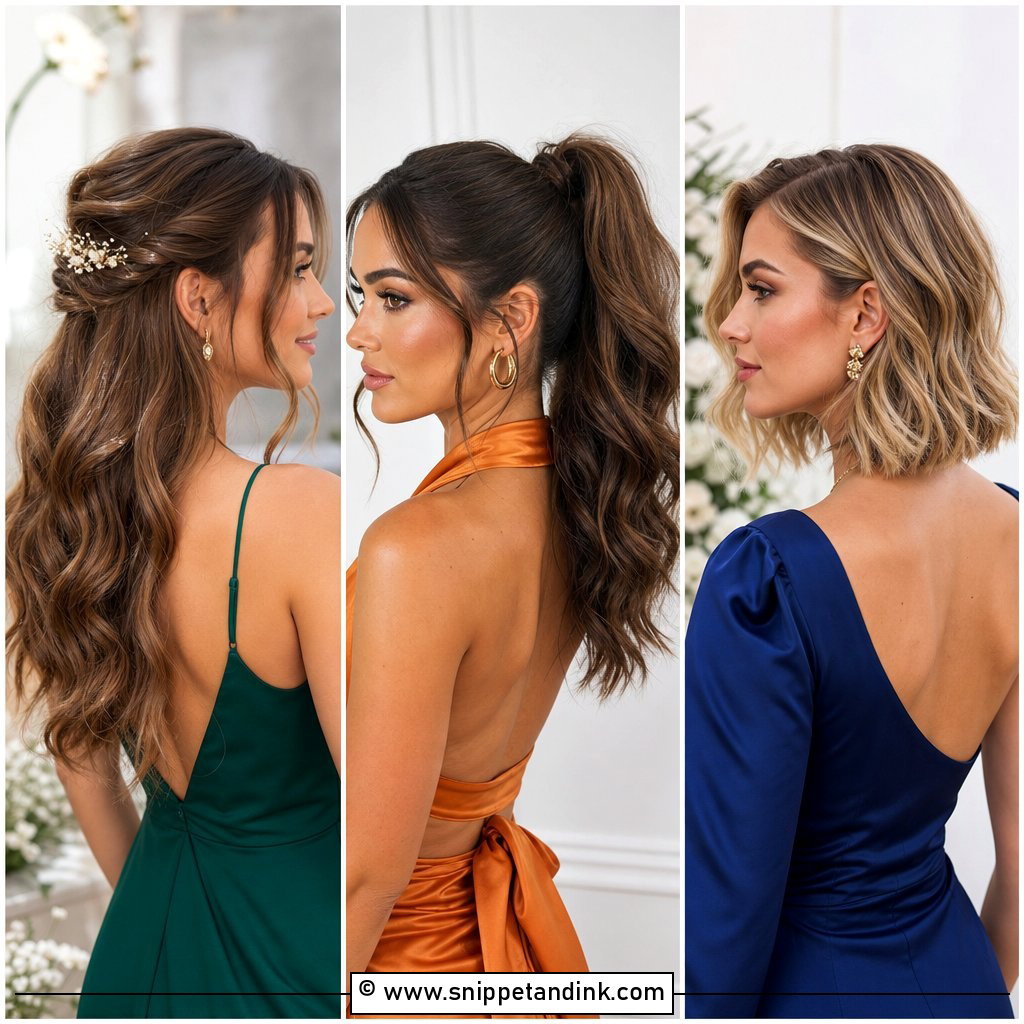
Take a 1-inch section from each temple, twist it back loosely and pin the two together at the back of the crown with a clip. Twisting away from the face, rather than toward it, keeps the sections from loosening as you turn your head. The rest stays down, waved or natural. This frames the face and keeps strands out of your eyes during the ceremony. It needs at least chin-length hair at the sides to meet. A pearl barrette is a nice finish.
4. Sleek Low Ponytail
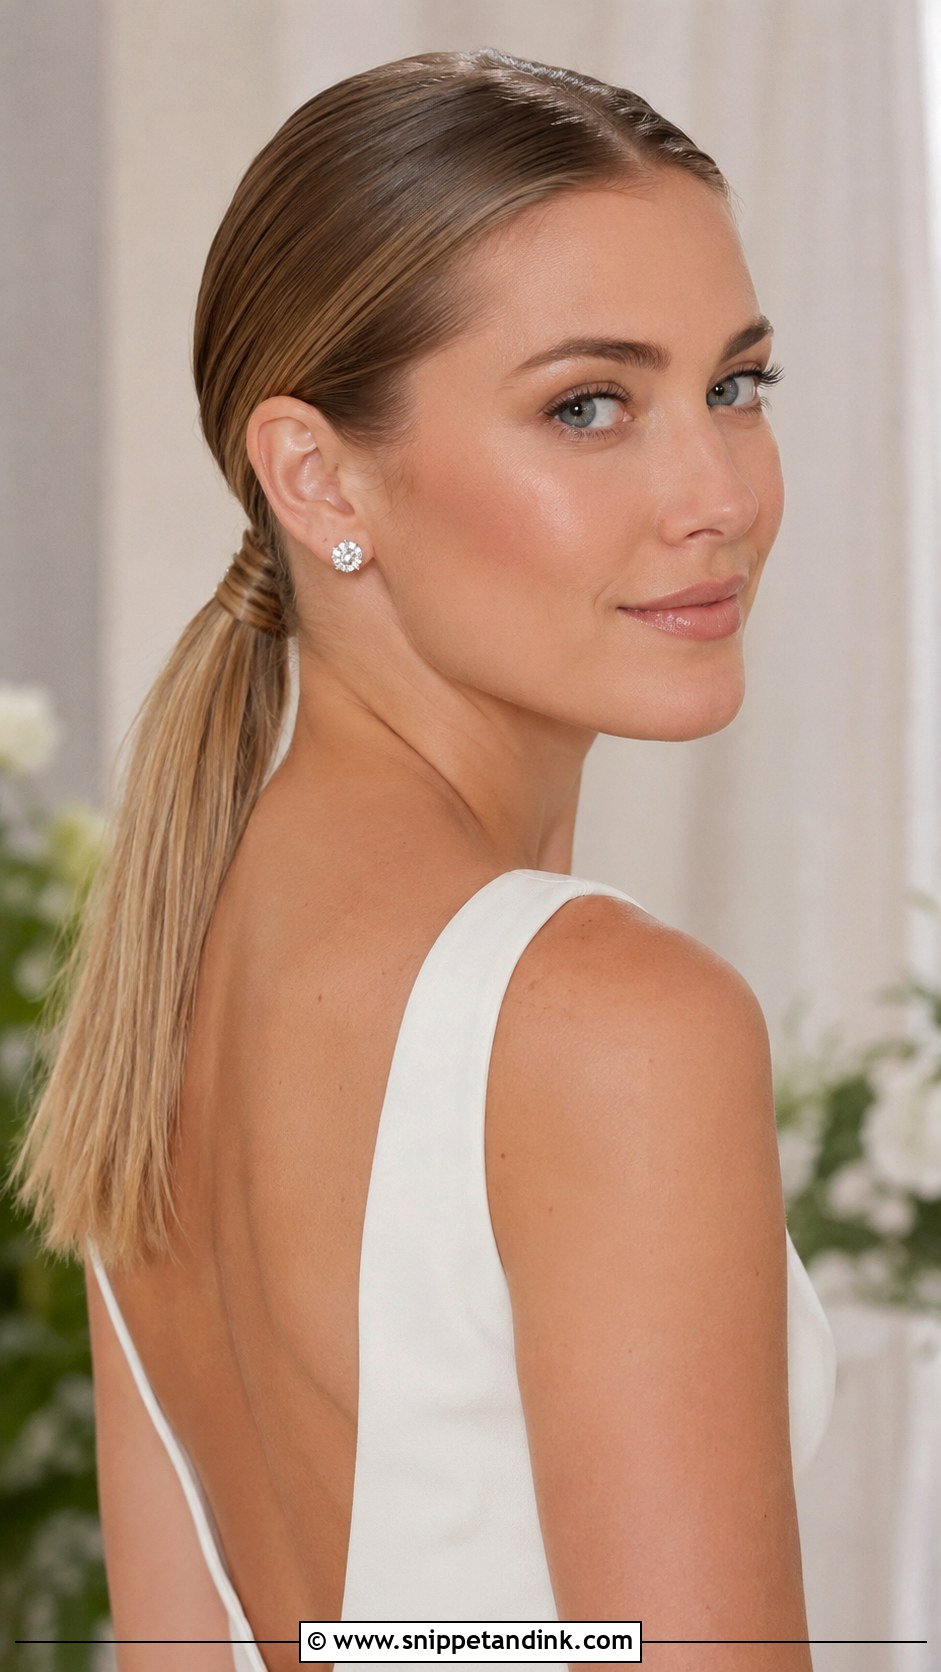
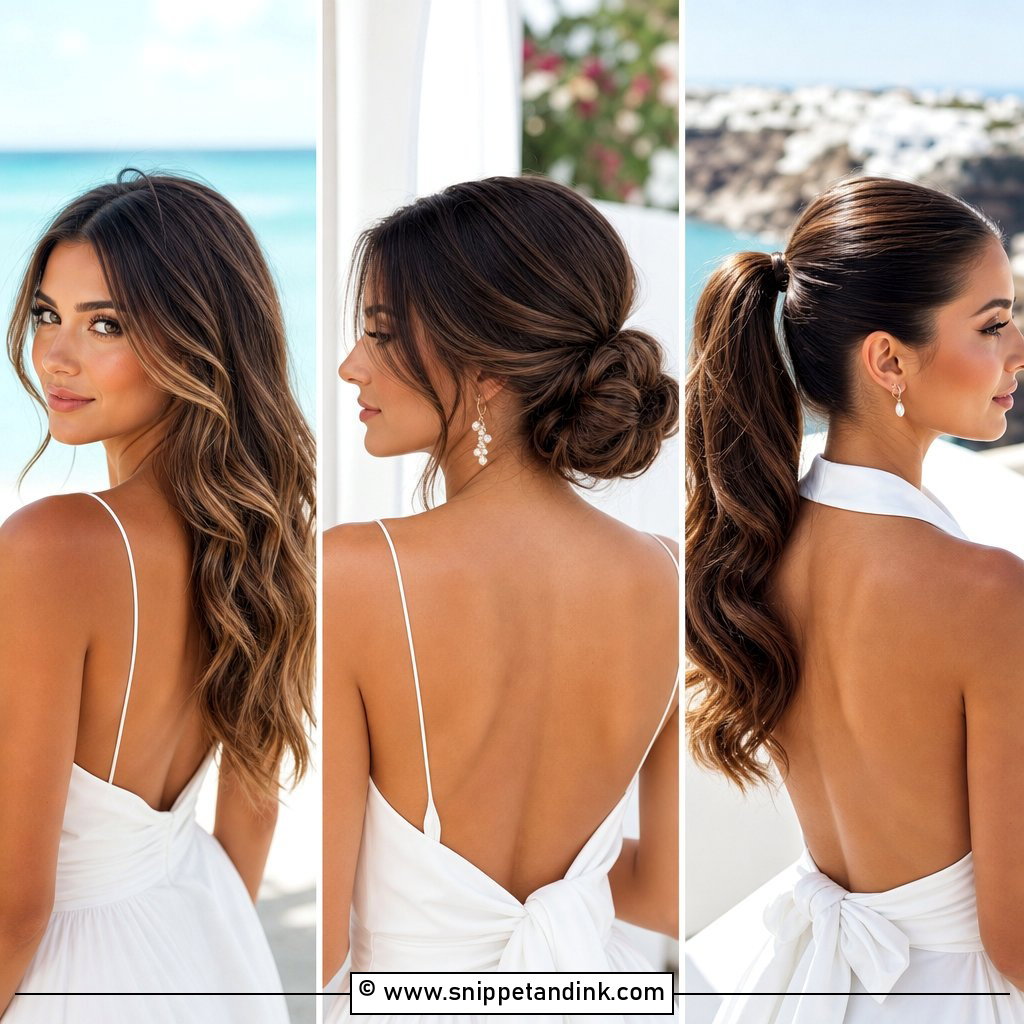
A low ponytail looks simple and shows every bump, so I brush it in front of a hand mirror to check the back. Secure it with a strong elastic, then wrap a small strand around the band and pin the end underneath. A touch of gel on a toothbrush smooths the baby hairs. Straight or slightly wavy hair does best; very curly hair can do it too, but needs more product and patience at the nape. Day or evening, it lets your earrings and jawline do the talking.
5. Classic Chignon
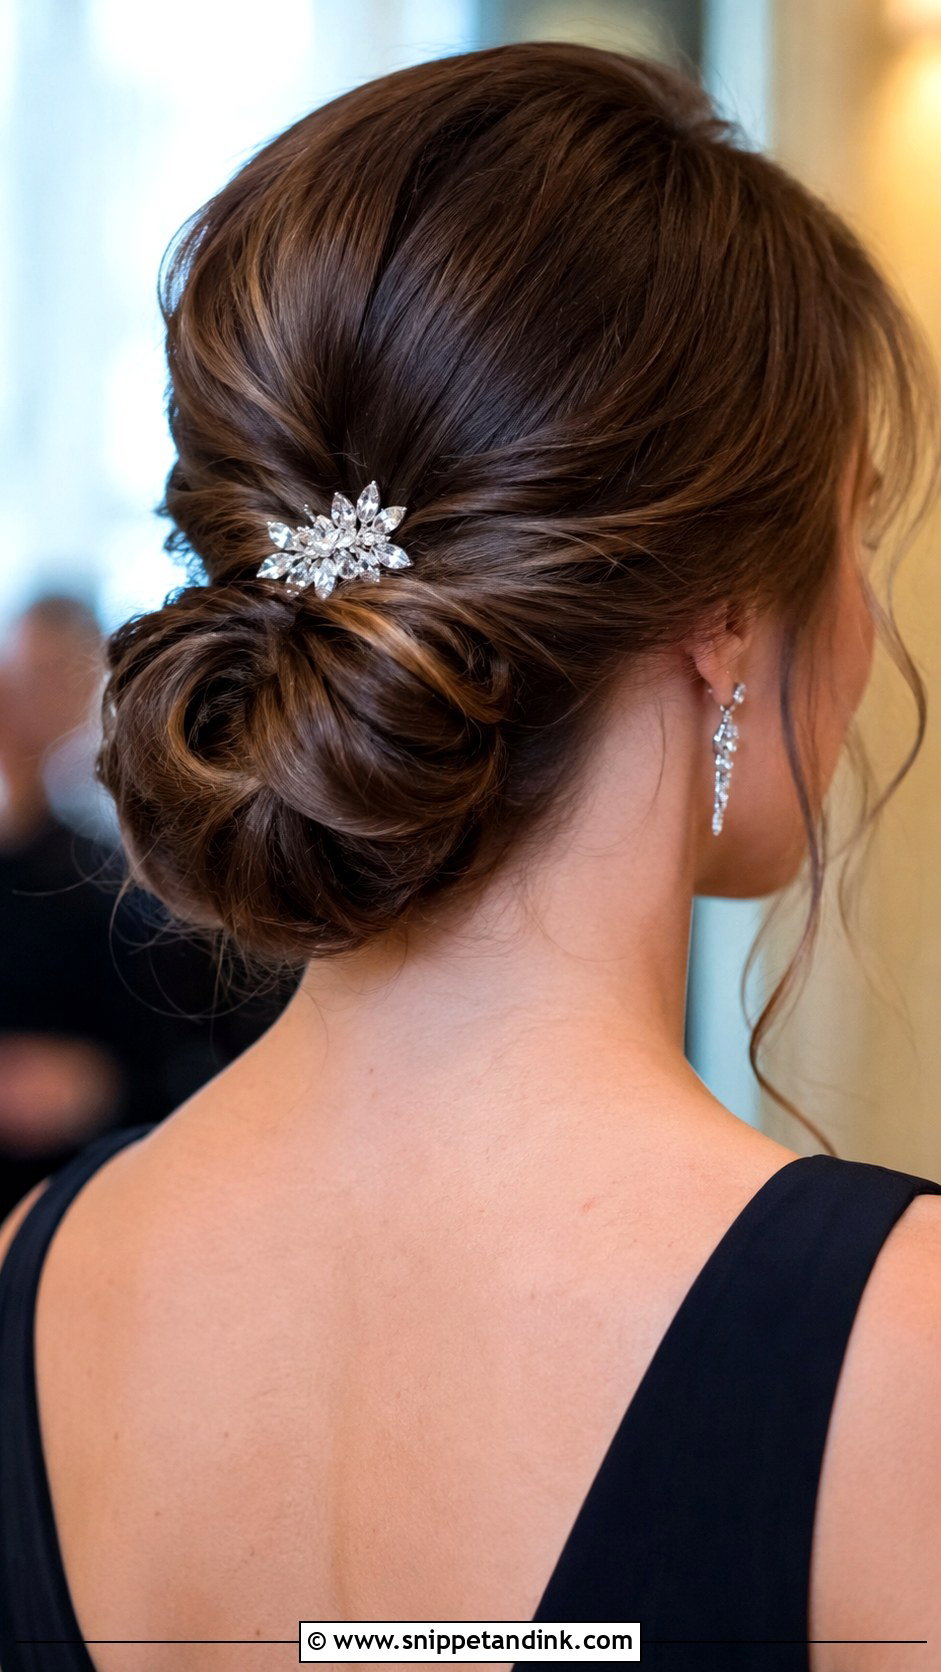
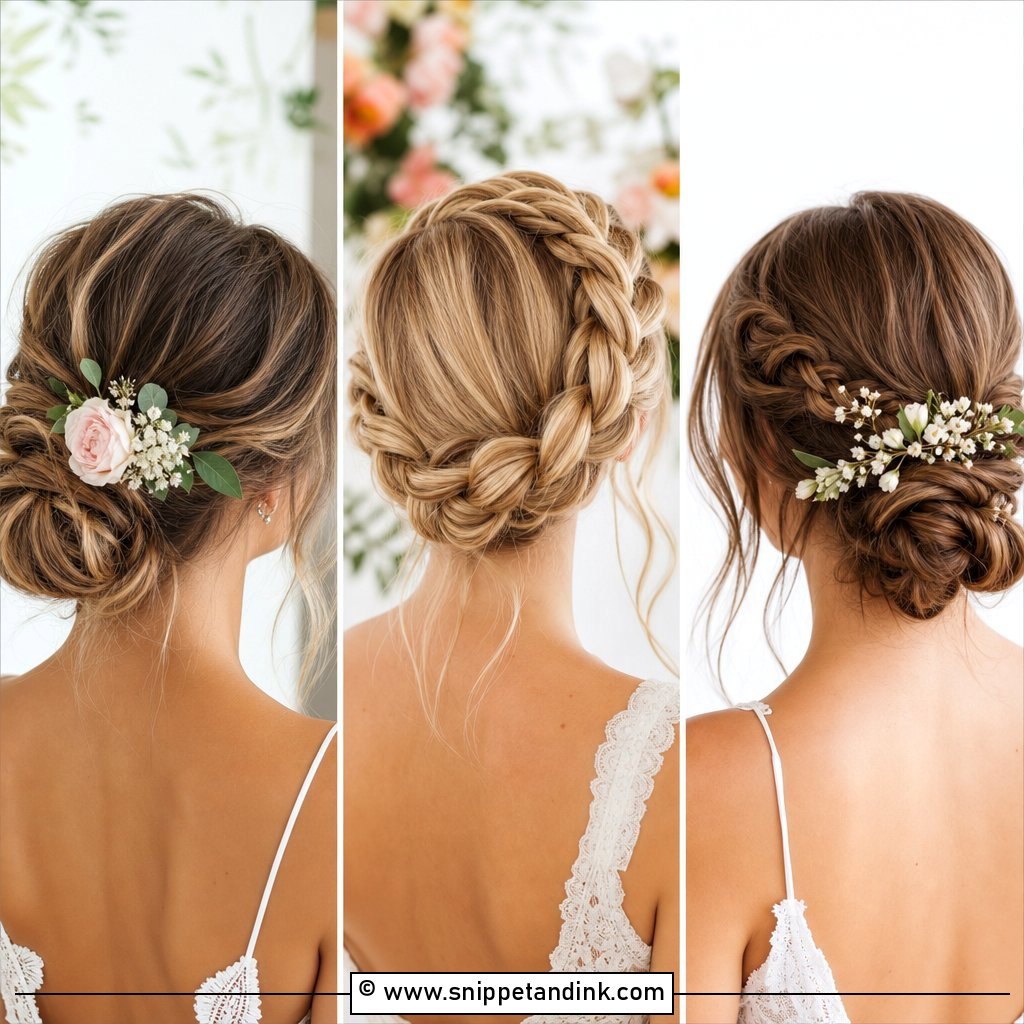
The chignon is a bun that’s folded rather than wound. Gather a low ponytail, twist it and tuck the length up and under itself into a looped knot, then pin through the fold into the base. On very thick hair I split the ponytail in two and roll each half separately, or the knot gets bulky and heavy. Loosen a few pieces at the top for softness. It suits medium to long hair, formal dresses, and a necklace you want people to see. A small jewelled pin near the base is enough decoration.
6. Halo Braid
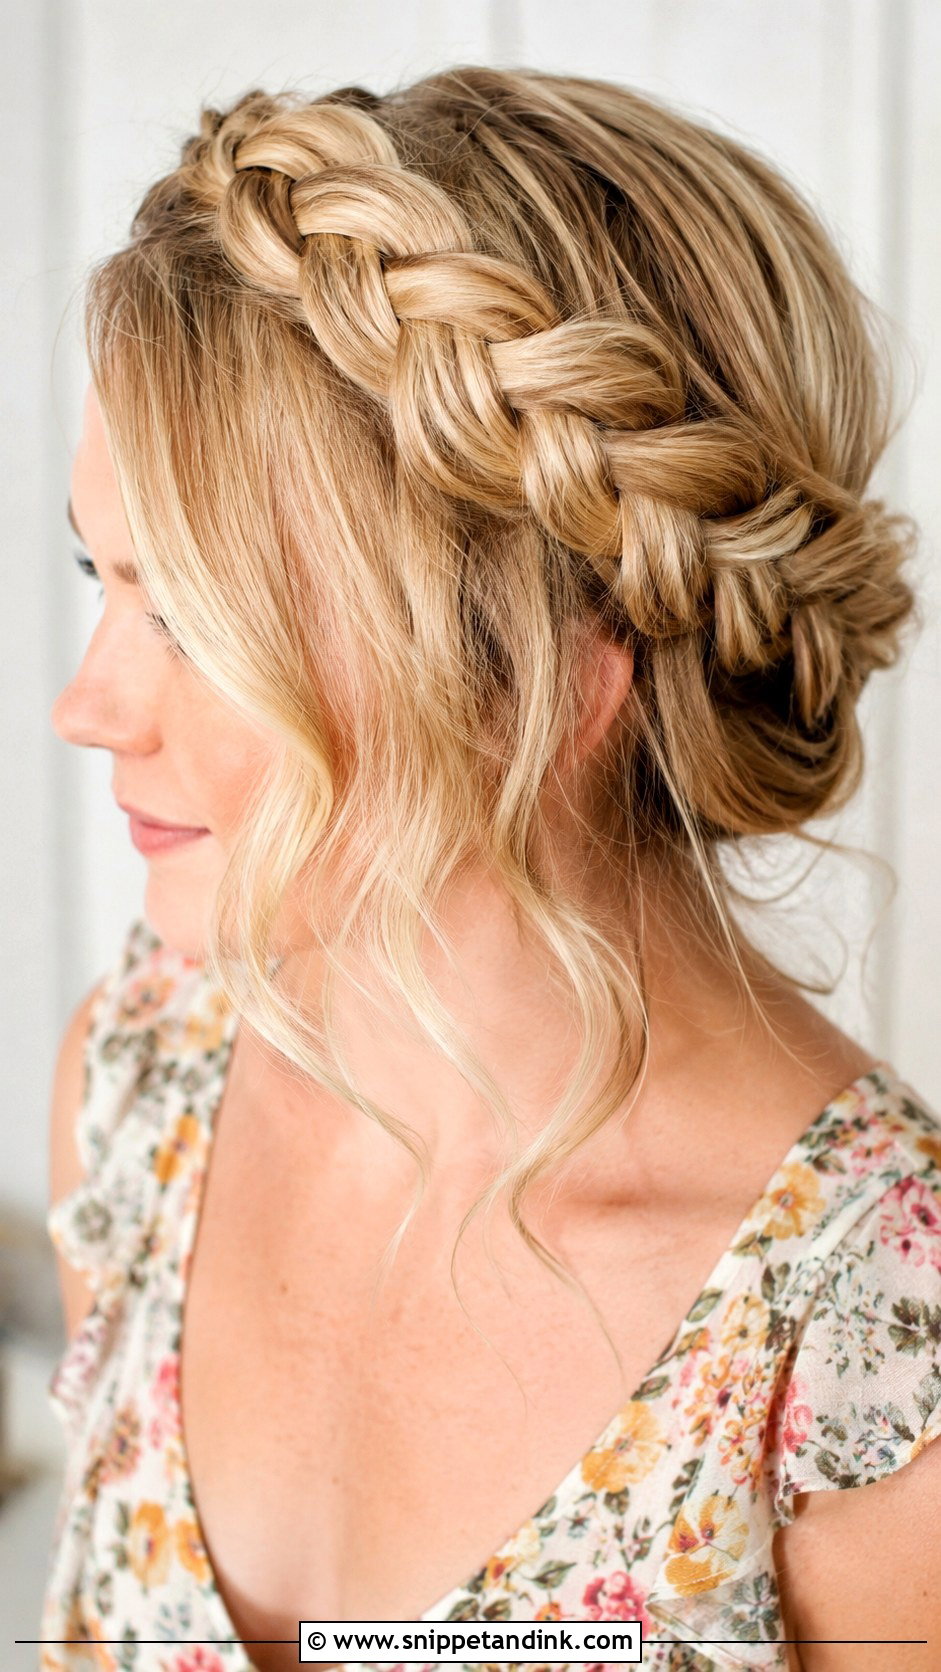
Part down the middle, plait each side, then lift the braids over the top of the head and pin them where the ends meet, tucking each tail under the opposite braid. The secret is that the plaits need to be long enough to cross, so this only really works from just past the shoulders. Gently pull the edges of each braid wider to make it look fuller. Because it keeps every strand off your neck, it’s my go-to suggestion for a hot outdoor wedding. Leave two thin tendrils at the front.
7. Messy Low Bun
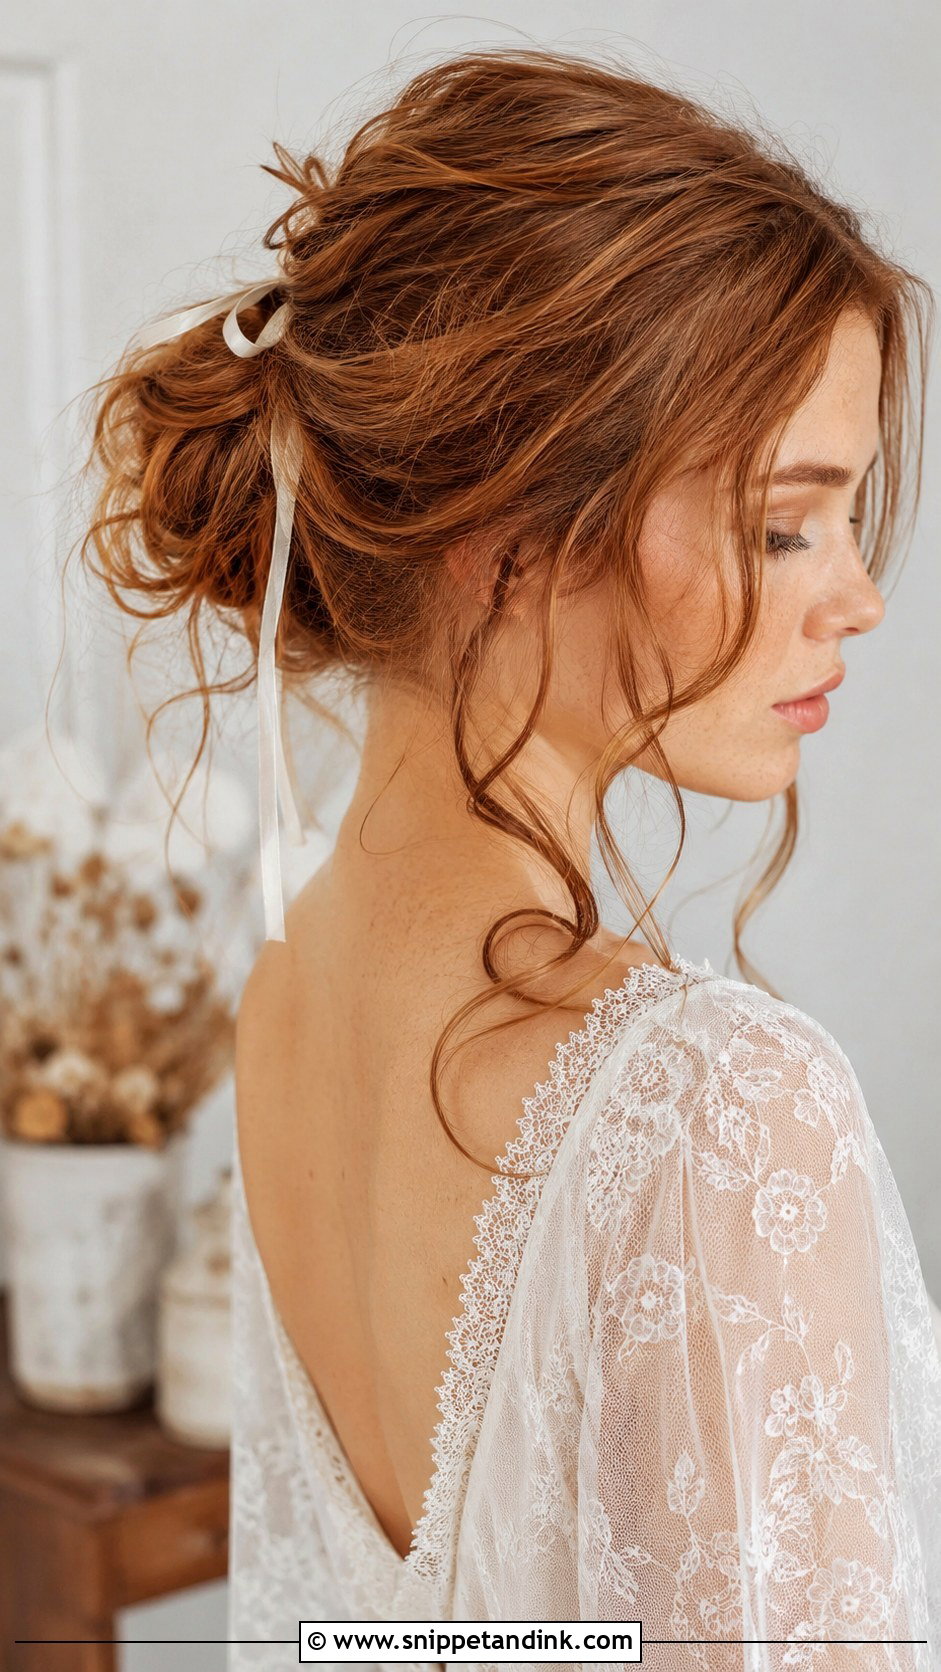
Messy buns fail when they’re made on clean, slippery hair. Second-day hair, or a dusting of dry shampoo at the roots, gives the grip it needs. Gather loosely without brushing, twist into a bun, pin, then pull at the edges to widen it. Leave a few face-framing pieces out. It’s relaxed by design, so it suits casual and boho weddings better than a black-tie evening. A thin ribbon around the base dresses it up.
8. French Braid Half-Up
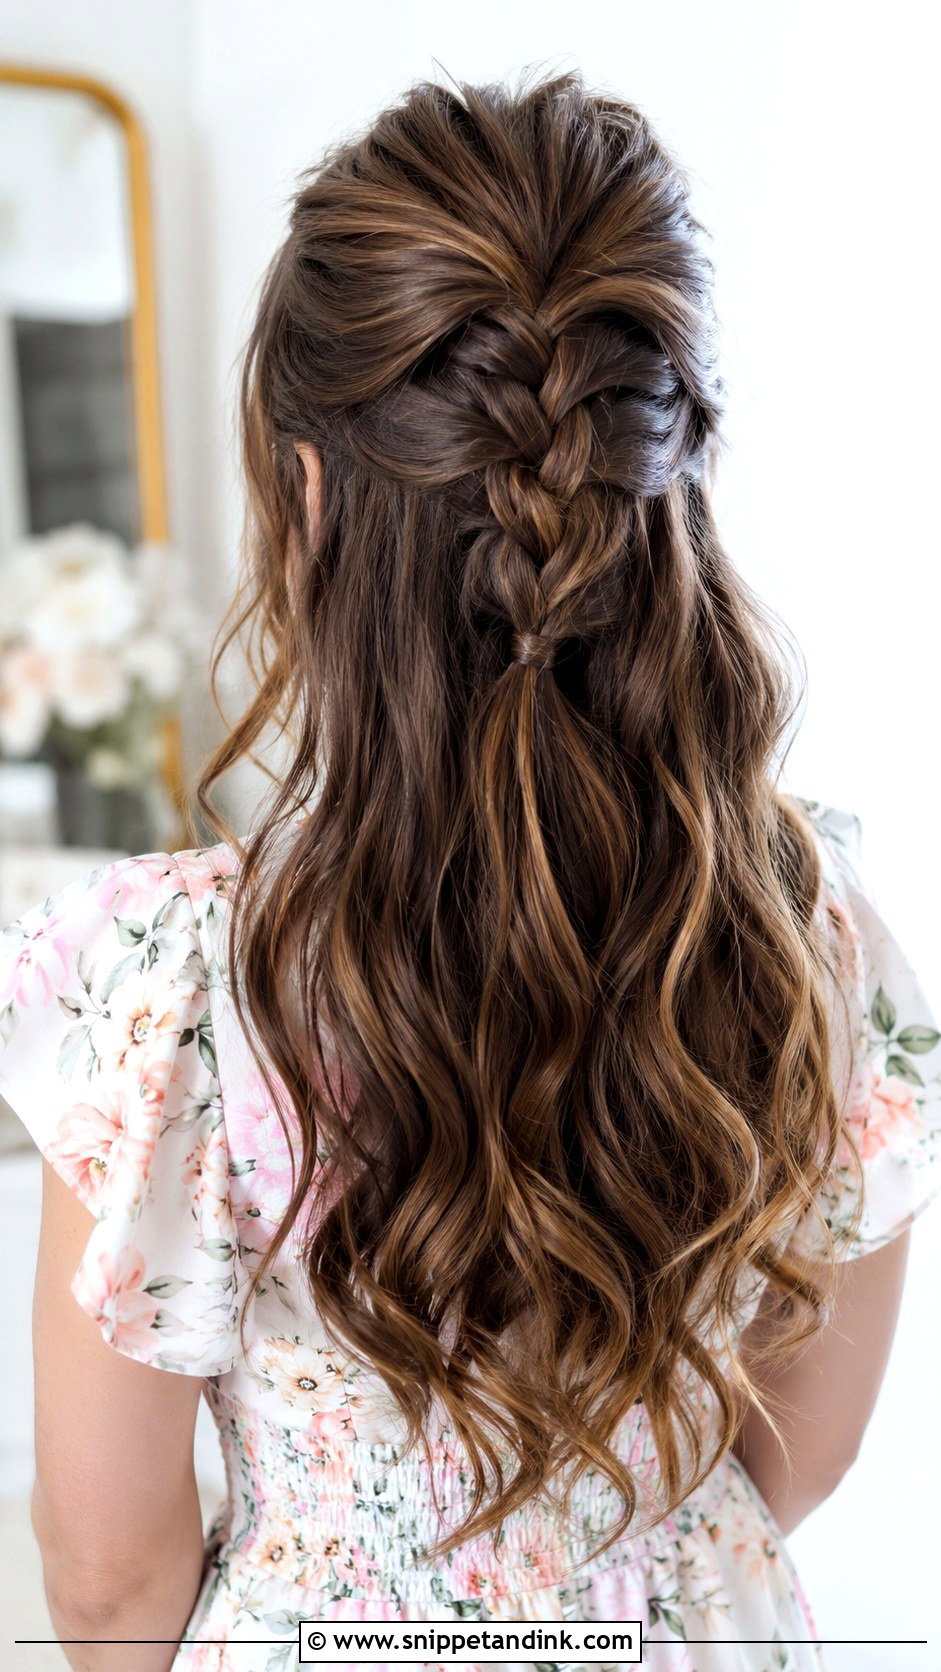
A French braid half-up adds detail to your wedding guest look without committing to a full updo. Start at the crown, picking up hair from the top section only, and stop at the back of the head. Secure with a small clear elastic and let the rest fall in waves. It works even on bob-length hair, which is why I recommend it often to clients with shorter cuts. Loosen the braid slightly by pulling at its edges. Daytime and spring weddings suit it.
9. Curly Updo
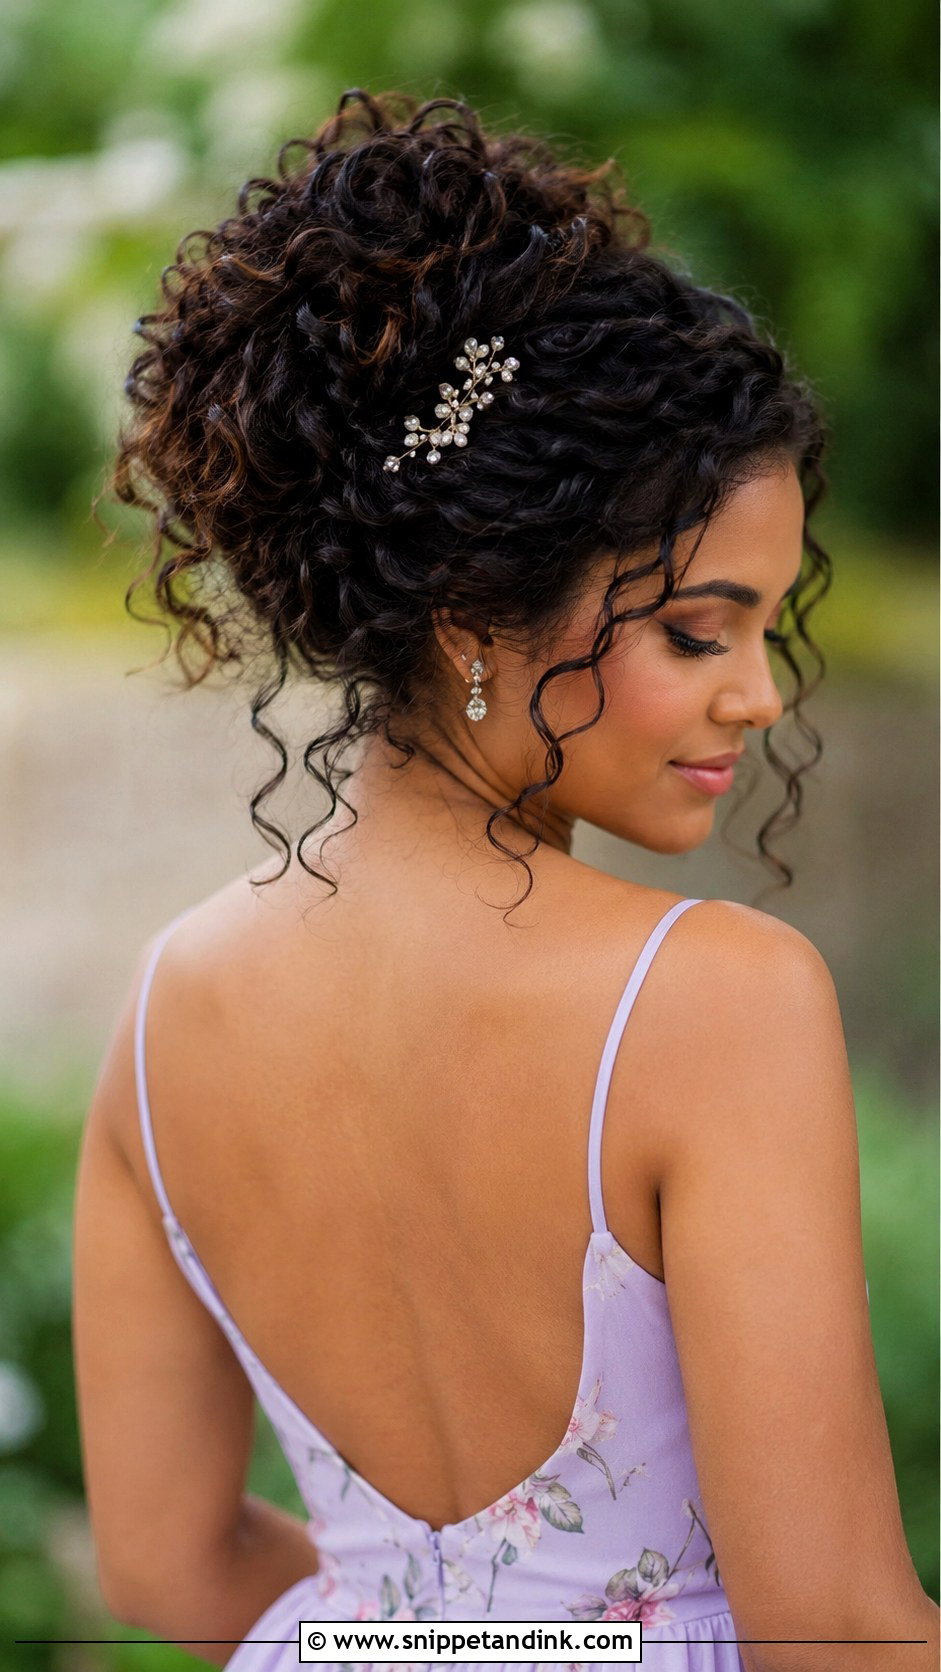
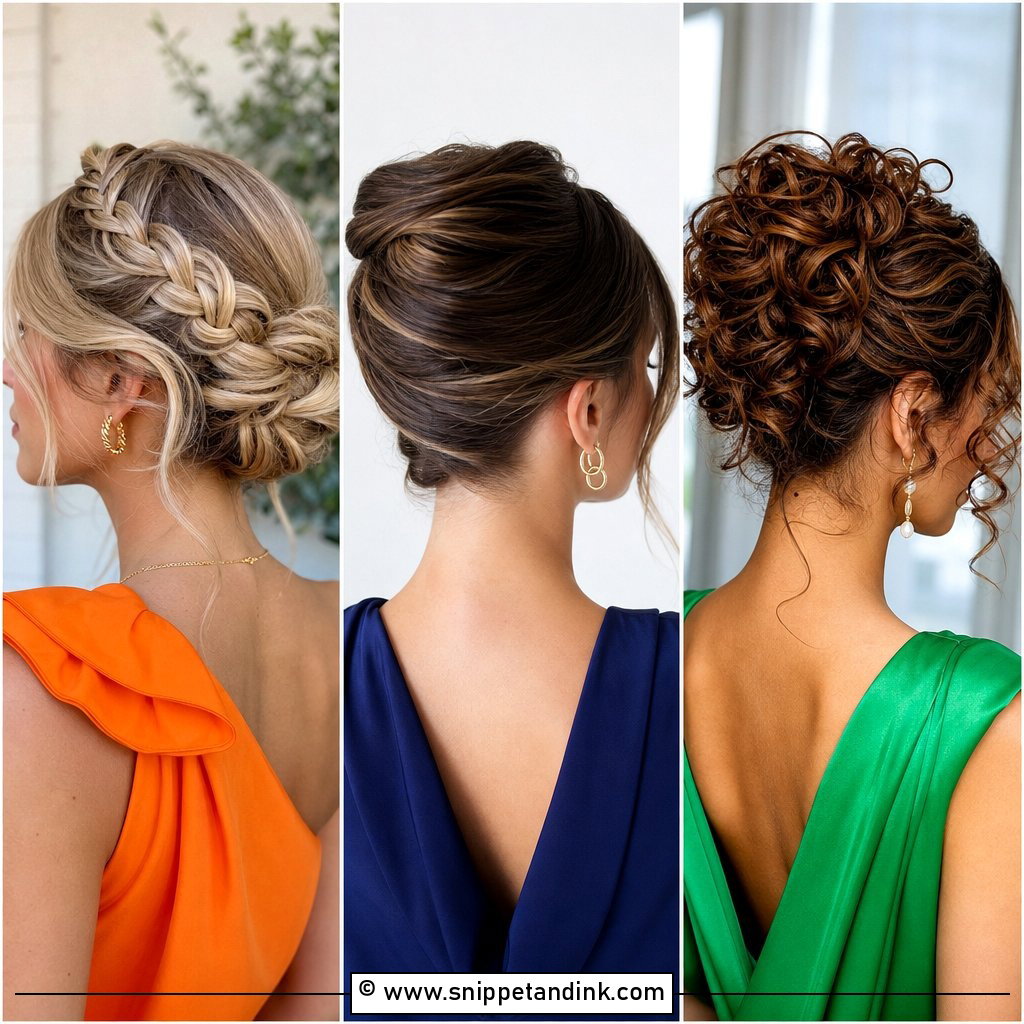
Curls hold an updo better than straight hair because they grip each other. I pin curls up in loose sections rather than in one ponytail, which keeps their shape instead of crushing it, and I use U-shaped hairpins rather than bobby pins so the curl pattern isn’t flattened. Apply curl cream or mousse on wet hair the day before, not just on the morning. Leave a few spirals by the face. It keeps your neck cool in summer and doesn’t fight your natural texture.
10. Side-Swept Curls
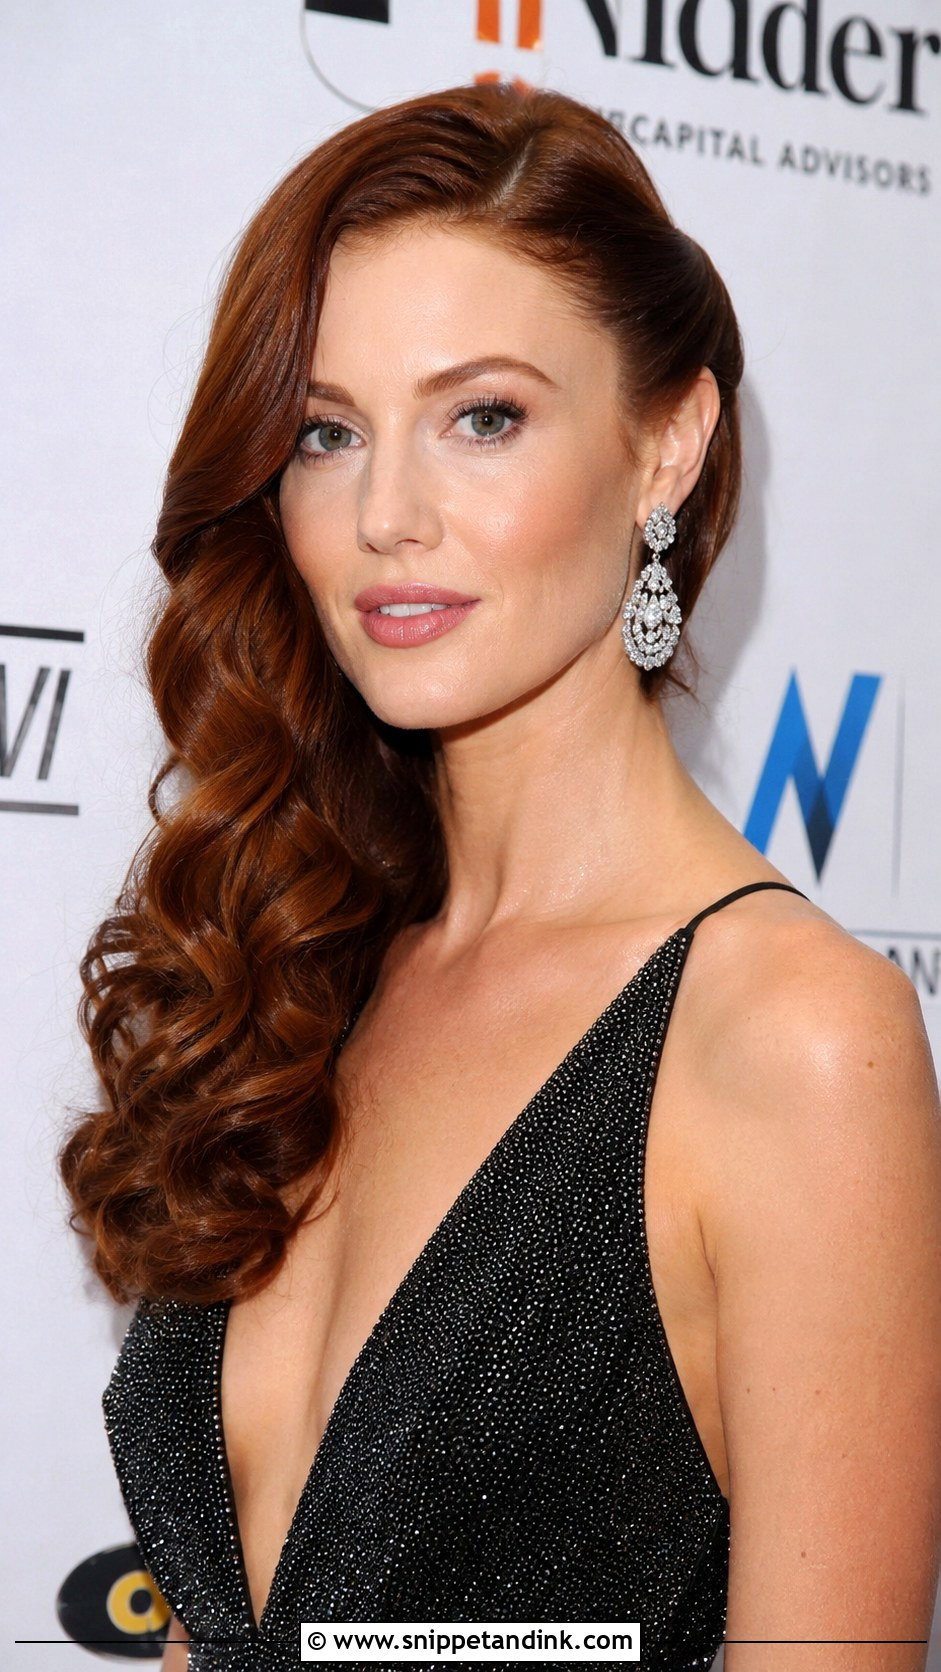
Side-swept curls are Old Hollywood in spirit. Curl everything in the same direction so the waves line up, then sweep it all over one shoulder and anchor the back with two crossed bobby pins behind the opposite ear. Those pins are what stop the whole thing sliding back to centre. You’ll need medium to long hair for the length to drape. Pair with an evening dress and statement earring on the bare side. A shine spray finishes it, held at arm’s length so it doesn’t wet the curl.
11. Braided Low Bun
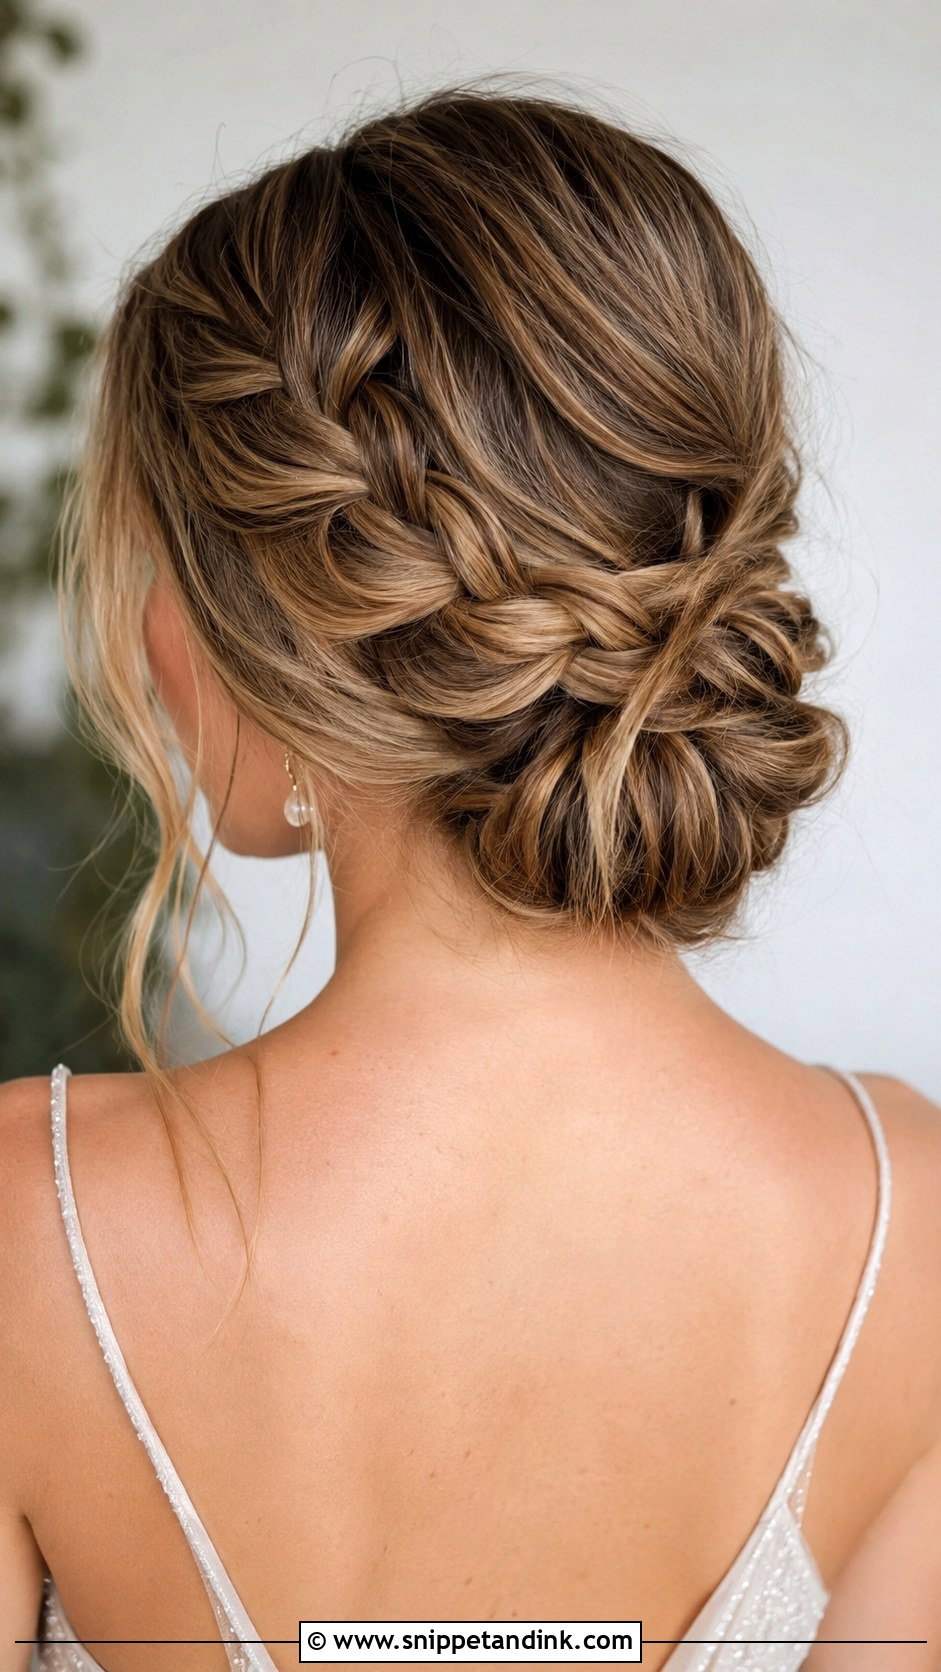
Adding a braid to a low bun gives it texture without much extra time. Braid one side or across the back, then gather everything into a low bun and tuck the braid’s tail into it. Plaits give the pins something to grip, so this tends to outlast a smooth bun through hours of dancing. It suits medium to long hair, formal or boho. Pull a few strands loose at the edges.
12. Textured High Ponytail
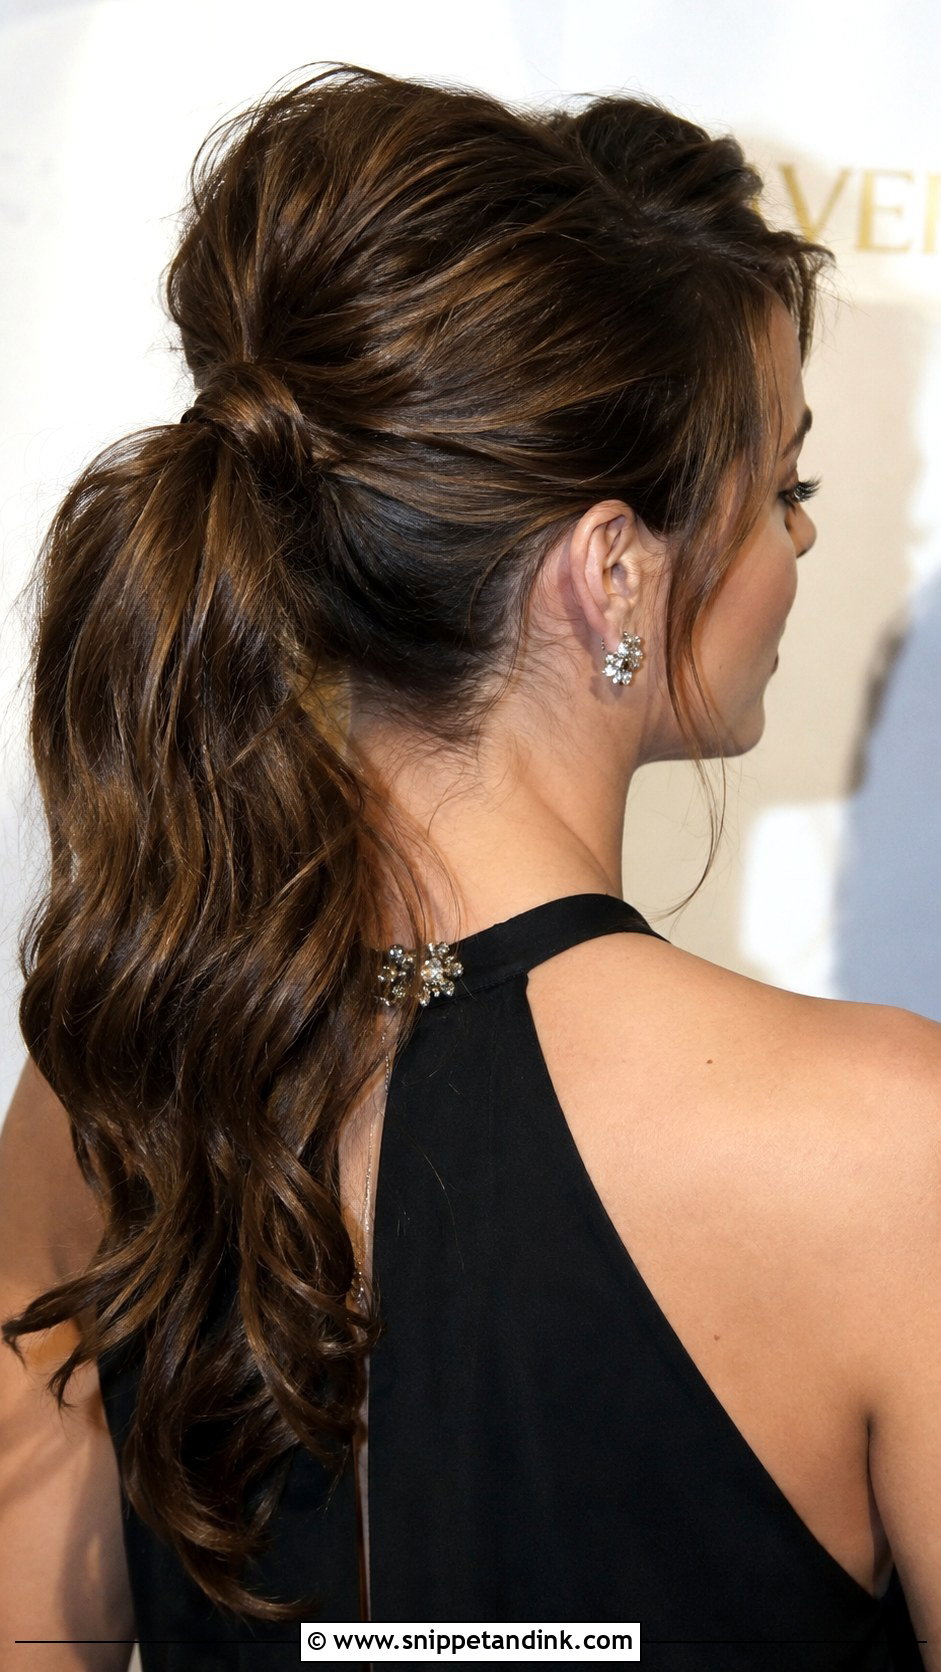
A high ponytail looks youthful and pulls the face up. Gather at the crown and secure with two elastics, the second right on top of the first, because a single band slips on heavy hair. Backcomb a little at the roots for lift, curl the length, and wrap a strand around the elastic. Heavy, very long hair can pull and give a headache by evening, so I’d suggest it to those with medium thickness. A ribbon or jewelled clip dresses it for a reception.
13. Bubble Ponytail
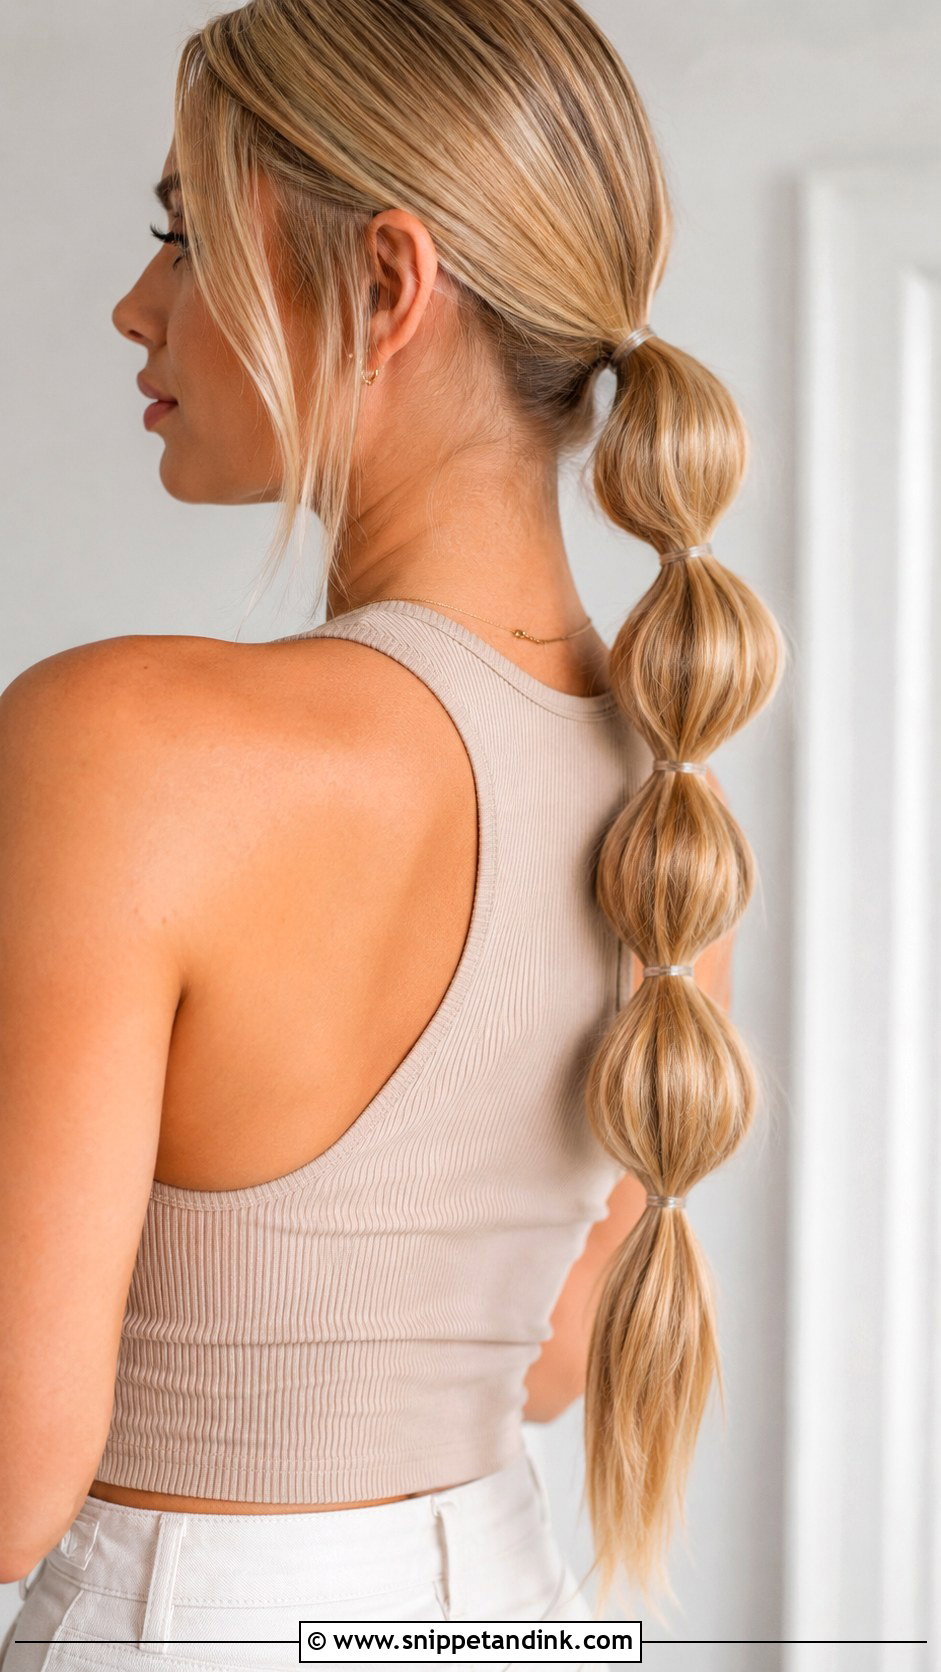
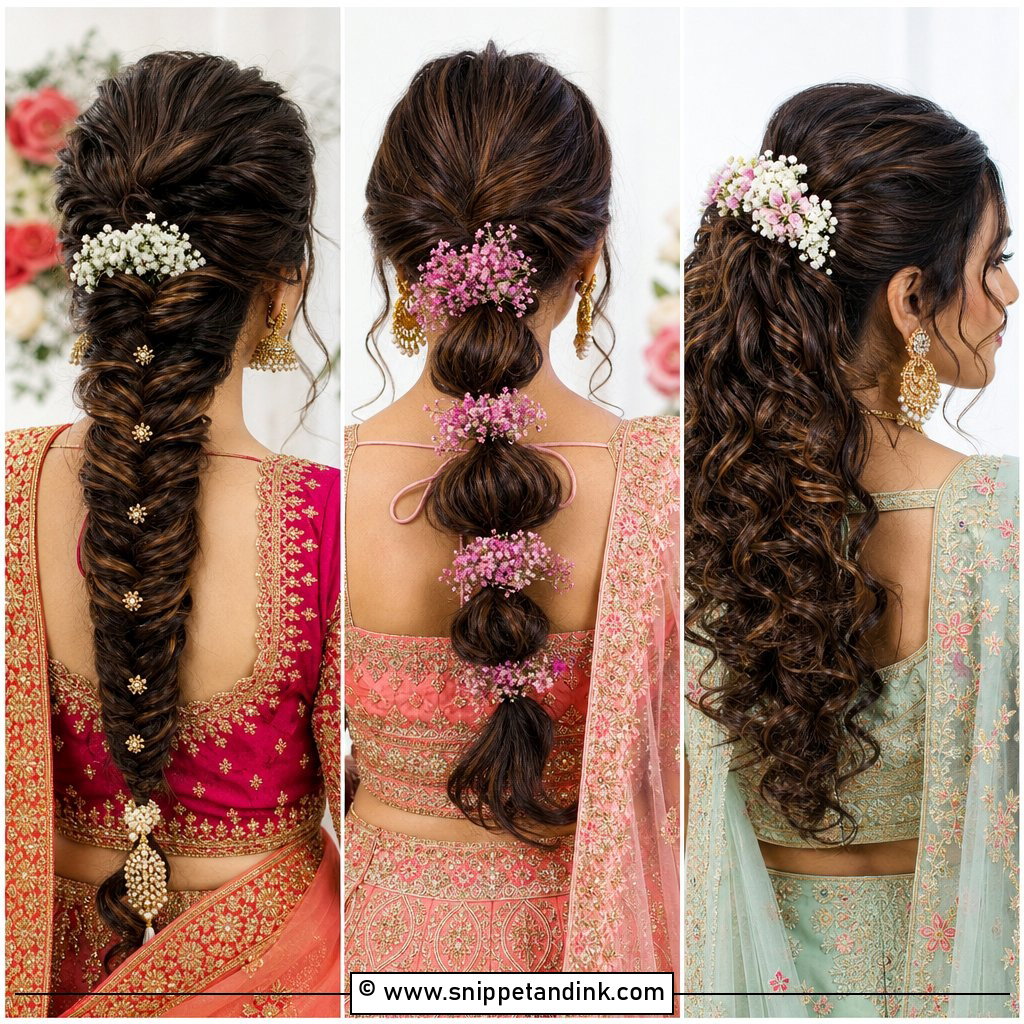
Bubble ponytails are playful and surprisingly quick. Make a ponytail, then add clear elastics down the length every couple of inches and gently tug each section wider to round it out. The bubbles stay round longer on hair with some texture; very fine straight hair tends to collapse. You’ll need long hair for more than three bubbles. It suits modern weddings and guests who like a bit of fun, high or low.
14. Wavy Bob
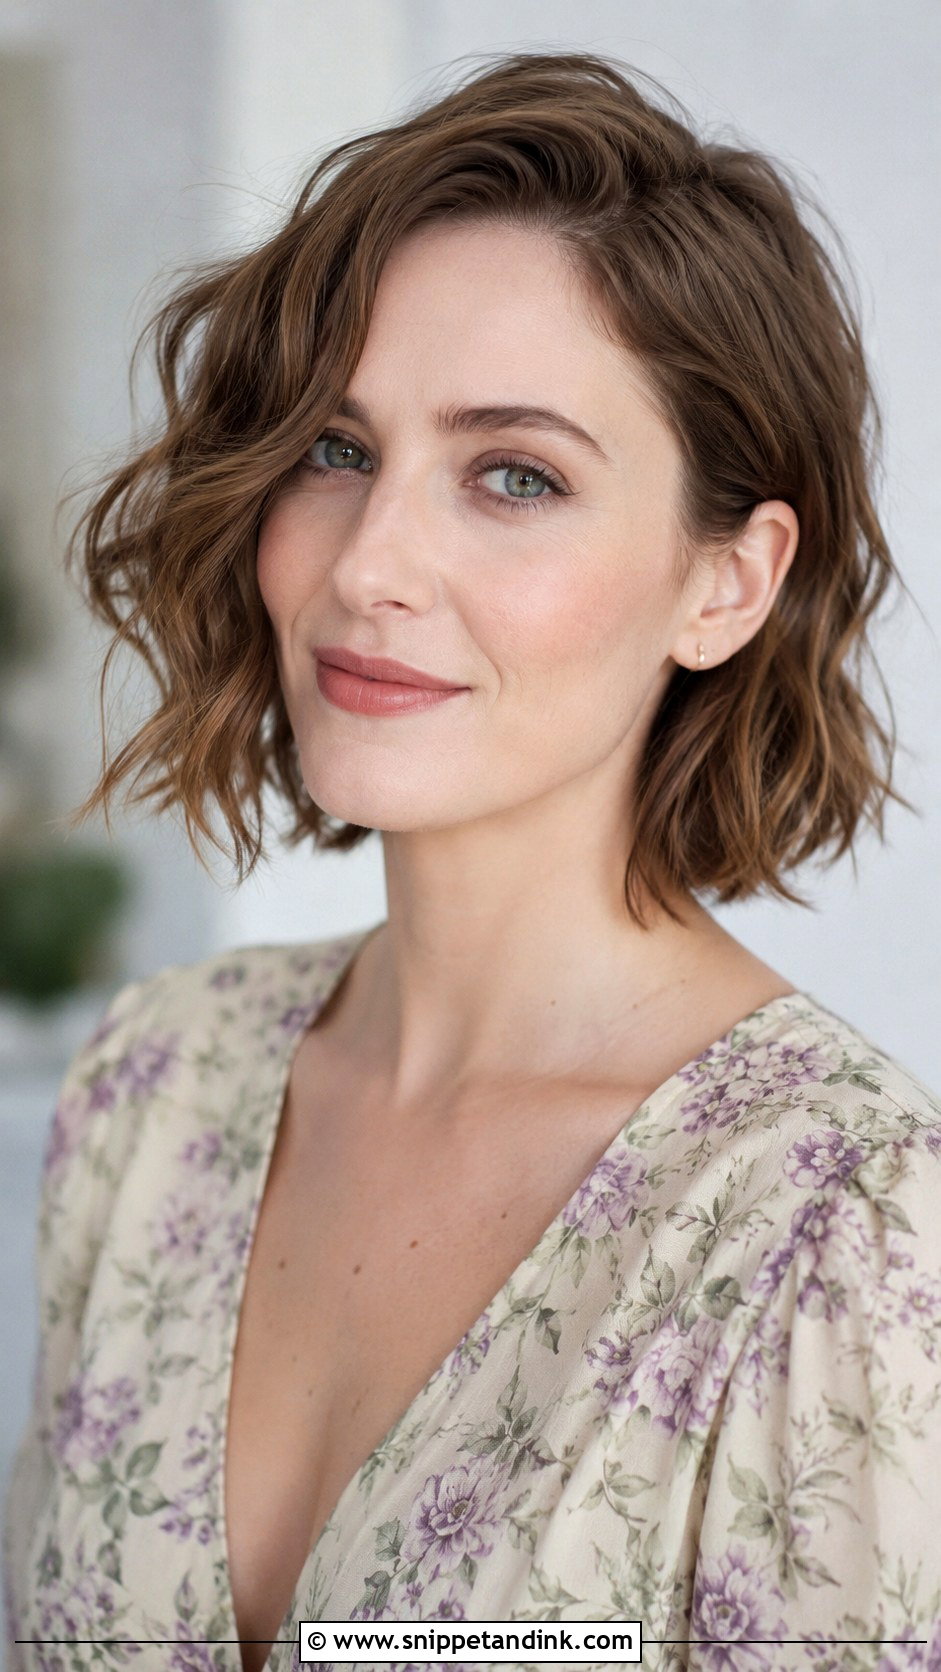
Short hair has plenty of options for a wedding, and a waved bob is my favourite. Use a flat iron or small wand and alternate the direction of each section, which stops the bends merging into one big curl. Leave the last inch straight for a more modern finish. Tuck one side behind your ear with a hidden pin. A texturising spray keeps the waves separated through the day, spring or summer.
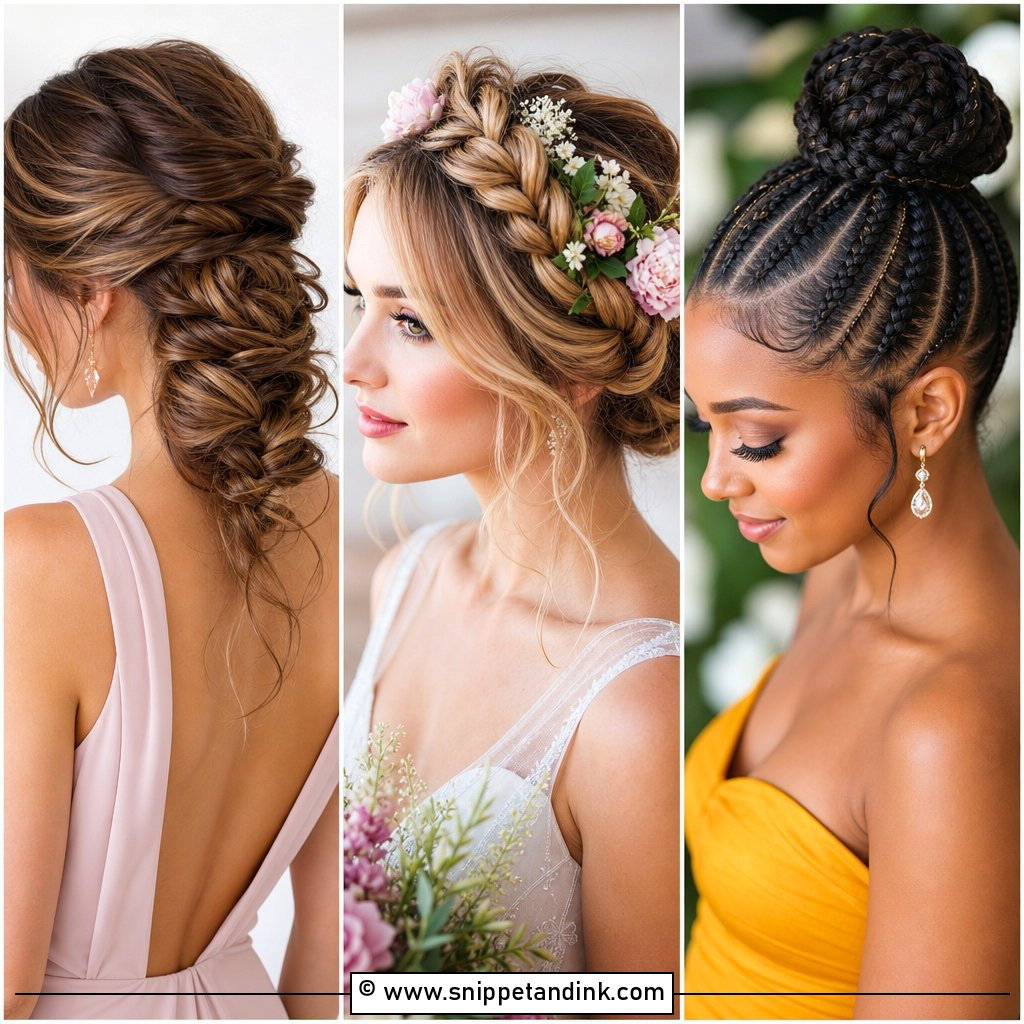
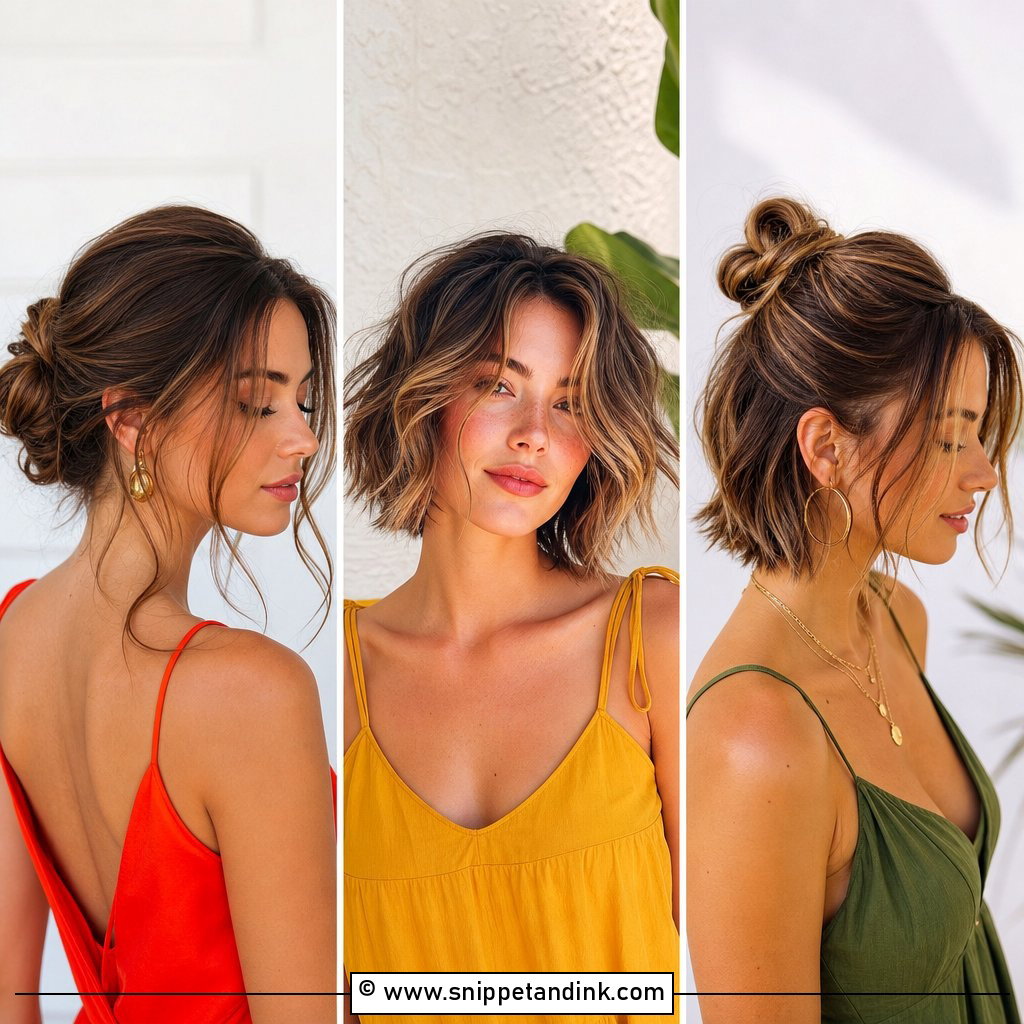
15. Half-Up Top Knot
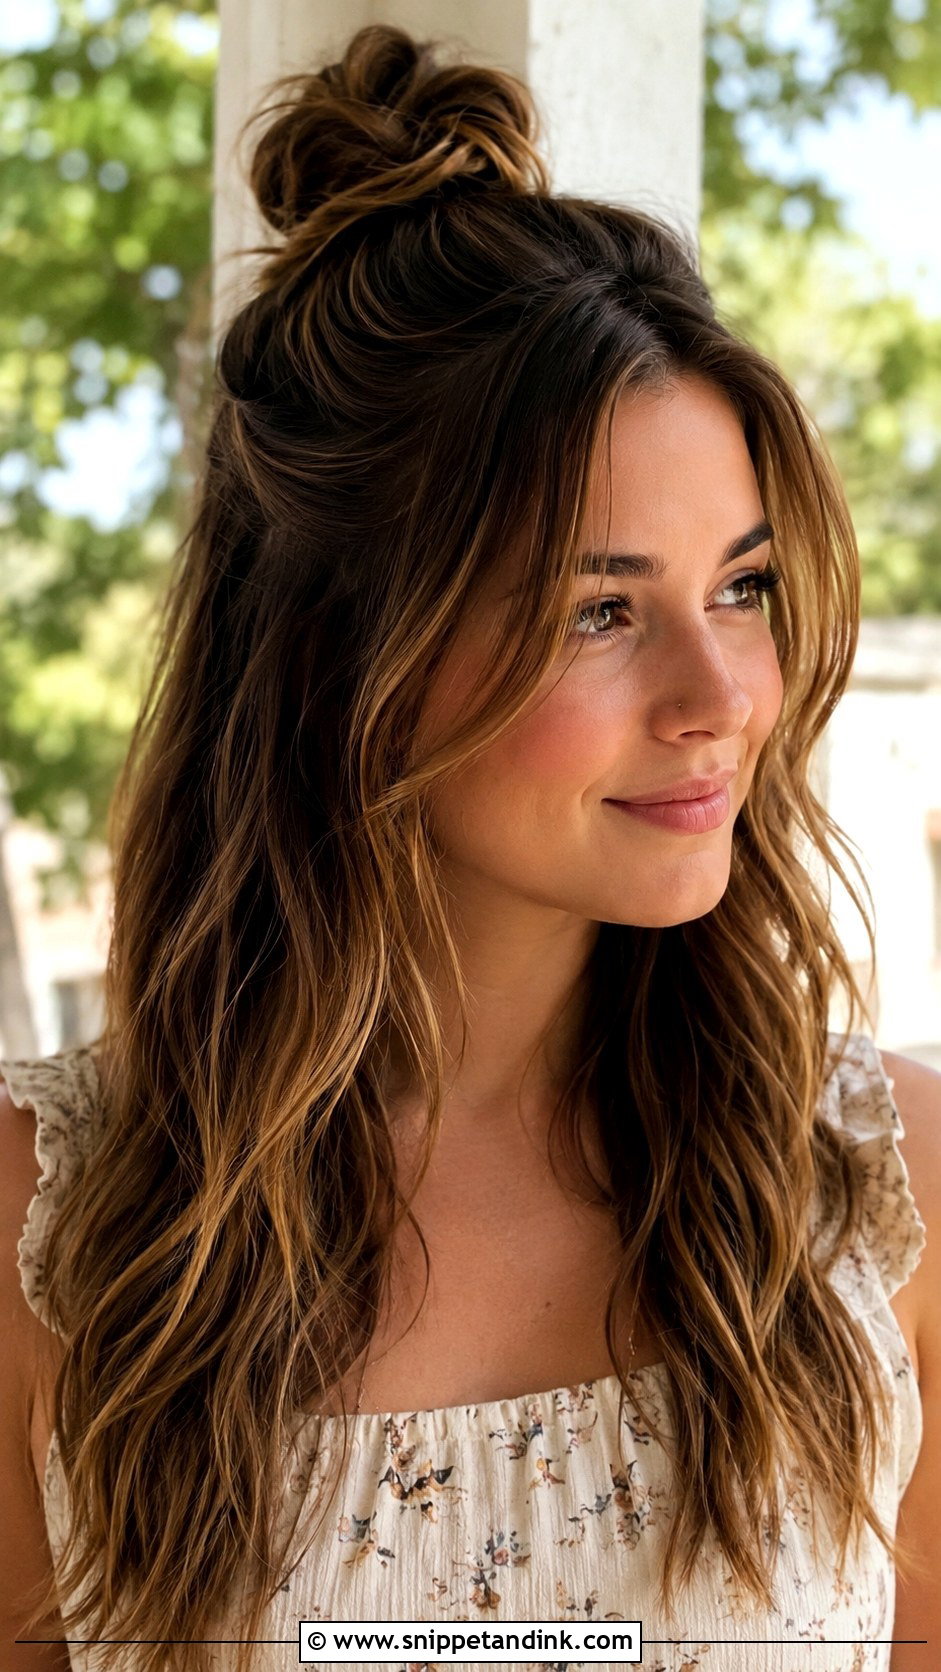
A half-up top knot adds height and keeps hair off your face while the length stays down. Gather the top section, twist it into a small knot on the crown and pin it. I keep the knot small, roughly the size of a golf ball, because a big one tips the proportions and starts to look like a gym bun. Waves or natural texture below. It works on most lengths and types, especially for a relaxed outdoor wedding.
16. Fishtail Braid
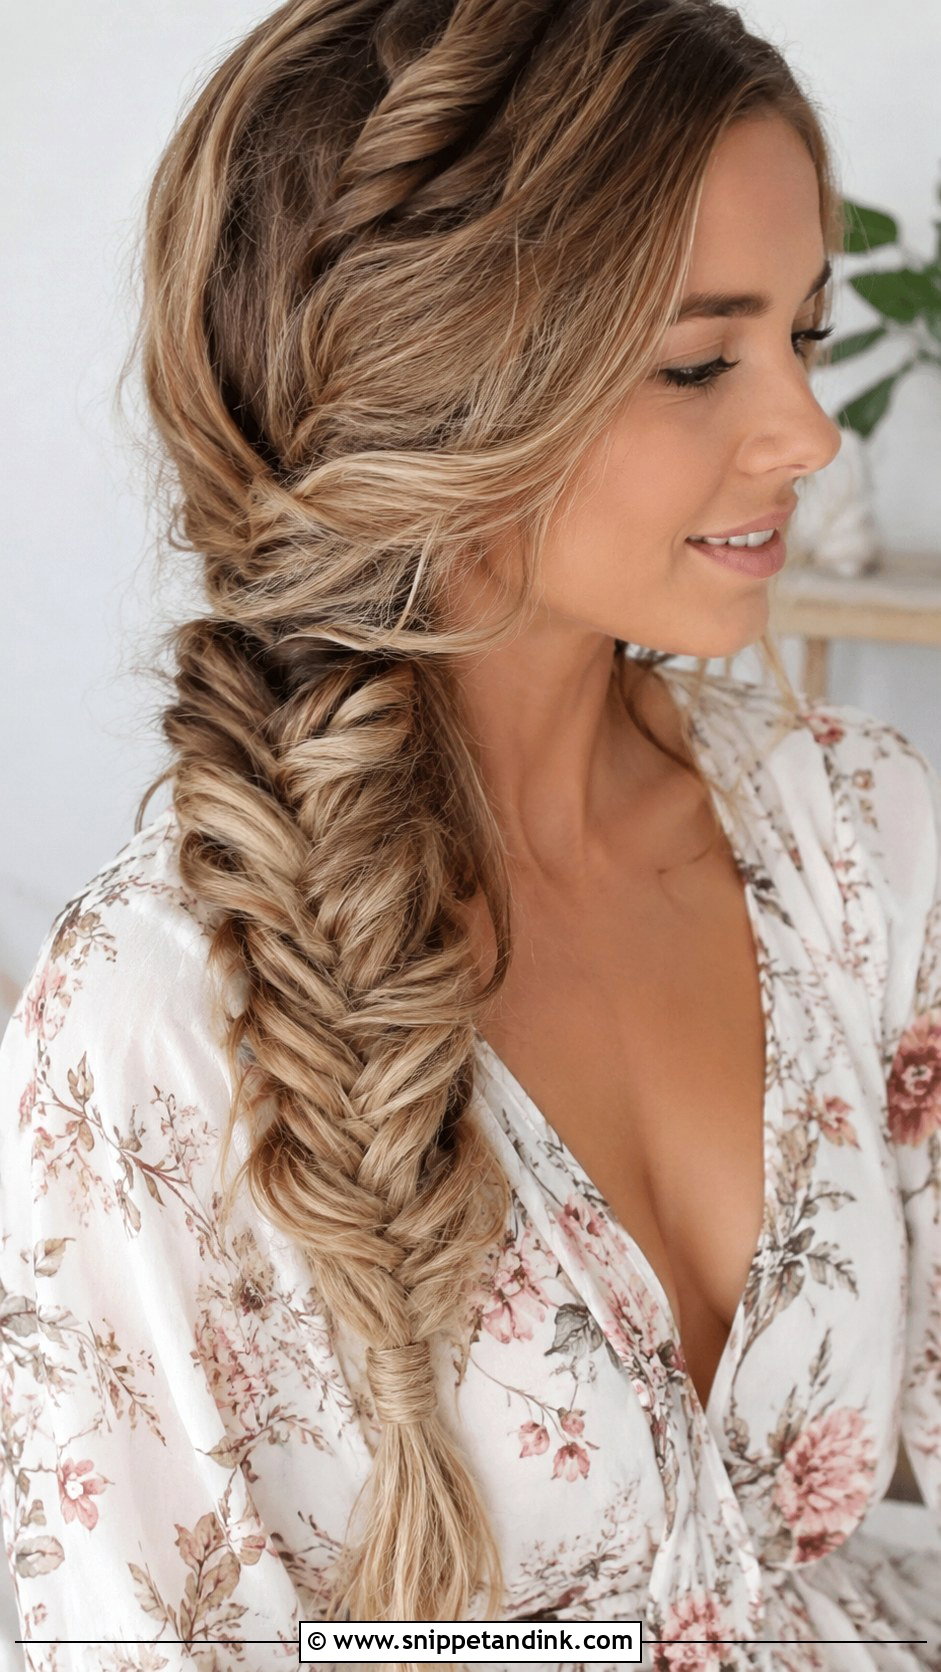
A fishtail looks complicated and is really just two sections with small pieces crossed between them, which gives a rope-like braid texture. The thinner the pieces you cross, the finer the pattern. Wear it over one shoulder and pull the edges gently for fullness. On layered hair, short layers poke out along the braid, so a little texturising paste helps keep them in. Rustic, garden and beach weddings suit it.
17. Twisted Low Chignon
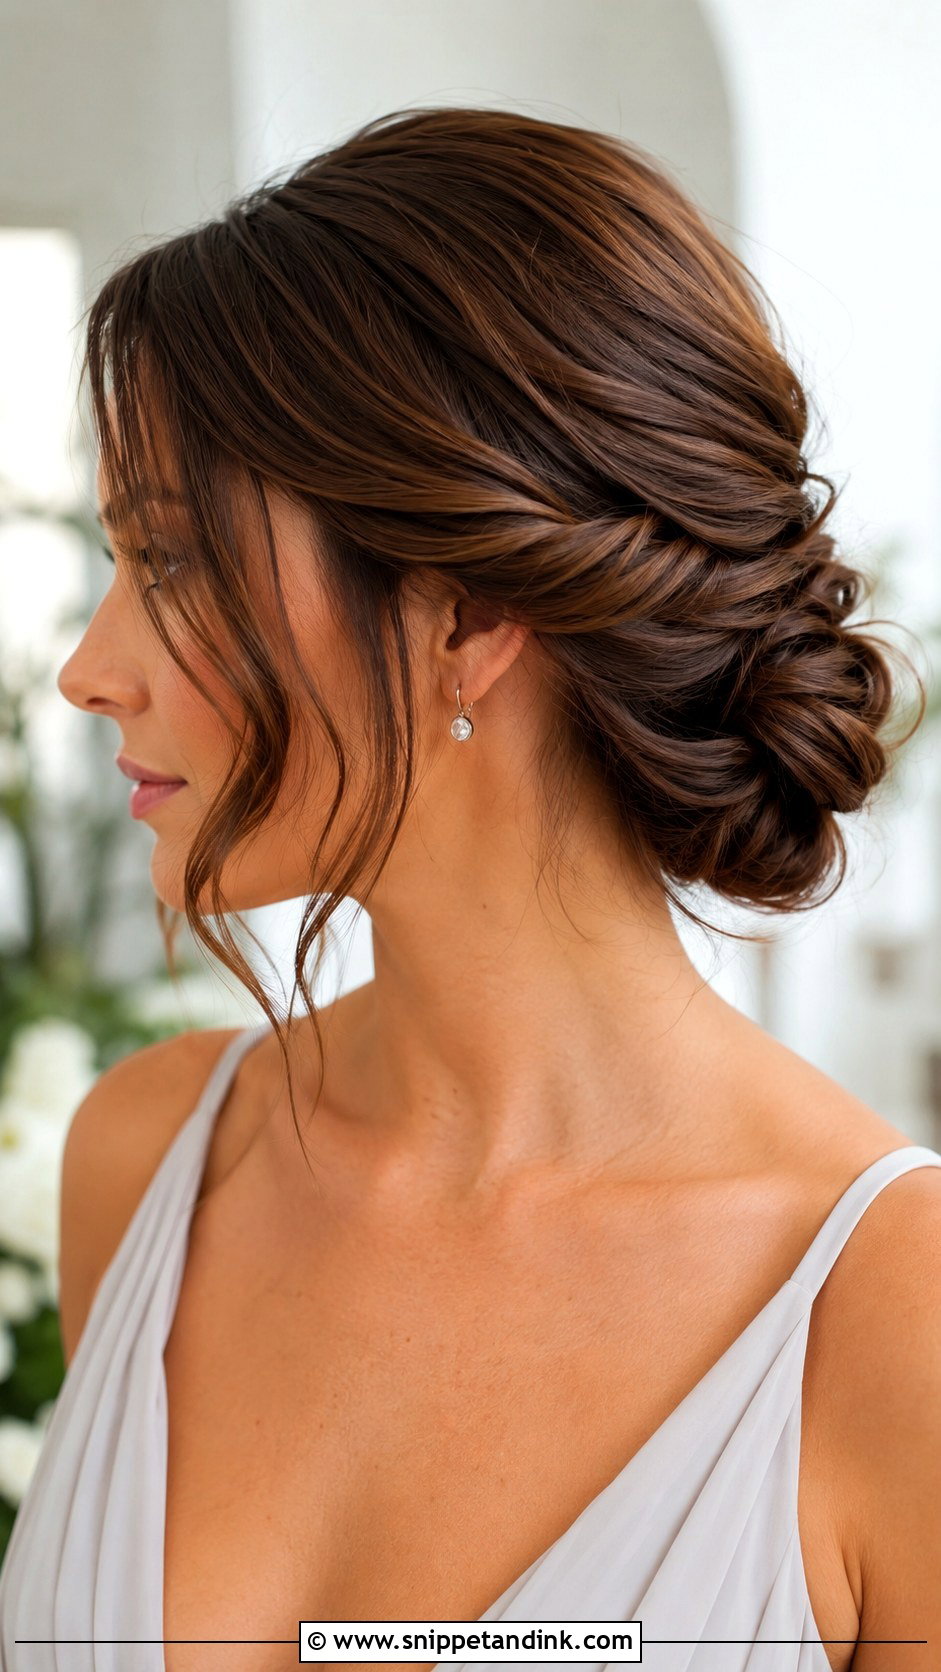
This is a side-swept version of the chignon. Gather everything to one side, twist into a coil and wrap it into a loose knot below the ear, then pin it securely. Pinning a side bun is fiddlier than a centred one, so I anchor it first with two crossed pins before wrapping. Loosen a few pieces for an airy feel. It suits medium to long hair, formal gowns and an interesting neckline. Leave a few face-framing tendrils.
18. Slicked-Back Bun
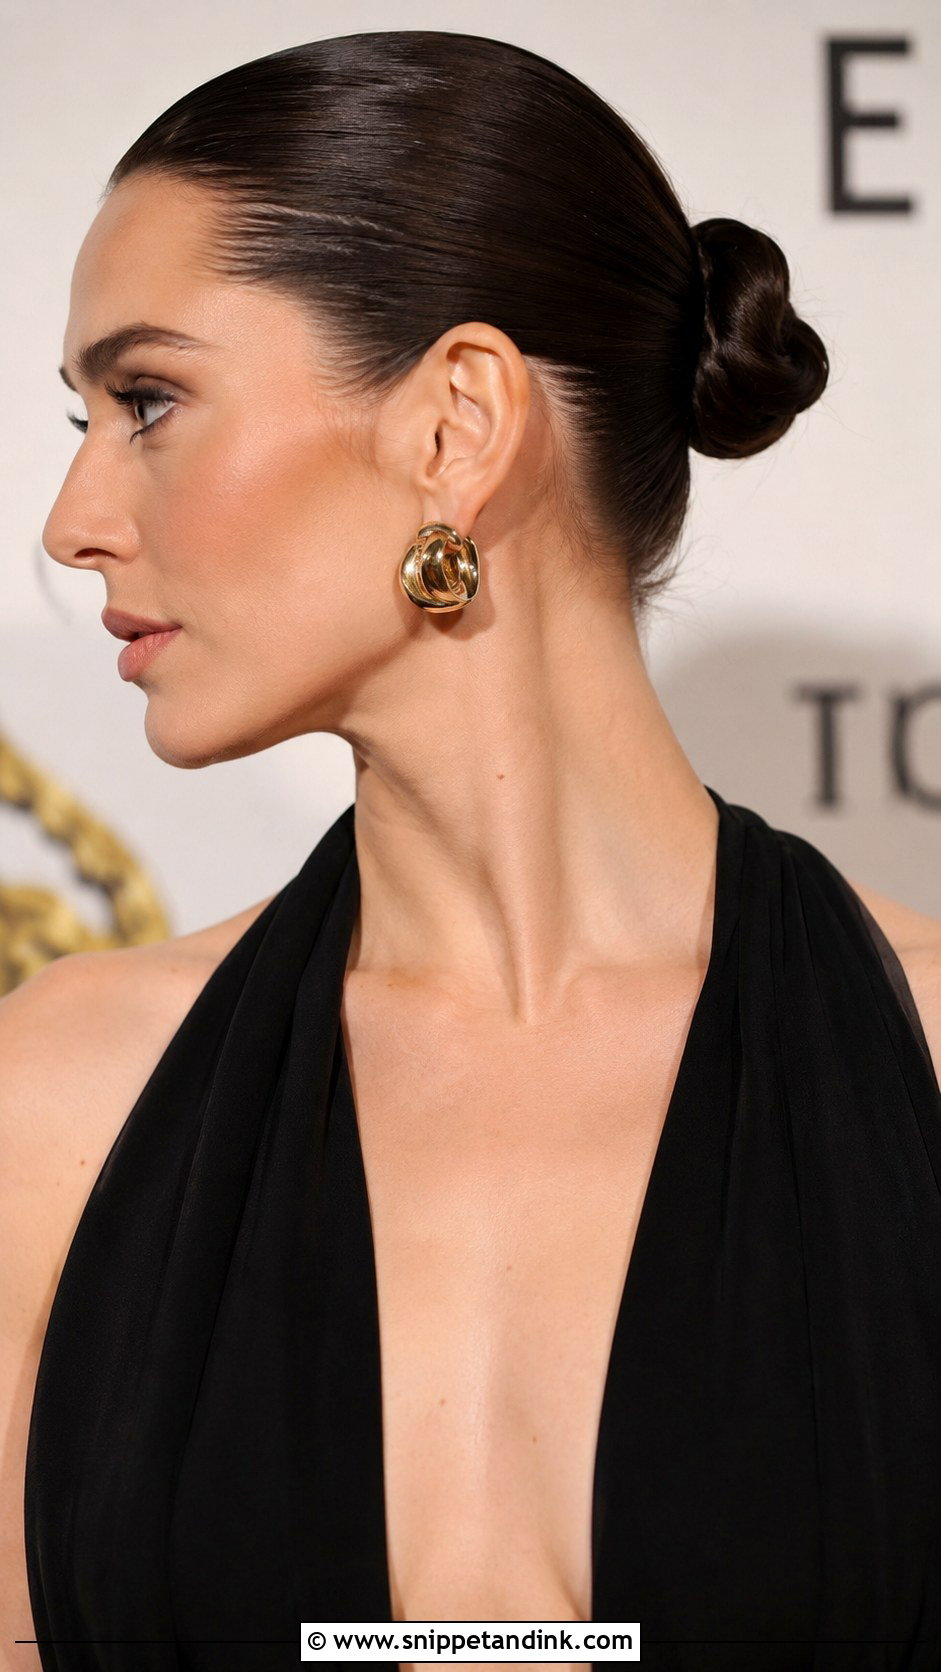
The slicked-back bun is bold and very modern. Comb gel or pomade through damp hair, brush back tightly, and twist into a sleek bun at the crown or nape. Damp hair is the key: the product sets as it dries and won’t flake by evening the way it can on dry hair. I’d avoid this if your hair is breaking at the hairline, because the tension adds stress there. It’s a good choice for warm weather and minimalist outfits, with statement jewellery.
19. Pinned-Back Waves
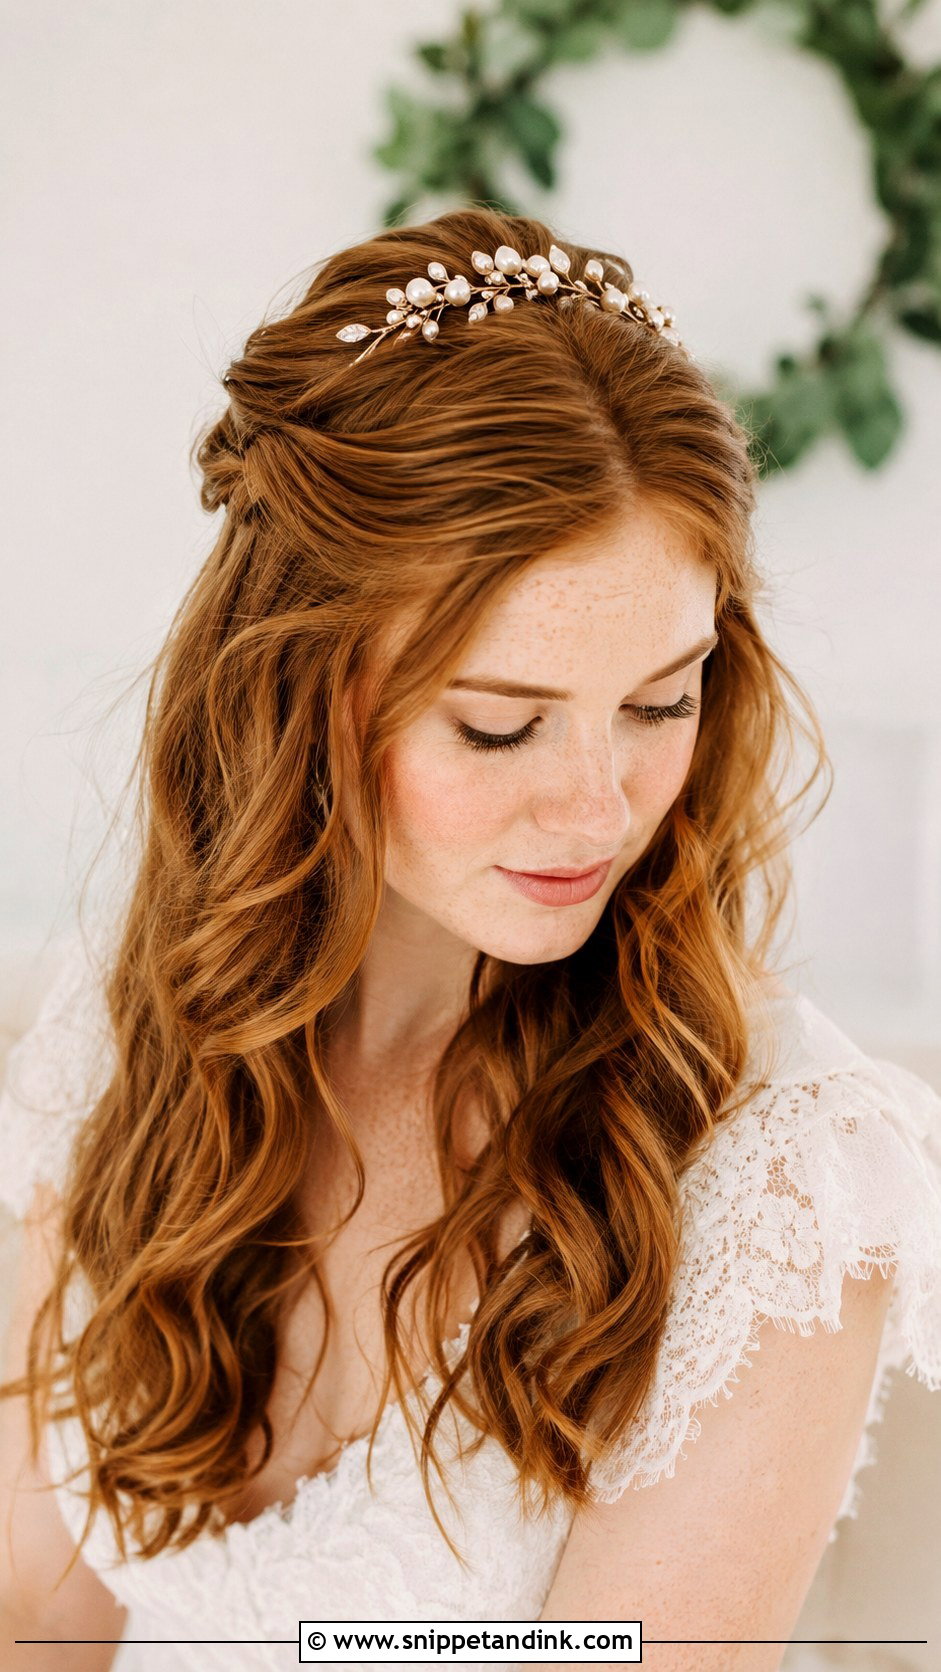
Curl the hair into loose waves, then pin both sides back to meet at the crown and let the length fall. I pin the sides slightly higher than the ears so they lift the face rather than drag down. A decorative pin or jewelled comb at the meeting point is a pretty finish. This style keeps hair out of your eyes, works day or evening, and flatters most face shapes and dress necklines.
20. Waterfall Braid
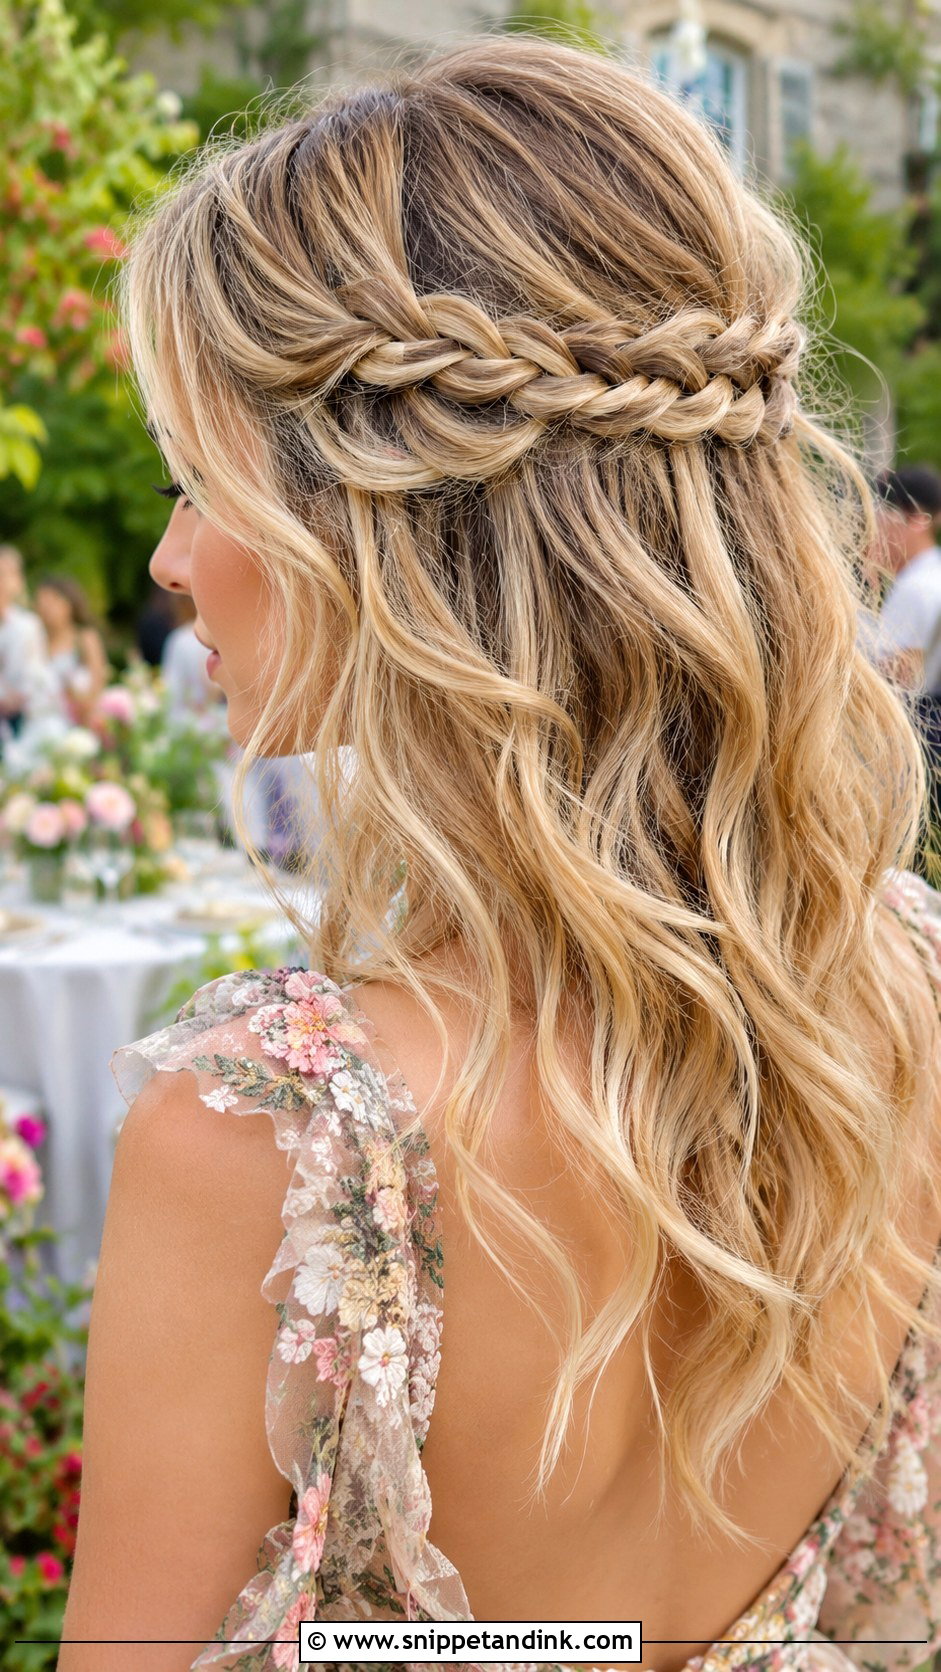
The waterfall braid gives a cascading effect as you drop a strand at every crossover and pick up a new one. Start near the temple and work horizontally across the back of the head, securing the end behind the opposite ear. It looks best over waved hair, because the dropped strands show up against the curl. It takes a couple of practice runs, so try it before the wedding morning. Garden and spring weddings suit it.
21. Voluminous Blowout
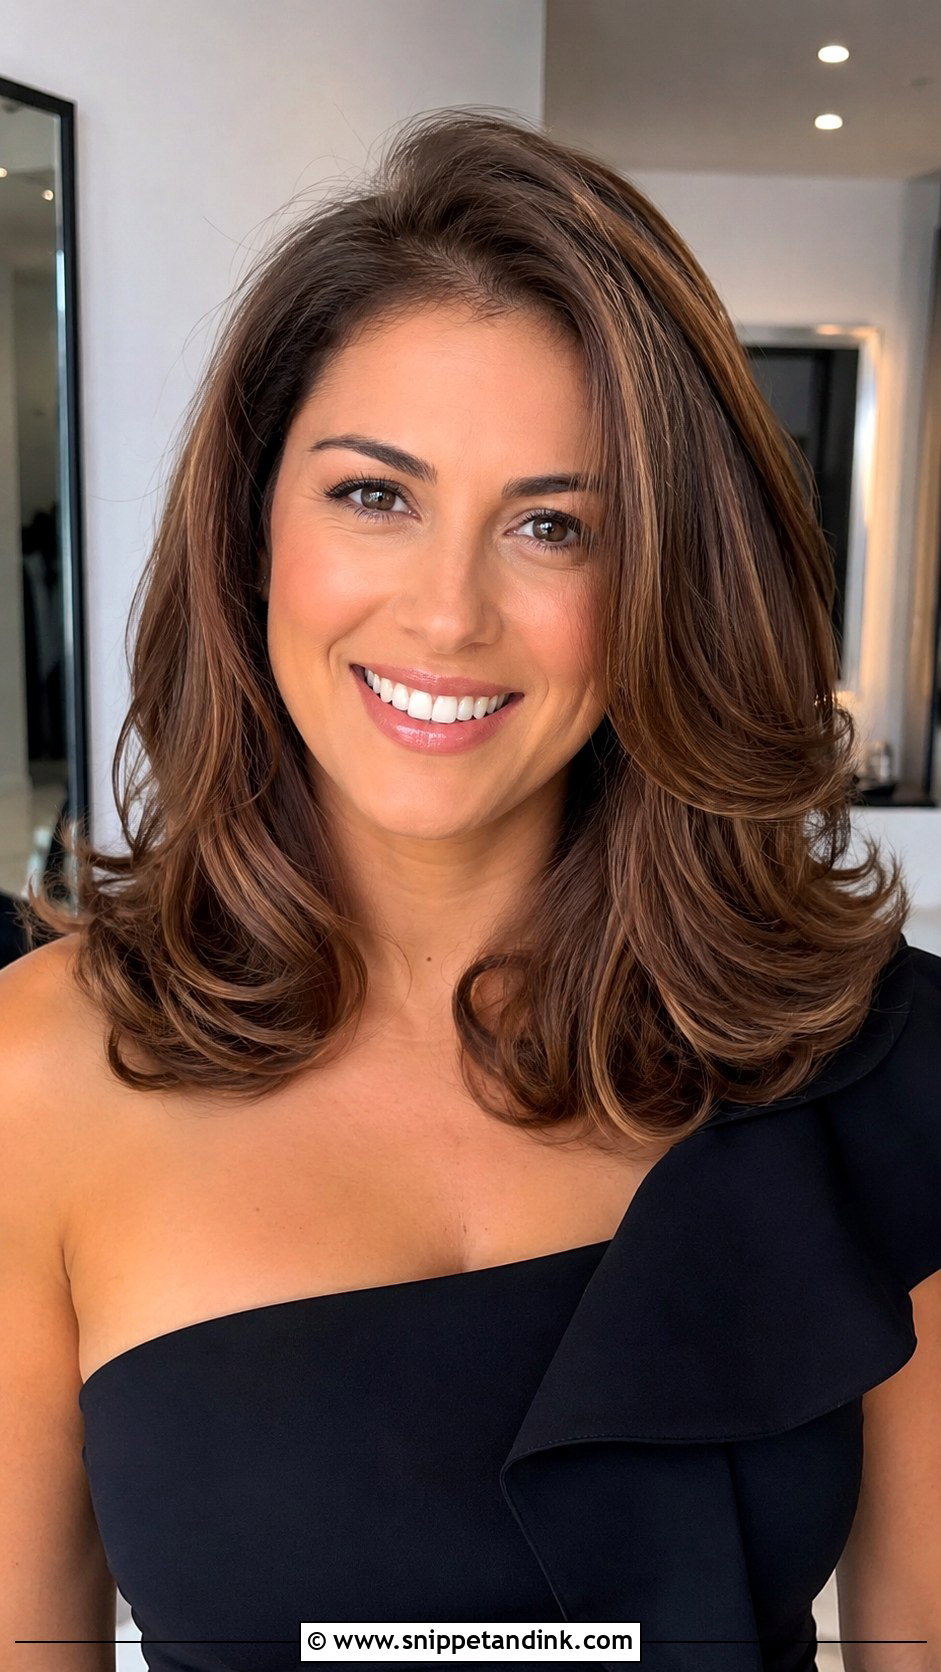
Sometimes a good blow-dry is all a guest needs. Use a round brush, lifting at the roots in sections and turning the ends under. Hold each section on the brush for a few seconds after drying, so it cools in shape; that’s where the bounce comes from. It works on any length and suits anyone who wants to wear their hair down but still look dressed up. Finish with a shine spray.
22. Knotted Half-Up
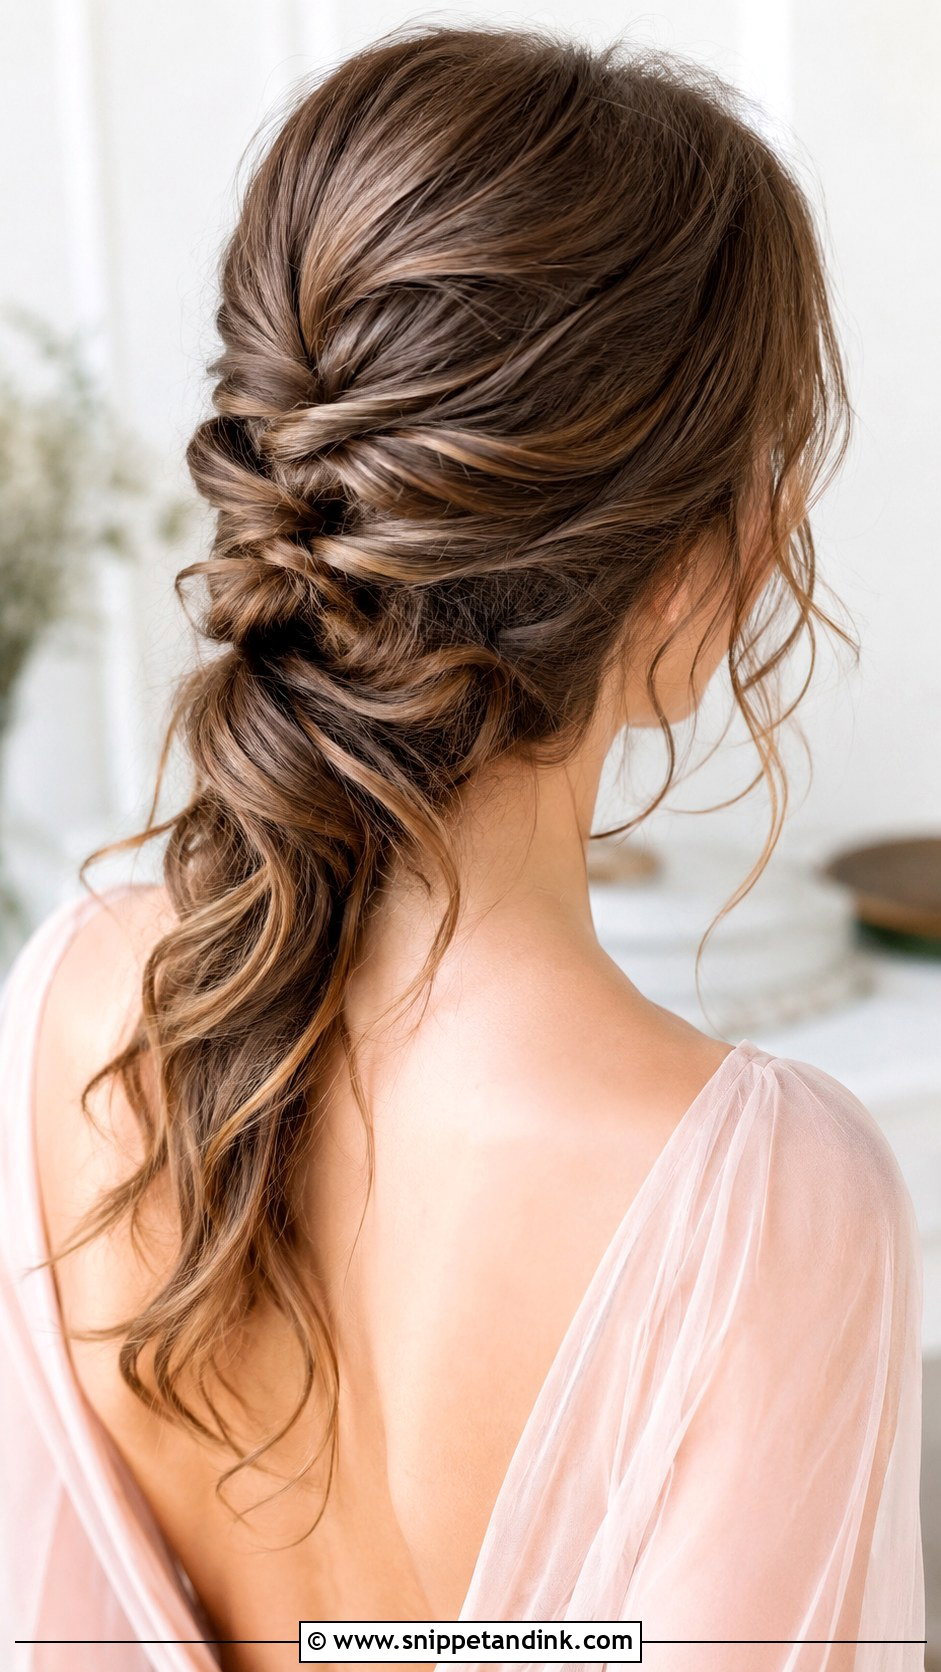
The knotted half-up is a pretty detail without braiding skills. Take a section from each side, tie them in a single knot at the back, and pin the ends under. Stacking two or three knots adds interest. Very slippery hair will untie itself, so a little texture spray first gives it some grip. Waves underneath, a few loosened strands by the face, and you’re done. It suits medium to long hair.
23. Dutch Braid Ponytail
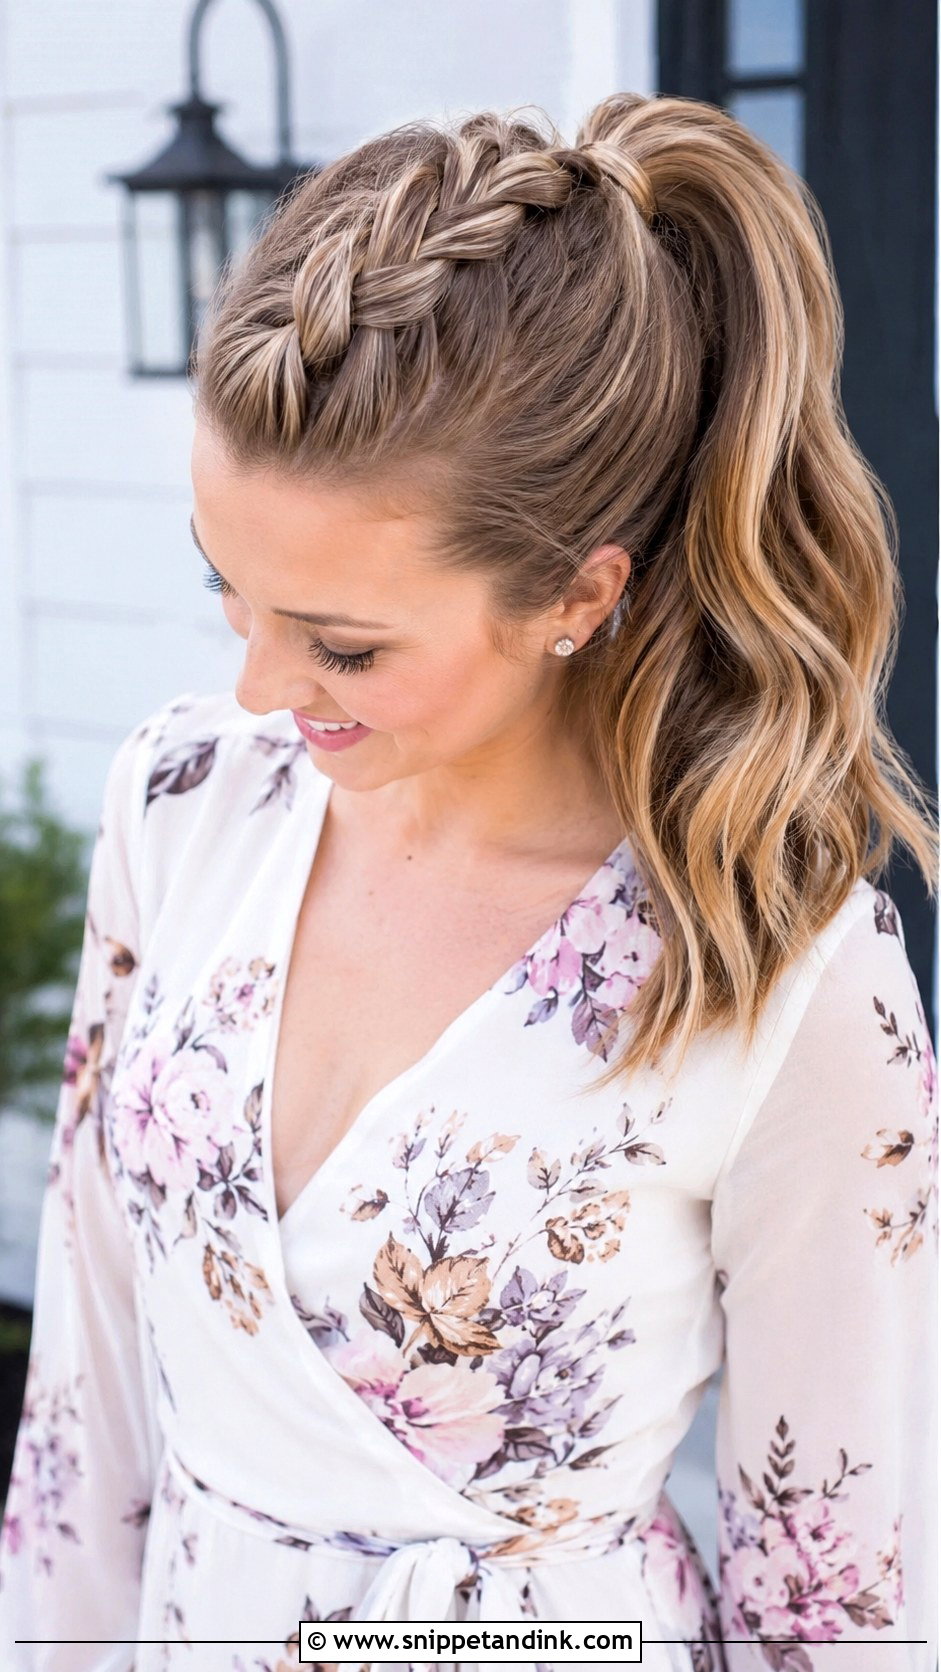
A Dutch braid is a French braid inside out: you cross sections under rather than over, so the plait sits on top of the hair. Braid from the hairline to the crown, then gather everything into a ponytail. Of all the styles here, this one survives a full night of dancing best. It suits medium to long hair, outdoor weddings and casual receptions. Pull at the braid edges for a softer finish.
24. Loose Braided Updo
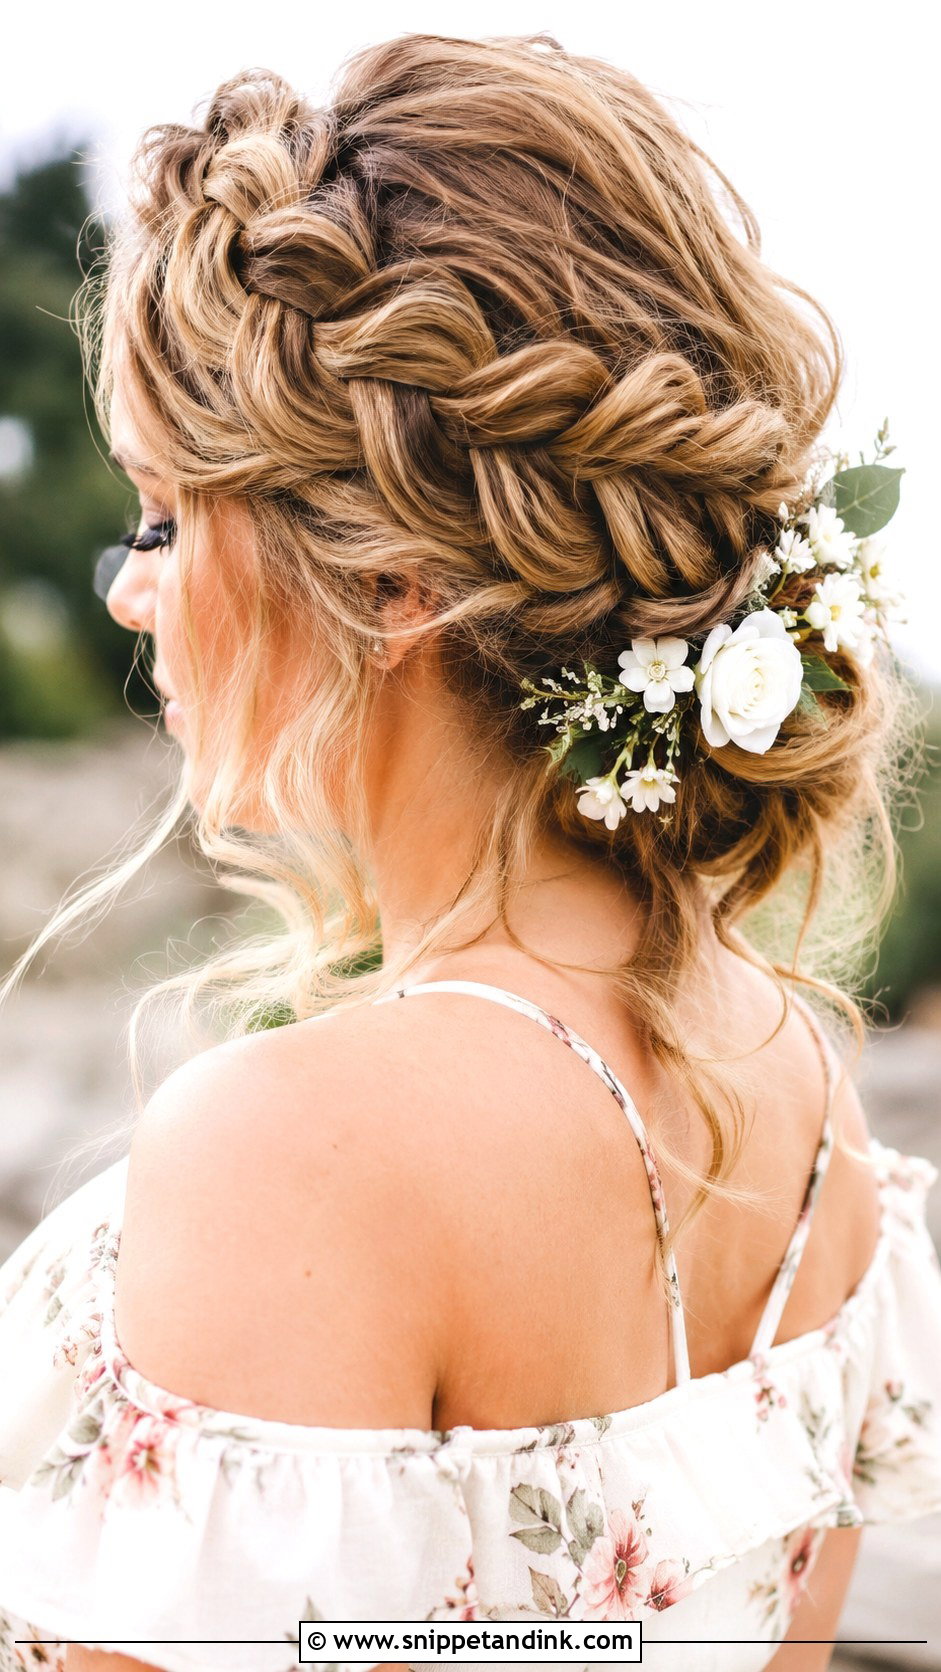
A loose braided updo is a bohemian-inspired look built from one soft braid twisted and pinned at the back of the head. The aim is an airy, textured shape, so pull pieces loose throughout. Pinning loose texture takes more pins than you’d think; I use a dozen or more, hidden inside the braid’s folds. It suits medium to long hair, flowy dresses and garden or barn weddings.
25. Vintage Finger Waves
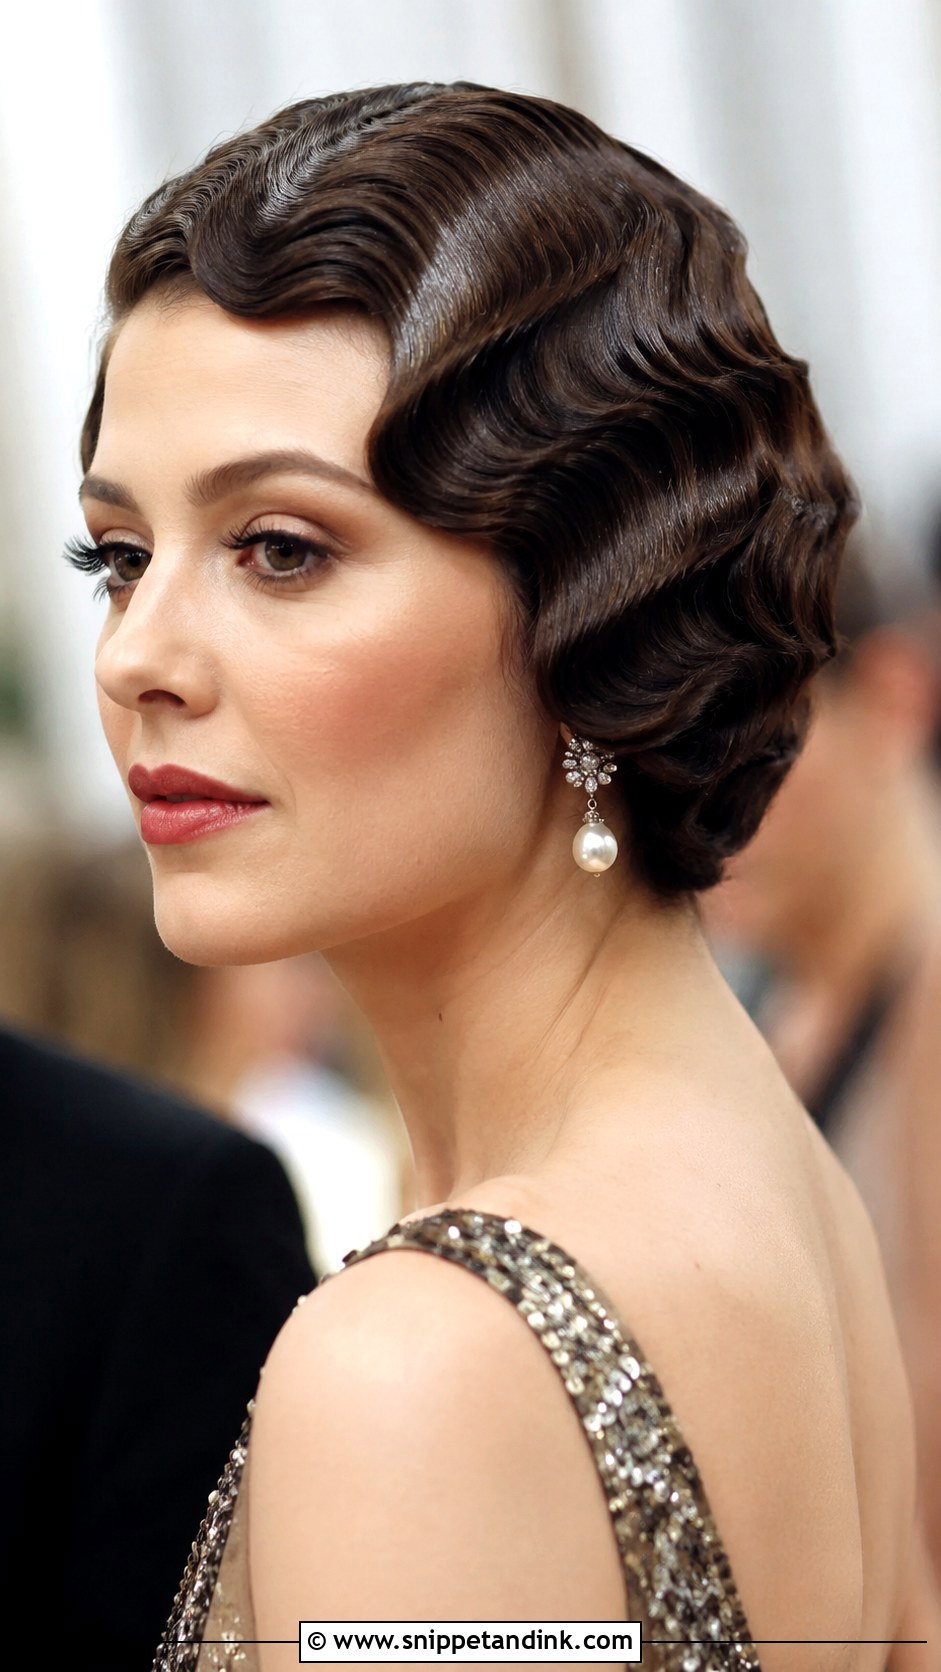
Finger waves are S-shaped ridges sculpted flat to the head, very Art Deco. Use setting lotion on damp hair, comb each wave into shape and let it dry completely before touching. It takes patience and practice, and I’d honestly say it’s the hardest style here to do on yourself. It suits short bobs especially well, and longer hair can be waved at the front and pinned up behind. Finish with a shine spray for that polished gleam at a formal wedding.
Upstaging the Bride, Hats and Other Guest Etiquette
Guest hair has one rule the bride’s doesn’t: don’t compete with her. I’d skip anything that reads as bridal, like a white flower crown, a veil-like comb or a large sparkling headpiece. Small accessories in your outfit’s colours are fine.
Check the ceremony too. Some religious venues expect heads covered, so a low bun or chignon is easier to fit under a scarf than a high ponytail. If you’re wearing a hat or fascinator, plan the style around it: a low bun at the nape lets a hat sit straight, while volume at the crown pushes it up.
A Clutch-Sized Repair Kit for the Reception
Even a well-pinned style needs some help by the evening. A small kit in your bag fixes most problems in the bathroom in a couple of minutes.
- Six bobby pins and two clear elastics, for re-securing a loose bun or ponytail.
- A travel-size hairspray or a small tub of smoothing balm for flyaways and frizz.
- A tiny comb or folding brush.
- If curls drop in humidity, twist each one around a finger and pin it flat for ten minutes while you sit through dinner, then release. It won’t be the same as a fresh curl, but it brings back the shape.
If a bun starts sliding, don’t add more pins on top. Take out the two or three anchoring pins, tighten the twist, and push the pins back in through the base where they can grip the elastic.
Practise Once Before the Wedding Morning
A wedding guest style doesn’t need to be complicated or expensive. Any of the 25 above can be done at home with pins, elastics and one good product. Pick the one that matches your hair type and the dress, then do a full run-through a week or so before. That practice session will show you how long it really takes and whether it holds for a few hours. Add a clip or a small flower on the day, and save your energy for the dance floor.
You'll Like These Ideas:


Leave a Reply