
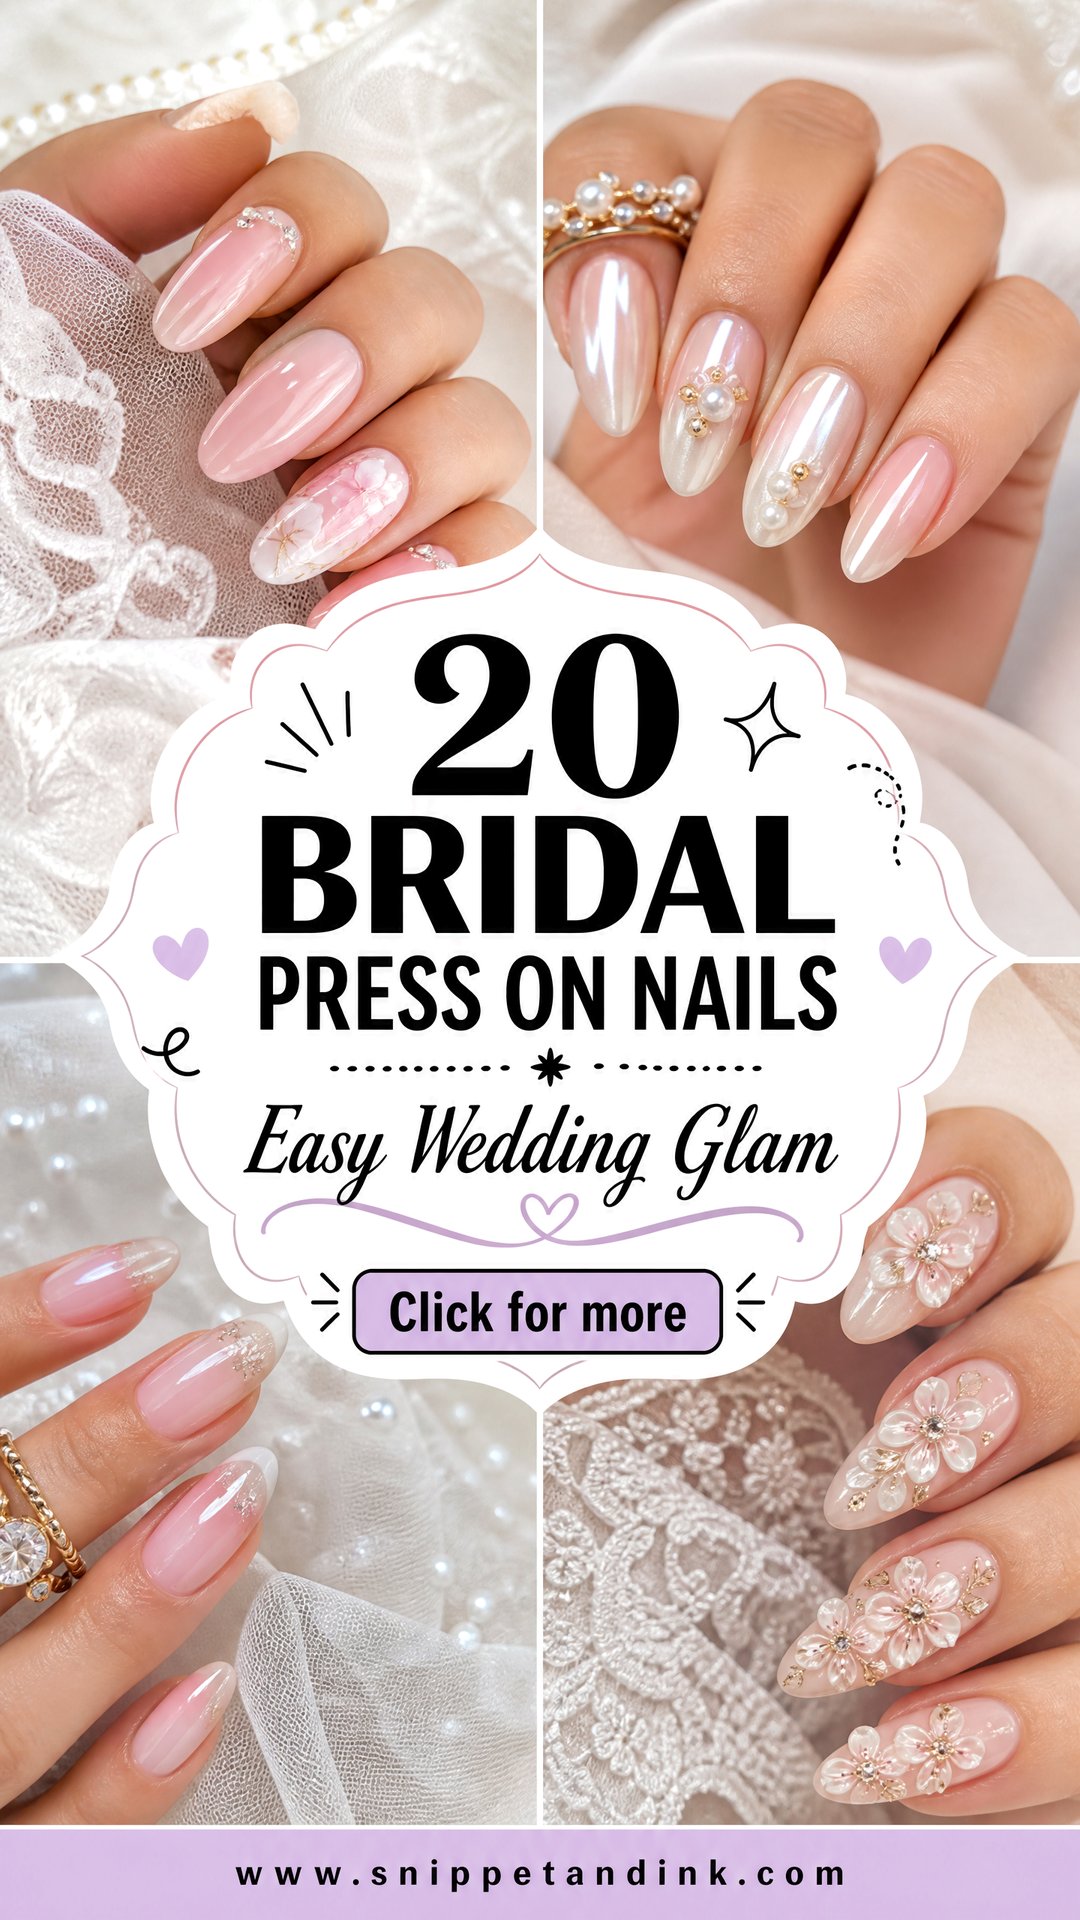
I used to think of press-ons as a backup plan. Then the handmade sets got good: thin, well-shaped, sized properly, and finished with gel that looks exactly like a salon manicure. For a bride, they solve real problems. You can try the design weeks ahead, see it next to your ring, and change your mind without booking another appointment. The designs below run from milky white almond nails to pearl chrome French tips and small 3D flowers, and for each one I’ve added what to watch for in fit, length and wear, since that’s where a press-on set succeeds or fails.
Sizing a Press-On Set to Every Finger
Most press-on problems I see are size problems. A nail that’s slightly too narrow leaves your own nail showing at the sides, and one that’s too wide lifts at the edges and catches on everything. Both make the set look fake and pop off early.
- Size every finger, not just one per hand. Thumbs and ring fingers are often different sizes on each hand.
- Measure the widest part of each nail bed with a thin strip of tape, then match it to the maker’s chart.
- If you fall between two sizes, choose the larger one and file the sides down gently to fit. A nail that’s too small can’t be fixed.
- Before you glue anything, line up all ten nails on your fingers and check the fit with your hand relaxed.
1. Milky White Bridal Press On Nails
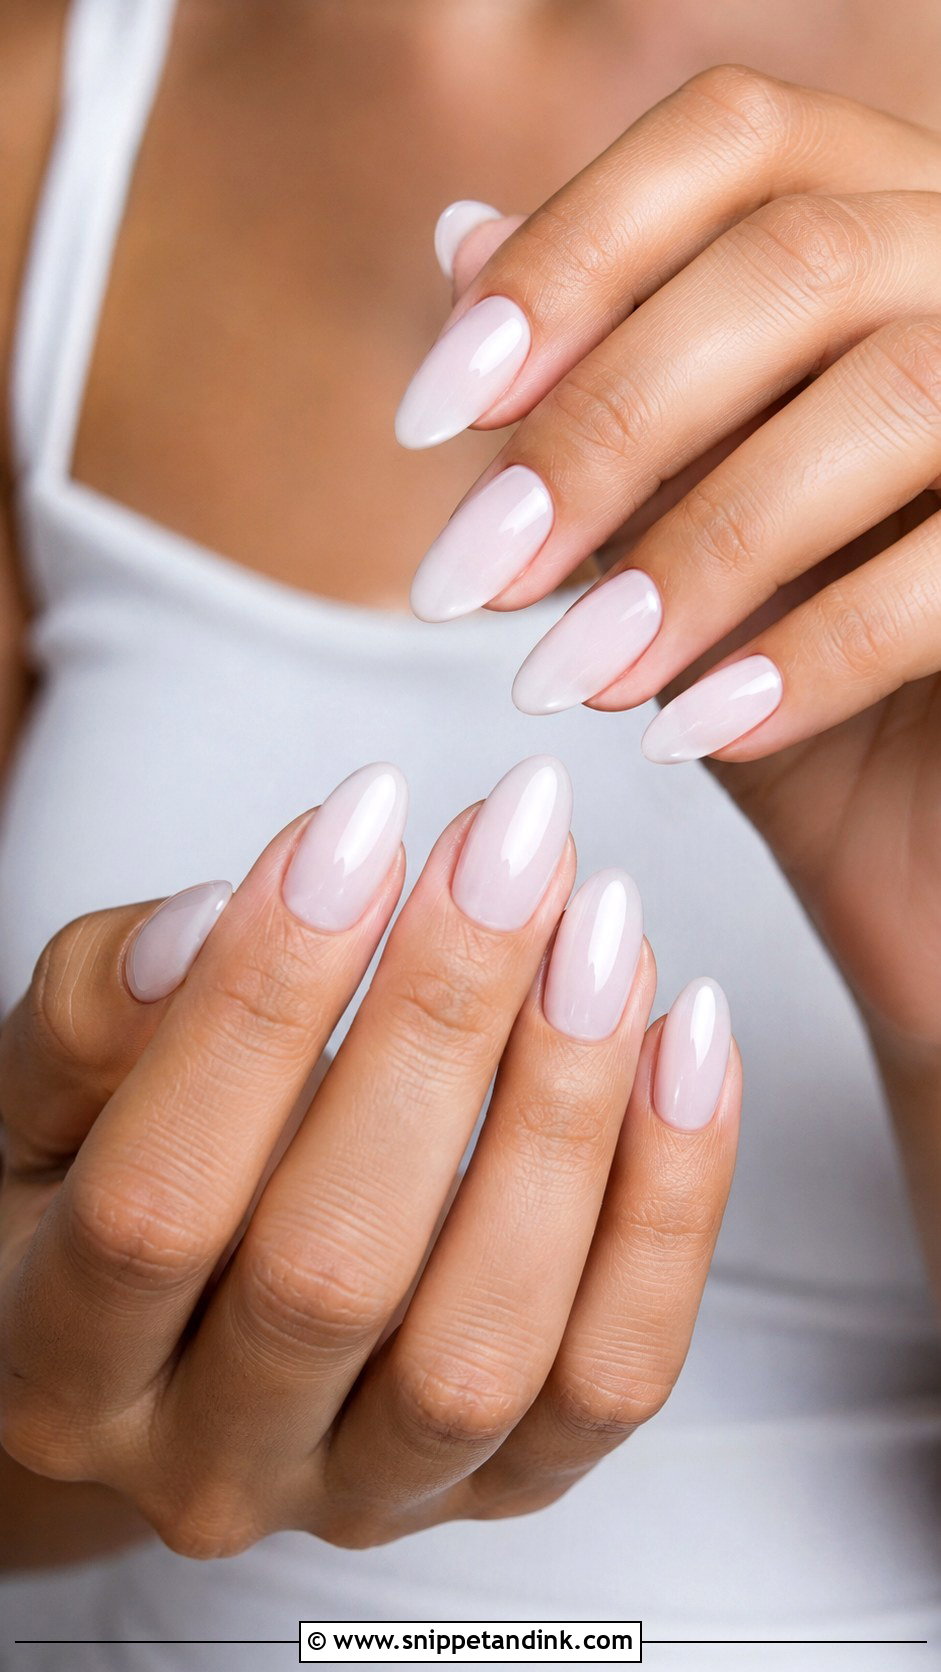
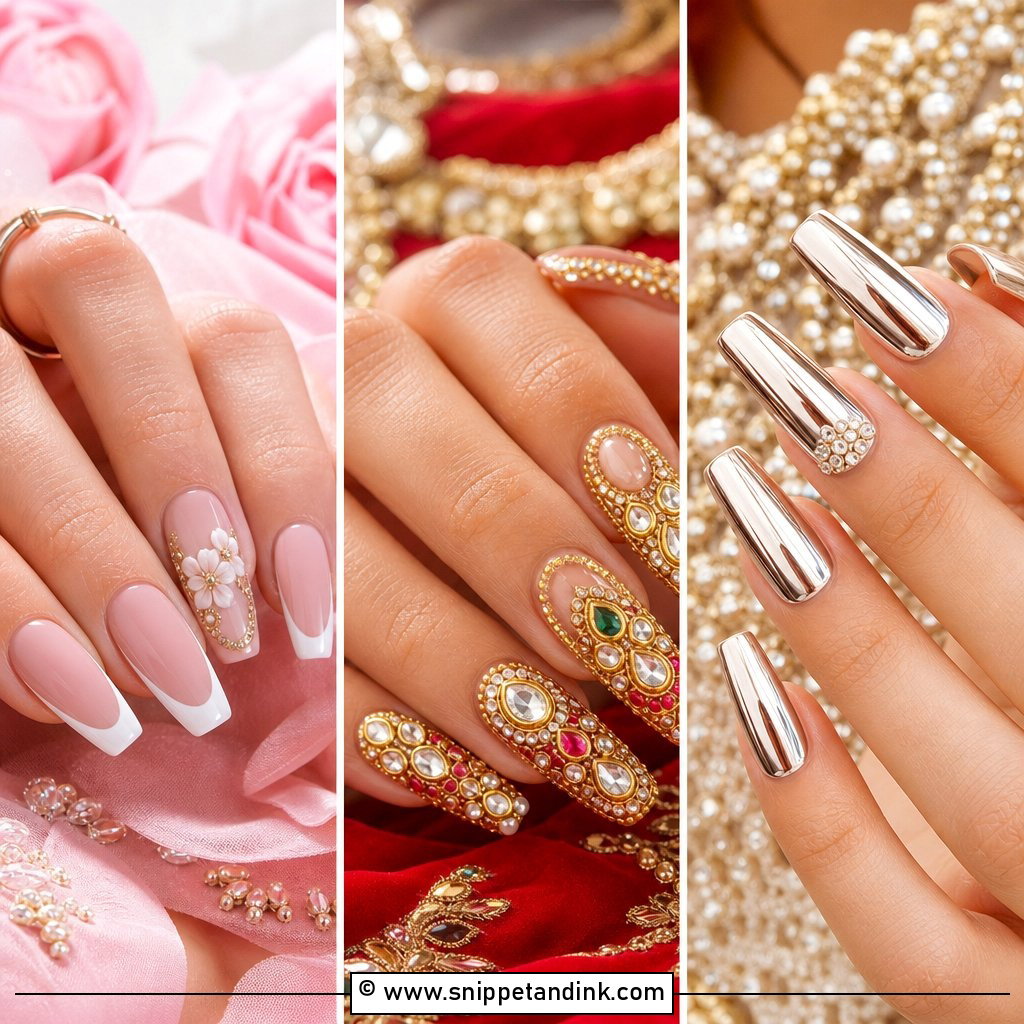
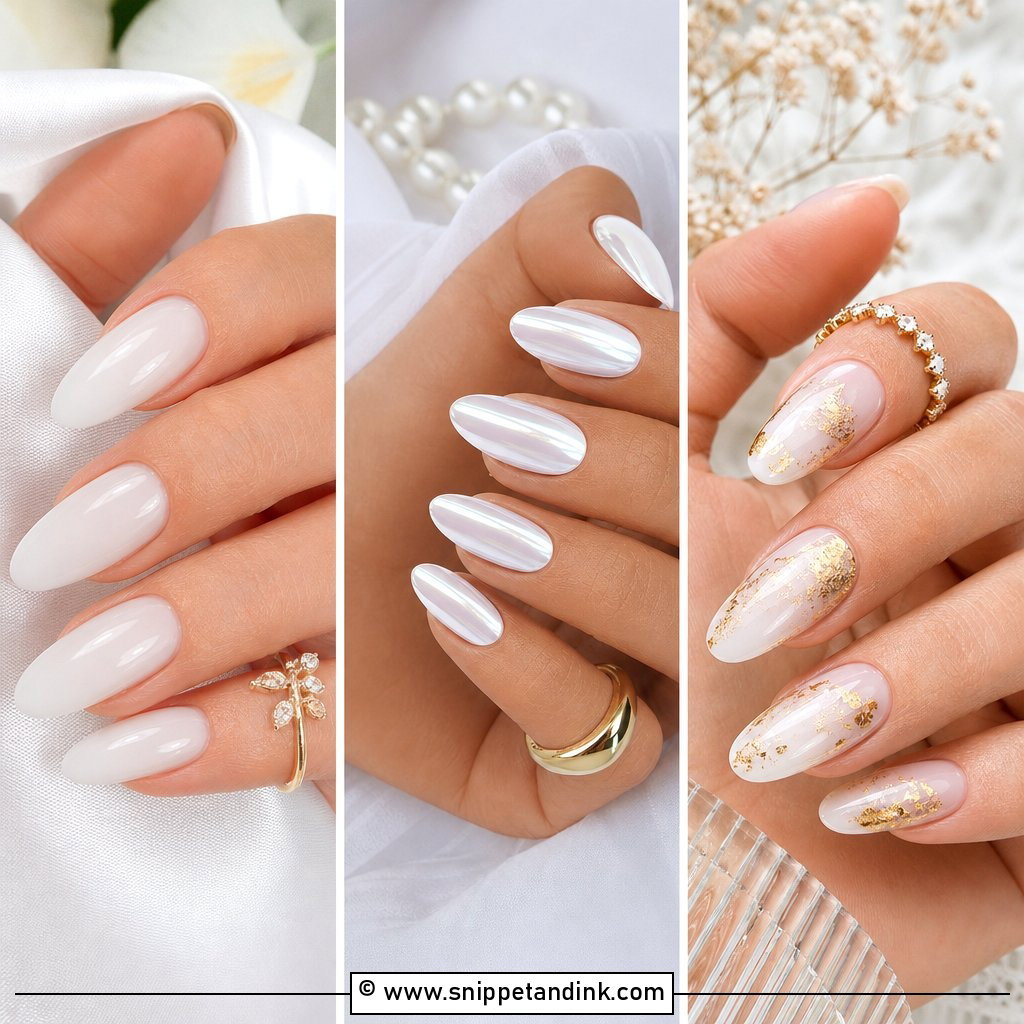
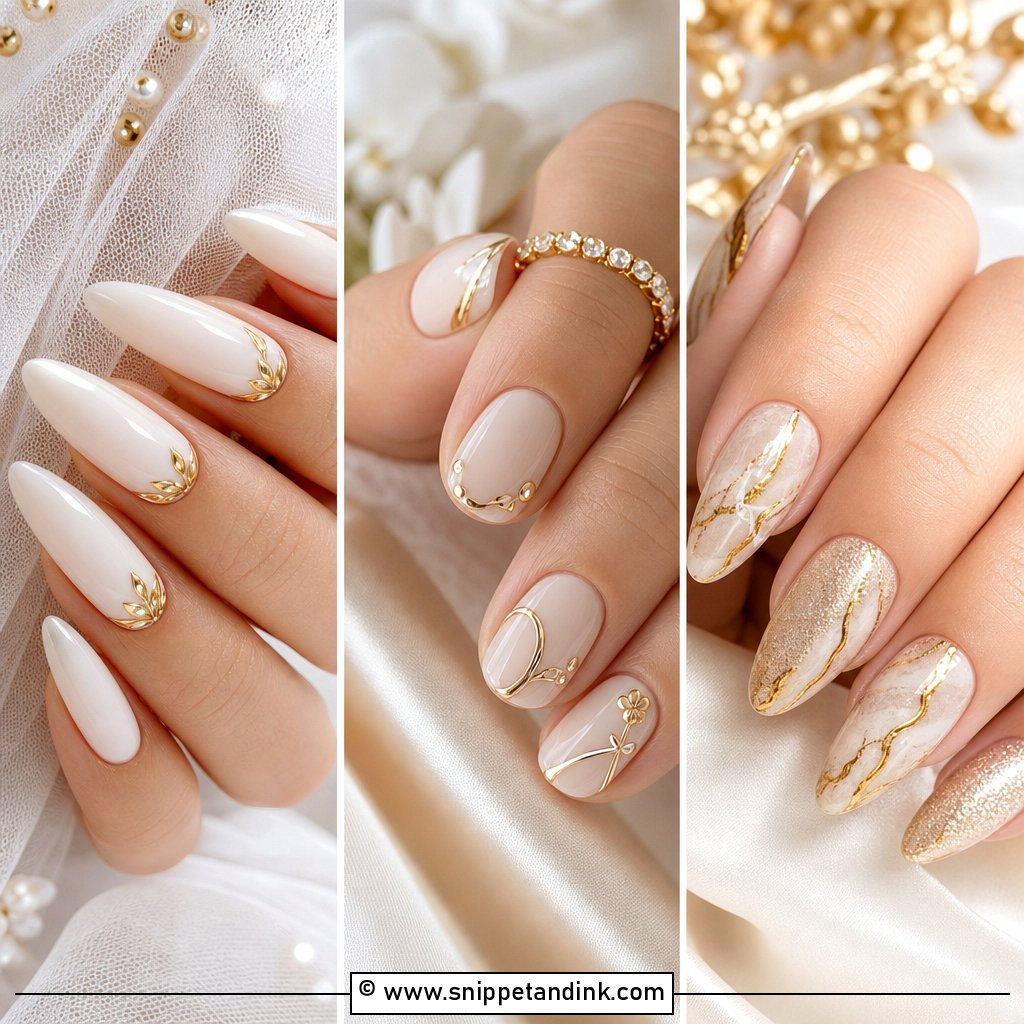
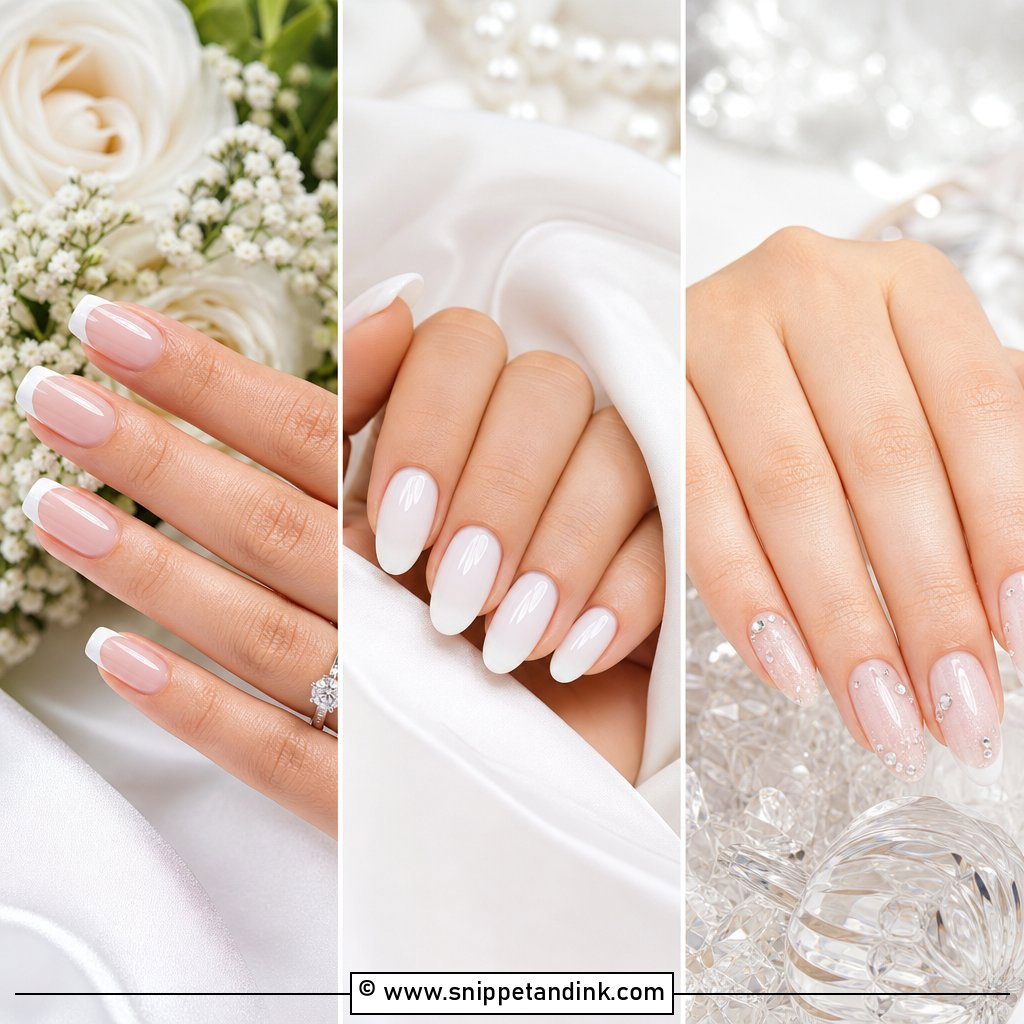
Milky white is the set I’d recommend to almost anyone unsure where to start. The semi-sheer base blurs the nail line and makes the fingers look clean, and it sits comfortably next to satin, crepe or tulle. It’s most flattering on almond, oval and short square shapes. Check the opacity before you order: some milky sets are nearly solid white, which reads harsher in photos than the soft, slightly translucent version. A glossy top coat is enough; a fine shimmer is optional for ring shots.
2. French Tip Bridal Press On Nails
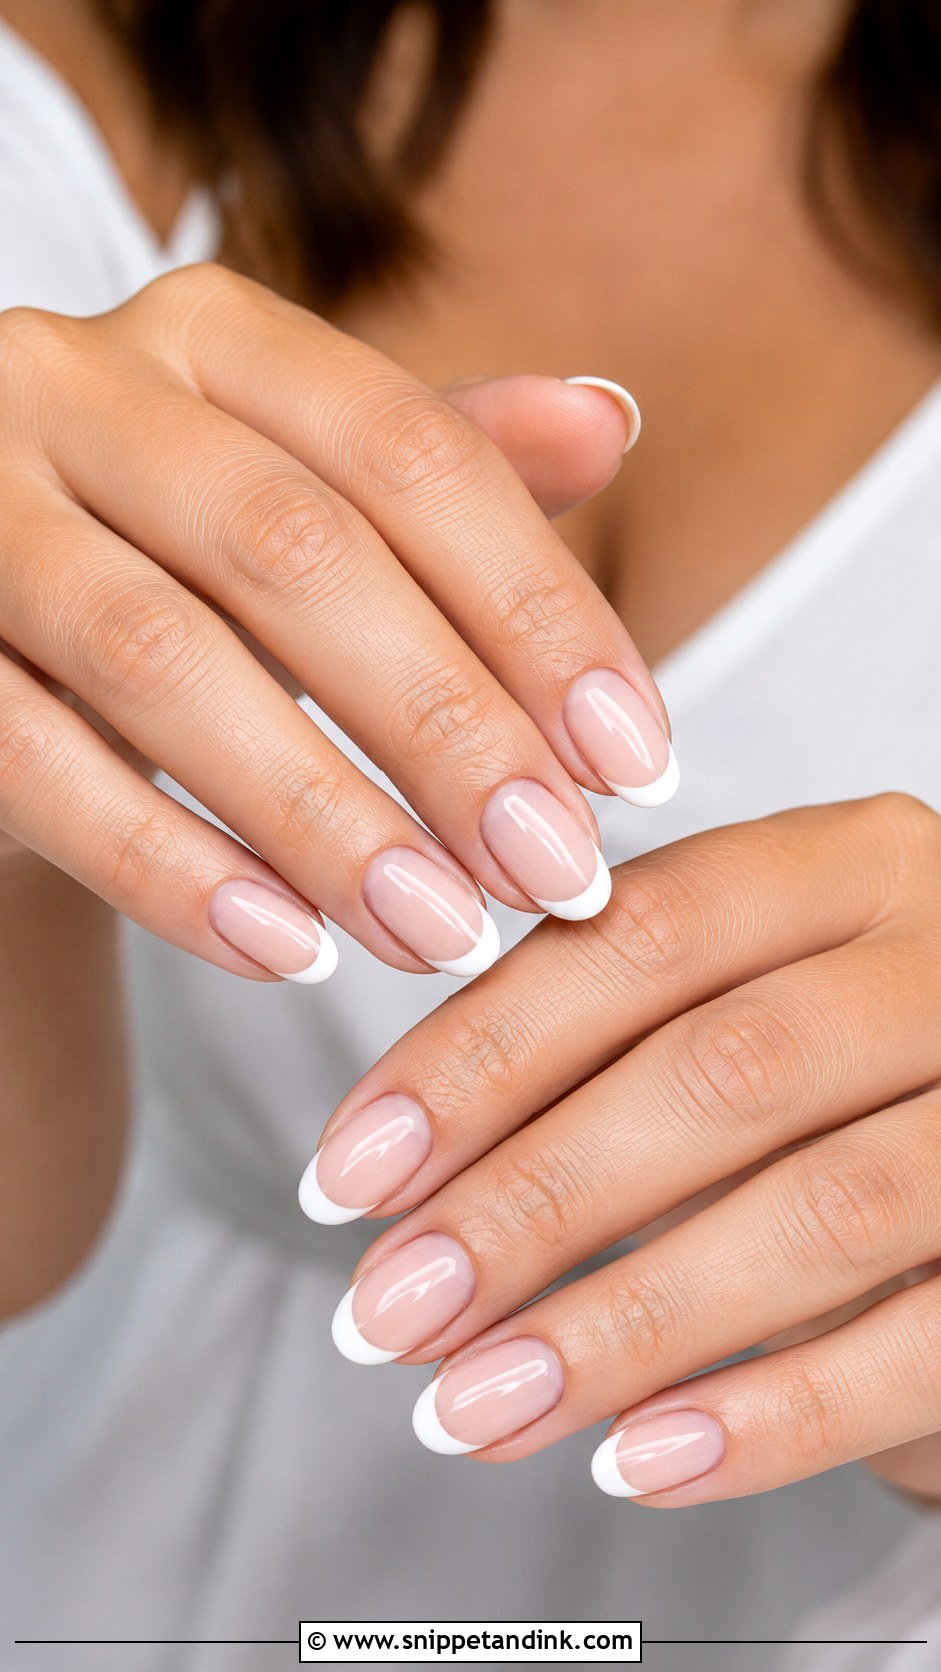
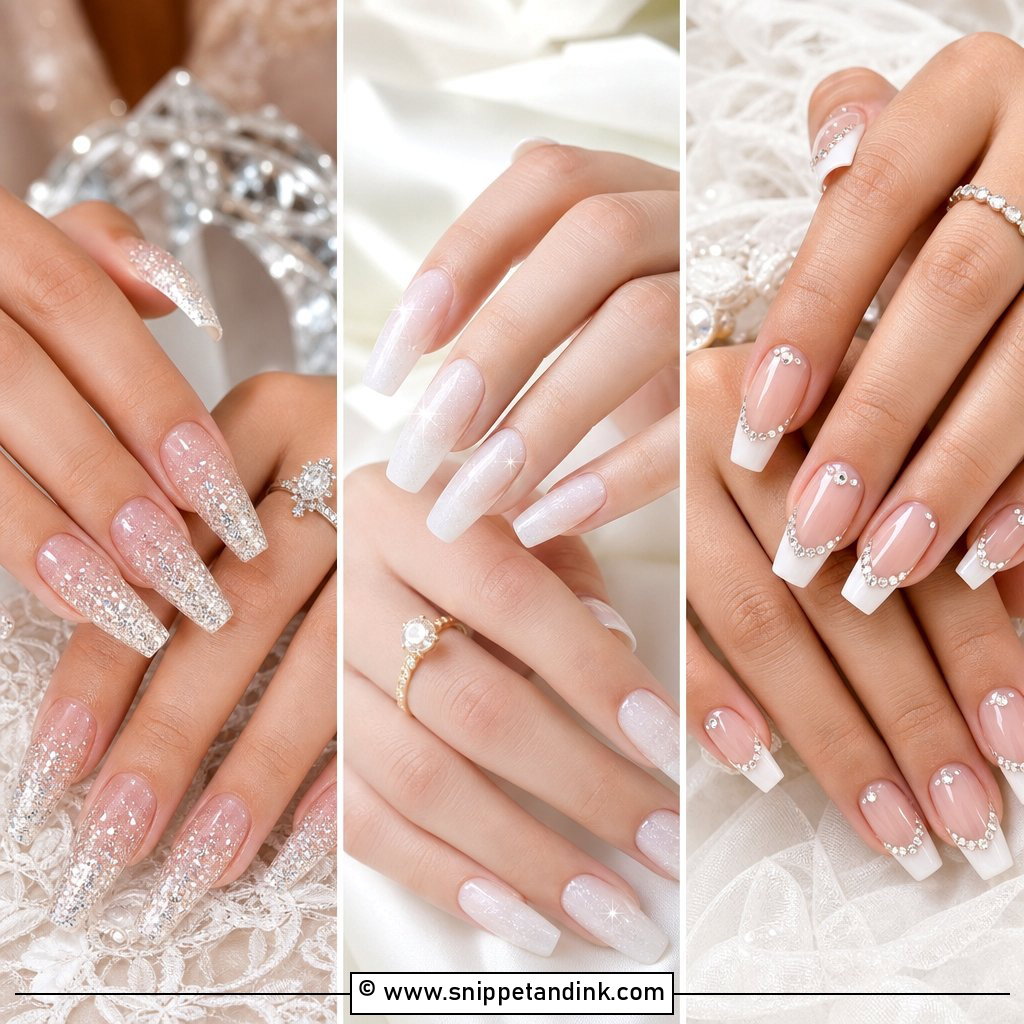
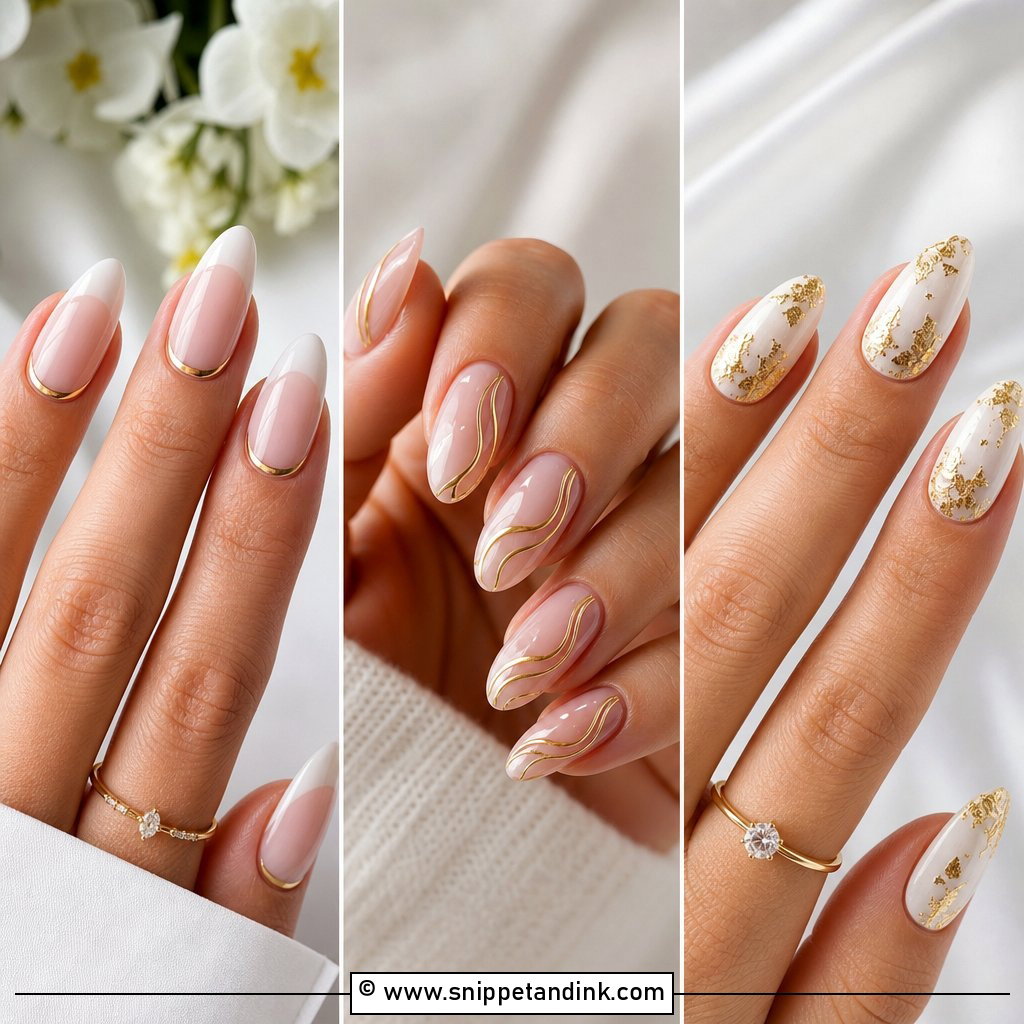
The French tip lasts in photos because it echoes the natural nail. A sheer pink or nude base with a clean white edge looks neat from across the room and soft up close. If a thick tip feels old-fashioned to you, a thinner micro French line modernises it straight away. One thing I always check in press-on French sets is the smile line: on a badly sized nail the white edge sits too high or too low compared to your own free edge, and it looks fake. Almond and oval feel romantic; short square looks classic.
3. Pearl Chrome Bridal Press On Nails
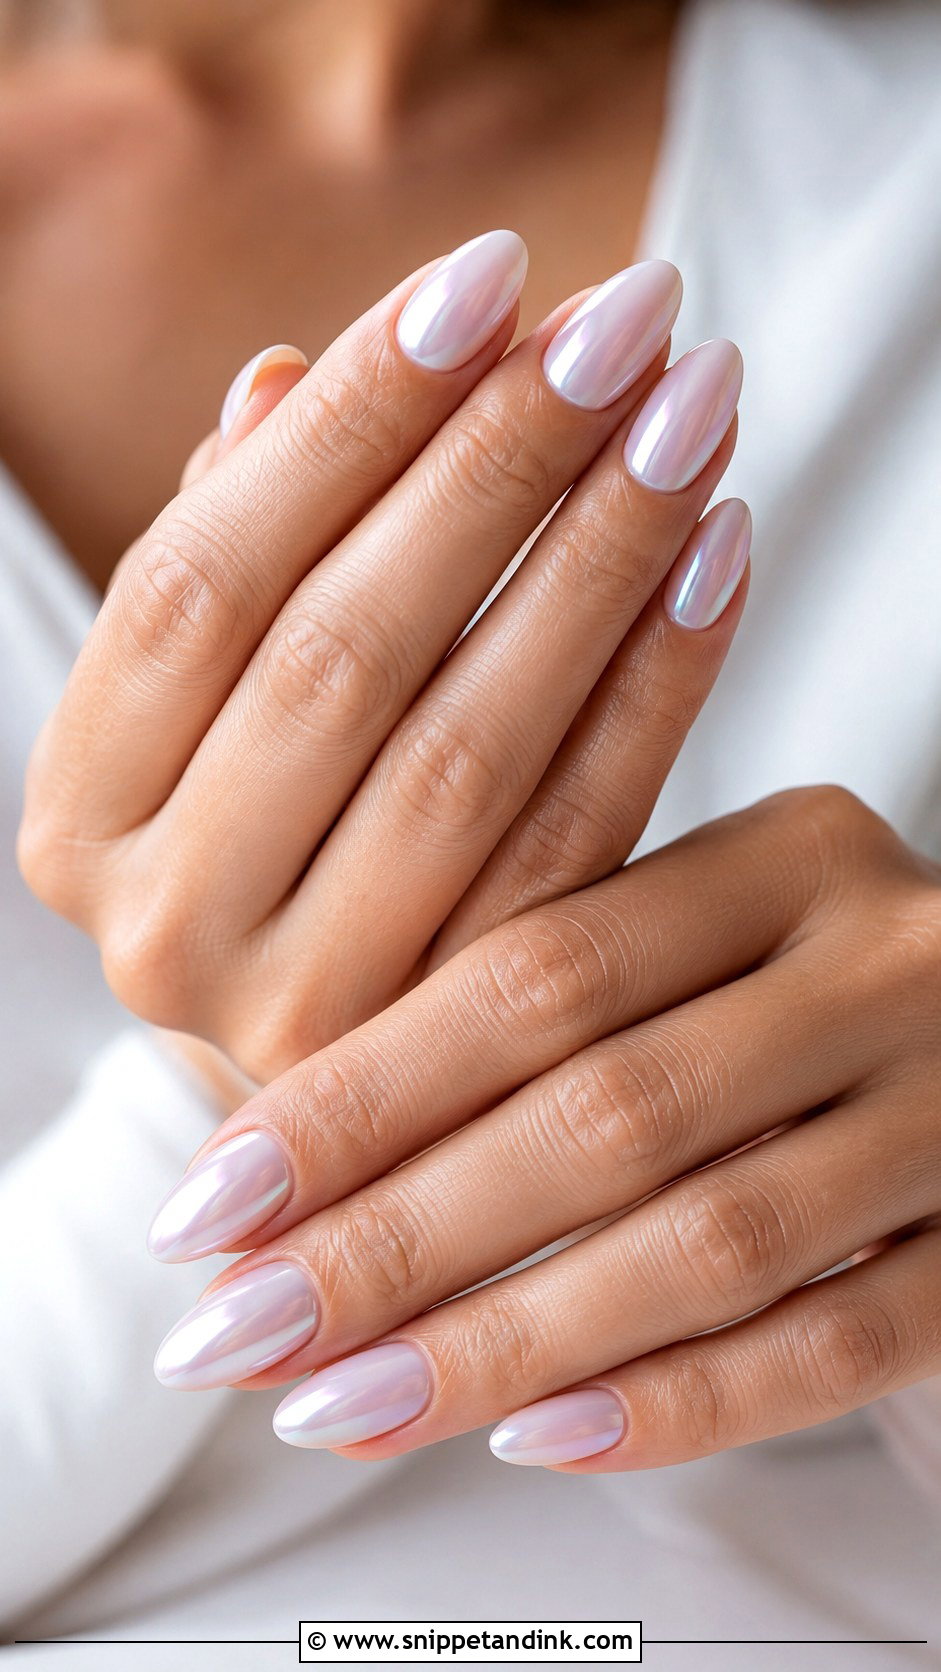
Pearl chrome is a powder rubbed over a cured gel base, and it gives that glazed, light-catching surface without colour. On a sheer white, blush or nude base it photographs as a soft glow, not a mirror. Almond and coffin shapes show the shine best because the long curve catches light. If your dress has heavy beading, I’d leave the gems off and let the chrome be the only detail. On a plain gown it can be the quiet focal point of the hand.
4. Nude Bridal Press On Nails
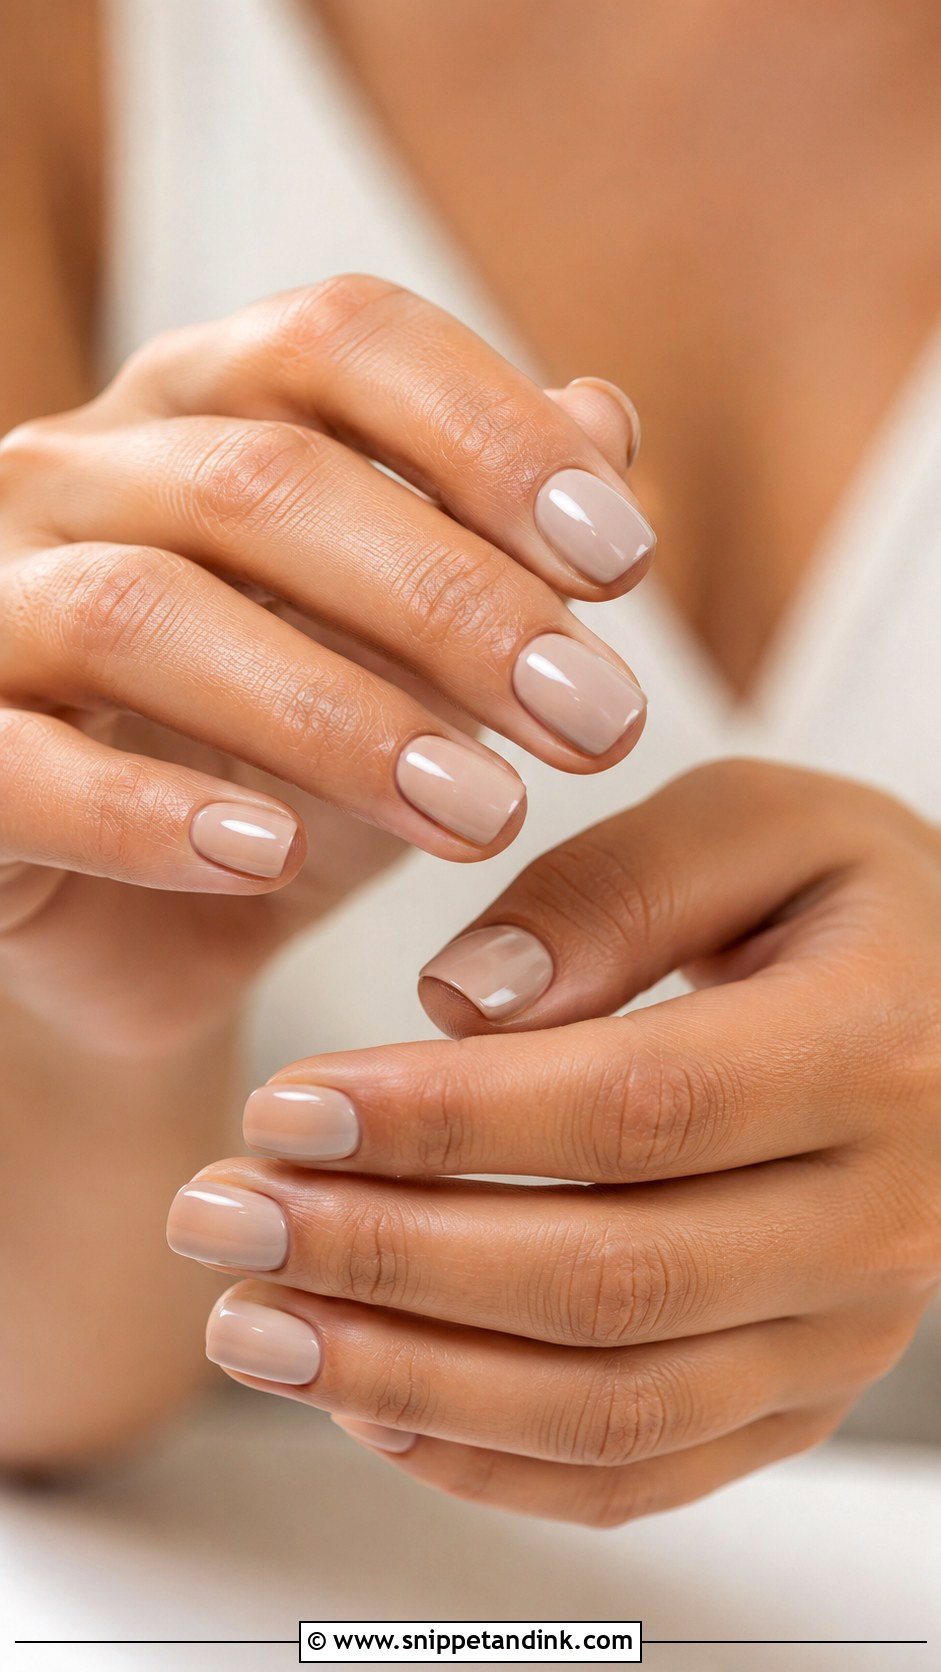
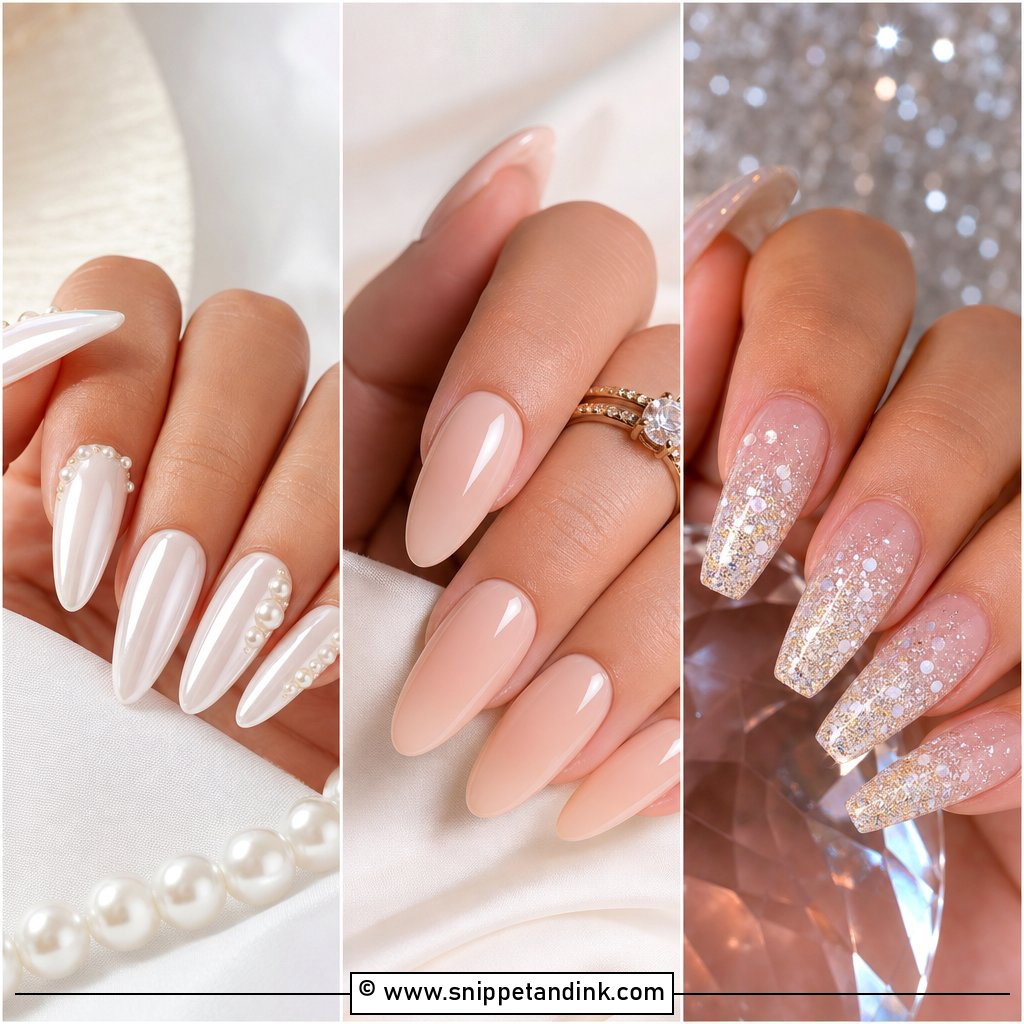
The hardest part of nude is the shade, not the design. Too pale and it looks grey against the skin; too dark and the fingers look shorter. As a starting point, fair skin tends to suit pink-beige, medium skin rosy nude or peach beige, and deeper skin caramel, mocha or warm taupe. I’d order a sample or a cheap single set first and look at it in daylight next to your knuckles. A glossy nude makes the fingers look longer and keeps attention on the ring, and small chips barely show.
5. Blush Pink Bridal Press On Nails
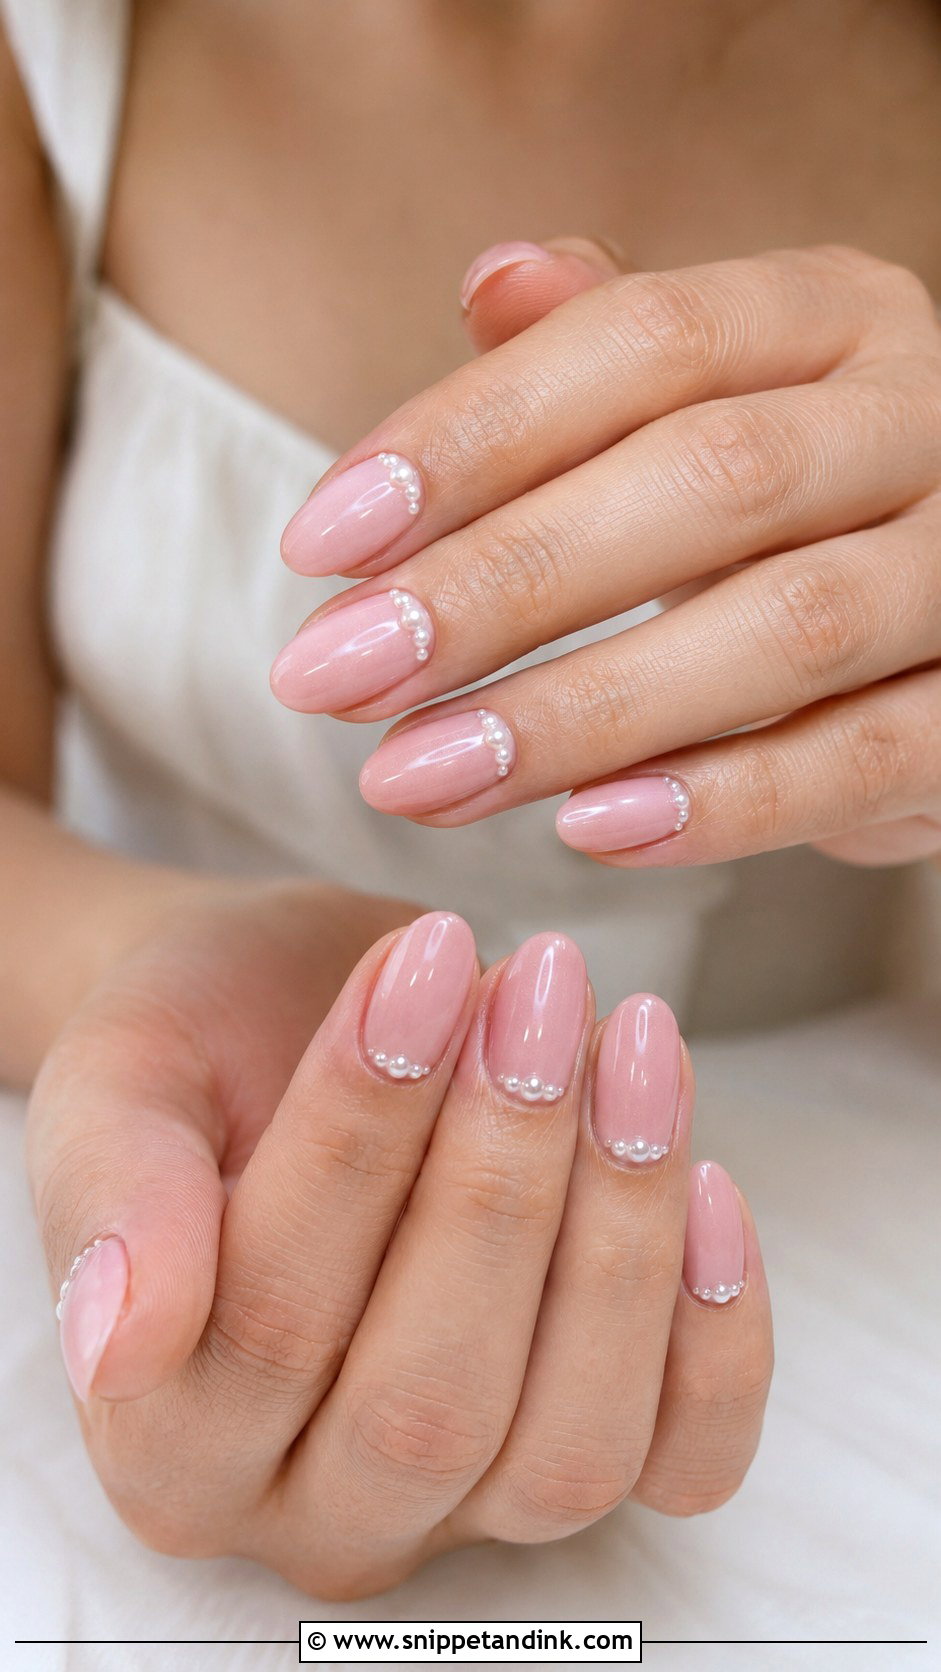
Blush adds warmth that white and nude don’t have, and it’s kind to hands that flush or redden when nervous. A sheer blush can pass as your own nail on a good day; a creamier pink looks more finished. It suits spring and garden ceremonies and softer makeup. I’d keep any decoration small here: a few tiny pearls, a whisper of shimmer or a thin white tip. Oval and almond shapes keep the whole hand looking gentle.
6. Short Bridal Press On Nails
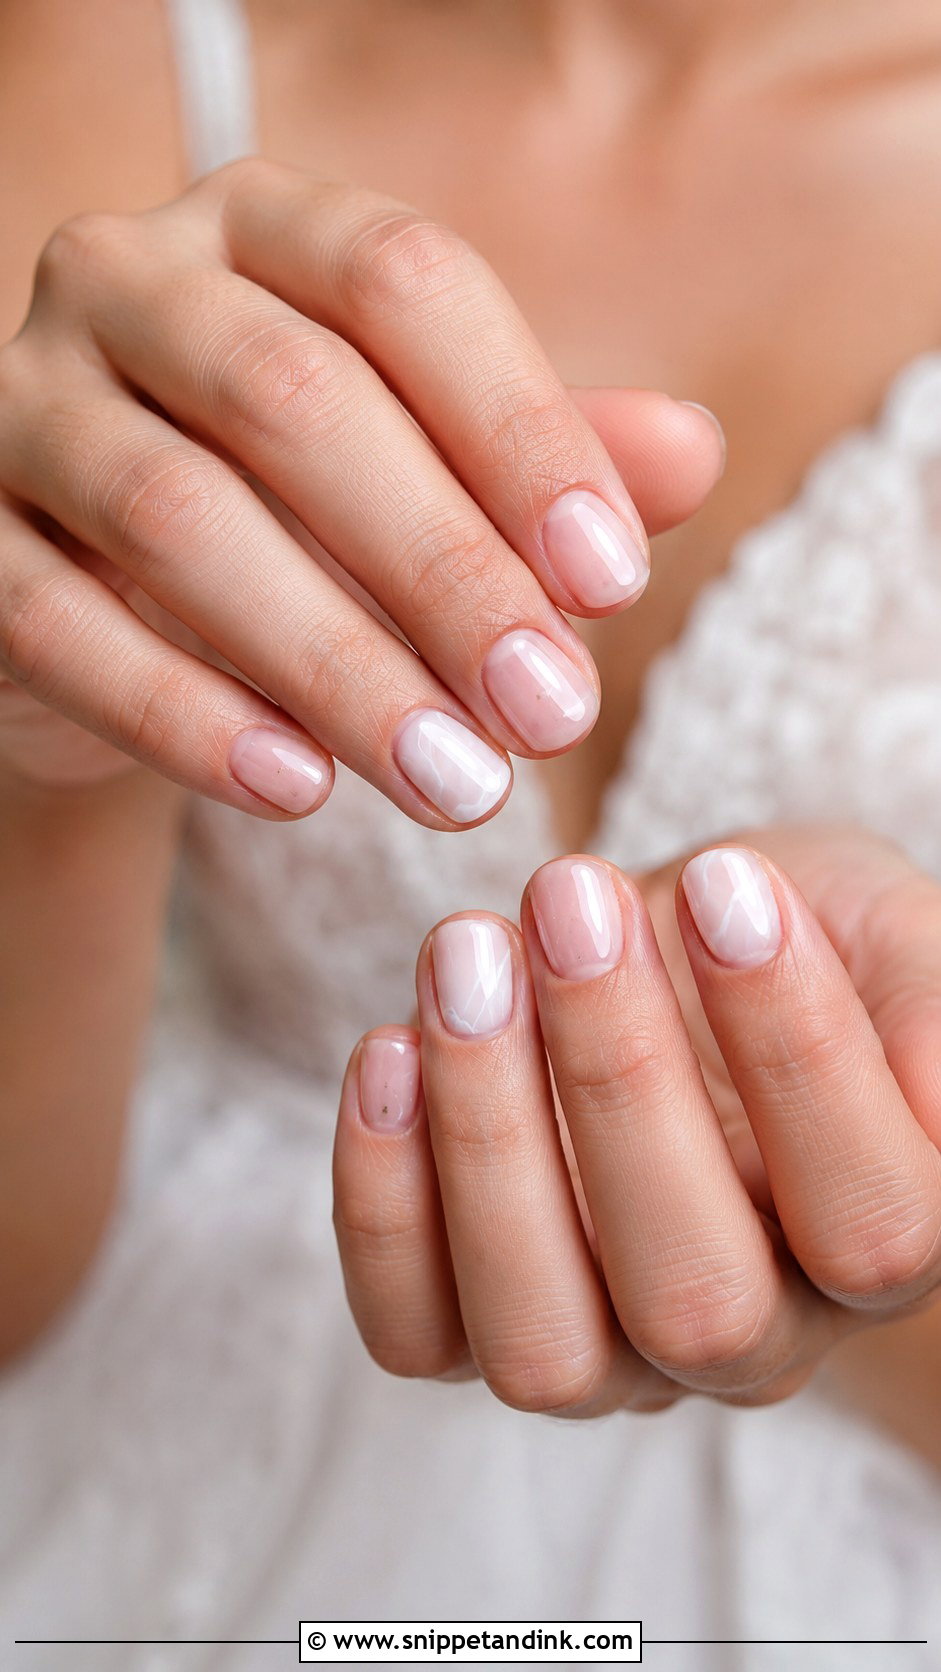
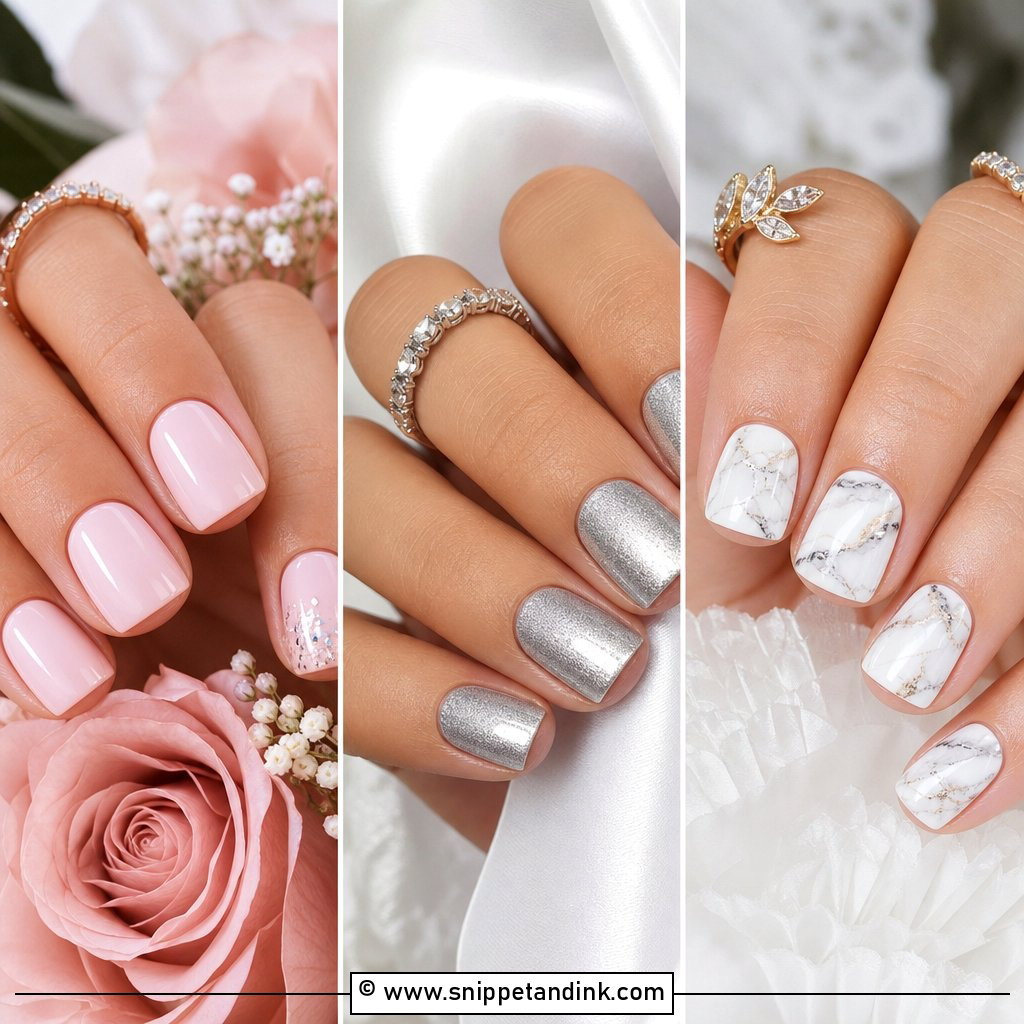
Length doesn’t make a nail bridal; finish does. Short bridal press on nails in an oval, squoval or round shape look just as polished as long almonds, and they’re far easier when you’re holding a bouquet, doing up buttons or signing the register. Short tips also have less leverage, so they’re less likely to pop off. If you’ve never worn press-ons before, I’d start here. Look for a high gloss, a clean cuticle edge and a shape that follows your nail bed.
7. Almond Bridal Press On Nails
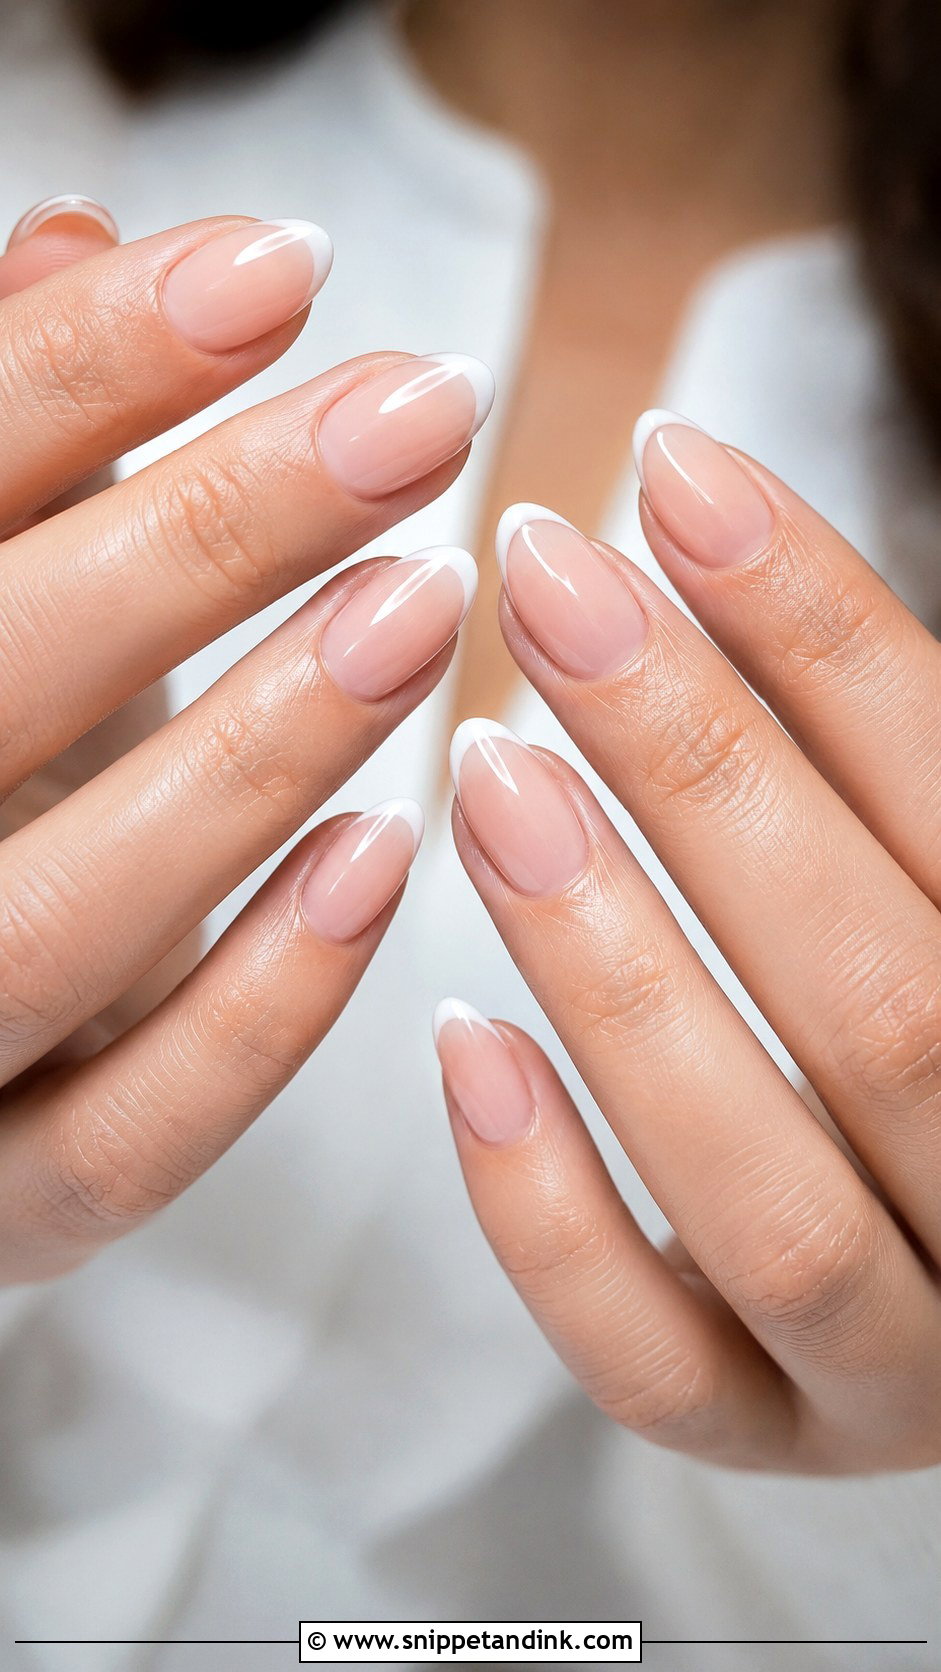
Almond is the shape I see most brides choose, and for good reason: the tapered sides and rounded tip lengthen the fingers without the sharpness of a stiletto. Medium almonds are the most practical, long enough to look dressy, short enough not to catch on lace or veil netting. Nearly every design in this list works on it. The one thing to check is the width at the base, since an almond press-on that’s too narrow leaves a strip of your own nail showing at the sides.
8. Square Bridal Press On Nails
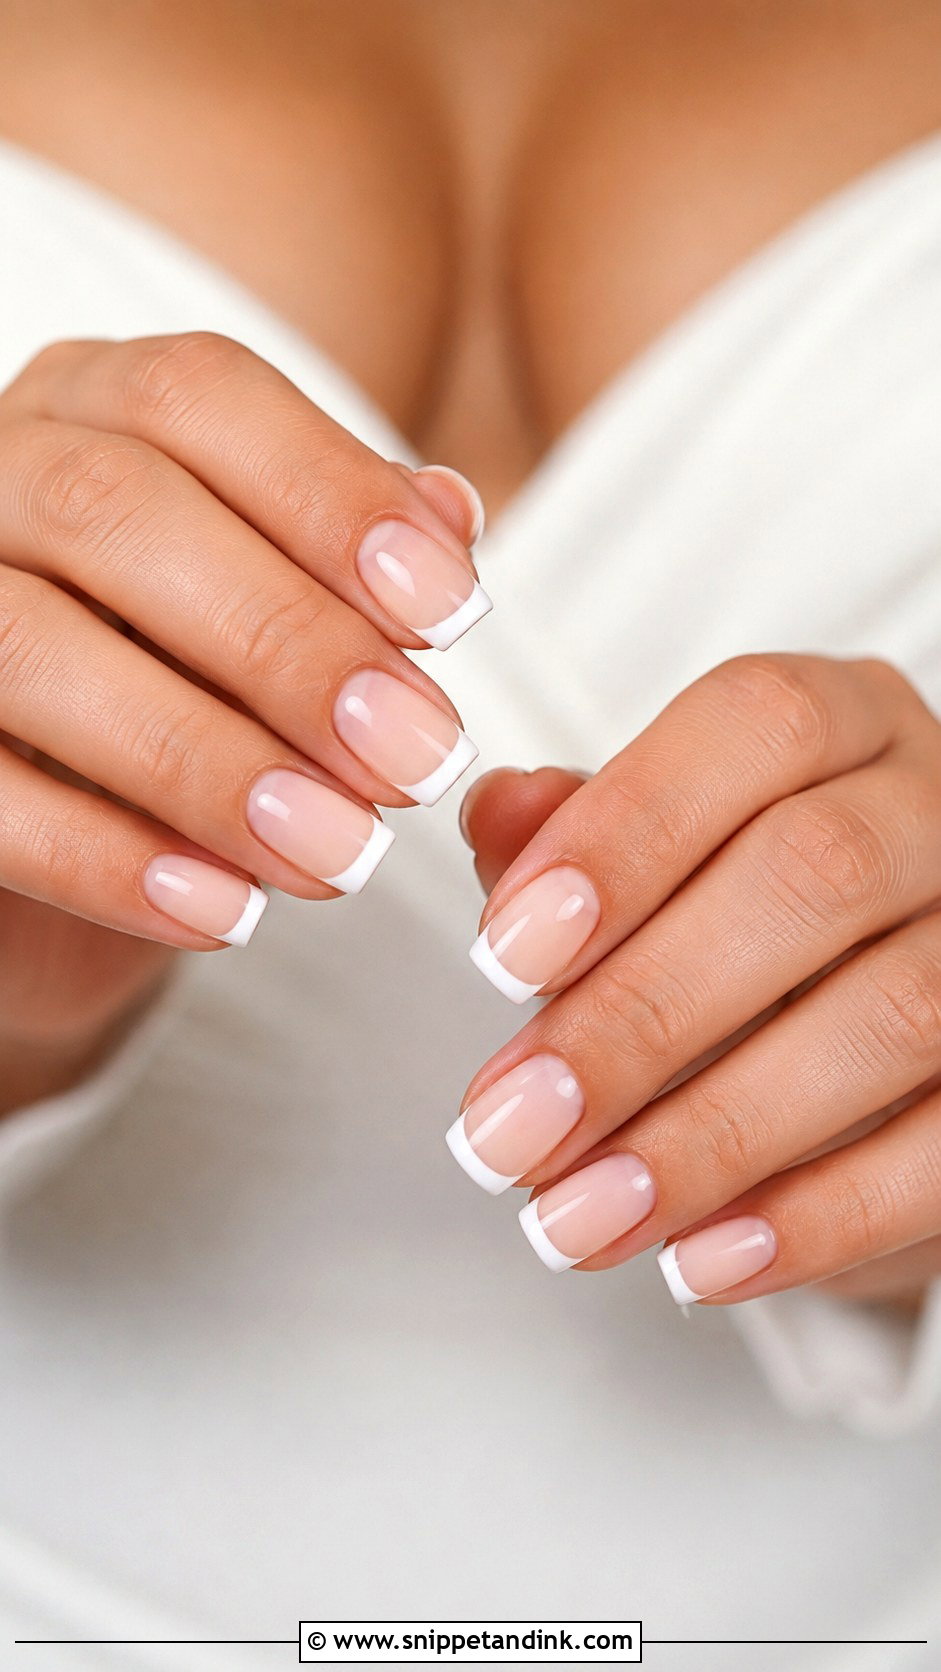
Square tips look structured and confident, and they suit French tips, nude, blush and sheer white. If a hard square feels too severe, ask for squoval, which keeps the straight edge but rounds the corners. That also stops the corners snagging on tights and fine fabric. I’d avoid tips that flare wider than your nail bed, because a fan-shaped square makes the hand look heavier. Modern gowns, sleek hair and minimal jewellery suit this shape best.
9. Coffin Bridal Press On Nails
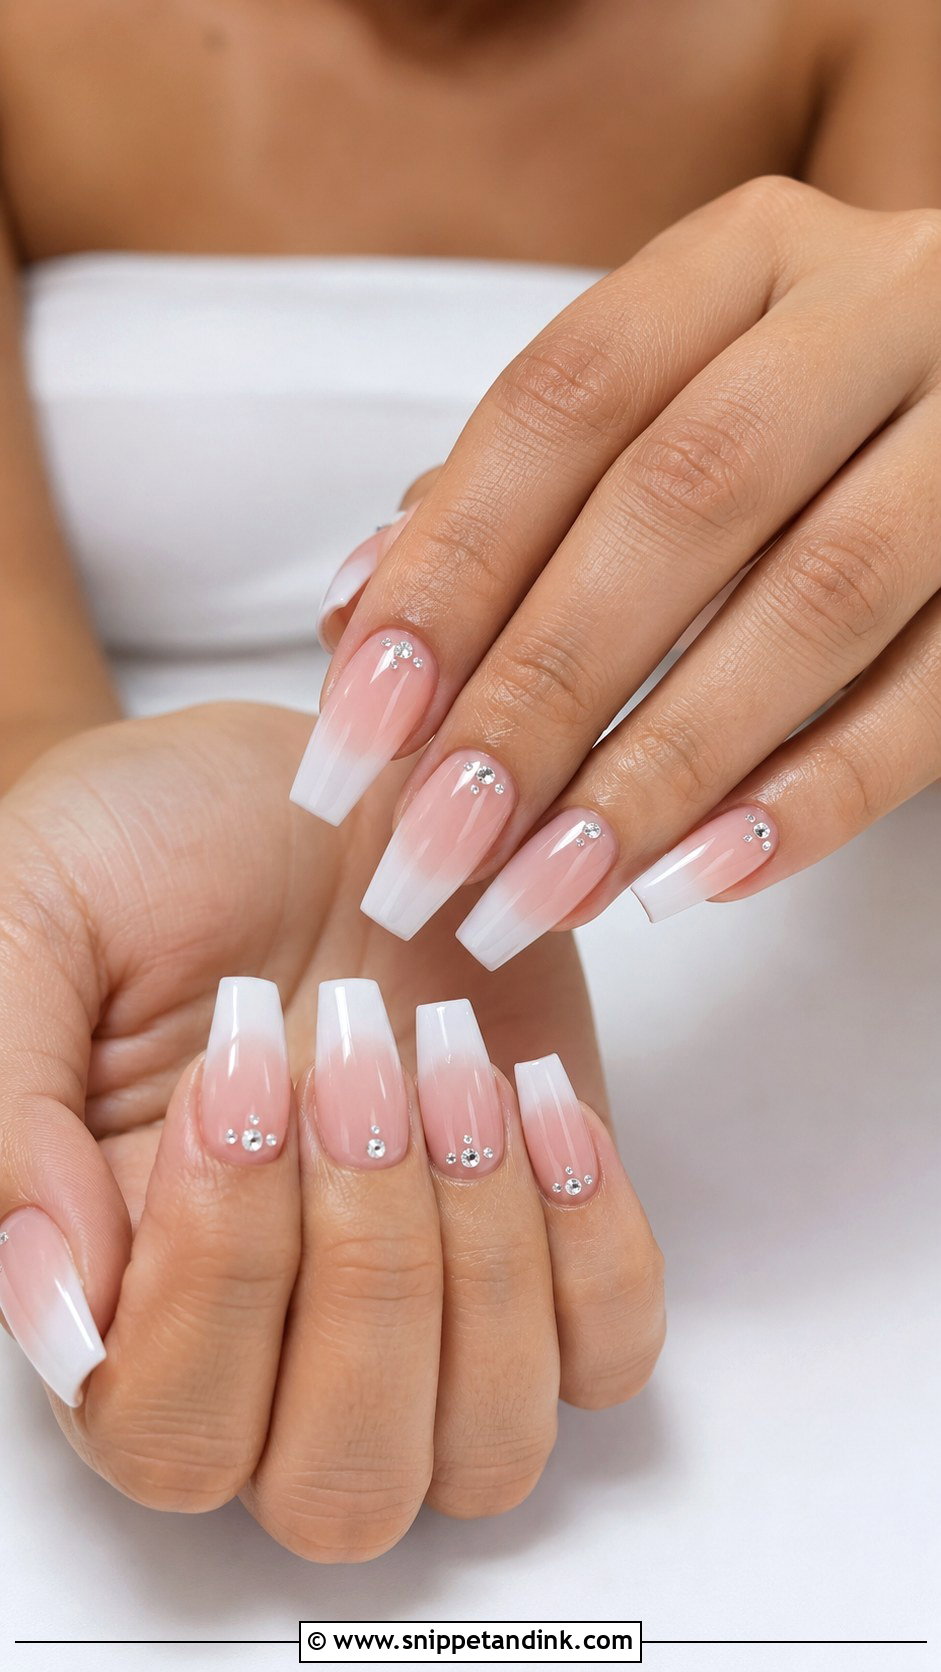
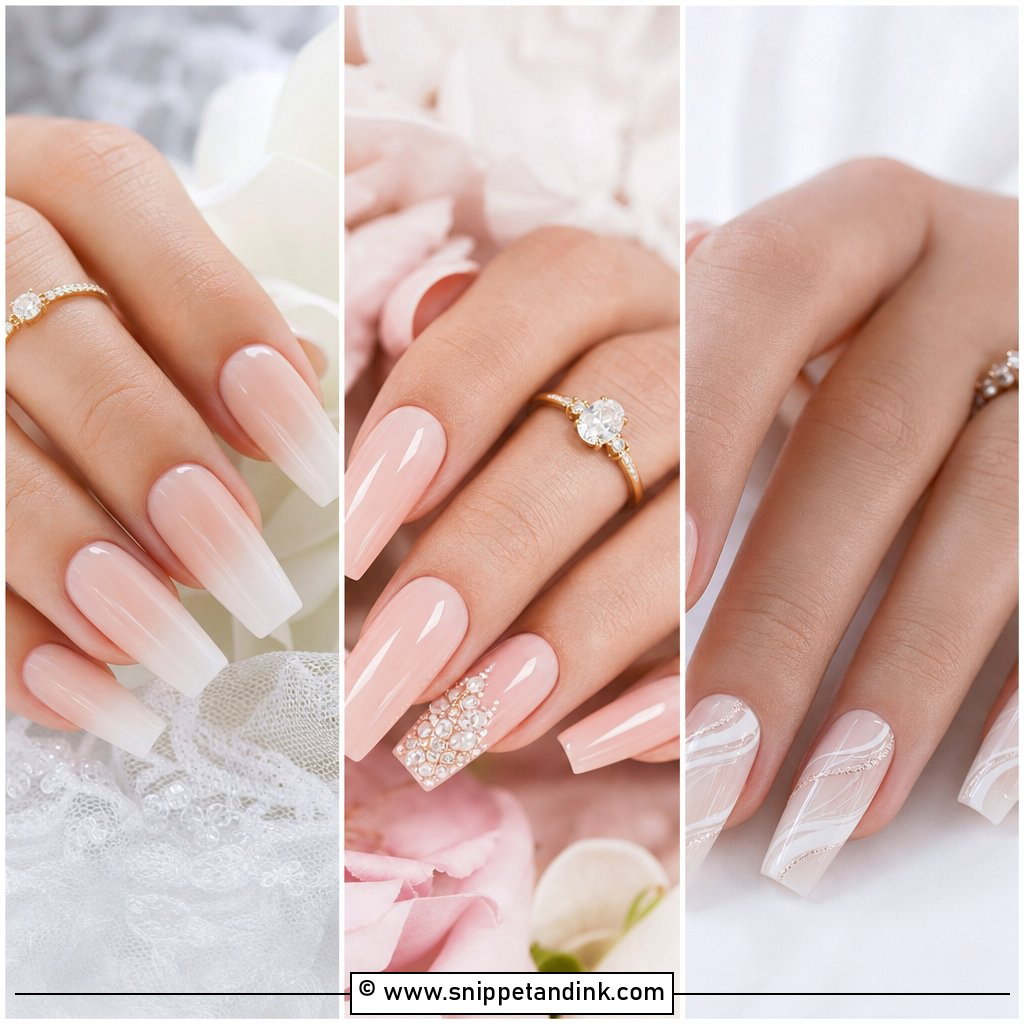
Coffin bridal press on nails have tapered sides and a flat tip, and they give more surface for detail than an almond. Keep them medium. Extra-long coffins are the most likely of any shape to pop off during hugs and bag-carrying, because the flat tip takes knocks squarely. Soft nude, milky white, pink or pearl chrome keeps the shape from overwhelming the hand. Ombre, French tips, rhinestones and sculpted flowers all fit well on it.
10. Ombre Bridal Press On Nails
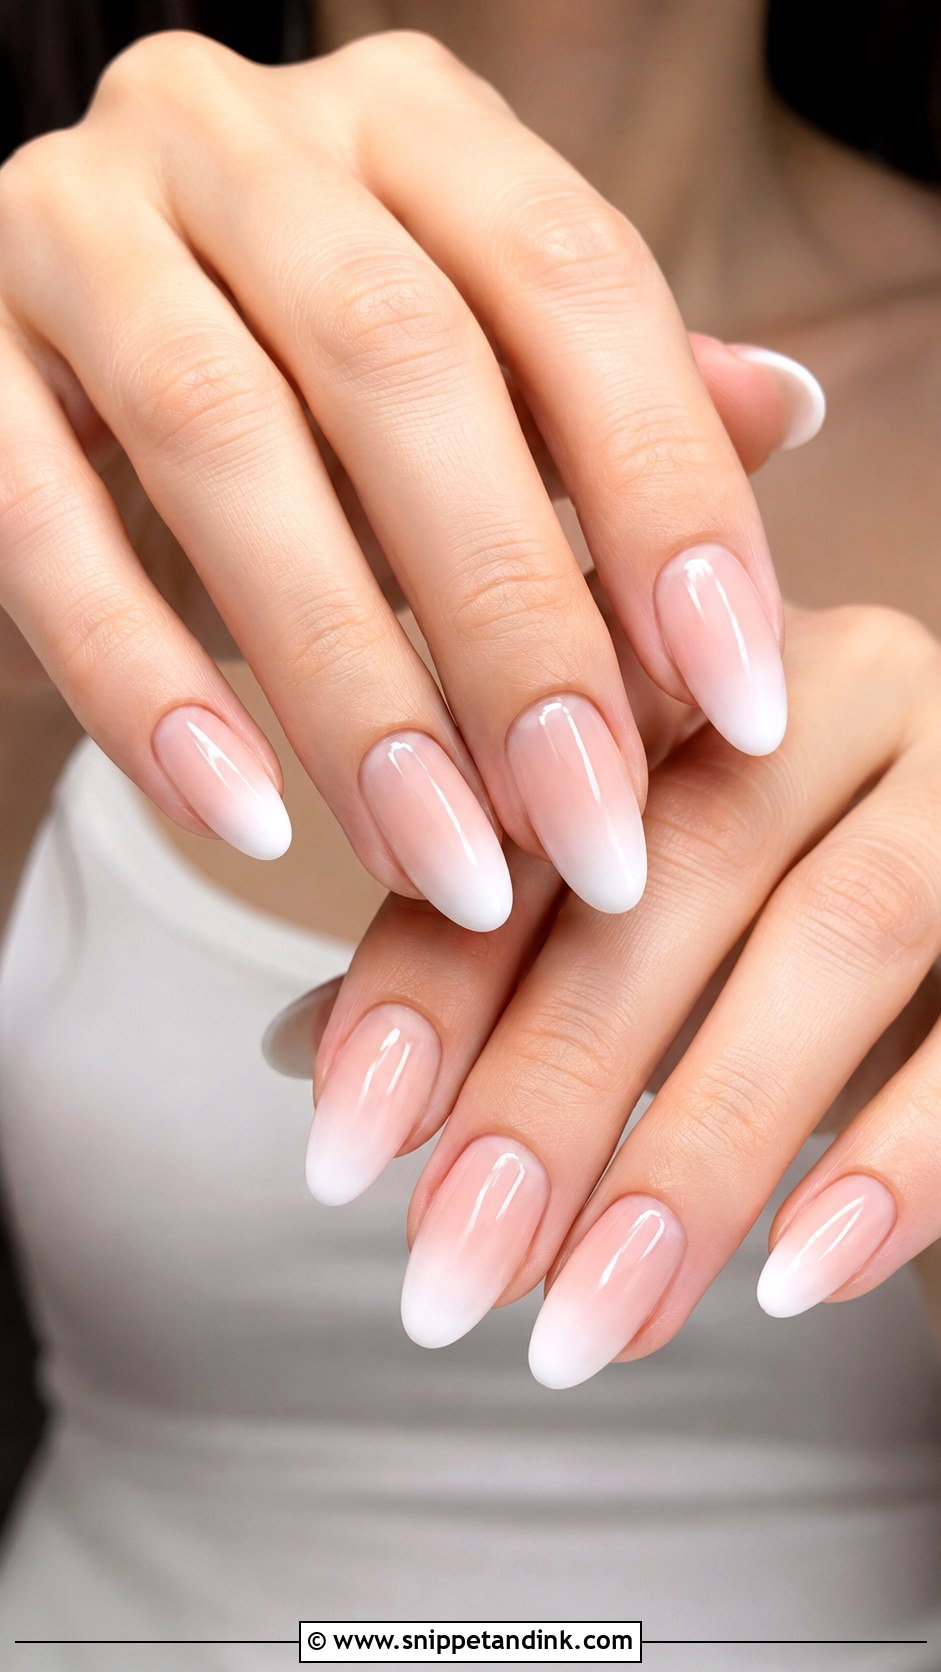
Ombre removes the hard line of a French manicure, blending nude or blush into white with an airbrush or sponge. Because there’s no edge, the nail looks longer and any small fit issues at the tip are less obvious. It works on almond, coffin and square, with medium length giving the smoothest fade. Check the transition in a close-up product photo before ordering: a good fade has no visible band of grey where the colours meet.
11. Lace Bridal Press On Nails
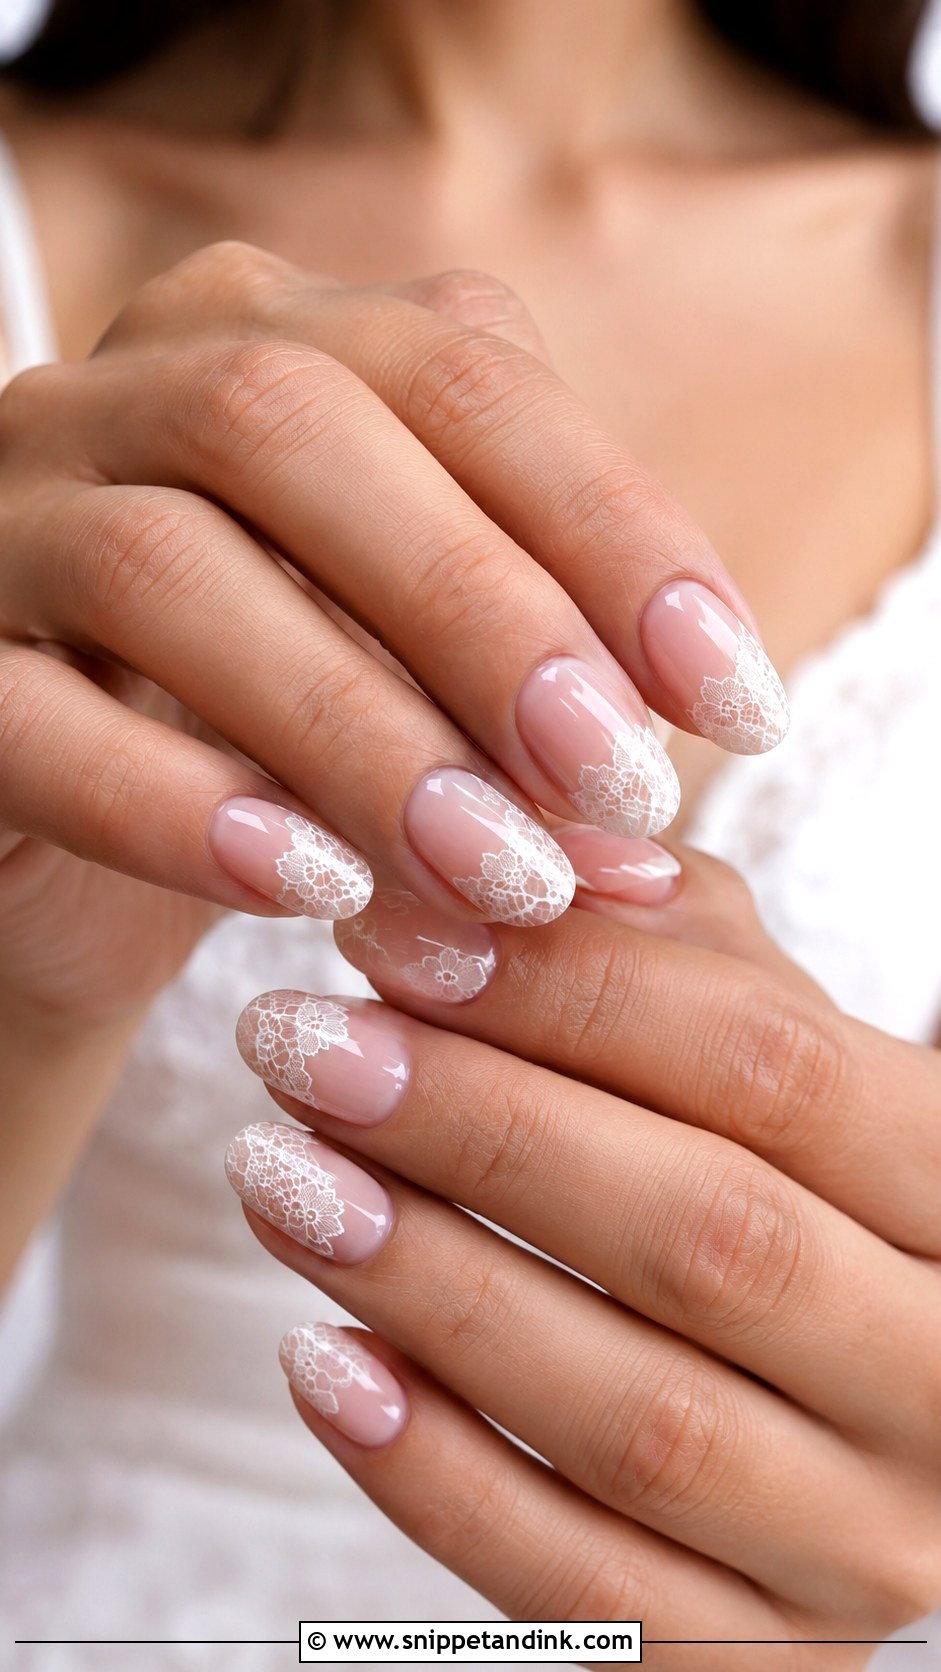
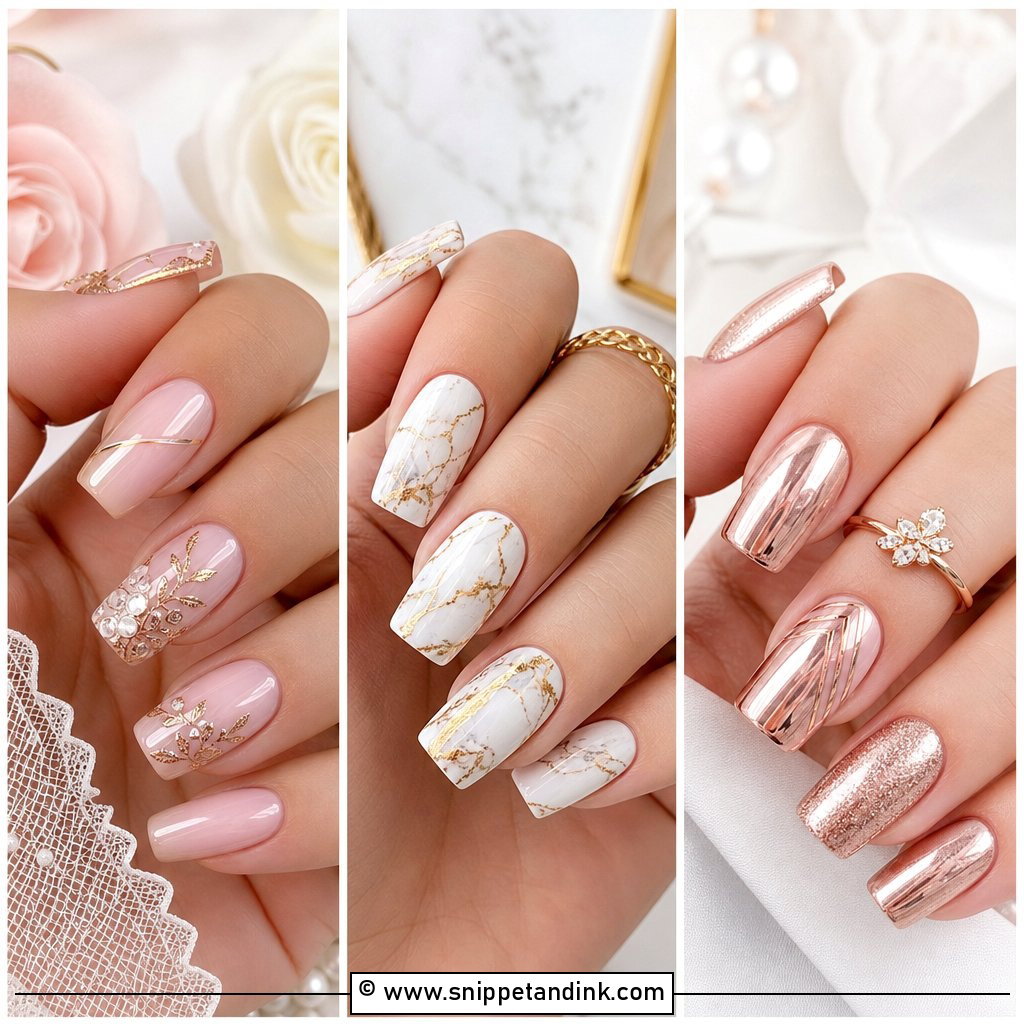
Lace on nails is painted by hand or applied as a fine decal over a sheer nude, pink or milky base. The finer the pattern, the more it reads as lace rather than a doodle. Almond and oval suit it best. If your gown already has lace sleeves or a lace bodice, I’d put the lace on two accent nails rather than all ten, so the hands echo the dress without competing with it.
12. Floral Bridal Press On Nails
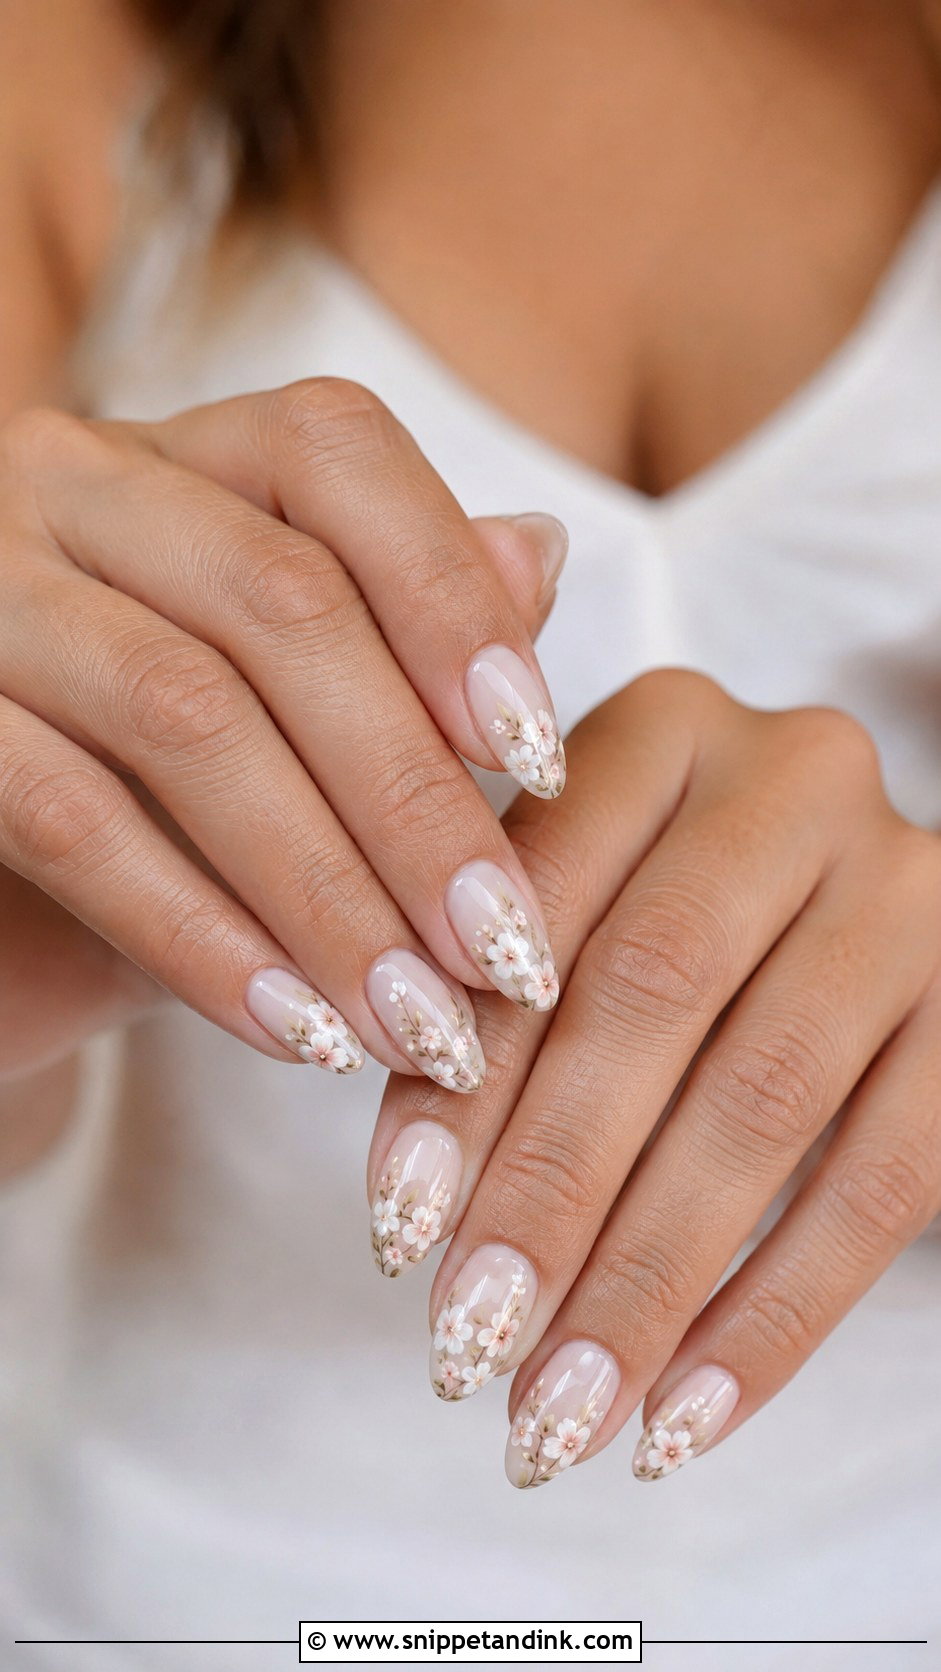
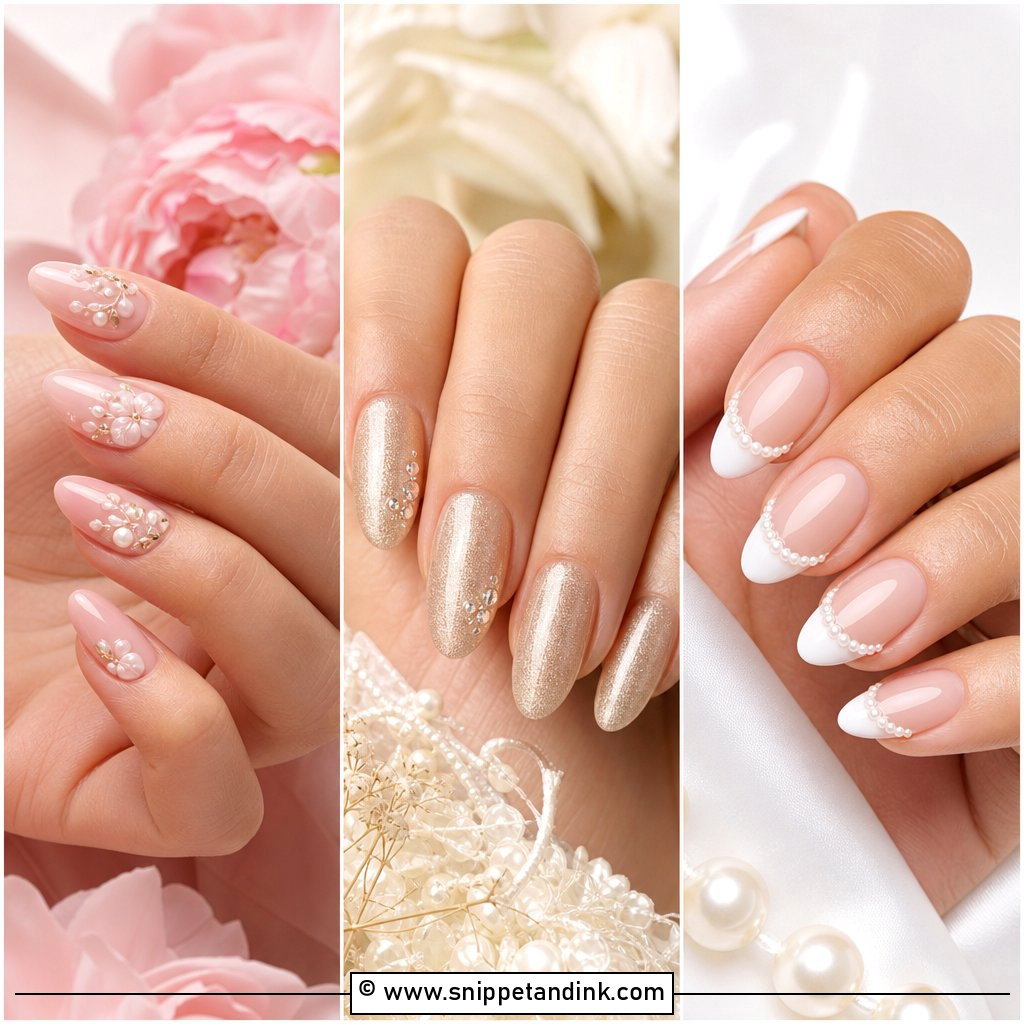
Florals can stay bridal without any bright colour. Small white flowers, blush petals or raised 3D blooms over a sheer nude or milky base look delicate, especially on almond and oval shapes. Painted flowers sit flat and wear well; raised ones can catch on tulle. I’d put flowers on two or three nails and leave the rest glossy plain, unless your dress is very simple. A tiny pearl centre or a fine gold line around the petals adds a finishing touch.
13. Pearl Accent Bridal Press On Nails
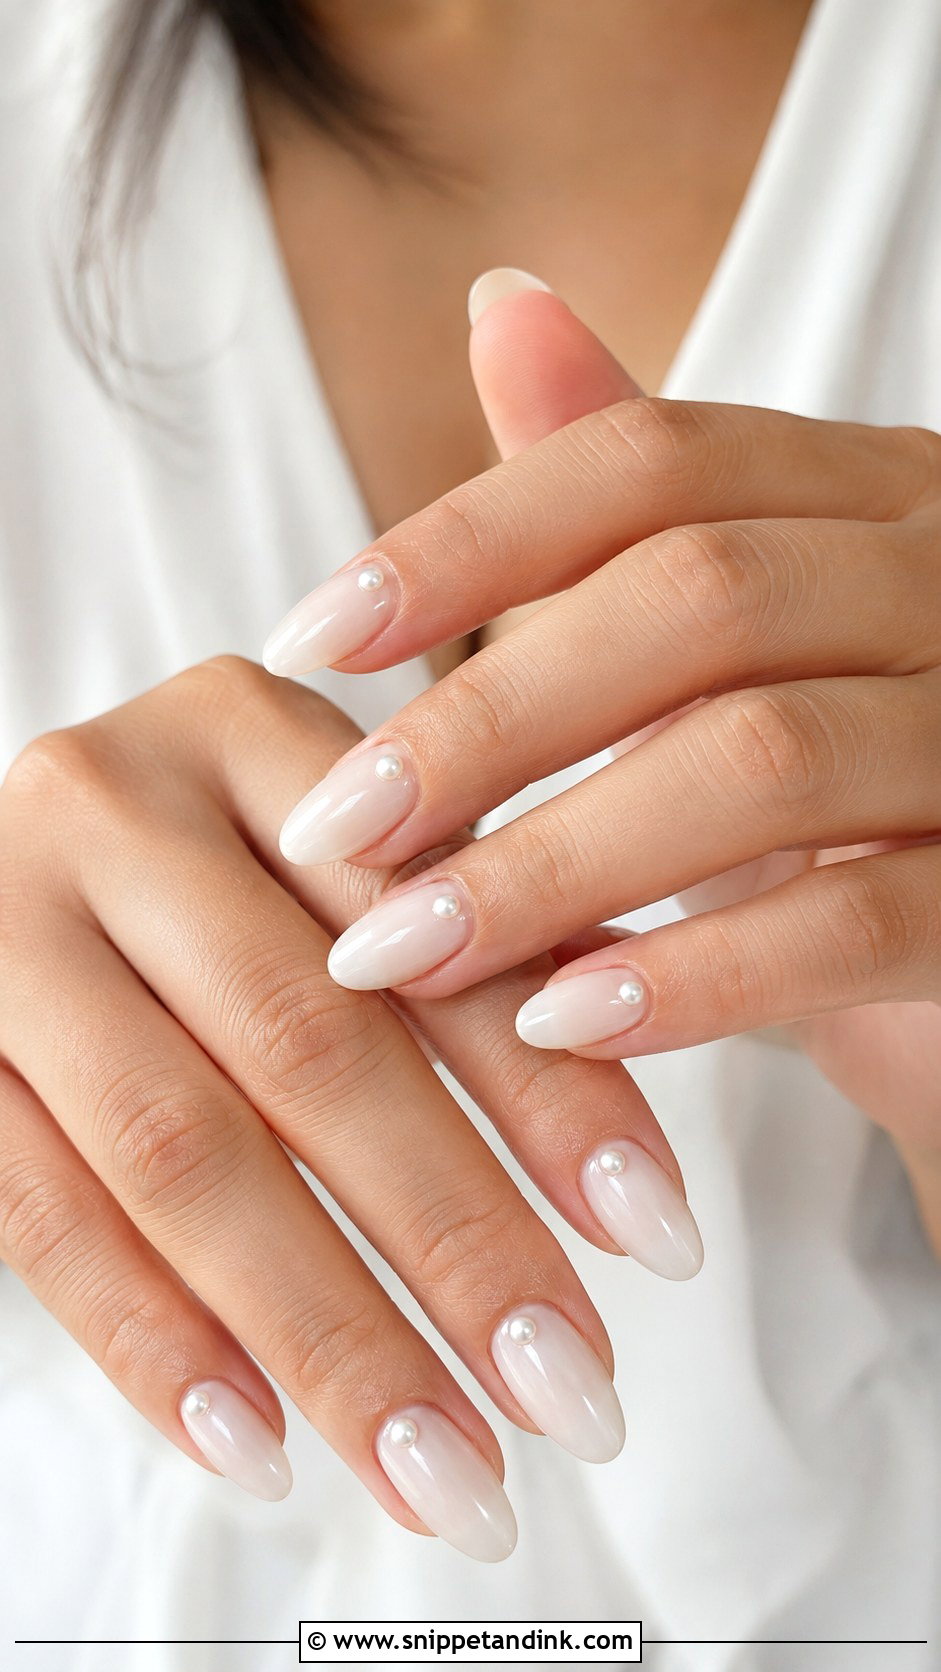
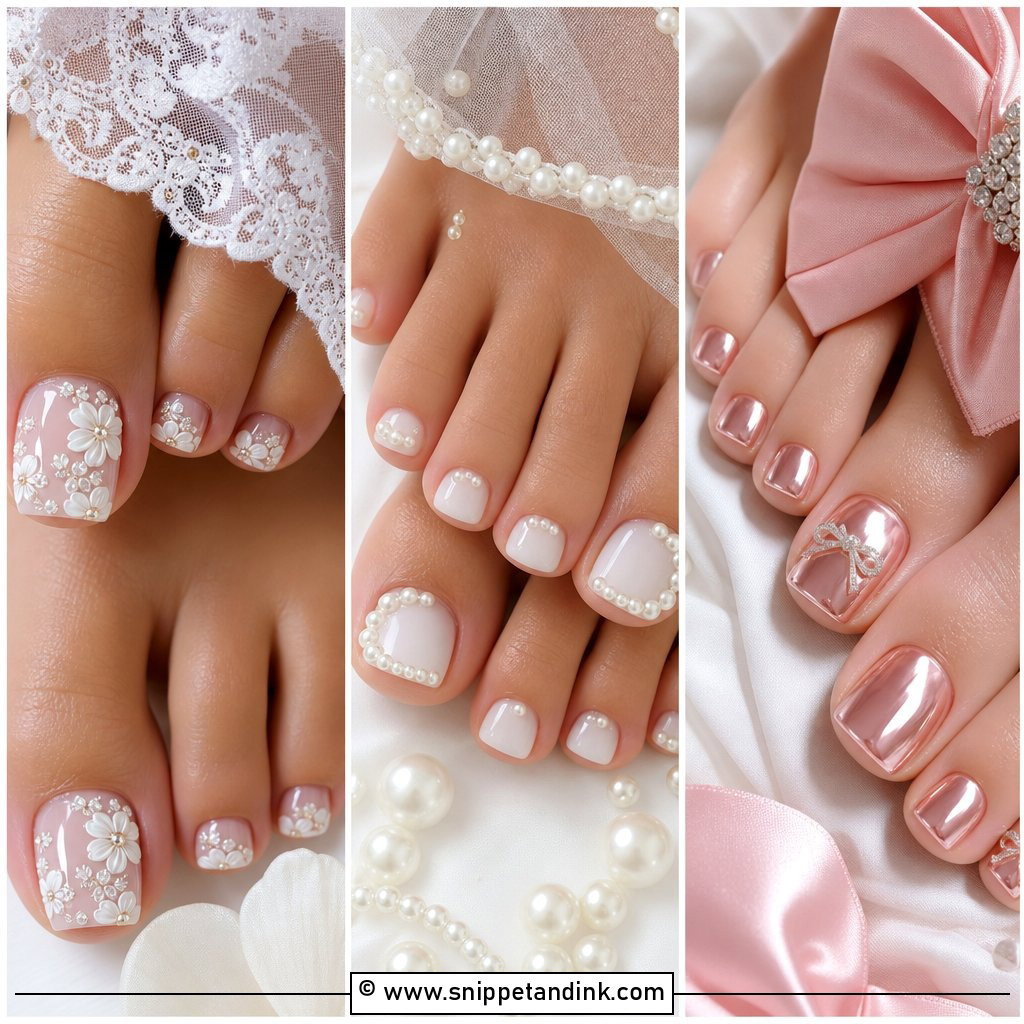
Pearls add a little dimension, and tiny ones near the cuticle, along a French line or on one or two accent nails are all you need. The base can be milky white, nude, blush or pearl chrome. Size really matters: small flat-backed pearls set in gel stay put, while larger domed pearls can snag on veil netting and knit fabric. Run your fingertips over a jumper at home as a test. Pearl earrings, pearl-edged veils and softly beaded gowns tie in well.
14. Rhinestone Bridal Press On Nails
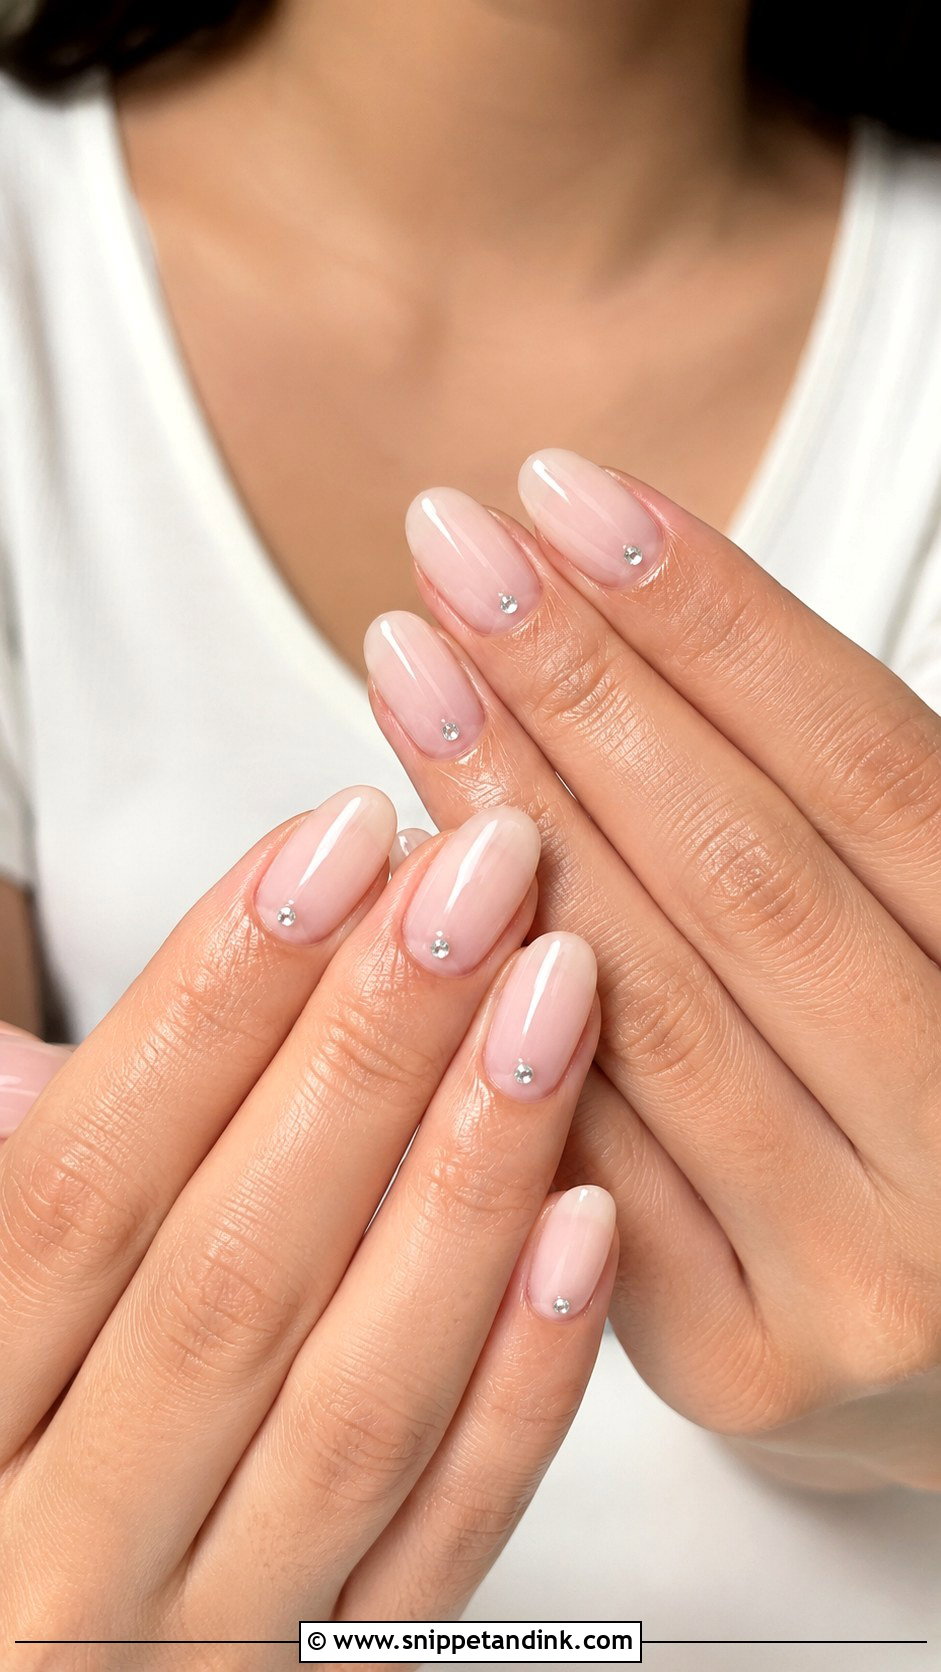
A little sparkle goes a long way on a hand that will be photographed holding a diamond. Small clear crystals on a sheer nude or pink base, placed near the cuticle or set in a fine line, catch light without fighting the ring. I’d choose clear stones over coloured ones for a bride. Make sure they’re embedded in gel, not just glued on top, or they’ll start dropping by the reception. Almond, oval and coffin all work, and satin dresses suit the shine.
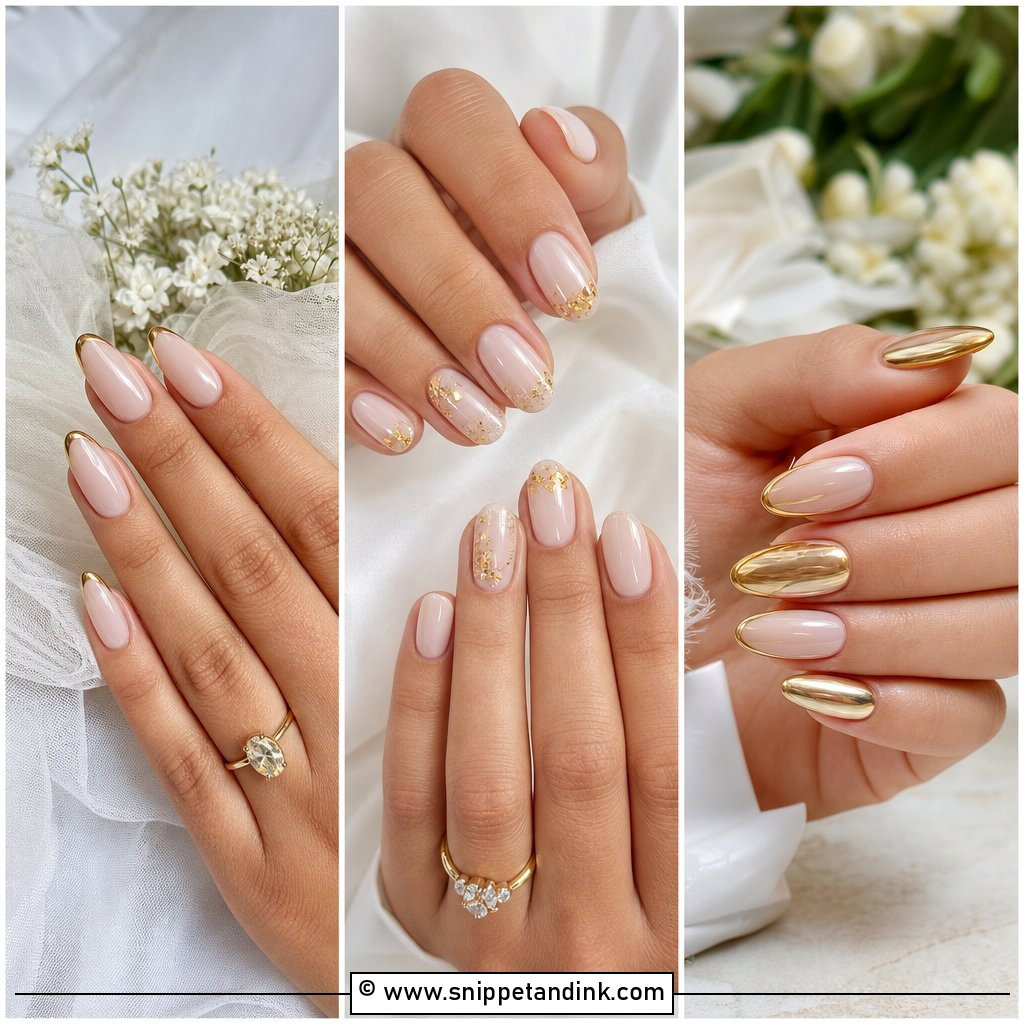
15. Gold Accent Bridal Press On Nails
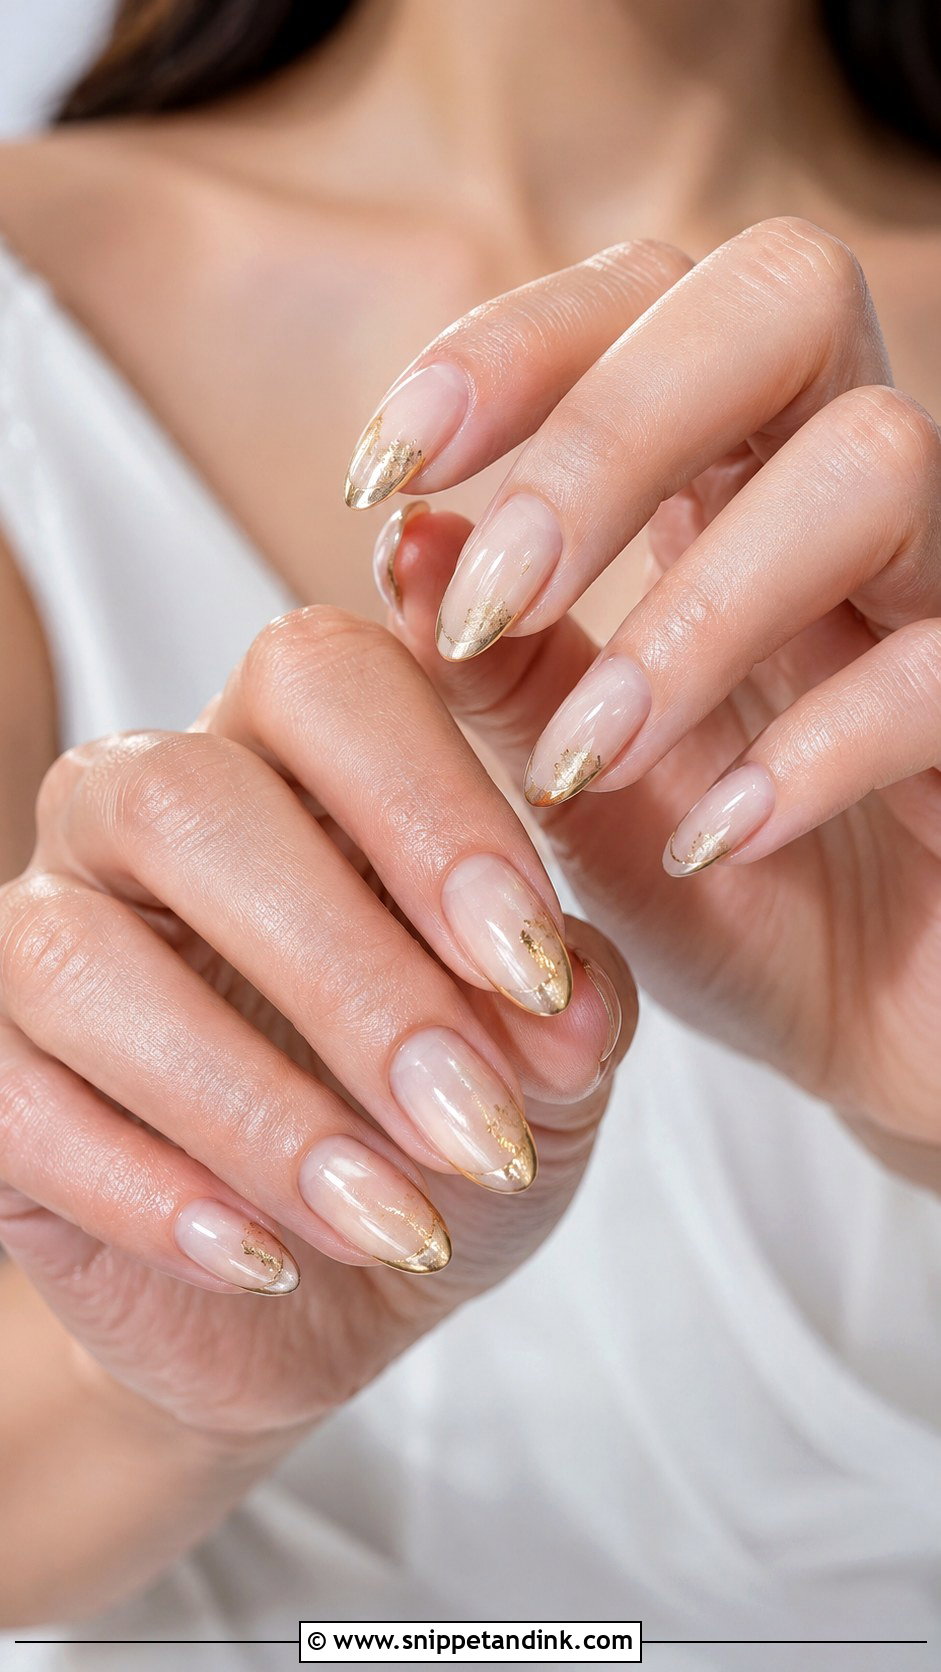
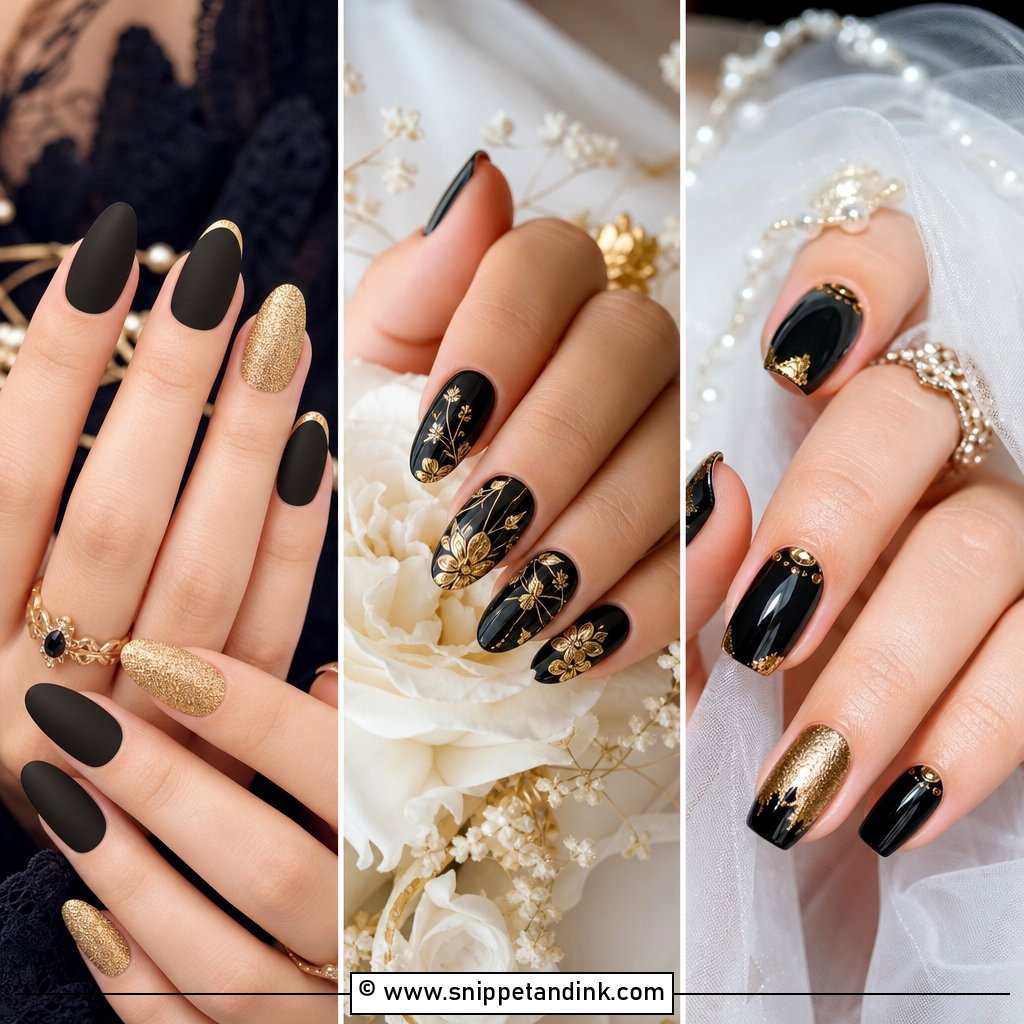
Gold accent bridal press on nails warm the whole hand, so they make sense if your ring, earrings or the décor lean yellow gold or champagne. Thin foil flakes, fine metallic lines or a gold-edged French tip over a nude or milky base are enough. Almond and oval shapes soften the metal. I’d skip chunky glitter; it reads cheap in close-ups. A few flecks of gold near the tips or cuticle makes the set look custom.
16. Silver Accent Bridal Press On Nails
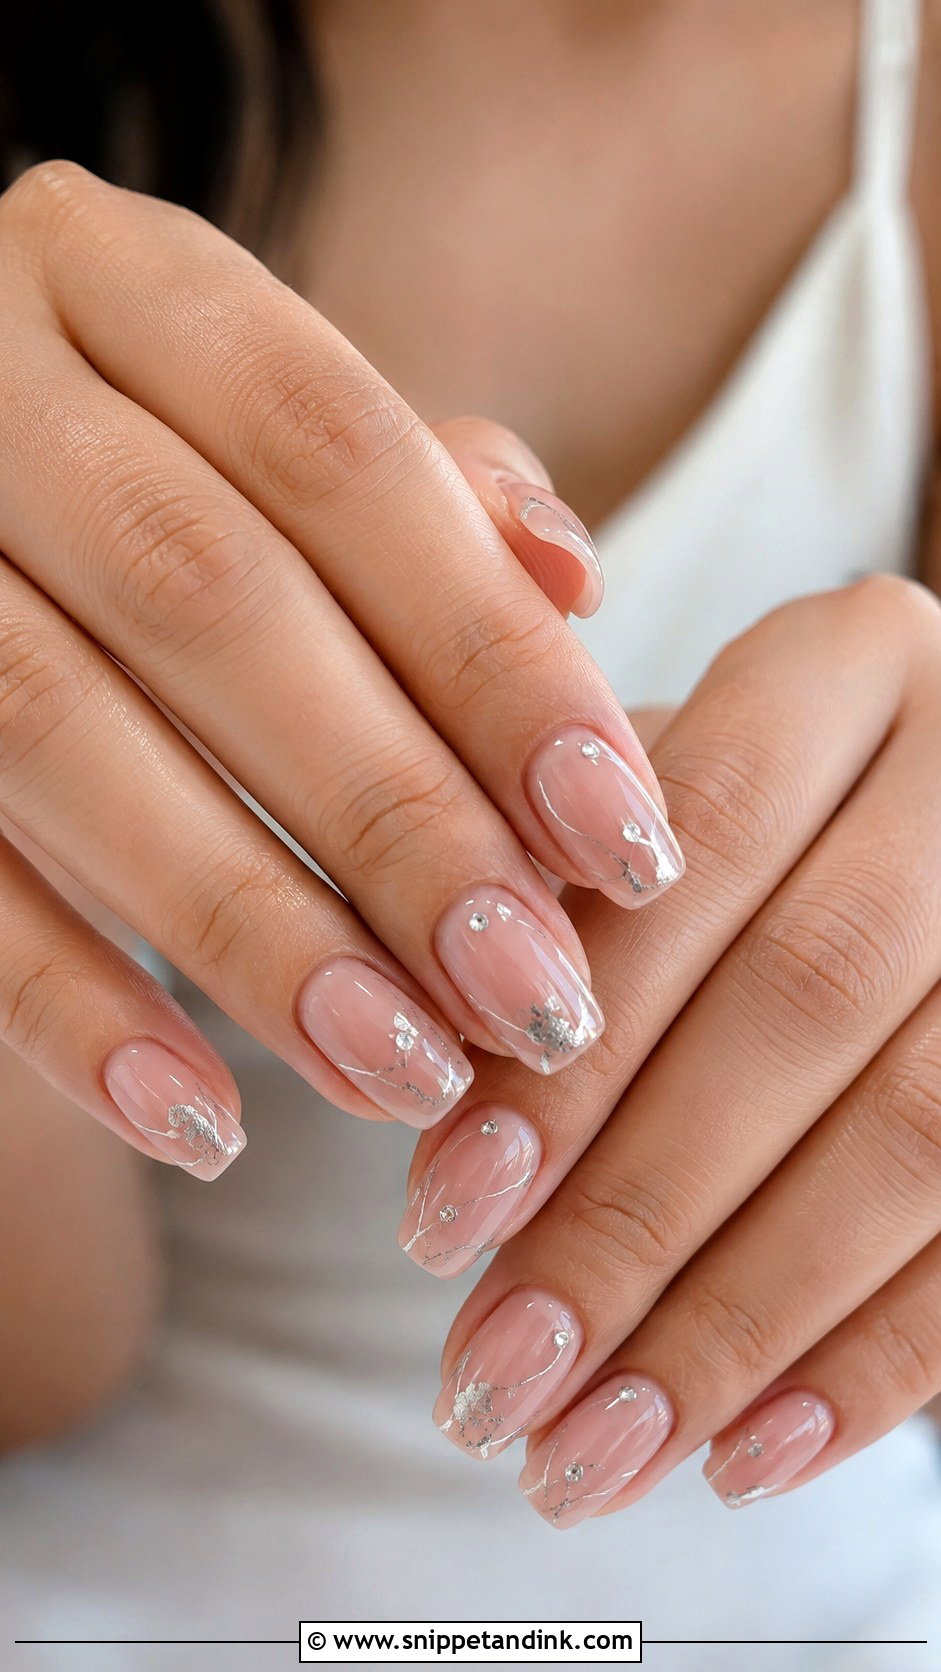
Silver is the match for white gold, platinum or silver jewellery. Over a sheer pink, nude or milky white base, fine silver foil, small crystals or a thin metallic French tip give a cooler, crisper shine than gold. It also suits winter-inspired palettes without needing snowflakes. Short square makes it look modern; almond makes it softer. Keep the metallic lines thin, because thick silver can look grey in photos taken in shade.
17. Matte Bridal Press On Nails
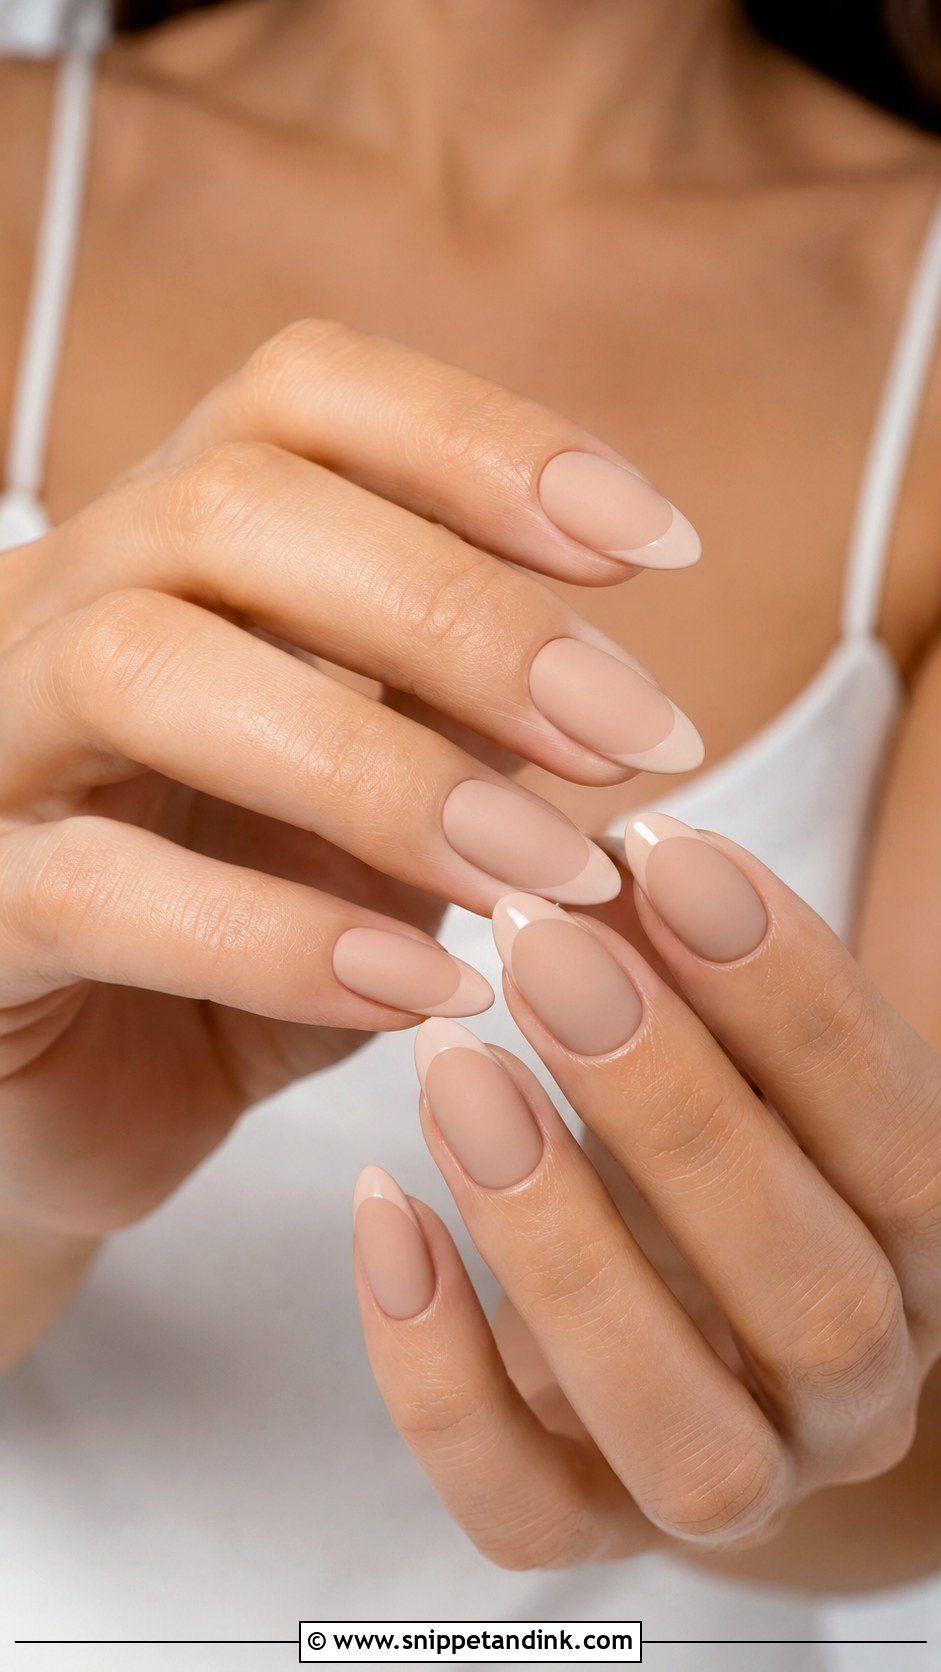
Matte finishes are velvety and diffused, and they suit nude, blush, taupe and milky white. They’re also unforgiving. A matte surface shows every bump and every edge where the press-on doesn’t sit flat, so I’d only recommend matte if your set fits perfectly. Matte top coat can also pick up marks from makeup and lotion during the day. A matte nail with a glossy French tip or tiny pearl detail looks deliberate rather than flat.
18. Sheer Pink Bridal Press On Nails
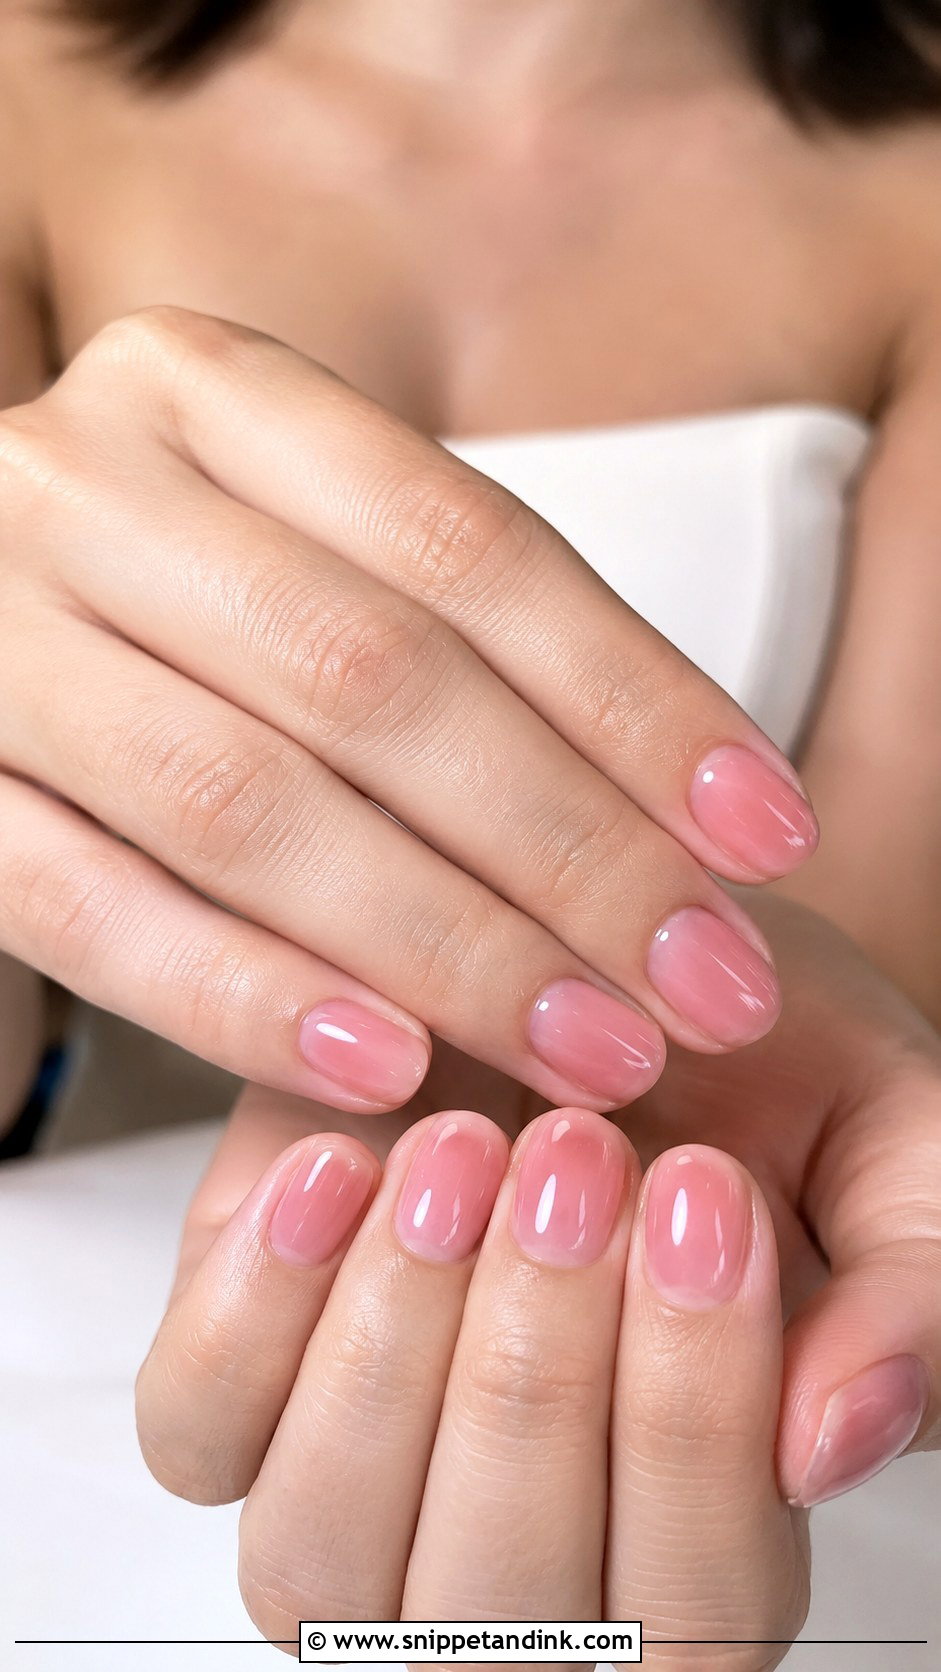
Sheer pink is the closest thing to your own nails, only better. It tints the nail rosy and looks clean on every length, from short round to medium almond. If you don’t normally wear polish, this is the set least likely to feel strange on your hands all day. It goes with any dress, jewellery or makeup. For a little more finish, a high-gloss top coat, a soft shimmer or one small crystal near the cuticle is plenty.
19. 3D Flower Bridal Press On Nails
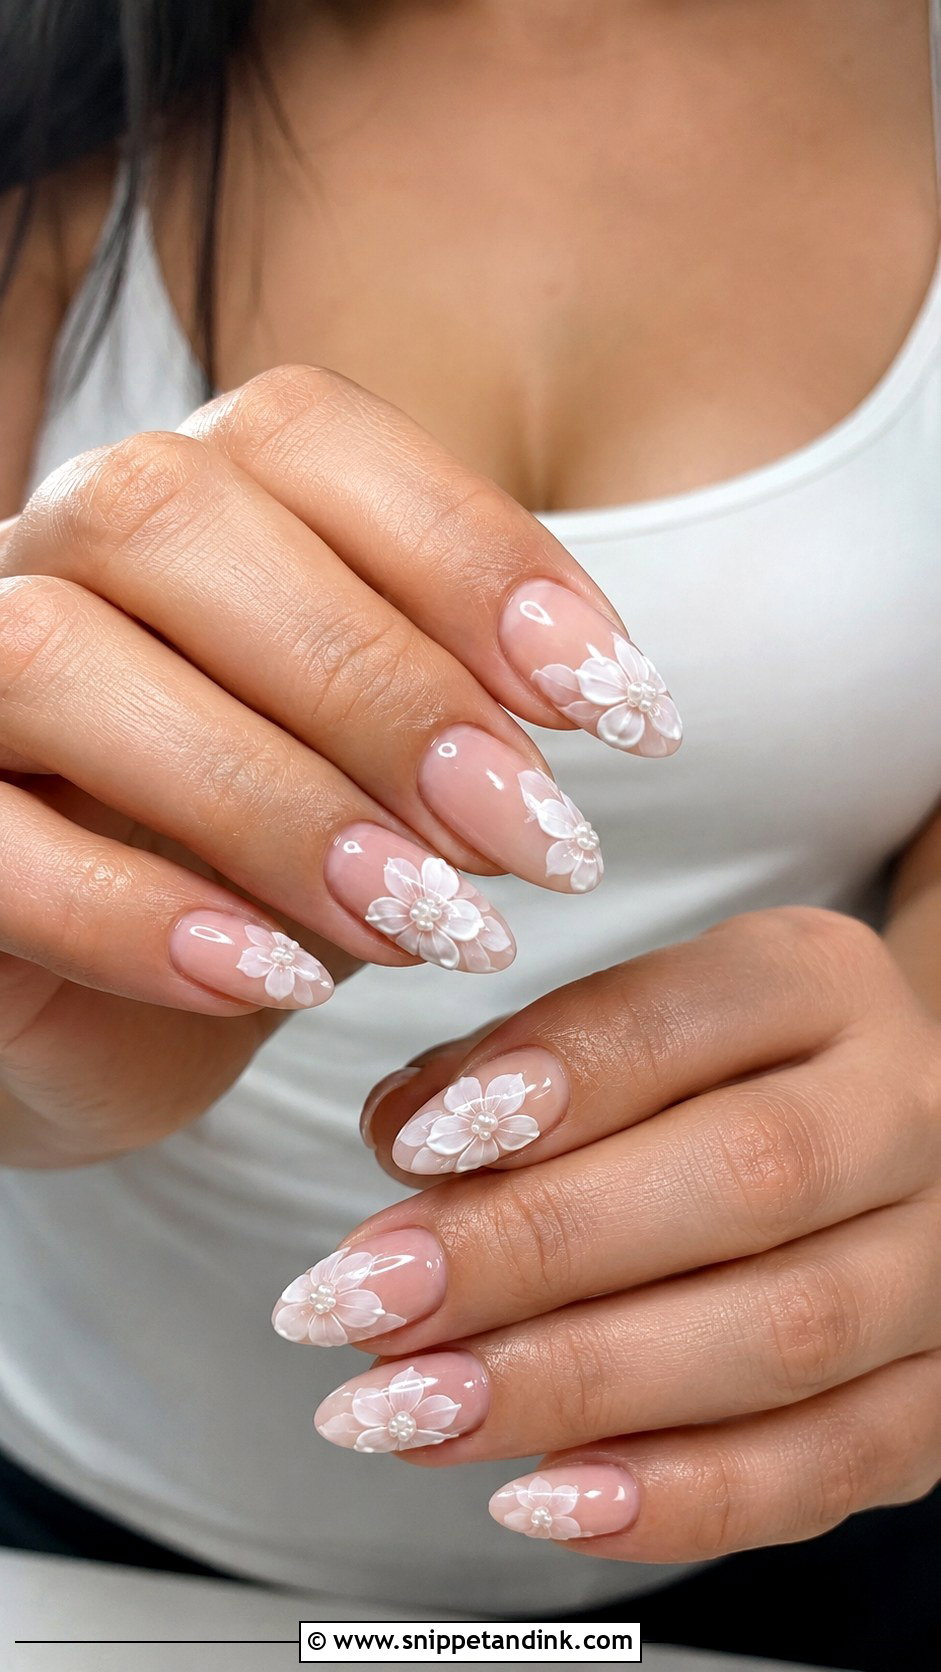
Sculpted 3D flowers are built from gel or acrylic and stand up off the nail, so they add real texture to ring photos. That texture is also the trade-off: raised petals catch on fine fabrics and hair. Keep the length medium and the flowers on one or two accent nails if your dress has lots of texture already. White or blush flowers over a sheer nude, milky or French base look the most bridal. Matching the flower colour to the gown, veil or bouquet ties it together.
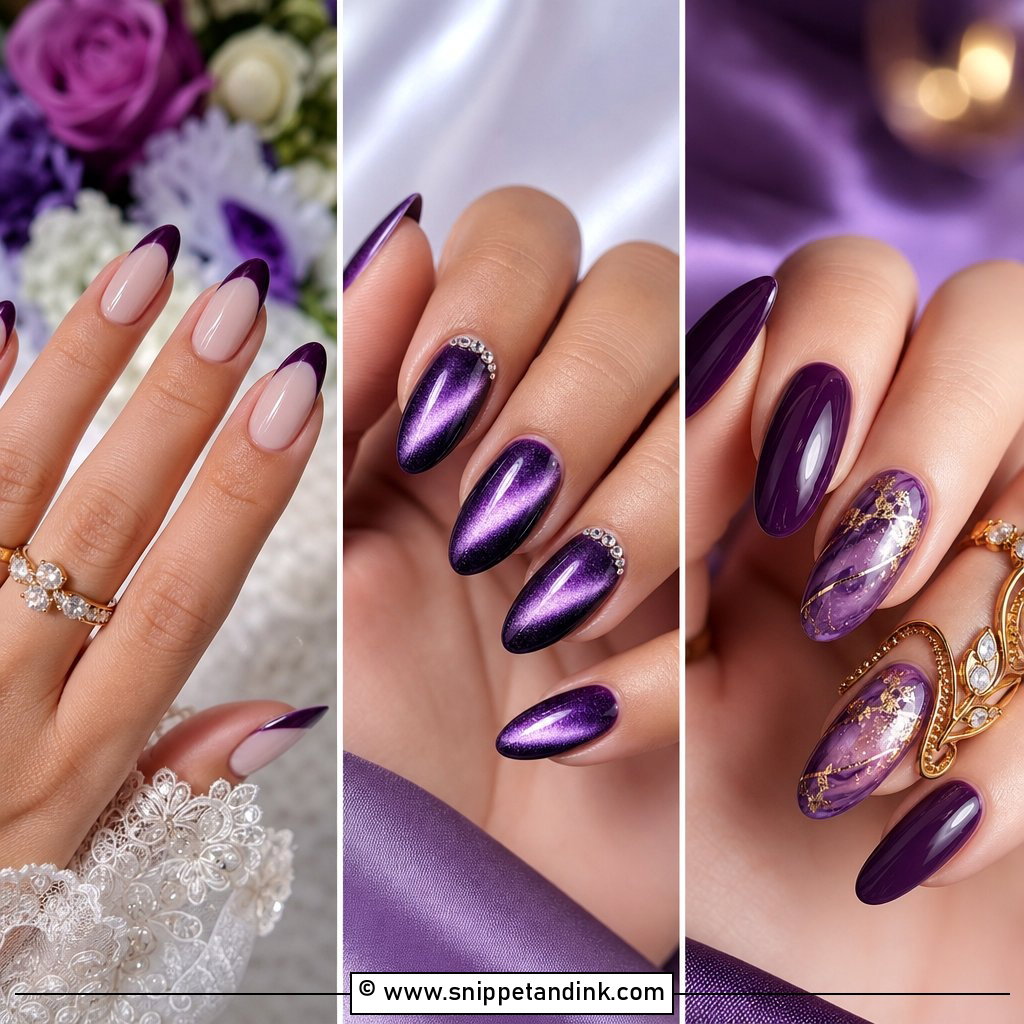
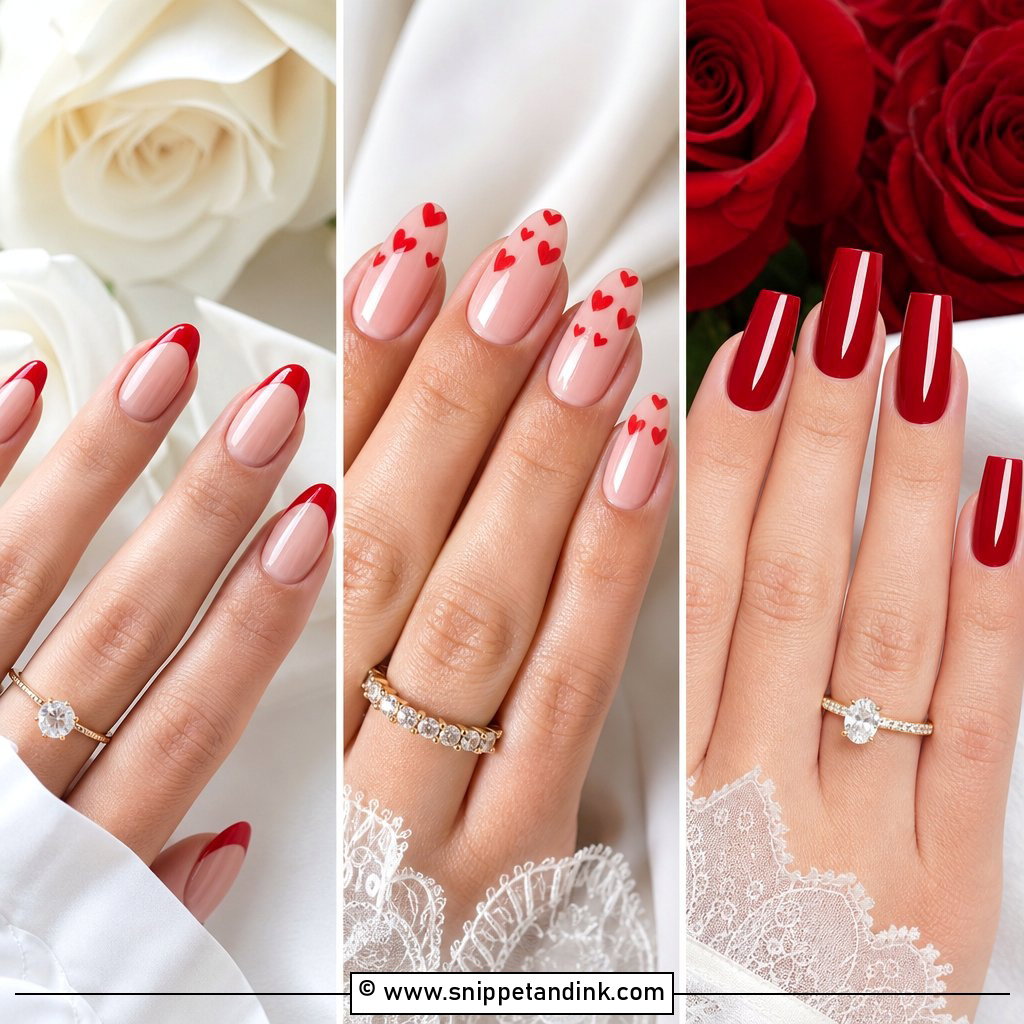
20. Custom Bridal Press On Nails
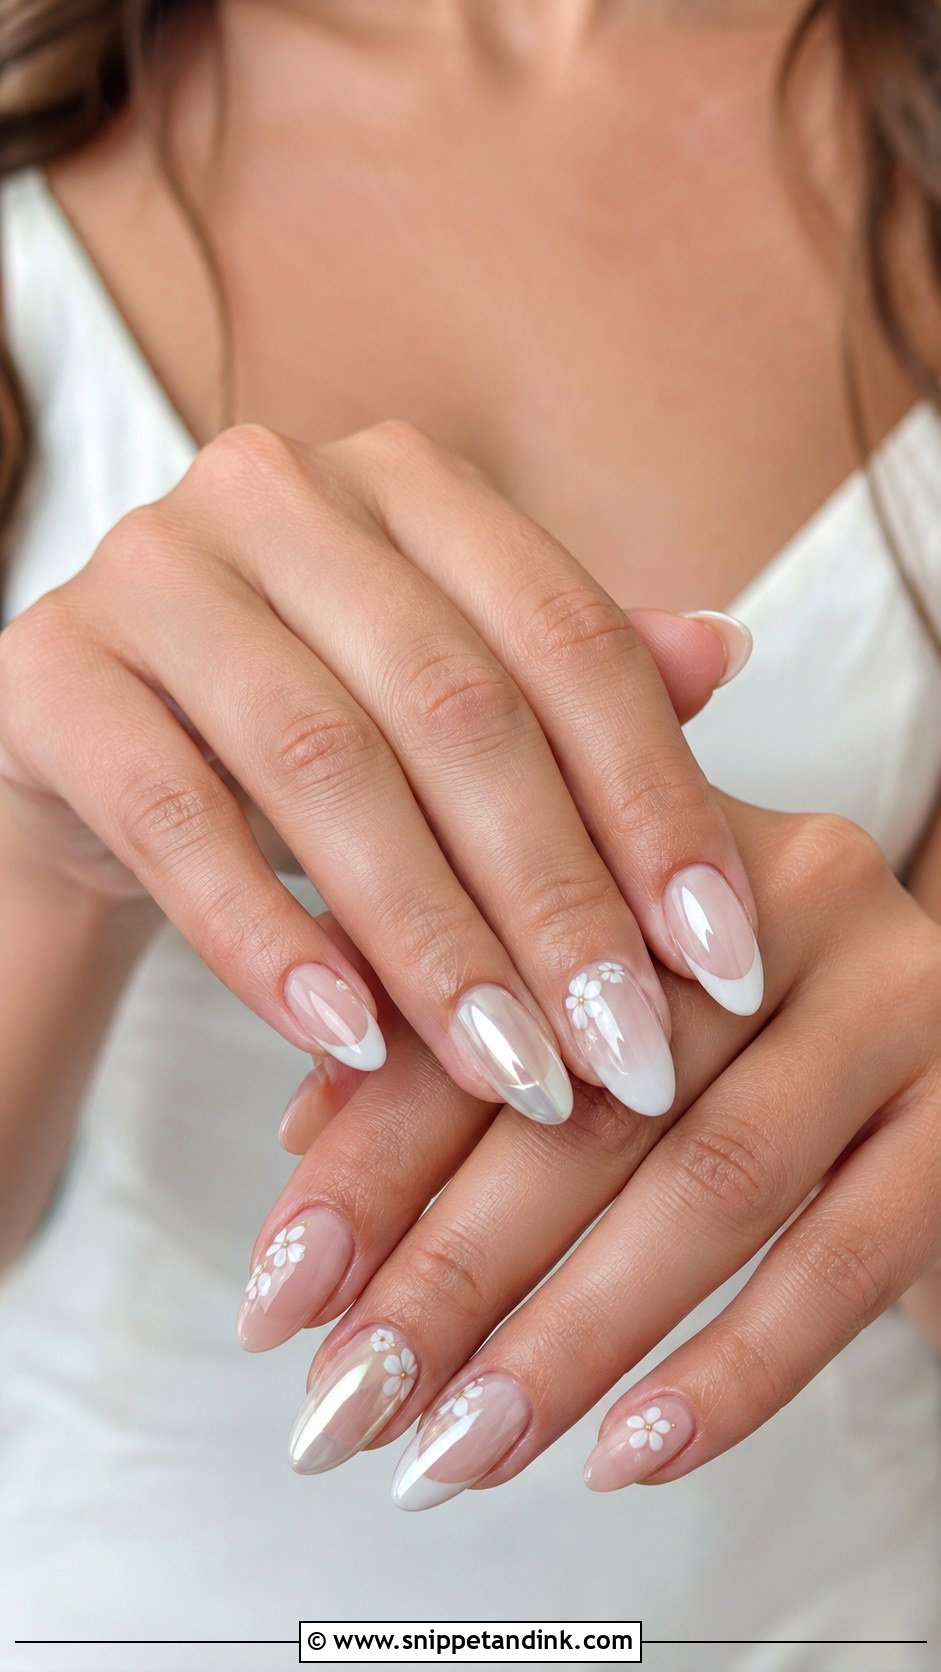
Custom sets are where press-ons really earn their place. A good maker will ask for sizing photos or measurements of every nail, then build the length, shape, colour and design you want: milky white almonds, pearl French tips, lace, small florals or a mix across the set. Fit is the biggest win, because a nail sized to you looks natural and stays on longer. Most handmade sets take a couple of weeks to make and ship, sometimes longer in wedding season, so order with plenty of time and test them before the day.
Glue or Tabs for a Twelve-Hour Day
For a wedding, I’d use nail glue. Adhesive tabs are fine for a photo shoot or a single evening, but they loosen with warm water and hand washing, and a wedding day can easily run from early hair and makeup to midnight. Glued sets normally hold for a week or more when the prep is done properly.
Prep is most of the job. Push back your cuticles, buff the shine off the nail surface very lightly, then wipe each nail with alcohol so there’s no oil left. Apply one or two days before the wedding, not the morning of, which lets the glue cure fully and gives you time to replace one if it lifts. Press each nail and hold for about thirty seconds, starting at the cuticle and rolling down. Avoid long hot showers or washing up for the first hour or two.
If One Pops Off at the Reception
Pack a tiny kit in your bridesmaid’s bag: a tube of nail glue, an alcohol wipe, a small file and one or two spare nails in your sizes. If a nail comes off, wipe the old glue off your natural nail as best you can, apply a small amount of fresh glue and press firmly. It takes less than five minutes in a bathroom.
When the wedding’s over, please don’t pry them off. Soak your hands in warm soapy water with a little oil for ten to fifteen minutes, then ease each nail up from the side with a cuticle stick. If the glue holds, a short acetone soak will loosen it. Forcing them off peels away layers of your own nail, and that damage takes months to grow out.
Soft Shades Make the Easiest Wedding Nails
If you’re unsure, start with the soft colours: milky white, blush, sheer nude or pearl chrome. They suit almost every hand and dress and they hide small wear. French tips, lace, pearls, rhinestones and 3D flowers add character when you want more. Whatever you pick, test a set early, practise putting it on, and wear it through a full ordinary day to check the length and fit. If it survives your commute, typing and washing up, it’ll survive the wedding and every close-up of your ring.
You'll Like These Ideas:


Leave a Reply