
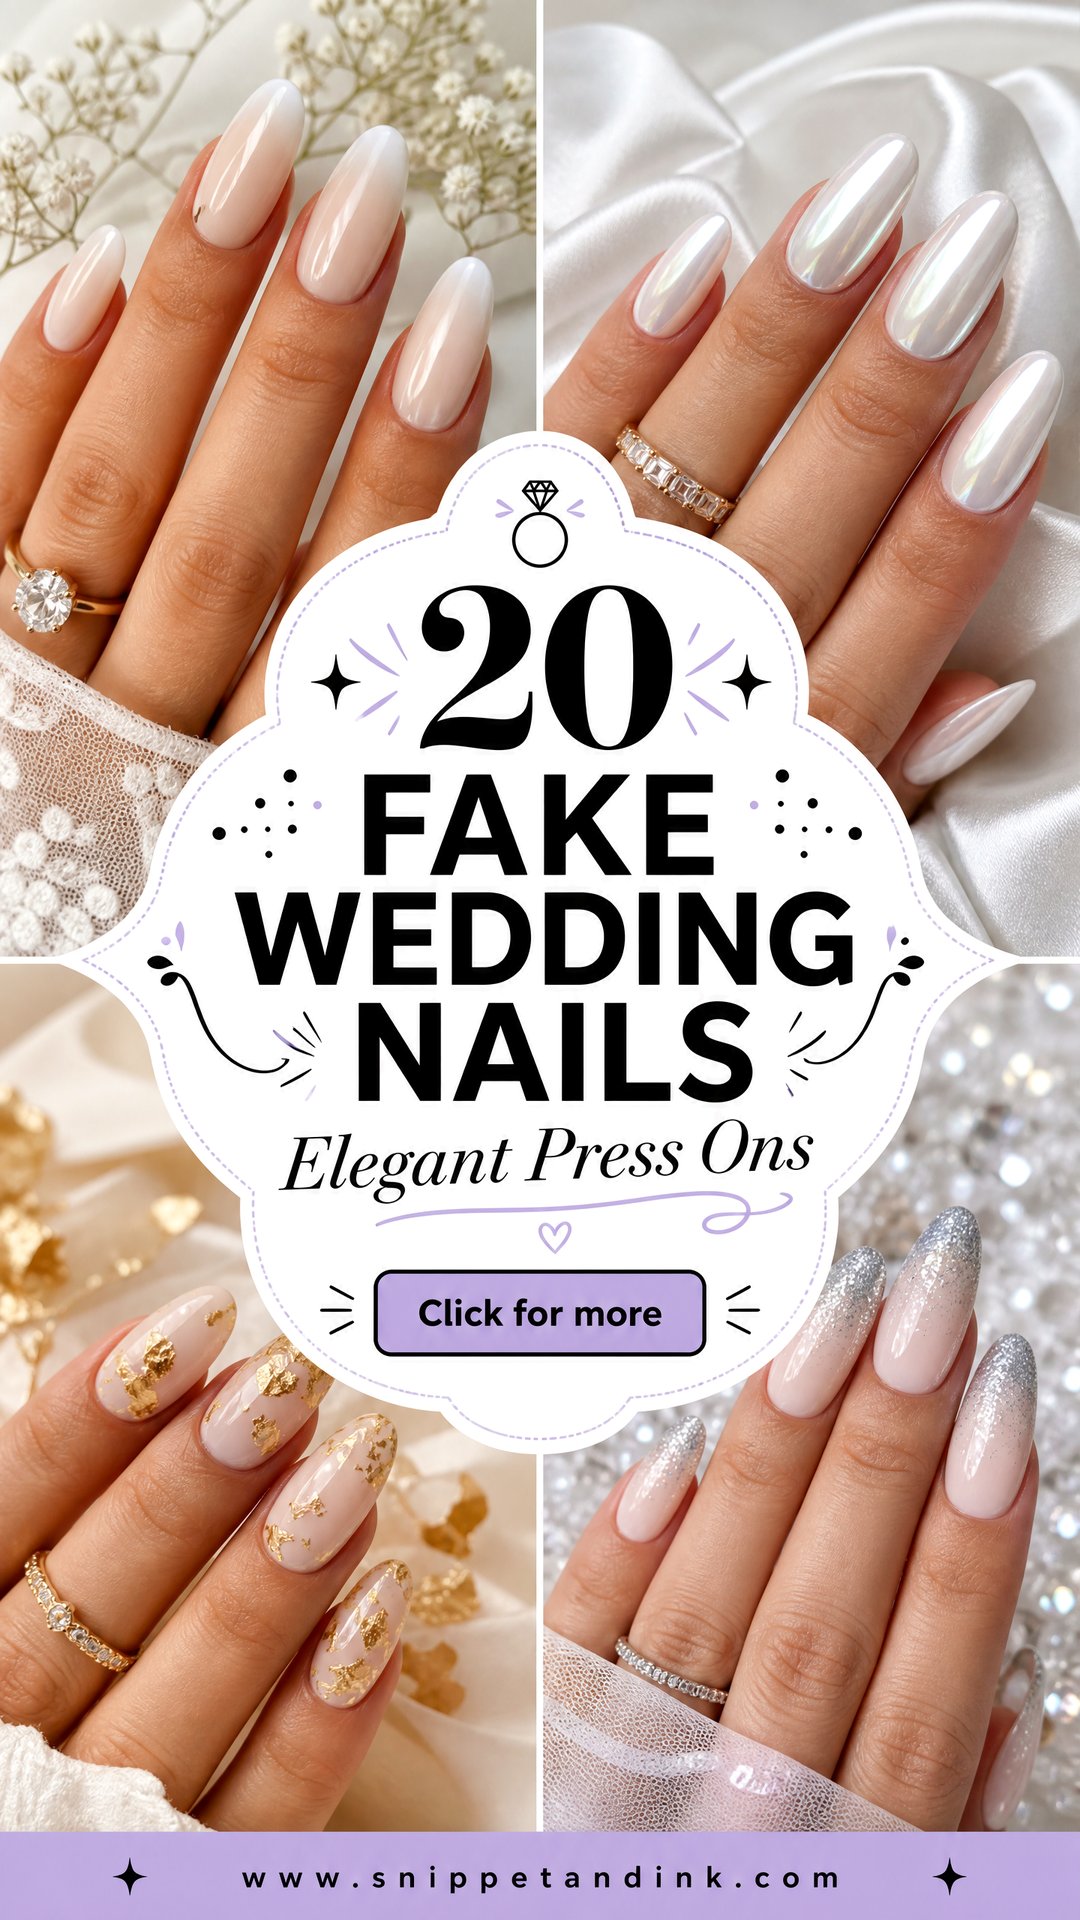
Press-ons have come a long way from the thick, shiny plastic tips that gave fake nails a bad name. A good set today is thin at the cuticle, curved to sit on the nail plate, and finished with gel so it reflects light the way a salon manicure does. For a bride, that solves real problems: you can test the exact set weeks ahead, keep a spare in your bag, and take them off after the honeymoon without the filing a salon removal needs. Below are twenty designs I’d happily put on a bride, with notes on which shapes and finishes pass as real nails in ring close-ups and which give themselves away.
Sizing Press-Ons to Your Own Nail Beds
Most press-on kits come with ten or more sizes, and most brides pick the wrong ones. Lay every nail out in size order and test each against your bare nail before any glue comes out. The nail should cover the plate from sidewall to sidewall without touching the skin. If you’re between two sizes, go for the larger one and file the sides down; a nail that’s too small leaves a gap at the edges that reads instantly as fake.
- Check the curve, not just the width. A flat press-on on a curved nail lifts at the sides within hours.
- Write down your sizes for each finger so you can order a matching spare.
- File the underside of the cuticle edge gently if it sits thick; a thin edge disappears into the nail.
- Shorten the tips before applying, never after, so you don’t stress the glue.
Glue or Adhesive Tabs for a Long Wedding Day
Adhesive tabs are kind to your nails and easy to remove, but they’re a short-term hold, usually a day or two, and heat and hand washing weaken them. For a wedding I use nail glue. Applied properly, it holds through the ceremony, the dinner and a lot of hugging, and usually for well over a week.
The hold depends on prep. Push the cuticles back, buff the shine off the nail plate lightly, and wipe with alcohol so no oil is left. Put a thin layer of glue on both your nail and the press-on, press at an angle from the cuticle down to push out air, and hold firm pressure for thirty seconds. Keep hands out of hot water for an hour afterwards.
1. Fake Wedding Nails With Classic French Tips
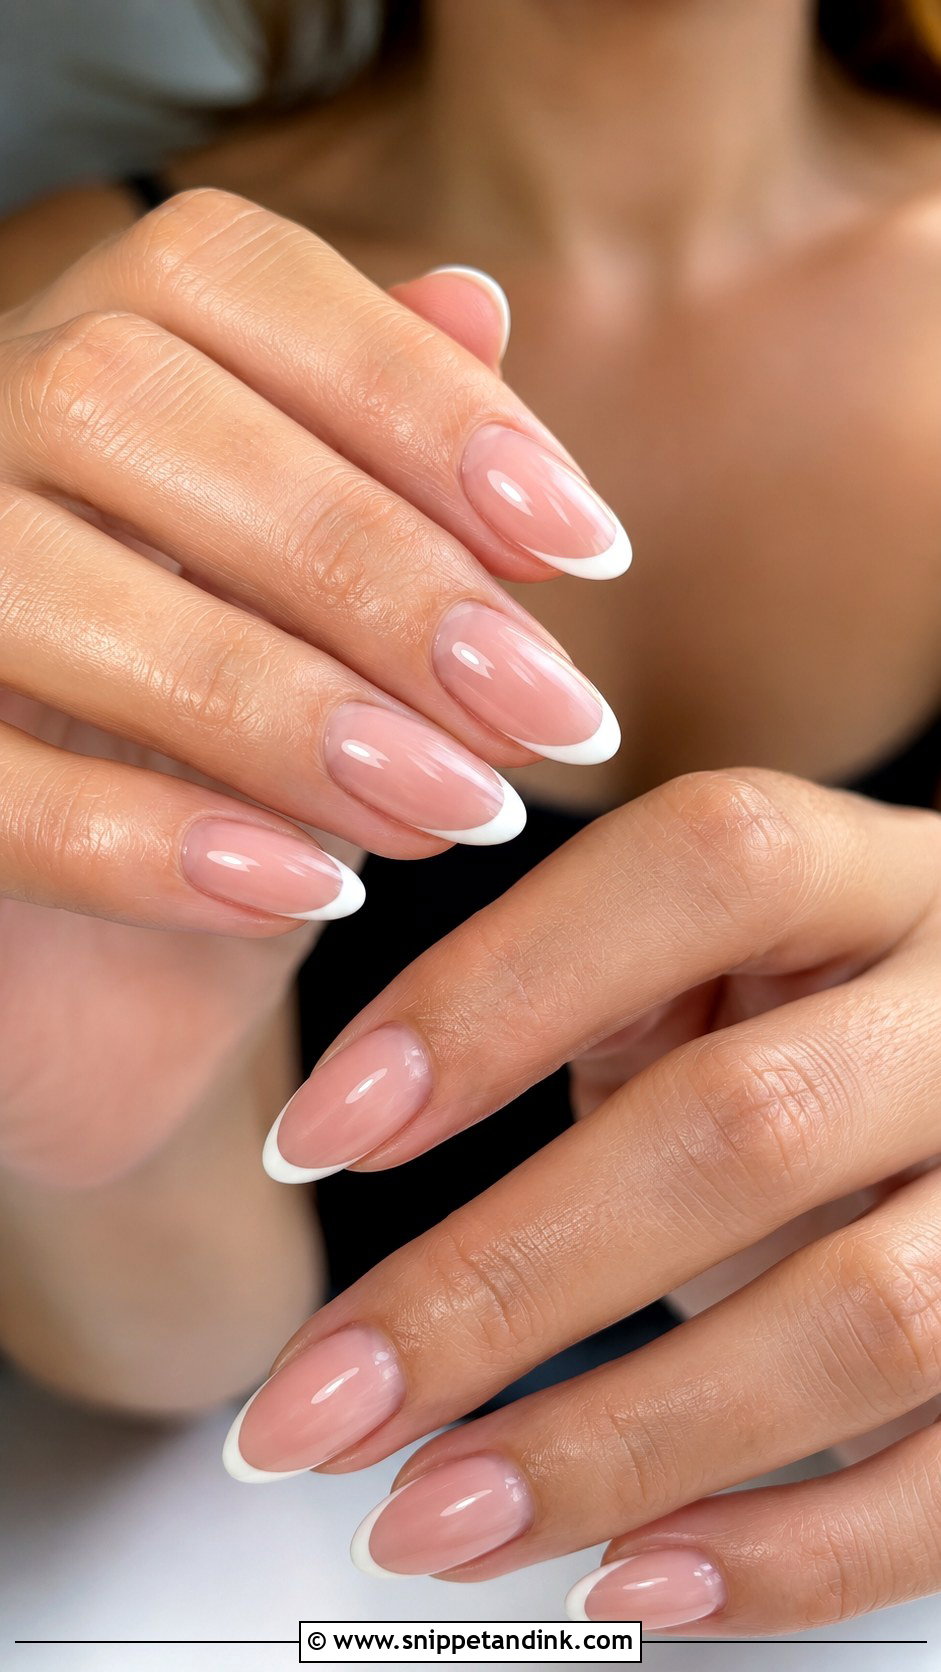
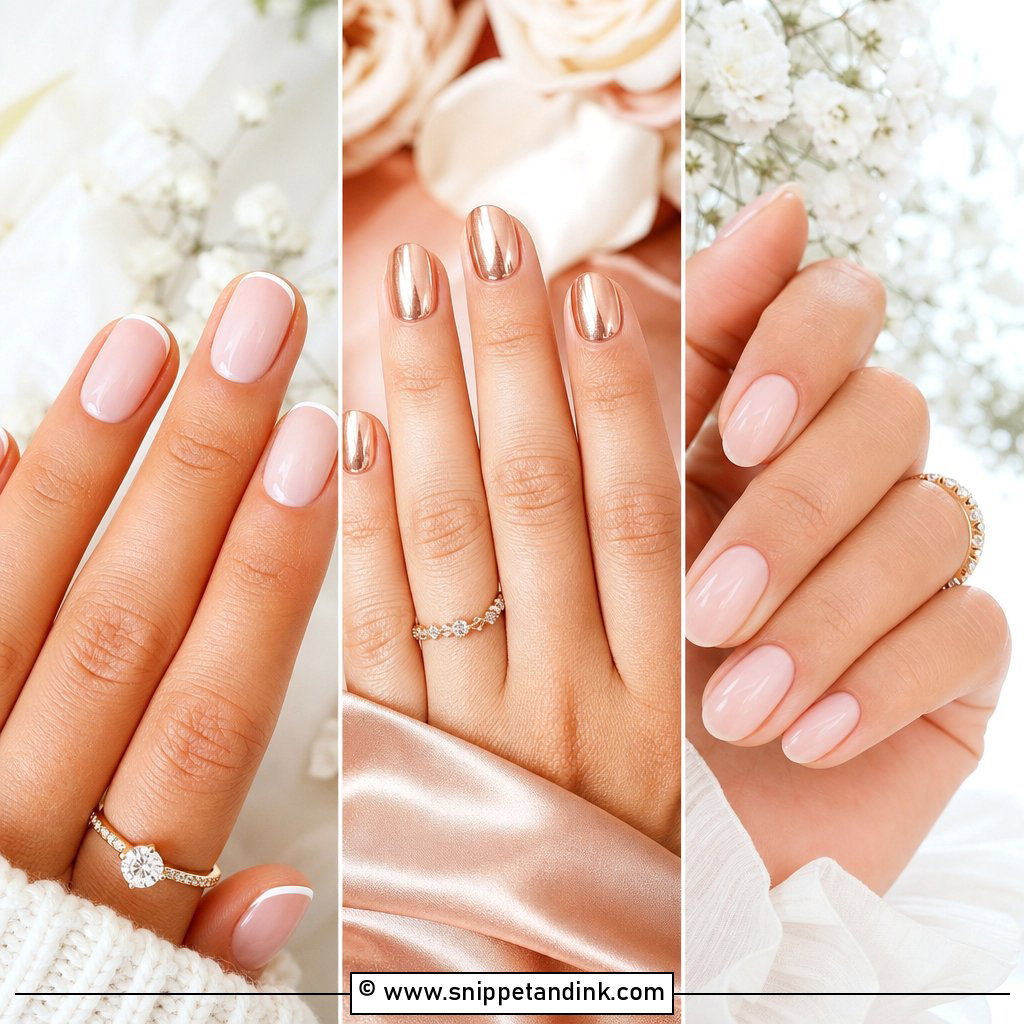
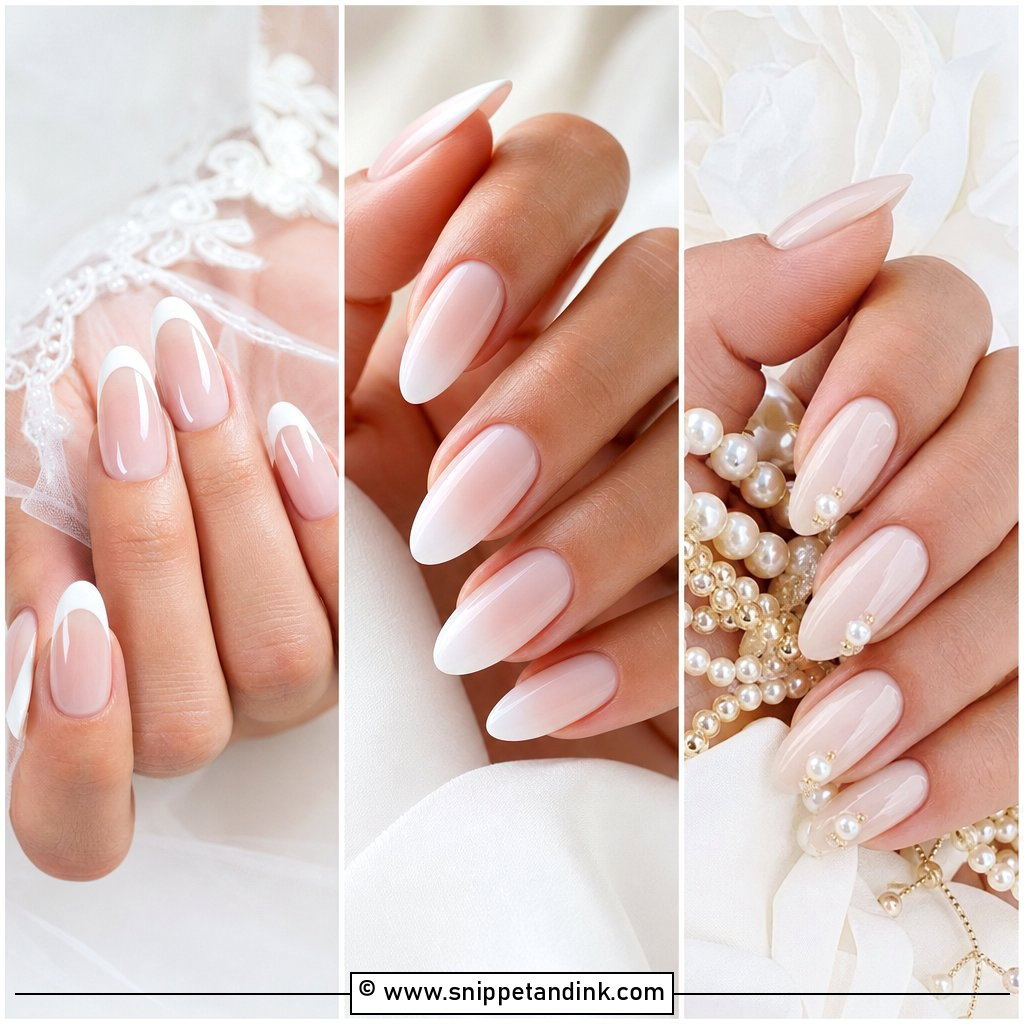
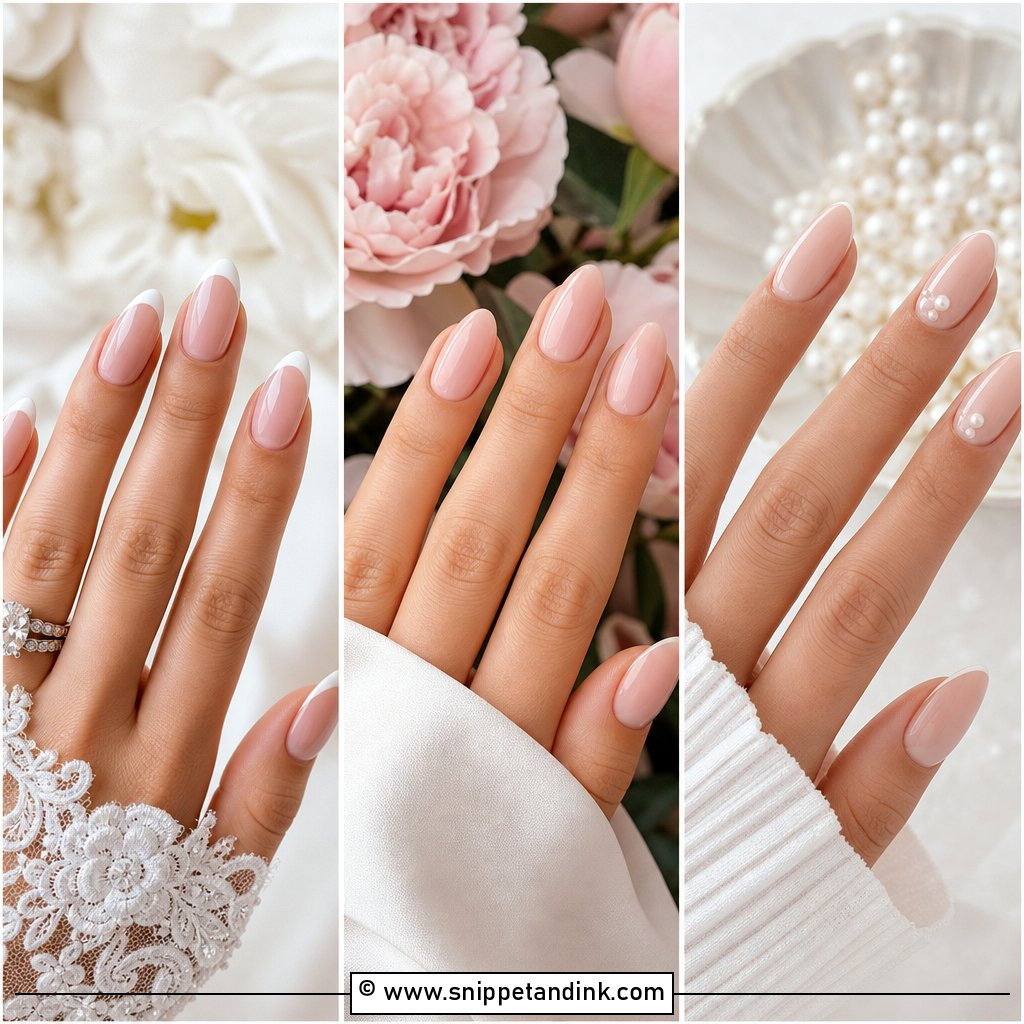
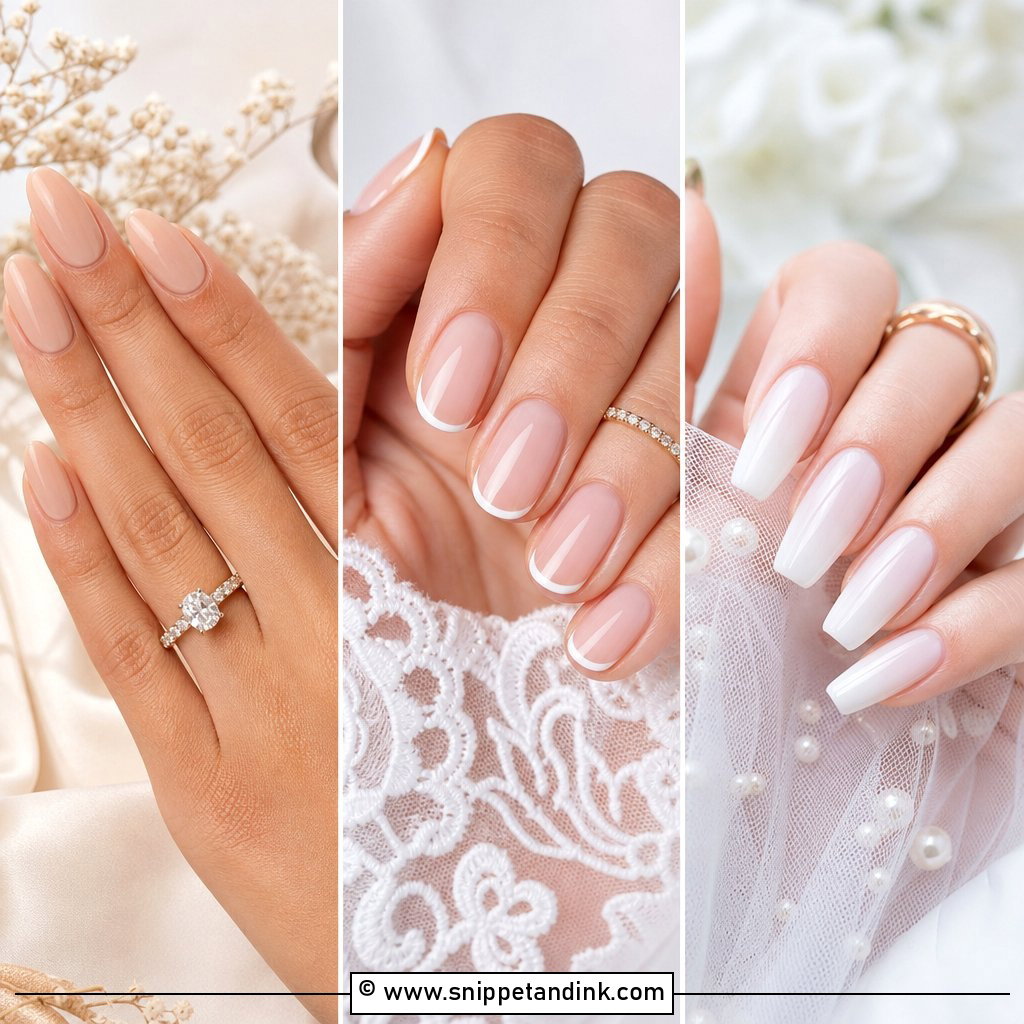
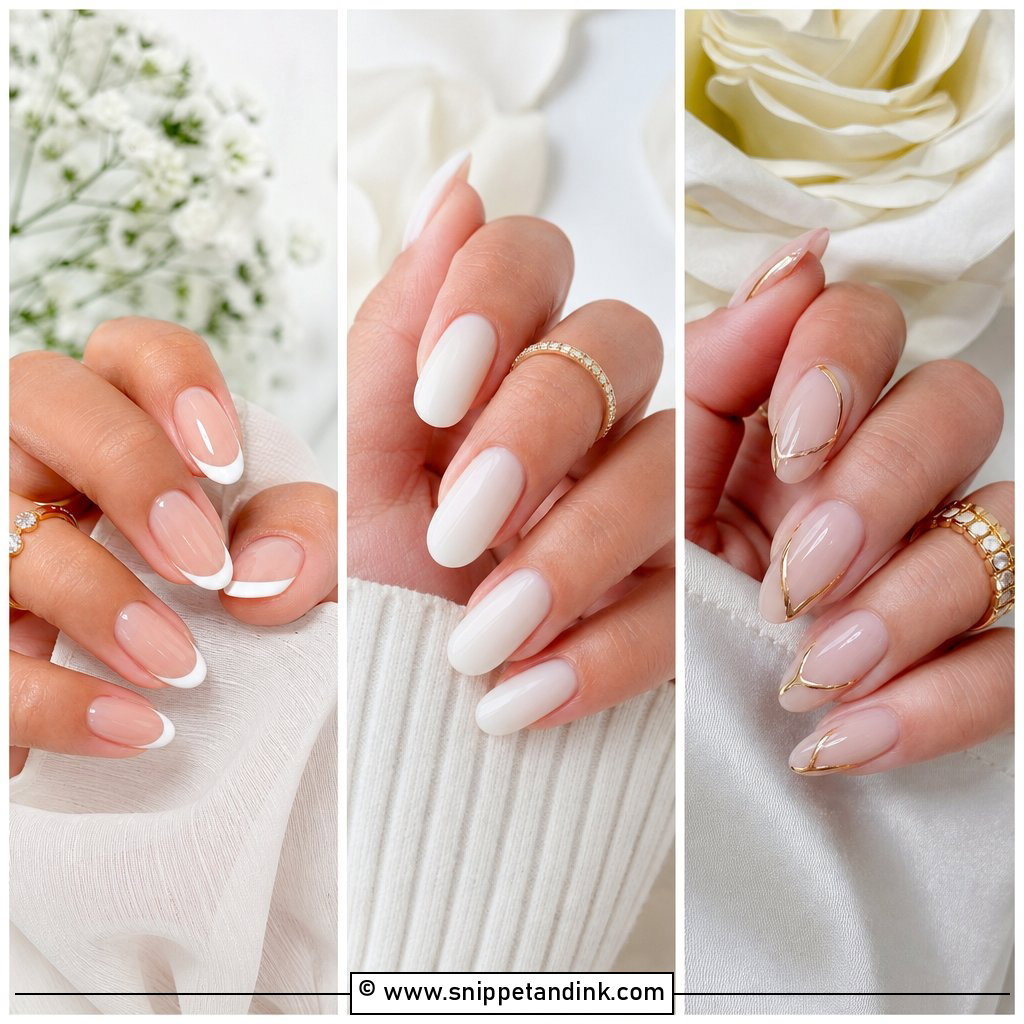
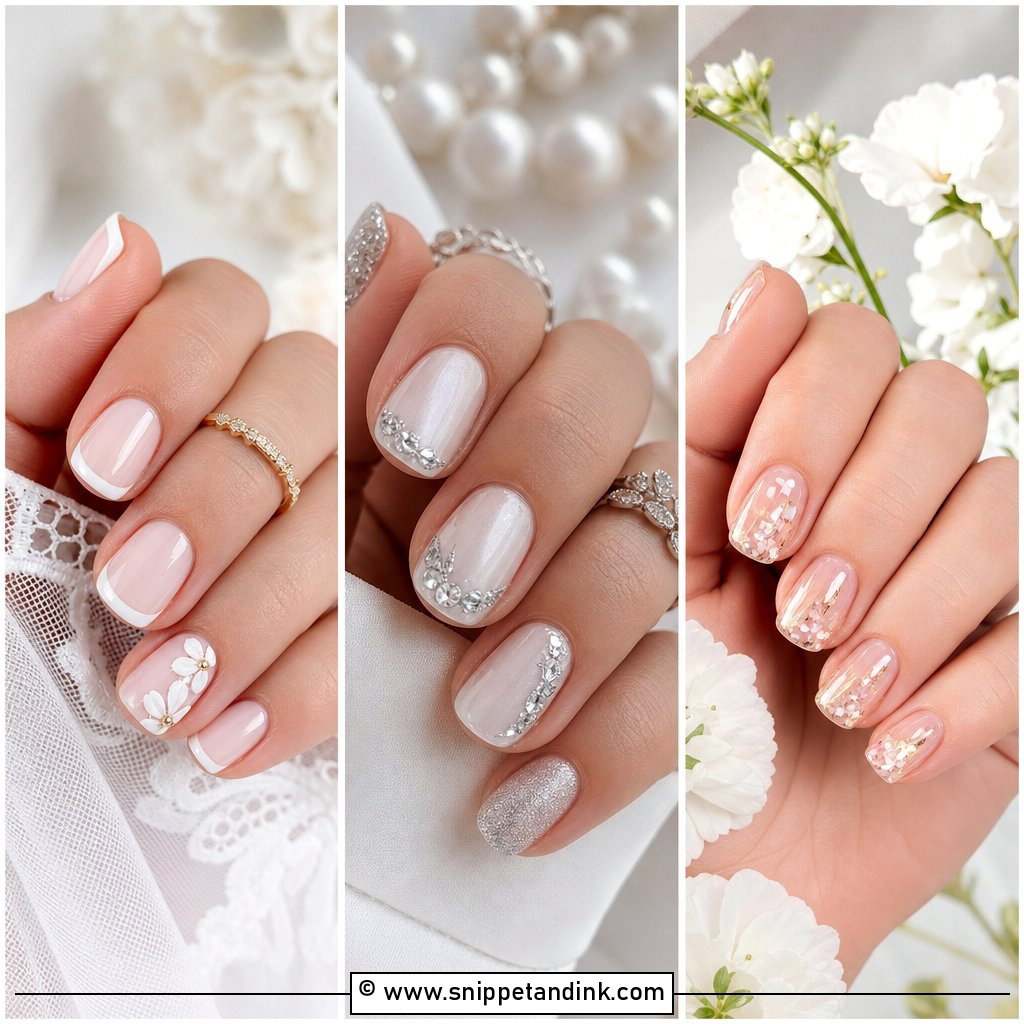
French tips are still the set most brides come back to, and the reason is the smile line. On real nails, that line follows the free edge, so on press-ons it has to be thin and curved, not a thick straight band. I look for a sheer pink or nude base close to your own nail bed, and a soft white rather than a bright opaque one, which reads as painted in close-ups. Short oval, medium almond and soft square all work. If the white runs wide at the sides, the tip looks pasted on. A high-gloss top finish completes it.
2. Fake Wedding Nails With Milky White Finish
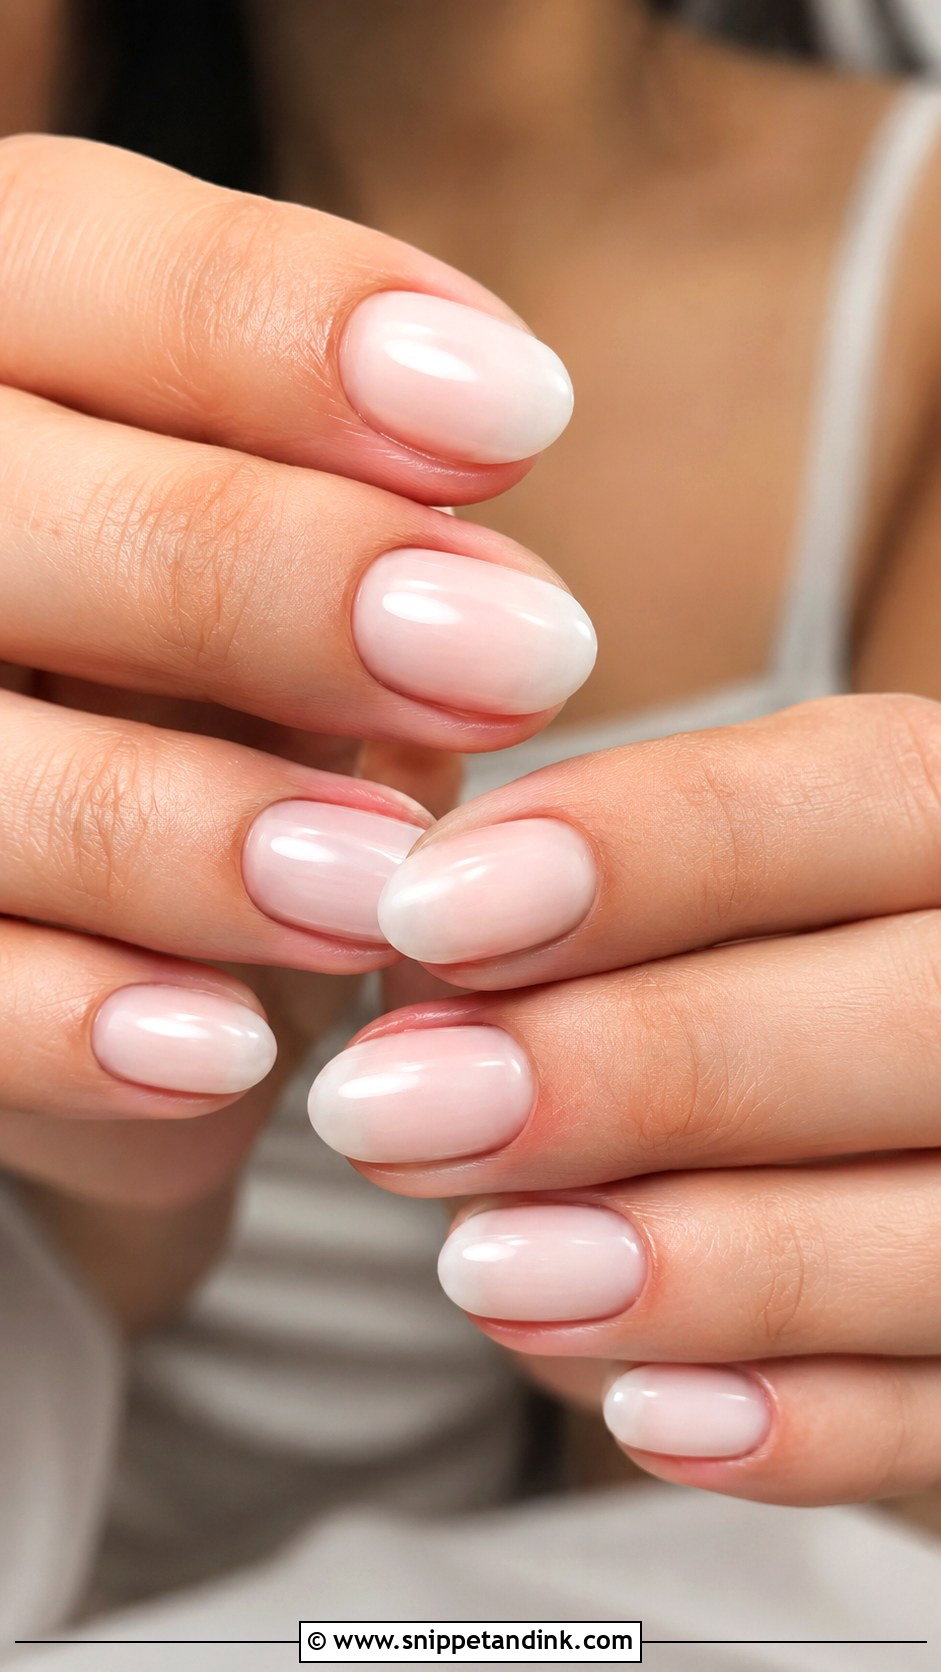
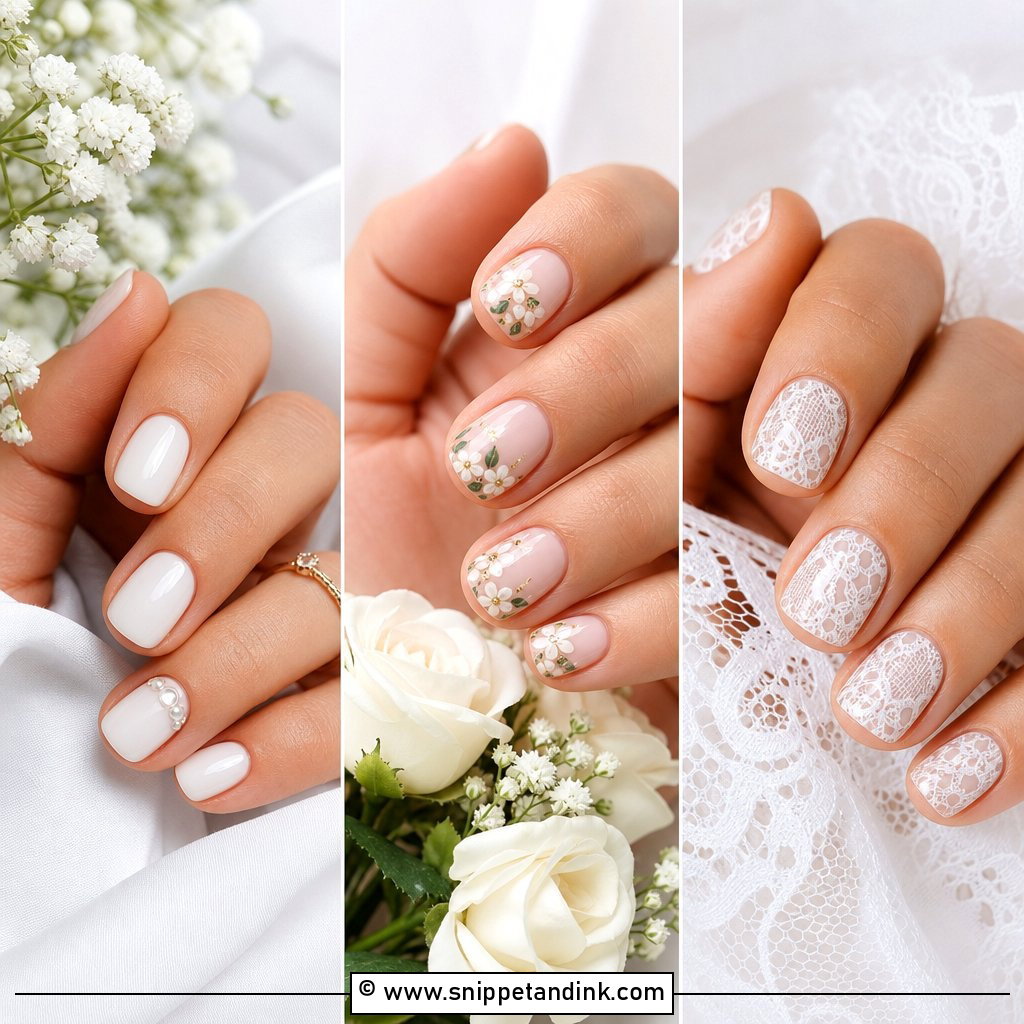
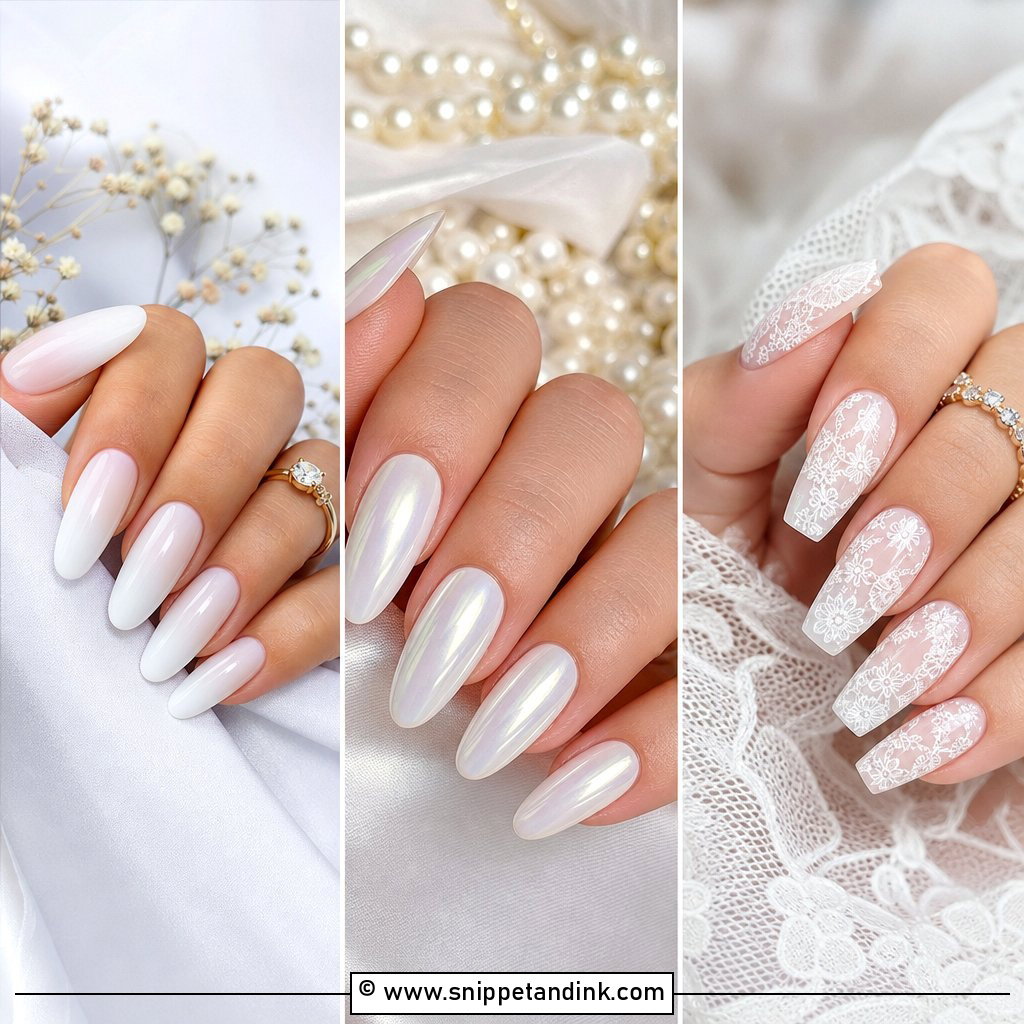
Milky white sits between bare nude and full color. The base should be semi-sheer, so a little warmth from the nail bed shows through; a fully opaque white on a press-on tends to look flat and thick. Almond and oval soften it and lengthen the fingers. It goes especially well with satin or crepe gowns, which have the same soft sheen. I’d keep it short to medium, because milky shades show the gap at the cuticle more than darker ones if a nail is slightly too small.
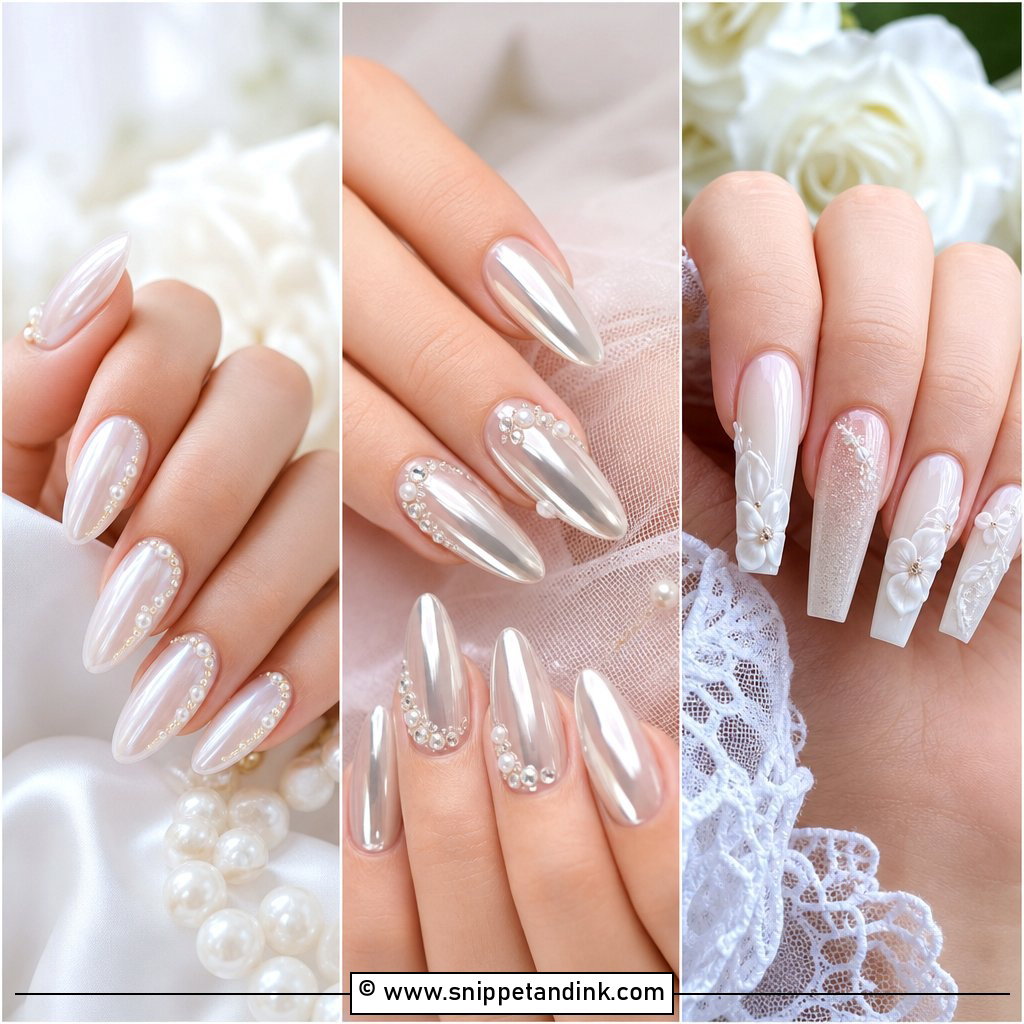
3. Fake Wedding Nails With Pearl Accents
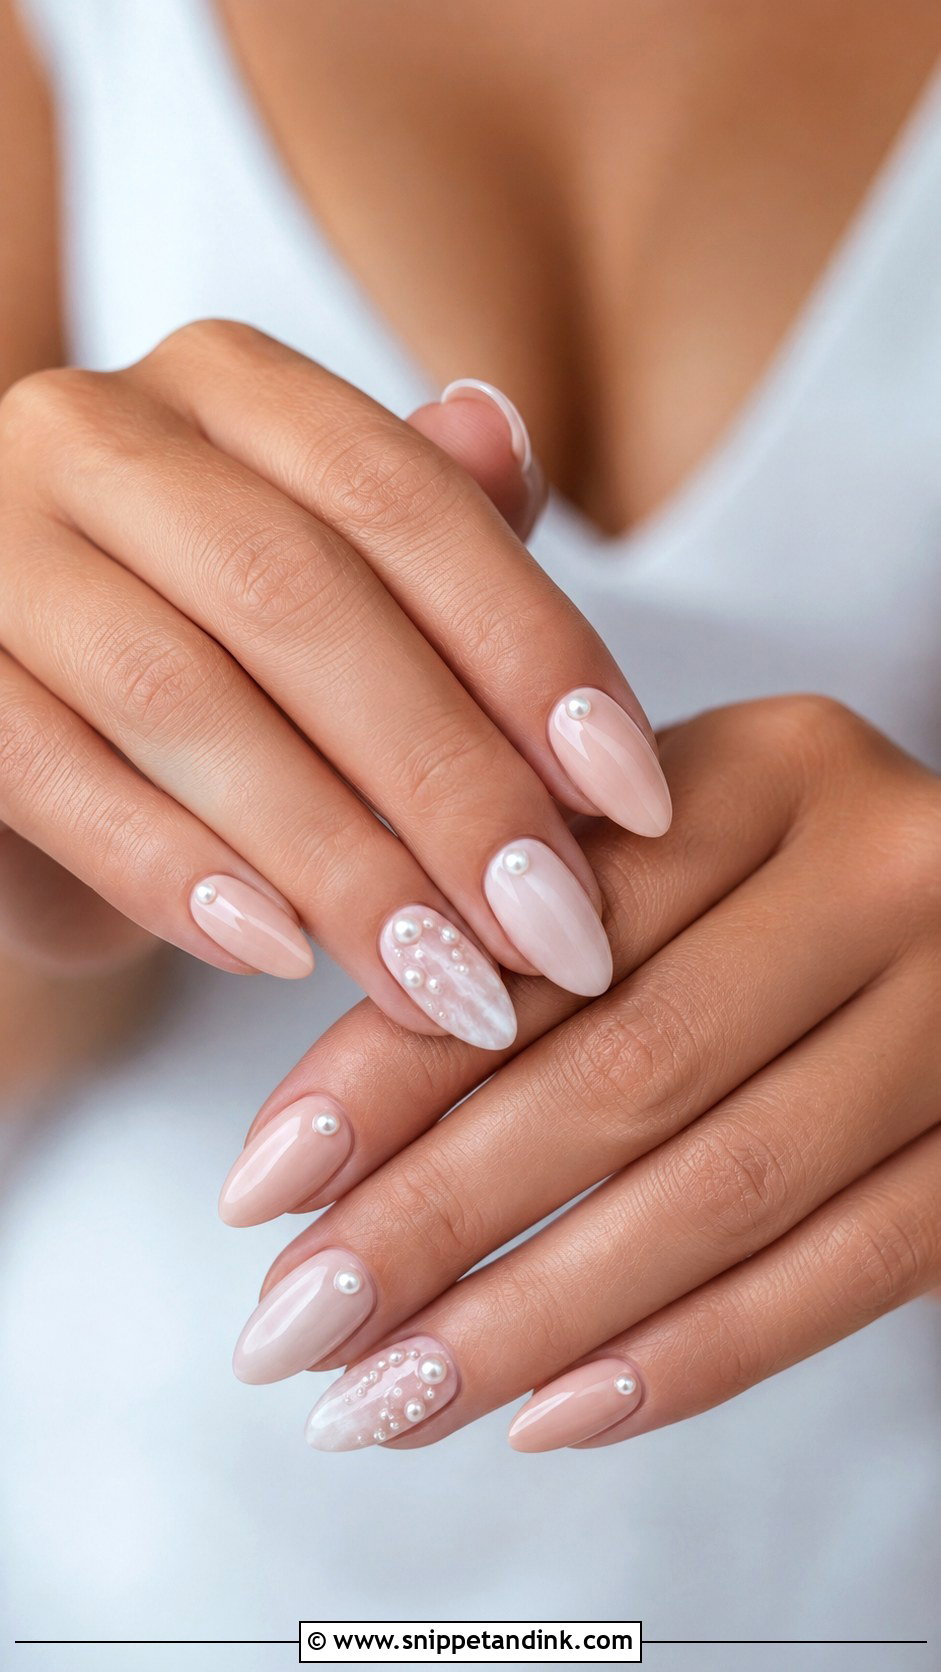
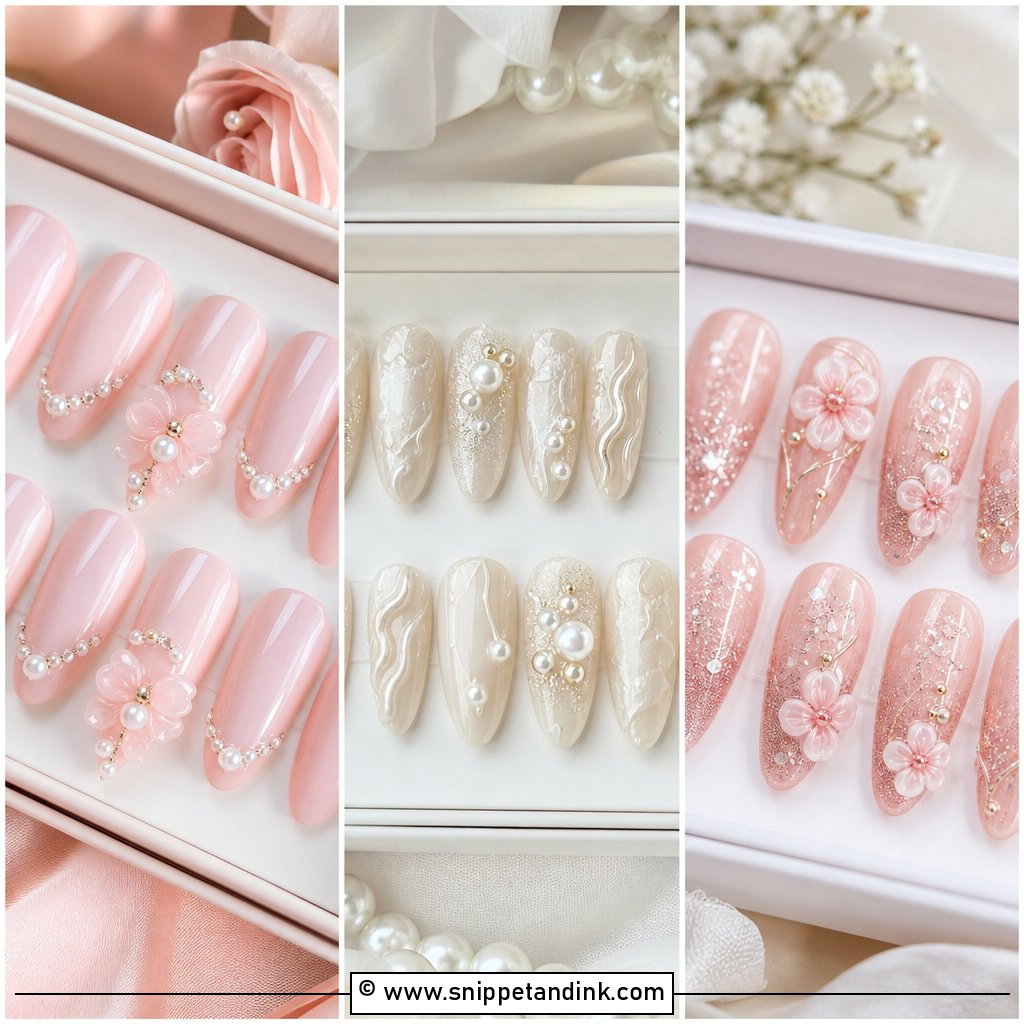
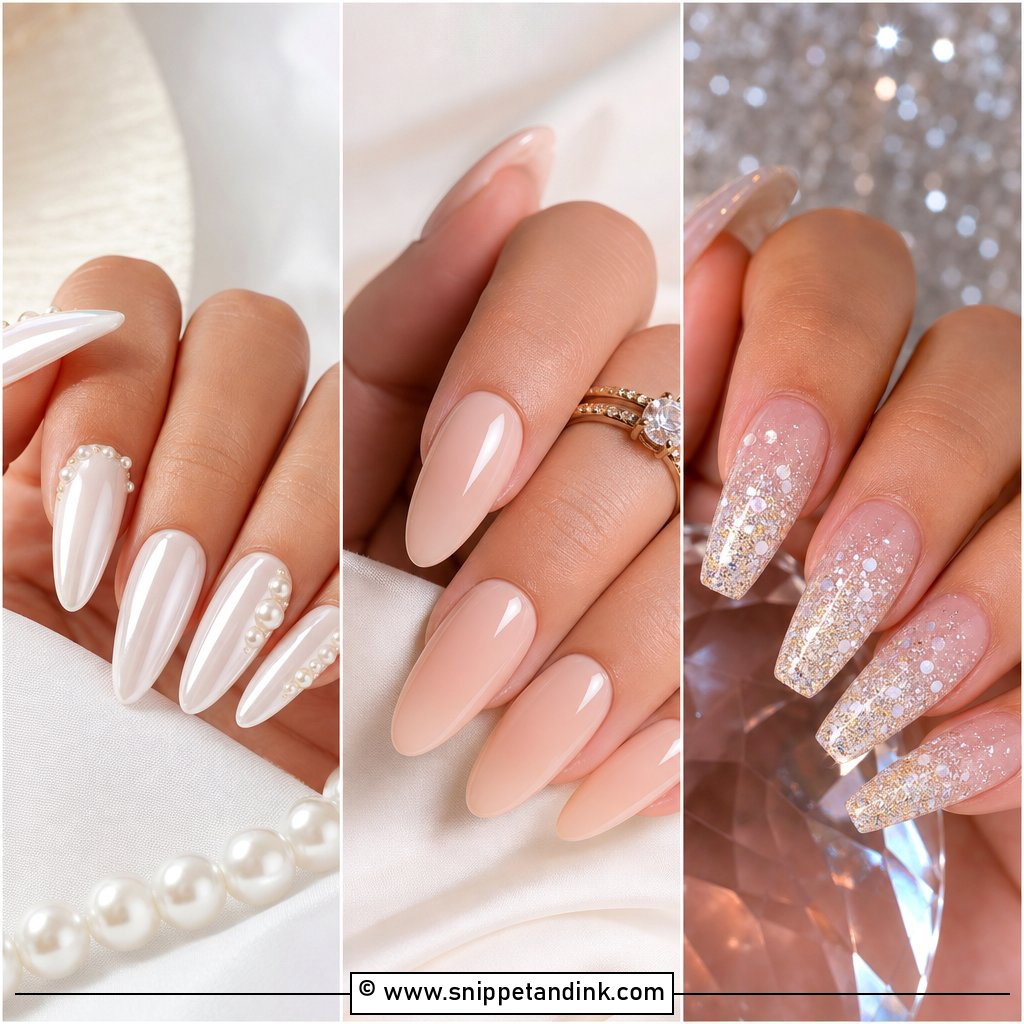
Pearl accents look refined only when they’re tiny and well placed. My usual layout is a few seed pearls at the cuticle of the ring finger, or one small pearl centered near the base, over a sheer nude, blush or milky background. Covering every nail makes the hands look busy and adds bulk. Domed pearls snag hair and lace, so for a long day I choose flat-backed ones set under gel. They suit brides already wearing pearl earrings or a beaded bodice.
4. Fake Wedding Nails With Nude Ombre
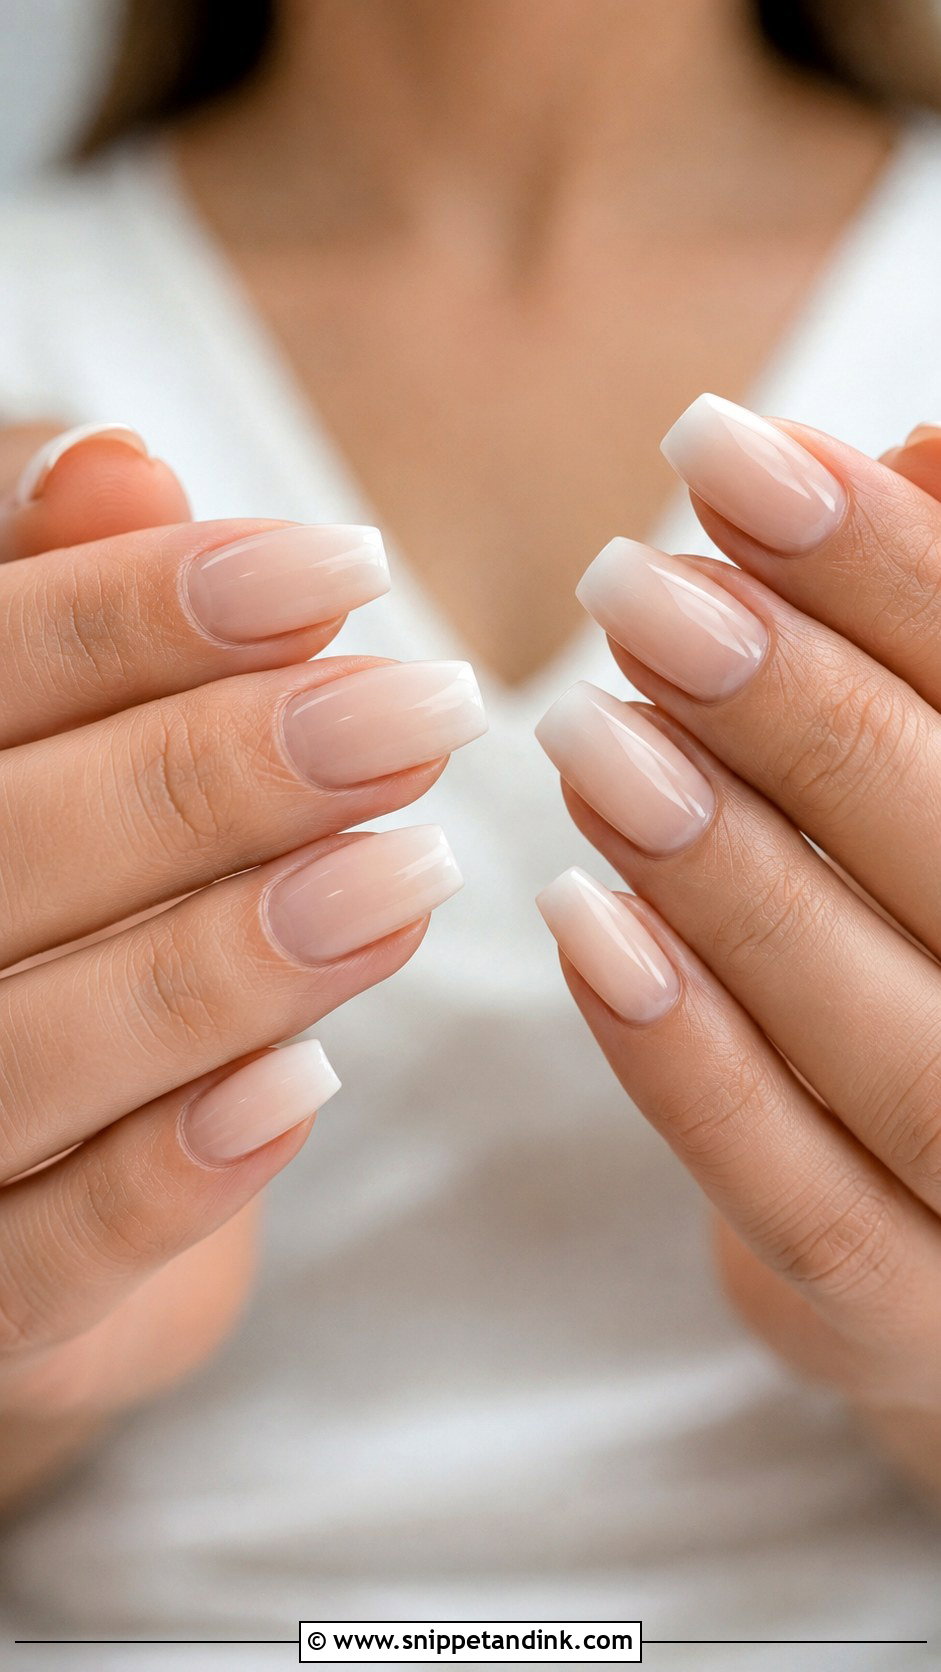
An ombre is the most forgiving design for press-ons. Because the color fades from a beige, pink or peach base into a lighter tip, the eye isn’t drawn to the cuticle, which is where fake nails tend to look obvious. Medium almond and coffin give the gradient room to show, though a short square version looks modern too. Match the base to your nail bed as closely as you can. Gloss suits most brides; a soft matte top is quieter, but it marks more easily.
5. Fake Wedding Nails With White Chrome Finish
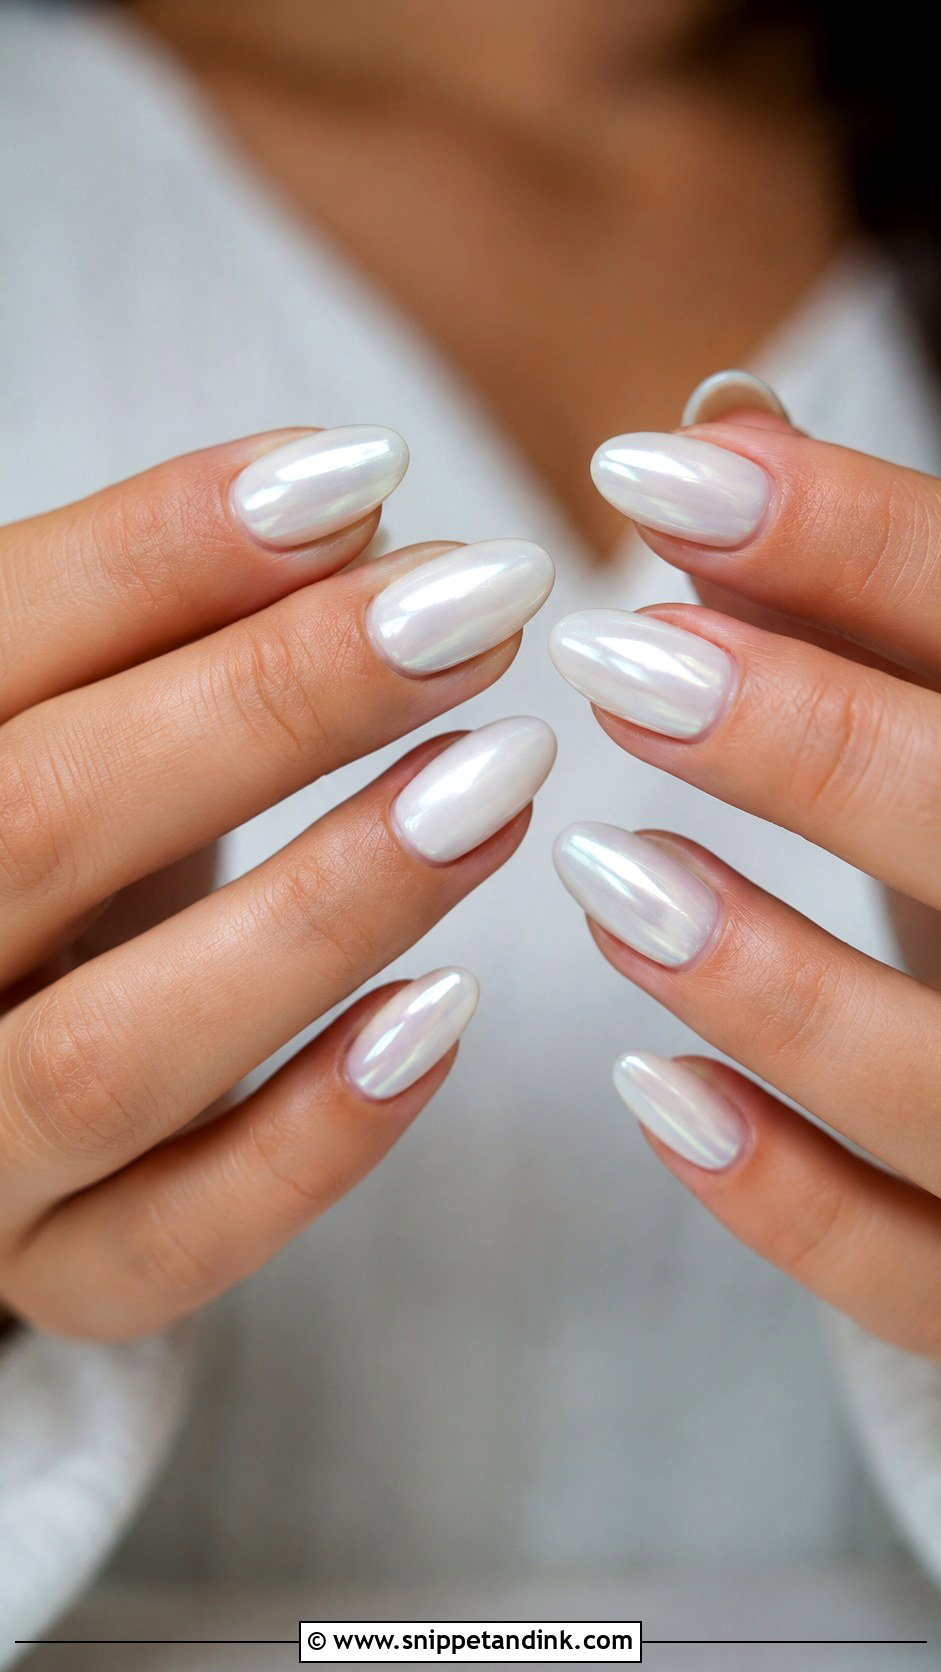
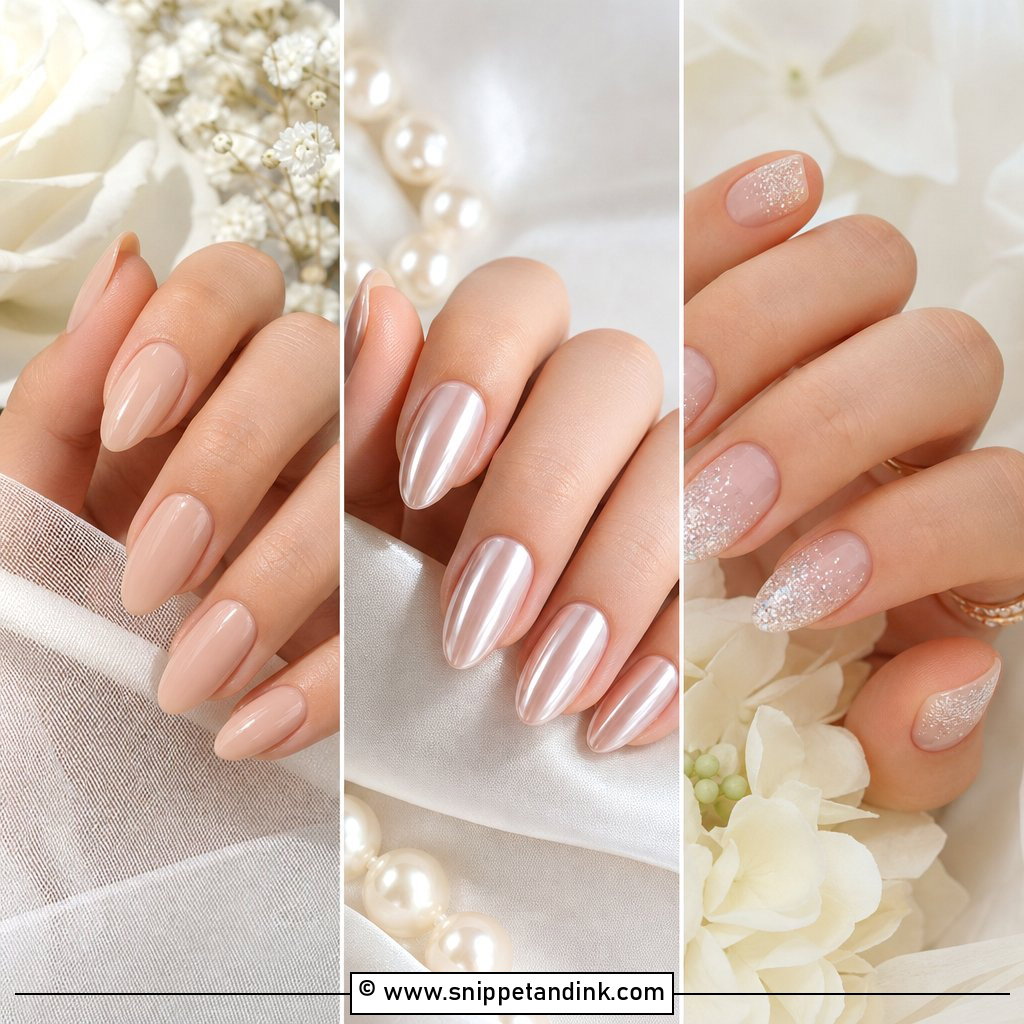
Chrome powder over a sheer white, milky pink or ivory base gives a glazed shine that catches light without glitter. When I order White chrome fake wedding nails, I always pick the soft, pearly versions over mirror metal, which reads as costume next to a gown. It pairs well with a simple dress, sleek hair and silver or white gold. Almond and short coffin look the most polished. One practical point: chrome on press-ons can scratch if you file the edges after they’re on, so size them before application, not after.
6. Fake Wedding Nails With Blush Pink French Tips
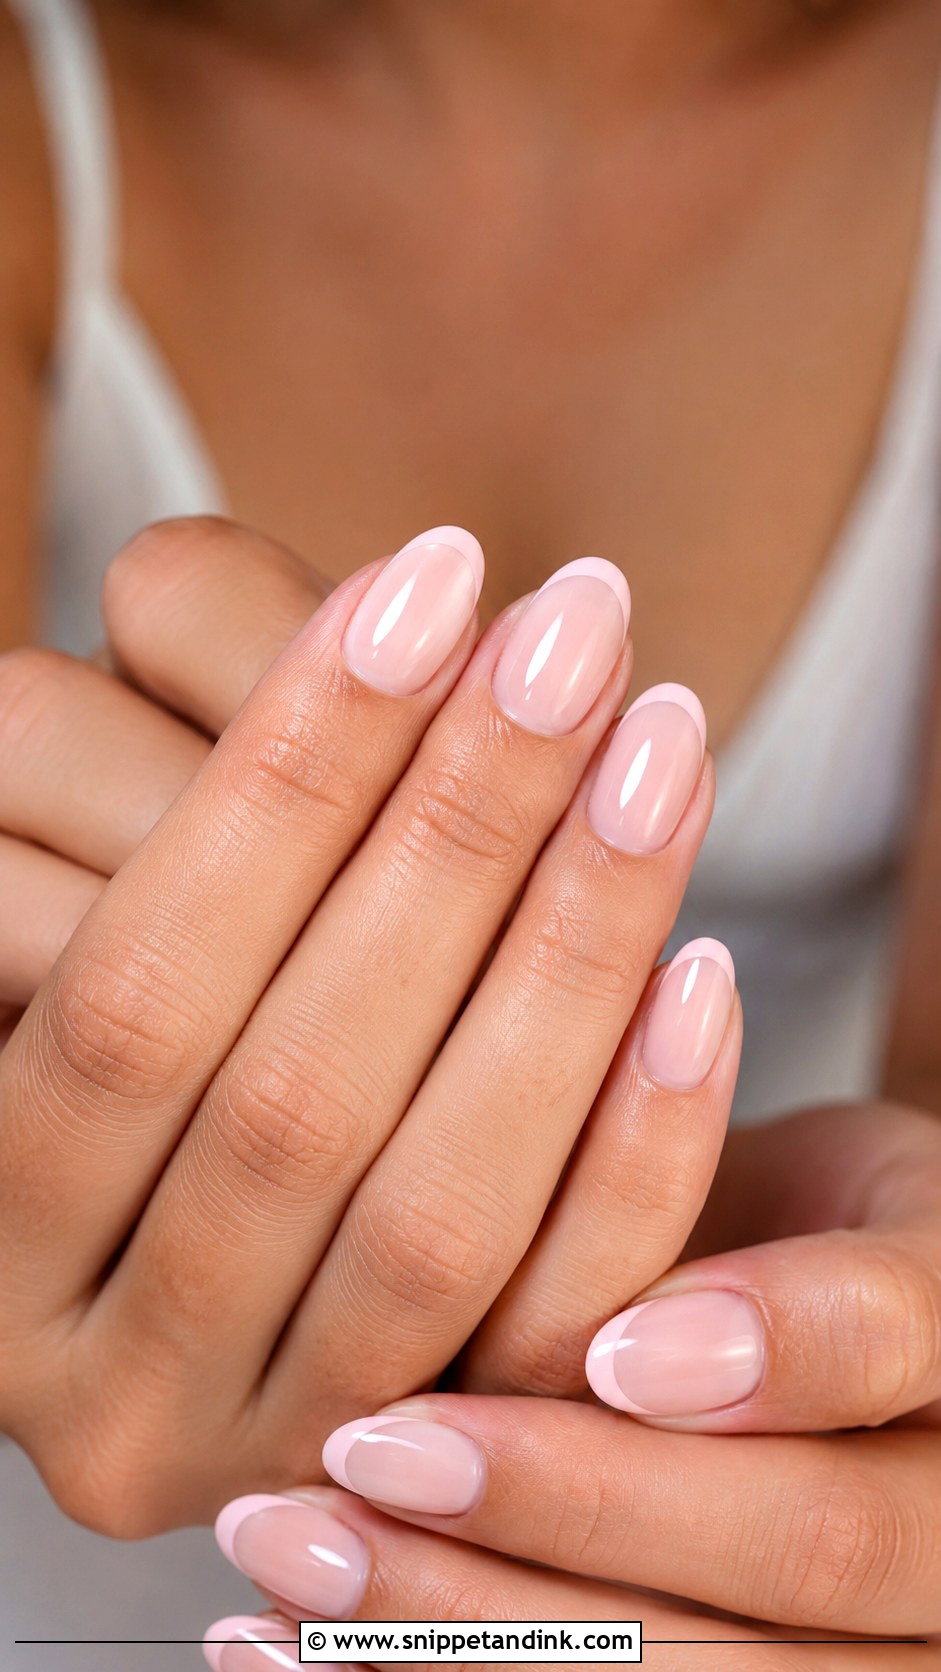
Swapping the white for pink gives a French that feels warmer and less formal. With Blush pink French fake wedding nails the tip is a pale pink over a sheer nude or rosy base, and it flatters most skin tones because there’s no stark contrast. Short almond or oval keeps it delicate. Keep the tips thin for a quiet look, or go a shade deeper if you want them to show in photos. Rose gold rings look right next to it.
7. Fake Wedding Nails With Lace Nail Art
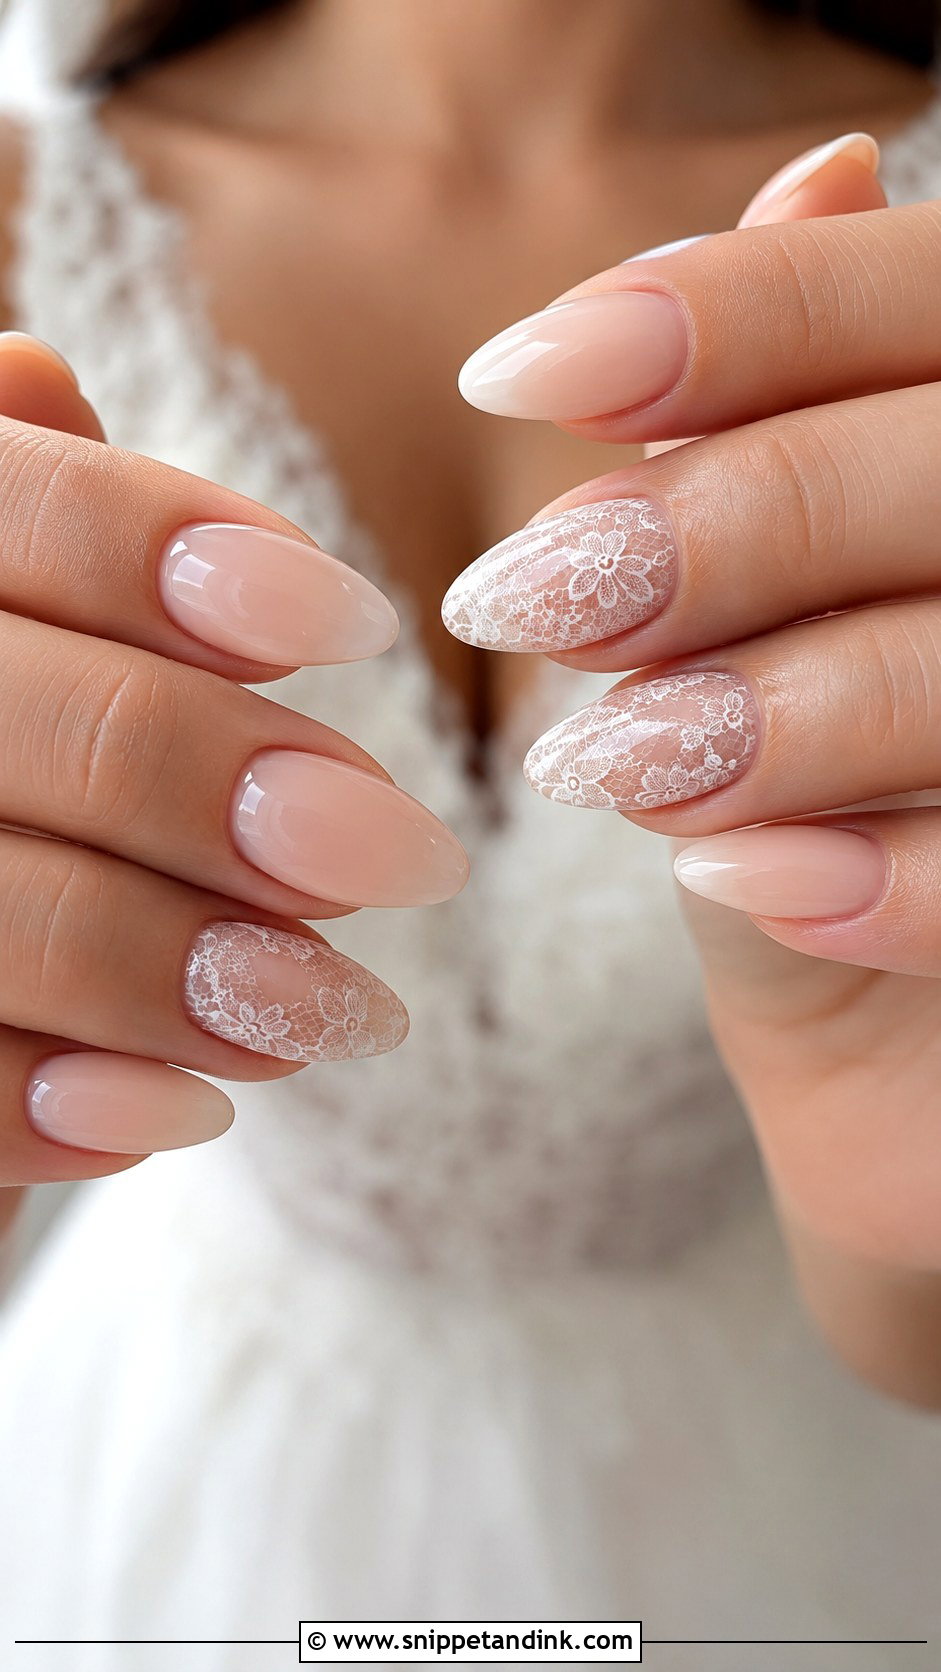
Lace on every nail looks busy and loses detail at arm’s length. I put fine white lace on the ring fingers and thumbs, over a sheer nude, pale pink or milky base, and keep the rest glossy and plain. Almond and oval let the pattern curve gracefully. When you’re shopping for press-ons, look closely at the lines: thin, crisp lace looks hand-painted and expensive, while thick printed patterns look like stickers. If your veil or gown has lace, bring a photo and match the motif scale, not just the color.
8. Fake Wedding Nails With Floral Accents
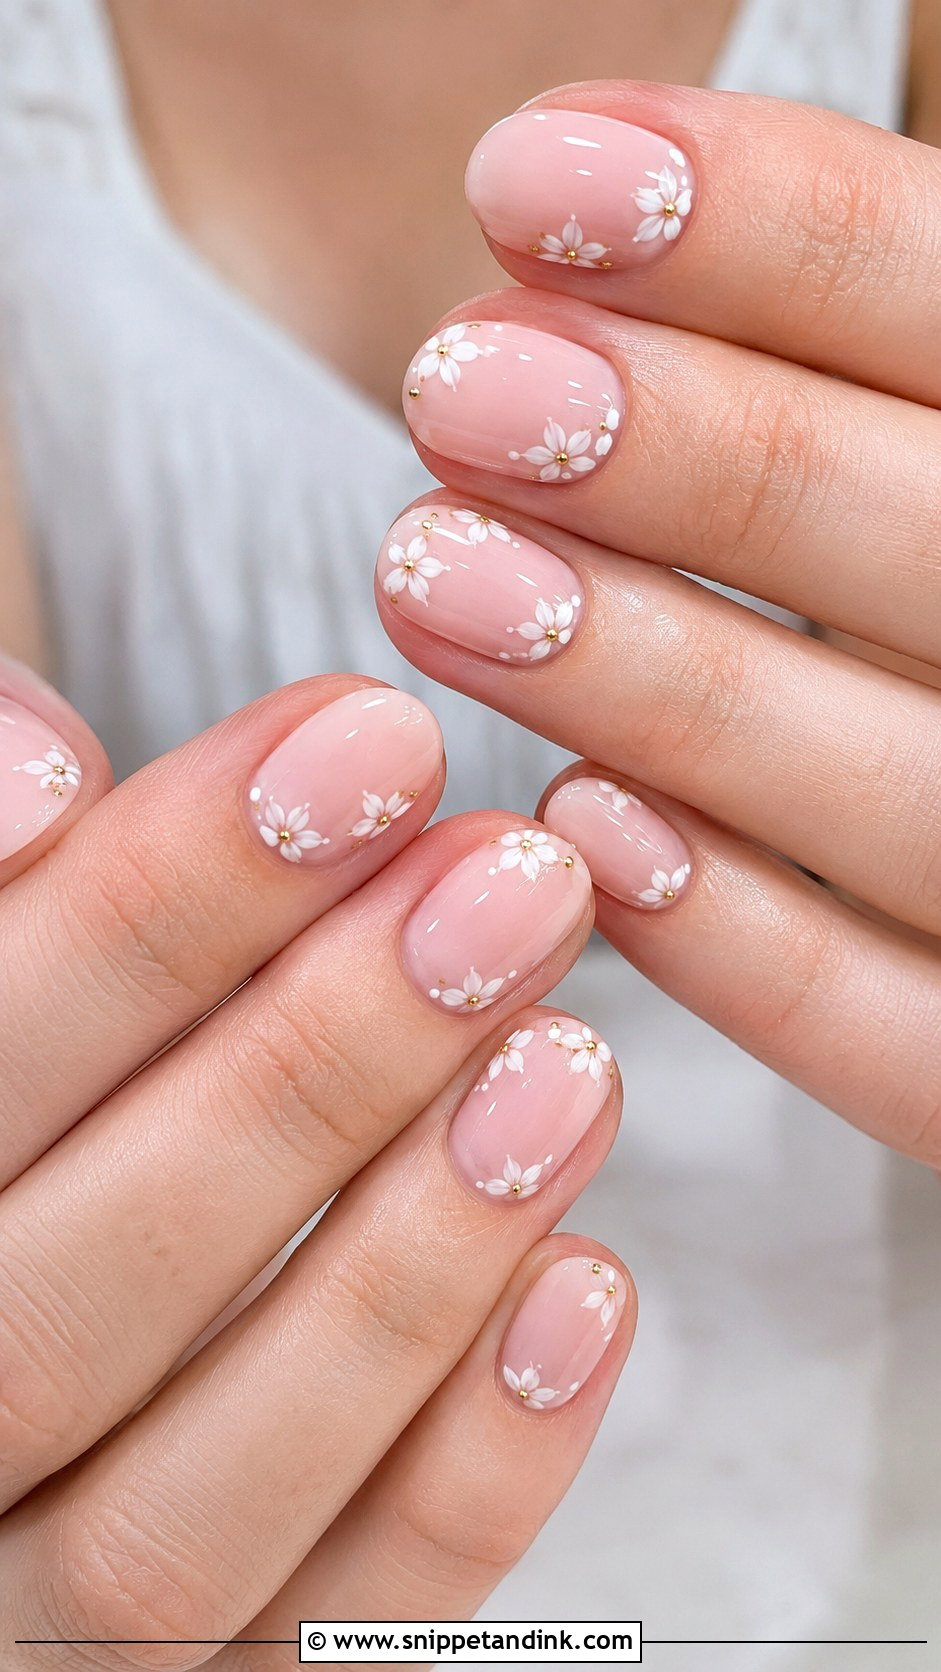
Floral nails tip into childish when the flowers are big or crowded. I keep them small and spaced: a few white flowers, a pressed-flower effect or fine painted petals over a nude, pink or milky base. A tiny gold dot or pearl center adds finish, but one detail is enough. Short almond and medium oval are the most flattering shapes. They suit spring and garden weddings, particularly if your bouquet has small white blooms the nails can echo.
9. Fake Wedding Nails With Gold Foil
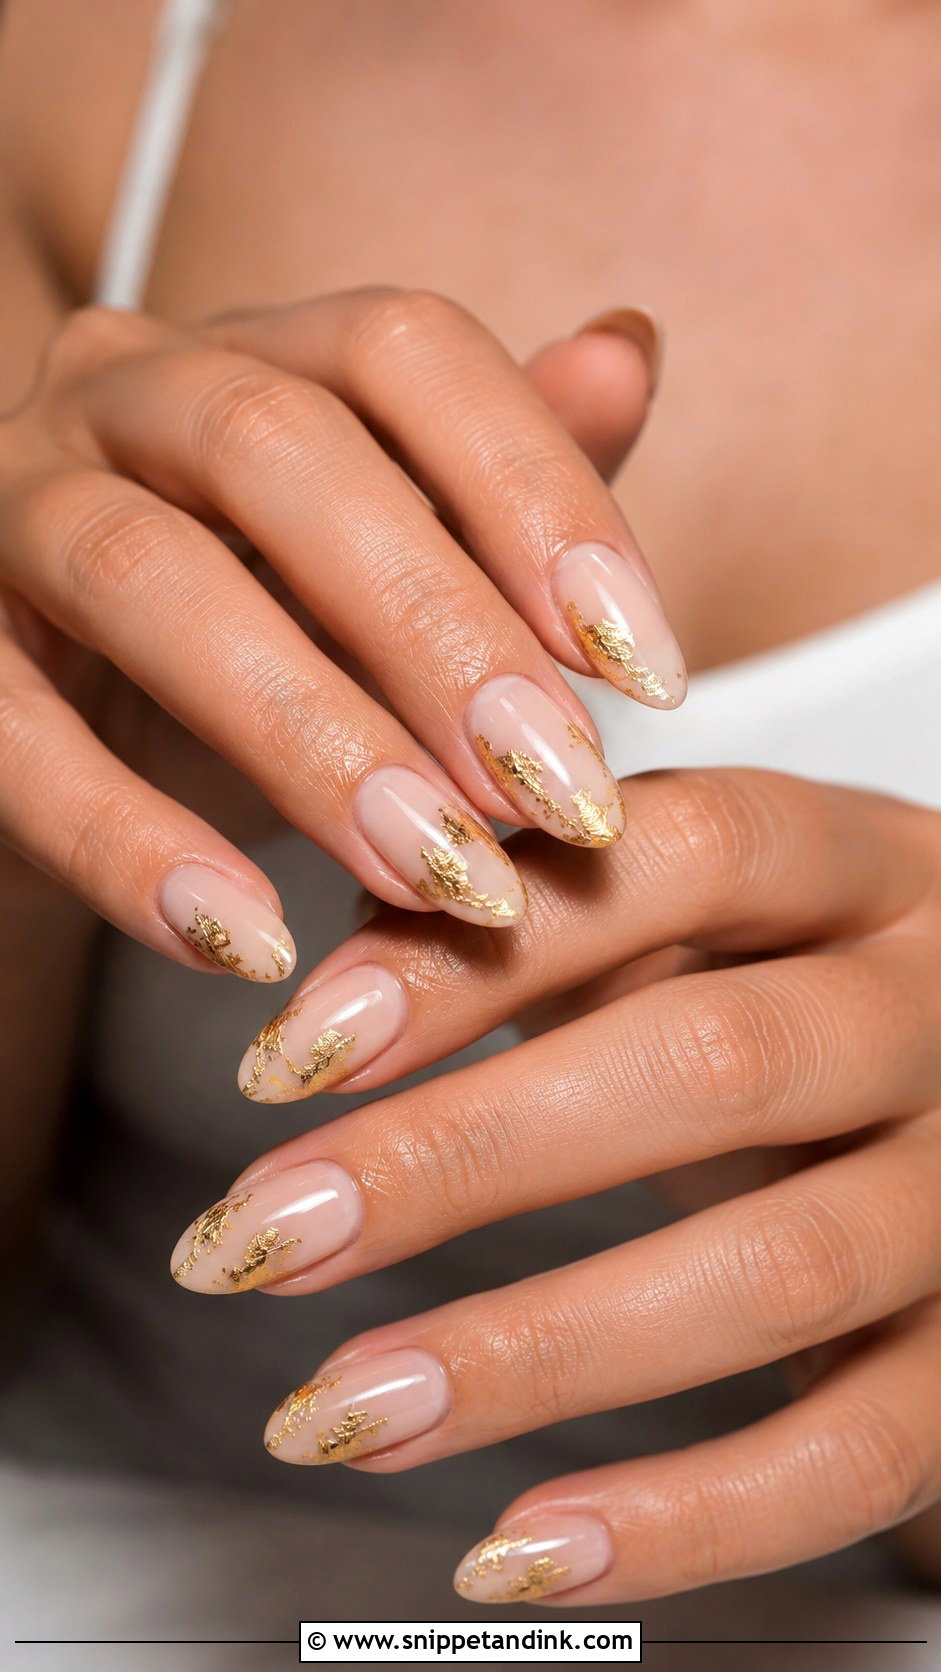
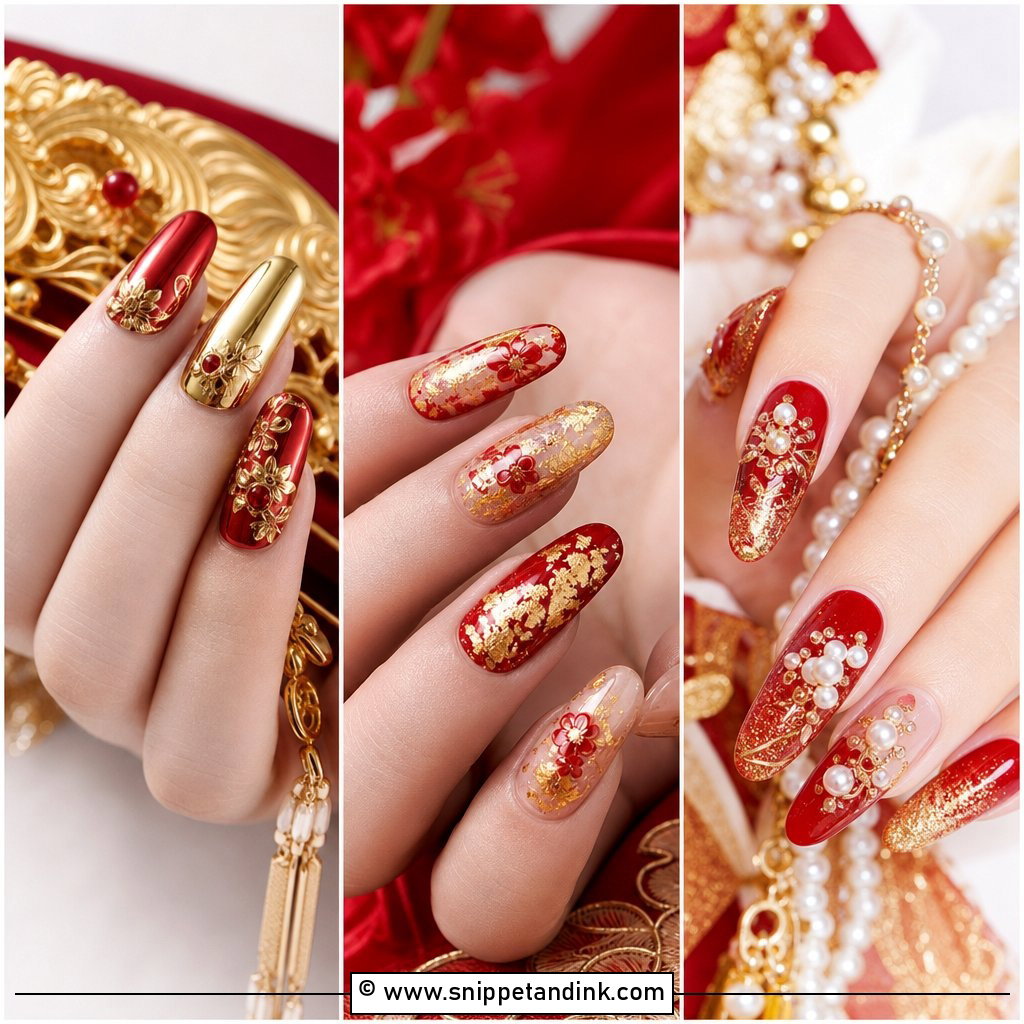
Gold foil works when it’s scattered, not slabbed on. Small flakes near the tips, along one side or across an accent nail look refined over sheer nude, ivory or soft pink; big patches look crinkled and heavy. The foil must be sealed under a smooth gloss, or the edges catch and lift. Almond and coffin give it room. Choose this one if you’re wearing gold jewelry or a champagne gown. With platinum and silver, the warm flecks can look out of place.
10. Fake Wedding Nails With Silver Glitter Ombre
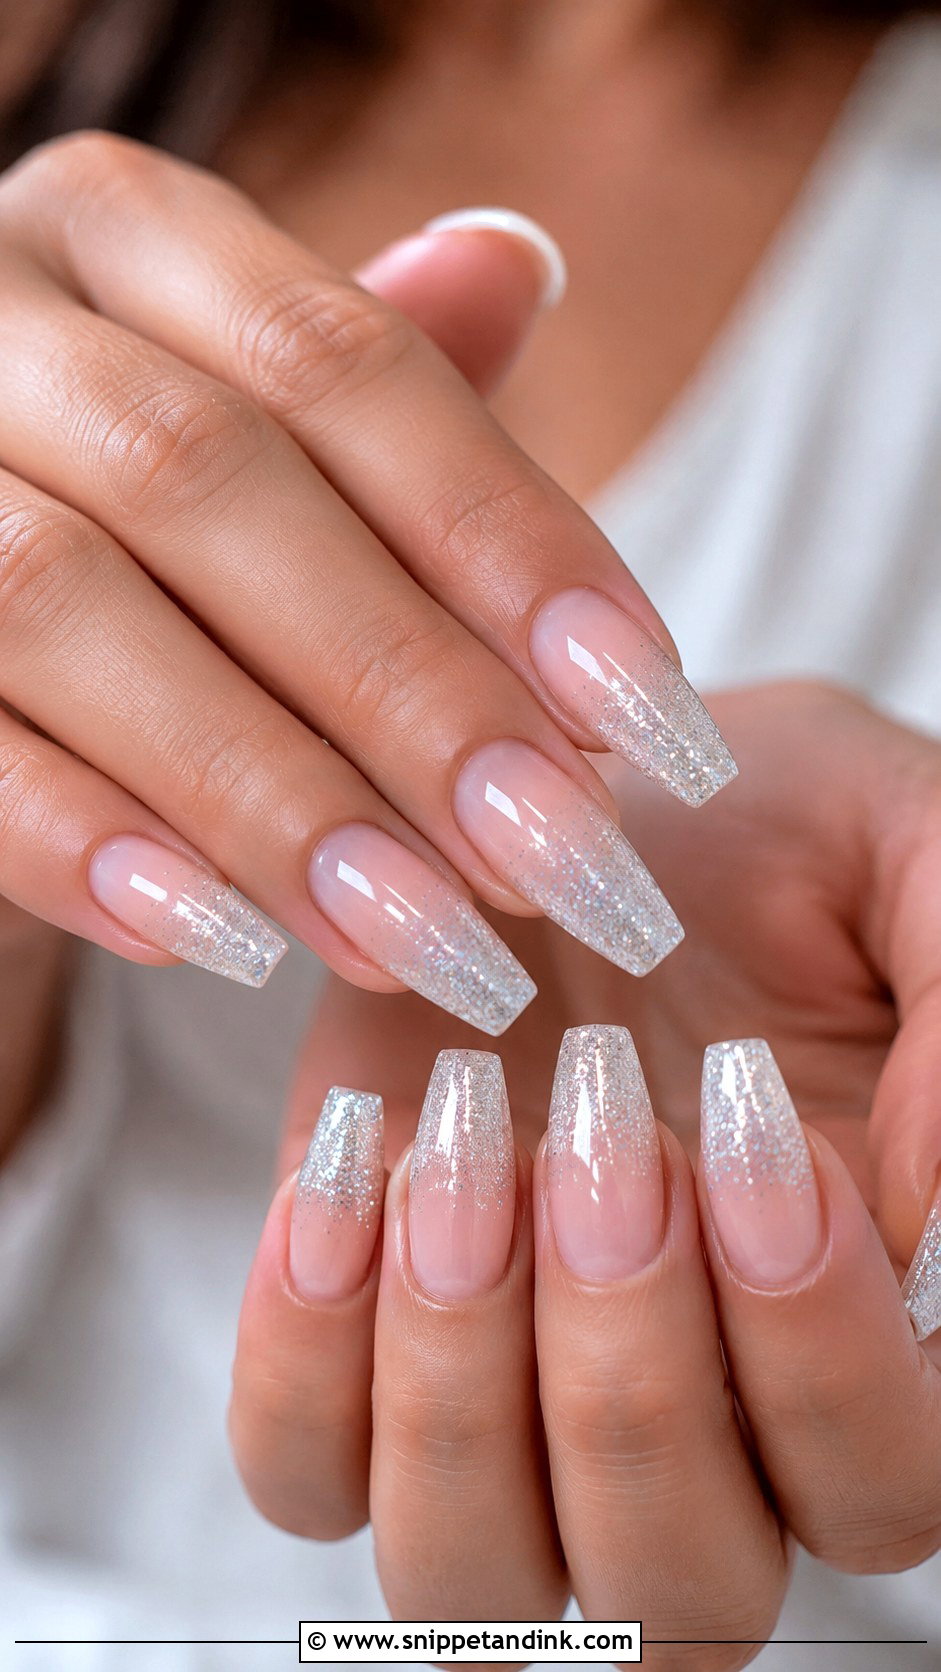
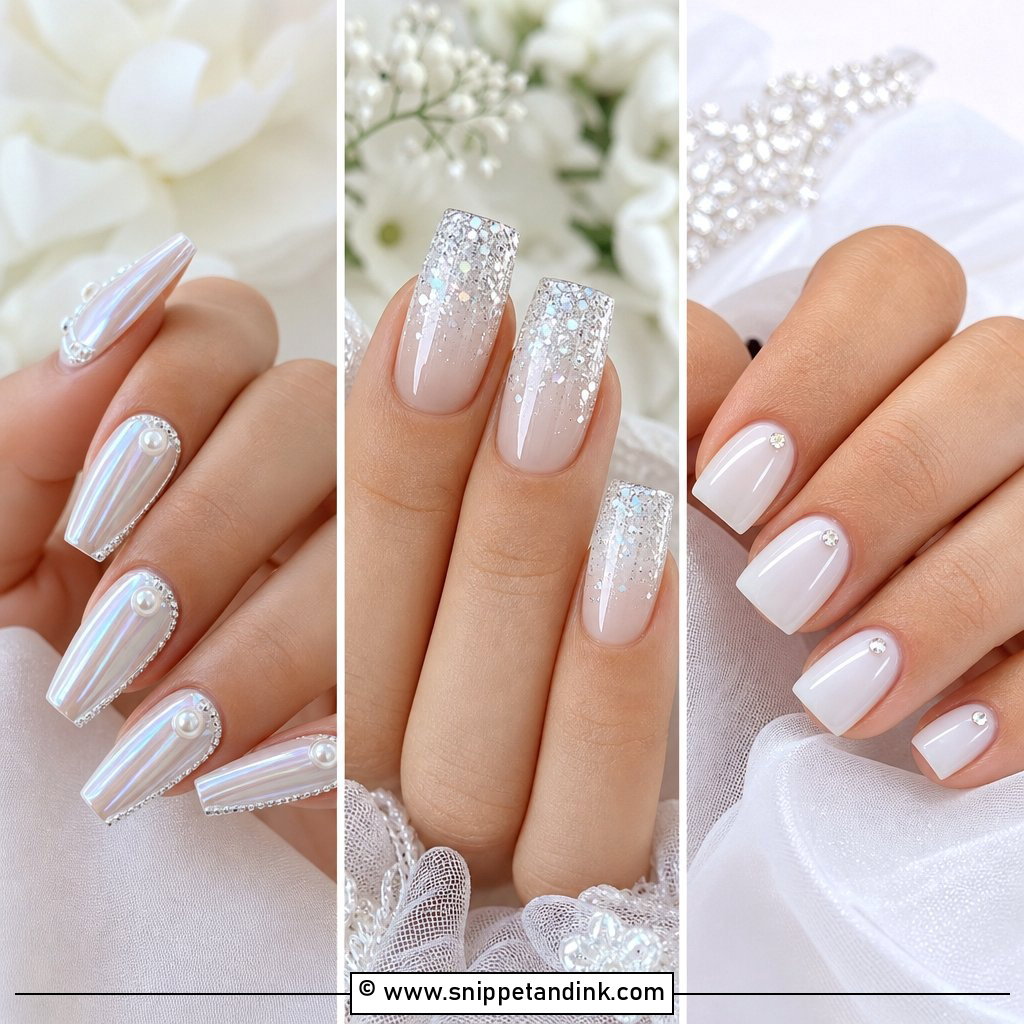
Sparkle at the tips only keeps the base clean, which is the secret to glitter on a bride. With Silver glitter ombre fake wedding nails the glitter starts at the free edge and fades into a nude, pale pink or clear base, so the hands shimmer when you hold the bouquet. Fine glitter is far better than chunky here; chunky pieces catch on tulle and show texture. Medium almond, oval or coffin give the fade enough length. It sits well with crystal hairpieces and silver jewelry, as long as the base stays sheer.
11. Fake Wedding Nails With Short Square French Tips
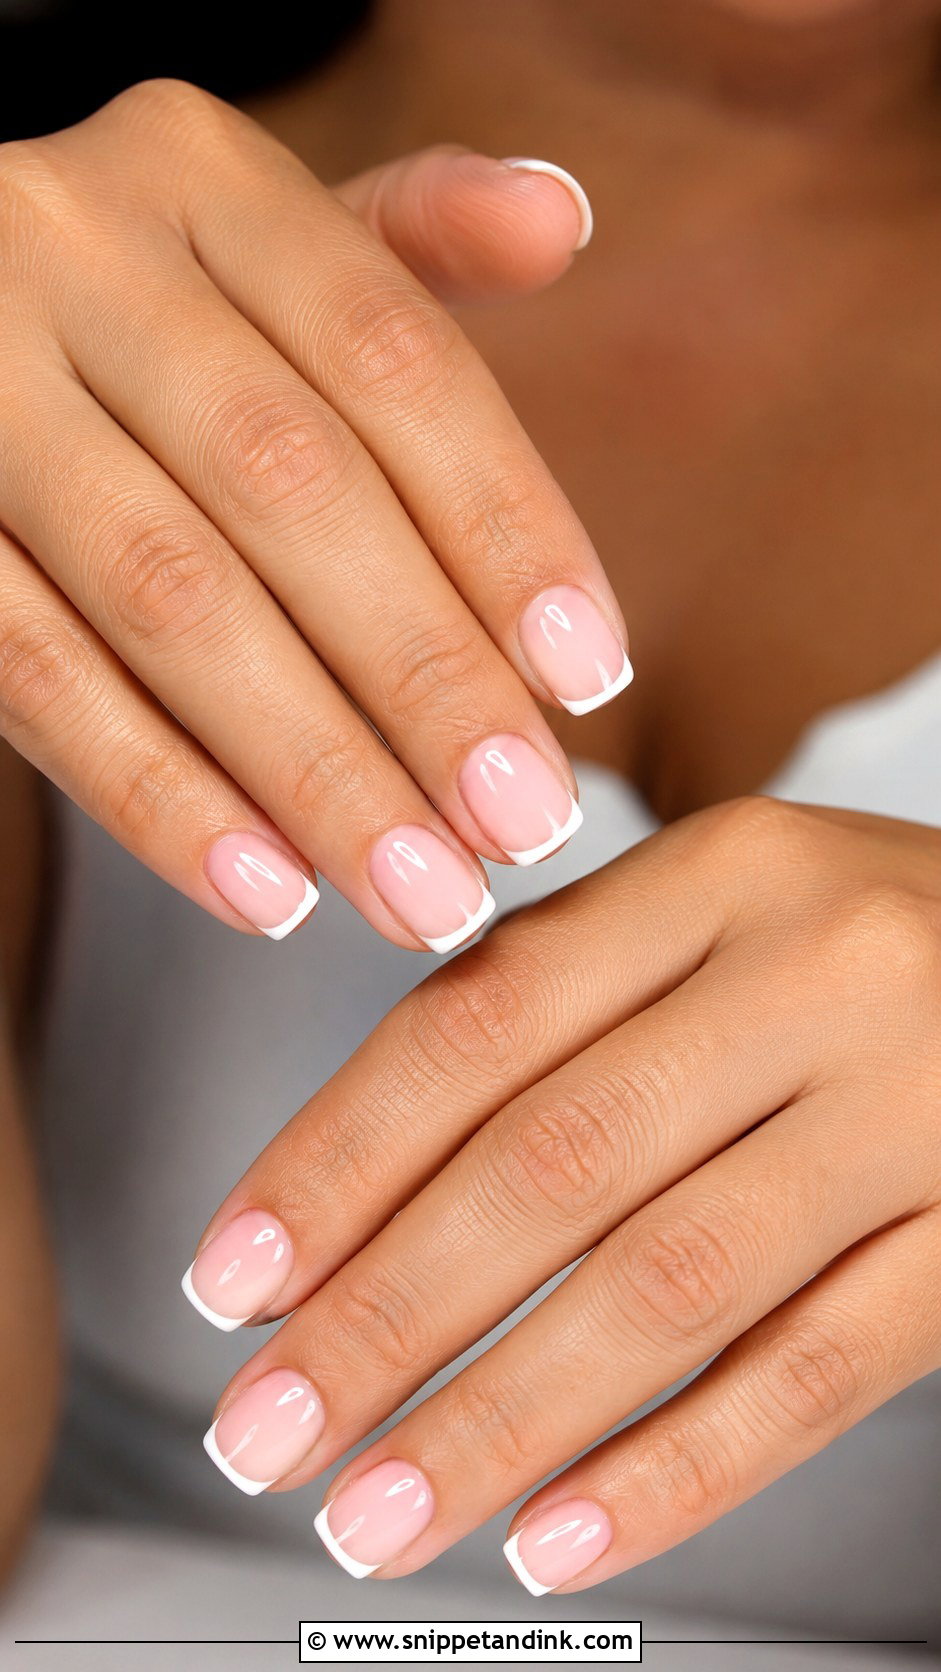
Short square is the shape I suggest to brides who never wear long nails. You can still do up zips, fasten an earring and type a text, and short press-ons are less likely to pop off because there’s less leverage on the glue. Pick a natural pink or beige base with thin white tips for the most real-looking finish. Square edges can catch on knit or lace, so I soften the corners slightly. The same set works for bridesmaids or for anyone doing hands-on setup the morning of.
12. Fake Wedding Nails With Almond Nude Finish
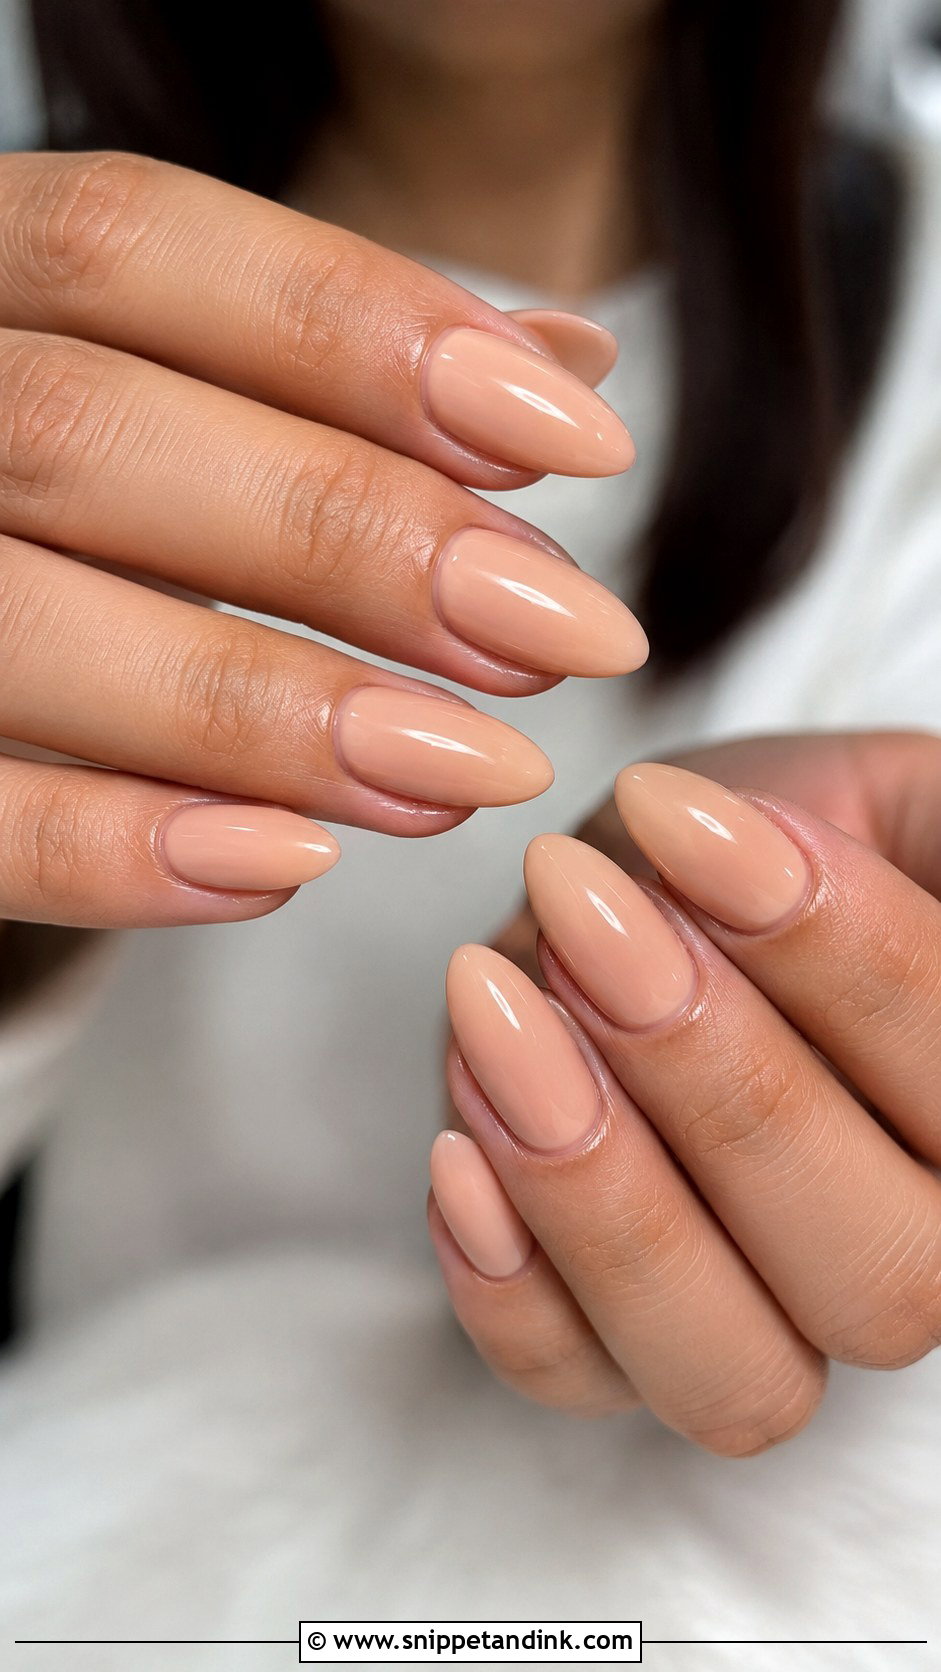
Almond lengthens the fingers, and a nude keeps the hands quiet next to the ring. The shade is everything: beige leans right on warm skin, rosy nude on cool skin, peachy nude on olive or golden tones. Hold the nail against your knuckle in daylight before you commit. Gloss looks classic, while a velvet matte is more modern but shows wear sooner. Keep the length medium or shorter. Long almond press-ons are more likely to snap at the tip if you bump them on a table.
13. Fake Wedding Nails With Baby Boomer Ombre
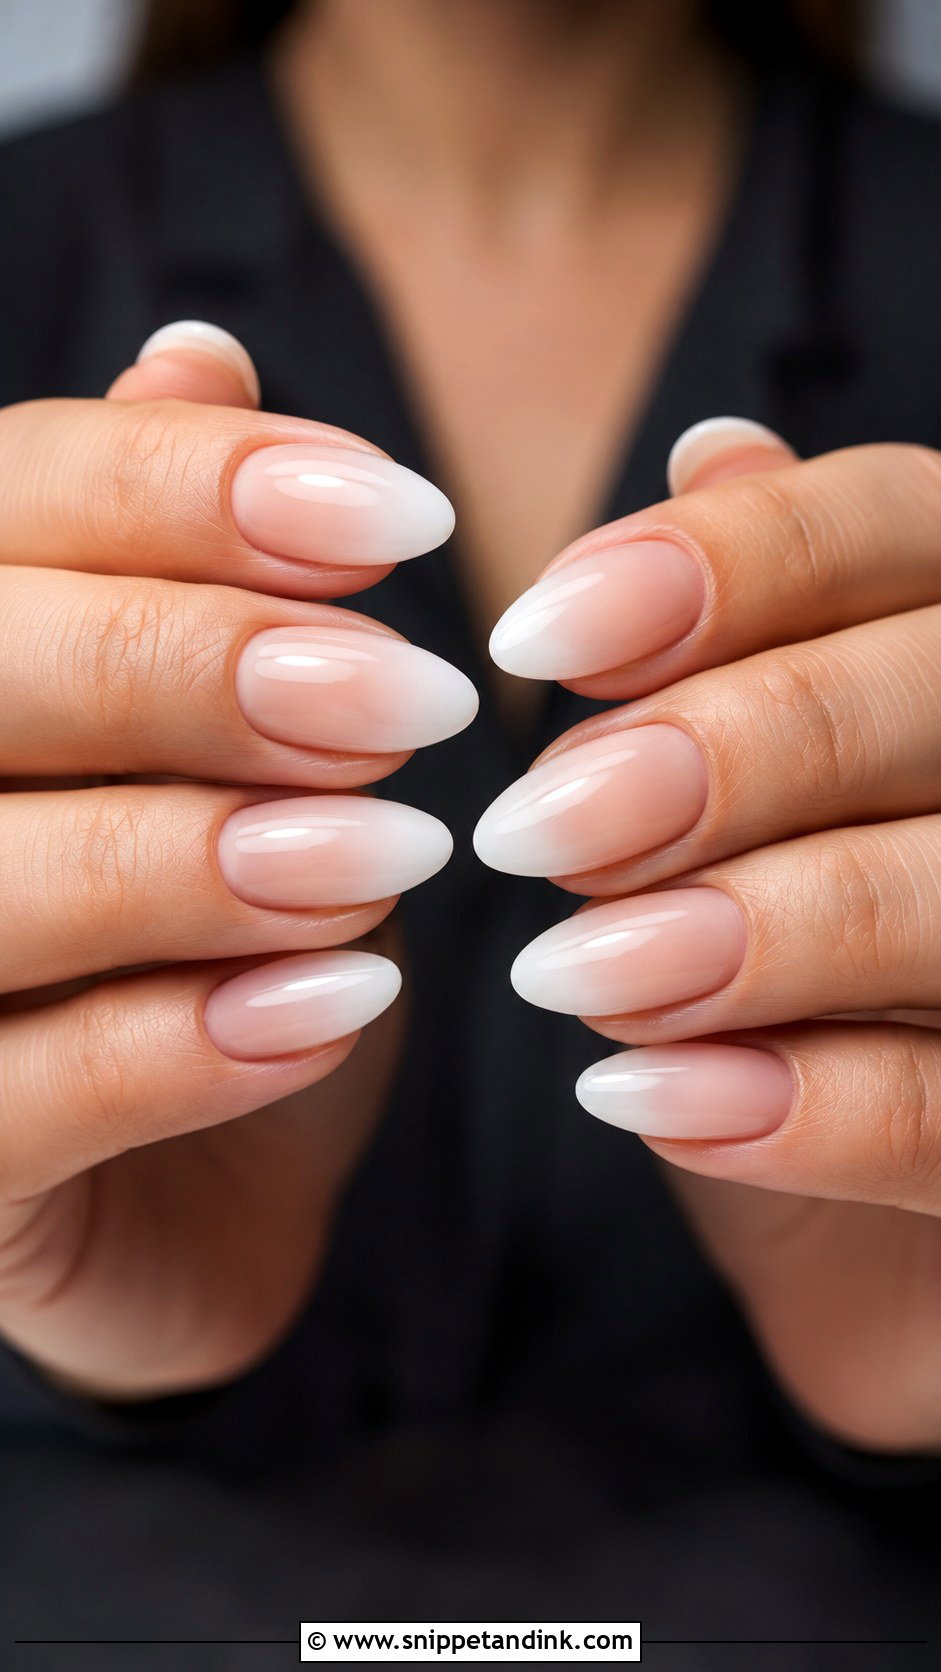
This is the gradient I’d pick if a classic French feels too stark. Baby boomer fake wedding nails fade from a natural pink or nude into a creamy white tip, so there’s no hard line at all. Almond, coffin and oval give the gradient length to stretch. Ask for a sheer base and soft white tip rather than a bright, opaque contrast; the softer version looks like a real manicure in natural light. It’s also the design where a slightly imperfect size shows least.
14. Fake Wedding Nails With 3D Flower Details
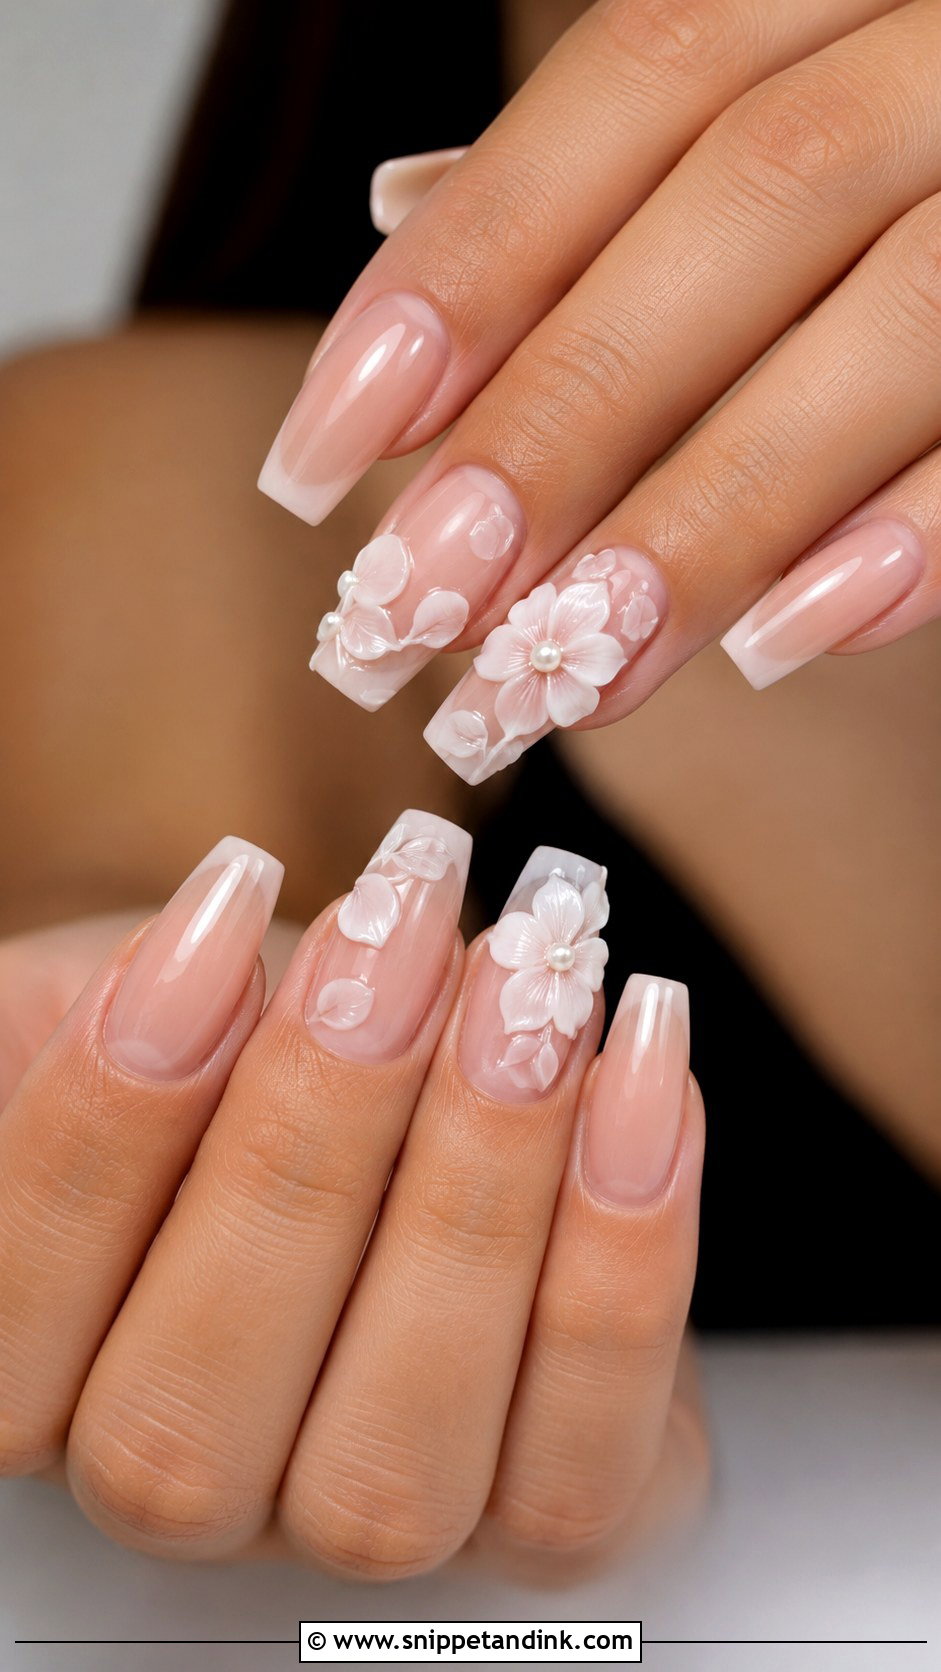
Texture is the appeal here, and it’s also the risk. Small sculpted flowers in white, ivory or blush over a sheer nude or milky base look refined on one or two accent nails, but tall petals catch on tulle, hair and lace. For a full wedding day, I sculpt them flatter than they look in most photos. Almond and coffin give a balanced canvas. If your gown has raised floral appliqué, matching the flower shape on one nail is enough to tie them together.
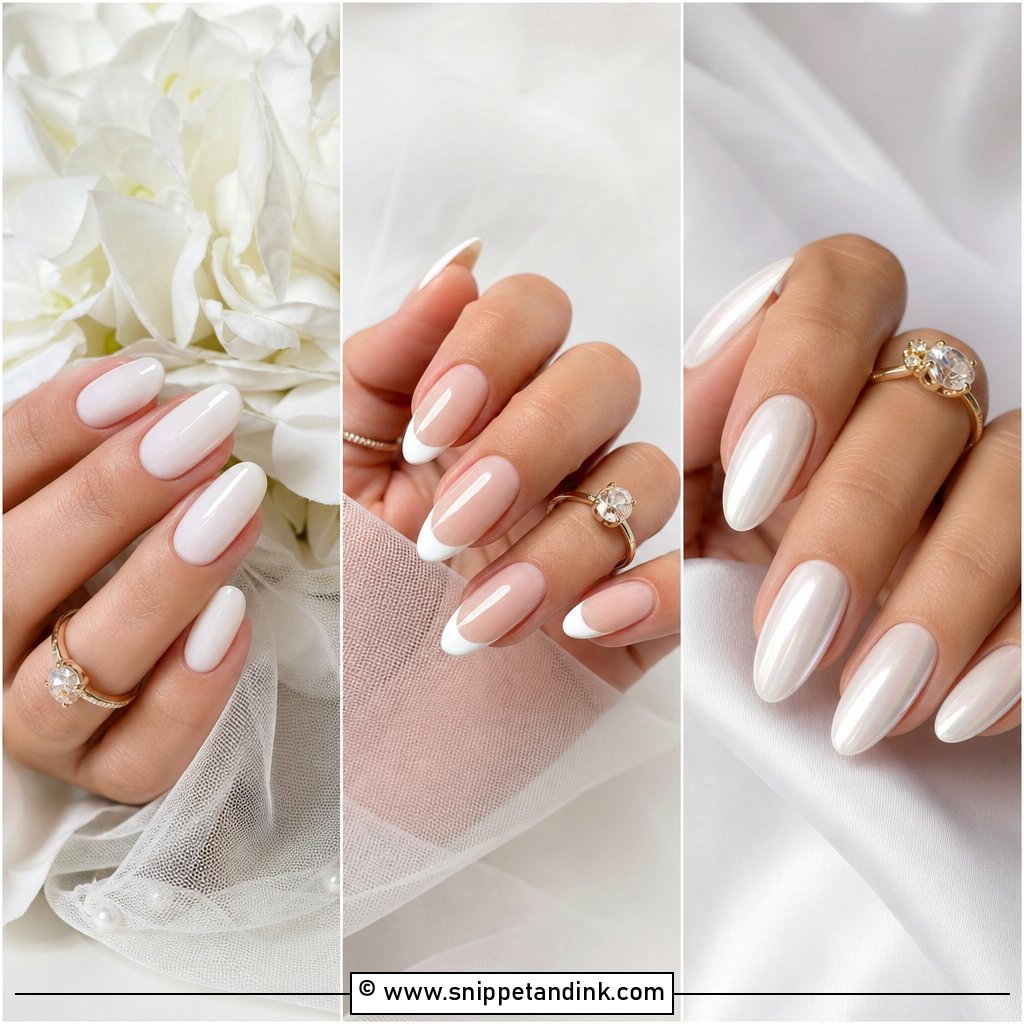
15. Fake Wedding Nails With Rhinestone Accents
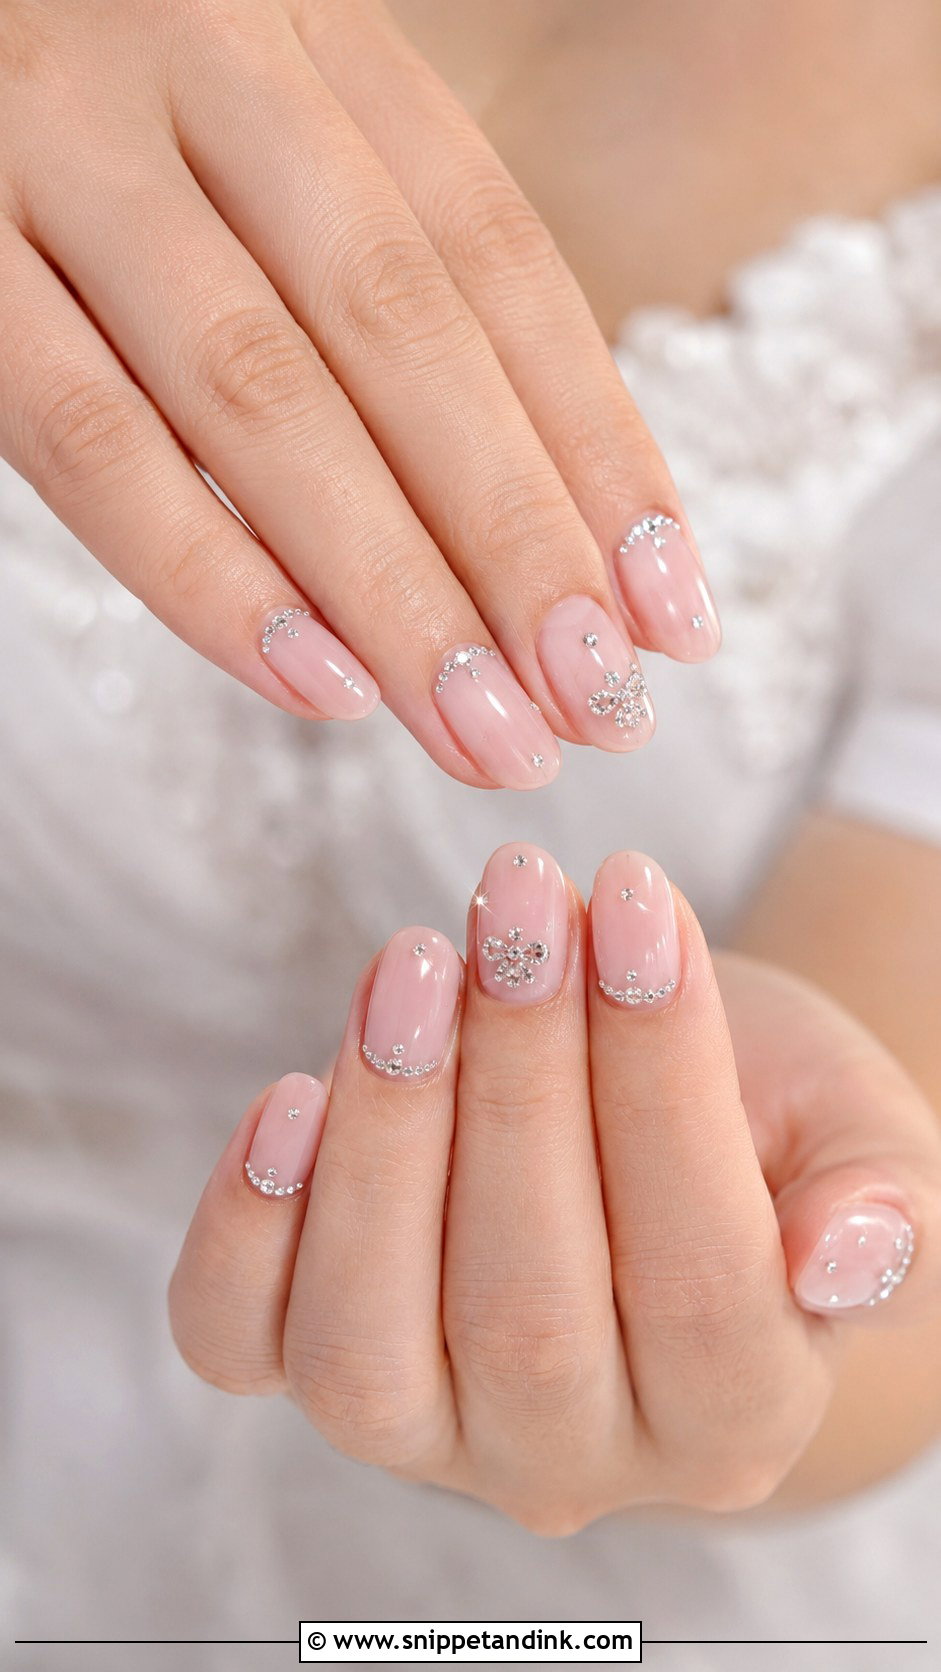
Crystals are the part of a set most likely to fall off, so placement matters. I put small stones near the cuticle, along a French tip or across one accent nail, over a nude, milky or French base. On Rhinestone accent fake wedding nails, skip oversized stones; they catch on fabric and lift. Short to medium almond or oval suits them best. Apply each nail with firm pressure for a full thirty seconds, and pack a spare in case one pops during the dancing.
16. Fake Wedding Nails With Ivory Coffin Shape
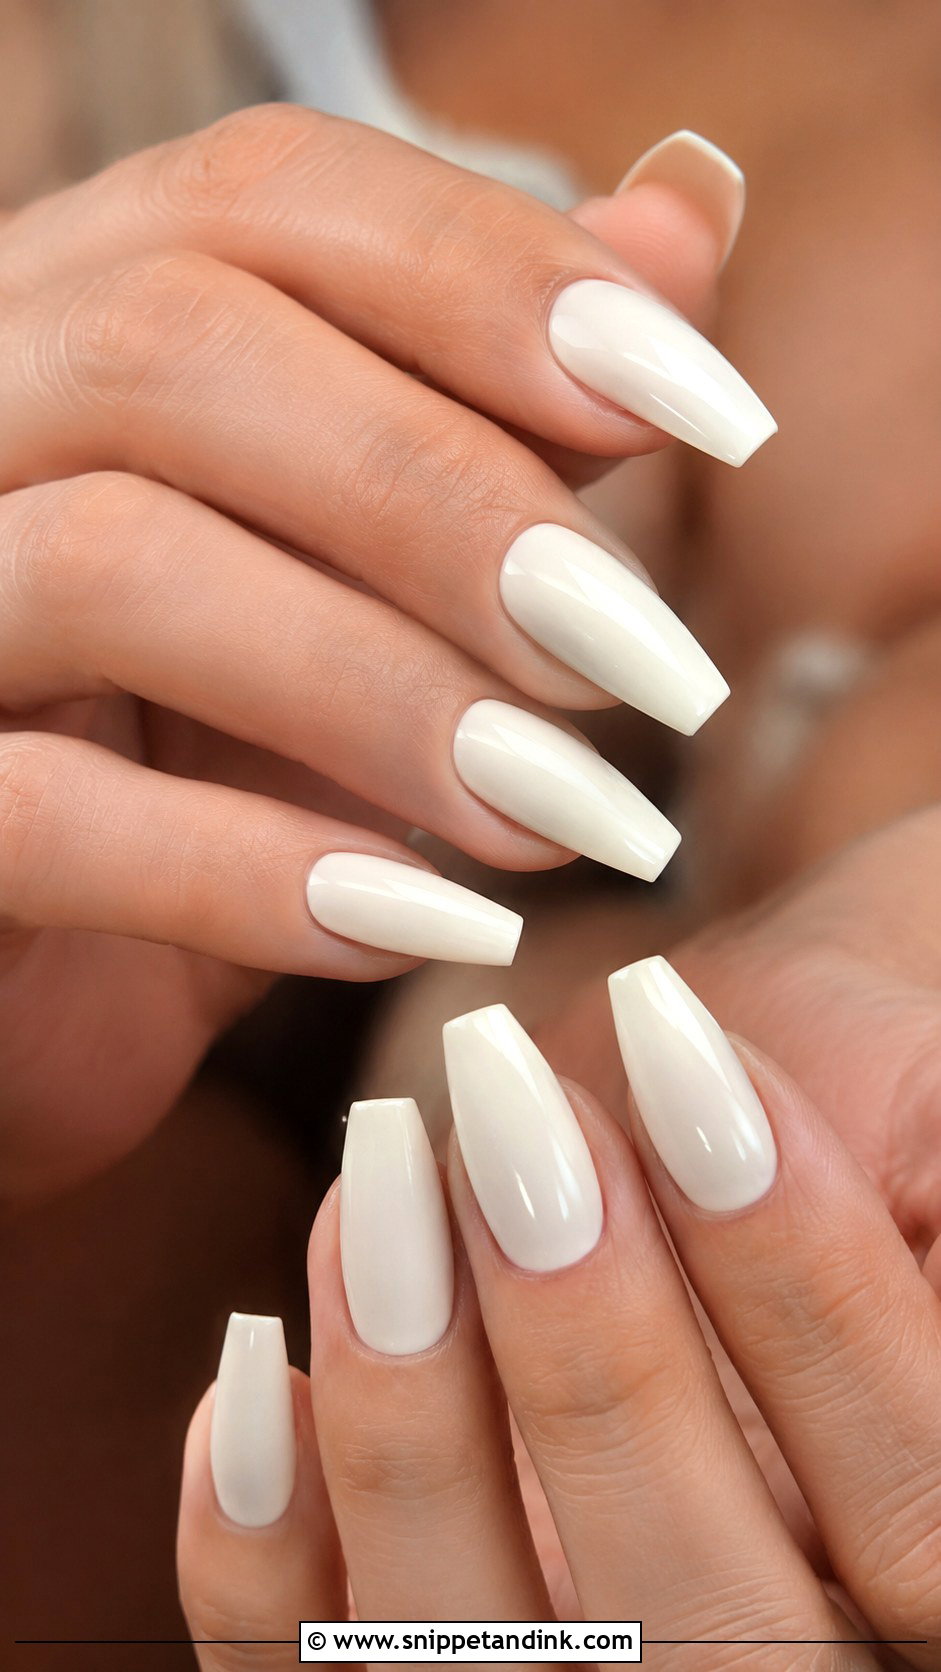
Coffin gives a structured, modern outline, and ivory keeps it bridal. Choose a creamy shade rather than stark white, which can look grey or blue in photos next to an ivory gown. You can leave the nails plain and glossy or add a very faint shimmer. Medium coffin is far easier to wear than extra long, especially when you’re pinning a veil or holding stems. If your dress is ivory or cream, this creates a close color match without looking flat.
17. Fake Wedding Nails With Sheer Pink Gloss
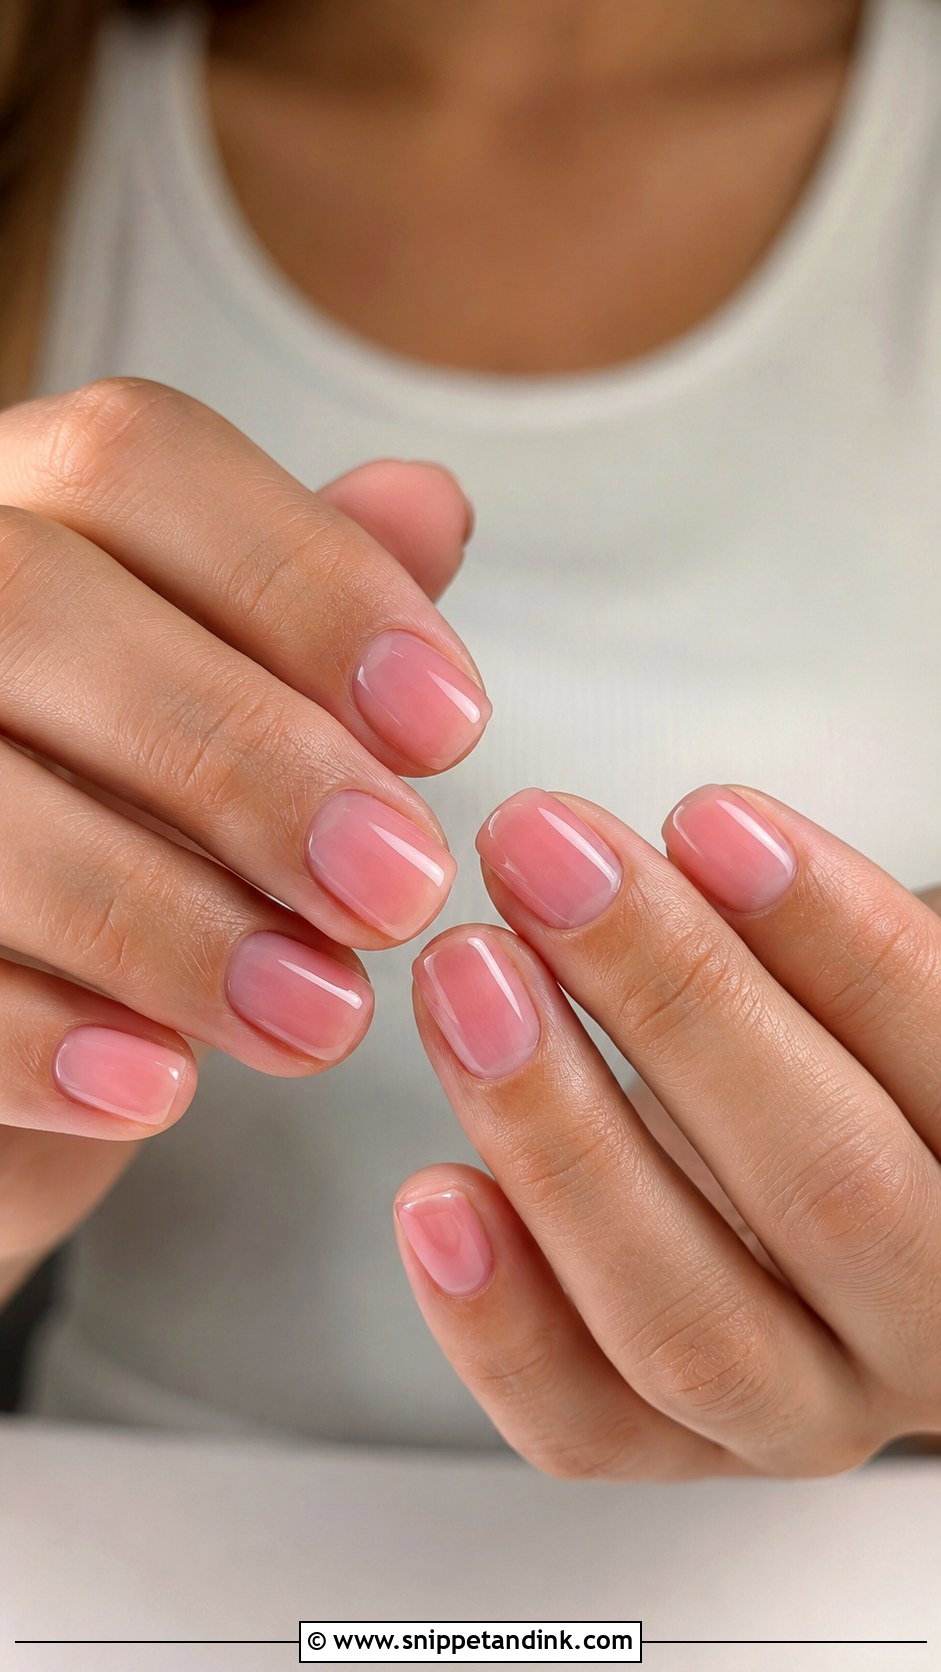
If you’ve never worn extensions, start here. A sheer pink gloss looks like your own nails on their best day, smoother and shinier. I look for a jelly-like pink base with high shine, because jelly textures let the nail bed glow through instead of sitting on top. Short oval, squoval or almond keeps it realistic. It works with every dress, and because there’s no art, a lifted edge or a replaced nail is barely noticeable.
18. Fake Wedding Nails With Something Blue Tips
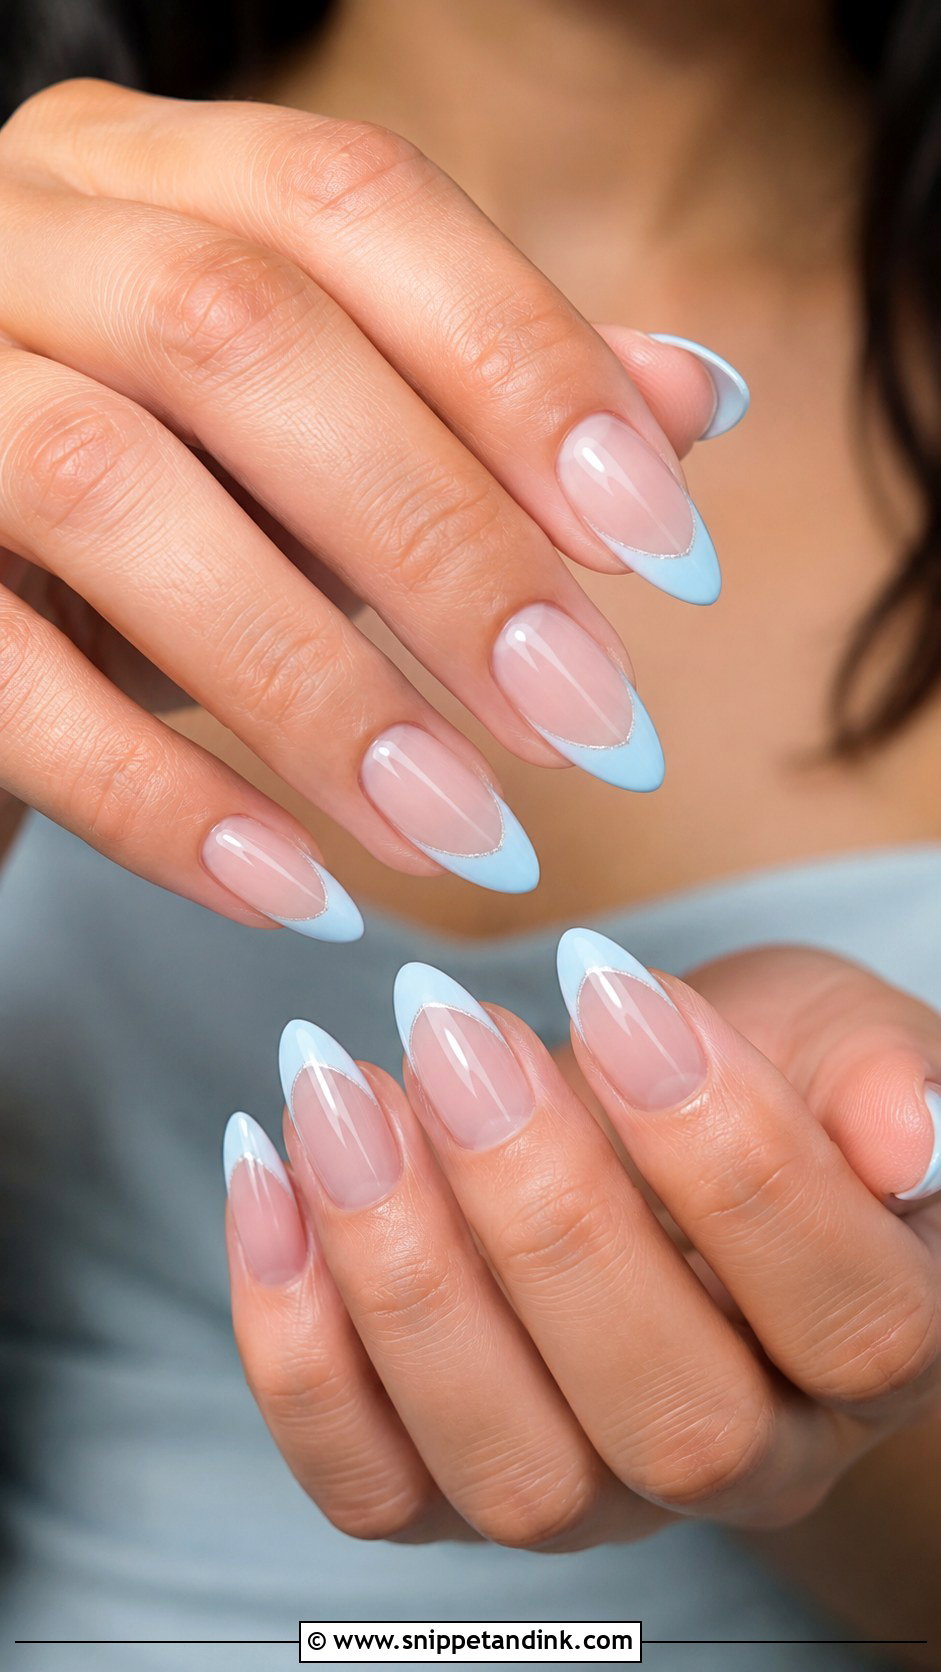
A pale blue tip is a quiet way to carry something blue. Over a sheer nude or milky base, powder or icy blue French tips add color without competing with the bouquet. Deeper blues look cheerful rather than bridal, so I keep the shade pastel. Short almond or oval shapes make it graceful, and a tiny pearl or silver accent on one finger is plenty. It also gives you a detail to show off in the ring photos.
19. Fake Wedding Nails With Matte Nude Finish
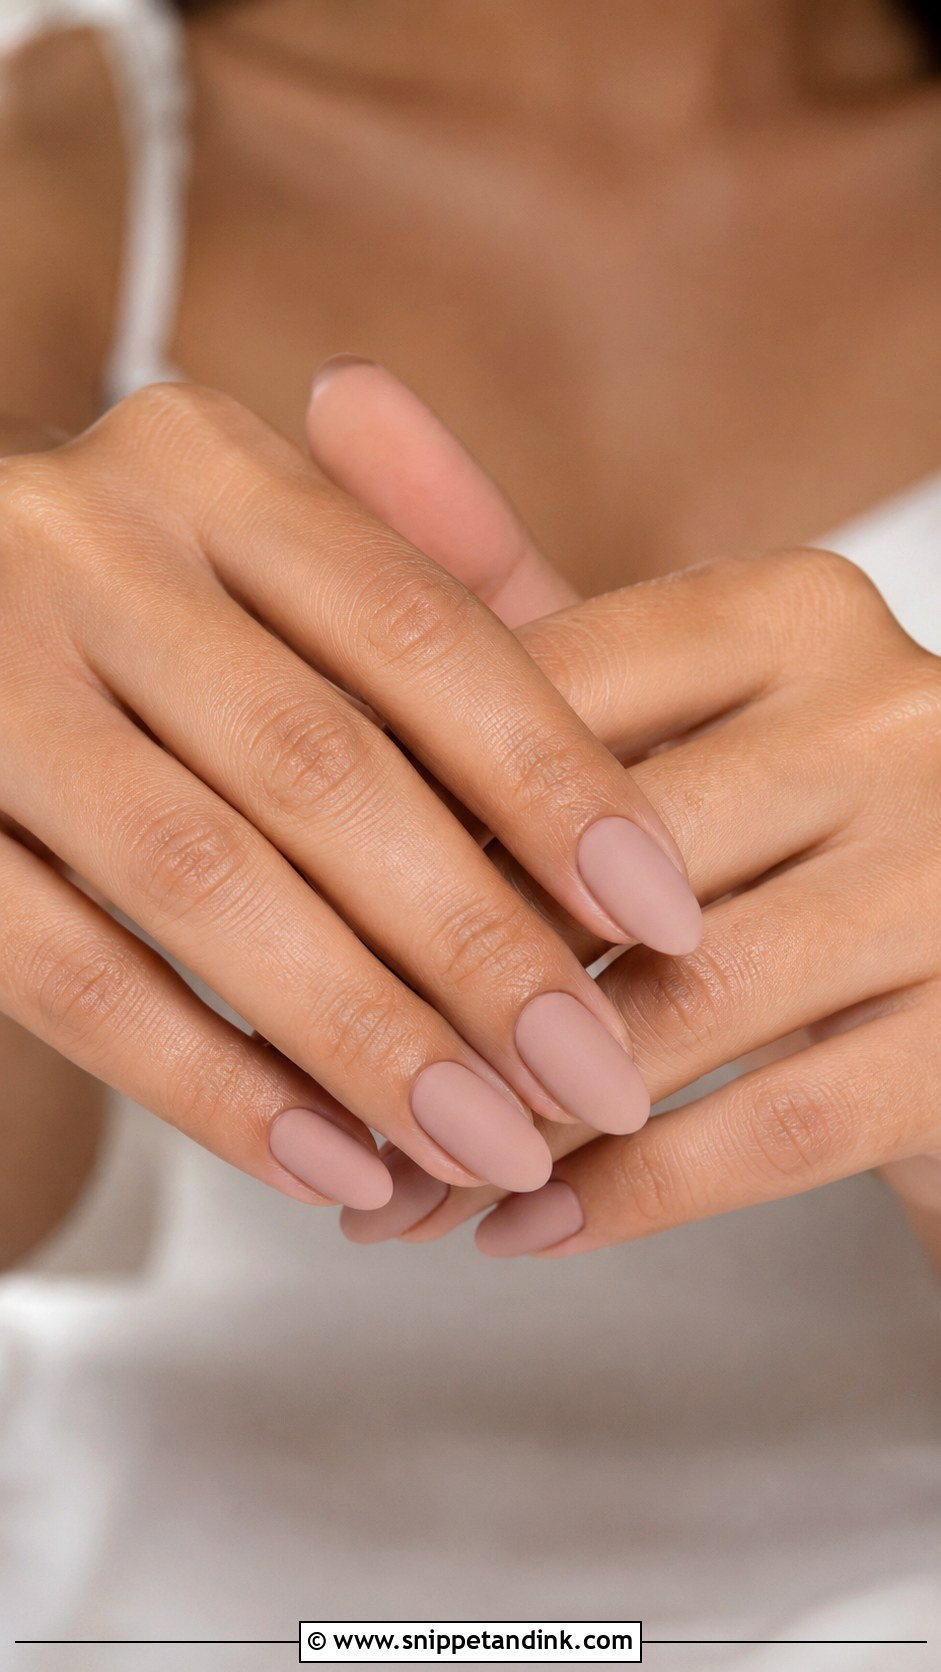
Matte is unforgiving on fit. Without shine, every gap at the sidewall and every bump at the cuticle shows, so I only recommend this when the press-ons hug your nail beds closely. Almond, oval and soft square suit it. Warm beige, rose nude and peach nude cover most skin tones. Matte also picks up oil from hand cream and makeup, so keep a lint-free wipe in your bag. Minimal dresses and soft makeup suit it best.
20. Fake Wedding Nails With Clear Gloss And White Art
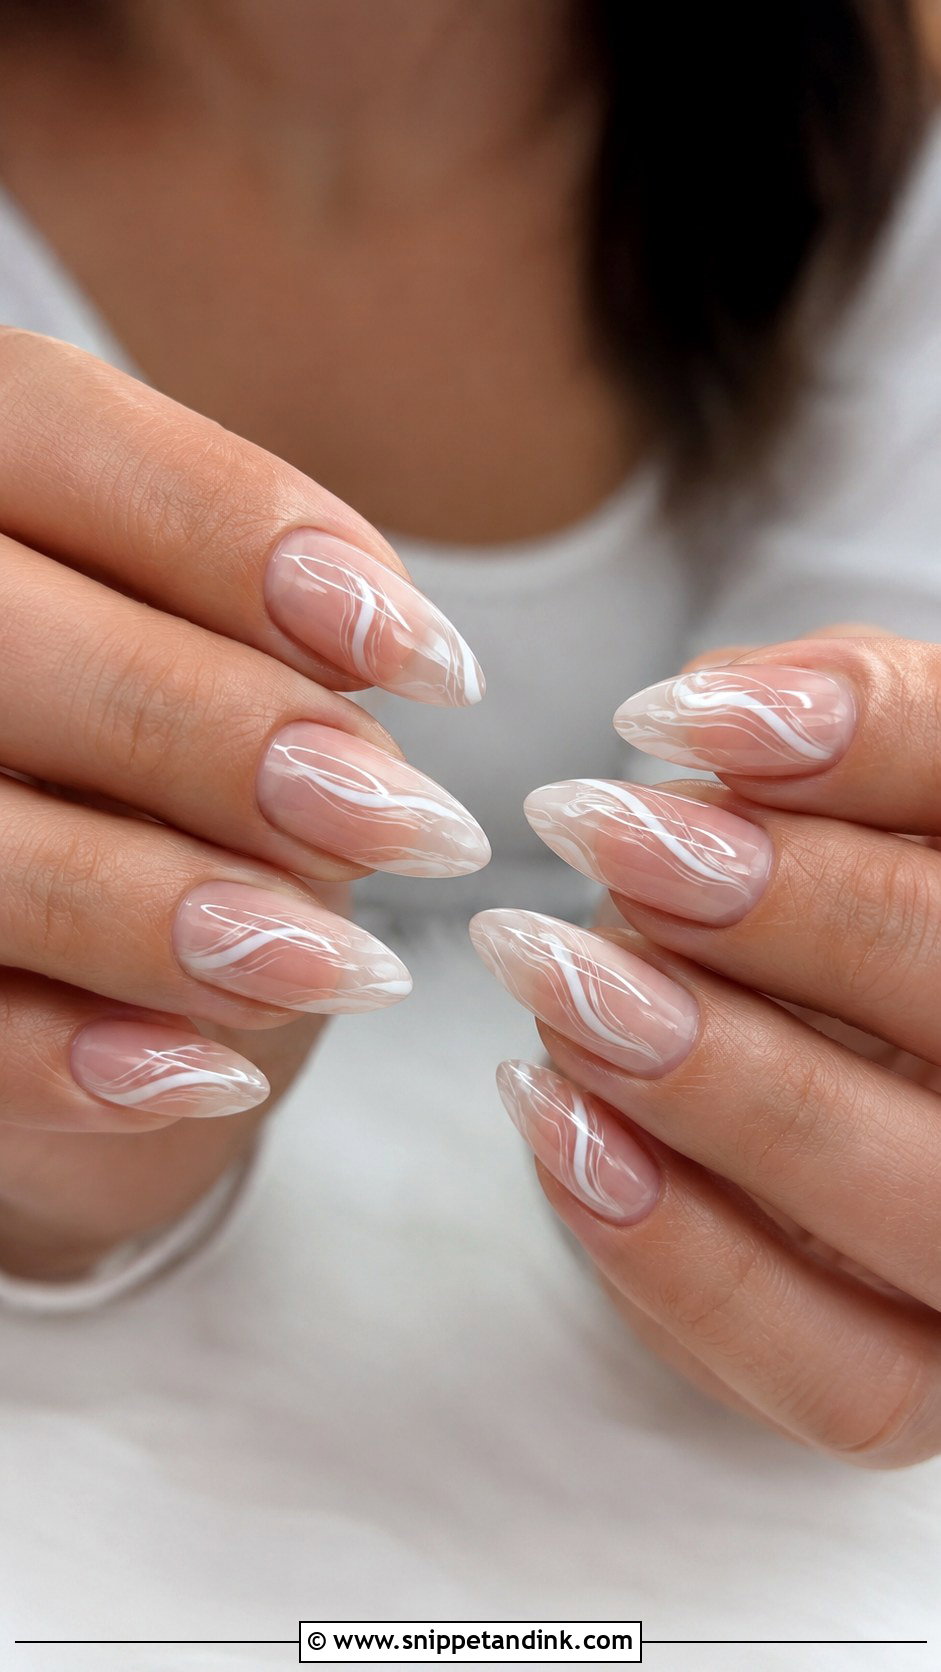
A clear or sheer nude base lets the natural nail tone show, with thin white swirls, small petals or soft abstract lines painted on top. It’s nail art for brides who don’t want their nails to look covered. Short to medium almond keeps the lines graceful. I balance the art across both hands, usually two or three nails each, so neither hand looks heavier. A smooth gloss seals it. Clear bases do show the glue underneath if it’s applied unevenly, so spread a thin, even layer.
When to Put Them On, and What to Do If One Pops
I’d apply the set a day or two before the wedding. That leaves time for the glue to cure fully and for you to notice any nail that feels loose, and the edges won’t have worn yet. Applying the night before works too, but don’t do it the morning of. You’ll be rushed, and the glue is weakest in its first hours, exactly when you’re doing up a dress and hugging people.
If one pops off on the day, don’t force it back on over old glue. Gently buff the old adhesive off the natural nail with a file, wipe it, and glue on your spare in the same size. That’s why I tell every bride to keep the matching spare, a mini glue and a file in her bag, or with whoever is carrying the lipstick.
Taking Them Off Without Damaging Your Nails
Never pry press-ons off; that peels layers off the natural nail. Soak your fingertips in warm, soapy water with a little cuticle oil for ten to fifteen minutes, then ease each nail up from the side with an orange stick. If the glue is stubborn, soak in acetone instead. Buff away the leftover glue and use cuticle oil for a few days afterwards.
Sizing, Gluing and Spare Nails Make a Set Look Real
A press-on set looks real when it fits, sits flat at the cuticle and isn’t too long for the life you’ll lead in it that day. Soft bases and restrained details help, but fit does most of the work. Do a full test run a few weeks before, wear it for a couple of days, and note which sizes you used. Prep carefully on the day you apply them, and keep glue, a small file and a spare nail or two in your bag. French tips, pearls, chrome or plain gloss can all pass for a salon set if those basics are right.
You'll Like These Ideas:


Leave a Reply