
The cake is one of the few things at a wedding that stands still long enough for me to photograph it properly, and yet it’s often the detail couples are least happy with in their gallery. Usually the cake was fine; the light, the background or the timing let it down. A good cake picture tells you something about the reception too: the colours, the room, the couple’s taste. Right now I’m seeing a lot of vintage piping, edible flowers, mini cakes, hand-painted tiers, fruit and soft film-style edits, plus some real statement cake tables. Below are twenty cake styles and how I’d approach each one with a camera, so you can plan images worth printing in the album.
When the Cake Gets Its Portrait, and Who Has to Make Room for It
The best moment to photograph a cake is the window between the baker finishing setup and guests walking into the reception. The room is tidy, the candles may not be lit yet, and nobody is leaning on the table. On most wedding timelines that window is short, and it overlaps with family photos or cocktail hour, which is where I’m usually needed.
So it has to be planned. I ask couples to tell me roughly when the cake will be delivered and set up, and to let the coordinator know I’ll need around ten minutes with it. If you have a second shooter, this is a natural job for them.
Where the cake table goes
Venues often push the cake into a corner or right in front of a window. A window directly behind the cake is the worst spot for photos: the cake becomes a dark silhouette against a bright rectangle. A window to one side is the best. If you can influence the floor plan, ask for the cake table to sit with daylight falling across it, with a clear wall or drapery behind.
1. Classic White Wedding Cake Photography
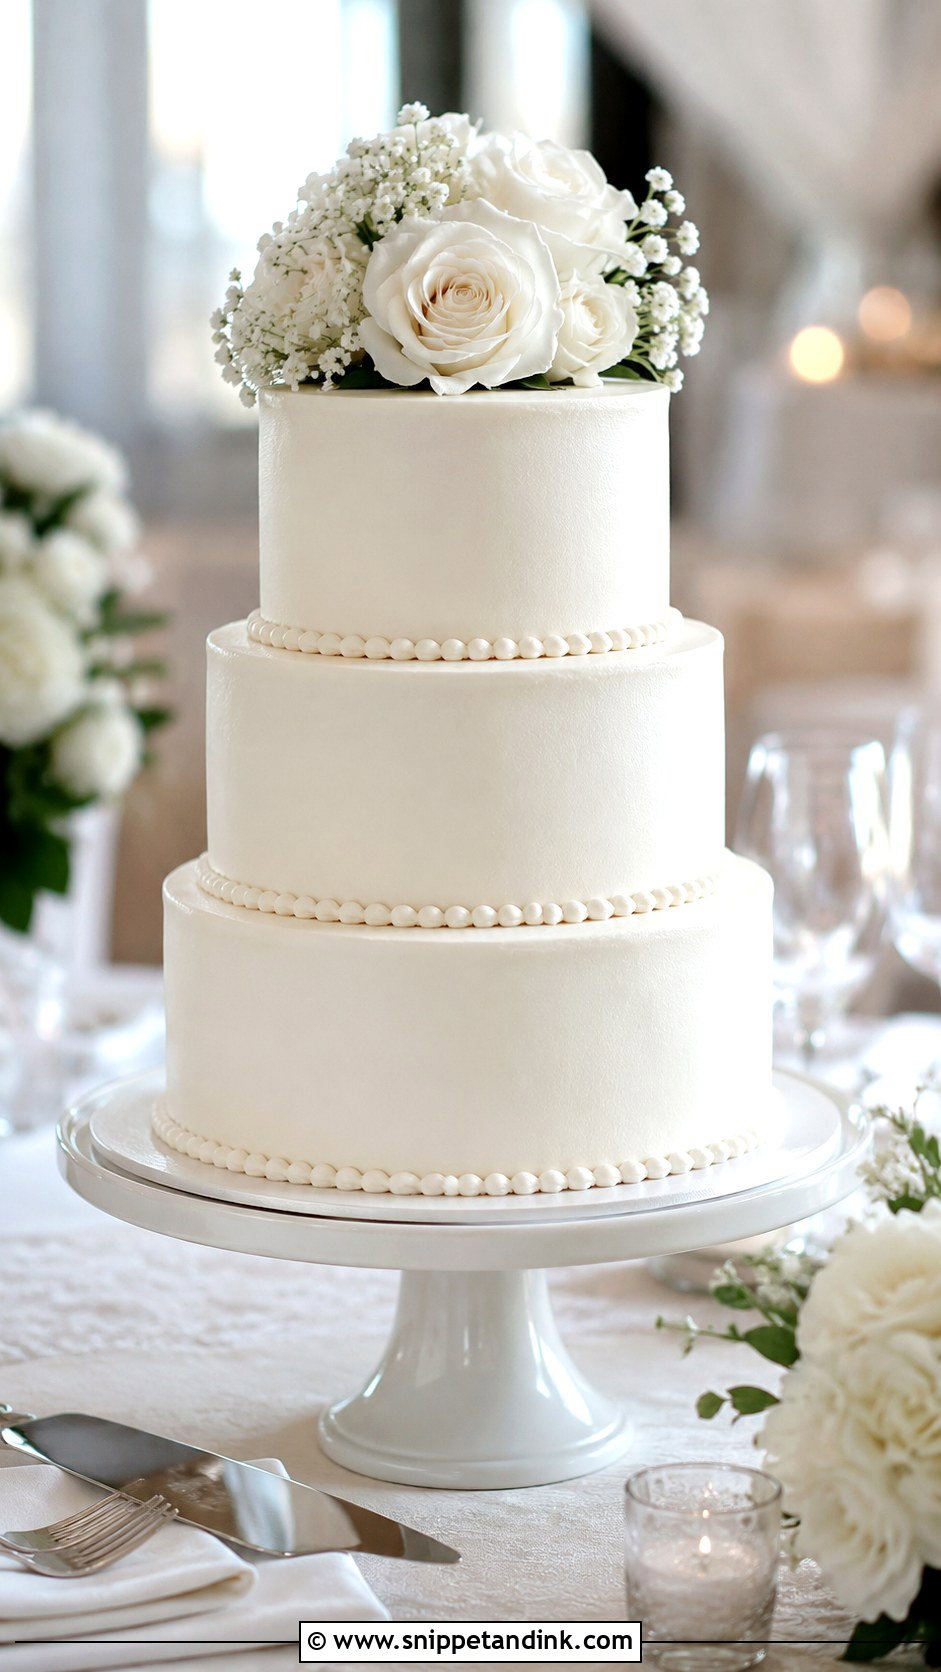
White is harder to photograph than it looks. A camera’s meter sees a big white cake and tries to turn it grey, so I deliberately brighten the exposure until the frosting reads white again while still holding the texture. Give me a three-tier ivory cake near a window before guests come in and I’ll shoot three frames: straight on for structure, angled for depth, and a close crop of the buttercream or fondant. Keep the background plain. White roses, pearl details or fine piping add enough interest on their own.
2. Vintage Wedding Cake Photography
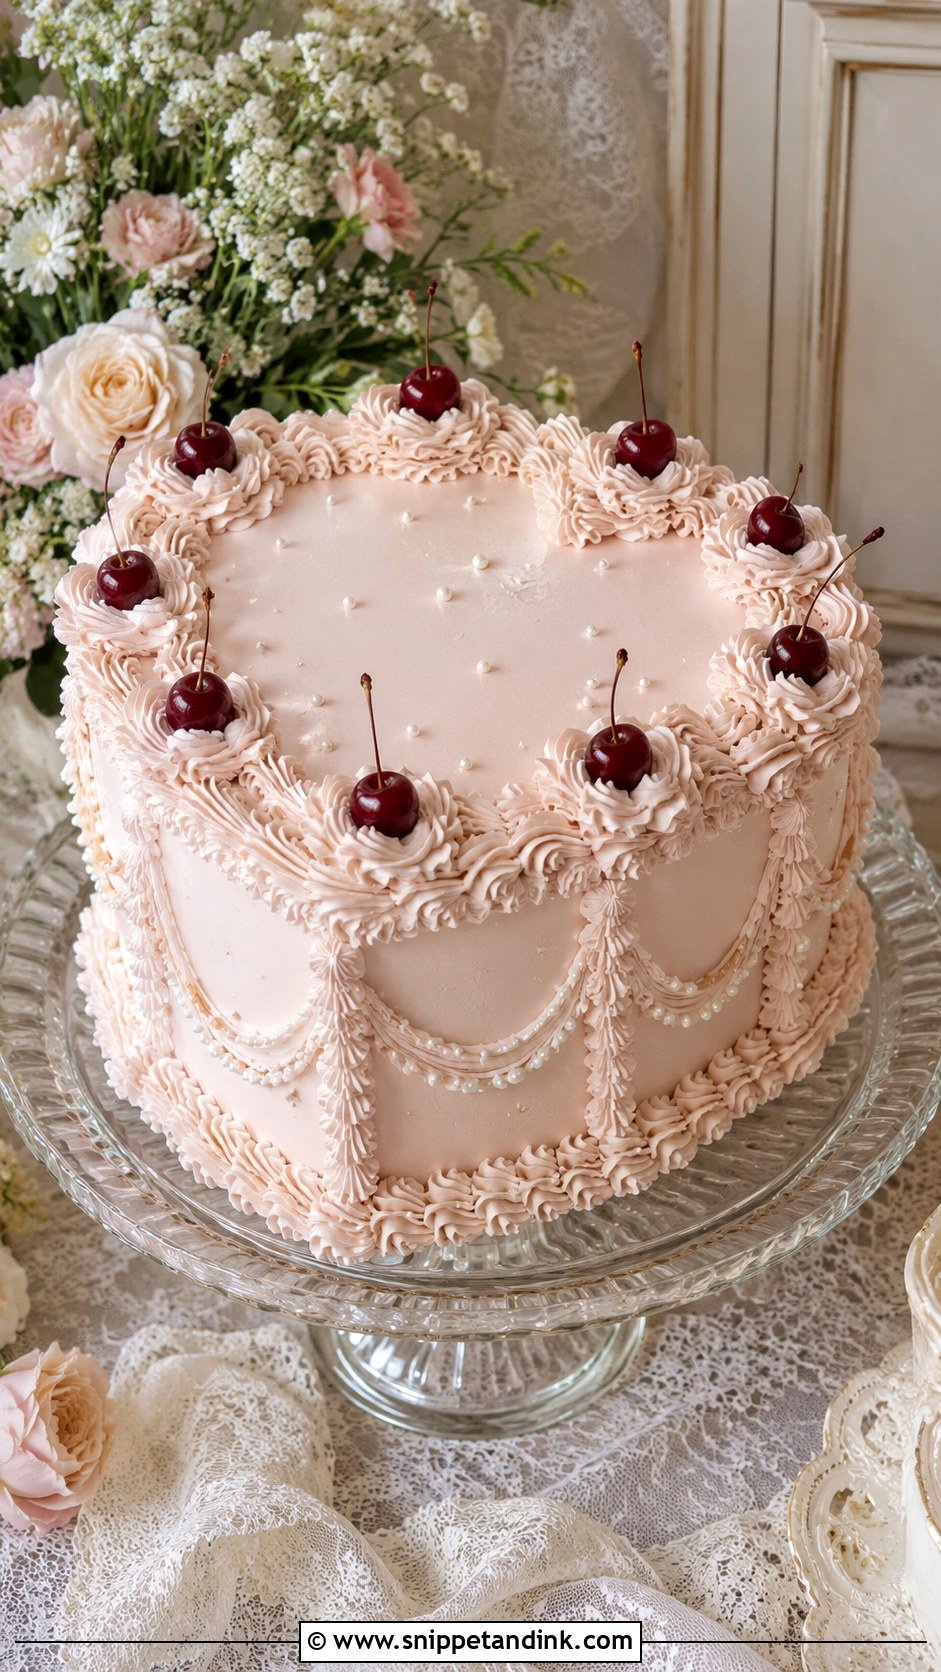
Piping is all shadow and relief, so vintage cakes want light coming from the side. A heart-shaped or round cake with Lambeth piping, shell borders, bows or cherries goes flat under light from the front, but turn it so a window falls across it at an angle and every swag throws a tiny shadow. A raised stand and a plain linen cloth are all the styling it needs; a busy background fights the movement already in the cake. I’ll take a tight frame of the borders and a wider one that includes the table.
3. Floral Wedding Cake Photography
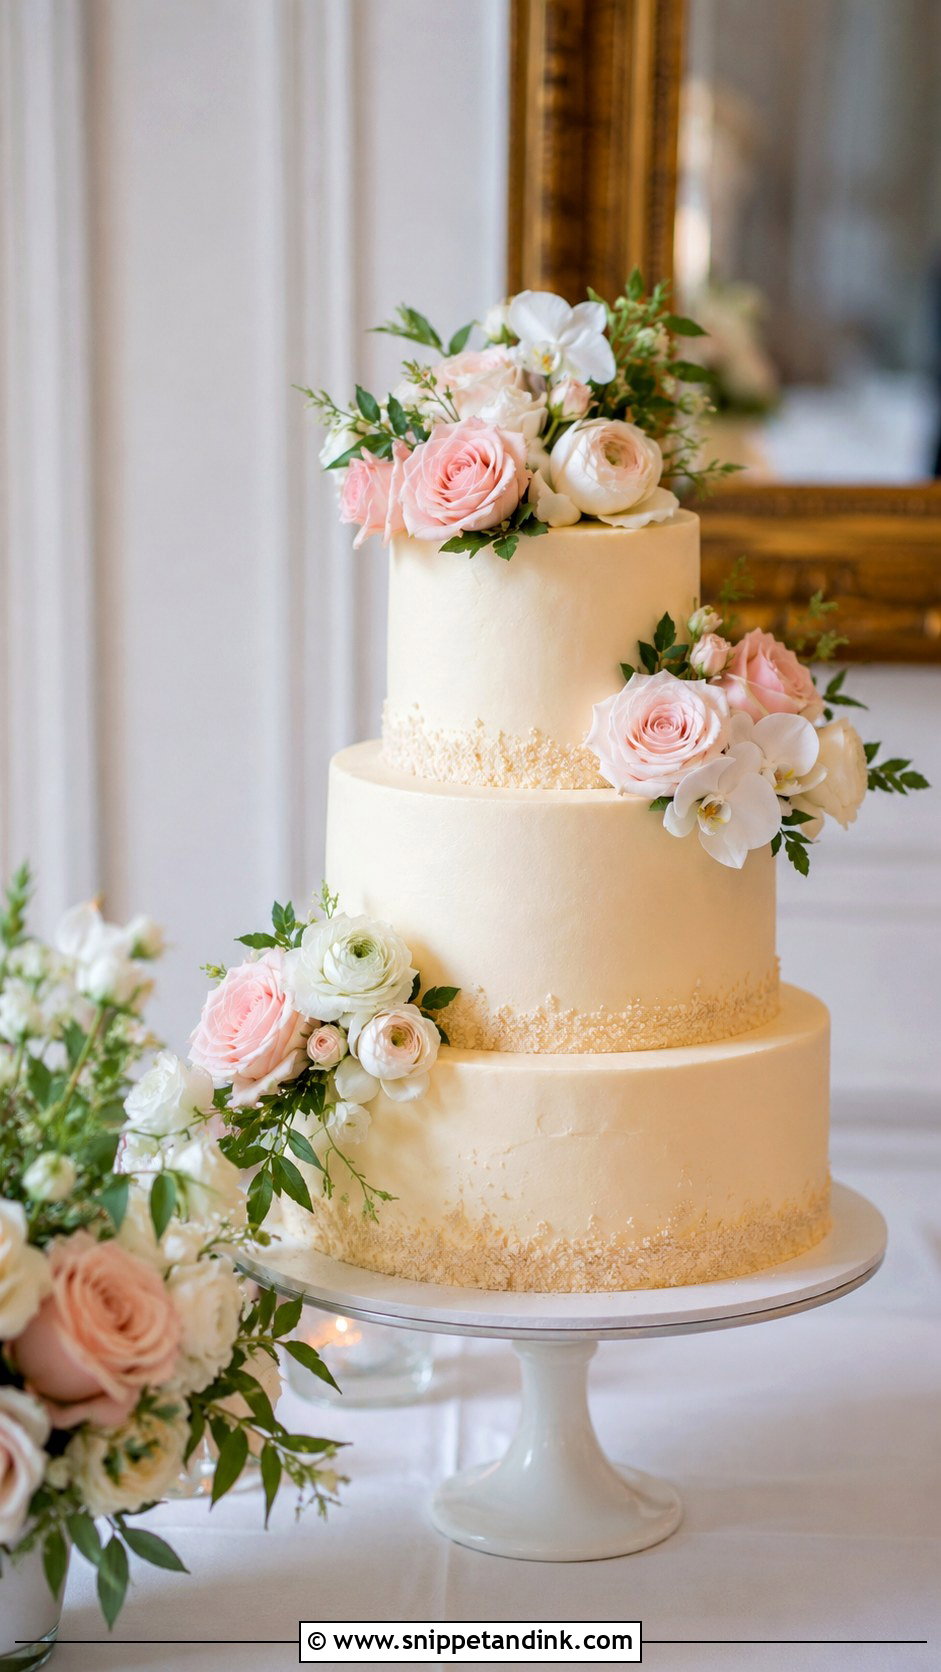
Fresh flowers on a cake can make it look like part of the floral design, or like an afterthought. What I look for is whether the cake flowers repeat the table flowers, because then I can frame them together and the picture holds together. A vertical frame shows both the cake height and any trailing stems. If the centrepieces are bright and busy, I’ll ask for the cake to sit a little apart from them, otherwise the eye doesn’t know where to land. Garden roses, ranunculus or orchids on white or blush tiers suit this best.
4. Edible Flower Wedding Cake Photography
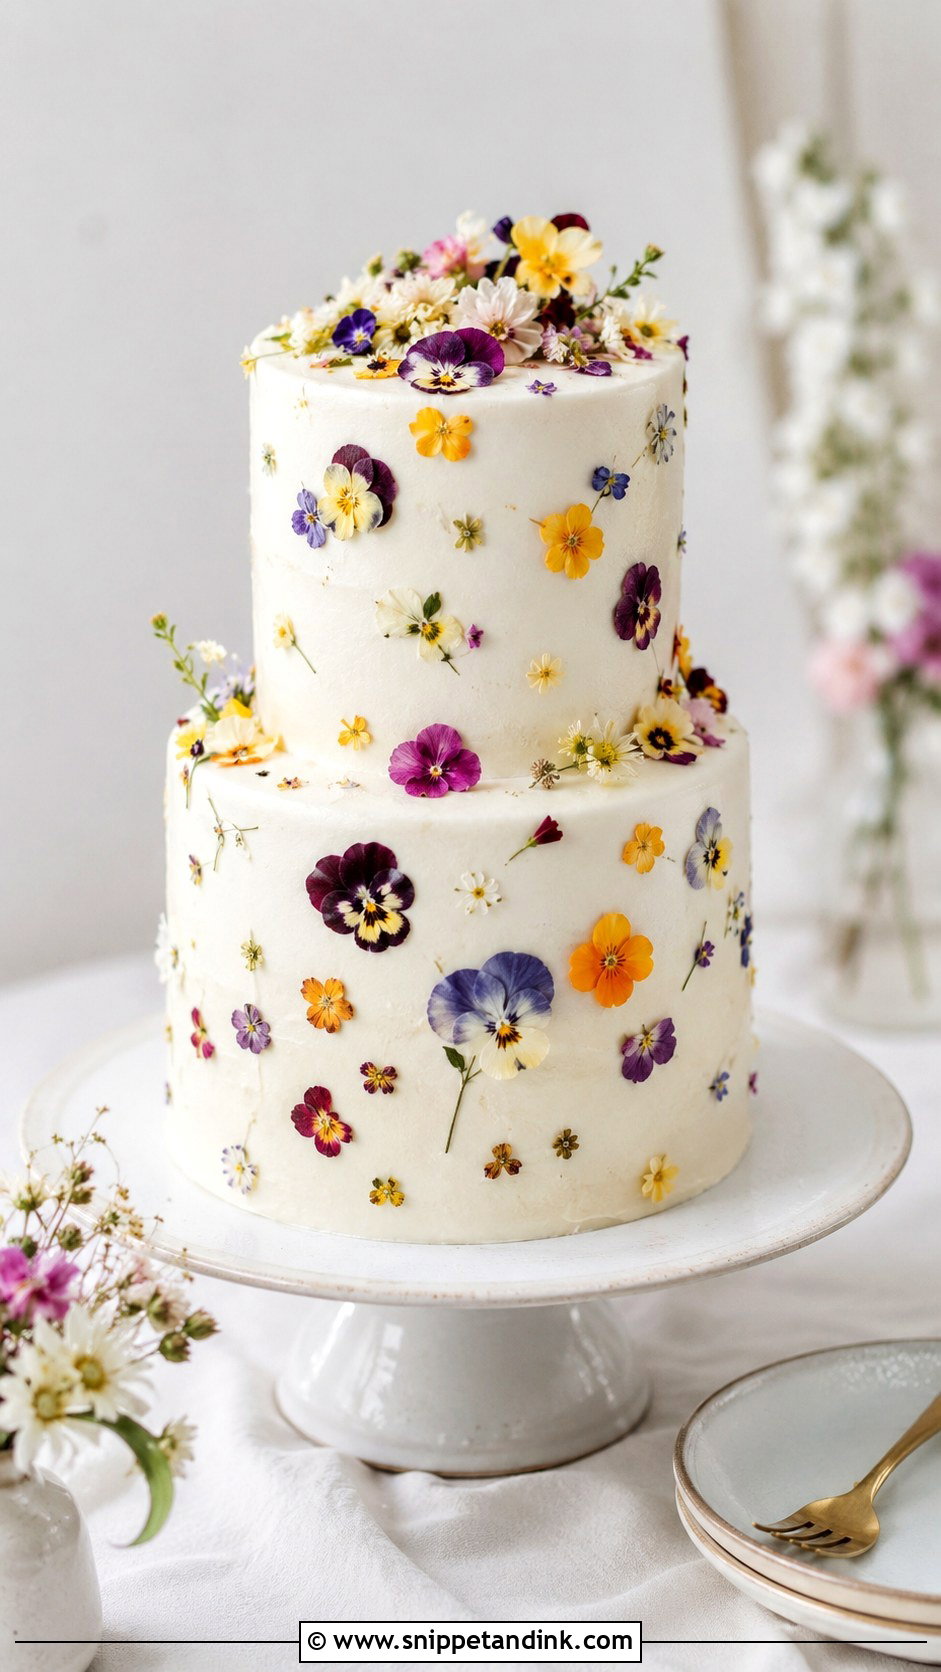
Pressed pansies, violas and rose petals are tiny and flat, so their detail lives in close-ups. I use a macro or a longer lens and get near enough to show the veins in a petal. If the flowers climb the tiers, a slightly low angle makes the cake look taller and follows the line upward. A neutral backdrop keeps the colours clean. One full frame, one detail crop, and the job is done.
5. Hand Painted Wedding Cake Photography
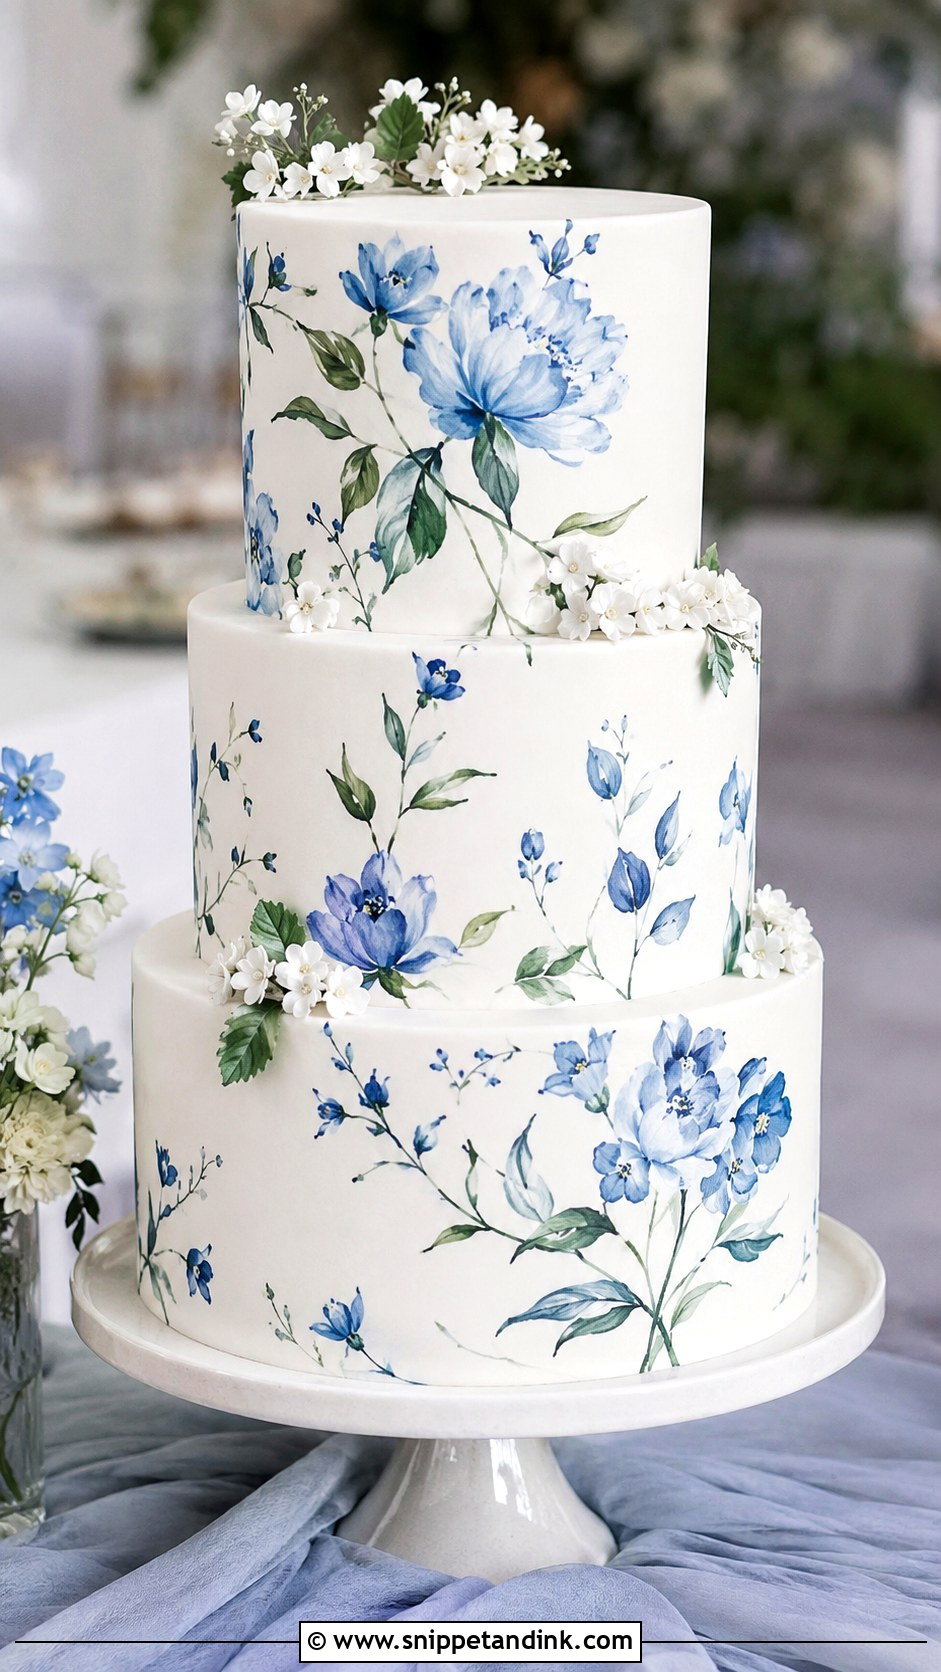
Painted cakes are artwork, and artwork gets distorted easily. If I shoot from above or below with a wide lens, the painted florals stretch and the tiers look like they’re leaning, so I set the camera at the middle tier’s height and keep it level. Even, soft light matters more here than mood; deep shadows hide brushwork. A plain wall or simple draped fabric behind it, a couple of matching stems at the base, and the painting carries the picture.
6. Buttercream Wedding Cake Photography
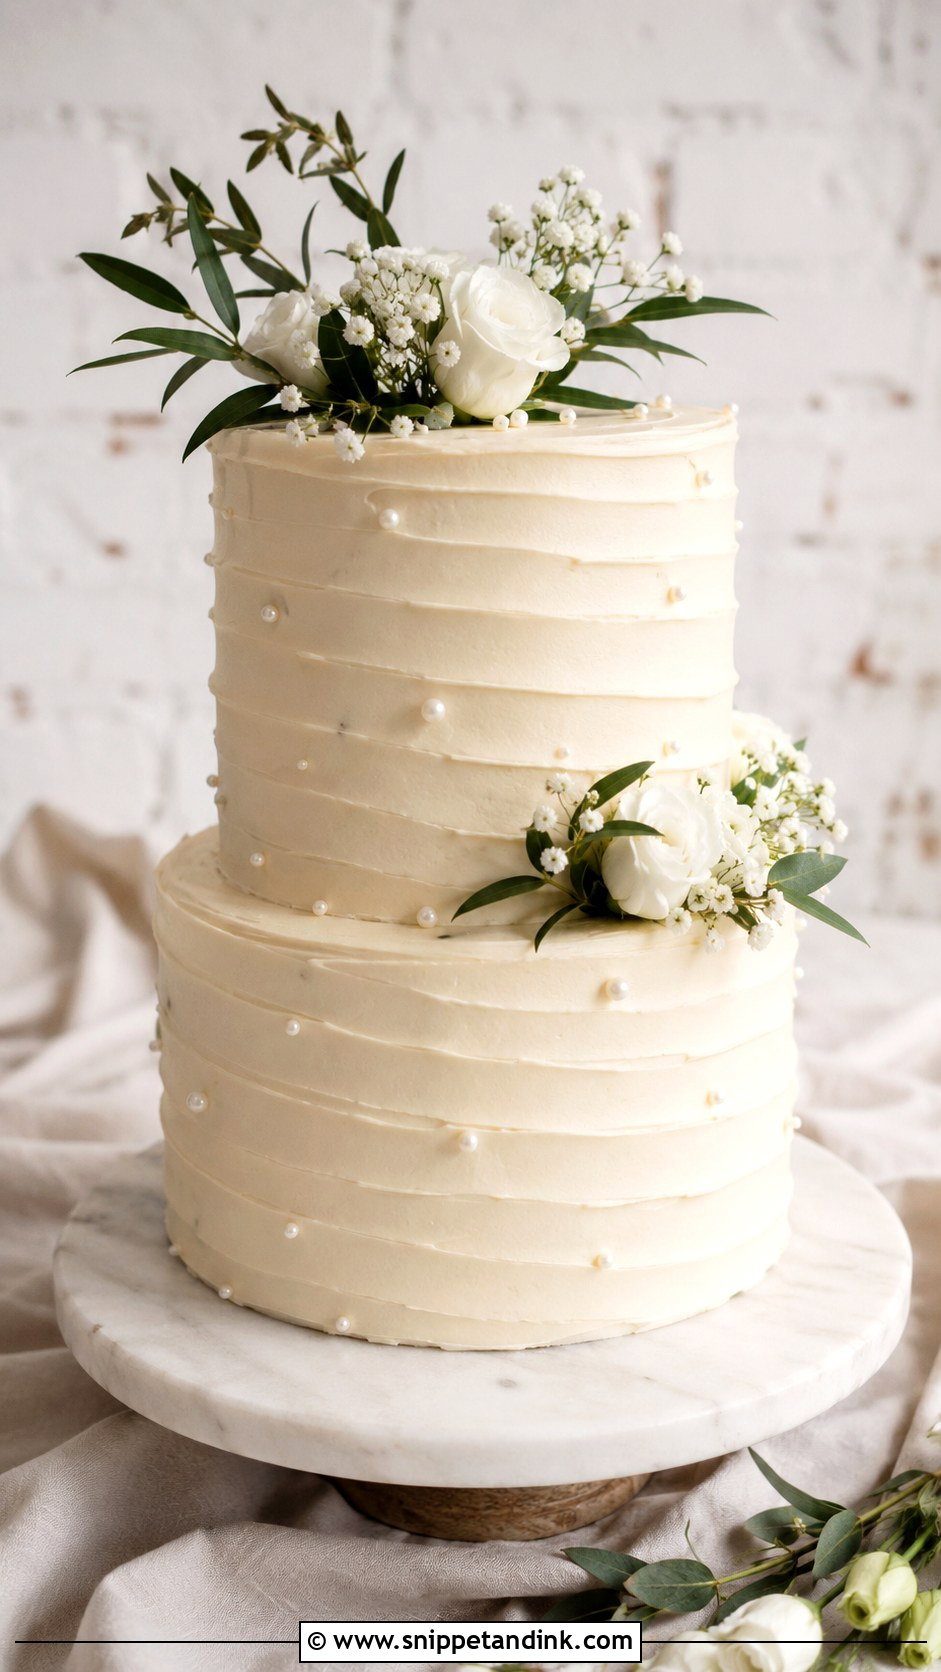
Texture is everything with buttercream. Light skimming across the side of the cake picks out each ridge and comb line, while flat front light makes good piping look like plastic. I’ll move the cake stand a quarter turn before I move my own feet. A wooden table pushes the mood rustic, a marble or white pedestal makes it formal. For round single tiers, a slightly raised angle shows the top; for tall tiers, shoot straight on.
7. Minimalist Wedding Cake Photography
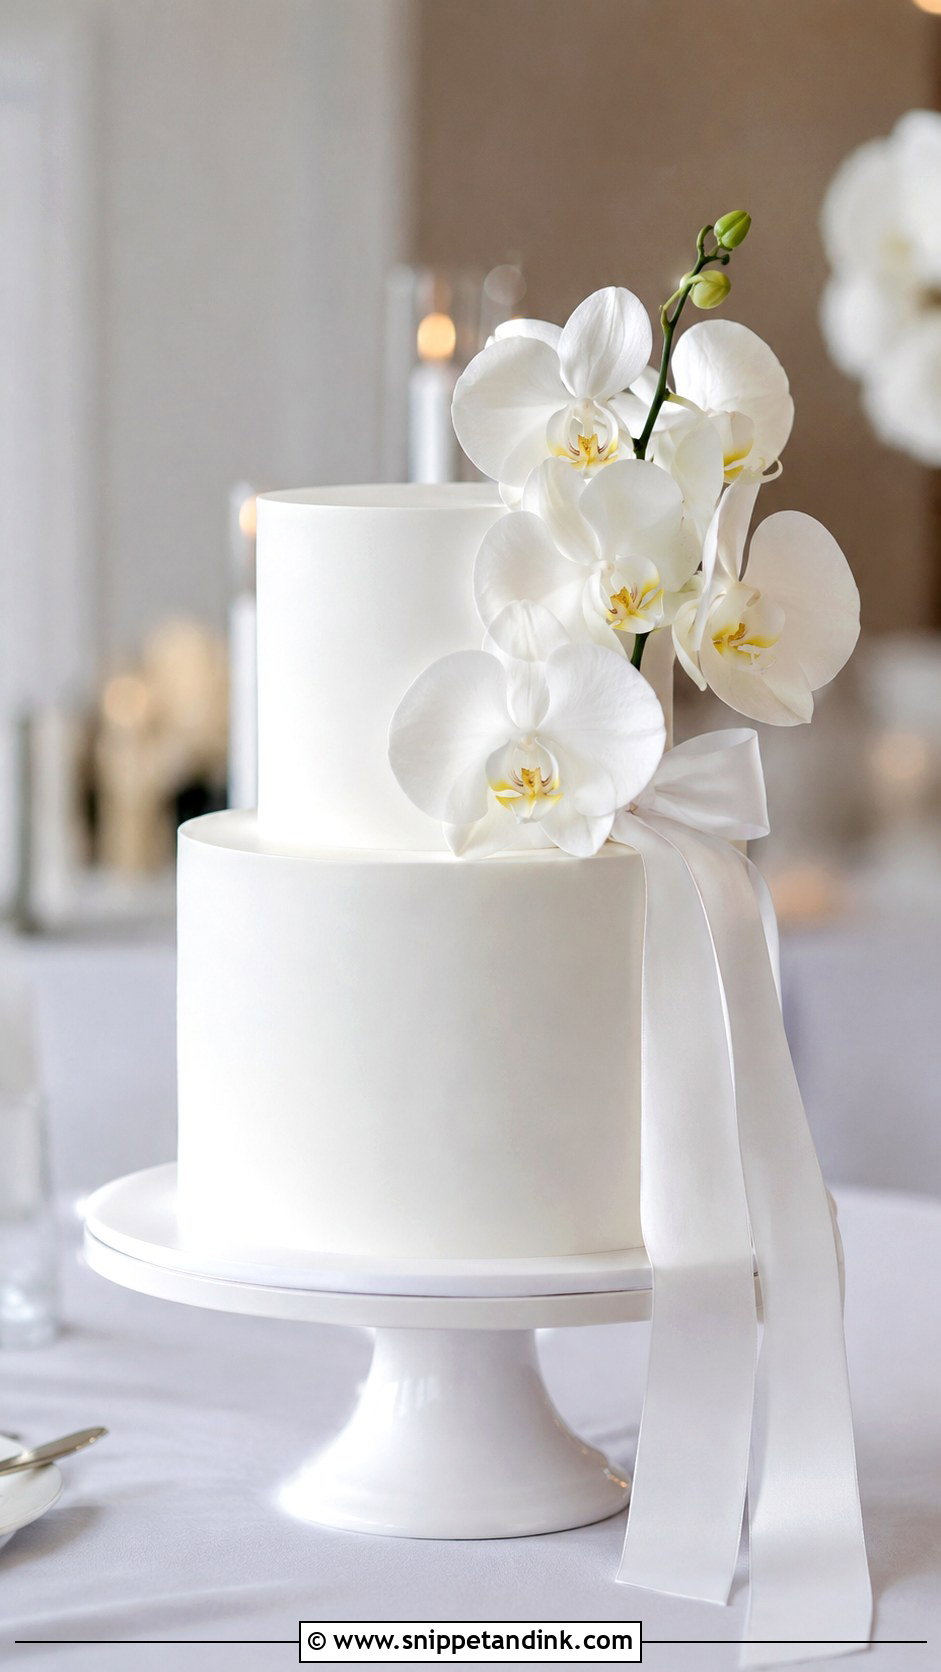
With a minimalist cake, the space around it is part of the design. Negative space, the empty wall beside it, is what makes a single white tier look intentional rather than lonely. That only works if the space really is empty, so I’ll quietly move a stray chair or water jug out of frame. Clean buttercream, sharp edges, one flower stem or a ribbon. Props stop at a stand, a linen cloth and maybe one small arrangement.
8. Rustic Wedding Cake Photography
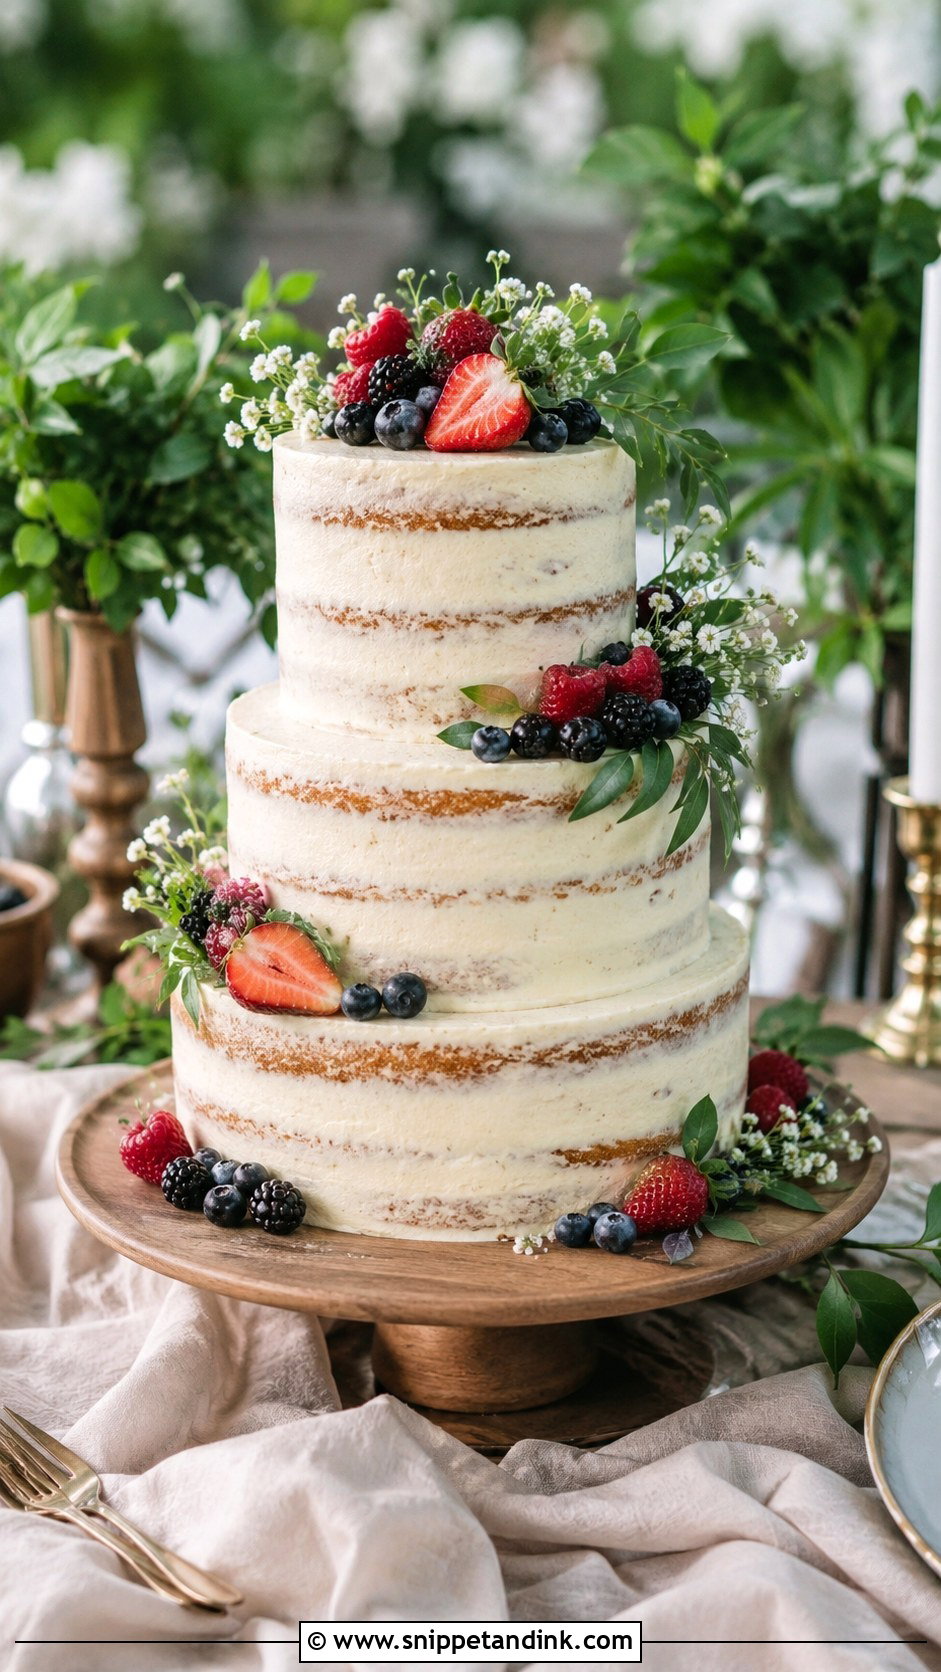
Semi-naked cakes photograph best soon after setup, before the exposed sponge starts drying at the edges. A semi-naked vanilla or spice cake with visible layers, berries and greenery looks right against barn wood, garden green or neutral linen, which ties it to the venue. Soft daylight suits it. I take this one at an angle so the layers, the frosting and the table all fit in one frame.
9. Black And White Wedding Cake Photography
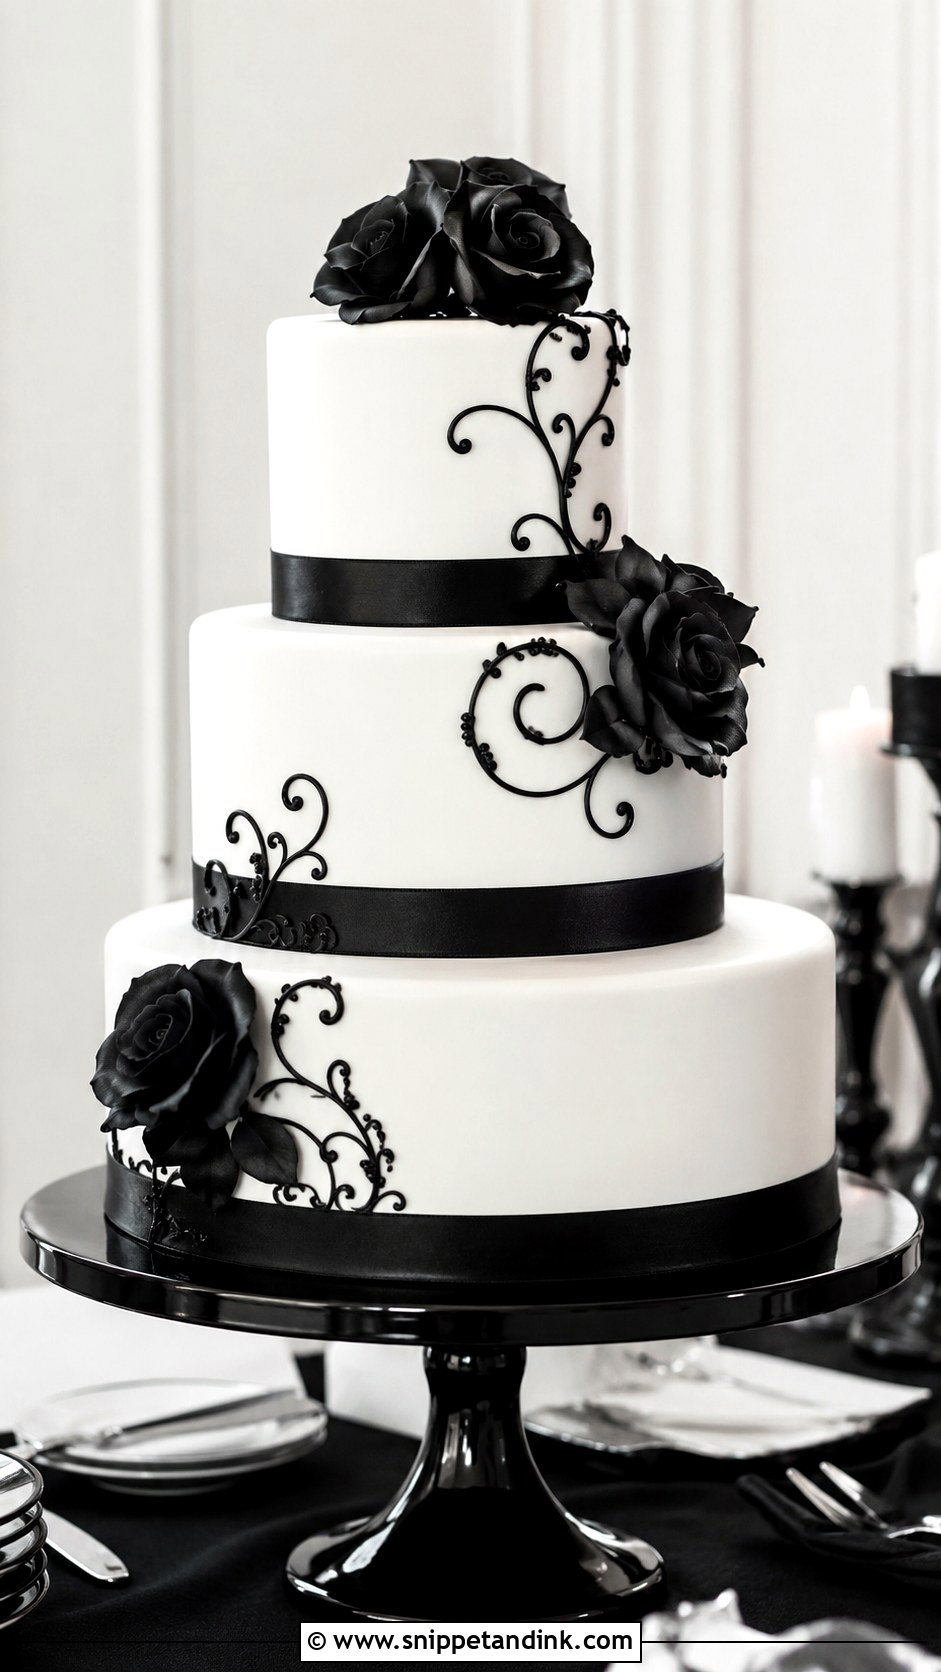
Contrast is the risk and the reward. A white cake with black ribbon, black piping or dark sugar flowers has a huge tonal range, and if I expose for the white, the black details can turn into featureless holes. I usually expose so the white is just short of blown, then lift the shadows a touch in editing. Balanced, even light and a clean backdrop keep the dark details crisp. A straight-on frame shows the formal shape; a close-up shows the frosting against the dark accents.
10. Colorful Wedding Cake Photography
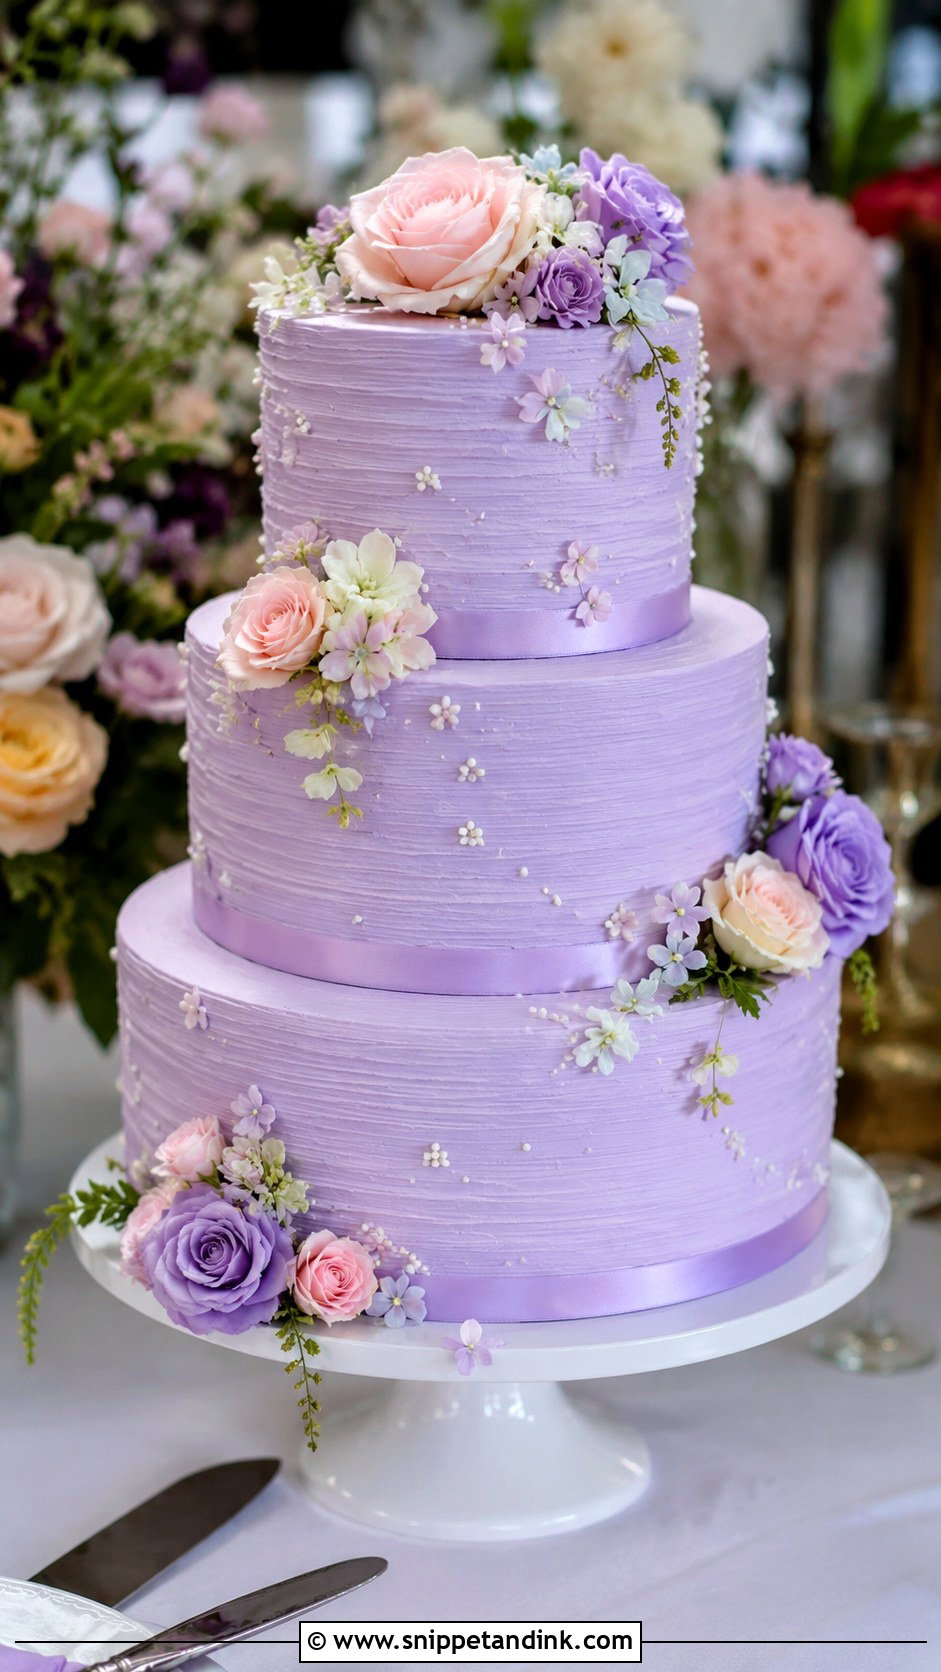
Colour picks up colour. A pastel pink, blue, lavender or yellow cake placed next to a green hedge or under orange reception lights will shift, and pastels are the first to look muddy. Bright, neutral light keeps the colour honest, which is why I’d photograph a colourful cake before the evening lighting goes on. Choose one main colour and let flowers and ribbon support it. Avoid strongly coloured walls unless they match. A tight frame makes the colour pop; a wide frame shows the mood of the room.
11. Pearl Wedding Cake Photography
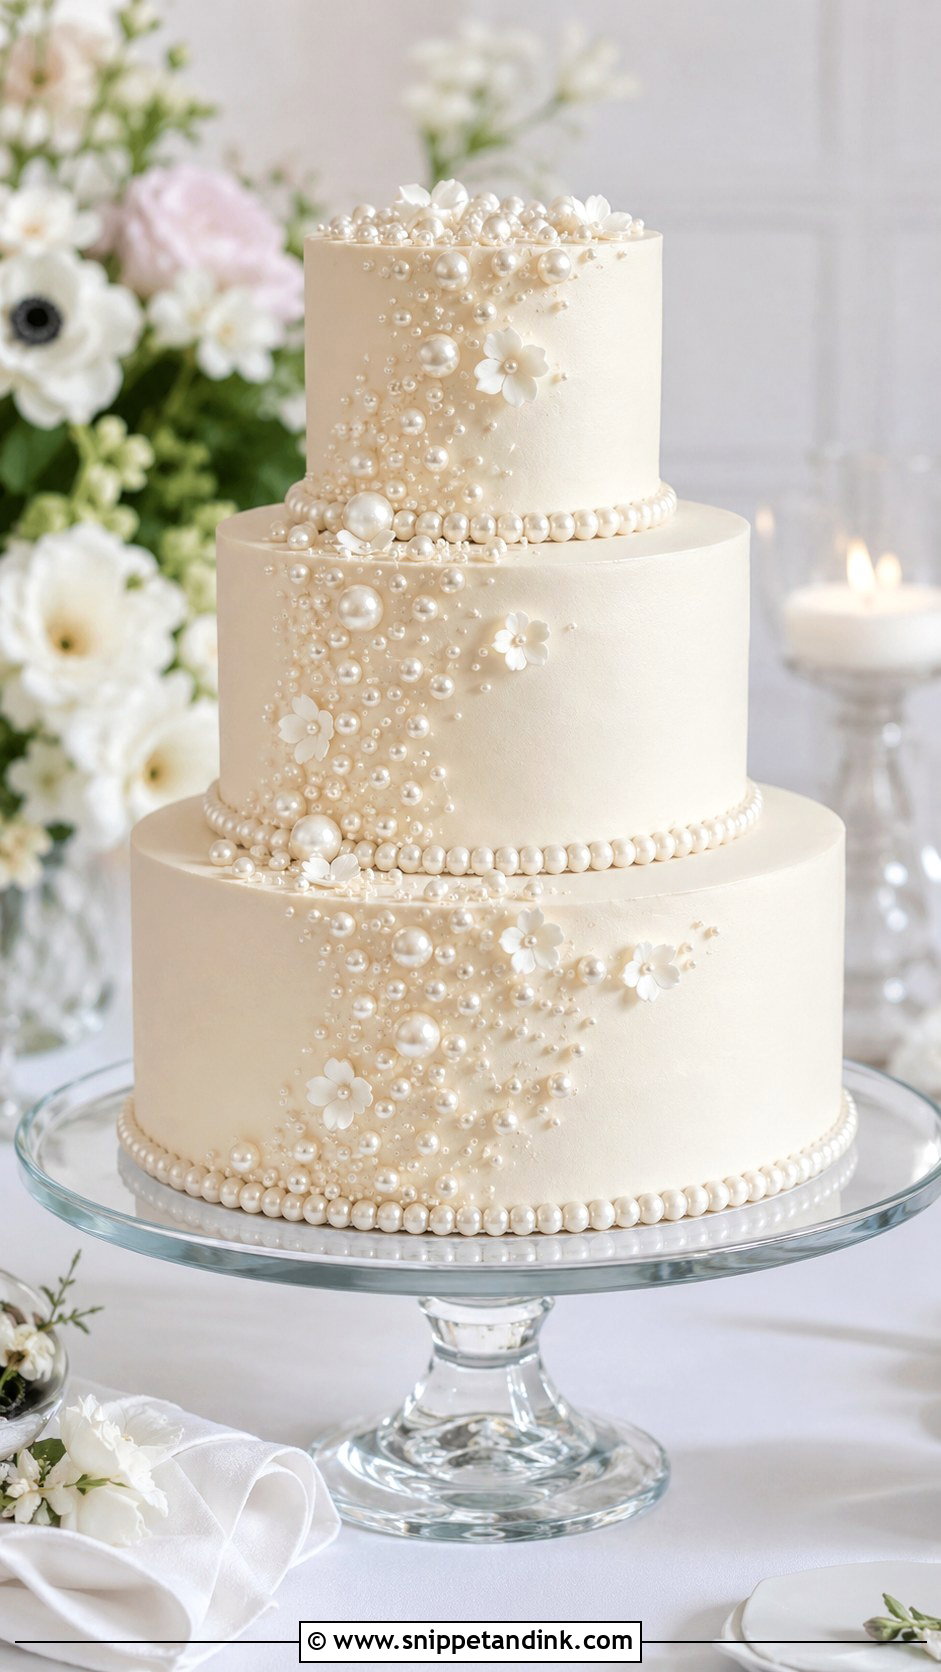
Pearls are tiny reflectors. Under a bare bulb they each catch a hard white dot of light, which can look like dust in a photo, but under soft window light they glow. That’s the light I’d want. A white or ivory cake with pearl borders or clusters on a white, glass or silver stand looks polished. Skip shiny props nearby, as they add reflections that compete with the pearls. Take one full frame and one close-up of the pearl work.
12. Bow Wedding Cake Photography
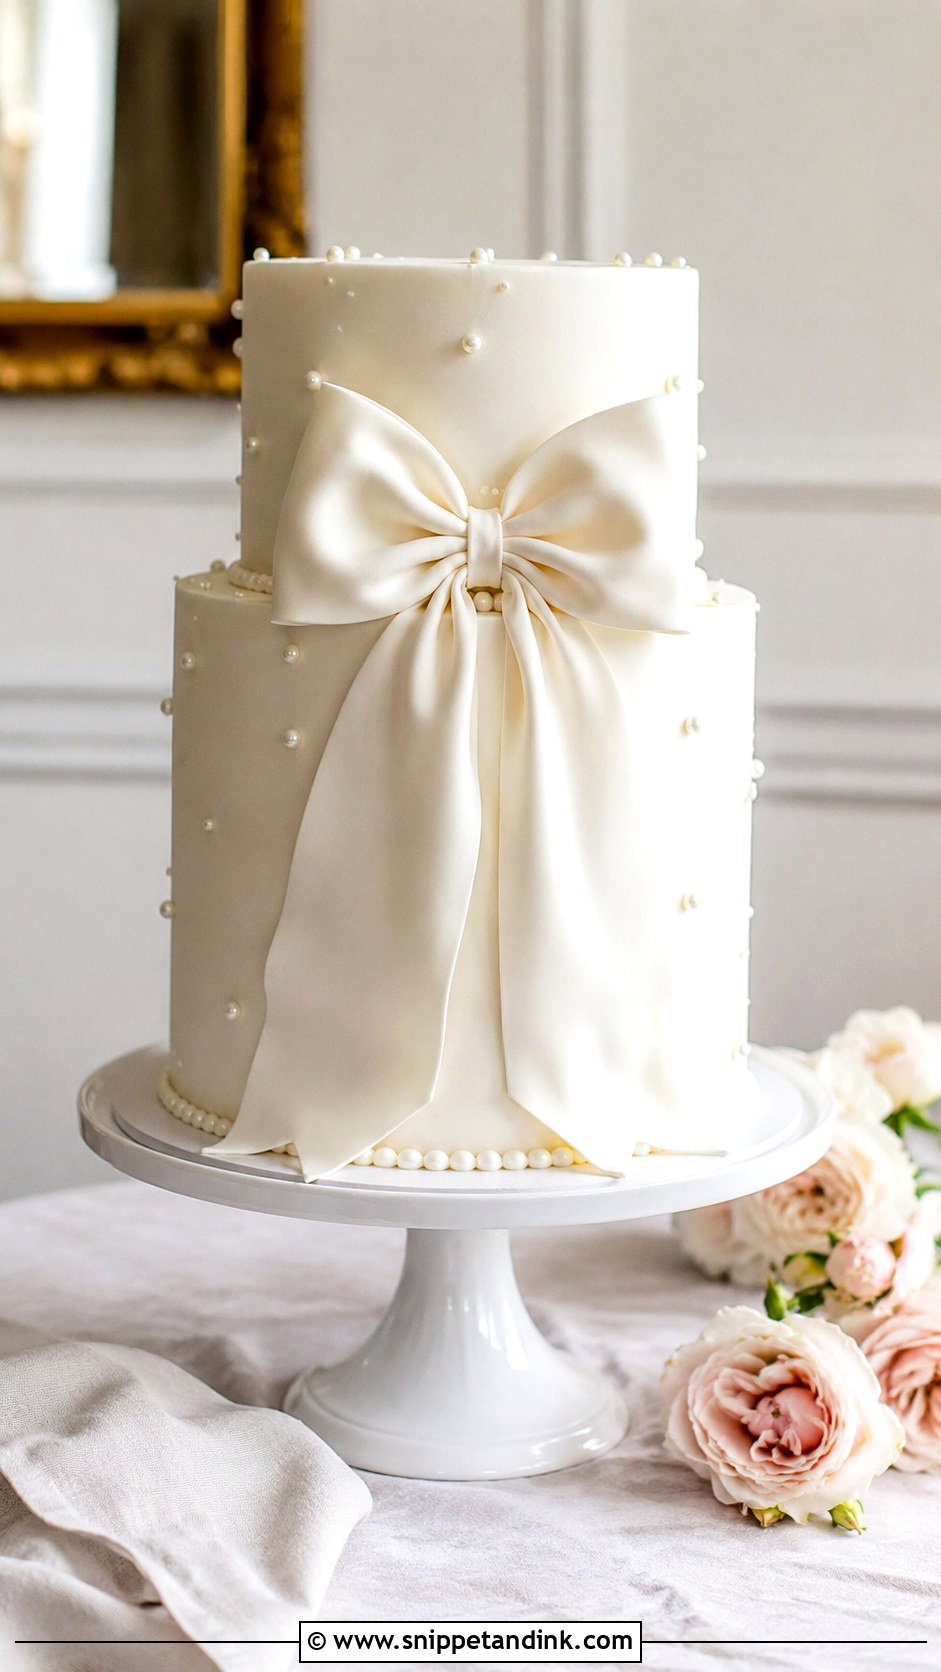
Where the bow sits decides the angle. A centred sugar bow wants a straight-on frame so it looks symmetrical; a ribbon trailing around the tiers looks better from a slight side angle so you can follow it. Satin-effect fondant bows have a sheen that reacts to light direction, so I’ll rotate the stand until the folds show depth. Keep the table clean, maybe add a pale arrangement or folded linen, and let the bow be the detail.
13. Heart Wedding Cake Photography
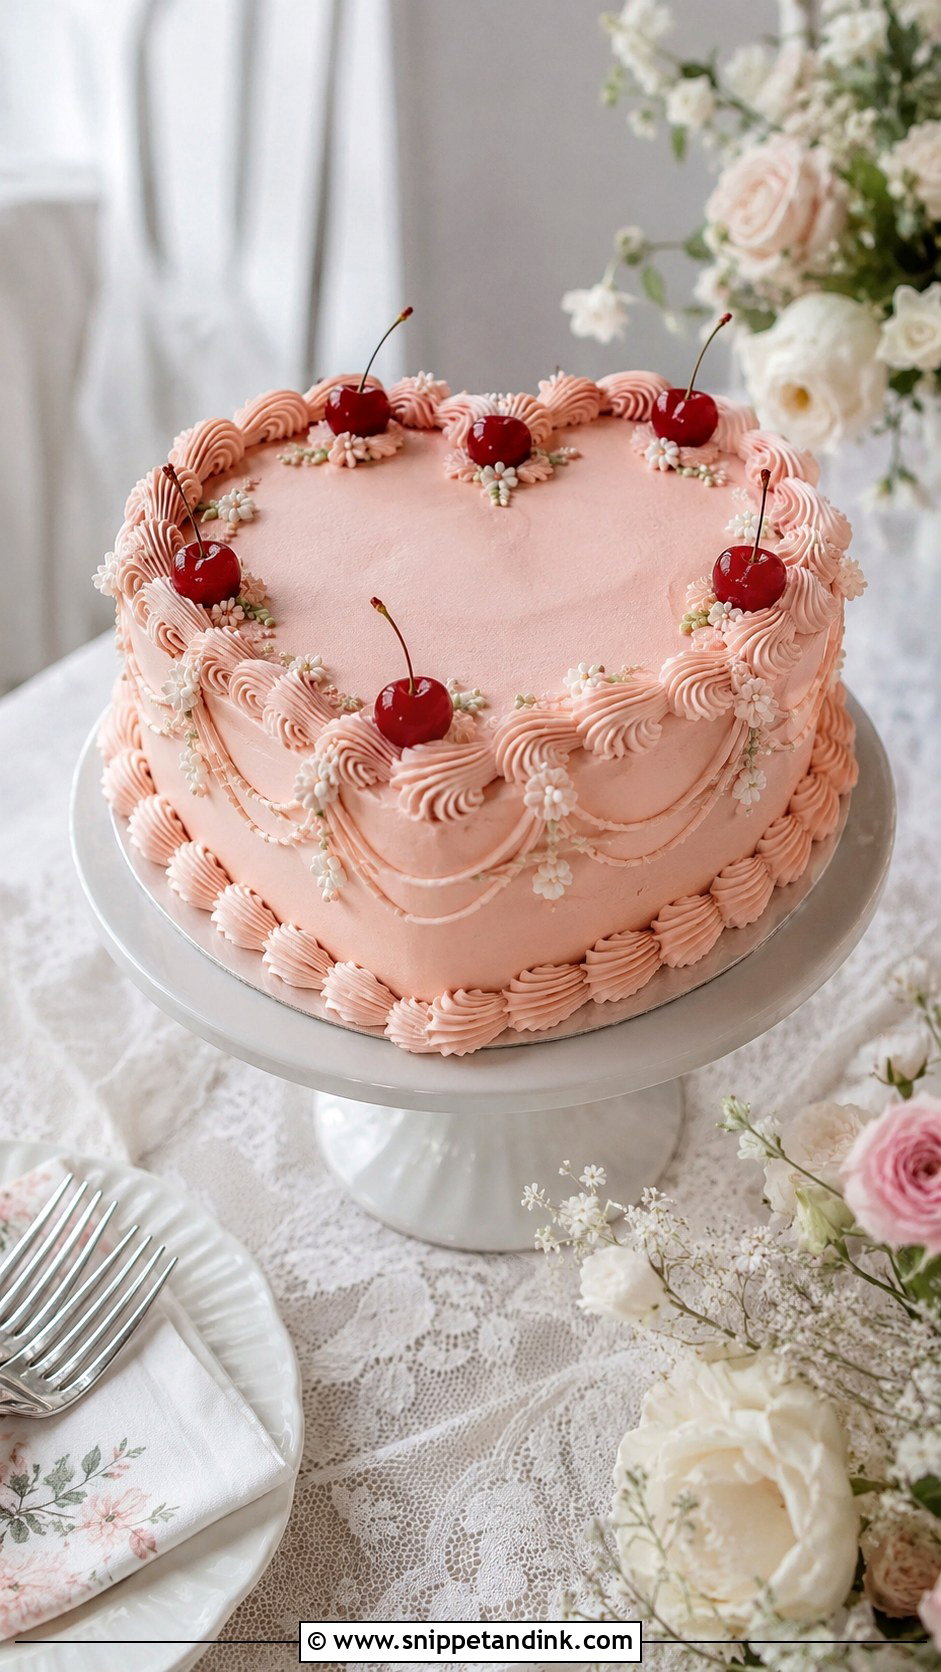
The only way to show a heart shape clearly is from above, so I bring a small step stool for this cake. A heart wedding cake with ivory or blush buttercream, piped borders and cherries or pearls then needs a second frame from the front to show the height of the piping. A pedestal stand lifts it. Lace, linen or a few flowers keep the background soft. Heart cakes suit small receptions and elopements, where the cake table is usually close enough to style quickly.
14. Fruit Wedding Cake Photography
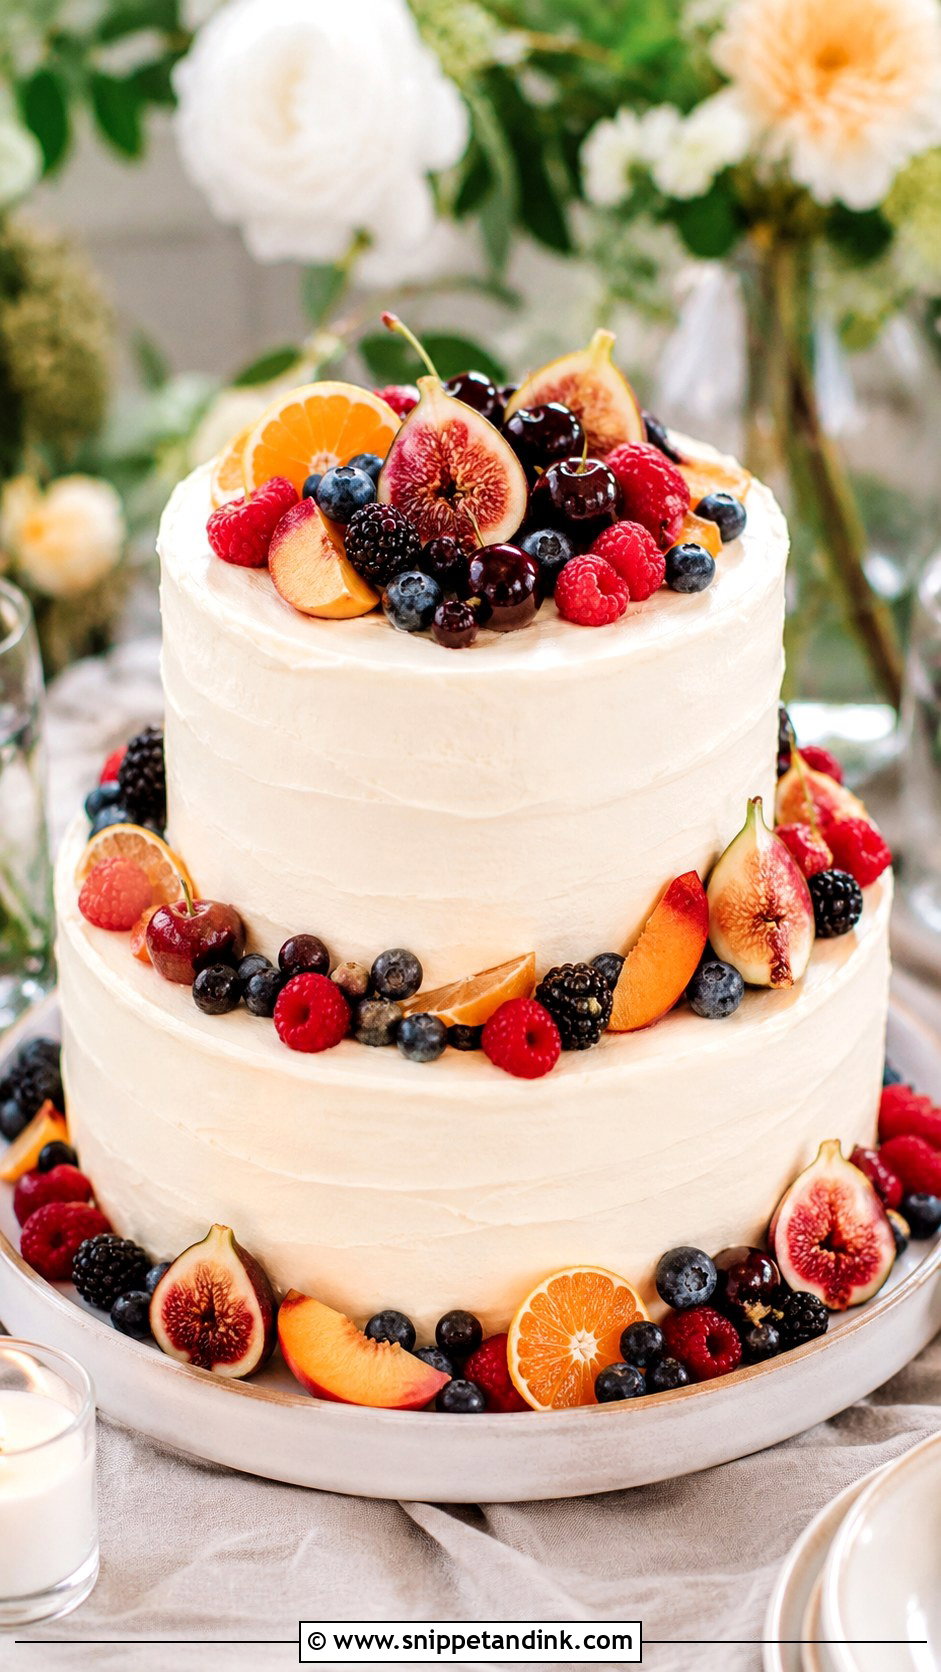
Fruit dulls fast. Cut figs, berries and citrus look glossy when the cake arrives and noticeably drier an hour later, so I photograph fruit cakes early. Bright light brings out the shine. A neutral stand stops the picture from getting busy. Shoot from an angle that shows both the topping and the tiers, and add just a few matching fruits at the base. Summer and outdoor receptions suit it best.
15. Macaron Wedding Cake Photography
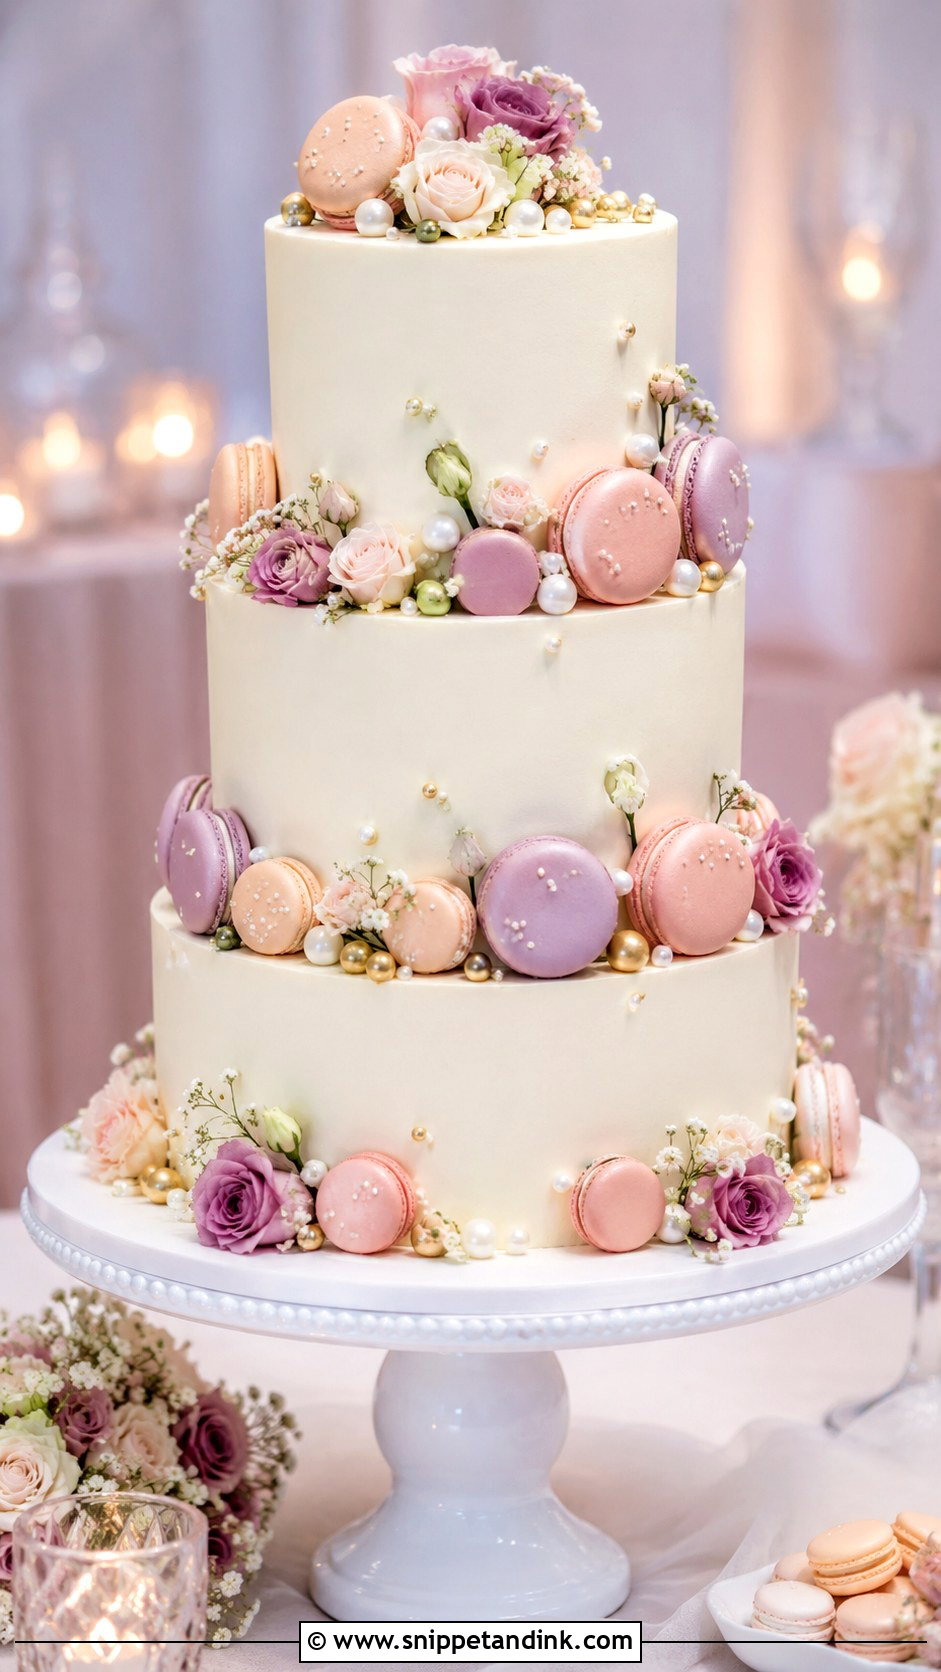
Macarons give a cake rhythm, a repeated round shape at the base, between tiers or down one side, and rhythm reads well in a photo when it’s even. If the shells are spaced unevenly, I’ll ask the baker or coordinator if they can be nudged before I shoot. Soft light flatters the smooth shells. Matching their colours to the wedding palette keeps it clean. I’ll shoot a close-up for texture and a full frame of the whole display.
16. Mini Wedding Cake Photography
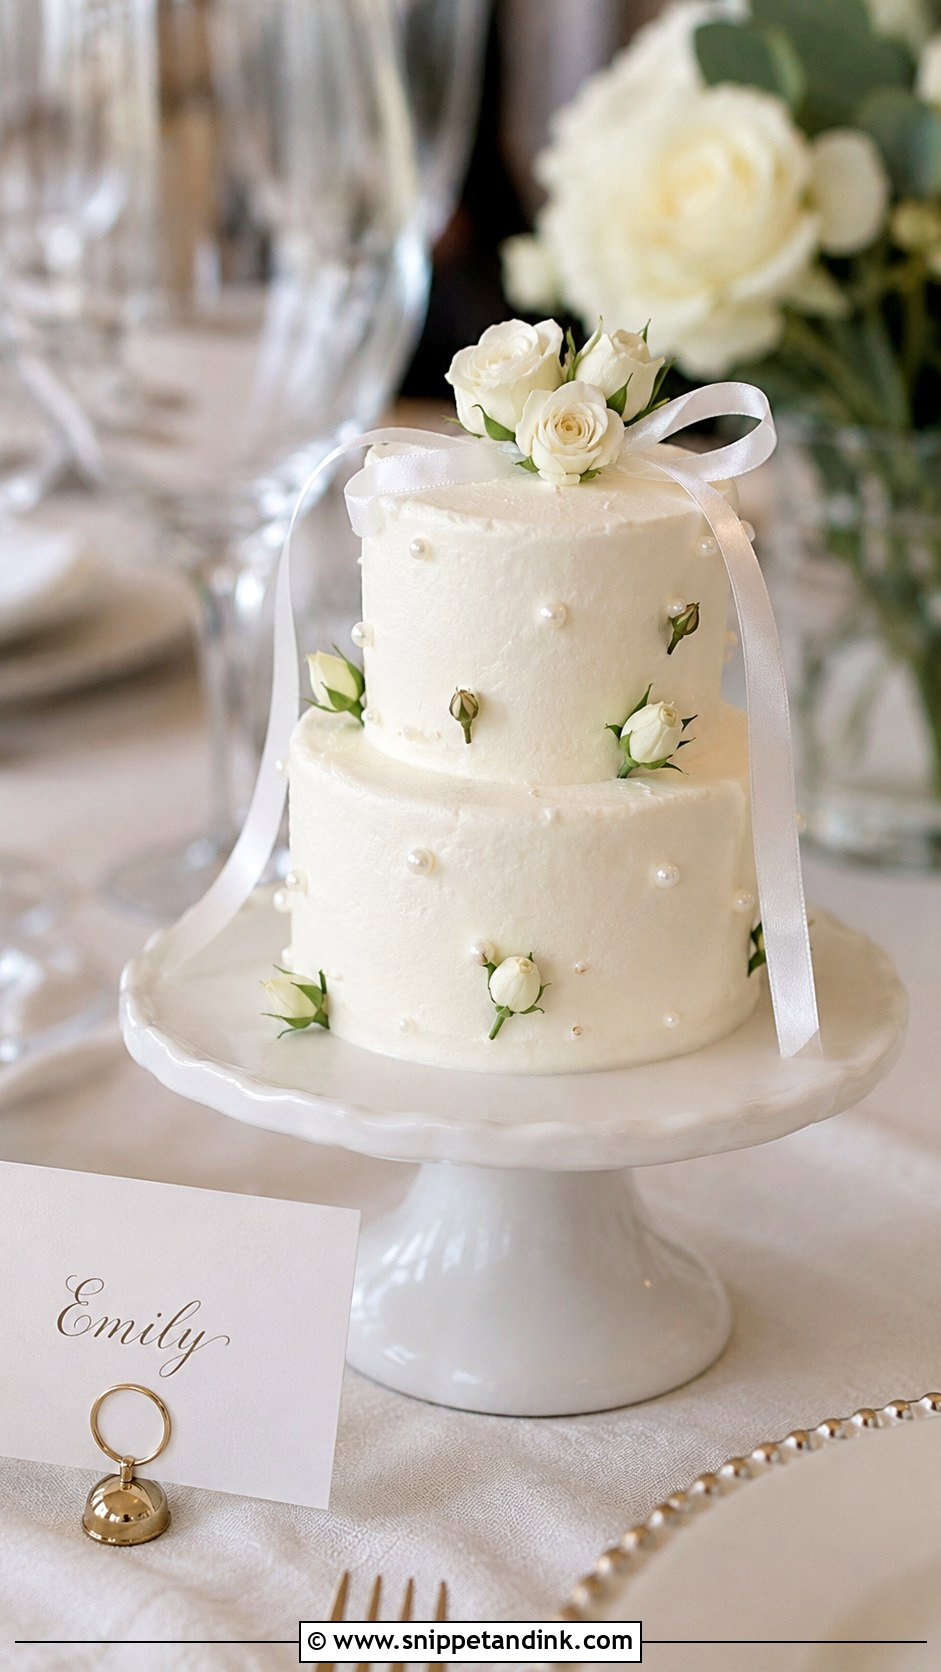
Mini wedding cakes lose their charm in a wide shot; they just look small. I get close and low so a single petite cake fills the frame, then pull back for one image of the set on matching stands. Including a place card or a fork in the frame shows the scale, which is what makes people smile at the photo later. Smooth frosting with tiny flowers or pearl dots keeps the detail refined. They suit intimate weddings and dessert tables well.
17. Sheet Wedding Cake Photography
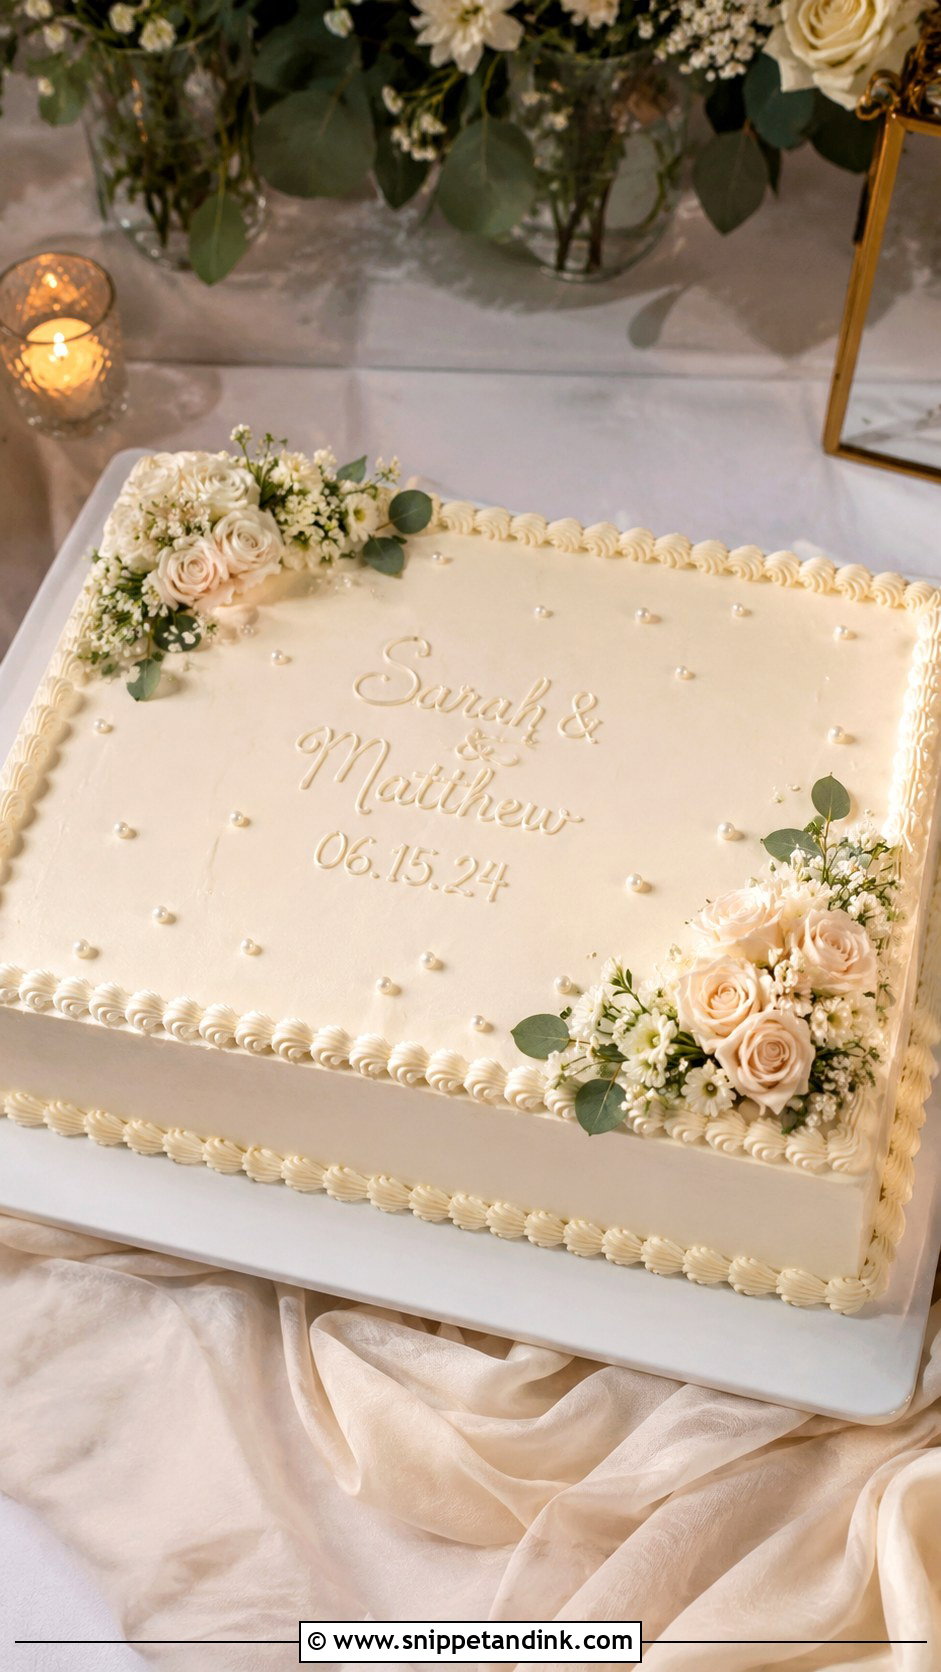
A wedding sheet cake can look just as considered as a tiered one if it’s photographed with intent. From overhead, the rectangle becomes a clean graphic shape, and piped borders, floral corners or vintage writing show clearly. Then a low front angle catches the frosting detail. Linen, a few flowers and a plain serving board are plenty. Treat it as the centrepiece, not the backup dessert hidden behind the main display.
18. Tall Wedding Cake Photography
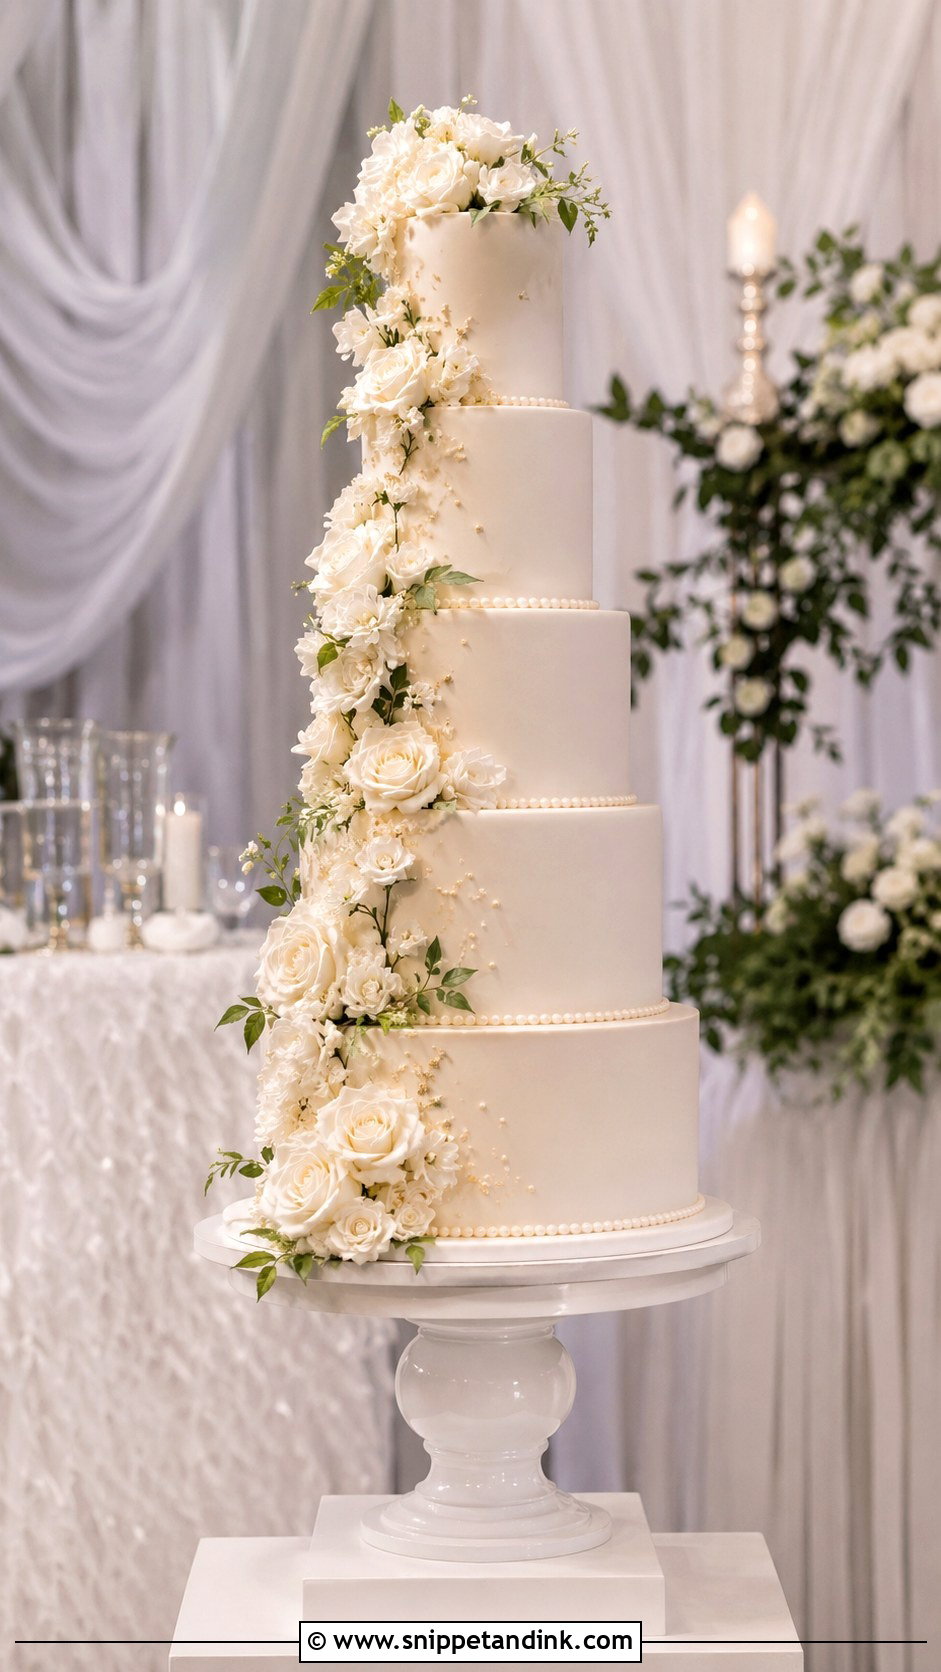
Tall cakes get their tops cut off more than you’d think, usually because the photographer is standing too close. I step back, turn the camera vertical and include the whole stand and topper with some breathing room above. A longer lens from further away keeps the tiers straight instead of tapering. If the venue has tall windows, drapery or columns, I’ll line them up behind the cake so the architecture supports the height. Four or five tiers with ivory frosting and floral clusters suit grand rooms.
19. Outdoor Wedding Cake Photography
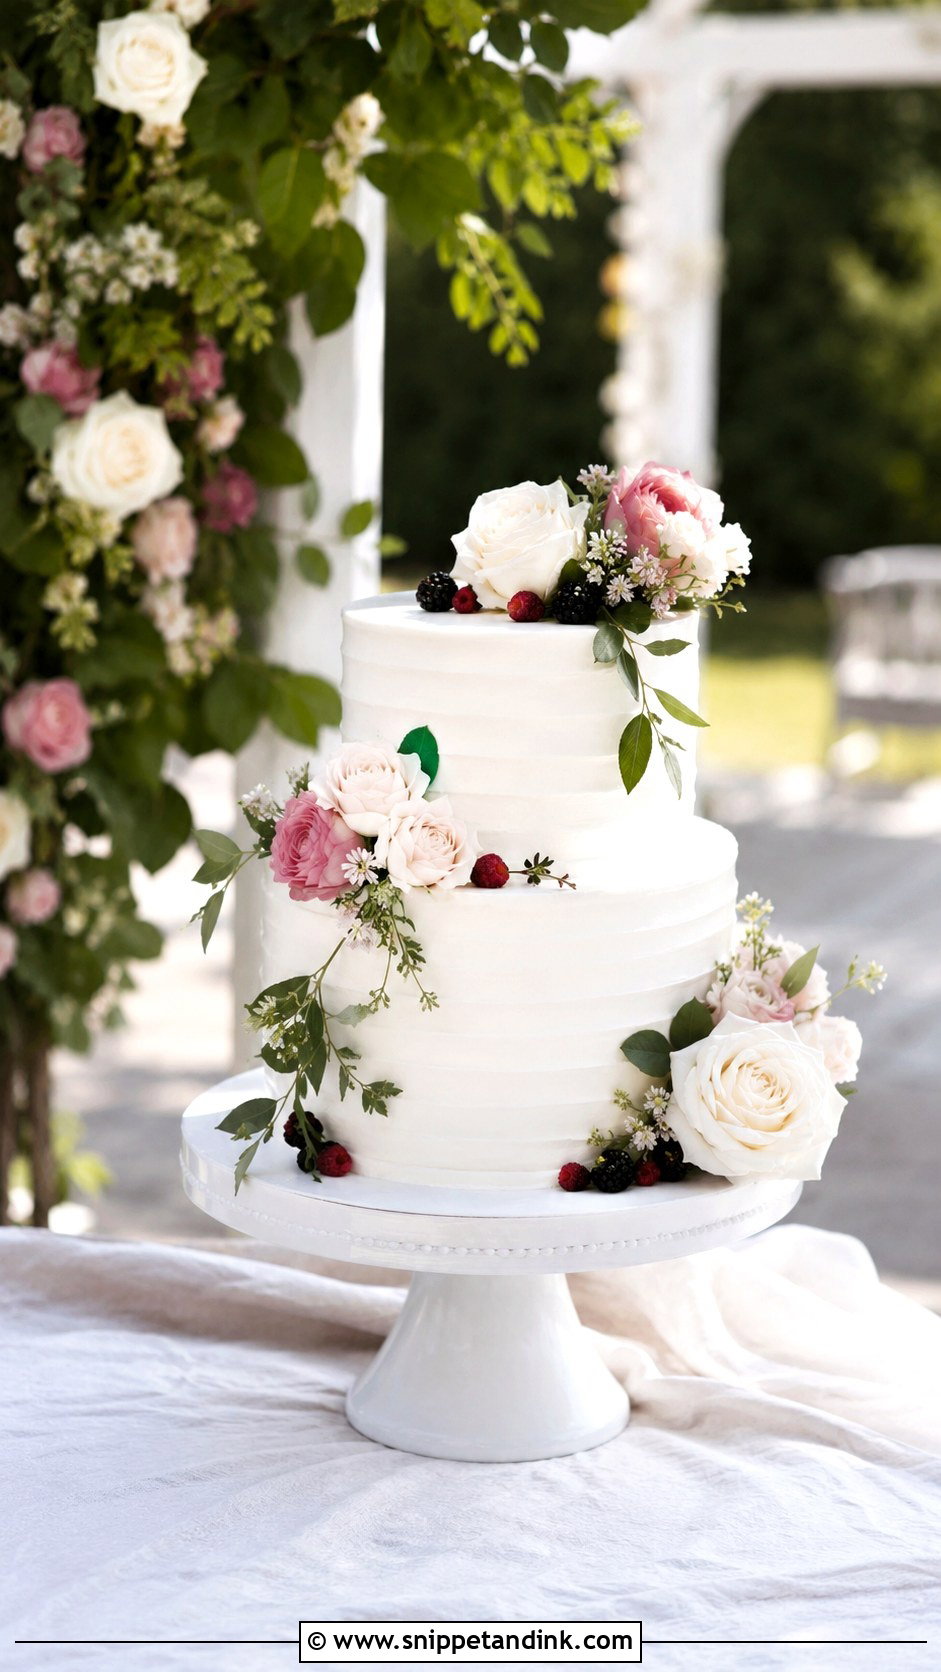
Outdoors, the sun is the problem twice over: it throws harsh shadows across the tiers and it softens frosting quickly. I’d always want the cake in open shade, under a tree or a tent edge where the light is bright but indirect. Early evening light is the kindest of the day. A plain stand, a linen cloth and the greenery behind it are enough. I take one wide frame with the landscape and one close frame, then the cake can go back somewhere cool.
20. Cake Cutting Wedding Photography
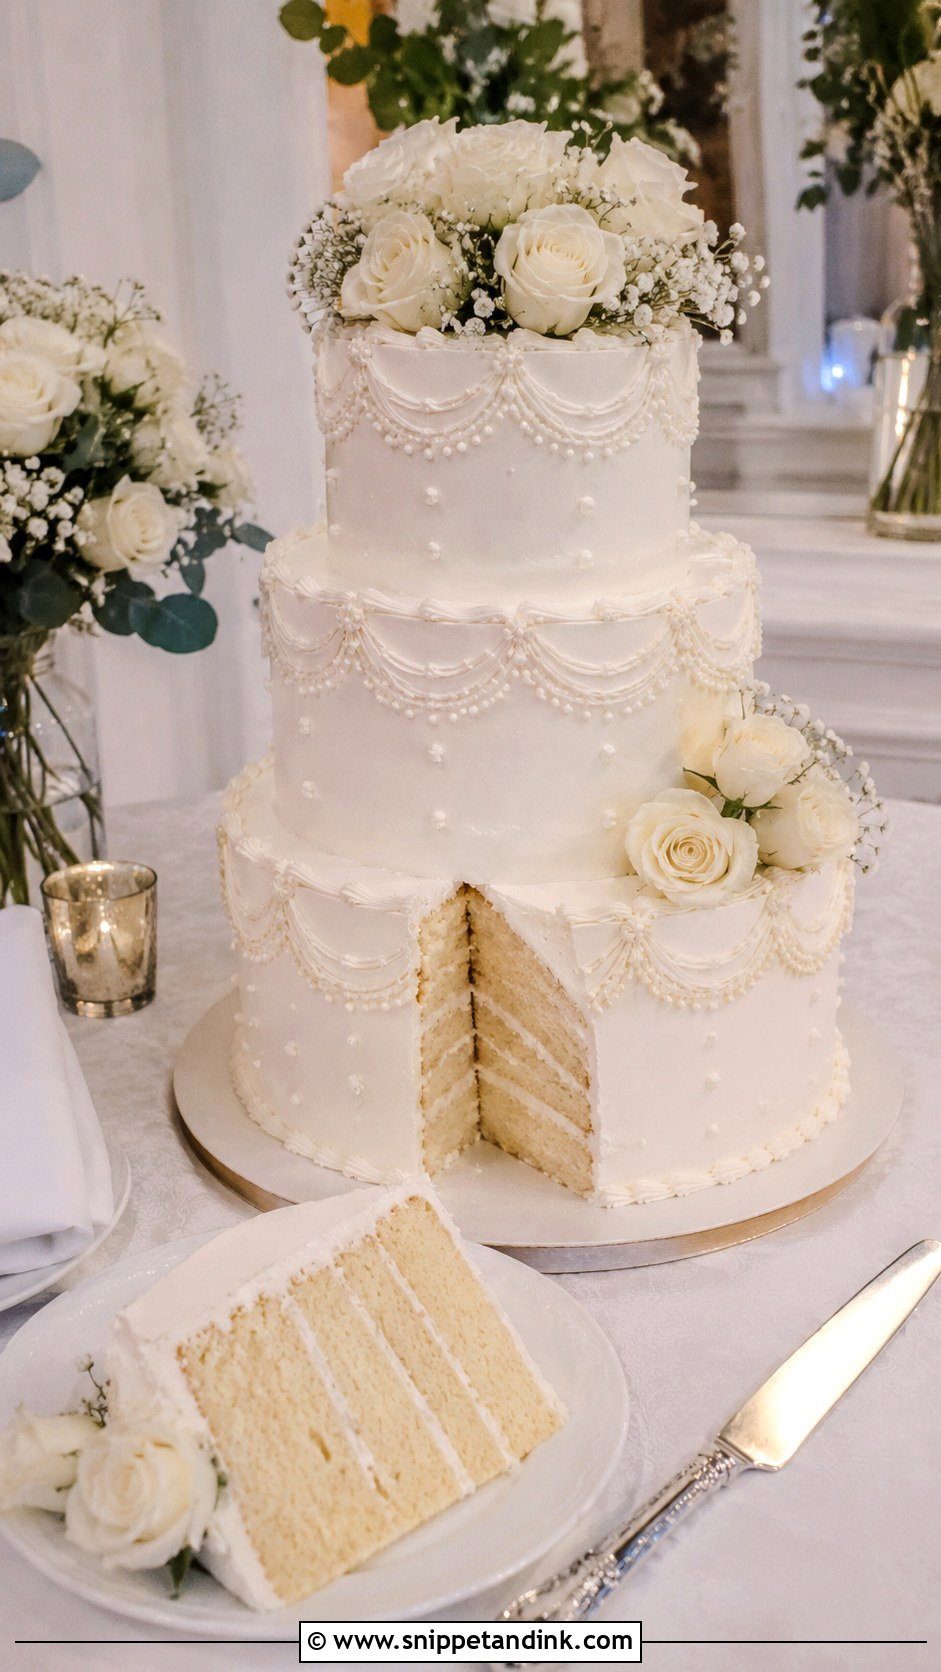
During cake cutting I’m photographing two people and a cake at the same time, so the table needs to be ready before they walk up: knife unwrapped, clutter cleared, the front of the cake facing the room. I’ll ask the couple to stand slightly to one side so they don’t block the tiers. Then the sequence: the first cut, the reaction, and a close frame of the slice being lifted. Watch for phones, cups and bags left on the table; they turn up in every frame.
Exit Signs, Orange Bulbs and Other Things That Spoil the Frame
Most weak cake photos have nothing wrong with the cake. Something around it pulls the eye away. These are the culprits I check for every time.
- Glowing exit signs, fire extinguishers and power sockets in the background. Moving my angle a little usually hides them; moving the table sometimes has to happen.
- Mixed light. Warm room bulbs on one side and cool daylight on the other leave the frosting orange on one half and blue on the other. I’ll switch off the overheads near the cake for a minute if the venue allows it.
- Coloured DJ or uplighting washing across the cake. Ask for those to start after the cake shots, or the white tiers turn purple.
- A cake knife still in its plastic sleeve, a box lid under the table, a crumpled tablecloth. Small, but they show in a close-up.
- Heat. A cake that’s been in a warm room for hours starts to sag, so earlier is nearly always better.
If you only brief your photographer on one thing, make it the timing. Everything else on this list can be fixed in a minute when there’s a minute to spare.
Treat the Cake Table Like a Small Set
The cake pictures I’m proudest of were planned, not lucky. The light, the background and the timing all worked together, so the cake looked like a finished part of the wedding and not a dessert on a side table. Classic white, vintage, floral, colourful, rustic or modern, the method is the same. Decide where the cake will stand, clear the table, find soft light and let your photographer have a few undisturbed minutes with it before the room fills.
You'll Like These Ideas:


Leave a Reply