
I photograph the dress as a character in the day, not as a product on a rail. A gown reads differently on a hanger at 10am, in window light during buttoning, and on a dance floor at midnight, and a good gallery follows it through all three. The ideas below are the dress shots I plan for at every wedding, with the practical details I watch for on location: where the light sits, what the fabric does when it moves, and which frames are worth the five minutes they take out of the timeline.

How Much Time Dress Portraits Really Take on the Day
Most couples are surprised by how quickly dress photos eat into a schedule. In my experience, a relaxed set of the shots below needs about 20 to 30 minutes of the bride’s own time, spread across the day rather than all at once. The hanging, flat lay and close-up frames happen while hair and makeup are still underway, so they cost the bride nothing.
Here’s how I usually split them up when I plan a timeline:
- Morning, before she dresses: hanging photo, flat lay, detail close-ups of lace and buttons.
- Getting ready: buttons or zip, mirror shot, back detail while the bodice is freshly fastened.
- After the ceremony or during golden hour: train, staircase, walking, twirl, veil and location portraits.
- Evening: exit frames, plus anything the bustle has changed.
Tell your photographer in advance which three or four dress shots matter most. If the day runs late, I protect those first and quietly drop the rest.
1. Wedding Dress Hanging Photo
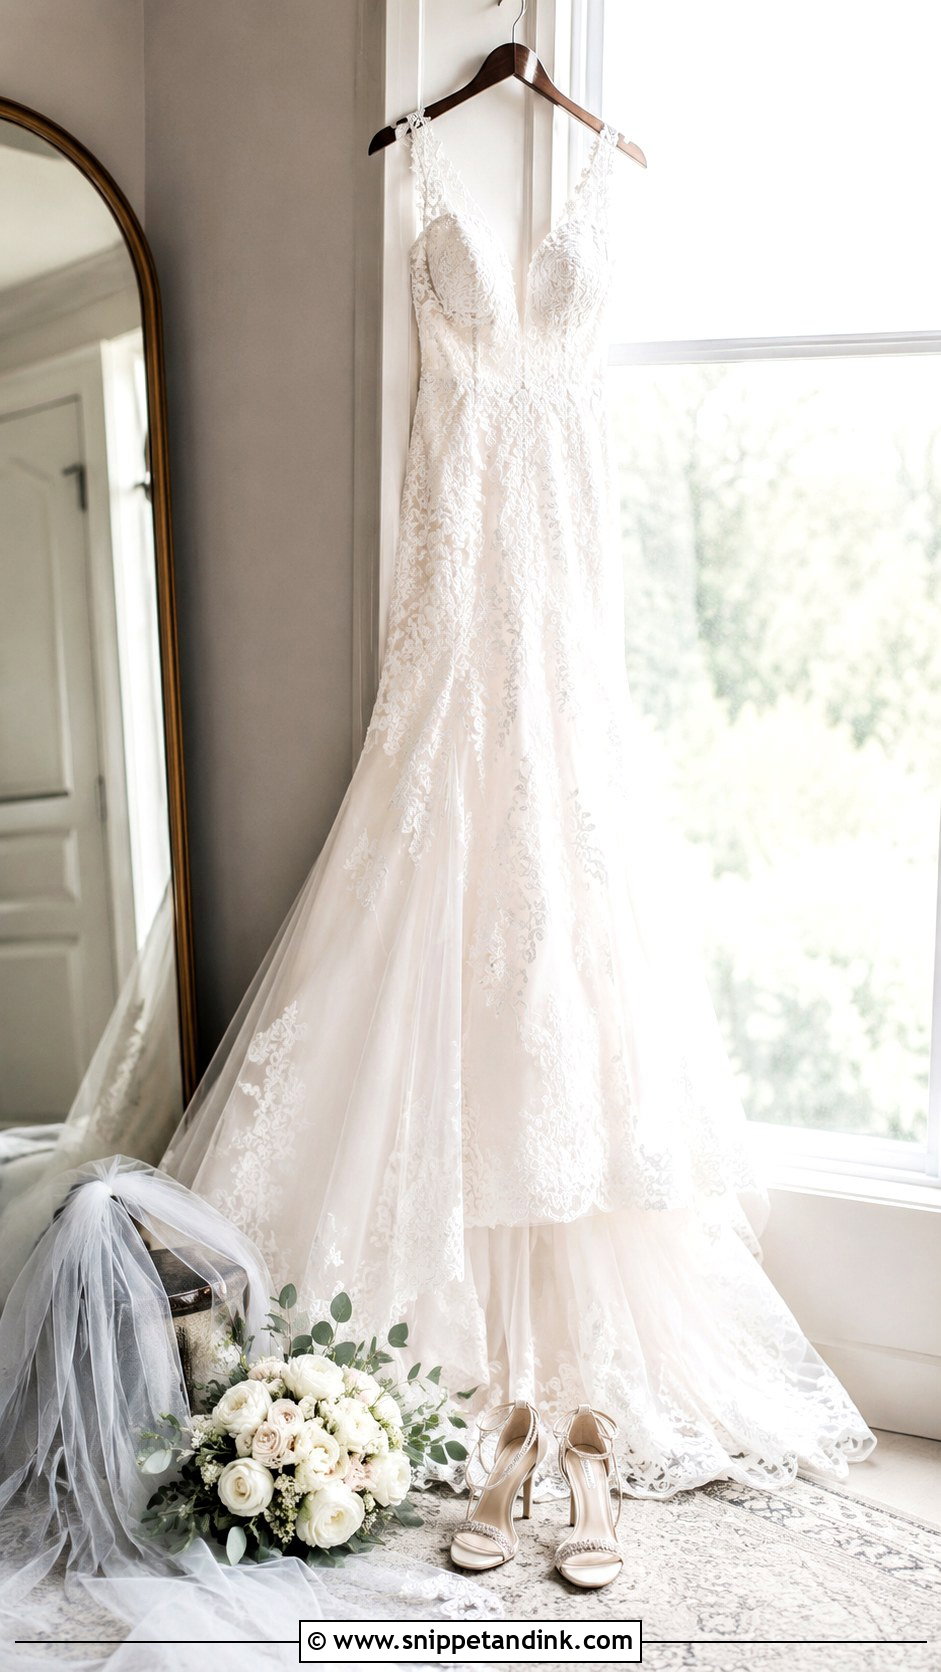
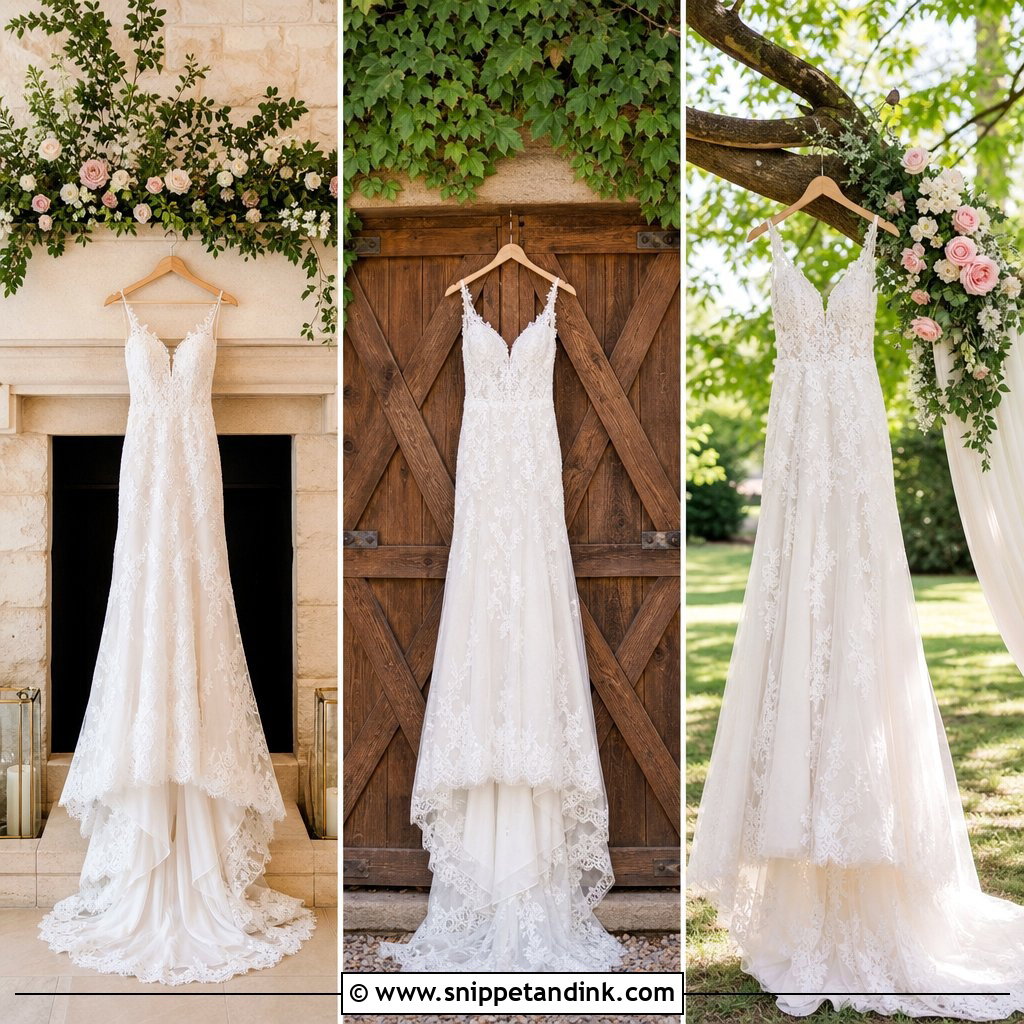
A wedding dress hanging photo is usually the first frame I shoot after the rings and shoes. I swap the plastic store hanger for wood or satin before anything else, because the clear ones with brand logos are hard to retouch out. Then I look for a door frame, a curtain rail or a tall wardrobe near a window, and I check the hem clears the floor so it falls straight instead of puddling. If the gown is heavy and beaded, I hang it by the inner loops rather than the shoulders so the straps don’t stretch.
2. Wedding Dress Window Portrait
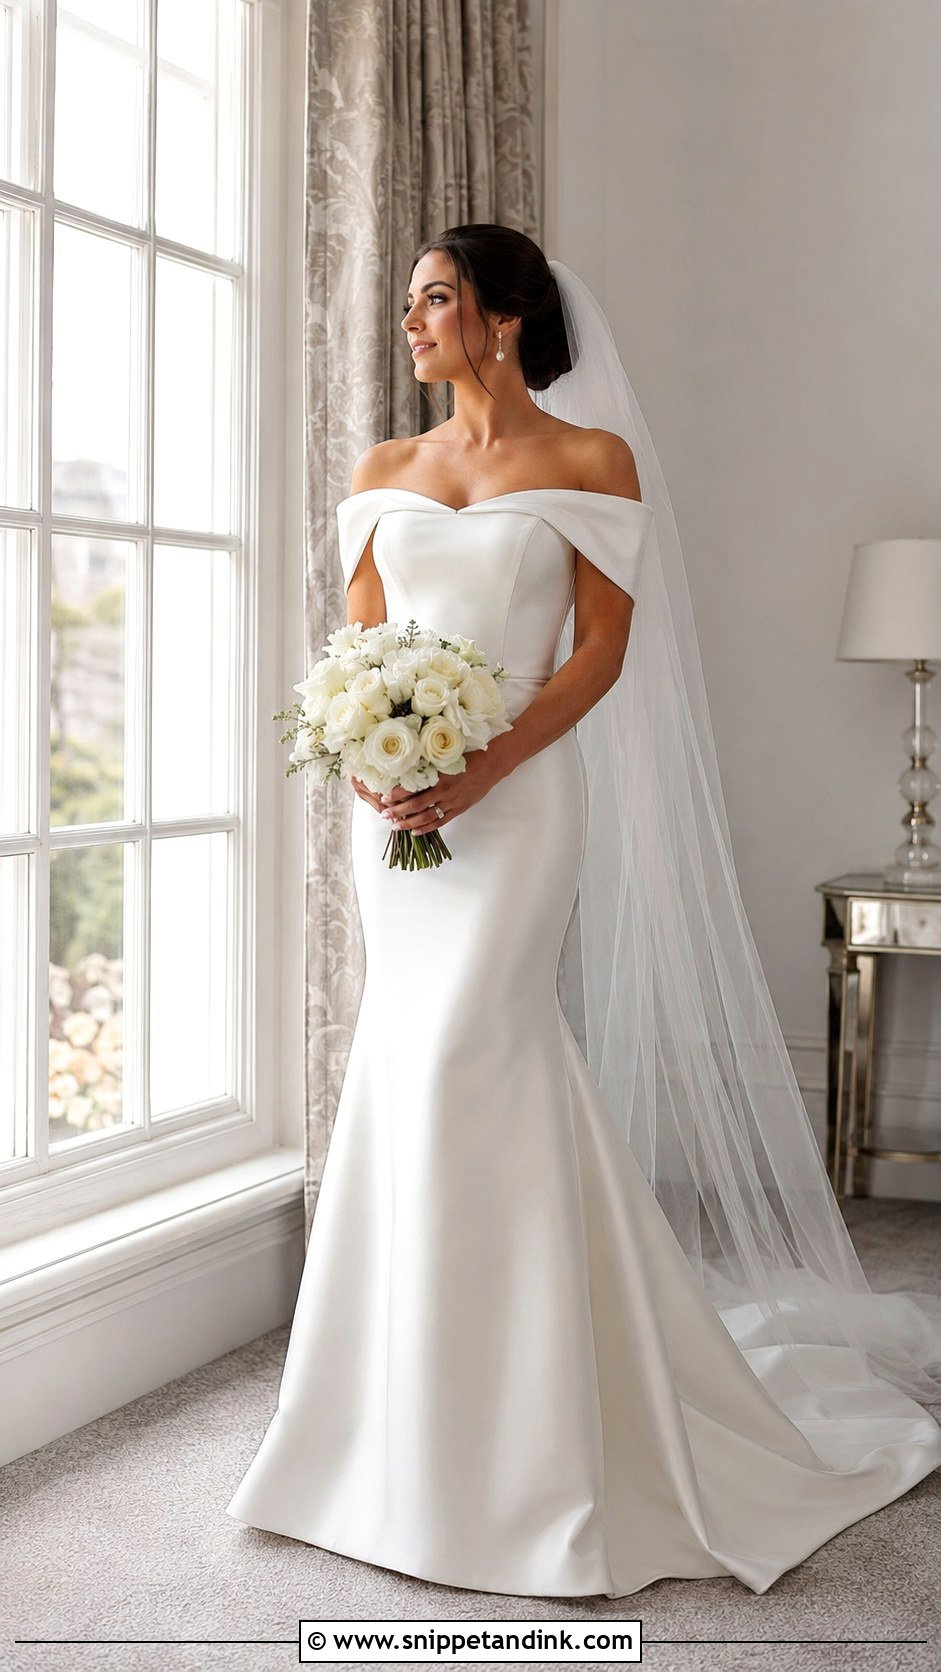
Window light does most of the work here. I turn the bride about 45 degrees toward the glass so the light skims across the fabric and picks out texture; face her straight at it and satin goes flat and shiny. Sheer curtains drawn across a sunny window act as a giant softbox. A full-length frame shows neckline, waist and hem together, and I ask her to smooth one side of the skirt with her hand because it gives her something to do besides pose.
3. Wedding Dress Train Photo
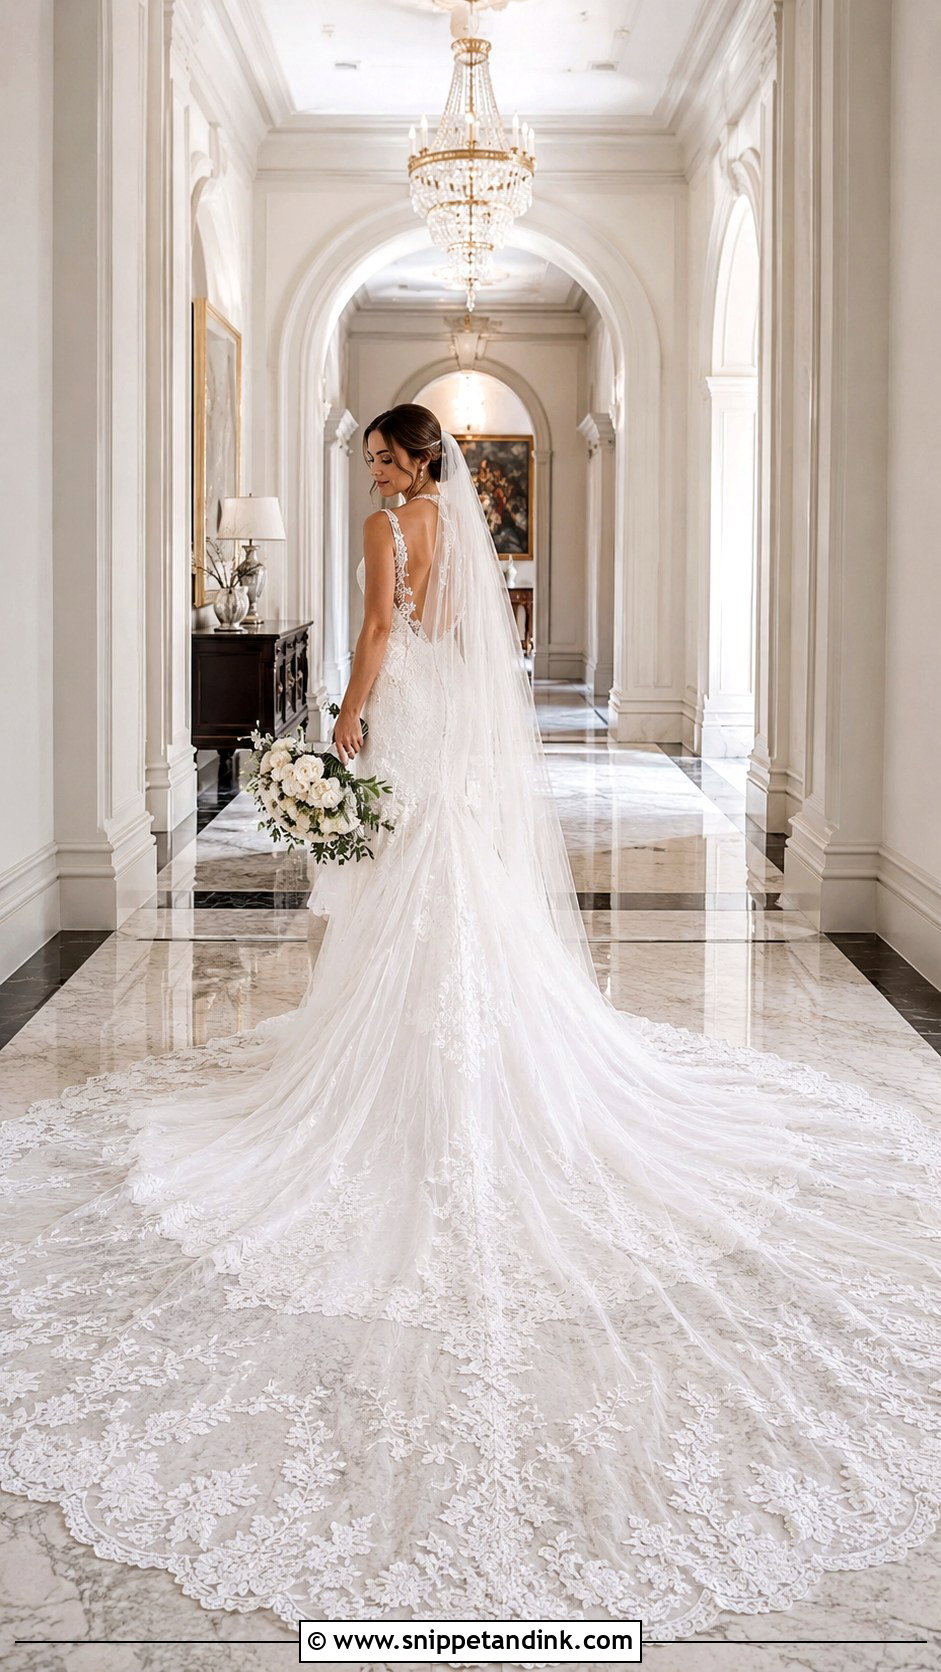
A train needs room and a helper. I pick the longest clear surface I can find, such as a hallway runner, a path or a ballroom floor, then have a bridesmaid flick the train out from the hem and let it settle rather than tugging it into place. From a step stool or the first few stairs, a slightly raised camera shows the full length without foreshortening it. With a cathedral train I leave plenty of empty floor around it, then I move in tight on any lace or embroidery at the edge, since the pattern is lost in the wide frame. Looking back over the shoulder works well because it turns her body toward the train.
4. Wedding Dress Veil Photo
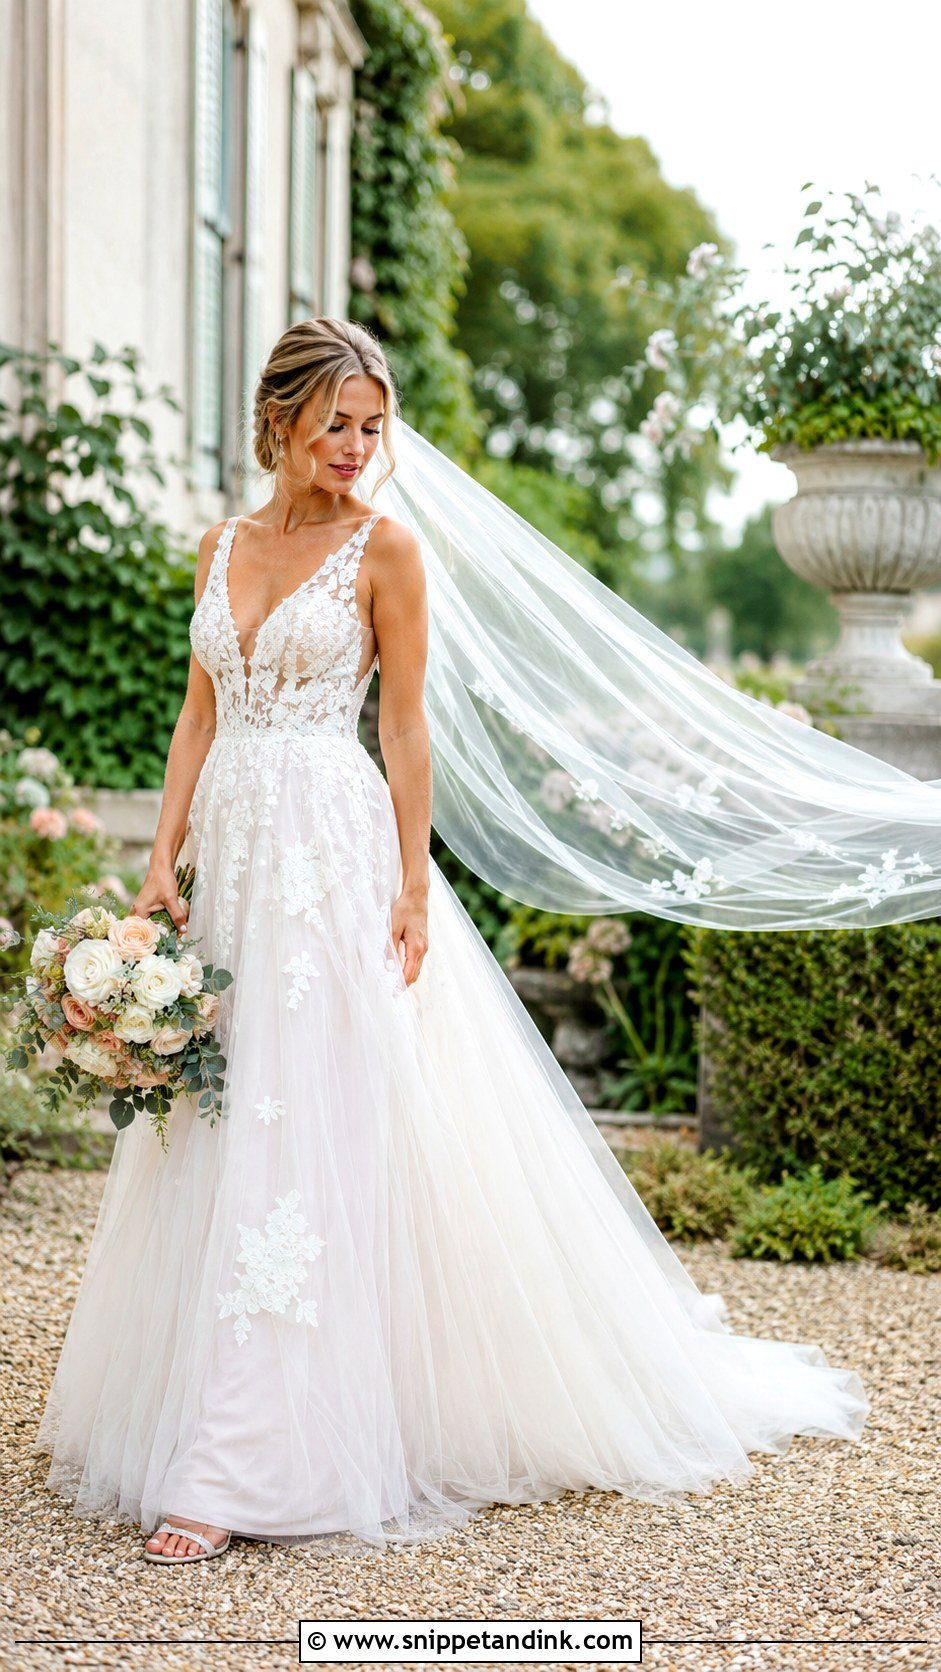
Veils are fragile in photos and in wind. Indoors I’ll drape the tulle forward around her face and shoot through it; the fabric softens the light the way a diffuser would. Outdoors I need two things: a breeze at her back, not her face, and someone just out of frame who can toss the veil up and step away on my count. I usually get the shot in three or four tries, and a long veil laid over the train gives a layered look that reads clearly from far back.
5. Wedding Dress Staircase Photo
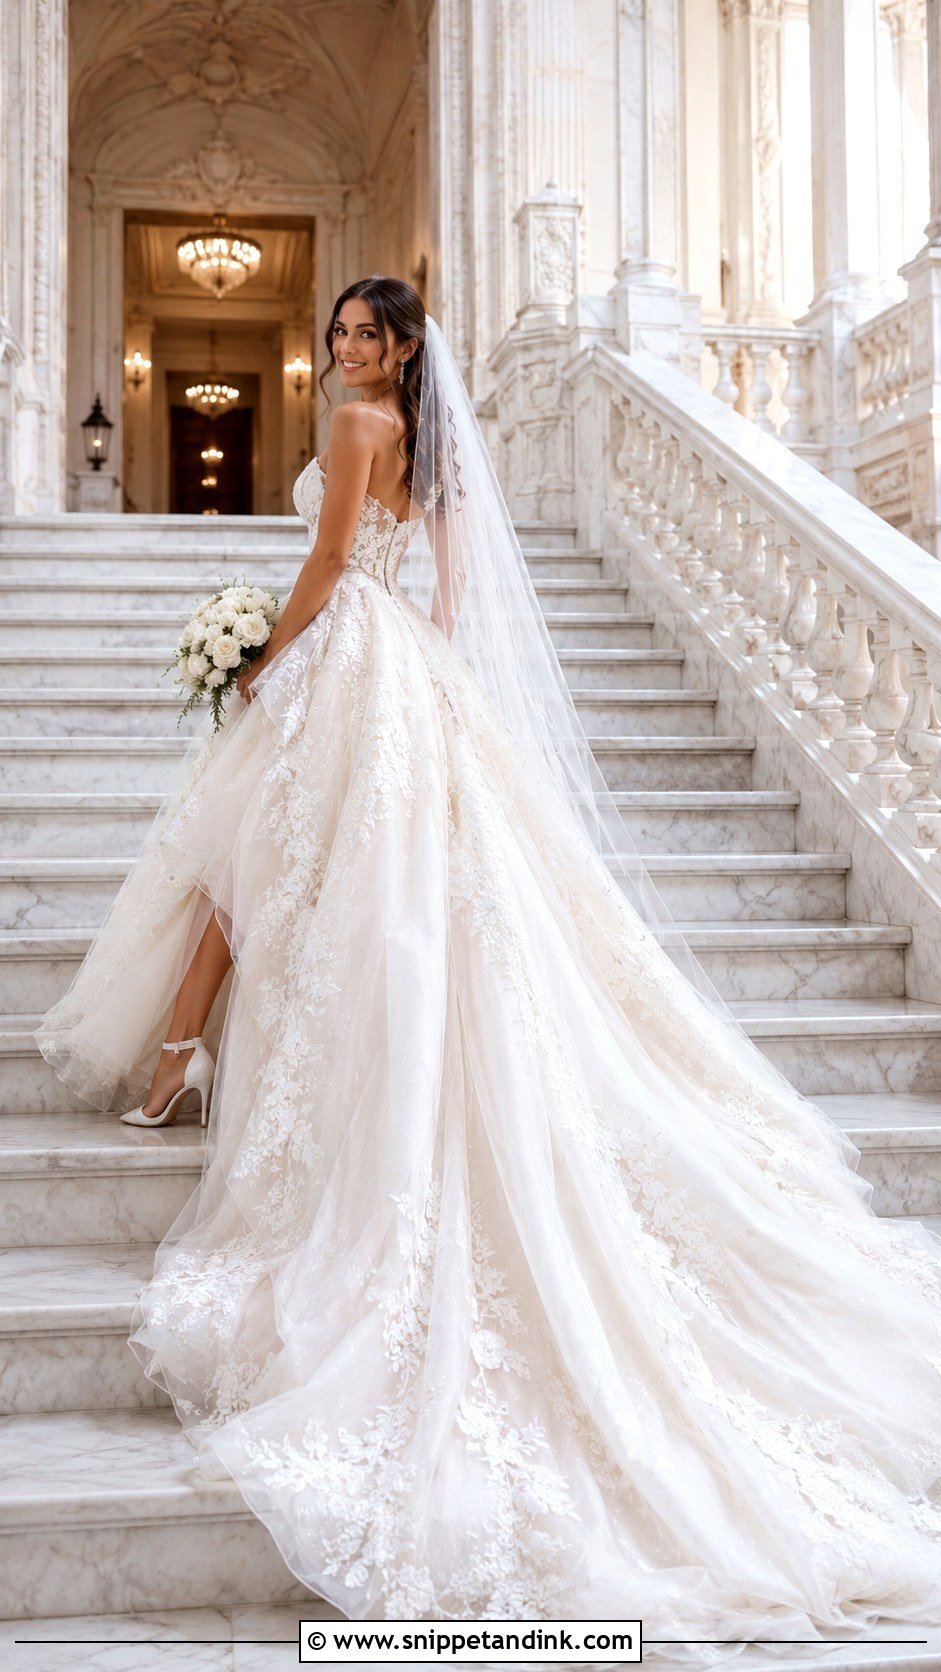
Stairs give height and a ready-made path for the train. My favourite placement is halfway down, with the train poured over the steps behind her. I check the stairs before she arrives, because dust, a stray coffee cup or a fire-exit sign at the top ruins the frame. A ball gown spreads nicely across several steps; a fitted mermaid gown photographs better from the side so the curve of the silhouette shows. Wide stairs with a banister on one side are easier to light than narrow ones closed in by walls.
6. Wedding Dress Mirror Photo
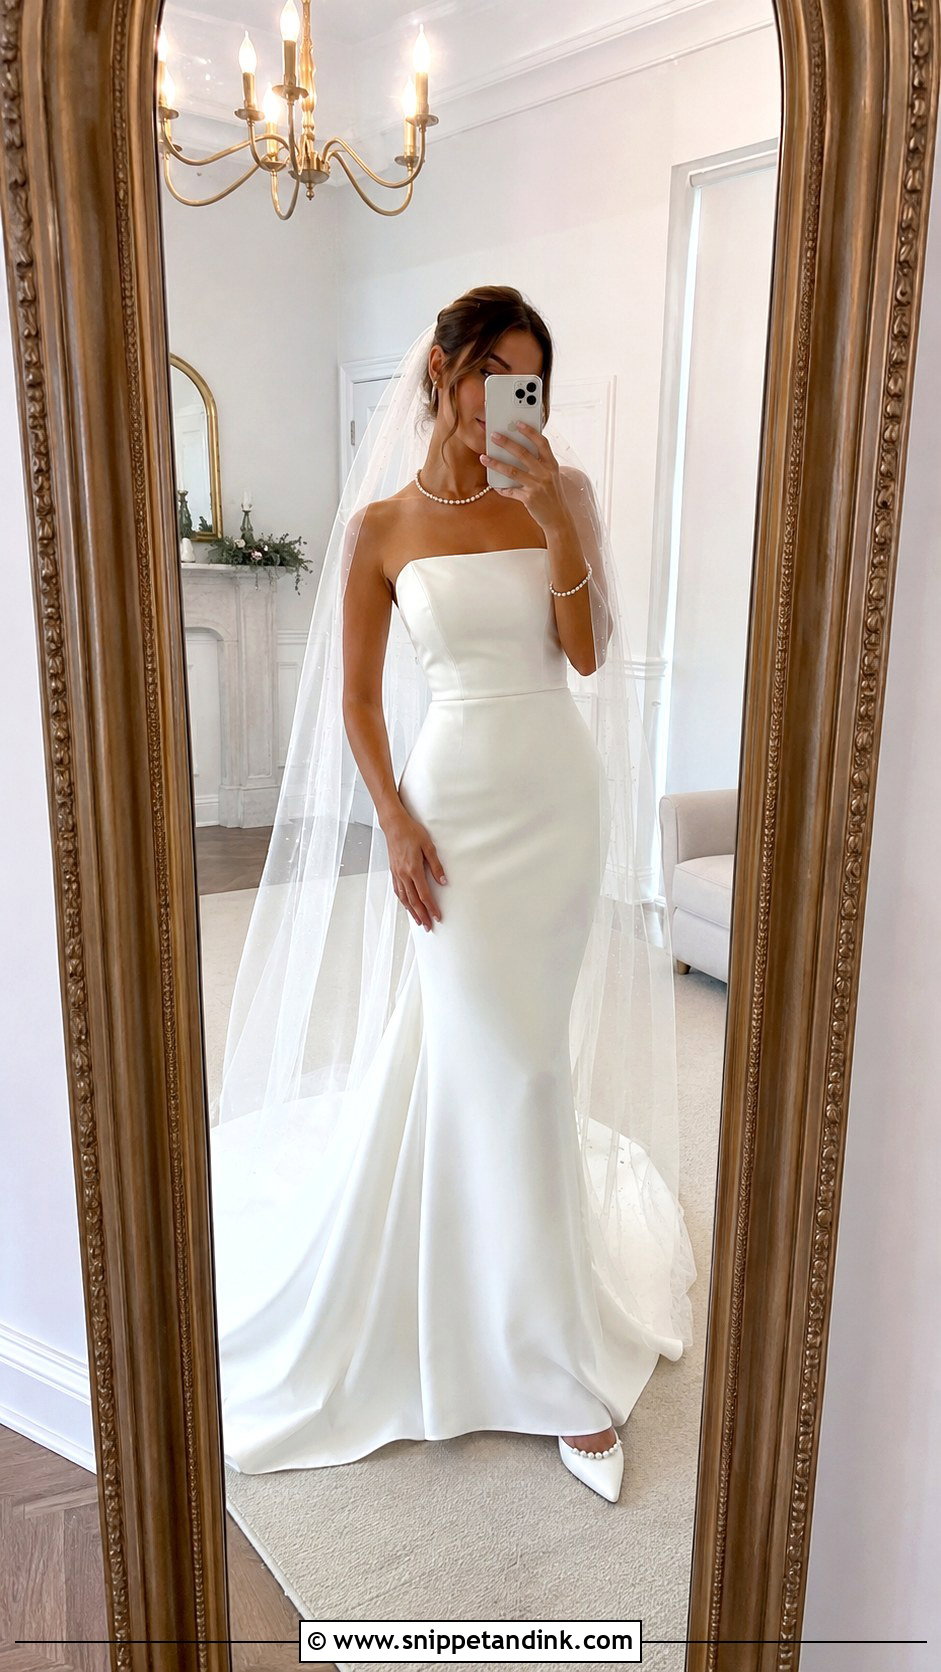
Mirror shots catch the moment she sees herself, and they’re one of the few frames where the back and face of the dress appear together. I shoot from an angle so my own reflection isn’t in the glass, which often means standing well to the side. Before anything, I wipe the mirror myself; hotel mirrors show every fingerprint under a long lens. A tall, freestanding mirror is easier than a bathroom one, because I can move it into the window light.
7. Wedding Dress Getting Ready Photo
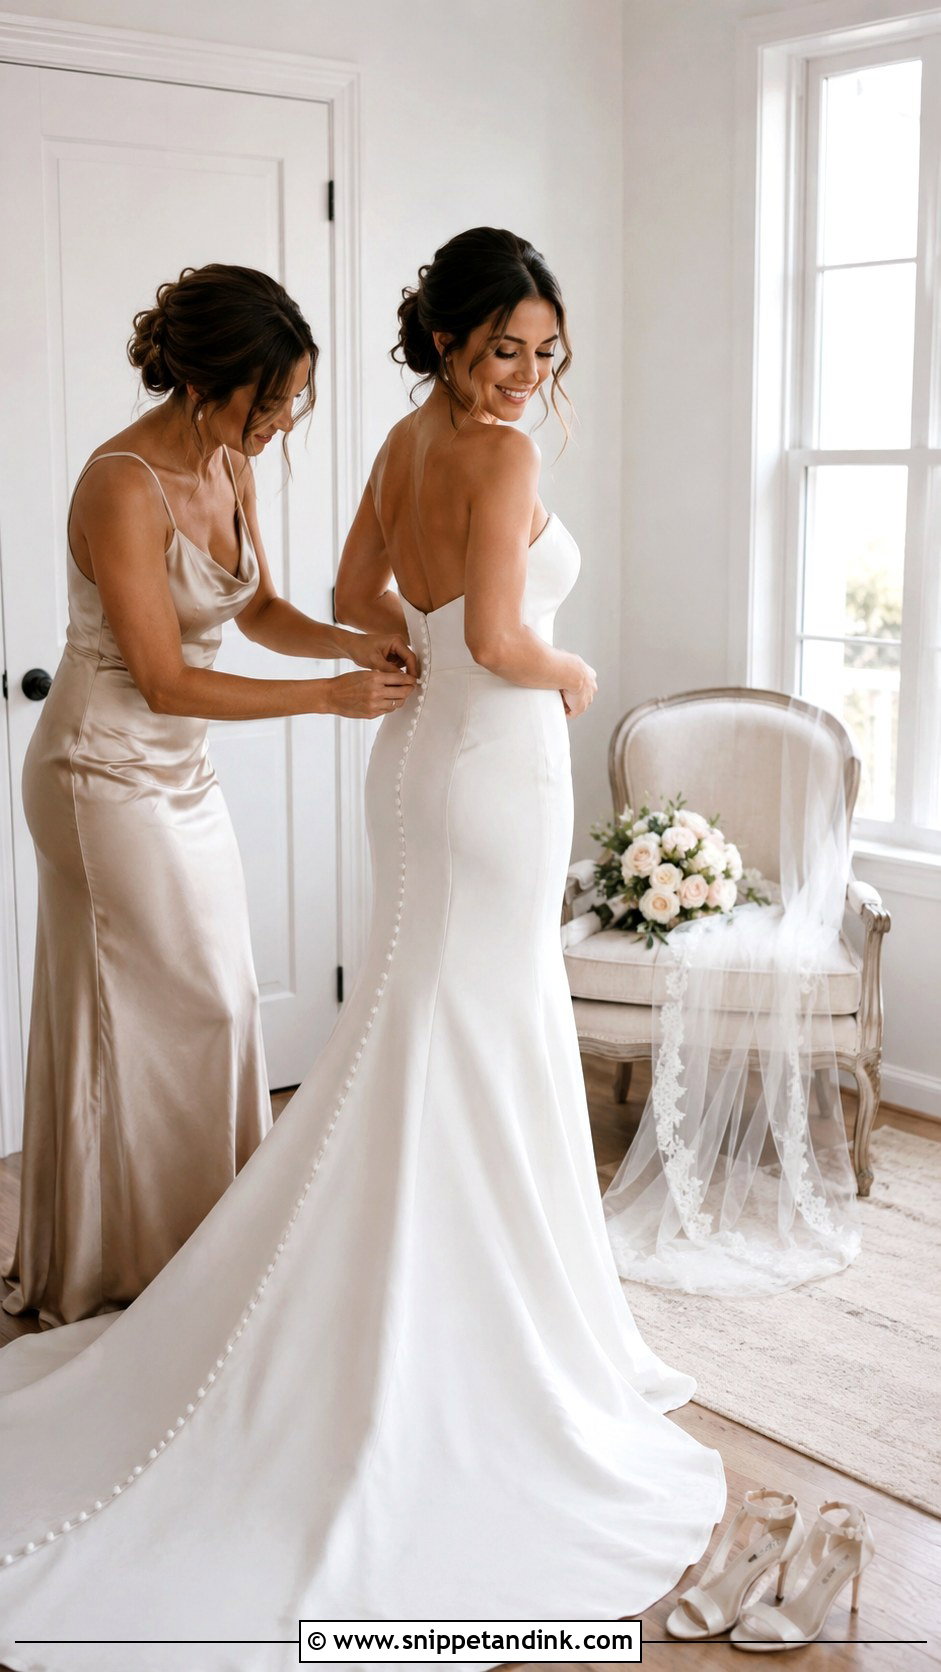
I’d rather photograph the dress going on than the dress already on. Stepping in, the loops being fastened up the back, her mum pulling the zip: those hands-at-work frames are what families reprint. I ask whoever is helping to stand slightly behind and to one side so their arms don’t hide the bodice. Button backs take longer than people expect, sometimes ten minutes with a crochet hook, so I build that into the timeline instead of rushing it.
8. Wedding Dress Back Detail Photo
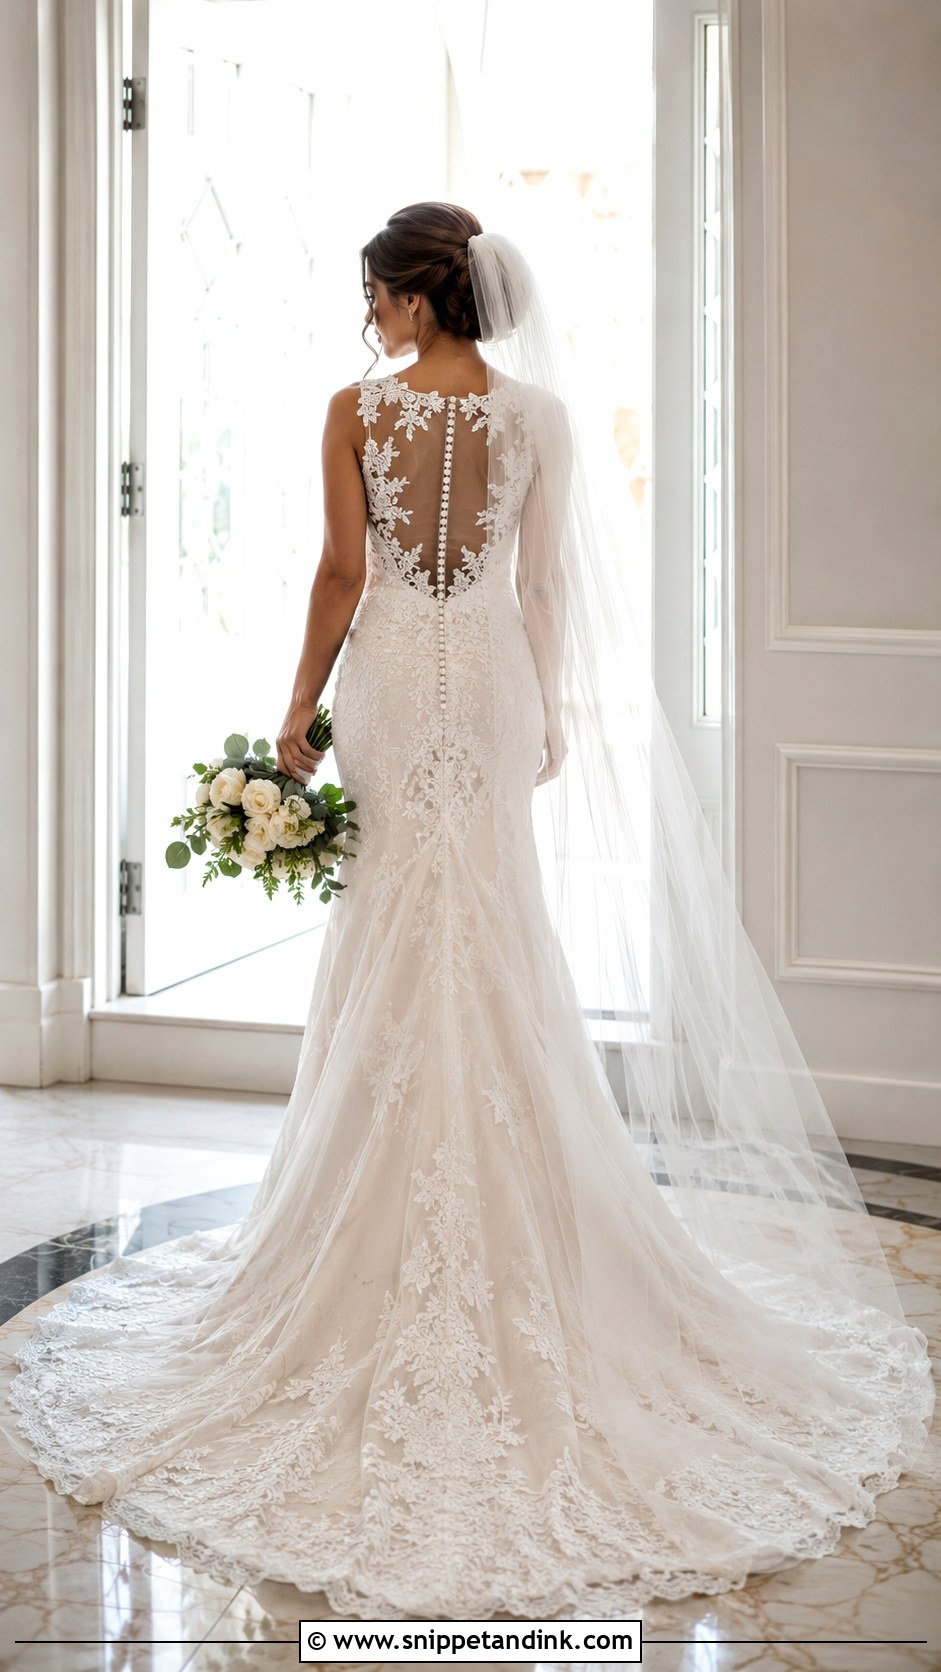
Back details disappear in most ceremony photos because the bride faces away from the guests only briefly. So I give them a dedicated frame: buttons, lace panels, an open back, corset lacing. I ask her to drop her shoulders and turn her chin toward one shoulder so the neck lengthens and there’s a hint of profile. Then I take two versions, one full length in a doorway or arch, and one close crop on the fastening. Corsets need checking first; a loose loop or twisted ribbon shows plainly in a crop.
9. Wedding Dress Walking Photo
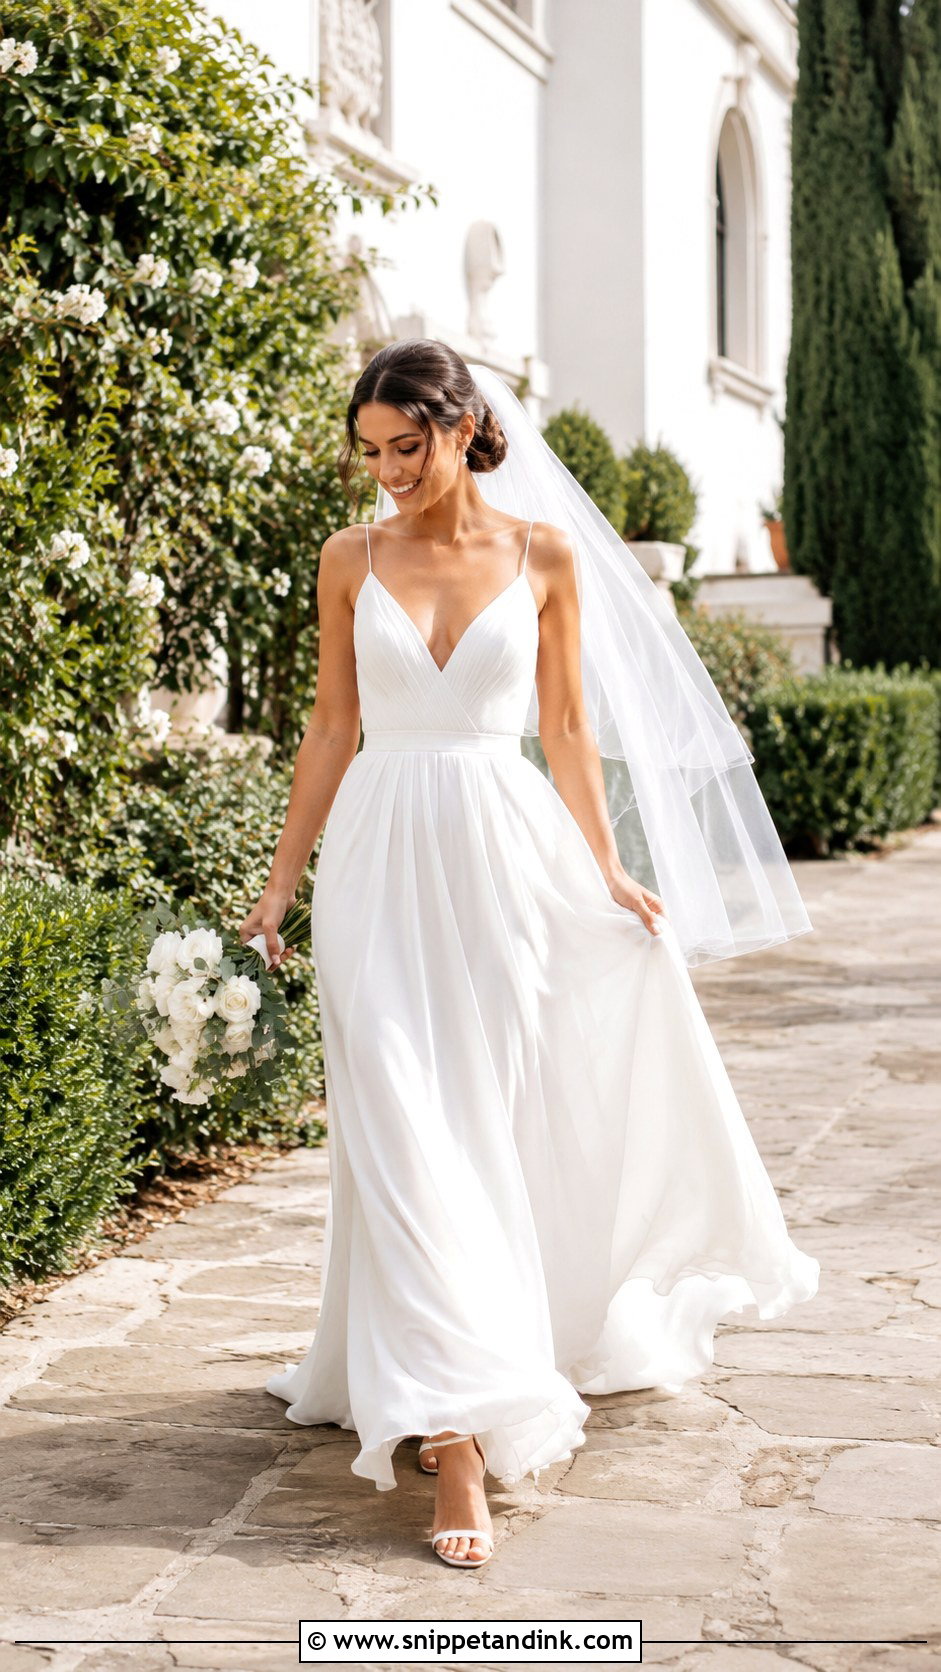
Walking frames tell me how a dress moves. Tulle and chiffon float; crepe and heavy satin swing. I ask her to walk slower than feels natural, take small steps and lift the front of the skirt a little so she doesn’t tread on it, then I shoot a burst and pick the frame where the hem is mid-swing. Paths with a bit of texture, such as gravel, a courtyard or a sidewalk, give a sense of place without crowding the dress.
10. Wedding Dress Twirl Photo
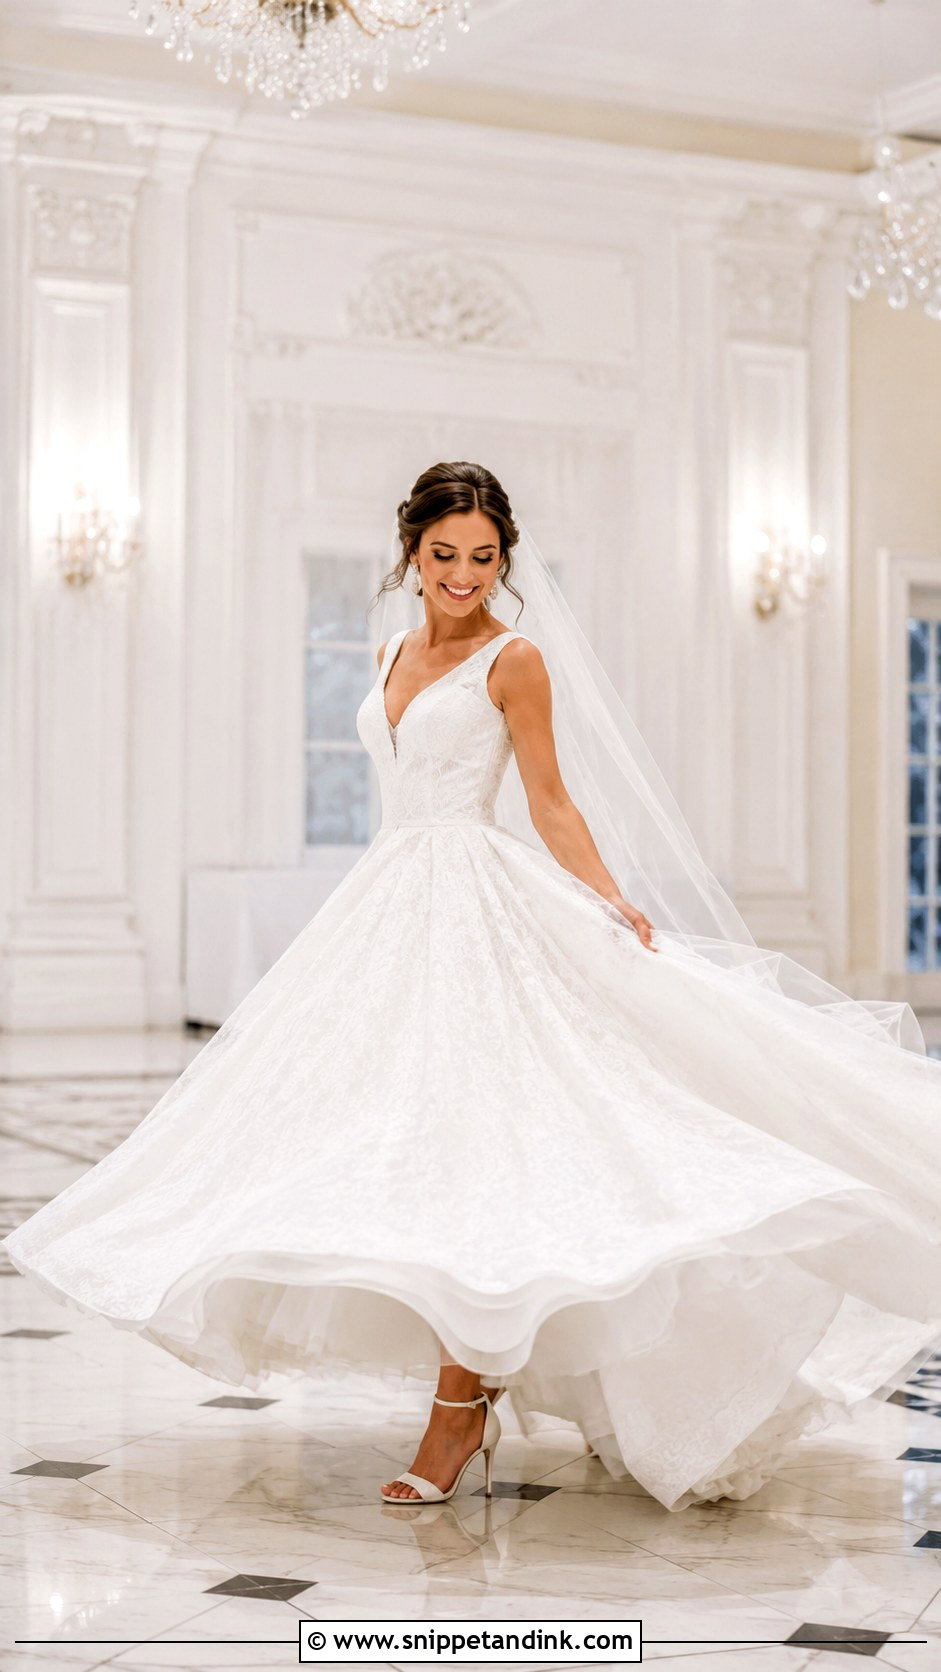
Twirls only work with skirts that can open. Layered tulle and lightweight silk flare out; a fitted gown just wraps around her legs. I ask for a slow half-turn rather than a spin, because a fast spin blurs the face and can twist the train under her feet. A wide lens and a clean floor matter more than anything else here. Laughter usually arrives on the second or third try, and that’s the frame I keep.
11. Wedding Dress Sitting Photo
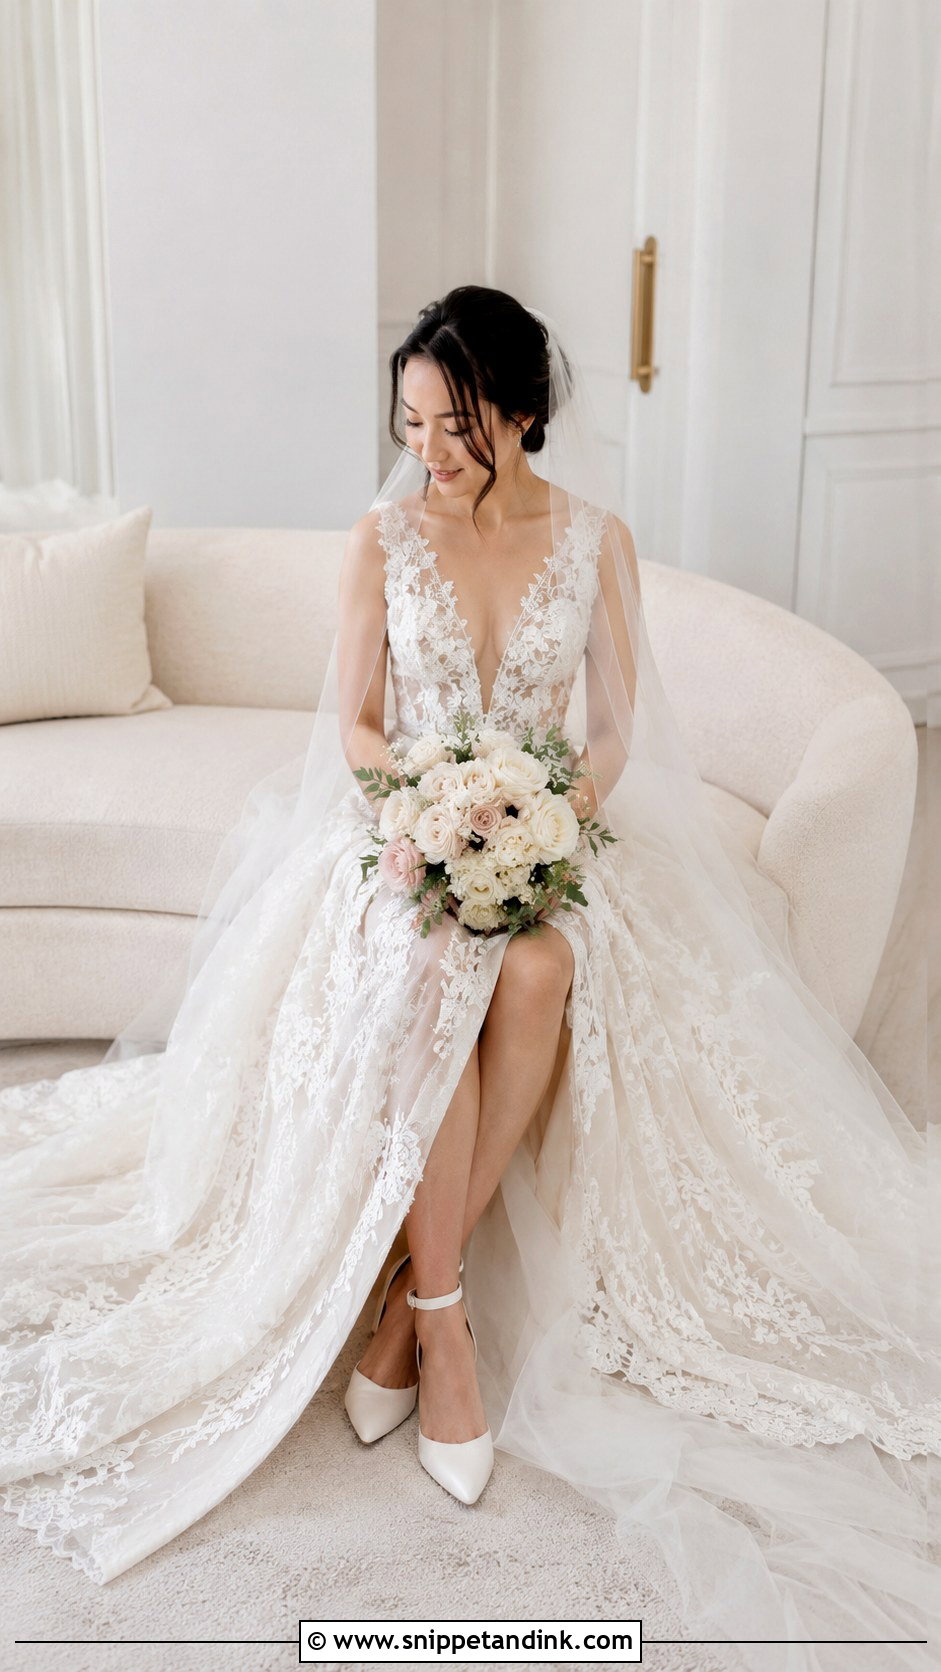
Fabric behaves badly when a bride sits, so a sitting pose needs set-up. I have her sit on the front edge of the chair or bench so the skirt doesn’t crush under her, then I lift and spread the fabric out from the sides. Satin creases where it bends at the hip; crepe is more forgiving. For full skirts I fan the fabric in a circle; for slim gowns I angle the knees away from me and let the train fall to one side. A bouquet resting in her lap gives her hands a place to go, and it’s a welcome rest between standing portraits.
12. Wedding Dress Bouquet Photo
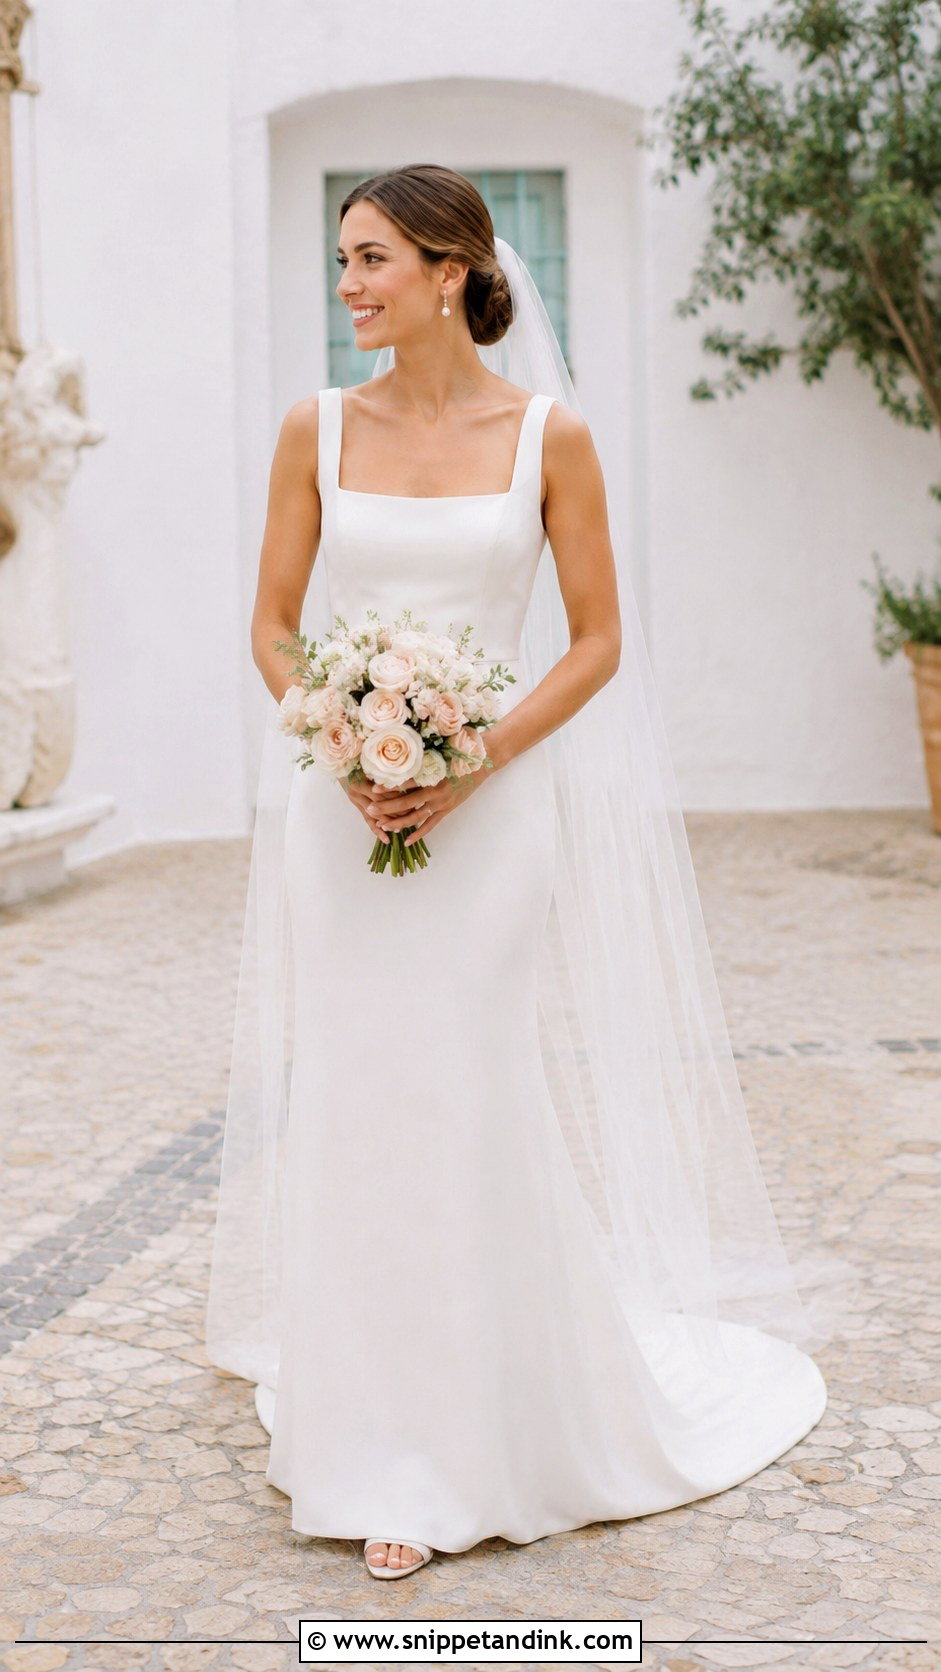
Where she holds the bouquet changes the dress shot more than people realise. Held at the belly button, it hides the waist and often the bodice detail. I ask brides to drop it to hip level with elbows relaxed, or to hold it to one side if the neckline or corset is the focus. A big, colourful arrangement balances a plain crepe gown; a soft, trailing one sits better with a busy lace bodice. I take one full-length and one tight crop so florist and dressmaker both get a frame.
13. Wedding Dress Shoes Photo
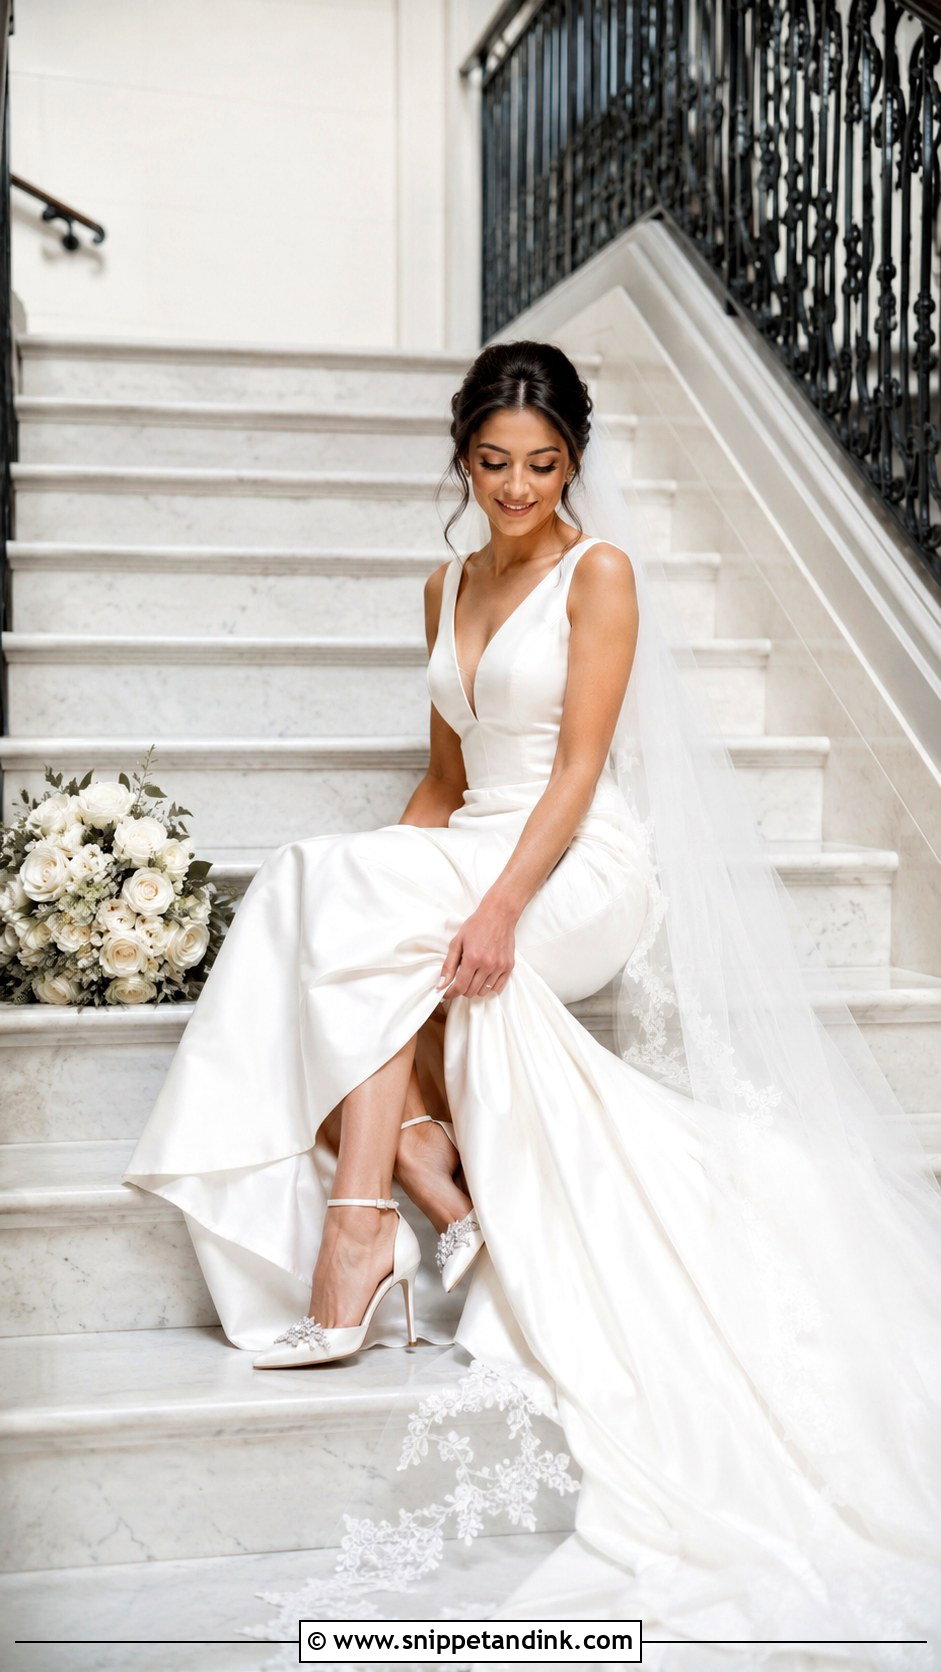
Shoe shots look staged when the hem is hoisted to the knee. I ask her to lift the front of the skirt only a few inches as she steps forward, or to perch on a stair so one foot shows. A thigh slit does the work without any lifting at all. Colourful heels or comfortable flats chosen for dancing tell a little story about the person, which a product-style shot on a windowsill never does.
14. Wedding Dress Close Up Photo
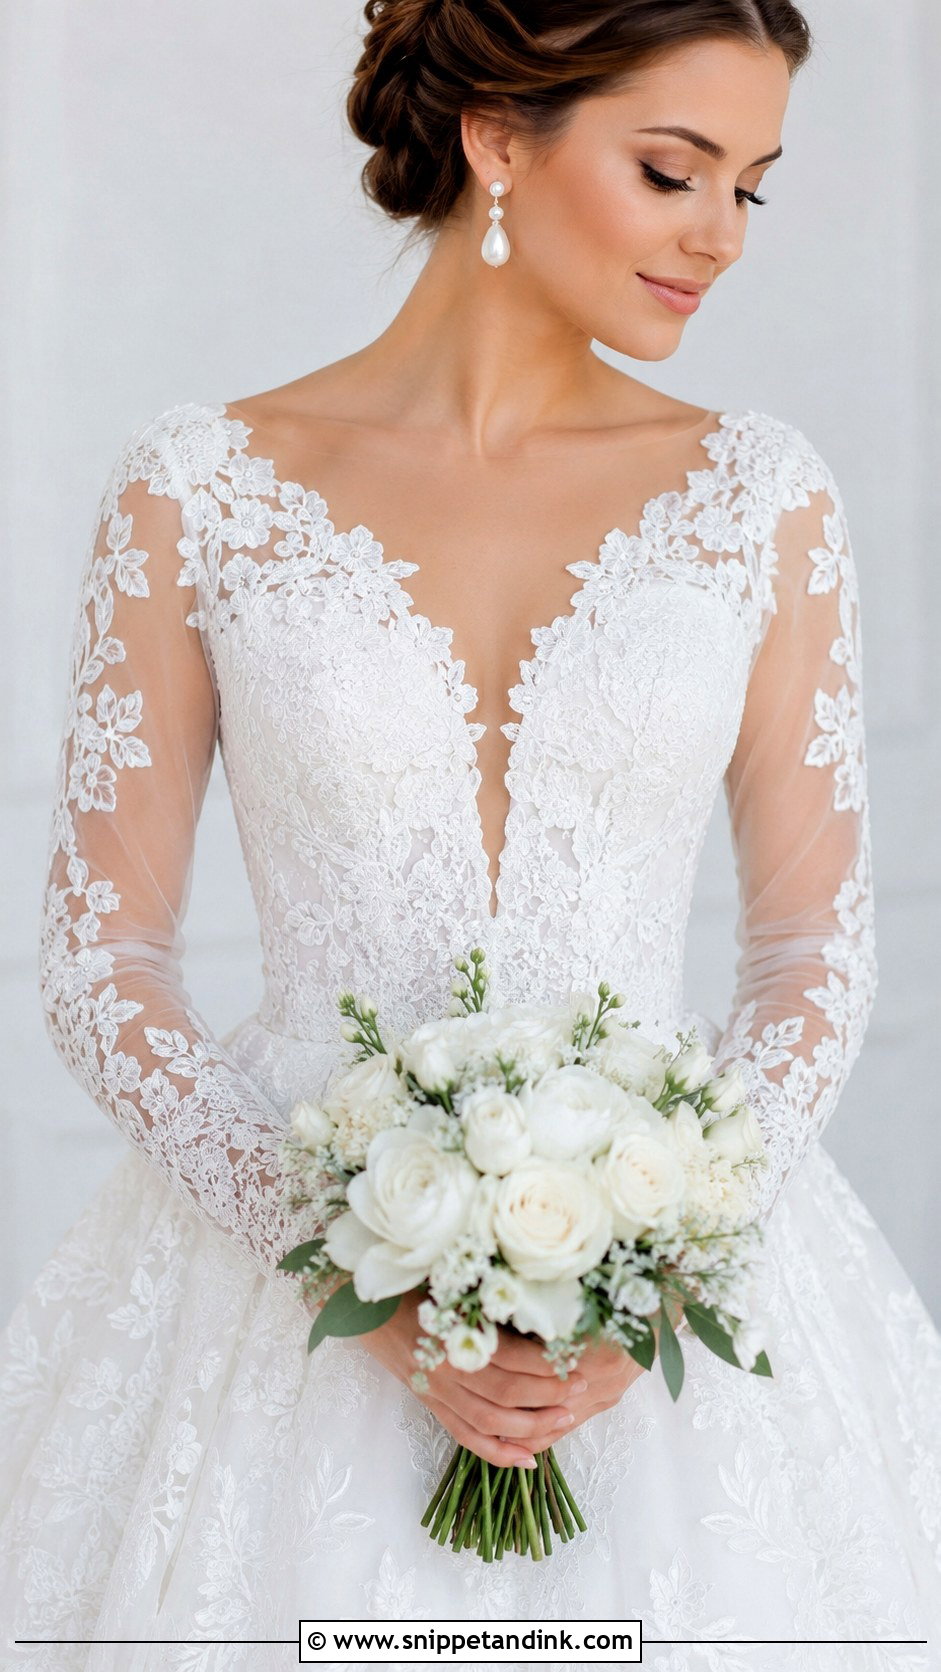
Close-ups are where the craftsmanship lives: hand-sewn beading, embroidered hems, covered buttons, pleating at the waist. I use a macro or a long lens and look for side light, which throws tiny shadows into the texture; front flash flattens beadwork completely. Including part of her hand or a ring gives the detail scale. These frames also give an album breathing room between the bigger portraits.
15. Wedding Dress First Look Photo
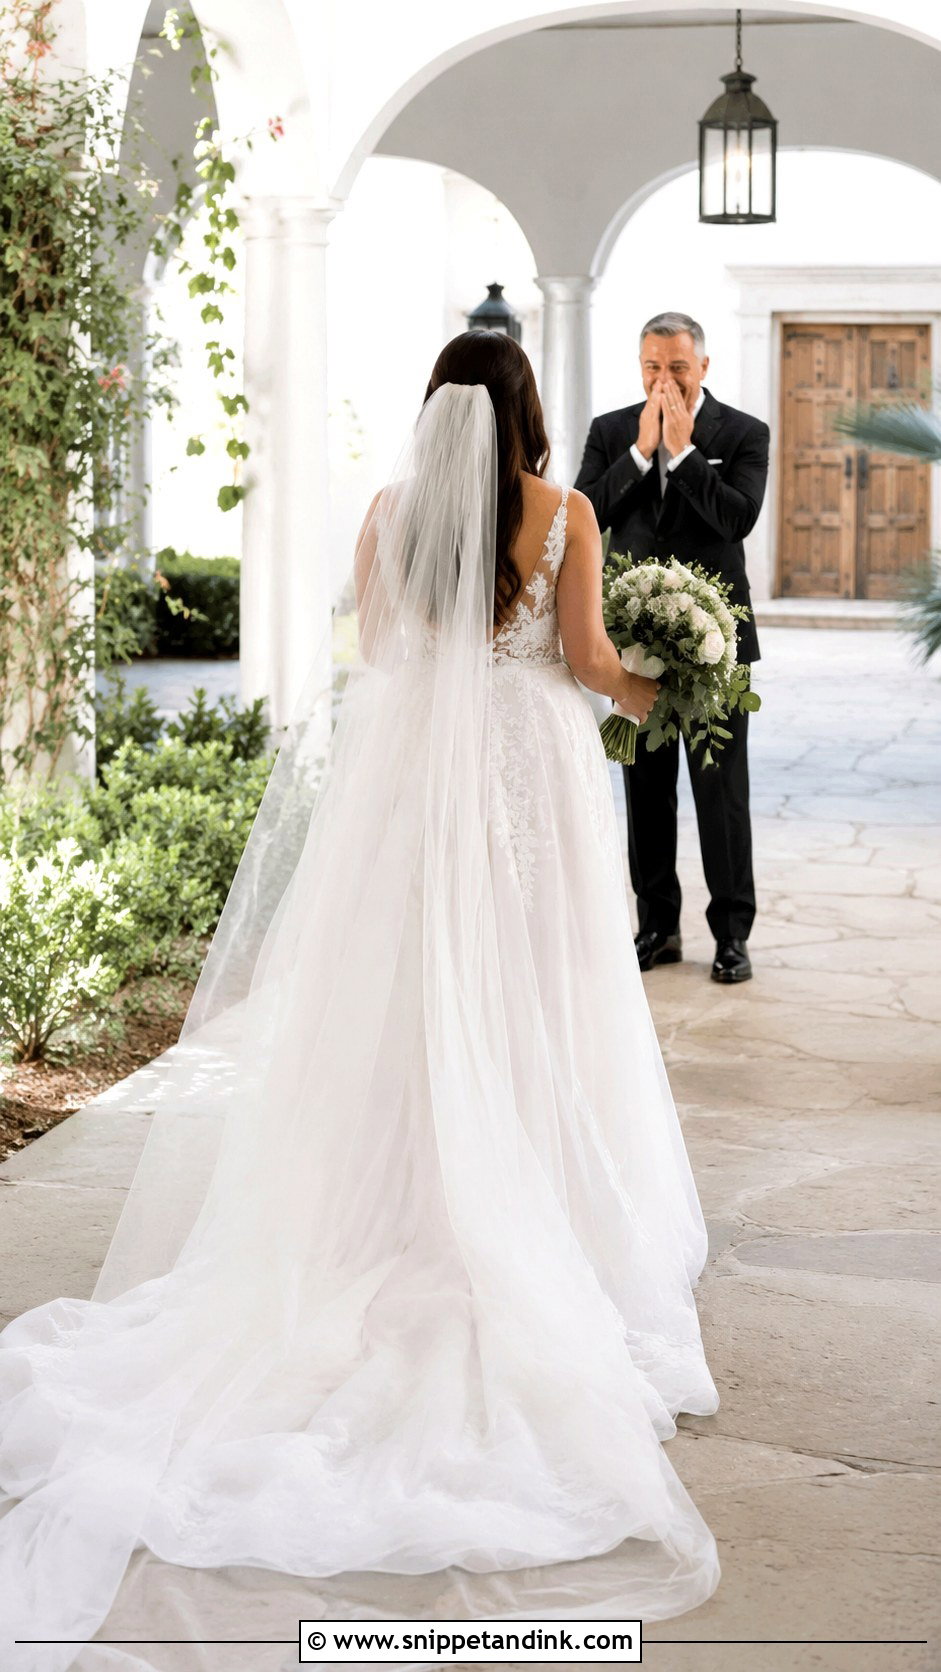
A first look is where the dress meets someone’s reaction, and it’s often my favourite emotional reveal of the day. I place the bride in even light before the other person turns, because once the moment starts I can’t reposition anyone. I start wide to get the whole gown and the face of whoever is turning, then I move in for hands and tears. Ask everyone else to stay out of the sightline; phones in the background are the most common thing I end up retouching.
16. Wedding Dress Outdoor Portrait
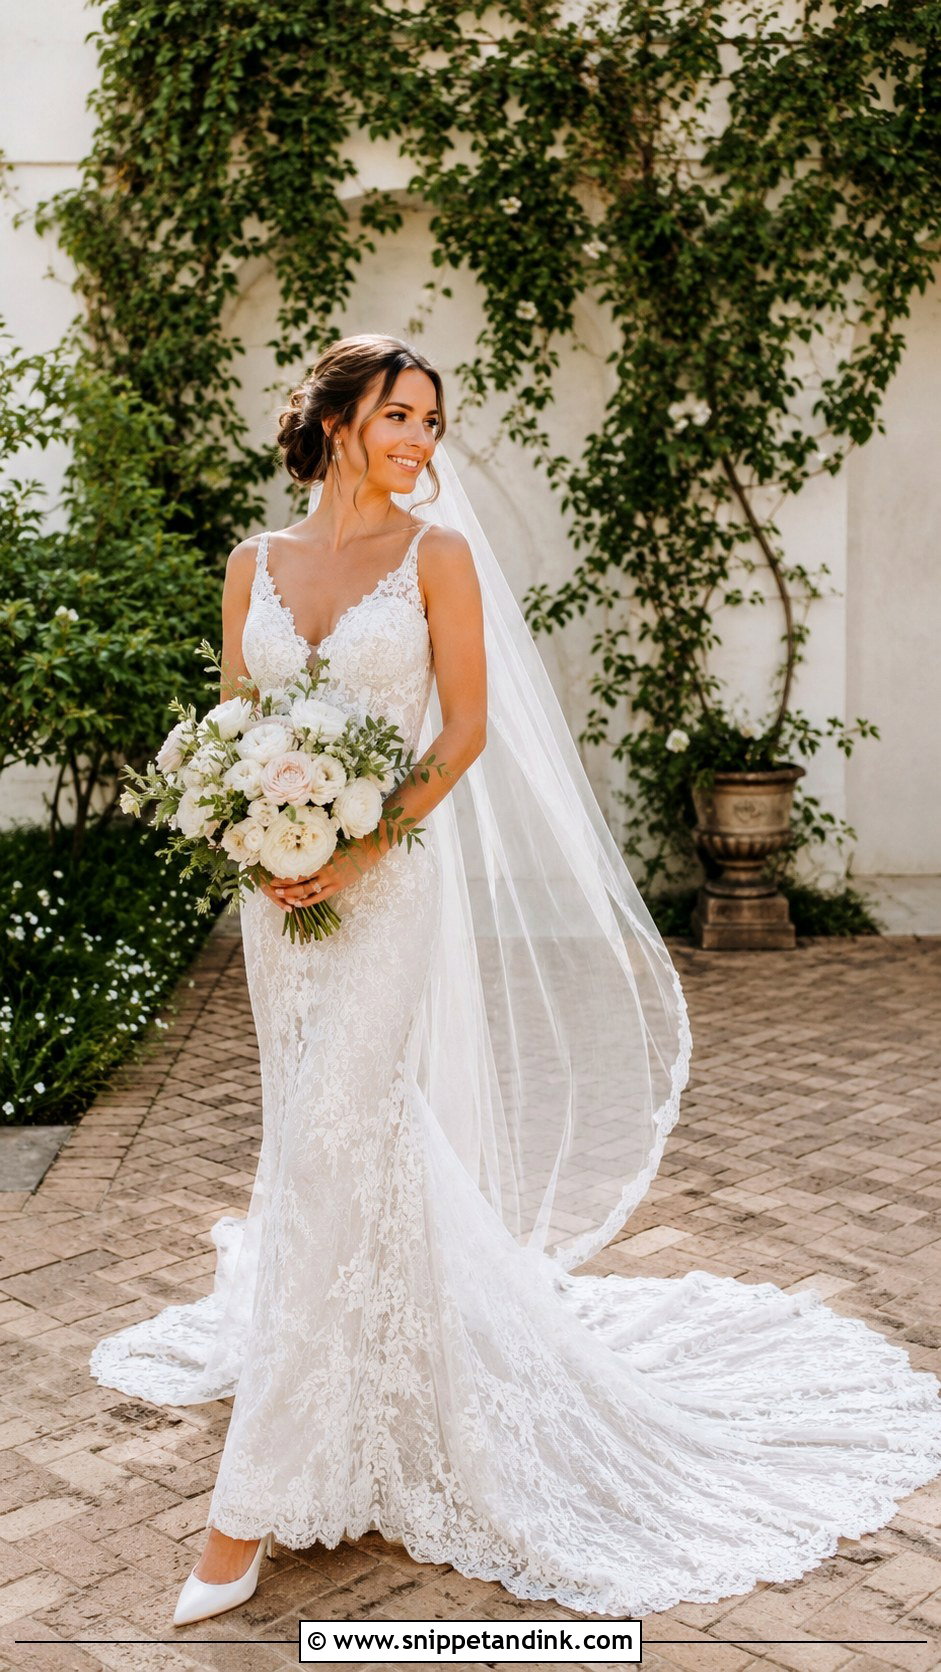
On location I’m looking for a backdrop that suits the gown rather than competes with it. Lace and soft tulle sit well against greenery; a sleek satin column looks sharper against stone or glass. The ground matters as much as the view: wet grass soaks a hem in minutes and red dirt stains silk. I aim for the hour before sunset or open shade, since midday sun blows out a white dress and gives everyone squinting eyes.
17. Wedding Dress Editorial Photo
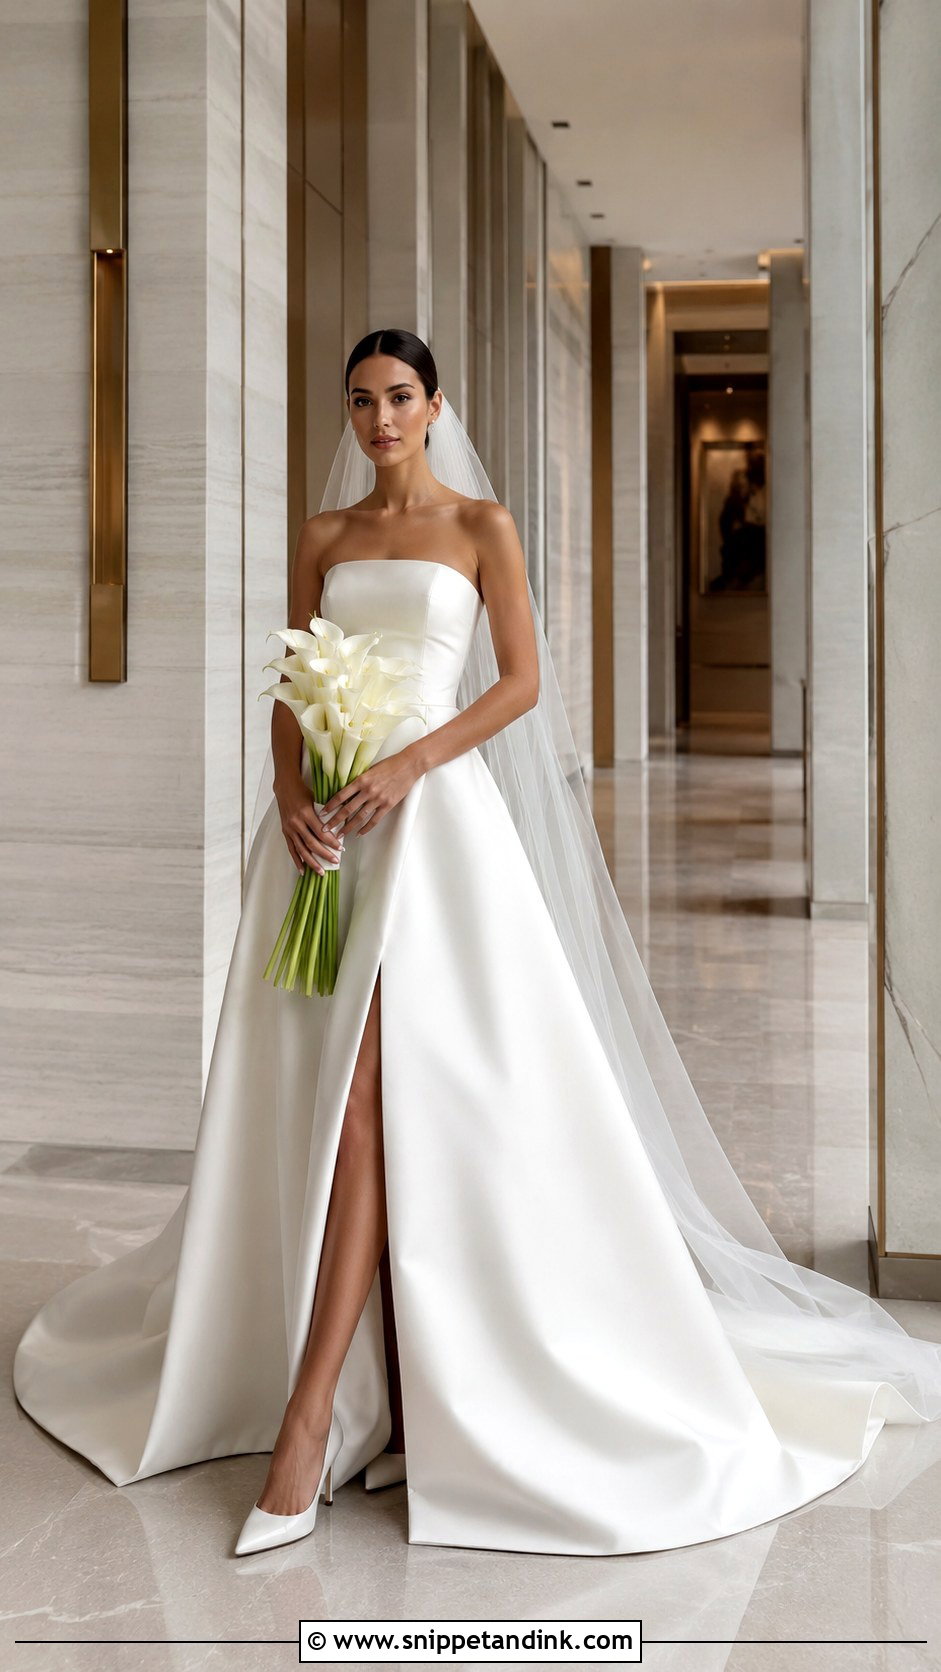
An editorial wedding dress photo borrows from fashion posing: weight on the back foot, shoulders angled, chin slightly forward, hands loose. I pick minimal spaces like a hotel lobby, a gallery-style corridor or a plain wall, so the shape of the gown carries the image. I’d skip this style for a bride who freezes in front of a camera, because rigid editorial posing shows nerves more than any other frame. With a relaxed bride it’s one of the strongest images in the gallery.
18. Wedding Dress Black And White Photo
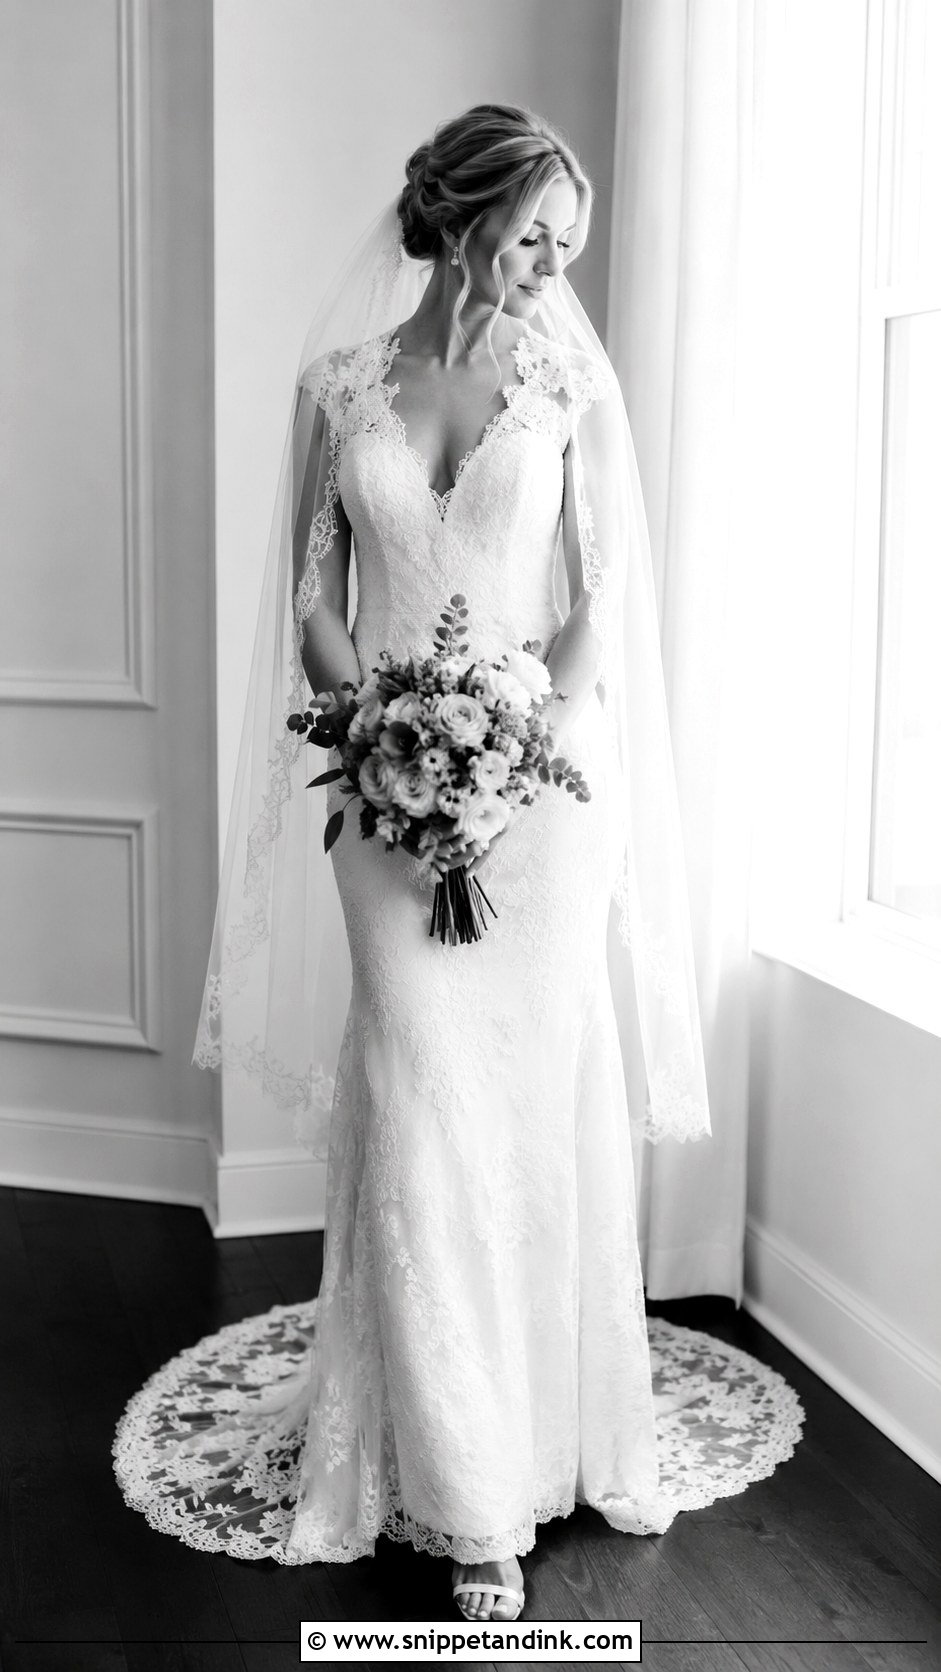
Black and white strips away colour casts and leaves light, shape and expression. It rescues frames where the background is a mess of colours or where mixed lighting has turned the dress yellow on one side and blue on the other. Lace and veils hold up particularly well because their texture becomes the subject. I still deliver a colour version of most of these, since some families want to see the true shade of ivory.
19. Wedding Dress Motion Blur Photo
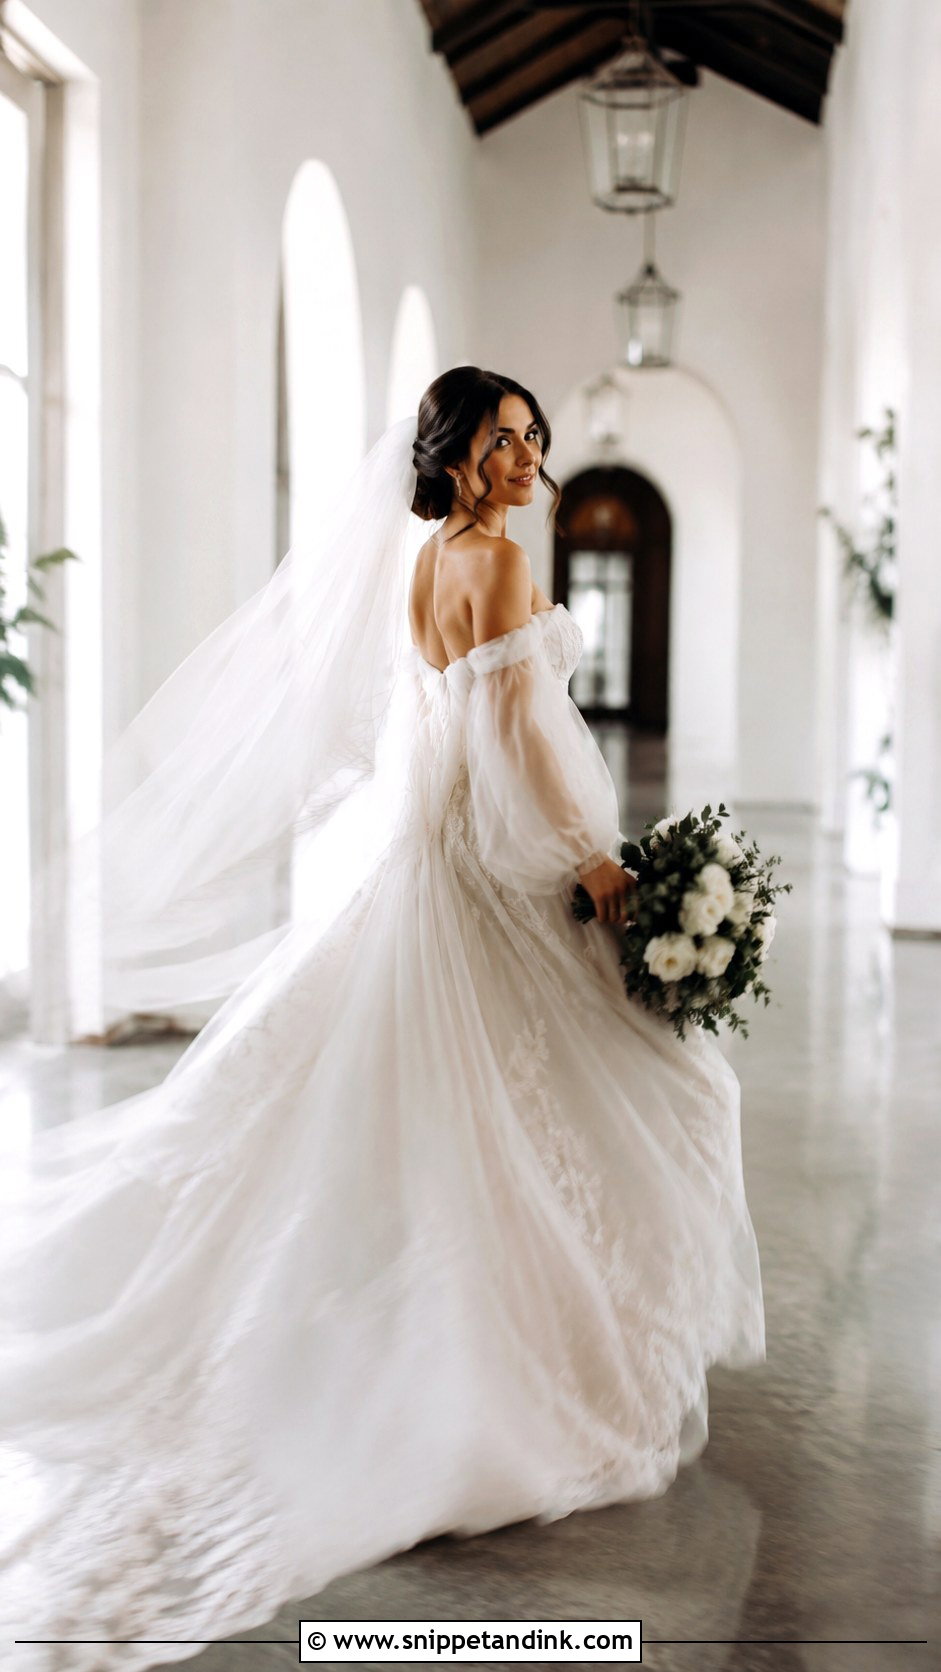
Motion blur is a technique I use sparingly. I drop the shutter to around 1/15 or slower and pan with her as she walks, so her face stays fairly sharp while the skirt and background streak. It takes a lot of frames to land one, and it only suits fabric with real movement: veils, chiffon, long trains. A gallery needs the clean, sharp portraits first; blur is a seasoning, not the meal.
20. Wedding Dress Flat Lay Photo
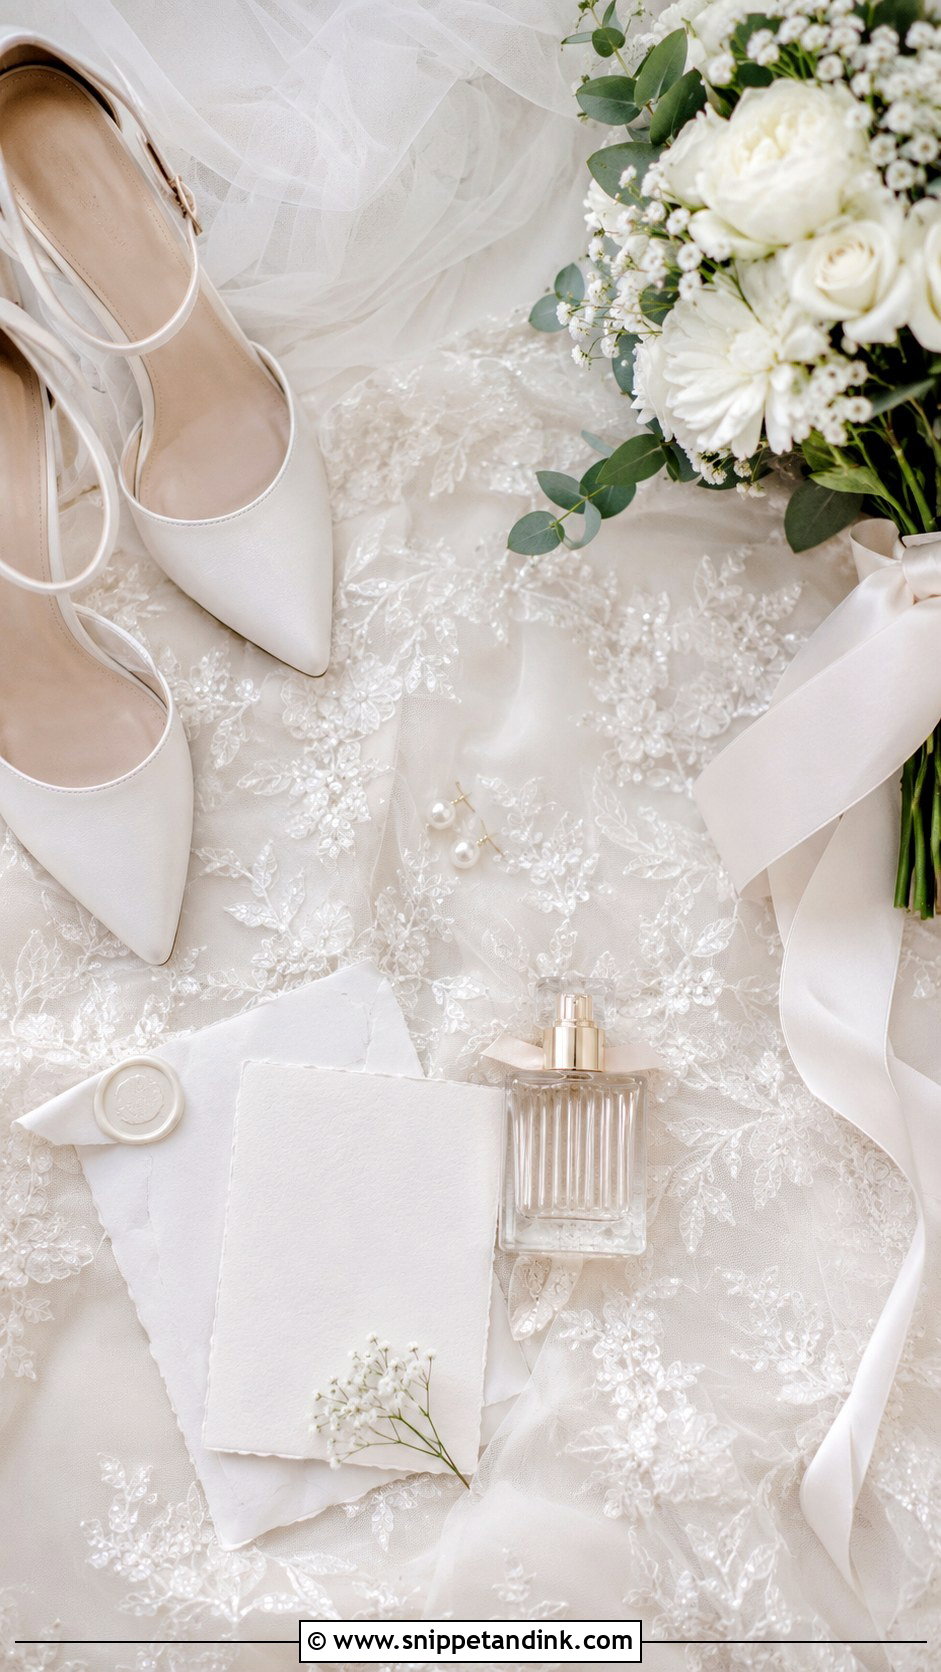
For a flat lay I don’t lay the whole gown down, which risks creasing and dirt. Instead I fold back a section of skirt or a sleeve on a clean bed or styling board and build the details around it: shoes, veil comb, invitation, perfume, a ribbon from the bouquet. I shoot from directly above with a step stool and use window light only. Textured fabric gives a flat lay depth, while plain crepe can look like a bedsheet, so I’ll use the veil as the base layer instead for those dresses.
21. Wedding Dress Garden Photo
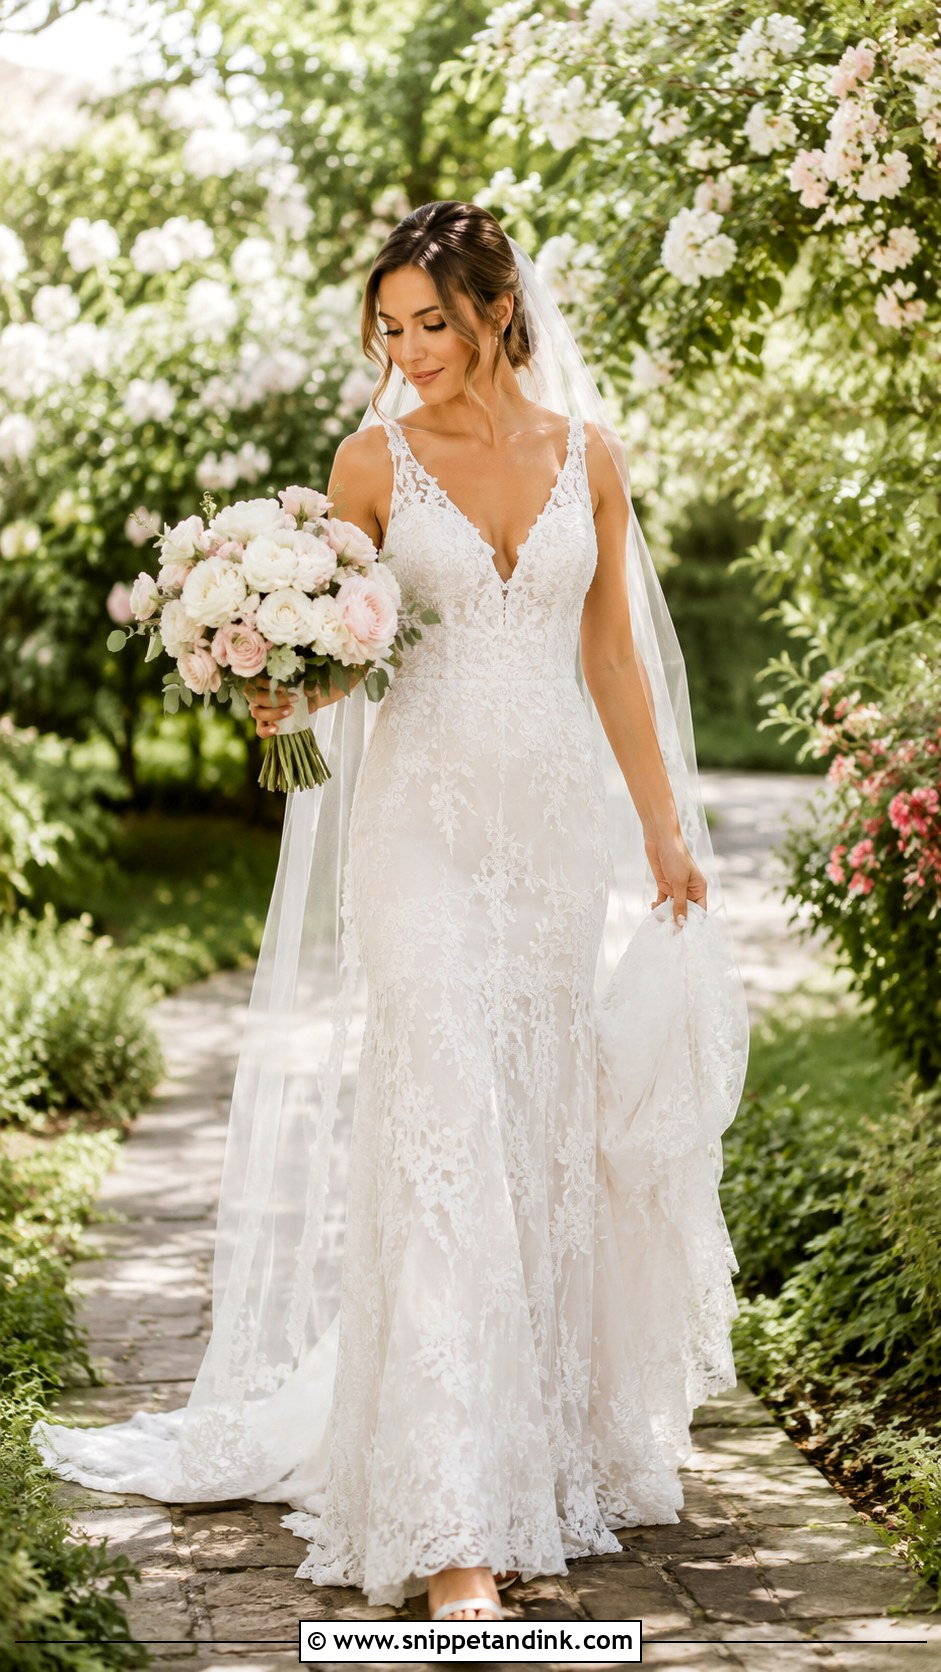
Gardens are generous to a dress, but direct sun on a white gown burns out the detail in seconds. I tuck the bride into open shade at the edge of a hedge or put the sun behind her so it rims the veil and hair. Green also reflects onto white fabric, so in dense foliage I keep her a step back from the leaves to stop the dress picking up a green tint. A garden gate or stone path gives her somewhere to walk, which is easier than standing still in a flower bed.
22. Wedding Dress Beach Photo
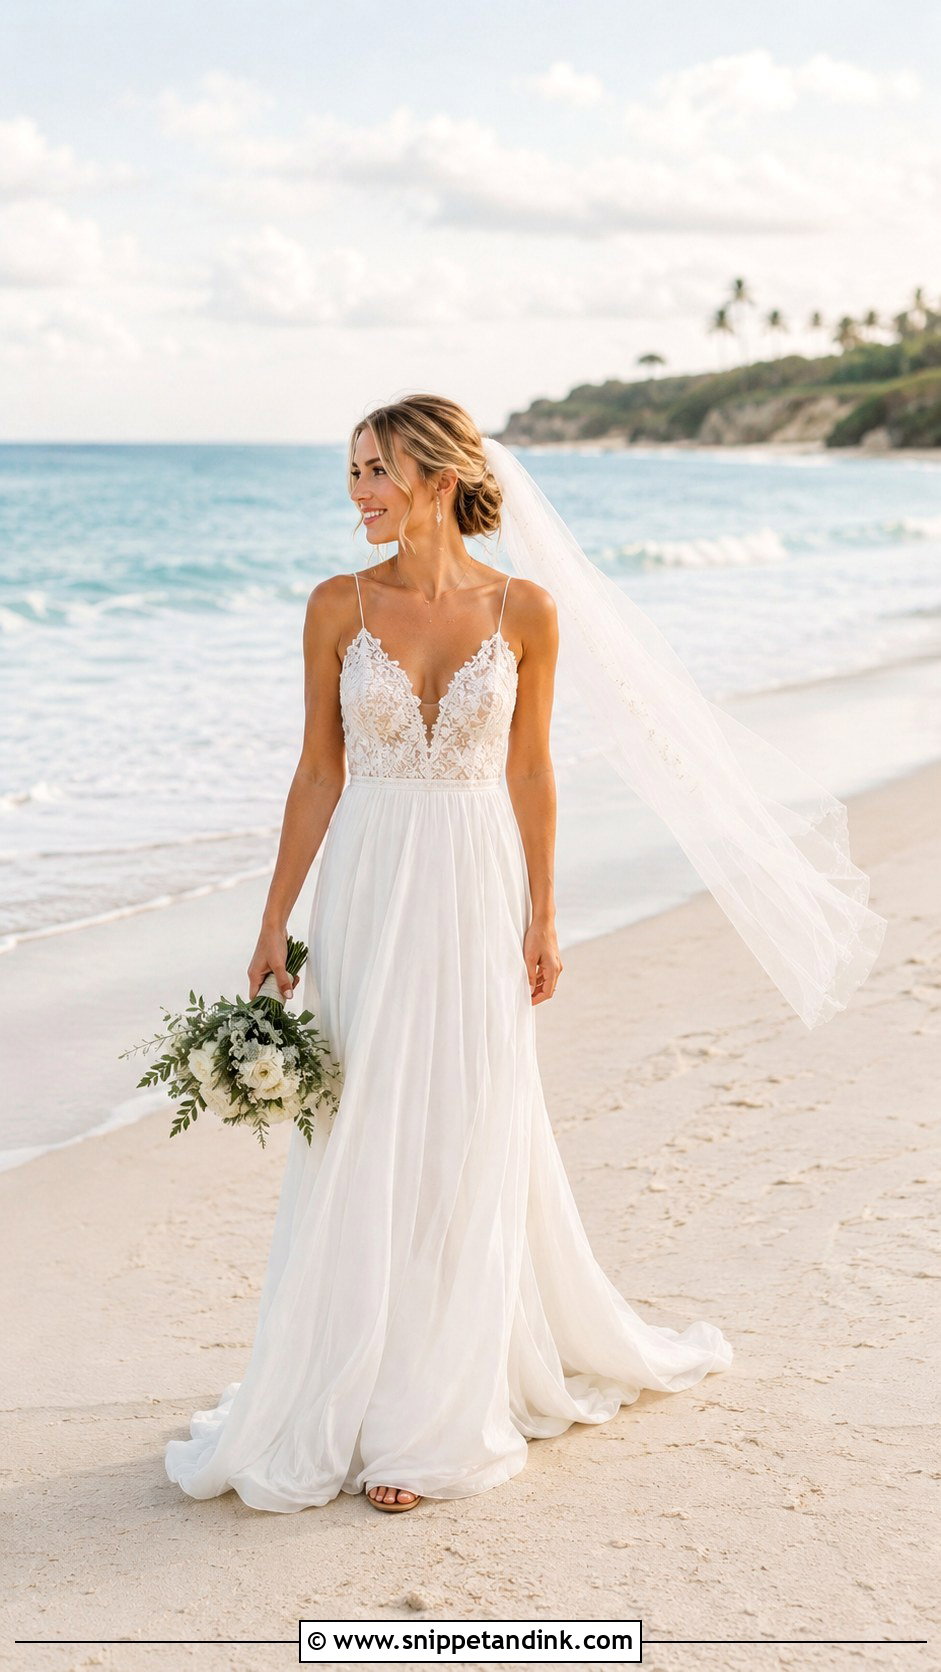
Sand is hard on dresses. I look for the firm, damp strip near the water where her feet won’t sink and the hem stays clean. Light, flowing gowns and short trains suit the beach; a heavy ball gown drags and collects sand that’s difficult to brush out. The best beach dress photos come in the last hour before sunset, when the water reflects warm light back onto the fabric. Wind off the sea is the free extra; I position her so it lifts the veil away from her face.
23. Wedding Dress City Photo
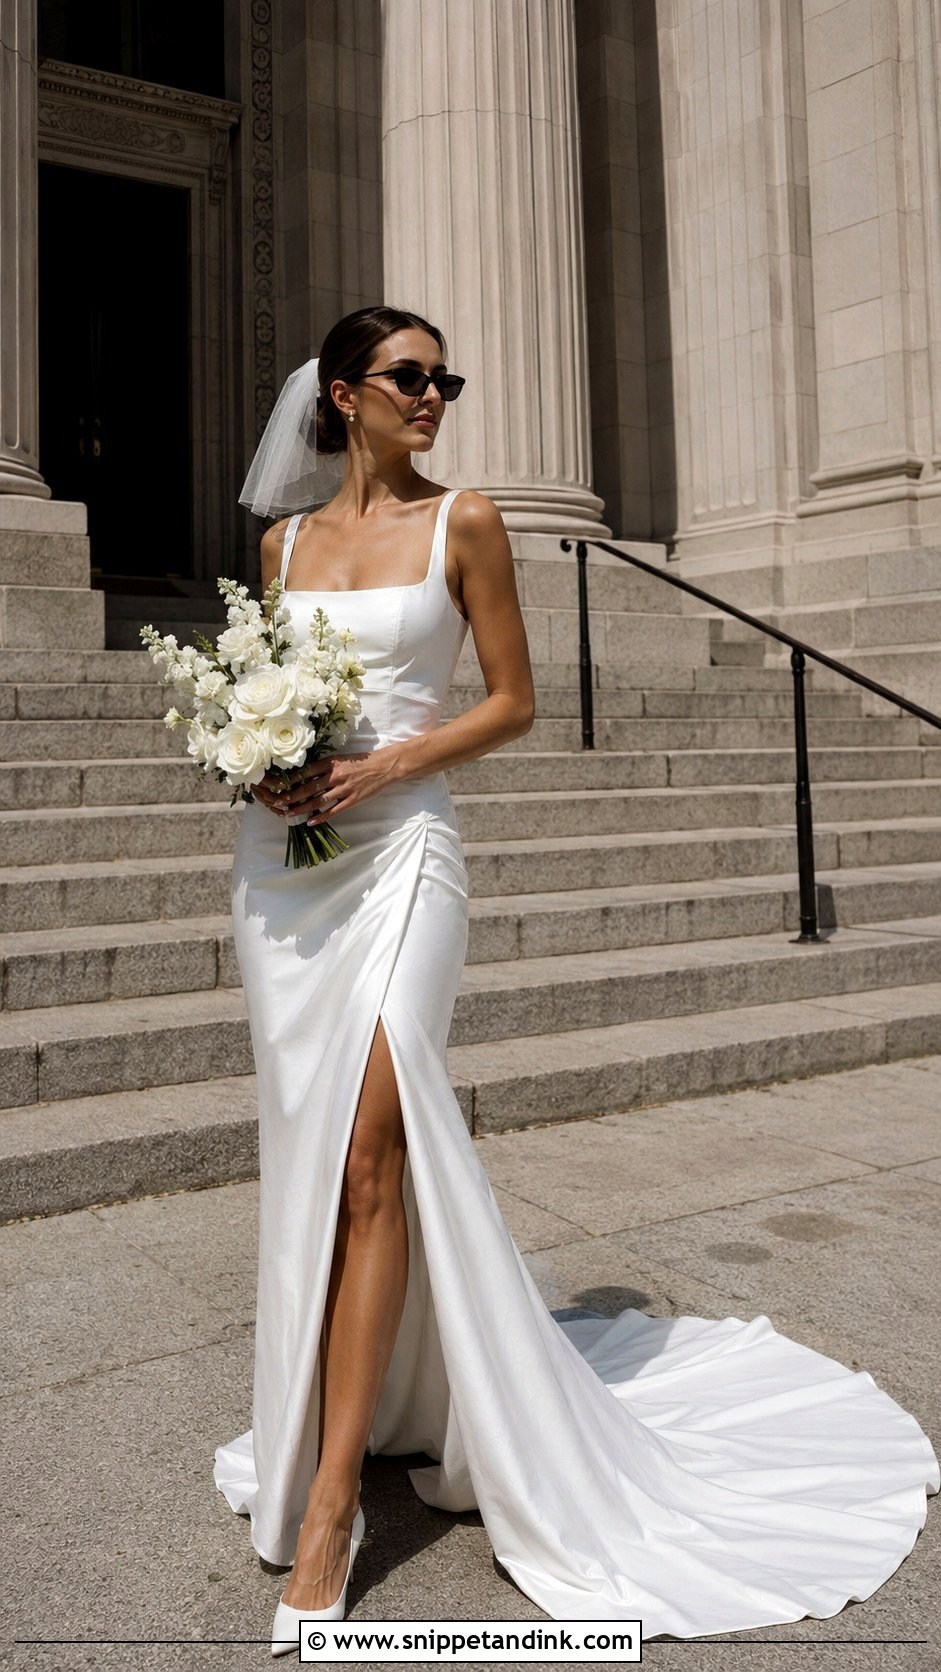
Cities give a dress a bit of attitude. Sleek satin, crepe columns and short dresses look sharp against stone steps, revolving doors and crosswalks. The trick is controlling the background: I pick a quiet side street or an entrance with plain architecture, and I wait for the gap between people and cars. Stepping off a curb, bouquet held low, gives natural motion. A long train in a busy street is a nightmare to keep clean, so for city portraits I bustle it first or keep the shoot short.
24. Wedding Dress Vintage Photo
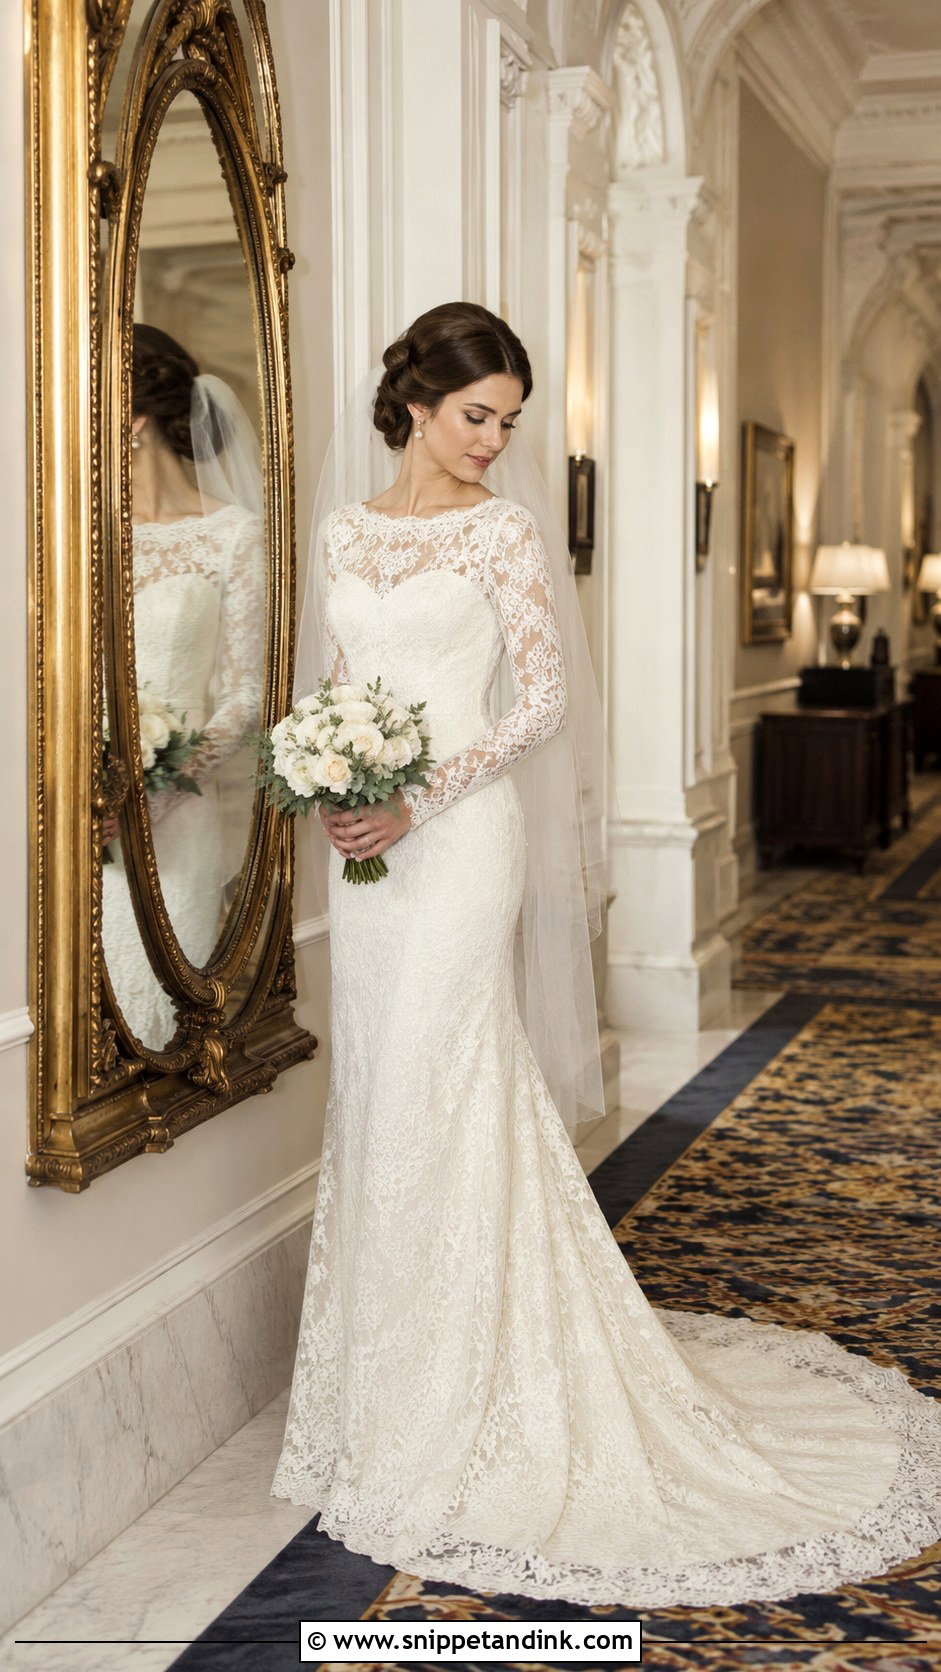
Vintage frames should nod to the past without looking like a costume. I look for real period details at the venue, such as an old mirror, wood panelling or a staircase with a carved banister, rather than props. Heirloom gowns, lace sleeves, pearls and birdcage veils fit naturally. In editing I keep tones warm but clean; heavy sepia filters date quickly. If the dress is a family piece, I always try to shoot a frame of the original label or a repaired seam, because that’s the image the family usually wants most.
25. Wedding Dress Exit Photo
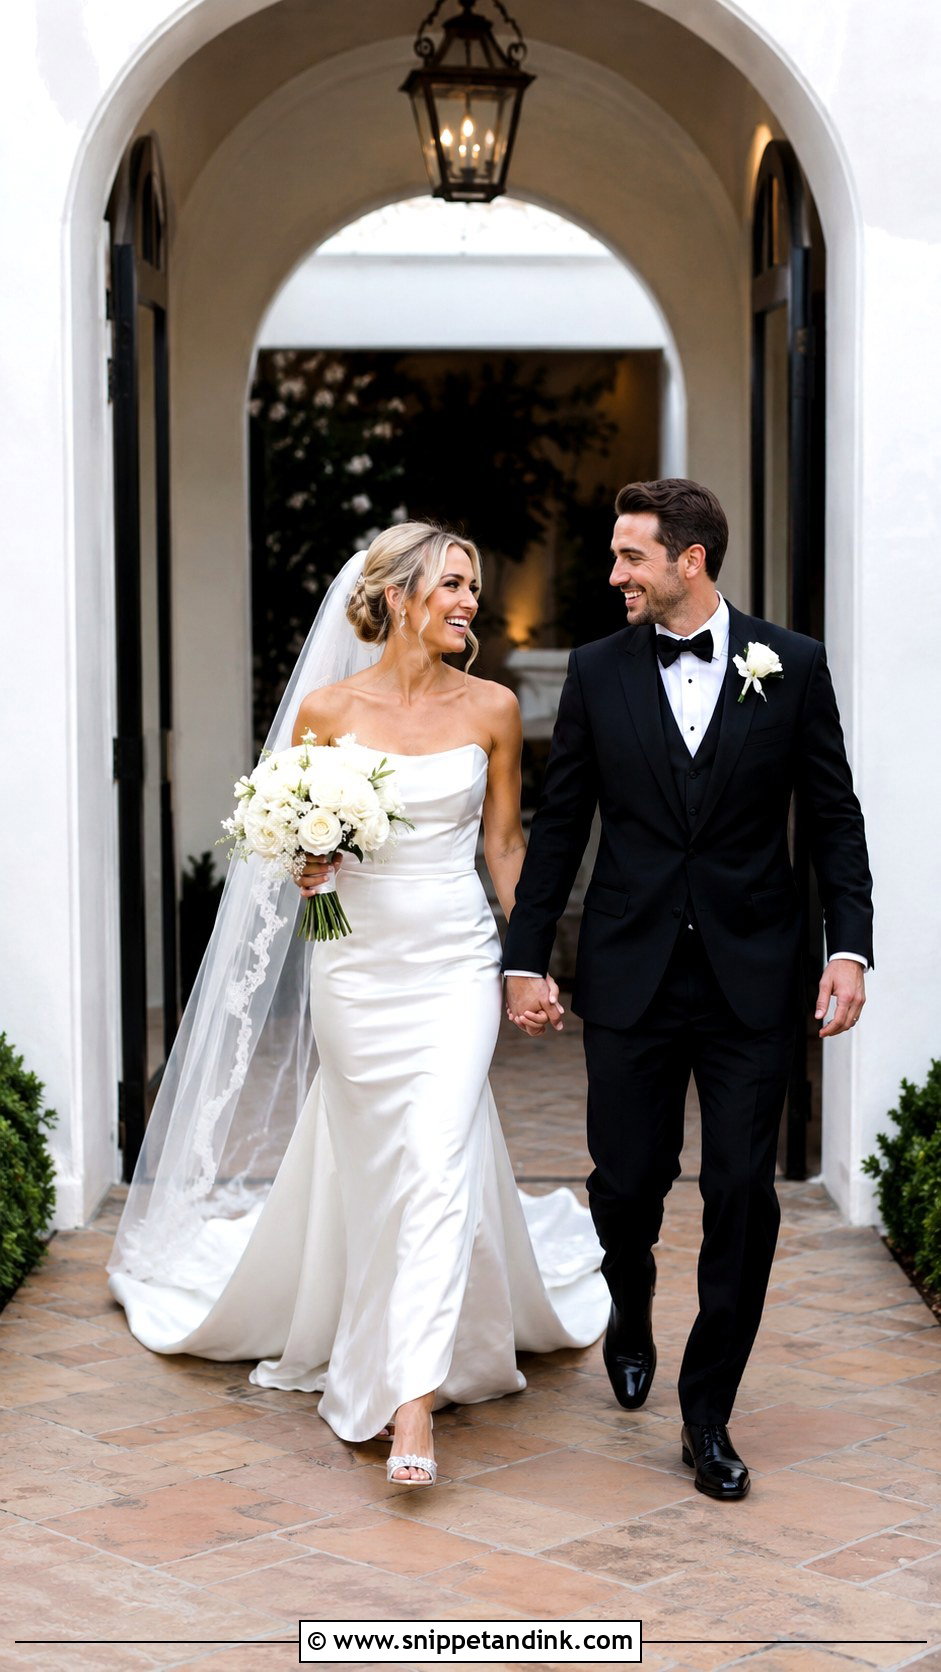
A wedding dress exit photo is often shot in difficult light: a dark courtyard, sparklers, a car with its headlights on. I set up off-camera light before guests line up, because there’s no second take on an exit. I check whether the train is bustled or the bride has changed into a second look so I know what to frame. Walking hand in hand, laughing, a quick glance back over her shoulder: those few seconds close the dress story for the day.
Why a White Gown Turns Grey, Blue or Green in Pictures
White fabric is the hardest thing I photograph all day. A camera’s meter sees a large white area and tries to make it mid-grey, so an unadjusted shot of a bride in bright light comes out dull. I expose for the dress, then lift the shadows in the face, which keeps the lace detail from blowing out to plain white.
Colour casts are the other problem. Fabric picks up whatever is around it: blue from open shade on a sunny day, green from lawns and hedges, orange from tungsten bulbs in old hotels. Ivory and champagne gowns are especially sensitive, because a slight cast can make them look dirty. Two things help me most: a quick custom white balance on location, and moving the bride a step away from strongly coloured walls or foliage.
Fabric changes how I shoot
- Satin and mikado reflect light like a mirror, so I keep the light off to the side to avoid hot shiny patches across the hips.
- Crepe absorbs light and shows shape rather than texture; side light brings out the seams.
- Tulle and organza go see-through when backlit, which can be lovely for a veil but revealing for a skirt, so I check the lining before I shoot into the sun.
- Beading and sequins sparkle best with a small, hard light source, not a big soft one.
A Small Dress Kit I Ask Someone to Carry
I can fix a lot in editing, but not a crushed train or a grass stain across the hem. A bridesmaid or planner with a small bag saves more photos than any lens I own. I ask for a handheld steamer for the morning, a few clear safety pins and clothespins for bustles, a lint roller, a clean white towel or sheet to lay under the train on dirty ground, chalk or a stain stick for light marks, and tissues for the inevitable makeup on the neckline.
Whoever carries the bag should also know how the bustle works. Learning it at the final fitting takes five minutes, and it means the dress can go from portrait mode to dance floor and back without a frantic search for the seamstress’s instructions.
Let the Dress Show Up in Every Chapter of the Gallery
A strong dress gallery follows the gown from the hanger to the exit, with a mix of wide, close and moving frames. Clean light, a tidy background and someone on train duty will improve almost every one of these shots. Treat the list as a menu rather than a checklist: talk through it with your photographer, mark the ones that matter to you, and let the rest happen around the real moments of the day.
You'll Like These Ideas:


Leave a Reply