
Wedding nails get looked at more closely than any manicure you’ll ever wear. They sit in the ring shot, they hold the bouquet in every portrait, and the photographer’s macro lens shows things a mirror never does. The wedding manicures I’m booking most right now mix soft chrome, pearls, sheer pink bases, fine florals, sculpted French tips and a little sparkle. Below are twenty of them, for brides and for bridesmaids, mothers and guests who want something dressier than usual, with notes from my side of the table on shape, wear and what tends to go wrong.
When Your Wedding Manicure Should Actually Happen
The best design in the world looks tired if it’s done at the wrong time. Here is how I time a bridal set, counting back from the wedding.
- Six to eight weeks out: stop picking and biting, start oiling cuticles daily, and book your appointment. Wedding season fills calendars early.
- Three to four weeks out: a trial, especially for lace, florals or anything hand-painted. It also tells you if your skin reacts to a product before the day it matters.
- Two to three days before: the actual gel or builder set. That’s late enough that there’s no visible regrowth at the cuticle, and early enough to fix a chip.
- The night before: cuticle oil only. Avoid trying any new hand cream or self tanner, which can stain the edges of light gel.
If you’re going away straight after, think about how long the set needs to last. Gel typically holds two to three weeks on healthy nails. Chrome and glitter wear at the tips first, so I’d lean toward an ombre or a cuticle fade that grows out gracefully.
1. Pearl French Wedding Nails
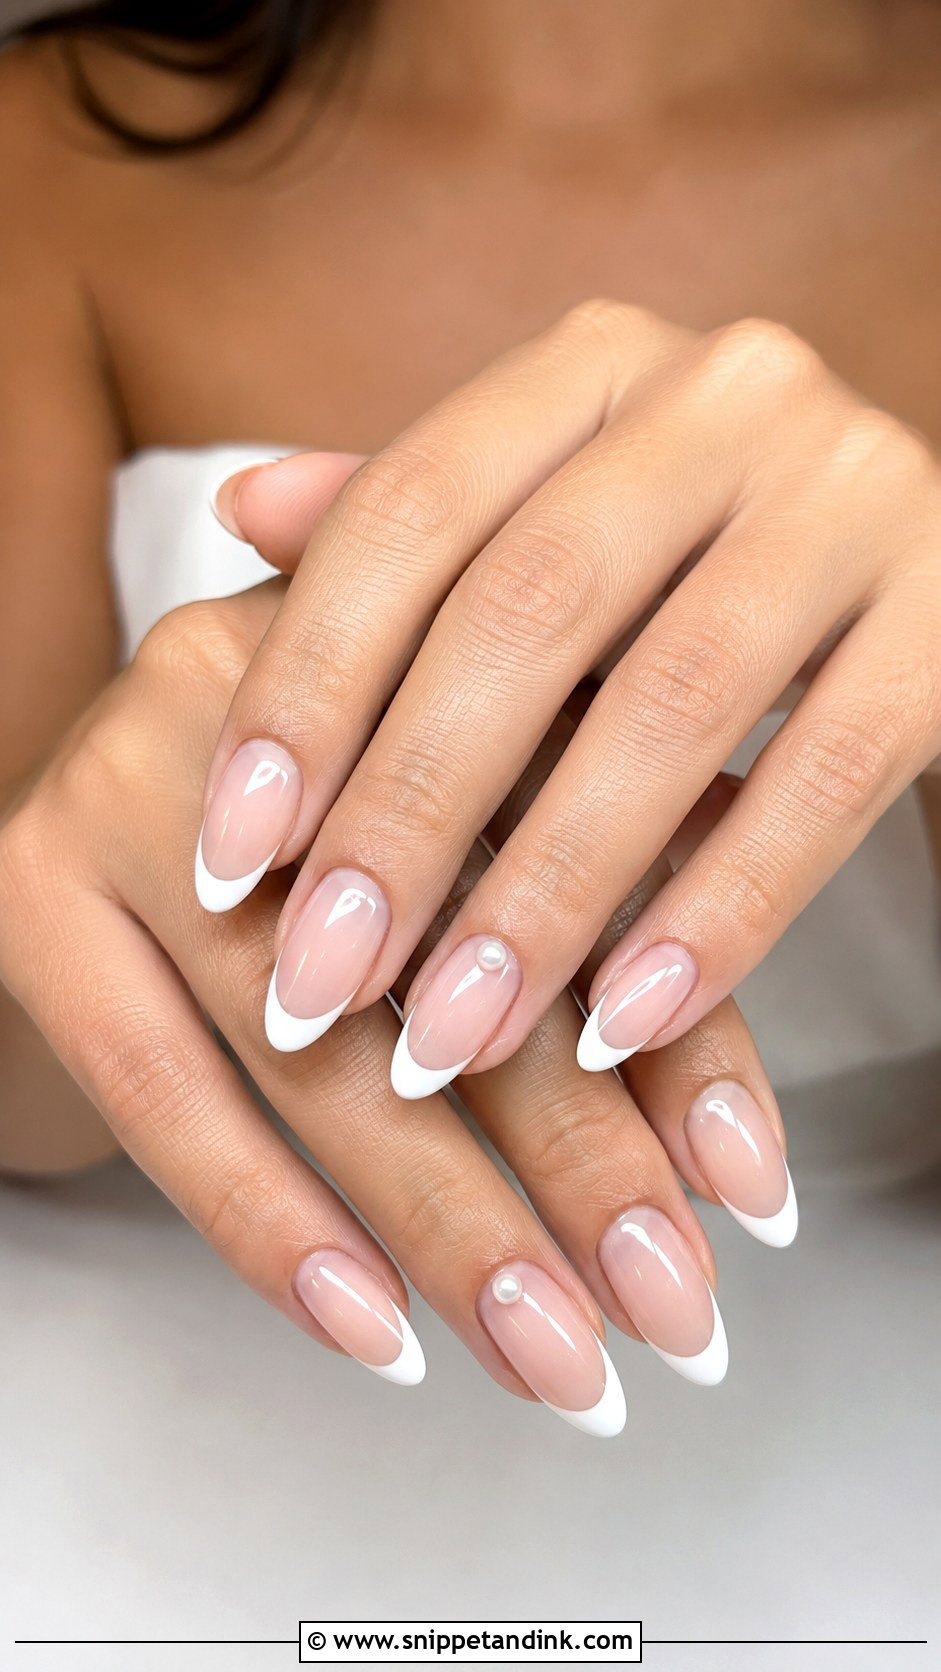
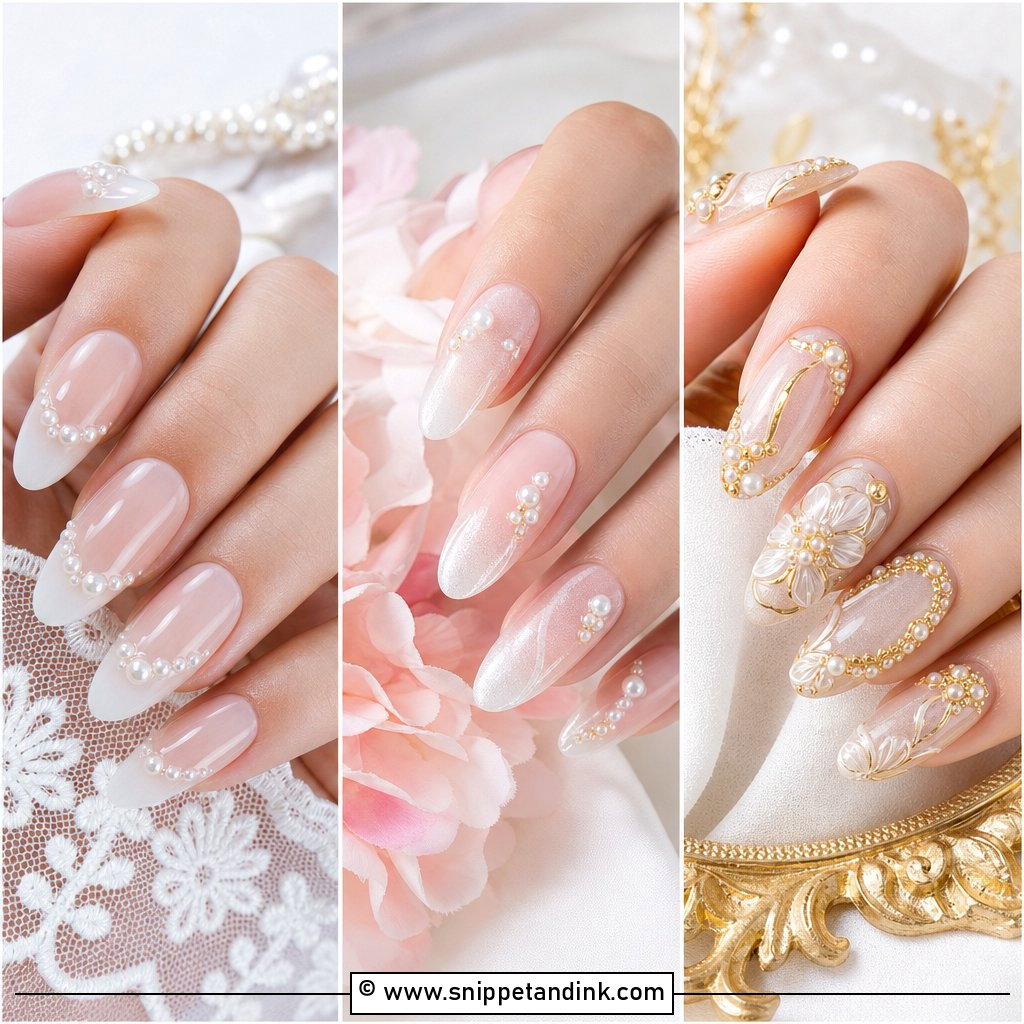
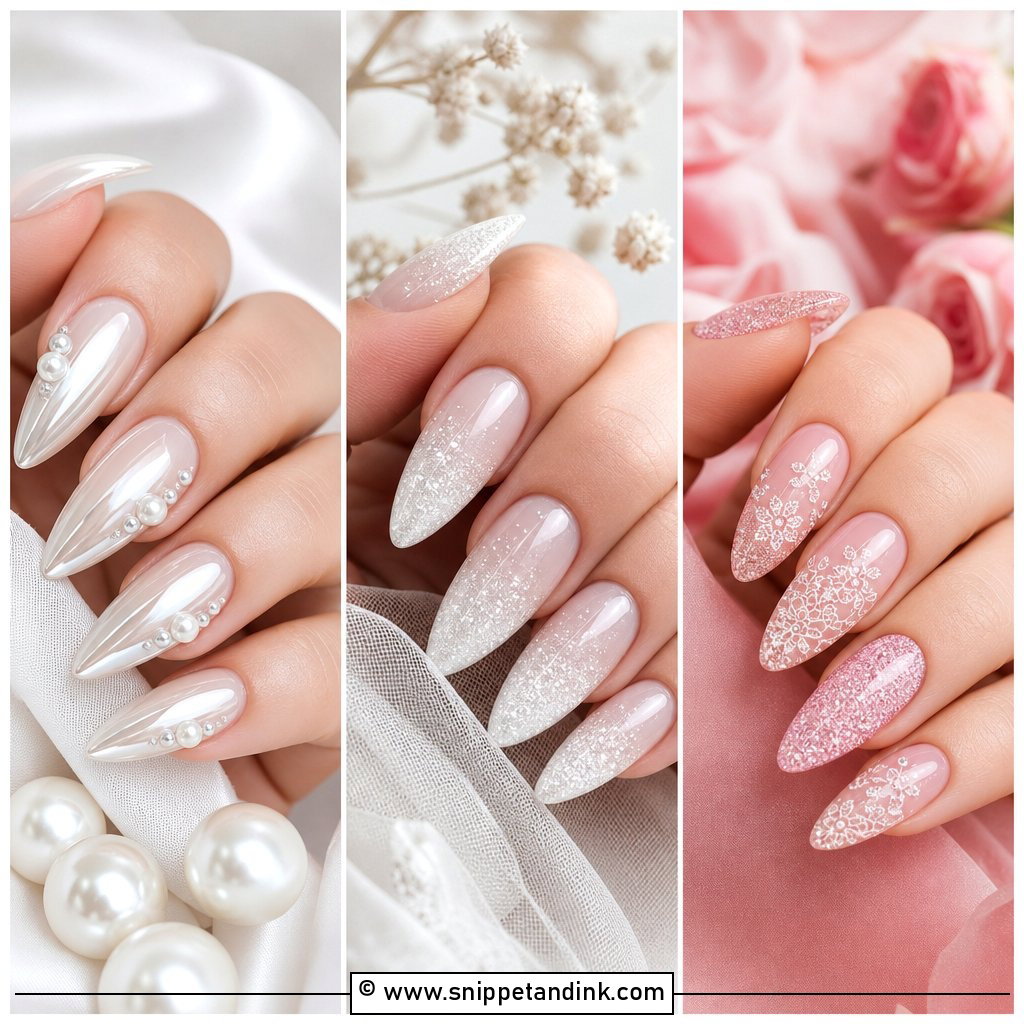
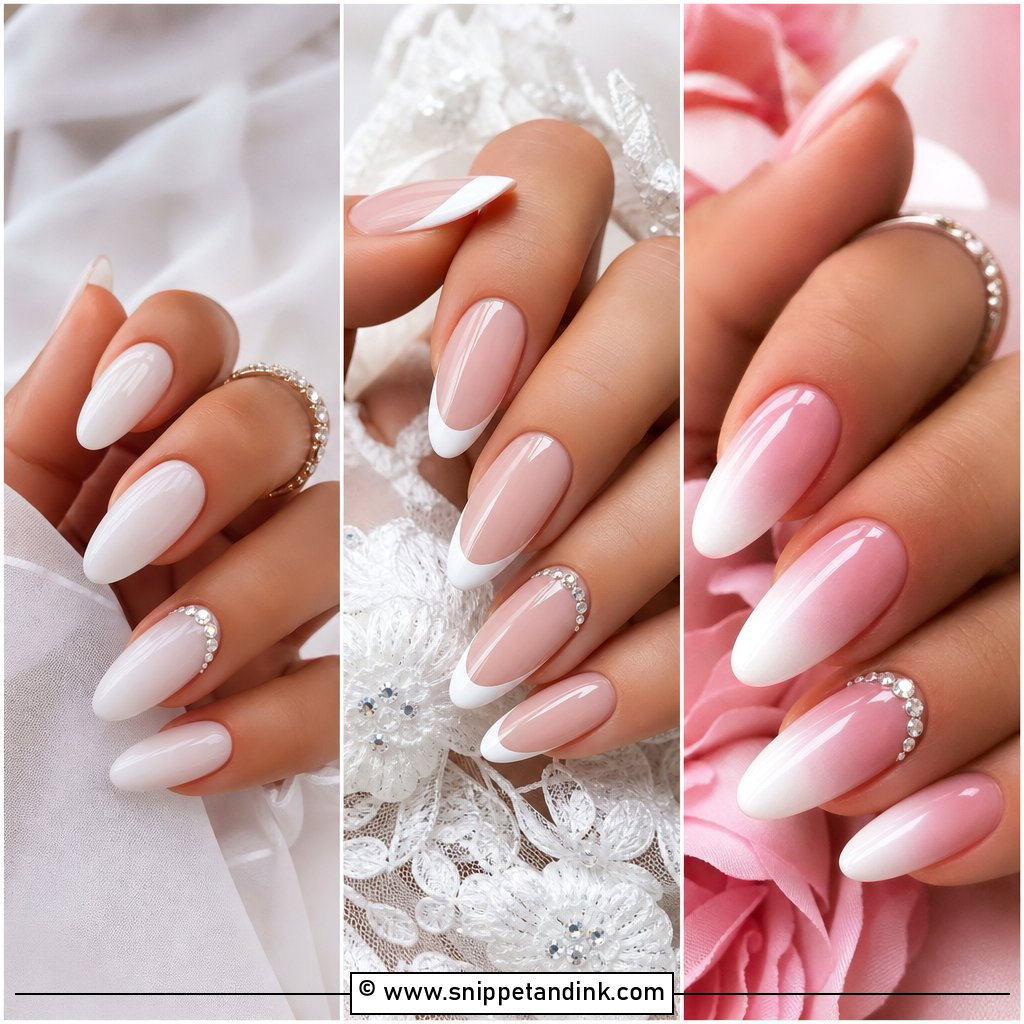
This starts with a sheer nude, blush or milky pink base and a crisp white tip, then adds a few tiny flat-back pearls near the cuticle, on the smile line or on one accent nail. I set pearls in a small dot of builder gel rather than just top coat, because a pearl held only by top coat pops off the first time it catches a sleeve. Two or three per hand looks elegant; a pearl on every nail starts to feel heavy. Almond and oval shapes suit it best. If your dress has pearl buttons or satin, this ties the whole look together.
2. Milky White Chrome Wedding Nails
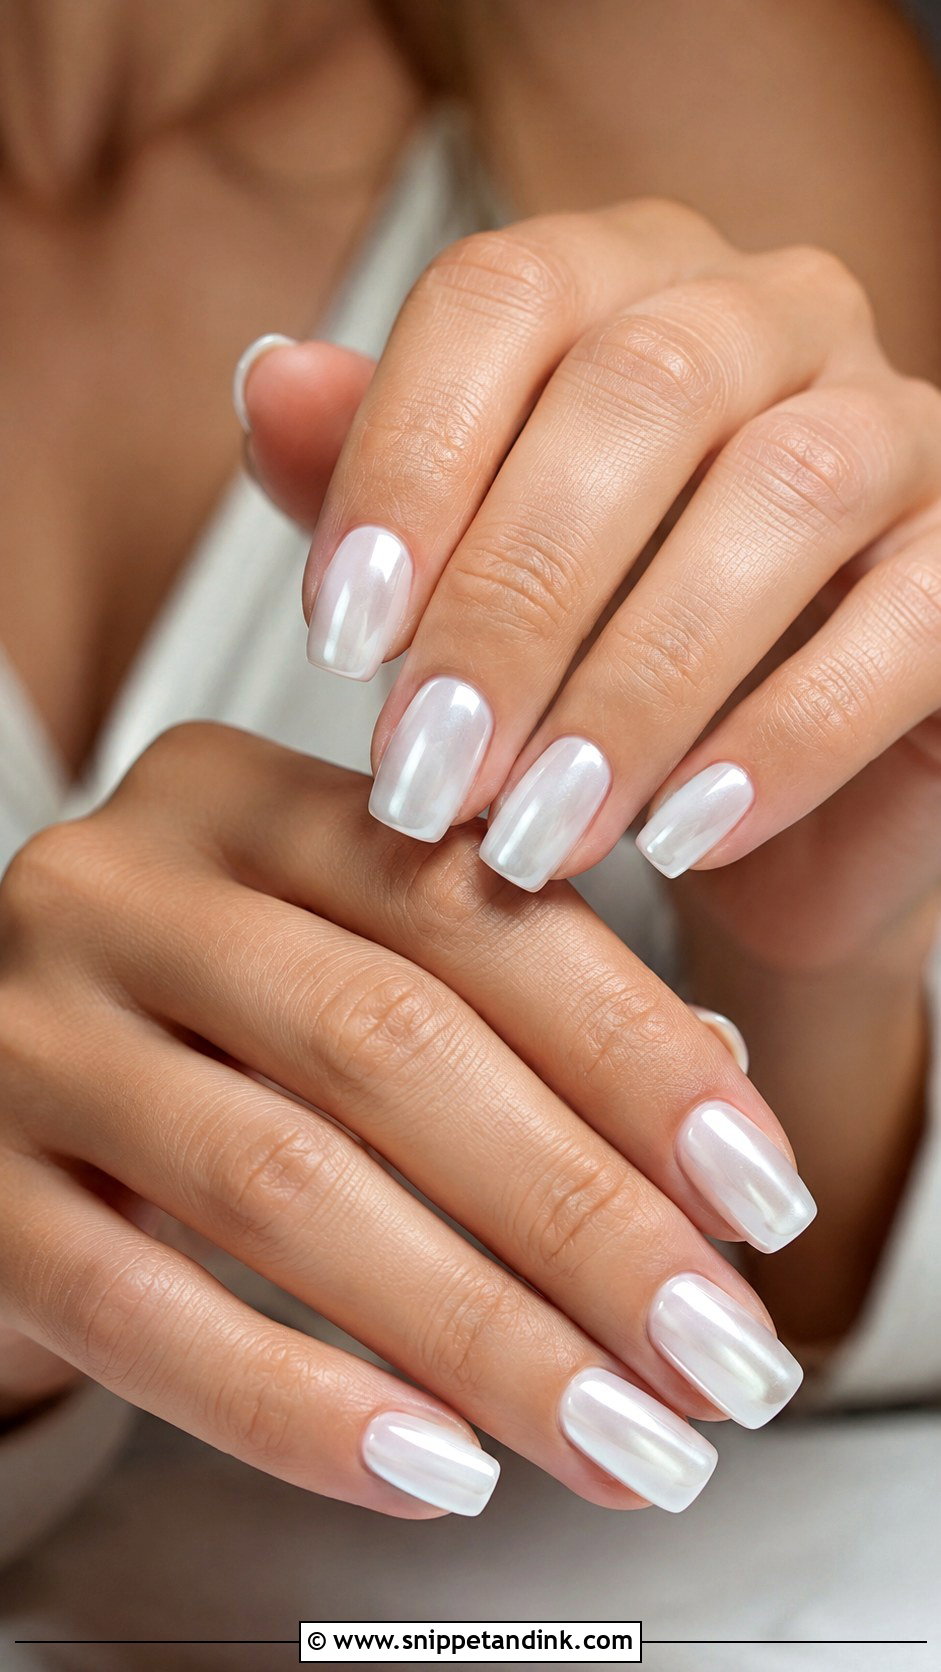
Milky white chrome wedding nails are the quietest way to look polished. A sheer milky base goes on first, then chrome powder is buffed over a no-wipe top coat until it glows like glazed porcelain. The detail clients miss: chrome needs a sealed edge, so I cap the free edge carefully or the shine wears off the tips within a week. Ask for a sheer white rather than a thick opaque one, which can look chalky. It works on short, medium or long nails in almond, squoval or ballerina, with sleek hair and minimal jewelry.
3. Blush Pink Wedding Nails
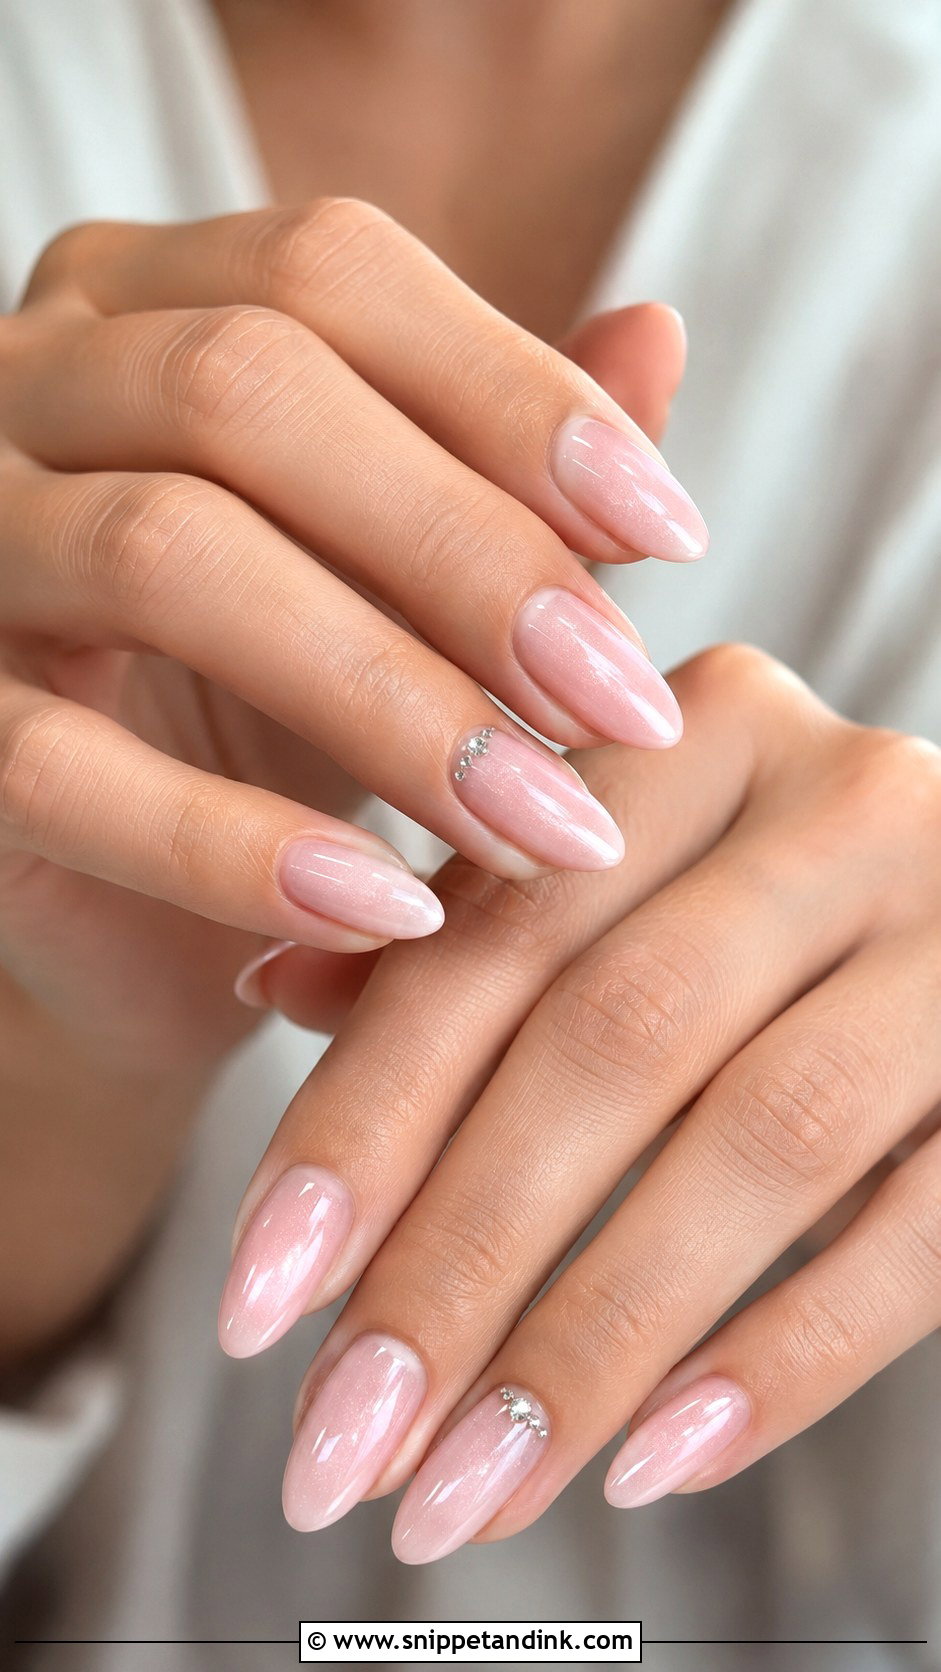
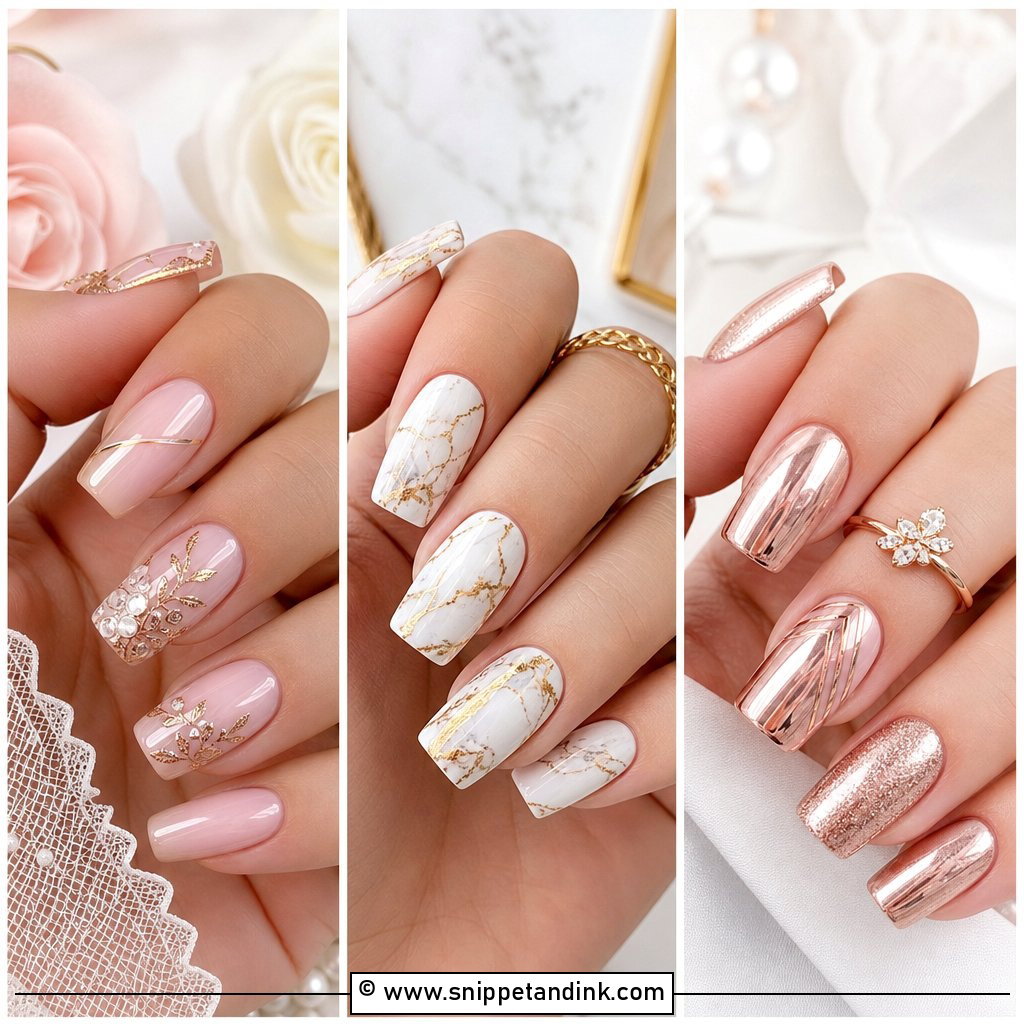
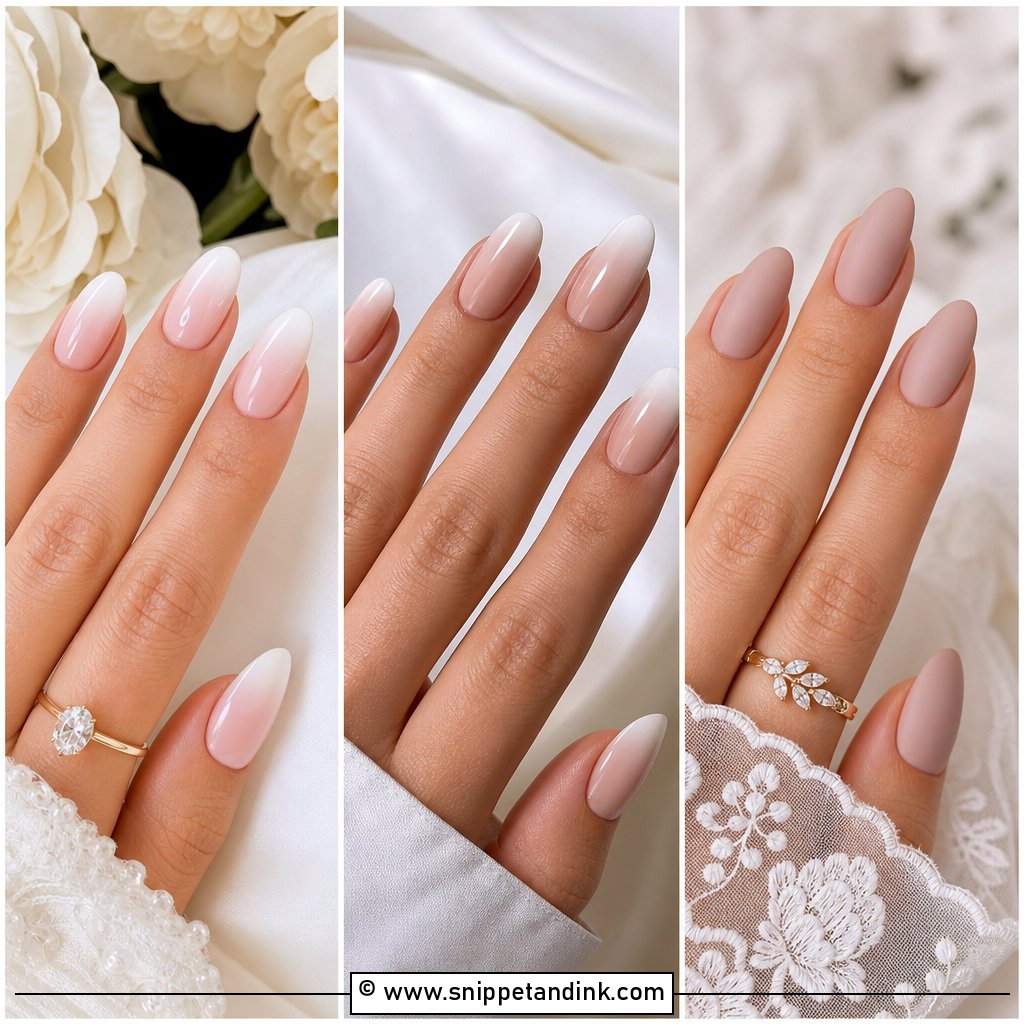
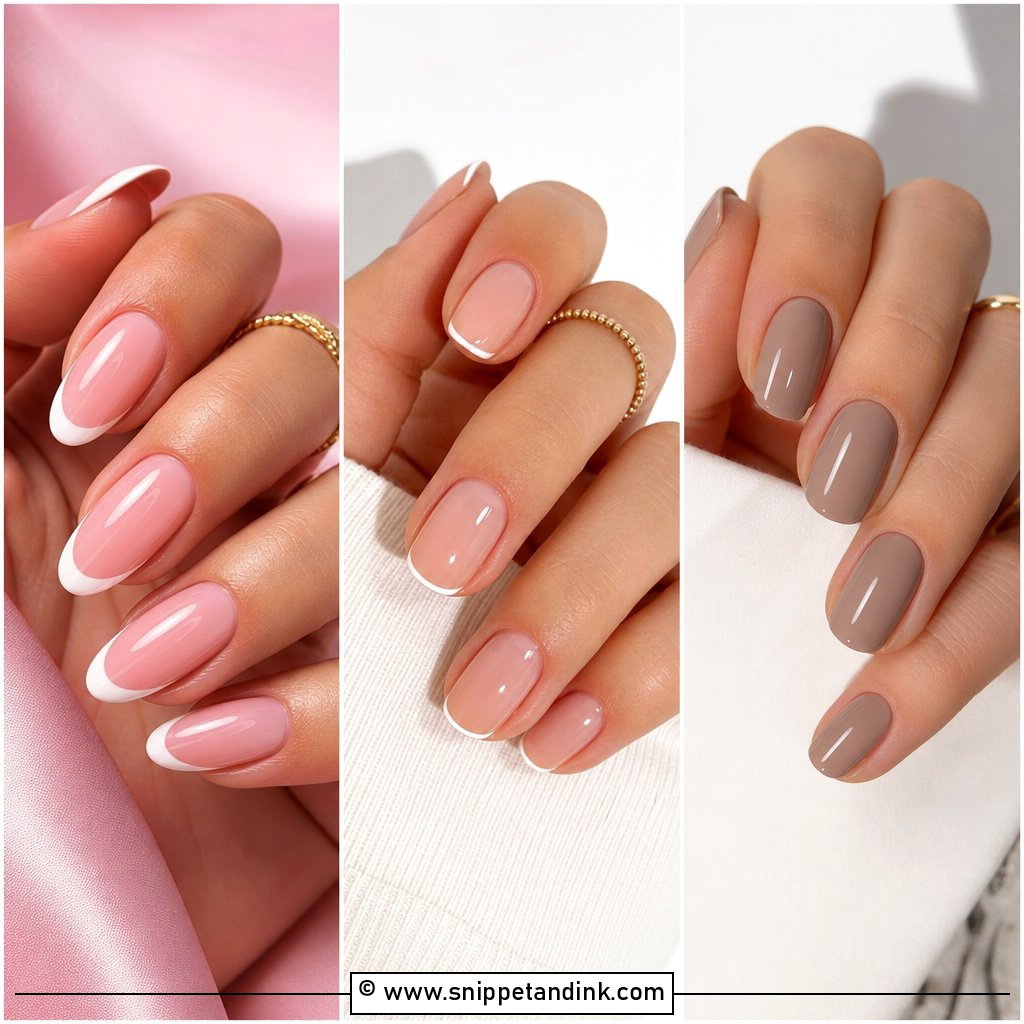
Blush pink is the shade I reach for when a bride says she never wears nail art but wants something special. It flatters most skin tones and makes hands look rested, which matters after weeks of wedding admin. To dress it up, I add a glossy top coat, a hint of shimmer, a couple of tiny crystals or a very thin chrome veil. The thing to check is undertone: a pink that’s too cool can make warm skin look grey in photos, so we swatch two or three shades at the trial. Medium almond reads refined; short square feels clean and practical.
4. Lace Wedding Nails
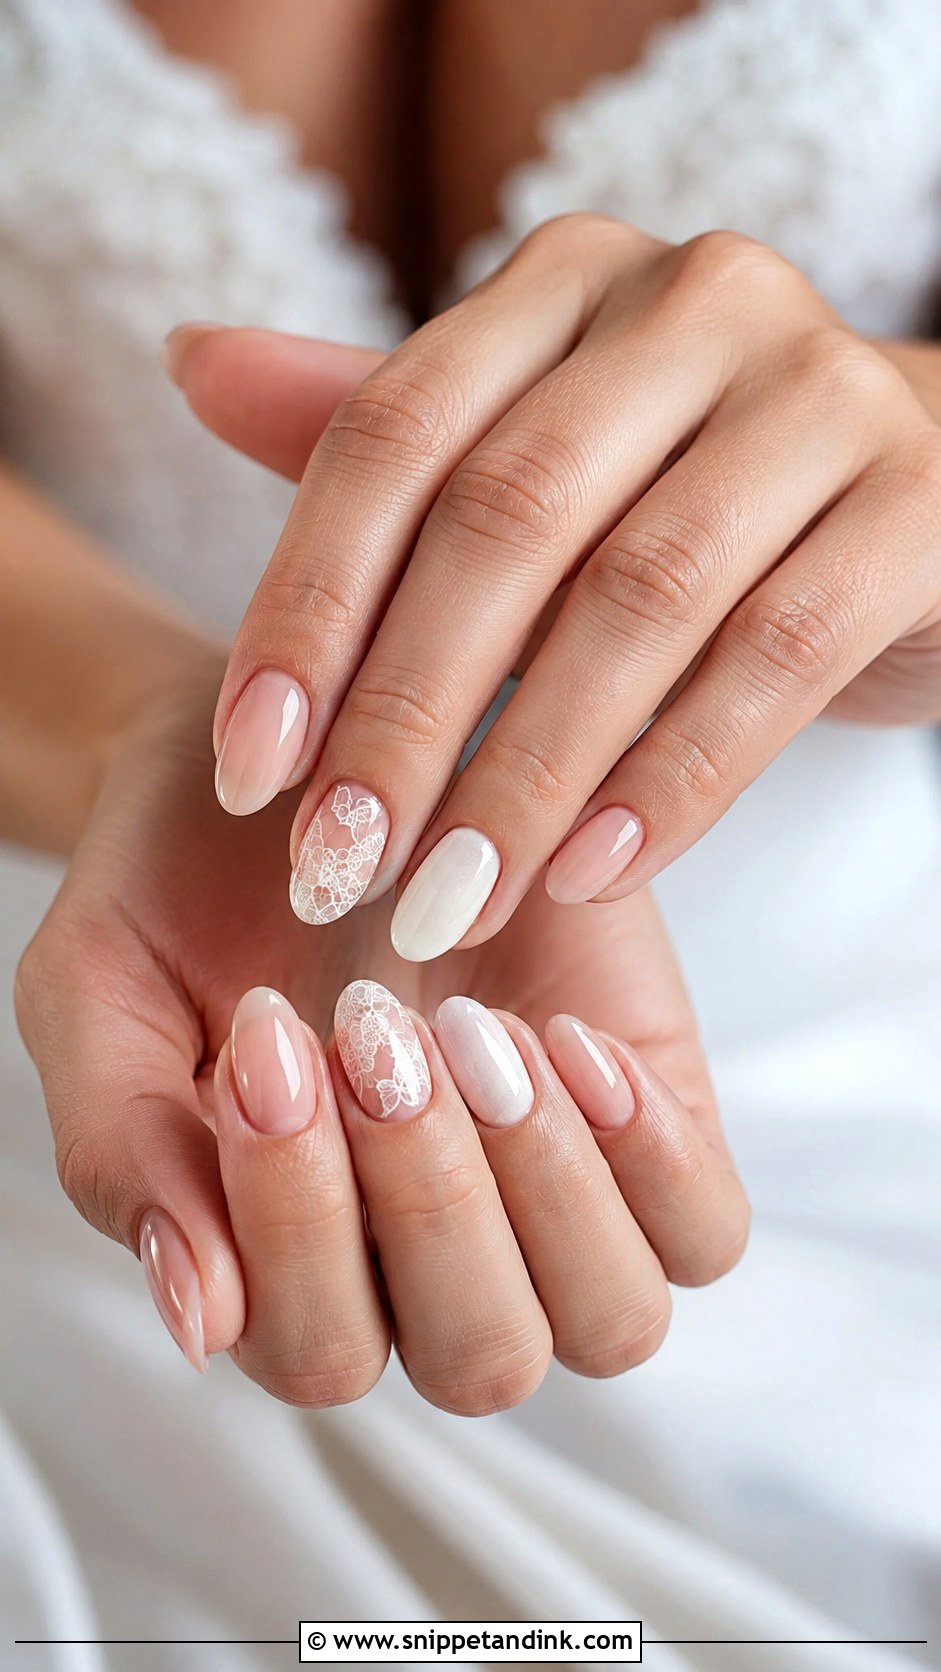
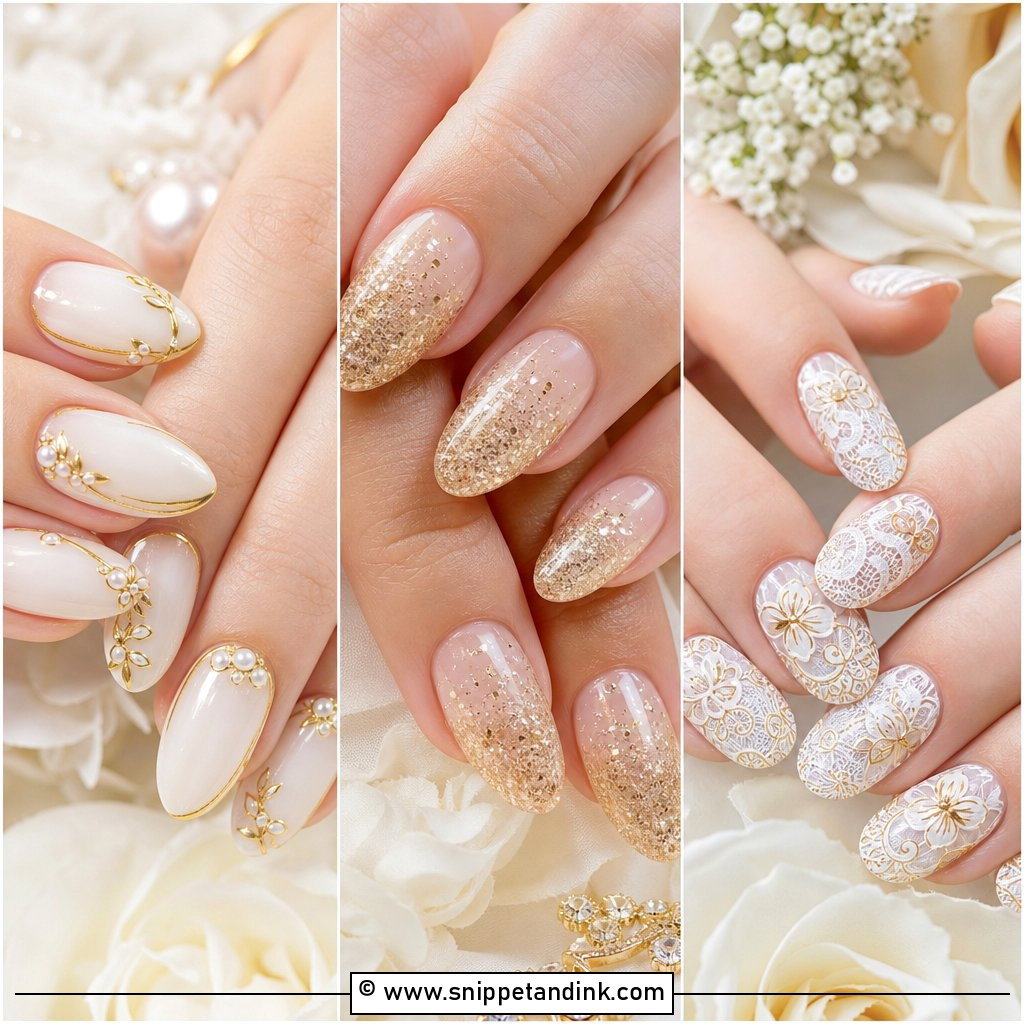
Lace nails work best when they echo your dress, so I ask brides to bring a close-up of the lace, not a full-length photo. The pattern is painted in fine white lines over a sheer nude or pink base, or applied as a decal on accent nails with the rest kept glossy. Thin, airy lines look like real lace; thick ones look like doodles. Coffin, almond or oval shapes give enough surface for the pattern to read. Hand-painted lace takes time, so plan a longer appointment than a standard gel set.
5. White Ombre Wedding Nails
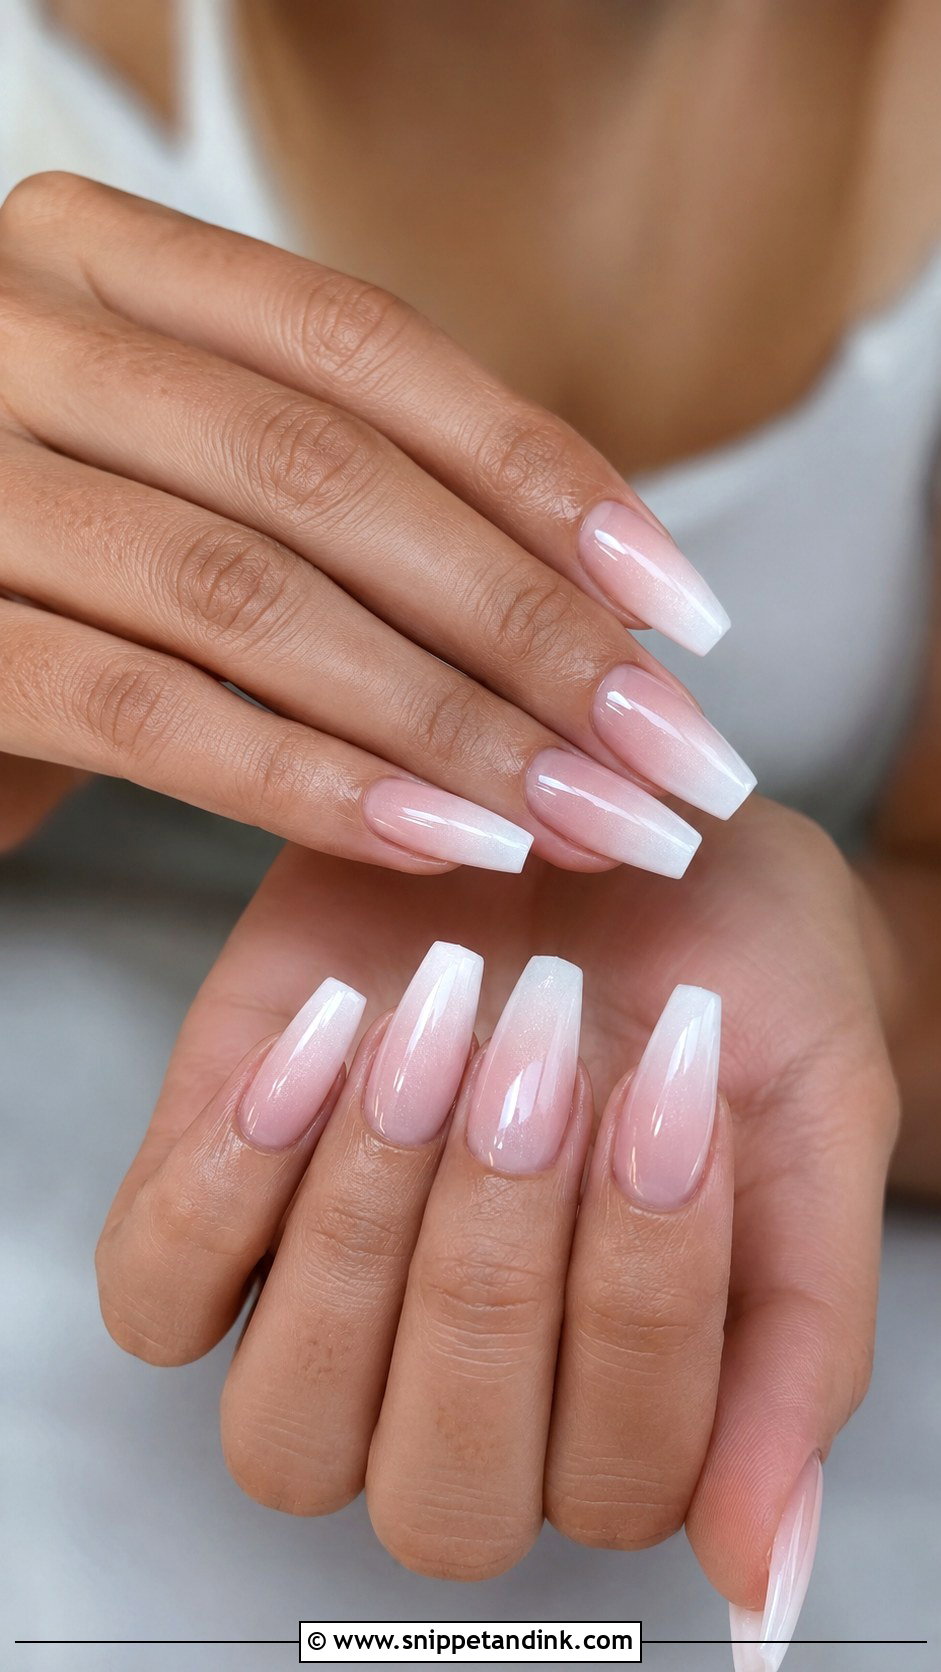
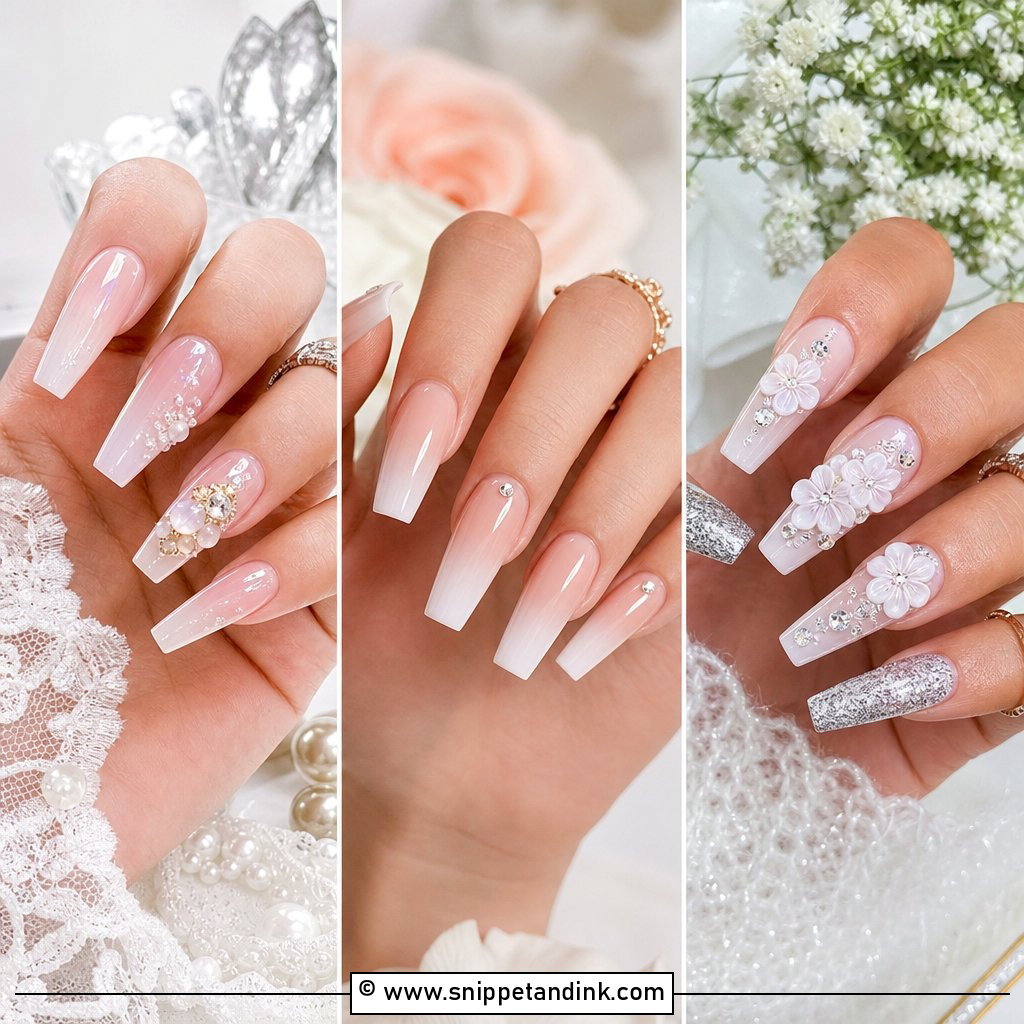
White ombre wedding nails are a softer take on the French manicure: the color fades from nude or pink into a clouded white tip with no hard line. That’s exactly why they flatter so many hands, and why they’re forgiving in close-up ring photos. I build the fade with a sponge or a soft brush in thin layers; rushing it gives a stripe instead of a blur. Ombre also grows out more gently, which helps if your wedding is a week into your honeymoon. A sheer shimmer top or a tiny crystal near the cuticle dresses it up.
6. Crystal Accent Wedding Nails
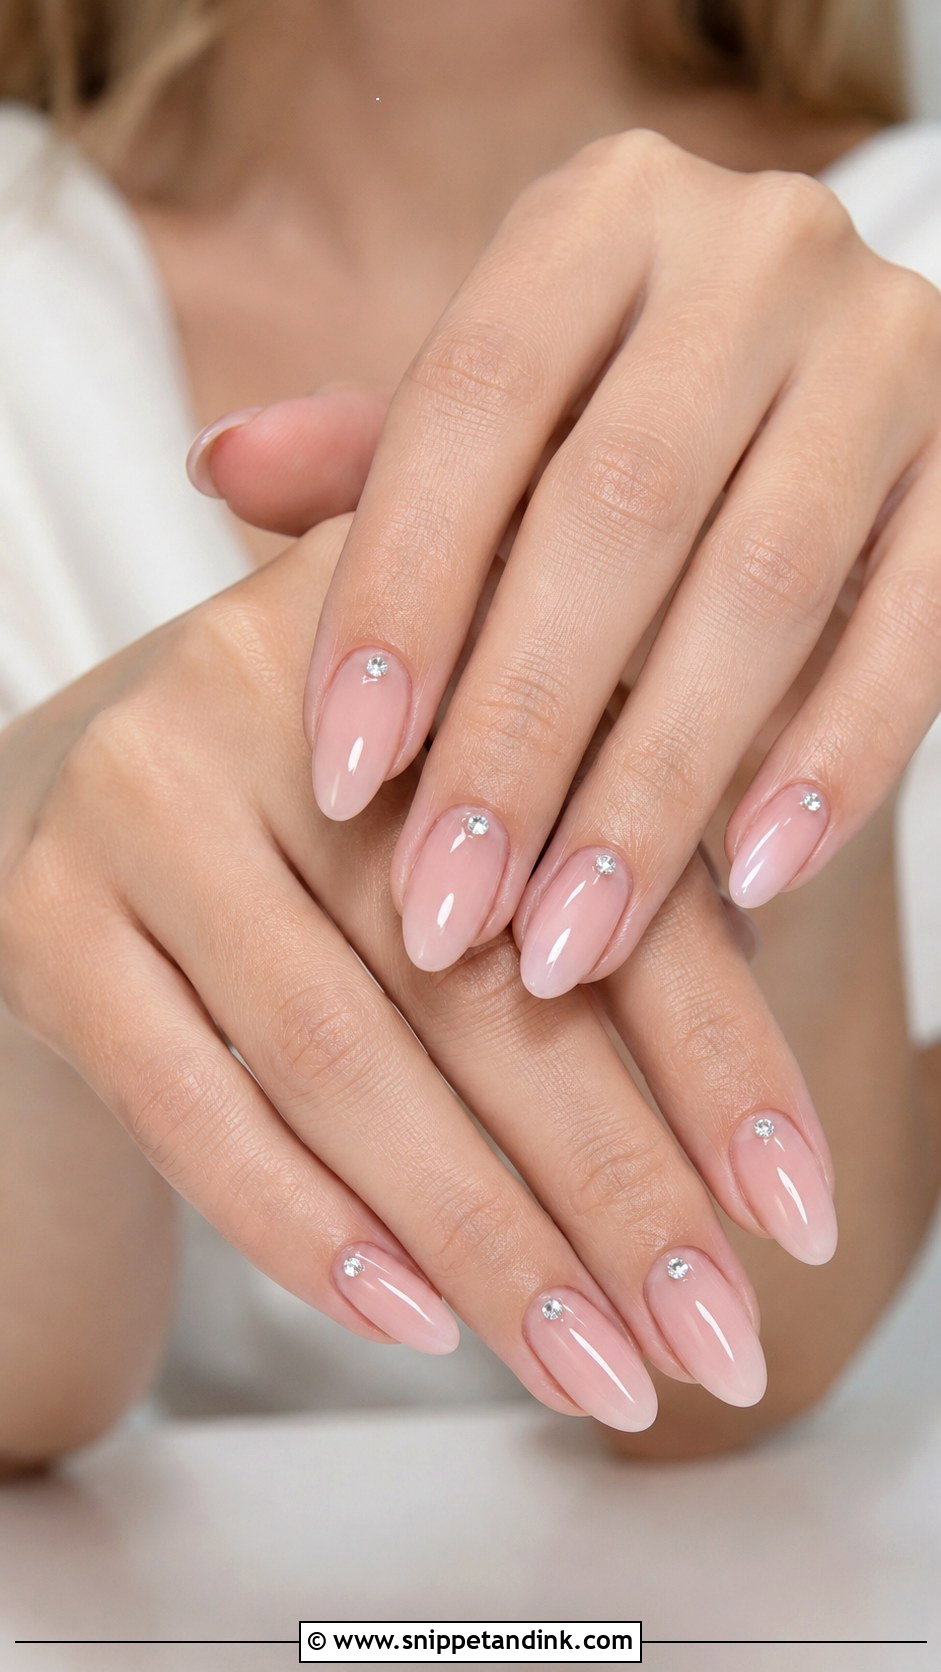
Crystals look best when they look placed, not scattered. I set them on a soft nude, milky pink or sheer white base: one at each cuticle, a curved line on an accent nail or a small cluster on the ring finger. Clear stones read bridal; champagne ones feel warmer. My practical worry is snagging. Raised crystals catch on lace sleeves, veils and fine hair, so I keep them low and flat, sealed around the edges, and I’d skip them on your ring finger if your dress is delicate lace. They suit evening receptions and beaded gowns.
7. Gold French Wedding Nails
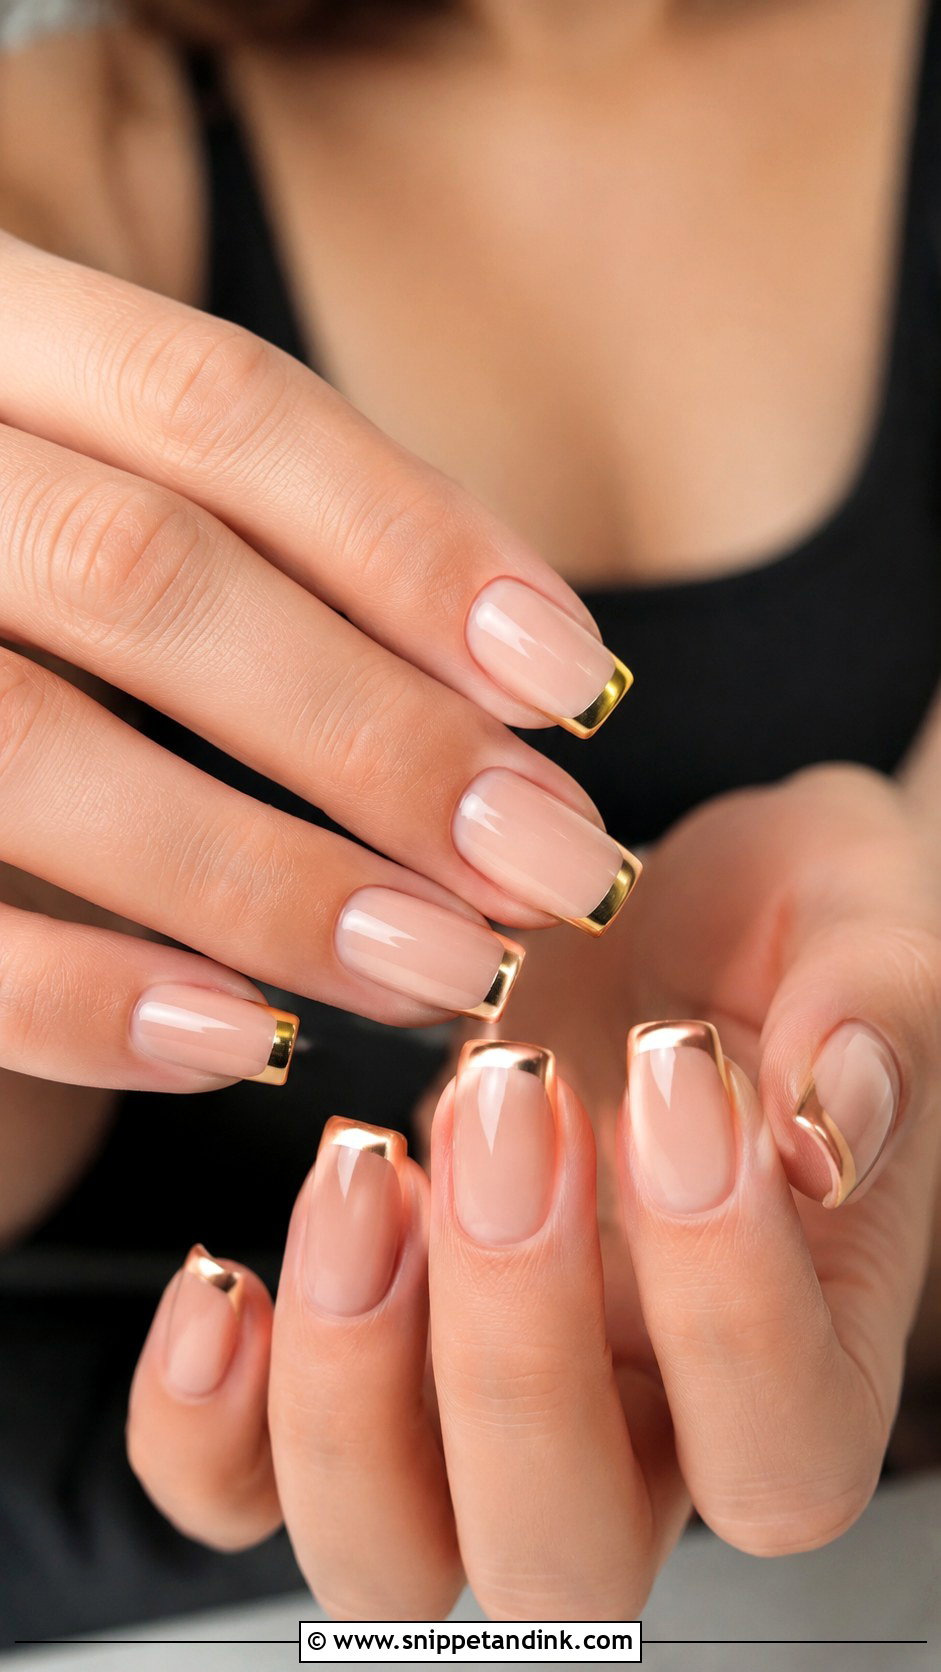
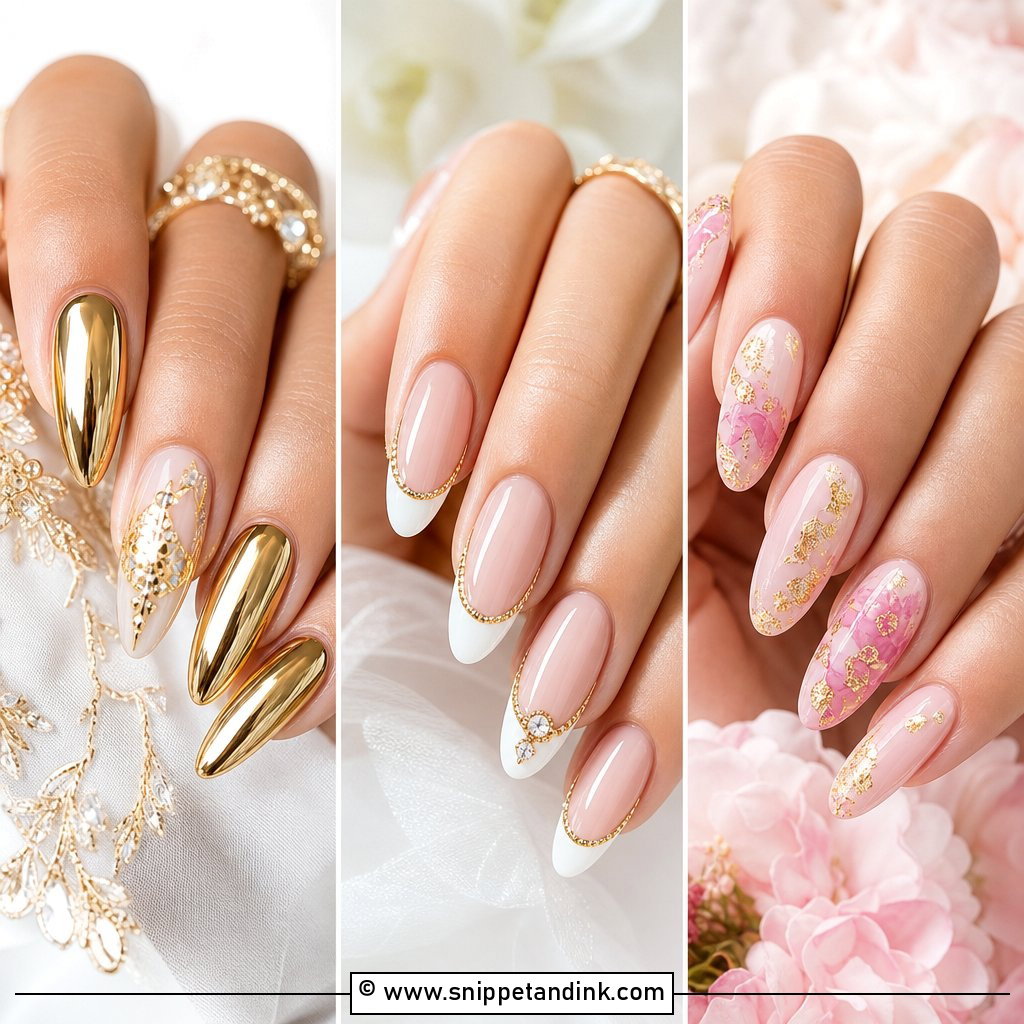
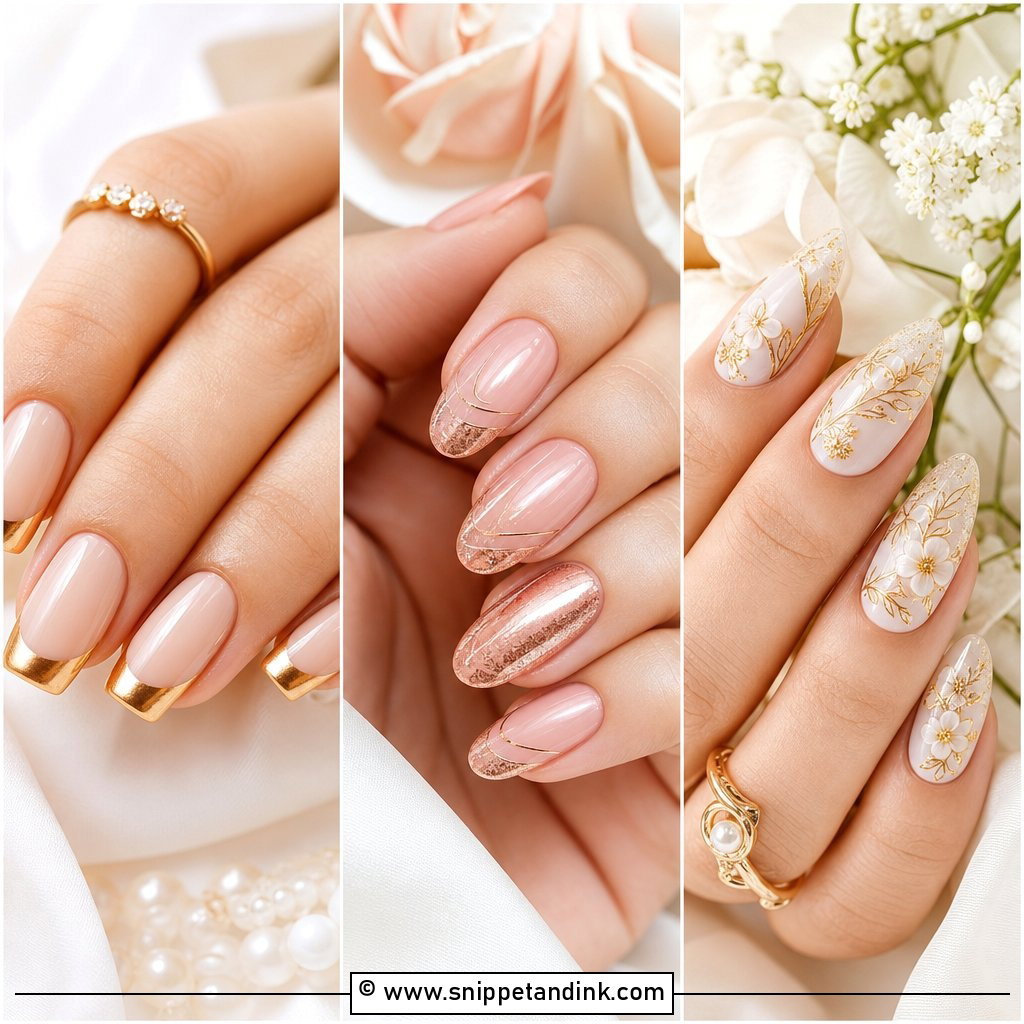
Swap the white tip for gold and the French manicure becomes warmer and more modern. The base can be sheer nude, pale pink or milky beige, chosen by your skin tone. A thin gold line looks minimal; a deeper curved tip is more glamorous. A fine gold stripe under a white tip is a nice middle ground. Metallic polish shows every wobble, so the smile line has to be painted with a striping brush in one stroke. Match the gold tone to your jewelry: yellow gold, rose gold and champagne all look different against skin.
8. Nude Chrome Wedding Nails
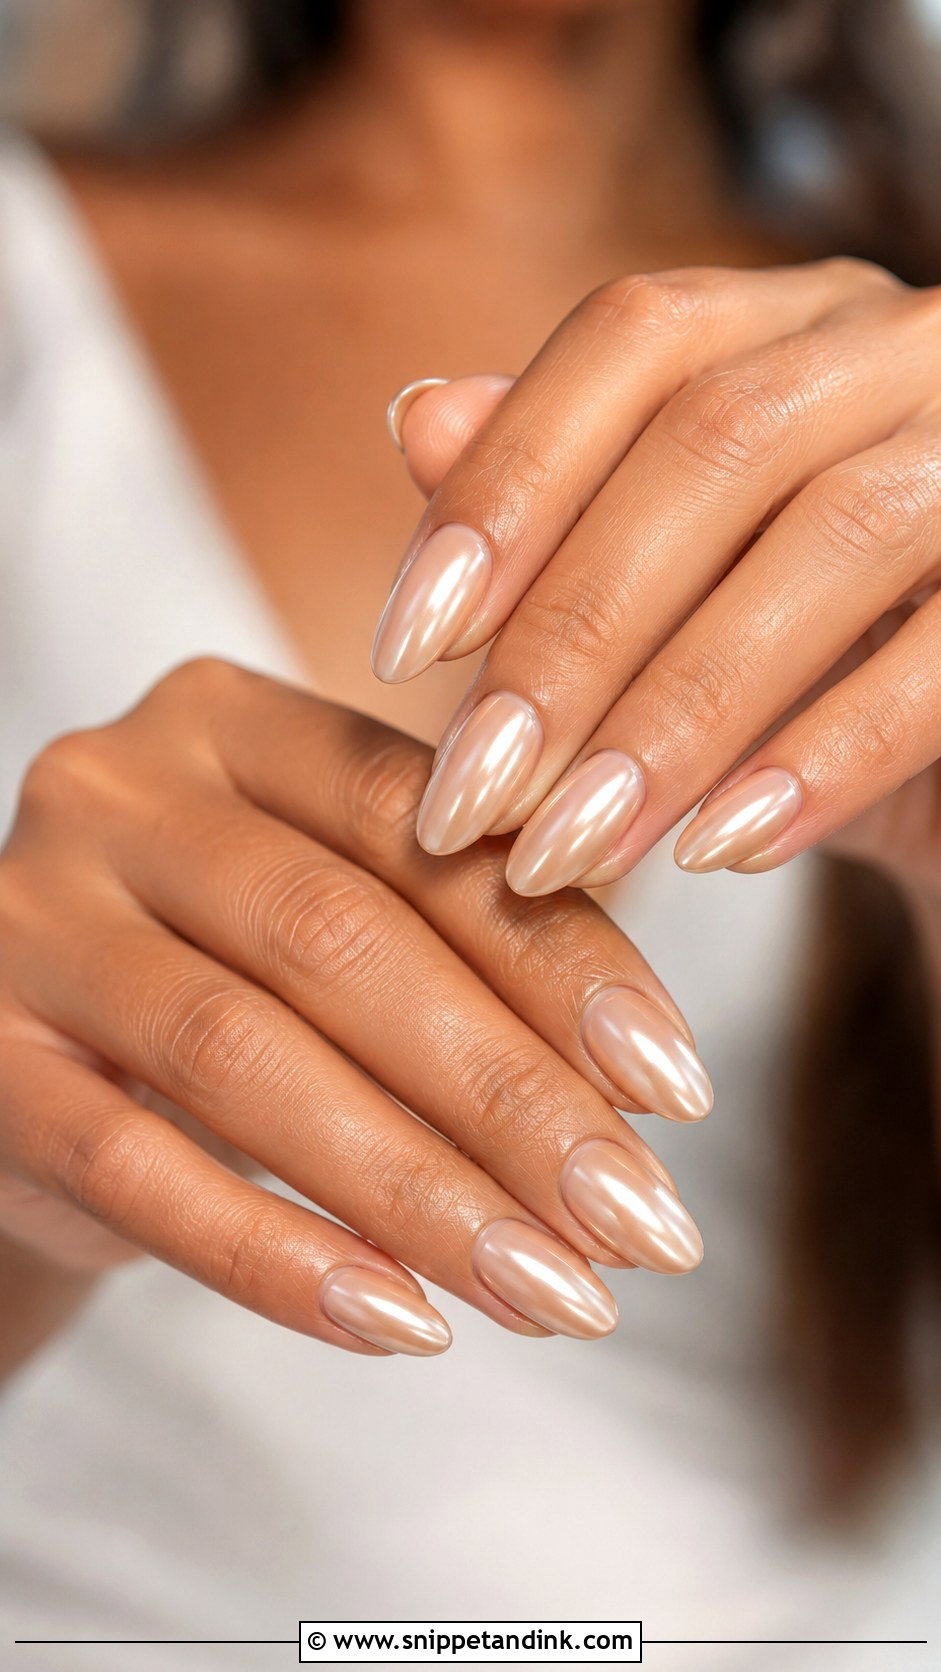
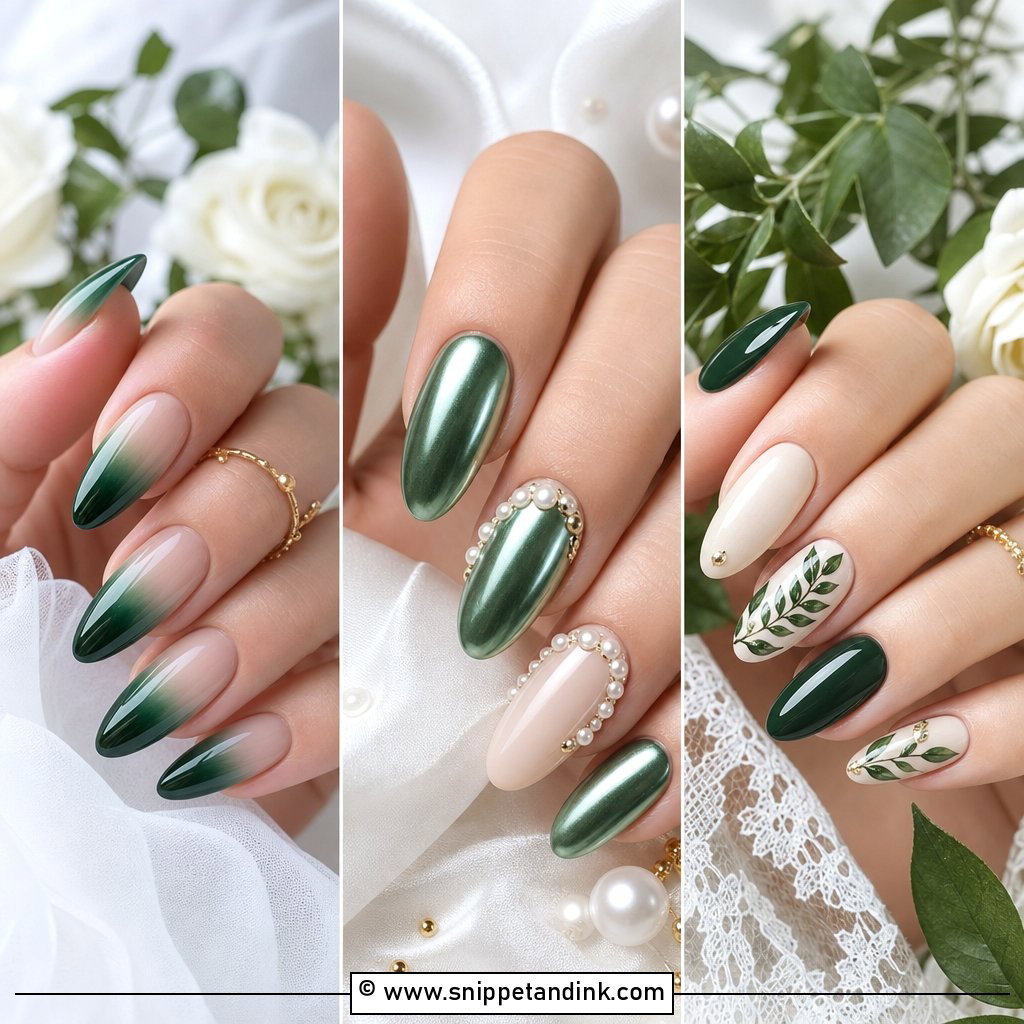
Nude chrome makes hands look expensive and calm. Getting the nude right is the whole job. I match it to your undertone, since a nude that’s too pink or too beige makes fingers look washed out, then rub a pearly or champagne chrome over it. It doesn’t compete with a statement ring or earrings, so it sits happily beside almost every gown. Medium almond looks sleek, short squoval just as chic. Like any chrome, it needs a sealed edge to stay glossy through the honeymoon.
9. Floral Wedding Nails
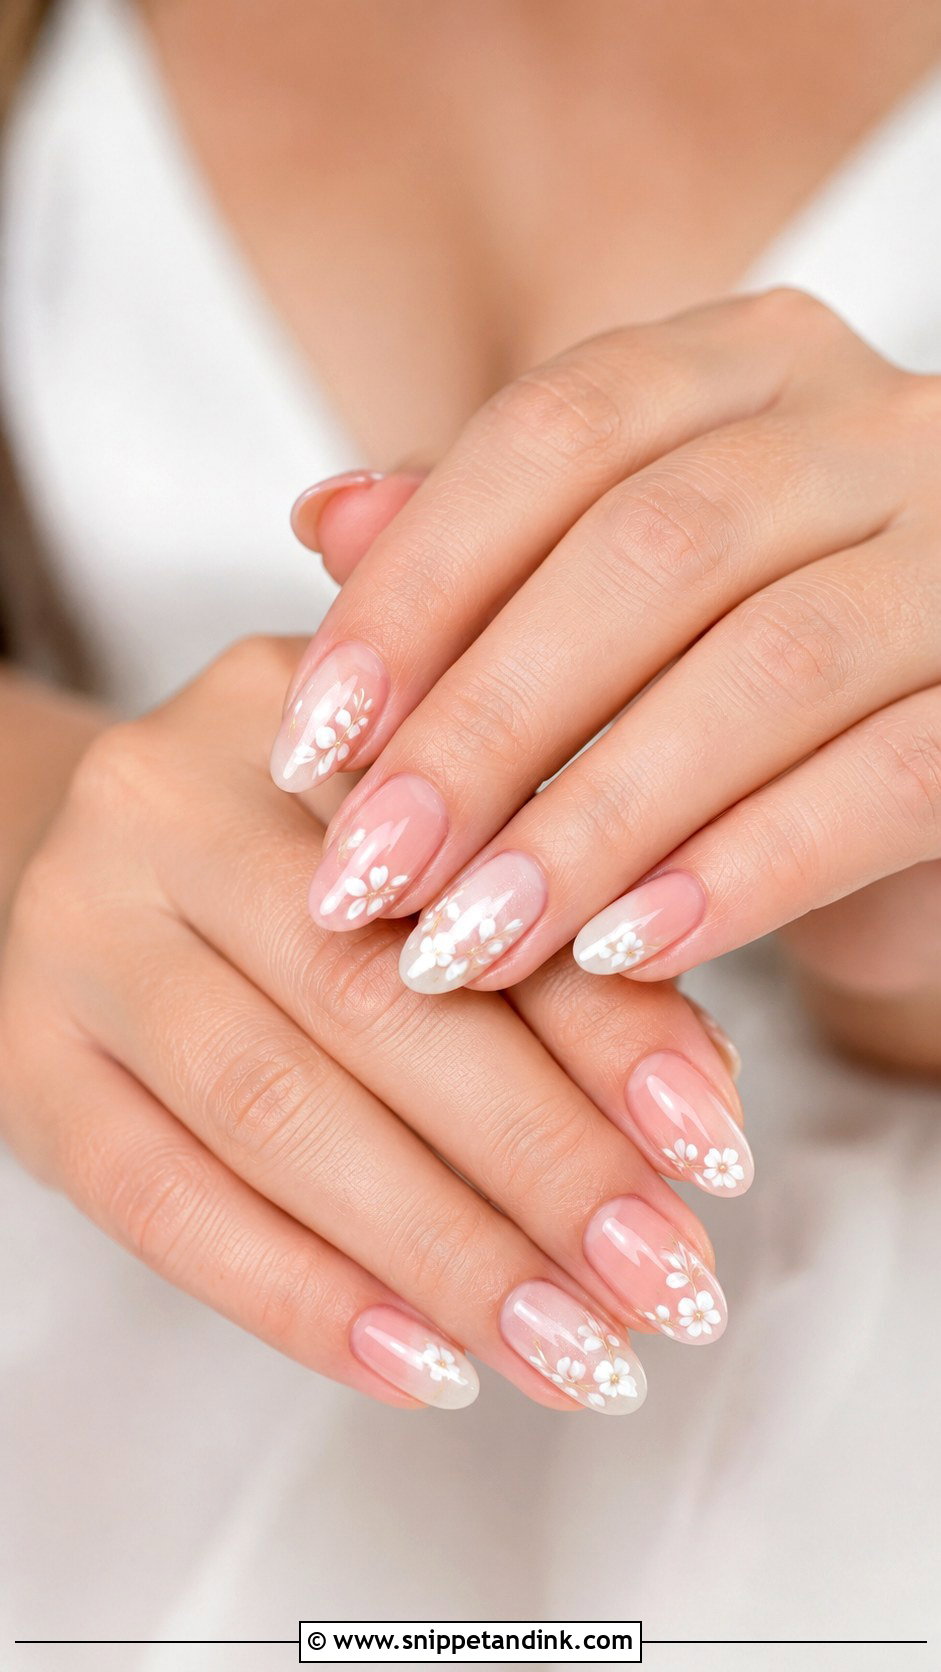
Small florals are the easiest nail art to overdo. I keep them to fine white flowers or soft petals over a sheer pink or nude base, either on every nail for a romantic set or on two accent nails for a cleaner one. Muted colors and thin lines look bridal; bright, busy prints look like a summer holiday. A tiny pearl center or a shimmer top coat finishes it. If your bouquet has a particular bloom, I can echo its shape. Oval and almond nails give florals a soft canvas, and spring and summer weddings suit them best.
10. Silver Glitter Wedding Nails
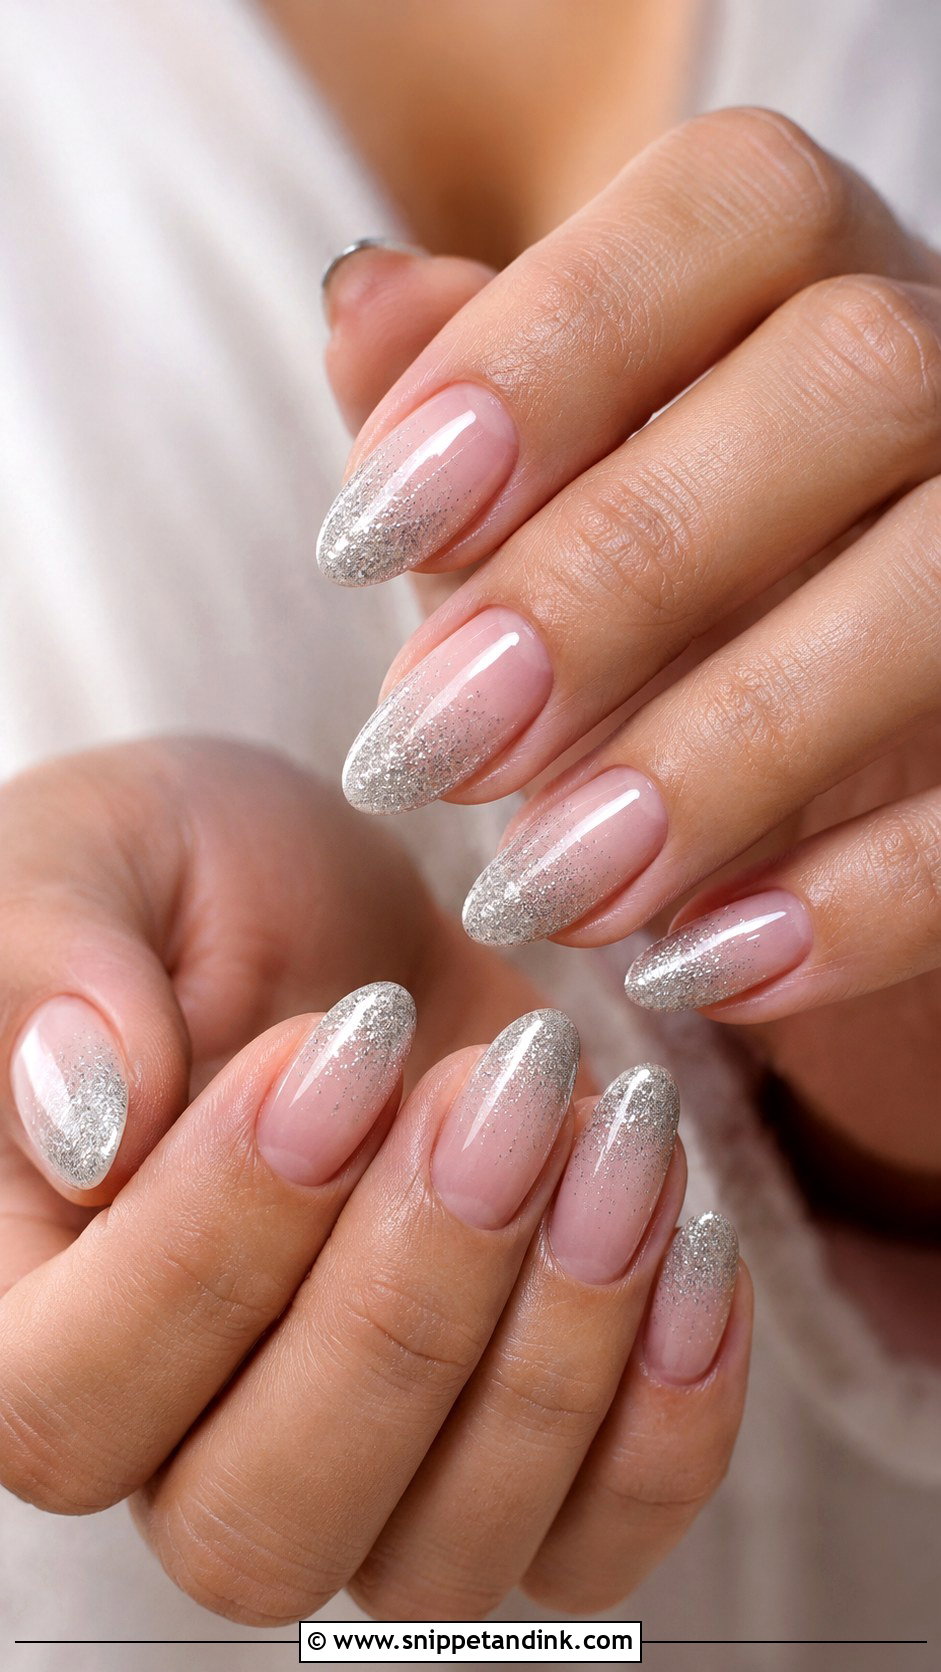
The difference between elegant glitter and party glitter is particle size. Fine silver glitter fading up from the tip over a sheer nude base looks soft and catches light gently; chunky hex glitter looks festive and is hard to make smooth. I always finish glitter with a thick, glossy top coat, because otherwise the surface feels rough and snags on tights or veil tulle. Medium length keeps it refined. It suits evening receptions, winter weddings and gowns with silver beading. Glitter is also the hardest gel to remove, so plan a proper soak-off afterward.
11. Almond French Wedding Nails
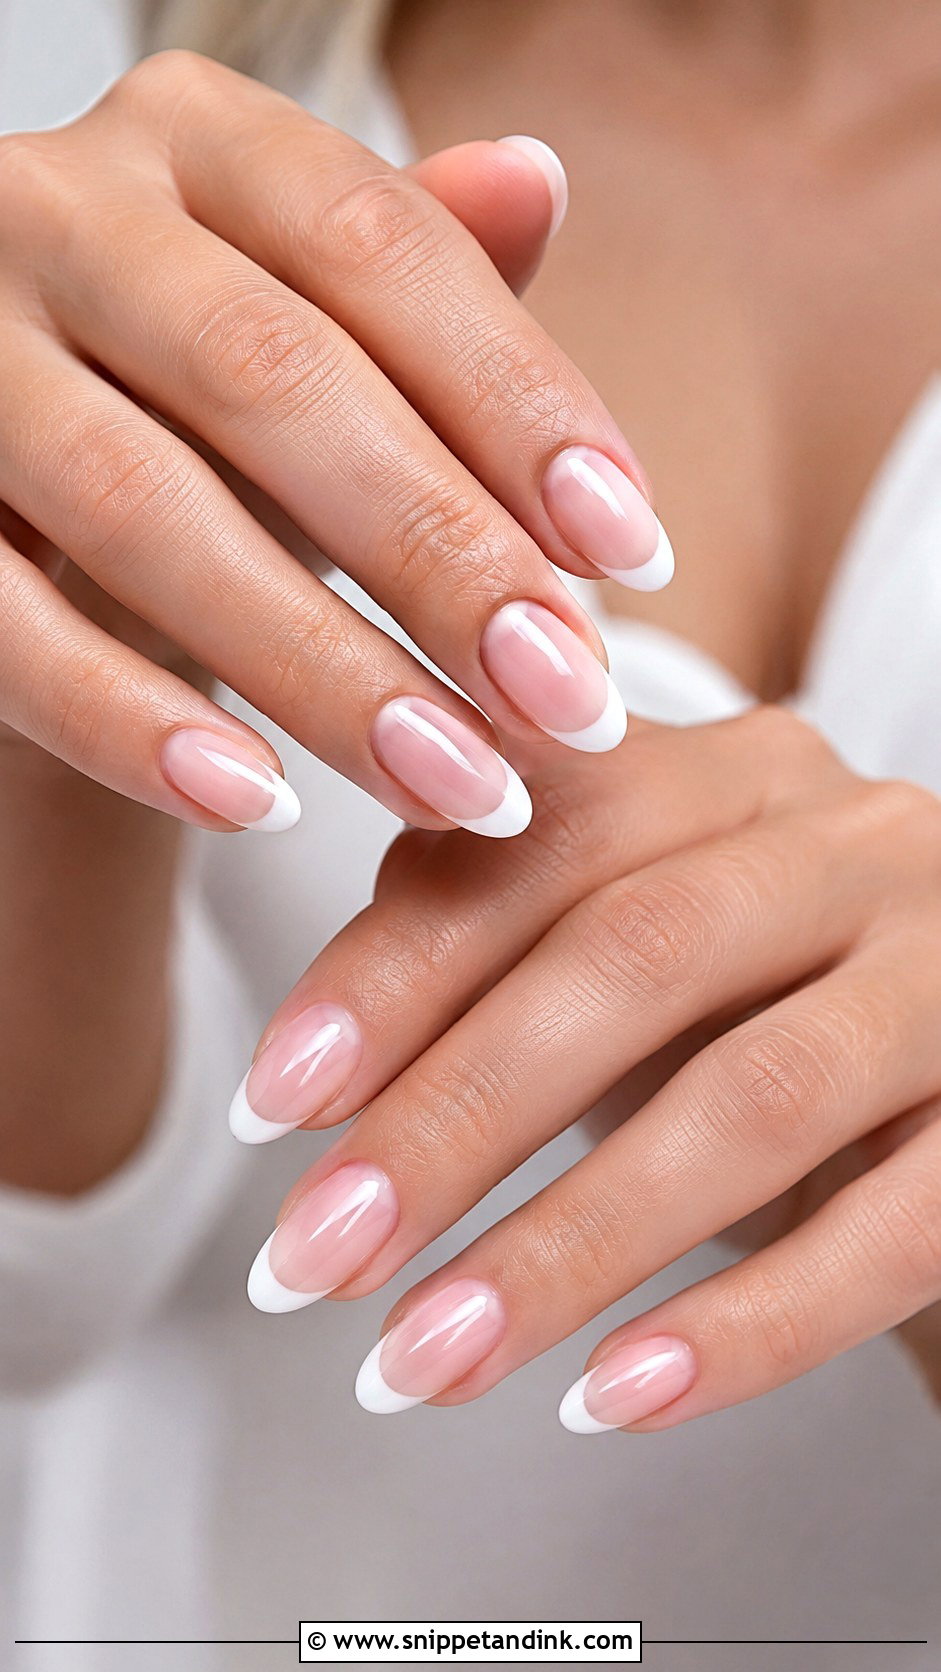
Almond French is the set I’d tell a nervous bride to pick, because it is hard to regret. The almond shape lengthens the fingers, and a sheer pink base with soft white tips and a glossy finish suits nearly every dress, venue and season. To make it more modern, I’ll do micro tips, a deeper smile line or a thin pearl chrome veil on top. The skill is in symmetry: each tip should match its neighbor in depth and curve, which is what makes it look professional in photos years later.
12. Marble Wedding Nails
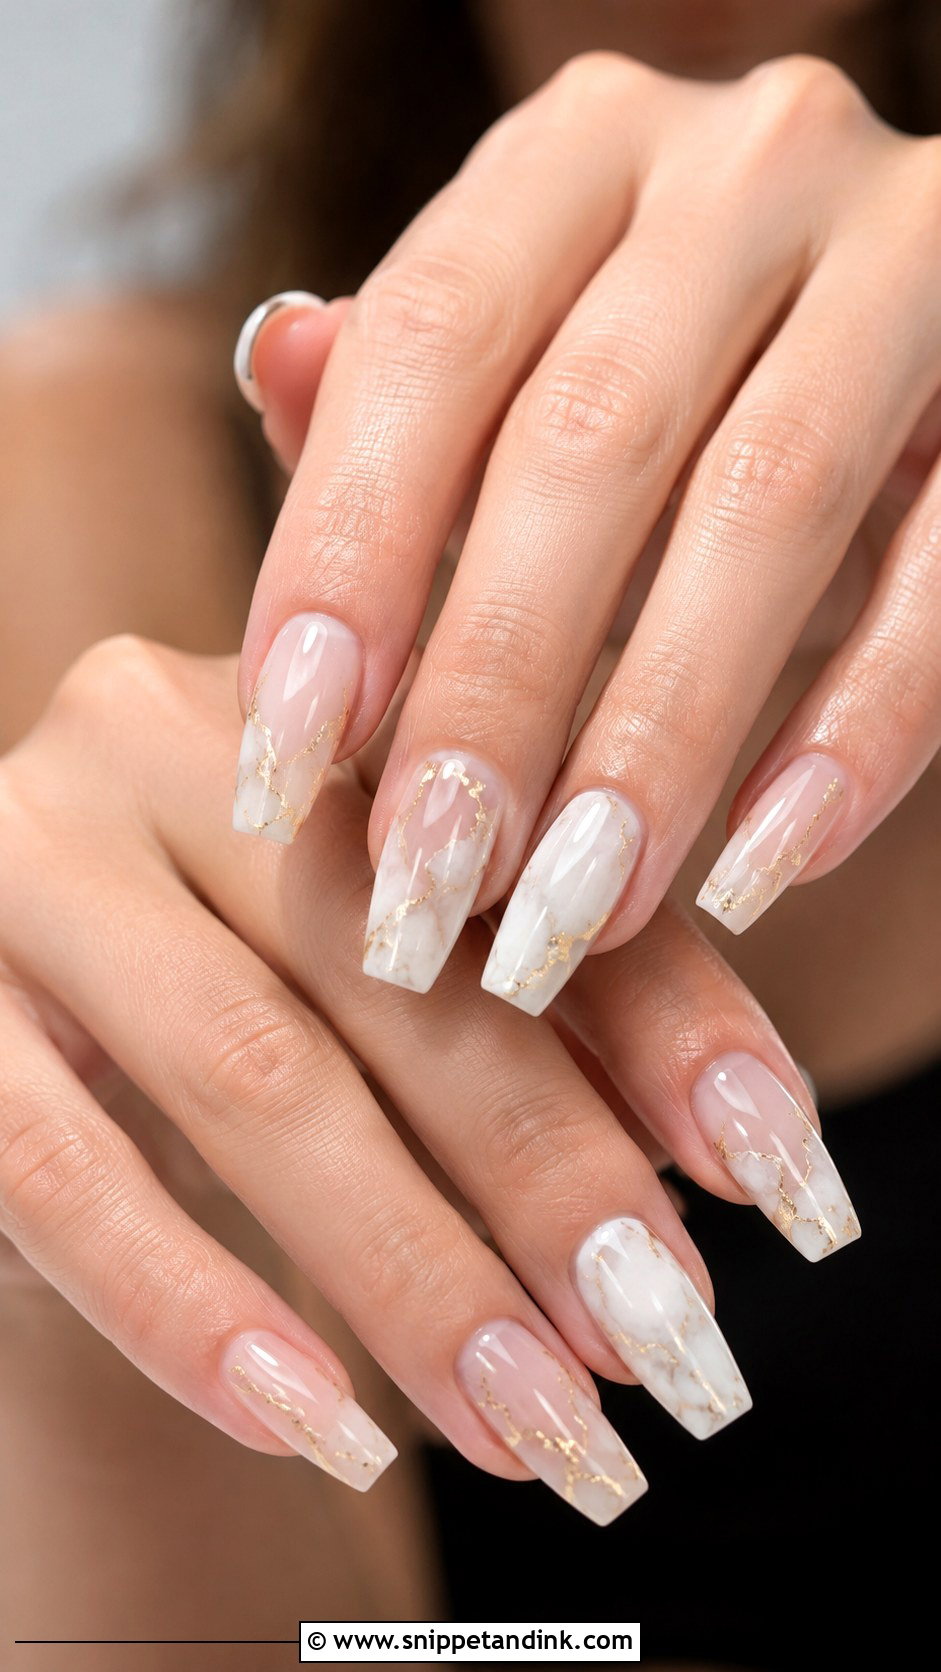
Marble on nails is done by dragging thin veins of white, beige, silver or pale gold through wet gel over a white, nude or blush base. The best versions look airy, with plenty of base showing between the veins, and a hint of shimmer or gold foil in small areas. Dark, heavy veining looks more like a kitchen counter than a bridal manicure. It needs a bit of length to flow, so longer almond, coffin or oval nails suit it. It pairs well with sleek gowns and minimalist accessories.
13. Pearl Chrome French Wedding Nails
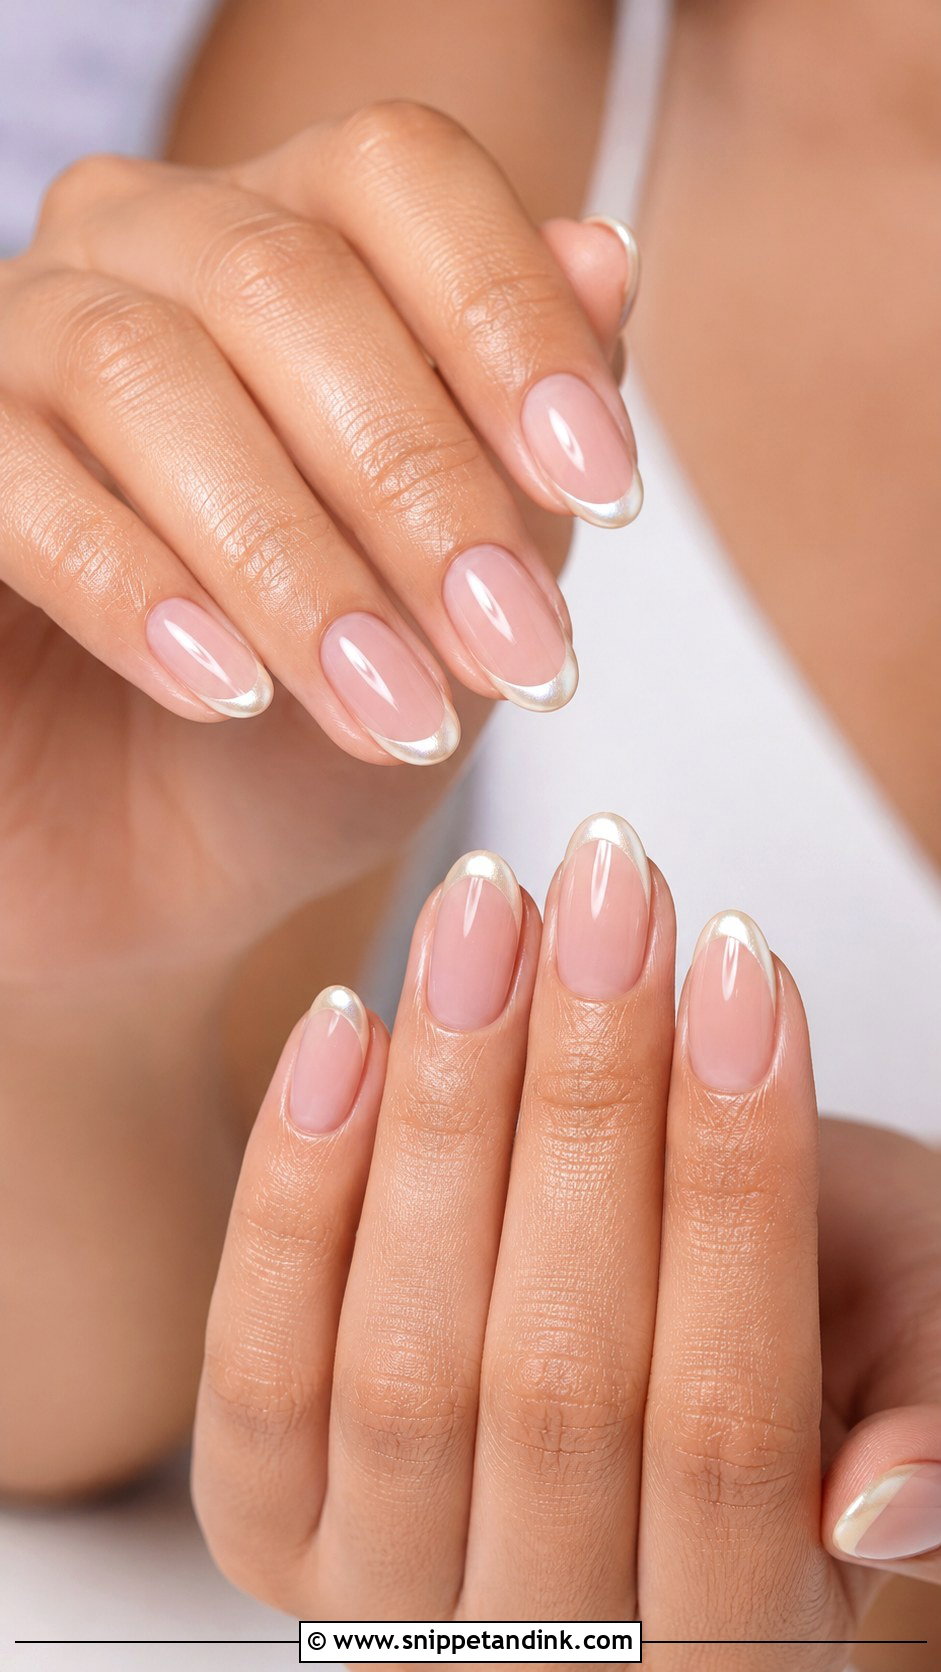
This version keeps the sheer natural base and gives the French tips a pearl chrome finish, so the edge shifts in the light as your hands move. I paint the tips first in white or pale pink, then rub chrome only over the tips, or over the whole nail for a blended glow. The tip line has to be clean before the chrome goes on, since chrome magnifies any unevenness underneath. Almond and oval shapes make it look graceful. It’s the update I suggest when someone loves a French manicure but wants it to look current.
14. Soft Pink Glitter Wedding Nails
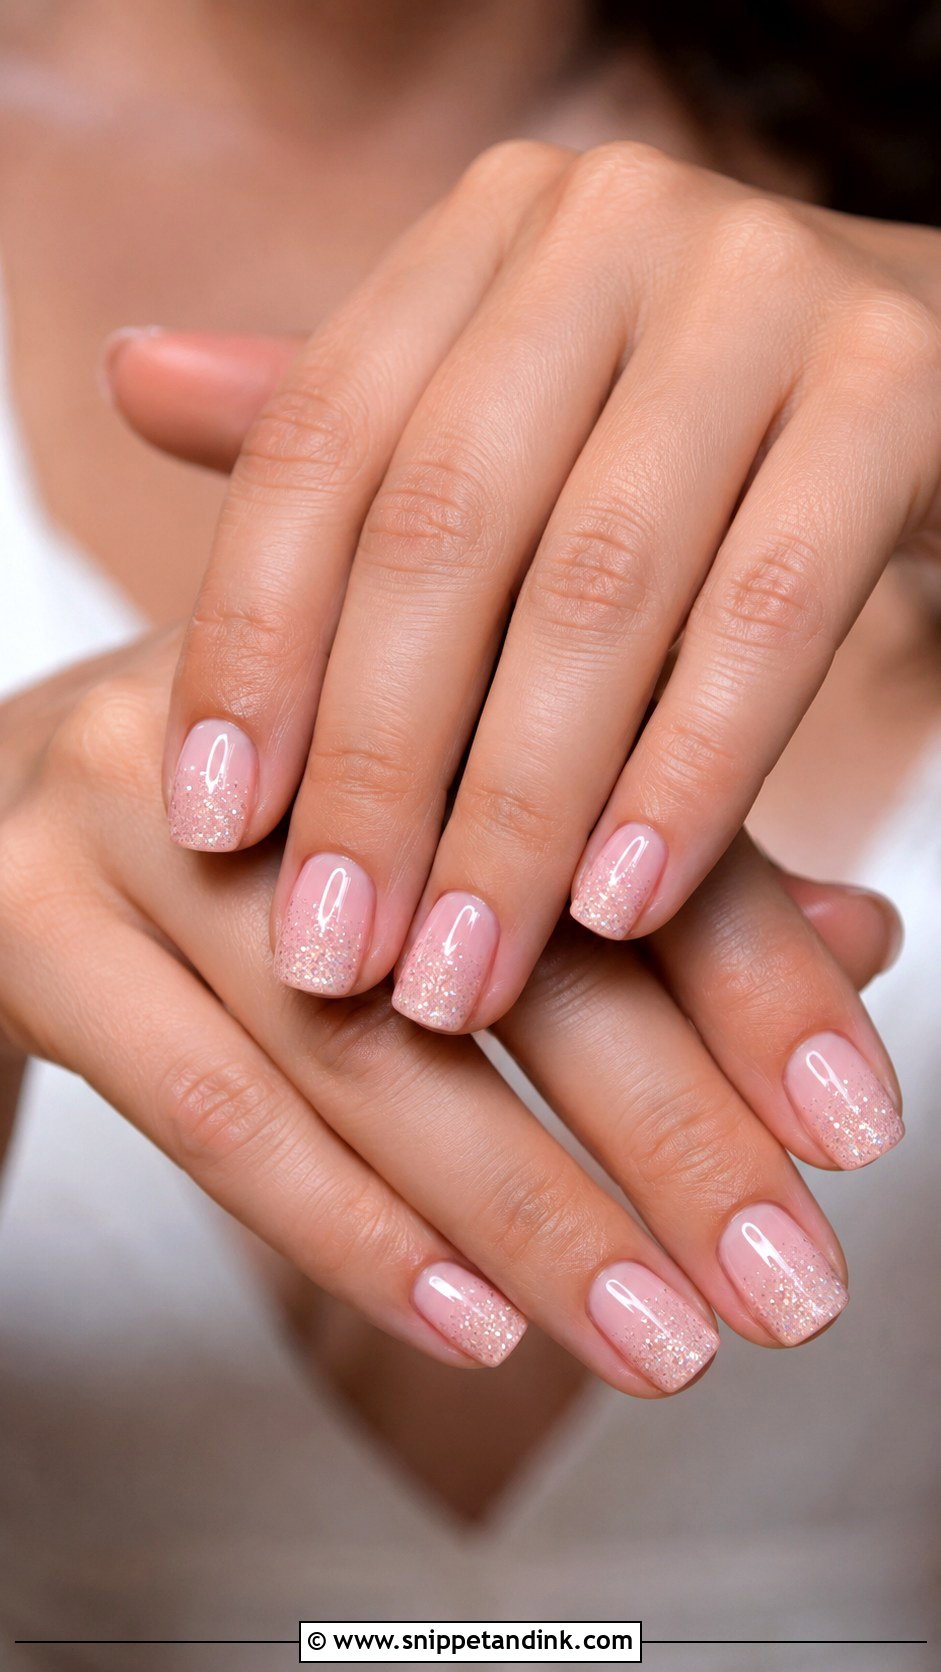
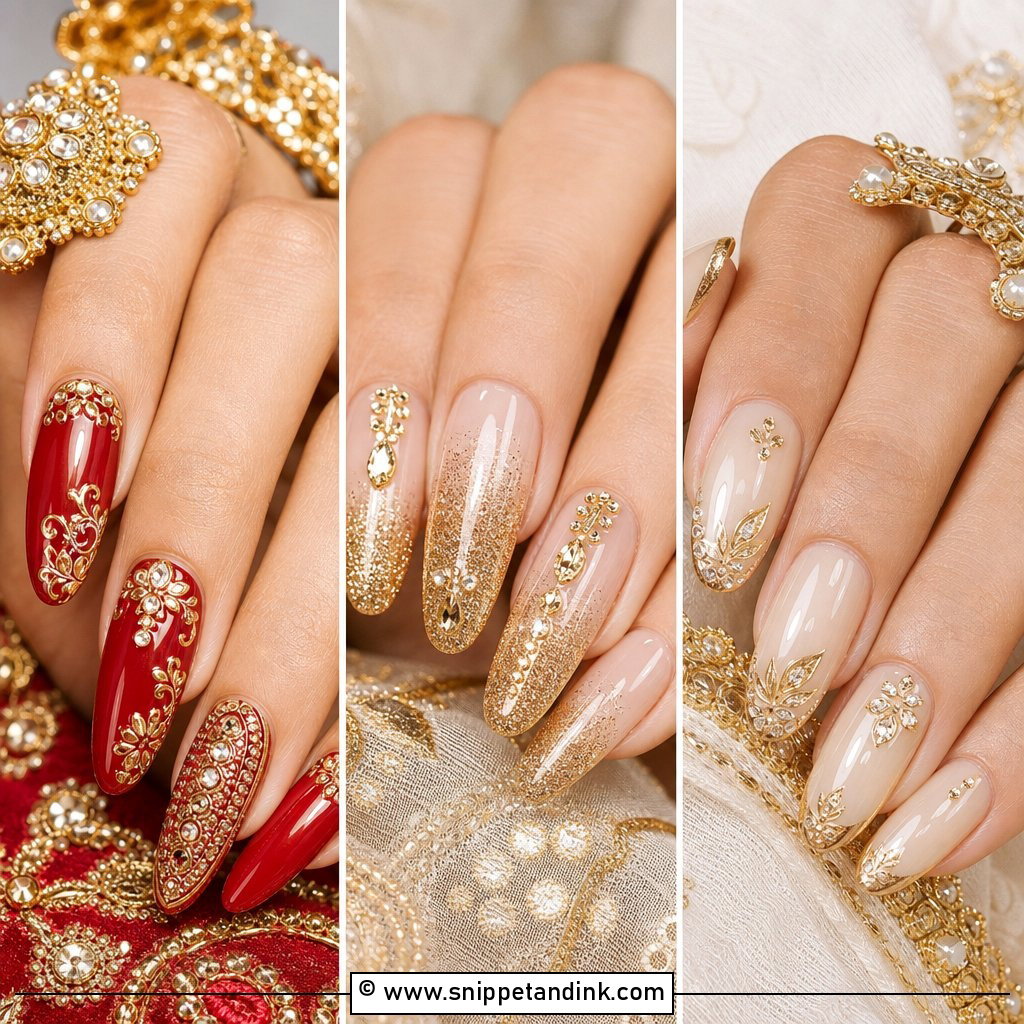
Soft pink with fine glitter is sweet without going childish, as long as the glitter is champagne, rose gold or iridescent rather than bright silver or holographic. The sparkle can sit near the cuticle, fade from the tips or stay on accent nails only. It works on short and long nails, which makes it easy for a bridal party with different lengths to match. Rounded square or almond keeps it soft. A glitter cuticle fade also hides growth well, useful if the wedding is a couple of weeks after your appointment.
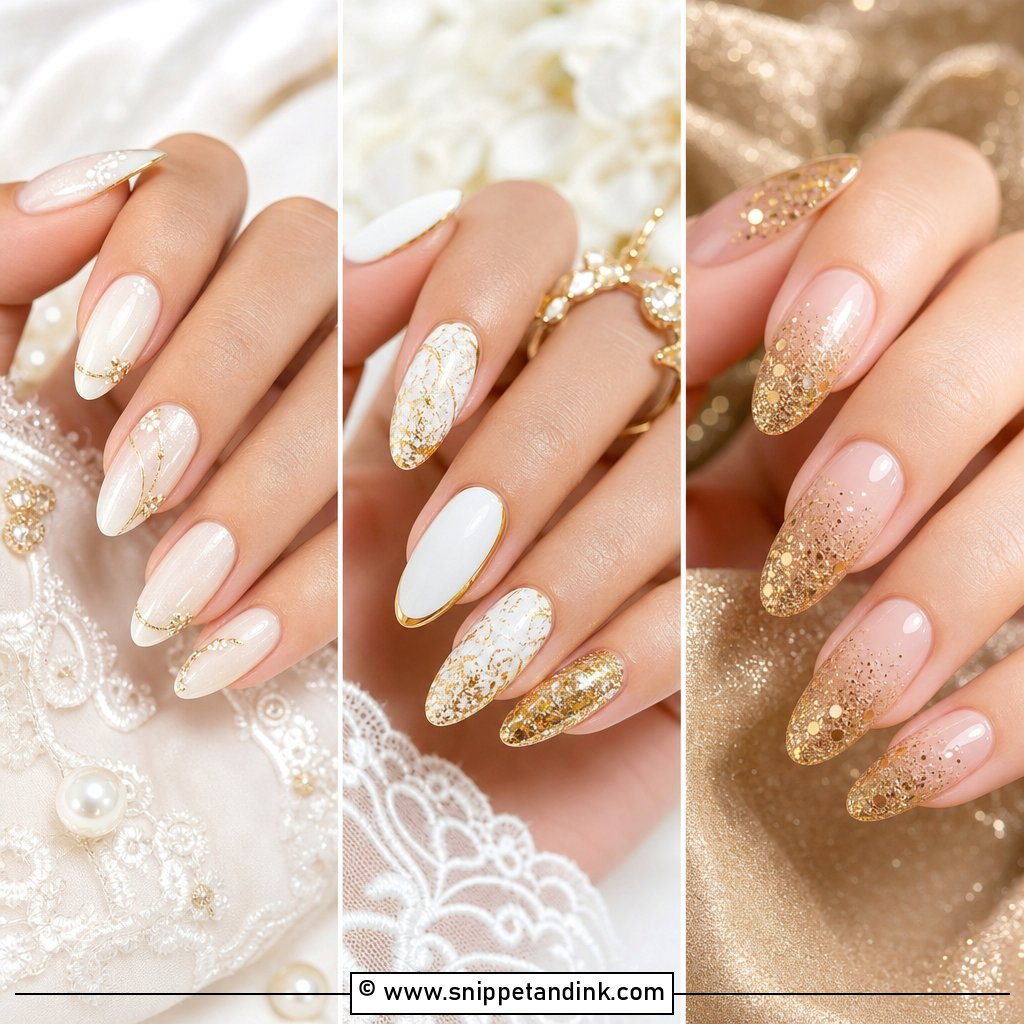
15. White And Gold Wedding Nails
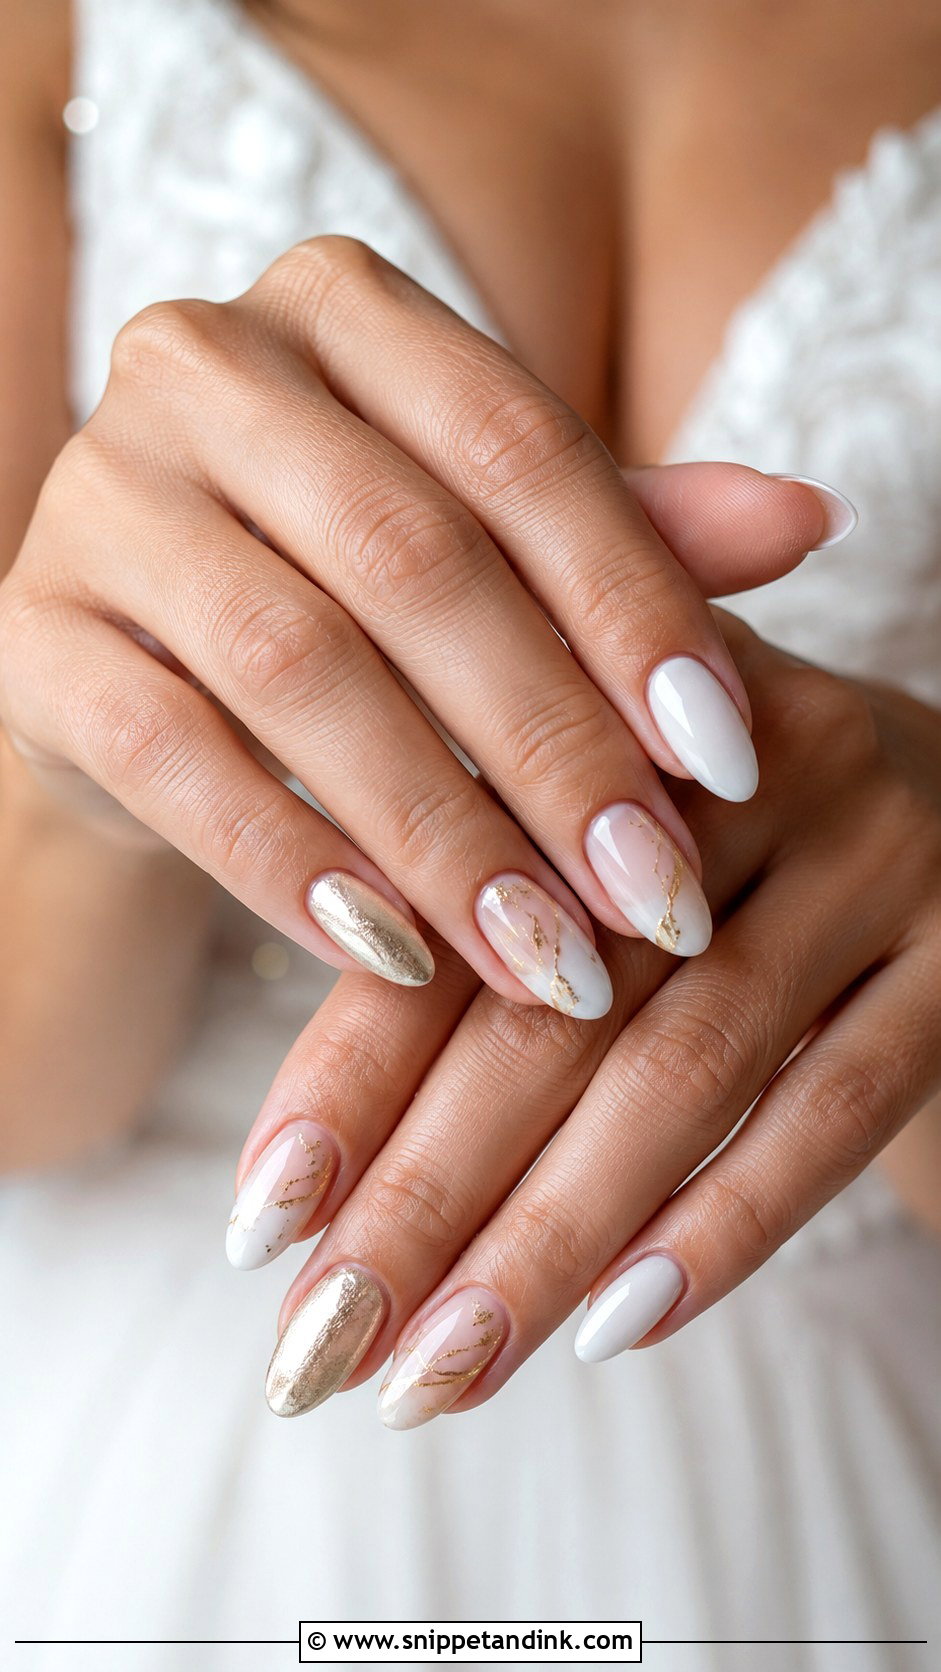
White and gold can tip into flashy quickly, so I keep the gold delicate: thin foil flakes, fine metallic lines or gold French tips on a milky white base. Milky works better than solid white here because a solid opaque white makes metallic details look stark. Mixing glossy white nails with one or two sheer nude accent nails detailed in gold adds depth. Almond, coffin and squoval all suit it. Pair it with ivory gowns, gold jewelry and warm neutral palettes, and match the gold to your rings.
16. Short Fancy Wedding Nails
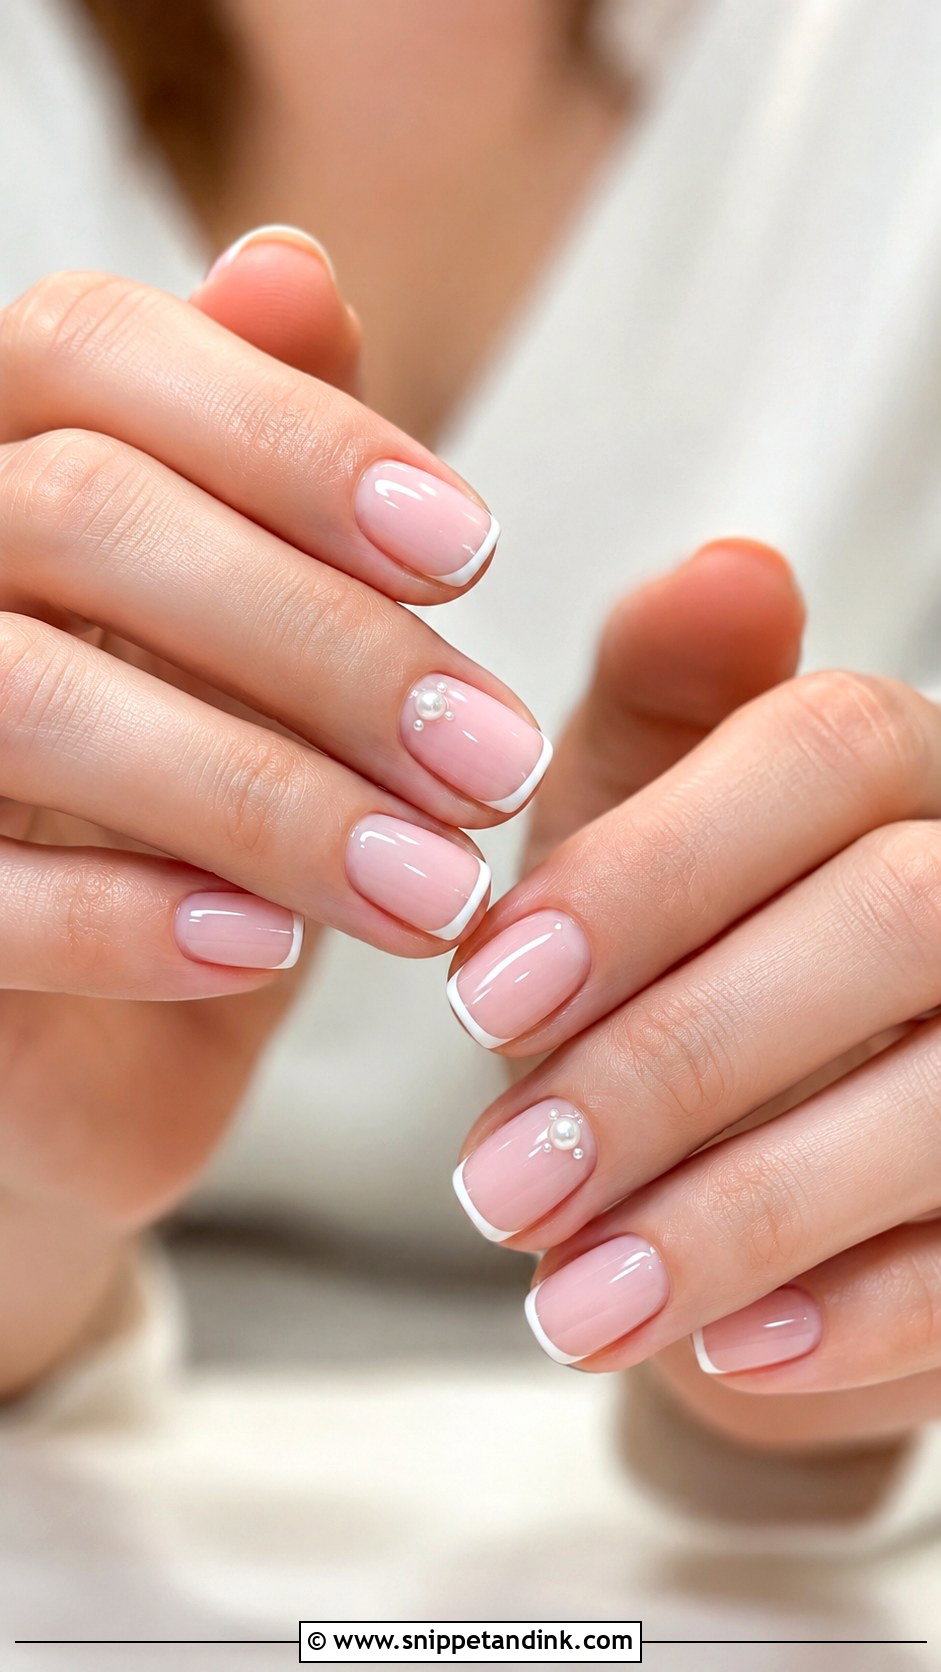
Short nails can look just as polished as long ones, and for a long day of hugging, buttoning and holding a bouquet they’re often more comfortable. Try a sheer pink base with micro French tips, milky white with pearl chrome, or nude with a few tiny crystals. Short squoval and soft square shapes are the least likely to snag or break. On short nails, every detail of the prep shows, so I spend most of the appointment on shaping and cuticle work before color goes on. A glossy top coat finishes it.
17. Coffin Wedding Nails
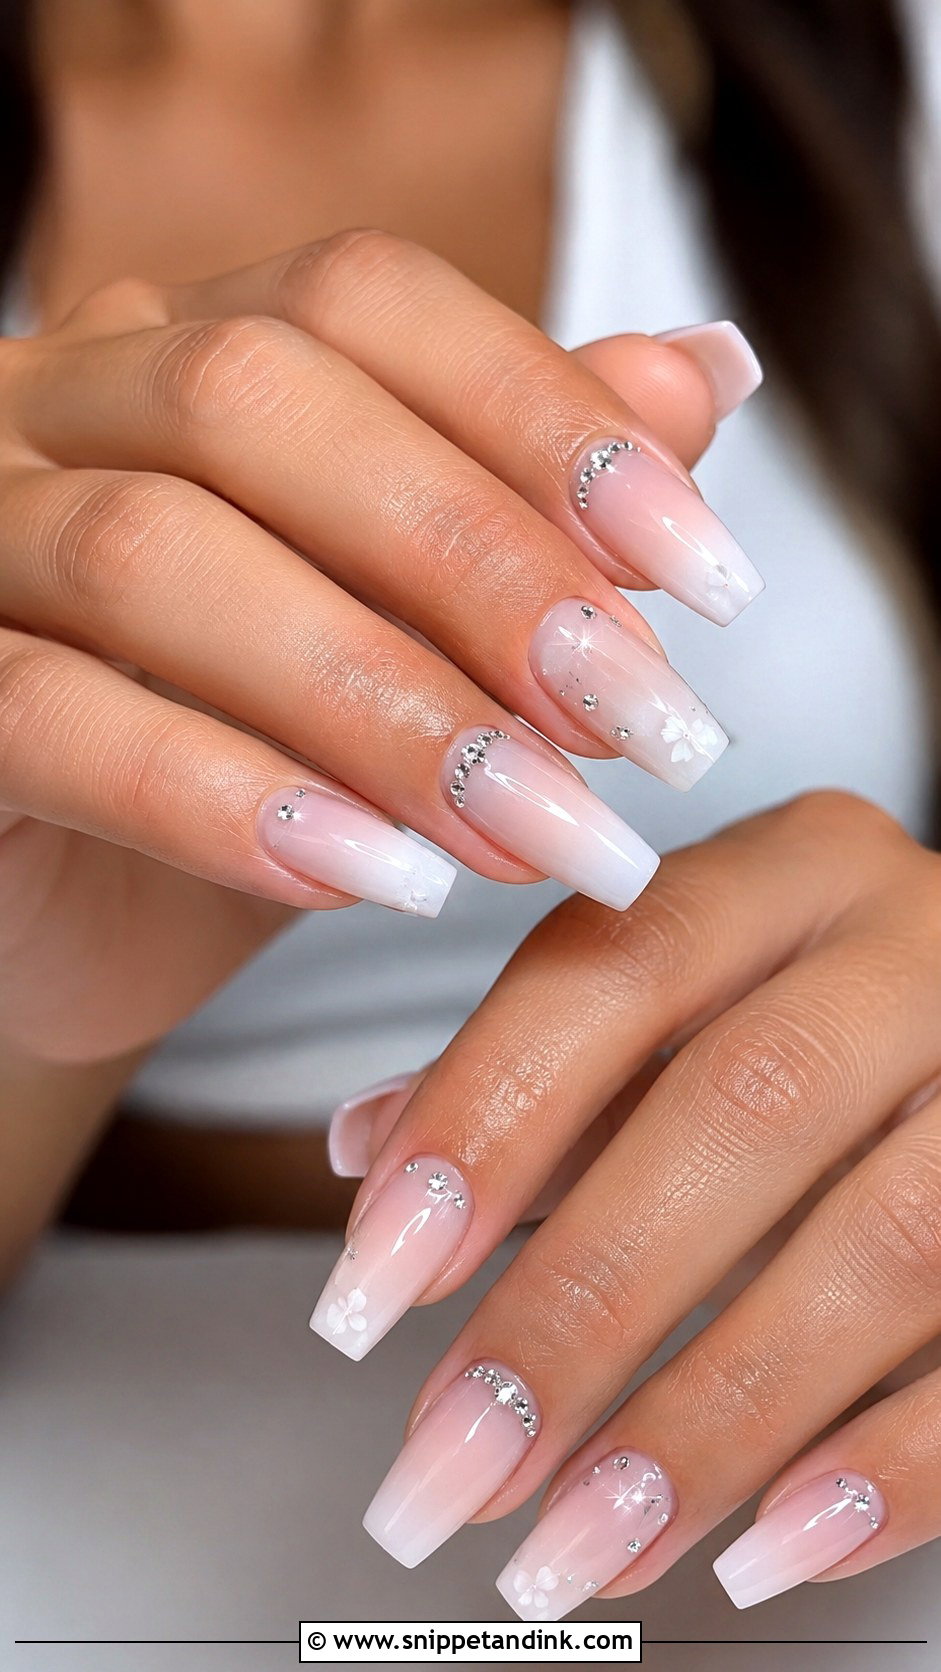
Coffin is the most dramatic shape here, tapered and squared off at the tip. Because the shape already makes a statement, I keep the color soft: milky white, blush, nude ombre or pearl chrome. Crystals, lace or thin gold lines add detail. My honest advice is to choose medium length rather than very long. Long coffin tips are hard to manage with buttons, earring backs and a phone, and the corners of the tip are where breaks happen. It suits a fashion-led bridal look.
18. Cat Eye Wedding Nails
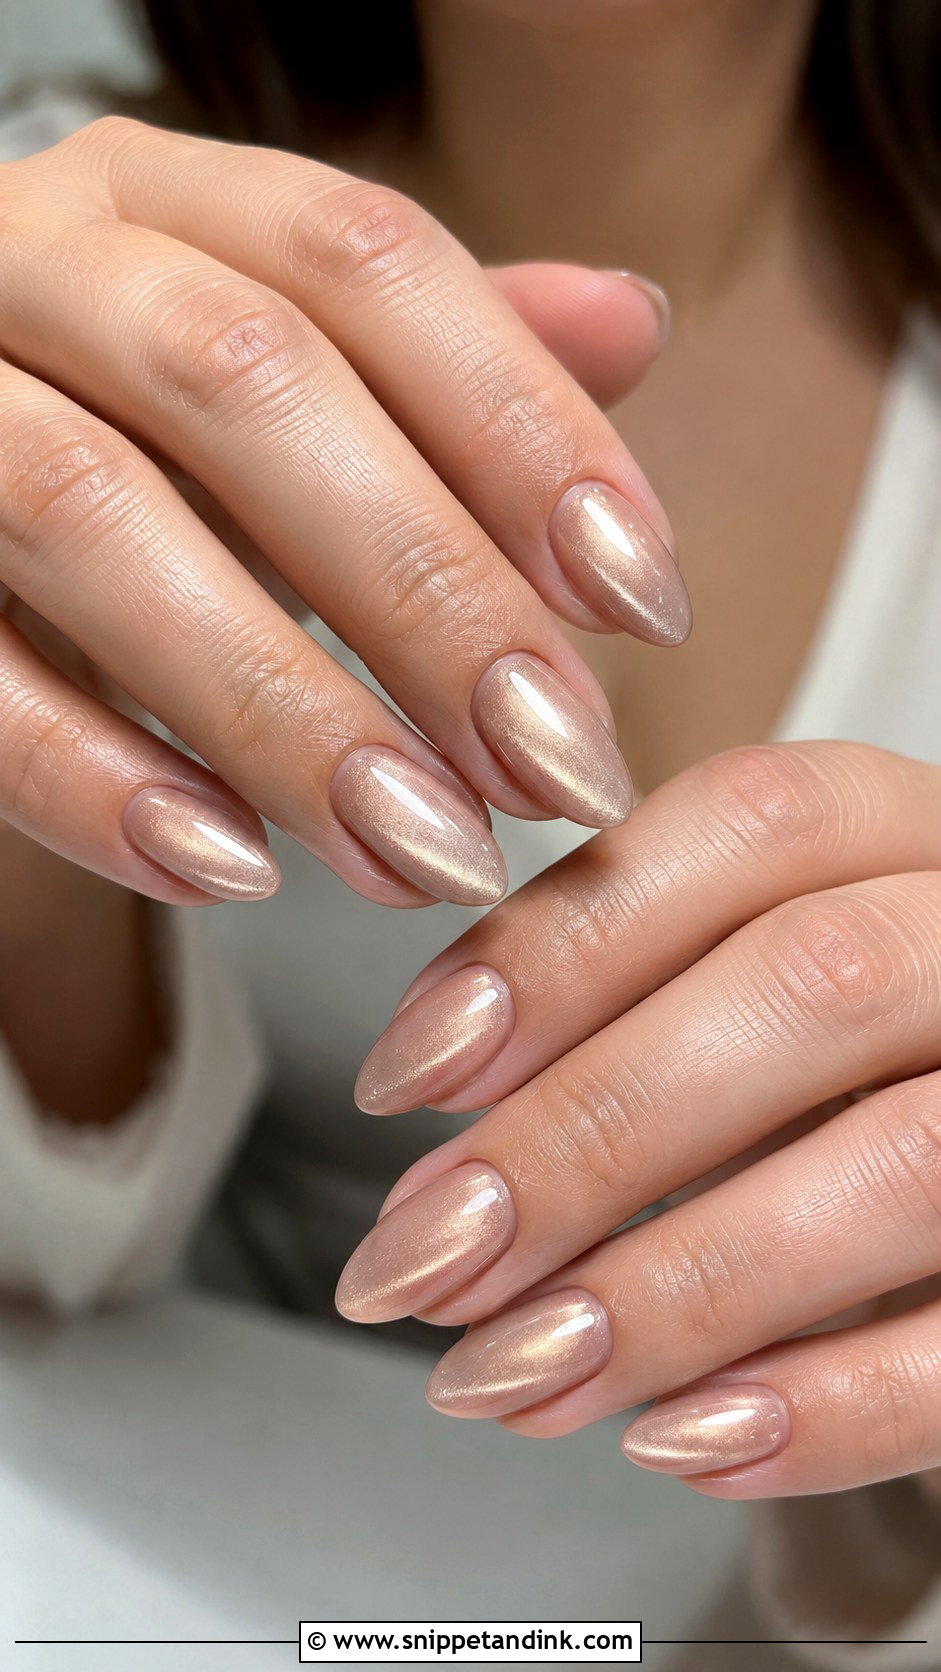
Cat eye polish contains tiny metallic particles, and I hold a magnet over each nail before curing to pull them into a glowing line that shifts like silk as your hand moves. For weddings, the prettiest shades are champagne, pearl, nude, blush or soft silver. You can wear it on every nail or as an accent beside a sheer nude. Almond shapes stretch the reflective line nicely. One thing to know: the effect depends on light, so it looks strongest in sunlight and candlelight and quieter under flat indoor lights.
19. Bow Wedding Nails
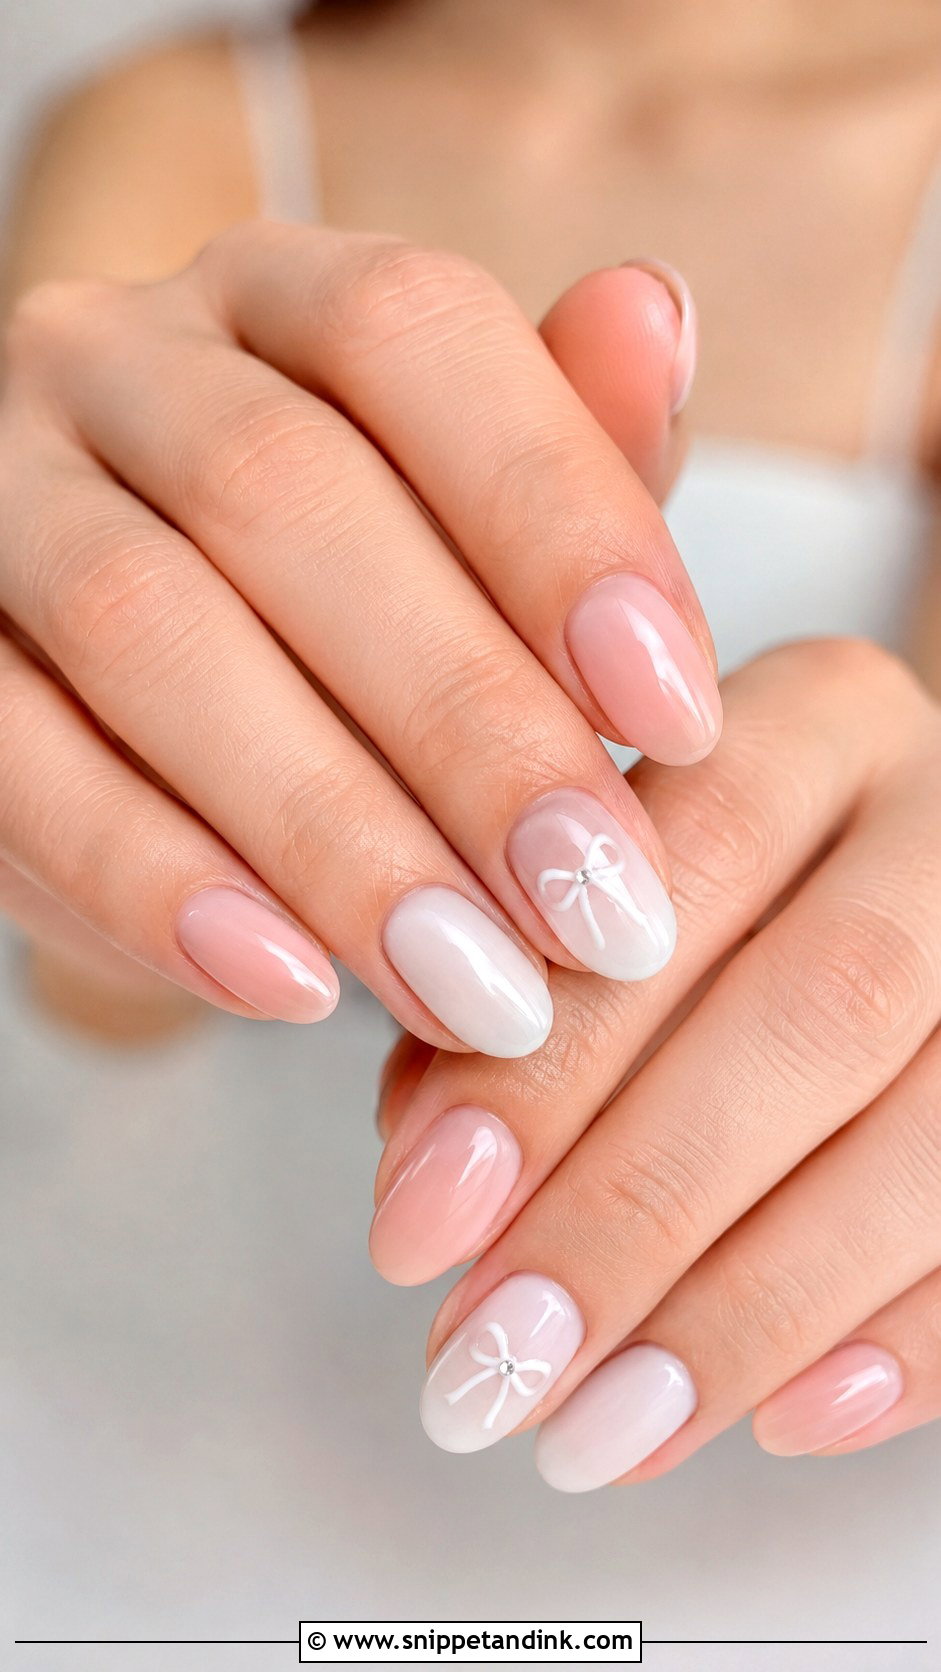
Bows can be painted in thin white lines, applied as tiny 3D gel accents or set as small metal charms. Painted bows sit flat and never snag; 3D charms look more striking but catch on fabric and hair, so I’d keep those to one nail and seal them well. Use them on one or two fingers rather than all ten so they stay refined. A sheer pink, nude or milky base keeps the set clean. They suit satin dresses, ribbon details and ballet-style shoes. Almond and oval shapes make the bows look graceful.
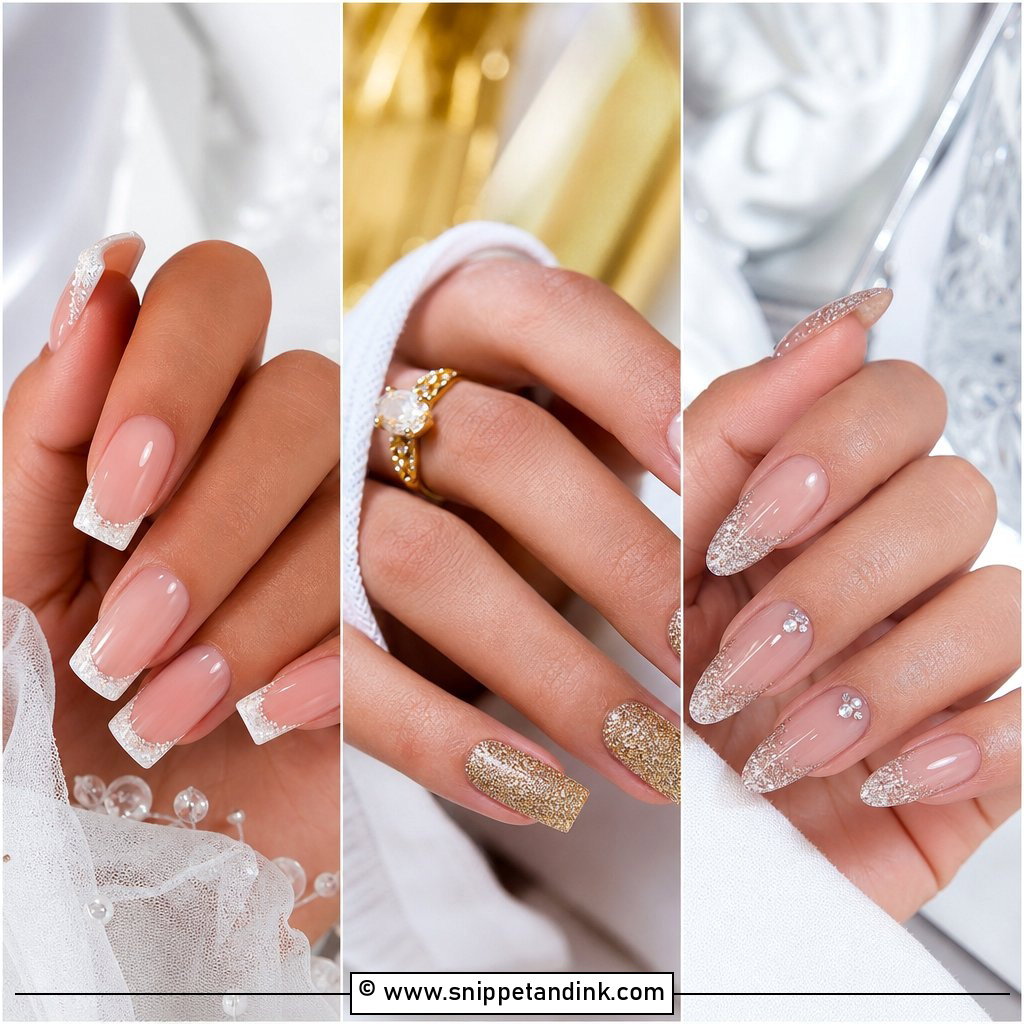
20. Champagne Shimmer Wedding Nails
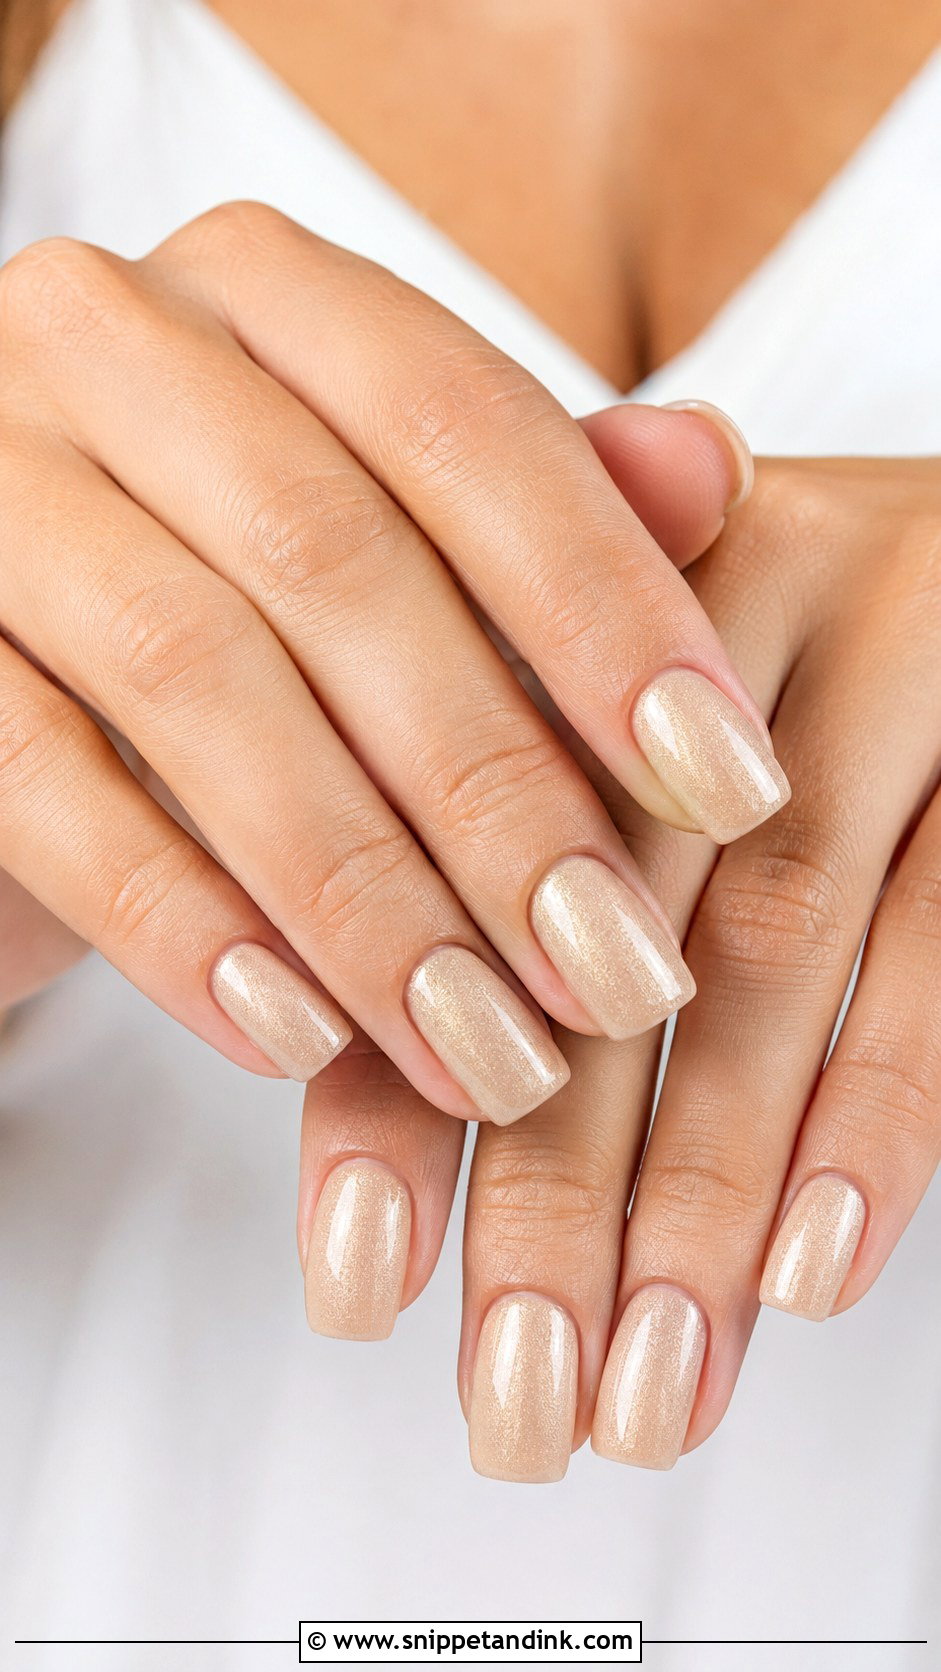
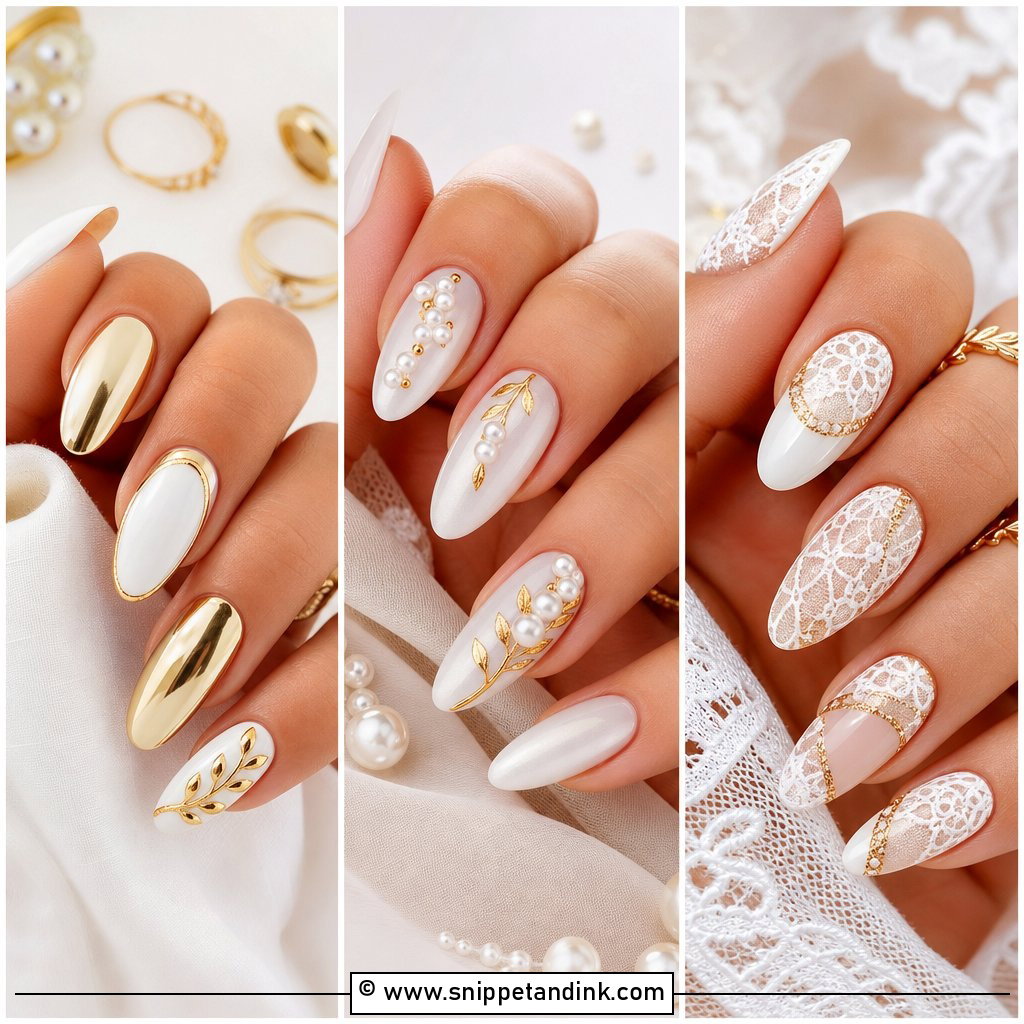
Champagne shimmer sits between nude, gold and soft beige, so it glows warmly in daylight and under reception lighting without looking bright. It flatters warm and neutral skin tones most; on cool skin, I’ll mix in a cooler pearl shimmer so it doesn’t turn yellow. A sheer wash looks subtle, layered shimmer gives more sparkle. Almond, oval or squoval suit it. It’s also the manicure I most often suggest for mothers of the bride and guests, because it looks dressy and coordinates with almost any outfit.
What a Ring Shot Shows That a Mirror Hides
Photographers shoot rings with macro lenses that make your nail look as big as a phone screen. Under that lens, small things become obvious, and they’re mostly fixable during the appointment.
- Gel touching the skin. When product floods onto the cuticle, it shows as a shiny ridge and lifts within days. A clean gap of skin around each nail looks far better close up.
- Dry cuticles. They look white and ragged in macro shots. Daily oil in the weeks before matters more than any design.
- Uneven smile lines. On French styles, compare your hands side by side before leaving the salon. Fixing it then takes minutes.
- Color against the ring metal. Very pale white can make yellow gold look brassy, while champagne and warm nudes flatter it. Cooler pinks sit well beside platinum.
A small kit for the day
Give your maid of honor a fine nail file, a tiny bottle of nail glue, cuticle oil and a clear glossy polish. A split edge can be filed and glued in two minutes, and a coat of clear brings back shine on dulled chrome for the evening photos. Wear gloves for any last-minute decorating, because hot glue guns and floral wire are behind most wedding-week breaks.
A Soft Base and One Detail Usually Wins
The wedding sets that look best in photos years later are rarely the busiest ones. A soft base, a clean shape and one considered detail, whether that’s chrome, pearls, crystals, lace or a fine French tip, almost always outlasts a set that tries every trend at once. Before your appointment, save a few clear photos and think about your dress fabric, the metal of your jewelry, your bouquet colors and how much you use your hands. Tell your nail artist all of that, and the manicure will look right in every close-up.
You'll Like These Ideas:


Leave a Reply