
Extensions are how most brides get the length and shape they want by a fixed date, because natural nails rarely cooperate on a schedule. The sets below are complete bridal manicures rather than single accents, so you can see how length, shape and finish work together on a whole hand. What I’m putting on brides right now leans sheer and personal: milky finishes, modern French tips, pearl accents, chrome veils, small florals and fine shimmer. Almond, coffin, square, oval or stiletto, the right set should sit comfortably with your dress, ring and skin tone instead of competing with them.
Soft Gel Tips, Acrylic or Sculpted Builder Under Your Bridal Set
Every look below can be built a few different ways, and the method matters more for a wedding than the colour does. Here is how I explain the options when a bride sits down.
- Soft gel tips are pre-shaped full-cover tips bonded with gel and cured under a lamp. They’re quick, light and come off with a soak, so they’re usually what I suggest for a first-timer.
- Acrylic is liquid and powder sculpted on a form or over a tip. It is very strong and suits long coffin or stiletto shapes, but it feels heavier and needs careful removal.
- Sculpted builder gel is shaped on a form without a tip. It gives the thinnest, most natural-looking extension, though it takes longer in the chair.
- Press-ons are fine for guests or a backup set, but on a bride who will be hugged and photographed for hours, I don’t trust adhesive tabs to stay put.
If your natural nails are thin or peeling, tell your tech before the appointment. Strong extensions on weak nails can pull at the nail plate if one catches, and I’d rather plan a shorter length than risk that the night before.
1. Milky White Wedding Nail Extensions
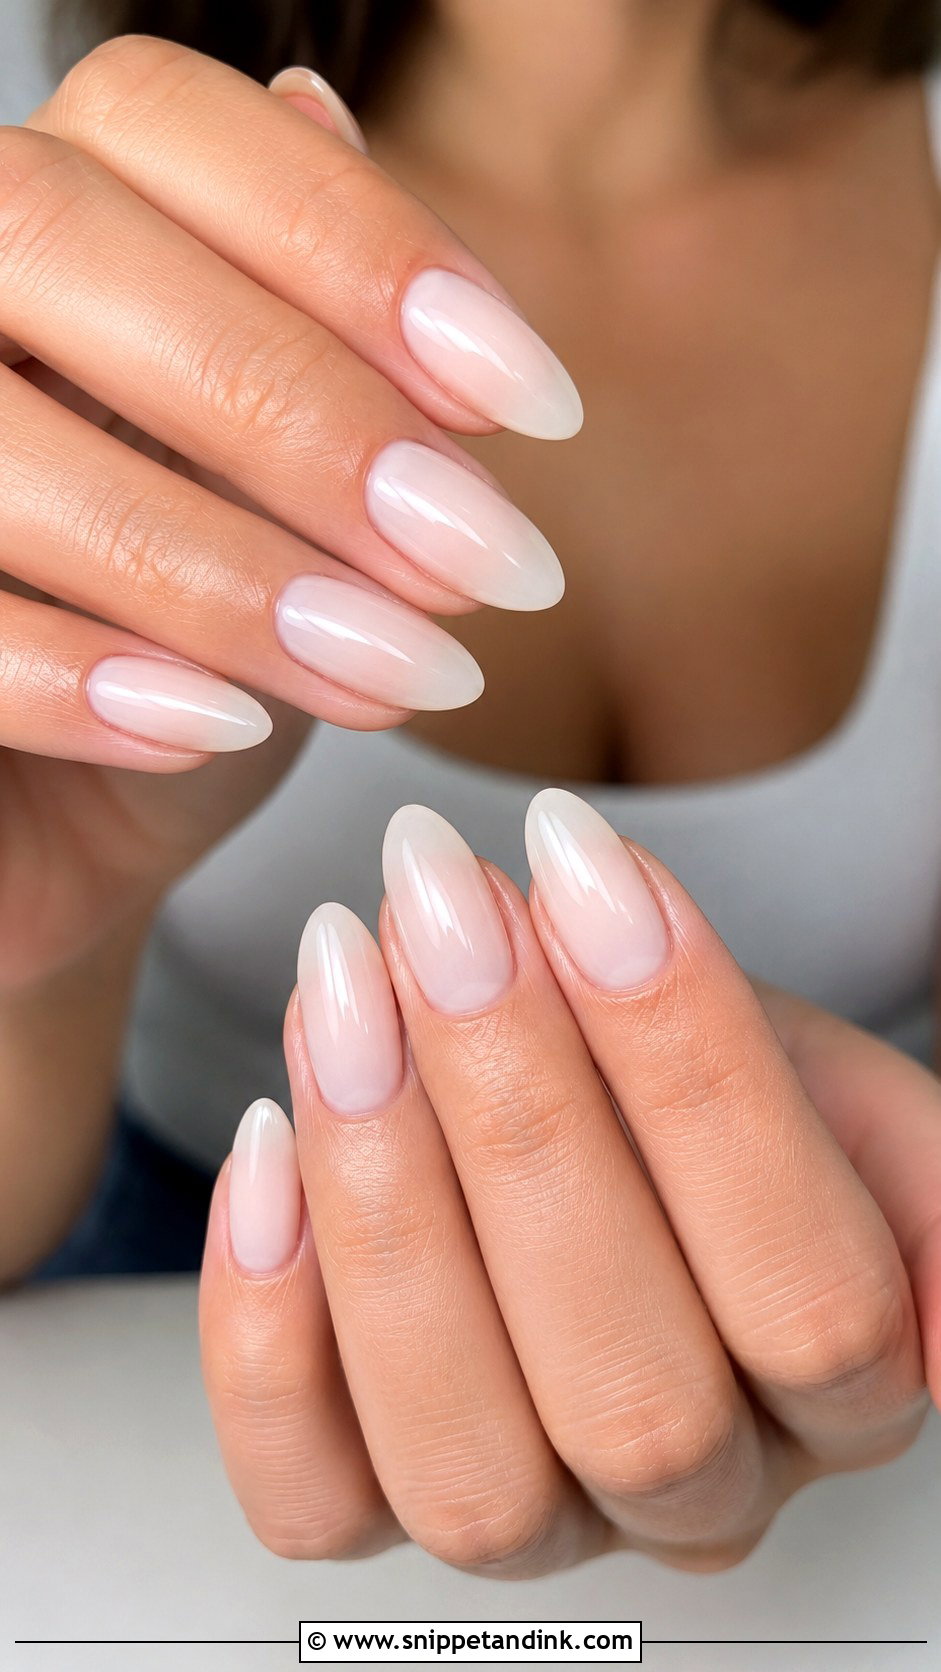
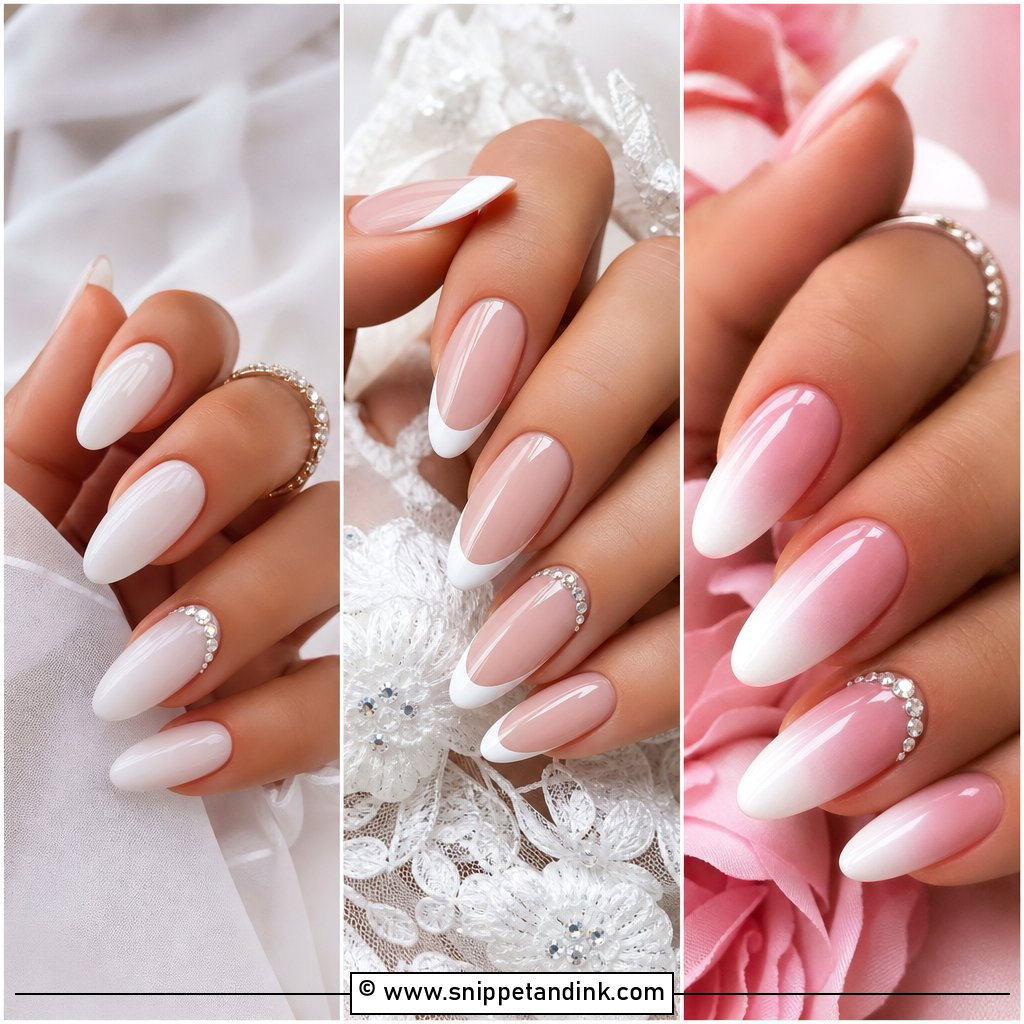
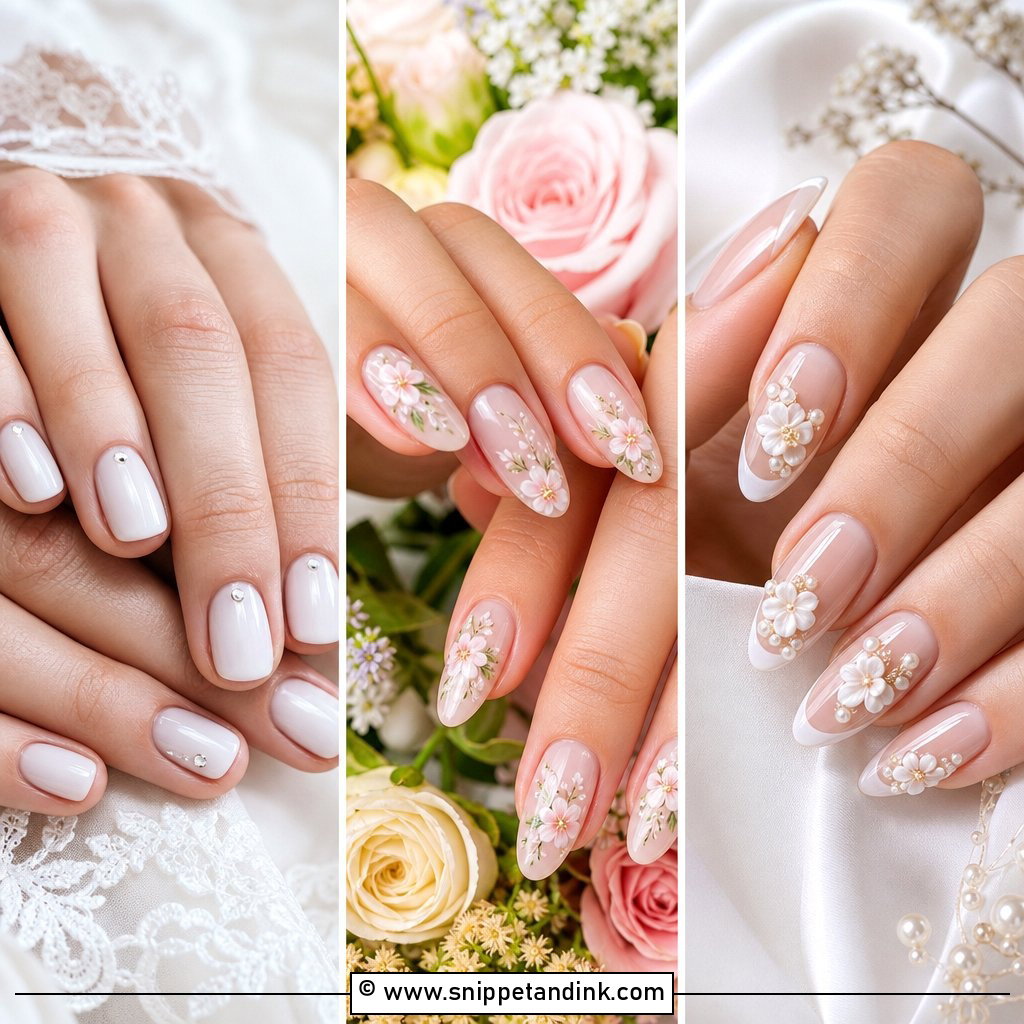
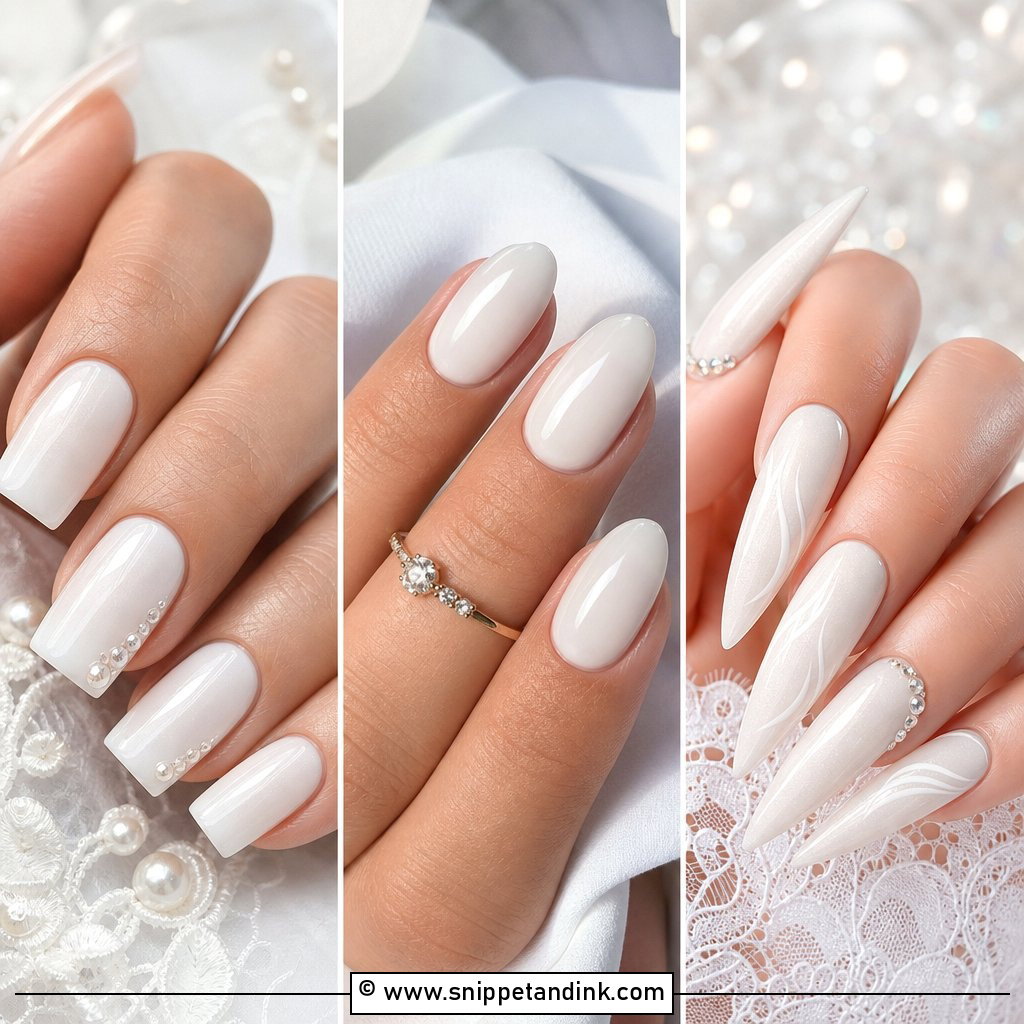
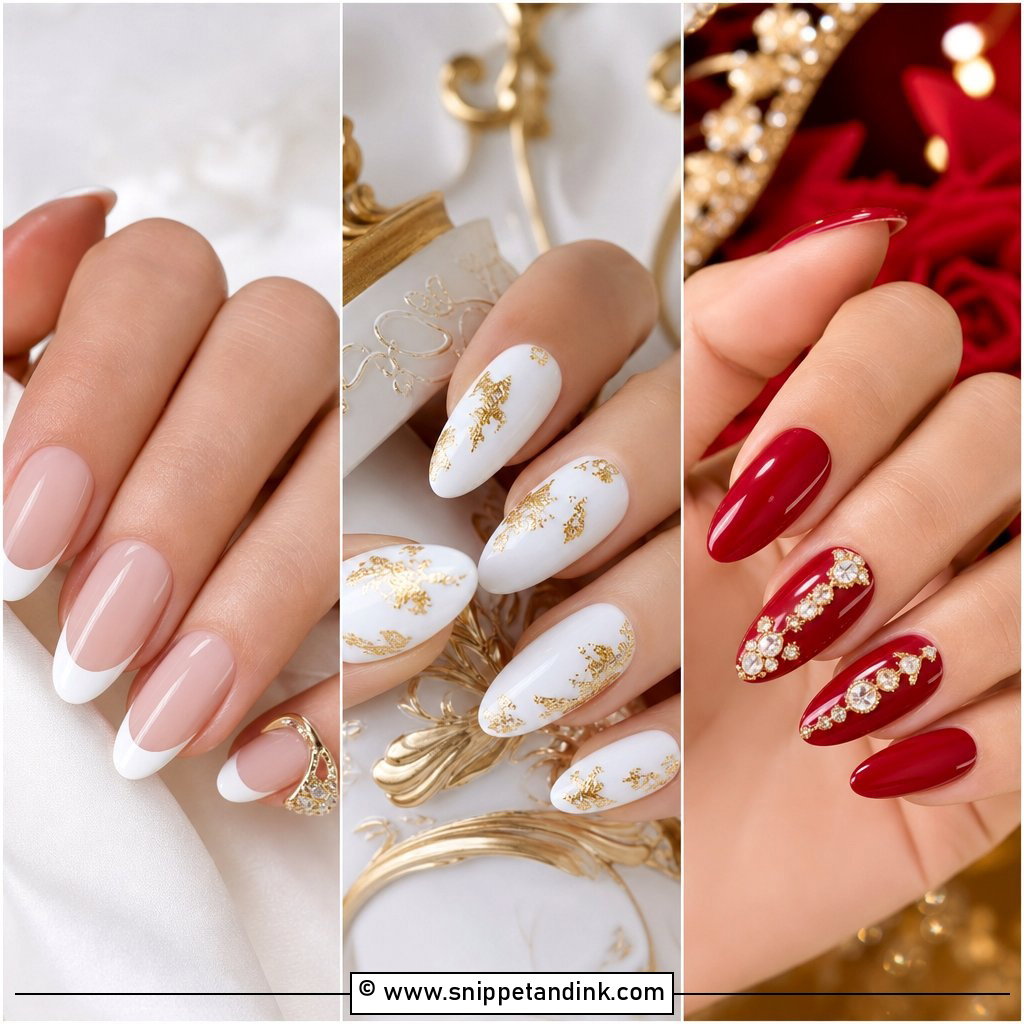
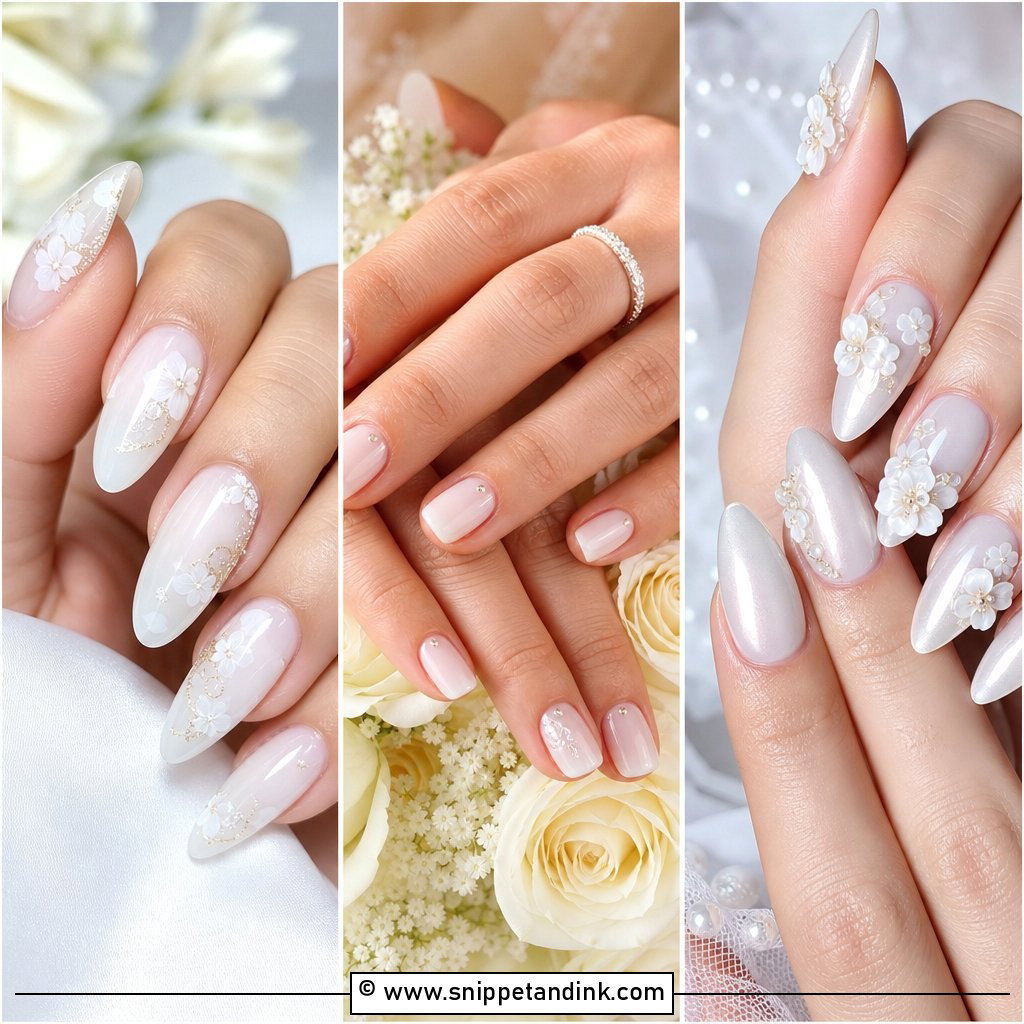
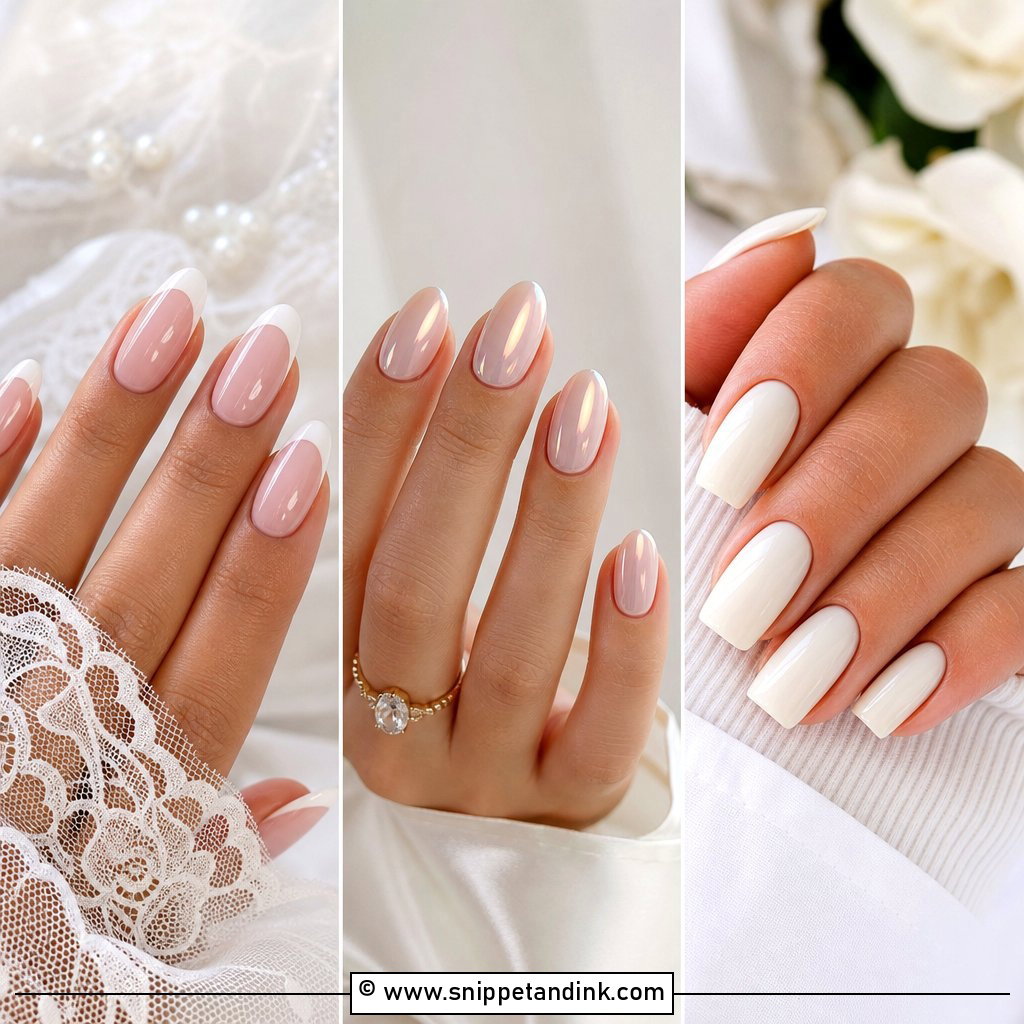
A milky white set is the one I’m asked for most, and the hardest to get exactly right. The finish should look cloudy and glossy, never chalky, which means a sheer white or cream builder gel layered thinly over medium almond, oval or soft square tips. Too much product and the nail turns flat and opaque in photos. I build it in two or three thin passes so the free edge still shows a hint of translucency. It sits naturally beside satin, lace and pearls, and a light pearl chrome or one tiny crystal at the cuticle adds depth if you want it.
2. French Tip Wedding Nail Extensions
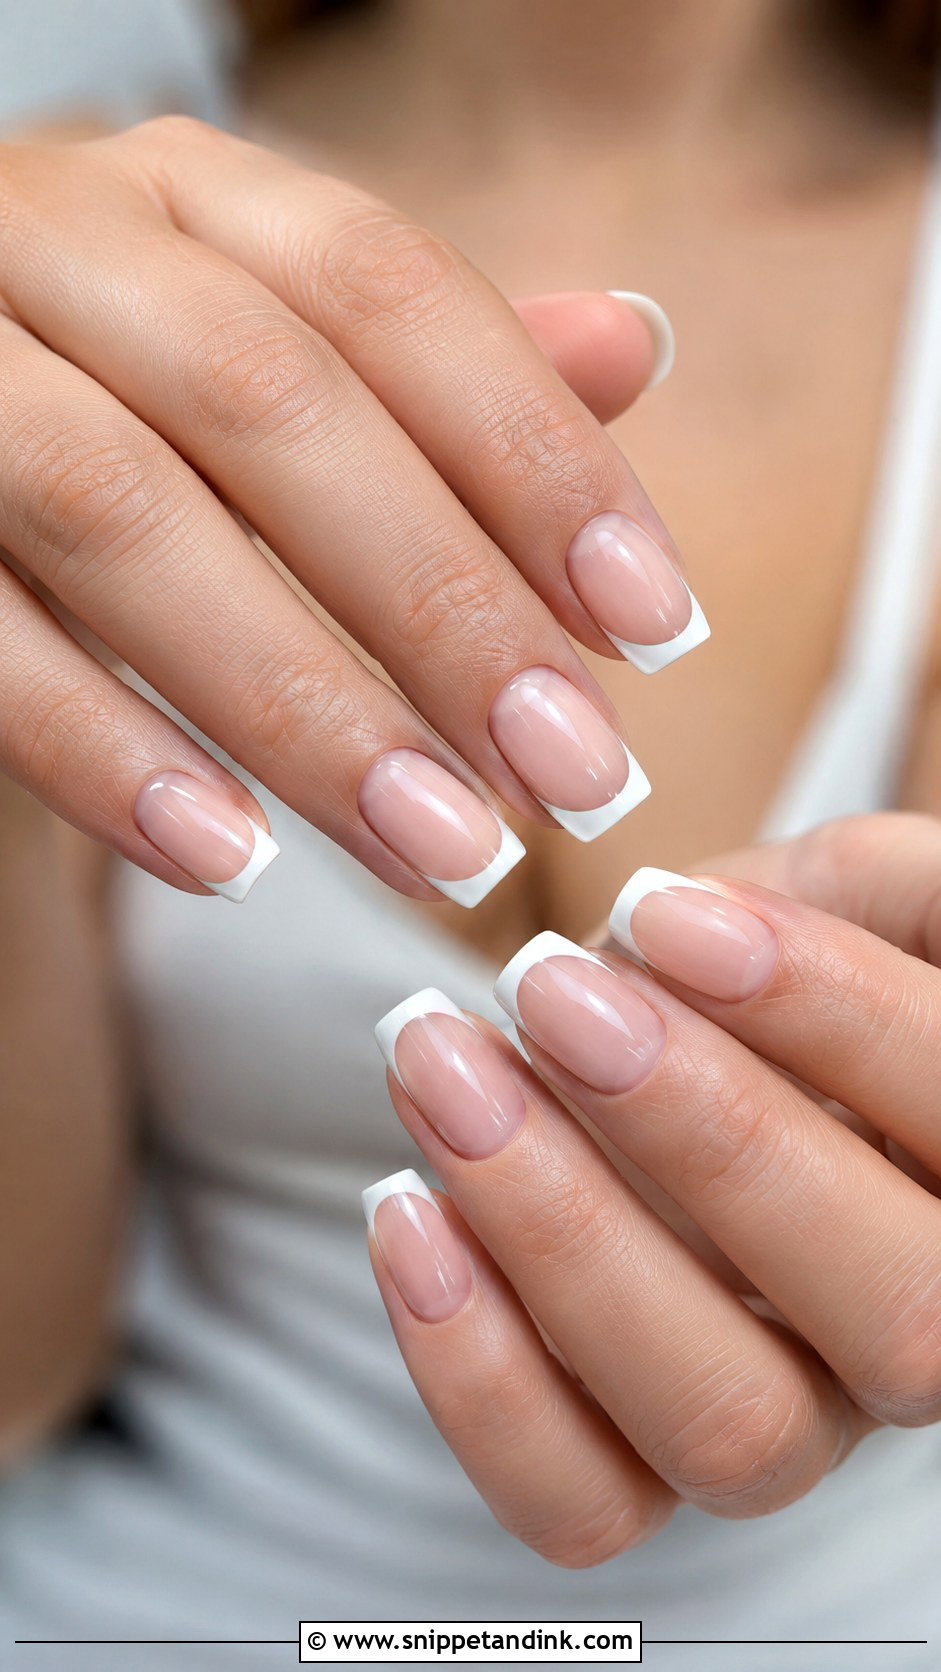
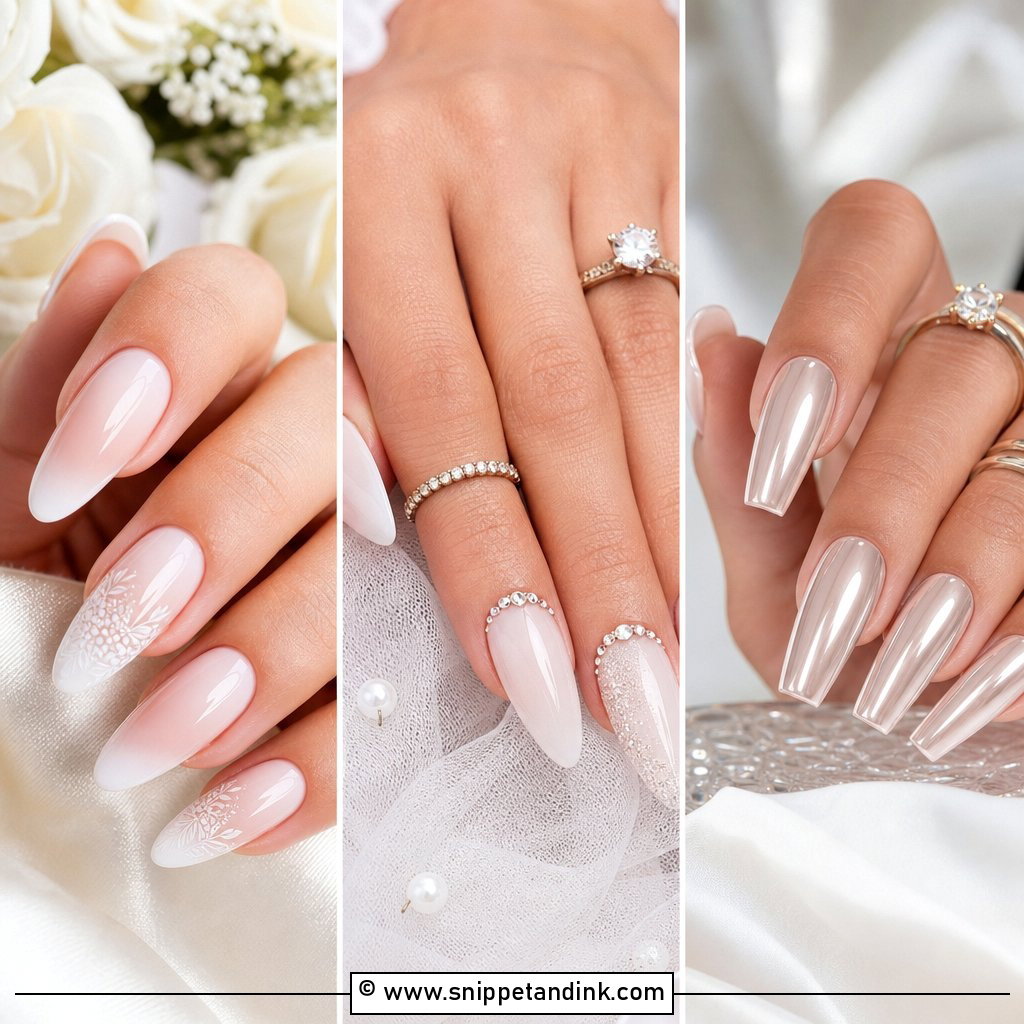
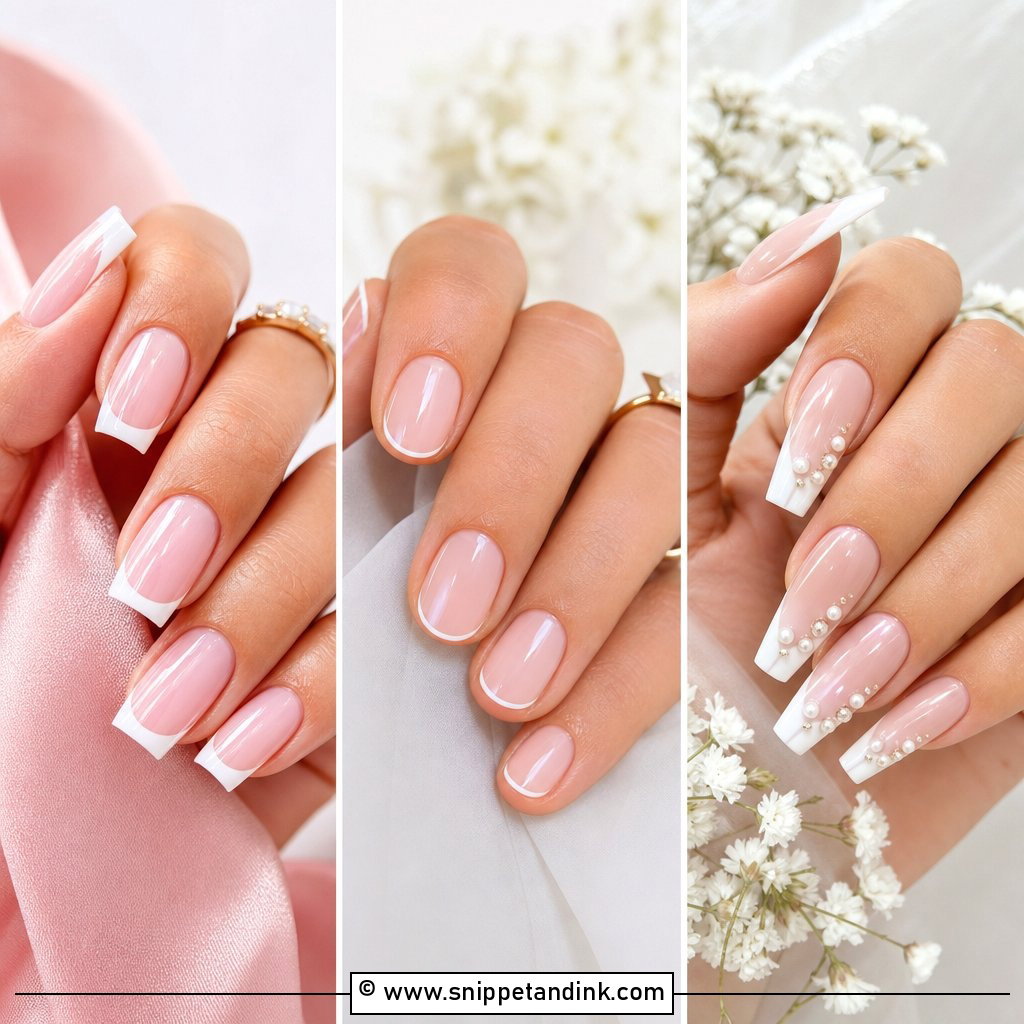
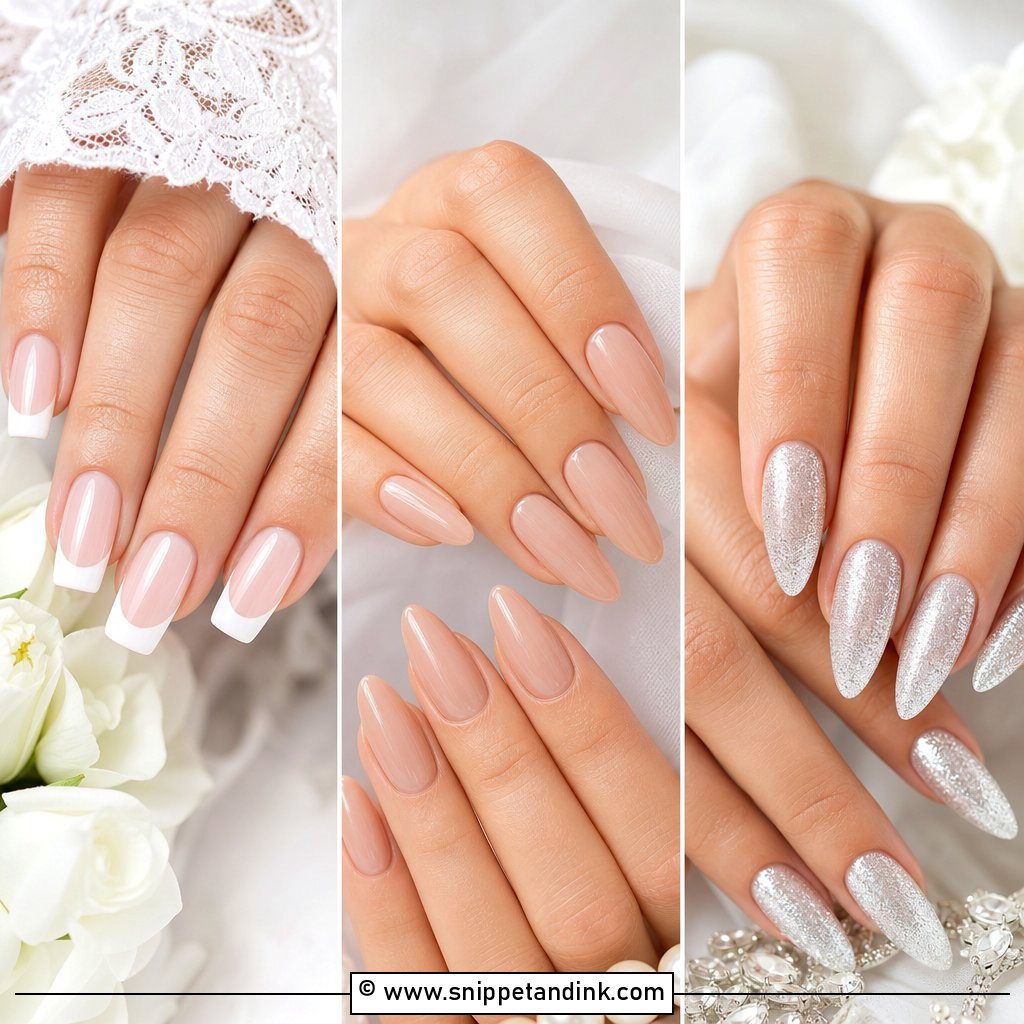
French tips lengthen the fingers and suit almost every dress, which is why they never really leave. On extensions, the tip width is everything. A smile line that looks right on a short nail looks heavy on a long one, so I keep the white slim and the curve matched on all ten fingers before I seal anything. A sheer pink, nude or beige base under off-white tips is softer than bright white. Bridesmaids and guests can wear the same set without it looking too formal.
3. Pearl Chrome Wedding Nail Extensions
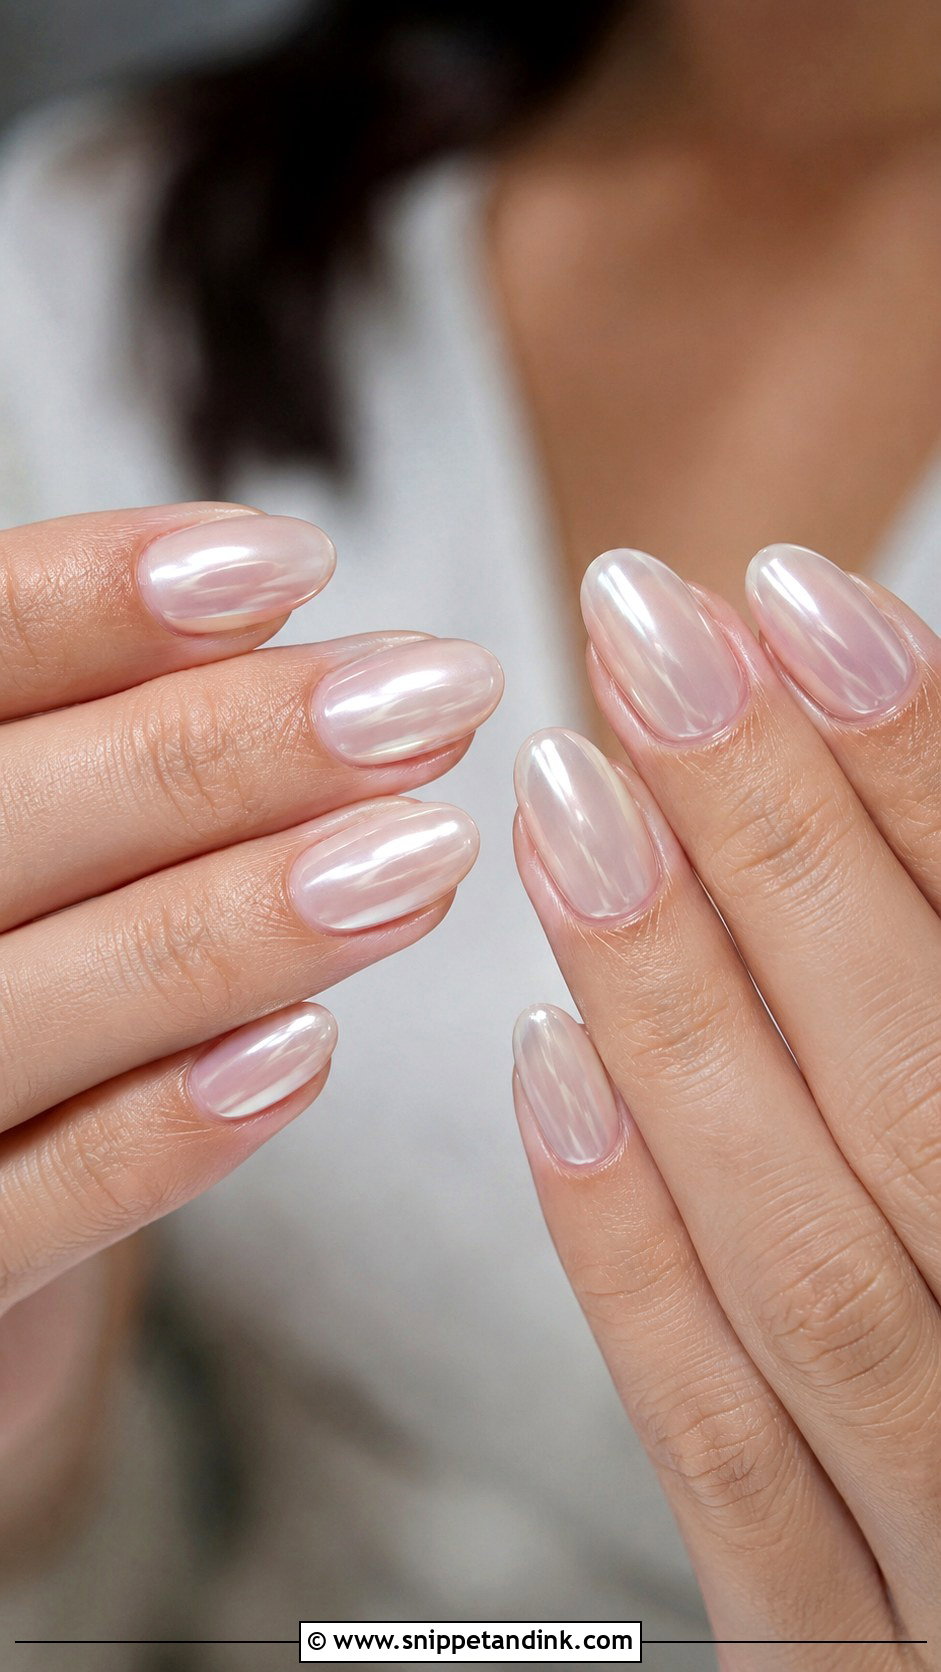
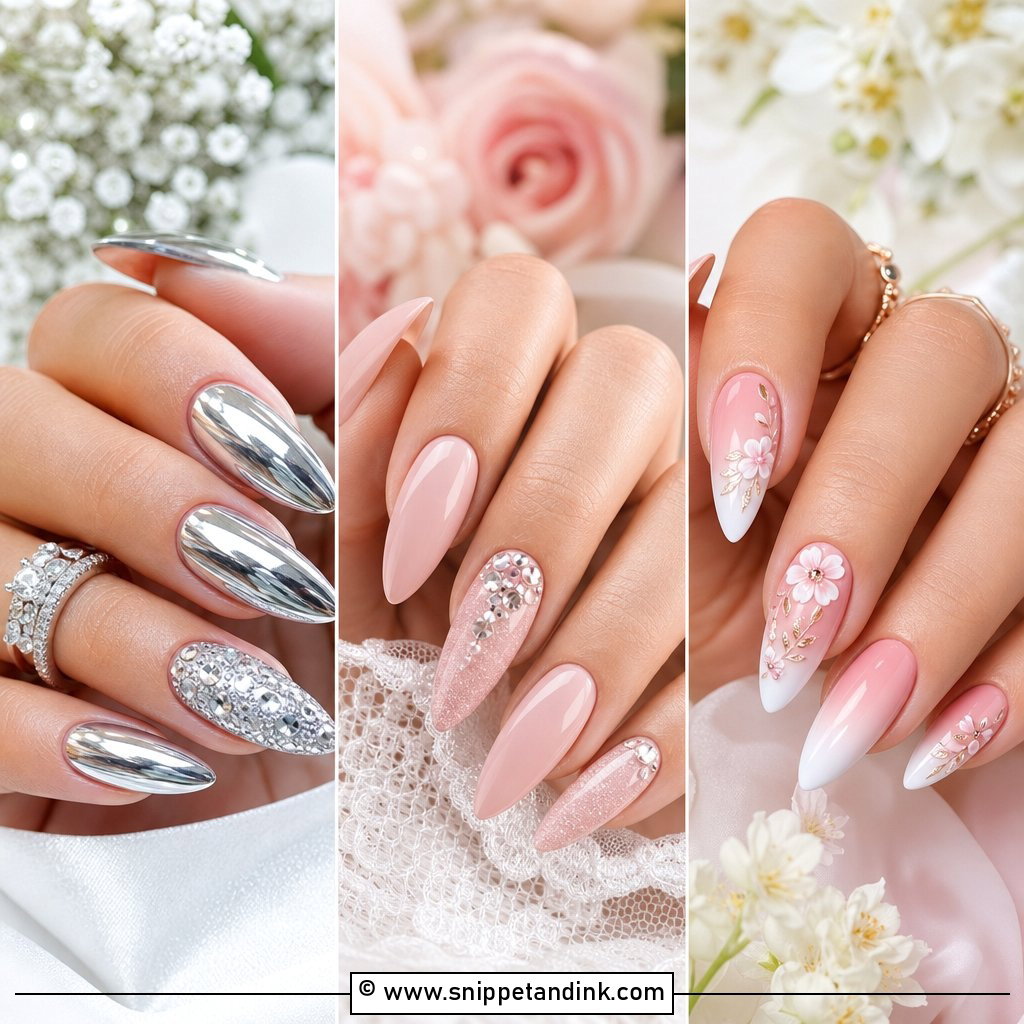
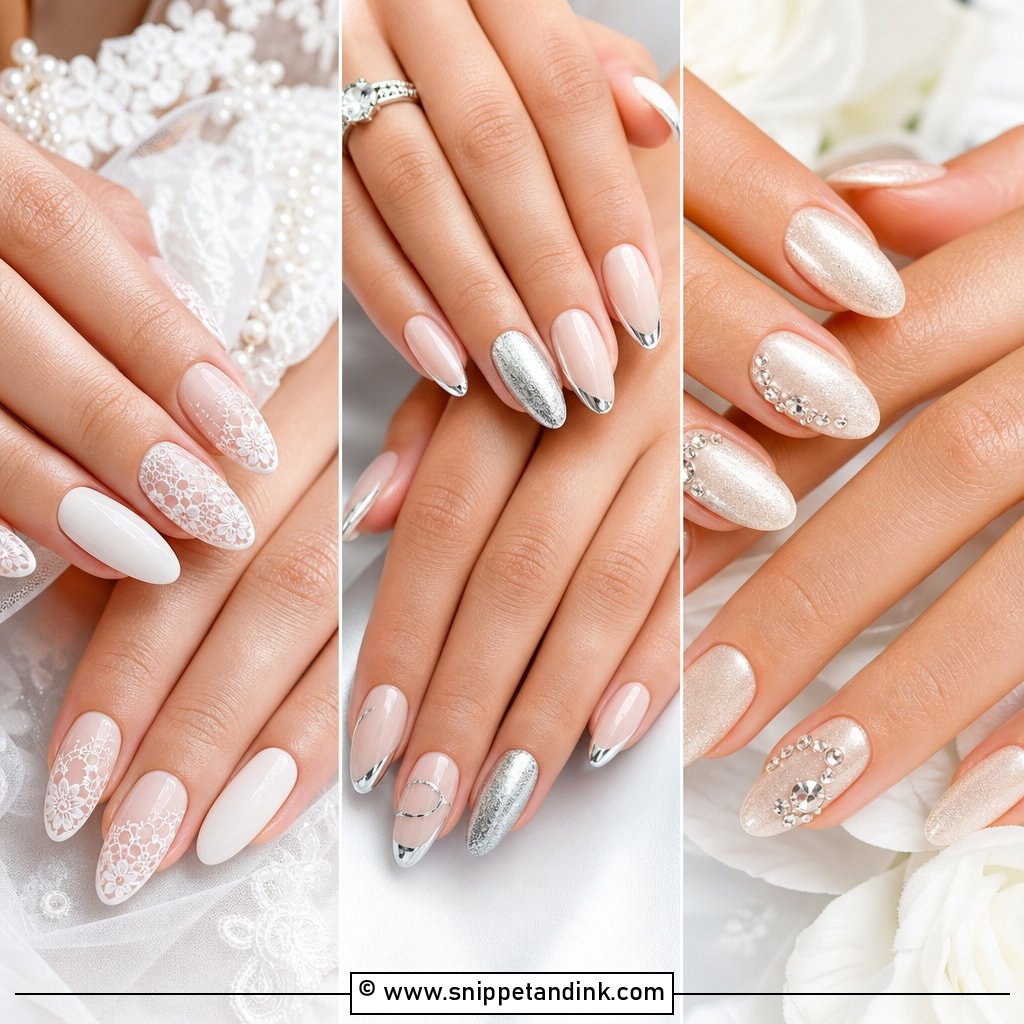
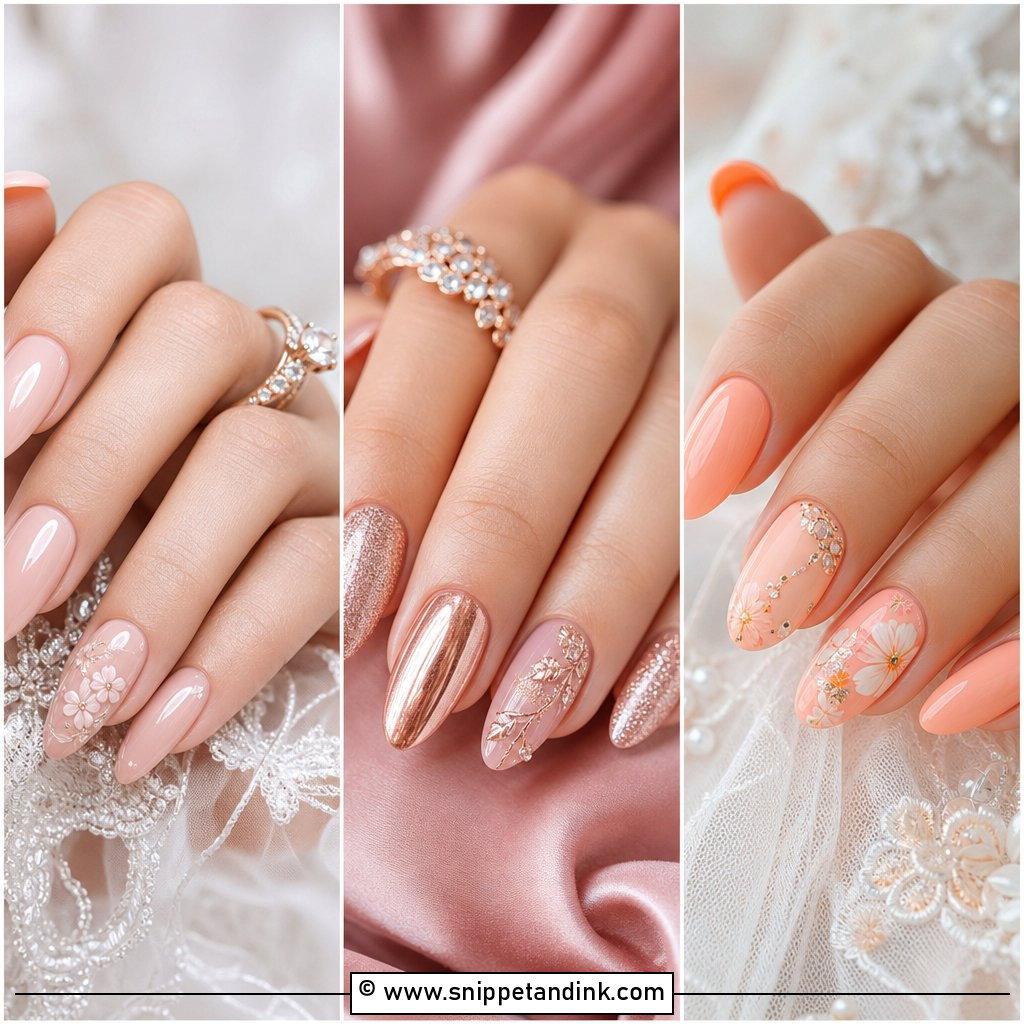
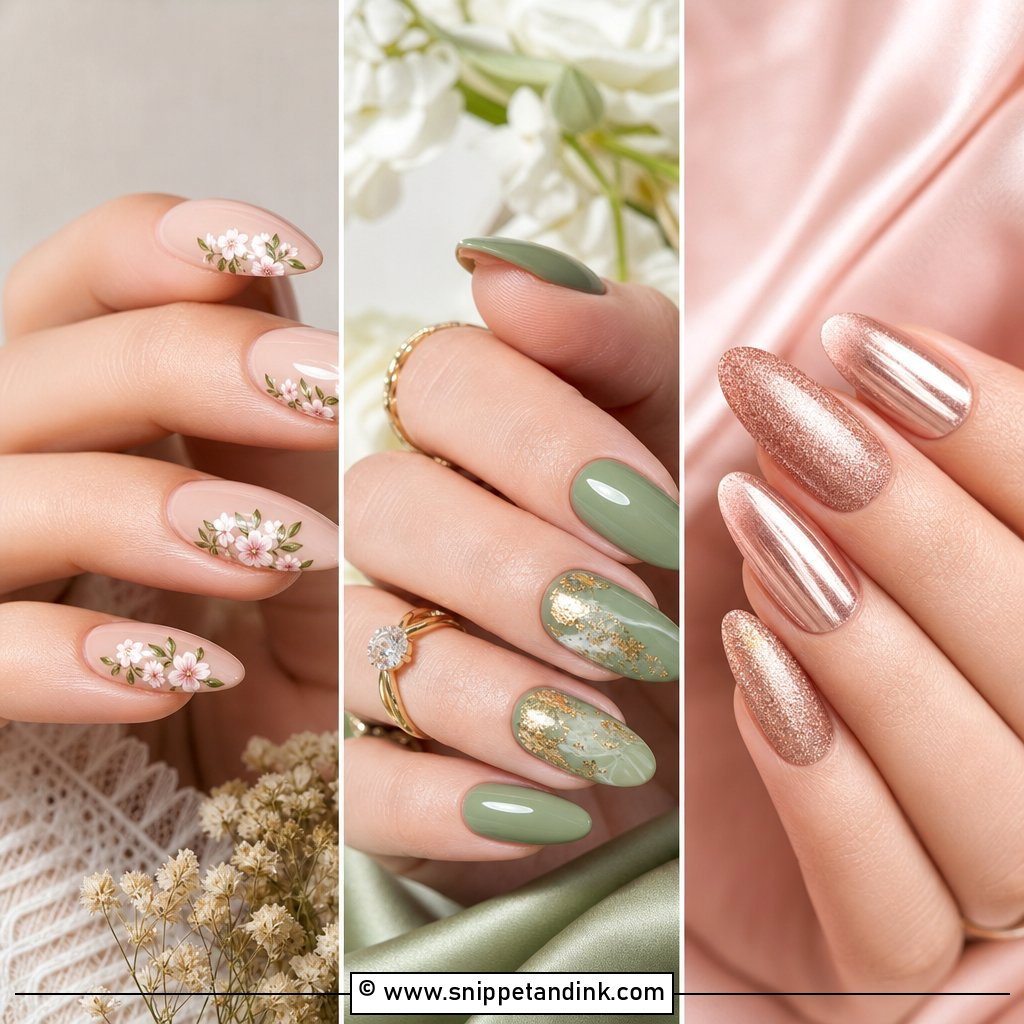
Pearl chrome gives a glow rather than a mirror. I rub a fine pearl powder over a sheer nude, blush, ivory or milky base, and the trick is a light hand: one pass reads as silk, three passes read as metal. On almond or oval tips it looks smooth and graceful, and it suits dresses with pearl buttons, beading or a subtle shimmer. Ask for a veil, not full chrome. It catches window light during ring shots and bouquet photos without flaring under flash.
4. Nude Almond Wedding Nail Extensions
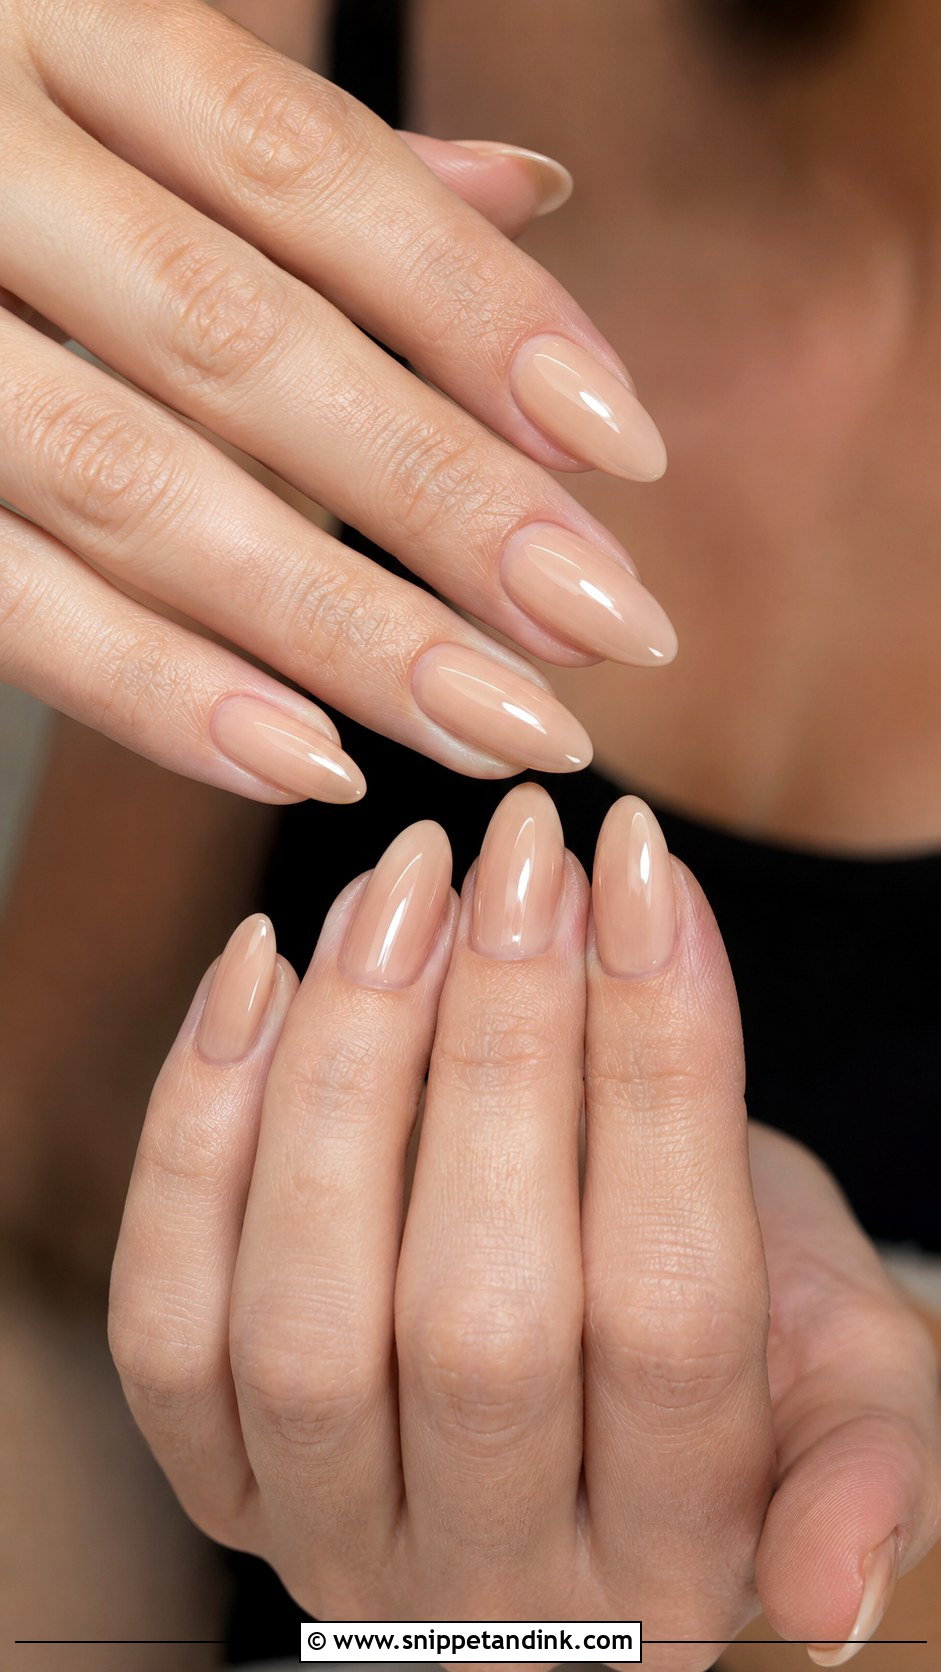
Nude almond wedding nail extensions flatter almost everyone, as long as the nude is matched to your undertone. Rosy beige tends to suit fair skin, peachy nude warm skin, caramel medium skin and cocoa deeper skin. I test the shade on one finger next to your knuckle before committing, because the wrong nude looks like a plaster cast in close-ups. The almond tapers the fingers, and a sheer builder gel adds strength without bulk. Add a micro French tip or a fine gold line if plain feels too plain.
5. Blush Pink Wedding Nail Extensions
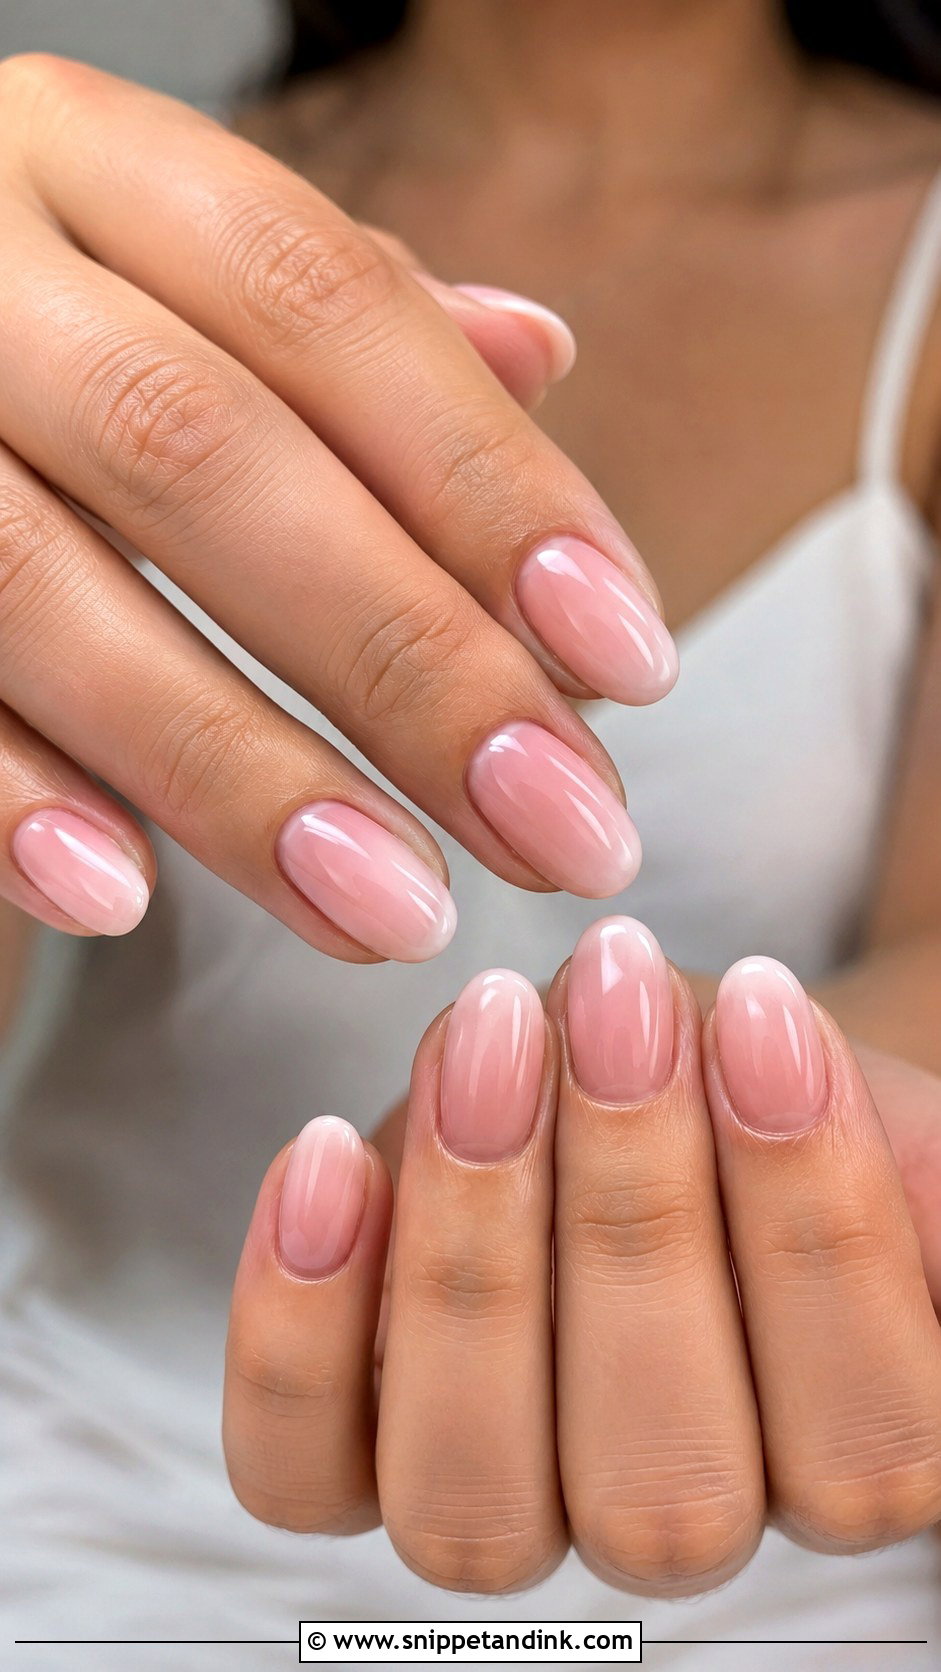
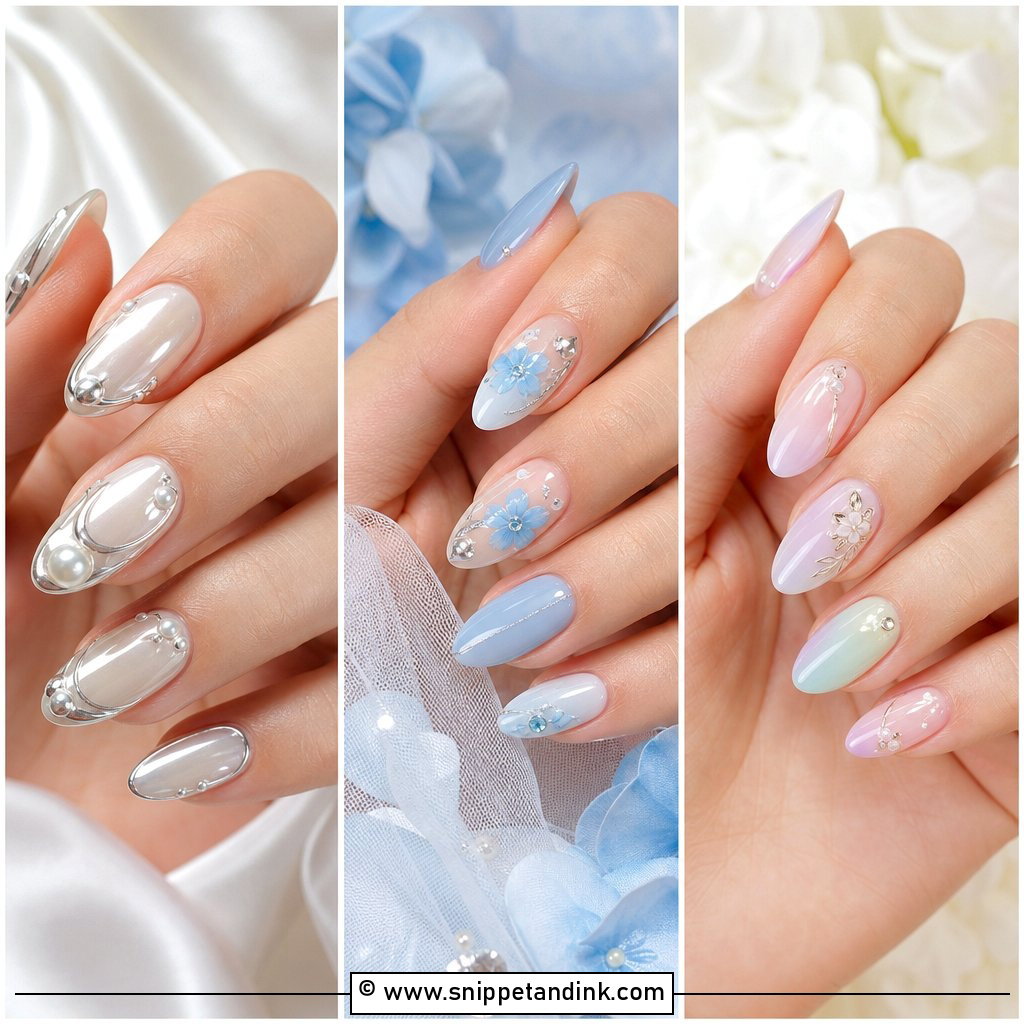
Blush pink is easy to wear with almost any bridal look, provided the pink is the right density. It should be sheer enough to stay bridal but pigmented enough to blur the line where your natural nail meets the extension. That transition is where I spend the most time on this set. Almond, oval and rounded square shapes all suit it, and pearl dots, a shimmer topcoat or a thin white tip add a little interest. Keep the length medium and it feels light for spring and summer weddings.
6. Baby Boomer Wedding Nail Extensions
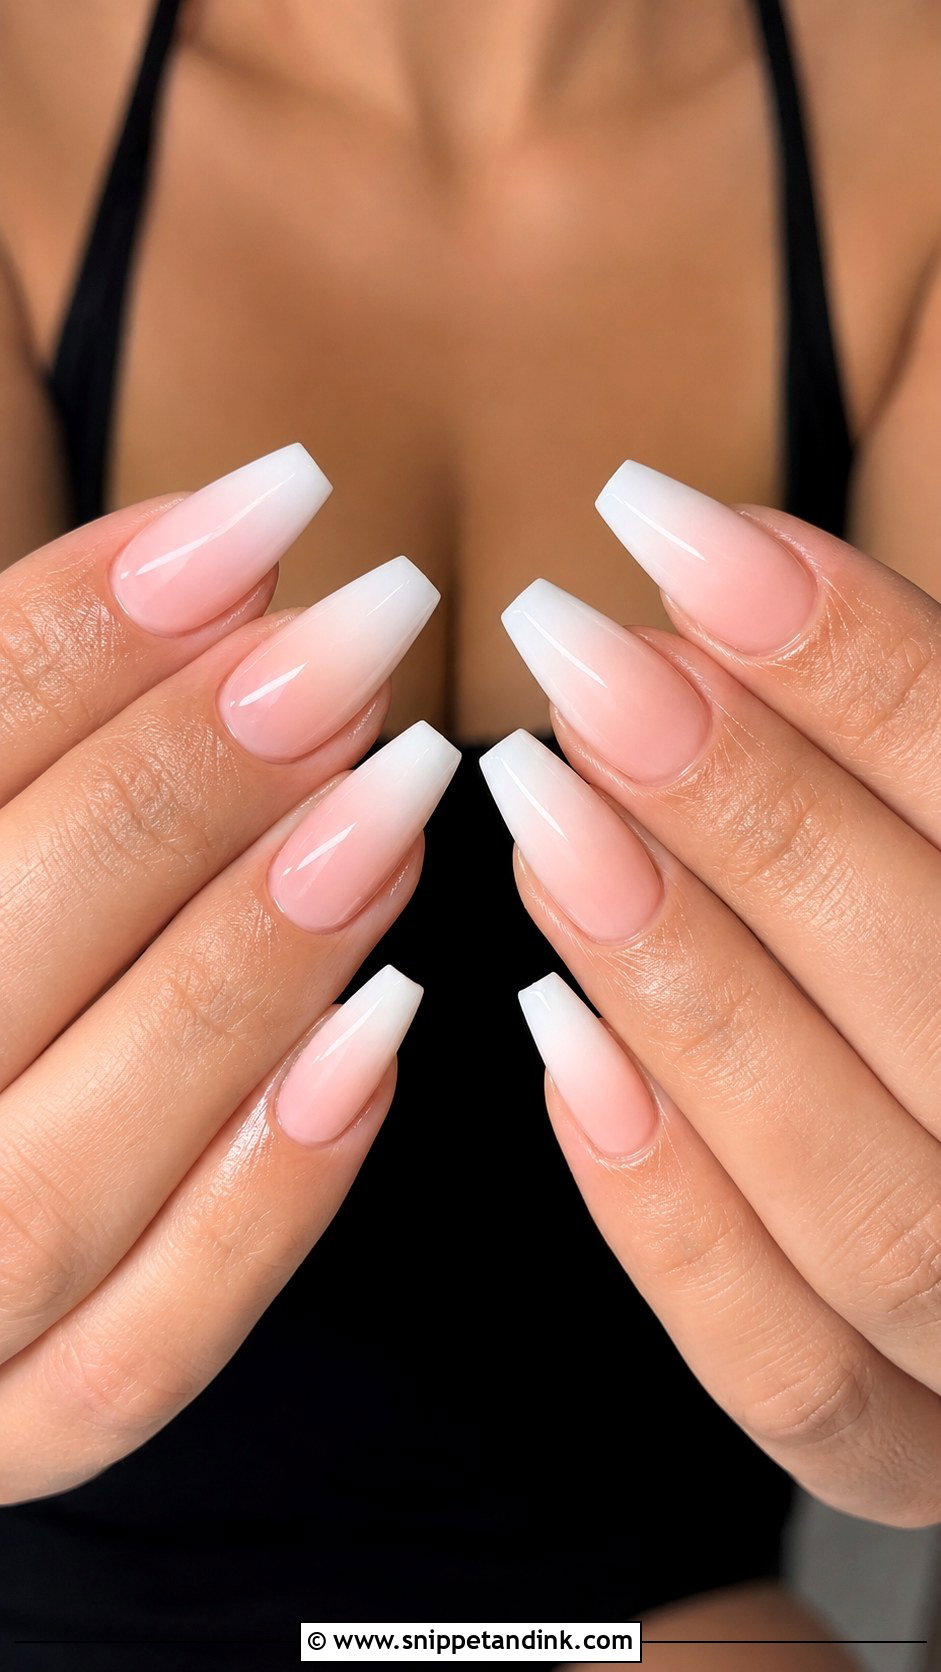
Baby boomer nails, also called French ombre, fade a nude or pink base into a creamy white tip with no hard line. The gradient makes almond, coffin and oval extensions look longer still. The blend is the whole design, so I sponge or airbrush it in thin layers and let each one cure before adding more white. Rush it and you get a visible band halfway up the nail. It’s a softer route to a French look for classic gowns, veils and formal ceremonies, finished with a high-gloss topcoat.
7. Lace Wedding Nail Extensions
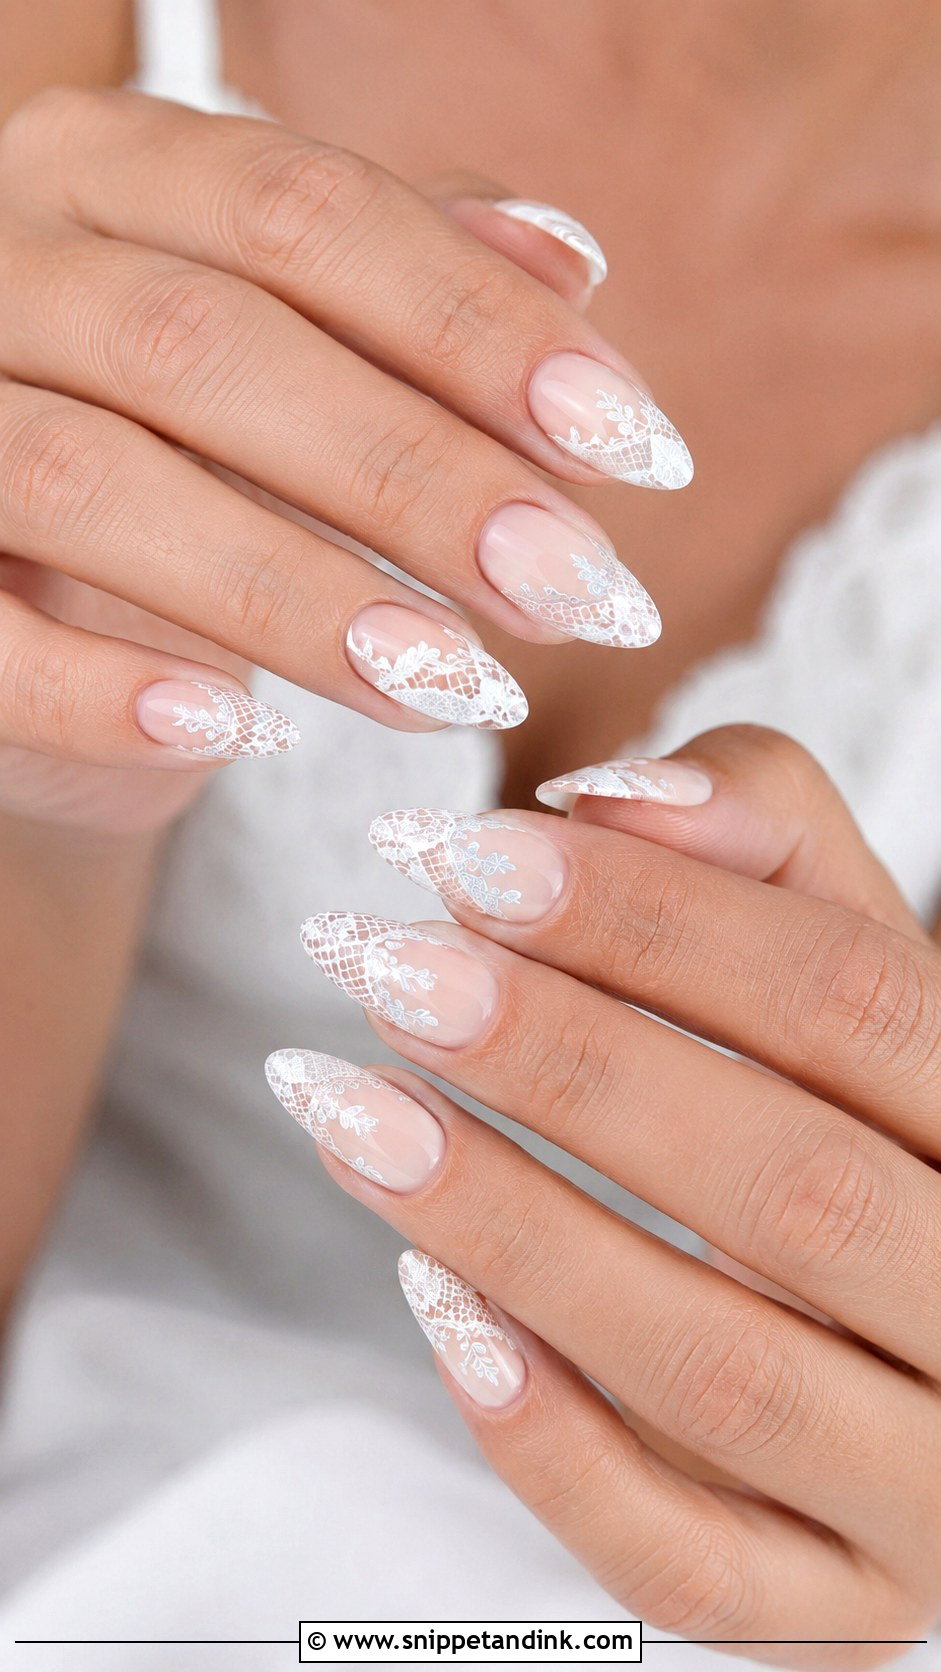
Lace art should echo the texture of a gown or veil, not cover every nail. I lay a sheer nude, blush or milky base and add fine white lace on a few accent nails or very lightly across the set. Almond and oval keep it delicate; coffin pushes it toward drama. Hand-painted lace looks the most real, though stamping works if your tech is skilled with it. Keep the pattern open, with small floral curves and net lines, because dense lace on a long nail starts to look like a sticker.
8. Floral Wedding Nail Extensions
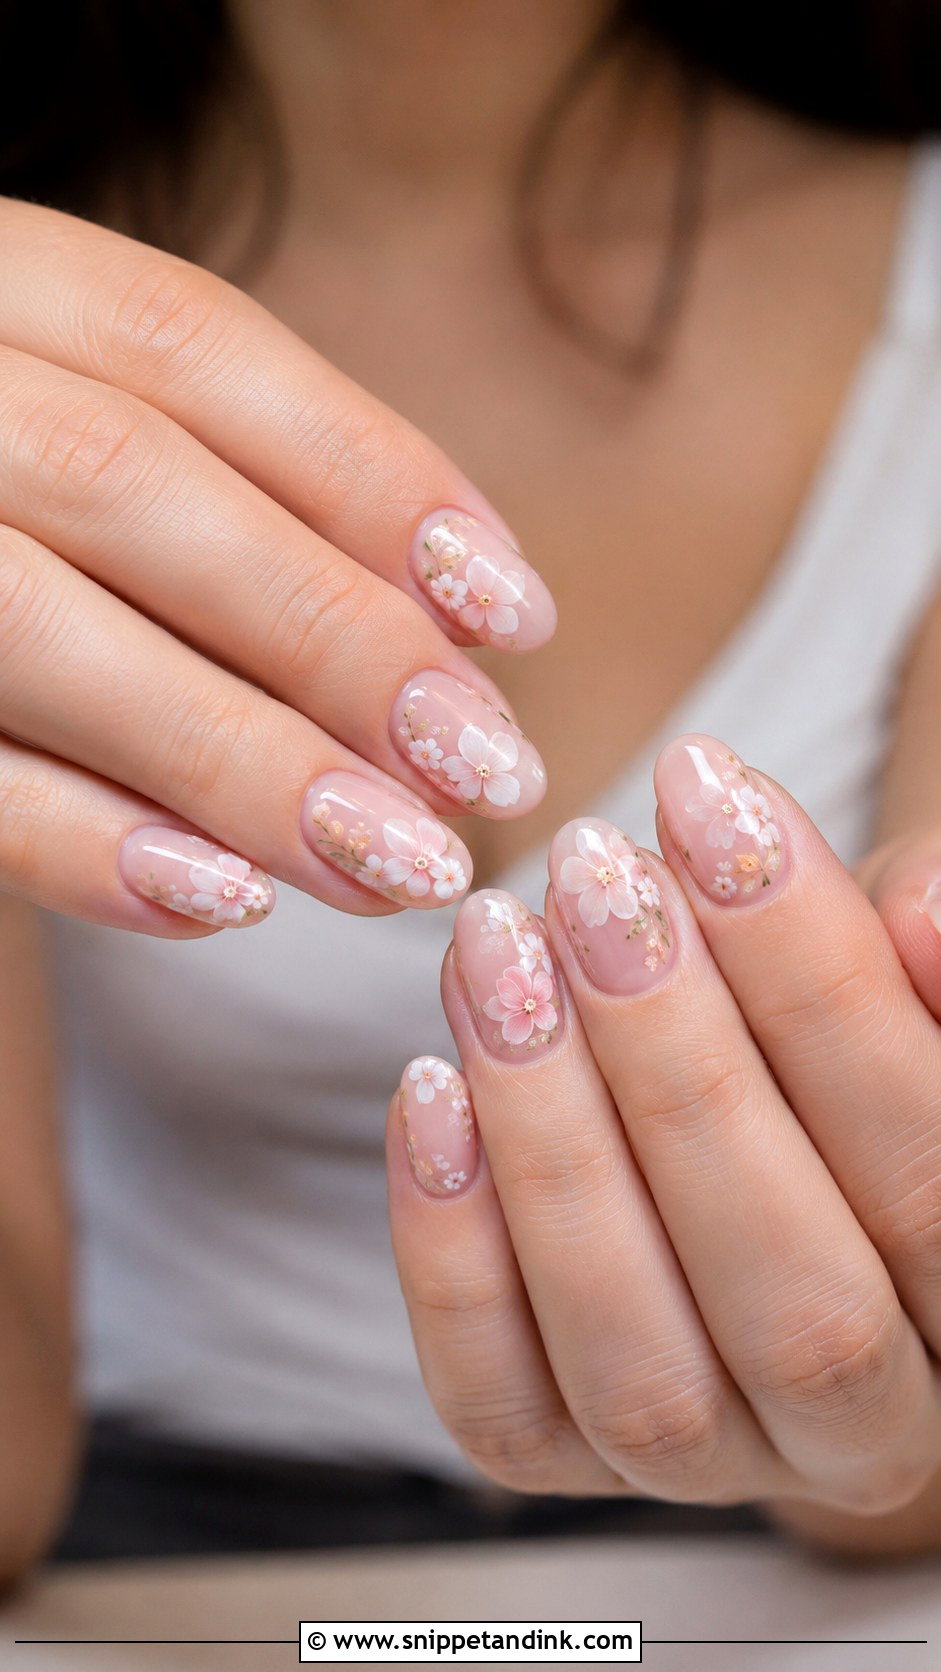
Garden weddings and spring ceremonies are where small florals shine. Start with a sheer nude, pink or milky base, then add tiny white or pastel blooms or a pressed-flower effect on two to four nails. The common mistake is crowding, so I place blooms near the cuticle or along a sidewall and leave the rest of the nail clear. Almond and oval curves suit flowers well. If you match the petal colour to your bouquet, bring a photo or a stem to the appointment; screen colours are rarely accurate.
9. White Chrome Wedding Nail Extensions
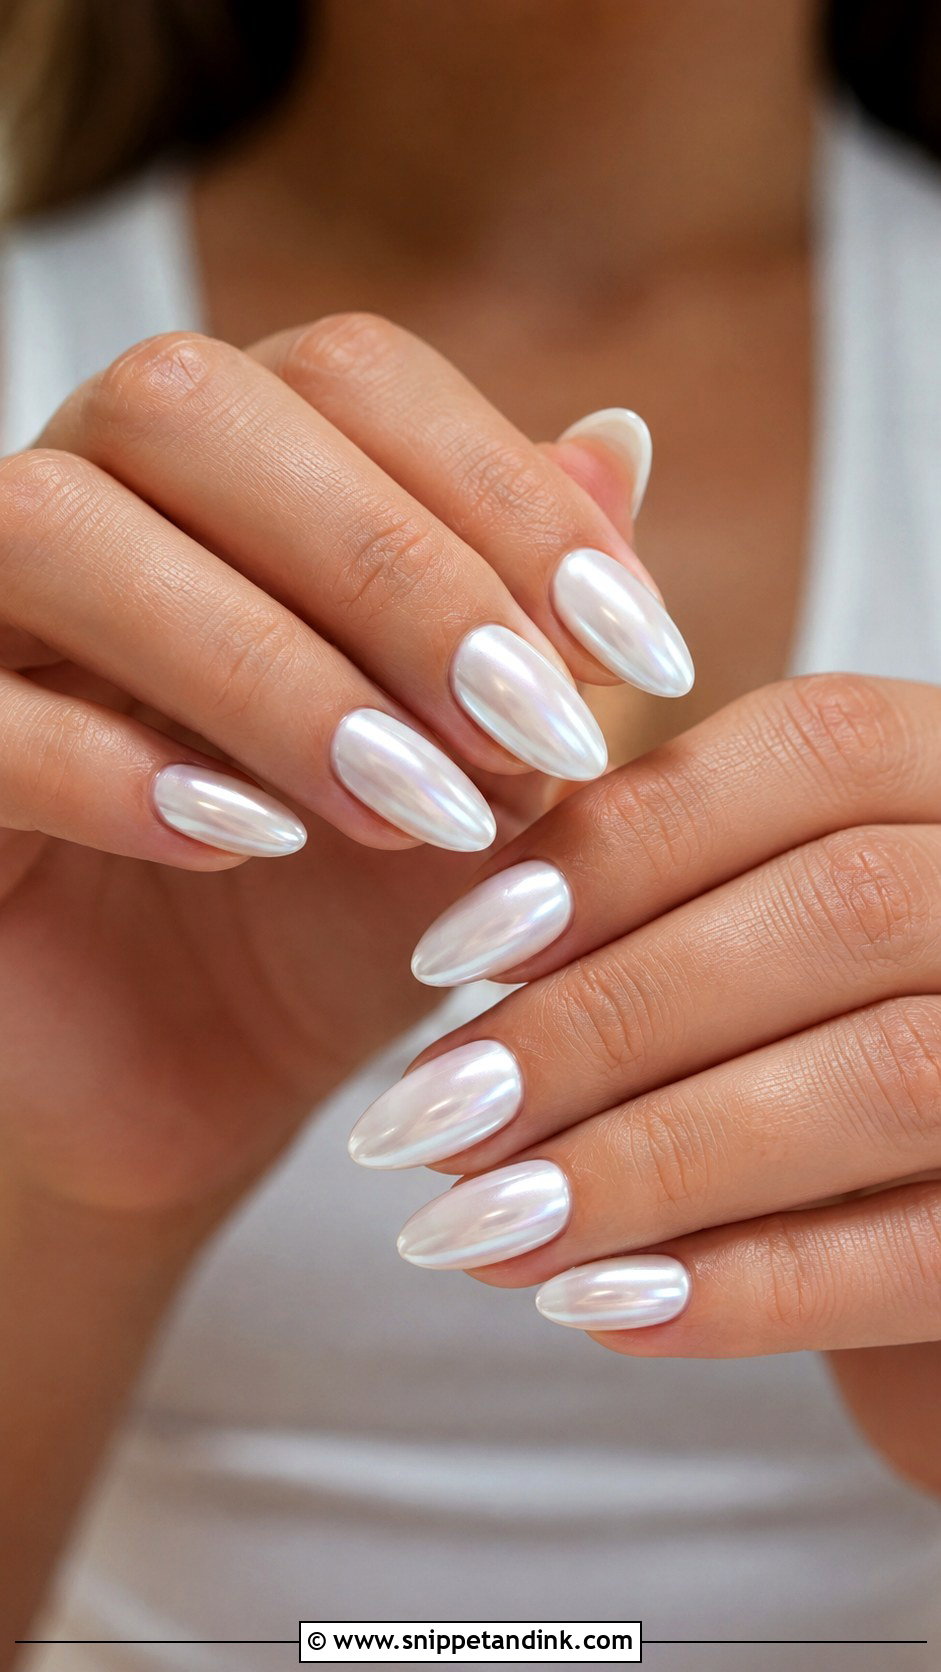
White chrome wedding nail extensions deliver shine without glitter: a white or milky base buffed with chrome powder to a glazed, reflective finish. On almond, coffin or stiletto tips it feels fashion-forward but still bridal. The base decides everything. Flat opaque white under chrome looks harsh and slightly grey in photos, while a soft milky white keeps it warm. Silver or platinum jewelry and simple, structured gowns suit it, and I keep art off this set entirely so the finish stays the feature.
10. Short Square Wedding Nail Extensions
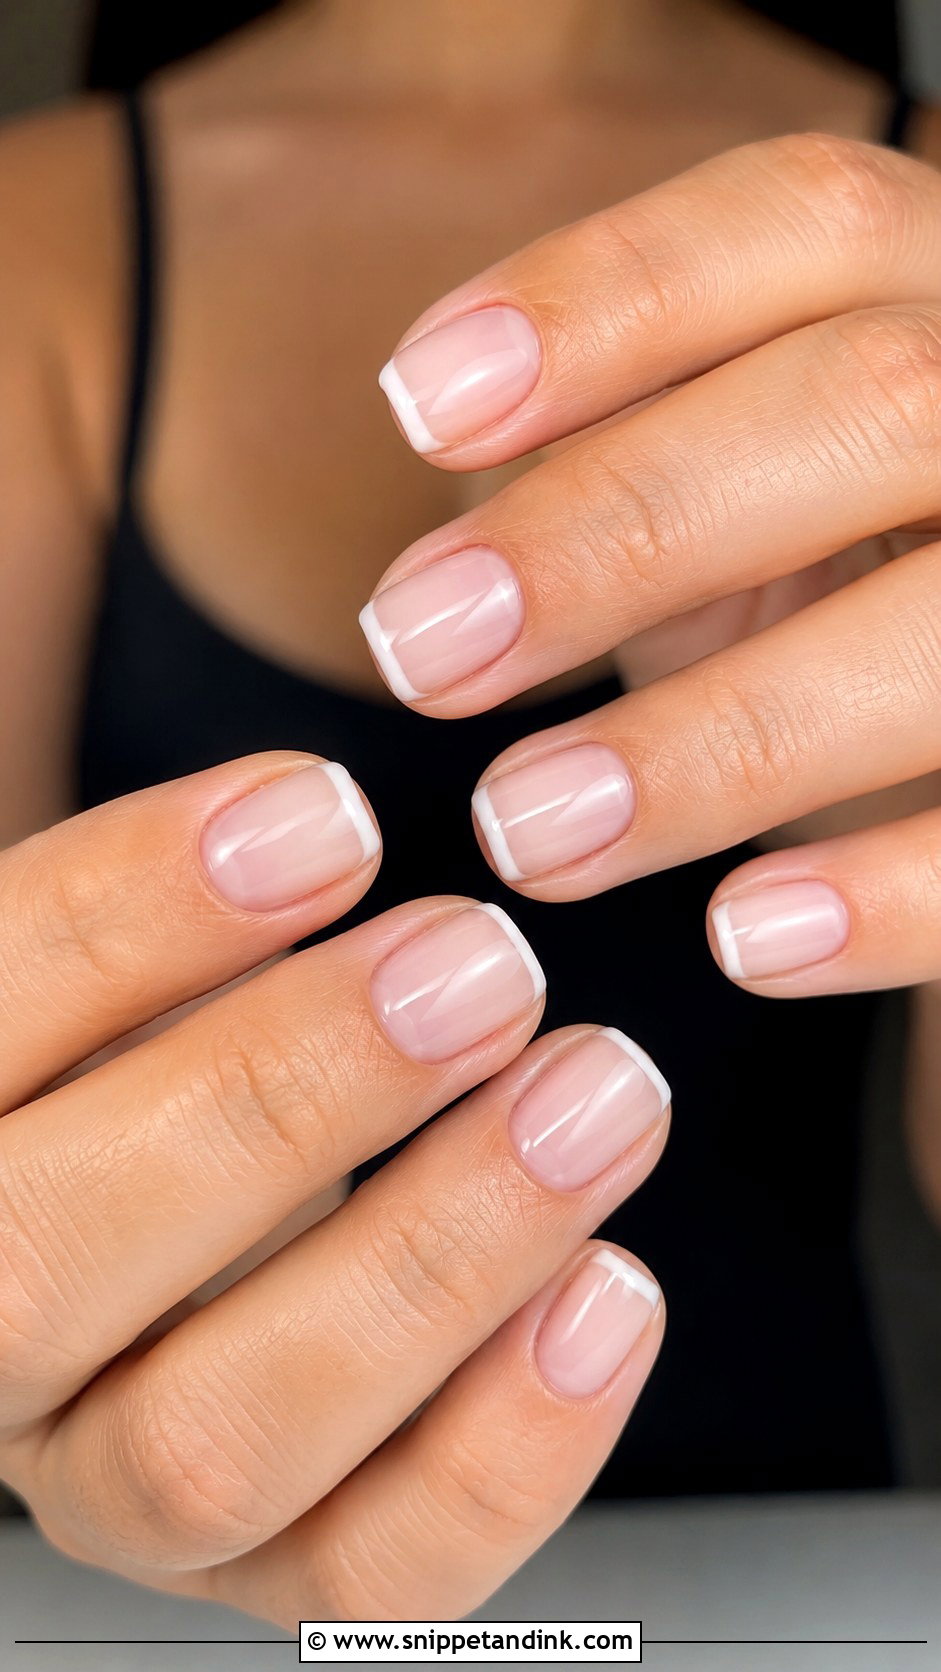
Short square is what I suggest to brides who have never worn length. You get the strength and neatness of an extension without learning to type, button and put in contact lenses with new nails the week of your wedding. I soften the corners so they don’t snag lace or beading. Sheer pink, nude, milky white and micro French designs all suit it, and the ring stays the focus because the nails are clean rather than loud. High gloss finishes it.
11. Coffin Wedding Nail Extensions
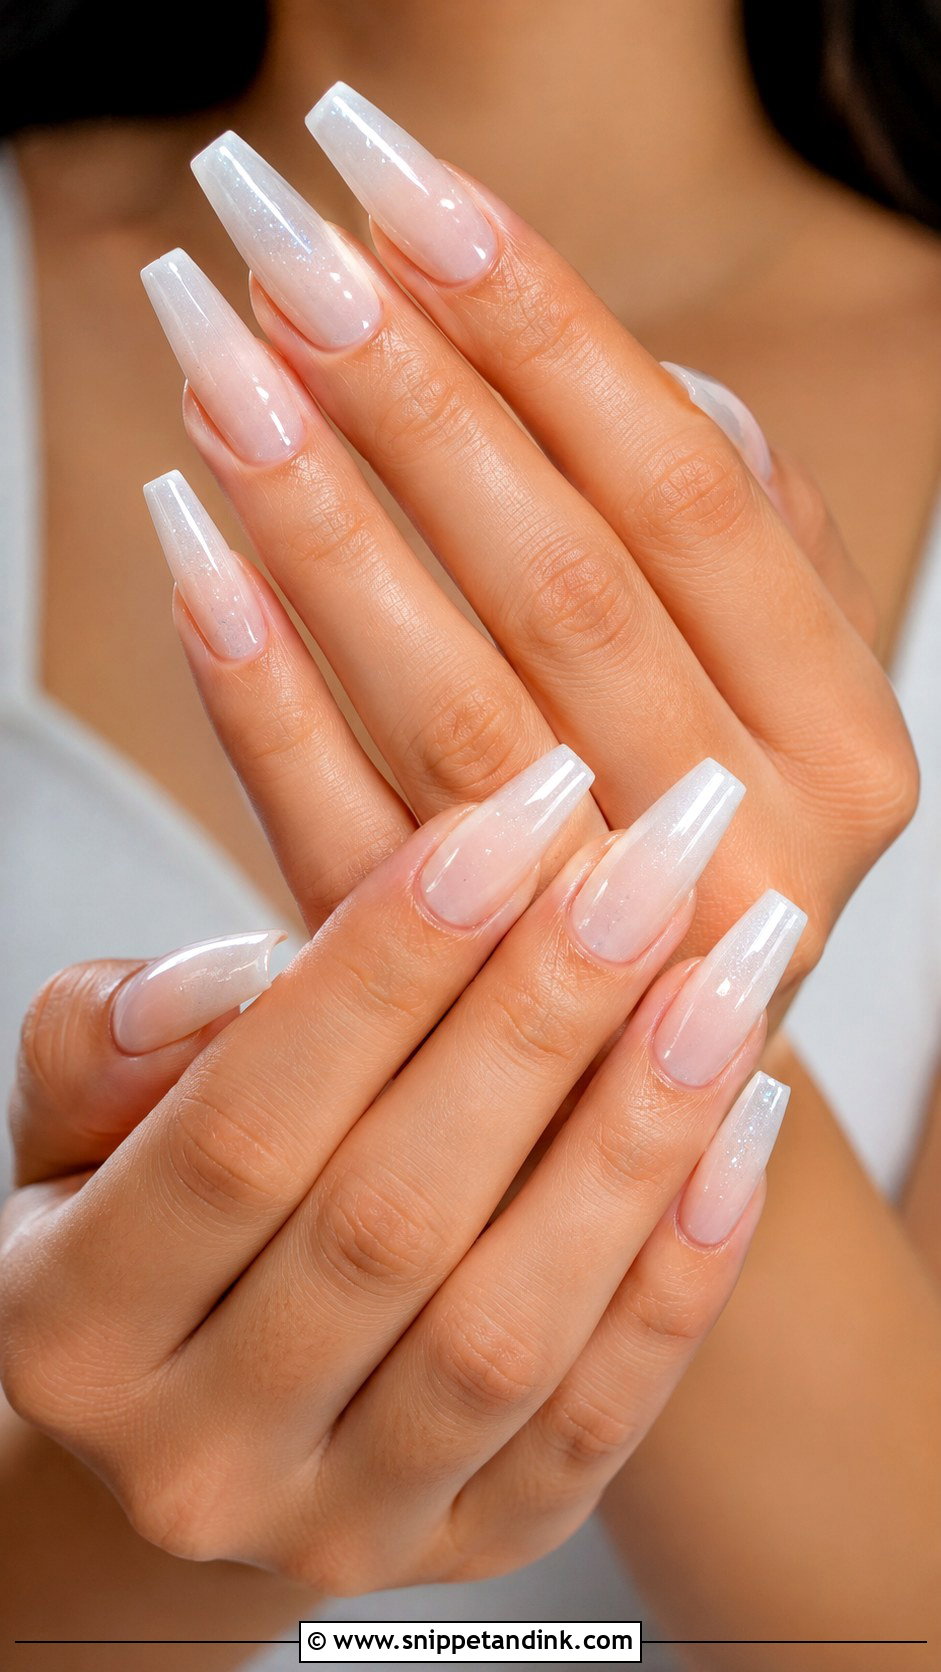
Coffin is the bold shape here: tapered sides, a flat tip, a sculpted look that pairs with modern gowns, glam makeup and statement rings. Keep the colour soft (milky white, blush, nude ombre, pearl chrome or a slim French) and it still reads as bridal. Thickness at the free edge is what ruins coffin nails, so I file the tip down until it looks sleek from the side, not just from above. Crystals or foil belong on one or two nails at most.
12. Almond Wedding Nail Extensions
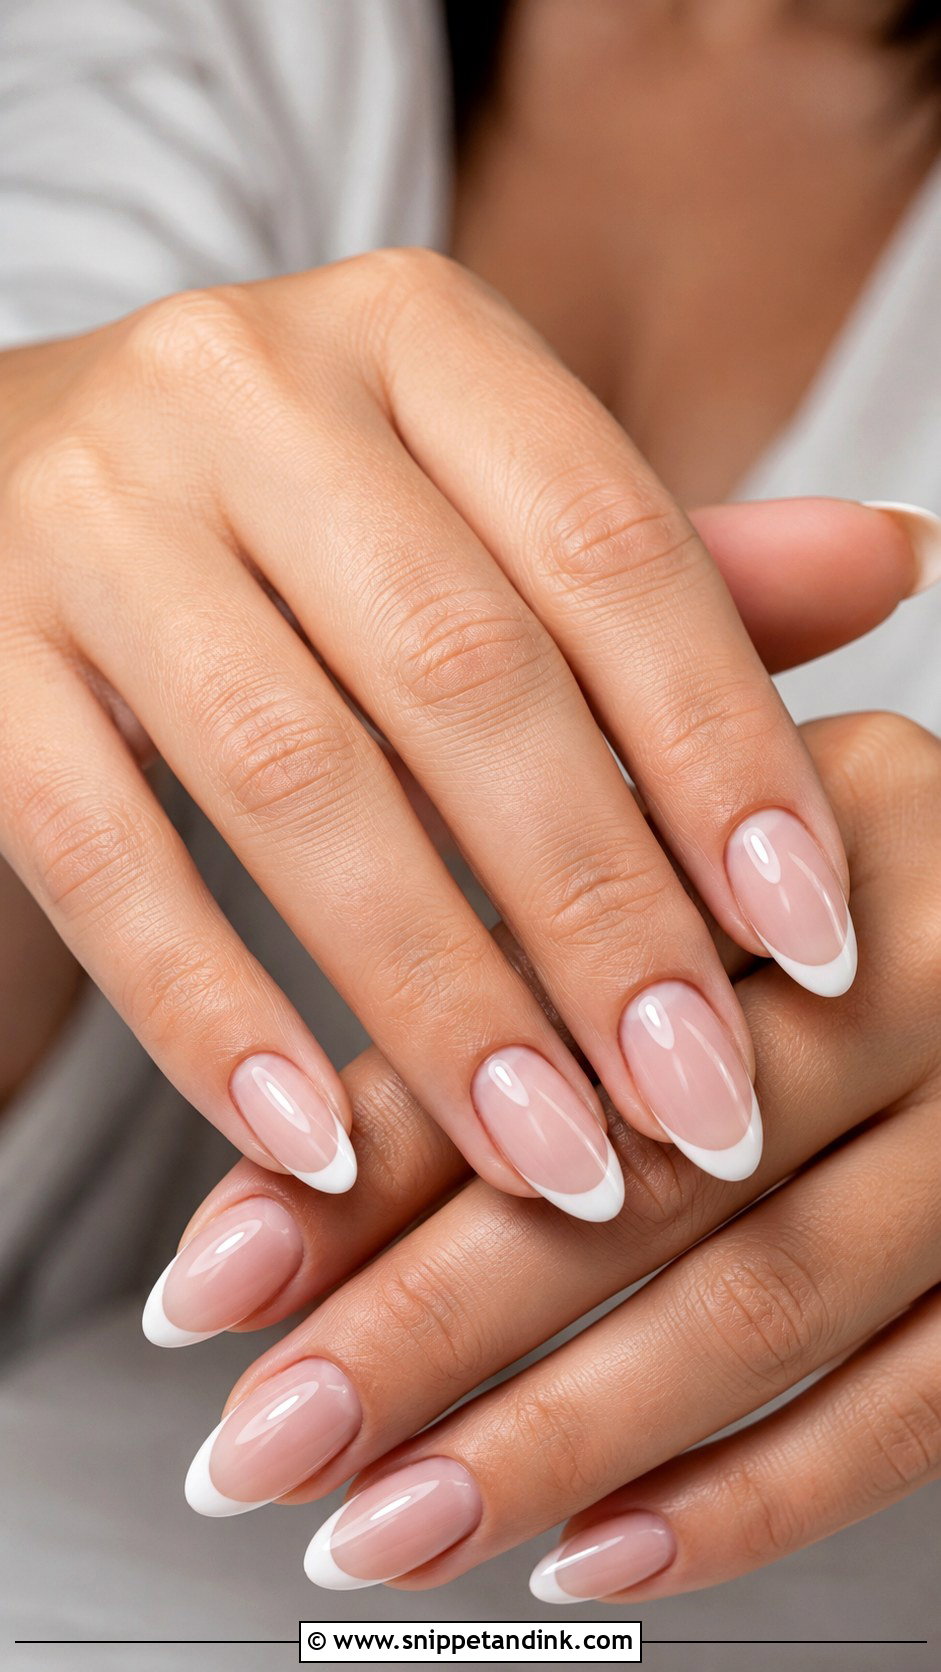
If a bride can’t decide on a shape, I usually file almond first. The tapered sides and rounded tip lengthen the fingers but don’t feel sharp, and almost every design on this list suits it, from milky white to floral art. Medium length is the practical sweet spot. It doesn’t fight delicate rings, and it lets you hold a bouquet without the tips digging into your palm. Pair it with a sheer pink, nude, ivory or soft white base, a clean cuticle line and a glossy topcoat.
13. Oval Wedding Nail Extensions
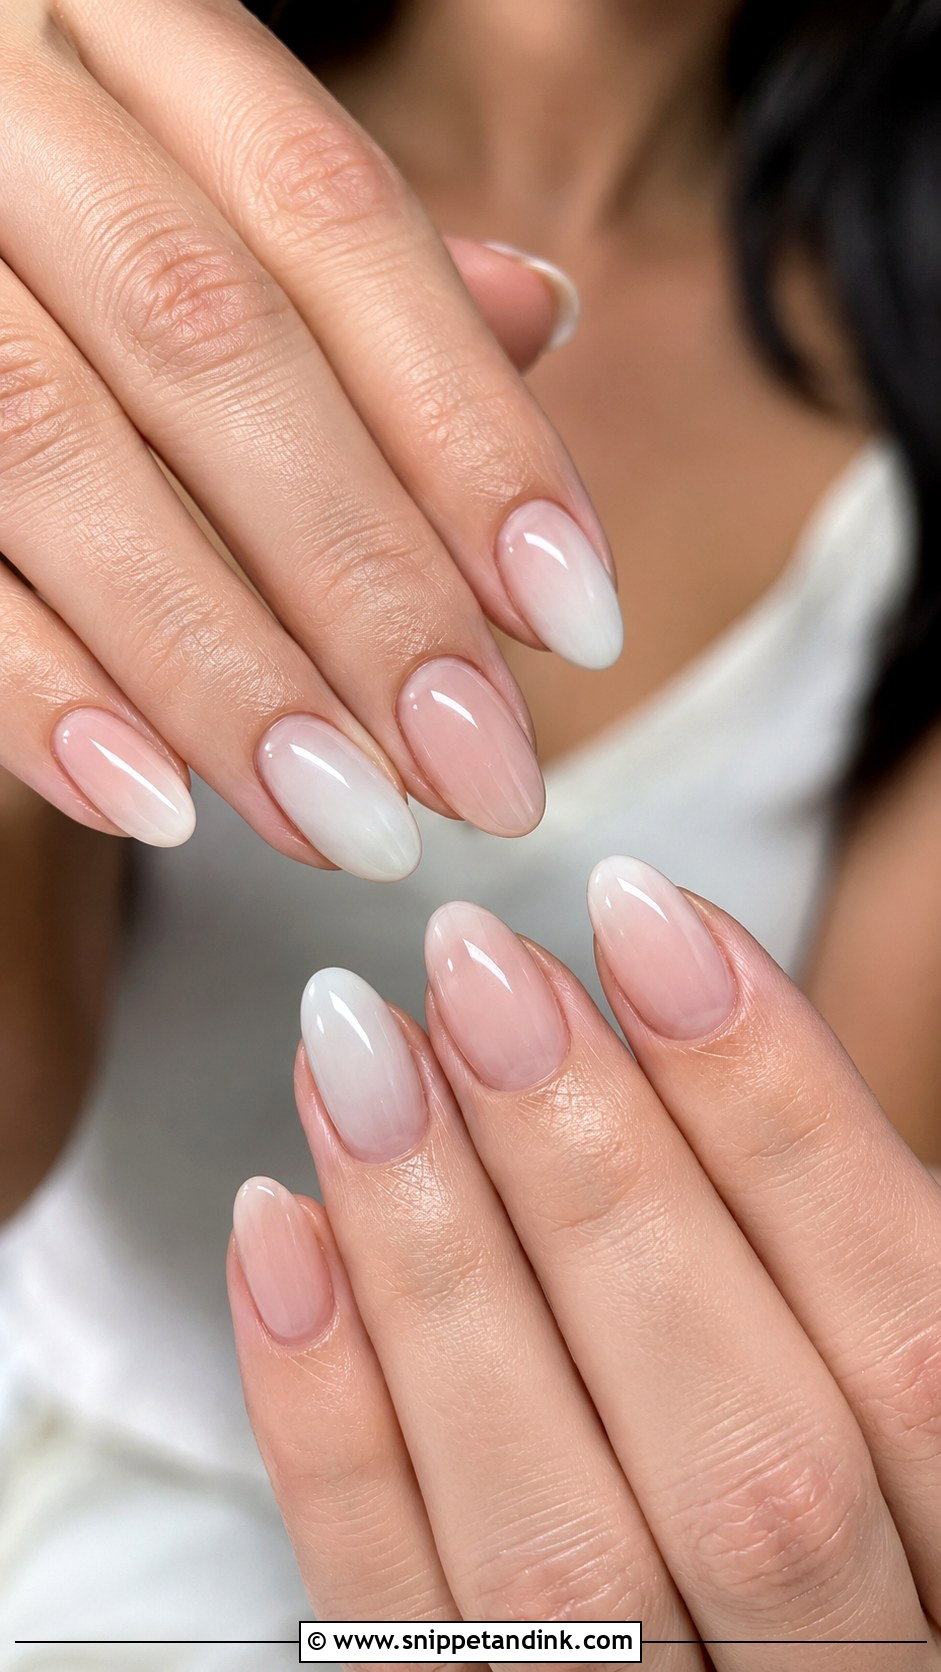
Oval follows the curve of your fingertip, so it gives length without corners. It suits sheer nude, milky white, blush and soft French designs, and its rounded line keeps lace or floral art romantic. On shorter fingers an oval extension adds a visible lengthening effect. What I check at the end is the apex, the slight hump of product that gives the nail strength. Placed too far forward it looks bulky from the side; placed well, the nail looks thin and still holds up to daily wear.
14. Glitter Ombre Wedding Nail Extensions
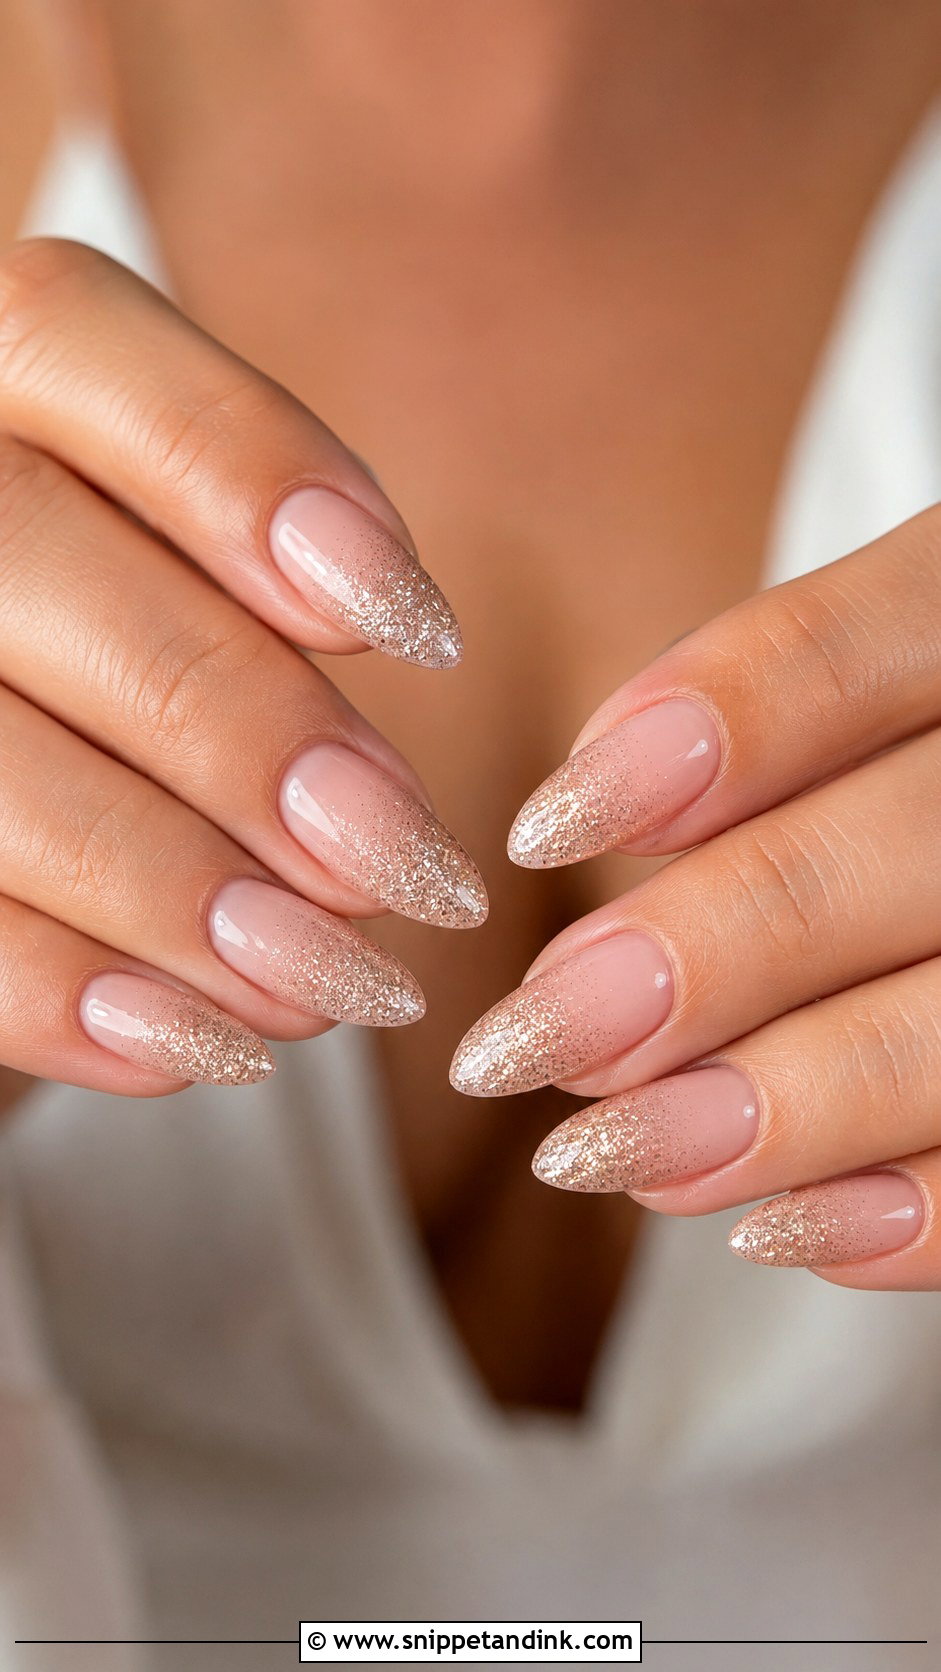
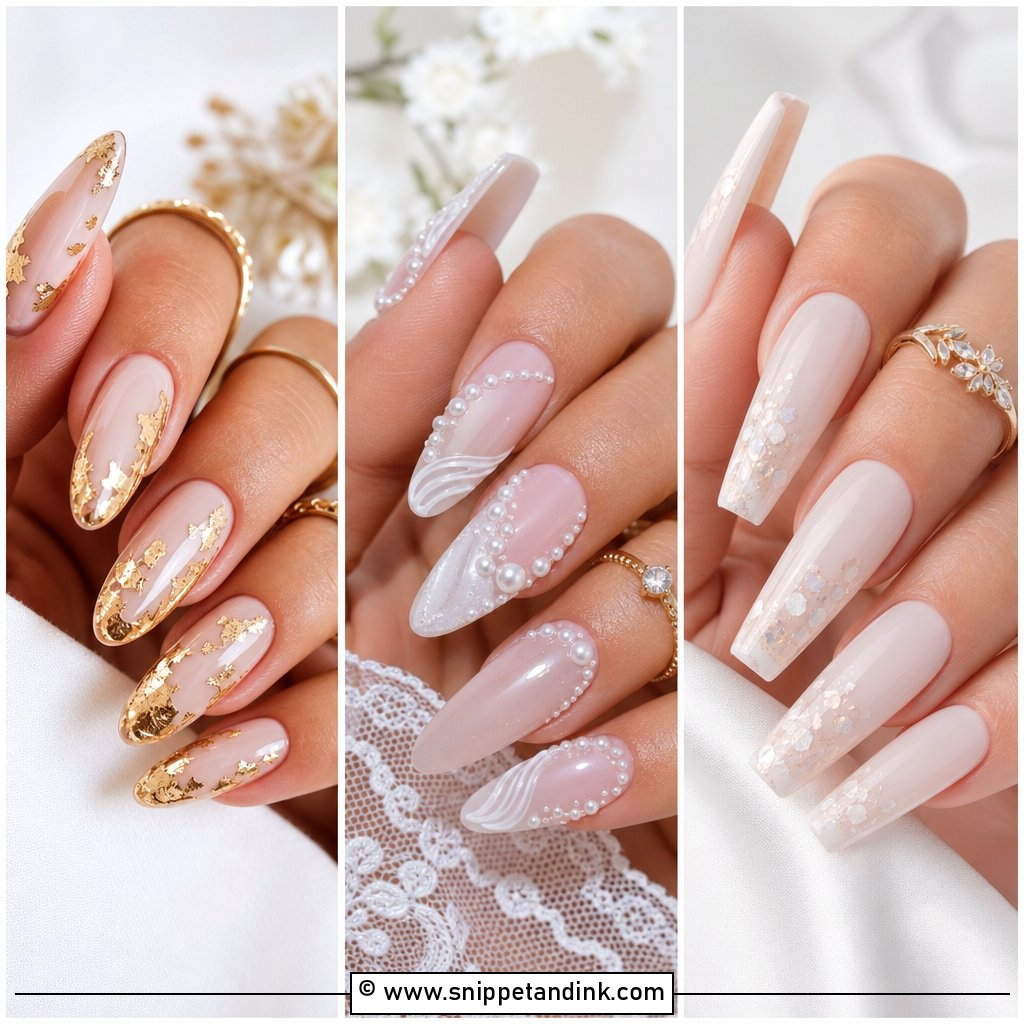
Glitter ombre puts sparkle at one end of the nail and lets it fade into a sheer nude, pink or milky base, so you get shine without a fully glittered hand. Silver, champagne, rose gold and soft white are the most wedding-friendly tones. Almond, coffin, and oval extensions give the gradient room to blend. Evening receptions and beaded gowns suit it particularly well. Fine, reflective glitter is the only kind I use for brides, and I seal it under a thick enough gel layer that the surface feels smooth to the touch, because chunky glitter snags hair and fabric.
15. Pearl Accent Wedding Nail Extensions
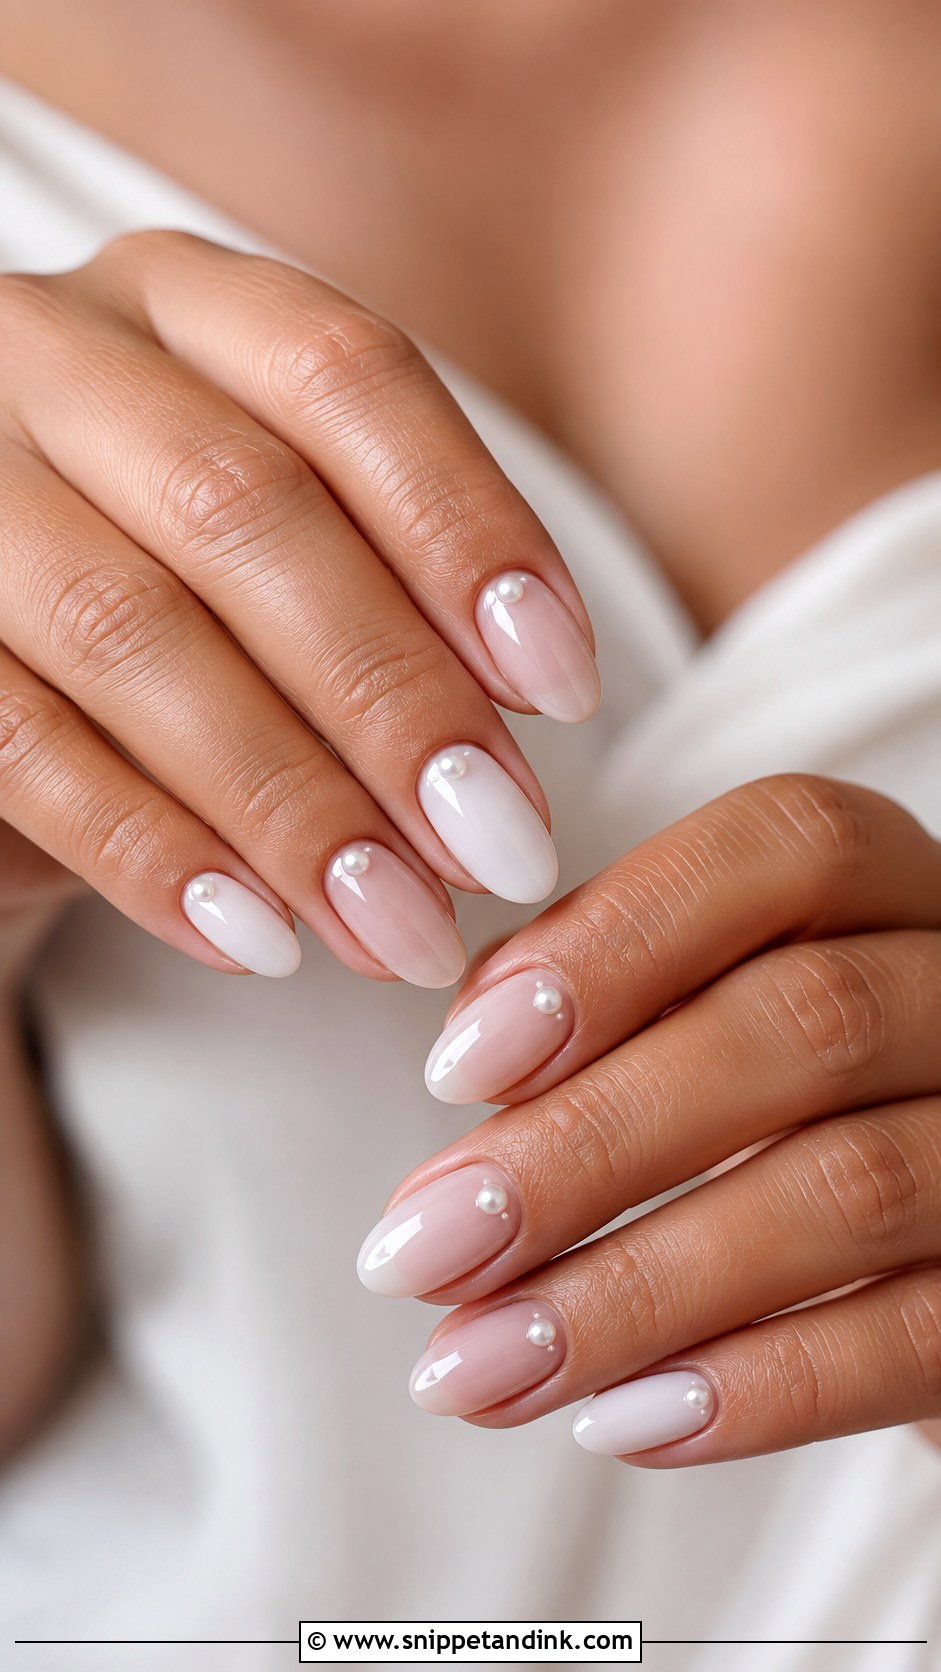
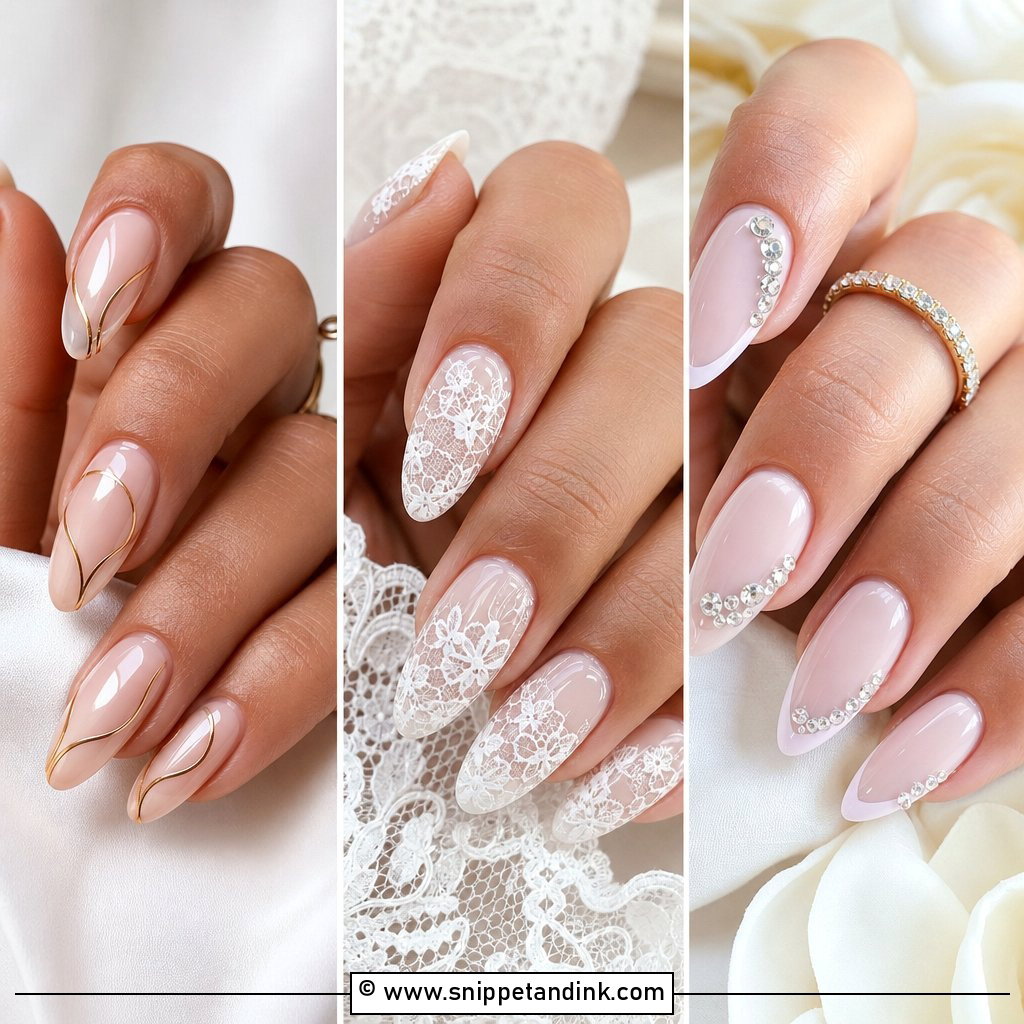
Pearls add texture that still feels soft. Over a milky, sheer pink, nude or French base, I set tiny flat-back pearls near the cuticle or along one side of selected nails. Restraint matters: large pearls on long extensions look heavy and catch on everything, from veils to clutch zips. Almond and oval shapes keep the look graceful, square makes it modern. Each pearl gets its own small pool of gel underneath and a sealing layer around it, which is what keeps them on through a full day of hugs.
16. Gold Foil Wedding Nail Extensions
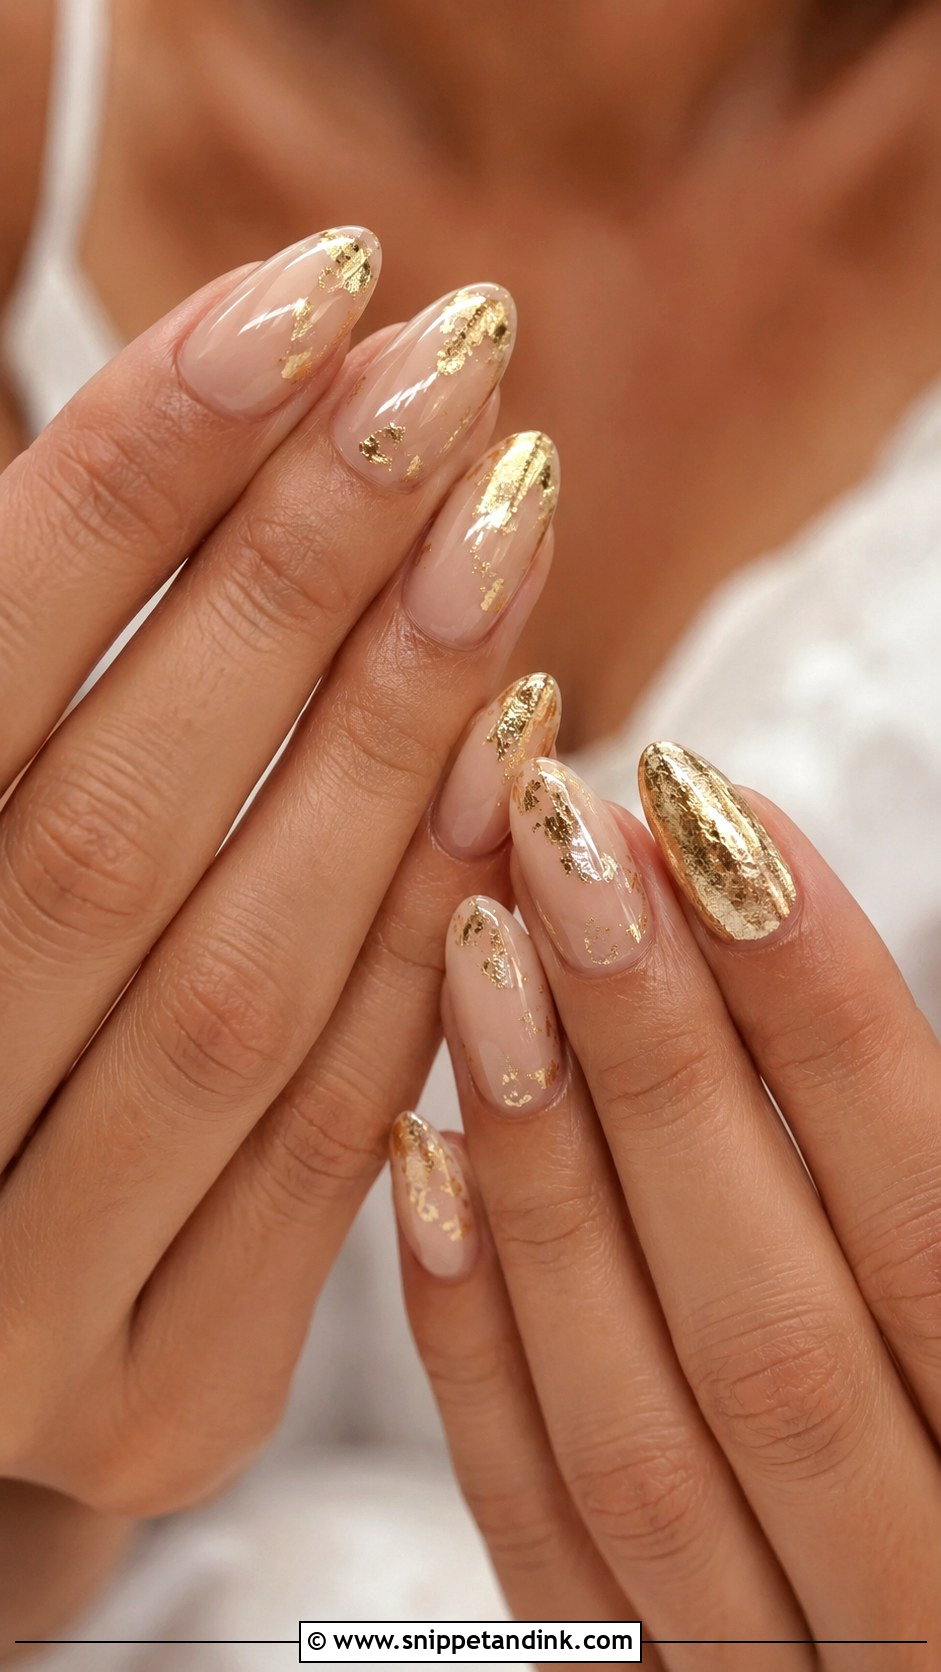
Gold foil wedding nail extensions add warmth and shine. Over a sheer nude, beige, blush or milky base, small pieces of foil are pressed lightly across the nail and sealed. It should look scattered and fine, never lumpy. Gold jewelry, champagne dresses, warm makeup and autumn weddings all suit it. Foil can lift at the edges if it isn’t fully encapsulated, so I trim any piece that reaches the free edge. For a quieter version, put it on two or three nails and leave the rest glossy.
17. Something Blue Wedding Nail Extensions
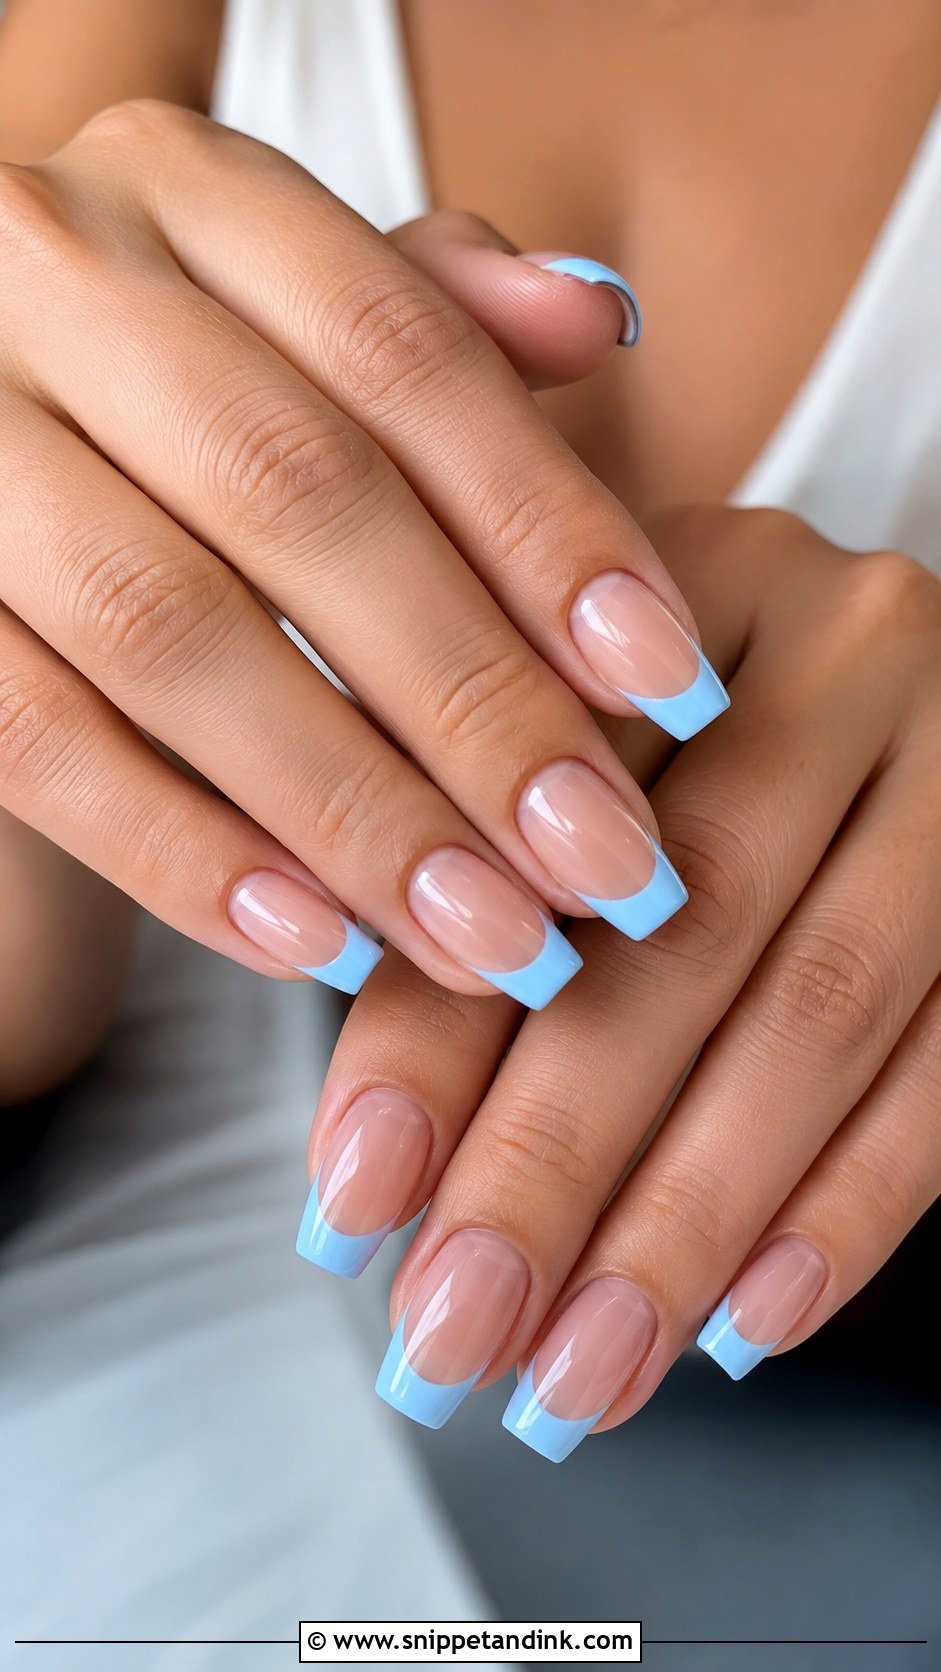
Something blue fits on a nail more easily than most brides expect. Pale blue French tips, tiny blue flowers, a blue chrome shimmer or a single barely-blue accent nail all work over a sheer, nude, pink or milky base. Powder blue reads delicate; dusty blue reads modern. I mix the blue on the day against your skin rather than picking from a swatch wheel, since some blues turn greyish on warm undertones. Almond and short square both suit it, and matching shoes or bouquet ribbon ties it together.
18. Marble Wedding Nail Extensions
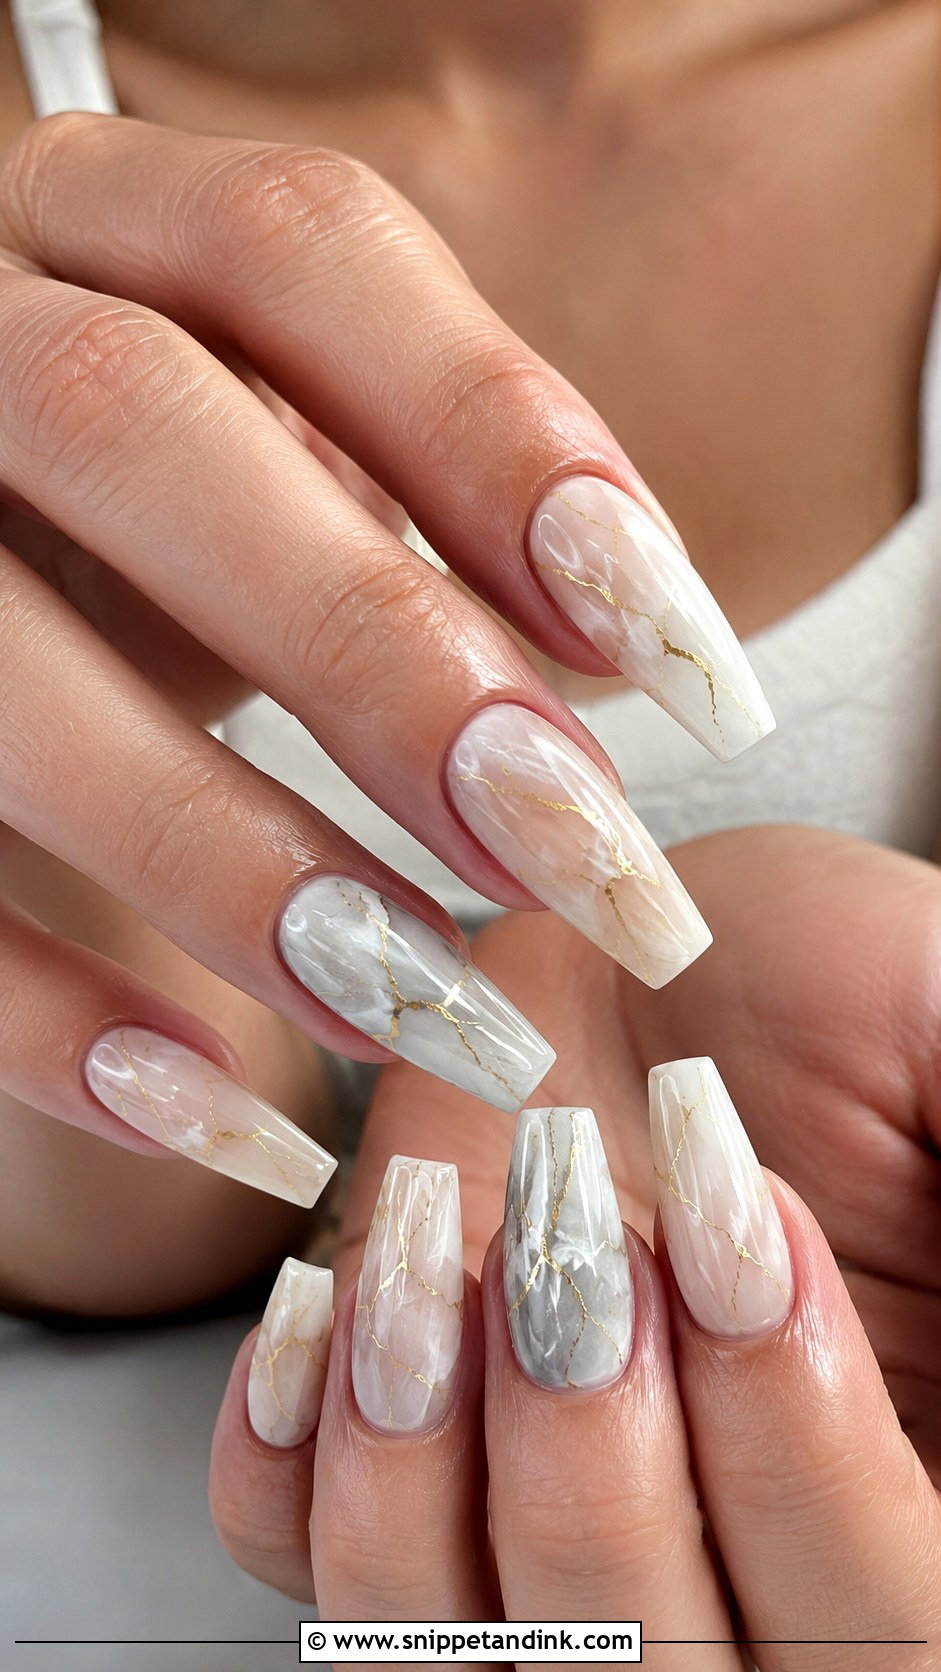
Marble wedding nail extensions should look like soft stone, not a dark storm. White, ivory, nude, blush or pale grey swirls over a sheer base, with optional fine gold or silver veins, keep it bridal. Coffin and almond give the pattern room to flow, and oval makes it softer. I drag the veining while the gel is still wet so the lines feather naturally. Ask for thin, wispy veins; thick dark ones look heavy against a white dress.
19. Crystal Wedding Nail Extensions
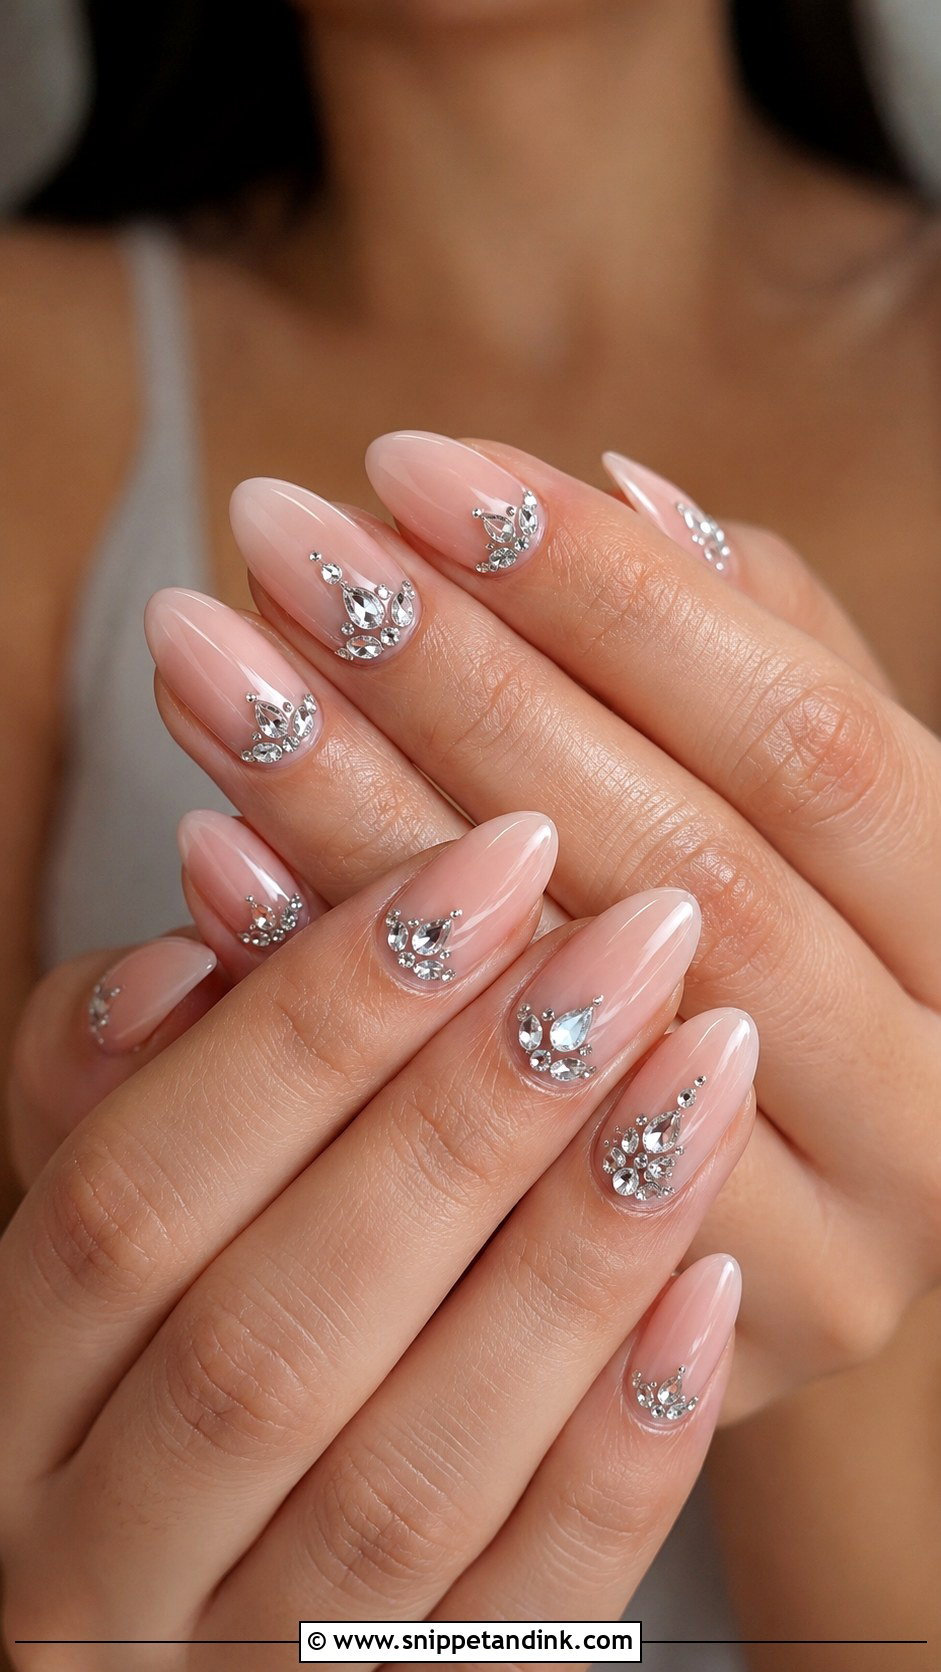
Crystals give the formal sparkle that reads from across a room. A nude, pink, milky or French base with tiny stones in a controlled arrangement looks best: a curve along the cuticle, one stone per nail, or an accent on the ring fingers. Oversized gems date quickly and catch on everything. Placement should follow the shape, so on a coffin I’ll run stones toward the tip and on an almond I’ll keep them low. Silver stones suit cool-toned jewelry; champagne ones suit gold. A thick gel collar around each stone is what keeps them on.
20. Matte Nude Wedding Nail Extensions
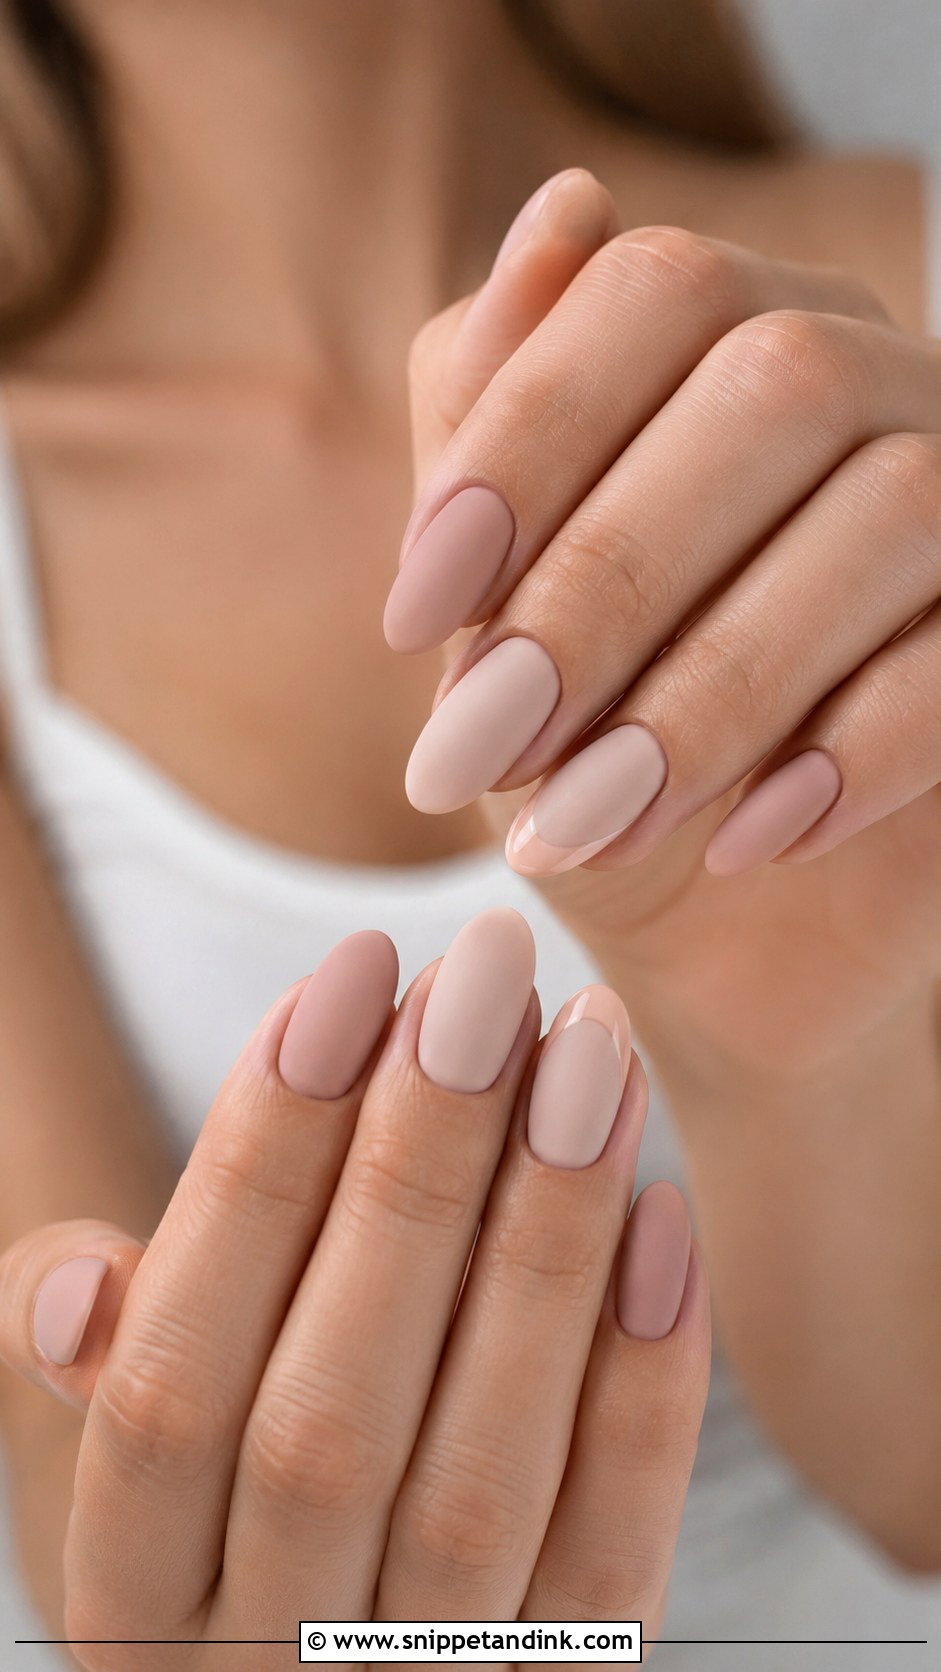
Matte nude is calm and modern, and it is the least forgiving finish on this list. A velvet matte topcoat shows every ridge and uneven layer that gloss would hide, so I file and buff the extension perfectly smooth before the colour goes on. The nude should still be matched to your skin tone. It pairs with minimalist dresses, structured gowns and simple accessories. If it feels flat, a glossy French tip, a tiny pearl or a faint shimmer under the matte adds contrast. Expect matte to pick up makeup and lotion marks more easily, so pack a lint-free wipe.
Living With New Length the Week of the Wedding
I book bridal sets two to three days before the wedding. That’s close enough that there’s no visible regrowth at the cuticle and far enough out that a lifted corner or a cracked tip can be fixed calmly. Use those days to practise the fiddly things: contact lenses, earring backs, the zip or buttons on your dress, and typing on your phone.
- Wear gloves for washing up and anything with hot water. Long soaks soften the bond and invite lifting.
- Rub cuticle oil in every evening. Hydrated skin around the nail looks better in ring shots.
- Pack a small file, a pot of nail glue and a spare tip in the size of your ring finger in your day-of bag.
- If a nail lifts, don’t pick at it or glue over a gap. Water trapped underneath is how infections start, so get it rebalanced properly.
Getting the Set Off Without Wrecking Your Natural Nails
Most damage I see under extensions comes from removal, not wear. Never pry or peel a set off, even when a corner is lifting and it feels tempting on the honeymoon. Soft gel and acrylic should be filed down to break the topcoat, then soaked in acetone until the product softens and slides off with a wooden stick. Builder gel can often be filed back and infilled instead of removed. Afterwards, give your nails a week of oil and short length before deciding on the next set.
Length, Shape and a Trial Run Before the Real Thing
The set worth wearing is the one that feels comfortable on your hands and fits your bridal style. Milky bases, French tips, pearl chrome, blush pink, lace art, glitter ombre and small accents all hold up because they flatter the hands without stealing attention from the dress or ring. Settle the shape and length first, then match the finish to your dress texture, jewelry metal and bouquet. If you can, book a trial set a few weeks ahead and wear it for a few days so you know how the length feels in real life before the wedding.
You'll Like These Ideas:


Leave a Reply