
Pearl is the finish I recommend most to brides who can’t decide, because it reflects light softly instead of throwing it back like glitter. That sheen sits comfortably next to satin, lace, beading, tulle or plain crepe, and in close-up ring photos it reads as glow rather than sparkle. It can be a barely-there milky sheen, raised 3D pearls, or a classic French with a pearly tip. Below are the pearl sets I’m asked for most, on short natural nails, almond and square extensions and longer coffin shapes. For each one I’ve added what it needs underneath, how it wears over a long day, and where it can go wrong, so you can plan a wedding day manicure that still looks right by the last dance.
A Nail Timeline Counting Back From the Ring Shot
Pearl finishes are soft, but close-ups aren’t. In a ring photo your fingers fill the frame, and dry cuticles, ridges or a lifting edge show up more than the polish does. A good set starts weeks before the appointment:
- About six to eight weeks out: stop peeling off gel or picking at cuticles. Peeling takes layers of nail with it and leaves thin, weak plates.
- From then on, cuticle oil once or twice a day. It’s the single most useful habit for photos.
- Three to four weeks out: book a trial if you want extensions, chrome or 3D pearls, so you can see how the shape and finish wear for a week or two.
- One to three days before the wedding: the final set. Gel is at its freshest, and any small problem has time to be fixed.
- On the morning: hand cream and cuticle oil, wiped off before you put your ring on for photos.
Bring your engagement ring to the trial. A tall setting or a yellow gold band changes which pearl shade looks best, and you’ll see straight away whether a pearl on the ring finger competes with your stone.
1. Pearl Chrome Wedding Nails
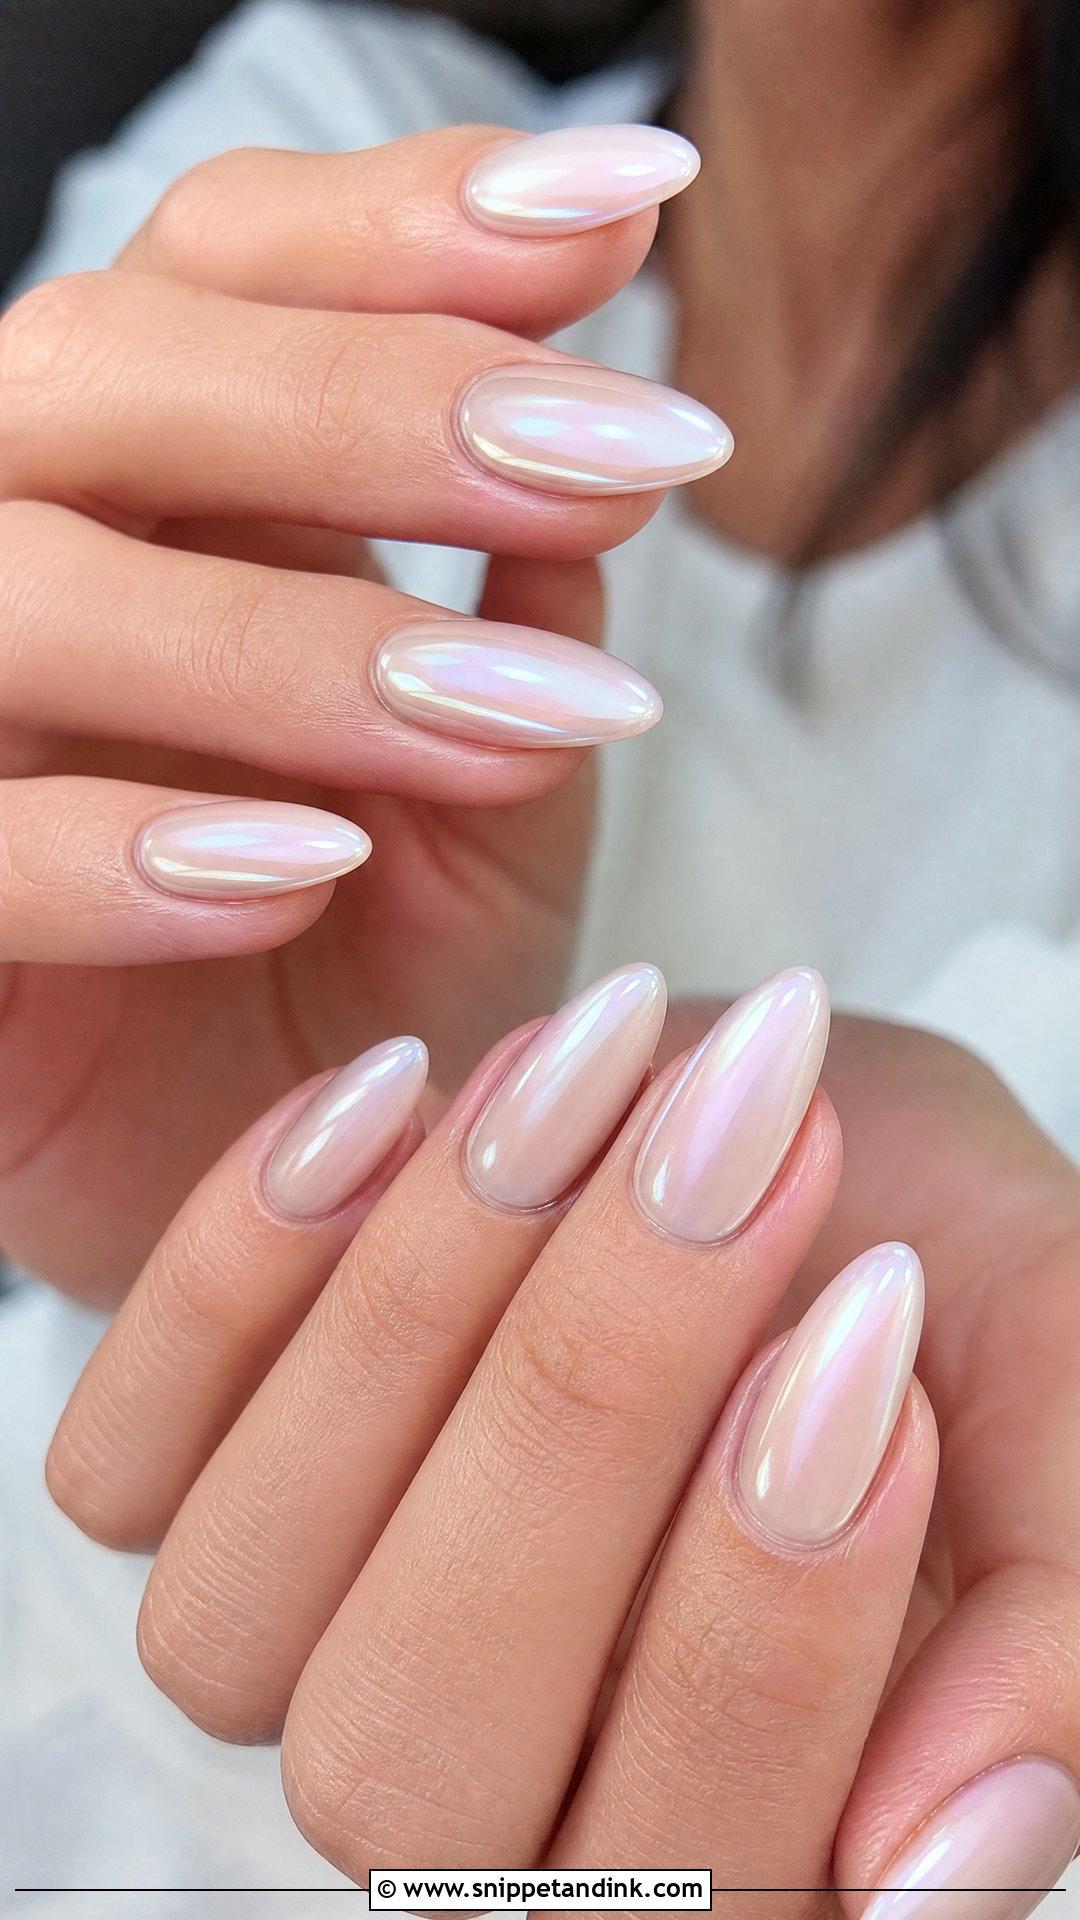
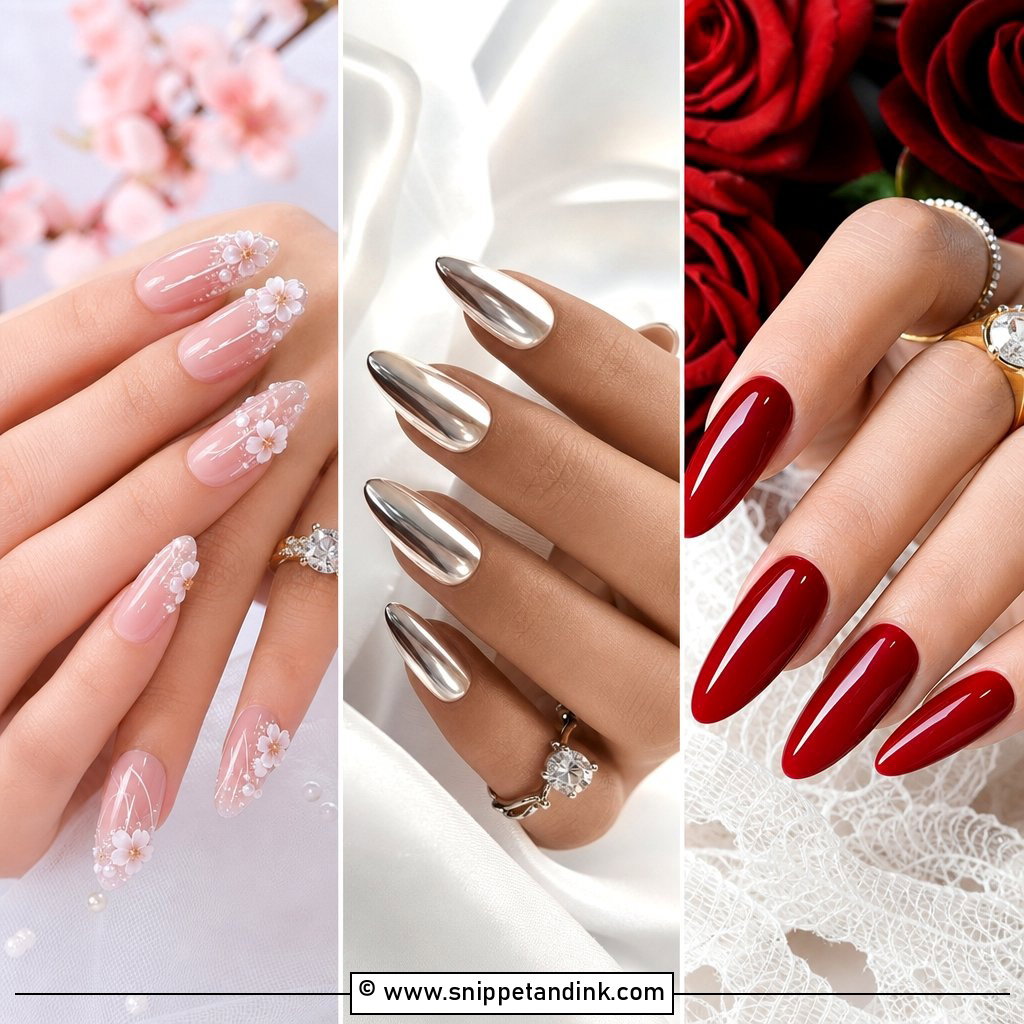
Pearl chrome wedding nails are on almost every bride’s mood board, and for good reason: a whisper of pearl powder over a sheer pink, milky white or nude base turns the nail glossy and faintly iridescent, like the inside of a shell. The catch is that chrome shows everything underneath it. Any ridge, dip or bump in the base becomes a visible line once the powder goes on, so I build a smooth, even base first and only then rub the chrome over a cured top coat. Almond, oval and short square shapes suit it best. I always cap the free edge when sealing, because chrome tends to wear first at the tips.
2. Pearl French Tip Wedding Nails
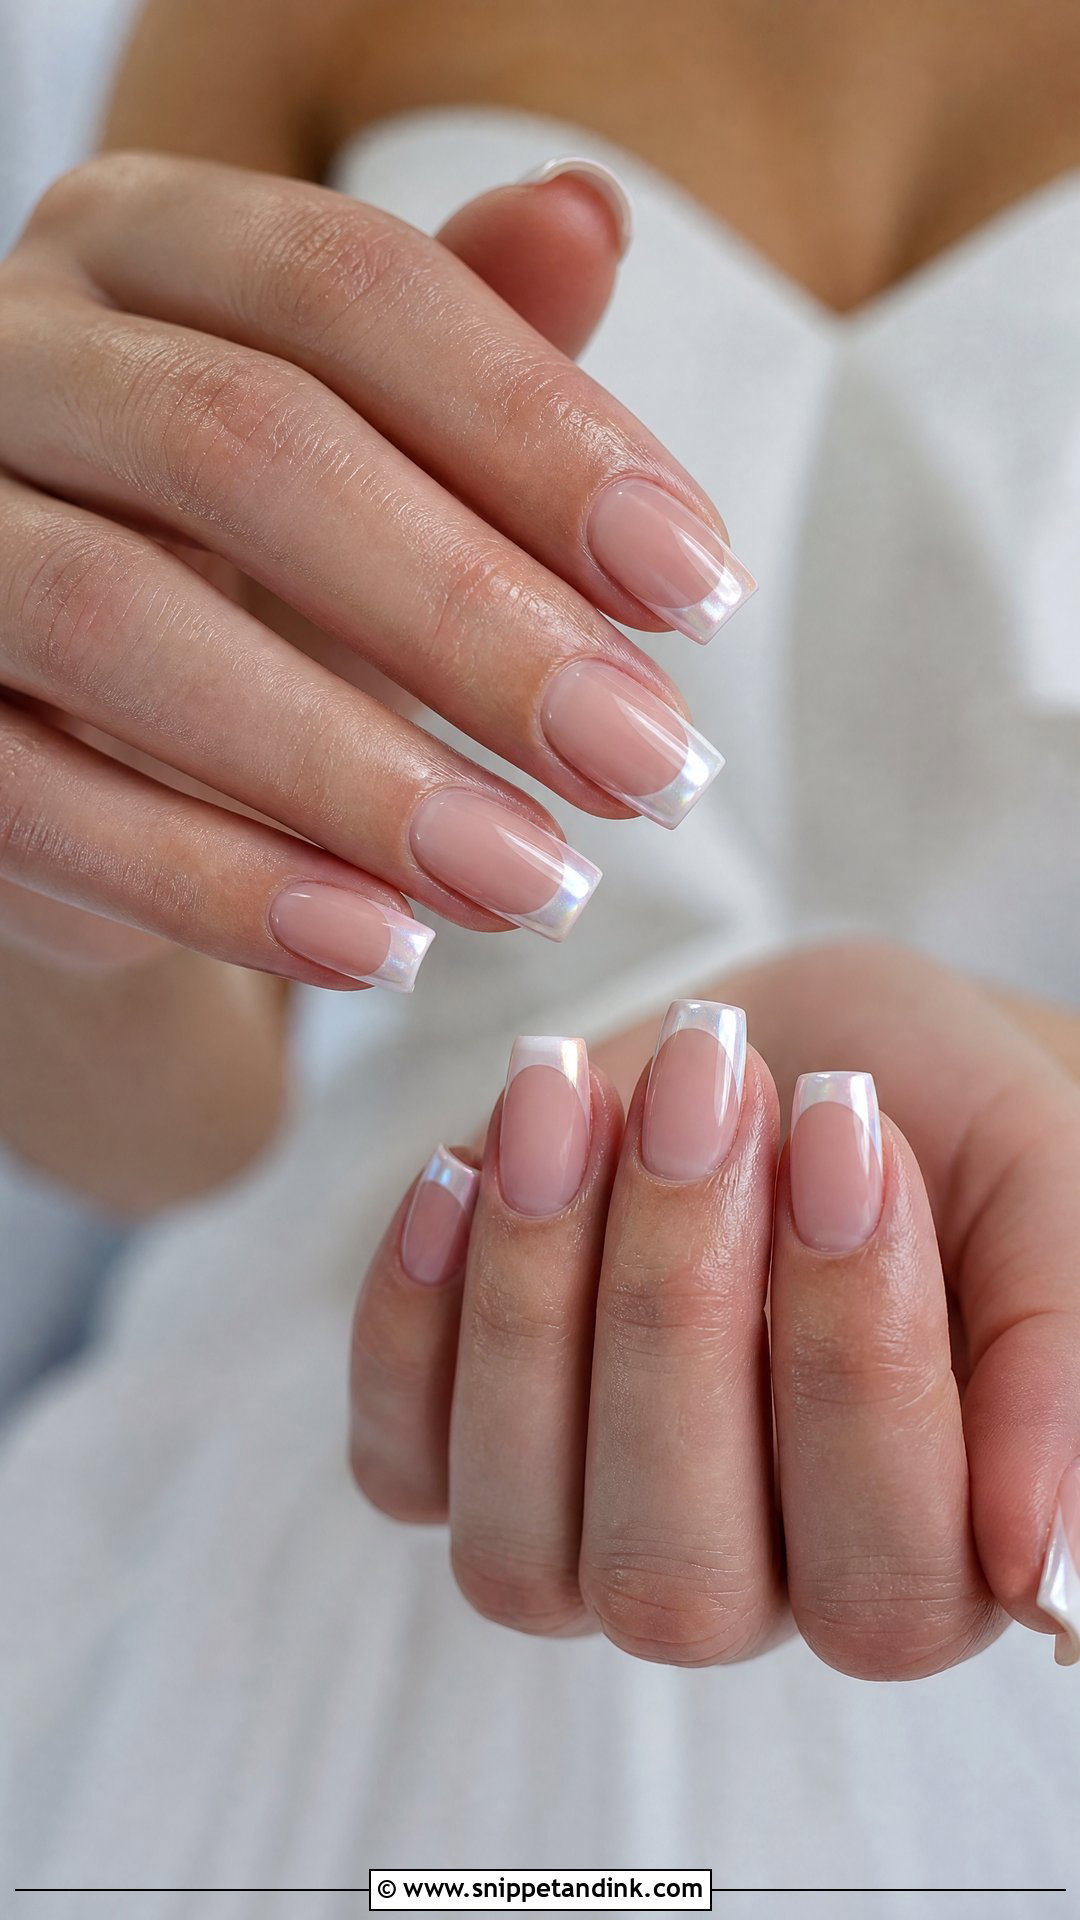
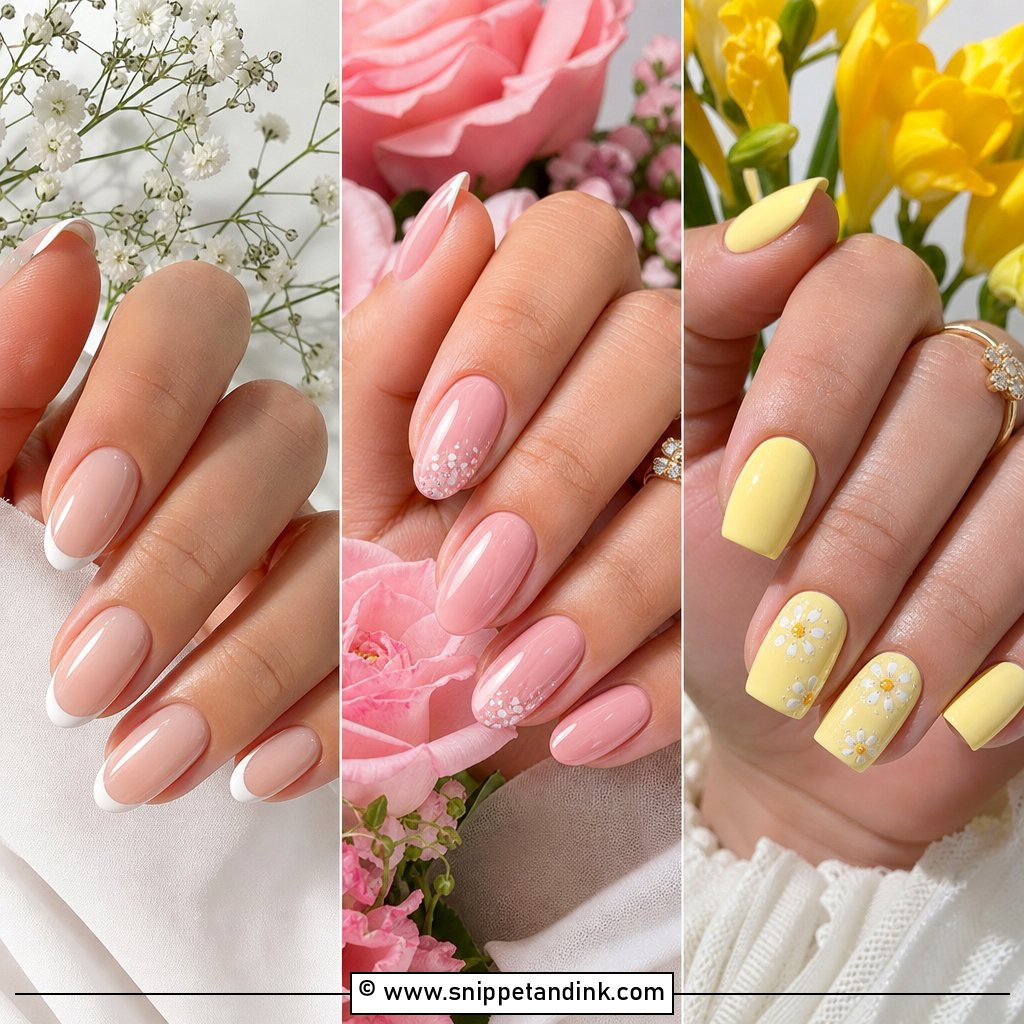
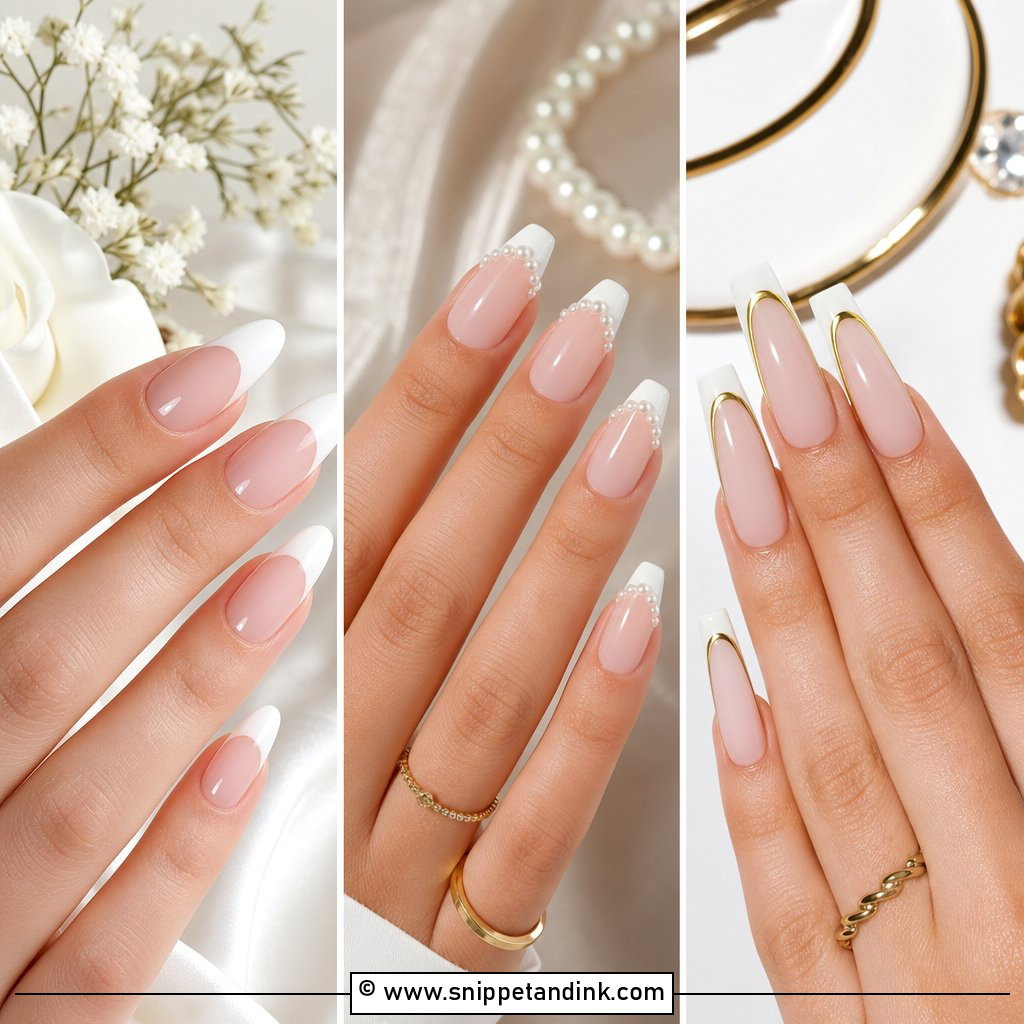
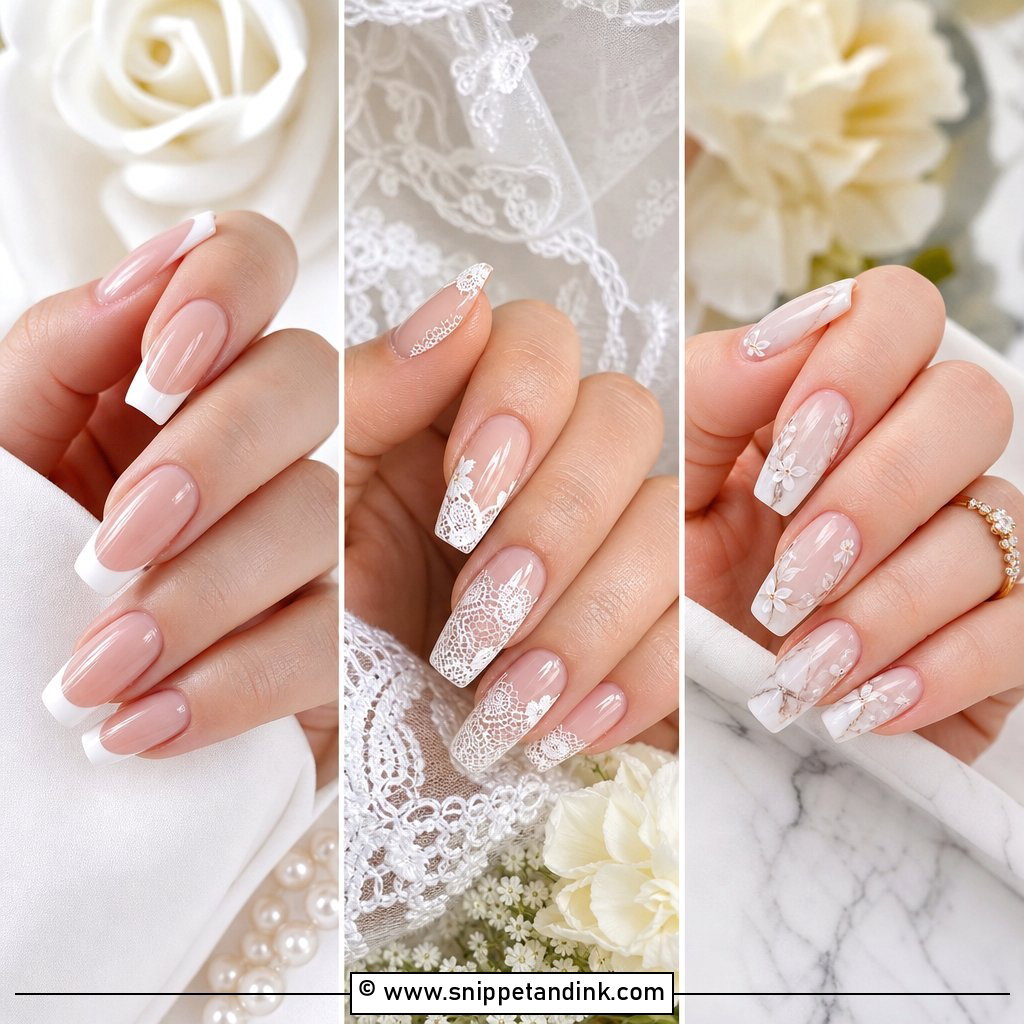
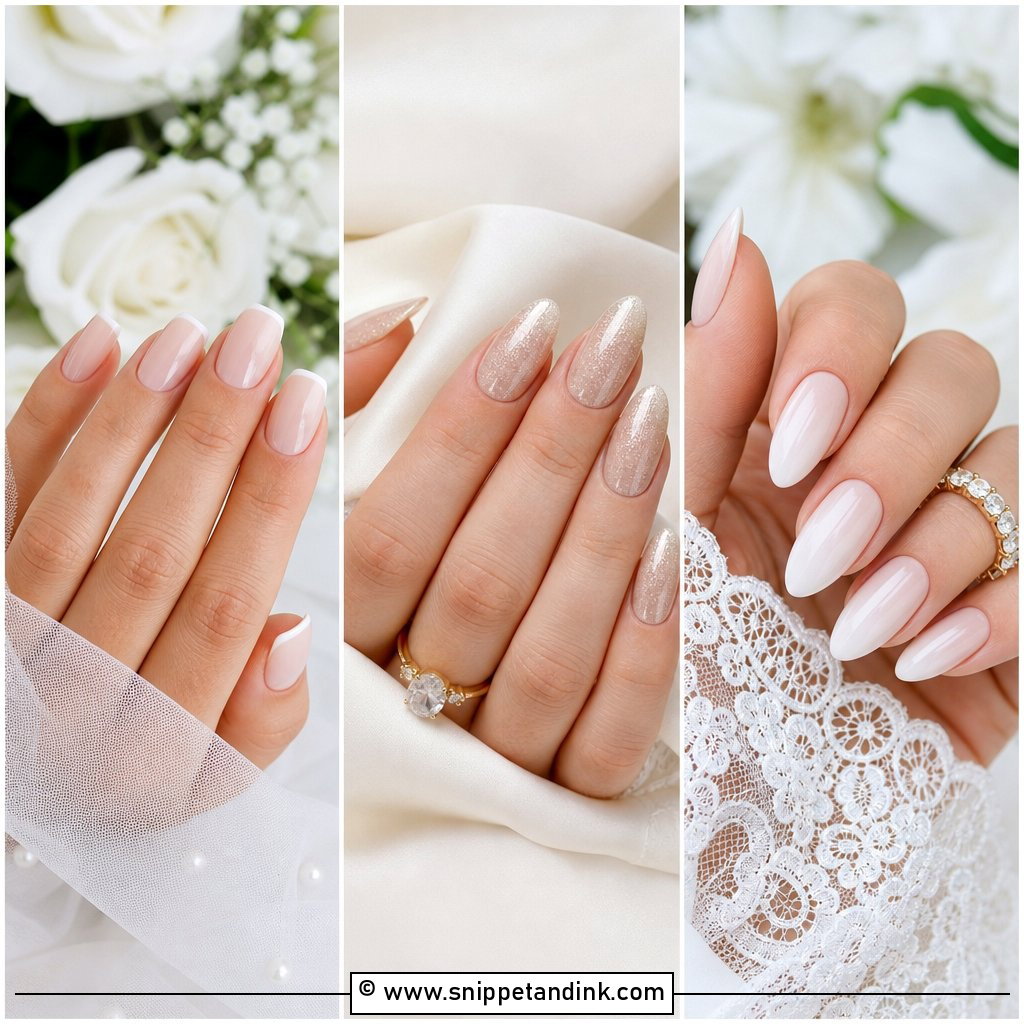
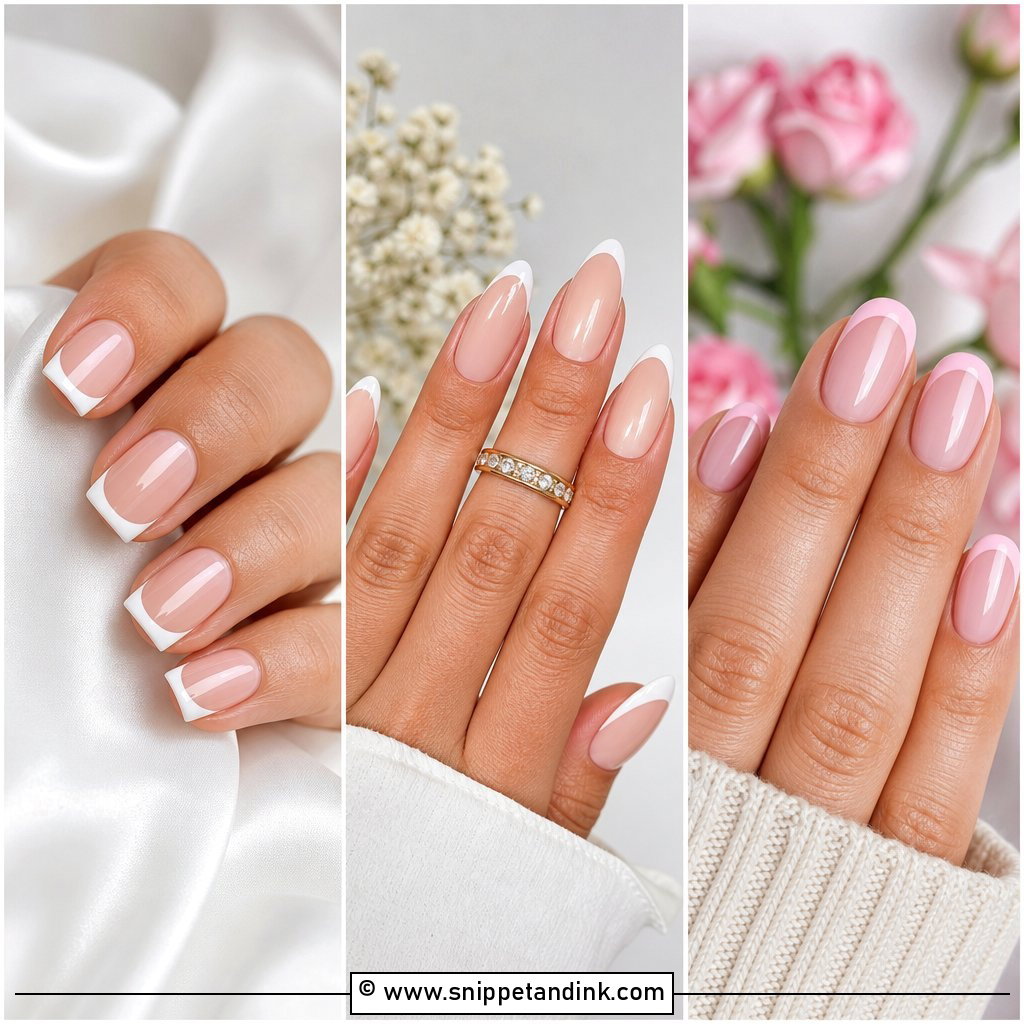
A pearl French keeps the classic bridal manicure but swaps the stark white tip for pearly gel, shimmer polish or a light chrome. Underneath, a sheer pink or natural nude keeps it delicate. The tip line is where a French lives or dies, so I paint the smile line in thin strokes and match the curve to each nail’s own shape rather than forcing the same arc on every finger. It works from short square to long almond. Ask for thin tips on shorter nails; a deep white band makes a short nail look shorter still.
3. Milky White Pearl Wedding Nails
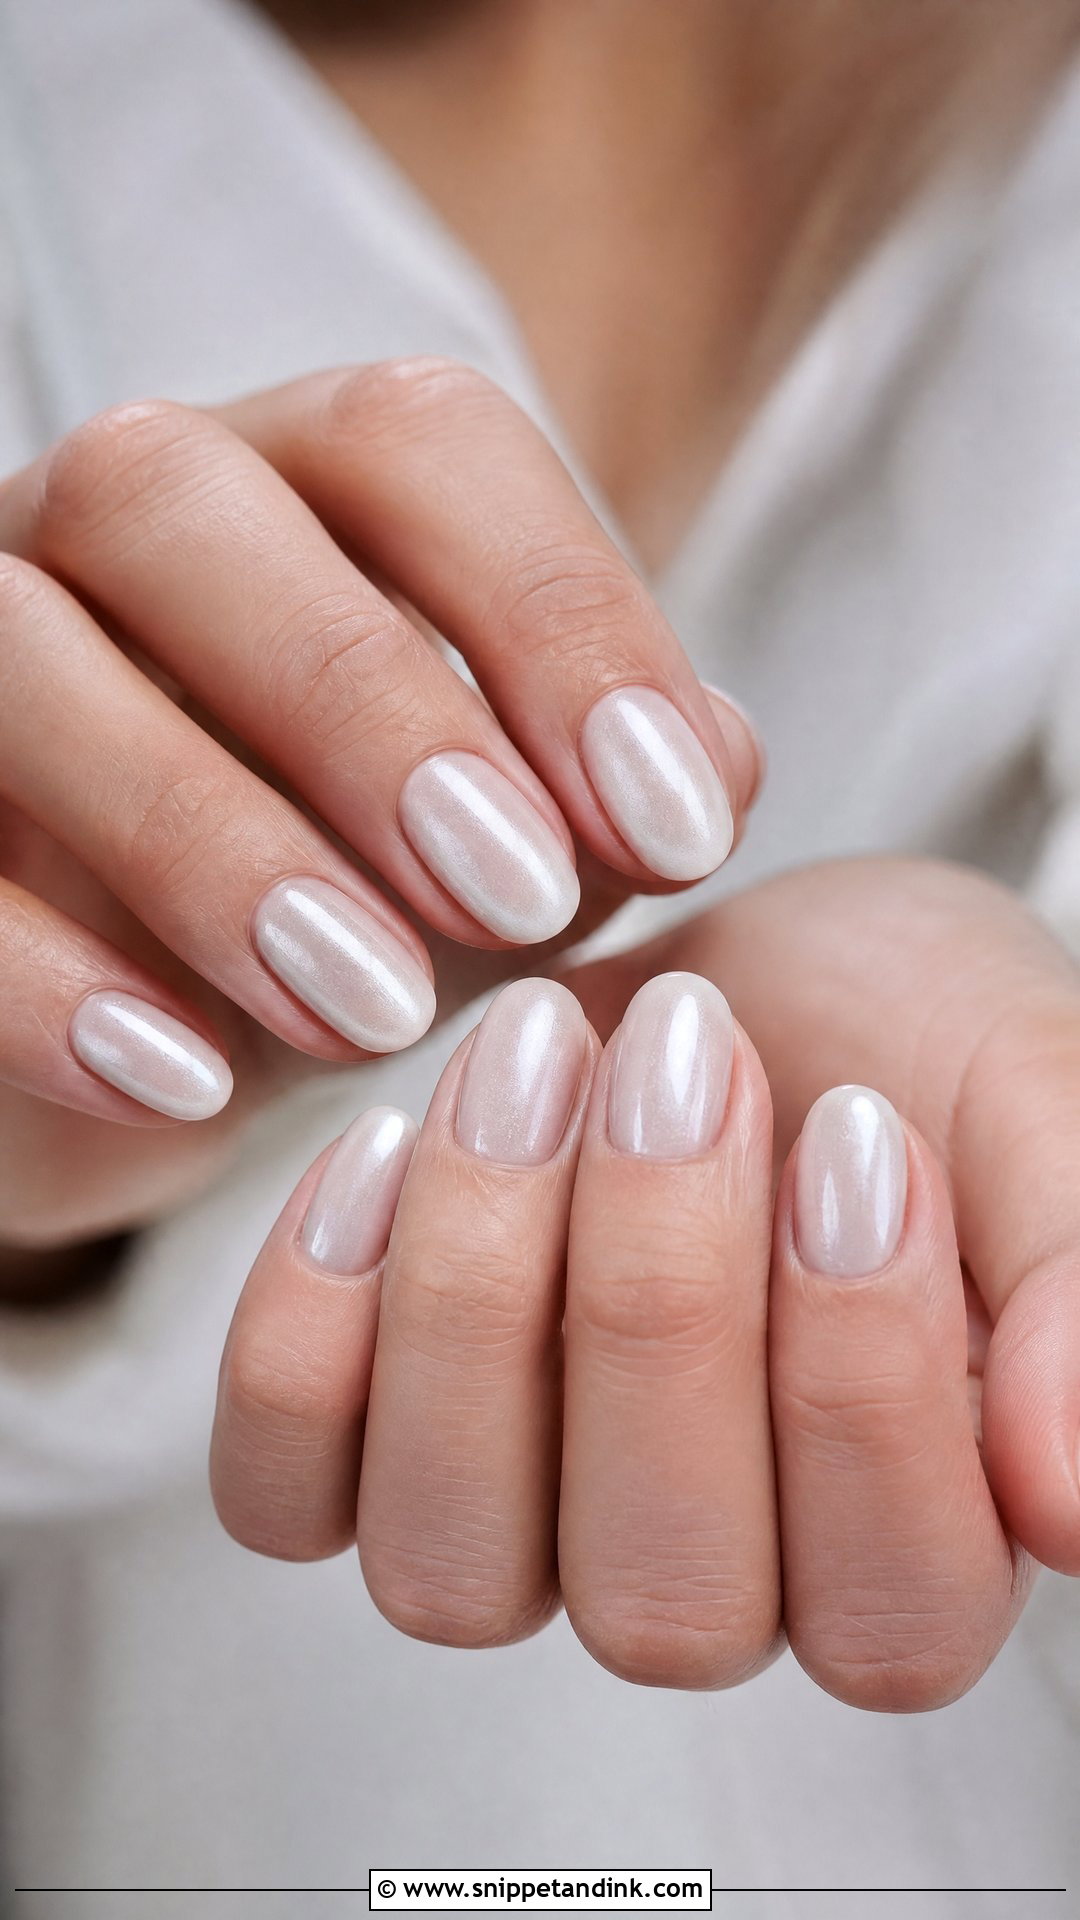
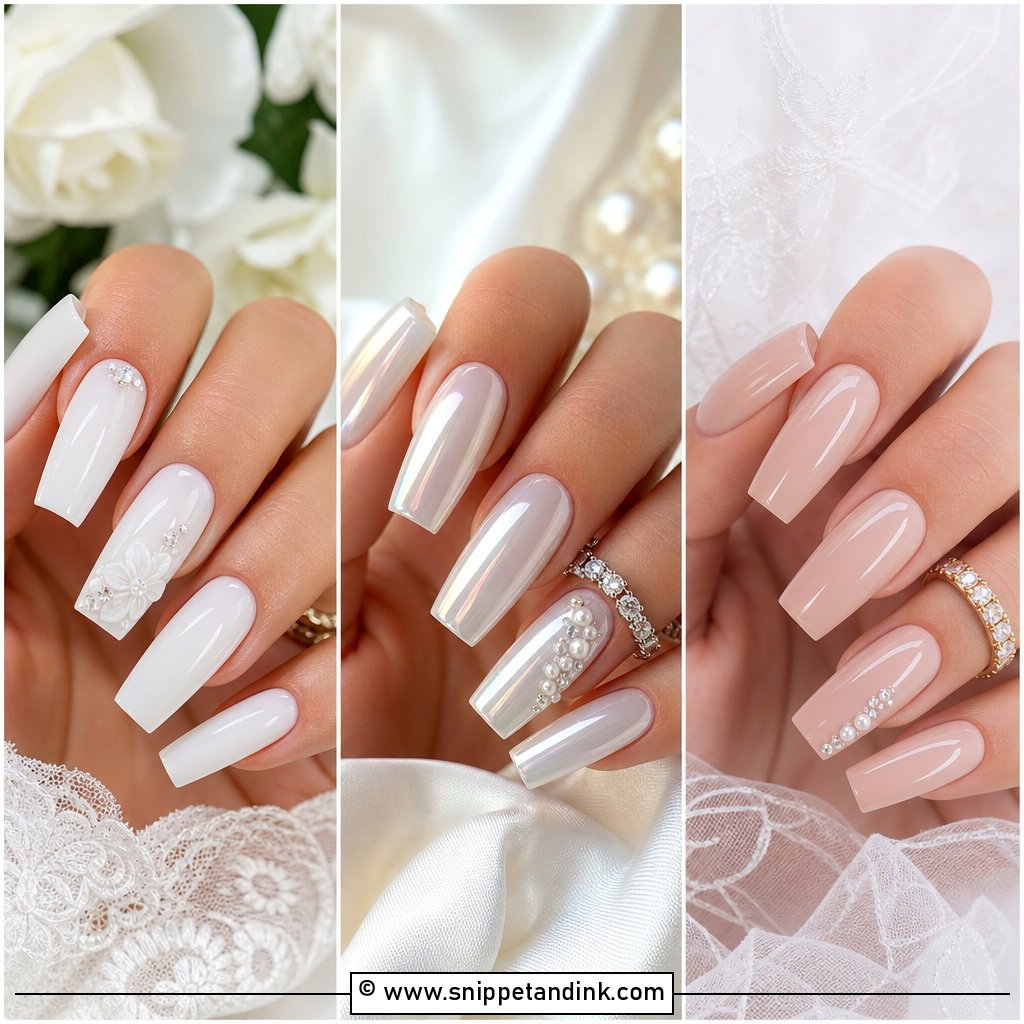
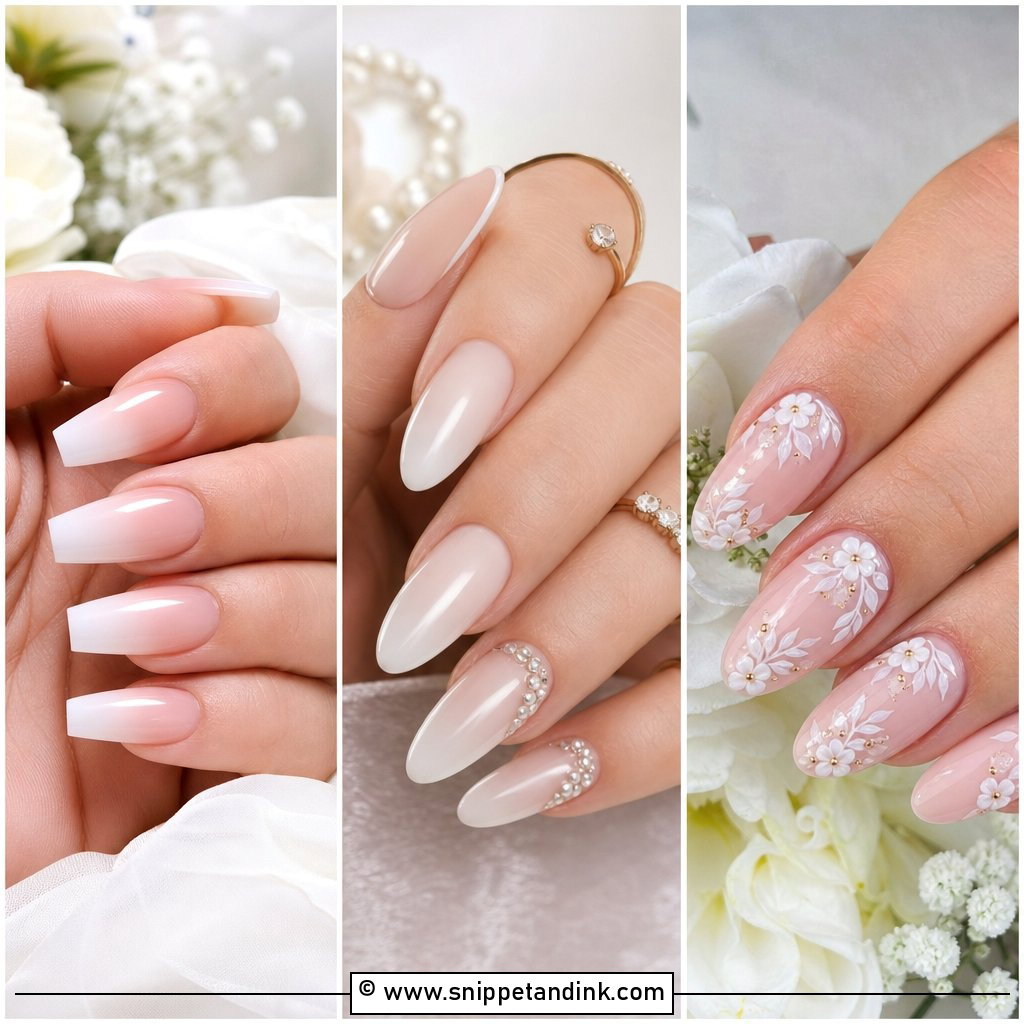
Milky white is more sheer than solid white, a creamy veil of color that softens the hand rather than covering it. Add a pearl shimmer or chrome layer and it gains depth without looking heavy. Getting the opacity right is the skill: too thin and it looks streaky, too thick and it turns chalky. I build it in two or three thin coats and check it against the client’s skin between each. On oval and almond nails the soft color makes fingers look longer. Brides with a minimal makeup look tend to love it.
4. Nude Pearl Wedding Nails
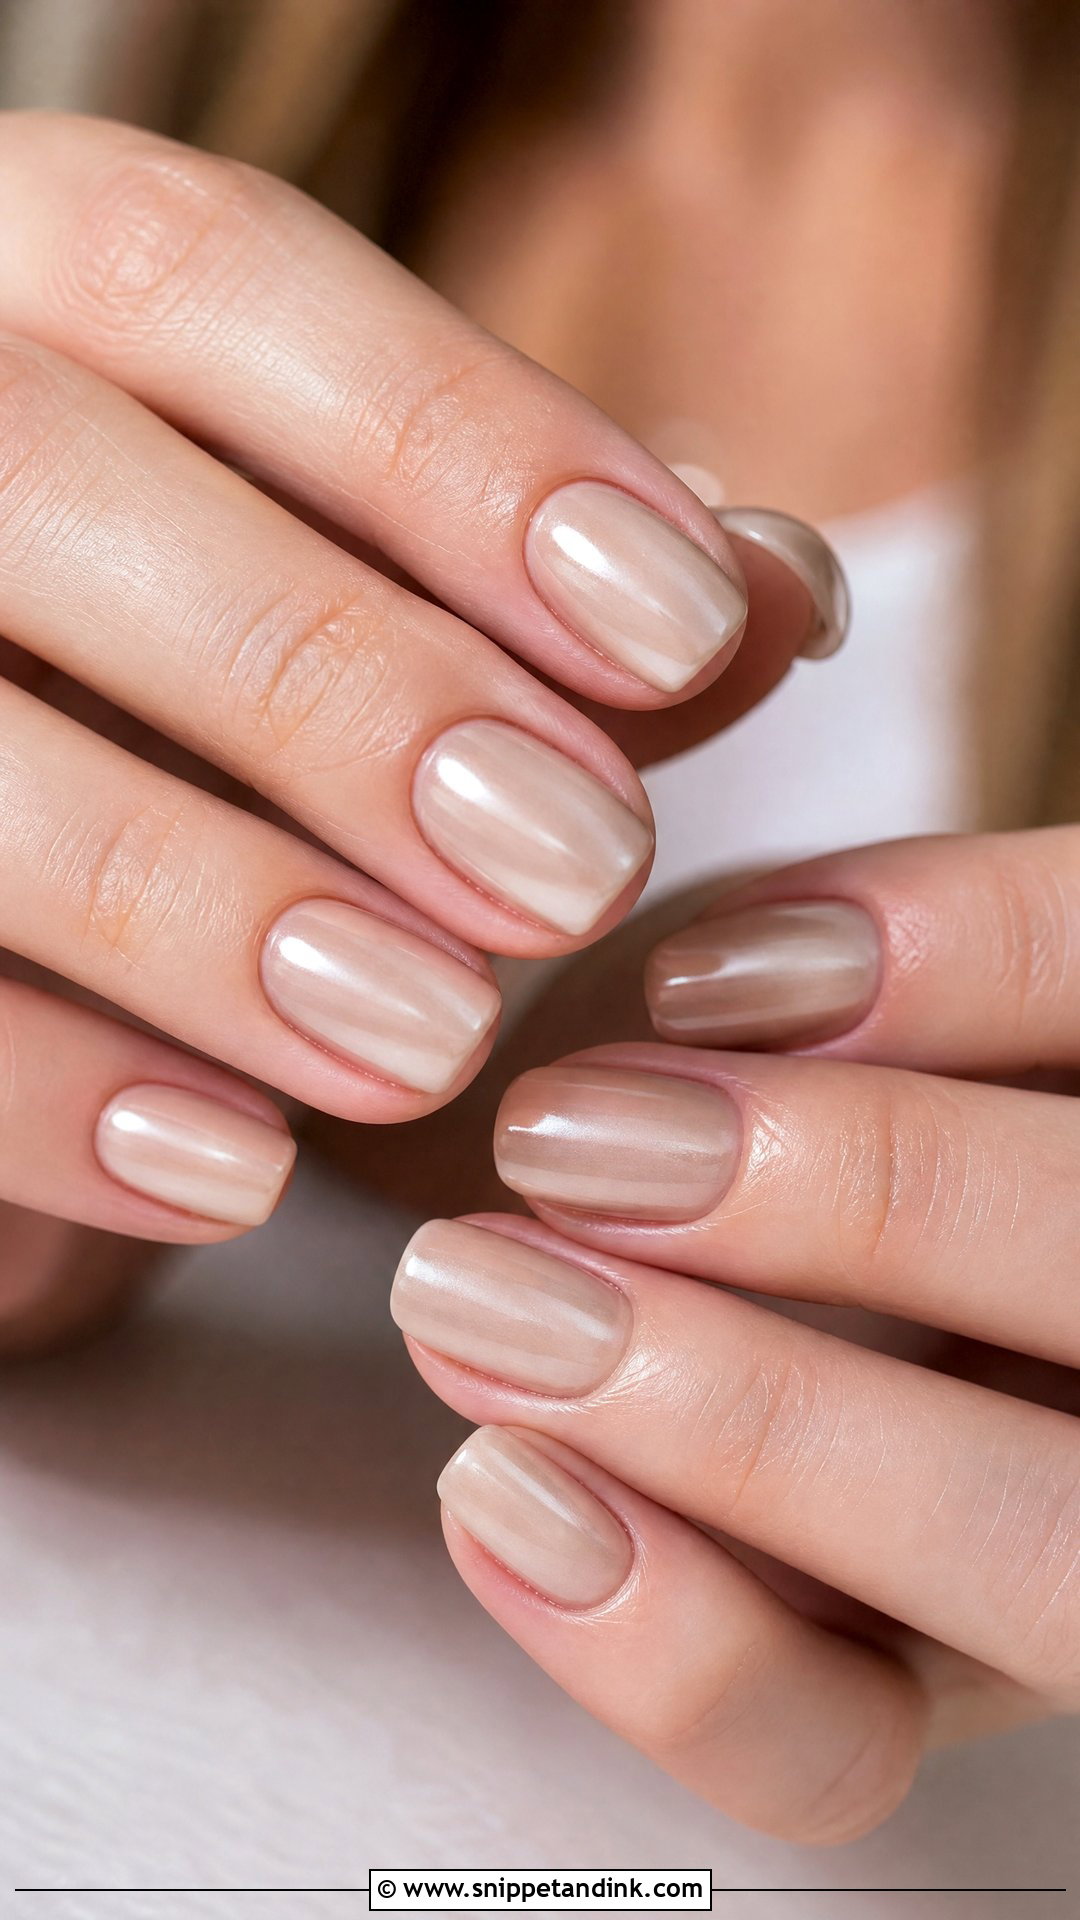
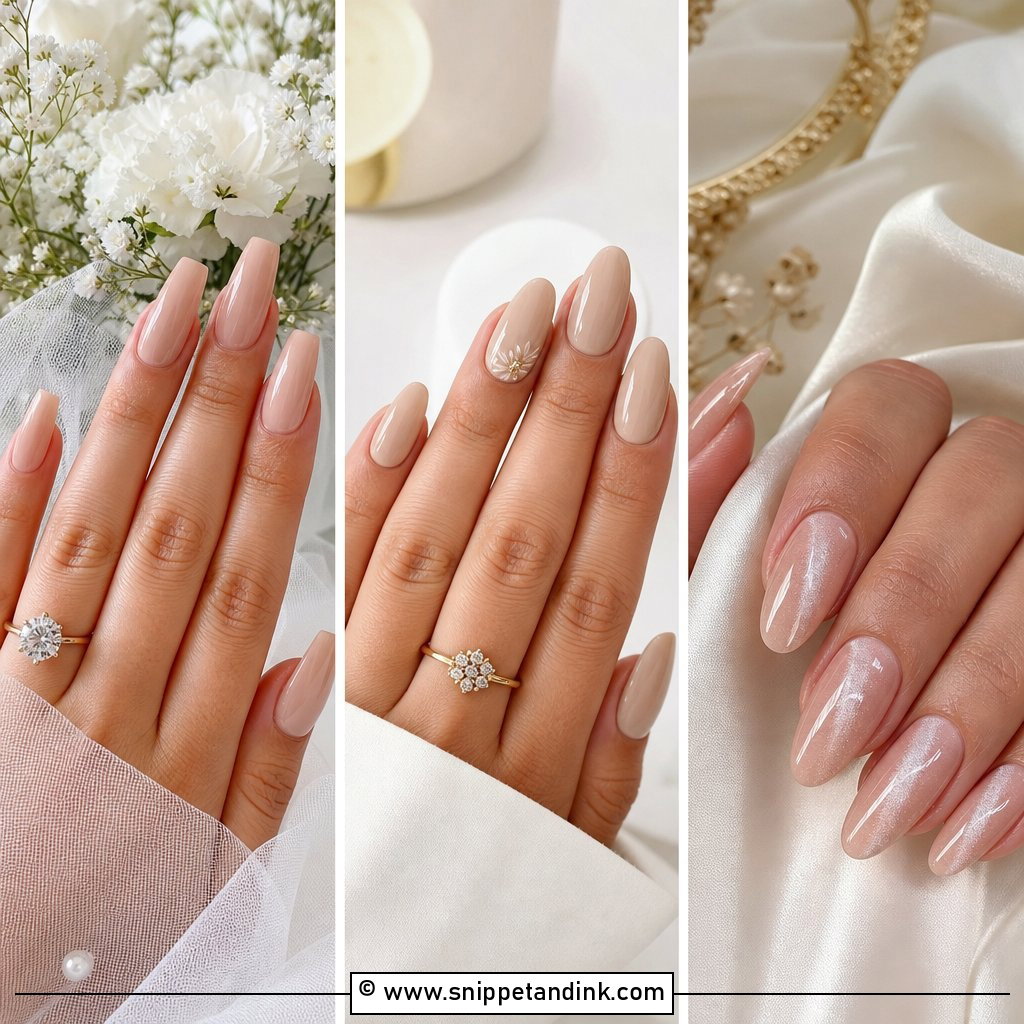
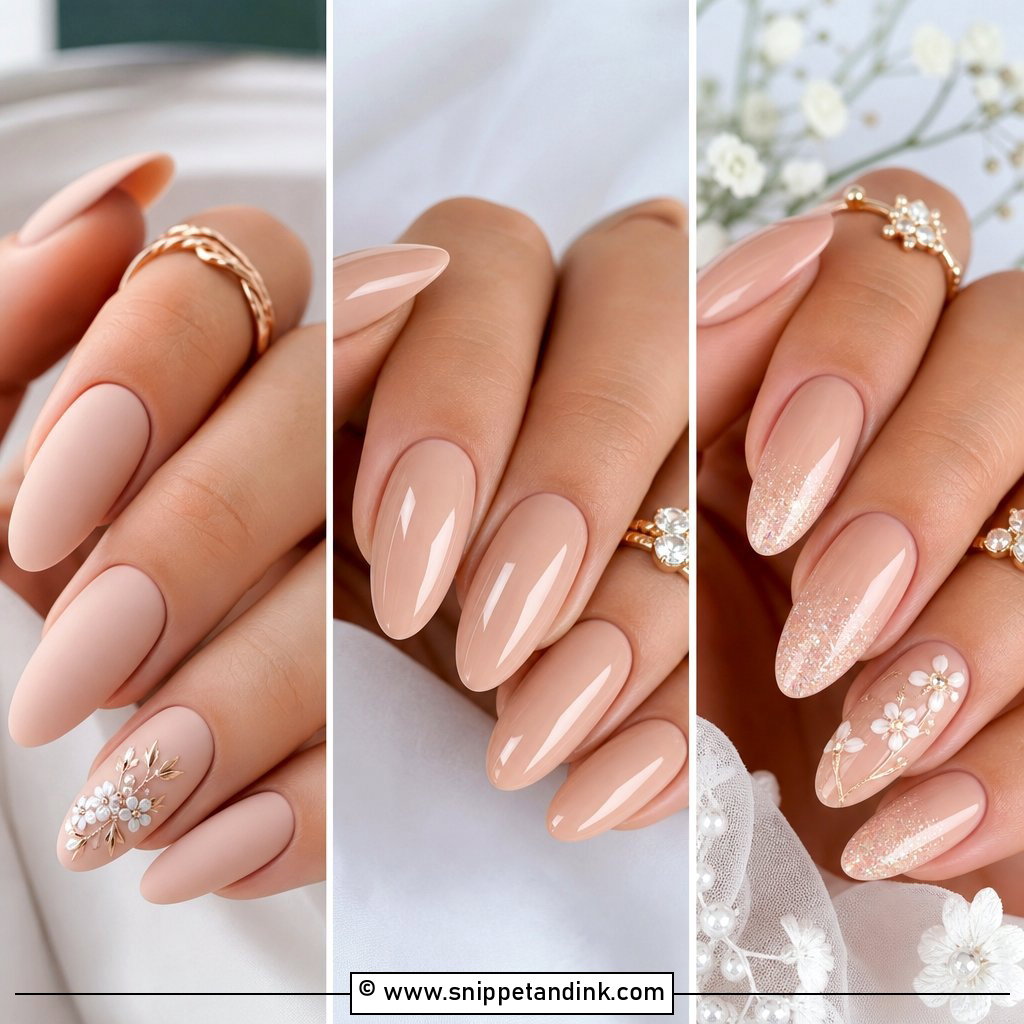
Nude pearl looks natural but more finished than bare nails. The nude should match your undertone, anywhere from pale beige to warm caramel or soft mocha, and I swatch two or three shades on the actual nail before choosing, because a nude that’s too pink or too grey makes fingers look washed out. The pearl overlay adds a bridal glow in close-ups. It’s practical too, since grow-out barely shows against a sheer nude, which matters if you want the set to last through the honeymoon. A rounded square or almond shape suits it.
5. Pink Pearl Wedding Nails
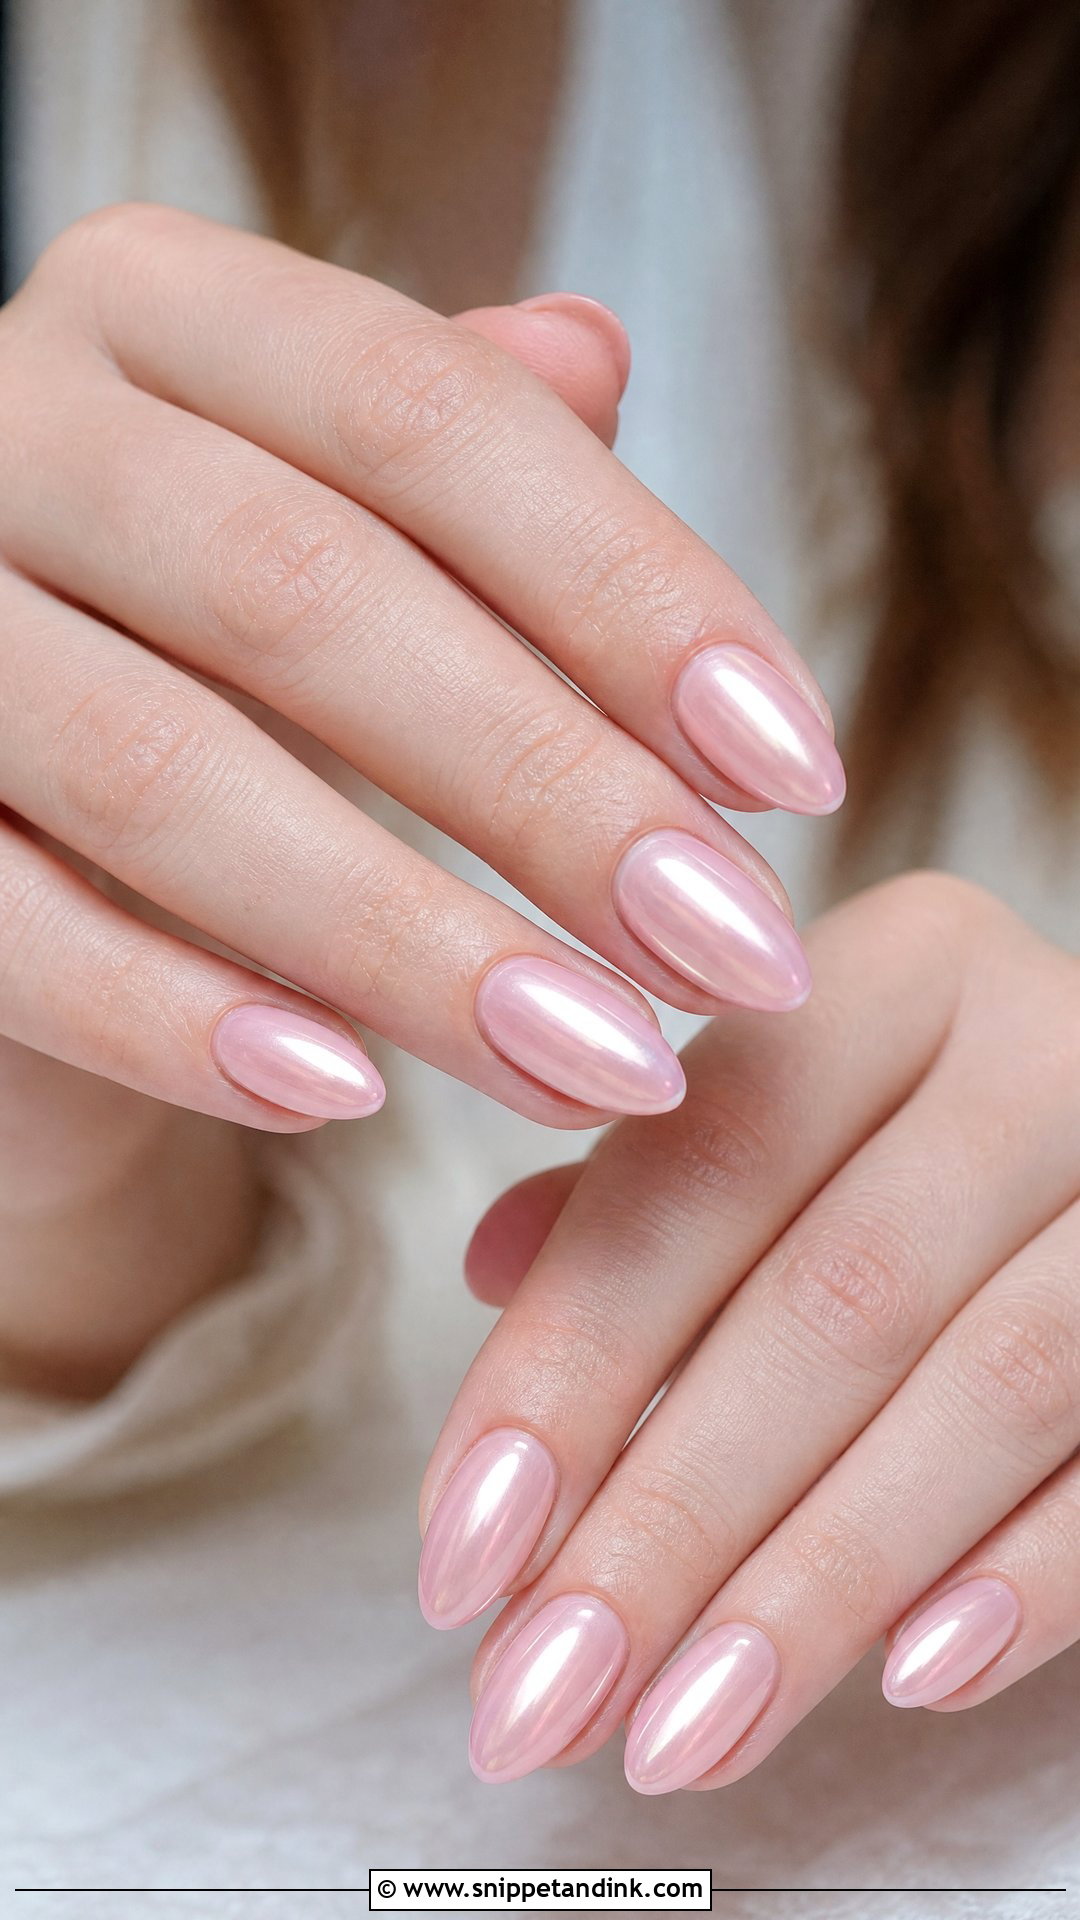
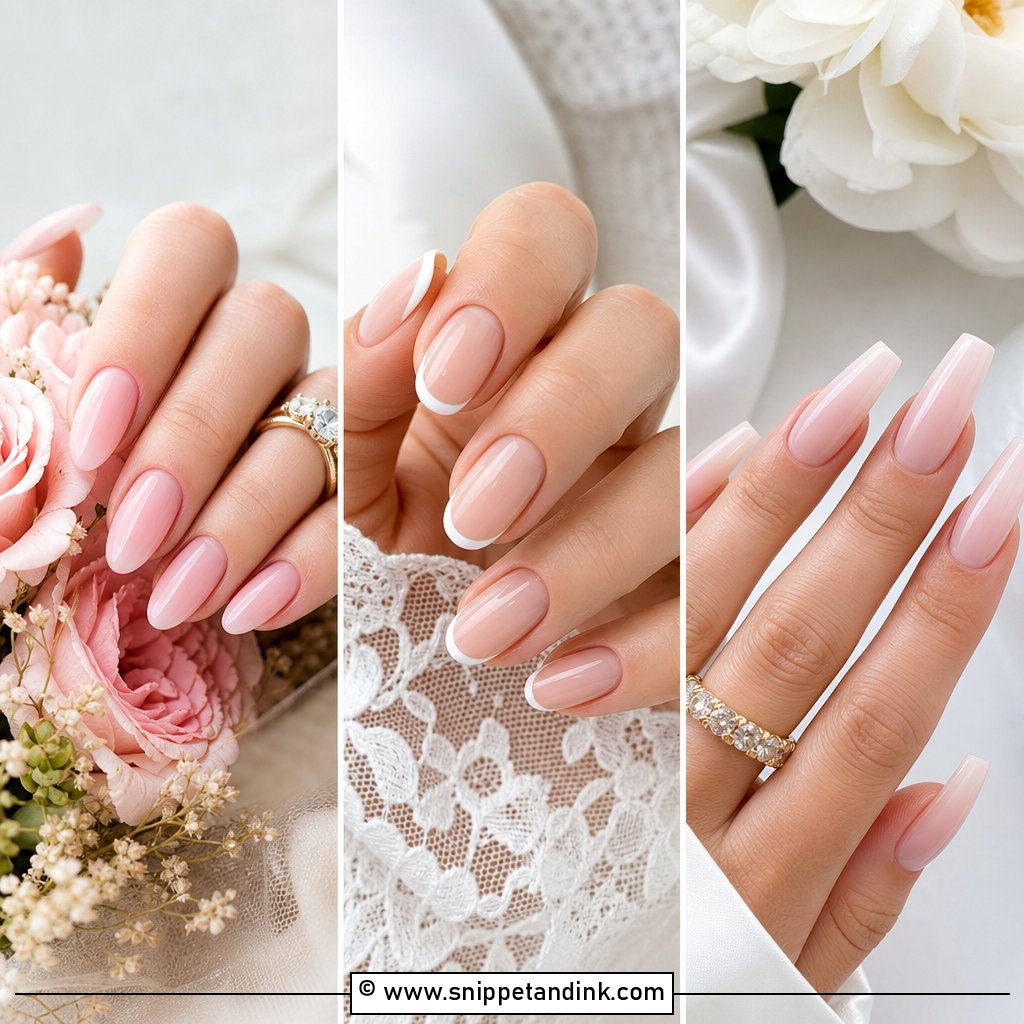
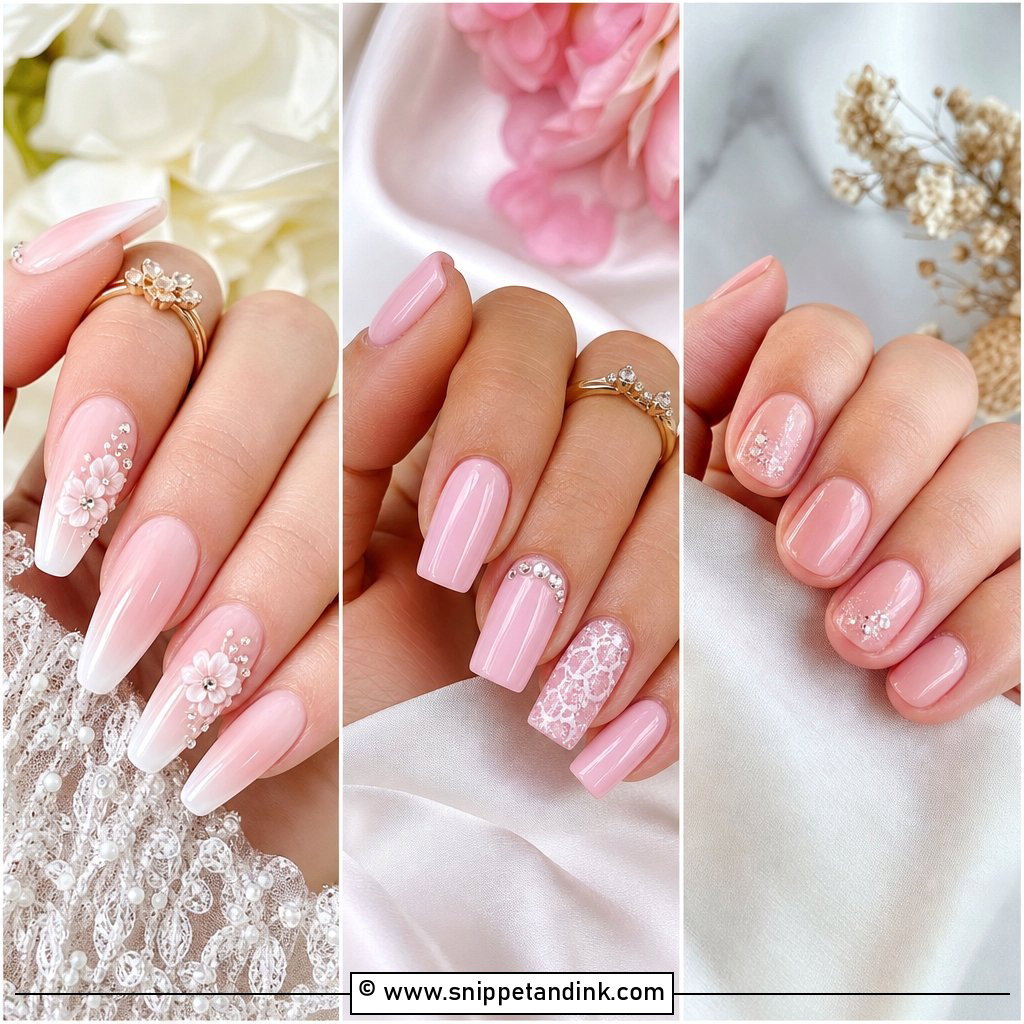
Sheer blush pink gives the nail a healthy natural tint, and the pearl finish turns it bridal. It pairs well with rose-toned makeup, soft florals and gowns with blush or champagne details. It’s also the set I suggest most often for bridesmaids, since it’s polished without competing with the bride. Fine pearl shimmer keeps it subtle; a glazed chrome over the pink gives more shine. One thing to know: very pale jelly pinks can look slightly patchy on nails with white spots or uneven tips, so on those I add a thin milky layer first to even things out.
6. White Pearl Wedding Nails
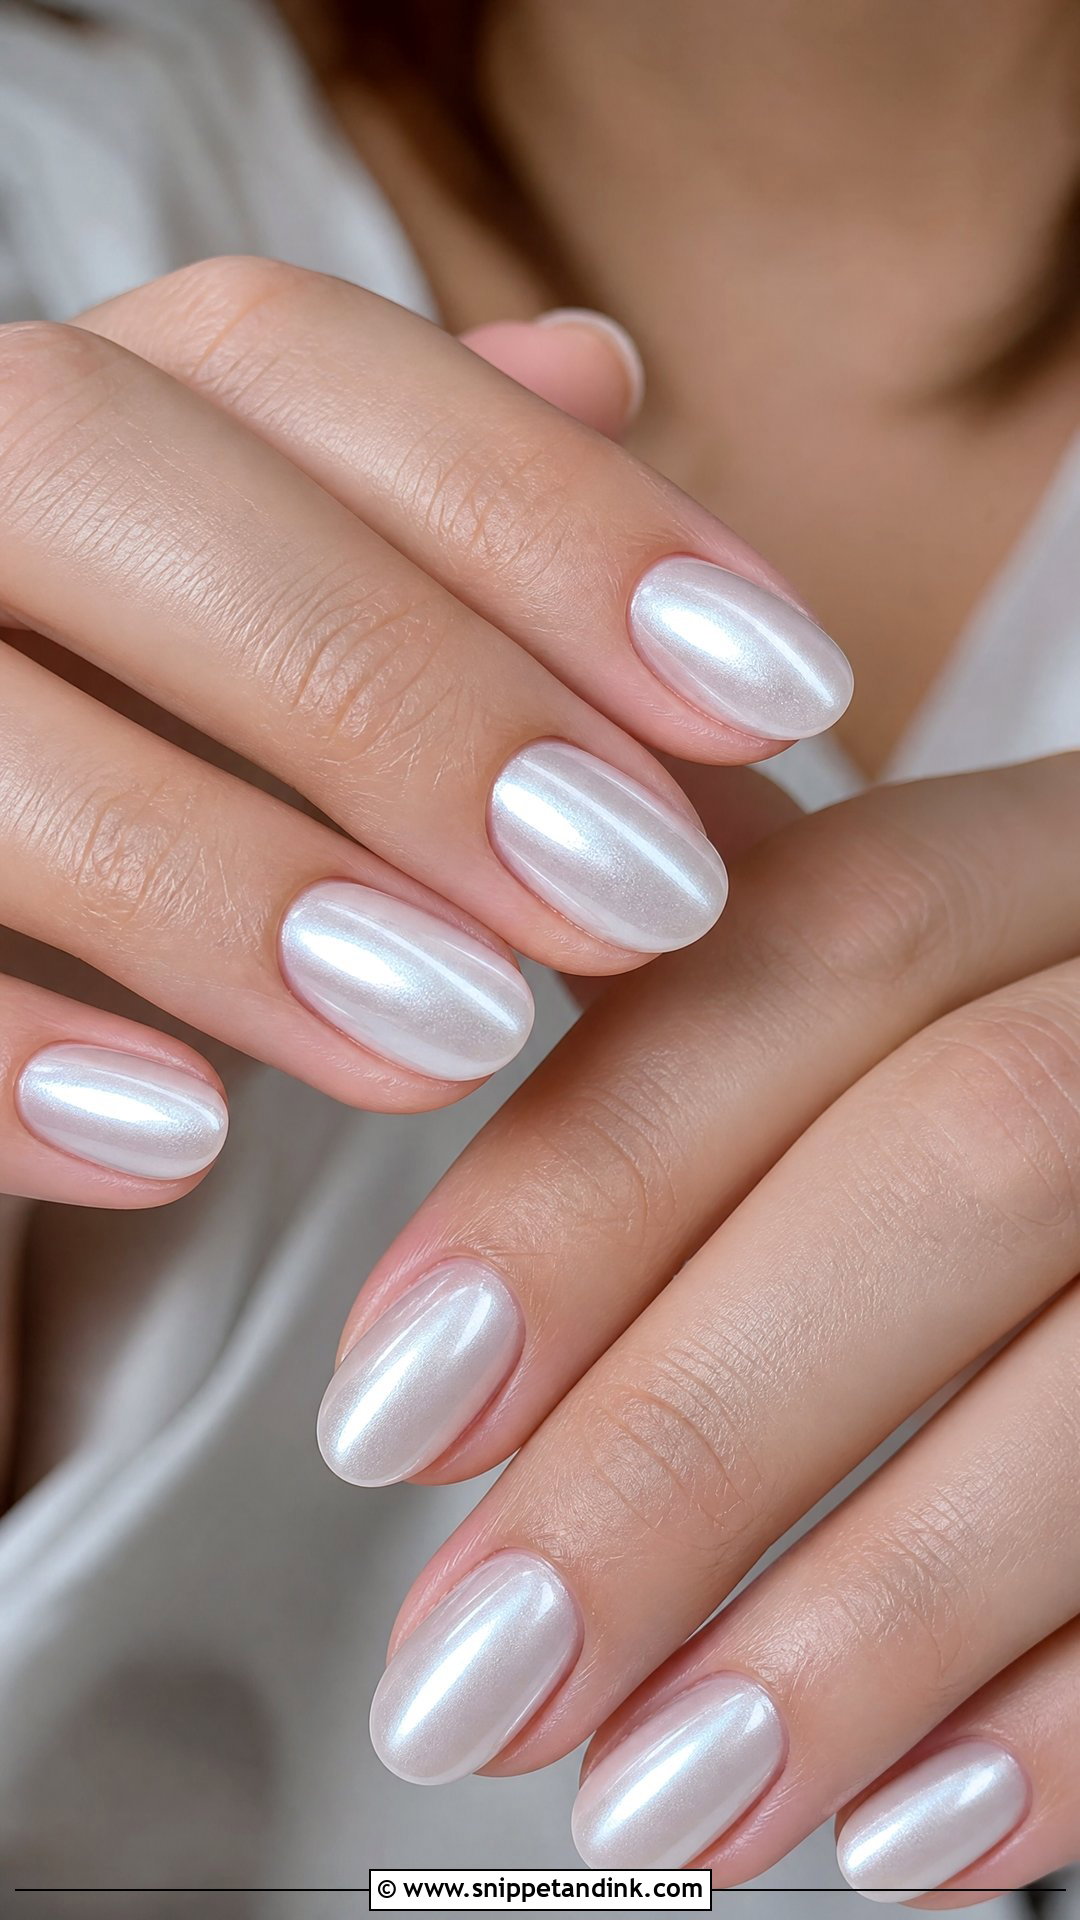
Flat white polish can look stark against skin and especially against an ivory dress. Pearl white has a gentle shimmer that softens it and adds depth. It suits lace gowns, pearl jewelry and clean modern dresses, either as a full set or mixed with a sheer base on some nails. Long almond feels more formal; short square keeps it neat and practical. If your gown is ivory or champagne rather than true white, bring a fabric swatch, because I’ll warm the pearl slightly so the nails don’t look blue against it. A glossy top coat keeps the pearl crisp.
7. Pearl Ombre Wedding Nails
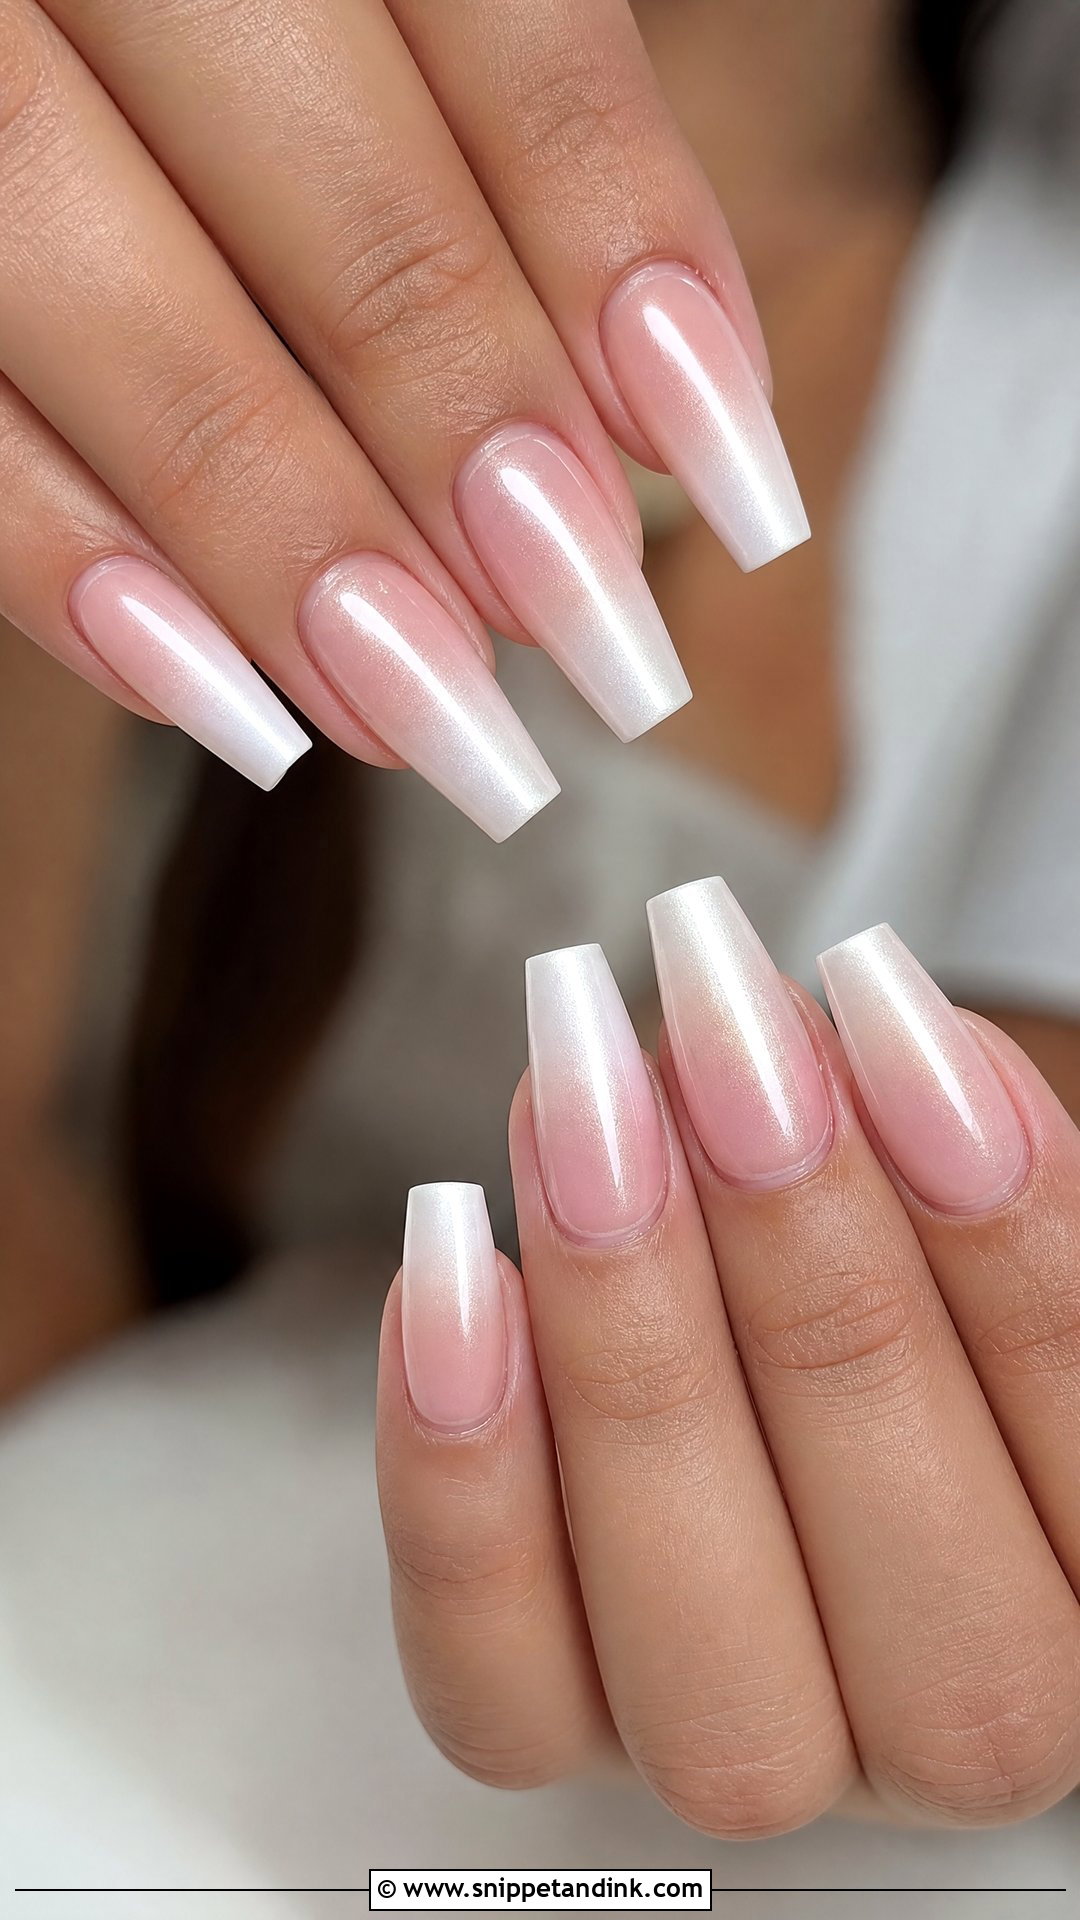
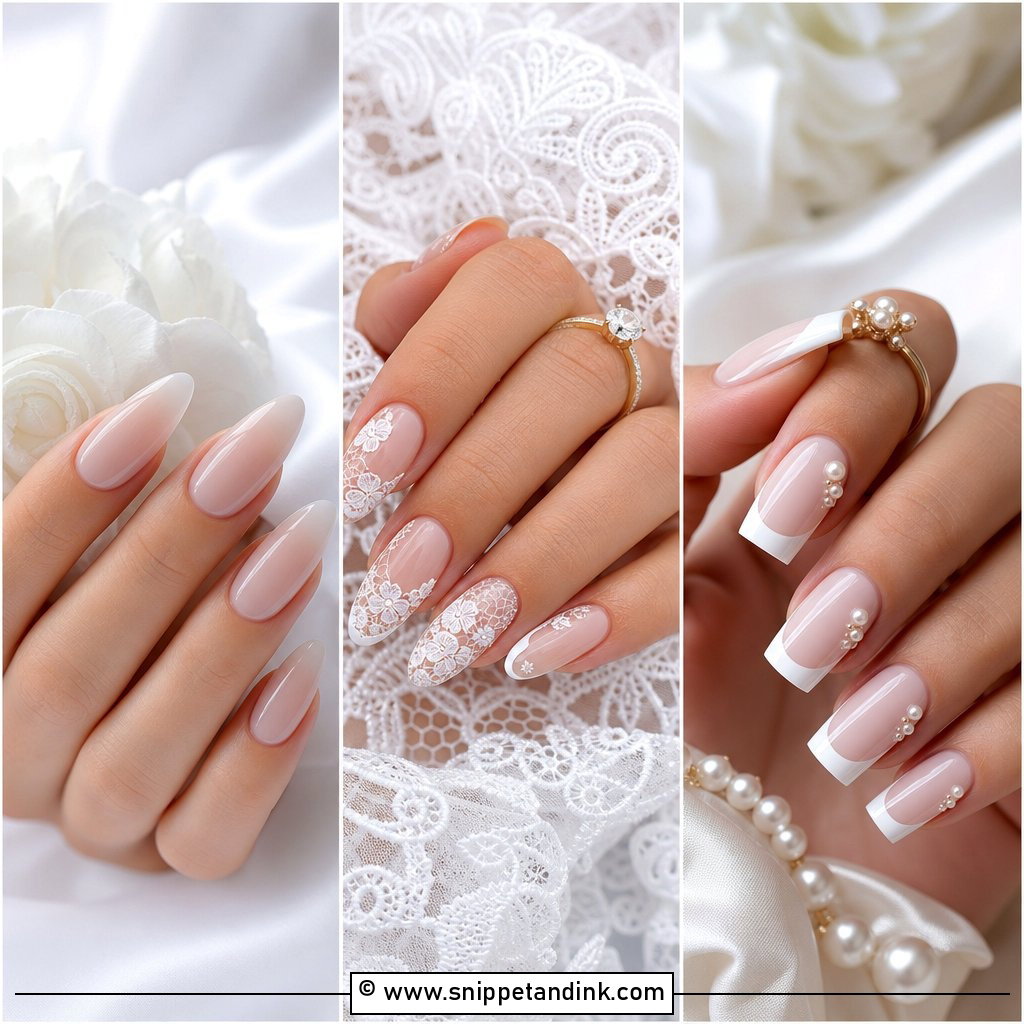
Ombre blends from sheer pink or nude at the cuticle into pearly white at the tips, so it reads like a French without the hard line. The pearl shimmer across the whole nail gives it glow in photos. I sponge or brush the gradient in thin layers and blur the middle zone until there’s no visible band. Almond, coffin and oval shapes flatter it most. It’s also forgiving as it grows out, because the soft base disguises the gap at the cuticle better than a crisp French.
8. Pearl Accent Wedding Nails
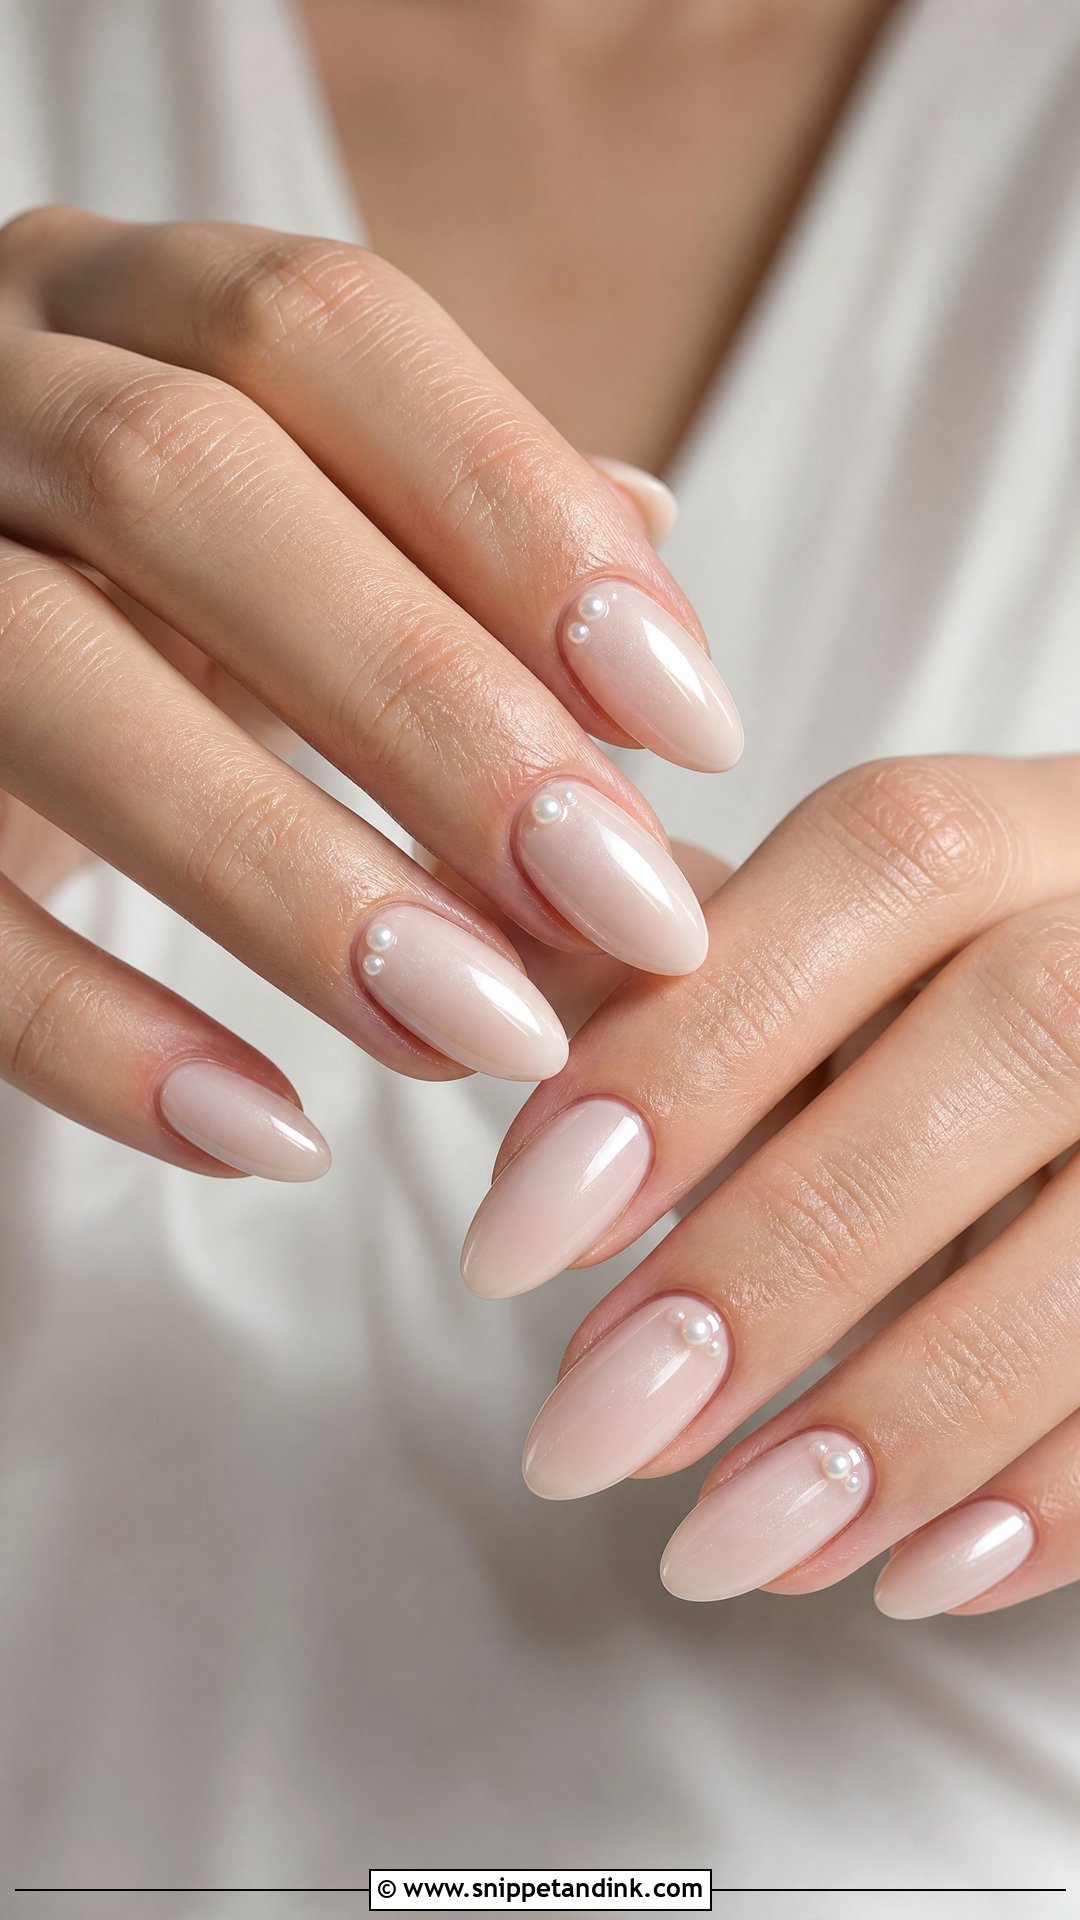
Accent nails keep the set mostly simple with a little detail on one or two fingers. The base can be nude, pink, milky white or French, with small pearls near the cuticle, along one side, or in a tiny cluster near the tip. If your dress or accessories already feature pearls, this is the most balanced way to echo them. I set accent pearls into a small bead of builder gel and seal around them, rather than relying on glue alone, so they’re flush and smooth to touch. Ring fingers are the usual choice, but think about whether you want the pearl competing with your engagement ring in close-ups.
9. 3D Pearl Wedding Nails
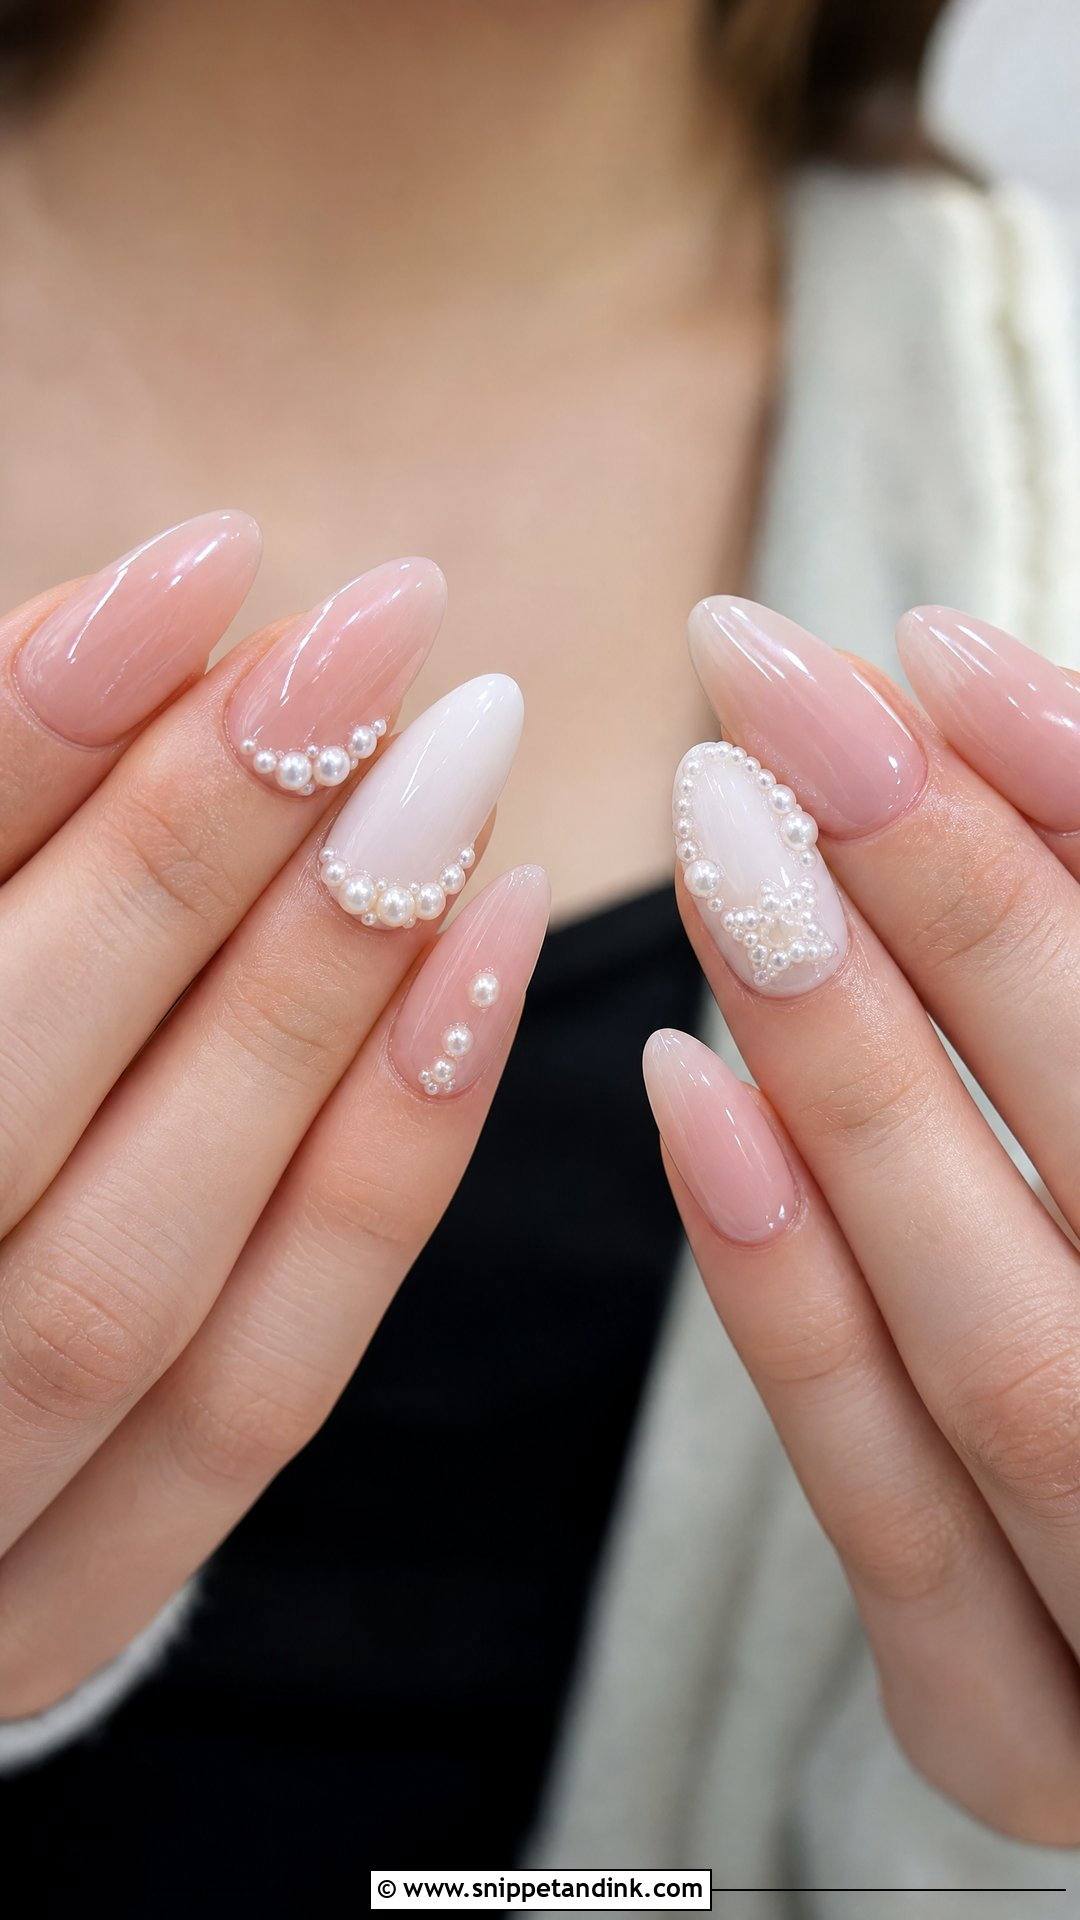
3D pearls give the most texture of anything here: small beads set into the nail as raised borders, clusters or flower shapes. They need a calm base of sheer nude, milky white or soft pink, or the set looks crowded. The practical issue is snagging. Raised pearls can catch on tulle, lace, a veil or knitwear, so I keep them on accent nails, closer to the cuticle than the free edge, and seal around every bead. Choose flat-backed pearls rather than round ones; they sit lower and stay on longer.
10. Pearl Almond Wedding Nails
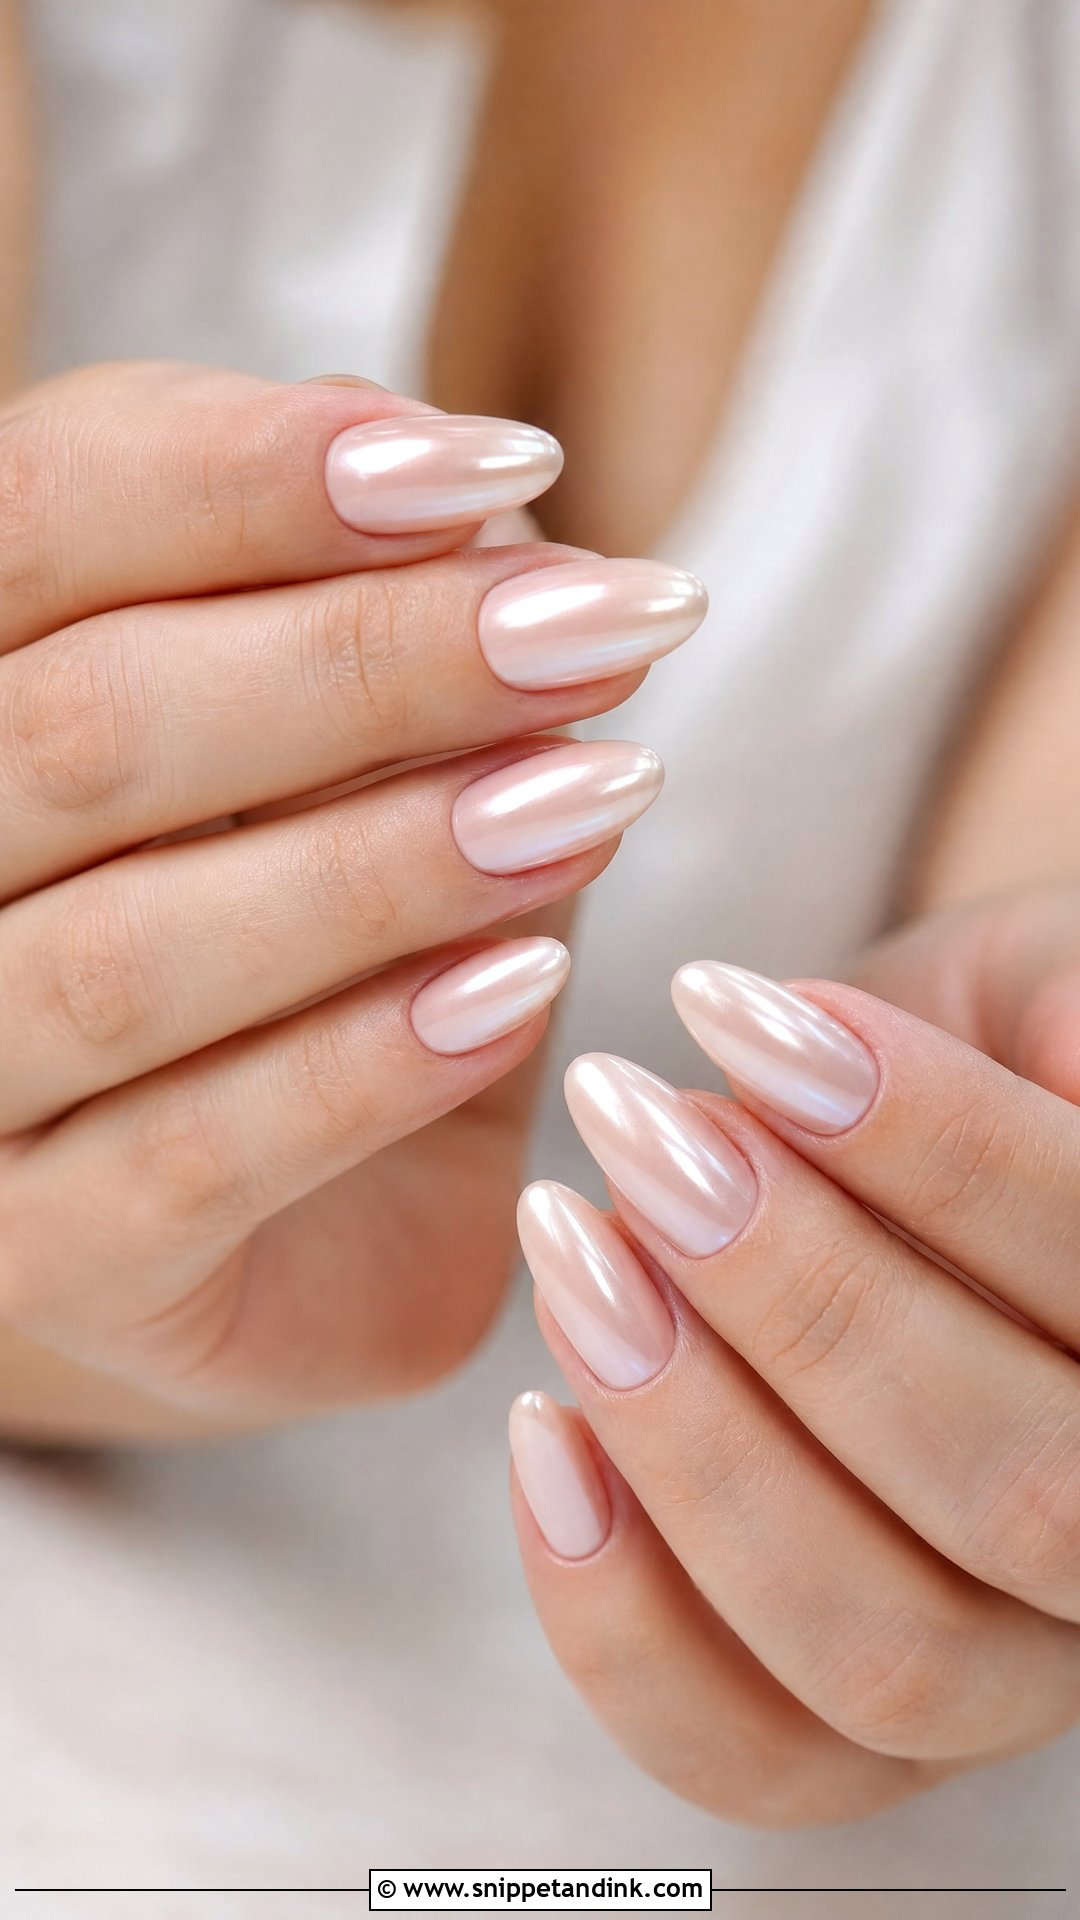
Almond tapers to a soft rounded point, which is why it lengthens the fingers better than any other shape. It suits nearly every pearl finish, from milky white, blush and nude to chrome, French tips, ombre and small accents. It’s also far more practical than stiletto, since the rounded tip is stronger and less likely to catch. I file almond from both sides toward the center and check it from above, because a tip that leans even slightly to one side shows in a ring photo. Medium length is comfortable for most brides, a little longer if you’re used to wearing extensions.
11. Short Pearl Wedding Nails
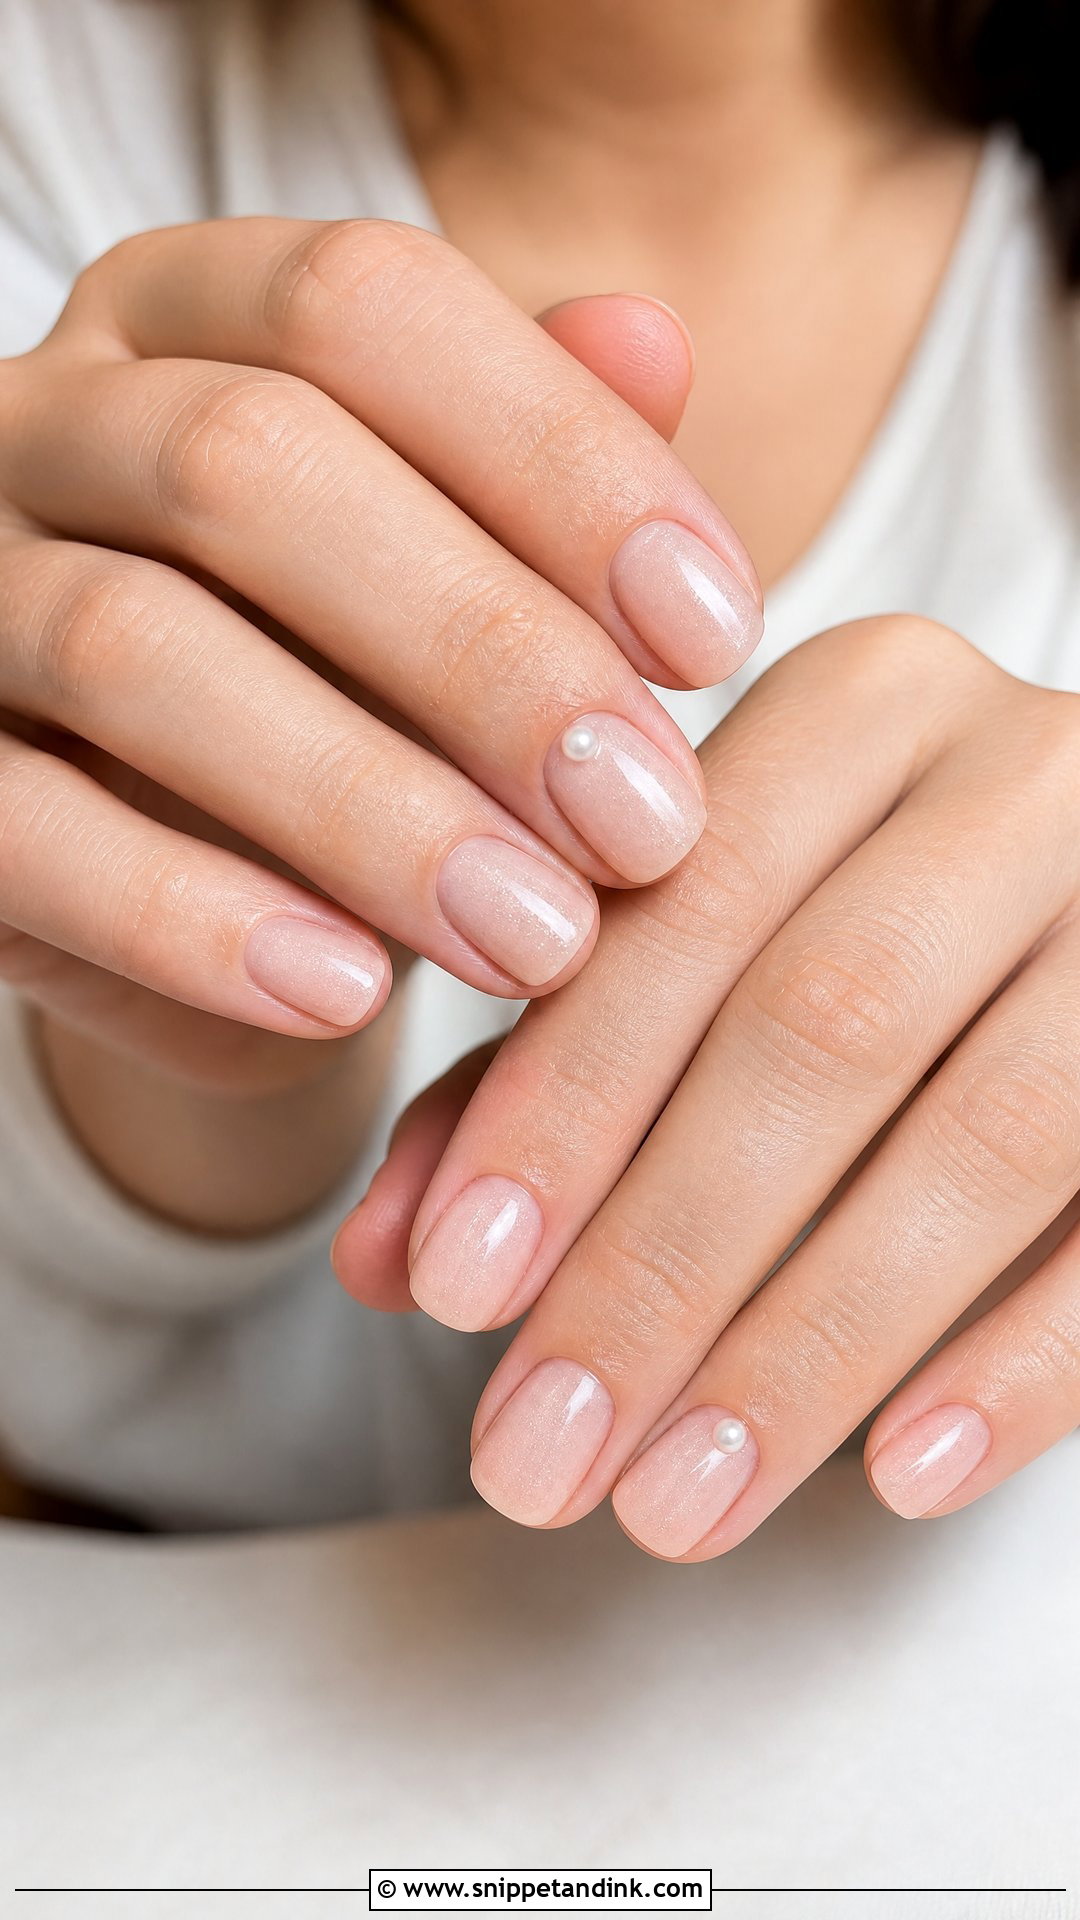
You don’t need extensions for pearl nails to look bridal. A short rounded or square shape with a sheer pearl finish looks refined, and short nails are far easier to live with on the day when you’re fastening buttons, holding flowers and putting rings on. To make short nails look longer, I use a nude or pale pink close to the skin with a fine pearl shimmer, and keep the cuticle area very neat, since on short nails the cuticle is a bigger part of what you see. A micro French or one tiny pearl at the cuticle adds detail without shortening the nail.
12. Long Pearl Wedding Nails
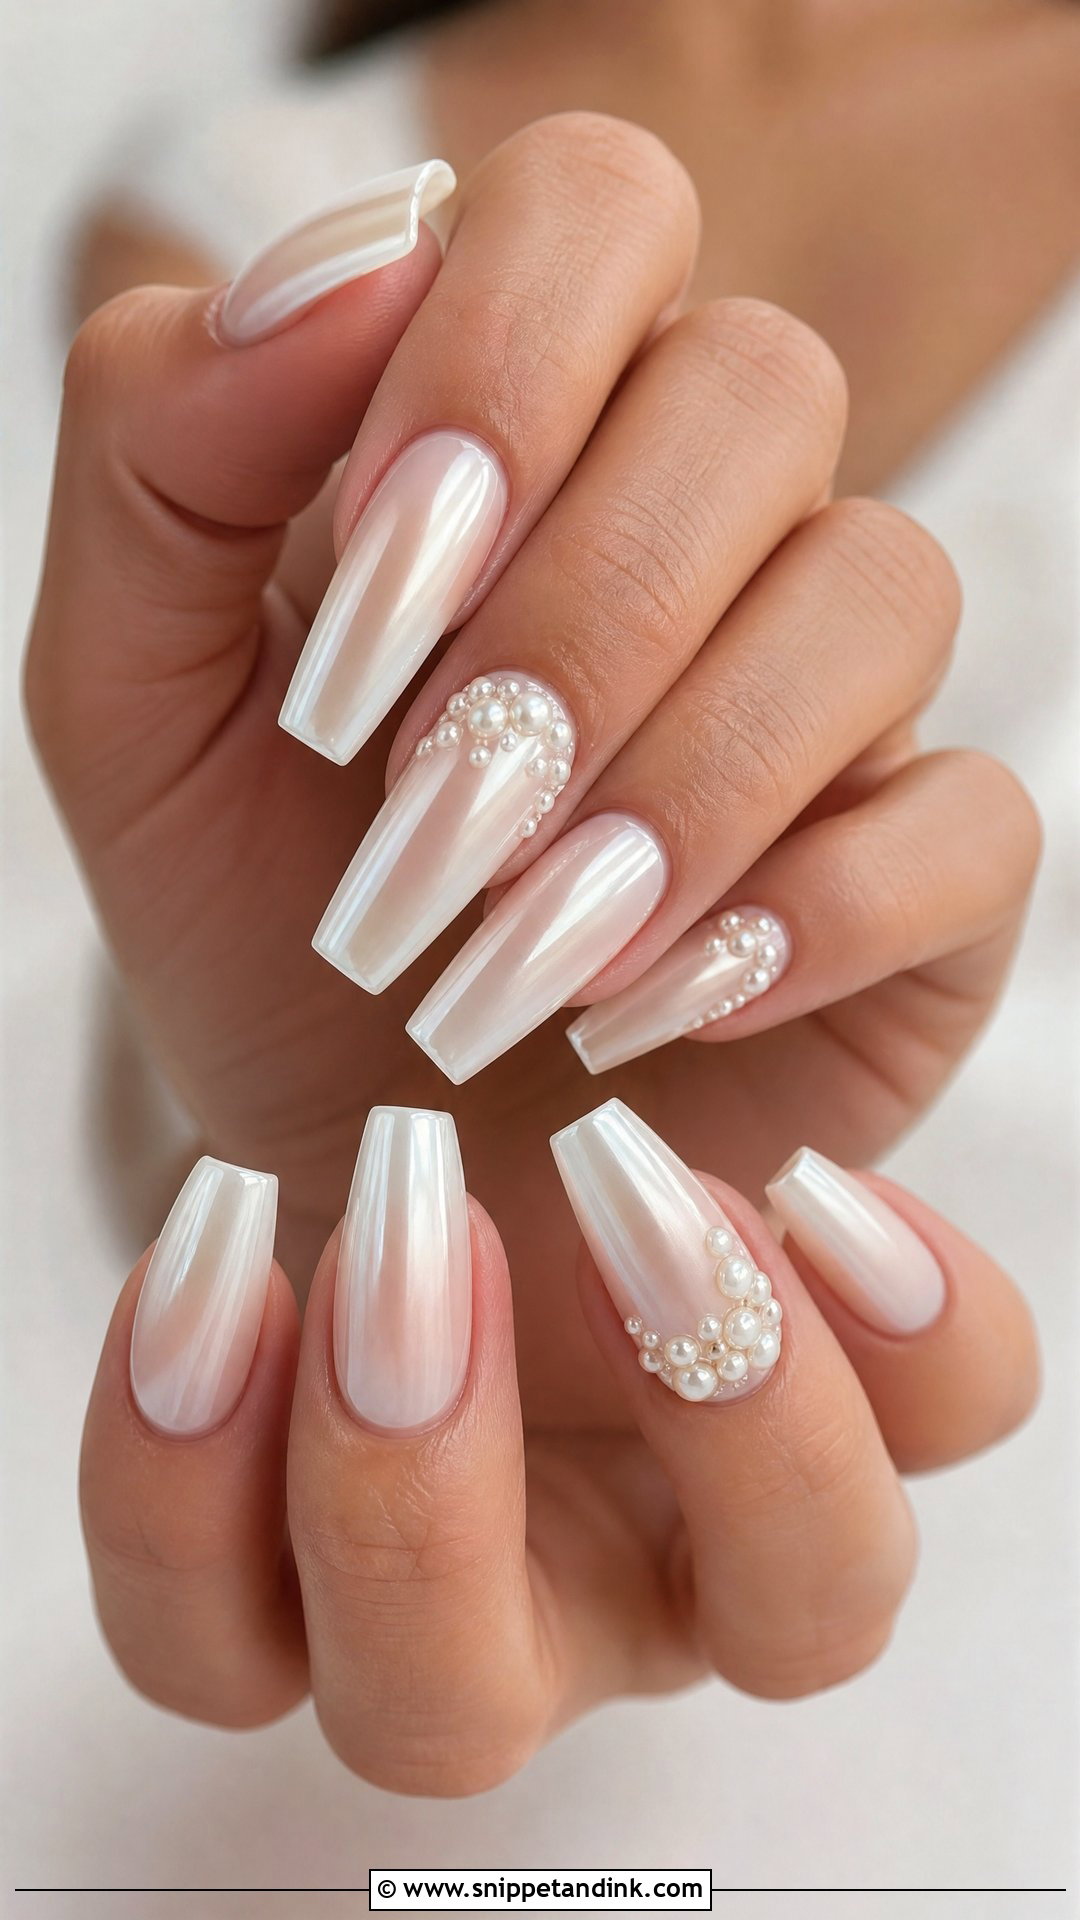
Length gives more room for ombre, French tips, pearl clusters, chrome and line art, on almond, coffin or tapered square shapes. The risk is overdoing it. If the base is already pearl chrome, I keep embellishment minimal, and if you want 3D pearls, they go on just a few nails. Long nails also need to be built properly. A weak extension with too little structure at the stress point can crack under the weight, so I build an apex for strength. If you’ve never worn long nails, do a trial set a few weeks before the wedding to make sure you can manage them. They look great in bouquet and ring close-ups.
13. Pearl Coffin Wedding Nails
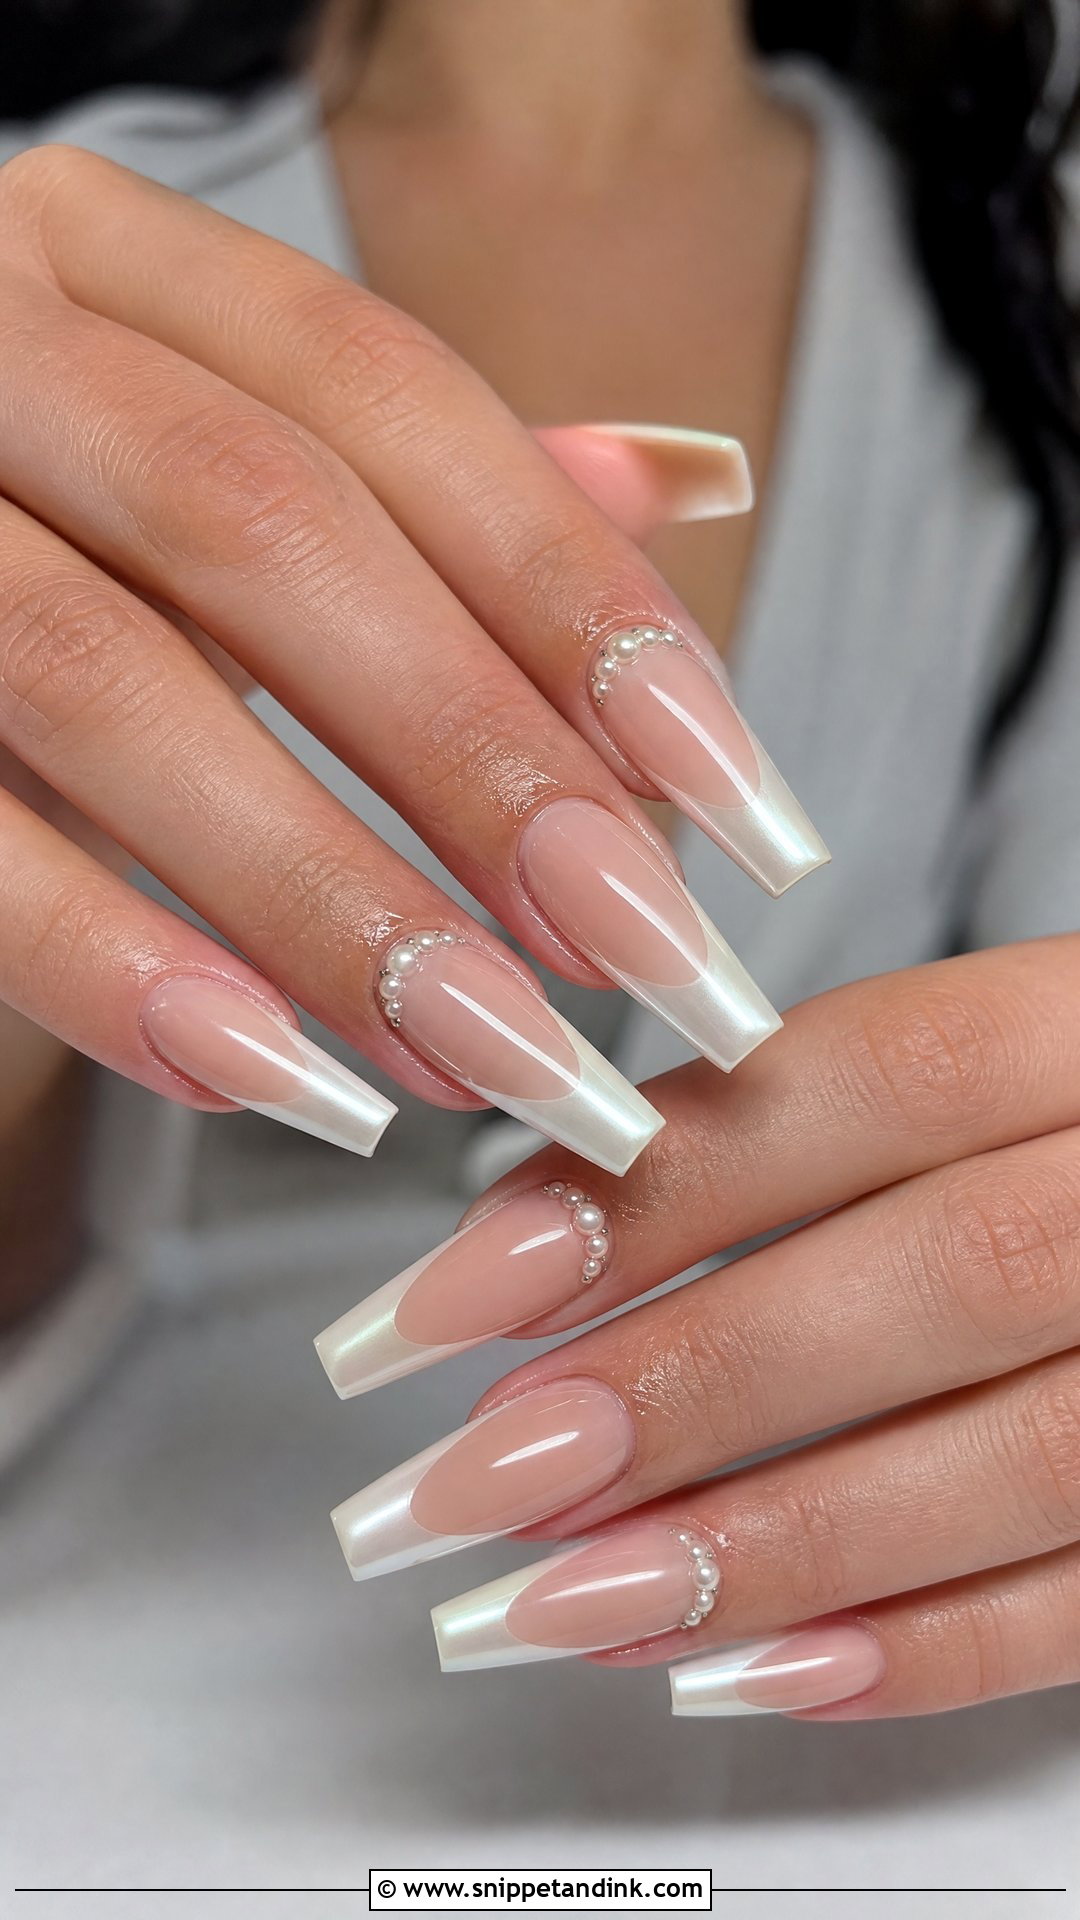
Coffin has straight sides and a flat squared tip, which looks sleek and fashion-led. Pearl polish or chrome softens it so it doesn’t feel too sharp for a wedding, in milky white, nude, blush pink or a subtle ombre. For more glamour, add tiny pearls or crystals near the cuticle on one or two accent nails. For something classic, I’d do a pearl French on medium coffin nails with a sheer pink base. Coffin corners take the most knocks, so I seal the tip edge carefully; chipped corners are the first thing to show on this shape.
14. Pearl Square Wedding Nails
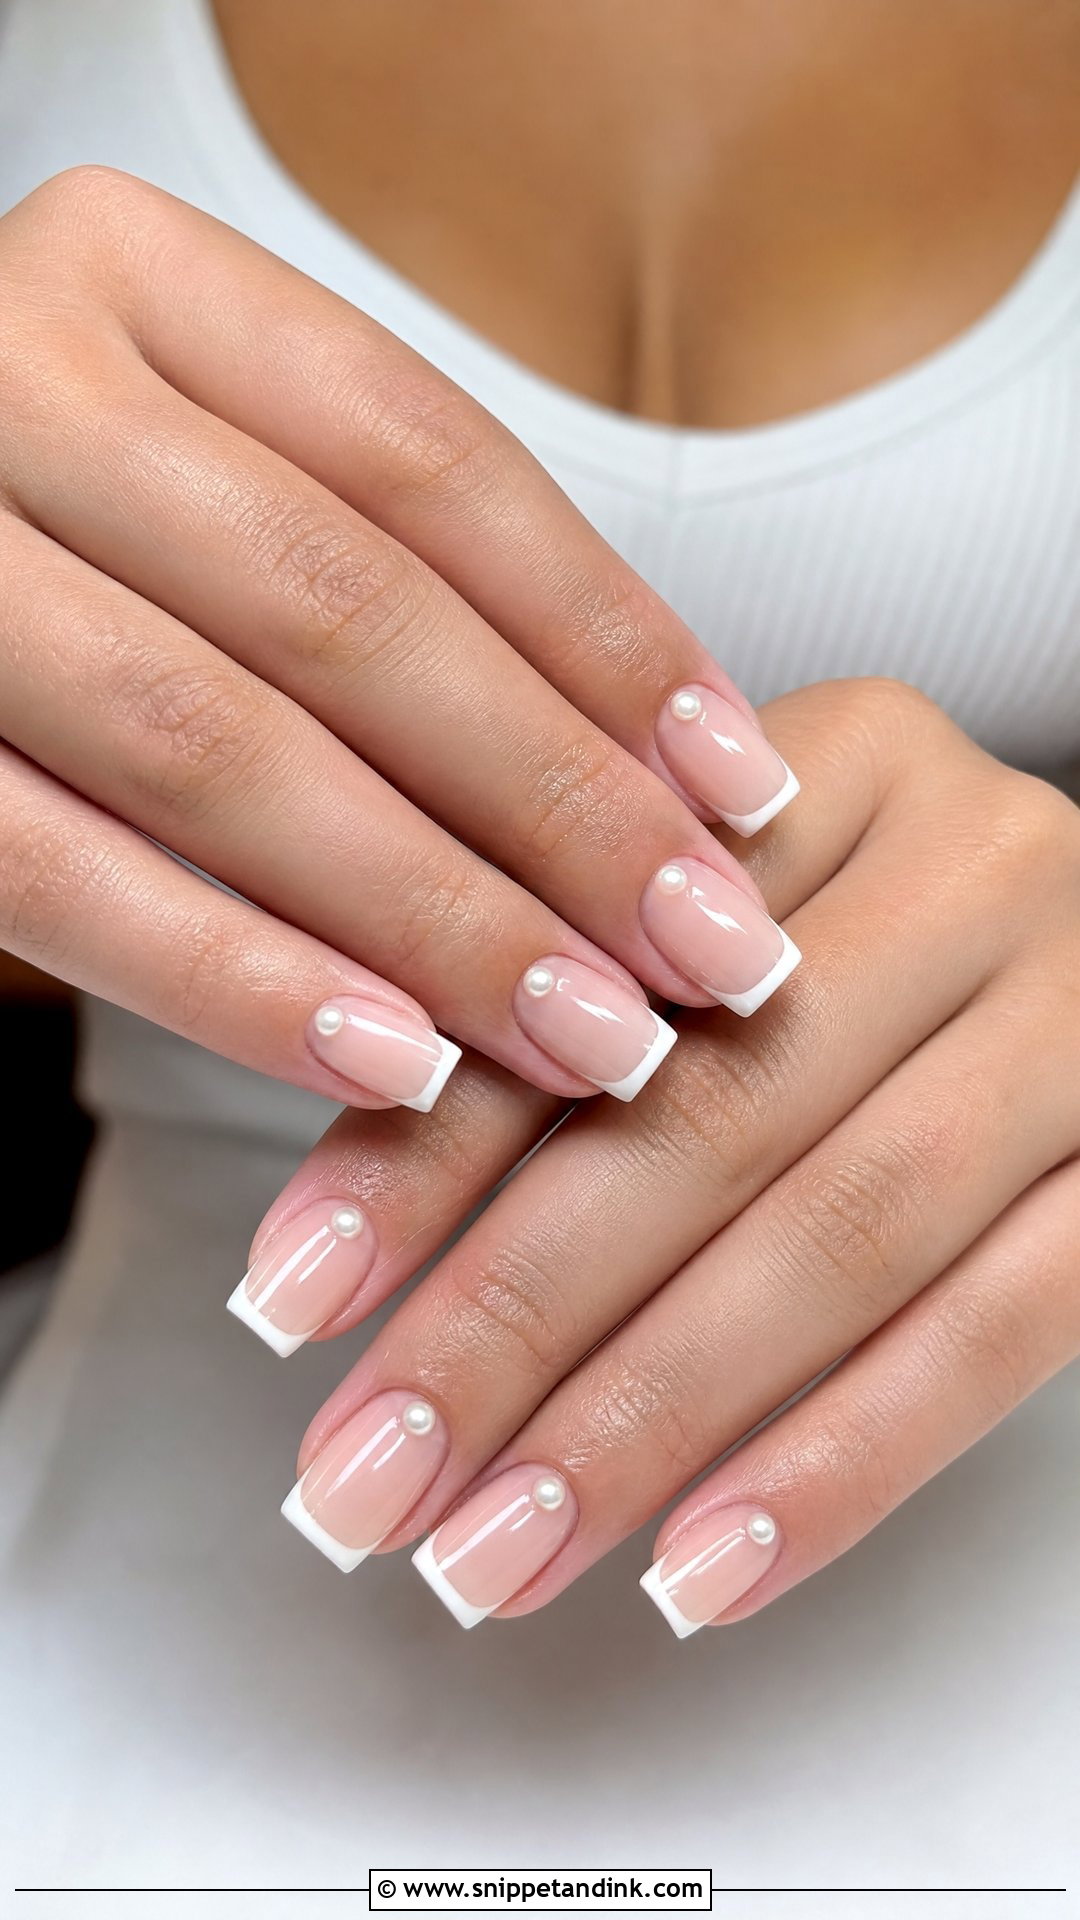
Square is the neatest, most structured shape, and pearl keeps it soft. It suits brides who like classic nails but want more glow than a plain French, at short or medium length, with a milky pearl base or a thin pearl tip. Tiny pearl cuticle accents look balanced against its straight edges. I usually soften the corners to a squoval for brides, since sharp corners catch on fine fabrics and snap off easily. The shape stays square from the front while being much kinder to wear.
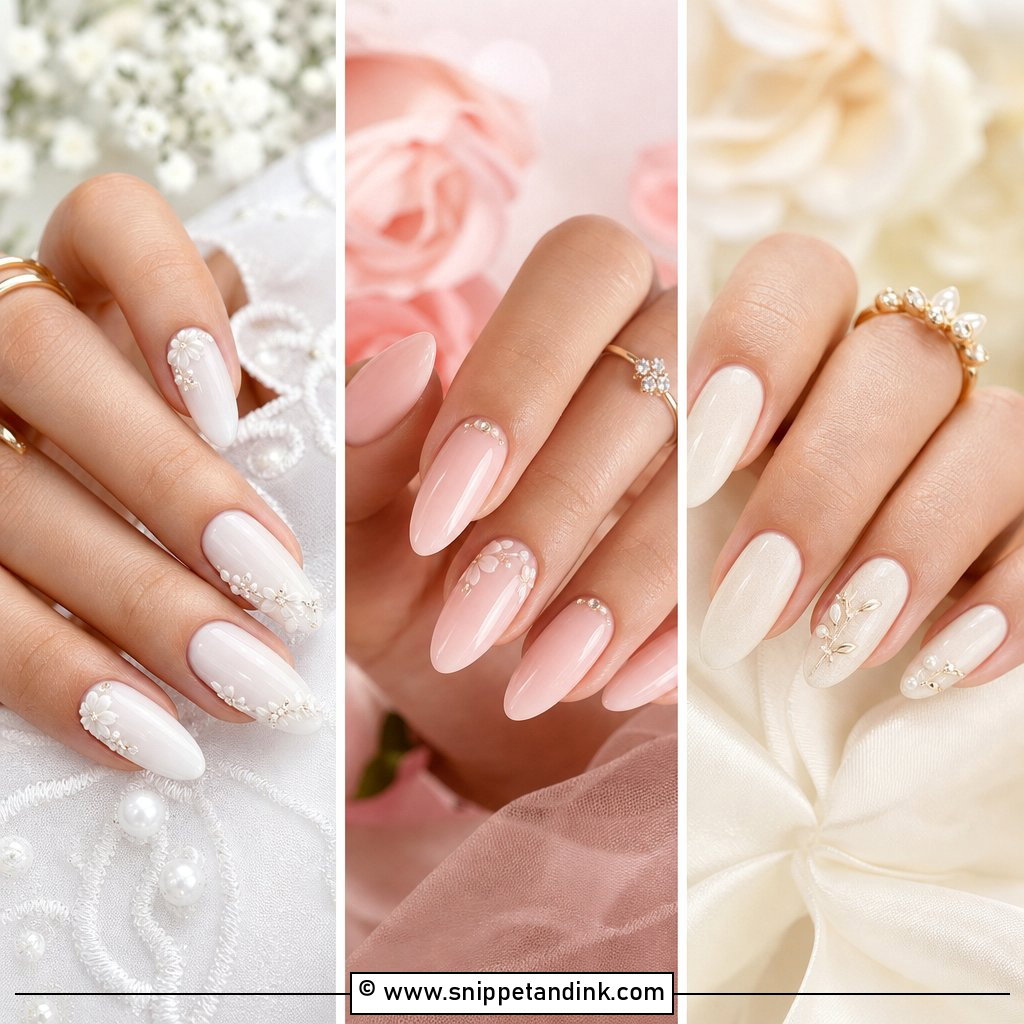
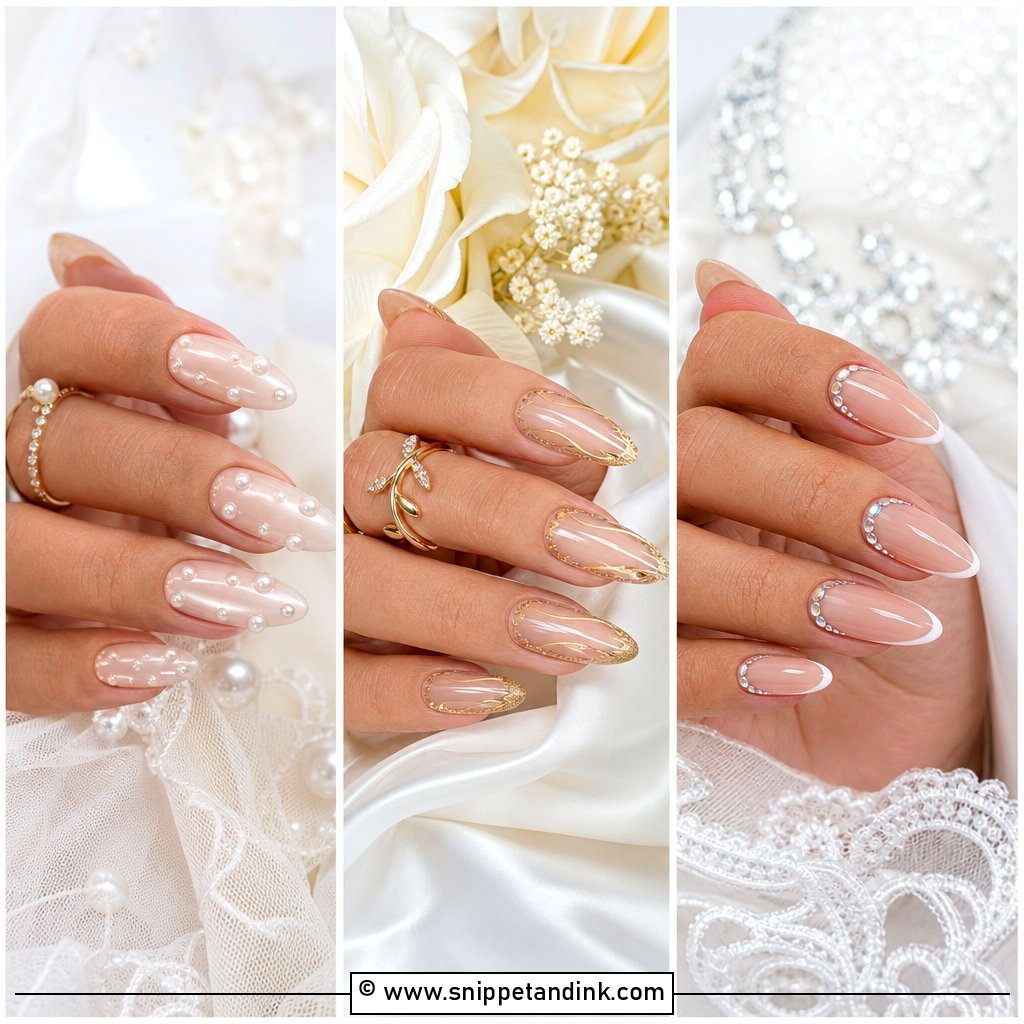
15. Pearl Oval Wedding Nails
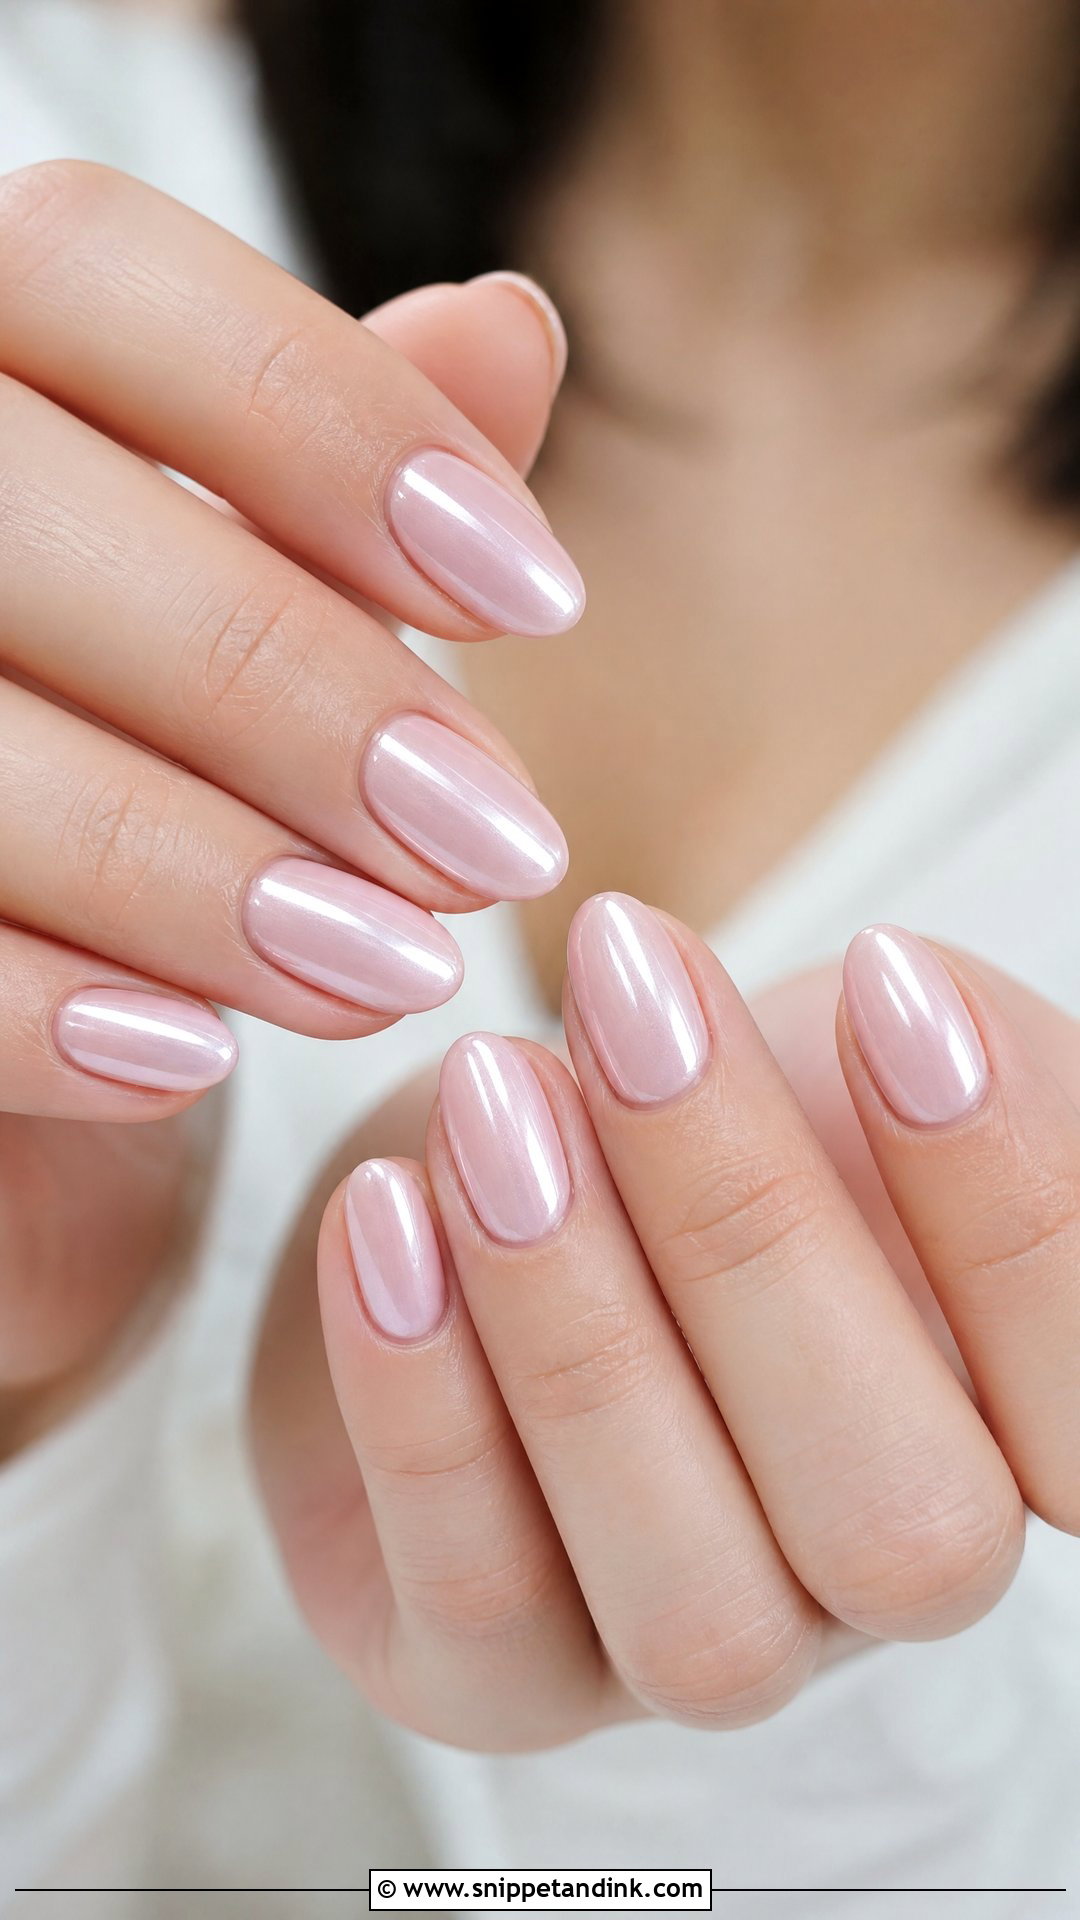
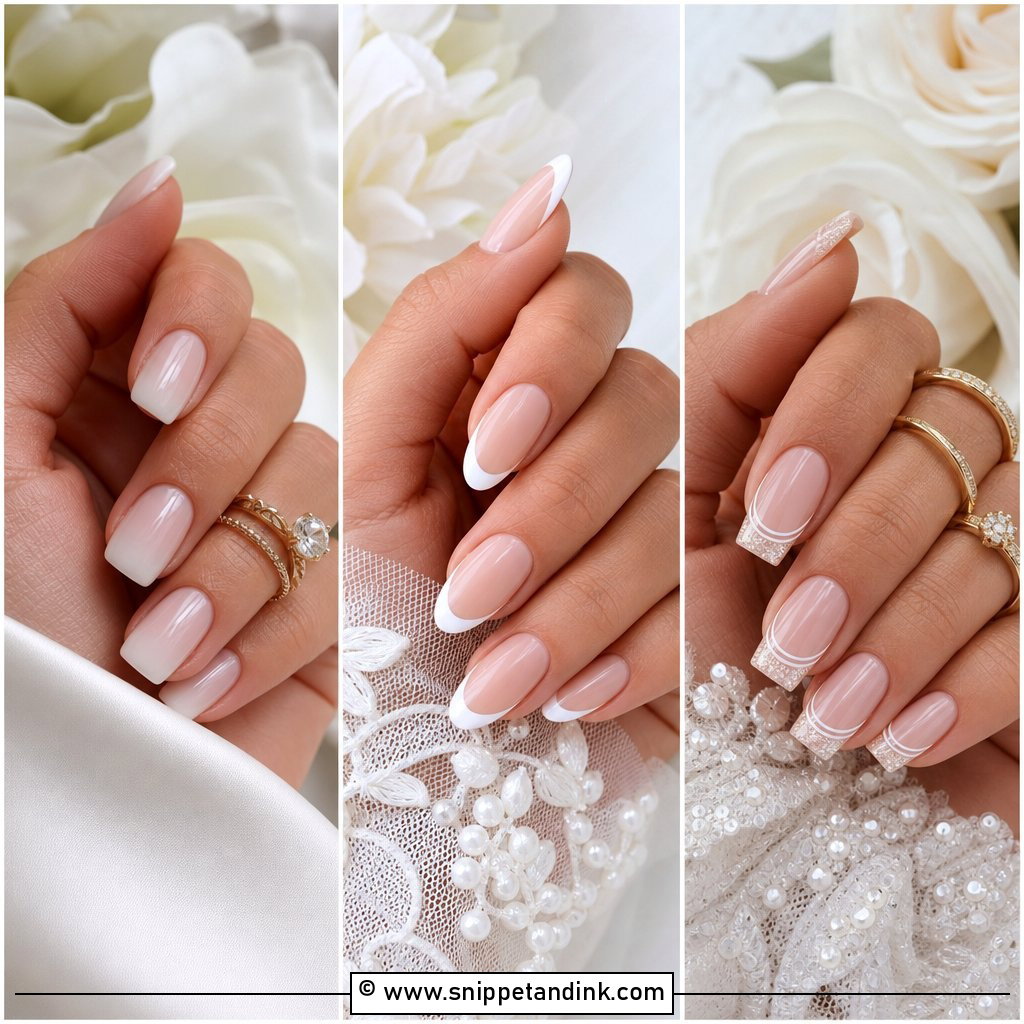
Oval follows the curve of the fingertip, so it looks natural and wears easily. It suits almost every pearl finish, from chrome and ombre to French tips and milky white. It gives length without a point, and the curved edge reflects light smoothly in photos. On wide nail beds I file the sides of the oval slightly narrower, which makes the nail look slimmer. For a classic finish, try sheer pink with pearl shimmer; for something cleaner and more modern, milky white pearl with a high gloss.
16. Pearl Stiletto Wedding Nails
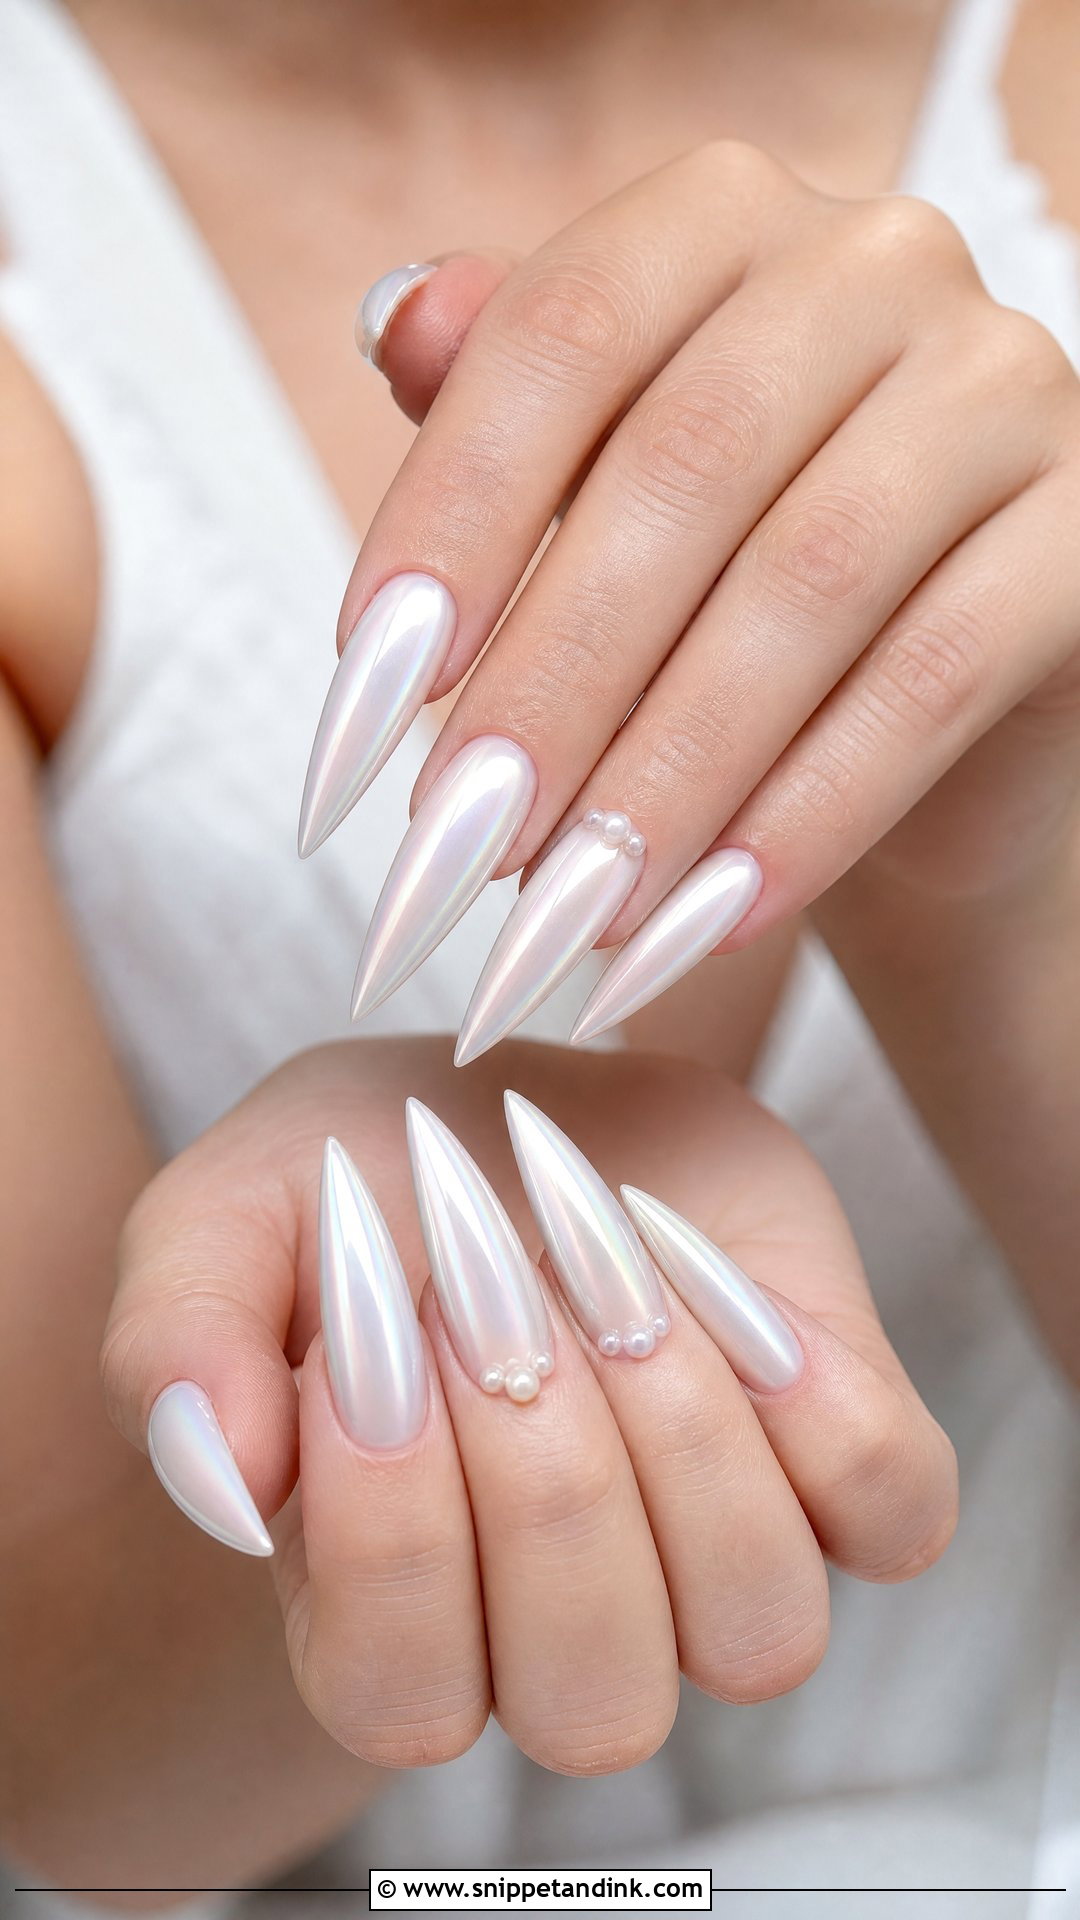
Pearl stiletto wedding nails are the most dramatic set here, a long pointed shape that can still feel bridal under a soft pearl chrome. They suit brides who already wear long nails and want their manicure to be part of the look. I’d be honest with you, though: if you’ve never worn stilettos, a wedding day is a hard time to learn, since you’ll be fastening jewelry, handling a ring and picking up a dress all day. Small pearl accents near the cuticle or along one side add detail. Don’t crowd every nail; the shape and shine are the focus.
17. Pearl Lace Wedding Nails
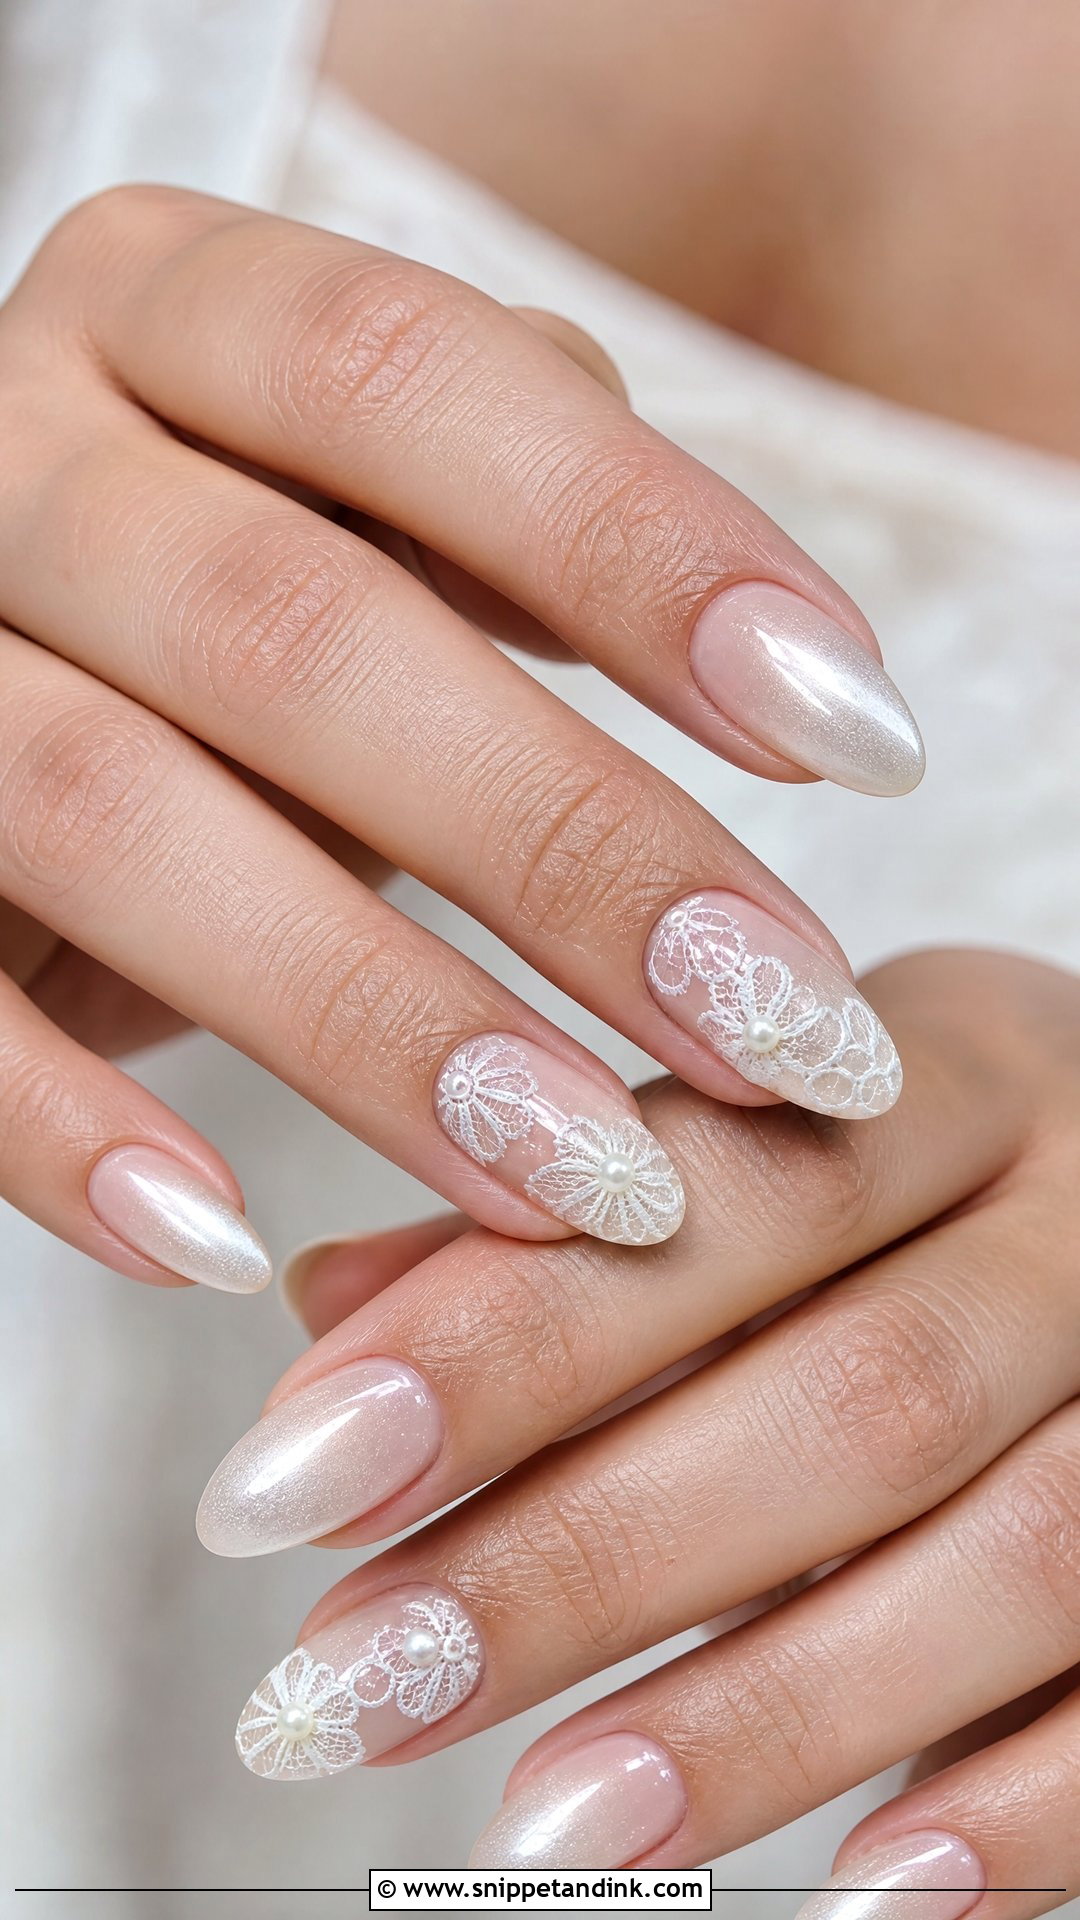
Lace nail art echoes a lace gown, sleeves or embroidered bodice. It combines a sheer nude or milky base with fine white lace-style linework and tiny pearl accents. The linework needs a very fine brush and a thin, slightly runny white gel, and it’s slow, so book extra time. Almond and oval shapes match the delicacy best. You can put the lace on accent nails only or across the whole set. Bring a photo of your actual dress lace, because I can copy its pattern, and keep the pearl accents small so the lace stays readable.
18. Pearl Floral Wedding Nails
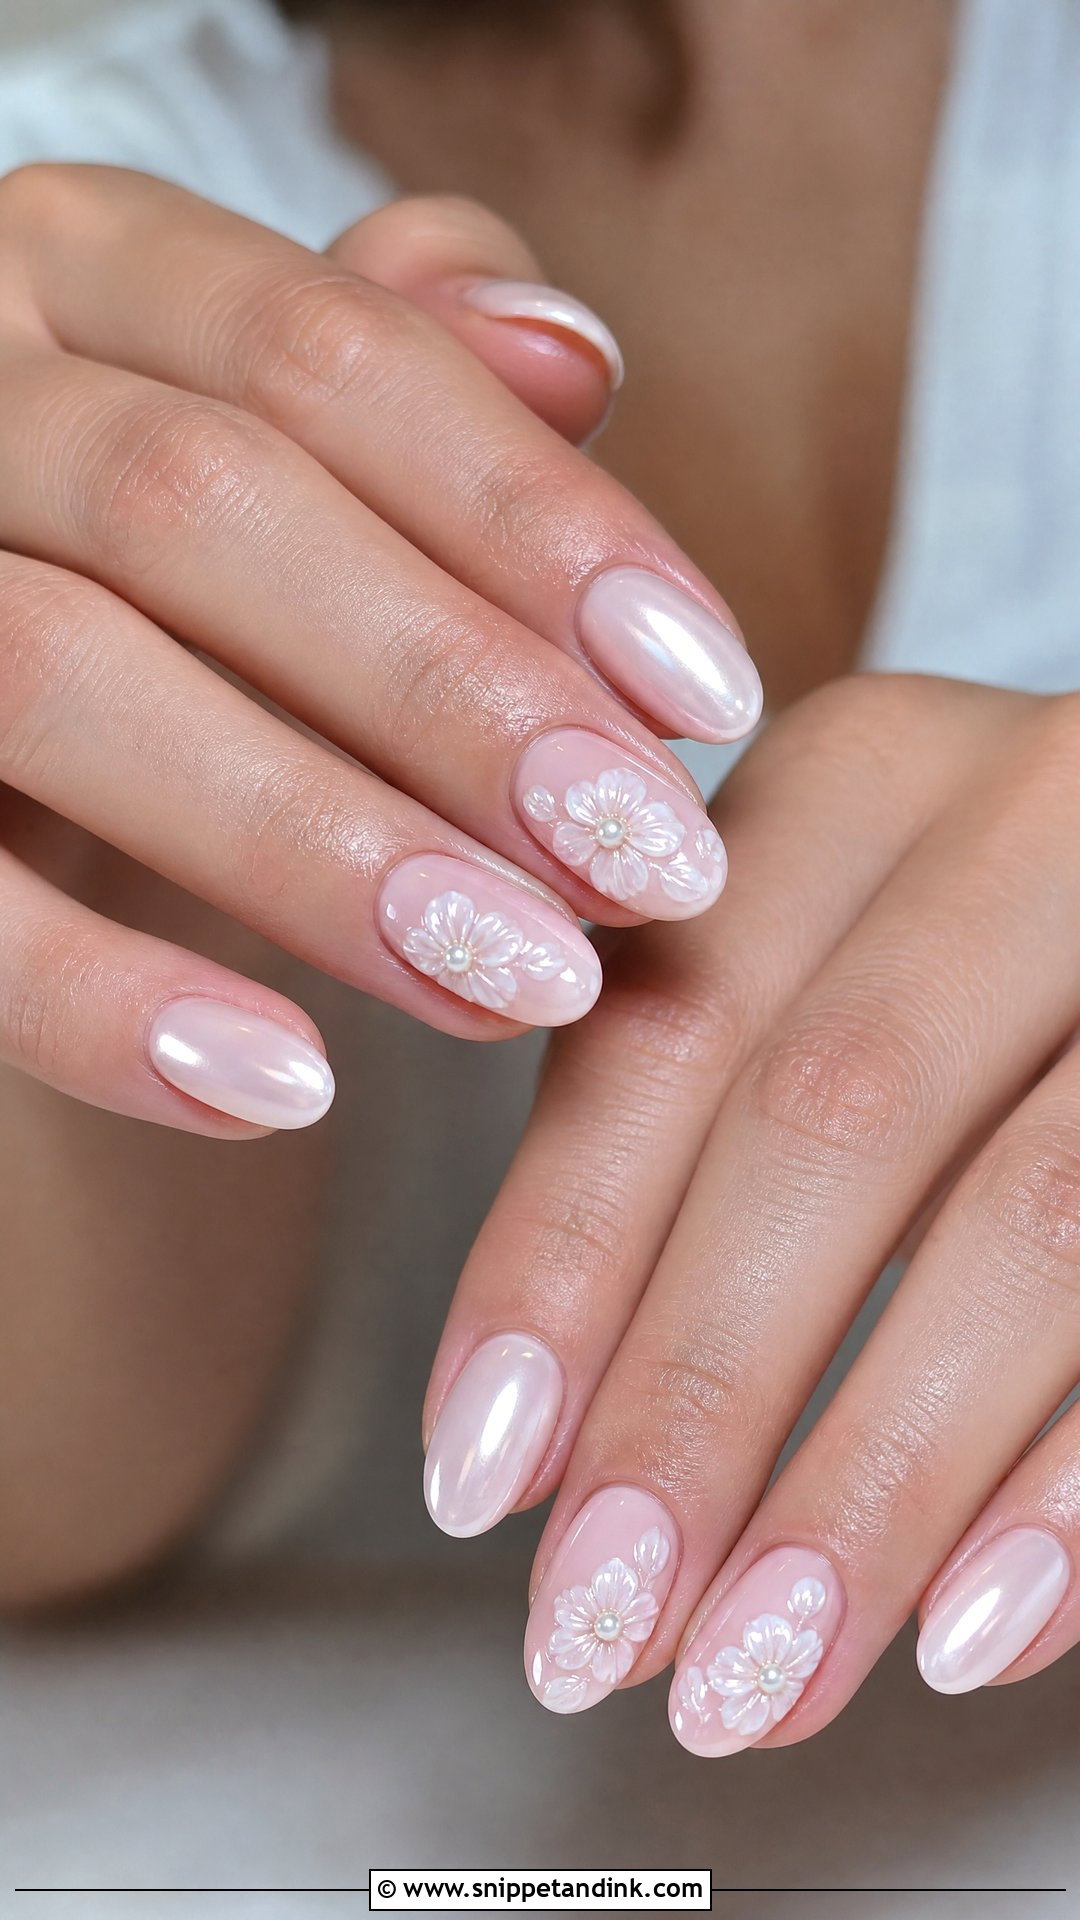
Floral pearl nails can be hand-painted white flowers, raised gel petals or tiny pearl centers on a sheer pink, nude or milky base. They feel like spring and summer, but kept delicate they work year-round, especially with lace gowns, floral veils and soft bouquets. Raised gel petals add texture but also thickness, so I keep them small and low on short nails. For a subtle set, flowers go on one or two accent nails; for more detail, pair small flowers with pearl chrome on the rest.
19. Pearl Swirl Wedding Nails
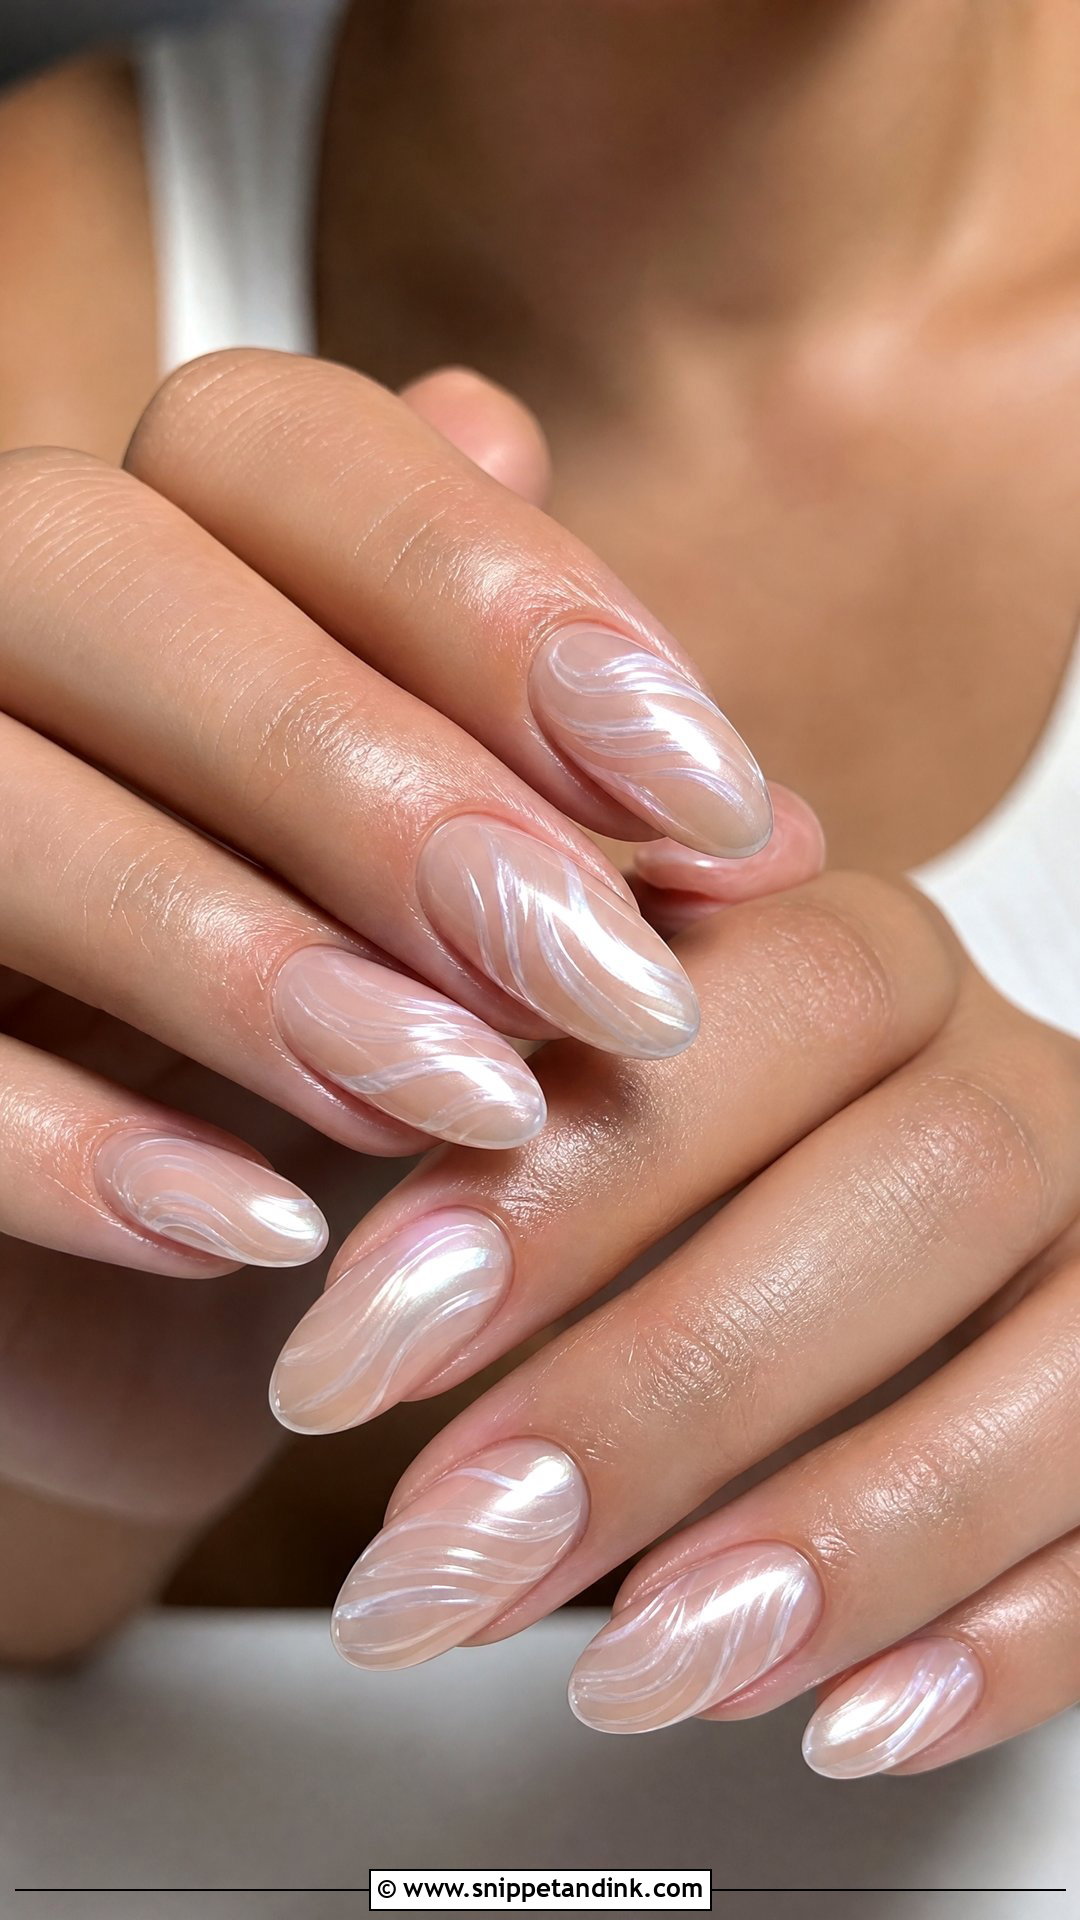
Swirls bring an artistic, modern touch: white or pearly lines flowing across a sheer base, sometimes finished with pearl chrome so the lines look smooth and luminous. The curves follow almond, oval and coffin shapes well. It sits between a plain pearl manicure and heavy embellishment. I paint the swirls before the chrome, not after, so the powder softens them rather than sitting on top as a flat layer. Keep the lines thin and airy; thick swirls look like a festival set rather than a bridal one.
20. Pearl Half Moon Wedding Nails
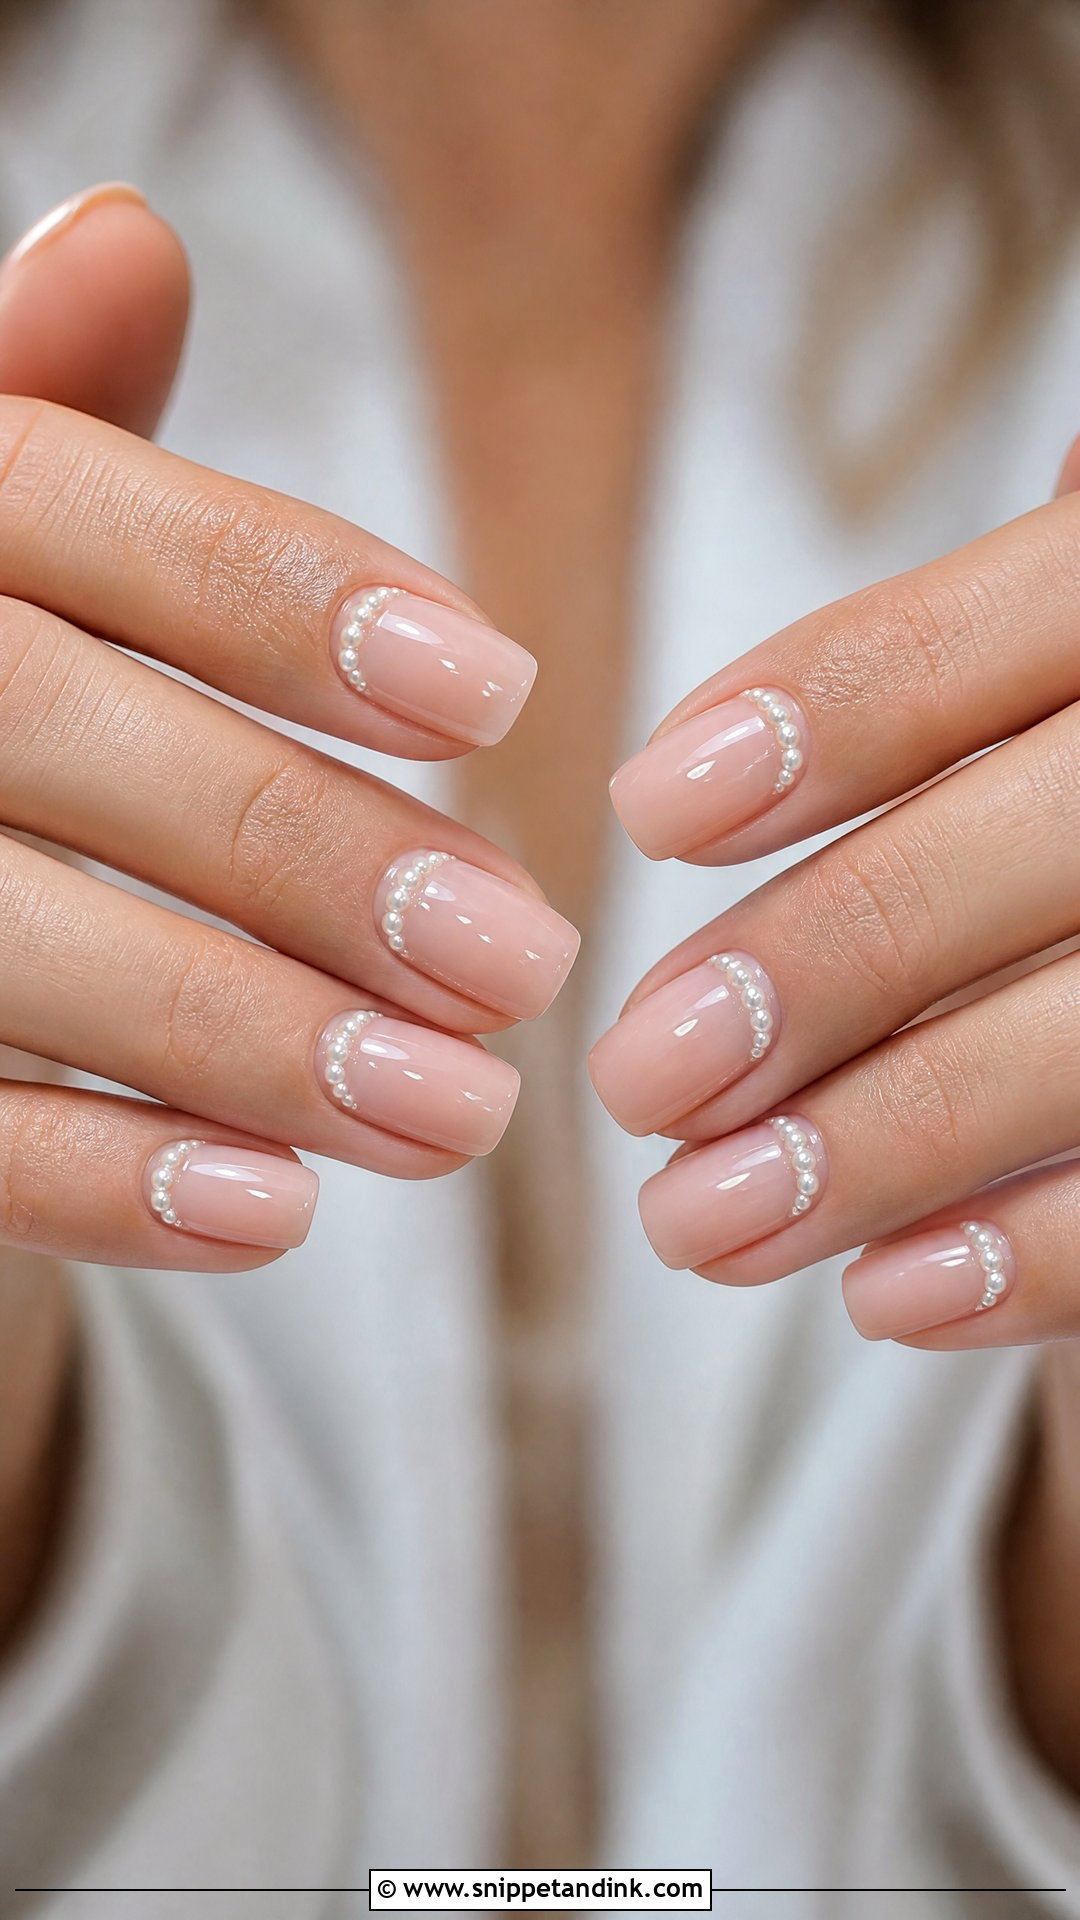
A half moon puts the detail at the cuticle in a soft crescent, done with pearl beads, pearly polish or chrome shimmer over a sheer nude, pink or milky base. It draws the eye to the natural shape of the nail, and it has a vintage feel without looking dated. The crescent has to match on every finger, so I mark the curve with a thin guide line first. Keep it small and evenly spaced. A big crescent on a short nail bed leaves little room for the rest of the nail and can look heavy.
21. Pearl Cat Eye Wedding Nails
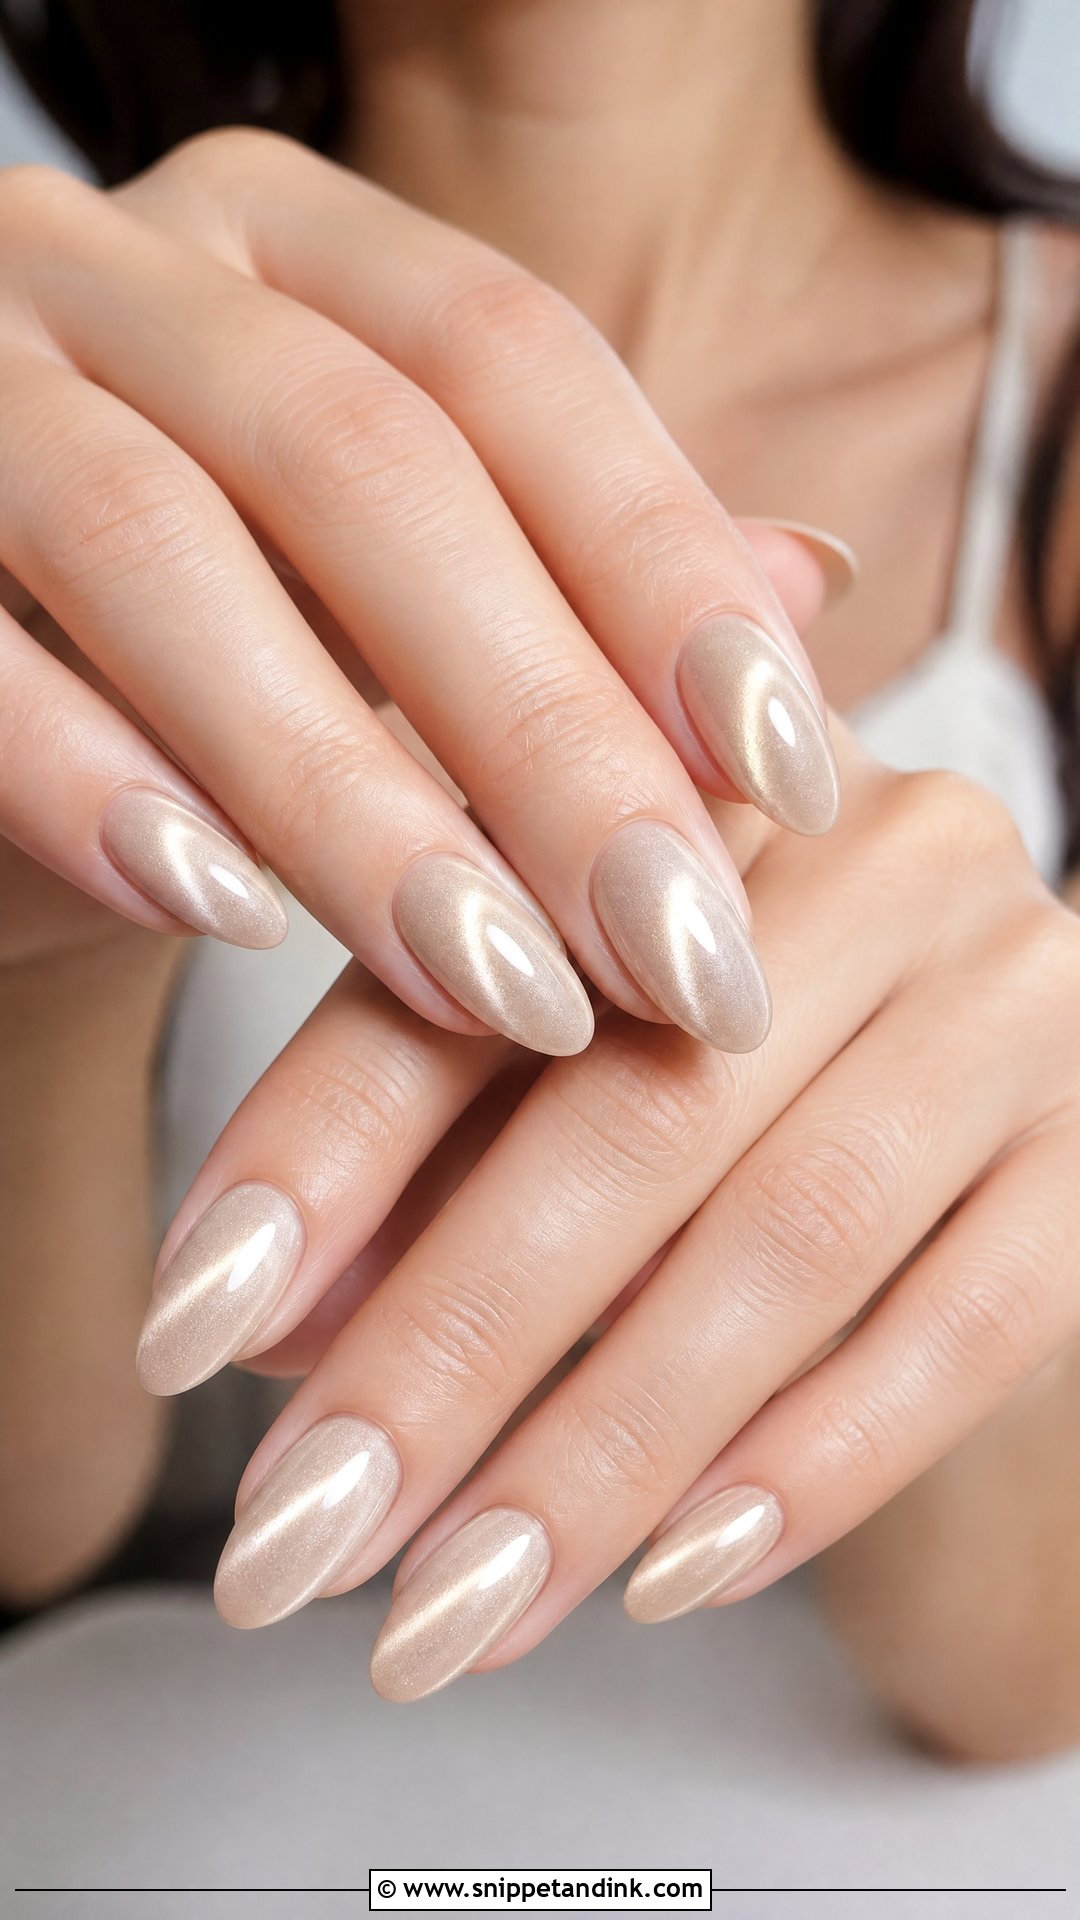
Pearl cat eye wedding nails use magnetic gel, where a magnet held over the uncured polish pulls the shimmer particles into a band of light that shifts as your hand moves. For brides I use pale champagne, soft white, blush or silver instead of the dark versions, which gives a silky glow almost like satin. It’s ideal if you want shimmer but not glitter. Medium almond, oval or coffin nails give the band space to show. Ask for a soft, diffused line, not a sharp stripe; I hold the magnet further away to spread the effect.
22. Pearl Glitter Wedding Nails
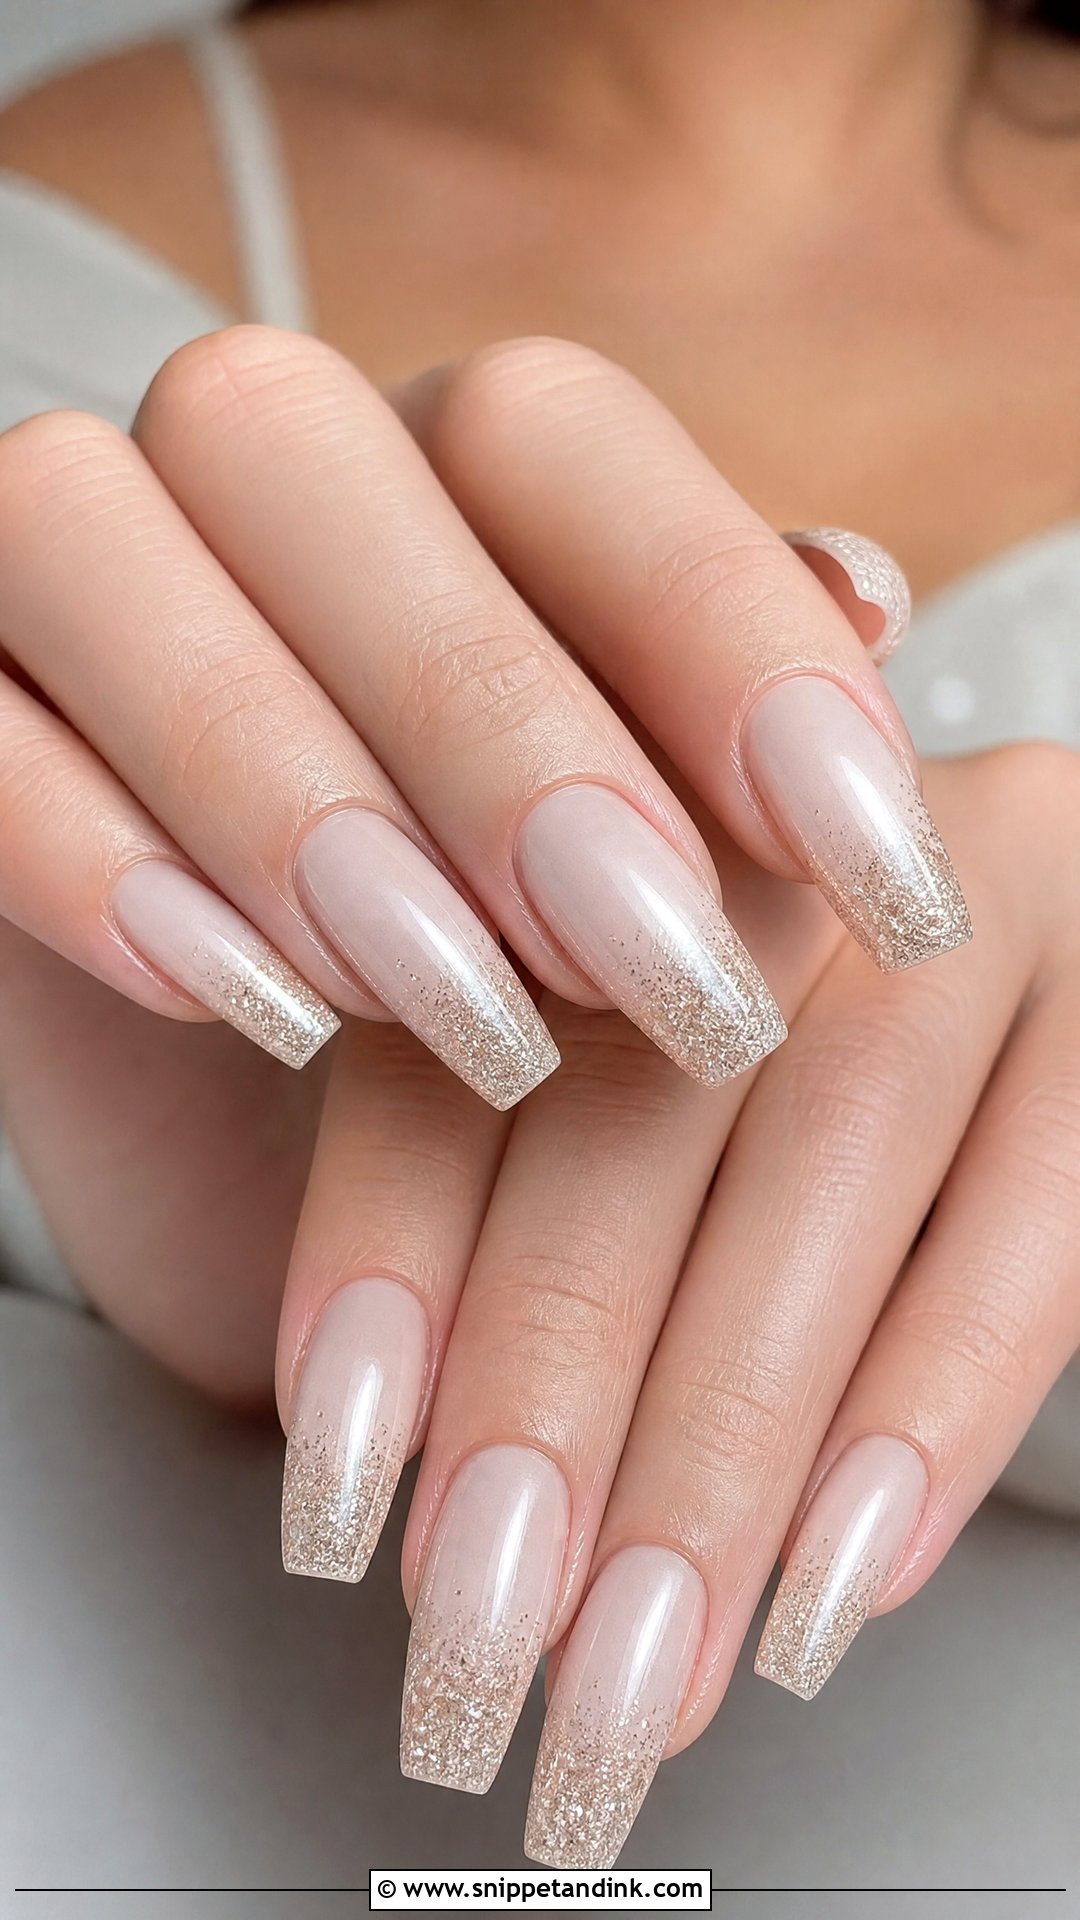
Glitter can look bridal when it’s fine, in white, champagne, silver or blush, rather than chunky. A pearl base underneath makes the sparkle softer. It can fade in from the tips, sit as a light full overlay or go on one accent nail next to pearl chrome. It catches the light in evening reception photos and when you move. Glitter does leave a slightly textured surface, so I add an extra layer of top coat to make it smooth. Balance it with sheer nude or milky nails so the whole set stays polished.
23. Pearl Rhinestone Wedding Nails
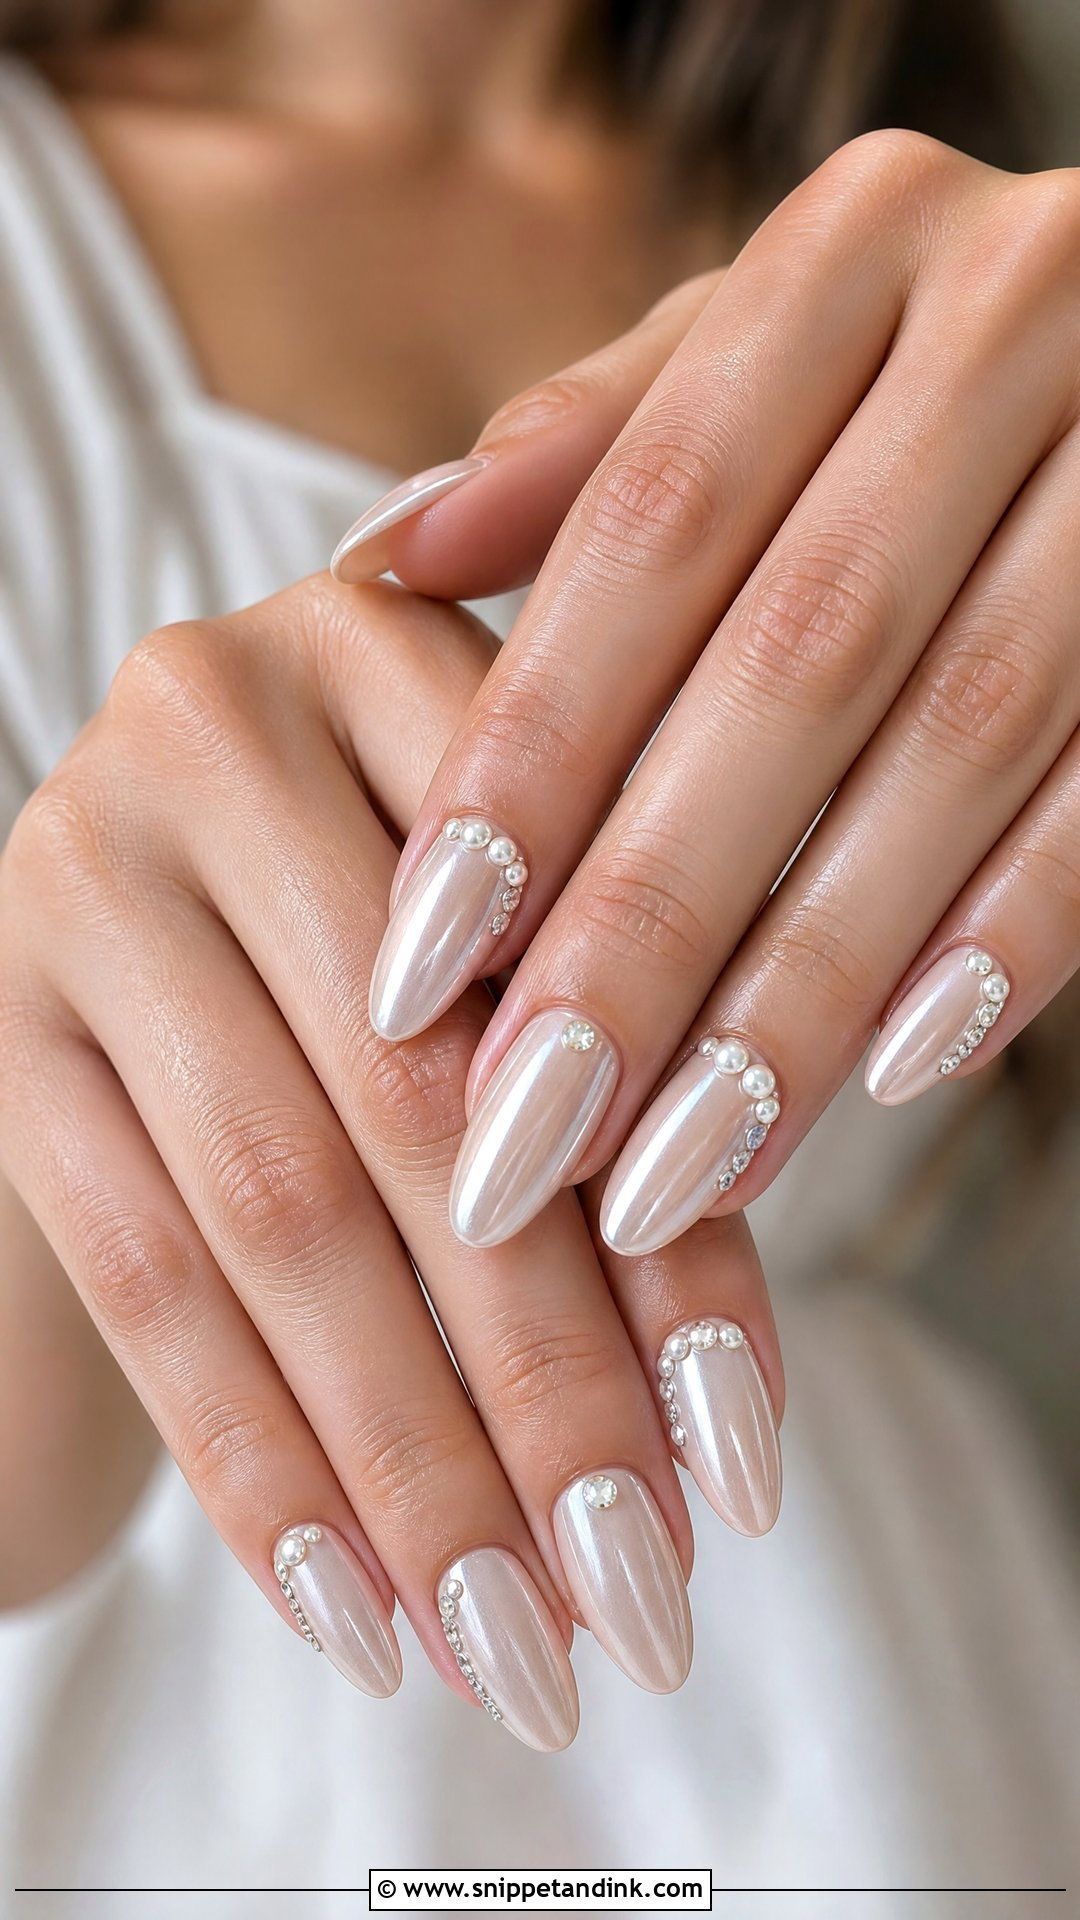
Pearls with rhinestones add crystal shine to the softer pearl, glamorous but still elegant if placement stays minimal. Try a sheer pink or milky white base with tiny pearls and stones near the cuticle or along one side. The mix of textures gives dimension without color, and it echoes beaded gowns, crystal straps or pearl details. Larger embellishments belong on accent nails only, sealed with a strong gel top coat around their edges so nothing lifts or catches on your veil.
24. Pearl Something Blue Wedding Nails
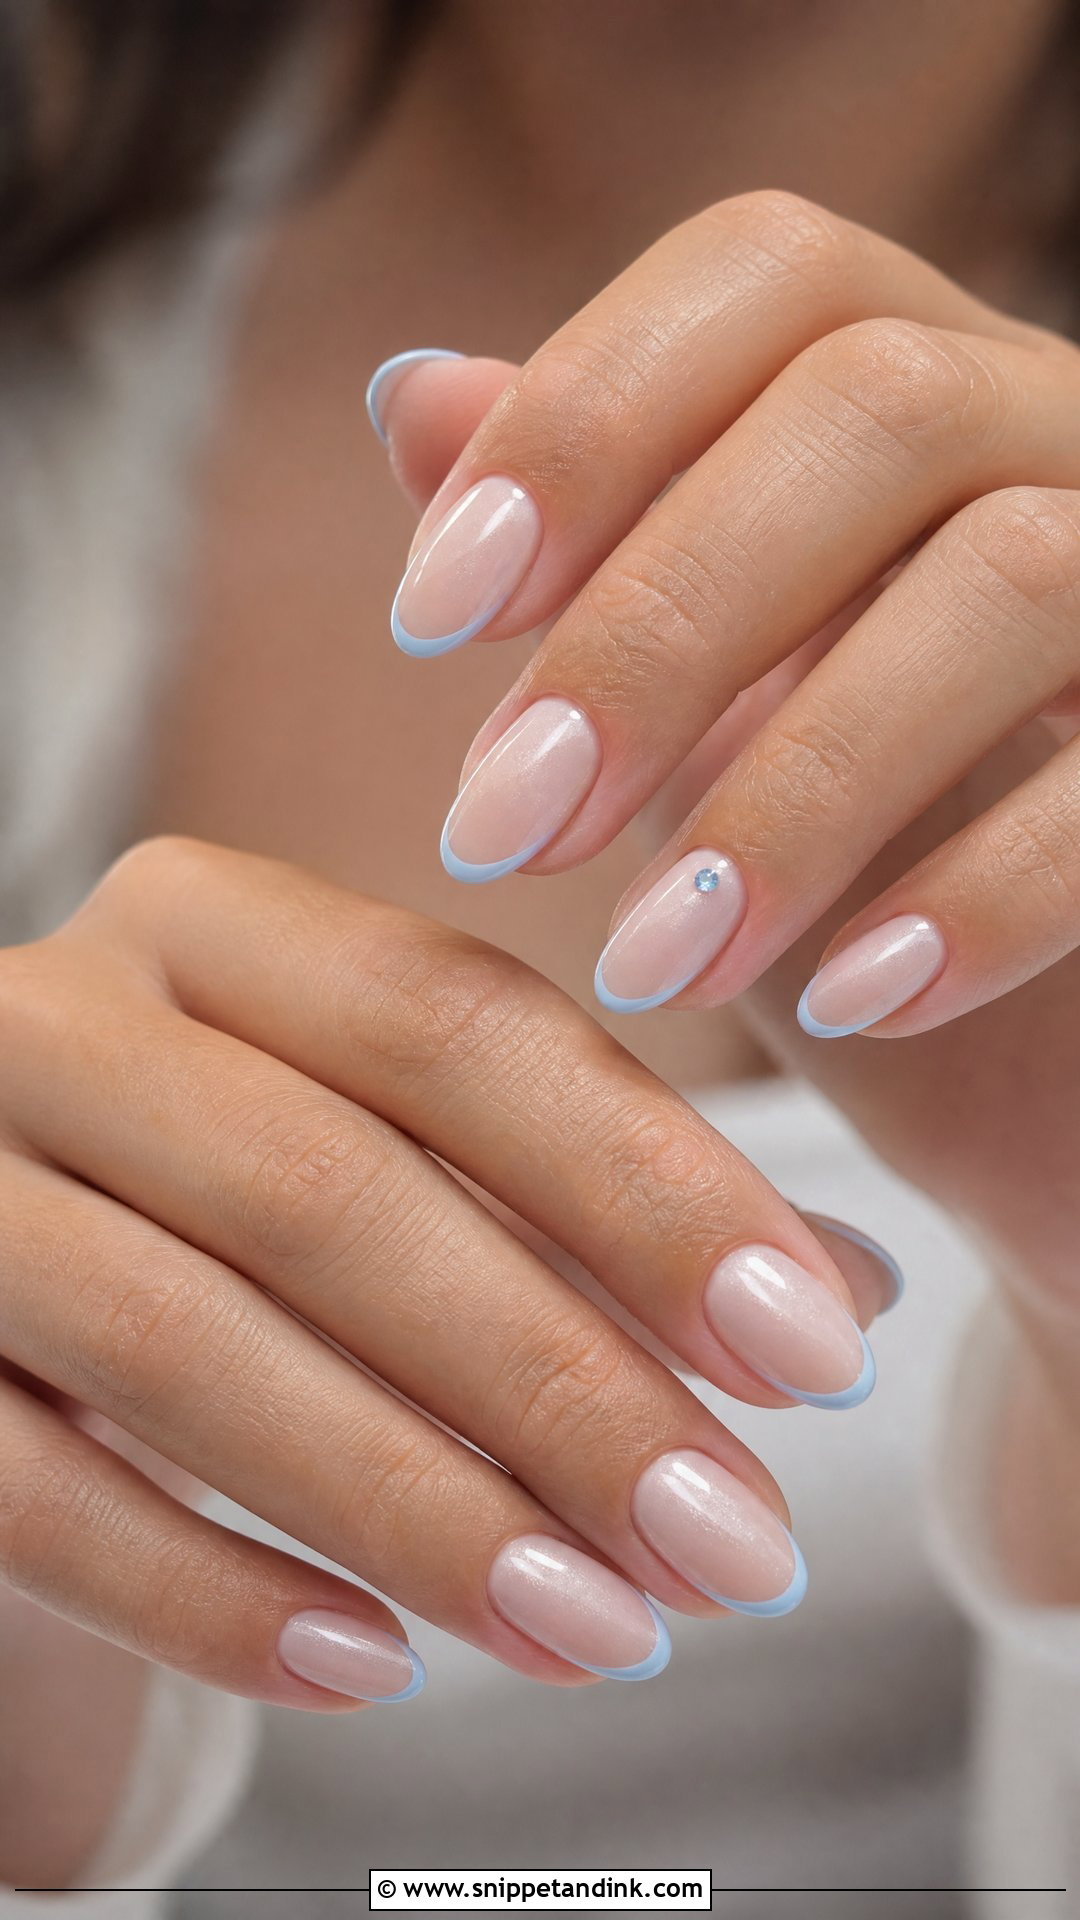
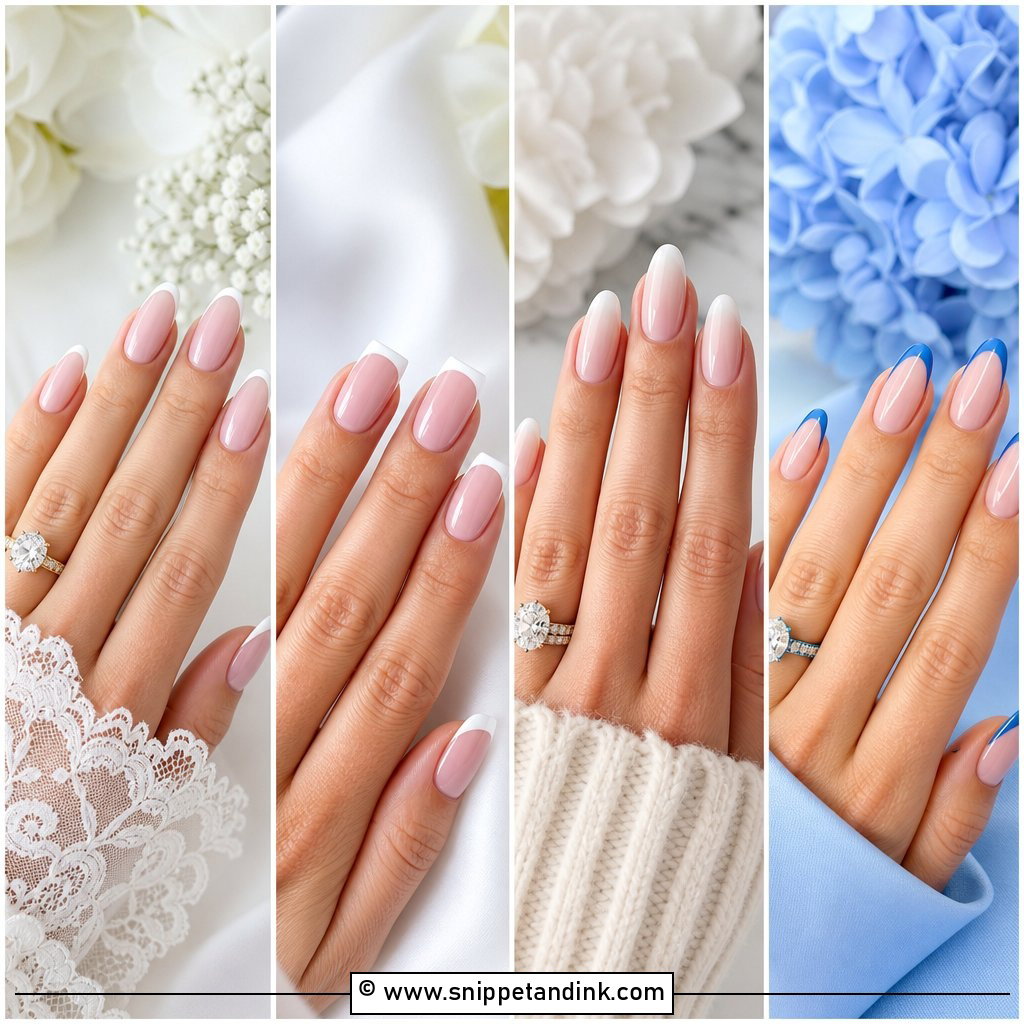
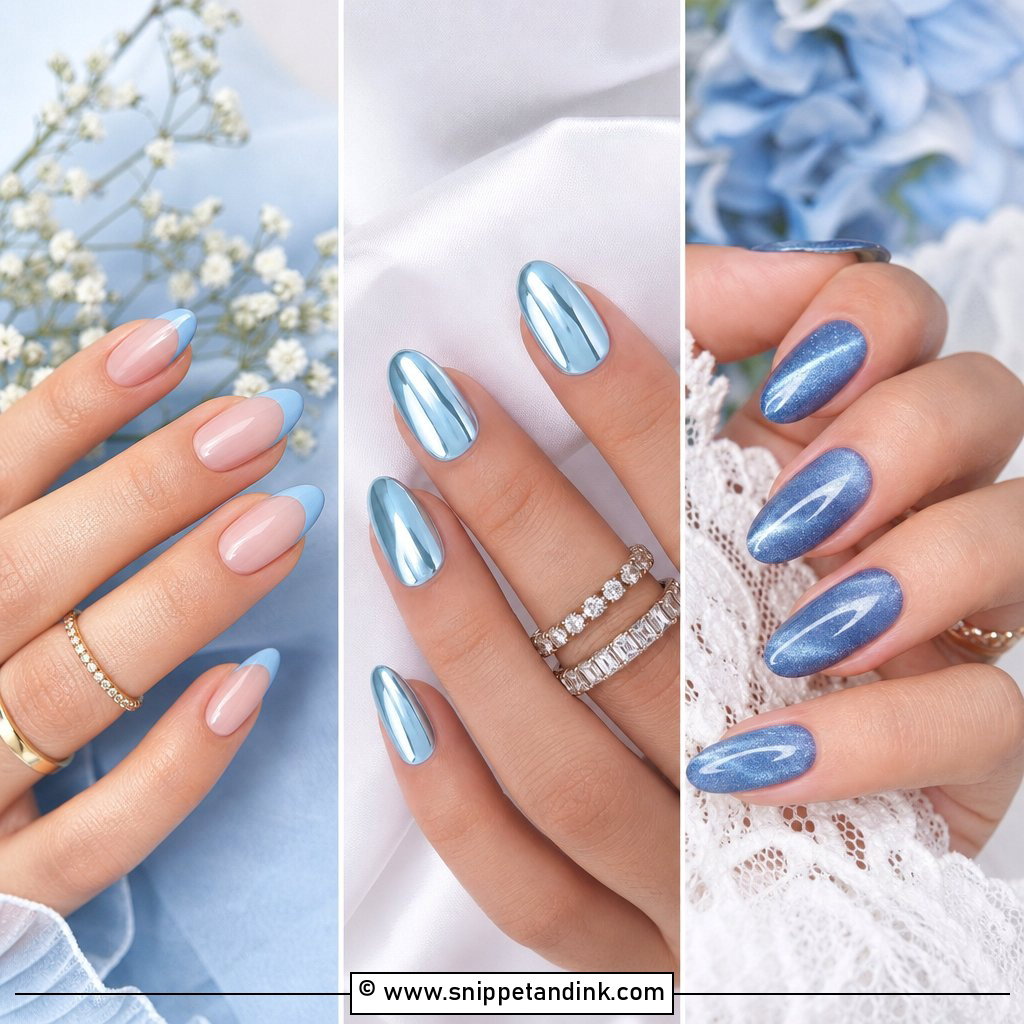
Nails are a quiet place to hide your something blue. Rather than a full blue set, I suggest a soft blue micro French, a tiny blue flower, a pale blue pearl shimmer or a small blue stone on one finger, over a nude, pink or milky pearl base. It’s personal without fighting the dress. Keep the blue soft and cool, powder blue or an icy pastel, because brighter blues pull attention away from your ring. Many brides put it on the ring finger so it shows up in the ring close-up.
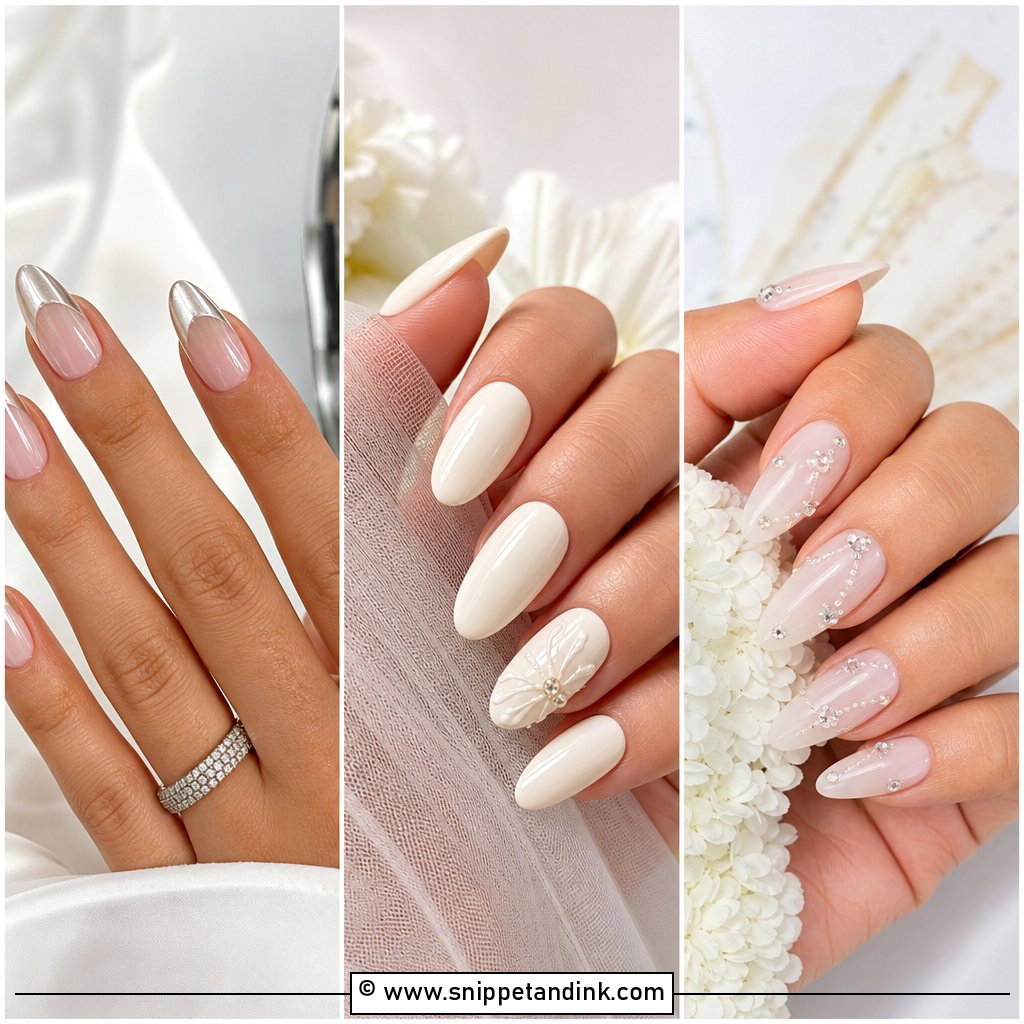
25. Pearl Bridal Shower Nails
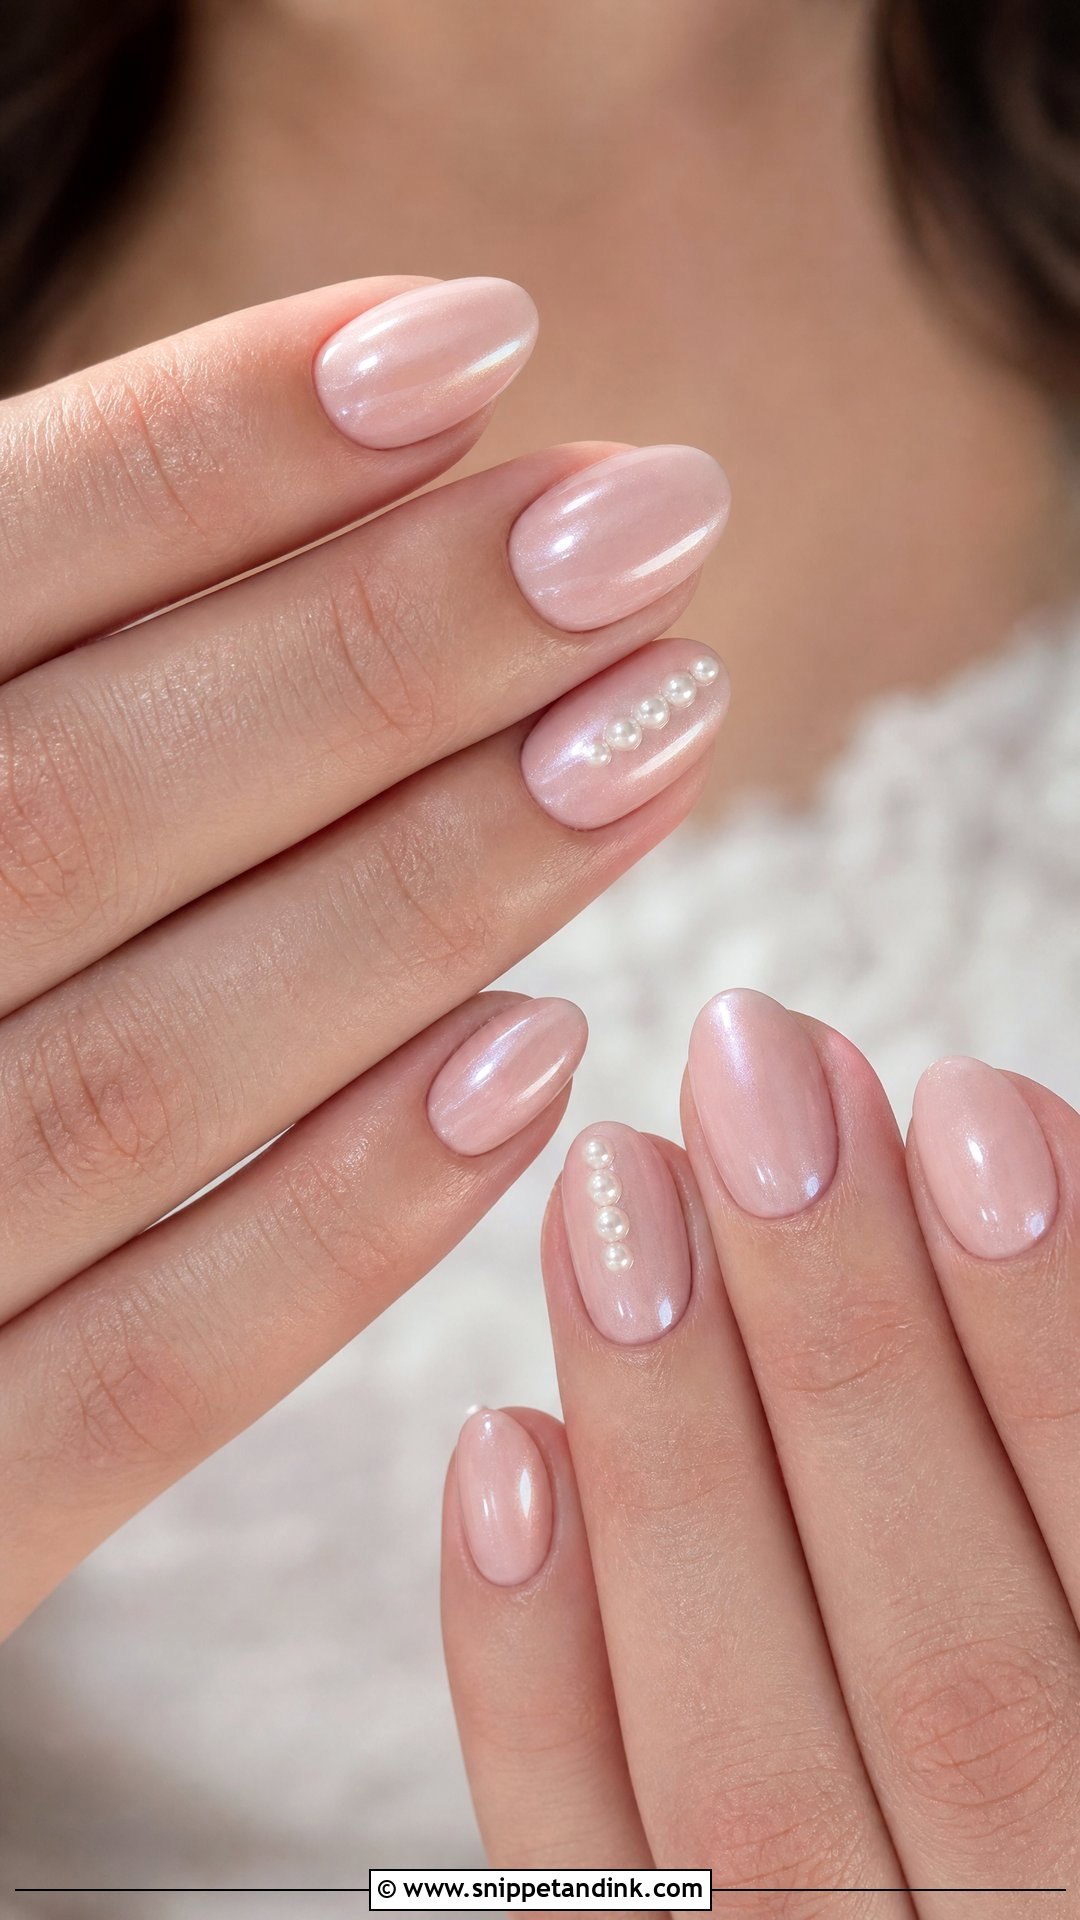
For pre-wedding events like showers, engagement photos, rehearsals and dress fittings, a lighter pearl set is ideal: soft pearl pink, nude chrome, milky white pearl or a simple French with tiny pearl accents. If you’re planning a more detailed set for the wedding, keep the shower version simple. Mind the timing. If your shower is a week or two before the wedding, the shower set will need removing and redoing, so ask your nail tech to plan both appointments together and keep the nails healthy in between. Short oval or almond nails suit most outfits and stay comfortable.
Will 3D Pearls Snag a Lace Veil?
They can, and that’s the most common worry I hear about pearl nails. Raised pearls near the free edge catch on tulle, lace and fine knits, especially when you’re adjusting a veil or bustling a train. The fixes are placement and sealing. I use flat-backed pearls, set them closer to the cuticle, embed them in gel rather than gluing them on top, and run top coat around the base of each one so there’s no ledge for fabric to catch on.
Run your fingertips over a scarf or an old piece of tulle right after the appointment. If anything catches, it can be smoothed on the spot, which is far easier than finding out while someone is pinning your veil.
If a pearl pops off on the day
Put a tiny tube of nail glue and a fine buffer in your maid of honor’s bag. If a pearl comes off, the spot underneath is usually smooth enough to leave, or the pearl can be glued back for the day. Don’t pick at a lifting edge, because it only lifts further and can tear the nail underneath.
Taking the set off after the honeymoon
Have gel and embellished sets removed properly by soaking or filing, never by prying pearls off or peeling the gel. Chrome and 3D sets take a little longer to remove, so book a removal appointment instead of tackling them in a hotel bathroom.
Pearl Works Because It Borrows Light, Not Color
Pearl suits nearly every bride because it can be classic, modern, minimal or detailed. Chrome gives a soft glow, while 3D pearls, lace art, florals and rhinestones bring more personality. Milky white, nude, pink or French pearl are the safe classics; long coffin, stiletto, cat eye or embellished designs make more of a statement. Choose based on your dress, jewelry, nail length and how practical the nails need to be on the day. With a smooth base, the right shape and a properly sealed finish, pearl nails will still look fresh in the last photos of the night.
You'll Like These Ideas:


Leave a Reply