
A good gown photo has less to do with the dress than with what the person inside it does with her weight, her hands and the fabric. Most of the stiffness I see in front of my lens comes from not knowing where to put an arm or how to stand so the skirt falls cleanly. The poses below are the ones I return to for bridal portraits, birthday and prom shoots, maternity sessions and editorial images, and each one includes what I watch for while shooting it. Every one of them can be done with a photographer or on a tripod with a timer, and most need no more than a few square metres of floor.

How I Order a Gown Session So Nobody Looks Rehearsed
Nobody poses well in the first ten minutes. Your body is still deciding whether to trust the camera, so I never open with the big dramatic frame. I start with simple standing shots, move on to walking and turning once your shoulders drop, and save the floor poses and the statement shot for the end, when you’ve stopped thinking about your hands.
A rough running order I follow for a one-hour gown shoot:
- Standing, side profile and hand on waist, to check fit and how the hem falls.
- Walking and twirls, while you still have energy and the fabric is crisp.
- Back view, over the shoulder and train shots, once someone has straightened the gown properly.
- Window, mirror and close portraits indoors, giving your feet a rest.
- Seated, chair and floor poses near the end, because sitting creases satin and you won’t want those creases in the standing shots.
- One or two dramatic frames to finish.
That order matters most with satin and silk crepe. Once you’ve sat down, those fabrics hold a crease across the lap that no amount of smoothing removes on location, so every standing frame should be done first.
Working with a tripod instead of a photographer
Set the timer to burst mode, ten frames if your camera allows it, and place a small marker on the floor where you need to stand. Frame a little wider than you think you need so a twirl doesn’t leave the shot, then crop afterward. Shoot a test frame of the empty spot first to check the background is clear.
1. Standing Gown Pose
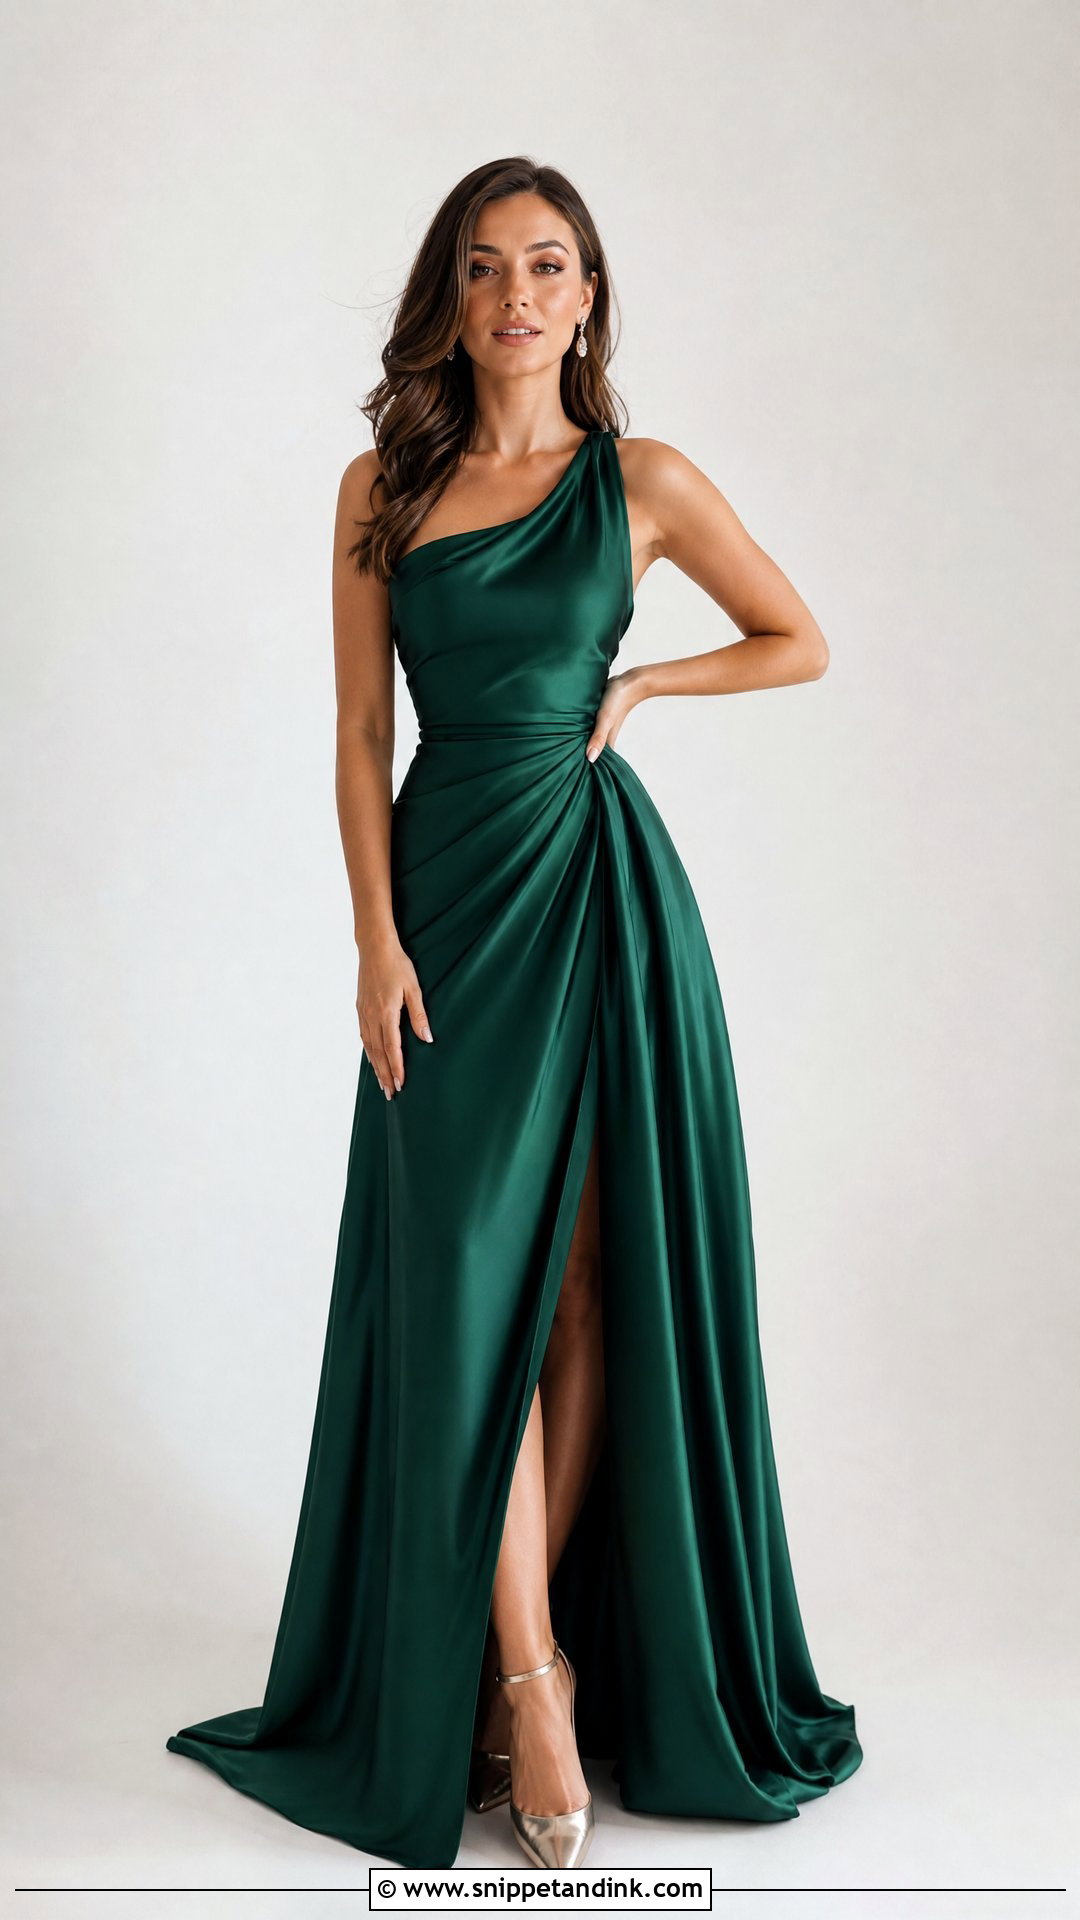
I start almost every session here because it lets me check how the dress hangs before we add movement. Put one foot slightly forward and settle your weight onto the back leg; that small shift softens the hip line and lets the skirt drop straight. Rest one hand lightly at the waist and let the other hold fabric or touch your hair. I shoot this from around chest height or a touch lower, which adds length to the legs without distorting the face. If your chin creeps backward when you’re nervous, push it forward a centimetre. It looks odd in the mirror and right on camera.
2. Walking Gown Pose
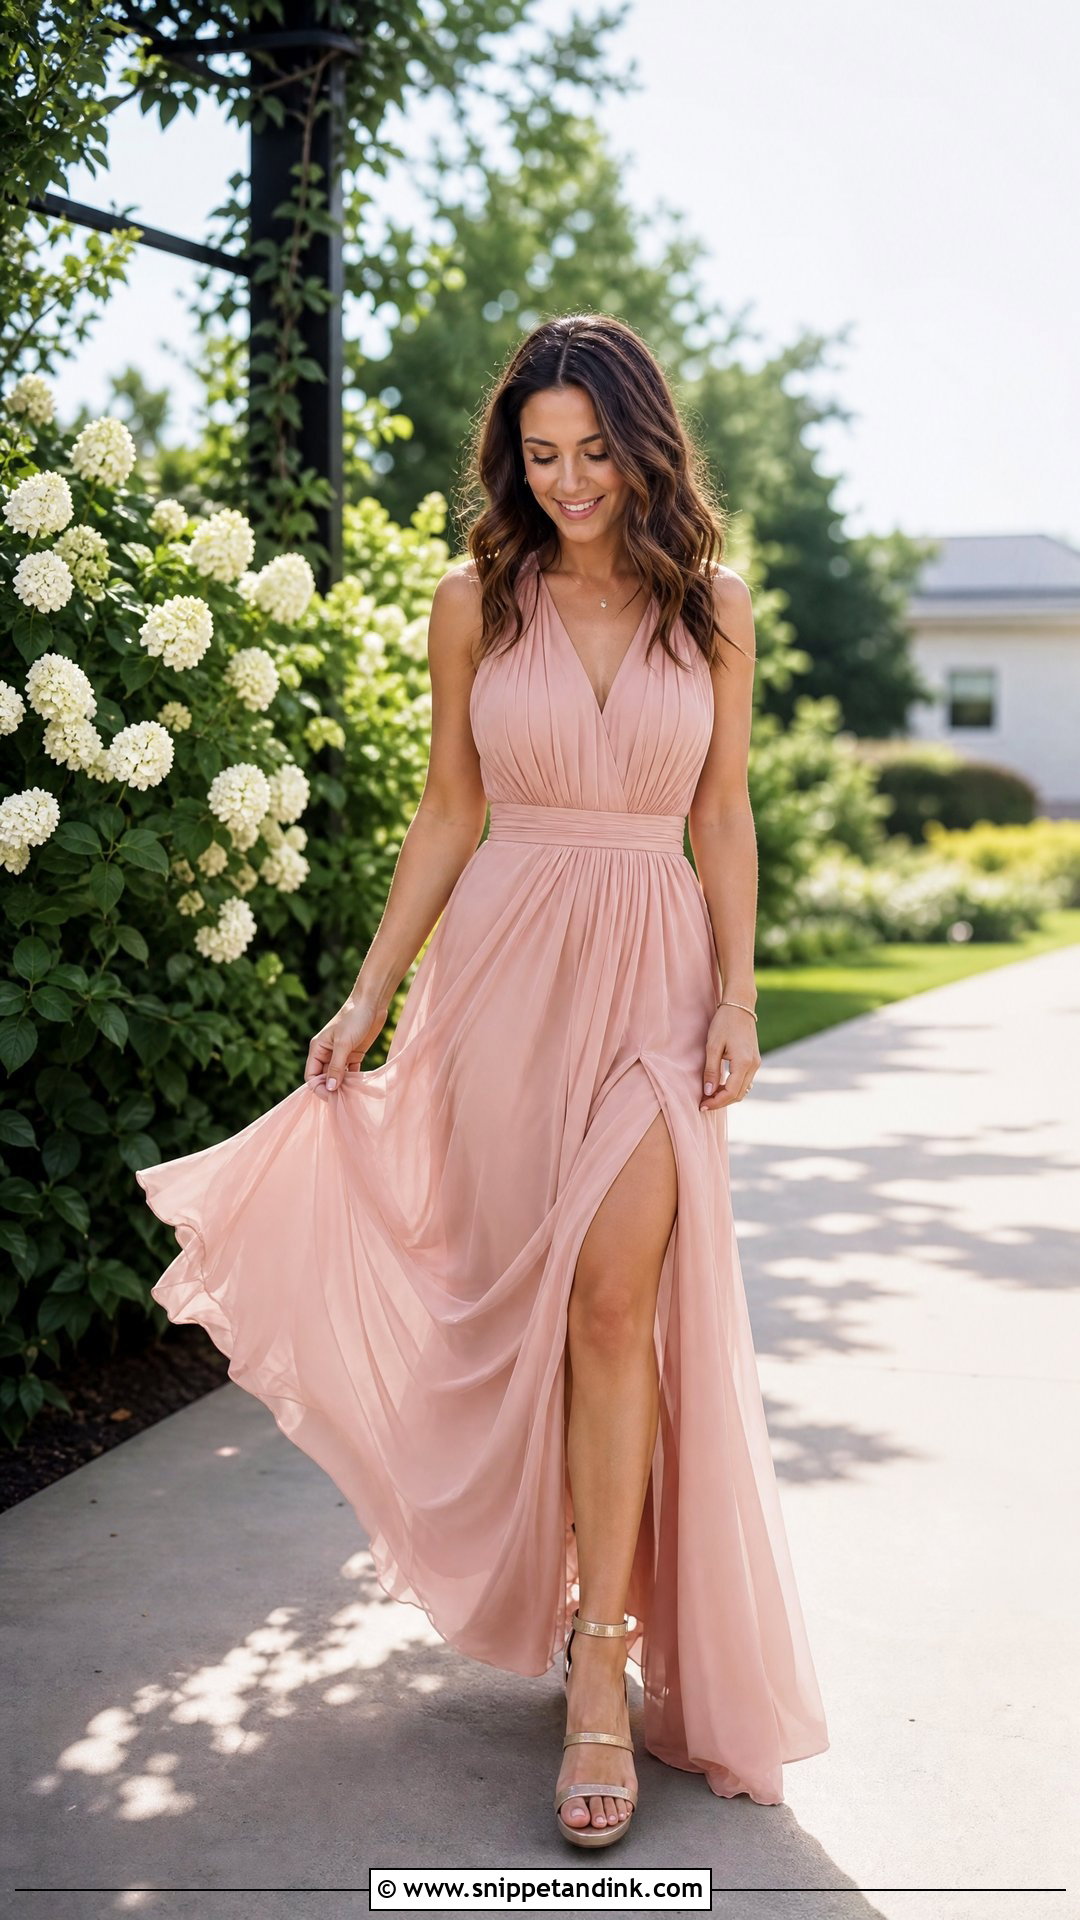
Walking frames only work at about half your normal pace. I ask brides to take small, slow steps and I fire a burst, because the frame where the hem is mid-swing and the front foot is just landing is usually the keeper. Lift the skirt with one hand if the hem is long so you don’t kick it. Look past the camera for a candid feel, or straight down the lens for something more editorial. If the gown has a slit, lead with that leg so it opens naturally rather than being forced into view.
3. Twirl Gown Pose
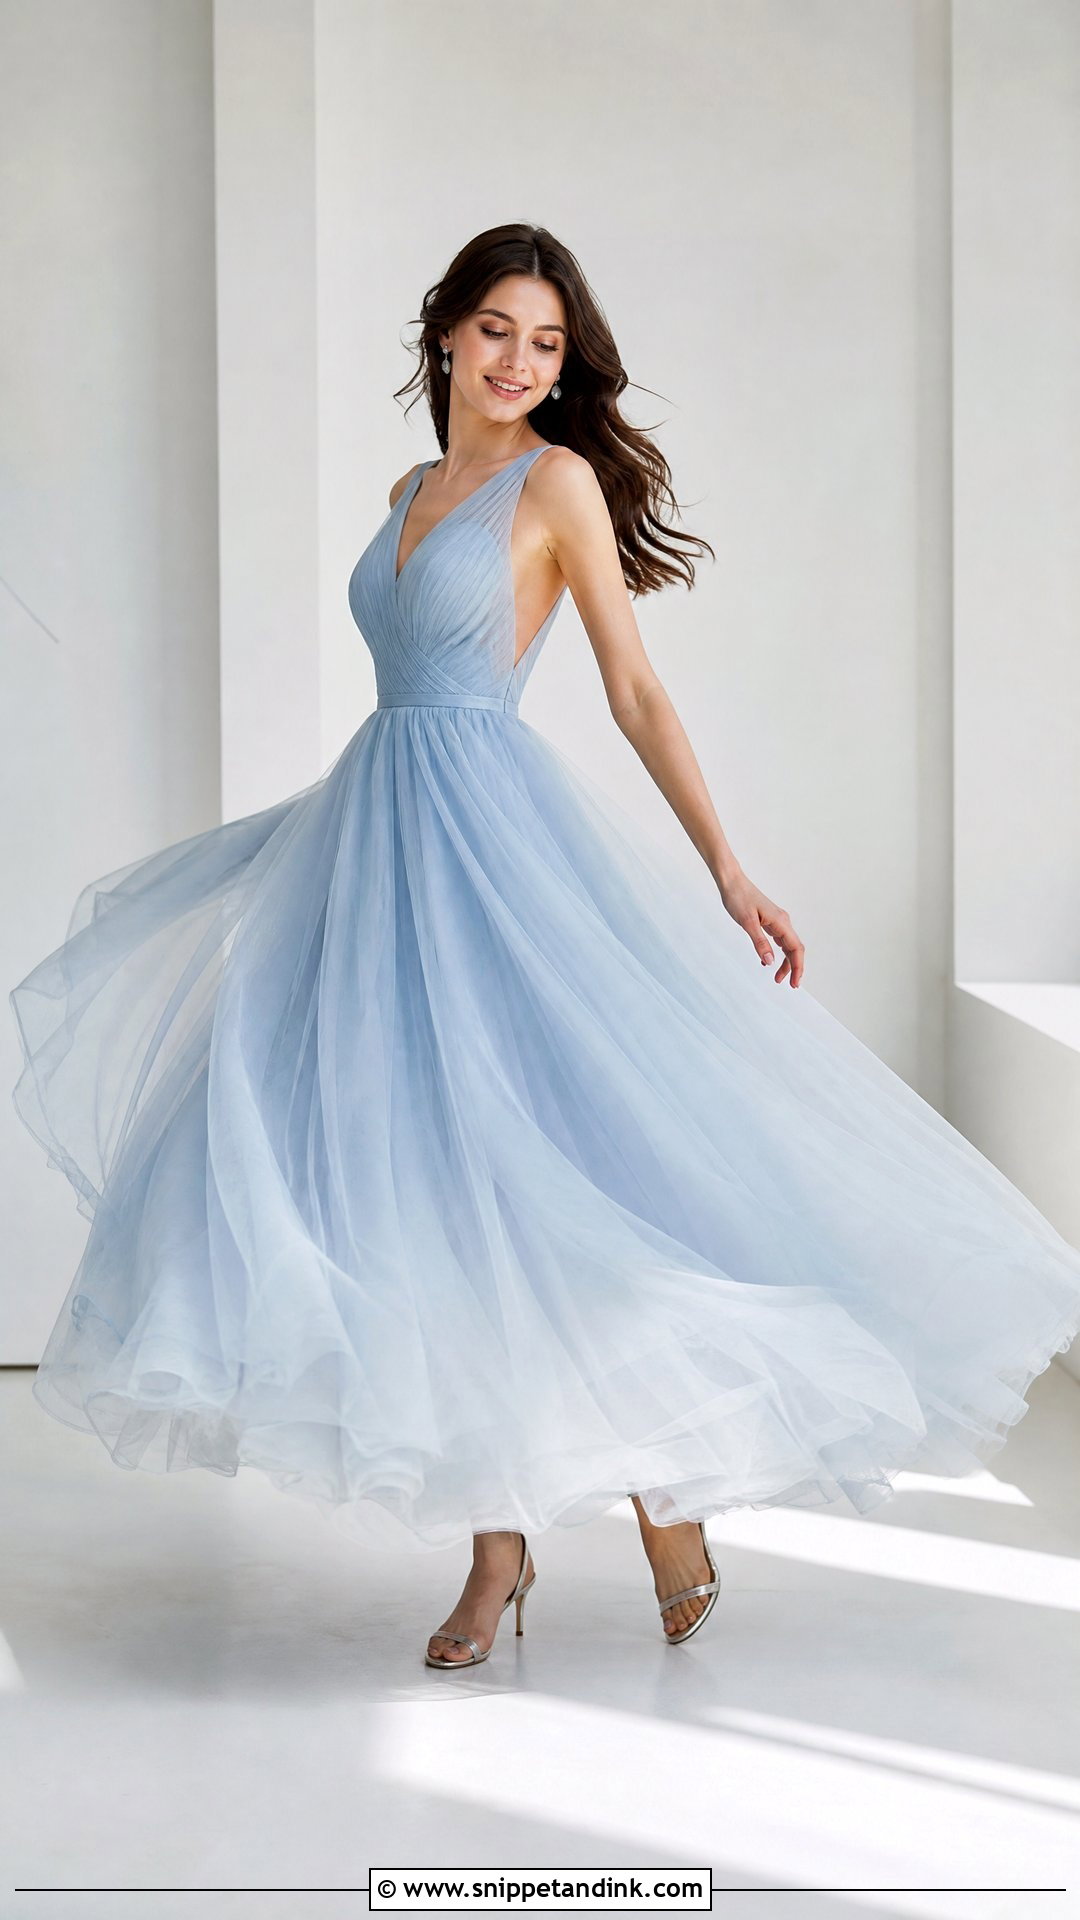
The twirl needs a skirt with air in it: chiffon, tulle, organza or a wide circle cut. Satin and crepe are too heavy to fan out and just wrap around your legs. Hold both sides of the skirt, turn slowly and stop sharply at the end of the turn; the fabric keeps travelling after you stop, and that overshoot is the shape I’m waiting for. I’ll usually ask for five or six turns and expect one or two usable frames, so don’t worry if the first few feel silly.
4. Over The Shoulder Gown Pose
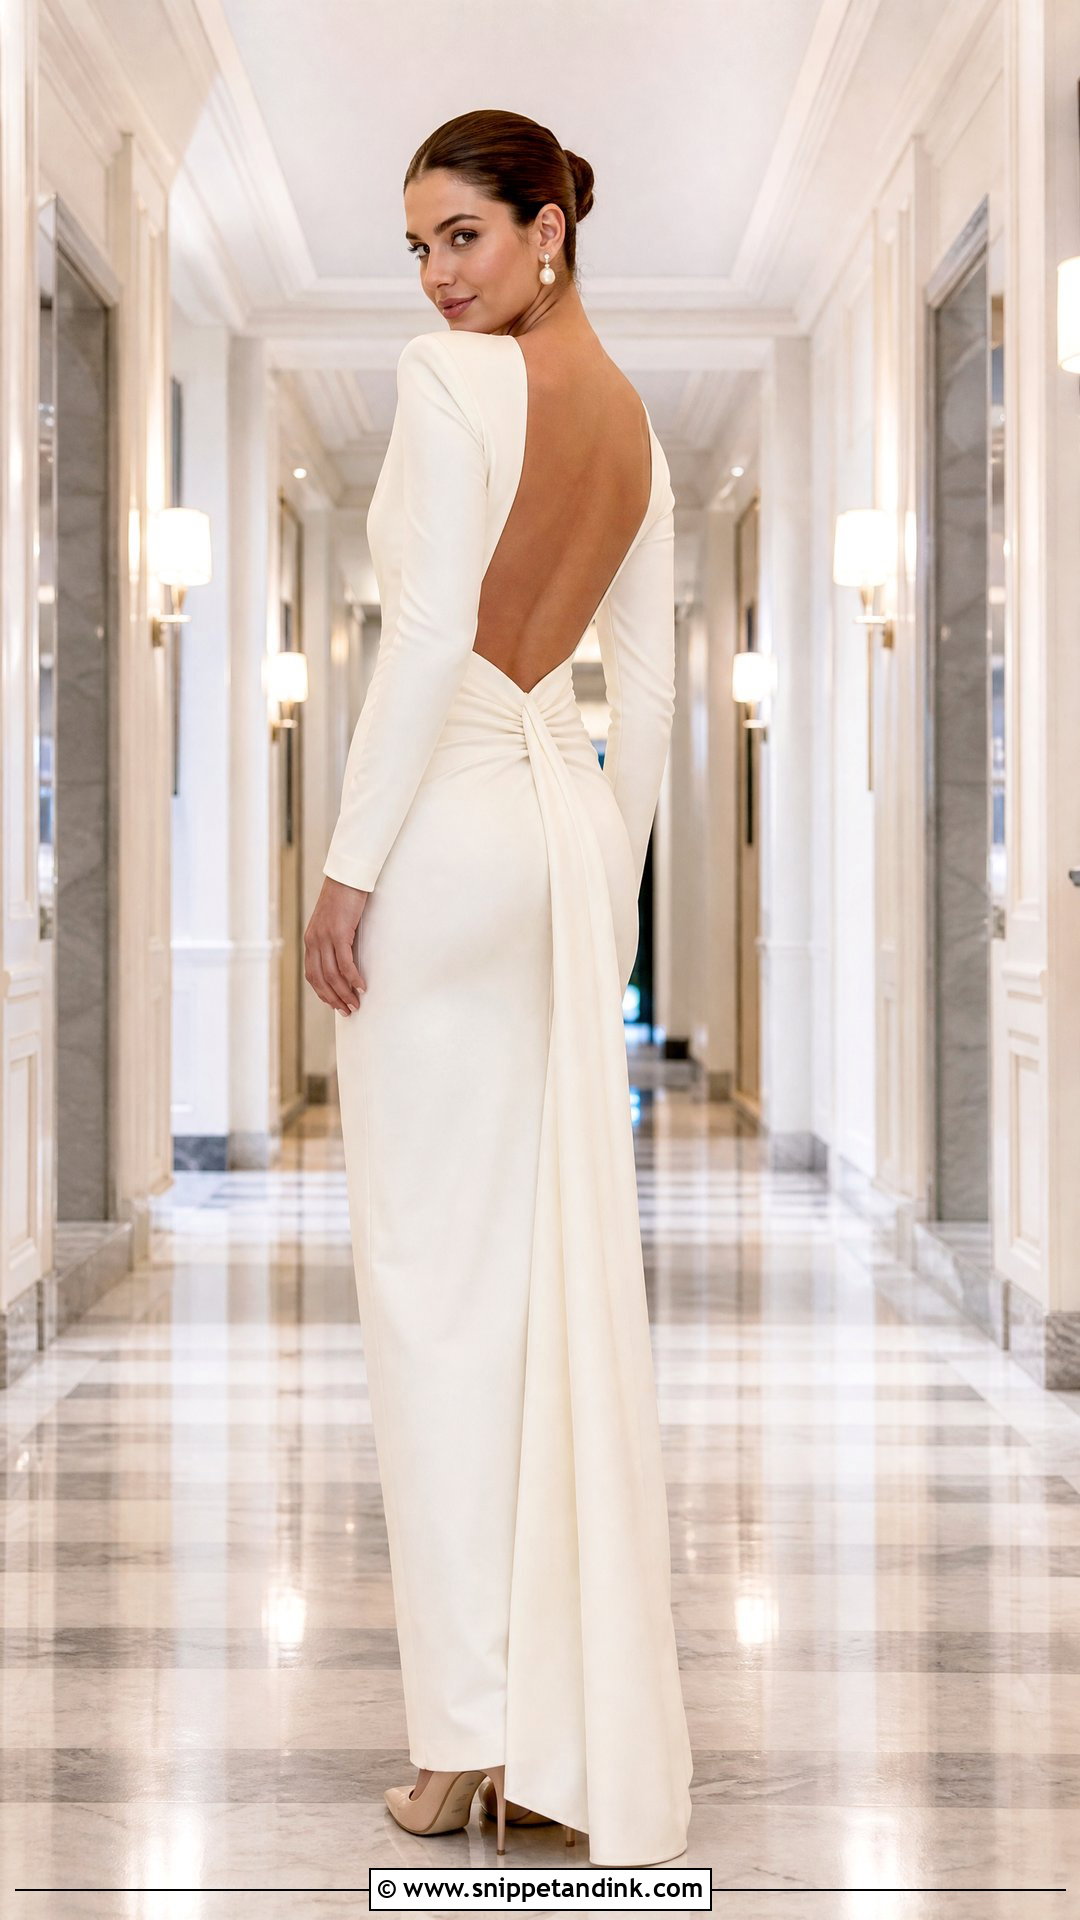
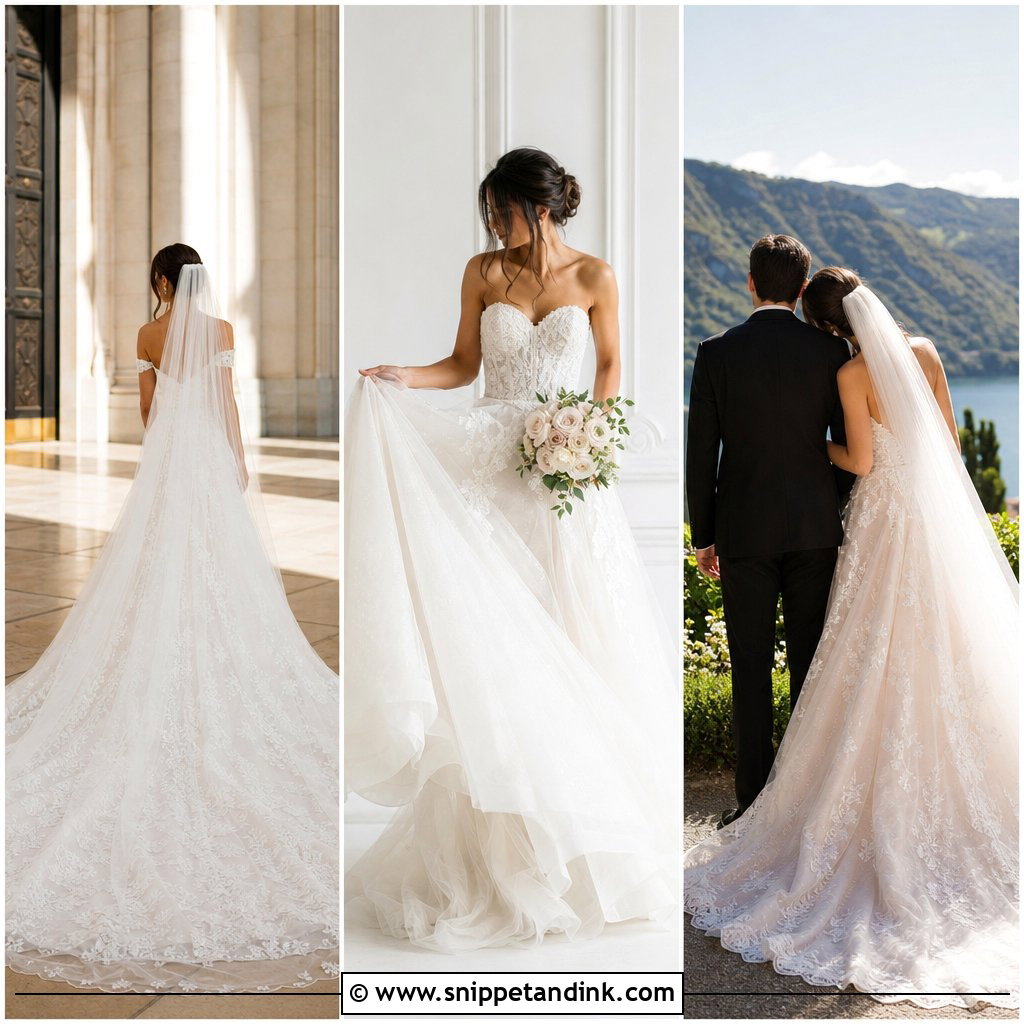
This one shows the back of the dress and the face in the same frame, so it earns its place for open backs, lace panels, bows and button rows. Turn away from me, then bring your head back over one shoulder only as far as it goes comfortably. The common mistake is turning the shoulders along with the head, which flattens the back detail and creates neck creases. Keep the body facing away and let only the head do the work. Shy clients often relax here because they aren’t facing the lens head on.
5. Sitting Gown Pose
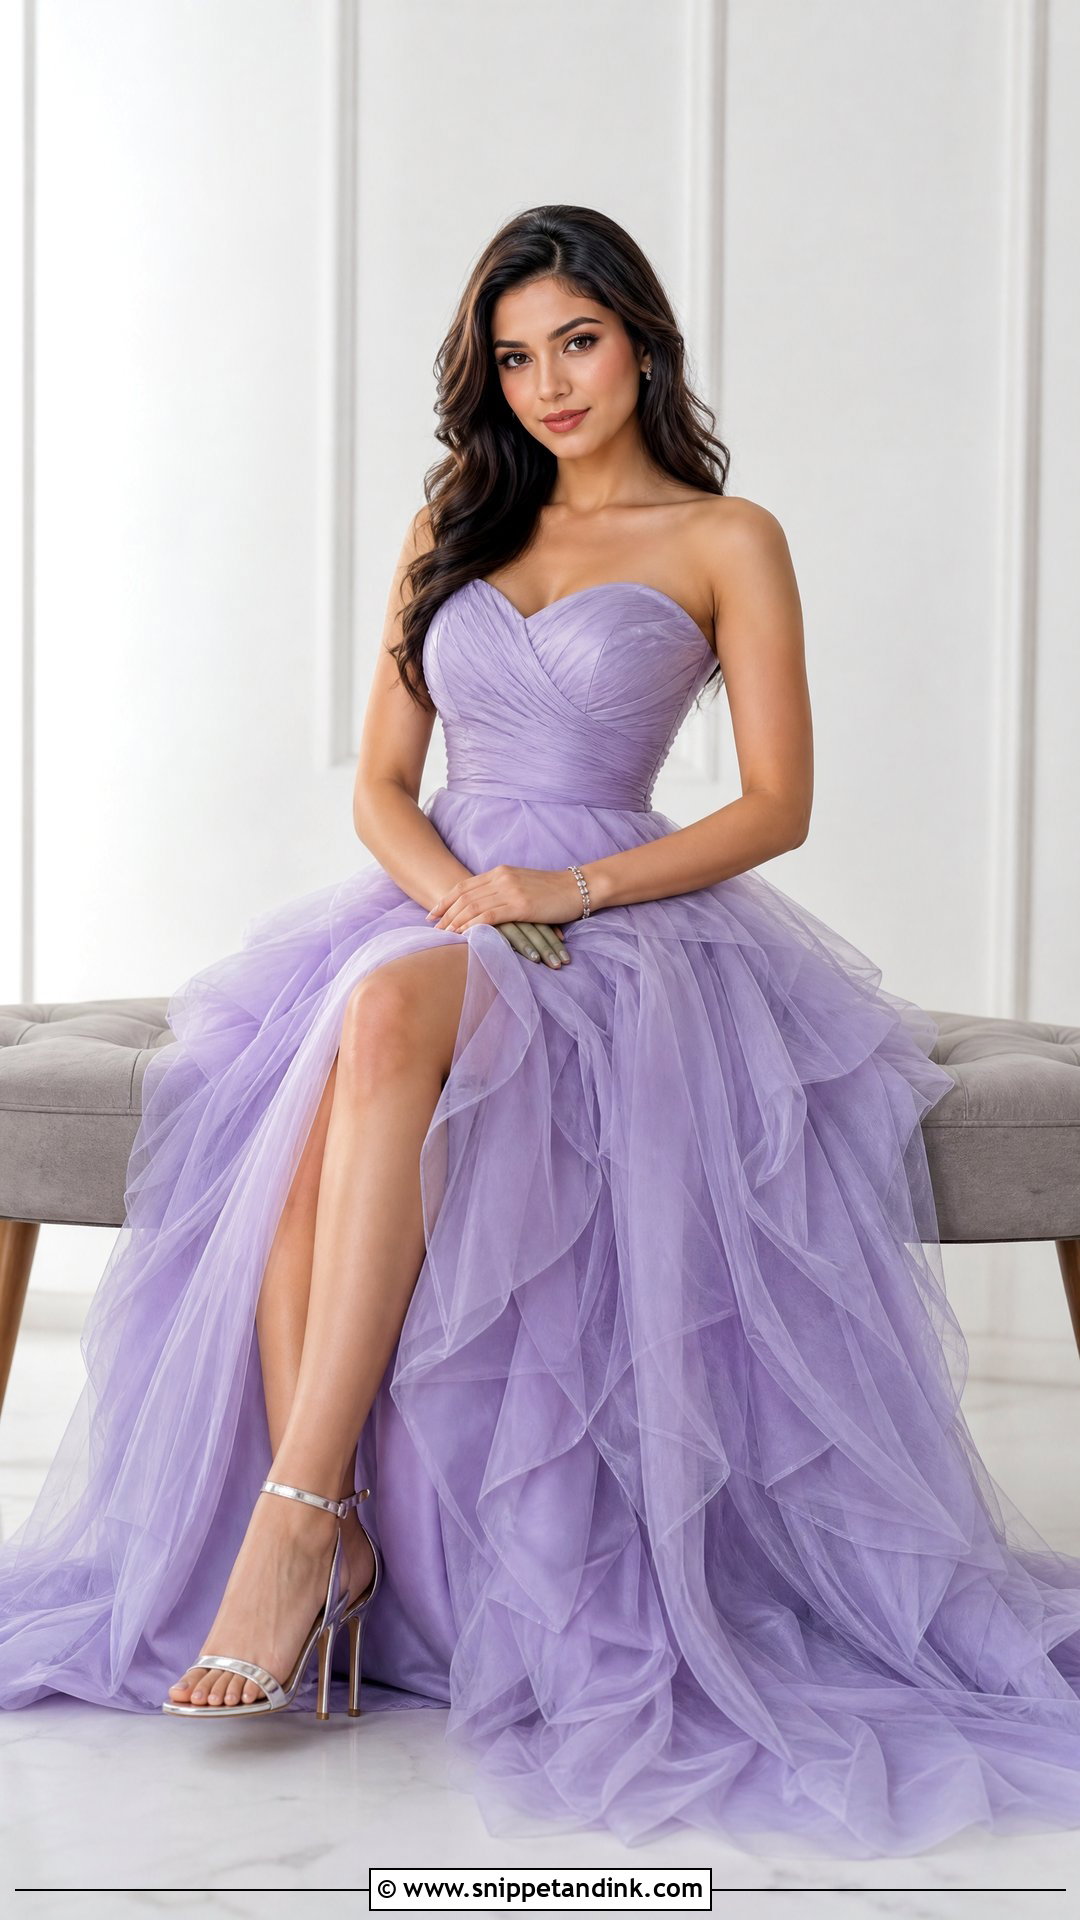
Seated shots succeed or fail on the skirt, so before I lift the camera I arrange the fabric myself and pull out anything bunched under the thighs. Sit forward on the bench or step rather than leaning back, keep the spine long and let the gown spread around your legs. Satin will show every seat crease, so with satin I prefer you perch rather than sit fully down. A hand in the lap and one near the face gives the arms somewhere to go.
6. Staircase Gown Pose
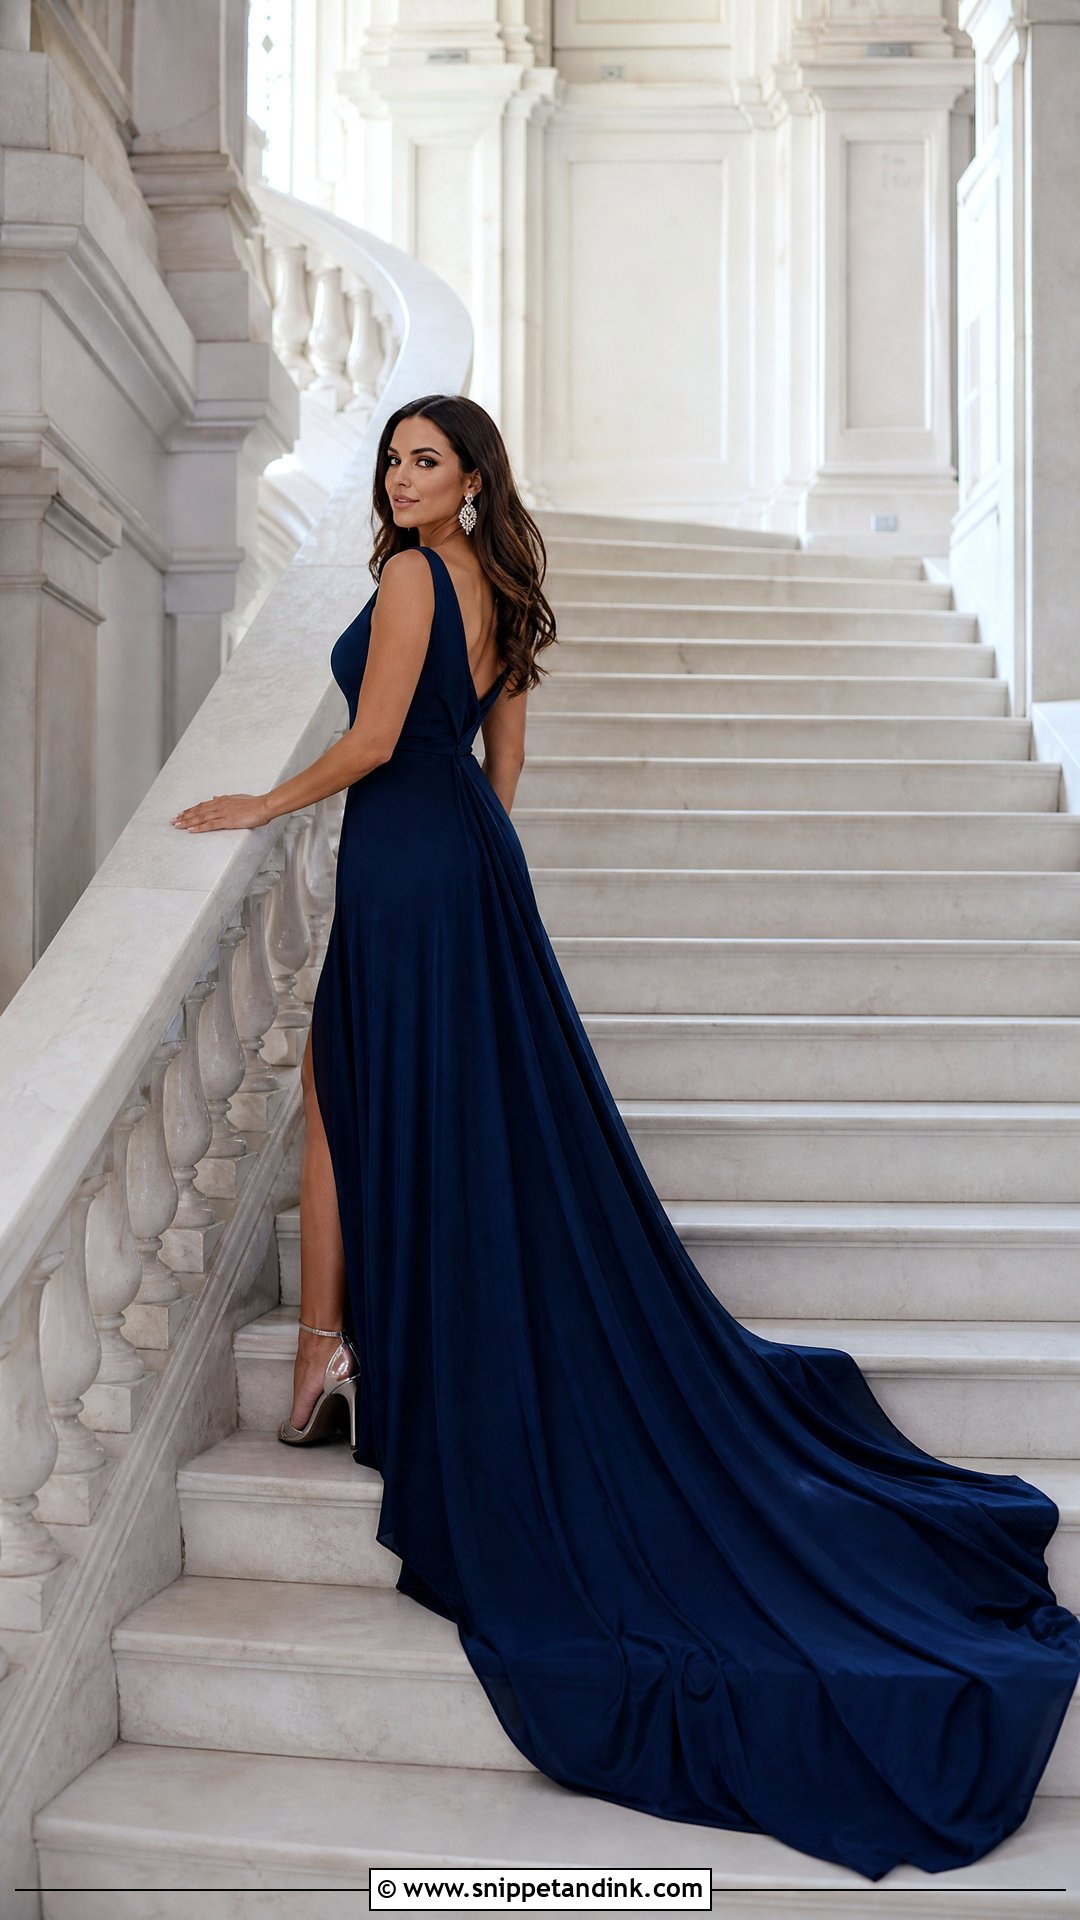
Steps give a long dress somewhere to fall, which is why a staircase gown pose reads as dramatic with very little effort from you. Standing, keep one hand on the rail and angle the body slightly. Sitting, raise one knee and turn the torso toward the light. I always walk down a few steps and shoot back up, then climb above and shoot down the train; the two angles give very different pictures. Have someone straighten the fabric across each step, because a single fold over an edge catches the eye before your face does.
7. Hand On Waist Gown Pose
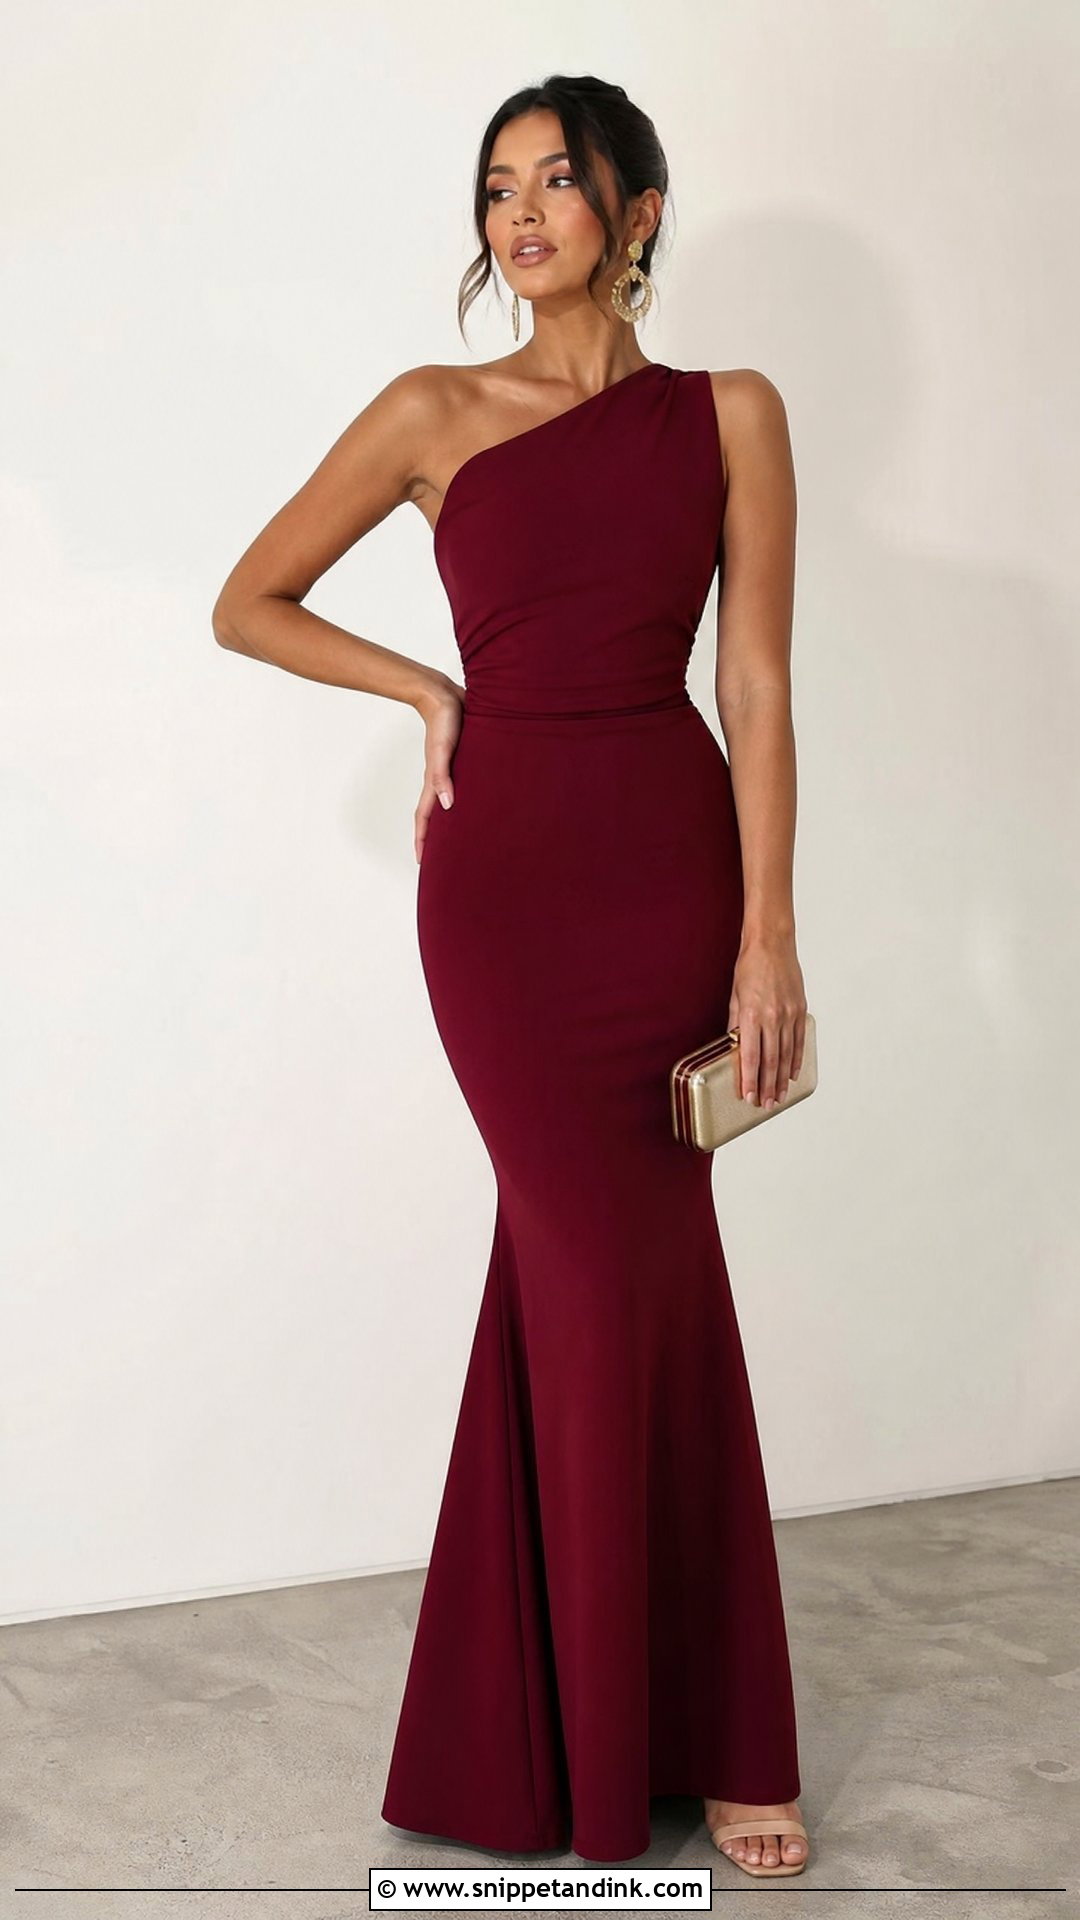
Hand placement is where this pose usually goes wrong. Find the narrowest point of your waist and rest the hand there with the fingers together and relaxed, not splayed. Then push the elbow slightly away from the body. That gap of air between arm and torso keeps the arm from pressing flat and widening on camera. It suits mermaid, sheath and other fitted gowns best; on a big ball skirt the hand tends to disappear into the fabric.
8. Holding Gown Fabric Pose
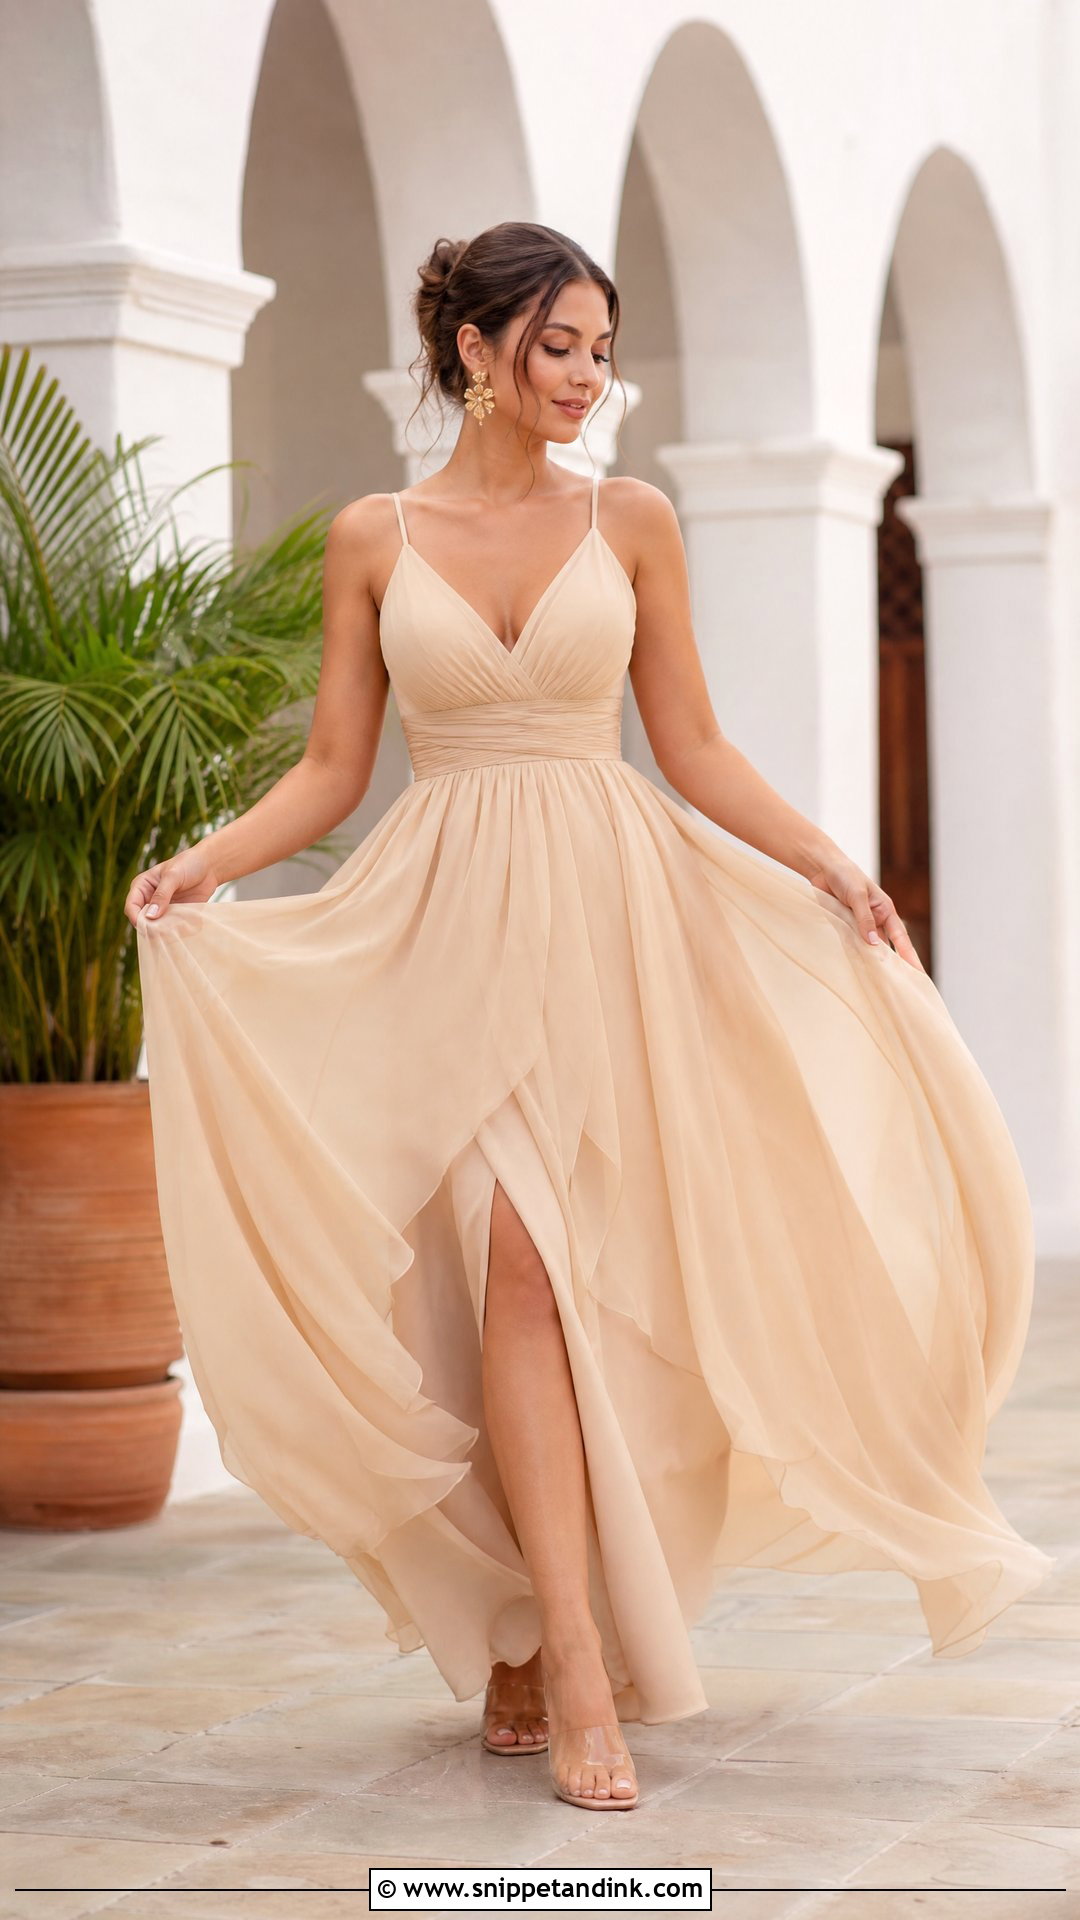
Lift the skirt only a few centimetres. Brides almost always grab a fistful and haul it up to the knee, and the result looks like stepping over a puddle. Pinch the fabric between thumb and two fingers with the wrist soft, and if the gown has beading or embroidery, hold it where that panel turns toward the light. Tulle and chiffon respond well to this. Heavy satin tends to fold in one hard crease from your hand, so I keep the lift even smaller there.
9. Looking Down Gown Pose
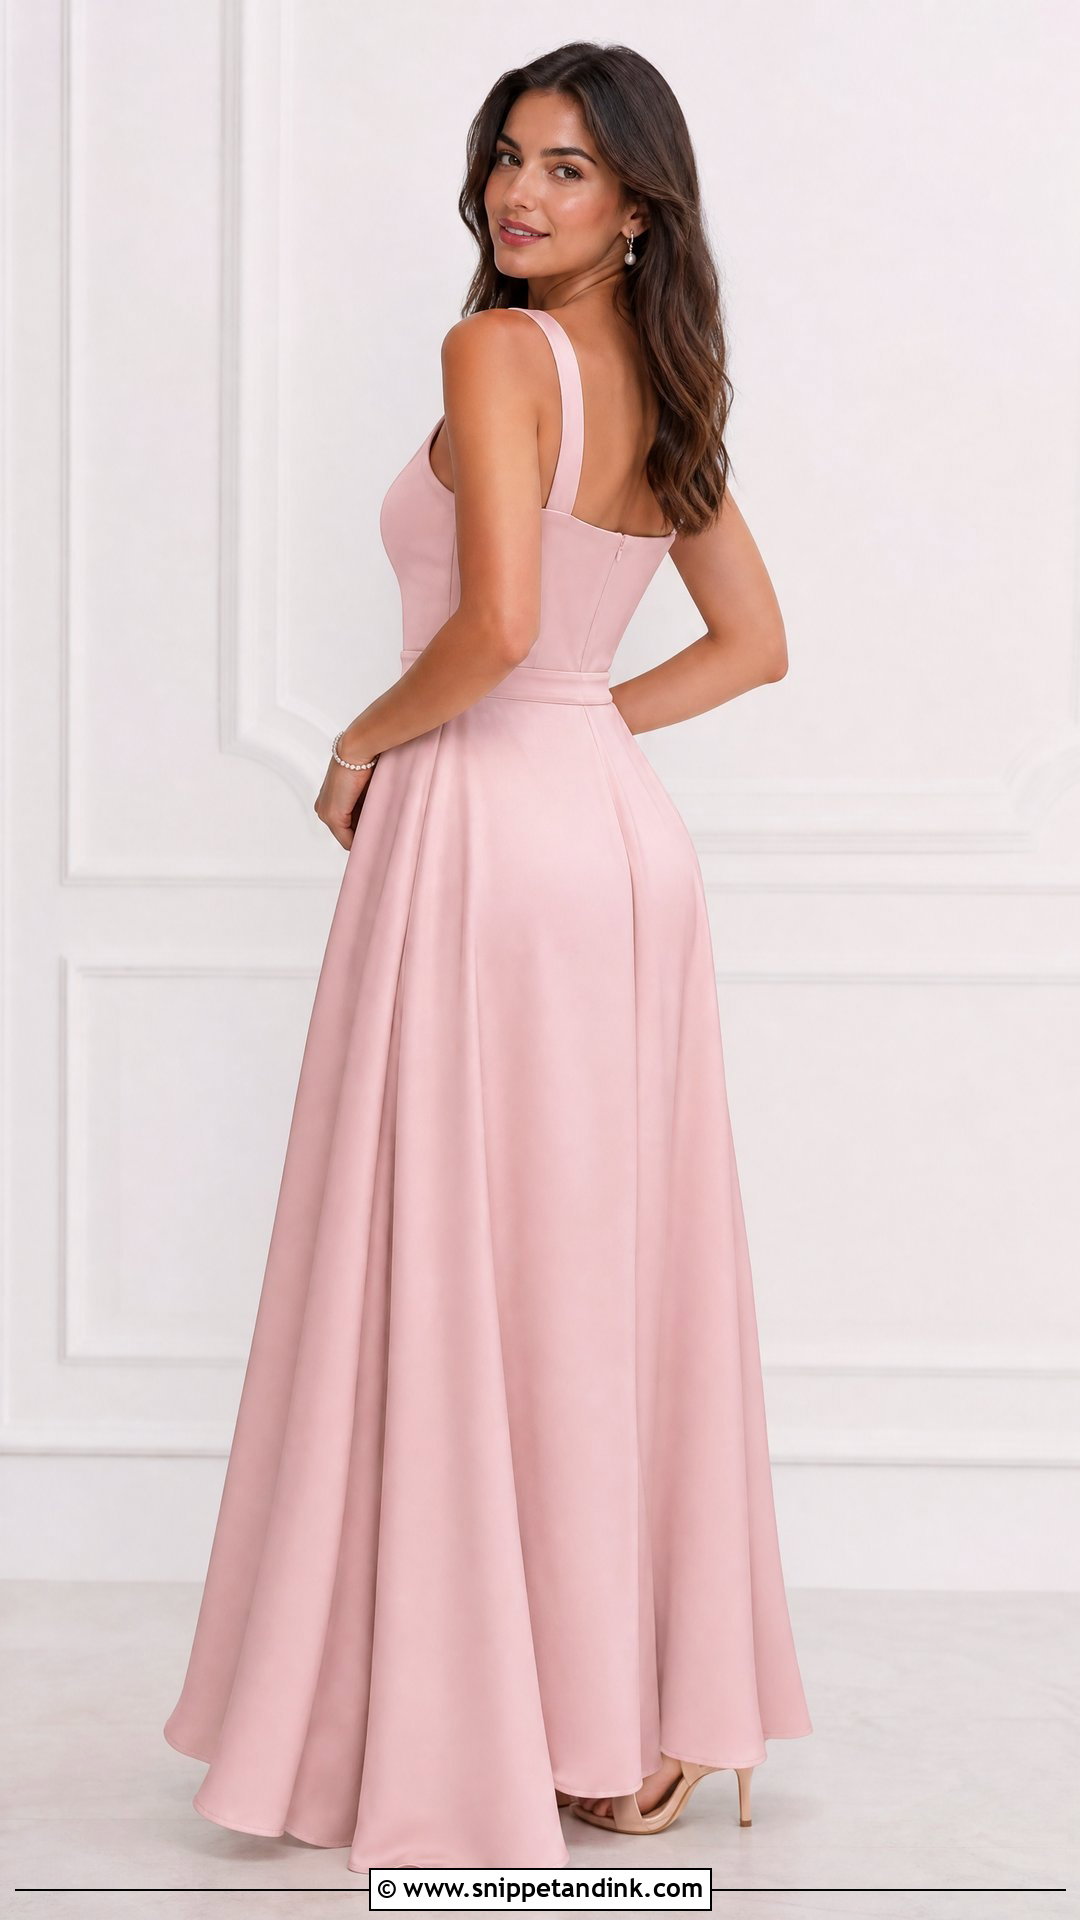
Lowering the gaze shows off lashes, eye makeup and earrings, and it gives camera-shy people a break from eye contact. The trick is to bring the chin forward first and then look down; if you only drop the head, the jaw softens and a double chin appears that isn’t really there. Look at something specific, such as the bouquet, your hands or the hem. Near window light this frame turns quiet and romantic without much effort.
10. Looking Away Gown Pose
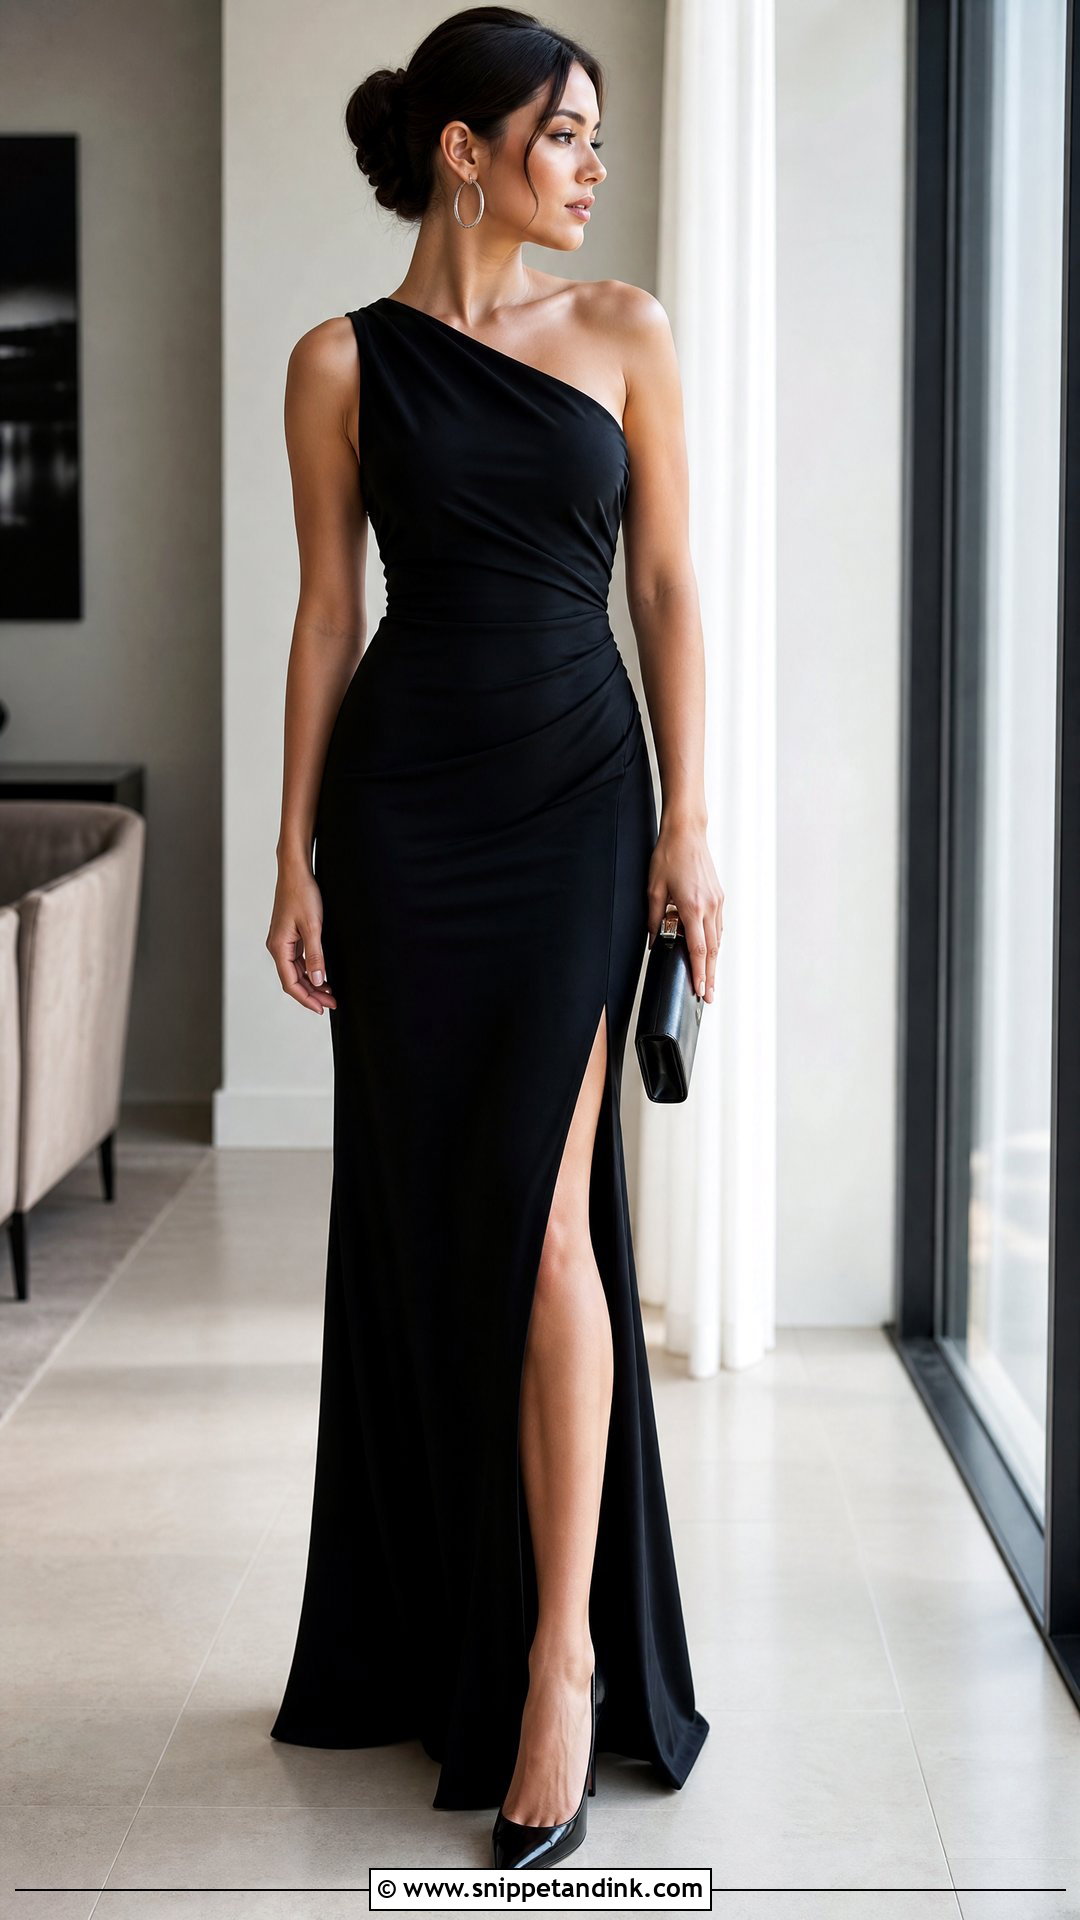
When people tell me they hate posing, this is where I put them. Pick a real point to look at, like a window or a tree line, rather than staring at empty air, because a focused gaze reads as thought and an unfocused one reads as bored. Angle the body a little and let the gown hang. I often get my favourite frames in the second after someone looks back toward me and then away again, so keep moving between the two.
11. Side Profile Gown Pose
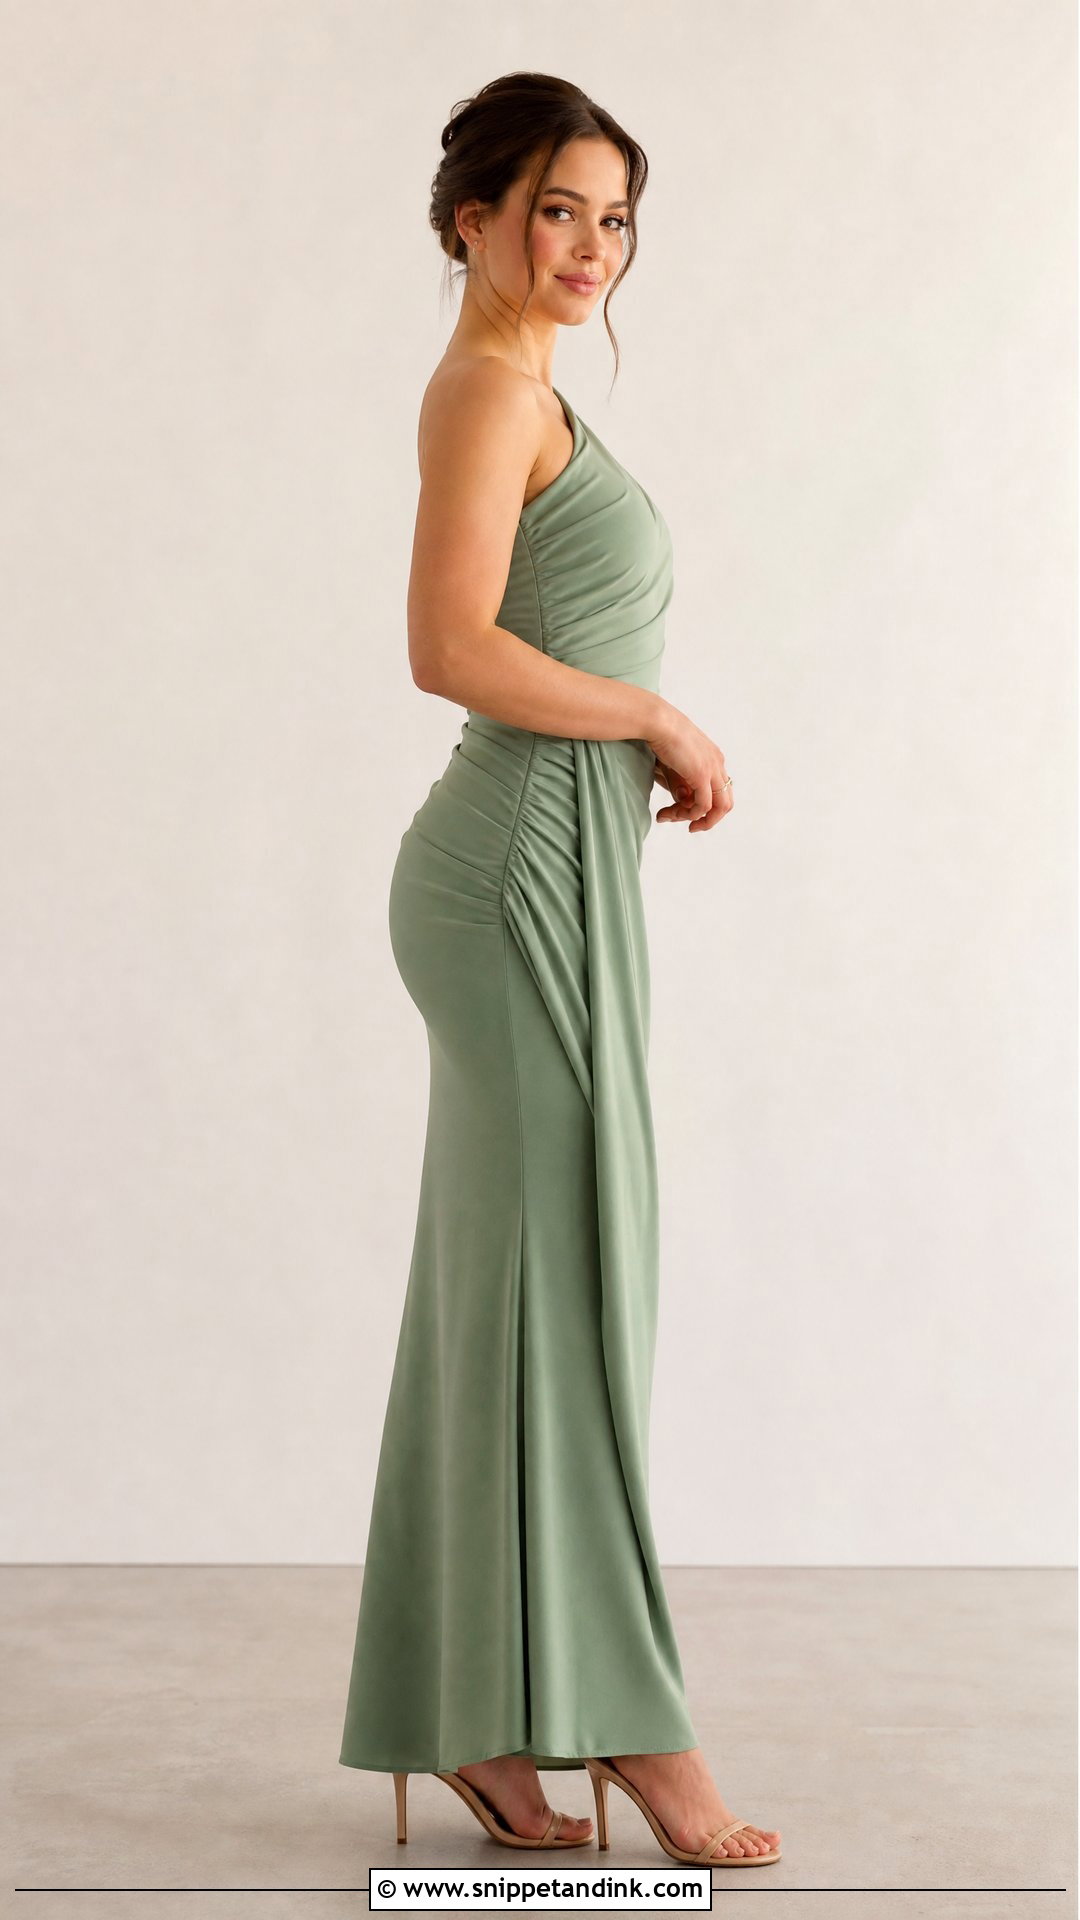
A true side-on stance is the clearest way to show a silhouette: fitted bodices, sculpted sleeves, a train or a full skirt. Stand sideways with one foot slightly ahead and lengthen through the back of the neck. For maternity sessions this is the frame that shows the bump honestly, and I’ll often have the mother rest a hand just under it rather than on top. Turn your face a few degrees toward the light so the far eye doesn’t fall into shadow.
12. Gown Pose With One Leg Forward
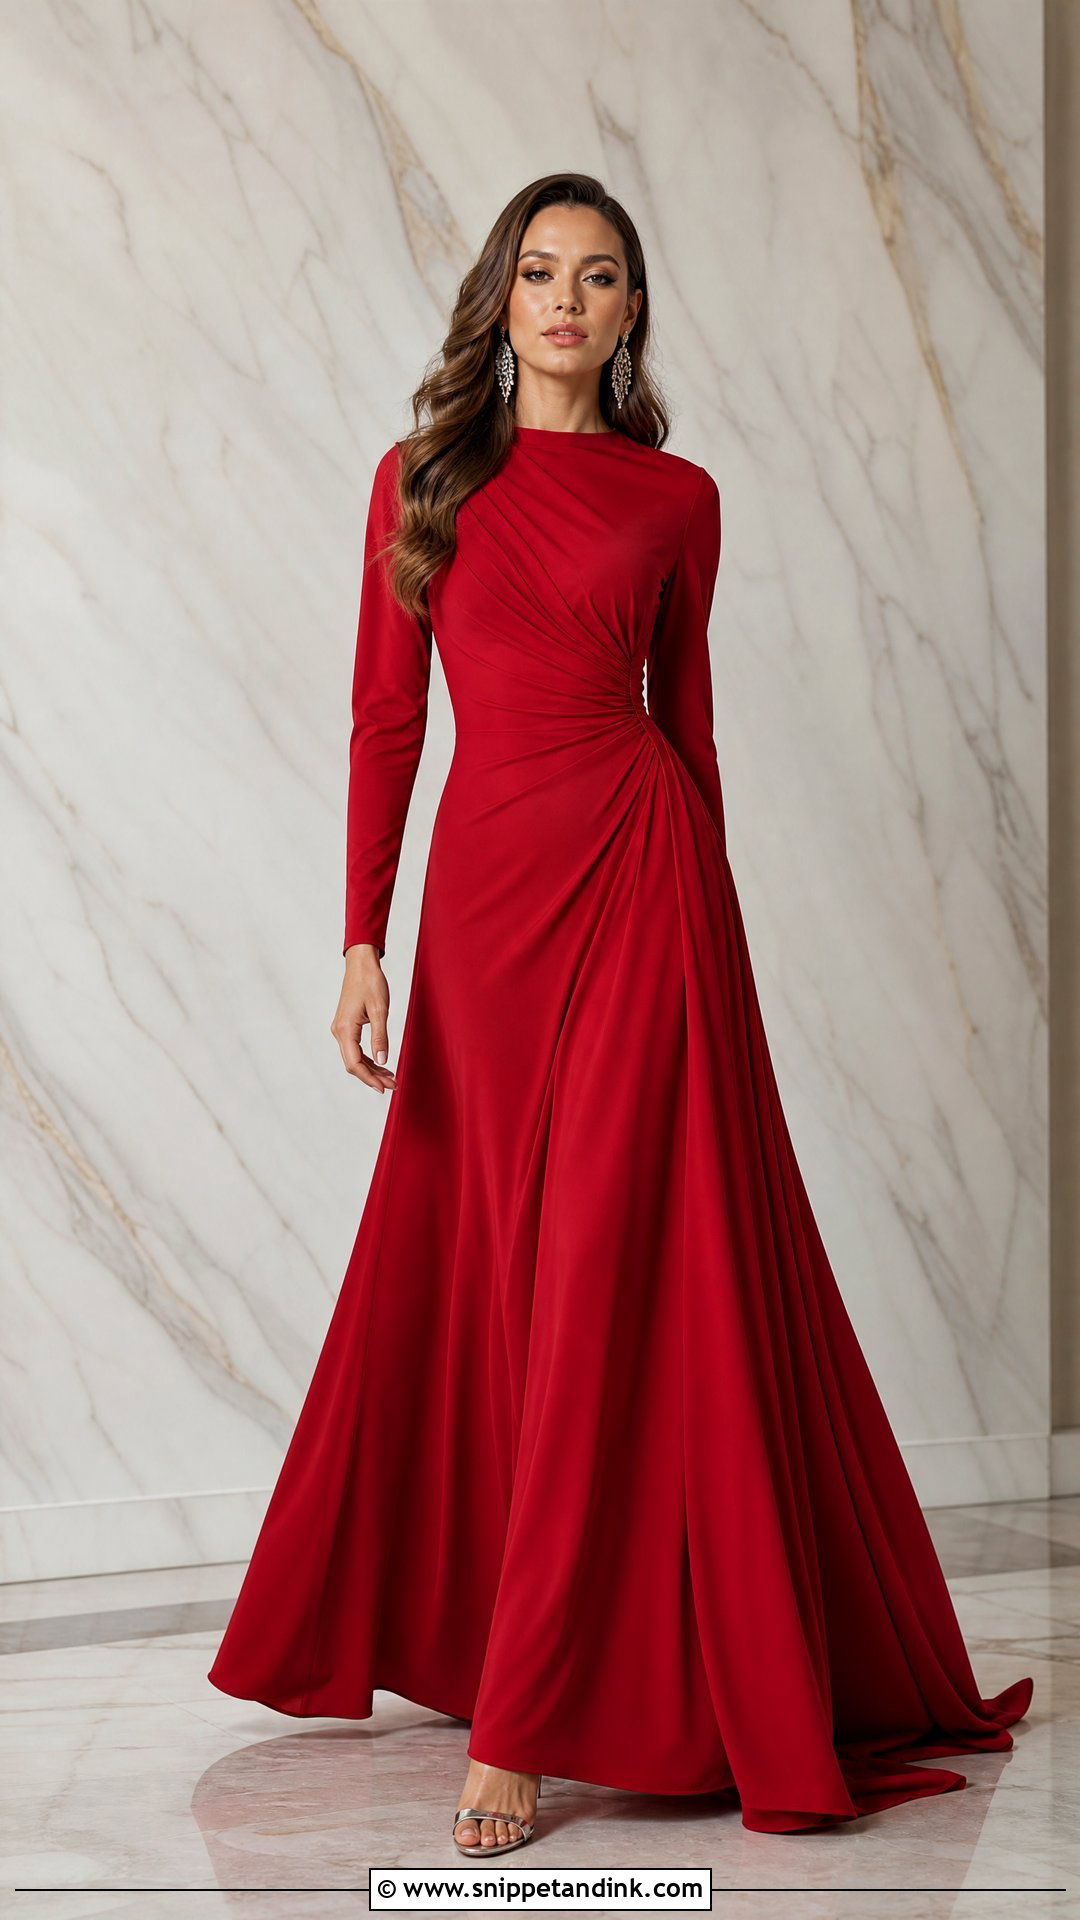
Step the leg nearest the camera forward through the fabric, toe pointed lightly, while your weight stays on the back foot. A small step reads as length; a big lunge reads as a lunge. With a slit gown I check that the opening falls over the front thigh before shooting, since it can slide to the side as you shift. Prom and birthday clients love this one because it borrows from red carpet photos without needing a backdrop.
13. Gown Pose With Train
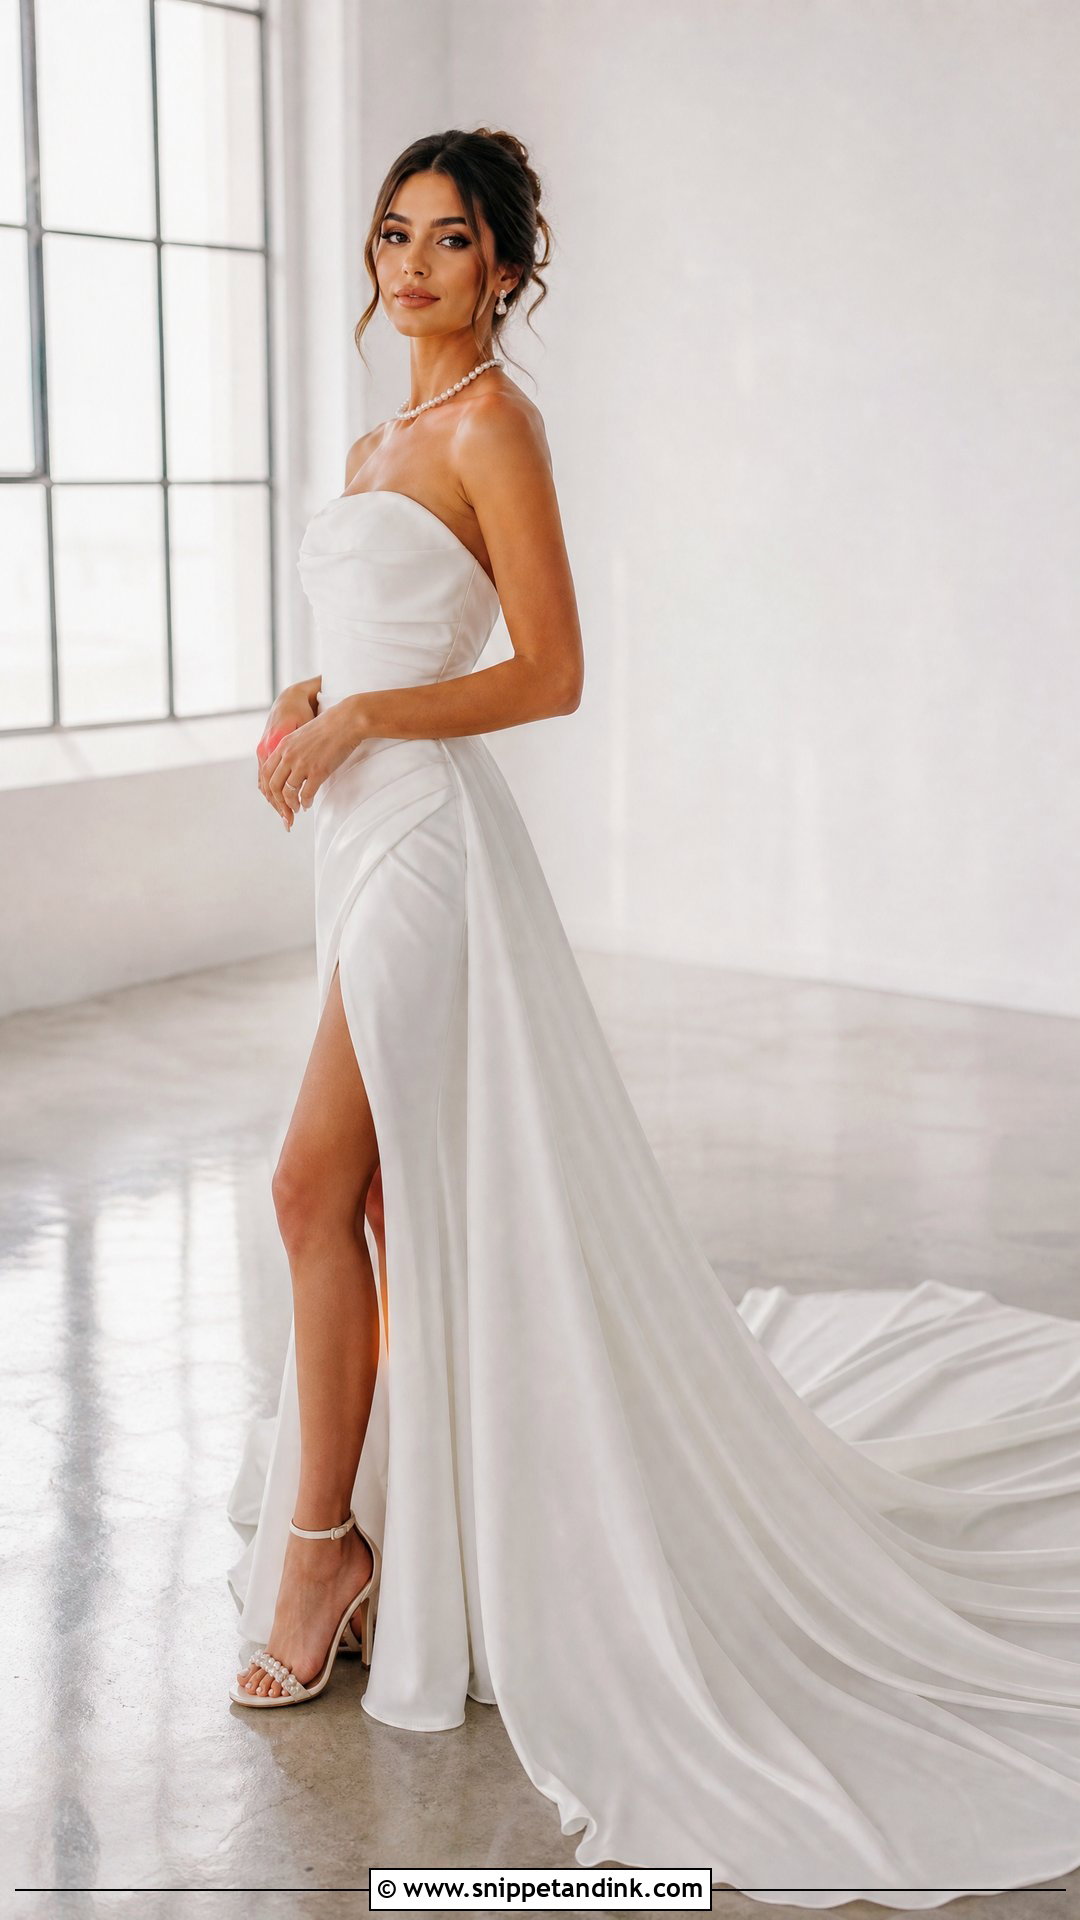
The train only looks good when it’s laid out flat and fanned, so I spend more time on fabric than on you for this frame. Stand still while someone pulls the train straight behind you, then flicks it lightly so it lands without twists. Your pose can stay very plain: face forward or look back over a shoulder. I’ll usually climb onto a chair or a step and shoot from above, which shows the full length of the train in a way an eye-level shot can’t.
14. Gown Pose With Hands In Hair
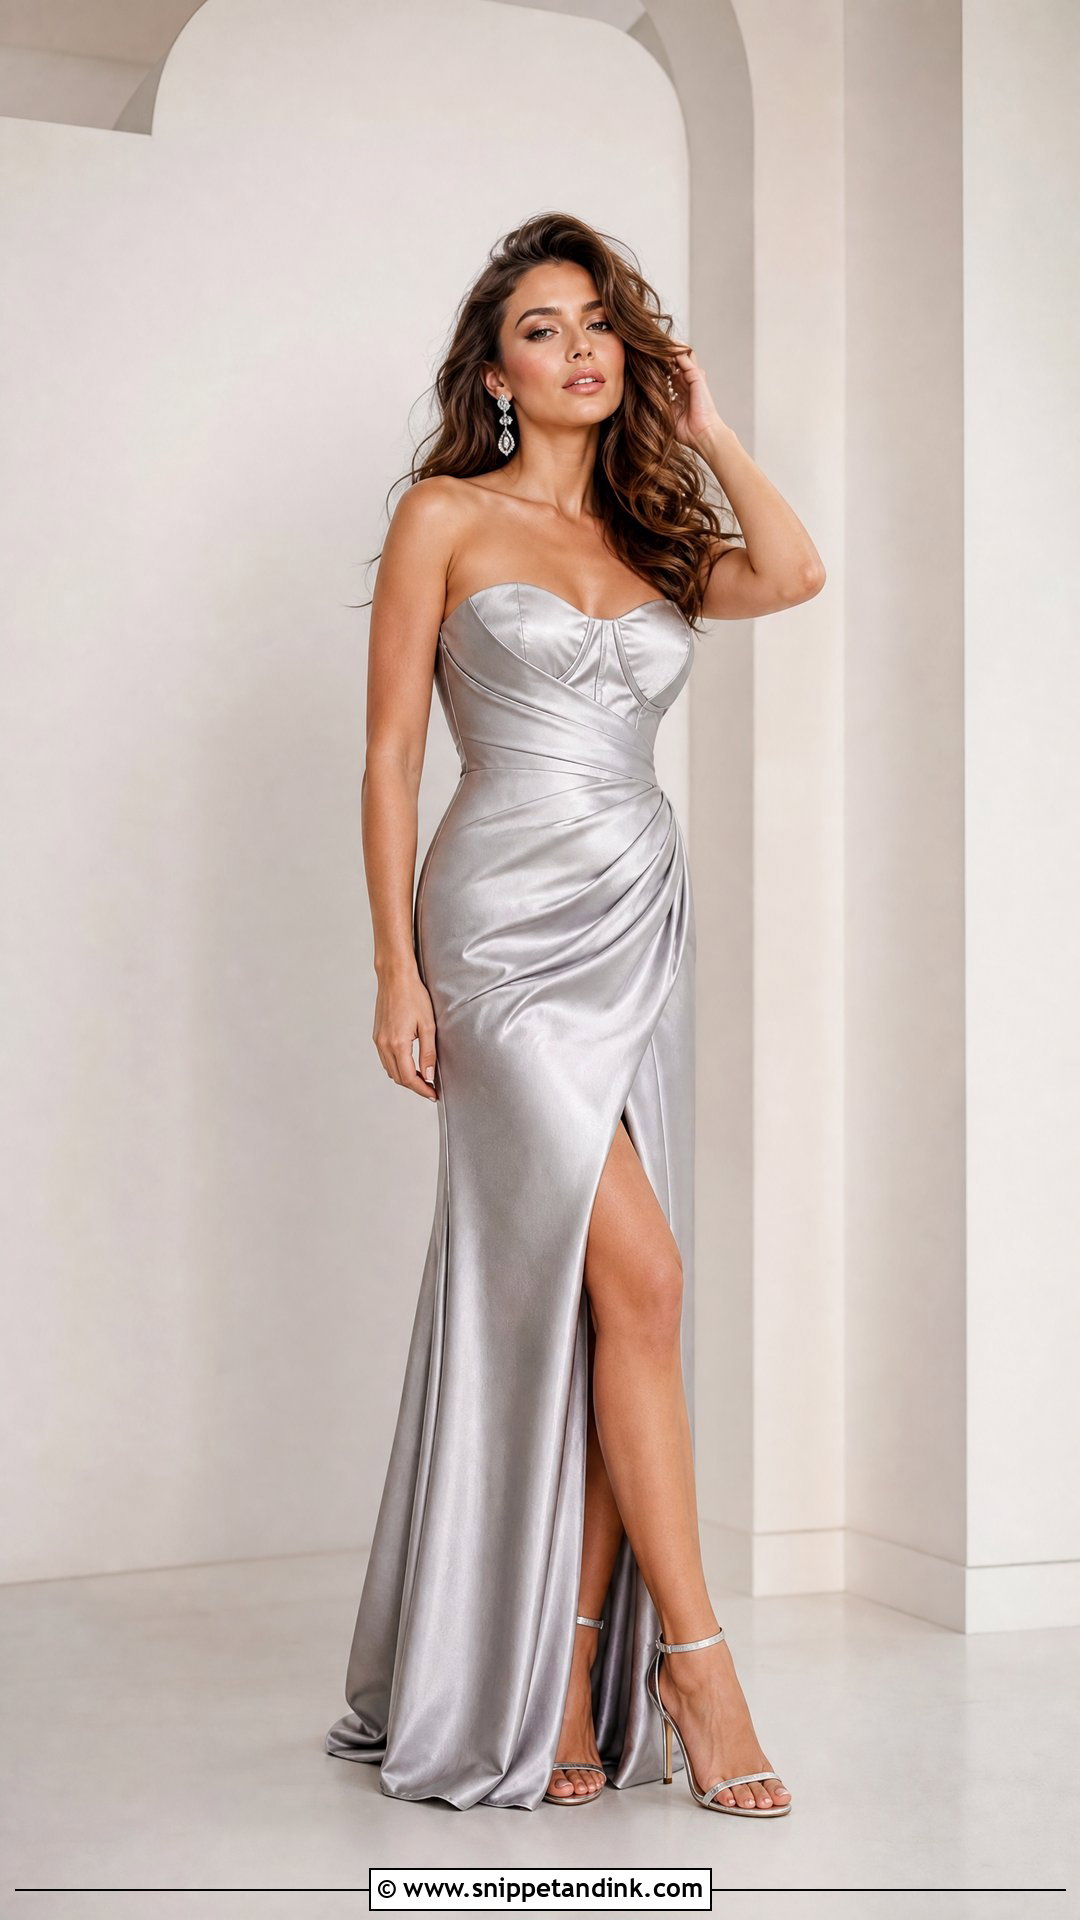
Hands in the hair work because the raised elbows frame the face and open the collarbones, which is why I reserve it for strapless, off-shoulder and halter necklines. Touch the hair rather than press into it; pressing pushes the scalp and pulls the eyebrows up. Turn the body a quarter away from me so the arms don’t line up flat across the frame. If the hair is pinned for a wedding, ask your stylist which side you can touch without loosening anything.
15. Gown Pose With Bouquet
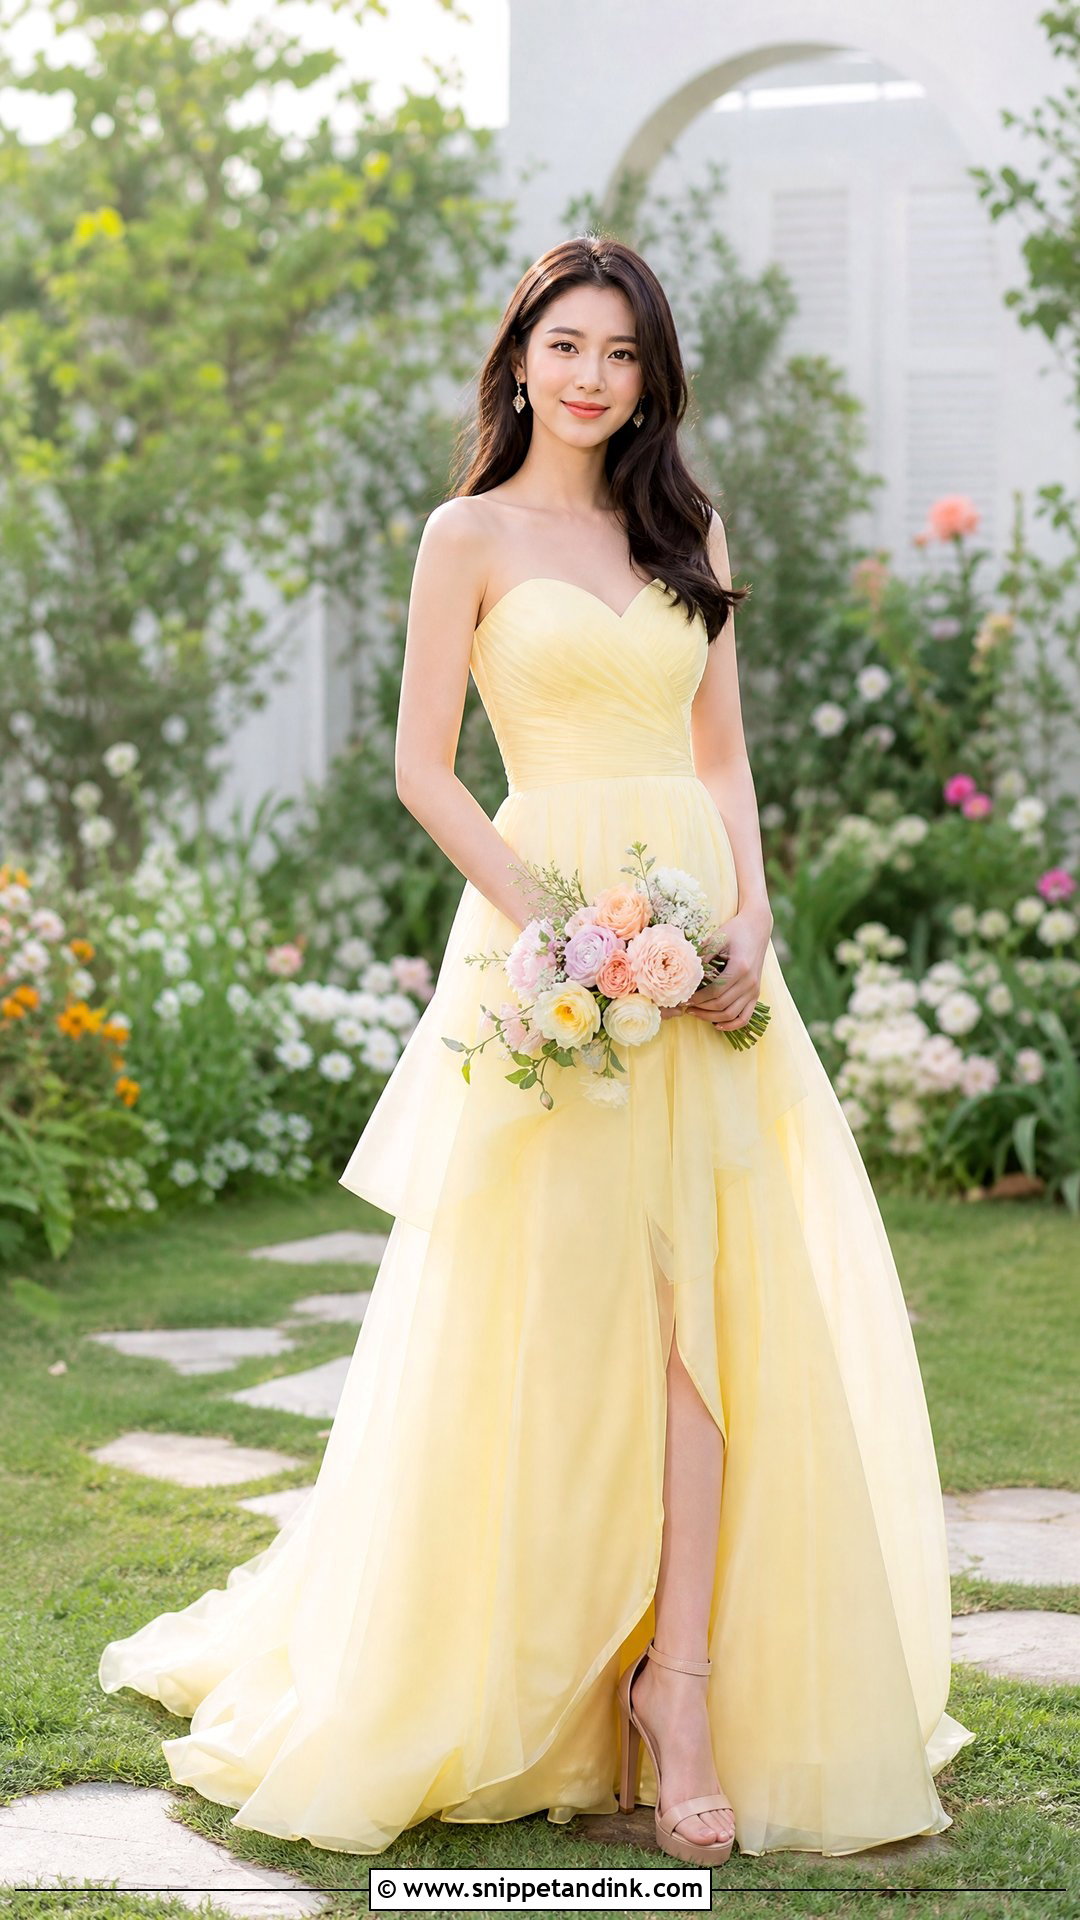
Hold the bouquet lower than feels natural, at the hip bone, with the elbows relaxed. Held at the chest it hides the bodice and makes the arms look short. Stand at a slight angle and tip the stems a little away from your body so the flowers face the camera rather than the ceiling. Pale flowers suit a softer mood, while a deep red or saturated bunch pulls the eye and works for darker portraits. Glance down at the flowers for one frame, then straight at me for another.
16. Mirror Gown Pose
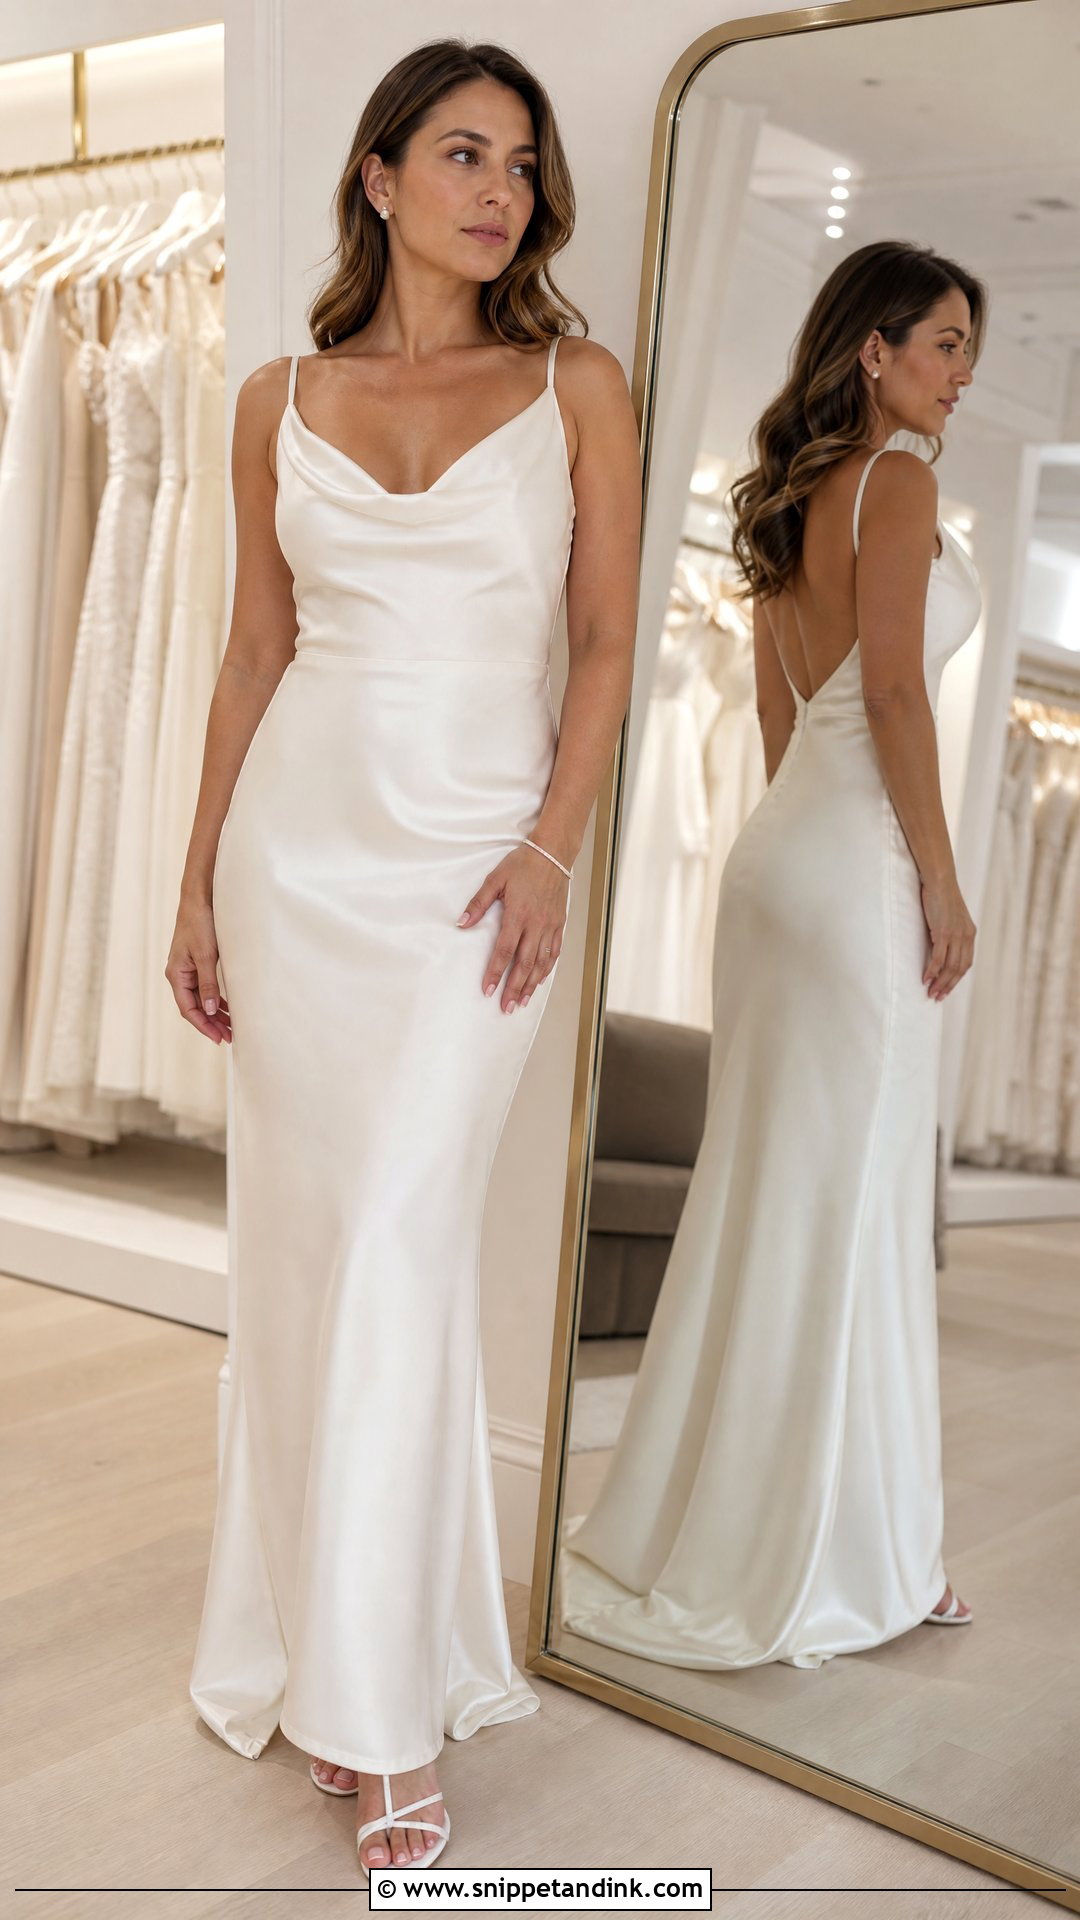
A mirror shows the front and back of the dress at once, which makes it useful in getting-ready coverage and dressing room photos. Give your hands a job, such as fastening an earring or settling a strap, because a person standing still in front of a mirror looks like they are waiting. I’ll shift around until my own reflection and any clutter behind you fall out of the glass. Hotel mirrors are often smudged, so a quick wipe before we start saves a lot of editing later.
17. Window Light Gown Pose
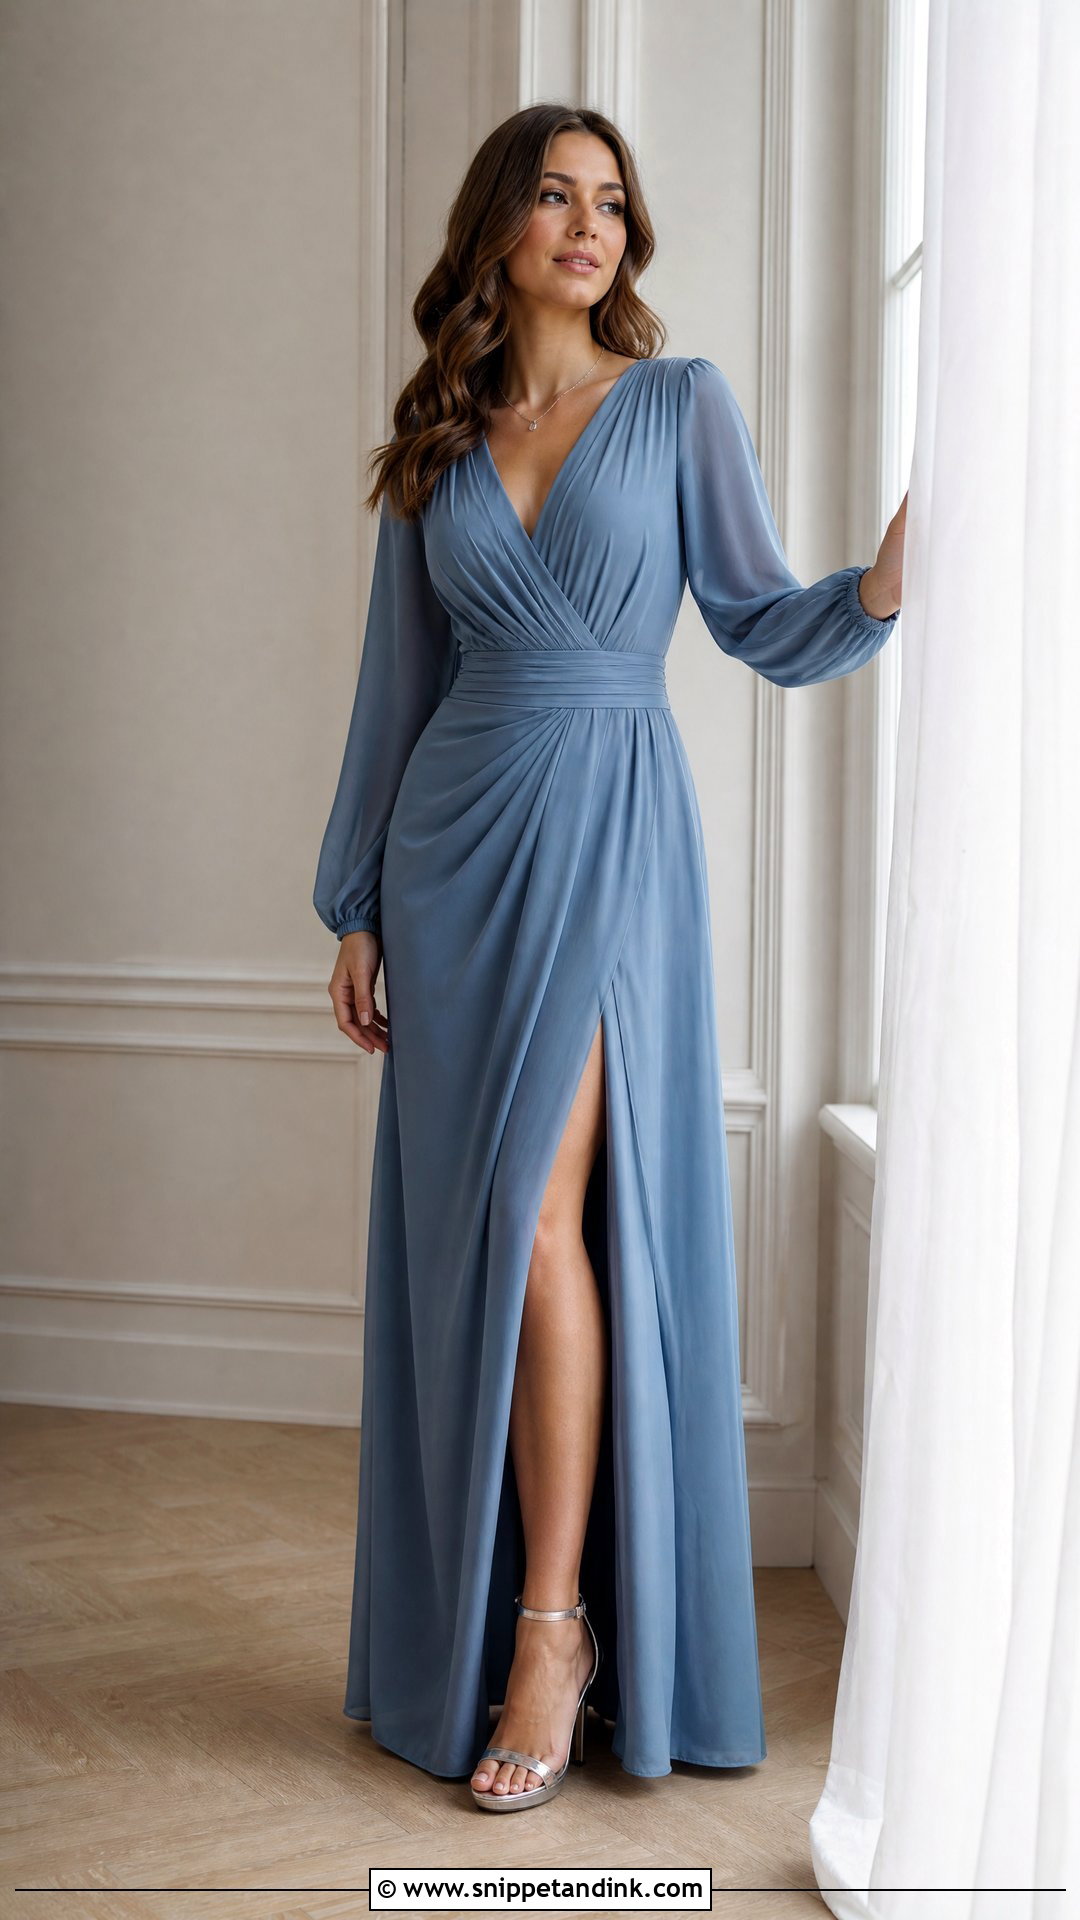
A big window is the best free light there is, provided the sun isn’t shining straight through it. Stand about an arm’s length from the glass, turn your face toward it and let the far side of your face fall slightly into shade, which gives shape to the cheekbones. Rest a hand on the frame or the curtain. If direct sun is pouring in, I’ll either wait, hang a sheer curtain to soften it, or move you to a window on the shaded side of the building.
18. Leaning Wall Gown Pose
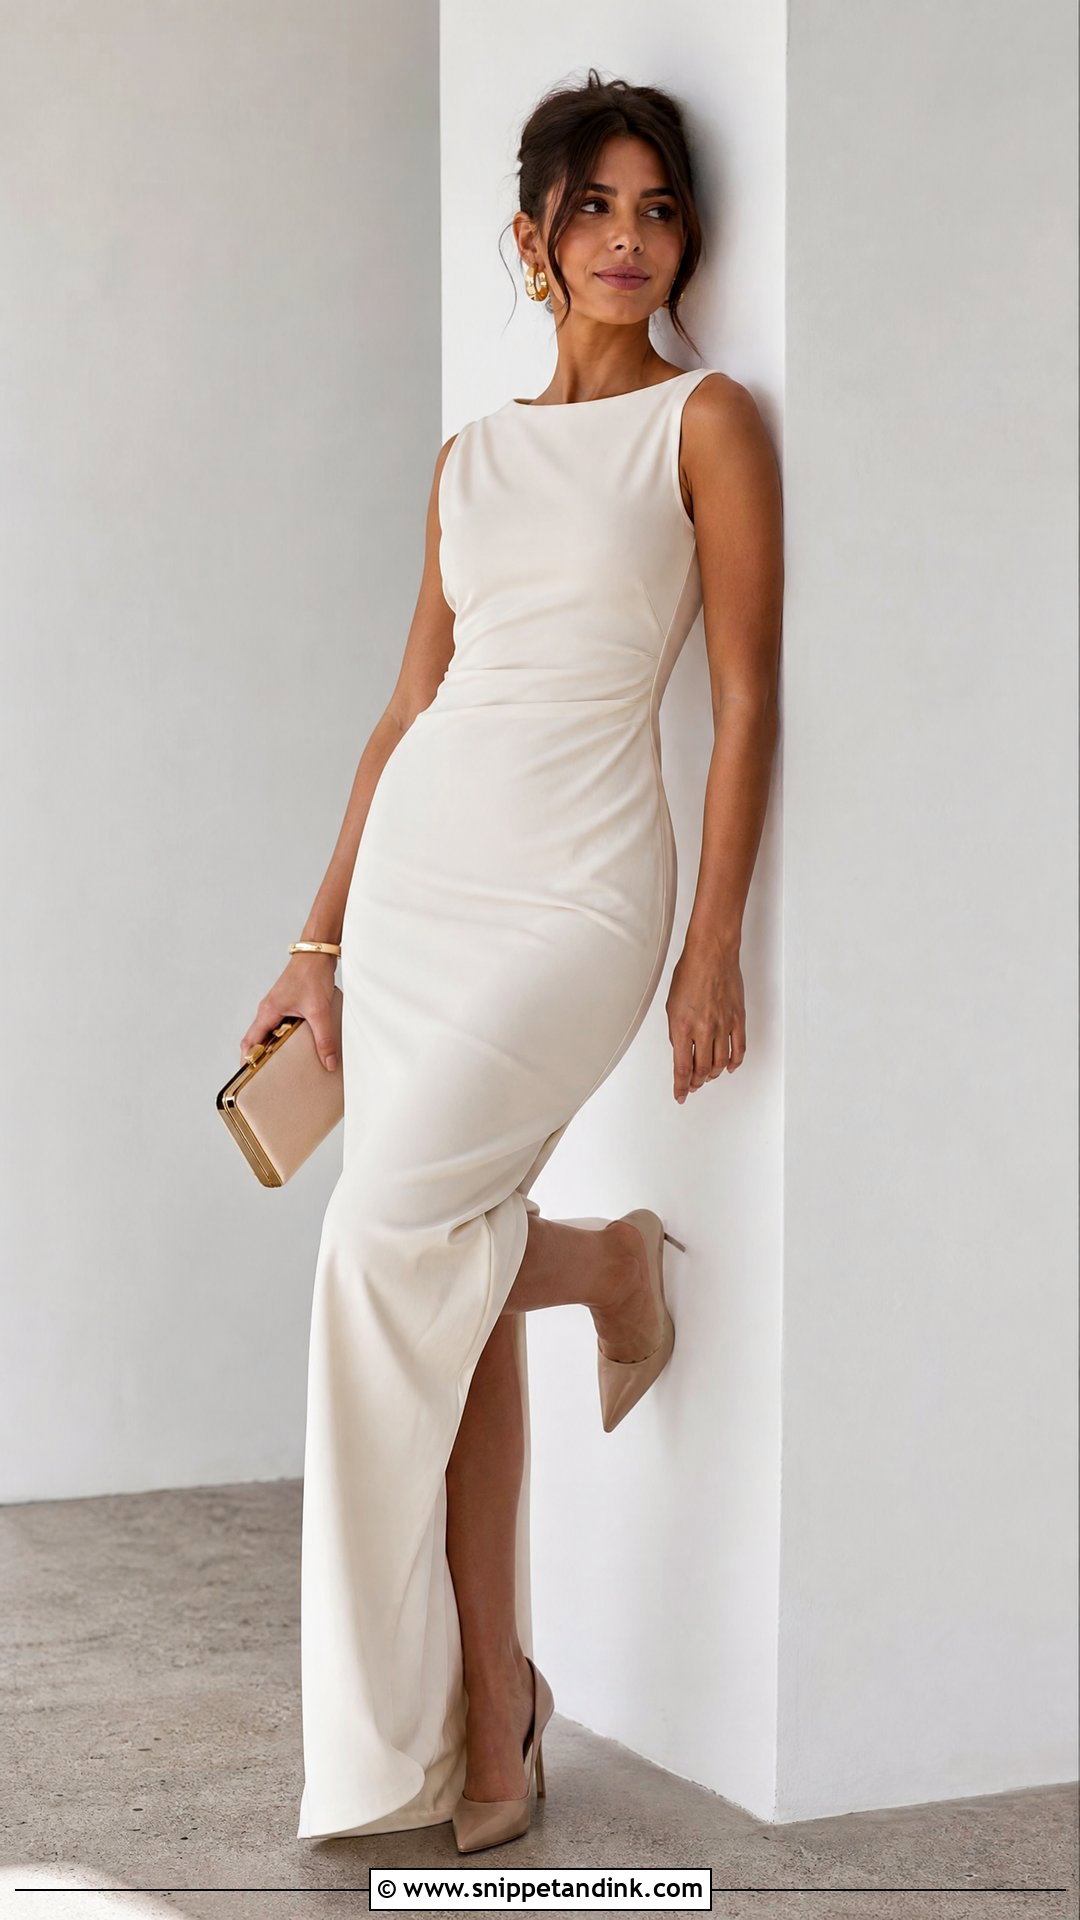
Lean lightly. Put the shoulder or upper back against the wall with only a little weight in it, bend the knee nearest the camera, and keep the chest lifted. When people put their full weight into a wall, the shoulders round and the pose starts to look like waiting for a bus. Sleek satin, long sleeves and minimal gowns suit this best. A plain, light wall also bounces soft light back onto the face, which is a bonus.
19. Floor Gown Pose
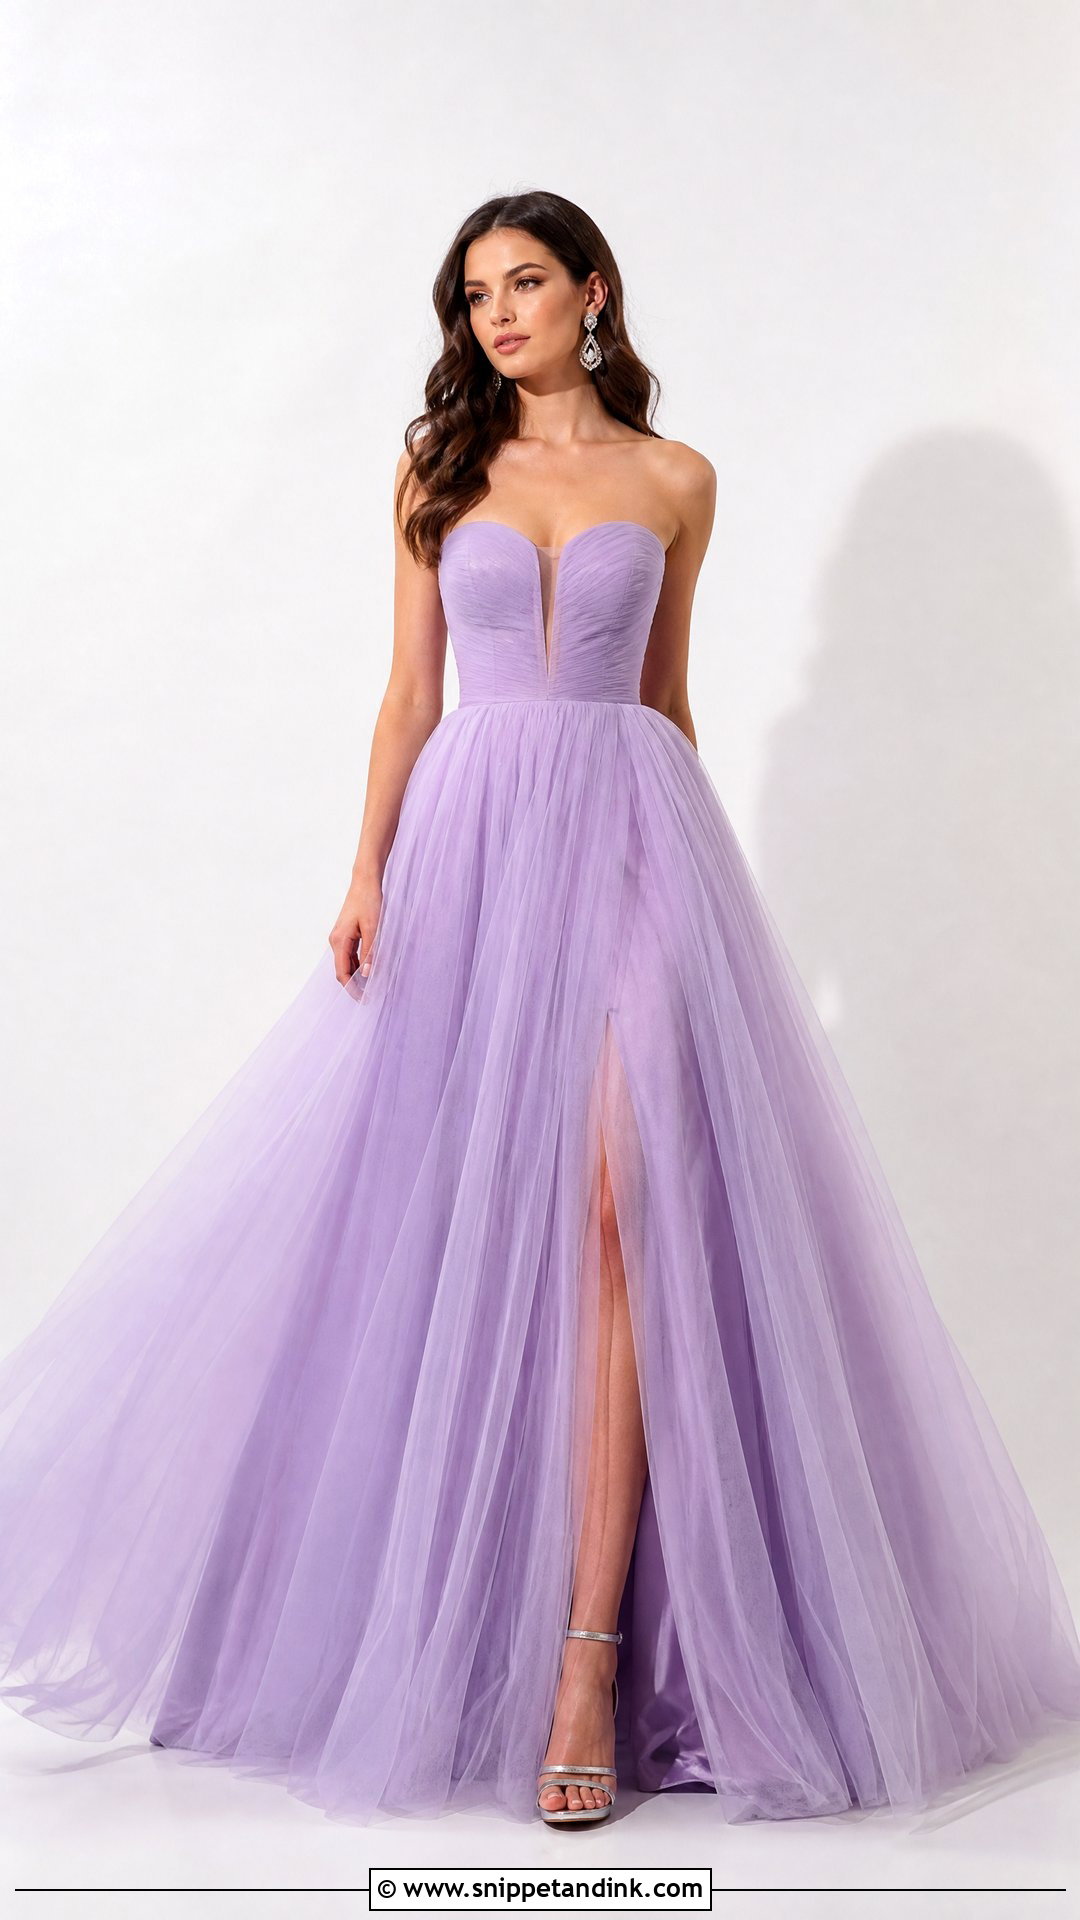
Floor poses are for volume: tulle, organza, layered skirts or a long train. Sit with the legs folded to one side and let me or an assistant spread the skirt into a circle around you. One hand goes to the floor for balance and the other to the lap or neckline. I shoot this from above or straight on at your eye level; shooting down from standing height without adjusting makes the body look small and the head large. Lay a clean sheet down first if the floor is dusty, since white tulle picks up grime instantly.
20. Back View Gown Pose
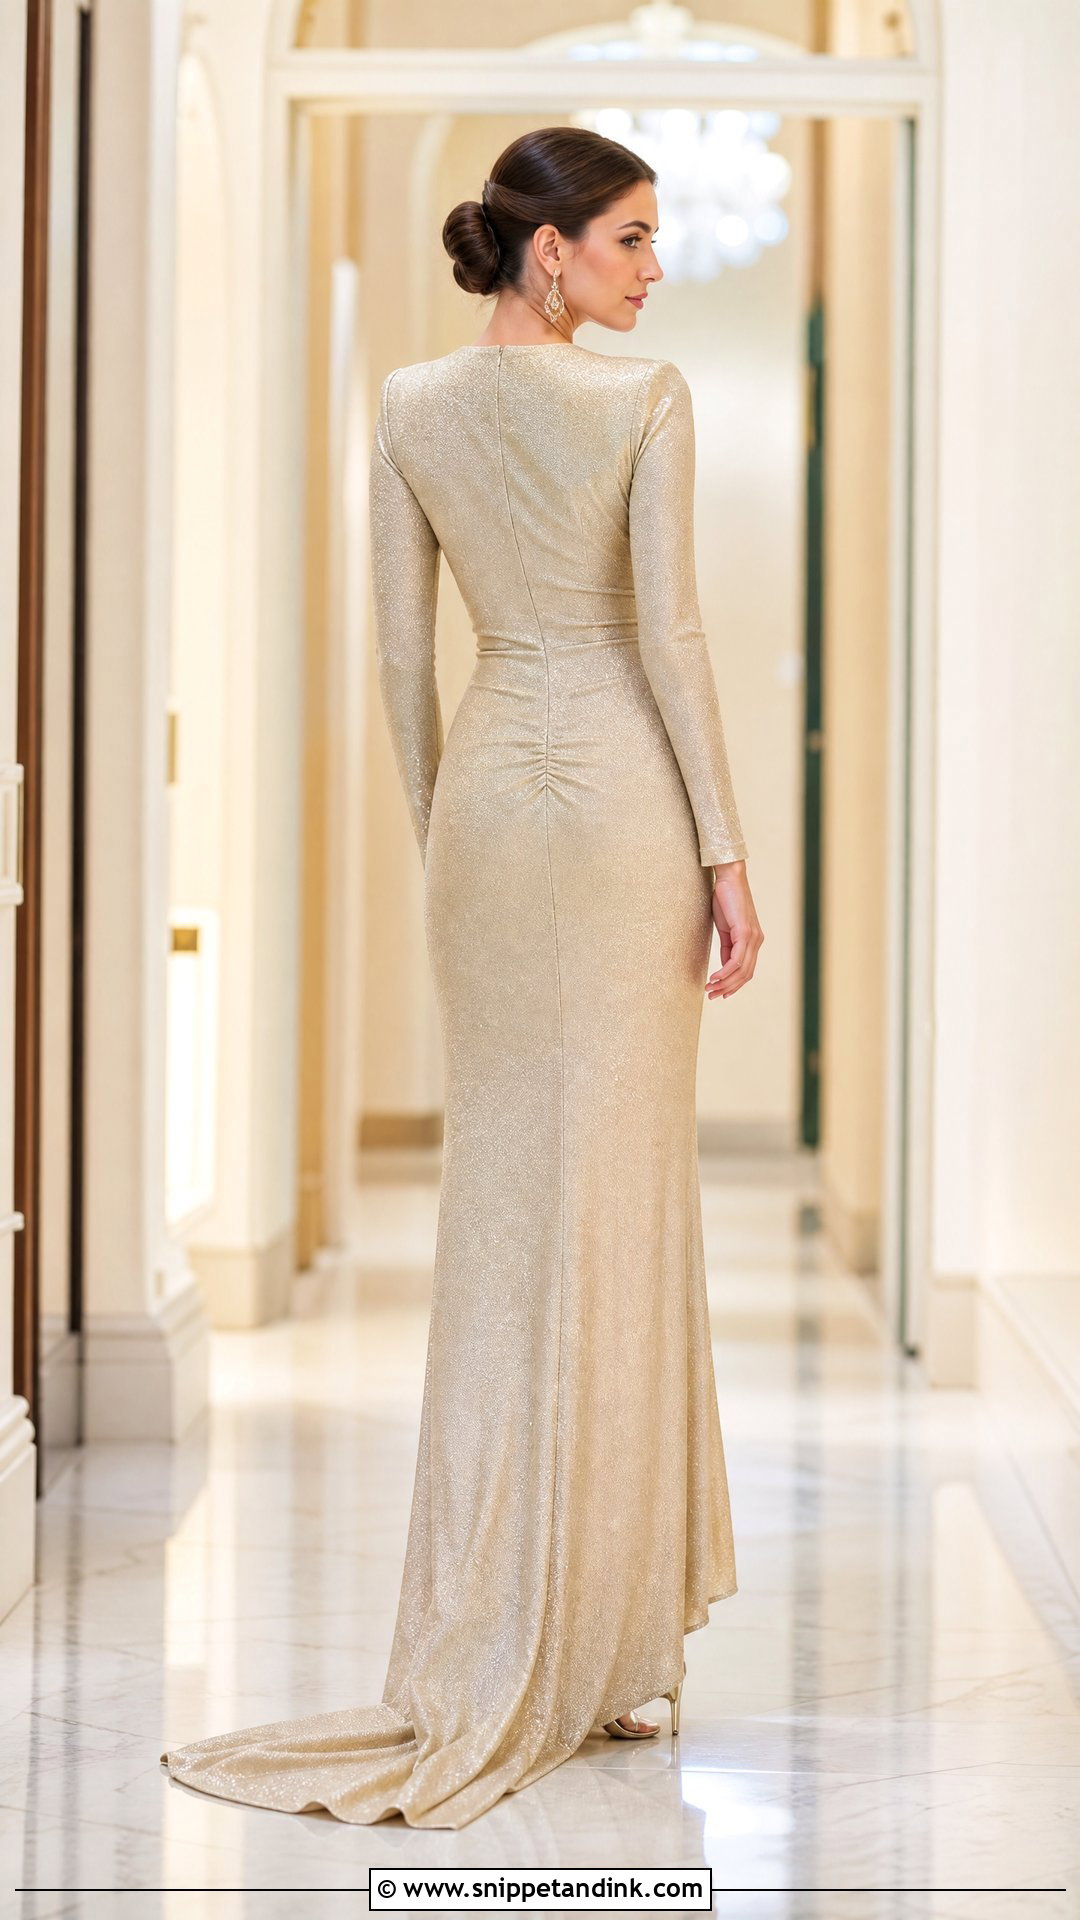
Save the back view for gowns whose backs are worth seeing: low cuts, lace panels, bows, corset lacing, buttons or a long train. Face away, stand tall and let the arms hang loose or hold the skirt at the sides. Before I shoot, I check the hair. Long loose curls tend to cover exactly the detail we’re trying to show, so I’ll move them over one shoulder. A slight head turn adds your profile without hiding the back.
21. Close Up Gown Pose
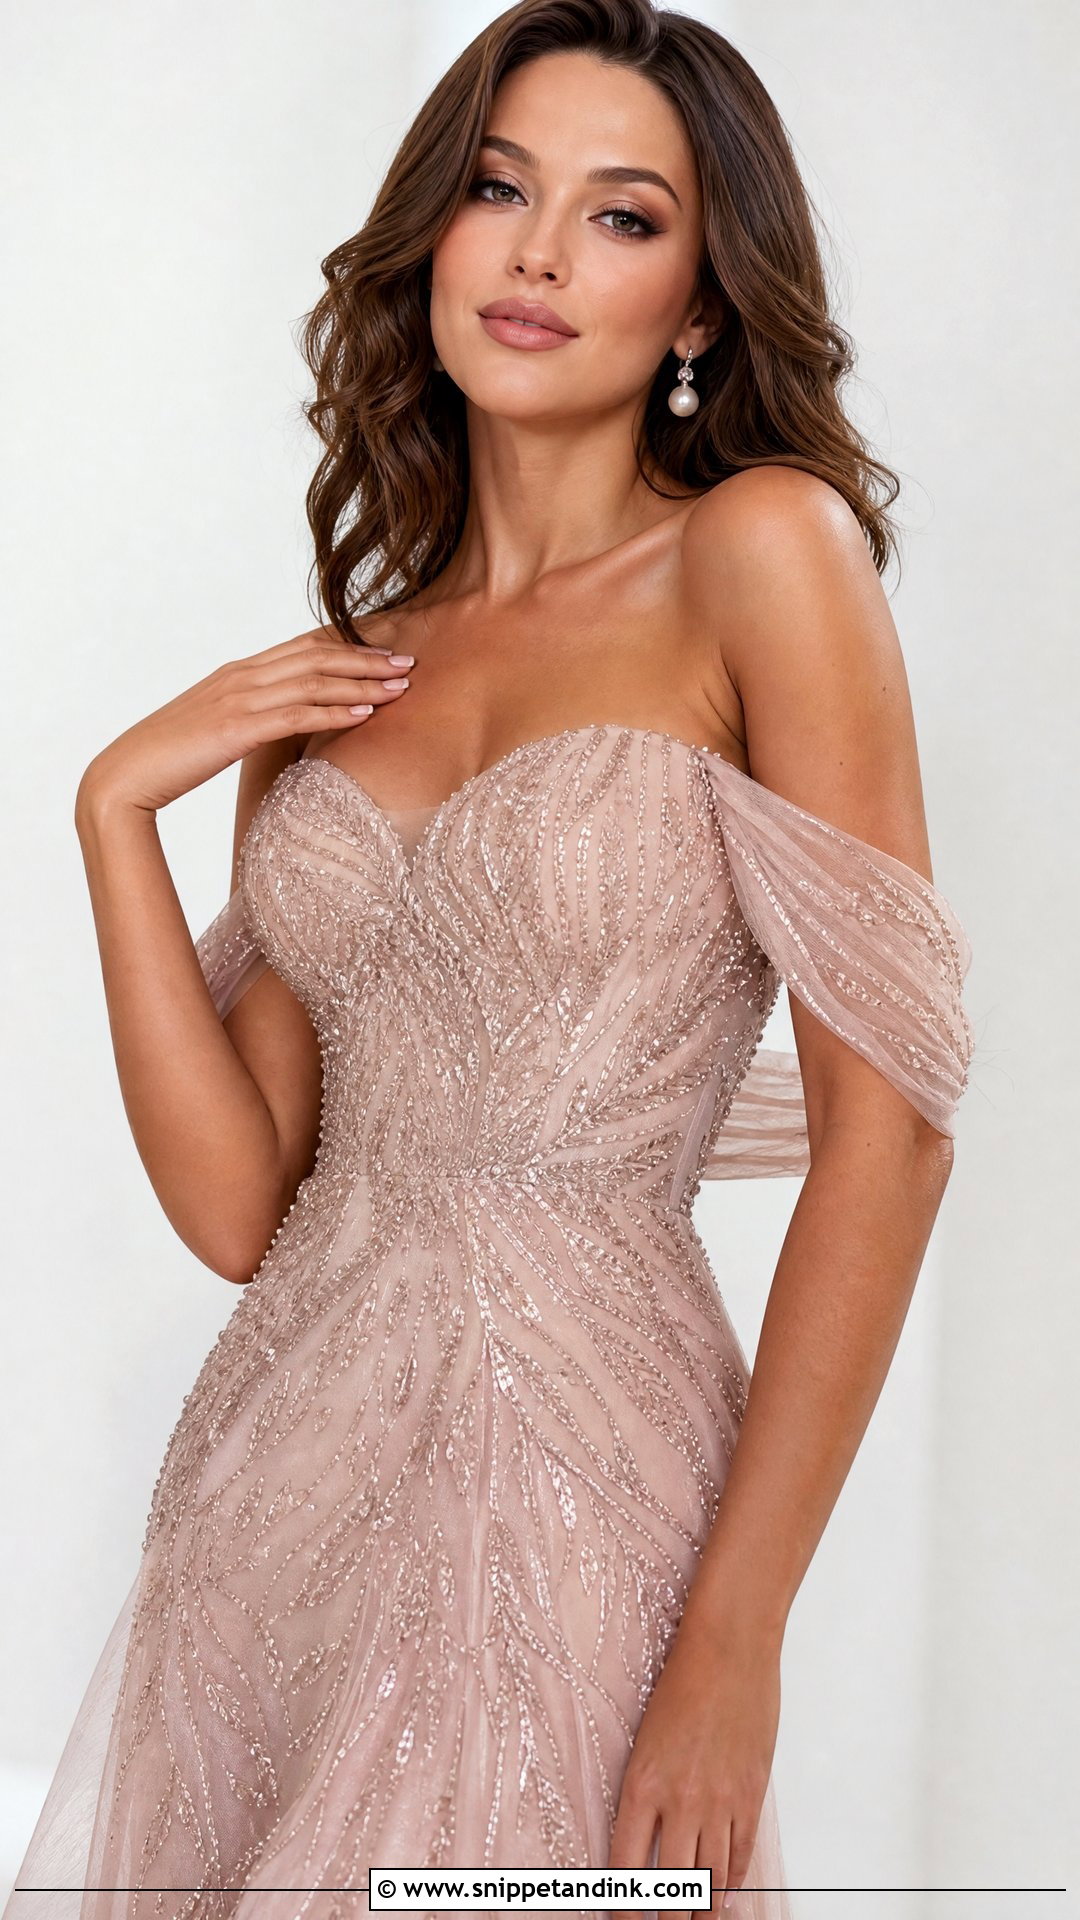
In a tight frame, hands and jaw are what people notice, so both need to be soft. Turn the shoulders slightly away, then bring one hand to the collarbone, an earring or the neckline with the fingers relaxed and side-on to the lens rather than palm-out. I avoid cropping at the wrists, elbows or knees because a cut through a joint looks like an amputation; cropping between joints reads cleanly. Take a slow breath out right before the shot and the mouth relaxes on its own.
22. Gown Pose With Chair
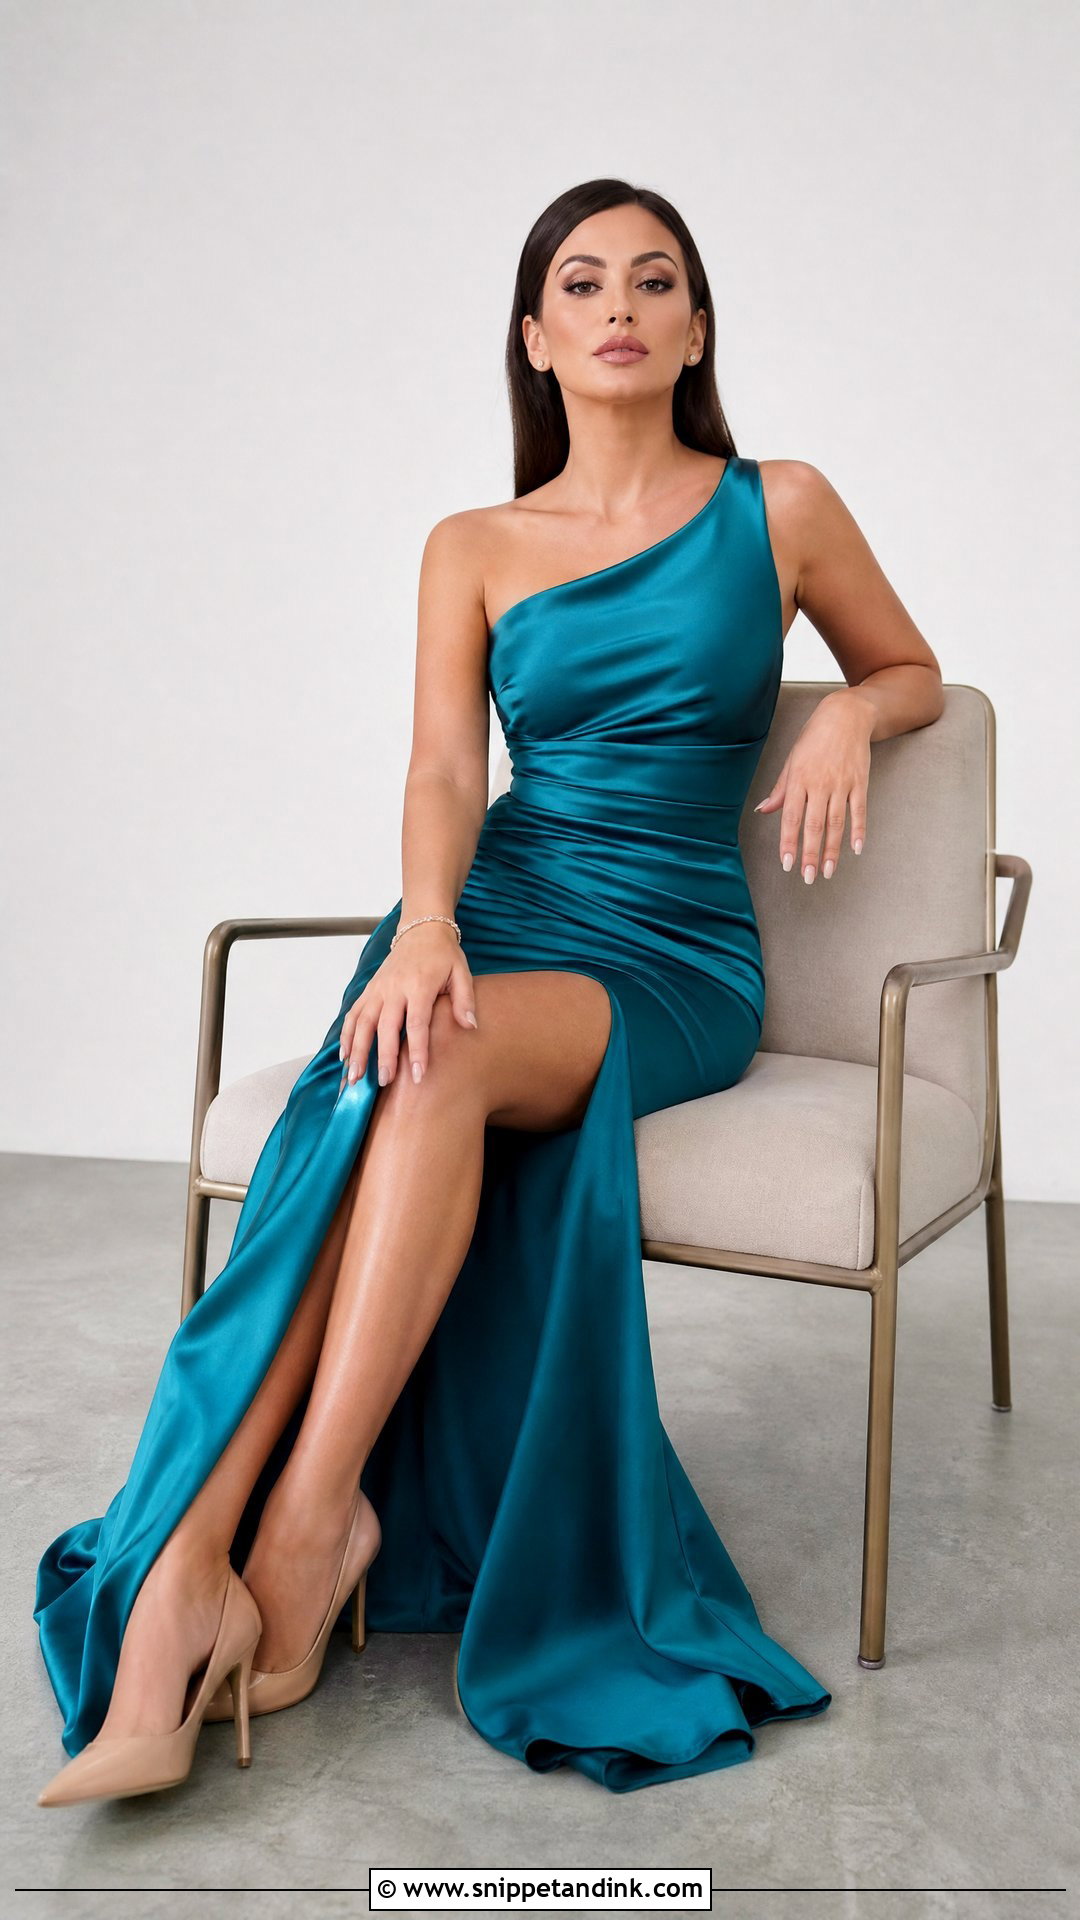
Pick the plainest chair available, because a carved or upholstered one competes with the dress. Sit on the front third of the seat with the legs angled to one side and the back straight; sliding back into the chair shortens the torso. Drape the skirt over the edge and down to the floor if the fabric is long enough. One arm on the chair back, or both hands in the lap, is enough. It’s one of the most dependable setups for studio portraits and indoor sessions where space is tight.
23. Gown Pose With Veil
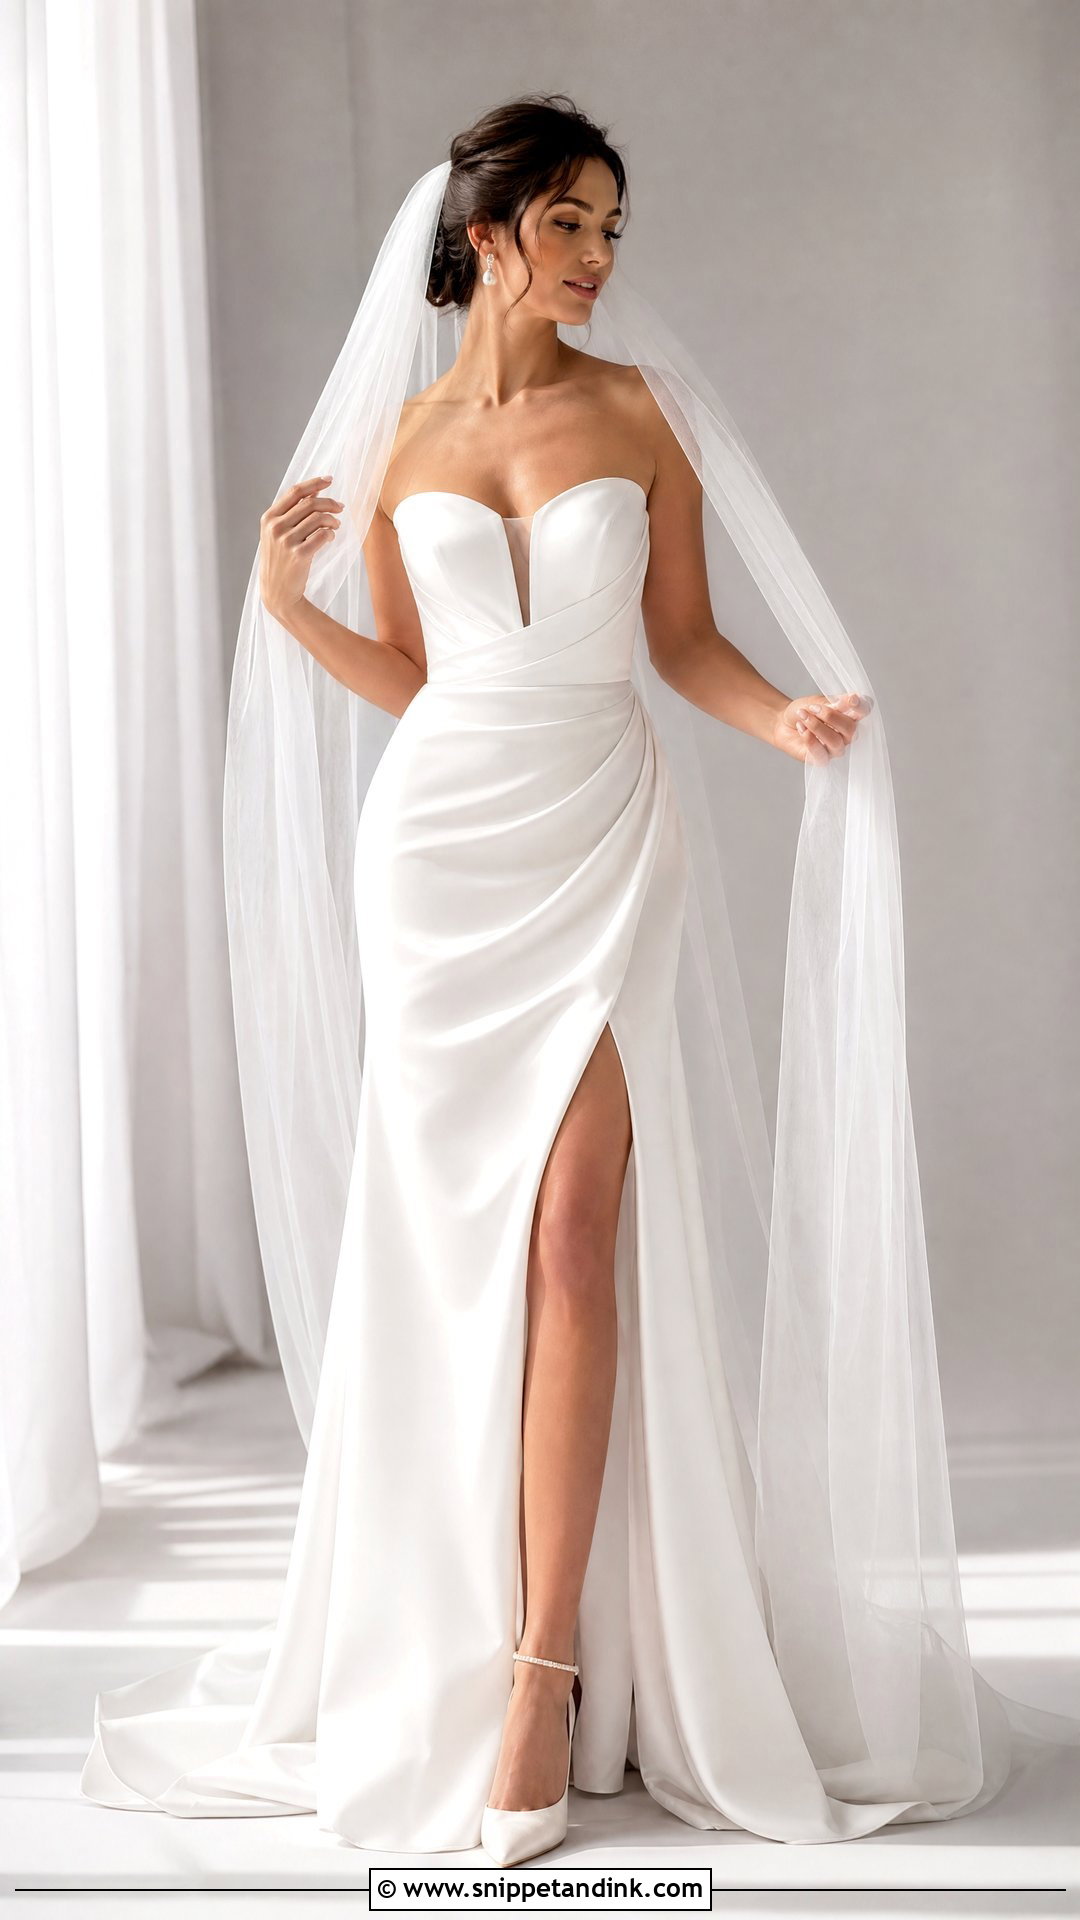
A veil is unpredictable, so I plan for it. A breeze can lift it nicely, but gusts push it straight into the face, and on still days an assistant standing out of frame tossing the edge upward gives more control. Hold one corner lightly or let it trail behind you, keeping the fabric off the front of the bodice. Cathedral-length veils need a person managing them all the time; fingertip veils mostly behave. Keep the rest of your pose simple, as the veil is already moving.
24. Gown Pose With Crossed Ankles
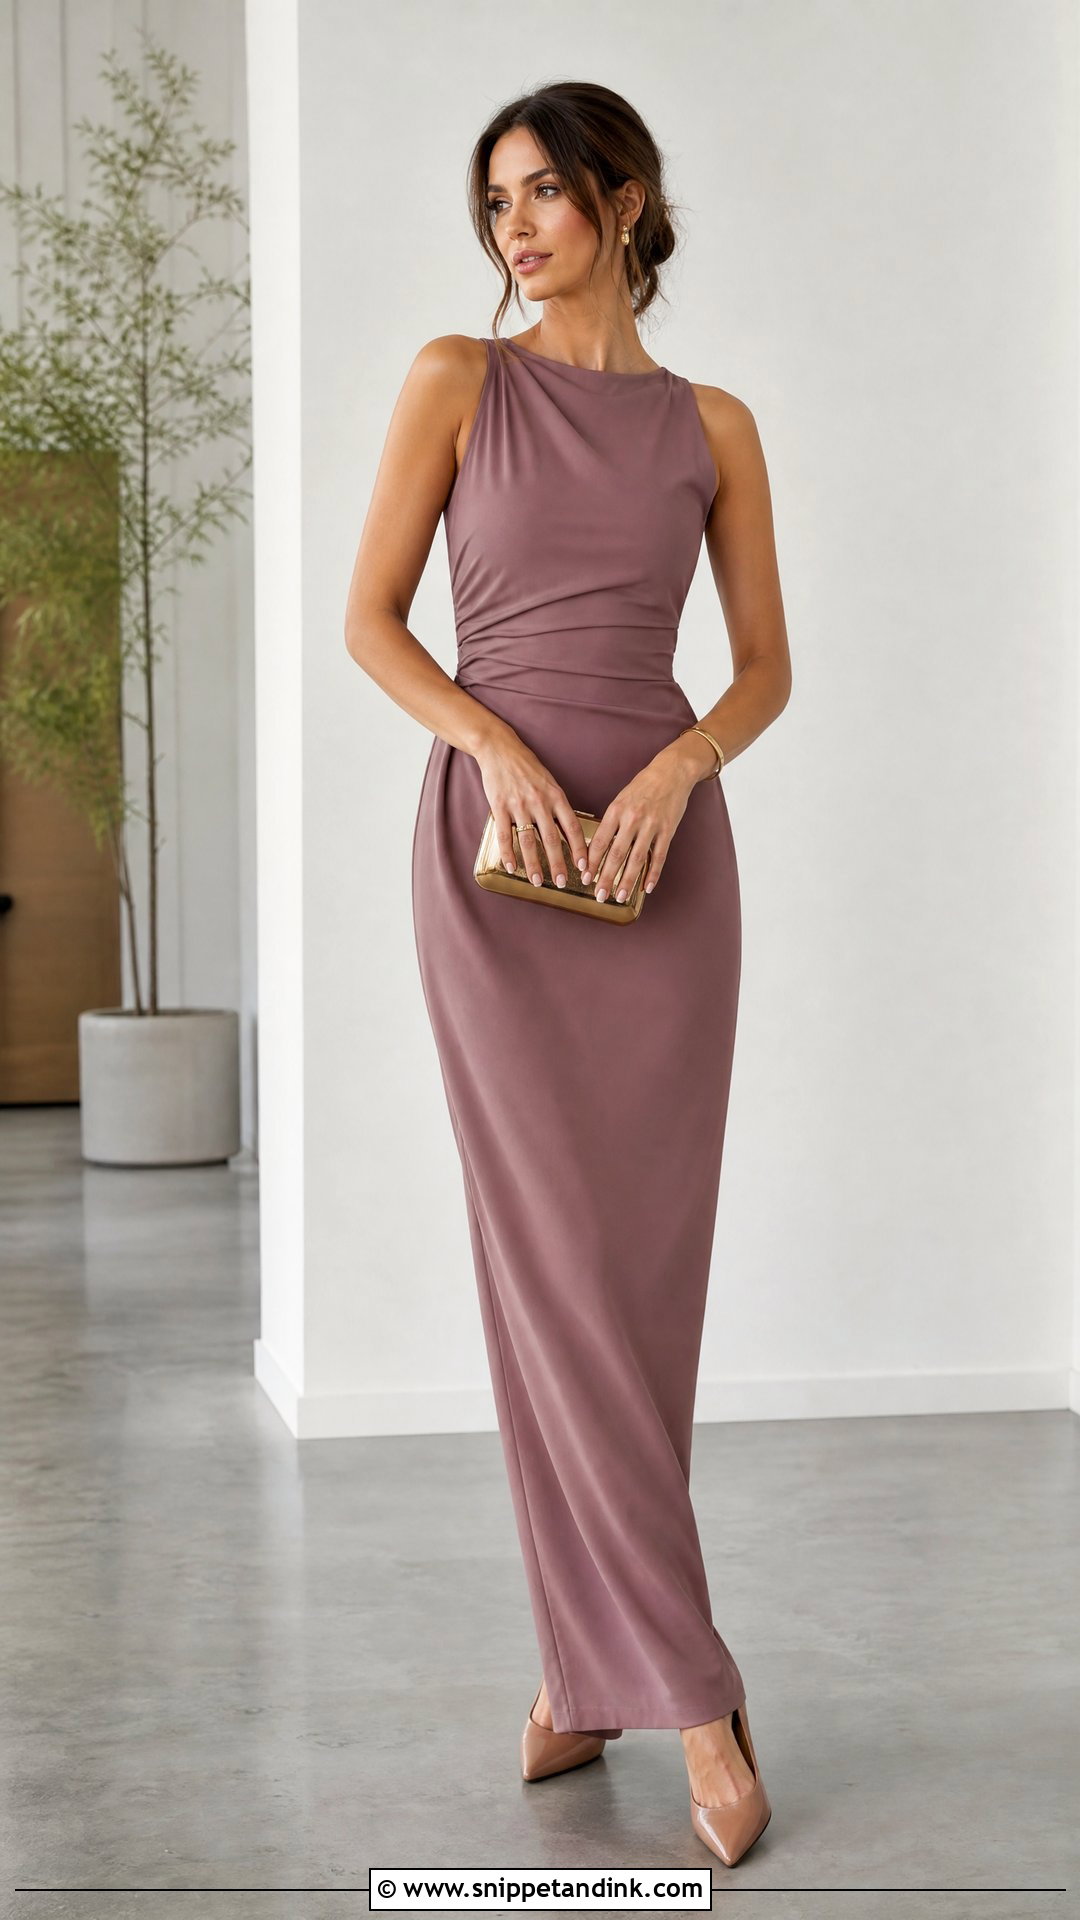
Crossing the ankles narrows the line from hip to foot, which is why it flatters column, sheath and slim satin gowns. Cross one ankle lightly in front of the other, angle the body a little, and keep the shoulders open. It takes up almost no room, so it’s my default for small hotel rooms, crowded venues or a narrow hallway. Beginners pick it up within one or two frames.
25. Dramatic Gown Pose
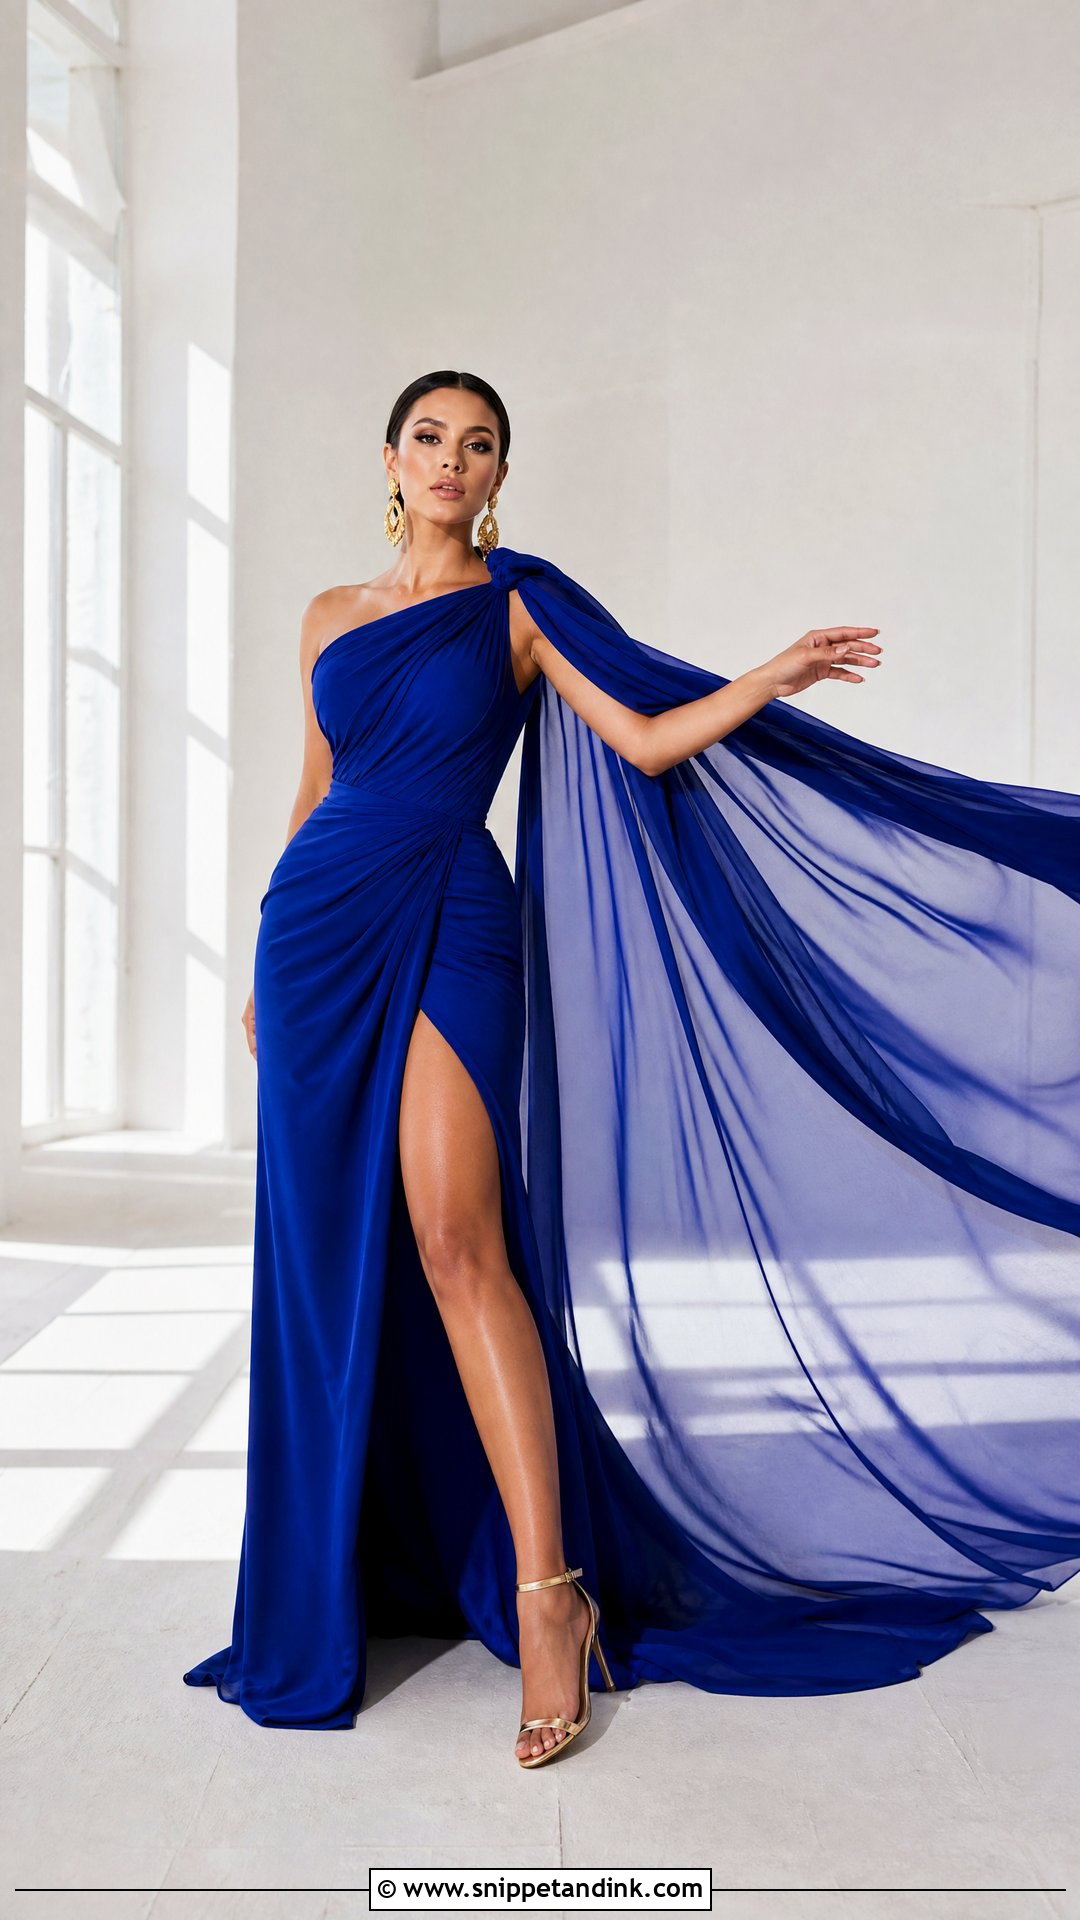
End the session on the gown’s strongest feature, whether that’s a train, a cape, sculpted sleeves, a slit or a huge skirt, and build the pose around it. By this point you’re warmed up, so this is when I ask for bigger moves: an extended arm, a full turn, fabric thrown wide. Keep the face composed rather than intense; the drama should come from shape and fabric. I’ll try a low angle and a wide frame here, and this is often the image clients print large.
Satin, Tulle and Sequins Each Behave Differently on Camera
I adjust poses to the fabric more than to the person. The same twirl that looks dreamy in tulle looks like a bedsheet in heavy satin, so it helps to know what your dress will do before the session starts.
Satin and silk
Smooth fabrics reflect light like a mirror, which shows every wrinkle and every bump of shapewear. Keep these gowns in standing poses, steam them on the hanger right before you dress, and turn your body so the light runs along the fabric rather than hitting it flat. Seated shots go last.
Tulle, organza and chiffon
These want movement. Walking, twirls and floor spreads all suit them. They barely crease but they snag on bark, rough stone and Velcro, and white tulle shows dirt within minutes on a path. A clean sheet to stand on between setups helps a great deal.
Sequins and heavy beading
Beaded bodices sparkle best when light comes from the side or behind, and they can blow out to white spots under direct flash or harsh sun. Close portraits and side profiles show the work. Floor poses are hard here, since beading presses into the skin and can catch on the skirt layers below.
What I Pack for a Gown Shoot Beyond the Camera
Most problems on a gown shoot are small fabric problems, and a few cheap items fix them before they reach the photos.
- A handheld steamer for creases from the car journey.
- Spring clamps to take in a loose back for front-facing frames, out of the camera’s view.
- A white sheet to stand or sit on outdoors.
- Lint roller, safety pins and fashion tape for straps that slip.
- Flat shoes for walking between locations, since heels on grass sink and tire you quickly.
- Water with a straw, so lipstick survives a drink.
If you can bring a friend, give them one job: watching the hem and the train between every frame. A second pair of eyes on the fabric saves more shots than any lens.
Relaxed Hands Matter More Than the Pose Itself
The frames people keep are rarely the most complicated ones. They’re the shots where the hands are soft, the posture is tall, the fabric is laid out cleanly and the expression is calm. Aim for a mix of standing, walking, seated, turning and close shots so your gallery has rhythm. If your gown is heavy or has a long train, practise a few poses before the shoot at home in it, or at least in a long skirt, so the movement is familiar before you’re in front of the camera.
You'll Like These Ideas:


Leave a Reply