
Your hands get photographed more on the wedding day than at almost any other point in your life: the ring exchange, the bouquet, the hand on a shoulder in the portraits. That is why I treat a bridal set differently from a normal appointment. The design has to sit quietly next to your ring and dress, survive a long day of hugging and holding, and still look freshly done when the photographer leans in with a macro lens. Below are twenty sets I’d happily put on a bride, from a plain French to pearl chrome and a hidden flash of blue, with notes on who each one suits and where it tends to go wrong.
Shape and Length Come Before Colour
When a bride sits down with a folder of colour photos, I usually ask her to put it aside for five minutes and show me her hands instead. The shape and length you can wear comfortably decide which of the designs below will actually look right, and colour is much easier to choose once that is settled.
Reading your own nail beds
Long, narrow nail beds can carry almost anything, including a square. Short or wide nail beds look best in an oval or soft almond, because the taper draws the eye upward. If your nails curve down sharply at the tip, a square will exaggerate it, while an oval hides it. I also look at the cuticles: dry, ragged cuticles will undo the most expensive design, and they need a few weeks of oil to settle.
Length you can live with for a week
Brides who never wear extensions often ask for long almonds for the photos and then struggle to fasten a dress, pin a veil or text a planner. Go one step longer than your usual length, not three. Short nails with a perfect cuticle and gloss look more bridal in a ring close-up than long nails you keep tapping on things.
- Wear your engagement ring to every nail appointment so the stone and band are judged with the design.
- Hold your hand next to a swatch of your dress fabric; ivory and white change how every nude reads.
- Ask for a photo of your hand at the end, taken from above and from the side, to see it as the camera will.
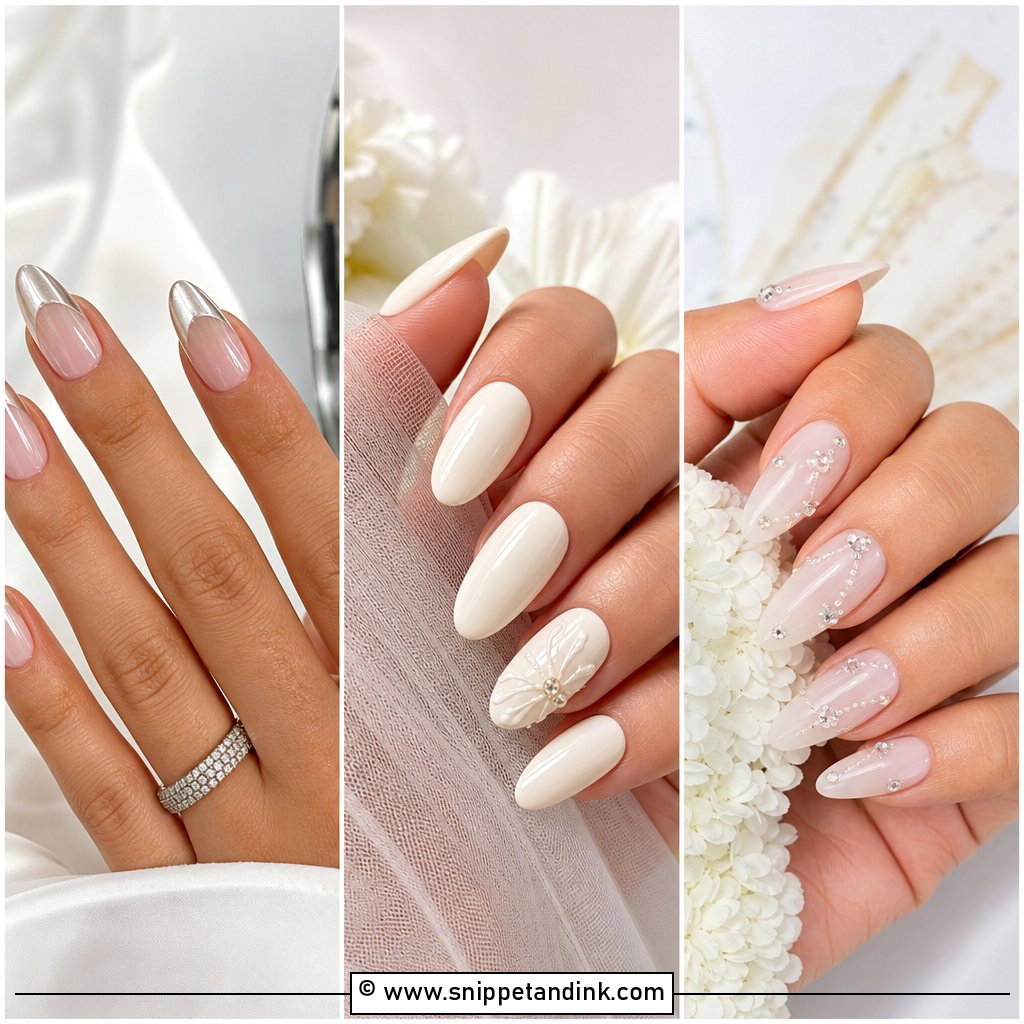
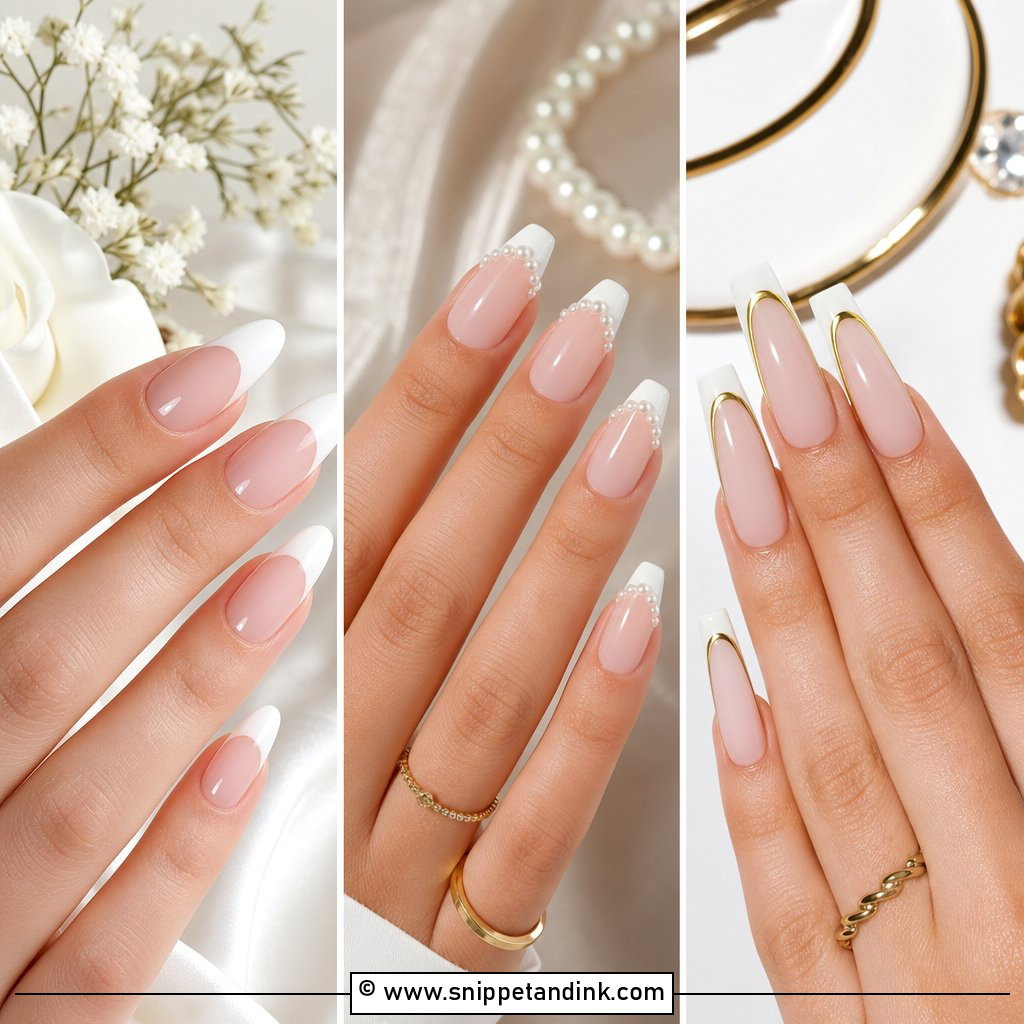
1. Classic French Tip Wedding Nails
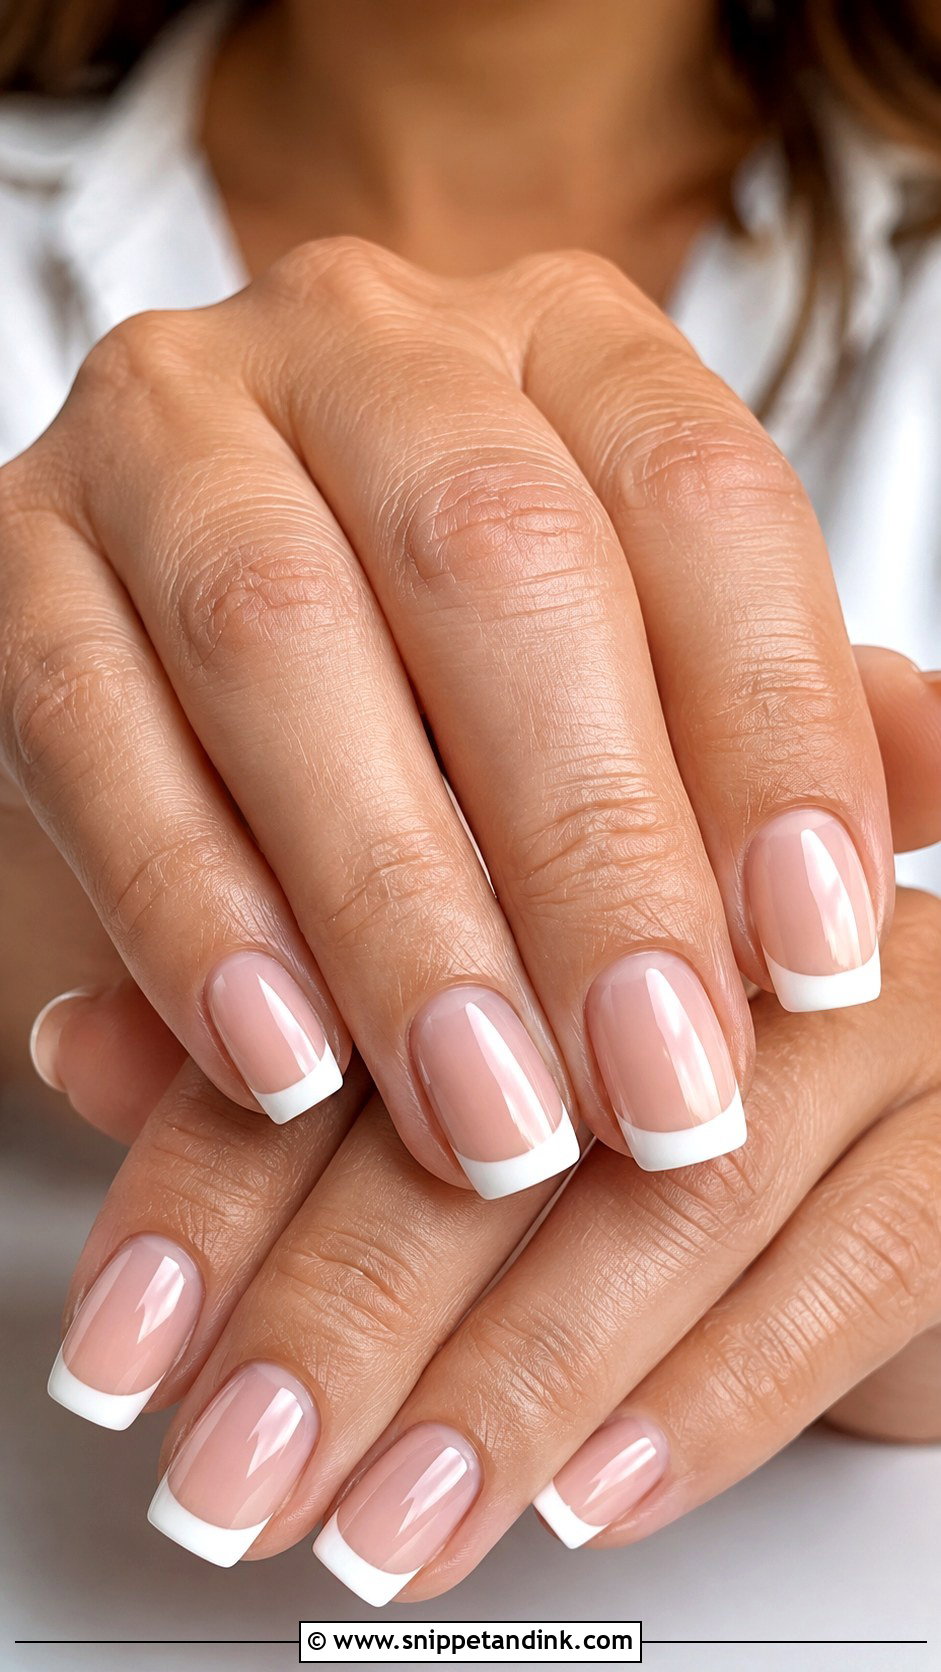
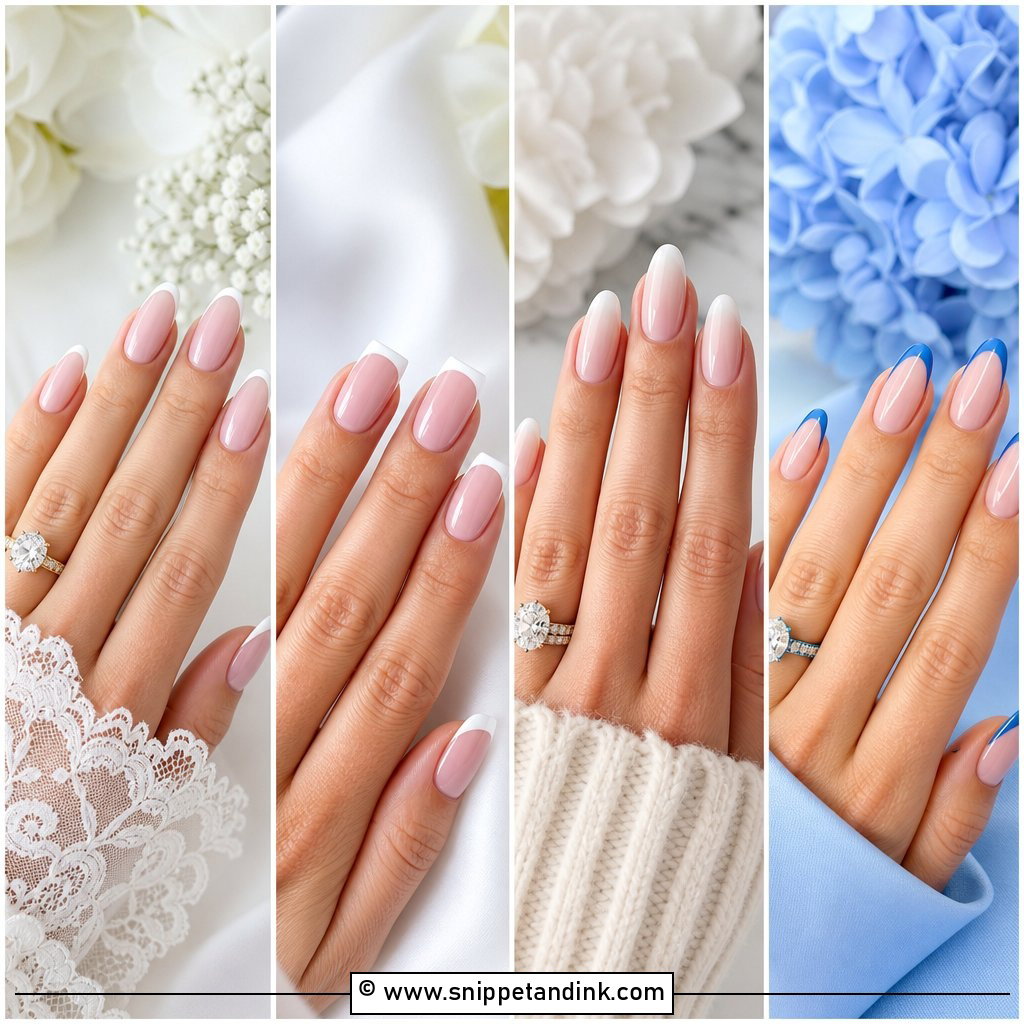
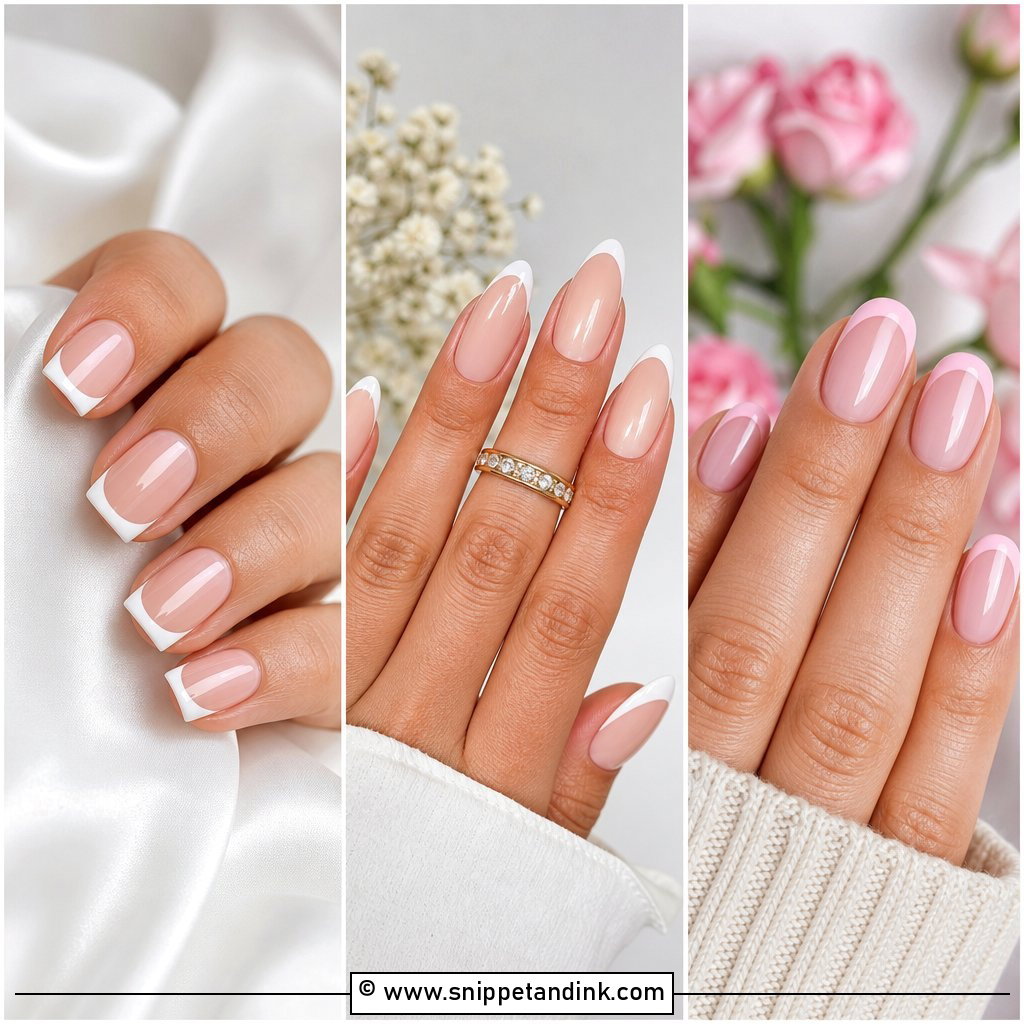
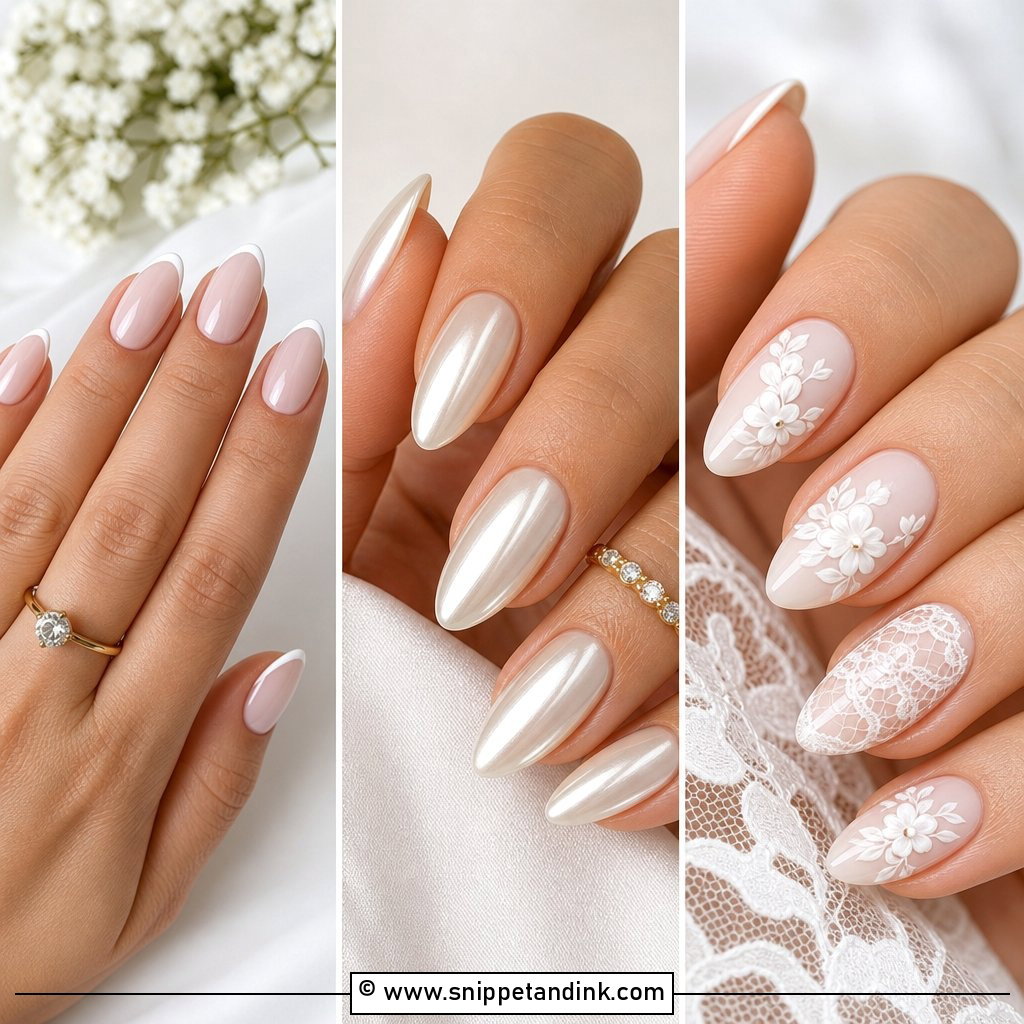
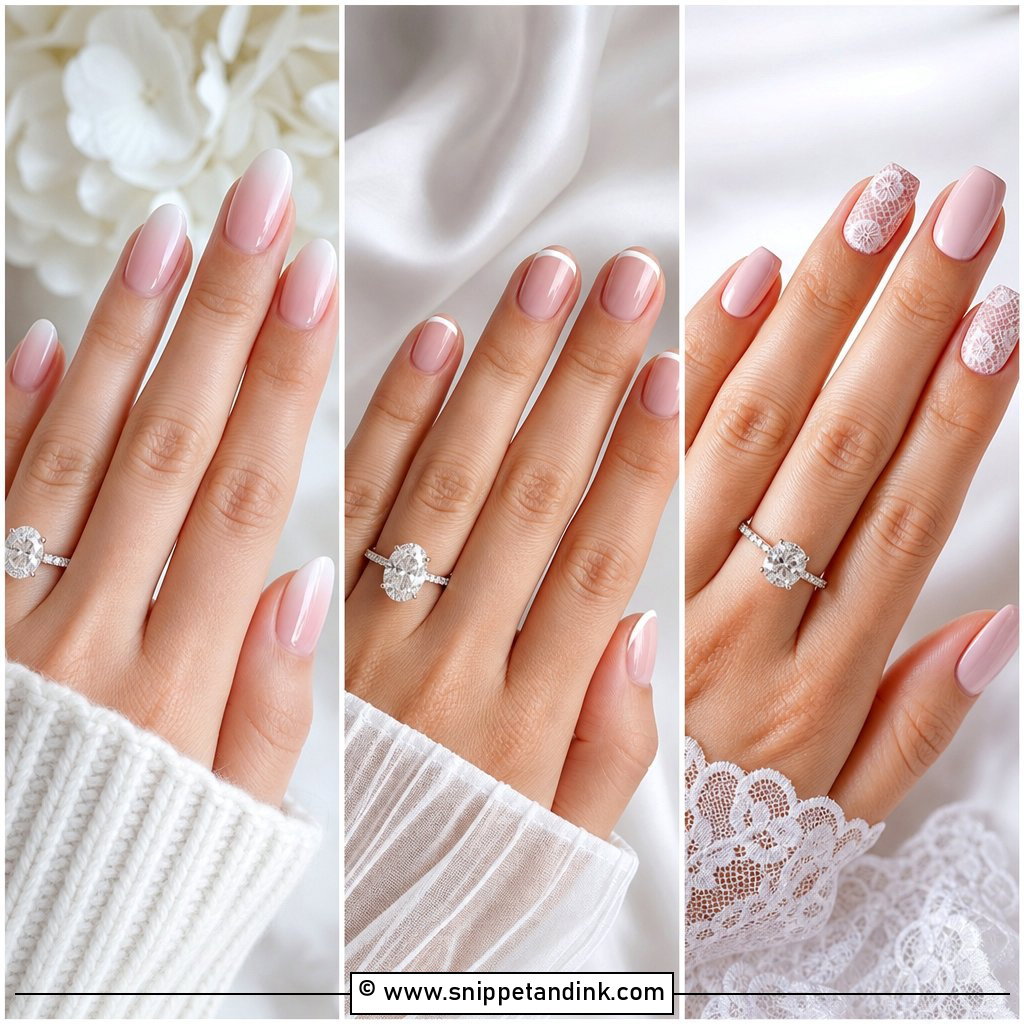
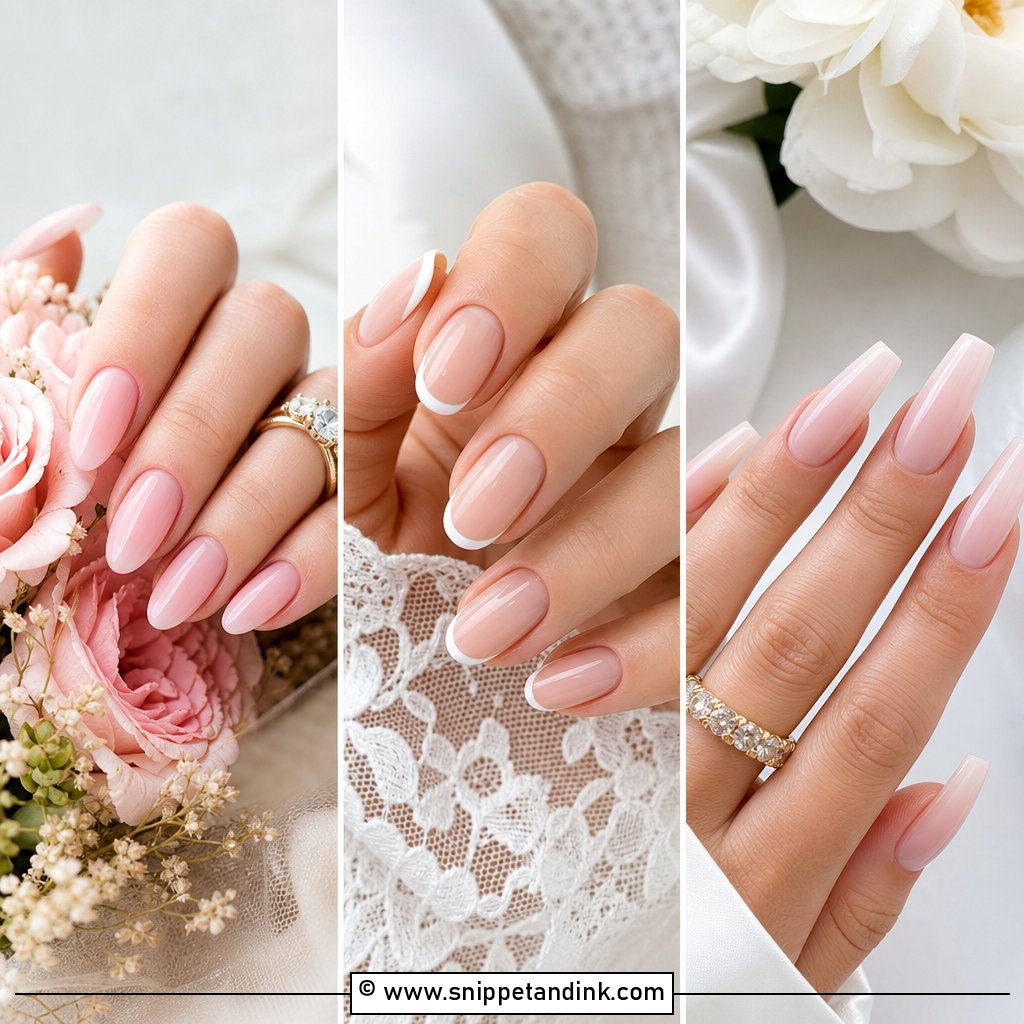
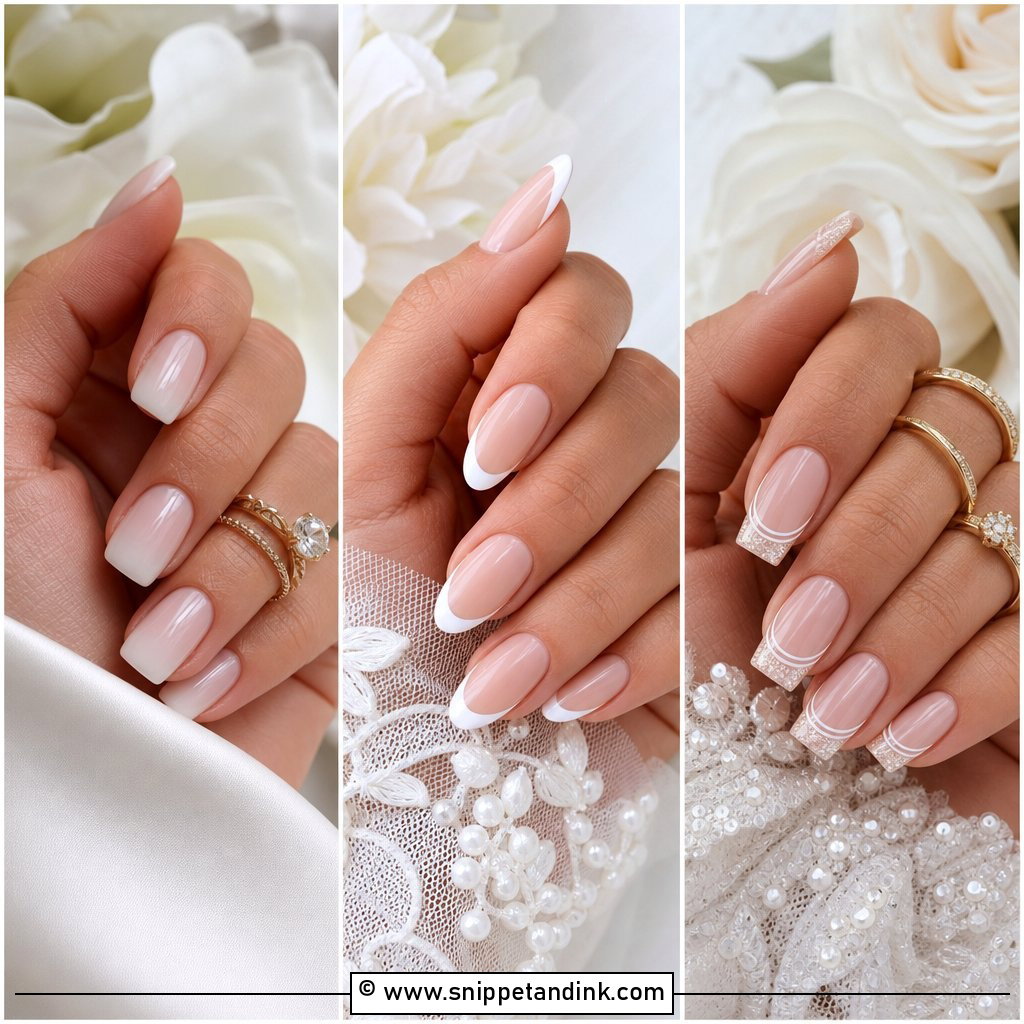
A French is the set I’m asked for most, and the one I see done badly most often. The trouble is usually a smile line that’s too thick and too stark, which shortens the nail and looks a little dated beside a modern gown. I keep the white band thin and follow the natural free edge, then use a sheer pink base that evens out the nail plate rather than hiding it. On oval and almond nails the curve reads soft; on a square, the corners keep it crisp and traditional. A clean cuticle matters more here than with any colour, because the white tip draws the eye straight down the nail.
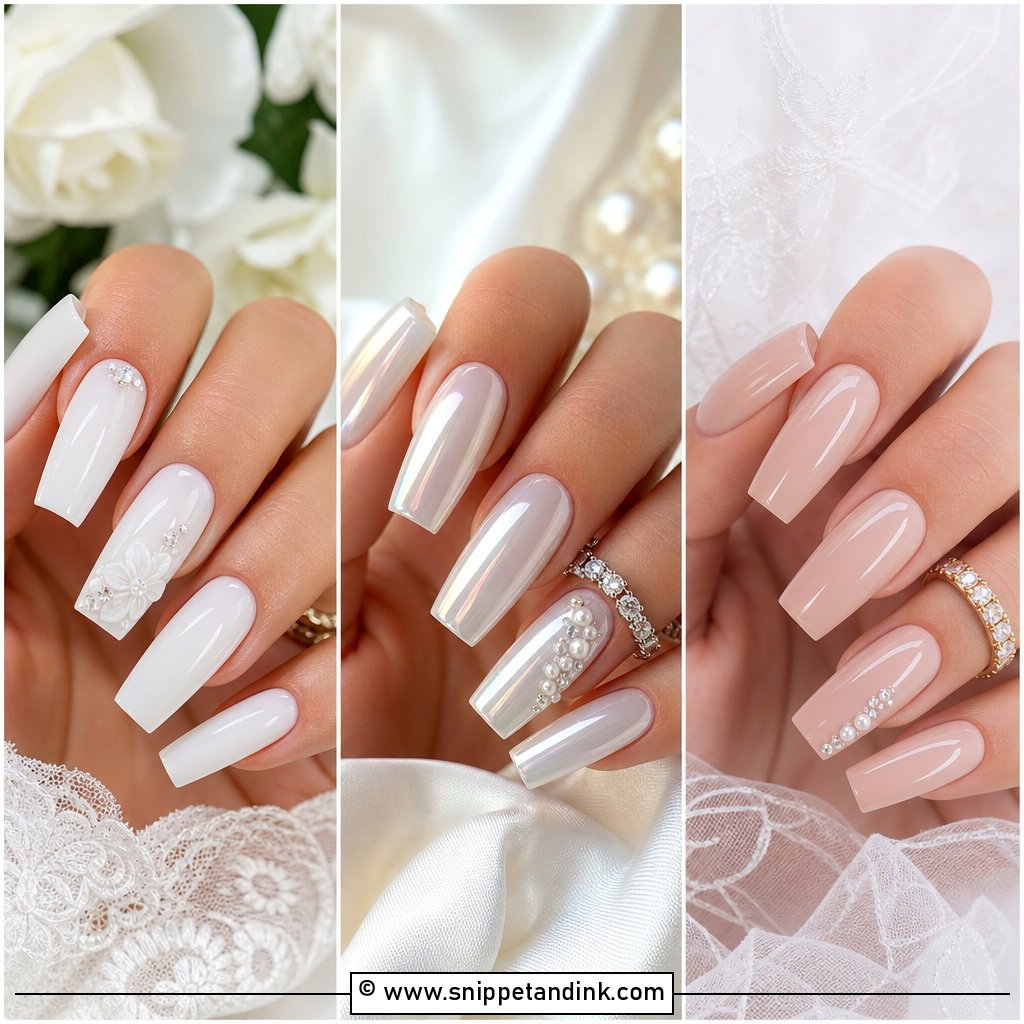
2. Milky White Bridal Nails
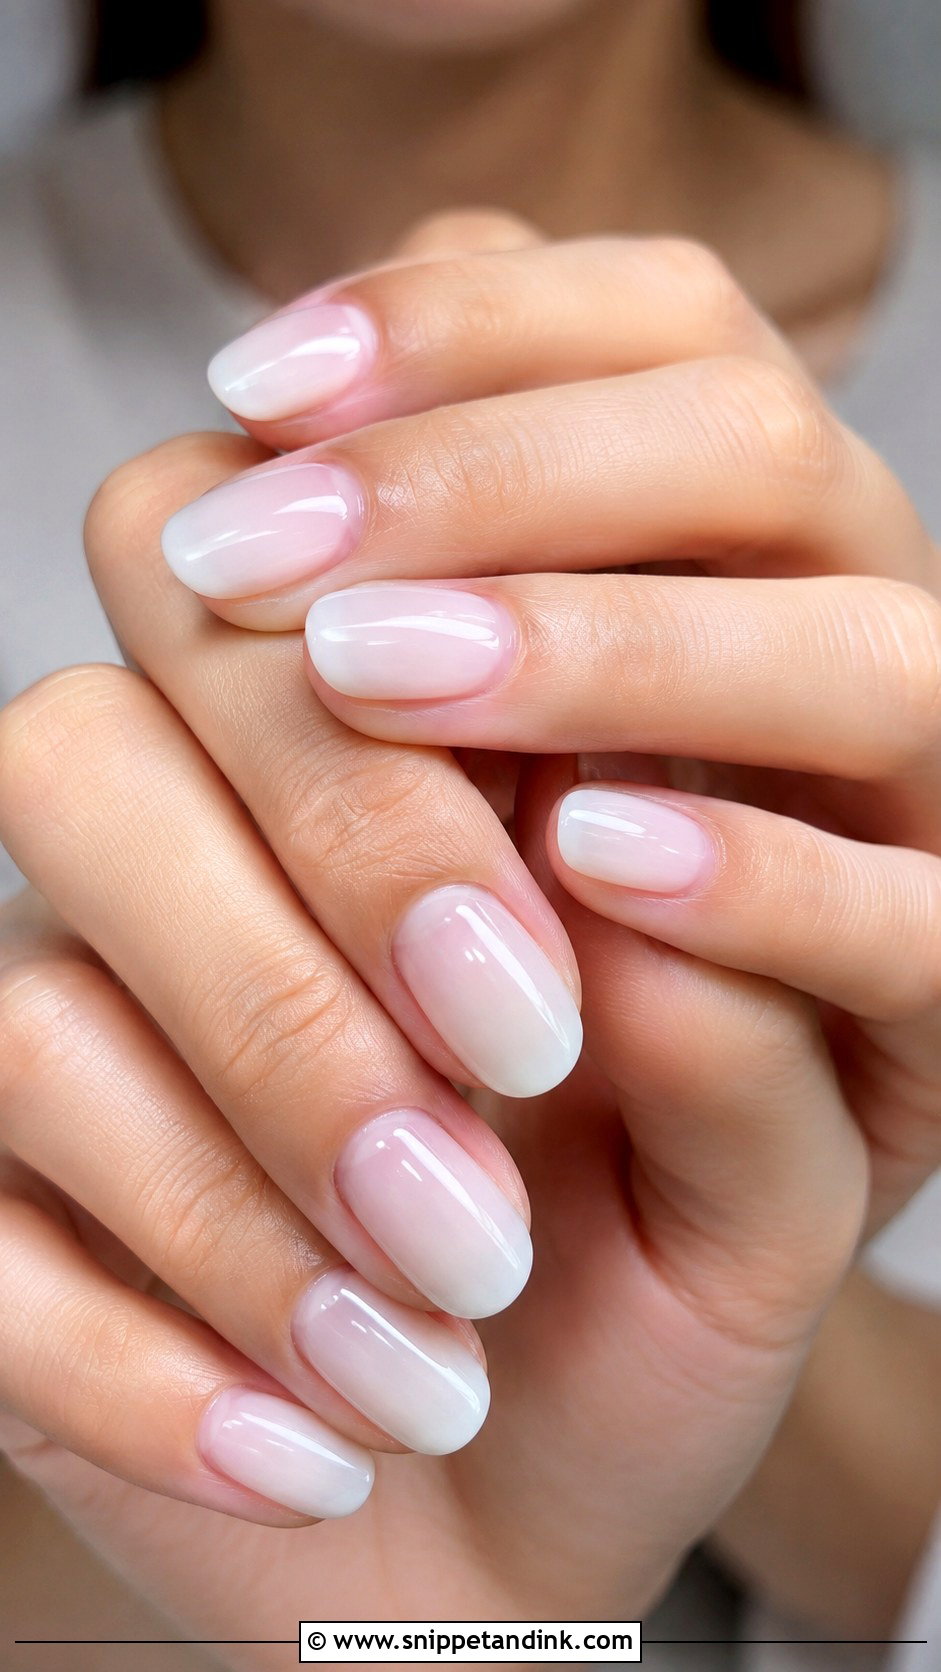
Some brides want white but find solid white polish too harsh and chalky on their hands. Milky white bridal nails solve that: the colour is translucent, so a little of the natural nail shows through and the finish looks cloudy rather than painted. I build it in thin coats, because a thick milky layer can pool and streak near the sidewalls. It sits well beside pearls and an ivory dress, and it suits short oval nails better than most whites do.
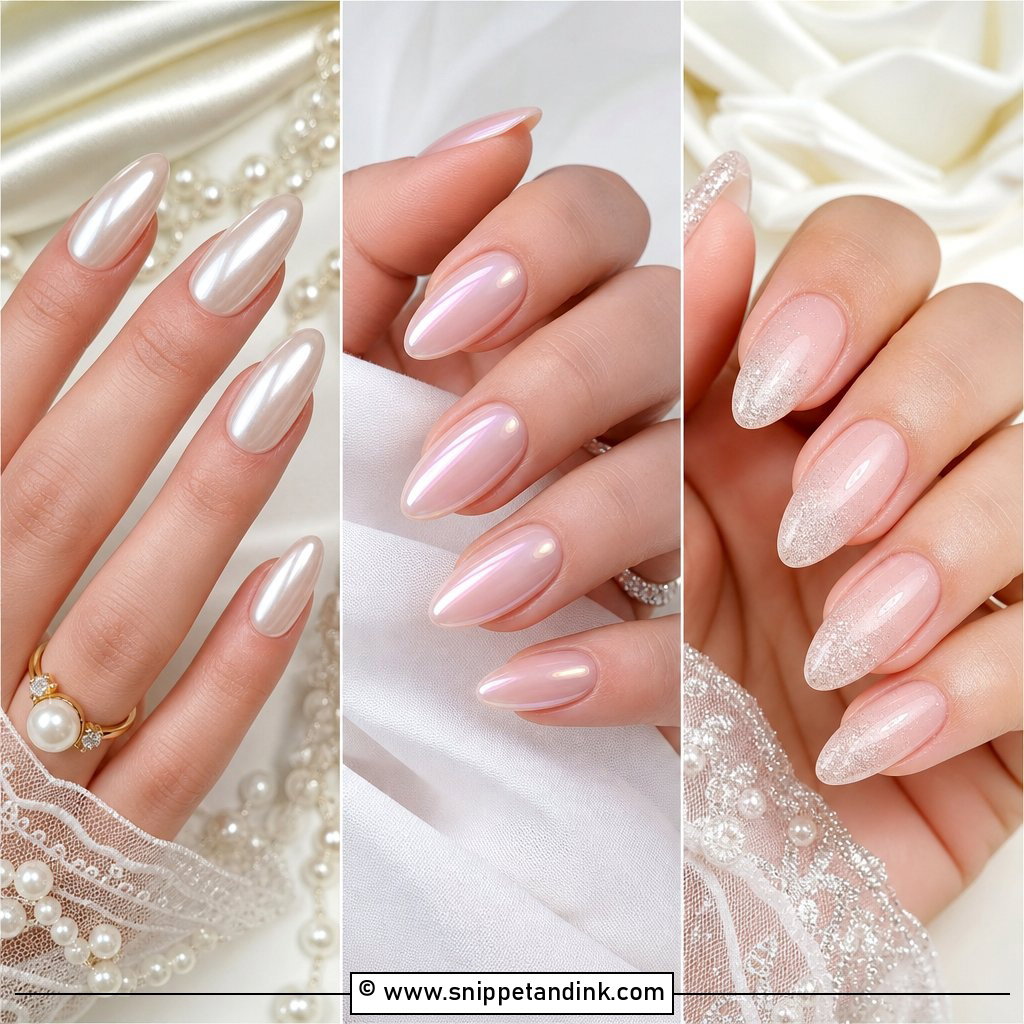
3. Pearl Chrome Wedding Nails
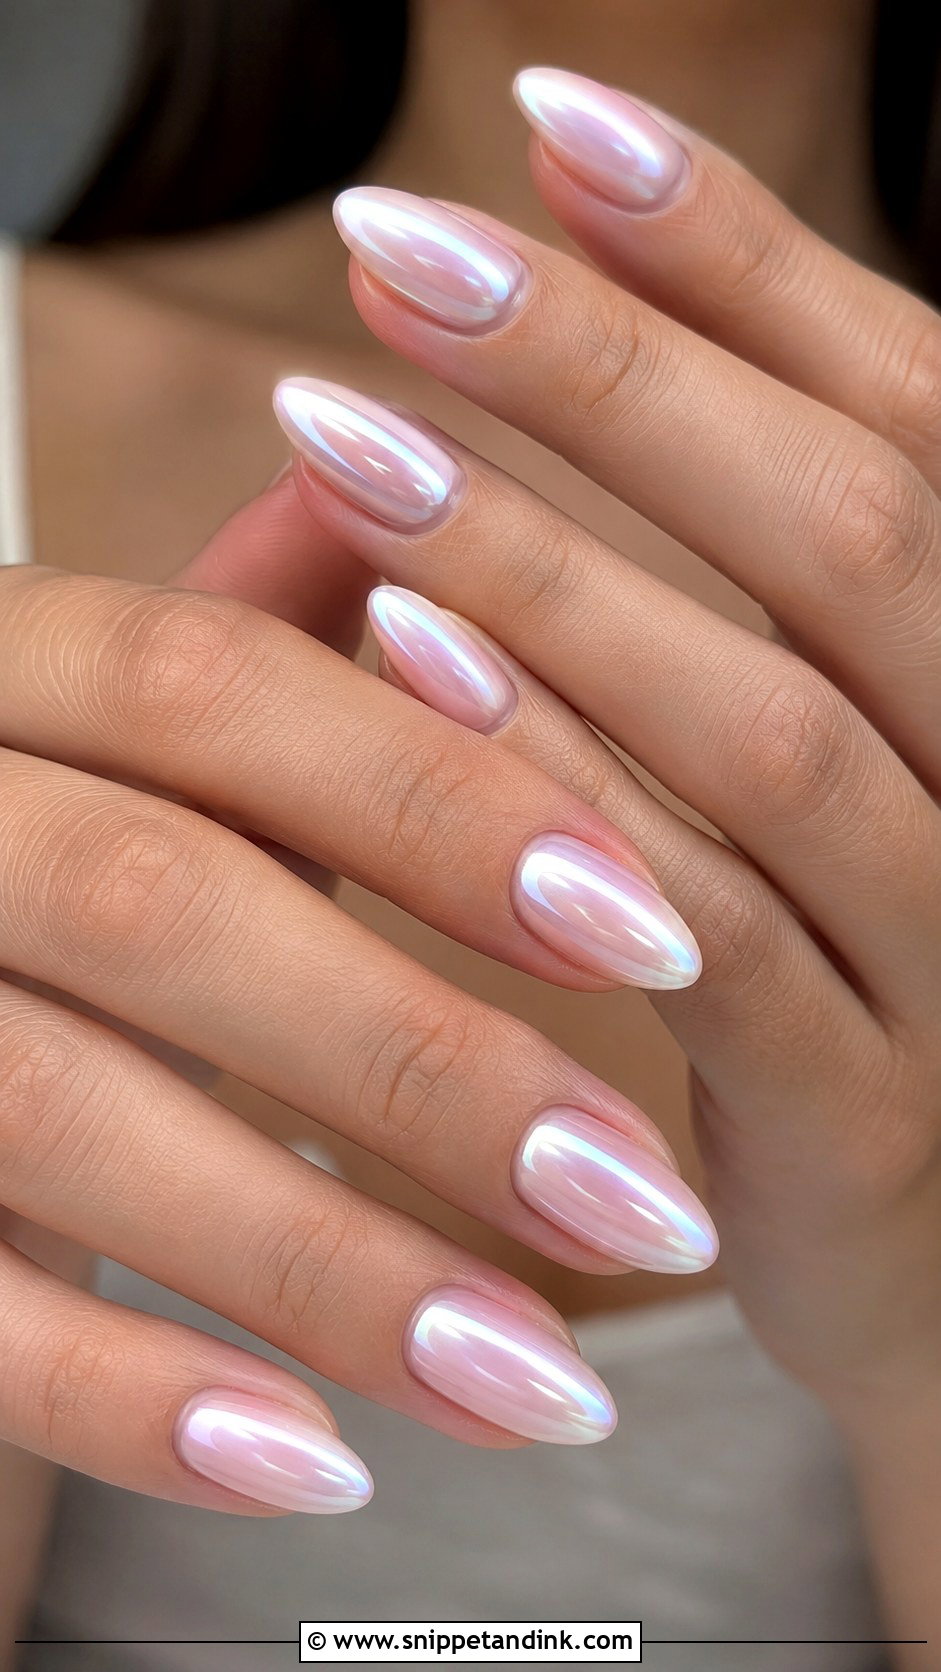
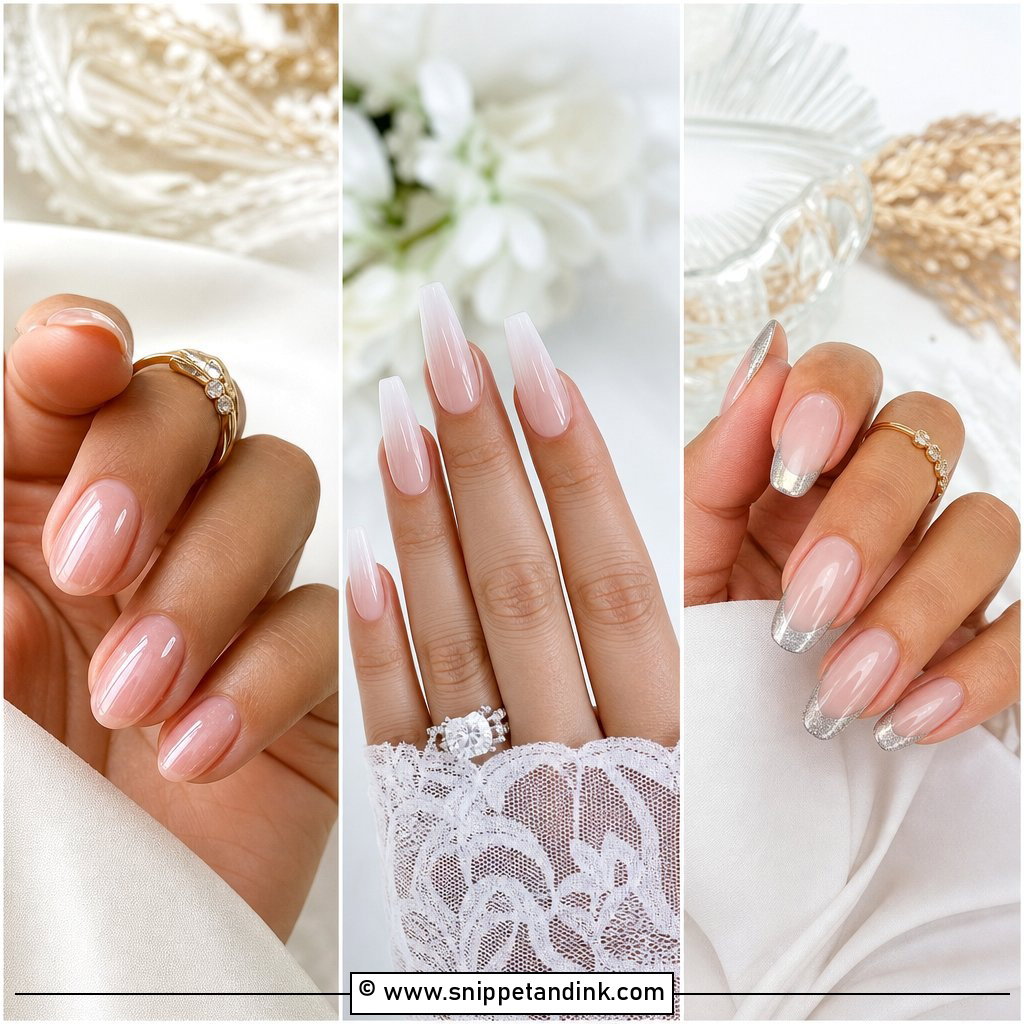
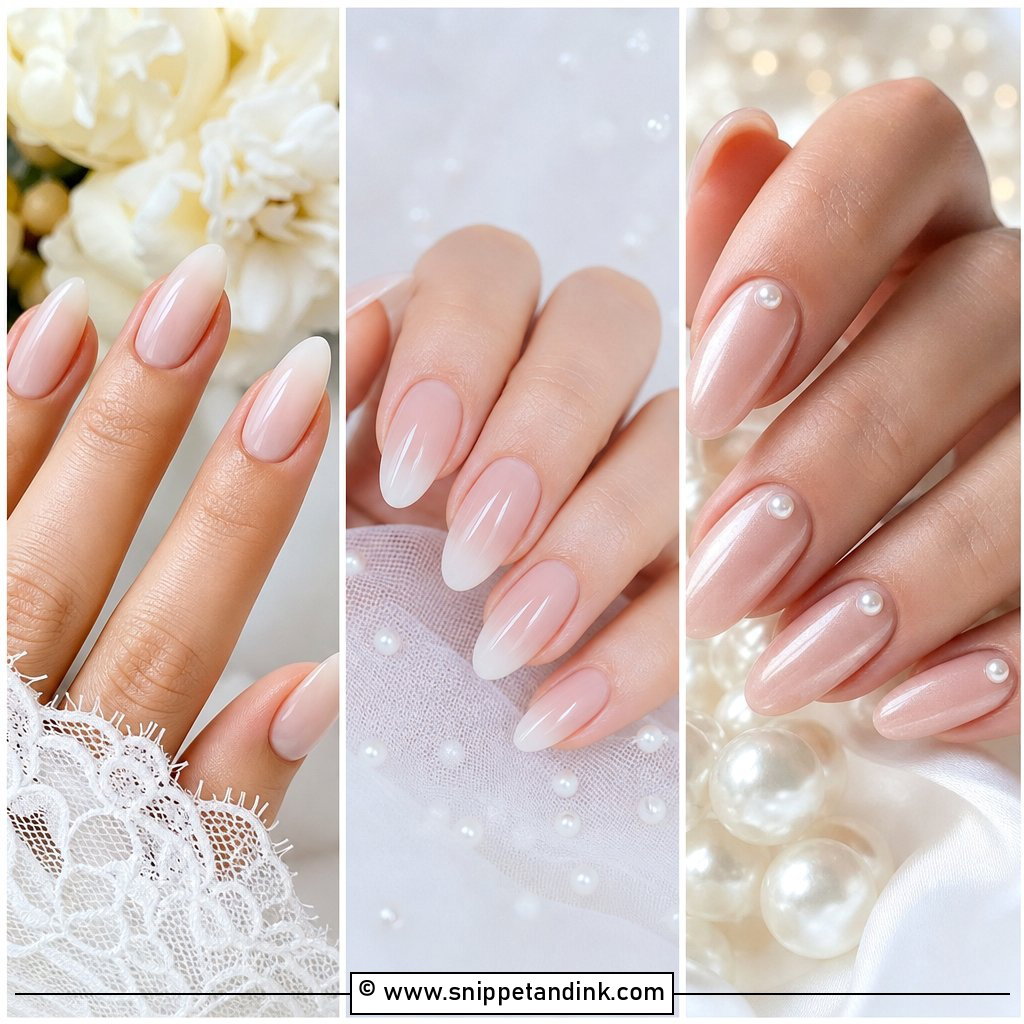
Pearl chrome is a fine powder buffed over a cured gel layer, and that buffing step is where the effect lives. Rub too little and the sheen is patchy; rub too hard and it starts to look like a mirror finish, which most brides don’t want. I lay it over sheer pink or milky white so the glow stays soft and shifts as the hand turns. It pairs naturally with pearl earrings or a satin dress. For a layered version, I’ll put the chrome over a micro French so the tips catch a little more light than the base.
4. Sheer Pink Bridal Nails
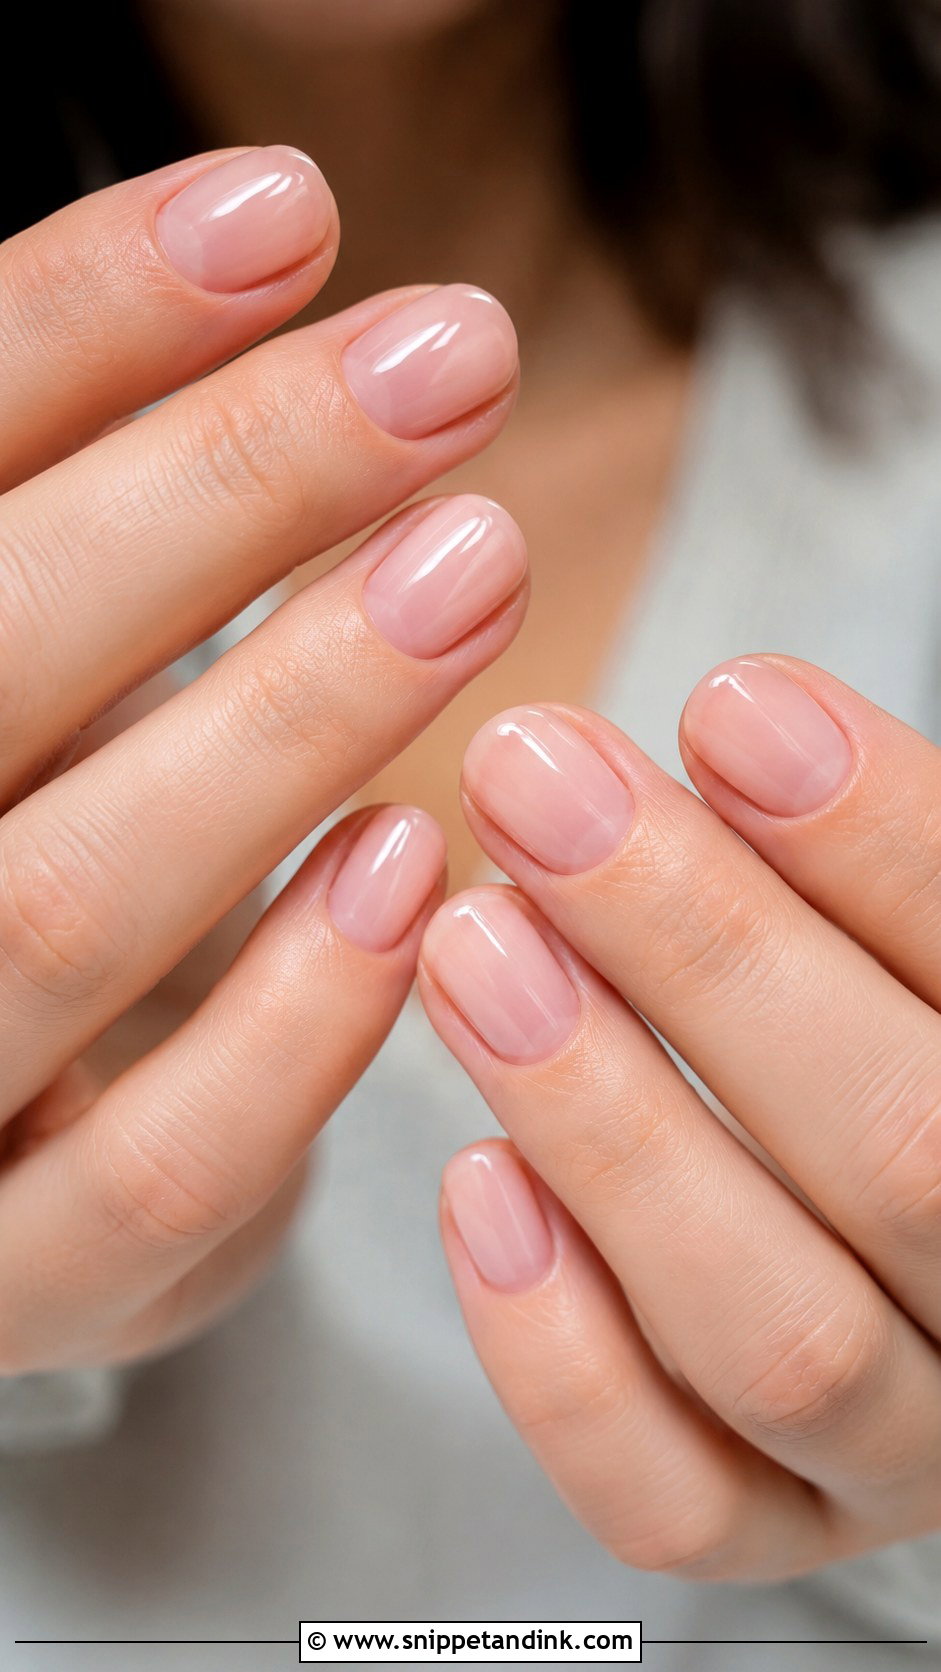
Sheer pink is my quiet favourite for brides who don’t want anyone to notice their nails at all, only that their hands look cared for. Two thin coats of a jelly pink even out yellowing and ridges without reading as colour. I match it to the bride’s natural nail bed rather than to the dress, which is why it flatters short nails and long ones equally. It is also the most forgiving set in the list: a small chip on day three barely shows.
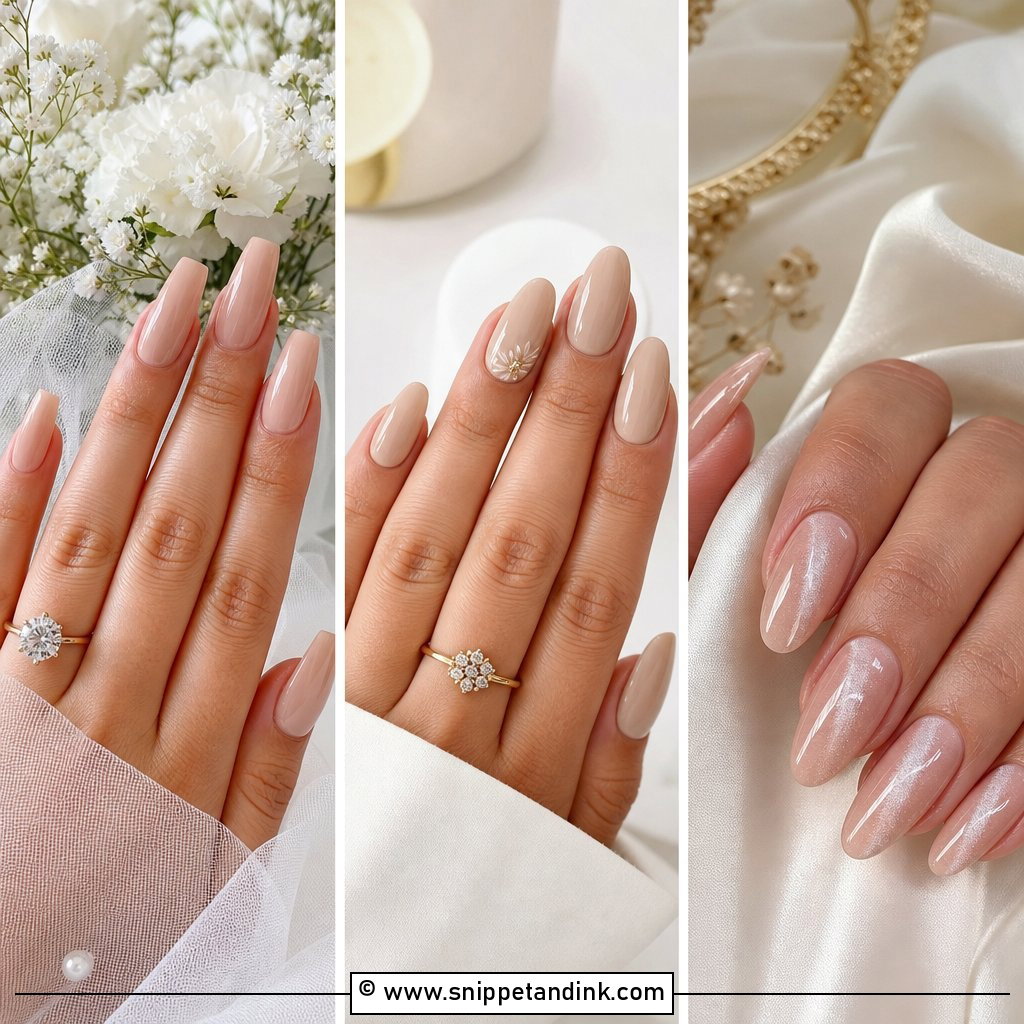
5. Nude Almond Wedding Nails
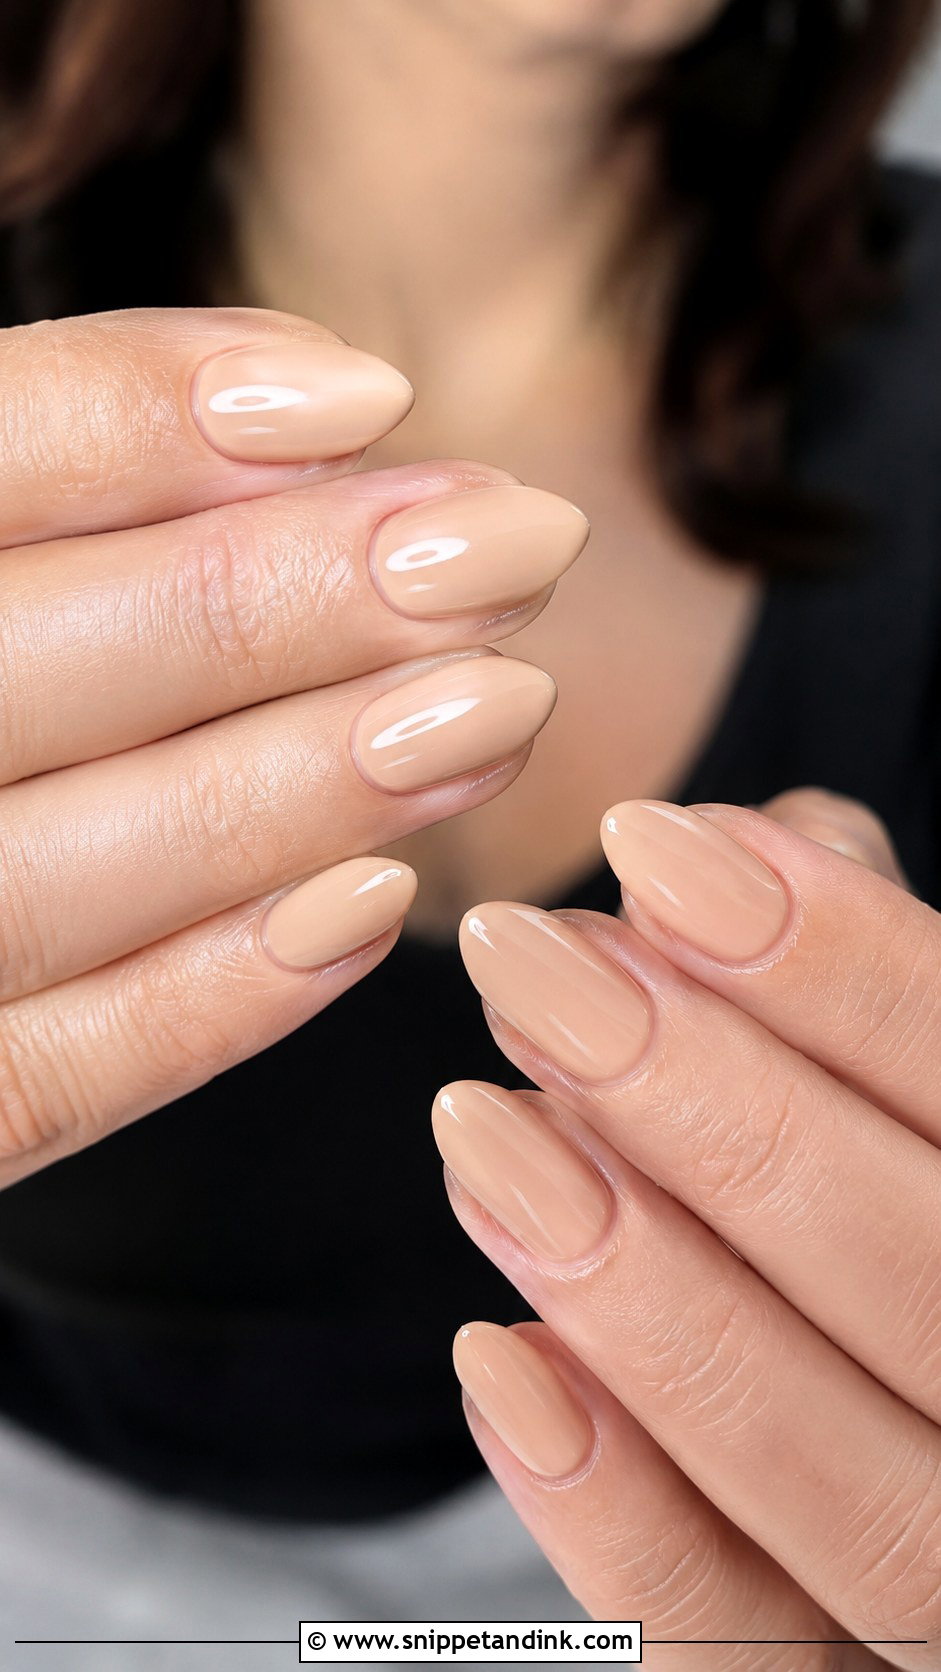
Almond shaping makes fingers look longer, but it needs enough free edge to taper; on very short natural nails I’d rather file a soft oval than force a point that looks stubby. Nude is harder to choose than people expect. A beige that flatters one skin tone turns grey or ashy on another, so I paint three shades on the side of a nail tip at the trial and let the bride look at them in daylight. On warmer skin I often end up with caramel or pink nude; on fair, cool skin a creamy taupe. Gloss keeps it fresh, while a milky top layer softens it.
6. Micro French Bridal Nails
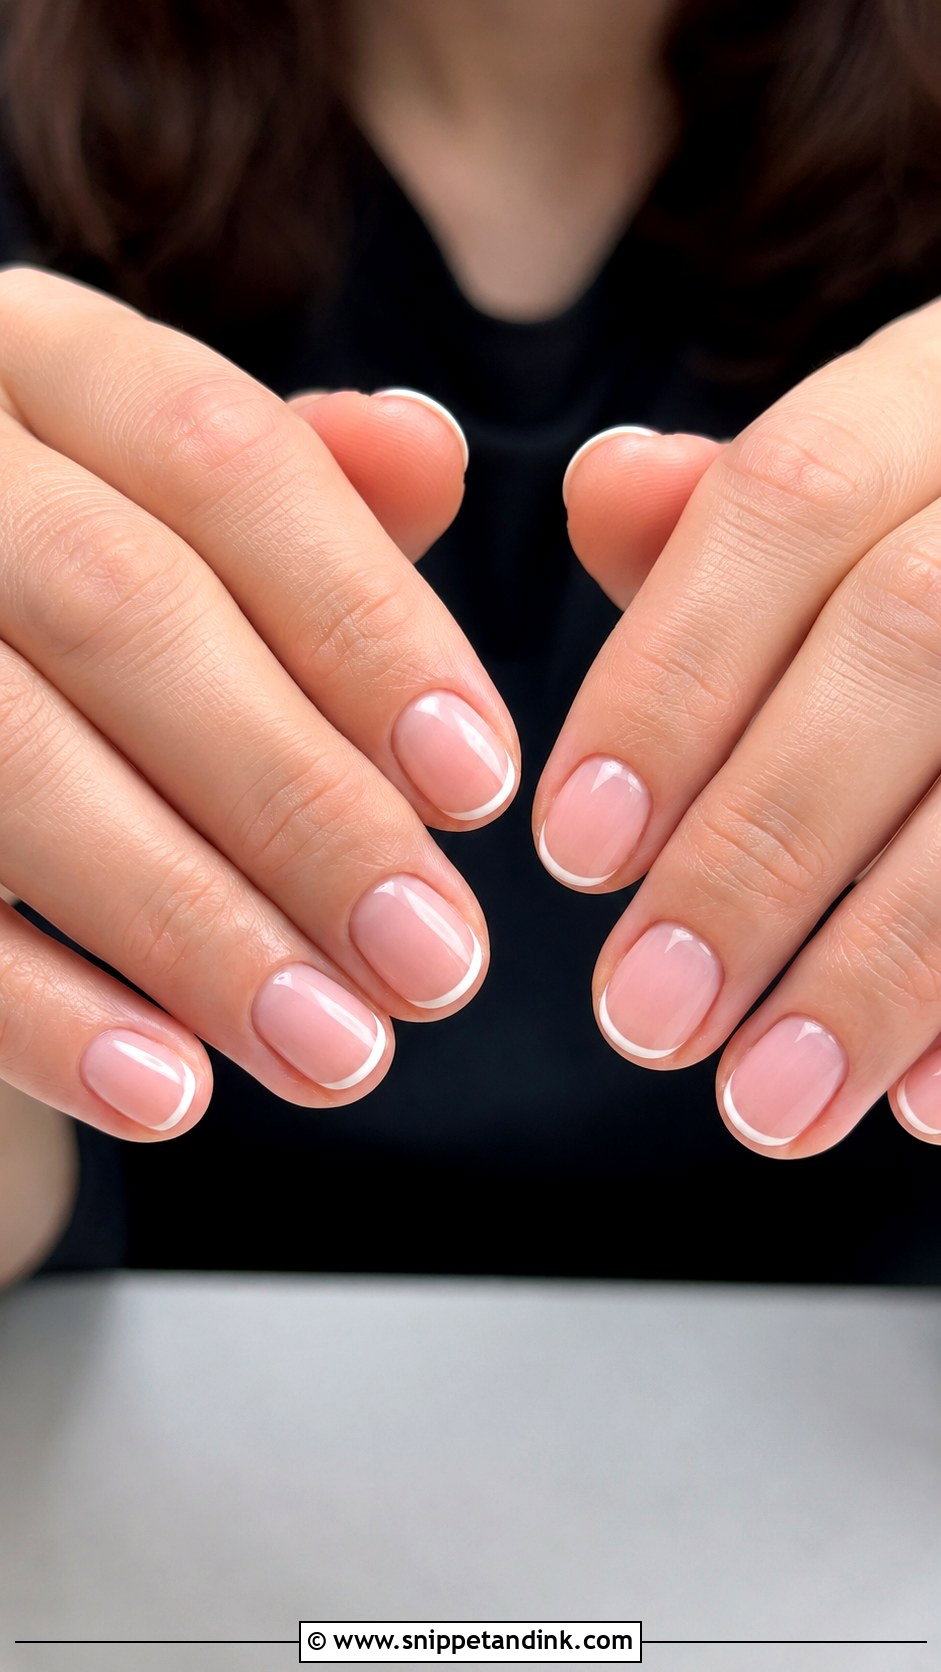
This is the French for brides who think a French is too much. Micro French bridal nails use a tip only a millimetre or two deep, painted with a fine liner brush rather than a wide one. Because the line is so thin, it works on short natural nails with no extensions. The tip doesn’t have to be white: ivory or champagne looks warmer against an ivory gown, and a pearl chrome line gives a faint glint. Keep the shape rounded or softly squared, since a sharp point makes such a delicate line look unfinished.
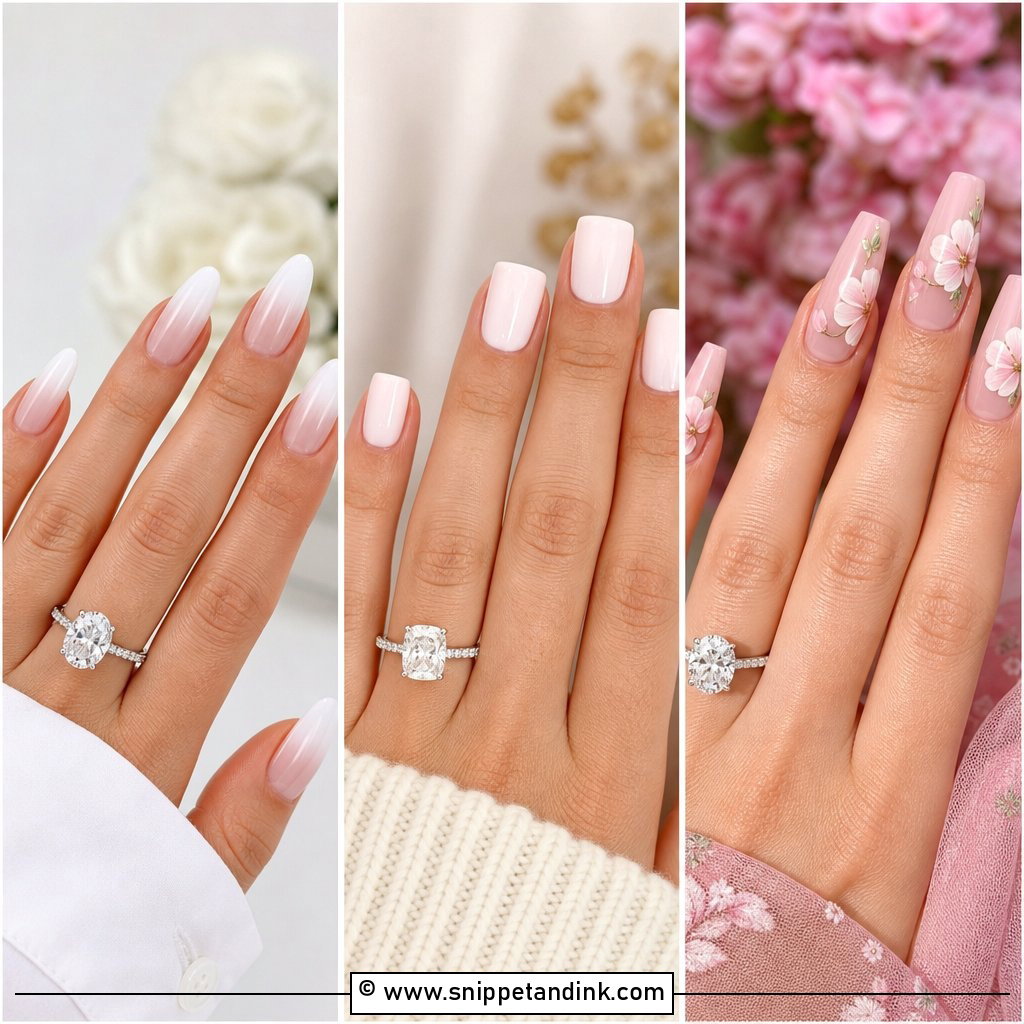
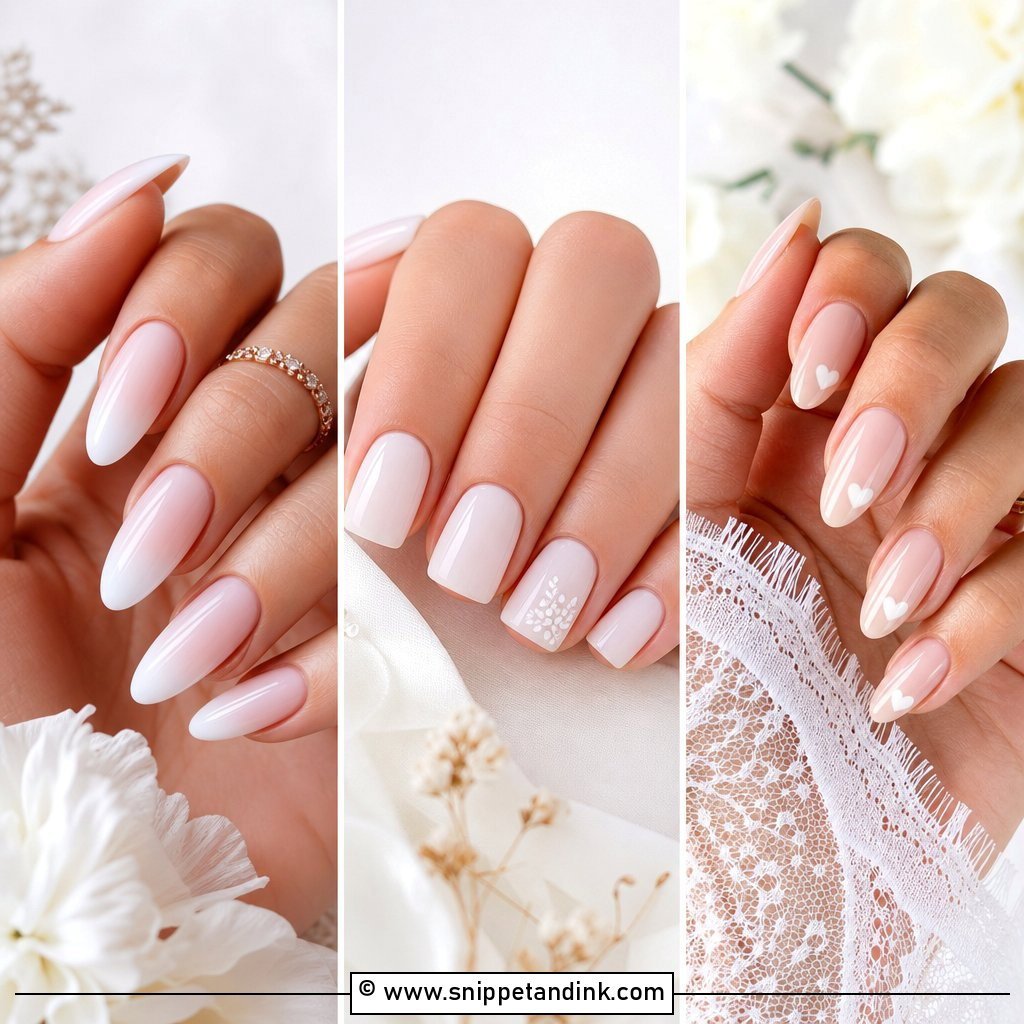
7. White Ombre Wedding Nails
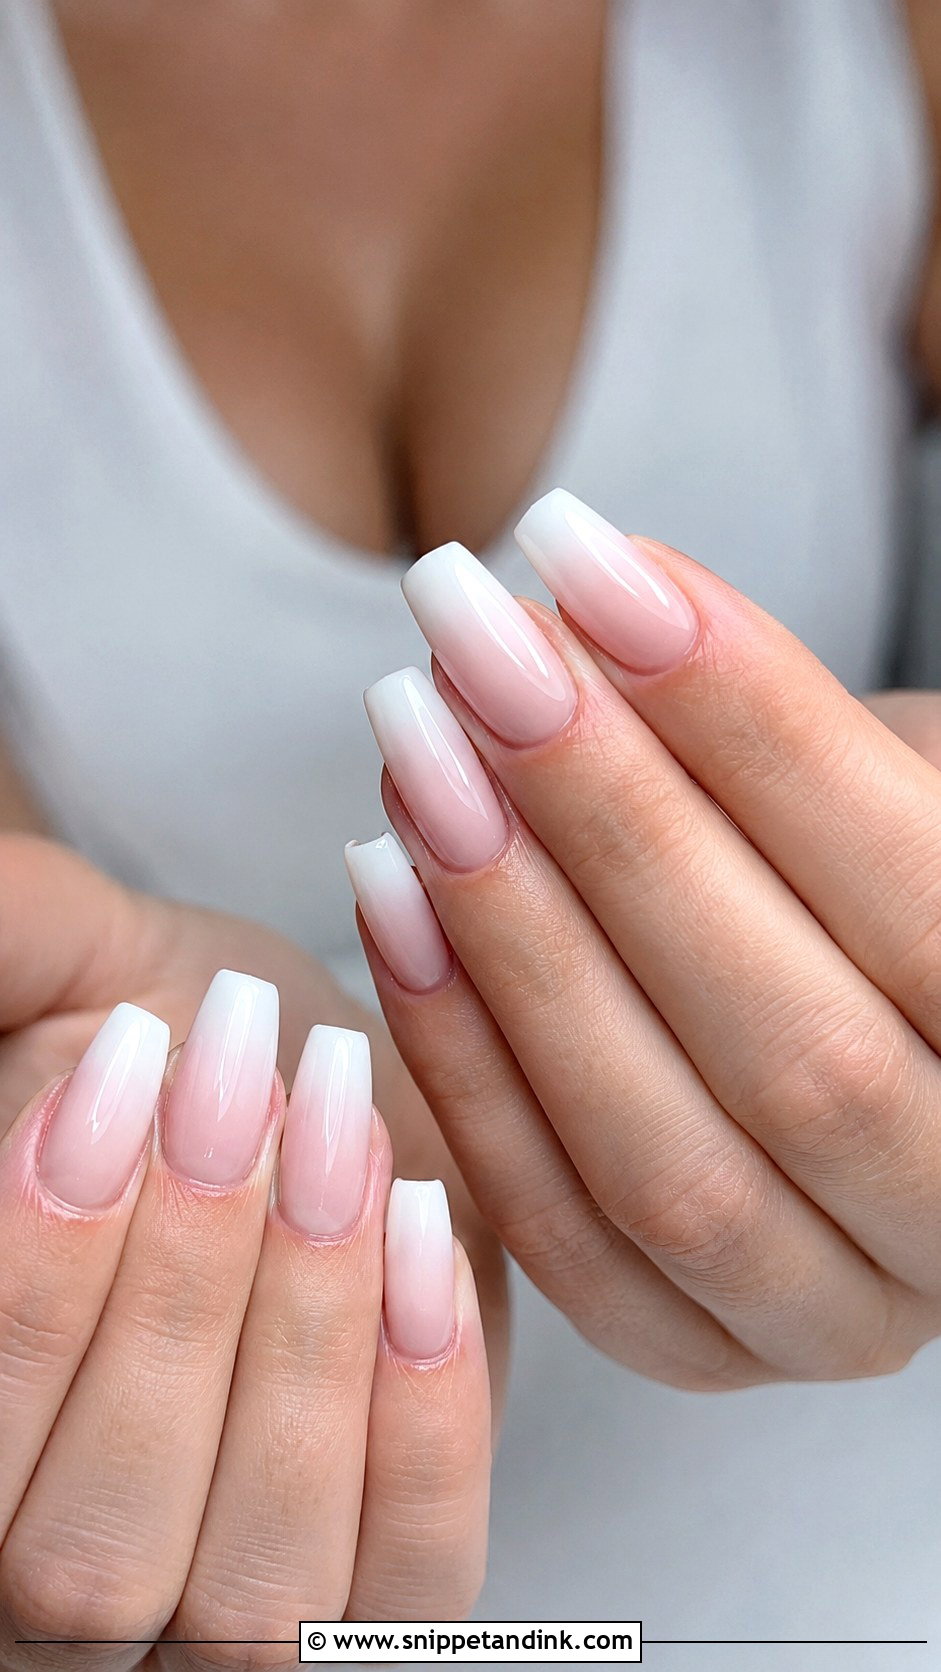
A faded French has less contrast than a classic one, so it forgives slightly uneven nail lengths. White ombre wedding nails move from nude or pink at the cuticle to white at the tip, and the blend is what separates a good set from a cheap-looking one. I sponge or airbrush the white in several light passes; one heavy pass leaves a visible band halfway up the nail that shows up badly in ring close-ups. It sits nicely with tulle and lace and works on almond, coffin, oval and square shapes.
8. Glazed Donut Bridal Nails
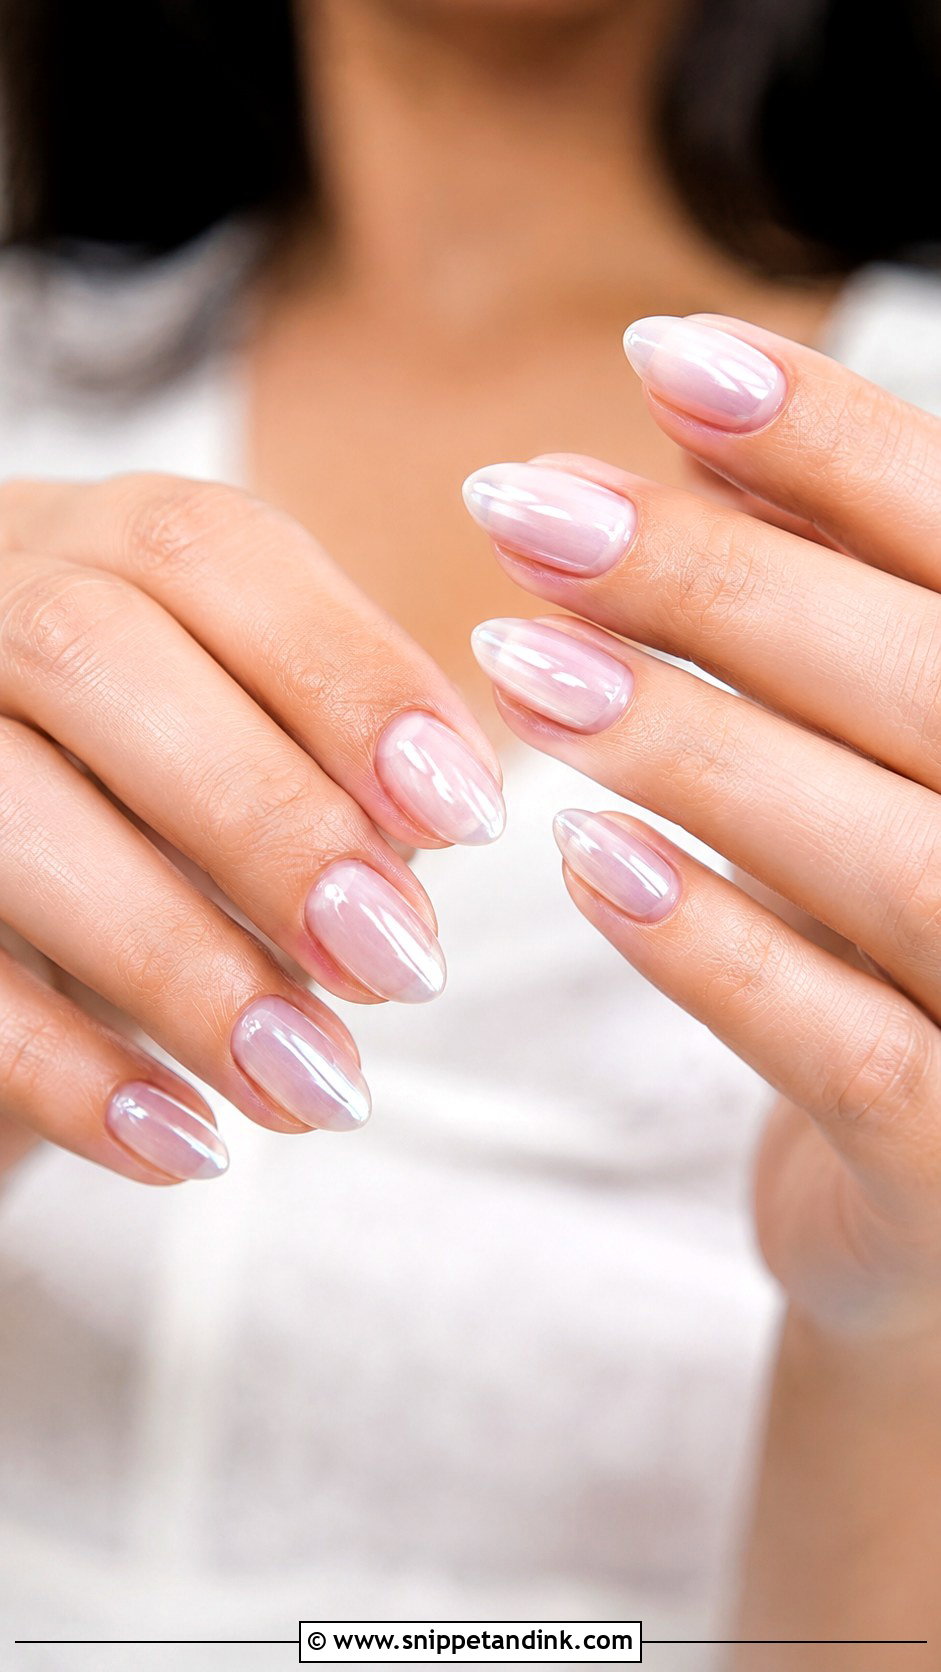
Glazed donut bridal nails are a sheer nude or milky base with a pearlescent chrome powder rubbed over the top. In daylight they glow; under warm reception lighting they go slightly golden, which some brides love and some don’t, so it’s worth seeing them in both. I keep the powder light for weddings. A heavy glaze can look more trend than bridal in photos you’ll keep for decades, and a soft pearl version ages better.
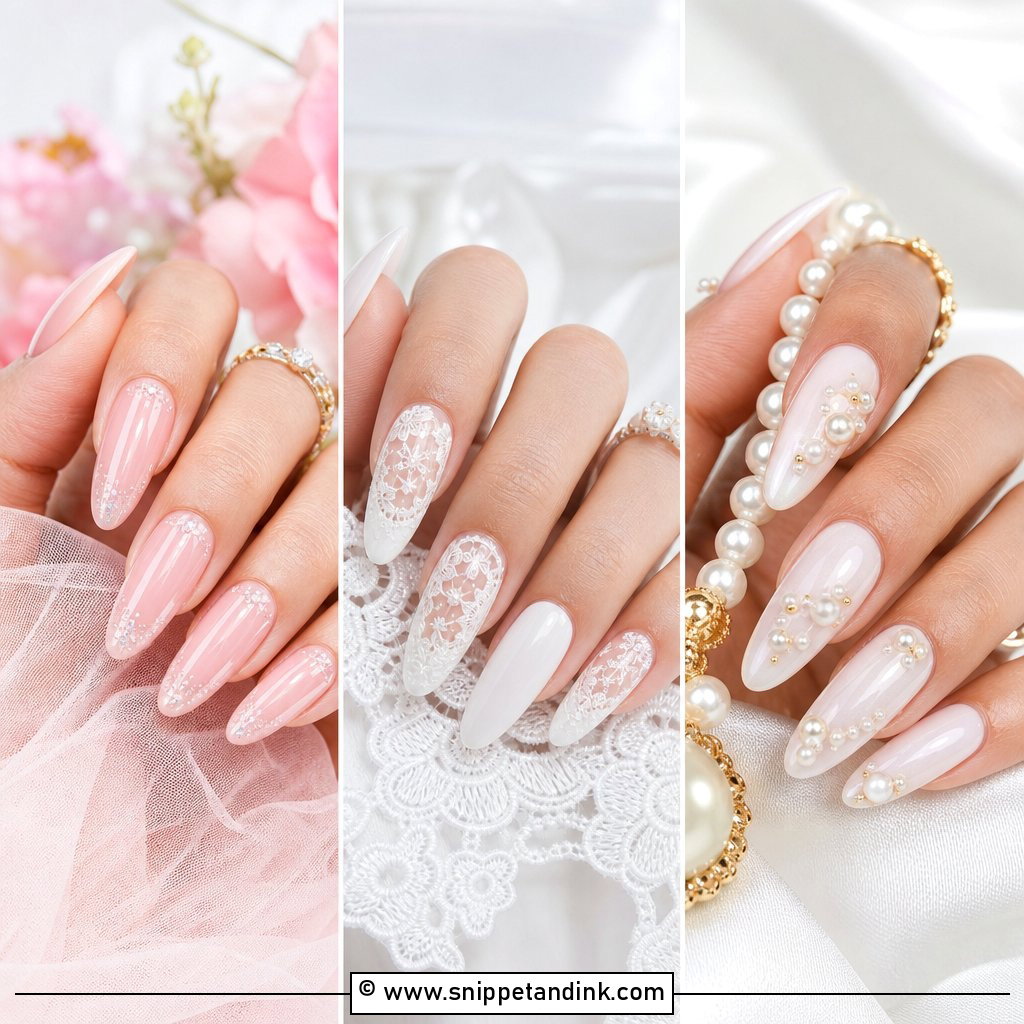
9. Lace Accent Wedding Nails
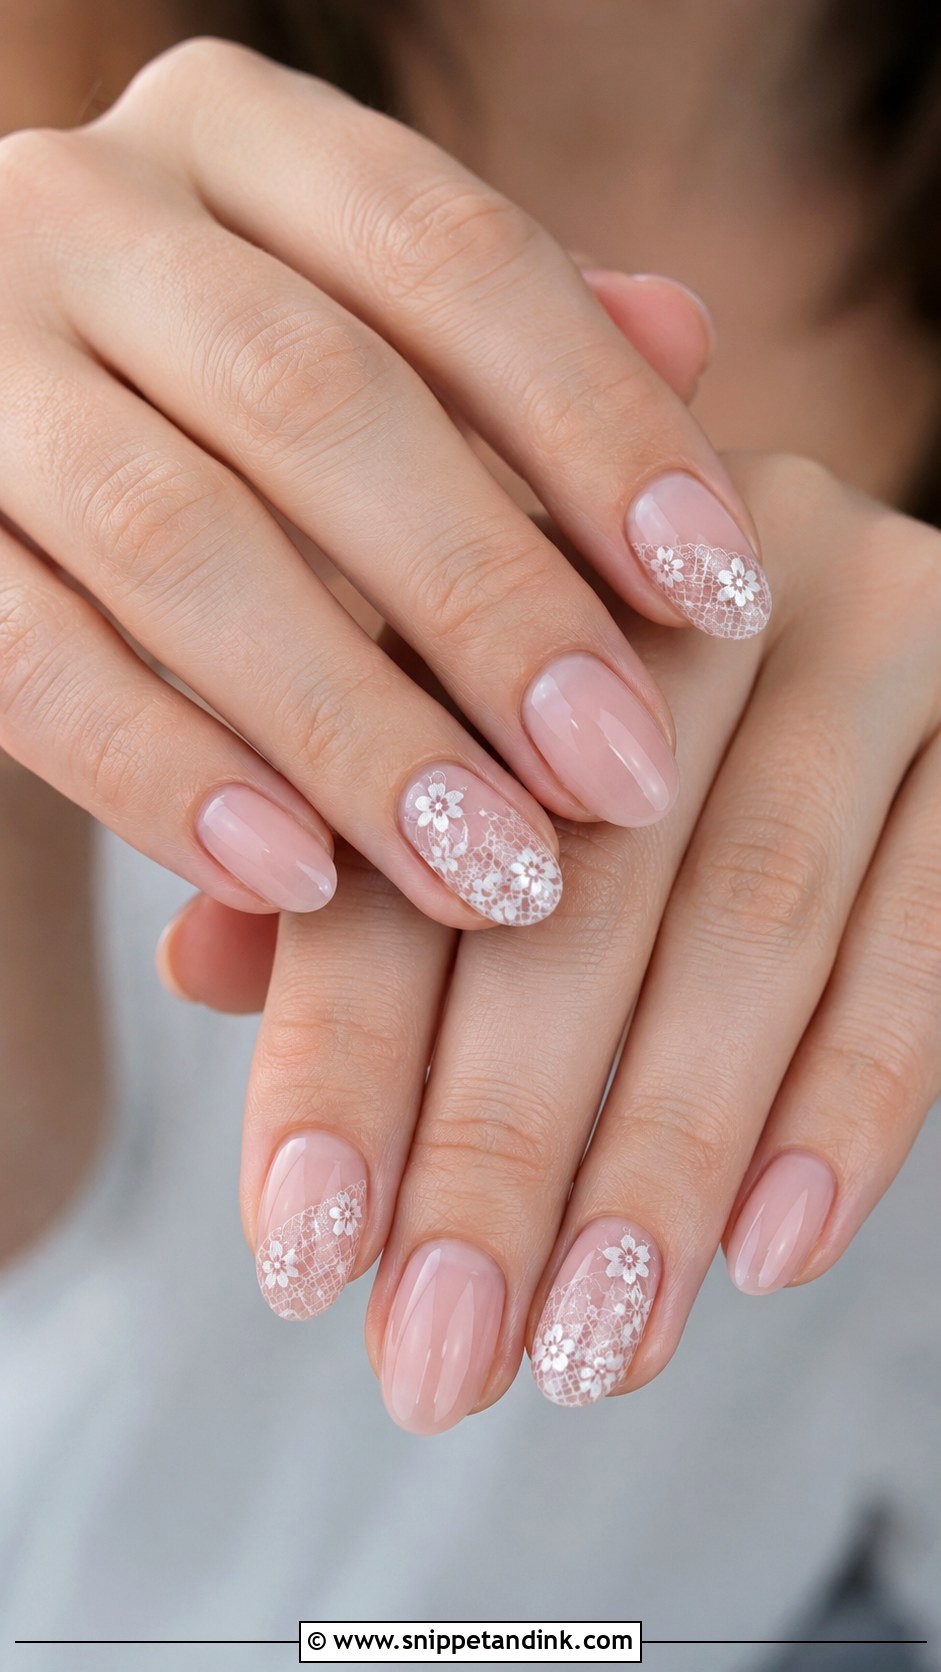
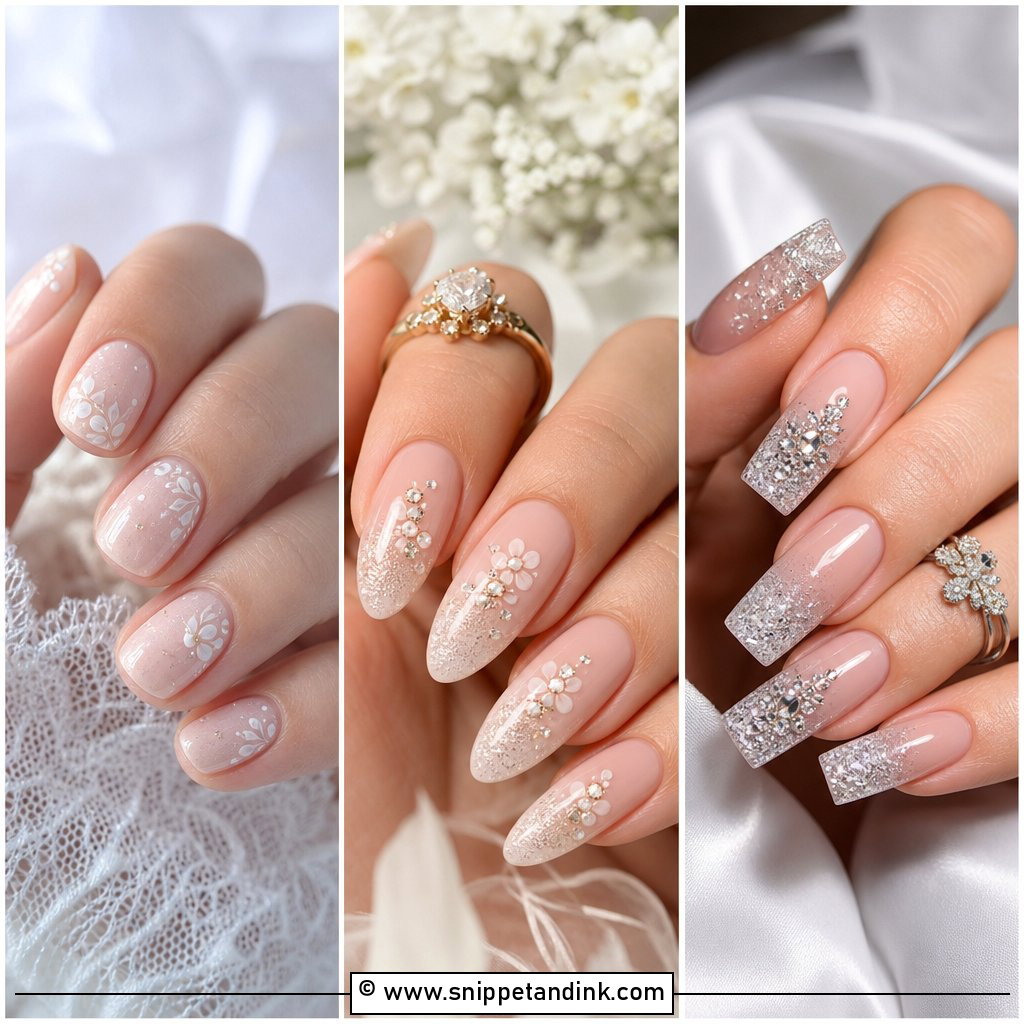
Lace art is fine linework, and it lives or dies on restraint. I paint it on one or two accent nails with a long, thin striping brush, using loops and tiny floral motifs taken from the bride’s actual lace if she brings a swatch or a close-up photo of her sleeve. Cover all ten nails and it turns busy, and at arm’s length the pattern reads as smudges. The rest of the set stays sheer pink, nude or milky white so the lace has room to show.
10. Floral Bridal Nails
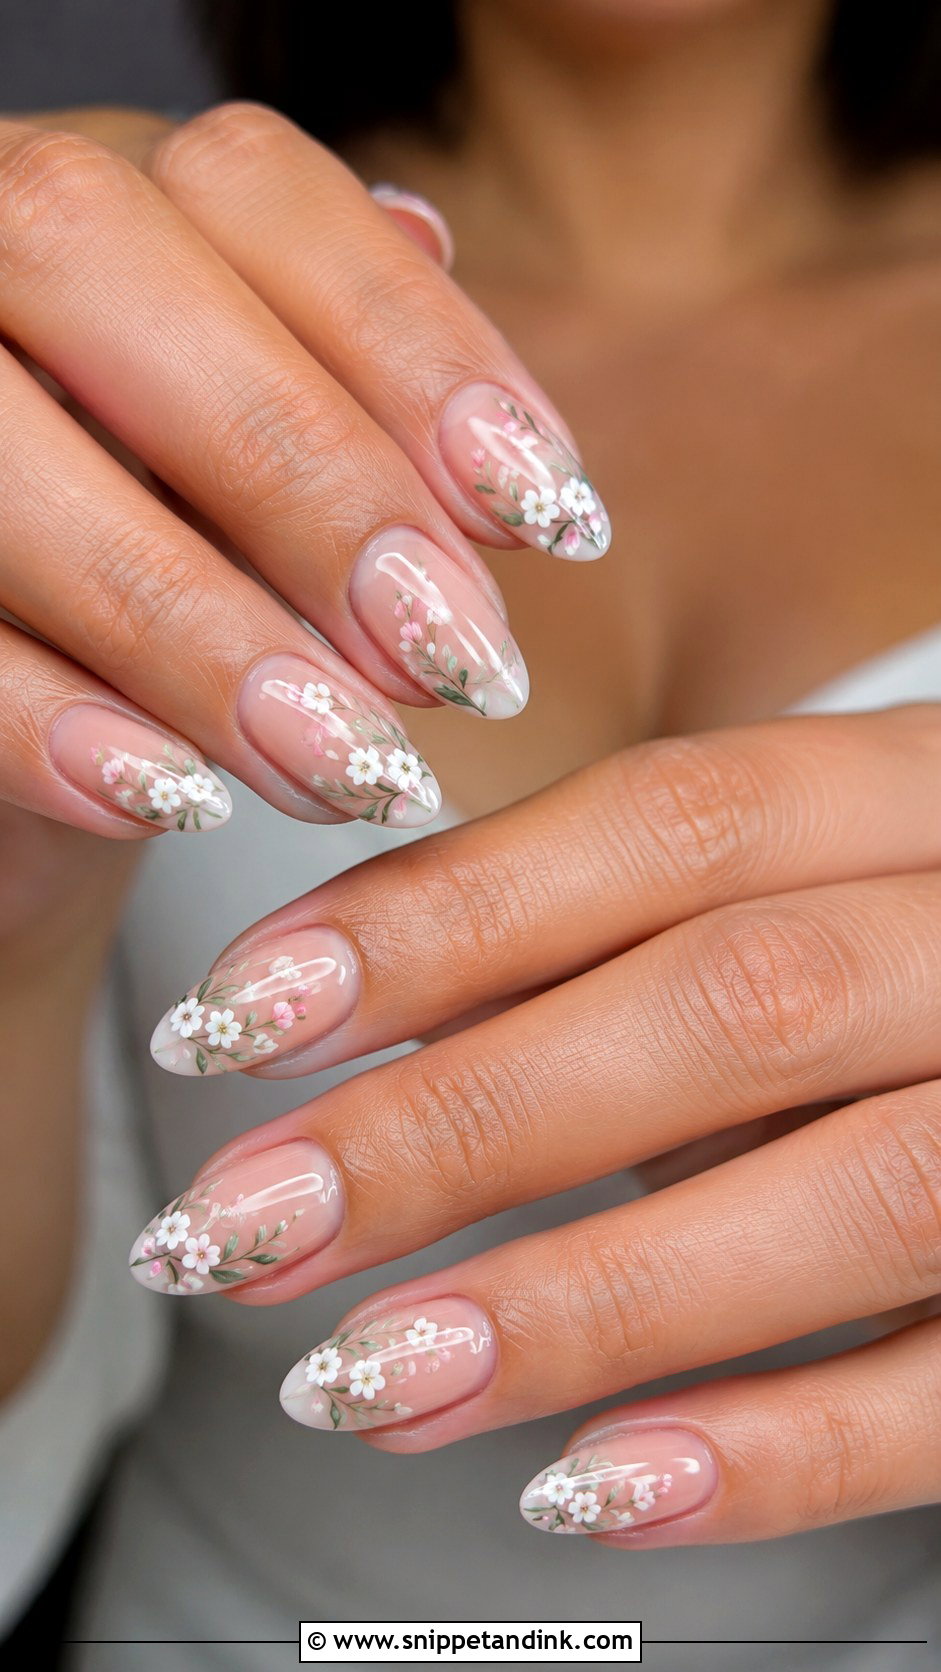
Painted flowers suit garden ceremonies and spring weddings, but the size of the flower matters more than the colour. Petals bigger than a third of the nail start to look like holiday nail art instead of a bridal set. I paint small white or blush blooms on a sheer base, usually on the ring and middle fingers only. Pressed-flower style art, with real dried petals sealed under gel, is another option, though it needs a thicker top layer that can feel slightly bulky on very thin nails.
11. Gold Foil Wedding Nails
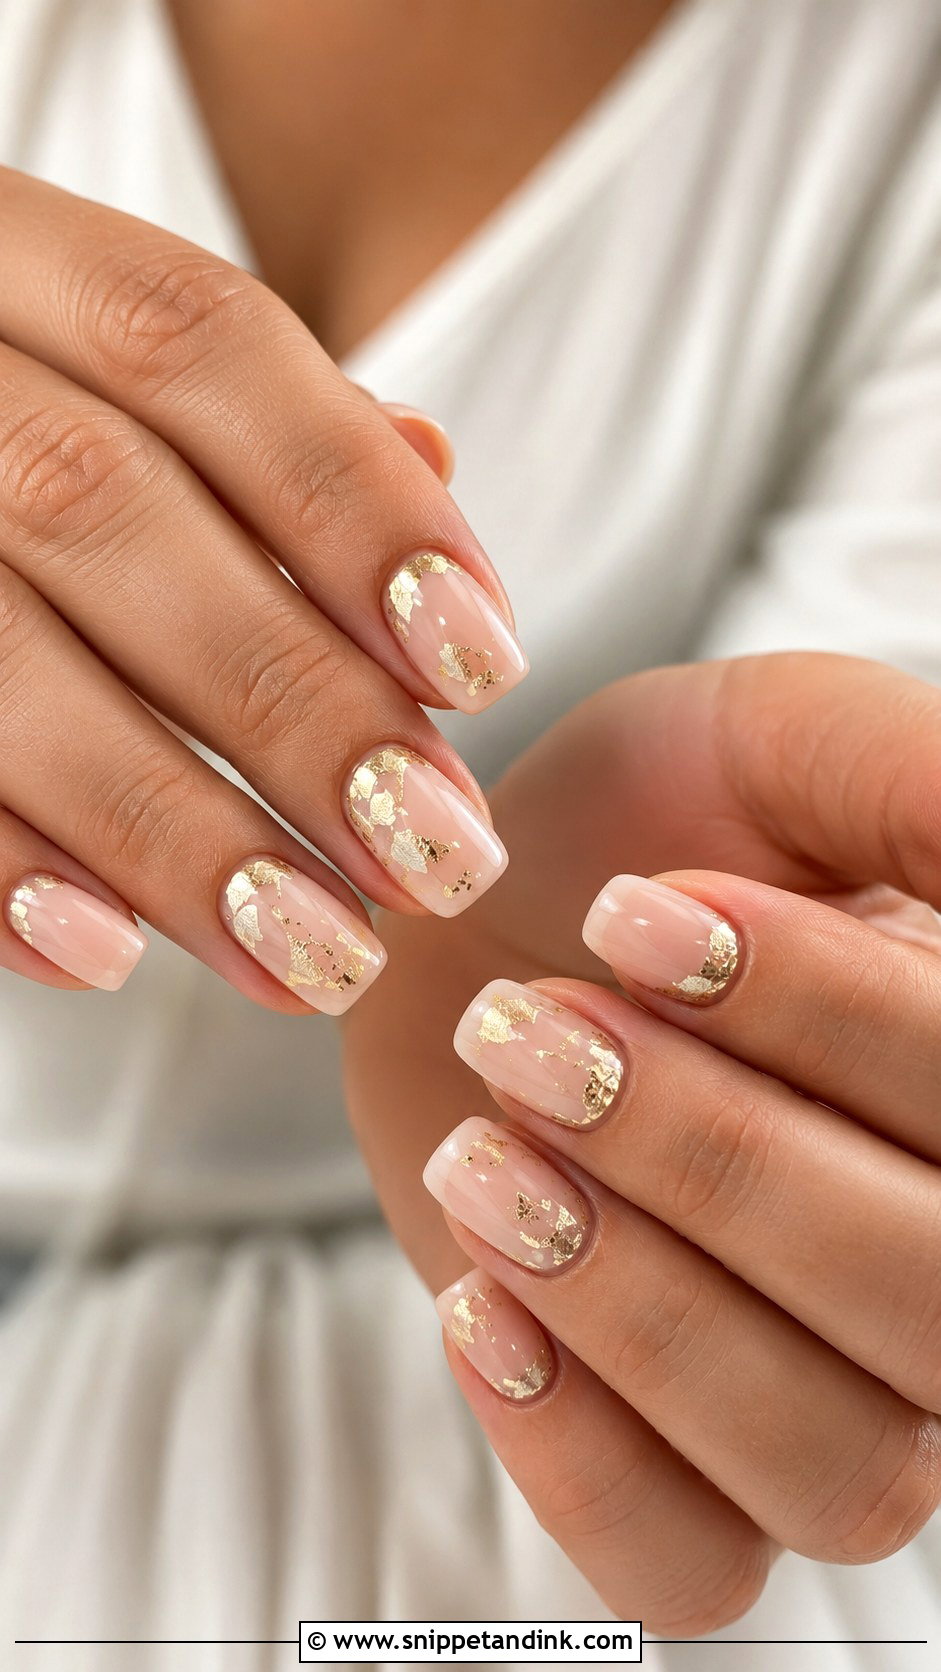
Gold foil is torn leaf pressed onto a tacky layer, so every set comes out slightly different, and that irregular texture is the appeal. It warms up nude, blush and milky white bases and makes sense if your ring and jewellery are yellow gold. Placement changes the mood: a few flecks near the cuticle stay subtle, while foil scattered over every nail is far bolder. Whichever you choose, the foil has to be fully encapsulated under top coat, because exposed edges catch on lace and tulle.
12. Silver Glitter Bridal Nails
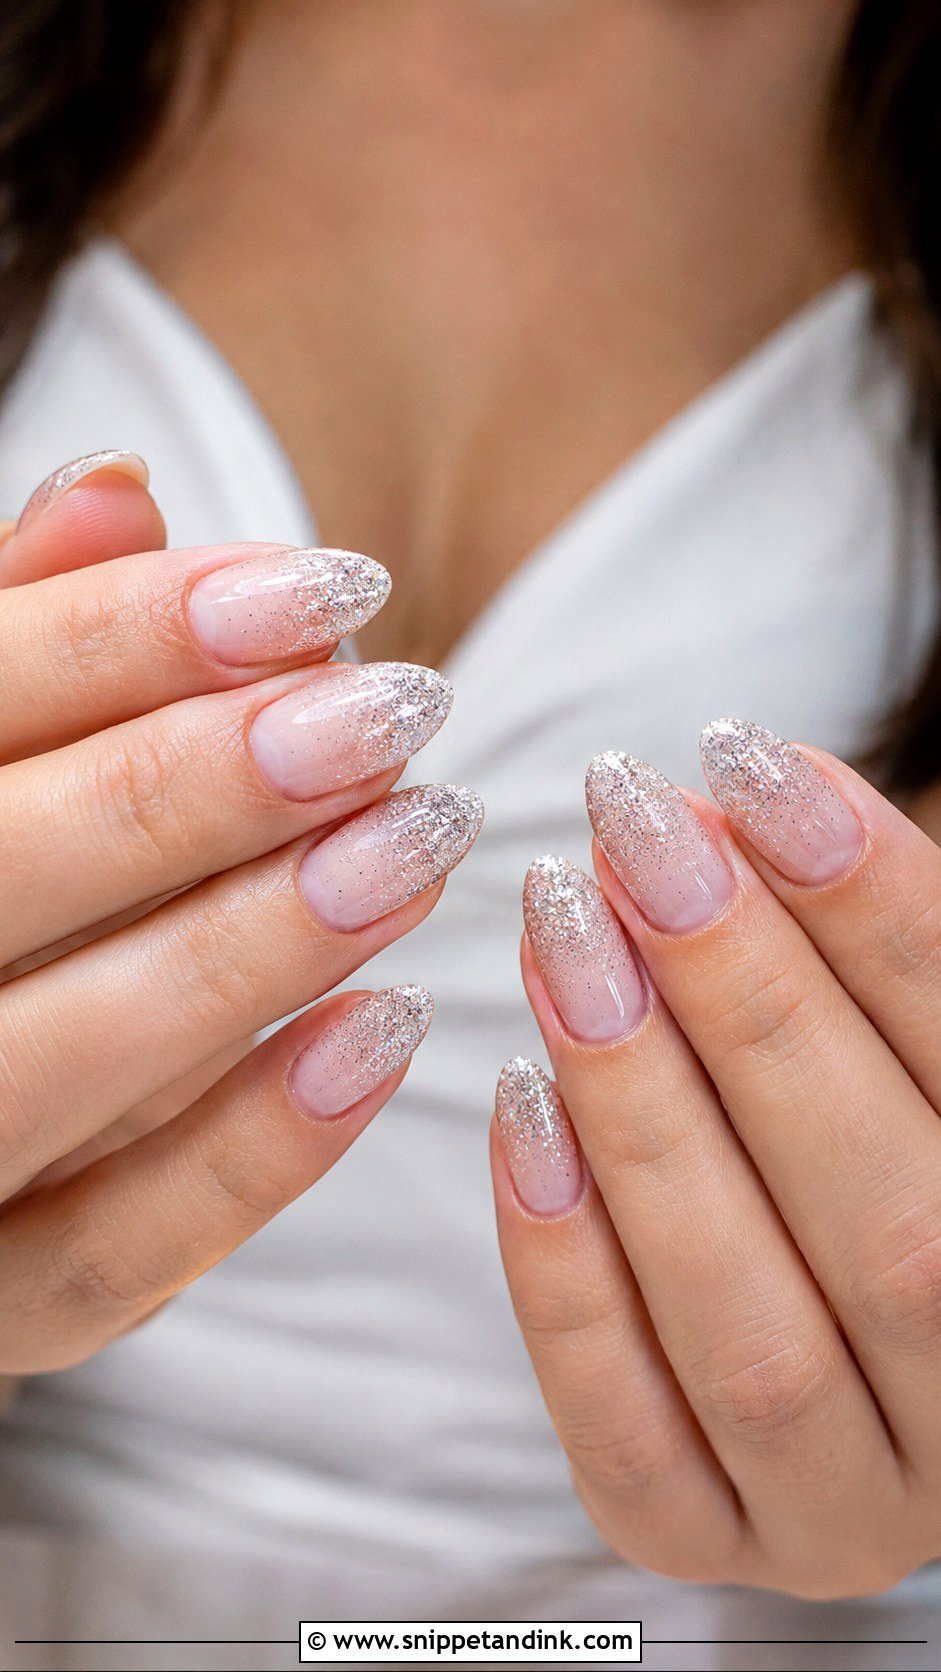
Silver glitter is where I most often talk brides down rather than up. Fine glitter, faded from the tip toward the middle over a sheer pink, gives an icy shimmer; chunky glitter looks heavy beside a diamond and steals attention from the ring. It suits silver or platinum jewellery and a beaded dress, and it picks up light nicely during an evening reception. One practical warning: glitter is the hardest polish to remove, so ask for a gel or soak-off base if you plan to take it off after the honeymoon.
13. Champagne Shimmer Wedding Nails
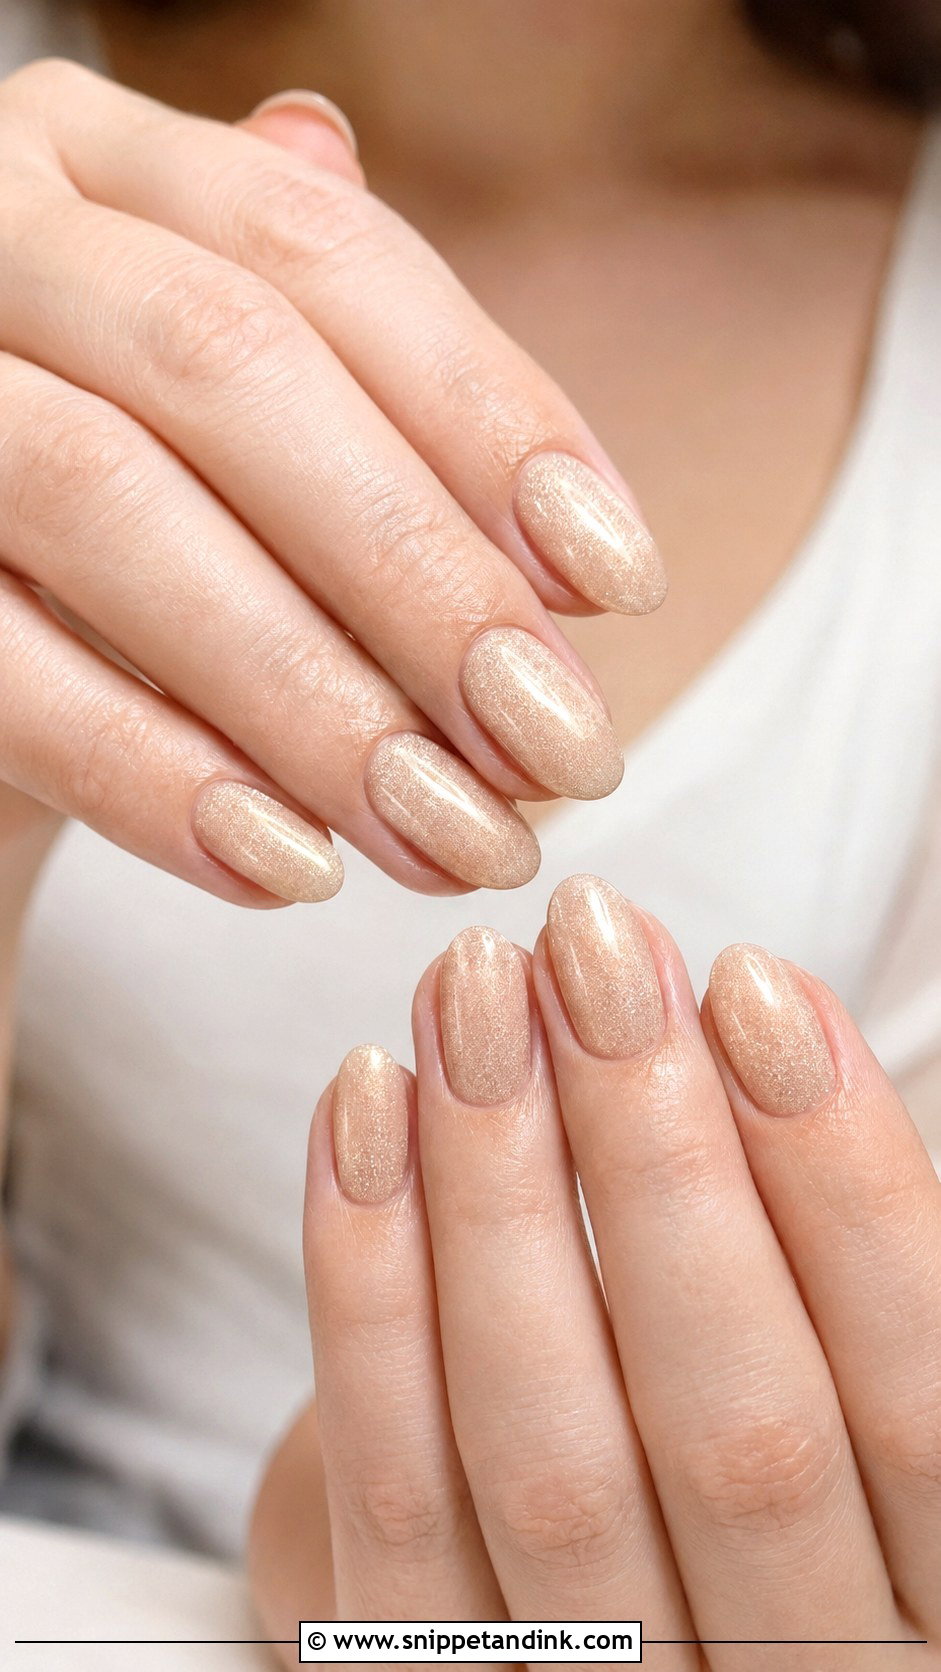
Champagne sits between nude, gold and beige, which is why it suits a wider range of skin tones than pure gold does. A finely milled shimmer reads as glow; a coarse one reads as glitter, so check the polish in the bottle under daylight before you commit. I like it sheer rather than fully opaque for a bride in ivory, because the warmth of the dress and the warmth of the nail then echo each other. It works on short natural nails and on longer almond shapes alike.
14. Blush Pink Wedding Nails
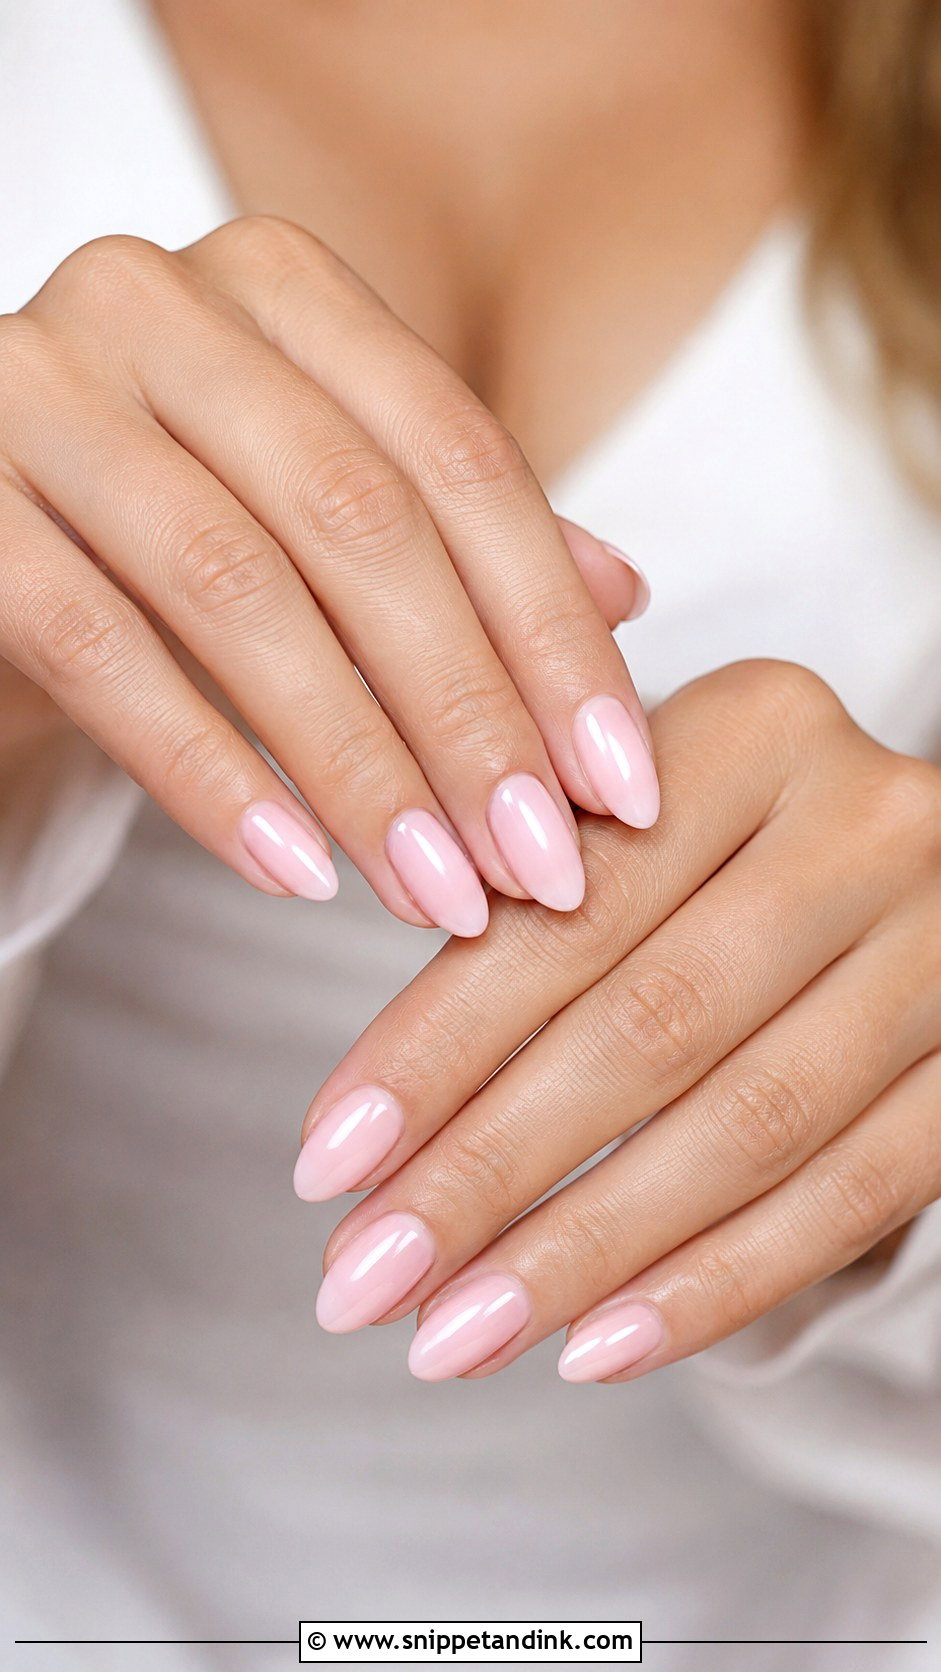
Blush has more colour than sheer pink and less contrast than white, so it lands in a comfortable middle. The test I use is to hold the shade next to the bride’s knuckle: if her skin looks sallow beside it, the pink is too cool or too grey for her. Rose gold rings and garden flowers sit well alongside it. Tiny white dots or a single pearl can be added, though honestly a plain glossy blush on short nails is one of the cleanest bridal looks there is.
15. Ivory Square Bridal Nails
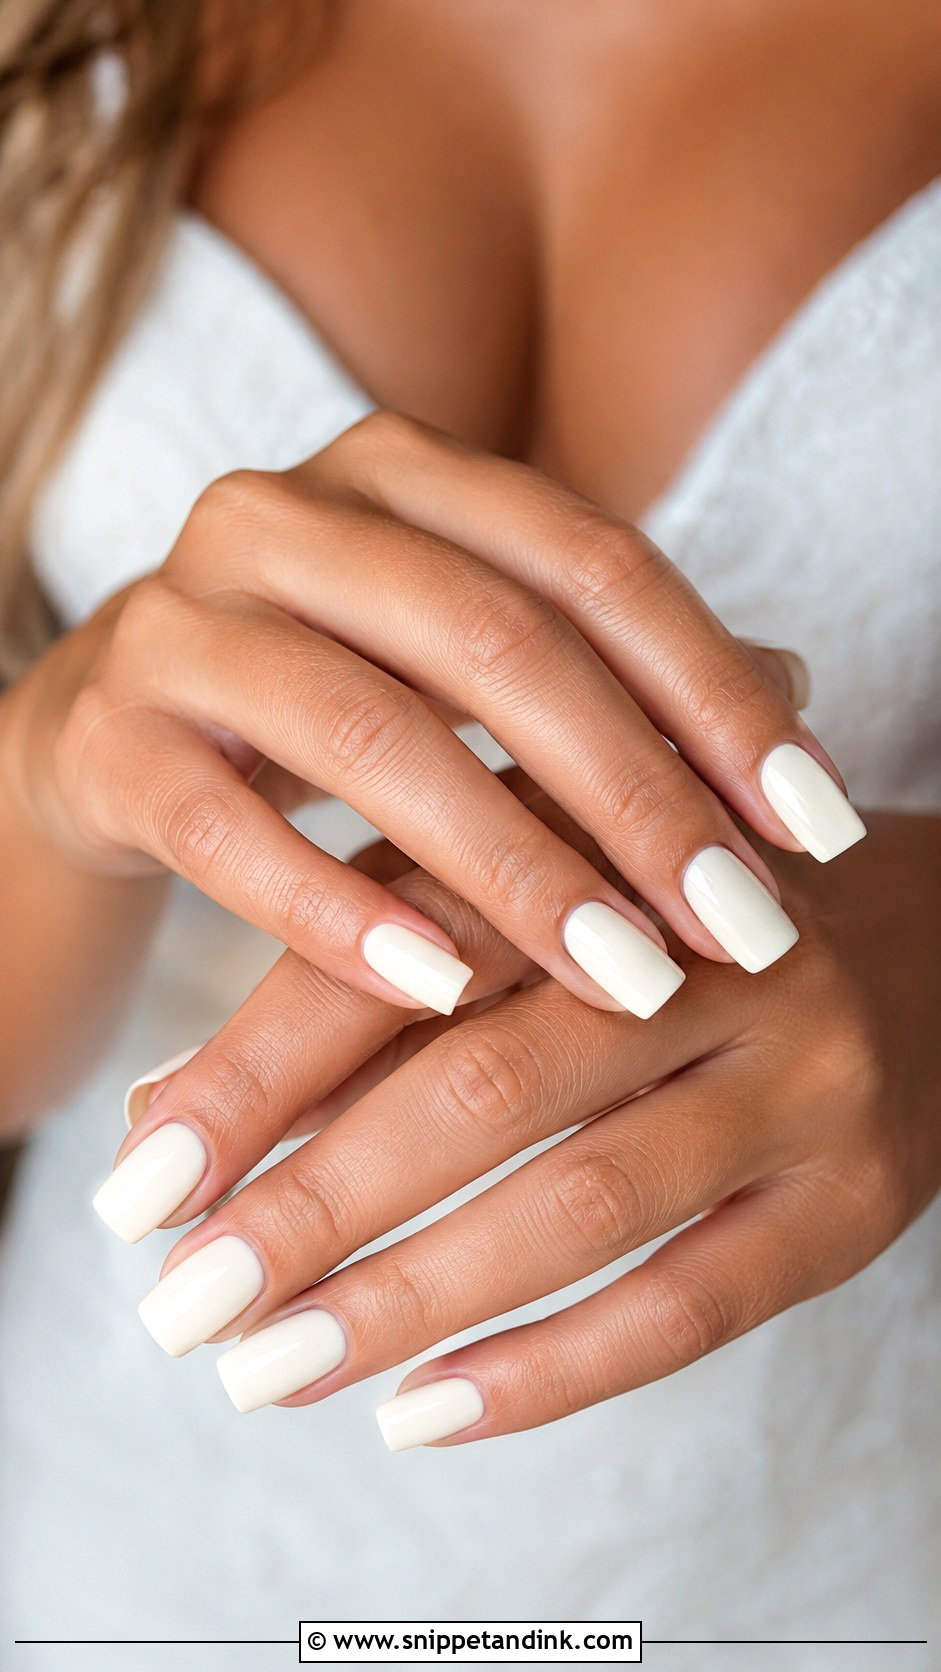
Ivory is softer than stark white and kinder to most skin, especially next to an off-white gown where pure white can make the dress look dingy. A square shape gives it structure and suits brides with long nail beds; on short, wide nail beds I soften the corners into a squoval so the hand doesn’t look boxy. I use a creamy ivory with a high-gloss top coat, since a flat cream finish can look like correction fluid in close-ups.
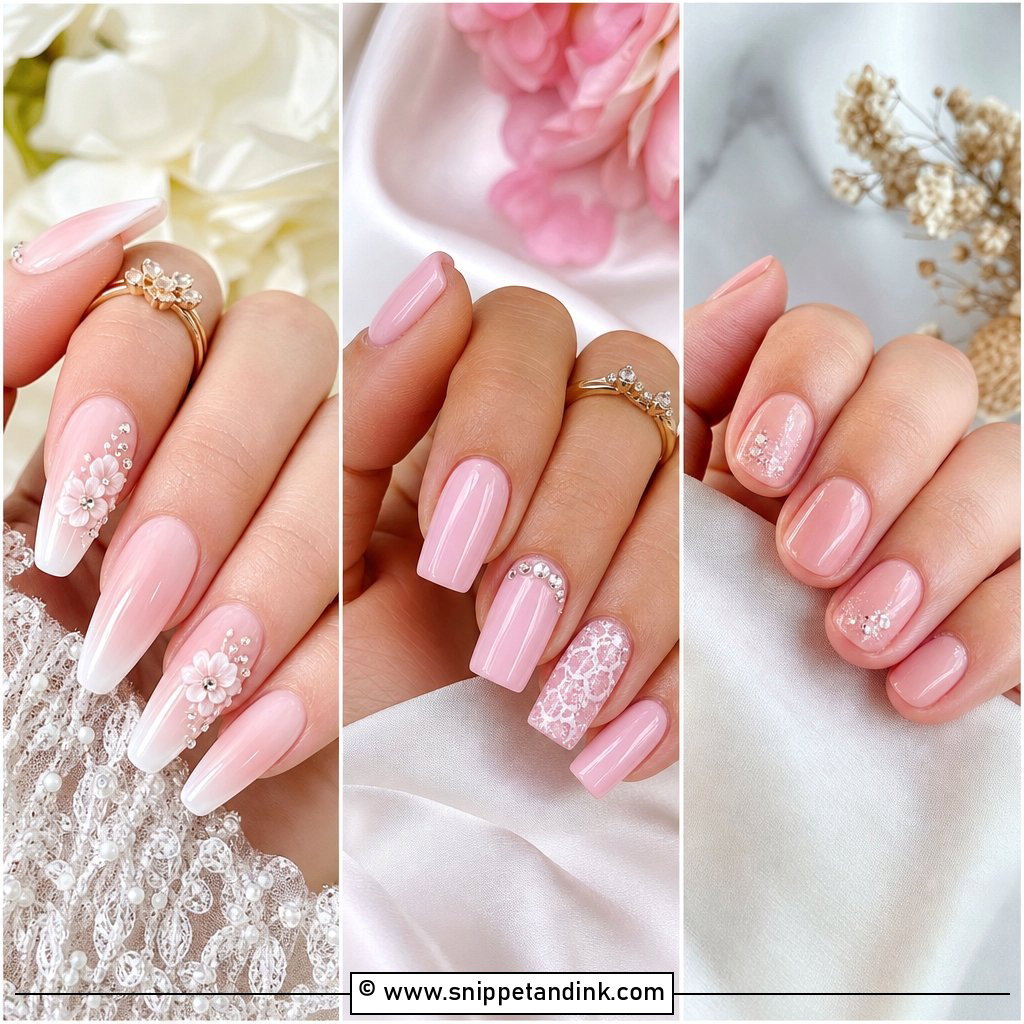
16. Pearl Accent Wedding Nails
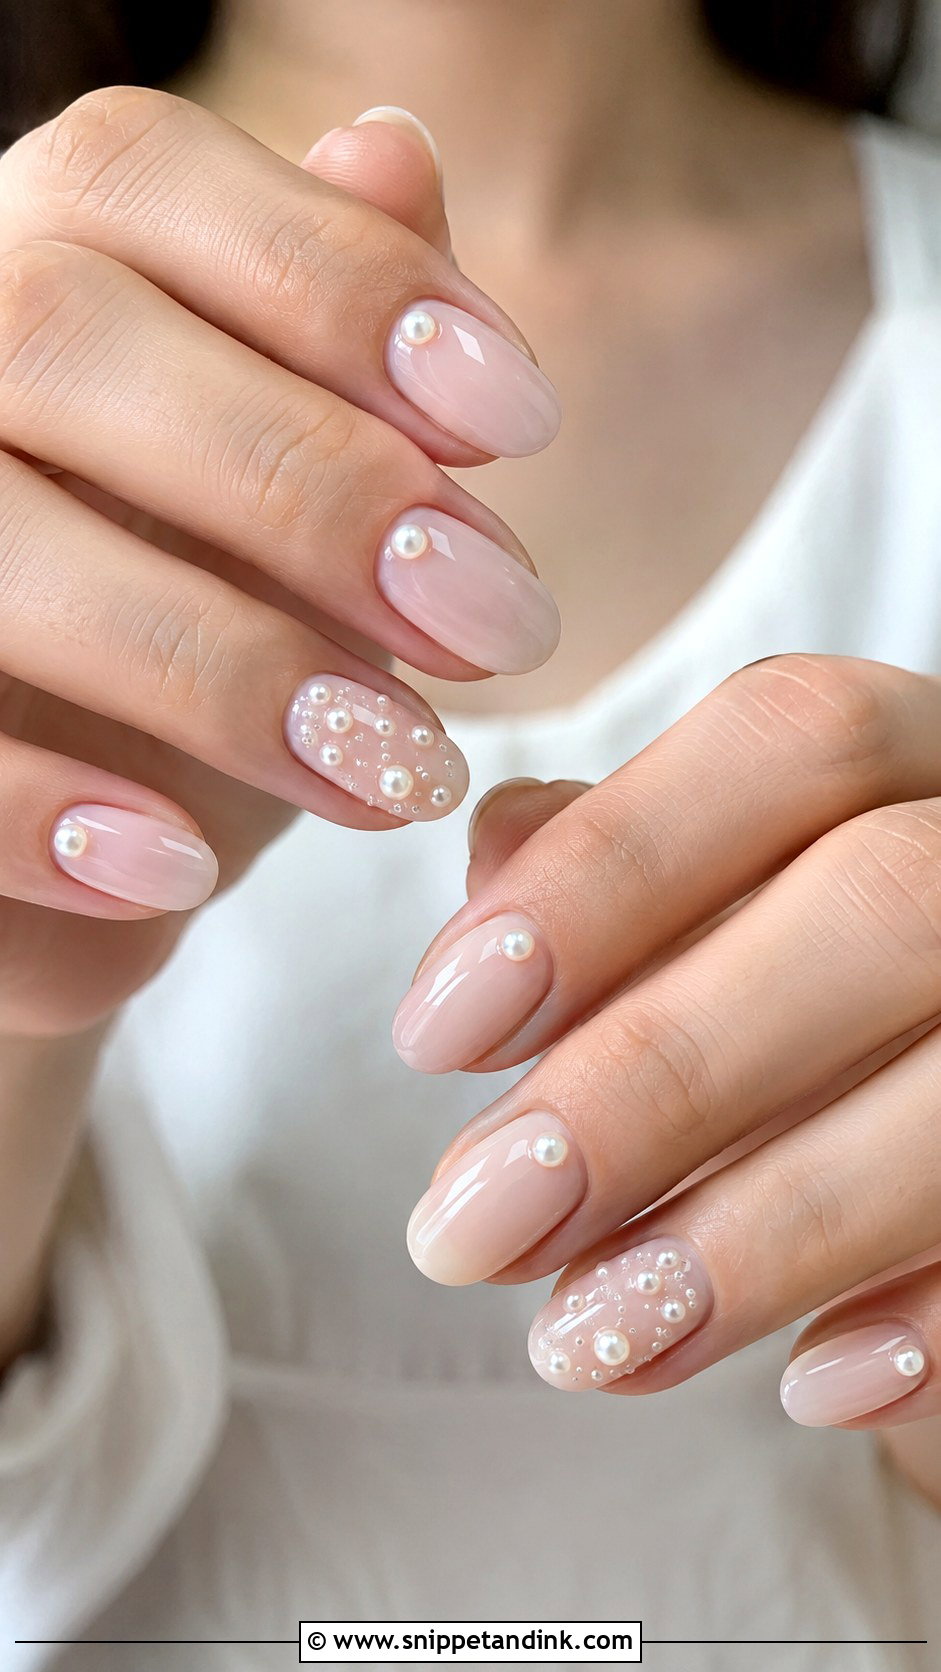
Pearl accents are tiny flat-backed pearls set into gel, and comfort decides how many you can wear. Domed pearls catch on hair, tights and the inside of a handbag, so I keep them small, flat-backed and close to the cuticle, often on one accent nail per hand. The base can be sheer nude, soft pink, milky white or ivory. If your earrings or hair pins have pearls, bring them to the appointment so I can match the tone, because pearls range from bright white to cream and a mismatch is surprisingly obvious.
17. White Chrome Bridal Nails
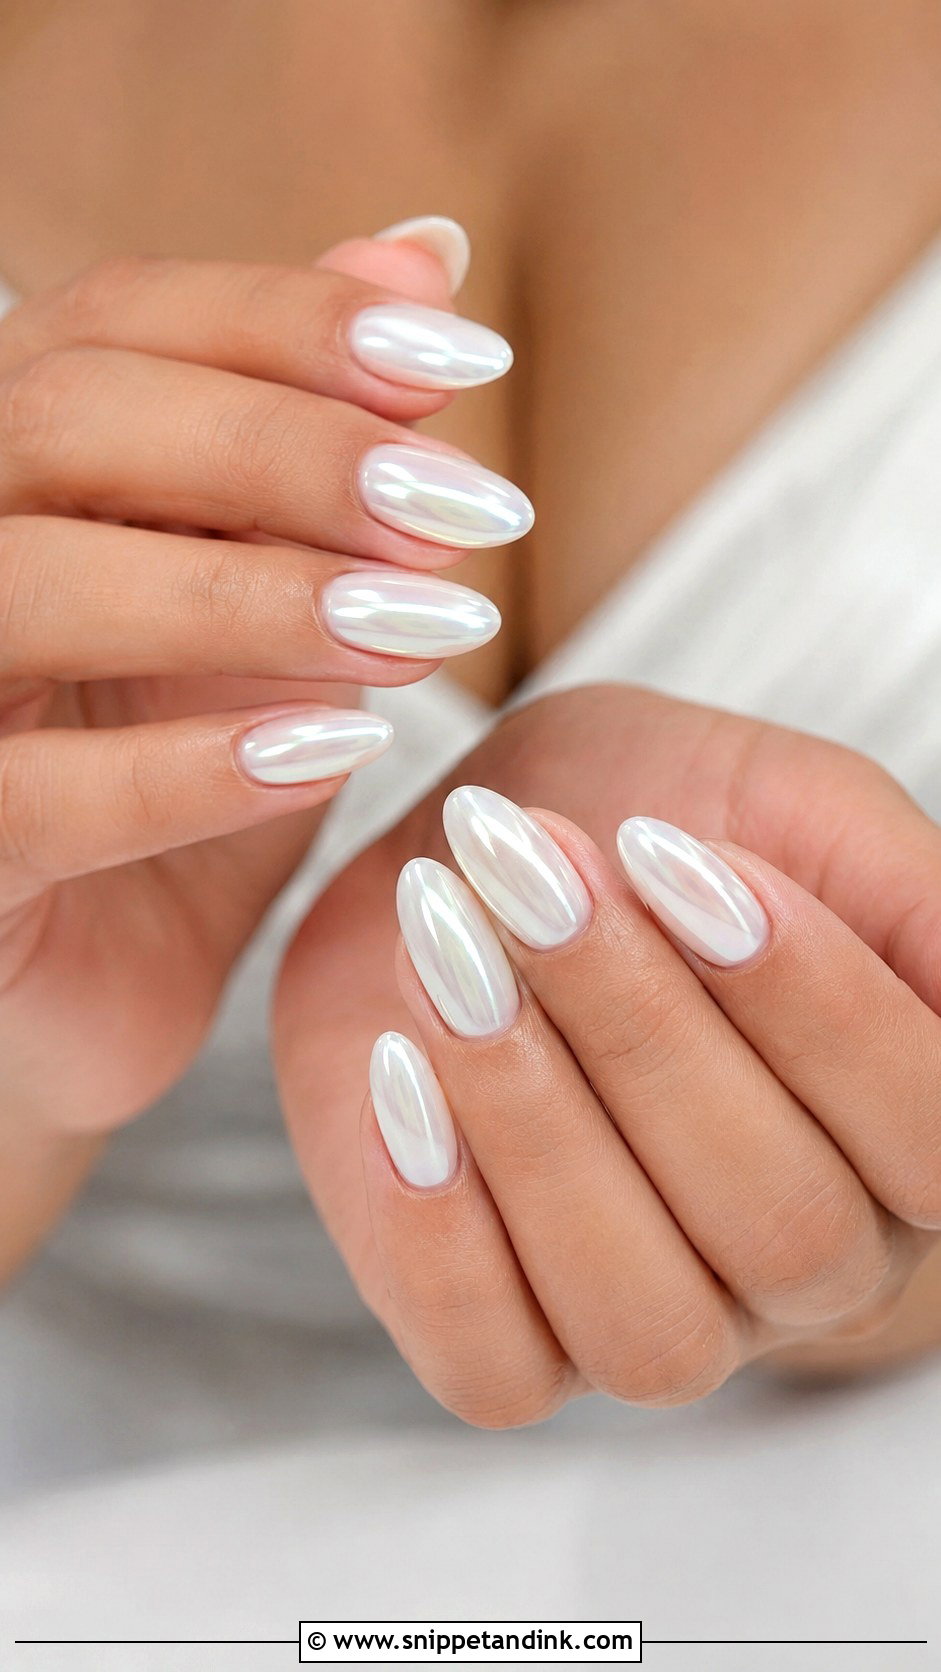
There is more shine here than in a milky white set but less than a silver mirror. White chrome bridal nails are made by buffing a white or pearly powder over a cured base, and the result looks sleek next to satin, structured dresses and simple jewellery. Ask for a pearly white chrome rather than silver if you’d like it softer. Chrome is unforgiving at the edges: any flooded cuticle or rough sidewall shows up instantly, so this is one set I won’t rush.
18. Baby Boomer Wedding Nails
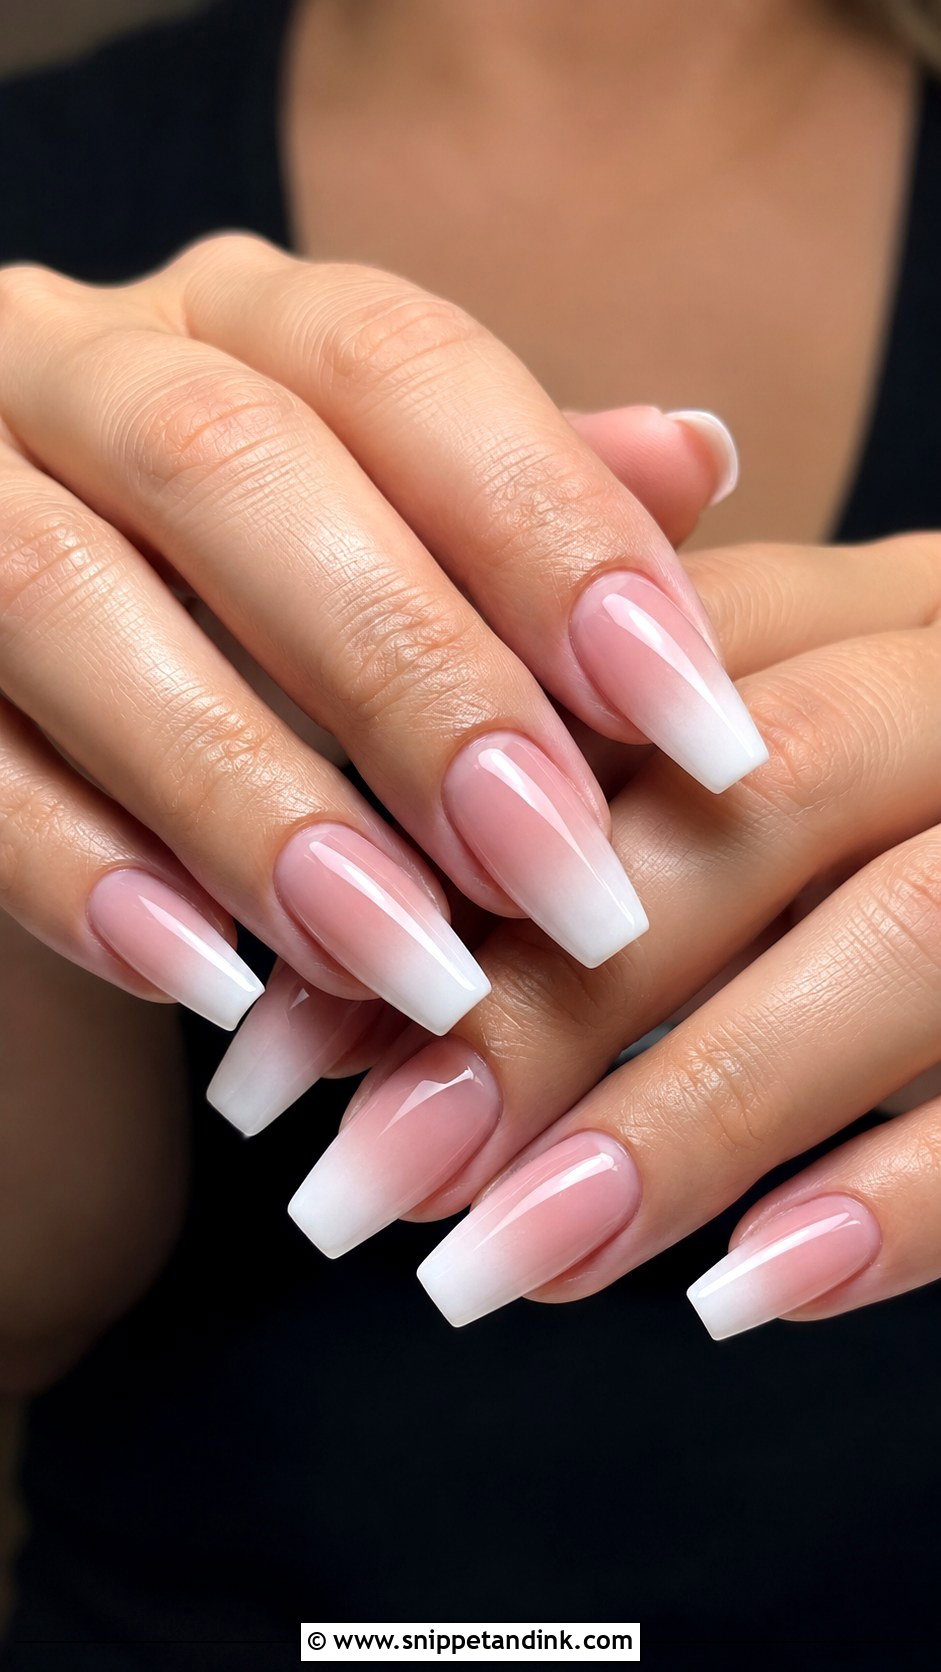
Baby boomer is simply the trade name for a French ombre, where a pink or nude base melts into a white tip. It is softer than a sharp French and visually lengthens the fingers, especially on almond, coffin and oval shapes. I find it works with nearly any dress, from a ball gown to a slip. Done in gel or acrylic it holds its blend; in regular polish the gradient tends to look patchy, so I’d only recommend it in a long-wear system for the wedding.
19. Minimal Rhinestone Bridal Nails
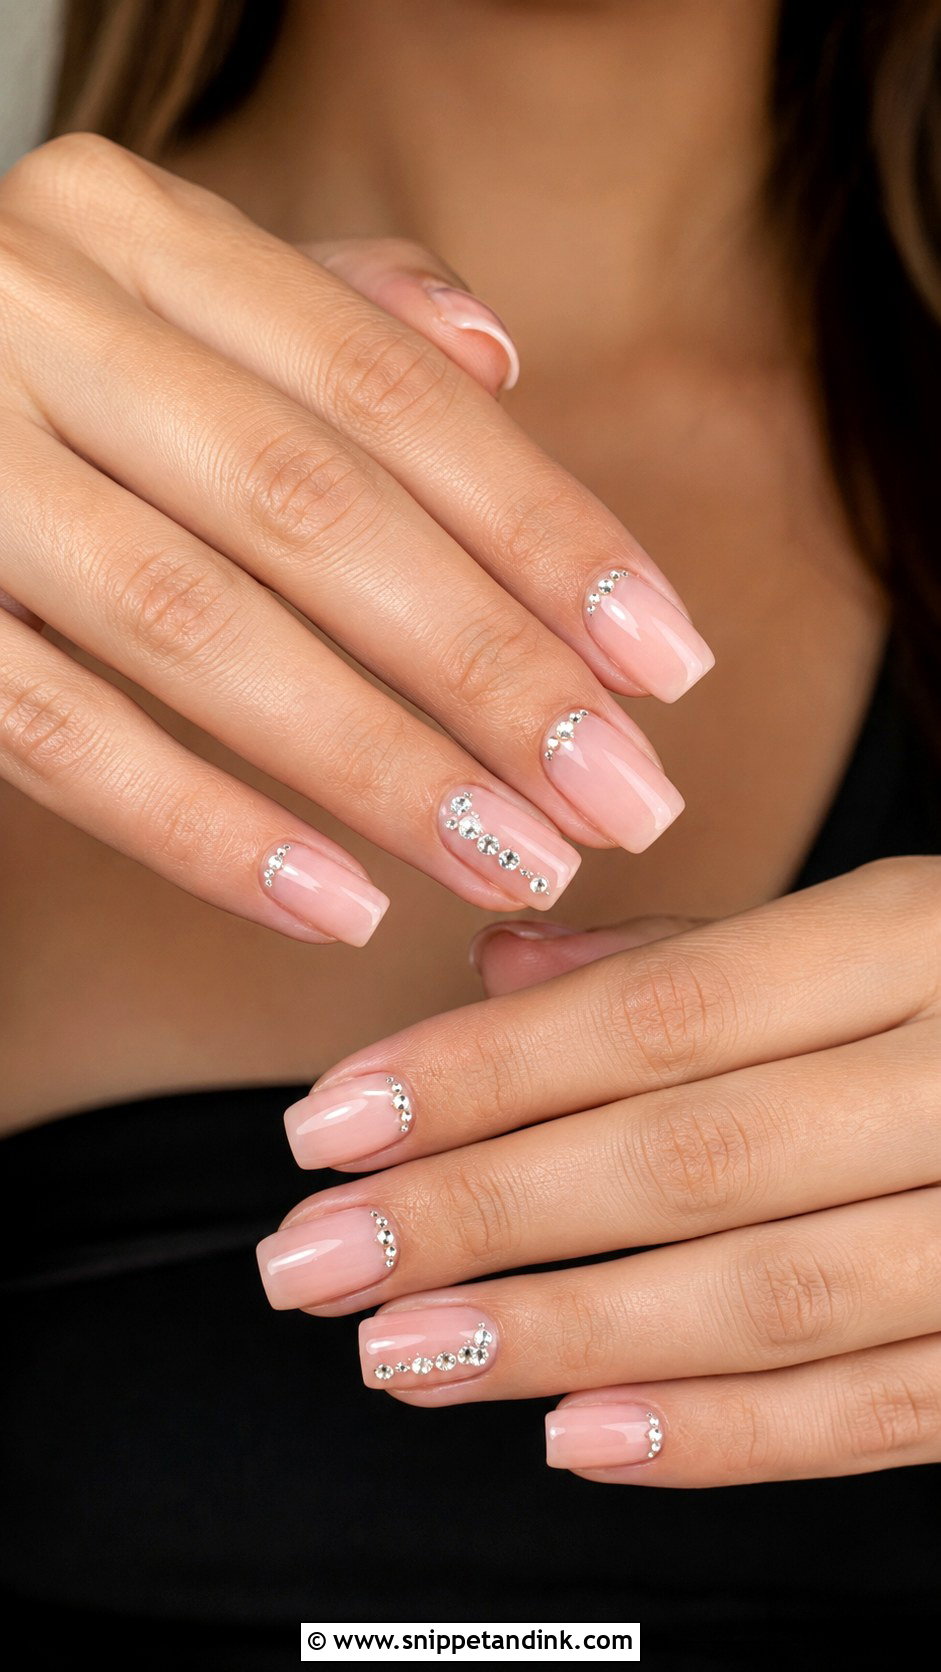
The difference between bridal sparkle and party nails is how many stones you use. Minimal rhinestone bridal nails keep the crystals tiny and few: one near the cuticle, a fine line along a French tip, or a cluster on a single accent nail. I set each stone in gel and run top coat around its base so it can’t snag a veil. On short nails, one small gem per nail is plenty. Pair this with crystal earrings or a beaded gown rather than layering it with heavy glitter.
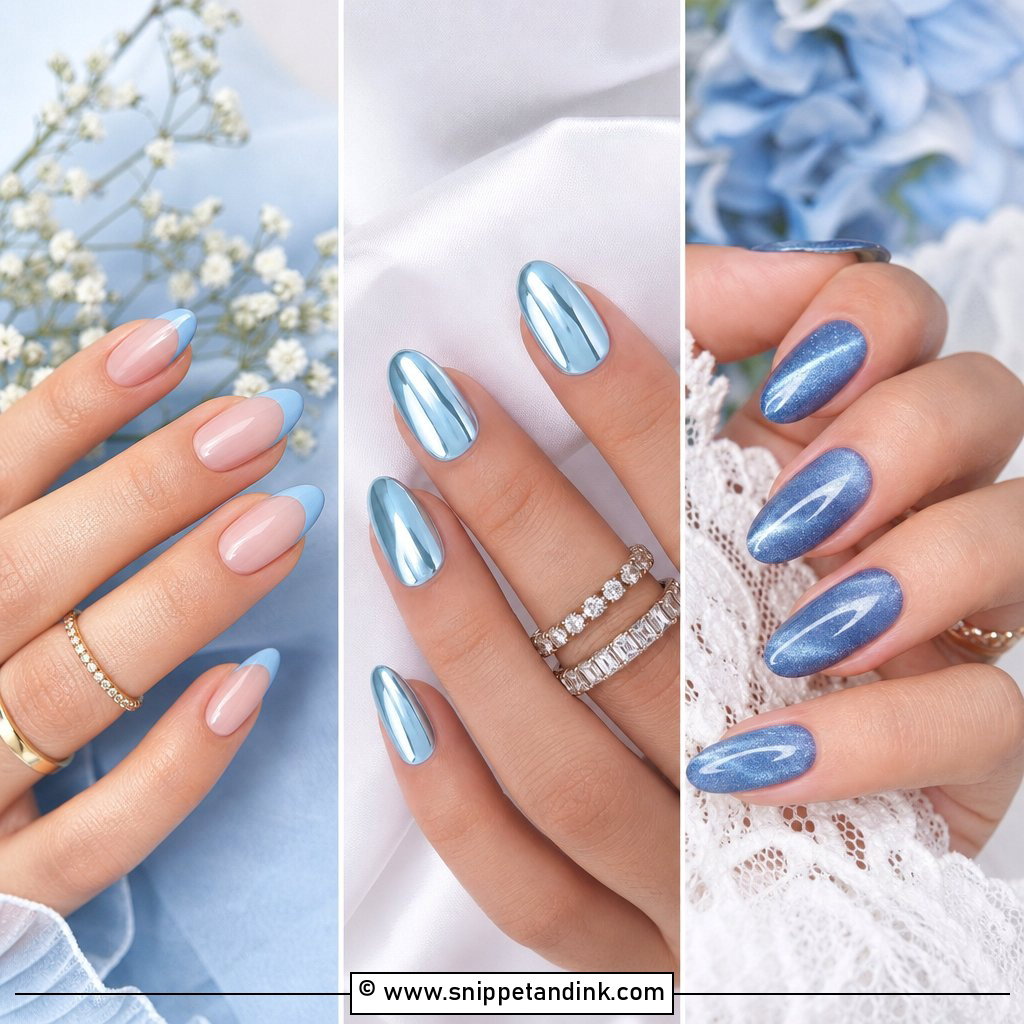
20. Something Blue Wedding Nails
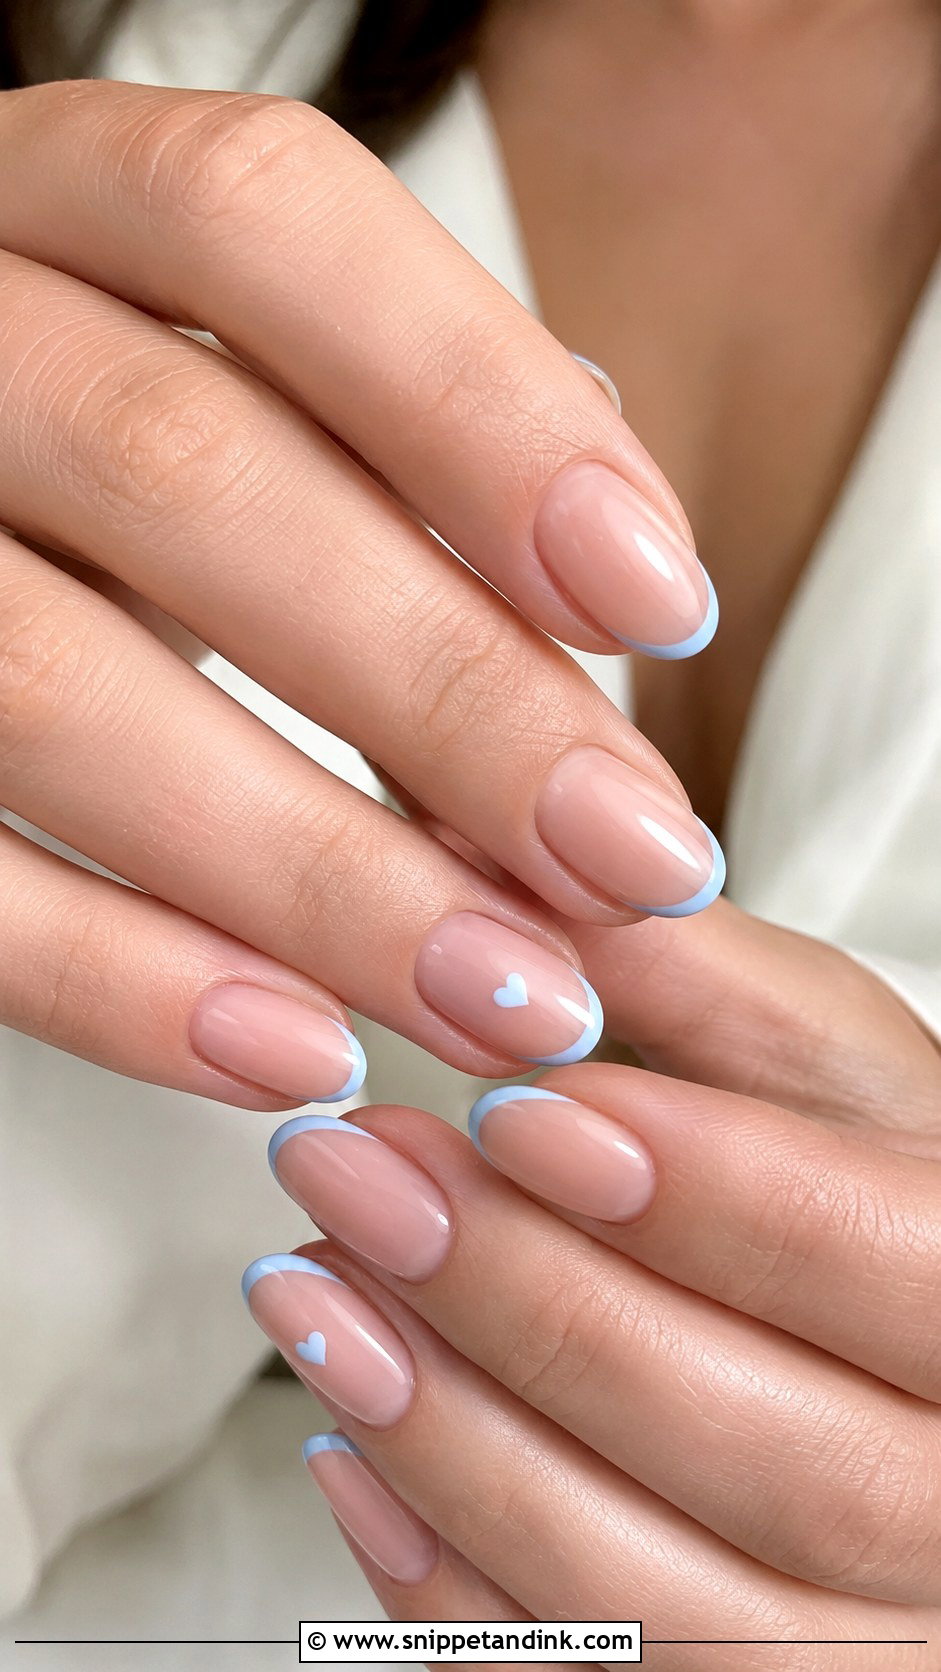
Something blue on the nails can be as visible or as private as you like: pale blue French tips, a few tiny blue flowers, or a small blue heart painted only on the ring finger or thumb. I keep the base sheer nude, pink or milky so the set still reads as bridal. Soft blues sit well with coastal and spring weddings and cool-toned jewellery. A hidden detail on the thumb is the one most brides end up loving, because they can glance down at it during the ceremony.
Gel, Dip or Plain Polish for a Twelve-Hour Day
Regular polish looks lovely for about a day and a half before the tips wear, which is cutting it fine once you count the rehearsal dinner. Gel is what I suggest for most brides: it cures hard under a lamp, holds shine for around two weeks, and resists chipping while you hug a hundred people. Dip powder lasts even longer but builds a thicker layer, which can look bulky on short natural nails. Builder gel adds strength if your own nails bend or split.
For timing, I like the final set done one to two days before the wedding. Earlier than that and you risk a chip during last-minute errands; on the morning itself you add stress and the lamp-cured layers have no time to prove themselves. If you’re going straight on a honeymoon, choose gel or dip so the set survives sunscreen, salt water and suitcases.
A Chipped Nail at Noon on the Wedding Day
It happens, usually while someone is fighting with a zip. A small chip in gel can be hidden if you have the right things with you, so I send brides home with the exact base shade in a regular polish bottle.
- Smooth the chipped edge gently with a fine buffer so the polish doesn’t lift further.
- Dab a thin layer of the matching polish only on the bare spot, not over the whole nail.
- Let it dry for several minutes, then add a thin clear top coat over the patch.
- Keep nail glue and a spare press-on in the shade for a broken nail; a bridesmaid can apply it in two minutes.
Rhinestones and pearls that pop off are best left off rather than glued back in a hurry; one missing stone is invisible, while a crooked one with glue around it isn’t.
Hold Your Ring Hand Up to the Light Before You Commit
Most bridal sets go wrong in small ways: a nude that turns grey, a tip too thick, a stone that catches the veil. A trial a few weeks out catches nearly all of that. Wear your engagement ring to it, look at your hand in daylight and under warm indoor light, and photograph it on your phone the way a photographer would shoot the ring. If you still like what you see after a few days of normal life, you have your design. Everything else comes down to clean shaping, a careful cuticle and a top coat that’s properly sealed.
You'll Like These Ideas:


Leave a Reply