
Your son is getting married, and you’ll be photographed at the altar, in the family lineup and on the dance floor, often by people standing behind you. As the mother of the groom, you don’t need a bridal-level updo, but you do need hair that still looks deliberate at ten o’clock at night. The twenty ideas below cover chignons, half-up styles, bobs, pixies and a couple of vintage sets. For each I’ve noted the length it needs, how it holds, and where it tends to let people down, so you can pick with your own hair in mind.
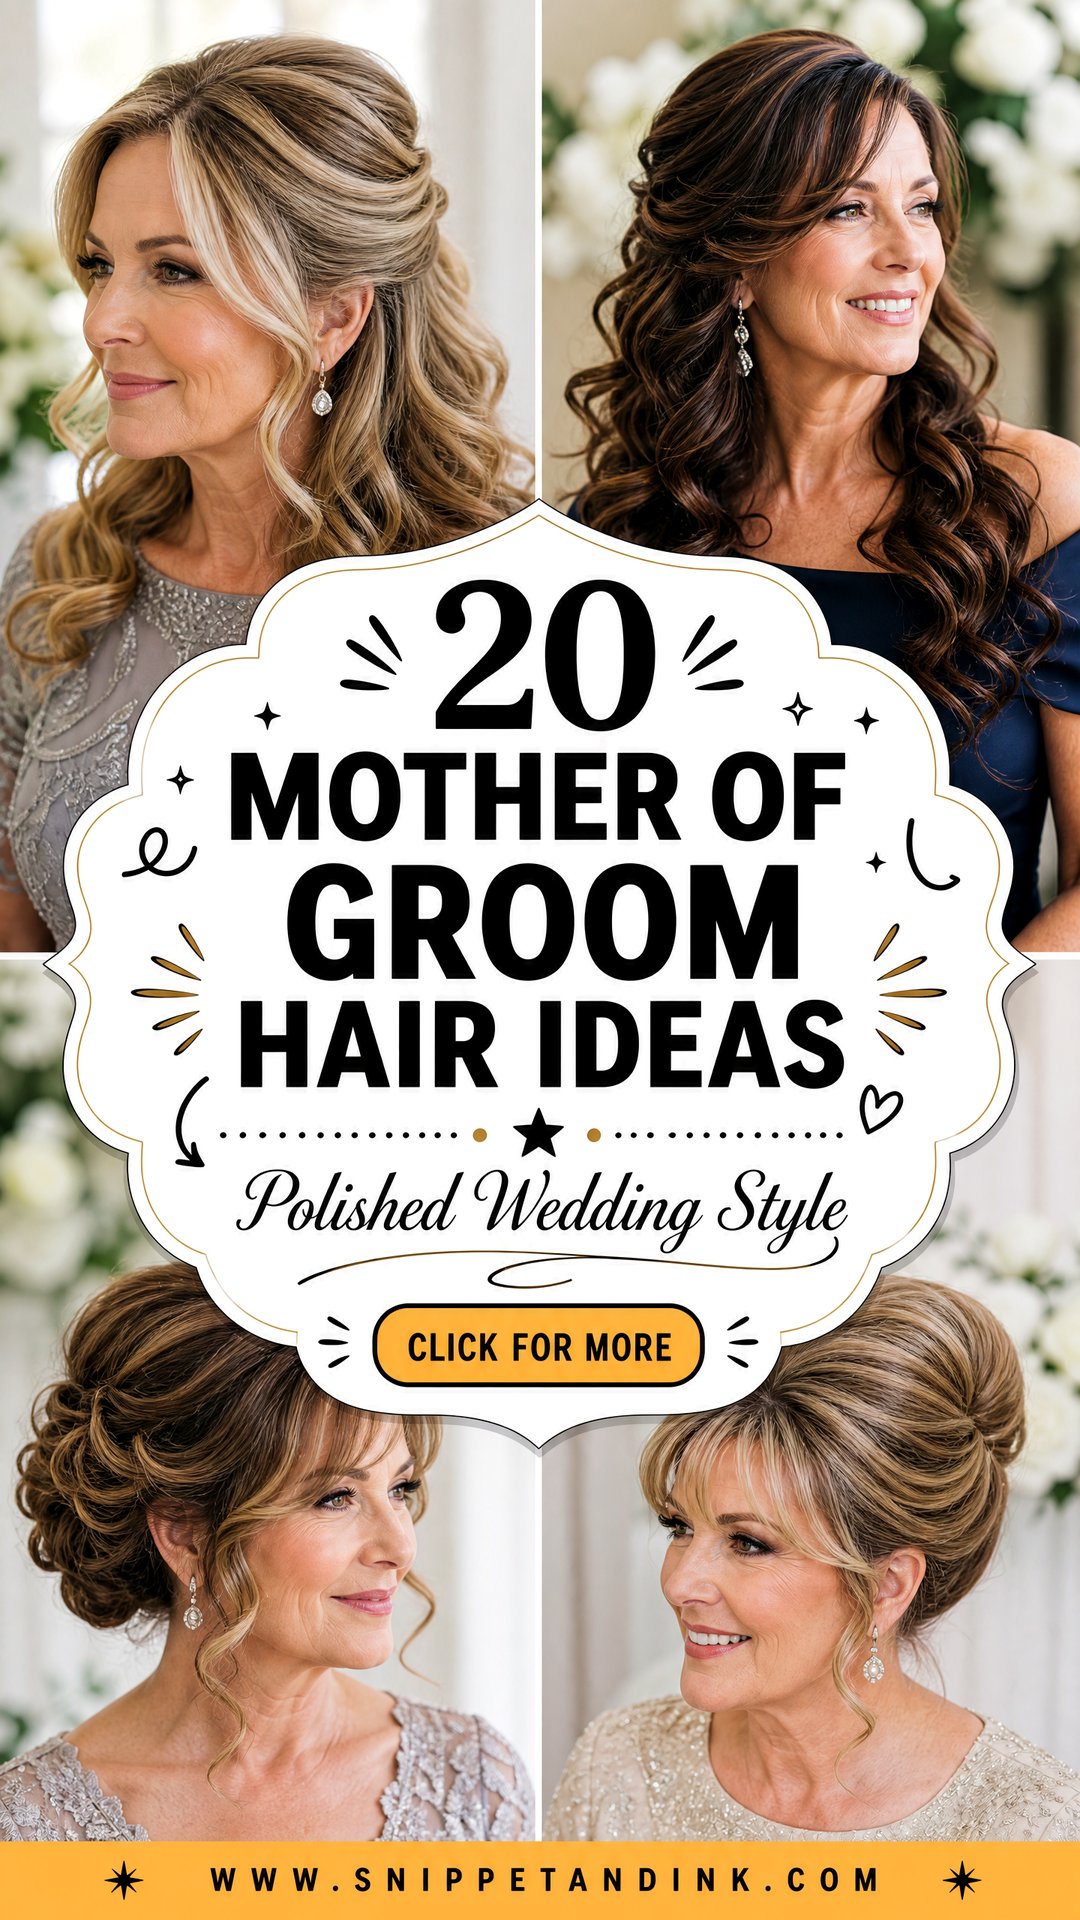
Who Does Your Hair If You’re Getting Ready With the Groom?
This is the logistics question most mothers of the groom realise too late. The bride’s hair team is usually booked for the bride, her bridesmaids and her mother, often in a suite on the other side of town. The groom’s family is rarely on that schedule unless someone asks.
So ask early, ideally as soon as the bride has booked her stylist. Some teams can add one more person; others are already at their limit for the morning. If there isn’t room, book your own stylist or a salon appointment close to where you’re getting ready. Plan on roughly 45 minutes to an hour for an updo and about half that for a blowout or cut-based style.
Working backward from the photos
Find out when the family portraits are, then aim to be finished at least an hour before. I’d much rather a mum sit with finished hair for a while than rush to the car. Wear a button-front shirt to the appointment so nothing has to go over your head afterward, and bring any clip, comb or hat you plan to wear so it can be fitted into the style rather than pushed in later.
1. Low Chignon for Mother of the Groom
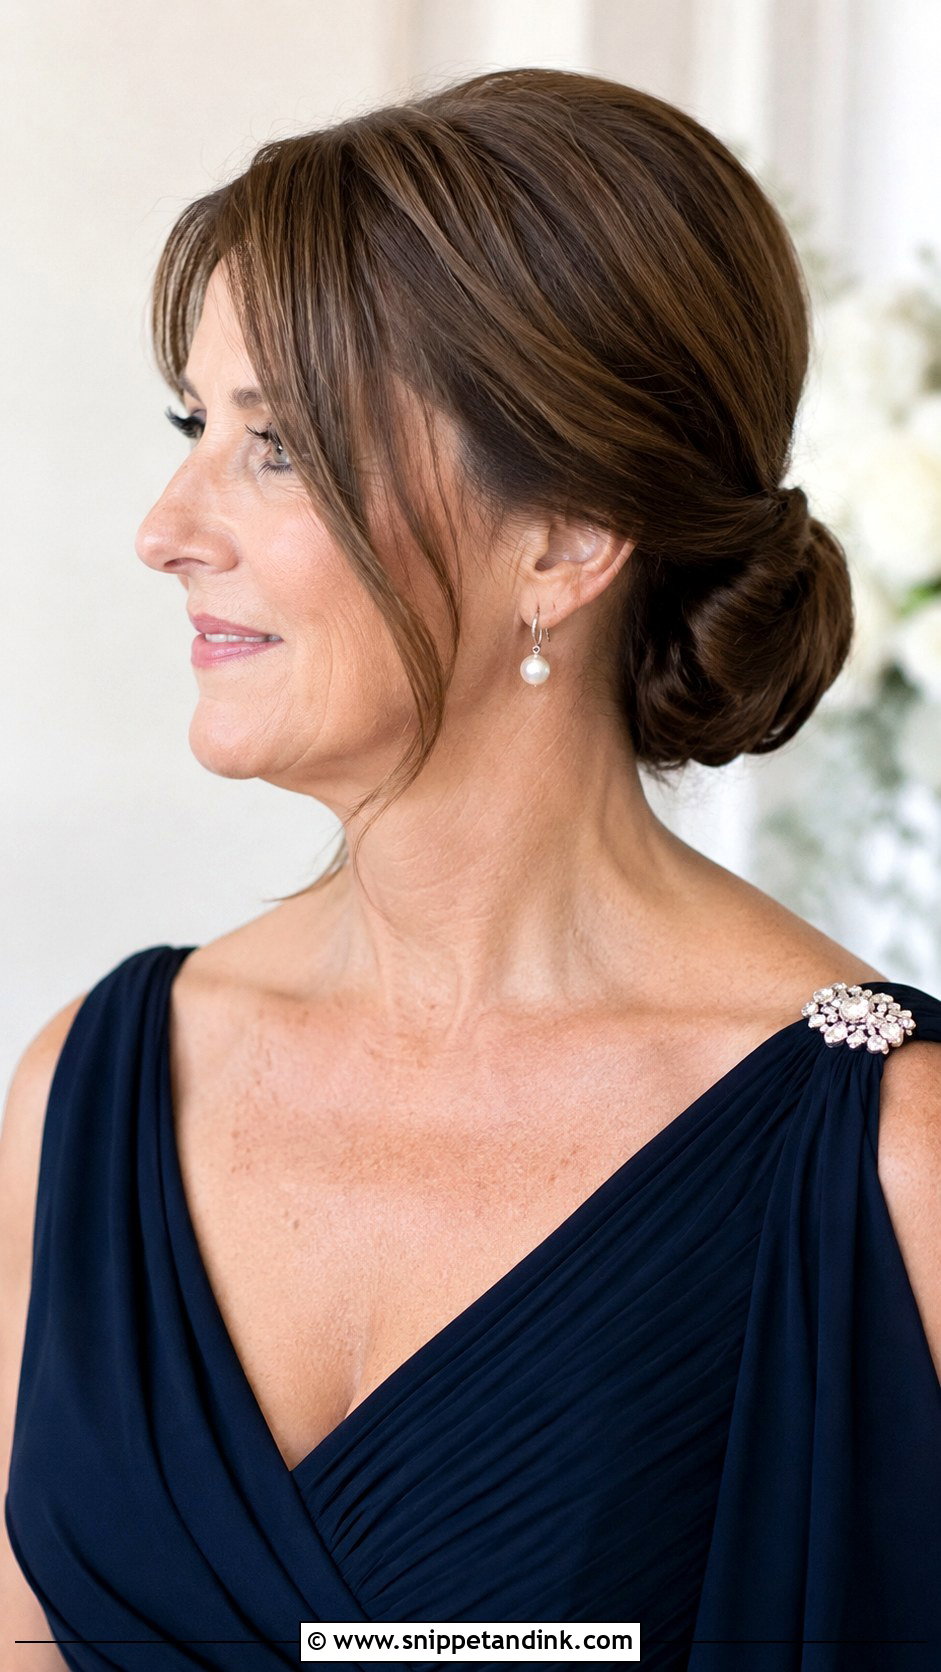
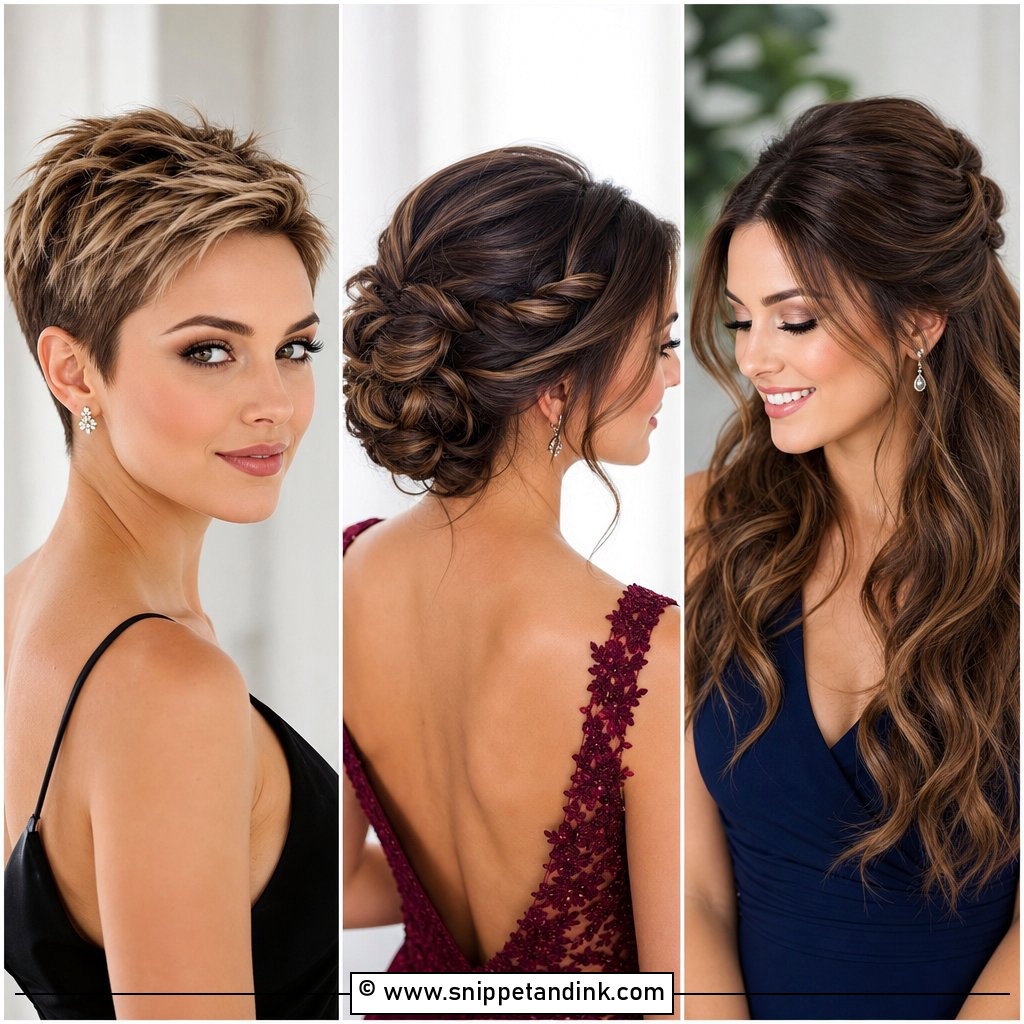
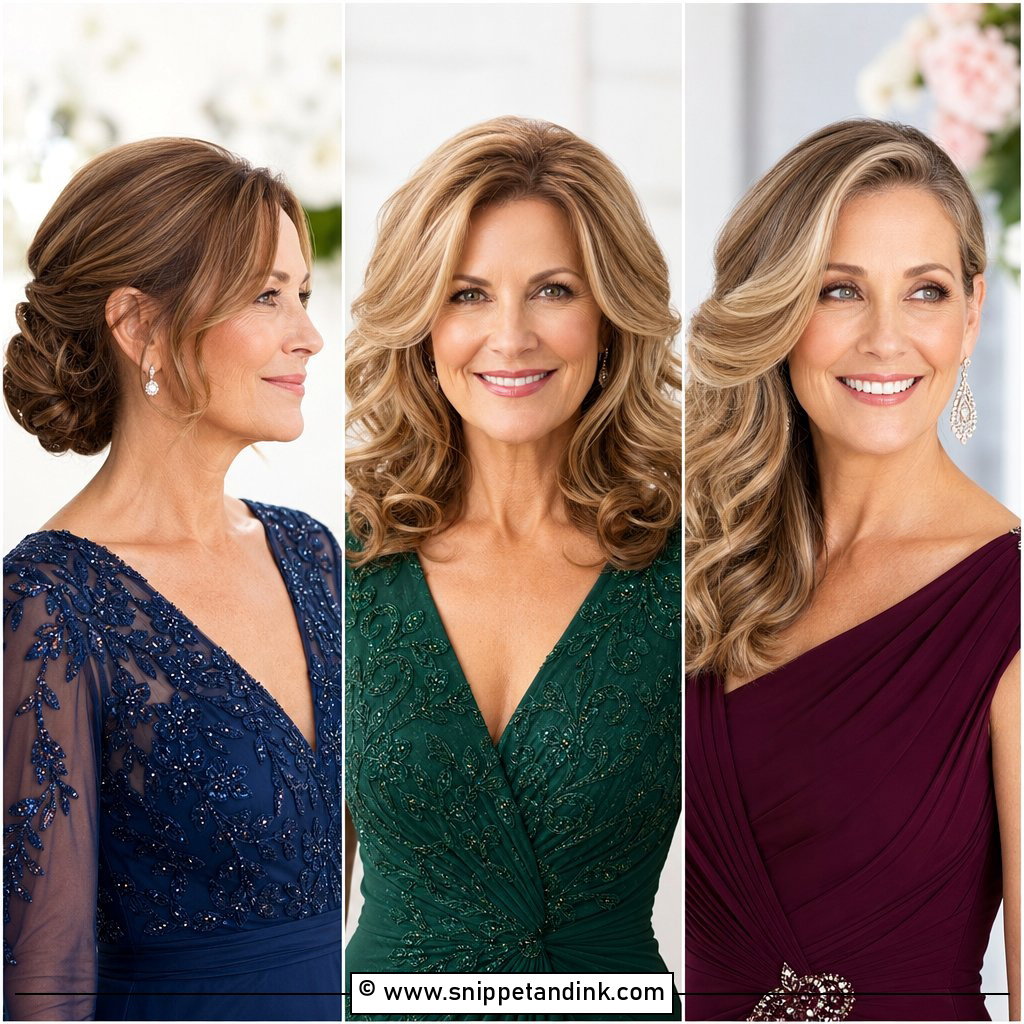
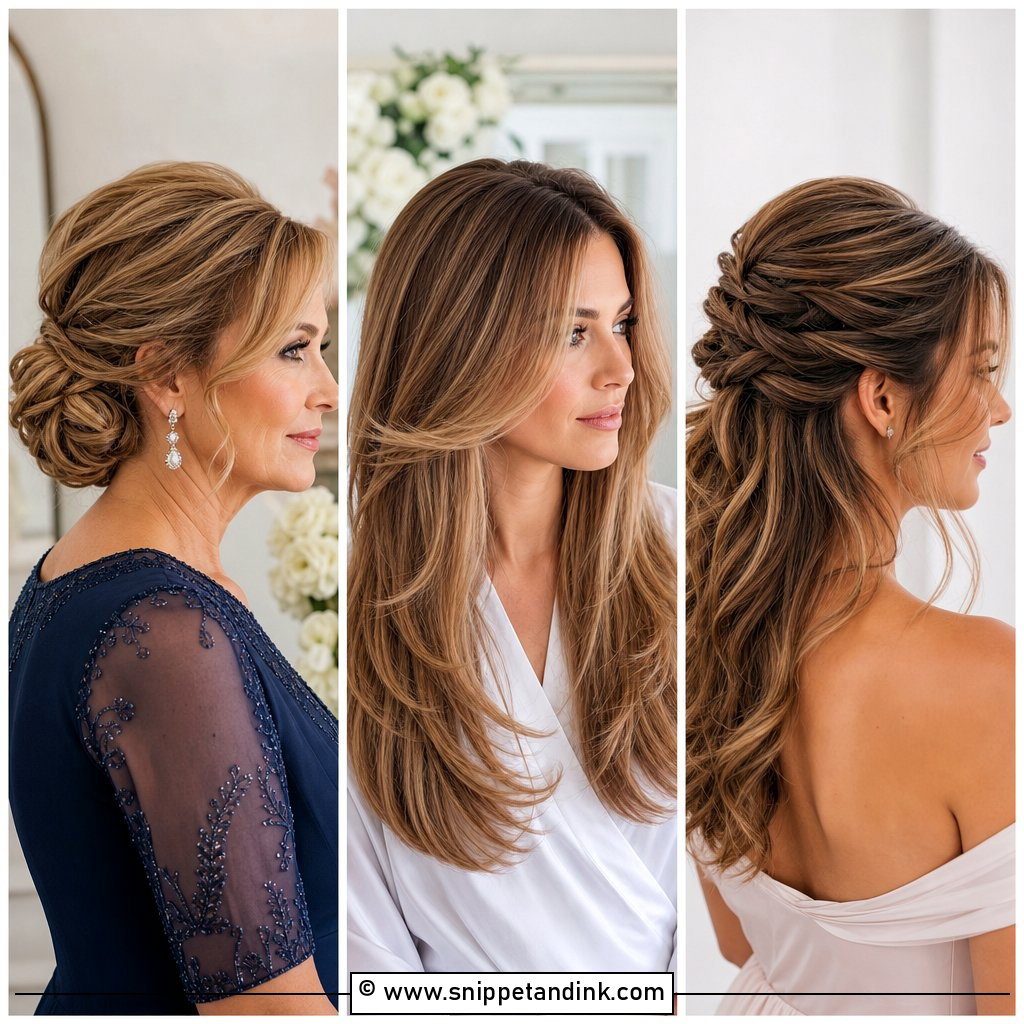
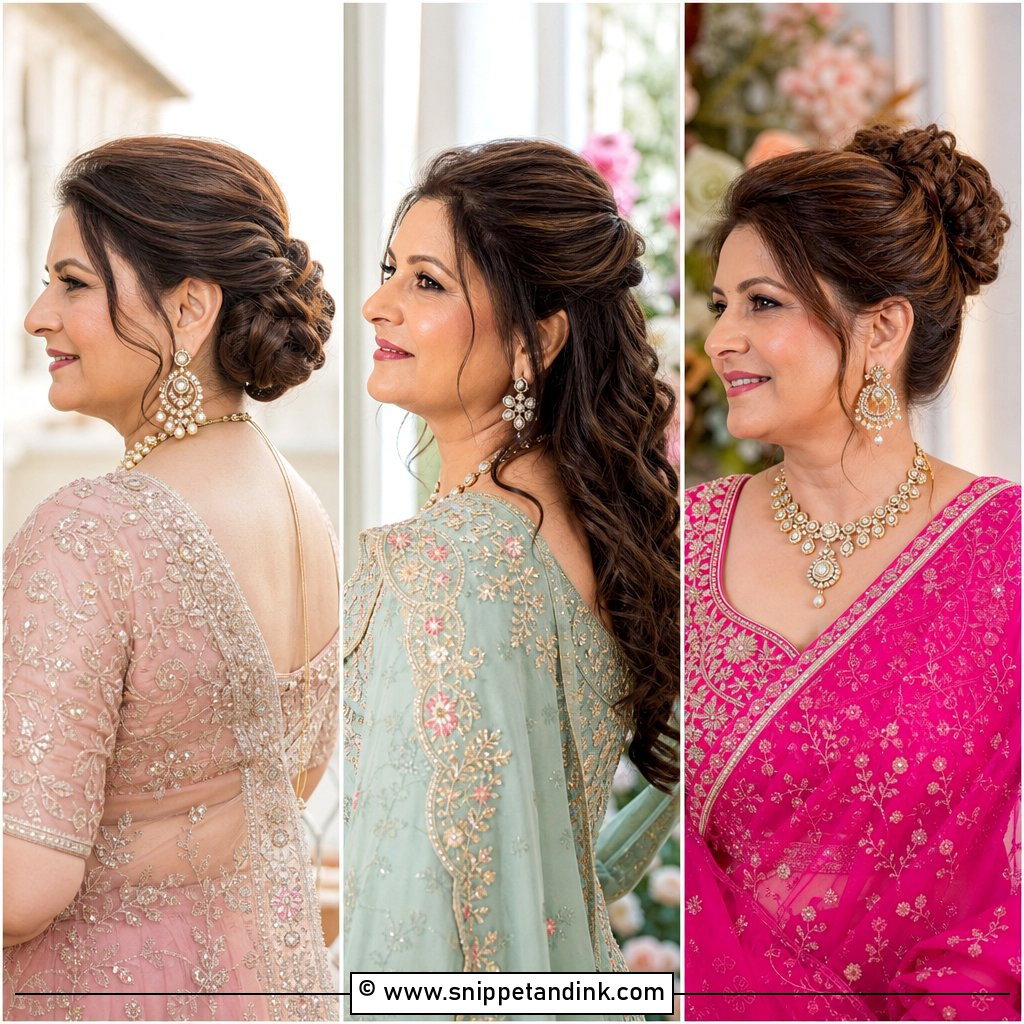
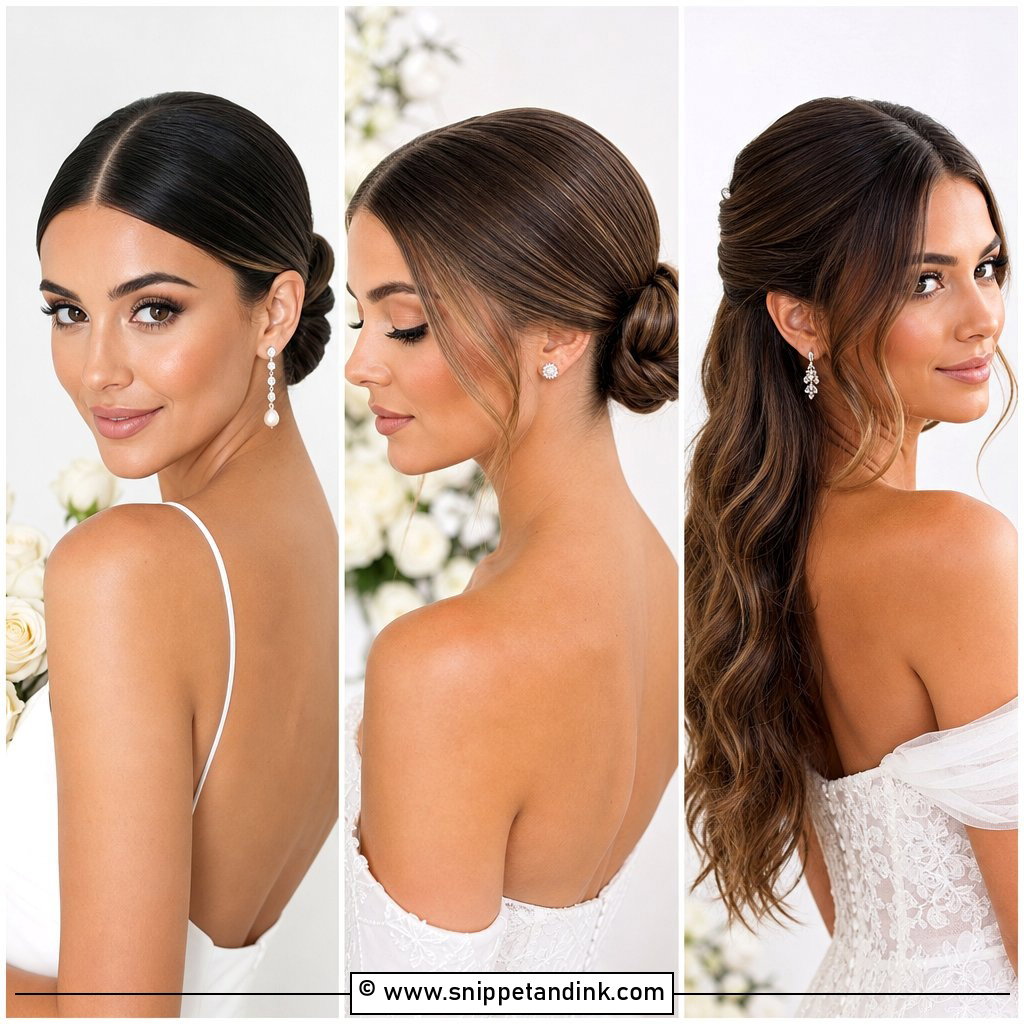
If I had to pick one style that suits almost every mother of the groom, it would be the low chignon. It sits at the nape, so it doesn’t fight a fascinator or a hat brim, and it shows off earrings and the neckline. Medium to long hair works; shoulder length is the minimum. I add a few loose strands for softness or keep it sleek for a black-tie room. The reason it outlasts most styles is the pin structure underneath: the weight sits low on the skull, where hugs and dancing barely move it.
2. Classic French Twist Updo
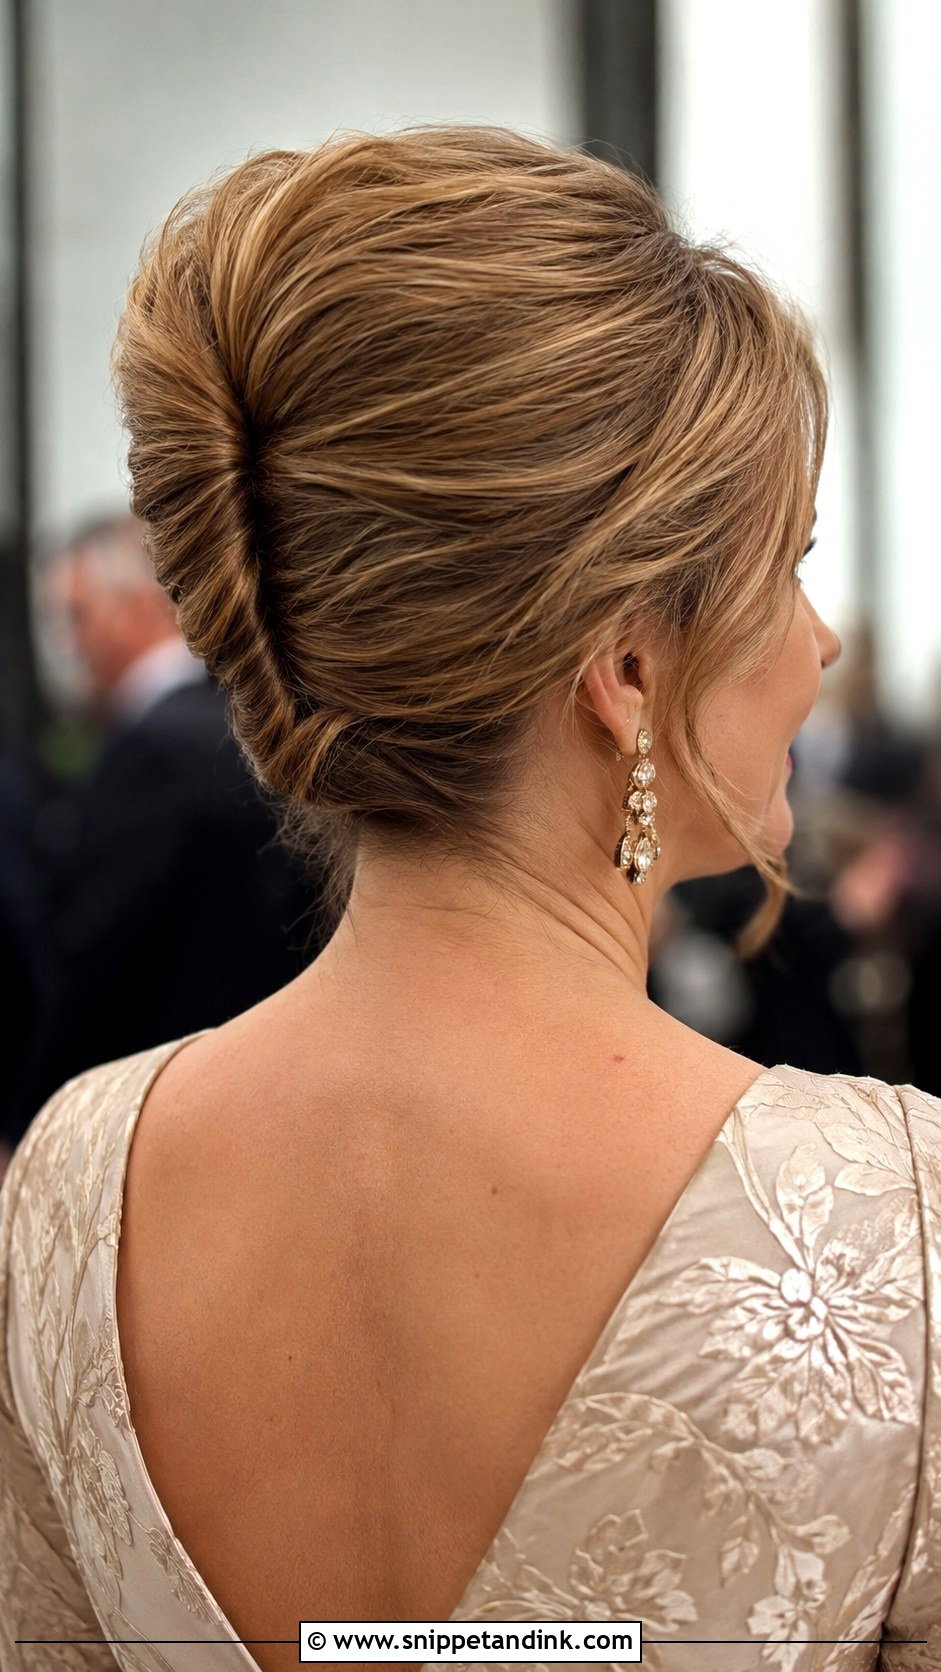
A French twist rolls the hair upward along the back of the head and tucks the ends inside the fold, giving a clean vertical line from the nape. Medium length is ideal; very long hair makes the roll bulky, and very short hair won’t reach the seam. I lift the crown slightly so the profile isn’t flat. Its weak point is the top of the roll, where the ends can work loose, so I cross-pin there with two grips locked into each other. Formal gowns and structured dresses are its natural partners.
3. Half-Up Half-Down with Soft Waves
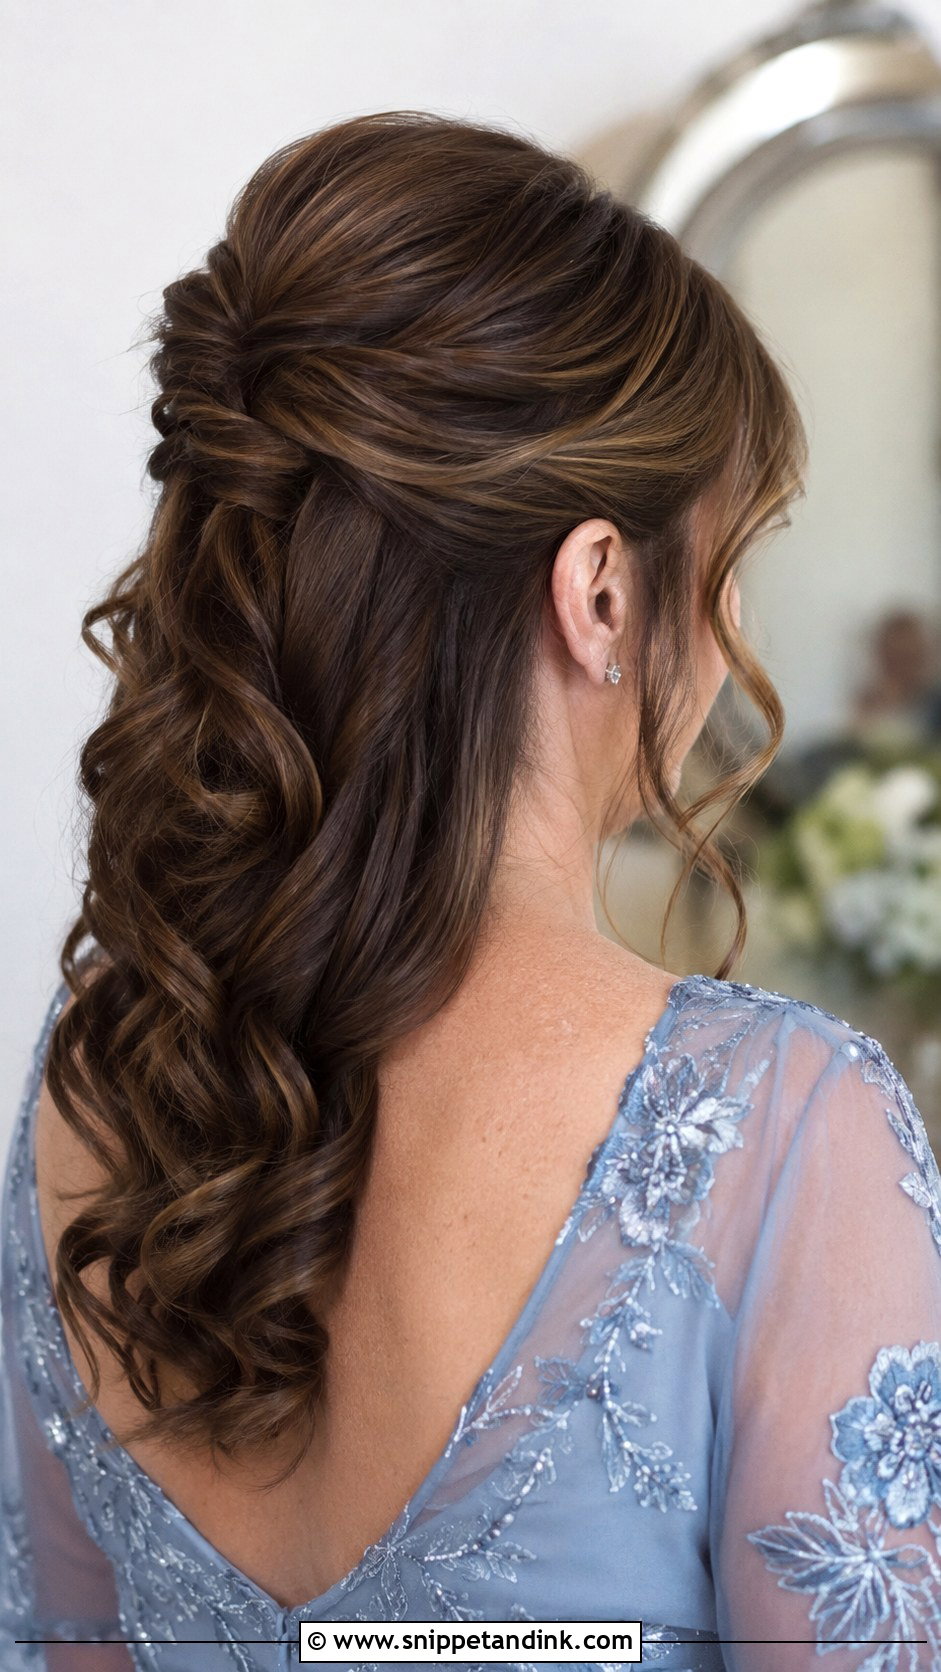
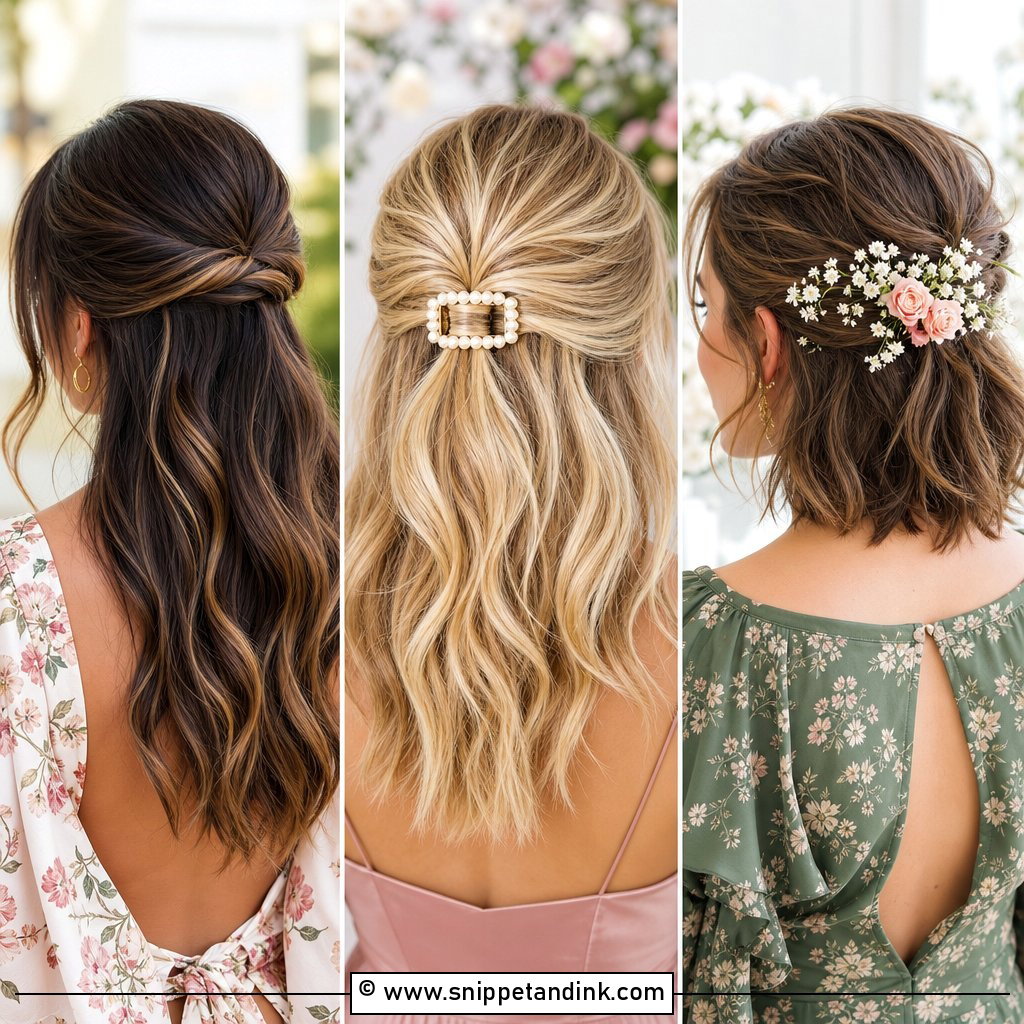
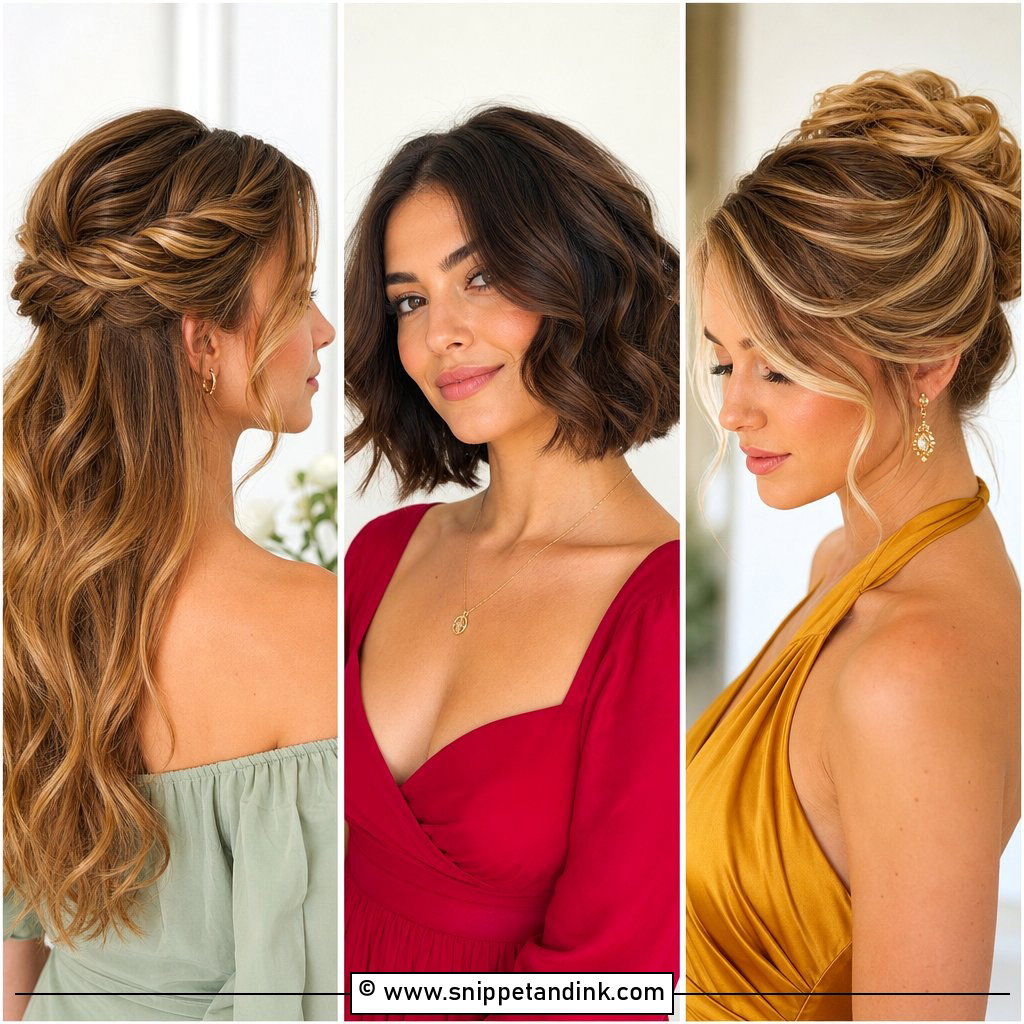
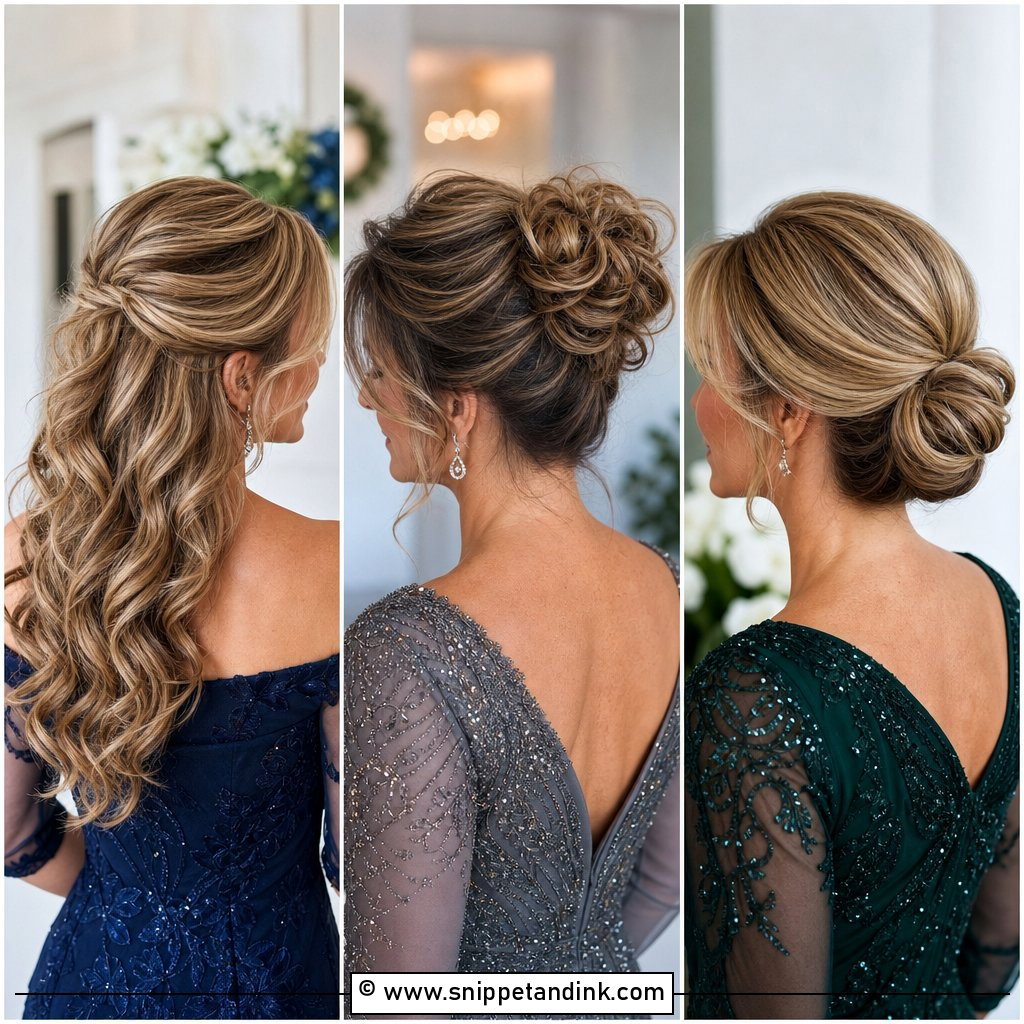
Half up, half down pins the top section back and leaves the length free, which keeps hair out of your face during the vows while still showing movement. The waves underneath are the part that fails first, especially at outdoor and boho weddings with humidity. I curl with a larger barrel, let the curls cool fully before brushing them out, and set the top section with a small hidden elastic under the pins. A sparkly clip dresses it up. Pick it if you rarely wear your hair up and want some structure without the full commitment.
4. Elegant Low Bun with Face-Framing Strands
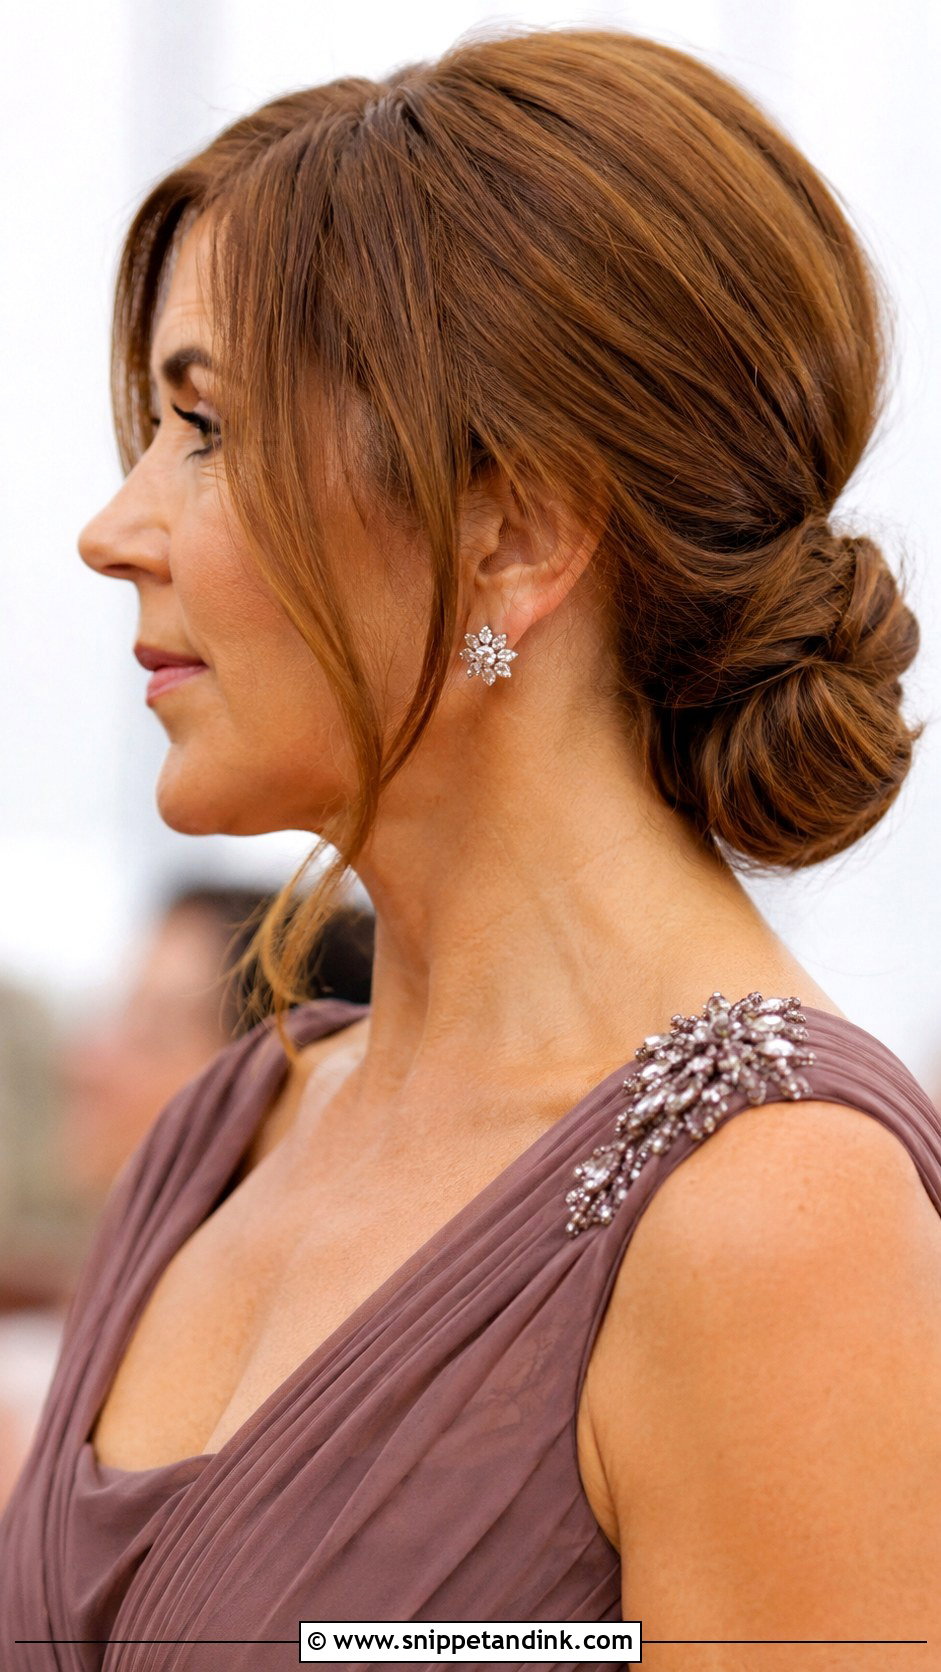
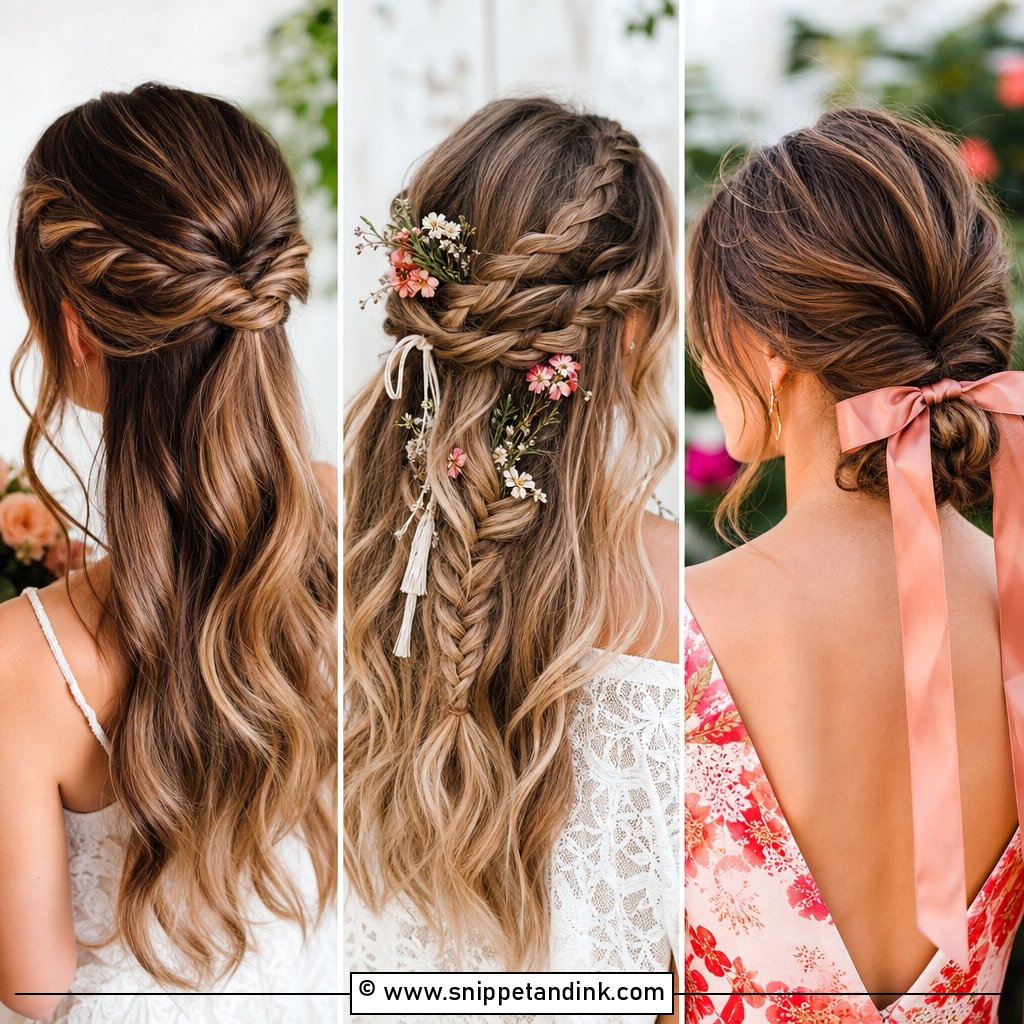
A simple low bun with a few loose pieces is the style I suggest when a mum tells me she hates fussy hair. The knot sits near the nape and the strands at the cheekbones stop it looking severe, which matters more on a mature face than on a 25-year-old’s. Medium and long hair suits it best; shorter hair needs a small padding piece to give the bun body. Smooth it for an evening reception, rough the surface up a little for daytime. My one warning: the face pieces should be cut-length pieces you already have, not long strands pulled out of the bun, which droop by evening.
5. Curled Bob for Mother of the Groom
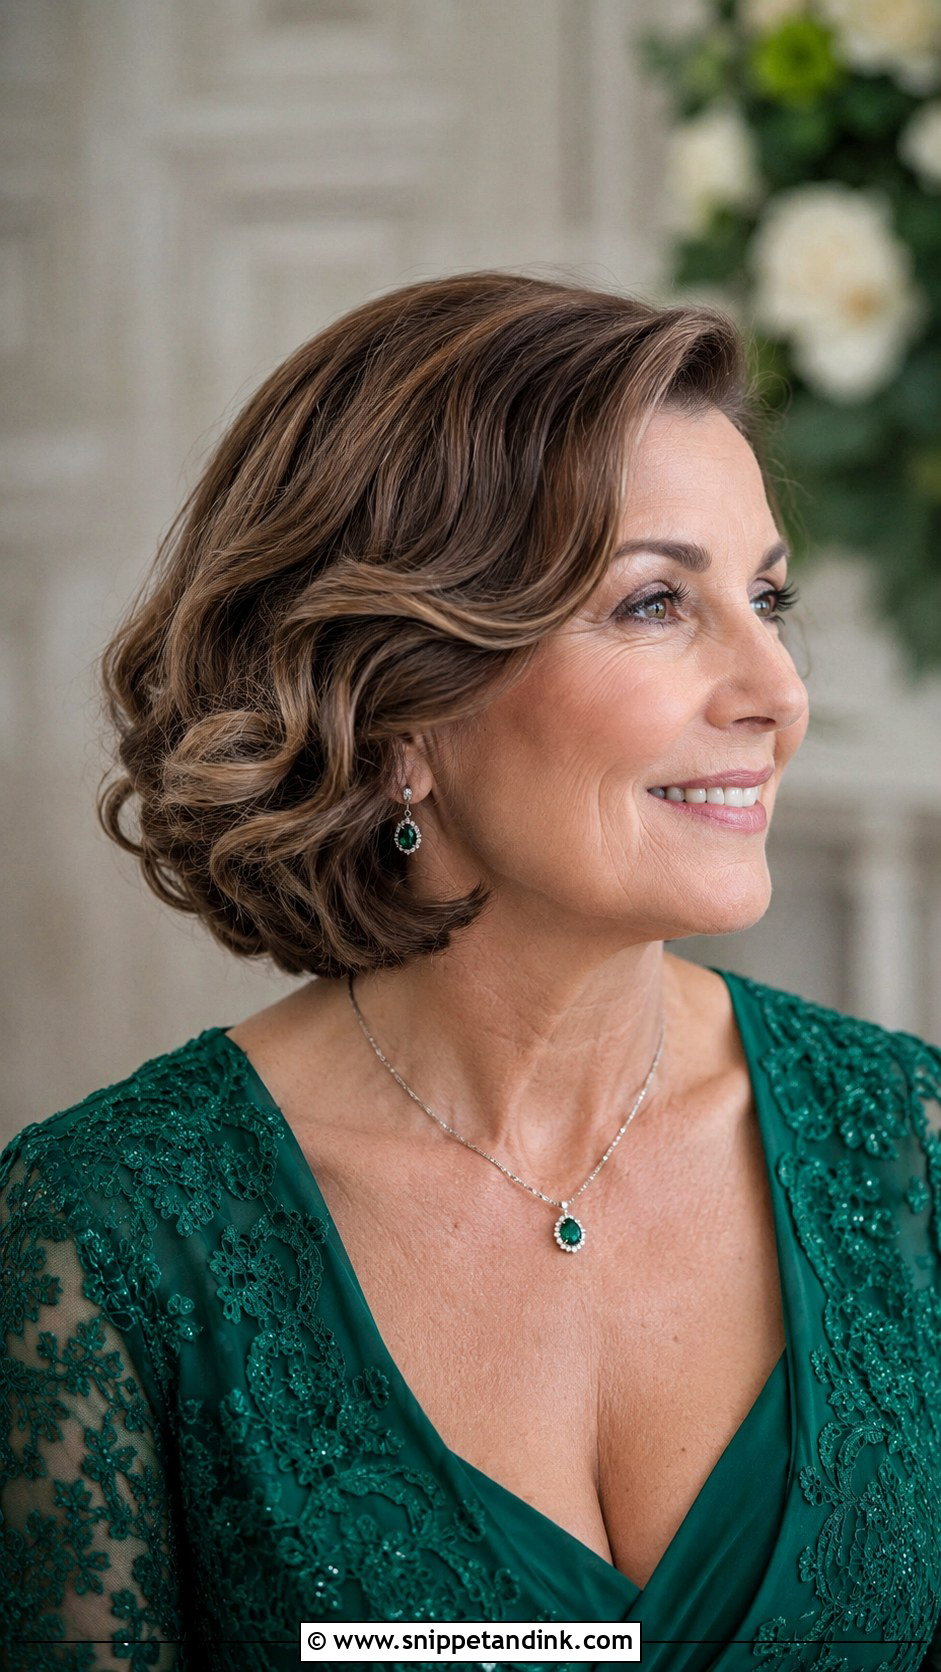
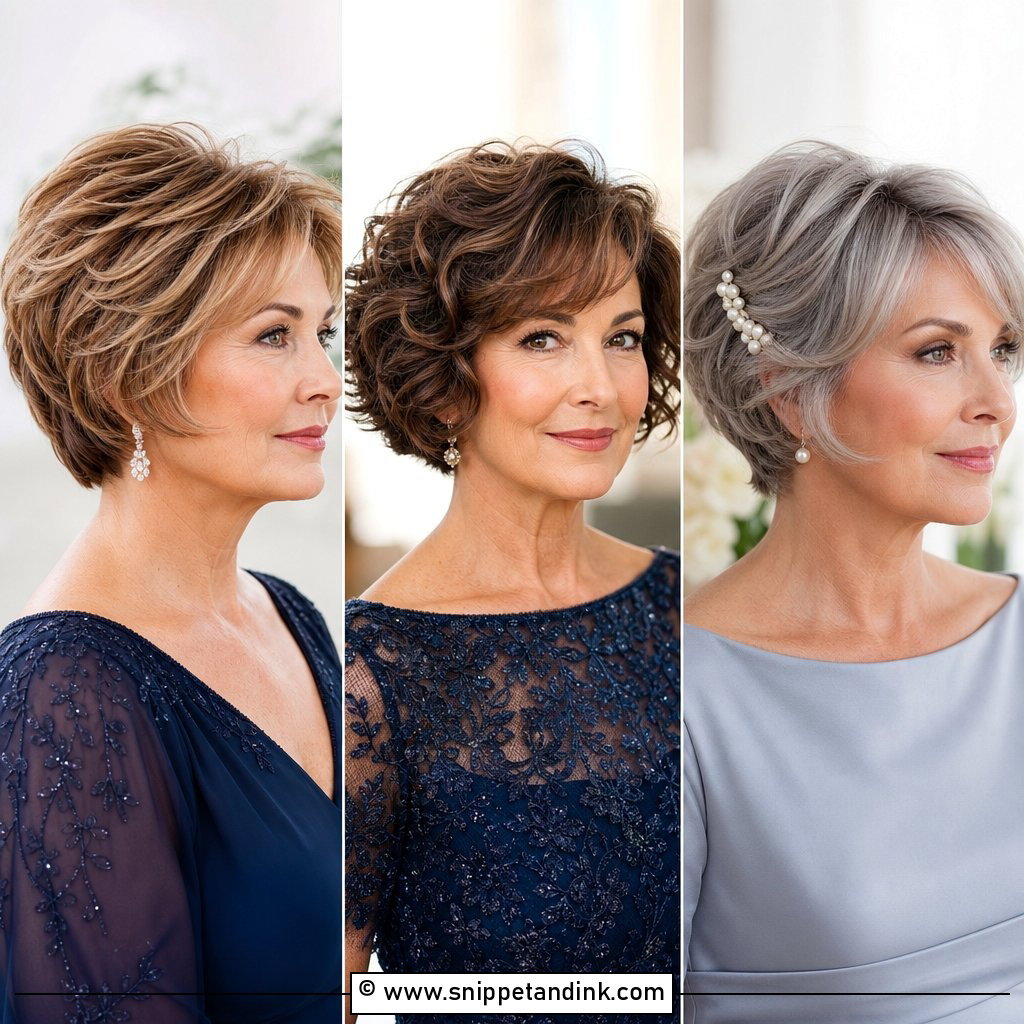
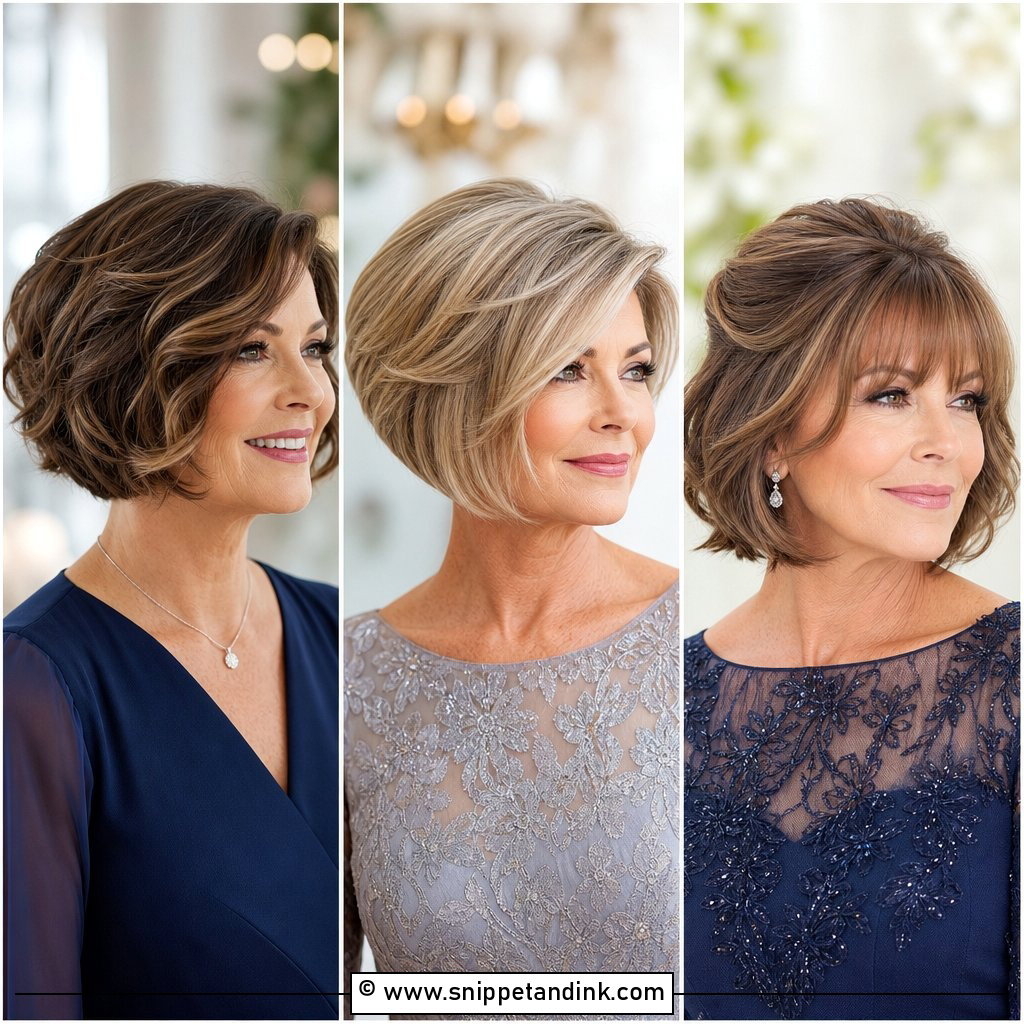
A bob is the easiest cut I style for a wedding, because there’s so little to go wrong. Curling it with a medium barrel, alternating the direction of each section, gives volume and movement without making it look set. A side part adds shape around the face. The thing I always ask for is a trim about a week before, not the day before, so the line has softened slightly. Fresh blunt ends can look harsh in close-ups, and a week lets the cut settle into its natural fall.
6. Sleek Pixie Cut with Volume
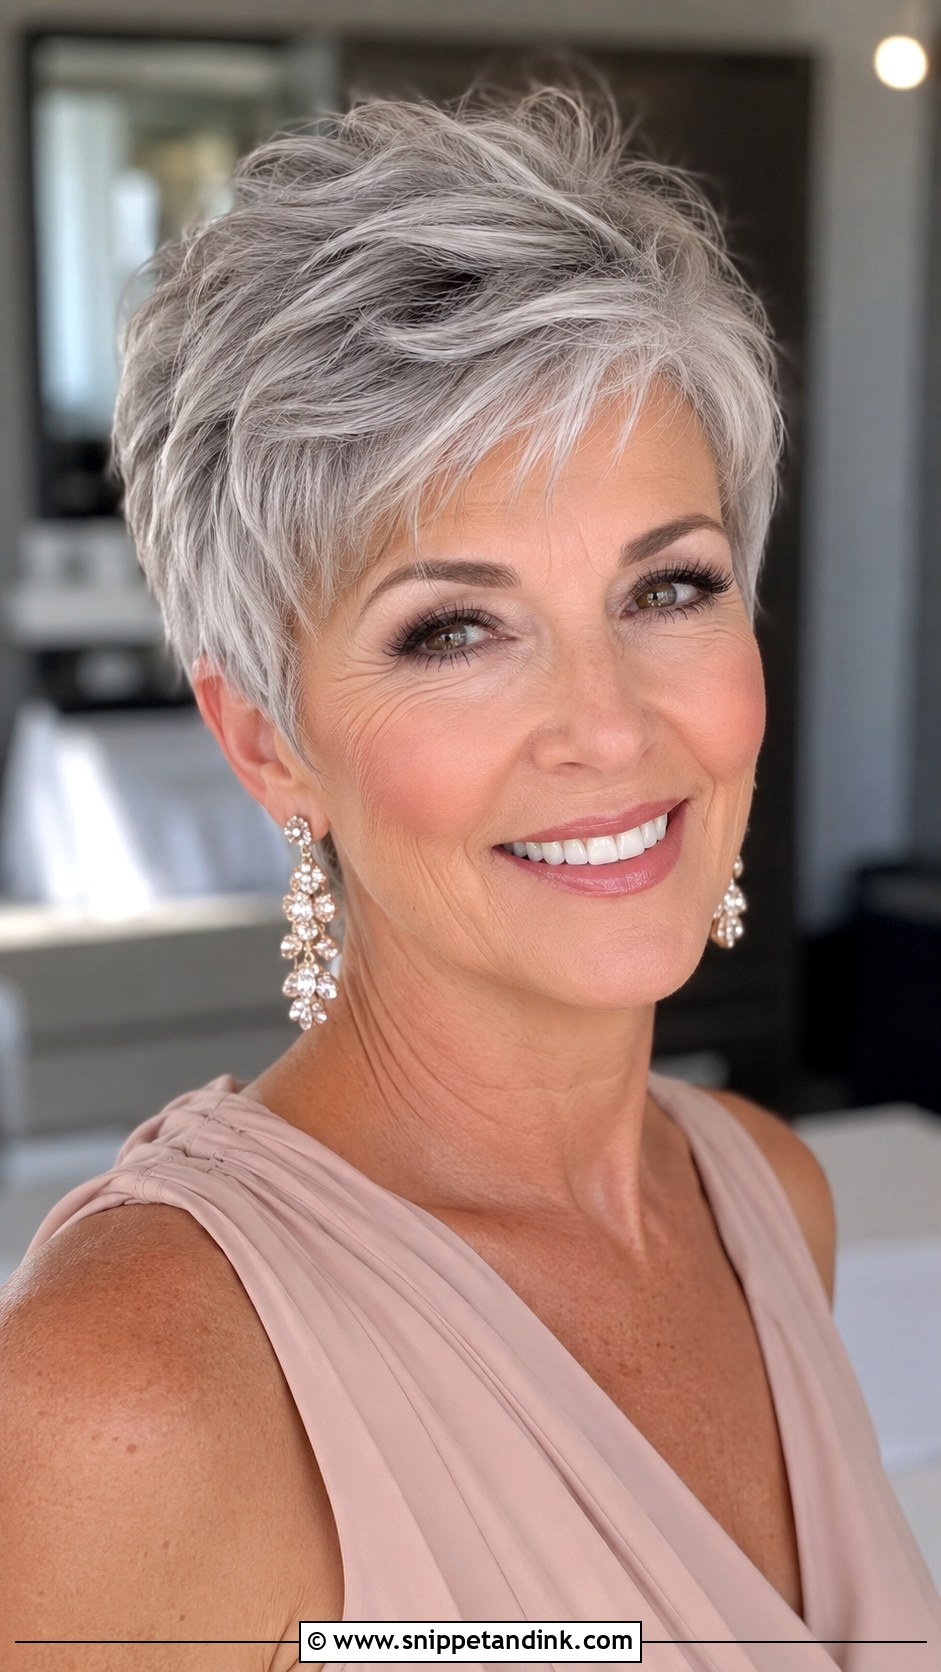
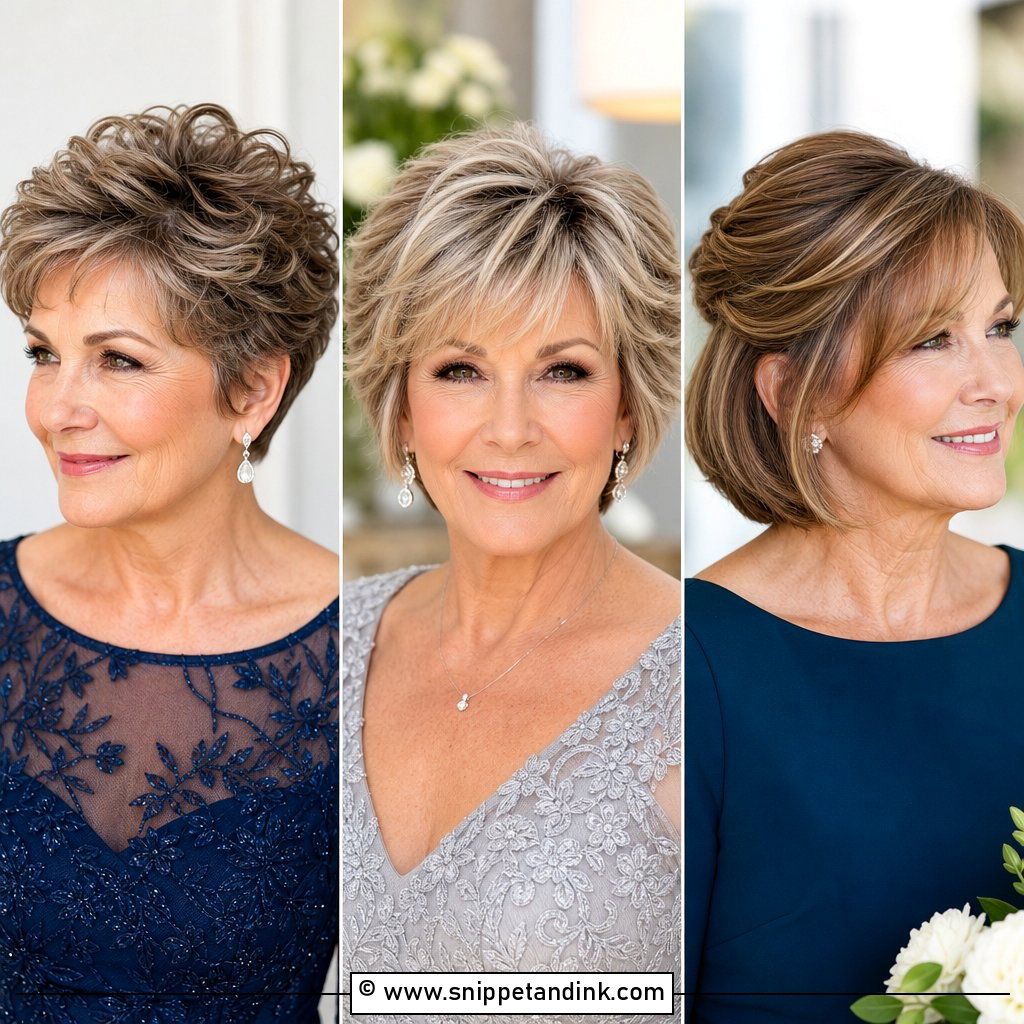
Short hair can absolutely be dressy, and a pixie cut styled with care is one of the easiest looks to keep right all day. The work is in the crown: a little root-lift spray and a blow-dry against the growth direction give height that holds. Textured pieces through the top make fine or thinning hair read thicker. It needs almost nothing during the reception, just a quick hand through it in the mirror. Statement earrings finish it, since there’s no hair competing for attention.
7. Vintage Finger Waves for a Retro Look
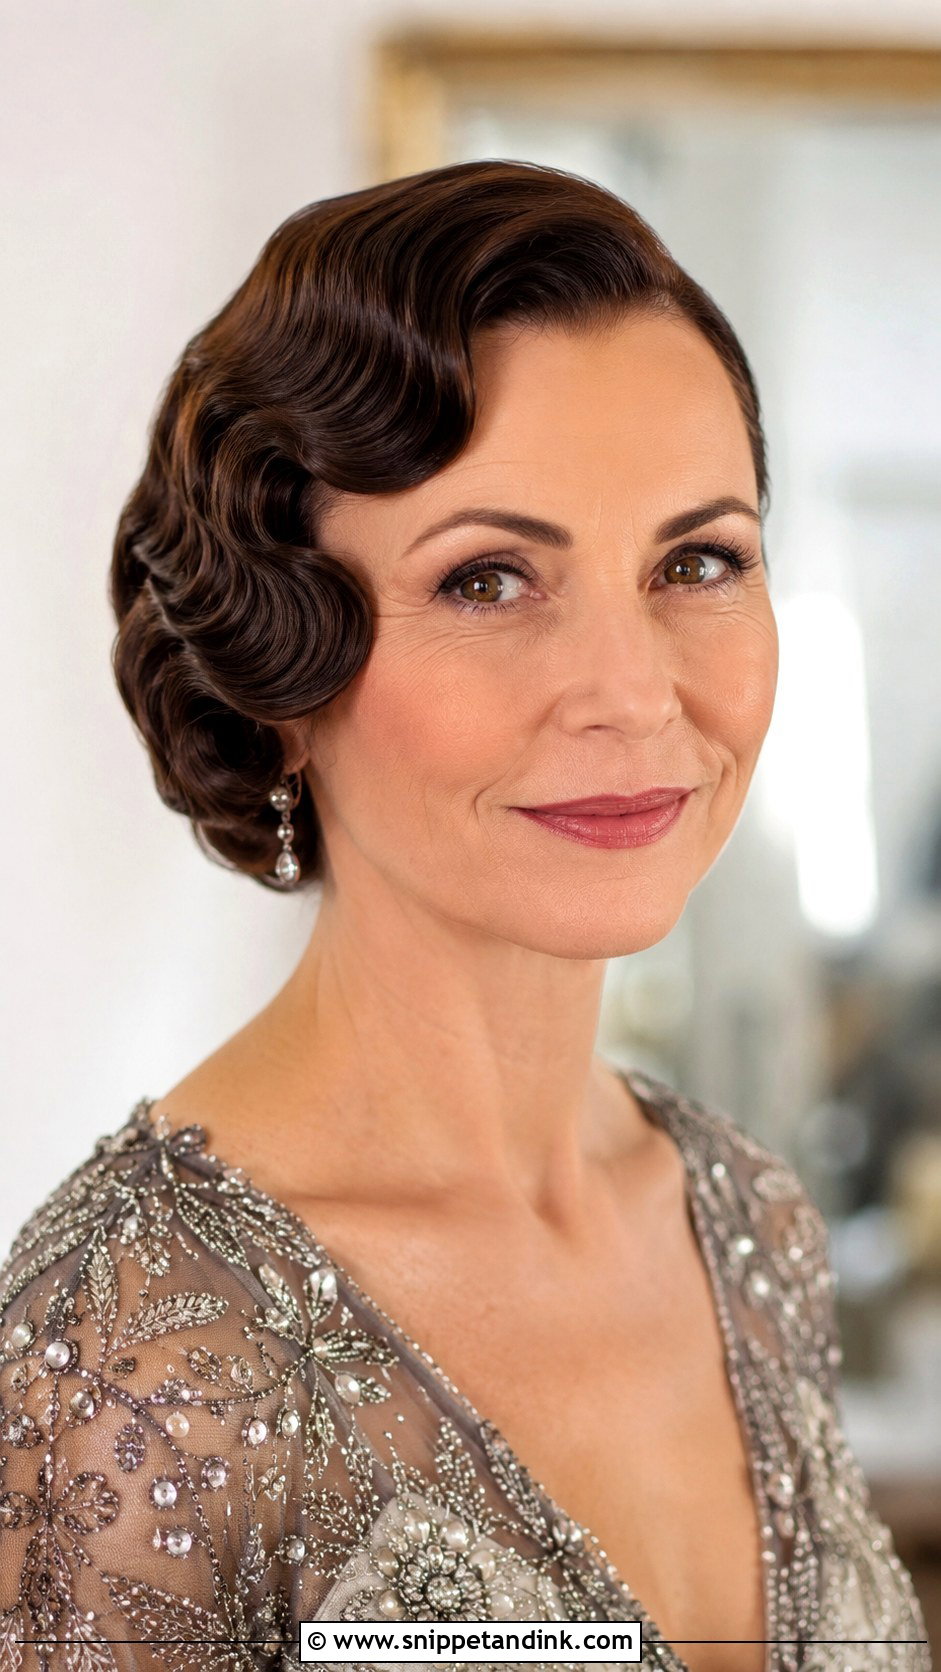
Finger waves are a 1920s set: S-shaped ridges pressed into wet hair with gel and fingers, then left to dry in place. They’re glamorous, but they’re also one of the hardest looks on this list to get right, and I’d only book them with a stylist who has done them before. Short and medium hair hold the ridges best; on long hair the waves usually run along the sides into a low pinned bun. They suit a Gatsby or vintage theme. Done well, they don’t move all night, which is the whole appeal.
8. Braided Updo with Soft Waves
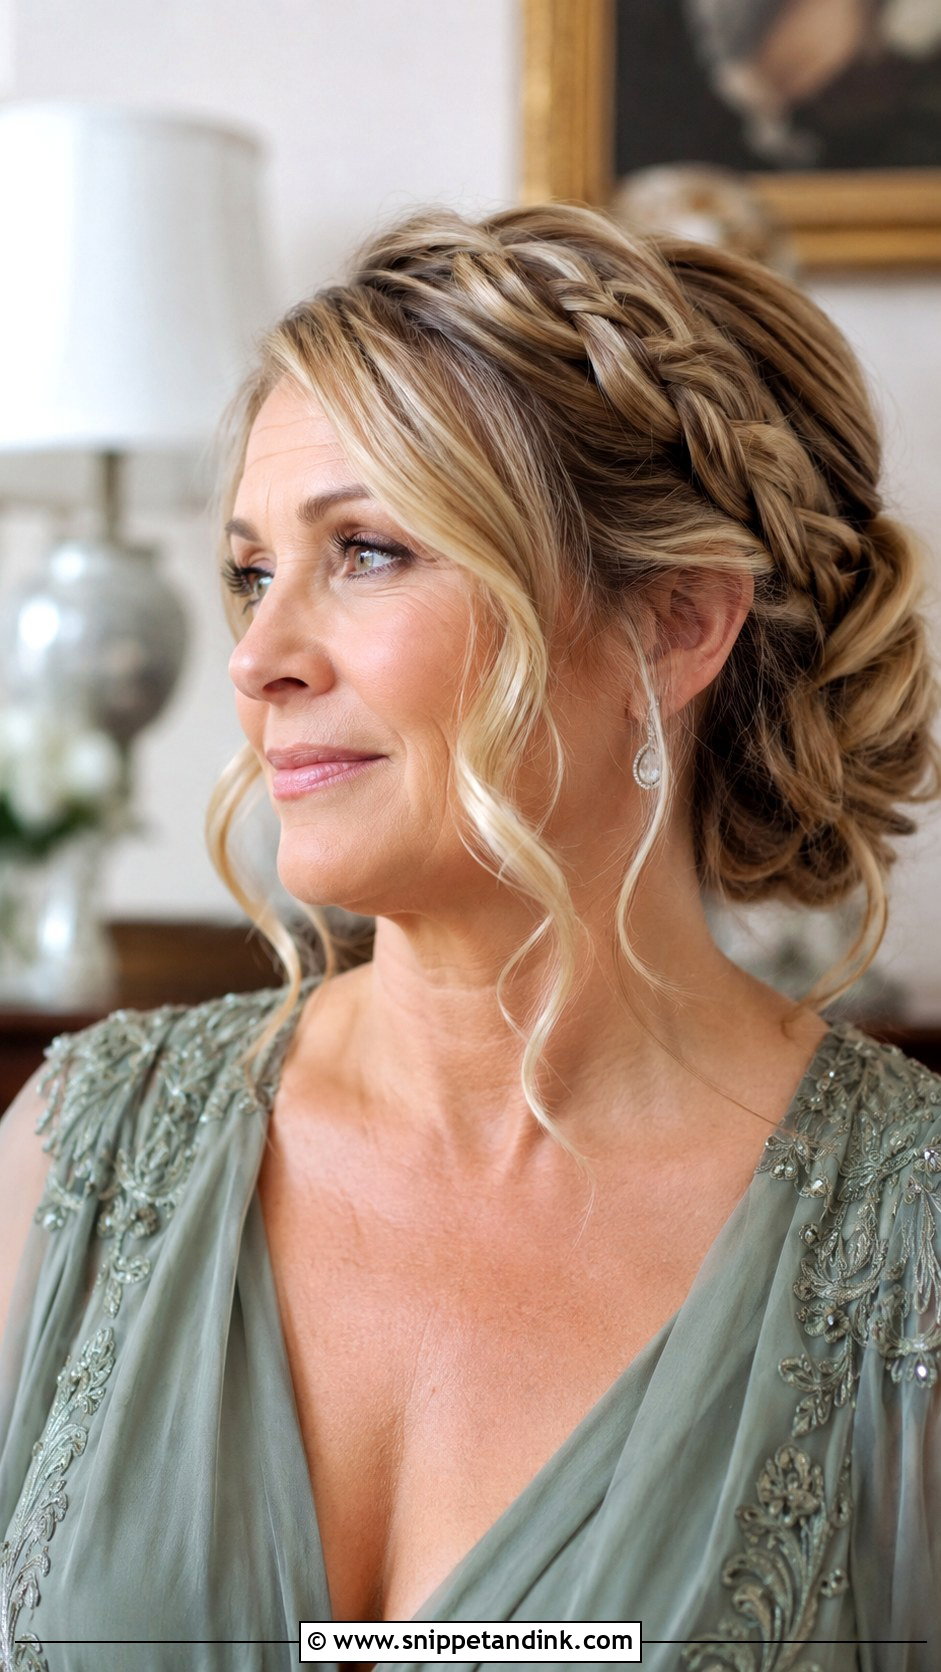
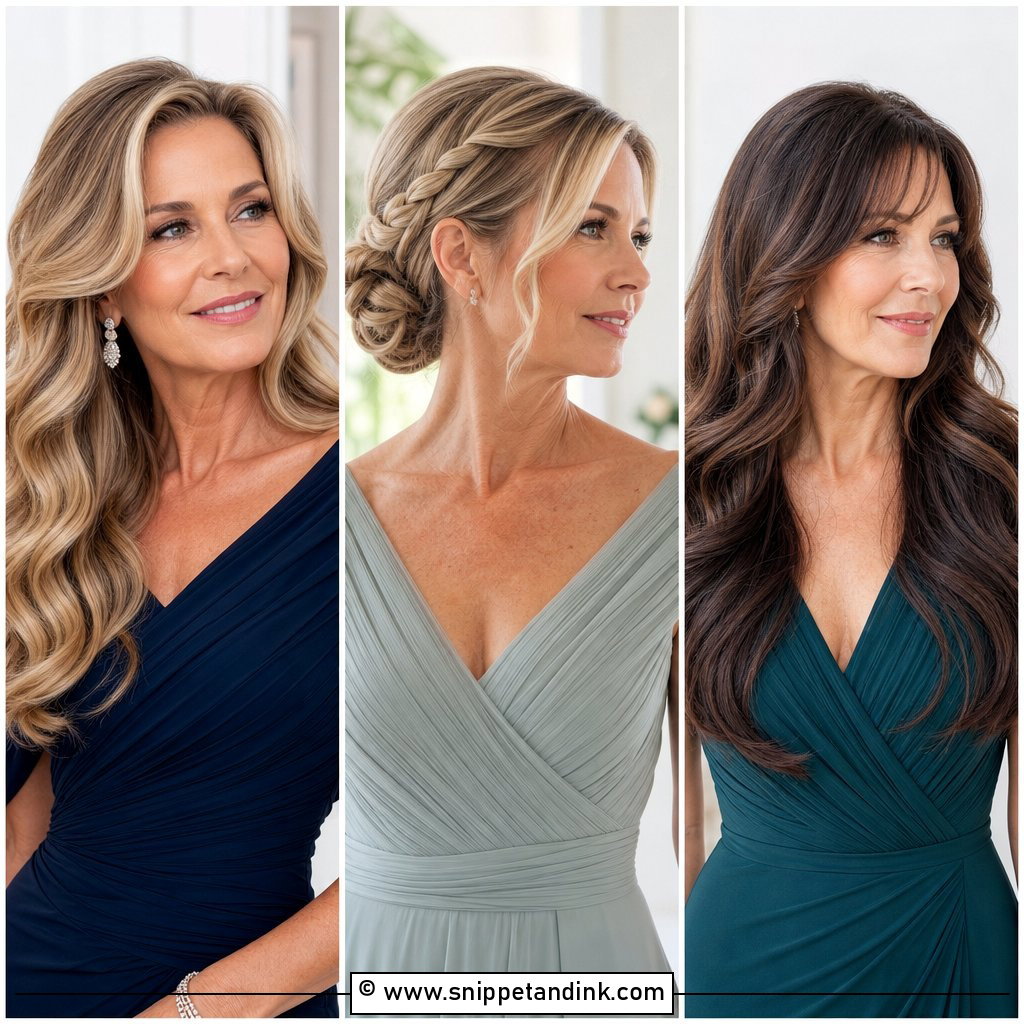
Braids add detail without bulk, which makes them useful on medium hair that would otherwise give a small, plain bun. I weave a braid through the updo and leave gentle waves around the face. A loose, pancaked braid feels boho; a tighter one reads more formal. What people underestimate is how secure braids are. Each crossover locks hair in place, so a braided updo usually holds better through the ceremony and reception than an equivalent loose twist.
9. Long Layered Bob with Side Part
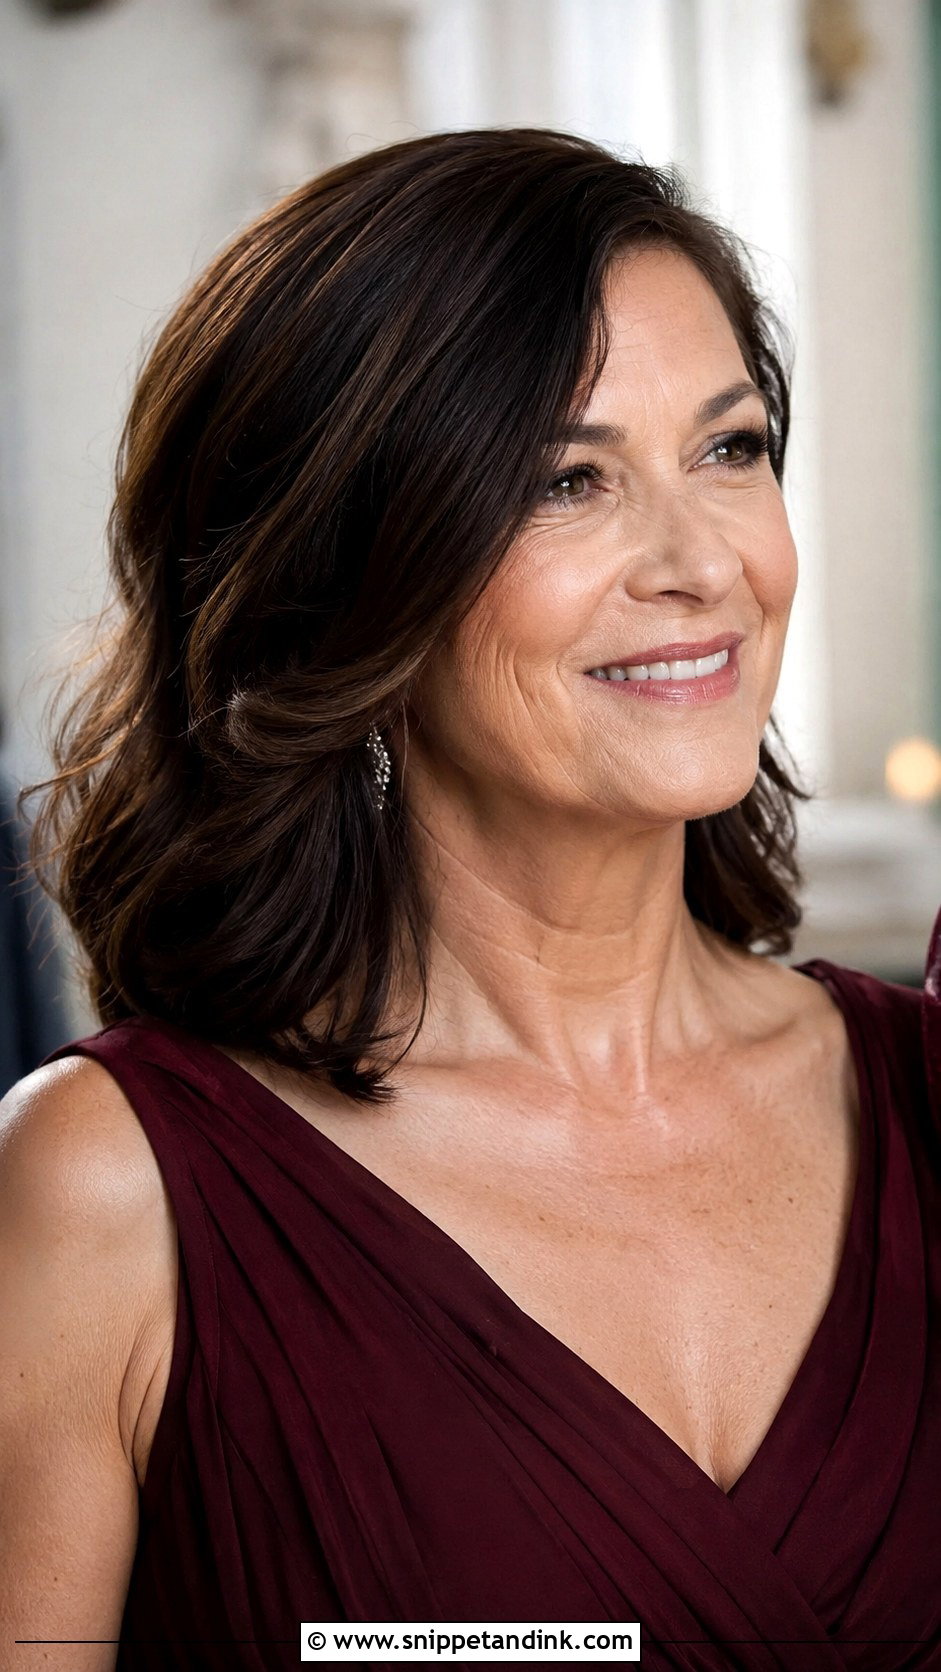
A long bob with a deep side part is the most forgiving cut-based look here. The asymmetry flatters most faces, and the layers give it shape without needing to be curled. You can wear it exactly as you normally do with a fresh trim, which is the main reason mums who dislike being styled choose it. If I’m adding waves, I keep them loose and leave the last inch straight. That modern finish keeps the lob from looking like a prom set.
10. Romantic Loose Curls for Long Hair
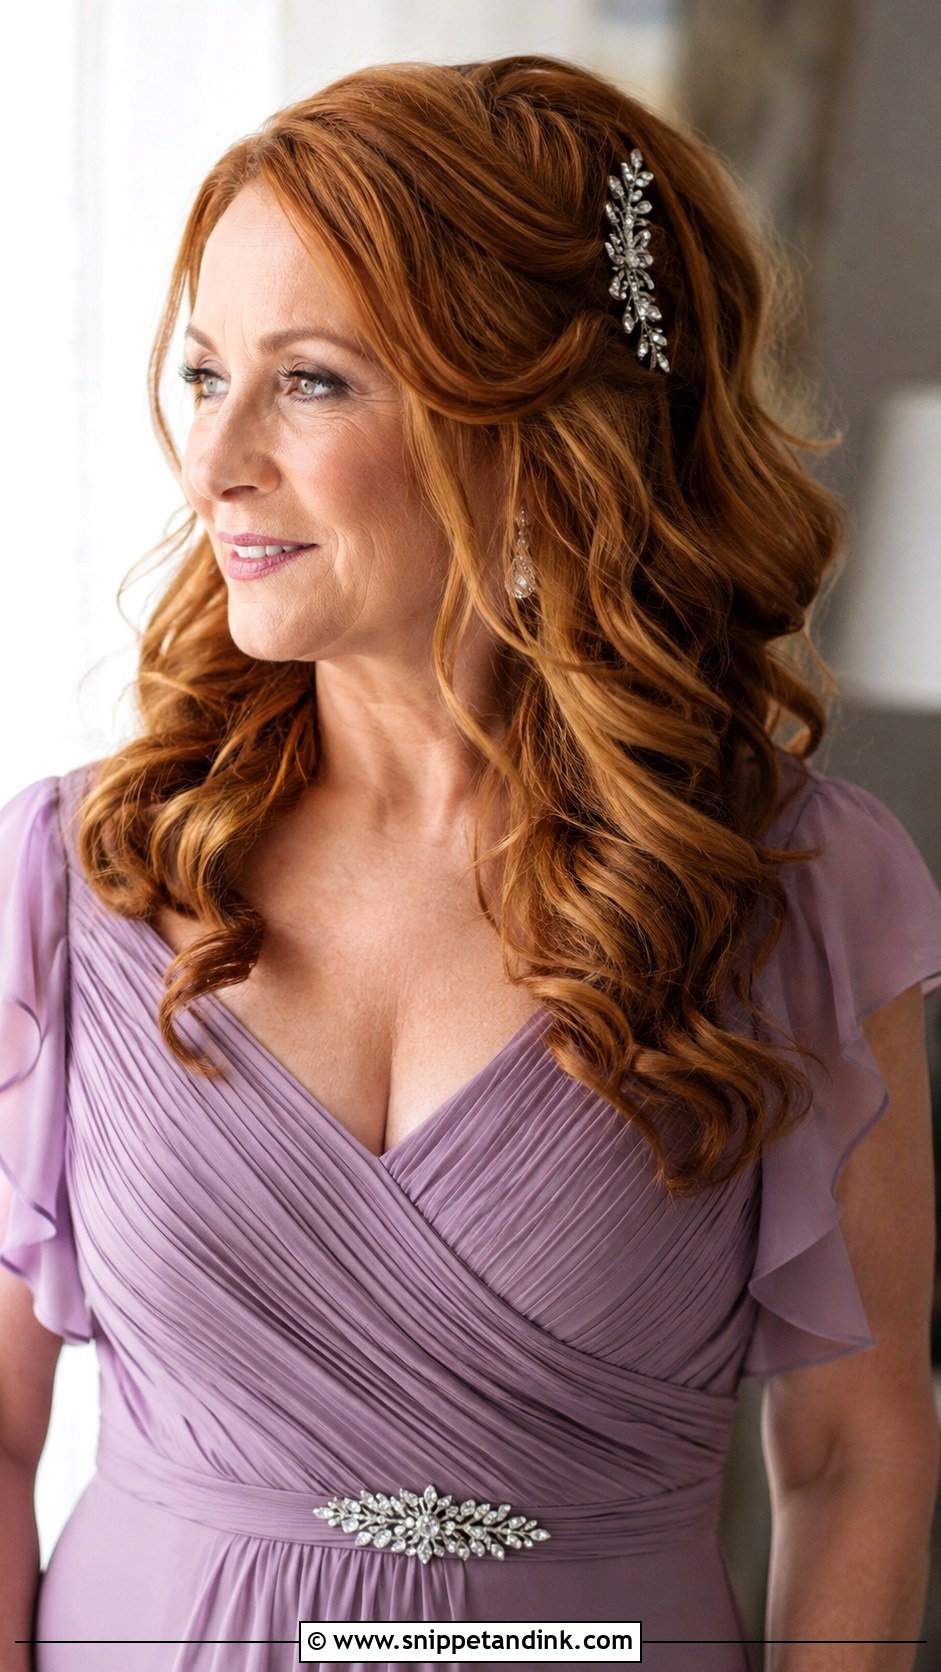
Wearing long hair down in big curls feels easy, but it’s also the style most likely to drop. I use a large barrel, pin each curl while it cools, and only brush out once it’s set, which makes the shape last much longer. A centre or side part changes the framing. Garden weddings and formal gowns both suit it. Be honest with yourself about the weather, though: on a hot, humid day a soft half-up might serve you better, and a sparkly pin can still go in either way.
11. Sleek Straight Hair with a Deep Side Part
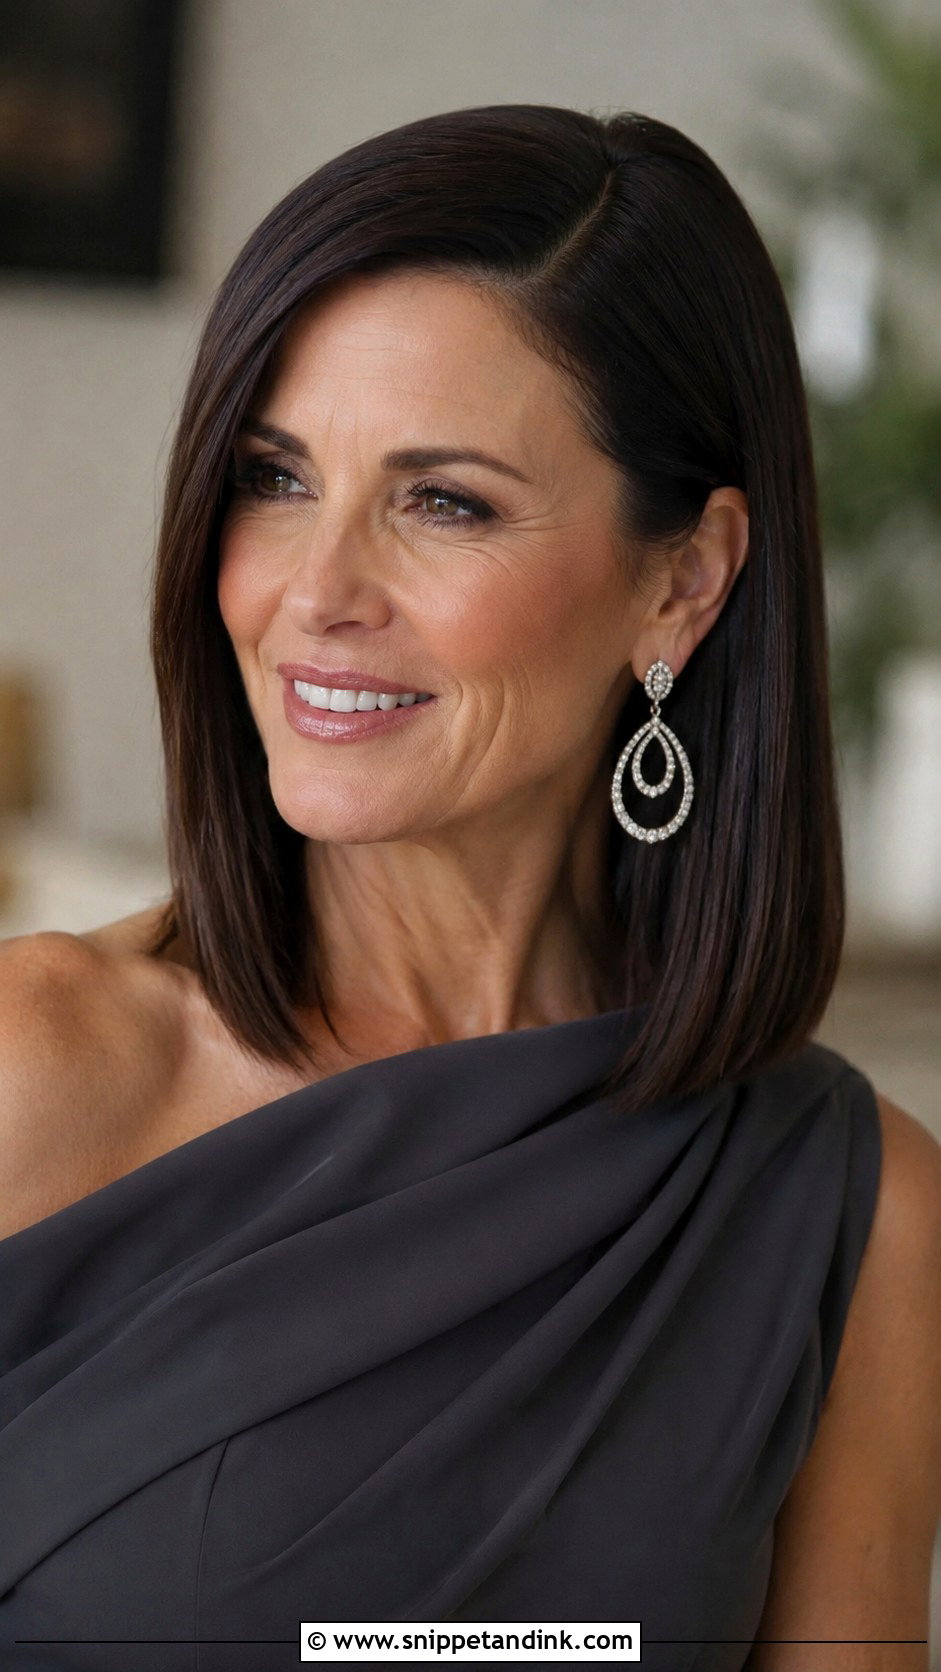
Sleek straight hair with a deep side part is about precision. The finish comes from a smooth blow-dry, a flat iron run slowly in small sections and a drop of serum on the ends, never at the roots. It works on bobs, lobs and longer lengths. The drama comes from the part, so I take time to place it cleanly. The risk is flatness by evening; a little dry texture spray at the roots, flipped to the opposite side and then back, gives hidden lift without breaking the shine.
12. Curled Pixie with Textured Waves
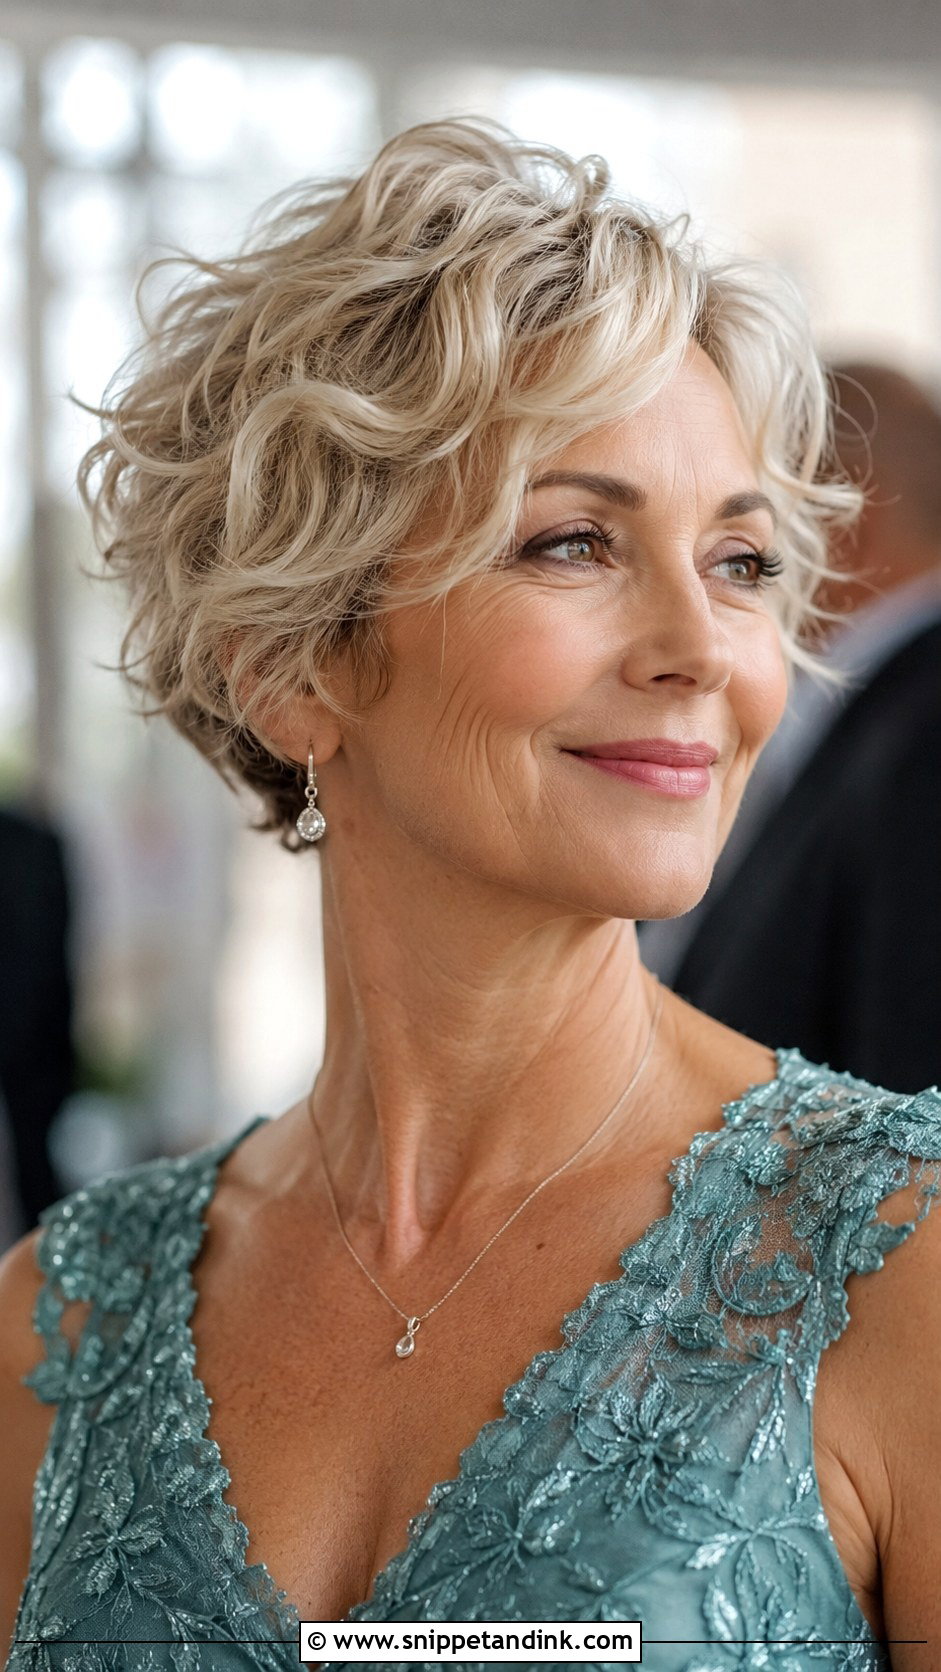
Waving a pixie gives it movement and makes it look dressier, and I find it one of the most effective changes for fine or thinning hair. Small bends made with a narrow iron or a flat iron twist break up the surface so you don’t see the scalp through it. Use a lightweight cream or mousse; heavy wax clumps short fine hair together and shows the gaps. It takes about fifteen minutes to style and almost nothing to maintain.
13. Twisted Half-Up with Bouncy Waves
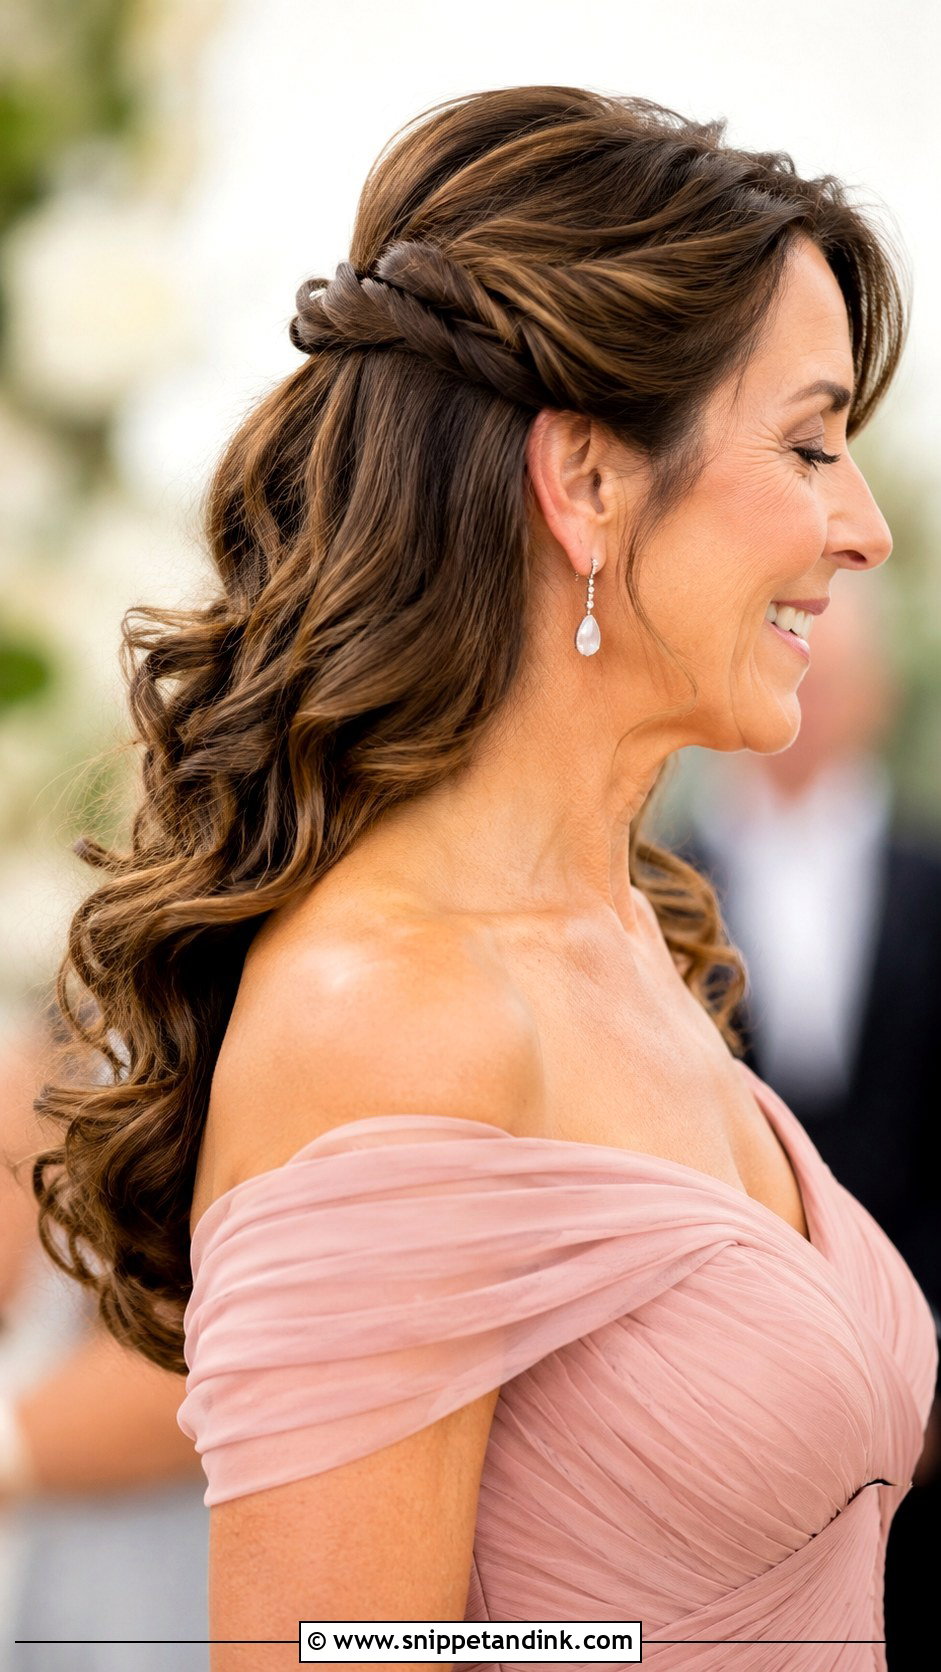
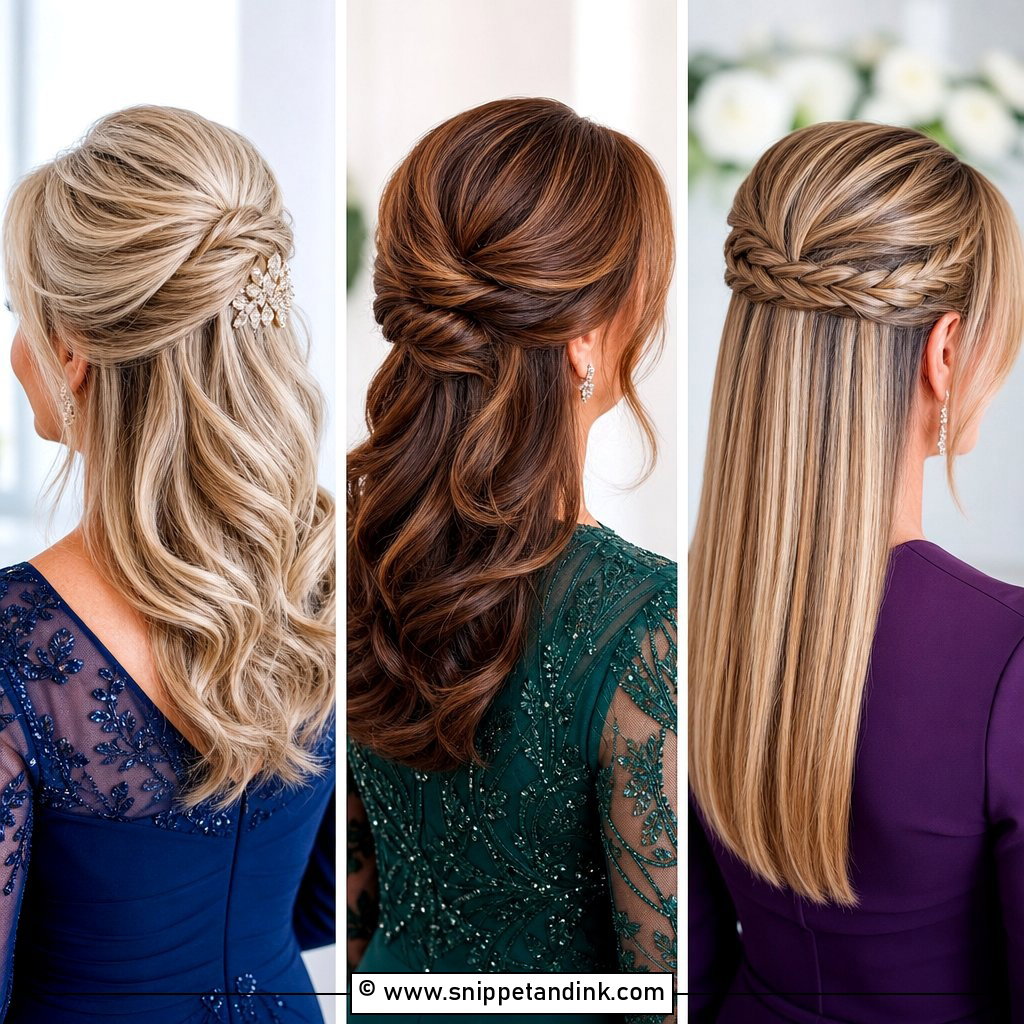
A twisted half-up pulls two small ropes from the temples back to the crown and pins them where they meet, with the length left in waves below. It keeps hair off the face and adds detail at the back, which shows nicely during the ceremony when guests see you from behind. Medium to long hair is needed for the twists to reach. Small jewelled pins along the twist add sparkle. My usual fix for a twist that slips is to pin it through the rope into the base underneath, not just across the top.
14. Polished Chin-Length Bob with Texture
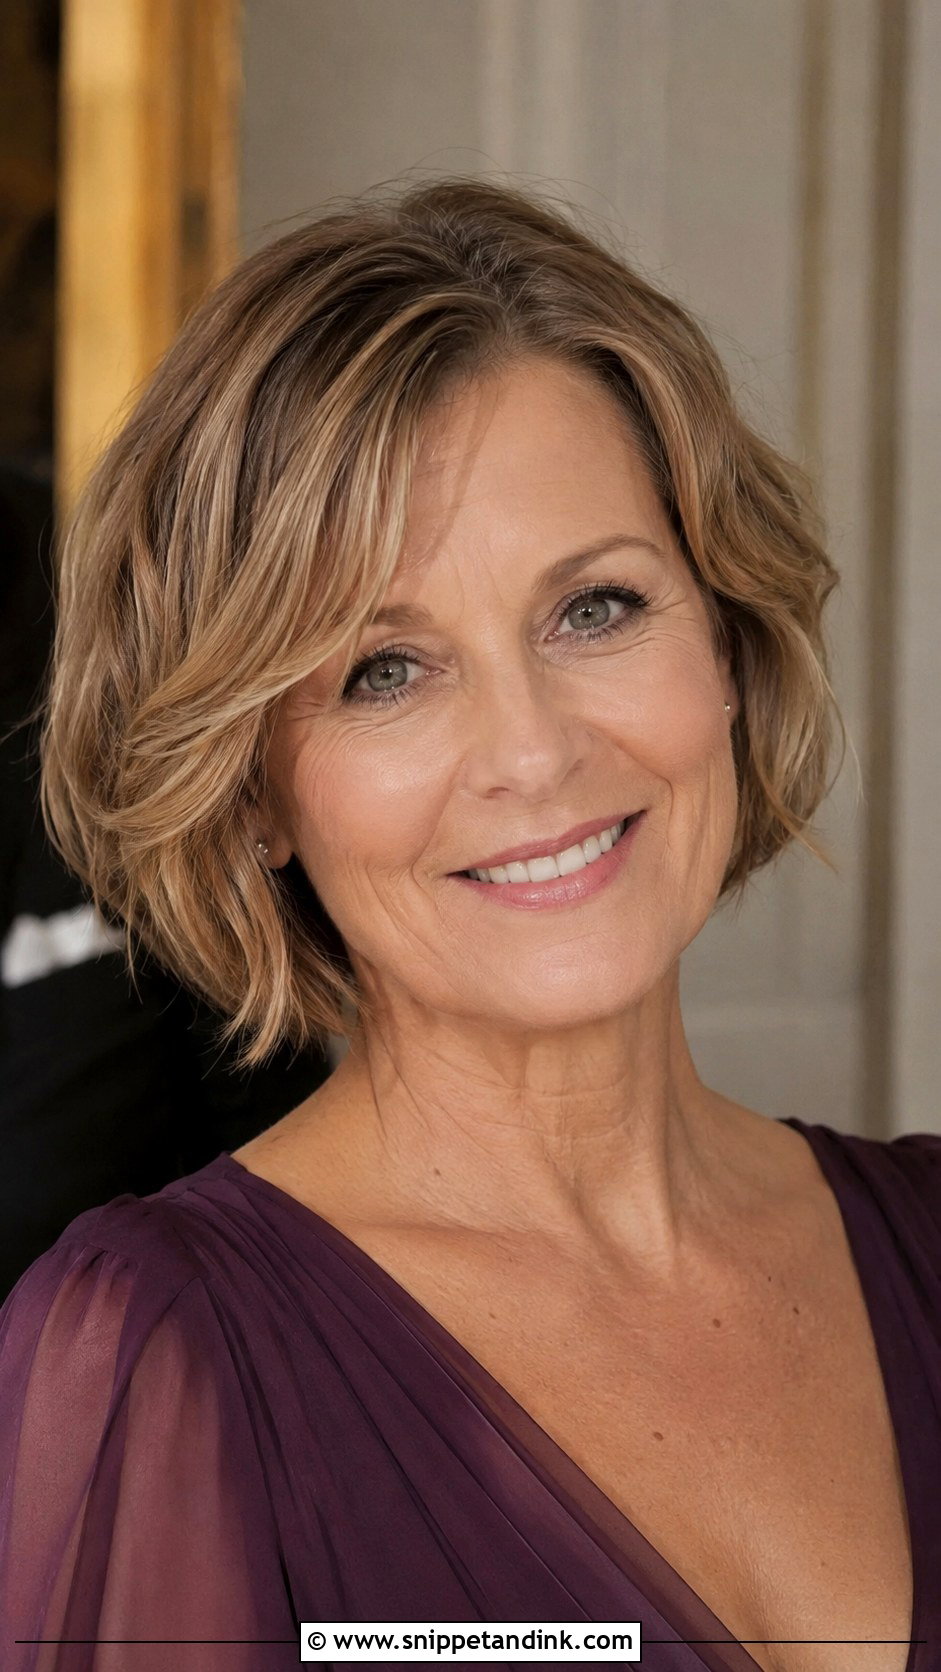
A chin-length bob has a sharp, modern shape, and soft texture with gentle waves turns it into a wedding look. The line sits right at the jaw, so it frames the face strongly; that’s flattering on most women but worth testing if you’re self-conscious about your jawline. I build lift at the roots with a round brush and finish with a texture spray rather than hairspray. It needs very little attention during the day, and you can take it sleek or tousled depending on the wedding.
15. Soft Updo with Curled Tendrils
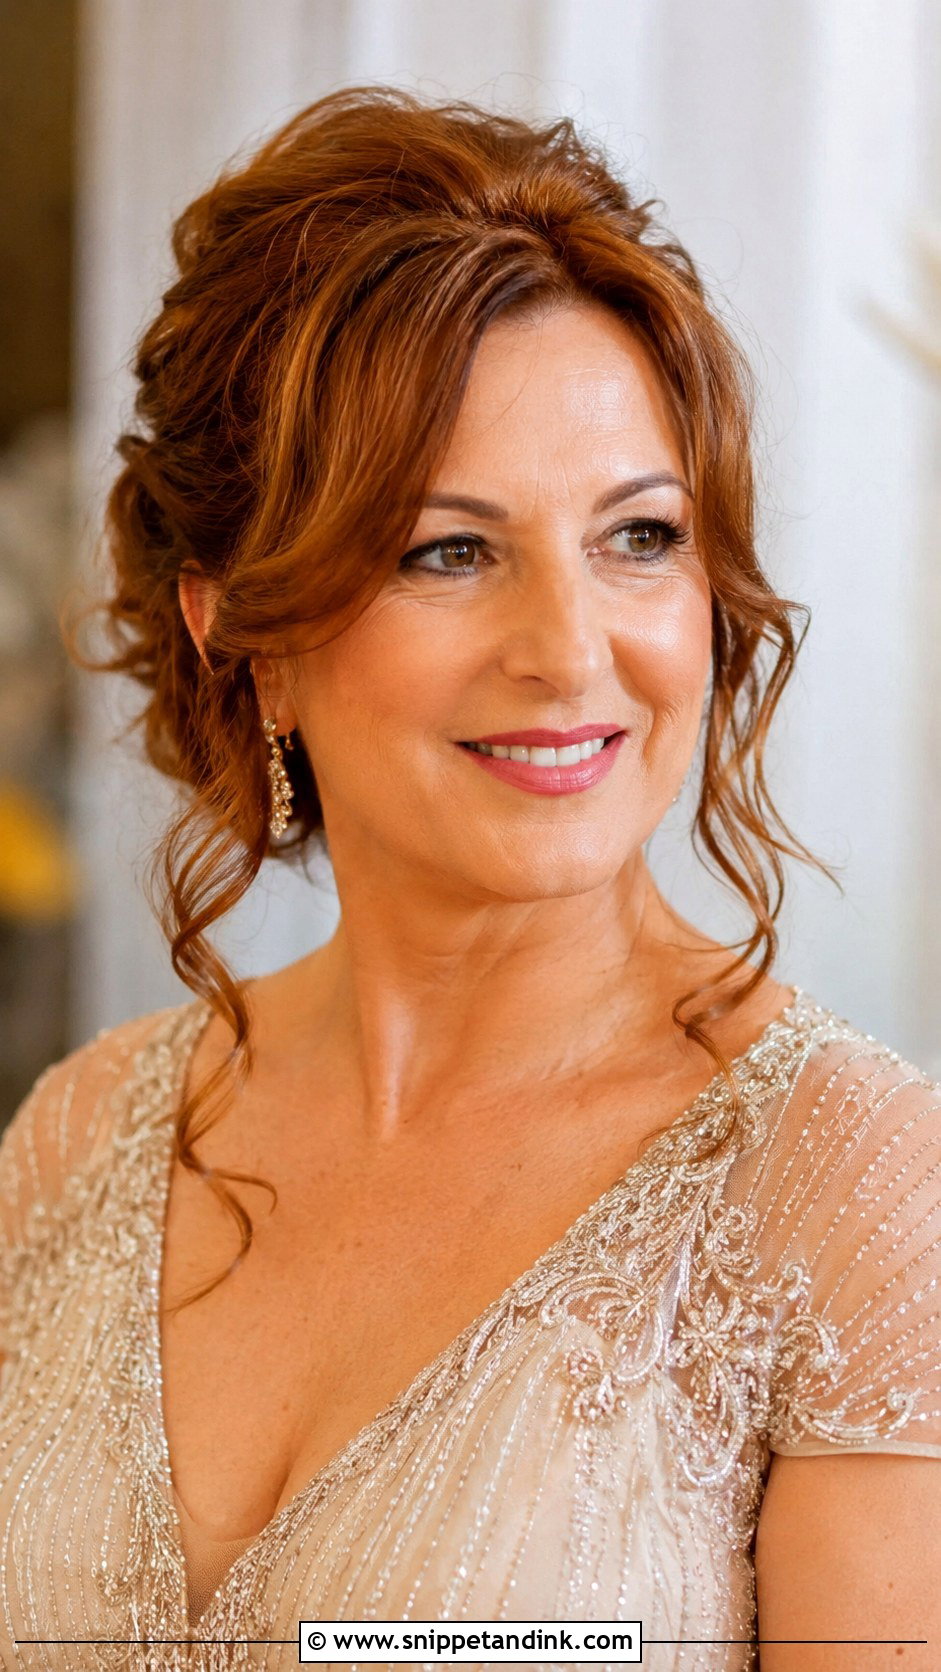
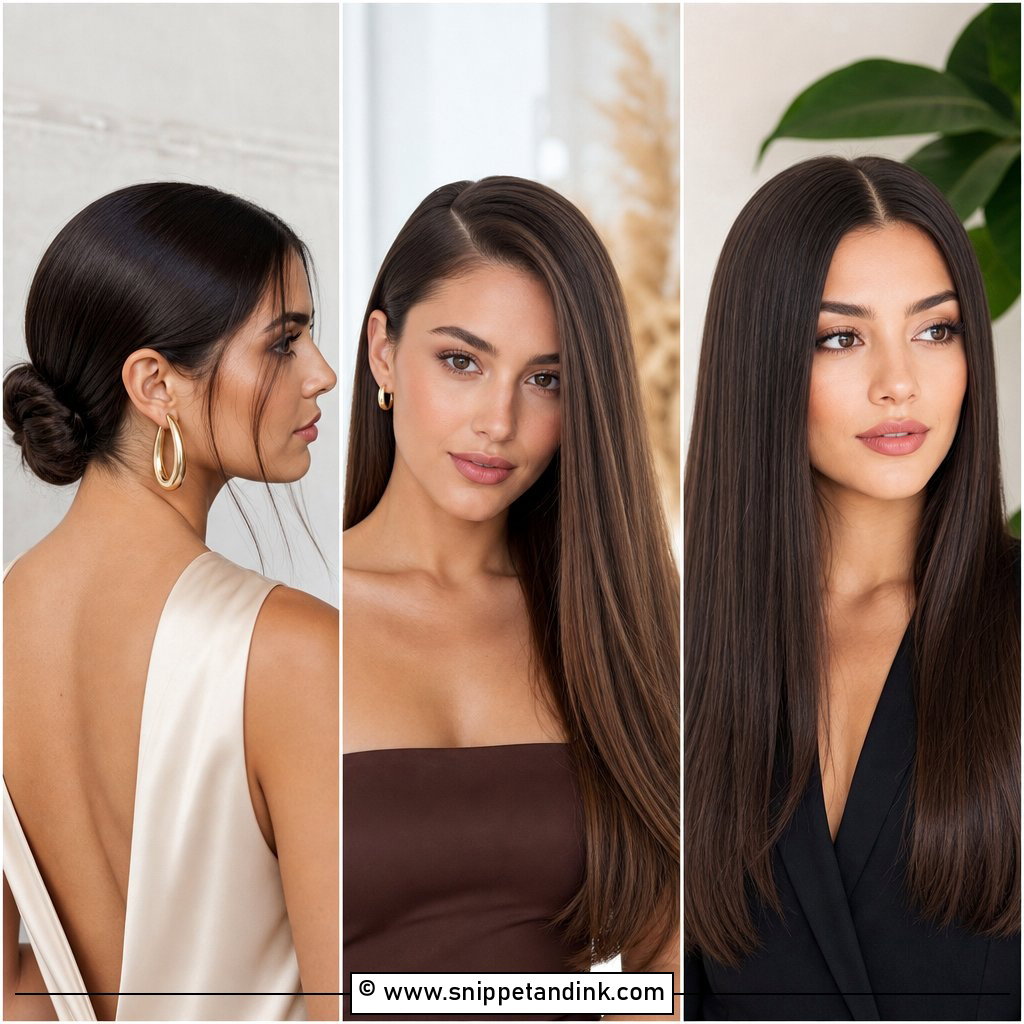
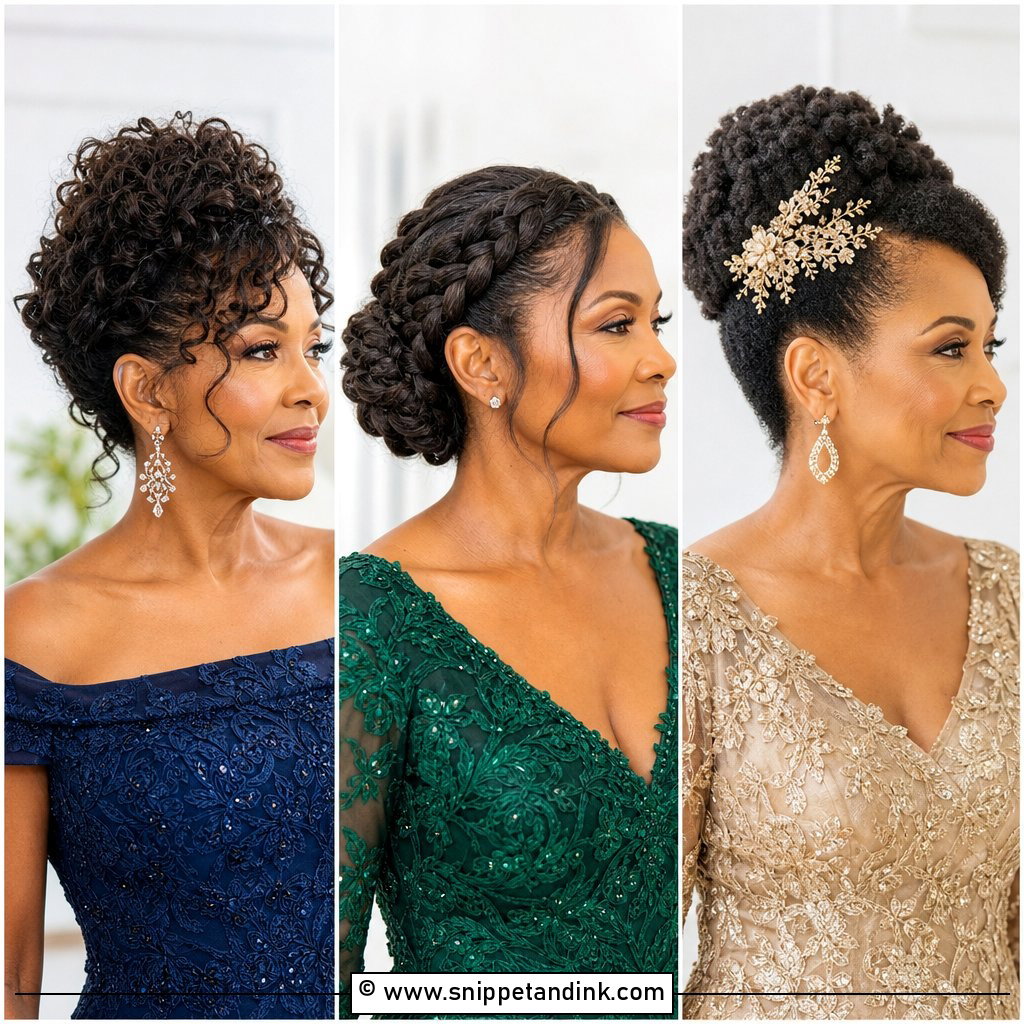
A soft updo with curled tendrils sits halfway between polished and relaxed. The hair is gathered up loosely and a few curled pieces fall around the face, which softens the whole thing. Medium and long hair suit it. I’d add a little height at the crown. The tendrils are where it goes wrong: curled with too small a barrel they turn into springy ringlets. A larger barrel and a pinch of light hold keep them in a soft bend all day.
16. Curled Updo for Short Hair
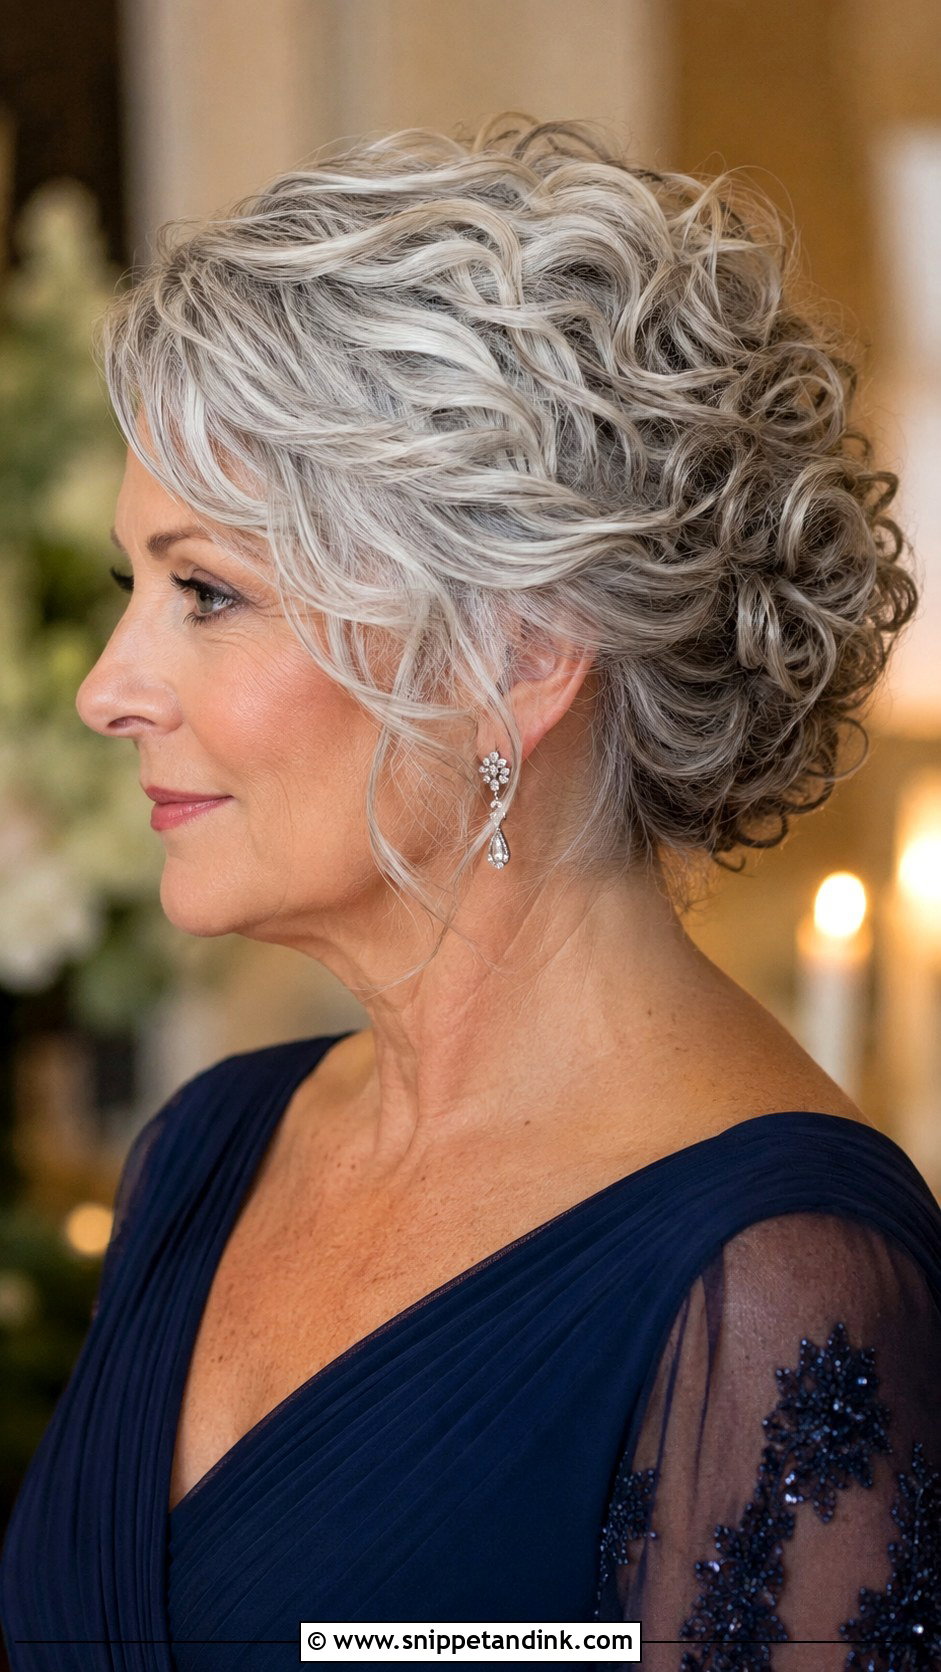
Shorter hair can still give the impression of an updo. I curl everything, then pin the curls up and back in small sections so they sit as a gathered shape rather than a true bun. It works on short and medium lengths, and the curl texture hides the pins. It feels dressy without being stiff, and sparkly earrings finish it. The main thing is enough pins and enough product for grip, since short hair has less weight to hold itself in place.
17. Voluminous Blowout for Medium Hair
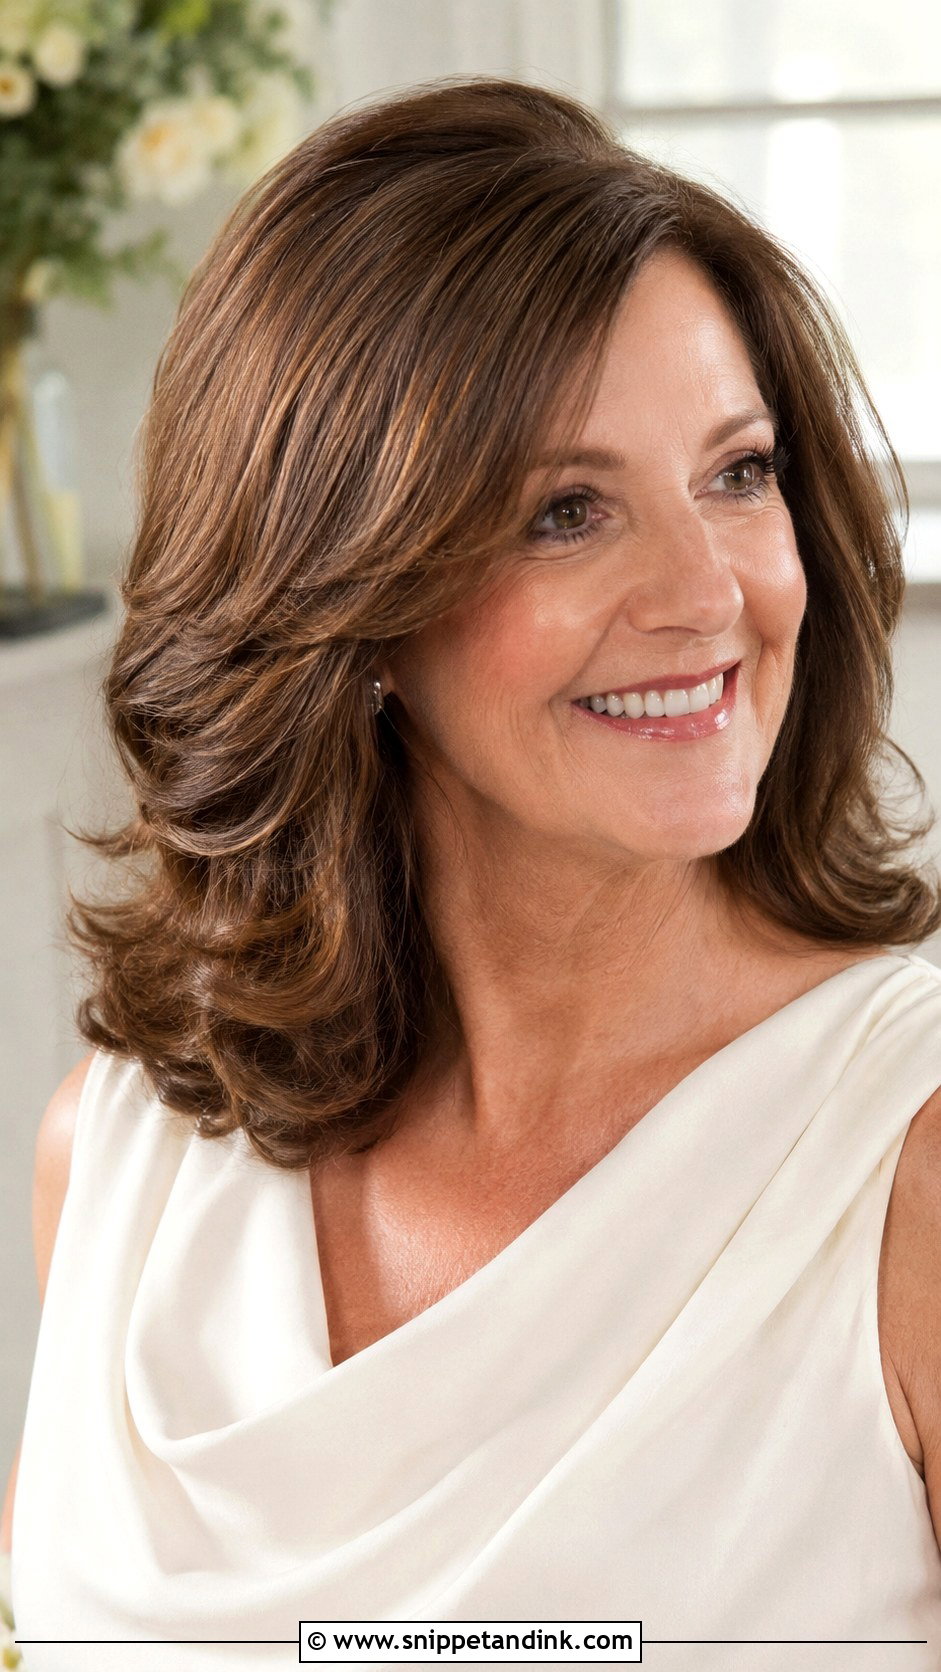
A good blowout gives medium hair real fullness and smooth, curved ends with no pins at all. Big round brush, sections no wider than the brush, and a cool shot at the end of each section to set the curve: that’s what keeps volume going for hours. It suits any theme and any outfit. Humidity is the enemy, so I’d use a humidity-blocking spray before you leave. For anyone who wants to wear her hair down with real body, a voluminous blowout is about as low-risk as wedding hair gets.
18. Classic Beehive for Vintage Weddings
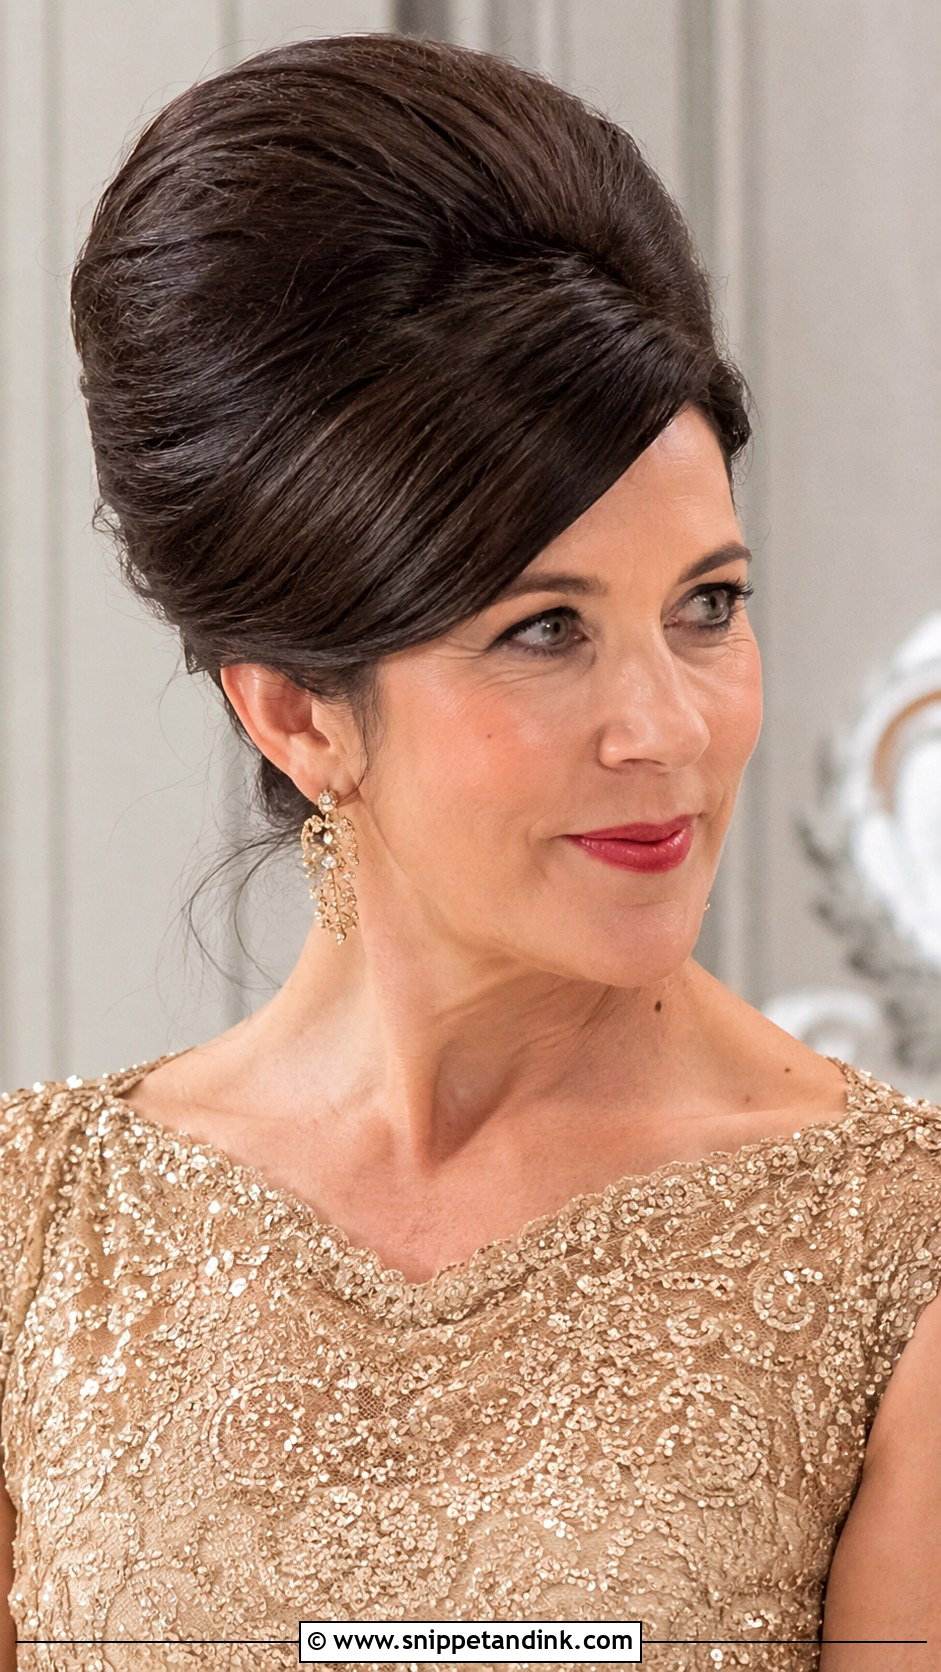
A beehive teases the hair at the crown into a tall, rounded shape, then smooths the outer layer over it. This 1960s icon suits medium to long hair and vintage-themed weddings, and it makes a confident silhouette. The back-combing is what holds it up, so I take time over it and keep the surface smooth with a soft bristle brush. Ask yourself how you feel about height in photos before choosing it; it’s striking, but there’s no hiding it in the family lineup.
19. Wavy Lob with Money Piece Highlights
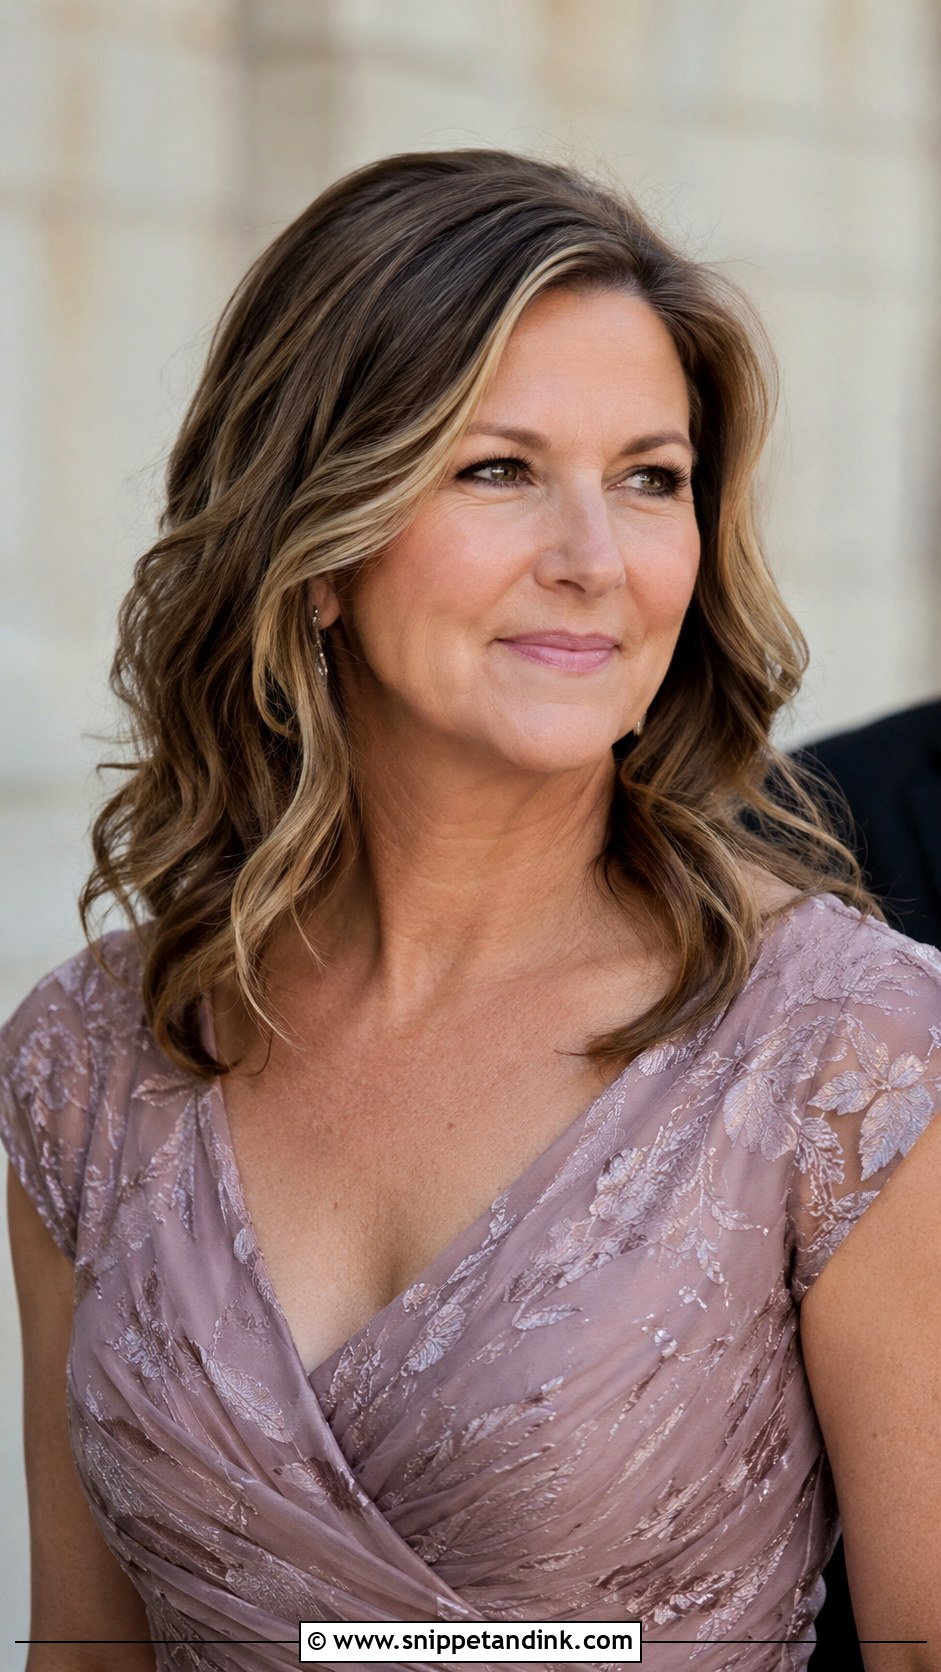
Brighter face-framing strands, often called a money piece, put lighter colour exactly where light hits the face, and waves through a lob show that colour off. The cut is easy to manage all day, and a side part softens it further. Timing is the thing to get right: have the highlights done two to three weeks before the wedding, so any brassiness can be toned and the colour has softened at the roots. Fresh highlights done two days before can look stripy in photos.
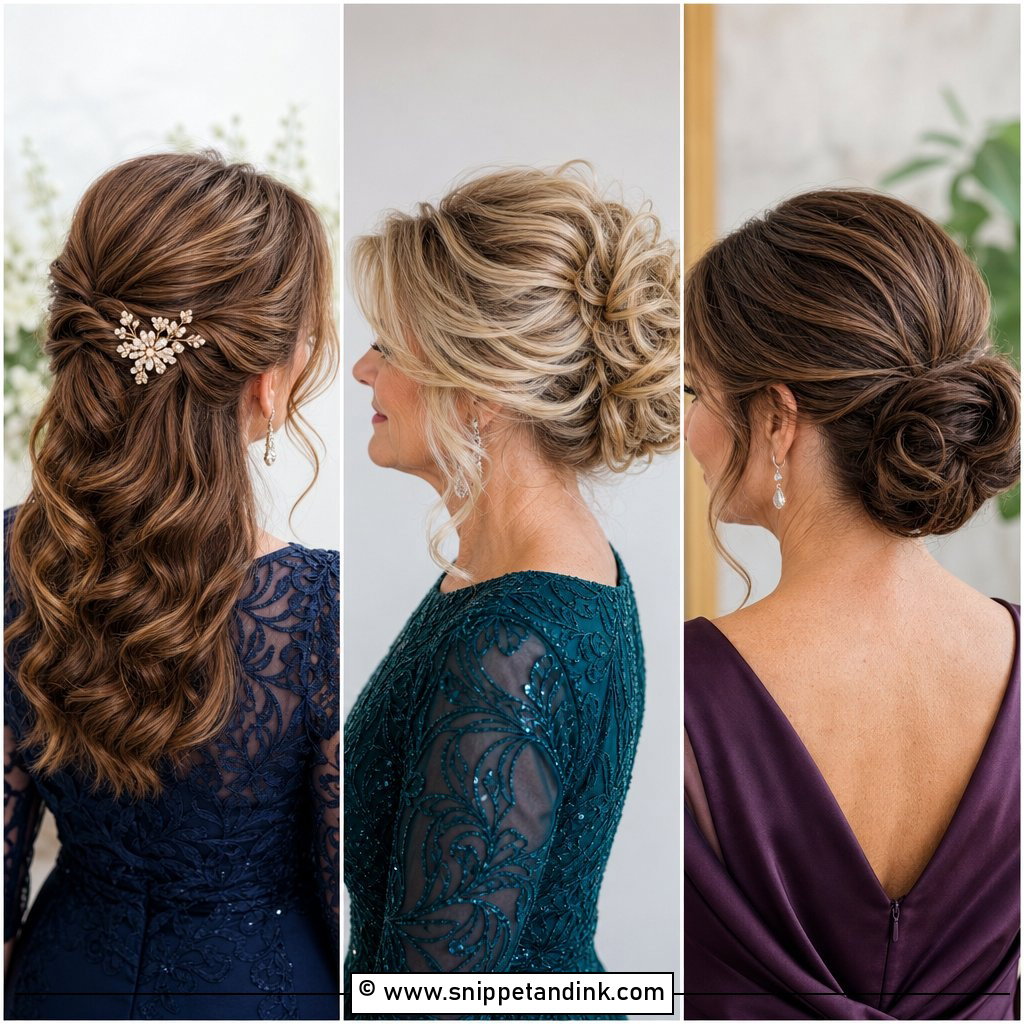
20. Smooth Bun with a Decorative Hair Accessory
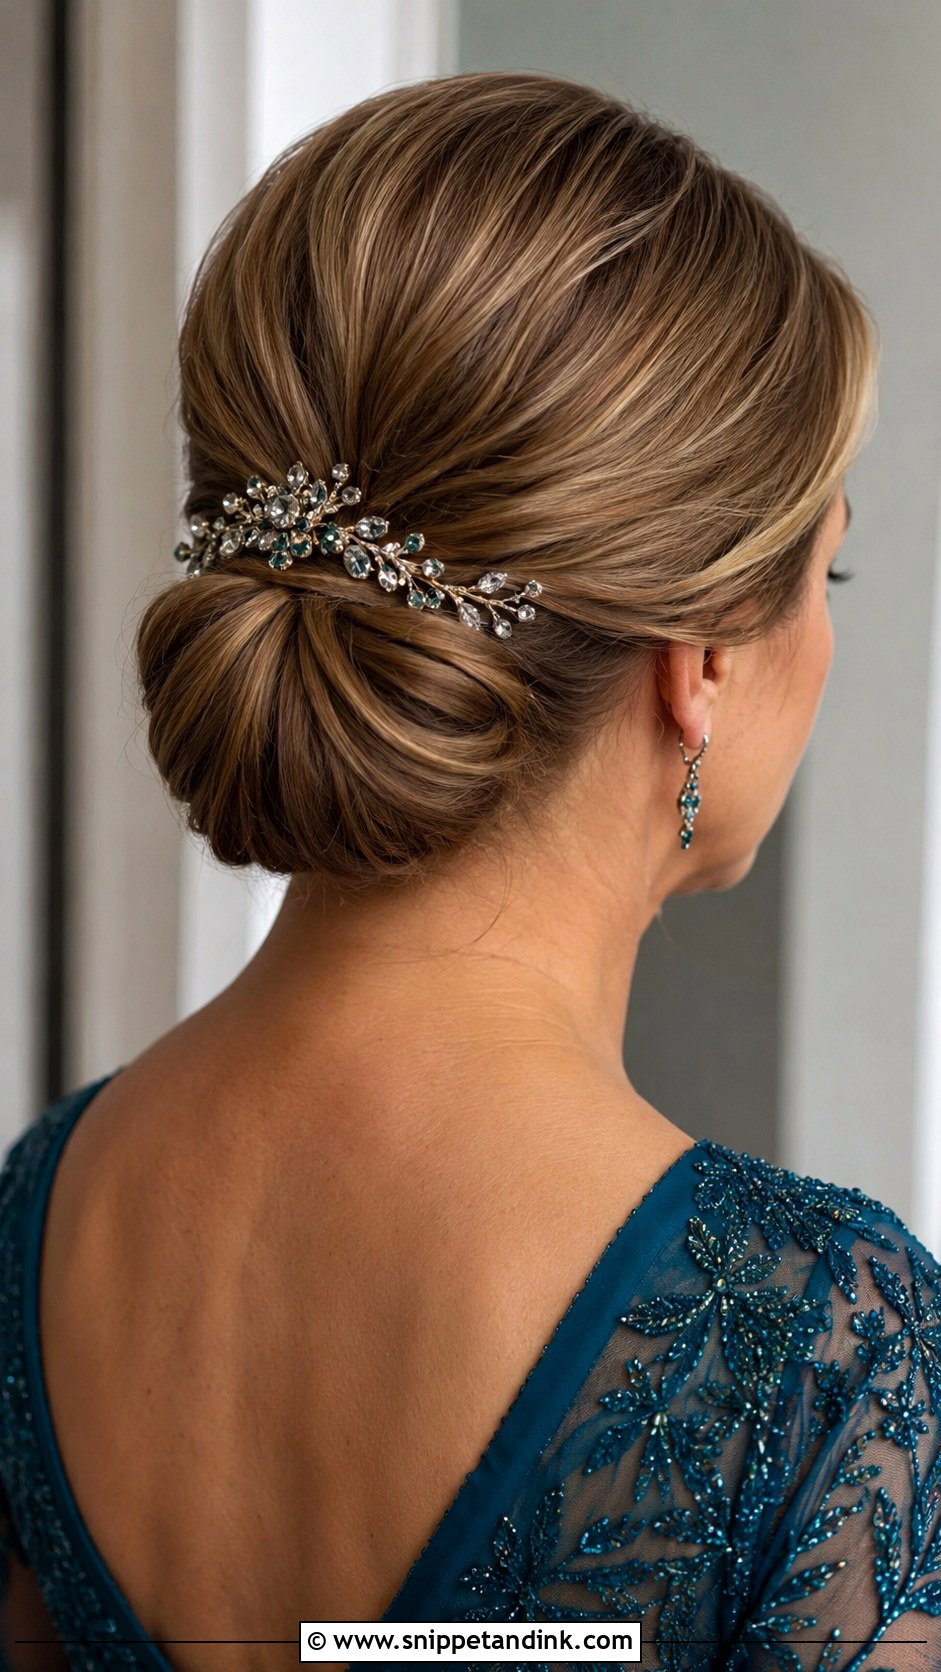
A smooth bun with a decorative accessory is the simplest way to look dressed up. A neat, gathered bun is the base; a jewelled clip, a pin or a comb is the detail. I’d match the metal of the accessory to your earrings or necklace so the whole outfit reads as planned. Medium and long hair suits it. Keep the bun sleek for a formal evening, slightly textured for daytime. Combs grip best when they’re slid in against the direction of the bun, then turned back.
Timing Your Cut, Colour and Any Chemical Service
Half the styles above depend on the cut being right, so the calendar matters as much as the style. Here’s the order I’d follow for anyone with a bob, lob, pixie or highlighted look:
- Six to eight weeks out: decide on the style and book your trial. If you’re changing length or colour, do it now, so there’s time to adjust.
- Two to three weeks out: last colour appointment. Roots, gloss or toner sit better after a few washes, and any overly bright or brassy tones can still be corrected.
- About one week out: final trim. Pixies grow out quickly, so they can go a few days closer; bobs and lobs look softer with a week of wear.
- The week of the wedding: no new treatments, perms, relaxers or keratin. Hair needs time to settle after any chemical service, and you don’t want surprises.
- The day before: wash and fully dry your hair, unless your stylist has asked otherwise. Second-day hair holds shape better for most textures.
If you’re growing out a short cut for the wedding, tell your stylist at the trial. A few awkward lengths are easy to hide with the right placement, but only if the stylist knows to plan for them.
Up, Down or Halfway? Let the Trial Decide
Your hair should feel like you on a better day, not like someone else’s. A chignon, soft curls, a chic bob or a vintage set can all work; what matters is your length, the wedding’s formality and how long you’ll be on your feet. Get a trim and a trial booked well ahead, and wear the trial style for a few hours afterward. That will tell you more than any photo, and on the day you’ll be free to enjoy your son’s wedding without checking a mirror.
You'll Like These Ideas:


Leave a Reply