
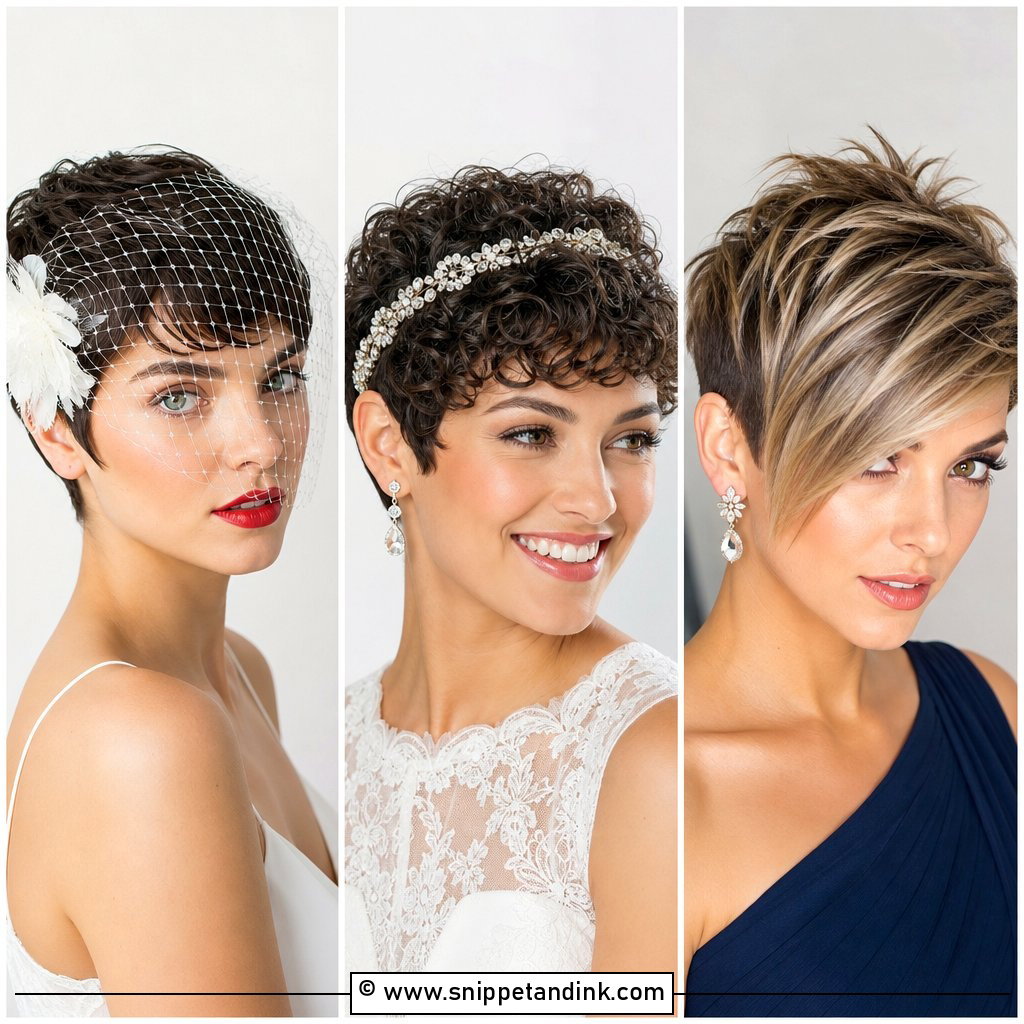
A pixie is the one bridal cut where the haircut itself does most of the work. There is no length to hide behind, so your face, your neckline and your earrings carry the look, and the styling is really about finish: how much shine, how much lift, where the part sits. I’d rather spend twenty minutes perfecting the shape of a short cut than an hour building an updo that hides it. Below are the pixie looks I reach for most often, with notes on which hair textures they suit and where they tend to go wrong.

Pixie Haircut Timing Around the Wedding Date
With long hair, the cut barely matters on the day. With a pixie, the cut is the hairstyle, so when you get it trimmed decides how the whole look sits. A pixie grows out of shape quickly; even three or four weeks of growth softens the edges and puts weight over the ears.
- Main cut: about one to two weeks before. That gives the hair a few days to lose the blunt, just-cut look while the shape is still crisp.
- Nape and around the ears: a quick neckline tidy two or three days before is fine if your barber or stylist offers it. Clippered edges grow back fastest.
- Colour: one to two weeks before, ideally done before the cut so the stylist can trim any dry ends the colour leaves behind.
- Don’t change the cut shape in the last month. A new length means new cowlicks, and the trial you did with the old shape stops being useful.
If you’re growing out a shorter cut for the wedding, tell your stylist months ahead. Shaping the grow-out with small trims every six weeks or so gets you to a wearable long pixie instead of an awkward in-between stage.
1. Pixie Wedding Hair With Pearl Headband
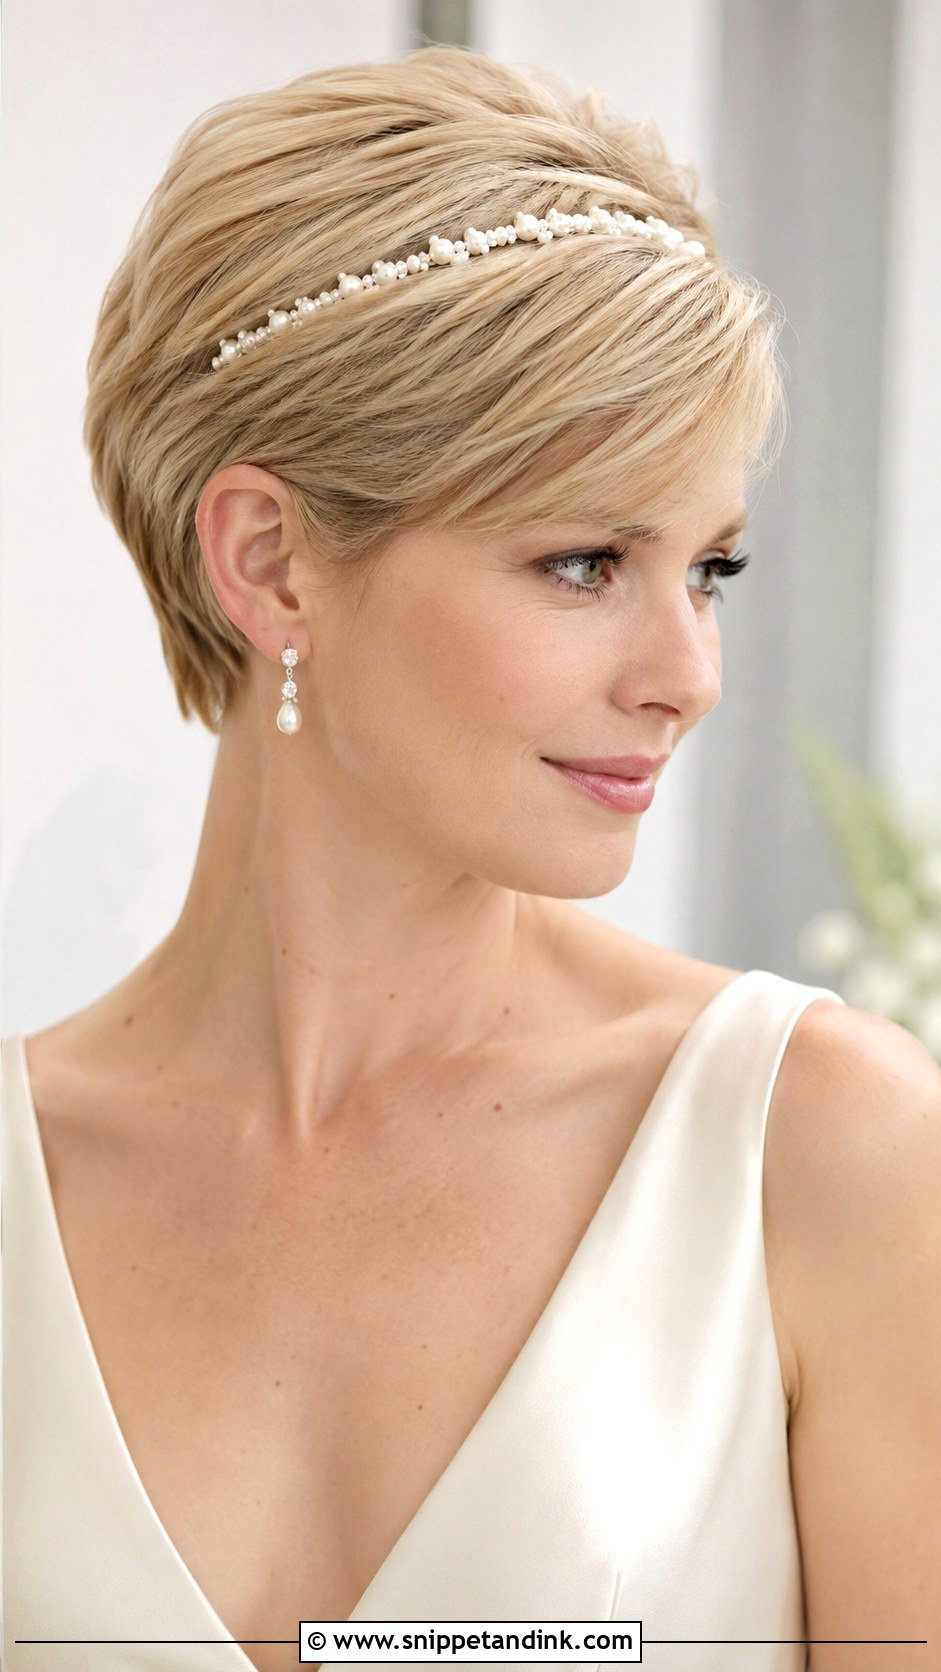
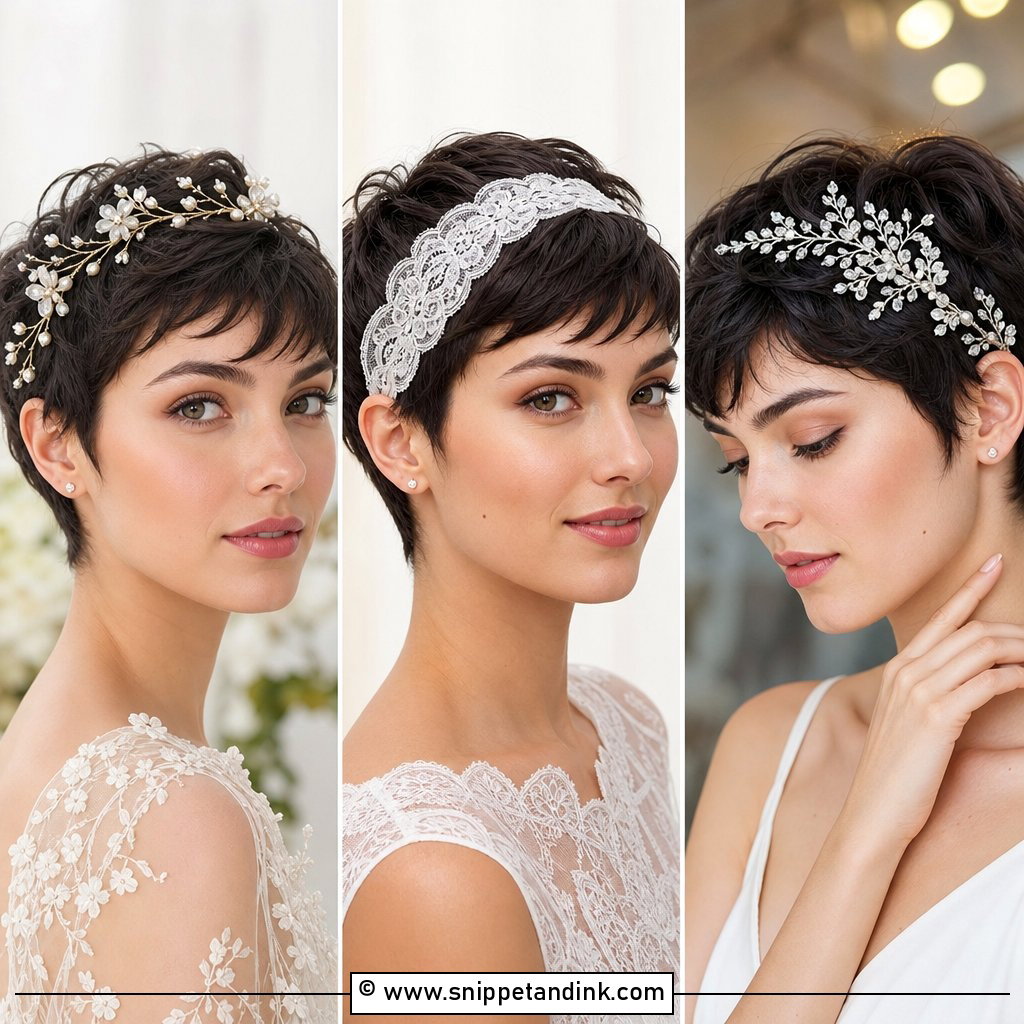
A pearl headband is the quickest way to make a short cut read as bridal, and it leaves the haircut fully visible. I smooth the sides first and lift the crown just slightly, because a band sitting on completely flat hair tends to slide forward during the ceremony. Thin bands look delicate; padded ones show up better in wide shots but can press into the scalp after a few hours, so wear yours around the house for an afternoon before deciding. On a very short pixie, pick a band with flexible ends that tuck behind the ears. Keep the earrings small, since the pearls are already doing that job.
2. Curly Pixie Wedding Hair
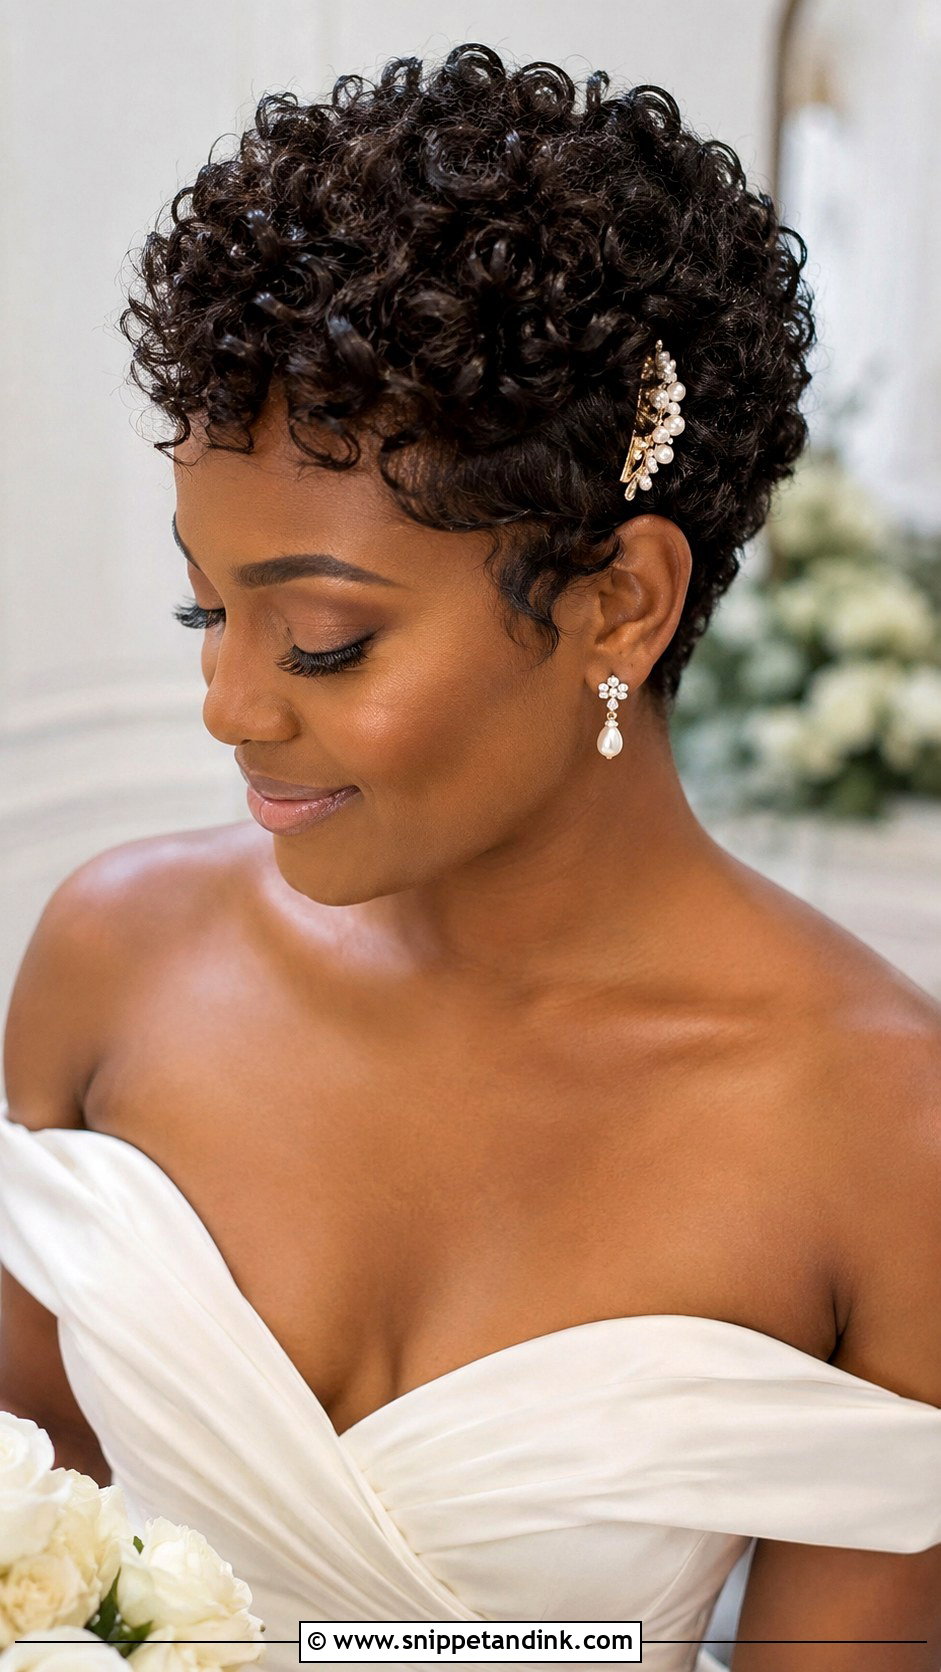
Curls on a pixie need definition more than hold. I apply curl cream or a light gel while the hair is soaking wet, scrunch, then leave it alone until it’s fully dry; touching it while it sets is what causes frizz by the first dance. A deep side part with a tiny pearl clip above one ear is all the decoration it needs. Get your trim two to three weeks out rather than days before, because freshly cut curls often spring up shorter than expected and need time to settle into their shape.
3. Sleek Pixie Wedding Hair
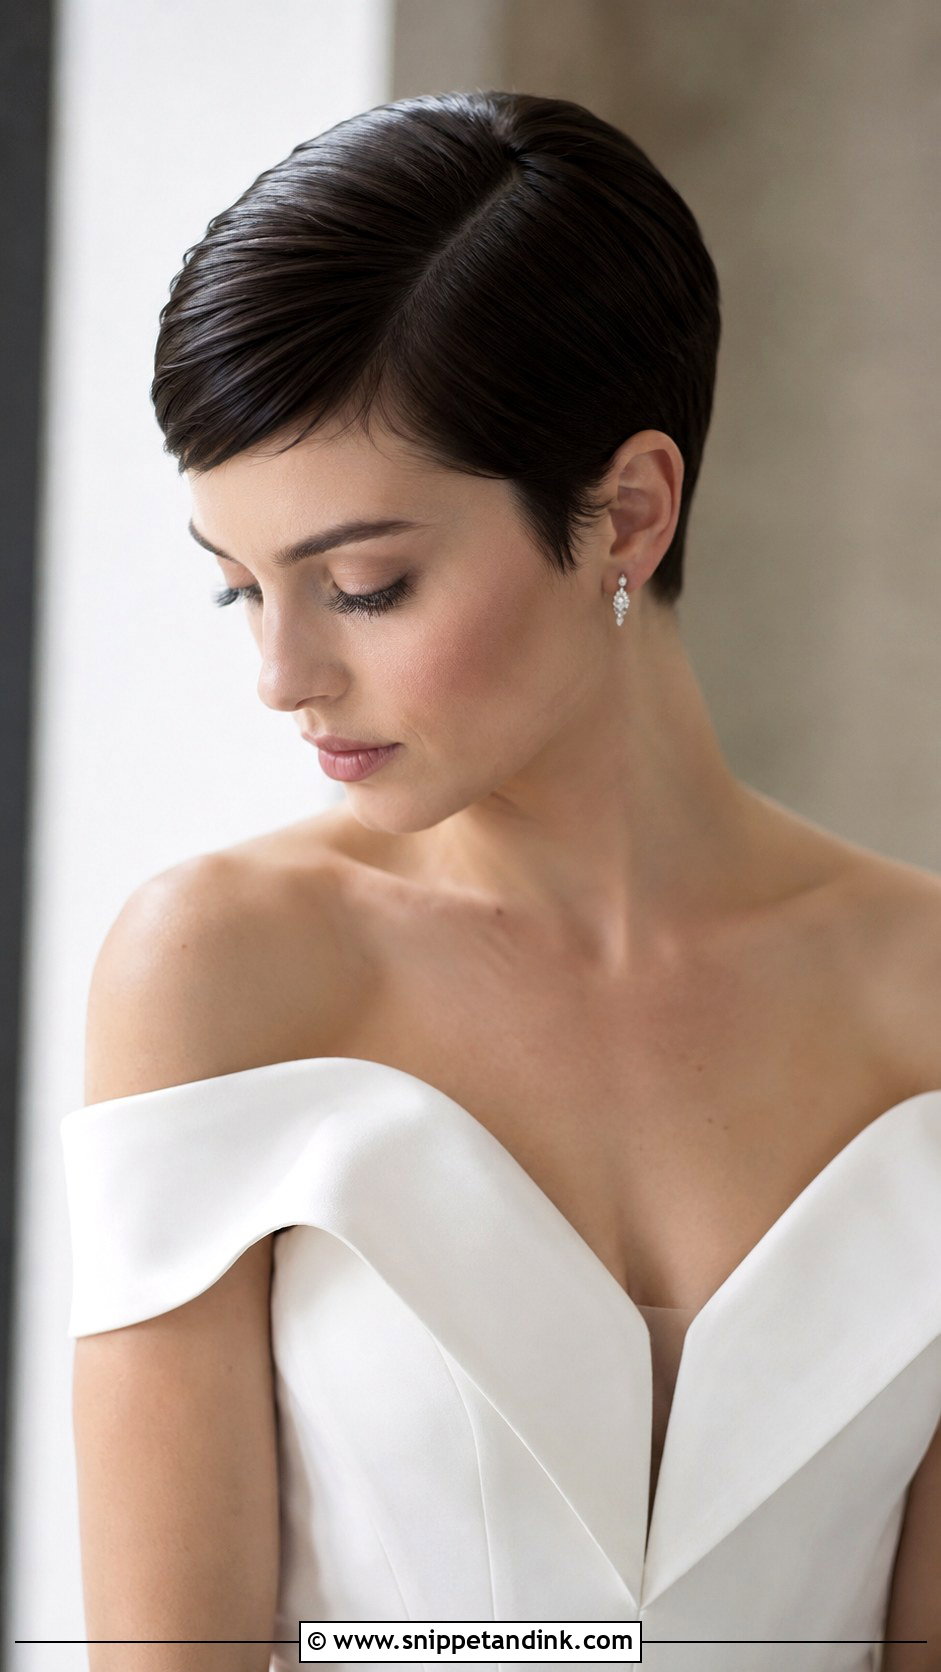
Sleek pixies come down to product control. I use a small amount of shine serum on damp hair, blow it flat with a paddle brush, then finish with a pea-sized dab of lightweight pomade on the fingertips only. Too much and the hair looks wet under flash. This finish suits structured dresses, high necklines and bold earrings, and it’s my first suggestion for a humid outdoor ceremony, because there’s no curl in it to drop. The one catch: a part line shows every bit of scalp, so plan for that if your hair is fine at the crown.
4. Wavy Pixie Wedding Hair
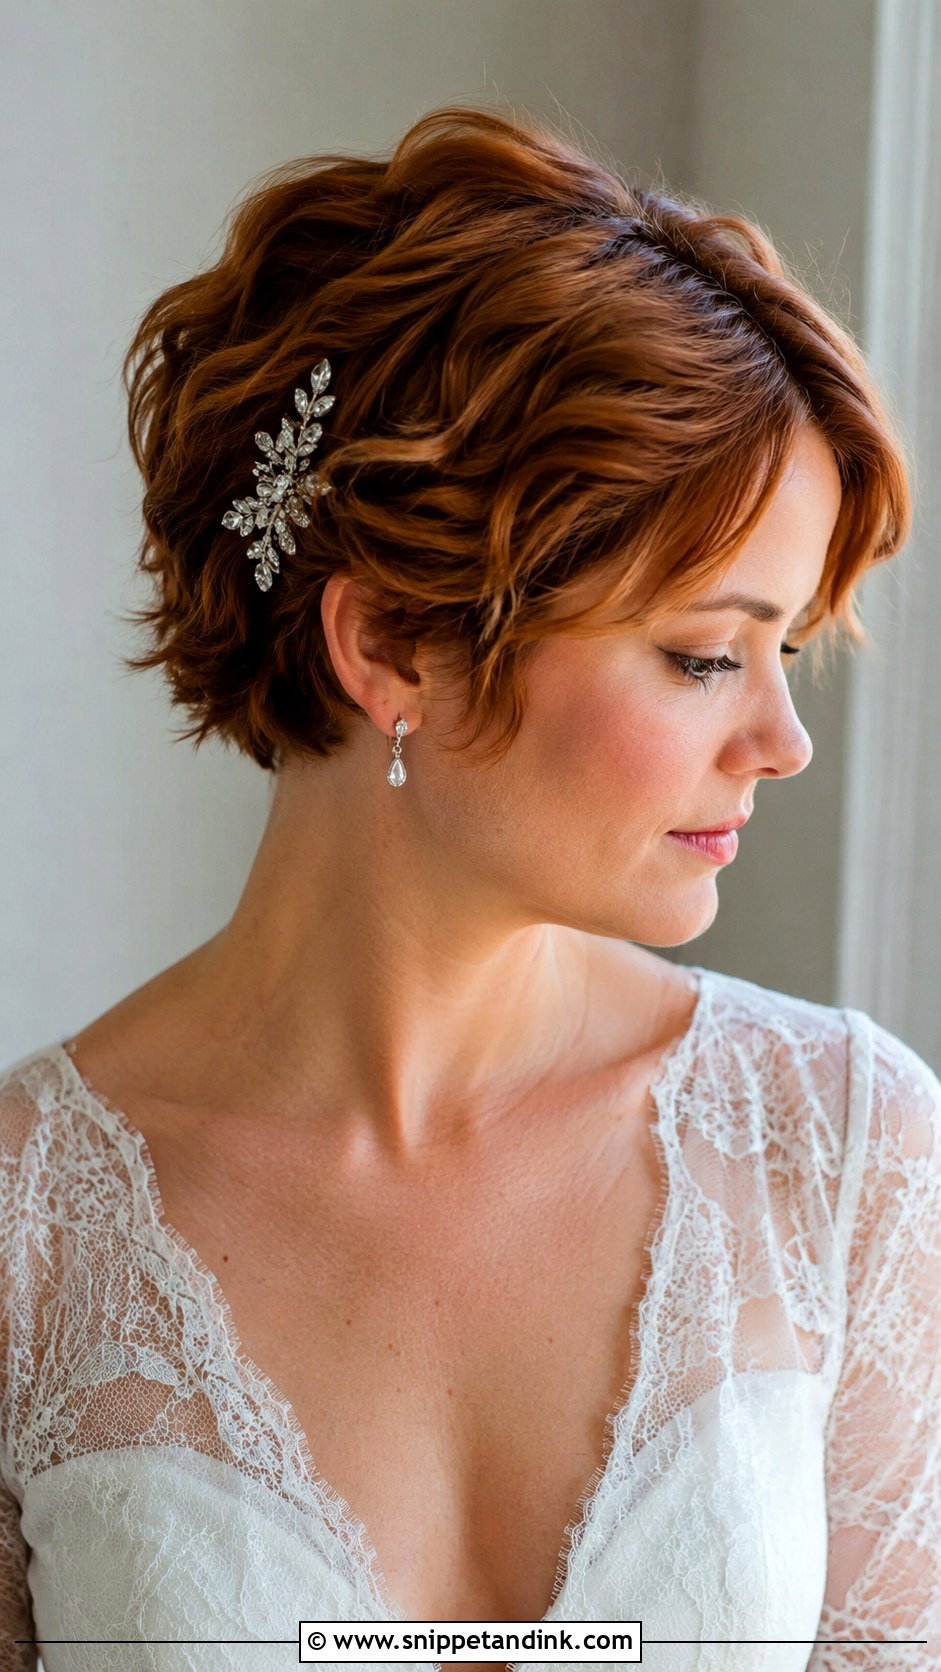
Waves only work once the top has some length to bend, roughly three inches or more. I use a small iron, half an inch or three quarters, and wrap just the top sections, leaving the sides tucked or smooth. A wavy pixie reads softer than any other short cut on this list, and one small comb or crystal barrette on the side is plenty. Finish with a flexible spray rather than a firm one; stiff waves on short hair look helmeted fast.
5. Pixie Wedding Hair With Veil
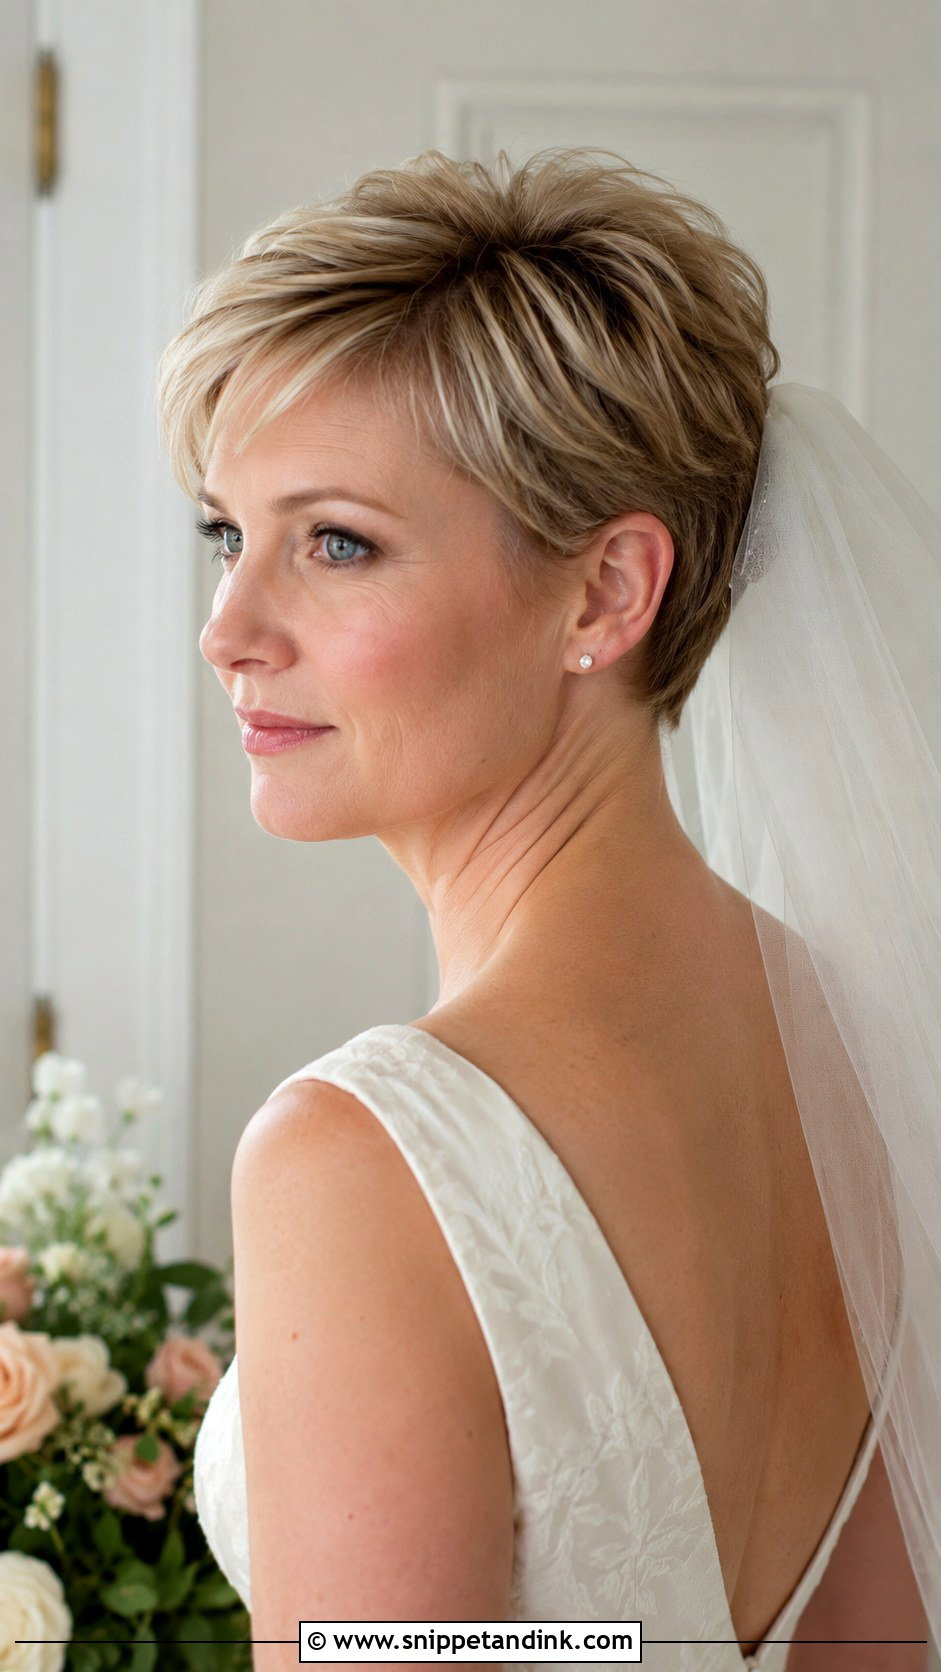
Yes, you can wear a veil with very short hair. The question is what the comb grips. If there’s an inch or two at the crown, I backcomb a small base there and slide the comb into it, then cross two bobby pins through the teeth. If there’s nothing to grip, I sew or attach the veil to a thin band or a small clip instead. Smooth pixies give a more classic outline under tulle, textured ones look more current. Bring the actual veil to your trial; a heavy cathedral length behaves very differently from the fingertip sample in the salon.
6. Pixie Wedding Hair With Flower Crown
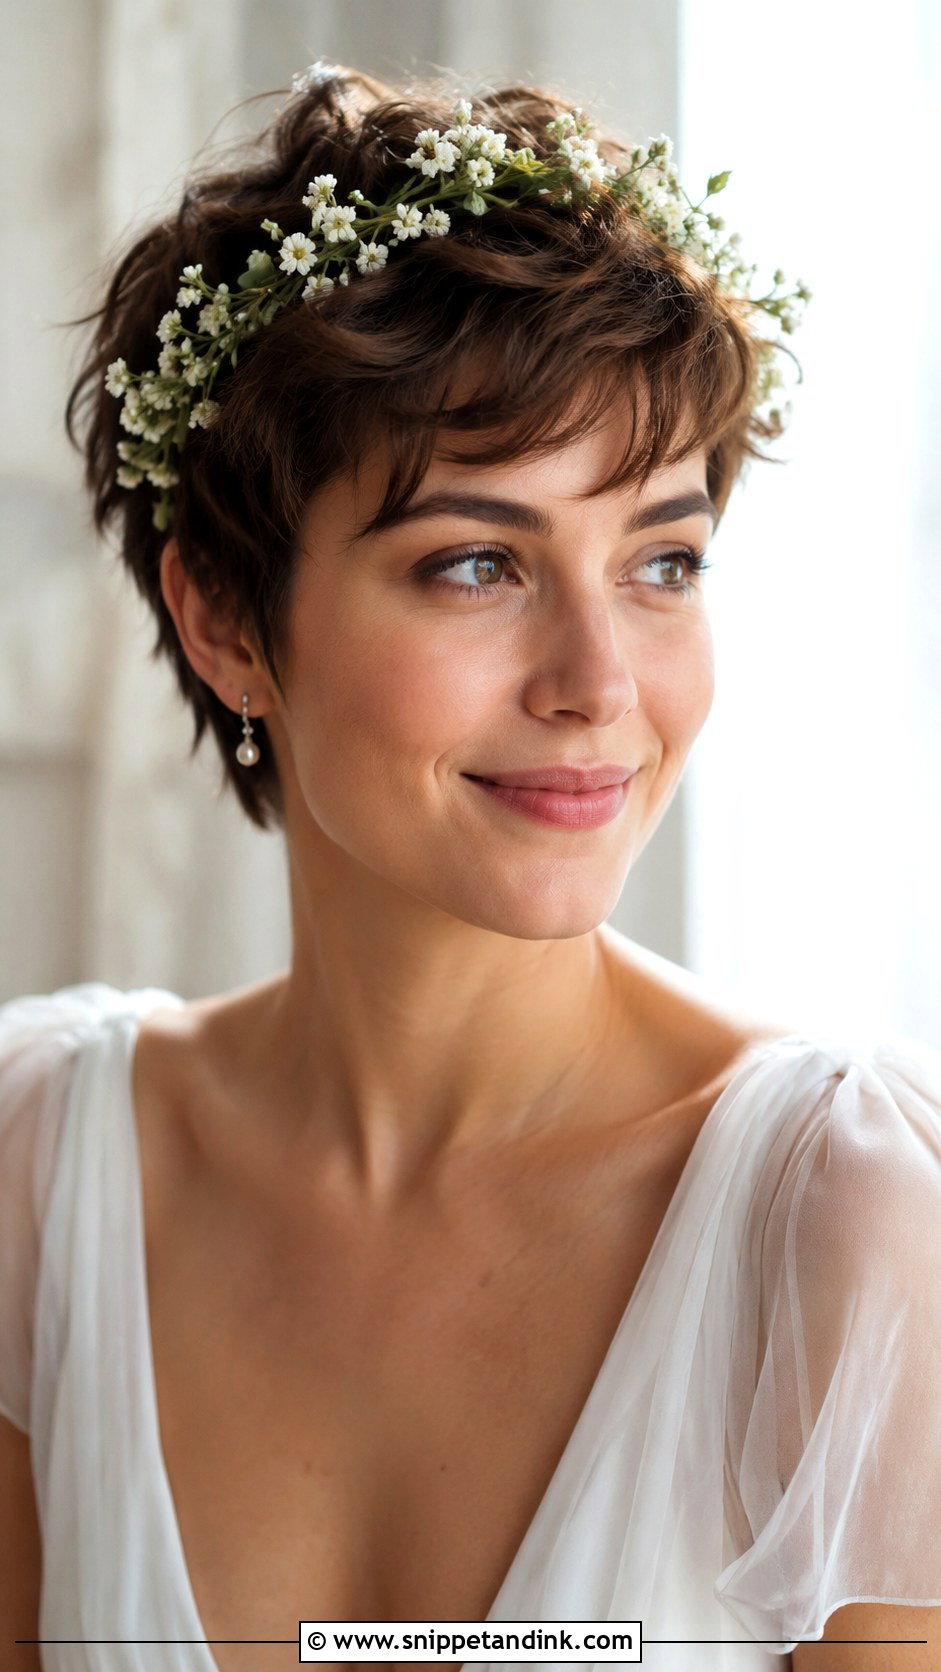
Flower crowns on short hair need to be scaled down. A full crown made for long, loose hair tends to sit low and swallow a pixie, so I ask florists for a narrow wire base and small blooms, or a half crown that stops at the ears. It sits well over a tousled pixie or curly pixie because the texture underneath gives the wire something to rest in. Fresh flowers wilt against a warm scalp in summer, so for an outdoor afternoon ceremony, good silk flowers are the safer bet.
7. Textured Pixie Wedding Hair
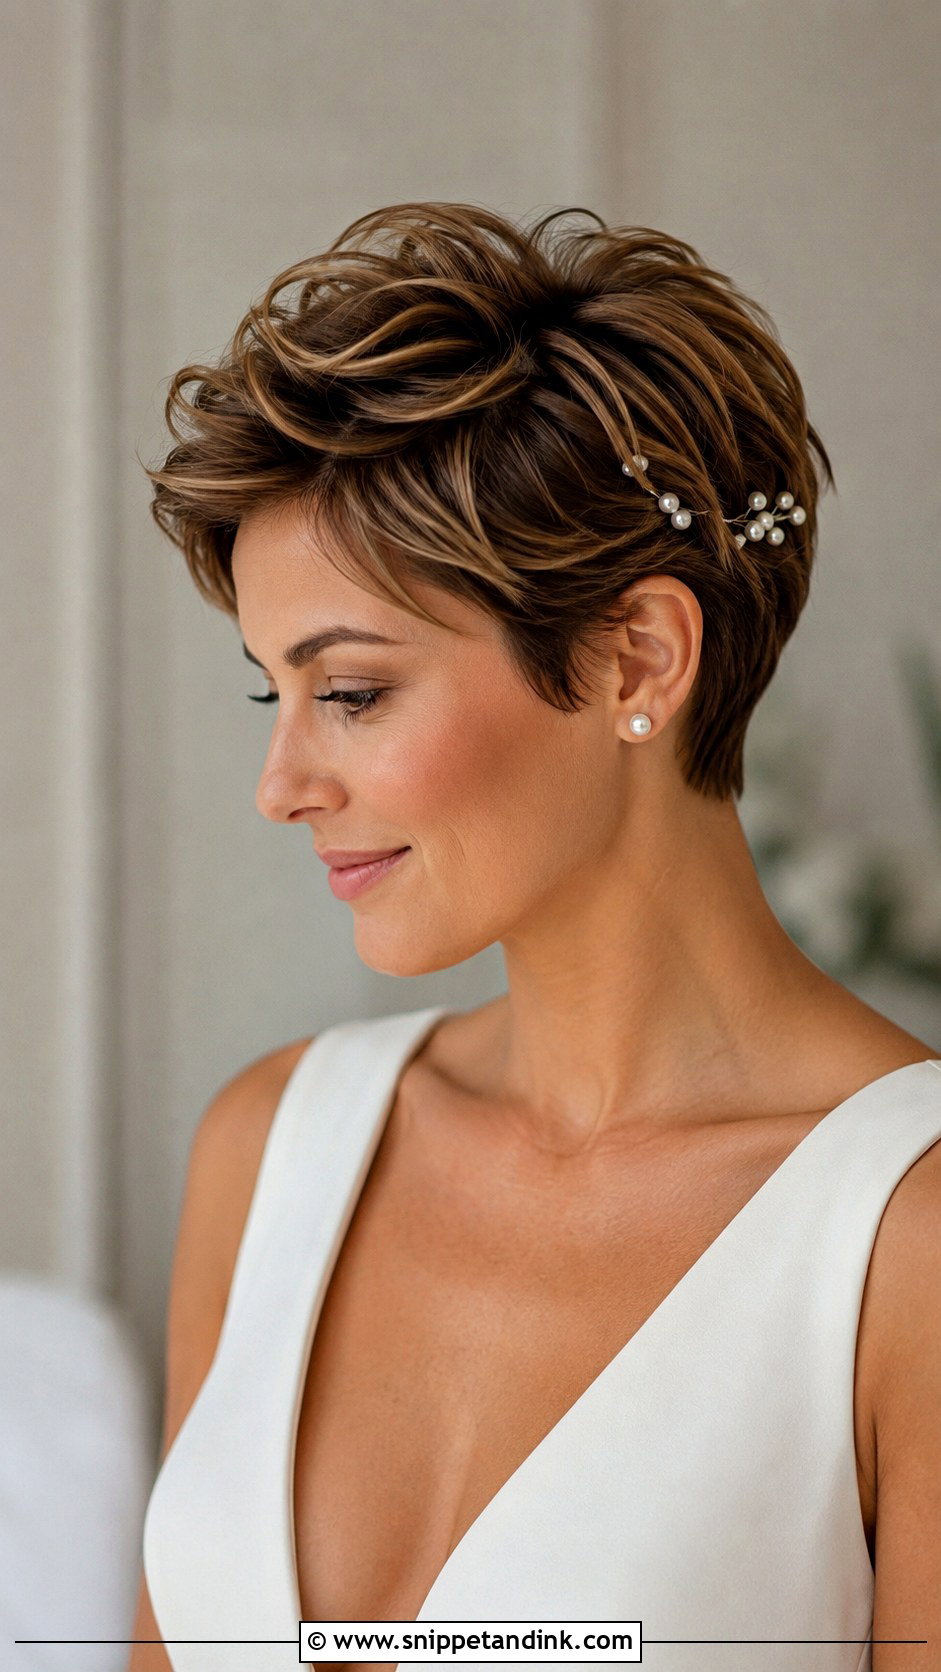
Textured pixie wedding hair is what I suggest most to brides with fine hair, because piecey separation makes thin hair look like there’s twice as much of it. I lift the roots with a blow-dryer, then work a matte paste through the ends with my fingers. Matte matters here: shiny product on separated pieces makes fine hair look greasy in photos. Keep the front pieces softer than the crown so the overall shape still feels bridal rather than editorial. It sits comfortably with a bridal suit or a minimal gown.
8. Side Part Pixie Wedding Hair
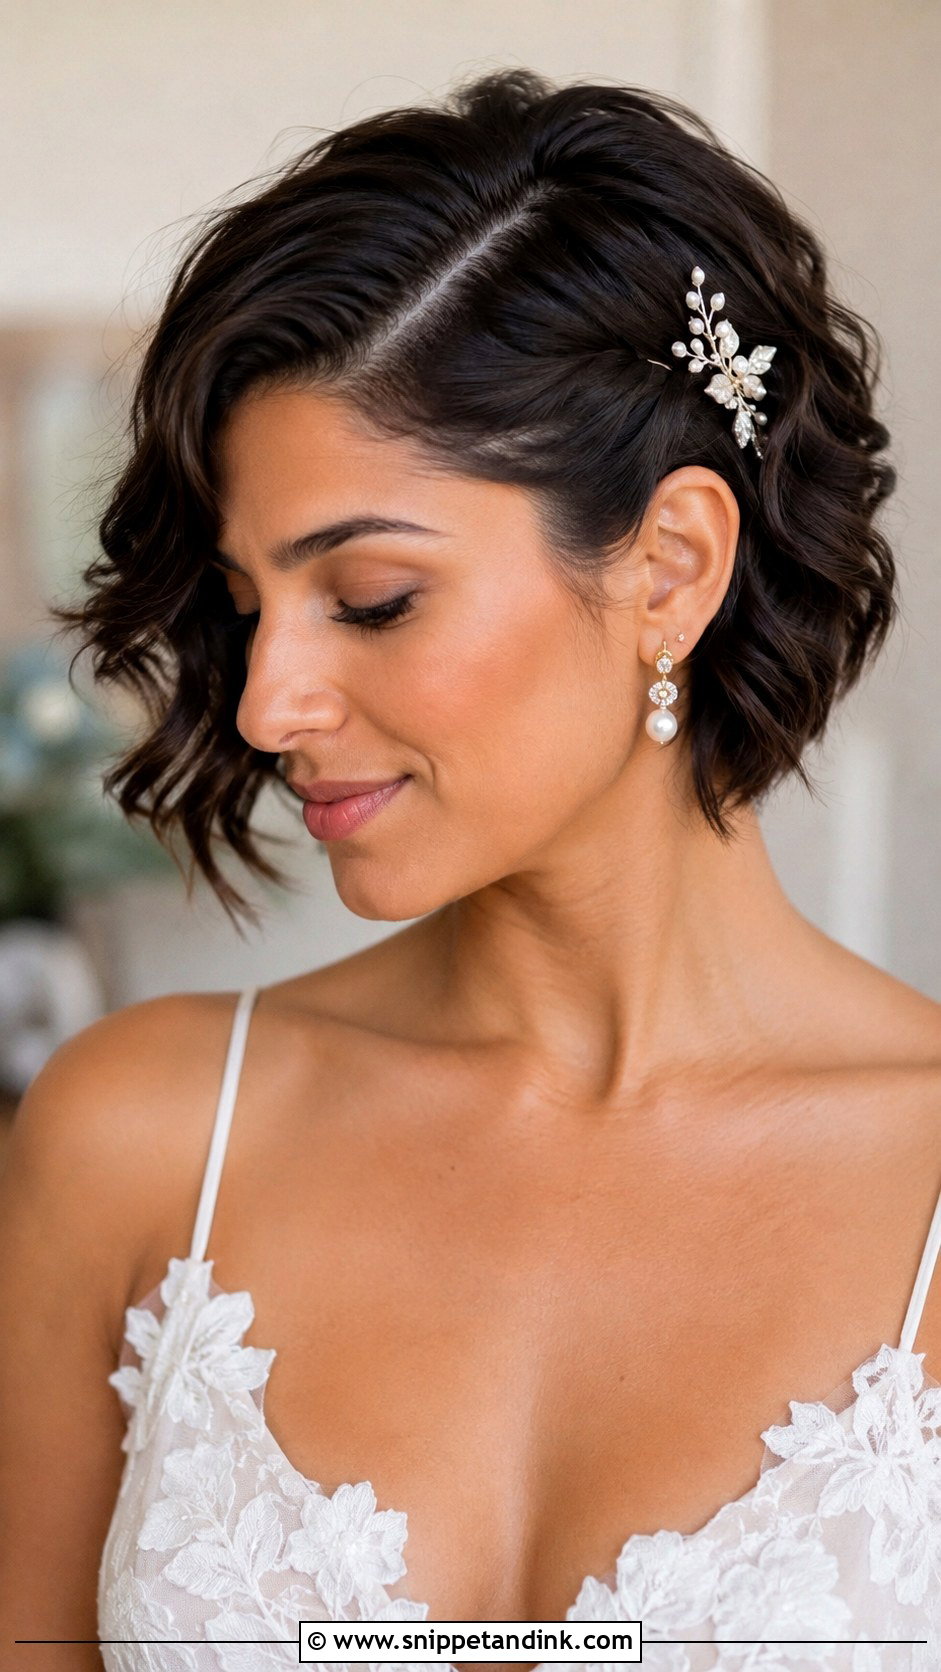
Moving the part is the cheapest styling change there is. A deep side part gives a pixie a softer frame and lets you tuck one side behind the ear to show an earring or a comb. I’ll usually check your natural cowlick first, since fighting it for twelve hours rarely works and the part will drift back by the reception. Straight, wavy and curly hair can all take a side part, as long as the top has enough length to fall over. A light hold cream is enough; anything stiffer makes the part look drawn on.
9. Pixie Wedding Hair With Crystal Pins
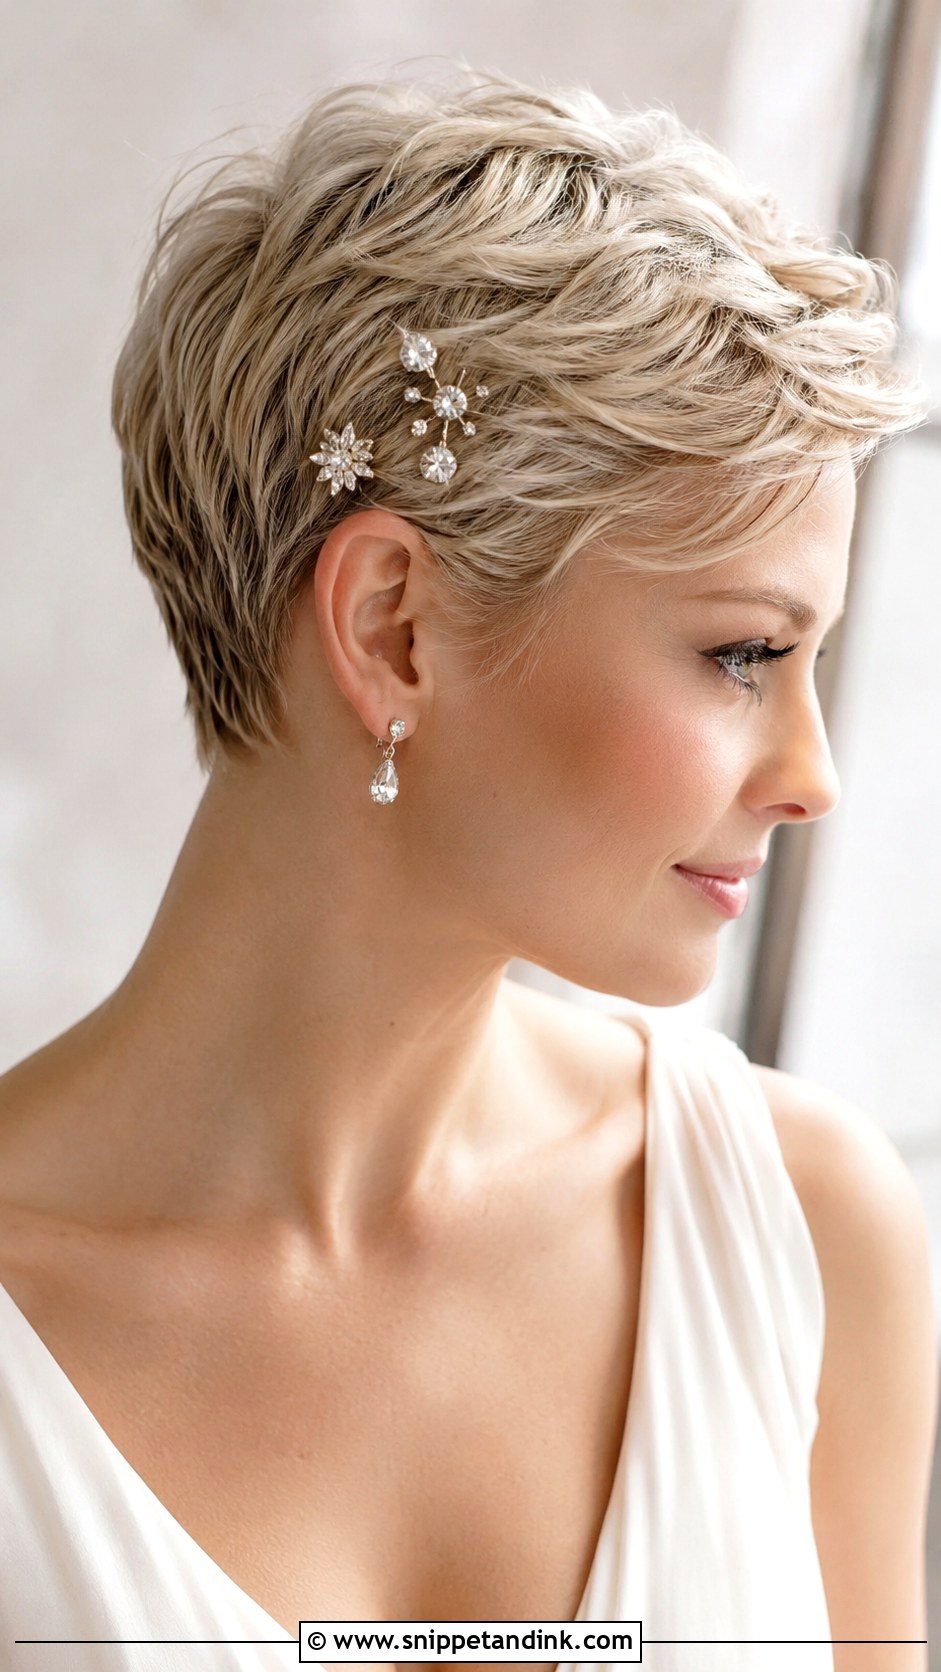
Crystal pins give sparkle without a headpiece, and they’re easy to adjust on the day. Grouping three or four near the temple looks deliberate; scattering them evenly can look accidental on short hair. The trouble with very short hair is grip, so I mist the area with texture spray first and use small pins with a ridged side. Indoor evening receptions are where crystals earn their place, because they pick up candlelight and flash. Match the metal to your earrings, not necessarily to the dress.
10. Vintage Pixie Wedding Hair
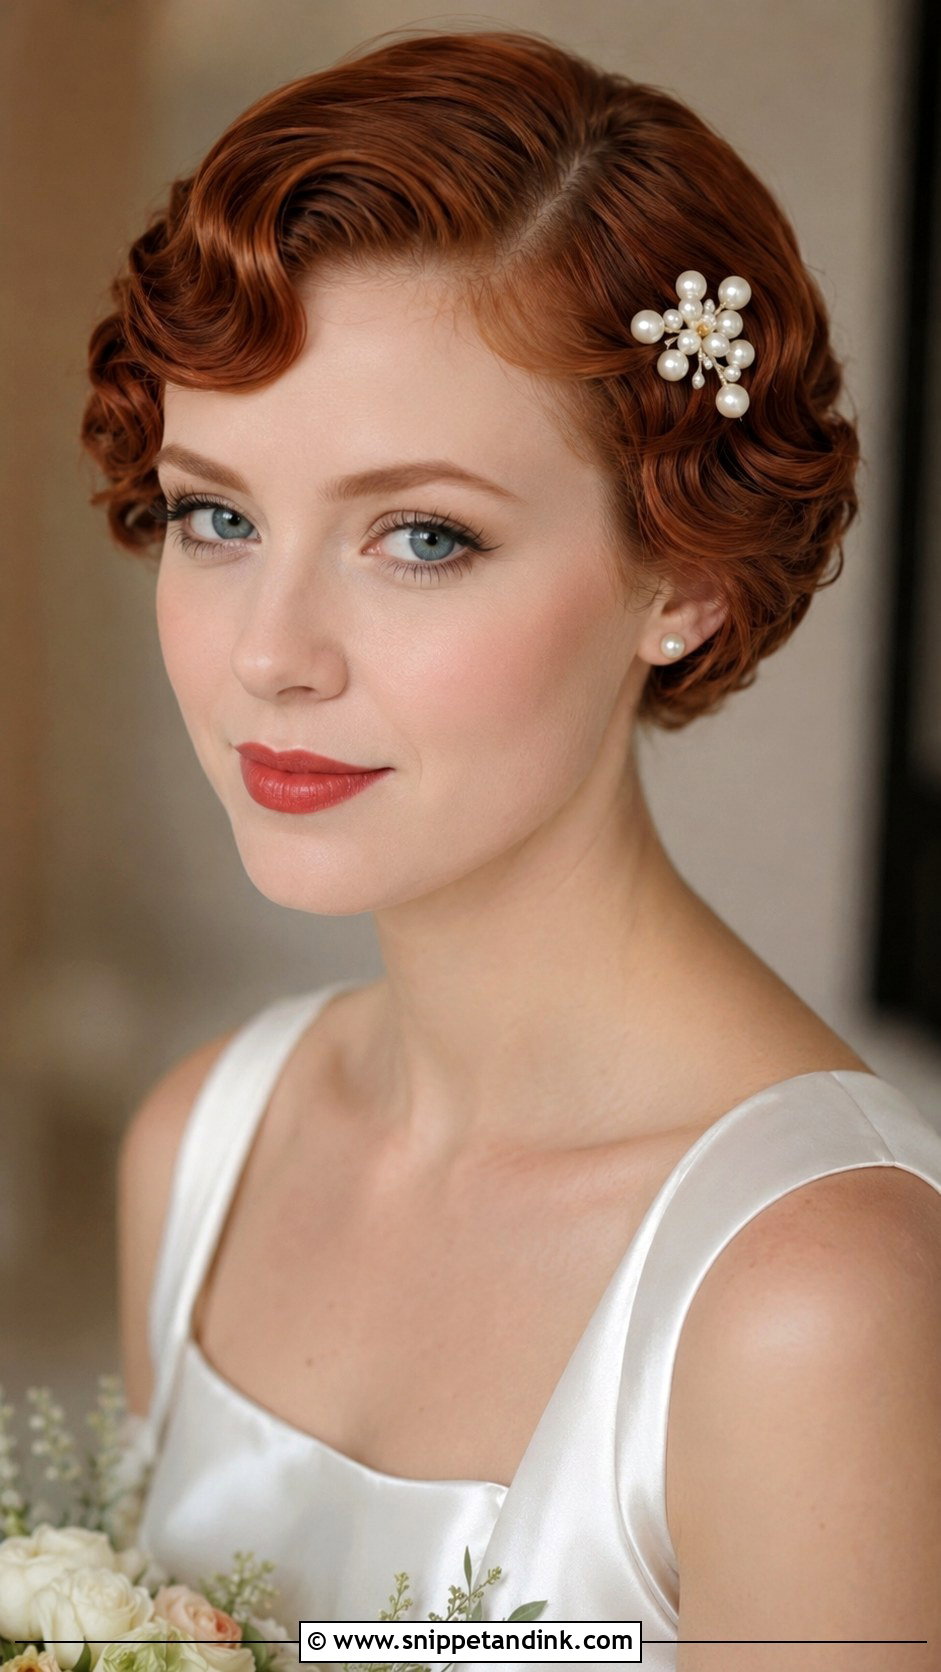
A vintage pixie is all about sculpted waves set close to the head, with a side part and a shaped curve over the forehead. I set these with a flat iron or small pin curls, brush them out, then press the wave in with fingers and a clip until the spray dries. Ask for movement, not tight curls; that’s the difference between modern and costume. A birdcage veil or a small pearl clip finishes it. It sits naturally with a red lip and satin, and it’s harder on very coarse hair, which resists lying that flat.
11. Pixie Wedding Hair With Baby Bangs
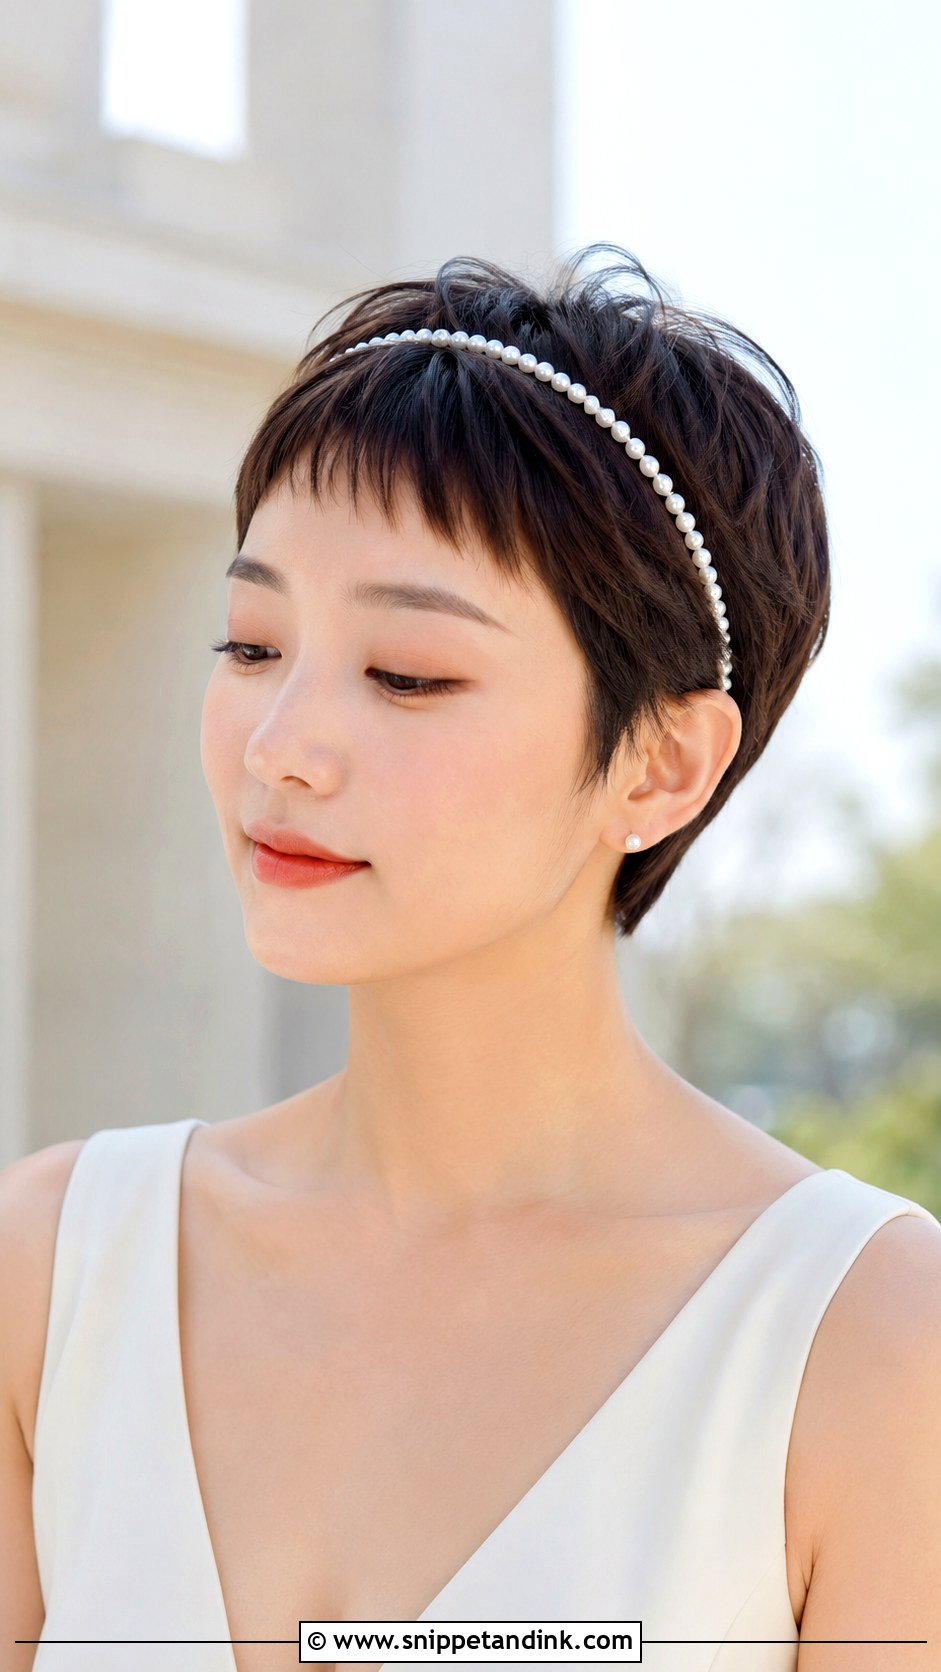
Baby bangs put every bit of attention on the eyes and brows, which is why they need to look deliberate. I smooth the sides down, keep a little lift at the crown, and make sure the fringe edge is clean rather than choppy. Trim the bangs one to two weeks before the wedding. Any later and they look freshly cut and blunt; any earlier and they creep into the brows by the photos. If you’ve never worn short bangs, don’t try them for the first time this close to the date.
12. Long Pixie Wedding Hair
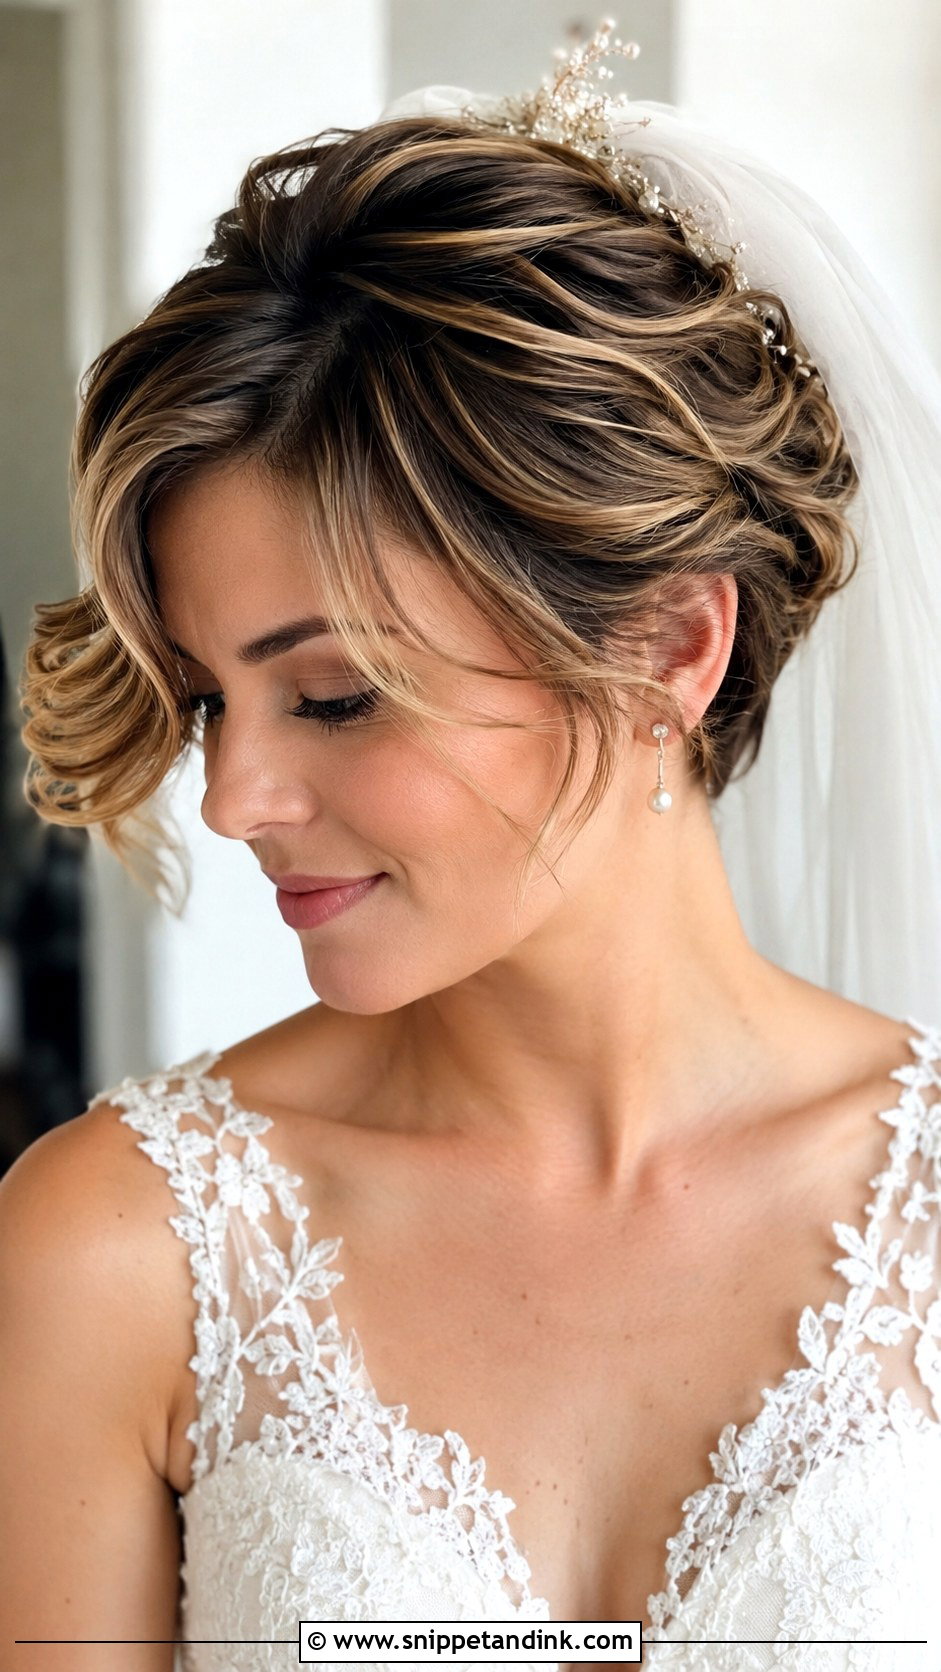
A long pixie gives me the most room to work with: waves, a swept front, pieces tucked behind the ear, or volume at the crown. It’s also where a lot of brides land when they’re growing out a shorter cut for the wedding. The extra length means pins and combs actually grip, which makes a veil much simpler. I keep the ends lightly layered so the shape moves. Leave too much weight at the back and the whole style collapses flat by mid-afternoon.
13. Pixie Wedding Hair With Side Braid
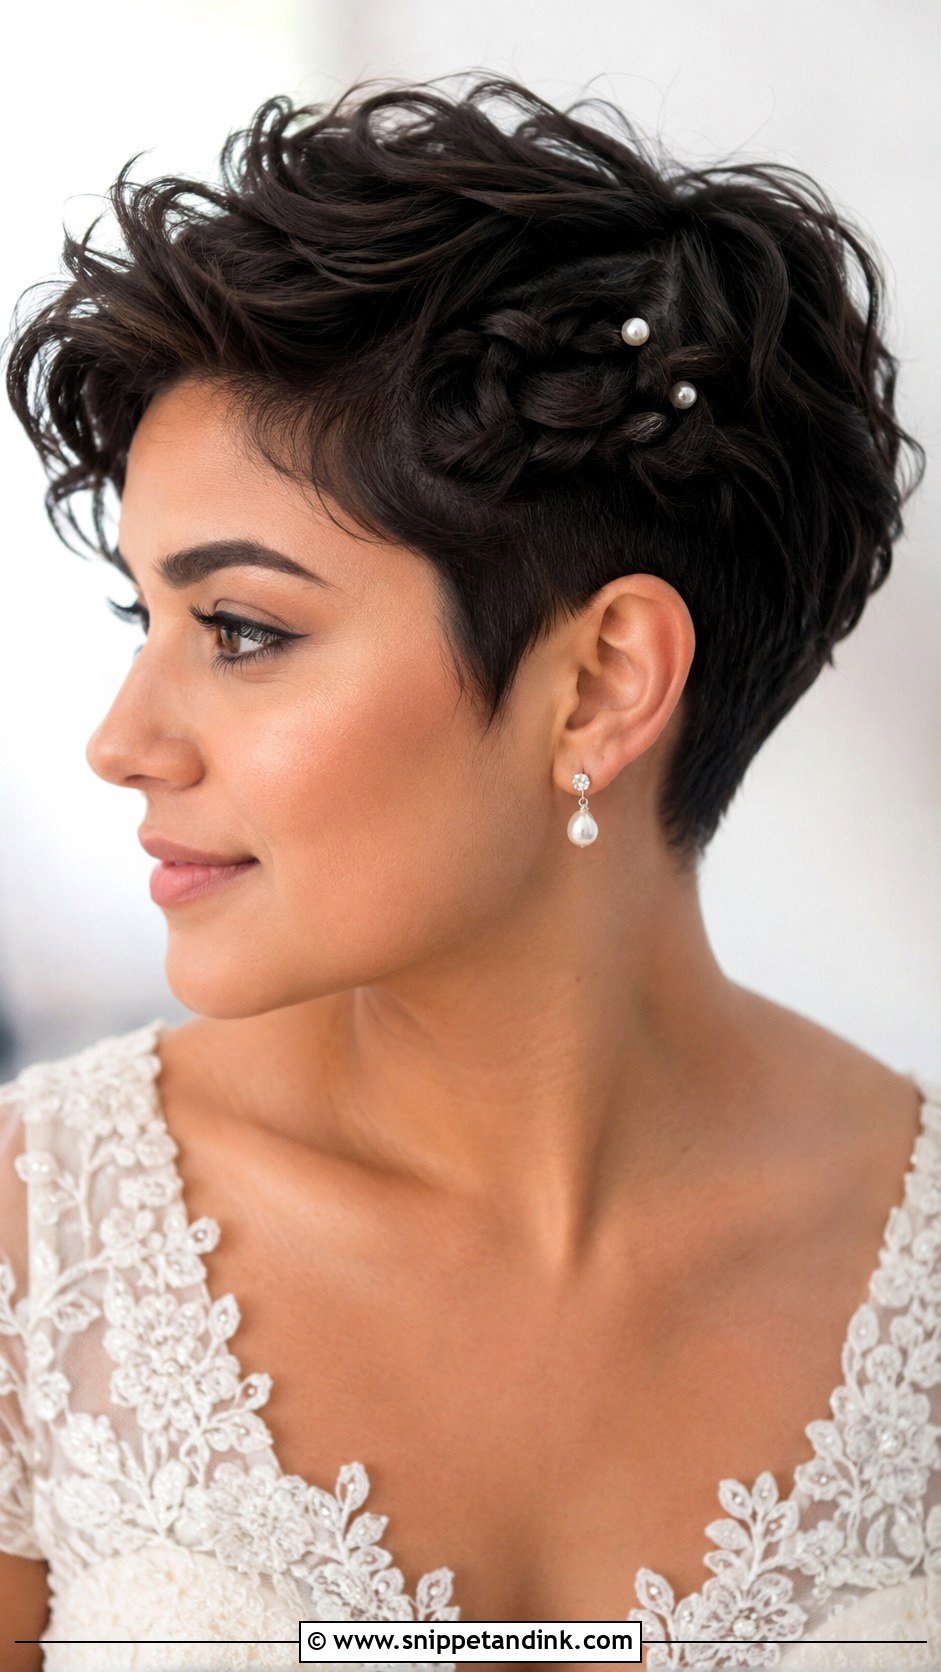
Braiding on a pixie only works on the longest side, usually a longer pixie or a pixie-bob. I braid tight to the scalp, above the ear or along the hairline, and tuck the tail under the top layer. Clean, slippery hair is the enemy here; a mist of texture spray before you start gives the strands something to hold onto. One or two tiny pearls set into the braid is enough decoration. If your sides are clippered, skip this one, because there’s simply nothing to braid.
14. Pixie Wedding Hair With Tiaras
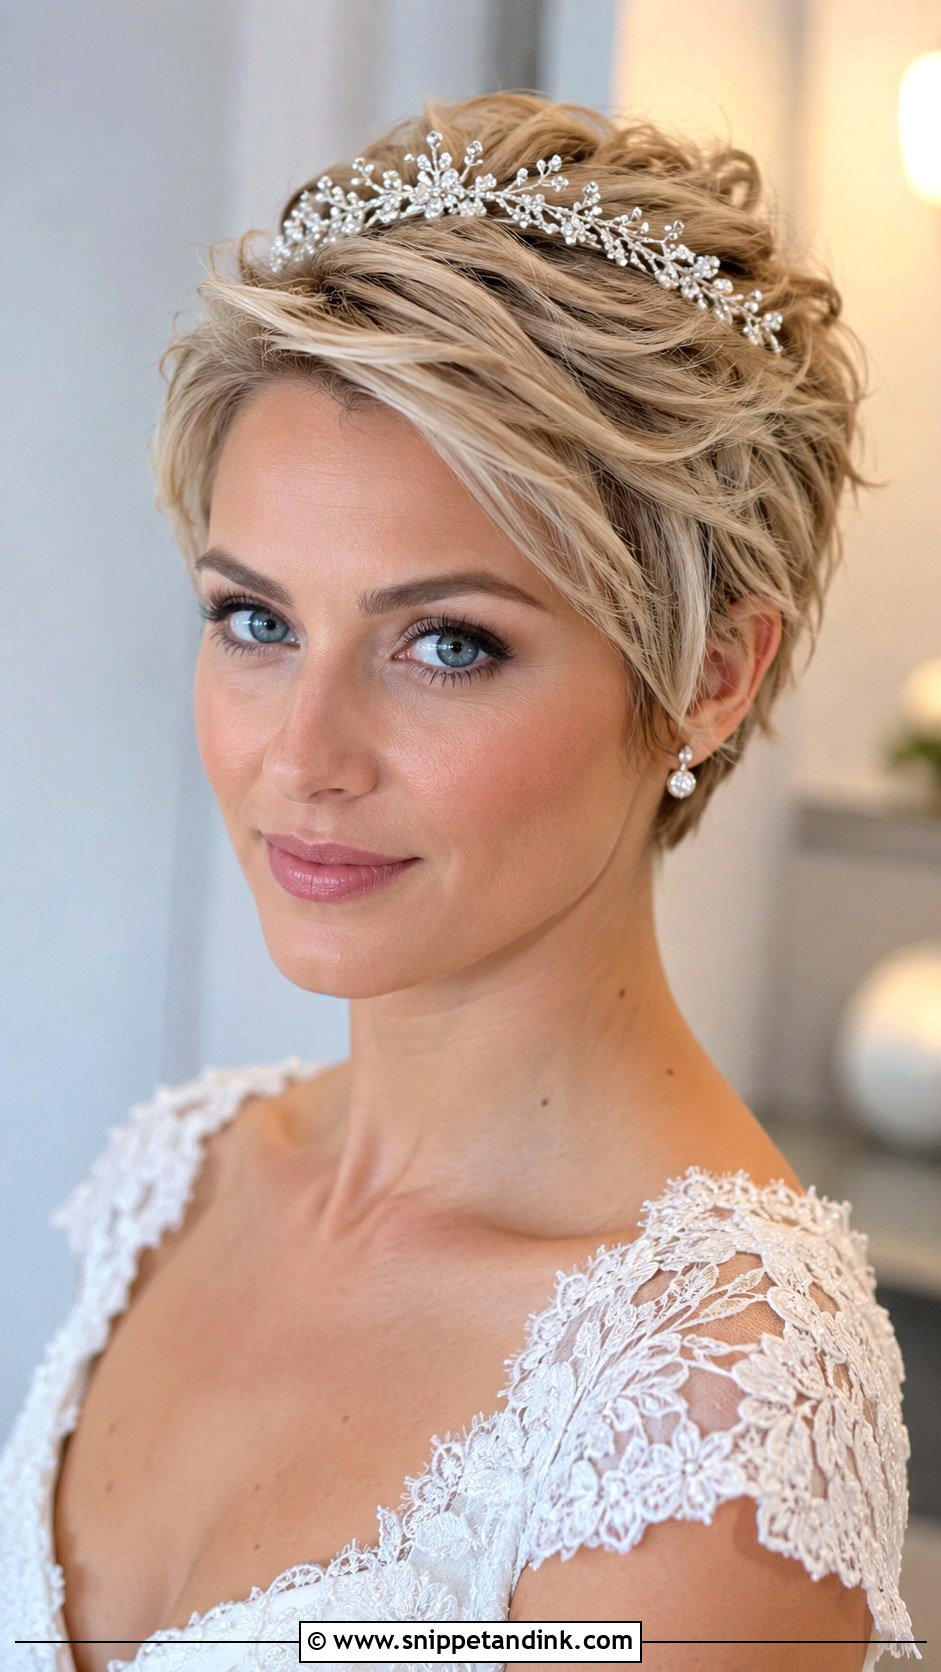
Tiaras on short hair come down to scale. A slim band or a delicate crown frames a pixie; a tall, wide piece sits on top of it like it belongs to someone else. The tiara can also anchor a veil when there’s not enough length for a comb, which solves two problems at once. I like the hair underneath sleek or lightly waved, and the front pieces neat around the temples, where a tiara’s ends tend to push hair out of place. Try it on with your veil for at least half an hour to feel where it presses.
15. Spiky Pixie Wedding Hair
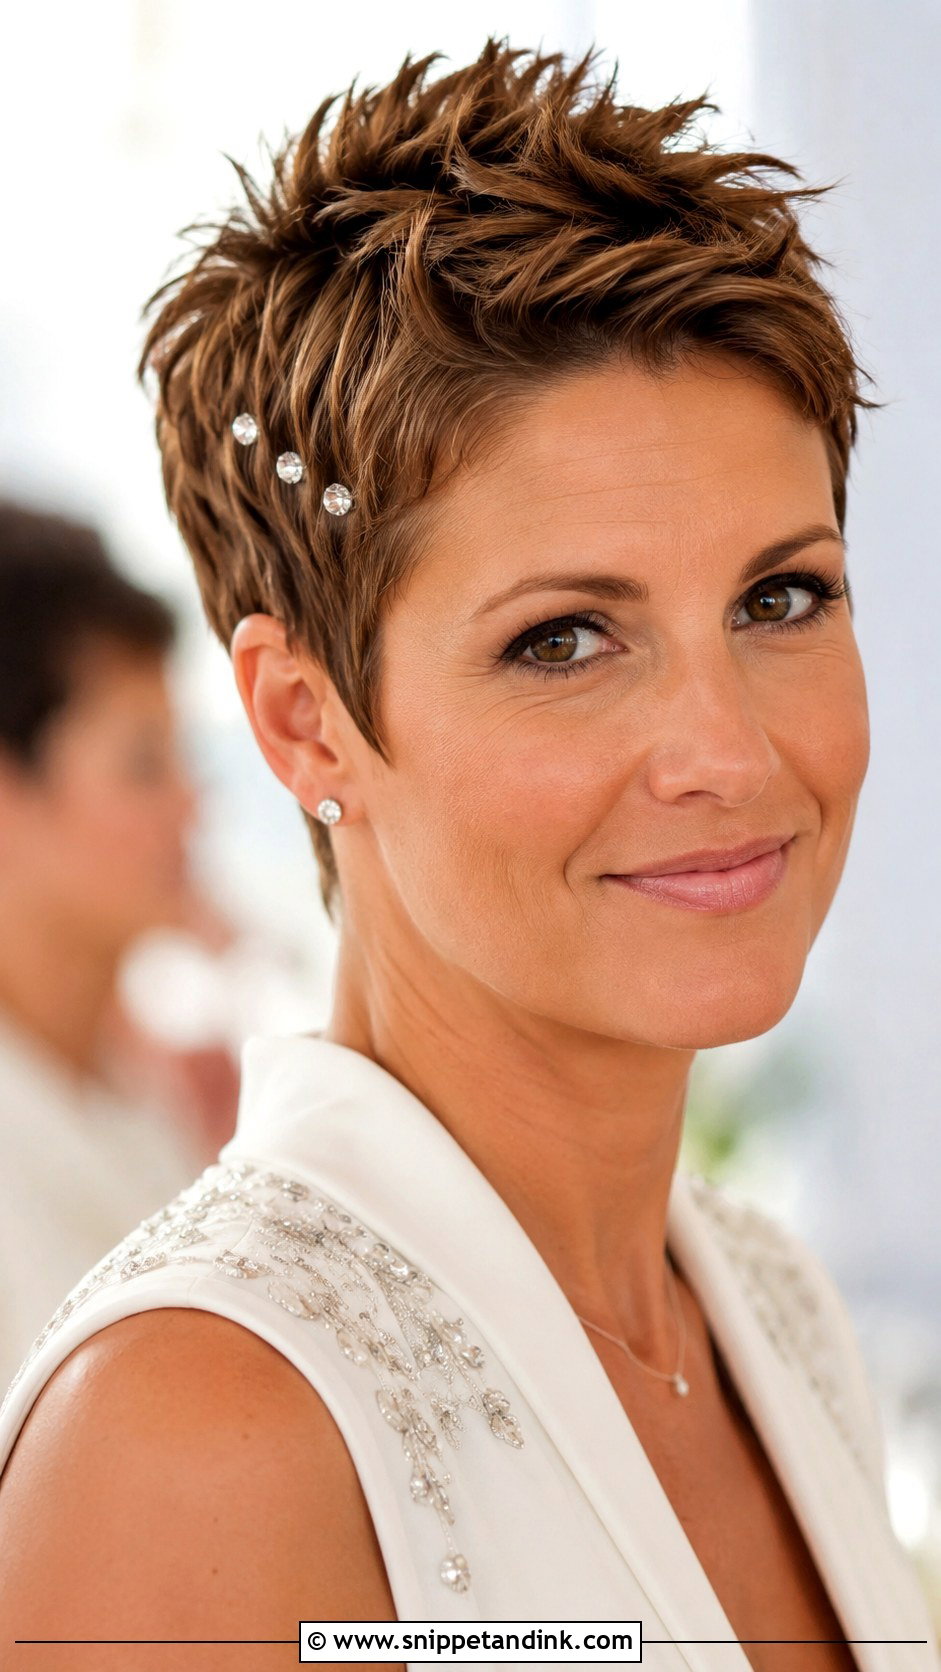
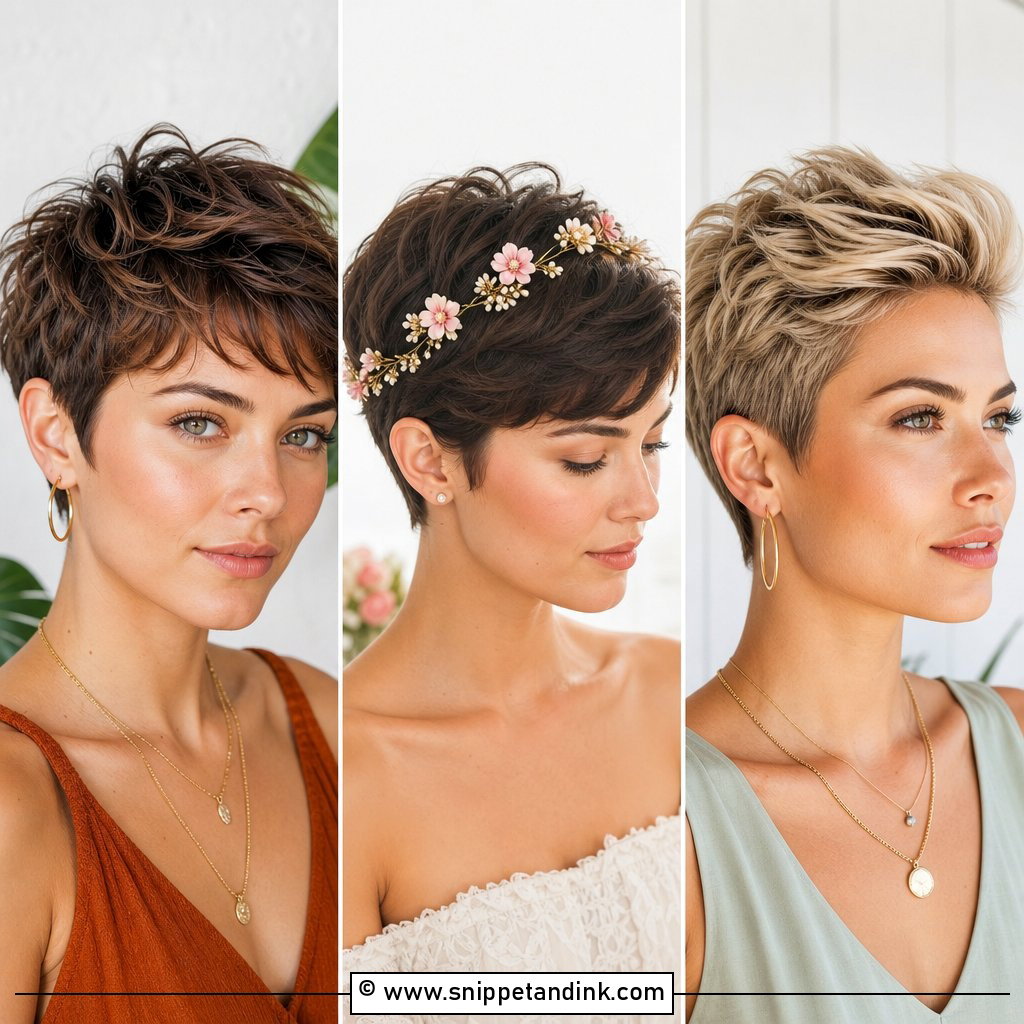
The aim with a spiky pixie wedding look is lift and definition, not sharp points. I work a small amount of wax or paste through the top with fingertips, pulling pieces up and slightly forward, and keep the sides tight. This one is really for brides who already wear their hair this way and would feel disguised in anything softer. Small crystal pins or bold earrings bridge it to a wedding outfit. Keep it touchable; hard gel spikes catch the light badly and look dated in photos.
Pin Grip on Hair Under Two Inches
Most bridal accessories are designed for long hair, which is why brides with pixies get told a veil won’t work. It will. It just needs a different way of attaching. Here’s how I handle it at a trial, based on how much length there is.
Two to three inches at the crown
This is enough to build a tiny backcombed base and slide a small comb into it. I cross two bobby pins through the comb’s teeth to lock it. Texture spray or dry shampoo on clean hair beforehand gives the base real grip.
Under an inch or clippered
Combs won’t hold at this length. I attach the veil to a thin headband, a slim tiara, or a small snap clip set in the longest section. Some veil makers will sew a loop or a band on for you if you ask early. Pins with a ridged side and a rubber tip grip better than smooth ones on short hair.
Whatever you choose, wear it with your full outfit for at least thirty minutes at the trial and turn your head quickly a few times. If it shifts in the salon, it will slide during the hugs.
How a Pixie Looks at Hour Ten
Short hair holds its shape far better than long curls, but it fails in its own ways. The crown flattens where a veil or headband has pressed on it all afternoon. The hairline picks up oil and sweat, so the front pieces start to separate and look stringy. And sleek styles lose their shine and start to look dull and dry under evening lights.
The fix kit is small: a travel dry shampoo for the hairline, a fingertip of the same paste or pomade used in the morning, and two spare pins. When the veil comes off, flip your head forward for a moment and rough up the crown with your fingers before a touch of product. That ten-second reset is usually all a pixie needs to look like it did at the ceremony.
Your Cut Is the Hairstyle Here
Every one of these looks starts with the same thing: a well-cut pixie, trimmed at the right time, and a finish chosen for your texture. Sleek suits humidity, curls suit a soft frame, texture fills out fine hair, and the accessory should be tested on your actual length before you commit to it. Book a trial, bring the veil and anything else that goes in your hair, and have someone photograph the back and sides. Short hair shows everything, which is exactly why it looks so good when it’s done right.
You'll Like These Ideas:


Leave a Reply