
Textured hair gives a bridal stylist more to work with than almost any other hair type: volume that holds a shape, pattern that reads in photos, and enough grip that pins actually stay where I put them. Your coils, curls, twists, and locs don’t need to be straightened to look bridal. What they need is a plan built around how your hair behaves, how much it shrinks, how it reacts to humidity and how much tension your edges can take. Below are twenty-five styles, from afro halos and twist-out updos to braided and loc styles, each with the practical detail I’d want a bride to know before she books her trial.
Shrinkage, Moisture and When to Install a Protective Style
Most problems I see with natural-hair wedding styles start in the week before, not on the morning. A rough timeline keeps things predictable.
- Braids, cornrows and other protective styles: install about a week before. Fresh braids feel tight and can leave the scalp tender, and a few days lets the roots relax.
- Twist-outs, braid-outs and knot-outs: do a deep-conditioning wash two or three days before, then set the night before so the hair has time to dry completely.
- Locs: retwist a week or two before, not the day before, so the new growth doesn’t look stiff or shiny.
- Every night that week: sleep on satin or in a bonnet, with curls in a loose pineapple so they don’t flatten.
Then think about weather. Defined styles like wash-and-gos and twist-outs shrink and puff in humidity, while stretched styles revert. If your wedding is outdoors in a humid season, I’d lean toward an updo or a protective style that looks right whatever the air does.
1. Loose Twist-Out Updo
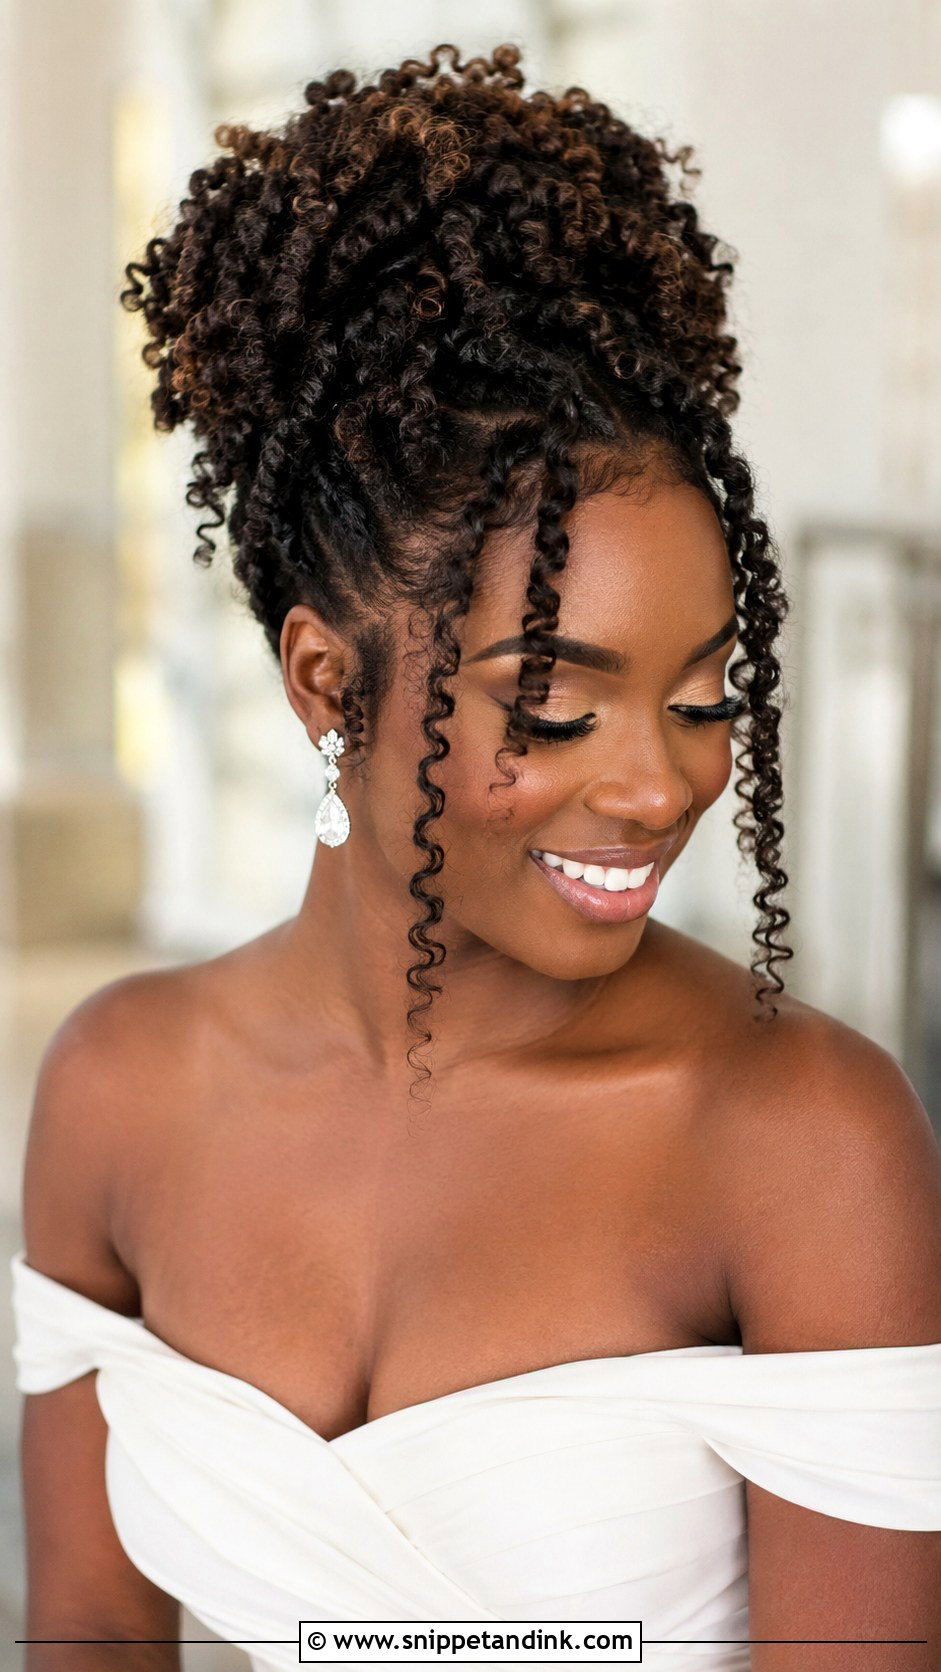
Twist-outs are only as good as the drying. I have brides twist on damp, well-moisturized hair the night before, and the one rule is that the hair must be completely dry before anyone unravels it, otherwise the curls frizz and lose definition within the hour. Unravel with lightly oiled fingers, separate gently, then sweep everything into a full bun at the crown or nape. It keeps the face clear for portraits and sits comfortably under a long veil or a floral crown. A few loose coils pulled out around the face soften the shape.
2. Natural Afro With Floral Crown
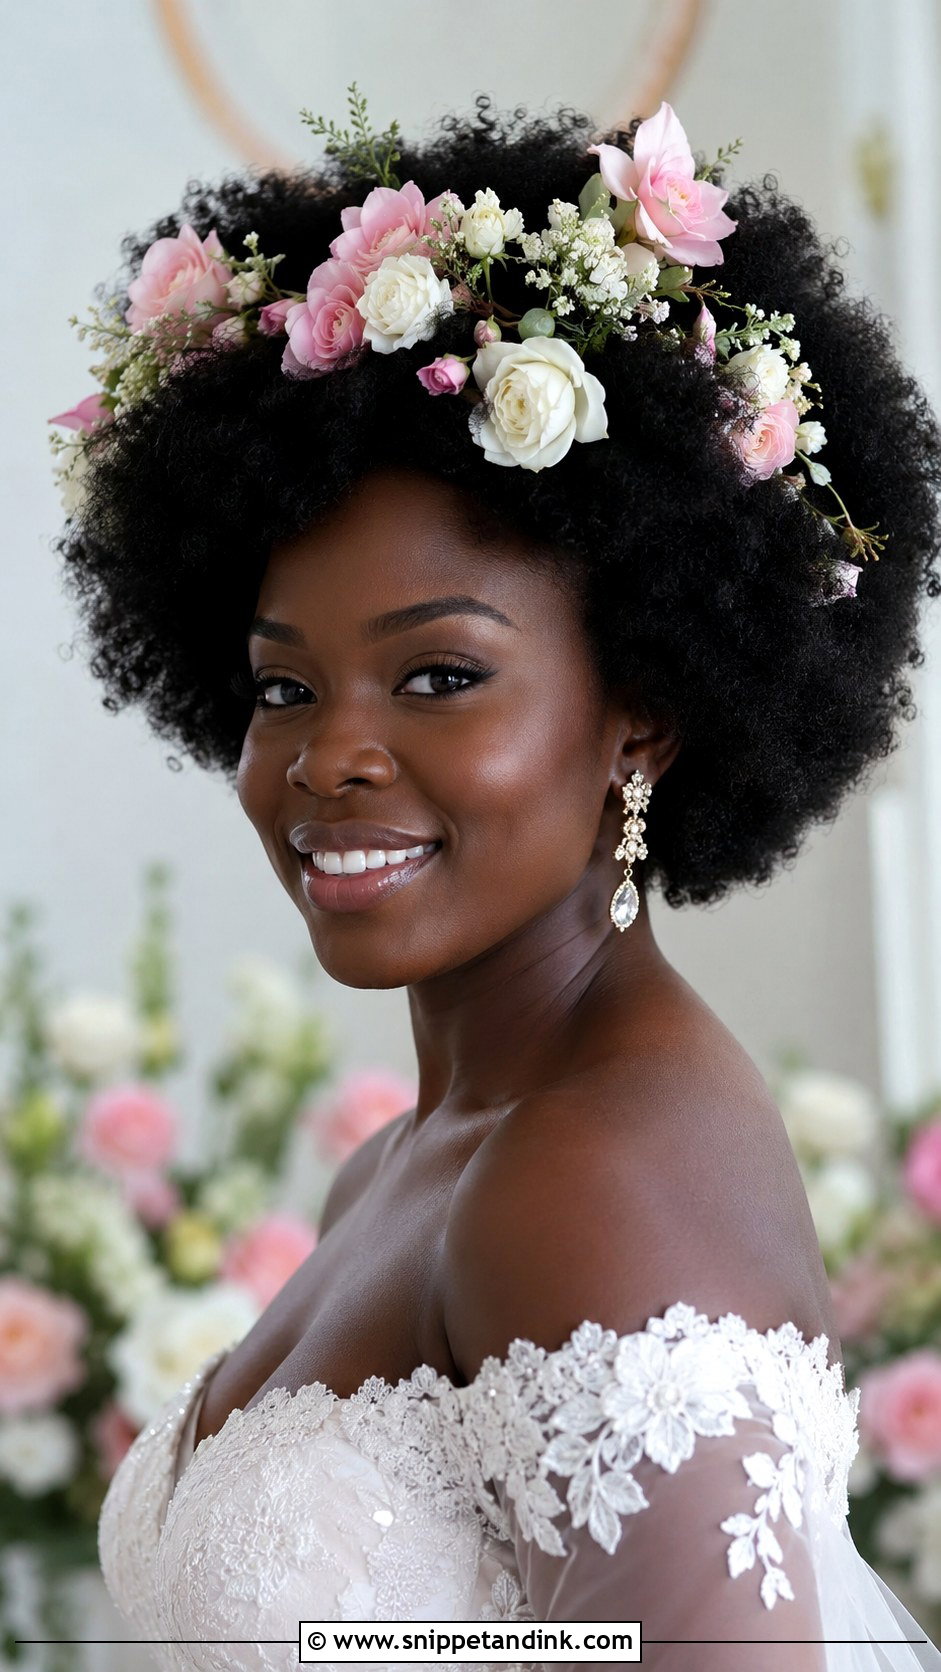
Why hide your afro when you can crown it? I shape a full afro with a defining cream and a wide-tooth pick, lifting from the root and then patting the outline into an even round so it doesn’t look lopsided from the side. Fresh flowers go along one side or all the way around. I wire the stems and anchor each one with a pin, because tucking alone won’t hold once you start hugging people. Petals against coils show up clearly in photos, and the look is right with an off-the-shoulder gown and bold earrings. Pick the flowers with your florist; delicate blooms wilt fast against warm hair.
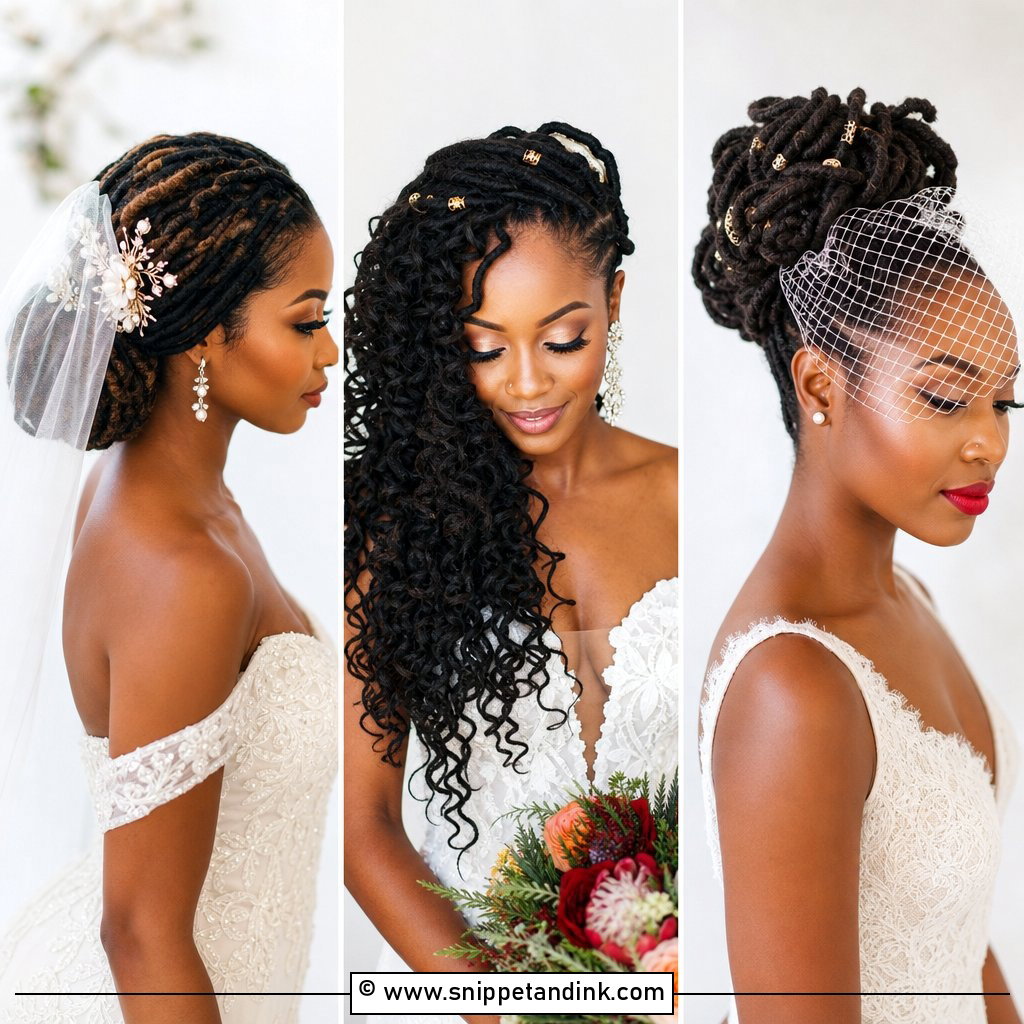
3. Elegant Loc Updo
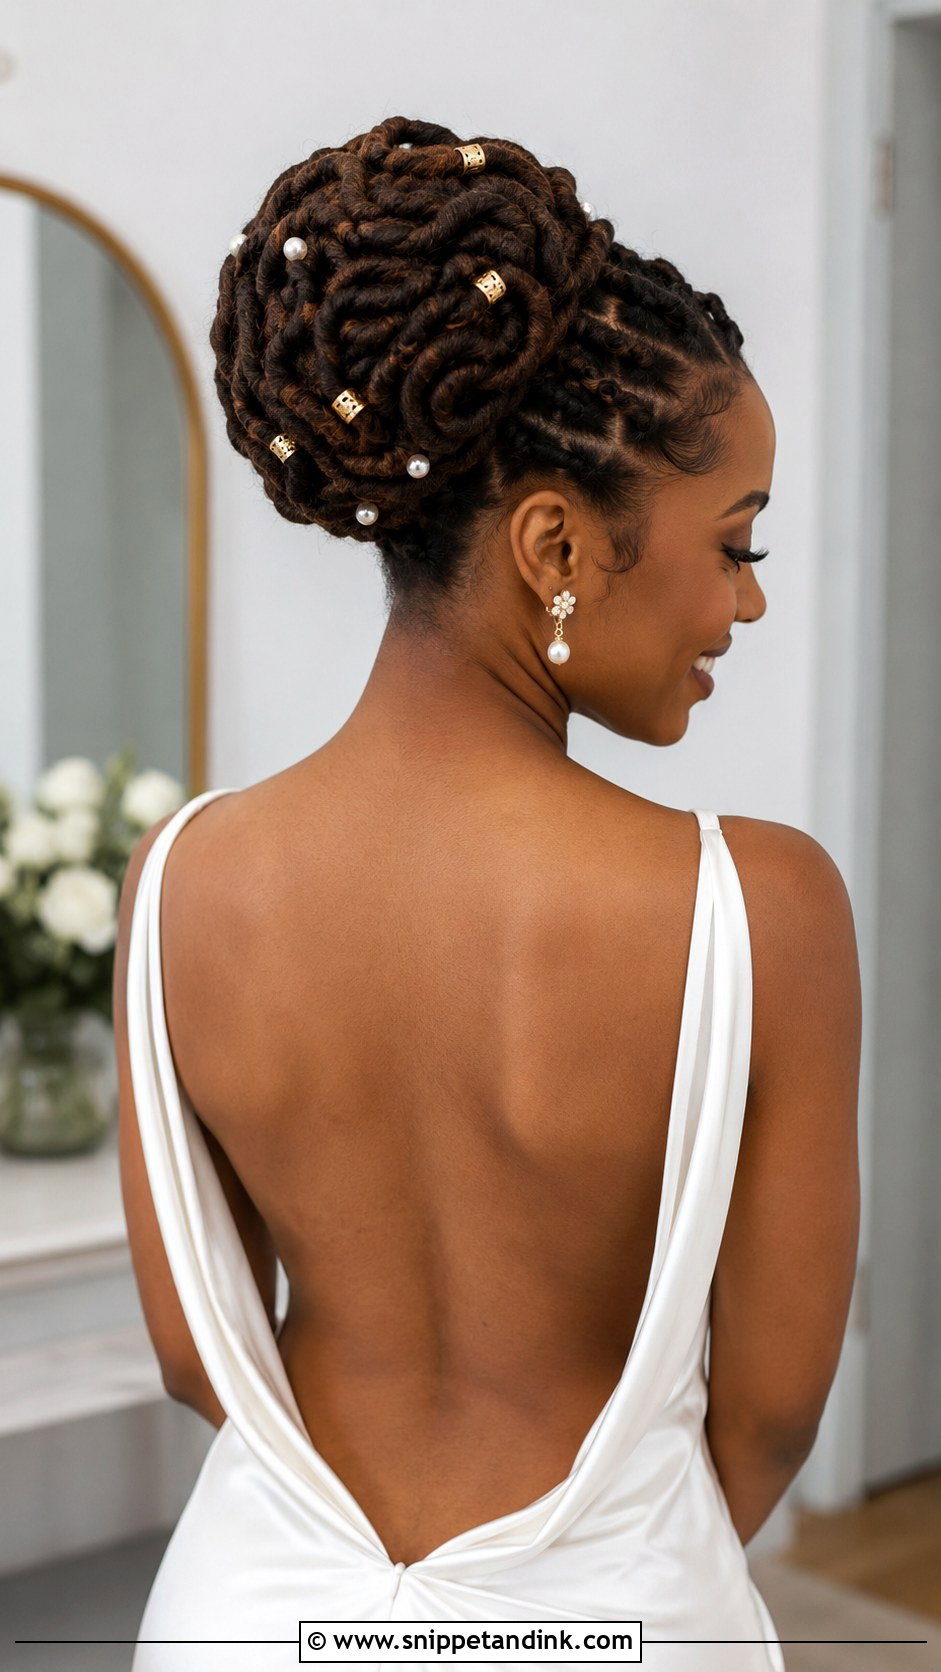
Locs are heavy, and that is the first thing I plan around with a loc updo. A full head pinned up can pull on the scalp by evening, so I build the shape from the nape upward, use U-pins and long hairpins instead of small bobby pins, and sometimes stitch the coil in place with thread for long locs. They can be coiled into a smooth bun or arranged into swirls. The open neckline suits a statement necklace or a low back, and small pearls or gold loc cuffs add detail. Starter locs are too soft to hold a sculpted shape well, so this suits mature locs best.
4. Flat Twist Bun
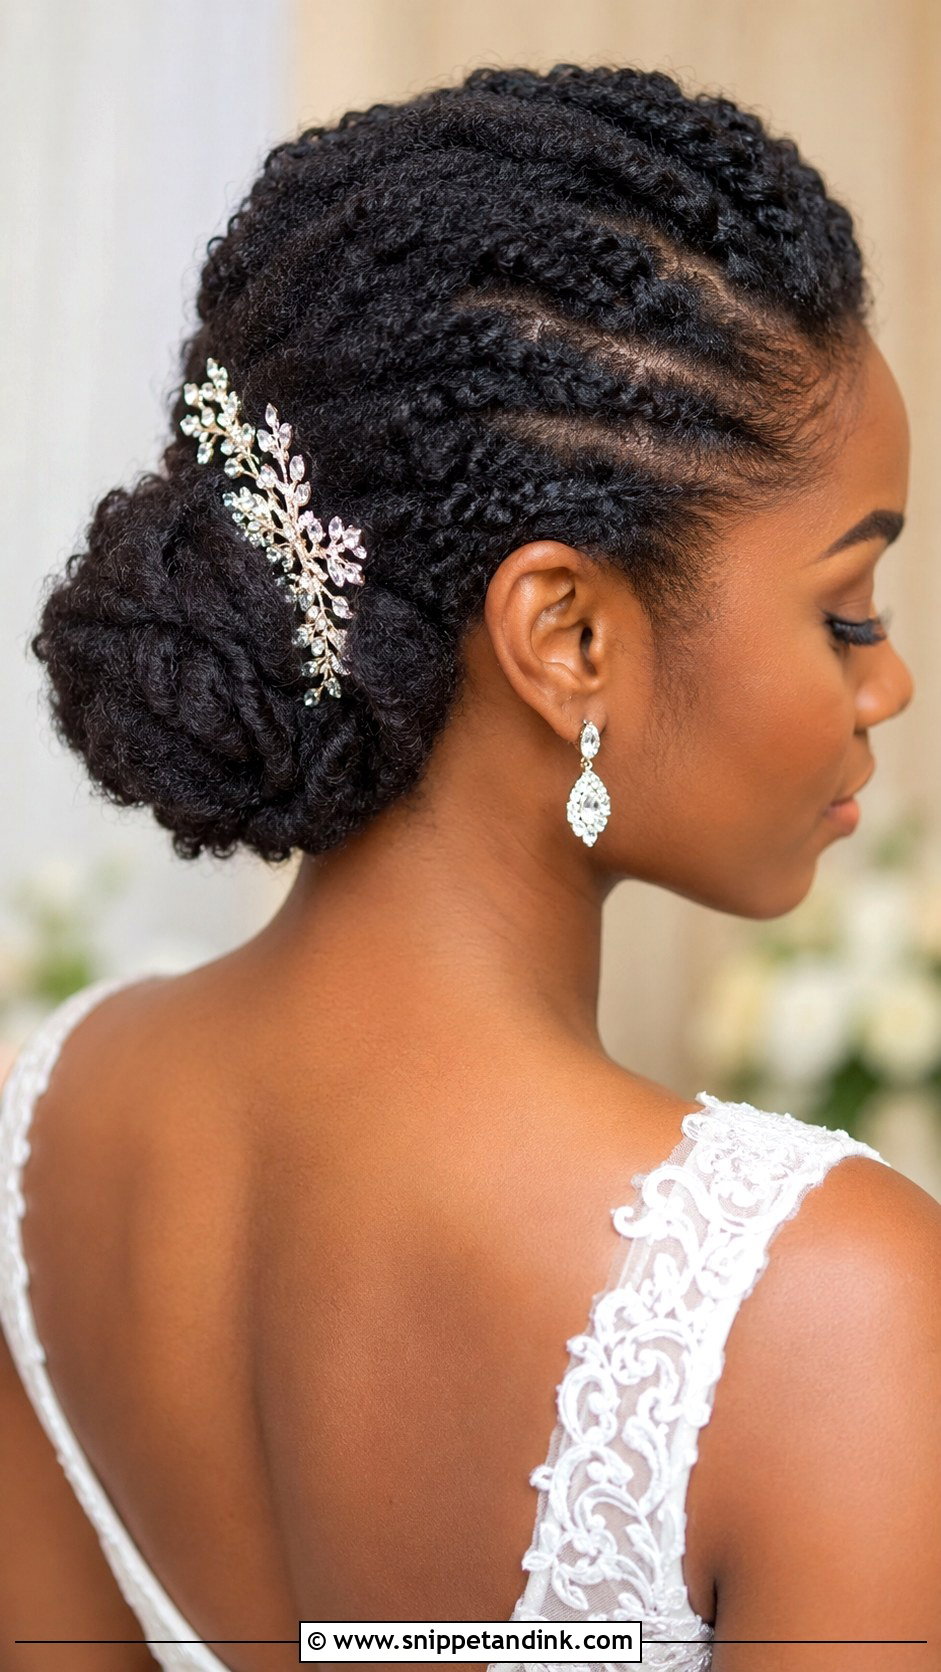
This is the style I point brides toward when they want to do their own hair. Flat twists lead back from the hairline into a soft, gathered bun, and they last longest on stretched hair, so I’d blow out on a low heat or band the hair the day before. Keep the twists neat at the front and don’t pull them tight at the edges; the hairline should look crisp, not strained. A jeweled comb or a single fresh bloom at the bun is enough decoration. It’s light on the head, which counts for a lot by hour ten.
5. Side-Swept Curly Updo
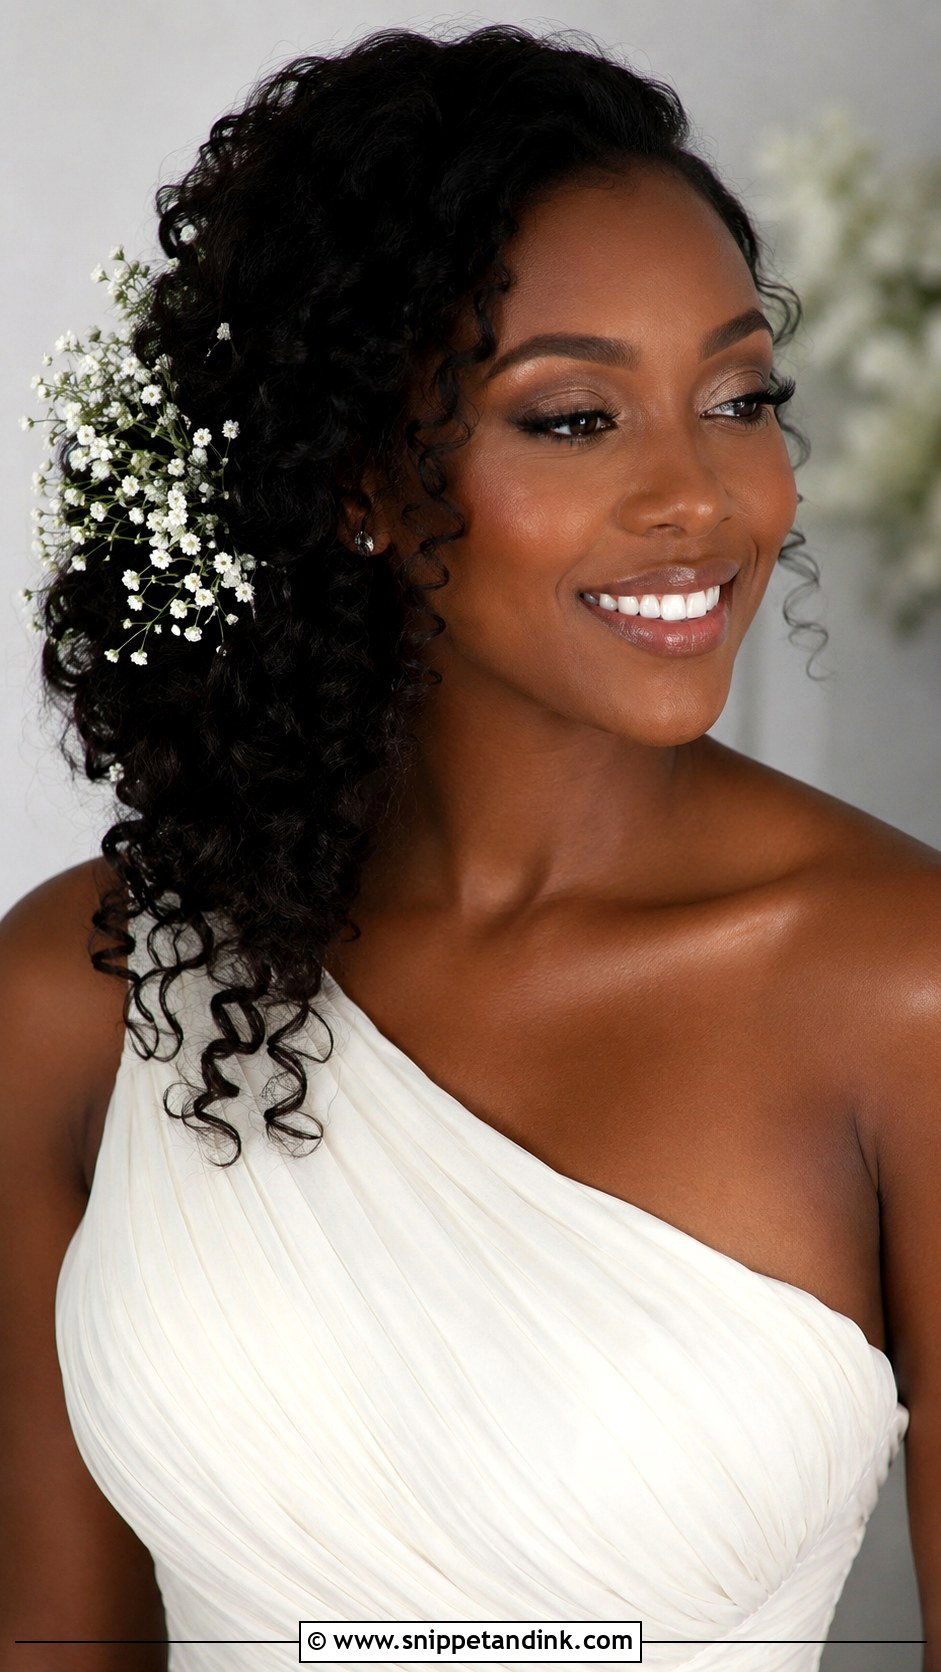
There’s something romantic about hair gathered softly to one side. I define the curls first, then pin the volume over one shoulder with crossed bobby pins hidden under the curls behind the opposite ear, which is what stops the weight from dragging the whole style down. It suits off-shoulder and one-shoulder gowns because it balances the bare side. Keep the pinning loose enough that the curls still move. A sparkling pin or a few sprigs of baby’s breath in the gathered section, and turn toward the light for portraits.
6. Halo Crown Braid
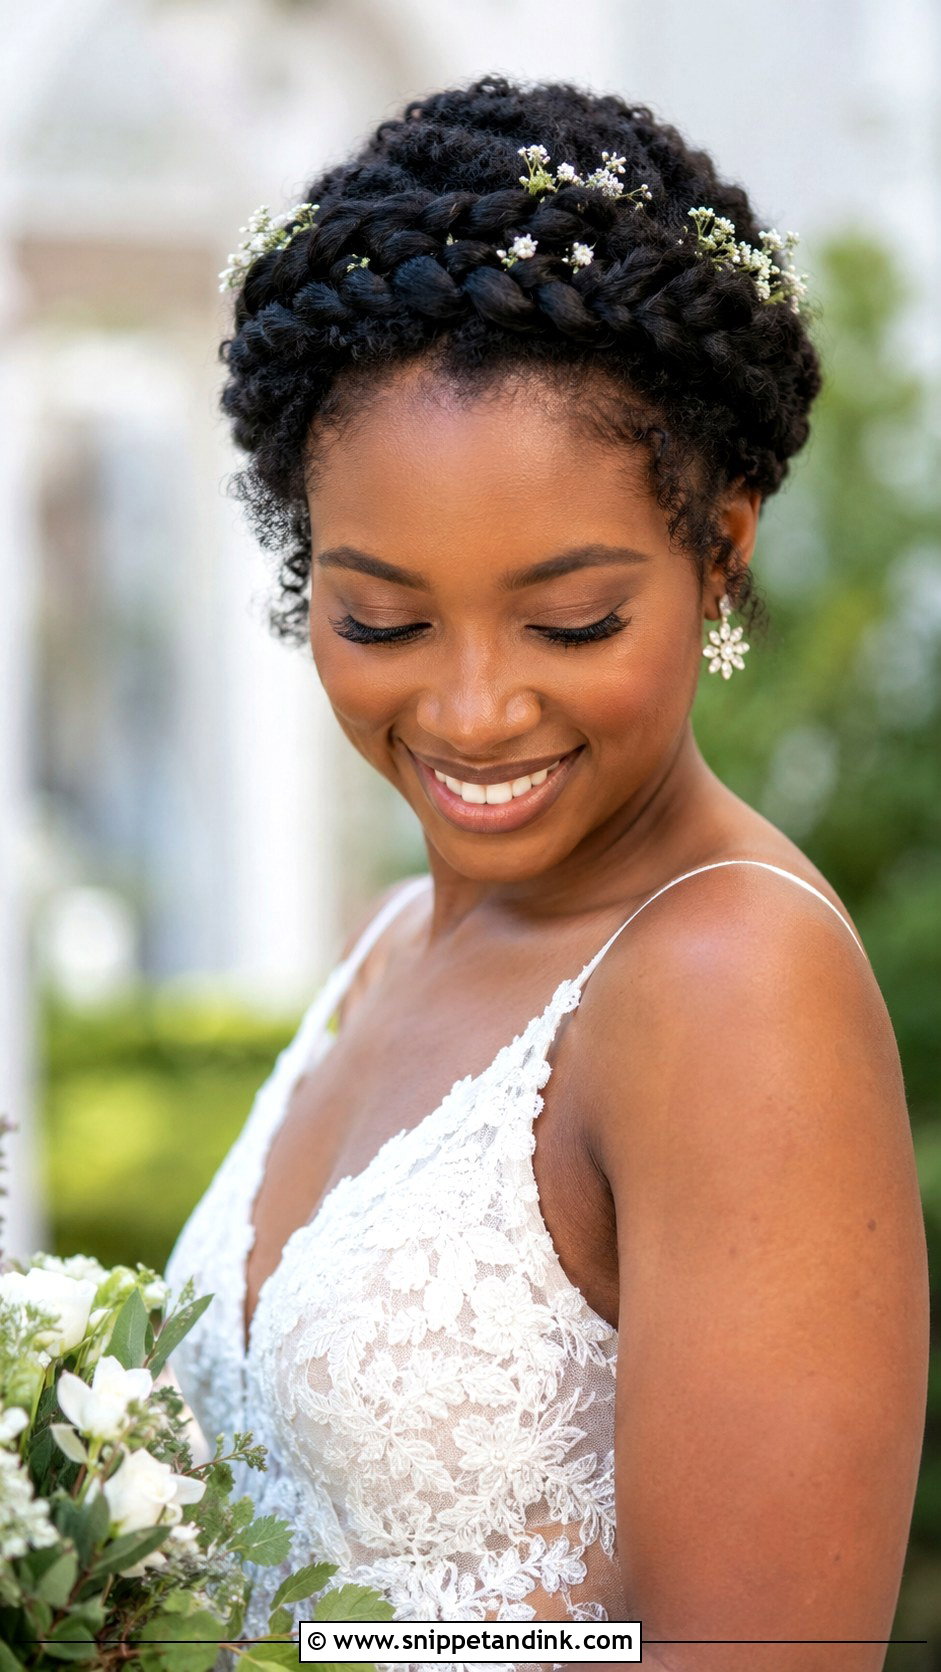
A halo braid wraps the hairline like a tiara and keeps every strand off your face and neck, which is a relief at a warm summer wedding. I braid along the hairline and pin the braid in one continuous circle, hiding the end under the start. Thick hair gives a chunky braid; on finer or shorter textured hair I add a matching braiding extension for even thickness all the way round. Tiny flowers or pearl pins slip between the plaits. It’s a strong choice for outdoor and garden ceremonies where wind would pull a looser style apart.
7. Pineapple Updo With Curls
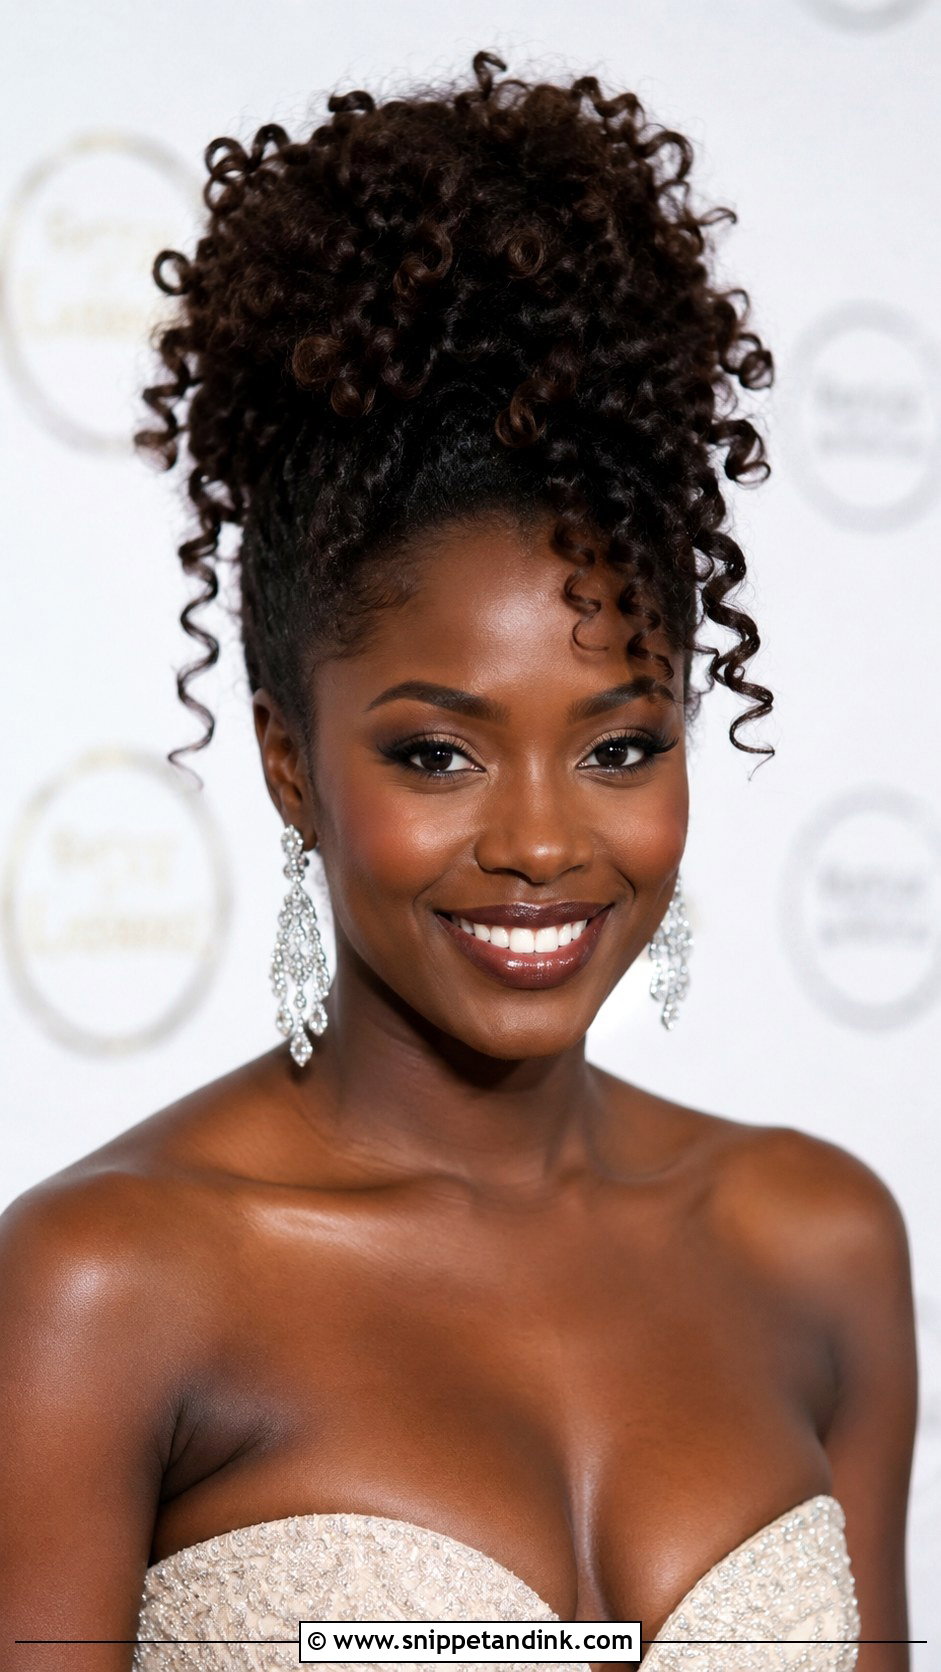
The pineapple gathers curls high on the head and lets them spill outward. It suits longer coils best, since shorter hair won’t reach the top without visible strain at the nape. I secure it with a soft, wide band rather than a thin elastic, then fan the curls out with my fingers and pin any that drop. The bare neckline shows off chandelier earrings and a sweetheart neckline. It’s playful rather than formal, so it fits brides who don’t want a fully structured updo and are happy to let the texture lead.
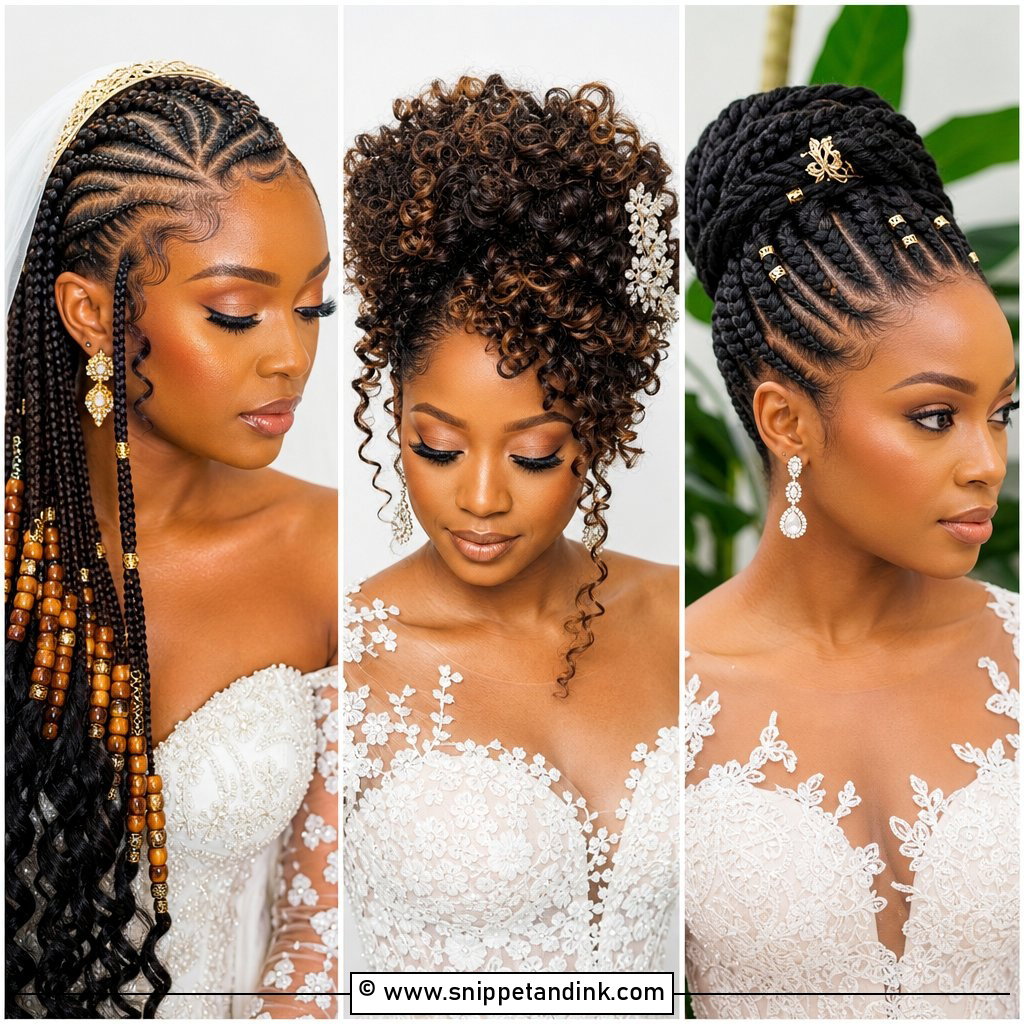
8. Box Braids Bridal Updo
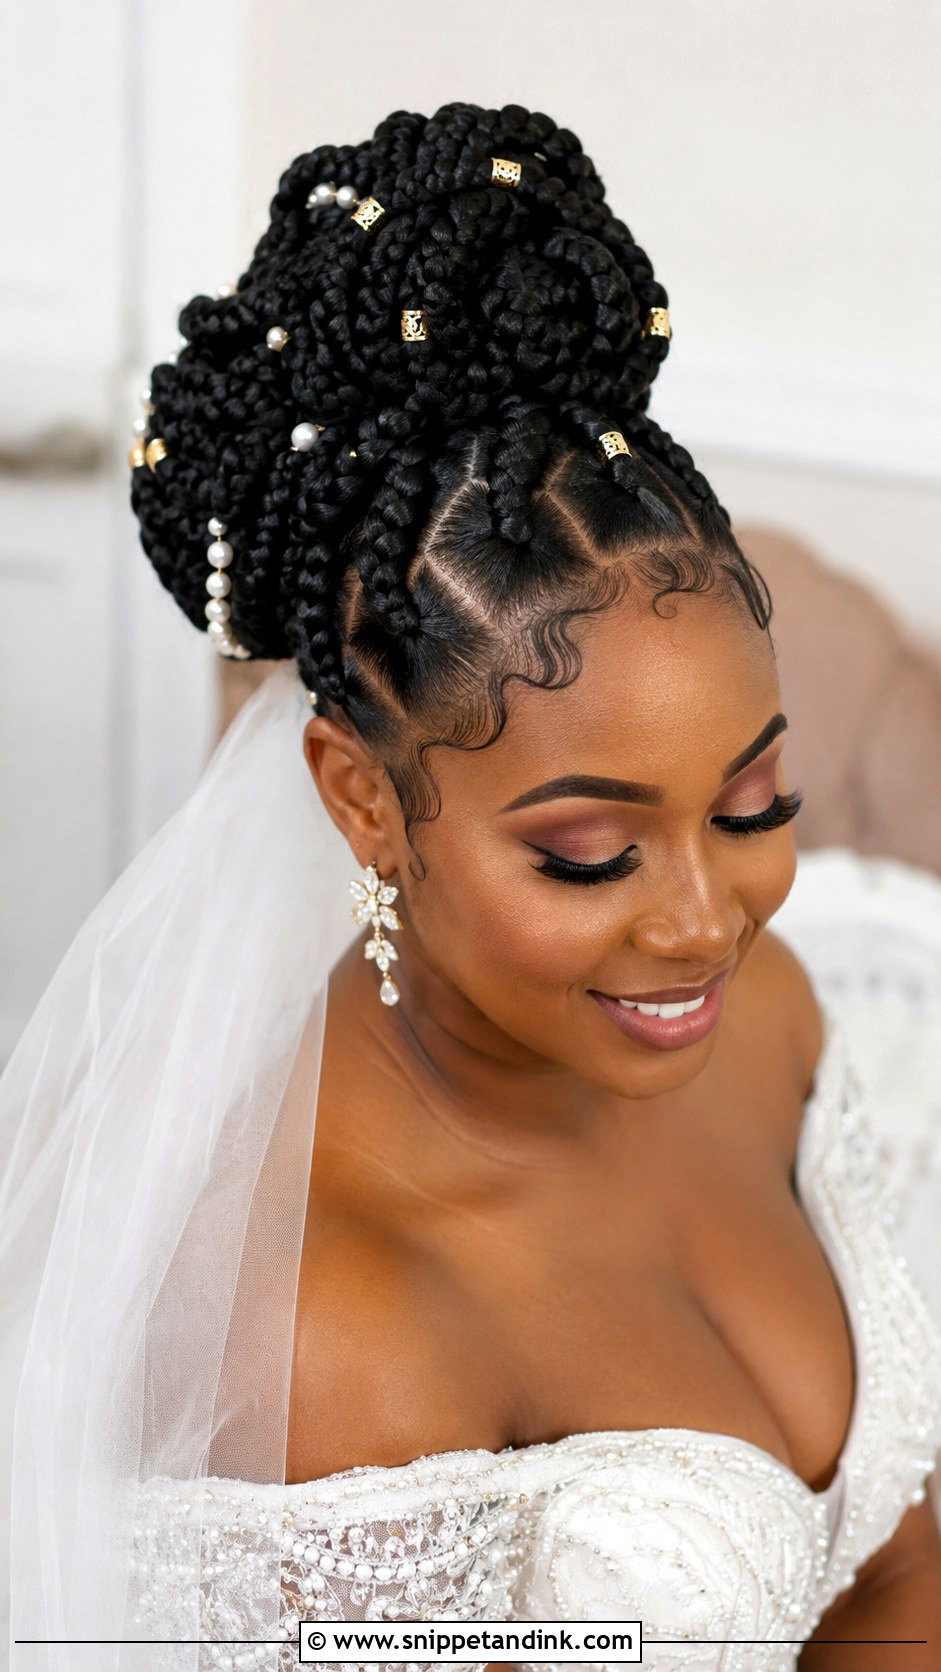
Box braids give a sleek, protective option that lasts from the morning to the last dance. I’d install them about a week before the wedding, not the day before, so the tension at the roots has time to ease and nothing feels tight in the photos. Sweep them into coiled buns or twist them into a crown; the neat partings create a pattern that reads well on camera. Gold cuffs, star pins or small pearls dress them up. Remember that a full head of braids is heavy pinned up, so ask for a test updo when they’re installed. Laid edges finish the frame.
9. Twist-Out Half-Up Half-Down
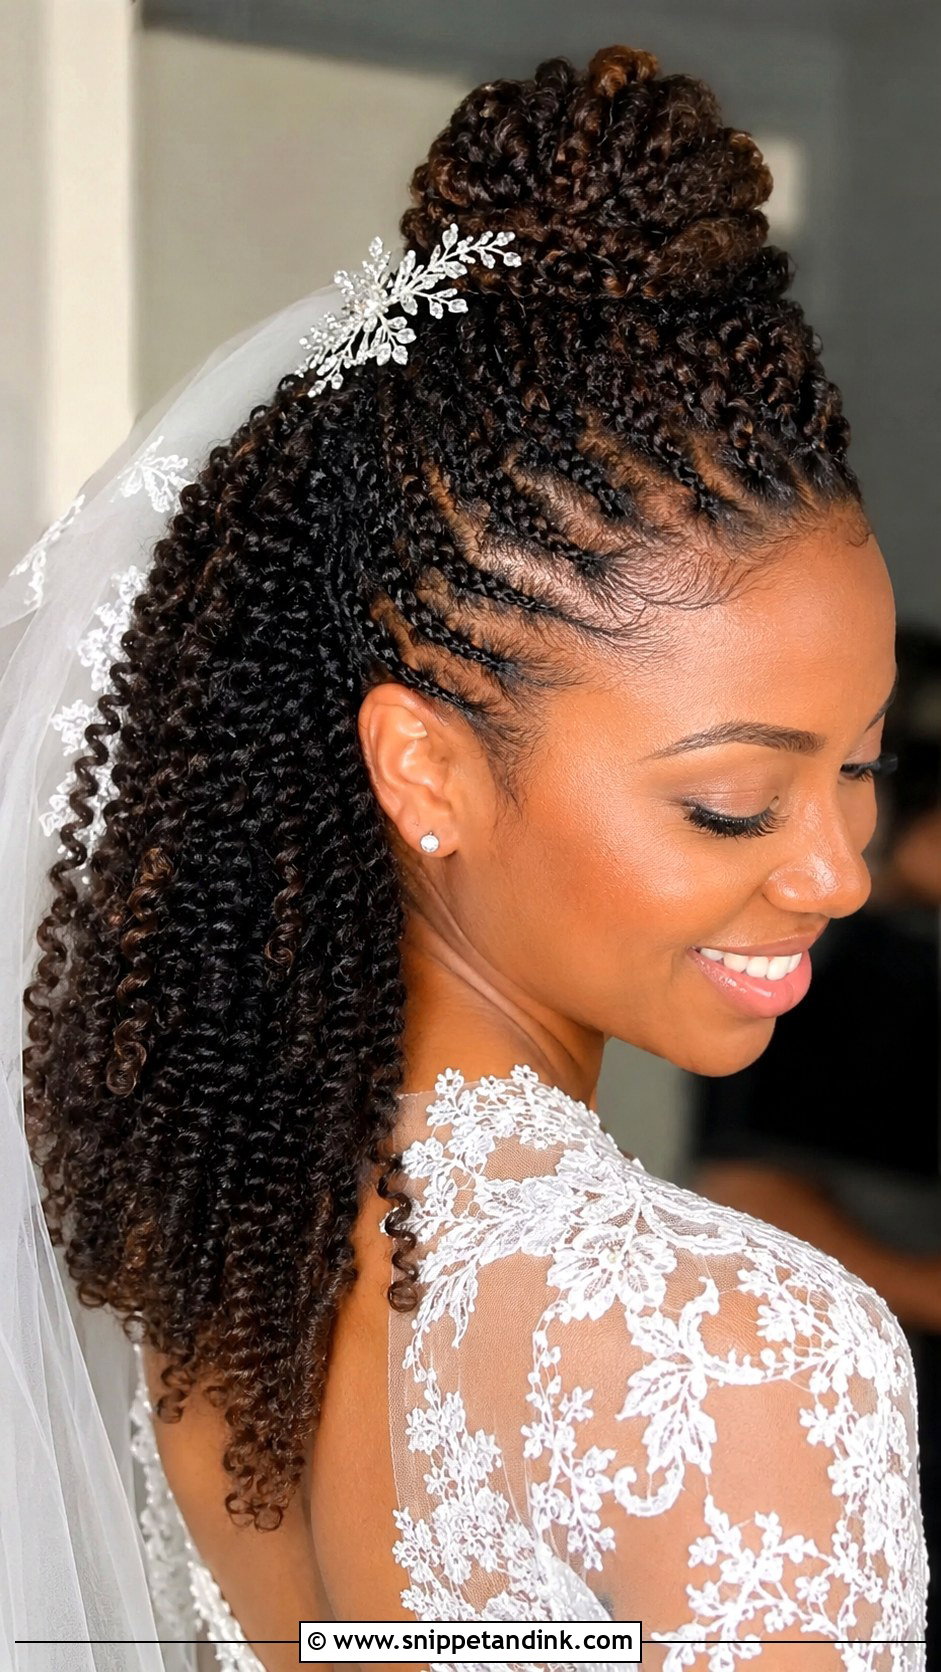
Can’t decide between up and down? The half-up twist-out gives you both. I gather the top section into a secure knot or small bun, which keeps hair out of your eyes during vows, and let the defined curls fall below. A veil tucks neatly underneath the knot, where the comb has something solid to grip. Watch the weight of the veil; a long cathedral veil can pull the knot backward, so I anchor it with crossed pins under the bun. A decorative comb or a few flowers at the crown finish it.
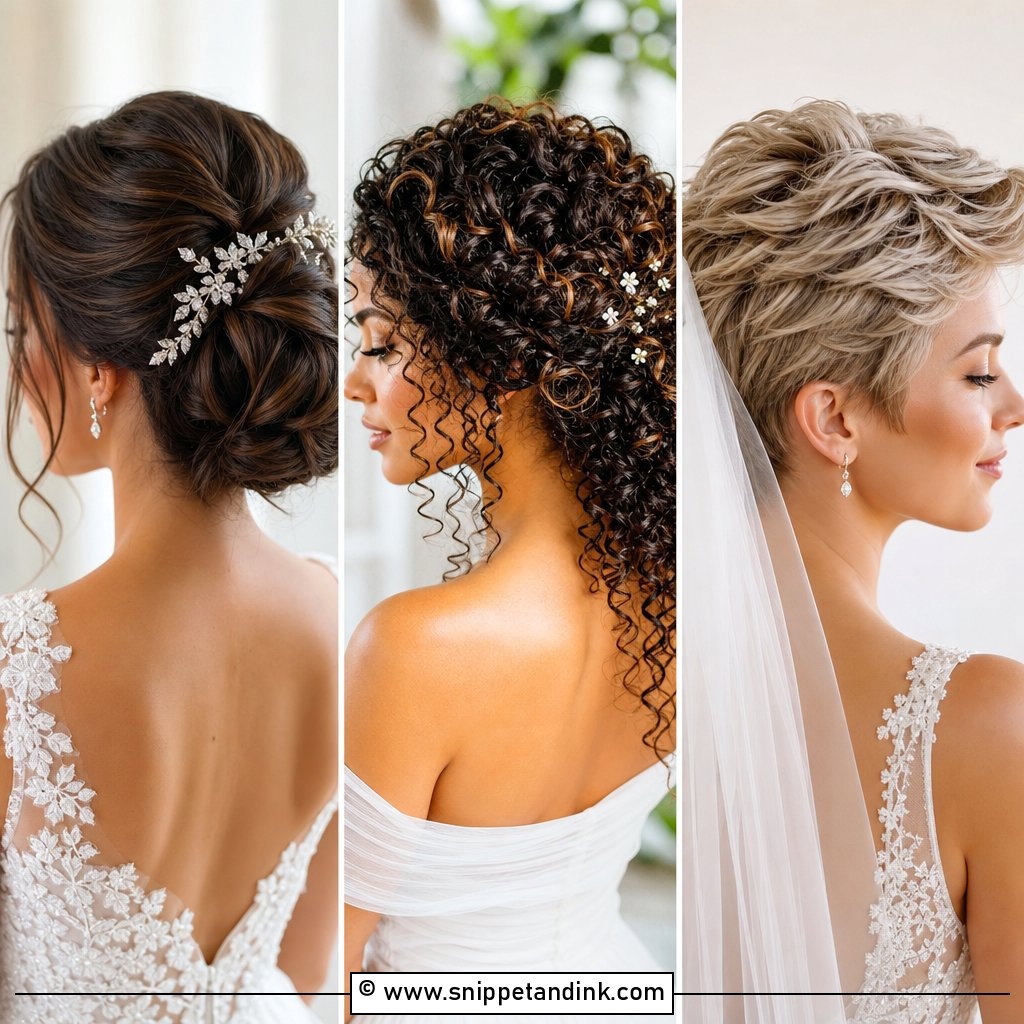
10. Curly Low Bun
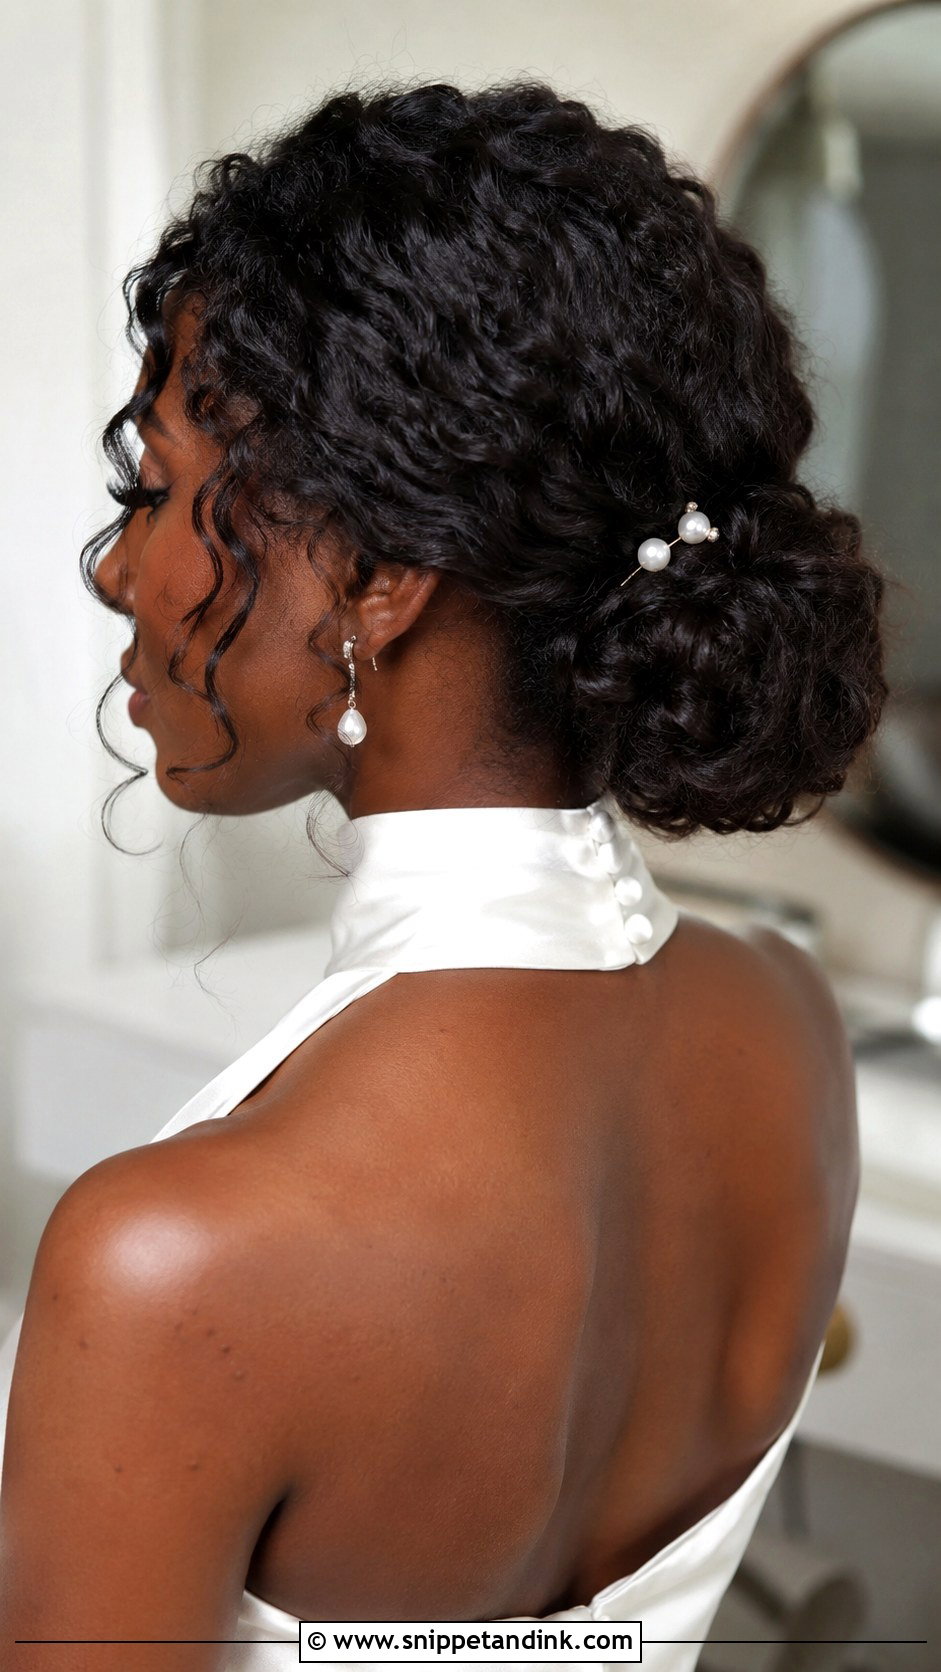
A low curly bun is the most dependable updo I do. I gather the curls at the nape, shape them into a textured bun that still shows the pattern, and leave a few tendrils loose at the face. Because the weight sits low, it doesn’t pull on the scalp, and a veil comb slides in above it with no trouble. It pairs well with a high neckline and suits formal and intimate weddings alike. Pearl pins or a small hairpiece add a little shimmer.
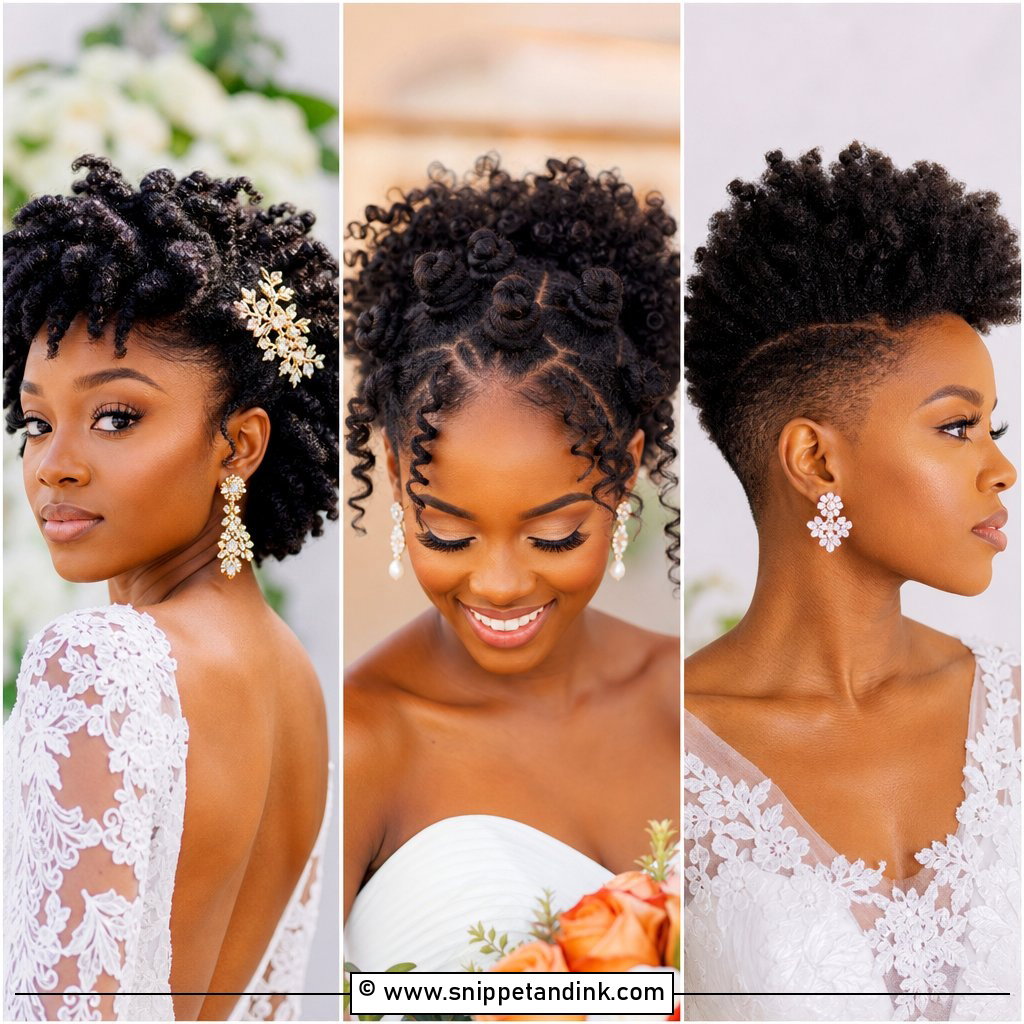
11. Afro Puff Updo
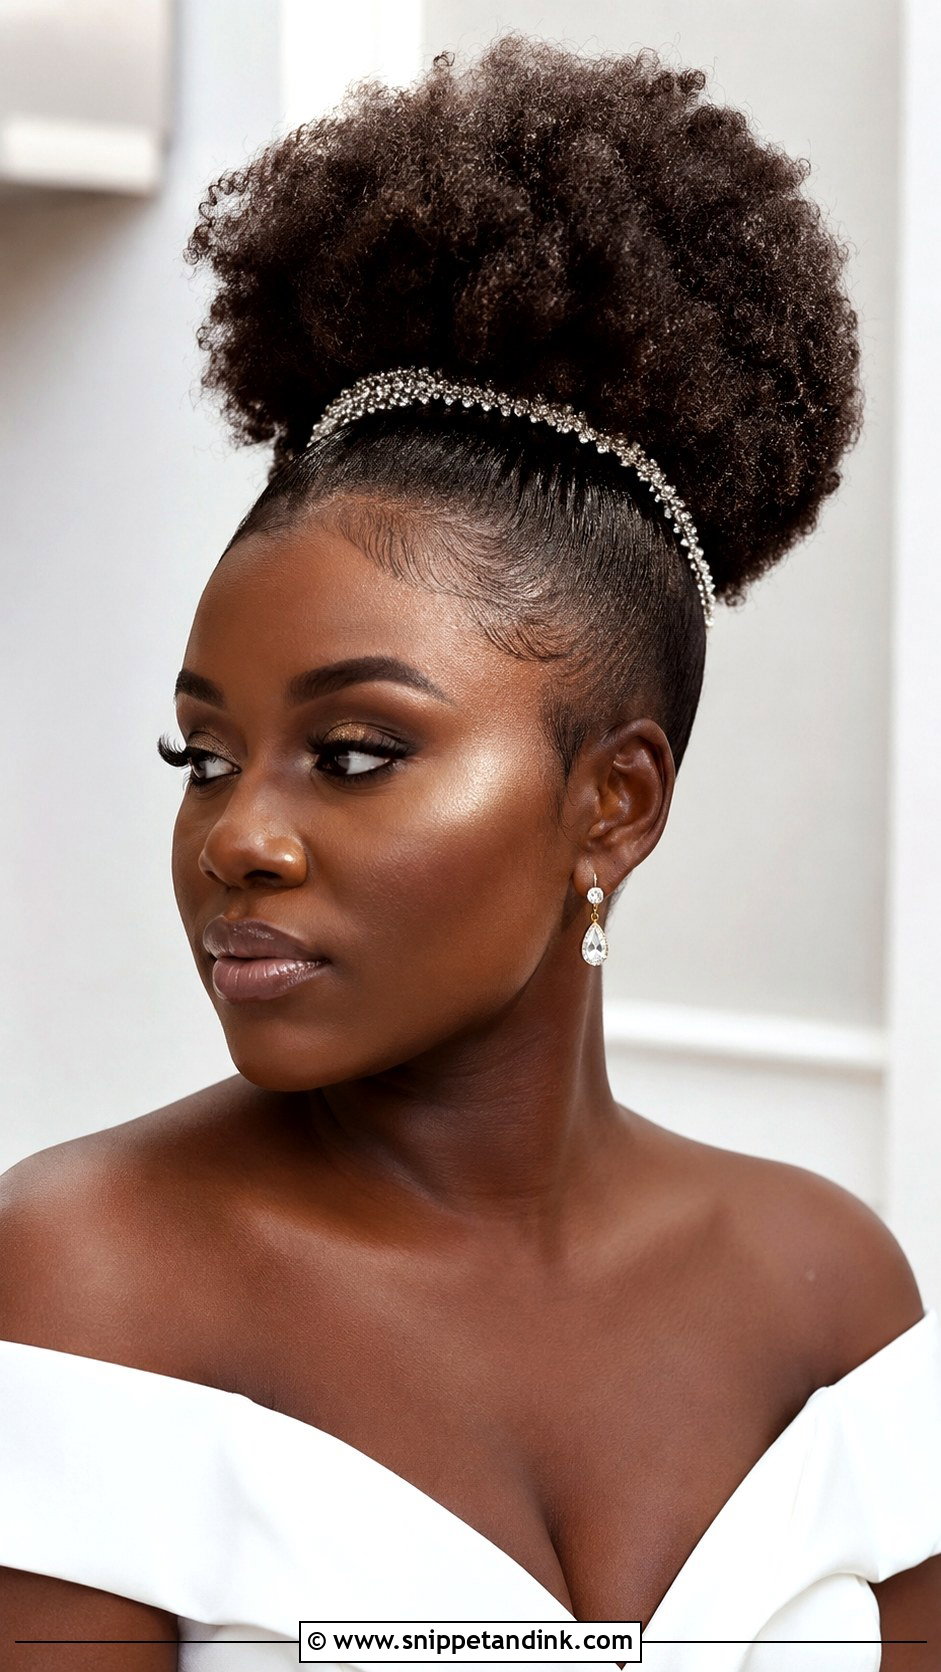
The afro puff updo lifts your natural volume into a full, rounded shape. I gather the coils high with a wide band, then fluff and pat the puff into an even dome. Edges get smoothed with a soft-hold gel. The common mistake is too much gel layered over a cream it doesn’t agree with, which leaves white flakes by the afternoon, so I test the product combination at the trial. A sparkly headband or one bold bloom is all the decoration it needs, and it sits well with modern gowns and minimal jewelry.
12. Bantu Knot Inspired Updo
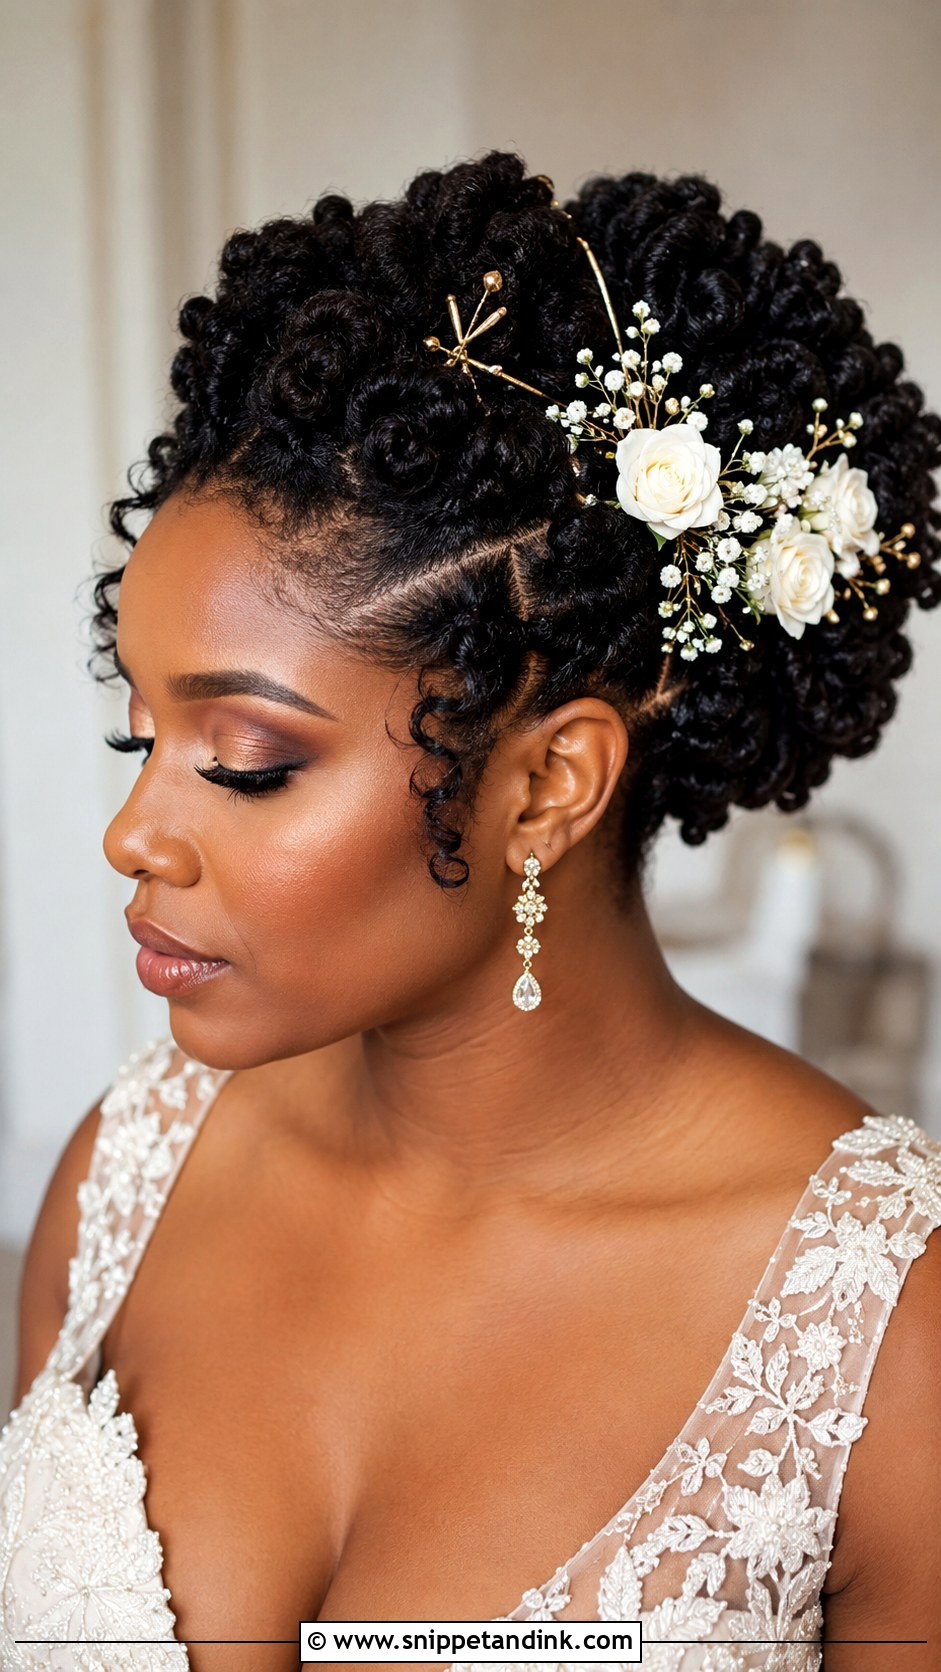
Bantu knots can be worn as sculptural knots across the head or unraveled into a knot-out with deep, defined curls, then gathered into an updo. For a knot-out, set the knots on slightly damp hair and let them dry completely, overnight under a satin scarf if possible. I sometimes leave a few knots intact in the finished updo so the original shape still shows. Gold pins or fresh flowers between the sections finish it. It carries real cultural weight for many brides, which is reason enough to wear it.
13. Cornrow Updo With Curls
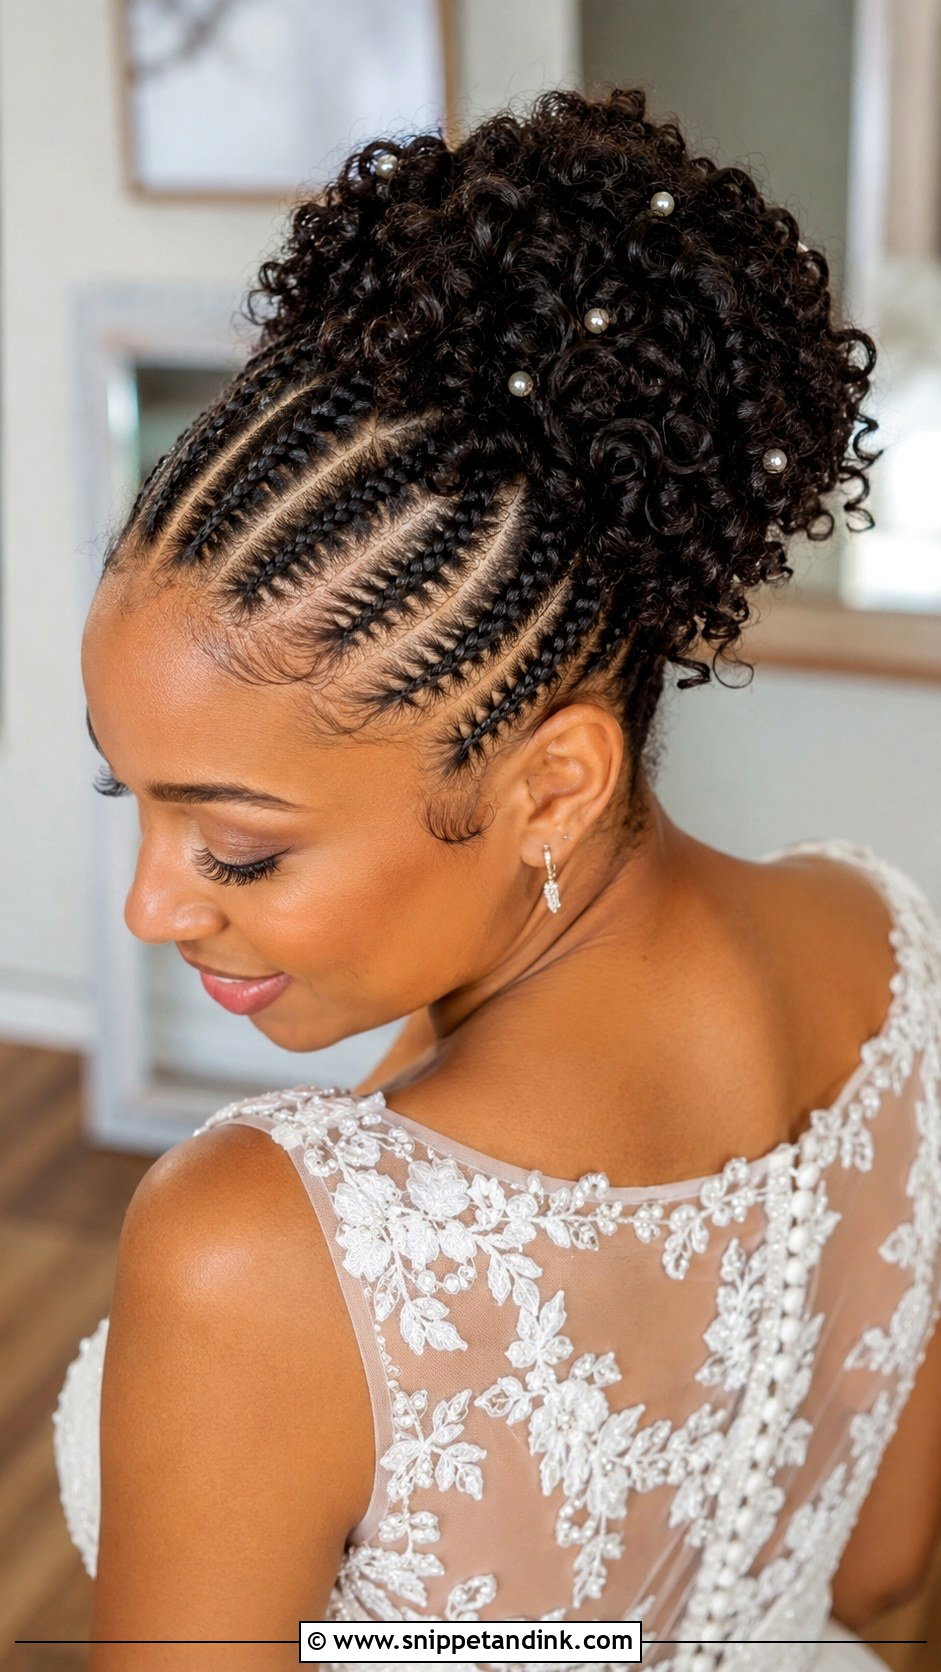
Cornrows at the front lead the eye back into a curly bun or puff, so you get a crisp hairline and soft volume behind it. The braiding at the edges should be firm but never tight; I’d rather redo a row than see bumps along the hairline, which are a sign of too much tension. The lines frame the face and the curls add movement, and the whole style holds up through hugs and dancing. Tiny pearls or gold beads can be threaded onto individual rows. Book the braiding a day or two ahead so the scalp settles.
14. Loose Curly Hair Down
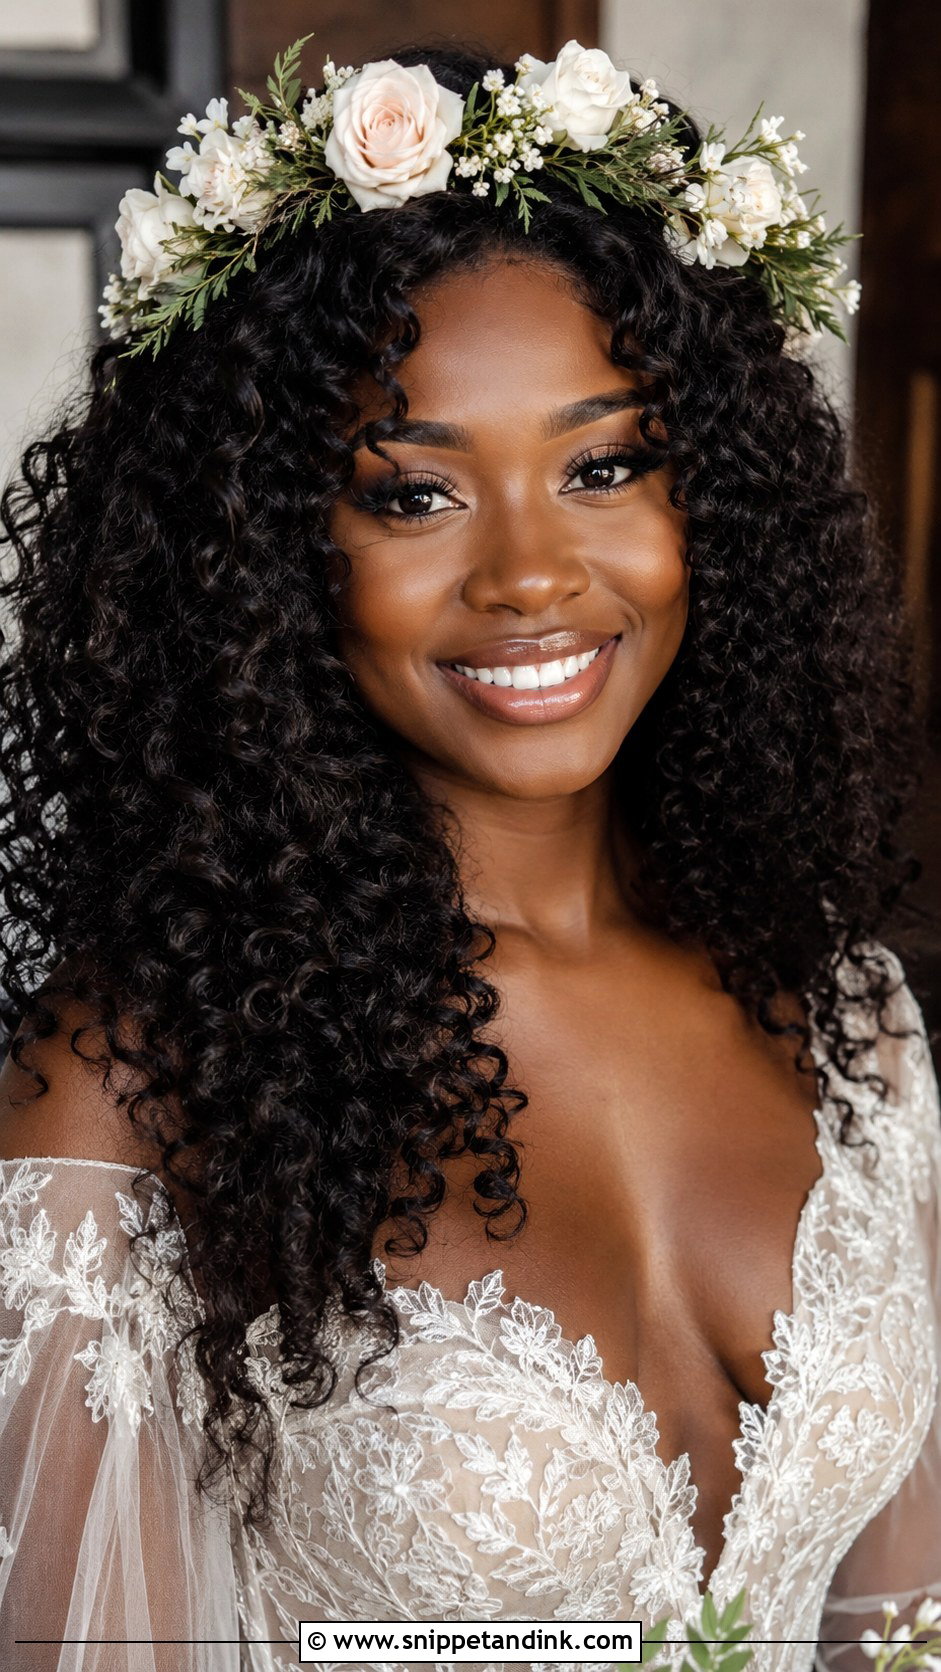
Sometimes the right choice is letting your curls go free. I define them with a leave-in and a cream, apply on soaking-wet hair so the pattern clumps, then leave them alone to dry. Touching curls while they dry is what causes frizz. Wearing them down shows the full length and texture, and a flower crown or a headpiece tucked to one side adds the bridal note. Twist a couple of sections near the face for detail. Know your shrinkage: hair worn down will look noticeably shorter by evening in humid air, so plan your photos with that in mind.
15. Goddess Braids Updo
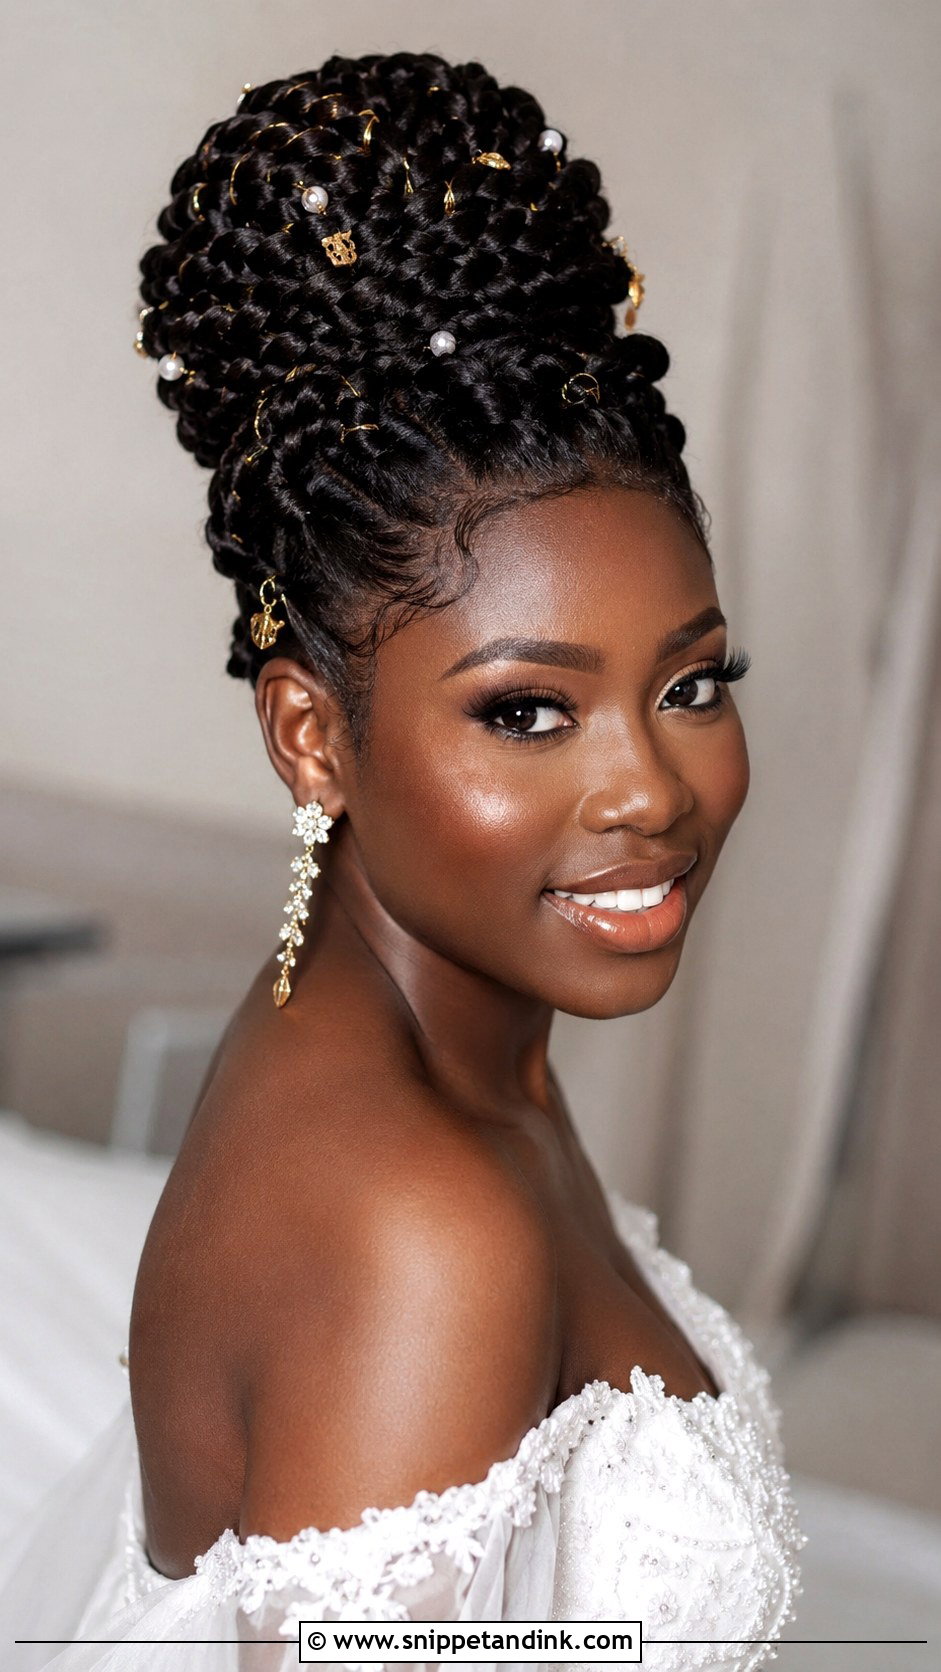
Goddess braids are larger, bolder braids, often finished with curly ends, and they make a dramatic shape when swept up. I coil them into a crown or a voluminous bun at the back. Because they’re thick, they’re quick to pin and very secure, and as a protective style they need nothing during the day. The trade-off is weight: if extensions are added for length, a full updo can feel heavy, so try it on for an hour before the wedding. Gold accents, pearls or fresh flowers finish them.
16. Twisted Updo With Baby’s Breath
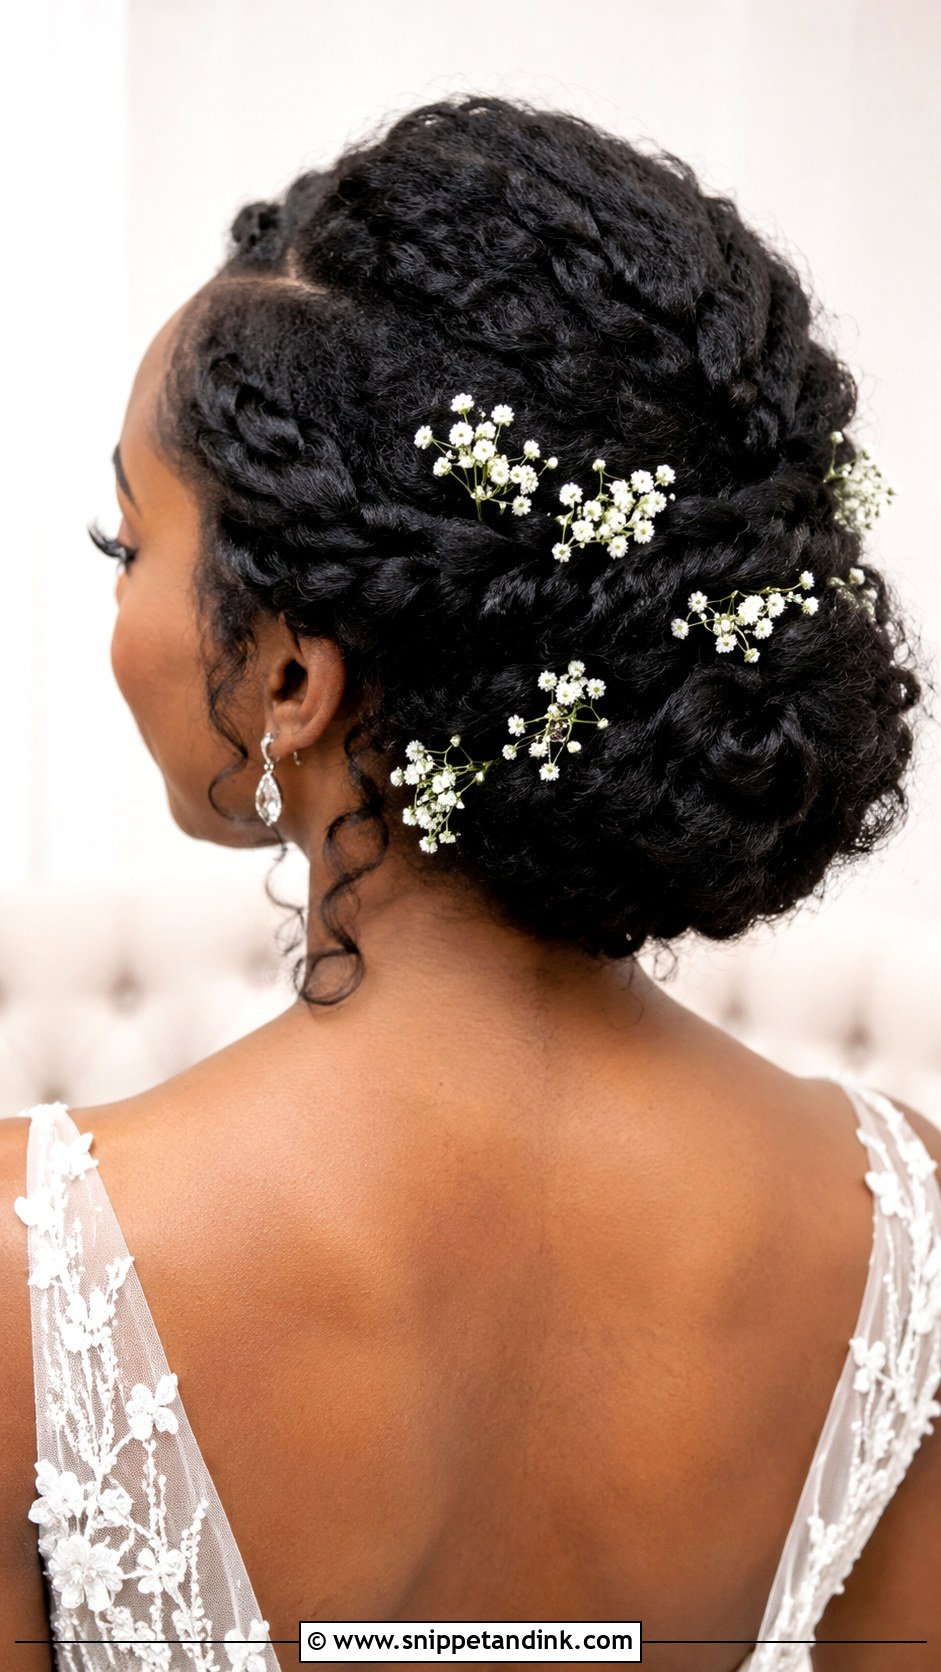
Soft twists pinned into a textured bun, then scattered with baby’s breath, make a gentle, garden-style updo. Baby’s breath holds up better than most flowers against warm hair, but I still cut the sprigs short and tuck them in last, after the hair is finished. White flowers show clearly against dark hair. The twists keep everything secure while the pattern stays visible. If your wedding is outdoors in high heat, ask your florist about dried baby’s breath, which won’t droop.
17. Mohawk Inspired Curly Updo
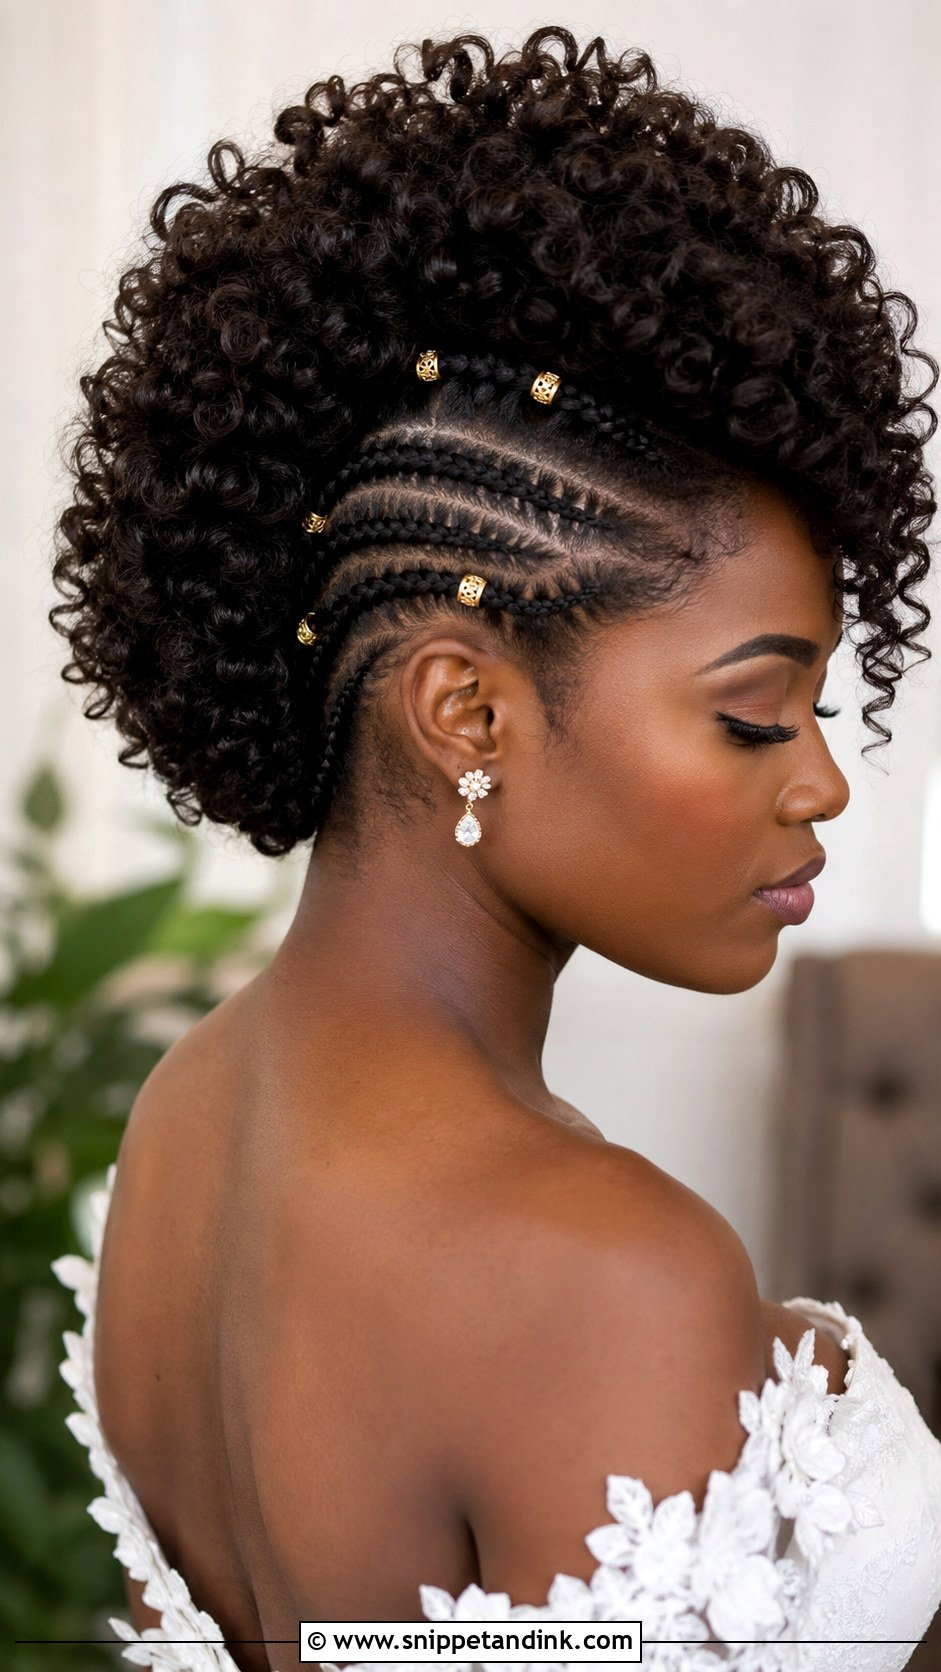
For the bold bride, a curly mohawk-inspired updo brings height and edge. I braid or twist the sides flat and up toward the center, then gather the curls into a full strip running front to back. The sides give the structure; the curly center stays soft. The braided sides keep it secure even with lots of dancing. Gold cuffs or a sparkling pin dress it up. It suits modern, sleek gowns and bold jewelry, and it photographs strongly from the side.
18. Short Natural Hair With Headband
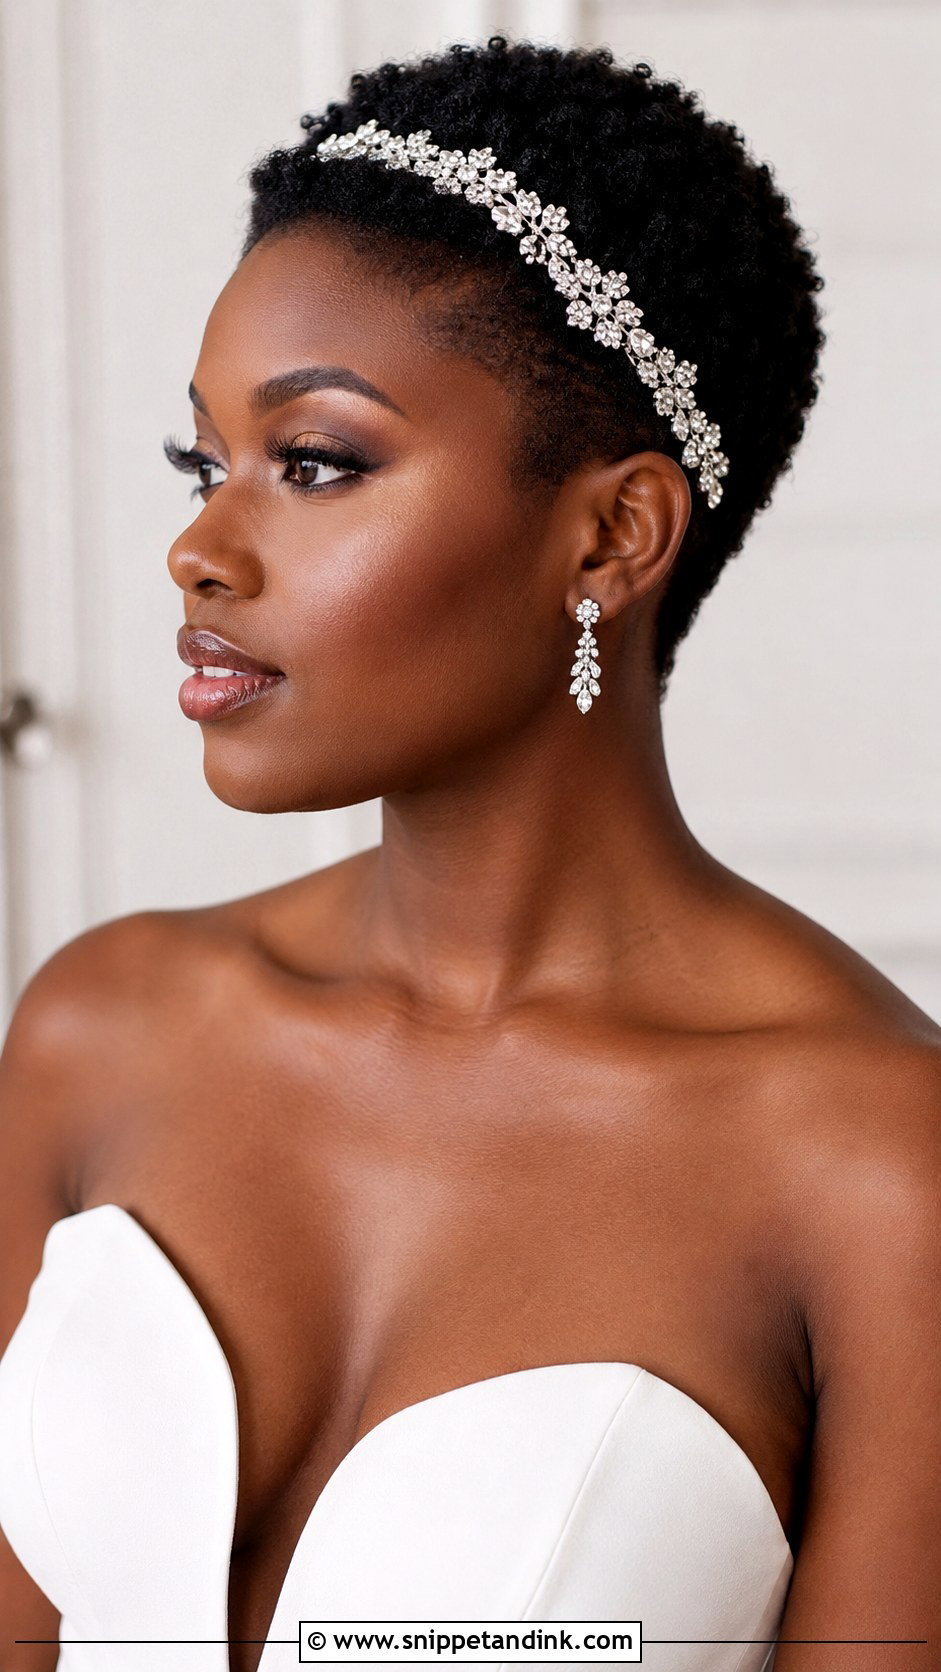
Short natural hair can be completely bridal. With a TWA or a tapered cut, I define the curls with a styling cream so the pattern is crisp, then let the shape do the work. A pearl or crystal headband instantly makes it bridal, though I always check the band behind the ears; a stiff one presses after a few hours, so choose a padded or flexible band. Fresh flowers pinned along one side give a softer feel. Short hair keeps you cool, and length has nothing to do with looking like a bride.
19. Curly Faux Hawk With Florals
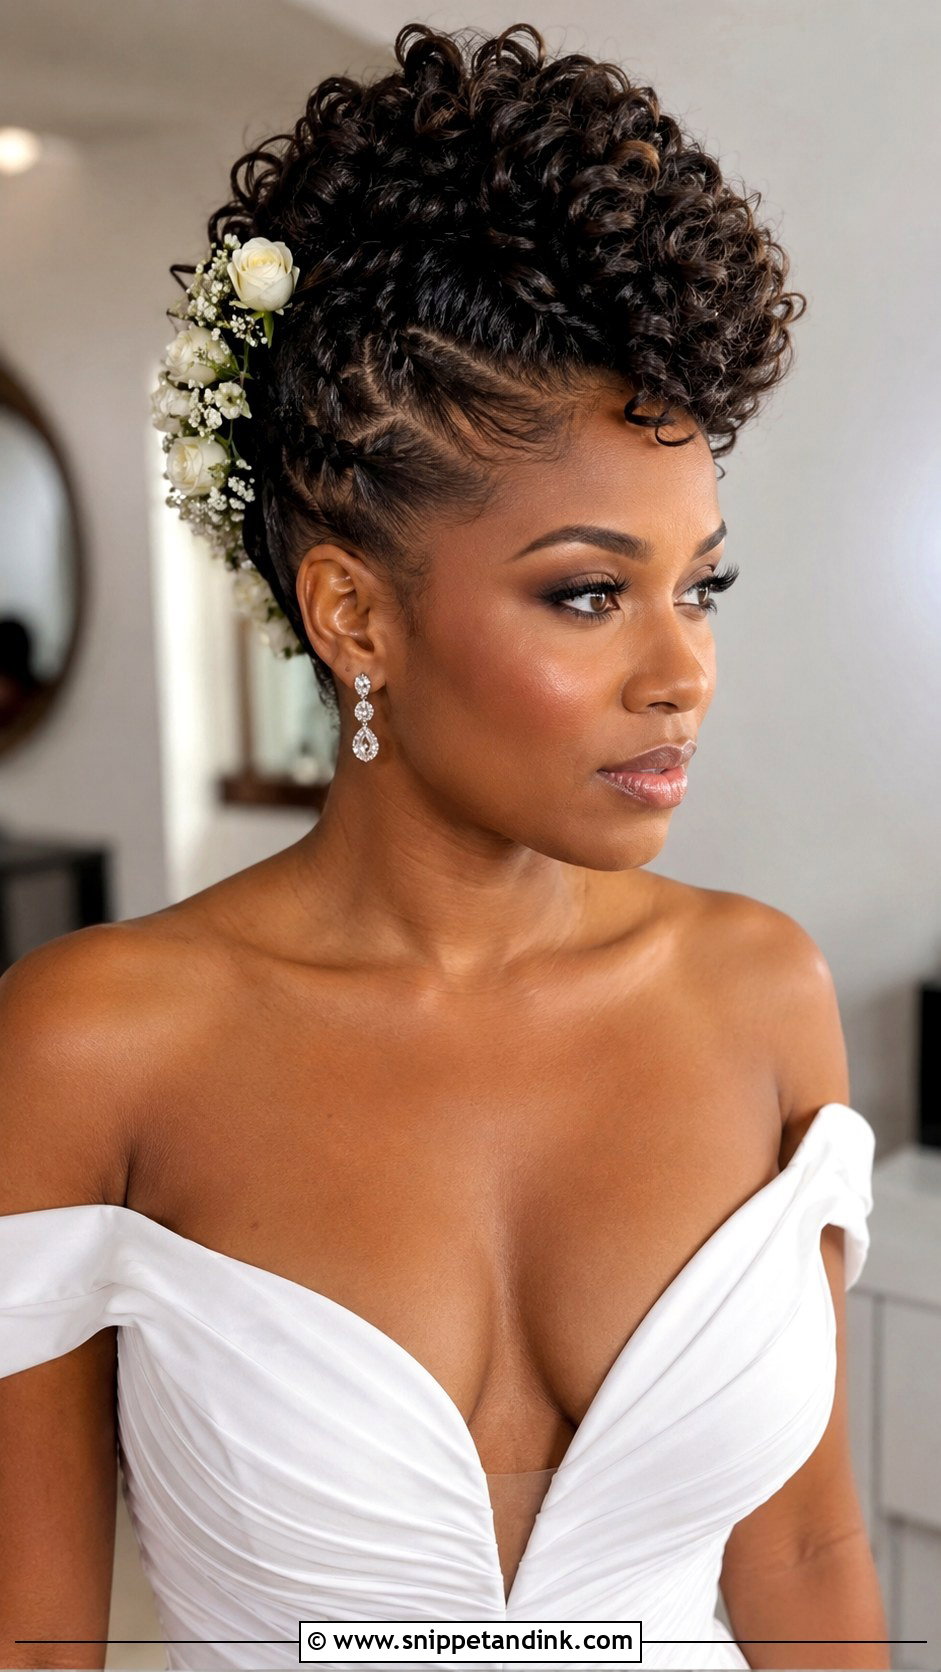
The faux hawk gives a raised, central shape without cutting anything. I pin the sides up and in with crossed bobby pins placed in a vertical line, which makes a hidden track that the center curls sit on. Defined curls hold the shape best, so prep matters. Small flowers tucked along the pinned sides soften the edge. It works best with modern weddings and dramatic portraits, and less well under a traditional veil, which flattens the height.
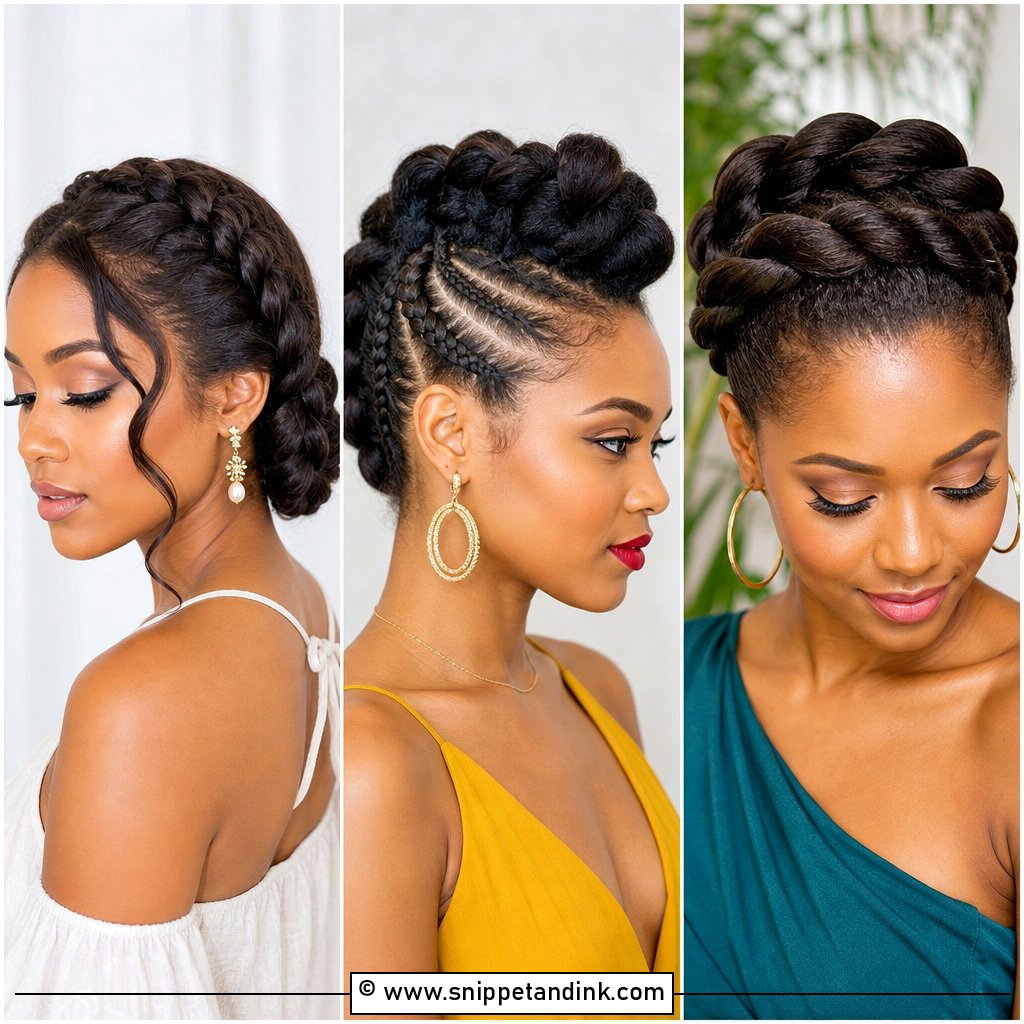
20. Locs Half-Up Style
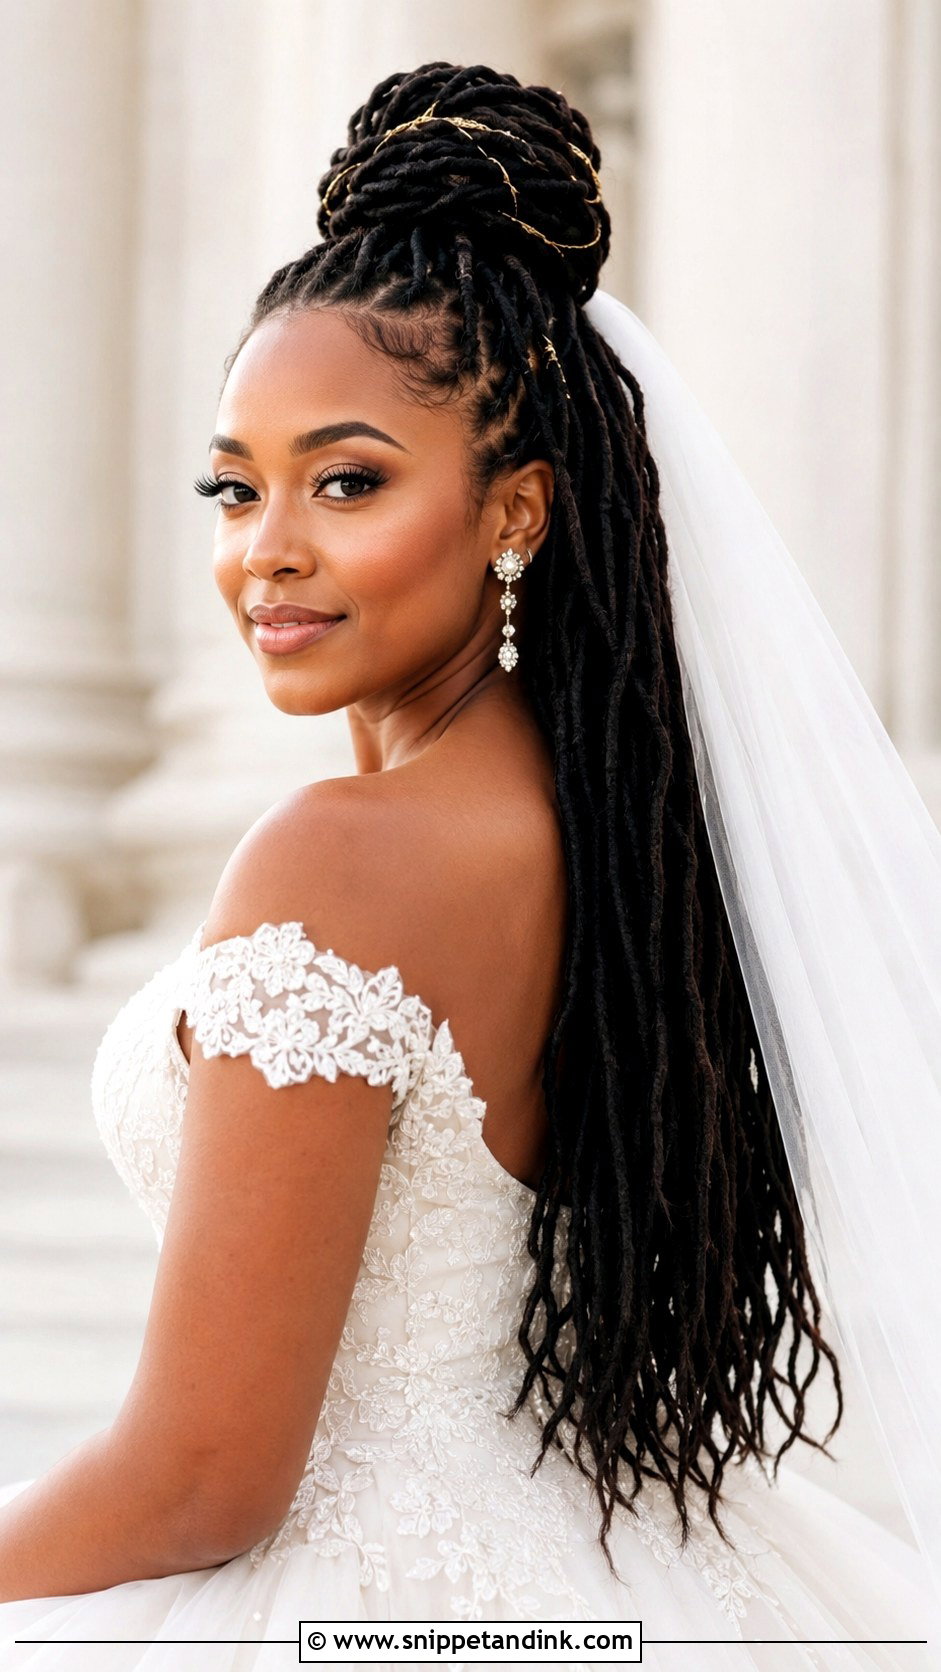
Half-up locs show off length while keeping hair off your face. I gather the top section into a bun or knot and let the rest hang down your back. Because locs are heavy, I secure the top with a loc-friendly band and long pins instead of a single elastic, which can slip. Wrap the gathered section with gold thread or add pearls. A veil sits nicely beneath the knot. It’s comfortable for long days and suits casual and formal weddings.
21. Vintage Curly Updo
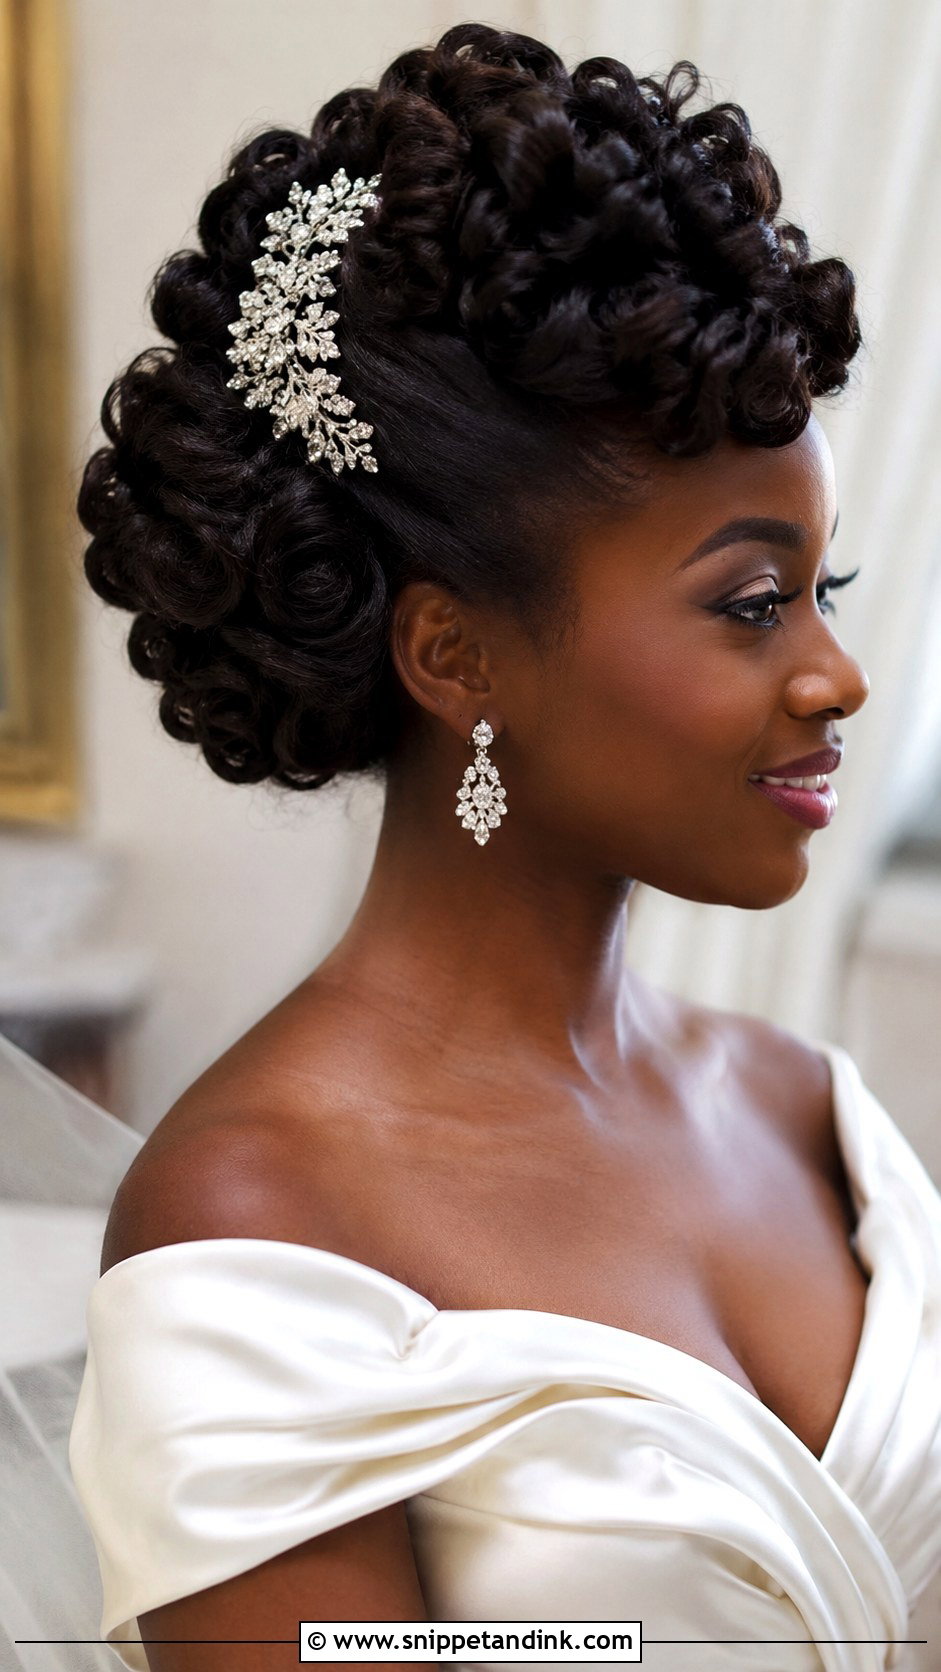
Old-Hollywood waves on natural hair need stretched hair to start, usually from a blow-out or a careful roller set, since the shape relies on a smooth S-wave that coils won’t hold on their own. The curls are swept back and pinned into a sculpted shape. A jeweled comb or a birdcage veil adds the vintage note, and the silhouette sits well with a satin gown. Be realistic about humidity here: stretched textured hair reverts quickly in damp weather, so this suits indoor and cooler weddings best.
22. Wash-And-Go Curls With Veil
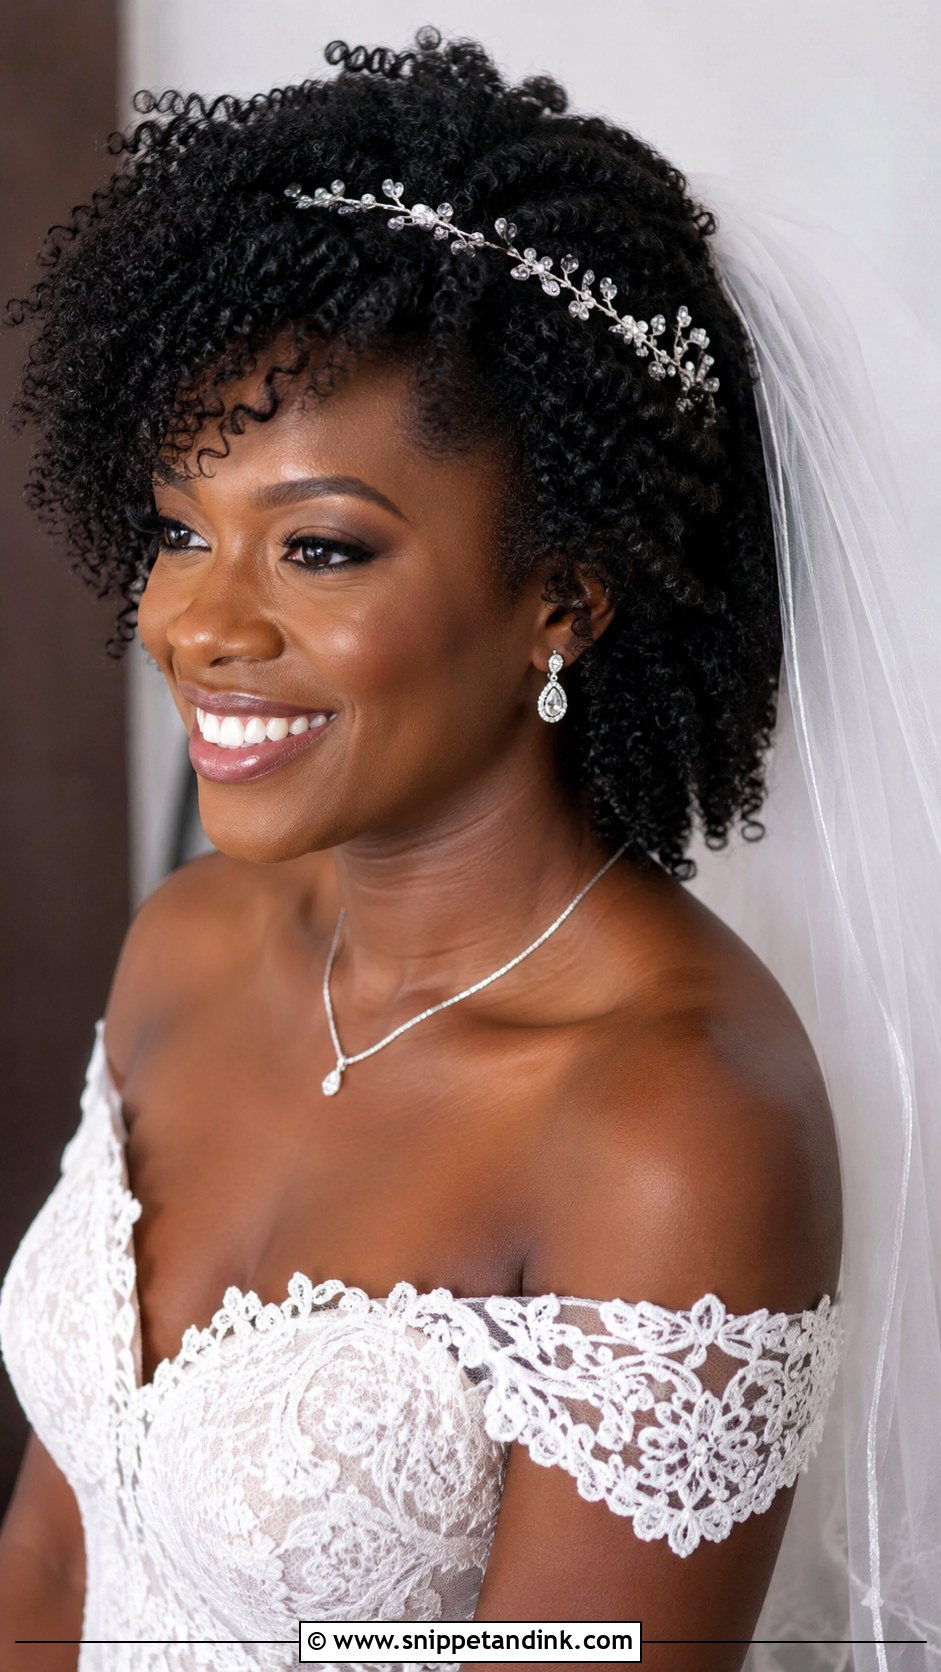
The wash-and-go is the lowest-stress way to wear your natural pattern. Curl cream and gel go on soaking-wet hair, then the coils dry into their full, defined shape. I’d do it the day before rather than the morning of; drying thick hair can take many hours. For the veil, I build a small pinned base at the crown first, two crossed bobby pins, so the comb has something to grip, because combs slide straight off gel-coated curls. A hair vine or fresh flowers near the veil add detail. It suits every curl type.
23. Braided Crown With Curls
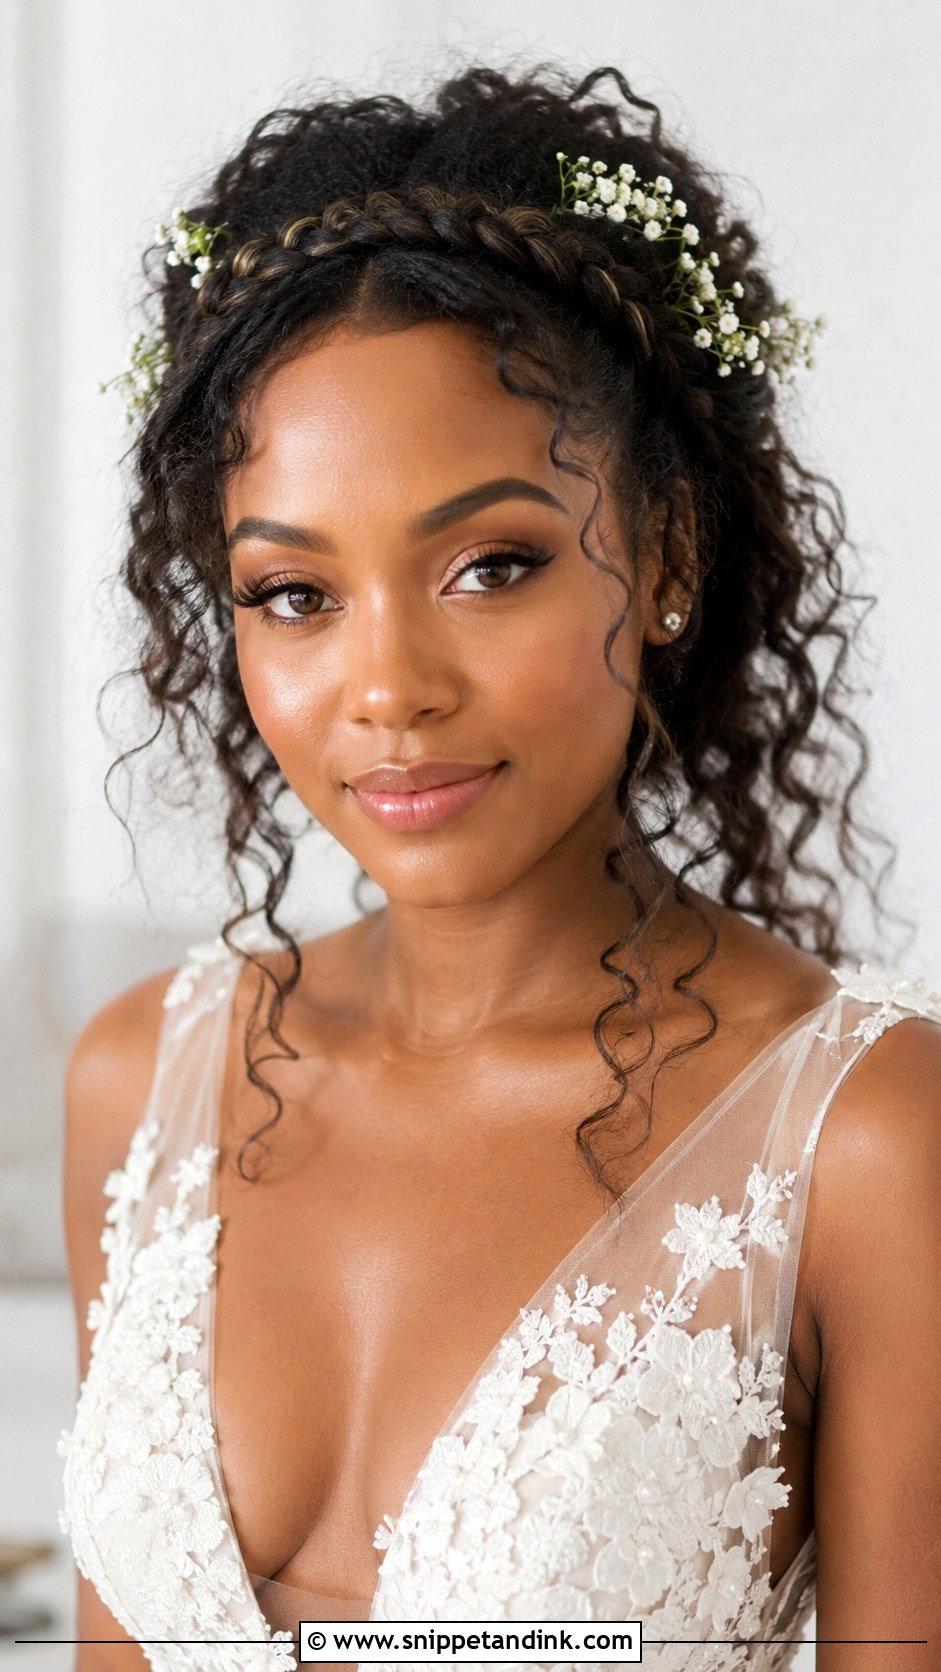
A braided crown along the hairline gives structure, and the rest of the curls can fall loose or gather into a soft bun. I braid from one temple around to the other so the braid sits like a natural tiara, then pin the tail under the curls. Small flowers or pearls woven into the braid add detail. It’s balanced between boho and formal, and the braid keeps hair off your face even when the curls are down.
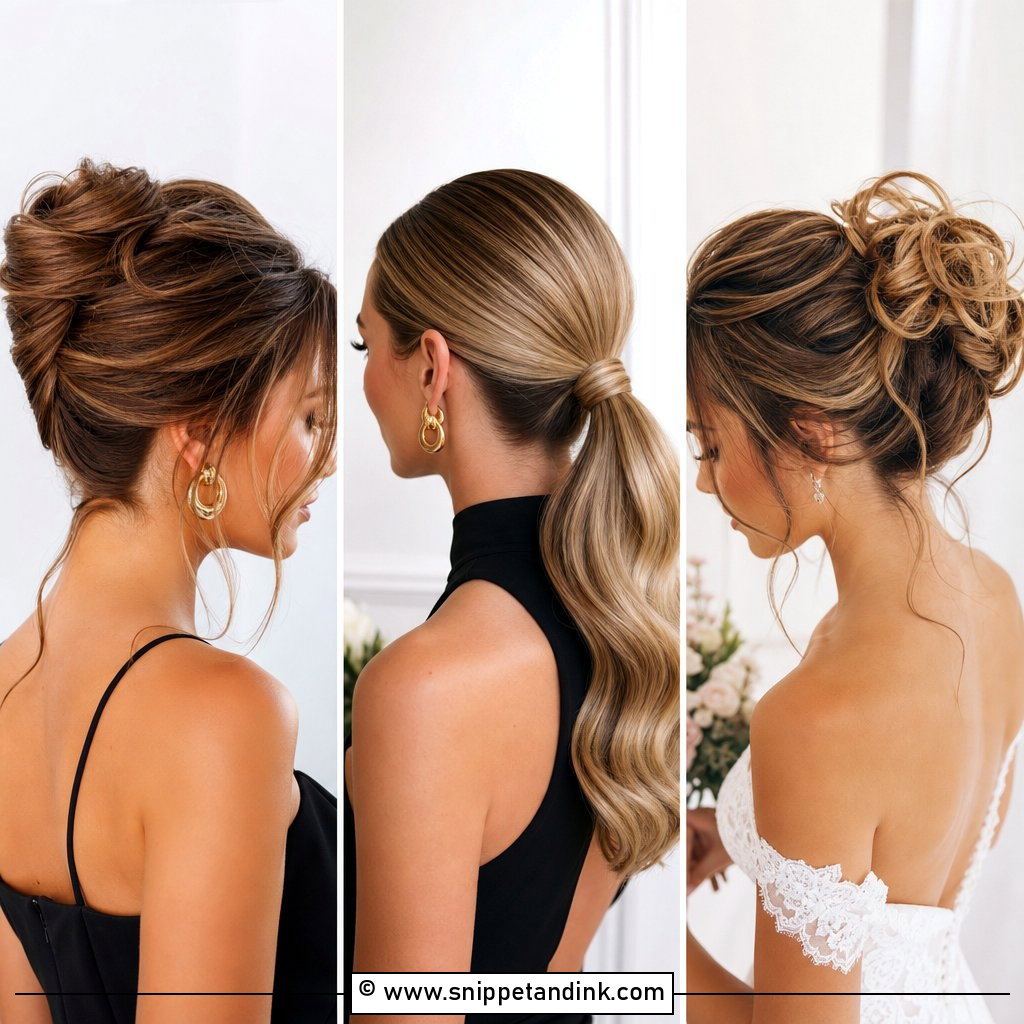
24. Sleek Protective Bun
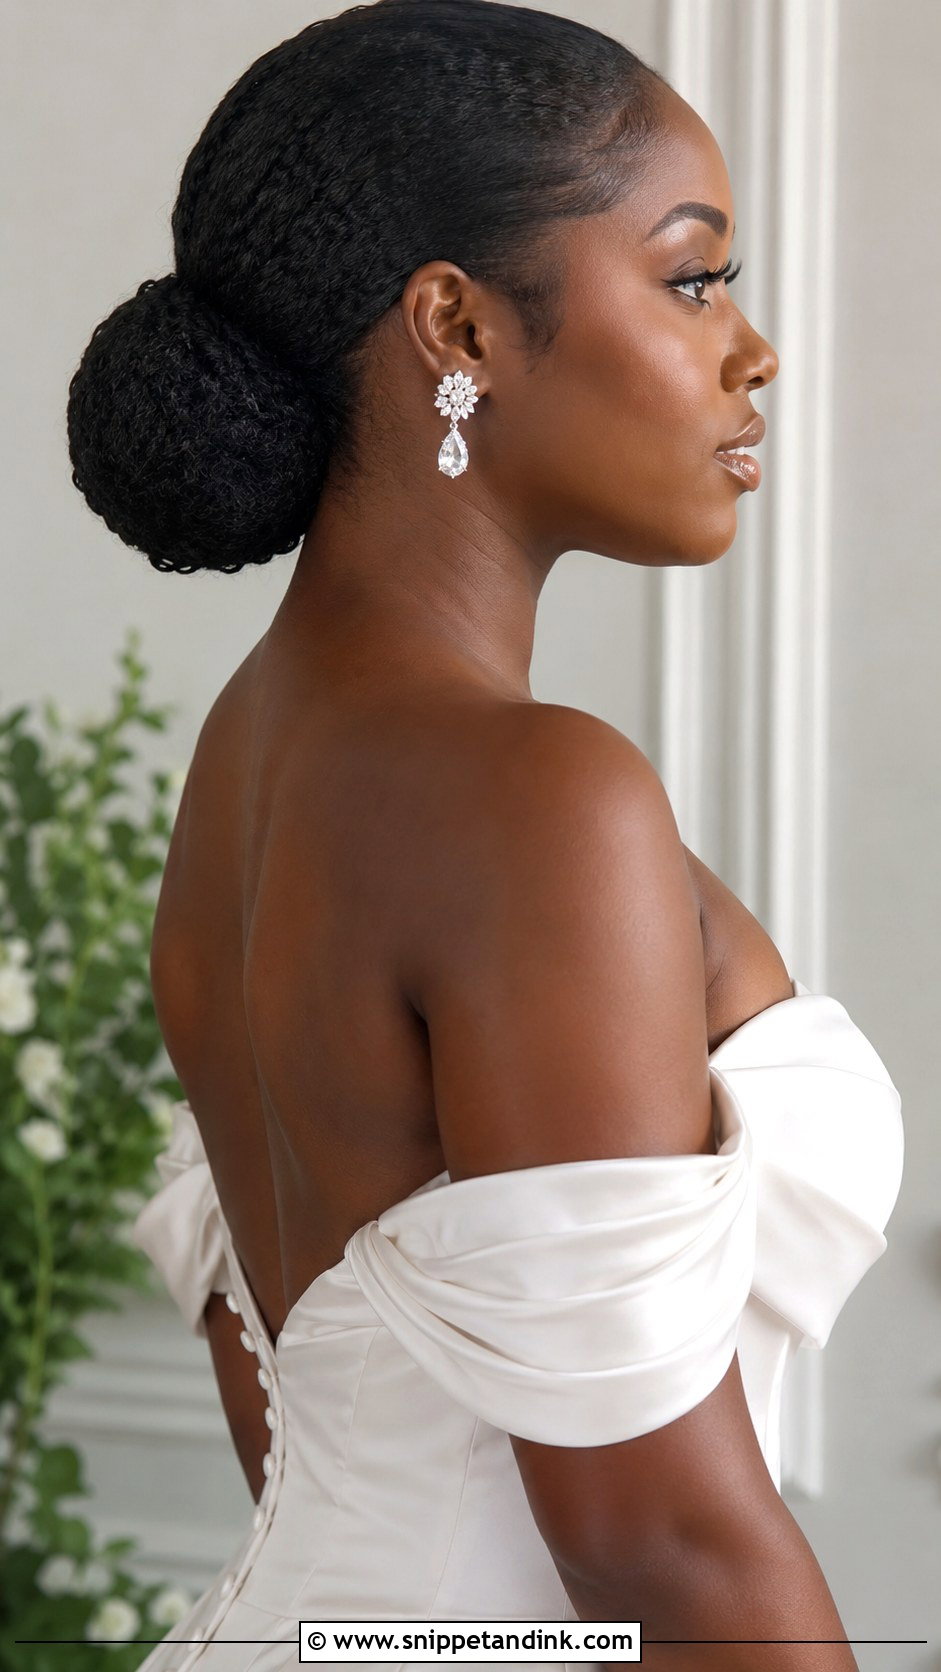
A sleek protective bun is the most polished option, and the one that asks most of your edges. I smooth the hair back into a low or high bun and lay the edges with gel, but I keep the tension moderate; a too-tight bun gives a headache by the reception and stresses the hairline. It looks sharp with bold earrings and a structured gown. A decorative cuff around the bun or a single accessory is enough. It holds all day with no touch-ups, which is why minimalist brides love it.
25. Twist Updo With Gold Accessories
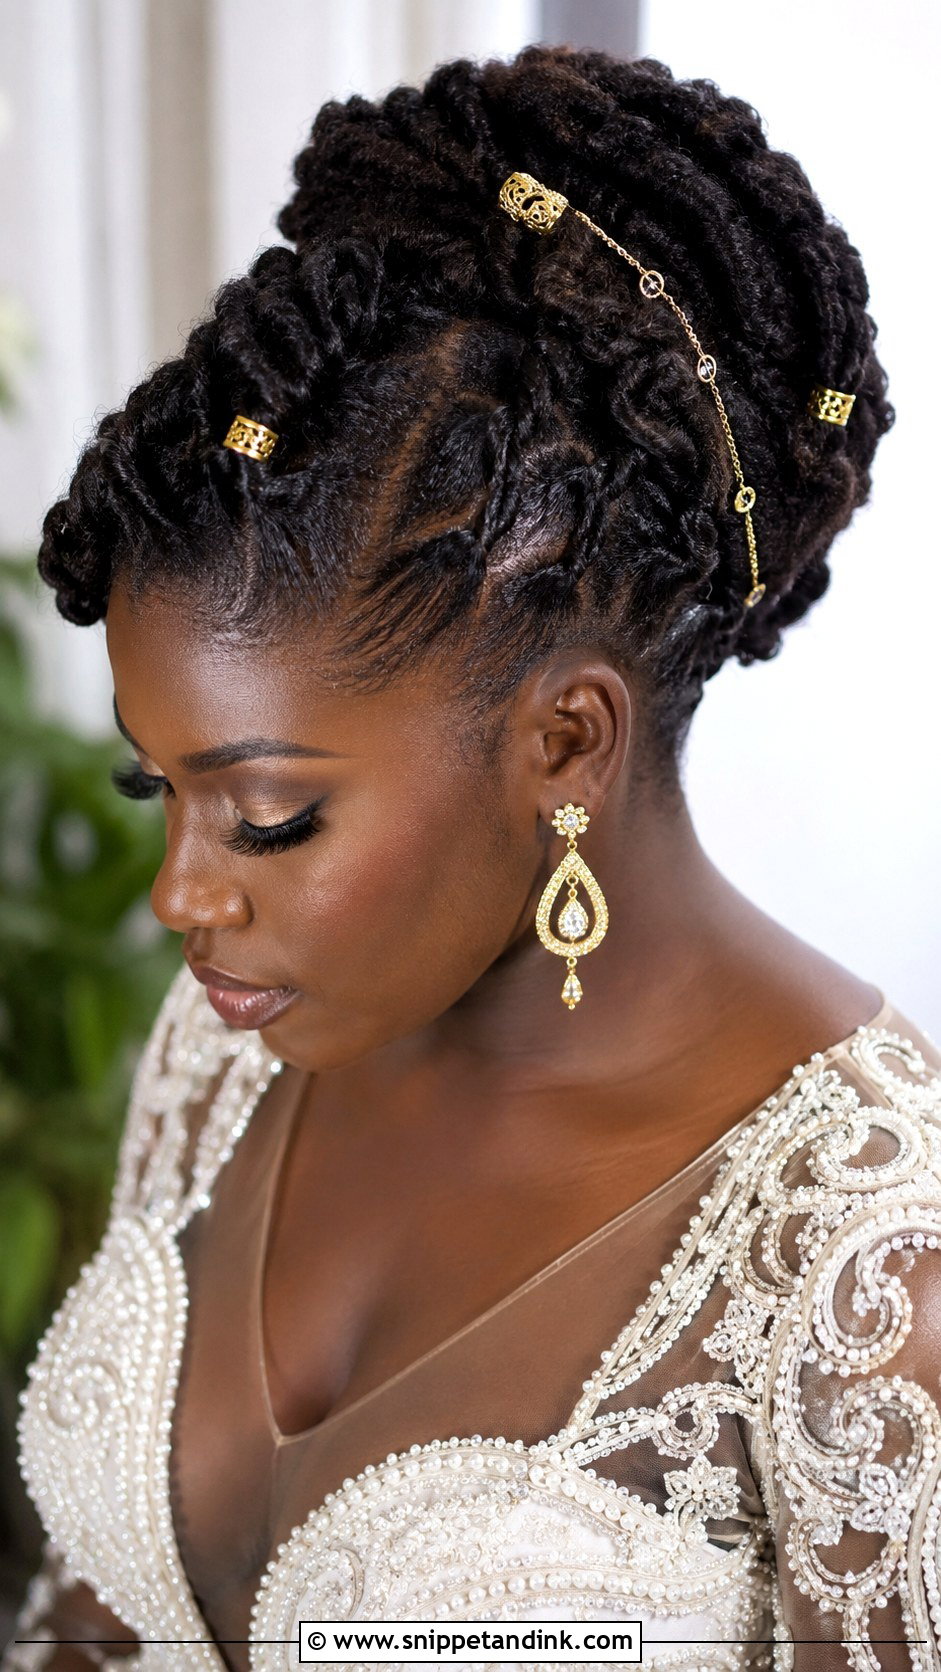
Twists gathered into a textured updo and dressed with gold cuffs, pins, beads or a fine hair chain give a rich, celebratory finish. Gold sits warmly against dark hair in photos. I place cuffs on twists that will face the camera, mostly at the front and sides, since cuffs at the back of the bun disappear in most shots. The twists keep everything secure, and for many brides the gold carries cultural meaning. It makes a regal finish for the aisle.
Questions for a Stylist Before They Touch Your Coils
Not every bridal stylist works with textured hair every week, and it shows quickly at a trial. These questions sort it out before you book.
- Can you show me finished wedding styles on hair like mine? Look for photos of a similar curl pattern and density, not just one texture.
- Can I bring my own products? Your hair already knows what it likes, and a good stylist will work with them.
- How will you secure my veil? You want an answer involving a pinned base or anchor, not just a comb pushed into the curls.
- How do you handle my edges? Listen for moderate tension and gentle laying, never pulling tight for a sleeker line.
- How long will it take? Detangling, stretching and setting textured hair can take far longer than a blow-dry, and the day’s schedule should reflect that.
Bring your veil, any hairpieces and a photo of your dress to the trial, and wear the finished style for a few hours afterward. If anything pulls or slips by the evening, you’ll know what to adjust.
Wearing Your Own Texture Down the Aisle
Your wedding is a good moment to wear your natural hair exactly as it grows. Coils, twists, locs, braids or a soft afro framed with flowers can all look bridal; the right choice is the one that matches how your hair behaves and how you want to feel. Plan around shrinkage, humidity and the weight of your style, test it with your veil and accessories at a trial, and choose a stylist who knows your texture. When you feel like yourself, it shows in every photo.
You'll Like These Ideas:


Leave a Reply