
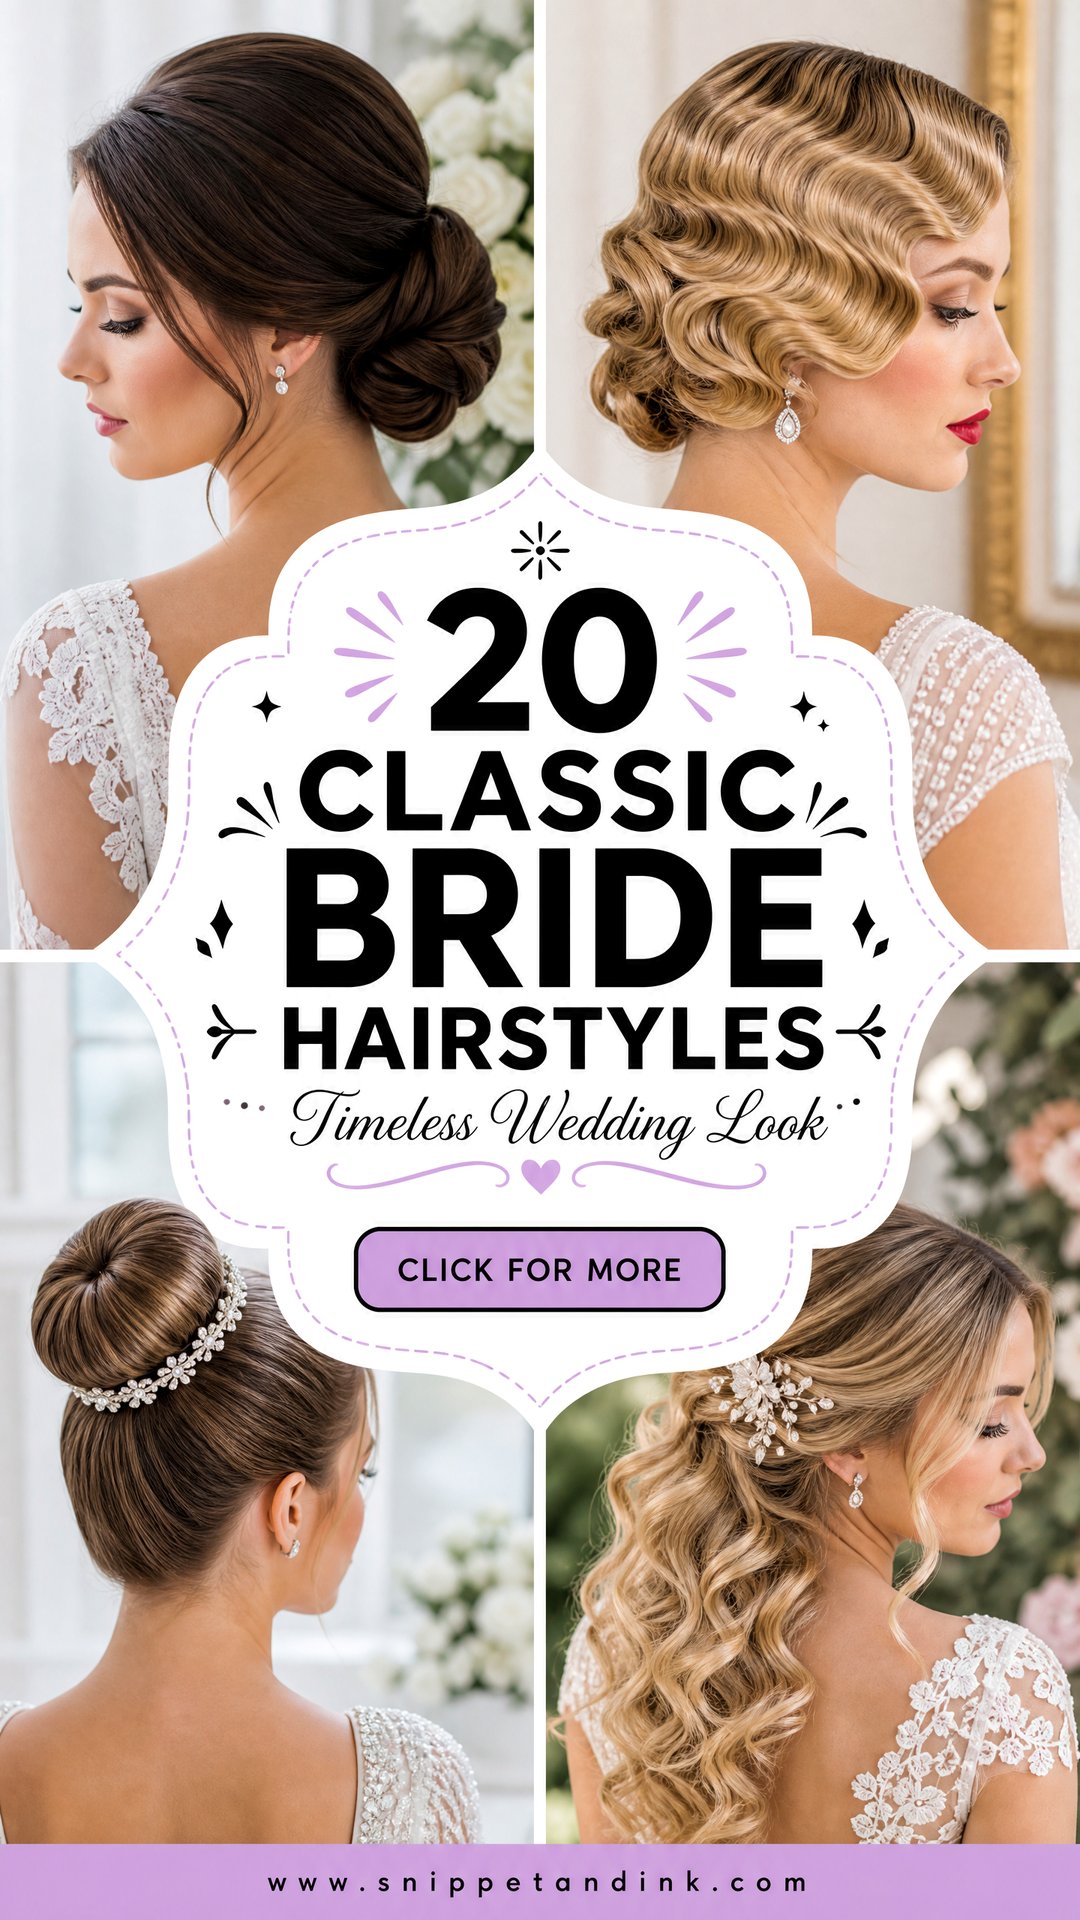
Classic bridal hair is less about a look and more about engineering. A style earns the word classic when it still holds its shape after the ceremony, the hugs, the car ride and three hours of dancing, and when the photos from today won’t look dated in twenty years. The twenty styles below are the ones I come back to again and again, from low knots and polished twists to sculpted waves and soft curls. Under each one I’ve written what actually makes it work in the chair, which hair it suits and where it tends to struggle, so you can walk into your trial with a clearer idea of what to ask for.
Your Hair’s Density Decides More Than Your Face Shape
Face shape gets most of the attention in bridal hair advice, but in my chair the deciding factor is usually density and texture. Two brides with the same face can need completely different styles, because one has fine, slippery hair that refuses to hold a curl and the other has thick hair that turns a small bun into a heavy weight at the nape.
- Fine or thin hair: braided crowns, textured buns and backcombed half-updos hold best, because texture gives the pins something to grip. Sleek straight looks show the scalp more than you might like.
- Thick or coarse hair: chignons, French twists and sleek ponytails work well, but I section the hair finer and use more pins. Very high buns can feel heavy after several hours.
- Curly or coily hair: sculpted buns and twisted updos keep their shape for a long time. I often work with your natural pattern rather than forcing a smooth finish that reverts in humidity.
- Layered or shorter cuts: finger waves, pin curls and partial braids suit layers, where short ends can be tucked into the shape instead of poking out of a large bun.
If you aren’t sure where your hair falls, gather it into a ponytail and look at its thickness at the elastic. That rough measure tells me a lot before any trial.
1. Classic Low Chignon
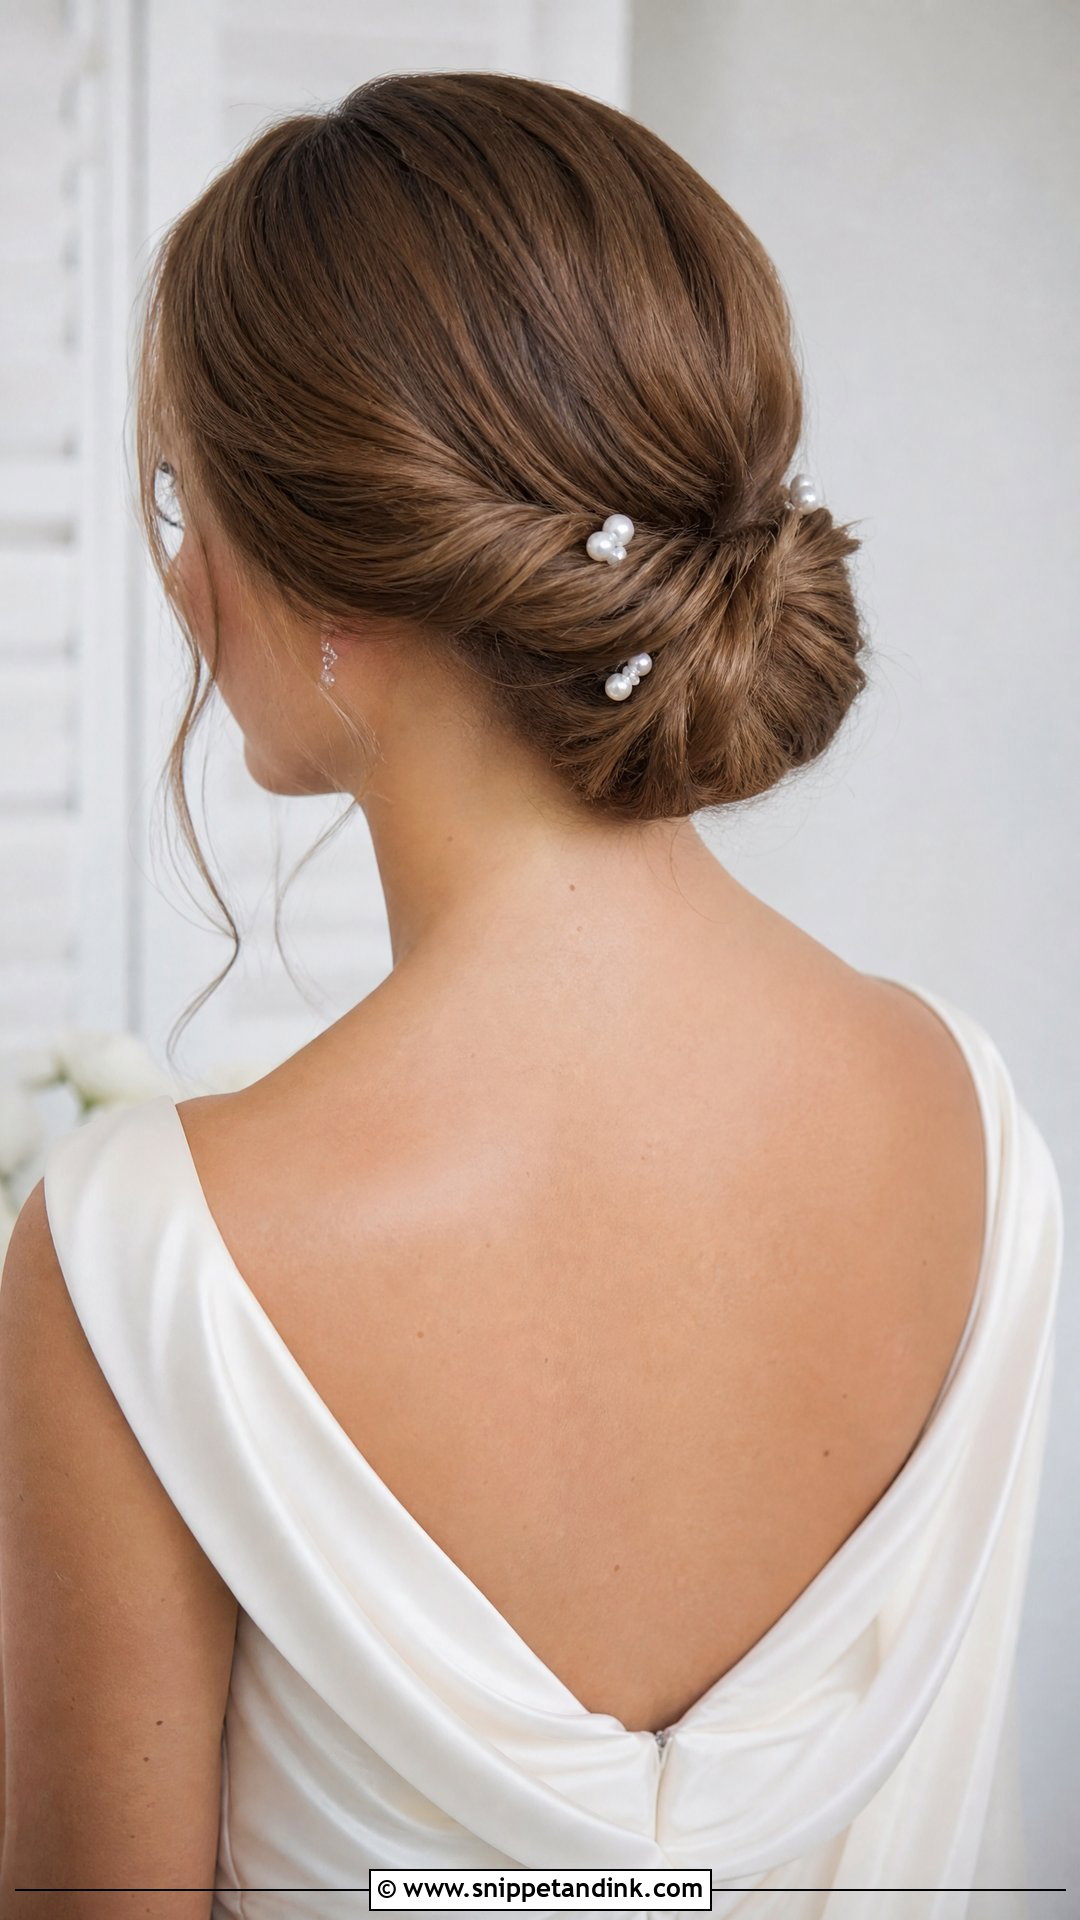
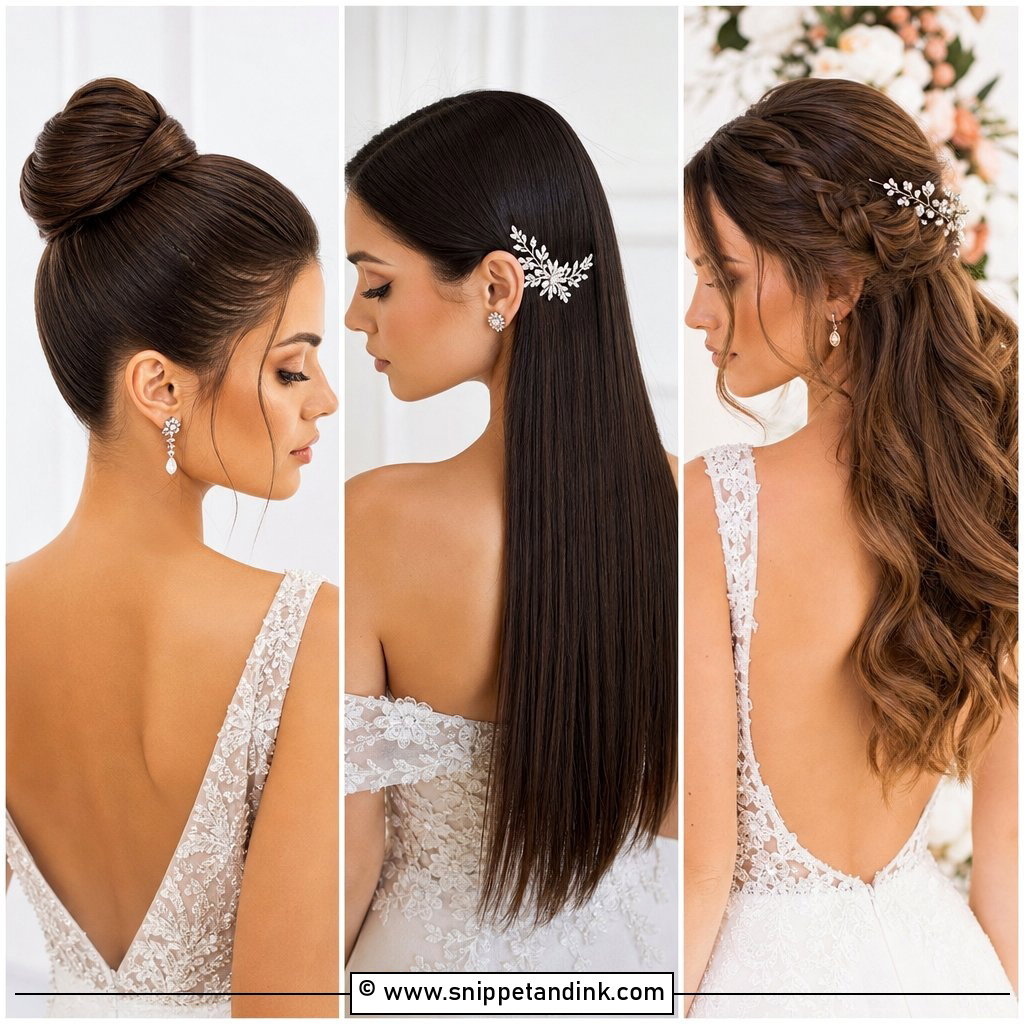
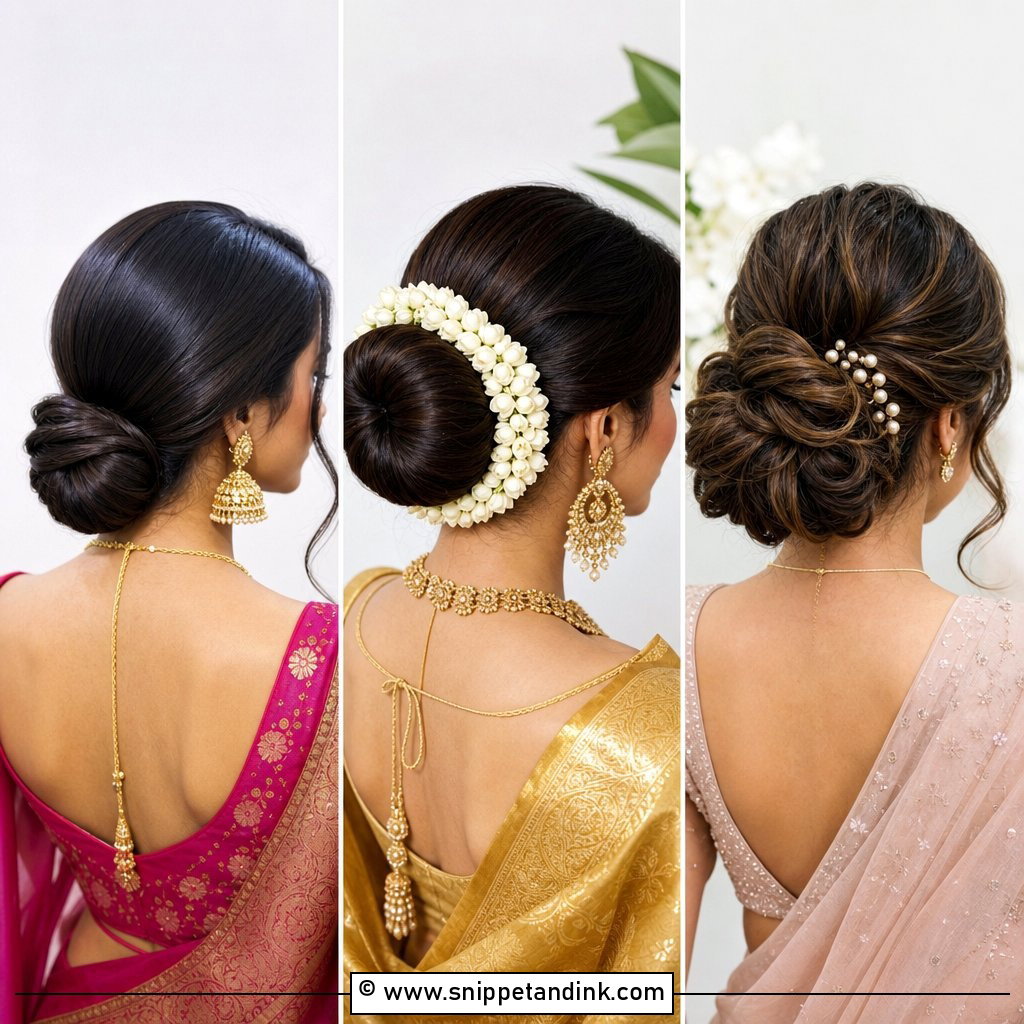
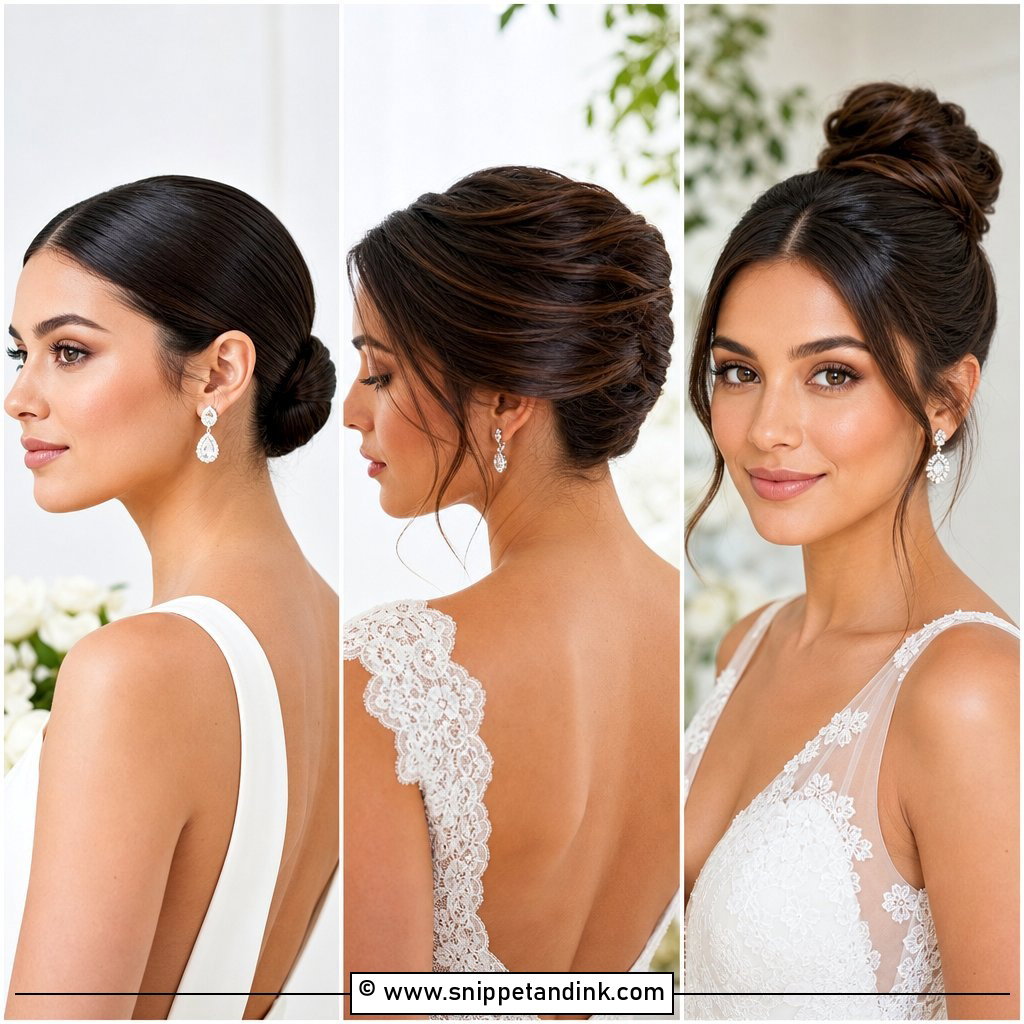
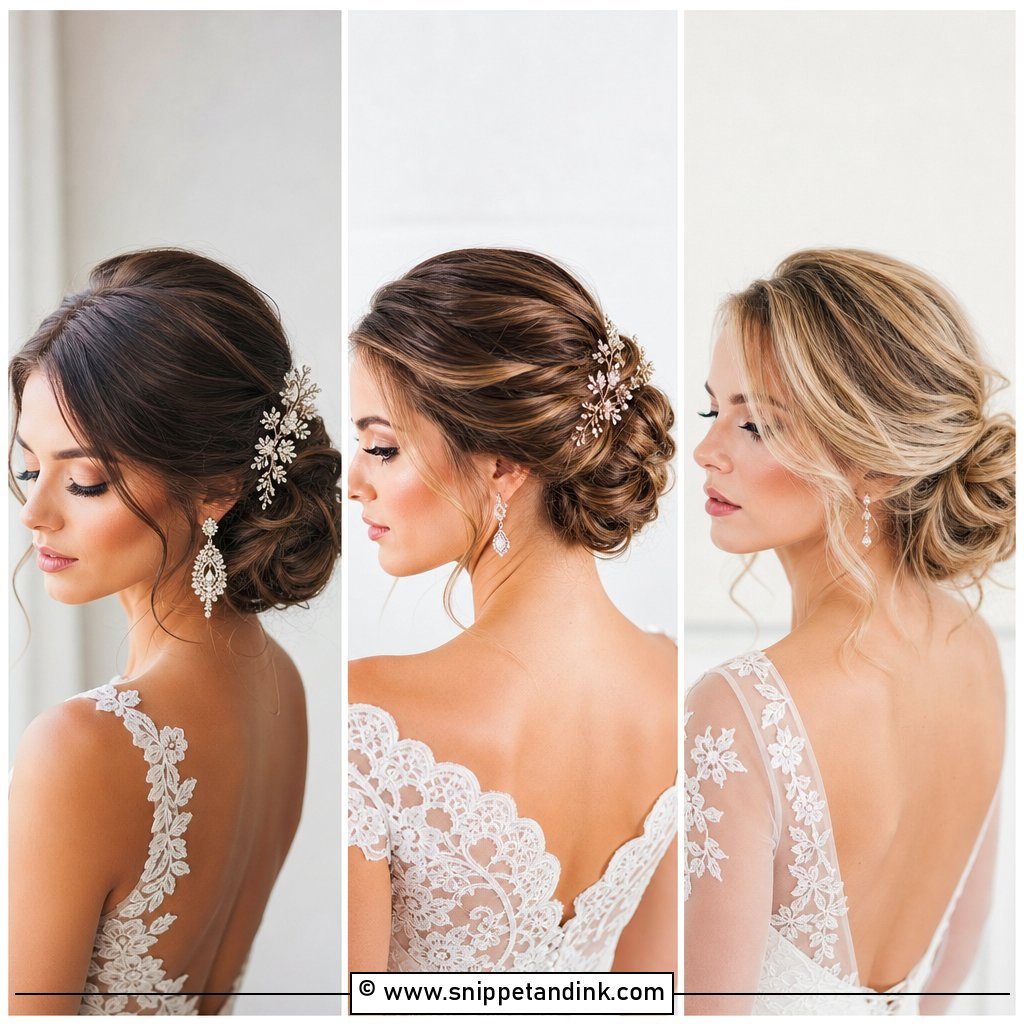
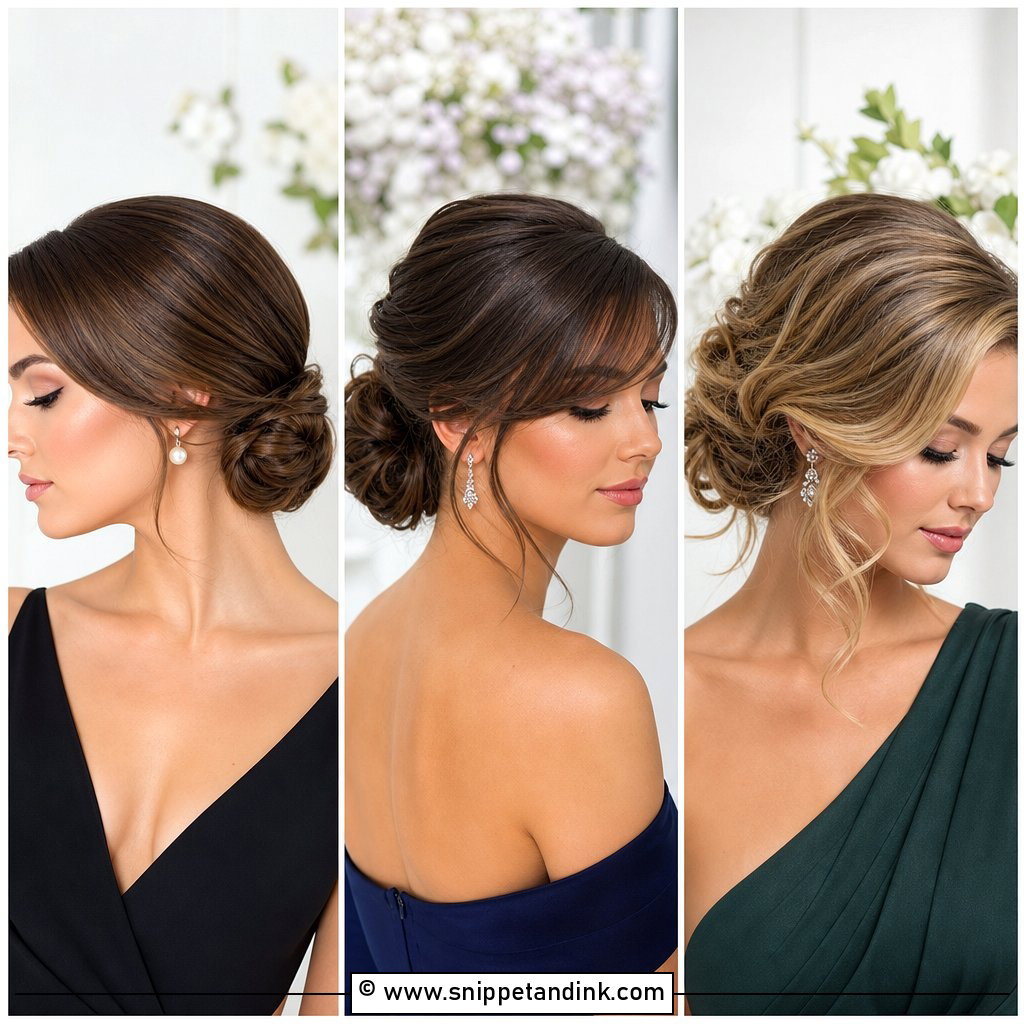
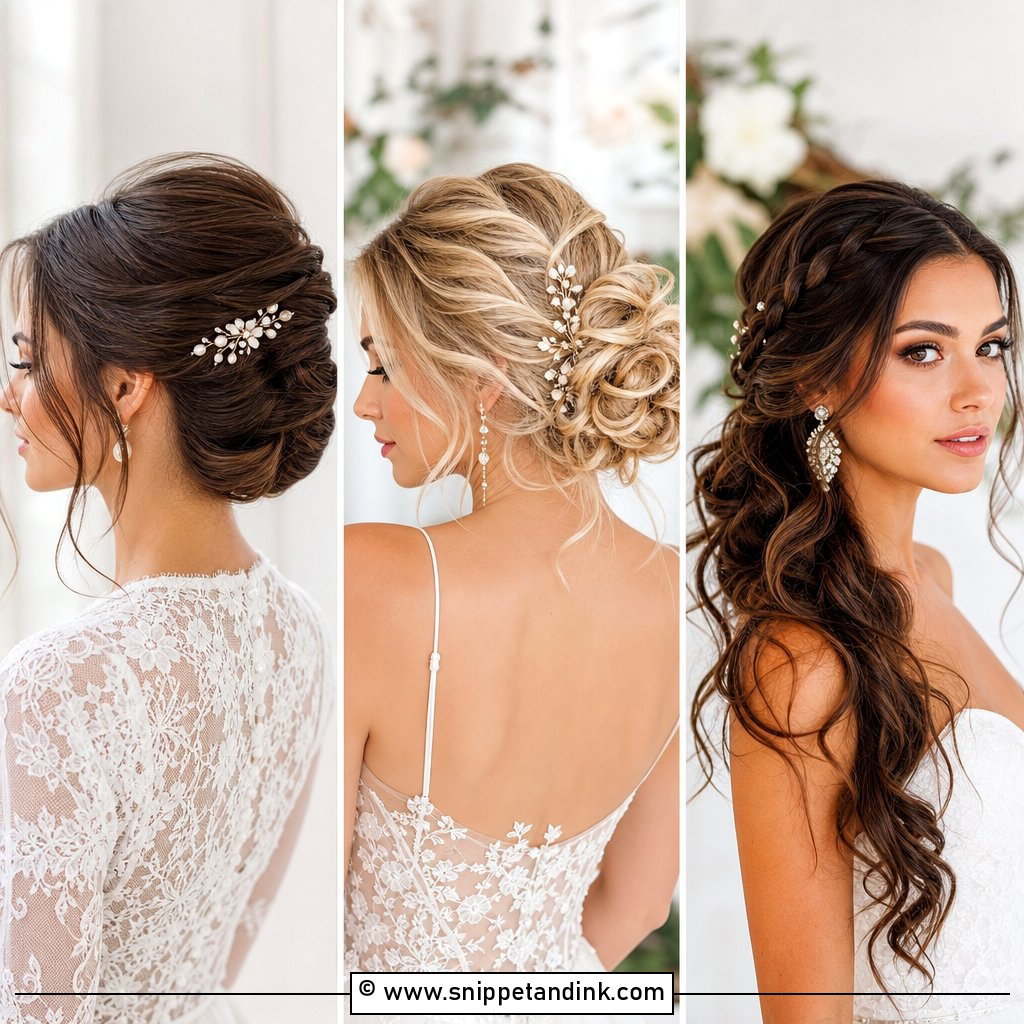
When I build a low chignon, the real work happens before any twisting: a small, firm ponytail base at the nape gives every pin something to grip, and the bun is wrapped around it. That base is why a chignon outlasts almost any other updo. Sat just above the collar, it clears high necklines and leaves room for a veil comb above it. Smooth or textured is your call, though smooth versions show every flyaway in close-up portraits, so I finish those with a light hold spray and a fine-tooth comb.
2. Romantic Half-Up Half-Down
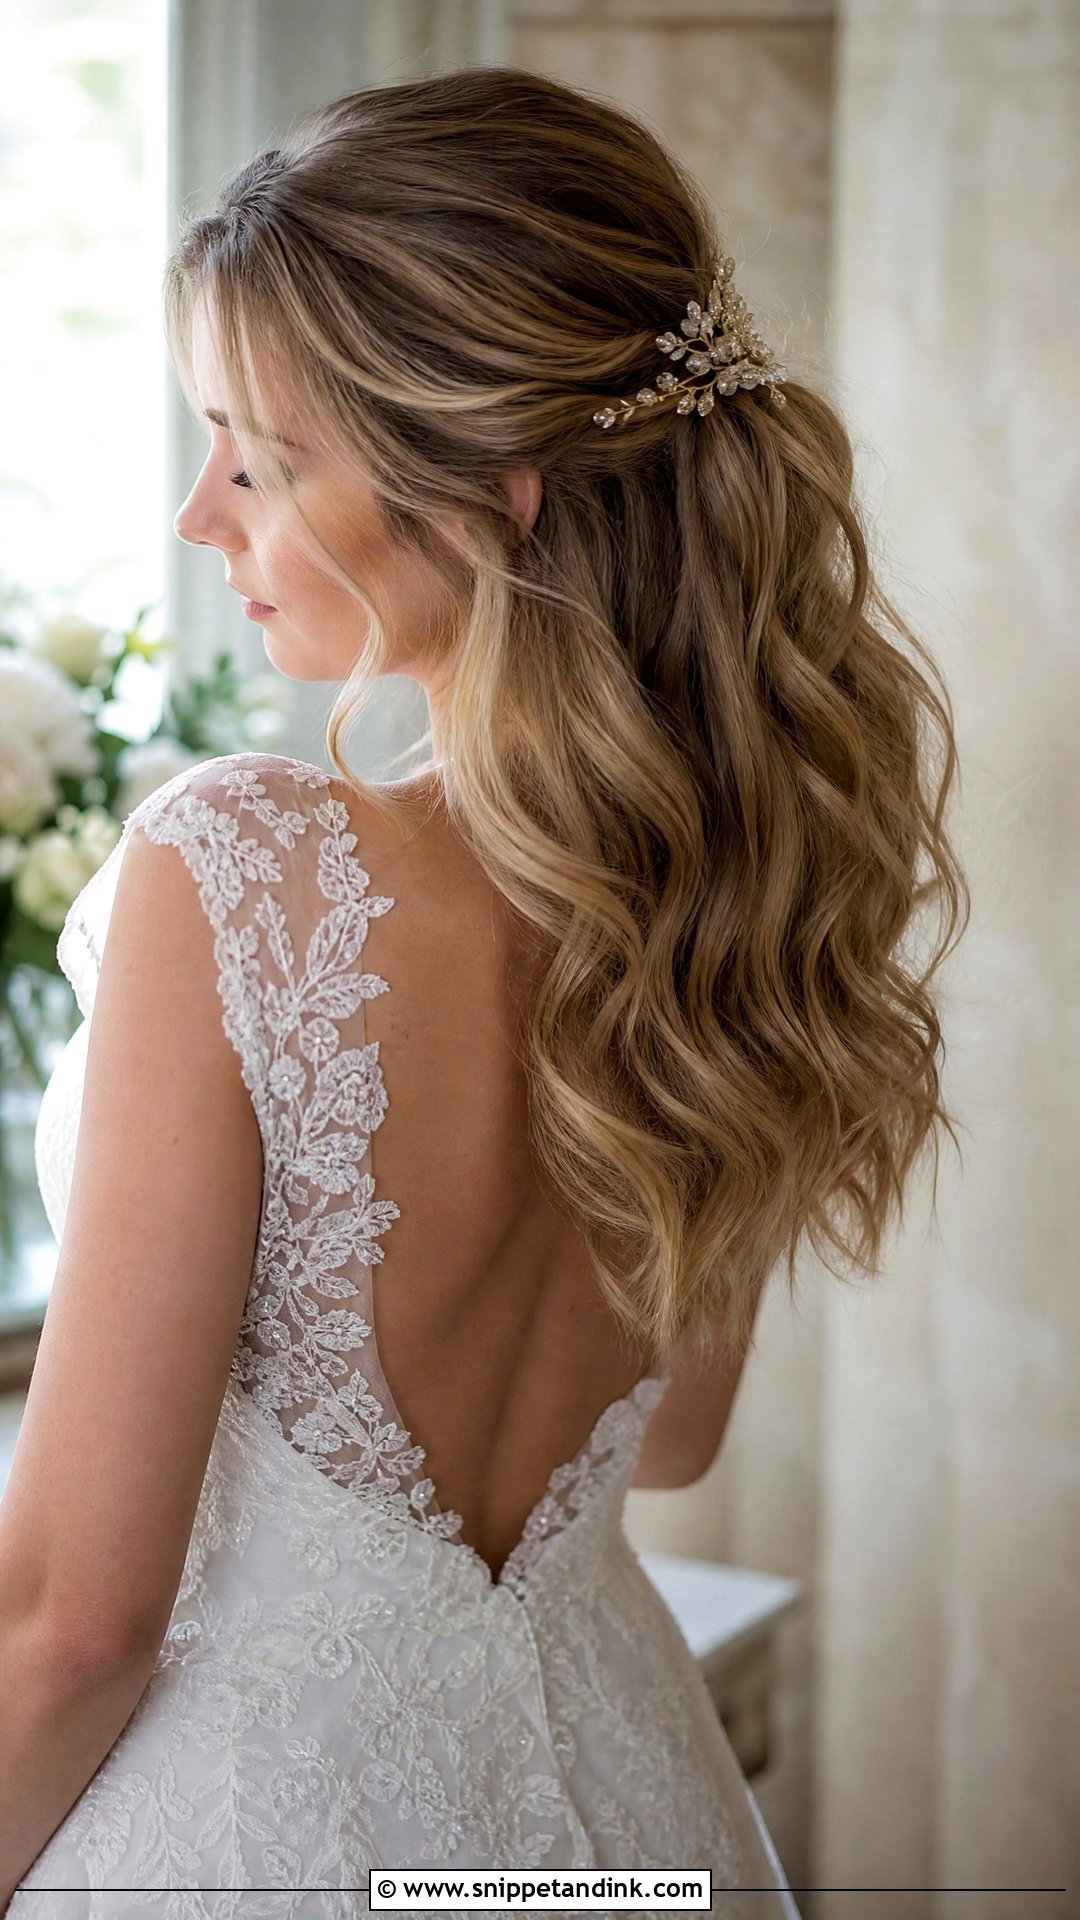
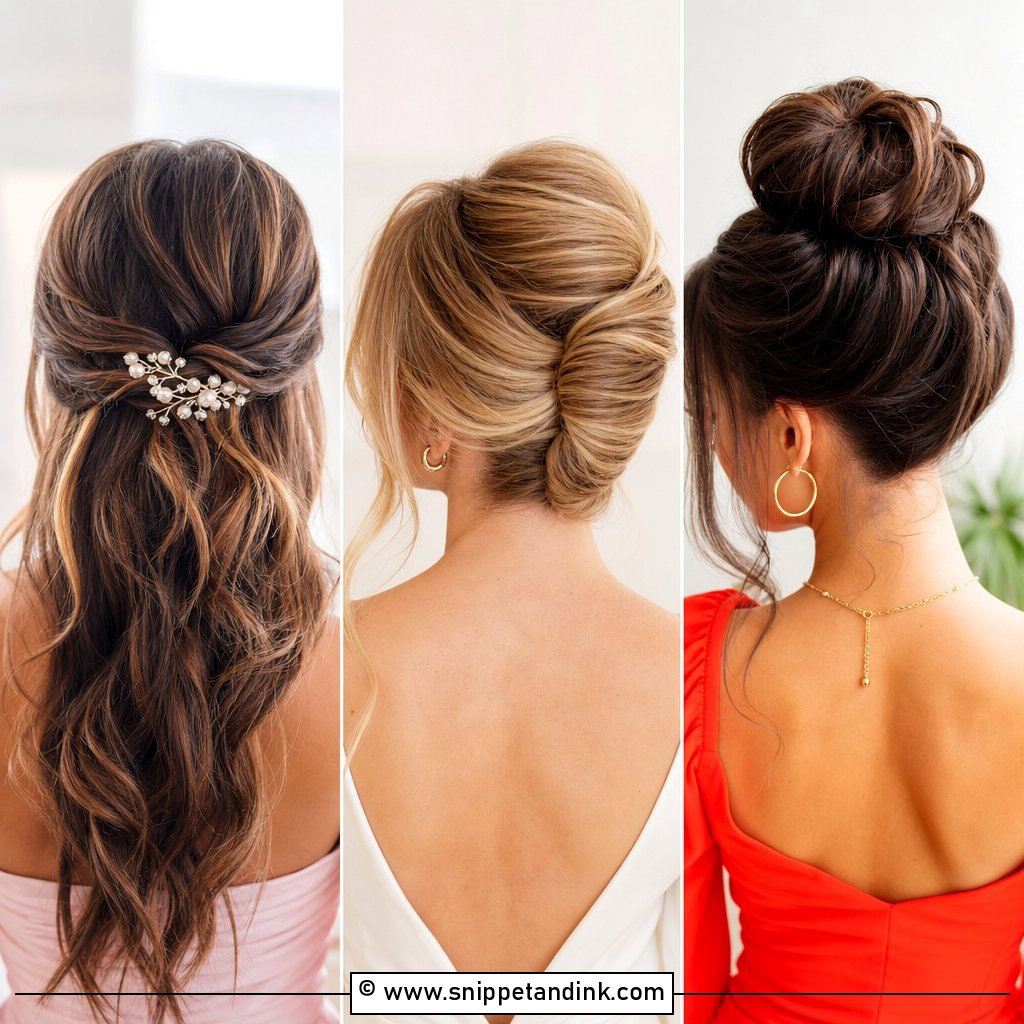
Half up, half down is the style I’m asked for most and the one that fails most often by evening, because the loose lengths carry all the curl and nothing protects them. I set the curls the night before or pin them up to cool fully before brushing out, and I anchor the top section with crossed bobby pins under a small clip rather than relying on the clip alone. A jeweled slide or a few fresh stems sit well at the join. If your hair is very fine and straight, expect softer waves by the reception and plan a quick touch-up.
3. Hollywood Glamour Waves
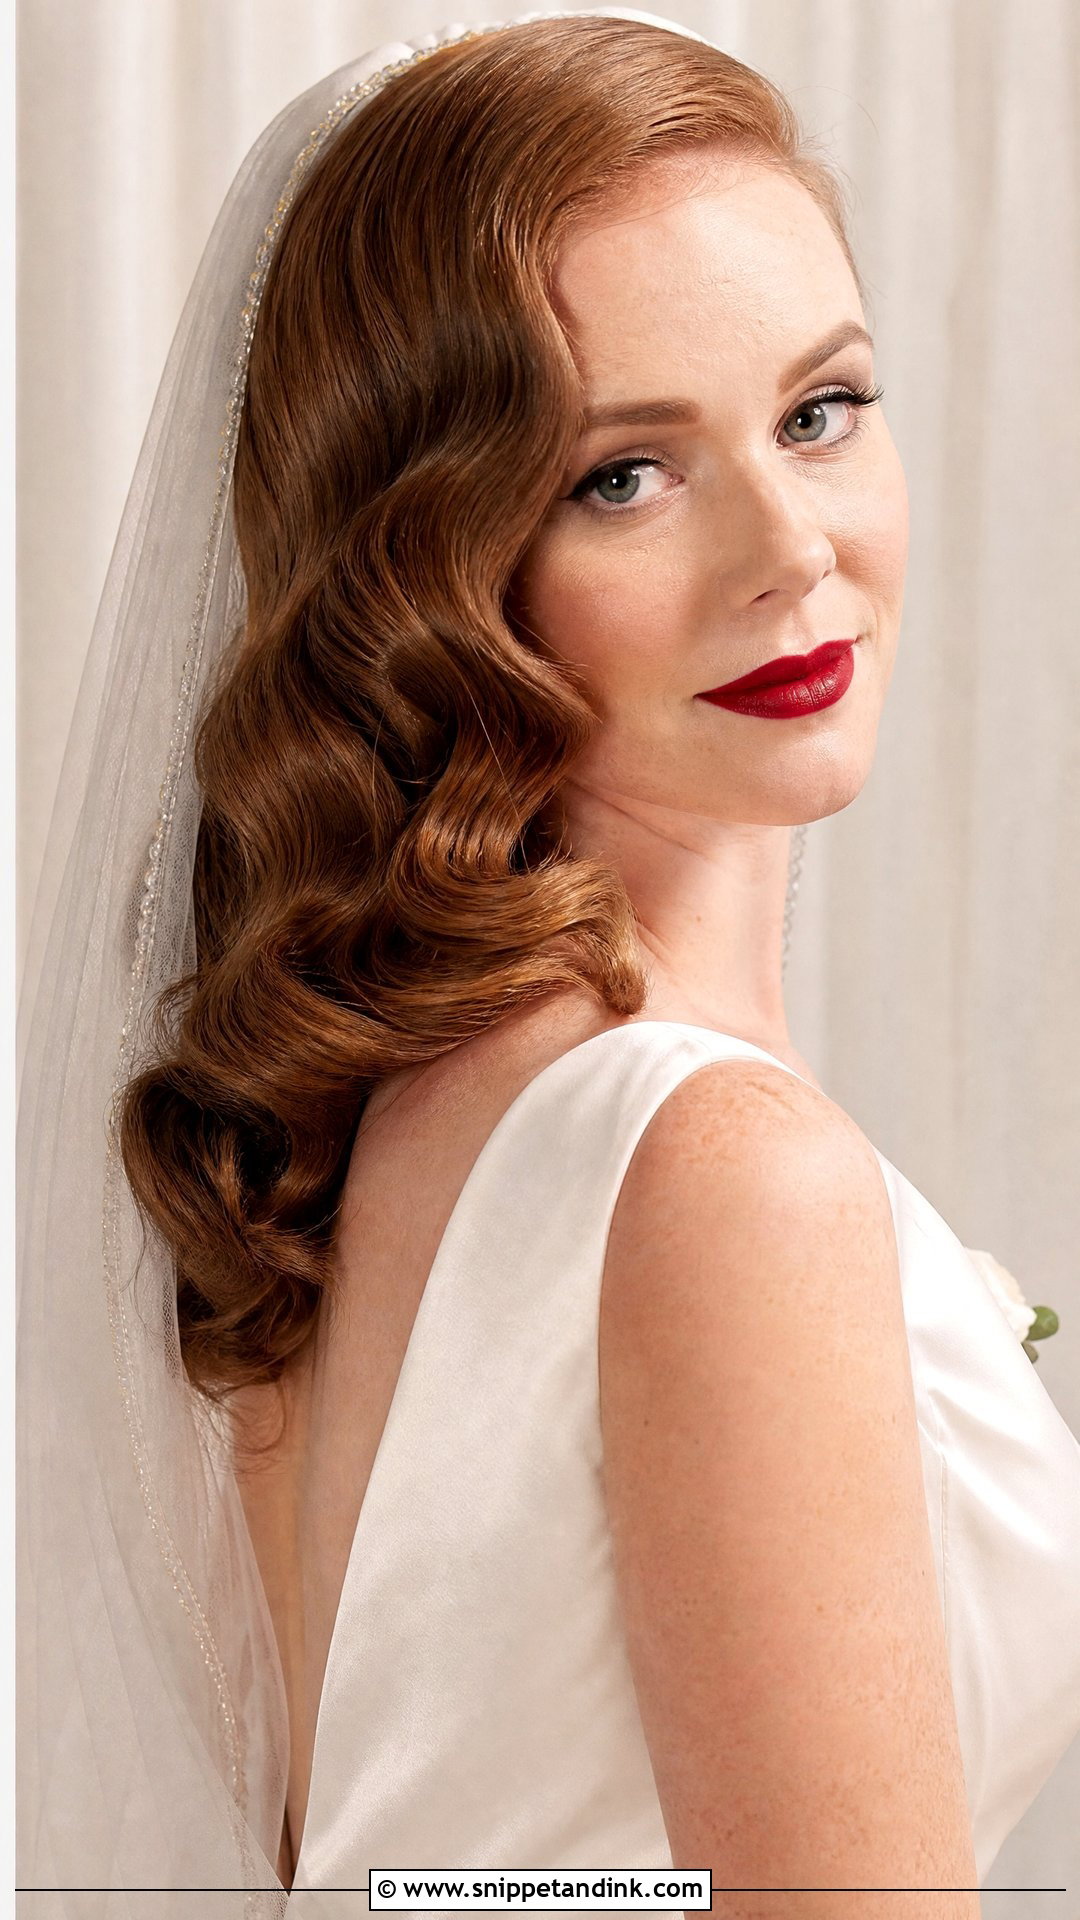
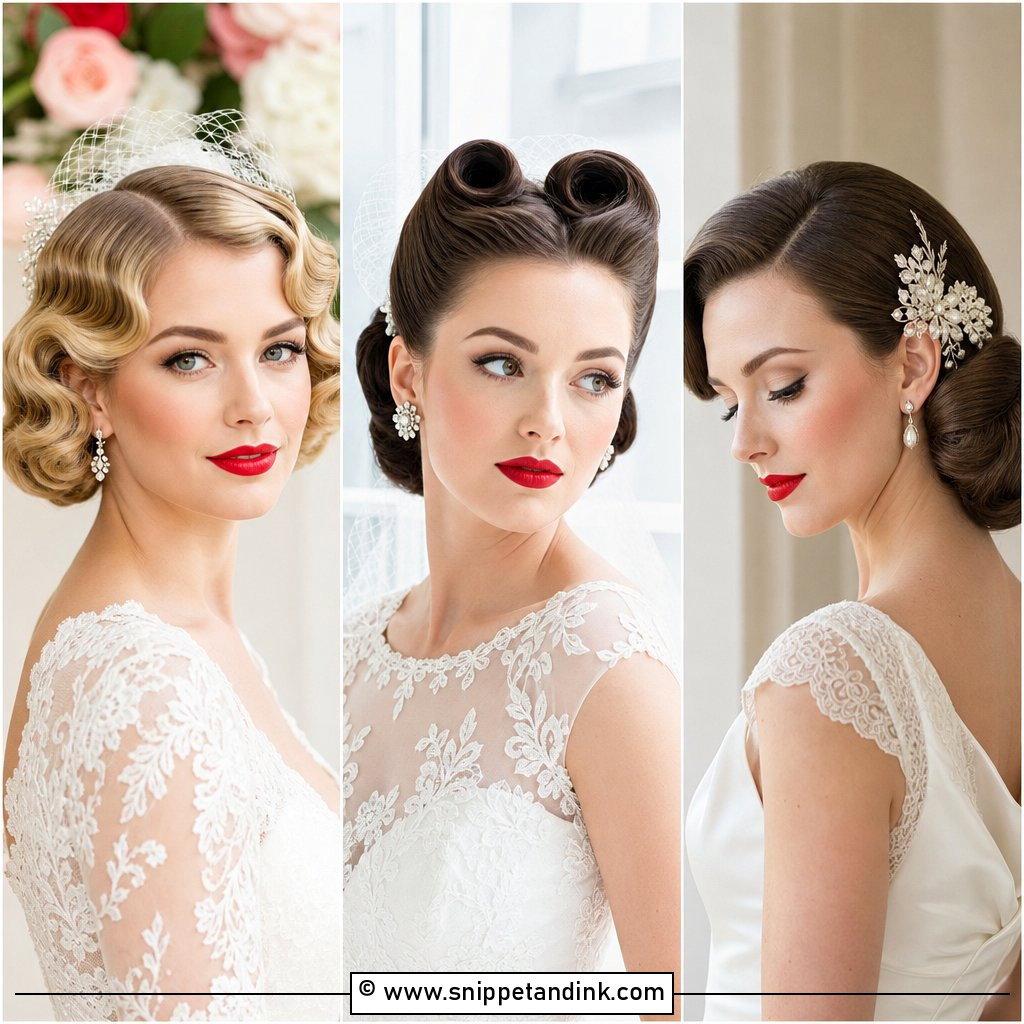
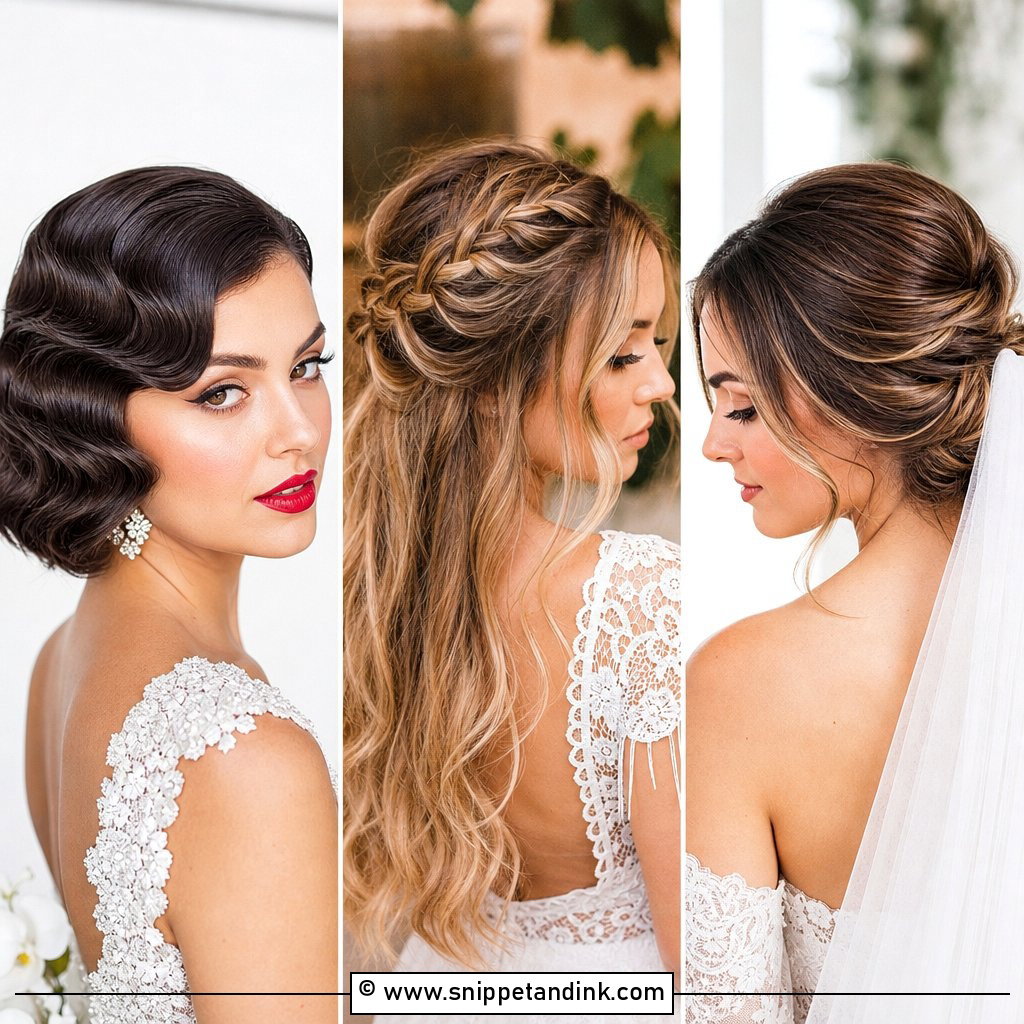
Real Hollywood waves are a set, not a curl. I curl every section in the same direction, pin each one while it cools, then brush the whole head out into one continuous wave and press the ridges in with clips. Skip the brushing and you get ringlets instead of that glossy contour. The finish loves a vintage gown and a red lip, and it reads strongly from across a room. It’s a poor match for very humid outdoor venues, where the ridges relax within an hour or two.
4. Sleek French Twist
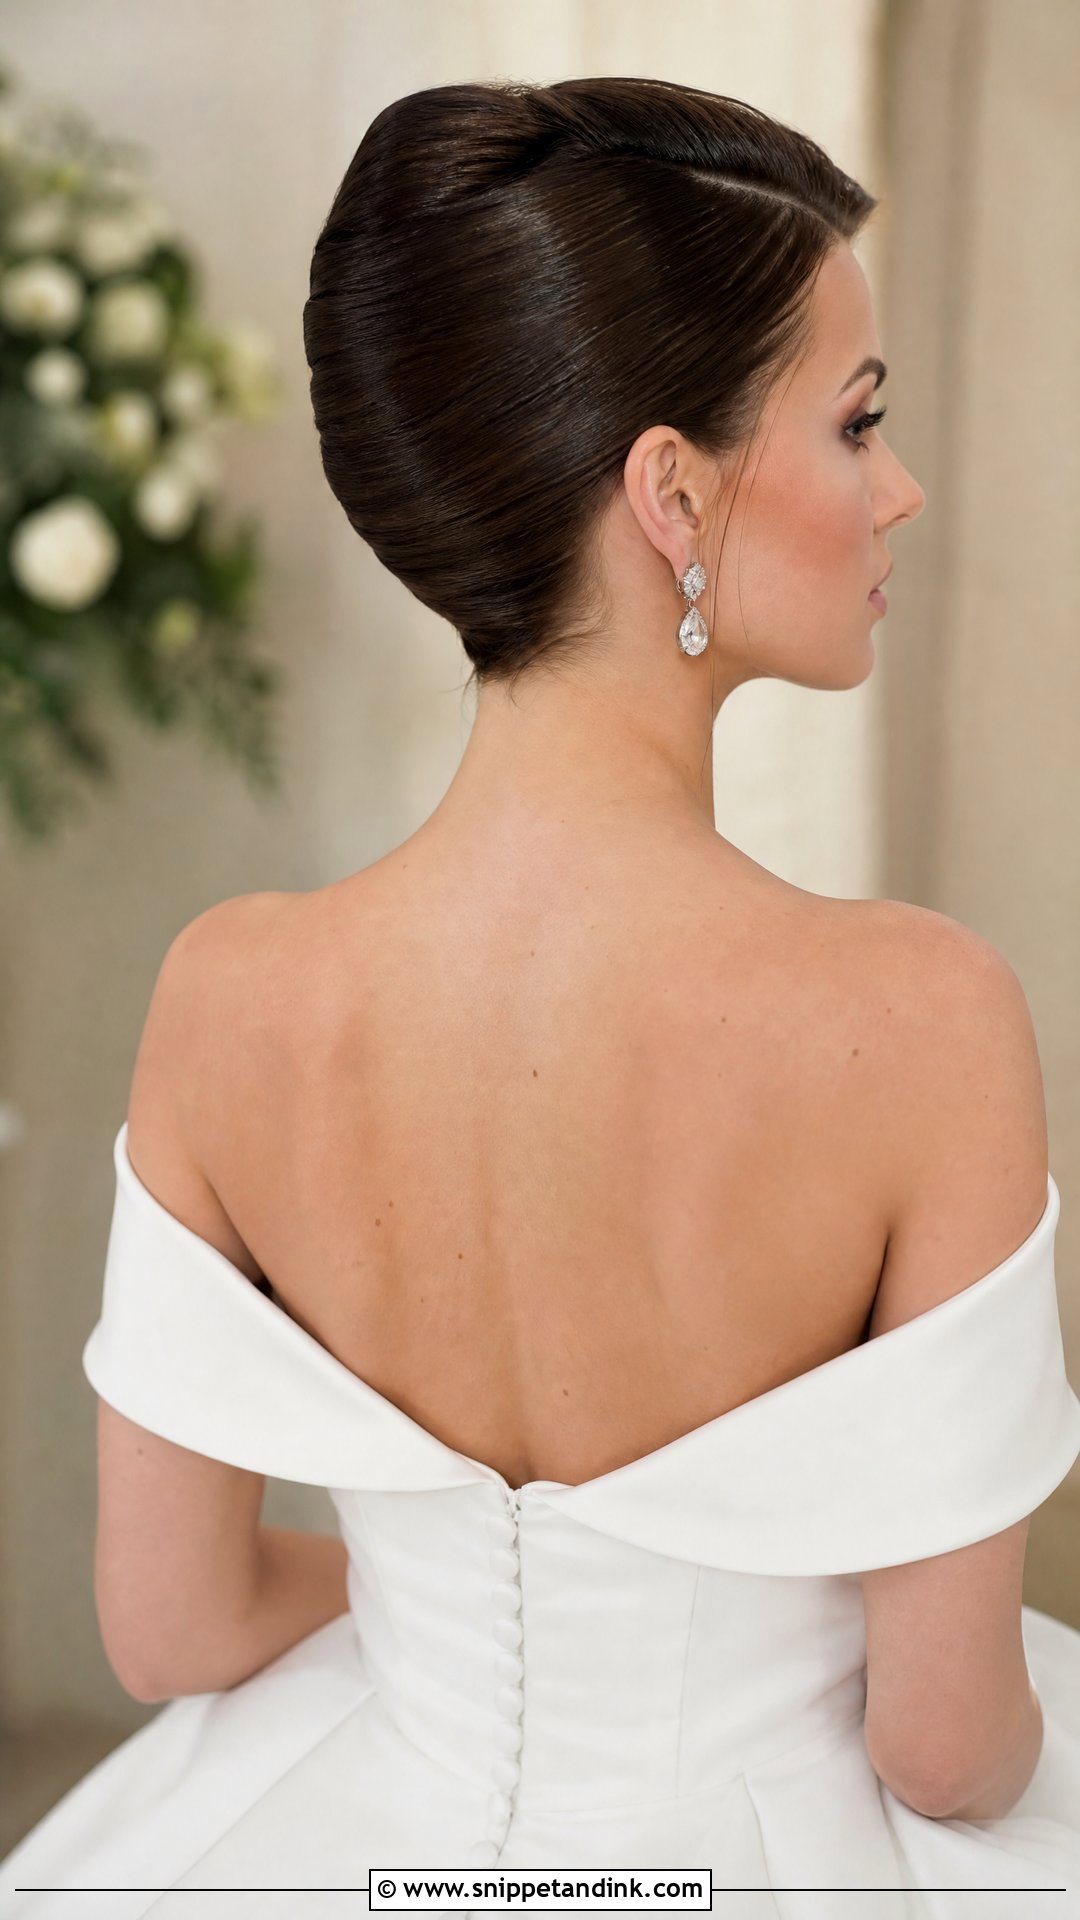
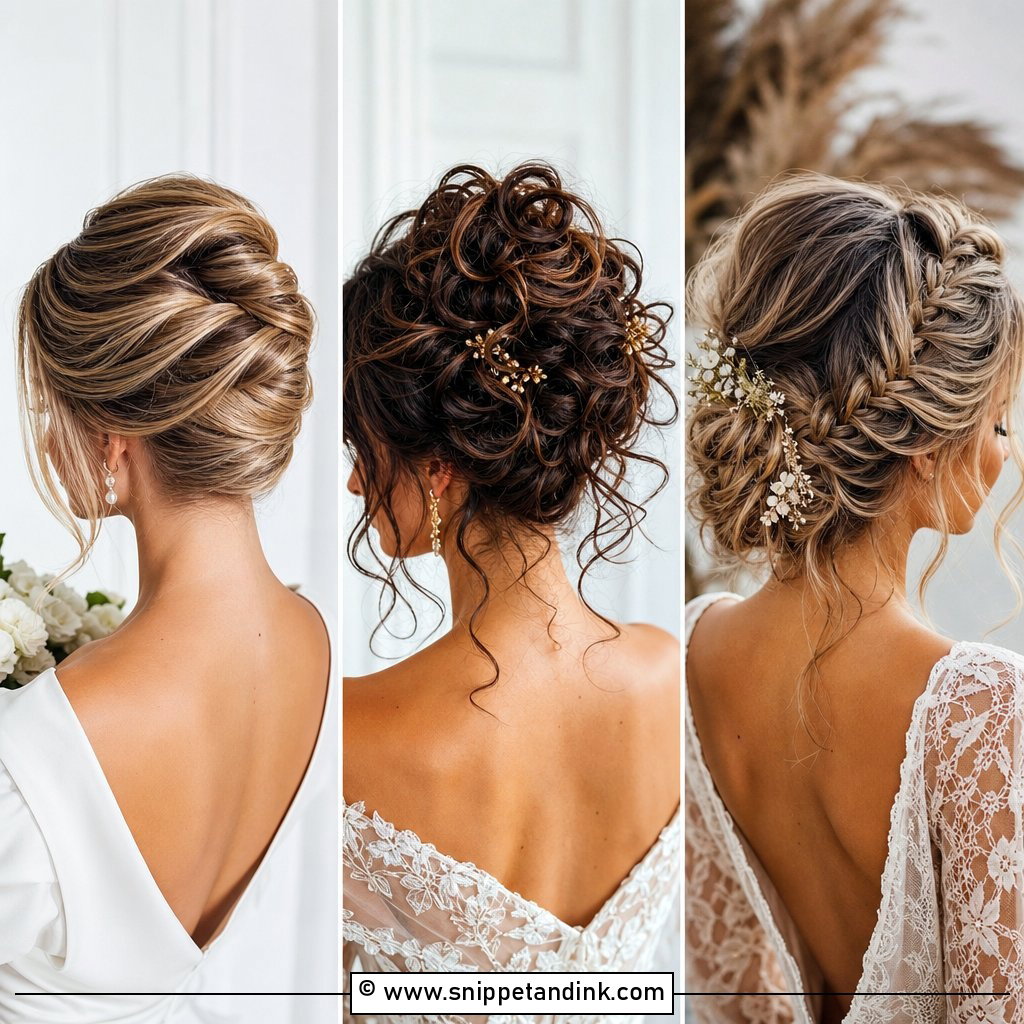
A French twist folds the hair vertically up the back of the head and hides the ends inside the roll, so the outside should look like one smooth sheet. I pin it in a zigzag down the seam, which is where it either holds or slowly unravels. It shows off an open back or an heirloom necklace well and lengthens the neck. Hair shorter than shoulder length struggles to make a full roll; I’ll usually add a small padded insert or suggest a chignon instead.
5. Loose Bridal Updo With Tendrils
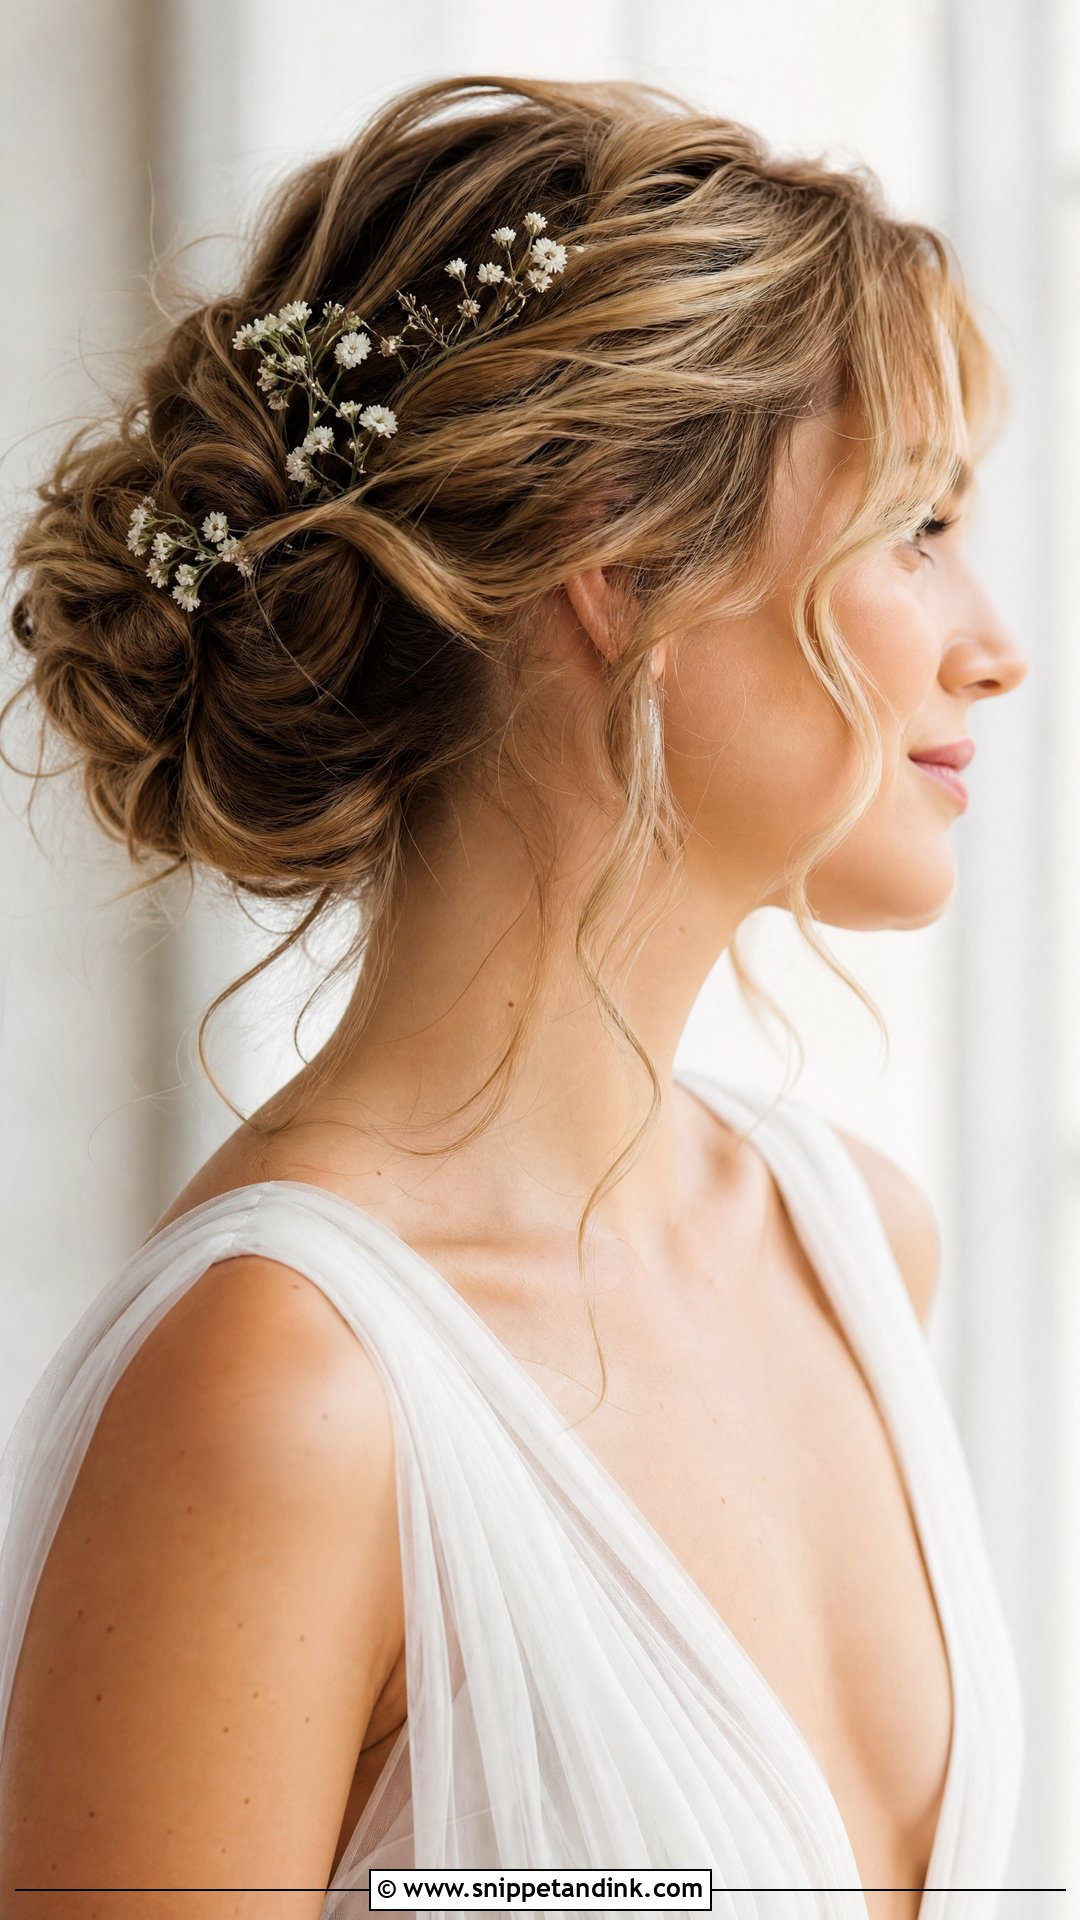
The tendrils are the hardest part of this updo to get right. Pulled too thick, they hang heavy and stick to a damp face by the first dance; too thin, they look accidental. I take them from just in front of the ear, curl them with a smaller barrel than the rest and leave them out of the hairspray until last. The loose bun itself is pinned more securely than it looks, with a firm base hidden underneath the texture. Garden and outdoor weddings suit it, and a few sprigs of baby’s breath tuck easily into the gaps.
6. Vintage Finger Waves
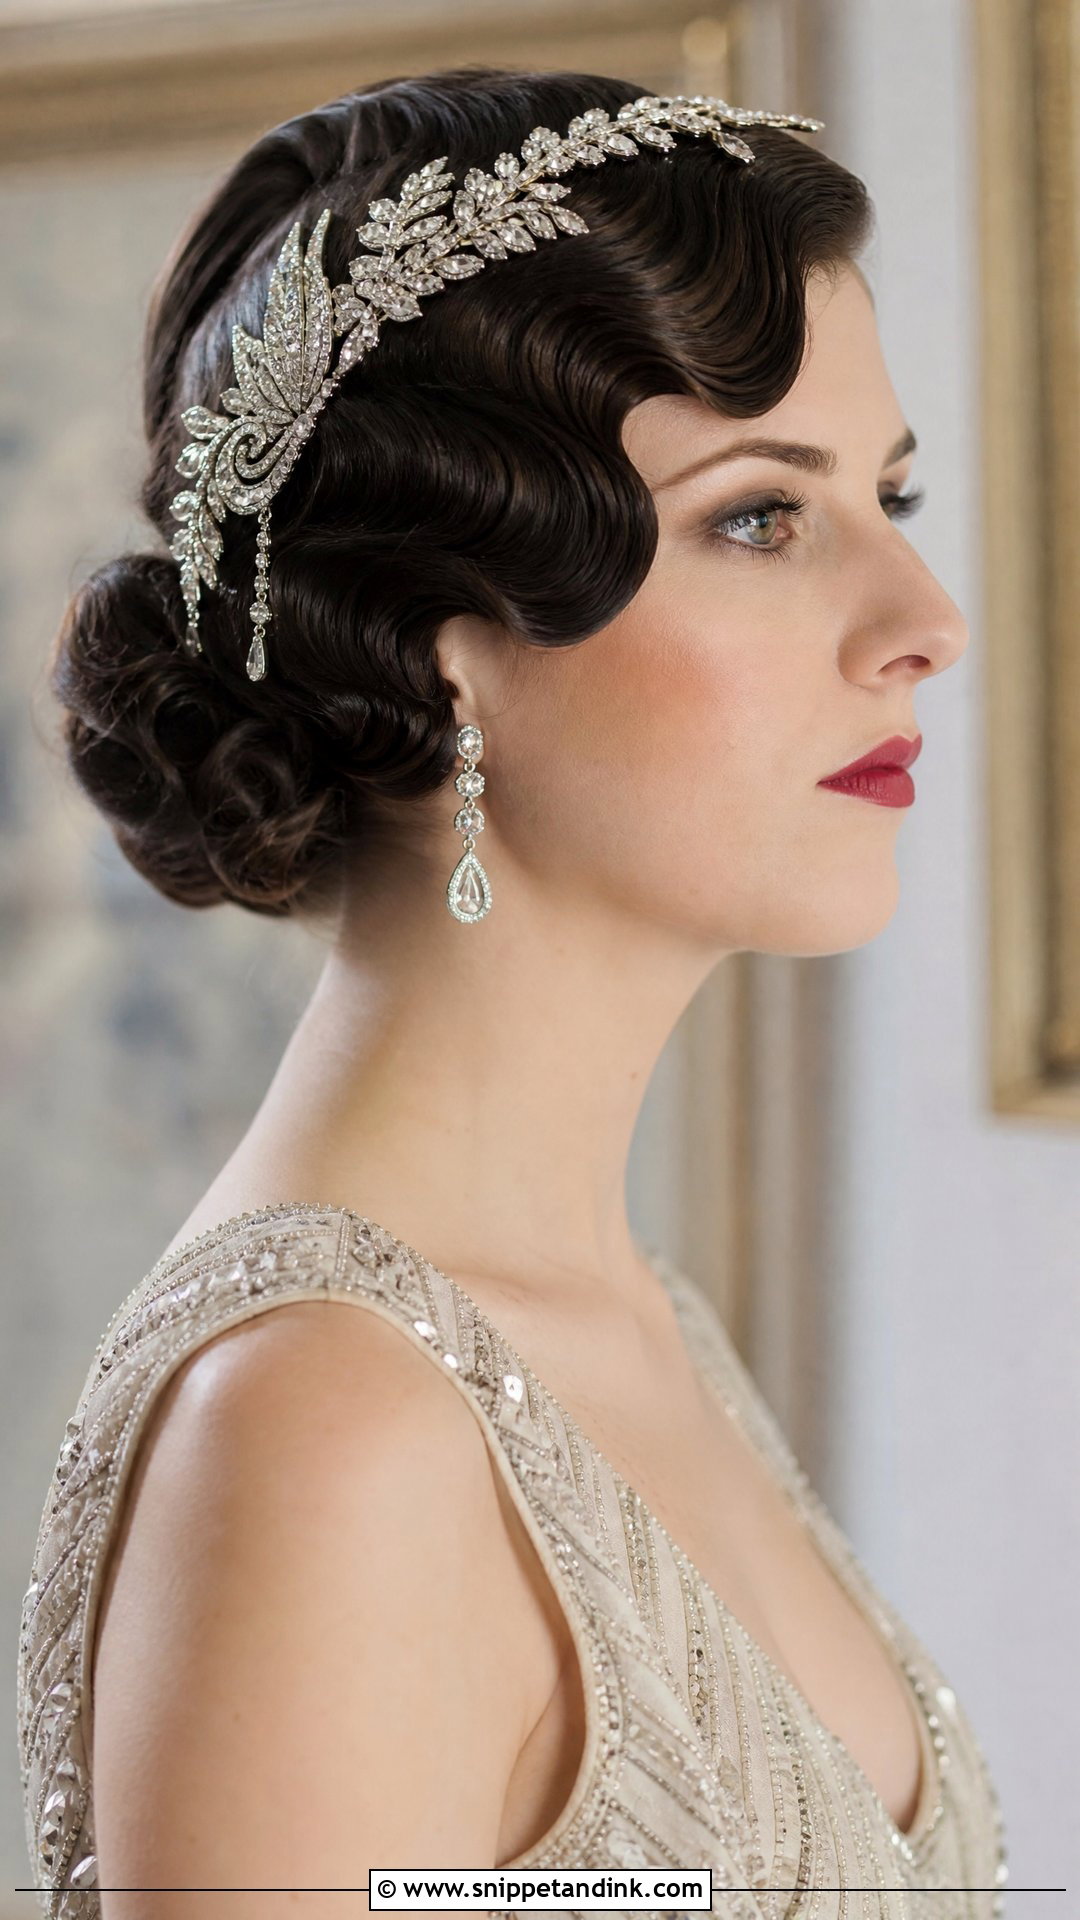
Finger waves are the retro choice that demands the most patience. This 1920s-inspired style is set with a wet gel, shaped ridge by ridge with fingers and a comb, then left to dry completely under clips before anything is touched. On bobs and lobs it looks authentic; on long hair I usually create the waves around the face and pin the lengths into a low roll so it reads as a faux bob. Beaded gowns, Art Deco detail and a jeweled comb finish the period look. Book extra trial time for this one, because the drying alone can take longer than you’d expect.
7. Braided Crown Updo
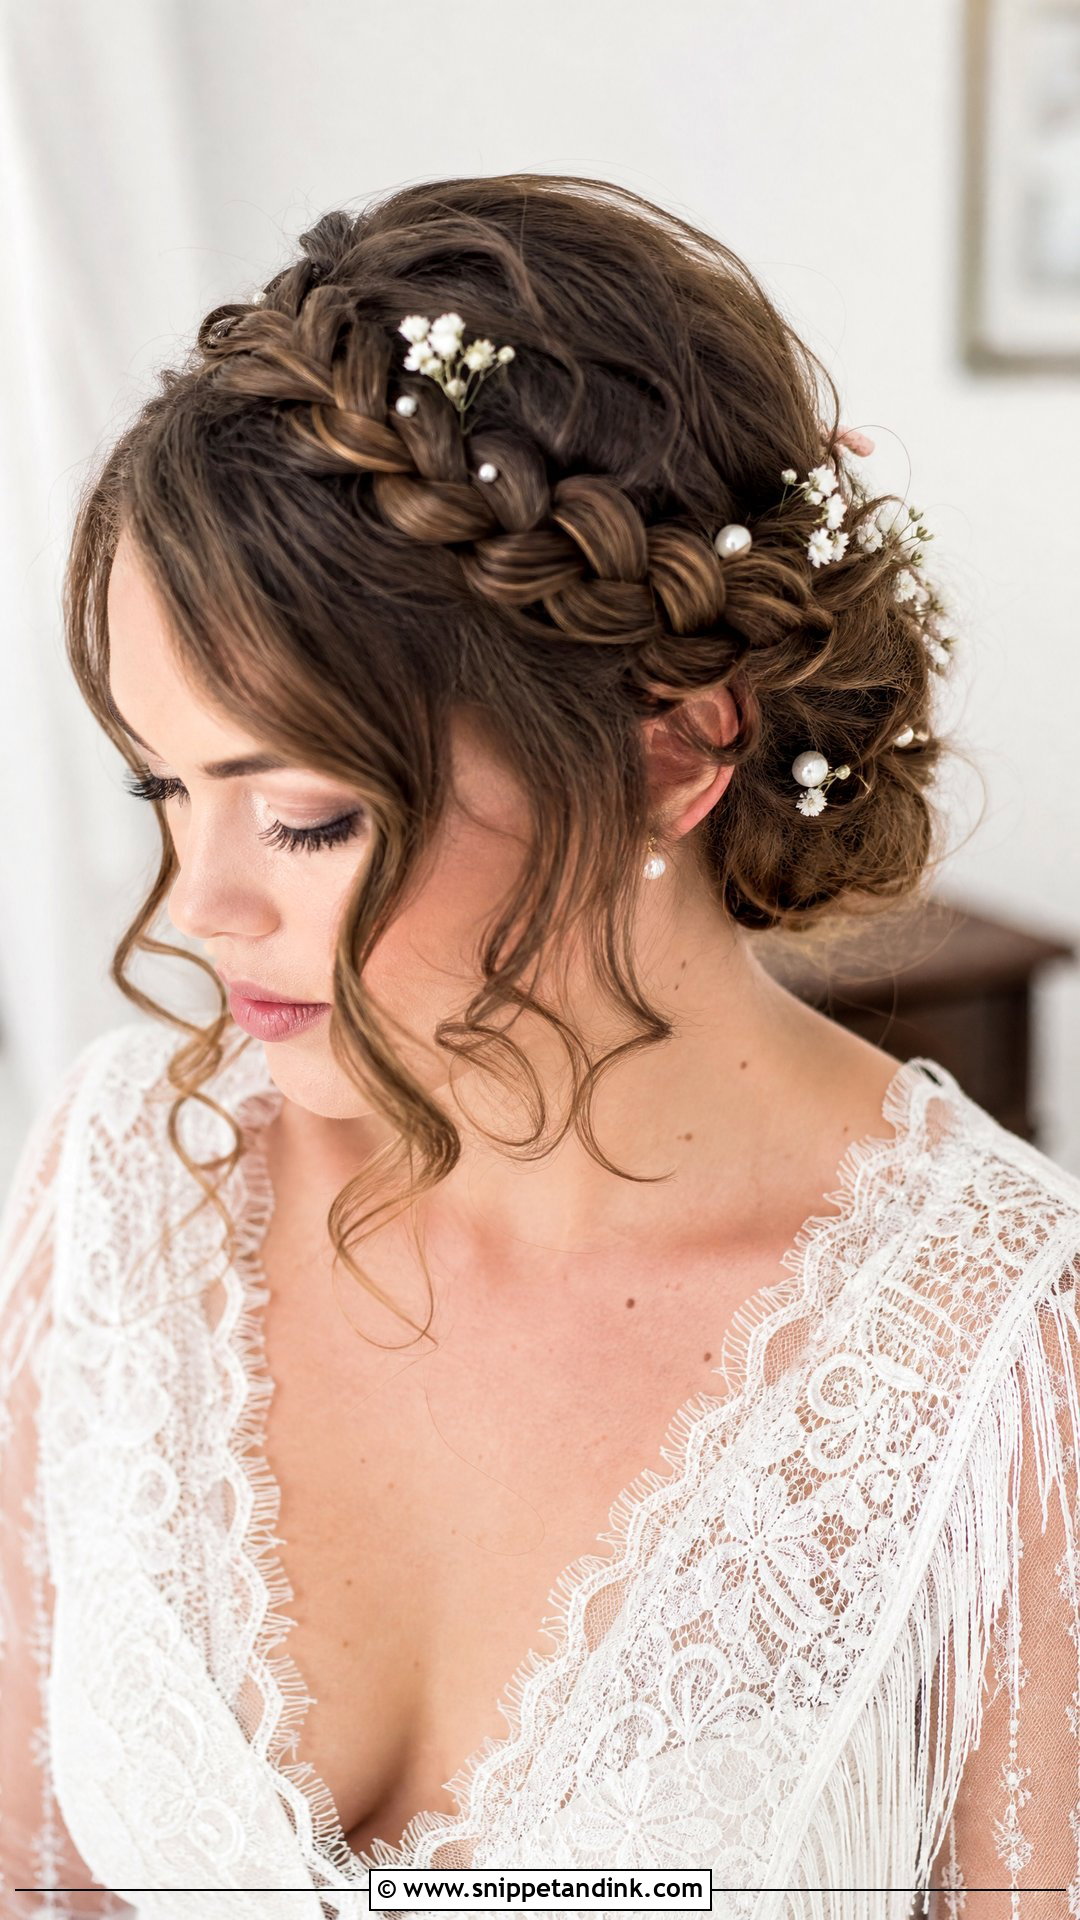
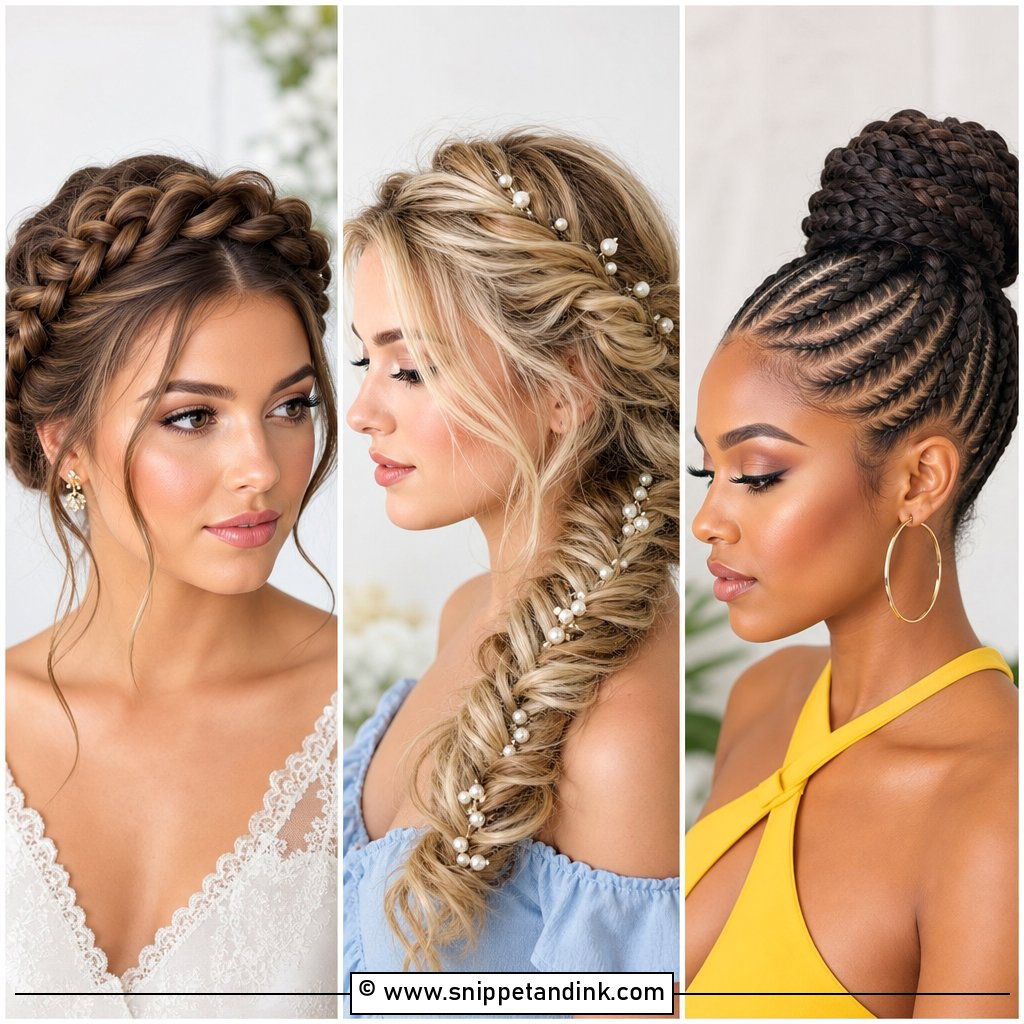
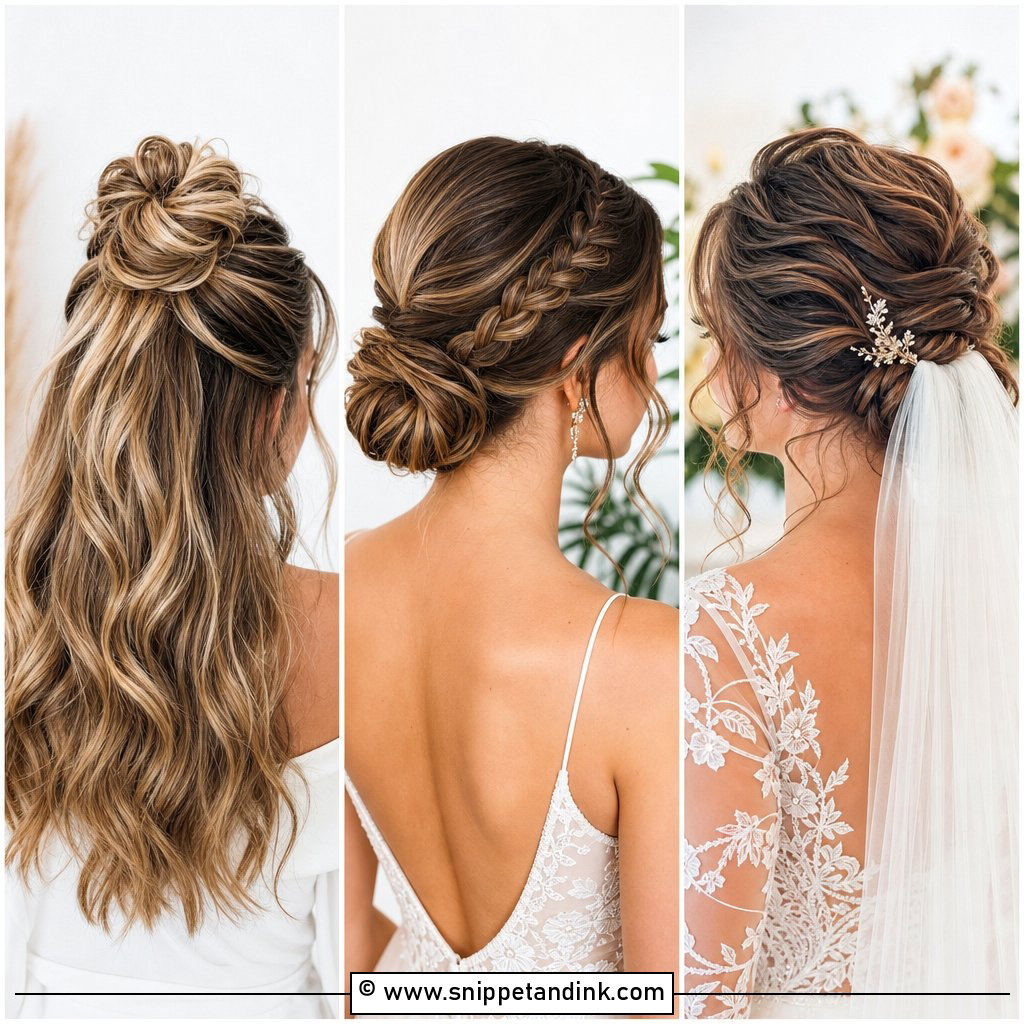
A braided crown is one of the most secure styles I do, since each braid is pinned flat against the head all the way round and spreads its weight evenly. I braid it a little tight, then pancake the edges outward so it looks fuller than the hair really is. That trick matters for anyone with fine or layered hair, where short ends can poke out of the braid by evening. It suits a fairy-tale aesthetic and outdoor ceremonies, and tiny flowers or pearl pins slot straight into the plaits. Very short hair can still get a partial crown with a clip-in braid.
8. Sleek Low Ponytail
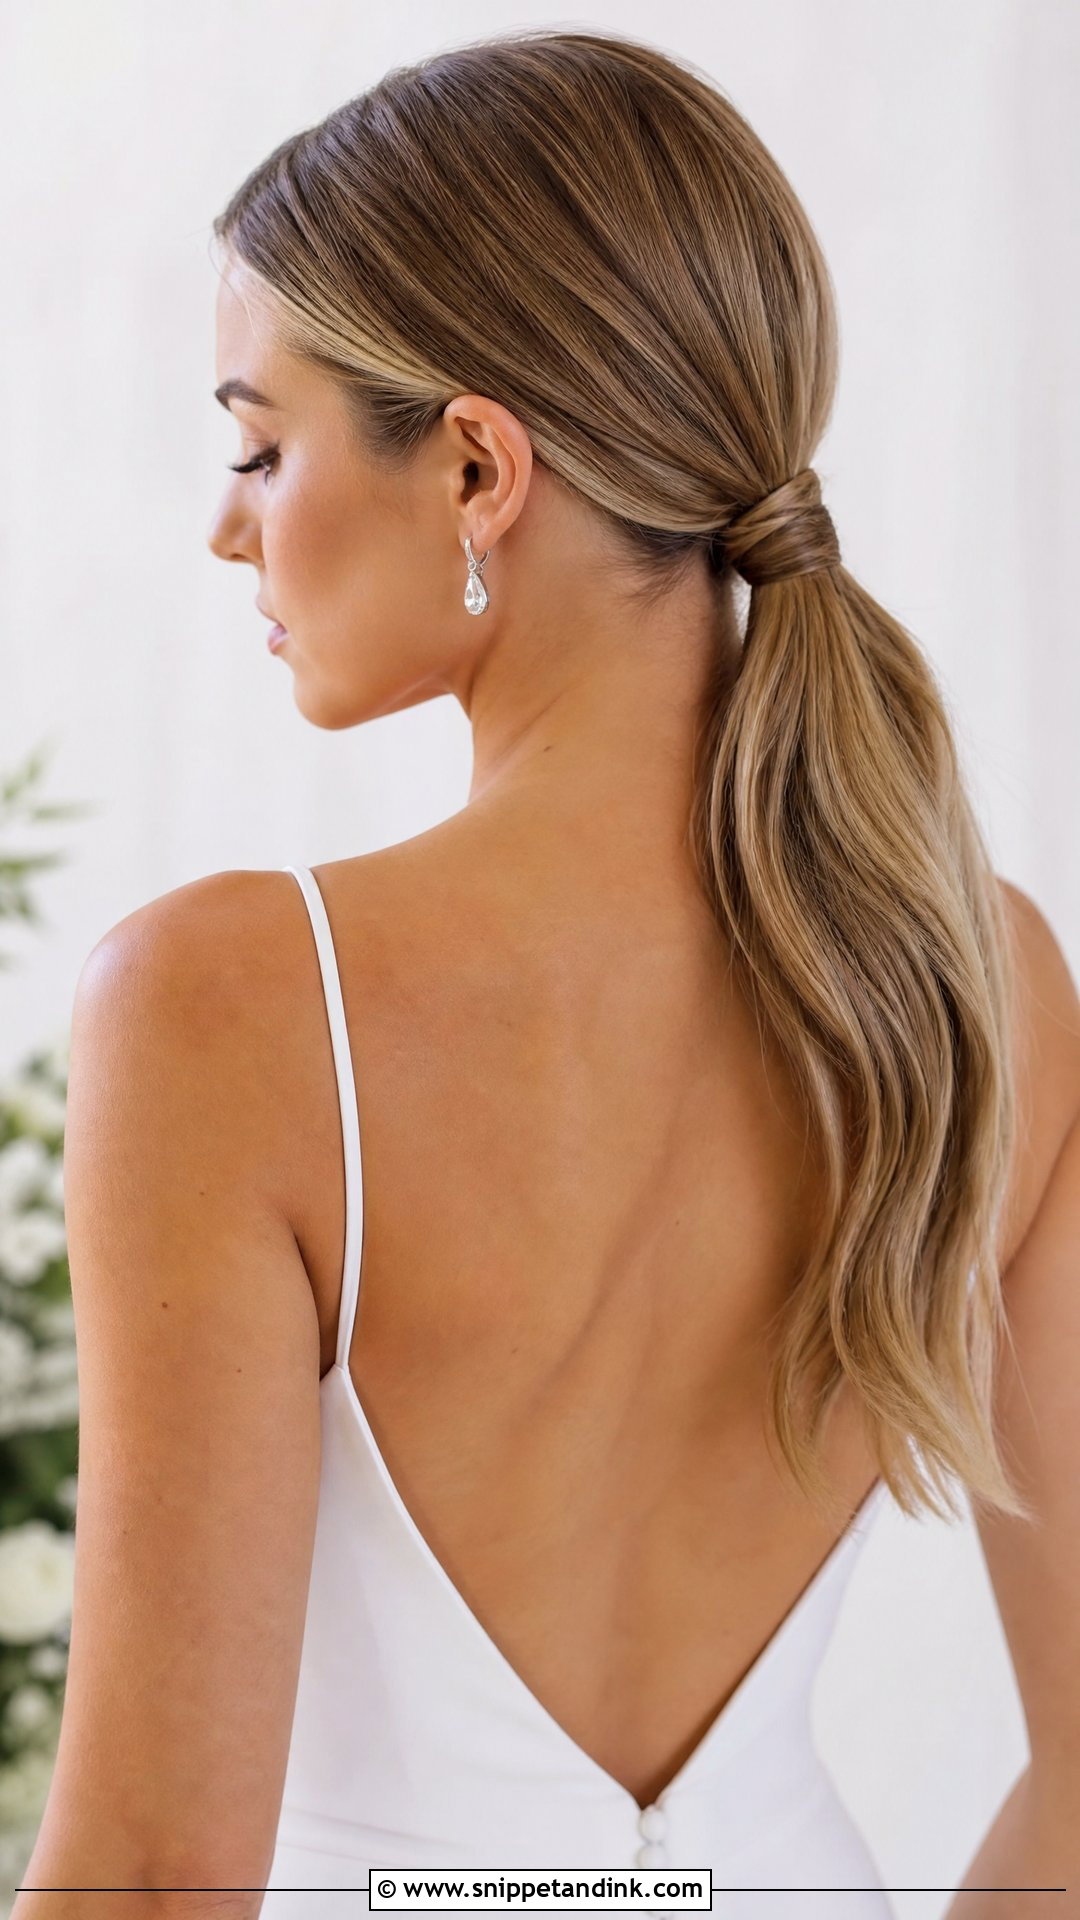
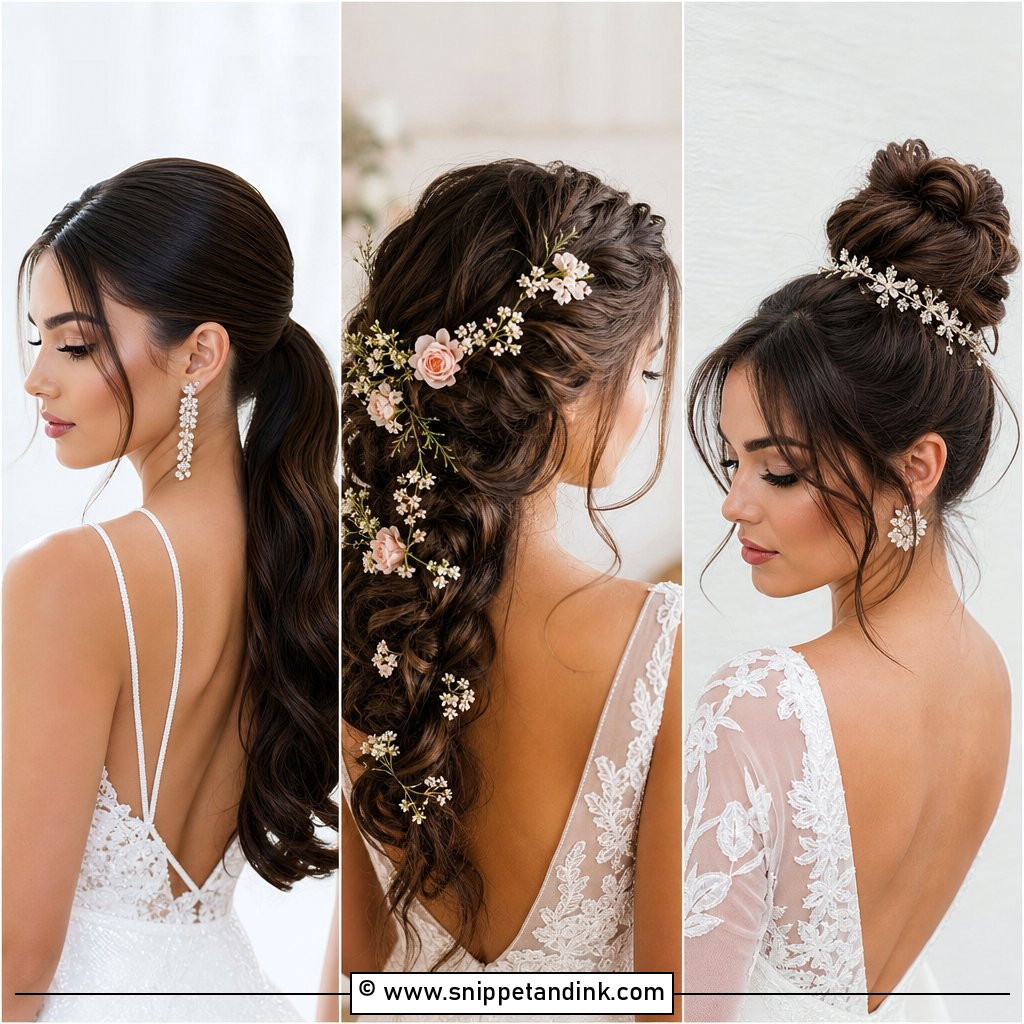
A sleek low ponytail looks simple, and that’s exactly why it’s unforgiving. Every bump shows, so I blow-dry the hair dead straight first and brush it into the elastic with a boar-bristle brush and a little smoothing cream. Wrapping a strand around the base hides the elastic and needs one well-placed pin underneath to stop it unwinding. Minimal gowns and a clean neckline are where it belongs. Thick, coarse hair can make a heavy tail that drags the base down, so I often secure two elastics a few millimeters apart for extra hold.
9. Soft Curls With Side Part
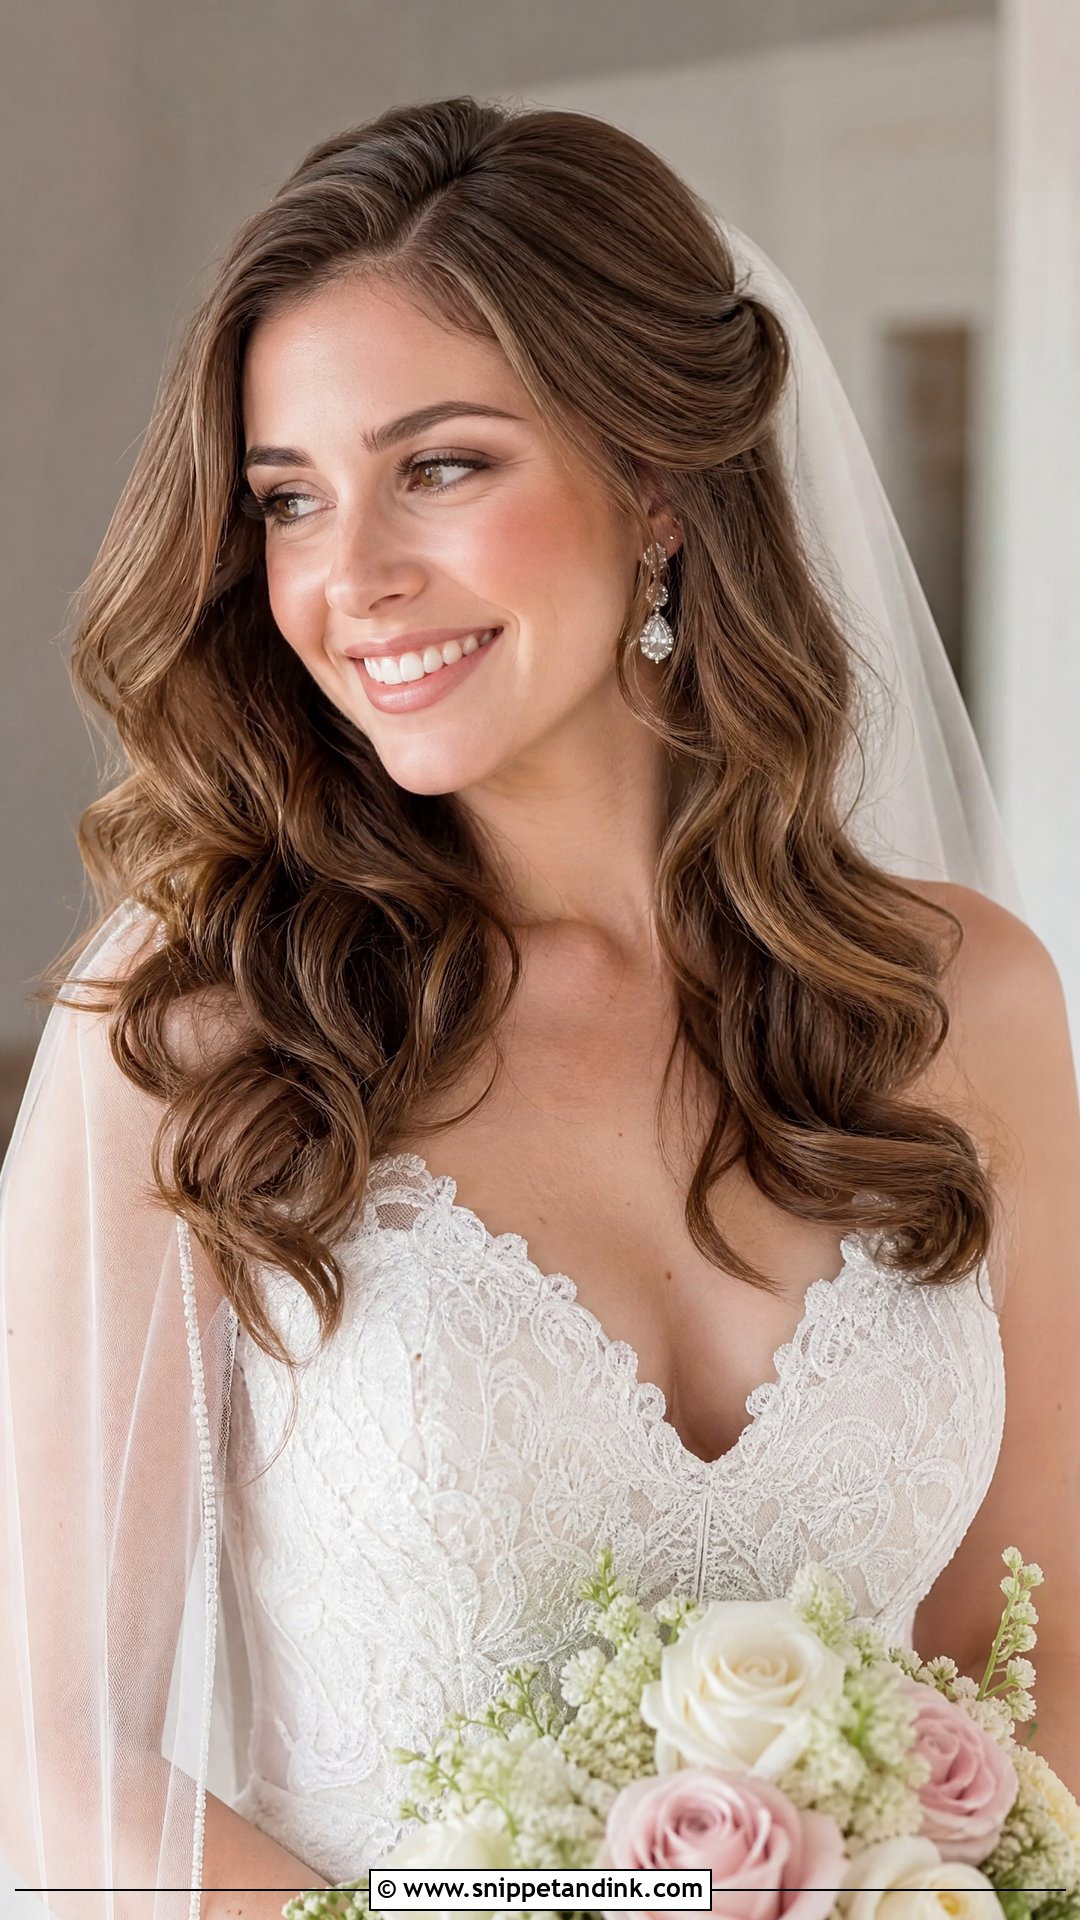
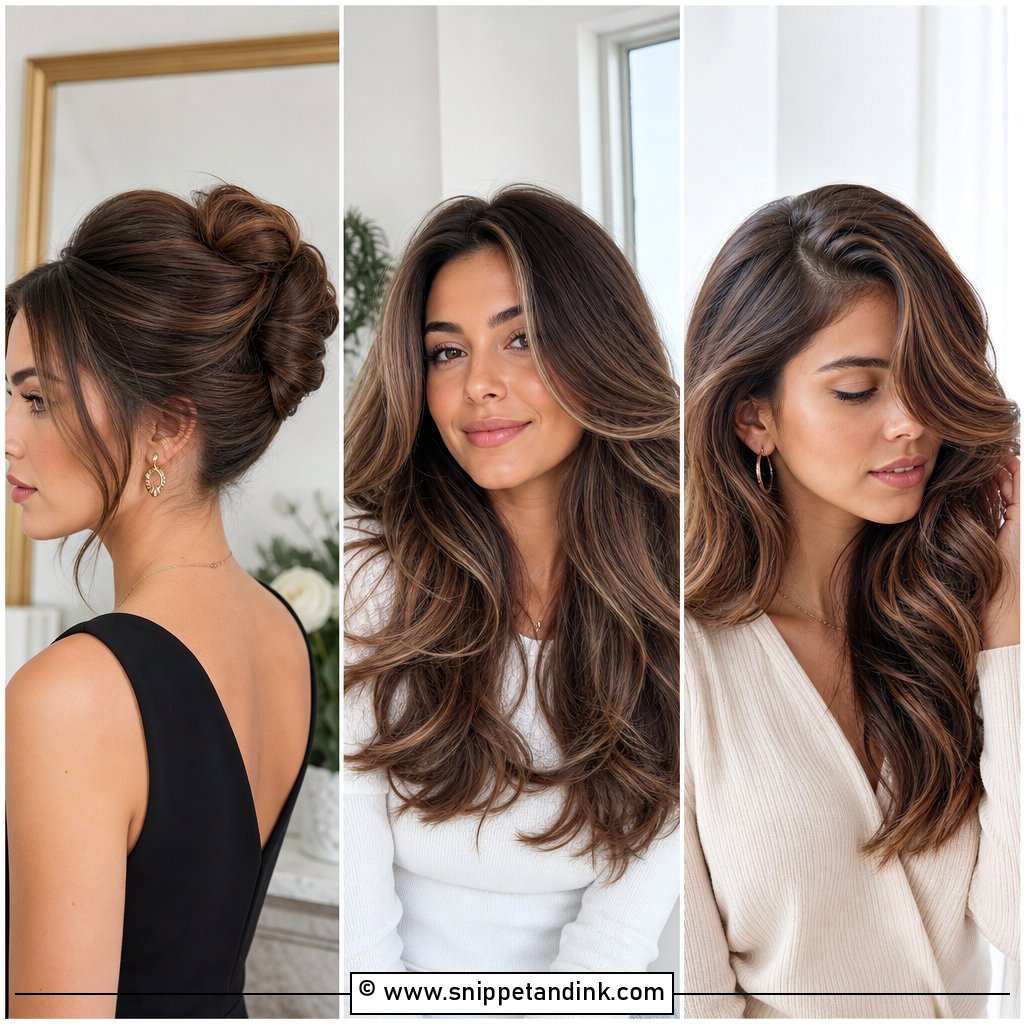
Soft side-part curls look natural but rely on prep more than any other down style. I add a texturizing mousse to damp hair, curl in alternating directions so the curls don’t clump into one sausage, and let them set before I touch them. The side part adds asymmetry that flatters most faces, and I’ll often pin the lighter side back behind the ear with a hidden grip. These voluminous curls sit nicely under a veil or a floral crown and look their best in daylight. Expect them to loosen by about a third over the day, so start a little tighter than you want to end.
10. Classic Ballerina Bun
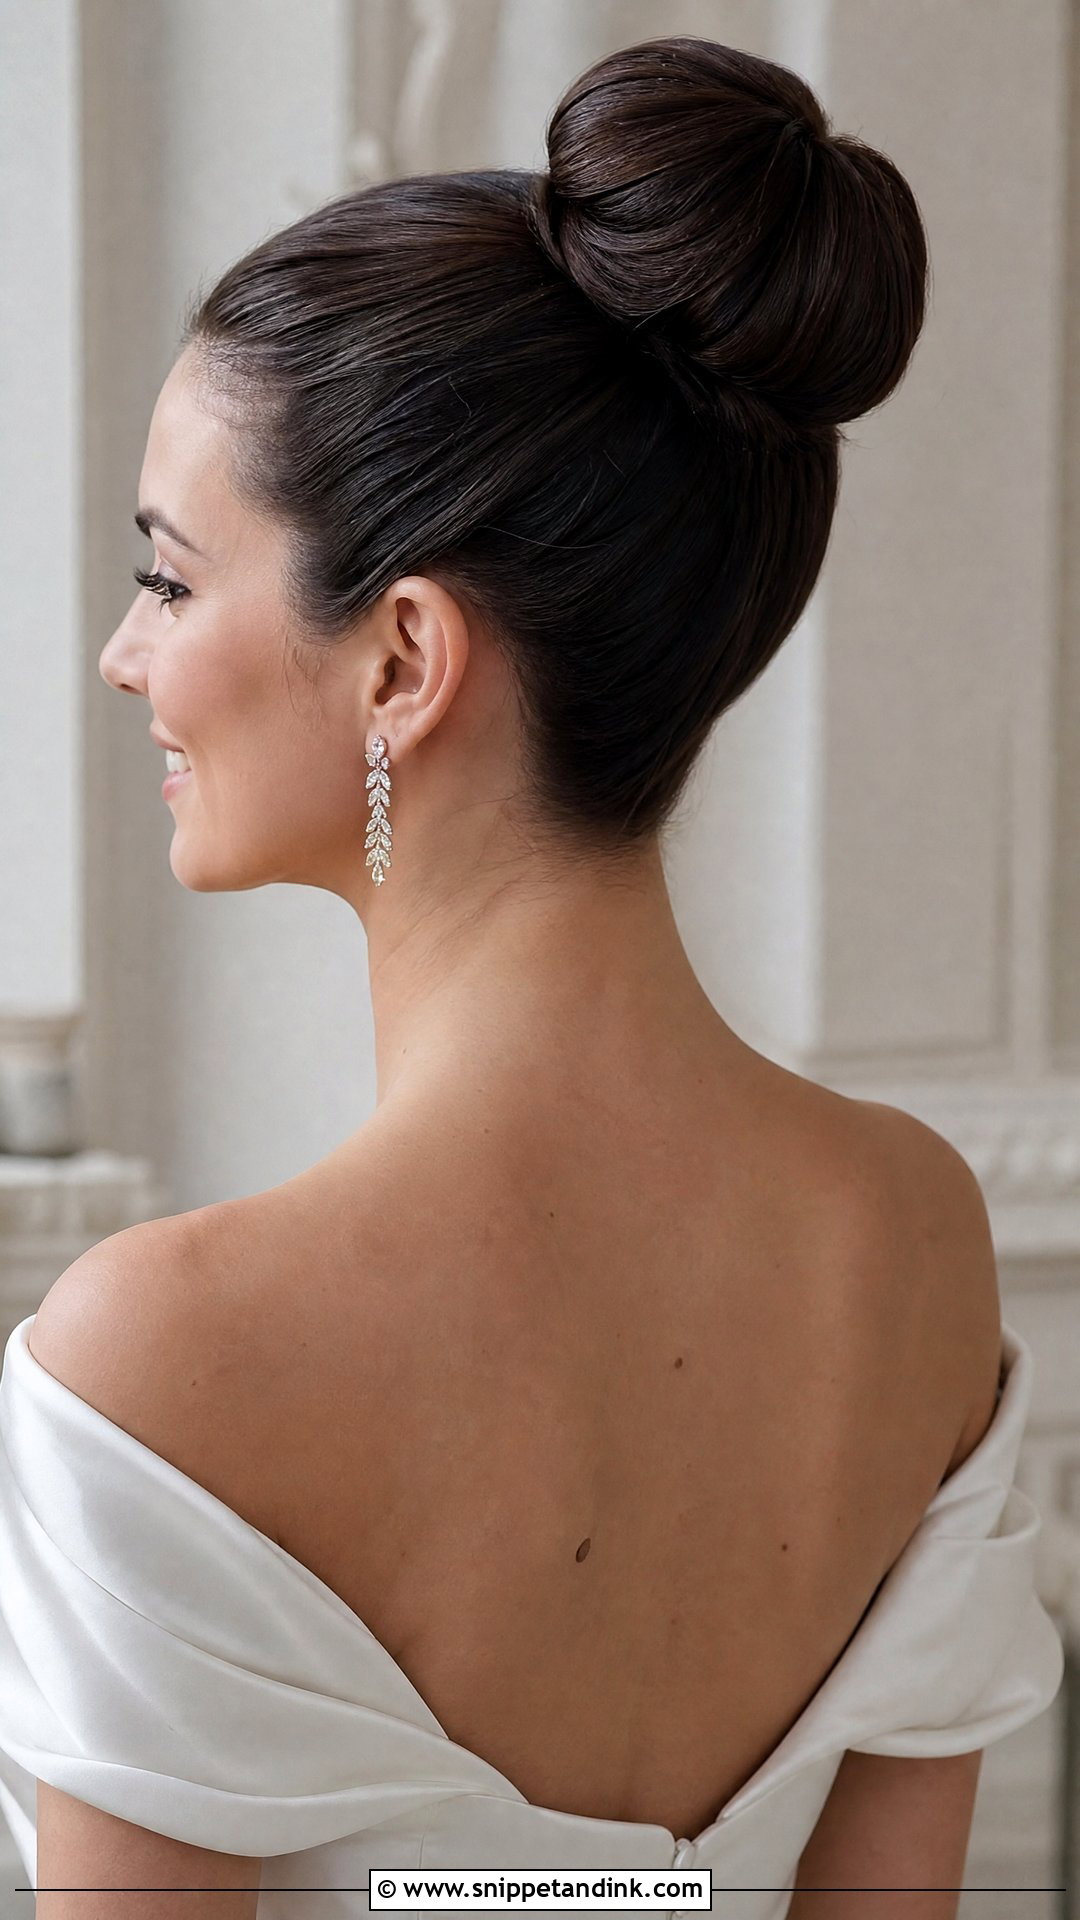
A ballerina bun sits higher than a chignon and is wound tight, almost like a coil, so its silhouette stays crisp from every side. I smooth the hair upward with a firm gel, secure it into a high ponytail, then wrap and pin it in a spiral. It flatters a long neck, makes structured gowns look sharper and leaves the earrings fully visible. The tension can feel heavy after several hours on thick hair, and a high bun interferes with veils that attach underneath, so I’d steer you toward a lower placement if you’re wearing a long veil.
11. Retro Beehive Half-Updo
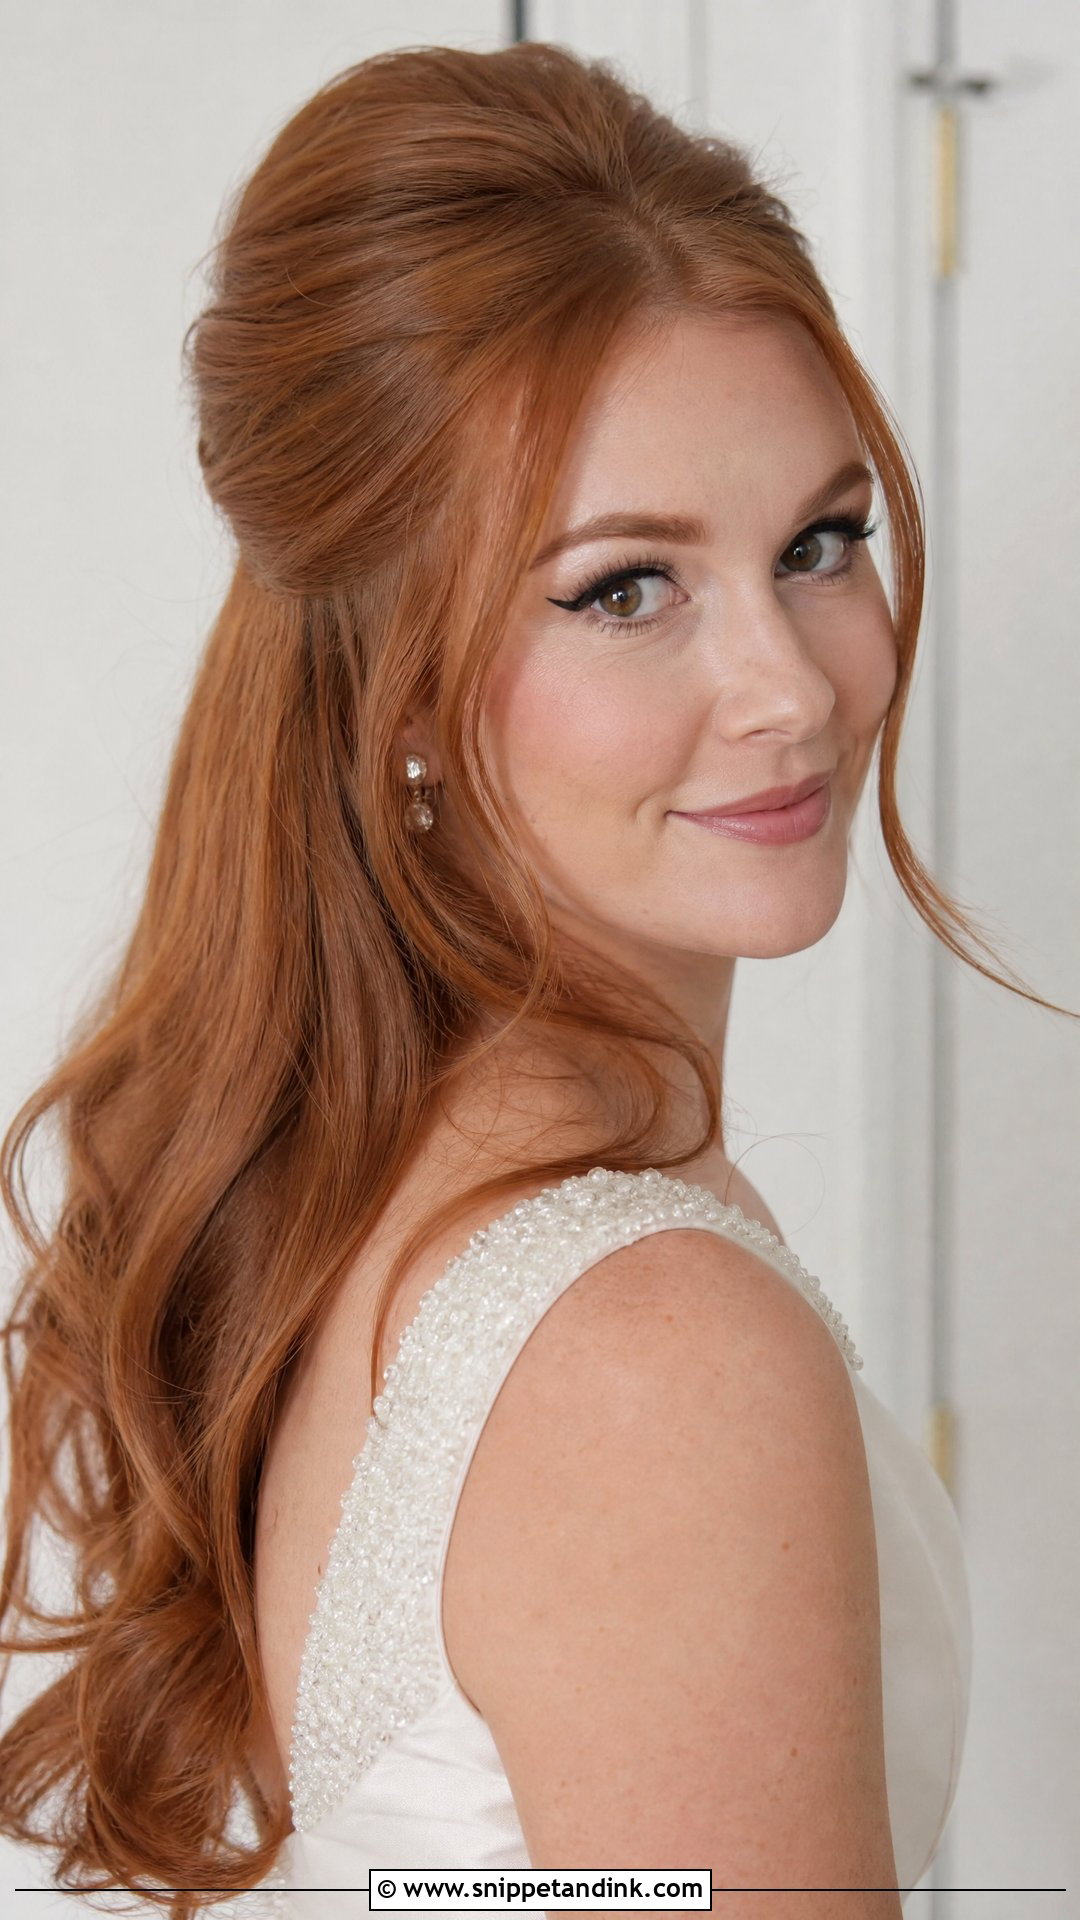
The beehive half-updo is built by backcombing the crown in thin sections, smoothing just the top layer over the cushion and pinning it at the back, with the rest of the hair falling loose. That backcombing is what gives it real 1960s glamour, and also what makes it a little tricky to brush out later, so bring a conditioner for the night. The height lengthens a round face and pairs well with a winged liner. I’d skip it if your veil is meant to sit at the crown, as the two compete for the same spot.
12. Twisted Side Updo
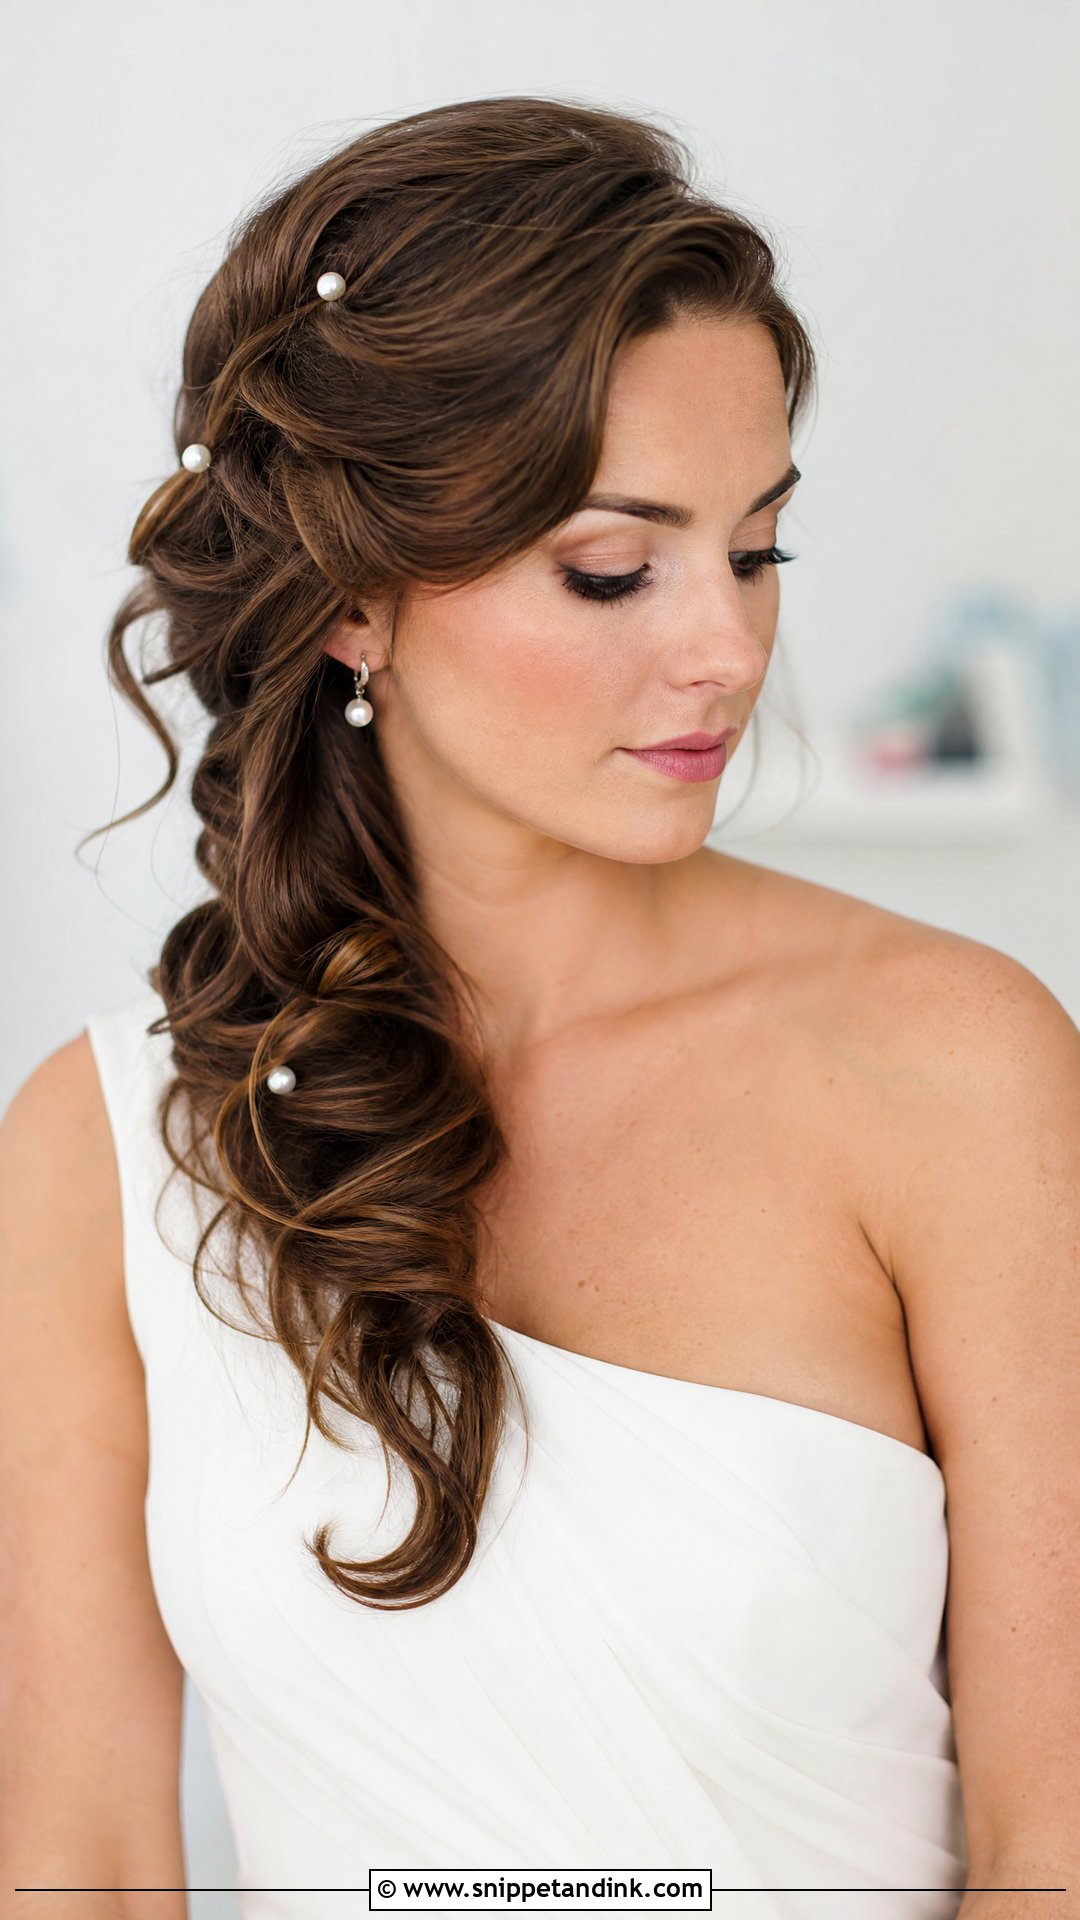
A twisted side updo gathers everything over one shoulder, which means all the weight sits on one side of your head. I place the main anchor pins slightly behind the ear so the style doesn’t drift forward when you lean in to hug people. It frames a statement earring and a one-shoulder gown nicely, and it looks better from the side the twist sits on, so tell your photographer which side that is. Smooth or textured both work; on very silky hair I add a dry texture spray first so the pins grip.
13. Boho Loose Waves With Braids
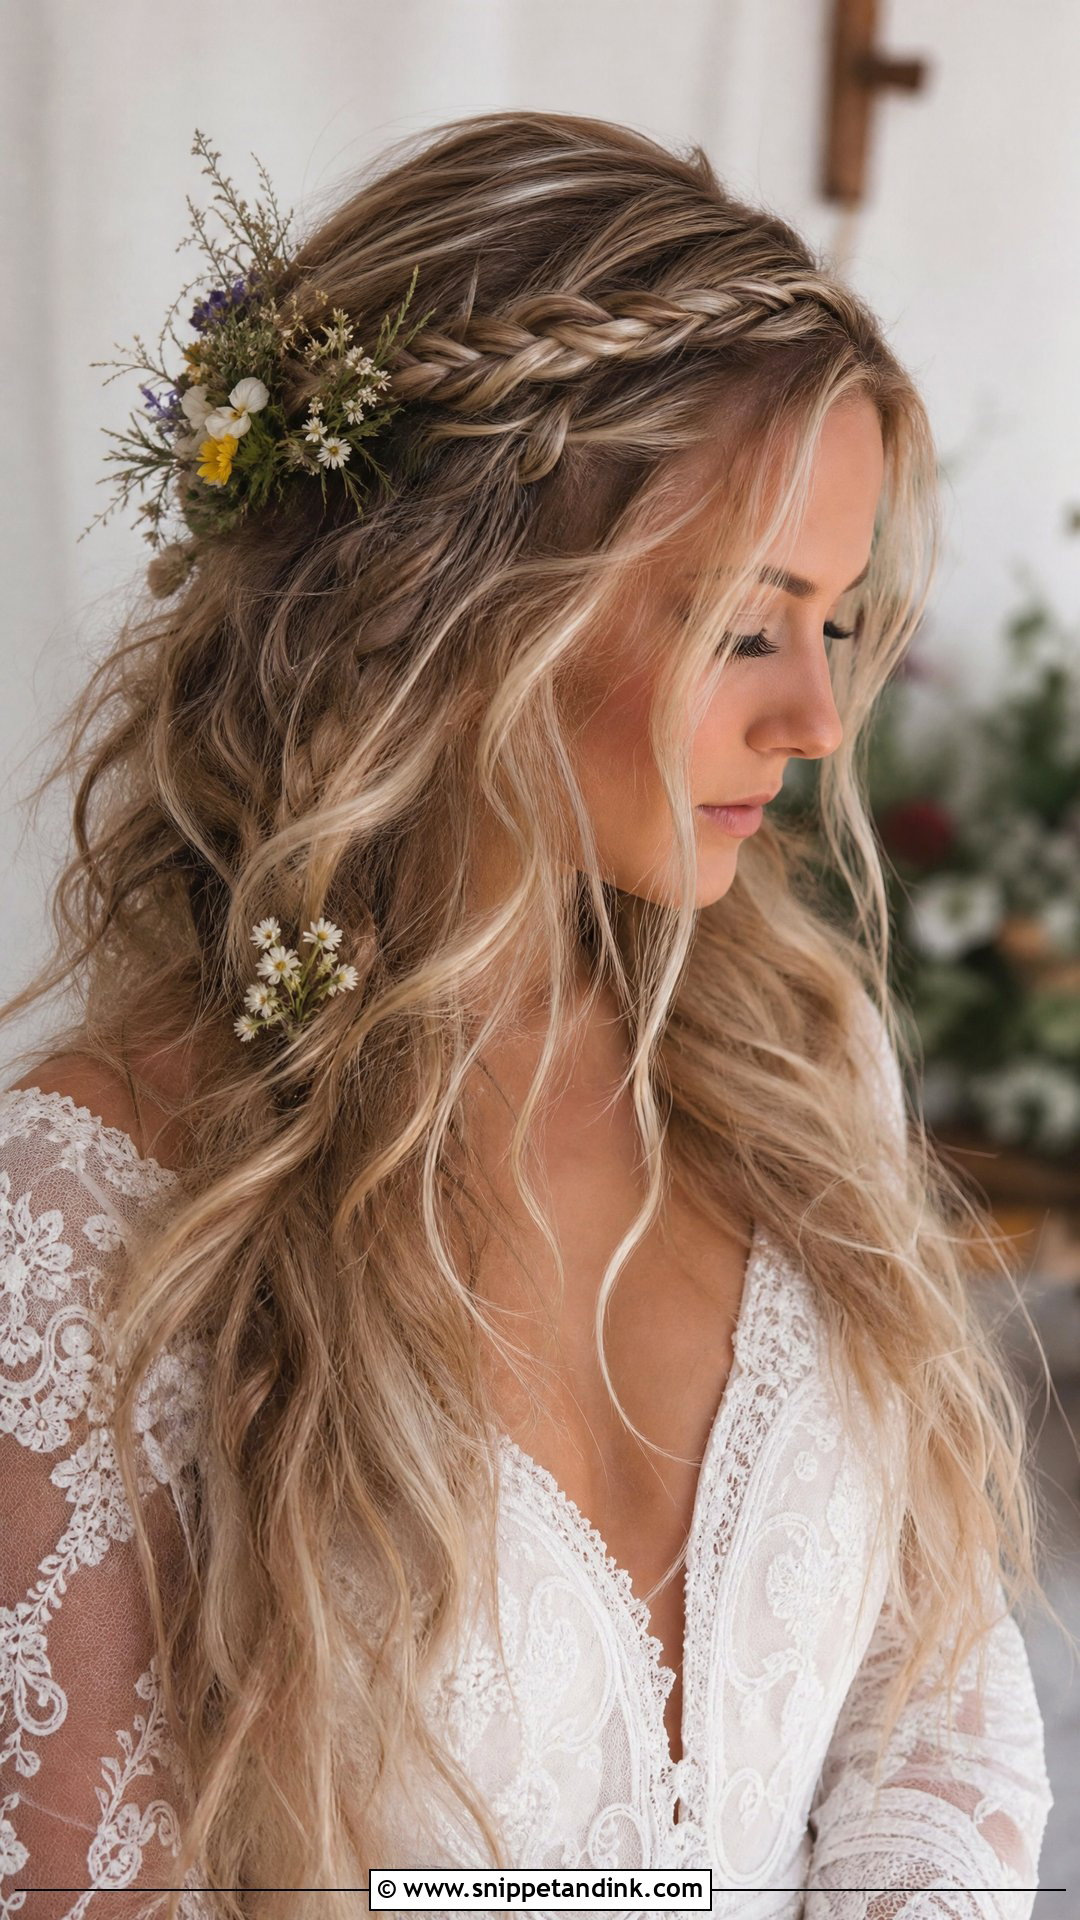
Boho waves with small braids look relaxed in pictures, yet the braids hold the whole thing together. I put two or three thin braids near the face, secure them at the back with a clear elastic, and then curl the lengths into loose tousled waves. The braids stay put even when the curl drops, so the style still looks intentional by evening. Wildflowers or gold pins slot in easily between the braids. Very fine hair can look thin with this much loose texture, and some volume powder at the roots helps.
14. Polished Top Knot
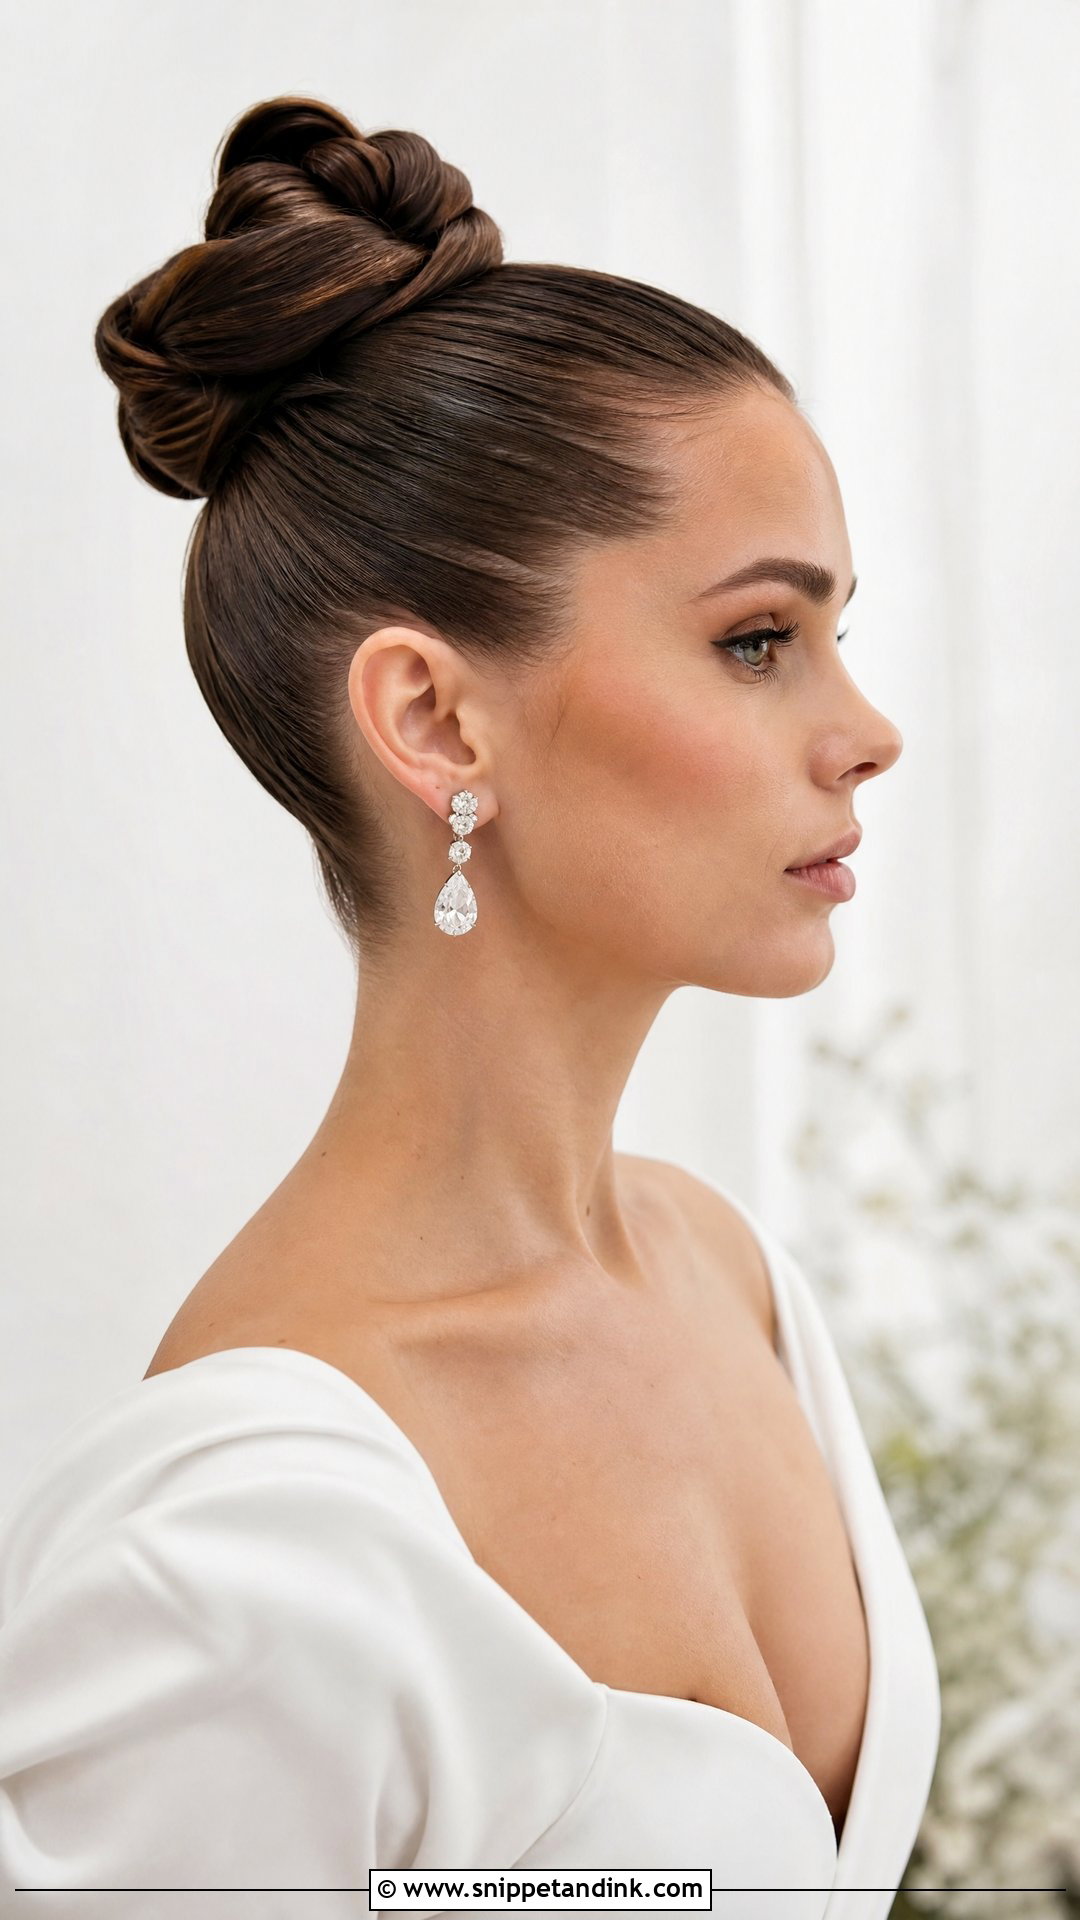
A polished top knot is about as modern as a classic style gets, and the clean finish depends on a smooth ponytail base sitting high on the crown. I twist the hair into a tight knot and pin it into that base, much like a sculptural knot at the nape, just placed far higher. It lifts the cheekbones and suits a minimal gown or a fashion-led wedding. It can feel exposing if you’re shy about your ears or hairline, and a high knot rarely sits well with a traditional veil unless the veil drops from beneath it.
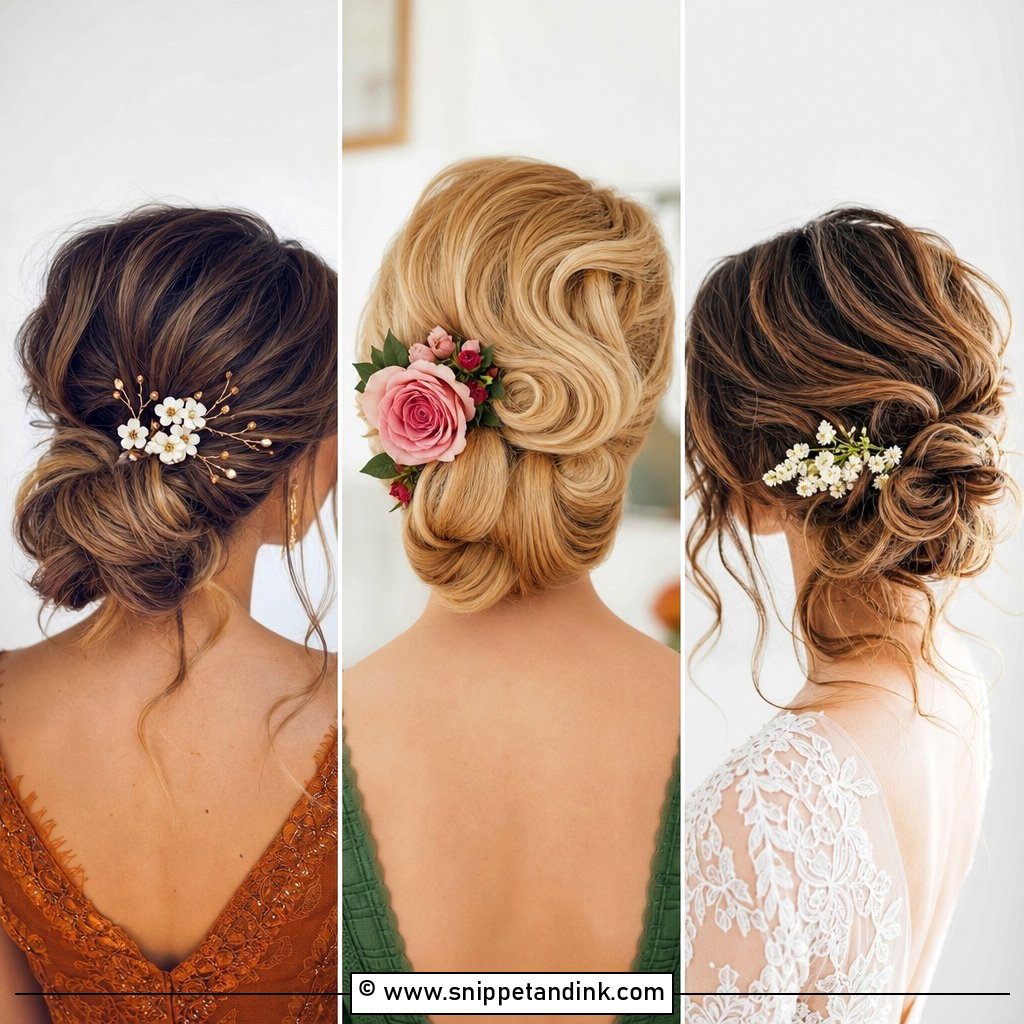
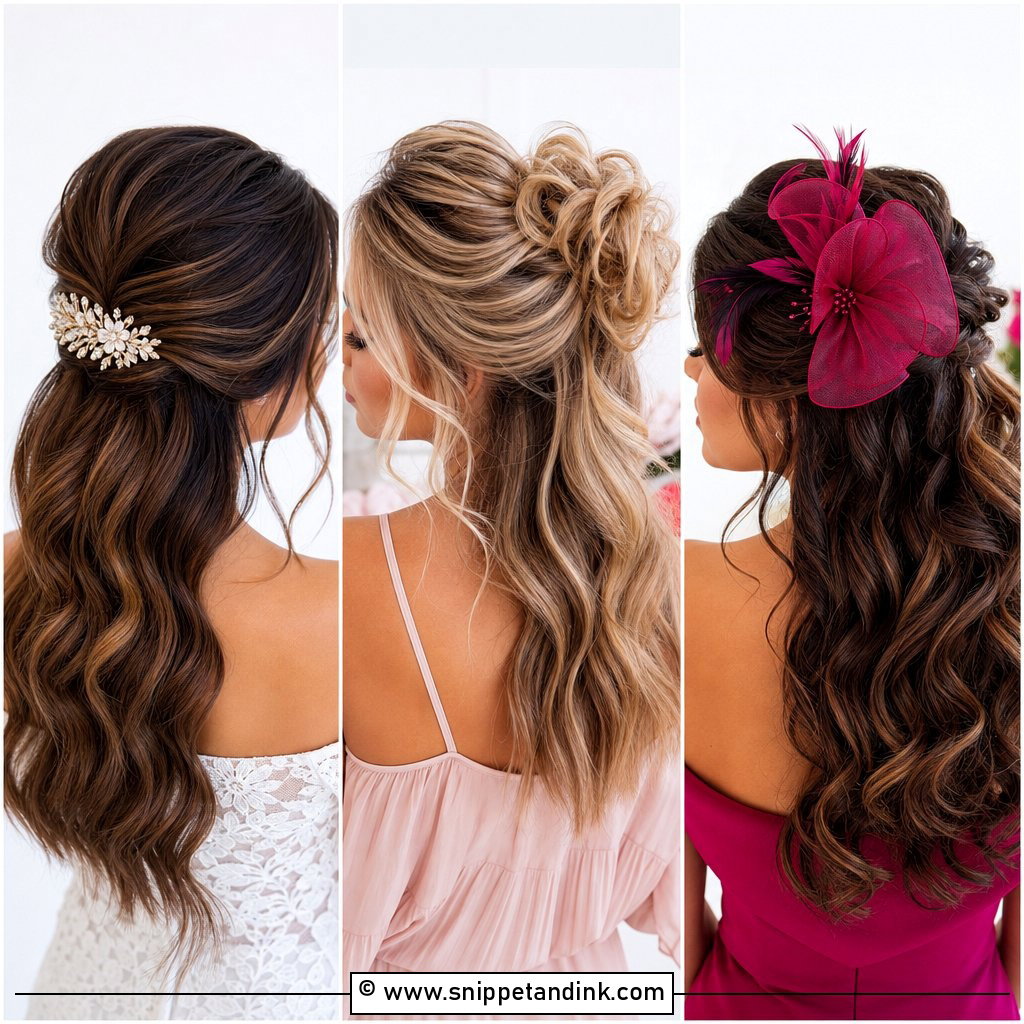
15. Romantic Side-Swept Curls
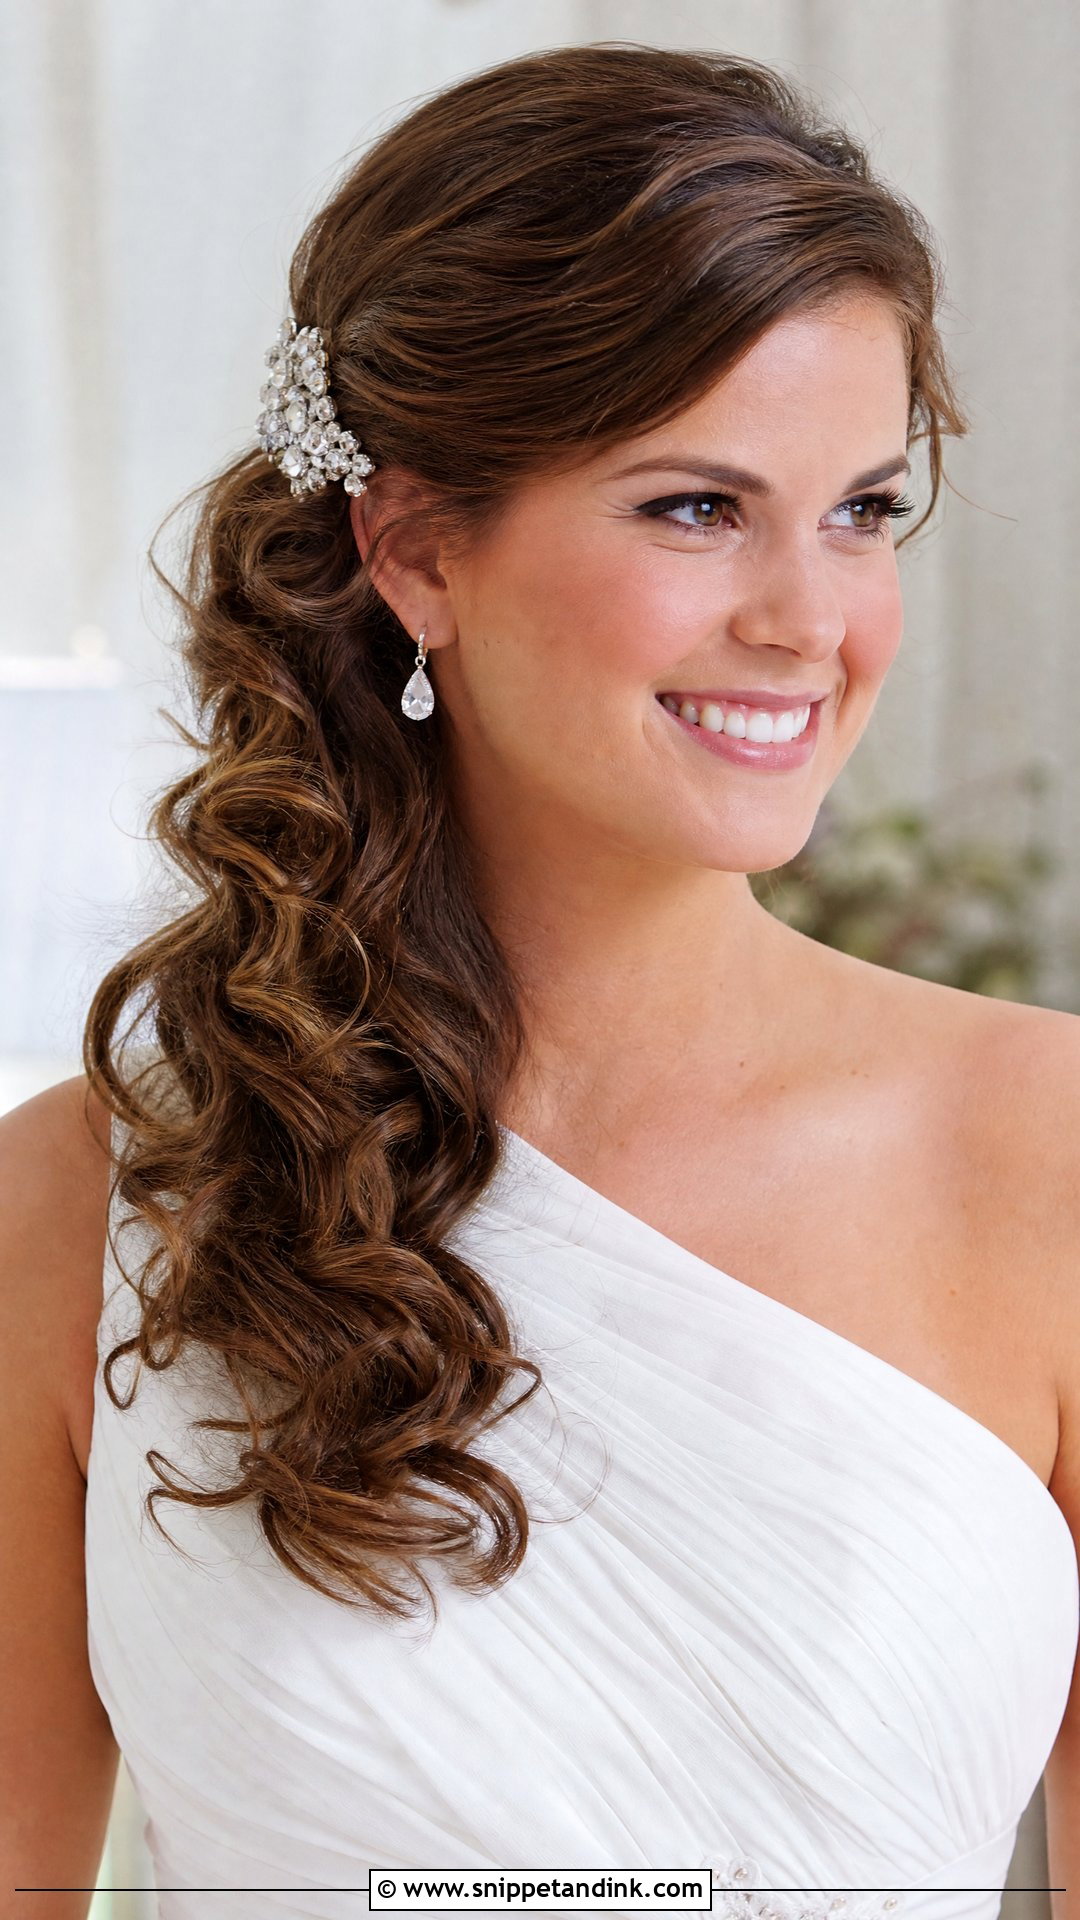
Side-swept curls look soft and luxurious, but the pinning that holds them over one shoulder is completely hidden. I cross pins down the back of the head along the opposite side, then brush the curls over and secure them with a decorative clip near the ear. The arrangement frames a one-shoulder neckline and a drop earring, and it gives a little old-Hollywood feeling without the full wave set. Expect the hair to rest on your shoulder for hours, so ask your makeup artist to set any shoulder shimmer before the curls go over.
16. Sleek Straight Hair With Center Part
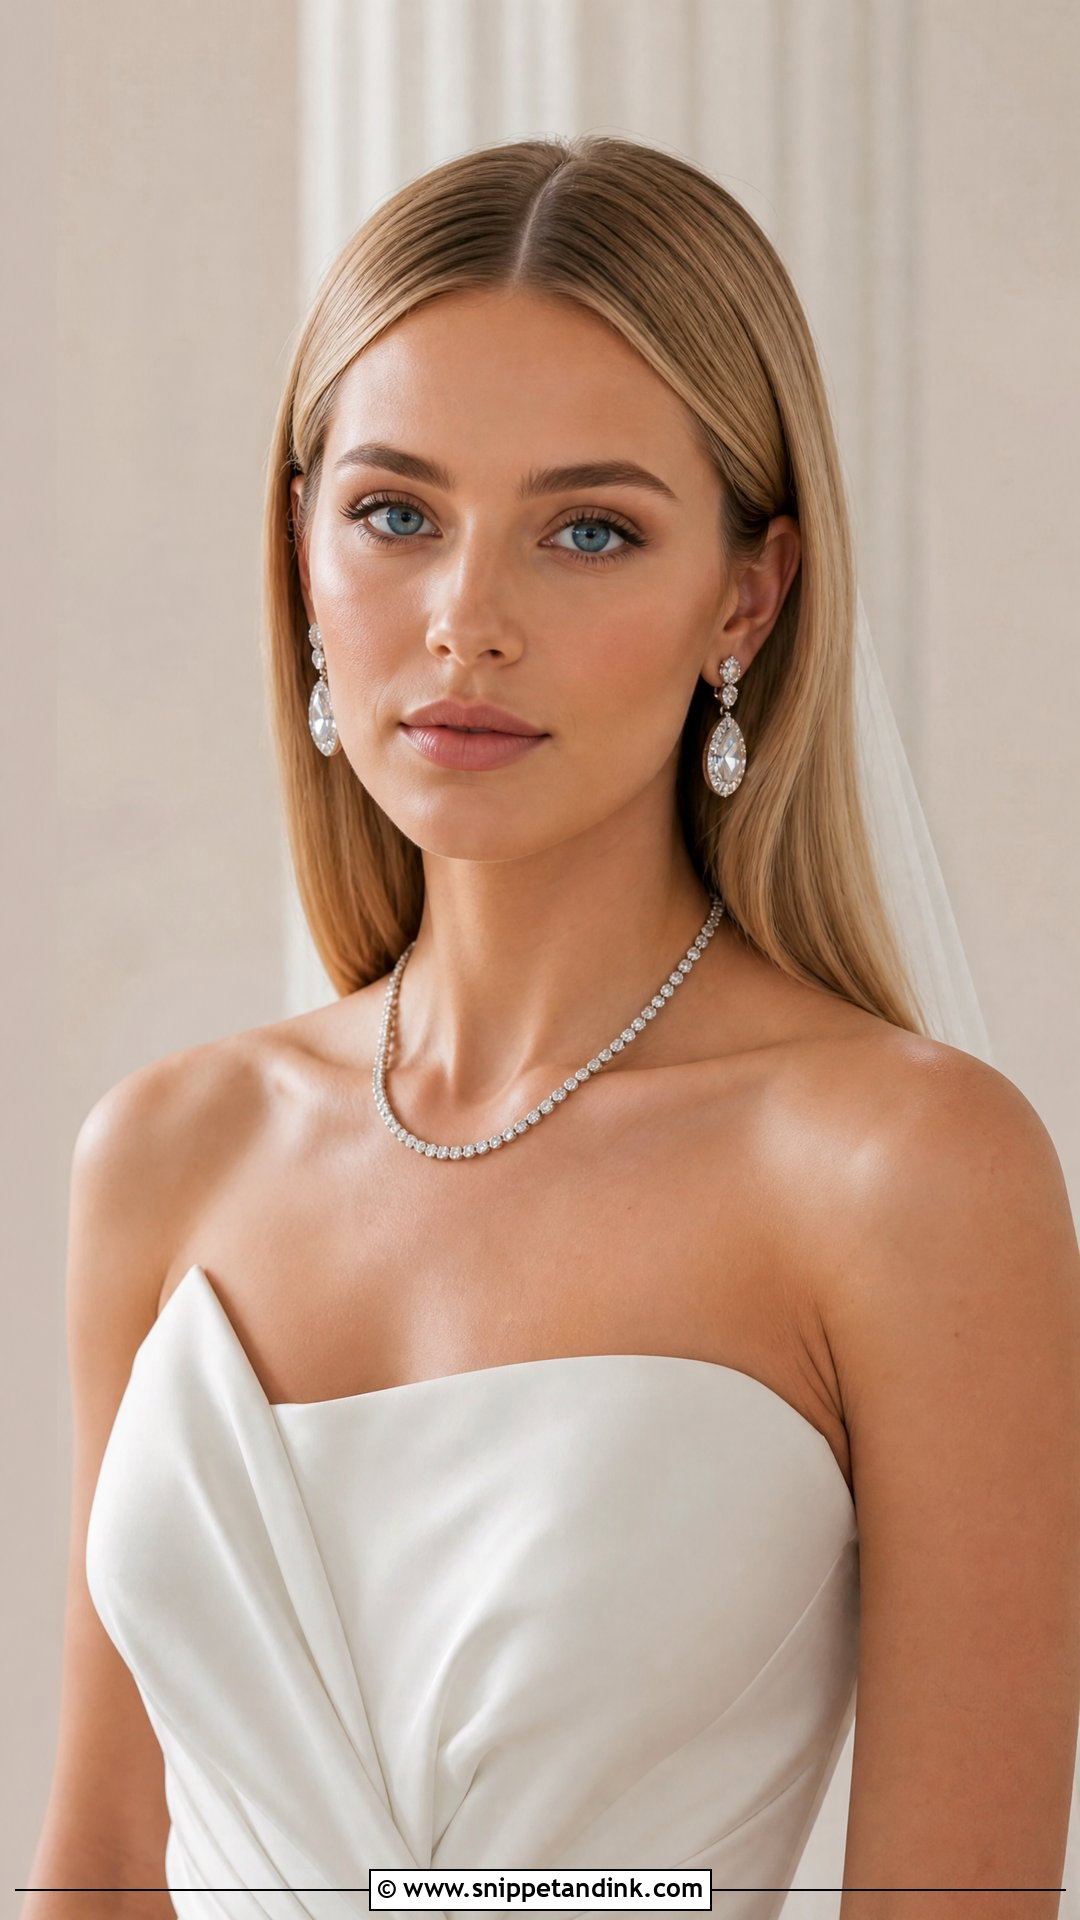
Straight hair with a center part sounds like the easiest look on this list and is actually the hardest to keep perfect. Humidity puffs it up, sweat makes it cling to the face, and any static shows in photos. I use a heat protectant with a smoothing serum, flat-iron in small sections and finish with a shine spray rather than heavy hairspray. The symmetry looks modern with sharp tailoring and bold jewelry. Hair with natural wave will revert by evening in damp weather, so it’s a better choice for a cooler, indoor wedding.
17. Classic Updo With Veil
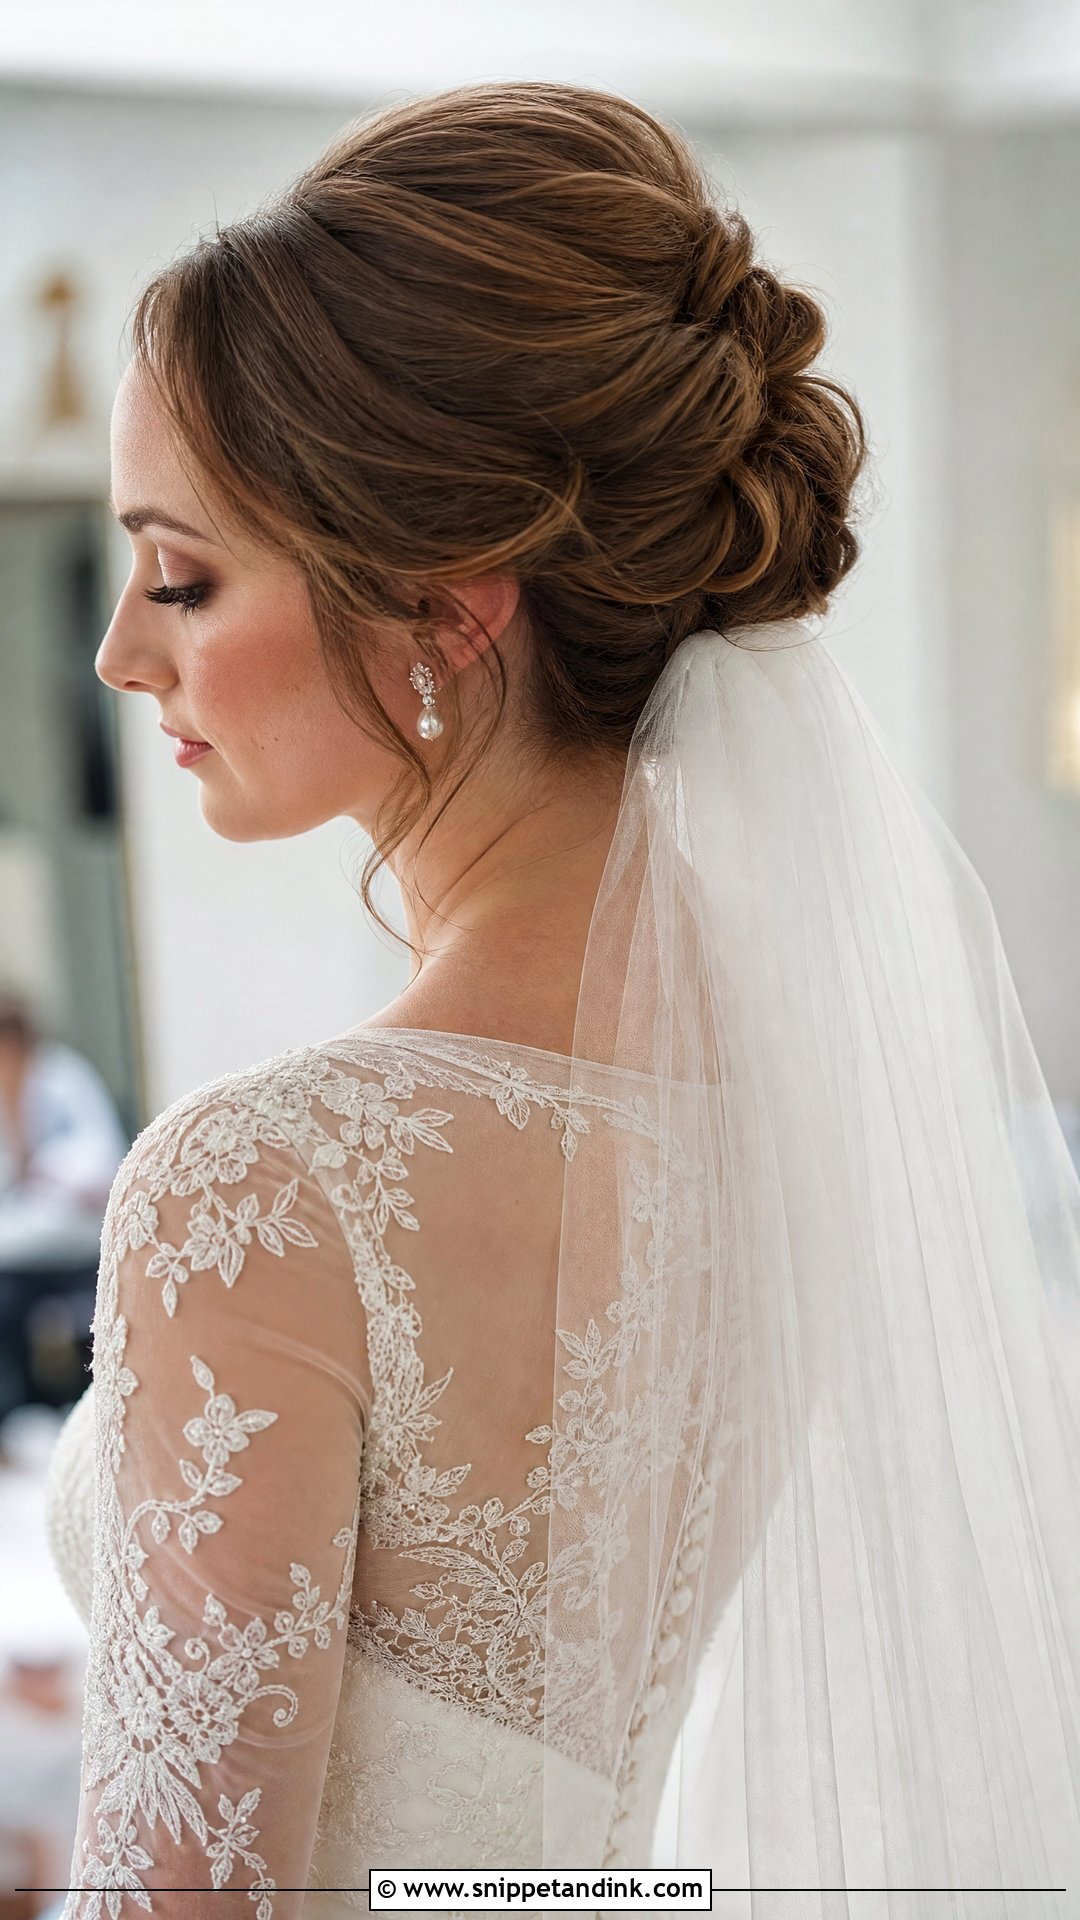
A classic updo with a veil is still the most traditional bridal image, and the order of work matters. I finish the updo, then decide where the veil comb goes, usually just under or above the bun, and pin a crisscross of bobby pins there first so the comb has something solid to bite into. That step stops the veil from slowly dragging the style down. Once the veil comes off for the reception, the updo underneath should look untouched. Cathedral-length veils and grand ballroom celebrations call for exactly this pairing.
18. Textured Messy Bun
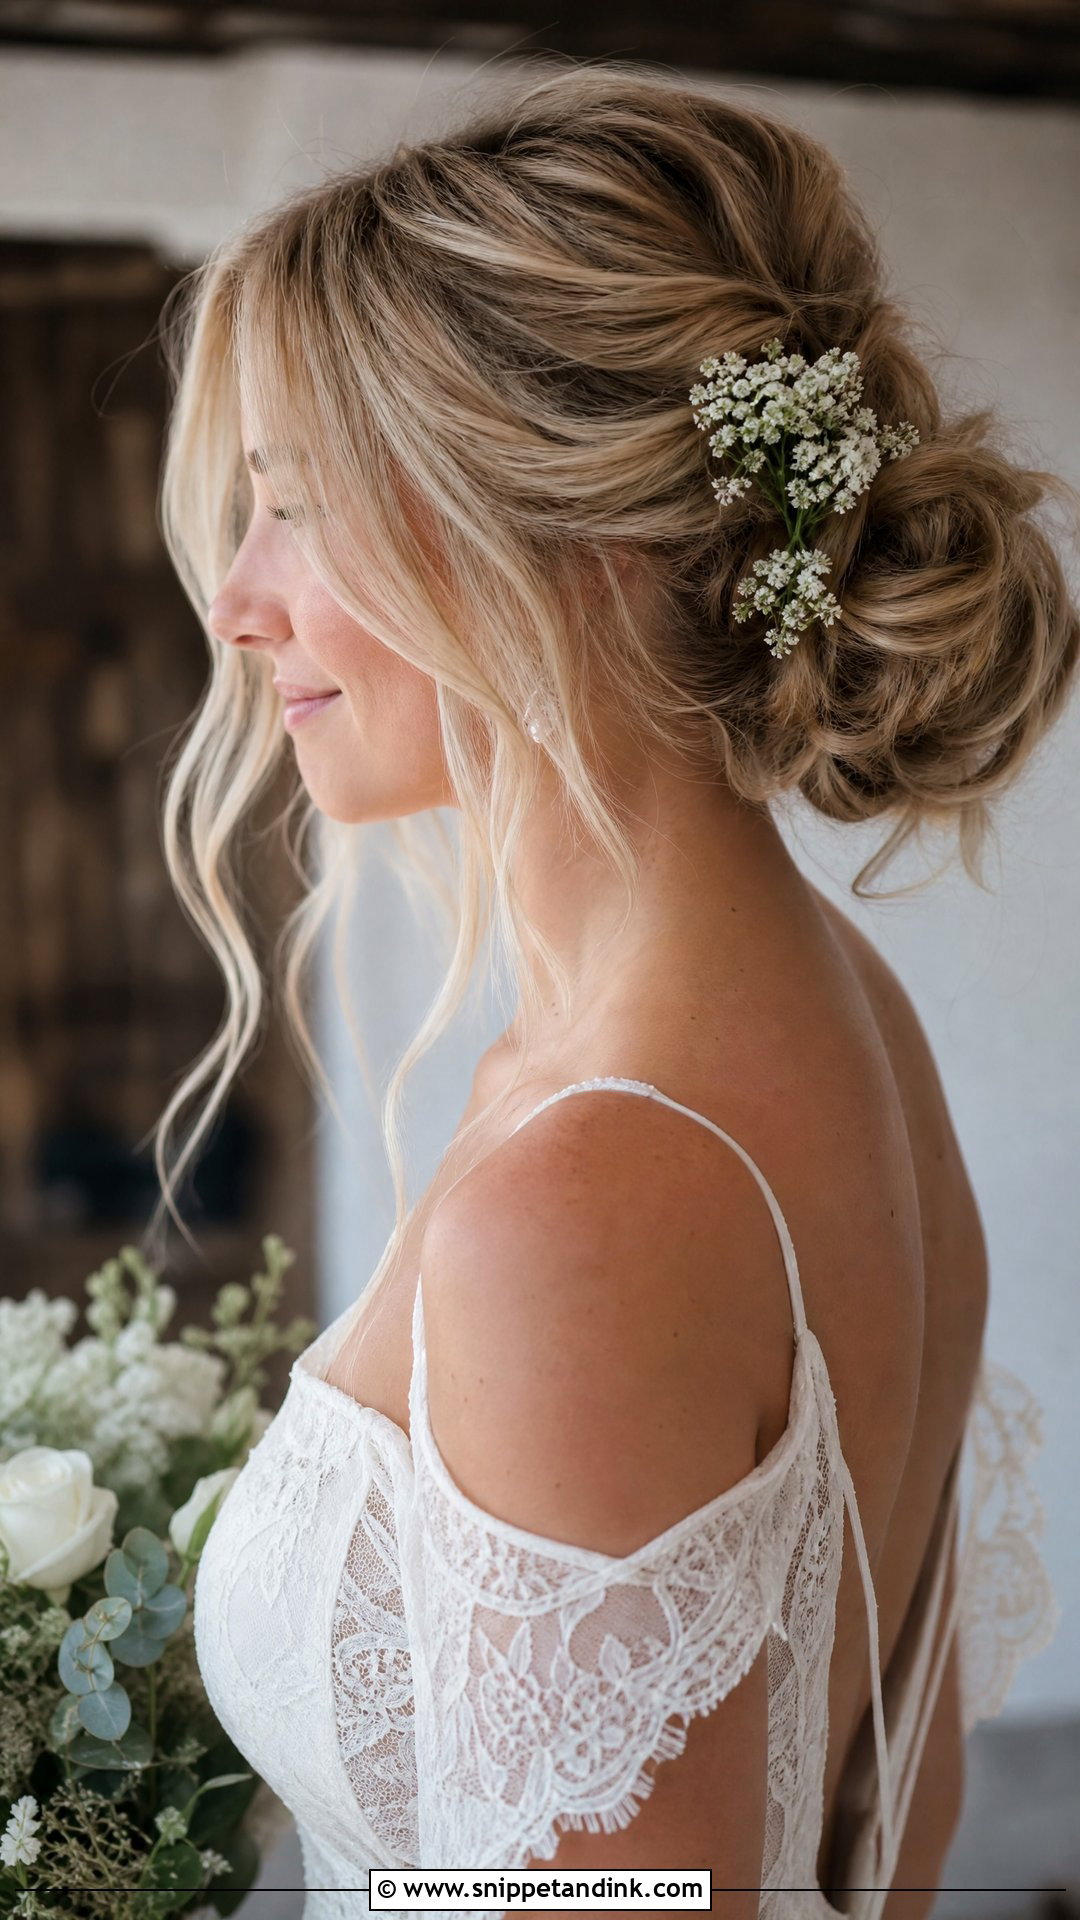
Brides often think a messy bun is the easy option, but the best ones are planned, with texture added first and the bun pinned securely underneath. I backcomb lightly at the roots and pin the bun in loops, pulling out the edges so it looks loose while the core stays firm. A few face-framing pieces soften it, and delicate flowers or pearl pins add a finishing note. Boho and outdoor weddings suit it. Very slippery hair needs dry shampoo or texture spray first, or the whole bun can slide down as the day goes on.
19. Vintage Pin Curls Updo
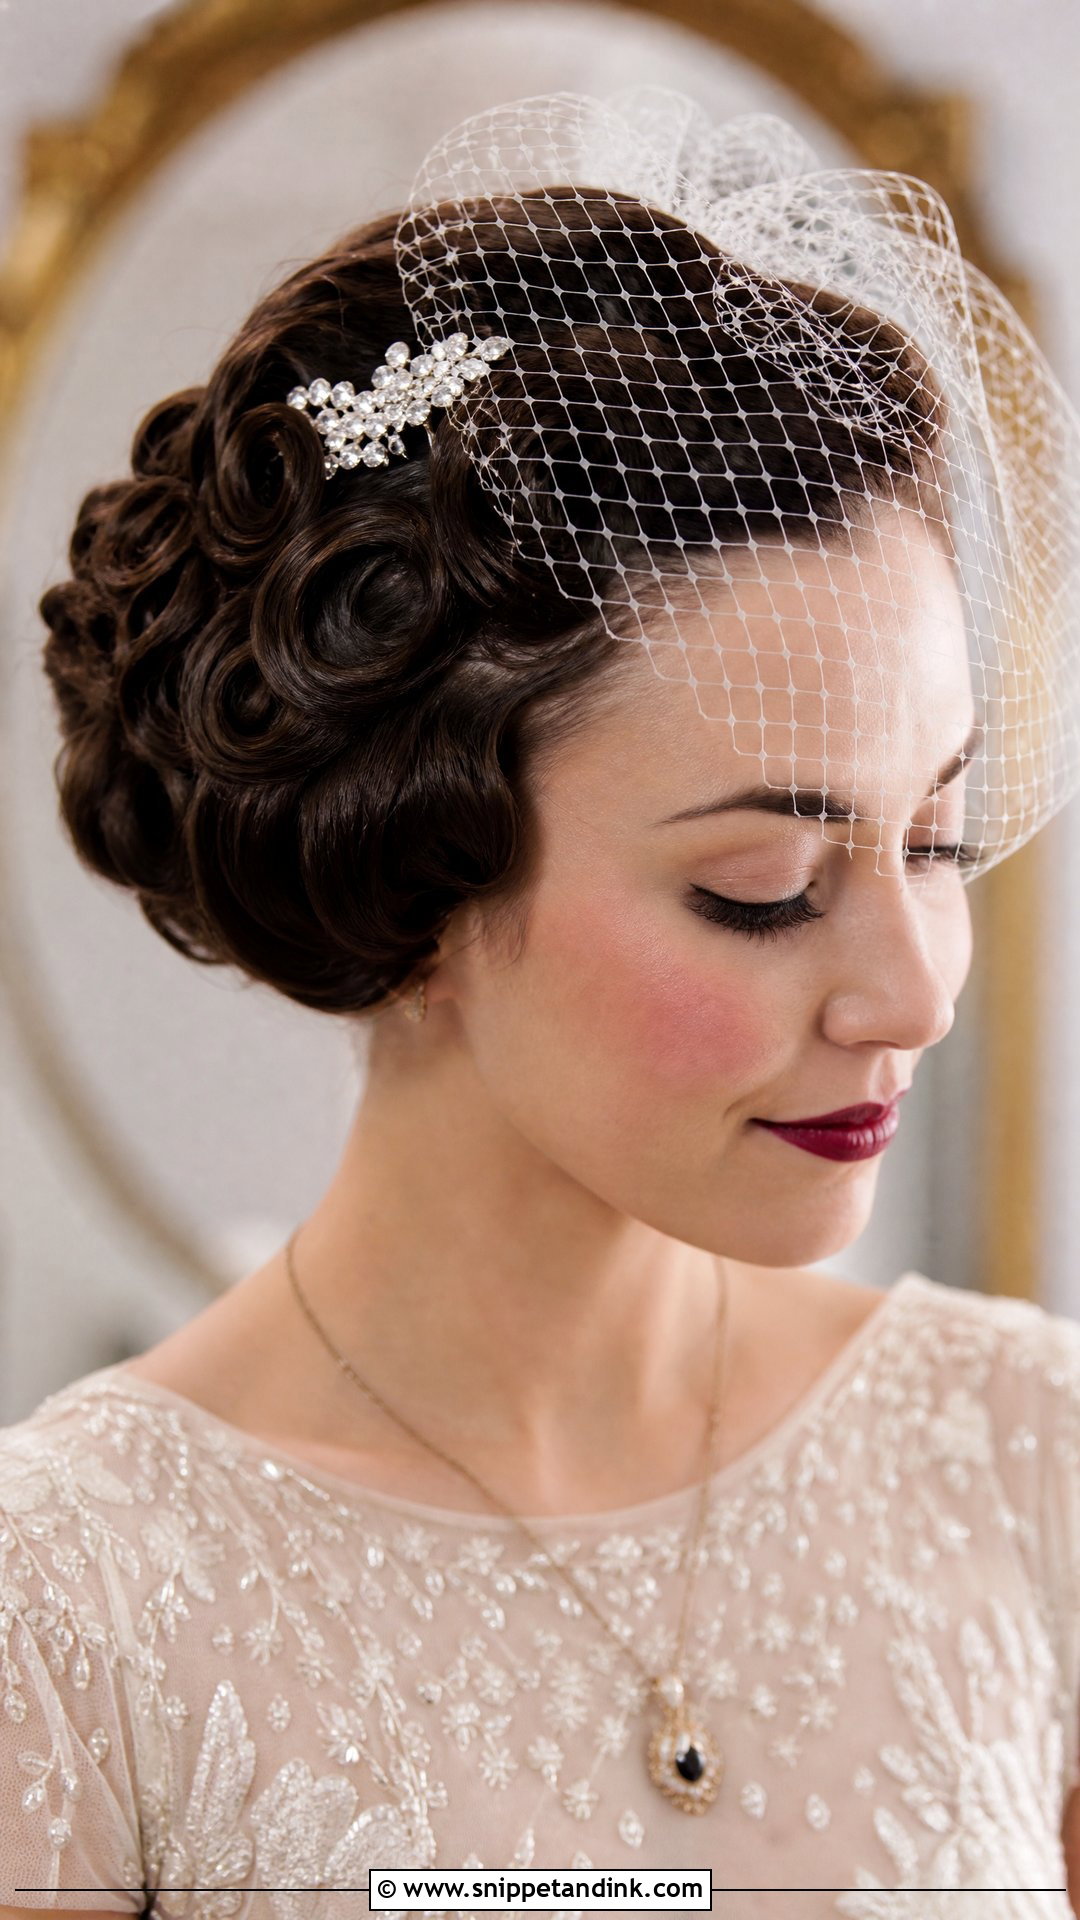
Vintage pin curls are a set-and-wait style. Each curl is wound around a finger, pinned flat to cool and later brushed or arranged into the final shape at the back of the head. Done properly, the curls hold their sculpted form all evening and catch the light nicely. They pair with a birdcage veil, a jeweled comb and a vintage gown. Allow extra time on the morning, as rushing the cooling step is what makes pin curls fall flat, and this is a style I’d only book with a stylist who has done it many times.
20. Low Bun With Center Part
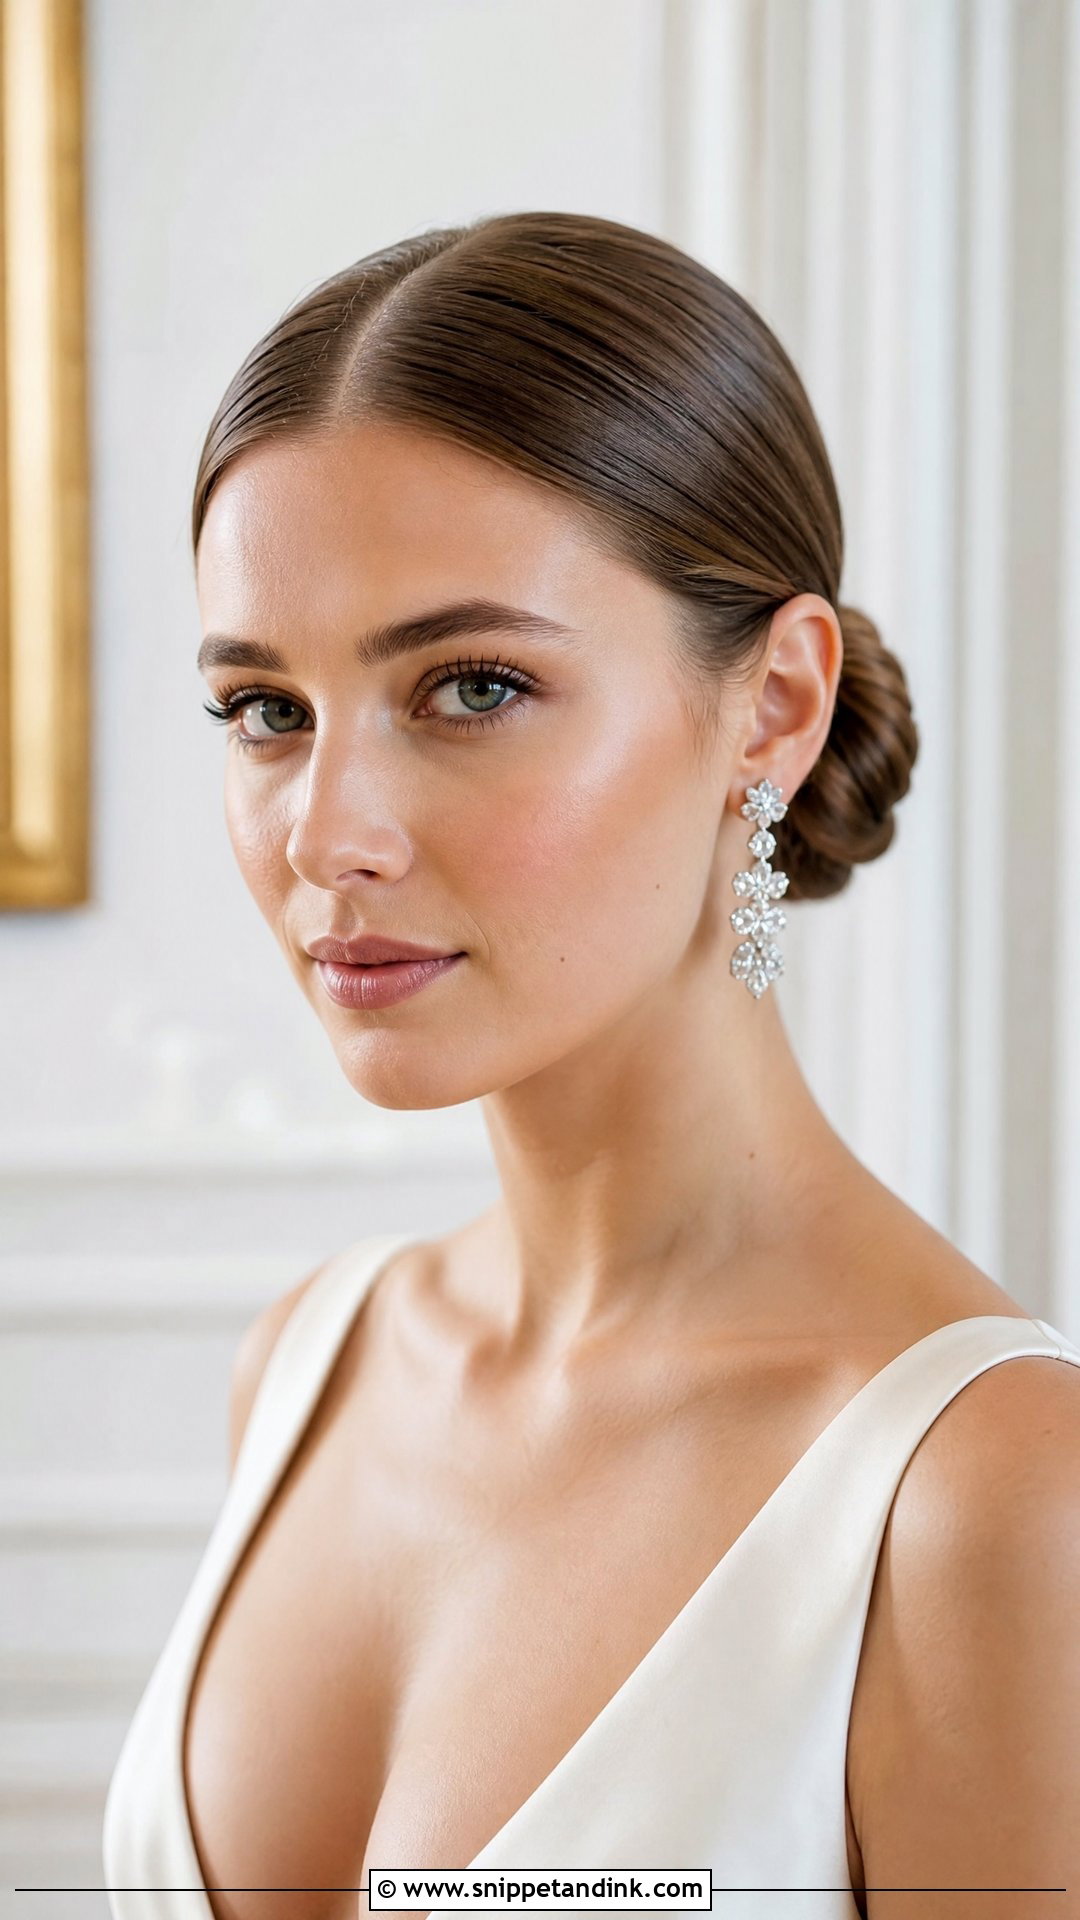
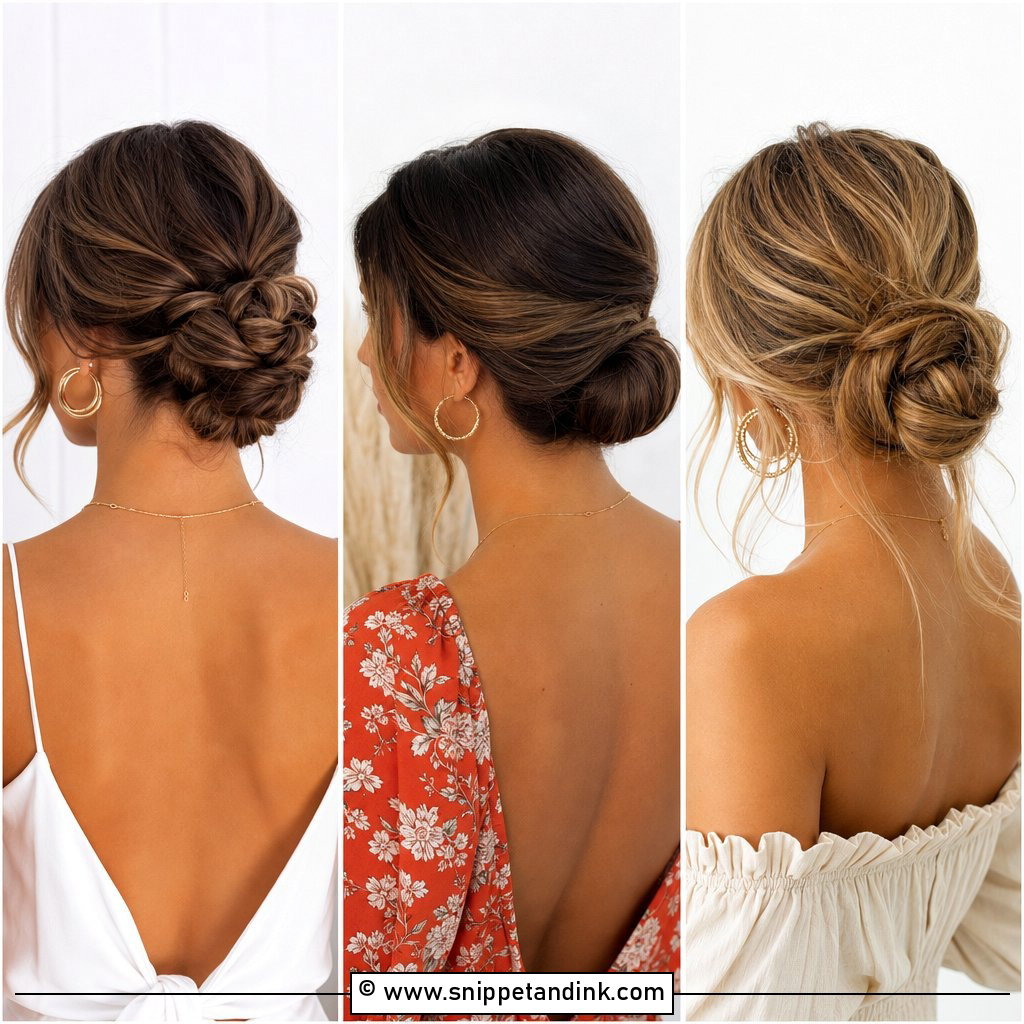
The low bun with a center part is the simplest classic here, and that simplicity makes the parting itself matter. I draw the part with the tail of a comb from the hairline right back to the crown, check it against the bride’s nose in the mirror, then smooth each side toward the nape. Off-center even slightly, it shows in every front-facing photo. The bun suits clean gowns and statement earrings, and it works on most hair lengths as long as there’s enough length to reach the nape comfortably.
What a Useful Hair Trial Should Test
A trial isn’t just a preview. It’s where I learn how your hair responds to heat, pins and product, so book it with a few conditions in mind.
- Arrive with hair washed the way you’ll wash it before the wedding, usually the day before rather than the morning of, so the grip matches.
- Bring your veil or headpiece, or at least a photo and its comb, so we can place it properly.
- Wear a top with a similar neckline to your gown to judge proportion.
- Keep the style in for the rest of the day and photograph it a few hours later, outside if possible, to see what moved.
If something drooped by dinner, tell me exactly where. A slipped side or a flattened crown usually comes down to pin placement or prep, and both are easy to fix before the real morning.
Small Repairs Between the Ceremony and the Last Dance
Even classic styles shift over a long wedding. A loose curl, a pin pushing through or a veil comb working loose are all normal, and they’re quick to fix if someone has the right kit in a bag nearby.
A Pocket Kit for Your Maid of Honor
- Bobby pins matched to your hair color, plus a few clear elastics
- A travel hairspray and a small tail comb
- Blotting papers for the hairline and a mini dry shampoo for flat roots
- A small mirror so you can check the back of the style
For an updo, push a slipping pin back in at an angle against the direction it fell rather than adding more on top. For curls that have dropped, twist the section around a finger, pin it flat for ten minutes, then release. Most brides never need any of this, but those who have it rarely worry about their hair after the vows.
The Shape That Carries Your Dress and Veil
Every one of these looks has lasted because it suits the way hair behaves on a long day. Before you commit, think about your dress, the weather, your veil and how much time you want to spend in the chair, then book a trial with your stylist so you can test the hold in real conditions. Screenshot the styles you keep coming back to and bring them along; those pictures tell me far more than a description ever could.
You'll Like These Ideas:


Leave a Reply