
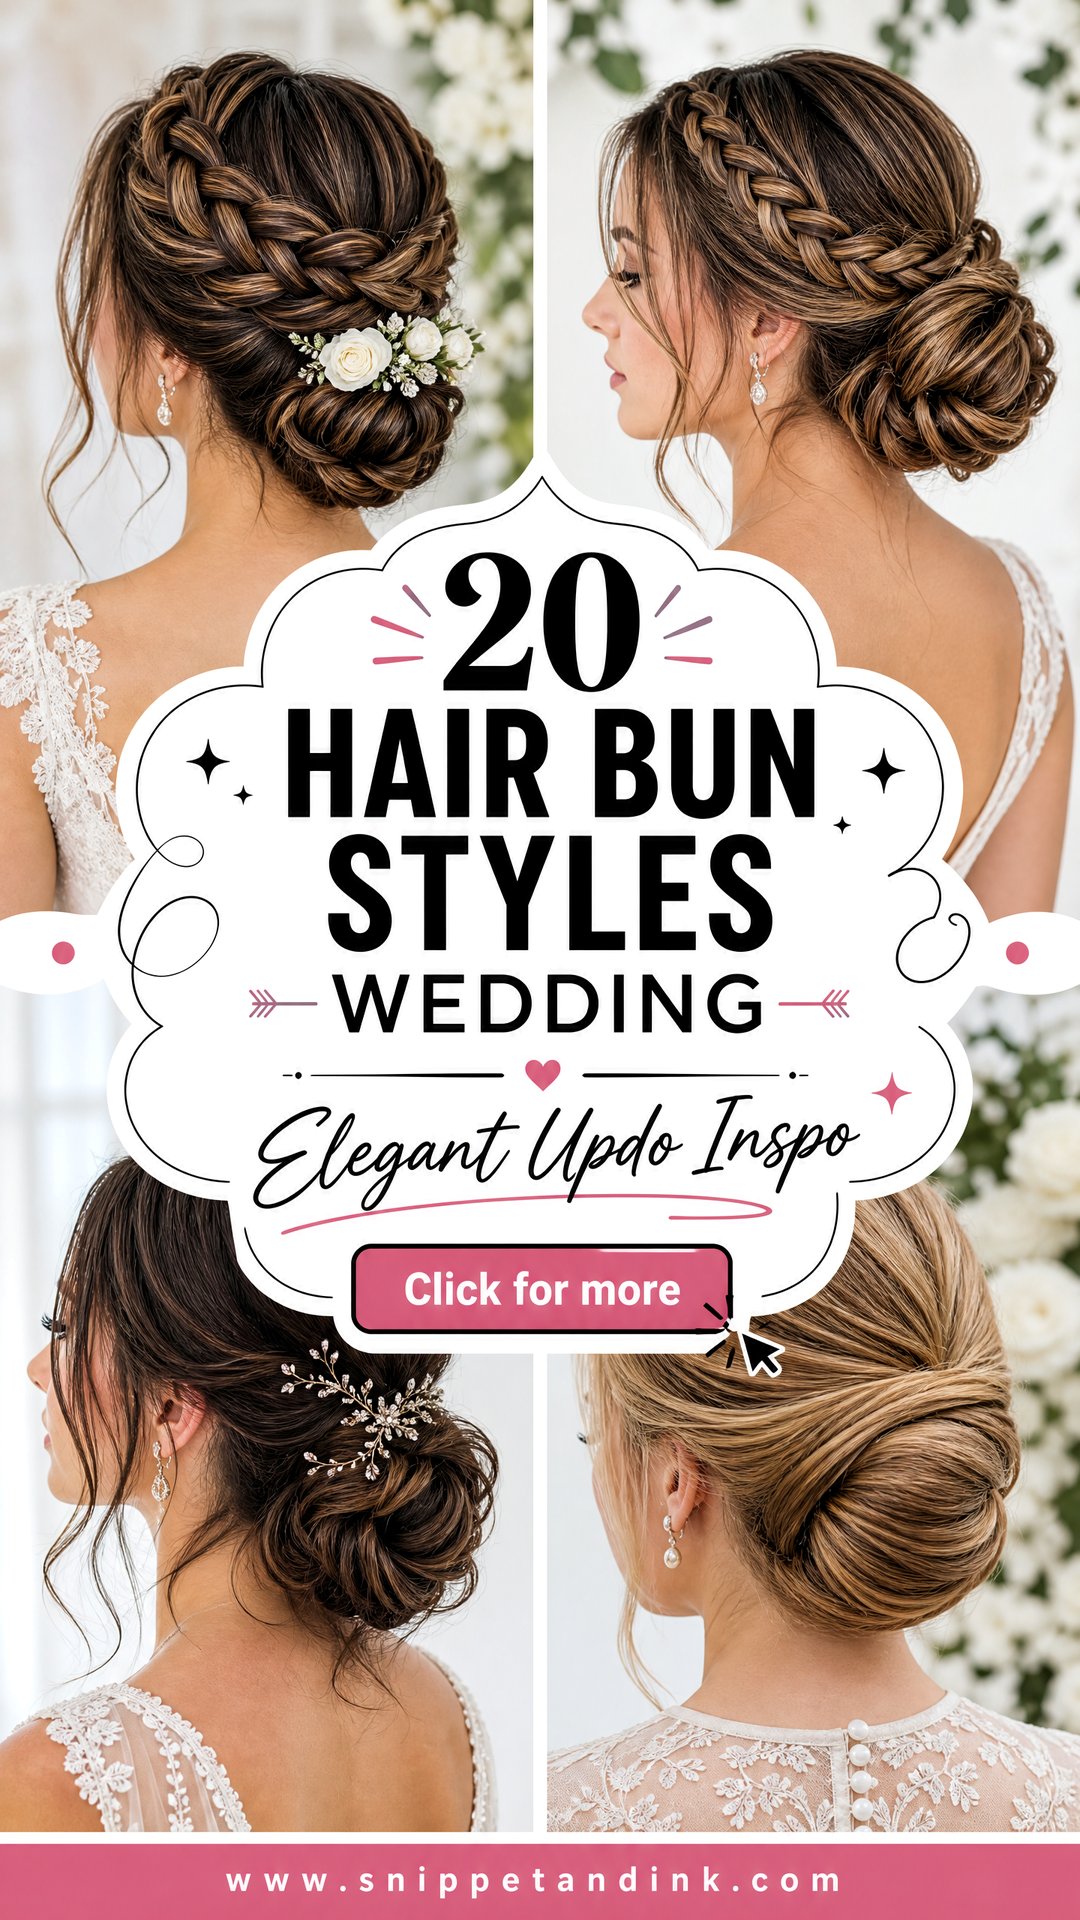
A bun is the style I reach for most often on wedding mornings, and not because it’s the safe option. It gets hair off the neck for a ceremony in the heat, gives a veil comb something solid to grip, and still looks intentional at midnight when most styles have wilted. The catch is that a good bun is mostly invisible work: the prep, the anchor and where each pin goes decide whether it lasts. Below are 20 bun shapes I’d happily build to inspire your bridal look, with notes on how each one behaves on real hair.
Where the Bun Sits Changes Everything Else
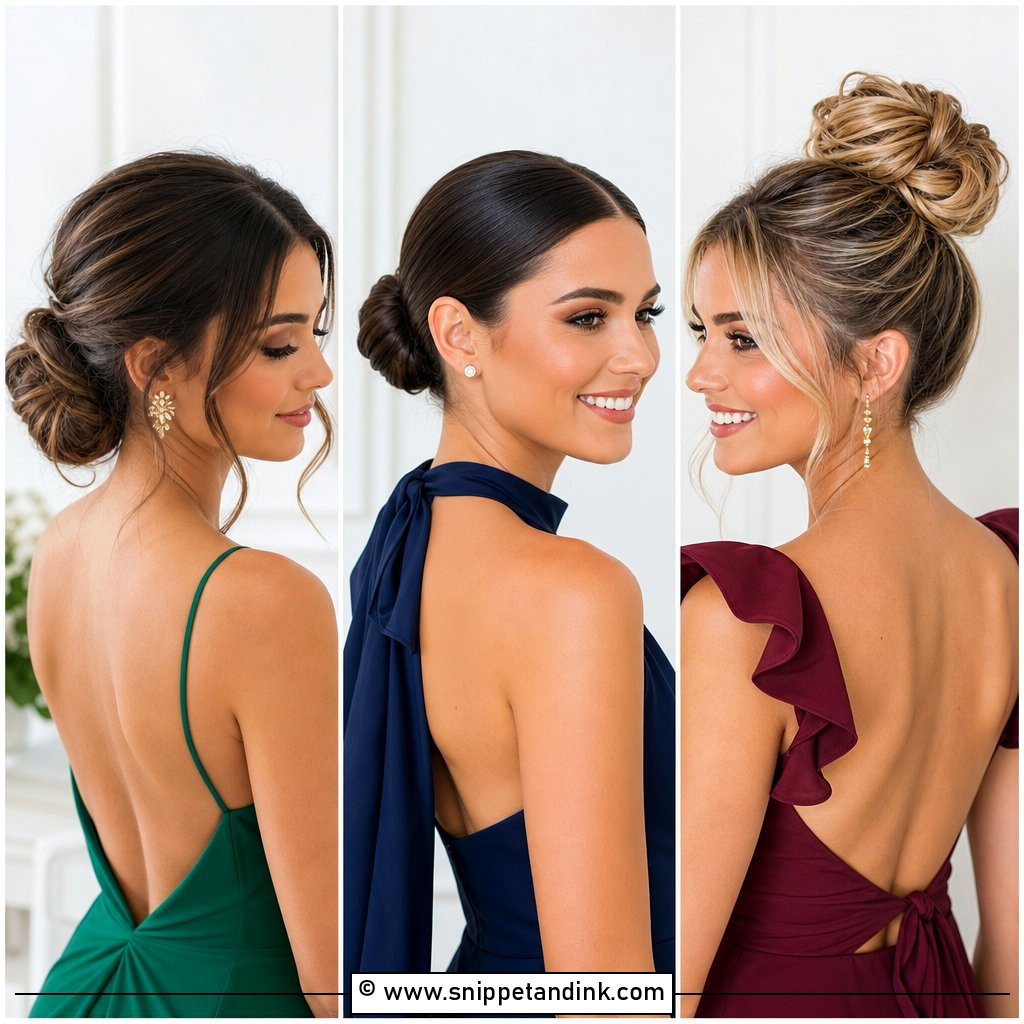
Before I talk about texture or accessories, I ask where the bun should sit, because placement decides how the rest of the day goes. A bun at the nape is the most comfortable and the easiest base for a veil. A mid-height bun, roughly level with the tops of the ears, shows well from the side in ceremony photos. A crown bun gives height and opens up the neck, but it carries the most tension.
Reading the back of your dress
Bring a photo of the back of your gown to the trial. Low backs suit a mid or high bun, since a low bun can make the gap between hair and dress look cramped. High necks and lace collars usually look better with a higher bun too, so the hair doesn’t rub the fabric all day. Strapless dresses are the most flexible and work with any height.
Matching height to the veil
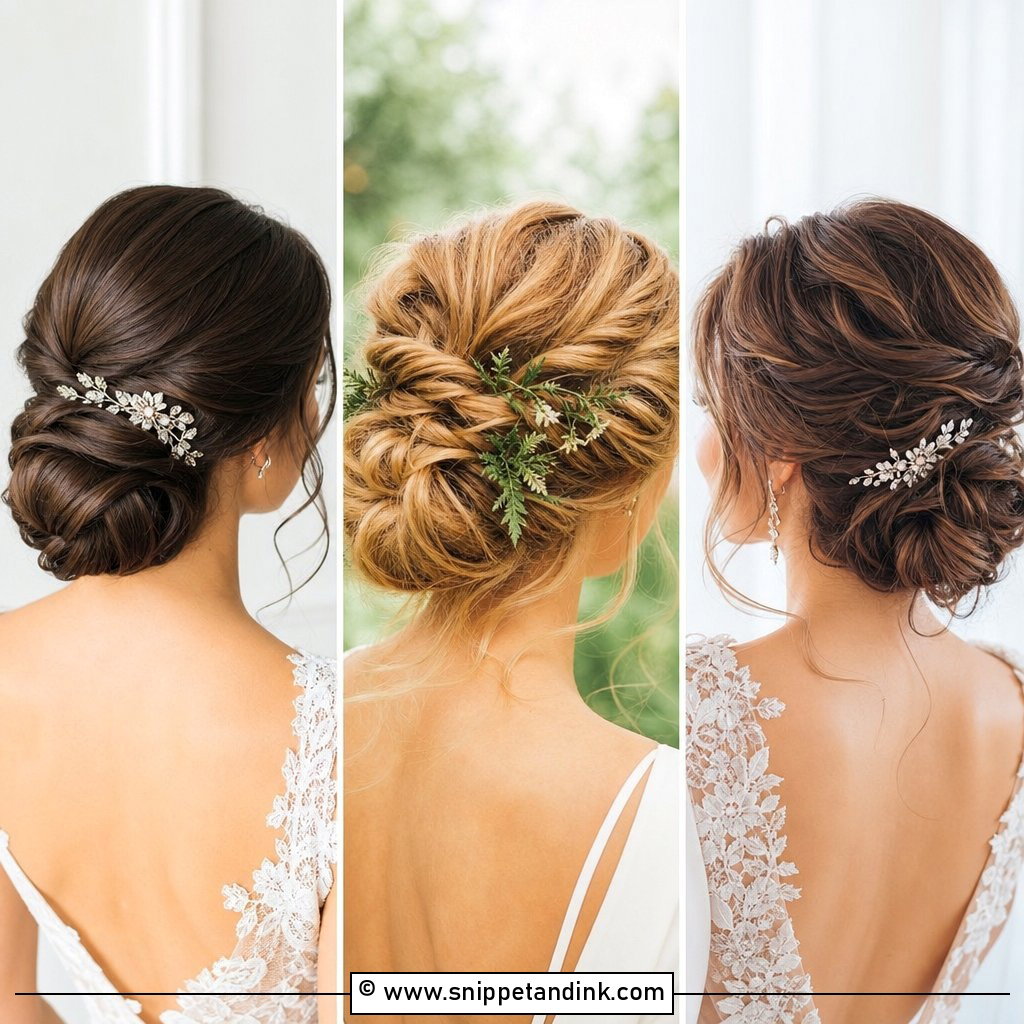
A long veil wants a firm base and sits best just above or below a low or mid bun. A short veil or a blusher set near the crown pairs more easily with a high bun. If the veil comes off for the reception, tell your stylist, so the pins under the comb are placed where removing it won’t loosen the whole style.
Being honest about comfort
Height means pull. If tight ponytails give you headaches, a crown bun worn for ten hours will remind you of it. Choose the lower option or ask for a looser anchor.
1. Classic Low Chignon Bun
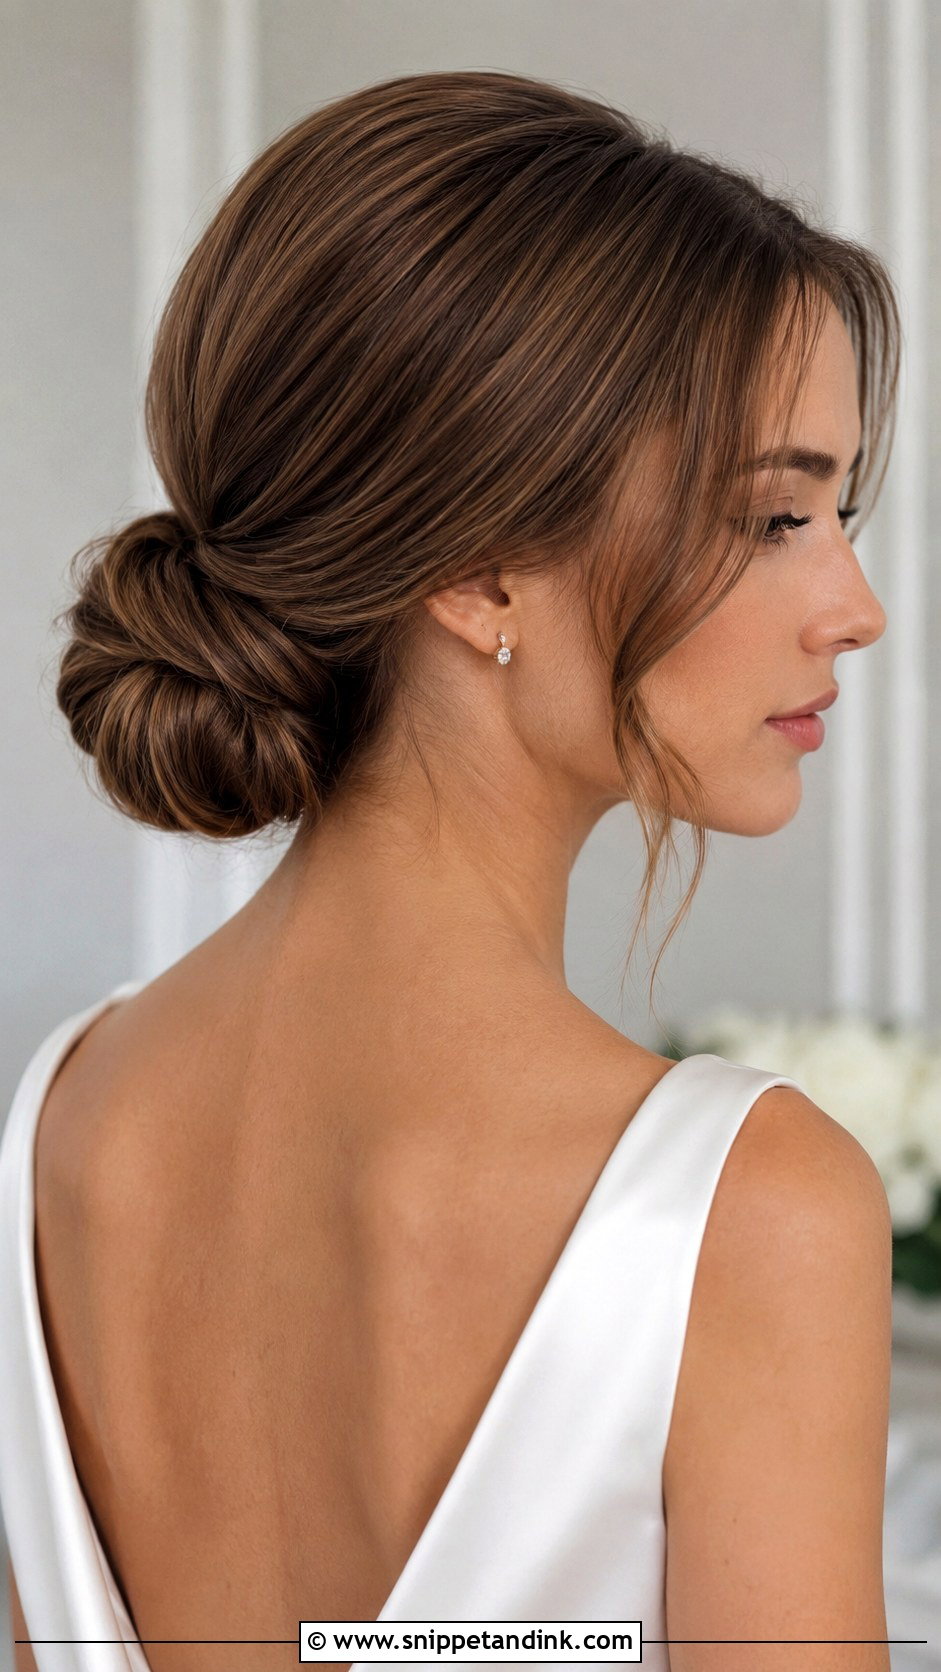
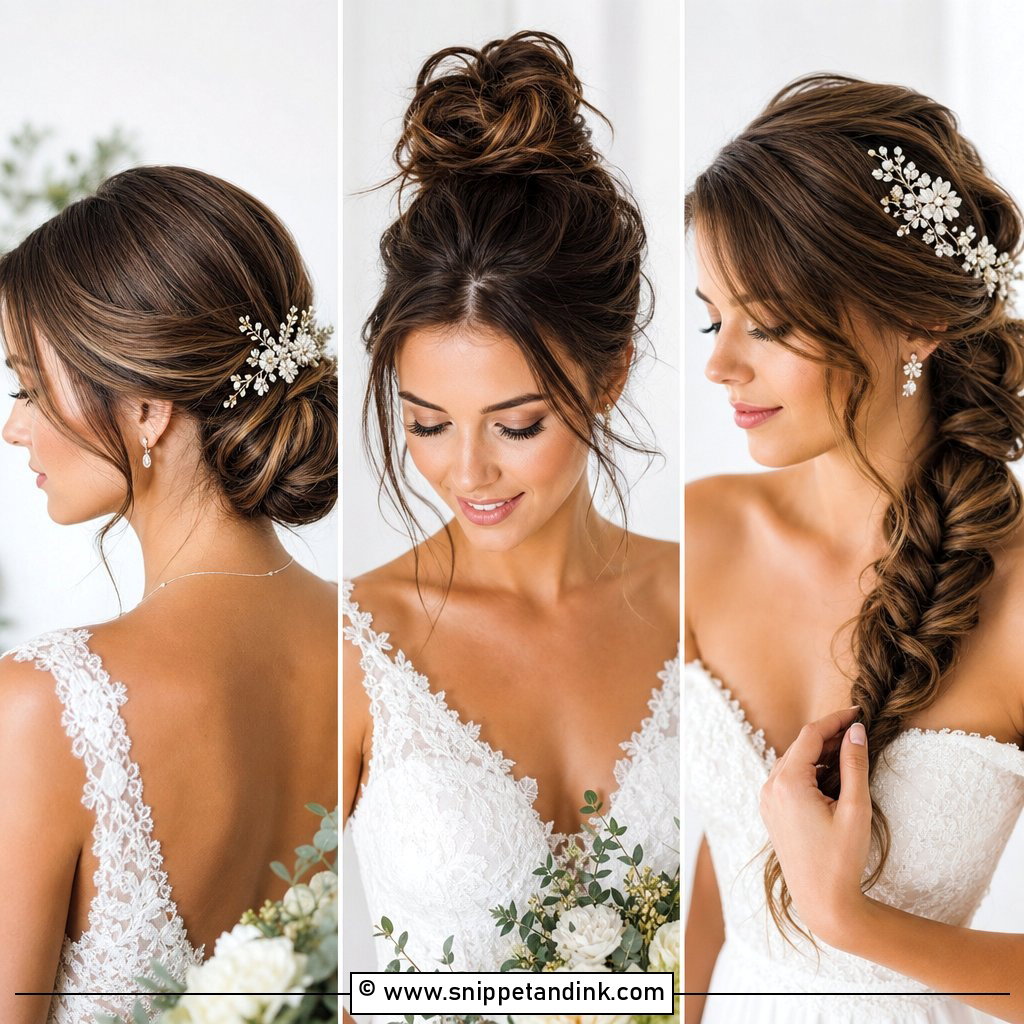
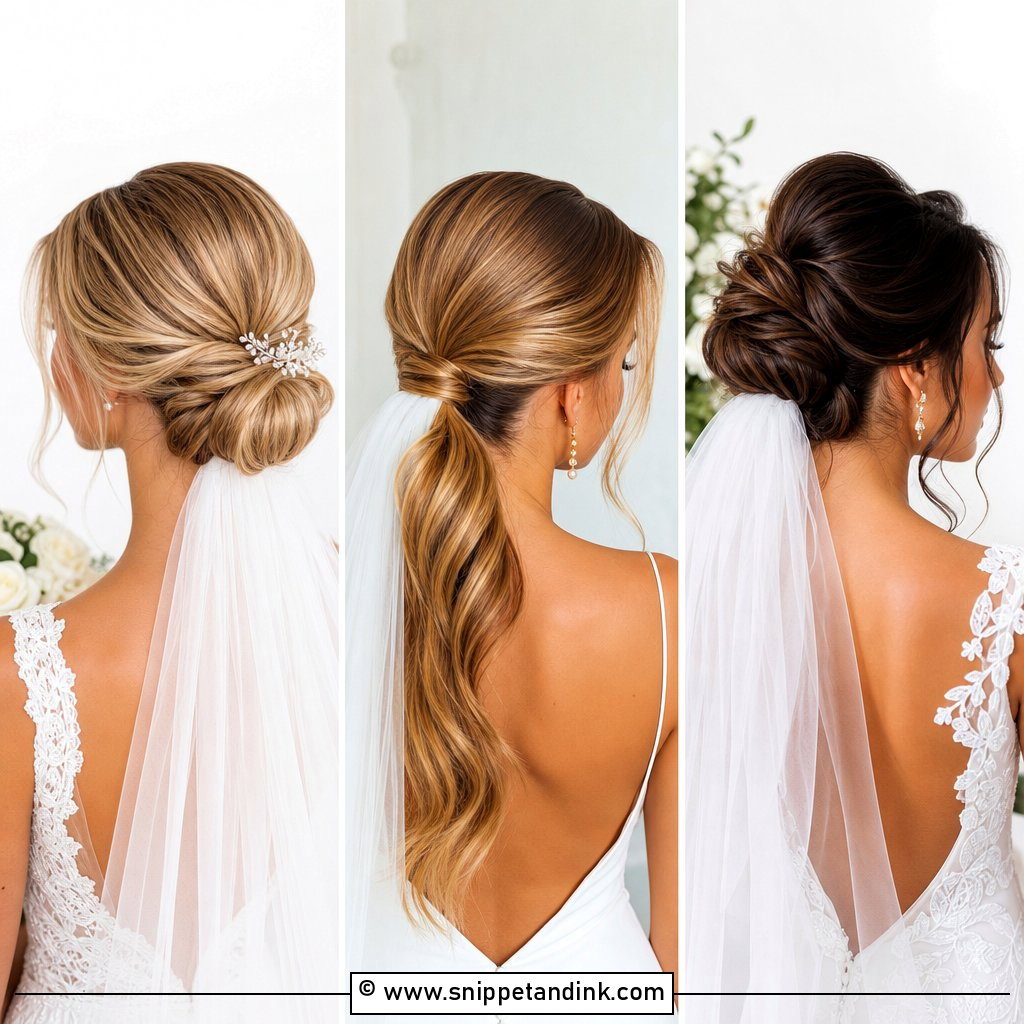
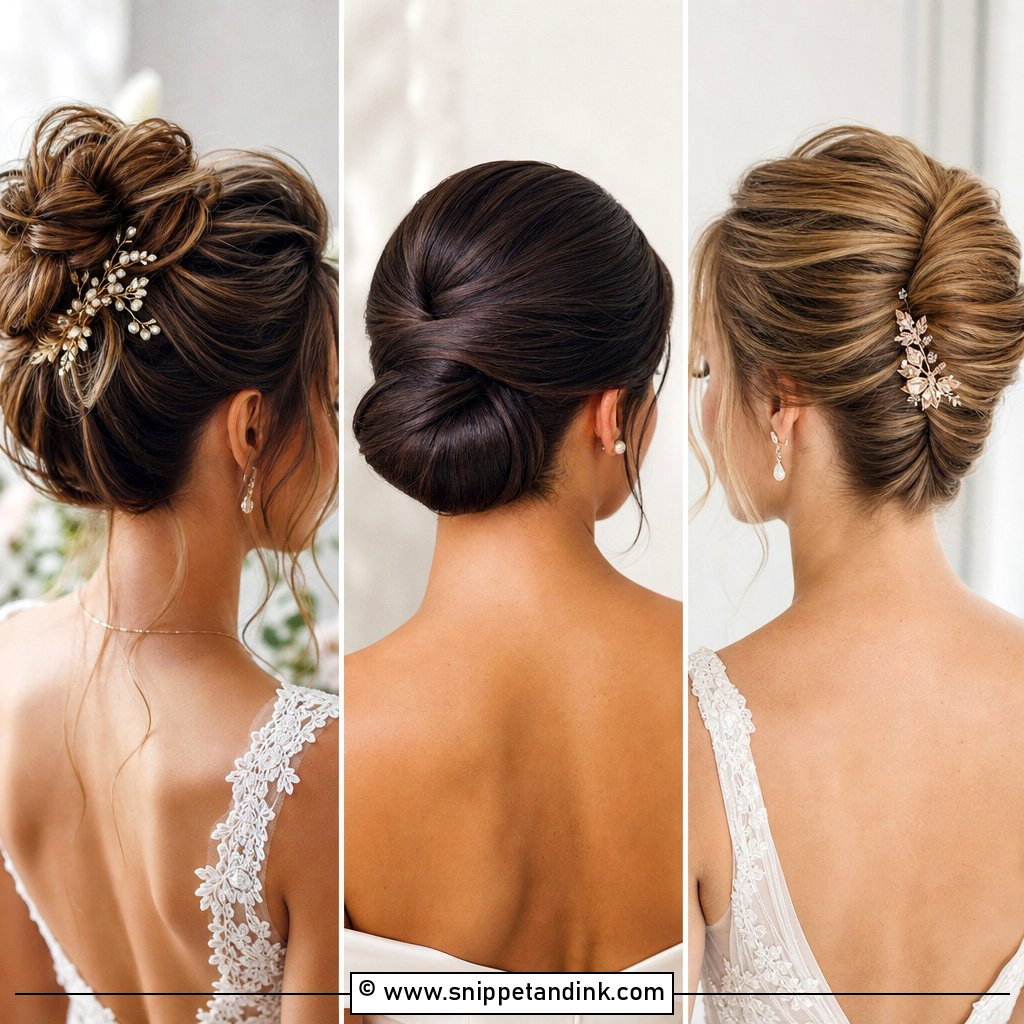
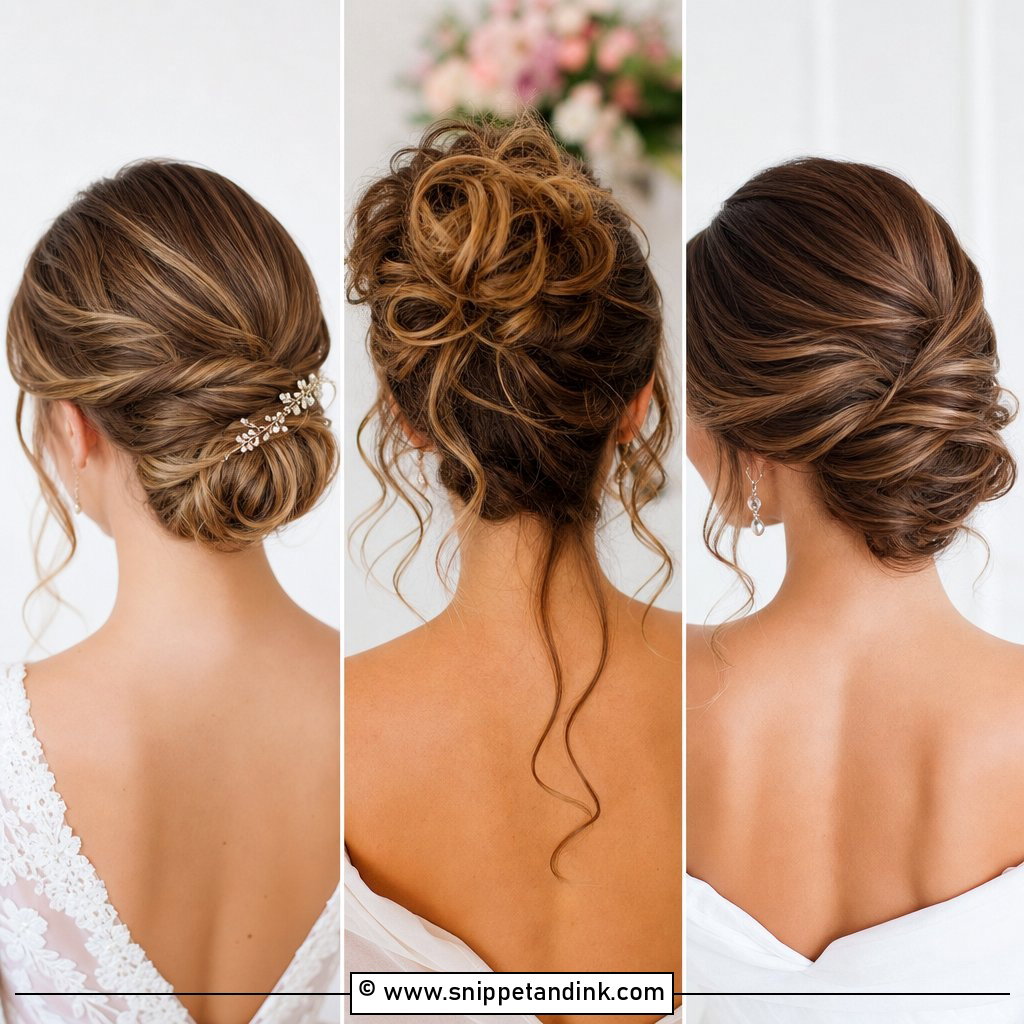
A low chignon is the shape I trust most for a long day. Because it sits at the nape, the weight rests on the strongest part of the hairline instead of pulling at the crown, so it rarely gives anyone a headache by the speeches. I build it over a small ponytail anchor secured with an elastic and two crossed bobby pins, then wrap and pin the lengths around it. It takes a cathedral veil comb tucked just above the coil without strain. If you want loose pieces, ask for them to be curled and left out from the start; pulling them out of a finished chignon usually leaves a bump.
2. Messy Bun With Loose Tendrils
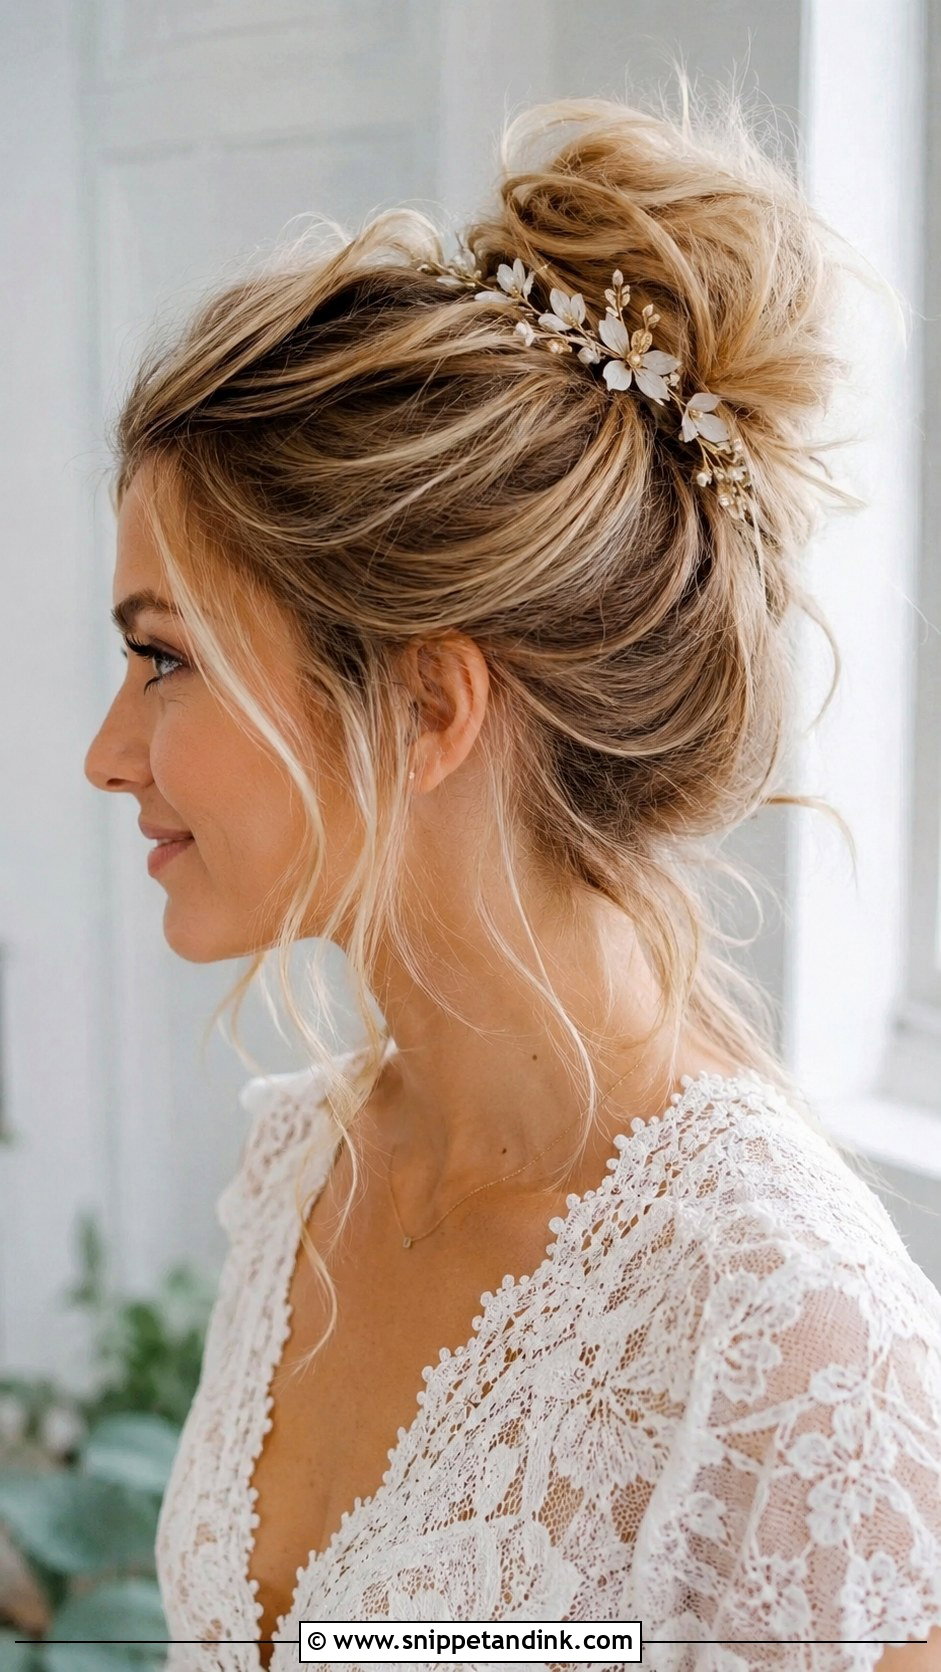
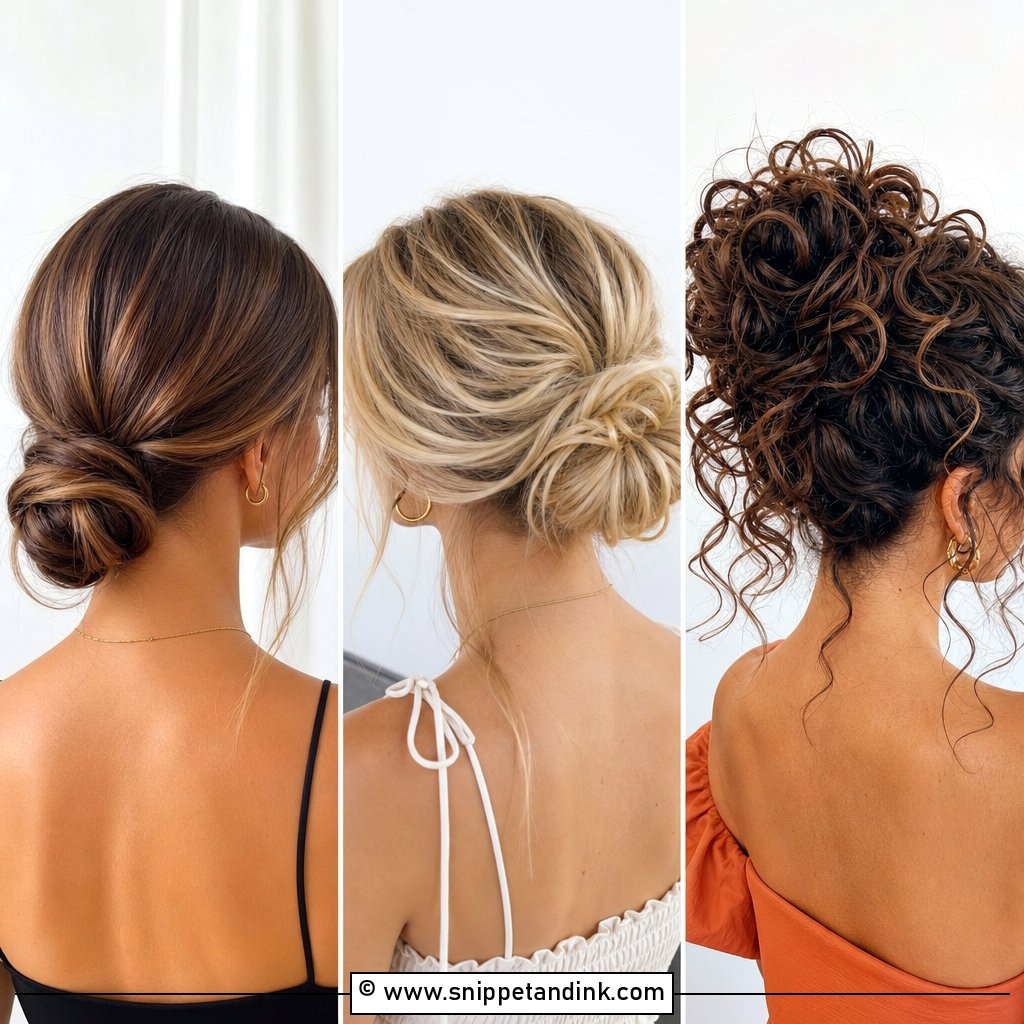
Messy buns are the hardest buns to get right, which surprises most brides. The relaxed look comes from controlled texture: I curl the whole head first, brush it out, then pin each section loosely so it looks undone while the base underneath is locked. On very silky hair I add texture spray before curling, or the pieces slide out by lunchtime. Done well, it leaves loose strands falling softly around the face without the whole thing collapsing on the dance floor. Garden weddings suit it, and fresh flowers sit happily in the gaps.
3. Braided Bun
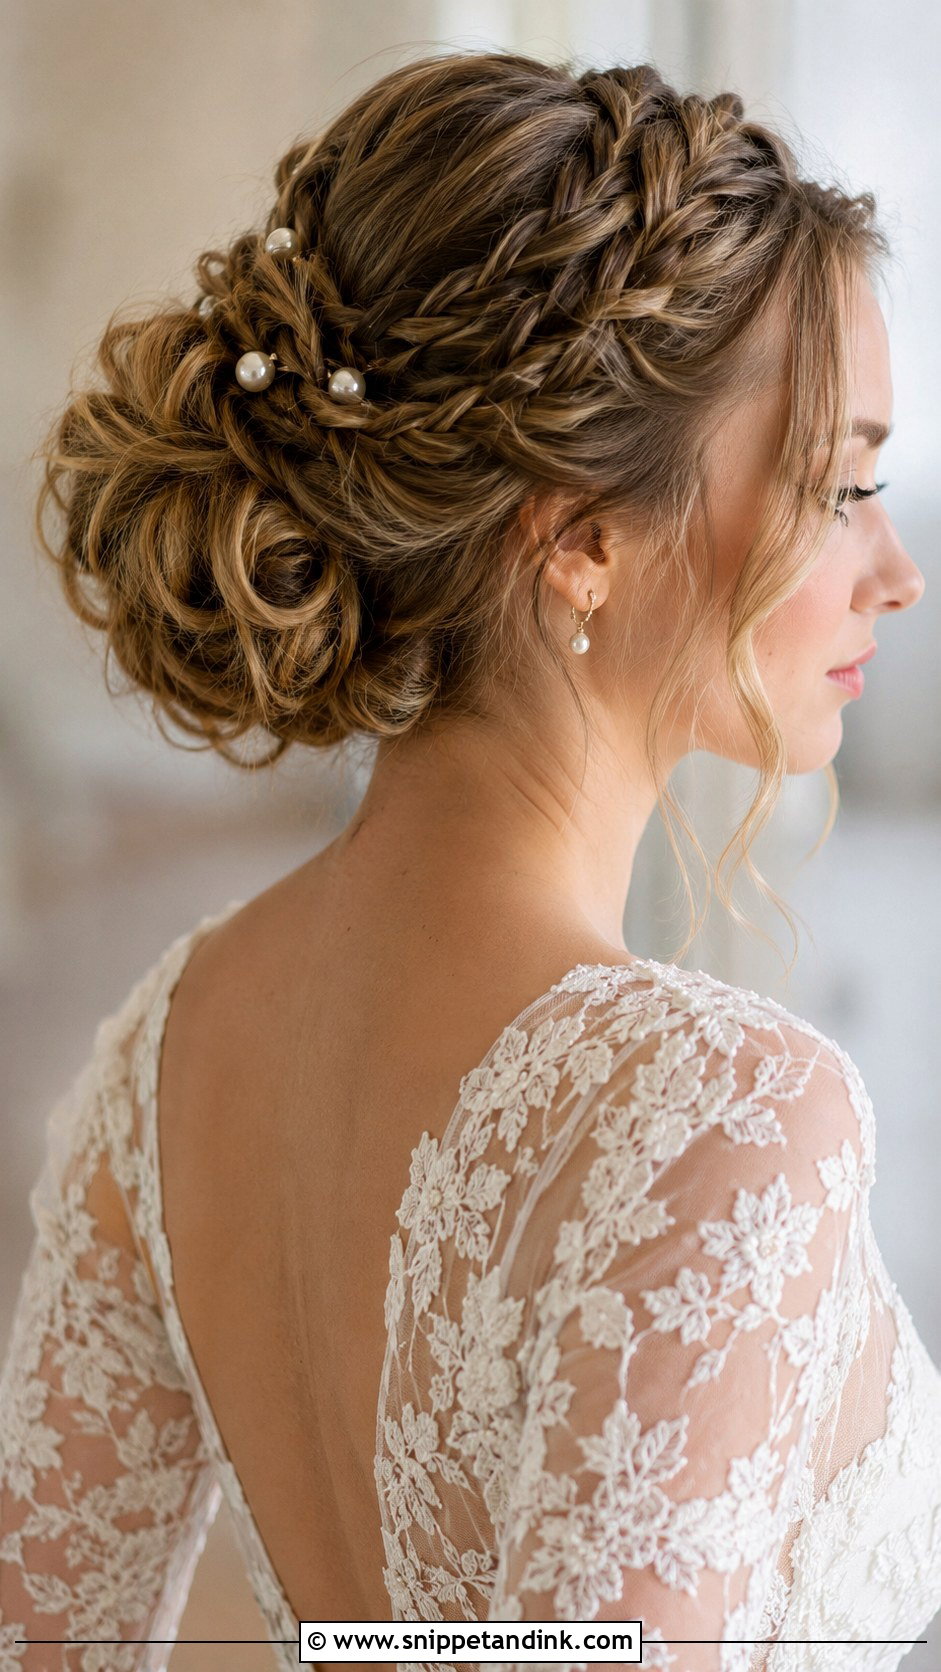
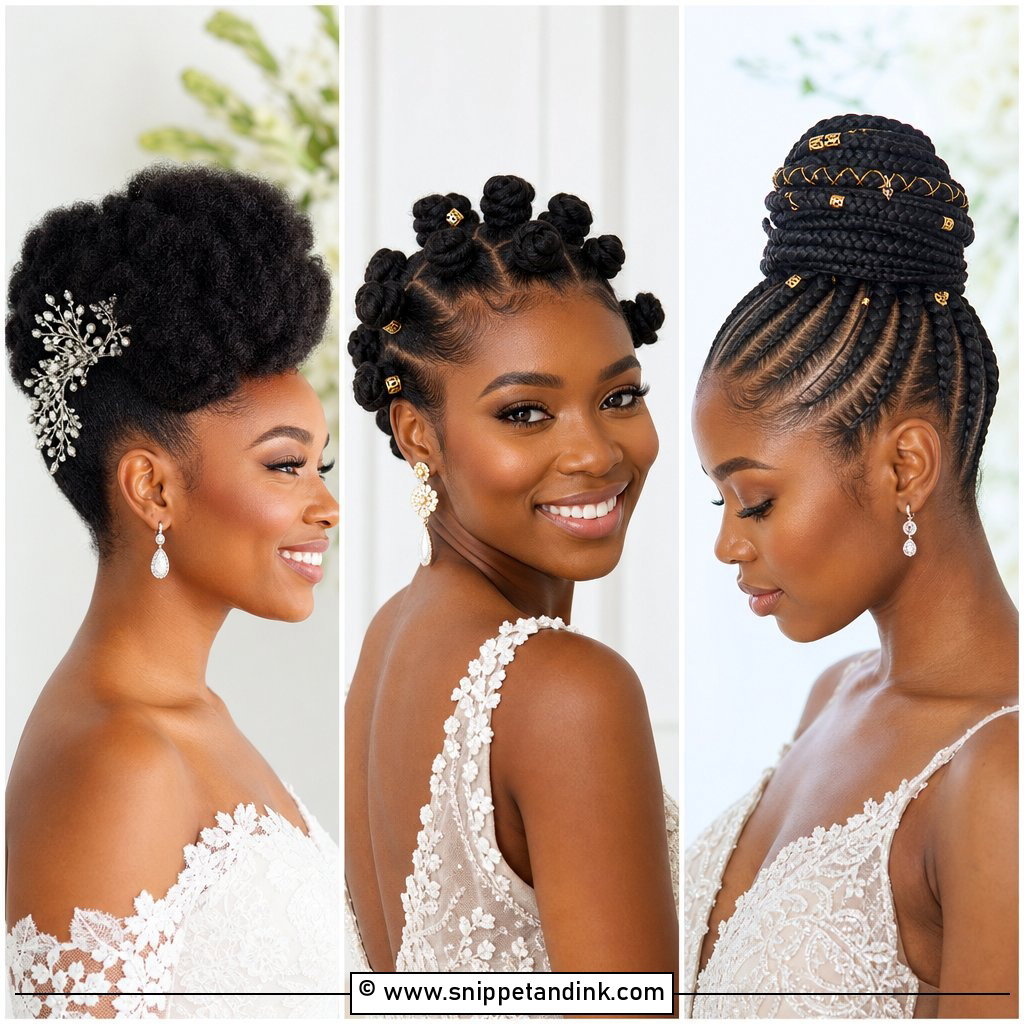
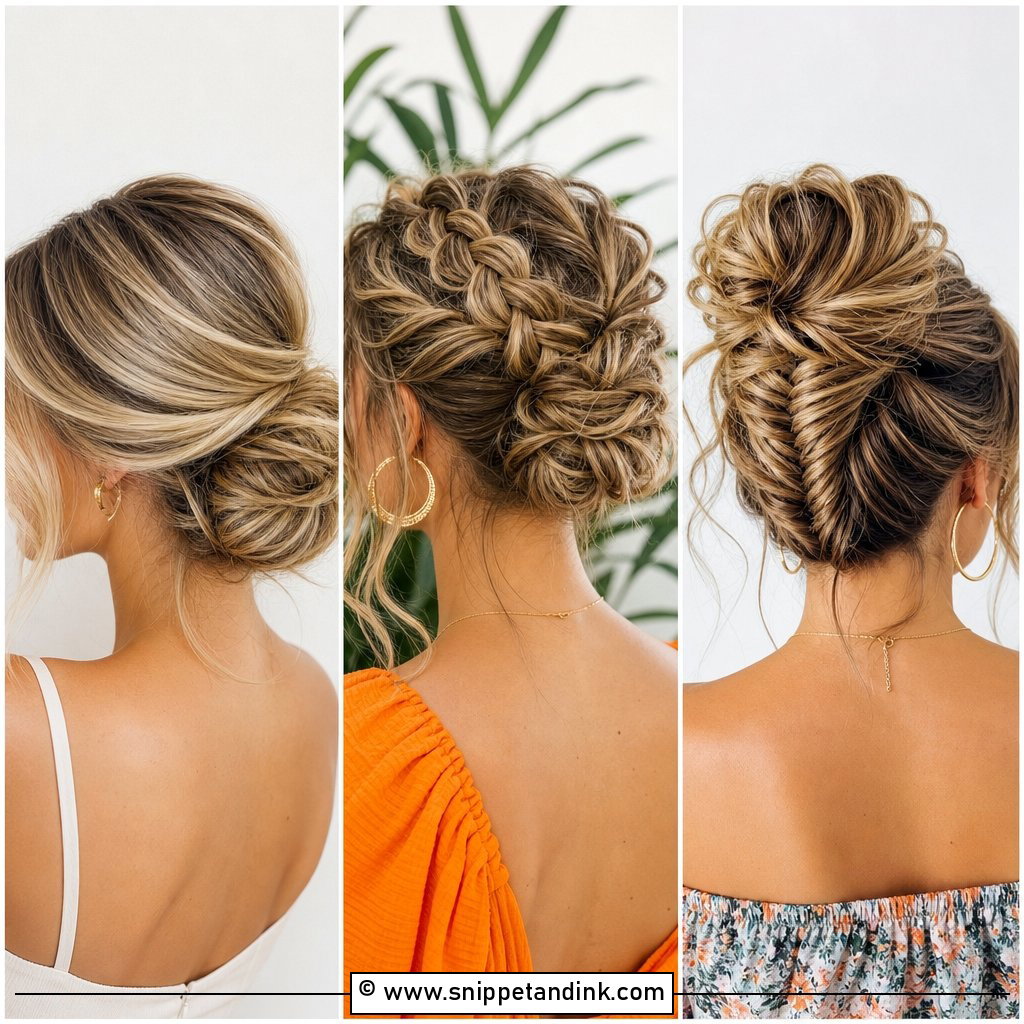
Braids give a bun grip, which is why I often use them on hair that won’t hold a curl. A single plait wrapped around the base hides pins and adds detail; several smaller braids woven together give a richer pattern but need more length, roughly past the shoulder blades. I pancake the braid, gently pulling the edges wider, so the weave reads clearly in photos taken from a few metres away. Tiny pearl pins can go straight into the plait. On layered hair, expect a few short ends to poke out and plan for a little wax to tame them.
4. French Twist Updo
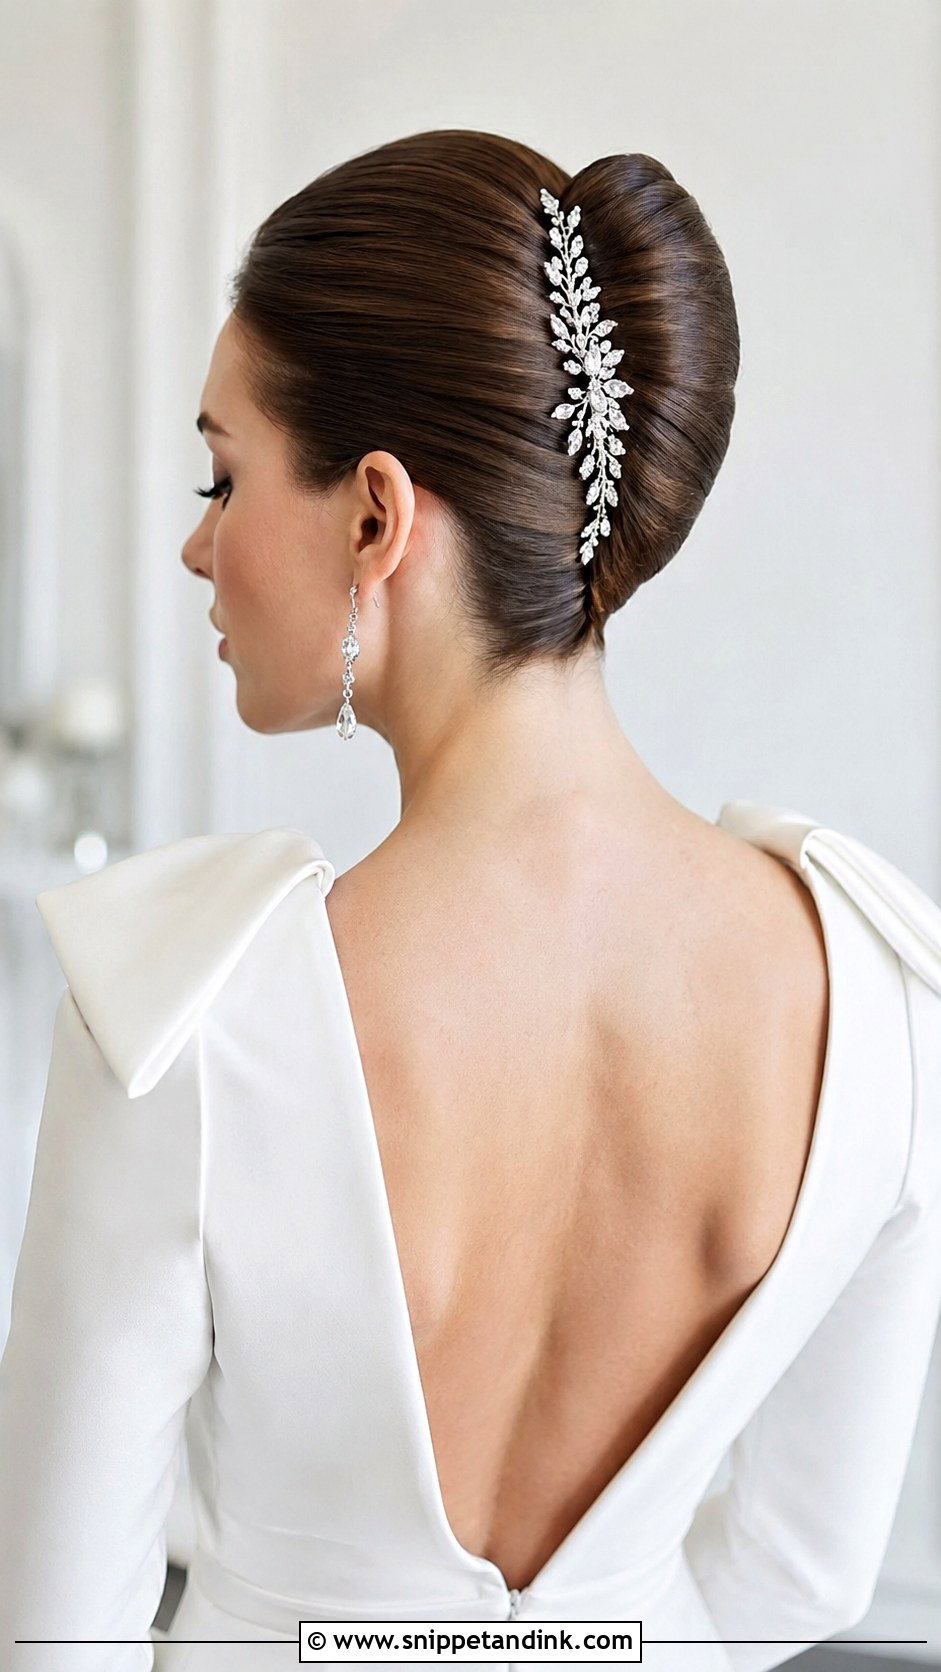
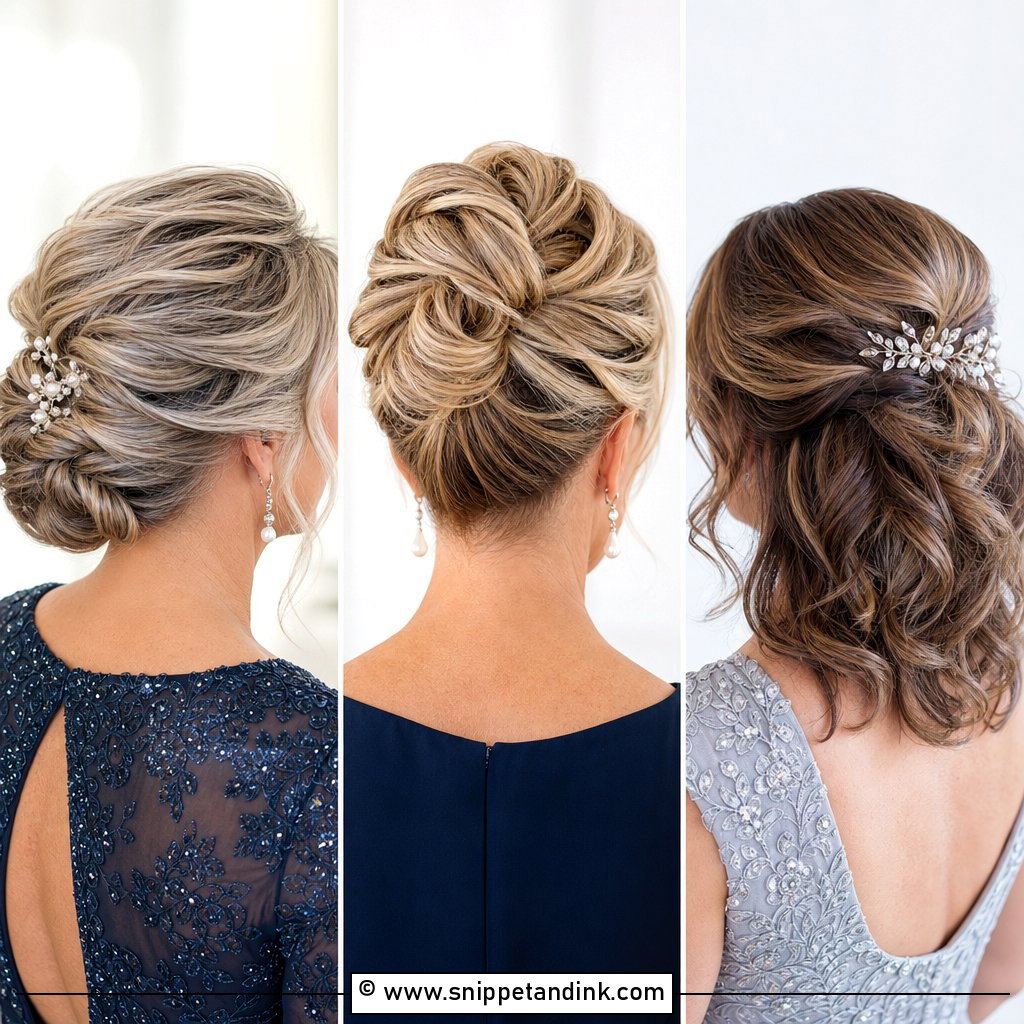
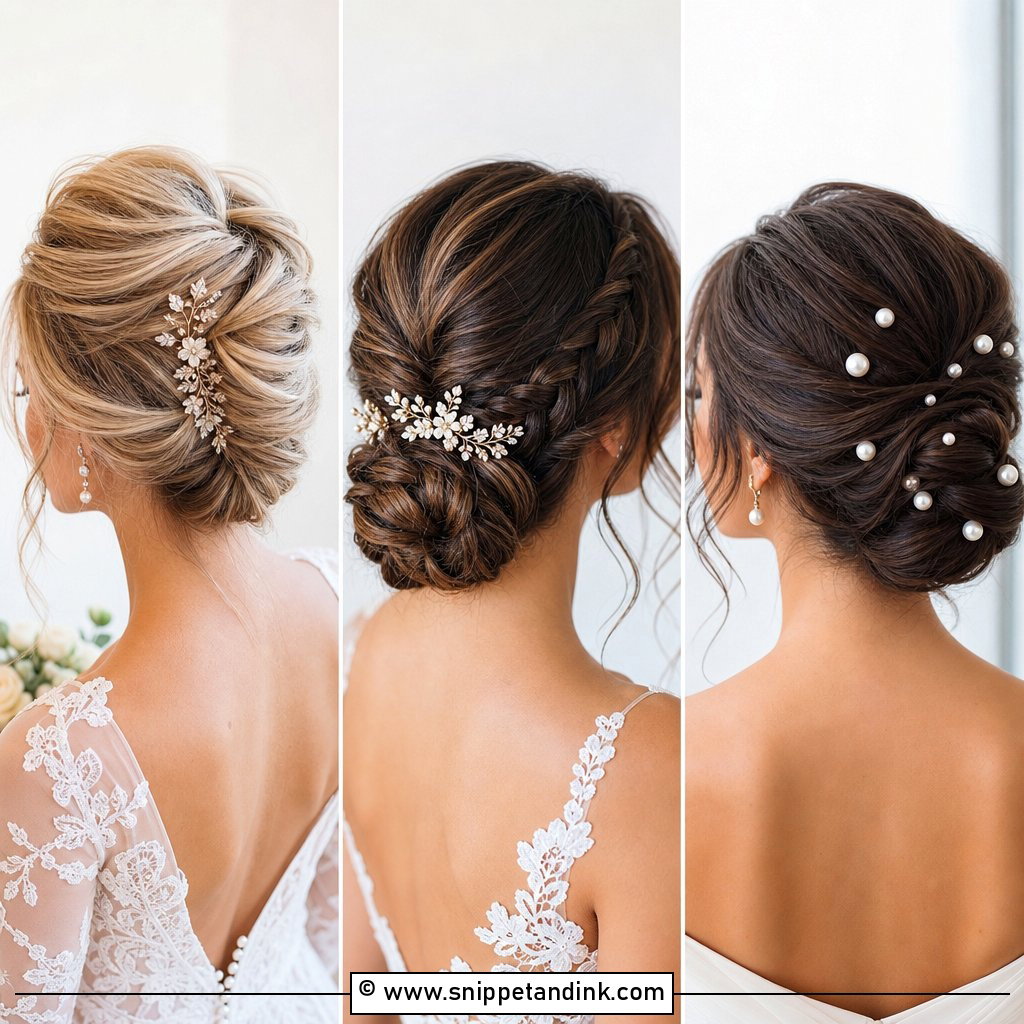
A French twist is a vertical fold rather than a round coil, so it suits black-tie weddings and fitted gowns where a column shape echoes the line of the dress. It depends heavily on prep. Hair needs grip, so I set it with a light mousse and backcomb the inner side before folding. Very thick hair can make the twist bulky, and very fine hair may need a small padding piece inside. Once it’s pinned with long U-pins along the seam, it barely moves, and a side comb sits flush against the fold.
5. Sleek High Bun
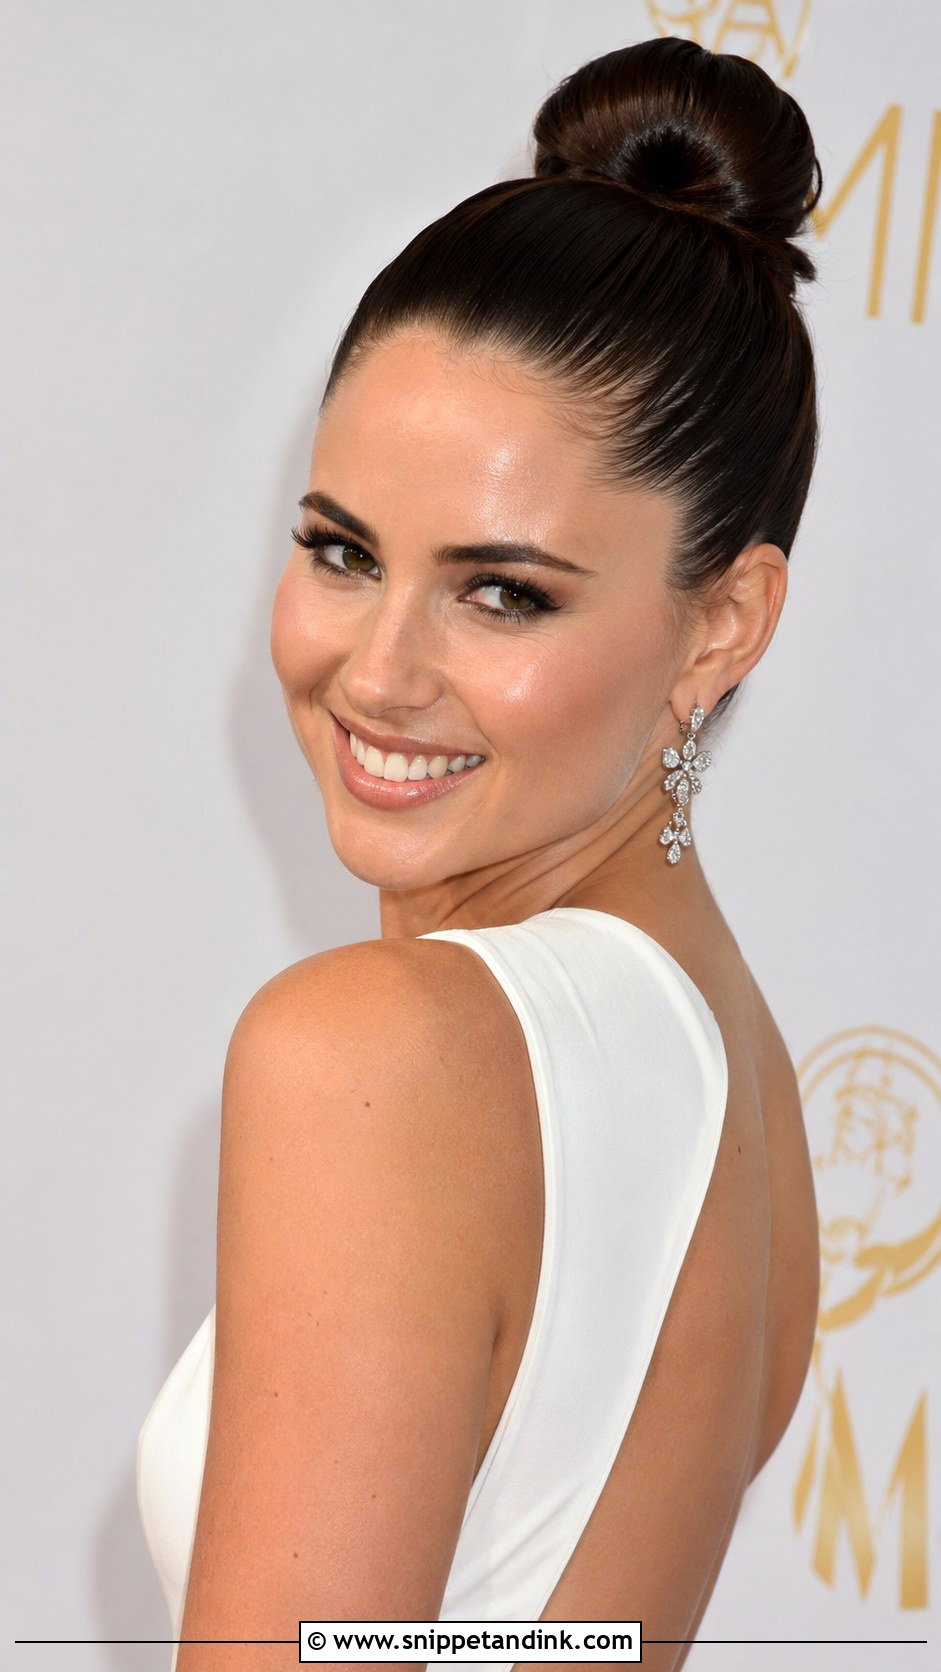
A sleek high bun is honest: every lump shows. I smooth hair upward with a boar-bristle brush and a little gel, secure a tight ponytail at the crown, then wrap. Because the weight sits high, it pulls more on the hairline, so I’d steer you away from it if you get tension headaches or have a sensitive scalp. It shows off the jaw and works with structured or strapless gowns and big earrings. A drop of shine serum helps the surface catch the light, but too much looks wet under flash.
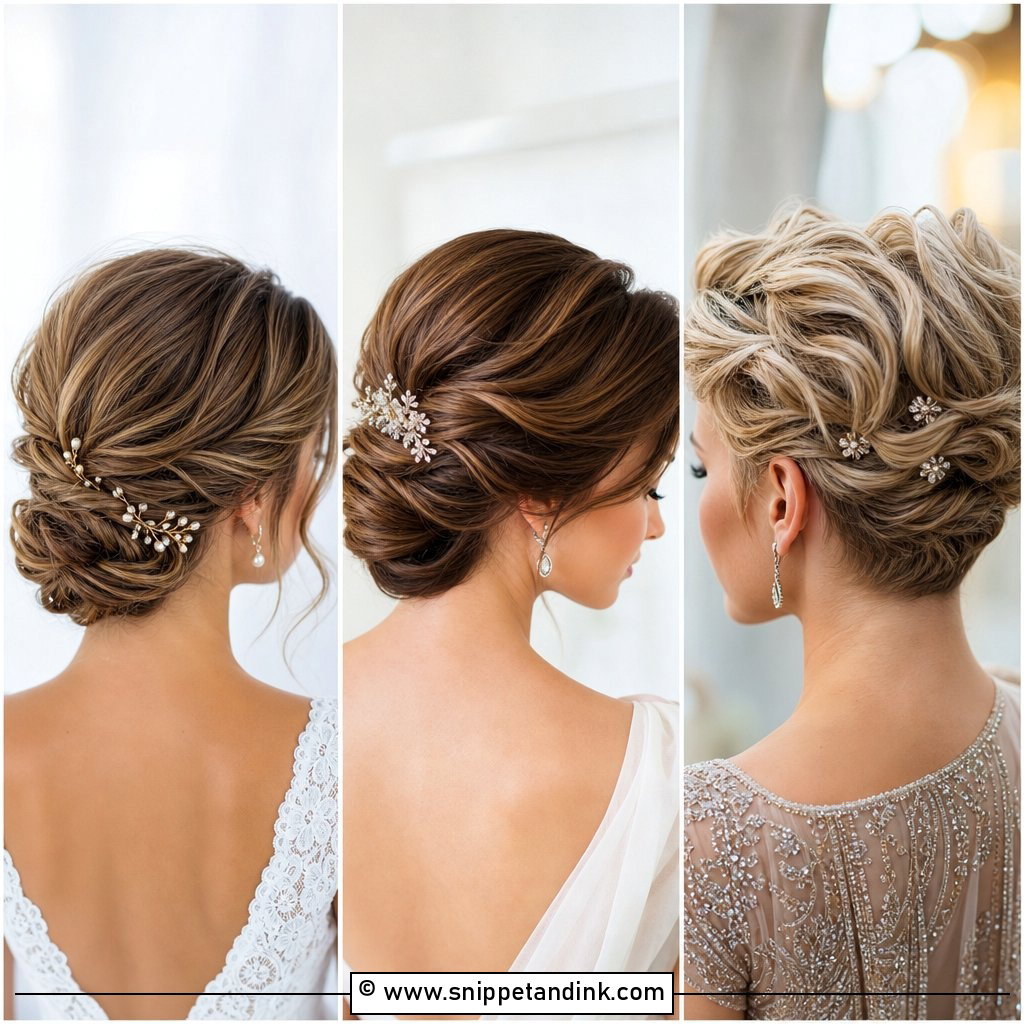
6. Twisted Low Bun
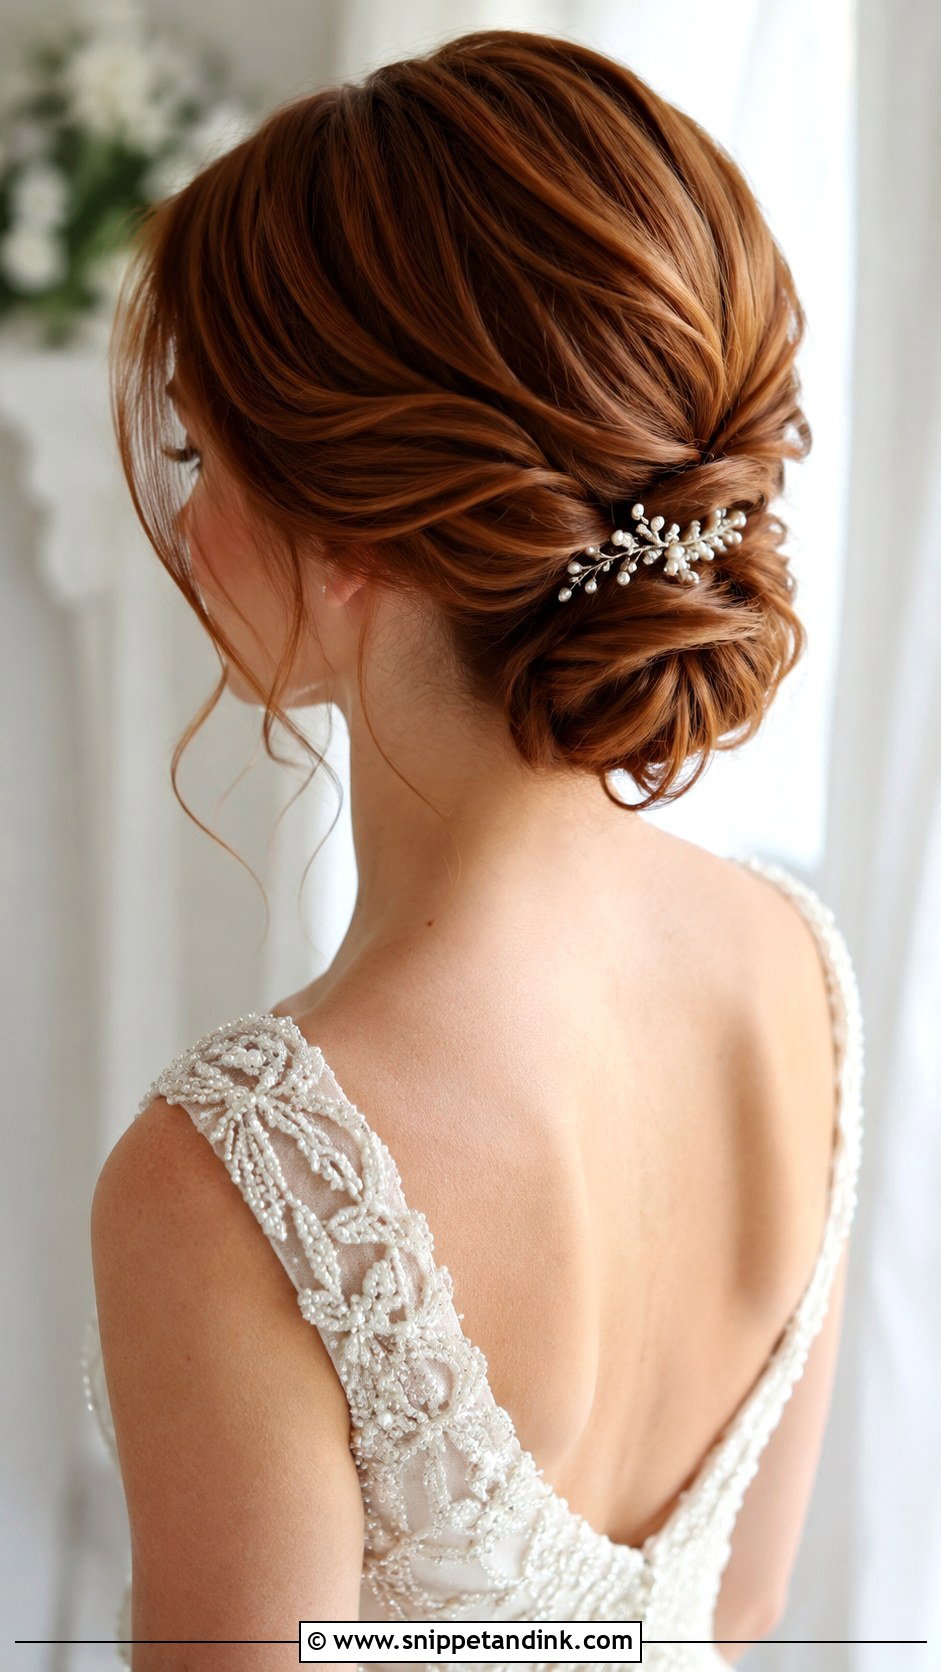
Twisting sections before coiling them adds dimension without the precision a braid demands. I split the hair into three or four sections, twist each one away from the face, and pin them into a loose cluster at the nape. It’s more forgiving than a smooth chignon if your hair has layers, because the twists hide short ends. A couple of soft pieces near the temples keep it gentle. A jeweled pin or a sprig of greenery tucks easily between the twists, and the low placement stays comfortable from the morning photos to the last song.
7. Braided Crown Bun
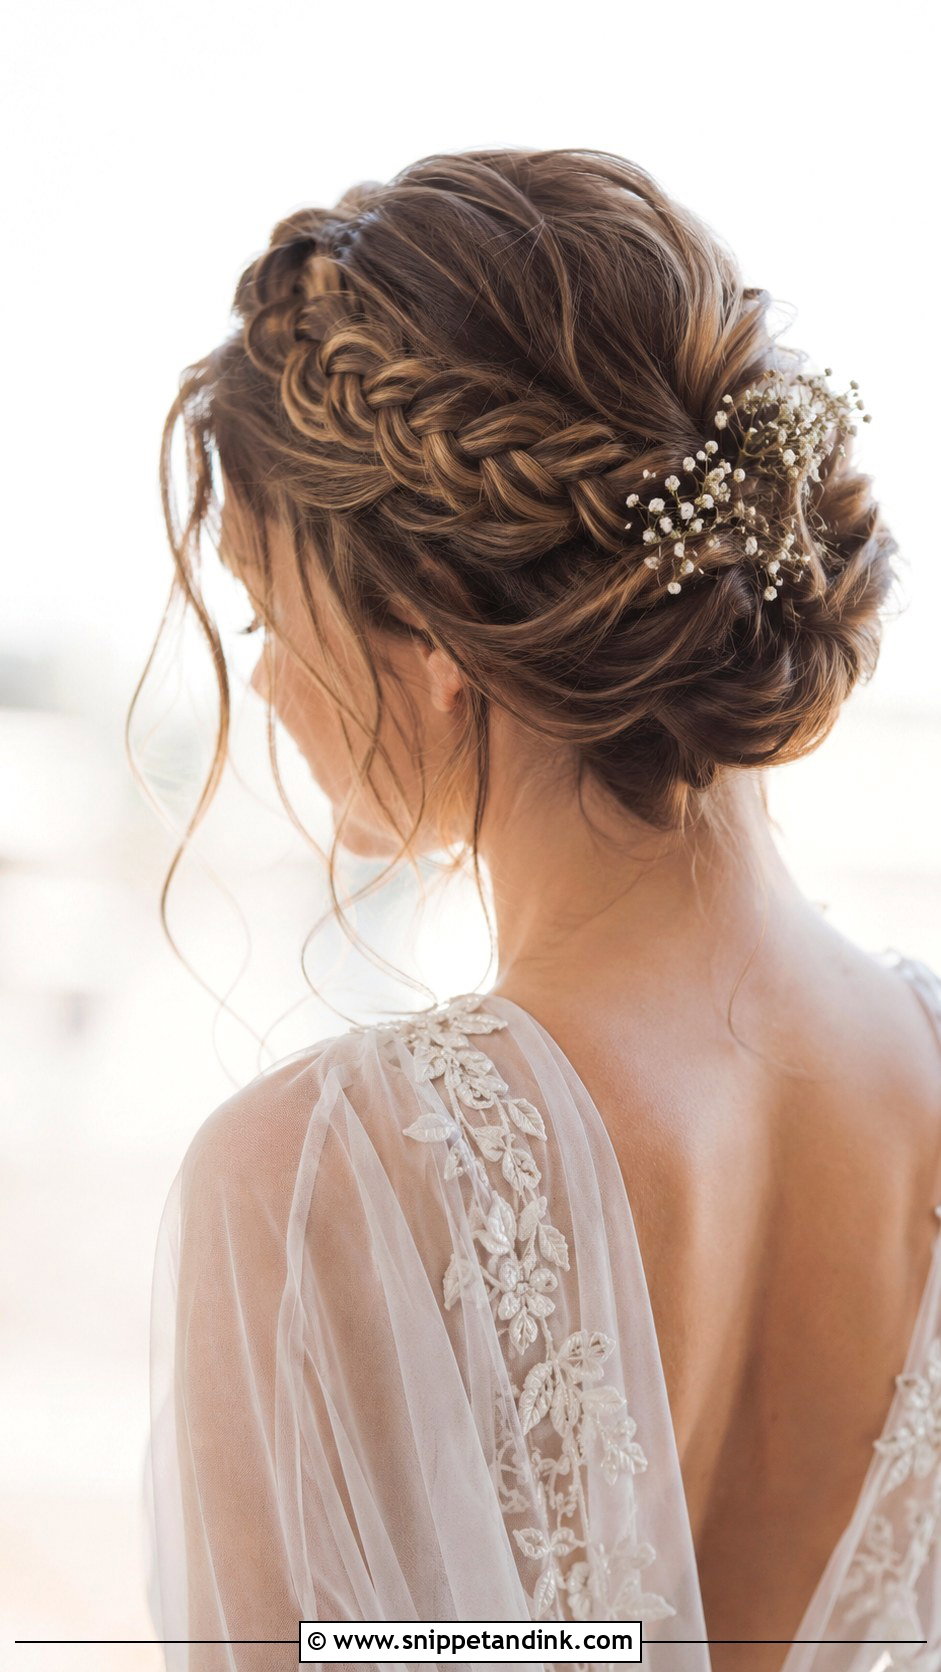
A crown braid wraps around the head like a halo before the ends tuck into a soft bun, and it’s one of the most secure styles I make because the braid itself acts as a pin. It needs length. If your hair stops at the shoulders, I’d add clip-in extensions so the braid can travel all the way around. One honest warning: a full crown braid competes with a tiara or a heavy headpiece, so pick either the braid or the jewelry as your focal point. Small flowers woven into the plait hold better than one large bloom.
8. Bun With Side Braid
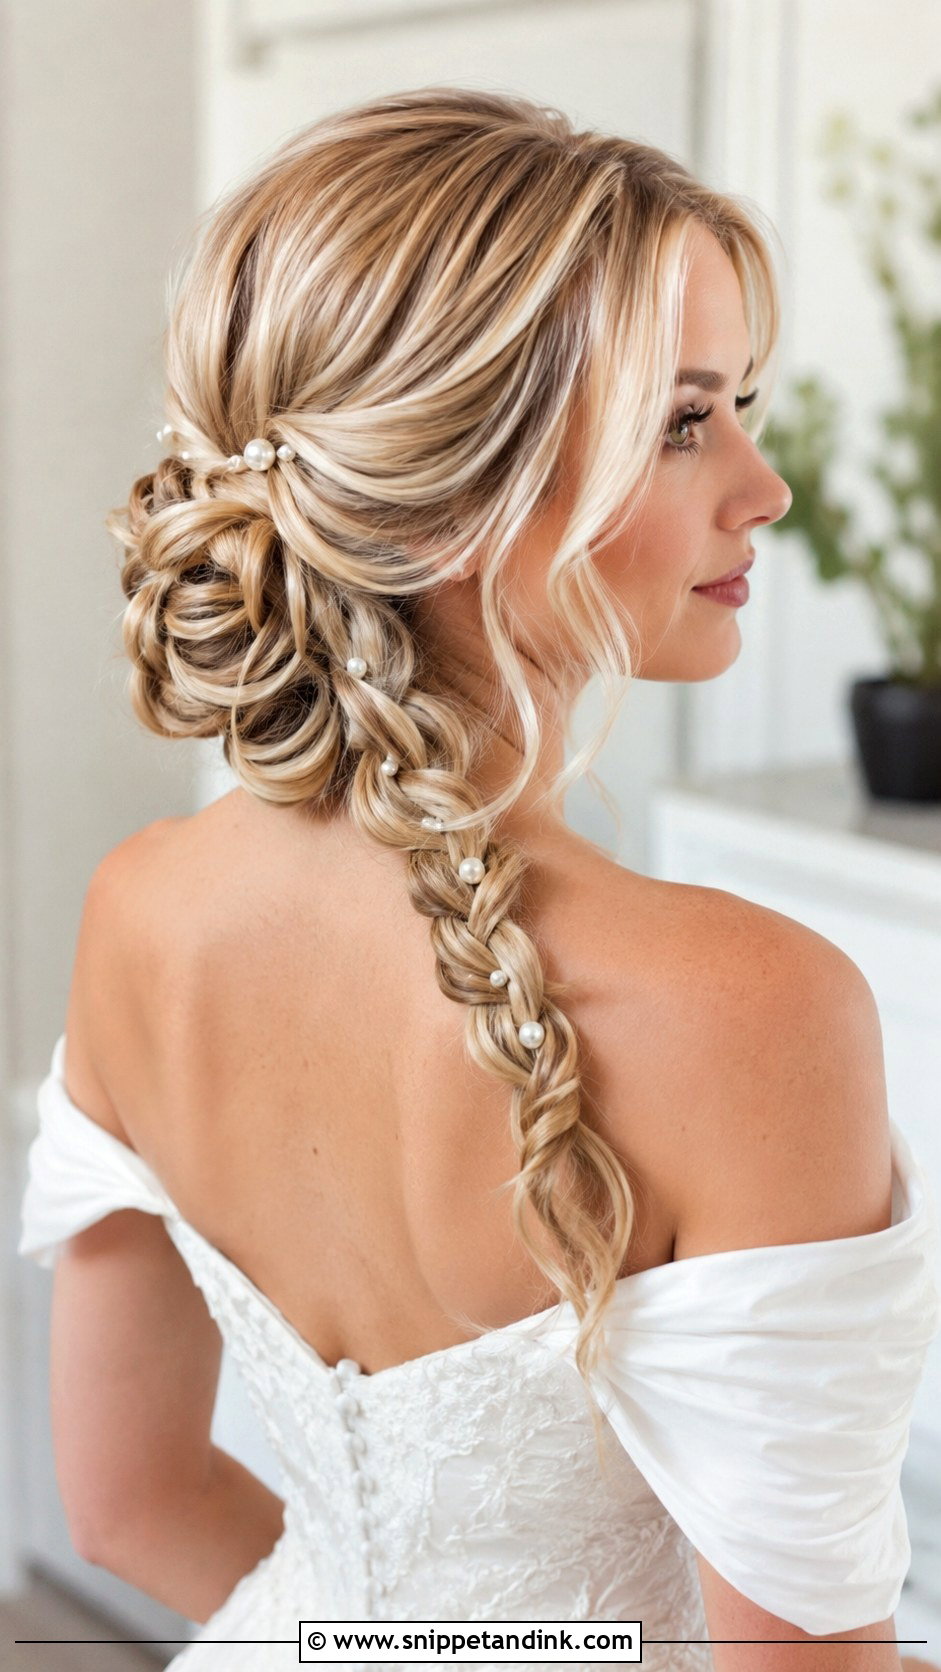
Running a braid along one side into the bun creates an asymmetric line that the camera picks up in profile shots. I always ask which side of the aisle you’ll stand on, because that’s the side guests see during the ceremony, and I put the braid there. A loose, pulled-out braid reads softer; a tight Dutch braid looks cleaner but exposes any gaps in fine hair. Off-shoulder necklines let the braid and bun be seen together. A few crystal pins along the braid are plenty. More than that and it starts to look busy.
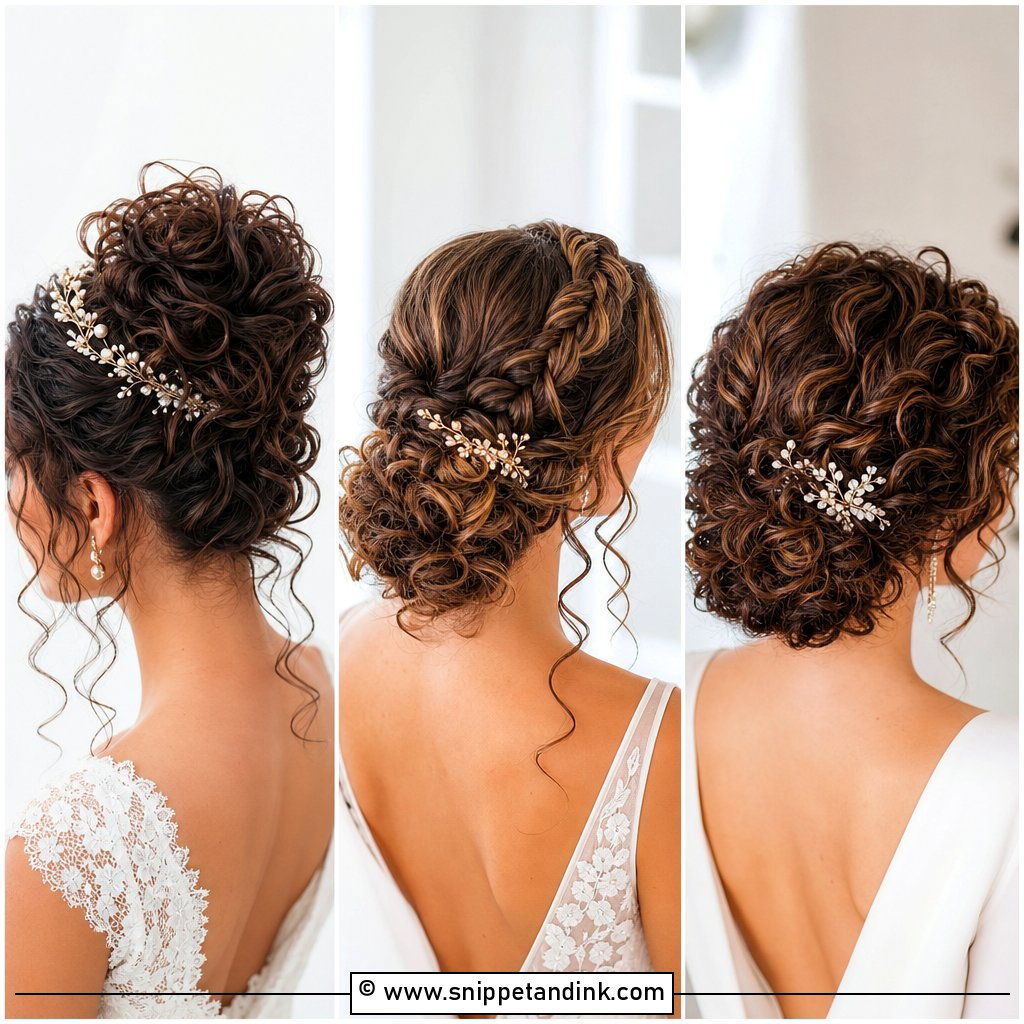
9. Curly Bun
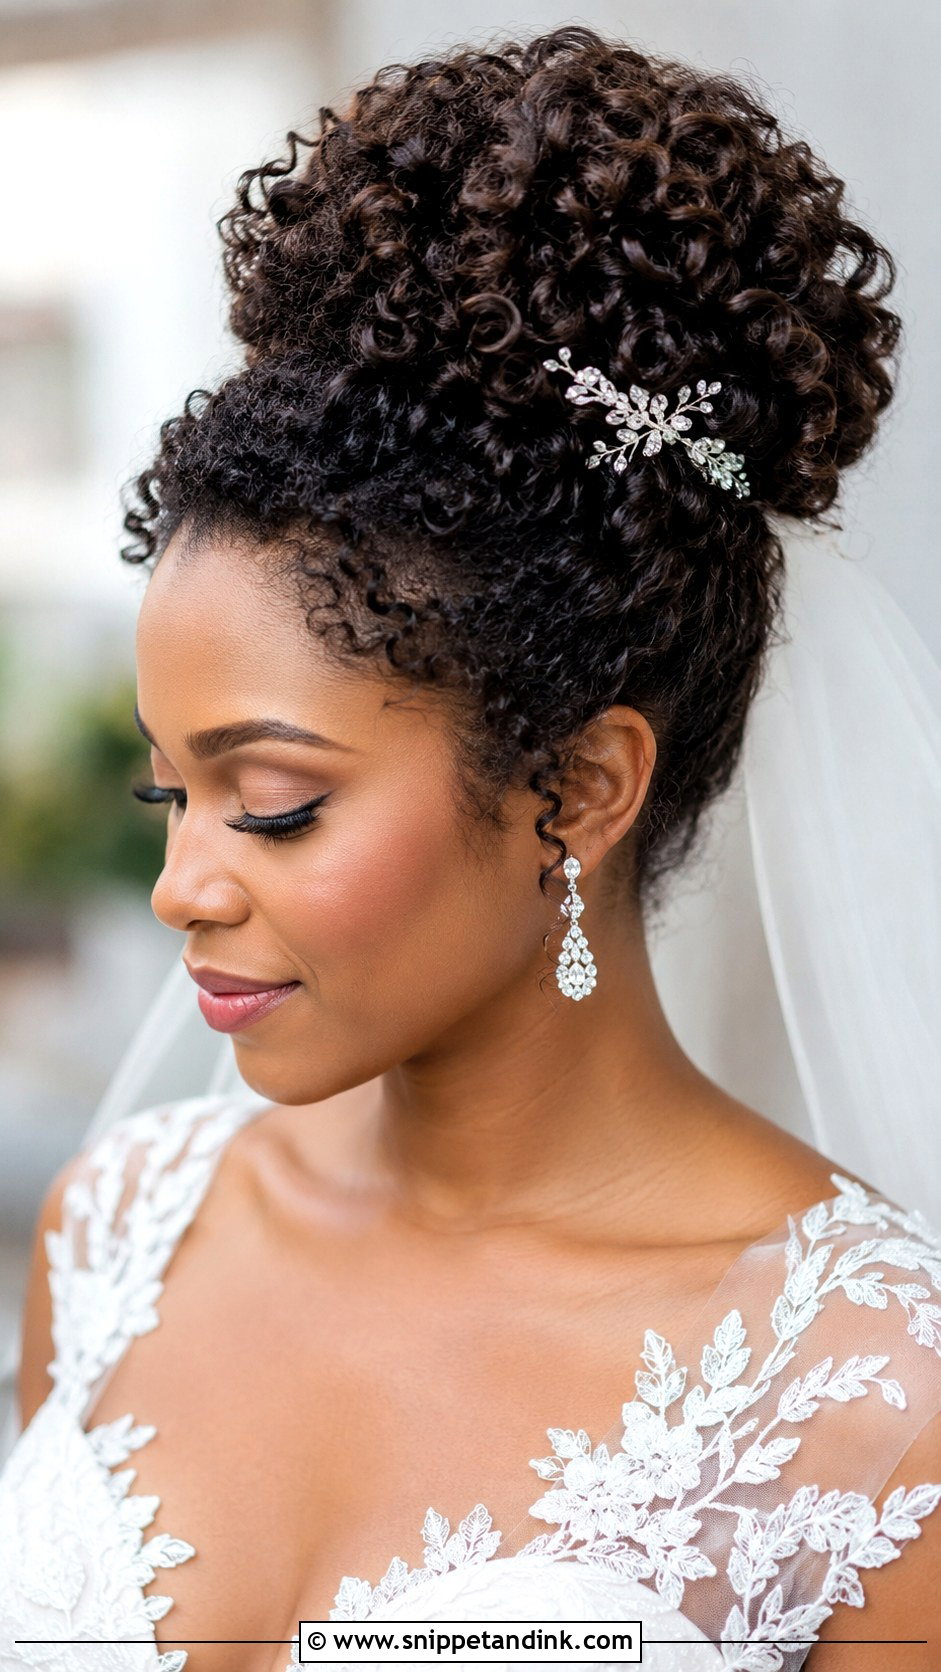
With curly and coily textures, I work with the pattern instead of fighting it. I’d rather the curls are defined the day before with your own products, then gathered gently into a full bun on the morning, than blown straight and restyled. Stretched or dry curls frizz faster in humidity, so I seal the surface lightly with a cream or gel. Large hairpins and spin pins hold curly hair far better than standard bobby pins, which slip out of the volume. A high curly bun adds height, which petite brides often like; at the nape it reads softer.
10. Bun With Face-Framing Pieces
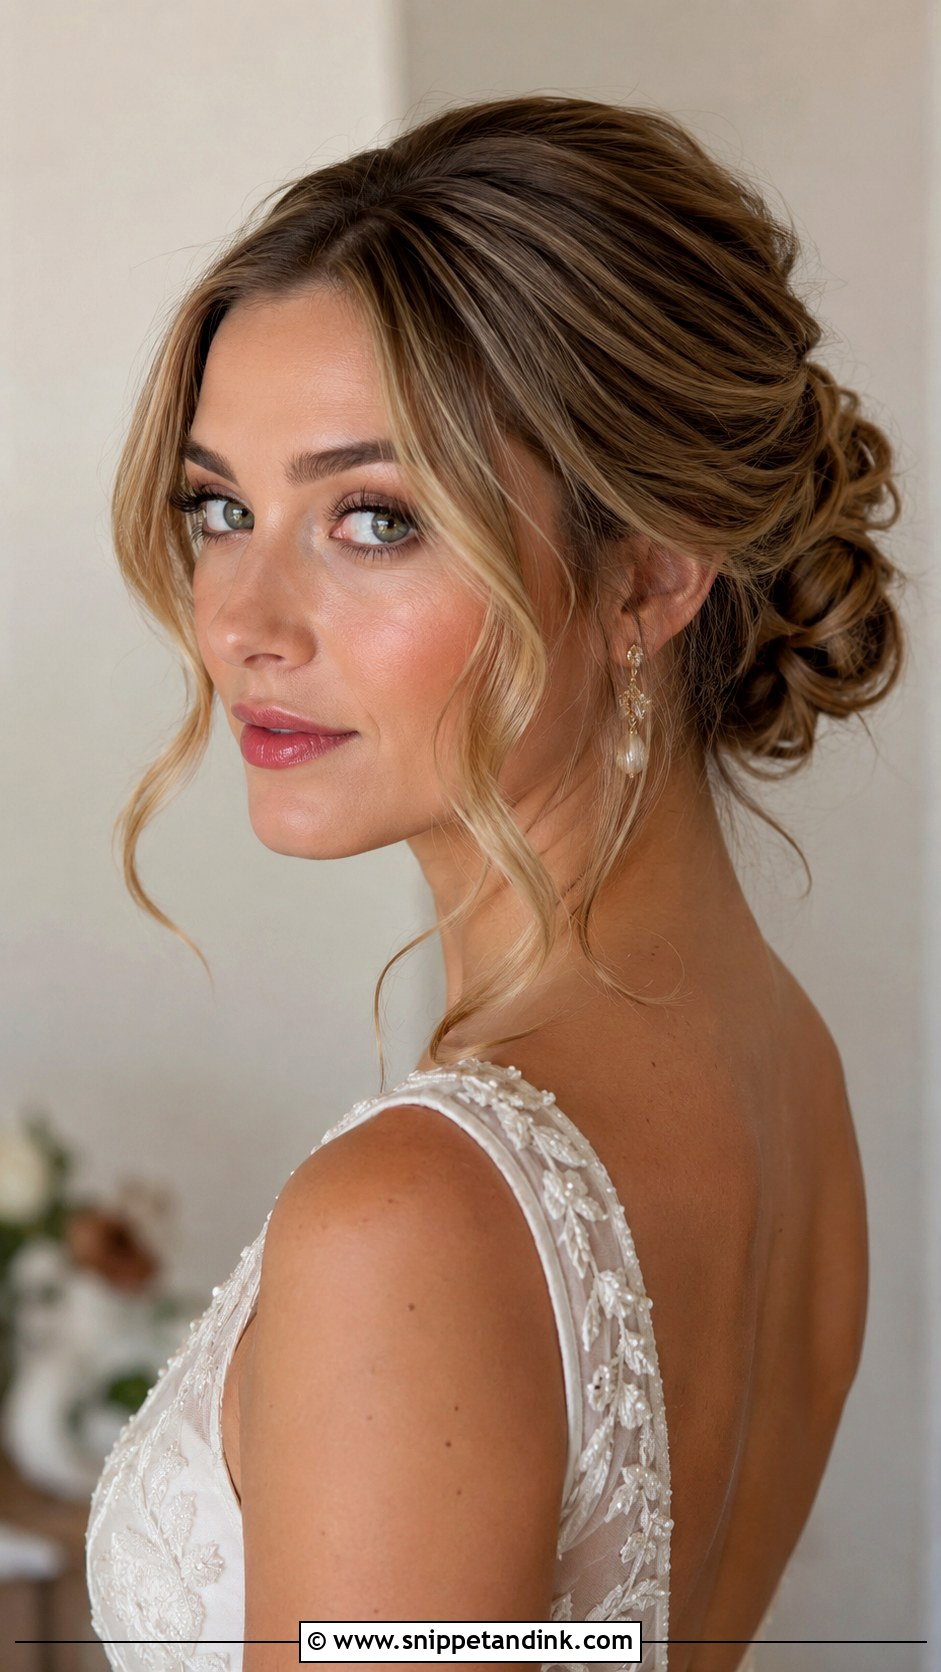
Face-framing pieces are small, but they change the whole bun. Their length matters most: pieces that end at the cheekbone soften the face, while pieces that end at the jaw can drag the eye downward. I curl them away from the face, let them cool fully, and only brush them out after the veil is on. If you’ve had face-framing layers cut recently, tell your stylist. Layers too short to reach the bun get left out anyway, so working with them deliberately looks far better than stray wisps. Straight pieces suit a sleek bun; curled ones suit a softer shape.
11. Pearl-Accented Bun
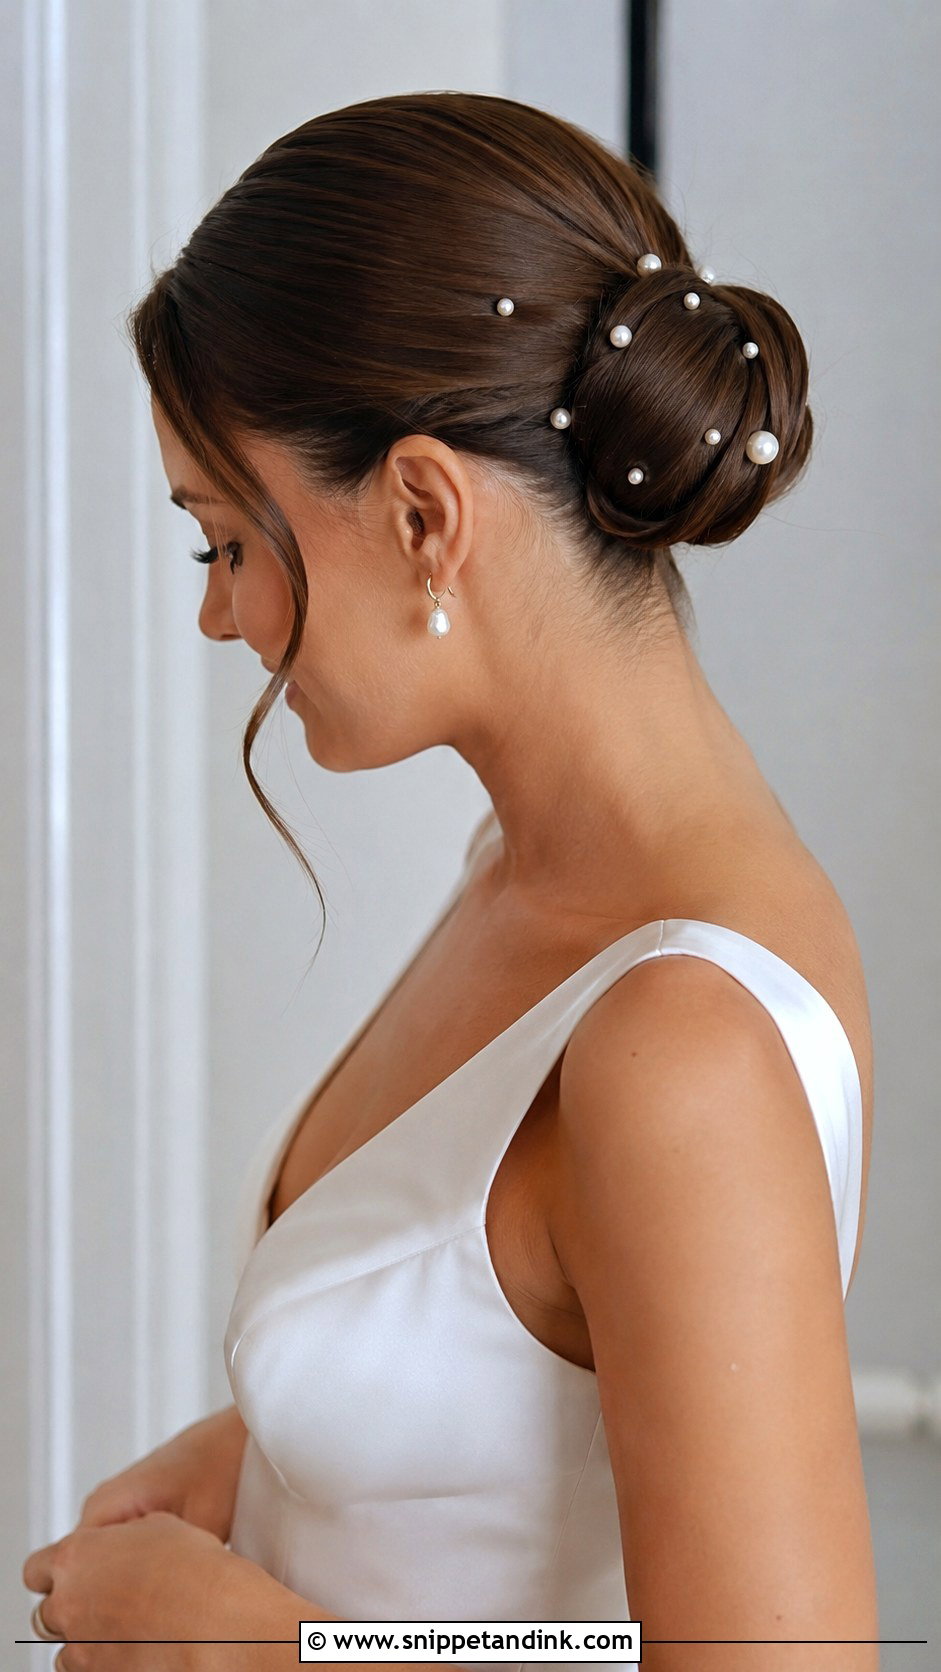
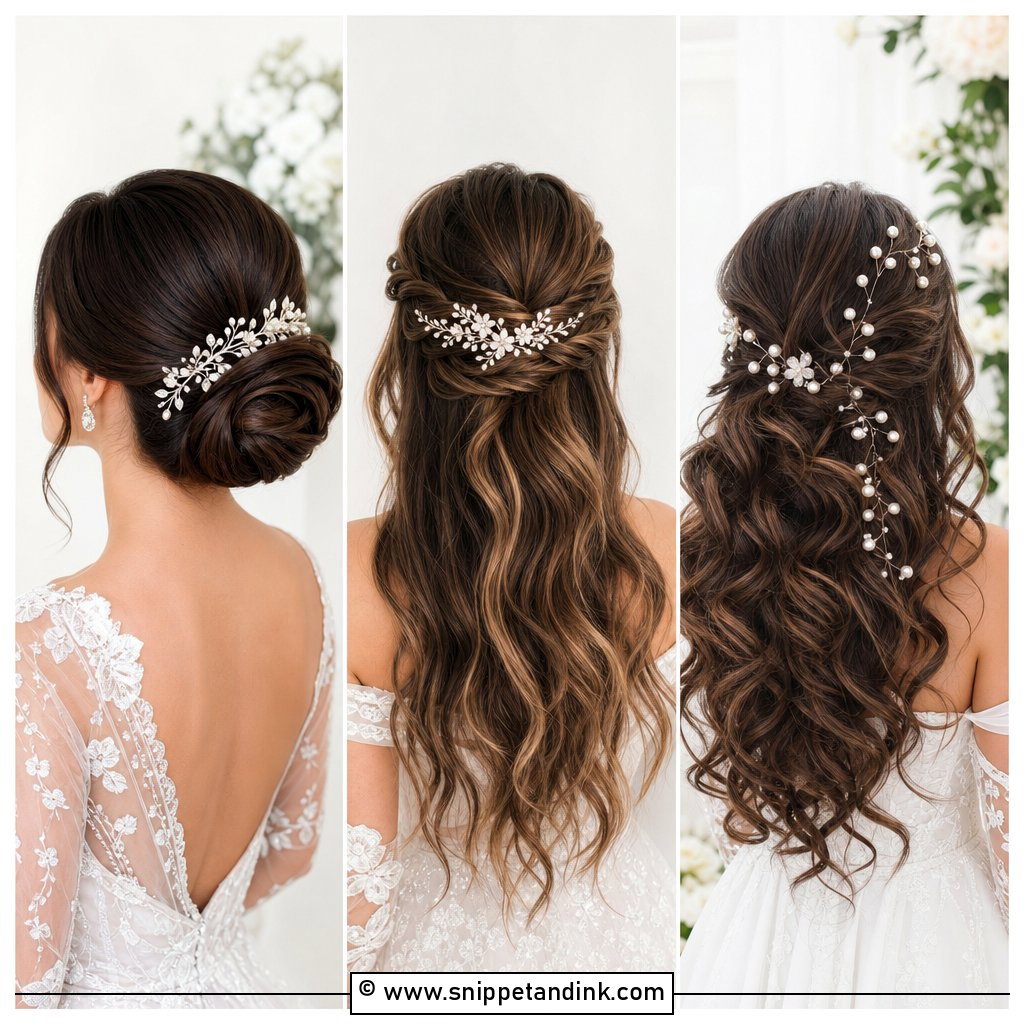
Pearls are easy to wear because they stay neutral against nearly every gown color and skin tone. On a pearl-accented bun, I place the pins last, after the hair is fully set, and angle them into the base of the bun rather than into loose strands, so they don’t drift out by evening. A cluster on one side reads as a deliberate accessory. Pearls scattered evenly give a starry effect, though on very dark hair they can look spotty in photos. Keep your earrings simple; the hair is already doing the decorative work.
12. Double Bun Updo
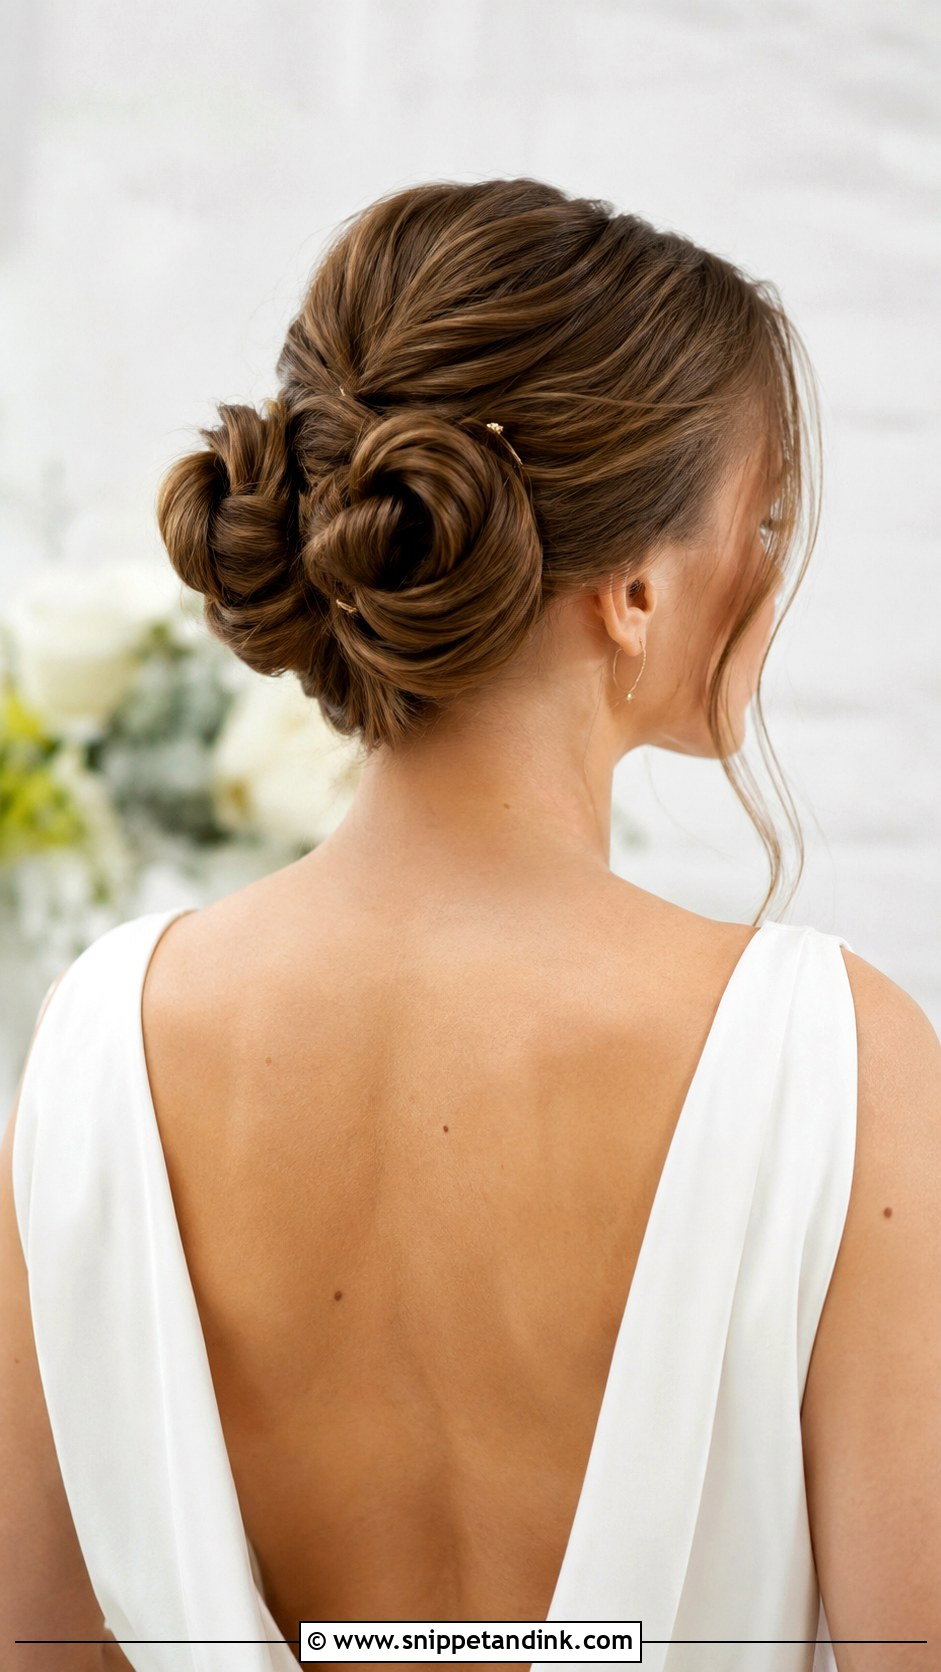
Two coiled buns placed close together make a sculptural shape you rarely see at weddings, so it suits a fashion-led bride who’s comfortable looking different. It needs plenty of hair. Split thin hair into two and each bun ends up small. I make two ponytails stacked vertically, coil them separately, and pin them so they overlap slightly. Commit to either very sleek or quite textured, because halfway tends to look unfinished.
13. Bun With Bohemian Waves
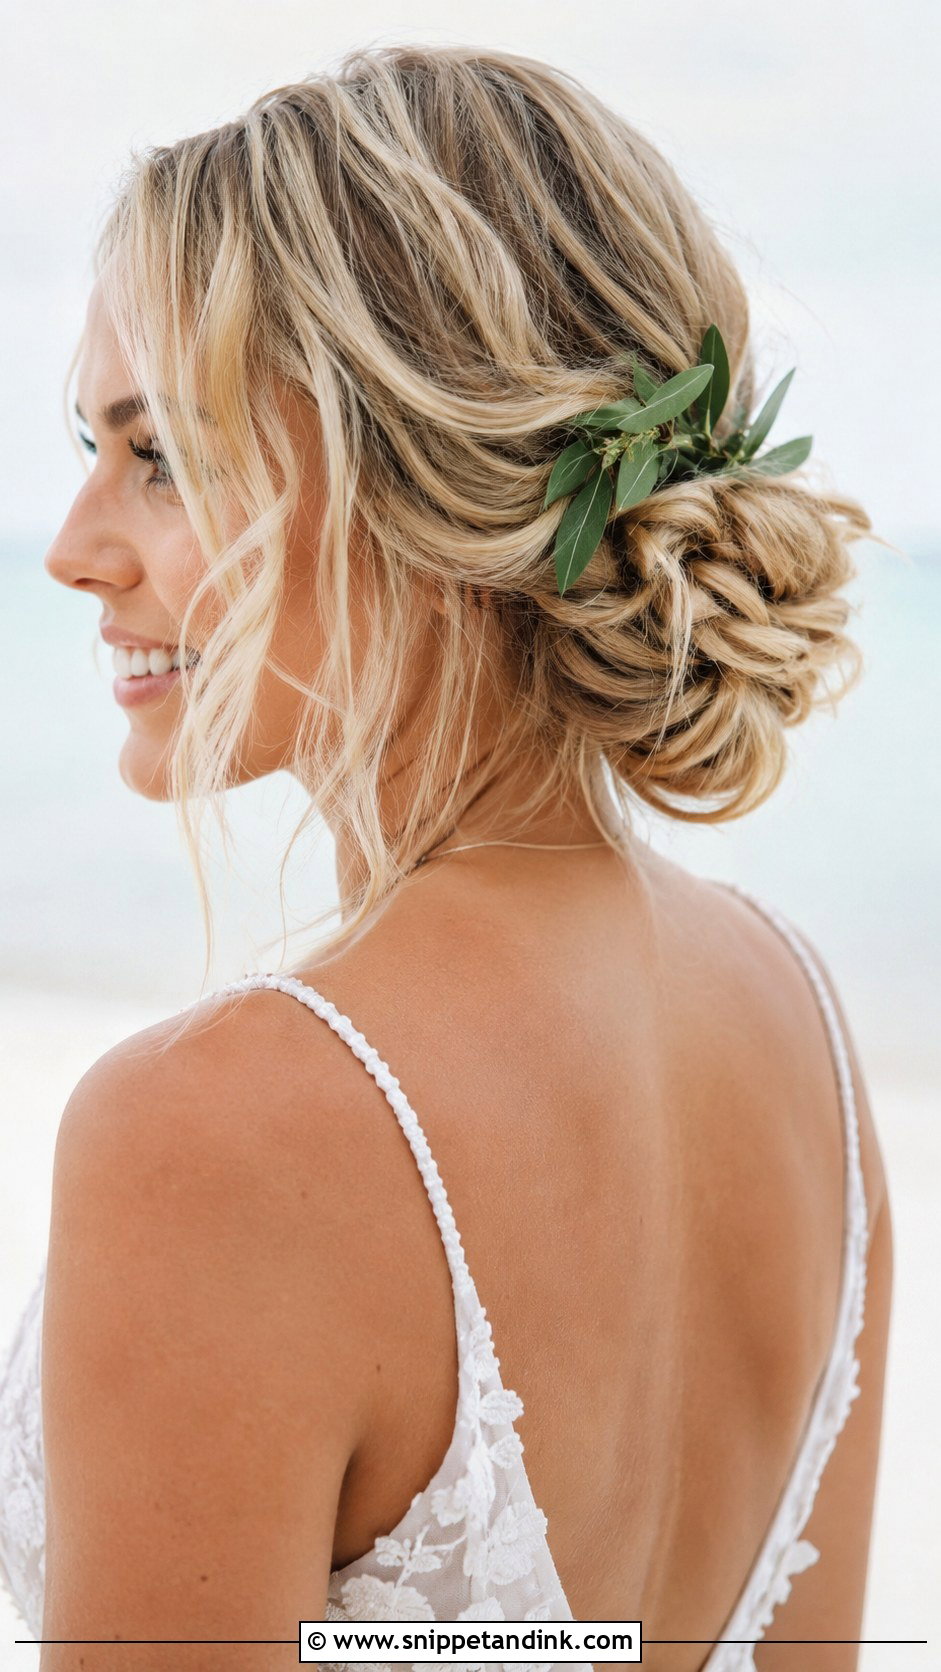
This one mixes loose waves at the front with a textured bun at the back, which is why I suggest it for beach and outdoor weddings where a fully smooth style would fight the wind. Waves need a firm set: I curl with a medium barrel, pin each curl to cool, and finish with flexible-hold spray, because sea air relaxes curls quickly. Long hair works best, since there’s enough to leave out and still build a decent bun. Greenery and dried flowers both tuck in well, and the dried ones won’t wilt in the sun.
14. Sleek Bun With Center Part
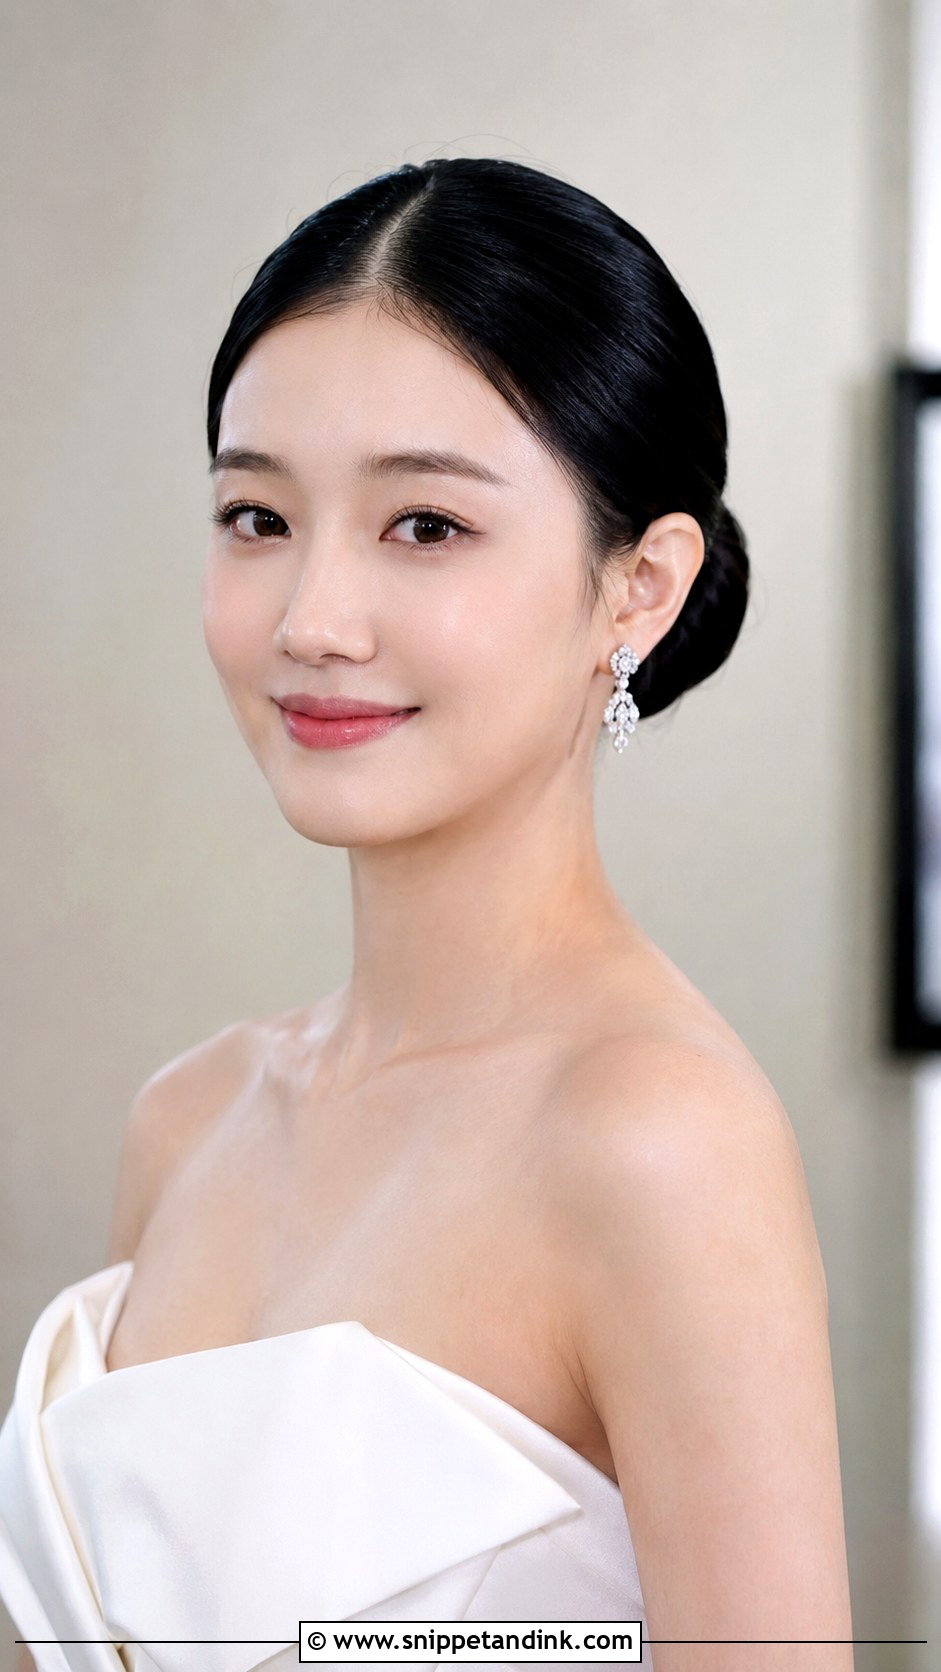
A center part leaves nowhere to hide, so I check the part line in daylight before anything else. Most heads have a natural part that sits slightly off center, and forcing a dead-center line on hair that wants to fall elsewhere creates a ridge that shows by afternoon. I comb it with a fine tail comb, smooth everything back with gel, and secure the bun low and tight. It suits modern, structured gowns and statement earrings. Go light on oils if you’re wearing a veil, since they can leave marks on tulle.
15. Bun With Hair Vine Accessory
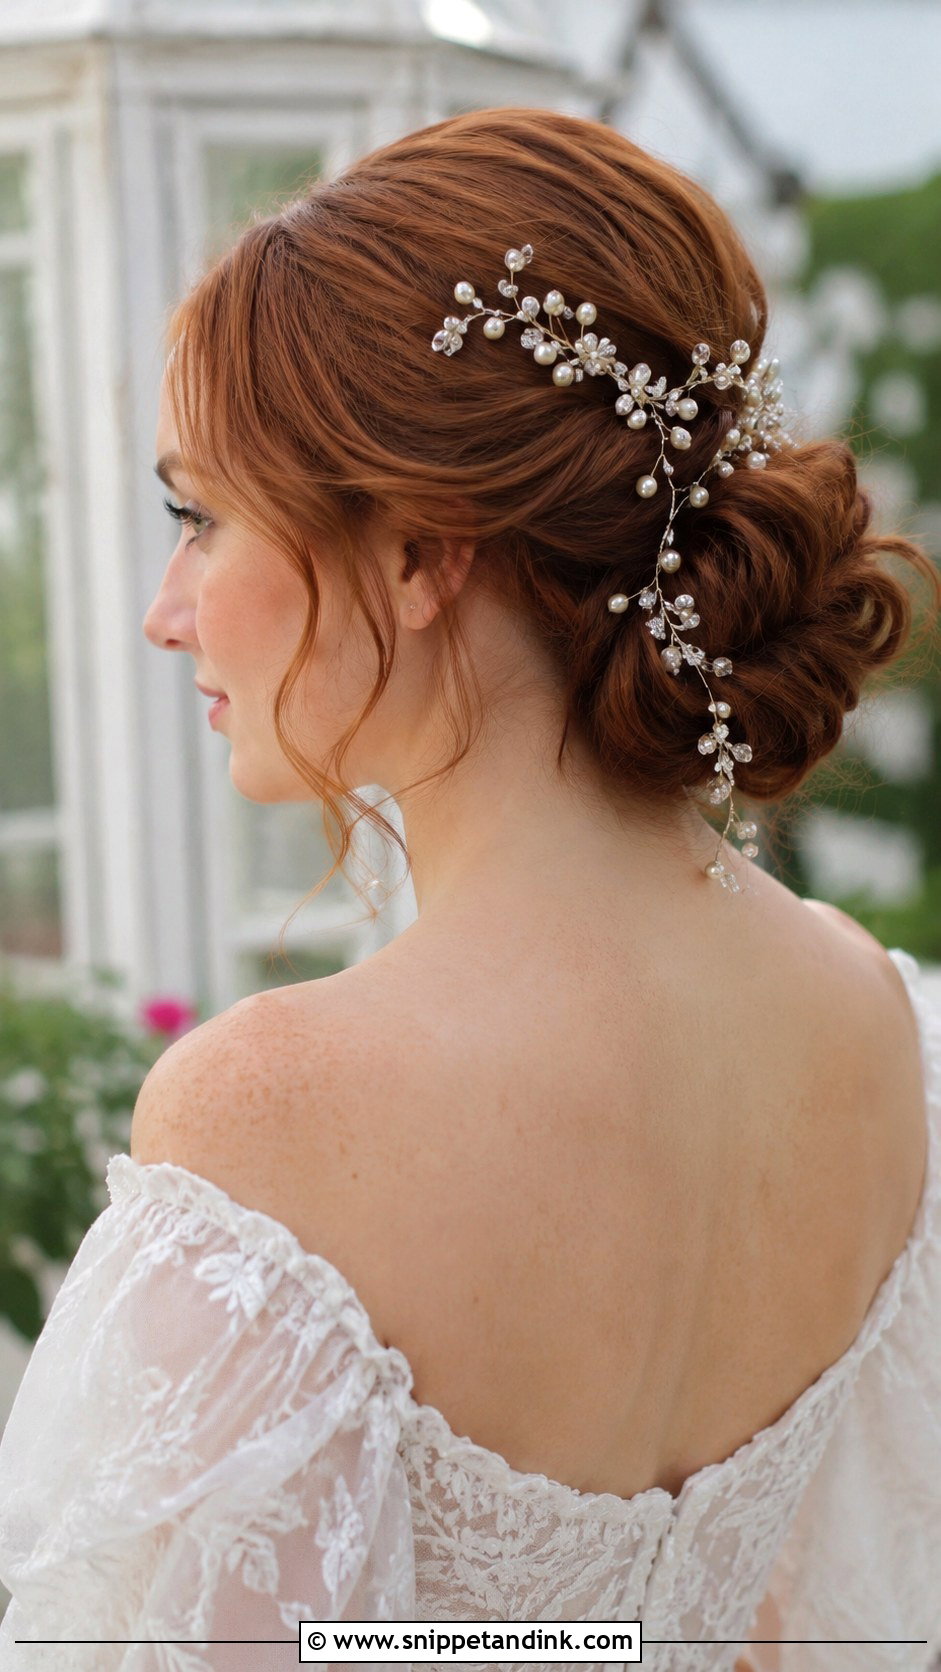
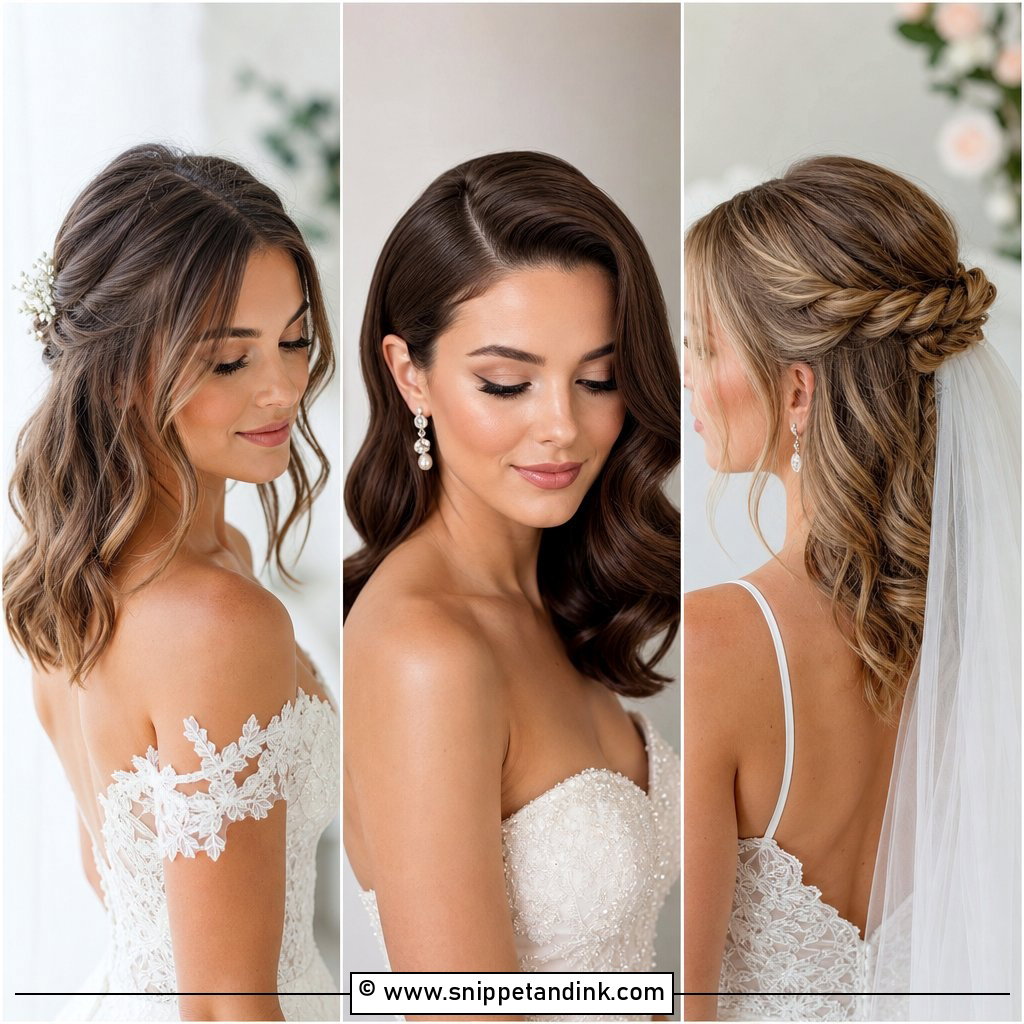
A delicate hair vine turns a plain bun into the focal point without the weight of a crown. The wire is flexible, so I shape it around the bun and secure it with small pins at both ends and every few centimeters along the way. The pins go through the loops and into the base, not into loose hair, or the vine sags as the style relaxes through the day. Bring the vine to your trial. Some are longer than they look online and need trimming or doubling back.
16. Low Bun With Veil
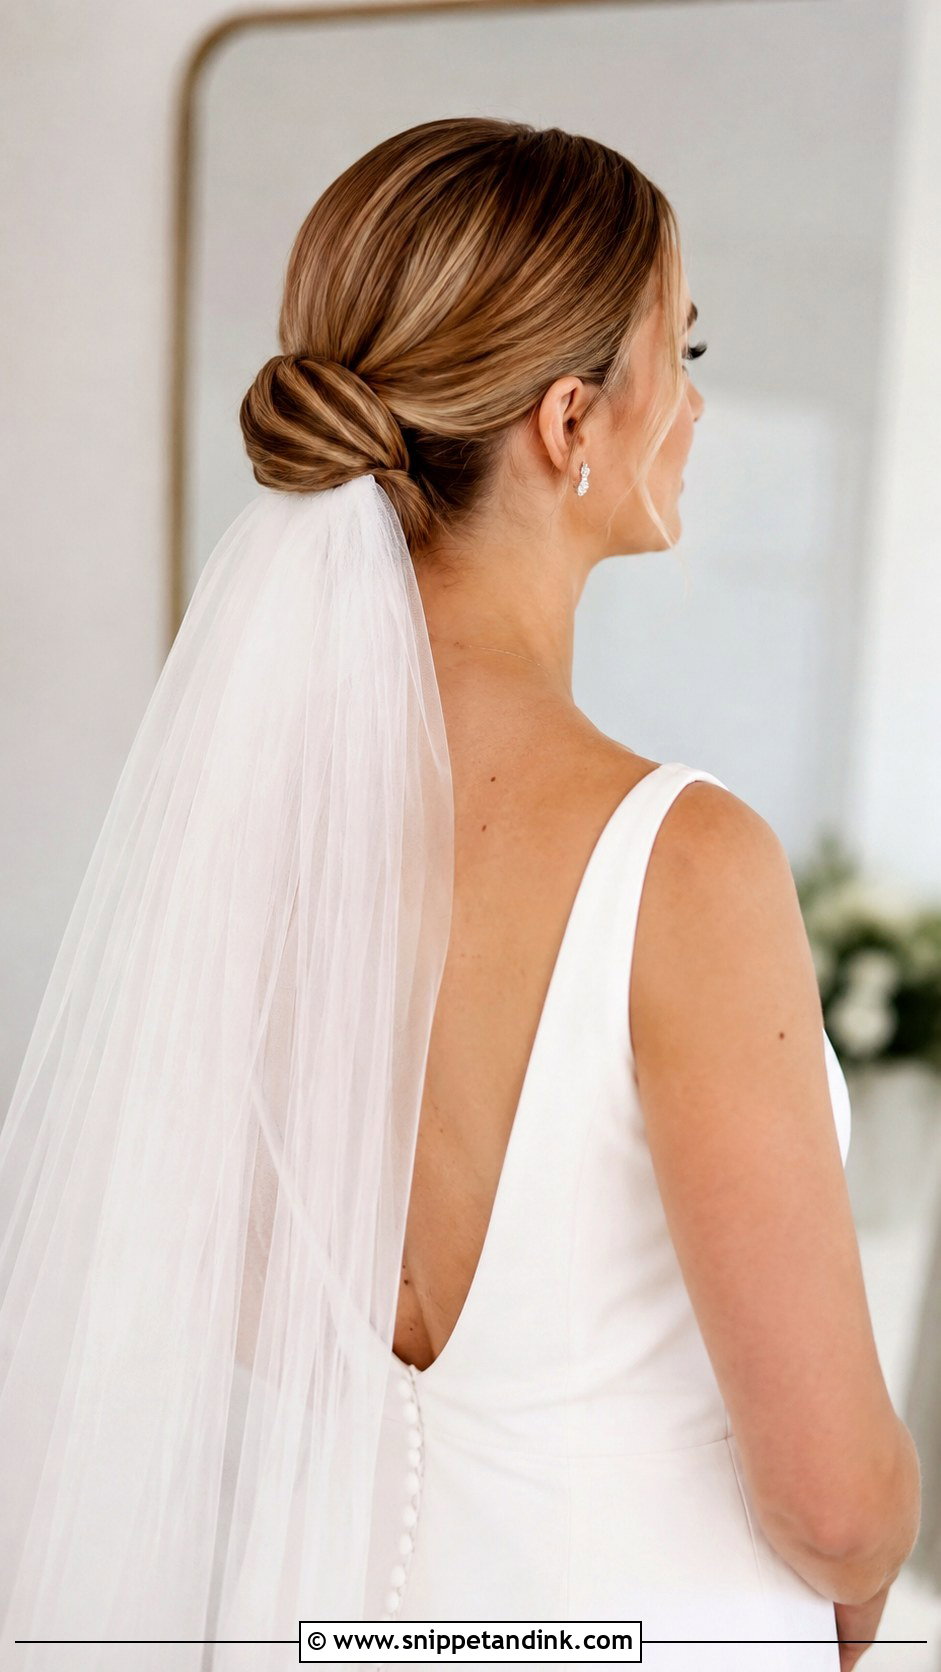
This is the classic pairing, and it works because a low bun gives the veil comb a firm base. I usually set the comb just above the bun so the tulle falls cleanly behind; for heavier, longer veils I place it underneath, where the bun supports the weight. Plan how the veil comes off before the reception, and make sure whoever helps knows to slide the comb out gently rather than tug. A birdcage veil normally sits at the front and side, so with that style the bun’s exact placement matters less.
17. Rolled Banana Bun
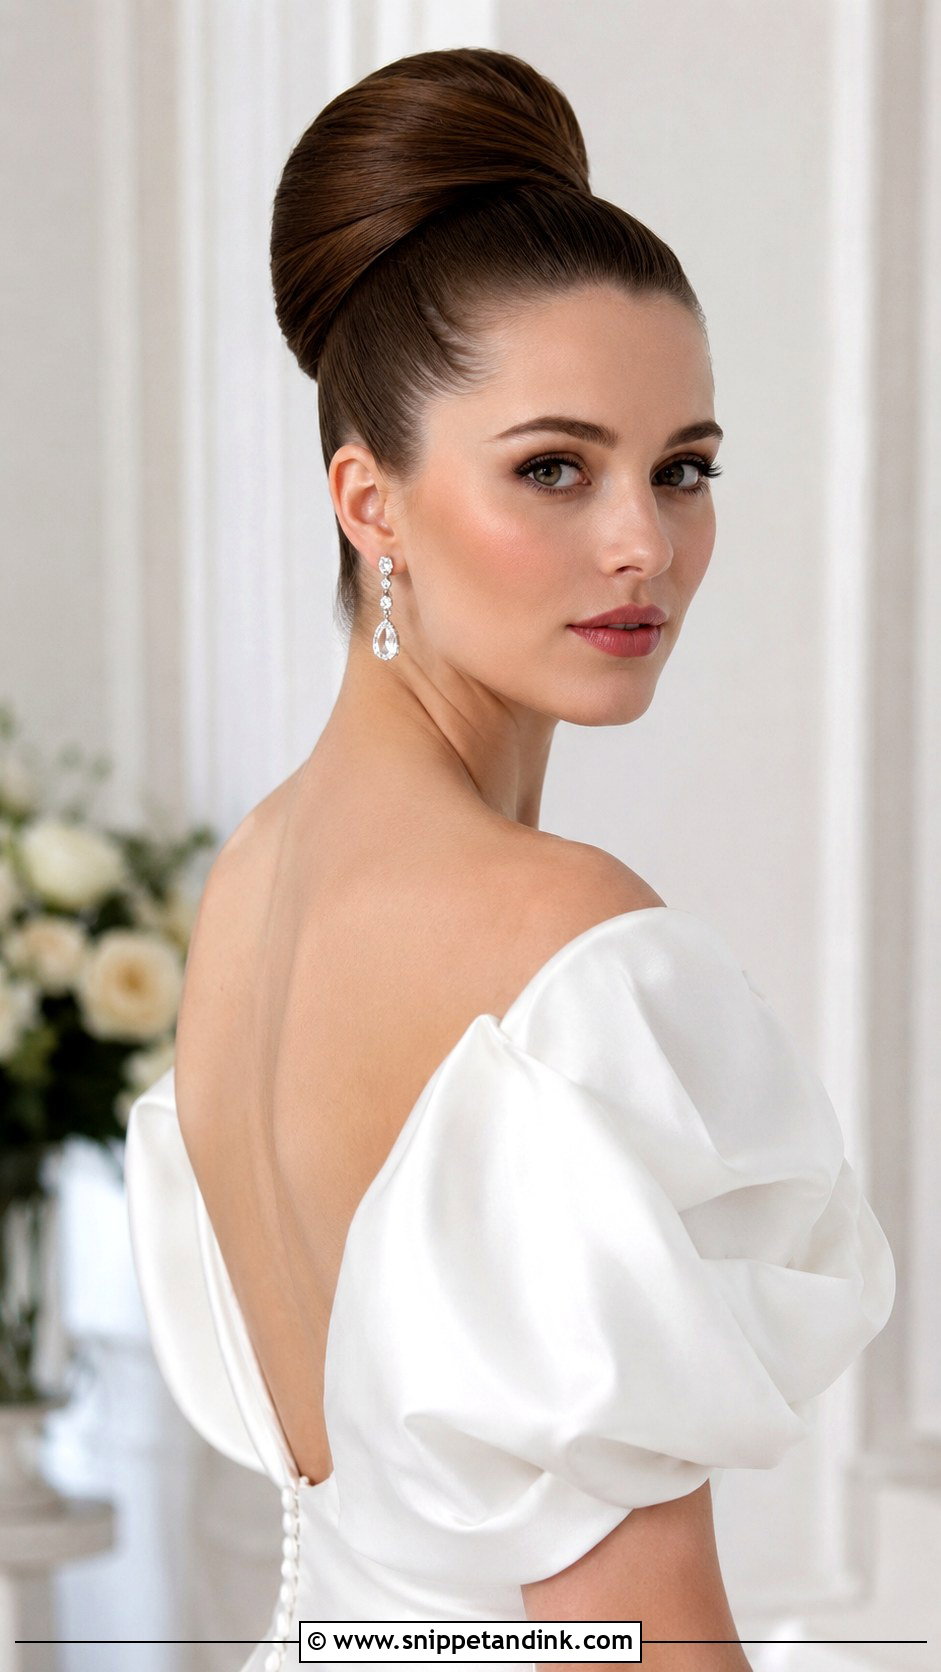
The rolled banana bun, also called a roll updo, is a vertical roll along the back of the head with an old Hollywood feel. It needs medium to long hair that’s been set with heated rollers for grip; silky, freshly washed hair simply unrolls. I backcomb the inside lightly and pin along the seam with long U-pins hidden under the edge. It looks right with formal gowns and drop earrings. If you love retro-inspired beauty, add soft waves at the front to complete the period look.
18. Textured Bun With Flowers
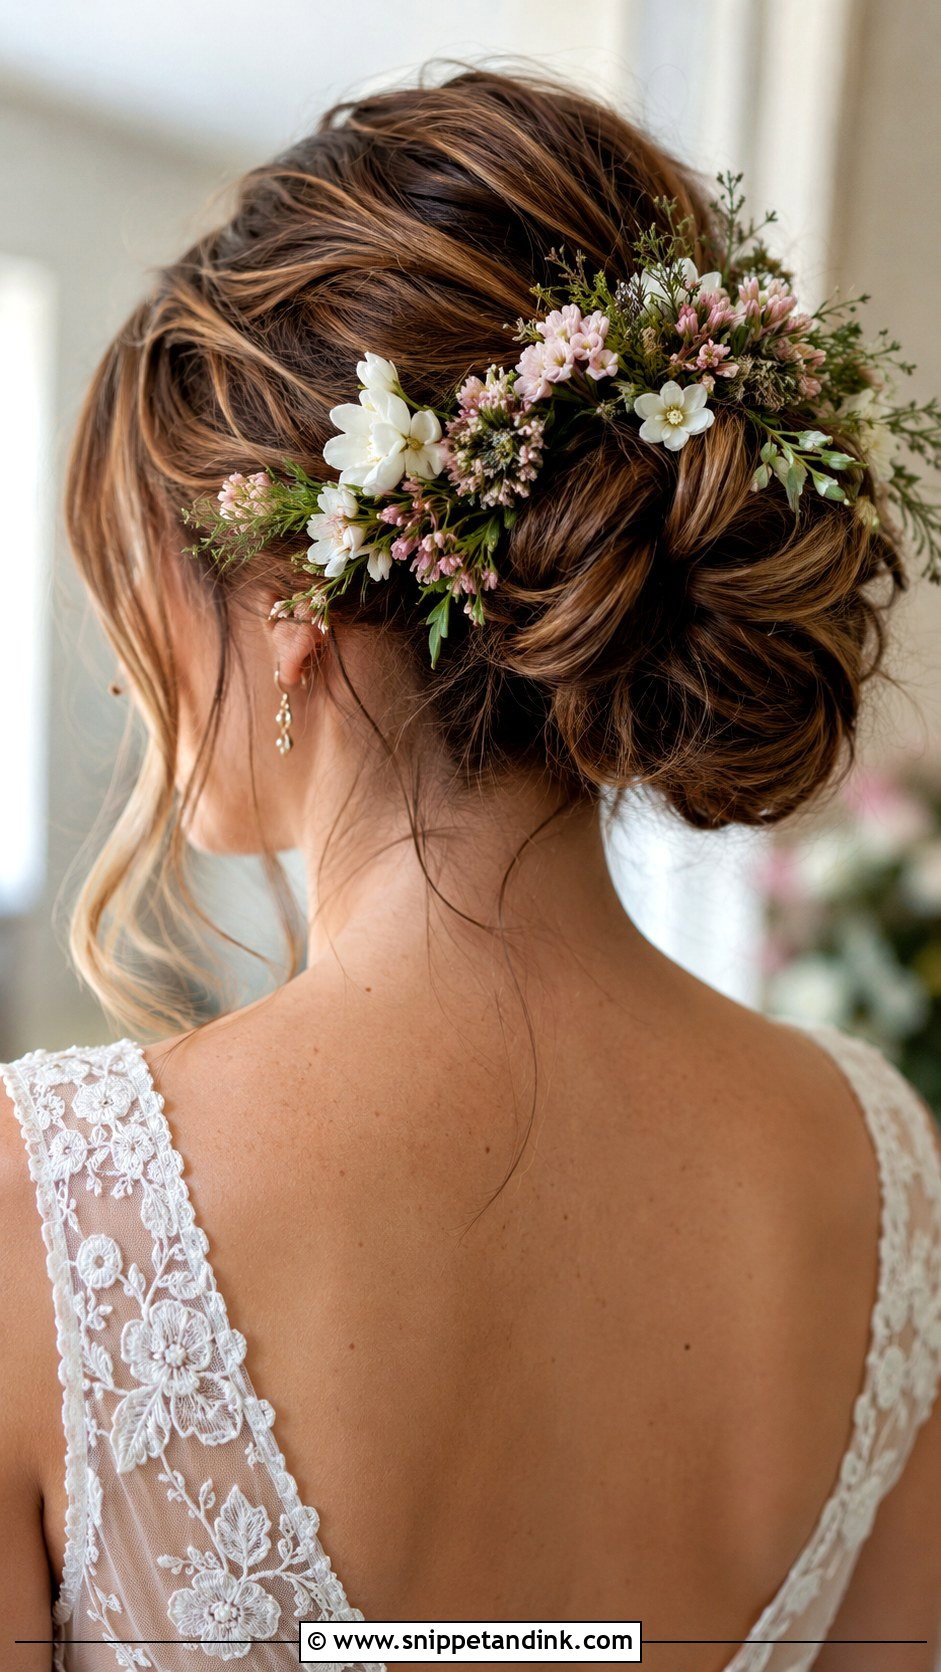
Fresh flowers in a bun need planning with your florist. Sturdy blooms like spray roses, orchids and waxflower hold up for hours out of water, while gardenias brown at the edges and hydrangea wilts quickly in warm weather. I ask the florist to wire and tape the stems, then pin them into the textured base of the bun so they can’t spin. Small buds give a subtle touch; one large bloom is heavier and needs a firmer anchor. Keep the flowers chilled until the last minute.
19. Bun With Side-Swept Bangs
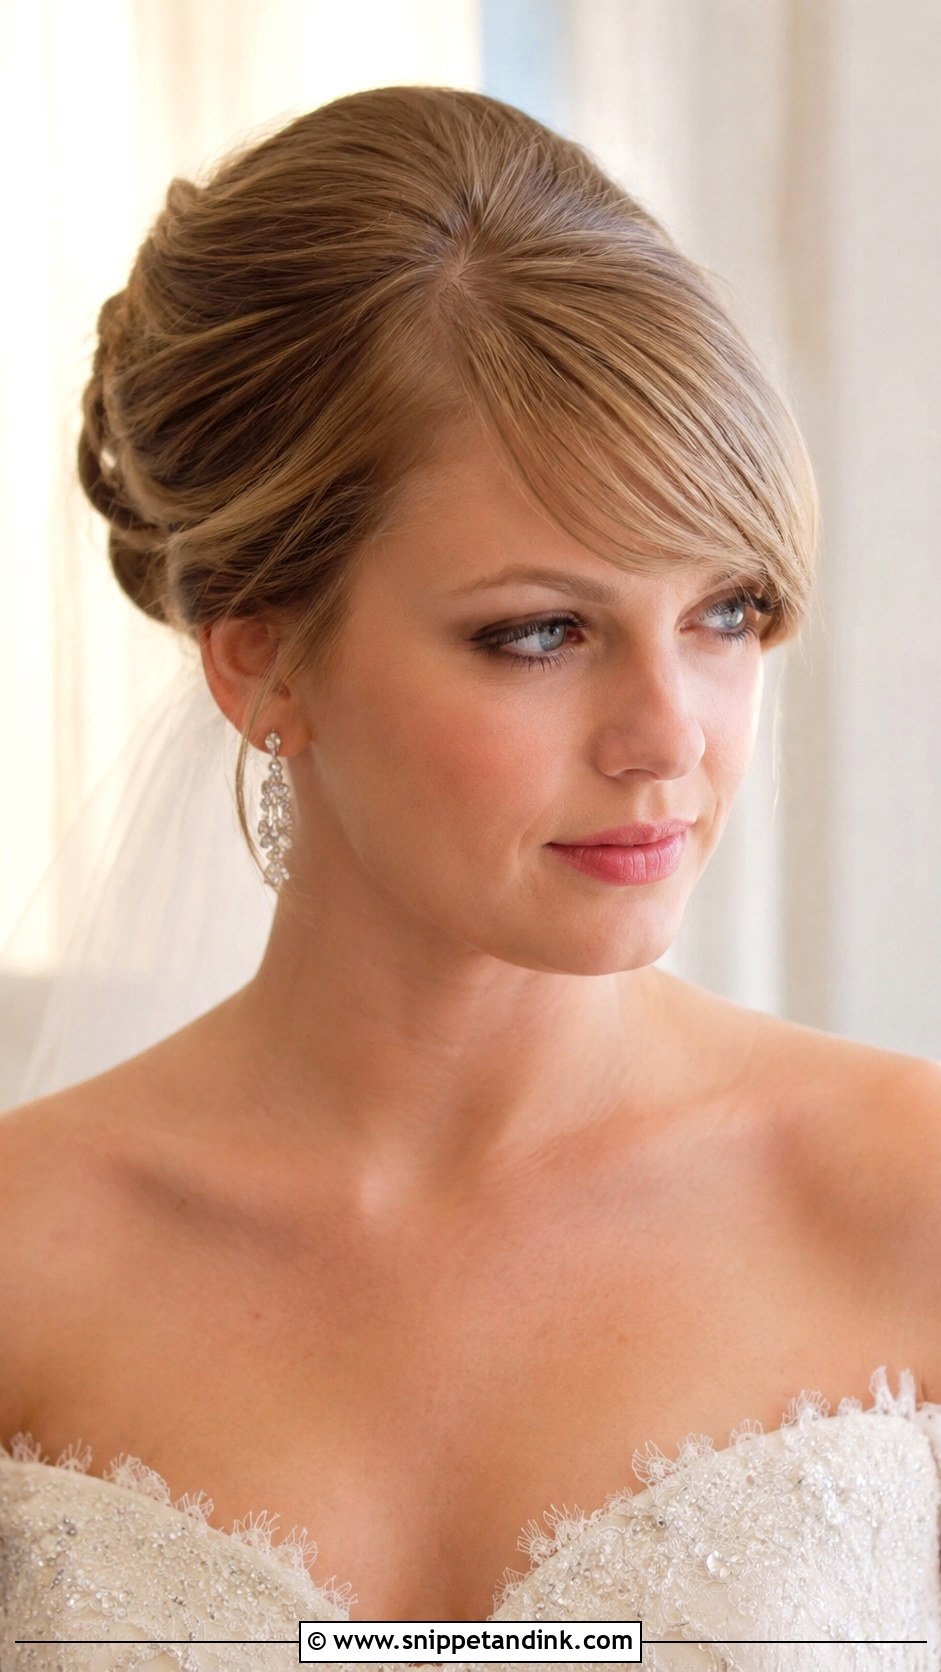
Side-swept bangs soften a bun around the forehead and suit brides who already wear a fringe day to day. I wouldn’t cut new bangs just for the wedding. Give any fresh fringe a few weeks to settle, or have it cut at your trial so you can see it styled. I blow-dry the bangs in the direction they’ll sweep, then set them on a large velcro roller. Oily skin on the forehead can separate a fringe by afternoon, so a dusting of powder or dry shampoo at the roots helps.
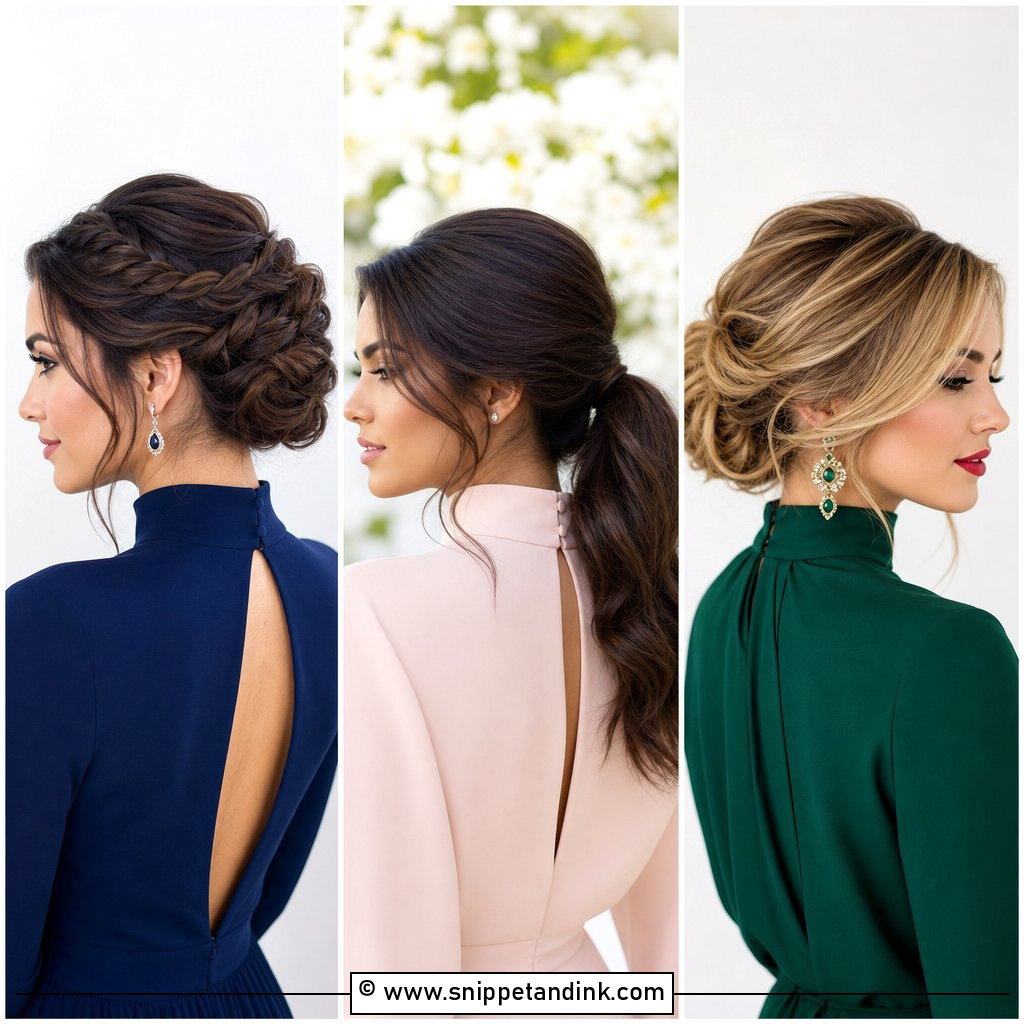
20. Halo Braided Bun With Accents
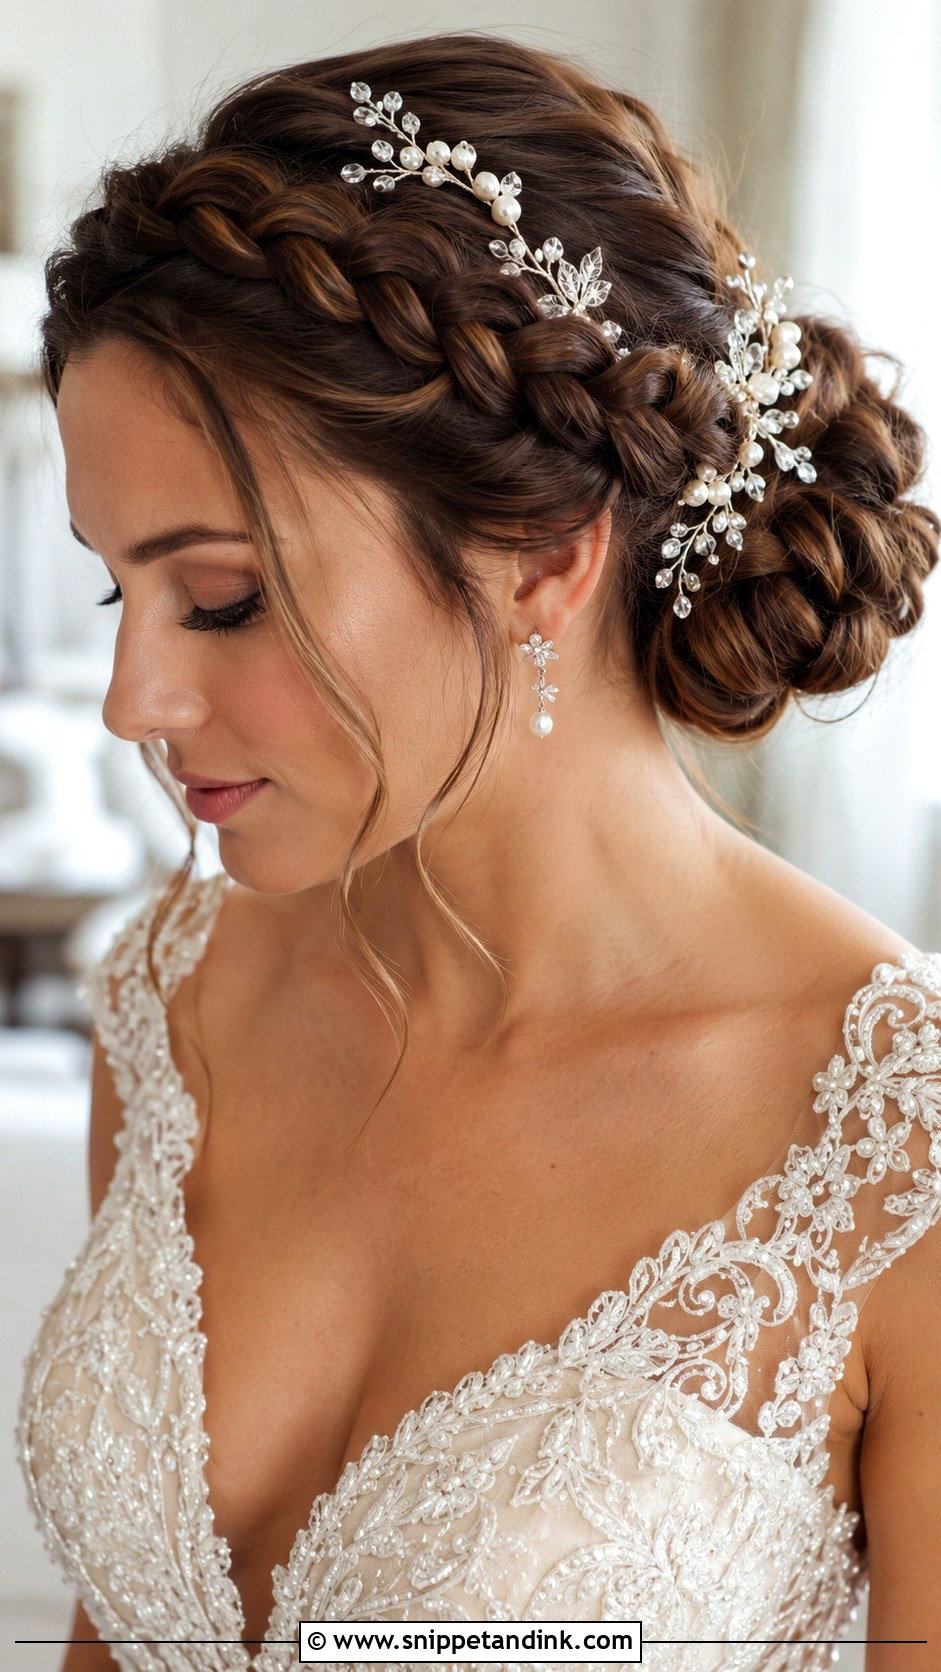
The halo braided bun combines a wrapped braid with a soft bun and then adds crystals or jeweled pins. It’s the most decorated style here, so I’d balance it with simple earrings and a clean neckline. Every accent adds weight, and lots of small pins can pull at fine hair by evening, so I use fewer, better-placed pieces anchored into the braid itself. Grand formal venues suit it best. Match the metal tone of the accents to your jewelry so the sparkle looks planned.
What Keeps a Bun Up Until Midnight
Most buns that drop do so for one of three reasons: the hair was too clean and slippery, the base was weak, or the pins went into loose strands instead of the anchor. Here’s how I prevent each one.
- Wash the day before, not that morning. Second-day hair has a little natural grip. If your roots get oily fast, wash the evening before and keep conditioner to the ends.
- Arrive with hair completely dry and free of heavy oil or silicone serum, which makes pins slide.
- Let your stylist build an anchor first: a secured ponytail, a small braid or a backcombed section that the rest of the hair pins into.
- Expect different pins for different jobs. Bobby pins work on flat sections, U-pins hold volume and rolls, and spin pins grip thick or curly hair.
- Ask for a few spare pins and a travel-size hairspray to go in a bridesmaid’s bag.
Humidity is the other enemy. Fine and naturally curly hair take on moisture and swell or drop in damp air, so for outdoor summer weddings I lean toward braided or twisted buns, which still look intentional when they relax a little.
Adapting a Bun to Fine, Thick or Shorter Hair
Fine hair
Use texture spray and light backcombing at the base, and consider a small padding piece in your own hair color. Clip-in extensions add bulk to a small bun, and once they’re pinned inside nobody can tell.
Thick hair
Here the problem is weight, not volume. I break up the bulk by braiding or twisting sections before coiling them, which makes a tighter, lighter bun that won’t drag downward by evening.
Hair at or just past the shoulders
A low bun is usually possible, though layers will escape. A braided or twisted bun hides short ends better than a smooth chignon. If you’re planning a haircut before the wedding, keep the length until after your trial.
What Every Good Bun Has Underneath
Whichever shape you love, the parts nobody sees decide how long it lasts: hair with a little grip, a solid anchor, pins set into the base rather than loose strands, and a finish suited to your weather. Look at your hair length, your veil and the back of your dress before you fall for a photo. Then bring the images you like to your trial along with your headpiece, so your stylist can show you how the shape actually sits on your own head.
You'll Like These Ideas:


Leave a Reply