
A sleek bun looks simple in a photo and is anything but simple in the chair. Most of the work happens before a single pin goes in: a smooth blow-dry, the right amount of product and a part placed exactly where you want it. Done well, it sits comfortably under a veil, keeps a high neckline clear, works just as well with strapless dresses, and looks the same at the last dance as it did at the ceremony. The ideas below run from a low knot at the nape to a high ballerina bun, and I’ve added notes on what each one asks of your hair so you can walk into your trial knowing which shapes are realistic for you.
The Prep That Keeps a Sleek Bun Smooth for Twelve Hours
A slick finish comes from the blow-dry, not from the gel. When hair is dried rough and then slicked, the product sits on top of the frizz and lifts within a few hours. I dry with a paddle or round brush in the same direction the hair will be pulled, so the cuticle lies flat before any styling product goes on.
Wash day matters more than you’d think
Hair washed the day before usually grips pins better than squeaky clean hair, but fine or oily hair can look limp by evening if it’s left too long. I ask fine-haired brides to wash the night before and keep conditioner off the roots. Thick or coarse hair can usually go a day longer. And please skip any new treatment, colour or keratin in the final week; the wedding morning is not the moment to find out how your hair reacts.
The products, in the order I use them
- A light heat protectant before drying, since a sleek style needs more passes of heat than a loose one.
- A smoothing cream worked through the lengths: enough to tame, not enough to look wet.
- Gel brushed only along the hairline and part if you want a truly glassy front.
- A flexible hold spray applied with a clean spoolie on flyaways, rather than sprayed all over.
- Shine spray held at arm’s length, as the very last step.
Humidity undoes more sleek buns than anything else. If your ceremony is outdoors in summer, tell your stylist early. A humidity-resistant finishing spray and a slightly lower, tighter bun will outlast a loose, airy one by hours.
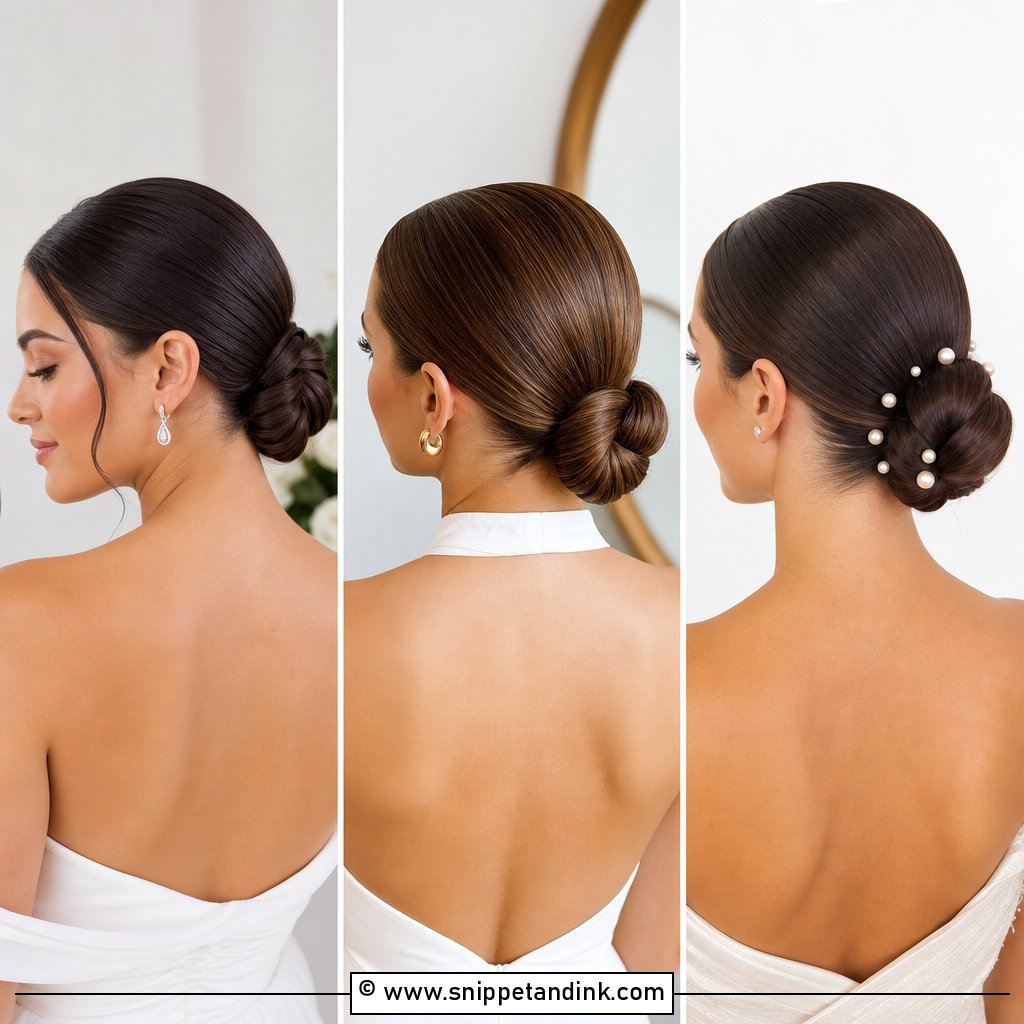
1. Sleek Low Bun Bridal Hair
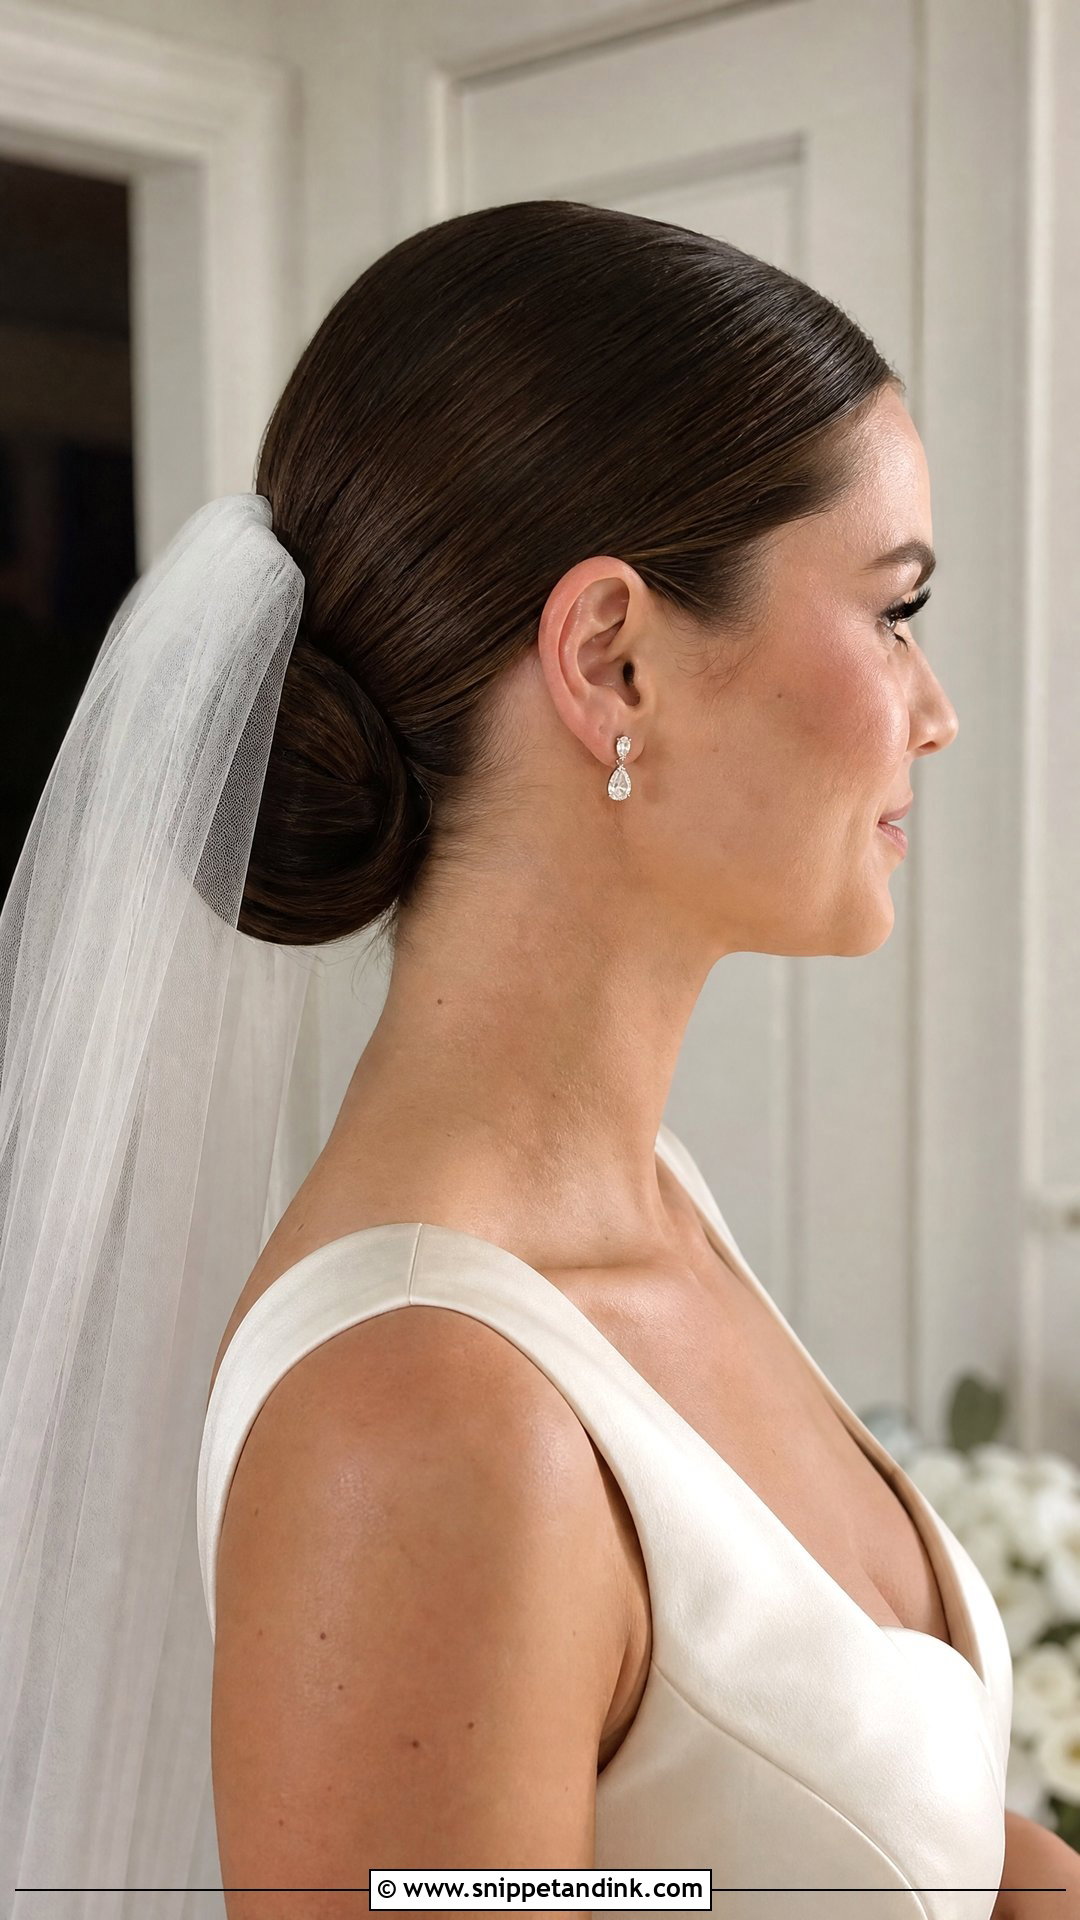
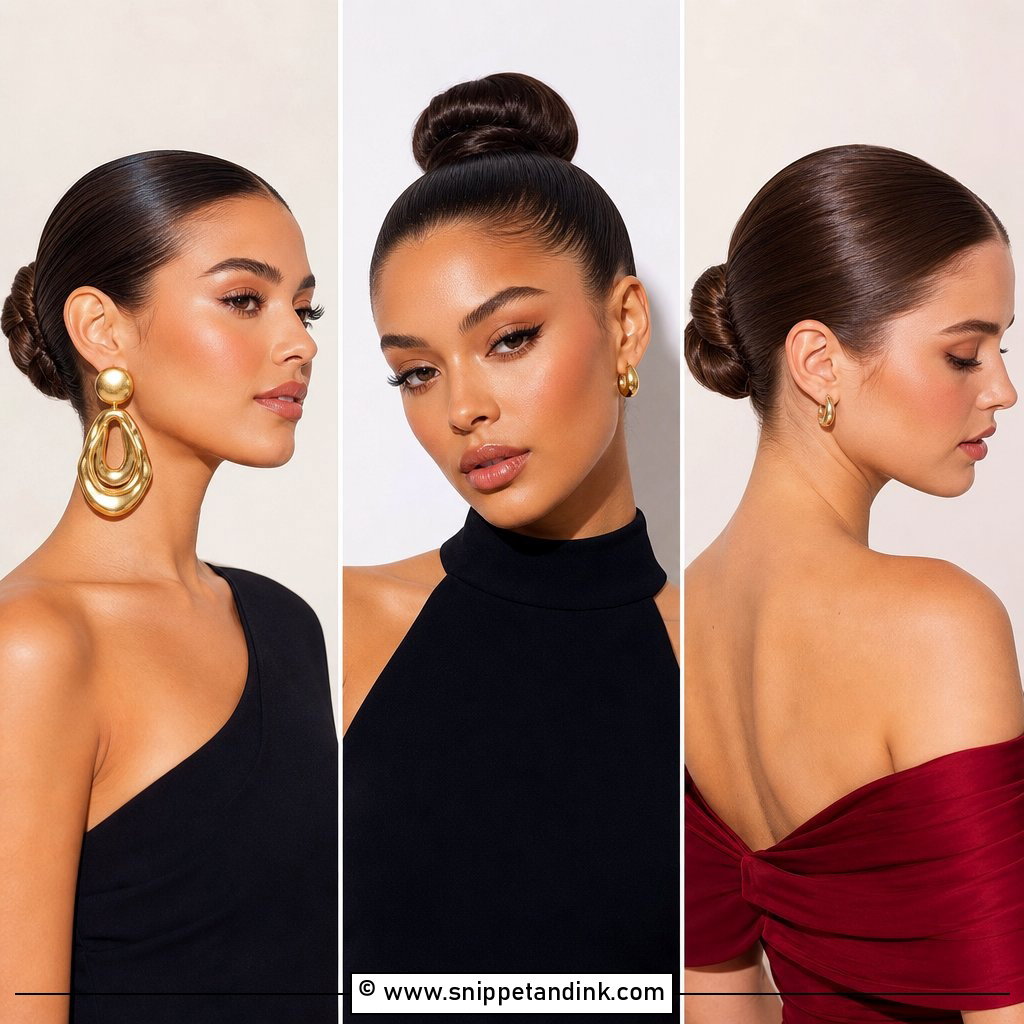
This is the bun I set most often, and the reason is practical. Sitting right at the nape, it gives a veil comb solid hair to grip and leaves the neckline completely open. I smooth everything back with a bristle brush, secure a ponytail with a thin elastic, then wrap and pin so the bun lies flat against the head instead of poking out. The fine-tuning happens at the hairline: I want shine there, but a few baby hairs softened with a little cream keep it from looking pulled. Lace, satin and a clean square neckline all sit well with it.
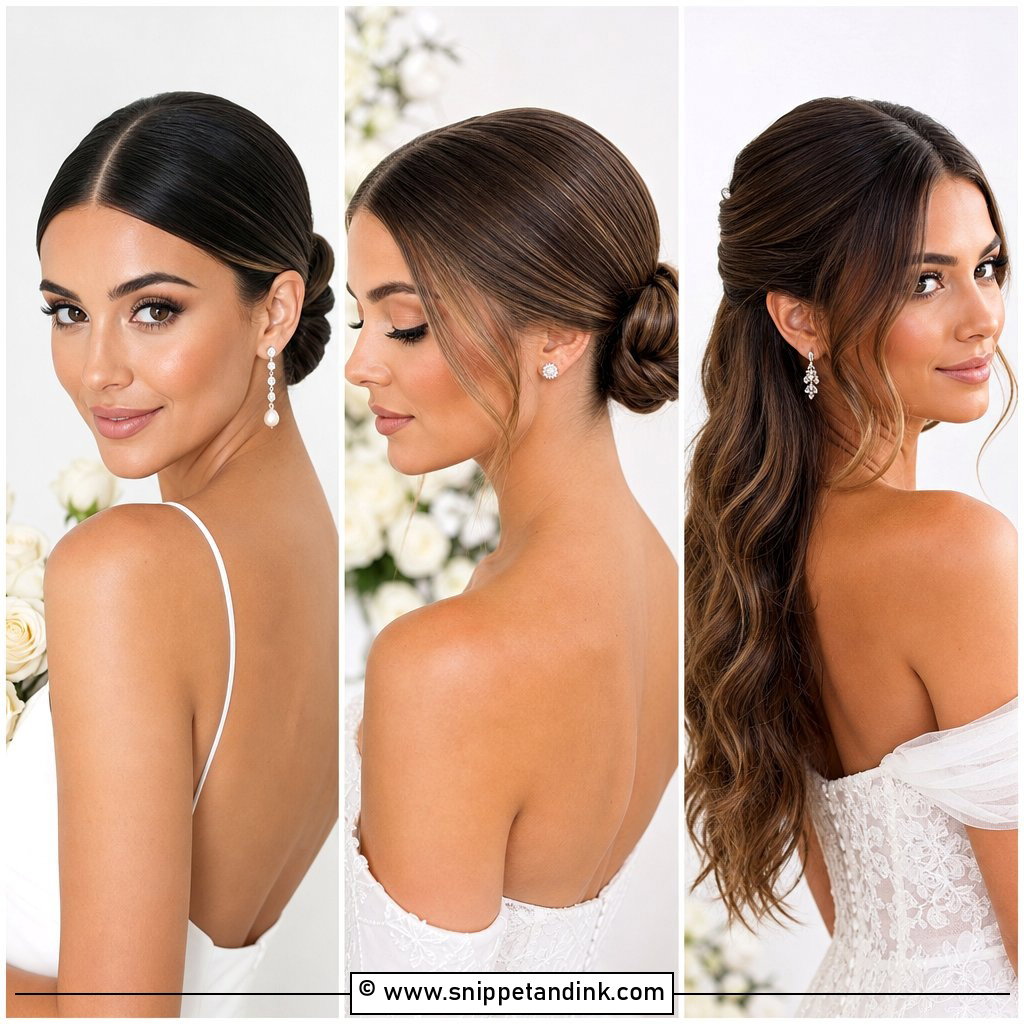
2. Sleek Center Part Bridal Bun
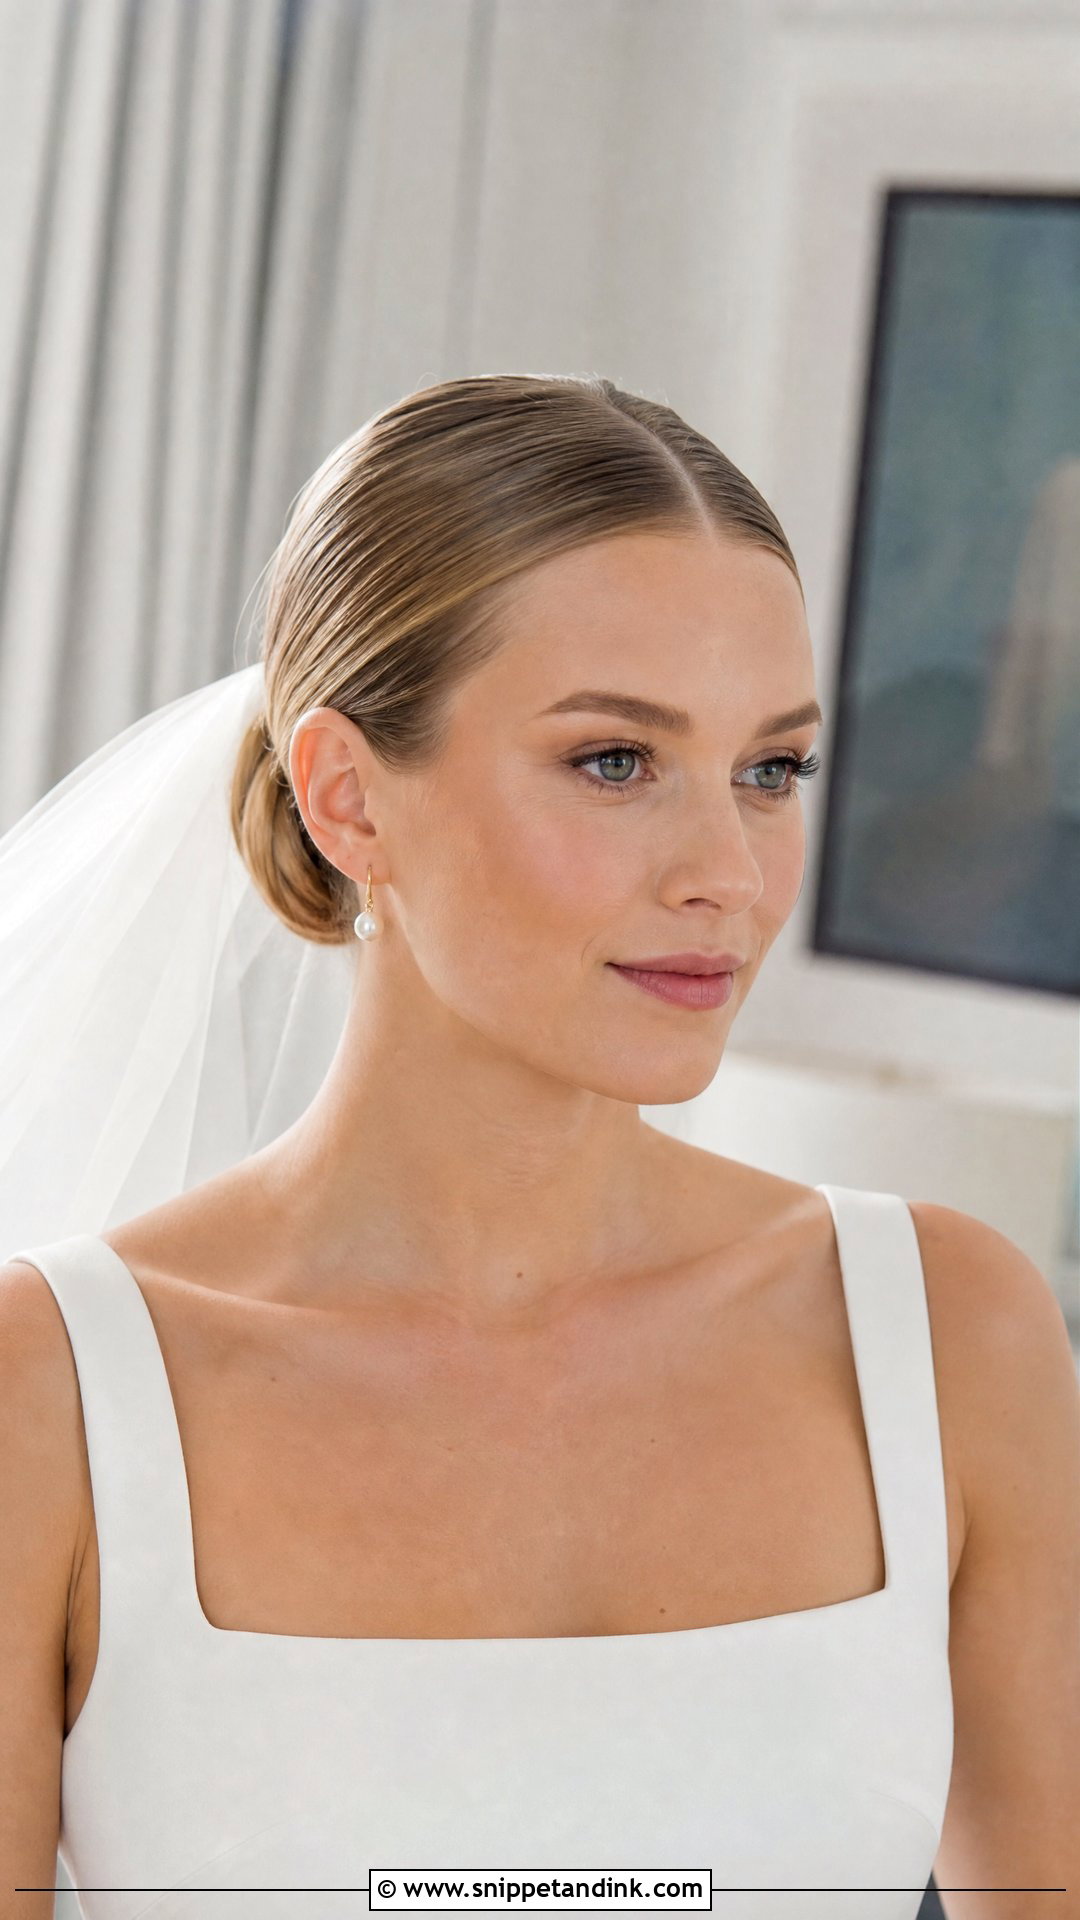
A center part is unforgiving, which is exactly why it looks so modern. Any wobble in the line shows in every front-on photo, so I draw it with the tail of a comb from forehead to crown and check it in the mirror before anything else happens. If one brow sits higher than the other, I sometimes nudge the part a few millimetres toward it and nobody notices but the bride. Worn tight, it reads editorial. Eased slightly over the ears, it softens enough for a garden ceremony, and the low or mid-low placement keeps the profile balanced.
3. Sleek Side Part Bridal Bun
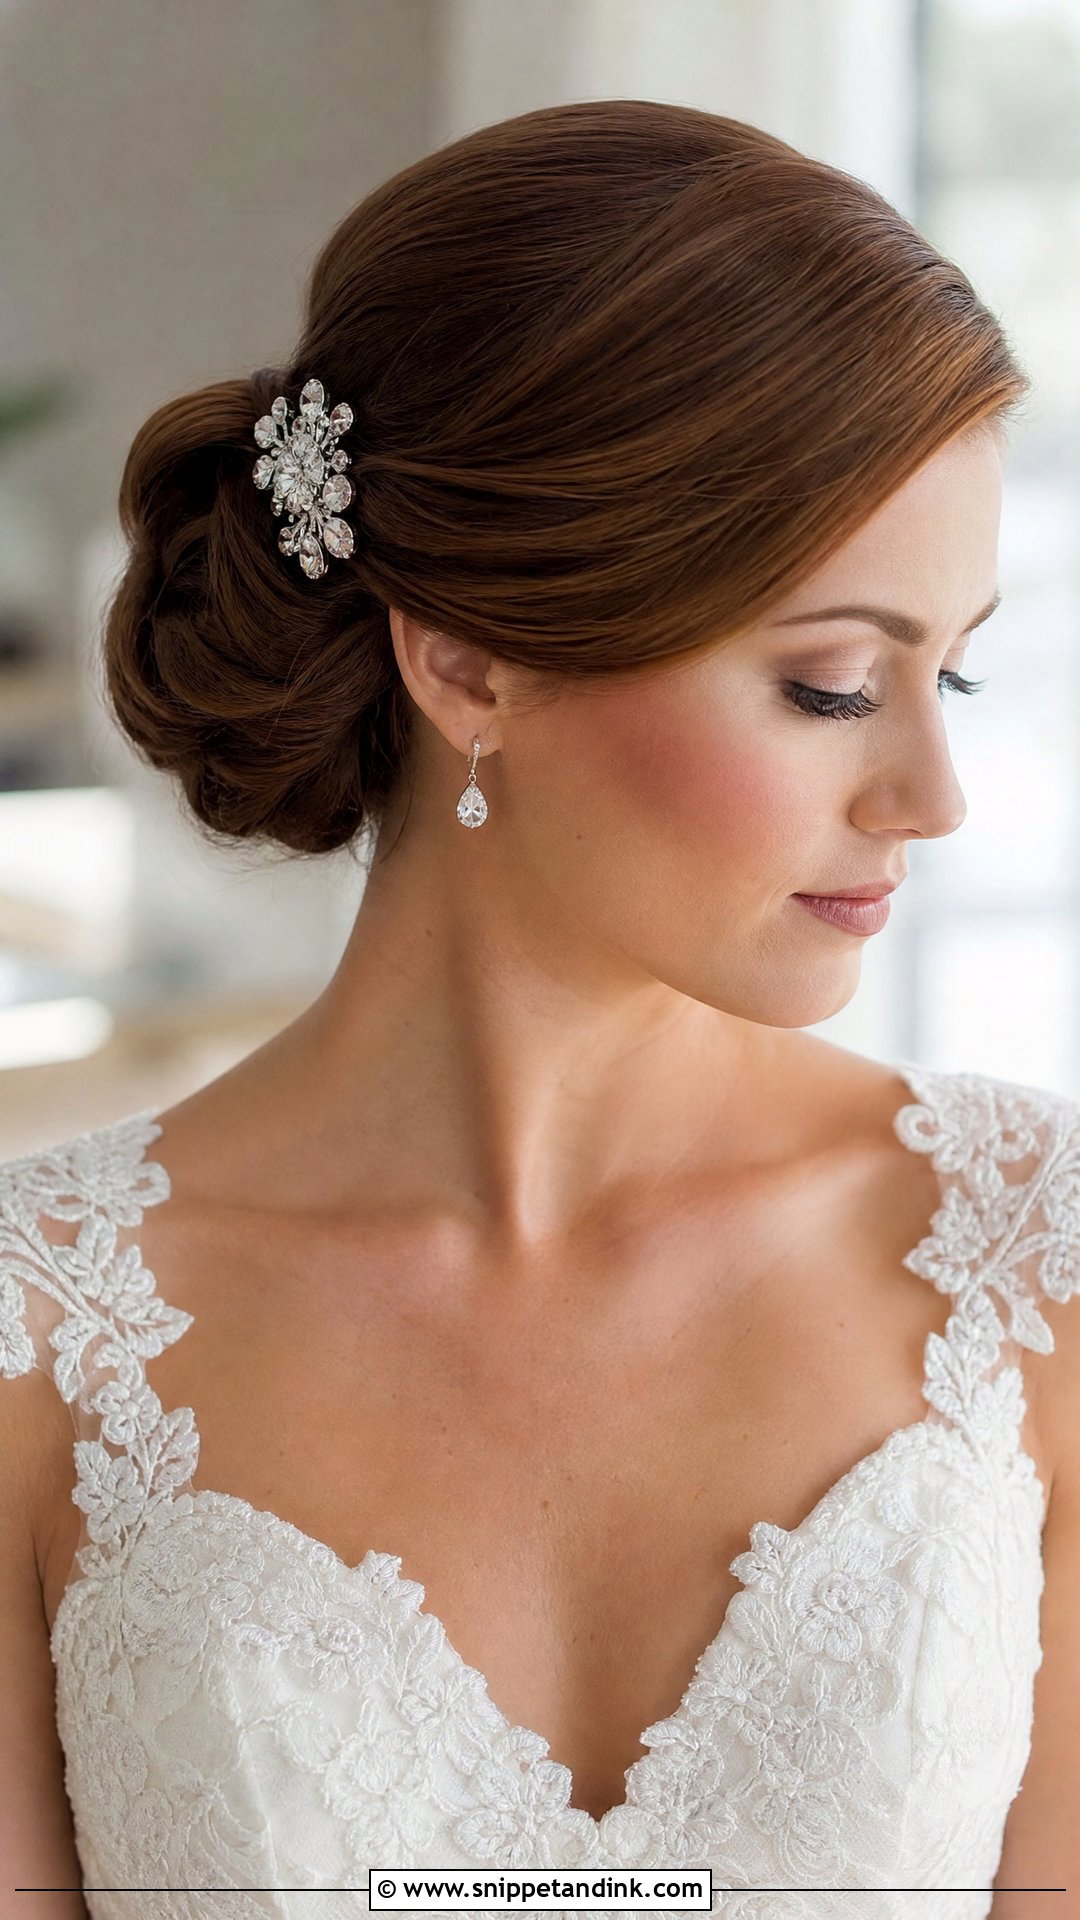
Moving the part to one side adds a sweep across the forehead, and that diagonal line is what flatters round, square, or heart-shaped faces by breaking up width. I usually follow the bride’s natural part or cowlick, because fighting a strong growth pattern all day ends with a section springing loose by the reception. The result leans a little vintage without feeling dated. Keep the bun compact if the dress already has volume or beading; a plain gown can carry a fuller bun and a side-swept veil.
4. Sleek Middle Part Low Bun
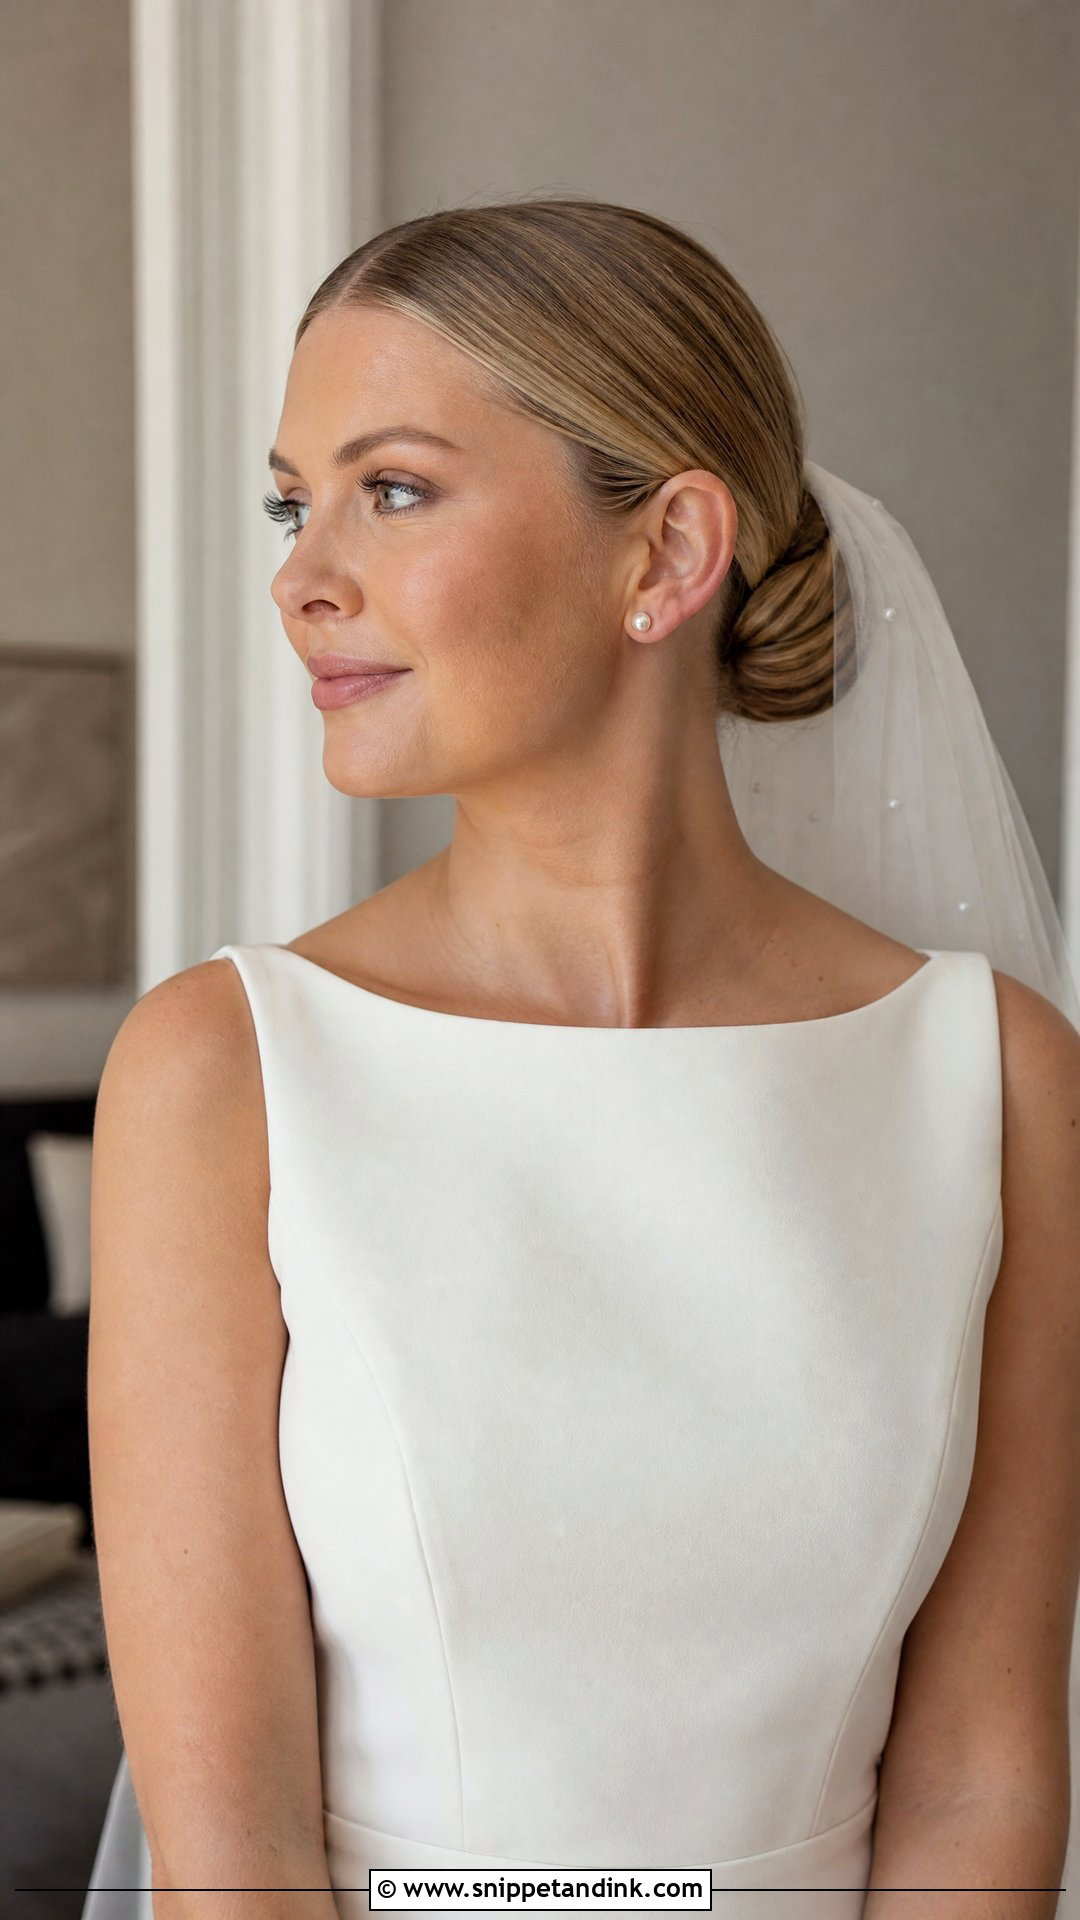
Shine is really the accessory in this version, so the condition of your hair matters as much as the styling. It shows off glossy brunette, black and deep auburn hair especially well, because dark colours reflect light in one clean band across the crown. Pale blonde can look flat when slicked, so on lighter hair I finish with a serum rather than adding more gel. If your ends are dry, a gloss treatment a week or two before the wedding is worth it. A strapless or high neck gown, a cathedral veil and two pearl pins are all it needs.
5. Sleek Bridal Chignon
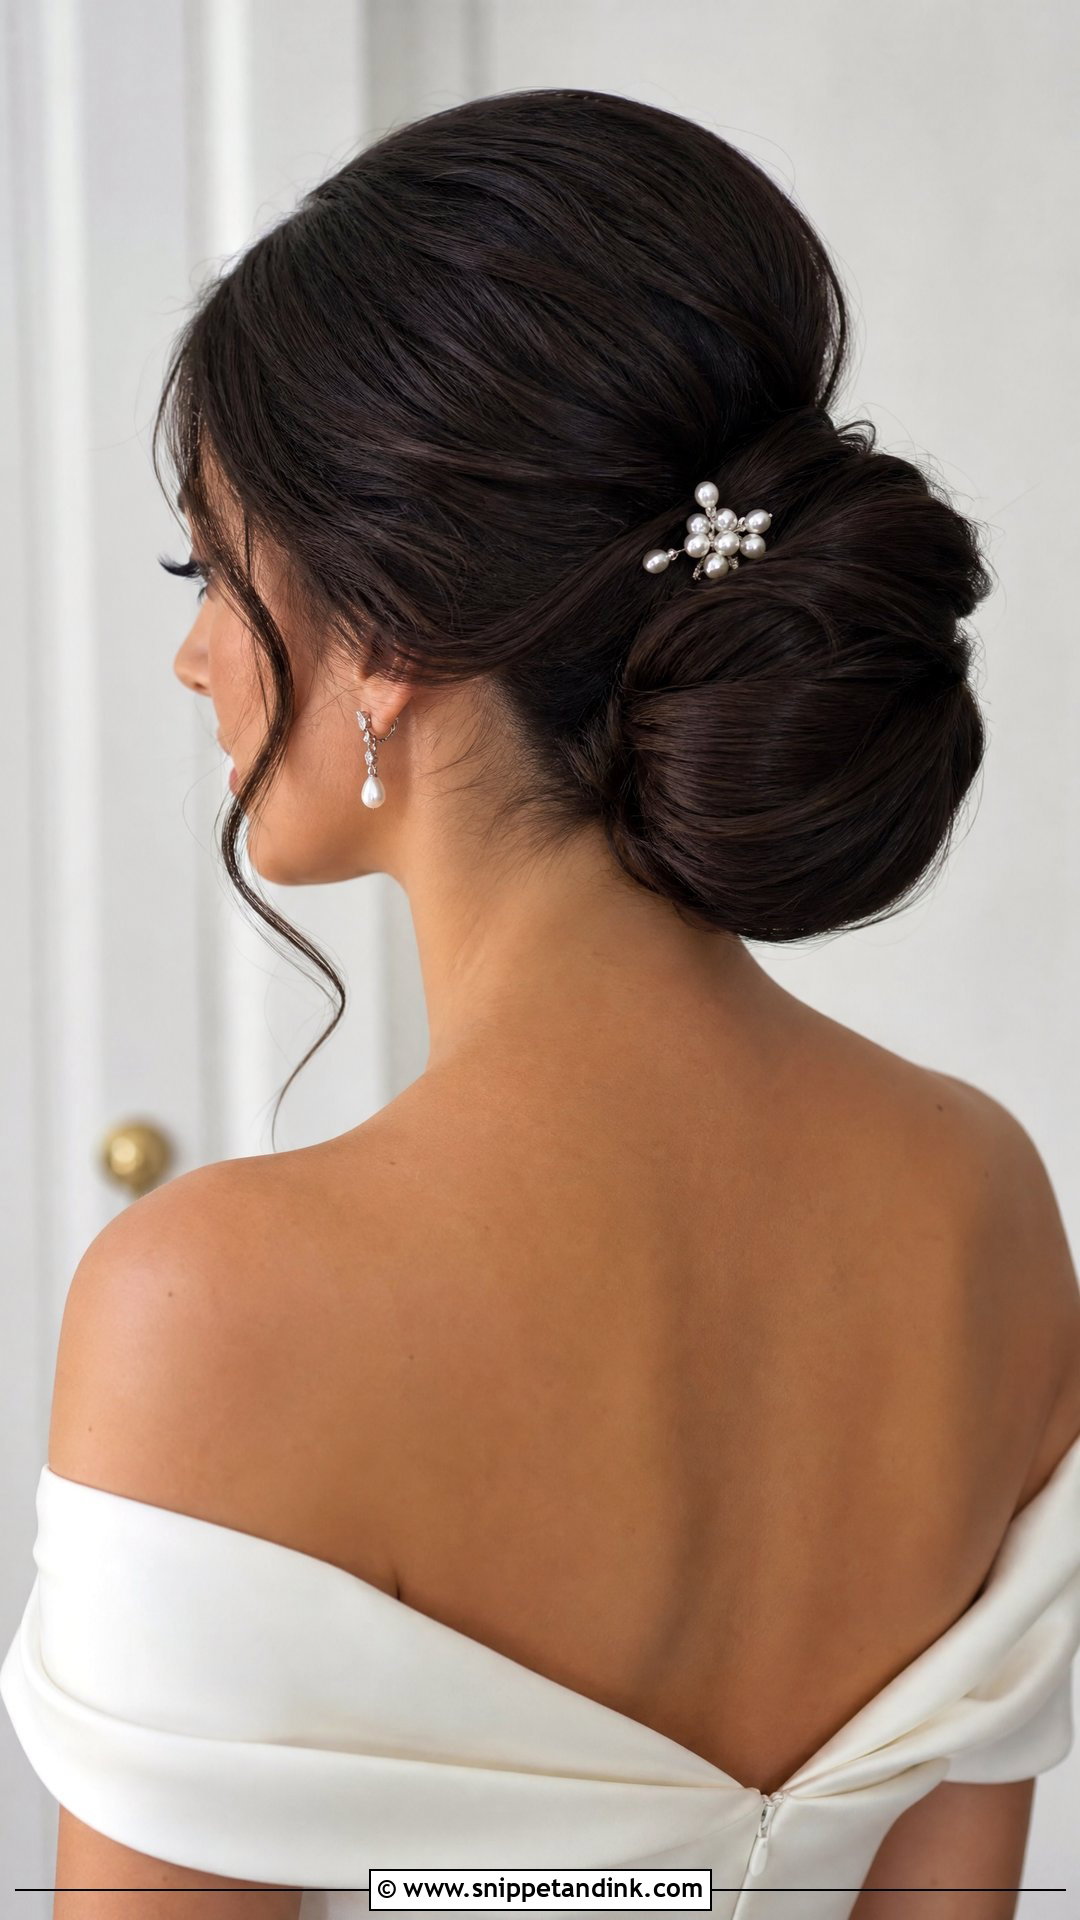
A chignon isn’t just a bun with a fancier name. Instead of wrapping hair around a ponytail, I fold and tuck the length into a sculpted roll at the nape, so it sits flatter and longer than a round bun. That shape is why it suits a church or ballroom ceremony, and why it survives a seated dinner: nothing presses into the chair back. You need hair at least past the shoulders to fold it without padding. A veil placed above it adds height, while tucking the comb underneath reads quieter.
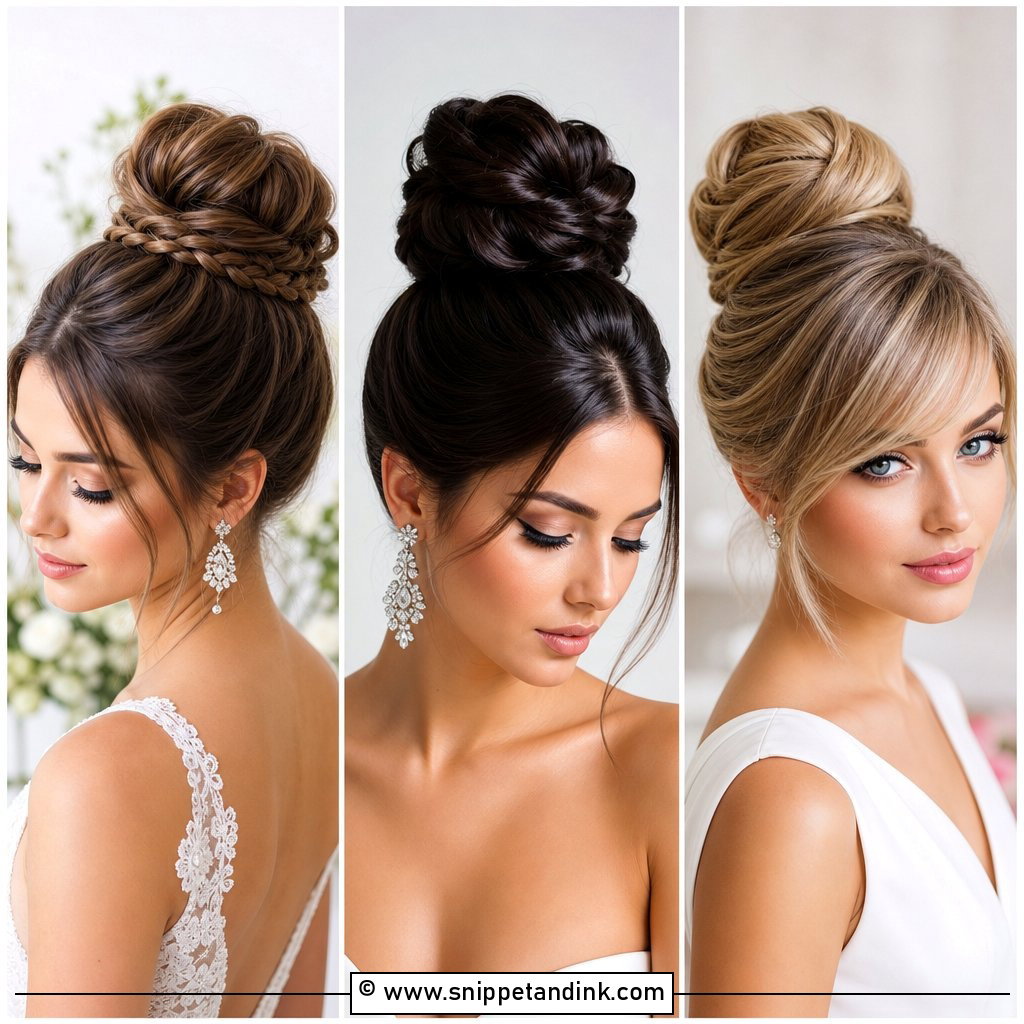
6. Sleek Ballerina Bun Bridal Hair
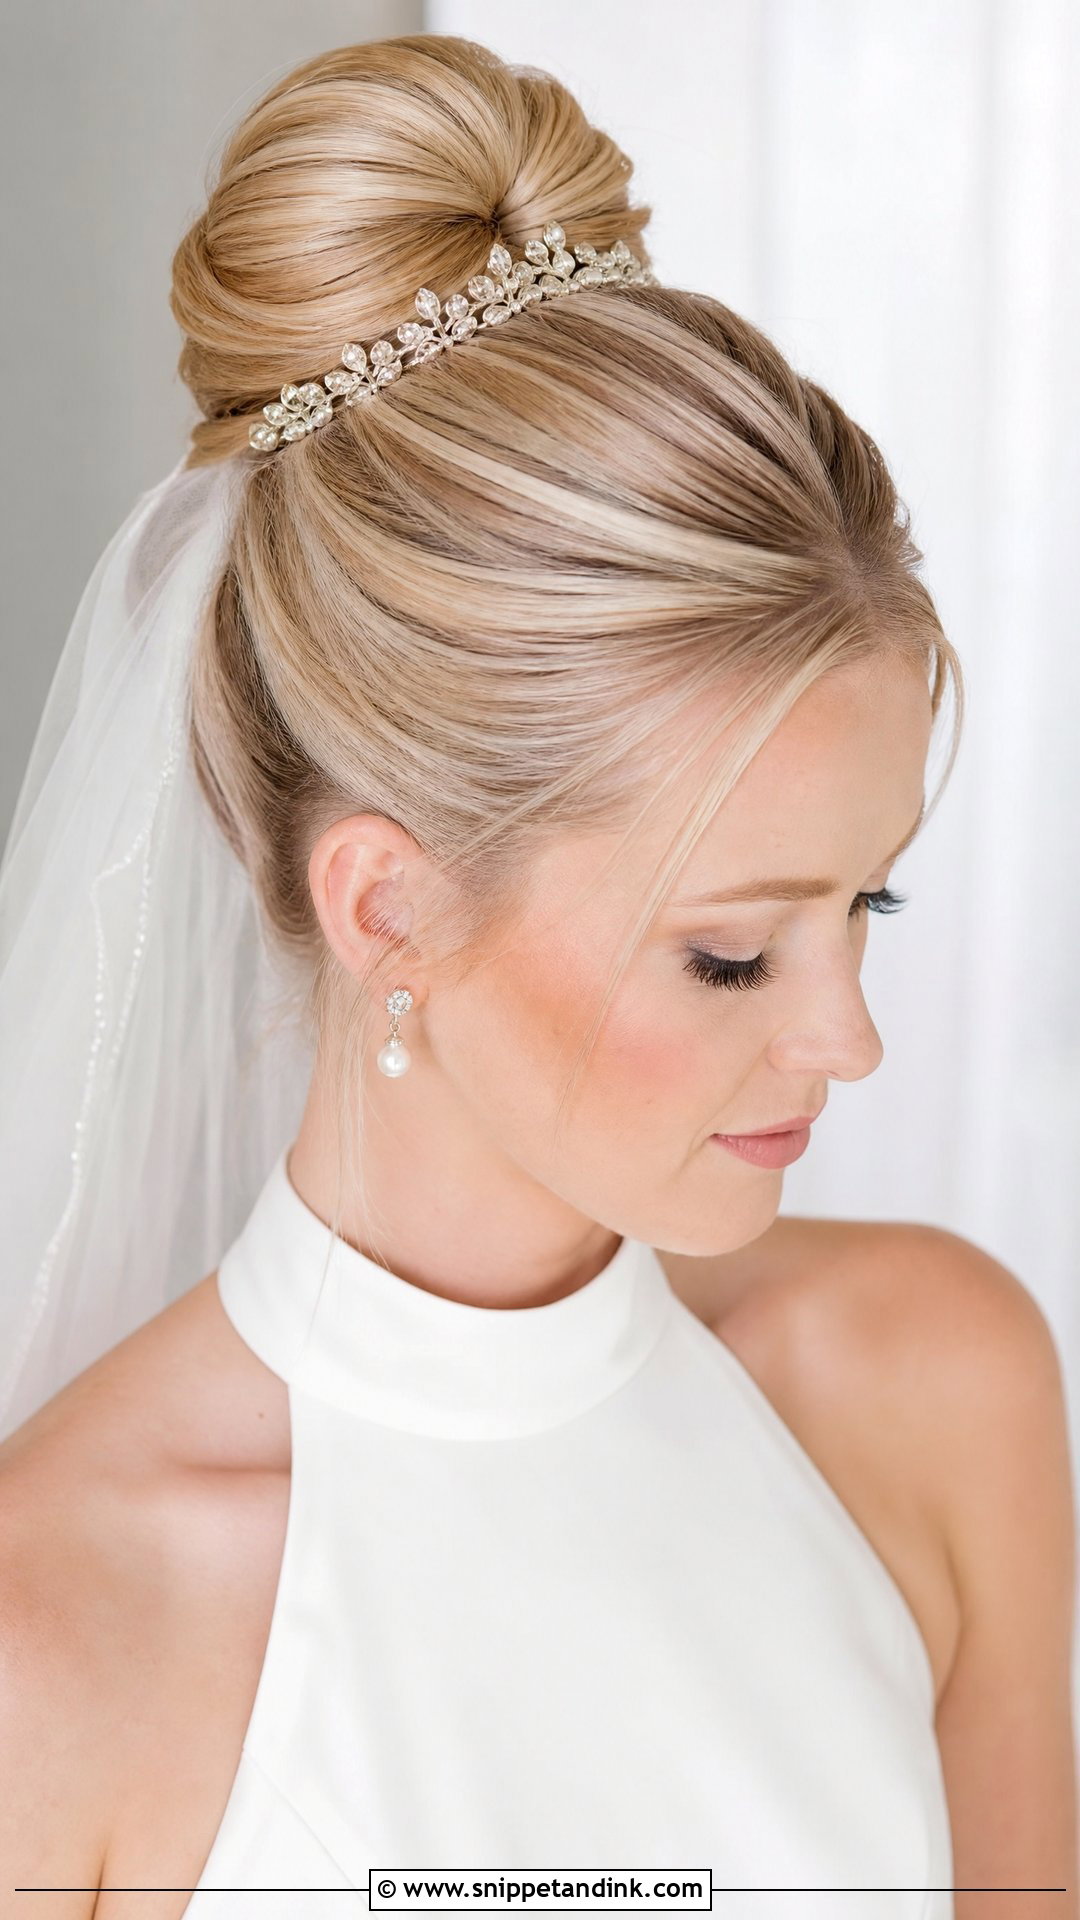
For an outdoor ceremony I trust the sleek ballerina bun bridal hair look more than anything else here, because a tight coil has no loose ends for the wind to catch. Placement changes the mood. At the crown it lifts the whole silhouette; at the nape it feels classic. Weight is the catch, since a long, thick ponytail coiled high can pull on the scalp by mid-afternoon, so with heavy hair I split the ponytail in two and wrap each half separately. Shine spray goes on at the very end, never before pinning, or the sections slide.
7. Sleek Knot Bun Bridal Hair
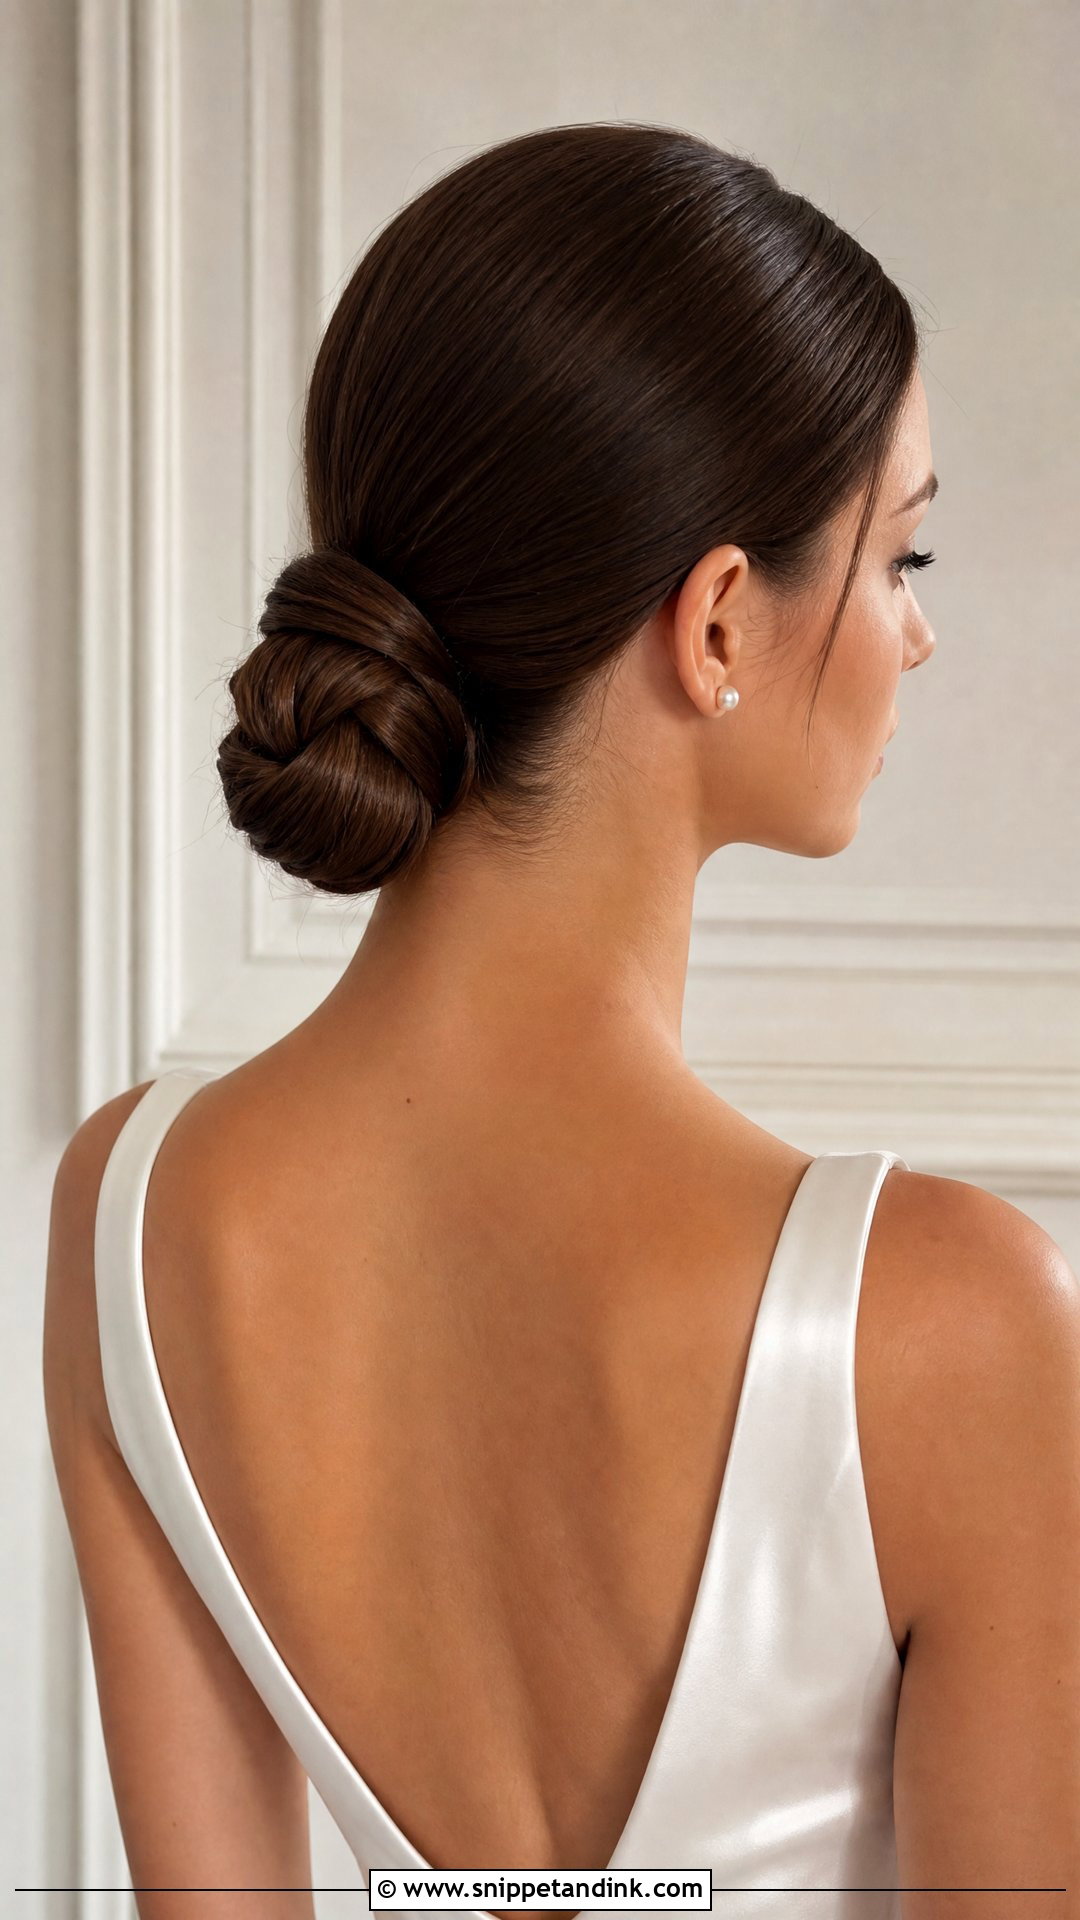
Here the hair is split and tied into an actual knot rather than coiled, which gives a crisp outline that sits well against clean satin gowns, column dresses and capes. The difference between intentional and untidy is section size. I work with two even halves, each smoothed with cream before tying; otherwise the strands separate and it starts to look like a gym knot. Set slightly off-center, it looks fashion-led. Centered at the nape, it stays classic and still feels a little different from a chignon.
8. Sleek Twisted Bridal Bun
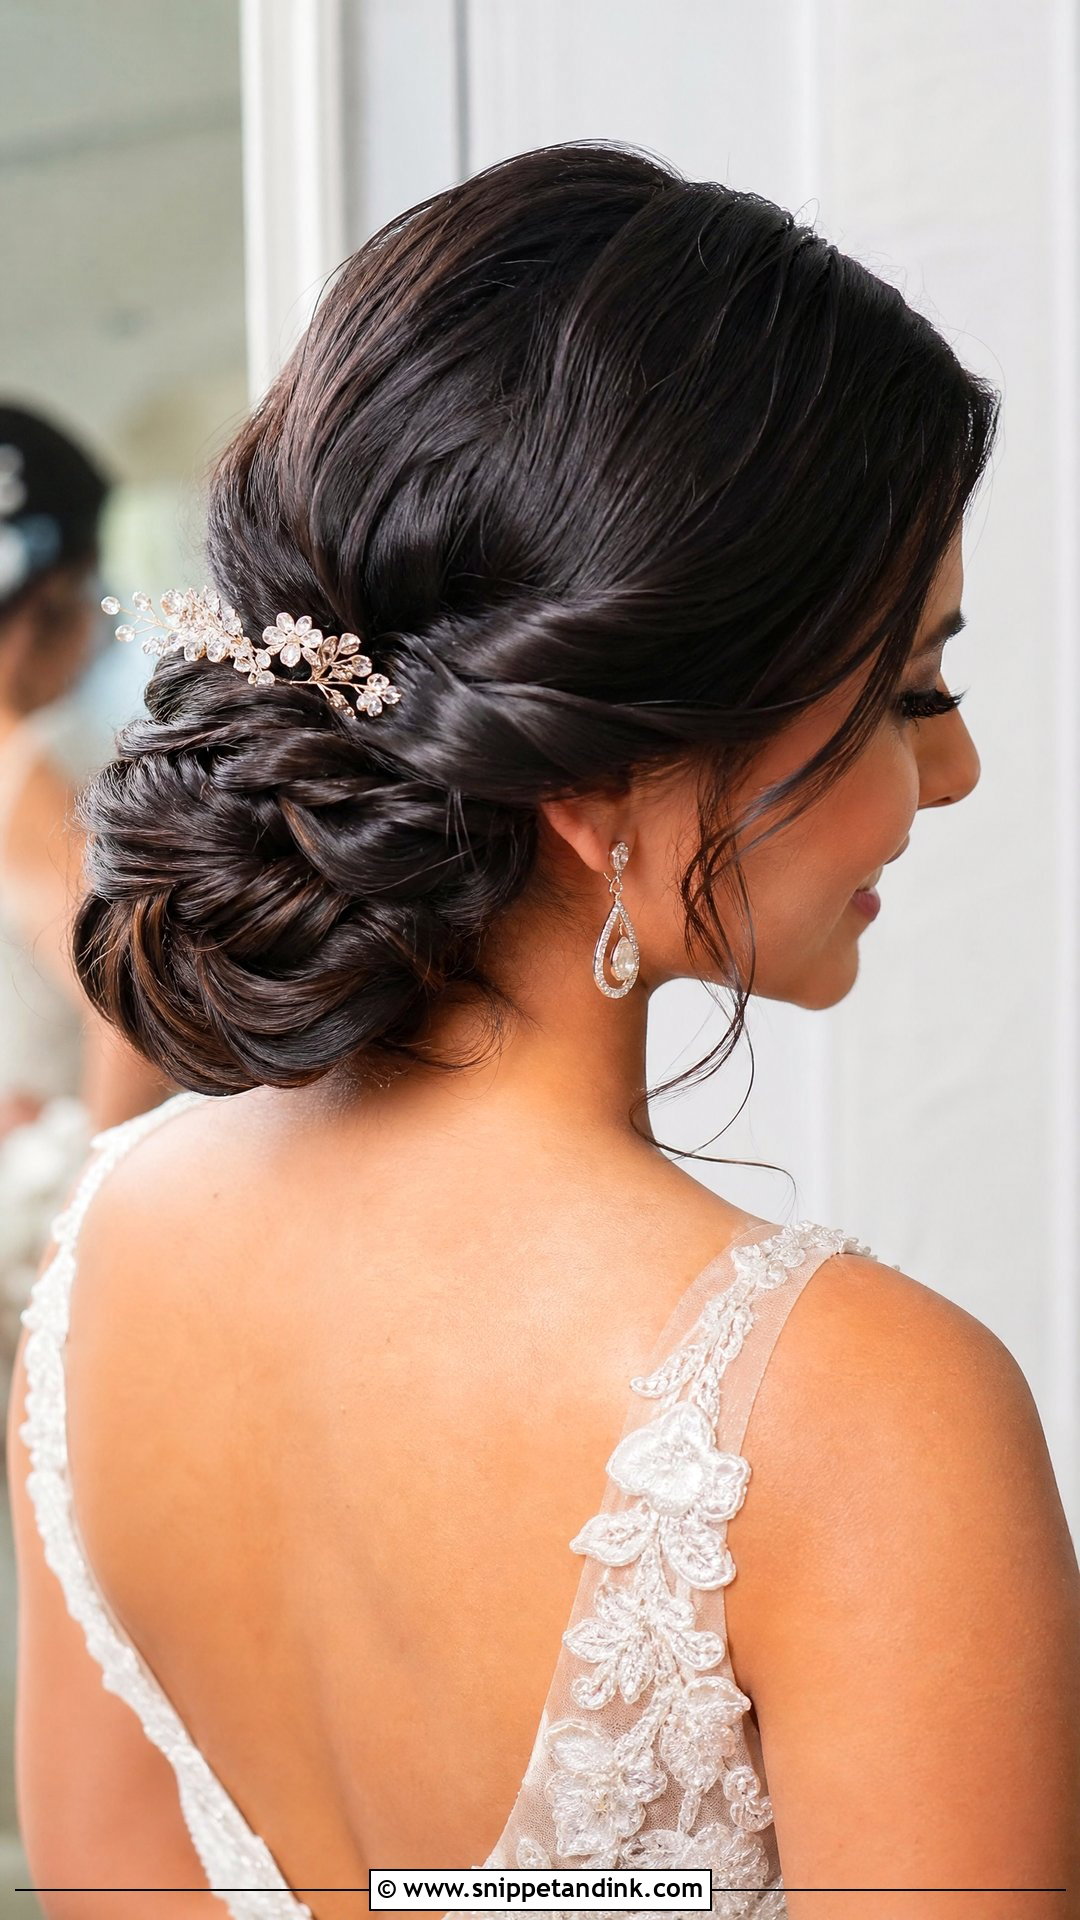
Twisting each section before pinning adds lines that catch light, and on dark hair that’s often the only way the back of a sleek bun shows any detail in photos. On very fine hair the twists can look thin, so I backcomb lightly at the base of each section first. The front stays completely smooth to send the eye to the back. Pearl pins or a few small flowers fit neatly into the gaps between twists.
9. Sleek Braided Bun Bridal Hair
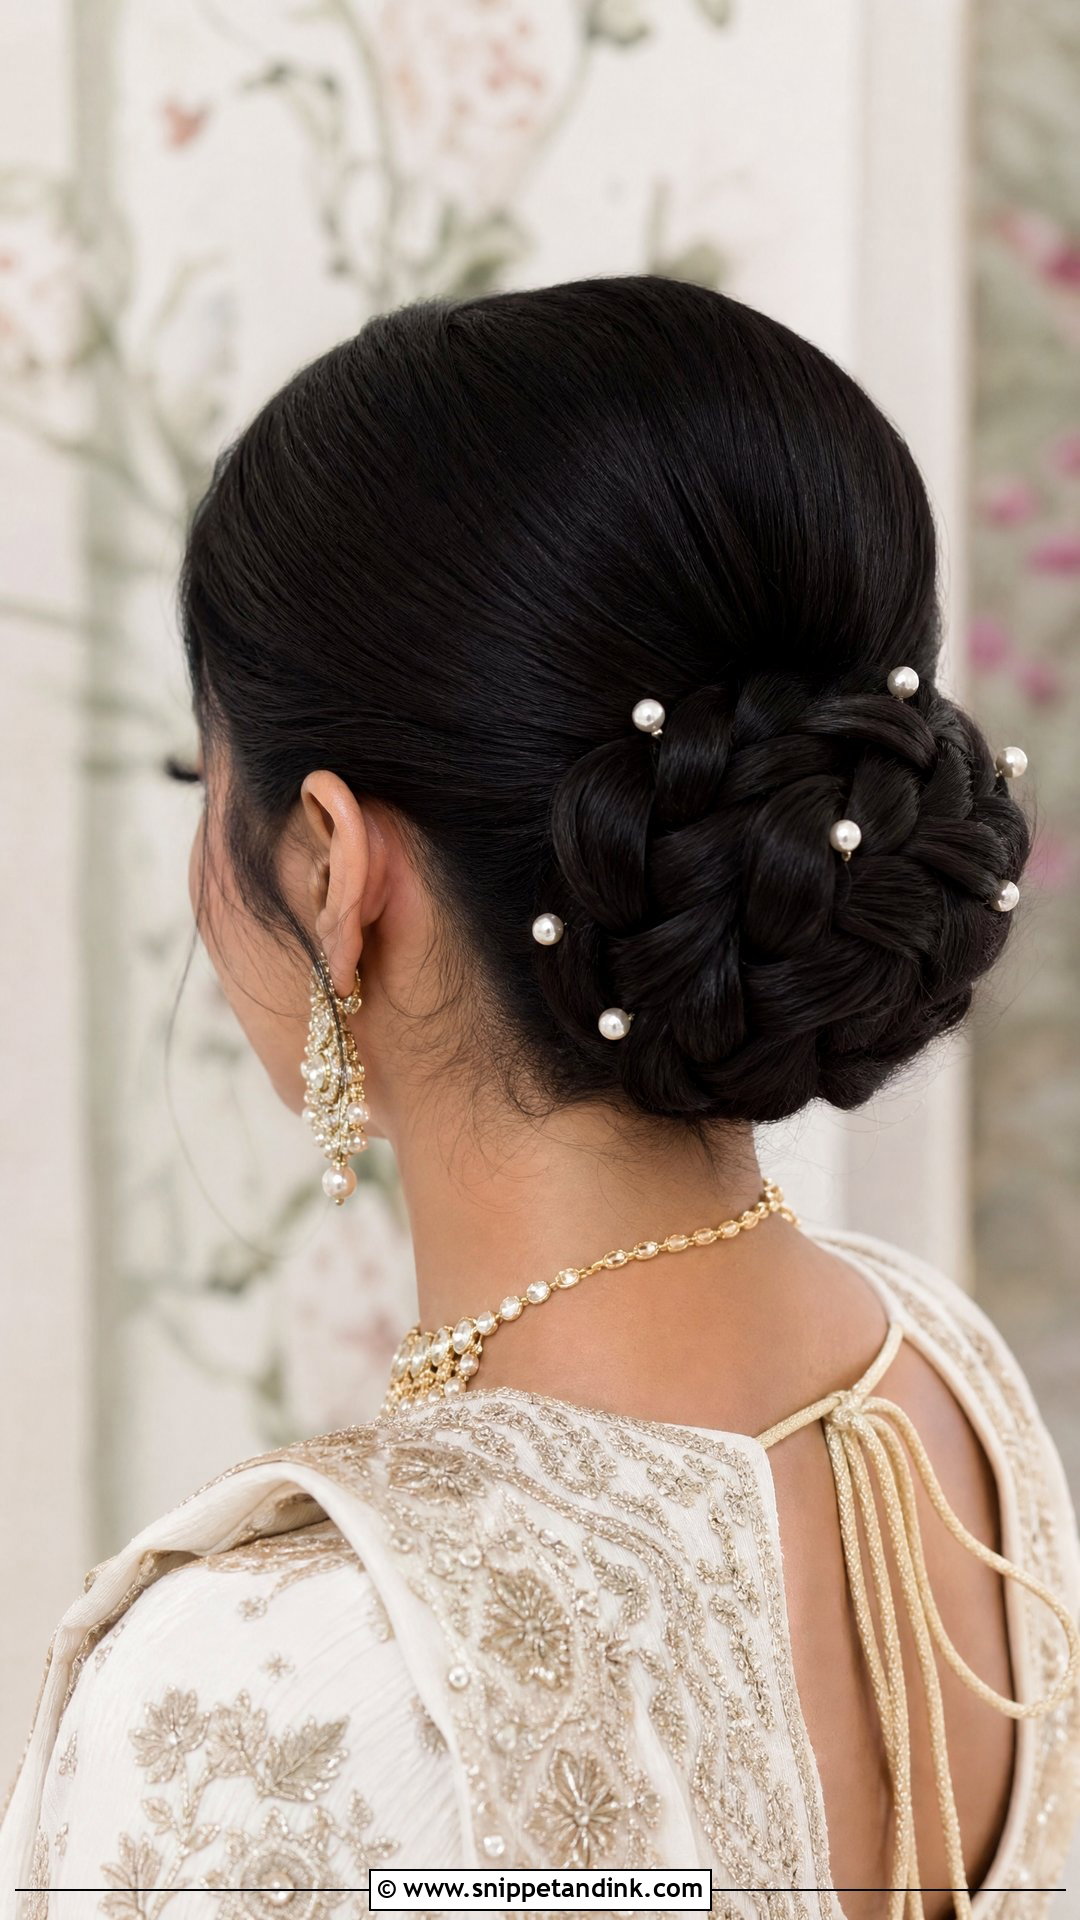
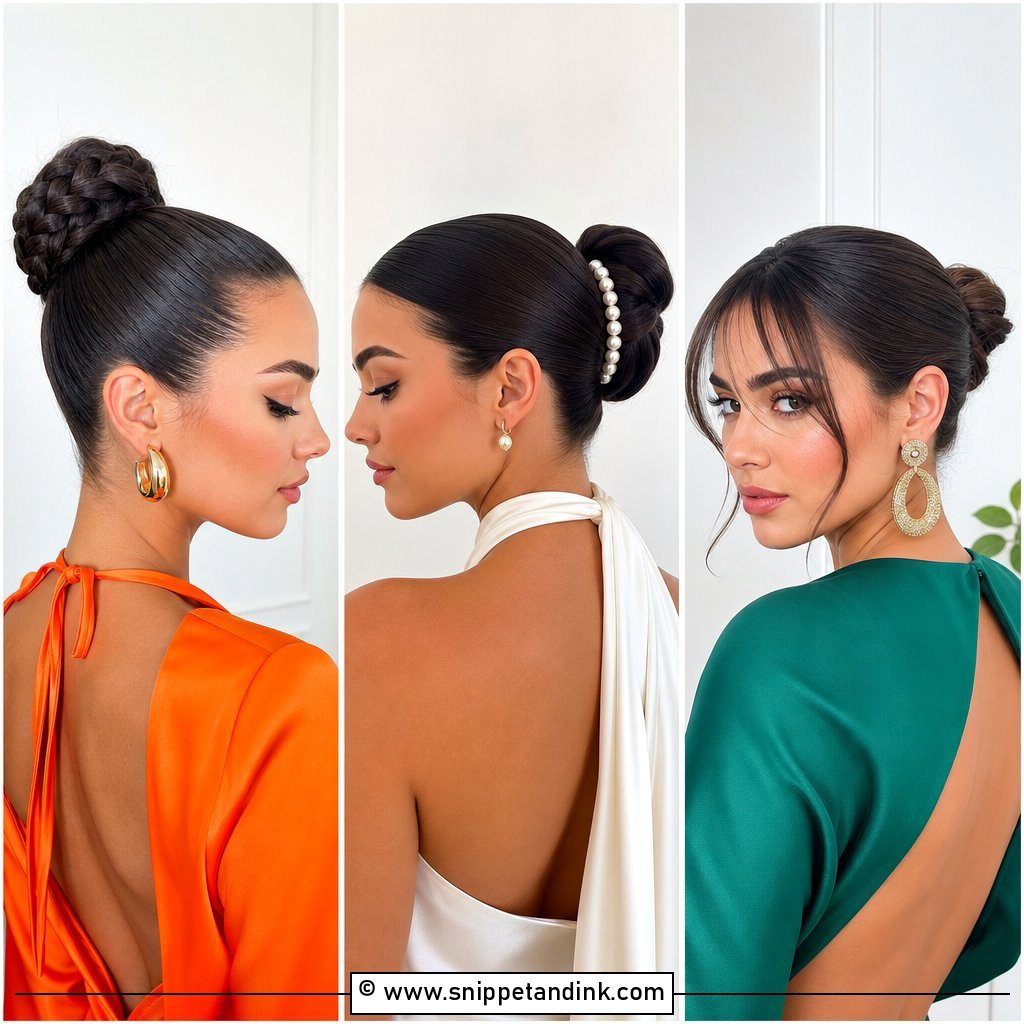
Braiding the ponytail before wrapping it does two jobs: it adds a woven texture and it compresses the length, so the bun holds far better than a plain wrap. I reach for it on long or thick hair, and whenever a bride wants a heavy comb or a long veil anchored all day. I braid tight and pull out only the outer edges a touch so it stays close to the head. Layered hair is the one problem, because short pieces poke out of a braid; a little wax and a couple of hidden pins sort that out before photos.
10. Sleek Bun With Pearl Pins
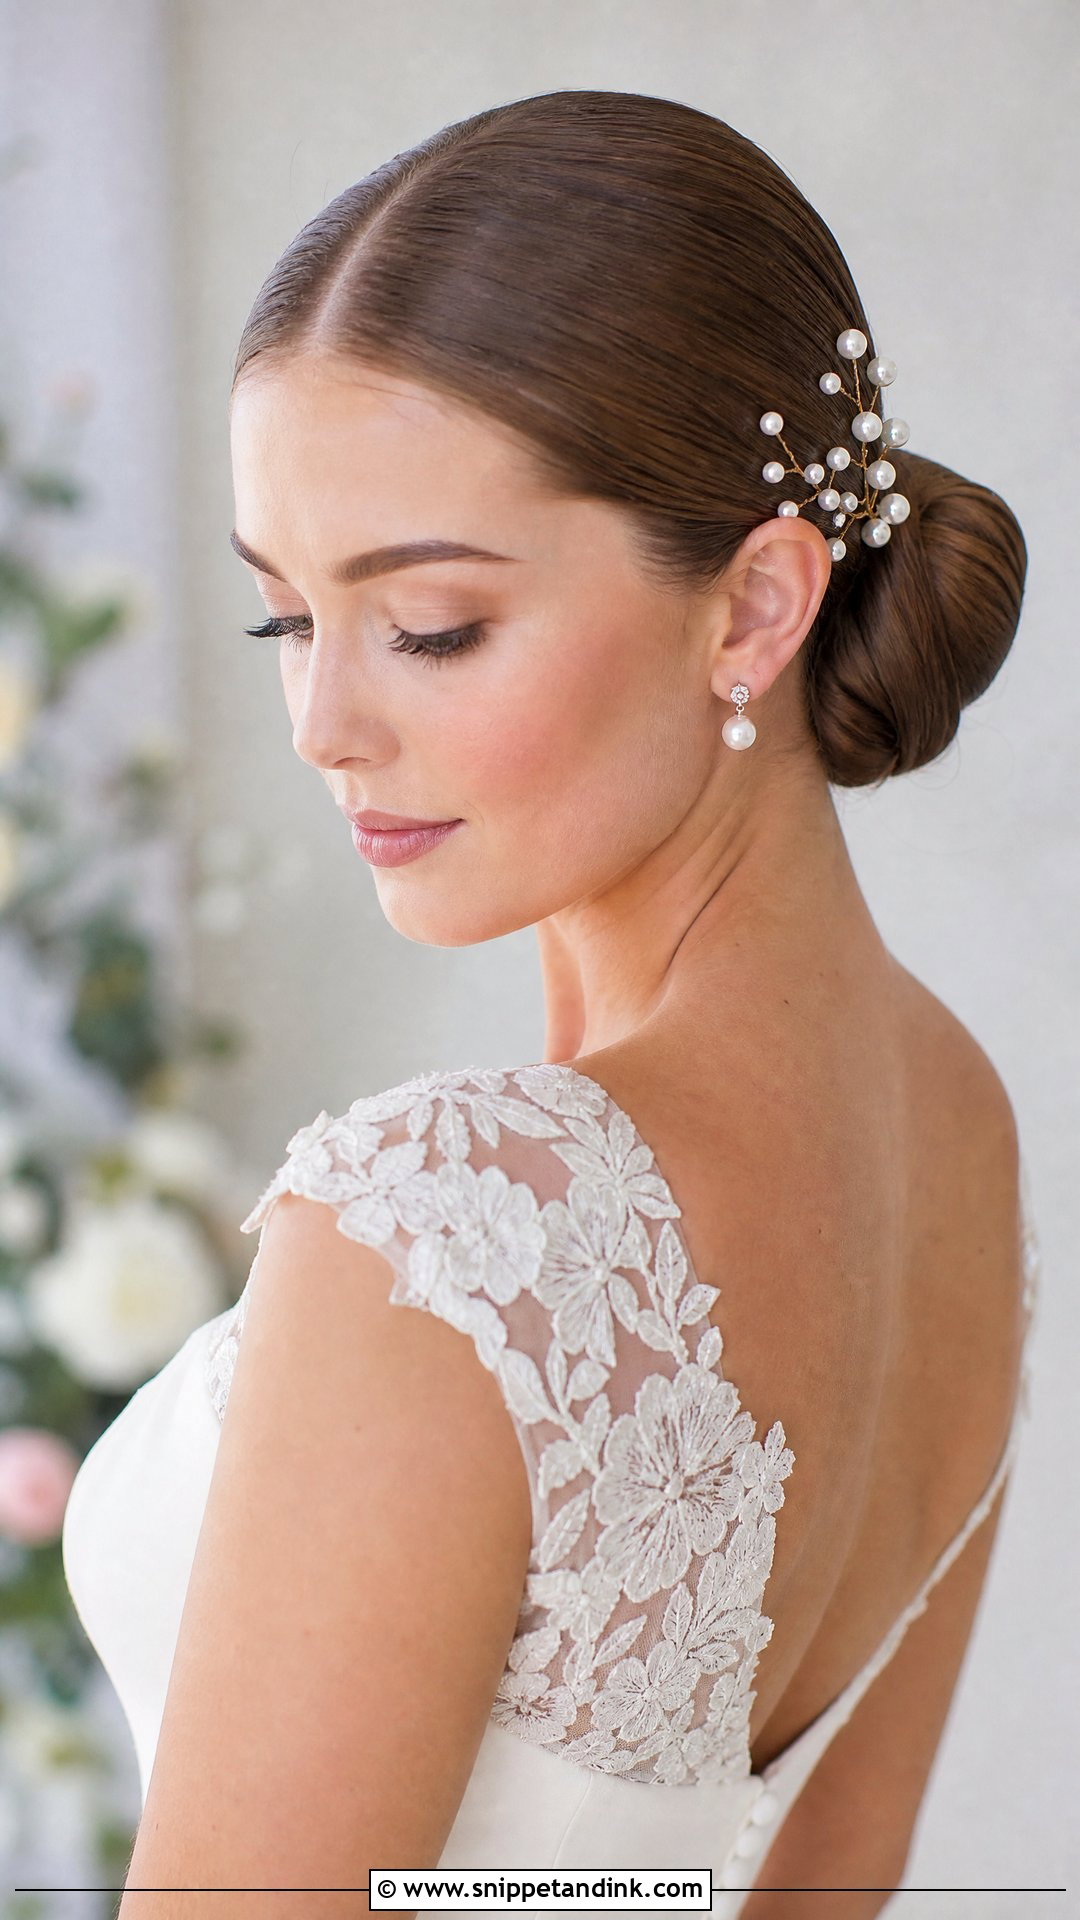
Pearls suit a sleek bun because the smooth surface gives them a plain background to sit on. I place them only after the bun is fully set, sliding each pin in at an angle so it catches underneath a section rather than resting on top, where a hug would knock it loose. Delicate pins work with a detailed lace dress, larger ones balance a minimal satin gown. A loose scatter across the back looks more relaxed than a neat crescent along one side.
11. Sleek Bun With Veil
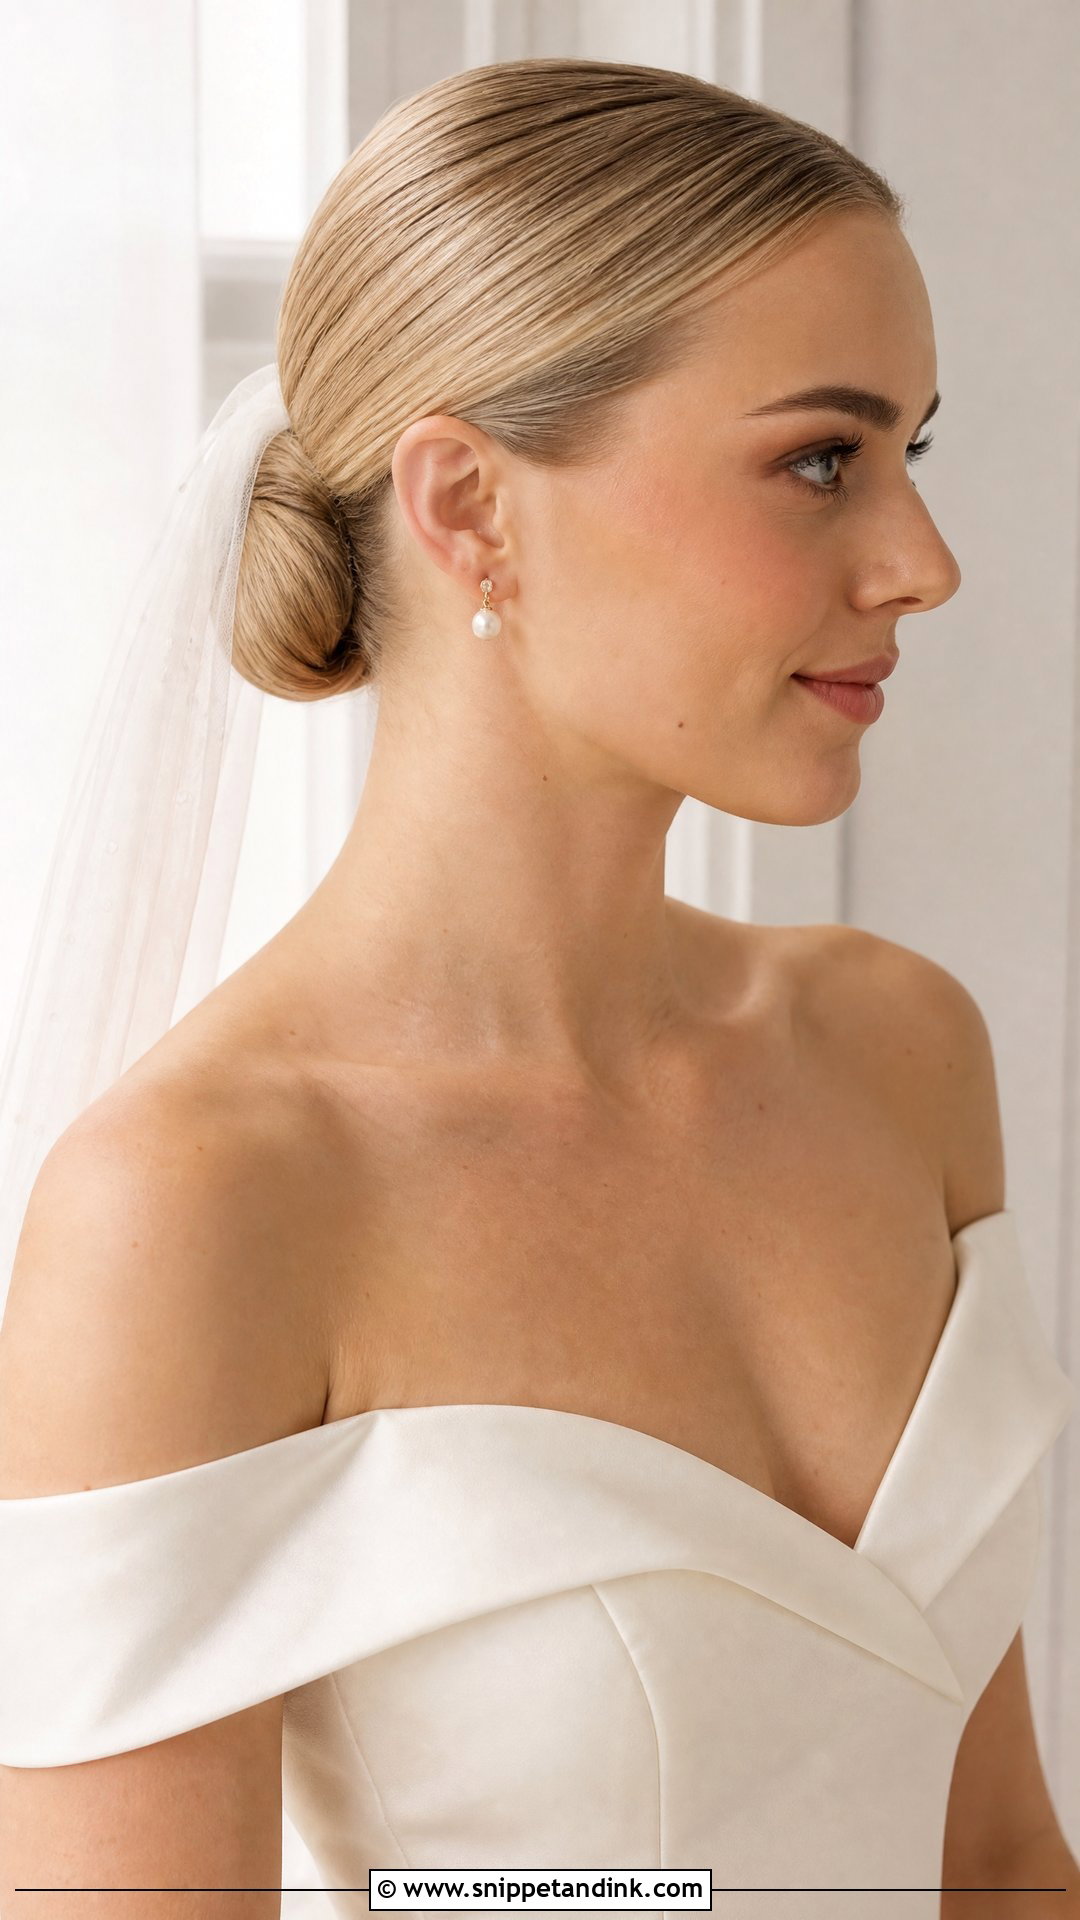
The bun gives the veil comb a firm base, and that’s the whole reason this pairing works through walking, hugging and the first dance. I build a cross of two bobby pins where the comb will sit and slide the teeth through it, so the weight of the tulle rests on the pins rather than on loose hair. Placed above the bun, the veil reads traditional. Tucked beneath, it’s softer and much easier to remove after the ceremony. A low bun also lets the tulle fall straight down your back instead of tenting out.
12. Sleek Bun With Tiara
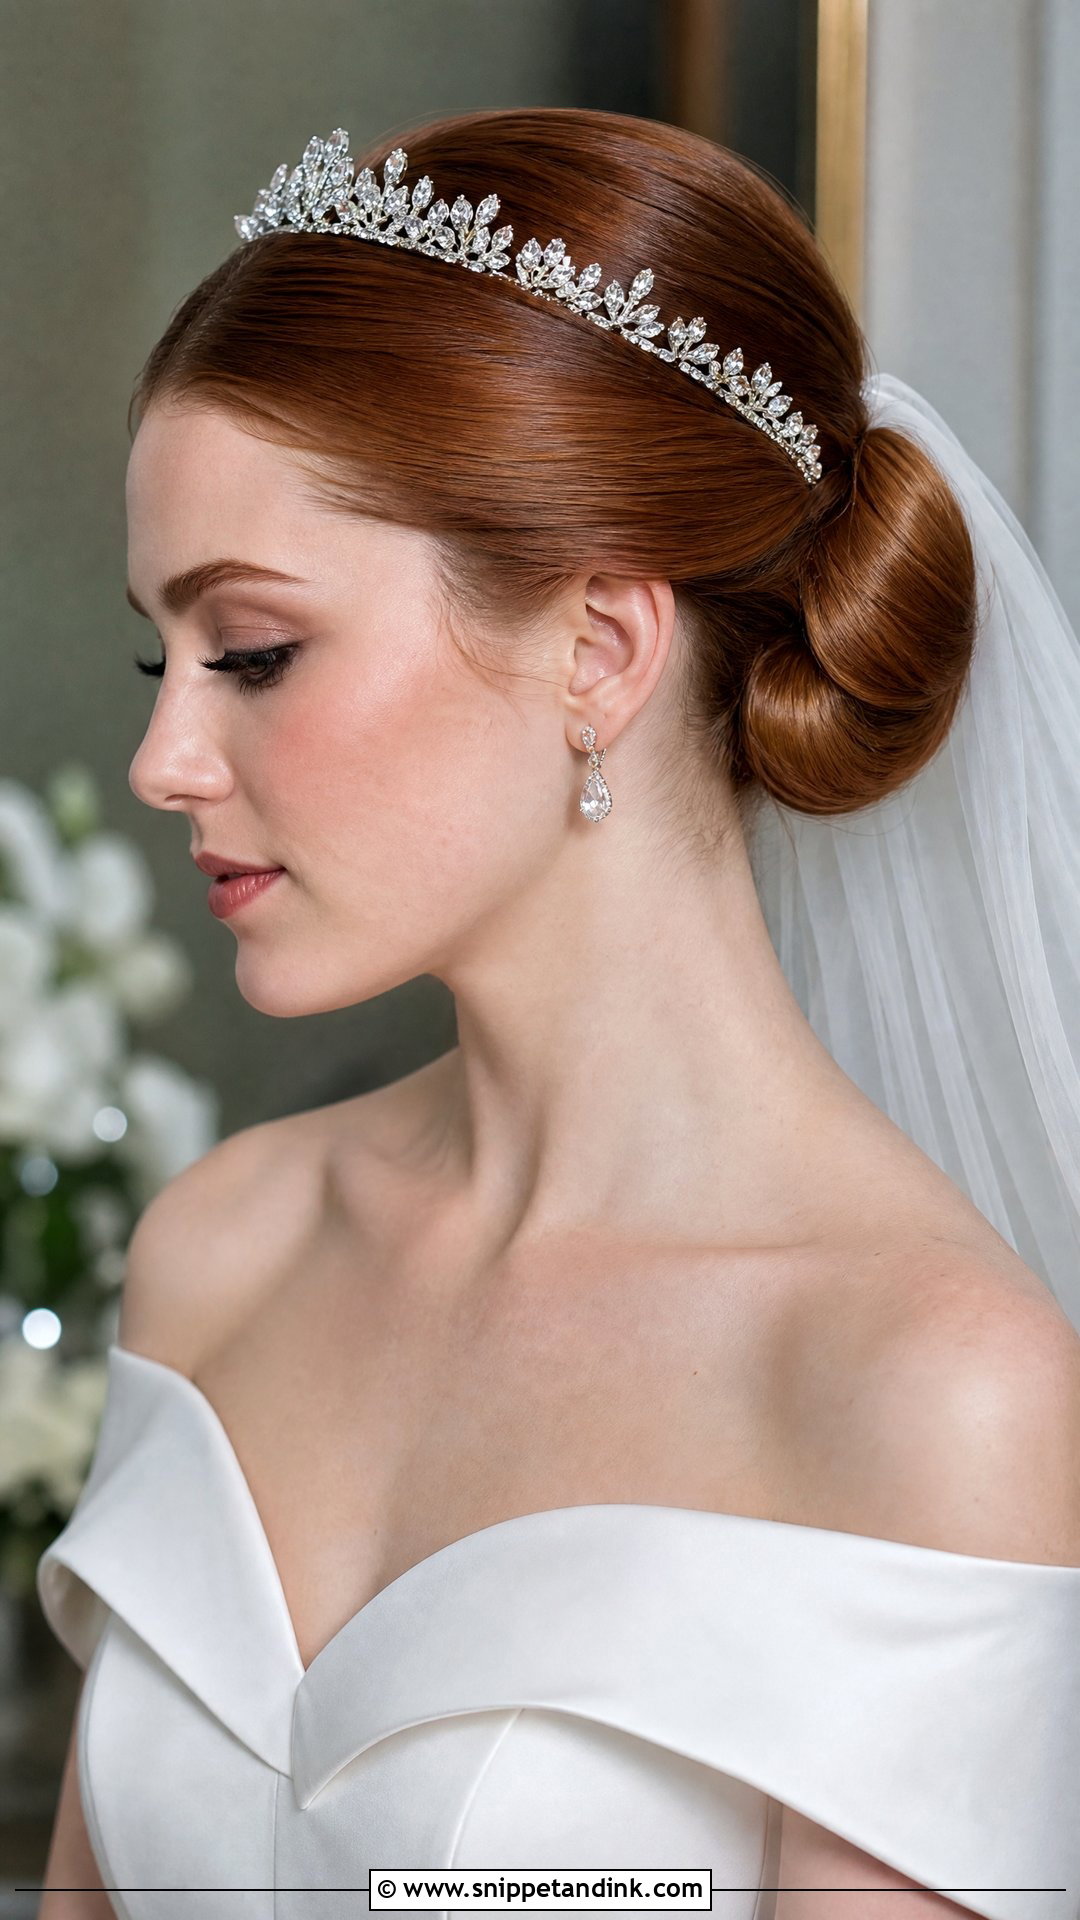
A tiara on loose texture can look like dress-up; on a smooth head of hair it reads regal. I set the tiara before the final shine spray and anchor each end with a pin threaded through its side loops, because tiaras tip forward the moment you look down at your vows. A center part keeps it refined and a brushed-back front makes it more formal. A slim band stays subtle, while a taller piece needs a black-tie room, a corset bodice or a long train to carry it.
13. Sleek Bun With Hair Comb
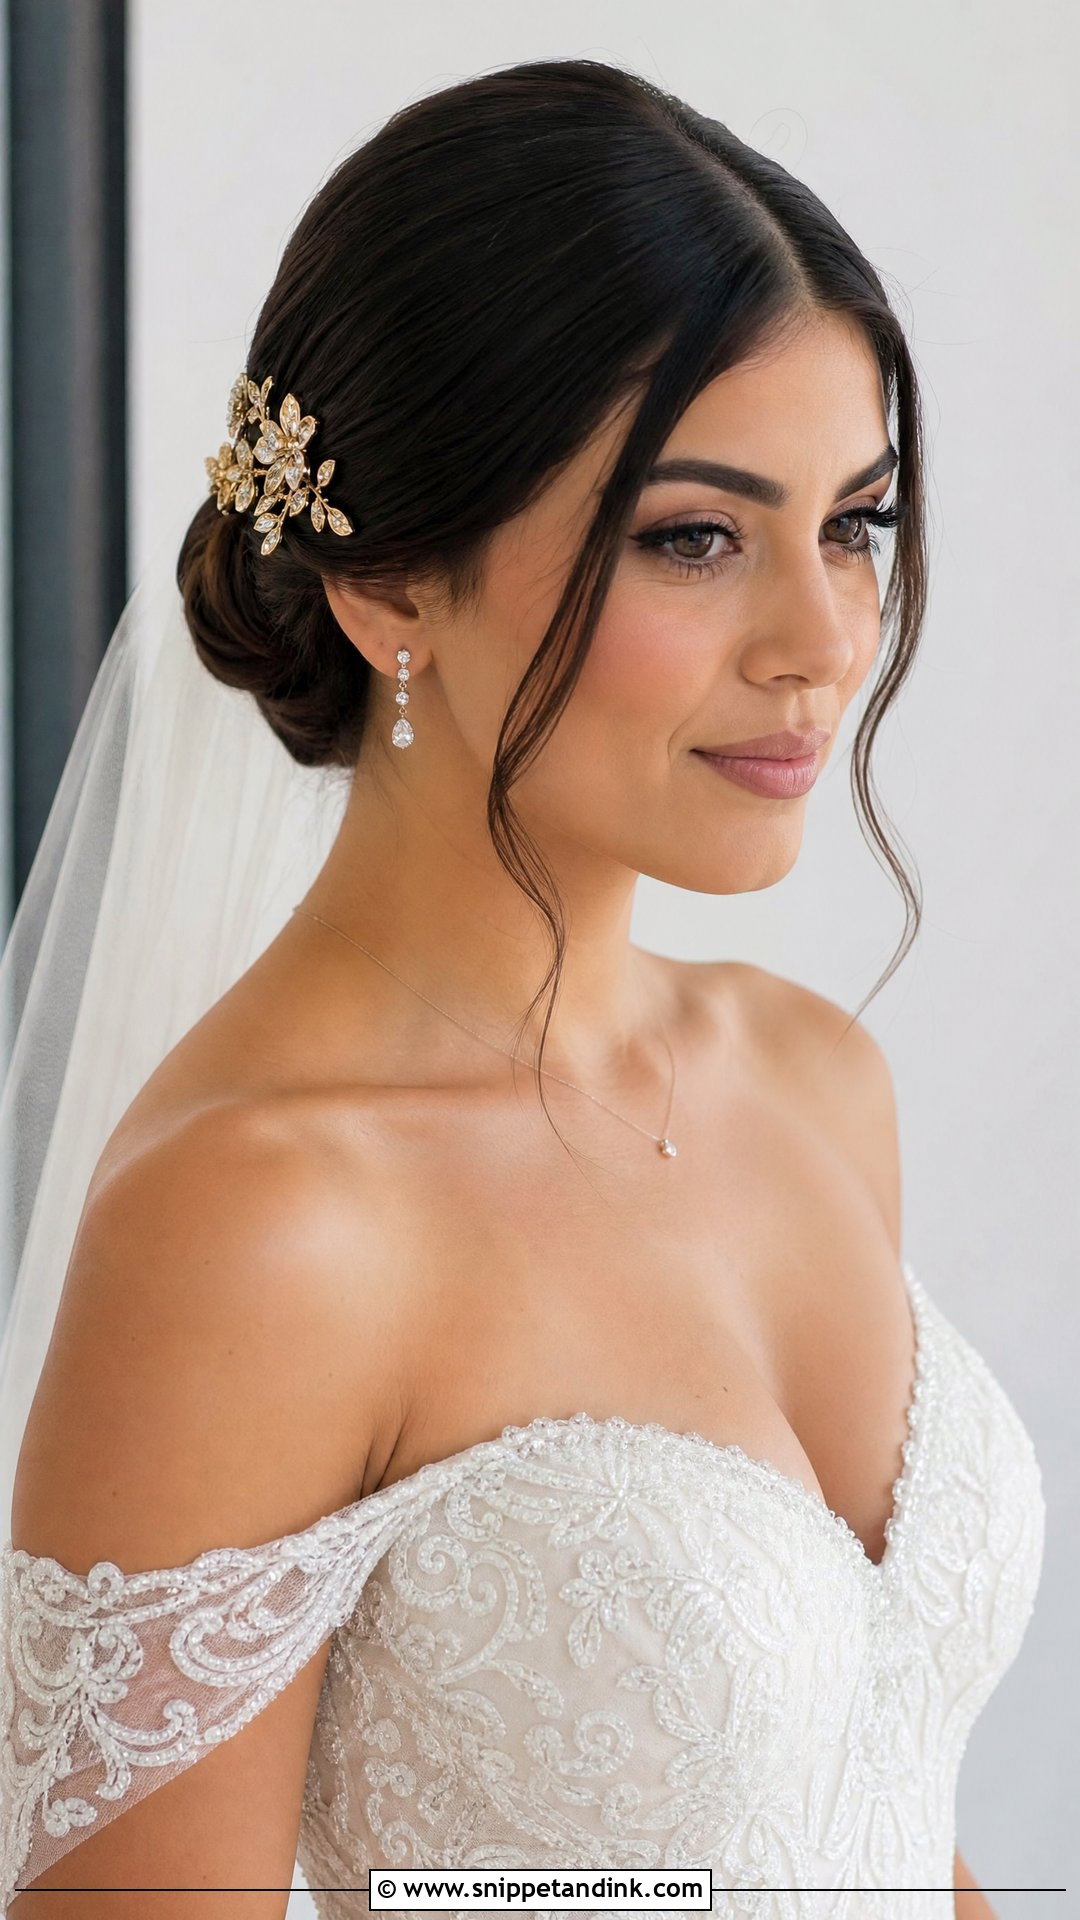
One comb is often all a sleek bun needs. Above the bun it adds height, at the side it looks asymmetric, and following the curve of a chignon it almost melts into the shape. If you’re skipping a veil or taking it off after the ceremony, a comb fills the spot where the veil sat. Weight is the thing I check first: a heavy crystal comb needs a braided or criss-crossed pin base to grip, or it slowly tilts over the evening.
14. Sleek Bun With Face Framing Pieces
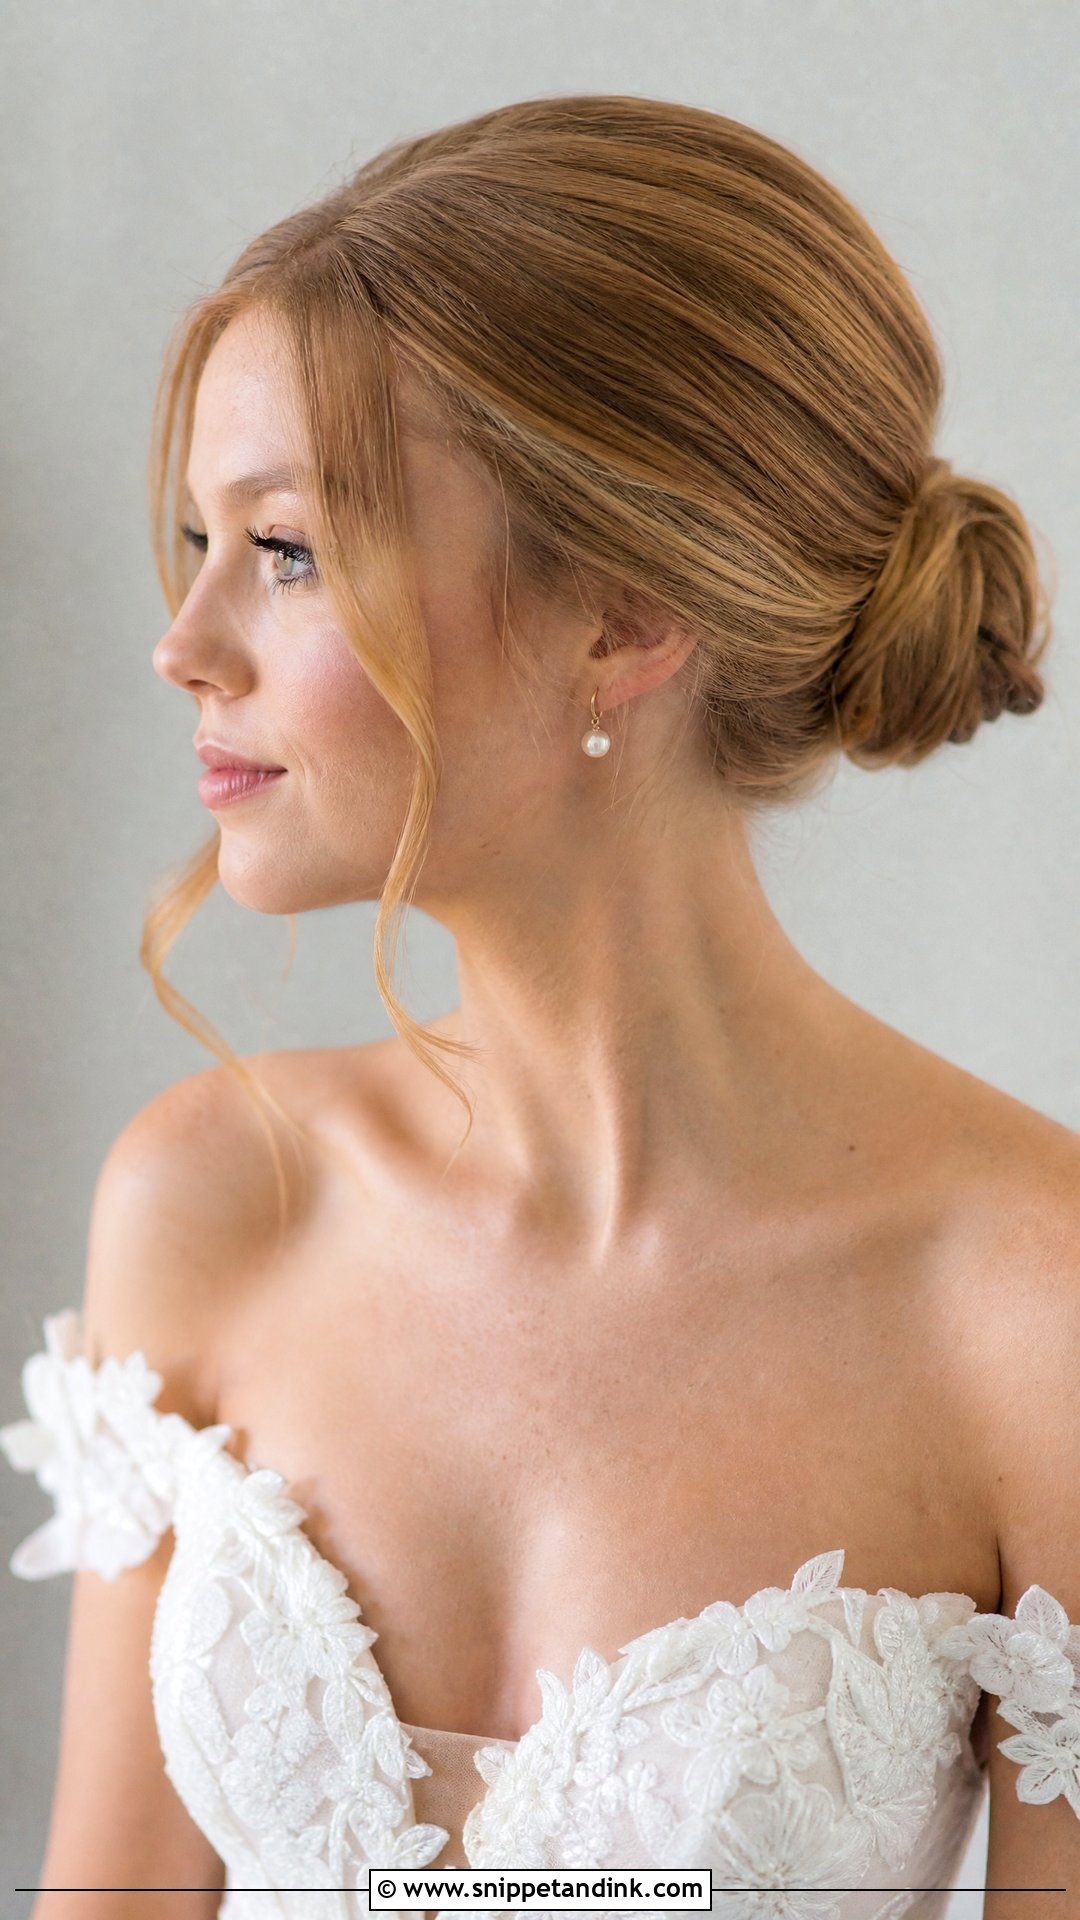
Leaving a few strands out takes the strictness away, but the strands have to be thin. Thick pieces separate into clumps by evening and make it look as though the bun has fallen. I pull out no more than a pencil-width section on each side, bend it away from the face with a flat iron and set it with a little spray. A soft bend at the cheek takes the edge off a strong jaw. One warning for oily skin: loose strands tend to stick to foundation after a few hours, so blot before photos.
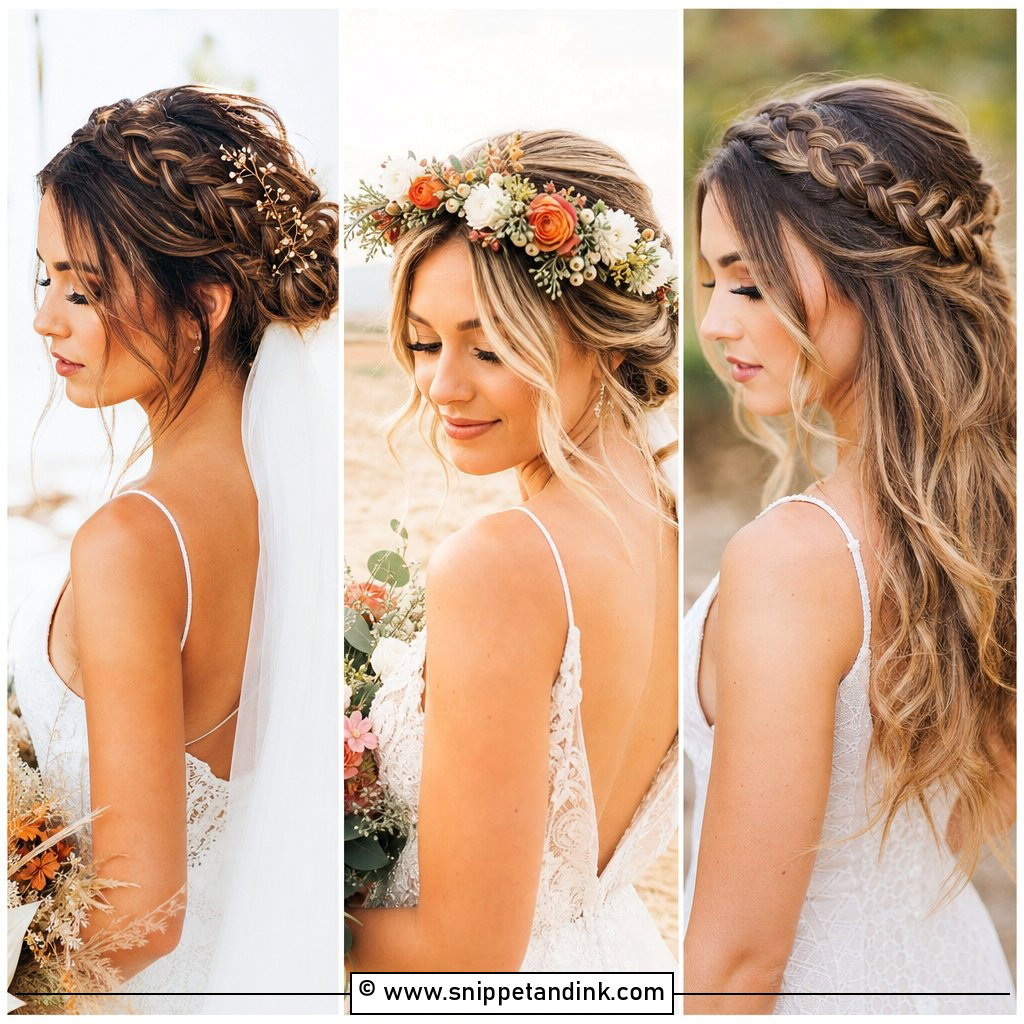
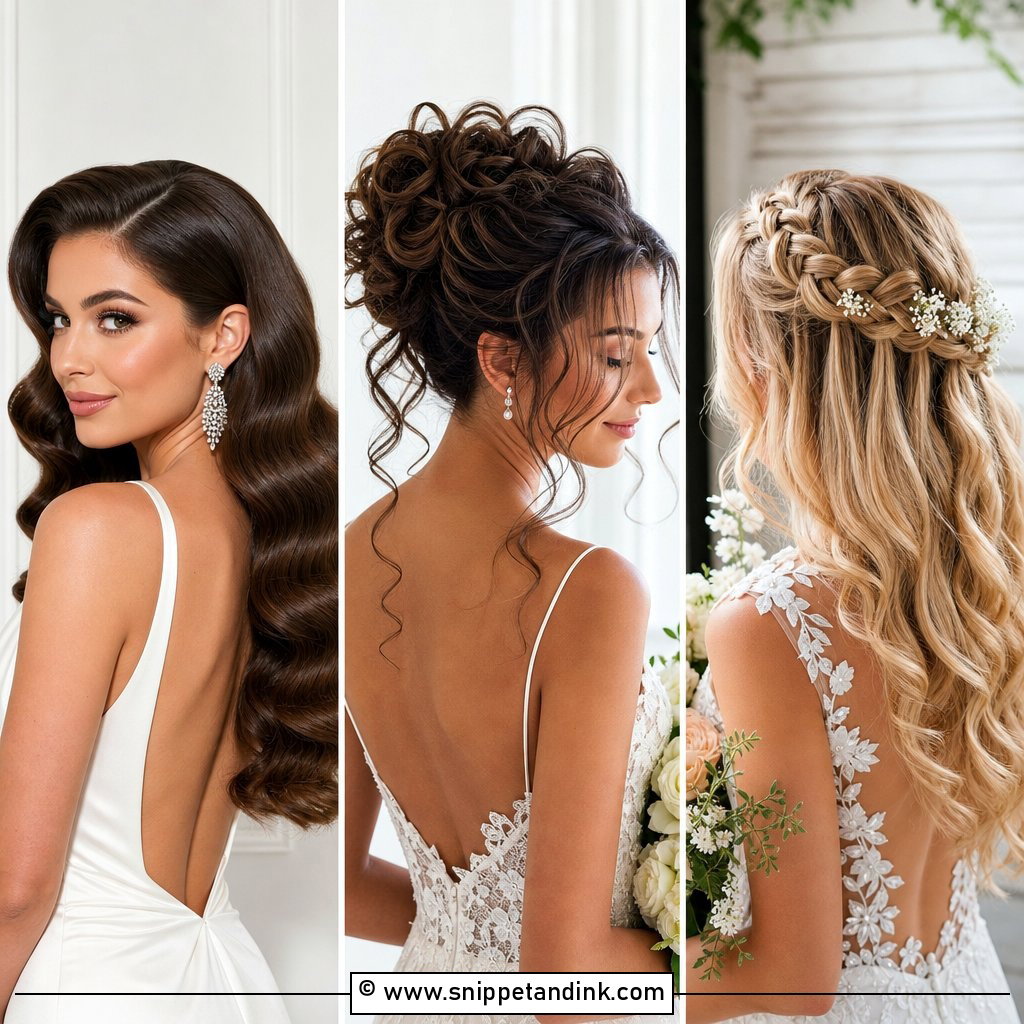
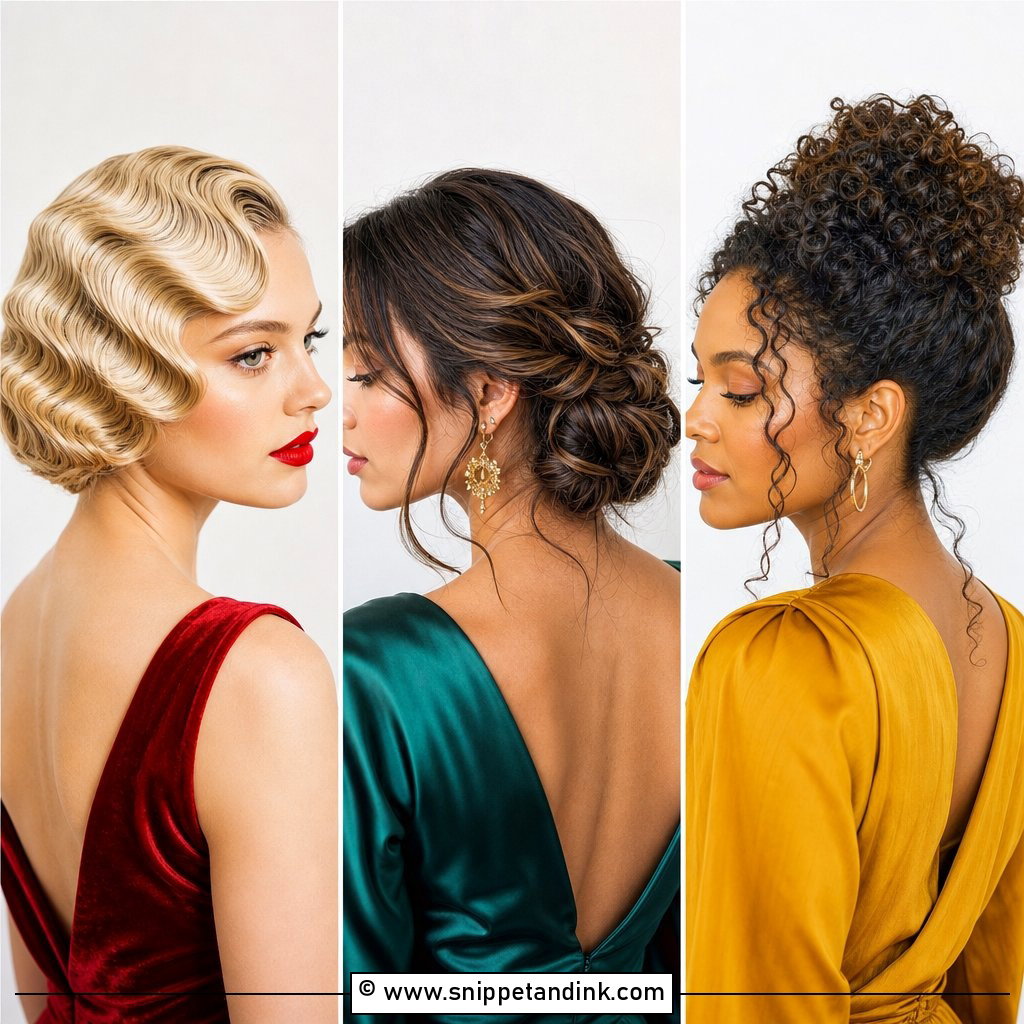
15. Sleek High Bun Bridal Hair
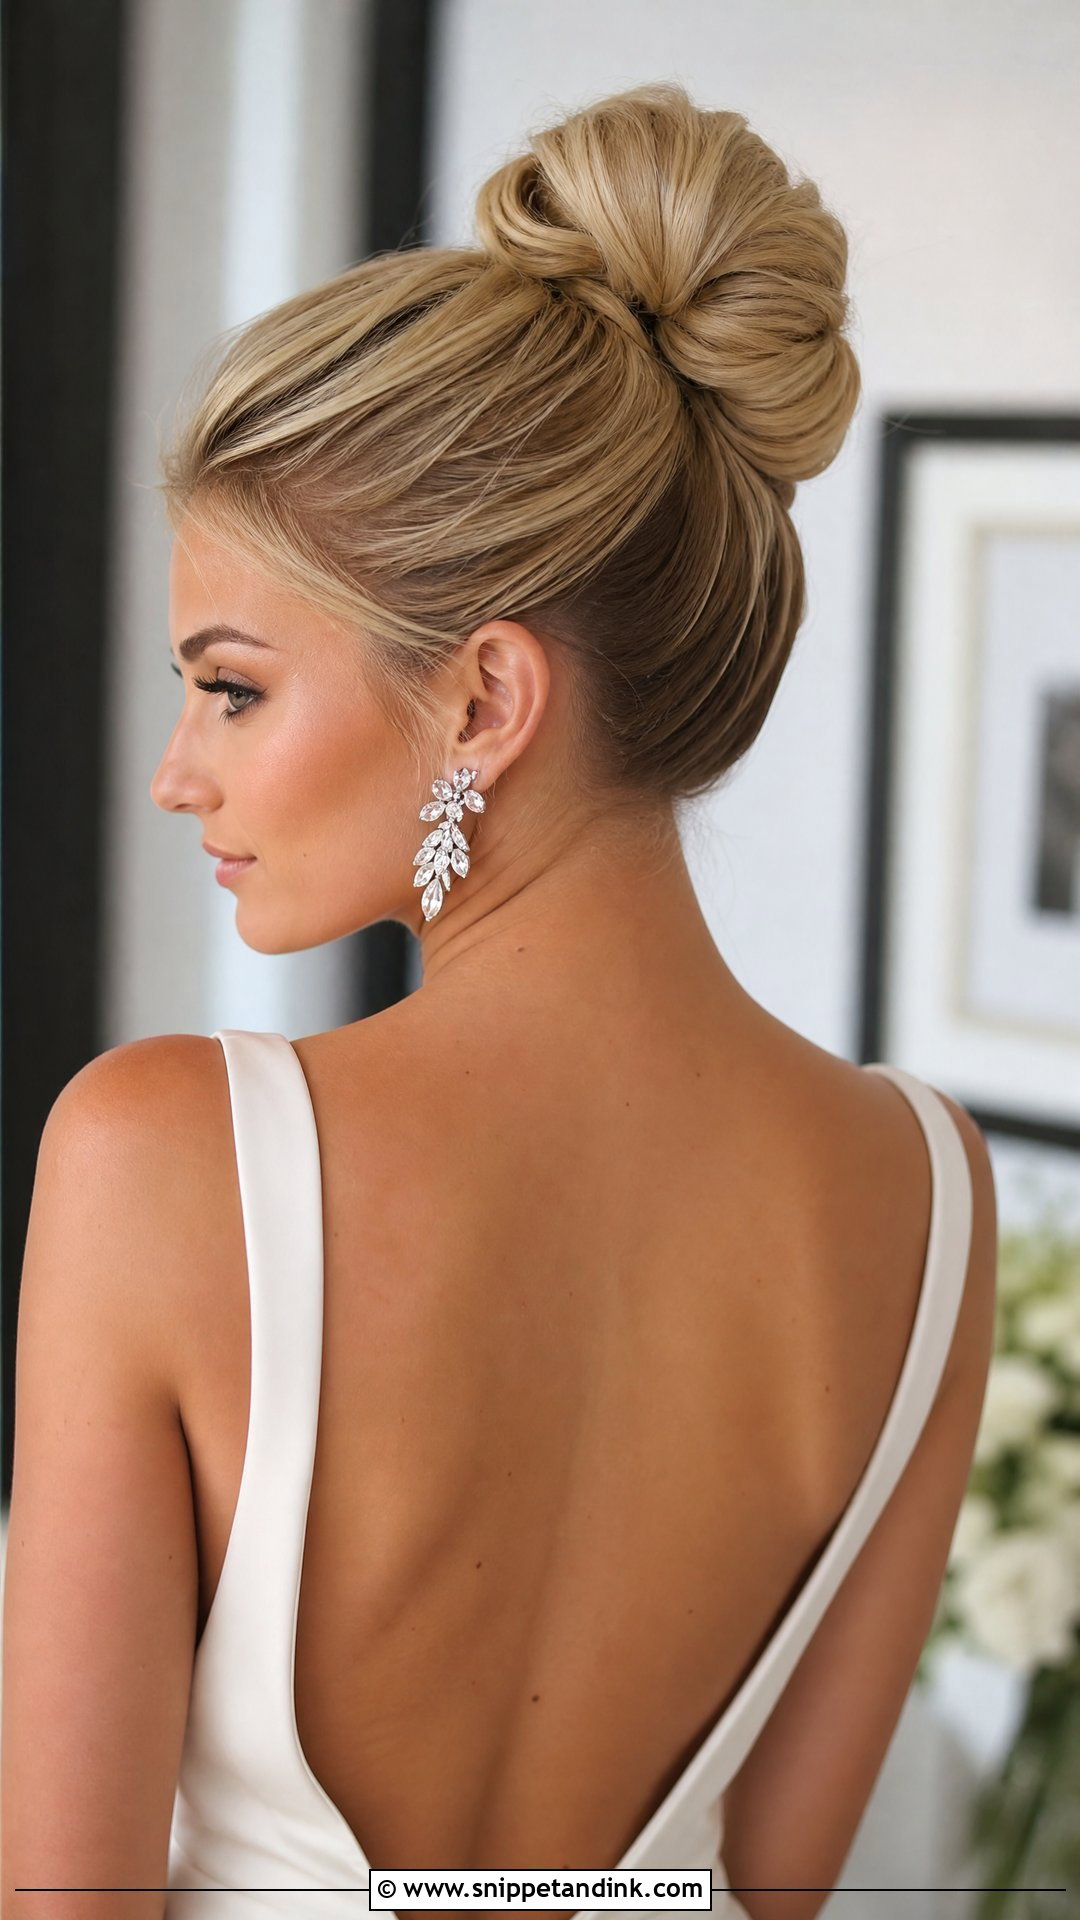
Set high on the head, the bun lengthens the line of the neck and makes the whole outfit look more formal. It sits easily under a crown or short veil and pairs well with high neck gowns, open backs and statement earrings. The work is all at the roots. I smooth the crown from several directions so there are no ridges, then use a strong elastic and plenty of pins, because gravity drags a high bun backward all day. If you get tension headaches, wear it for a full afternoon after your trial before you commit.
16. Sleek Low Bun For Long Hair
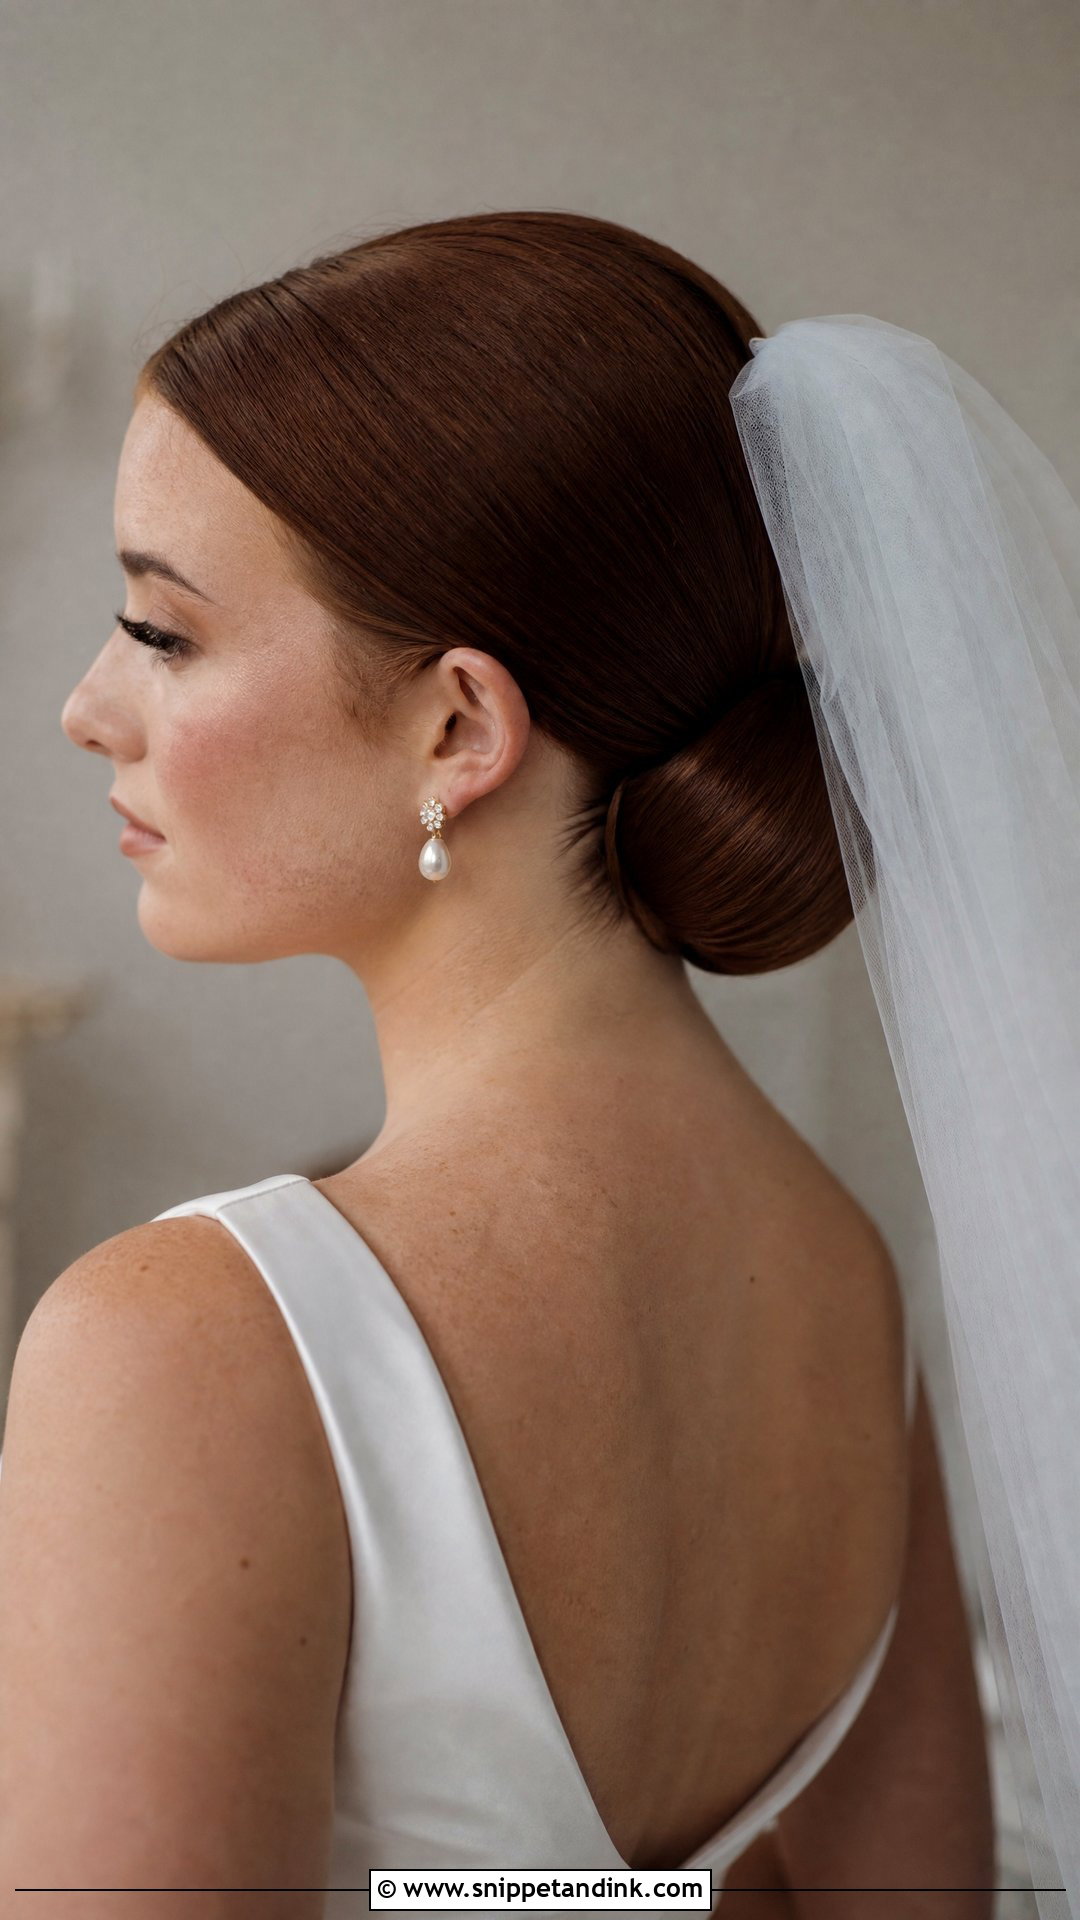
Long hair gives me plenty to wrap, fold or braid, and the bun comes out naturally full at the nape. The difficulty is the opposite of what most brides expect: too much length makes a bulky bun that sits like a doughnut. I’ll often wrap only part of the length and tuck the rest flat underneath, or split it into two smaller sections, with hidden pins keeping everything close. A long veil or pearl comb then sits neatly above. Glossy hair shows at its best here, since the smooth length is visible right up to where it’s pinned.
17. Sleek Low Bun For Medium Hair
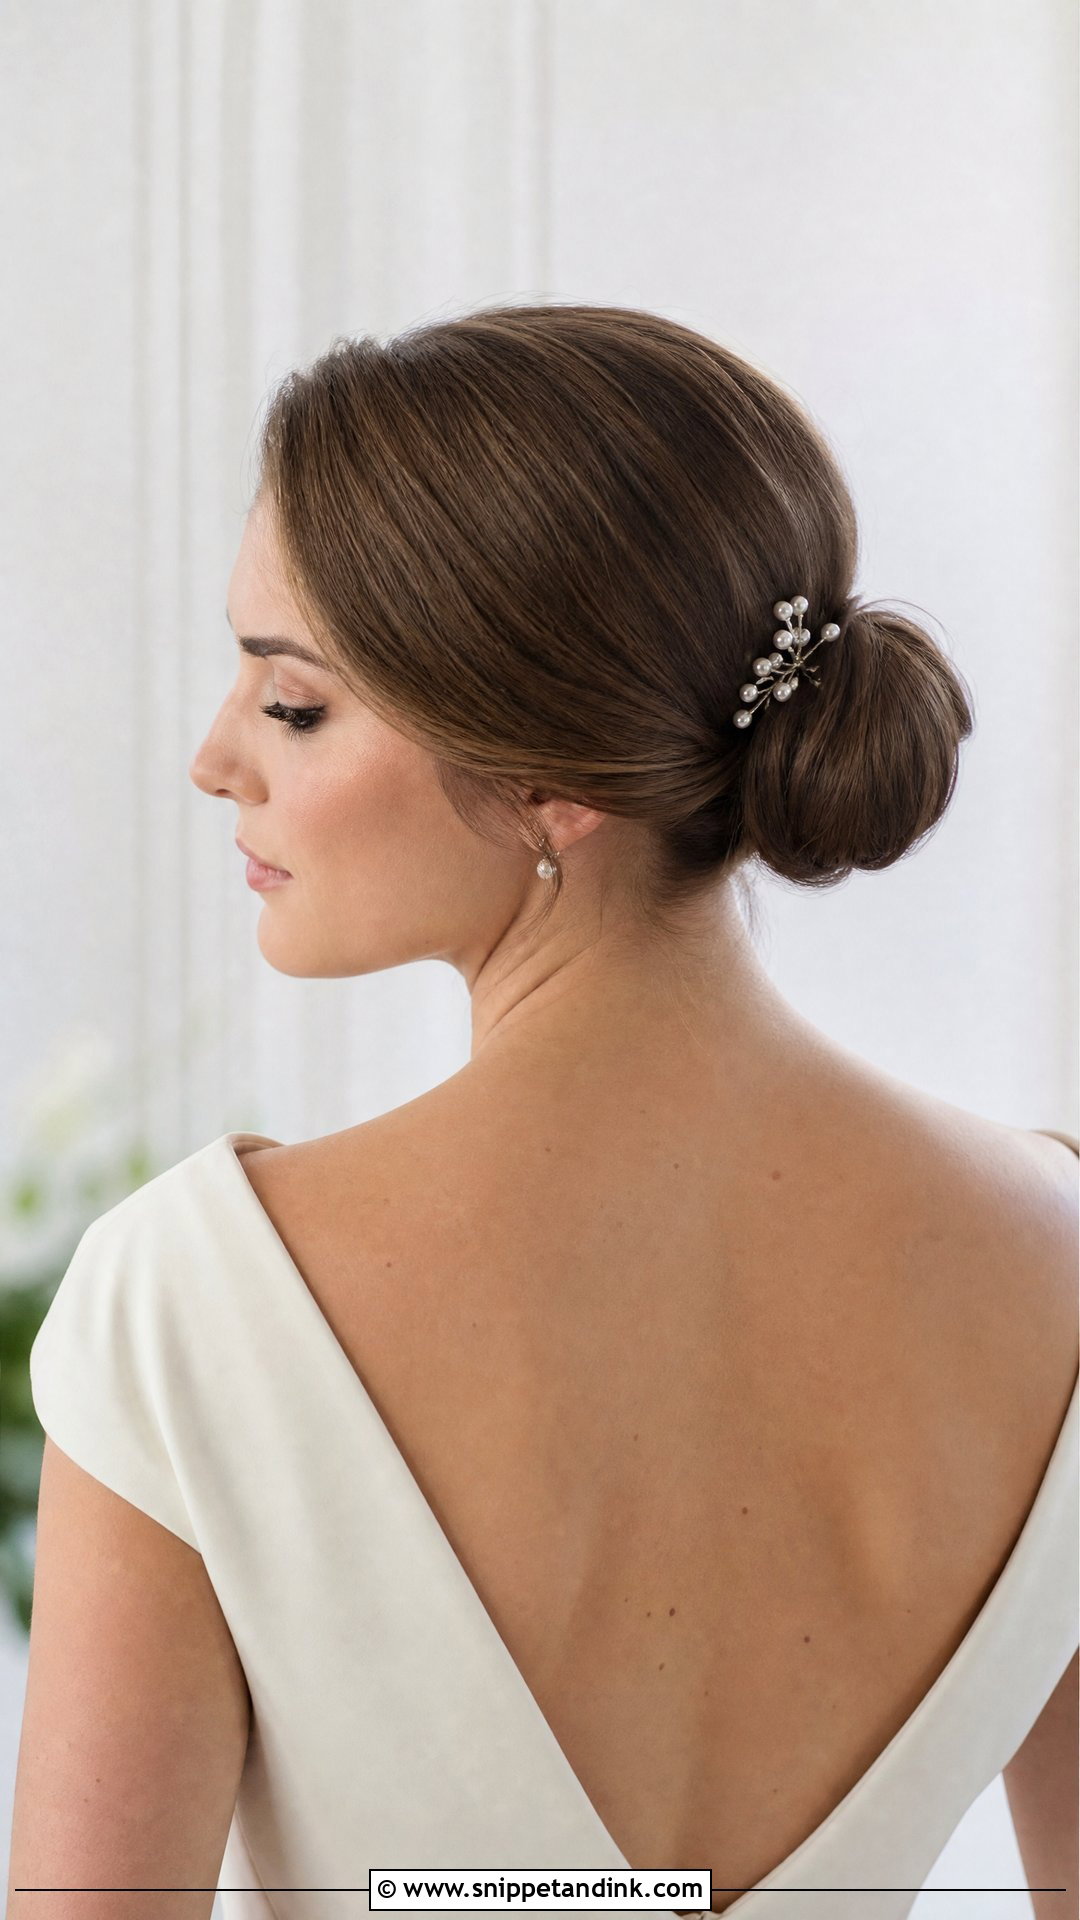
Shoulder to collarbone length is easier to secure than very long hair because there’s less weight dragging the bun down. What it lacks is volume. If you want a fuller bun, I hide a small donut or a few pieces of matching clip-in hair under the wrap. A center part keeps it modern and a side part softens it. Watch out for short layers: anything that doesn’t reach the elastic needs pinning in place before the bun goes in, or it works loose during the reception.
18. Sleek Bun For Curly Hair
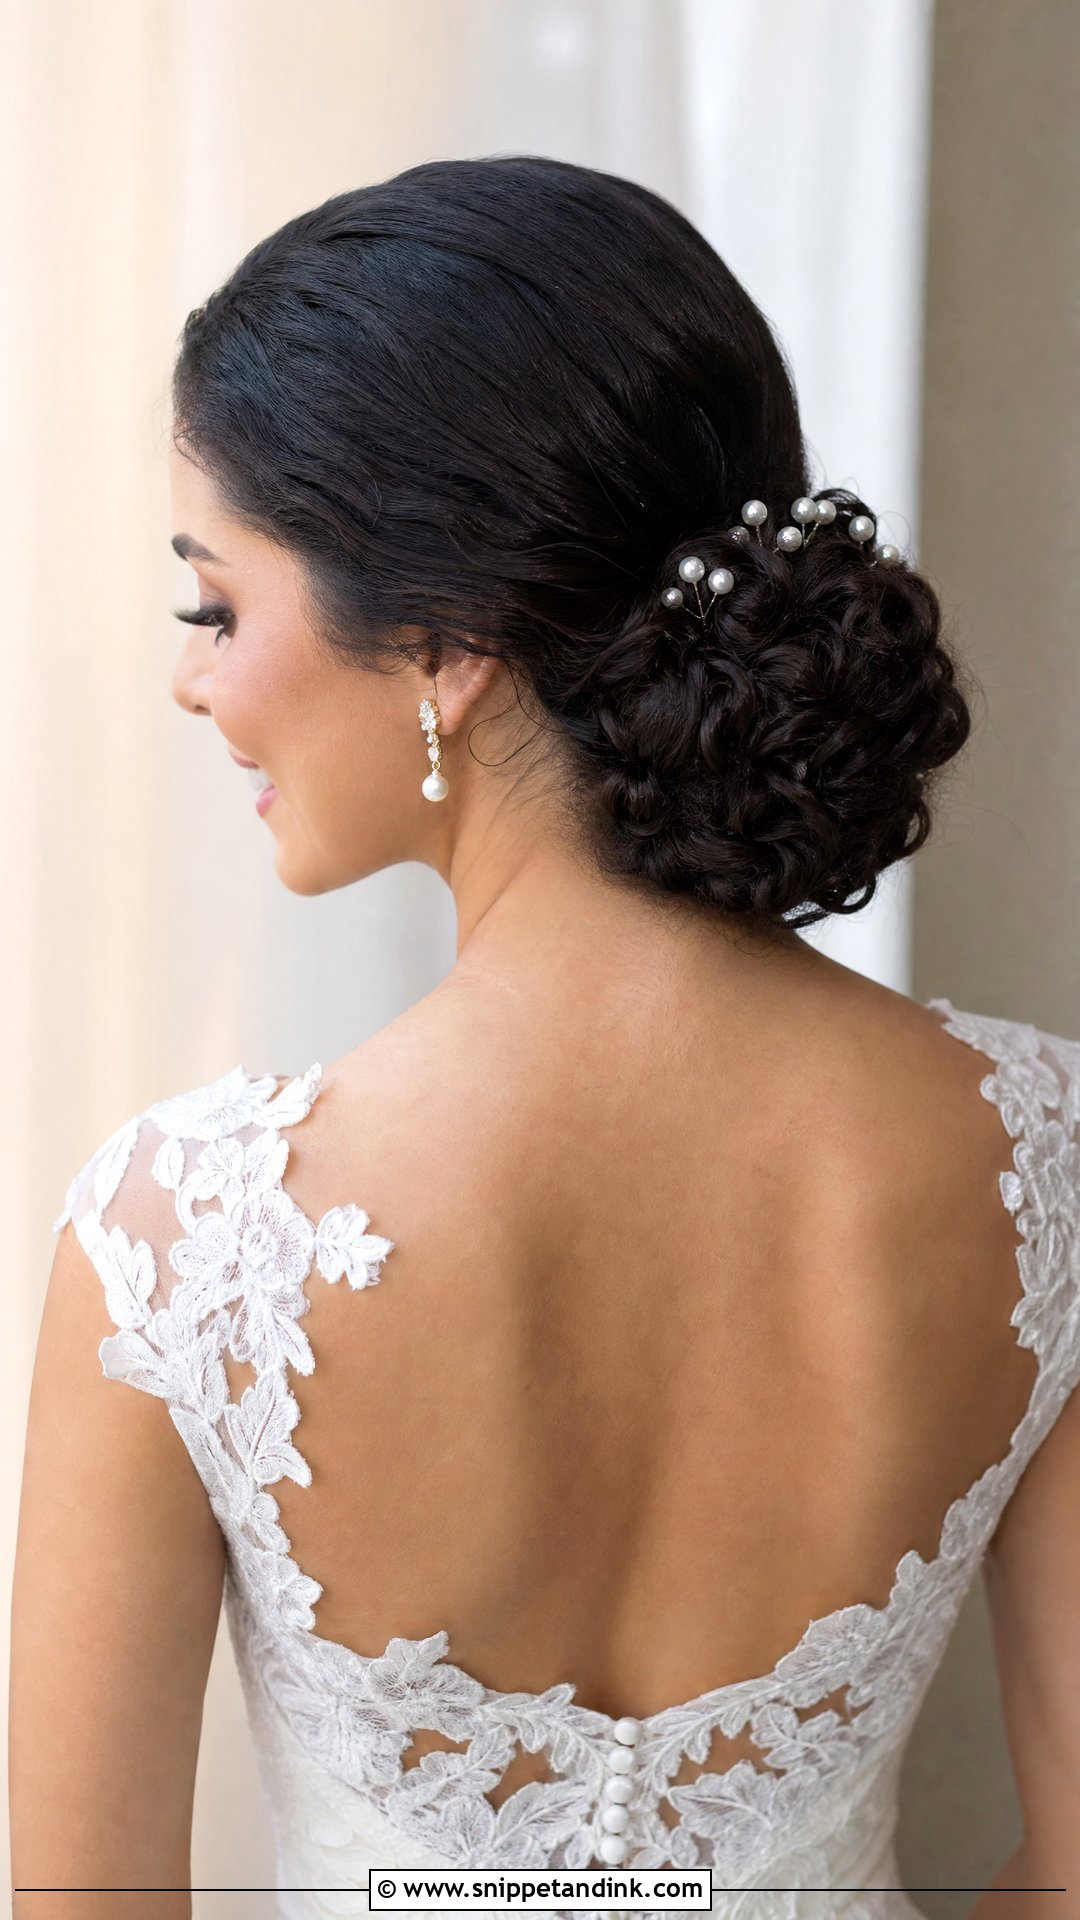
With curly hair I smooth only what needs to be smooth. The crown gets a firm gel or cream brushed through while damp, and the bun keeps its natural curl, so it has volume and shape without any heat. Test the product at your trial and look at it again hours later, because some gels dry with white flakes that show up in close-up photos. A low bun suits a veil, while a mid bun lets more of the curl show from the side. Once the gel dries, I scrunch the curls in the bun gently so they don’t look crunchy.
19. Sleek Bun For Natural Hair
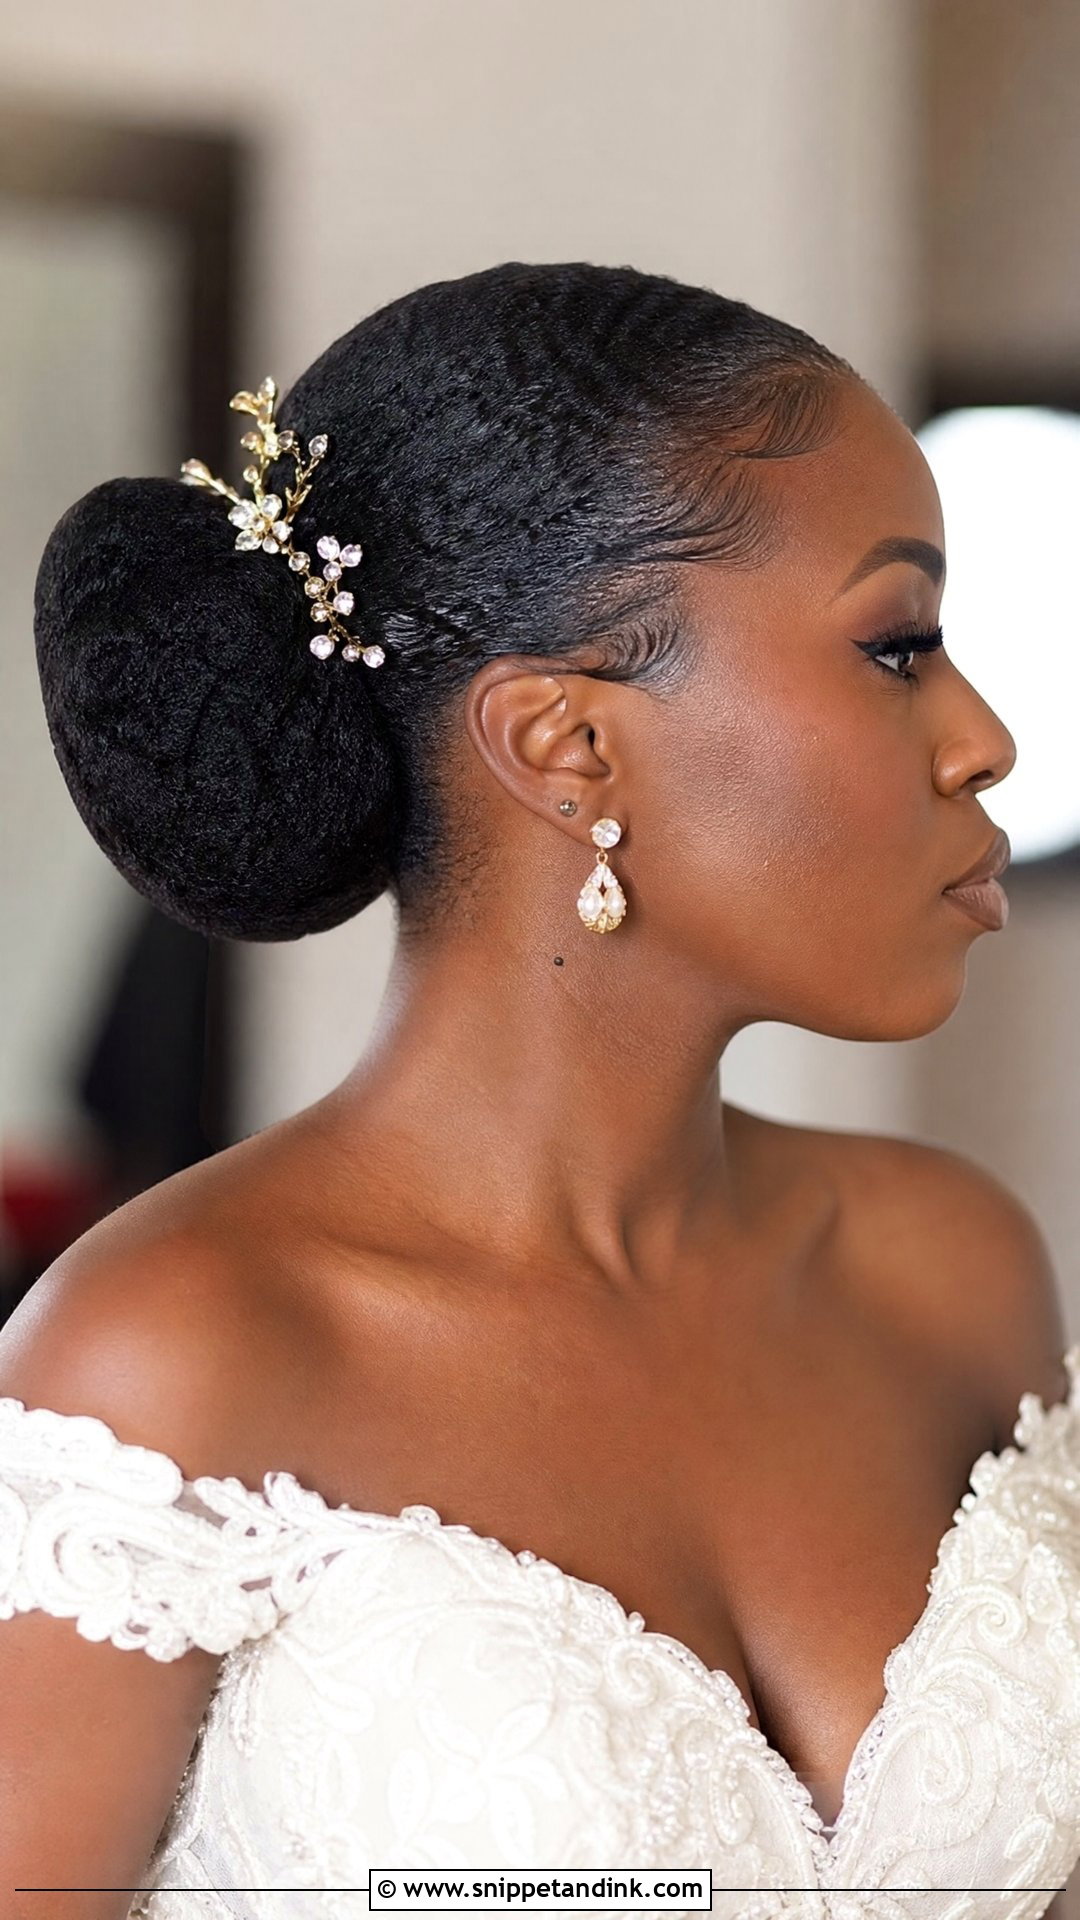
Natural hair can be stretched, silk pressed or slicked with gel and a brush, depending on how the bride wants to wear her texture. I always ask which she prefers before suggesting heat, because a silk press can revert in humidity, while a gel-set finish holds up better on a damp day. The bun can be her own hair, added hair or built around a braided base. A moisturising layer under the gel and a soft edge brush keep the hairline from drying out, and I keep tension light at the edges. Gold or pearl pins look striking against that smooth, dark surface.
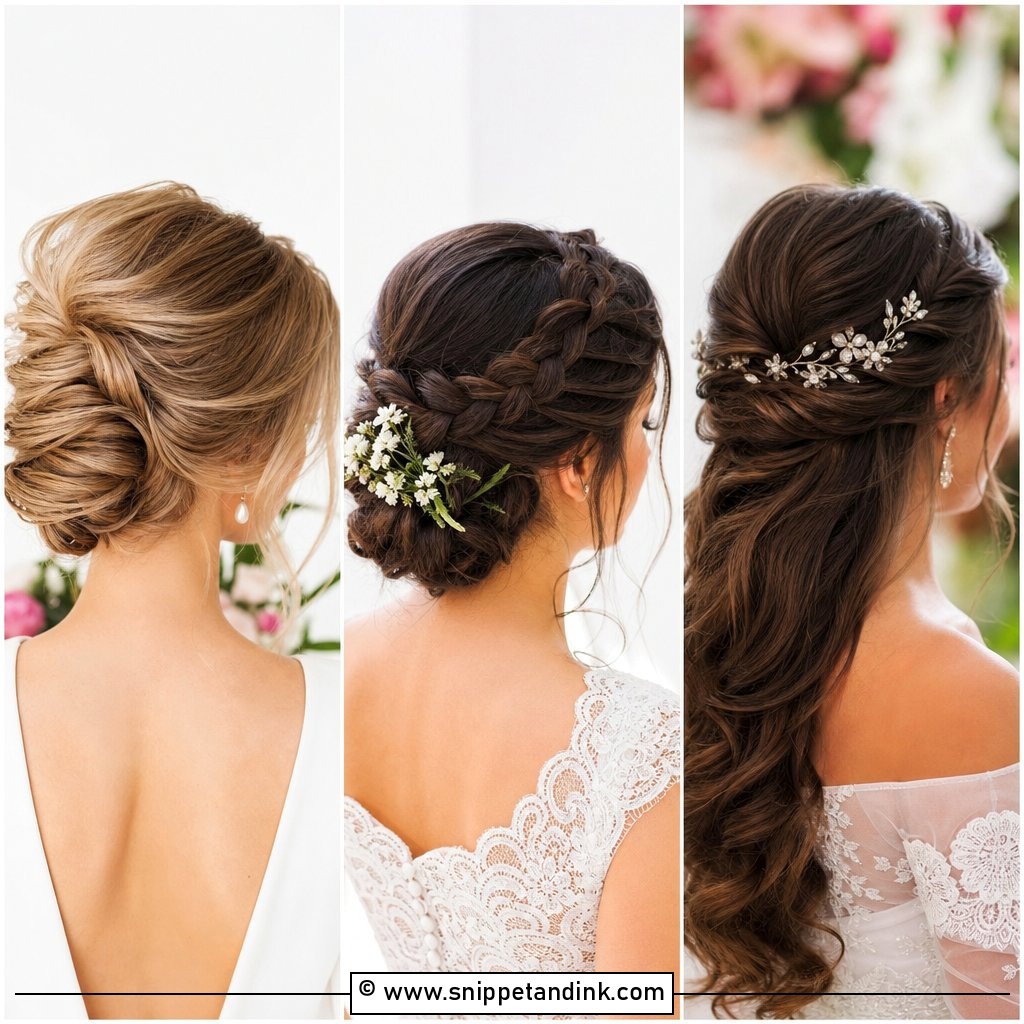
20. Sleek Bun With Flowers
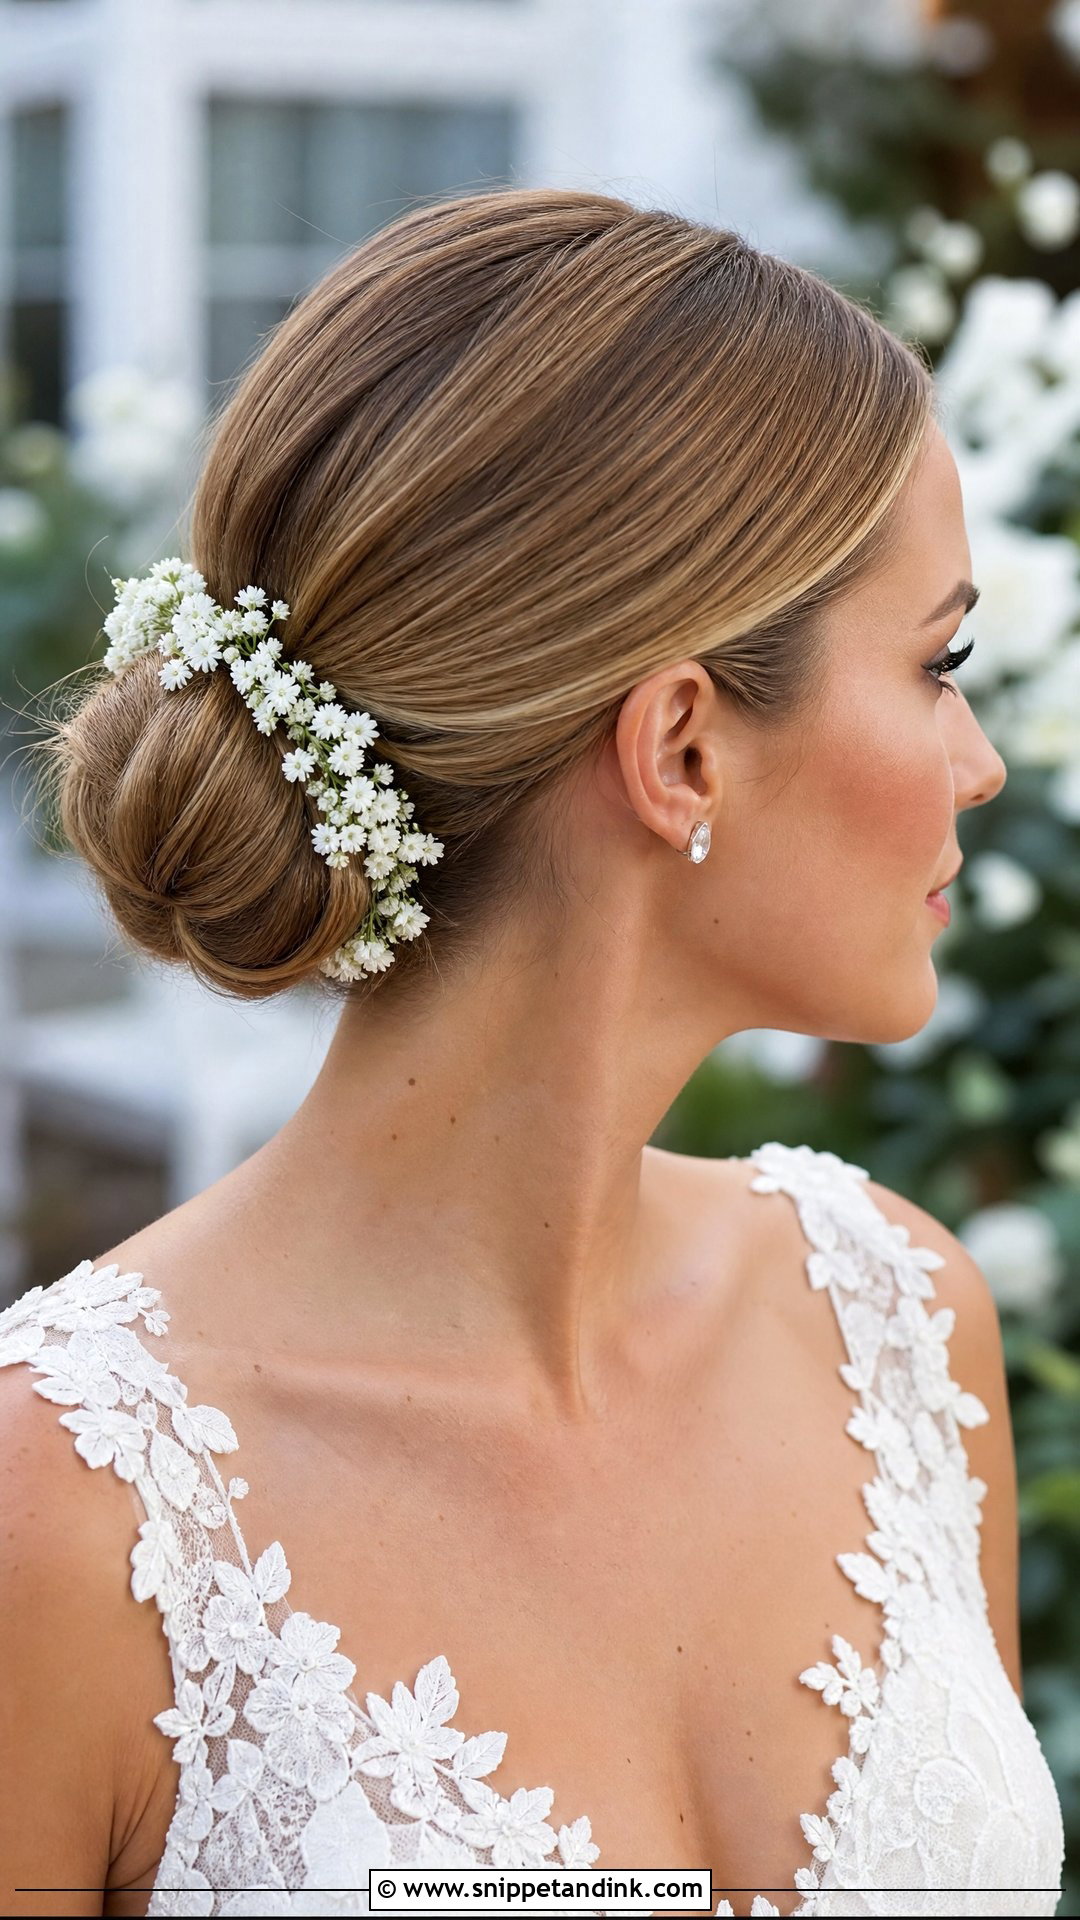
Flowers soften the shape, but too many large blooms hide the very thing that makes the bun sleek, so I keep them to one side or along the base. Small white flowers feel classic and a little greenery suits a garden setting. Out of water, fresh flowers fade fast, so for summer or beach weddings I ask the florist for sturdy stems such as spray roses, waxflower or orchids, wired and chilled until the last minute. Gardenias smell wonderful but bruise and brown wherever they’re touched.
If It Pinches, Slips or Frizzes Halfway Through the Reception
A sleek bun is pulled firm, and firm styles can give you a headache by the third hour. If you felt any pulling at your trial, say so then. The fix is simple: a softer elastic, fewer pins at the crown or a slightly lower placement. Don’t wait until the wedding to mention it.
What your maid of honor should carry
- A handful of bobby pins in your hair colour.
- A travel-size hold spray and a clean spoolie for flyaways.
- Blotting papers, because an oily forehead makes the hairline look greasy in photos.
- A small mirror for checking the back after a round of hugs.
If a section does slip, don’t pull the whole bun out. Smooth the loose piece back with a little spray on your palm and slide a pin under the edge of the bun, pointing toward its center. It takes thirty seconds and nobody will notice.
At the end of the night, take out every pin before you touch the elastic. Then work conditioner through the gel in the shower instead of brushing it out dry, which snaps stiff hair. My advice is to sleep on it loose and leave the second-day styling for the brunch.
Show Your Stylist the Back, Not Just the Front
Most of these buns differ in only three ways: where the part sits, how high the bun is placed and what holds it. Settle those with your dress, veil and venue in mind and the rest follows. Bring photos of the front, side and back to your trial, because guests see the back of your head for most of the ceremony. Then keep the style in for a few hours afterward. If it still feels comfortable and looks smooth by dinner time, you’ve found your bun.
You'll Like These Ideas:


Leave a Reply