
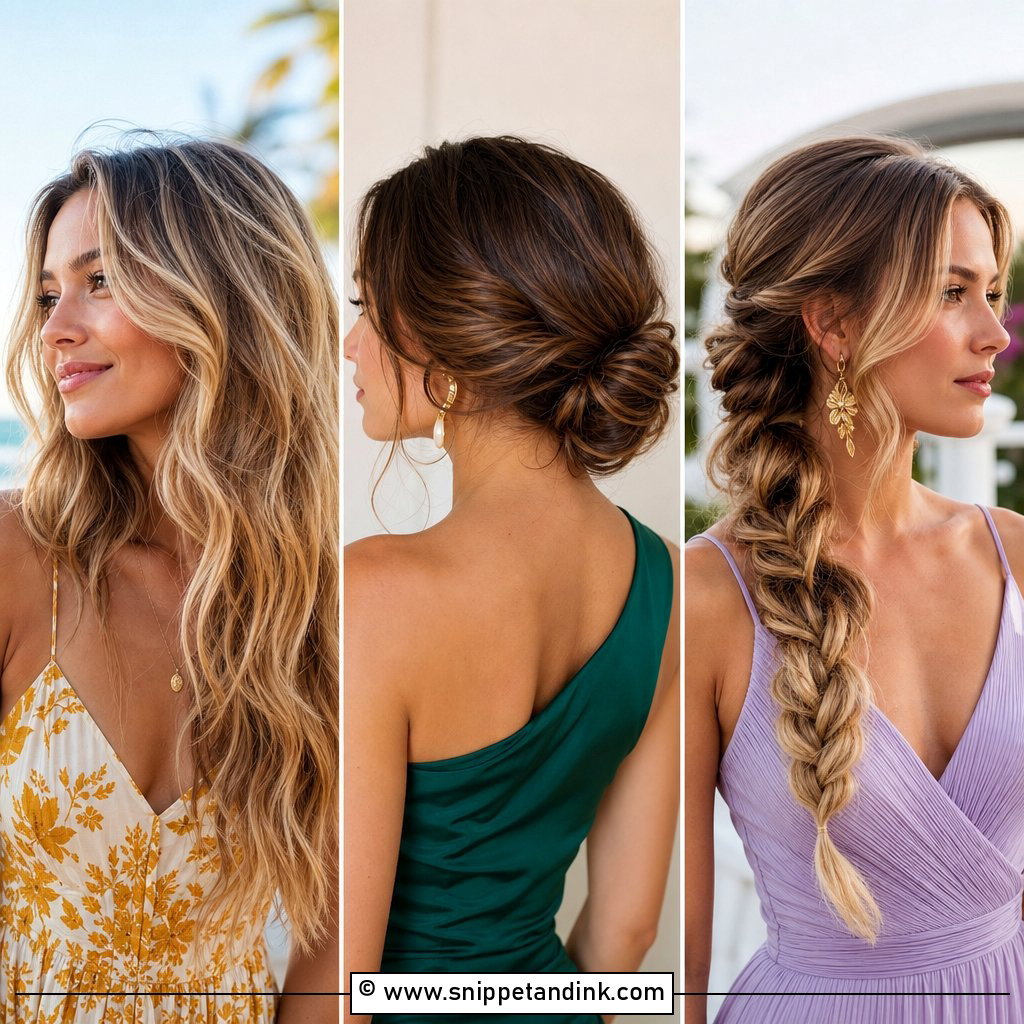
Most of the styles I put on wedding guests and bridesmaids could be done at a bathroom mirror by someone with steady hands and an hour of practice. The secret is less about skill and more about prep: hair that has some grip, the right pins, and curls that are allowed to cool before you touch them. If you’ve seen a style you like and want to recreate at home, the 25 below are the ones I’d trust a confident beginner with. I’ve noted where each one struggles, because a style that falls apart by the speeches was never really easy.
What Belongs in a Do-It-Yourself Hair Kit
When I teach someone to do her own wedding hair, the kit matters almost as much as the technique. Drugstore bobby pins with the ridged side facing your scalp grip far better than smooth pins, and U-shaped pins hold buns and braids without the pressure points that give you a headache by dinner.
- Ridged bobby pins in your hair colour, plus a few U-pins for buns and braids
- Clear elastics, which disappear in photos better than fabric ones
- A 1 to 1.25 inch curling iron for loose waves; a smaller barrel only for tight curls
- A dry texture spray for grip and a flexible hairspray for finishing
- Sectioning clips so the curls can cool in place
- A handheld mirror so you can see the back of your head
Freshly washed hair is the hardest to style because it’s slippery. I prefer hair washed the day before, or I add texture spray at the roots before curling. It sounds like a small change, but it’s often the difference between a bun that holds and one that slides.
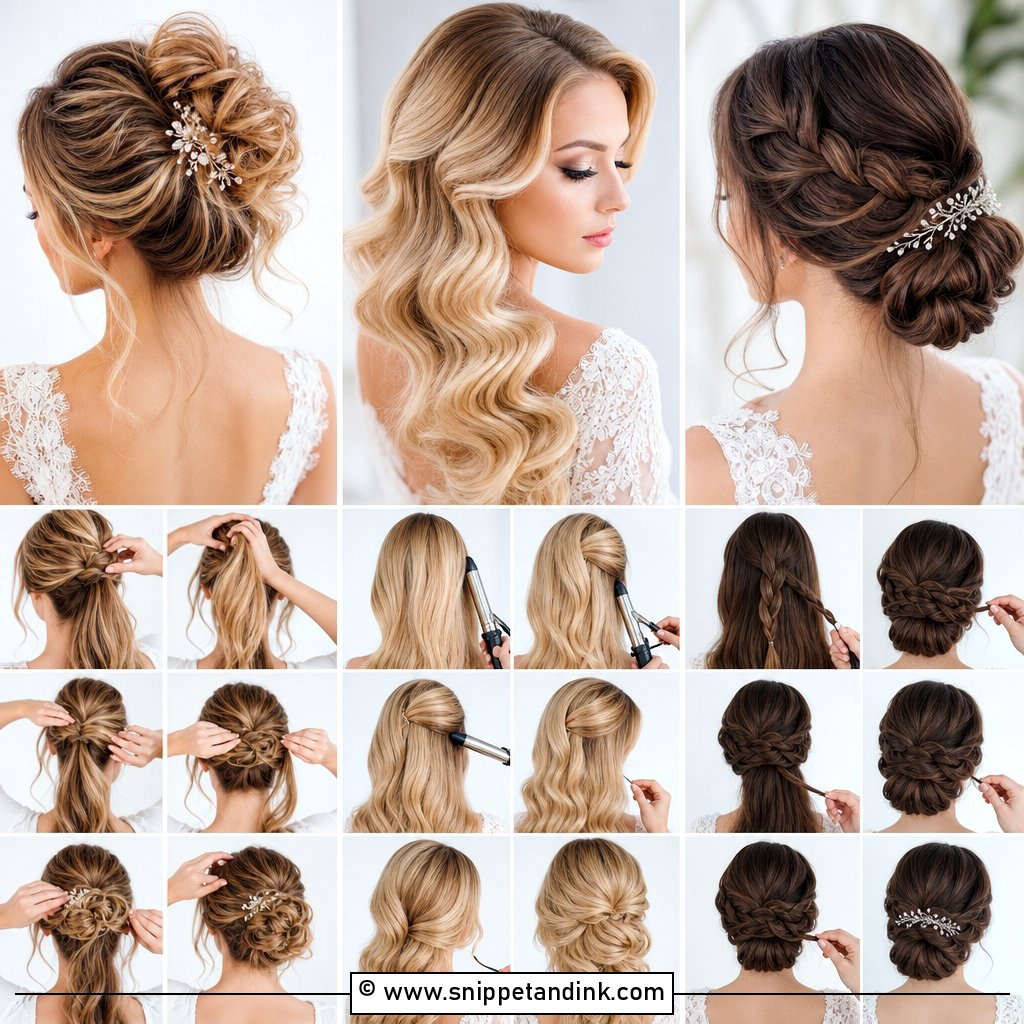
1. Half-Up Half-Down With Loose Curls
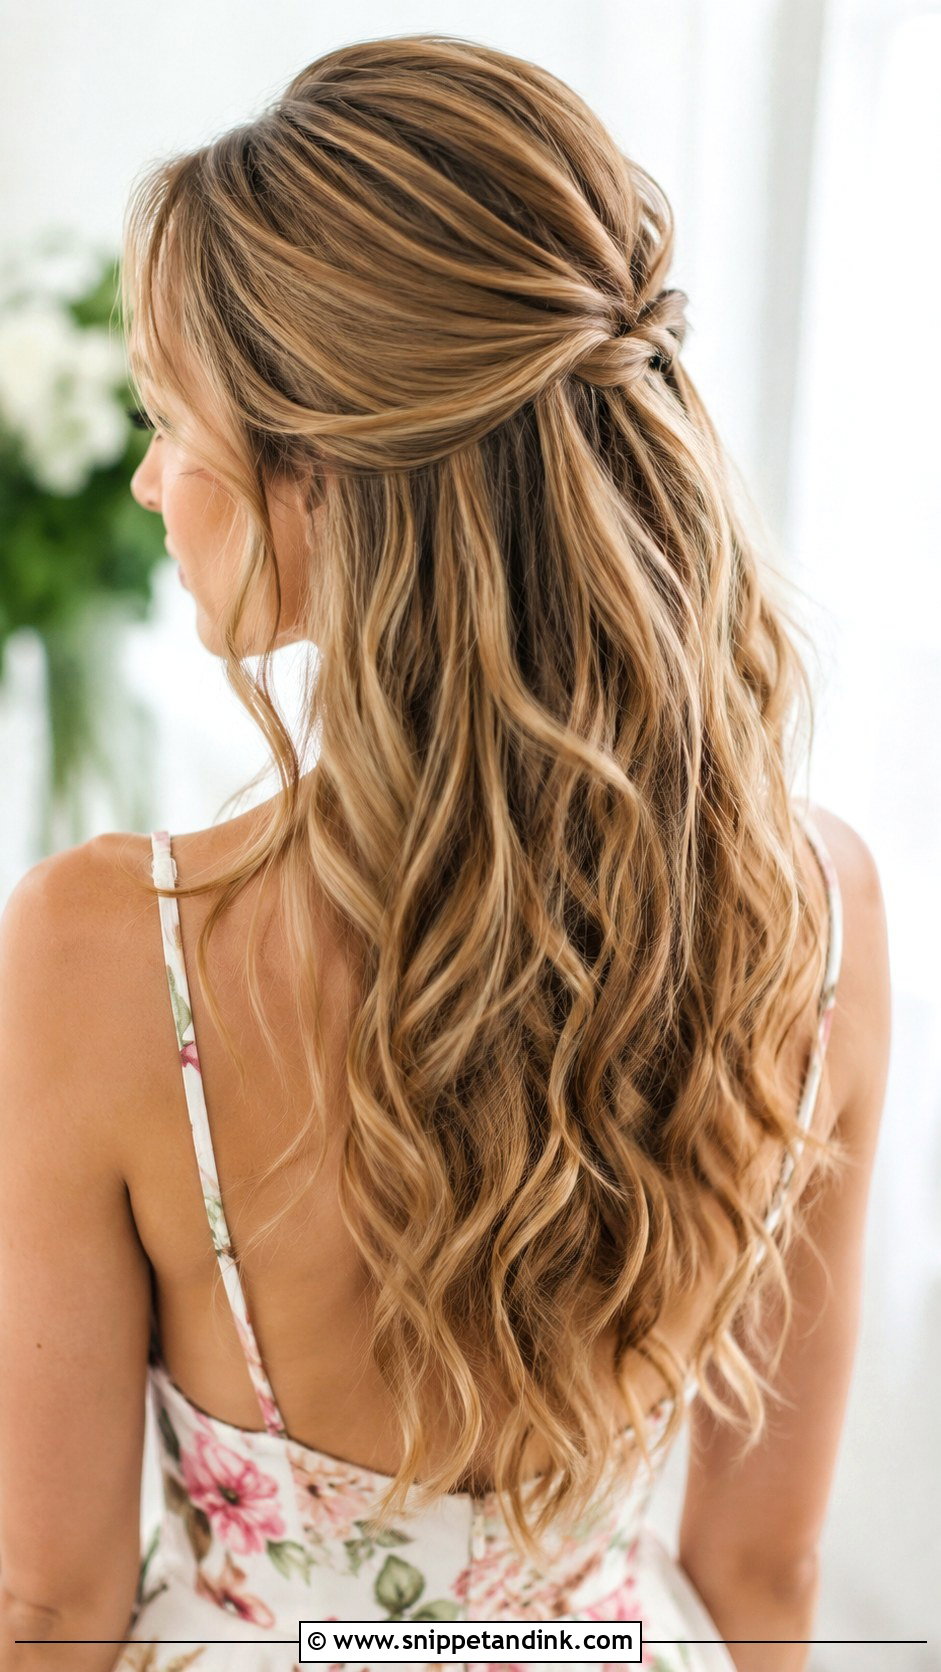
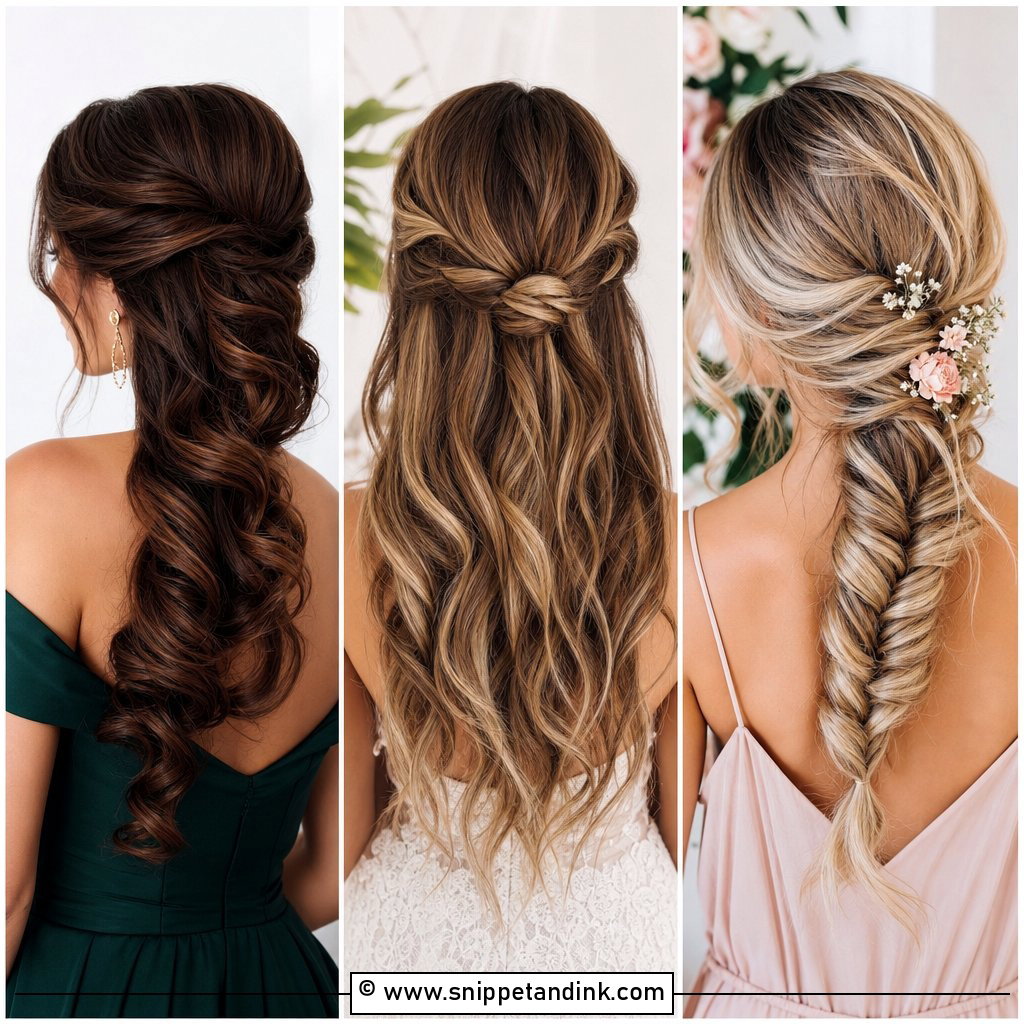
This is the style I get asked for more than any other, and it’s forgiving because the pinned section is small. Curl with a 1.25 inch barrel, clip each curl up while it cools, and only then brush through with your fingers. On very fine hair I crisscross two bobby pins under the clip, since a decorative clip alone will slide down the back of the head within an hour.
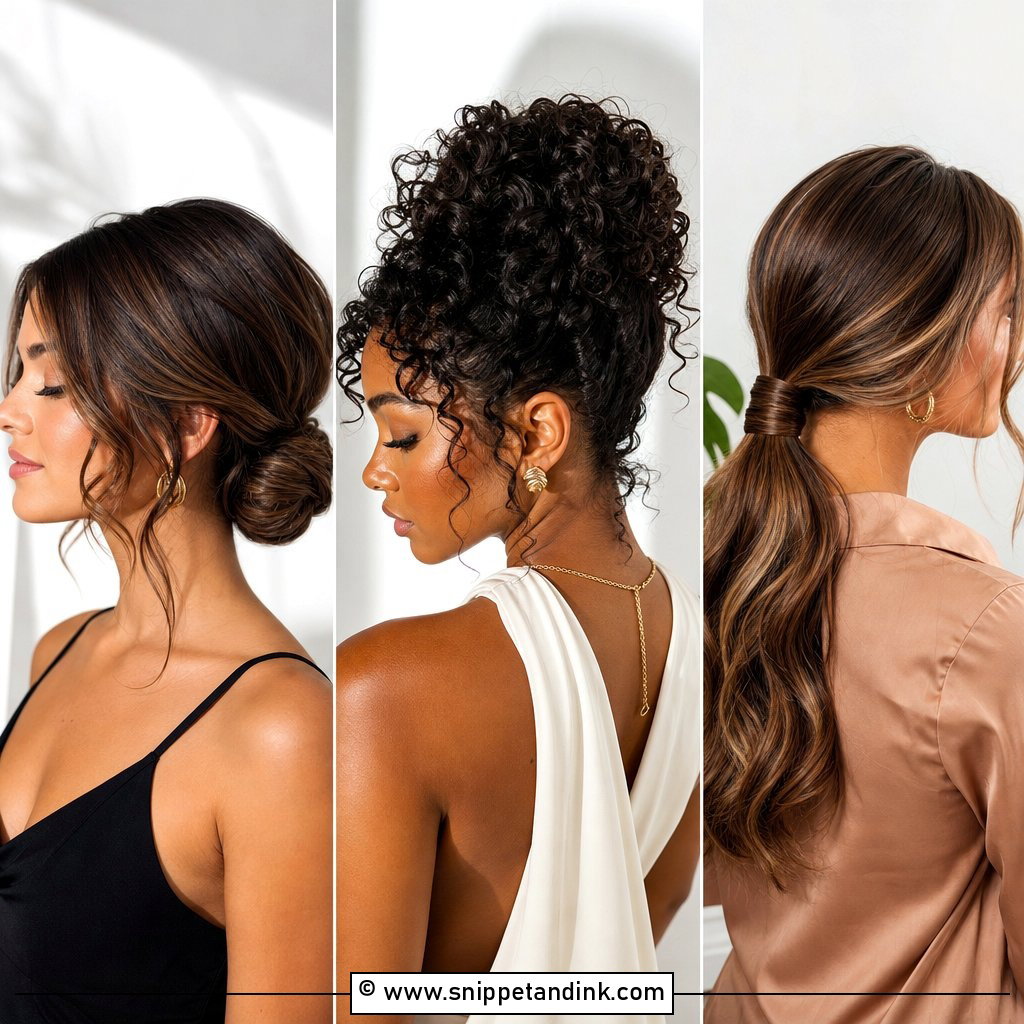
2. Sleek Low Bun
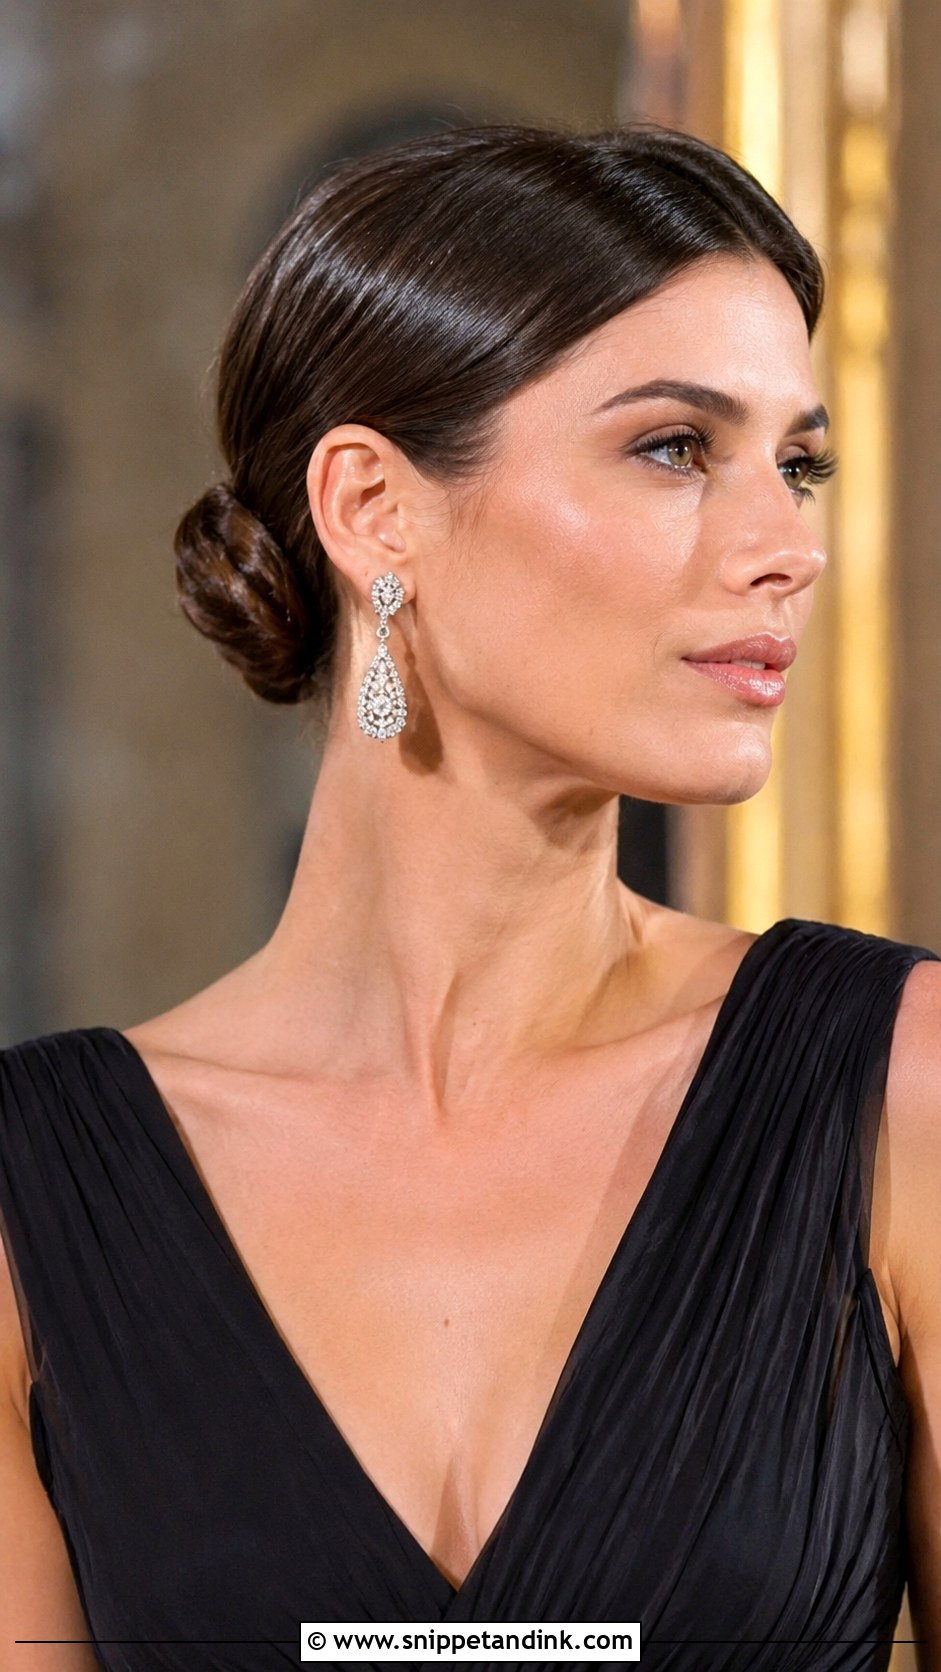
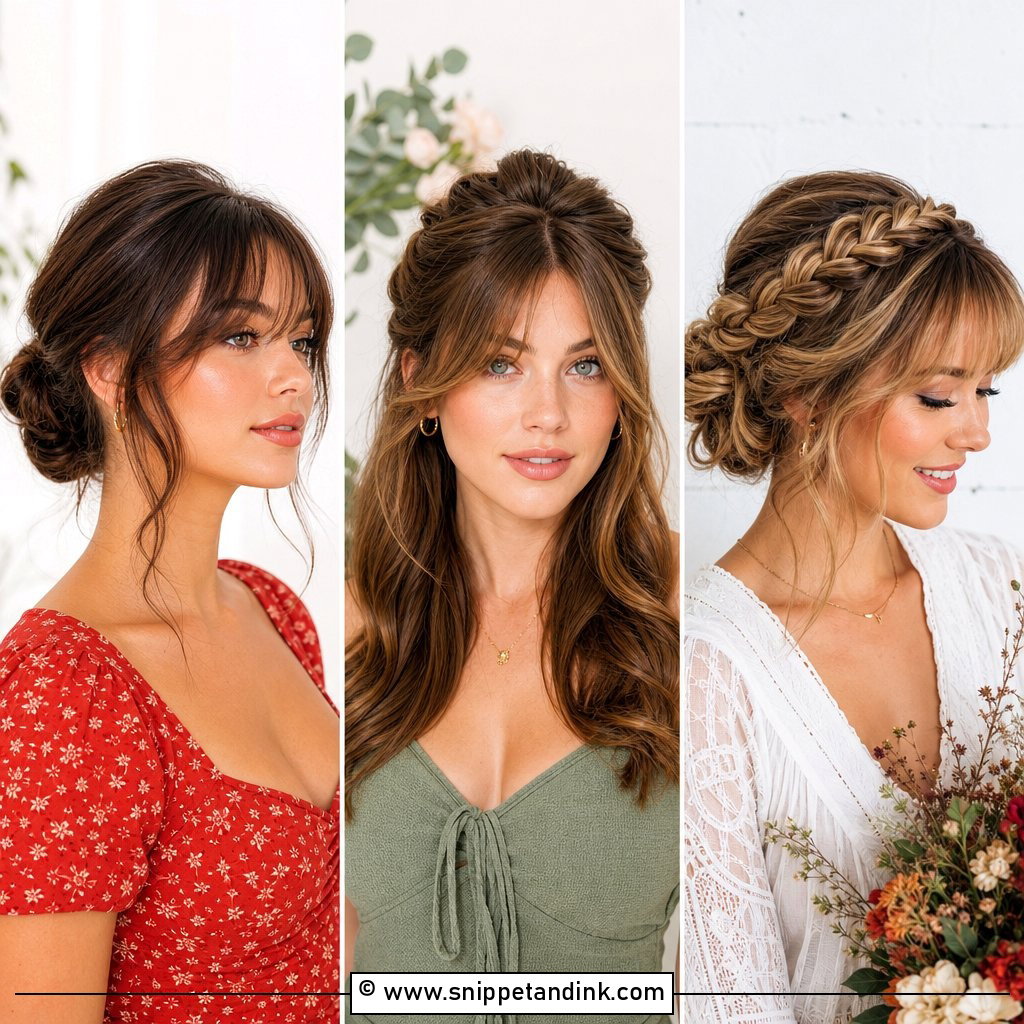
A smooth low bun looks simple, but the tension is everything. I brush the hair back with a boar bristle brush and a pea-sized amount of serum, then tie it with a clear elastic before twisting, so the shape has an anchor. Pins go in toward the head and then flip back into the bun. Skip serum at the roots if your hair goes flat quickly, or the top will look greasy by evening.
3. Messy High Bun
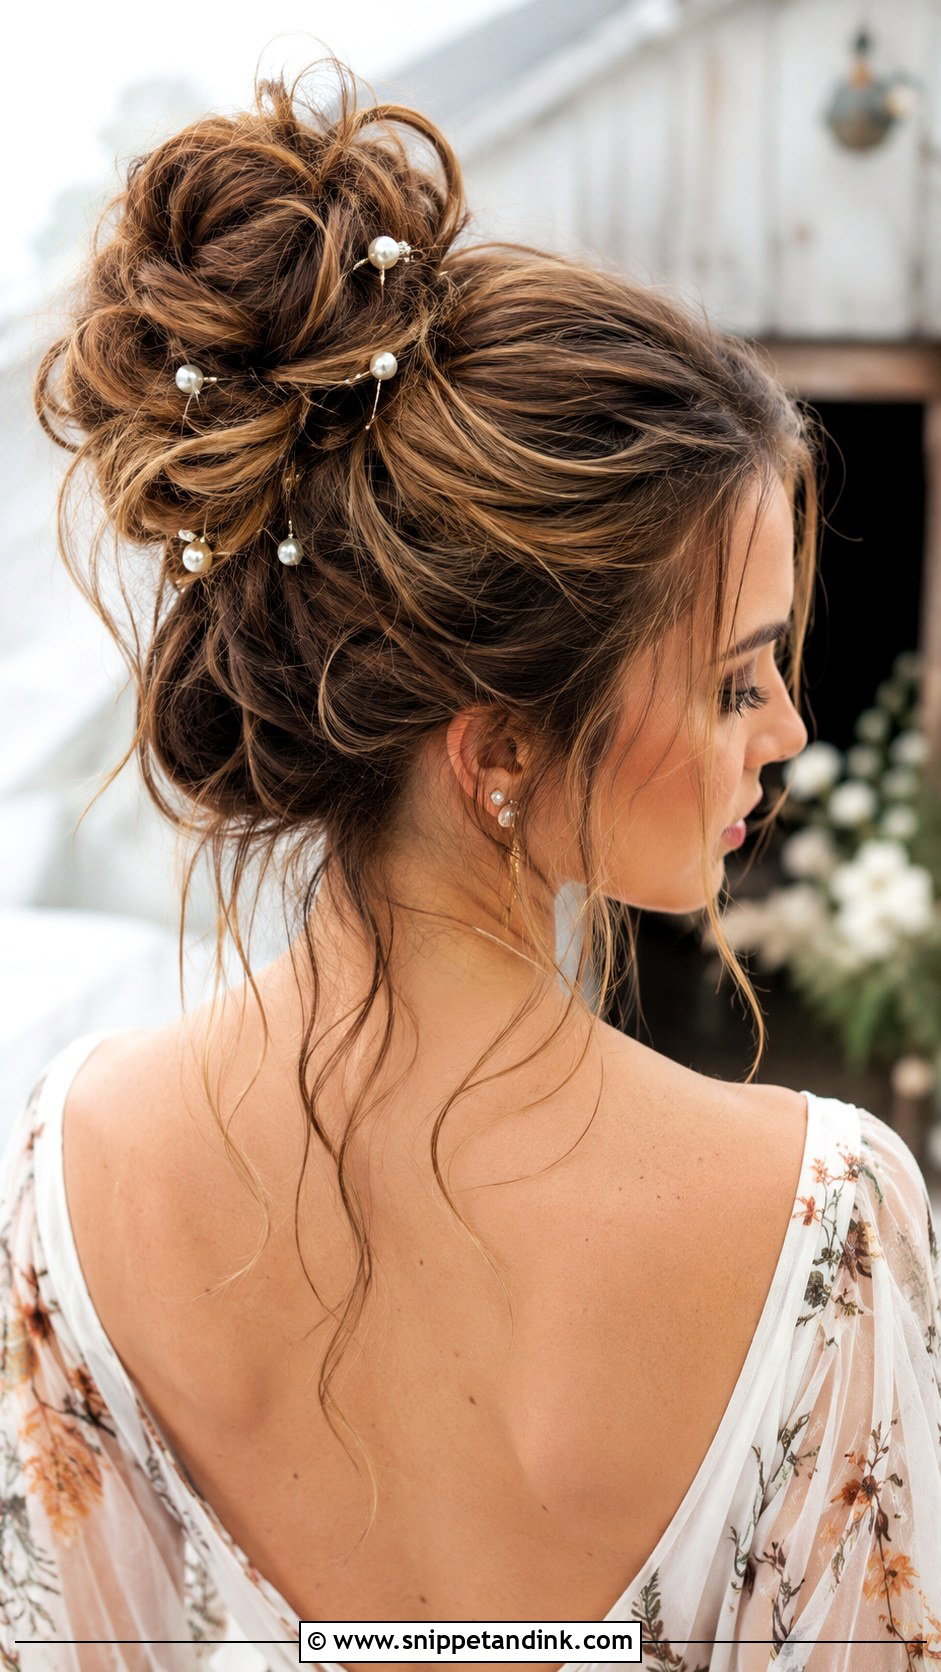
A loose high bun suits bohemian and rustic weddings because it’s meant to look a little lived in. Second-day hair holds it far better than freshly washed hair, which slips out of the twist. I pull the face-framing pieces out last, after spraying, so they don’t get crunchy. Very short layers tend to poke out at the nape, so bring a couple of extra pins for those.
4. Soft Waves Down
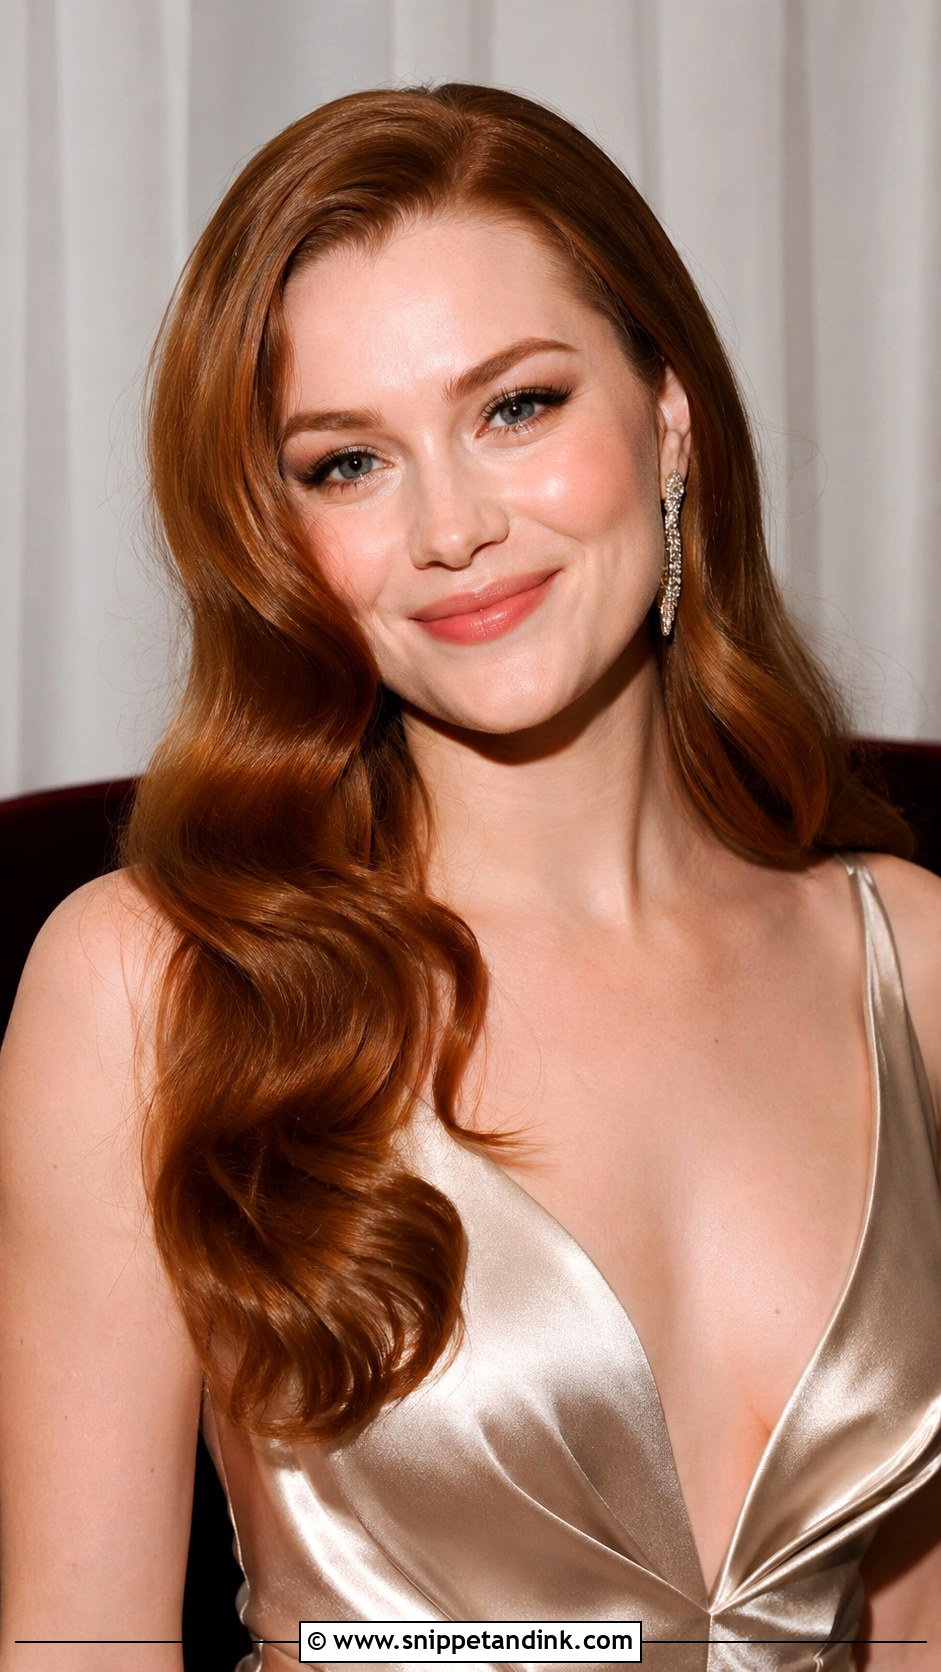
Loose waves worn down are the hardest of the easy styles to keep going, because nothing is holding them. I set them with a round brush blow-dry first, then curl in sections and leave them alone until they cool completely. A light flexible spray at the end is enough; heavy hold makes the waves look stiff in movement. Humid outdoor ceremonies are the one place I’d choose something pinned instead.
5. Braided Crown
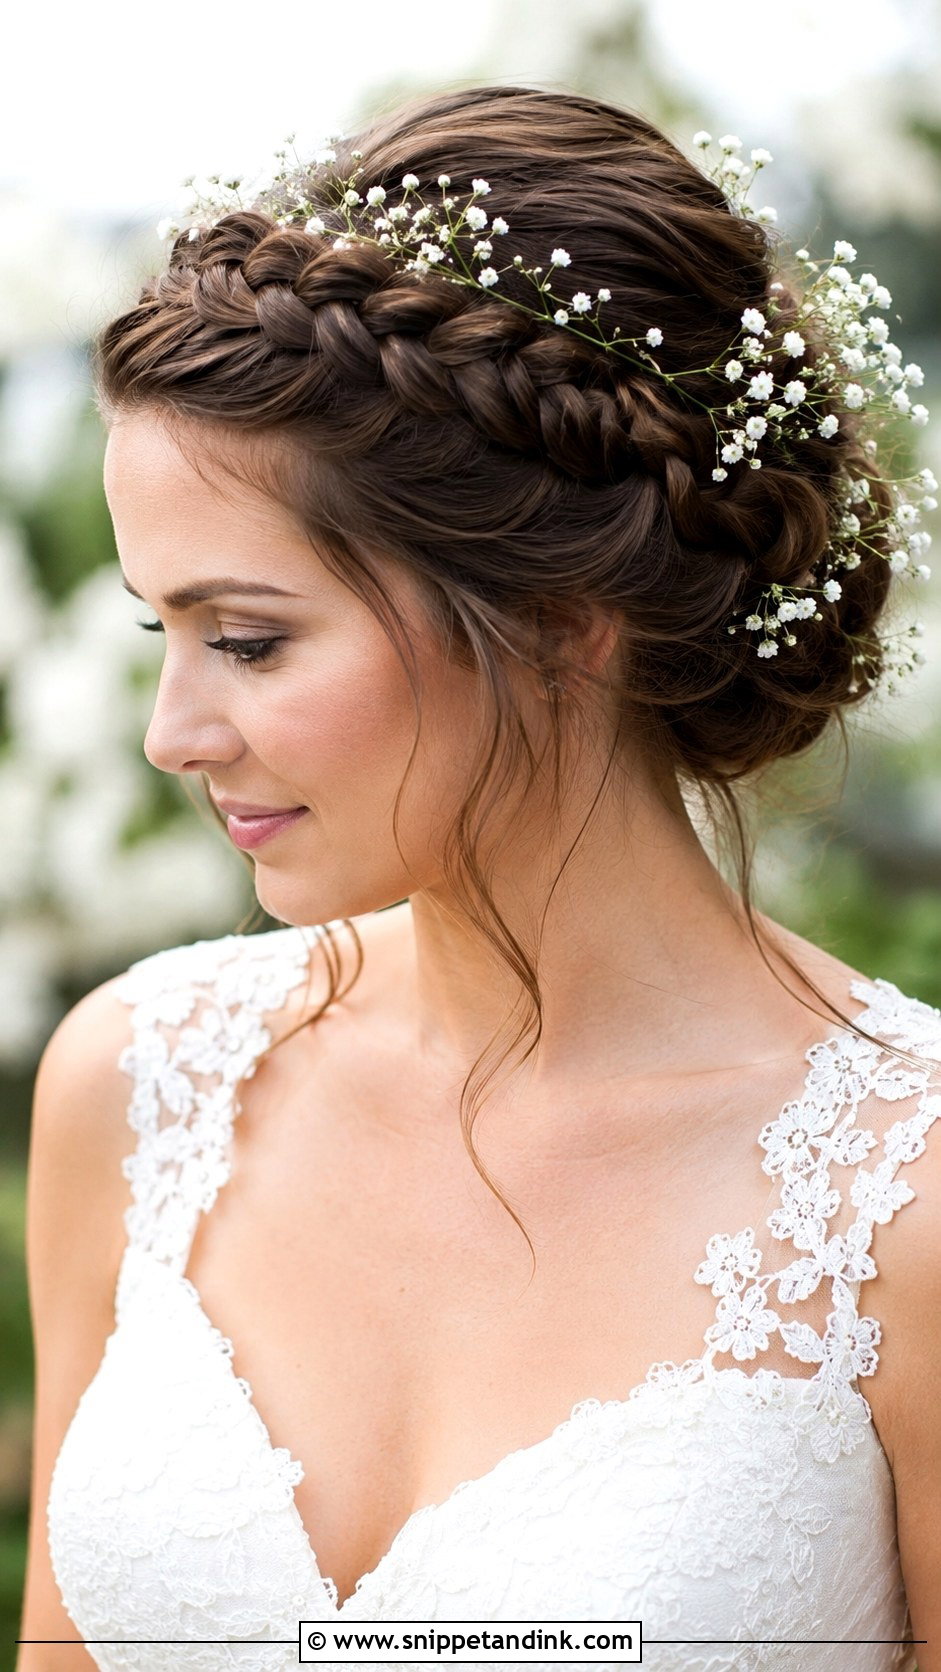
Two Dutch braids pinned over the top sit like a natural halo and stay put through a full day of hugging. Braid slightly back from the hairline so the crown doesn’t pull at your temples. I hide the ends under the opposite braid and secure with U-pins, which grip braided hair better than bobby pins. Shoulder-length layers can poke out of the braid, so a texture spray before you start helps hold them in.
6. Low Ponytail
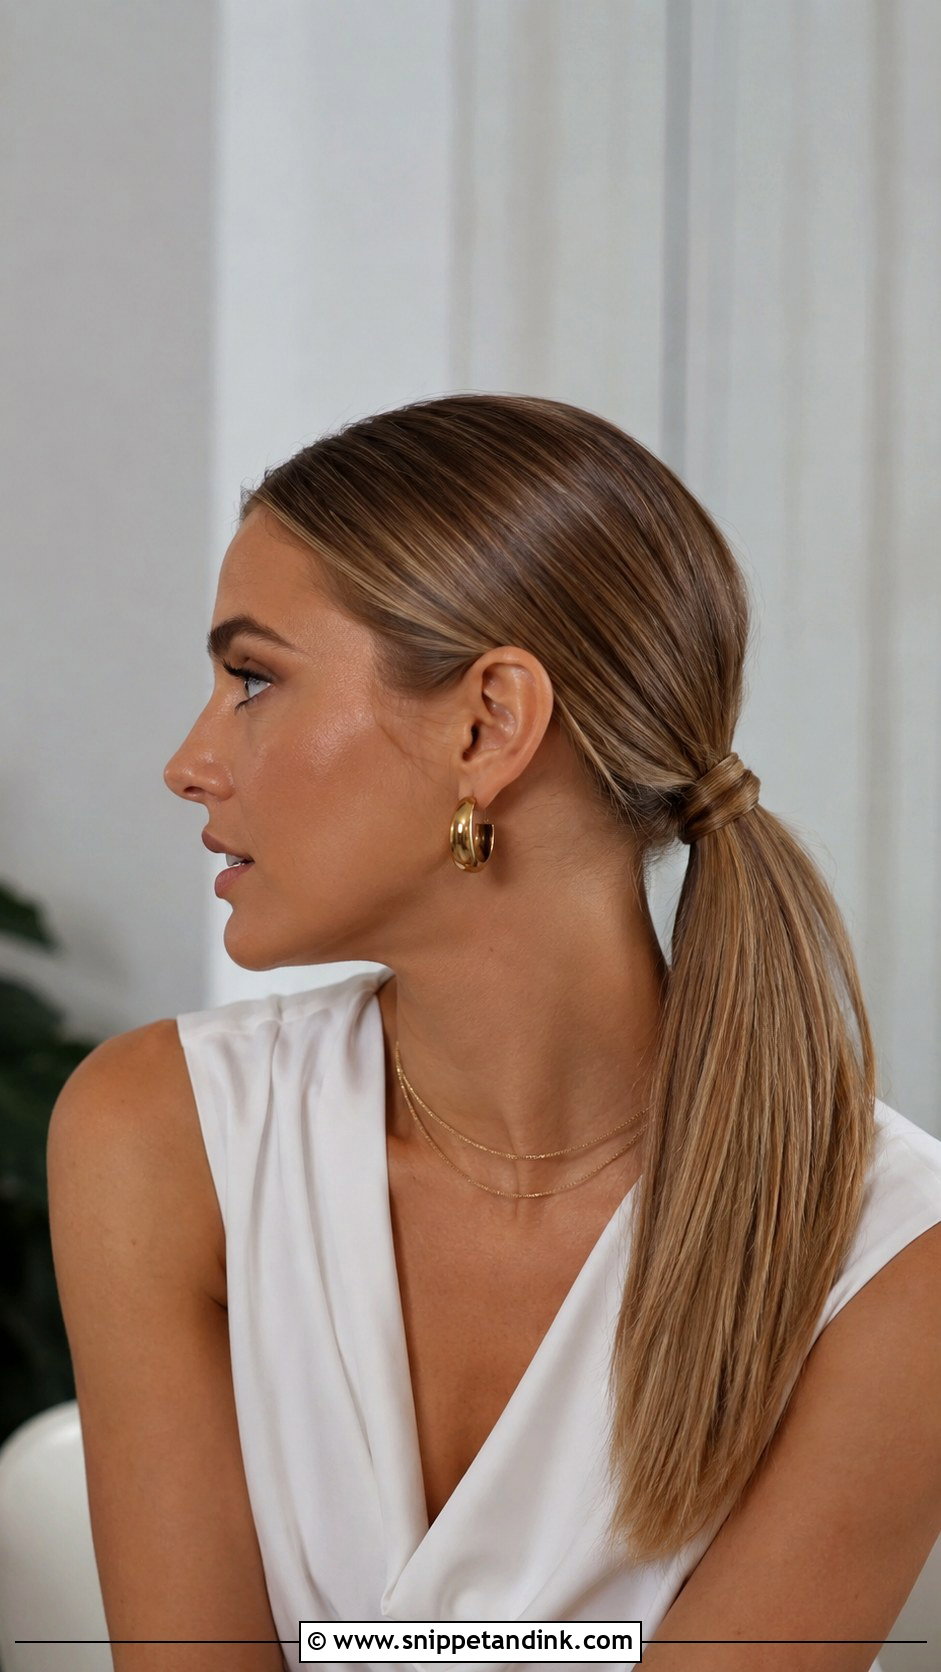
This one depends on smoothing before you tie. Brush back with a little serum, secure at the nape, then wrap a small strand around the elastic and pin it underneath. If your hair is very thick, split the ponytail into two elastics stacked close together; one band alone usually loosens and drops by the reception.
7. Twisted Half-Up
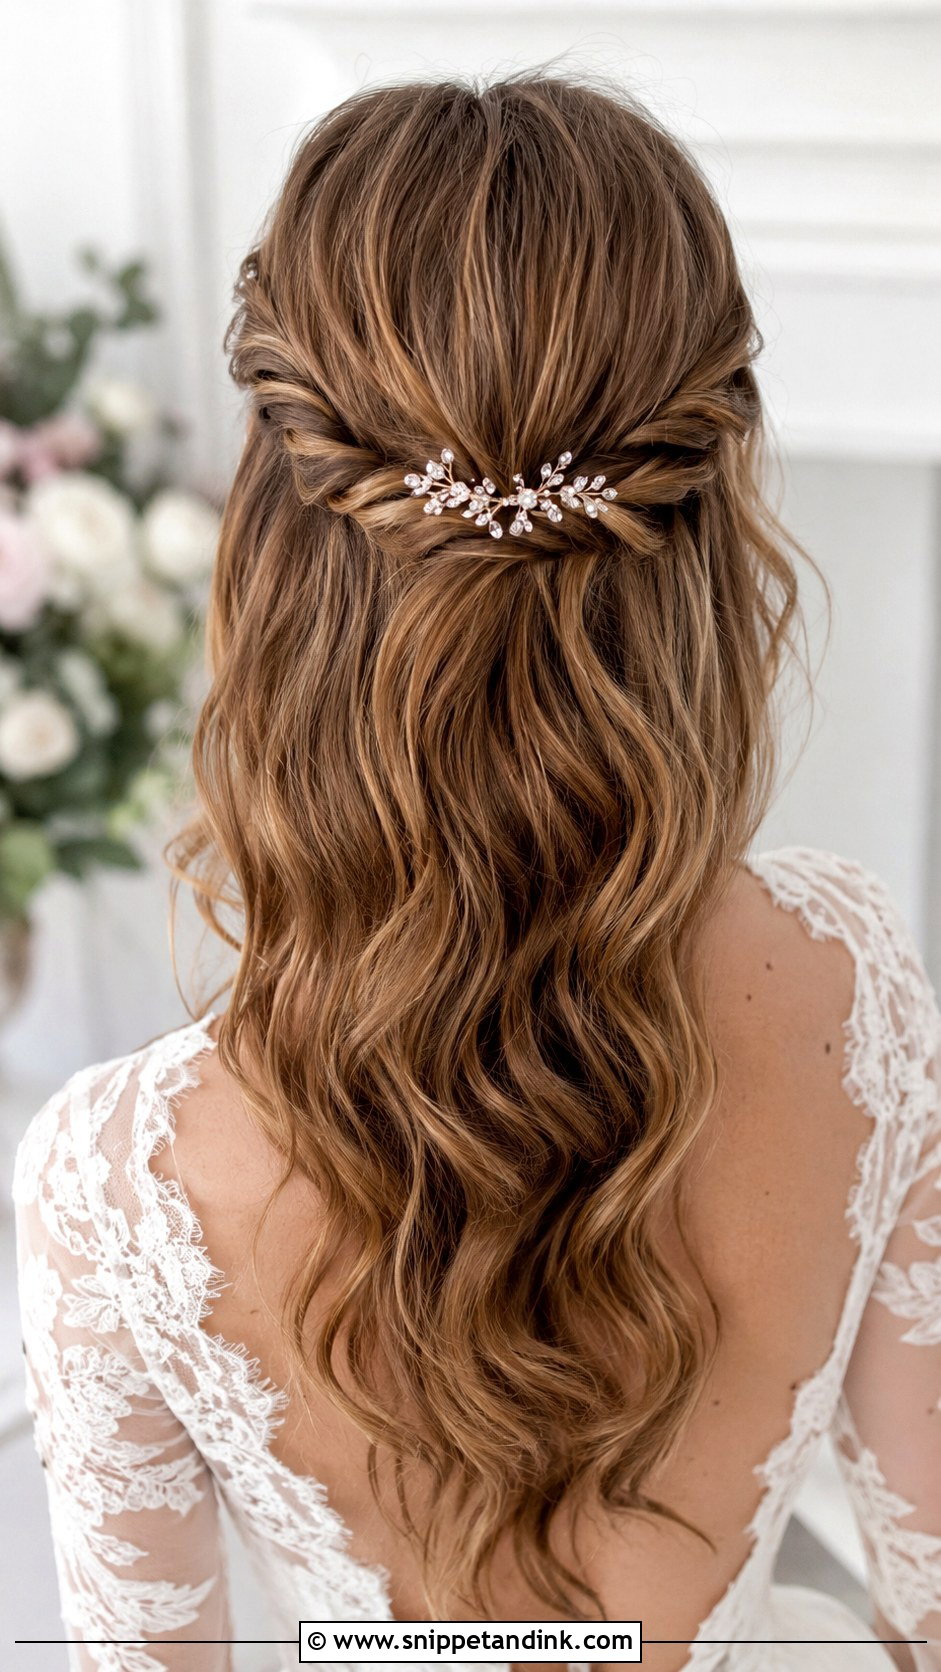
Take a one inch section from each side, twist it away from your face, and pin them together at the back. That’s the whole technique, which is why I recommend it so often for bridesmaids doing their own hair. Twist tighter than you think you need to, because twists relax as the day warms up. A small pin where they meet hides the crossing point.
8. Classic Chignon
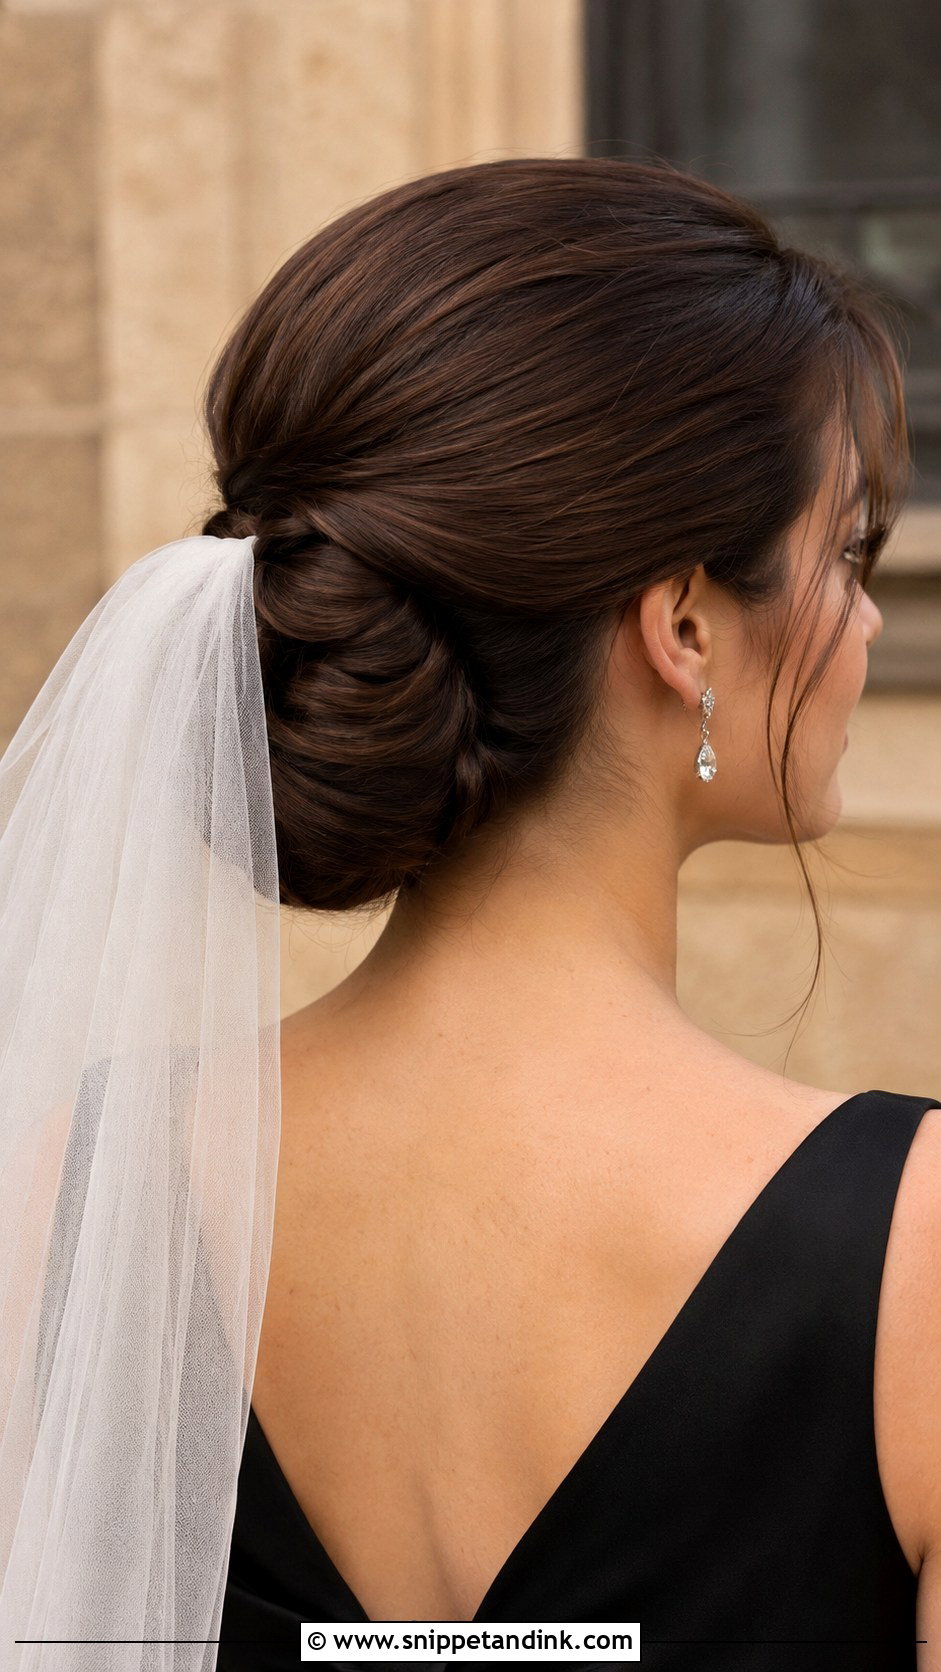
A chignon is a twisted, tucked knot at the nape that sits close to the head, which makes it the easiest base for a veil or tiara. Creating one means rolling the length up and inward, then pinning along the seam. I use more pins than people expect, roughly eight to twelve, angled into the roll. Hair that stops above the shoulders usually doesn’t have enough length to roll and looks better in a low twist instead.
9. Boho Braided Half-Up
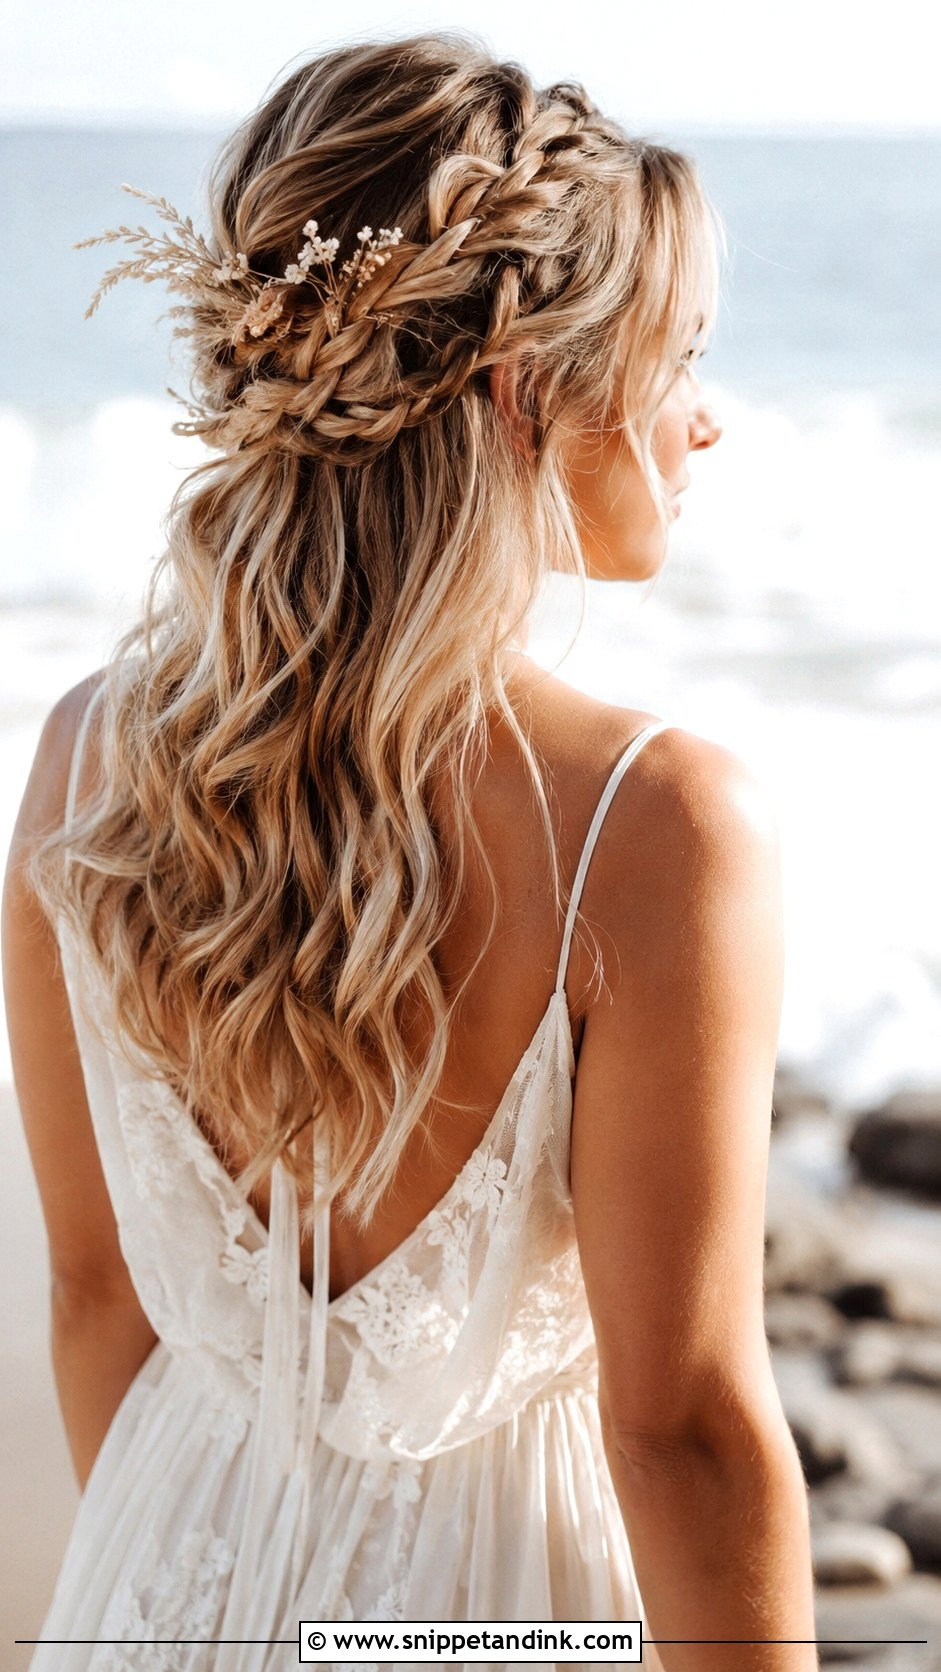
Two or three small braids woven through the top half give this its handmade look. I keep them loose and pancake the edges with my fingertips so they read from a distance. Dried flowers stay fresher looking than fresh ones in summer heat. Slippery straight hair makes the little braids unravel, so I’d brush a dry texturizer through first.
10. Curly Updo for Natural Hair
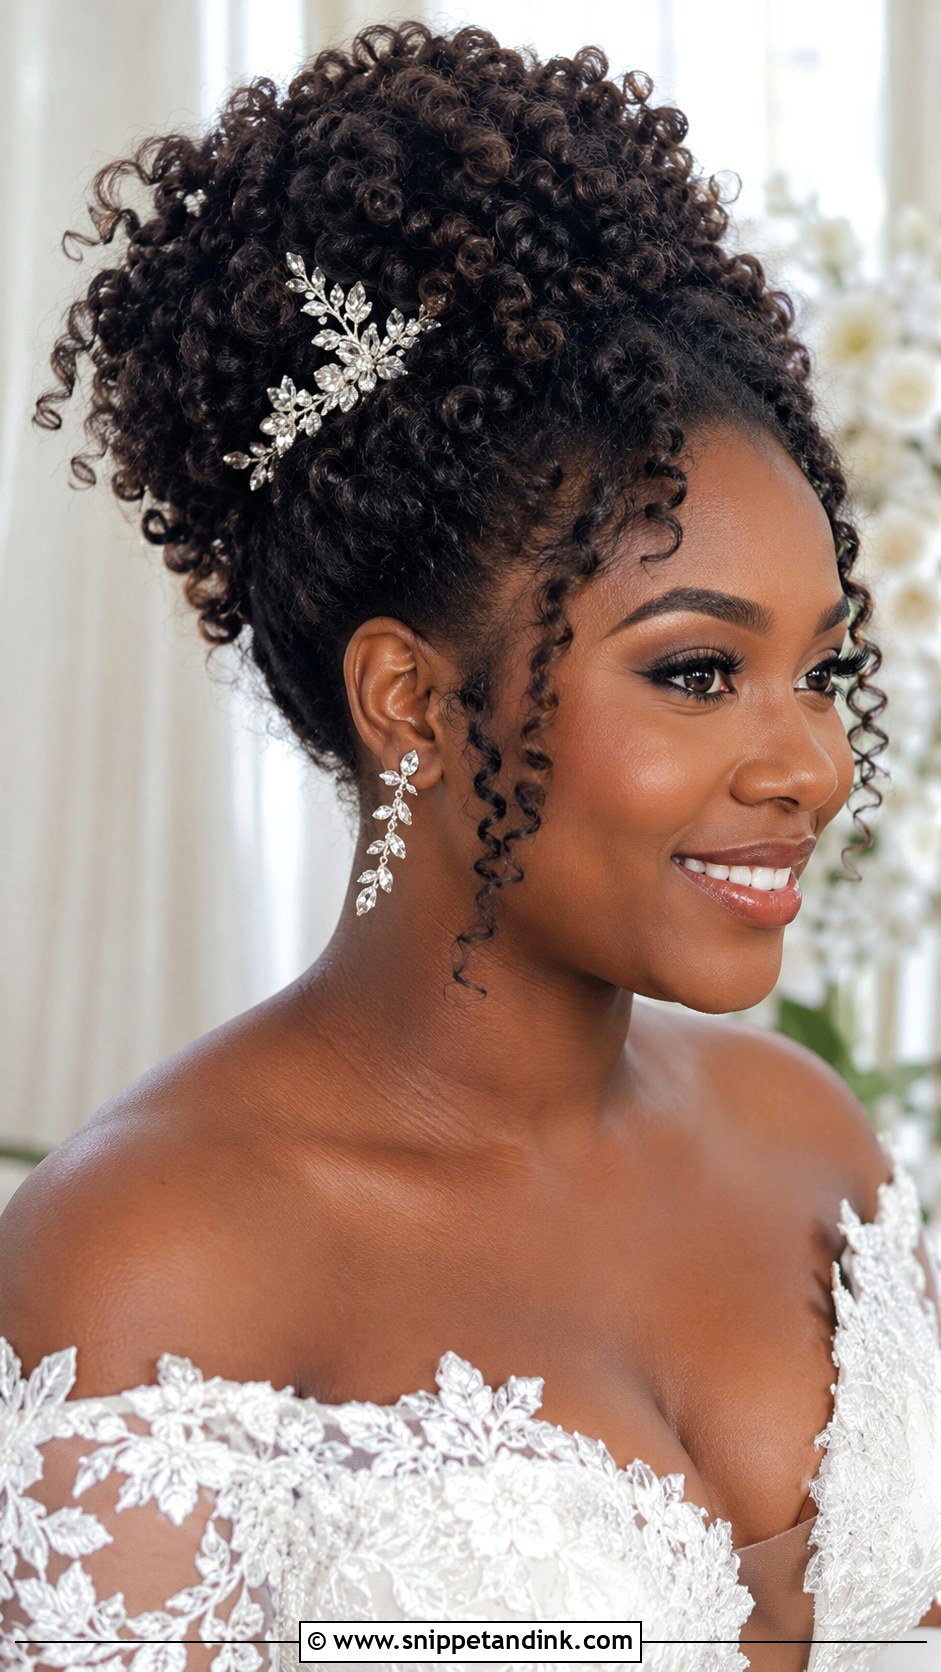
With natural curls, I never brush the texture out; I gather the hair up with my hands and pin it in clusters so the curl pattern stays defined. A curl cream applied the night before keeps the spirals clumped and reduces frizz. Large-pronged hair pins hold coily hair better than thin bobby pins, which tend to vanish into the volume. A comb or a single flower tucked to one side finishes it without competing with the curls.
11. Side-Swept Curls
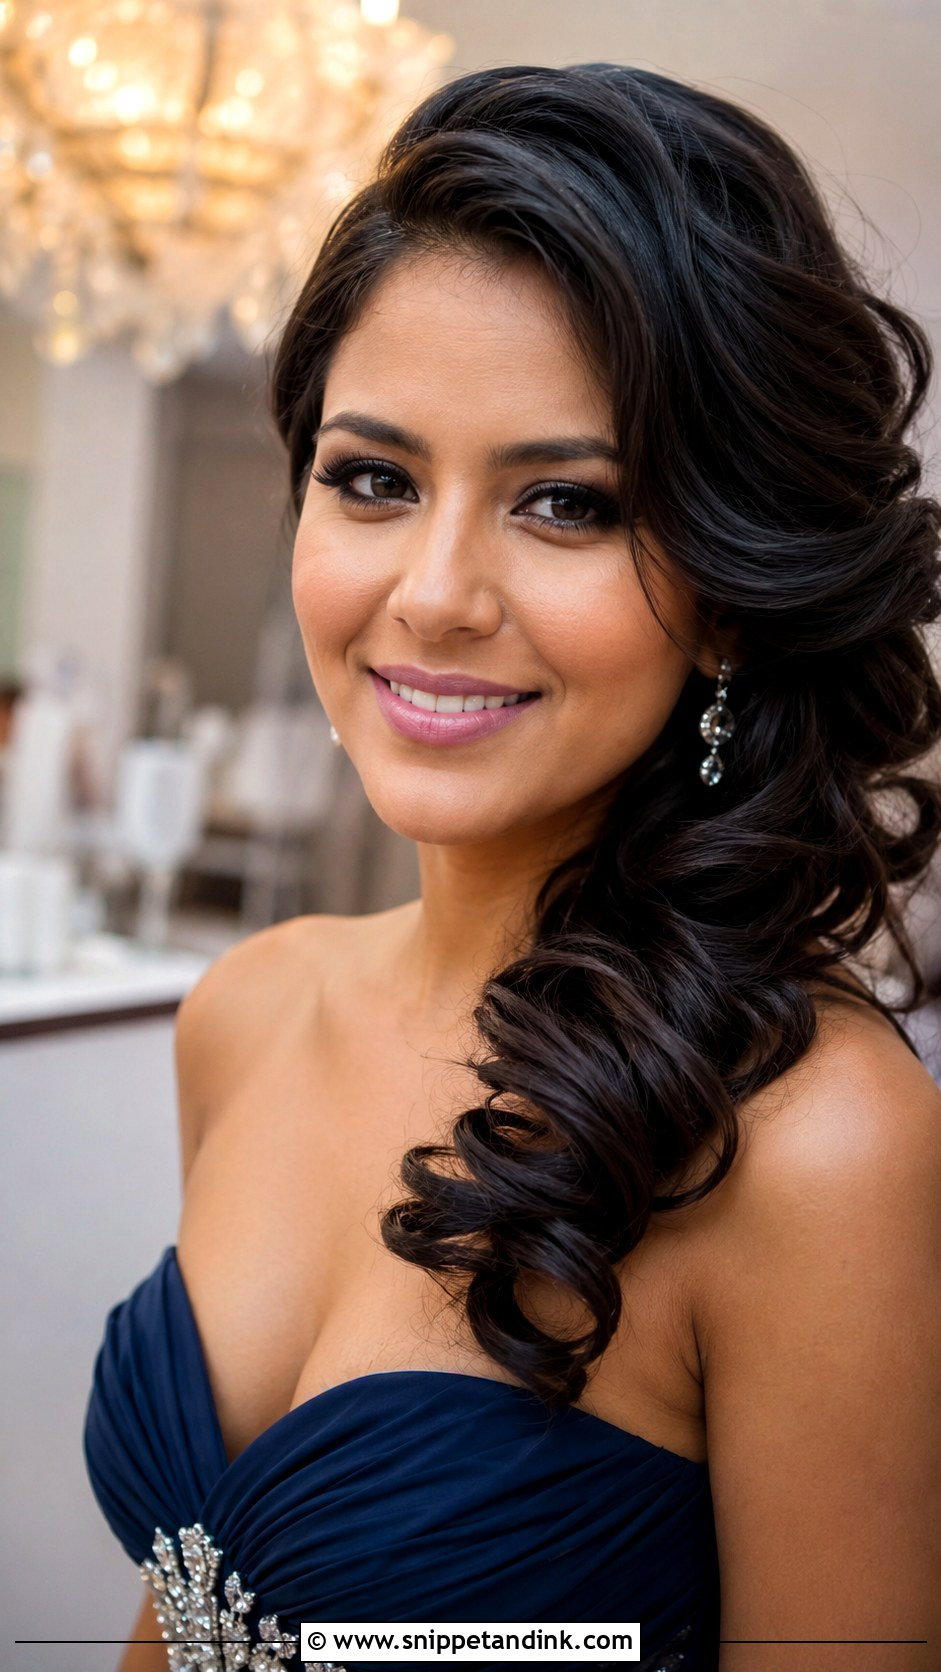
Curl everything with a large barrel, then sweep it over one shoulder and anchor it with a row of crossed pins behind the opposite ear. Those hidden pins are what stop the curls from sliding back to center during the day. Decide which shoulder before you curl, because the curls should point away from your face on the swept side. It leaves one ear bare, so earrings carry more weight here.
12. Fishtail Braid
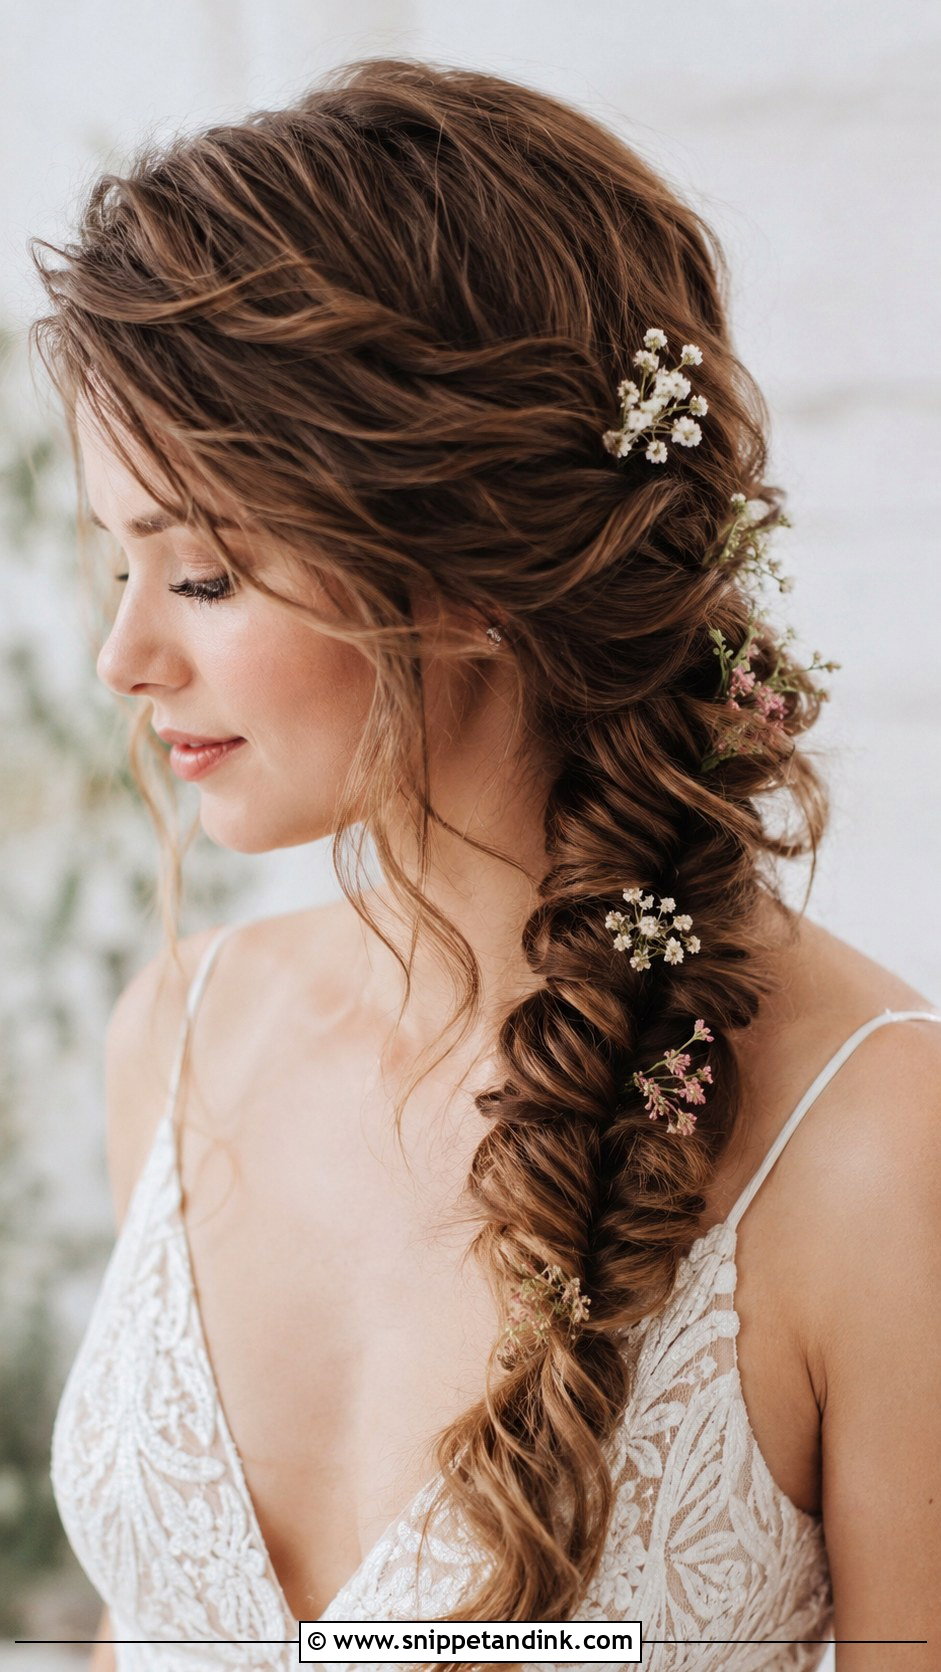
A fishtail looks complicated but only uses two sections, crossing a thin strand from the outside of each half to the other. The thinner the strands, the more detail you get. I tie it off first and loosen it second; pulling the edges before tying makes the braid lopsided. Layered hair shorter than the collarbone tends to fan out of a fishtail, so I’d pick a regular braid for that length.
13. Pinned Back Waves
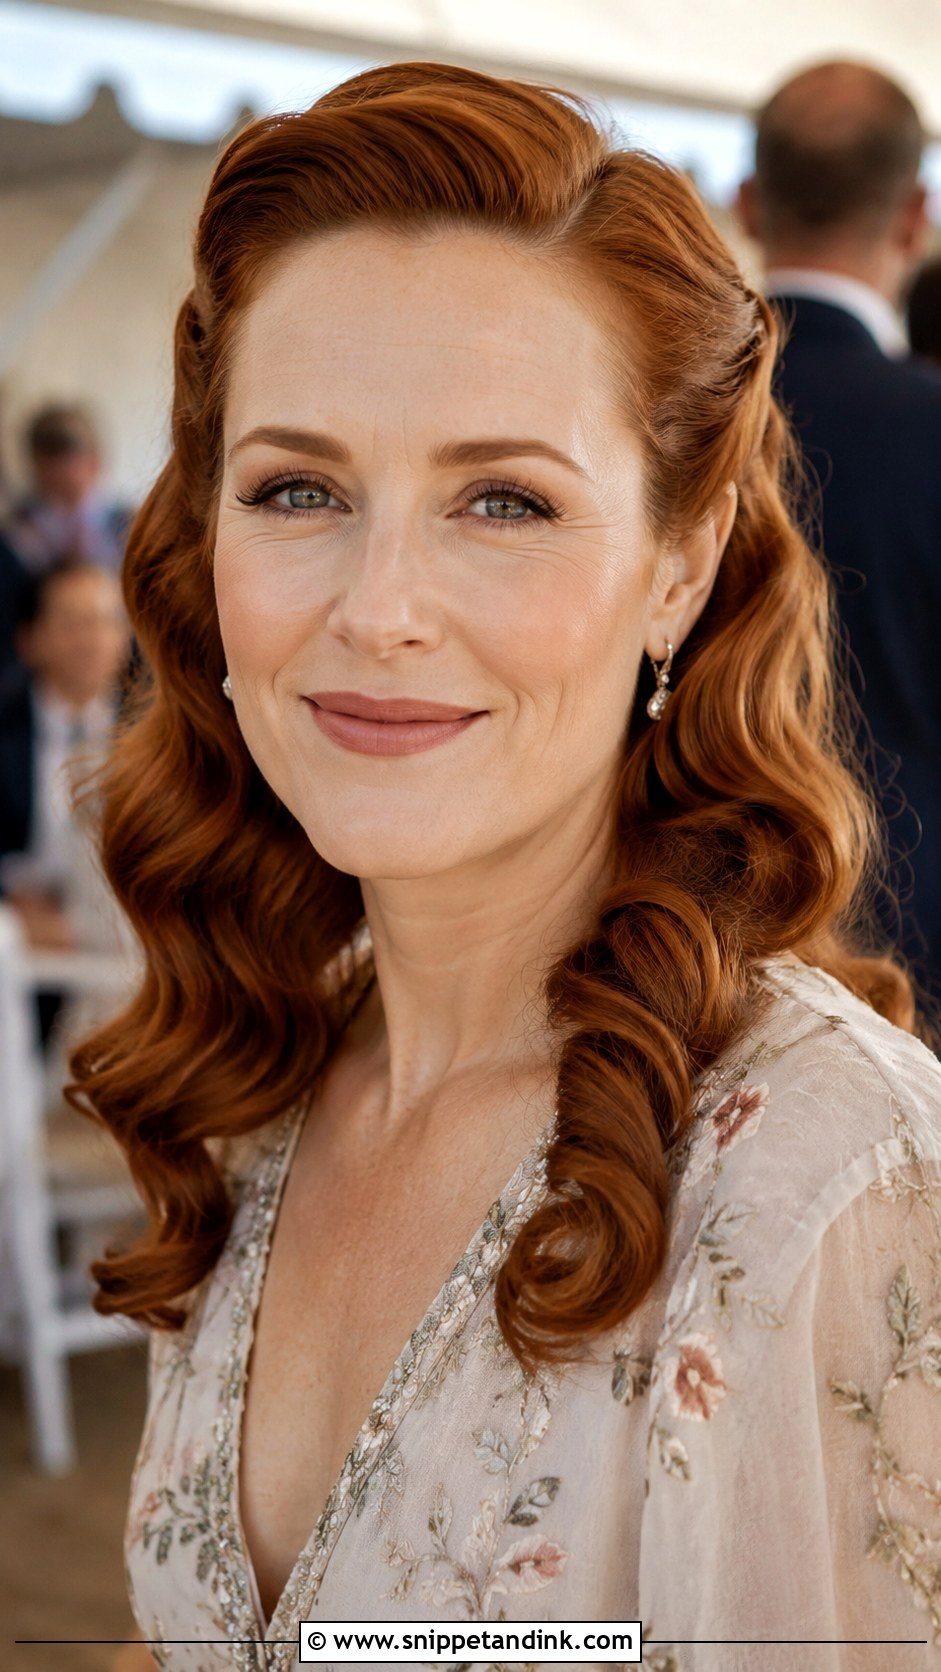
Pinning the sides back over soft waves is a fast fix for anyone who doesn’t want hair in her face during dinner. Wave the hair first, then twist each side back once before pinning so the pins have something to bite into. I aim the pins downward and slightly behind the ear where they disappear. Short hair and long hair both handle this one, as long as the sides reach behind the ears.
14. Top Knot
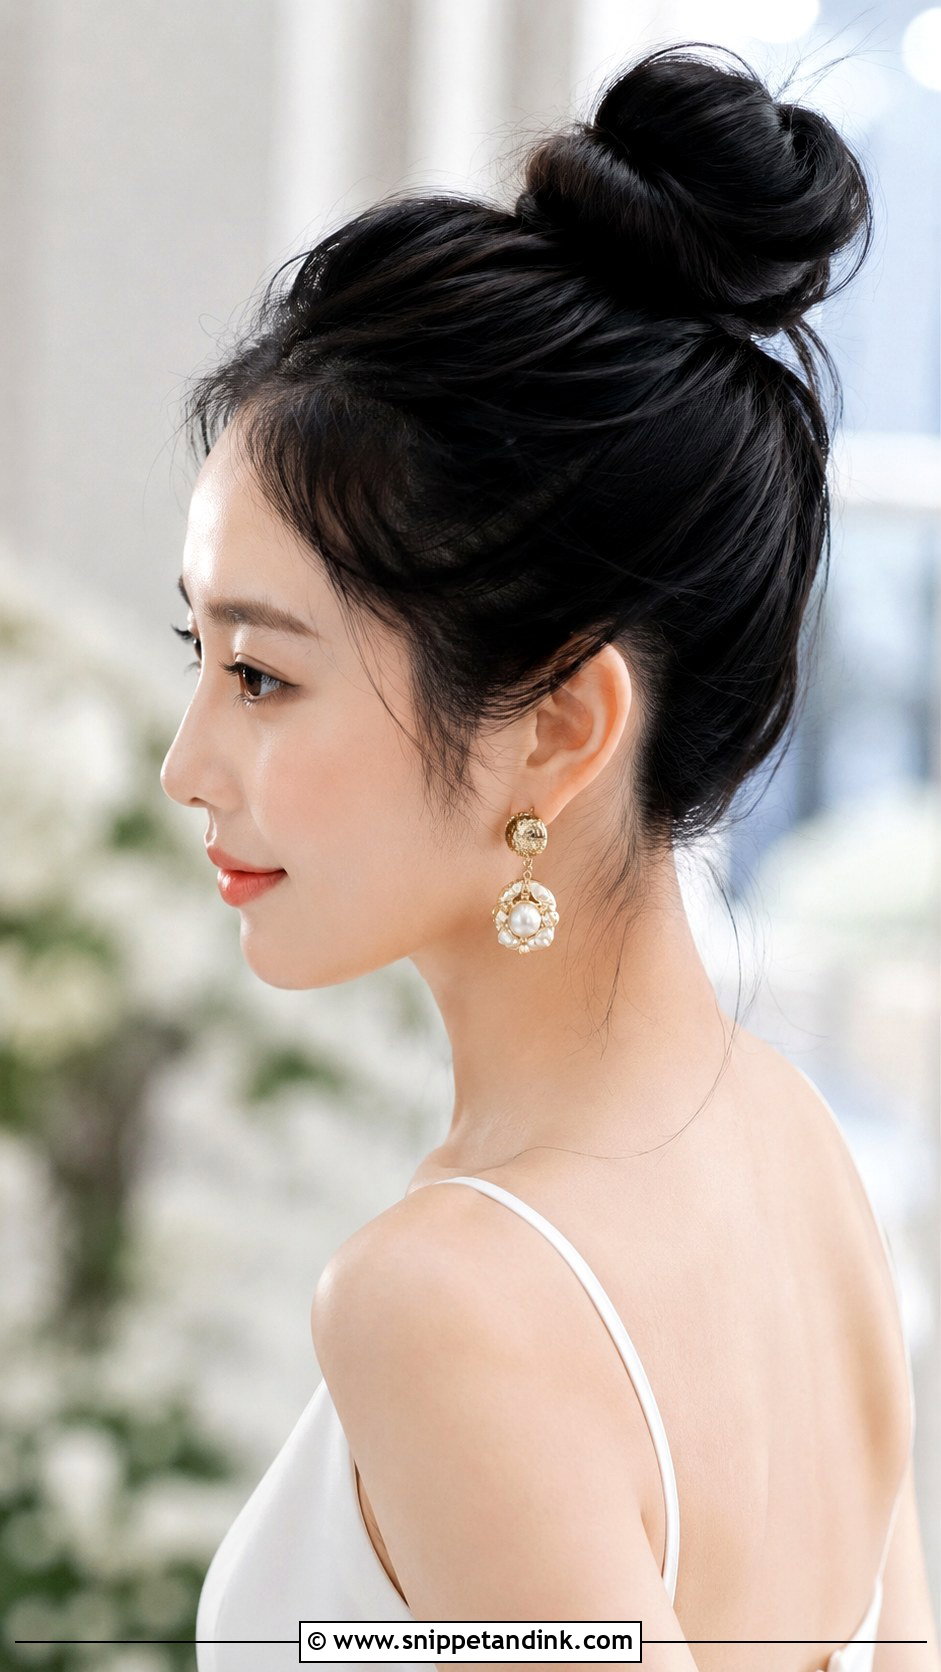
A top knot sits on the crown, so it lifts the eye and shows off the neck in hot weather. The placement matters more than the knot itself: too far forward and it looks casual, too far back and it reads as a messy bun. I find it sits best in line with the tops of your ears. Pair it with a statement earring and let the knot stay neat. It needs long hair; anything shorter than shoulder length won’t wrap around enough times.
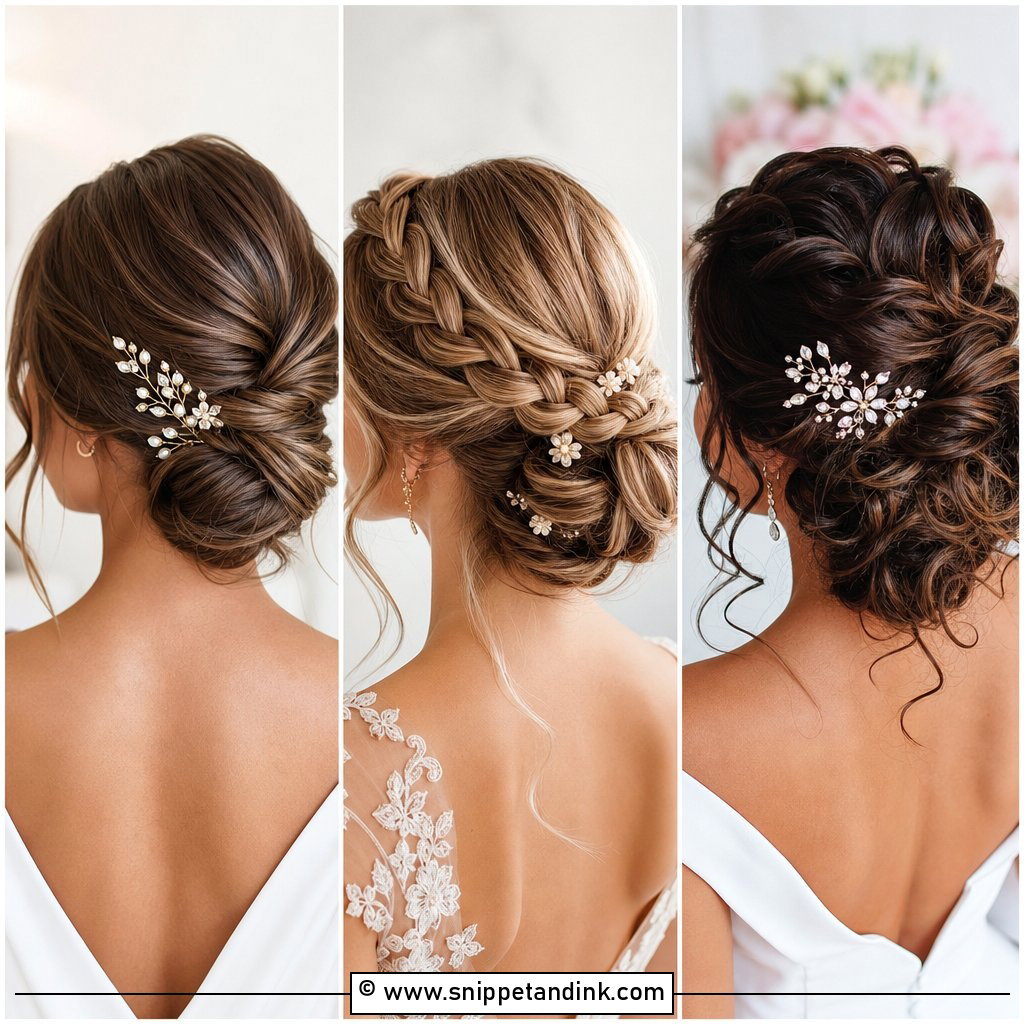
15. Romantic Loose Updo
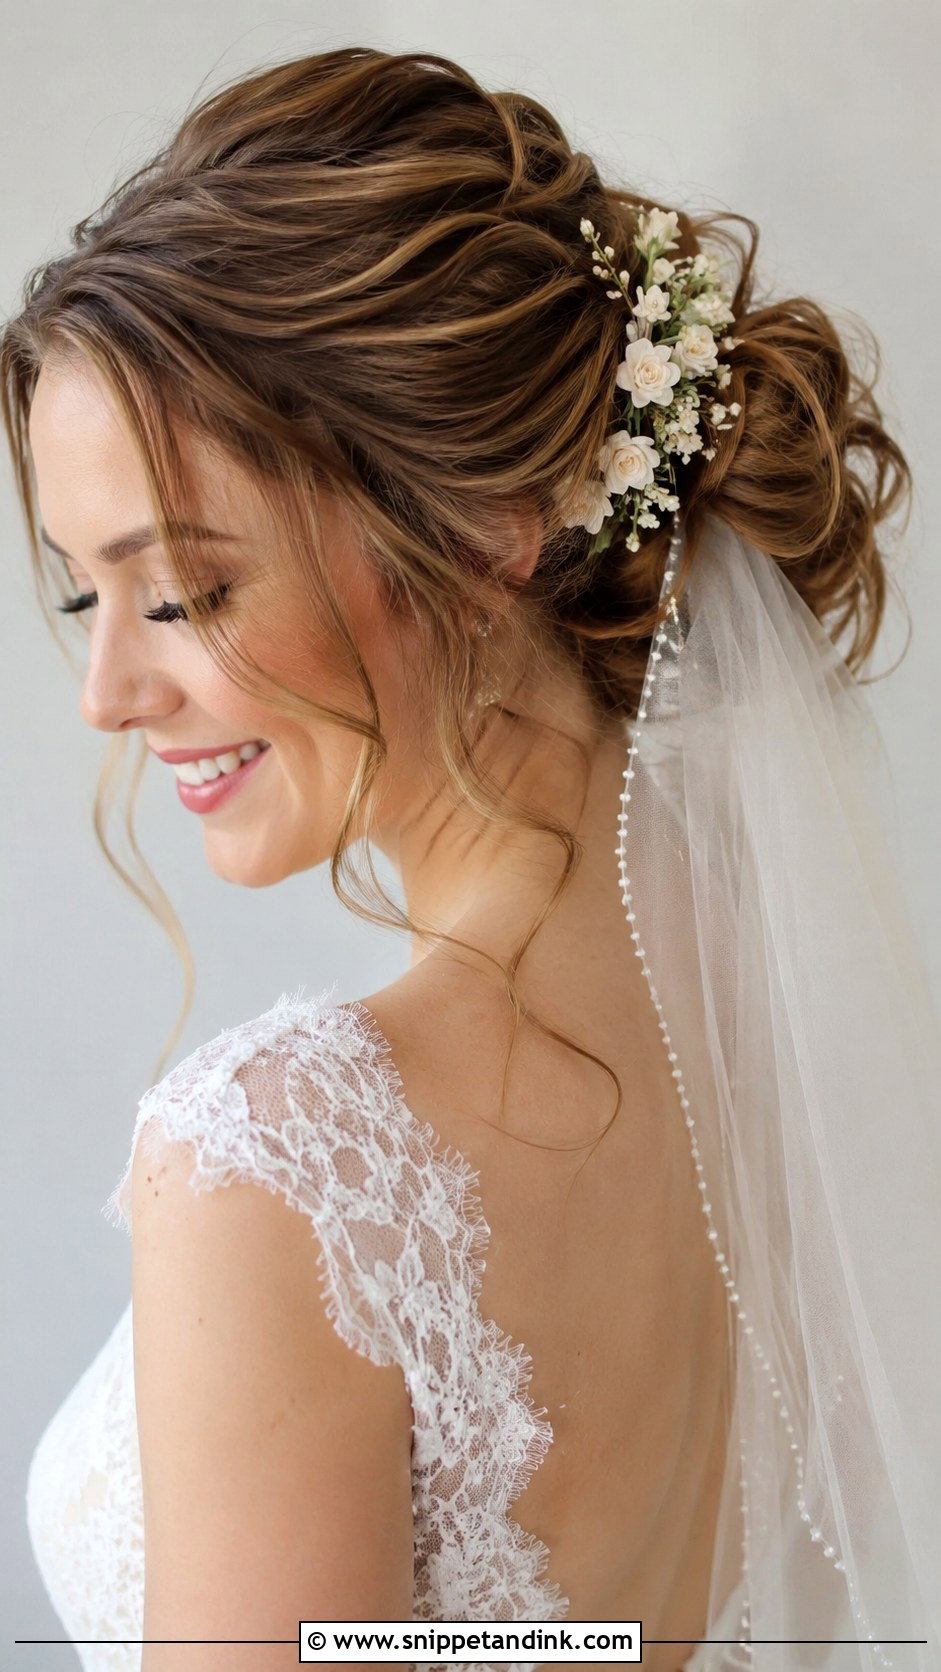
Soft updos are where I see the most DIY trouble, because loose has to be built on something secure. I put a small hidden ponytail or two pinned anchors underneath, then pin the soft sections onto that base. Pull the tendrils out at the very end. A little teasing at the crown gives height, but stop before it looks backcombed in side profile photos.
16. Dutch Braid Updo
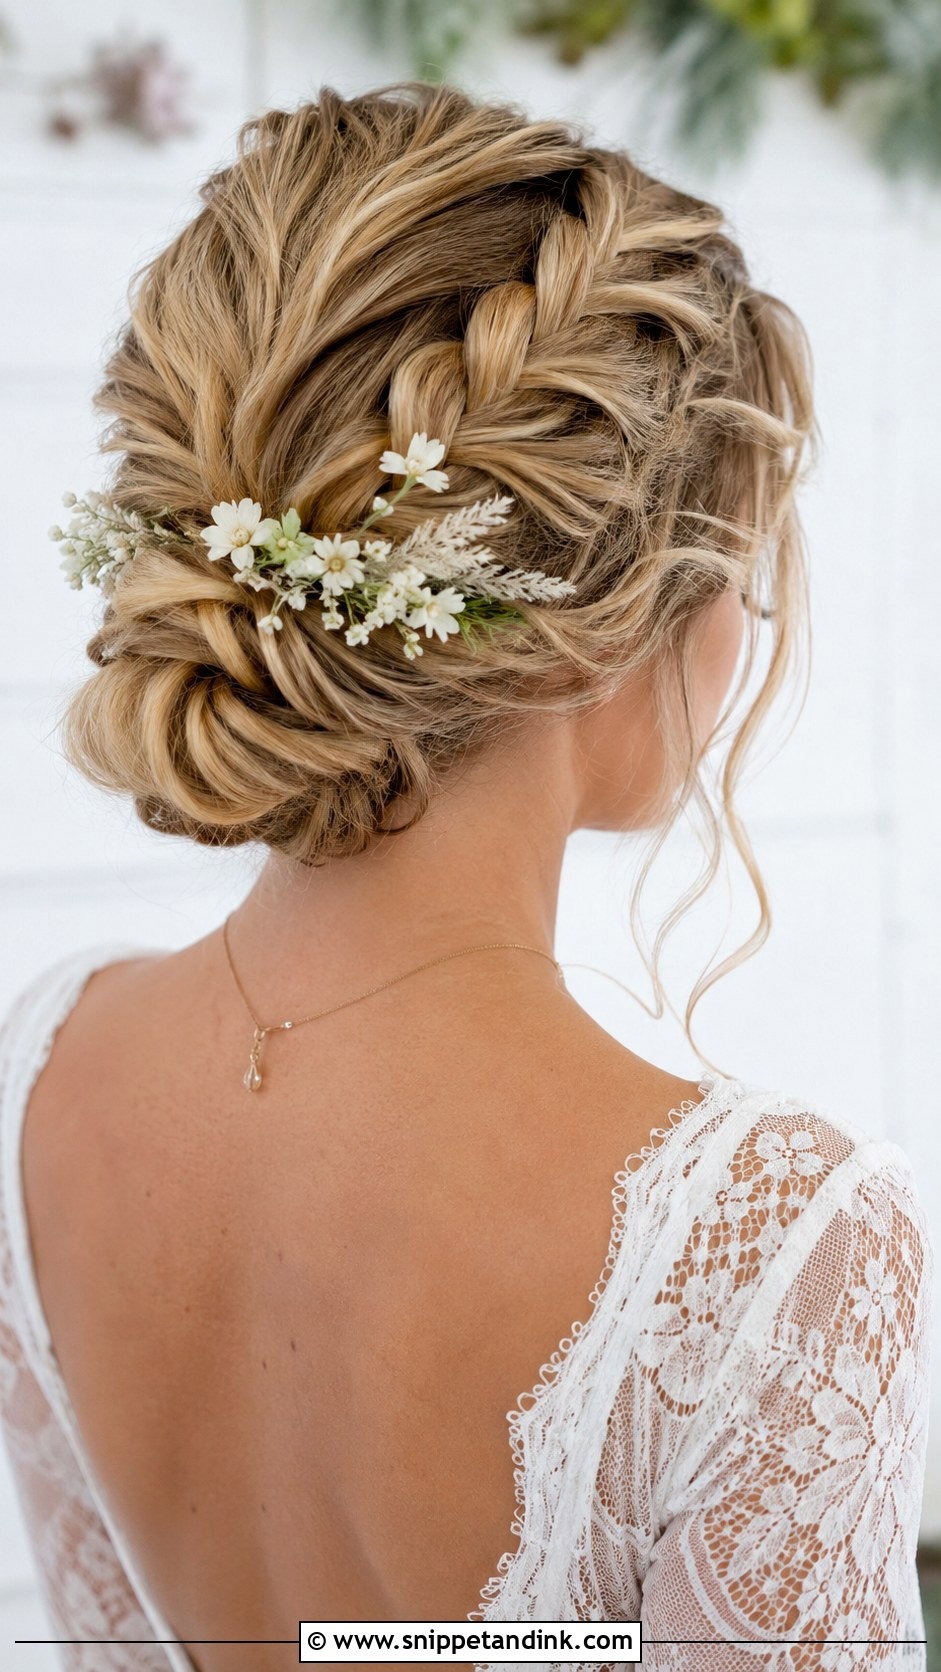
A Dutch braid is braided under rather than over, so it stands up off the head. I braid toward the nape and then wrap the tail into a low bun, which makes this one of the most secure options on the list. It’s my pick for barn dances and outdoor receptions where people will move a lot. Slippery fine hair can show scalp between sections, so I gently pull the braid wider to cover it.
17. Half-Up Top Knot
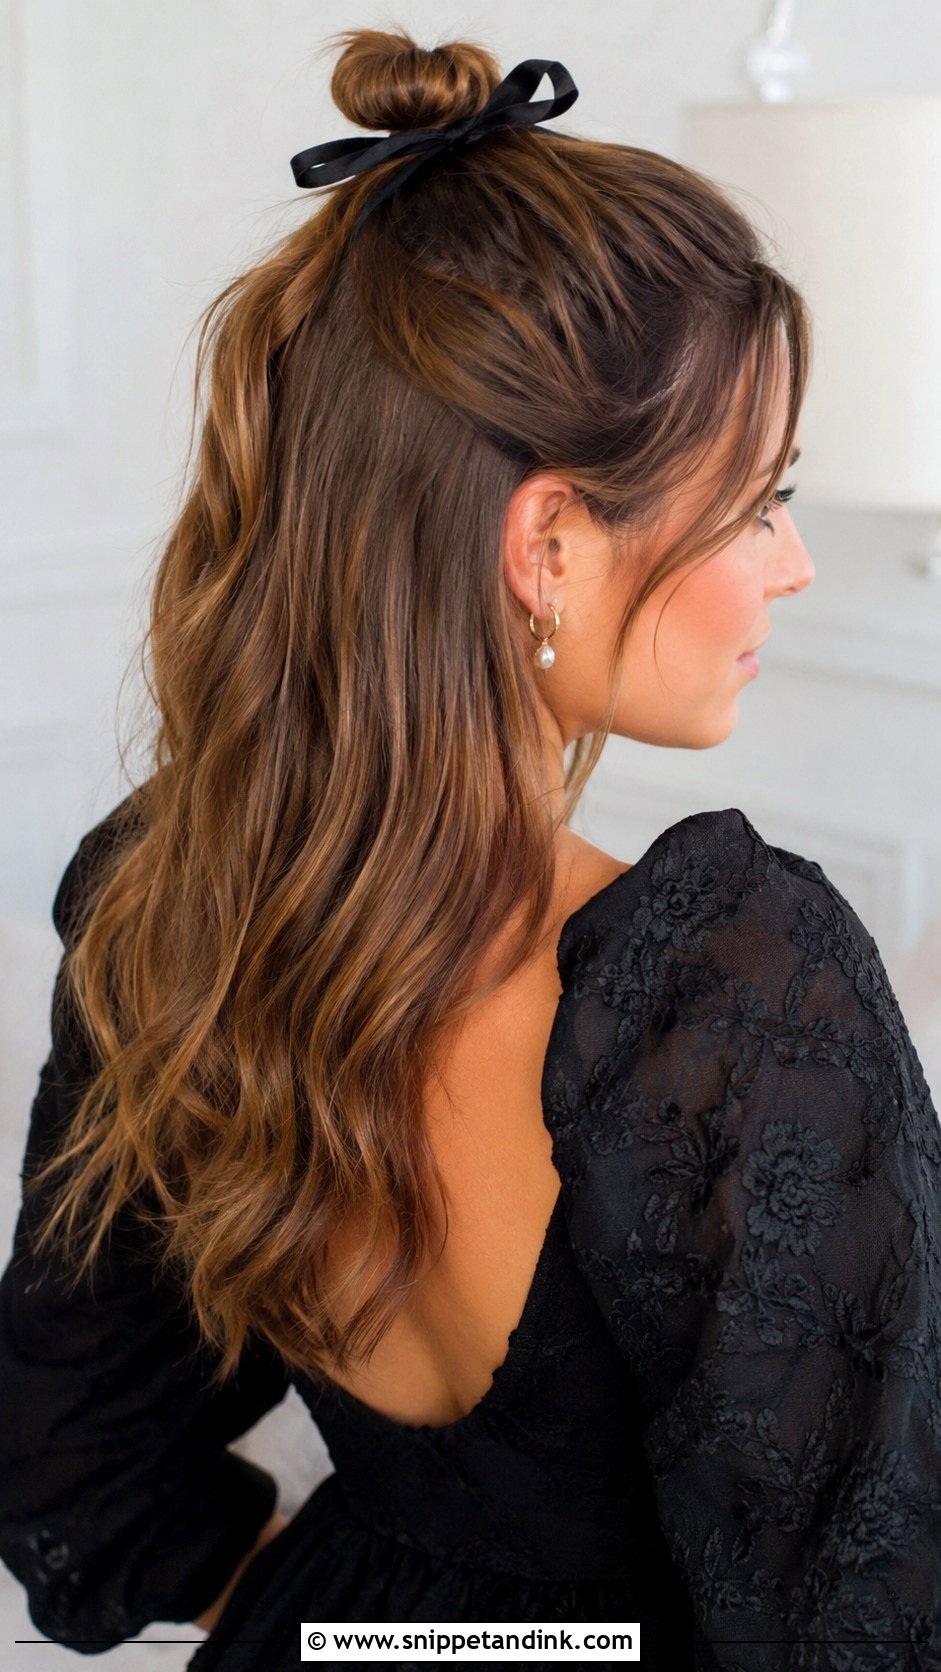
A small knot on top with the rest left down is quick and slightly playful. I take a section no wider than the arches of your eyebrows, otherwise the knot gets heavy and starts to droop. It suits relaxed and semi-formal weddings more than black tie. Pin through the base of the knot into the scalp hair, not just around it, and add a bow or a single pin last.
18. Vintage Victory Rolls
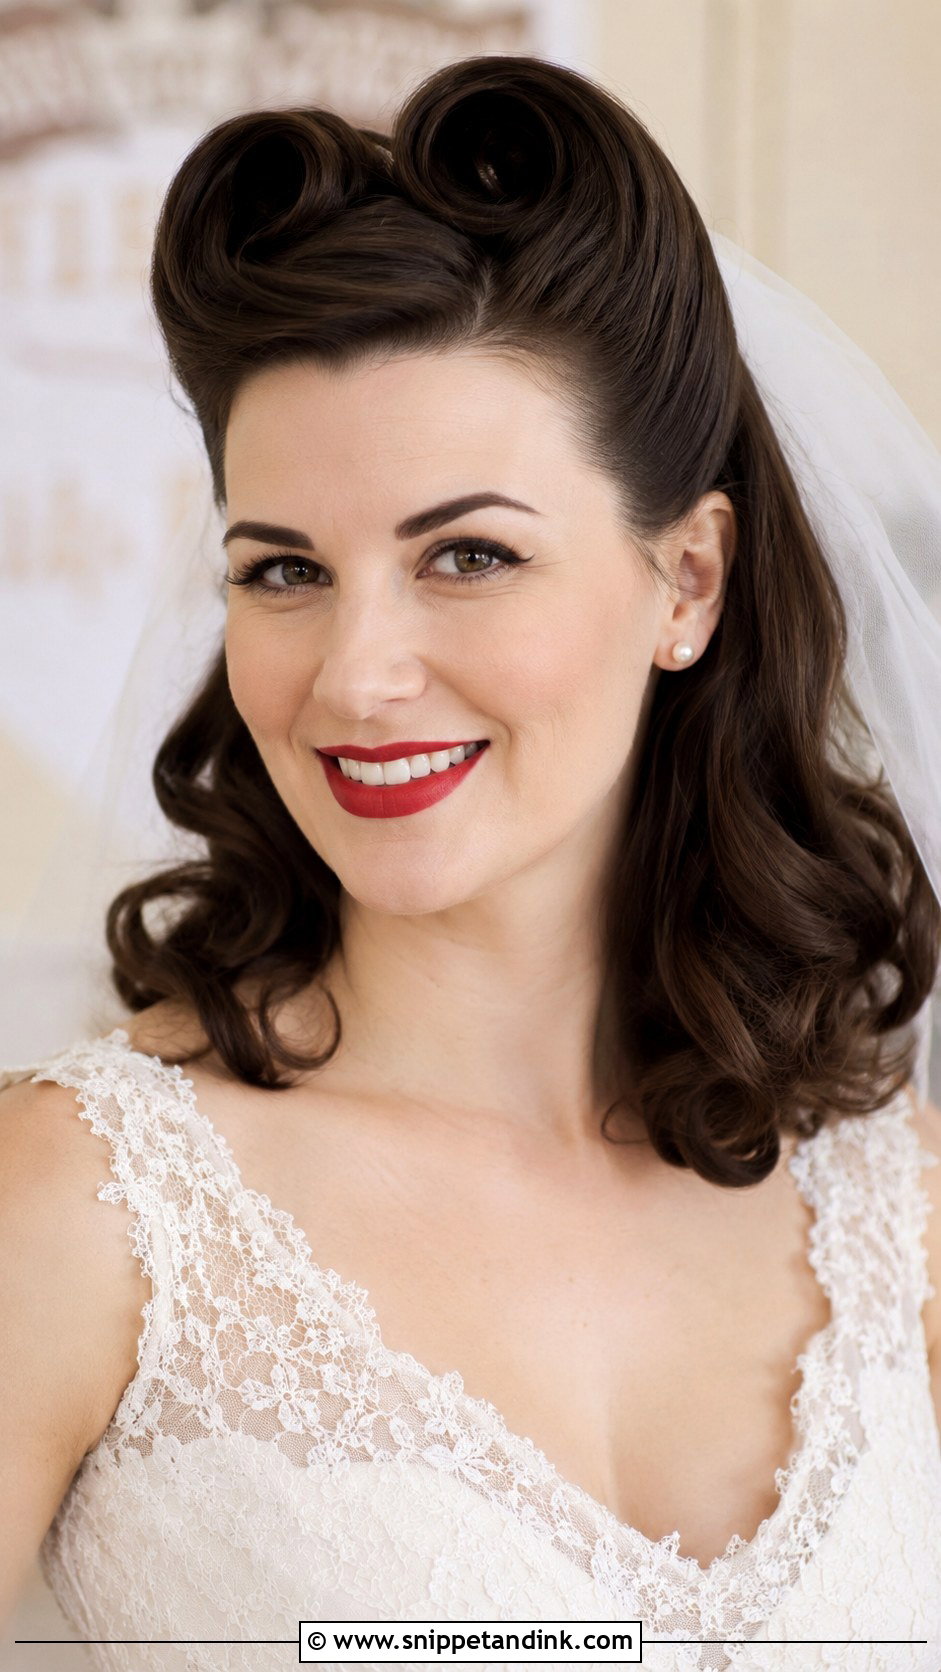
Victory rolls bring retro glamour to weddings, but they need hair with structure. I set the sections with hot rollers or a curling iron first, roll them around two fingers, and pin through the center of the roll. Freshly washed silky hair won’t hold the shape at all. A strong-hold spray matters here more than on any other style in this list, and I’d practise twice before the day.
19. Bubble Ponytail
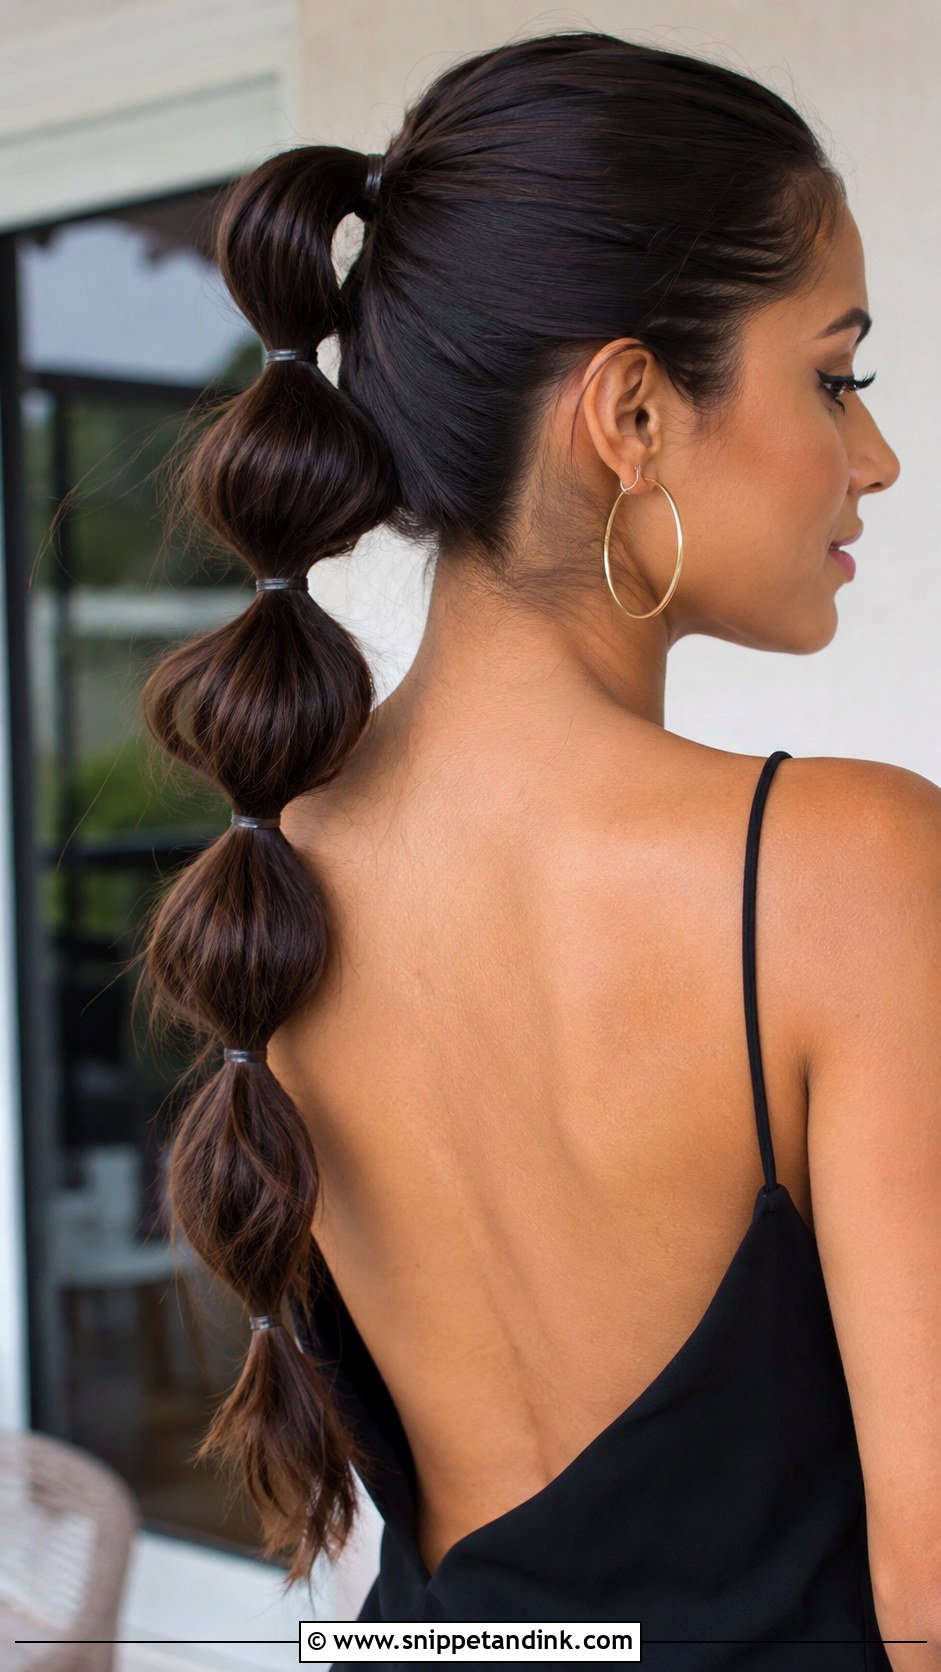
A ponytail divided by small elastics into rounded sections is one of the easiest styles for younger guests to do on each other. Space the elastics evenly, roughly a hand’s width apart, then pull each section out gently to round it. Clear elastics look cleaner in photos than coloured ones. Medium hair gives you two or three bubbles; long hair gives you more.
20. Flower Adorned Bun
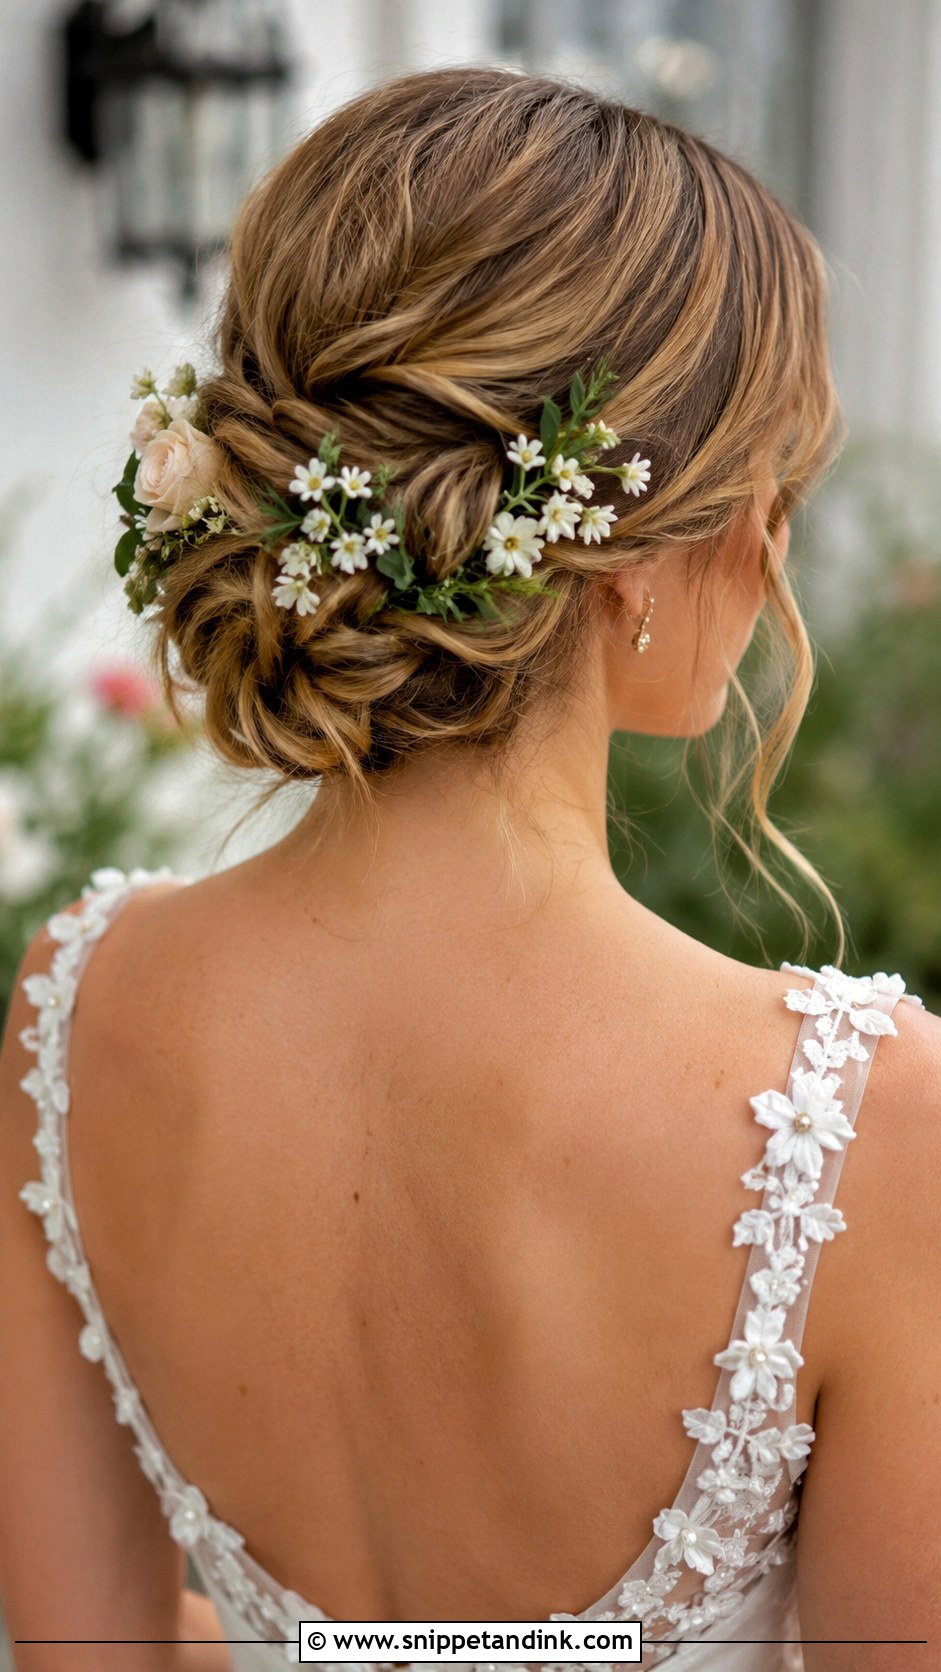
Start with a basic low or high bun and tuck flowers into the gaps once it’s finished. I wire fresh stems with floral tape or use a small comb as a holder, because flowers pinned straight in tend to droop. Hardy flowers like spray roses, wax flower and gypsophila last longest out of water. Ask your florist for a few extra stems from the bouquet so they match.
21. Sleek Straight Hair
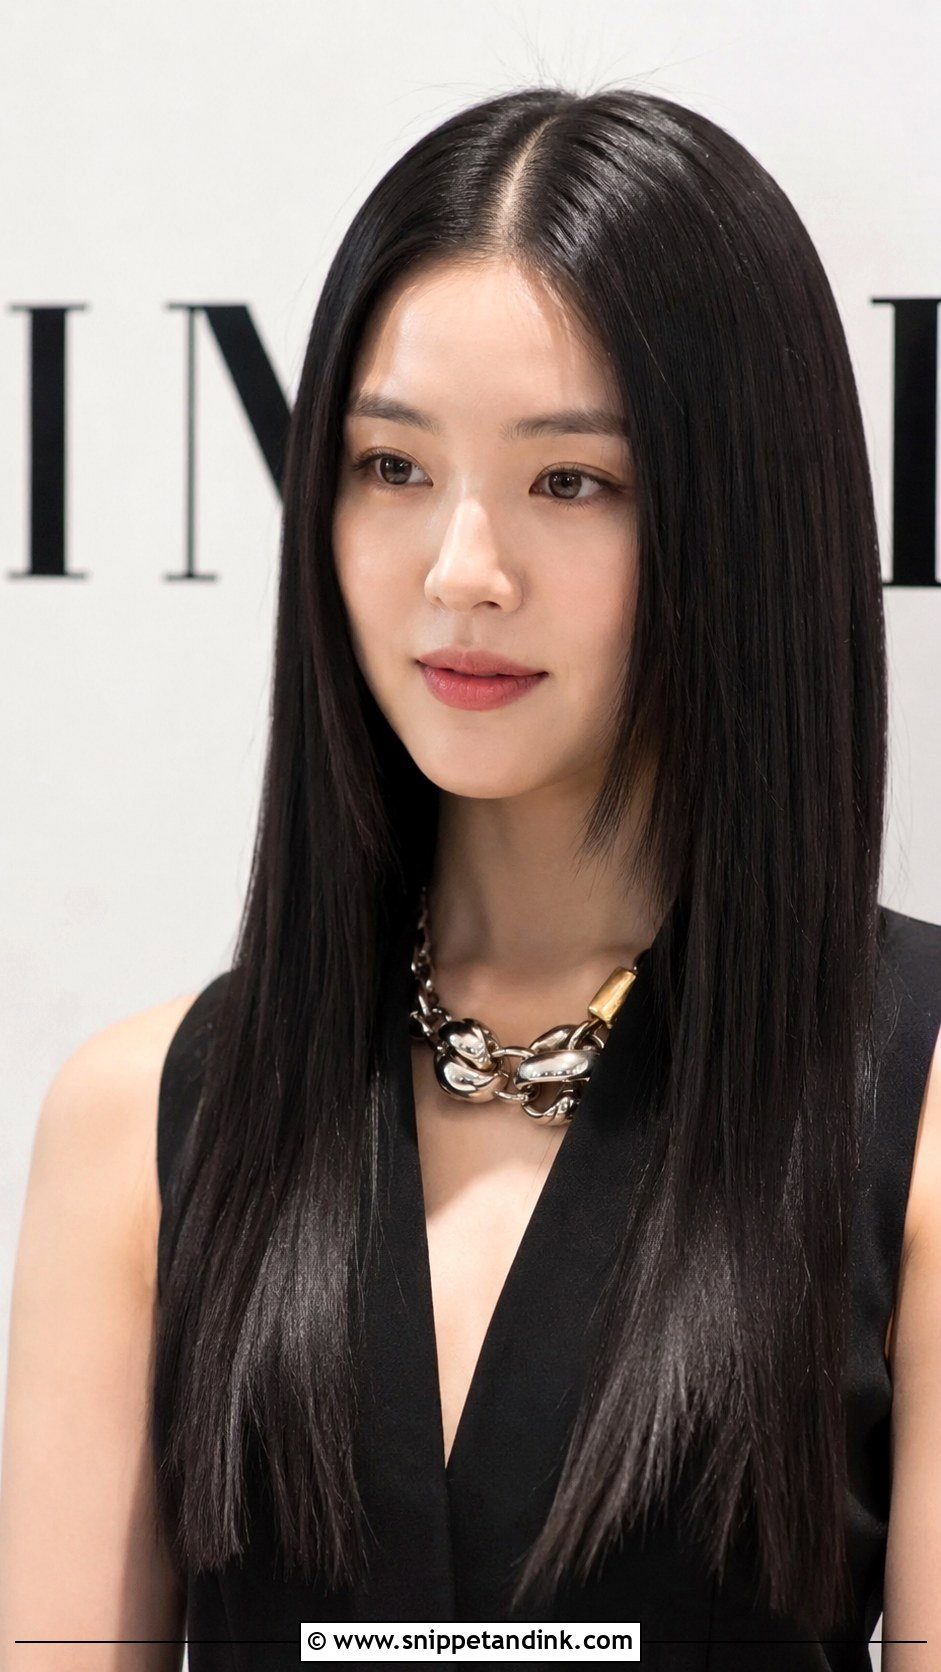
Straight, glossy hair is the style that shows a good haircut best. I flat iron in thin sections at a moderate heat so the hair stays shiny rather than fried, then finish with a drop of serum on the ends only. It drops flatter in humidity, so if your hair naturally waves, carry a small comb and anti-frizz cream for later in the evening.
22. Twisted Low Bun
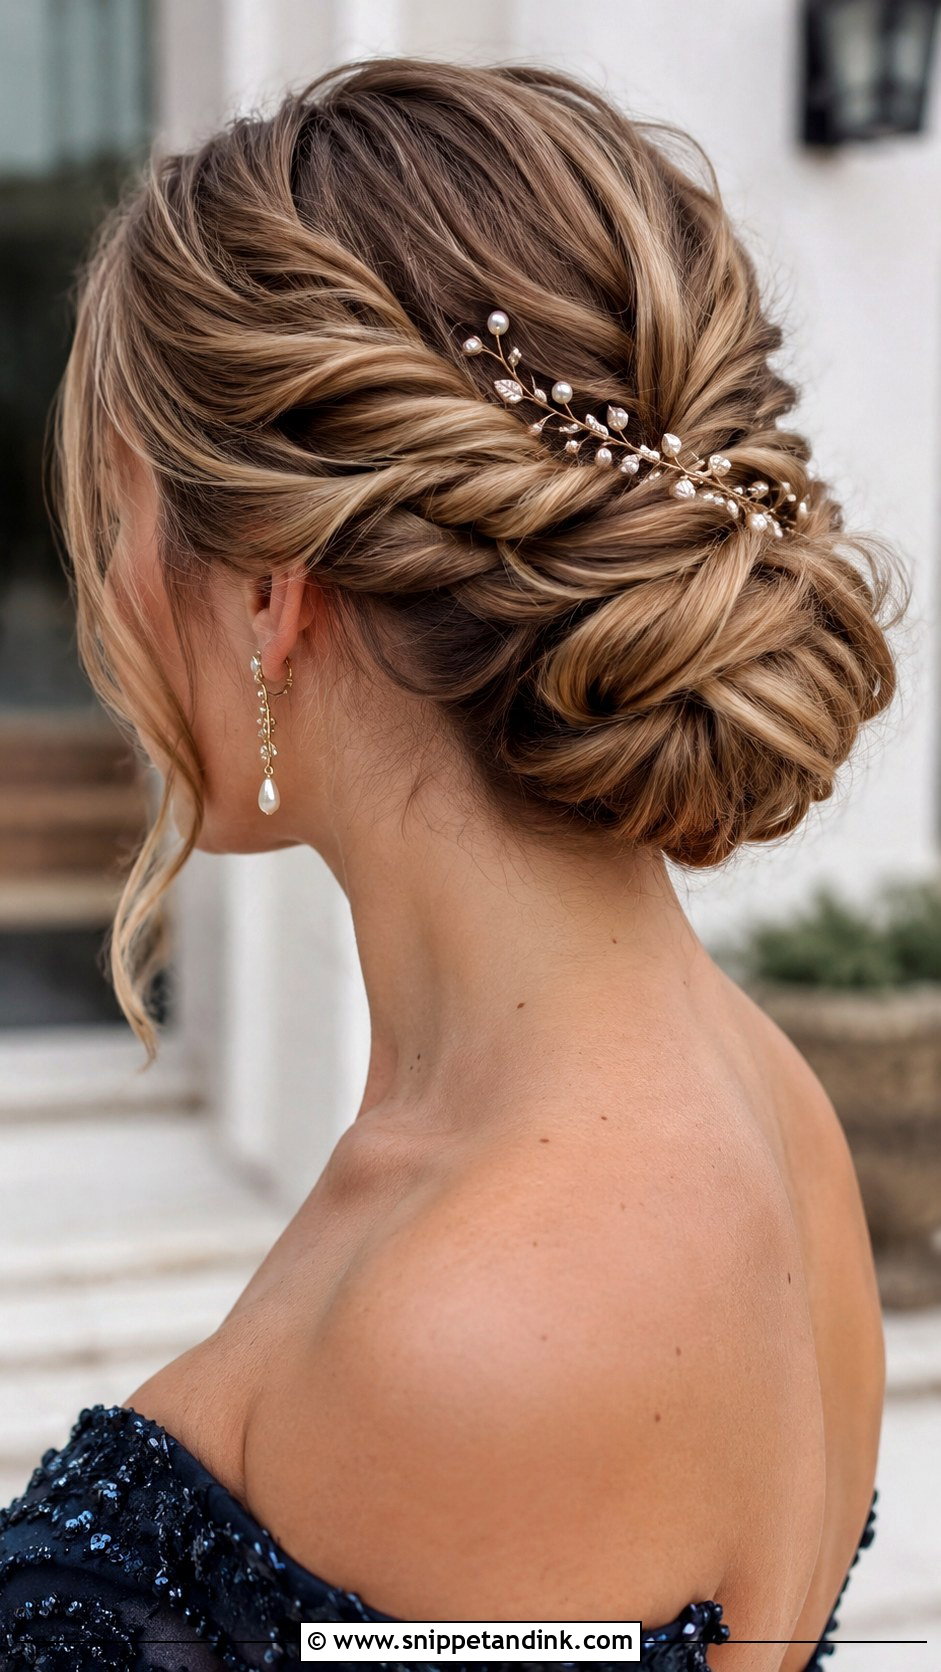
Twisting the length into two ropes before coiling them into a low bun adds texture to a classic shape, and it hides uneven layers well. I twist each rope in the same direction, then wrap them around each other in the opposite direction so they lock. Add decorative pins or a hair vine along one side. Shoulder-length hair can do a smaller version.
23. Waterfall Braid
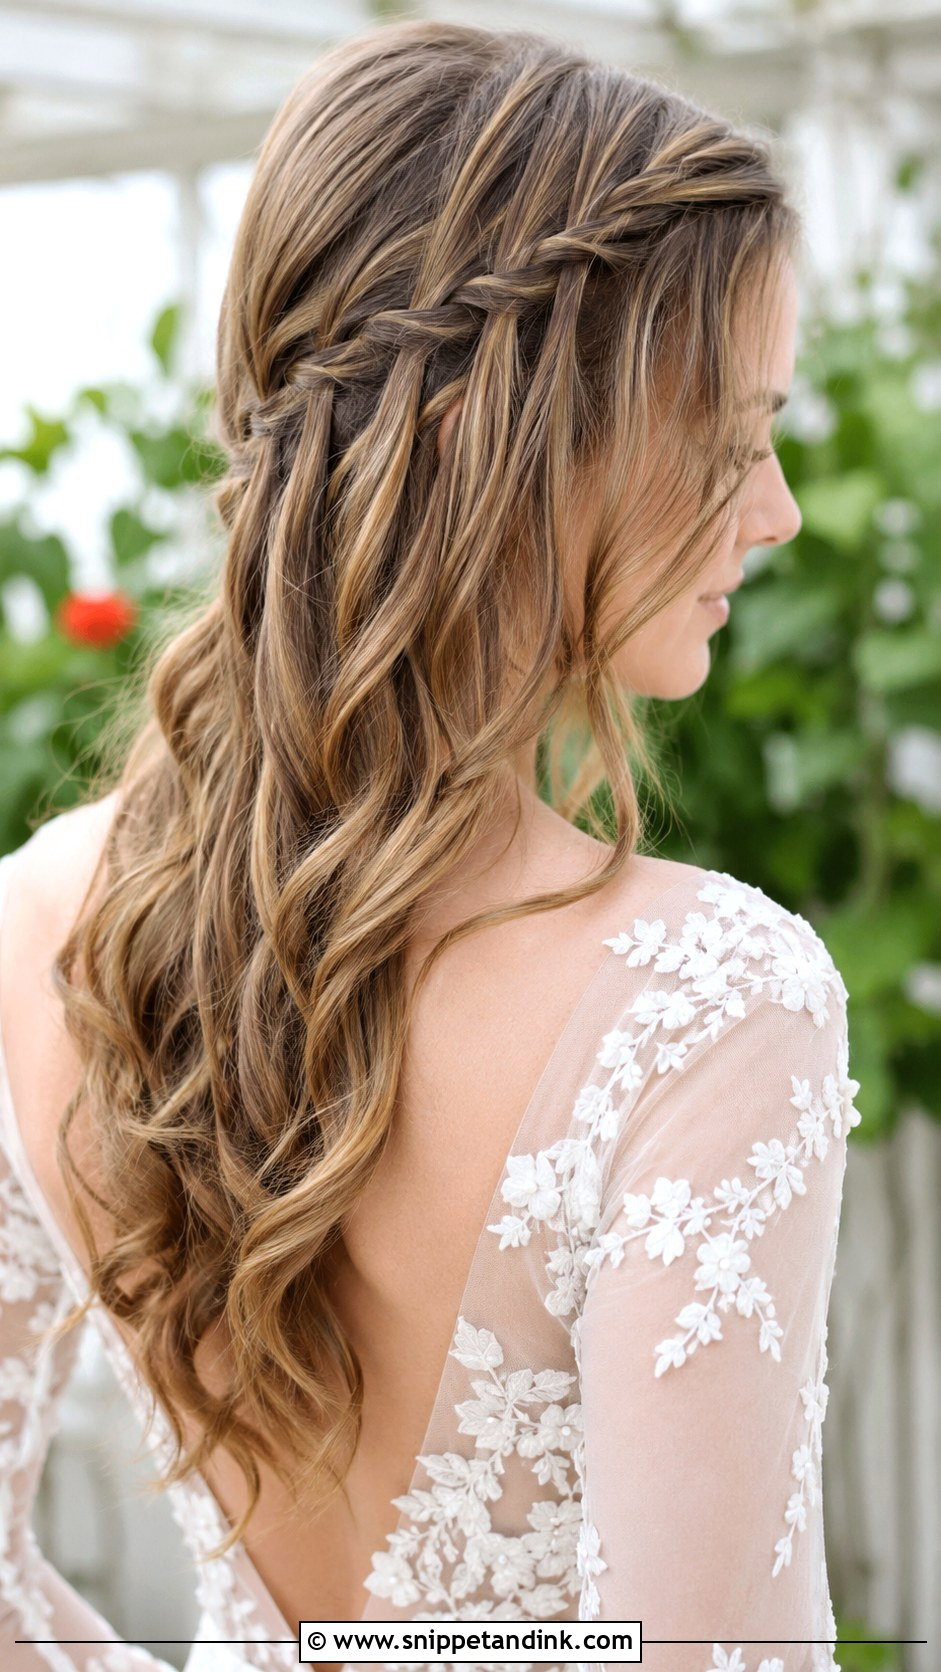
A waterfall braid travels across the head, dropping one strand and picking up a new one each time, so the hair below stays loose. The trick is dropping the top strand every time, not just occasionally. I curl the loose pieces after braiding so the curls don’t get trapped. Fine hair shows the dropped strands nicely; very thick hair can look bulky, so I use smaller sections.
24. Accessorized Half-Up
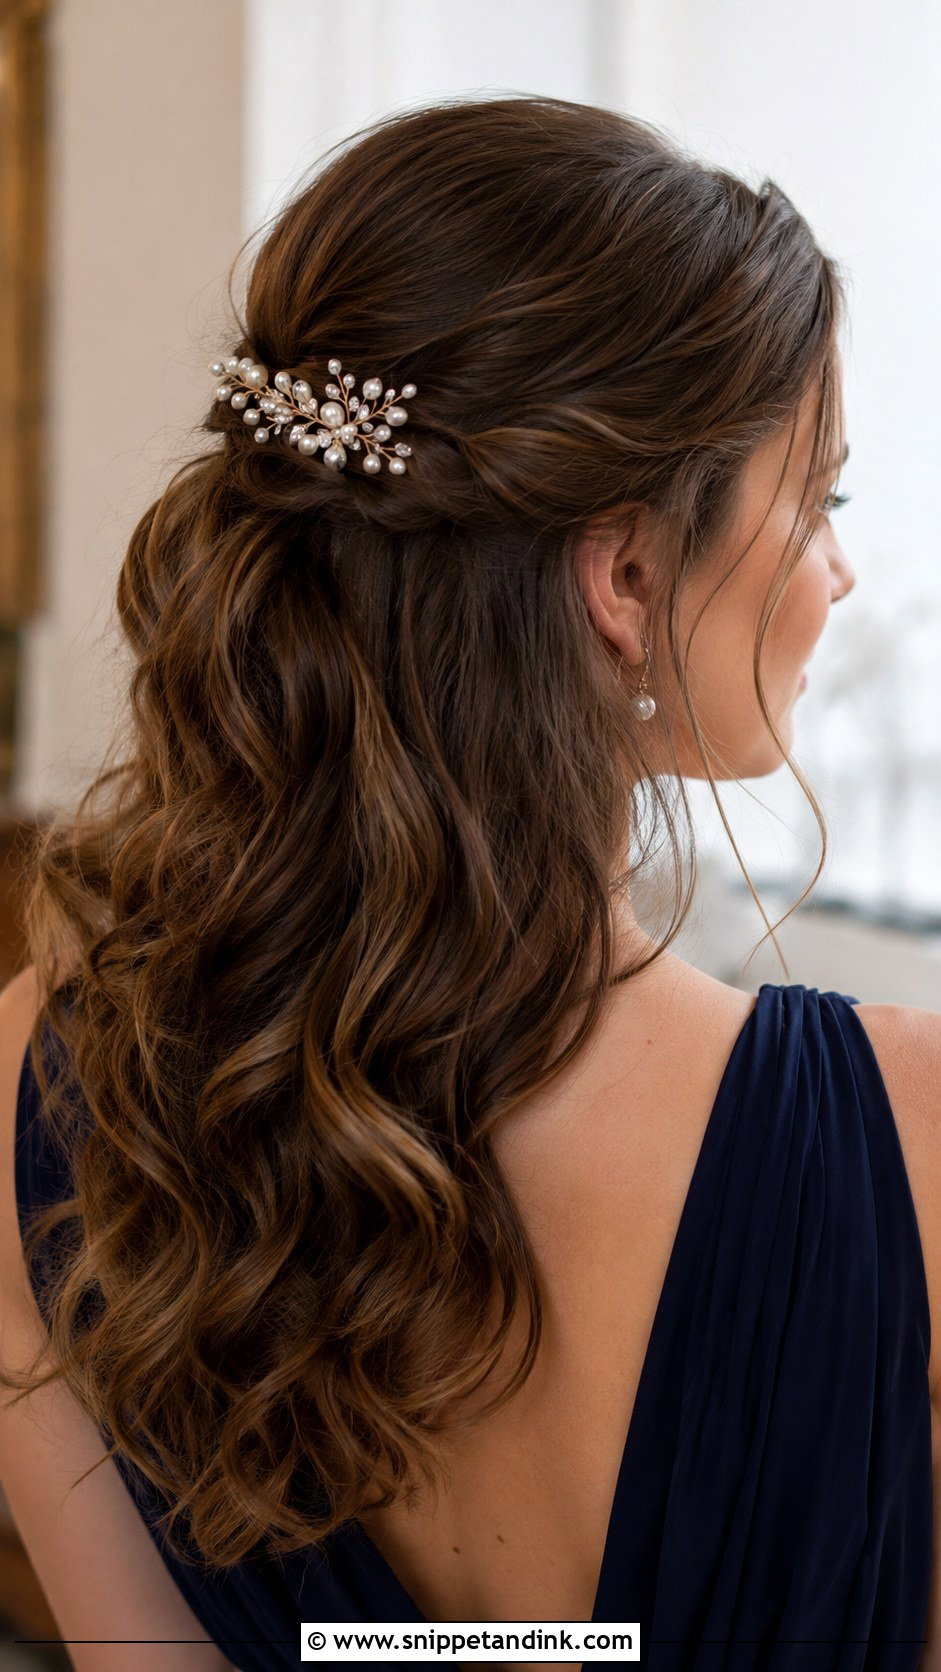
A plain half-up with one good accessory is often the smartest choice for a guest in a hurry. Pick the piece first, then size the half-up section to fit it; a wide comb needs more hair behind it than a small pearl clip. Heavy jeweled pieces need a crossed pin anchor underneath or they’ll slide by evening. Any hair length that reaches the back of the head works.
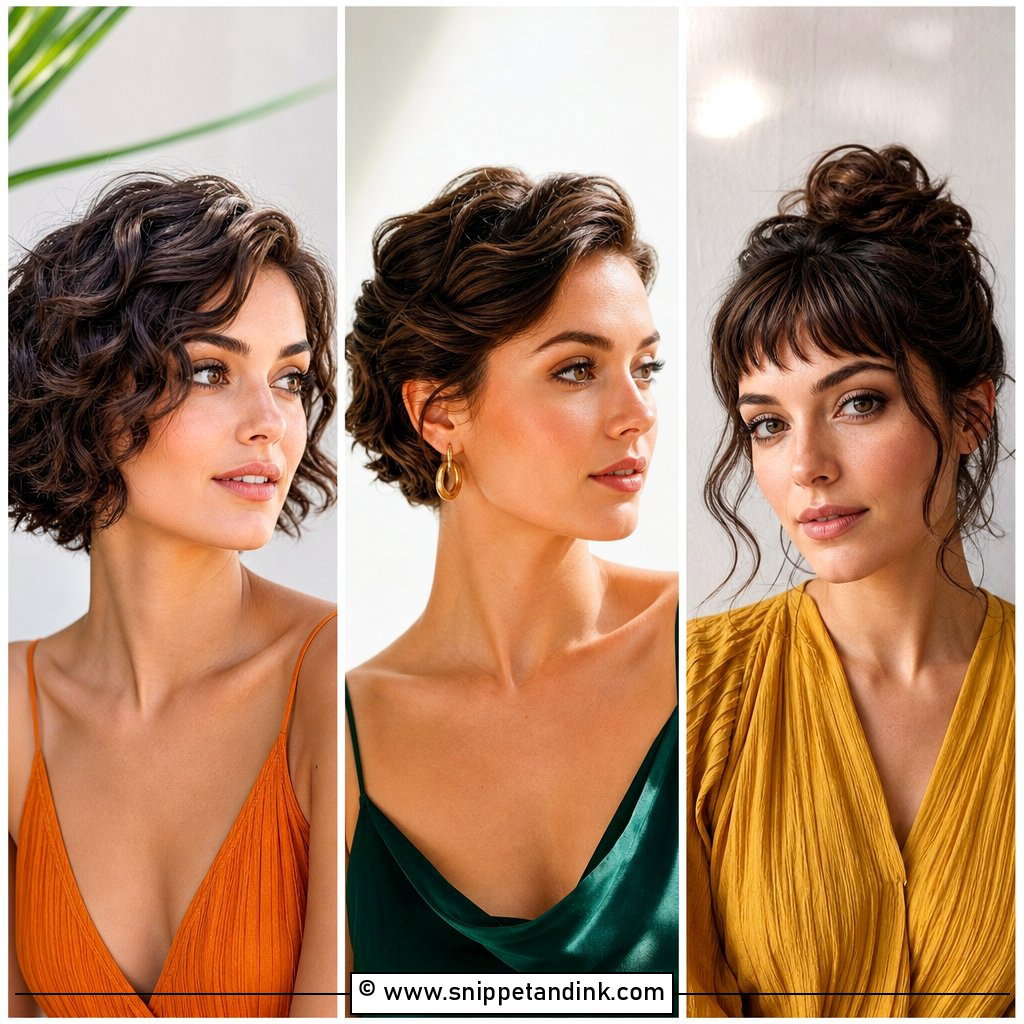
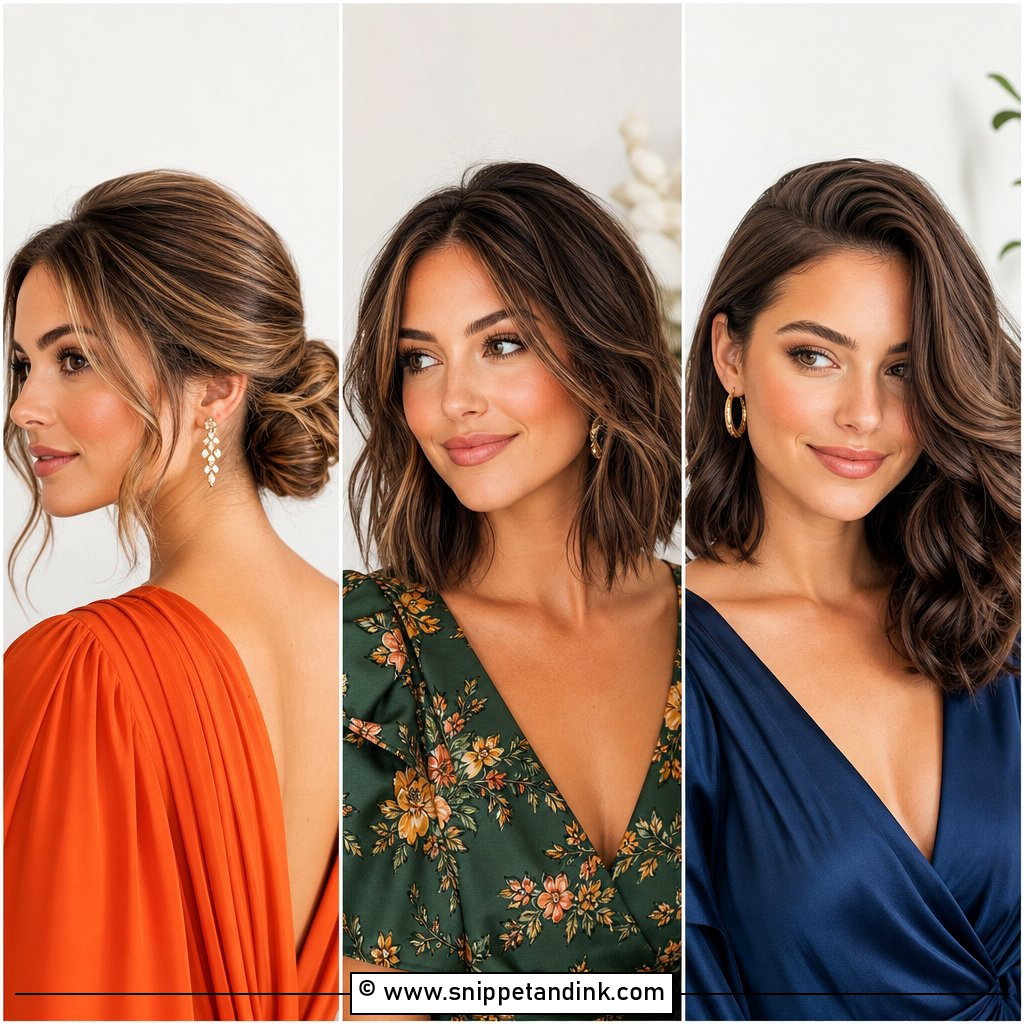
25. Low Side Bun
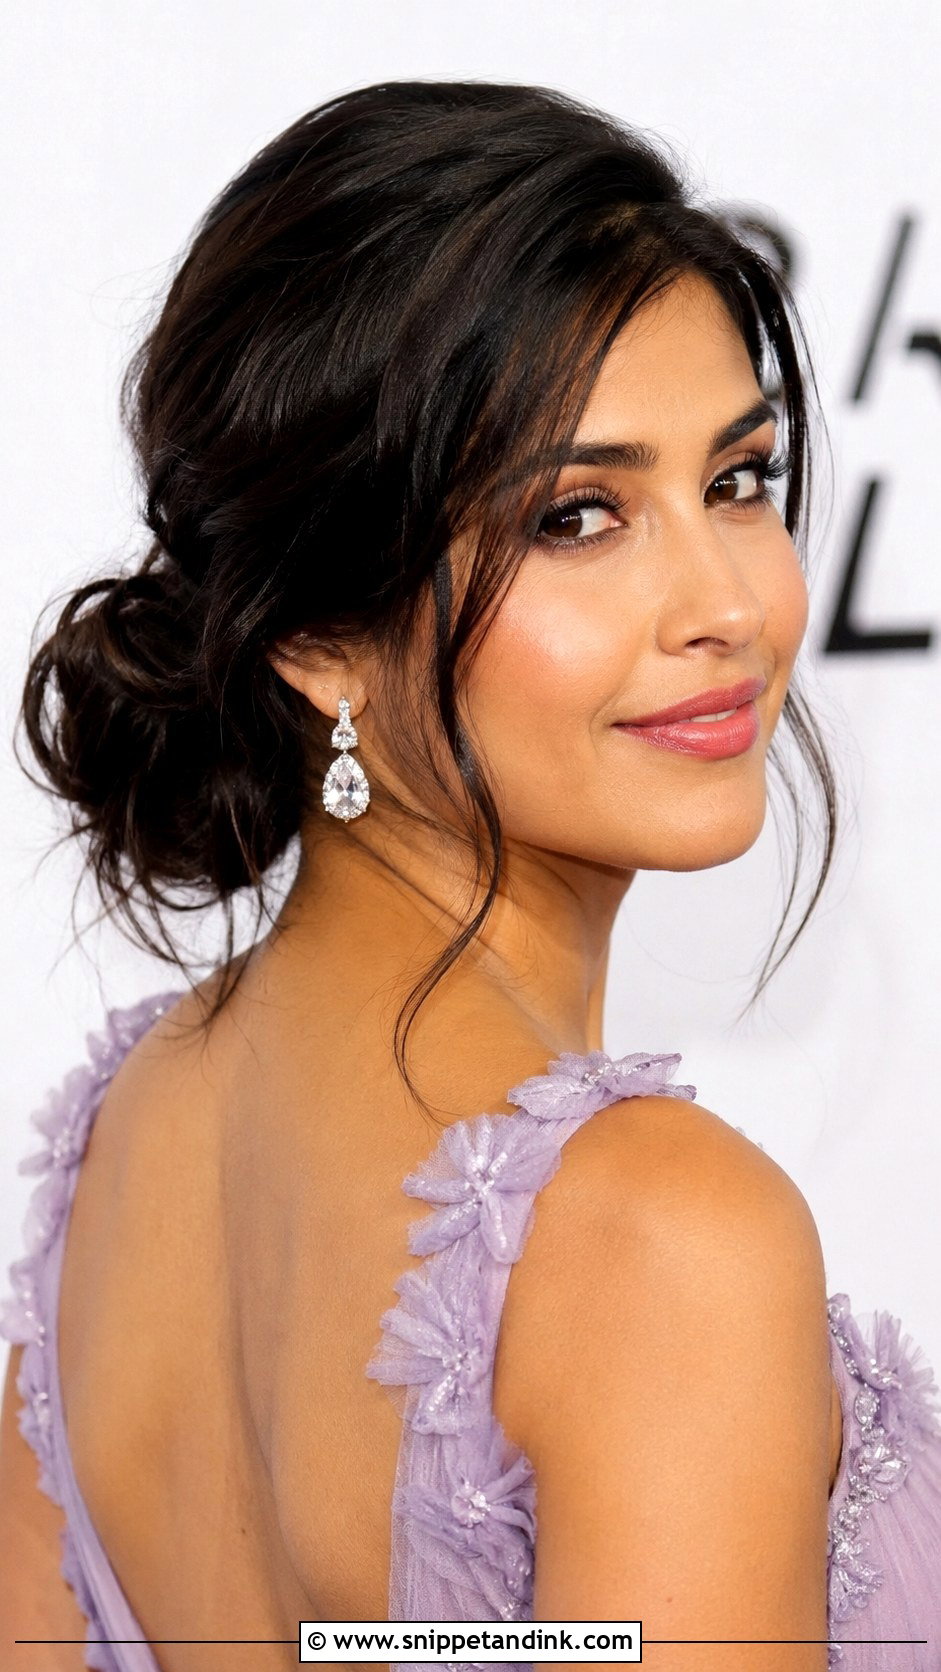
Moving a low bun off center gives you a simple shape with more interest. I secure the ponytail just below one ear, coil it, and pin it with the opening facing the back so the side view looks finished. Choose the side that you’ll be photographed from most, usually the one facing your partner at the altar or your table companion. Leave a few loose pieces on the opposite side to balance it.
Which Styles Suit Fine, Thick or Layered Hair
Not every easy style is easy on every head of hair. I’d sort them like this before you pick:
Fine or slippery hair
Braided styles like the Dutch braid updo and braided crown hold best because the braid itself creates grip. Avoid loose waves worn down unless you have time to set them; they drop fastest on fine hair.
Thick or heavy hair
Low buns and chignons work well, but split the hair into two sections before twisting so the bun isn’t too heavy for the pins. A single ponytail on thick hair needs two elastics.
Layered or shoulder-length hair
Half-up styles, pinned back waves and the waterfall braid hide shorter layers well. High buns and fishtails show every piece that escapes.
How to Make Curls Last Until the Last Dance
The most common mistake I see at home is brushing curls while they’re still warm. Hair sets as it cools, so pin each curl in a loop against your head and leave it for ten to fifteen minutes. Spray lightly once the whole head is done, not after every section.
Humidity is the other enemy. If the wedding is outdoors in summer, I’d choose a style with at least part of the hair pinned up, and carry a small comb, a few pins and a travel spray. Touch-ups after the ceremony and before the first dance are usually all you need.
Practise Once, Then Wear It With Confidence
All 25 of these styles can be done at home, but the ones that last are the ones you’ve tried at least once before. Pick a style that suits your hair length and the weather, practise it with the accessories you’ll wear, and keep a few pins in your bag. A style that looks good at 11 p.m. is worth more than one that looks perfect at noon.
You'll Like These Ideas:


Leave a Reply