
Mothers of the bride and groom are photographed almost as much as the couple, often from behind, in profile and under flash. That changes how I style their hair. A look that’s fine in the bathroom mirror can show a wide part from above or a halo of flyaways against a bright window. These mom wedding hair ideas are the ones I trust to look good from every angle a photographer will catch, and I’ve noted what each needs from your hair.
What the Camera Sees That Your Mirror Doesn’t
At a trial I take photos from the side, the back and slightly above, because that’s how a mother is usually photographed: walking in, seated in the front row, hugging guests.
- Part lines show clearly from above, so a soft or zigzag part hides thinning better.
- Flyaways light up against windows and backlit outdoor scenes. A smoothing cream and a fine brush deal with them.
- Flash can make heavy hairspray look shiny and stiff, so I use lighter hold products.
- Volume looks smaller on camera than in person, so I usually add a little more lift at the crown than you’d expect.
Ask your stylist to send you photos from the trial. Look at them the next day with fresh eyes before deciding.
1. Classic Low Chignon for Mother of the Bride
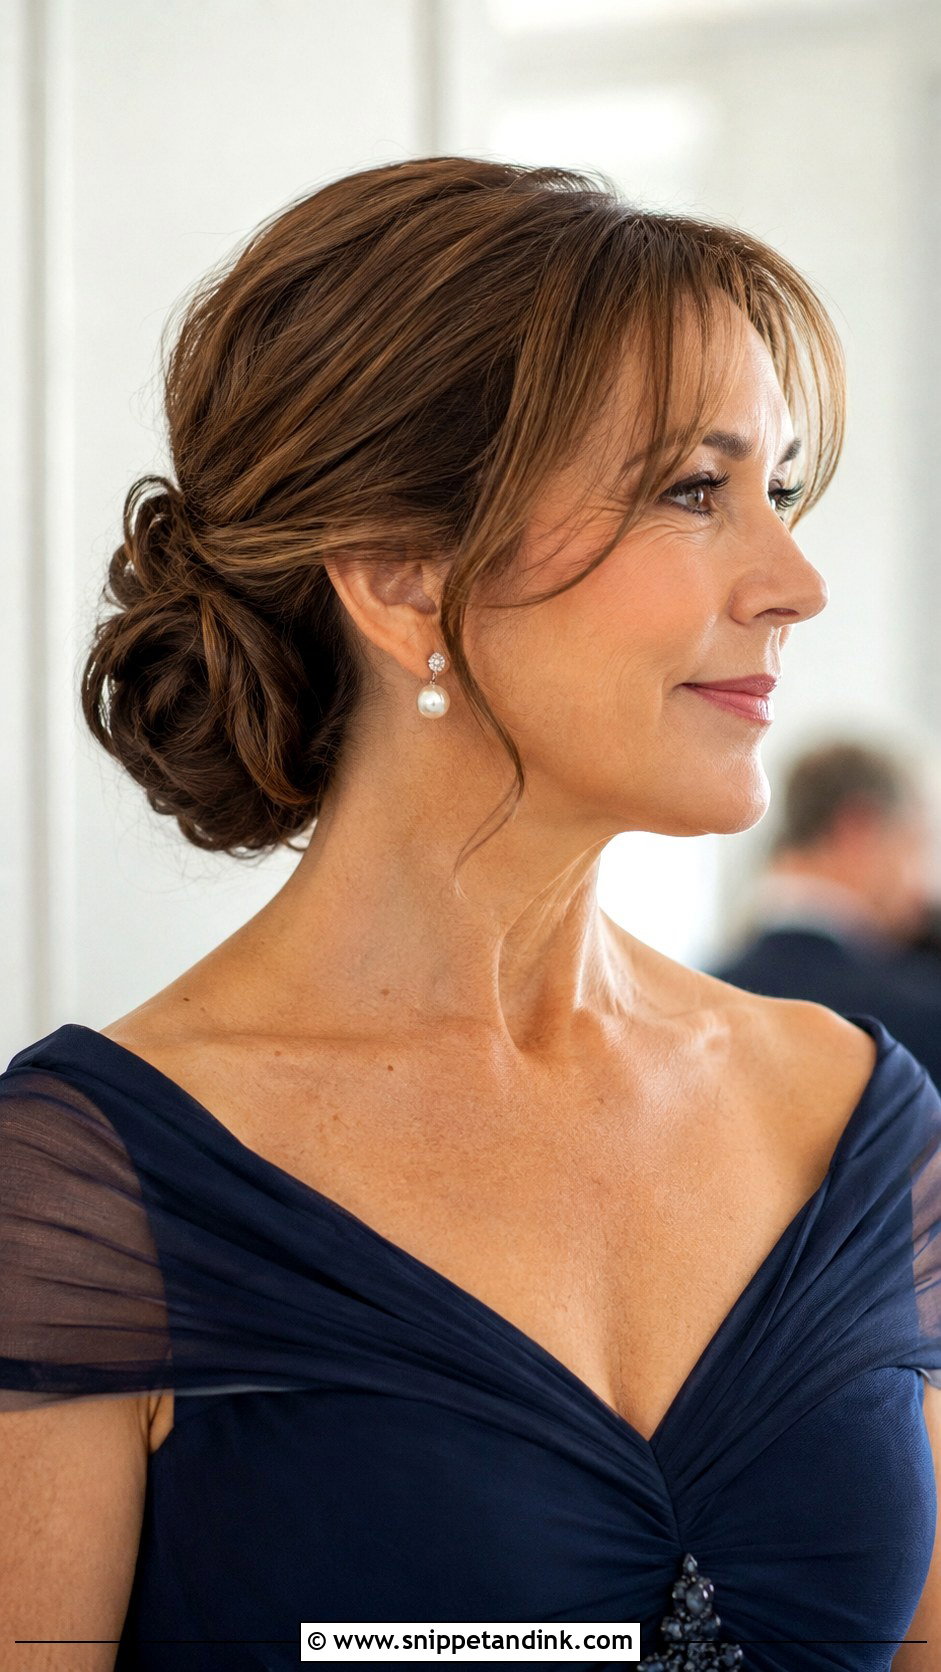
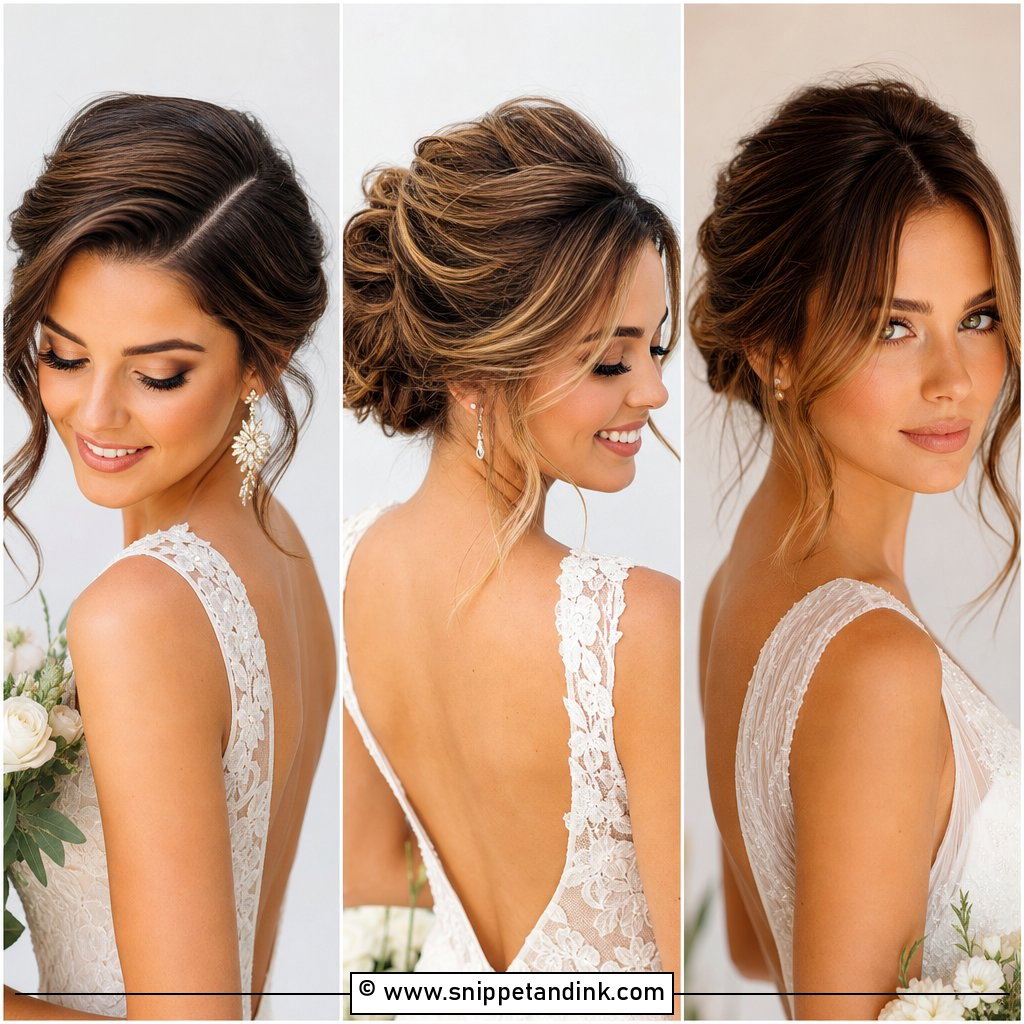
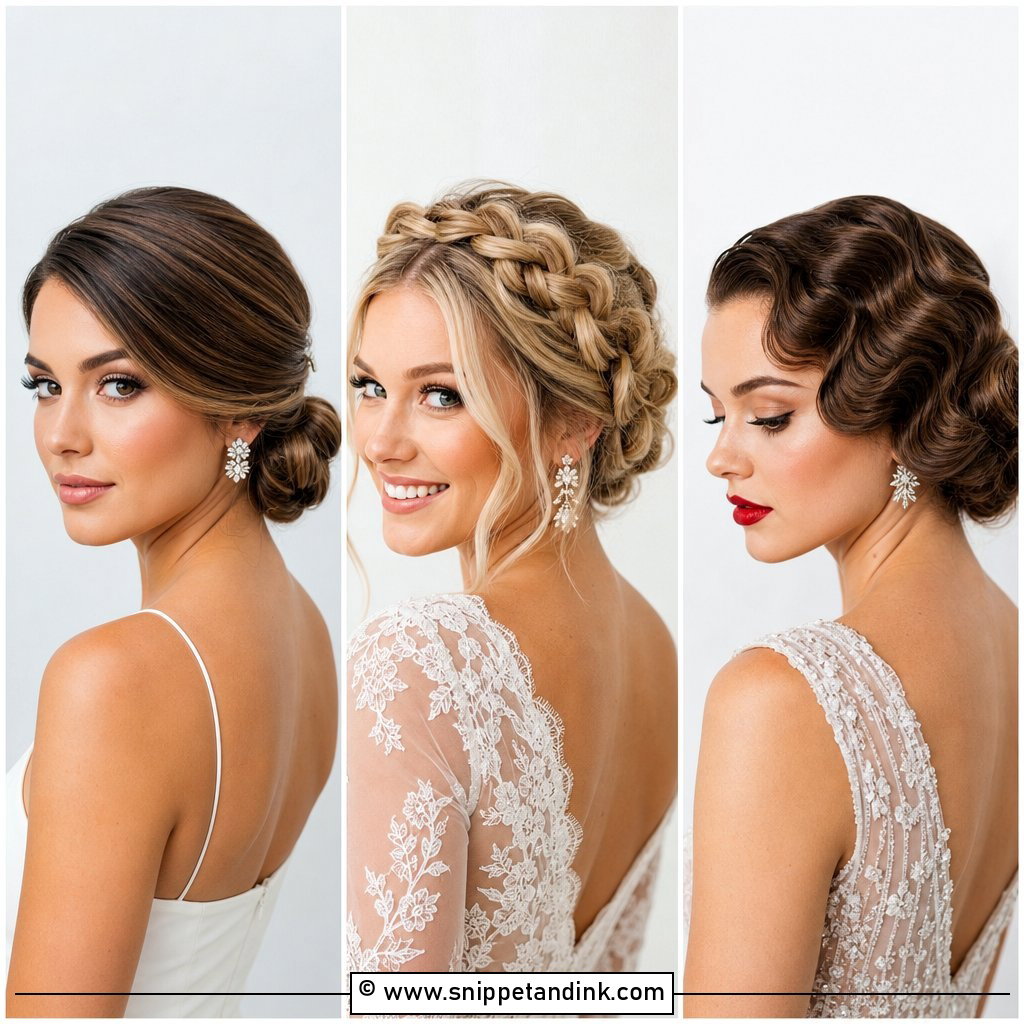
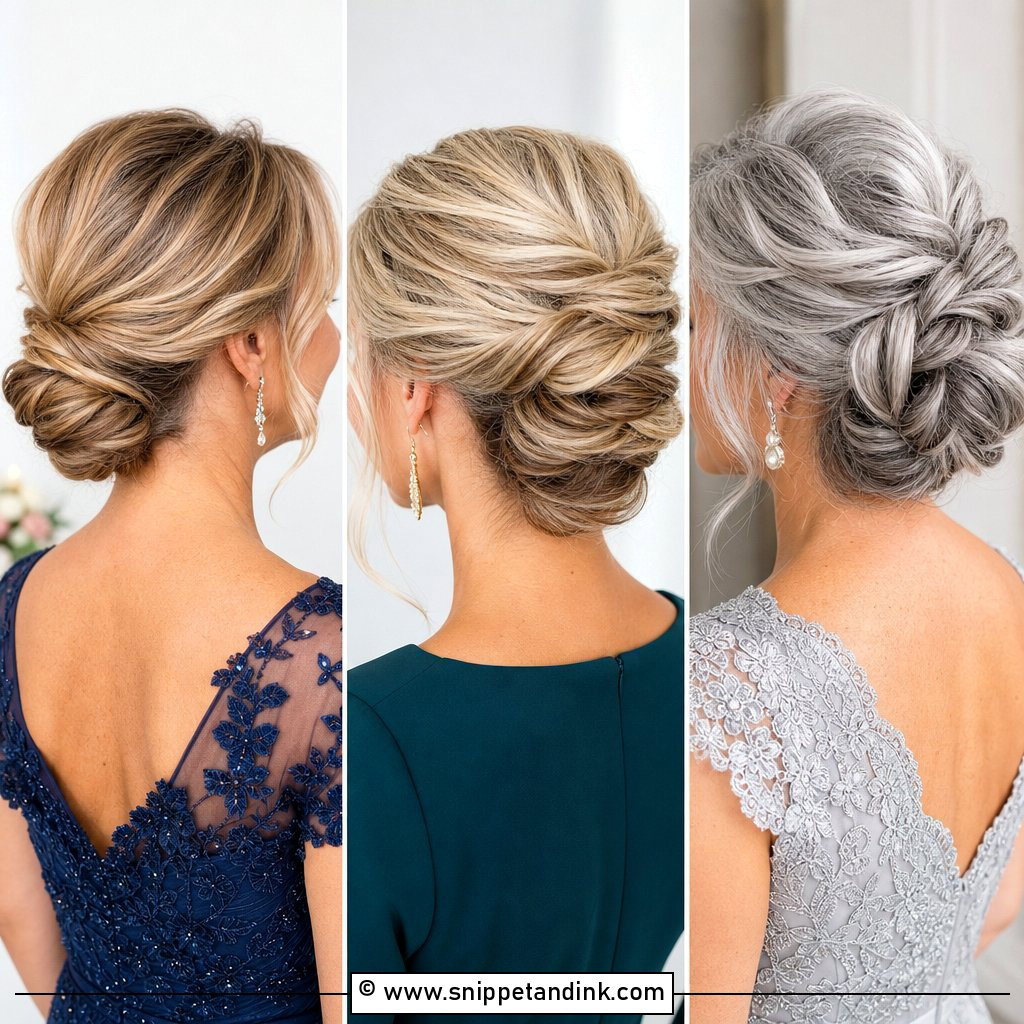
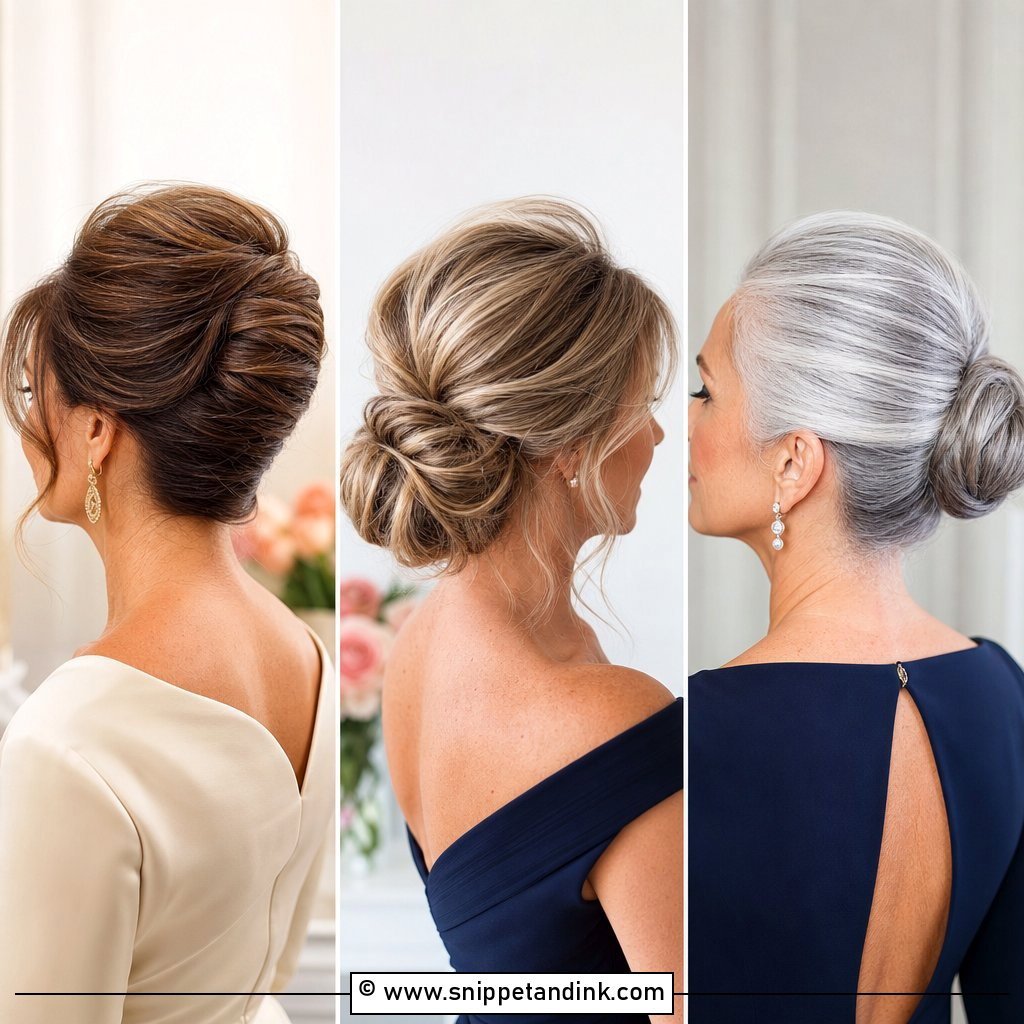
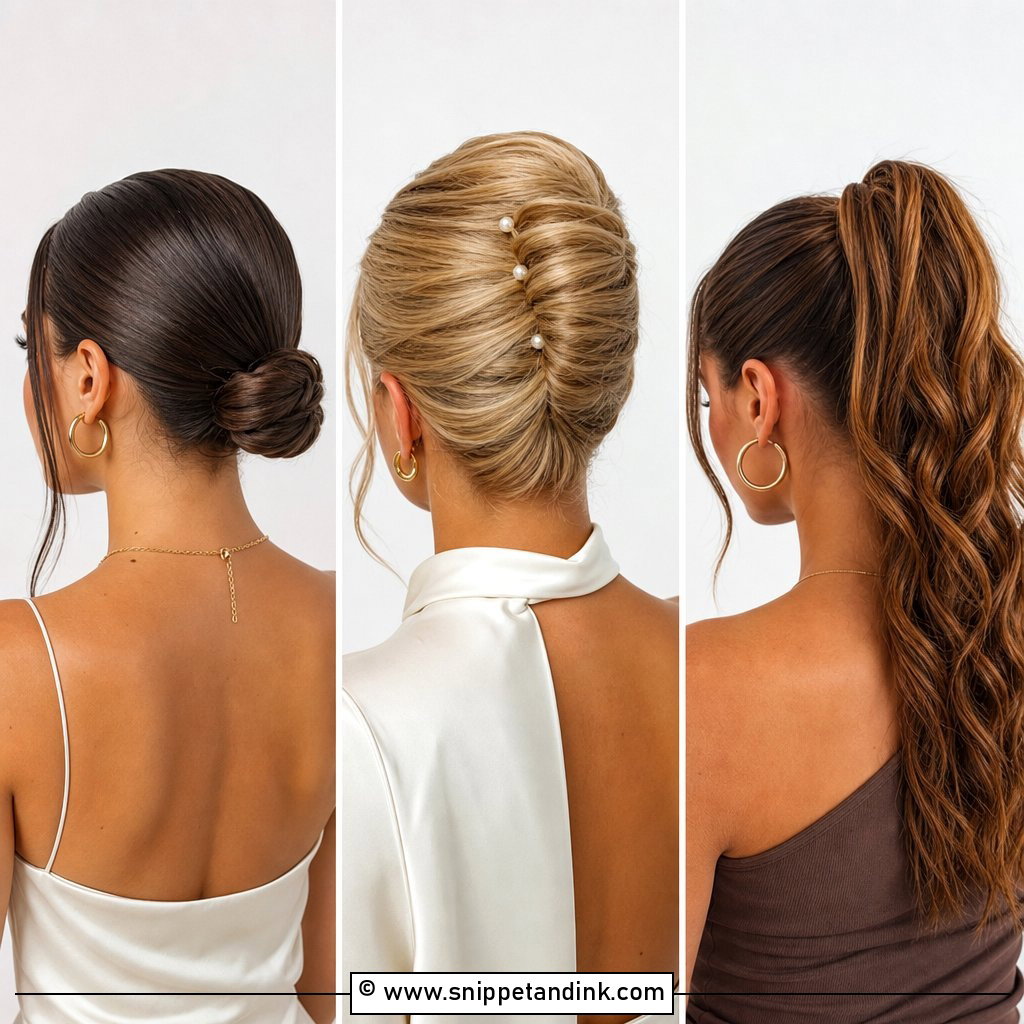
Low chignons rarely let anyone down. The knot sits at the nape, which keeps your profile clean in side-on shots during the ceremony. I build it on a small ponytail base so it can’t slip, then tuck and pin the lengths around it. Sleek reads formal; loosened slightly, it softens. Medium to long hair is needed. A couple of face-framing pieces help if your cheekbones are high and the style feels severe.
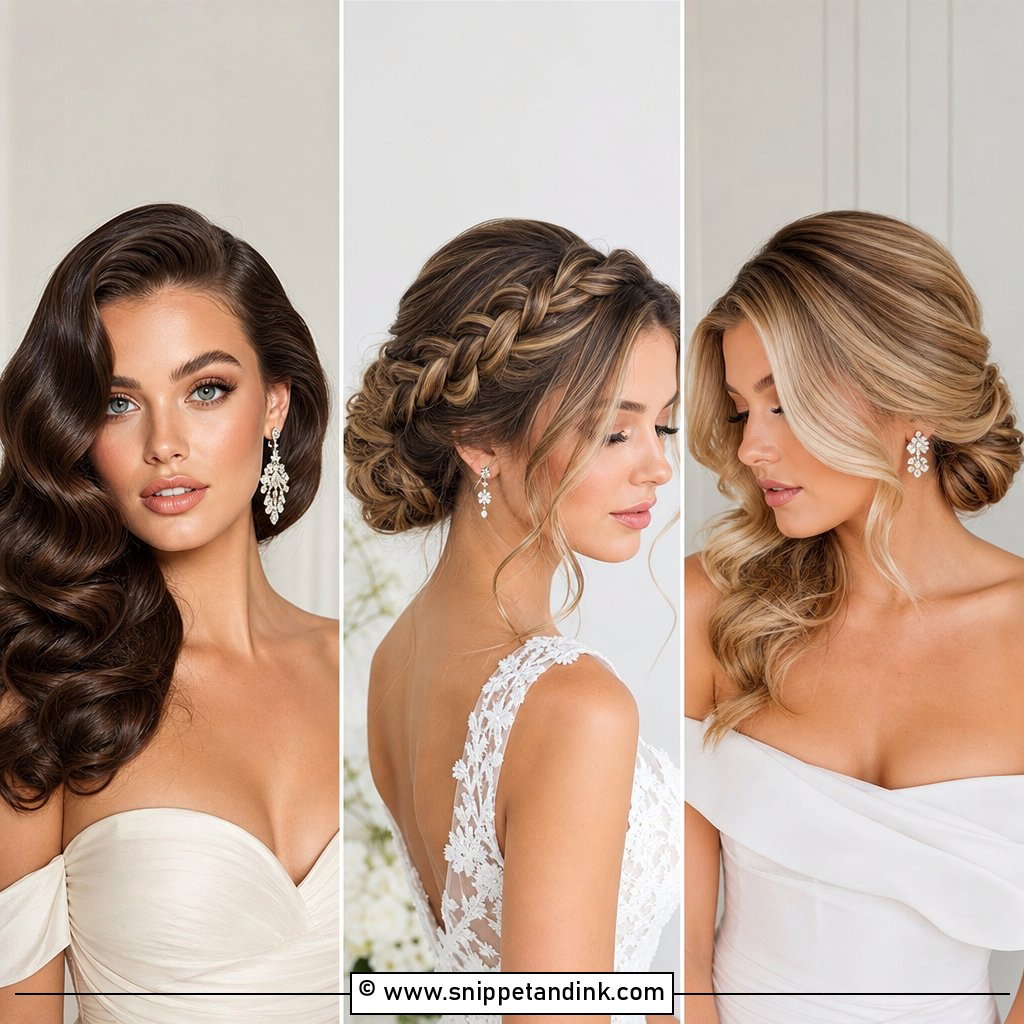
2. Soft Hollywood Waves With a Deep Side Part
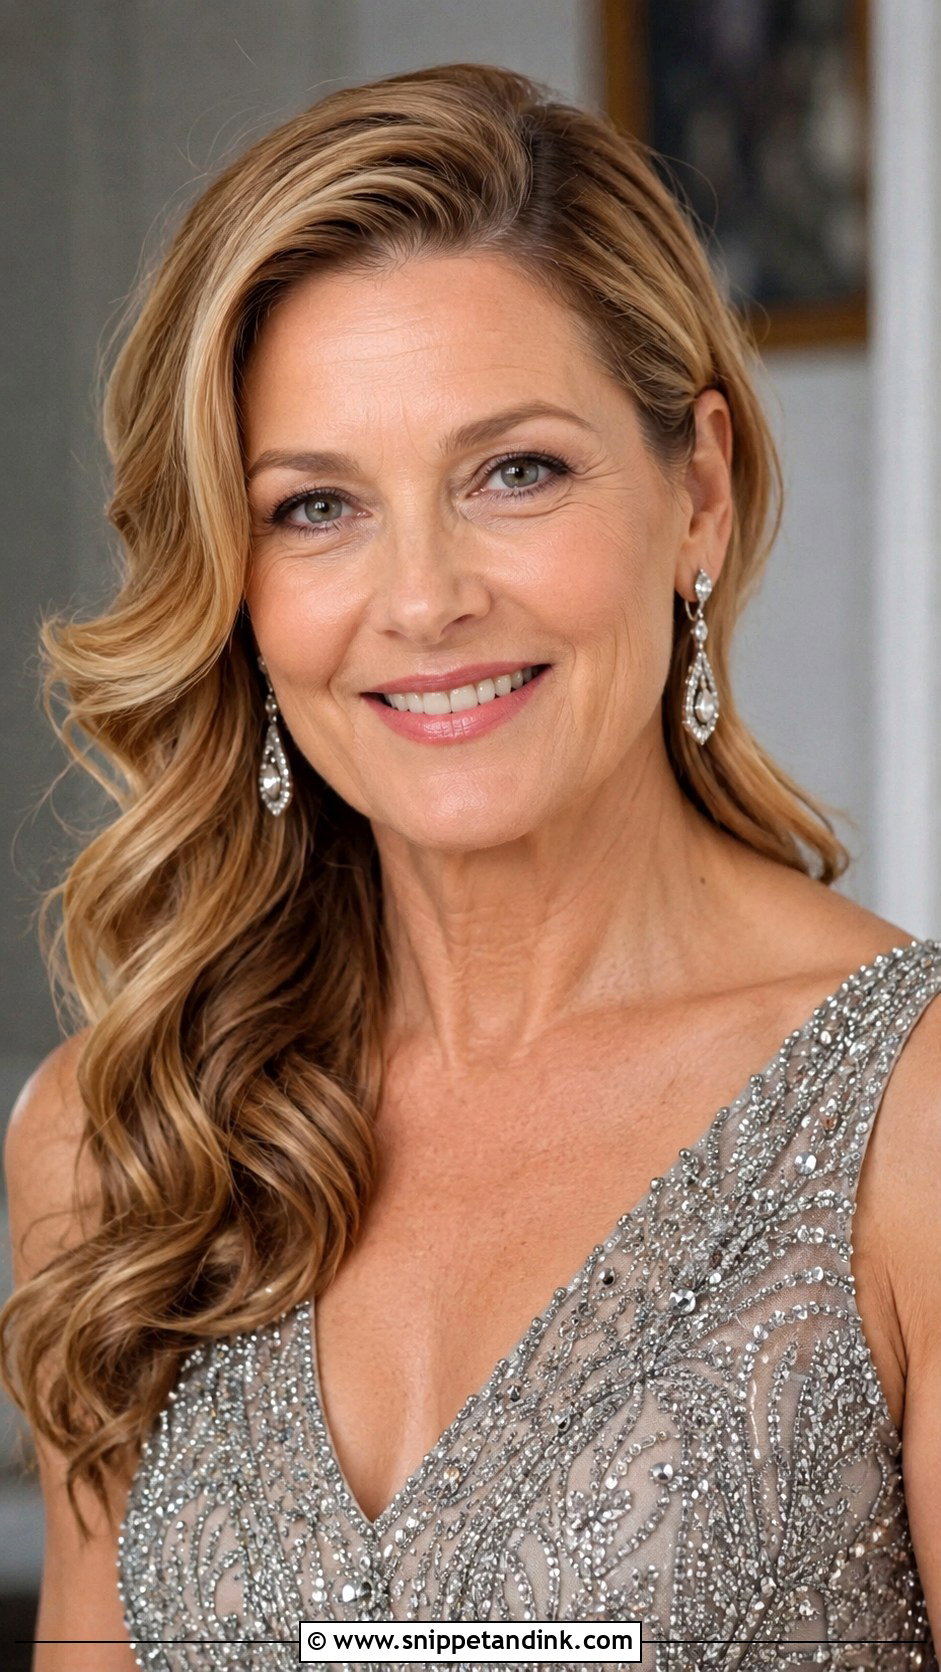
Hollywood waves catch light along each ridge, which is why they look so glossy in photos. I curl everything in one direction, pin every curl to cool, then brush it into one wave and set the ridges with clips. A deep side part adds drama but only suits you if your hair naturally falls that way; forcing it leaves a bump at the root. Shoulder length or longer, with some density. Simple drop earrings are enough jewelry.
3. Half-Up Half-Down With Loose Curls
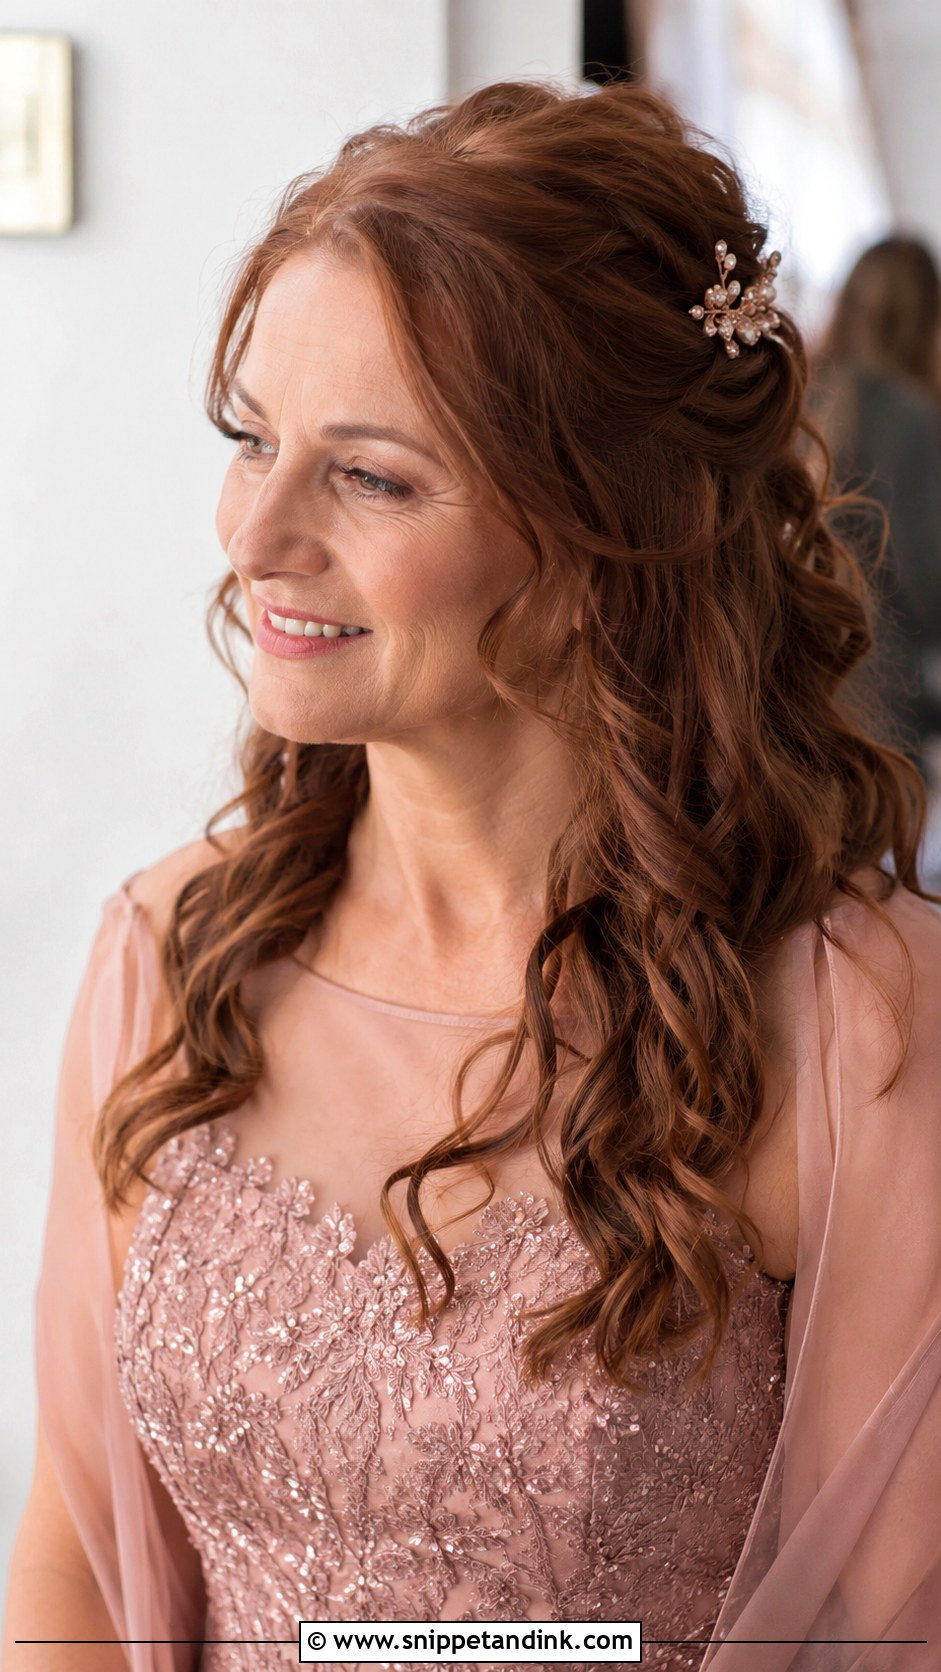
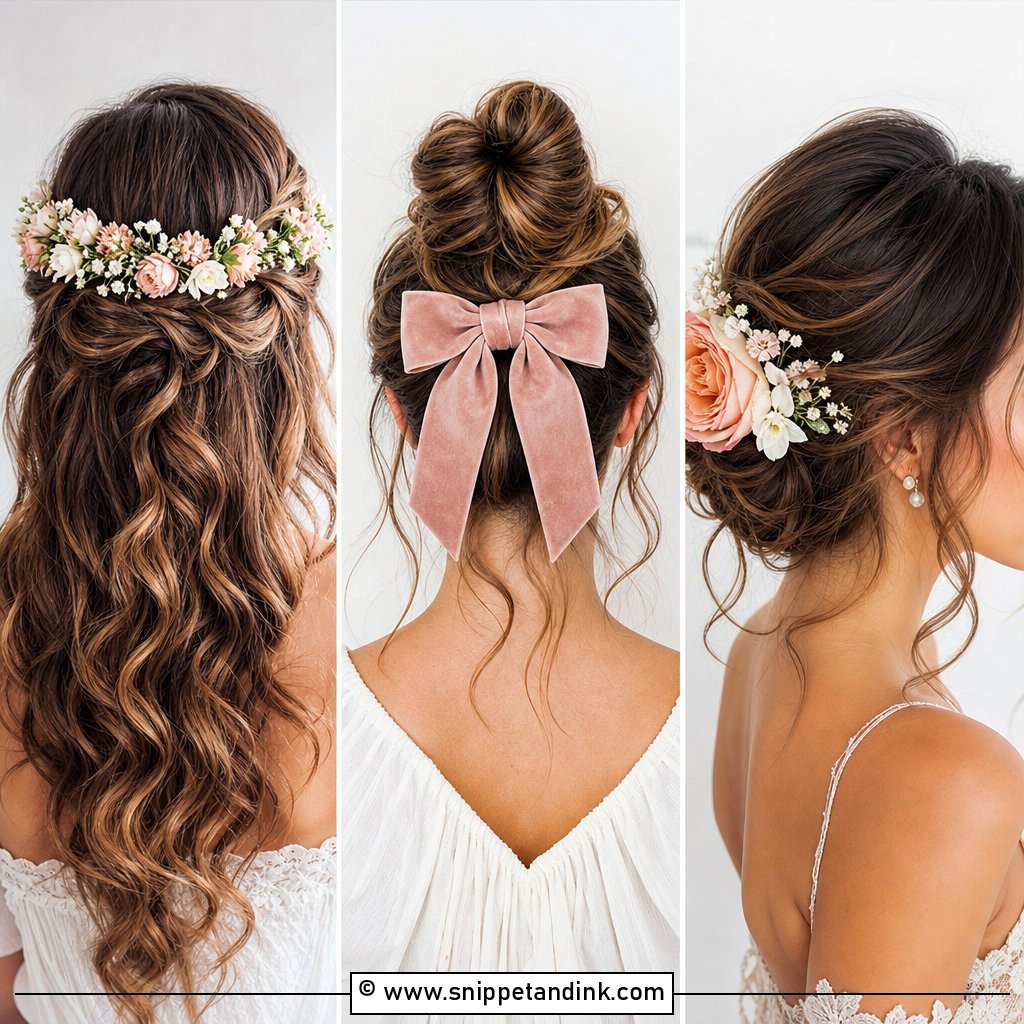
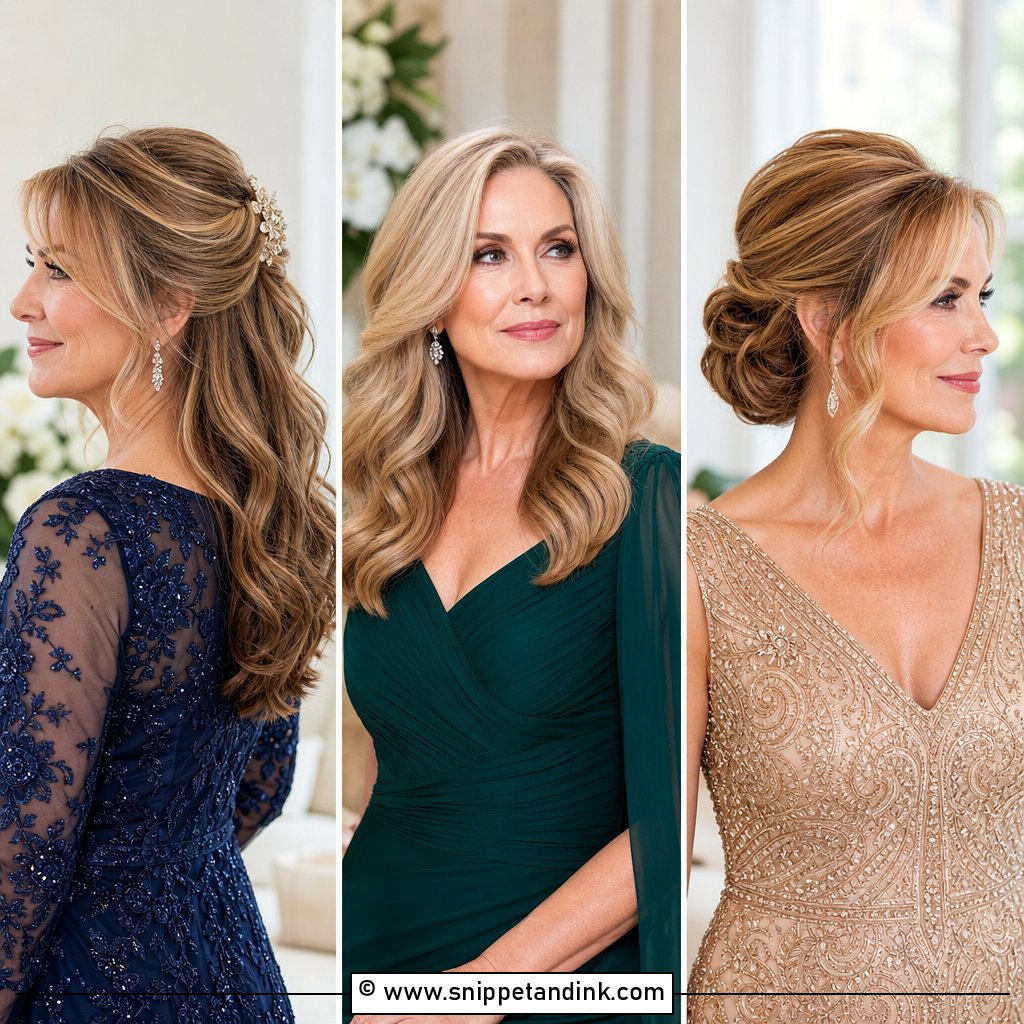
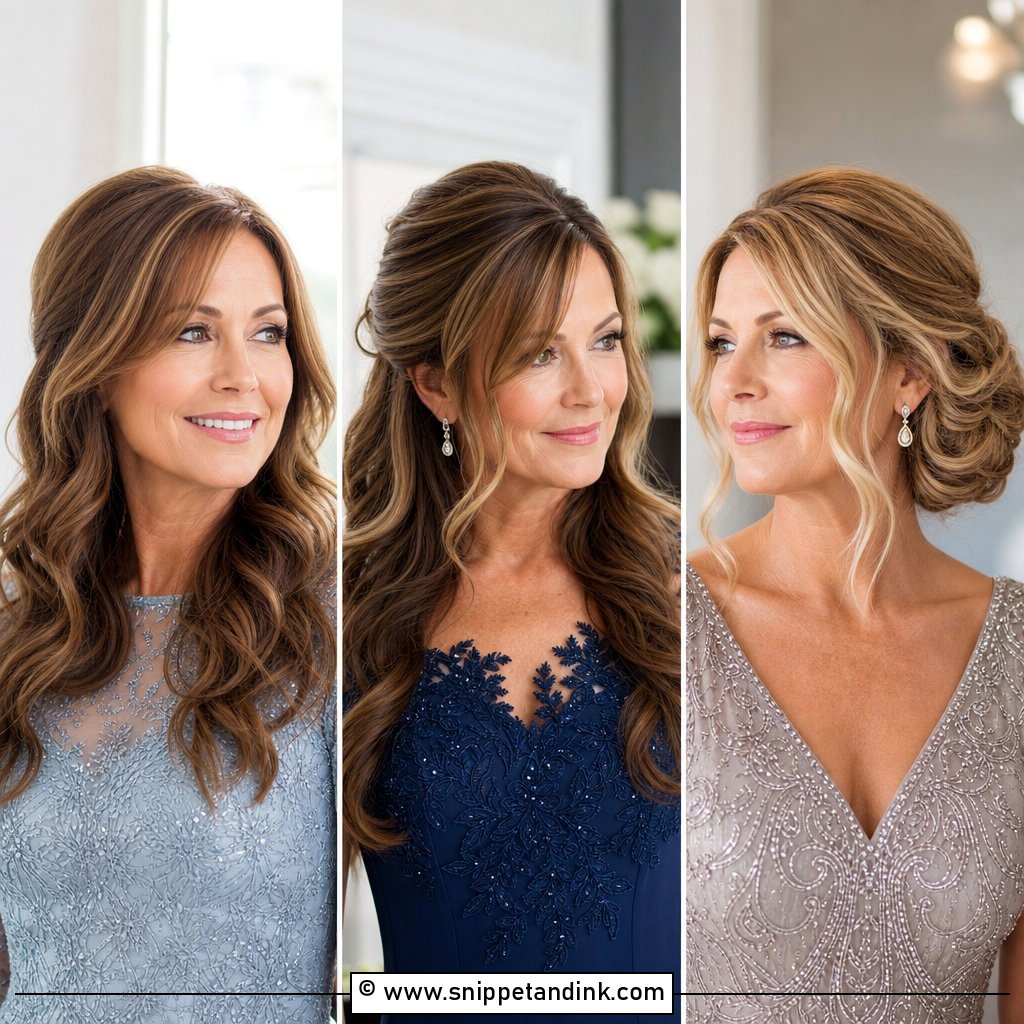
Half-up hides more than people think. It covers a thinner nape and keeps volume at the crown, both of which help in photos. The trade-off is that the curls below will relax, sometimes within a couple of hours on fine hair, so I set them firmly and let them cool before brushing. A small comb or clip at the back covers the pins. It suits medium to long hair best.
4. Sleek Twisted Bun With Pearl Accents
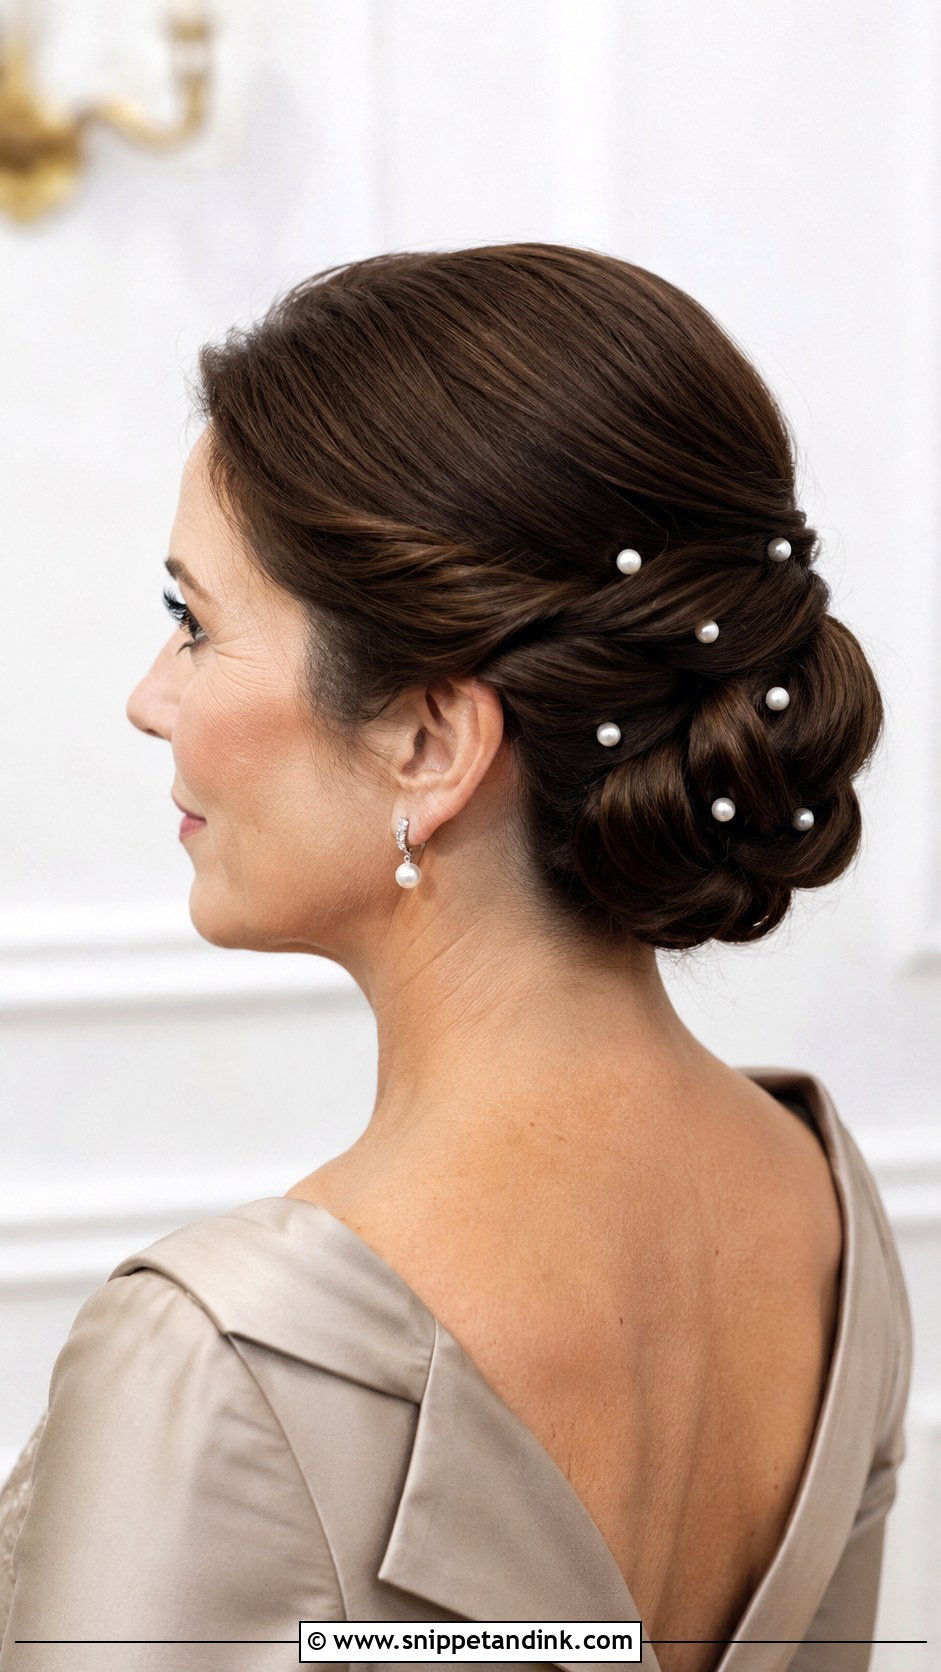
Pearl pins are a simple way to tie your hair to your jewelry. I twist and pin the bun low and smooth, then add the pins last, spacing them so they catch light without clustering. Small pearls look best; large ones can look like costume pieces on camera. Medium to long hair holds it securely. Match the pearl tone to your earrings, ivory with ivory and white with white, because the difference shows in close-ups.
5. Voluminous Blowout for Medium Hair
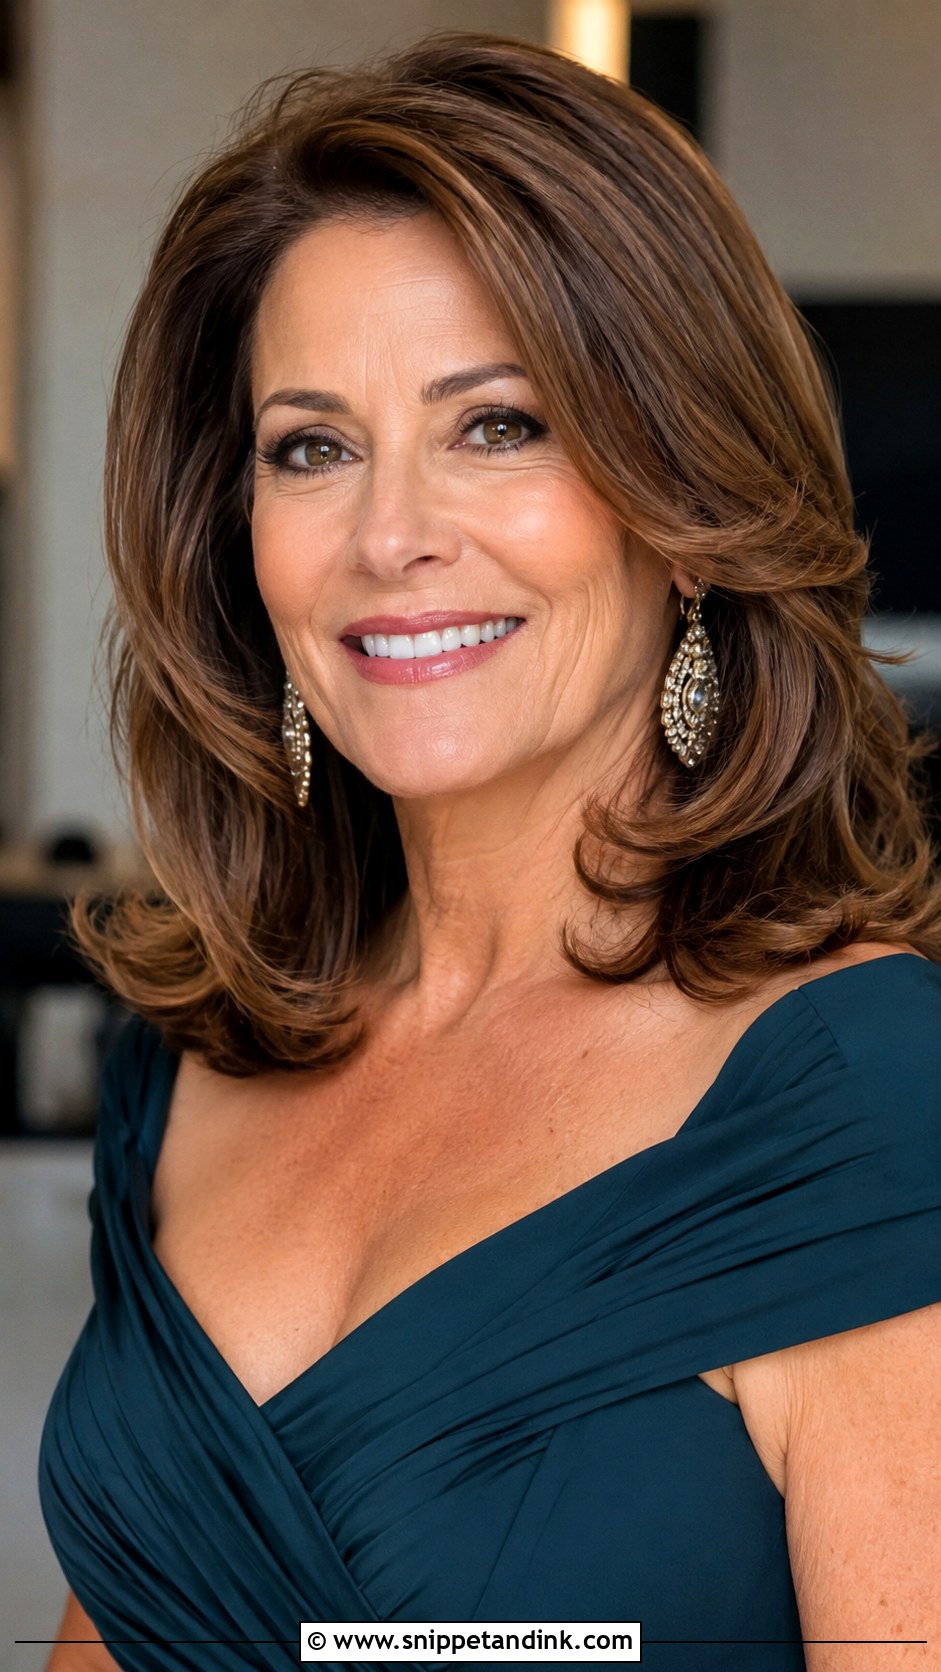
Medium hair takes a voluminous blowout very well, since the length isn’t heavy enough to pull the volume flat. I blow-dry with a round brush for lift at the root, then set the ends in large rollers while you do makeup. Fine hair looks thicker this way. Blowouts slowly drop through the day, so expect some loss of body by evening, and keep a small brush with you. Statement earrings sit nicely beside it.
6. Crown Braid Updo for Mother of the Groom
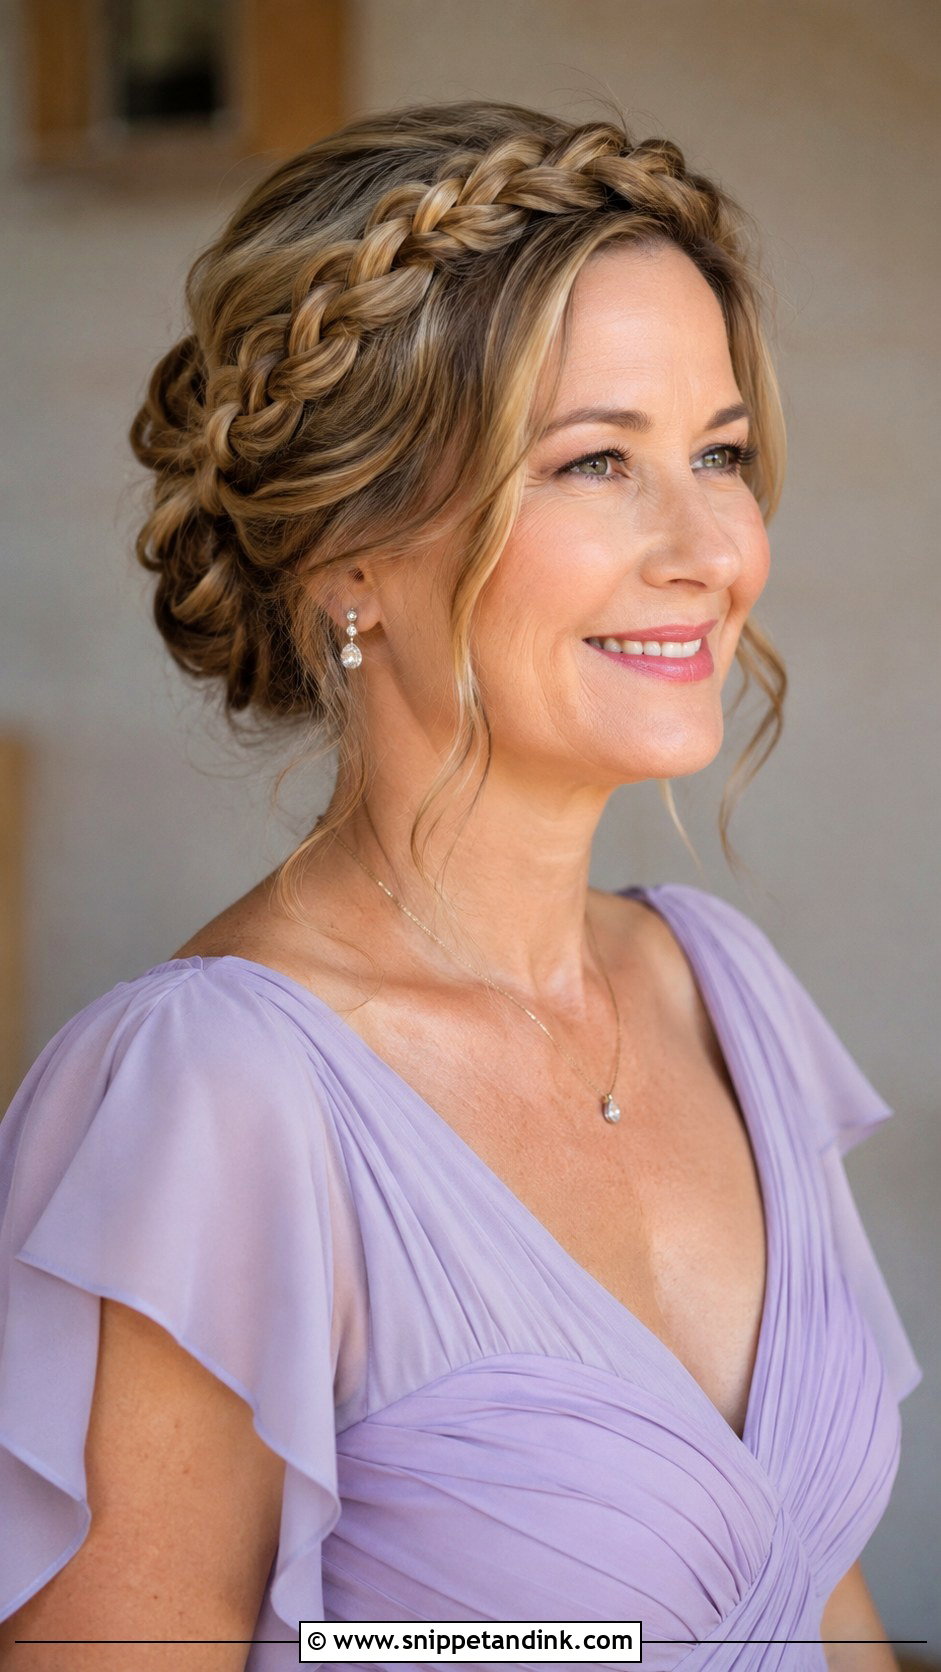
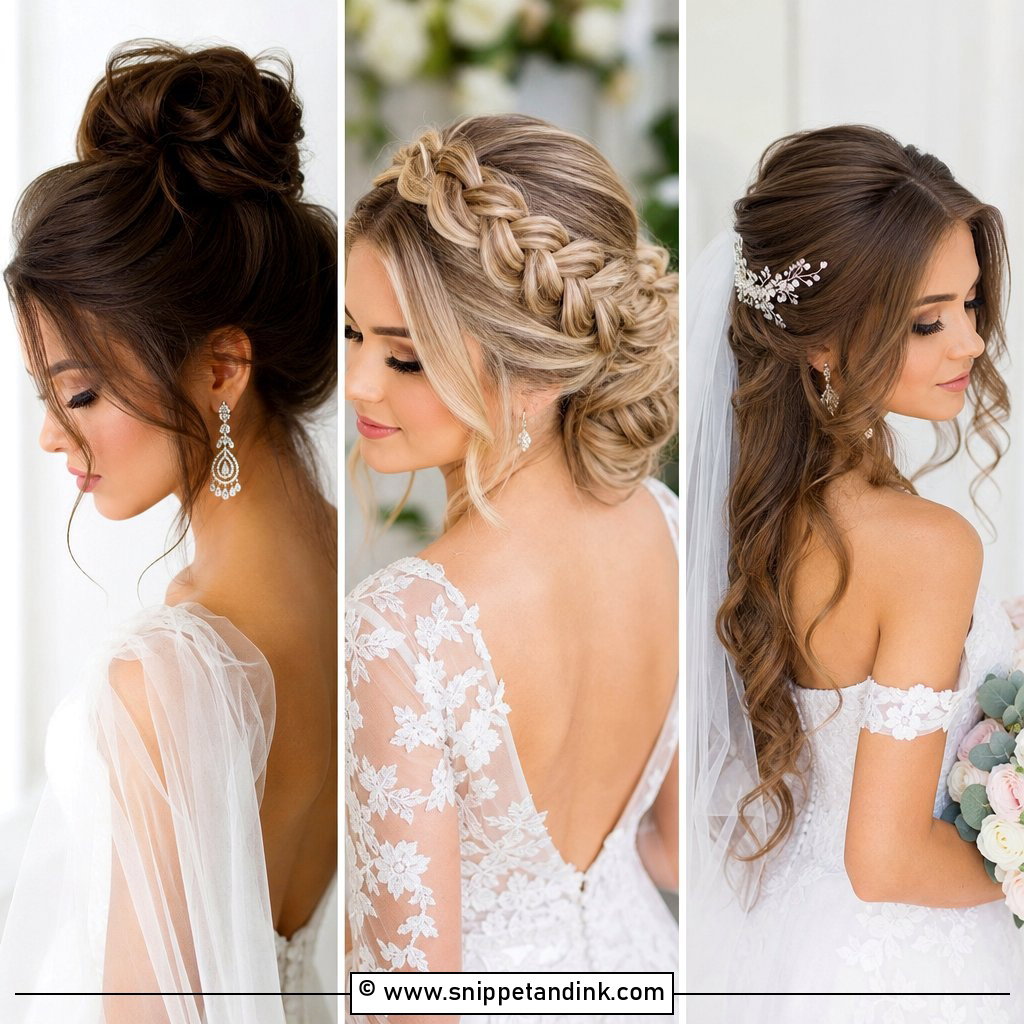
Crown braids are one of my go-to options for warm weather, since every strand is off the neck and nothing can droop. The braid wraps around the head and is pinned flat every couple of inches. You’ll need enough length to reach around; shorter hair can use two braids that meet at the back. It frames the face well. Delicate jewelry and flowing dresses suit it. It holds through hugs and tears without moving.
7. Elegant French Twist Updo
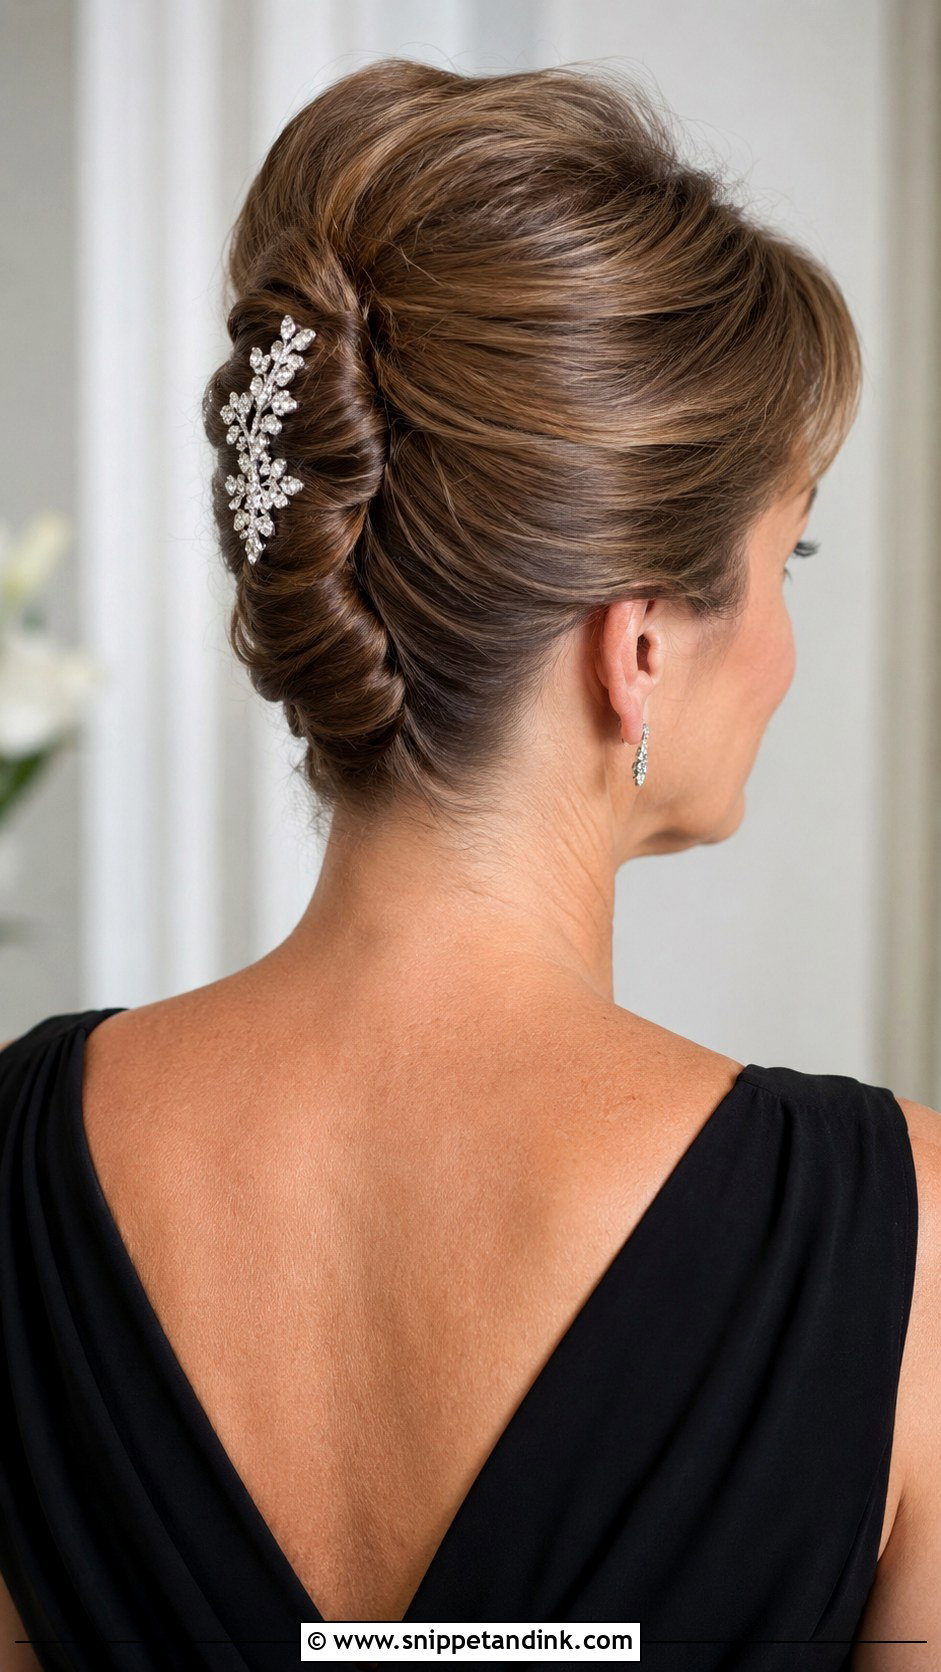
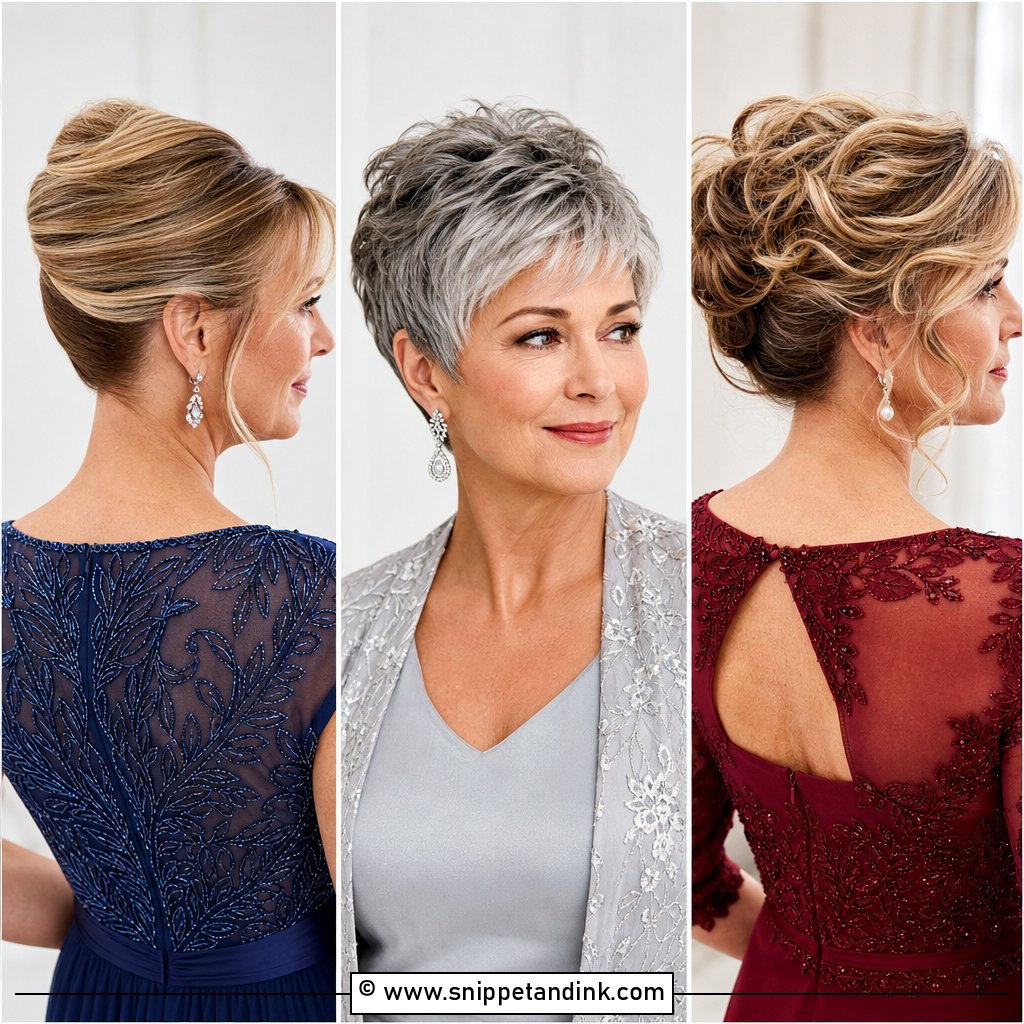
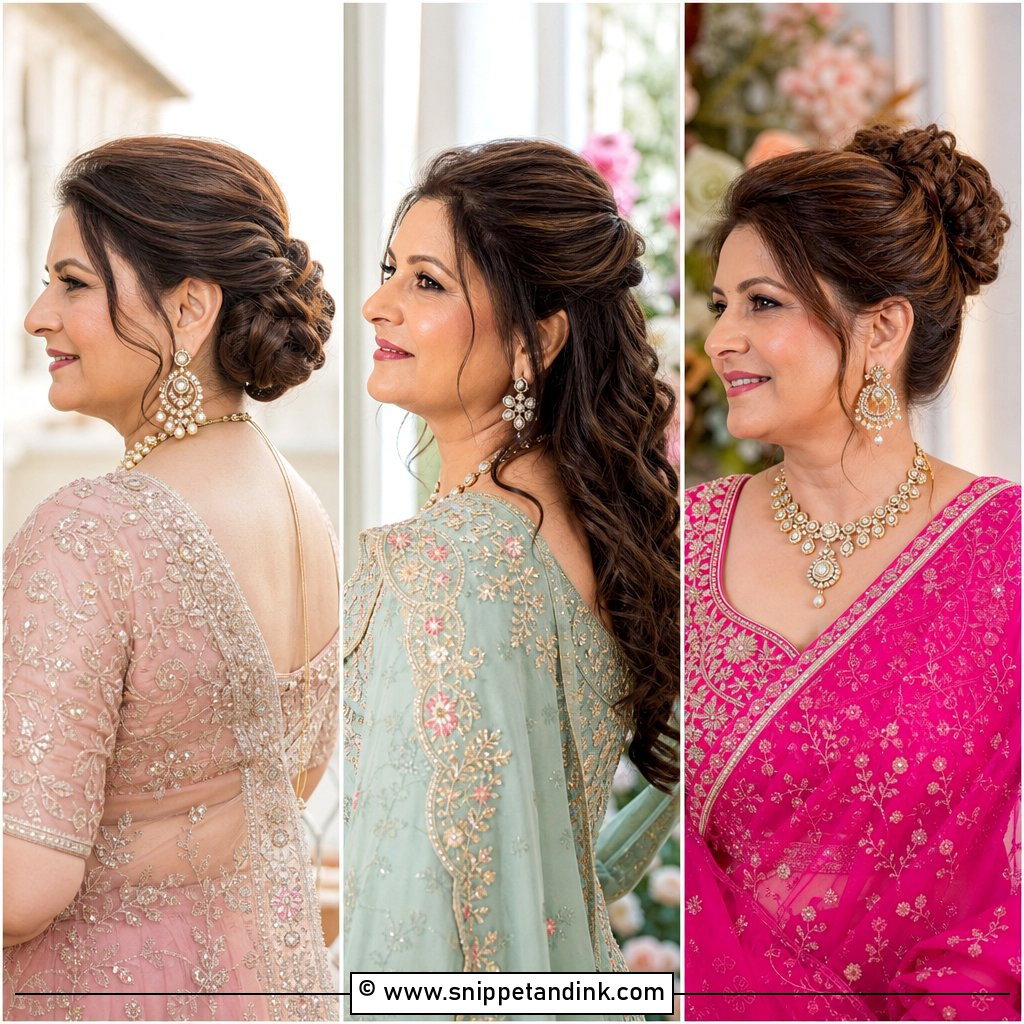
A French twist is a sleek vertical roll that sits flat against the back of the head, which makes it very practical under a dupatta, a veil-like scarf or a high jacket collar. I lock it with interlocking pins along the seam. It can be tight and sleek or have soft volume on top. Medium to long hair works, of most textures. A single decorative pin is plenty.
8. Soft Curls With a Side-Swept Style
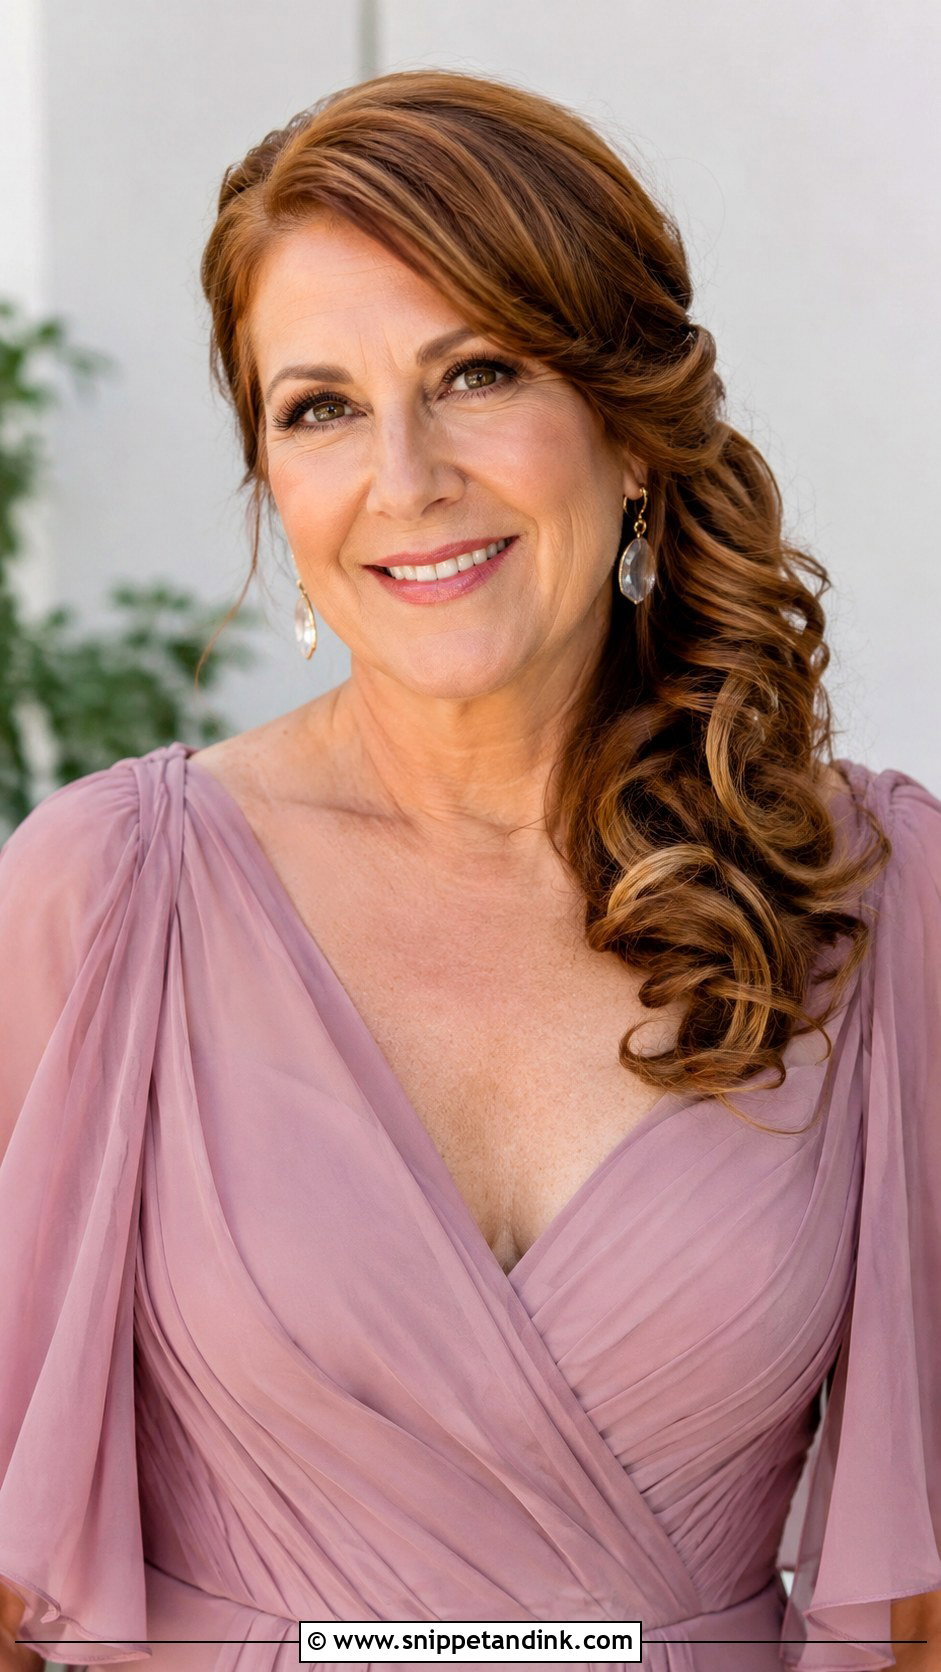
Side-swept curls rest on one shoulder, so they show your neck and a long earring on the other side. I pin the back securely to the swept side, because that’s where hair tends to escape when you turn your head. Curls are set and cooled before brushing out. Medium to long hair suits it. Consider which side faces the couple during the ceremony, since that’s the side guests and photographers will see.
9. Polished Bob for Short Hair
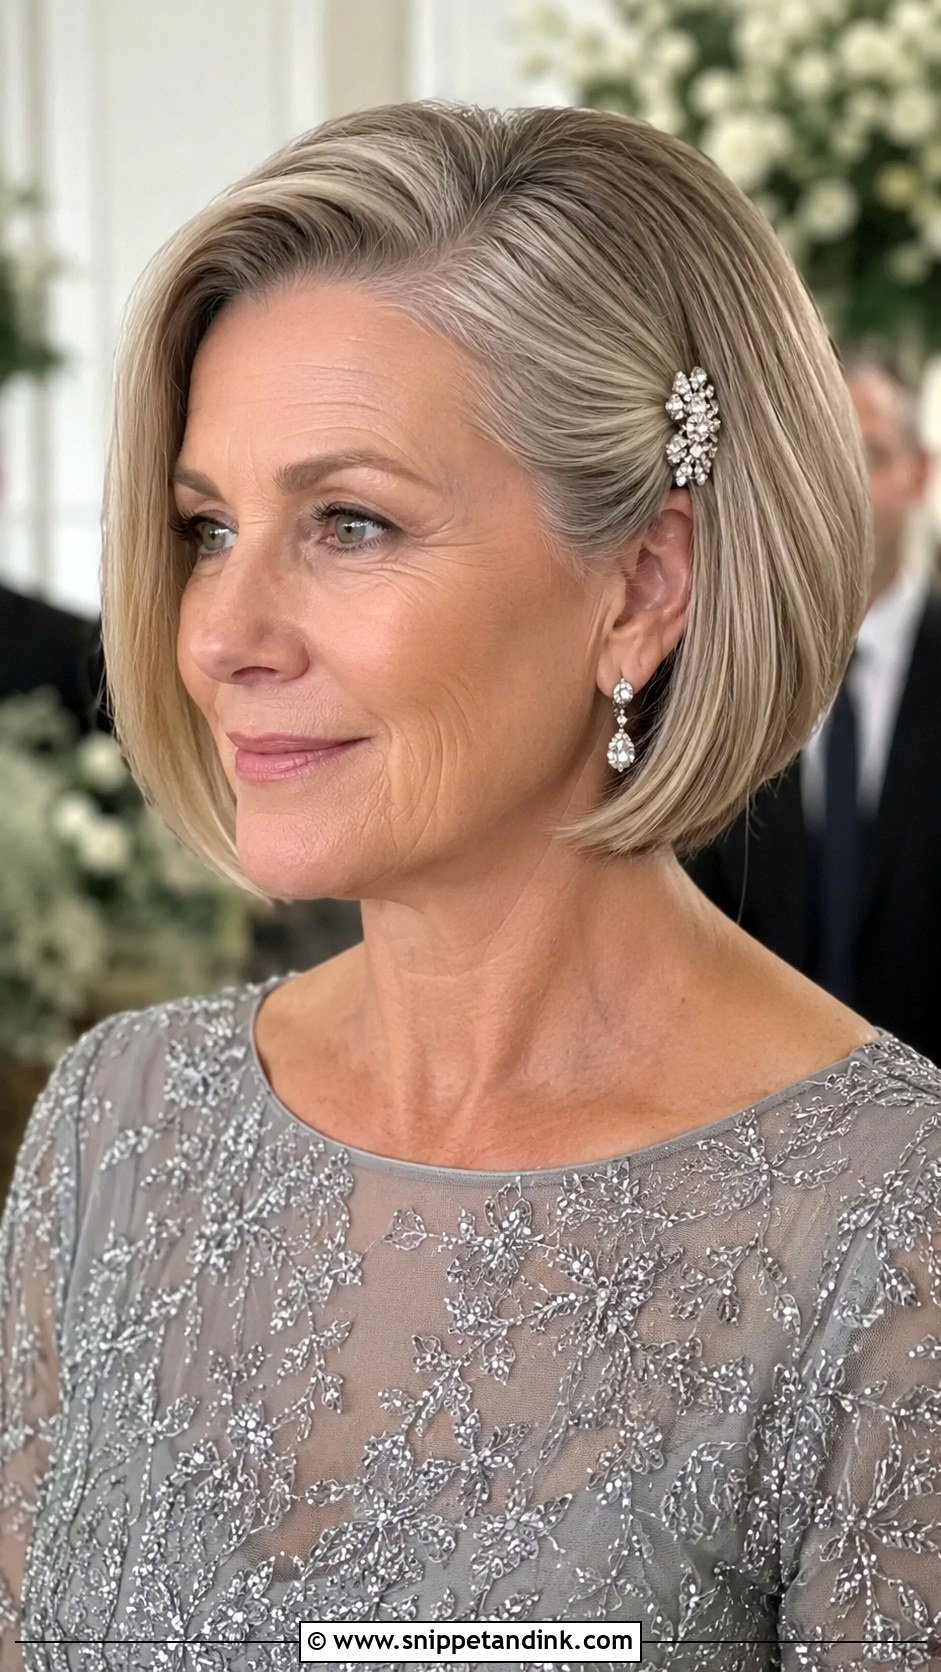
Short hair has one big advantage: it barely moves all day. A polished bob just needs a smooth blow-dry and a light finishing product. I’d test smooth versus gently waved at a trial and see which suits your face. Get it trimmed about a week before so the ends aren’t blunt and freshly cut in photos. A jeweled clip near the temple adds detail. Fine and thick hair both suit a bob.
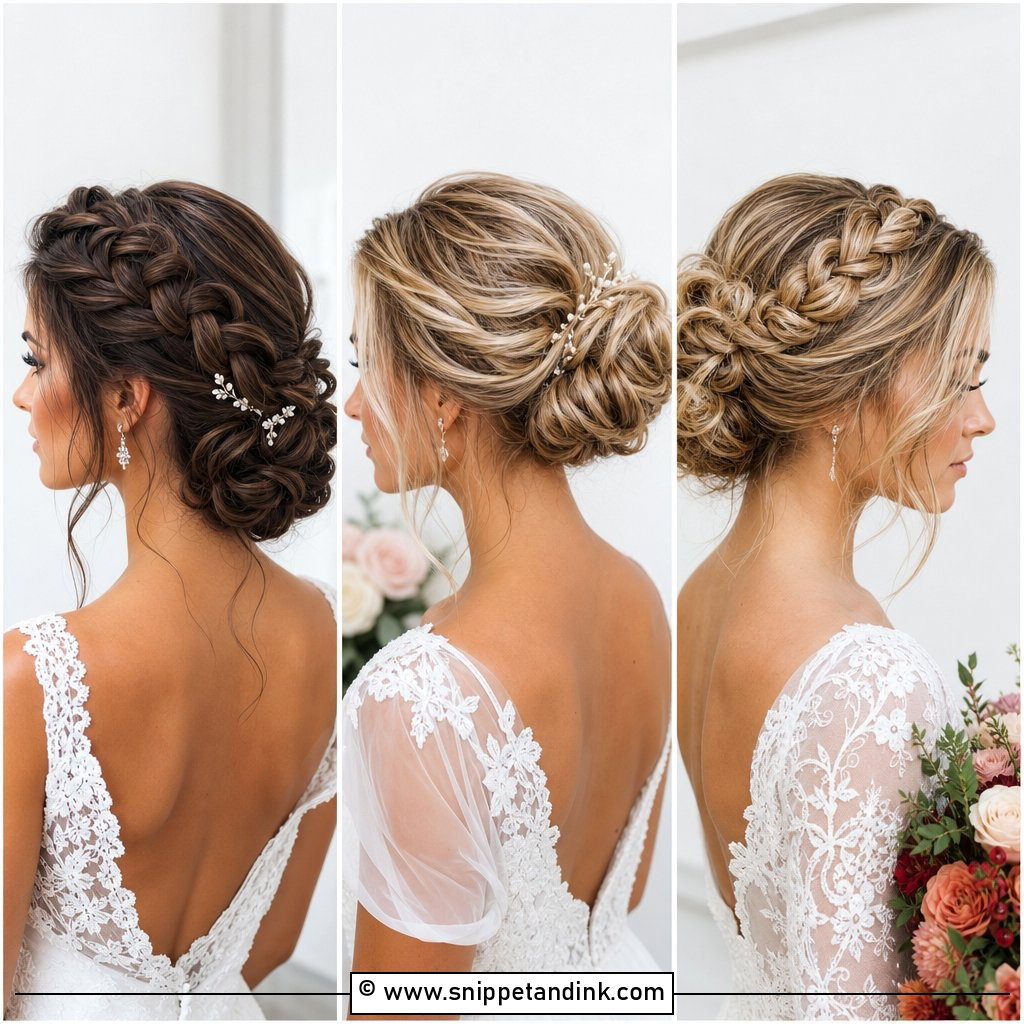
10. Braided Chignon With Face-Framing Pieces
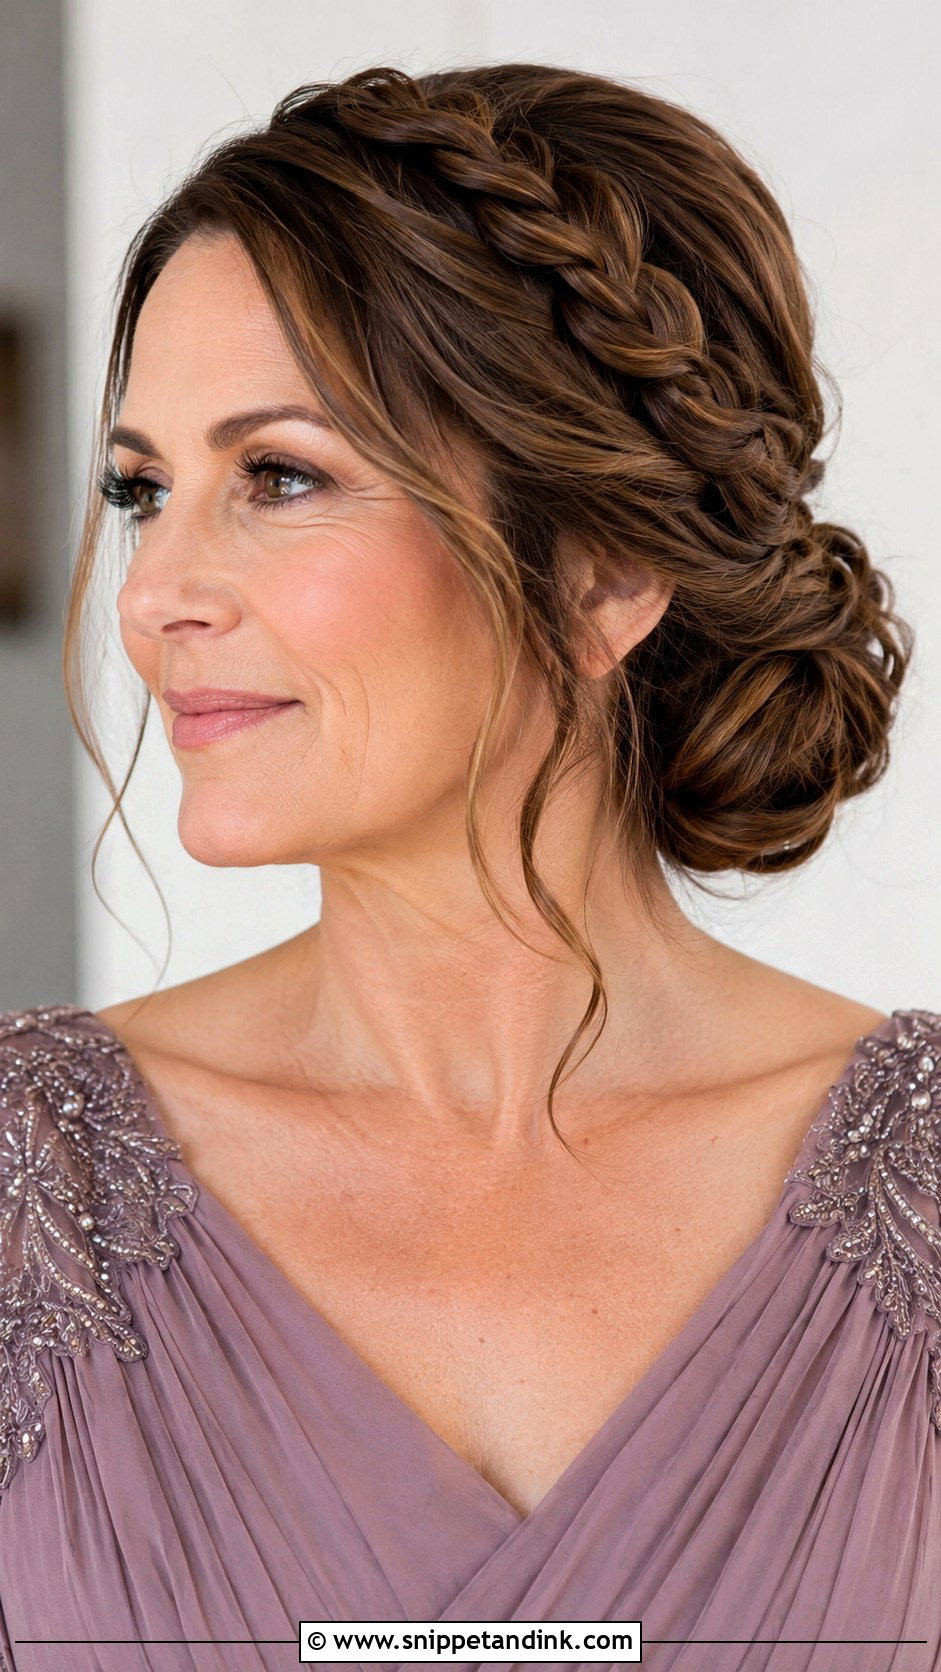
Adding a braid to a chignon gives it texture that shows up nicely from behind, which is how half the ceremony photos are taken. I braid a section, pancake it lightly, then wrap it around the low bun. Two face-framing pieces soften the front. Braids give extra grip, so this is a good option if your hair usually slips out of updos. Medium to long hair is needed. It suits traditional and modern outfits alike.
11. Loose Waves Worn Down With a Soft Part
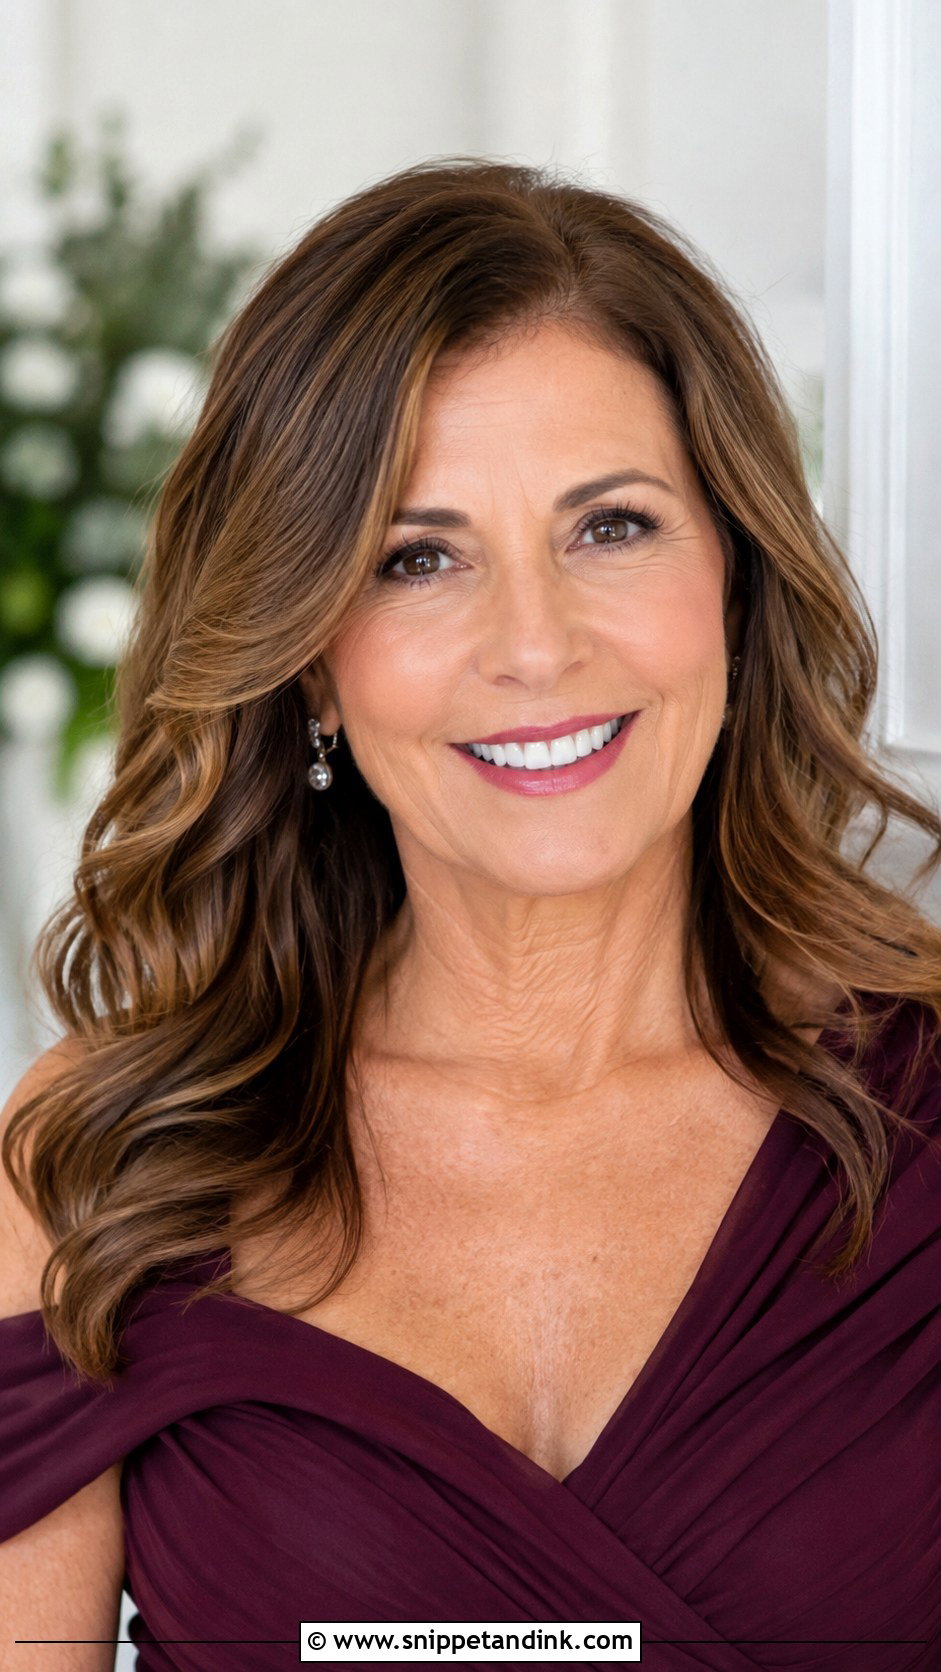
Waves worn down have become far more common for mothers, and I’m happy about that. They feel natural, especially for women who never wear updos. The key is a soft part that follows your natural fall, so it doesn’t look forced. A little shine serum at the ends finishes it. Hair with natural body holds the waves longest; very straight hair will need more setting. Expect the waves to soften by evening.
12. Sleek Bun With a Center Part
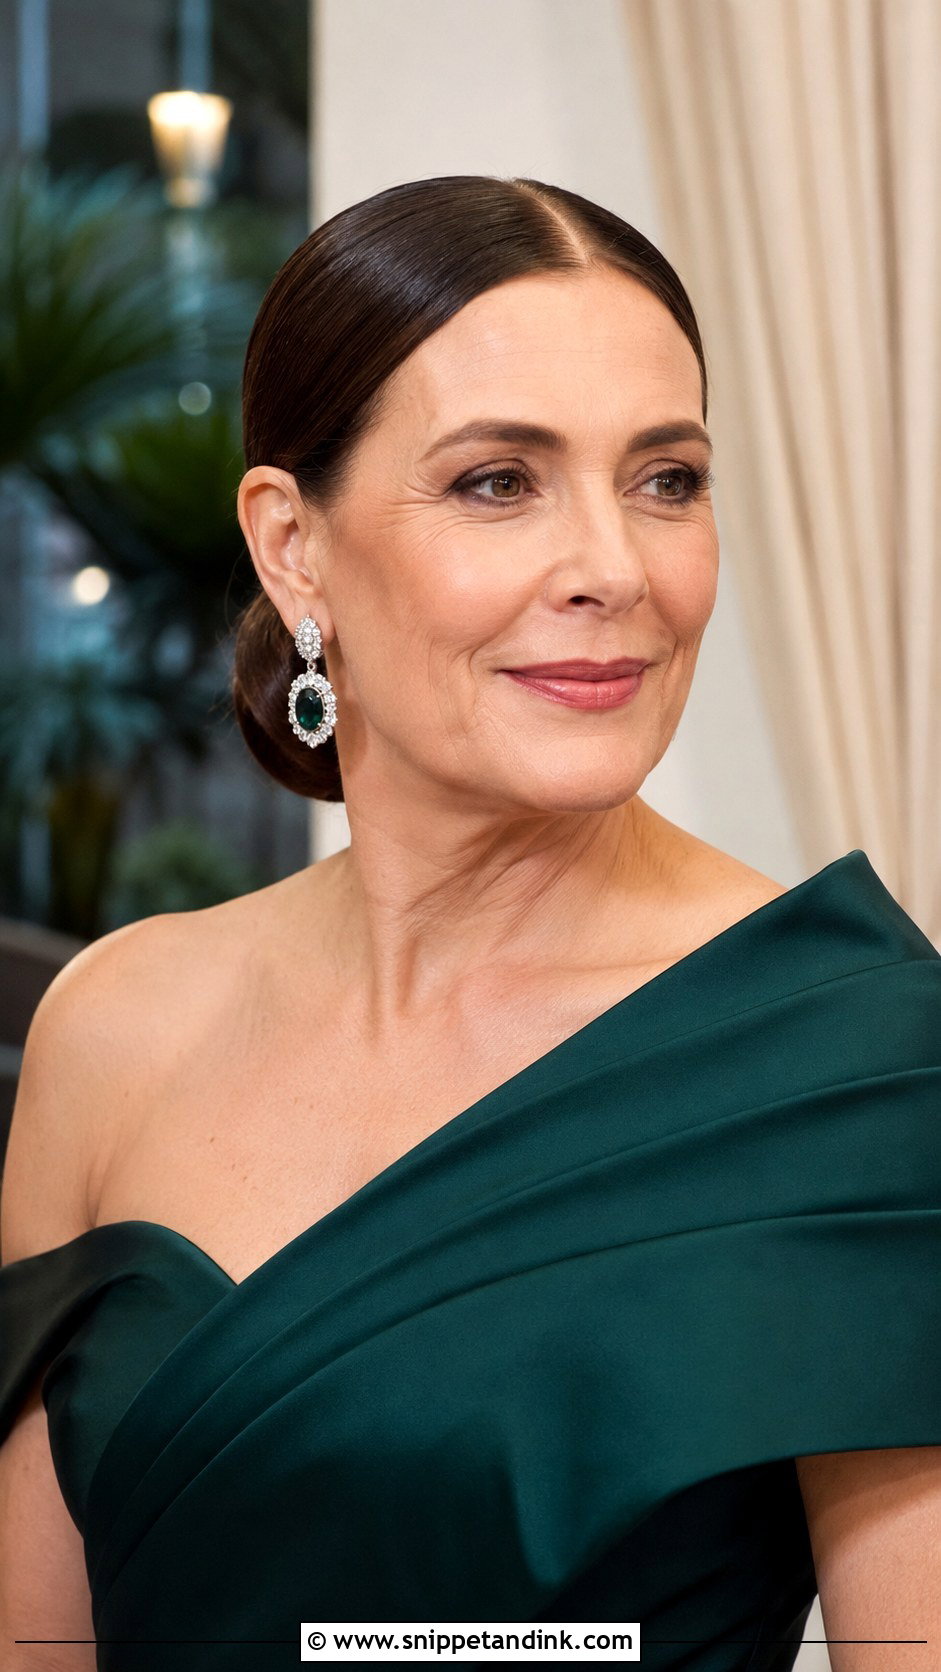
A center part with a sleek low bun is very modern, but it’s also very honest. It only suits you if your face is fairly symmetrical and your part is full; a thinning part shows clearly in overhead shots. I smooth the hair with a firm-bristle brush and a bit of cream so no ridges show. It’s secure from morning to midnight. Structured gowns and bold earrings are the natural partners.
13. Vintage Updo With Finger Waves
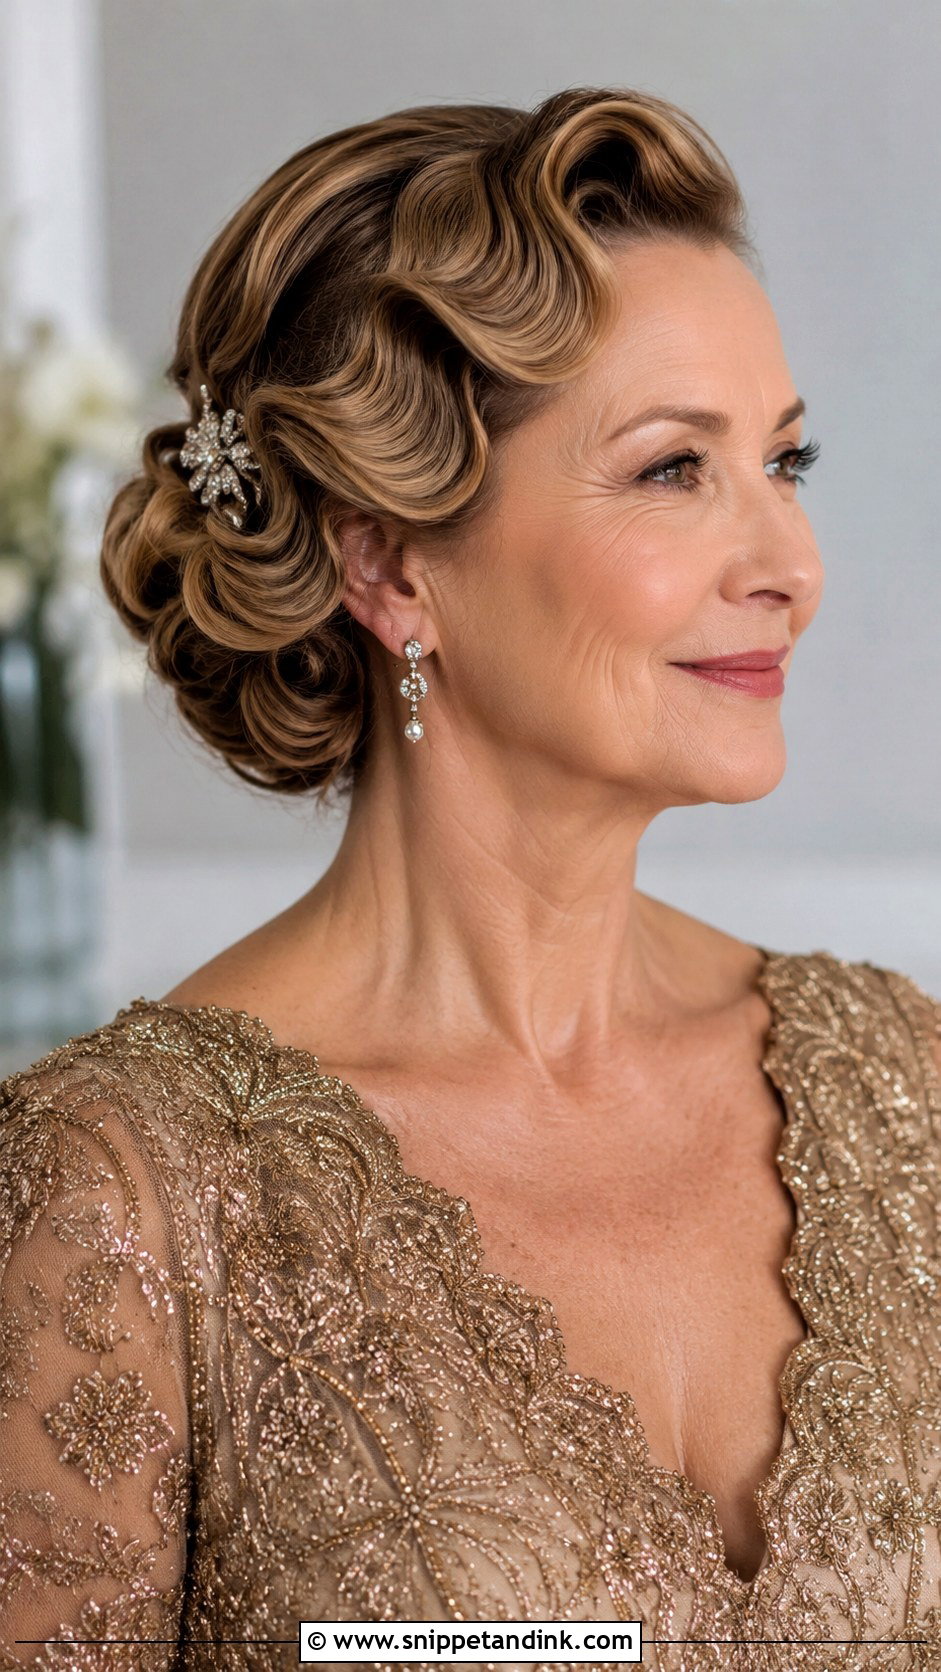
Finger waves combined with an updo give a sculpted, 1920s look. The waves are molded close to the head at the front with gel and clips and left to set, while the rest is pinned into a low roll. It takes time and skill, so ask your stylist whether they’ve done finger waves before. Shoulder length or longer works. A small jeweled pin at the side completes it. Once set, it holds all day.
14. Half-Up Twisted Style for Long Hair
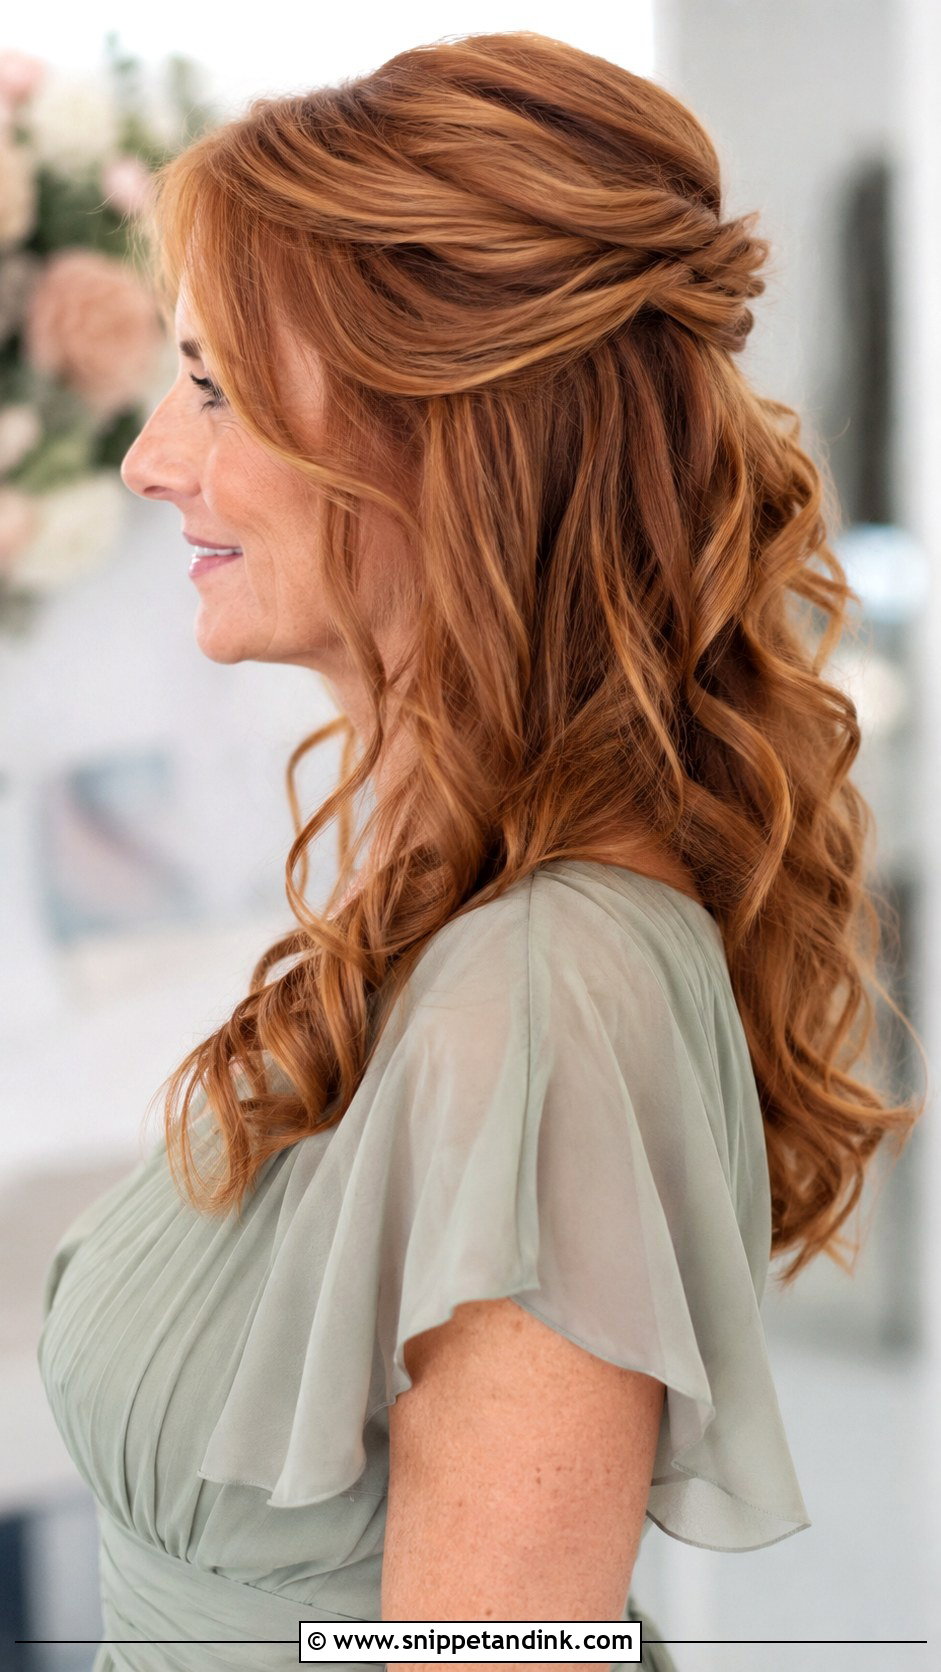
For long hair, twists are a lighter alternative to braids. I twist sections from each side back to the crown and pin them where they meet, leaving the rest in waves. The weight of very long hair can pull the twists loose, so I add grip spray before twisting and cross-pin underneath. It keeps hair off the face but still shows length. Delicate accessories finish it well.
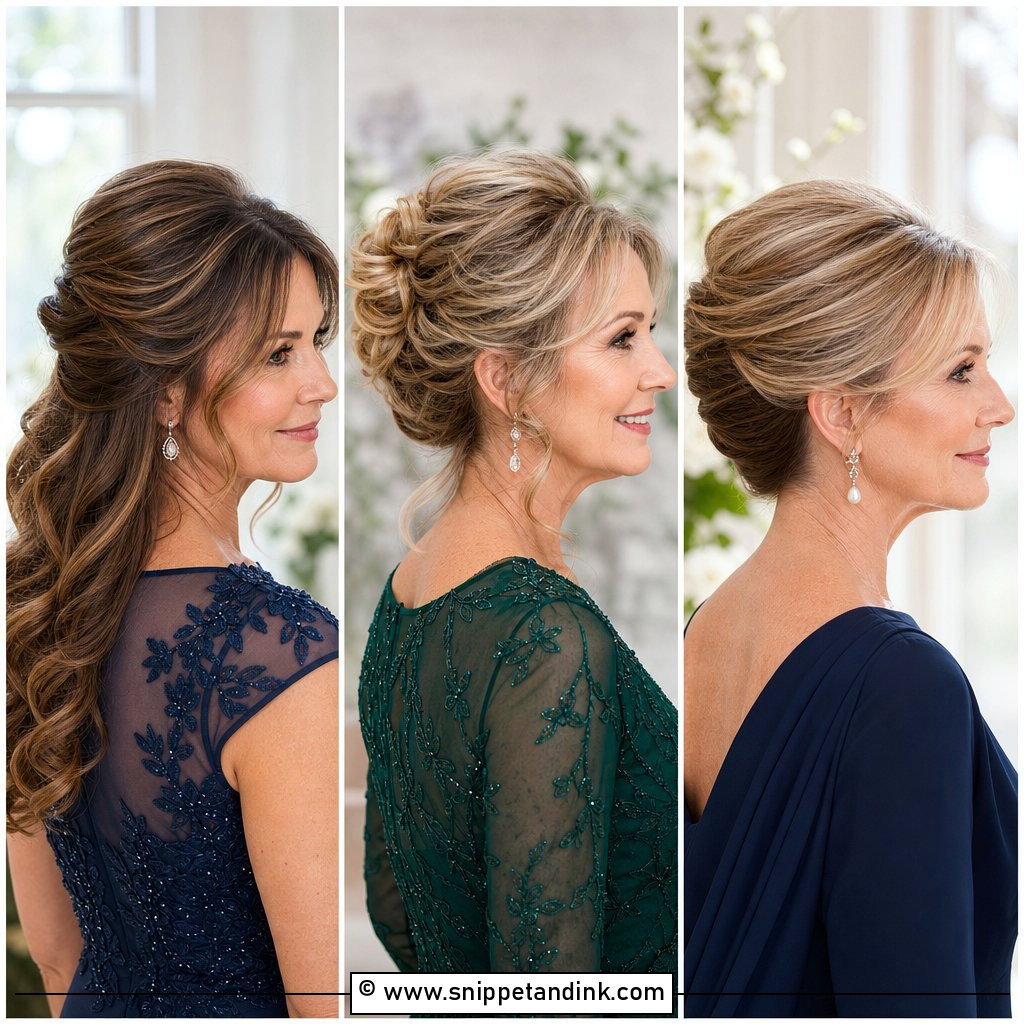
15. Curly Updo for Natural Hair
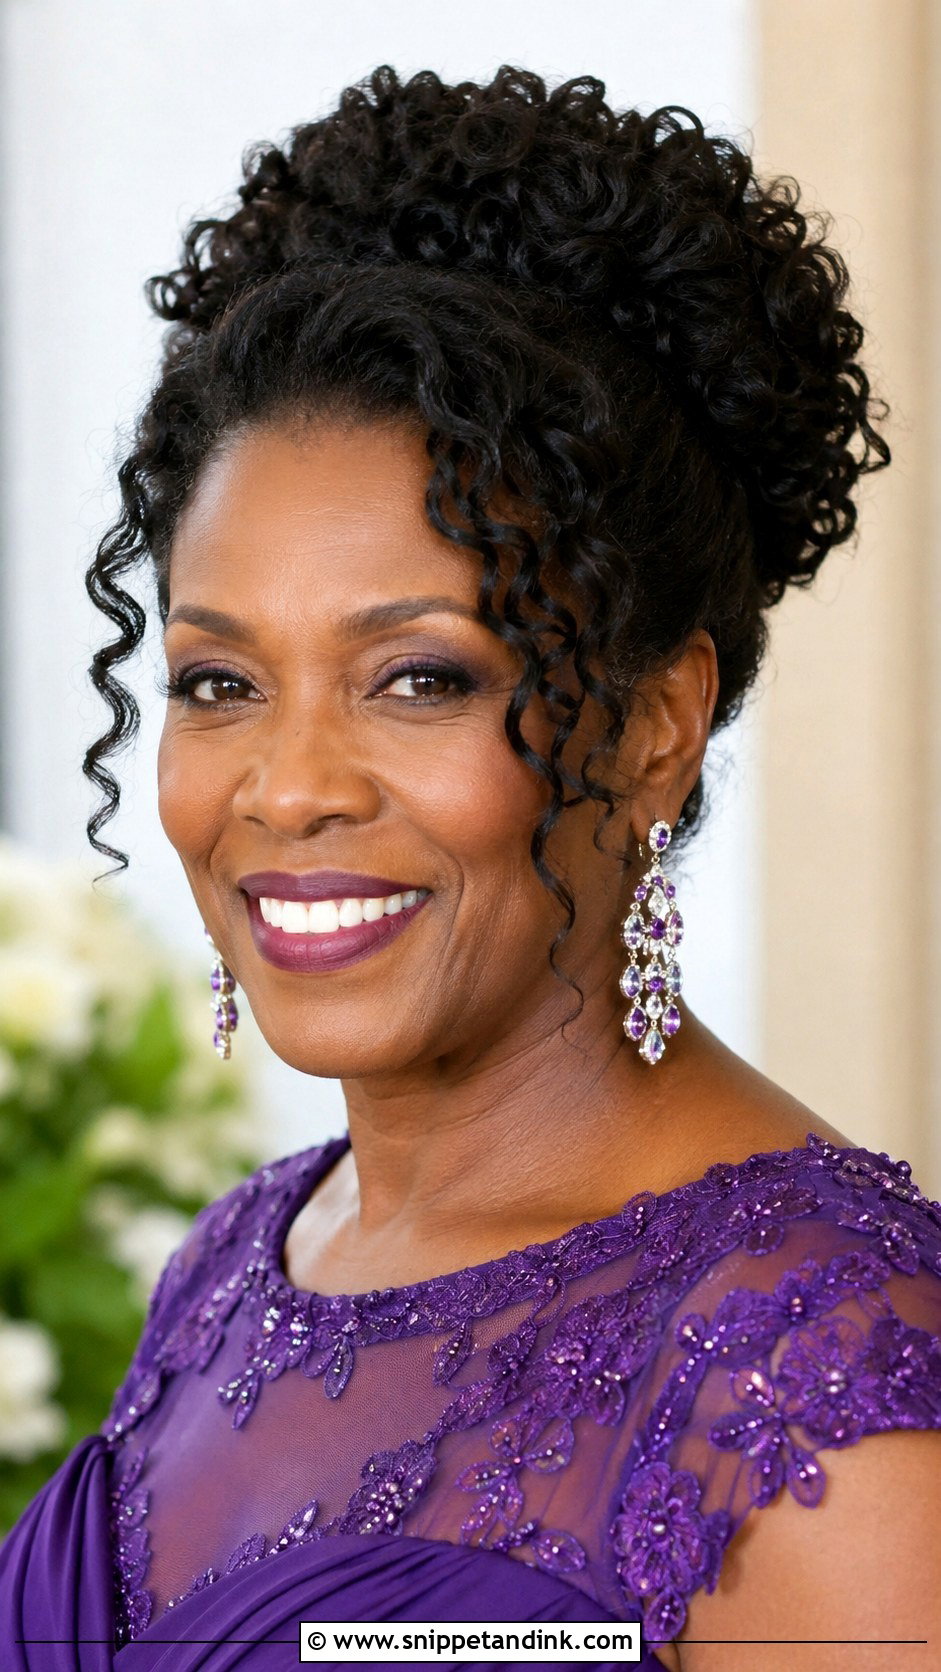
With natural curls and coils I work with the texture as it is. I gather the curls into a full shape at the crown or back using large U-pins, which hold the volume without crushing the pattern. Curls should be washed and styled the day before so they’re defined. A few curls left out frame the face. It holds well in heat and humidity, and the fullness shows clearly in photos.
16. Low Ponytail With Soft Volume
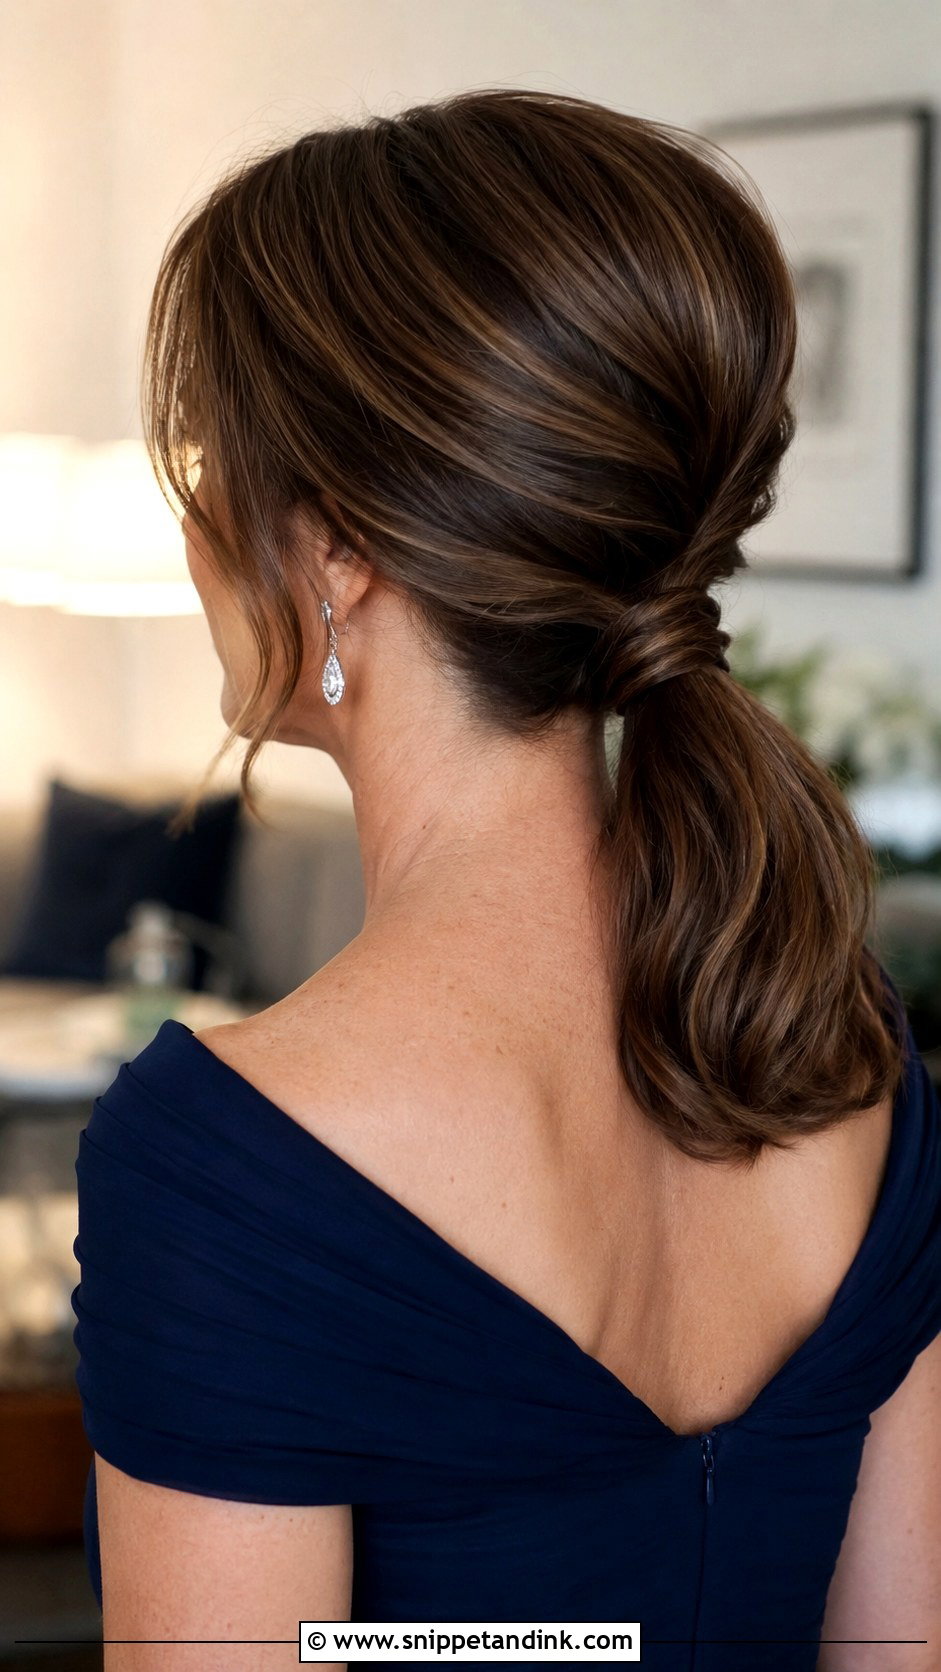
A low ponytail is comfortable and quick, which is why many mothers choose it. I add some volume at the crown, gather the hair low and wrap a section around the elastic to hide it. It suits medium to long hair of any texture. It’s secure enough for dancing. The main thing to check is the back view; a flat crown makes a ponytail look casual, so lift at the top matters.
17. Side Bun With Cascading Curls
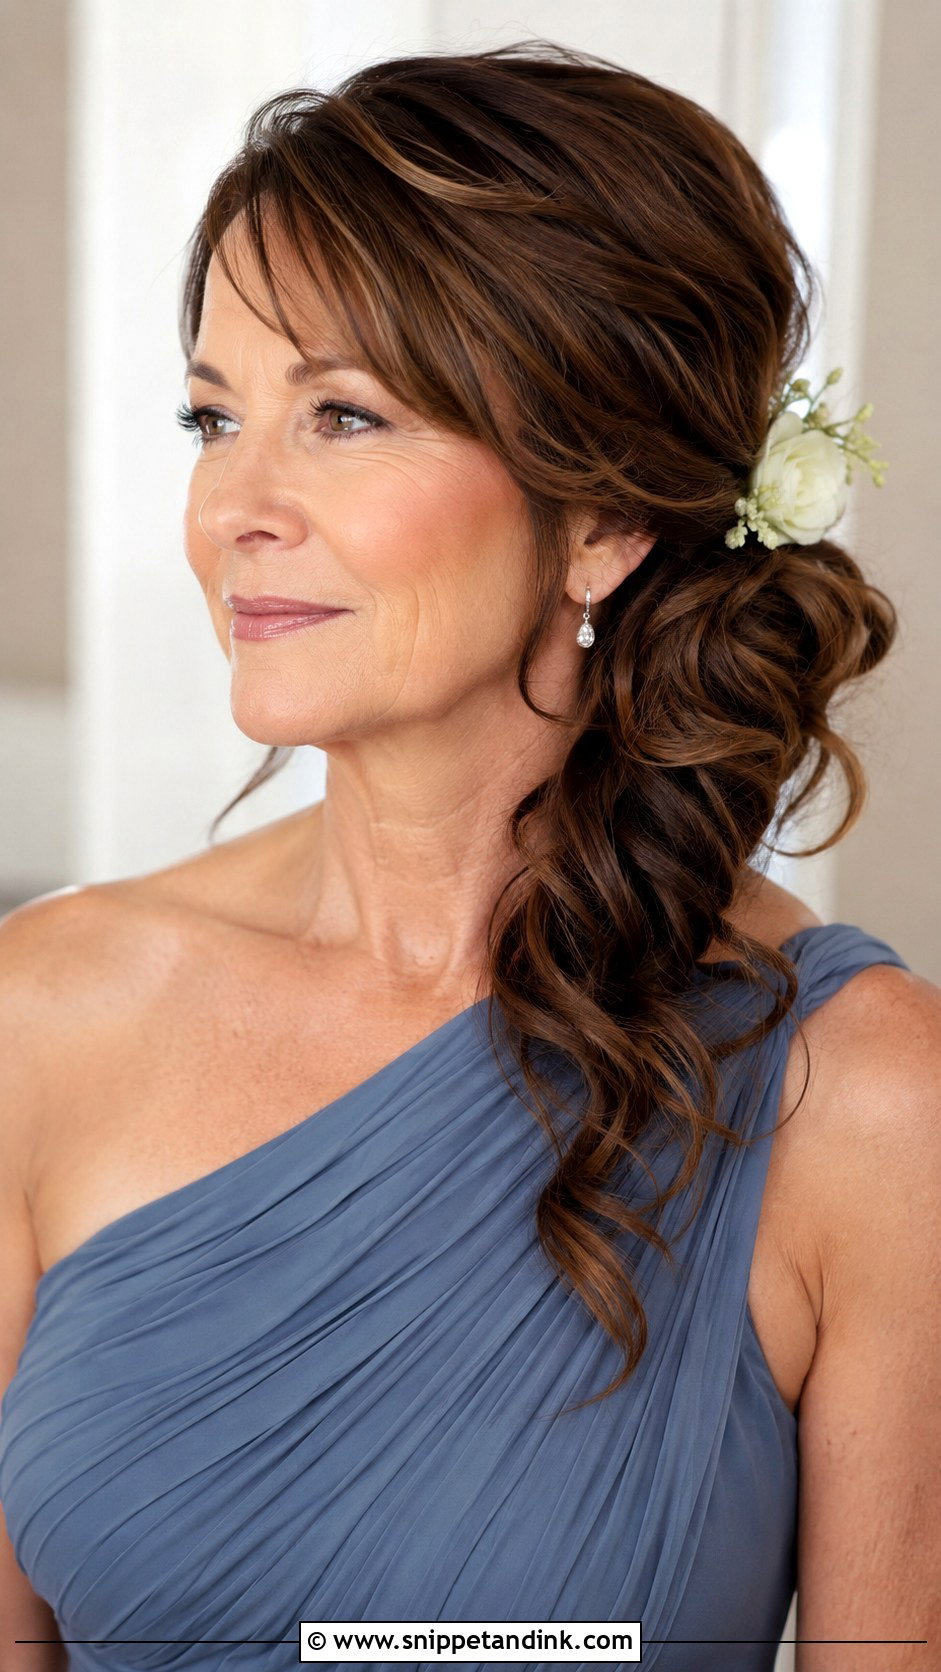
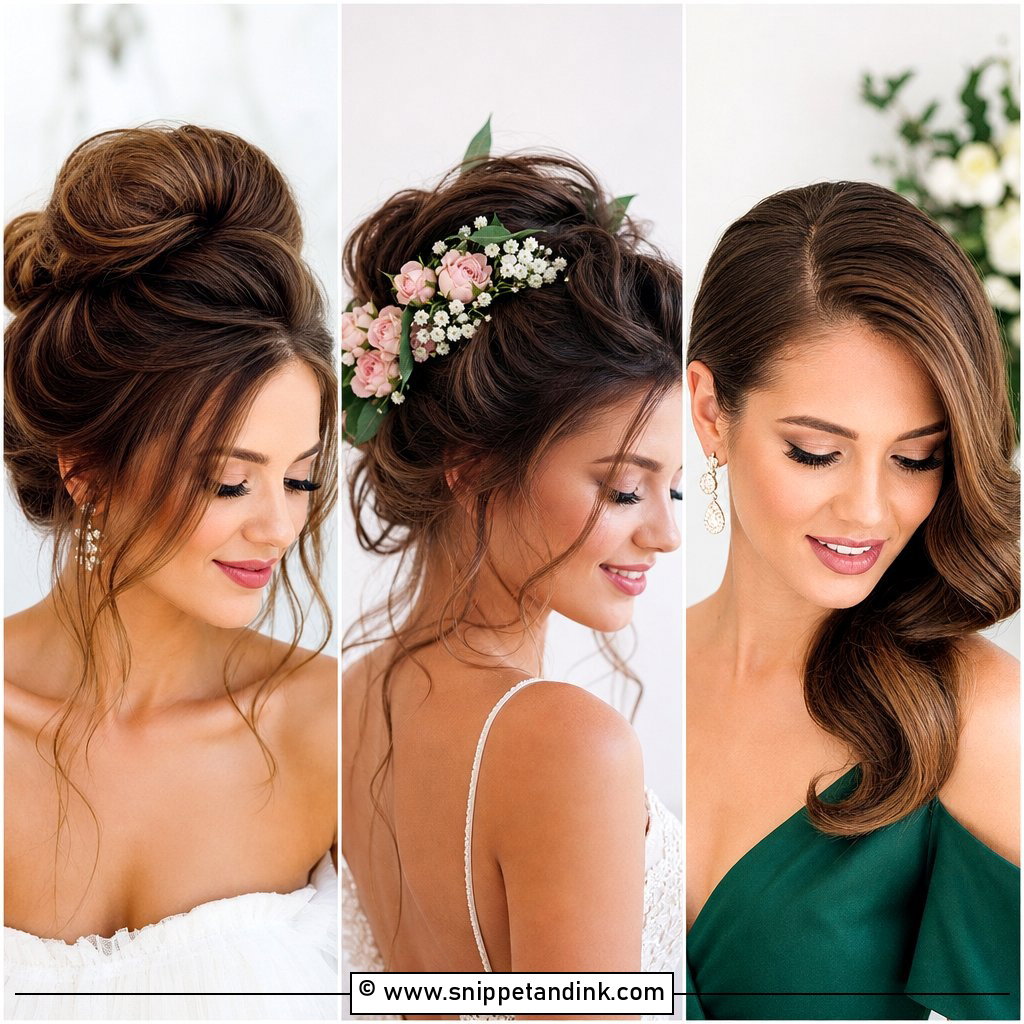
A side bun changes how you look in profile, giving your jaw a softer frame on one side. The asymmetrical placement works with one-shoulder gowns and long earrings. I pin the base firmly off-center, since gravity drags side buns down. Curls spilling from the bun need to be set well or they’ll go flat. Medium to long hair with some body is needed. A small floral accent adds a soft touch.
18. Sleek Straight Hair Worn Down
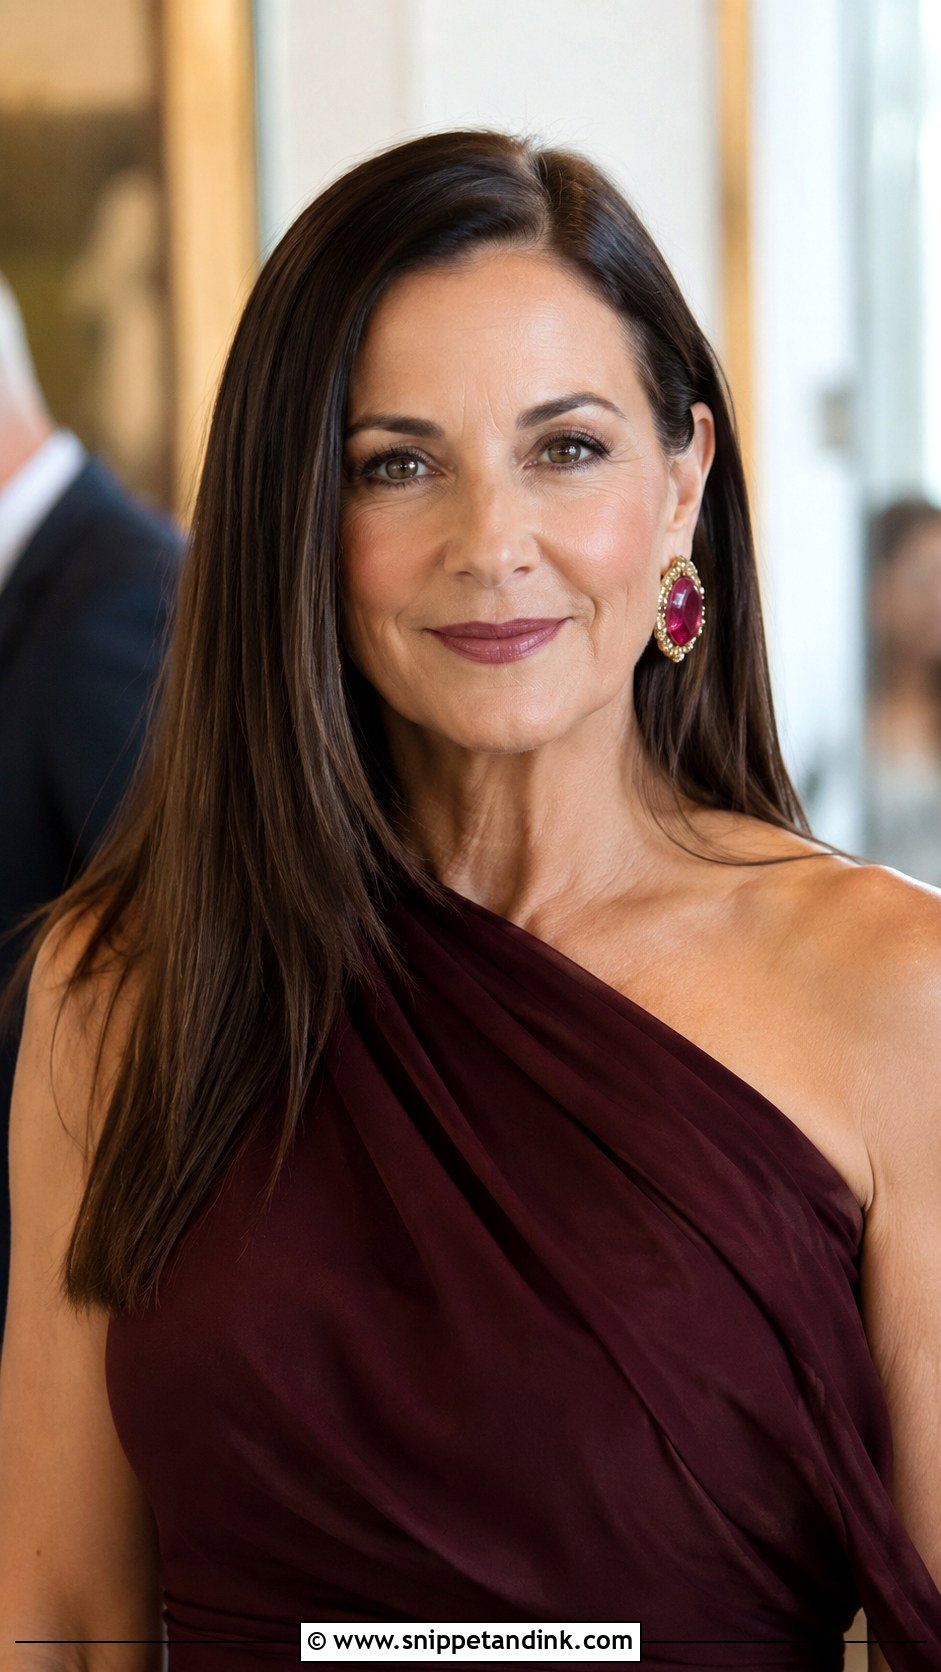
Straight hair shows its condition, so this works best on healthy hair. I flat iron in small sections with a heat protectant, then finish with a light shine product. In bright sunlight, very smooth hair can reflect and look flat, so I sometimes add a slight bend at the ends. Bold earrings and a strong lip balance the simplicity. Keep a small brush on hand for touch-ups after hugs.
19. Twisted Updo With Loose Tendrils
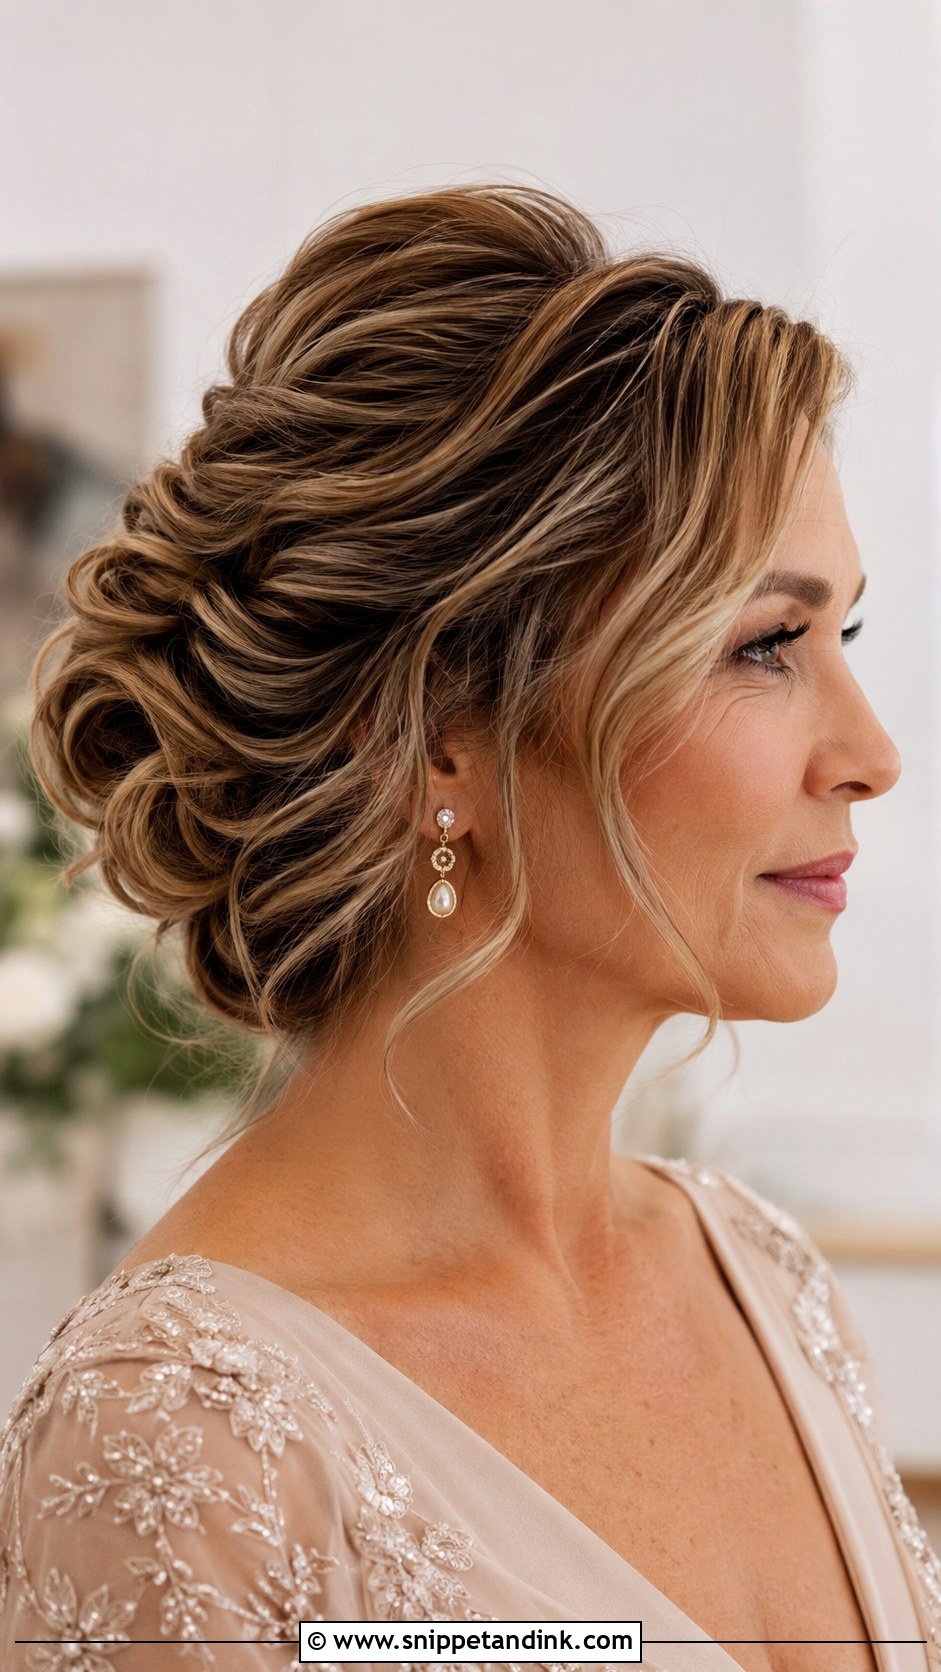
Twisted updos sit somewhere between sleek and soft. I twist sections and pin them in place at the back, then curl a few tendrils separately and leave them down just before photos. Tendrils left down all morning lose shape, so timing matters. Medium to long hair suits it. It goes with both classic and modern outfits, and it’s secure for the full day.
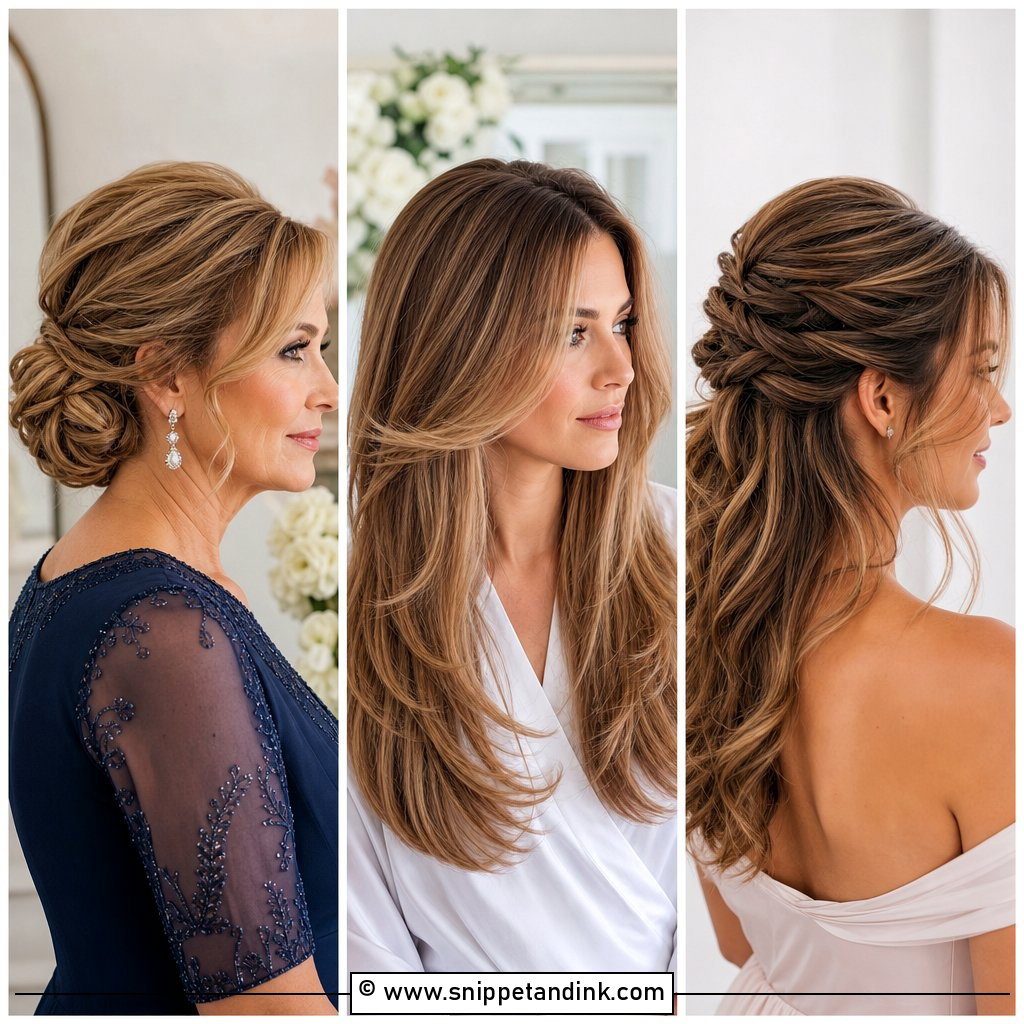
20. Pixie Cut With Soft Styling
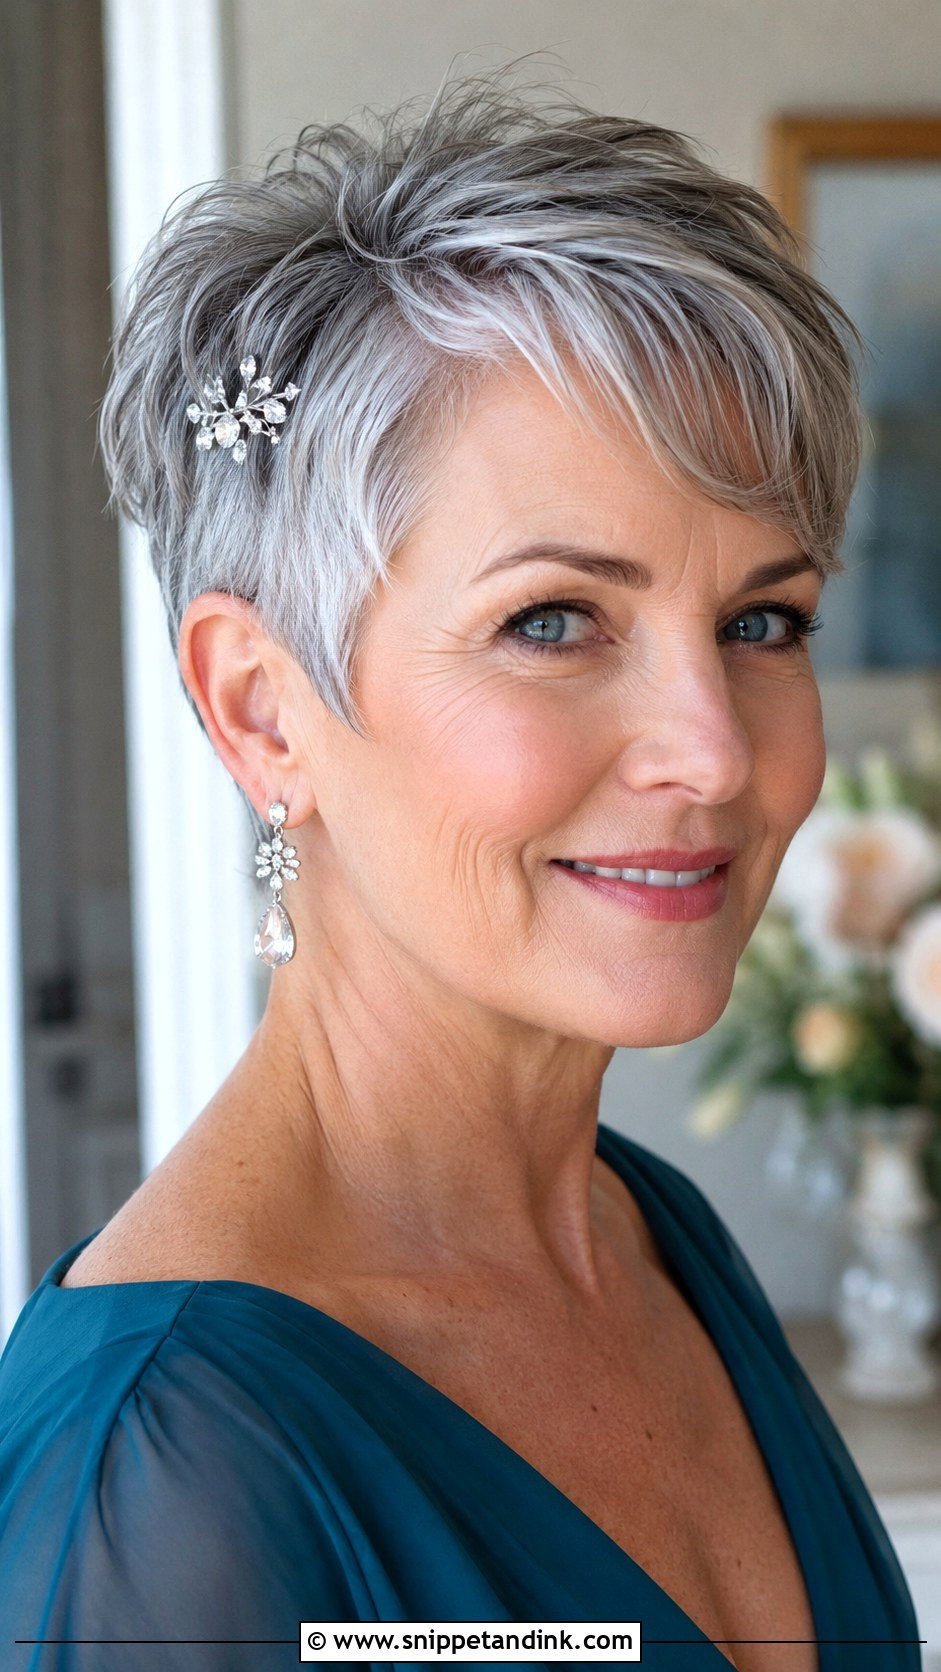
A pixie is the lowest-maintenance style on this list. I add a little texture paste to separate the layers and a light spray to hold. Sweeping the front to one side softens it. Trim it about a week before the wedding so it settles. Statement earrings really stand out with short hair. A small jeweled clip adds a wedding touch.
21. Romantic Updo With Braided Crown
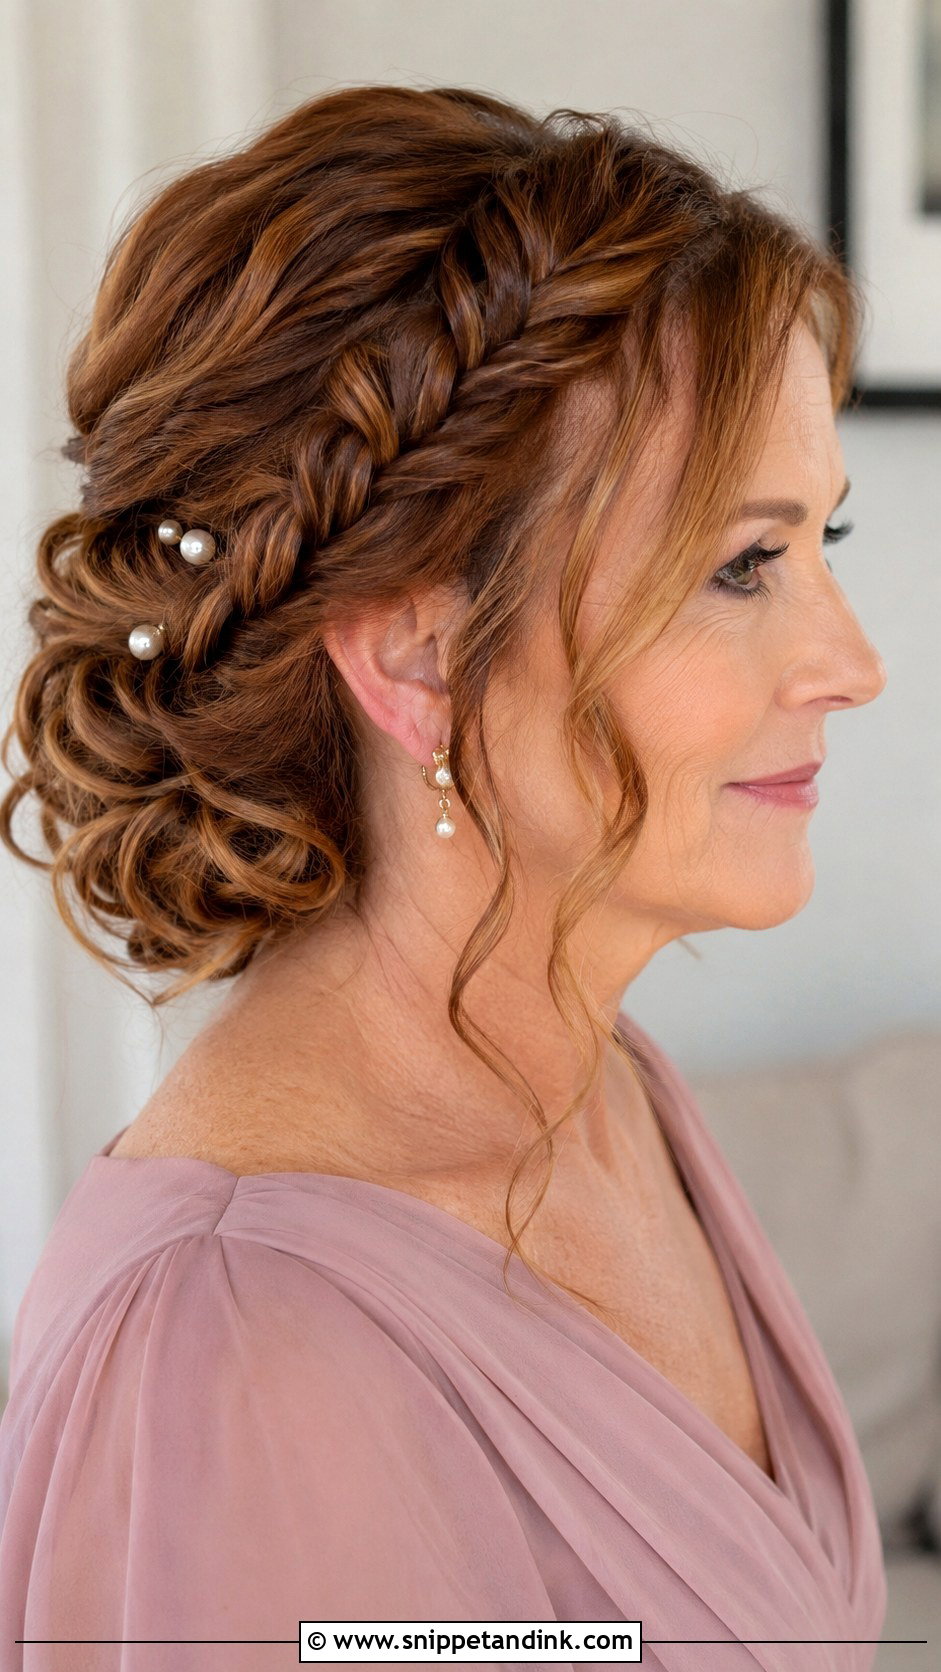
This is a fuller version of the crown braid: a braid across the top, with the rest of the hair gathered into a soft bun behind. It’s very secure and keeps hair off the face. I pin the braid along the scalp so it lies flat. Medium to long hair is needed. Small flowers or pearl pins tucked in add detail. It suits flowing dresses and garden weddings well.
22. Shoulder-Length Waves With Curtain Bangs
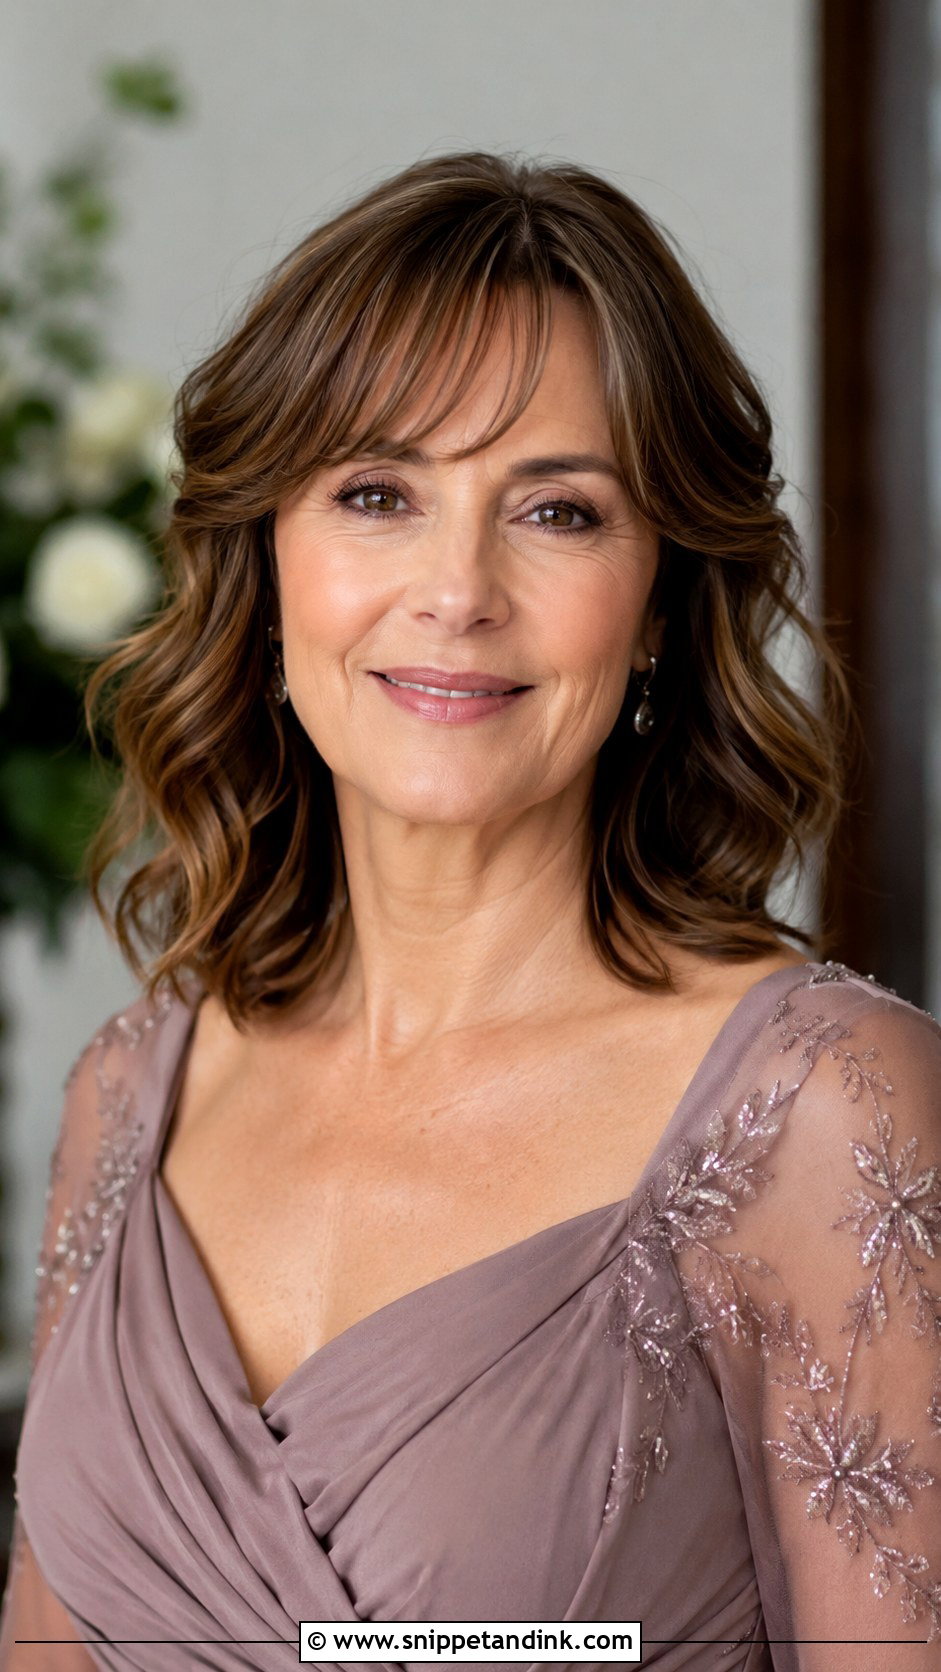
Curtain bangs part in the middle and sweep to each side, framing the face. With shoulder-length waves they look modern and soft. I style the fringe with a round brush and a little spray, then add waves through the length. If you don’t already have curtain bangs, I’d cut them at least a few weeks before so they’ve grown in a little and you know how to style them. Hair with natural body holds the waves best. Delicate earrings keep the balance.
23. Elegant Bun With Decorative Hair Comb
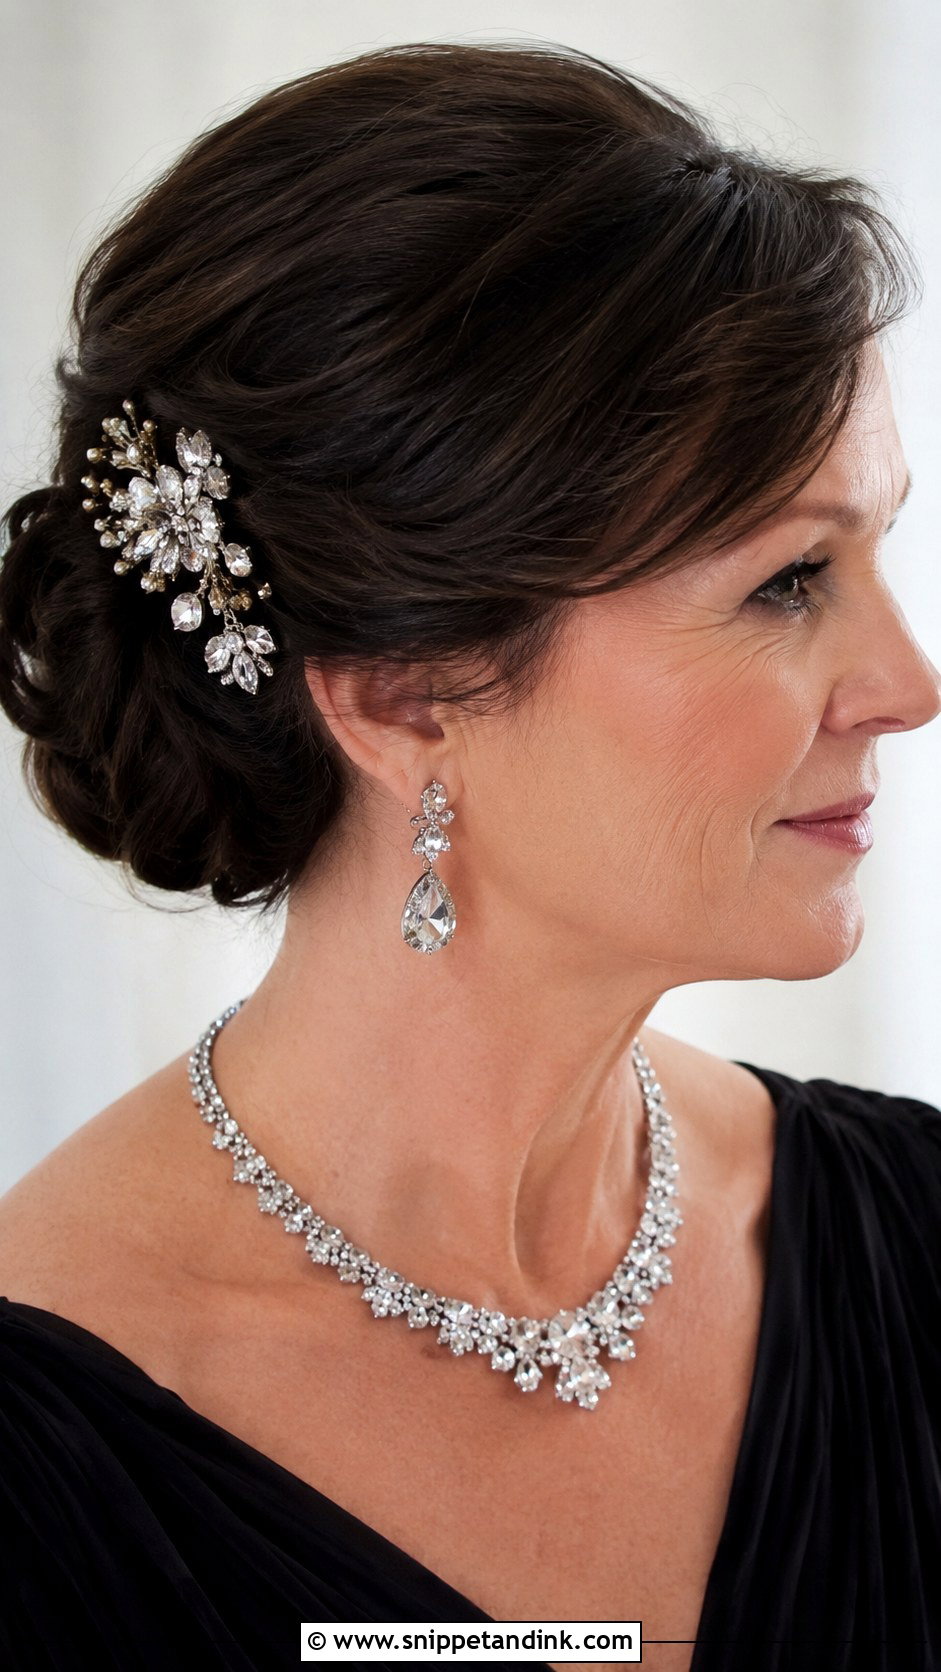
A decorative comb turns a simple low bun into something formal. I pin the bun first, then slide the comb in at an angle beside it, adding two crossed pins underneath so it doesn’t slip. Heavy combs need that extra support. Choose metal and stones that match your jewelry. The bun stays secure all day. It works on medium to long hair of most textures.
24. Tousled Low Bun for a Relaxed Look
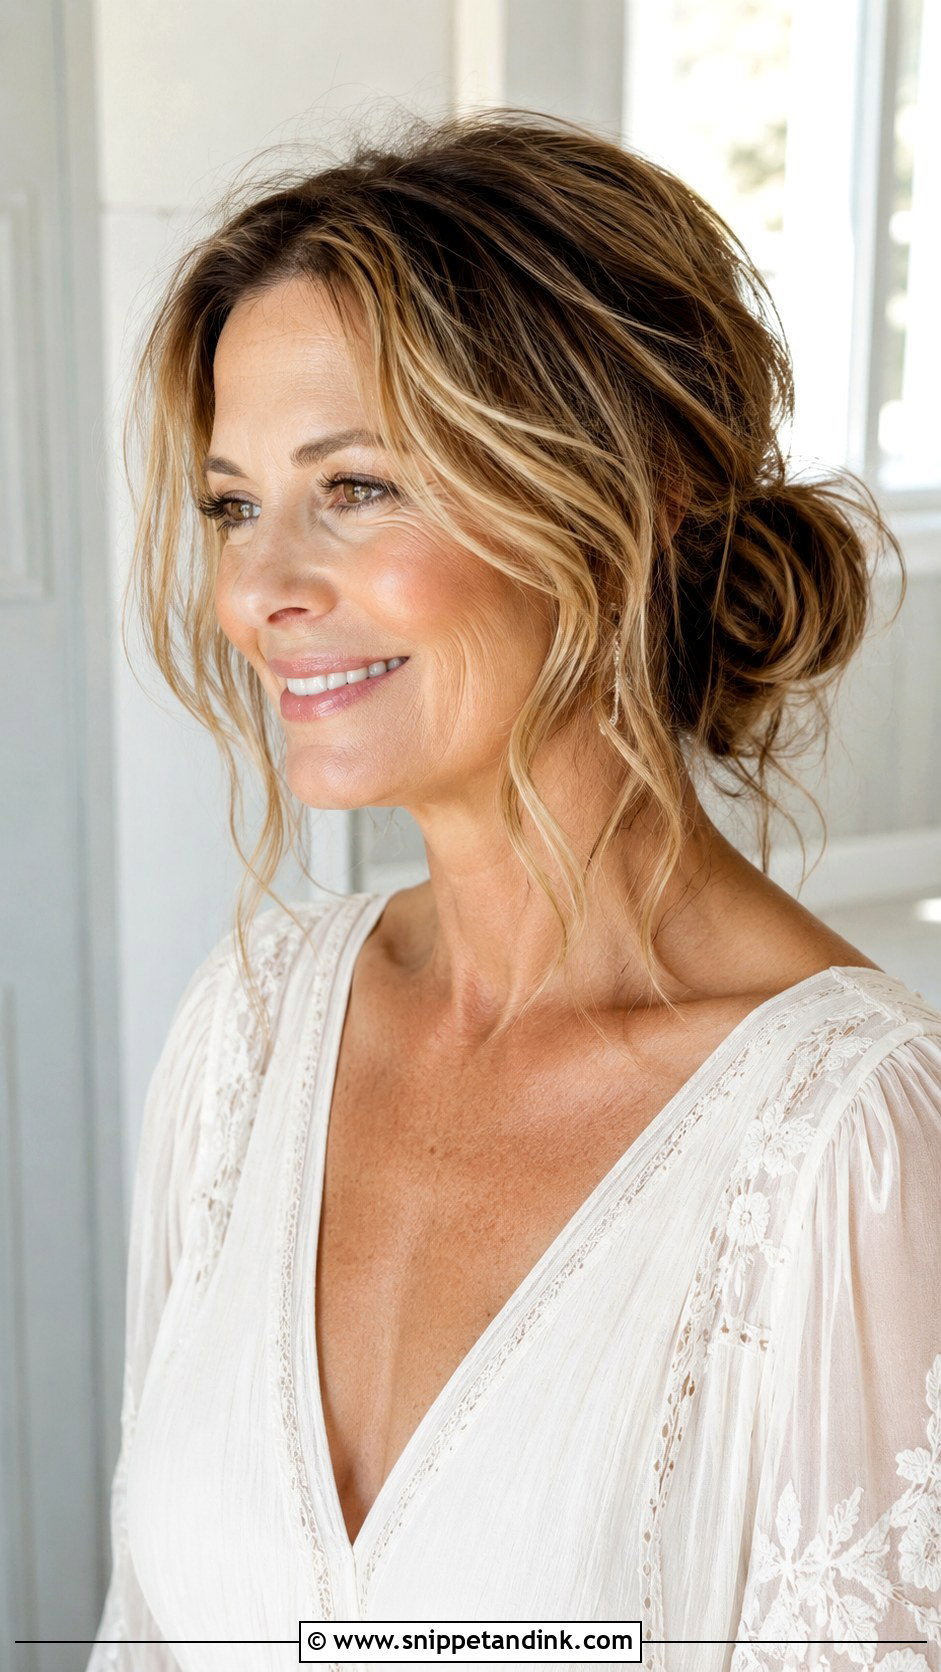
Tousled buns look relaxed but are pinned firmly at the base. I add texture spray, form the bun loosely and pull out a few pieces for softness. Fine hair looks fuller with the texture; thick hair needs more pins to hold the weight. It suits bohemian gowns and outdoor weddings. It’s comfortable and secure, and it’s a good choice if you don’t like feeling overdone.
25. Sleek High Bun for a Modern Mom
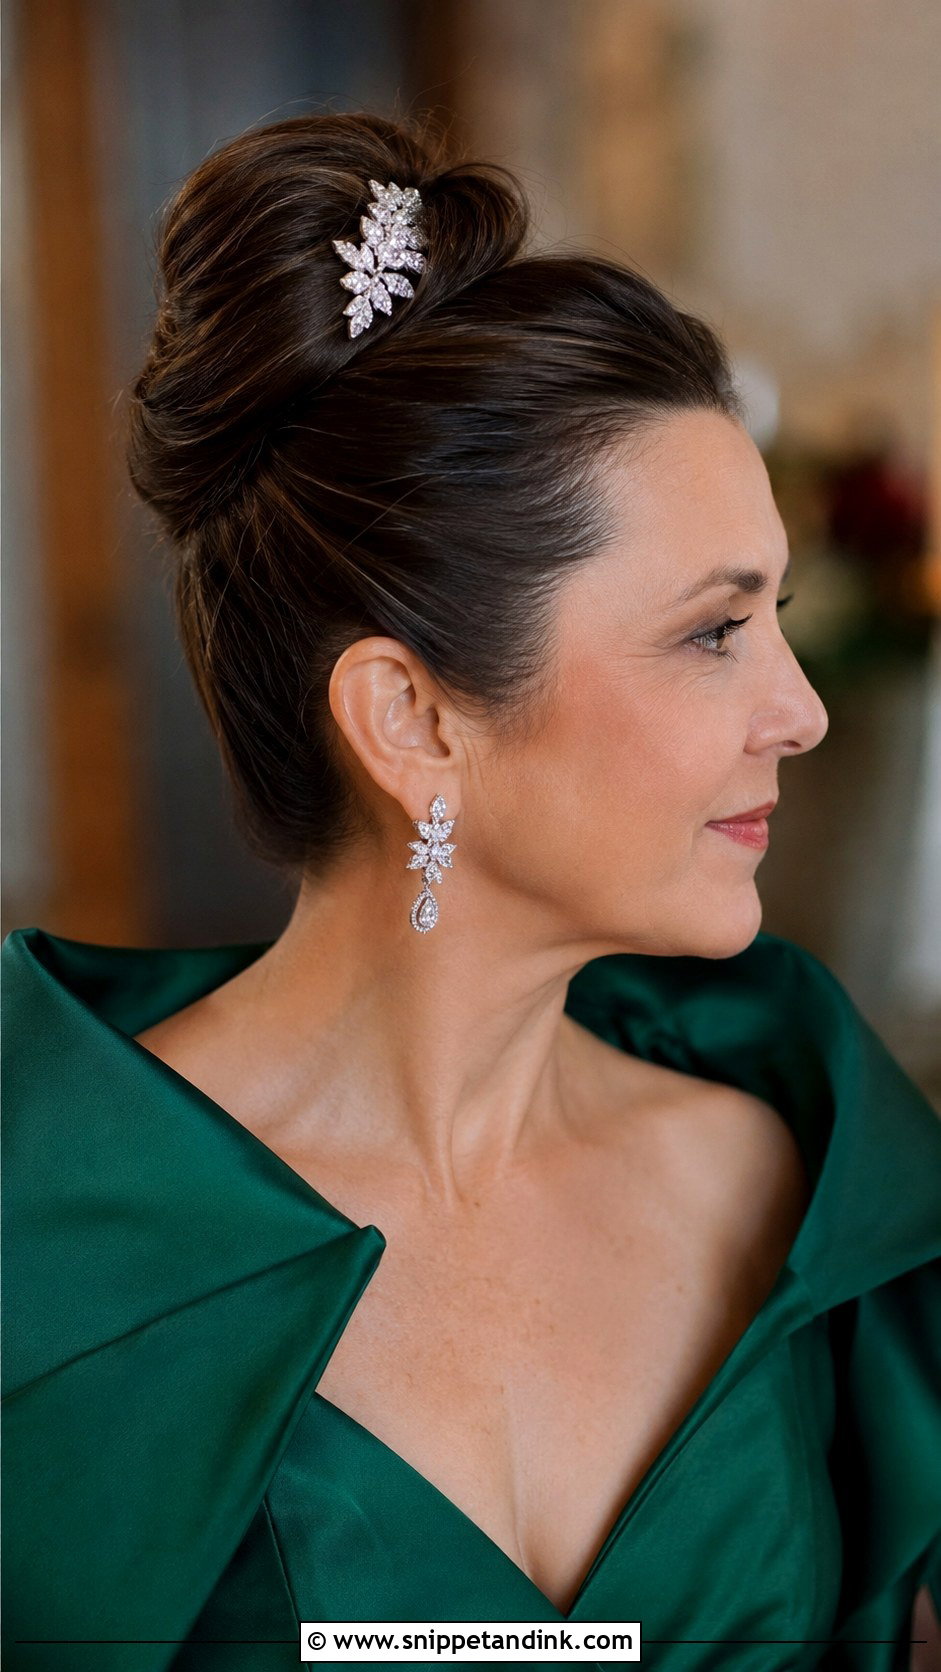
A high bun shows off your face, neck and earrings completely. I gather the hair high and smooth with a firm brush, then wrap and pin the bun. It shouldn’t be pulled too tight, since a tight high bun can cause a headache after a few hours. Medium to long hair of any texture works. Structured gowns and statement earrings suit it. A sparkly pin adds a finishing detail.
Planning Around a Jacket, Shawl or Dupatta
Many mothers wear something over their hair or shoulders, and that changes which styles will work.
Jackets and high collars
A high collar can crush a low bun or rub against hair worn down. A French twist or a slightly higher chignon clears the collar and stays neat. Shawls are similar: wool and textured knits catch on loose waves and pull them into knots by the evening, so smoother updos are safer if you’ll wear one for hours.
Dupattas and head coverings
If you’ll drape a dupatta or scarf over your head, keep the style low and flat at the back so the fabric sits evenly. I pin the fabric to the hair at a few points with small pins so it doesn’t slide during rituals. Bring the actual dupatta to your trial. Heavier embroidered ones need more anchoring than light chiffon, and their weight can drag a soft bun down.
If You’re Styling It Yourself at Home
Not every mother wants or can book a stylist. Simple styles such as a low ponytail, a straightforward low bun or a blowout are realistic to do yourself.
- Practice the style at least twice before the wedding, with the same products.
- Use second-day hair for updos, since it grips better.
- Spray each section lightly before pinning, not just the finished style.
- Ask a friend to check the back before you leave.
If the style starts to slip on the day, don’t add more spray on top. Take the loose section out, re-twist it, and pin it again with two crossed pins. That fixes most problems in under a minute.
A Style That Looks Good From Behind, Too
Remember that your hair will be photographed from the side and back during the ceremony, and from above when you’re seated. Choose a style that suits your outfit and hair length and that you feel comfortable in. Book a trial and ask your stylist to take photos from every angle. Discuss how the style will hold through hugs and dancing. Then you can relax and enjoy the day with your family.
You'll Like These Ideas:


Leave a Reply