
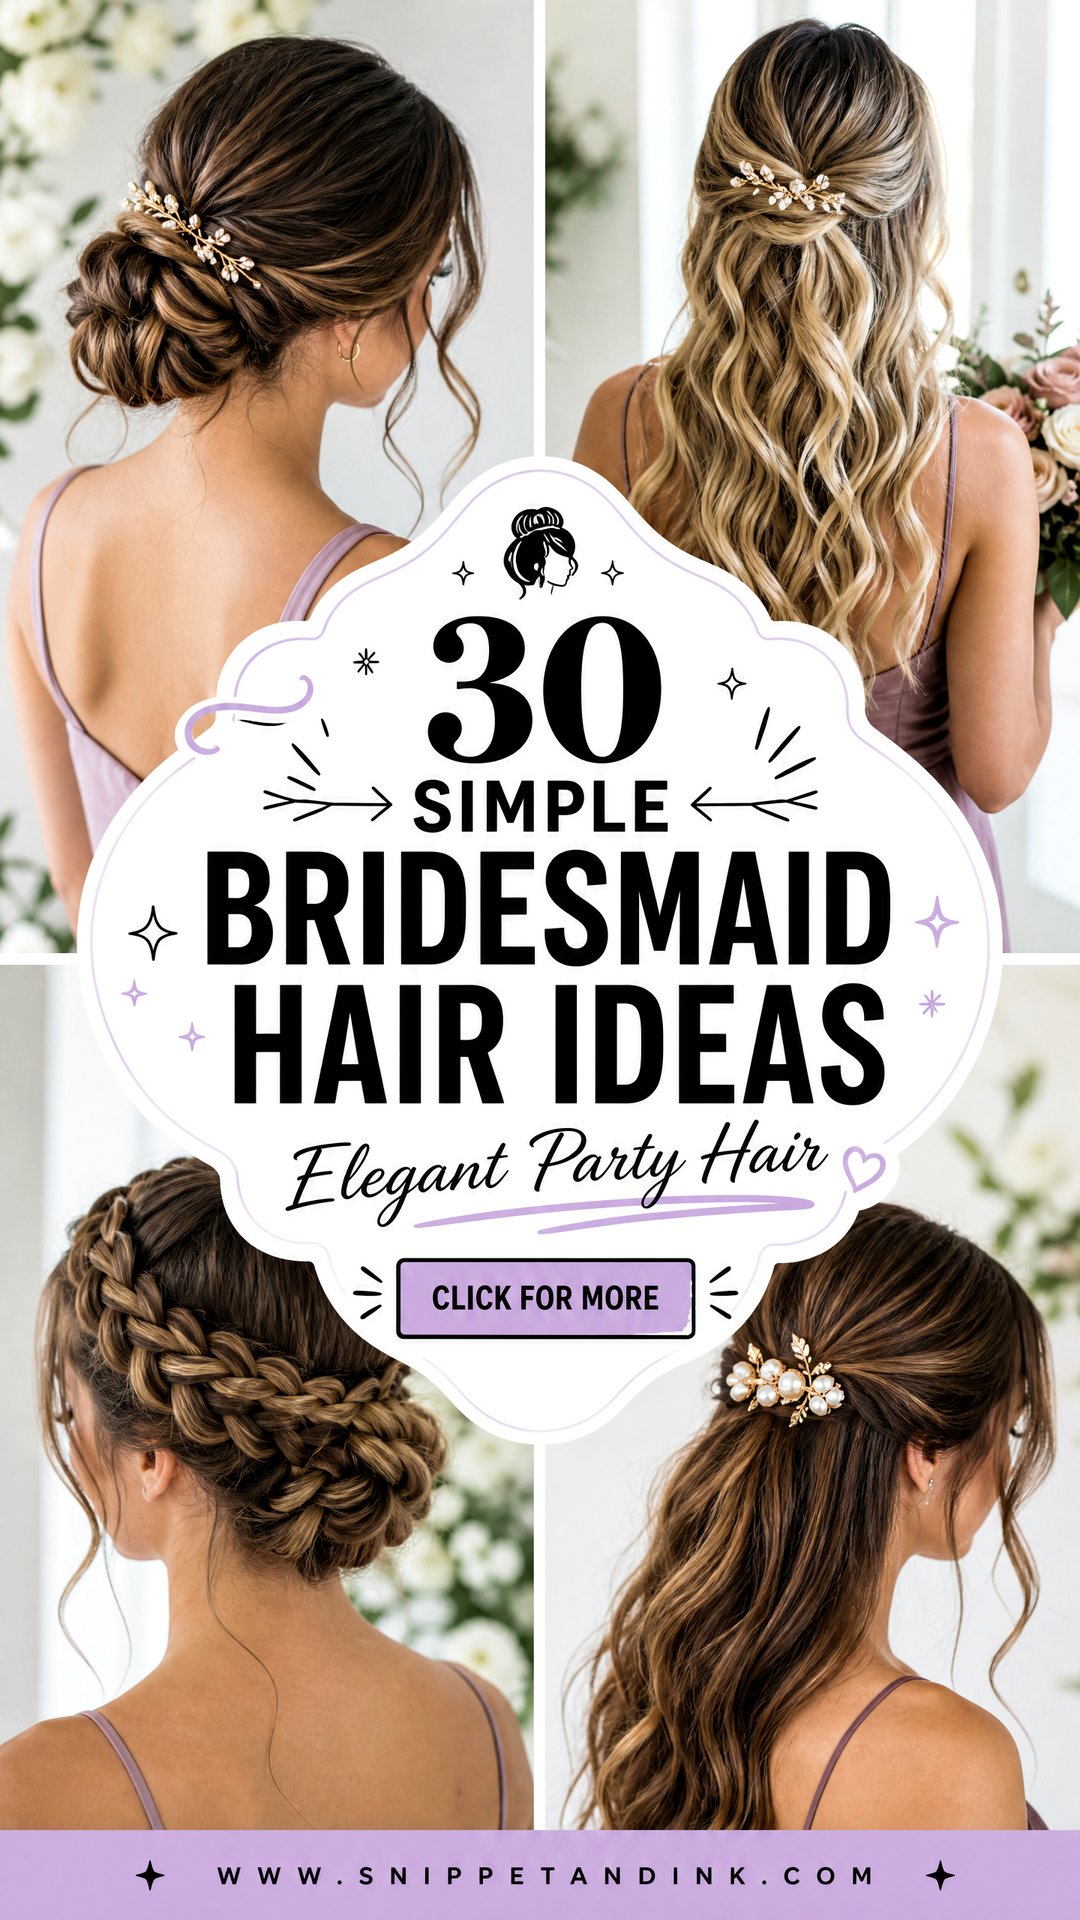
Bridesmaid hair has a different job from the bride’s. It has to look polished in the group photos, survive hugging, crying and dancing, and get done quickly enough that the whole morning doesn’t slip behind schedule. That’s why the styles I lean on for bridal parties are simple in construction: a well-anchored bun, a ponytail with a wrapped base, waves that are set properly before they’re brushed out. Below are the shapes I use most, with notes on the hair types and dresses each one suits, and where each one tends to go wrong.
Getting Five Heads Done Before the Photographer Arrives
On a wedding morning, bridesmaid hair is the part of the schedule most likely to run late. A simple style takes me roughly 30 to 45 minutes per person, longer for thick, long hair or anything braided, so I work out timings backwards from the first photo, with the bride’s hair finished about an hour before then.
What I ask bridesmaids to do before they sit down
- Wash the day before for most hair types; second-day hair grips pins better. Very fine or oily hair can be washed that morning.
- Arrive with hair completely dry. Drying it on the day can add 20 minutes or more per head.
- Leave out oils, serums and leave-in conditioner. They make hair too slippery to hold a curl or pin.
- Wear a button-up shirt so the finished style doesn’t have to come over your head.
- Bring a photo of the dress neckline and any accessories you plan to wear.
If a bridesmaid wears clip-in extensions, I’d want to see them at a trial or at least a day ahead to check color and how they blend with her hair.
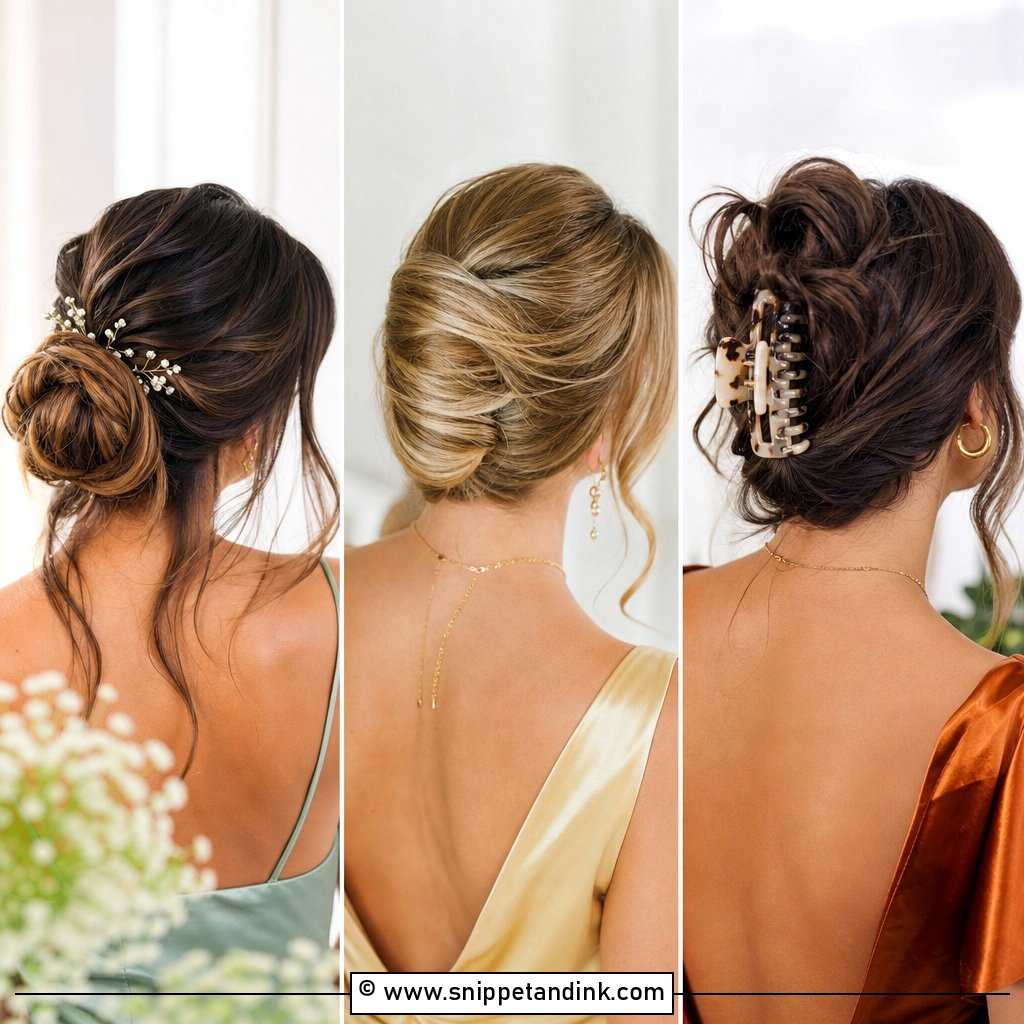
1. Low Bun Bridesmaid Hair
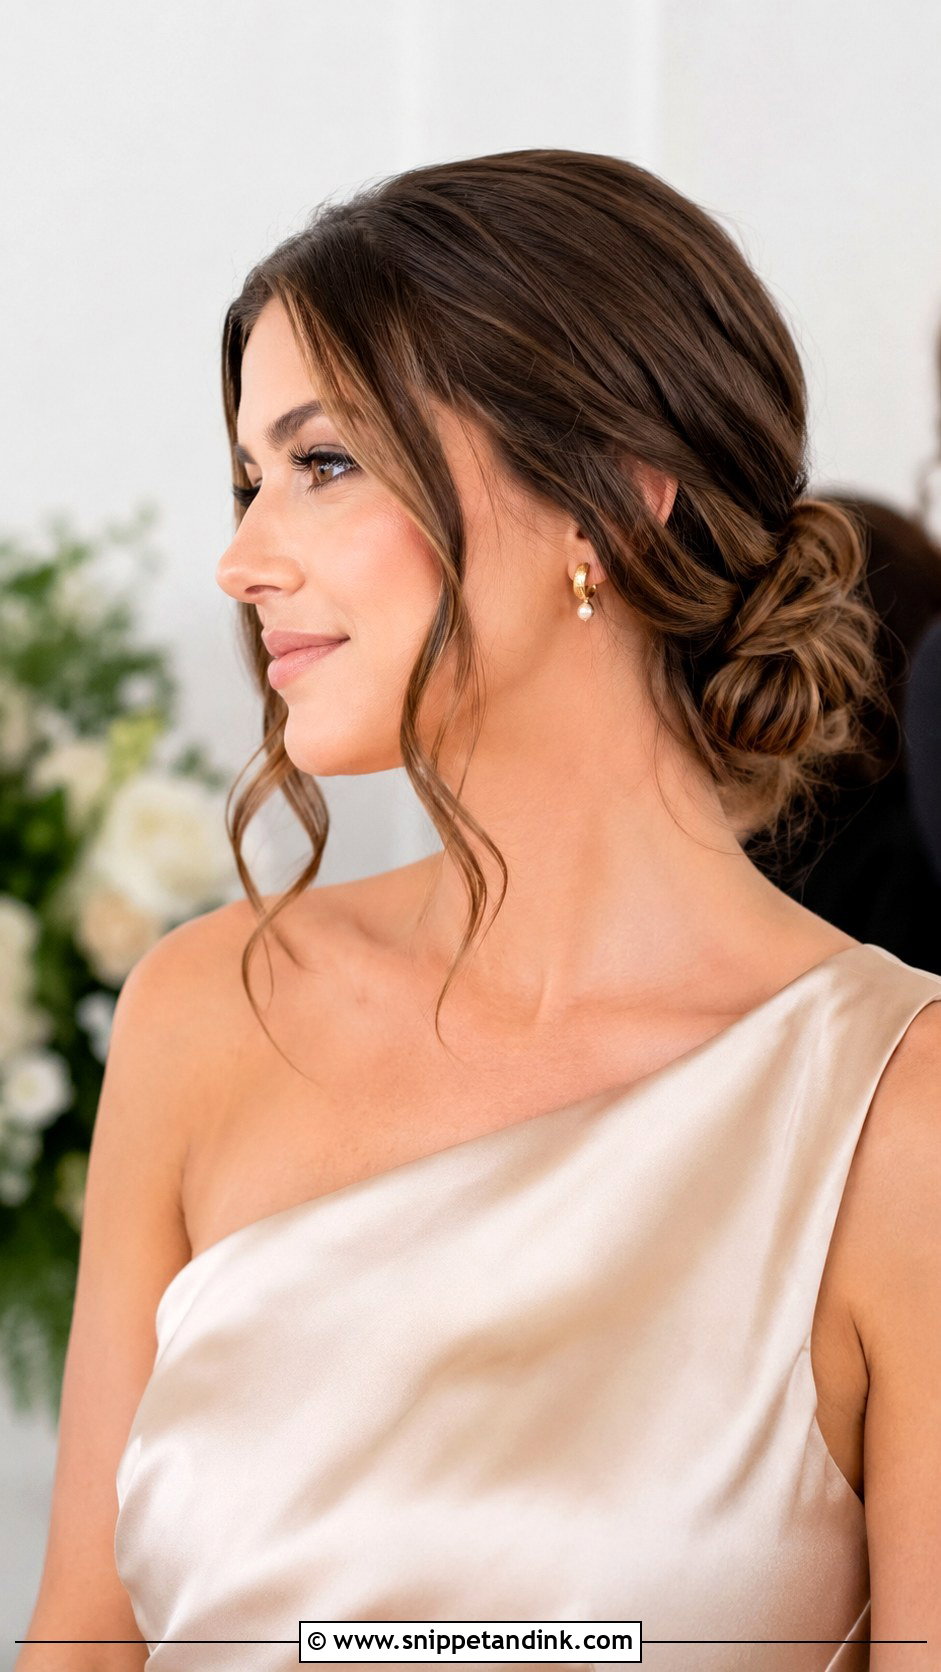
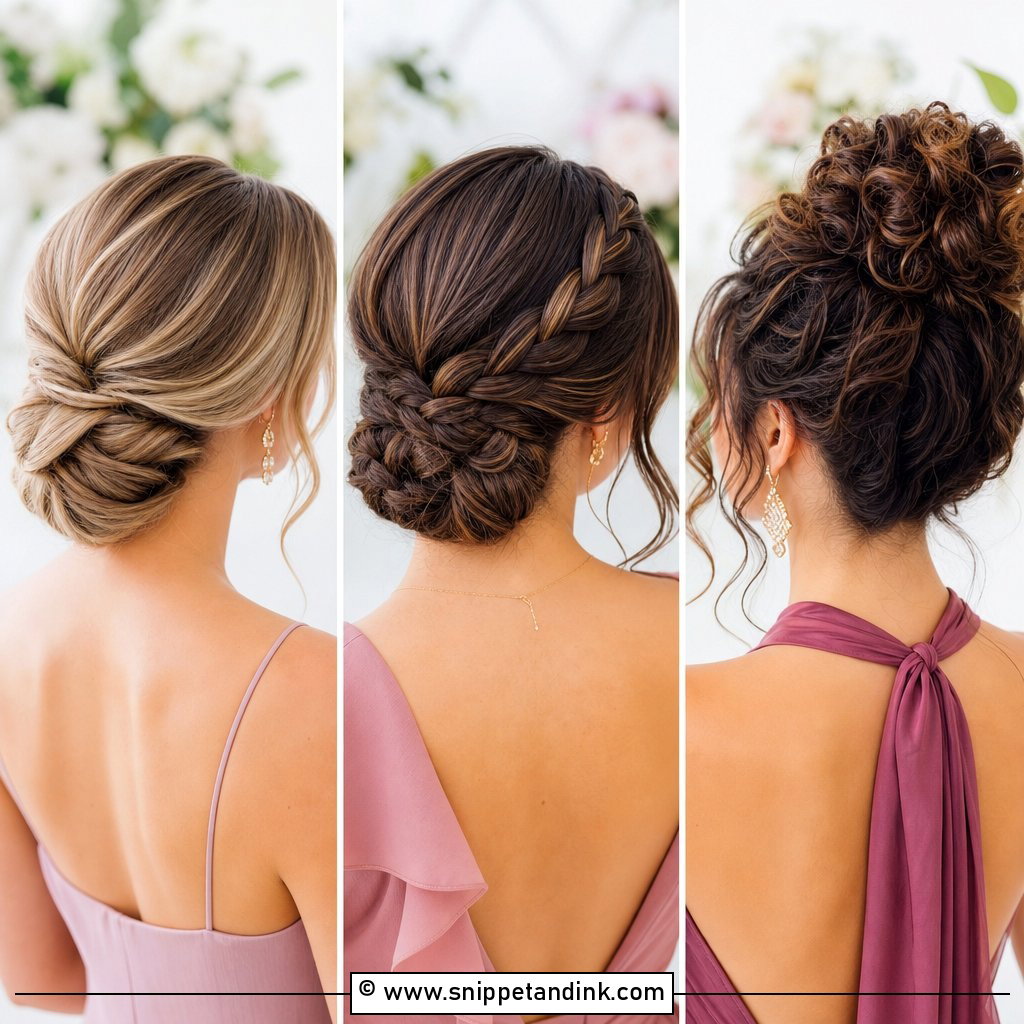
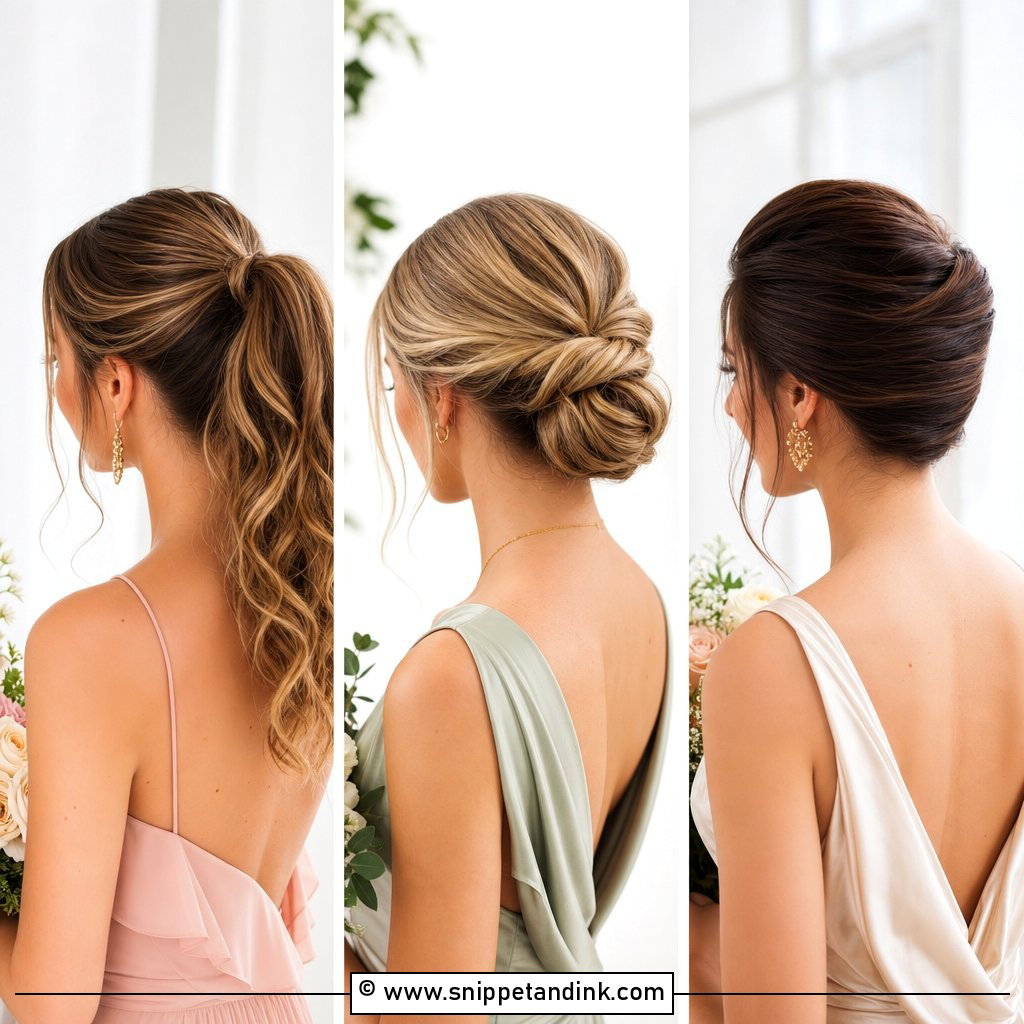
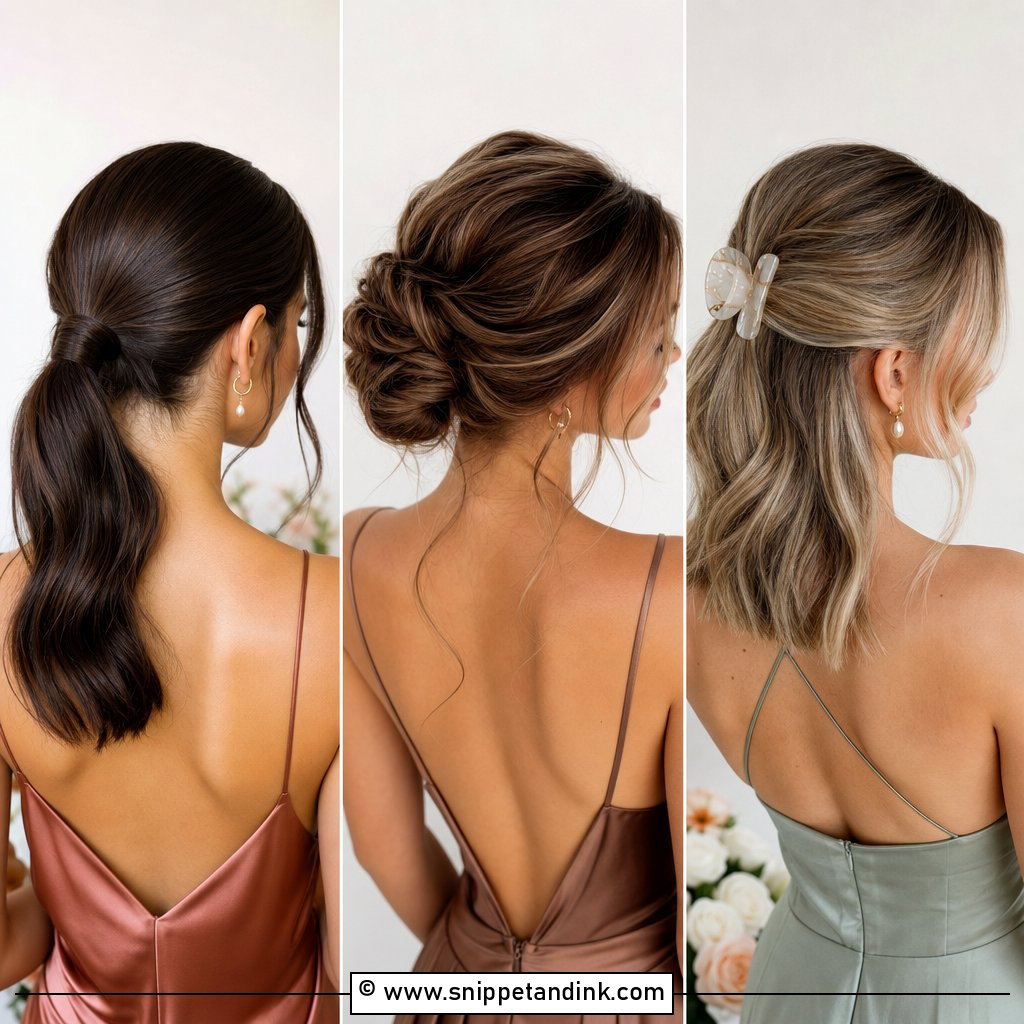
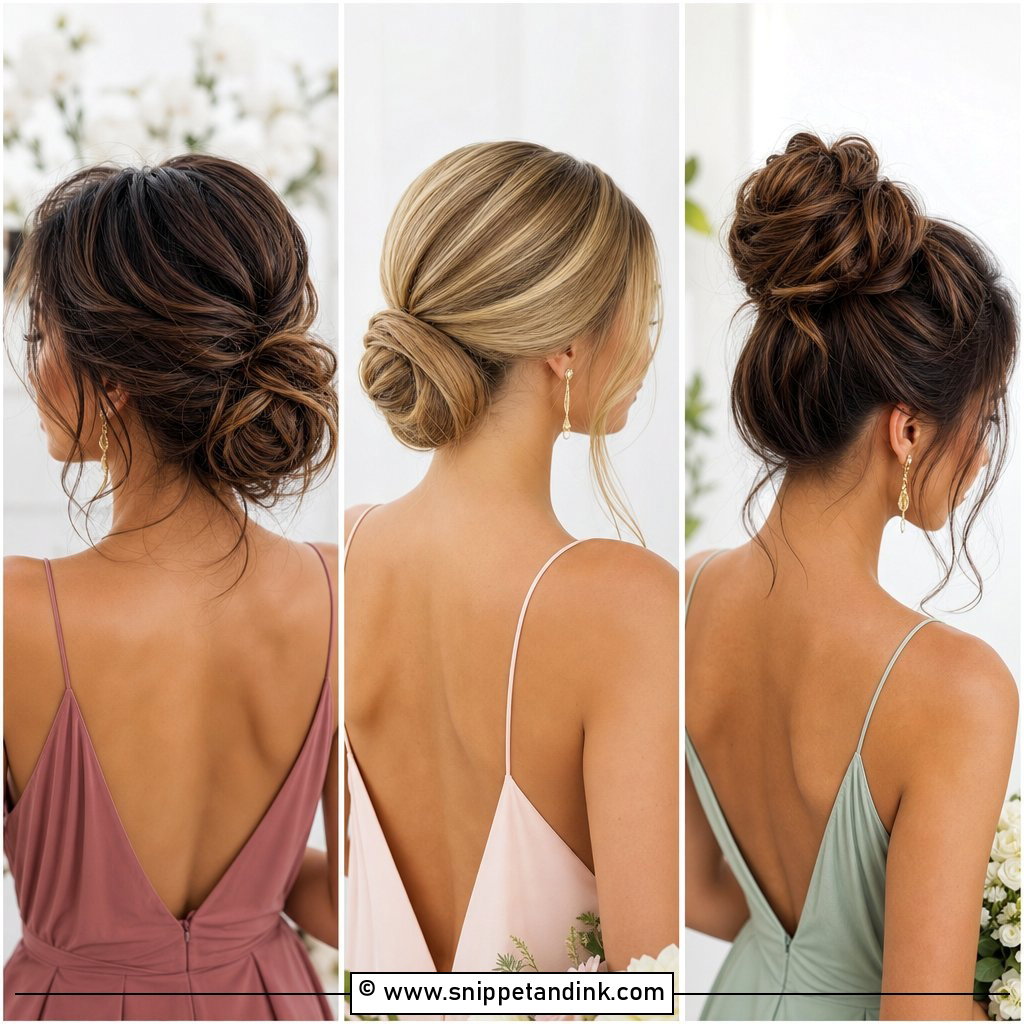
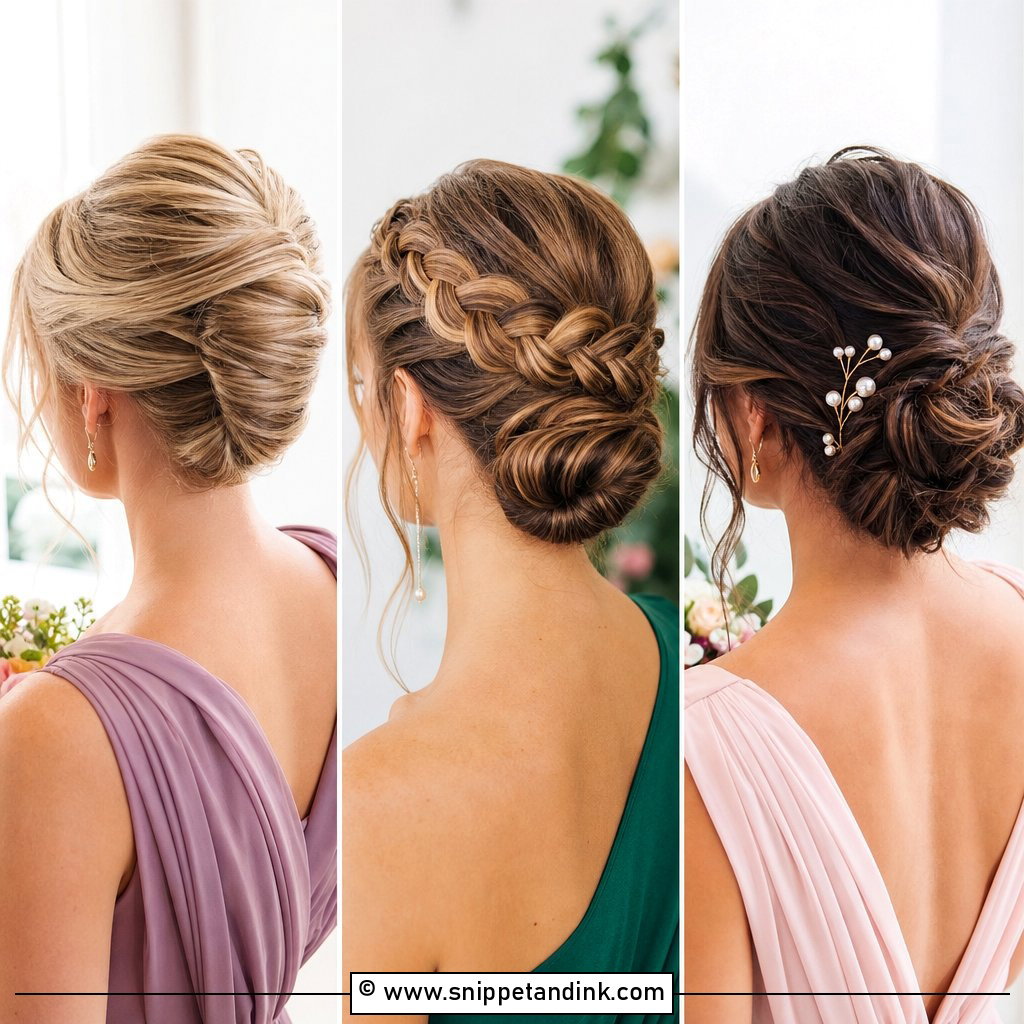
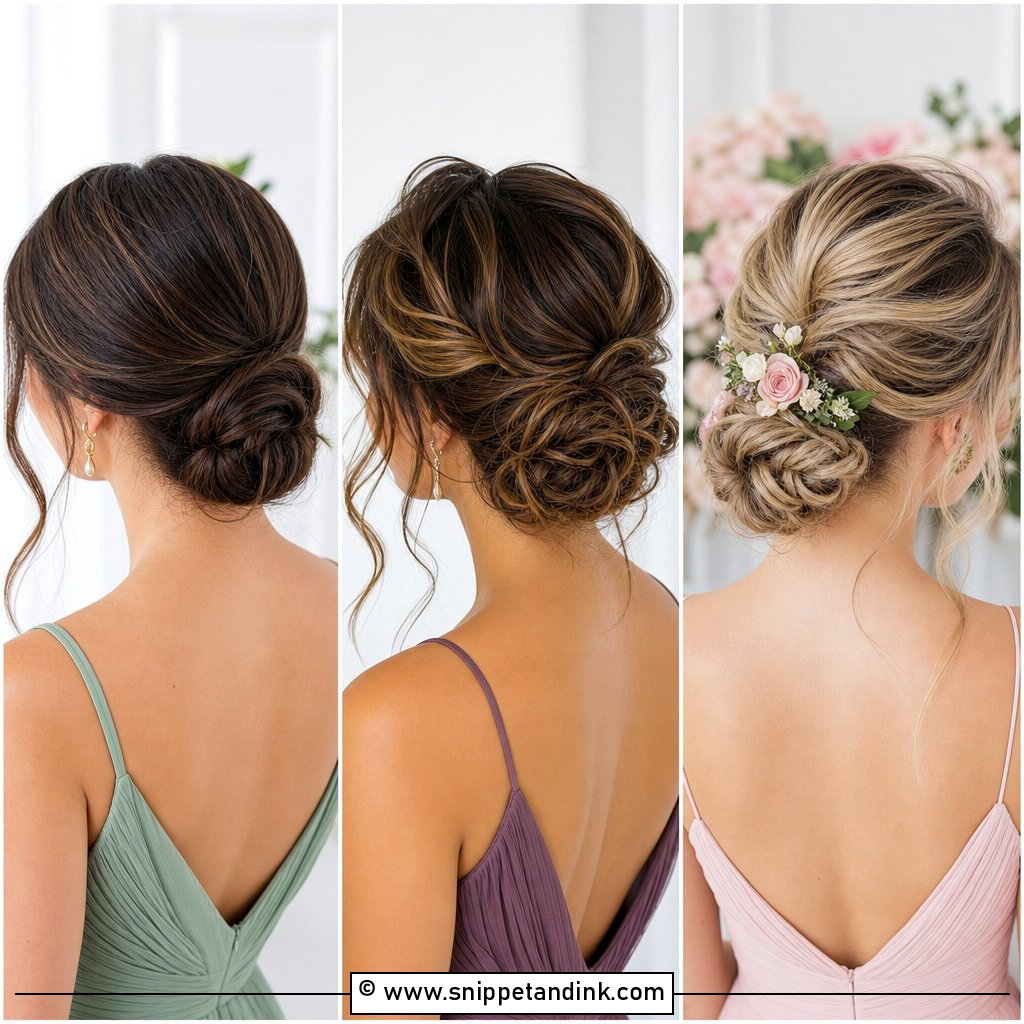
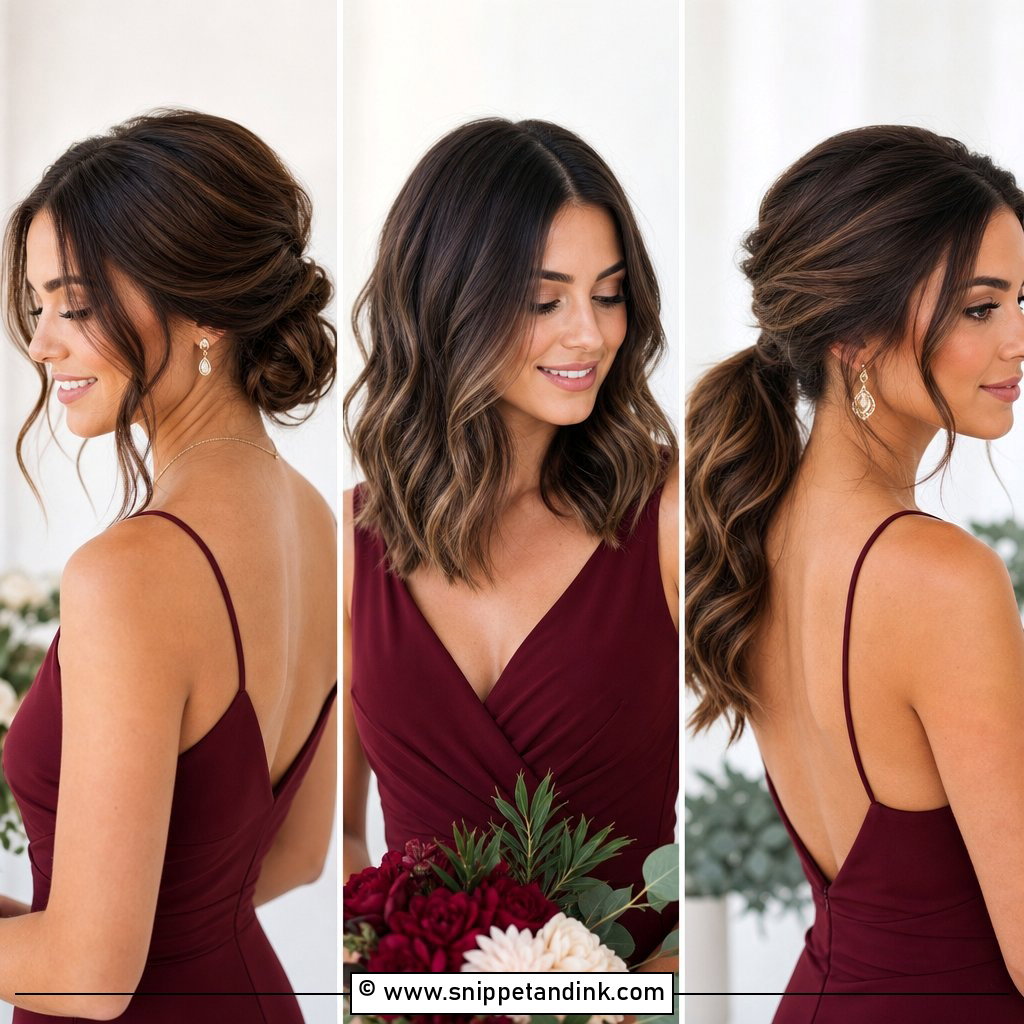
If I had to pick one style for a mixed bridal party, it would be the low bun. It sits at the nape, keeps the neckline open and stays comfortable through a long ceremony because there’s no weight pulling at the crown. The secret is the base: I put the hair in a tight elastic first, then wrap and pin the bun around it, so the pins have something solid to grip. Smooth the crown for formal weddings, or leave a couple of curled pieces at the face for softer ones.
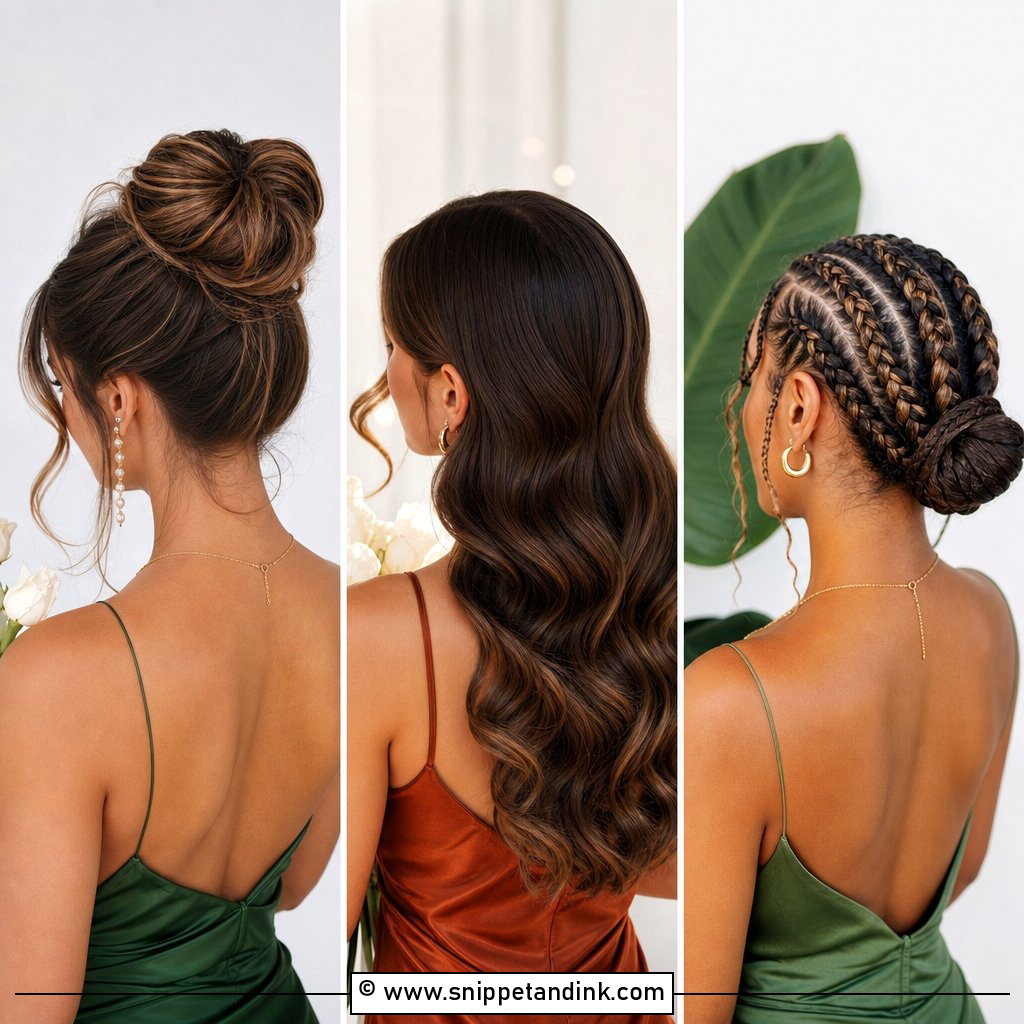
2. Messy Bun Bridesmaid Hair
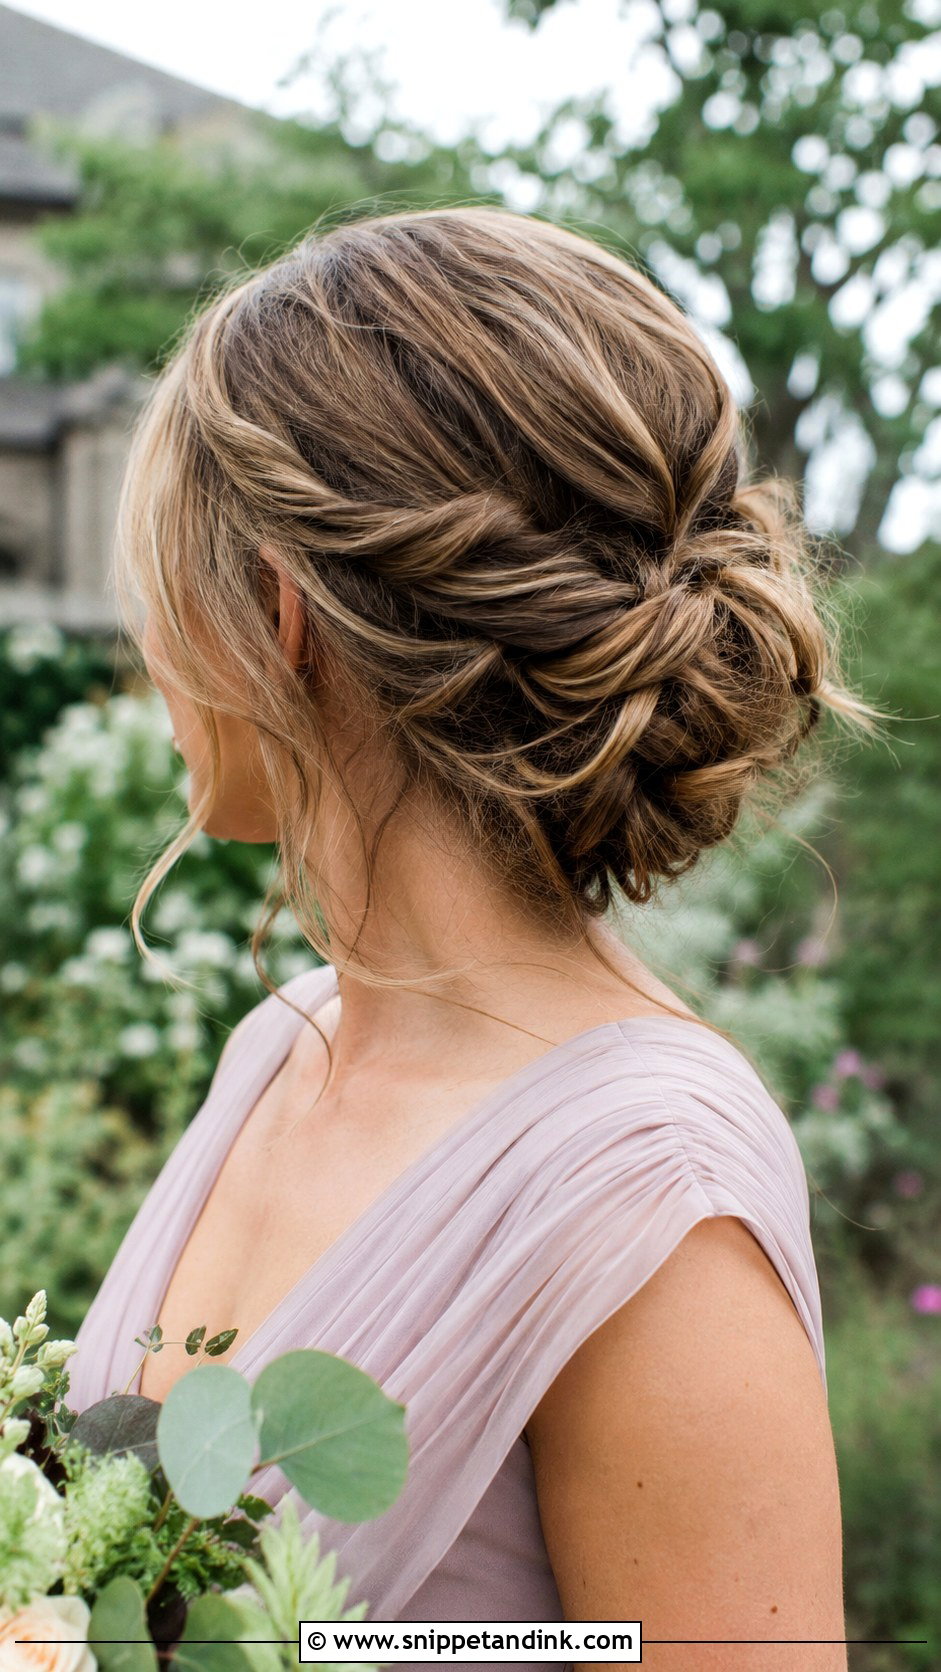
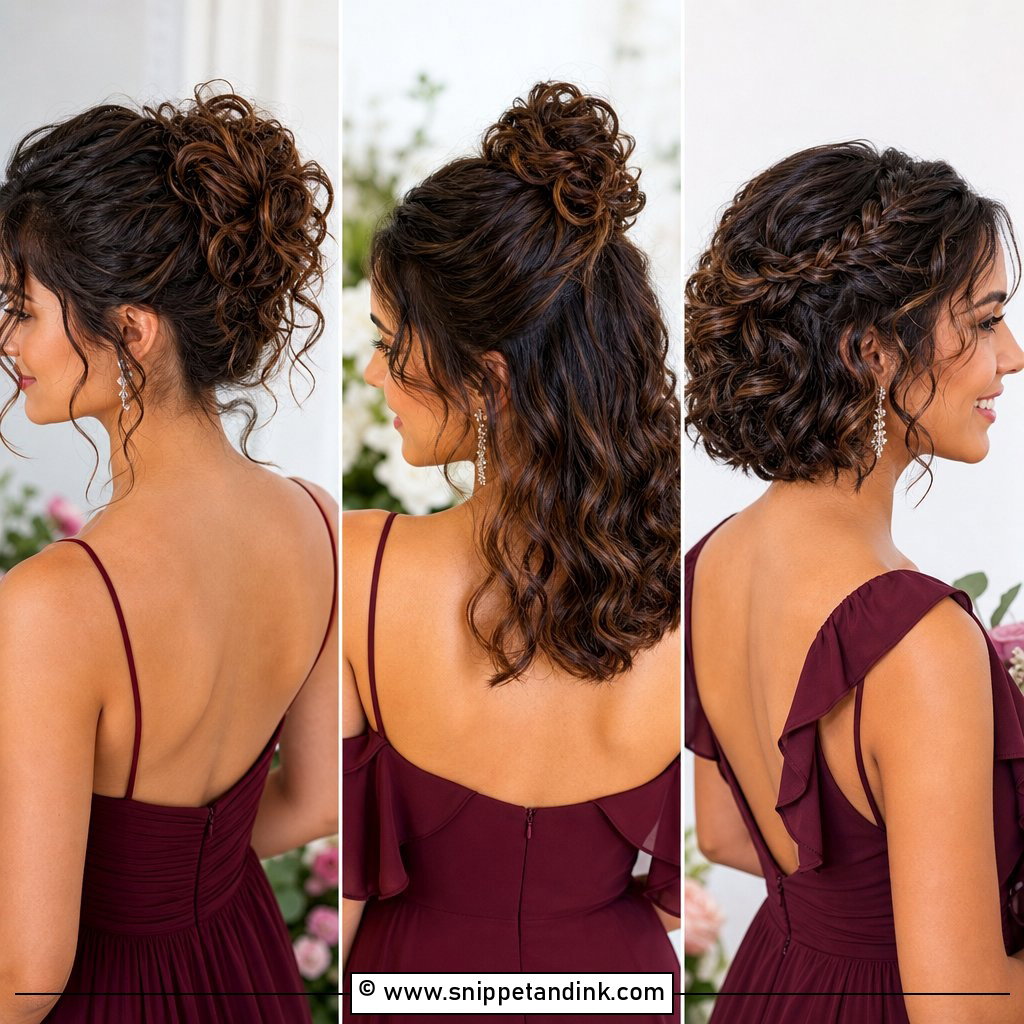
A messy bun has to look loose and be secure, and those two things fight each other. I curl or texturize the hair first, because a bun made from straight, clean hair slides out within the hour. Then I gather it low or at mid-height, pin it in sections with hidden U-pins, and only afterwards pull out the face-framing and nape pieces. It suits medium to long hair and handles mixed textures in a group well, which is why it’s so common at garden and beach weddings.
3. Sleek Bun Bridesmaid Hair
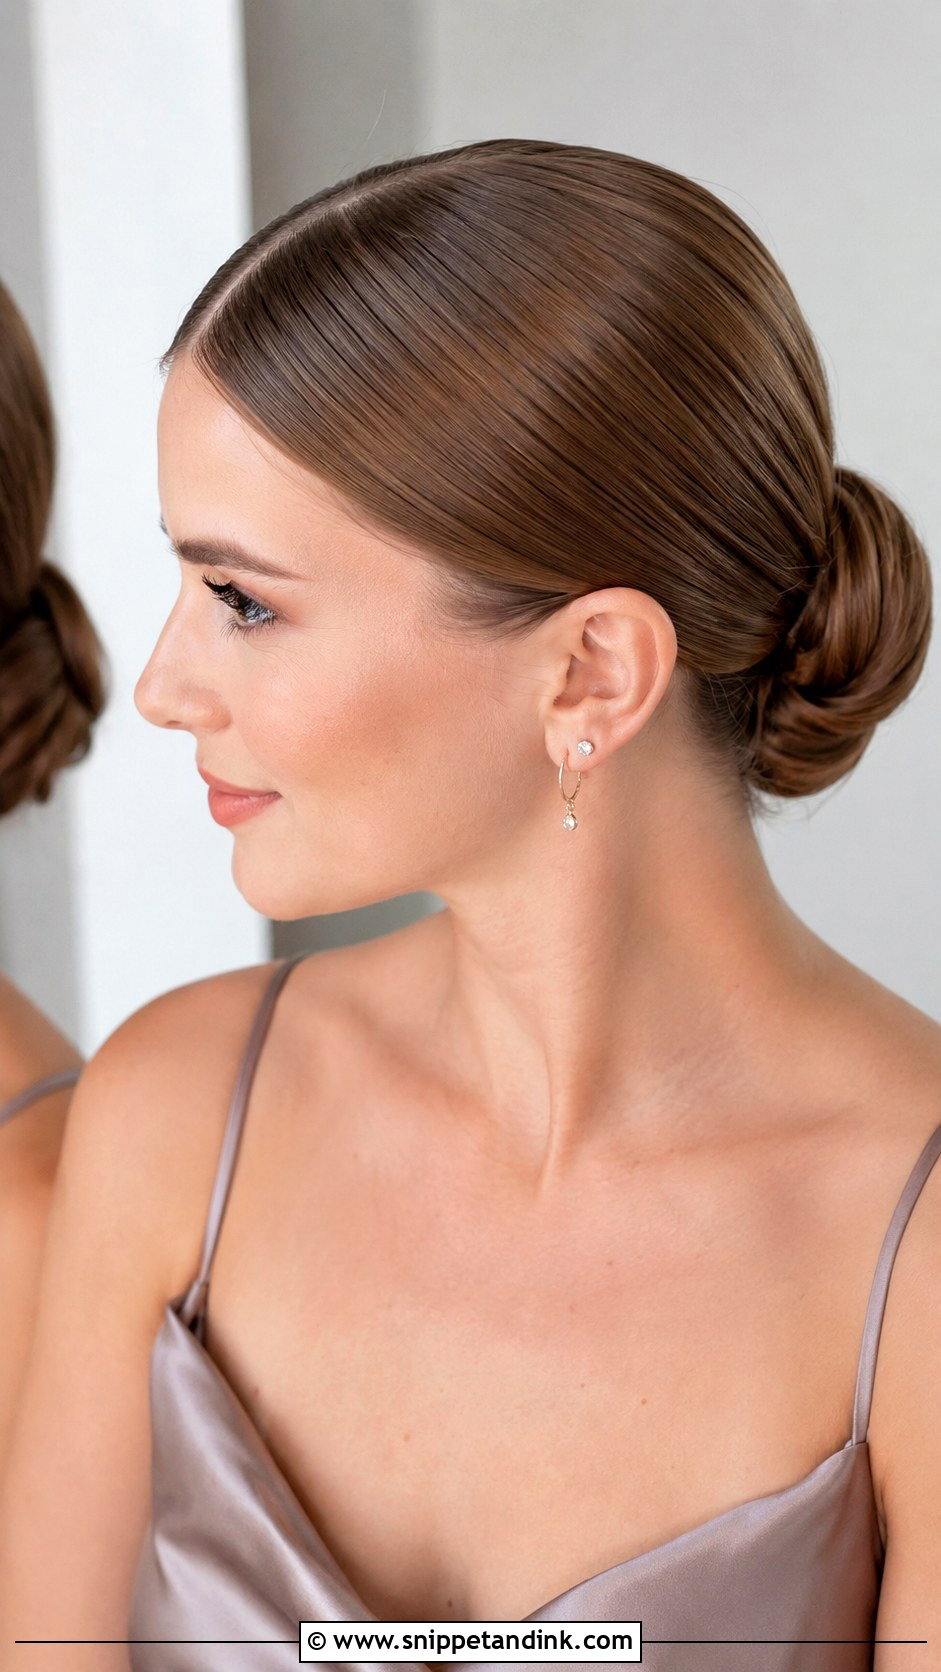
Sleek buns live or die on flyaways. I smooth the hair back with a cream rather than a heavy gel, so it stays sleek without looking wet, then secure it tightly at the nape or slightly higher. A center part, side part or no part all work; I decide by face shape. Humid days are where this style earns its place, because there’s no curl to drop. Small pearl pins along the side add a detail without breaking the line.
4. Twisted Bun Bridesmaid Hair
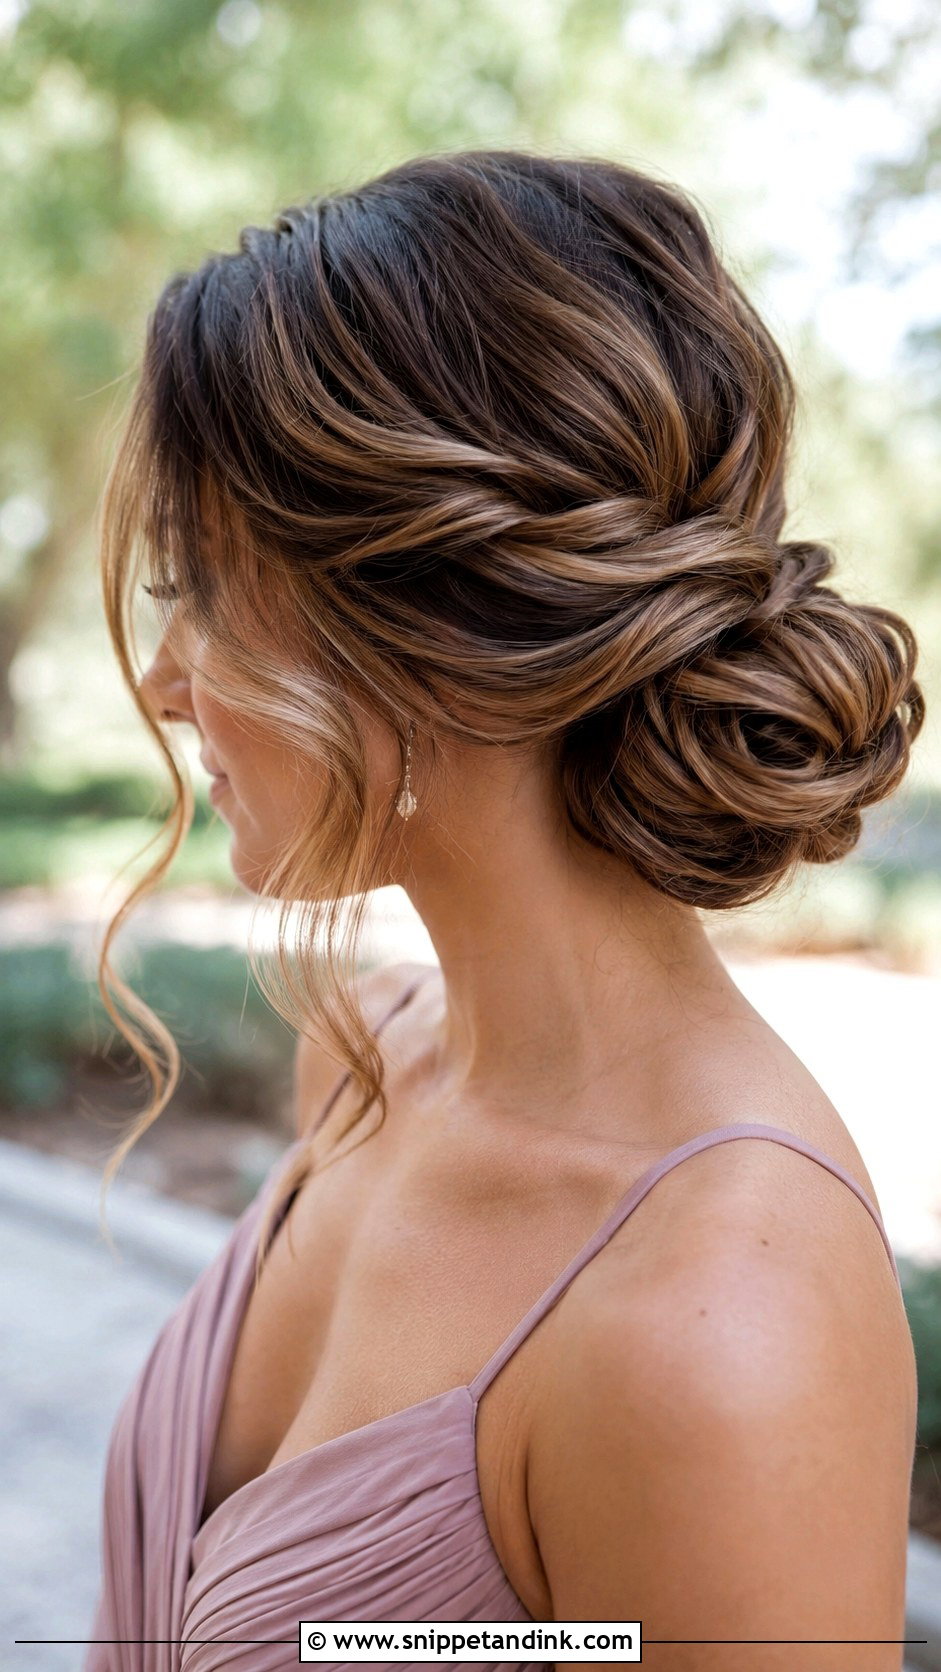
Twisting sections before wrapping them into a bun gives texture that shows up in close-up photos without adding much time. It’s especially good on highlighted or balayage hair, since each twist catches a different tone. I twist each section in the same direction so the bun looks deliberate rather than knotted. Loosen the twists slightly for a softer look or keep them tight for polish, and add a small comb just above if you want an accent.
5. Chignon Bridesmaid Hair
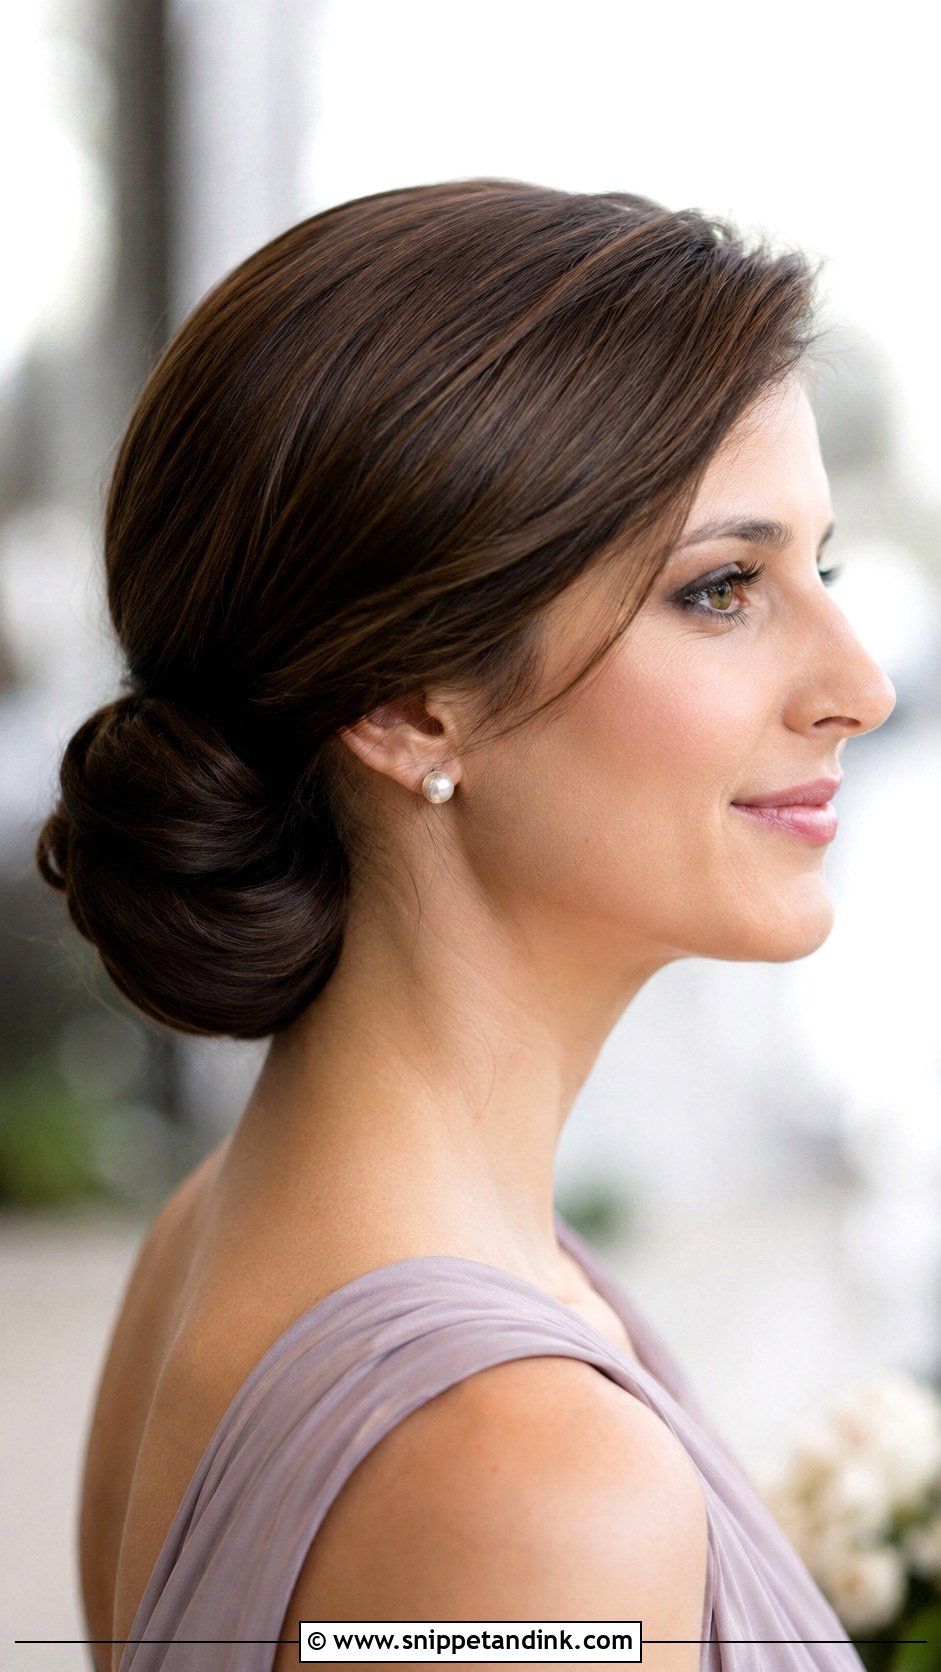
A chignon sits low at the nape as a tucked, rolled, or folded bun, and its clean outline suits formal weddings, high necklines and dresses with detailed backs. Fine hair often doesn’t have enough bulk for the shape, so I’ll add texture spray or a small padding piece in a matching color. With very thick hair, the opposite applies: I thin out the section going into the roll so the chignon stays compact rather than heavy. A soft side part keeps it from looking severe.
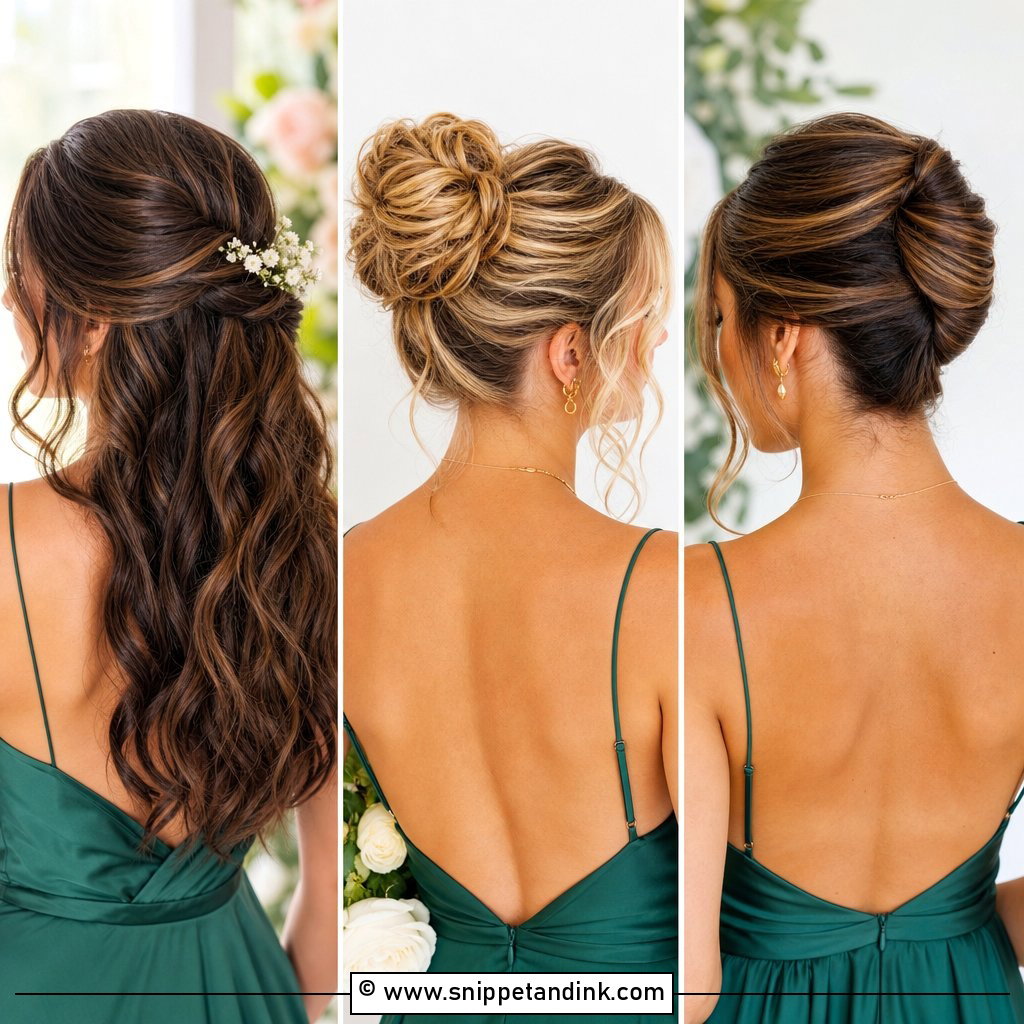
6. Half Up Bridesmaid Hair
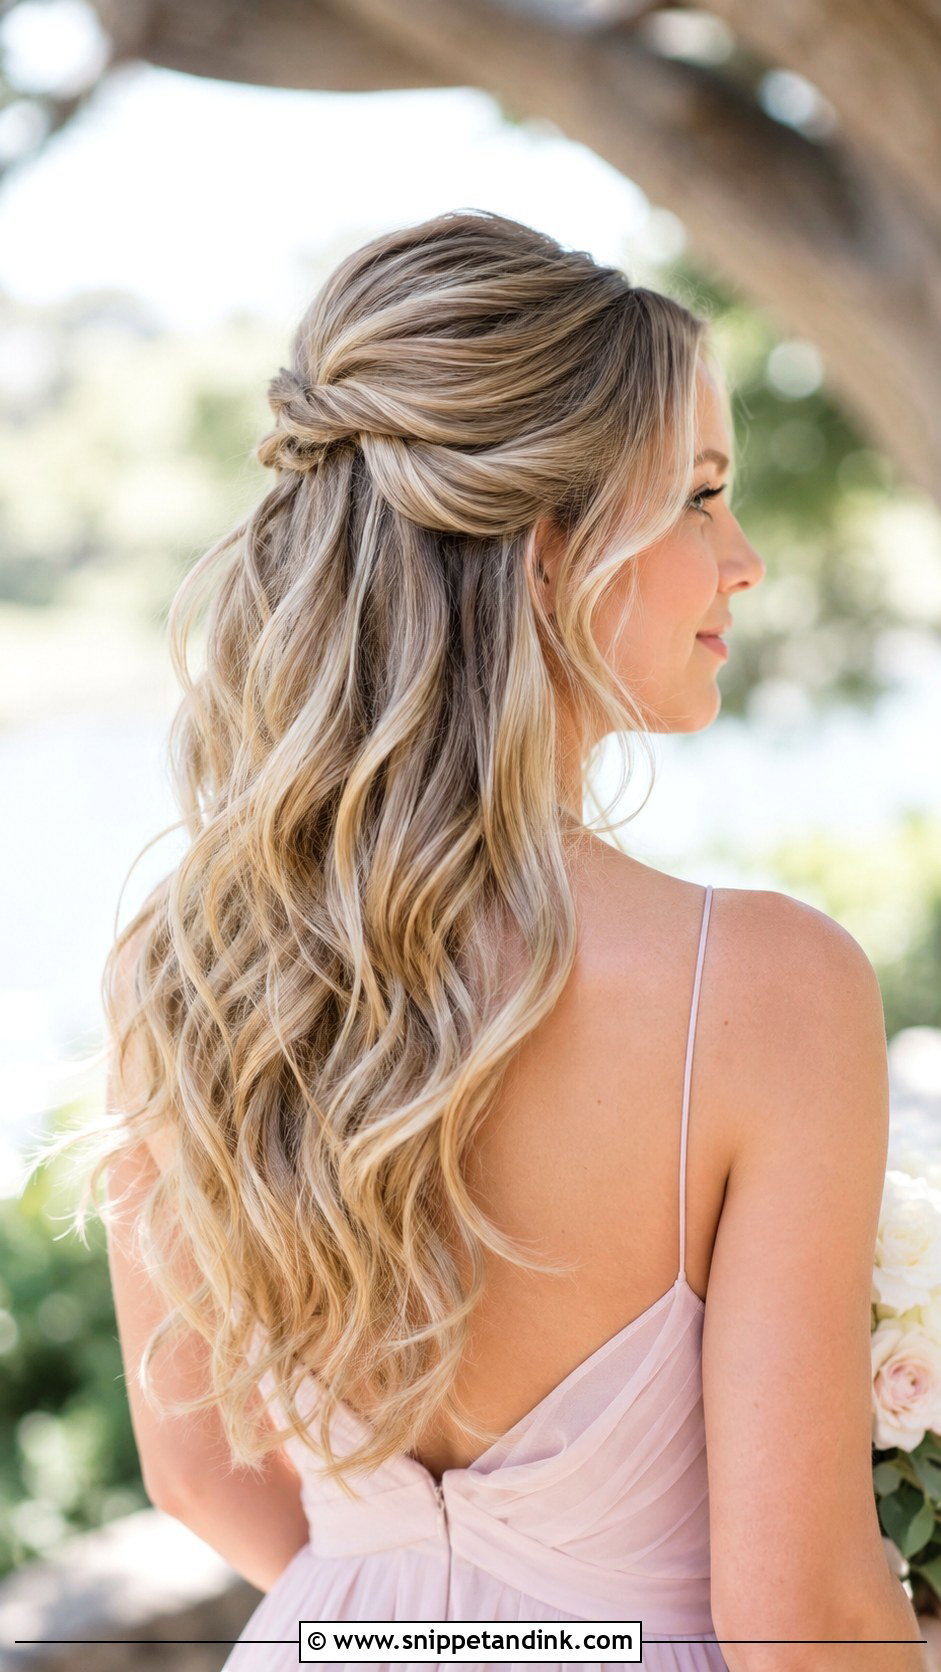
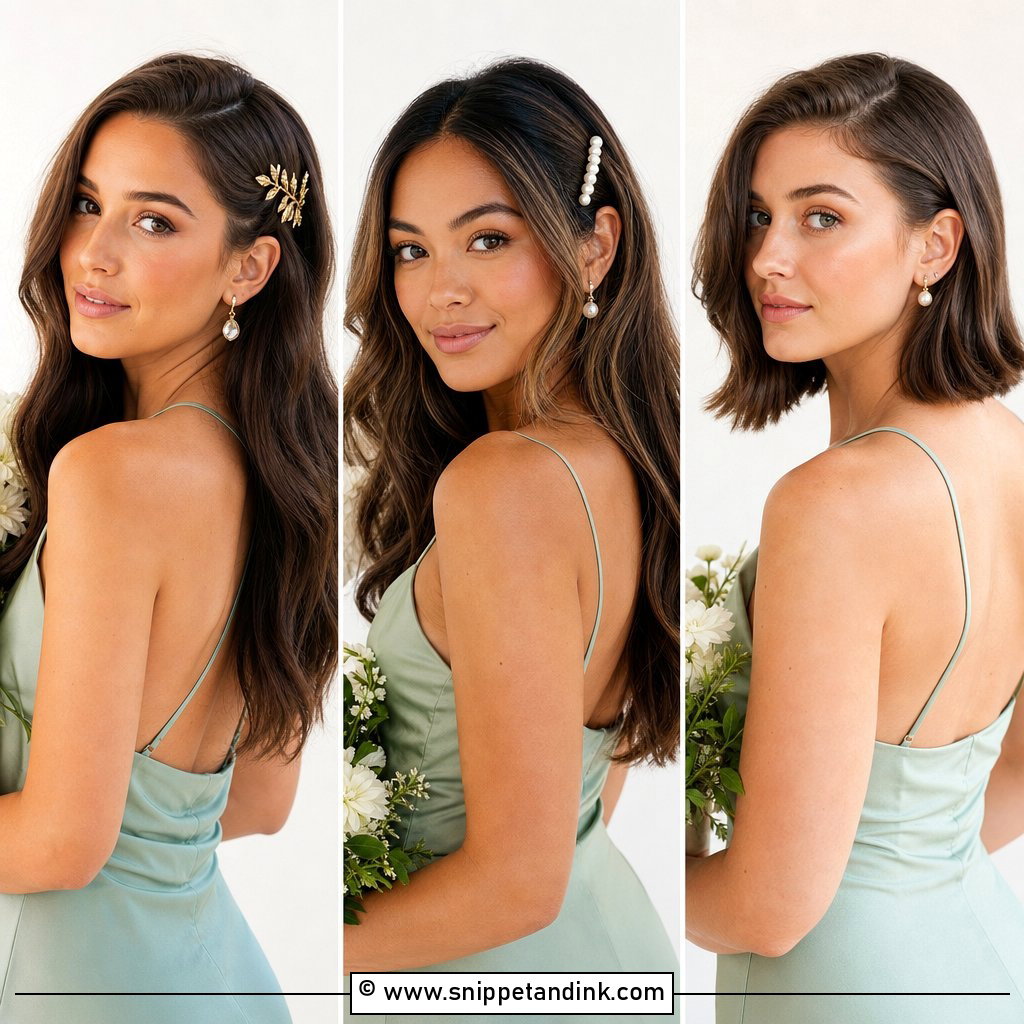
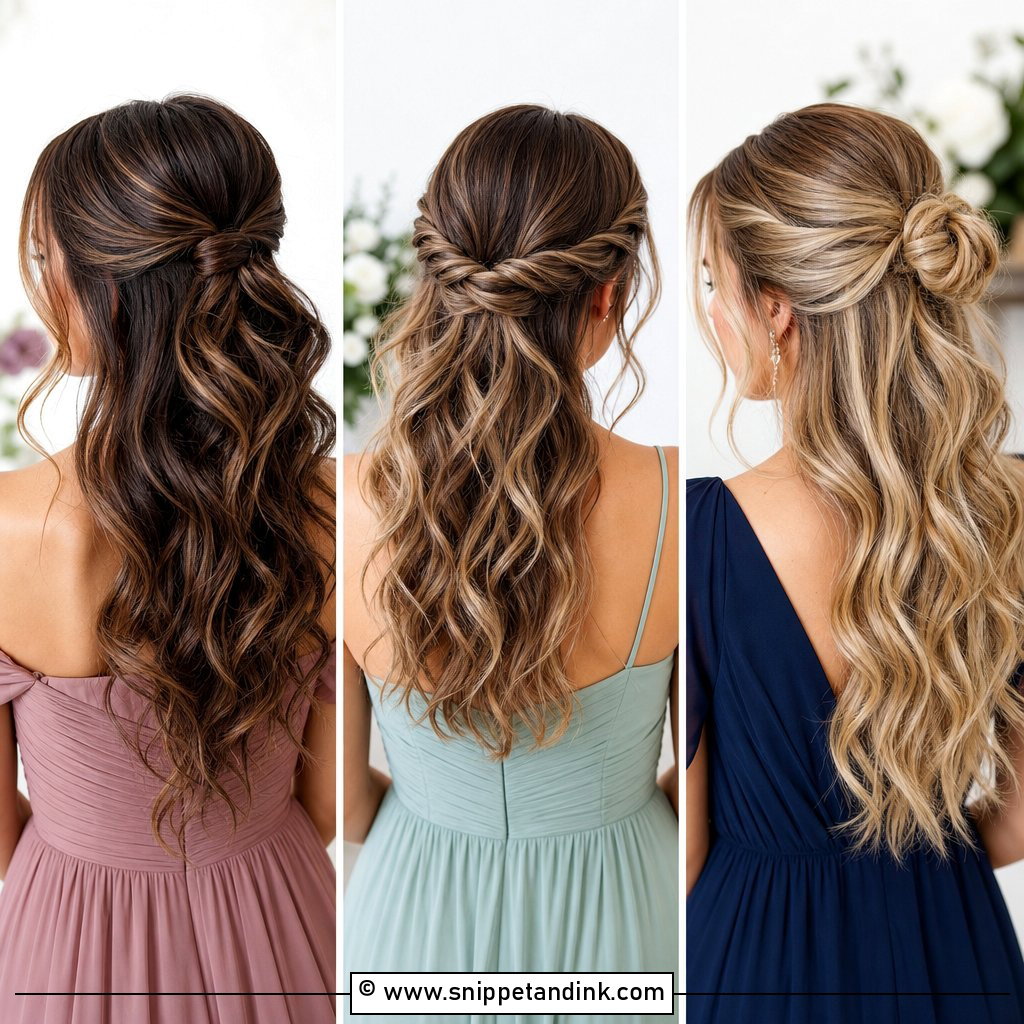
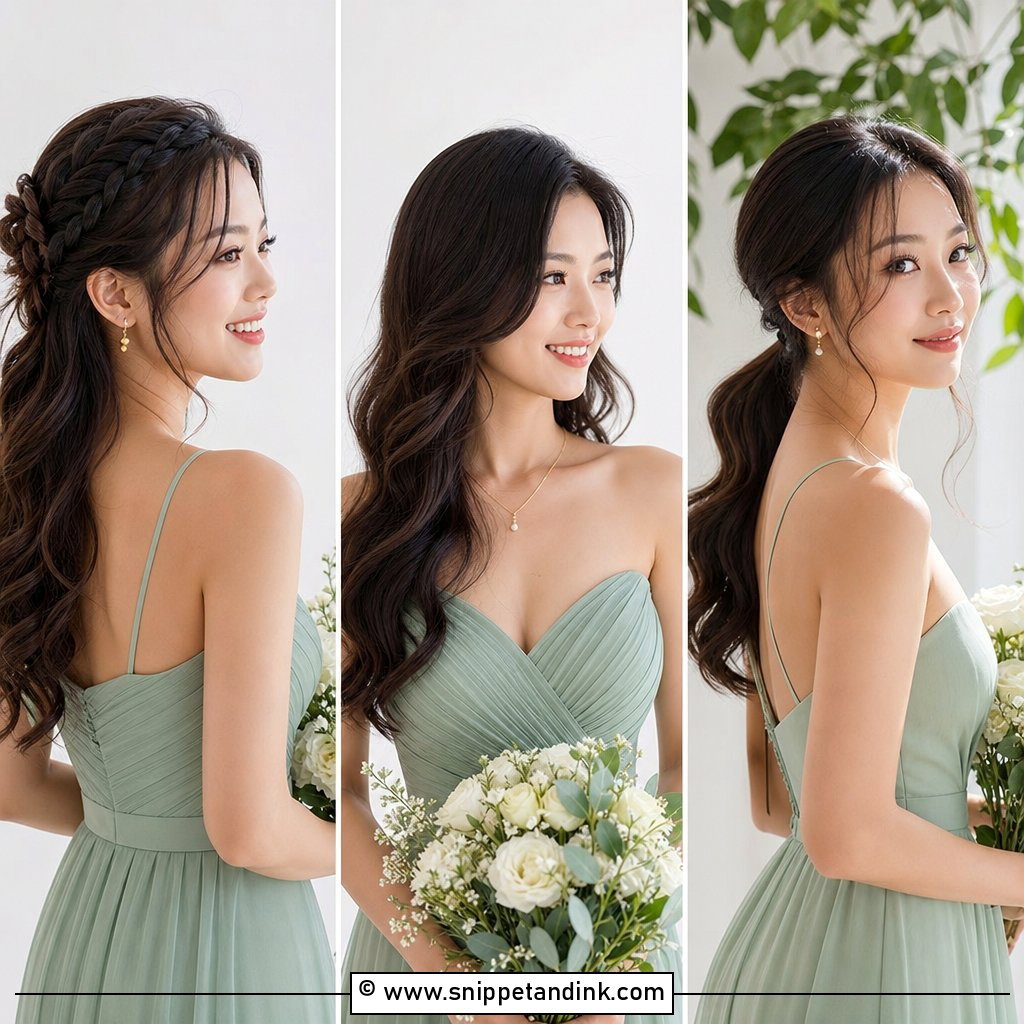
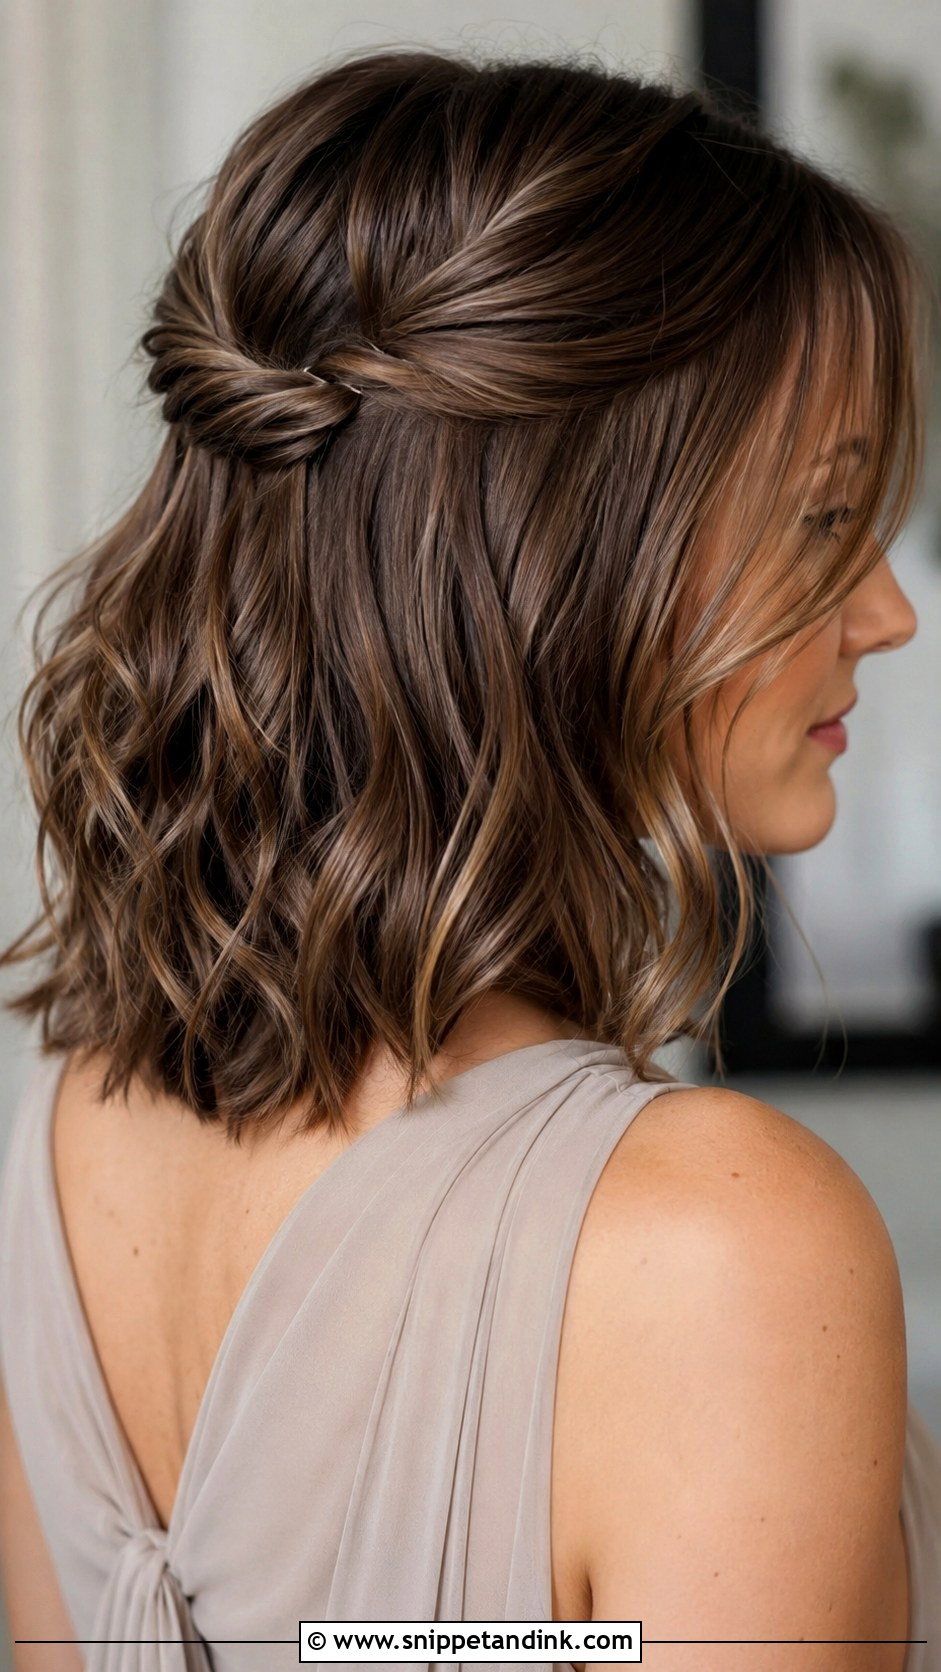
Half-up gives you the softness of wearing hair down while keeping it out of your face, which matters for bridesmaids who fidget with their hair. I take the top section back, leave the rest in waves or smooth lengths, and anchor it with crossed bobby pins or a small hidden elastic. Lifting the crown slightly flatters most face shapes. A small twist or braid at the join can replace any accessory.
7. Half Up Half Down Bridesmaid Hair
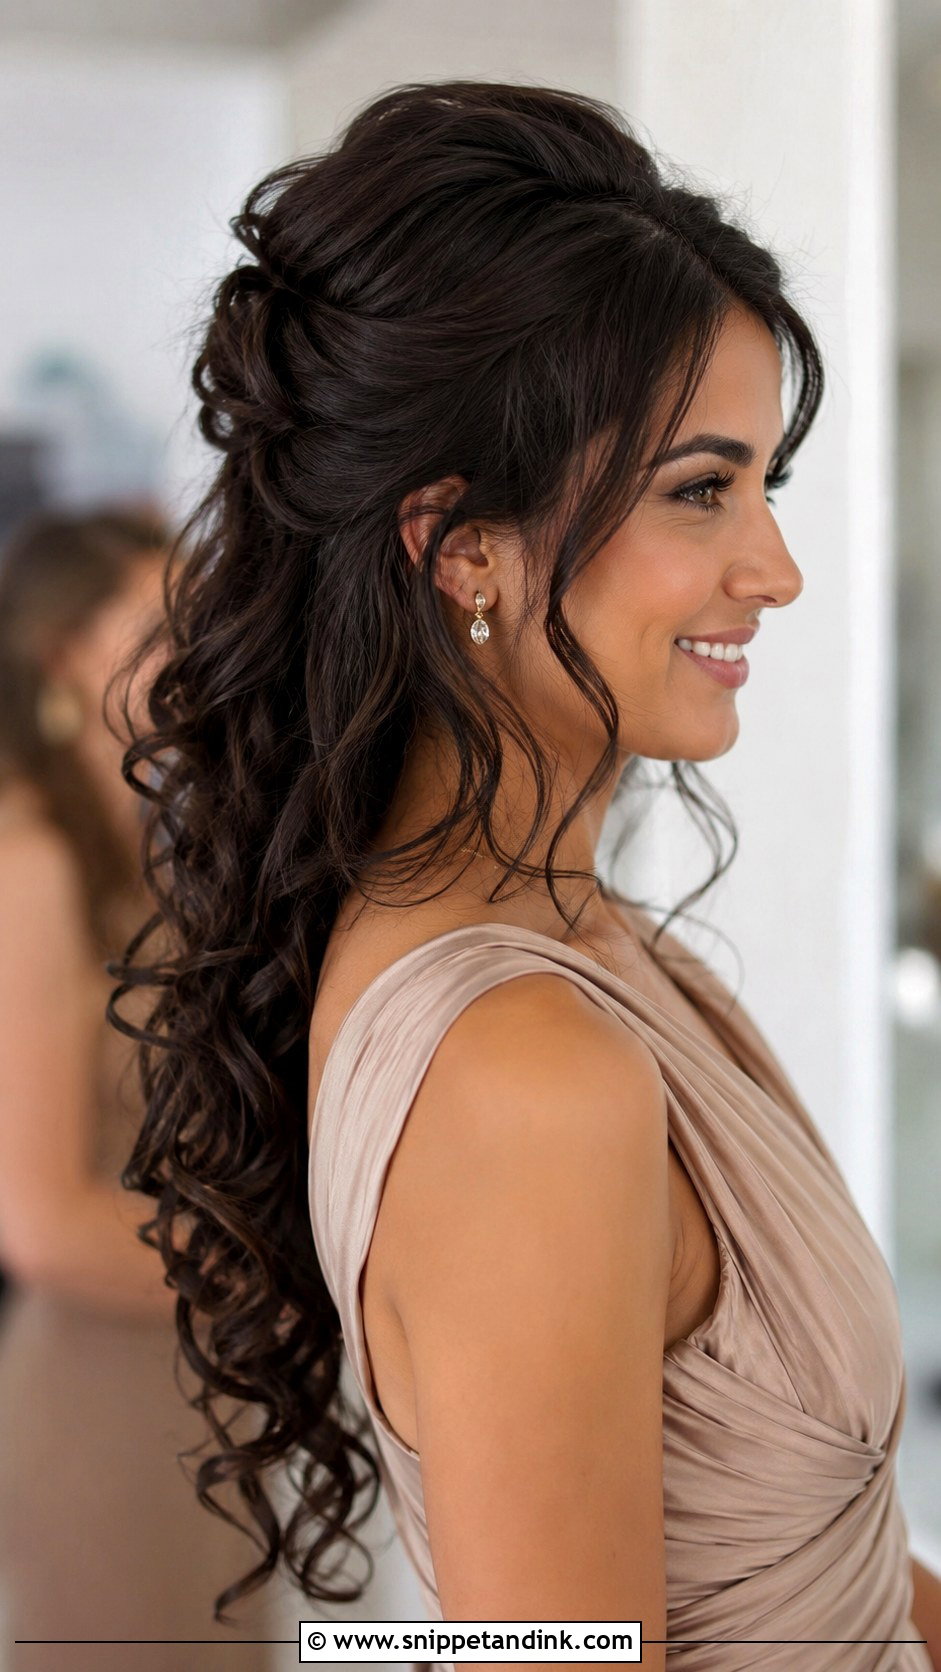
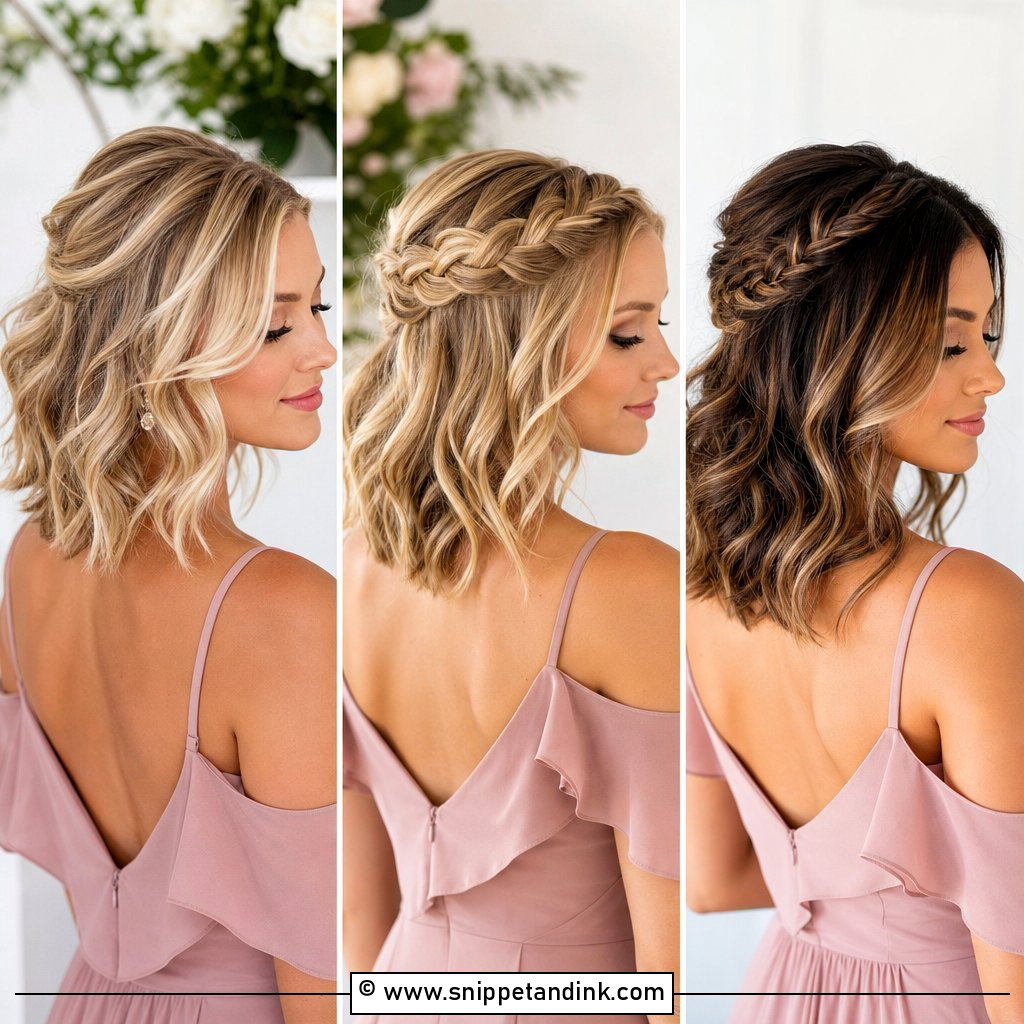
Half up half down bridesmaid hair works on shoulder-length hair as well as long, as long as the pinned section is balanced against what’s left down. Waves underneath make it look full; a smooth crown keeps it dressed up. The weak point is the spot where the sections meet, which sags as the day goes on, so I pin it to a small anchor braid or elastic rather than just to loose hair. That join is also the best place for a pearl pin or small comb.
8. Braided Half Up Bridesmaid Hair
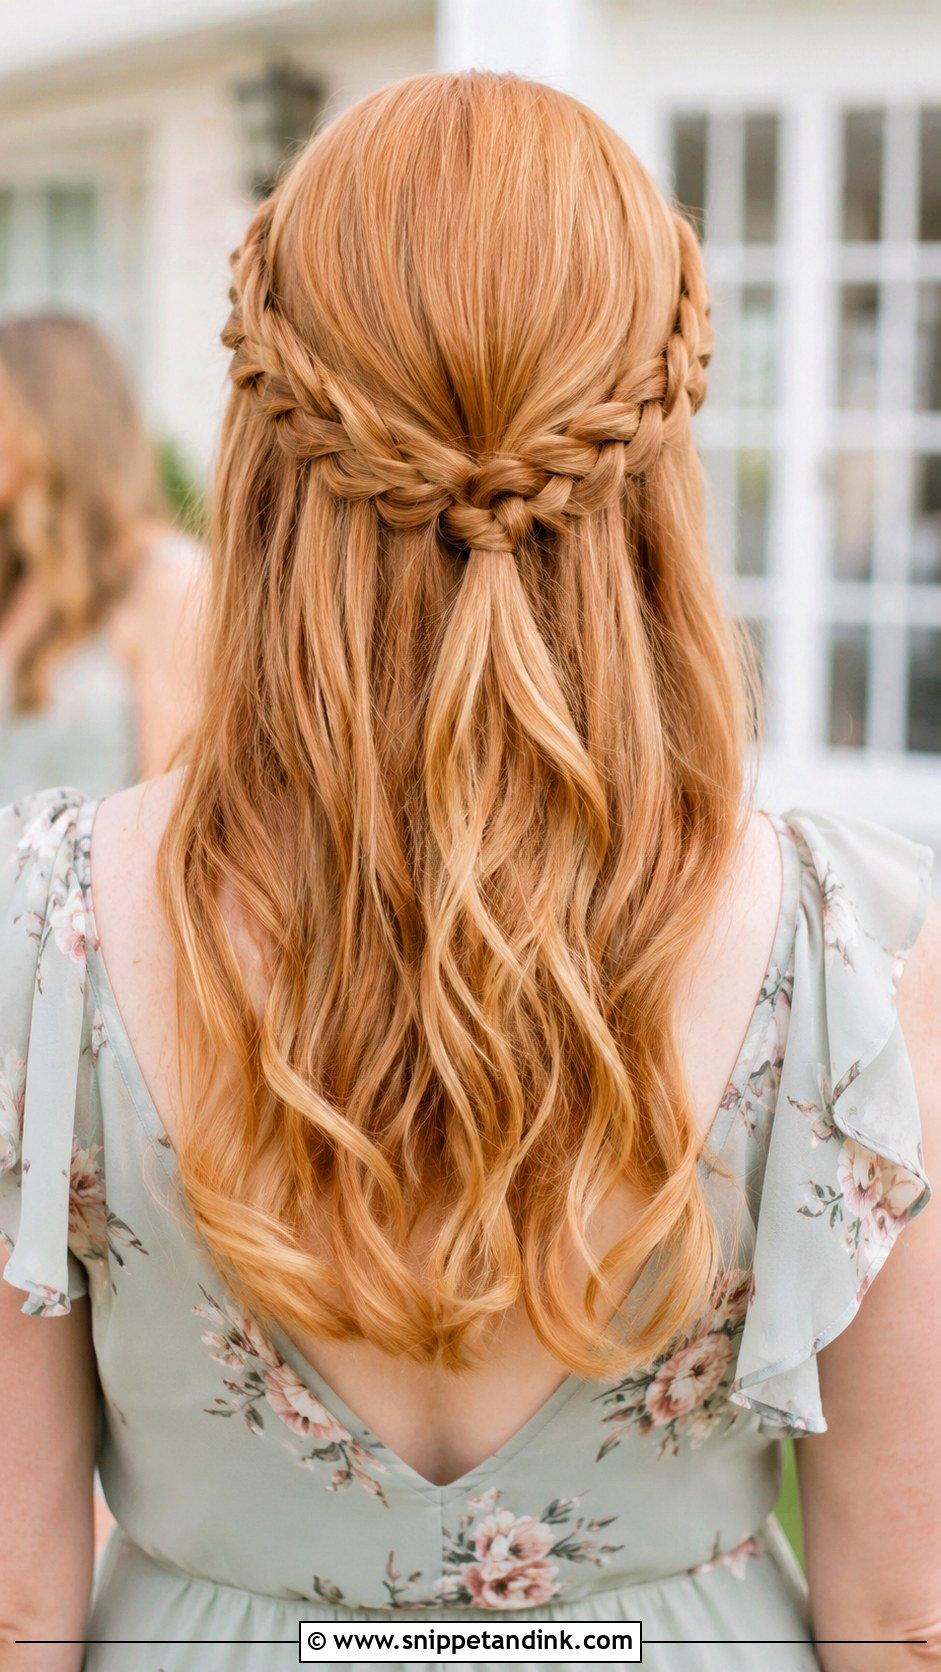
Two small braids from each side meeting at the back are the quickest way I know to secure short front layers that would otherwise fall forward. The rest of the hair gets loose waves. I braid slightly tight and then loosen it by hand, which looks fuller than braiding loosely from the start and holds much better. It’s at home at rustic and garden weddings with pastel dresses.
9. Loose Waves Bridesmaid Hair
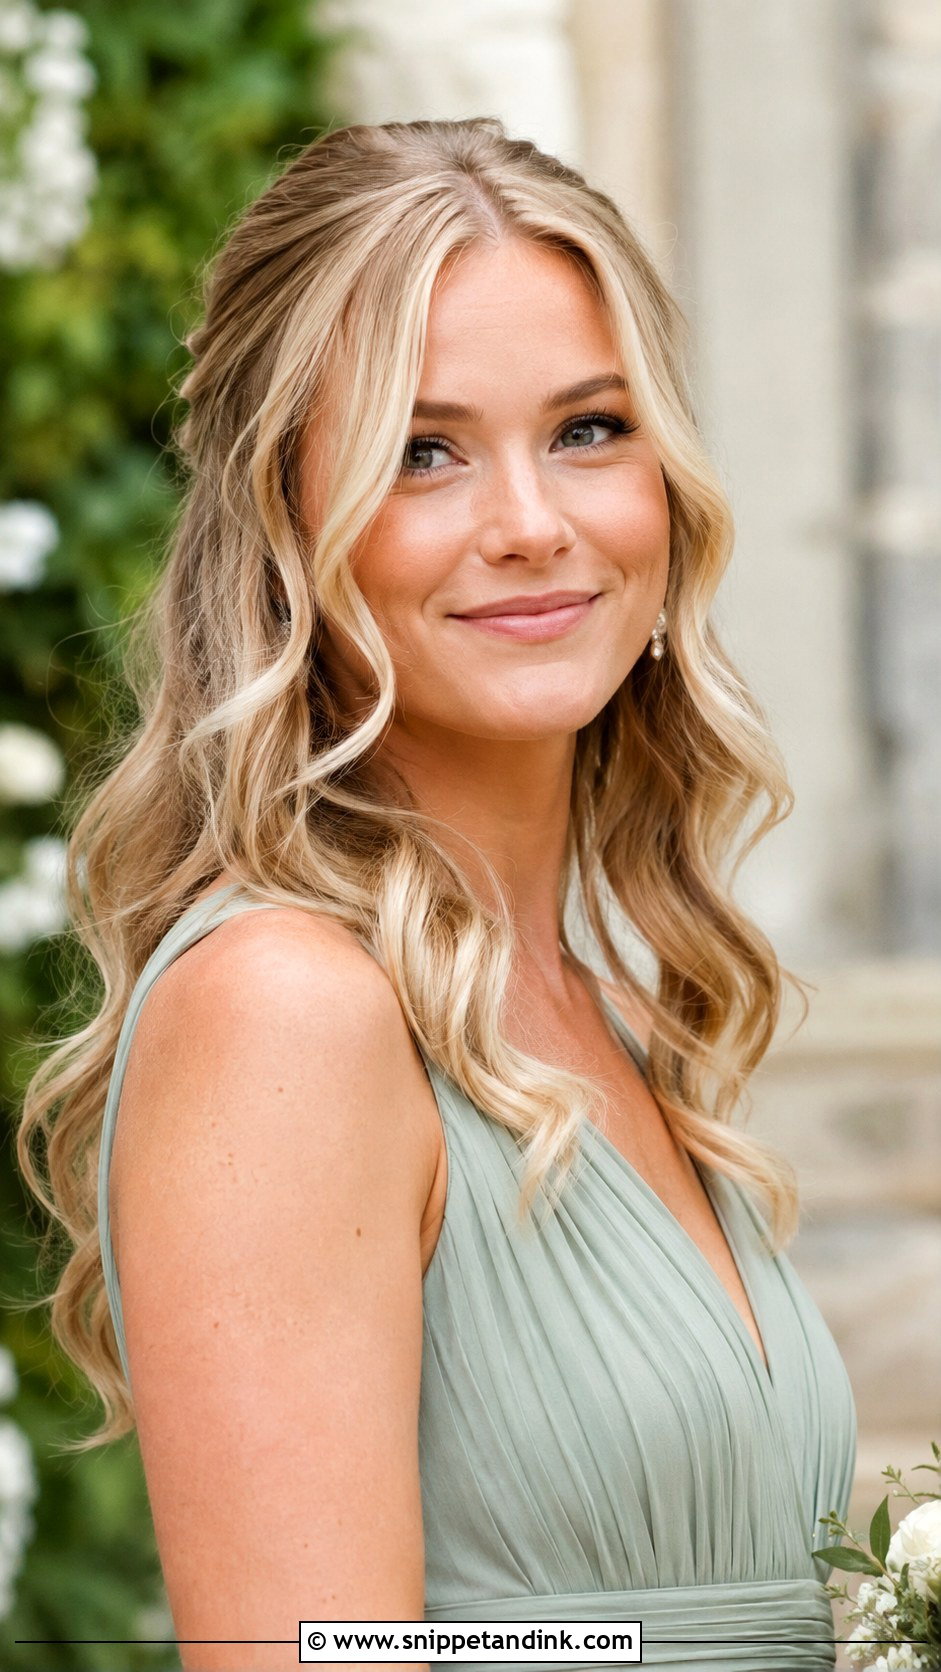
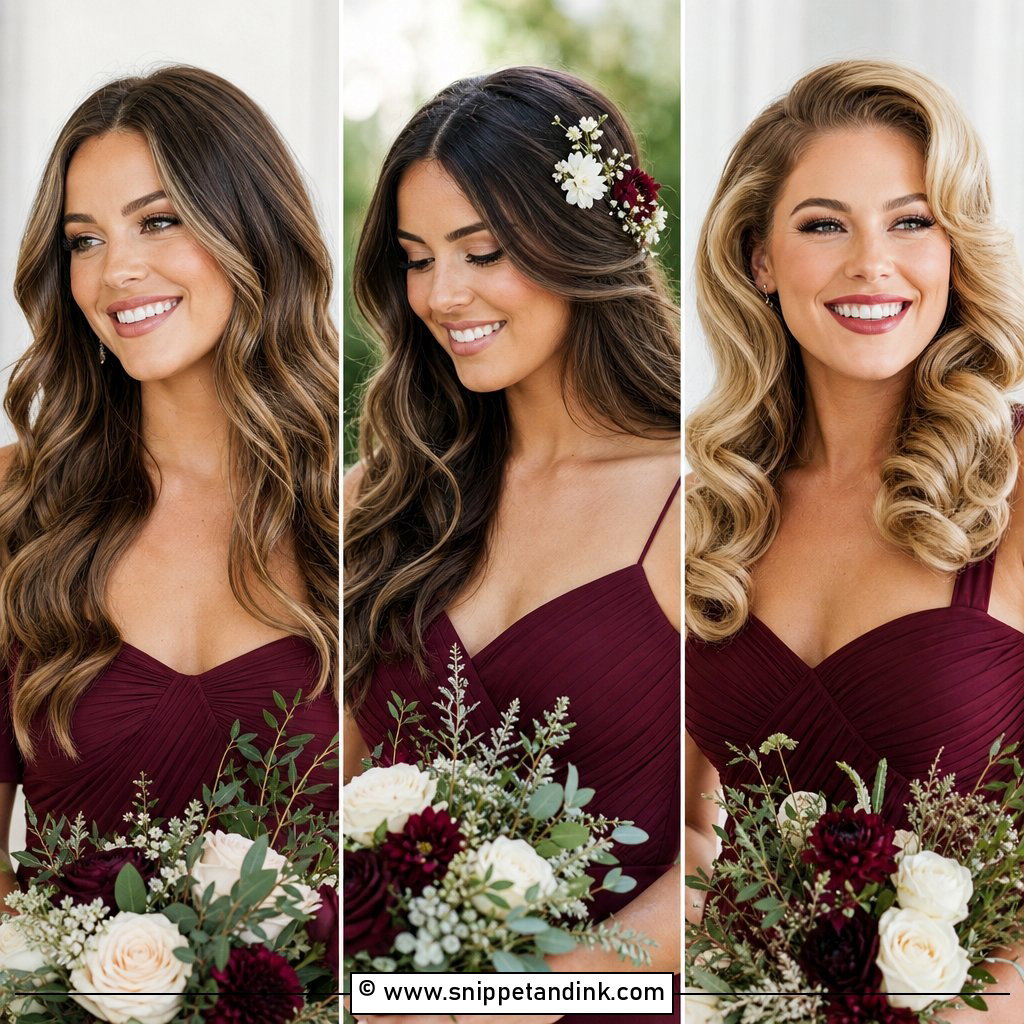
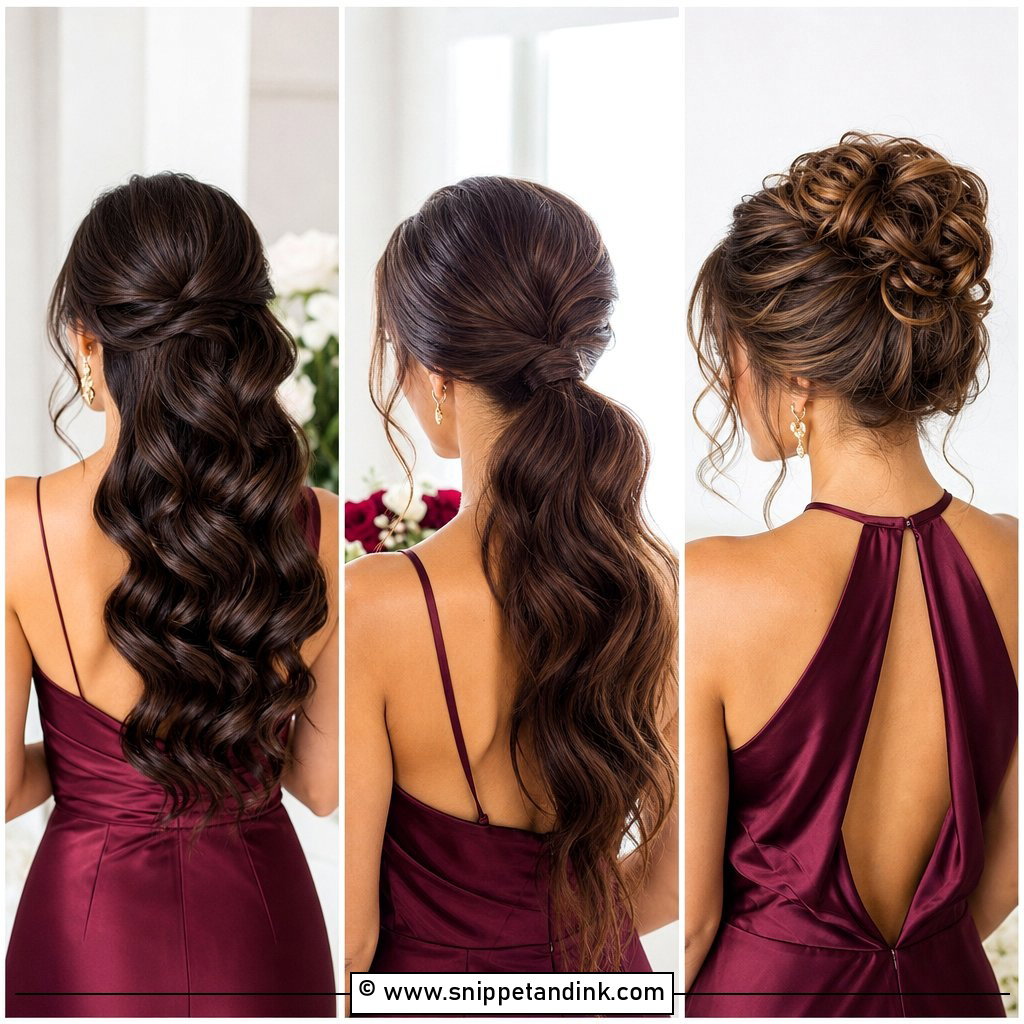
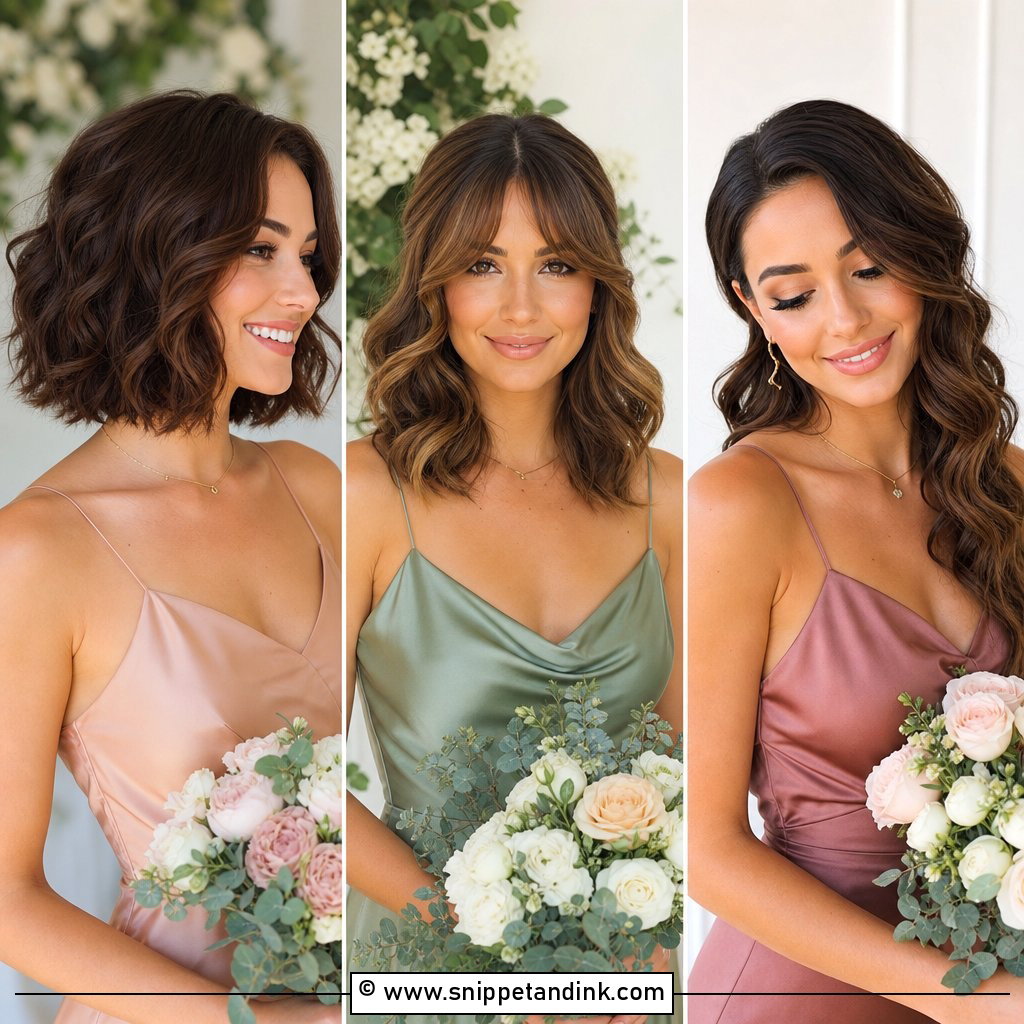
Waves worn down are the style most likely to fall flat by the reception. Prep is what holds them: heat protectant and a light mousse on damp hair, a full blow-dry, then curls that cool completely in a pin curl or clip before anyone brushes them. Brushing hot curls is the most common reason waves vanish by dinner. Once cool, brush through for a soft, touchable pattern, and finish with a flexible spray. Center parts read modern; side parts read softer.
10. Hollywood Waves Bridesmaid Hair
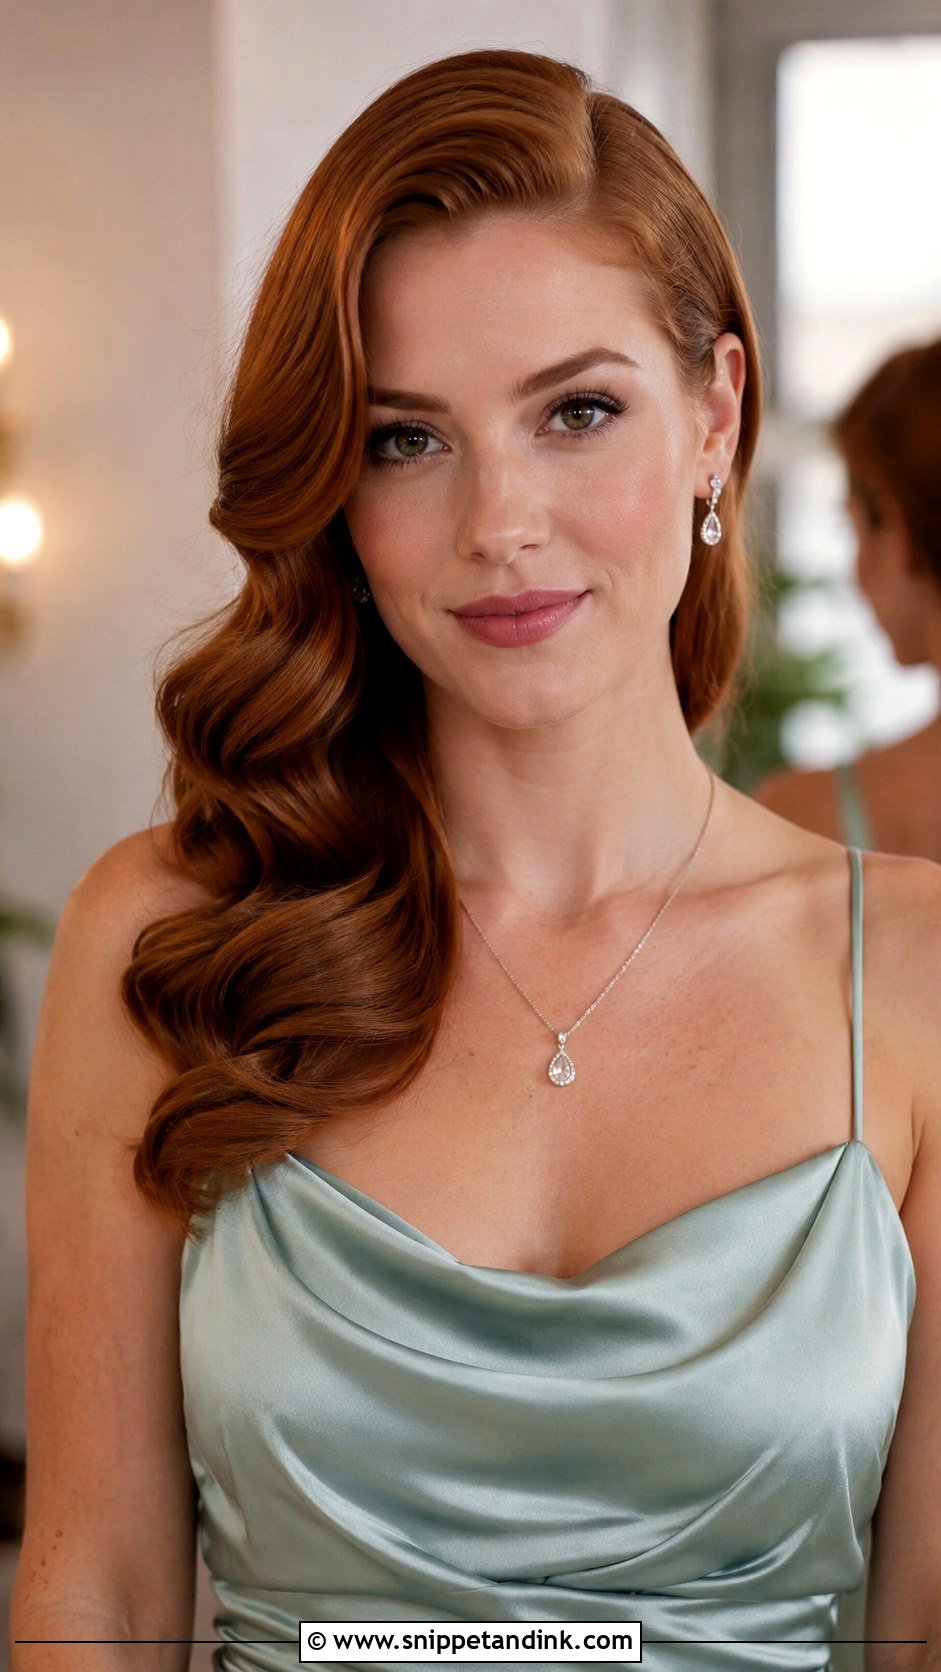
Hollywood waves are smooth, glossy and set in the same direction all the way round, so the bridal party gets a vintage, red-carpet finish without an updo. I curl everything away from the face, clip each curl while it cools, then brush the whole lot with a boar bristle brush until the waves link into one ripple. They need medium to long hair to show the pattern. A deep side part adds drama, and a light shine spray finishes it. On formal evening weddings and satin dresses, this is the look I’d suggest.
11. Beach Waves Bridesmaid Hair
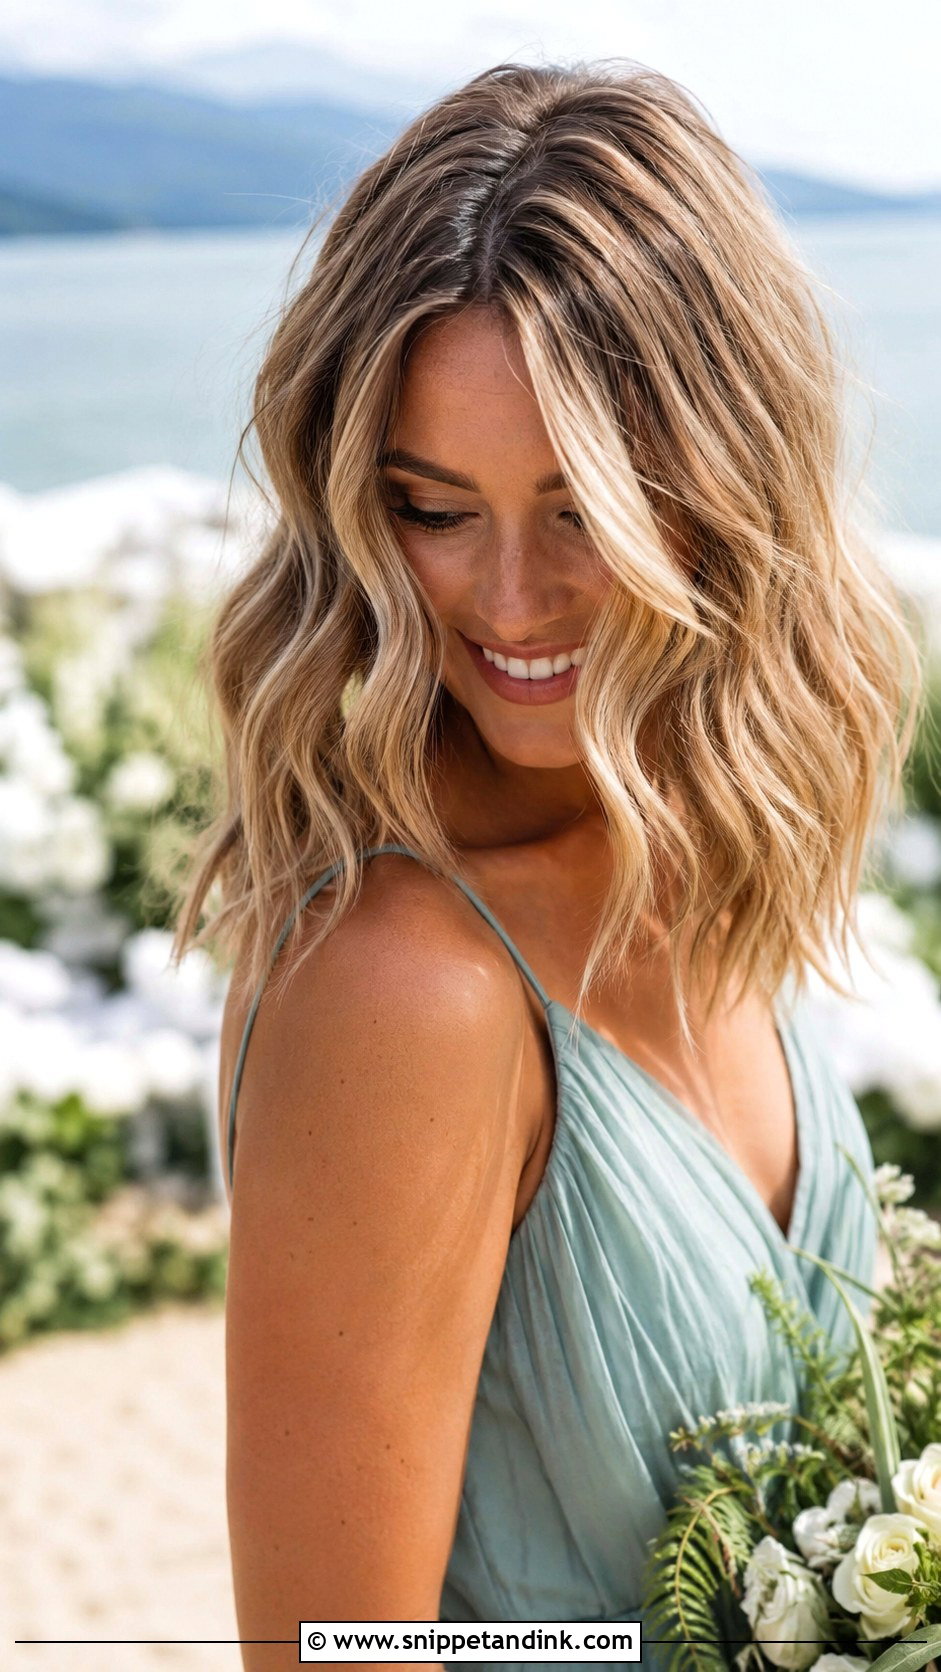
Beach waves are looser and less formal than Hollywood waves but still styled. I start the bend around the cheekbones and leave the last inch or so straighter for a modern finish. Texture spray gives hold without weight; heavy spray makes them crunchy, which looks out of place outdoors. They’re easy to refresh during the day by twisting a piece around a finger. Add a side clip if you want a bit more polish.
12. Side Swept Curls Bridesmaid Hair
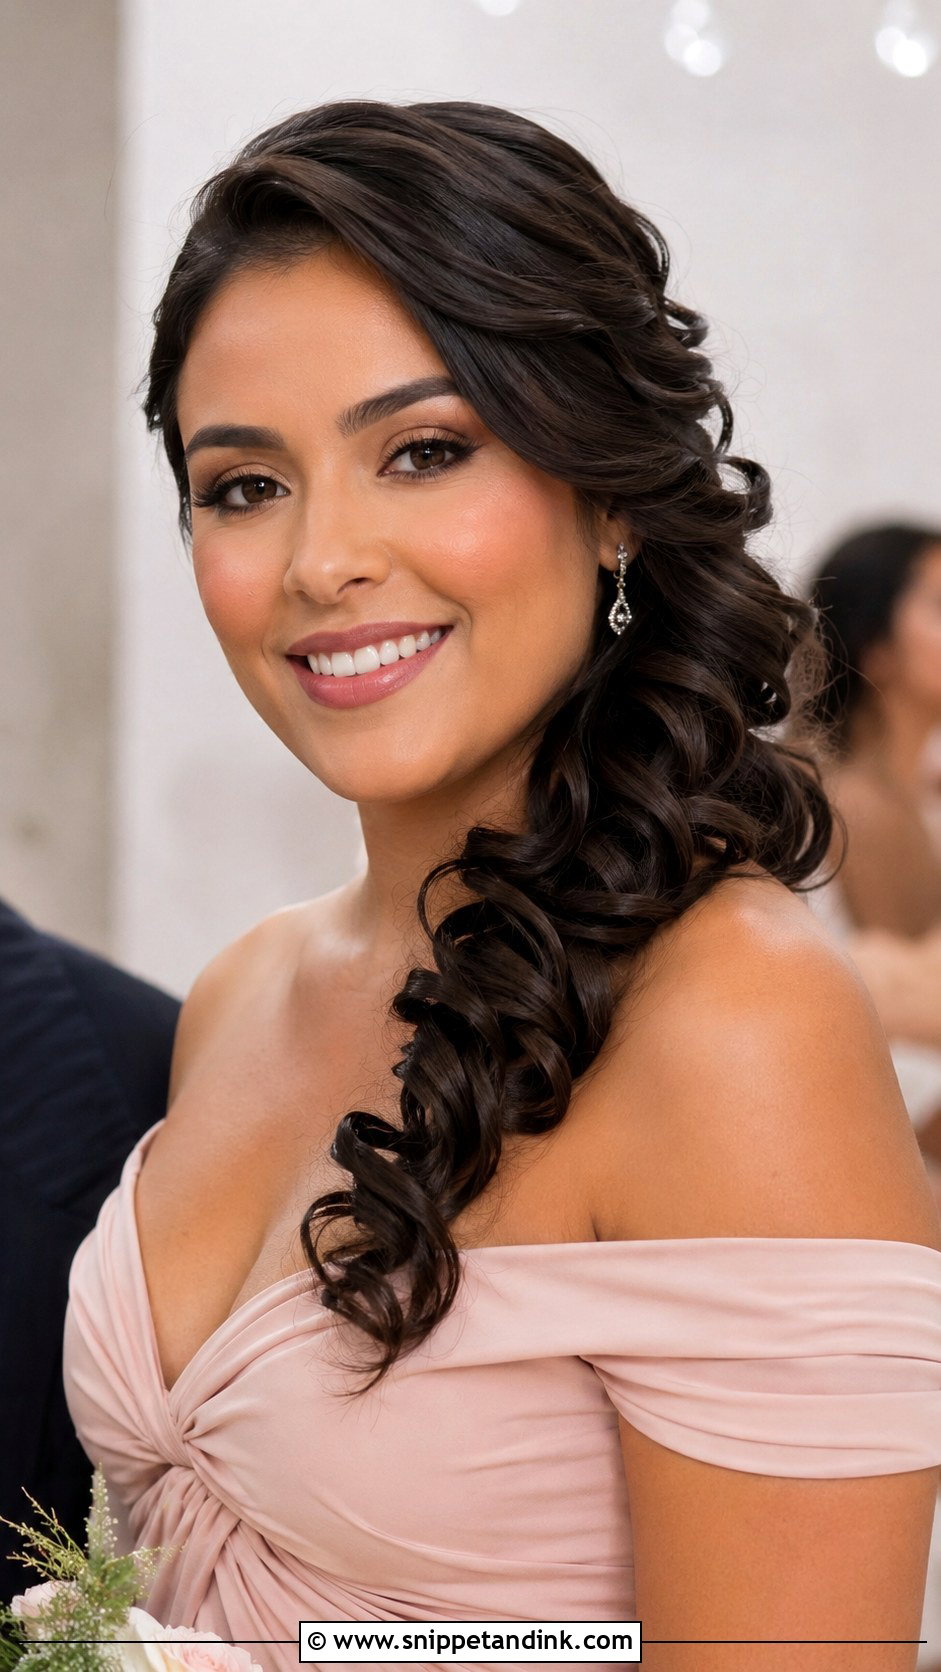
Side-swept curls are gathered over one shoulder and pinned behind the opposite ear, which frames strapless and one-shoulder necklines well. The pinning is the hard part. I build a small anchor of crossed bobby pins behind the ear first, then pin the curls into that, otherwise the weight of the hair pulls everything back to center within an hour. Keep the curls brushed out so it looks current, and use a small comb to cover the pins. It needs enough length to drape past the shoulder.
13. Low Ponytail Bridesmaid Hair
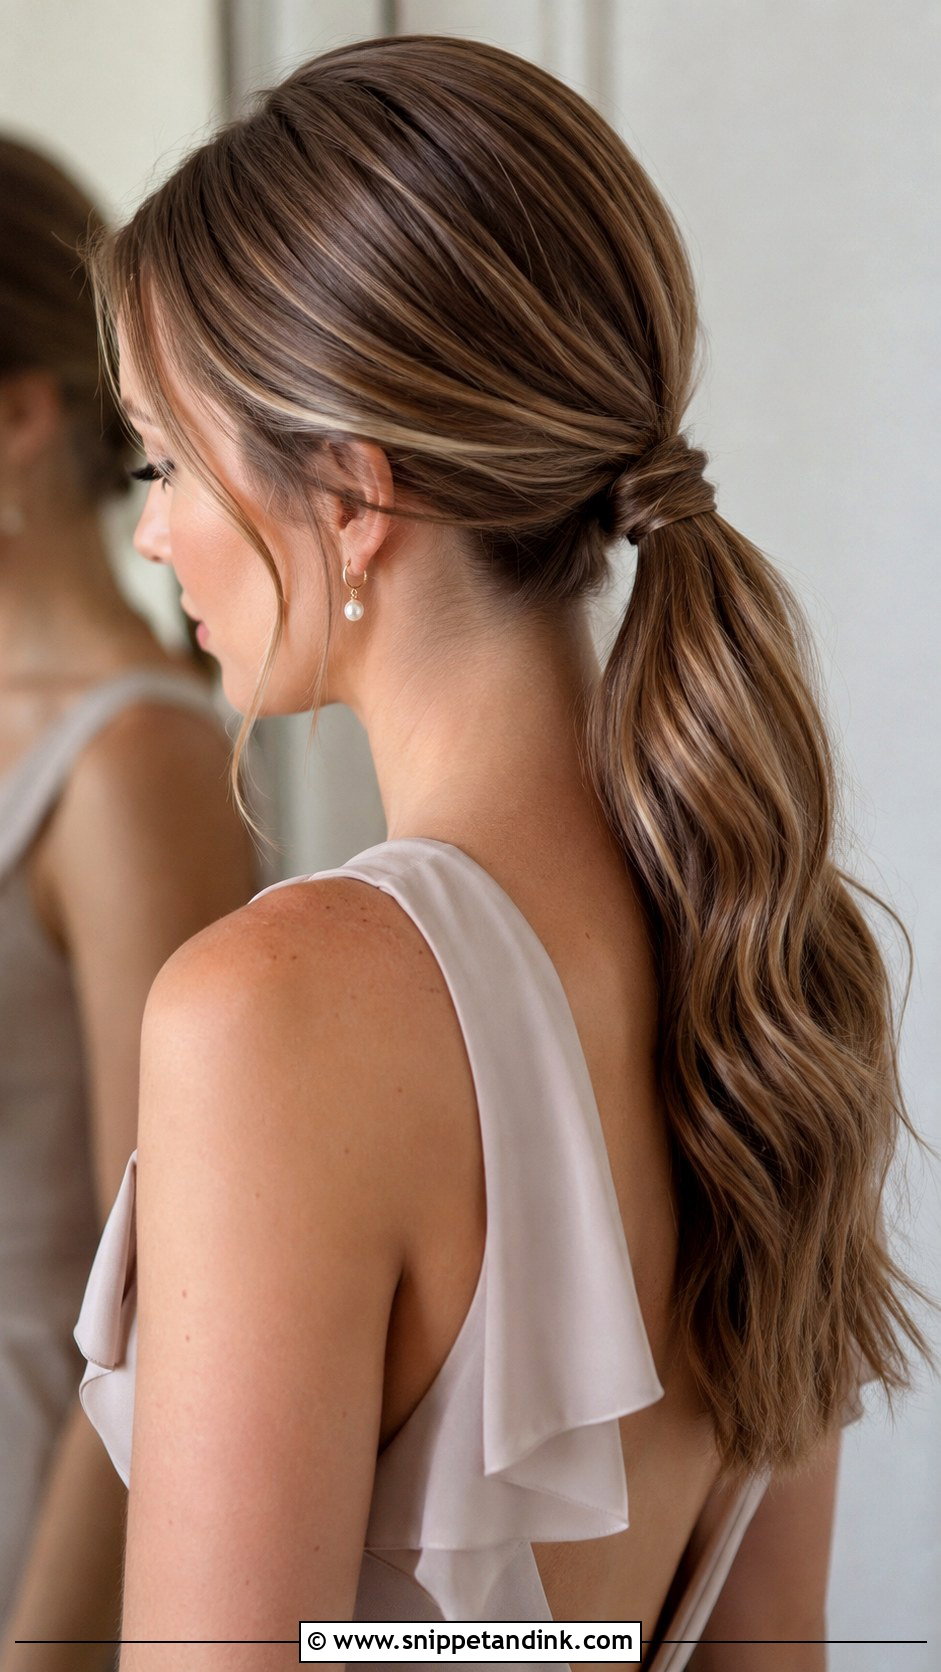
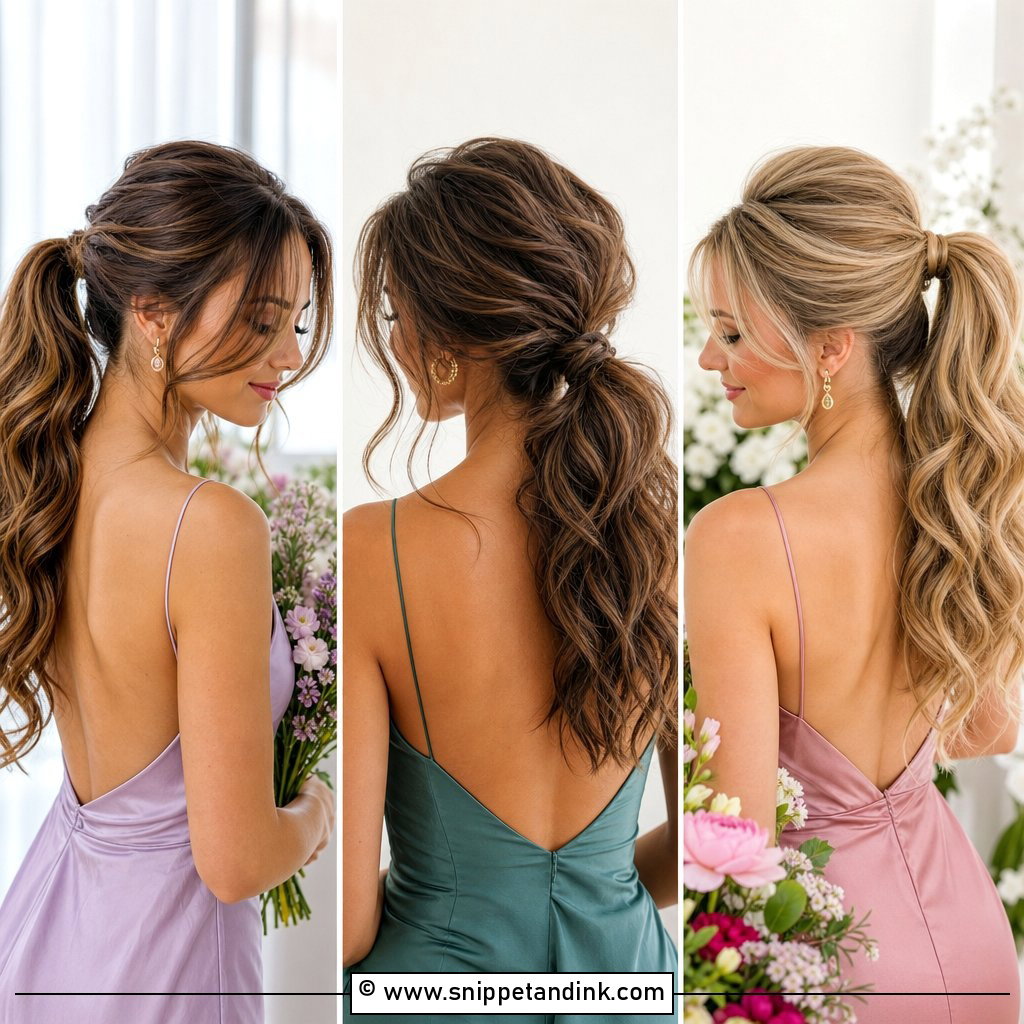
A low ponytail is one of the most reliable bridesmaid styles over a long day. It can be sleek, waved or textured. Wrap a piece of hair around the elastic and pin it underneath; the difference that one step makes is bigger than people think. It keeps hair away from the face without a bun and suits statement earrings and detailed necklines. I add a little volume at the crown so it doesn’t look flat in profile photos.
14. High Ponytail Bridesmaid Hair
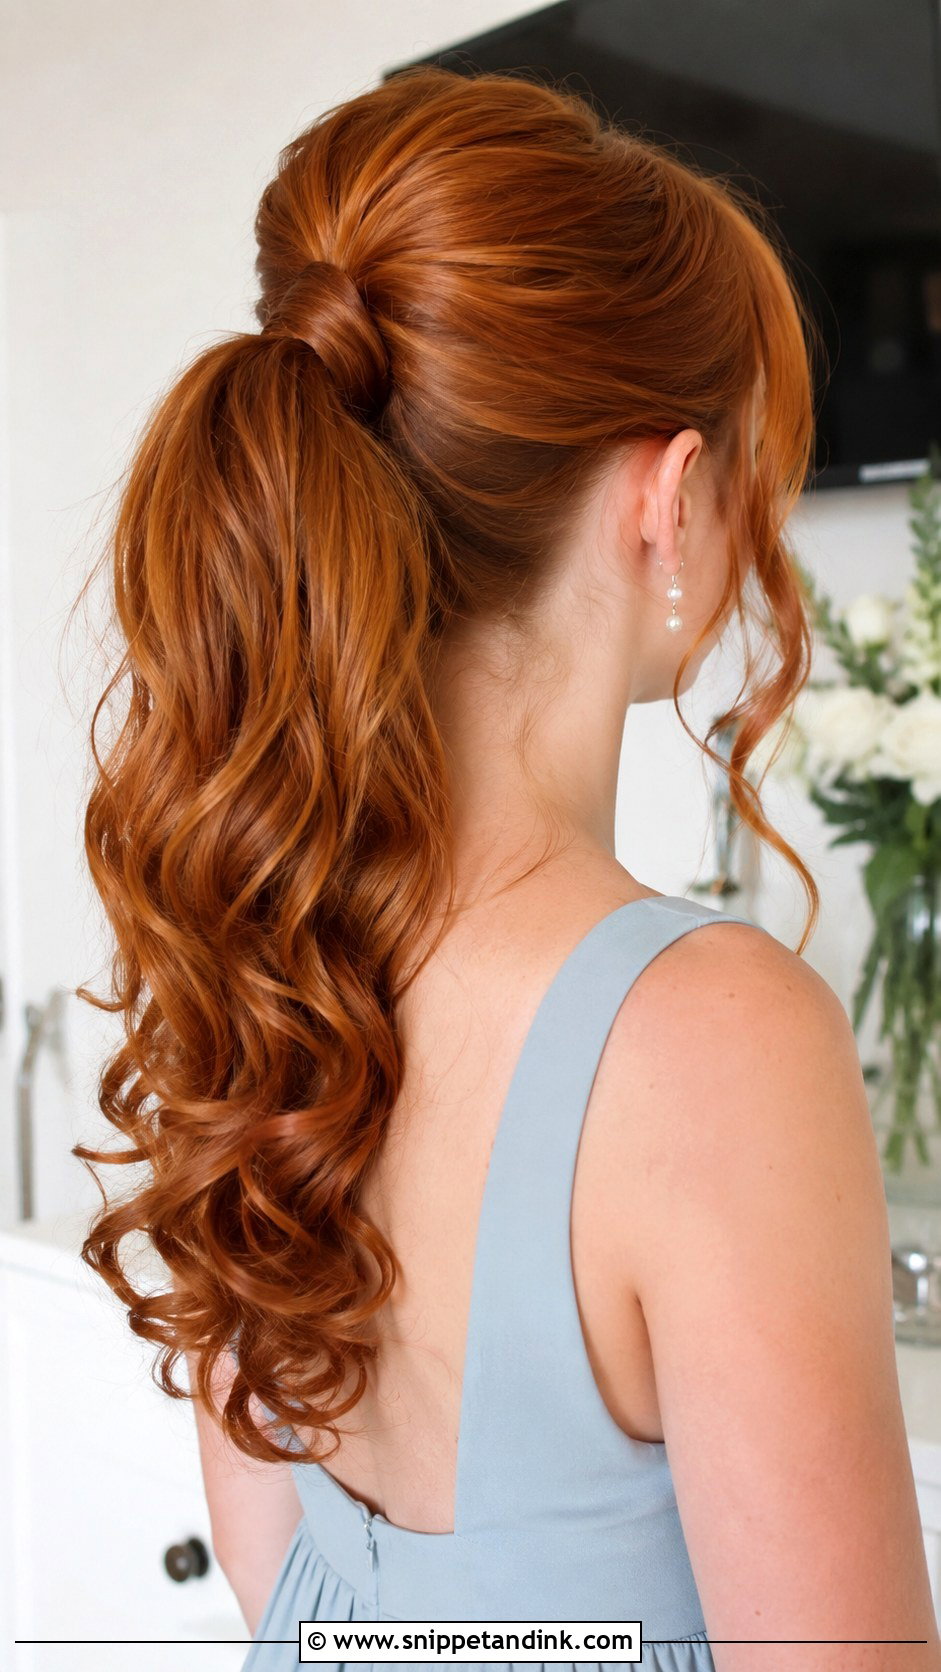
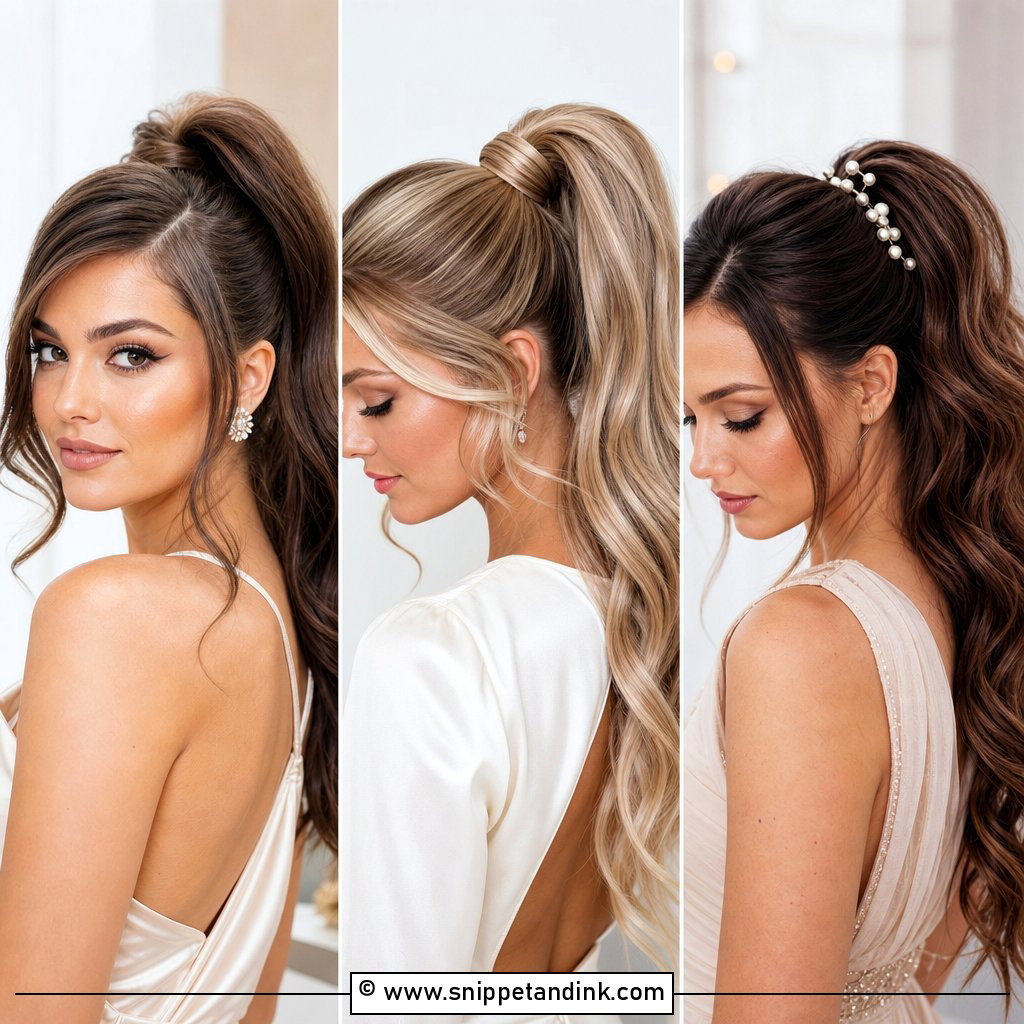
High ponytails lift the face and show off length, especially when the ends are curled. Long, heavy hair can droop over the evening, so I secure it with two elastics or a pair of bobby pins crossed under the base to prop it up. Smooth the crown and wrap the base for polish, or leave a few face-framing pieces for softness. It keeps the neck cool at warm venues.
15. Textured Ponytail Bridesmaid Hair
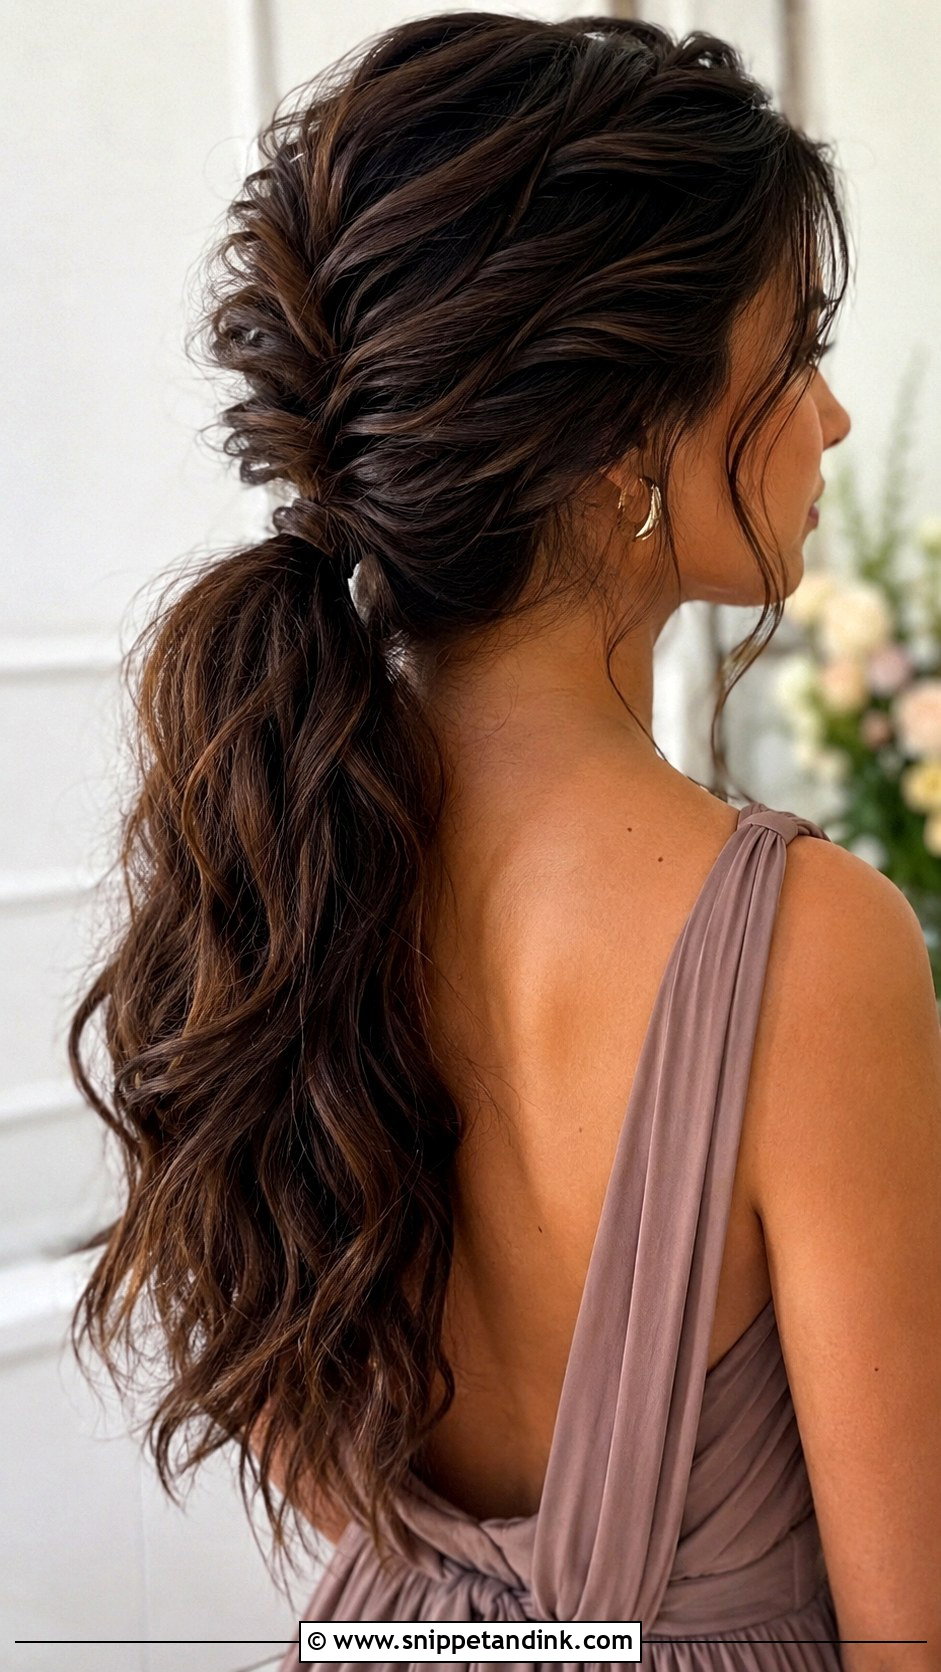
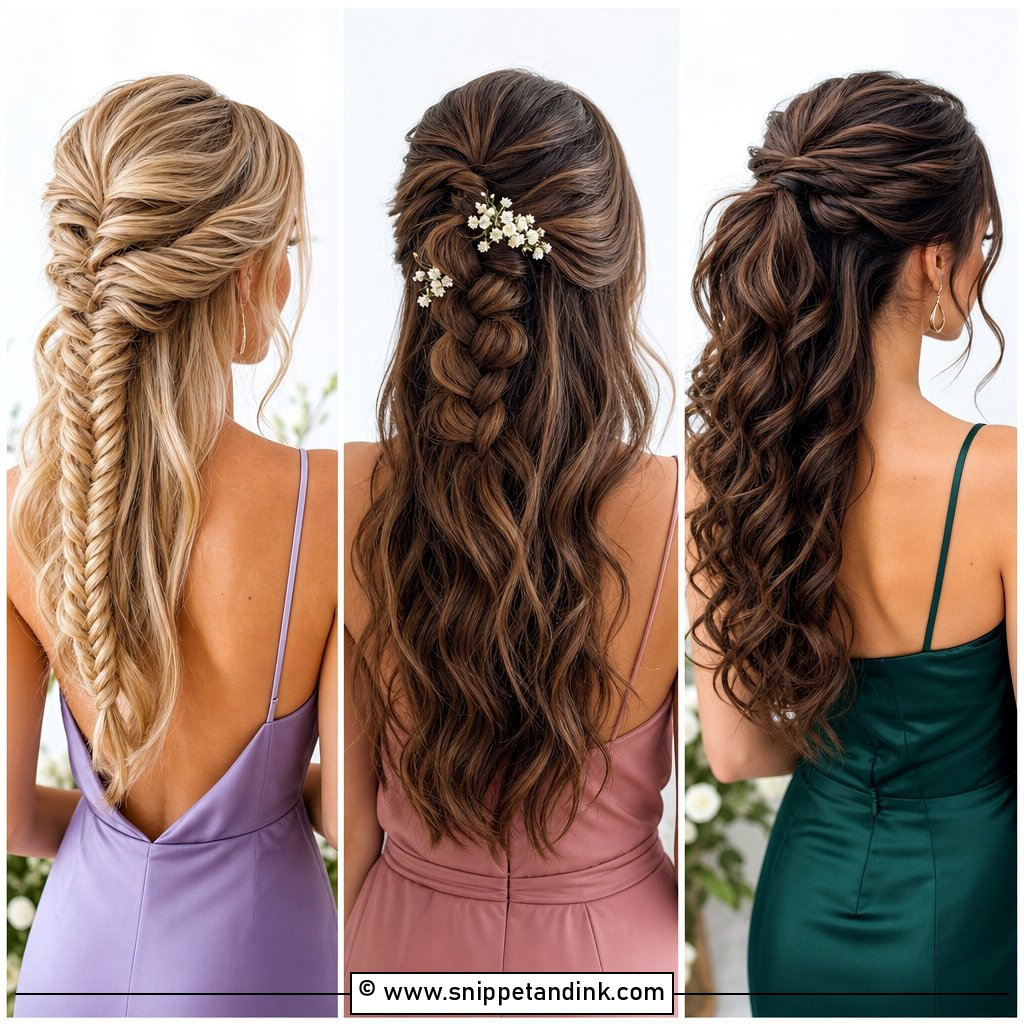
Curling or waving the hair before gathering it into a ponytail gives fullness that photographs as styled rather than everyday. For fine hair, I tease lightly at the crown and inside the ponytail to build volume. Thick hair needs the waves shaped and controlled so the ponytail doesn’t puff out. A center or side part, with or without loose face pieces, finishes it.
16. Bubble Ponytail Bridesmaid Hair
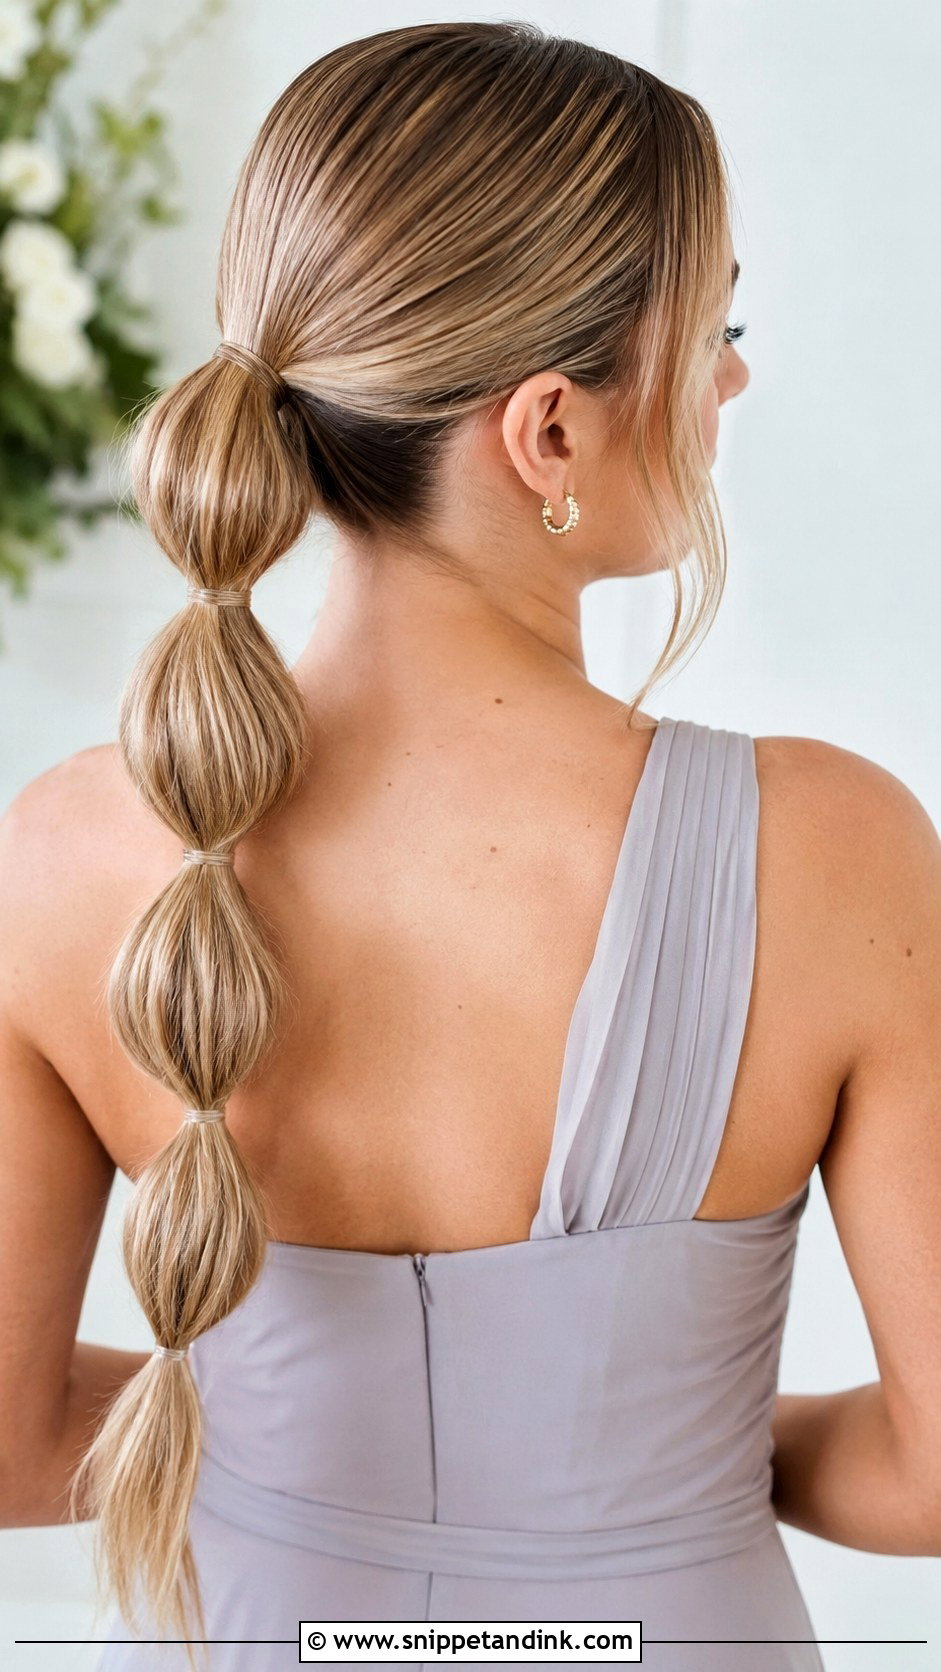
A bubble ponytail looks playful but is one of the most secure styles here, since each section is tied off separately. I tie elastics at even intervals down the length, then pull each section outward gently for shape. Clear elastics or ones matched to the hair color keep the line clean. It needs long hair to show the bubbles. I’d smooth the crown and curl a couple of front pieces to soften it.
17. Braided Ponytail Bridesmaid Hair
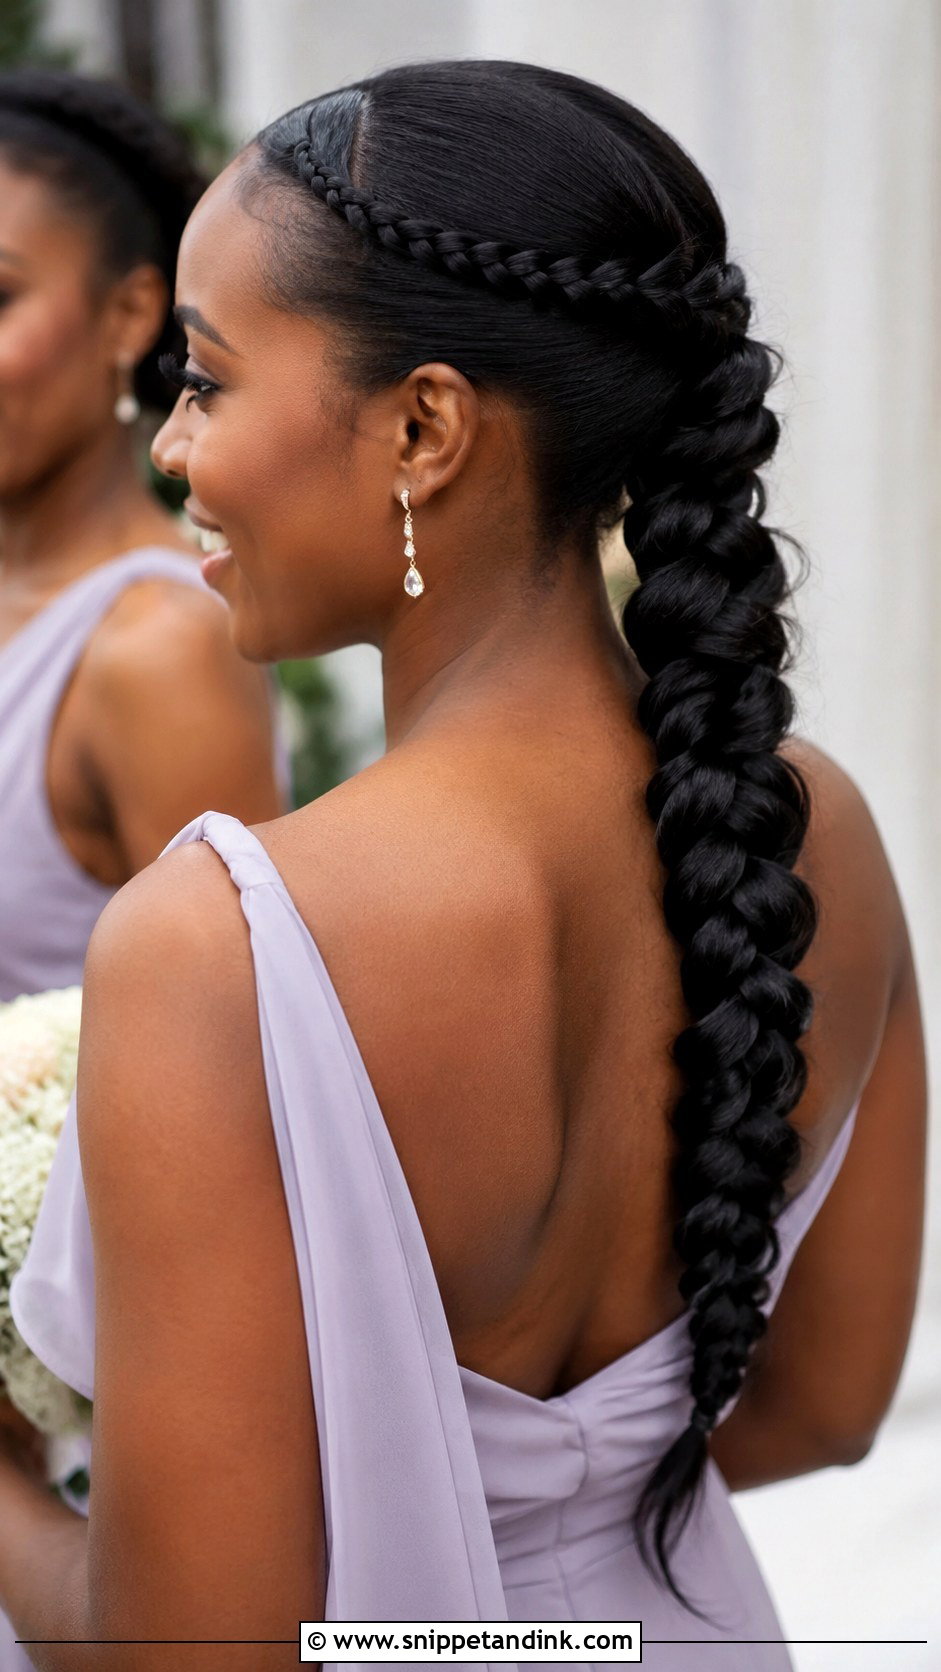
A braided ponytail holds for hours and keeps long, heavy hair under control outdoors, where wind can wreck a loose style. The hair can go into a sleek ponytail and get braided down its length, or small side braids can lead into it. I loosen the braid a little by hand after it’s secured, and finish with a light shine spray so it doesn’t look dry in photos.
18. Crown Braid Bridesmaid Hair
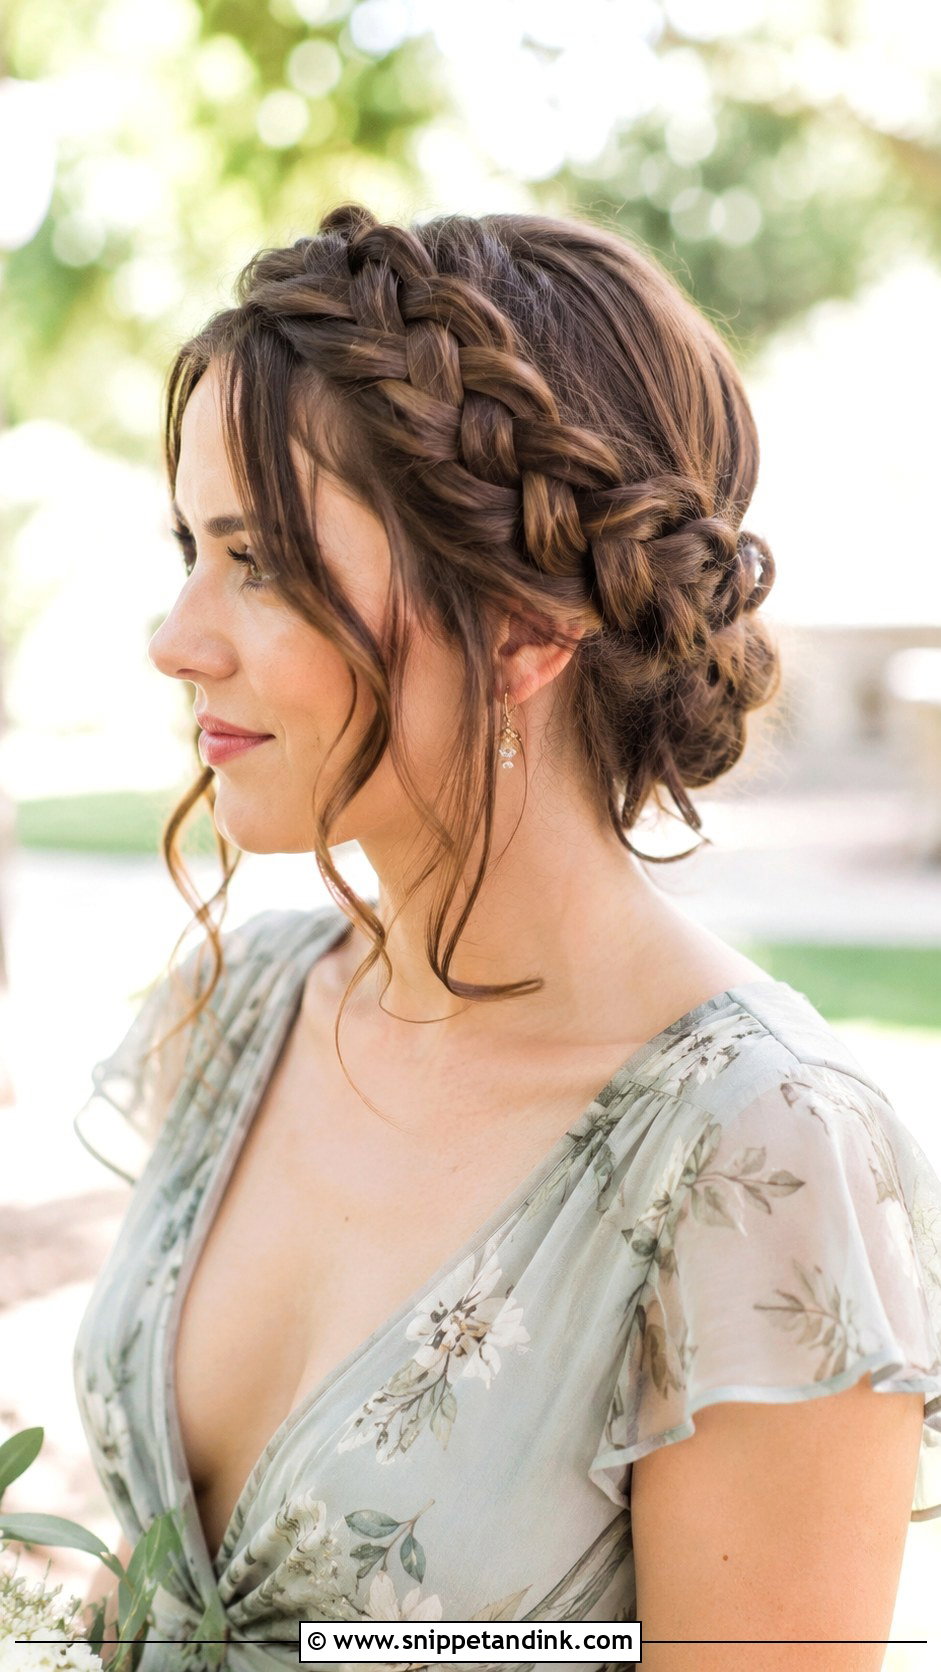
A crown braid sits like a halo around the head or across the top, keeping hair off both the face and the neck. It suits garden and rustic venues and floral dresses. The braid needs to be loosened gently and pinned every few inches, otherwise it slips down at the back once the bridesmaid starts moving. On shorter hair, I braid across the front only and pin the rest into a low bun. Small flowers or pins finish the look.
19. Fishtail Braid Bridesmaid Hair
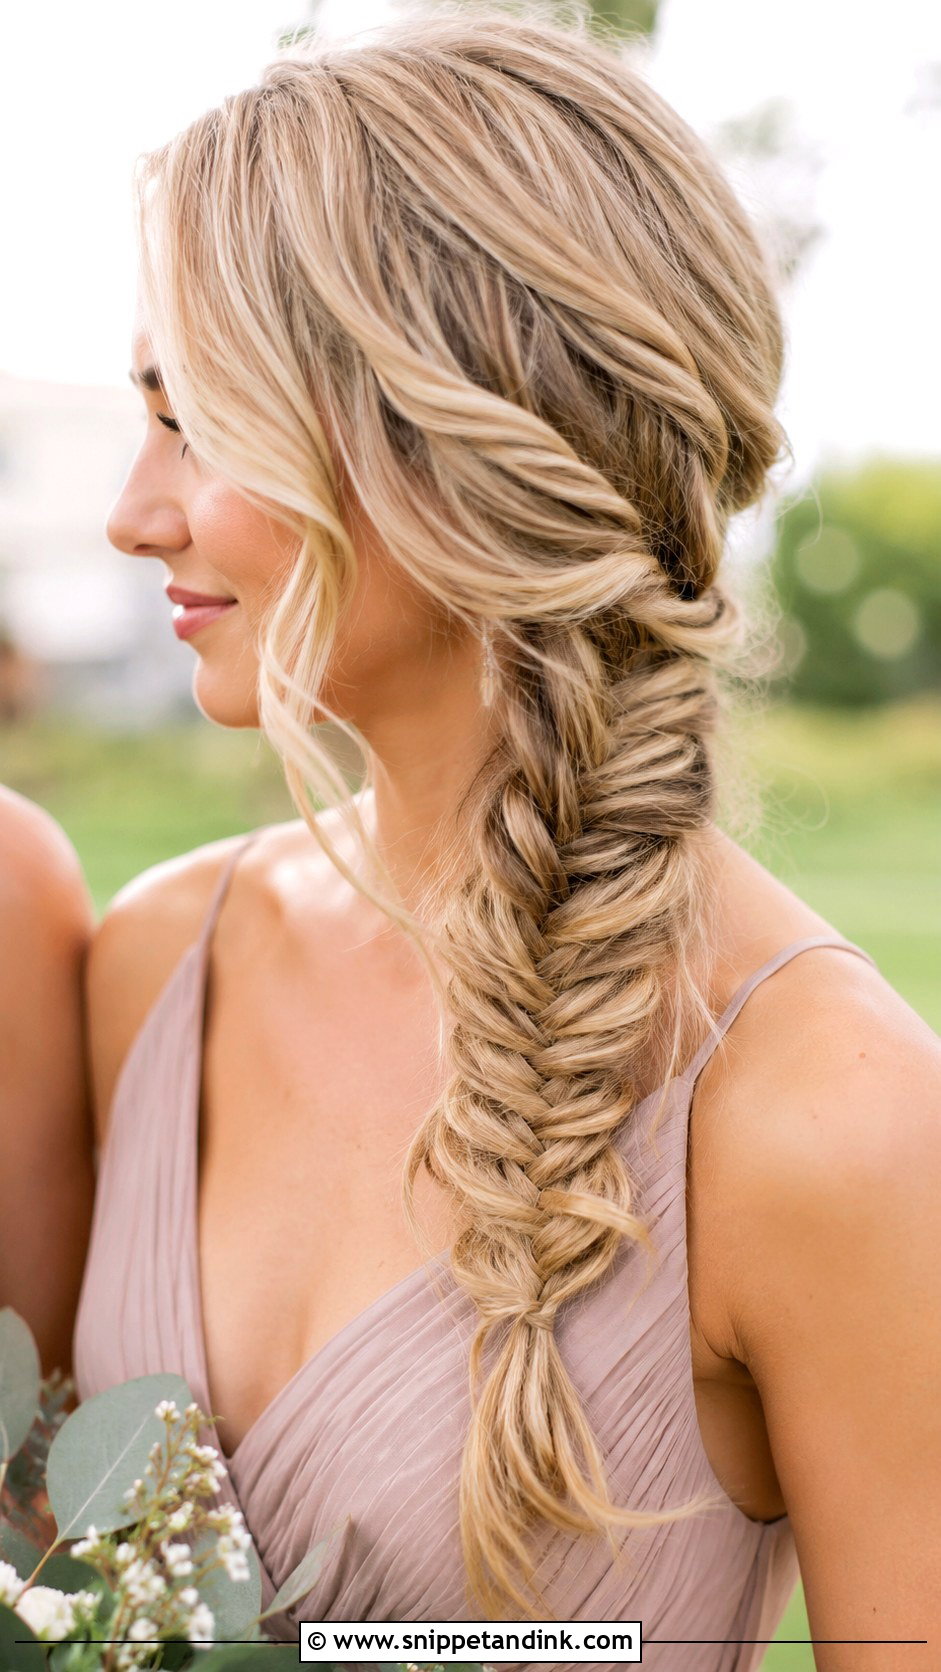
Fishtail braids show dimensional color better than any other braid because the pattern is so fine. They need medium to long hair. I braid it reasonably firmly, then pull small pieces out from the edges to widen it, which gives a fuller, softer finish than braiding loosely. Worn down the back, over the shoulder or as part of a half-up style, it holds through photos and dancing.
20. French Braid Bridesmaid Hair
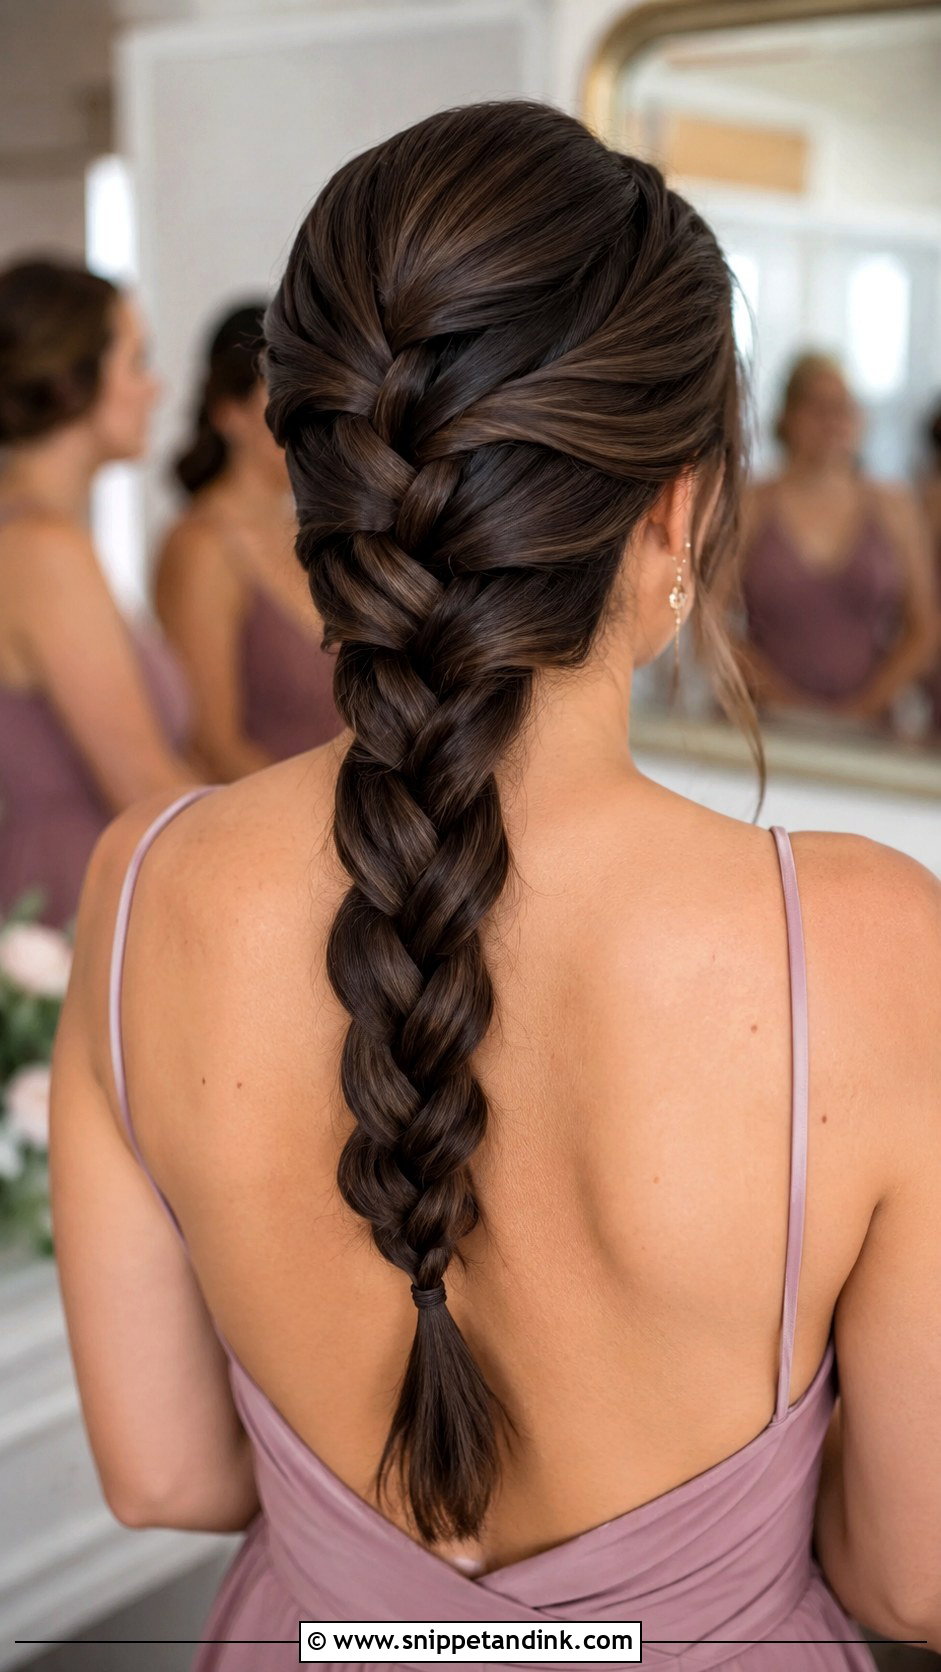
A French braid can look everyday or wedding-ready depending on the finish. I use it as one braid down the back, two braids pinned into a bun, or a side braid that melts into loose waves. It’s very good at holding layers and stray pieces in breezy outdoor settings. Loosen it slightly, smooth the edges and leave a few curled front pieces, and it looks dressed up. It suits medium to long hair and natural texture.
21. Dutch Braid Bridesmaid Hair
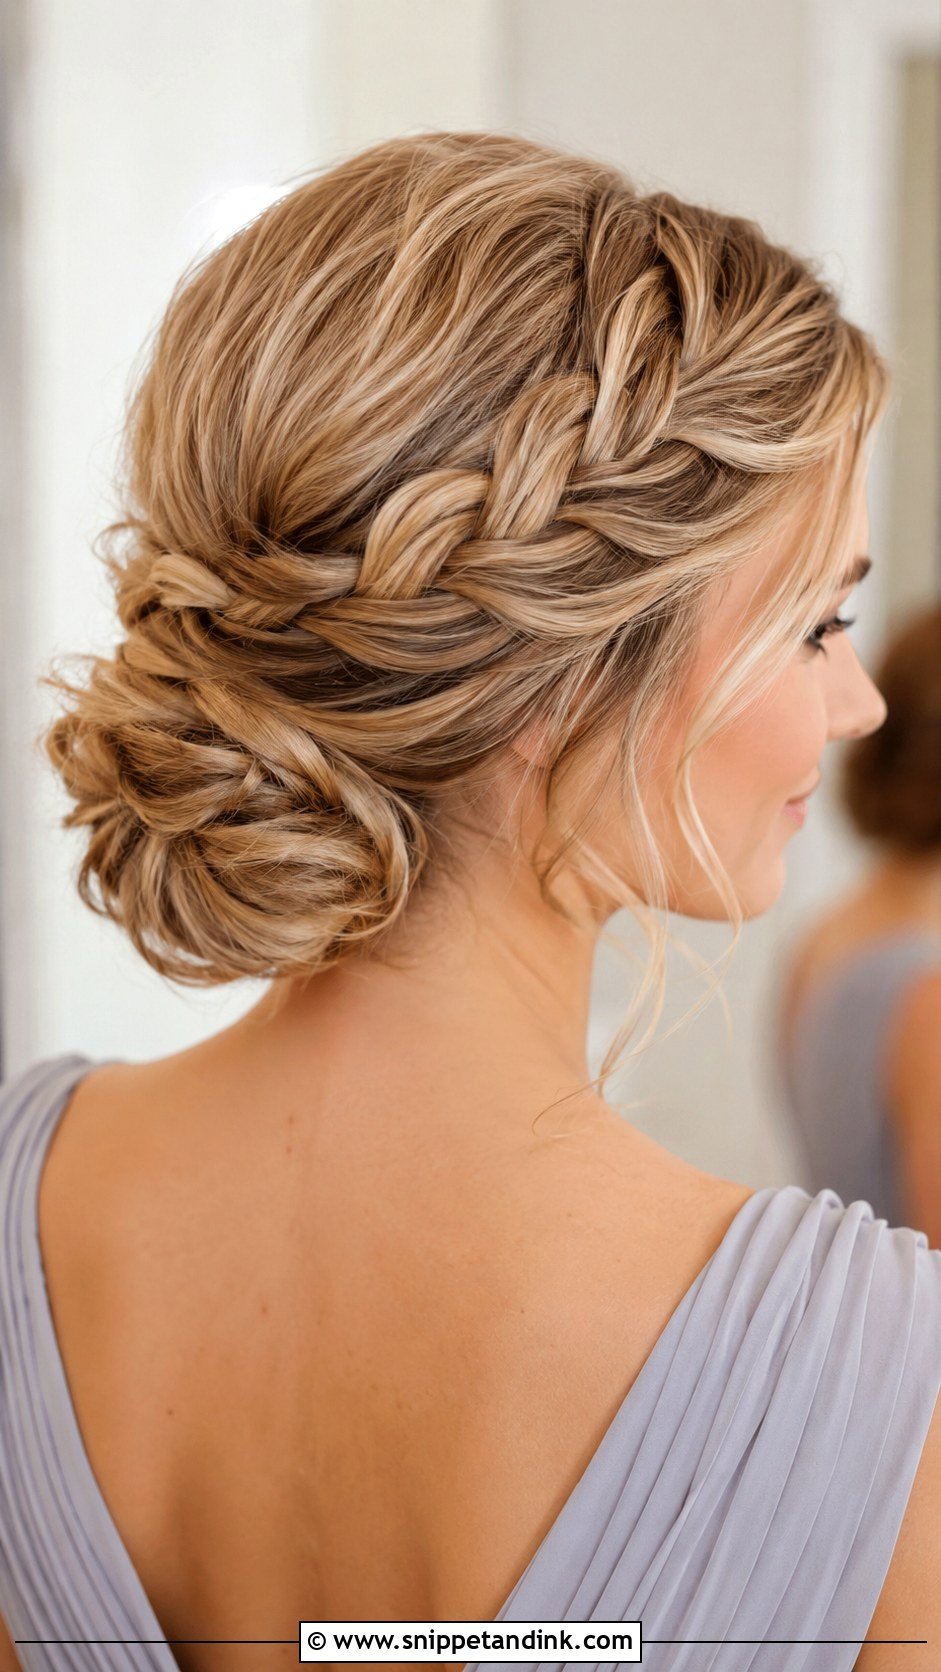
A Dutch braid sits on top of the hair rather than blending in, so it shows up clearly in photos, especially with highlights or natural texture. I’ll lead it into a bun, ponytail or loose waves. For a simple wedding look, one side Dutch braid pinned into a low bun is secure and tidy. Pancaking the braid, pulling it apart slightly, makes it look fuller. Thick hair stays controlled in this style.
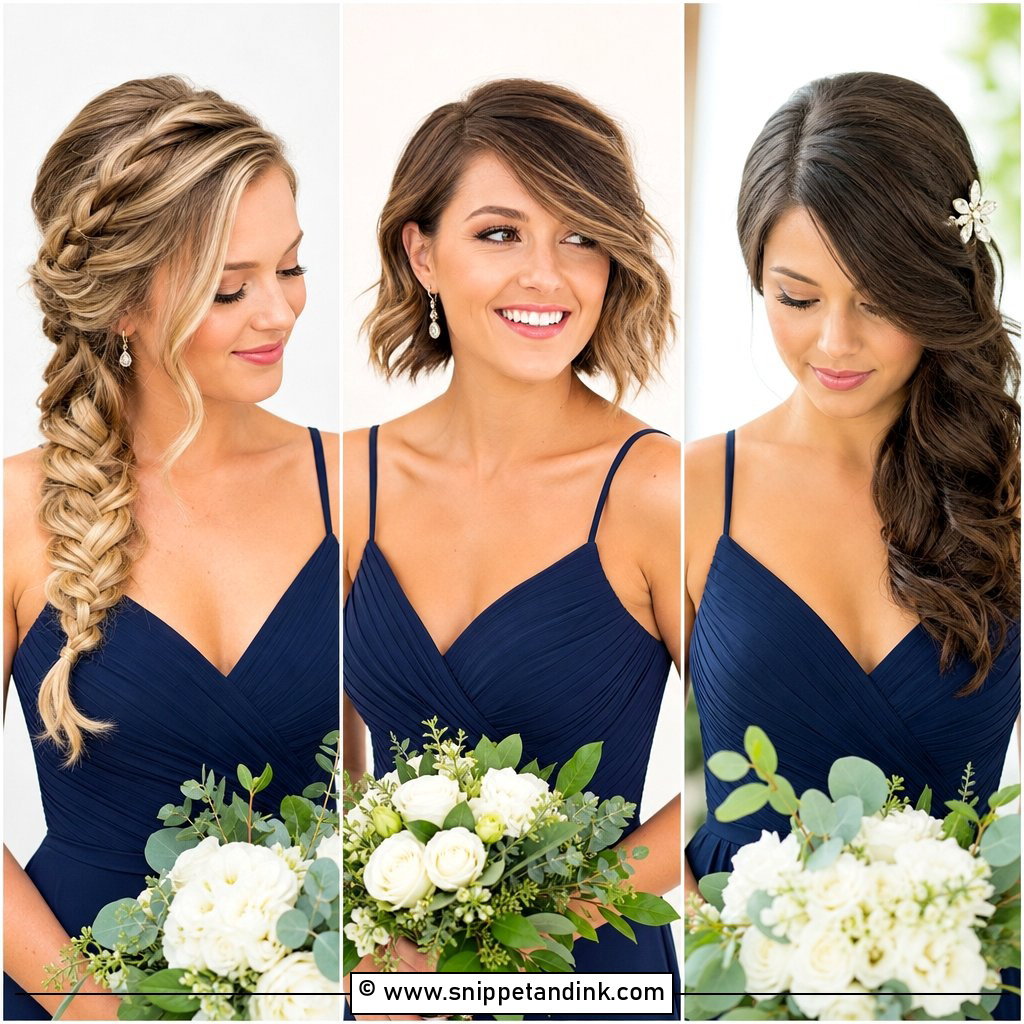
22. Short Bob Bridesmaid Hair
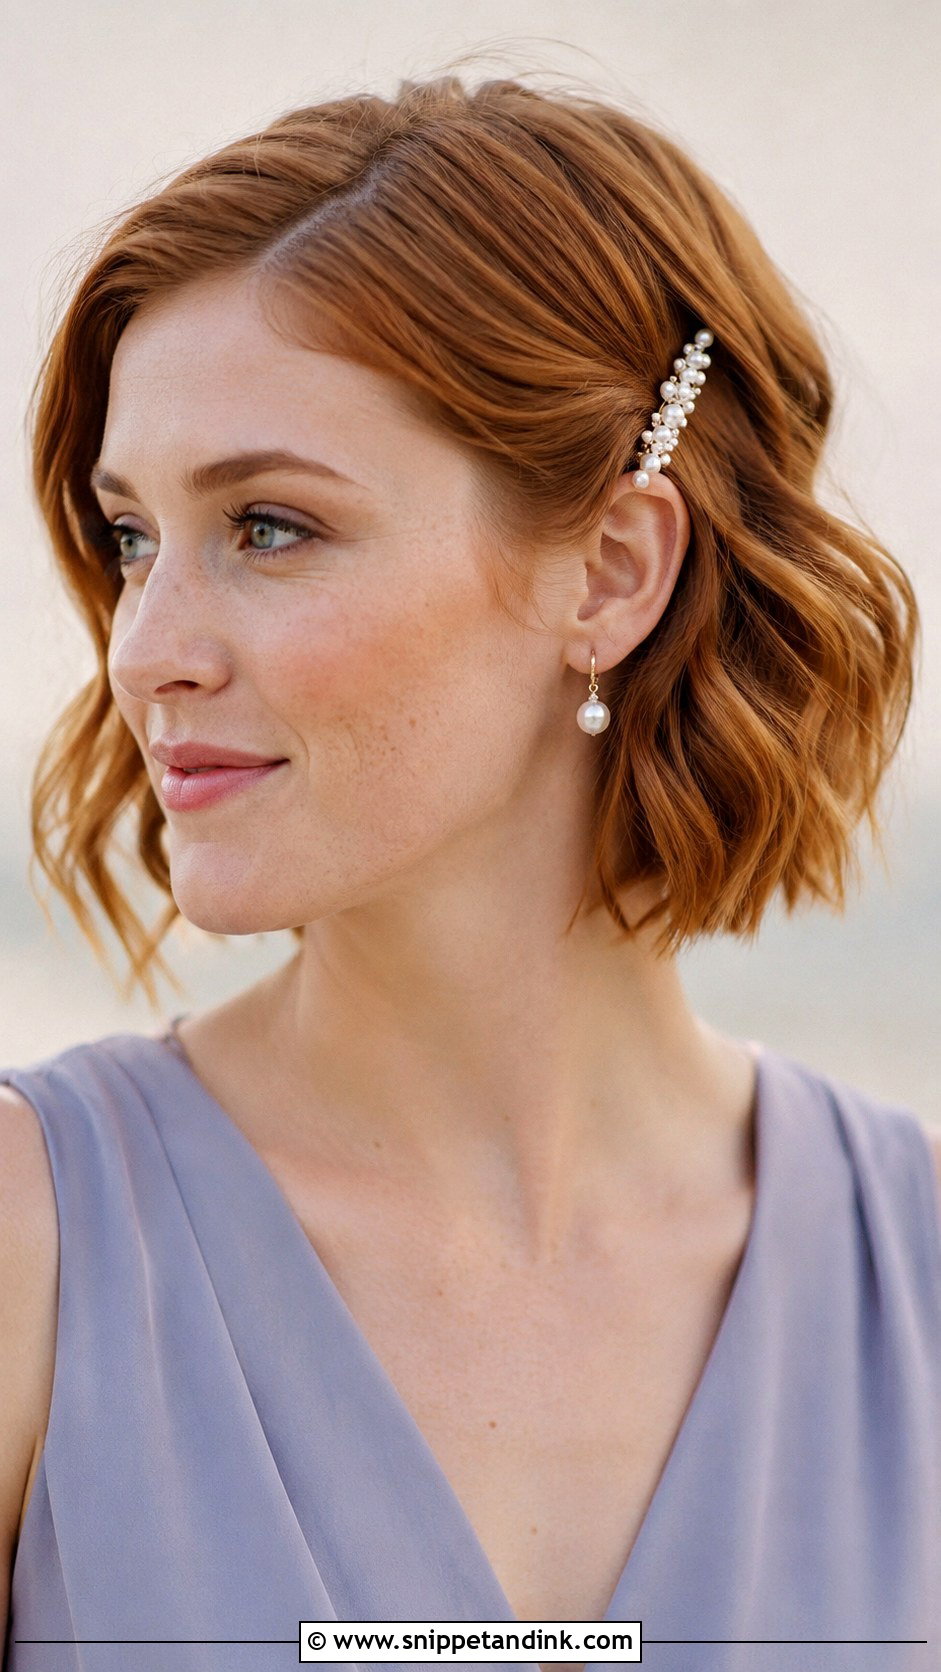
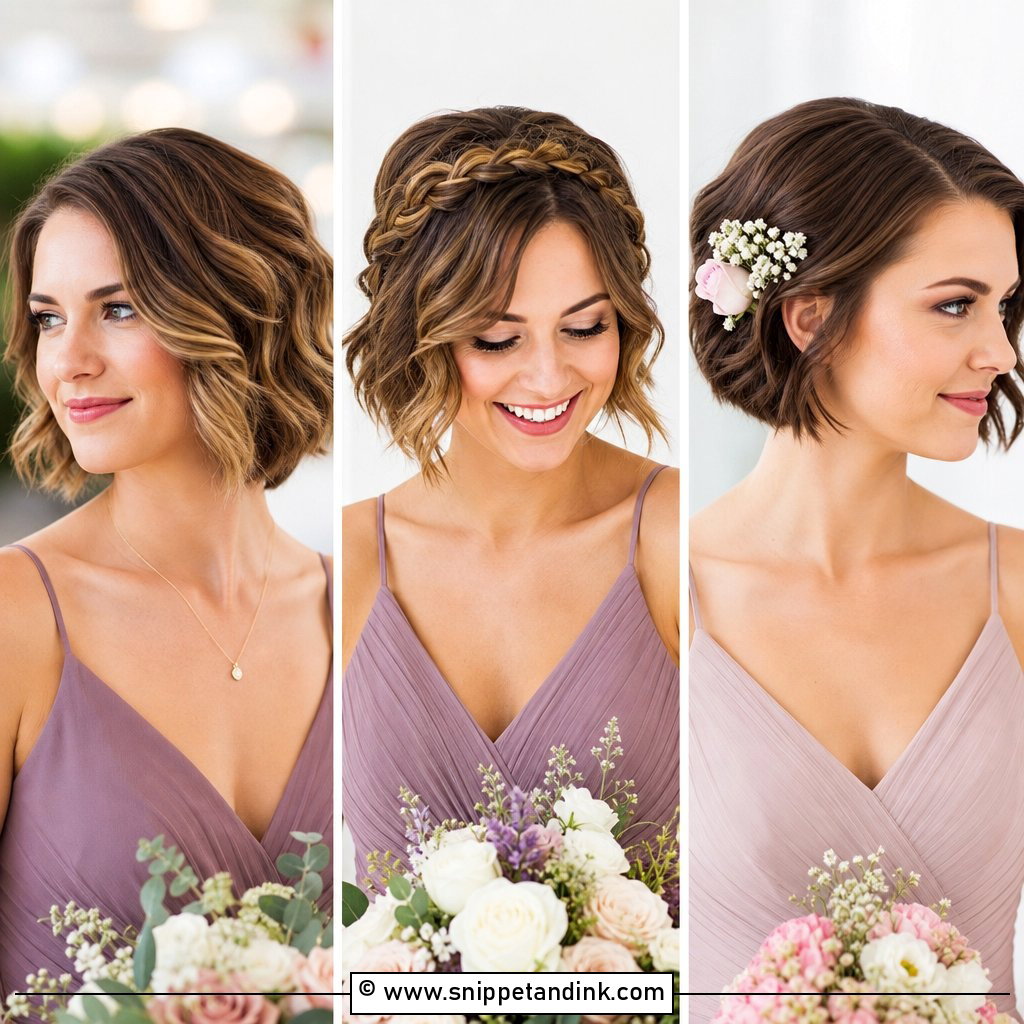
A bob can look as polished as long hair; it just needs a smooth finish, because there’s nowhere to hide frizzy ends. Soft waves add movement, while a sleek tucked-behind-the-ear style feels modern and clean. A side part makes the bob look fuller; a center part looks balanced. A small barrette or pearl pins add a wedding touch without overpowering the cut. Pins slide out of short, silky hair easily, so I spray the pin itself with a little hairspray before sliding it in.
23. Lob Bridesmaid Hair
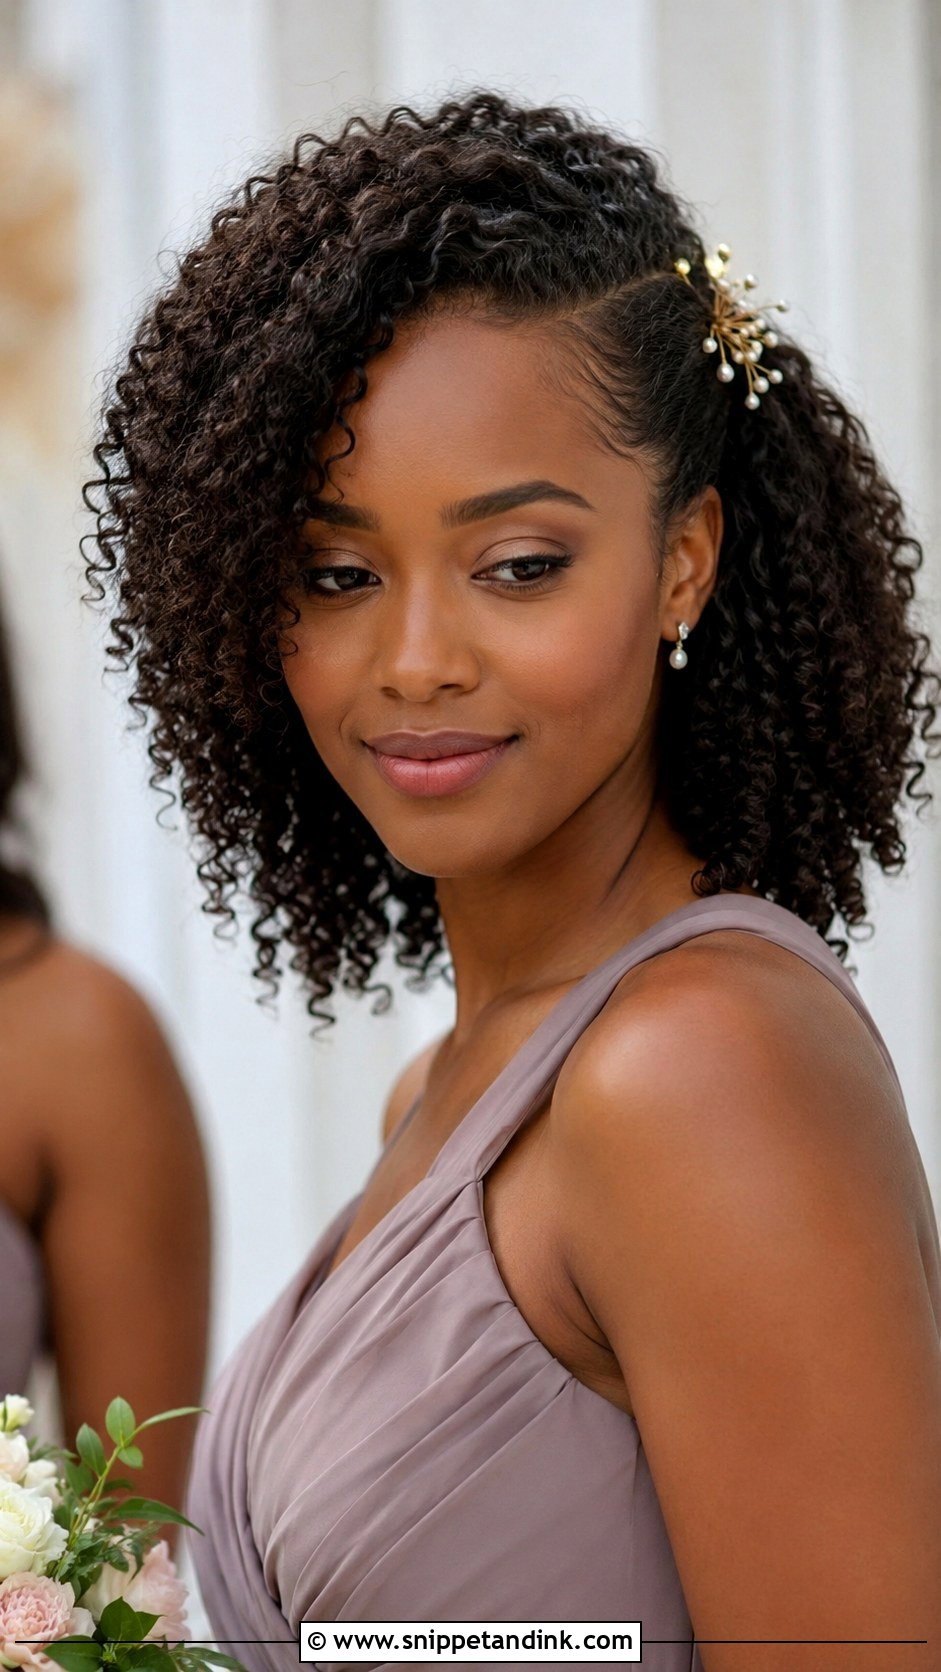
A lob has enough length for waves, pins and half-up looks, but it’s still light enough to be comfortable for dancing and warm venues. Soft bends through the middle and ends look modern. A half-up twist keeps the front pieces out of the face, or you can tuck one side behind the ear with a small clip. I’d finish with texturizing spray rather than strong hairspray, which keeps the shape without stiffness.
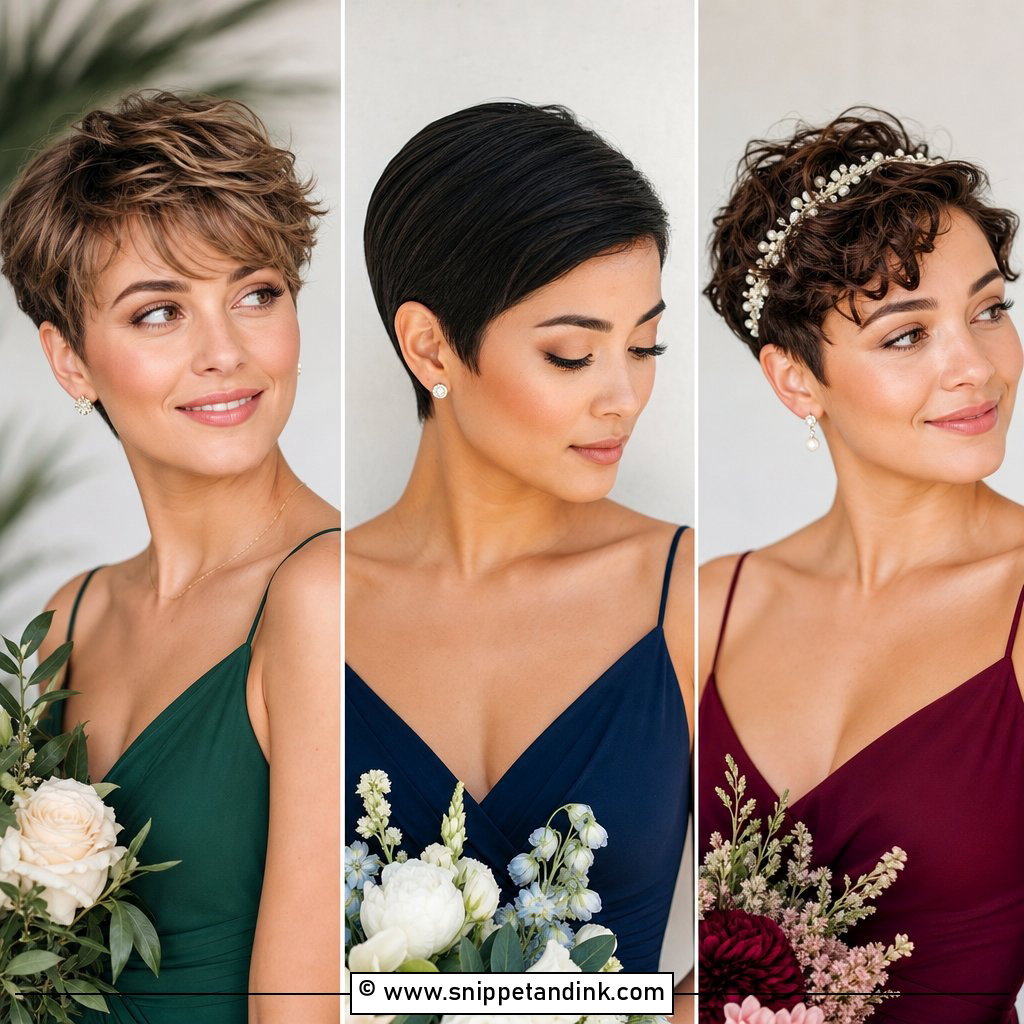
24. Pixie Bridesmaid Hair
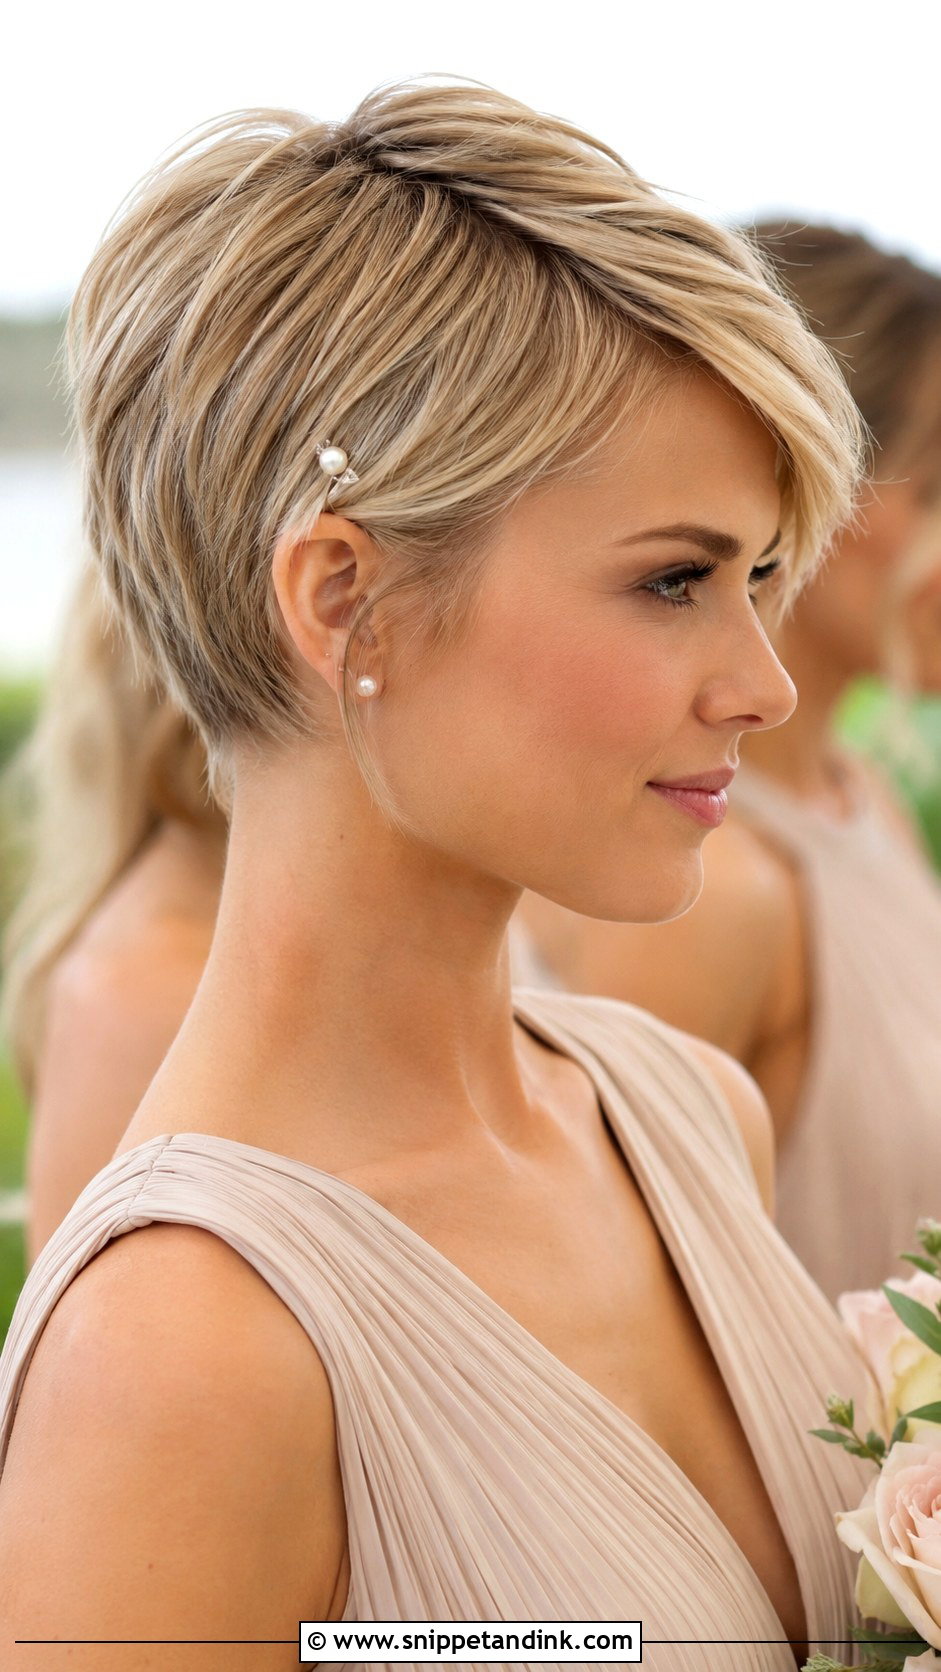
With a pixie, there’s less to style but every detail shows: texture, shine and how the front pieces sit. I use a small amount of styling cream to define the layers, either swept softly or sleek and side-parted. A small comb or decorative pin can work if the wedding allows. Pixies are also the easiest of all for the day itself, because nothing can fall down. Ask for a trim about a week before, not the day before, so the cut has time to settle.
25. Natural Curls Bridesmaid Hair
Natural curls look their best when they’re hydrated and defined, not hidden. They can be worn down, half up or pinned to one side. I choose between curl cream, gel or mousse based on the curl pattern, and then the hard part: let the curls dry completely before anyone touches them, because handling damp curls causes frizz that no product fixes. A few pins can lift the crown or secure the front. Personal and full of movement, this is a style that suits the person rather than a trend.
26. Curly Updo Bridesmaid Hair
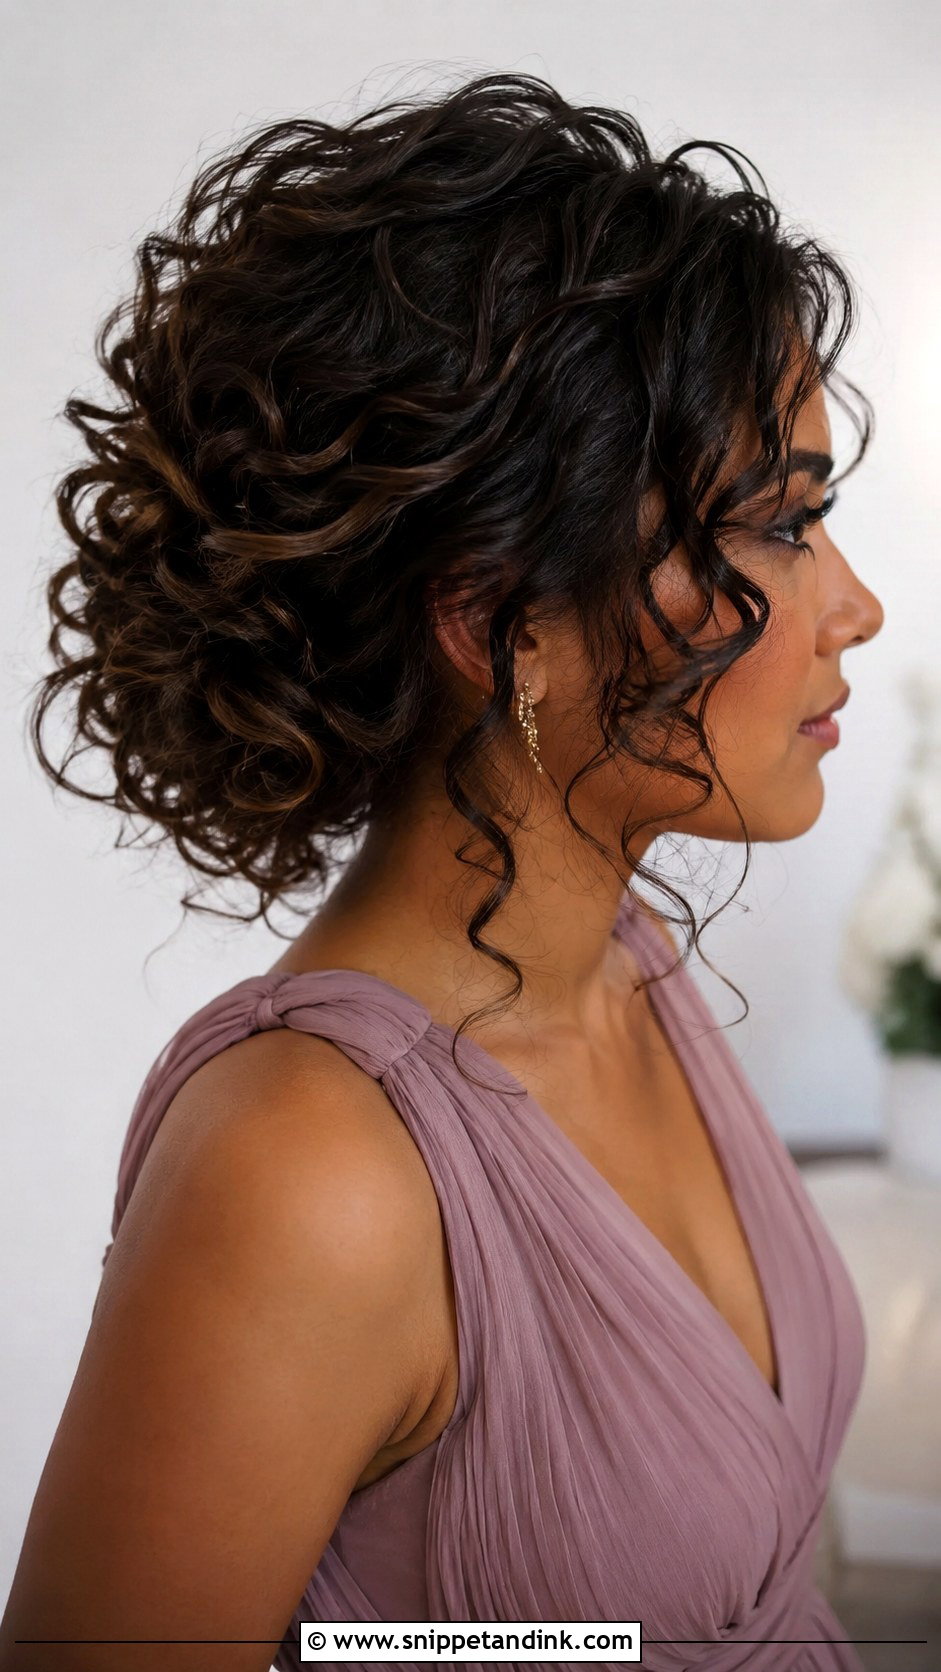
Curly updos give texture and security together. I pin the curls into a soft bun, puff or gathered shape, keeping volume around the crown and face. Curly hair grips pins much better than straight hair, so it needs little teasing. I use strong pins and a flexible hairspray so the shape holds without flattening the curls. A few defined pieces around the face soften it.
27. Straight Bridesmaid Hair
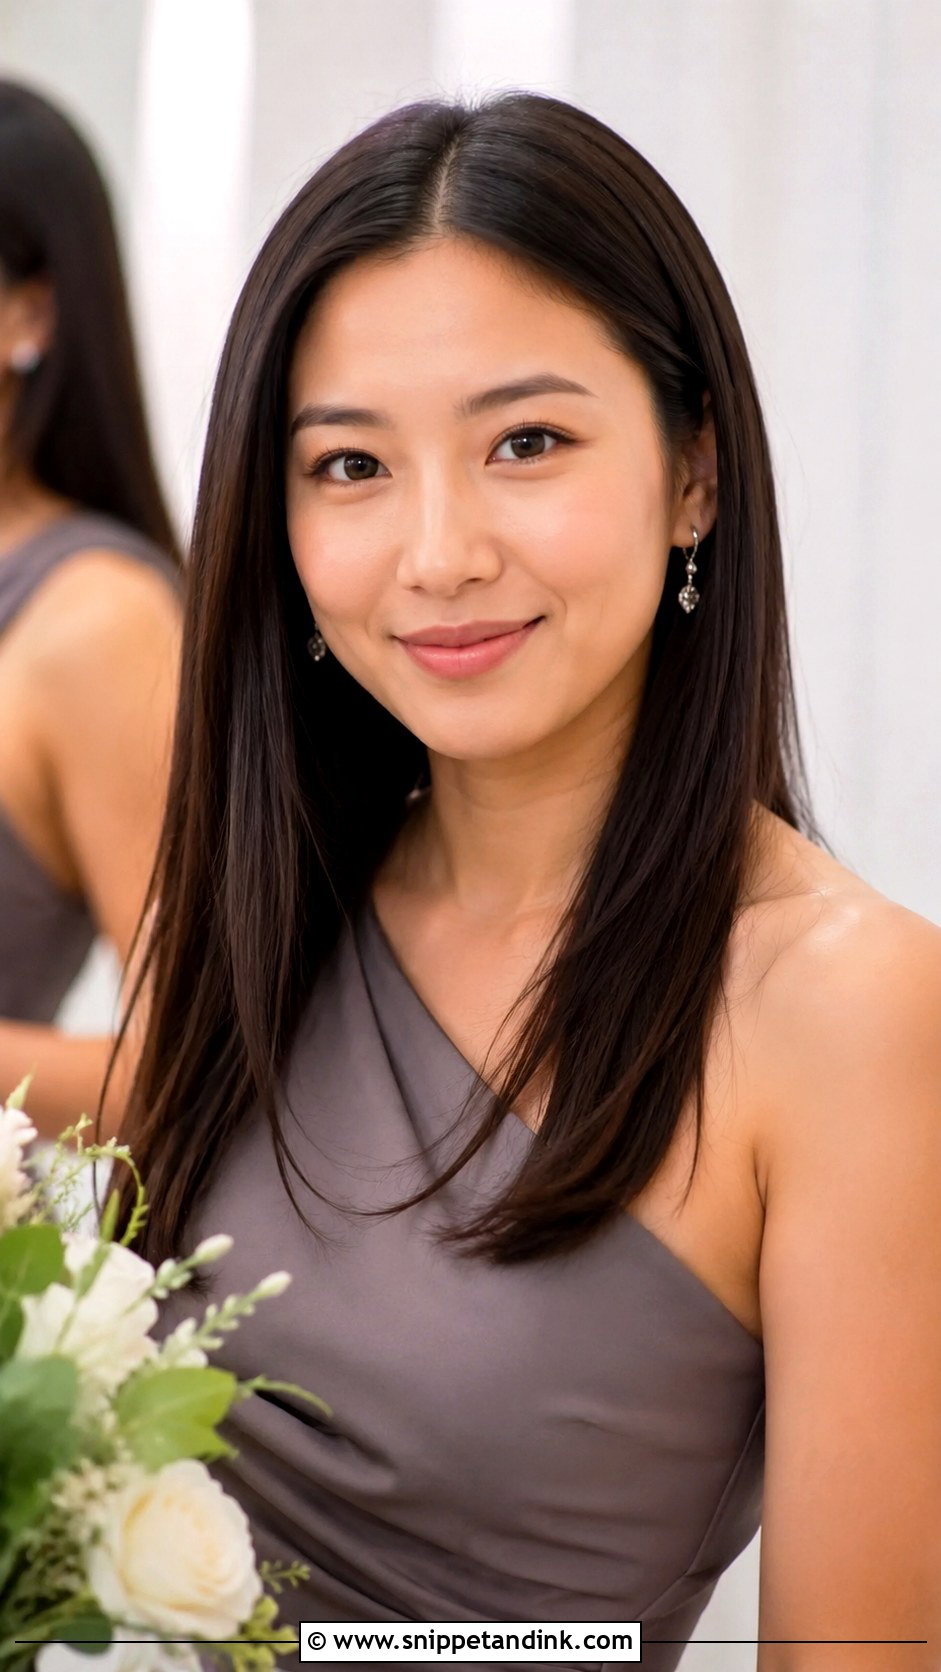
Straight hair can look flat and unfinished in photos unless it has shape and shine. I add a little root volume and bend the ends slightly in or out so they don’t hang limp. A center part, side part or one side tucked behind the ear all work. Smooth ends make it look styled rather than casual, so a fresh trim and shine serum are worth it. It sits well with minimalist weddings and modern dresses.
28. Side Part Bridesmaid Hair
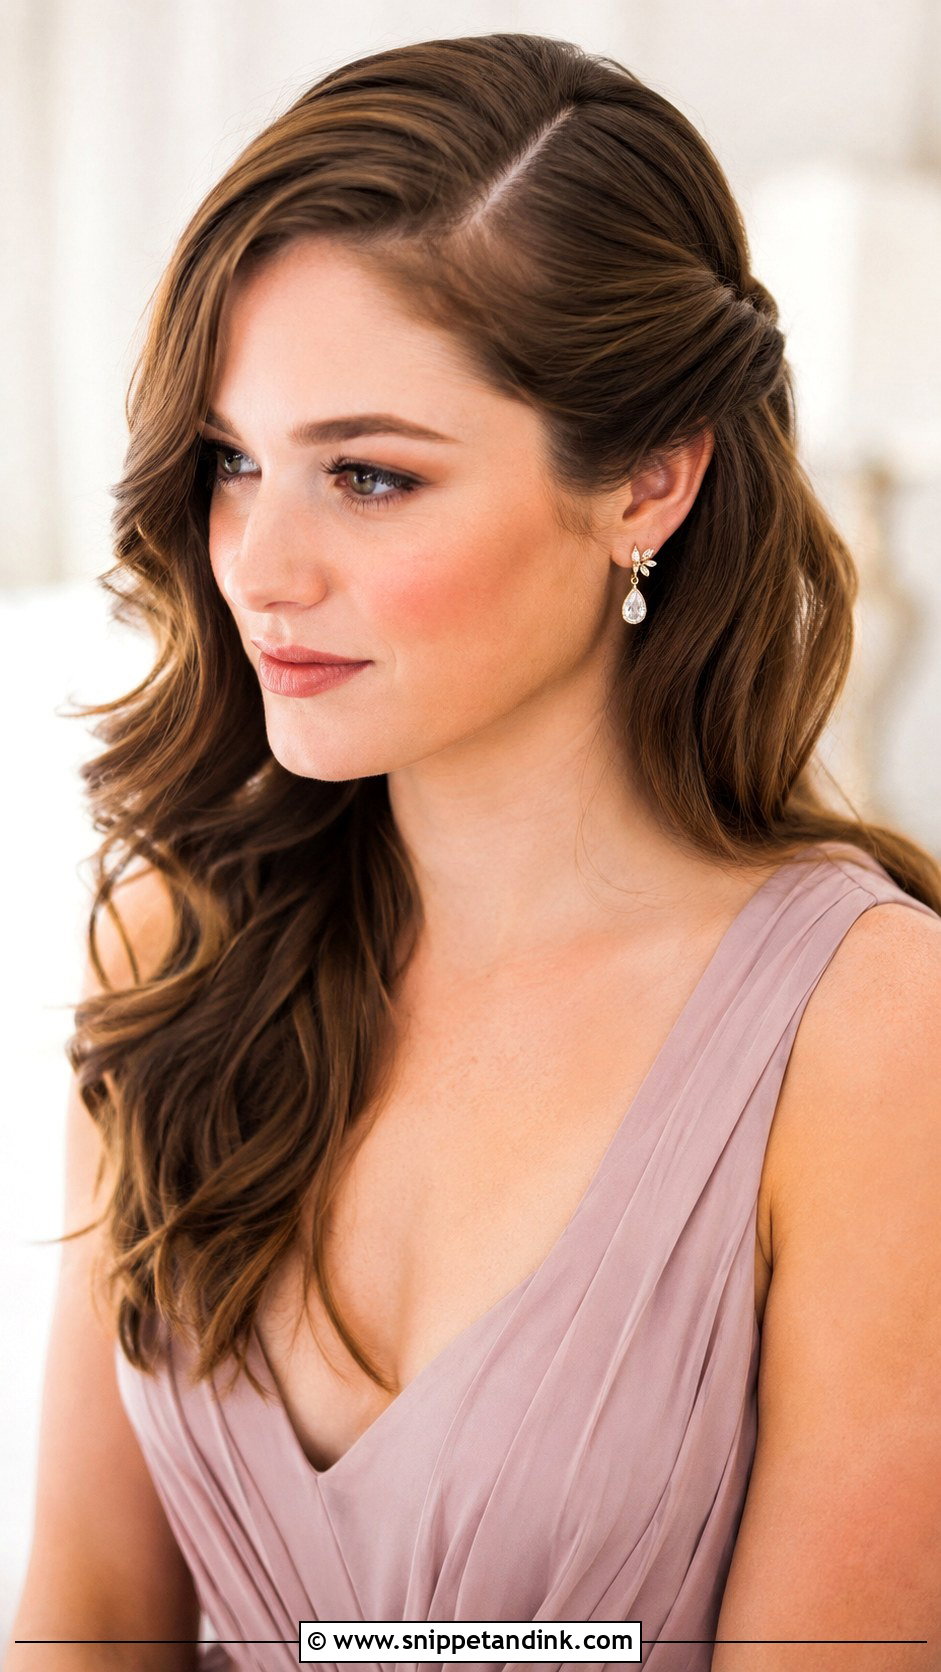
A side part softens a face and adds fullness at the crown, and it works with almost any style: waves, curls, straight hair, low buns, ponytails. It’s my go-to for unifying a bridal party with varied cuts, since everyone can wear it. Pair it with loose waves and one side pinned back for a romantic look, or with a low bun for a formal one.
29. Center Part Bridesmaid Hair
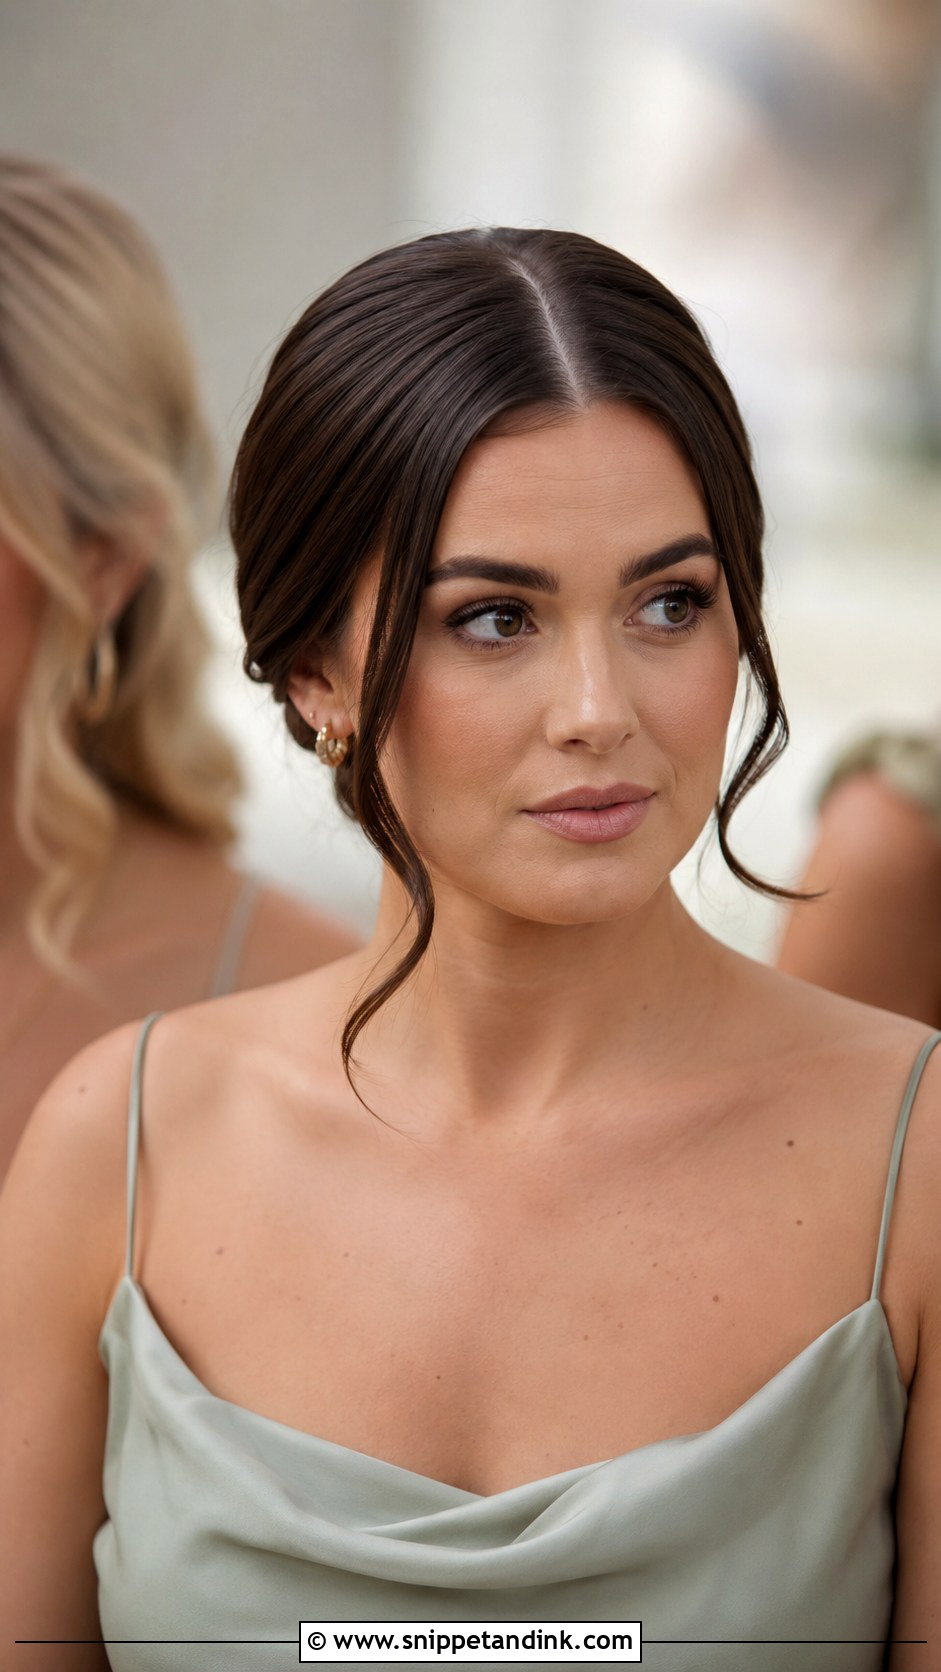
A center part looks clean and modern and makes classic buns and ponytails look current without any extra steps. I make the part with a fine-tooth comb and smooth the top with a little styling cream. Symmetry is unforgiving on uneven hairlines, so I check the part straight-on in the mirror before setting anything. Soft face-framing pieces or bends around the cheekbones keep it from looking harsh.
30. Hair Clip Bridesmaid Hair
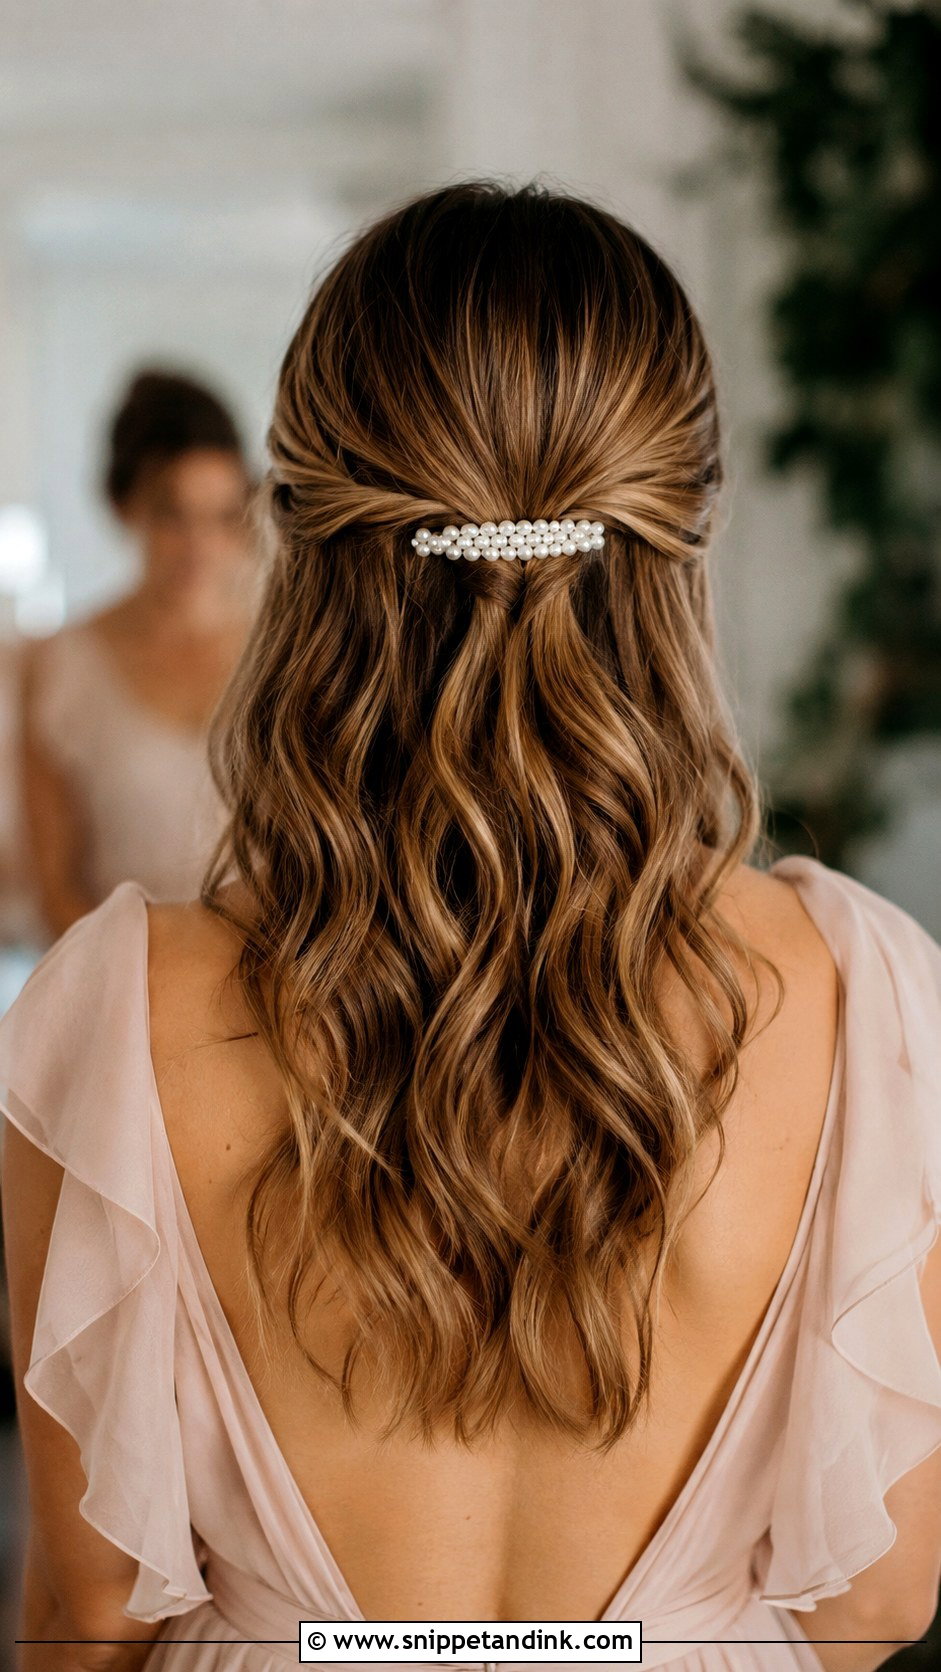
A clip turns a simple base into a styled look, and it can do structural work too. The base can be loose waves, a low bun, a half-up style or a sleek bob. Pearl clips, gold barrettes, floral pins and plain metal clips all work, depending on the theme. I always place the clip where it also holds hair, such as above one ear or at the back of a half-up style, so it isn’t purely decorative. Heavy clips slide out of silky hair; a pair of crossed bobby pins underneath gives them grip.
One Look, Six Different Heads of Hair
Most bridal parties include a pixie, a lob, very long hair and a curly texture at the same time. Asking all of them to wear the same bun rarely works. Instead, I pick one or two things they share and let the rest adapt.
- The same part, center or side, across the whole group.
- The same height: everything at the nape, or everything lifted.
- One shared accessory, worn in the same place on each head.
- A shared finish: everyone glossy and smooth, or everyone soft and textured.
Two of those in common usually makes a group look intentional in the photos, even when the actual styles differ.
Pins, Elastics and Spray to Pass Around Before the Ceremony
I leave a small bag with the maid of honor: bobby pins and U-pins matching the hair colors in the group, a few clear elastics, a travel hairspray and a fine comb. Bobby pins go in with the ridged side down, which grips better. If a curl falls, twist it back around a finger, hold it for a few seconds and pin it in place rather than reaching for more spray.
A Bridal Party That Matches Without Looking Cloned
Simple bridesmaid hair doesn’t mean boring. The right style suits the wedding mood and the person wearing it, and stays comfortable from getting-ready photos to the last dance. My approach is to agree one shared direction, then adjust each look to the hair in front of me. That keeps the group cohesive without forcing everyone into a style that doesn’t work on their hair. With proper prep, pins and finishing spray, any of these will hold all day.
You'll Like These Ideas:


Leave a Reply