
Your hands end up in more photos than almost anything else you wear: the ring swap, the bouquet hold, the hand-on-his-shoulder candid, the close-up of the band. That is why I plan a bridal set from the camera backwards. A colour that reads as clean at arm’s length can look streaky at macro distance, and a shape that feels fine at the salon can catch on tulle by the second hour. Soft French tips, milky white nails, pearl details and sheer chrome all earn their place below, but each one behaves differently once it is worn for a full day. I’ve noted what I check first on every design, and who I’d steer toward something else.
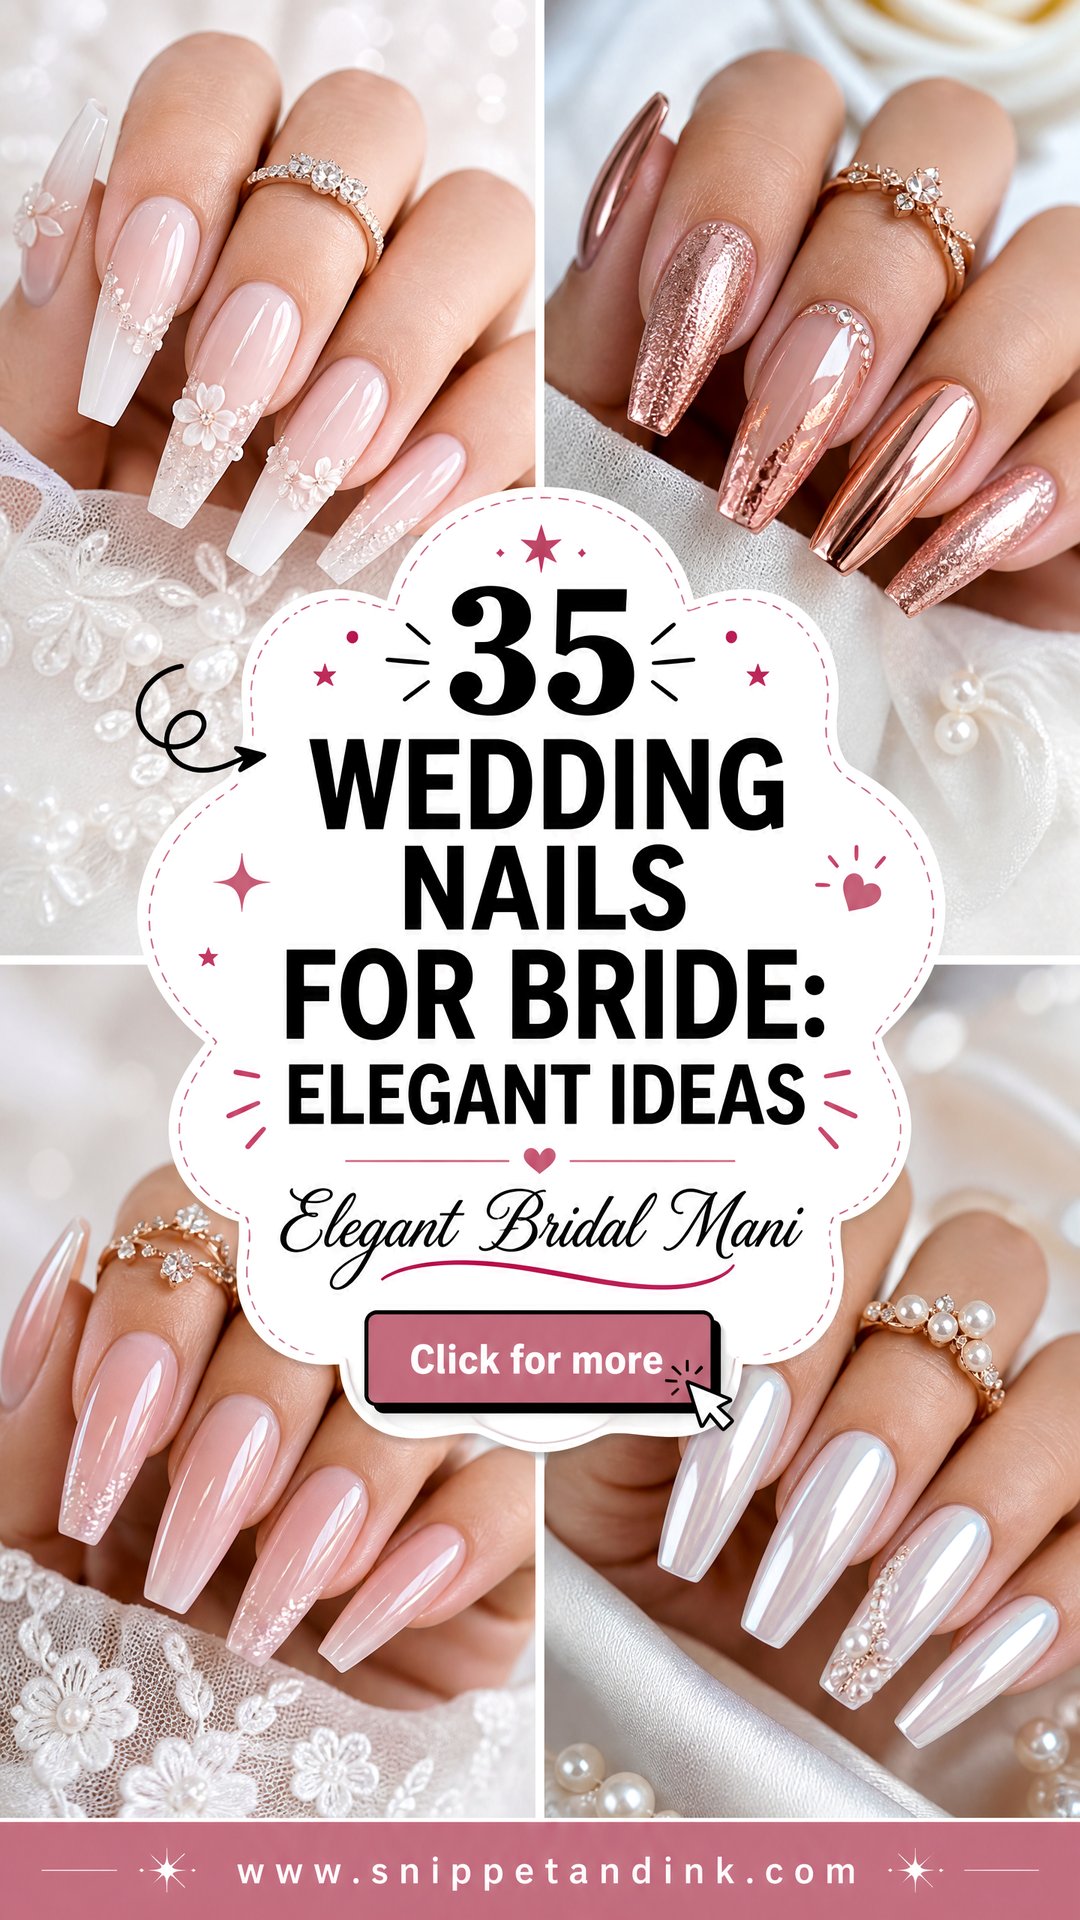
Gel, Builder or Press-Ons, and How Close to the Date Each Should Go On
Most of the bridal sets I do are gel or a builder gel overlay, because they cure hard under a lamp and hold their shine for the honeymoon. Regular polish looks just as good on the first evening, but it can chip by the next morning, so I only suggest it for brides who change their nails every few days anyway. Press-ons are a fair option if you are doing your own, provided they are sized properly and glued rather than stuck with tabs.
- Trial: four to six weeks out if you want extensions, a new shape or nail art you have never worn. It shows how the length feels and how the colour sits next to your ring.
- Final appointment: one to three days before the wedding. Any earlier and you will see regrowth at the cuticle in close-ups; the same morning is too rushed.
- Spray tan or self-tanner first, nails after. Tanner stains a fresh manicure and settles into the cuticles.
- Bring the ring, a fabric swatch and a bouquet photo. I judge colour against those, not against the bottle.
If your natural nails peel or break, tell me at the trial. I’ll add a thin builder layer for strength rather than relying on length alone, and we can decide whether a shorter shape will be kinder on the day.
1. Classic French Wedding Nails
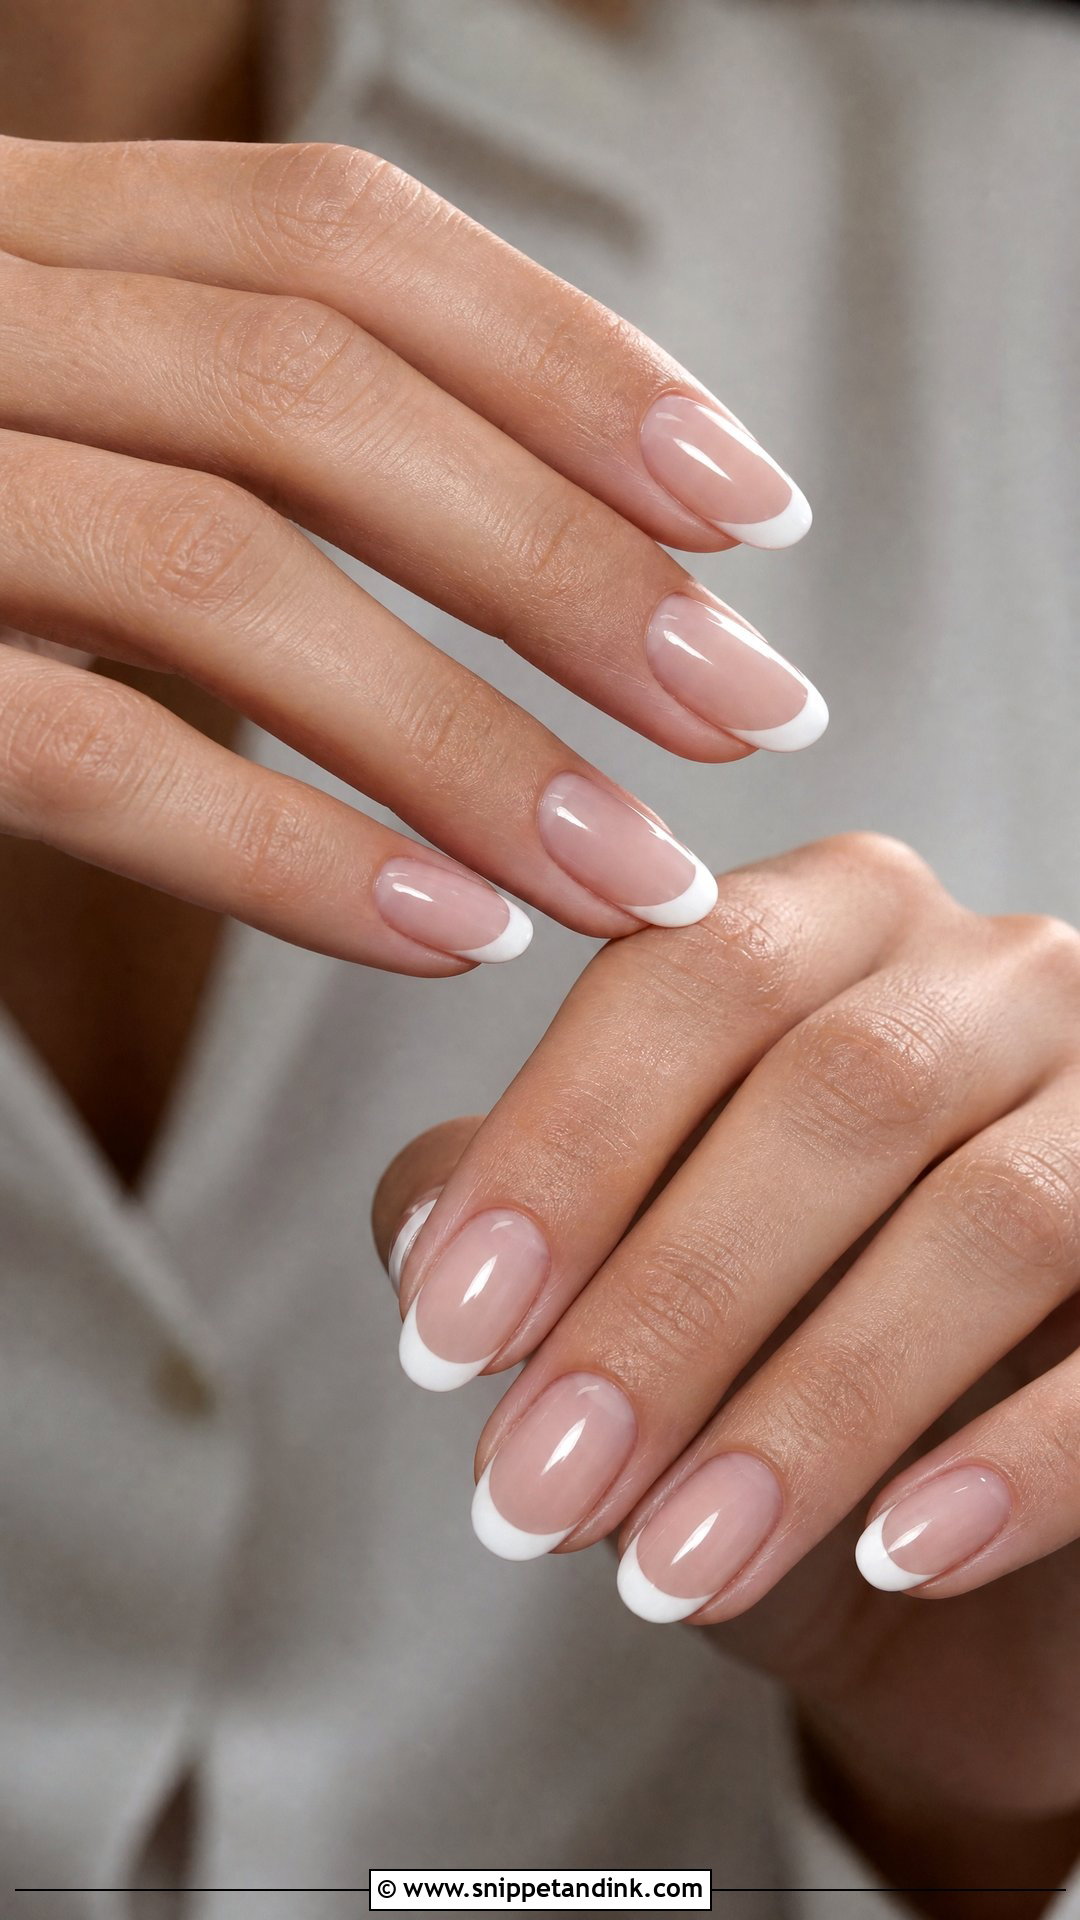
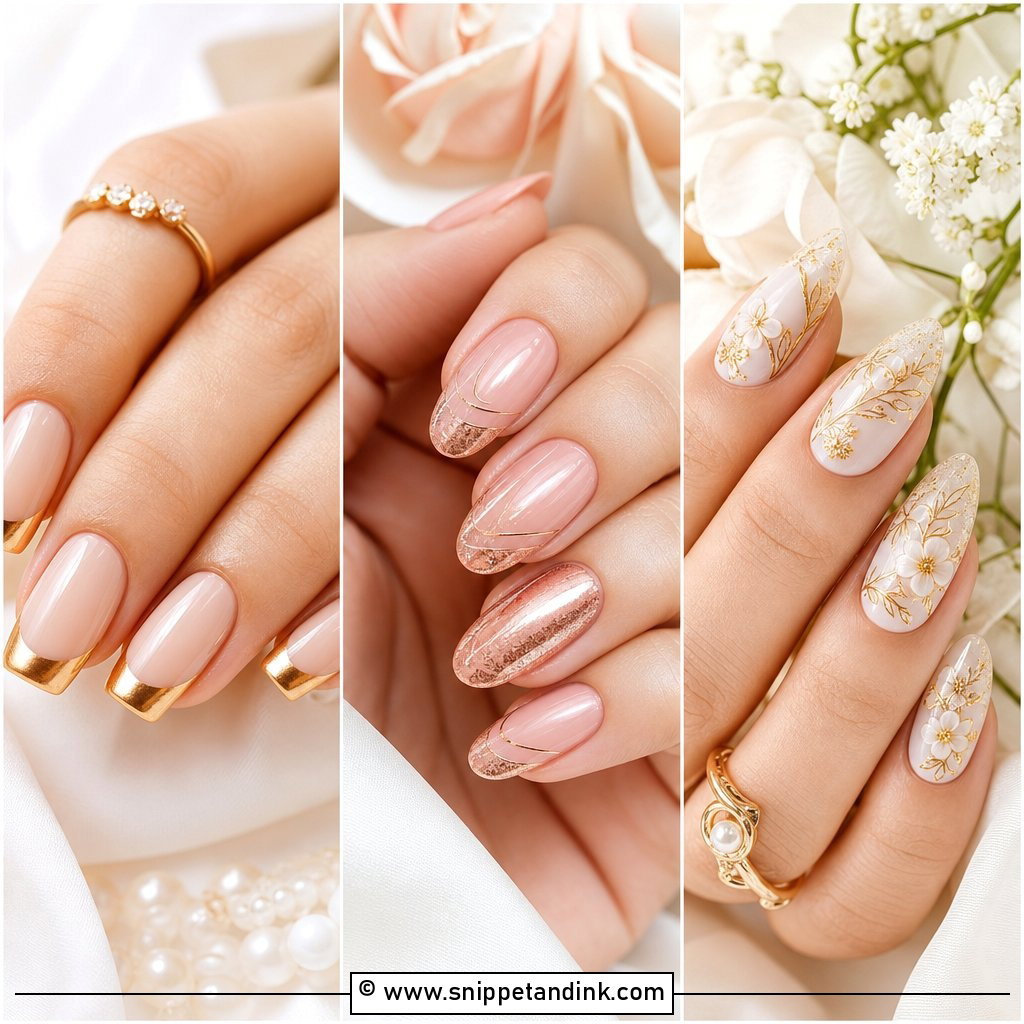
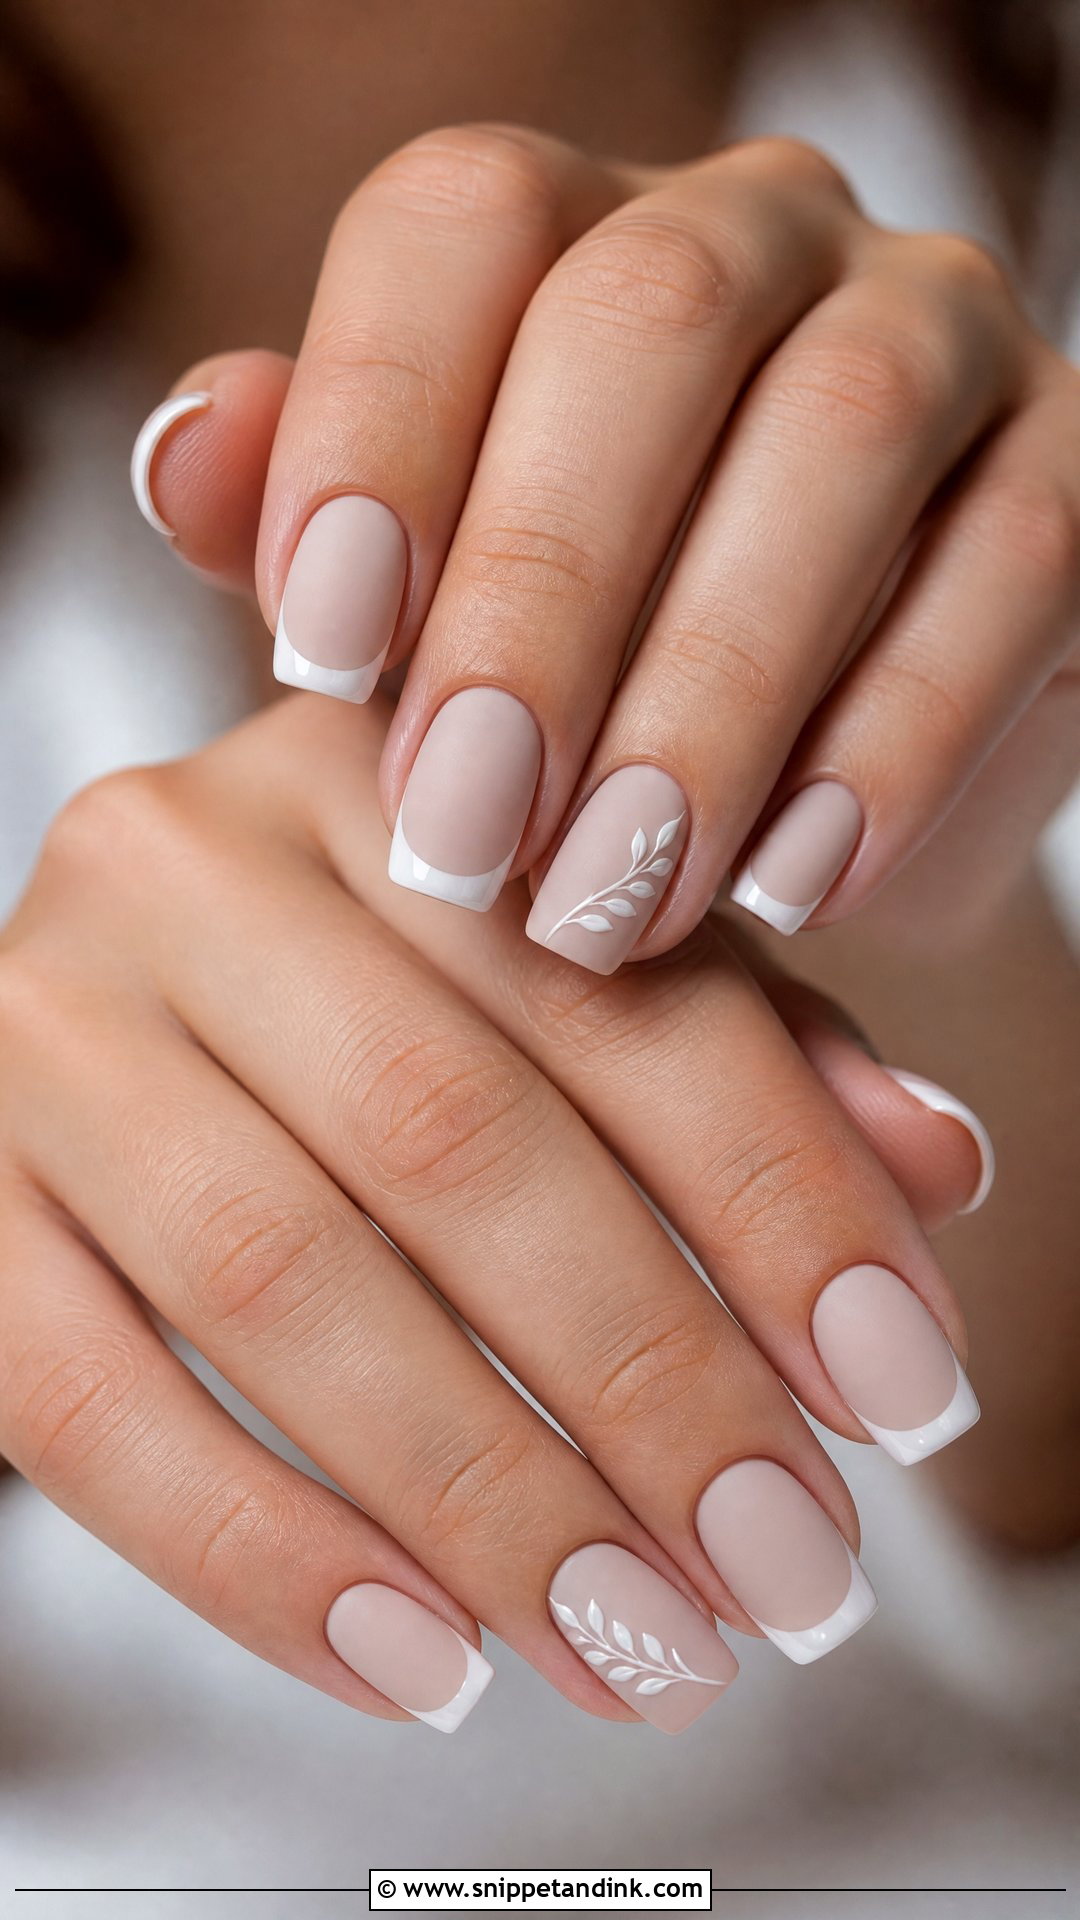
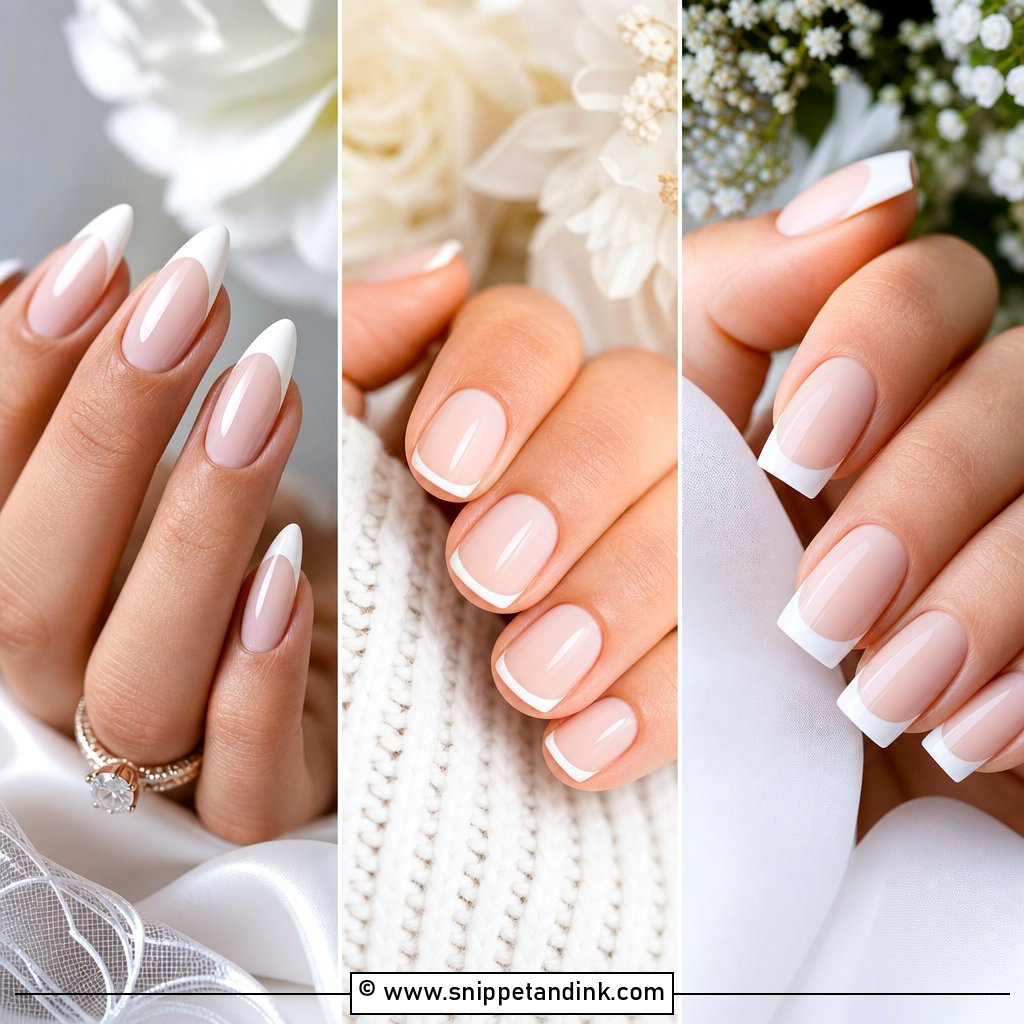
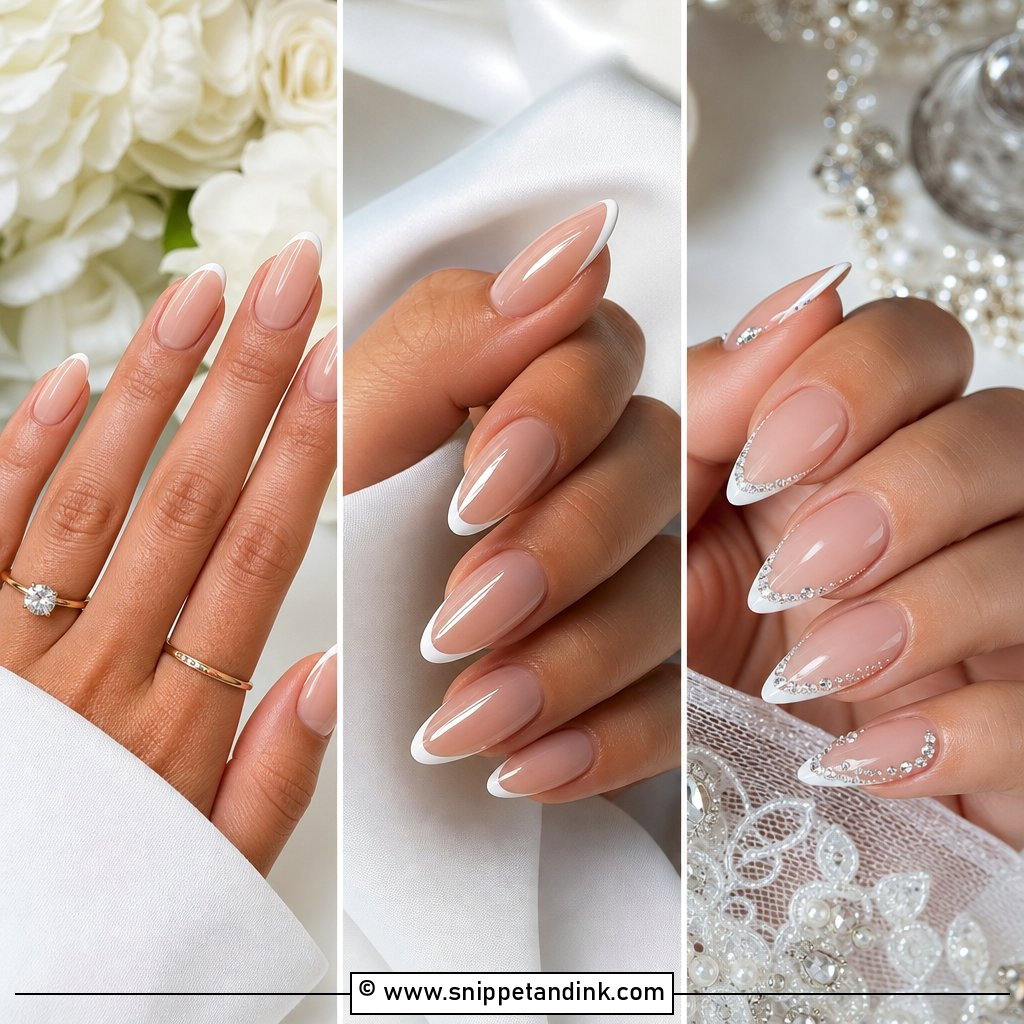
This is the set I can do half asleep, and it is still the one I am most careful with. The smile line has to sit at the same height on all ten nails, so I map it to the shortest free edge rather than the longest. On a bride I keep the white thinner than a salon French and seal it under a high-gloss top coat, because a thick, chalky tip is the first thing a macro lens exaggerates. It sits happily under almost any gown, from plain satin to lace sleeves.
2. Milky White Wedding Nails
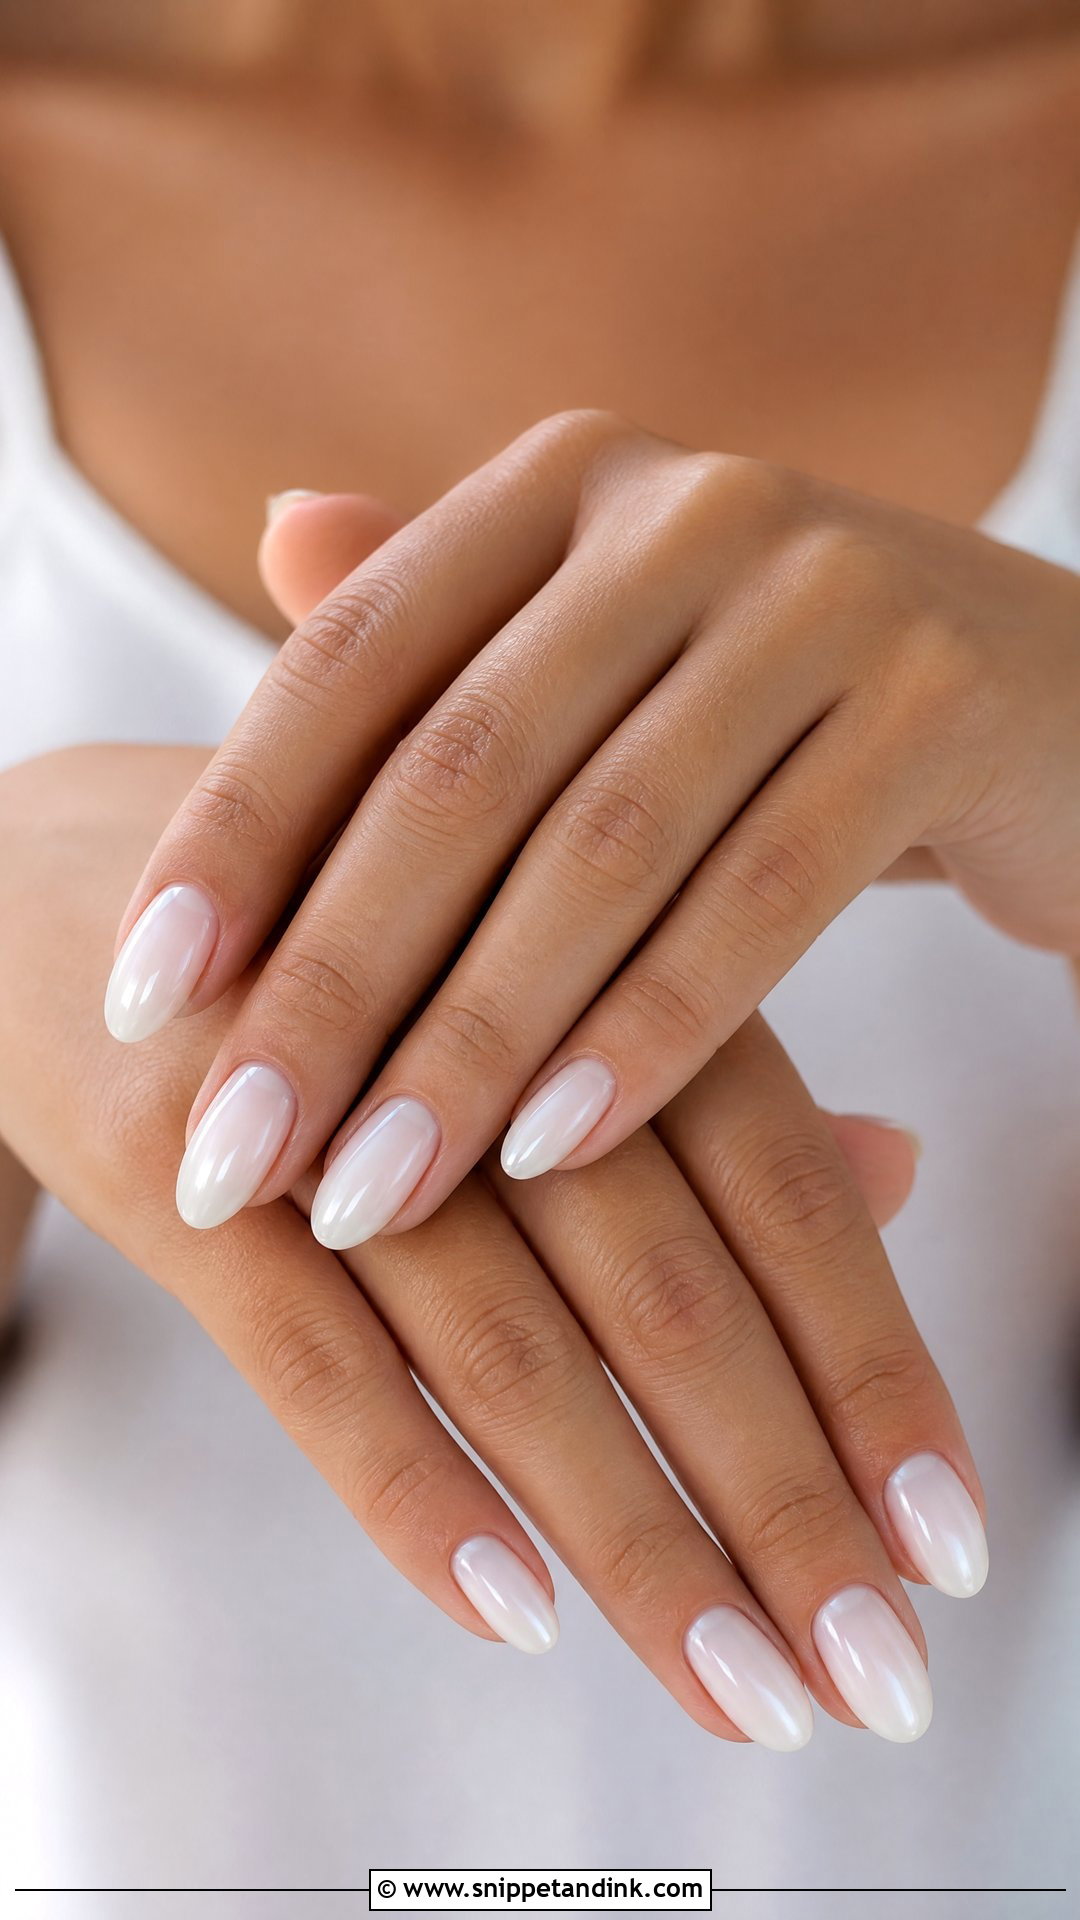
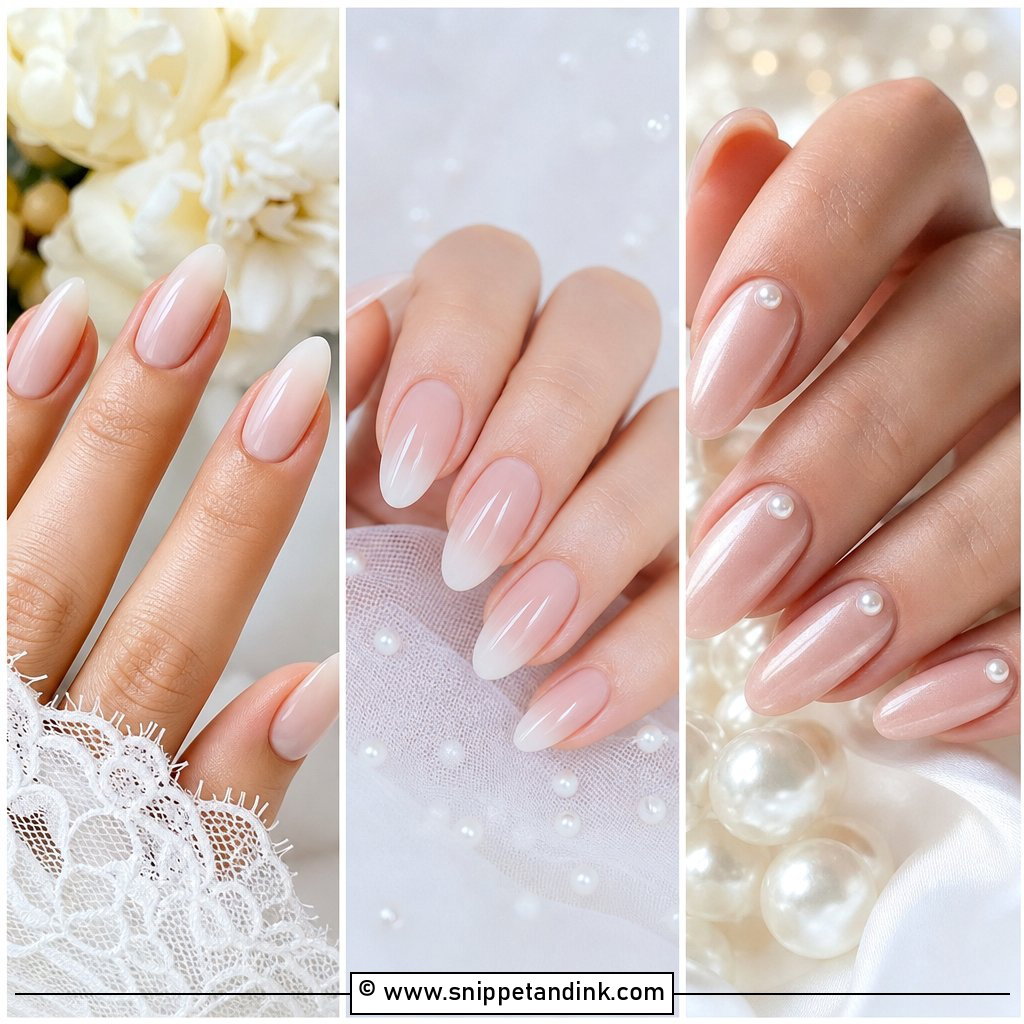
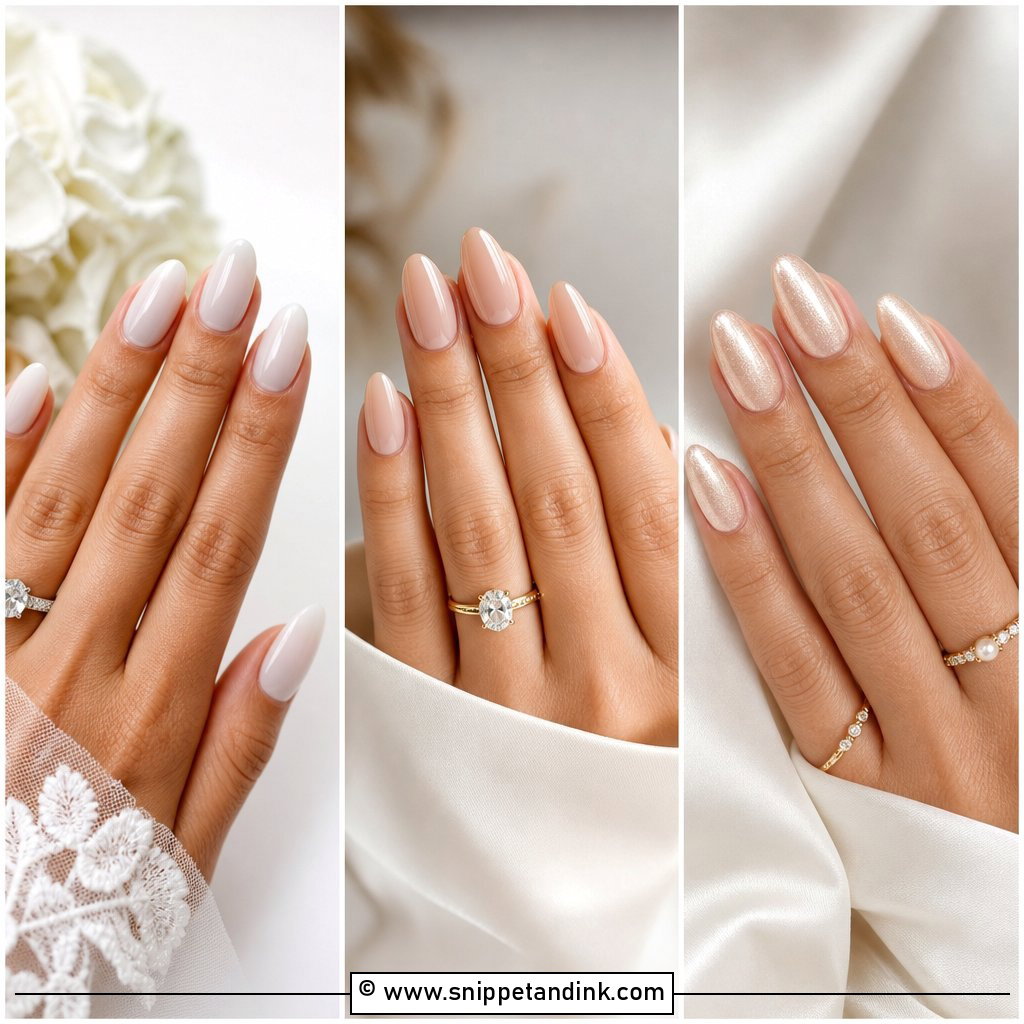
Milky white is a semi-sheer white, closer to skimmed milk than to correction fluid. I build it in two or three thin layers instead of one heavy coat, because white gel pools at the cuticle and that thickness shows in ring shots. Almond and squoval shapes suit the softness best. If your skin runs very cool and the gown is bright white, I’ll warm the mix slightly so your hands don’t look grey against the fabric.
3. Glazed Donut Wedding Nails
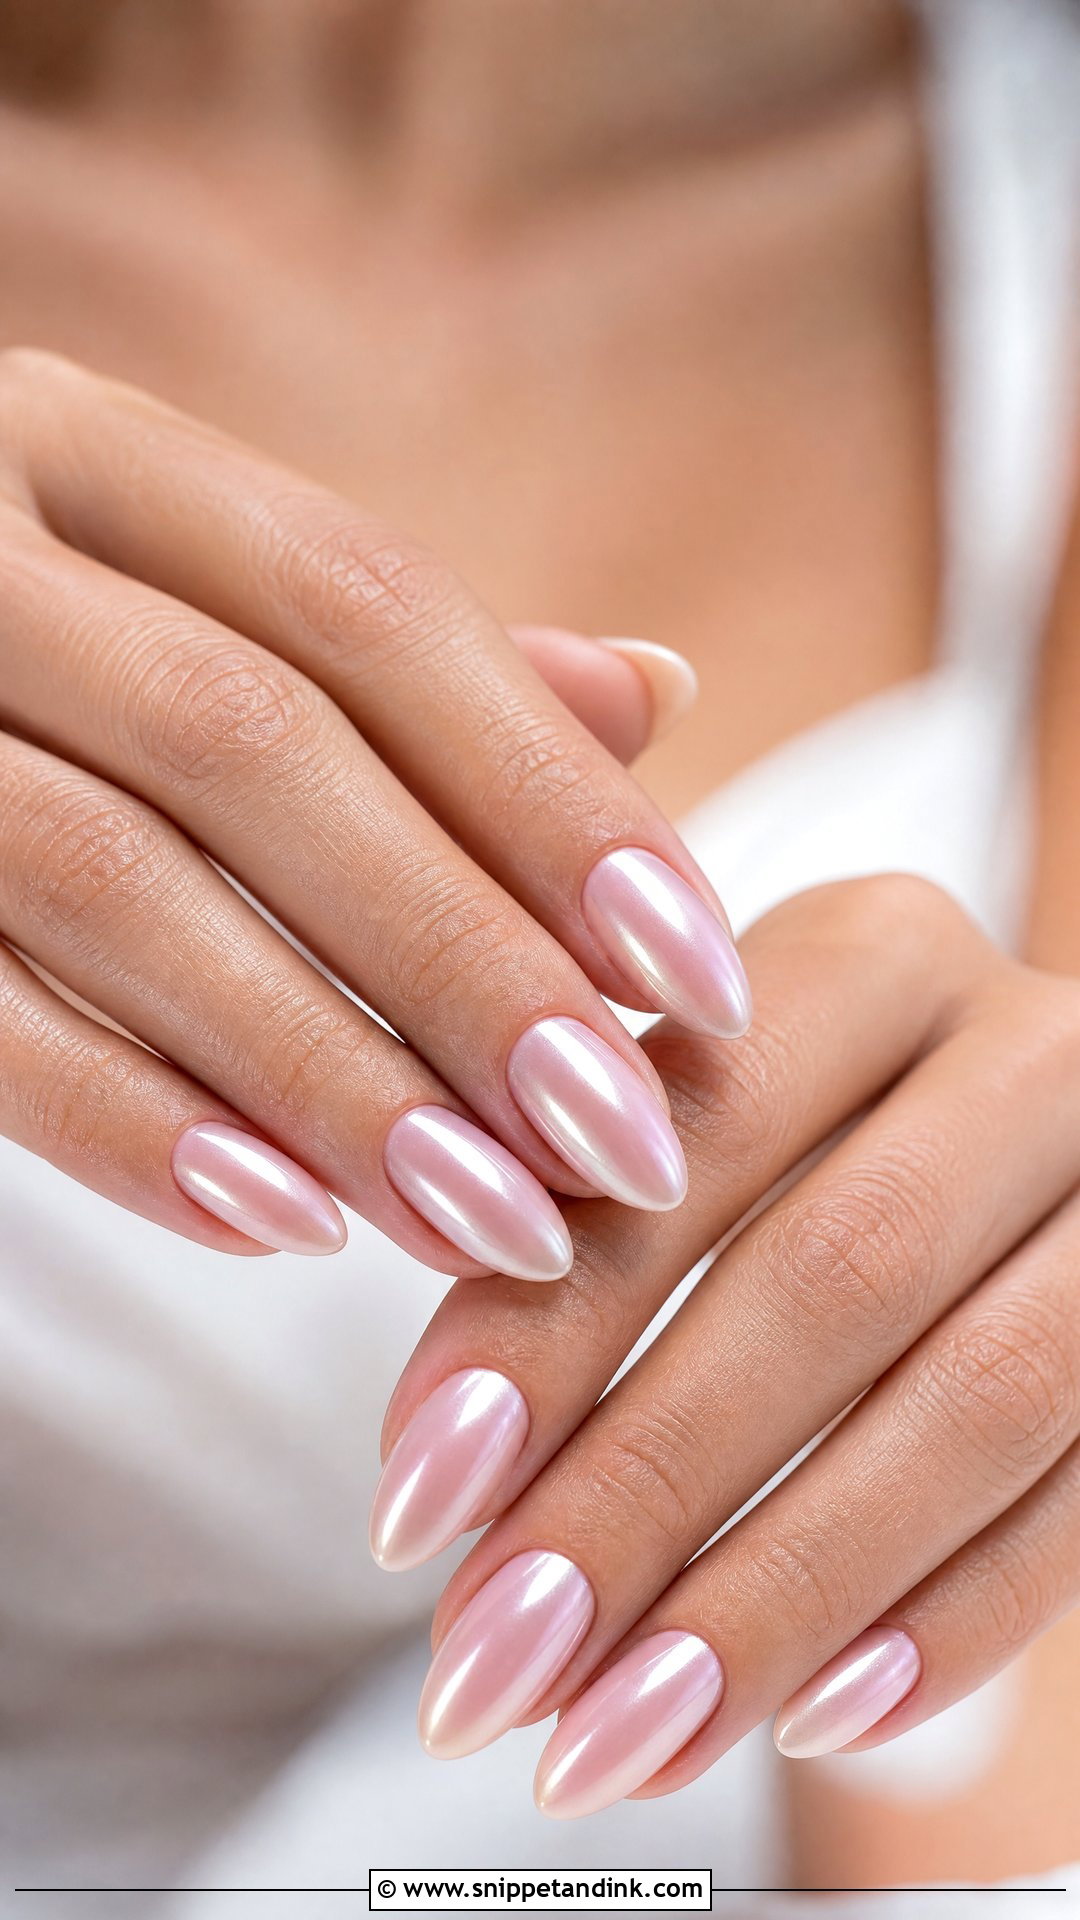
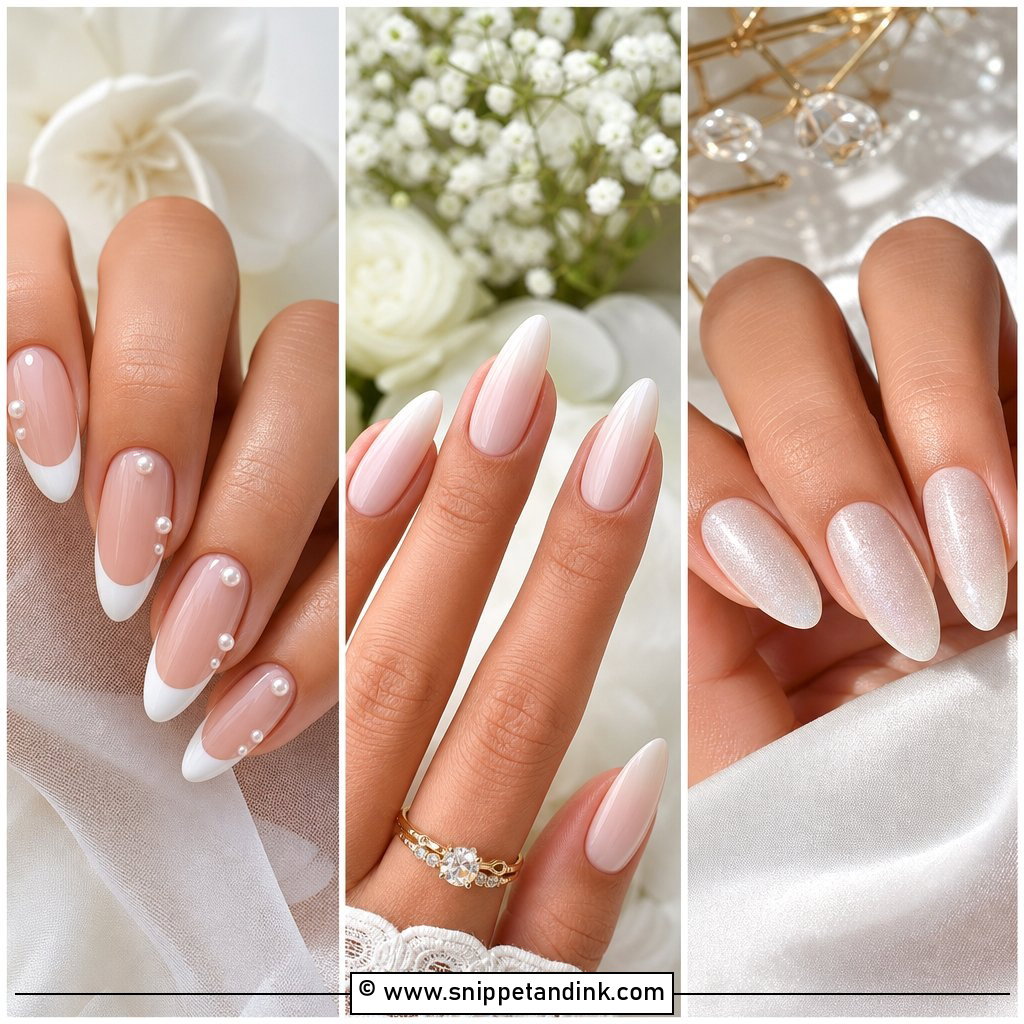
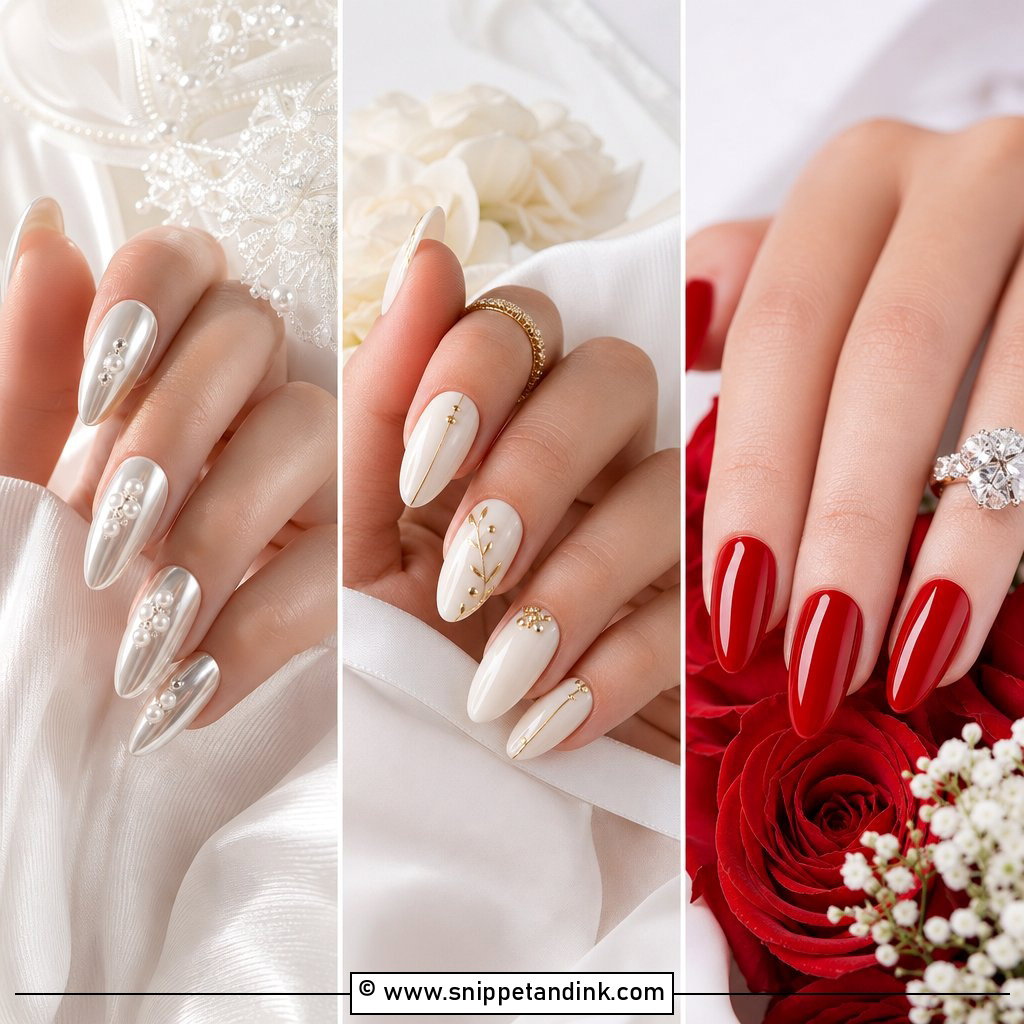
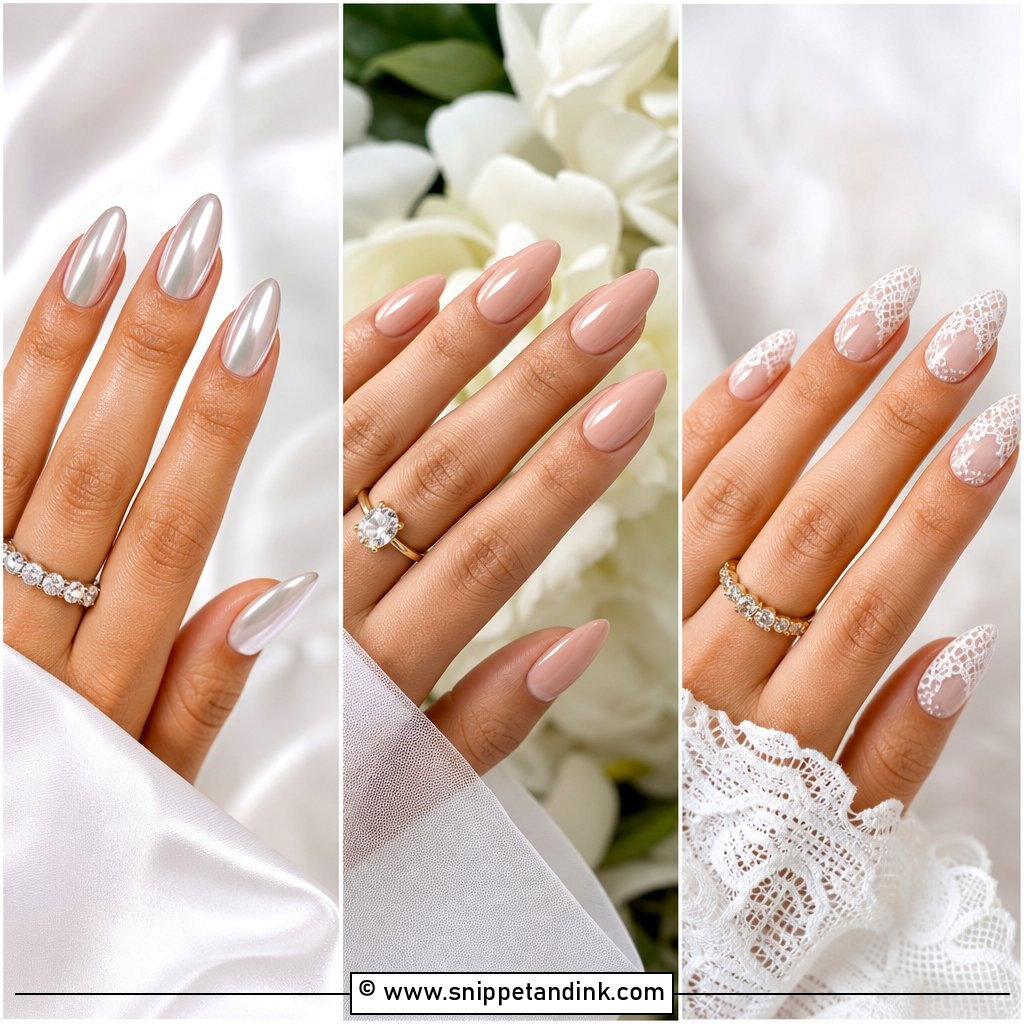
Glazed donut wedding nails are a sheer base rubbed over with a fine pearl chrome powder. The powder only grips a no-wipe top coat at the right stage of cure, so if the glaze looks patchy, the timing was off, not the product. I keep it pearly rather than metallic. Too much powder and the effect tips from glazed to tinfoil, which flash photography makes worse. Satin and pearl jewellery are the easiest partners for it.
4. Pearl Wedding Nails
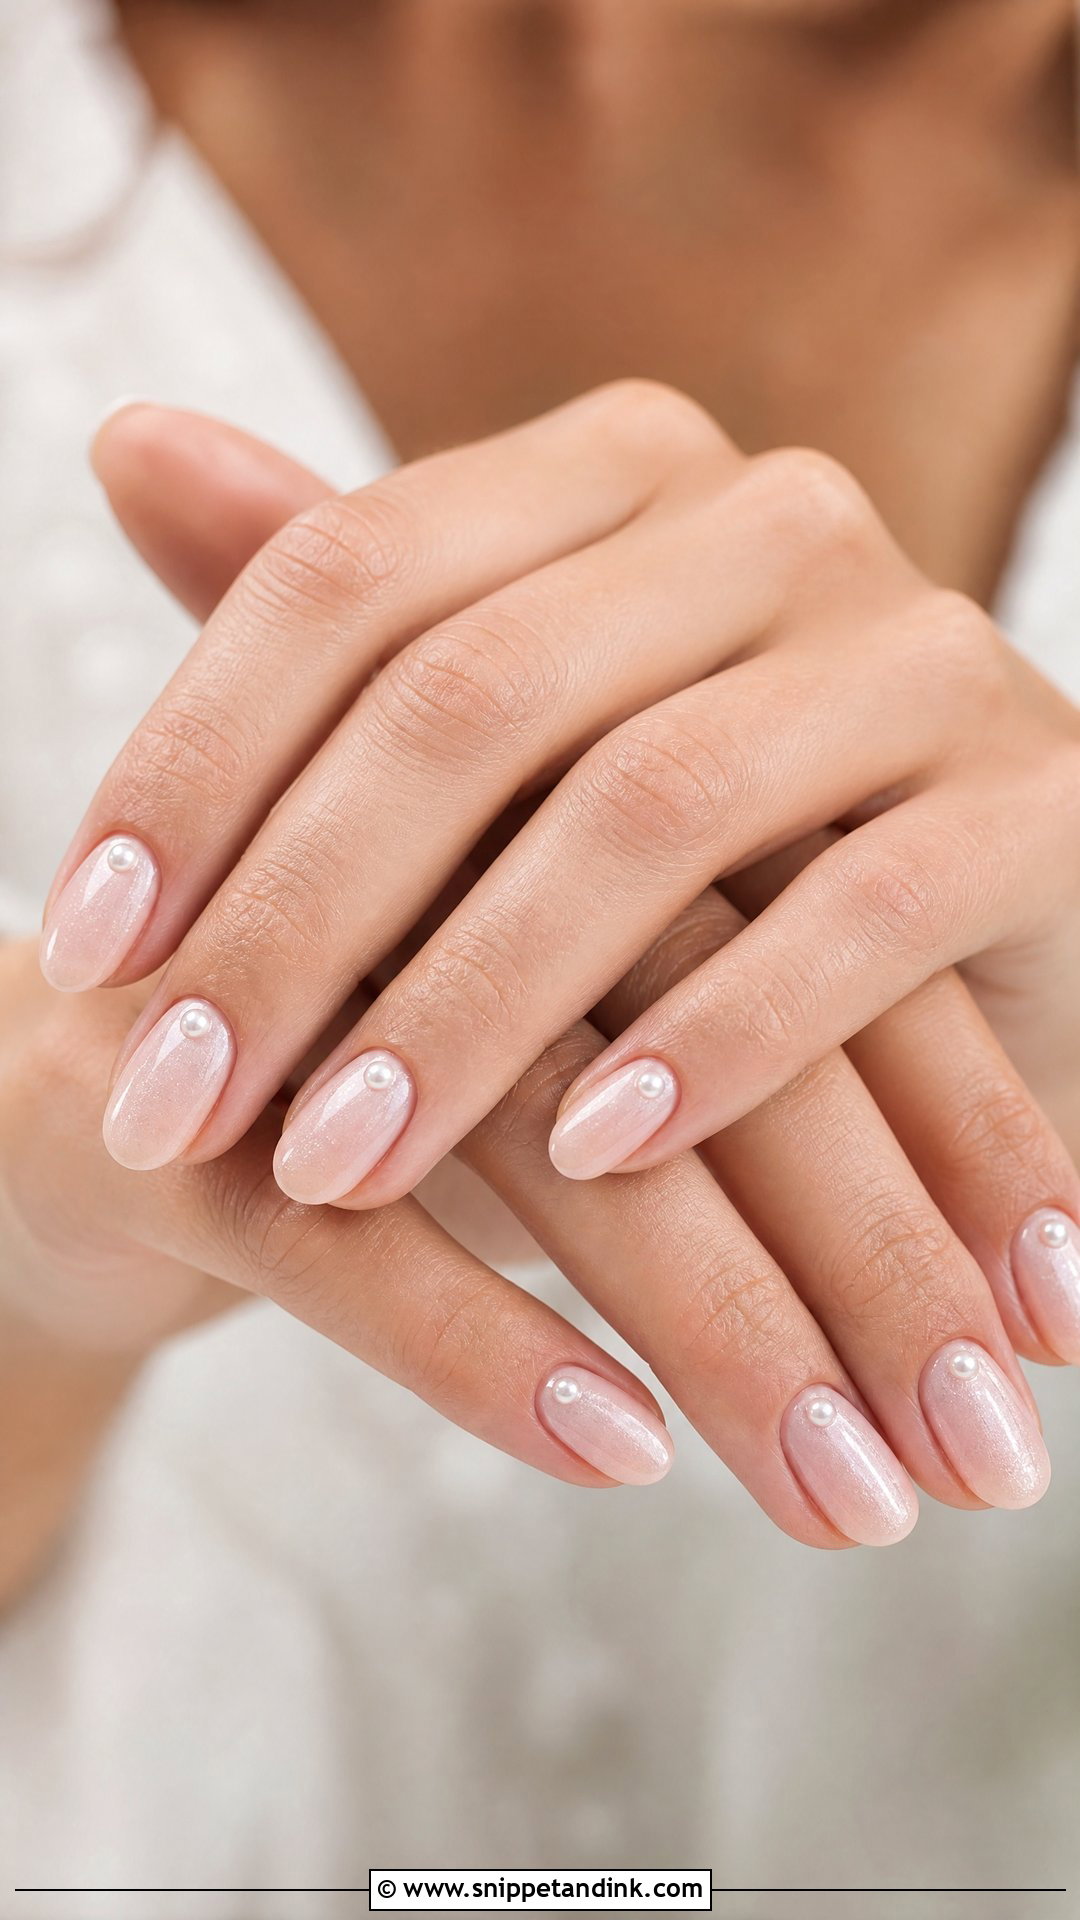
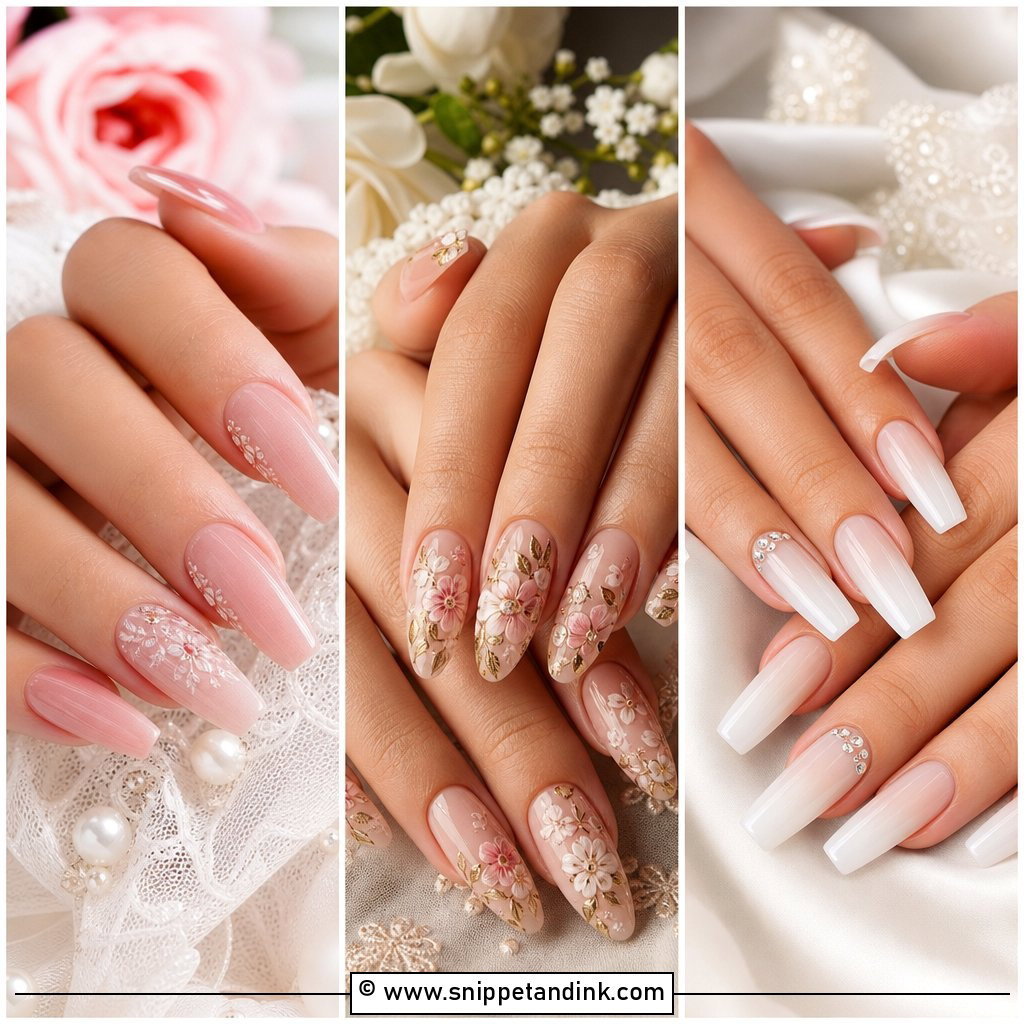
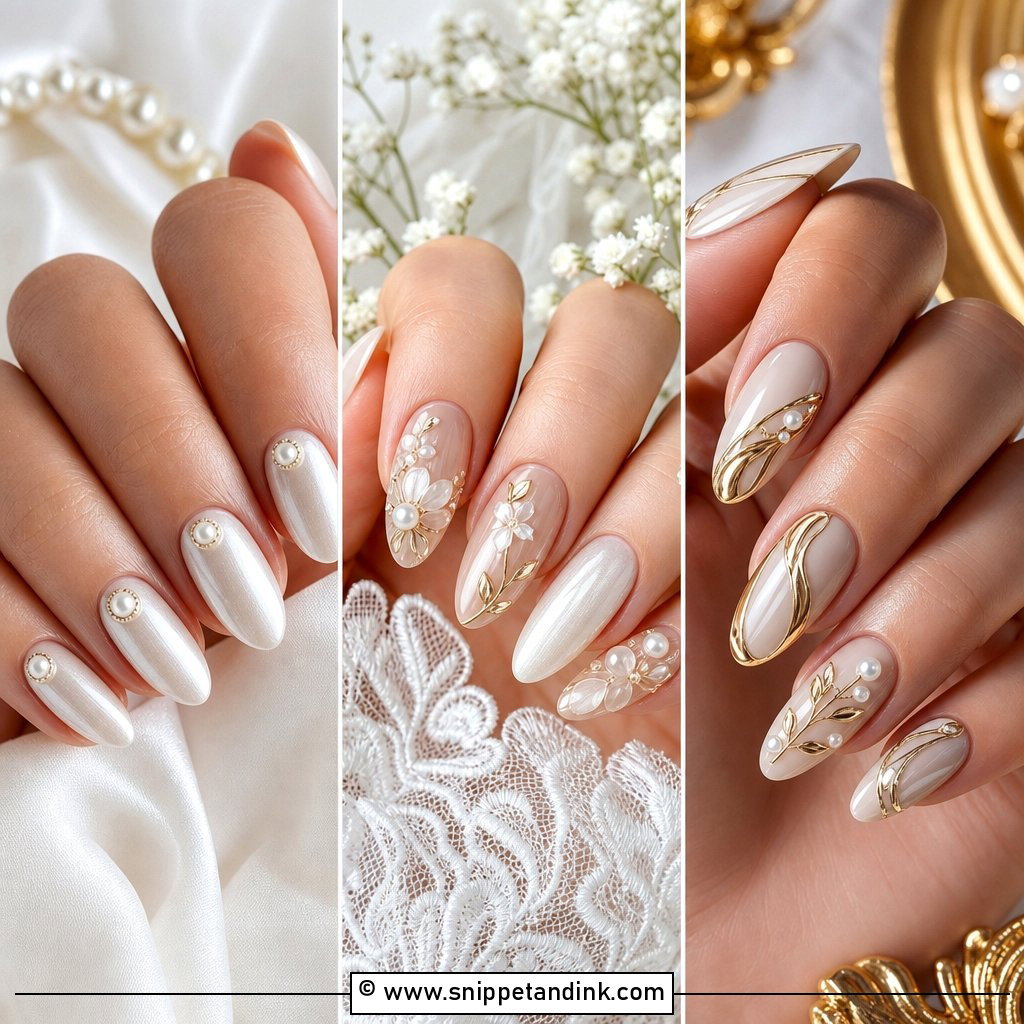
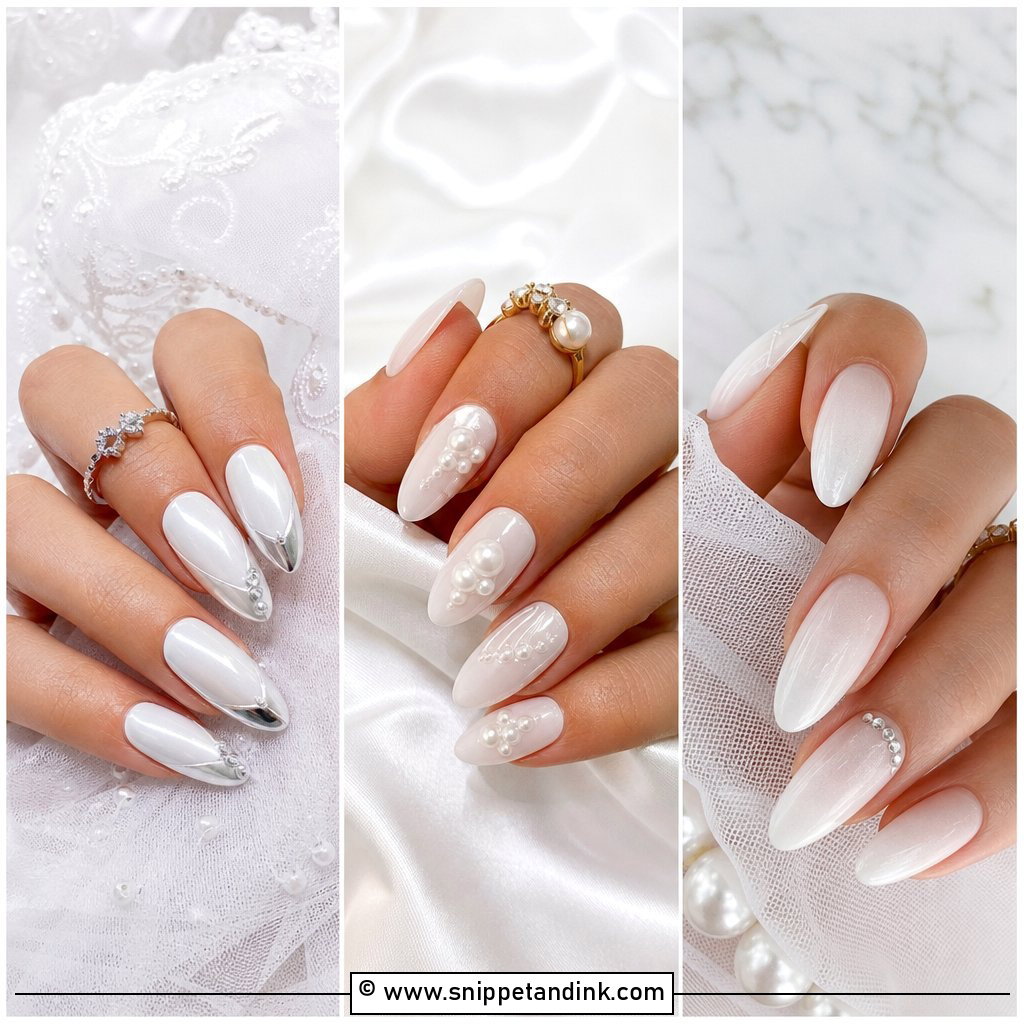
Pearls are where comfort becomes a real question. Half-pearls with a flat back sit low and stay put; full round pearls look richer but rise off the nail and snag knit wraps, lace and hair. I set them near the cuticle, embedded in builder gel, and I keep them off the free edge entirely. Over a sheer pink or milky base they read as jewellery rather than decoration, and they echo pearl earrings without competing with them.
5. Pink French Wedding Nails
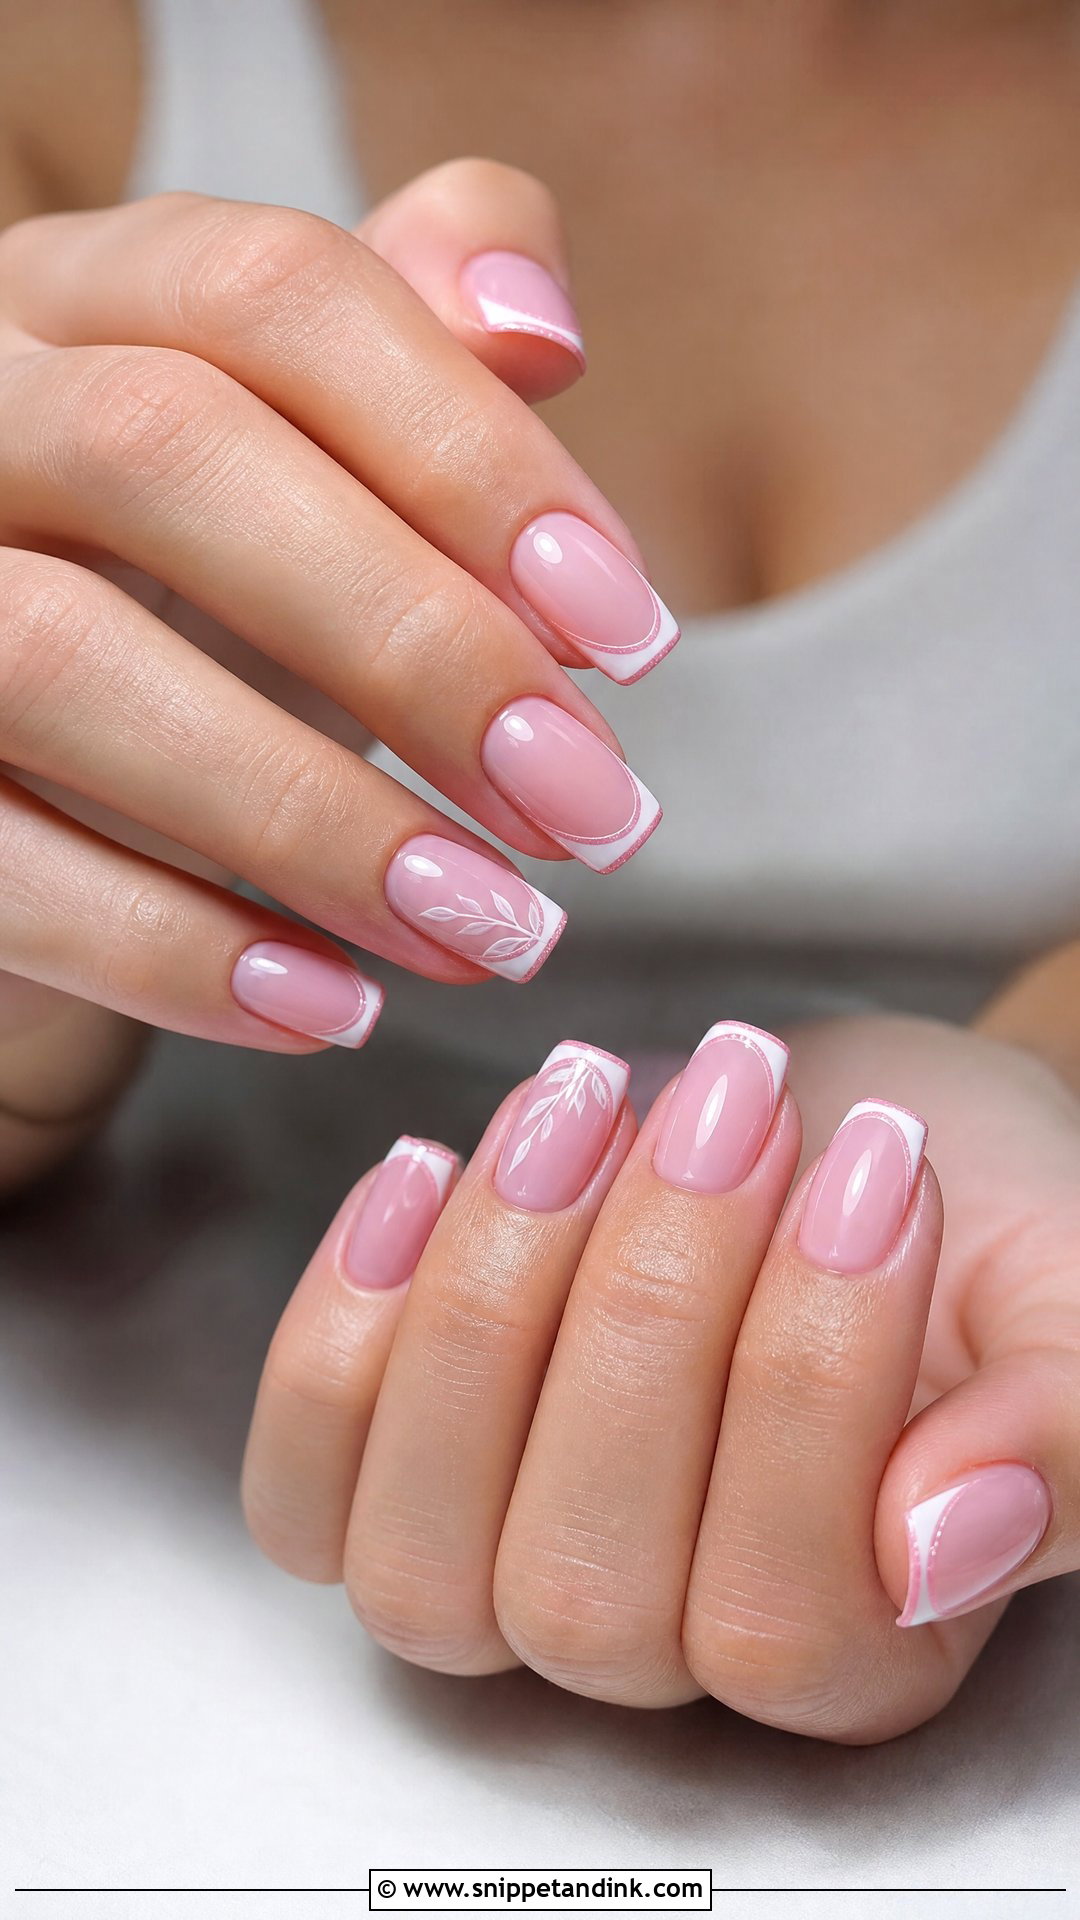
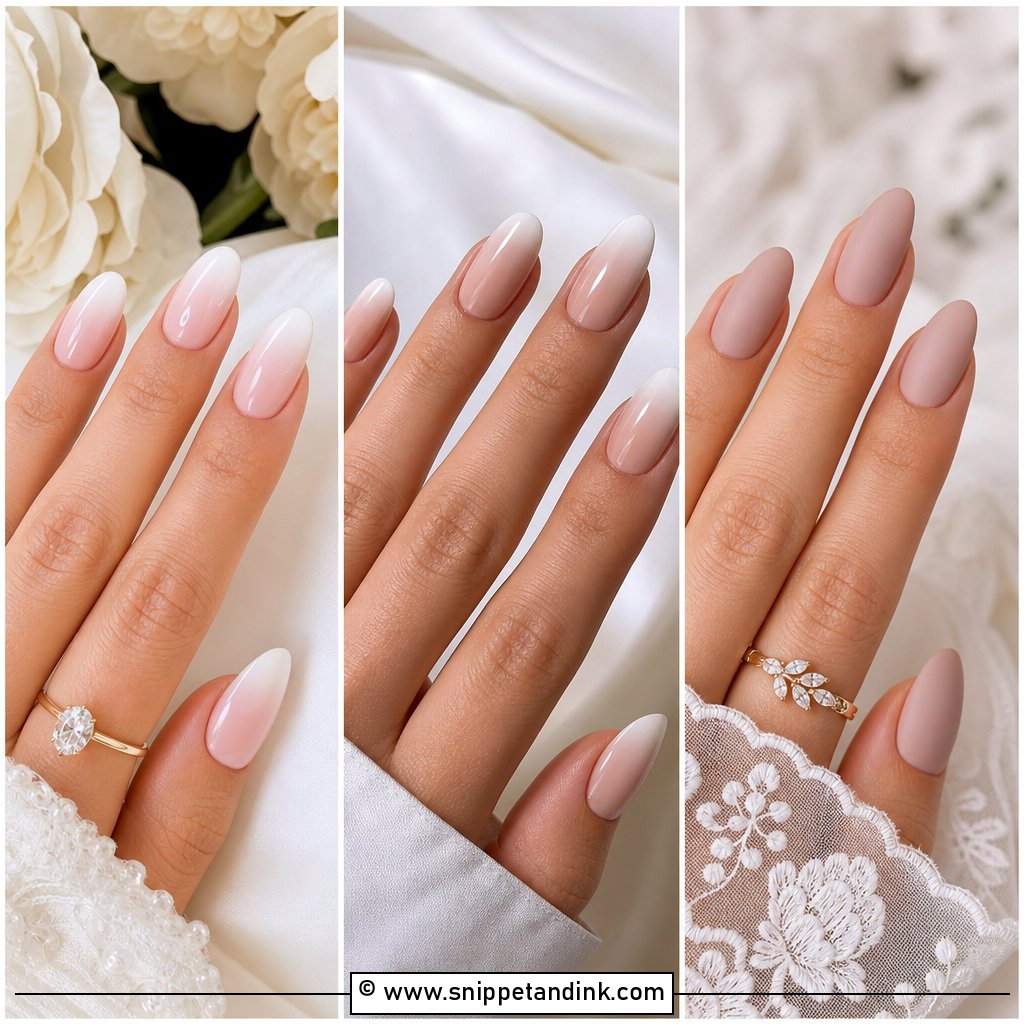
A pink French swaps the nude base for a rosy one and softens the tip to white or a very pale pink. I like it on short nails because the low contrast hides a slightly uneven nail bed. Your skin decides the base. Cool-toned hands need a blue-leaning pink, warm hands a peachy one. Get that wrong and the fingers look flushed in daylight. A thin tip and high gloss keep it modern next to rose gold and soft makeup.
6. Nude Wedding Nails
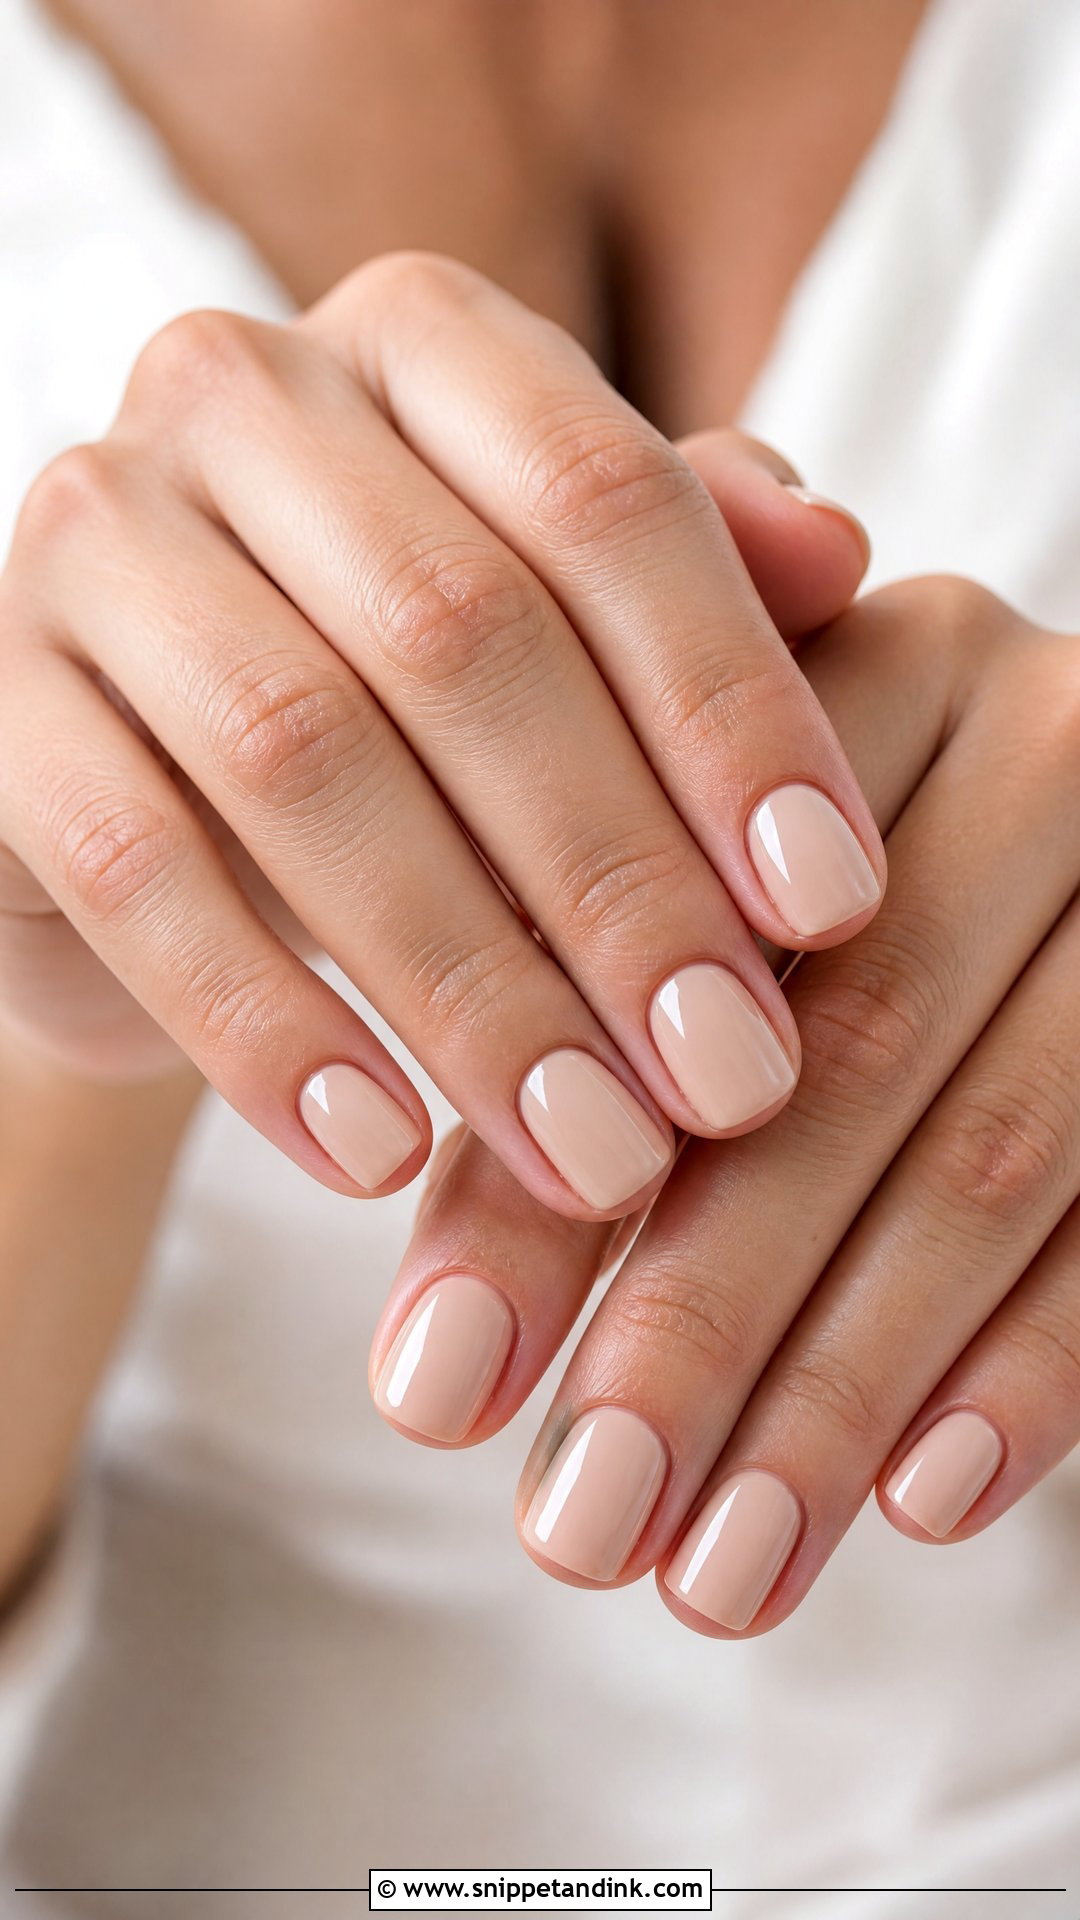
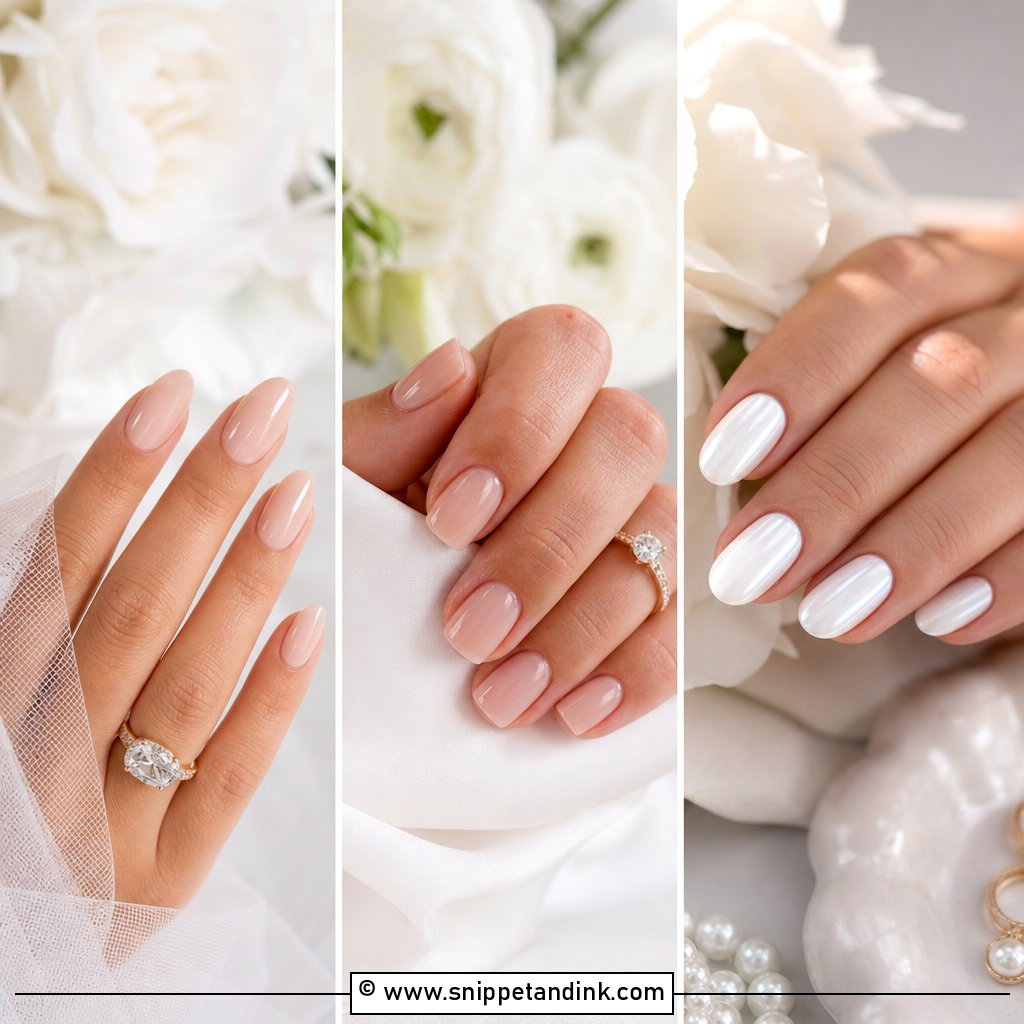
Nude is the hardest colour to choose because the shade that looks invisible in the bottle often makes your hands look washed out. I pick one or two steps deeper or pinker than the skin on the back of the hand: beige-pink for fair skin, warm caramel for medium, and cocoa, mocha or rosy brown for deep skin tones. Hold the swatch next to your ring before you commit. A glossy nude then lets the dress, bouquet and metal do the talking, and a tiny crystal at the cuticle is about as far as I’d push it.
7. Almond Wedding Nails
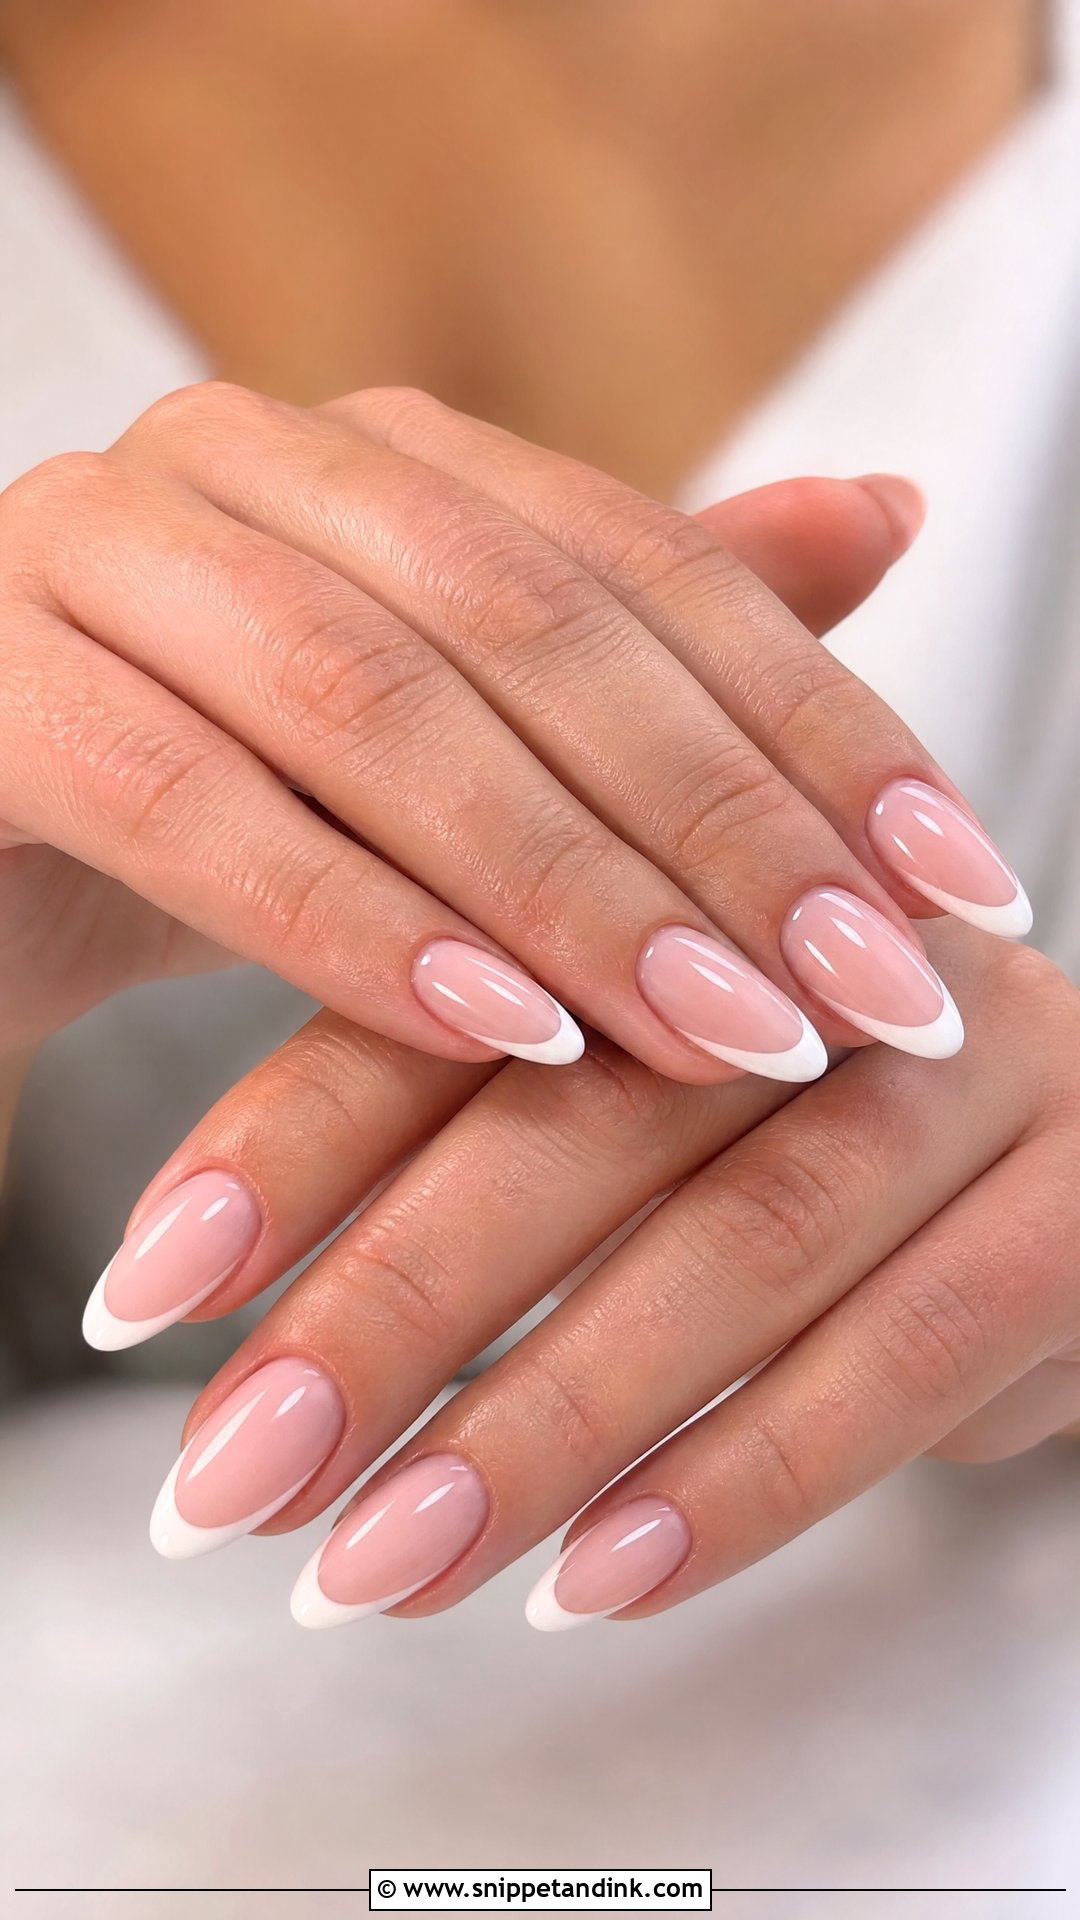
Almond is the shape I file most often for weddings, because it makes the fingers look longer without the sharpness of a stiletto. The catch is length. A medium almond gives you that line and still lets you fasten earrings, while a long one starts to catch on lace and phone screens. It carries almost every finish here, from French to chrome to florals. If your nails are short and wide, I’ll often suggest a soft oval instead, since a forced almond on a wide bed can look pinched.
8. Short Wedding Nails
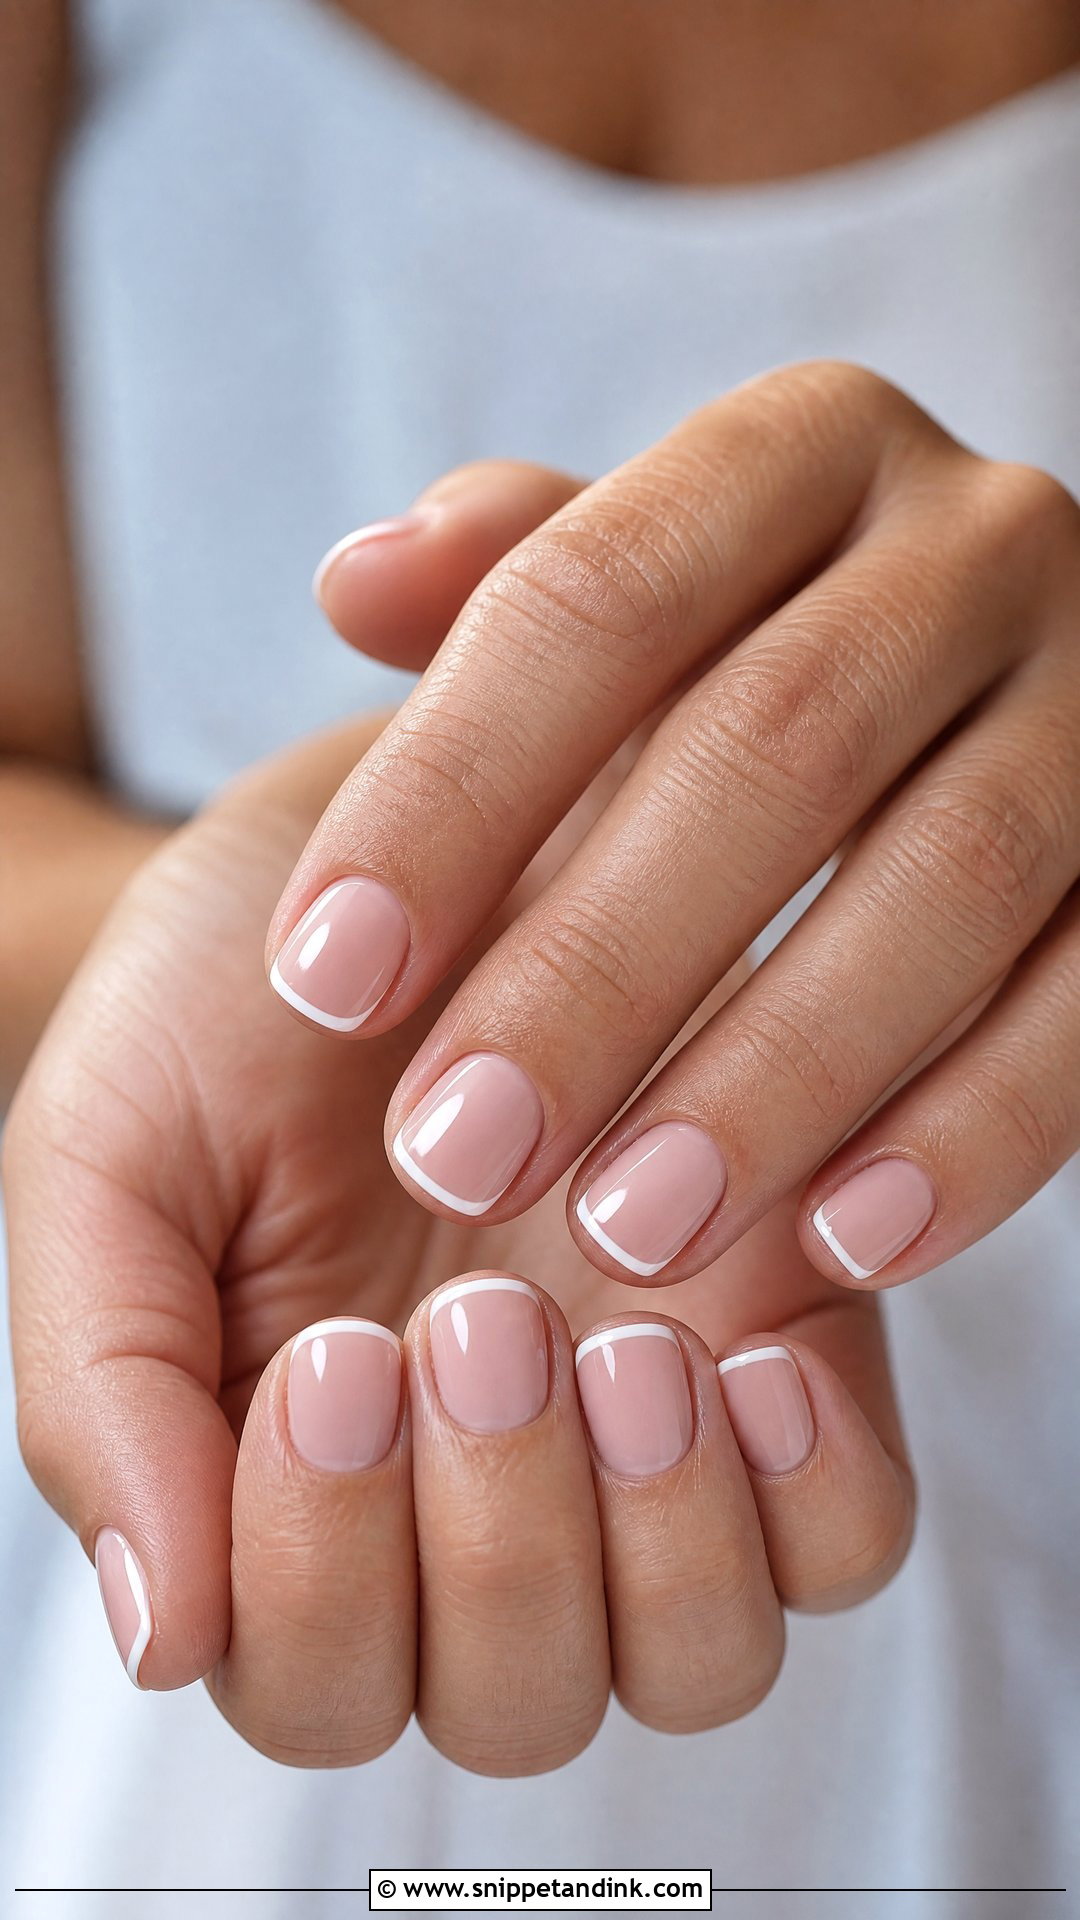
Short nails are the sensible choice if you have never worn length, and nobody looks at a tidy short set in photos and thinks it is unfinished. What carries it is prep: pushed cuticles, a clean sidewall and polish that wraps the free edge. I file short sets into an oval, squoval or soft square and keep the colour sheer, like a pale pink or the micro French designs that suit a small canvas. You will also thank yourself when it is time to do up dress buttons, pin a veil and untie bouquet ribbon.
9. White Chrome Wedding Nails
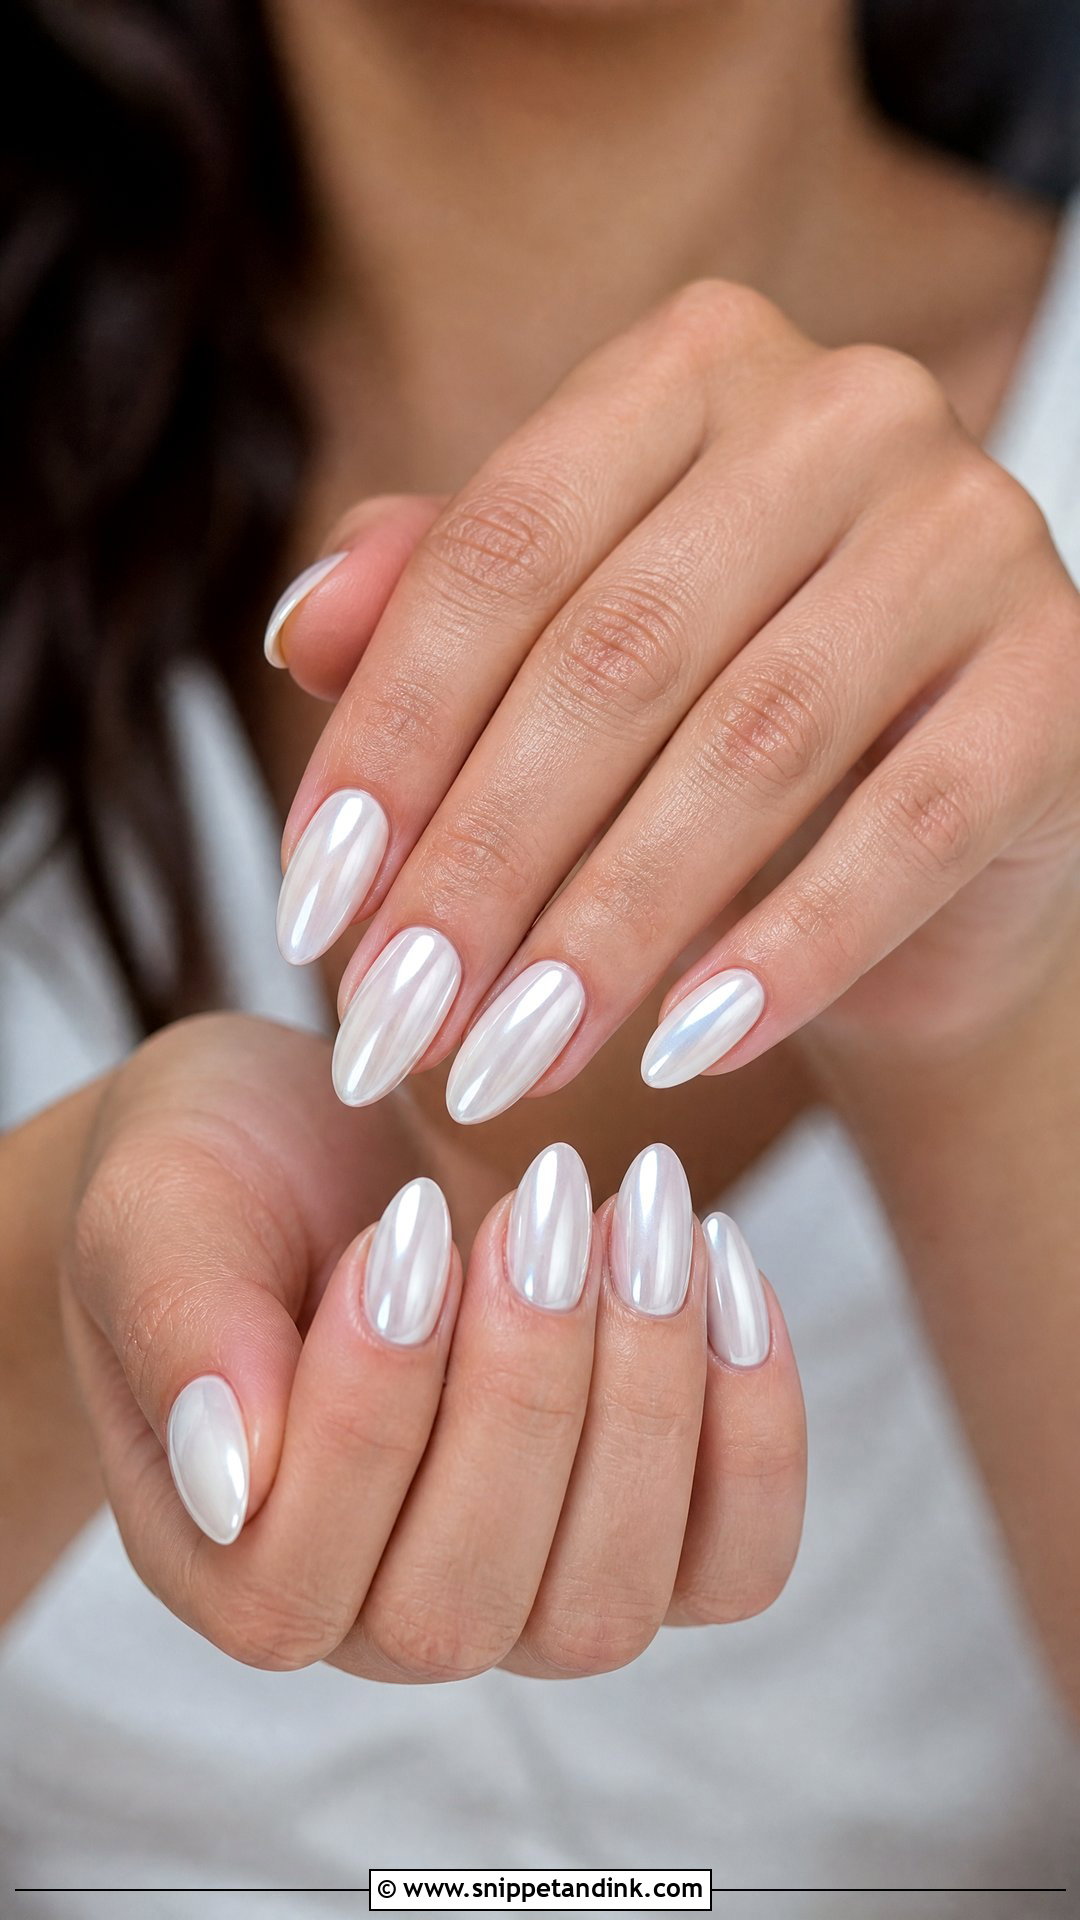
White chrome is milky white with a fine powder burnished on top, which gives a glassy, almost wet sheen that silver never has. It is the right call if plain white feels too flat for you. Watch the free edge, though. Chrome is the first finish to rub through at the tips, so I wrap the top coat over the edge and tell brides not to have it done more than three days out. Pearl or crystal jewellery suits it; heavy yellow gold can clash with the cool shine.
10. Blush Pink Wedding Nails
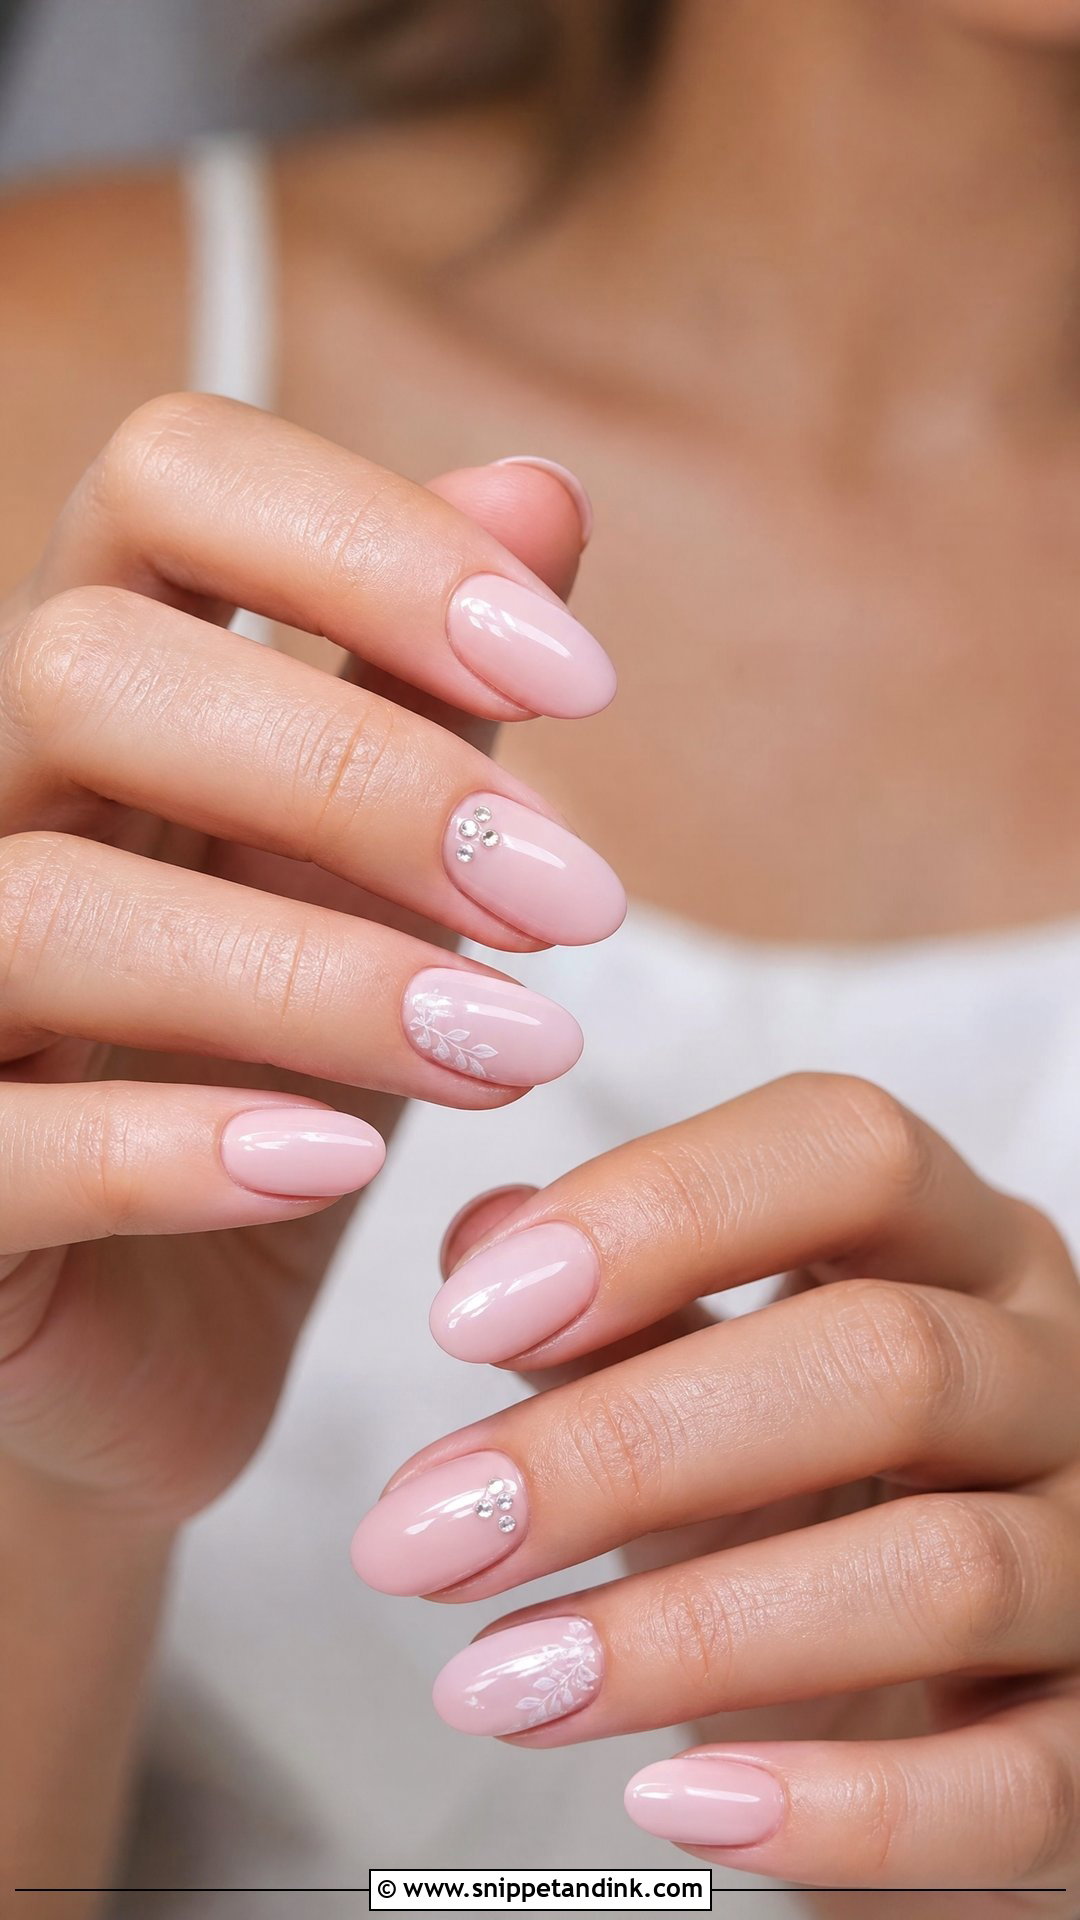
Blush pink is the quiet one, and it is kind to almost every skin tone because it mimics a healthy nail bed. I use a jelly or sheer formula on most brides. Opaque pink can look sweet in person but reads flat and slightly plasticky under flash. If you want detail, a pearl or a single flower is enough. It sits comfortably with a pink bouquet and rose gold, which is where it naturally ends up.
11. Ombré Wedding Nails
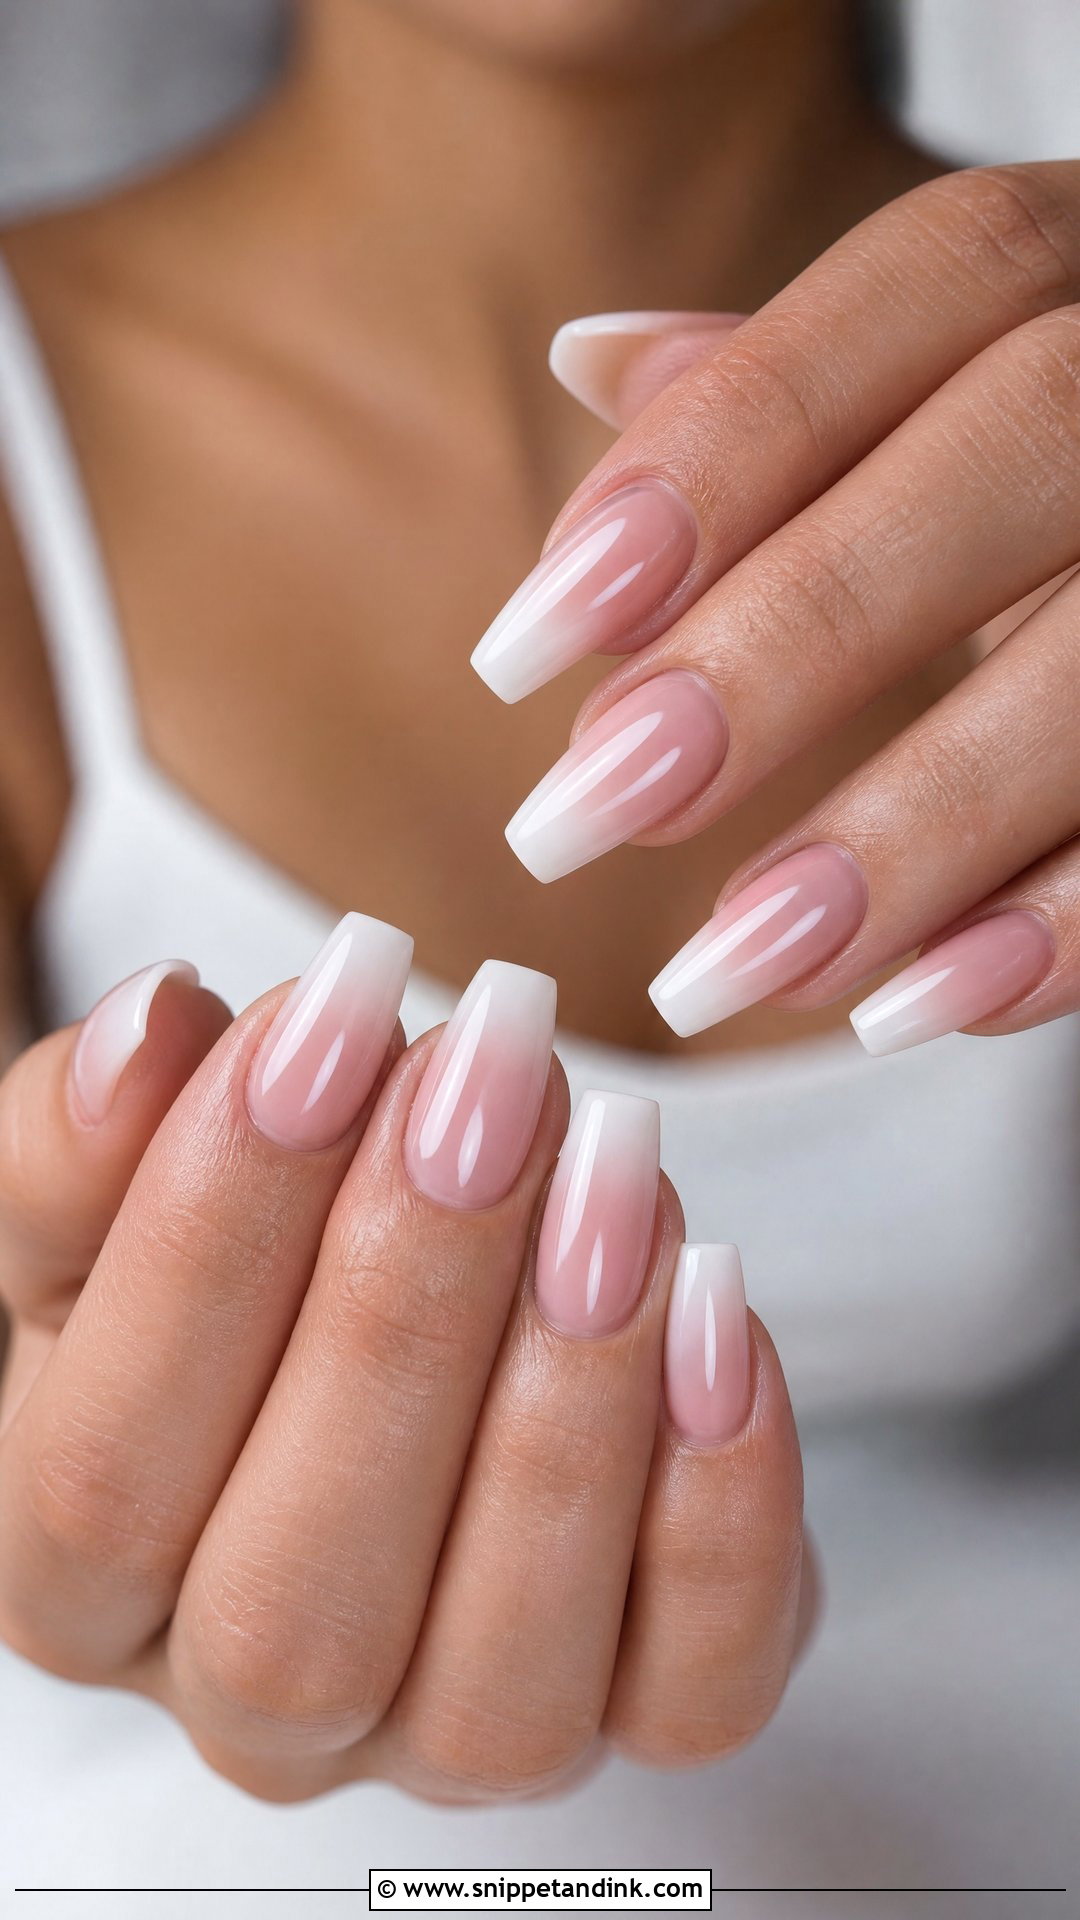
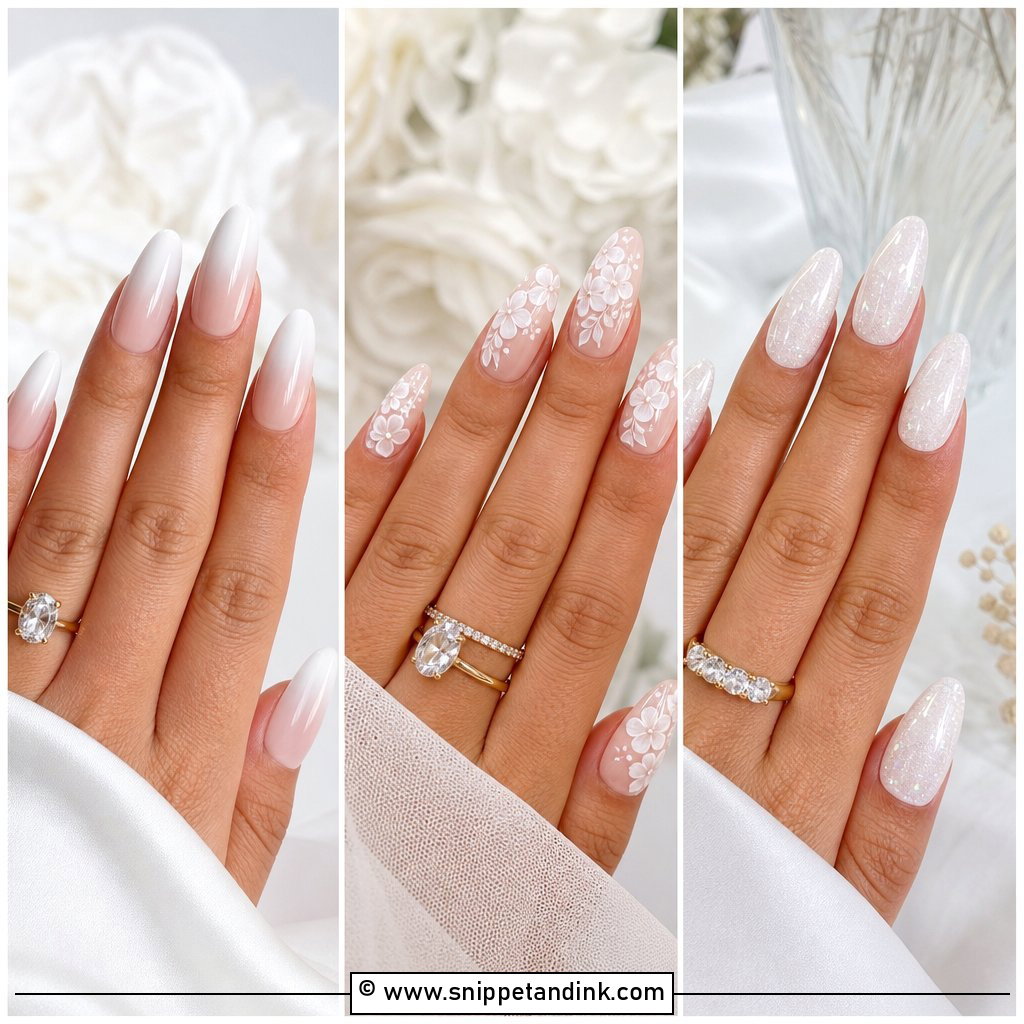
Ombré wedding nails fade from nude or pink at the cuticle to white at the tip, like a French with the line rubbed away. I build the gradient with a sponge or by brushing gel in thin passes. Do it too quickly and you get a visible band halfway up the nail, which is the most common reason an ombré looks cheap. The upside for brides is growth. A soft fade hides the gap at the cuticle better than a solid colour, so it forgives an appointment a few days early.
12. Micro French Wedding Nails
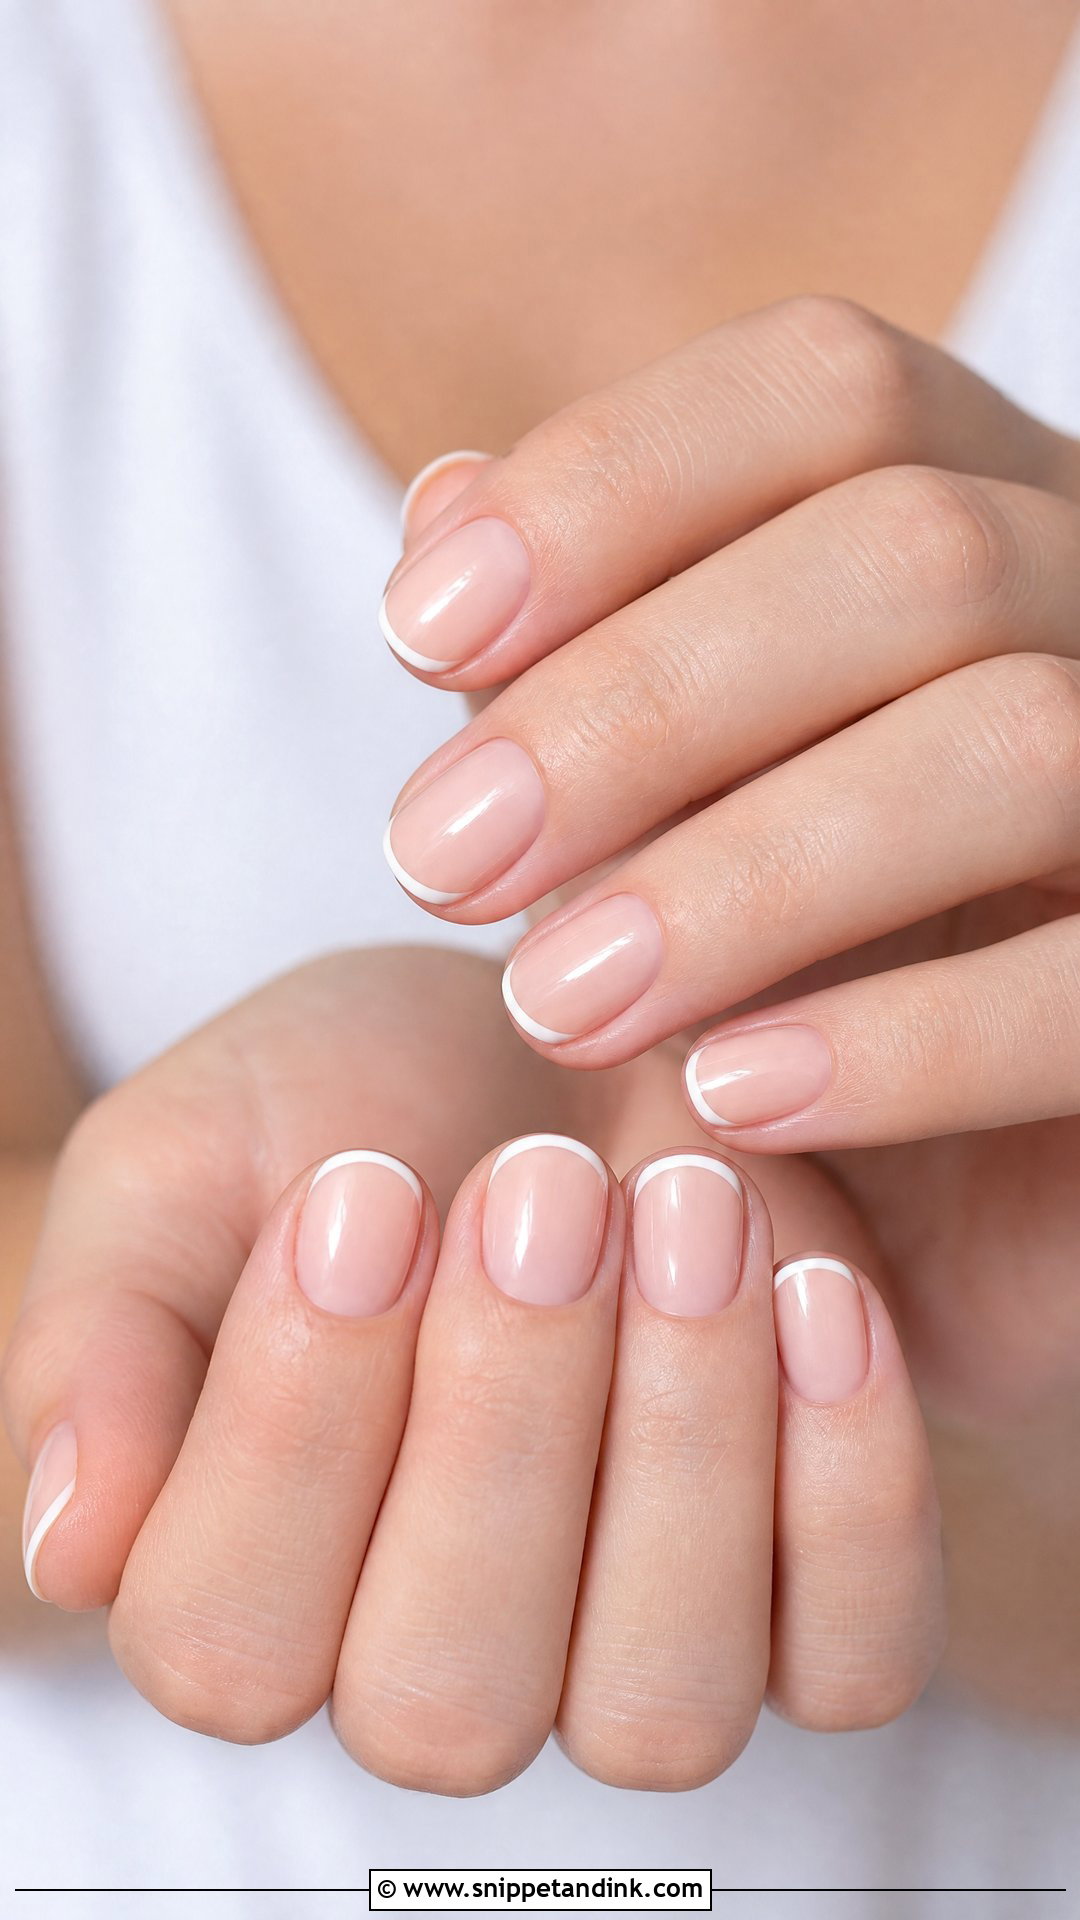
Micro French uses a tip so thin it is almost a line, and it is my go-to for short nails that would be swamped by a standard smile. It is also the most unforgiving to paint. A tremble of the brush shows, so I do it with a striping brush and clean up with a fine brush dipped in cleanser before curing. Ivory or champagne tips are softer than stark white. One tiny pearl is as much extra as it needs.
13. Lace Wedding Nails
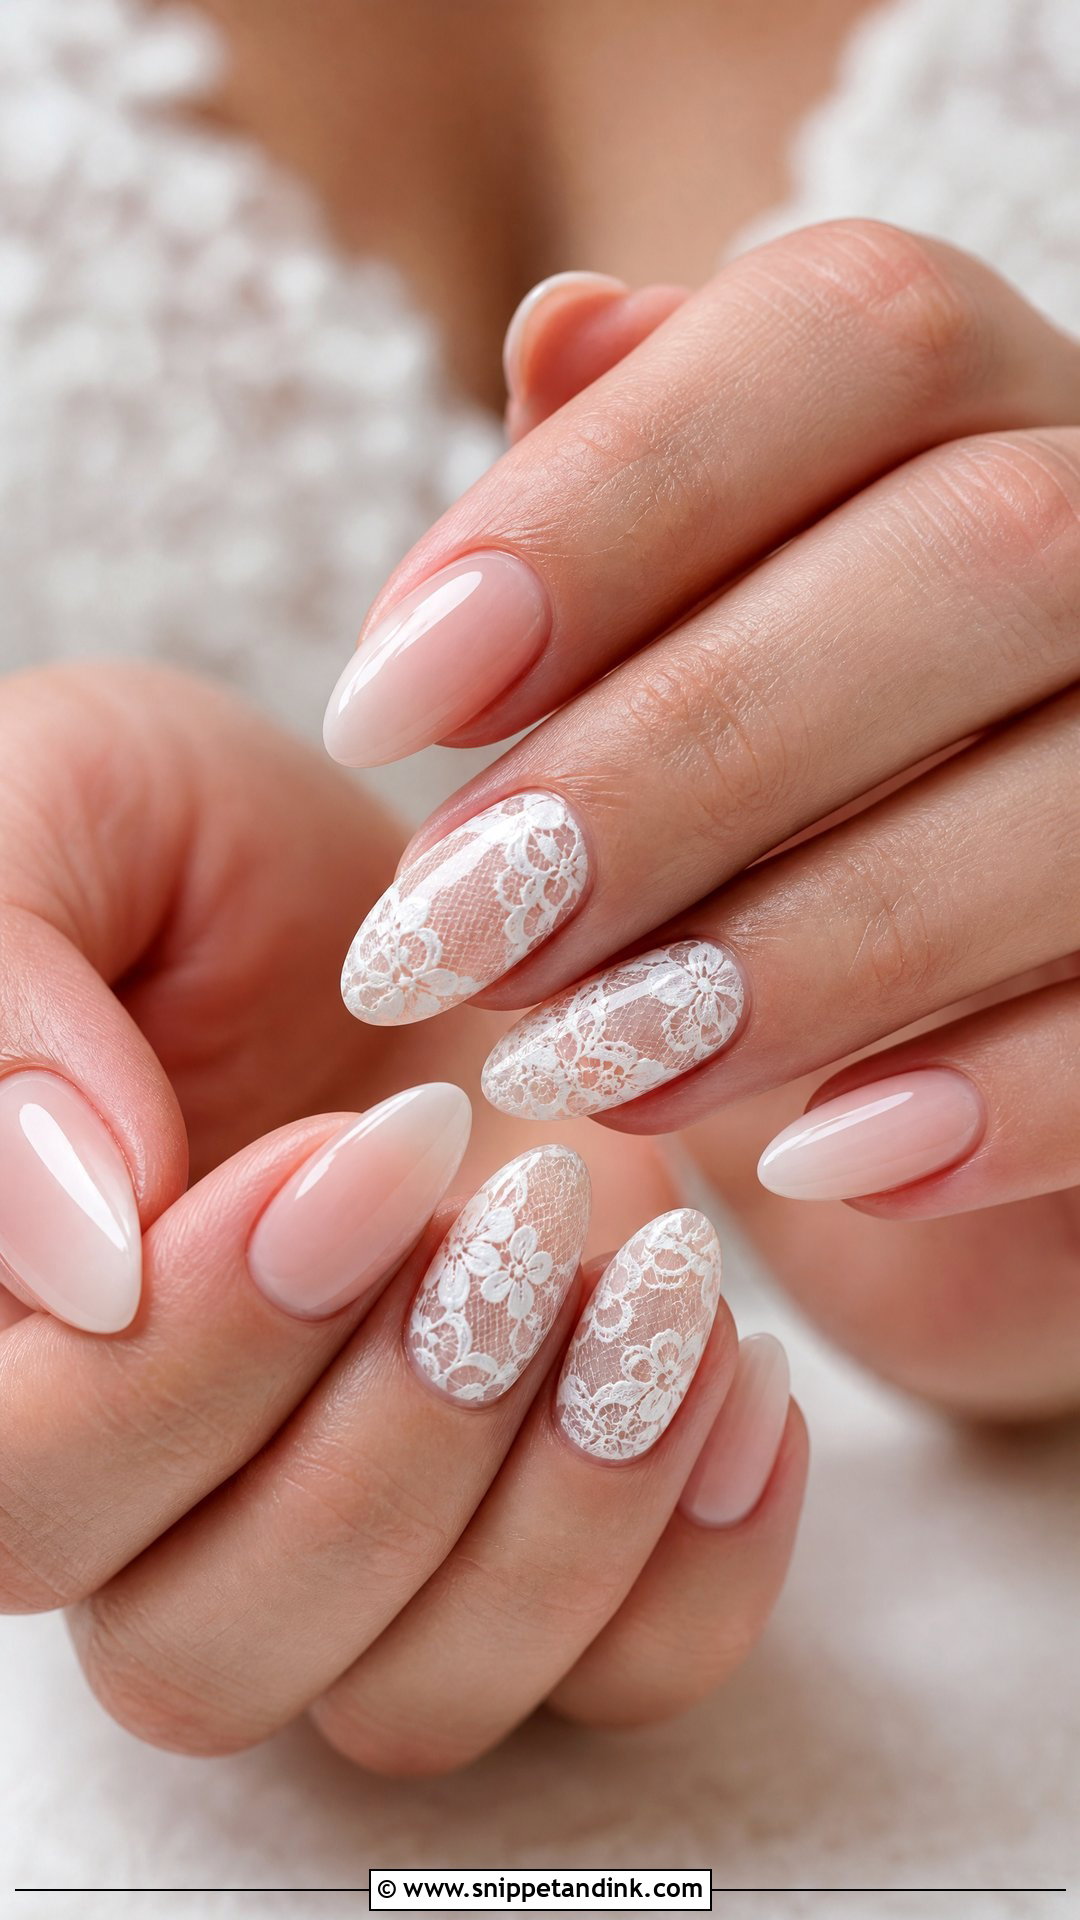
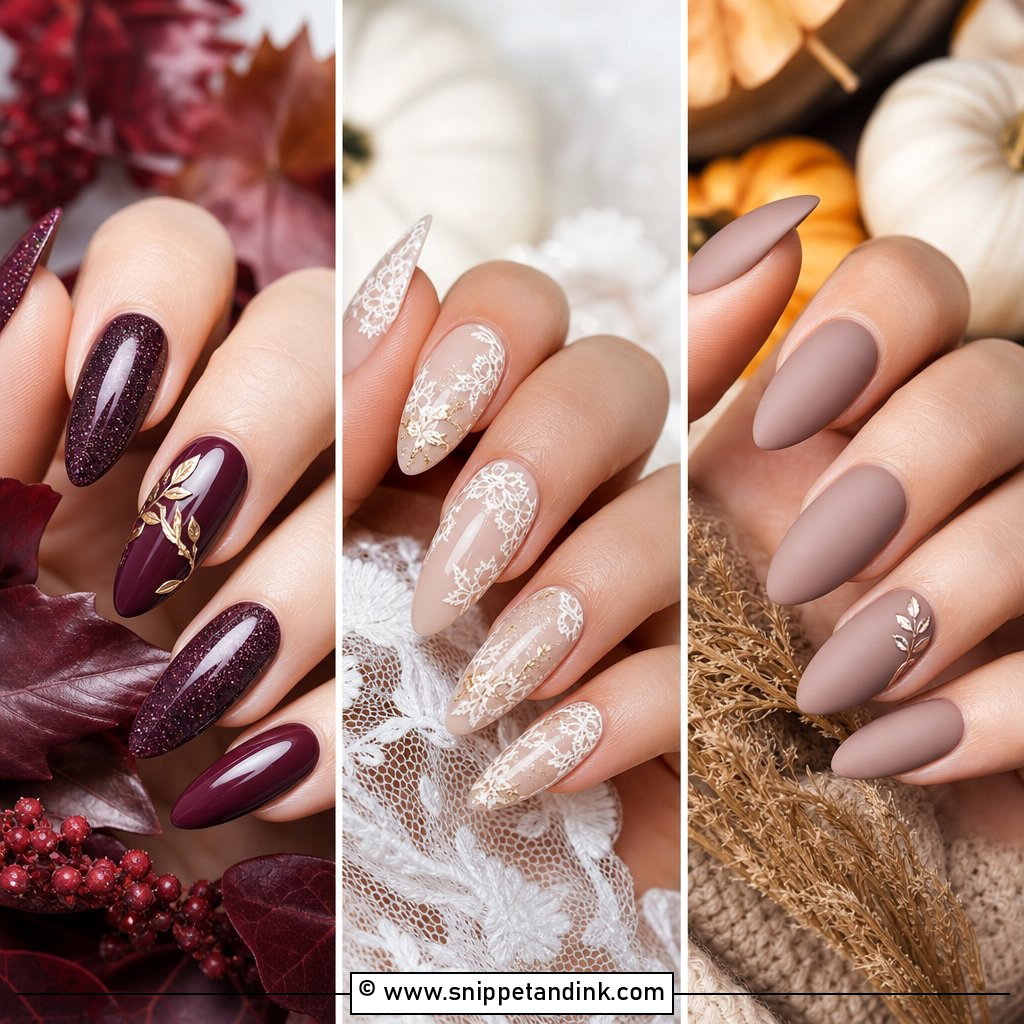
Lace art can be hand-painted, stamped or applied as a decal, and the method changes the result. Stamping gives crisp, even pattern; hand-painting looks more like real lace but takes far longer in the chair. I usually keep lace to one or two accent nails. A full set of busy pattern starts to look like a print rather than a detail. Bring a photo of the actual lace on your gown, because matching the motif is what makes it feel personal.
14. Floral Wedding Nails
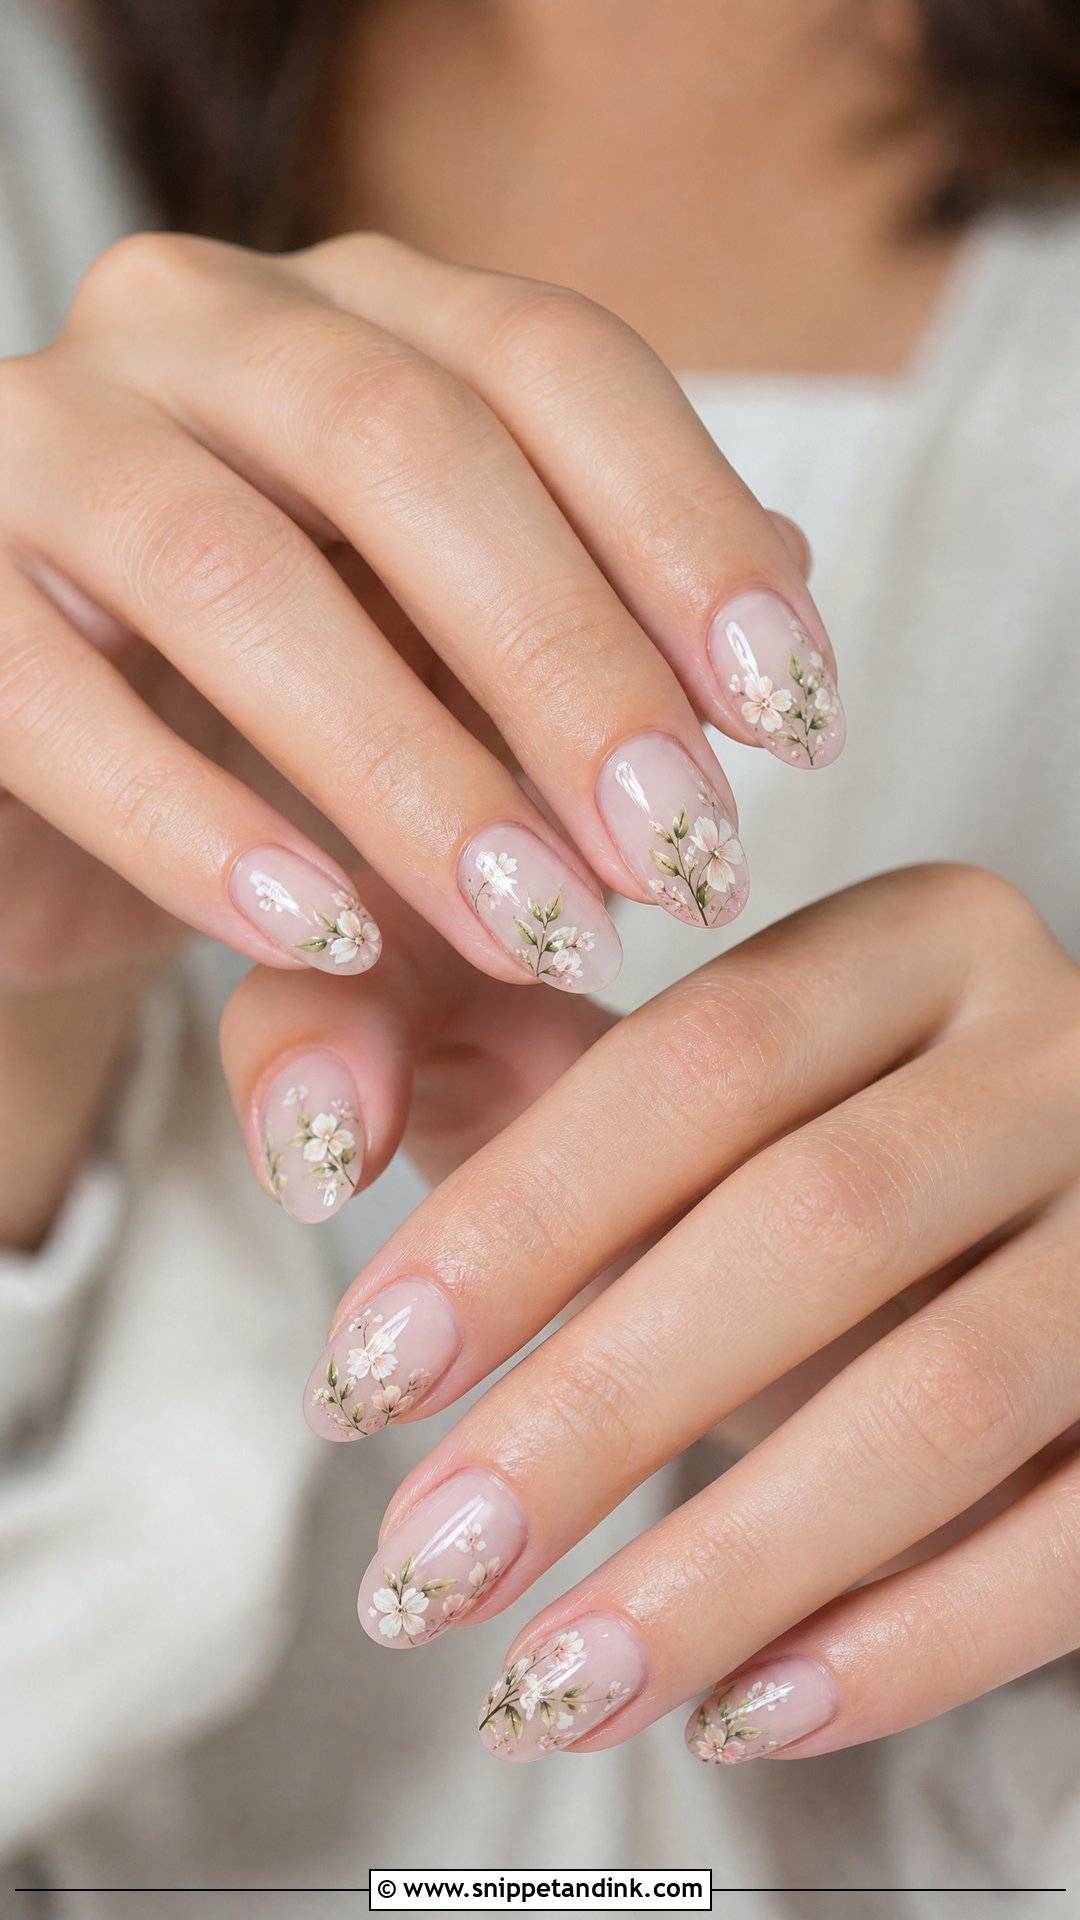
Floral art works best when the flowers are small and the base stays sheer. I paint petals in thin white or blush strokes and add a dot of pearl or gold at the centre for depth. Blooms that are too big, or on all ten nails, make hands look busy in bouquet photos, where the real flowers are already doing the work. For a spring or garden ceremony, two accent nails per hand is usually where I stop.
15. Gold Accent Wedding Nails
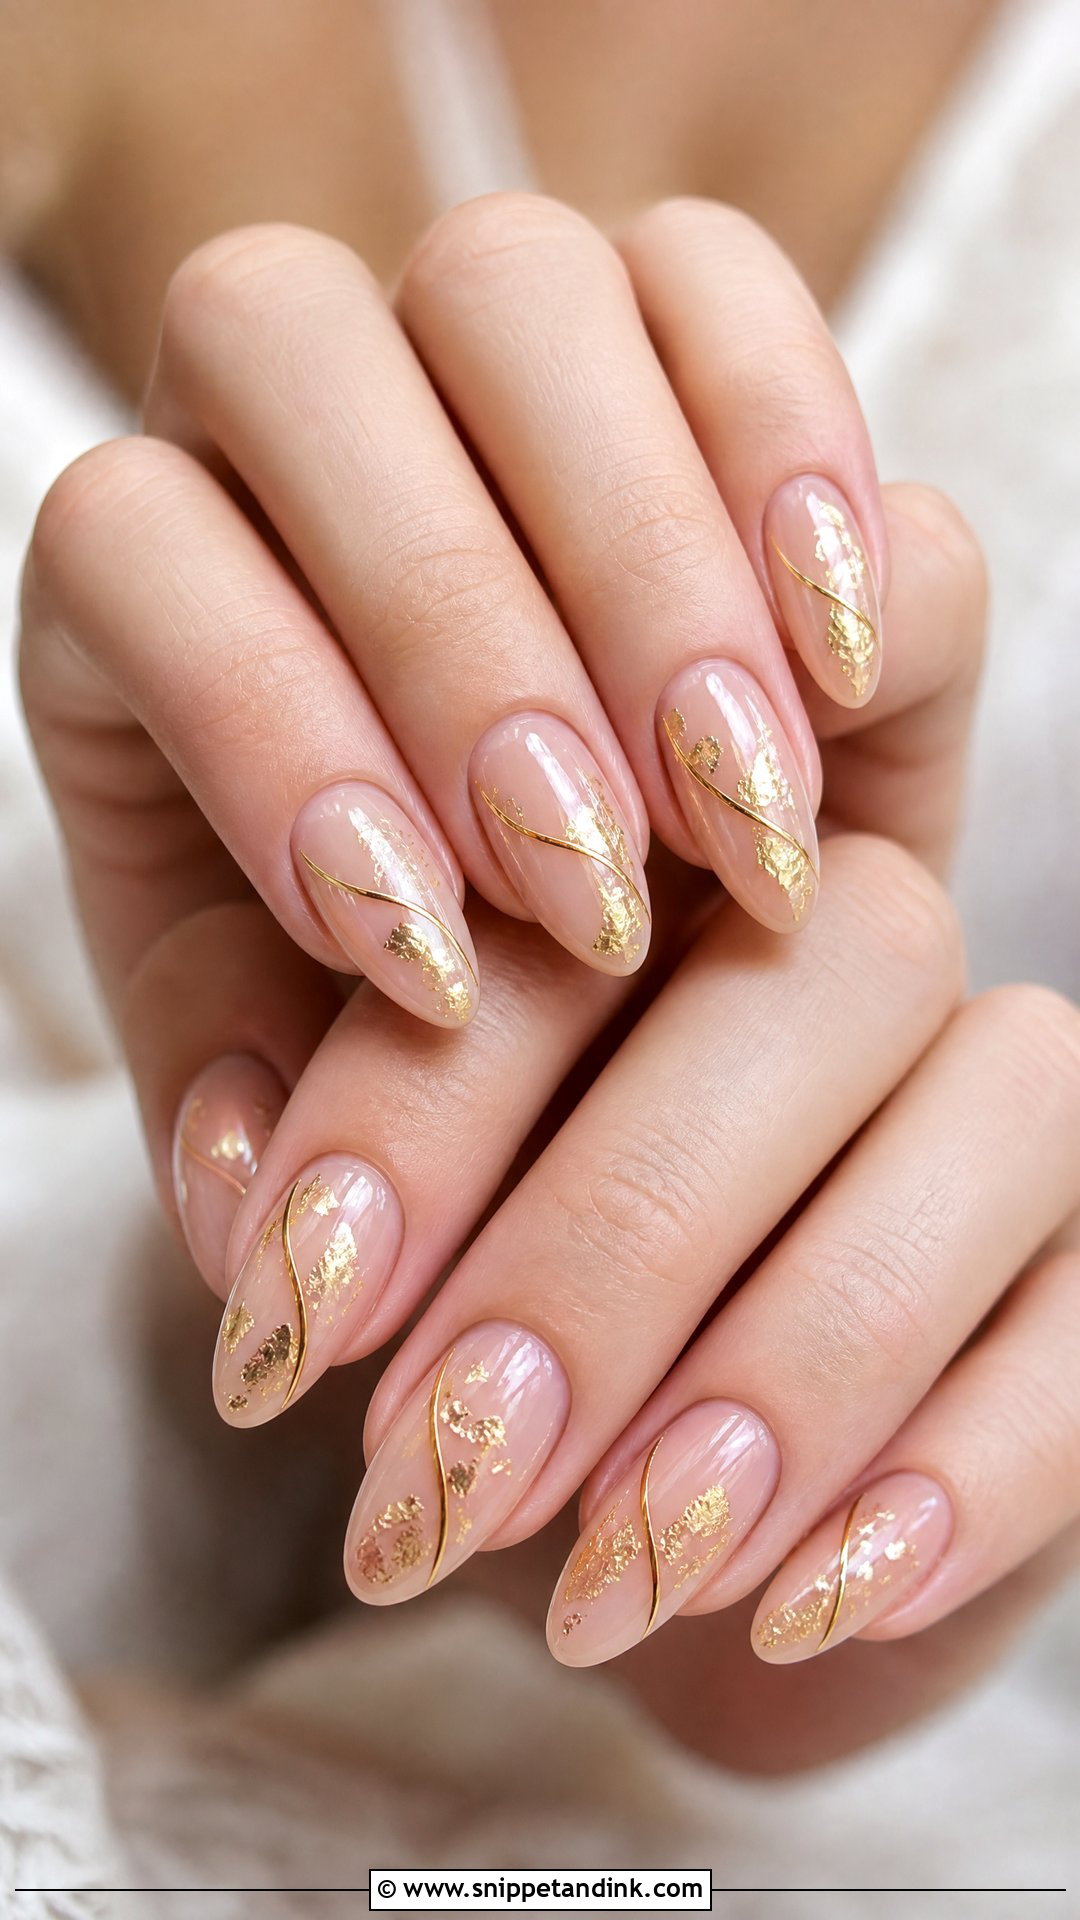
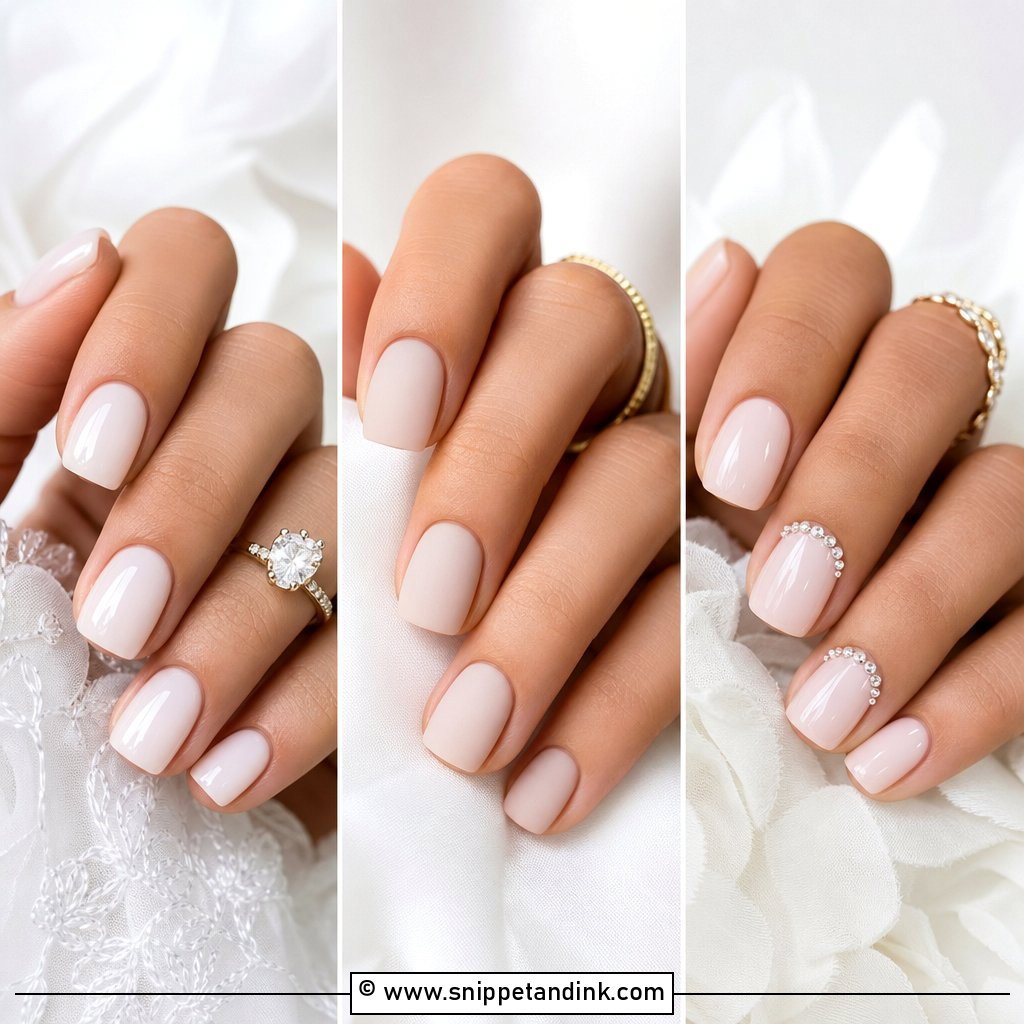
Gold accents suit brides wearing yellow gold, and they bring warmth under candlelight in a way cooler metals don’t. I use foil flakes, a fine gold line or a hair-thin tip rather than chunky glitter. Foil needs to be fully sealed under top coat or the edges lift and catch. Keep the base nude, blush or milky so the metal looks deliberate, and repeat the gold of the ring rather than inventing a new shade.
16. Silver Accent Wedding Nails
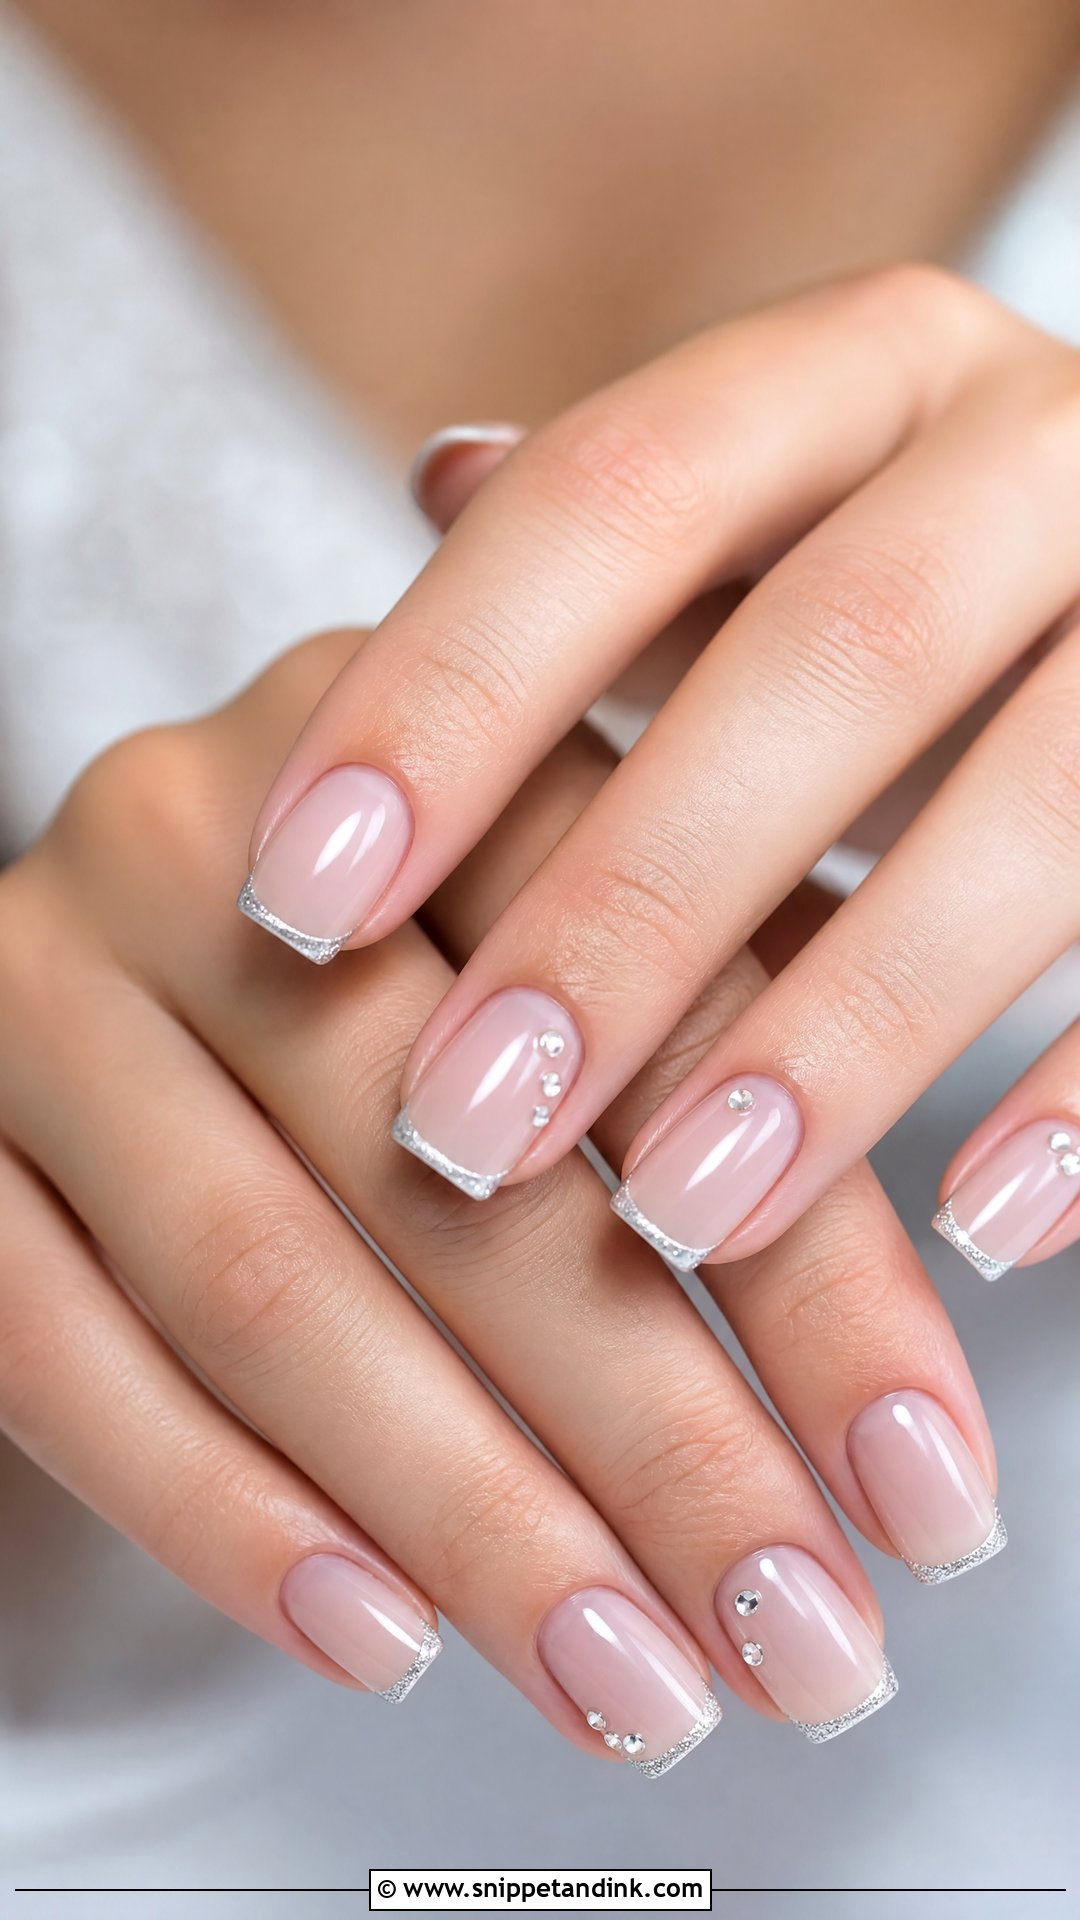
Silver detail is the counterpart for platinum, white gold and diamonds. A fine silver tip or a thin line over a sheer base keeps it crisp. I lean toward it for winter and evening weddings, when cool light makes silver sparkle rather than look grey. The risk is contrast. Over a very warm nude, silver can look disconnected, so I pair it with a cooler pink or a sheer white.
17. Marble Wedding Nails
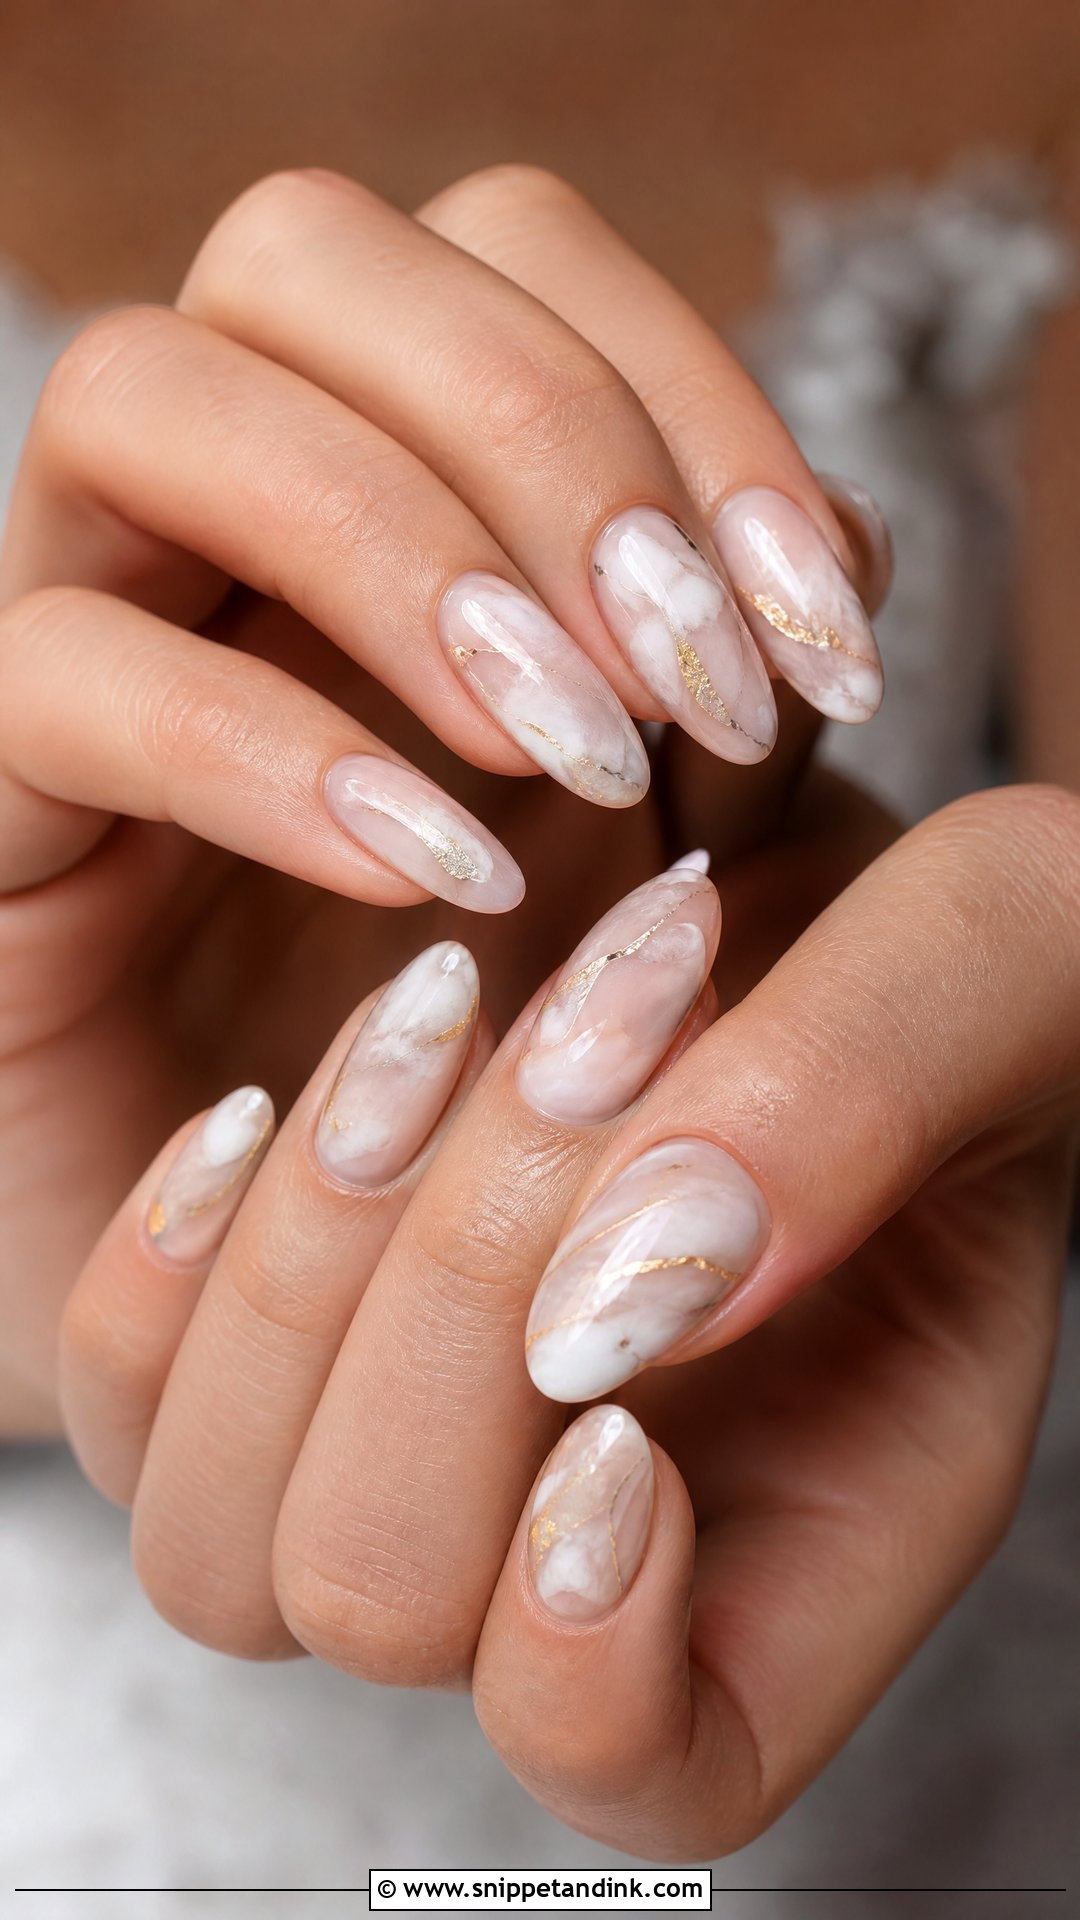
Marble wedding nails need restraint to stay bridal. I work the veining in white, cream and the palest grey, blooming it into wet gel so the lines soften on their own, and I stop before it looks like a kitchen counter. Dark veins read as dirt in photos. Almond, oval and coffin give the pattern enough length to flow. A fleck of gold foil is the most I’d add, and only on one nail.
18. Coffin Wedding Nails
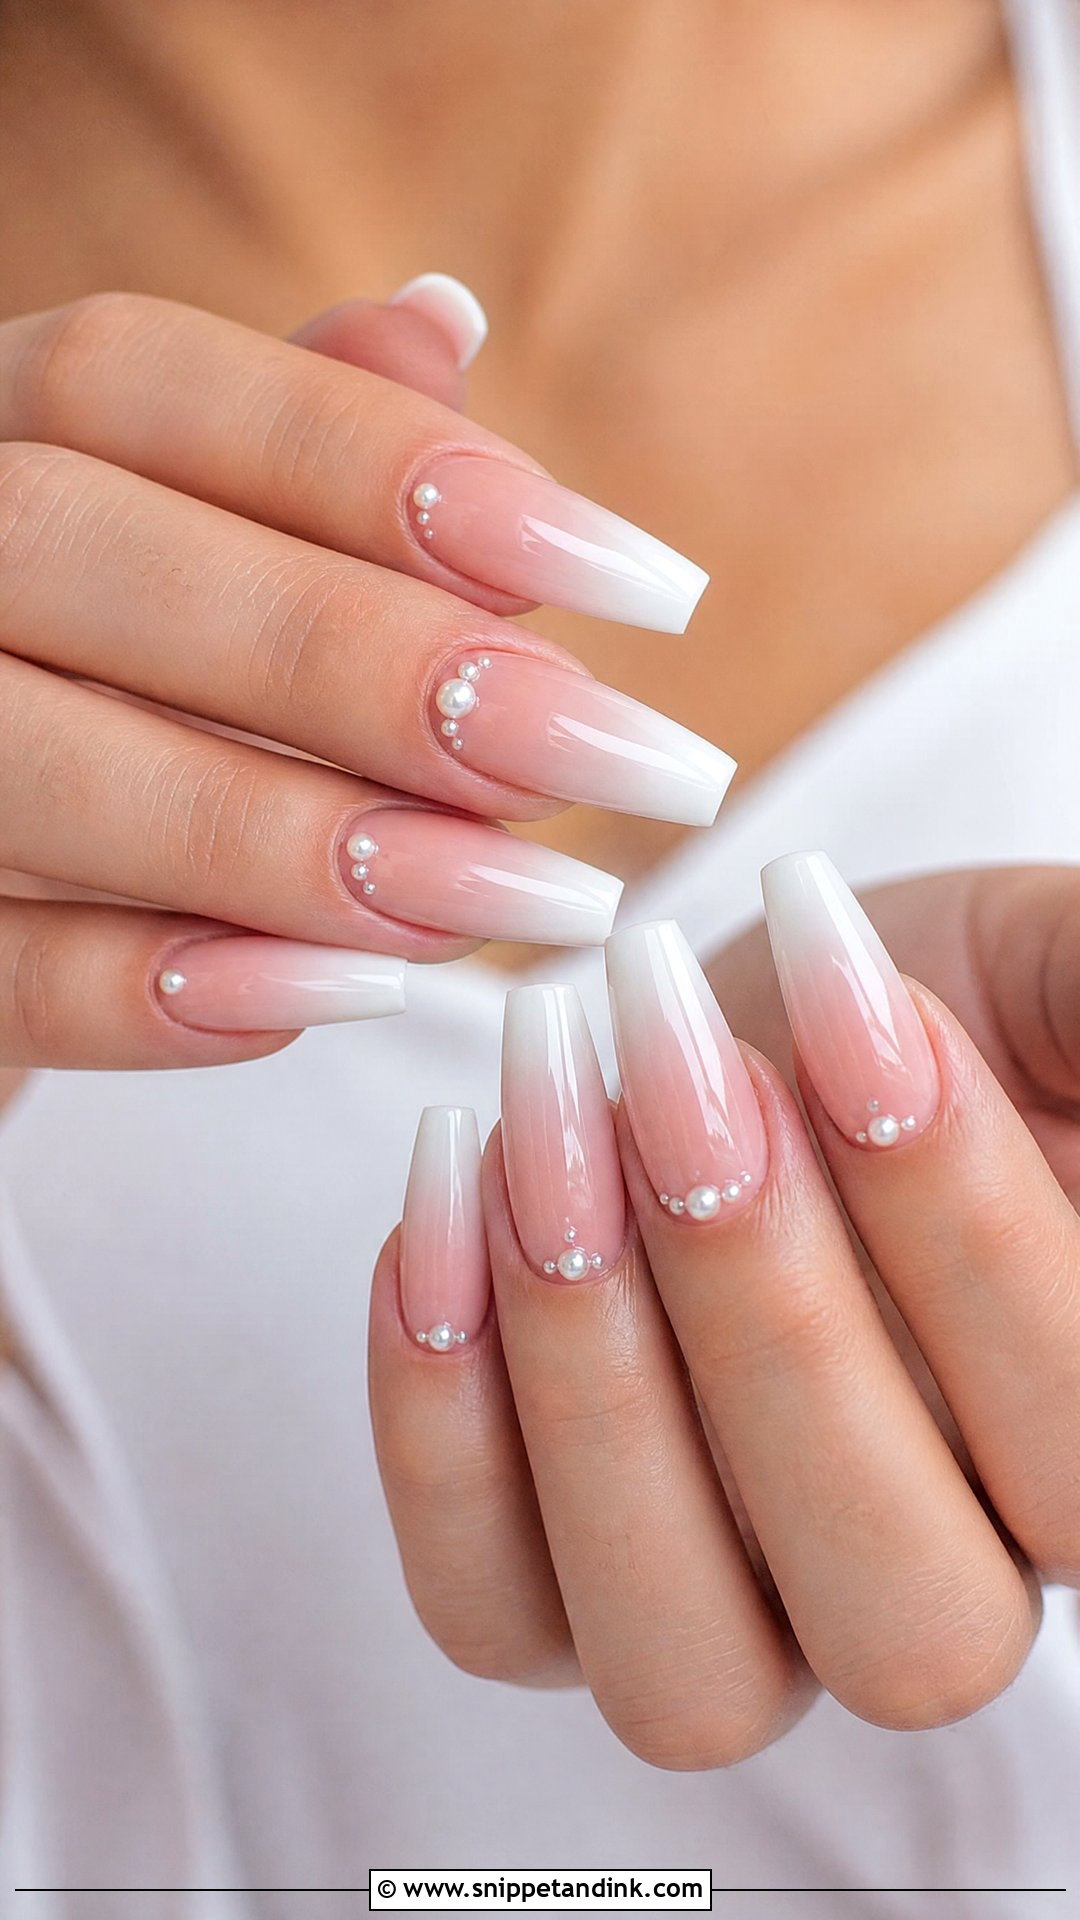
Coffin nails give the most surface for art, which is exactly why they can tip into too much. I recommend medium length for a wedding. Long coffin tips are vulnerable at the corners, and a cracked corner is the repair I get called about most often on the morning itself. Soft ombré, milky white or a blush chrome keeps the shape bridal. If you add crystals, keep them toward the cuticle where the nail is strongest.
19. Square Wedding Nails
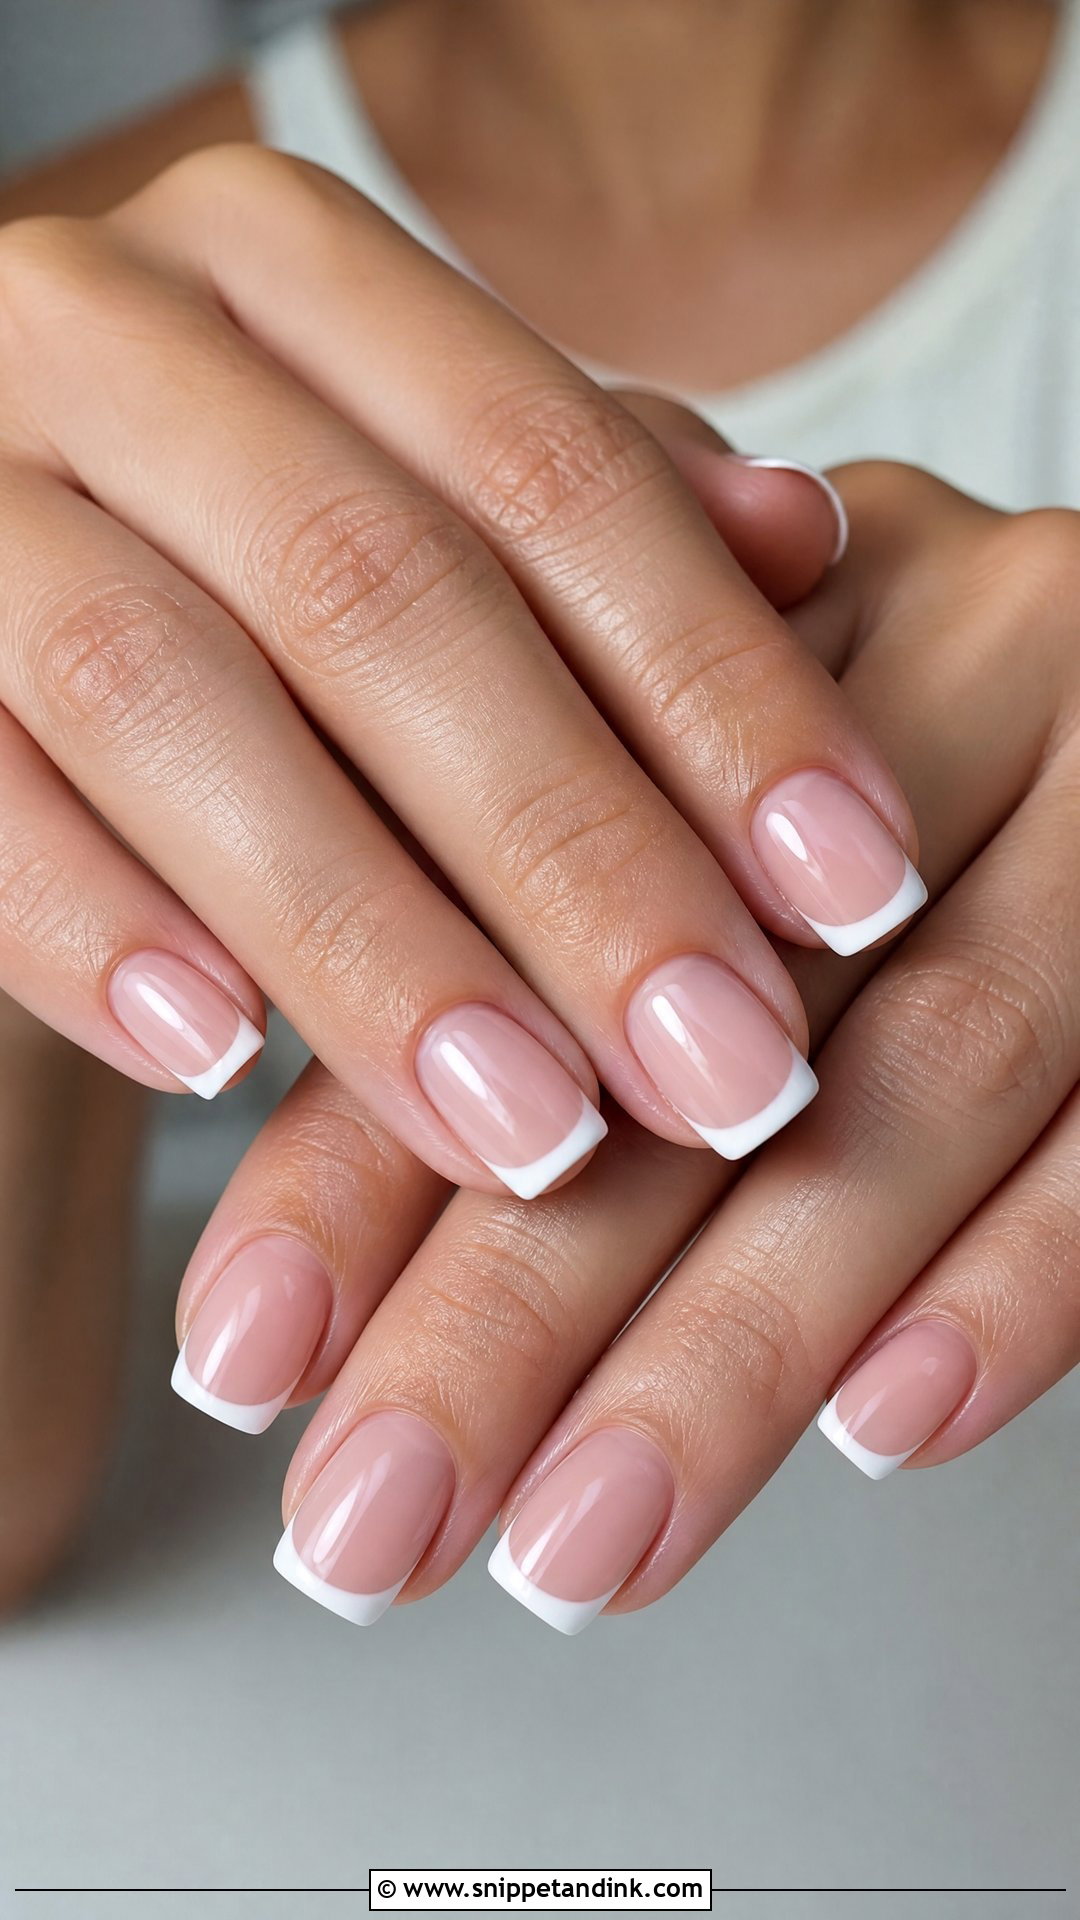
A hard square can look blunt in close-up, so on brides I soften the corners slightly into a squoval. The shape suits short nails particularly well because the straight edge makes even a small nail look deliberate. It loves a French or a micro French, and it is the most practical shape for anyone typing, lifting or holding a toddler on the day. If your fingers are short, though, I’d suggest a rounder shape to lengthen them.
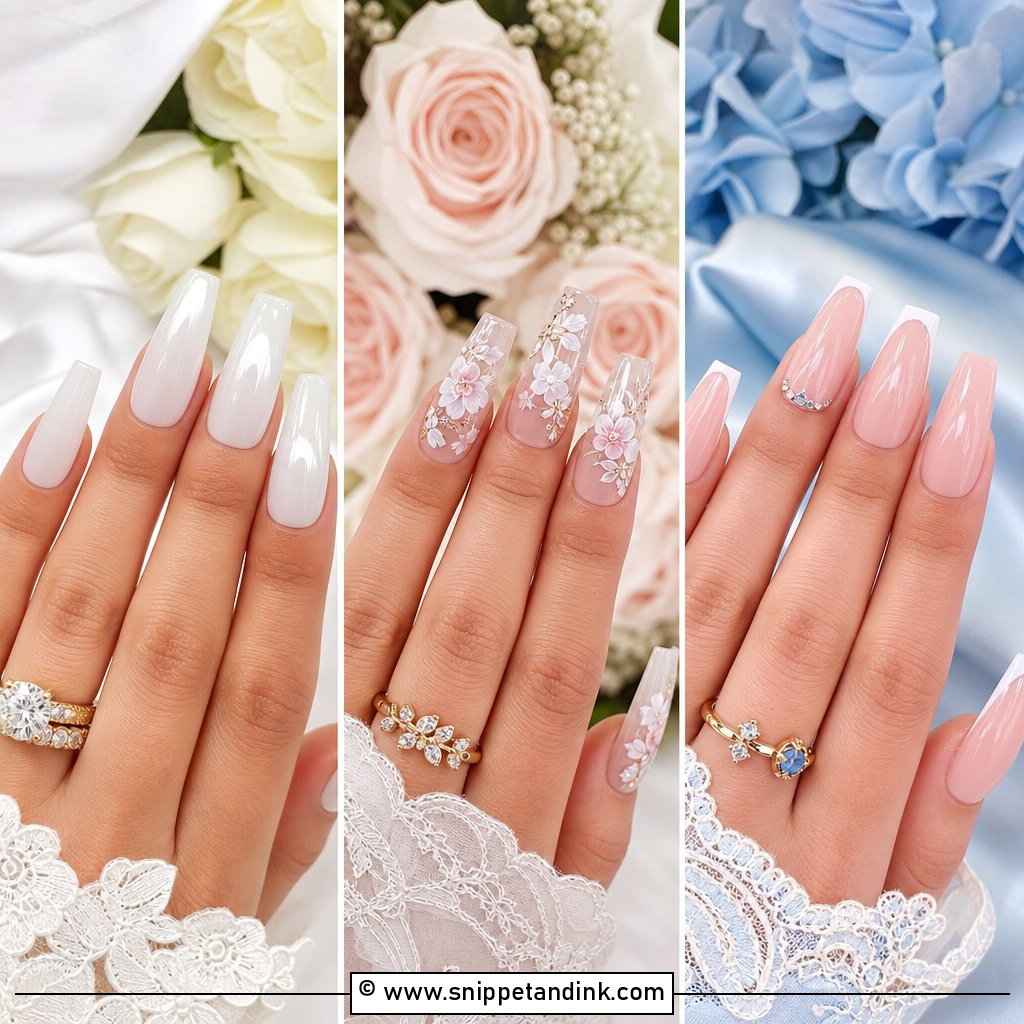
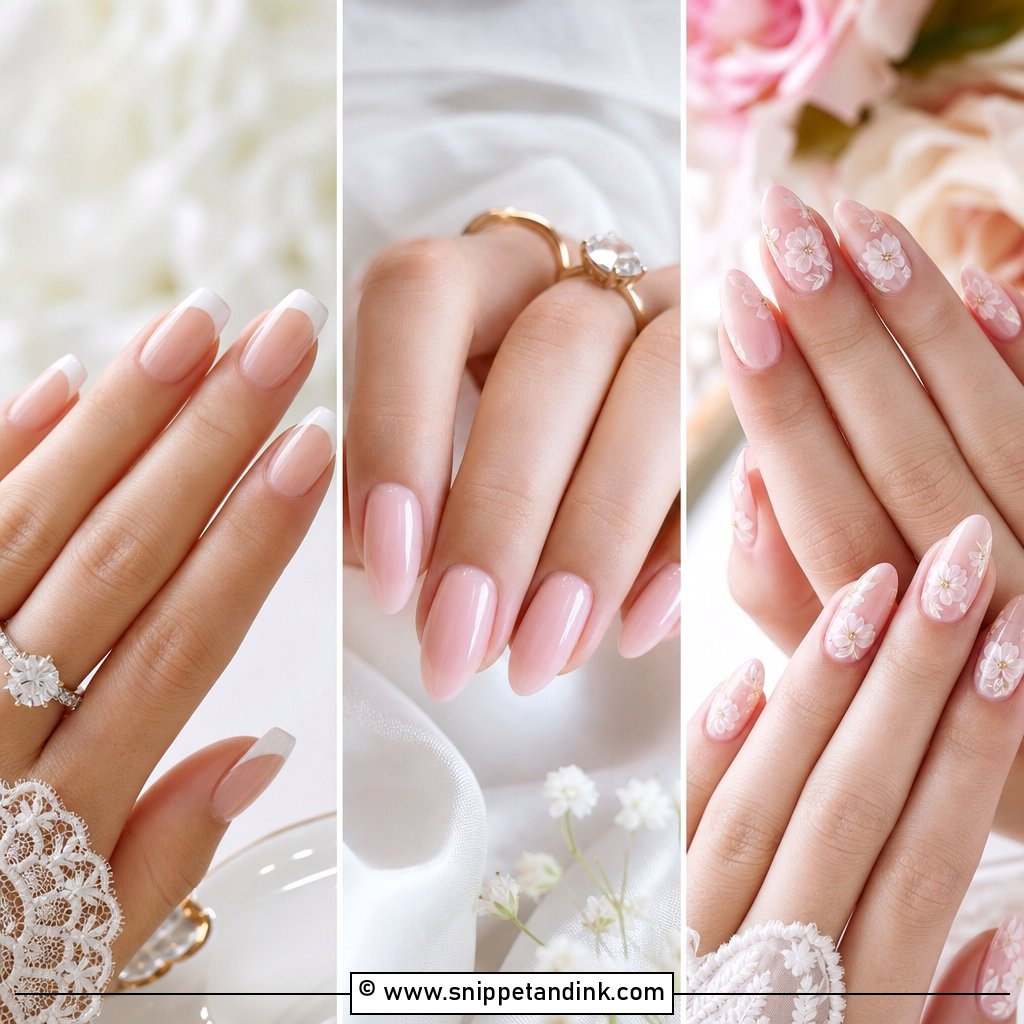
20. Oval Wedding Nails
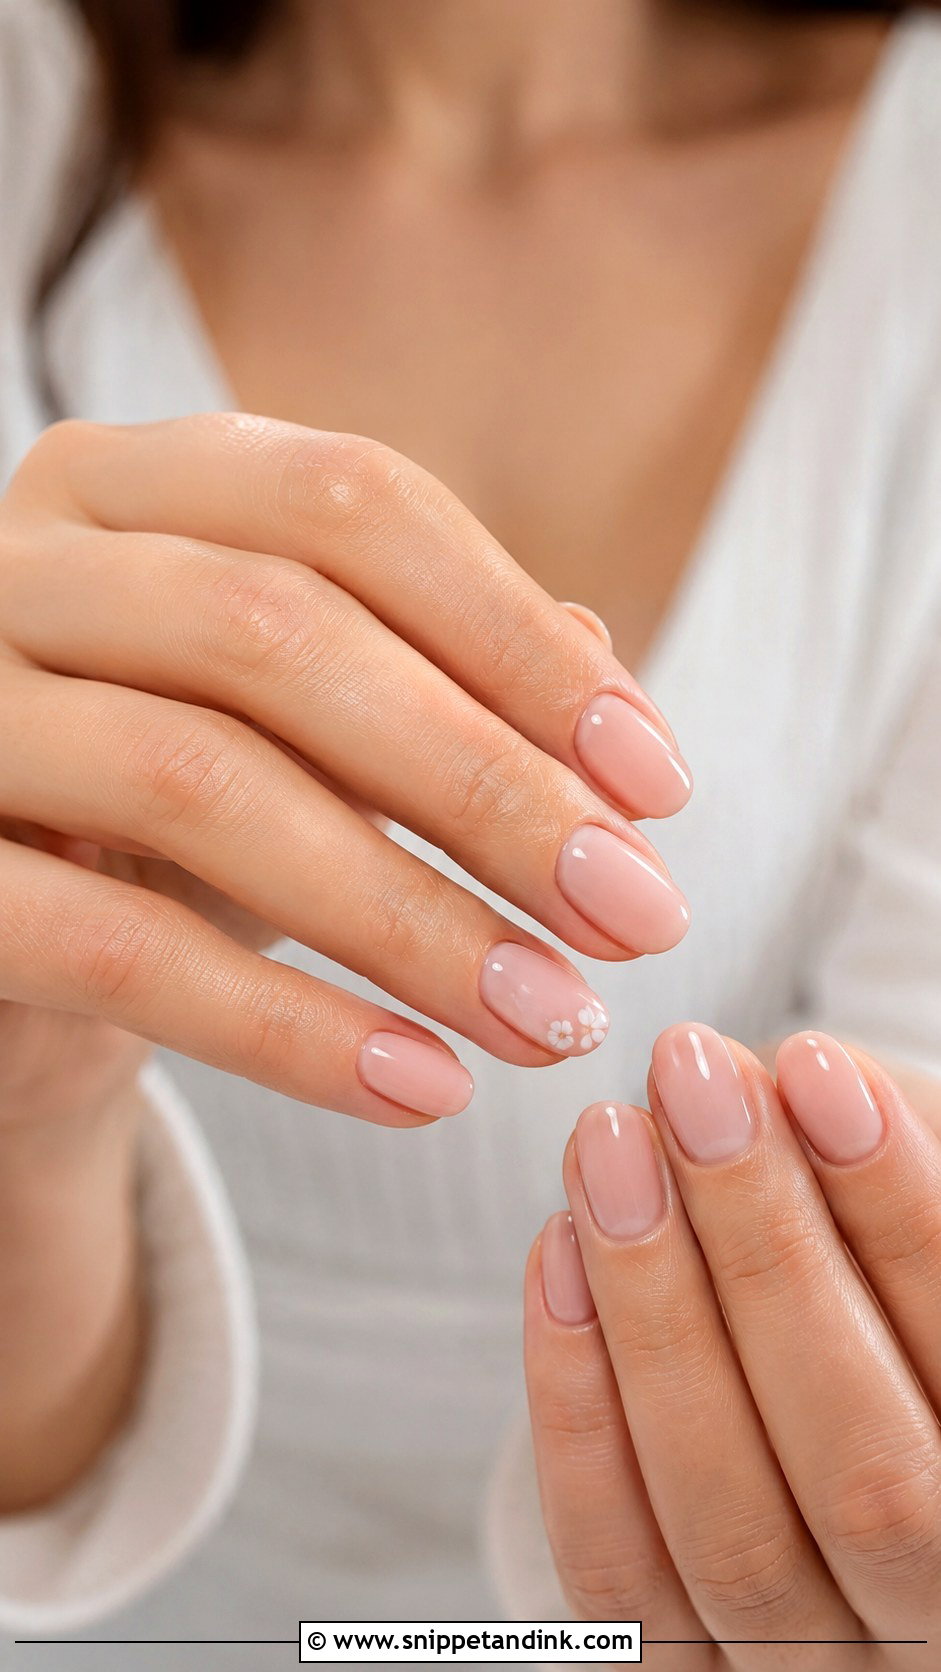
Oval follows the natural curve of the cuticle, which is why it looks gentle in every photo angle. It is my first suggestion for brides with weaker nails, since there are no corners to break. It takes sheer pink, milky white and pearl finishes well, and it is the right canvas for small flowers or a little lace. Very wide nail beds can look rounder than you’d like, and that is the only time I steer someone away from it.
21. Glitter Ombré Wedding Nails
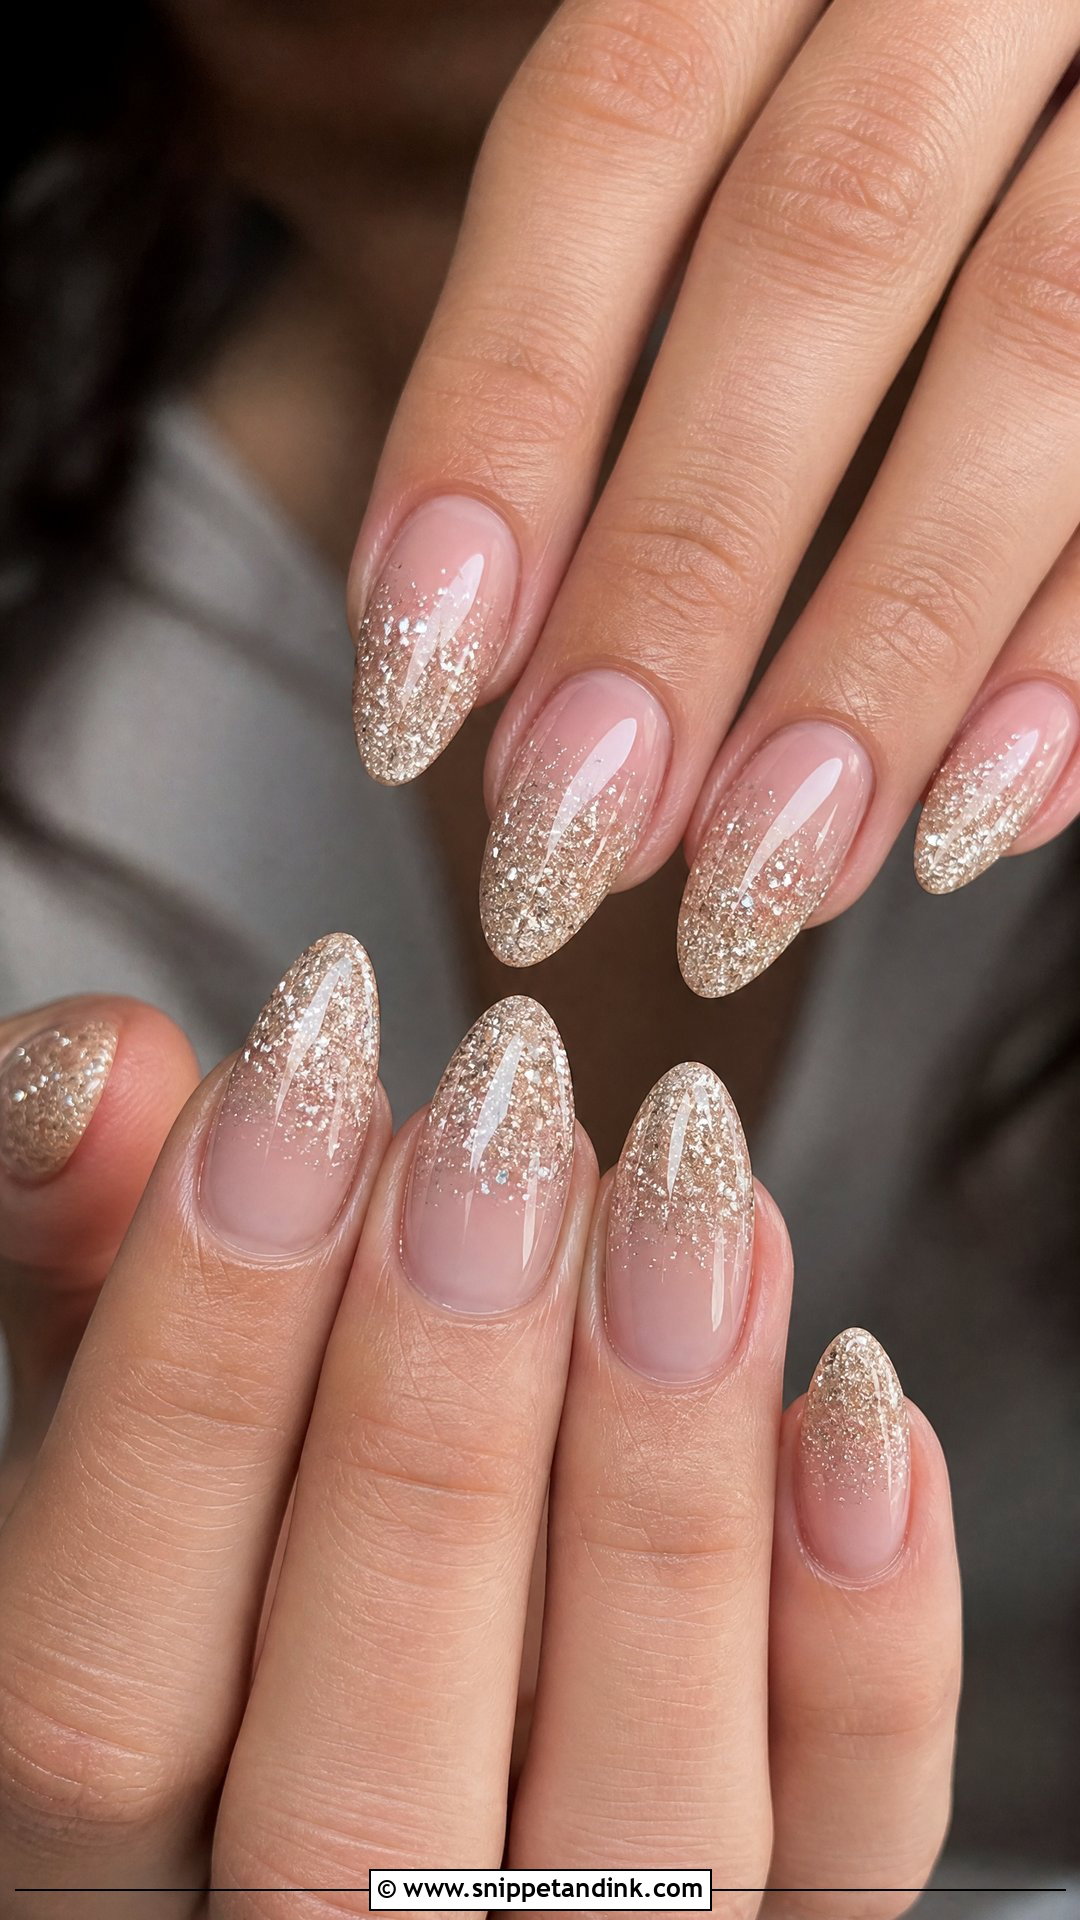
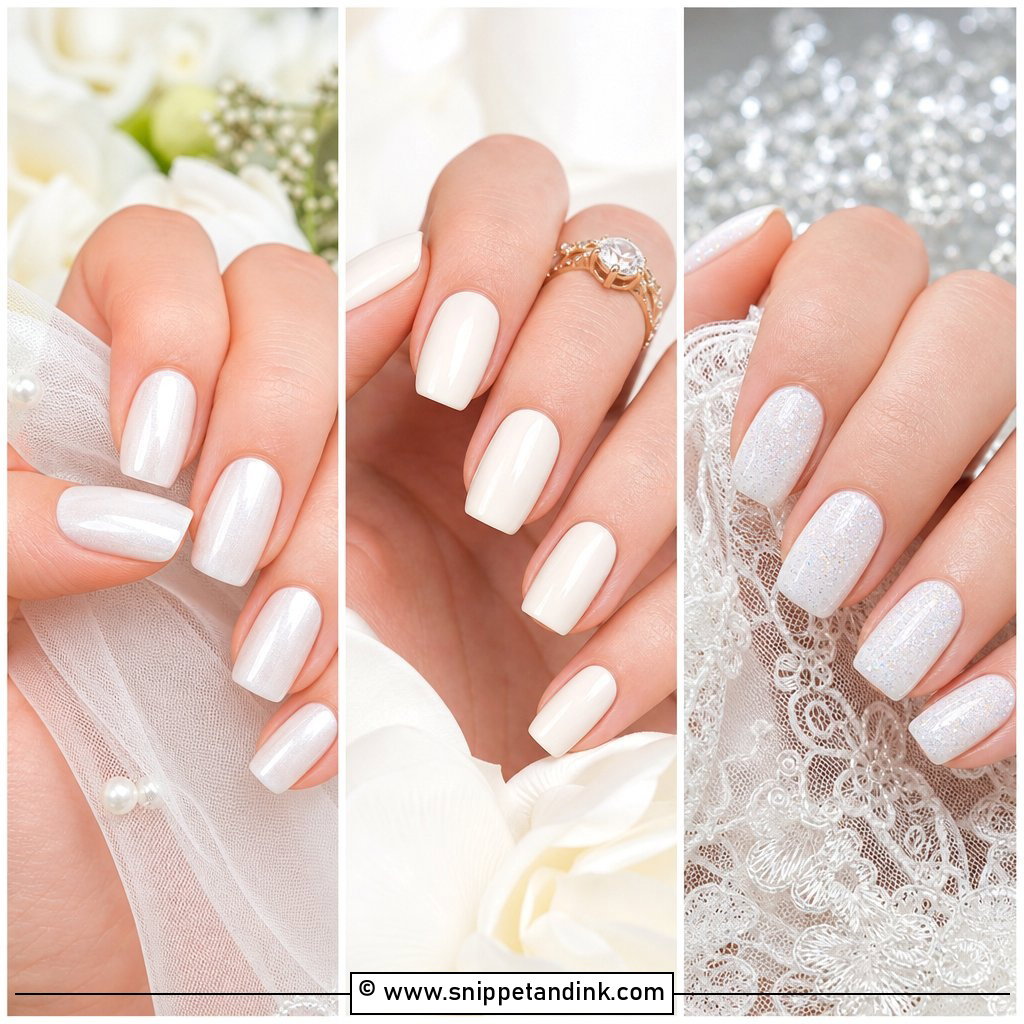
Glitter ombré concentrates the sparkle at one end and fades it out over a sheer base, so you get shine without a full disco set. I prefer a fine glitter suspended in gel to loose chunky flakes, which feel rough and are hard to remove. Champagne, pearl and rose gold are the shades that photograph softest. Expect removal to take longer than a plain gel; glitter soaks off slowly, so allow for that at your post-honeymoon appointment.
22. Crystal Wedding Nails
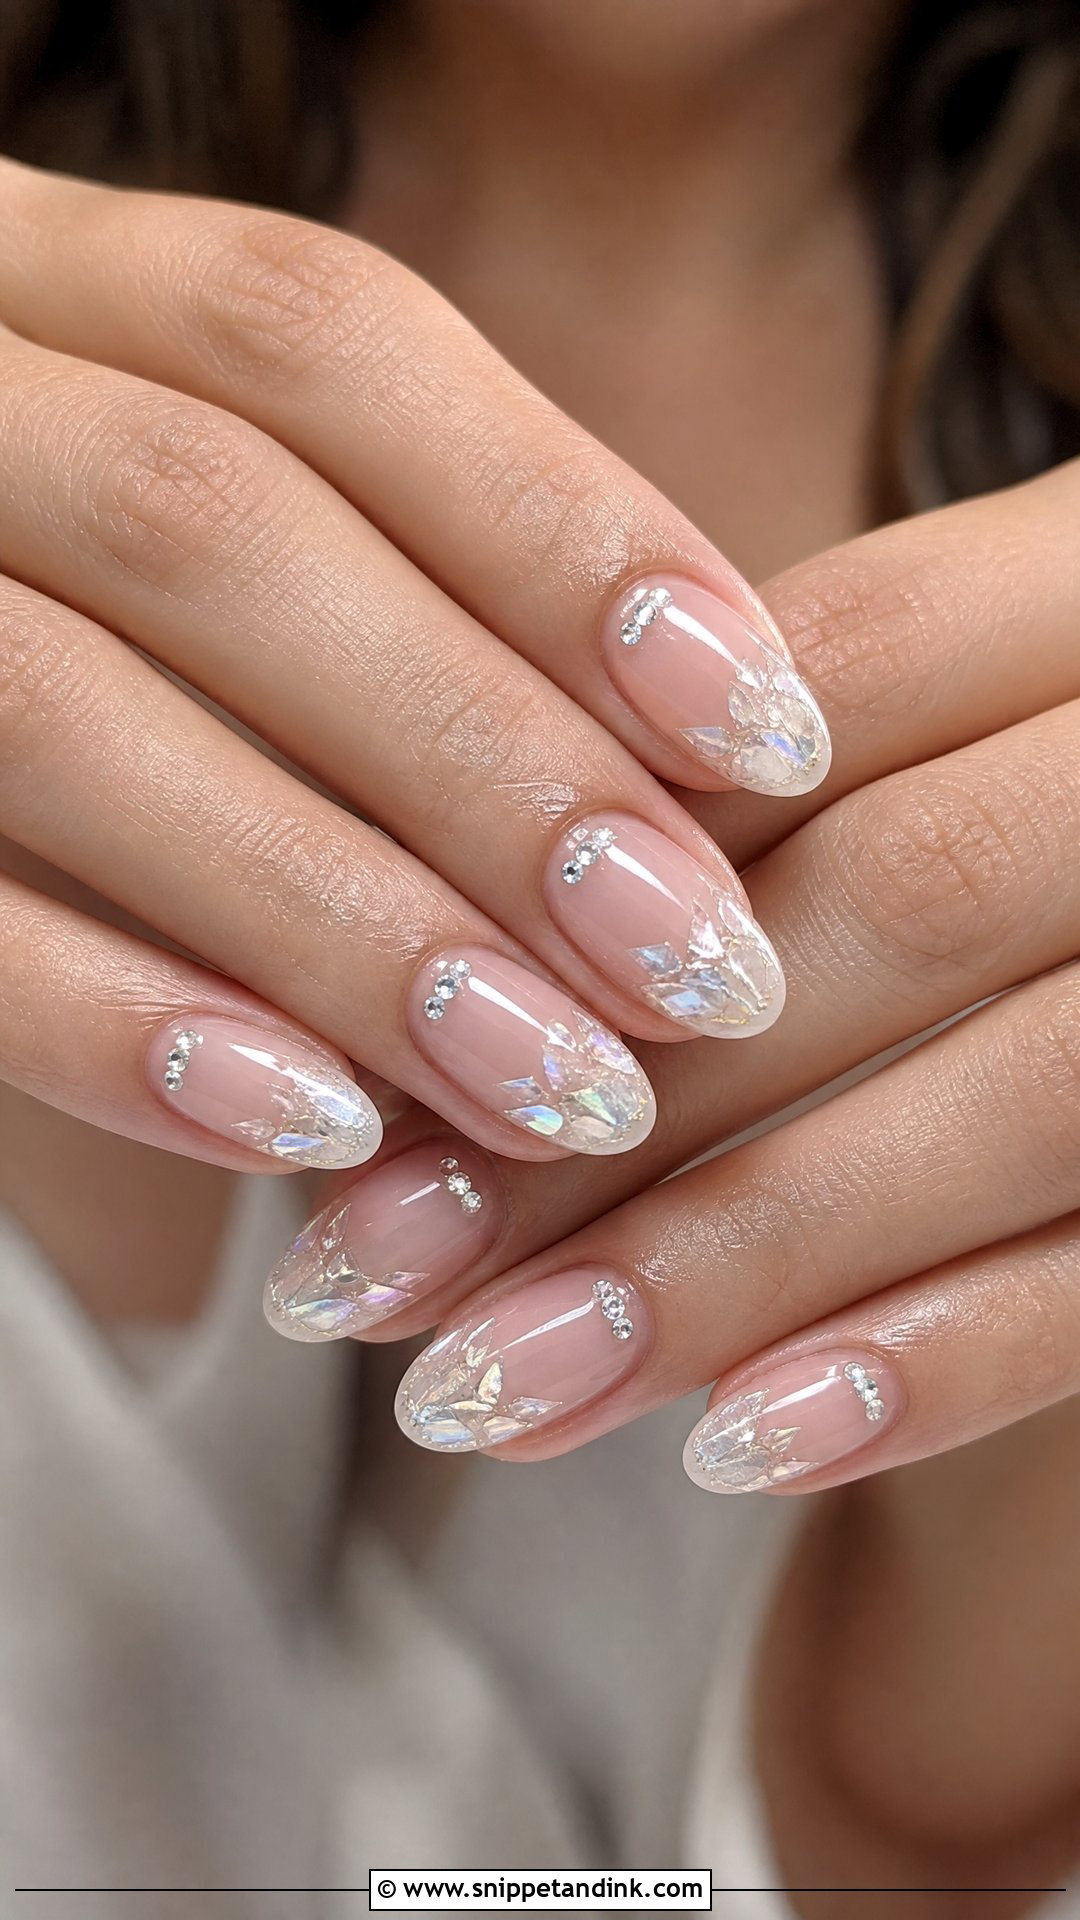
Crystals are jewellery on the nail, and they behave like jewellery: they catch. I set small, flat-backed stones with gel glue near the cuticle and leave plenty of bare space around them. Stones at the tip are the ones that snag lace, so I avoid placing them there on anyone wearing a veil or embroidered sleeves. If your dress is beaded or sequinned, a few crystals tie the hands in. If it is plain crepe, one stone per hand is plenty.
23. Rose Gold Wedding Nails
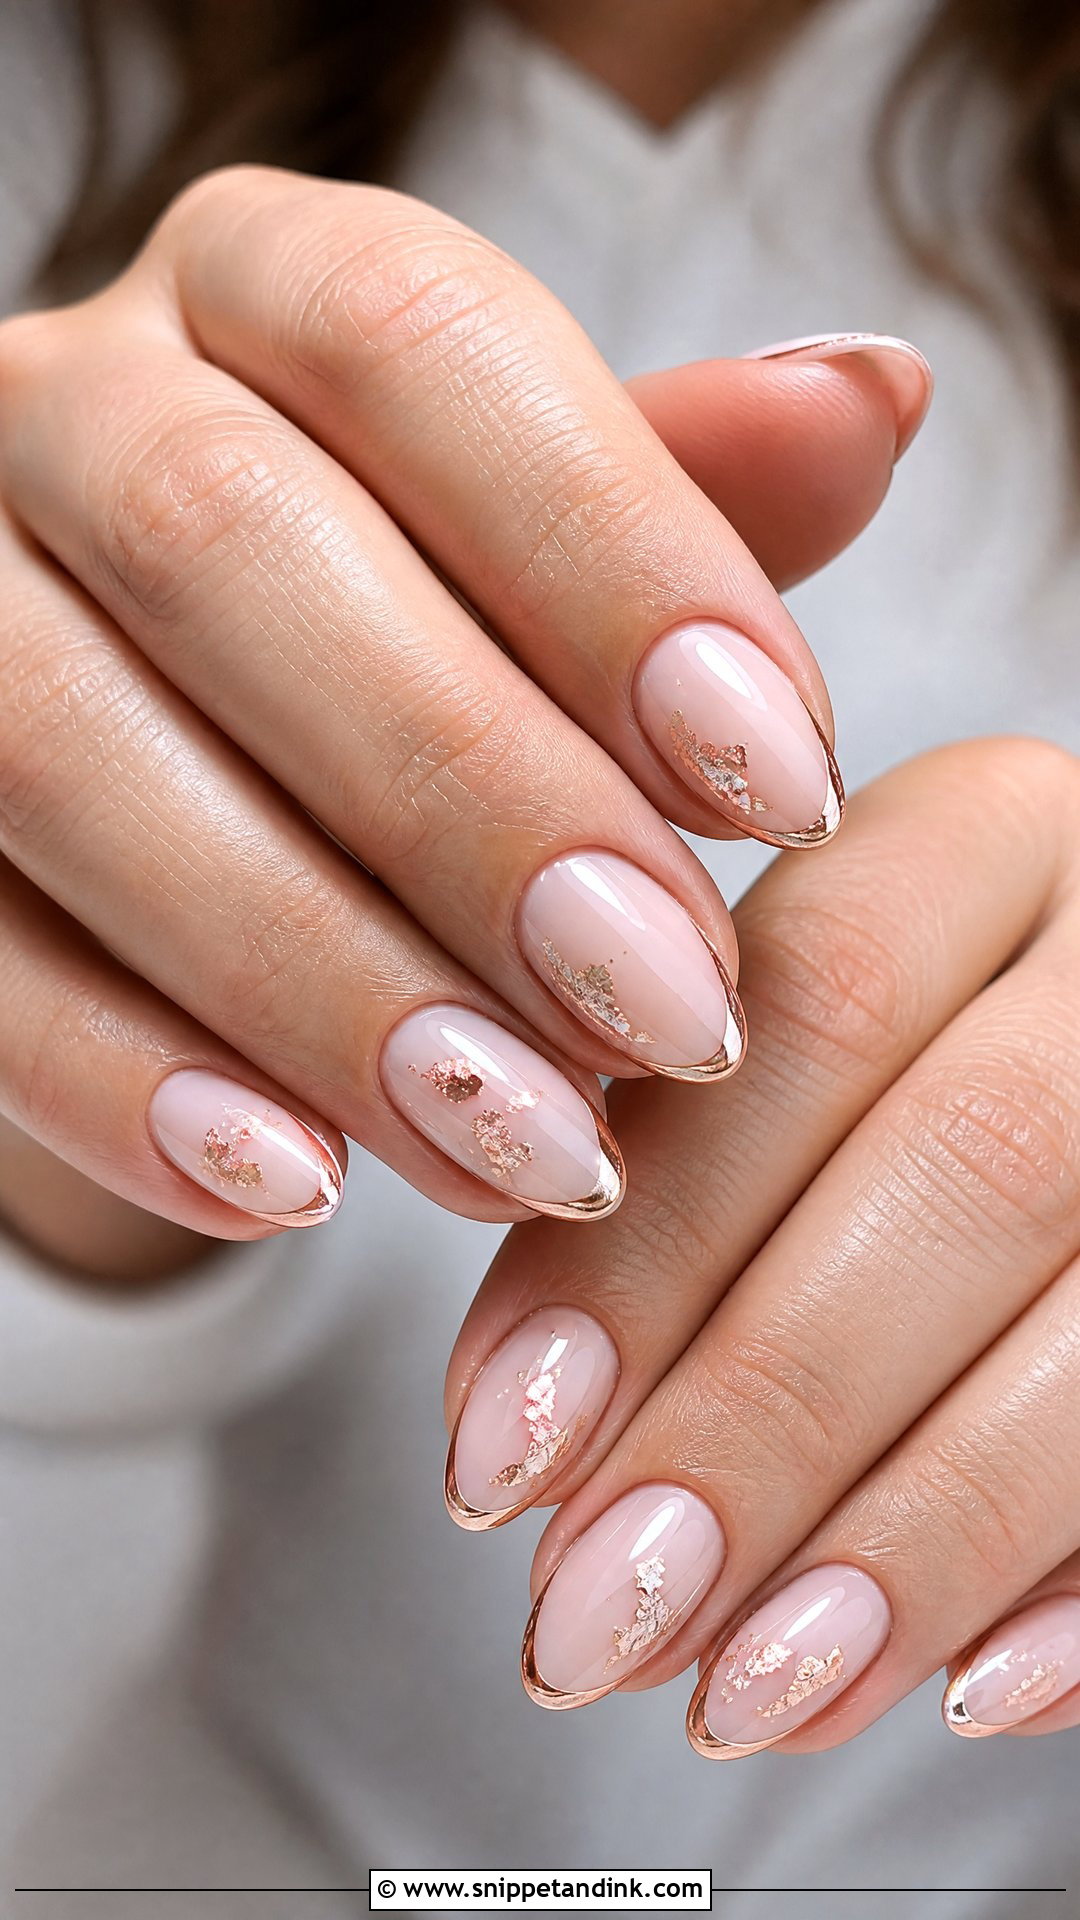
Rose gold sits between pink and metal, and it is at its best beside rose gold rings and blush gowns. I use it as a fine tip, a sheer chrome or a foil fleck over pink. It tends to flatter medium and warm skin; on very pale, cool skin I’ll lighten it so it doesn’t read orange. It is the softest way to wear a metallic without the brightness of yellow gold or silver.
24. Matte Wedding Nails
Matte is the finish I am most cautious about for brides. It looks velvety and modern, but the matte top coat absorbs oils, self-tanner and makeup, and it shows every ridge in the nail underneath. If you love it, I’ll make the base perfectly smooth first and add glossy tips or a pearl so the contrast looks intentional. Keep the shade soft. Nude, ivory or taupe suits a cool-weather or minimalist wedding best.
25. Sheer Pink Wedding Nails
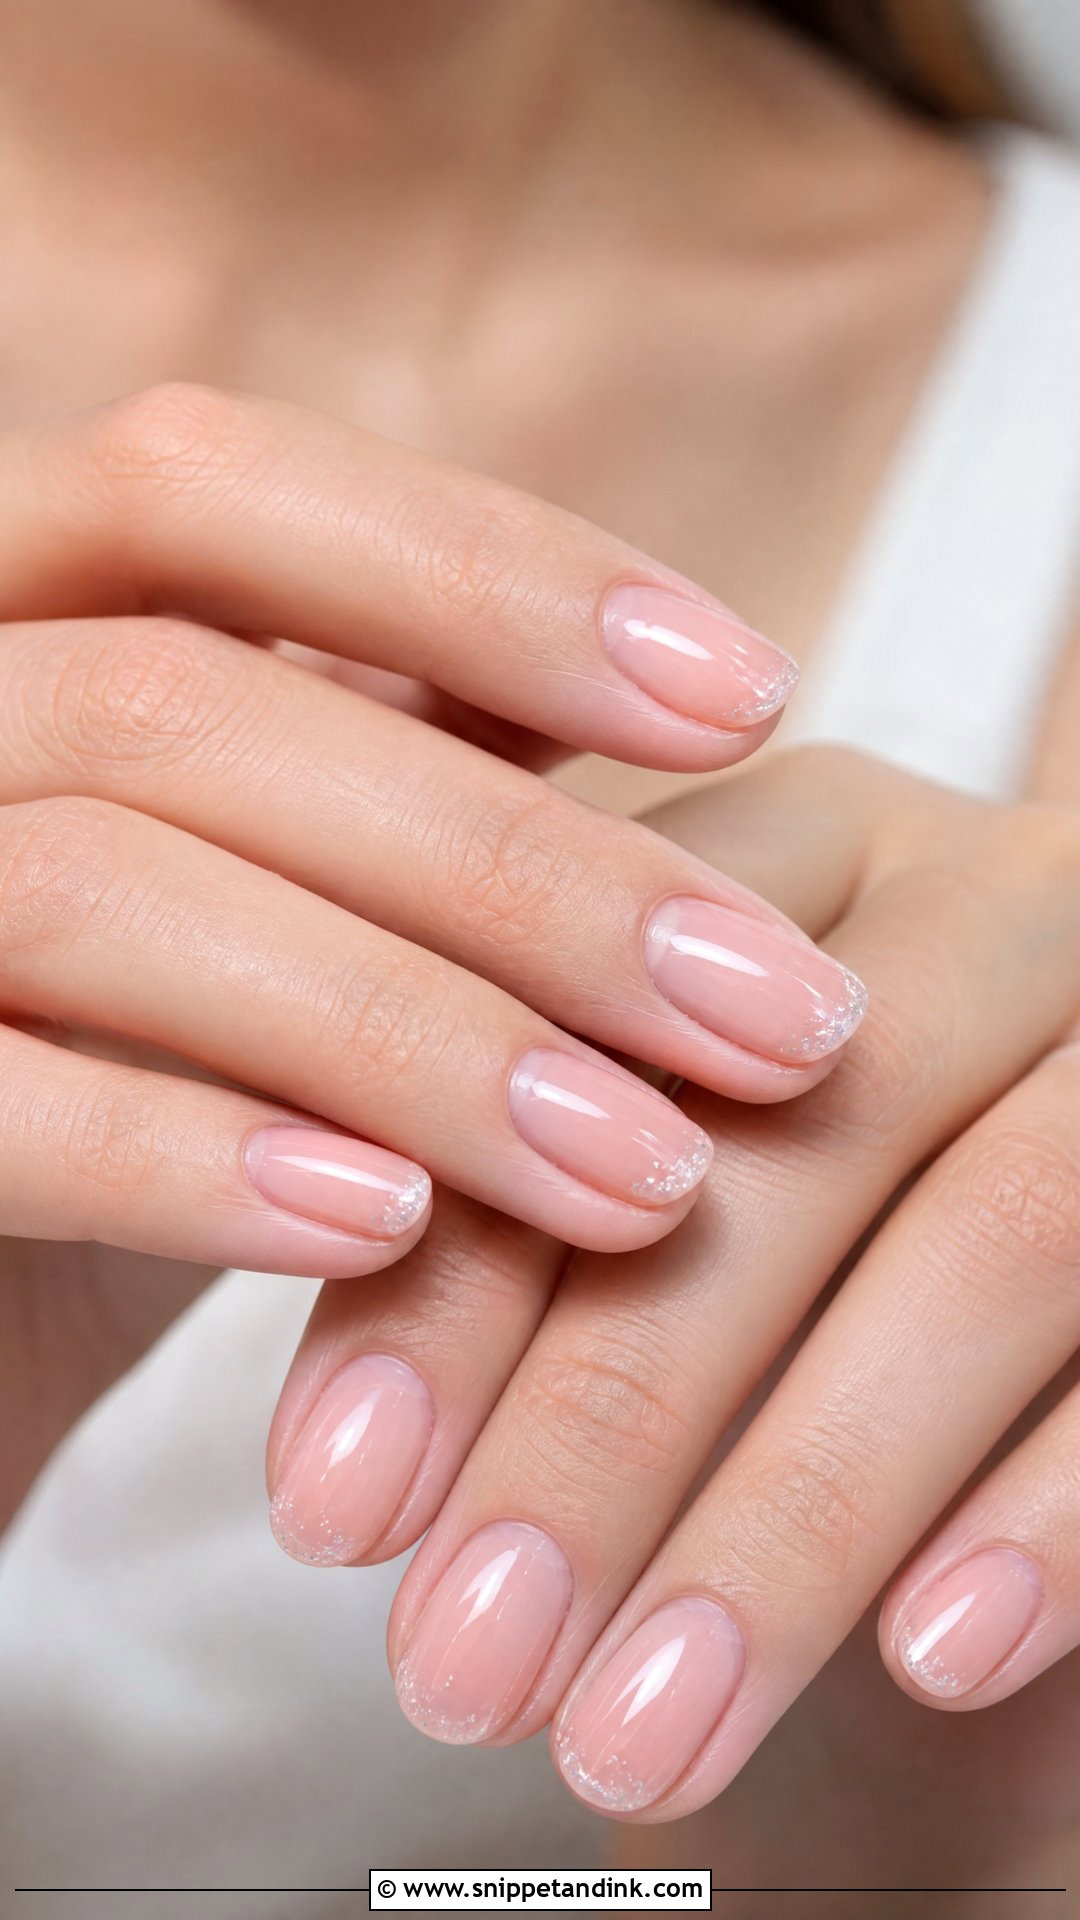
Sheer pink is the closest a manicure gets to your own nails on a good day. One or two coats of a tinted gel let the natural nail show through, so any staining or white spots will show too. I check for those first and add a slightly more opaque layer if needed. It suits every length and shape, and it is the safest bet when you have not chosen your bouquet yet. A pearl top coat is the only extra I’d consider.
26. Ivory Wedding Nails
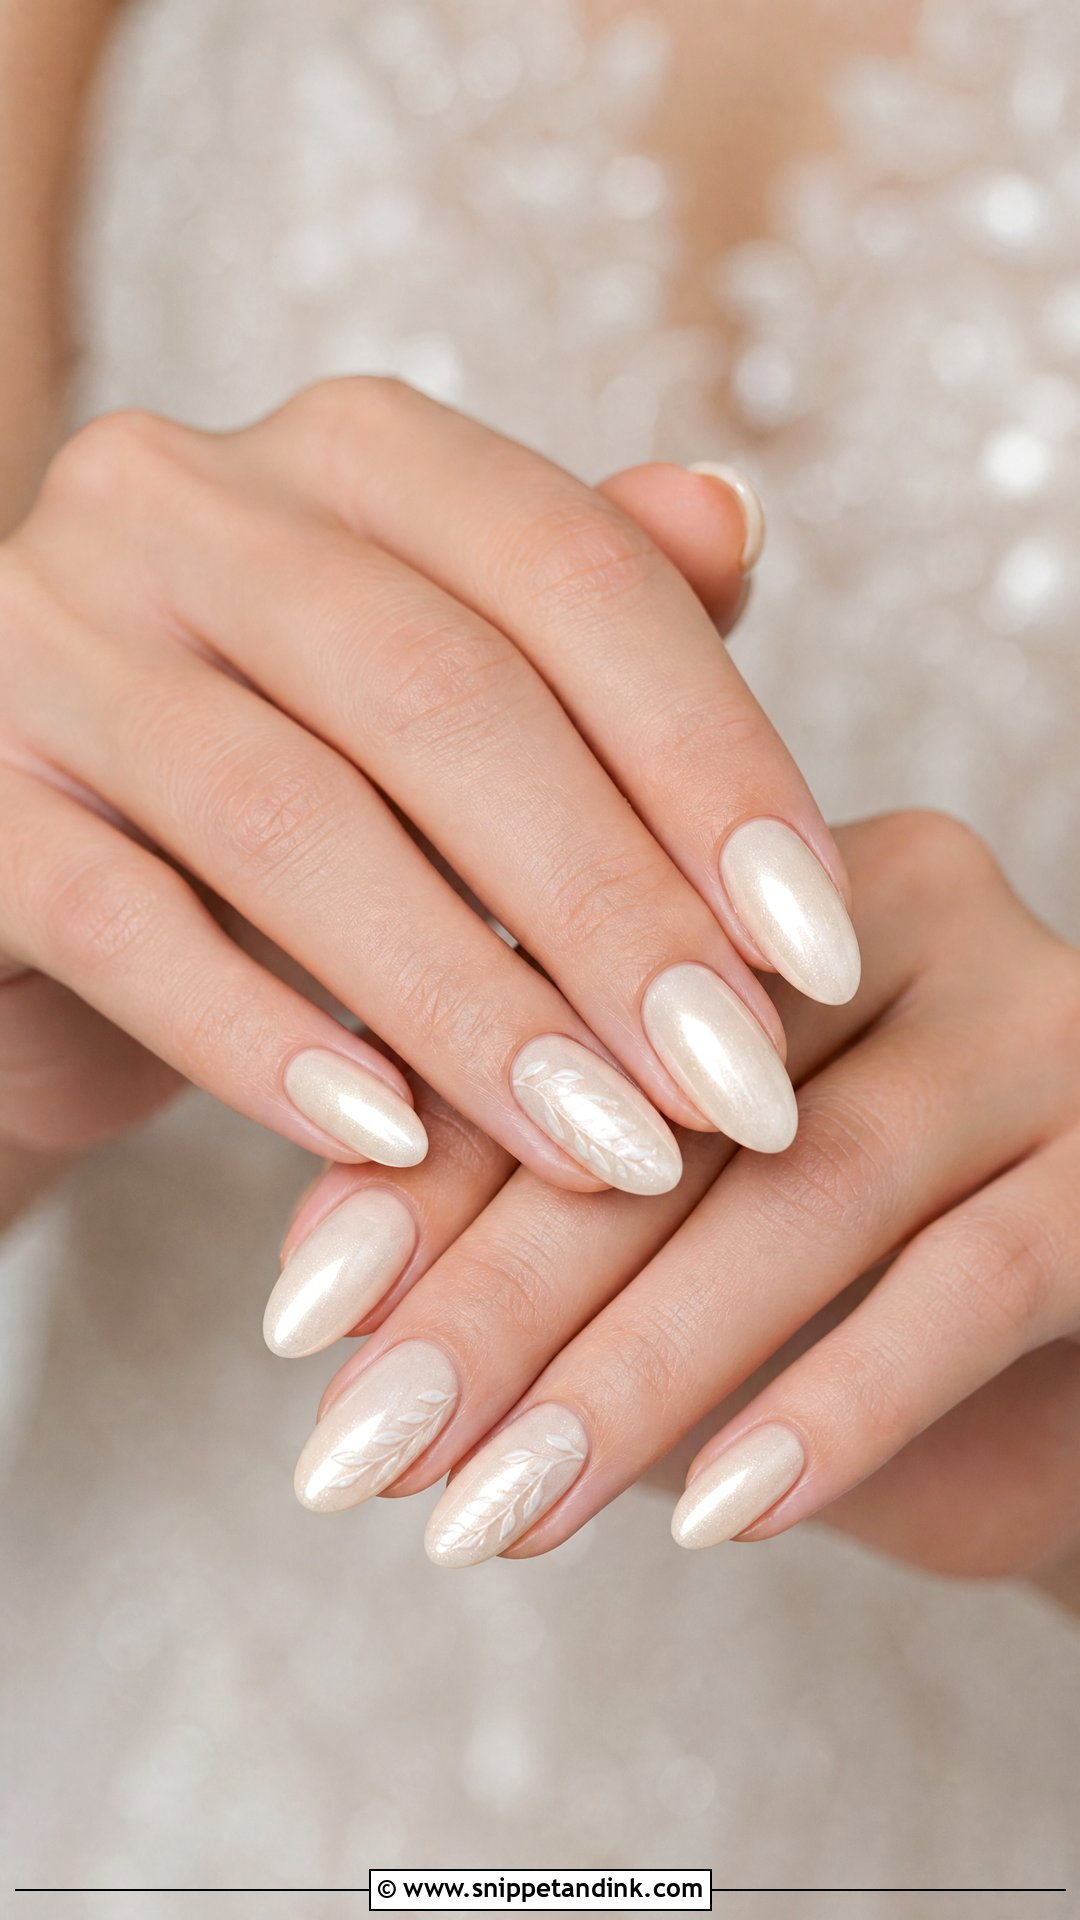
Ivory is warmer than white, and it is the answer when bright white makes an ivory or champagne gown look yellow by comparison. I hold the swatch against a fabric sample before deciding. That one check prevents more regret than anything else I do. A sheer ivory wash looks the most natural; an opaque cream is stronger and needs a perfectly even application. A little pearl shimmer is enough texture.
27. Minimal Wedding Nails
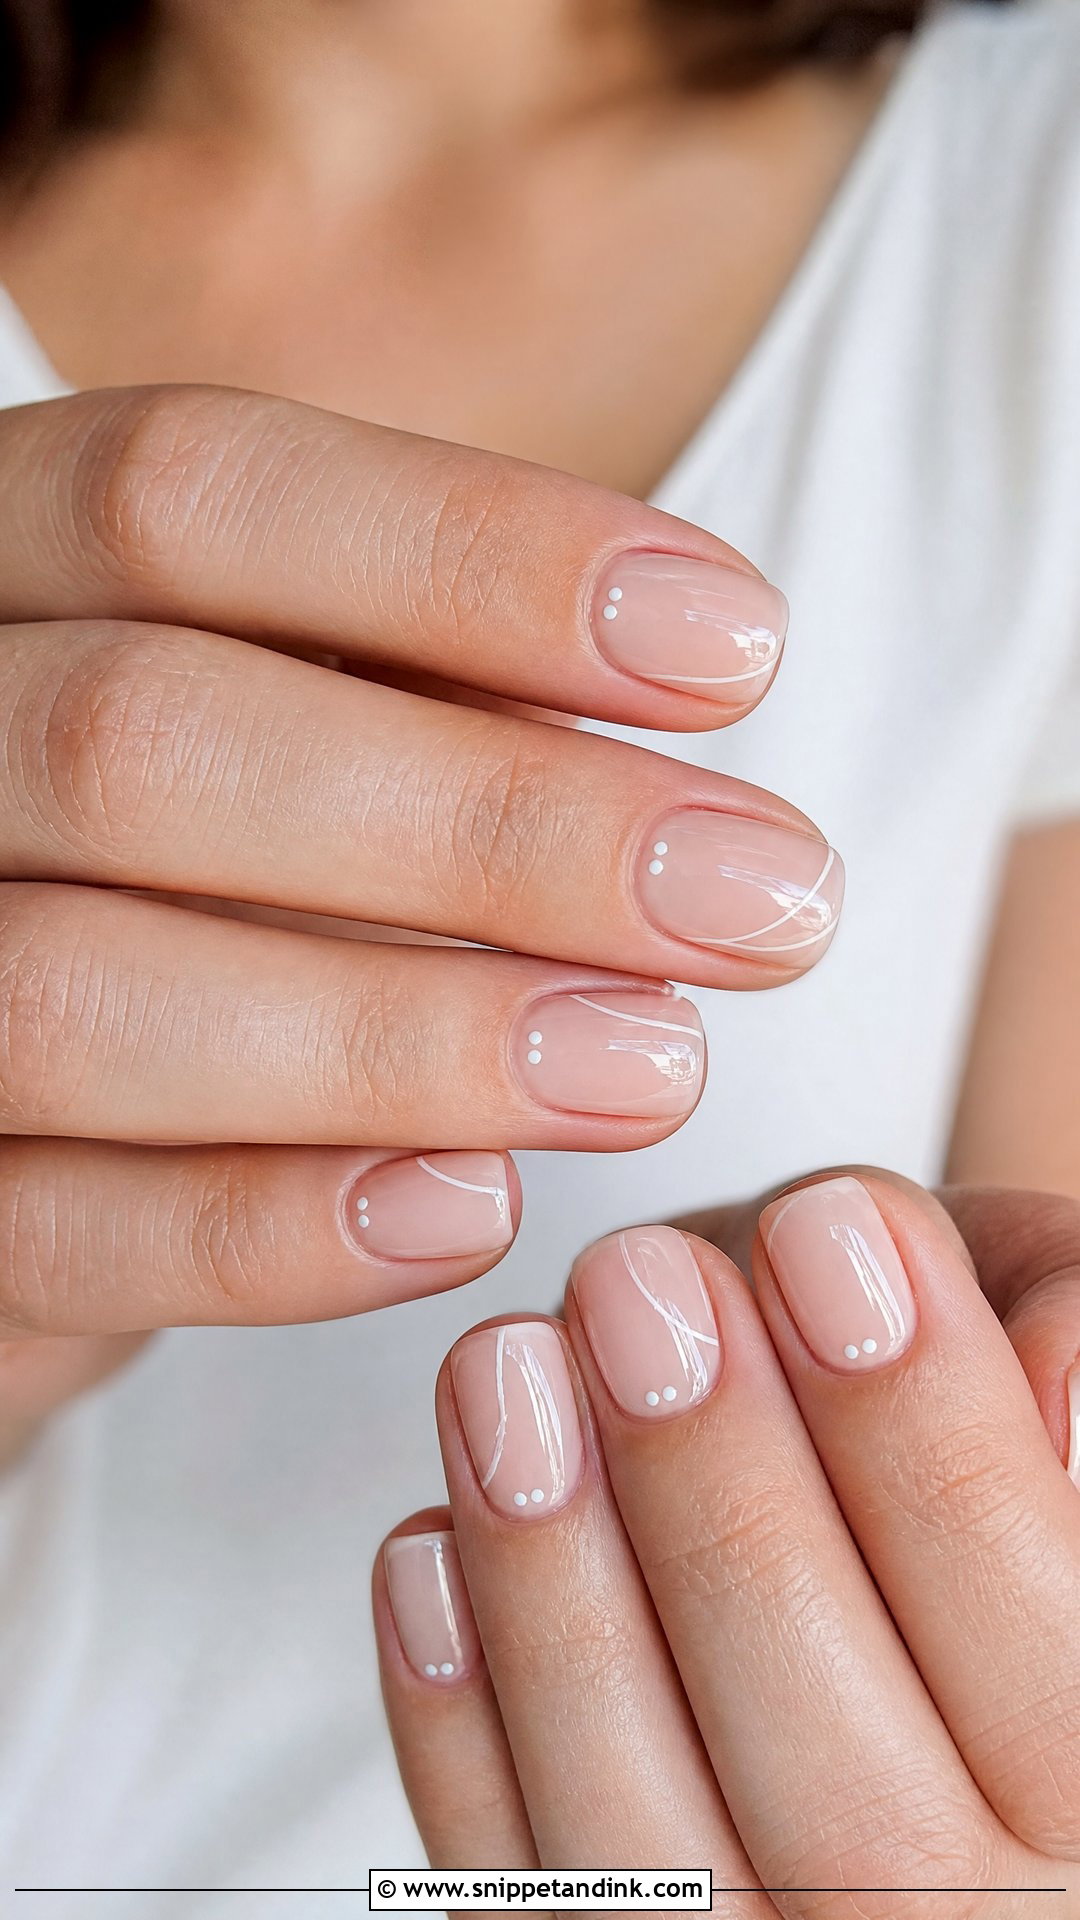
Minimal sets are harder than they look, because there is nothing to hide behind. A single dot, a thin line or one pearl needs a flawless base, clean cuticles and identical placement on both hands. I measure accent placement against the cuticle, not the tip, so it lines up even when the nails are different lengths. Short ovals and medium almonds suit it, and it is right at home with a sleek bun and modern jewellery.
28. Cat Eye Wedding Nails
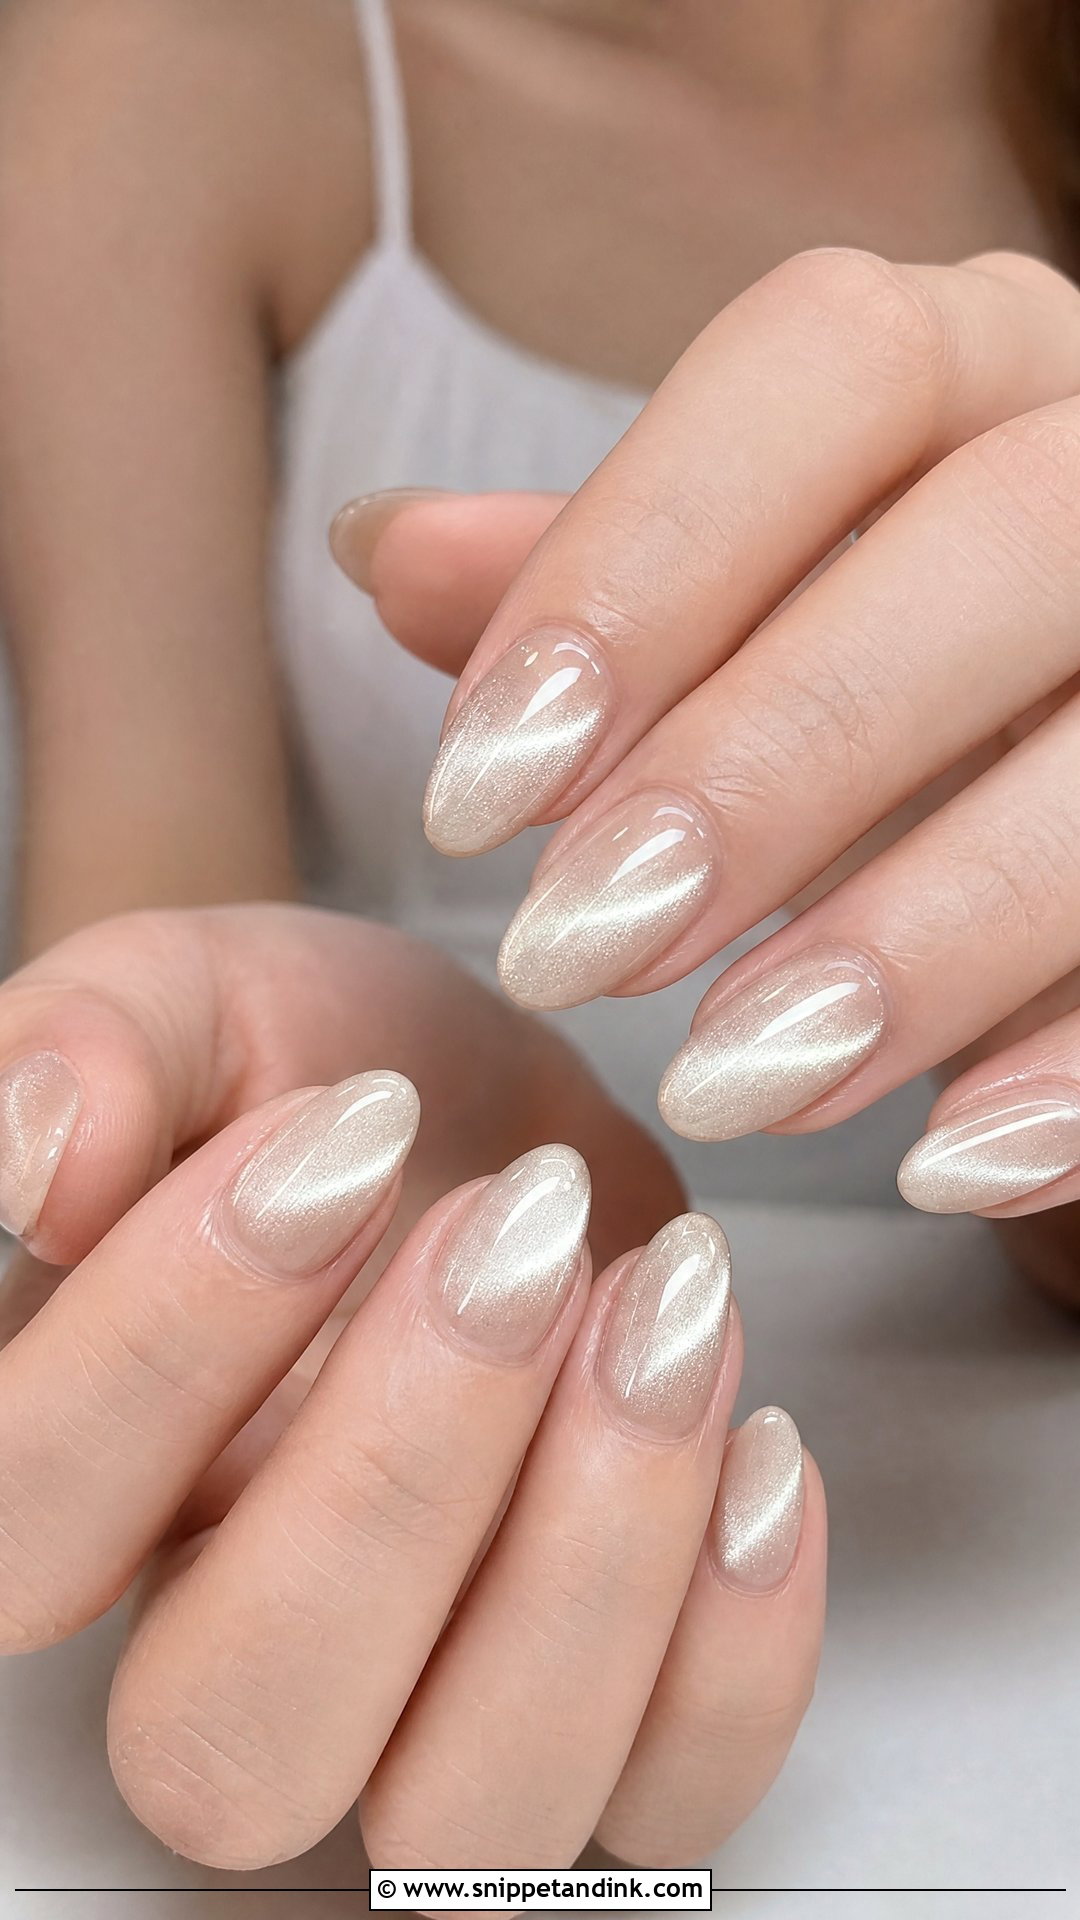
Cat eye gel contains metallic particles that a magnet pulls into a band of light, so the shimmer shifts as you move your hand. For brides I use champagne, pearl or blush versions rather than dark ones. The line needs to be pulled quickly and evenly before curing, or it drifts and blurs. A soft, centred band looks refined; a sharp diagonal reads more like party nails. It comes into its own under evening lighting.
29. Champagne Wedding Nails
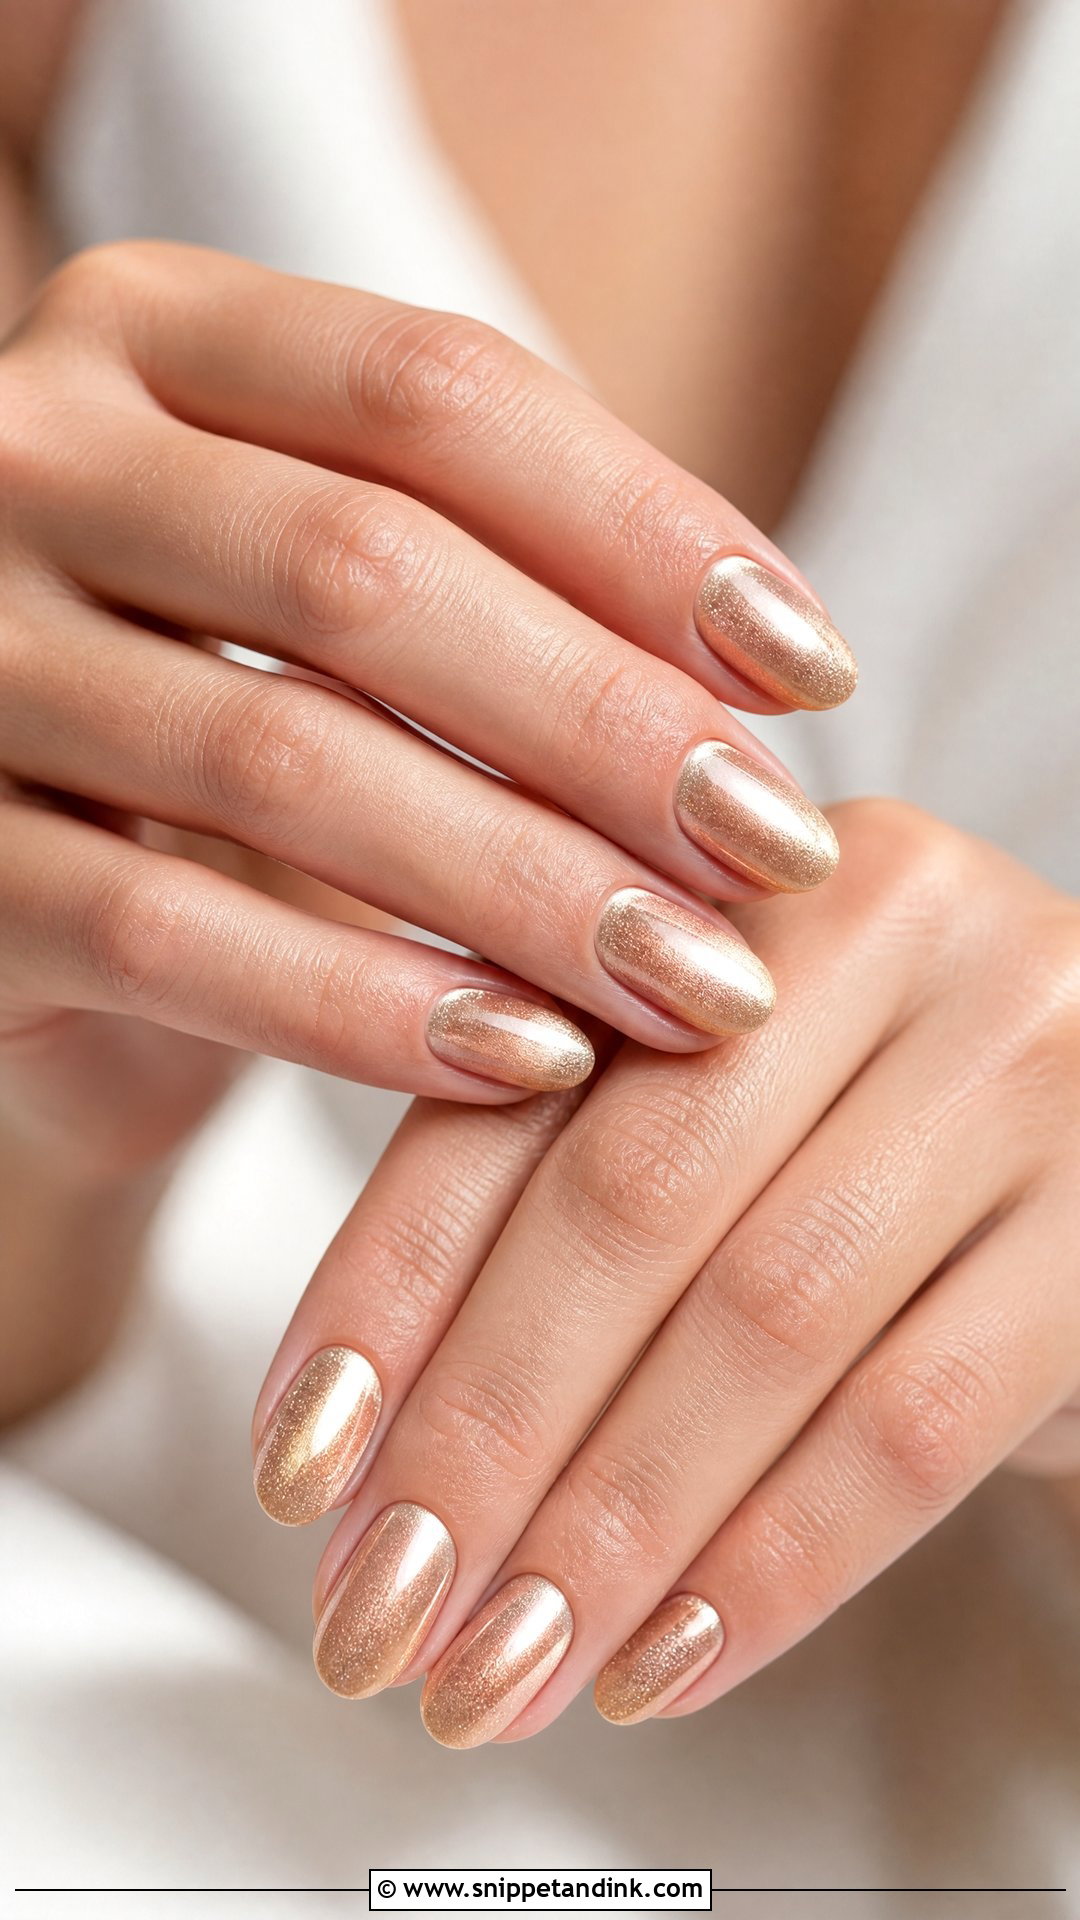
Champagne is a golden beige that sits between nude and metallic, and it flatters a wide range of skin tones because it is neutral with a little glow. It suits fall weddings, evening ceremonies and gowns with warm beading. I keep the shape soft and the finish smooth. Champagne glitter can look busy if it is too dense, so I’d choose either shimmer or a creamy champagne nude, not both.
30. Baby Boomer Wedding Nails
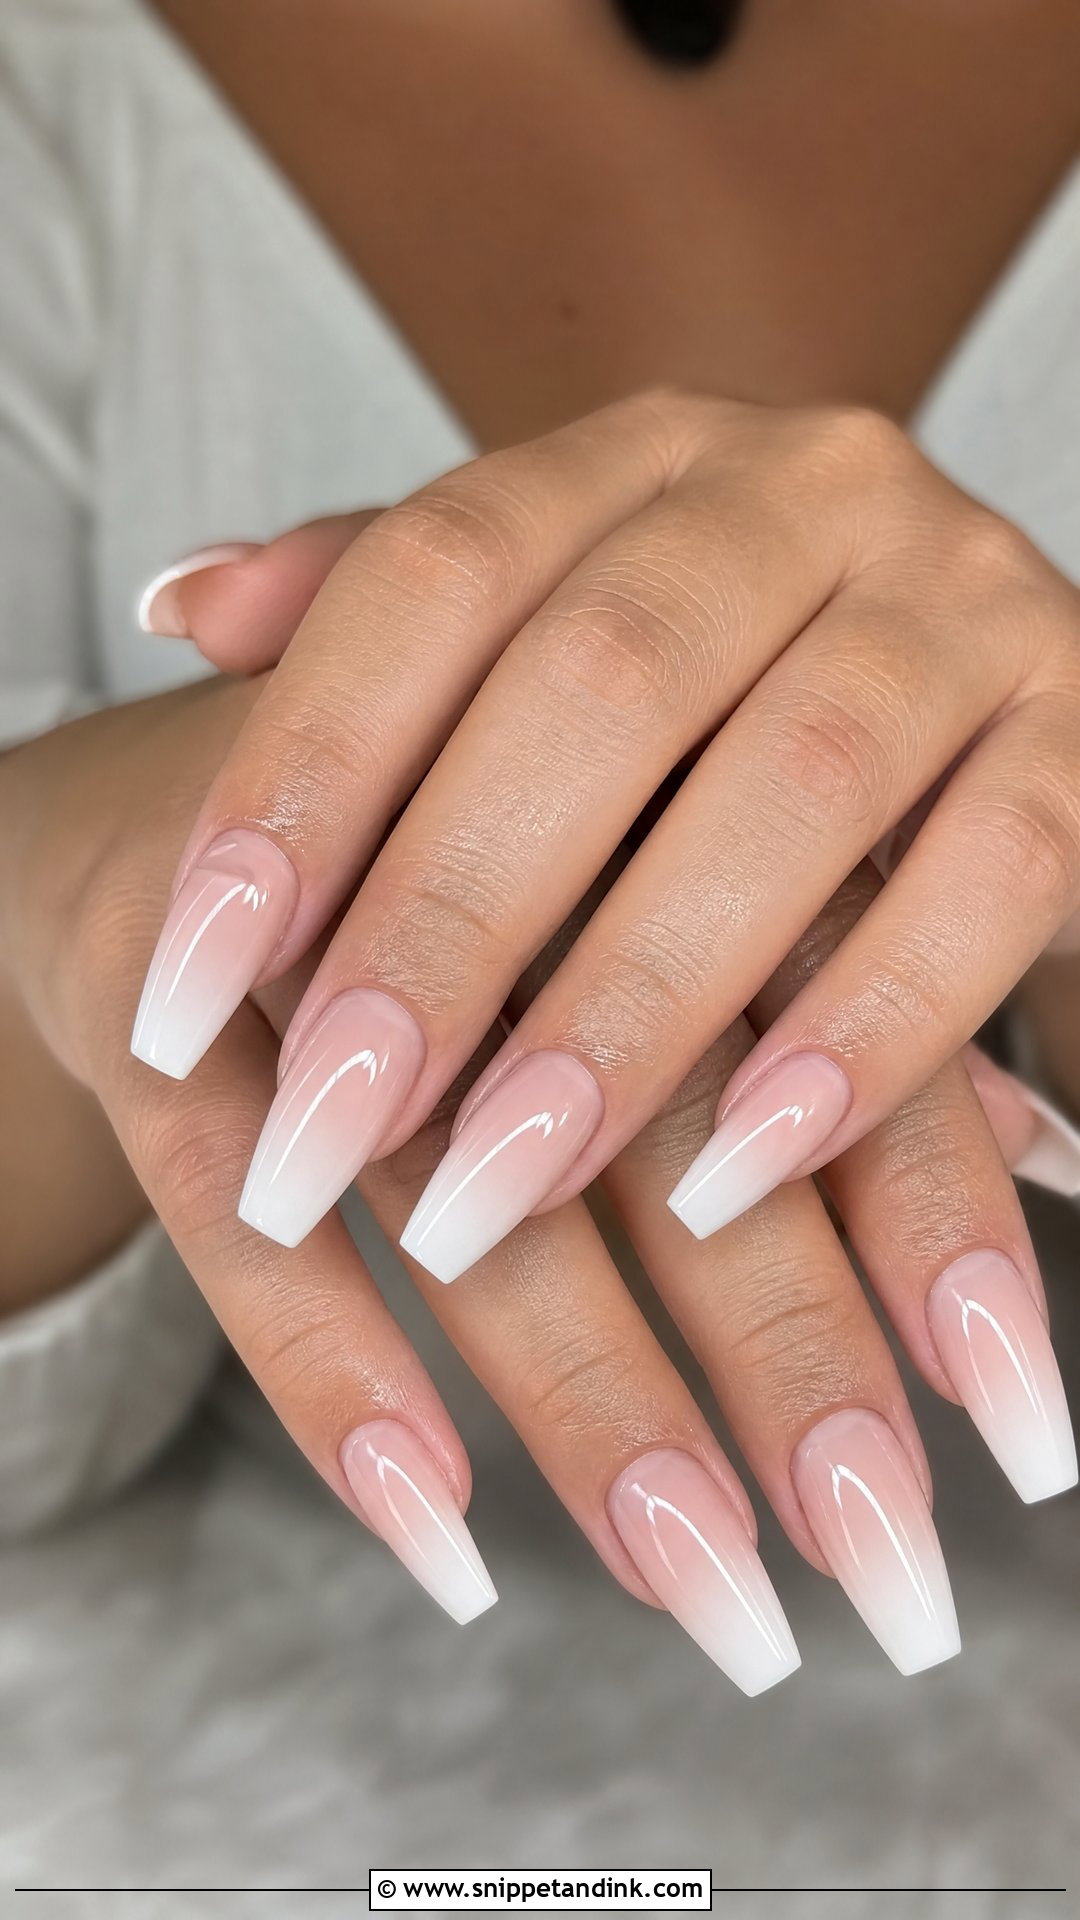
Baby boomer wedding nails are a French ombré, pink or nude melting into white with no line at all. Because there is no hard edge, they forgive a slightly uneven free edge and grow out gracefully. I match the base to your skin first, then decide how bright the white end should be; sheer white is softer, opaque white more graphic. A glossy top coat is enough. Shimmer is optional and easy to overdo.
31. Something Blue Wedding Nails
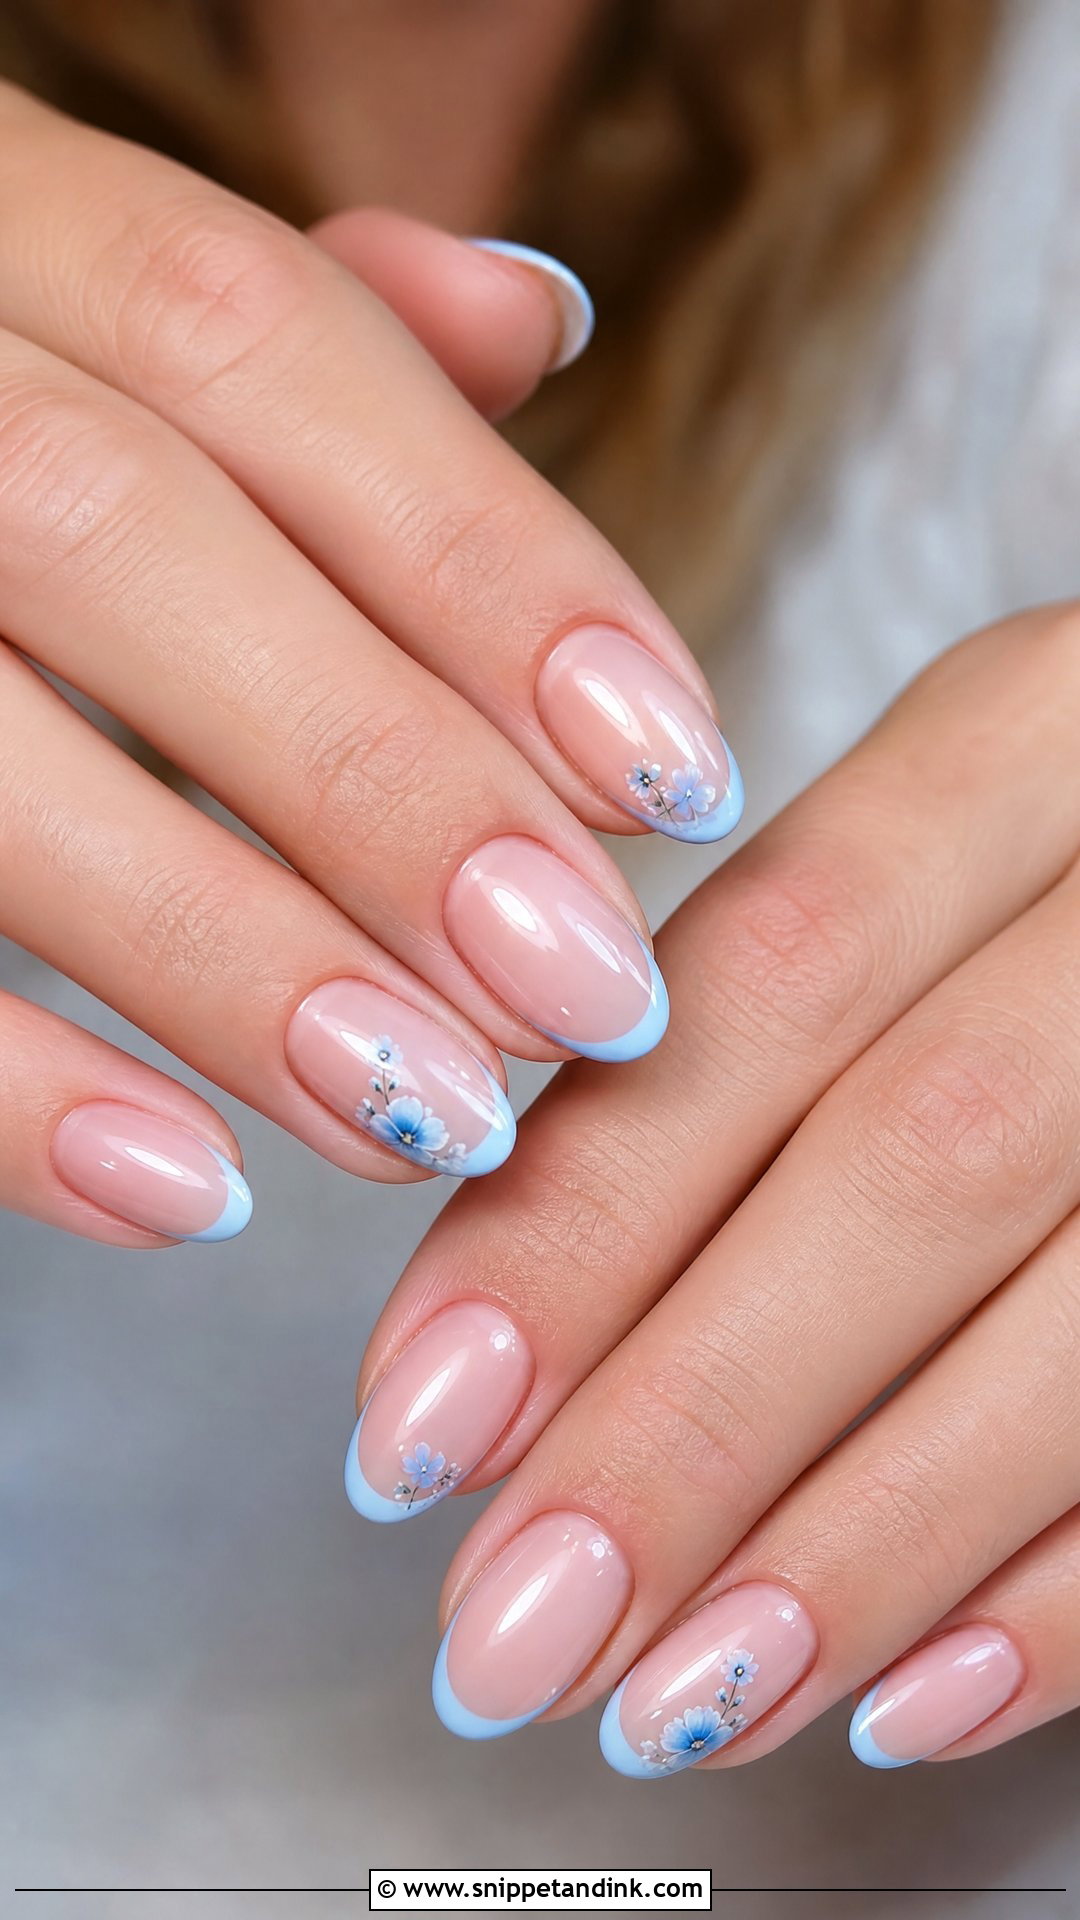
This is one of the nicest ways to carry the something blue tradition, because it travels with you all day. I keep it small: a pale blue tip, a single blue flower or a hidden dot near the cuticle on the ring finger. A full set of bright blue fights with the gown. Matching it to the bouquet ribbon or shoes helps it look planned. It suits spring, beach and garden weddings especially.
32. Pearl Chrome Wedding Nails
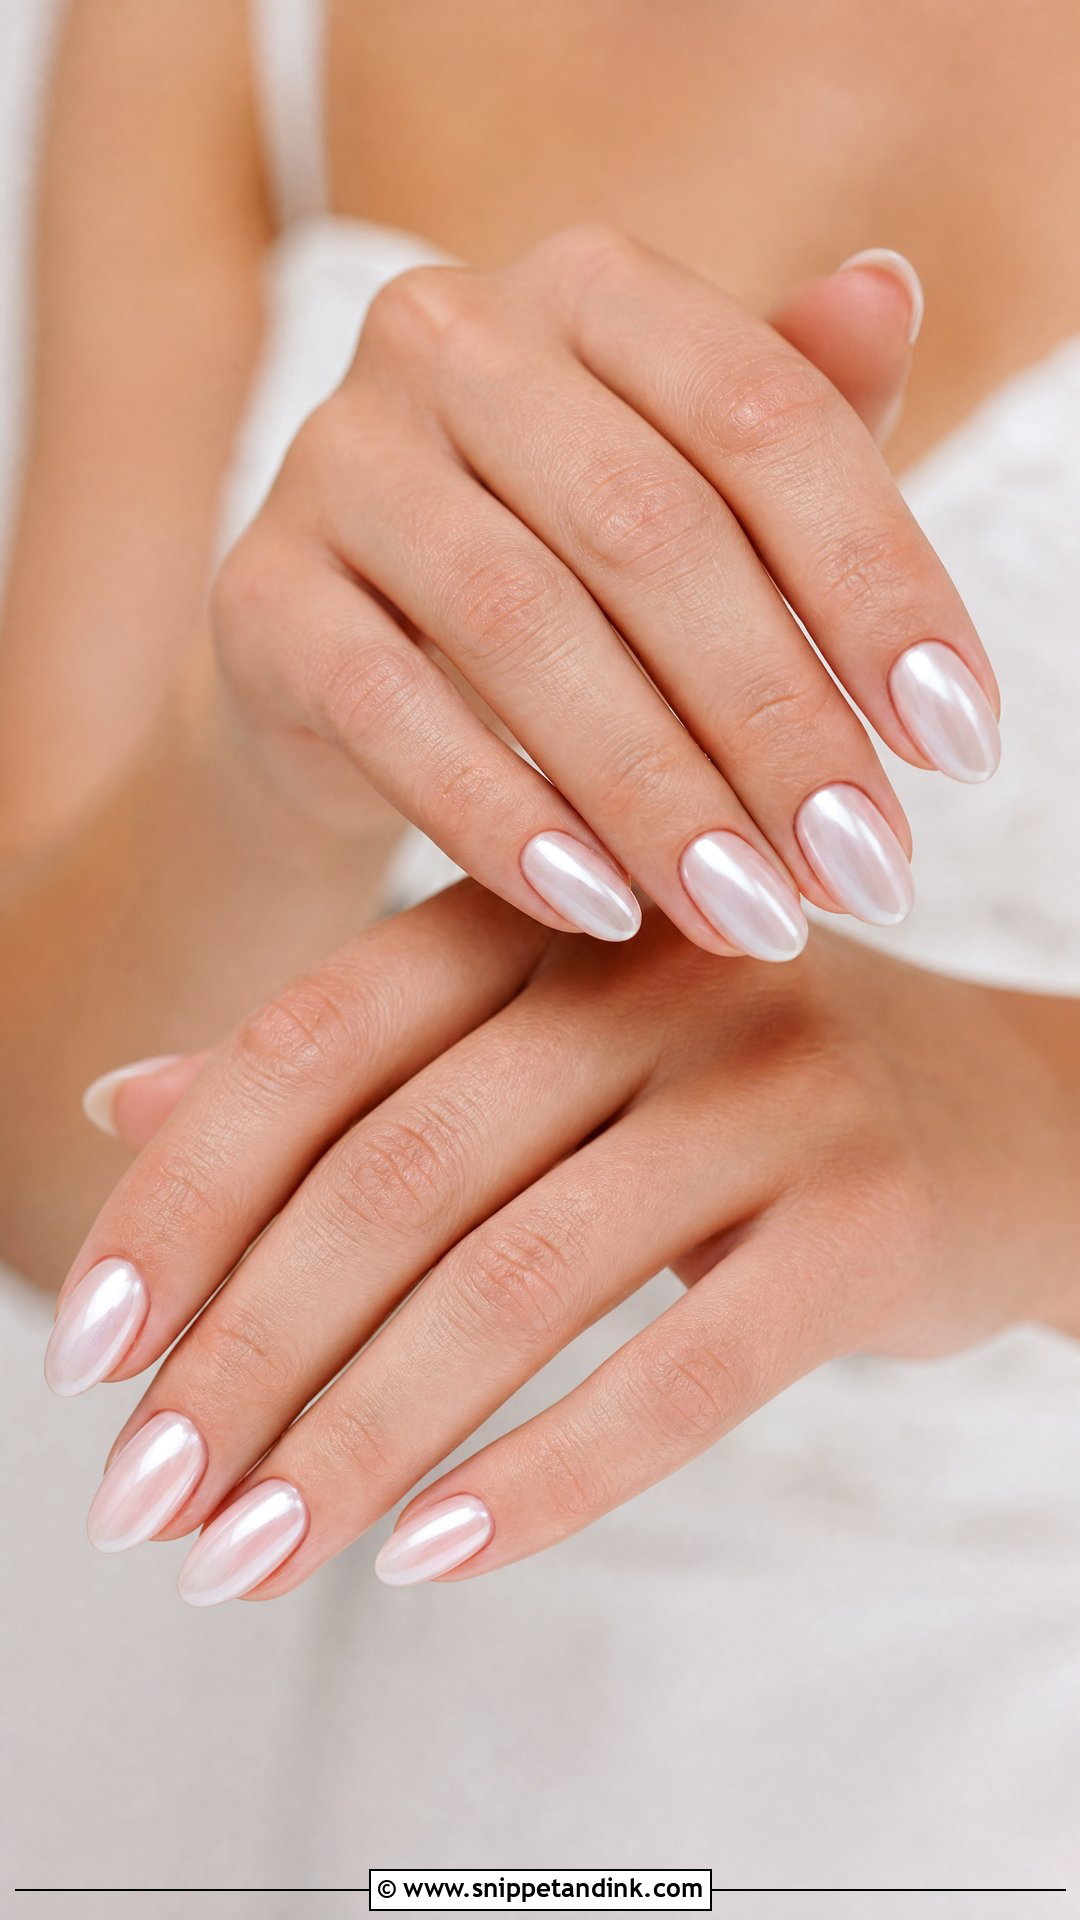
Pearl chrome is the glazed effect with more pearl and less sheen, burnished over a sheer white, nude or blush base. It has a soft luminosity that holds up in both daylight and flash. Like any chrome, it wears first at the tips, so I seal the free edge carefully and suggest booking it close to the date. Almond and oval shapes show the glow best, and it is a natural match for pearl jewellery and satin.
33. French Tip Wedding Nails With Pearls
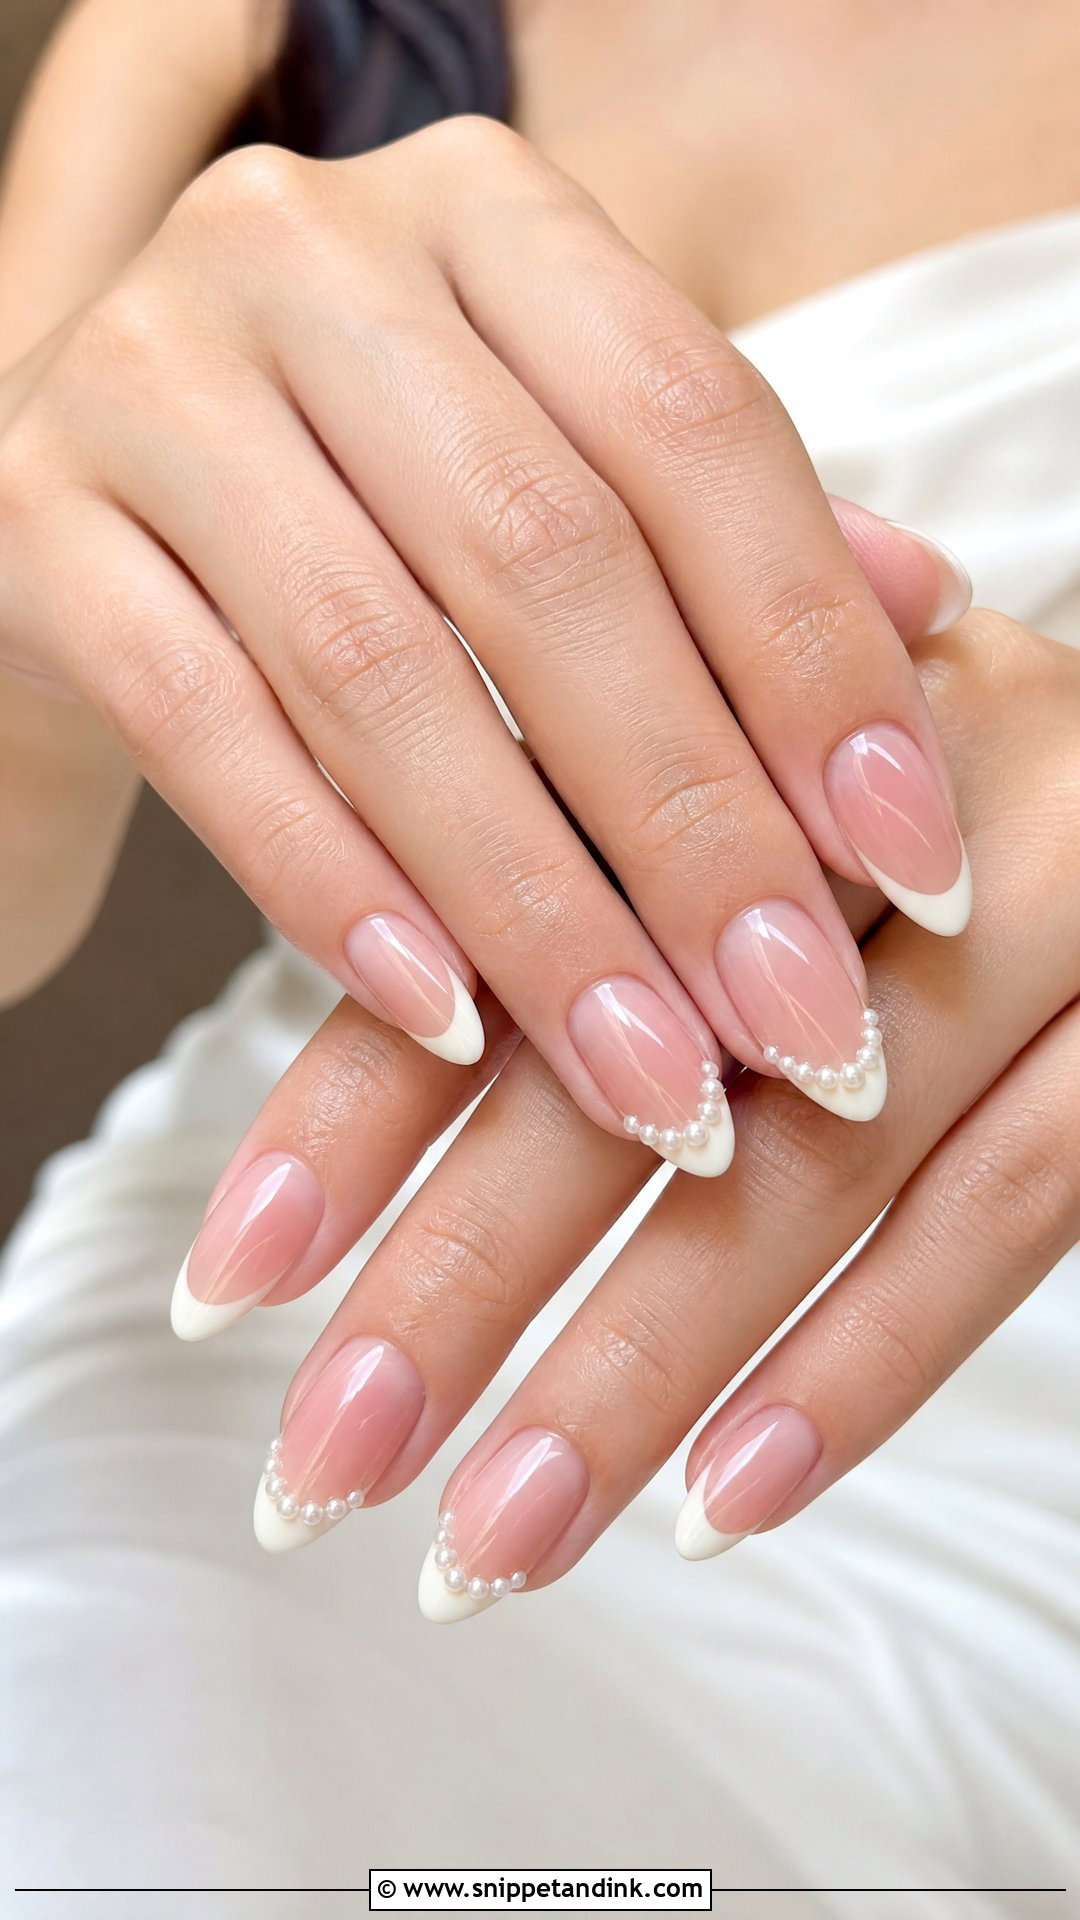
Pearls along a French line look delicate in a photo but feel very different on the hand. The tip is where you touch everything, so pearls placed there snag and pop off. I put them at the cuticle or on a single accent nail and keep them tiny. Ivory or soft chrome tips are softer than stark white here. Almond, oval and soft square shapes all carry it, and it echoes a beaded gown or pearl earrings well.
34. Soft White Wedding Nails
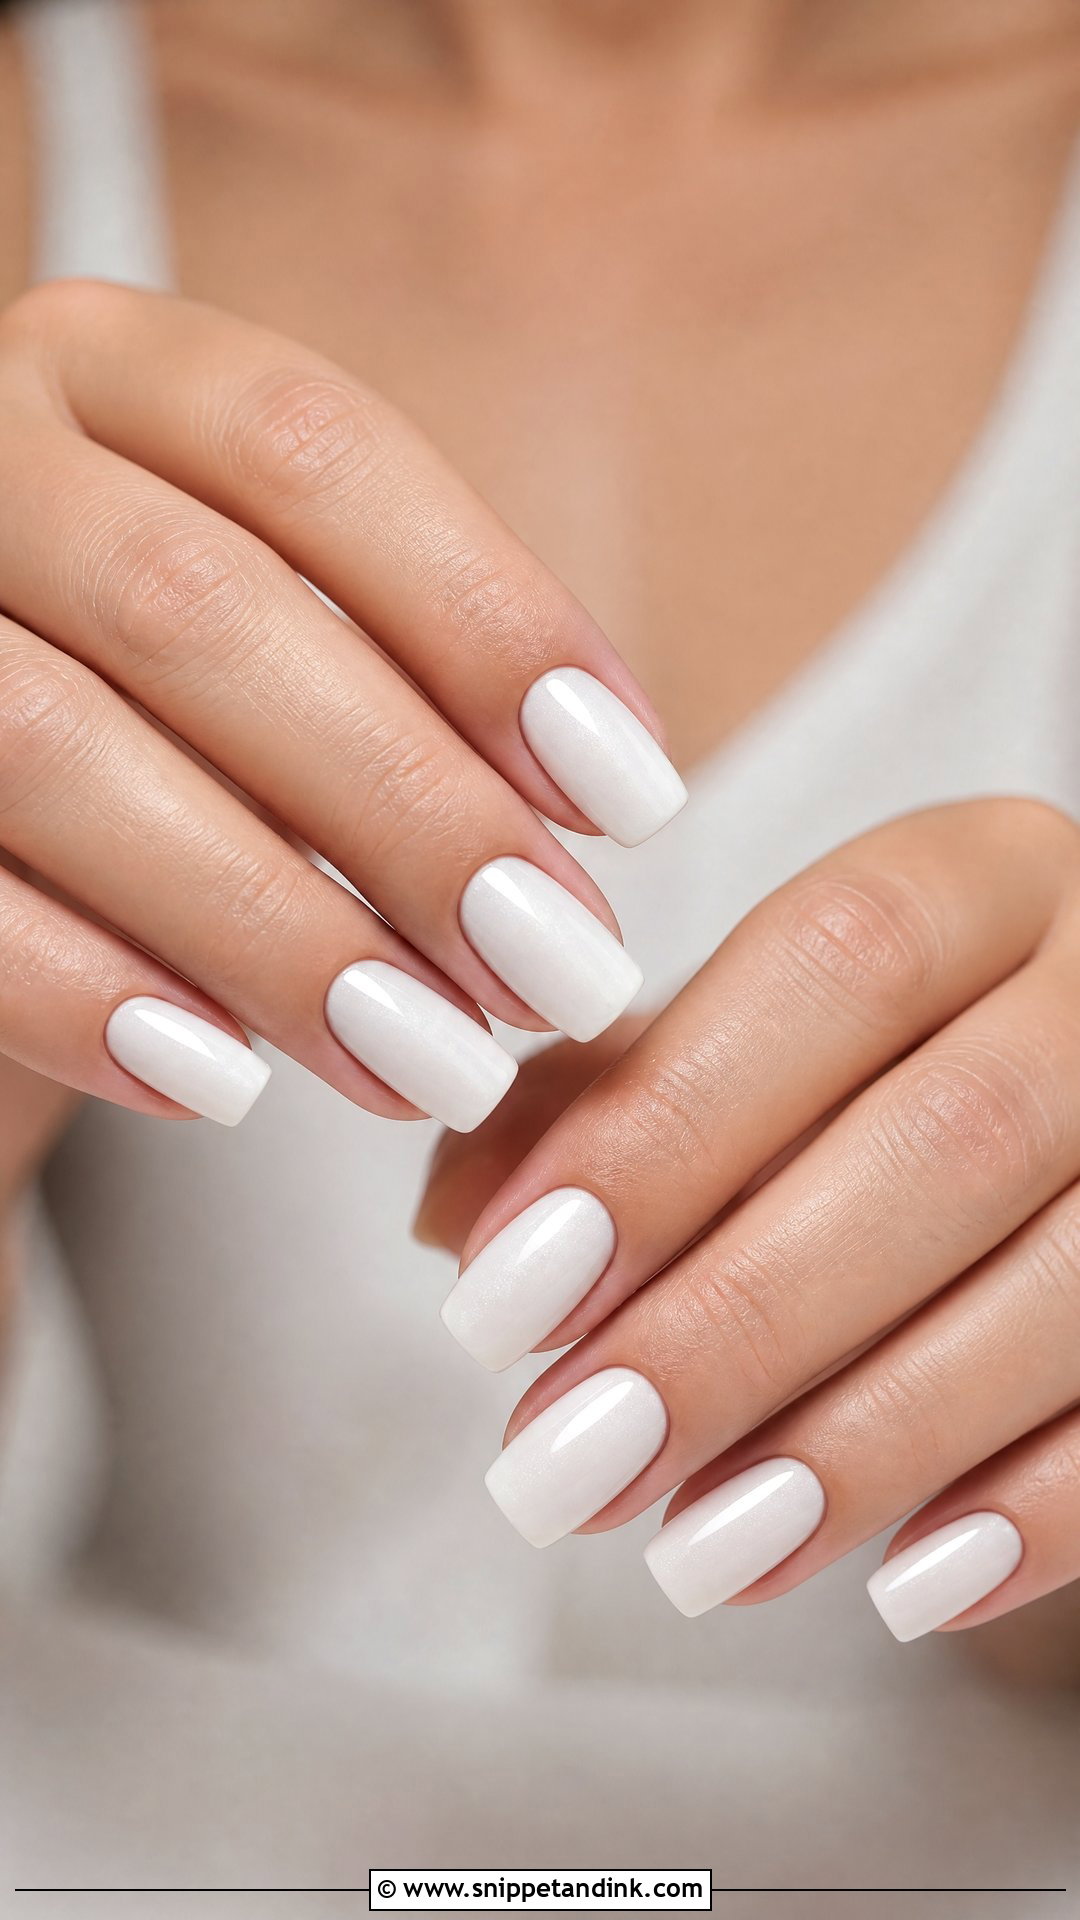
Soft white is bright but not stark: creamy, sheer or slightly warm depending on your gown. It is the classic choice with no art at all, so the finish has to be flawless. I check the surface under a bright lamp before sealing, because any ridge shows through white more than any other colour. It sits well on short, almond, oval or square nails. If you want a little lift, a hidden shimmer layer is subtler than chrome.
35. Bridal Blush Wedding Nails
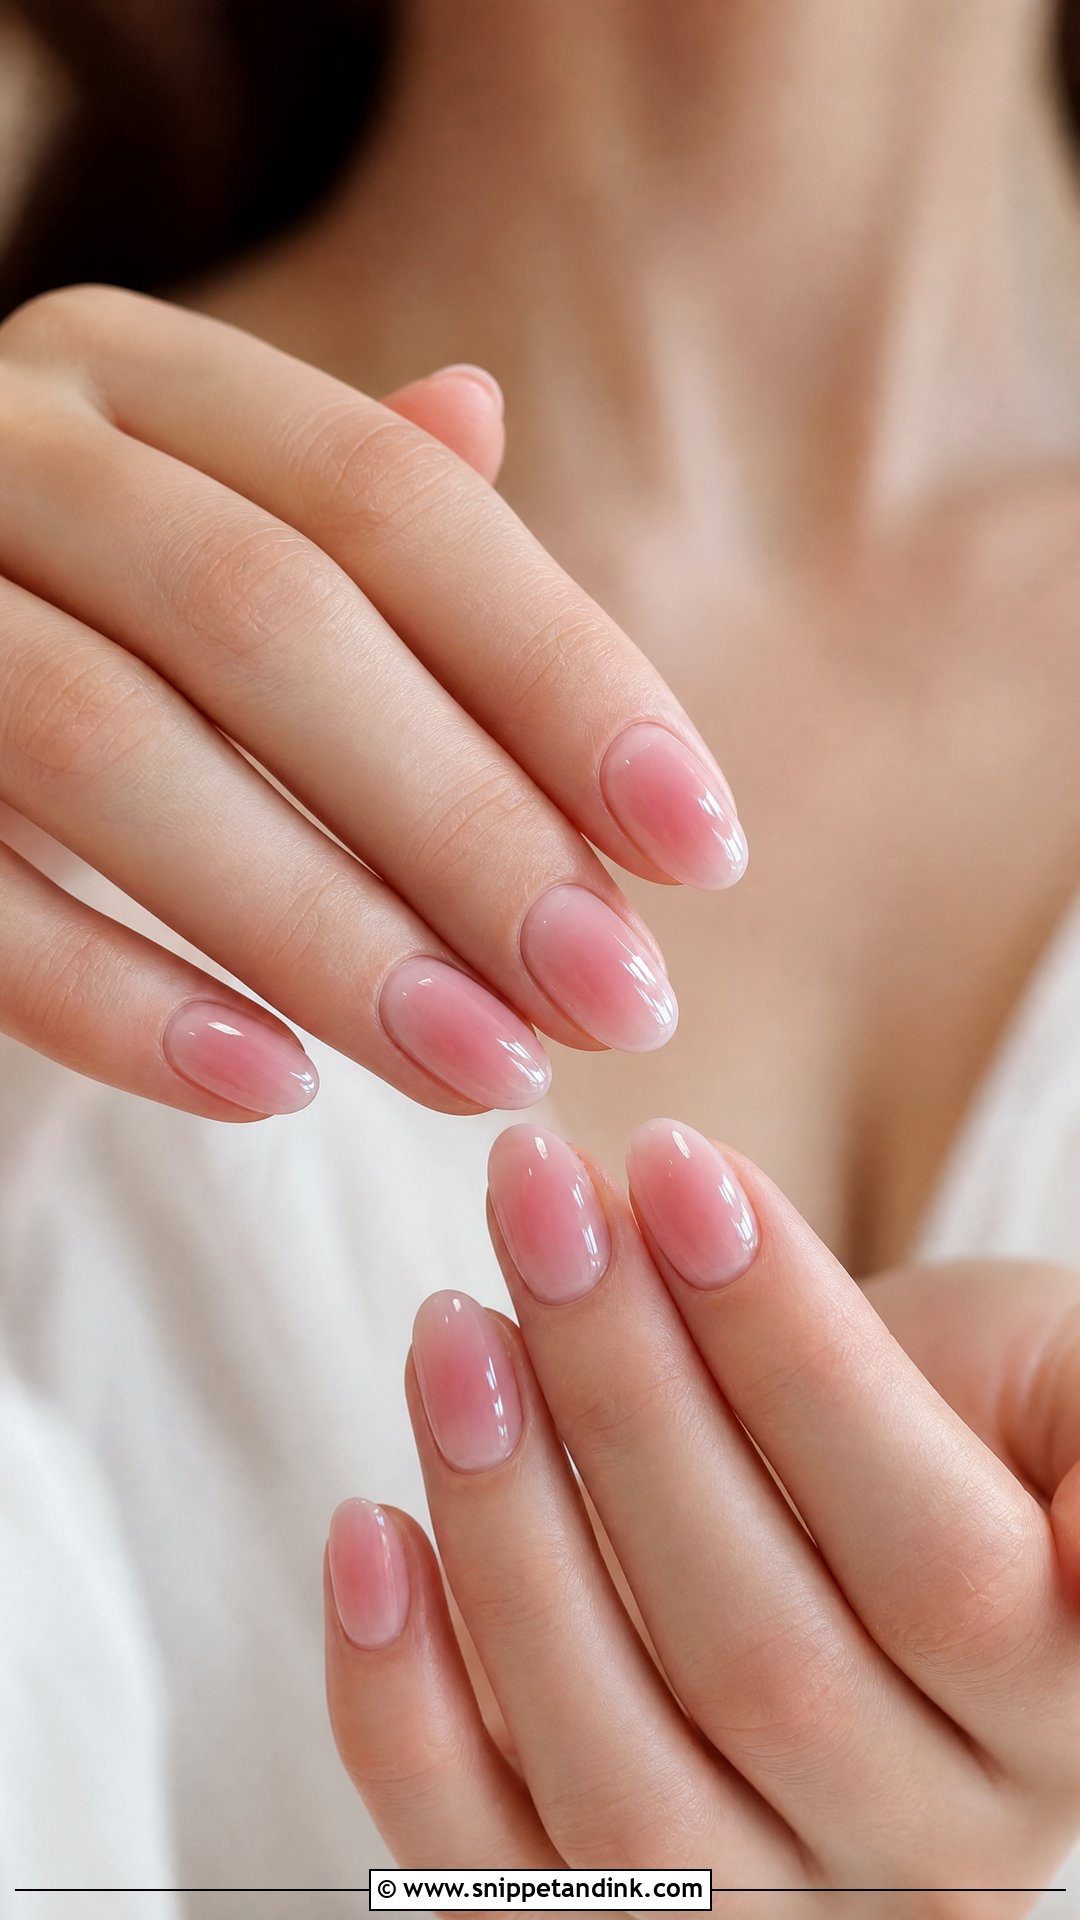
Bridal blush uses a sheer, jelly-like pink so the nail glows through. Some versions add an aura: a soft, airbrushed blush spot in the centre of each nail that fades outward. I build the aura in thin layers with a sponge or airbrush; a hard edge ruins it. It suits dewy makeup and rosy bouquets, and almond or oval shapes make the fade look smoothest. A high-gloss top coat finishes it.
Lifted Corners, Snagged Lace and Other Day-Of Nail Problems
Bridal nails rarely fail dramatically. They fail in small ways that show up in photographs. Here is what I see most often and what I do about it.
A chipped or cracked tip
Usually from opening a bottle or a zip. Keep a fine file and a clear top coat in your bag; filing a small chip smooth and sealing it is invisible from three feet away. A cracked extension needs glue and a silk wrap, so if you have long tips, ask whoever did them for a quick repair kit.
Charms catching on the veil
Run your fingertips over a scrap of tulle at the end of the appointment. If anything catches, I’ll add another layer of top coat or move the stone. It takes two minutes then and saves a torn veil later.
Dull chrome or lifted edges
Chrome wears first at the free edge and lifting starts at the cuticle when prep was rushed. Hand cream and cuticle oil the night before help, but avoid oiling right before the appointment, because oil under gel is a common cause of lifting. If a corner lifts, don’t pick it. Press it down and seal it with clear top coat until it can be fixed properly.
Hands photograph best when they are moisturised, so a little hand cream an hour before the ring shots does more than any extra nail art.
A Bridal Set You Forget About Until Someone Asks to See the Ring
The right bridal set is the one you forget about until someone asks to see the ring. A classic French is always safe, and milky white, pearl chrome, blush and soft ombré are the easiest modern updates. If you love detail, lace, florals, crystals or gold can make it personal, as long as one idea leads. Bring your ring, a fabric swatch and a photo of your bouquet to the appointment, and book a trial if you are trying a new shape or extensions for the first time.
You'll Like These Ideas:


Leave a Reply