
Braids are the style I reach for when a bride tells me she needs her hair to last from the first look to the last song. A braid is a locked structure: once the strands cross over each other, they grip, so it survives hugging, dancing and a breezy ceremony far better than loose curls do. The catch is that every braid behaves differently depending on your hair’s thickness, length and texture, and some of the ones below need more help from pins or extensions than the photos let on. I’ve written each one up the way I’d explain it at a trial, including who it suits and where it tends to go wrong.
Braiding Fine, Layered and Coily Hair So the Pattern Actually Shows
Most braid photos are taken on long, thick hair with extensions, so the first thing I do at a trial is match the style to your texture, not the other way round. A braid that looks full on one bride can look skinny on another, and that’s down to density, not skill.
Fine or thin hair
Small braids almost disappear in photos. I prep with a dry texture spray, braid a little thicker than the picture, and pancake gently. A single clip-in weft hidden under the braid adds bulk without anyone noticing, and it gives the pins something to grip.
Heavily layered hair
Short layers poke out of the crossings, especially in a fishtail or waterfall braid. Dutch and French braids pick up the hair as they go, which traps those ends better. I also keep a little pomade on my fingertips to tuck stray pieces back in as I braid.
Curly and coily hair
Natural texture is a gift for braiding because the hair grips itself. I’d braid on stretched hair, either blown out or banded the night before, so the pattern stays clear, and I use a leave-in cream rather than a heavy gel so the braid keeps its softness. Twists often show the curl better than three-strand braids, so don’t be afraid to mix them.
- Arrive at the trial with hair washed the day before, not the morning of, so it has some grip.
- Bring your veil, comb or headpiece; the anchor point changes where the braid begins.
- Wear a button-up shirt so you don’t pull anything over the finished braid.
1. Boho Fishtail Braid
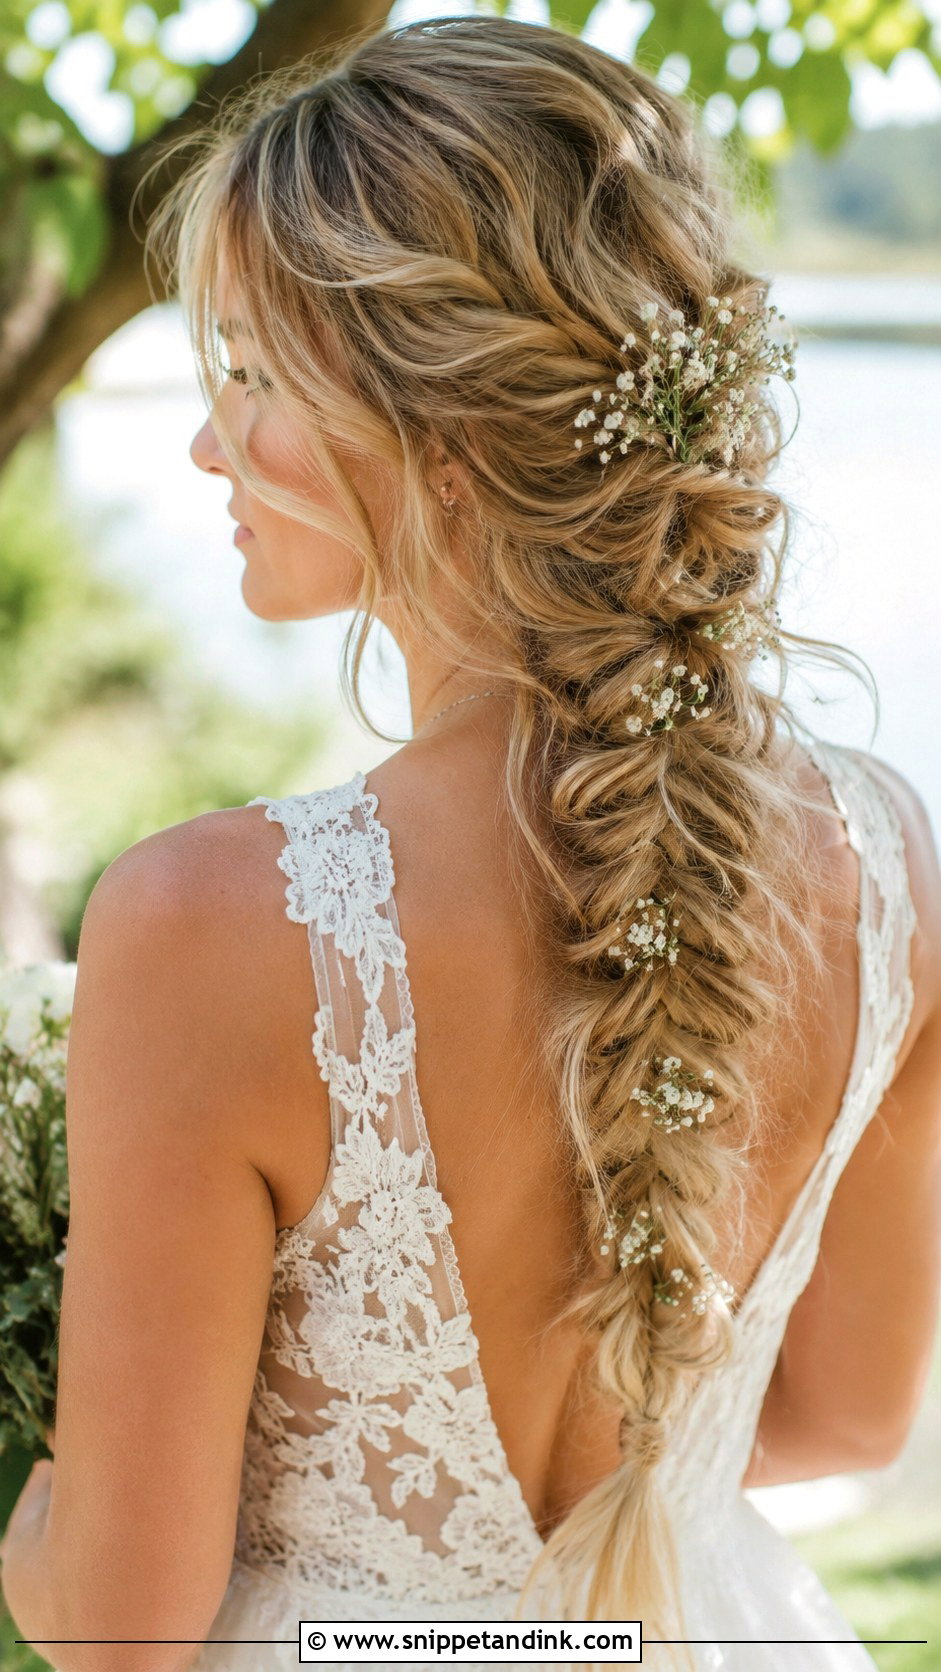
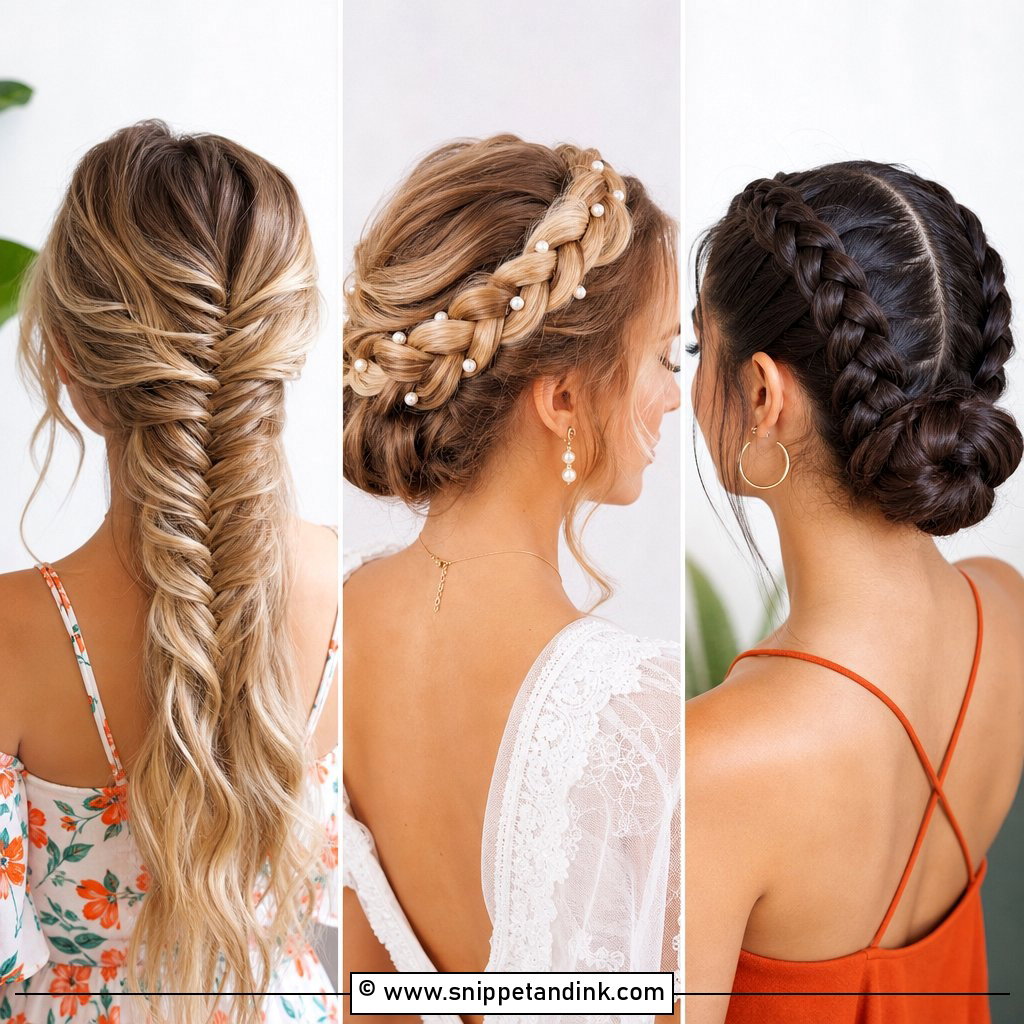
A fishtail splits the hair into two sections instead of three, which is why it looks so detailed for such a simple technique. I braid it fairly snug first and only then pull the edges out with my fingertips, because pancaking a loose fishtail makes it collapse by the reception. On very slippery or freshly washed hair the tiny crossings slide apart, so I prep with a dry texture spray before I start. It sits naturally with a flowy lace gown, and if you want baby’s breath along it, I wire the sprigs in small clusters so they don’t shed every time you turn your head.
2. Braided Crown Halo
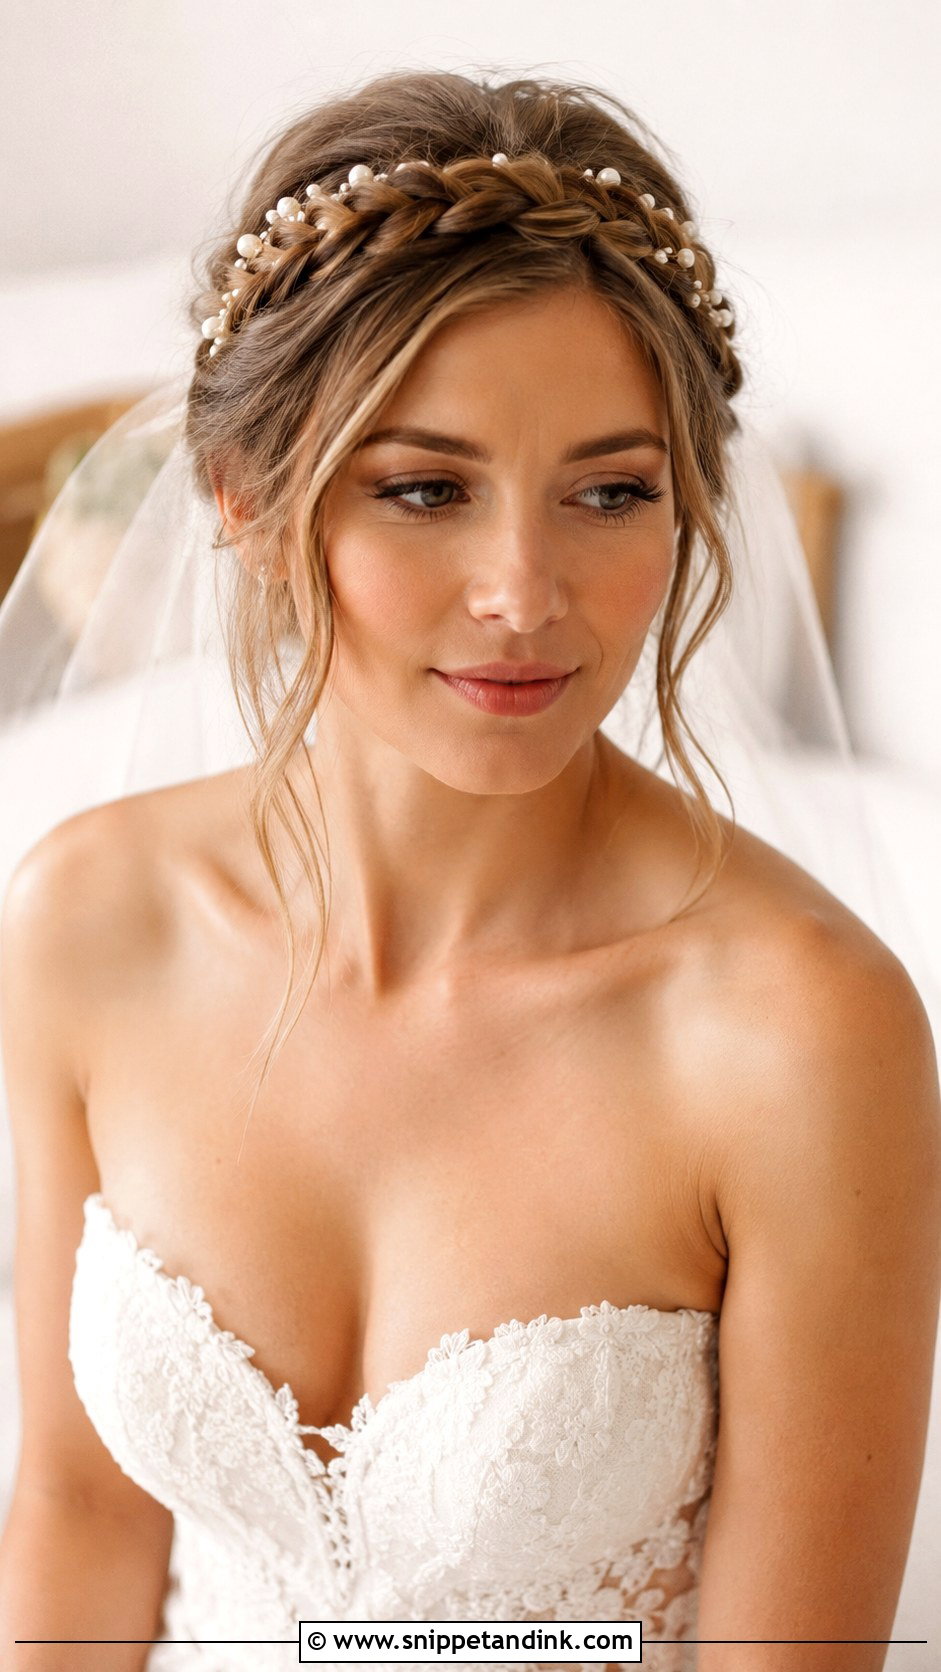
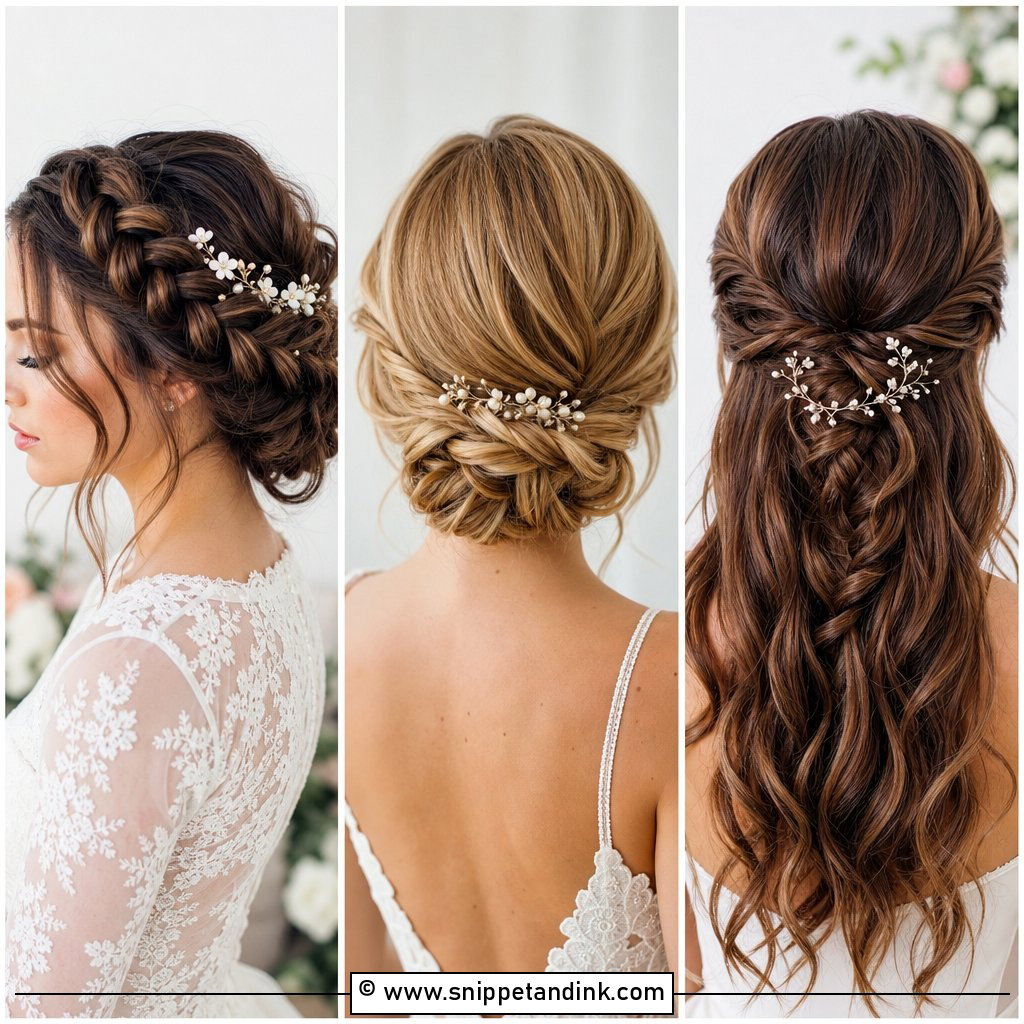
The halo version of a braided crown needs length: as a rough rule, if your hair can’t reach from one ear across the top of your head to the other, I’ll either braid two sections and join them or add a clip-in weft. I pin it with U-pins every few inches rather than bobby pins, since U-pins hold the braid to the head without flattening it. It frames the face from every angle, which is the point, but it also exposes every uneven parting, so I spend more time on sectioning here than on the braid itself.
3. Half-Up Dutch Braid
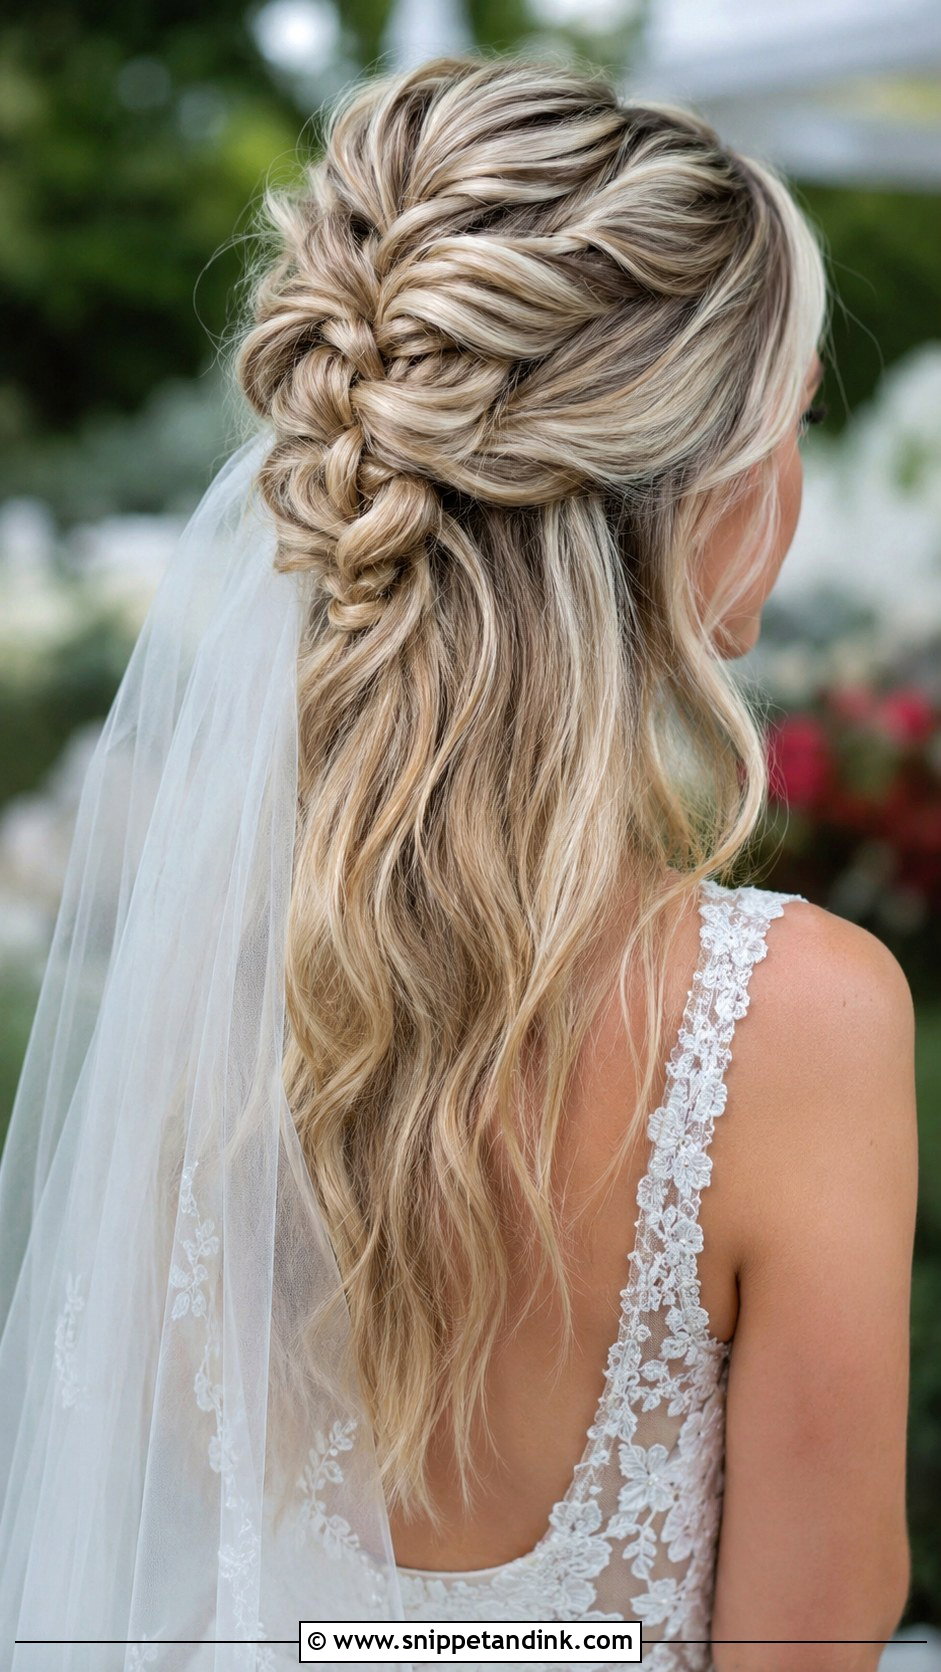
Think of the half-up Dutch braid as a compromise that actually works: the top is secured, and the length below stays loose. A Dutch braid crosses the strands underneath rather than over, so it sits raised on the head instead of lying flat like a French braid. That raised ridge is what reads from the back of the aisle. My one warning is for brides with heavy, very long hair: the loose lengths pull downward all day, so I anchor the end of the braid with two crossed bobby pins under the hair rather than relying on an elastic alone.
4. Braided Low Bun
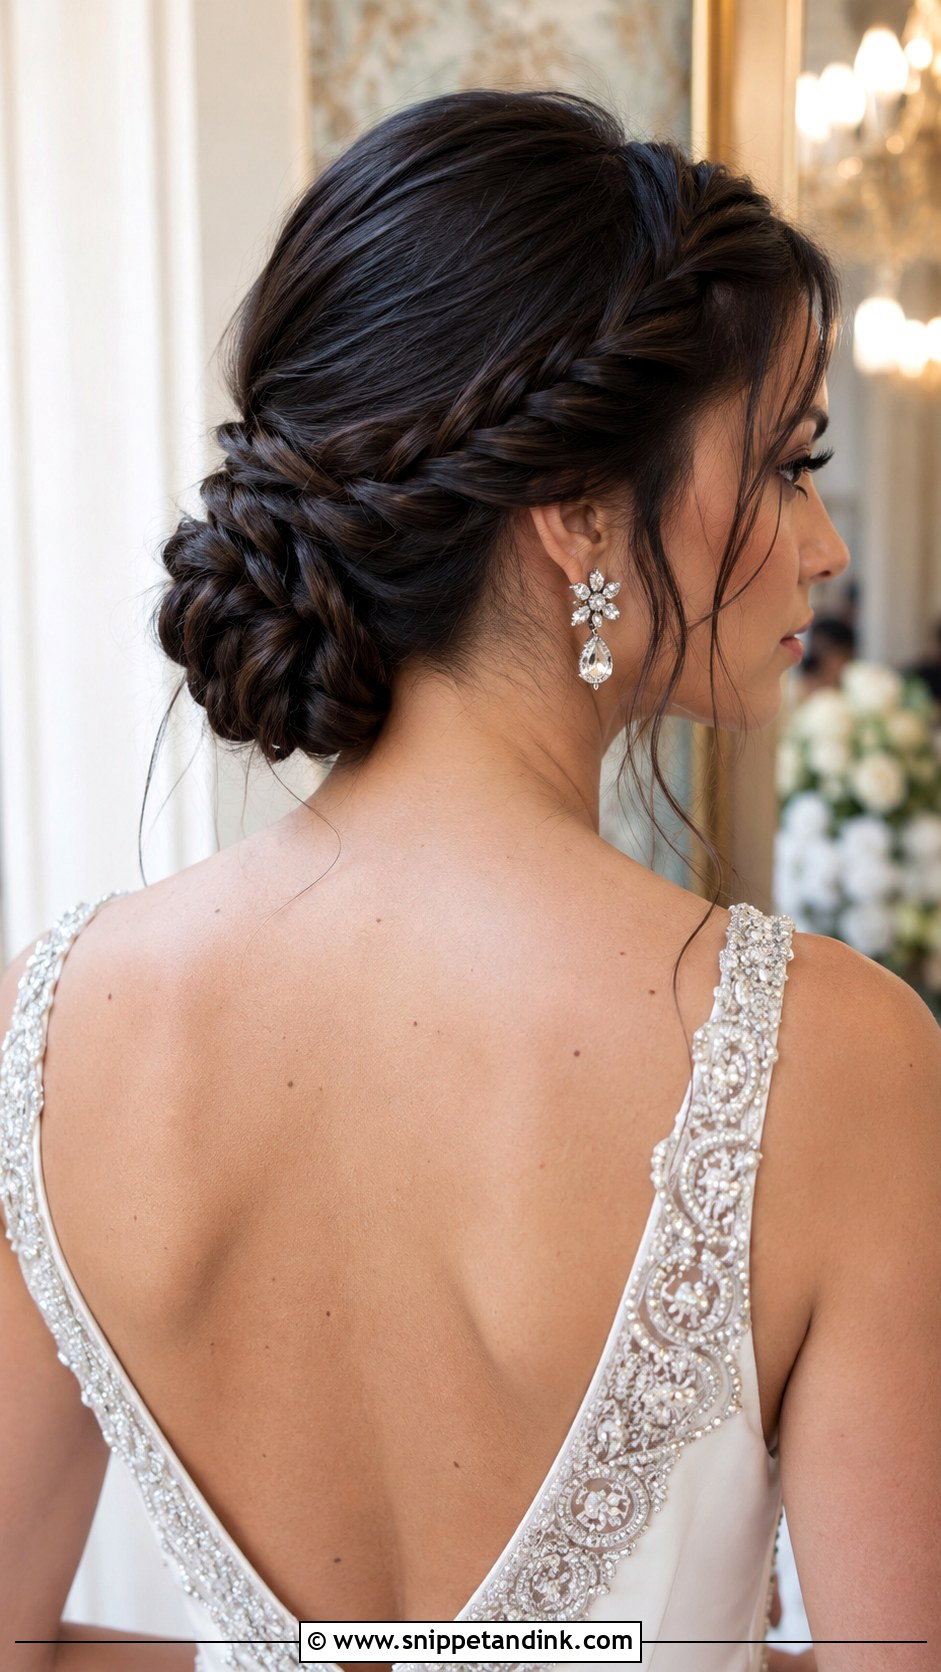
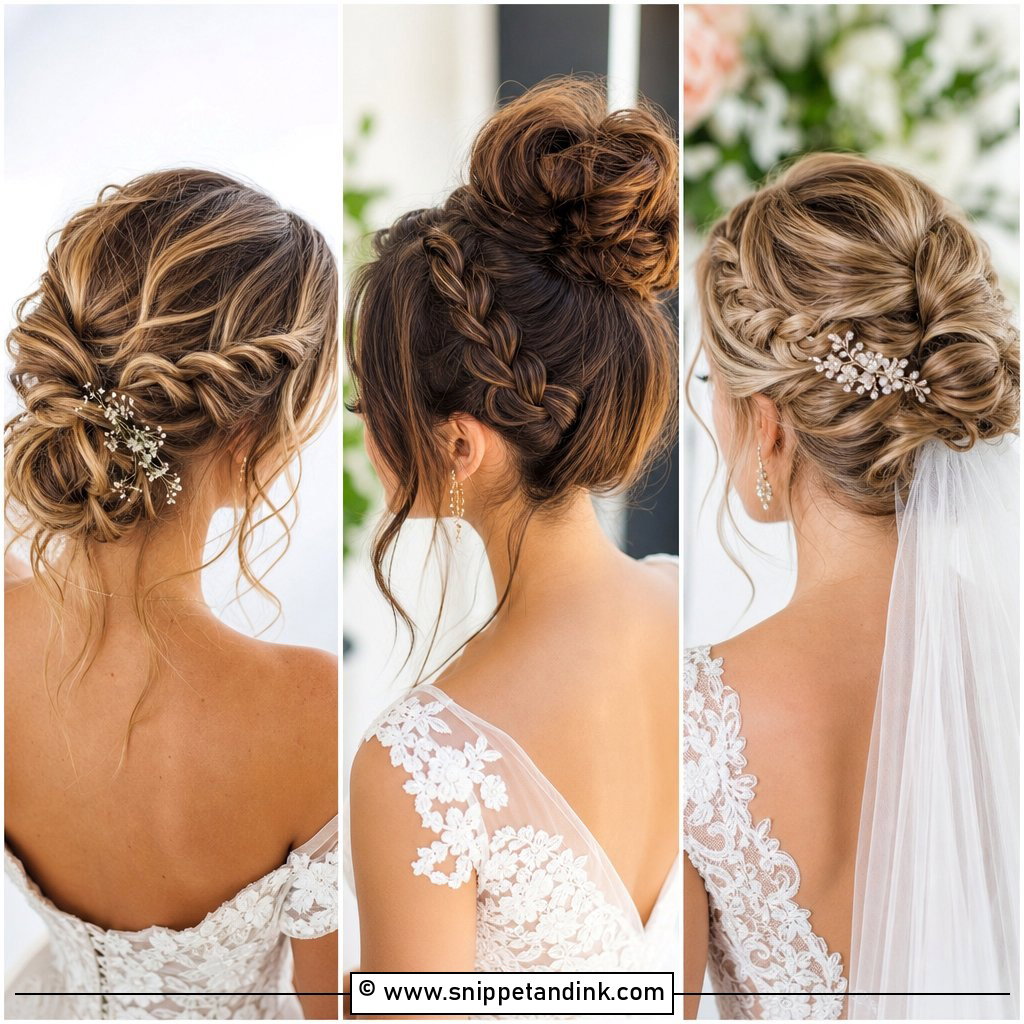
A braided low bun is the one I suggest most often for church ceremonies and long veils, because the low placement leaves the crown free for the comb. I usually braid two or three sections and wrap them into the bun, which gives more texture than a single braid coiled on itself. If you have shoulder-length hair, this is still possible, but the braid will be shorter and the bun smaller, so a padded donut or a few clip-in pieces help it look full. Leave tendrils out only if your hair holds a curl; straight tendrils on fine hair go limp by the speeches.
5. Waterfall Braid
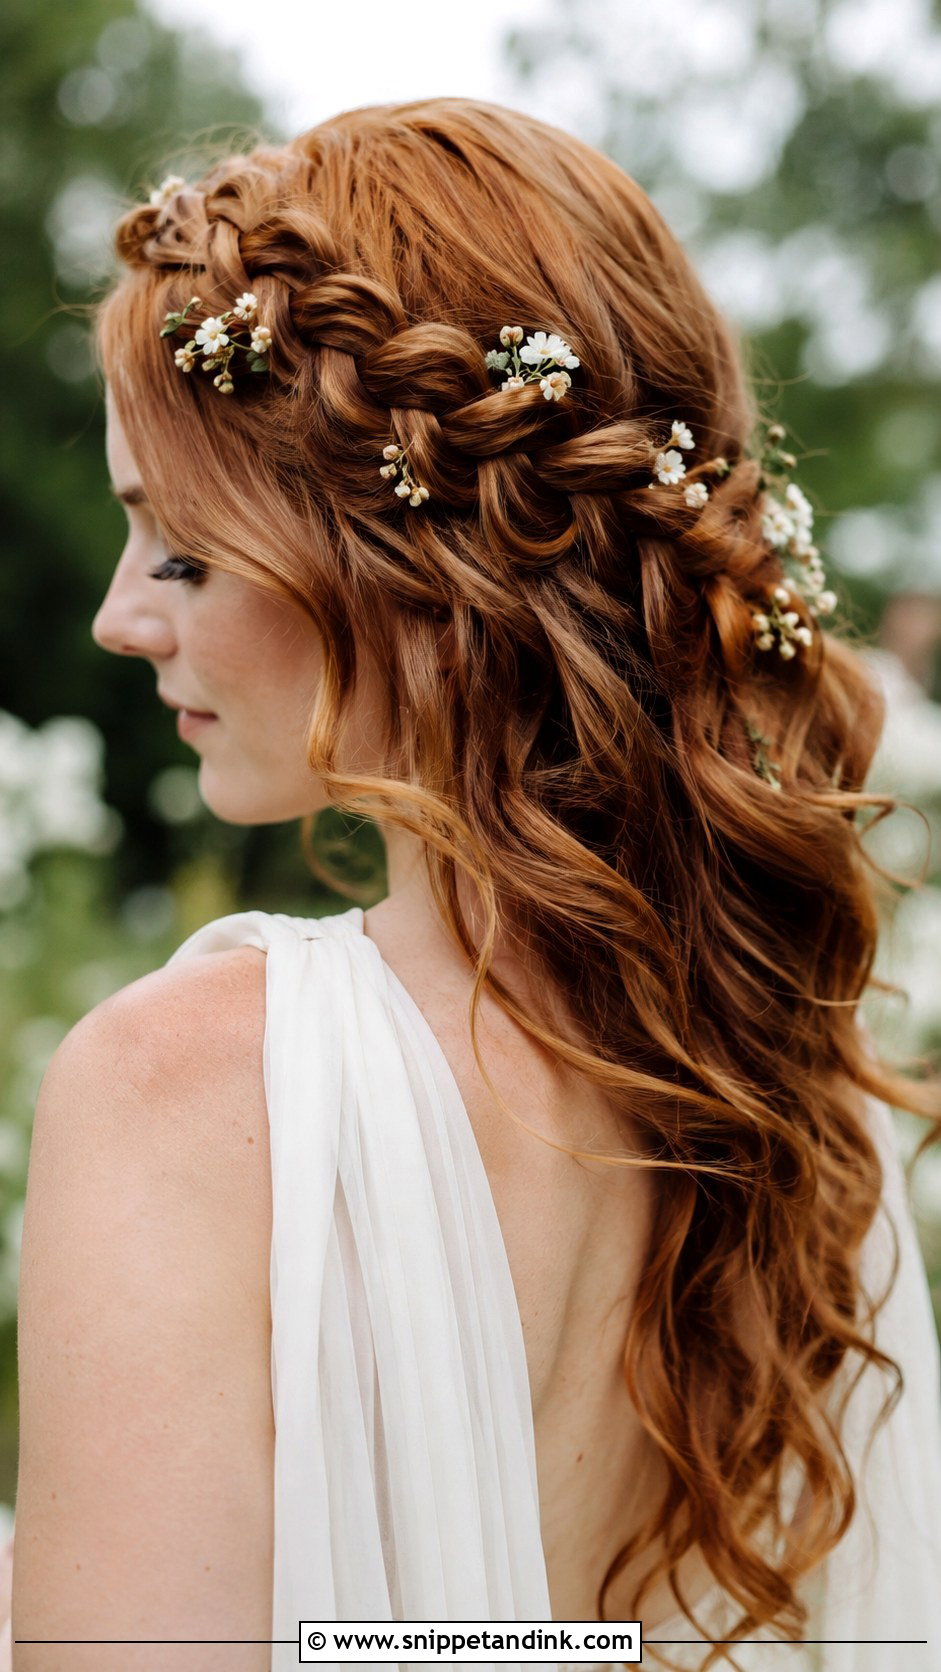
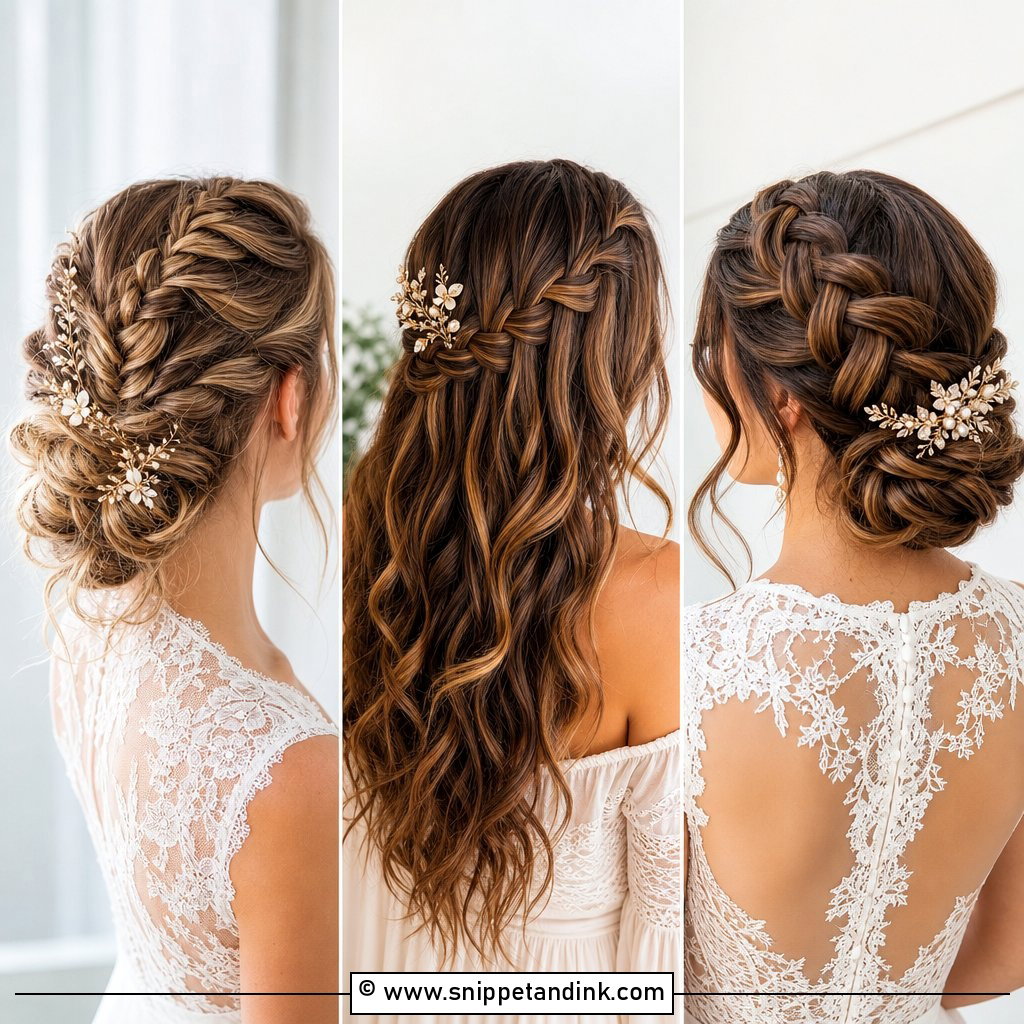
In a waterfall braid, I drop one strand out of the braid at each pass and pick up a new one, which is what lets the loose pieces fall through. It’s a delicate technique, and that is its weakness: on straight, silky hair the dropped strands slide right out within an hour. I always curl the hair first and set the braid with a light hold spray, and I’ll steer you to a different style if you can’t hold a curl for long. On wavy or curly hair it is one of the prettiest braids from behind.
6. French Braid Updo
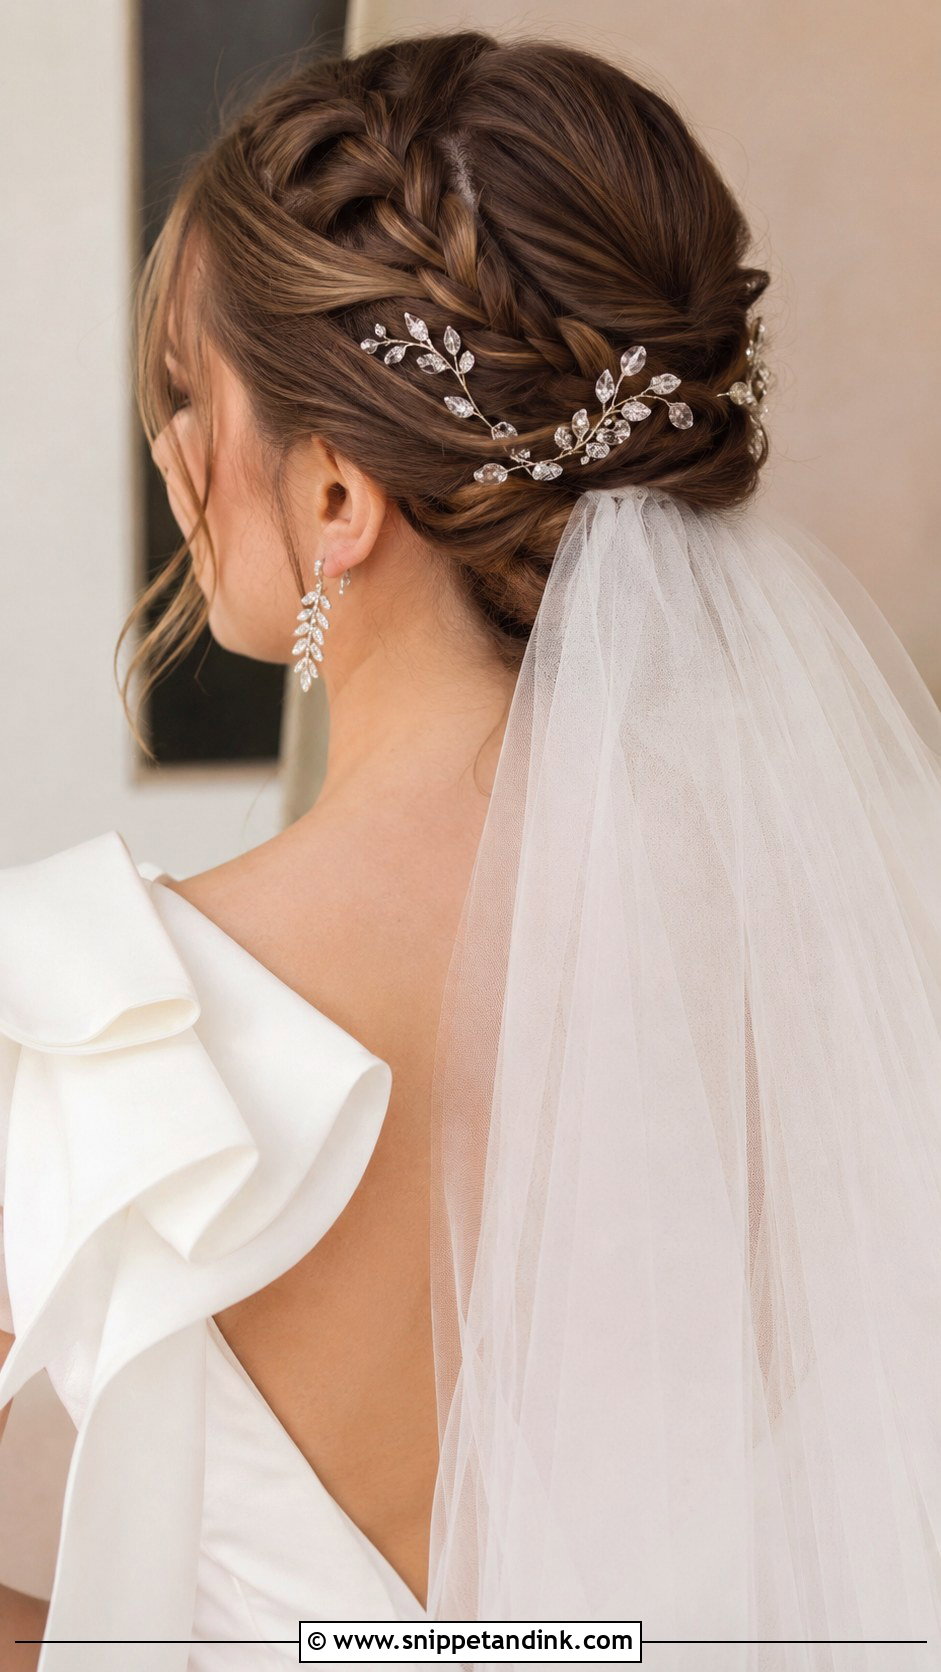
This is the braid for a bride who hates the feeling of hair touching her neck. I take a classic French braid down the back, fold the tail up and pin it into a tucked shape, so there’s nothing left to move. Because every strand is locked in, it’s very forgiving in heat and wind. The downside is that a tight French braid can look severe on a soft or round face, so I usually loosen the outer loops slightly and pull a couple of fine pieces out at the temples to keep it from looking like a gym braid.
7. Boho Braided Half-Up
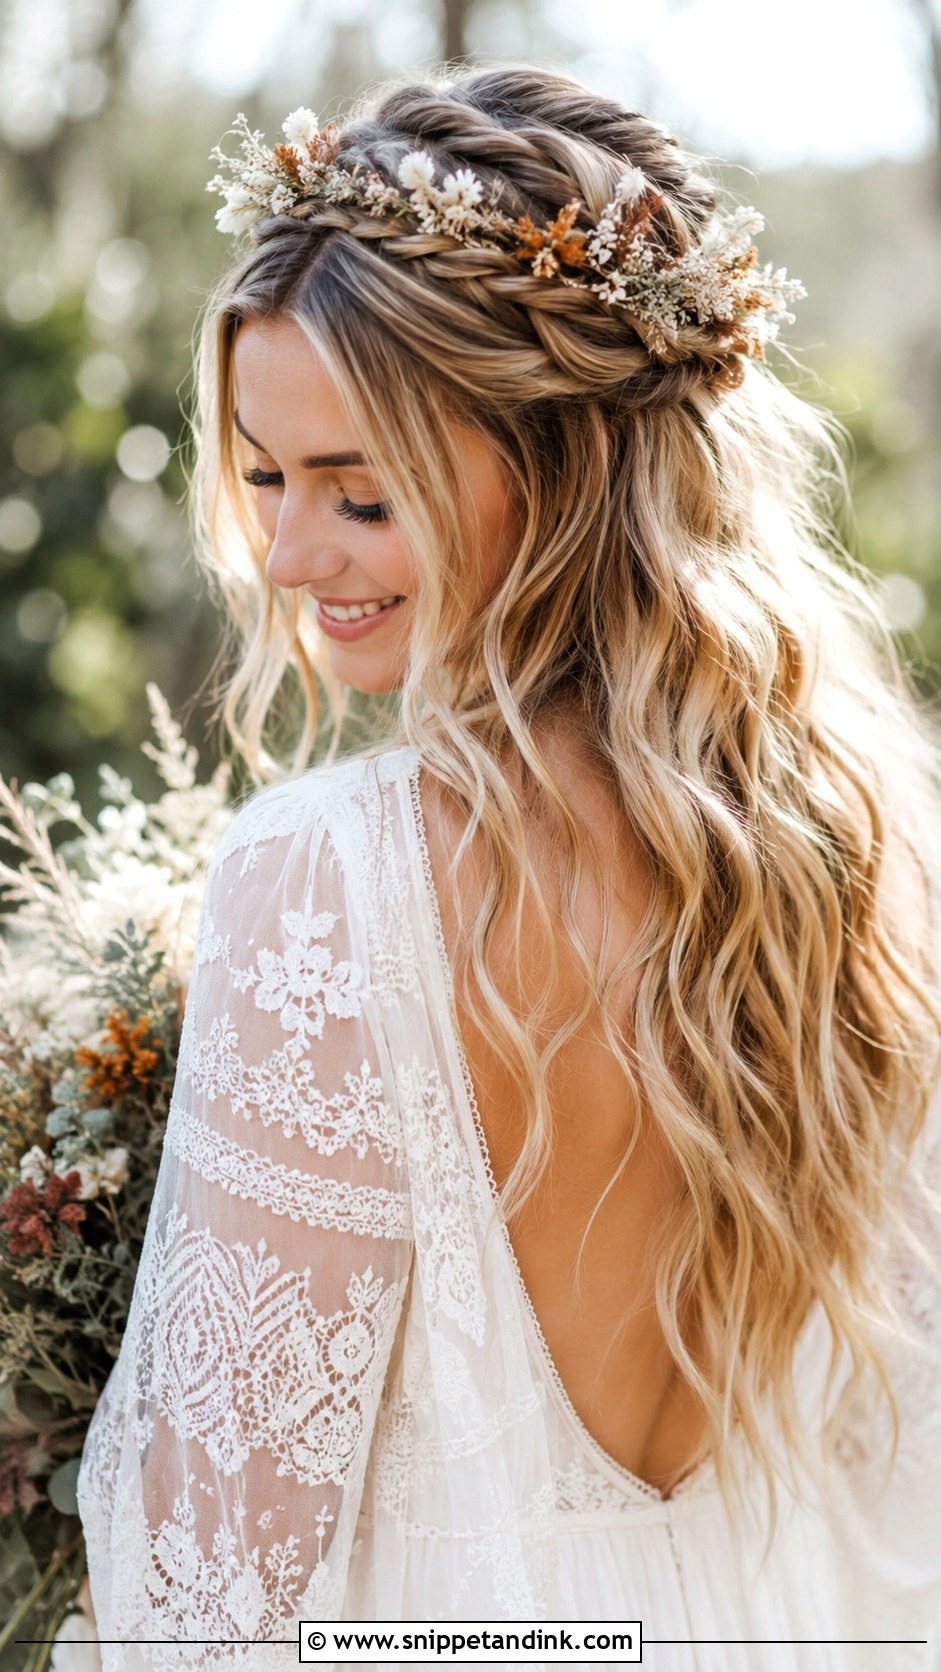
The boho braided half-up works best when the braids are small and slightly uneven, almost like they formed on their own. I braid two or three skinny sections at the crown, pancake them, and pin them into the back, then wave the length below with a large barrel. Dried flowers and eucalyptus last much longer in hair than fresh blooms on a hot outdoor day, so I’d choose those for a beach or garden setting. If your hair is very fine, these small braids can disappear in photos, so we’d make them a little thicker than you think.
8. Braided Chignon
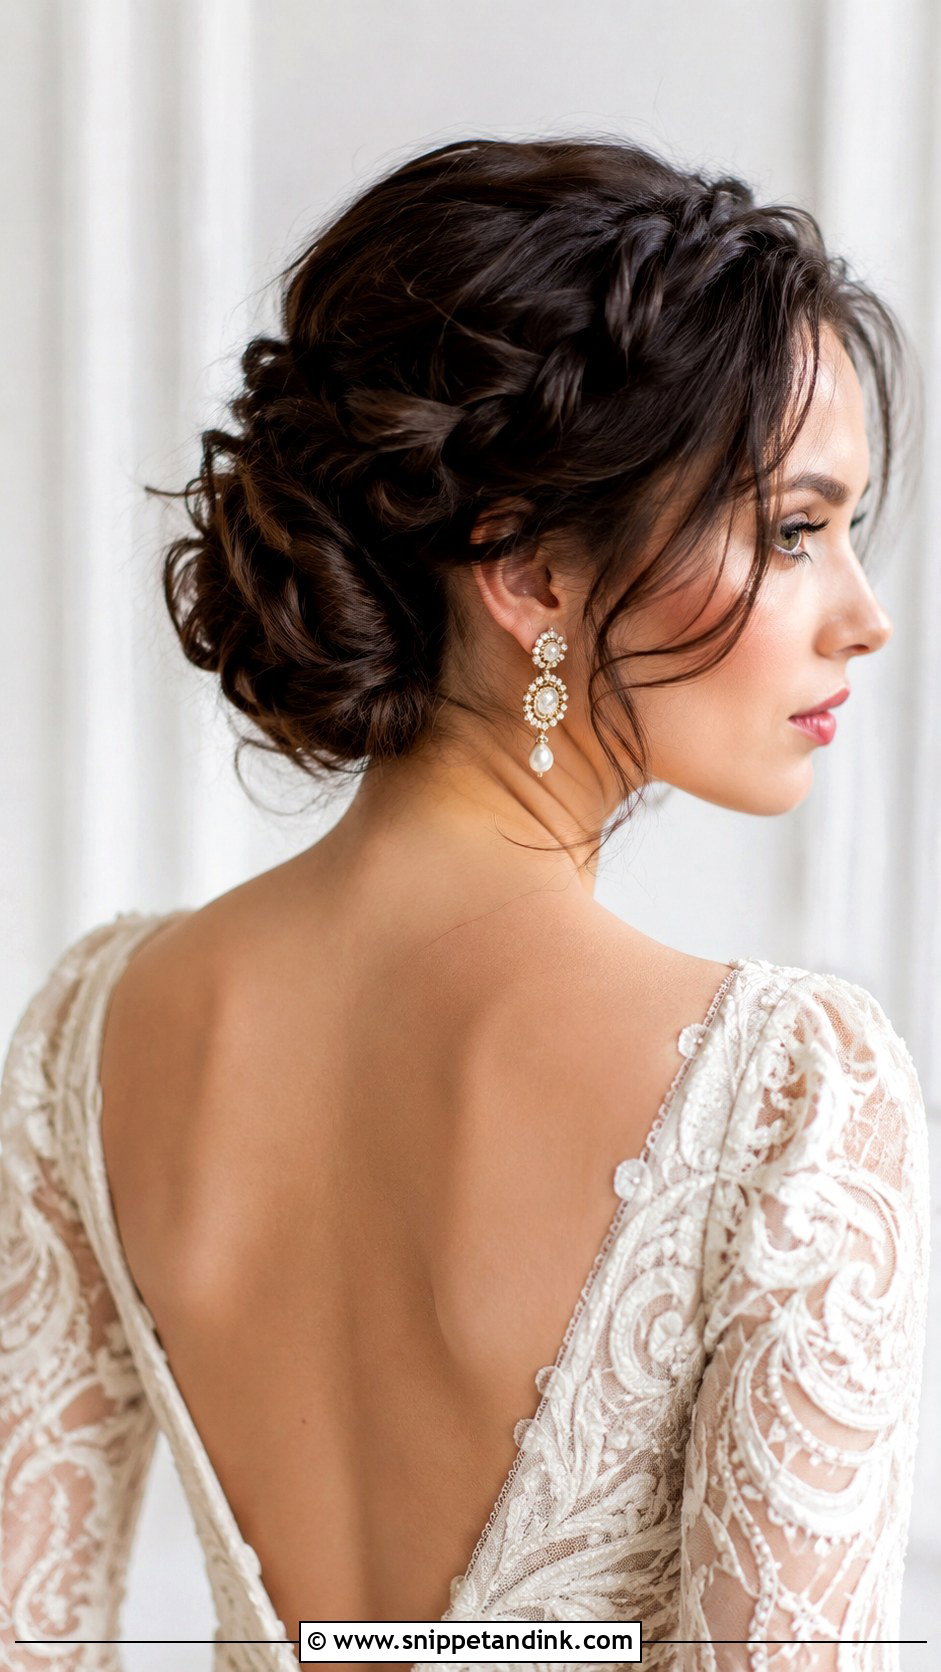
A braided chignon coils a braid into a low knot at the back of the head, and it’s my favourite way to give a classic shape some texture. The braid adds grip, so the chignon stays tight even when you hug a lot of guests. I build it with a few sections braided separately rather than one long braid, because one braid coiled up tends to look like a cinnamon roll. It suits vintage necklines and drop earrings well, and it is one of the most reliable styles on this list for a twelve-hour day.
9. Side-Swept Braid
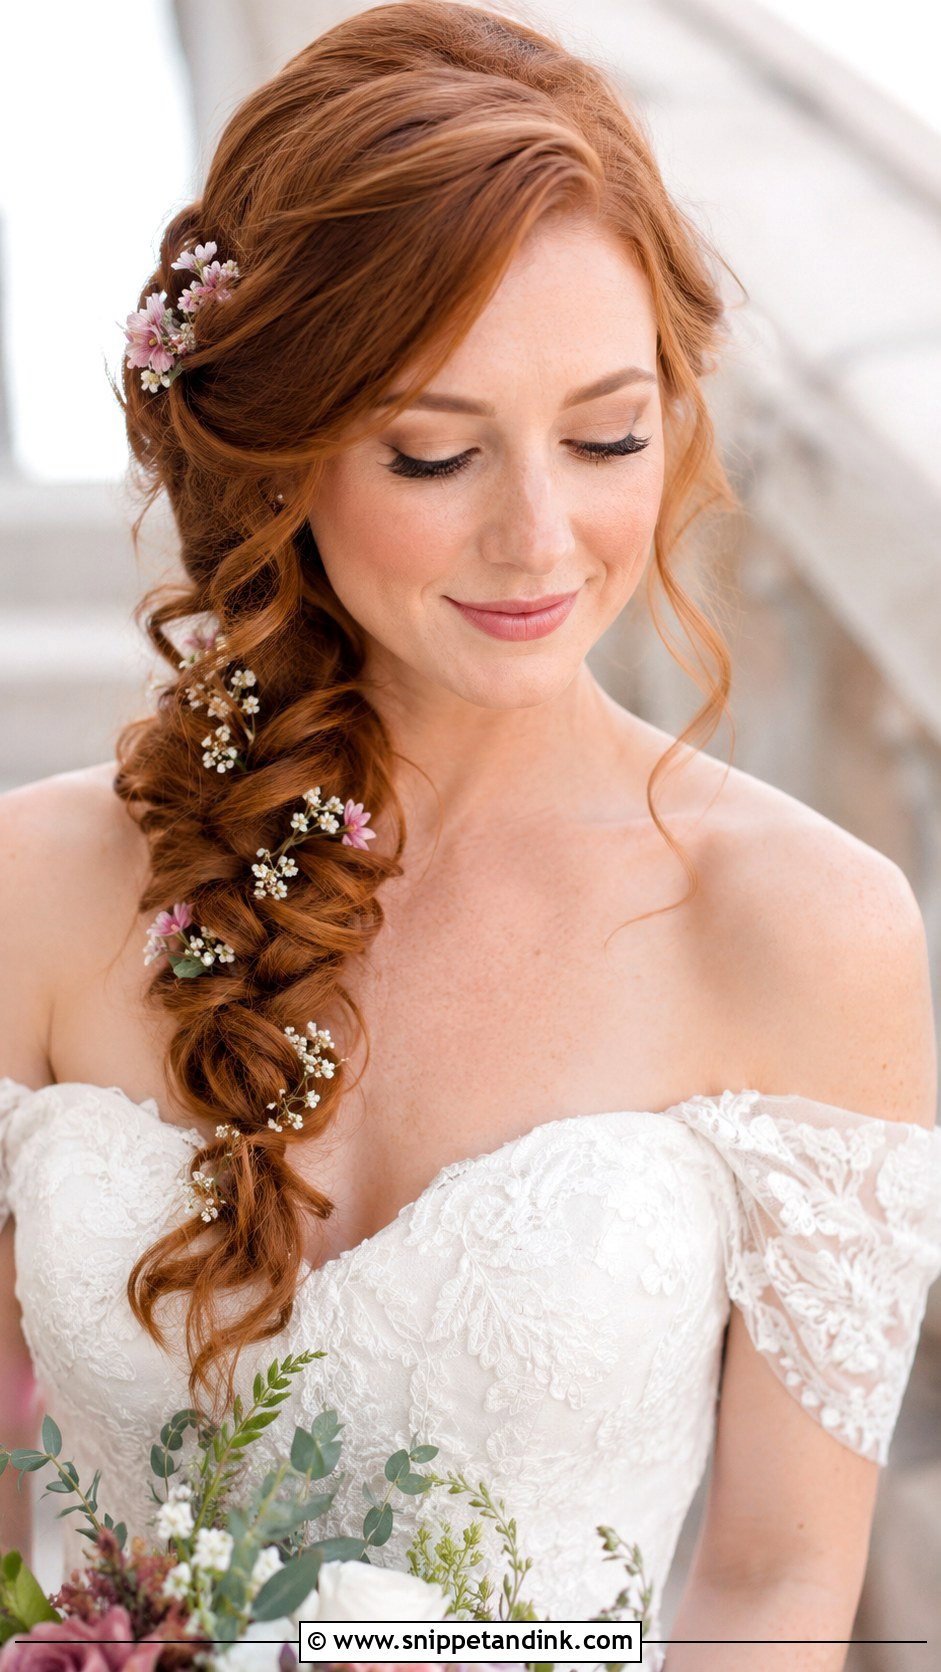
Draping the braid over one shoulder puts all the weight on one side, so I always ask which side your earrings and the photographer’s main angle will be on before I start. I build the braid from the nape so it begins behind the ear, not at the top of the head, which keeps it from pulling your parting crooked. A loose side braid on very thick hair can feel heavy by evening, and on an off-the-shoulder gown it can catch on lace edges, so I check the dress at the trial.
10. Braided Ponytail
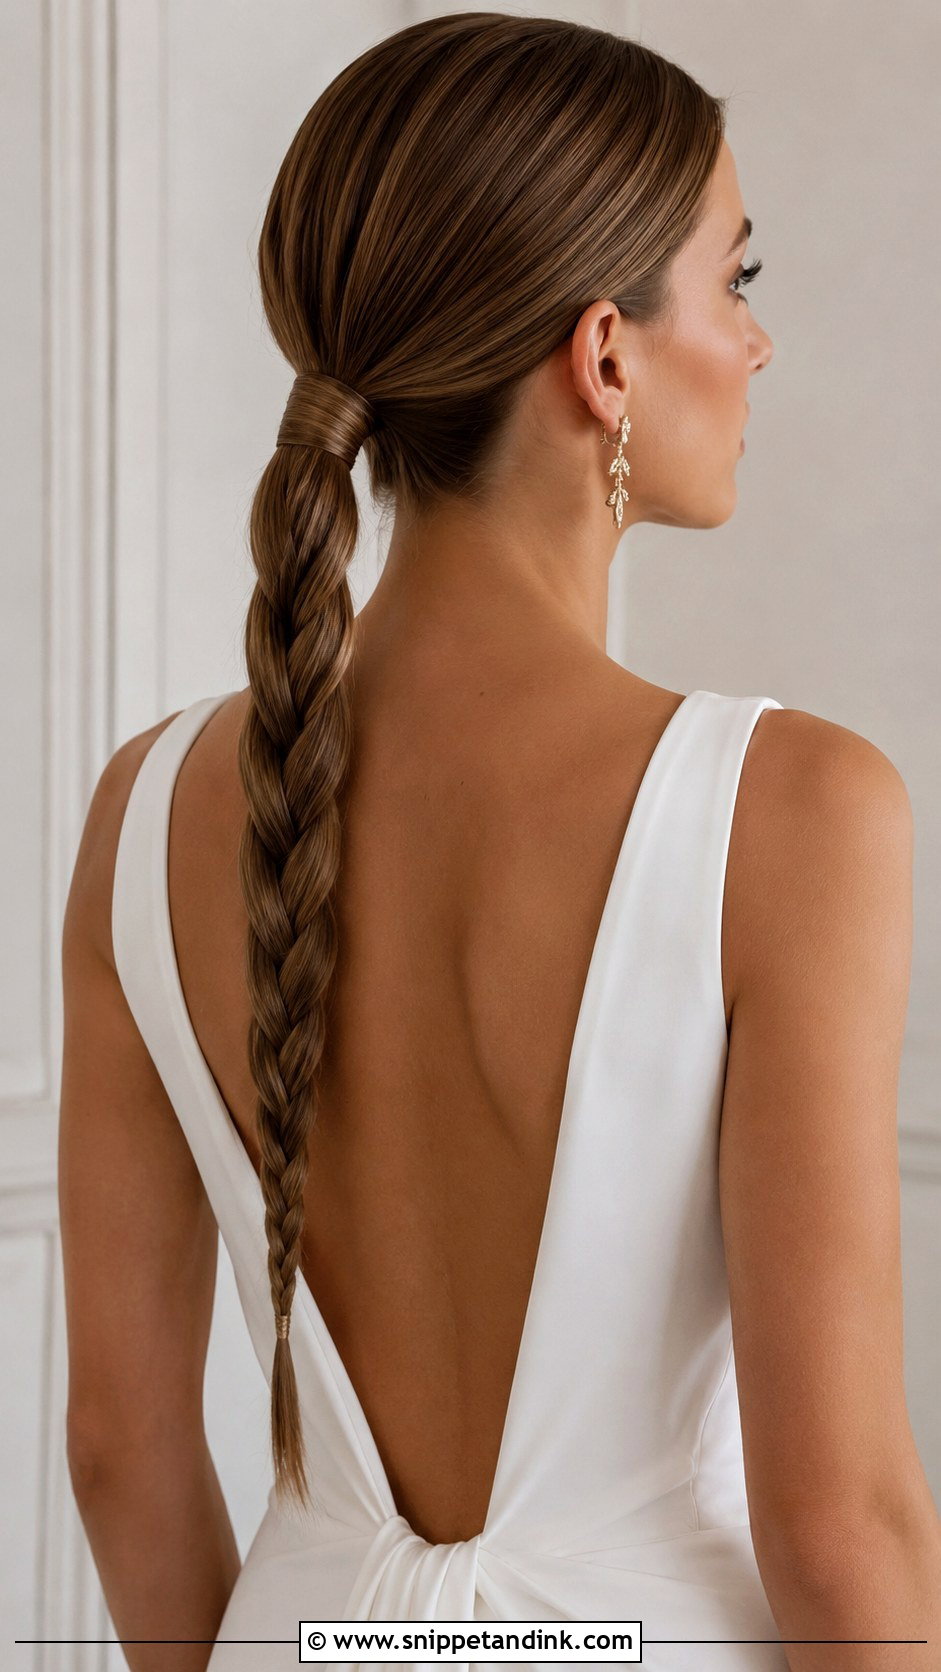
A braided ponytail is built on its base, and that’s where most go wrong. I set the elastic exactly where I want the pony to sit, wrap a small section of hair around it to hide it, and secure that wrap with a bobby pin pushed upward into the base. A high pony looks more modern but will tug on your scalp after several hours, so if you get headaches easily I’d place it at mid-height. It’s one of the easiest styles to dance in.
11. Milkmaid Braids
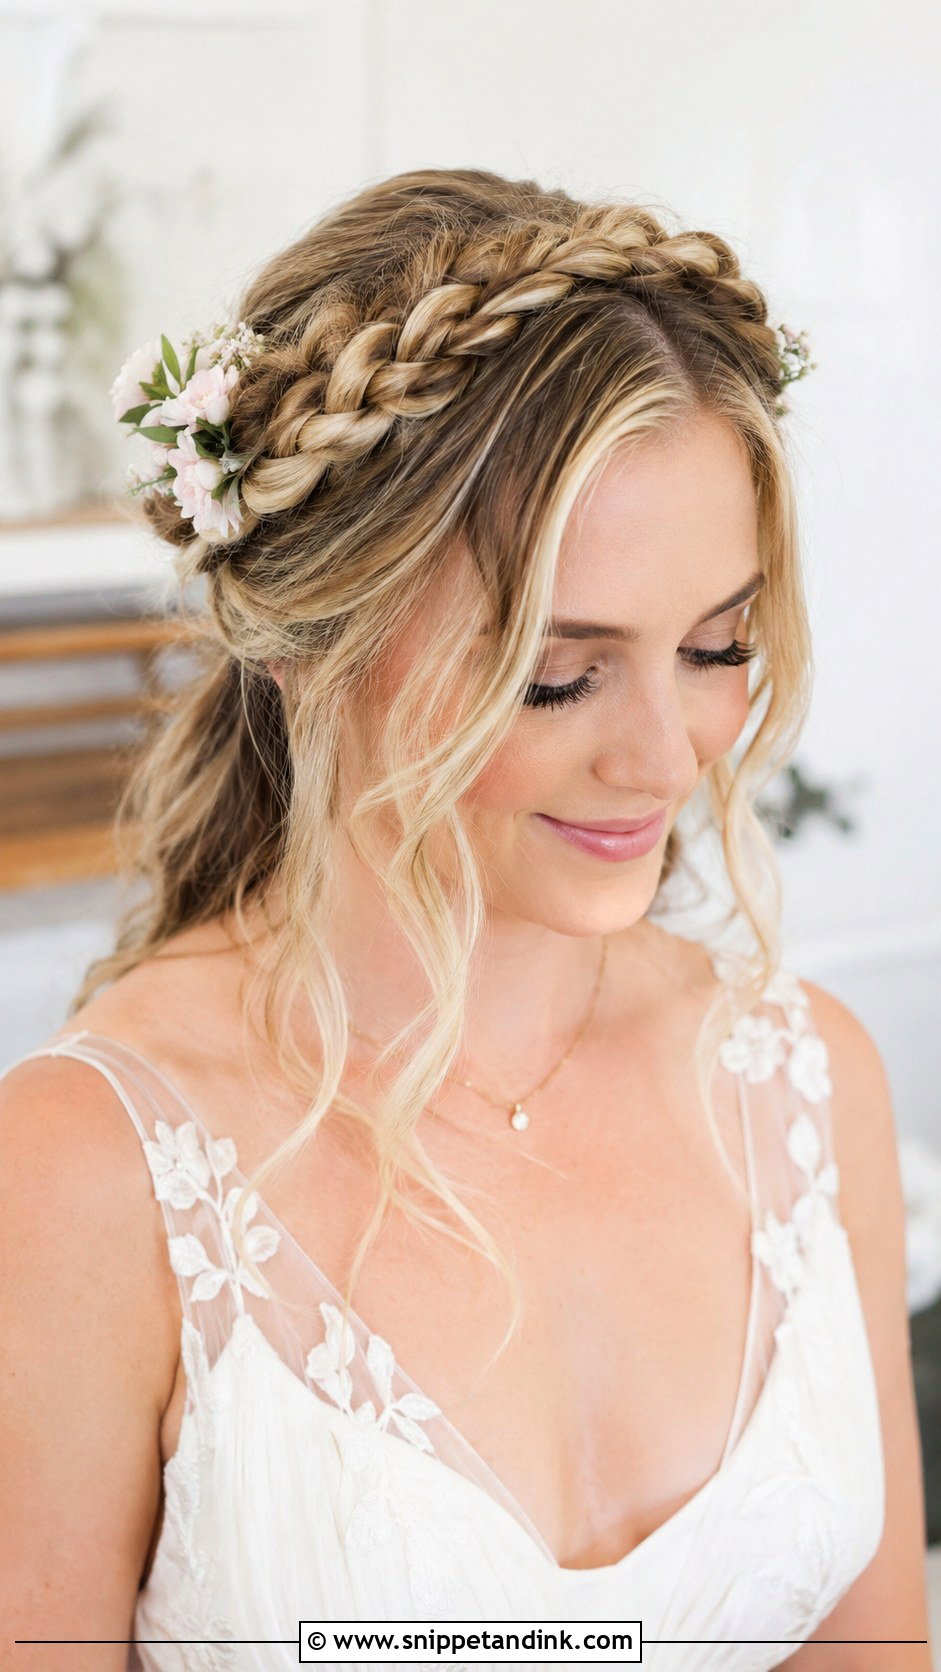
Two braids wrapped across the top of the head is what makes milkmaid braids so practical for summer: nothing touches your neck. You need enough length for each braid to reach from the nape over the head, so roughly shoulder length at minimum. I pin each braid down along its whole length with U-pins and hide the ends under the opposite braid. On thinner hair I’ll pancake them heavily, since a skinny milkmaid braid can look childish rather than bridal.
12. Braided Updo With Flowers
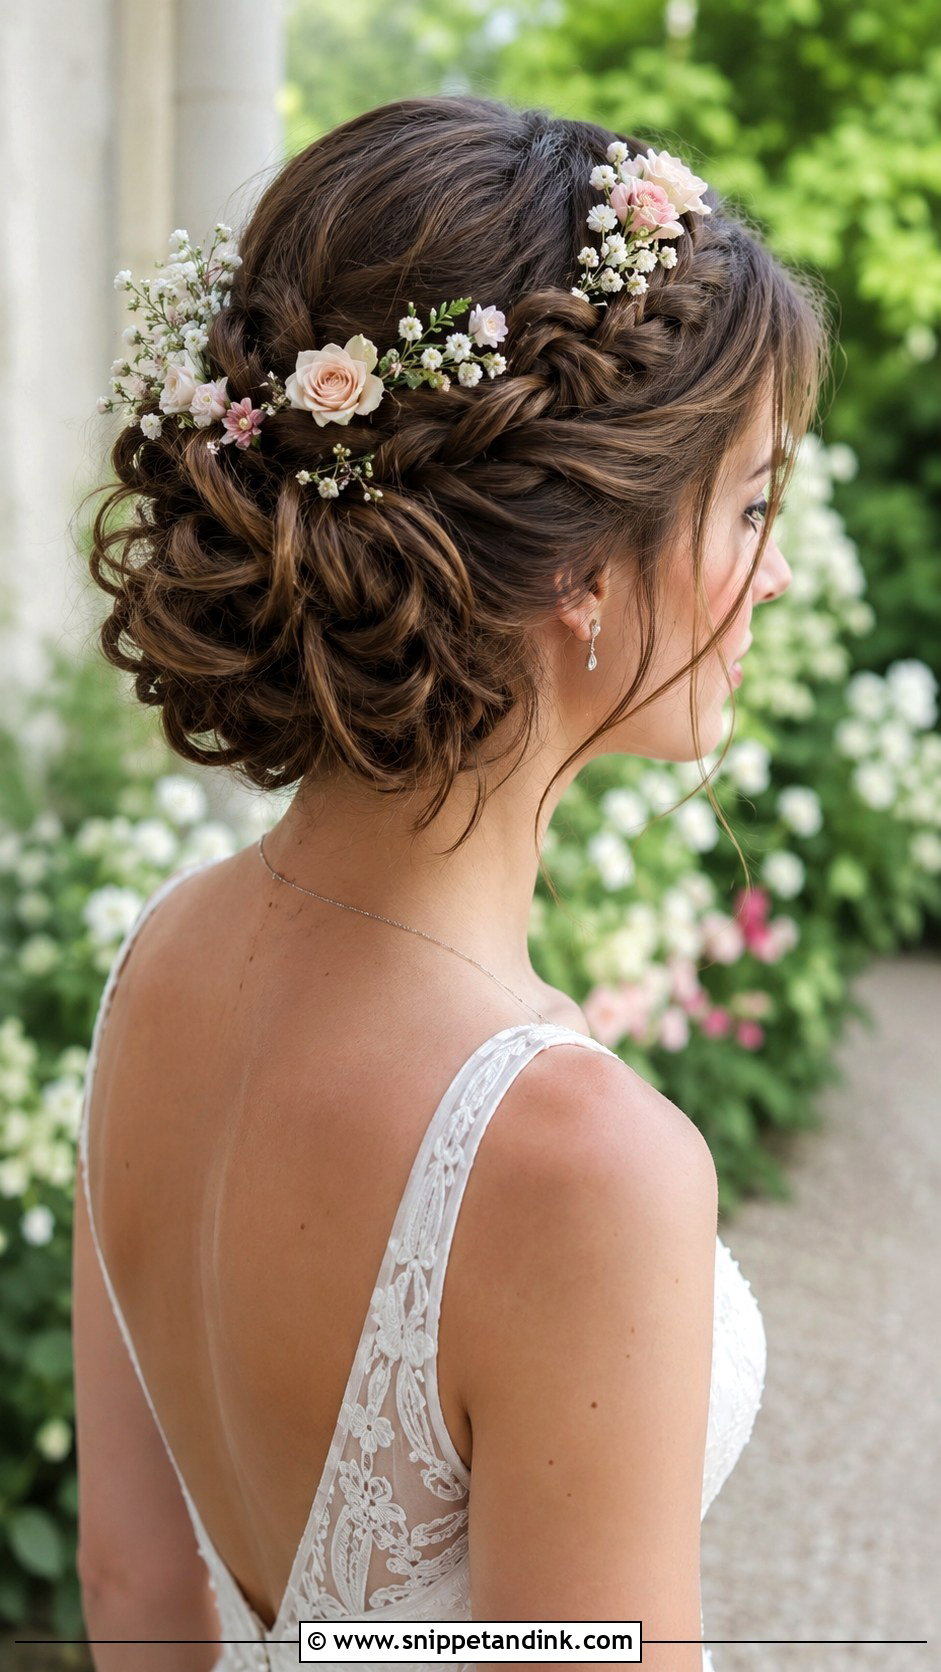
Fresh flowers in an updo are about planning more than styling. I need the florist’s stems wired or taped and delivered with the bouquets, and I add them last, after the hairspray, because spray darkens and spots petals. Hardy choices like spray roses, waxflower and eucalyptus hold far better than hydrangea, which wilts quickly out of water. Keep the gown simple if your hair is carrying this much detail, so the two aren’t competing.
13. Loose French Braid
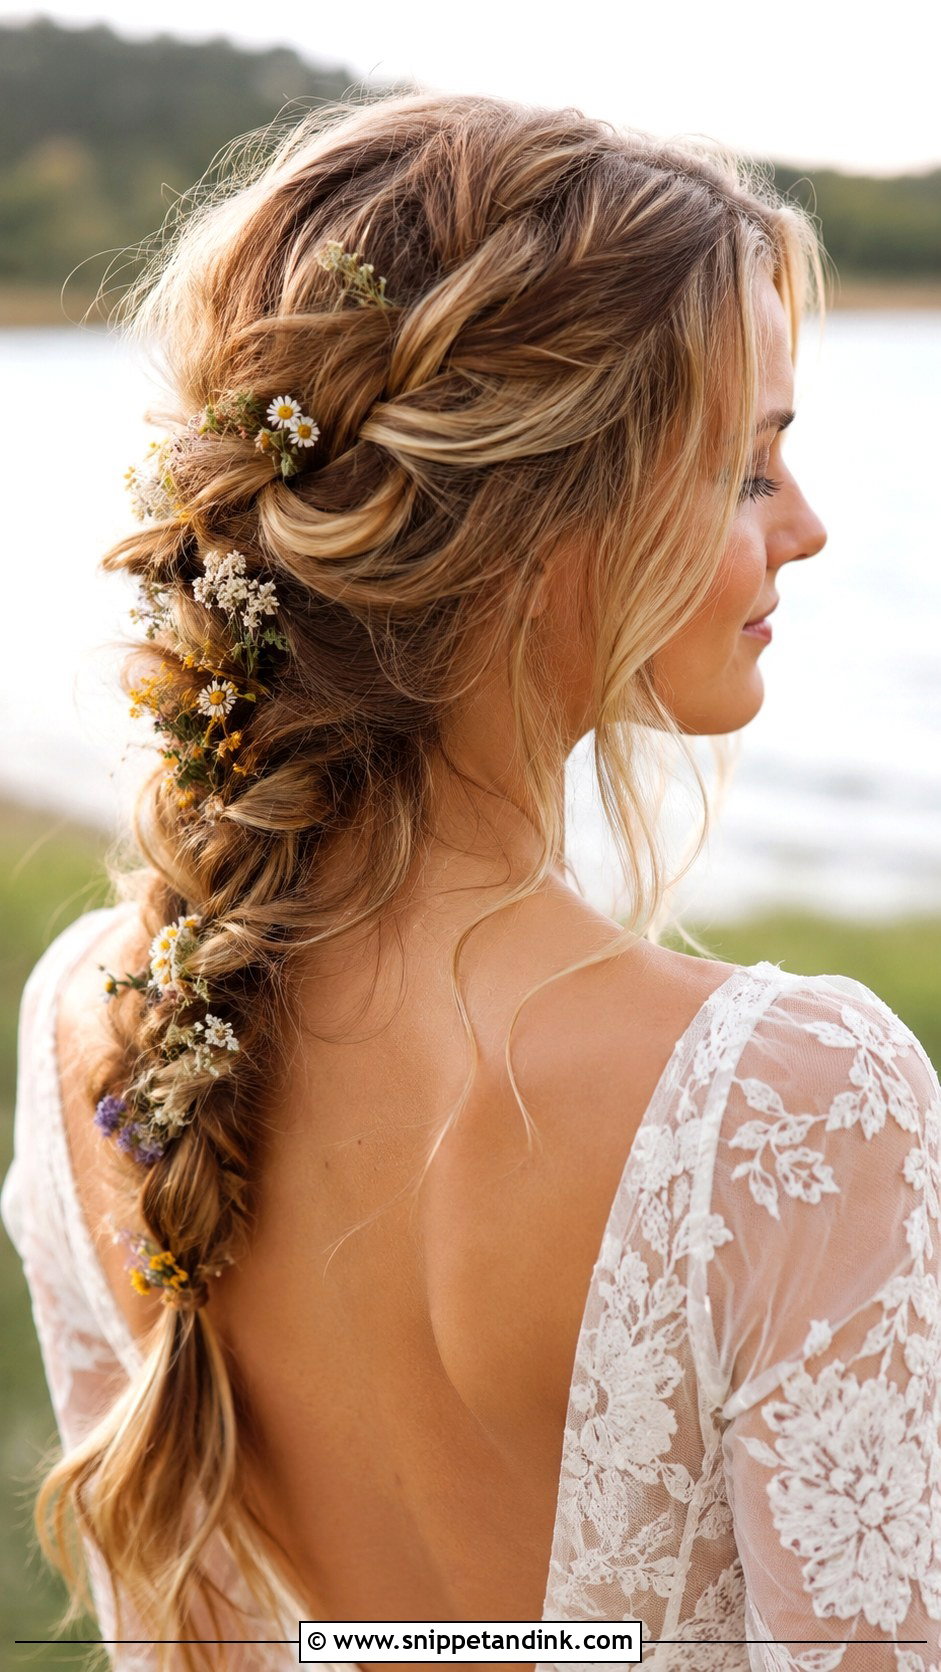
A loose French braid is just a standard French braid with a lot of careful pulling afterwards. The trick is pulling the outer loops evenly from top to bottom, otherwise one side looks fuller and the braid appears to lean. It suits wavy and medium-thick hair especially well. Very fine hair tends to show the scalp through a heavily loosened braid, so I’d keep it a little tighter or add a weft underneath. Wildflowers or greenery tucked into the gaps finish it nicely for a rustic or outdoor setting.
14. Infinity Braid
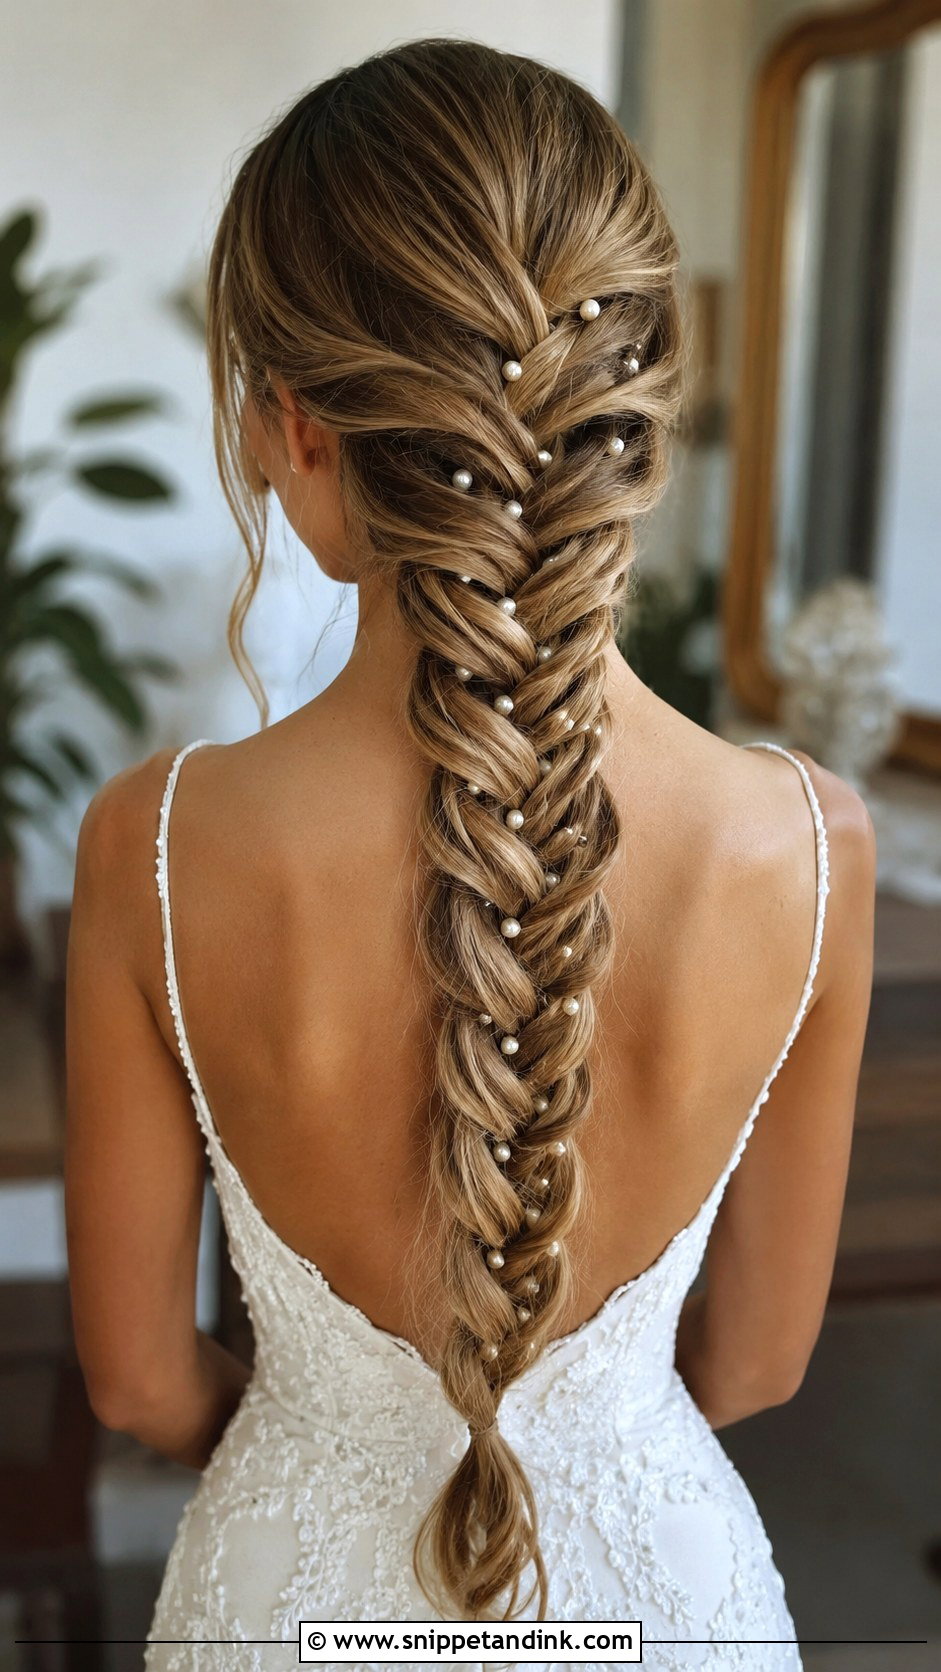
Despite the name, an infinity braid is simpler than it looks: two strands are woven in a figure-eight with a small piece picked up each time. It needs medium to thick hair to show the looped shape properly. On thin hair the loops are so small that it reads as a twisted rope in photos. I like it run down the back of a half-up style, with a few small pearl pins along the weave rather than flowers, since the pattern is the detail.
15. Braided Bun With Veil
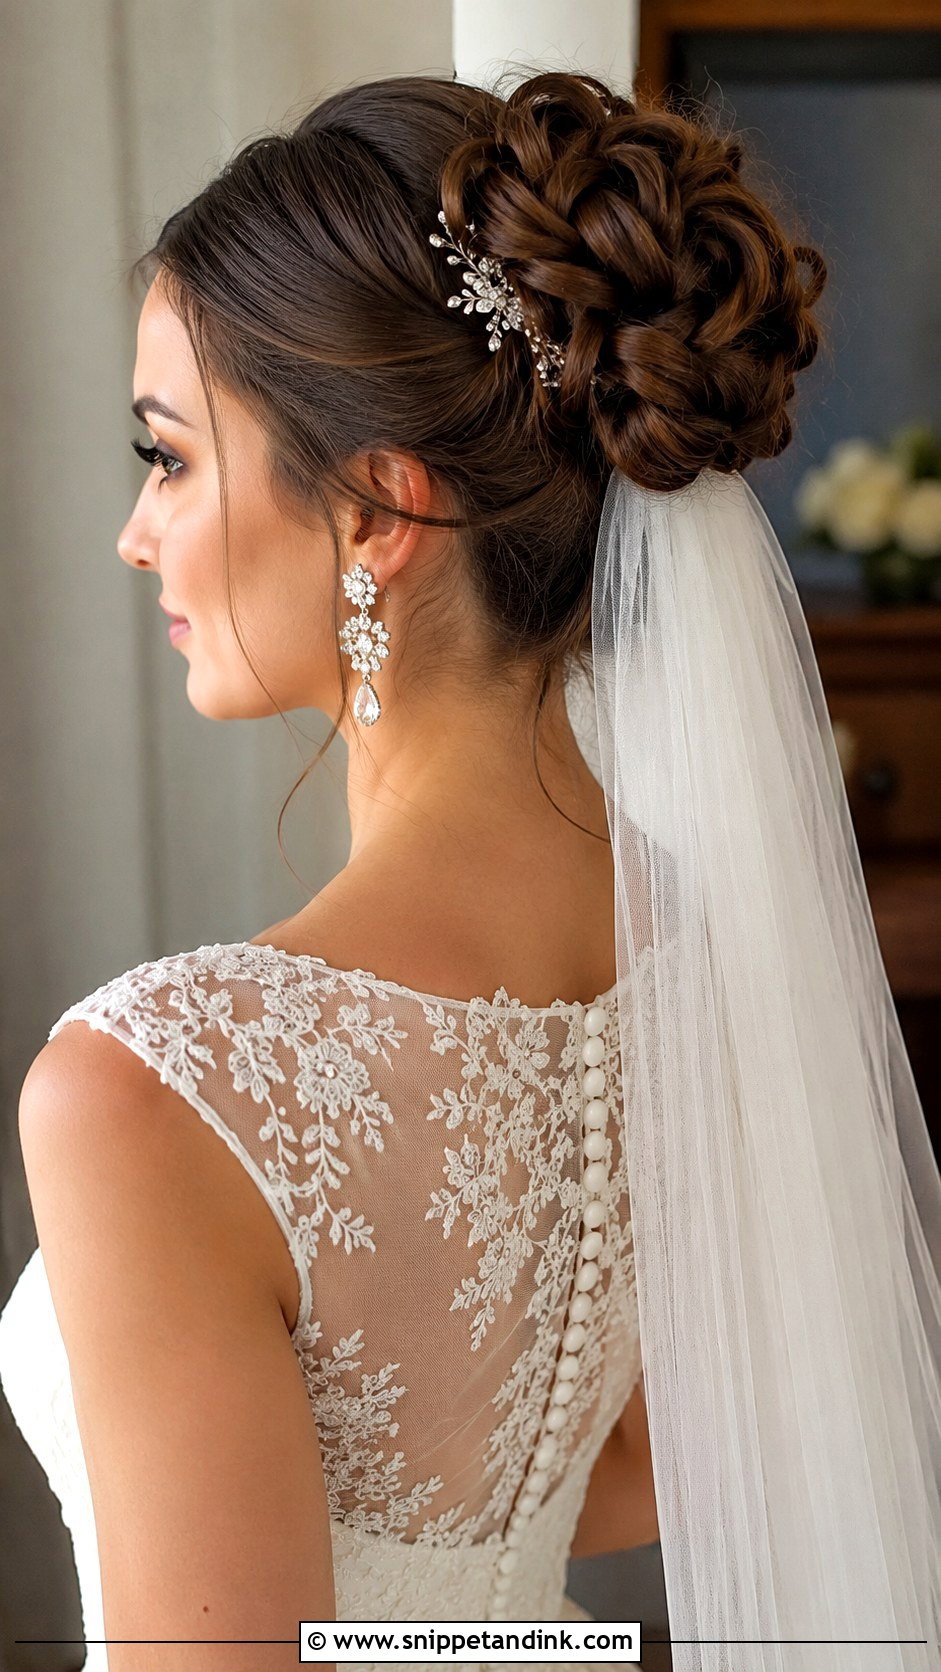
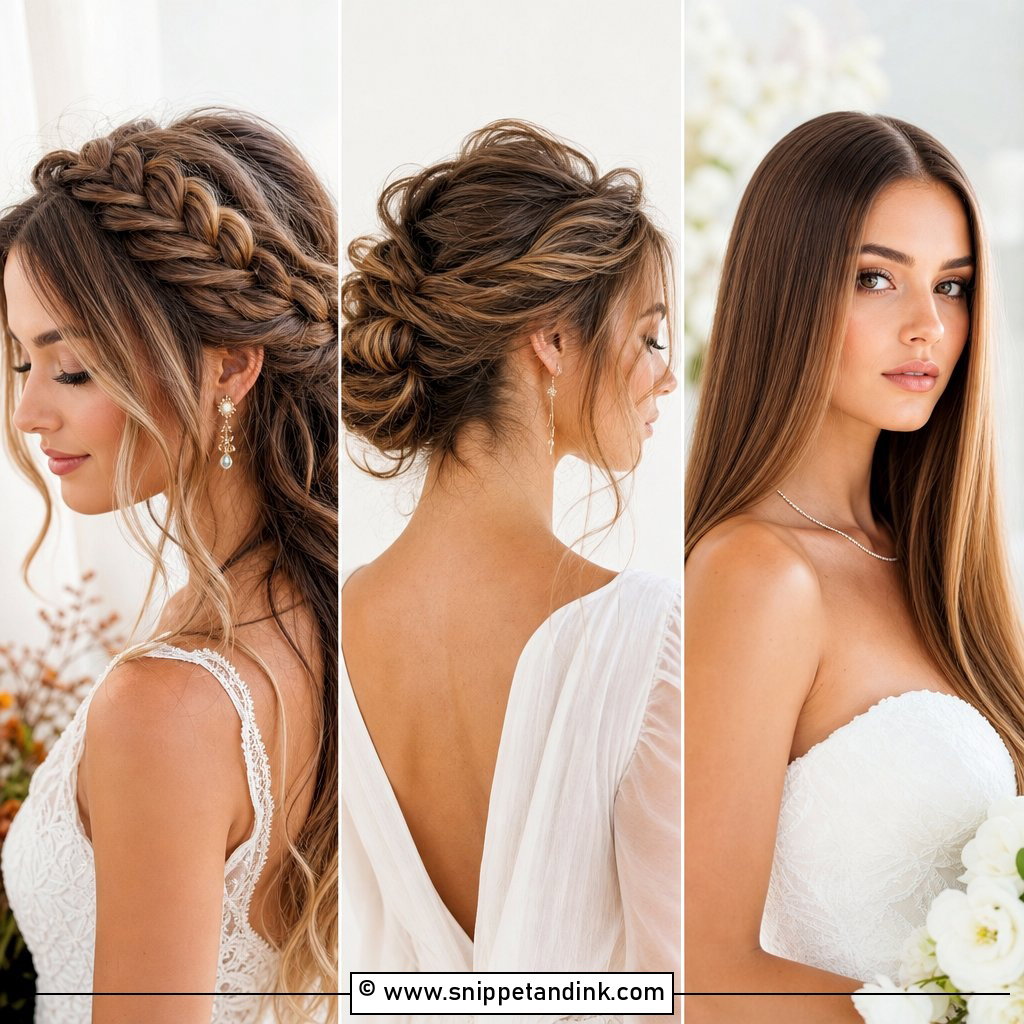
If you’re wearing a long veil, a braided bun gives the comb something dense to grip. I build the bun first, check where the veil needs to sit for the length you’ve chosen, and slide the comb into the braided base, not into the soft top. A comb pushed into smooth hair can slide out during the processional. Once the veil comes off for the reception the bun still looks finished, which is why I think this is such a practical choice for formal and traditional ceremonies.
16. Mermaid Braid
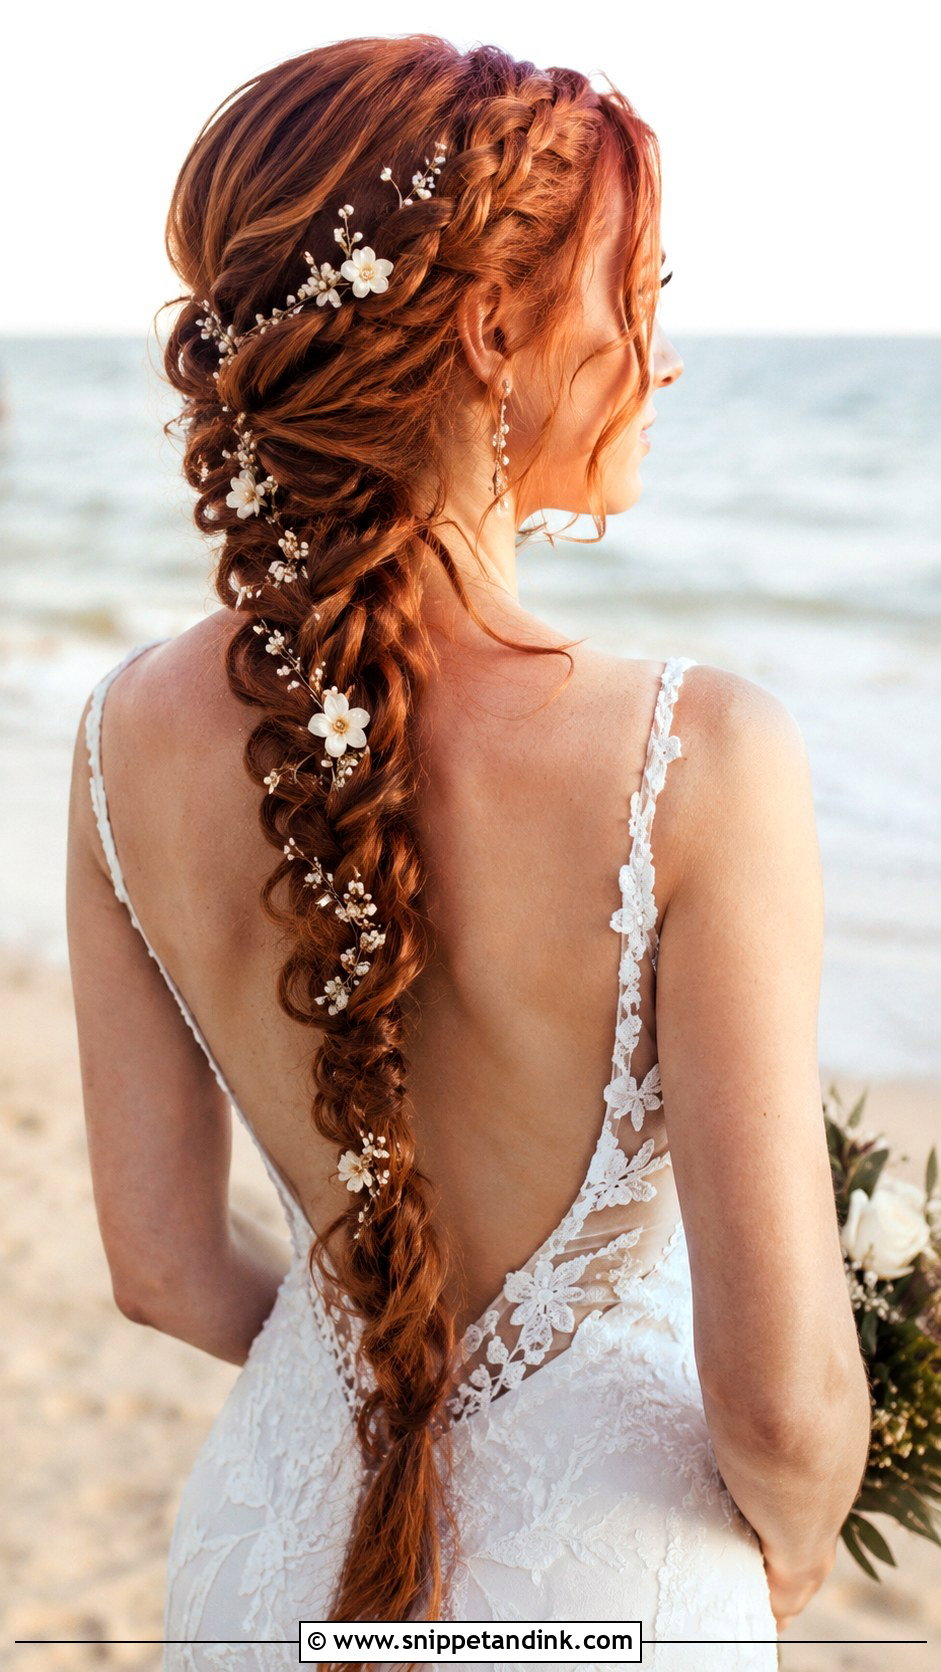
A mermaid braid is several braids woven together into one wide panel, and it really does need long hair, ideally past the shoulder blades. With hair any shorter, I’d add clip-in extensions matched to your colour, or the braid tapers to a thin tail halfway down. It’s best from behind, so I make sure the photographer knows to catch a back shot during the ceremony. I often add a few pearls rather than fresh flowers, since the braid already carries a lot of texture.
17. Twisted Braid Updo
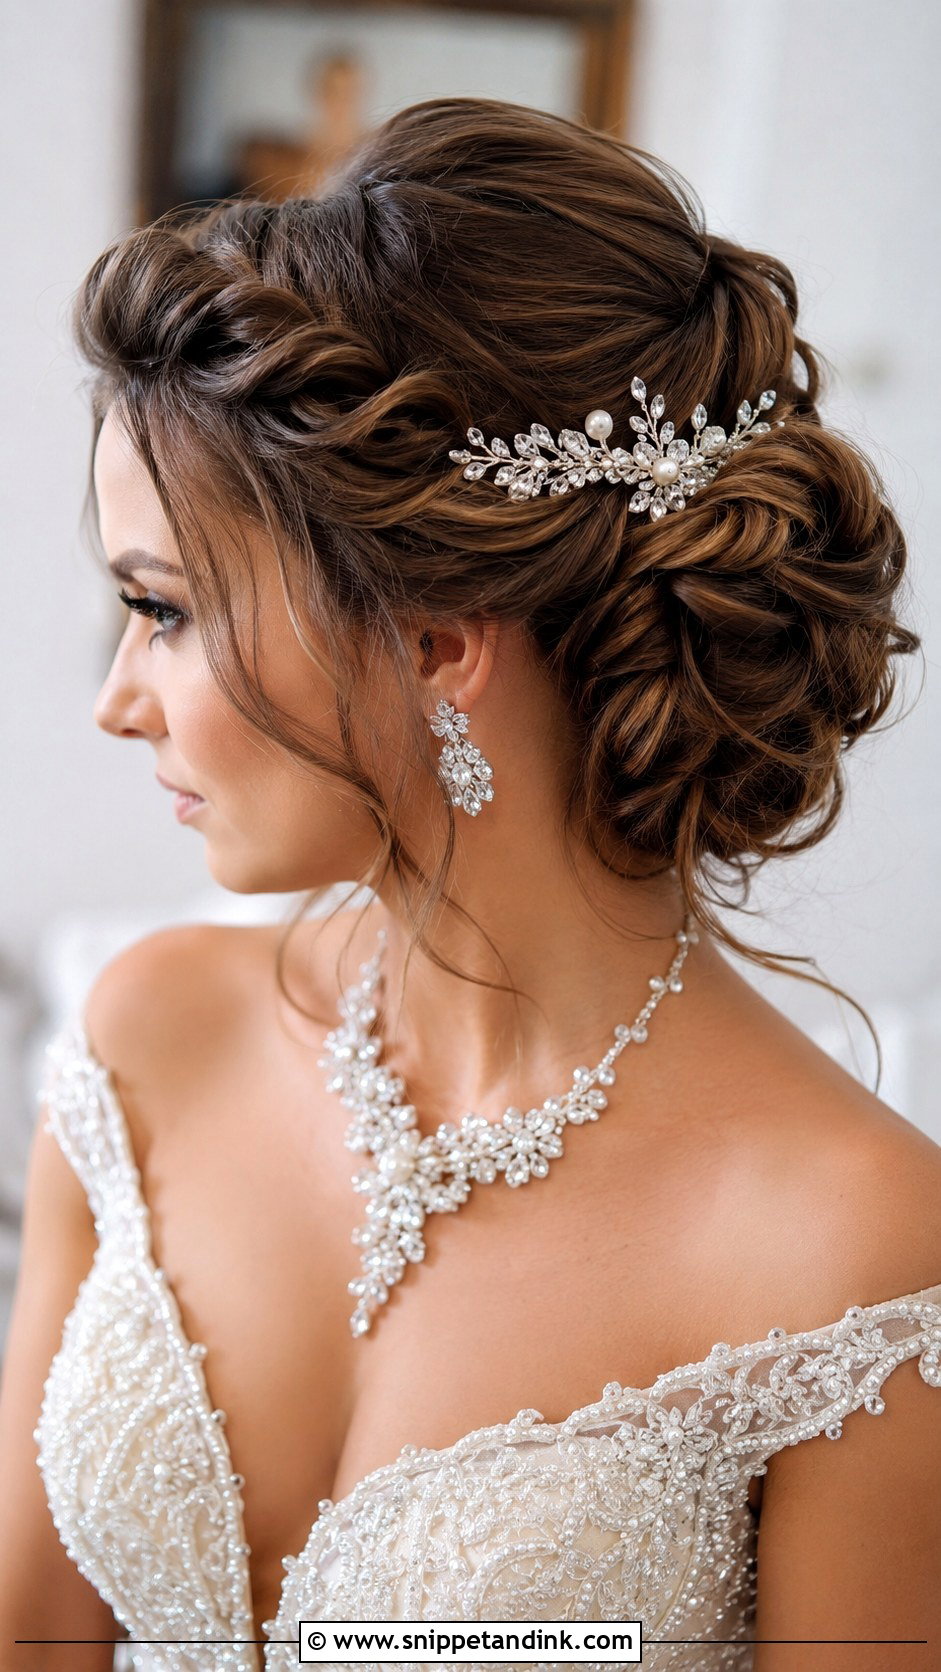
The twisted braid updo mixes rope twists and braids, and the reason I use both is that twists hold volume while braids hold structure. The result is a full updo that doesn’t rely on teasing. It sits well with sparkling combs and heavy earrings because there are no loose lengths to tangle with jewelry. On very curly hair, I’d twist rather than braid most sections, since the curl pattern shows better in a twist.
18. Braided Pigtails
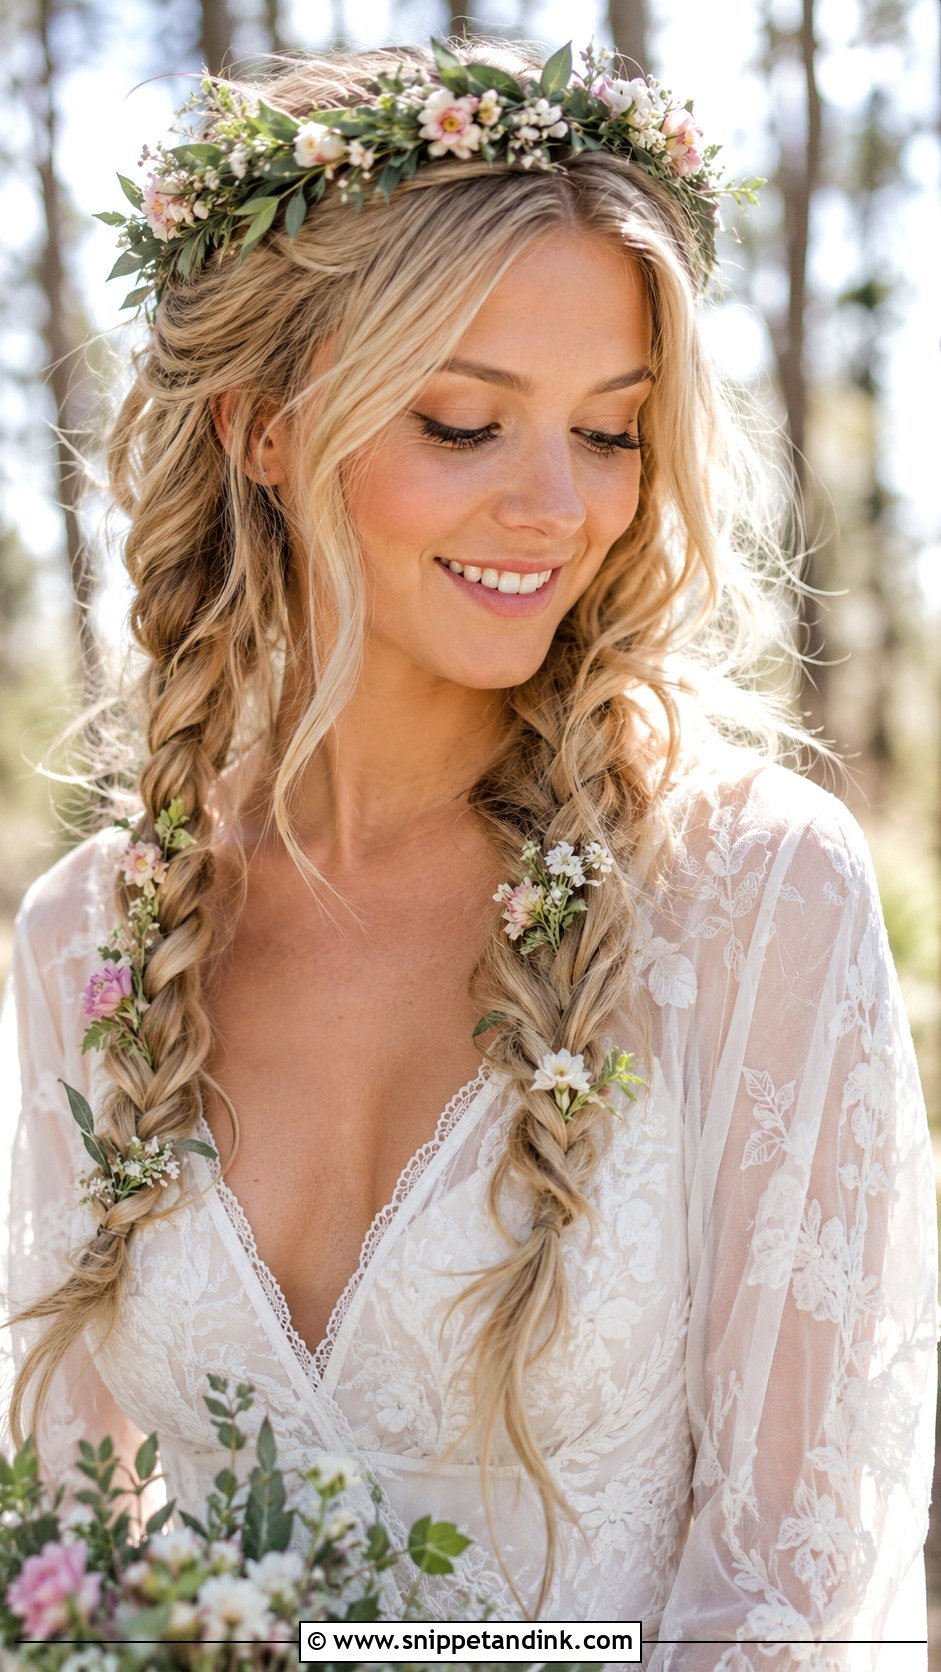
Braided pigtails are a playful pick and not right for every wedding, but for a festival-style or very casual celebration they’re fun and practical. I keep the part clean and start each braid slightly behind the ear so the overall shape stays grown-up. Pull them loose for a softer finish. If you pair them with a flower crown, I attach the crown first, then braid, so the crown sits securely over the part.
19. Accent Braid With Curls
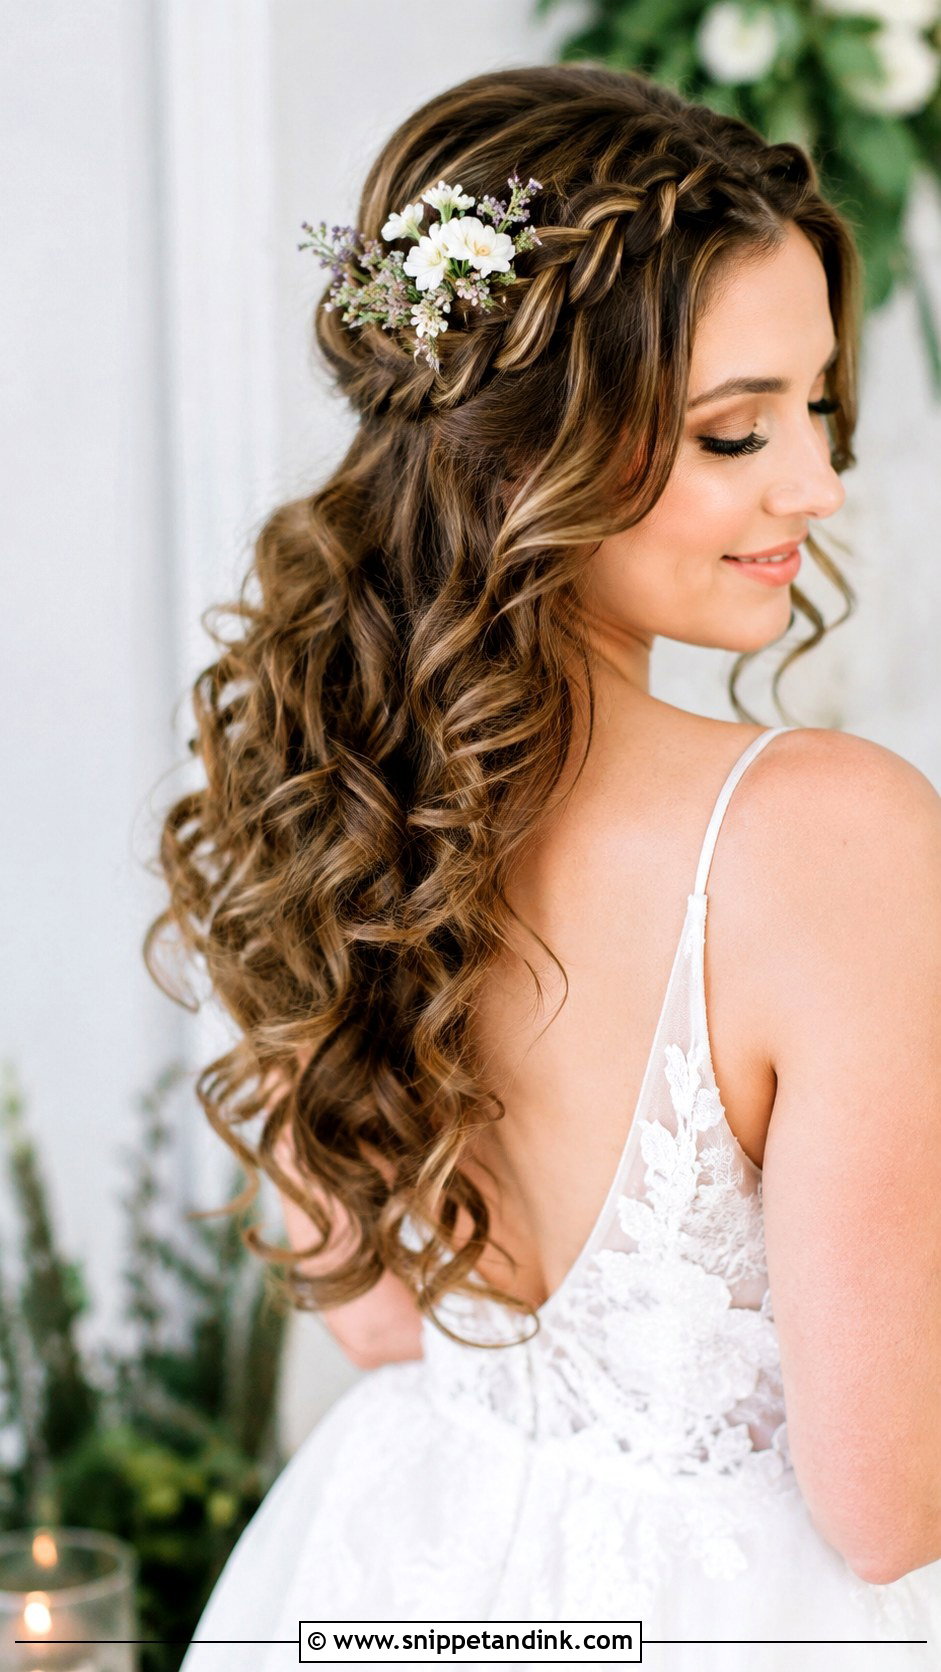
An accent braid gives you the movement of loose curls with a small structured detail across the crown or along one side. I suggest it whenever someone wants her hair down but worries it will look unfinished in photos. The braid also anchors the top section, which helps curls in front from falling flat. If you have a lot of layers, a small accent braid hides shorter pieces nicely around the temples.
20. Sleek Braided Bun
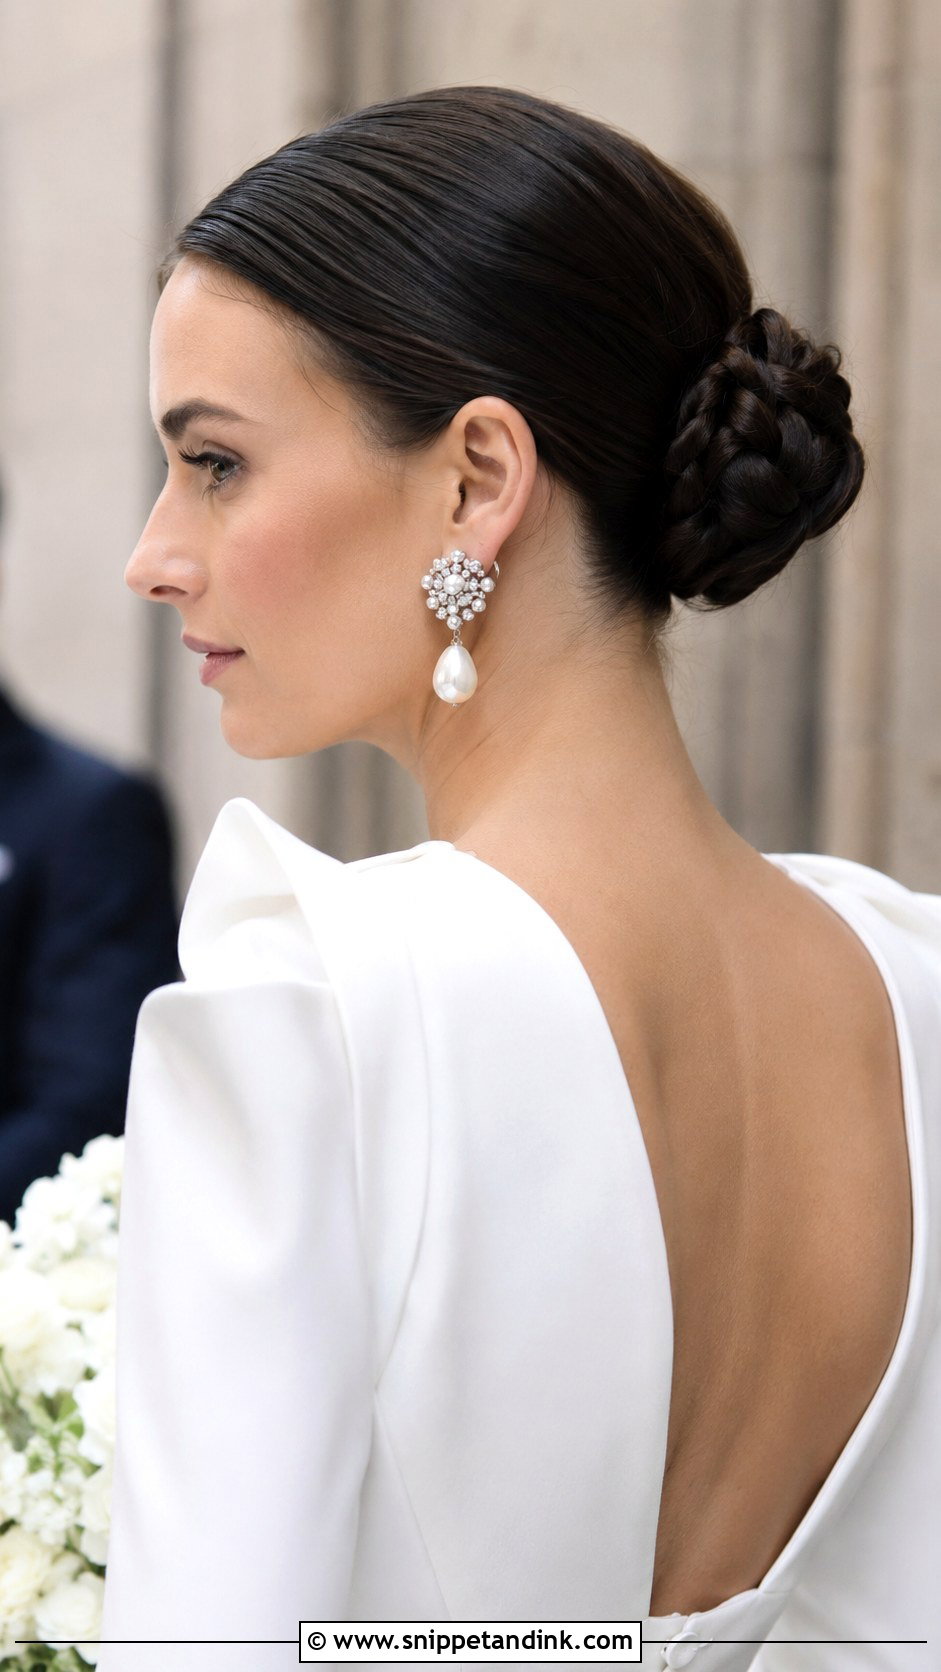
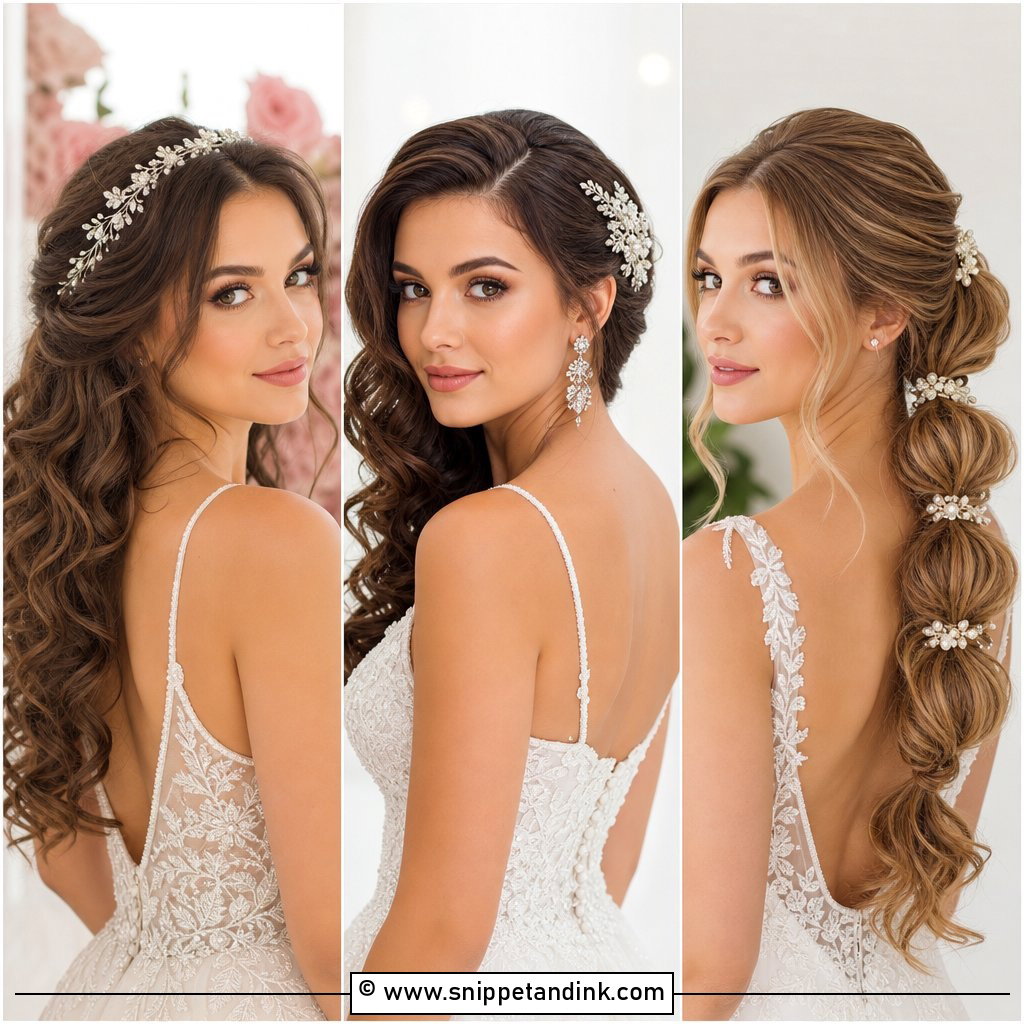
The sleek braided bun is the most precise style here, and it shows every flaw. I smooth the hair back with a firm gel or pomade before braiding, then wrap the braid tightly into the bun with no loosening at all. Strong, straight hair is the best match; very curly or frizz-prone hair needs a smoothing prep and still may show some fluff in humid weather. It suits structured gowns, bold earrings and minimal floral details.
Pancaking, Pins and Weather Between the Trial and the Last Dance
A braid is sturdy, but the loosened, fluffy part of it is not. The pulled-out loops are what make a braid look soft and romantic, and they are also the first thing to flatten in humidity or under a veil. I pancake about two thirds as much as I’d like on the morning, then finish the rest after the veil goes in, so it doesn’t crush them.
The pins matter more than people expect. U-pins hold a braid to the head without squashing it, while bobby pins lock sections together. I cross bobby pins in an X at stress points such as the base of a bun or the end of a crown braid, and I match the pin colour to your hair so nothing glints in flash photos.
What I’d hand your maid of honour
- Six to eight bobby pins and two U-pins in your hair colour
- A travel-size flexible hairspray, not a strong-hold one, so a quick fix doesn’t go crunchy
- A small comb with a pointed tail for lifting a flattened loop back out
- Clear elastics in case a pony or braid end slips
If rain or high humidity is forecast, I’d choose a tighter style from this list rather than the loosest version, and keep any loose face-framing pieces to a minimum. Frizz on a tight braid looks like texture; frizz on a loose one looks like a style that’s falling apart.
A Braid Is Only as Good as the Prep Underneath It
Pick the braid that matches the hair you actually have, then plan around it: length for a crown or mermaid braid, density for an infinity braid, and a curl that holds for anything with loose pieces. Book a trial, wear it for a few hours afterwards and check what slips. Flowers, pearls and pins are the last layer, not the foundation. Get the base right and your braid will still look neat when the last guest leaves.
You'll Like These Ideas:


Leave a Reply