
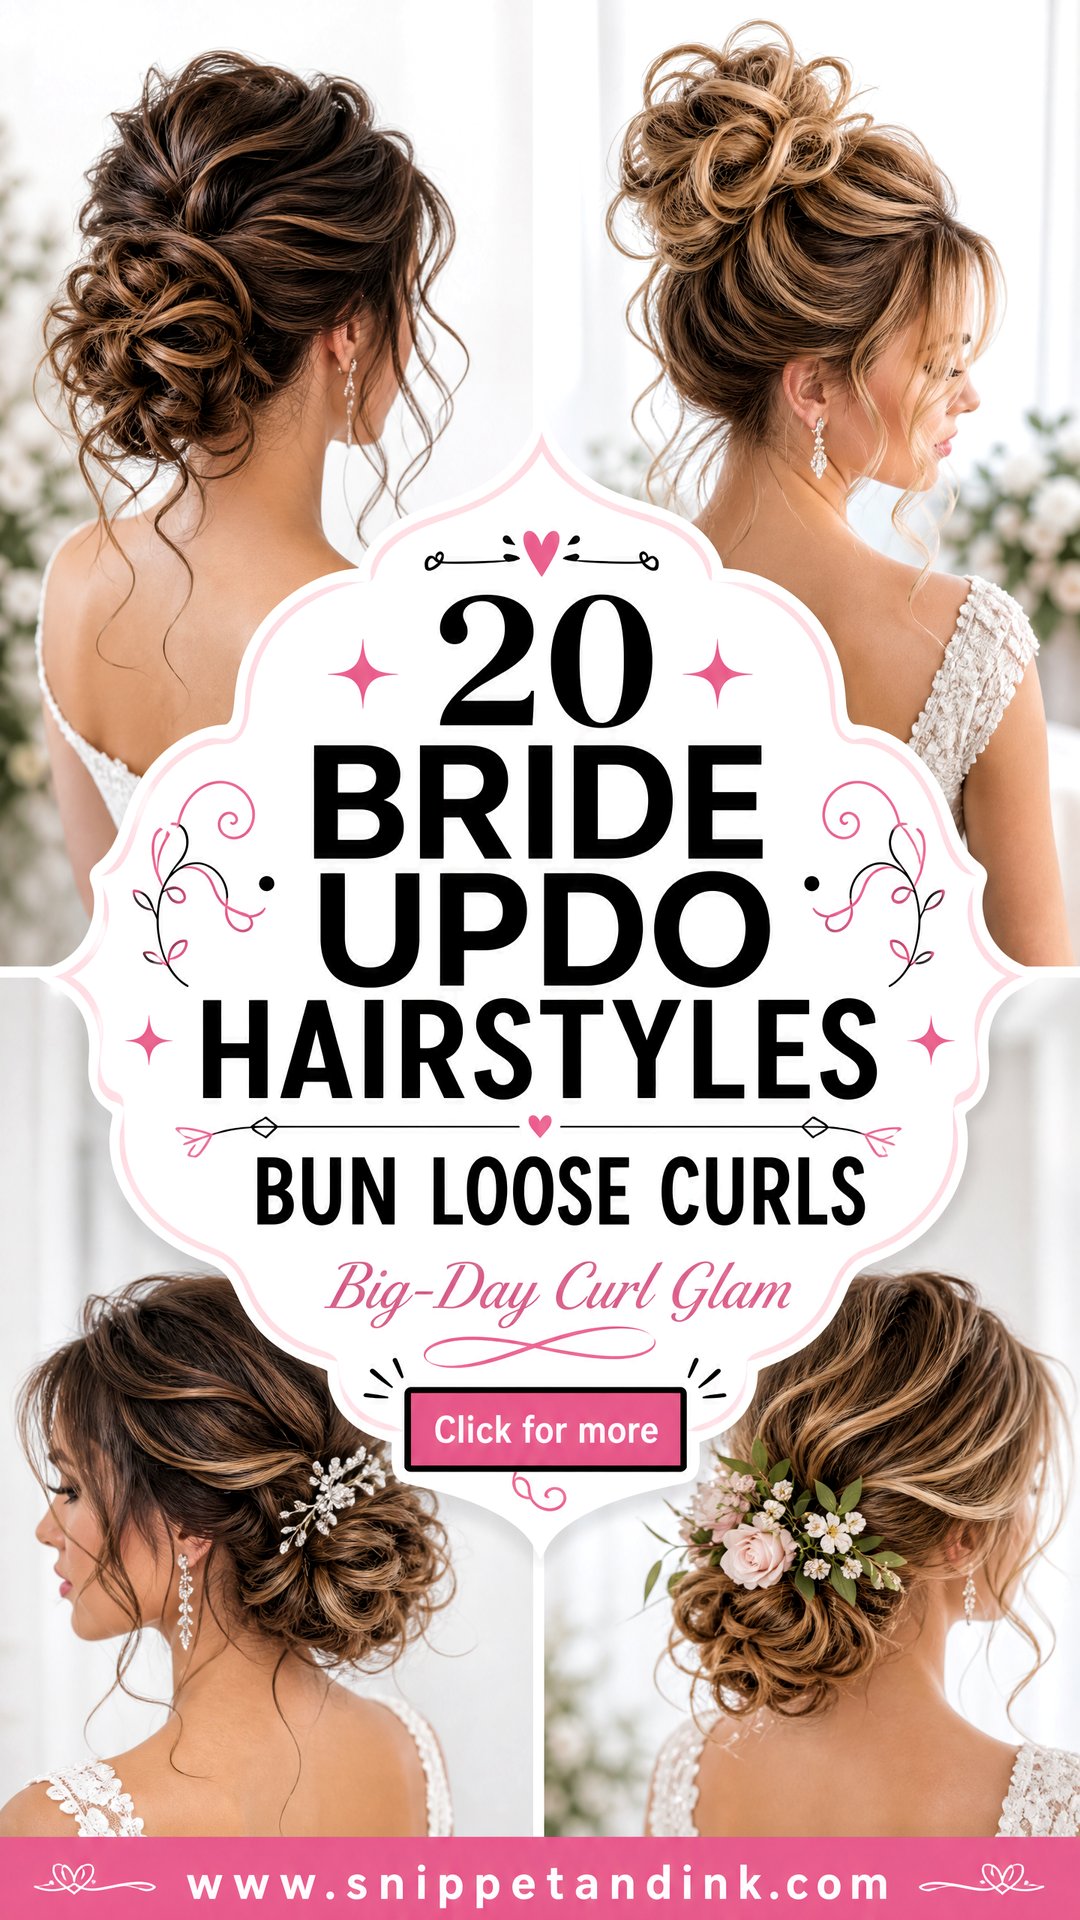
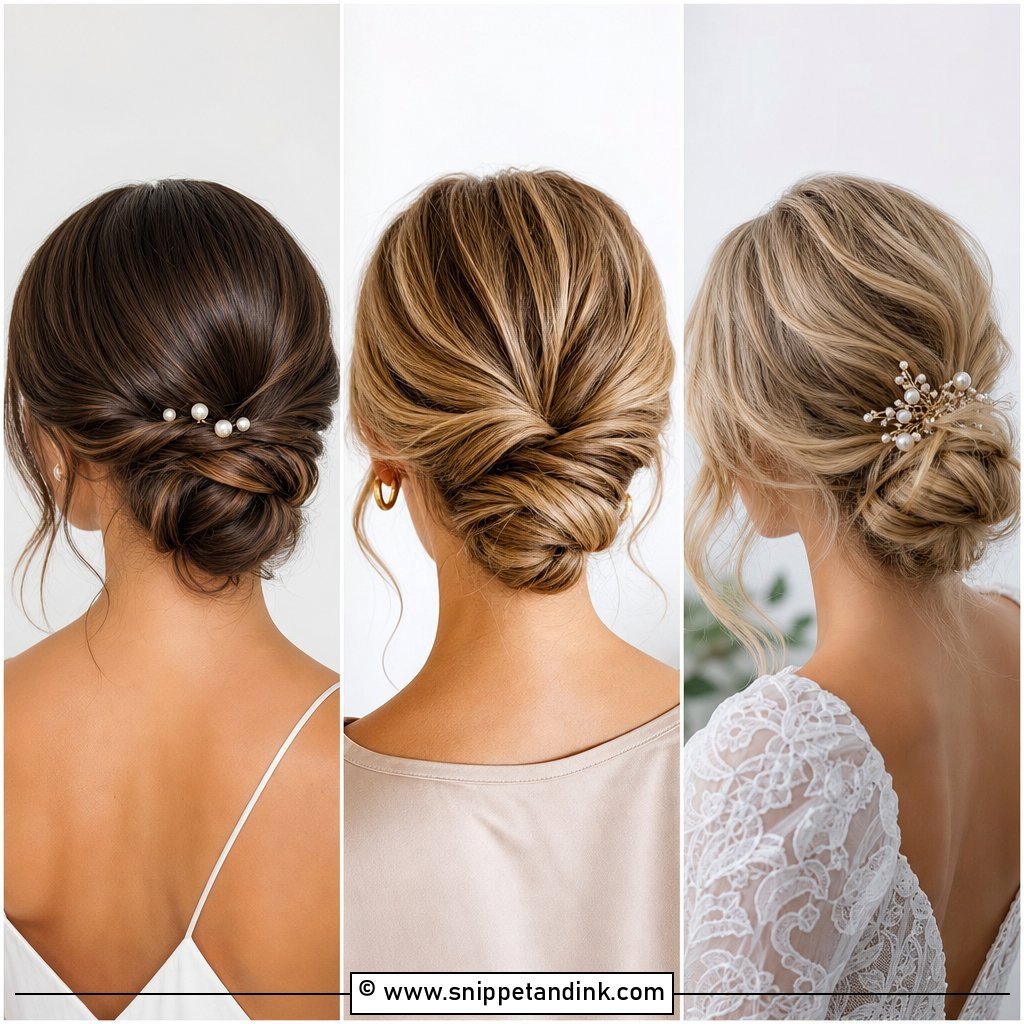
A bun built from curls is the updo I get asked for more than any other, and I understand why. It lifts the weight off your neck for a long day, yet the curls give your face some movement so you never look scraped back. The trick is making it look soft while it is actually pinned like scaffolding underneath. It sits happily under a veil, takes pearl pins or a floral comb, and can be tuned for a garden-inspired, beachy, or classic setting just by changing the height and how much texture I pull out. Below are twenty versions I actually build, with notes on what each one needs from your hair.
Curls Only Hold in a Bun if They Were Set to Hold
Most curled buns that collapse by dinner were doomed in the first hour. A curl straight off the iron is warm and soft, and if I pin it while it is still warm it relaxes into a wave within a few hours. So I curl every section, then either pin it in a flat coil against the head or simply leave it alone until it is fully cool to the touch. Only then do I brush it out and start building.
Prep matters just as much. Hair washed that morning and blow-dried silky is the hardest hair to pin, because there is nothing for a bobby pin to grip. I’d rather you wash the day before, or I add a texture spray or dry shampoo at the roots before I start. That grit is what keeps the bun from sliding.
Adjusting for your texture
- Fine hair: smaller sections, a lighter mousse at the roots, and often a few clip-in wefts so the bun has something to wrap around.
- Thick or heavy hair: I split the bun into two smaller anchored sections, because one big knot pulls on the scalp and gives you a headache by the evening.
- Coily or curly hair: I define your own pattern rather than re-curling with heat, then pin it while slightly stretched so shrinkage doesn’t tighten the shape.
- Layered or shoulder-length cuts: shorter layers poke out of a bun, so I pin them in flat curls underneath and plan for a few deliberate face pieces.
1. Low Bridal Bun With Loose Curls
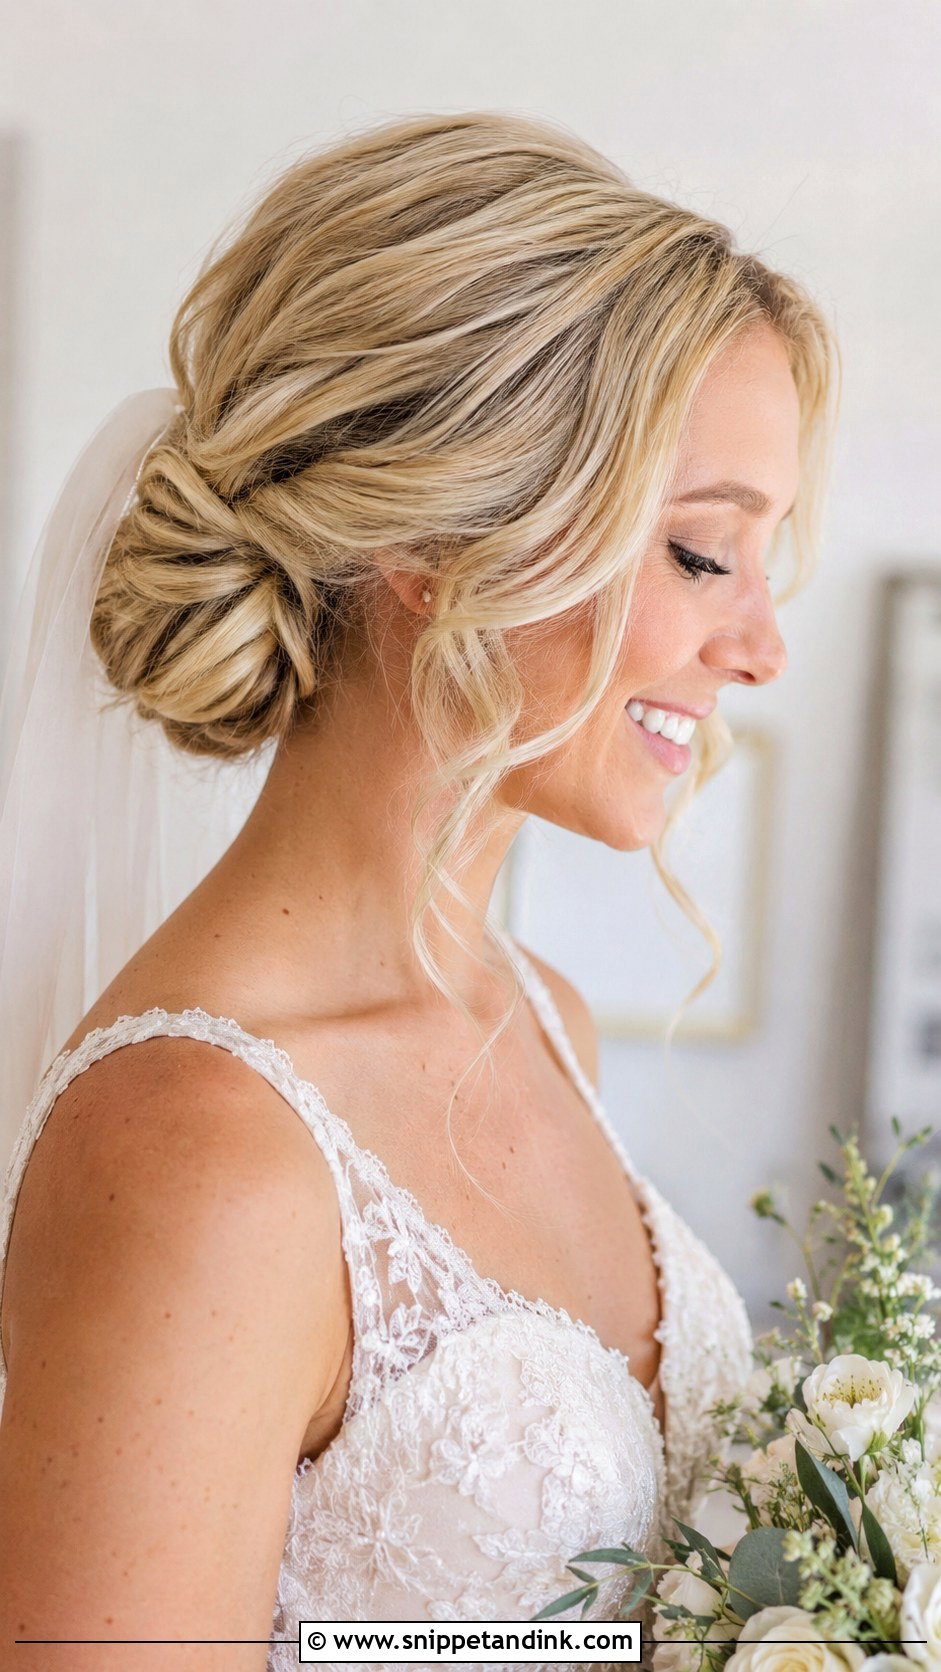
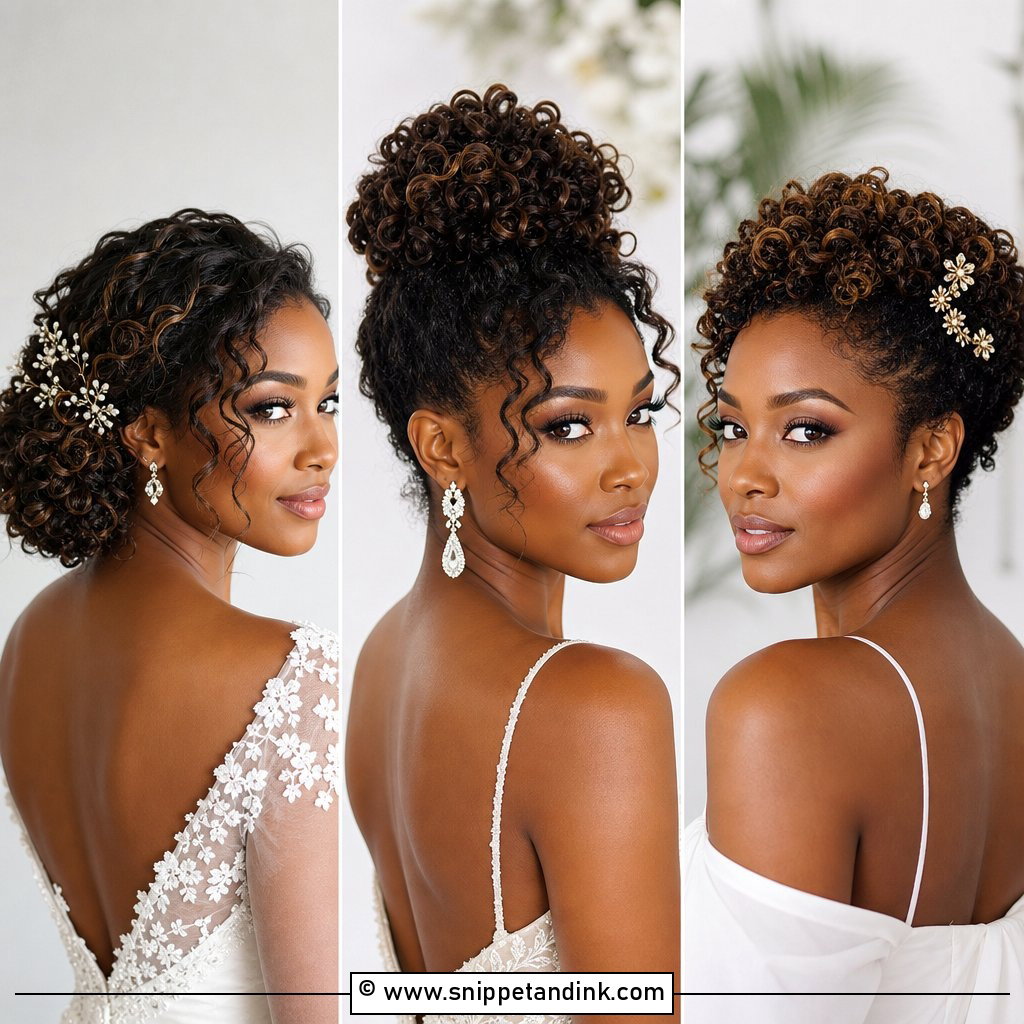
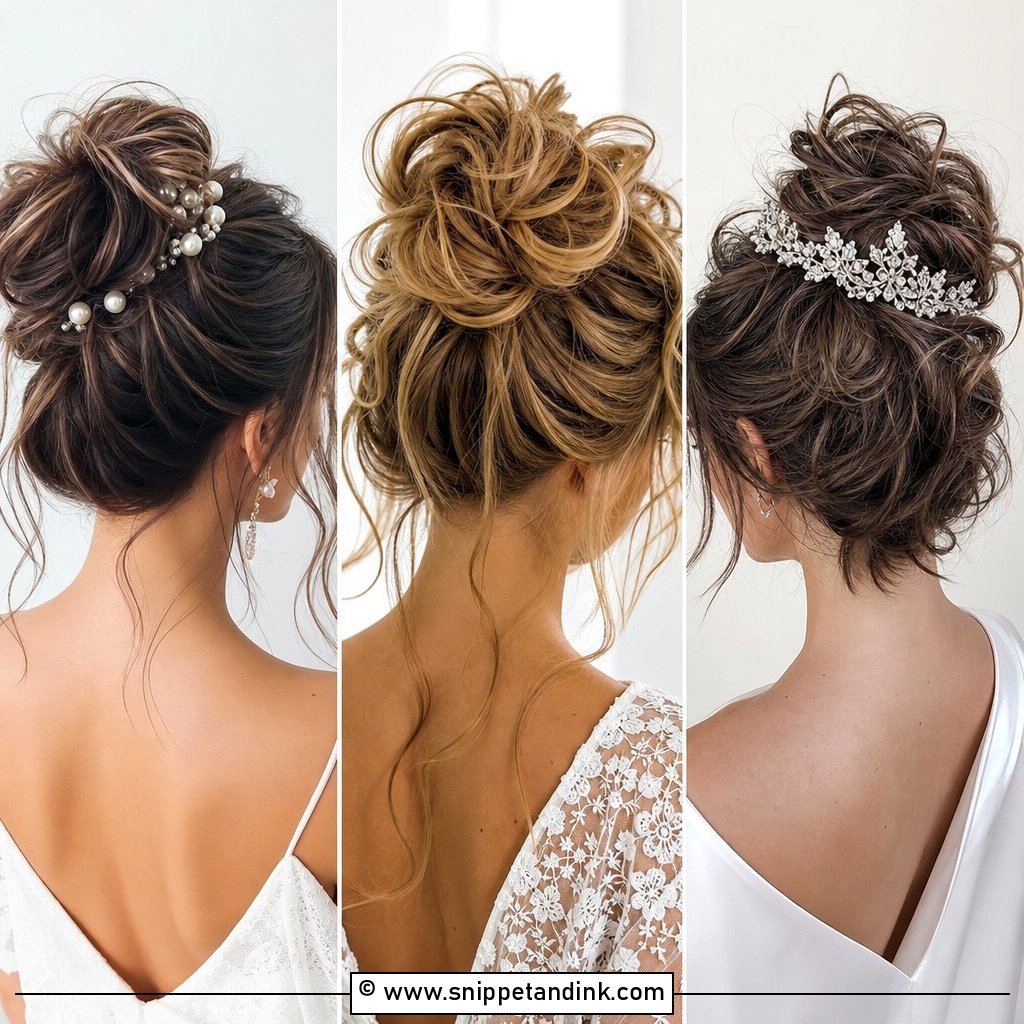
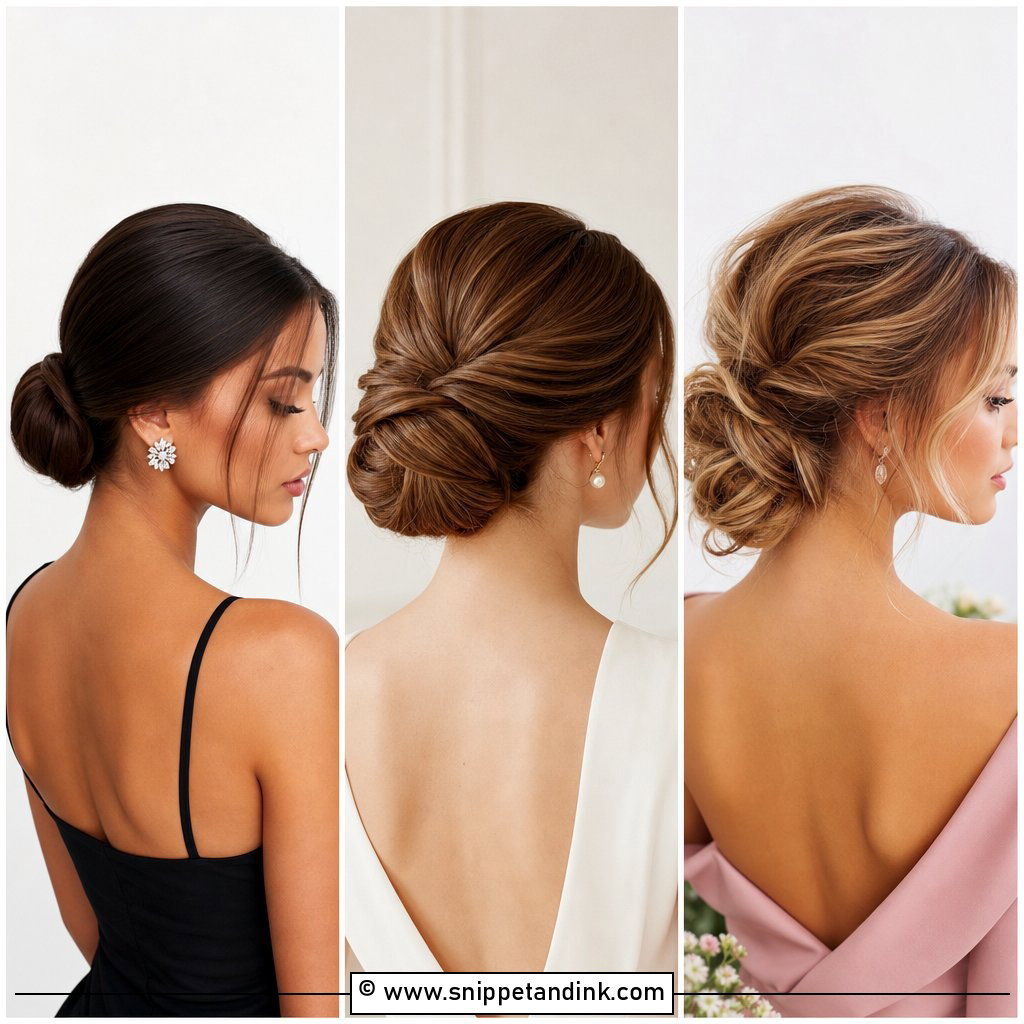
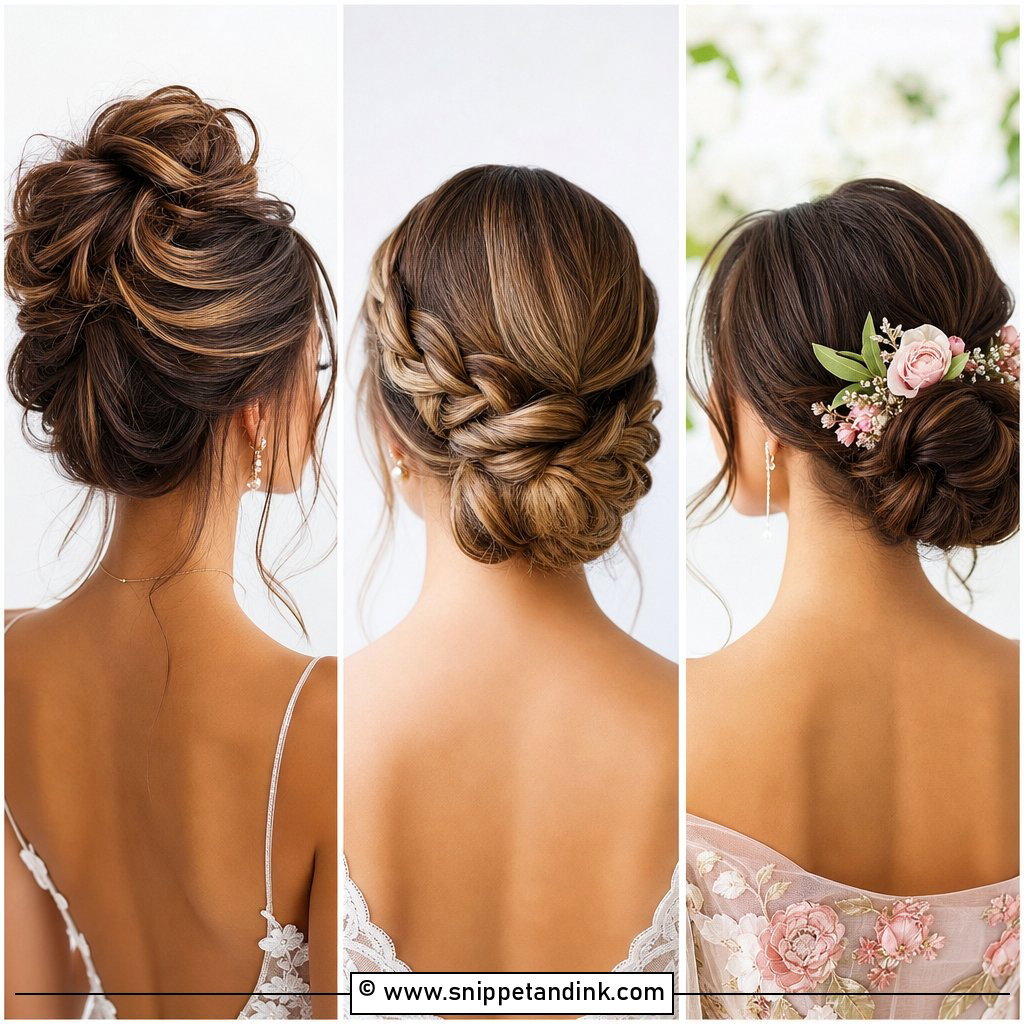
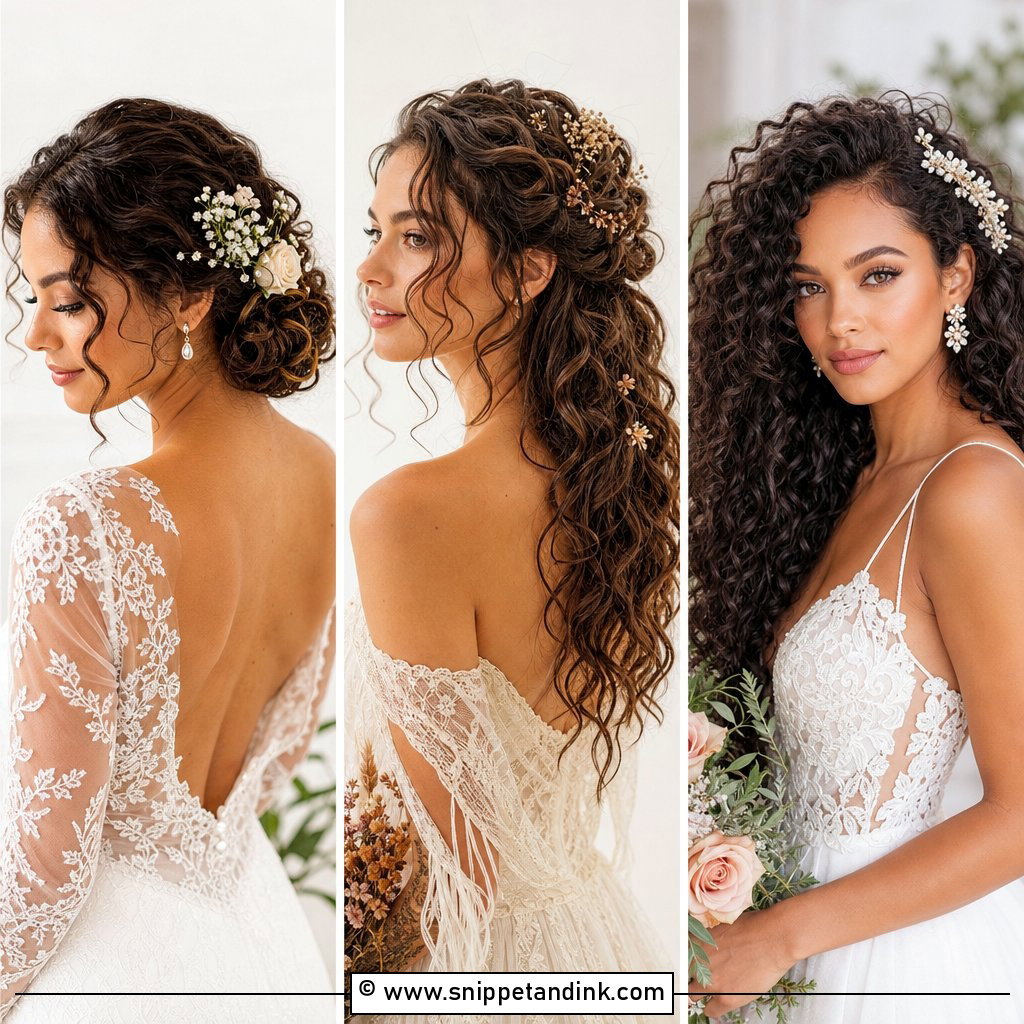
This is the version I trust most for a long day, because a bun sitting at the nape is anchored on the strongest part of the head and barely moves. I set the curls first, let them cool completely, then wrap them around a small ponytail base so the pins have something to grip. A couple of curls left at the cheekbones keep it from looking severe. It sits comfortably under a veil placed above or below the bun, and it suits strapless, sweetheart and off-the-shoulder necklines. Ask for a flexible finishing spray rather than a firm one so the curls stay touchable.
2. Messy Bridal Bun With Loose Curls
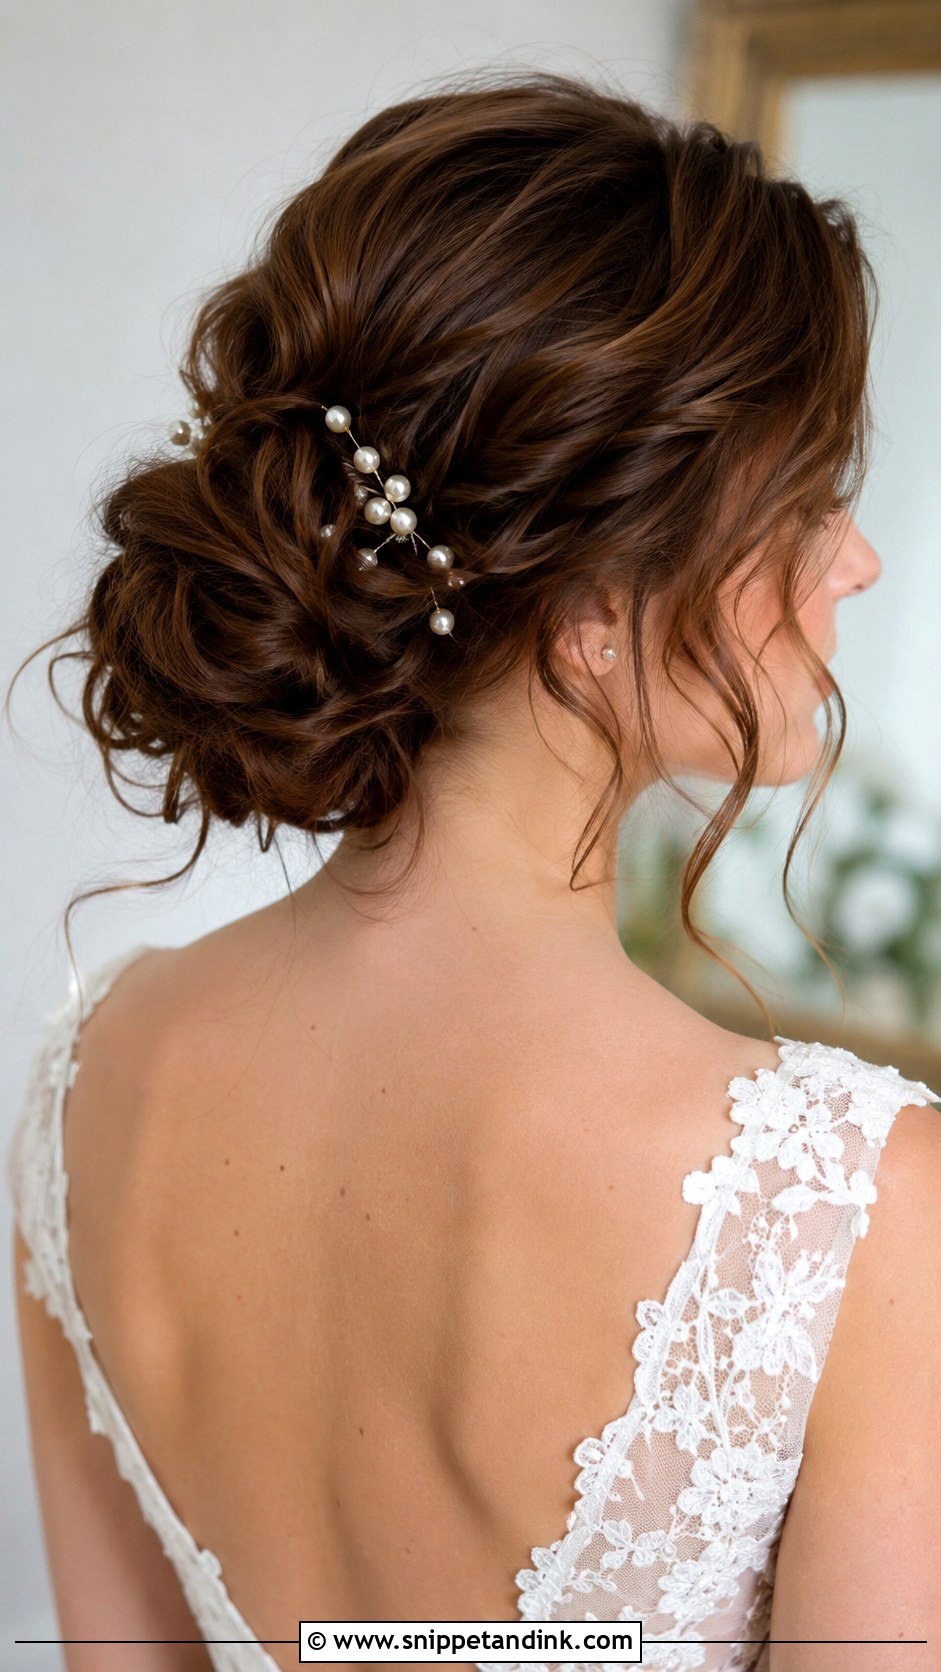
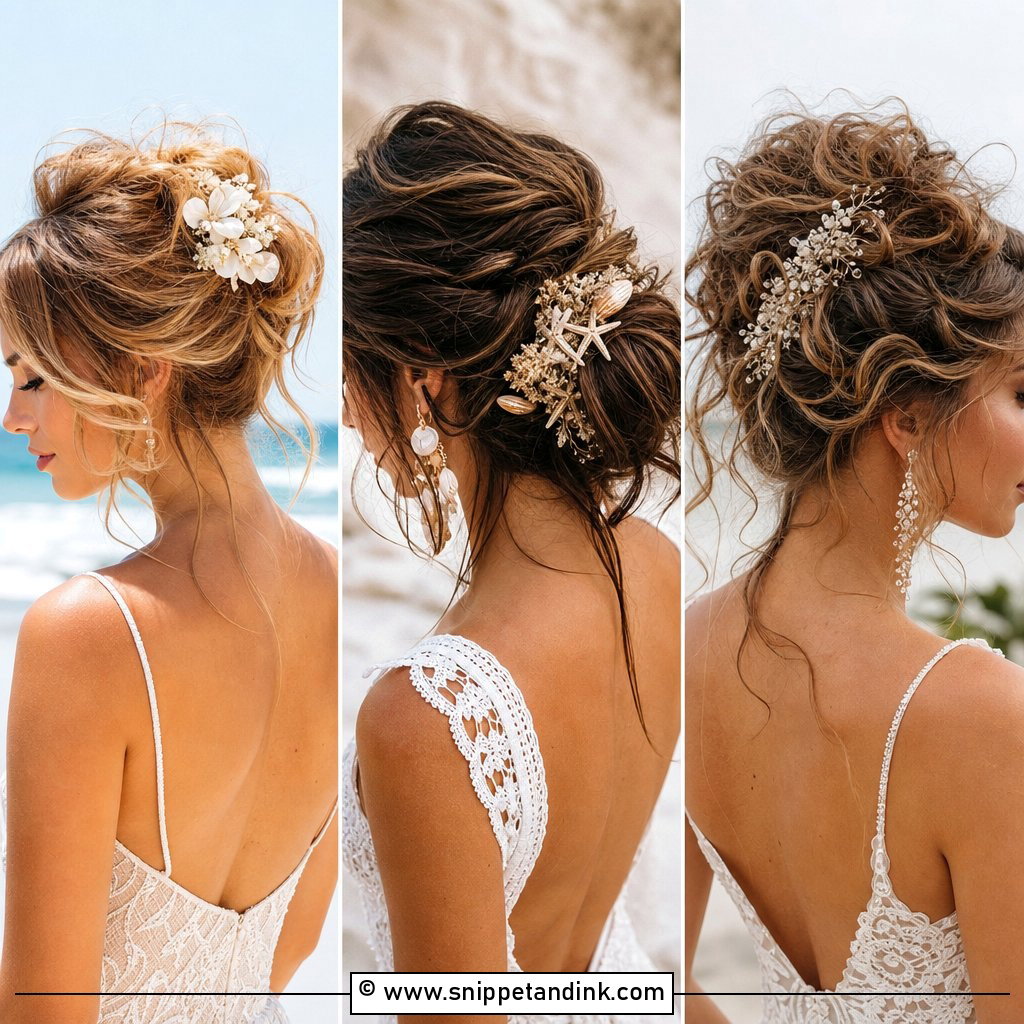
A messy bun only looks relaxed in photos if every loose piece was placed on purpose. I curl the whole head, rake it up loosely with my fingers, and pin it with volume at the crown, then pull out a few face pieces and check them from both sides, because the camera will see both. It suits outdoor ceremonies and softer gowns, and holds small pearl pins or a few flowers well. If your hair is very silky and slippery, I’d steer you toward a tidier style, since this shape relies on grip and tends to slide by evening.
3. High Bridal Bun With Loose Curls
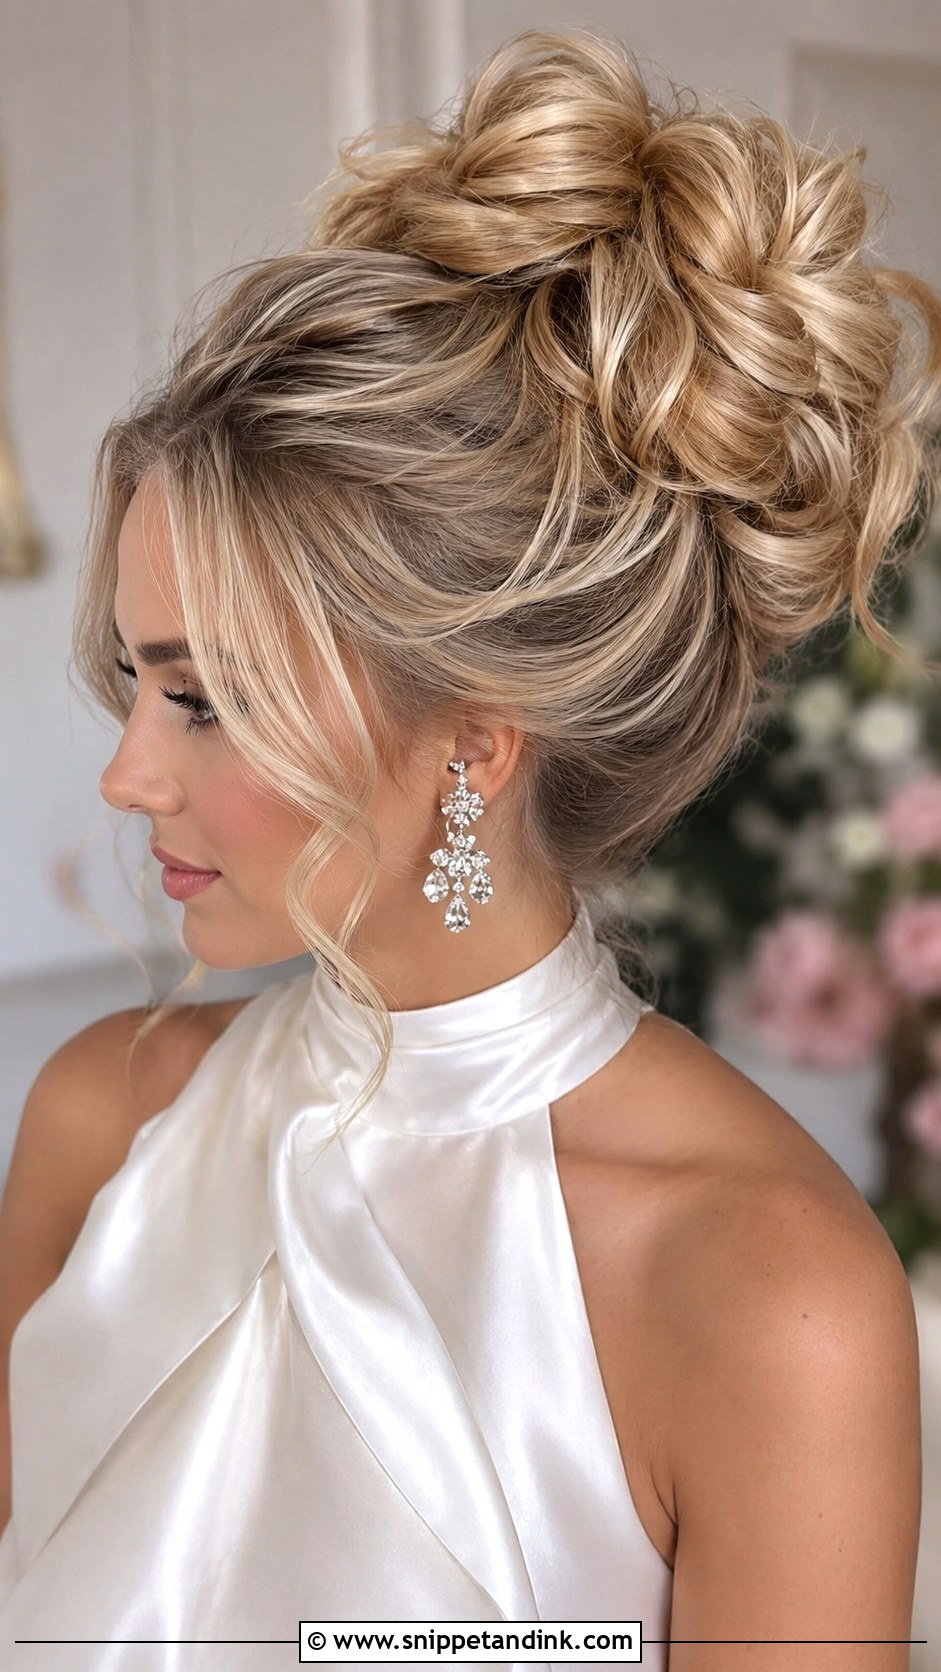
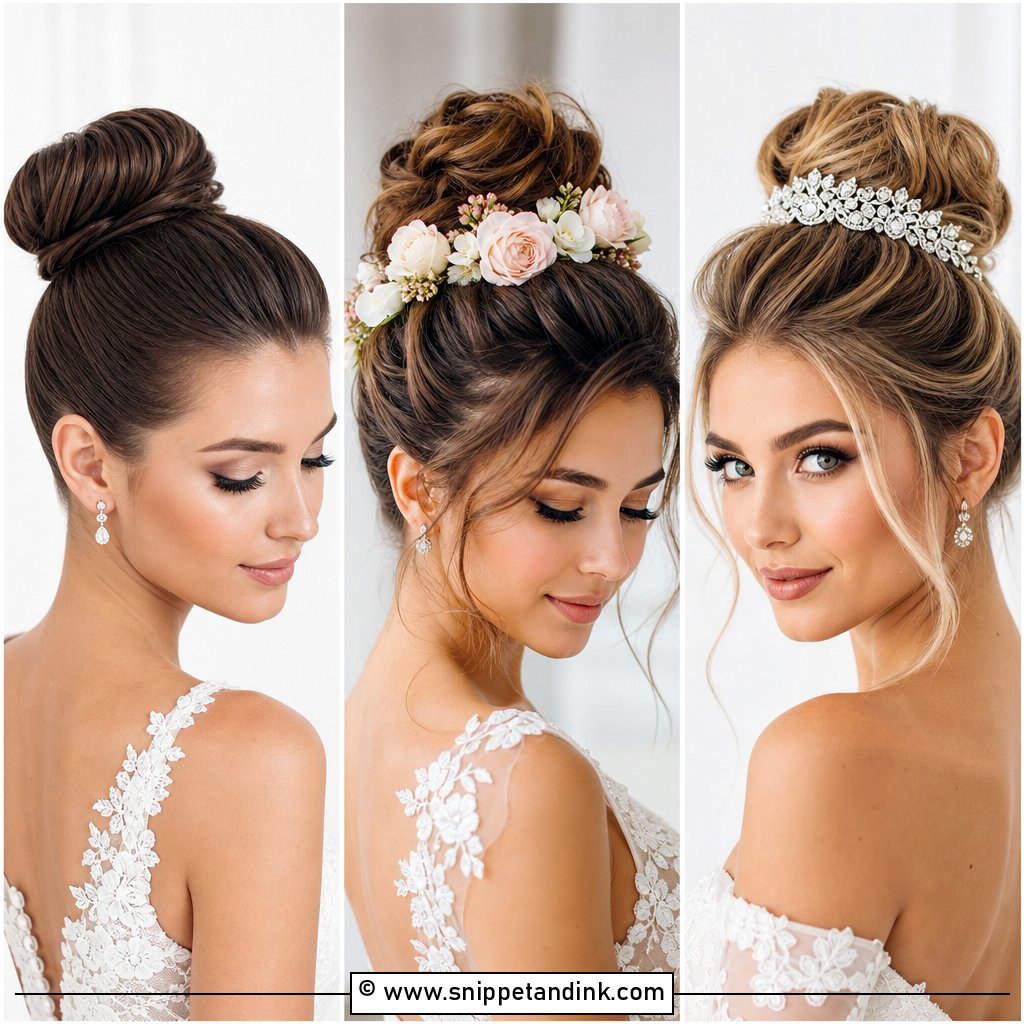
Sitting the bun high lifts the whole face and shows off the neck, which is why I suggest it for high necklines, dramatic sleeves or an open back you want seen. I place the ponytail base at the crown and secure it with an elastic plus two crossed bobby pins, since a high bun carries its weight further from the scalp and drops faster otherwise. Curls go around the base for texture, with tendrils at the temples to soften the line. Statement earrings get room to show. Under strong venue lighting, a light shine spray stops the curls looking dry.
4. Curly Bridal Chignon
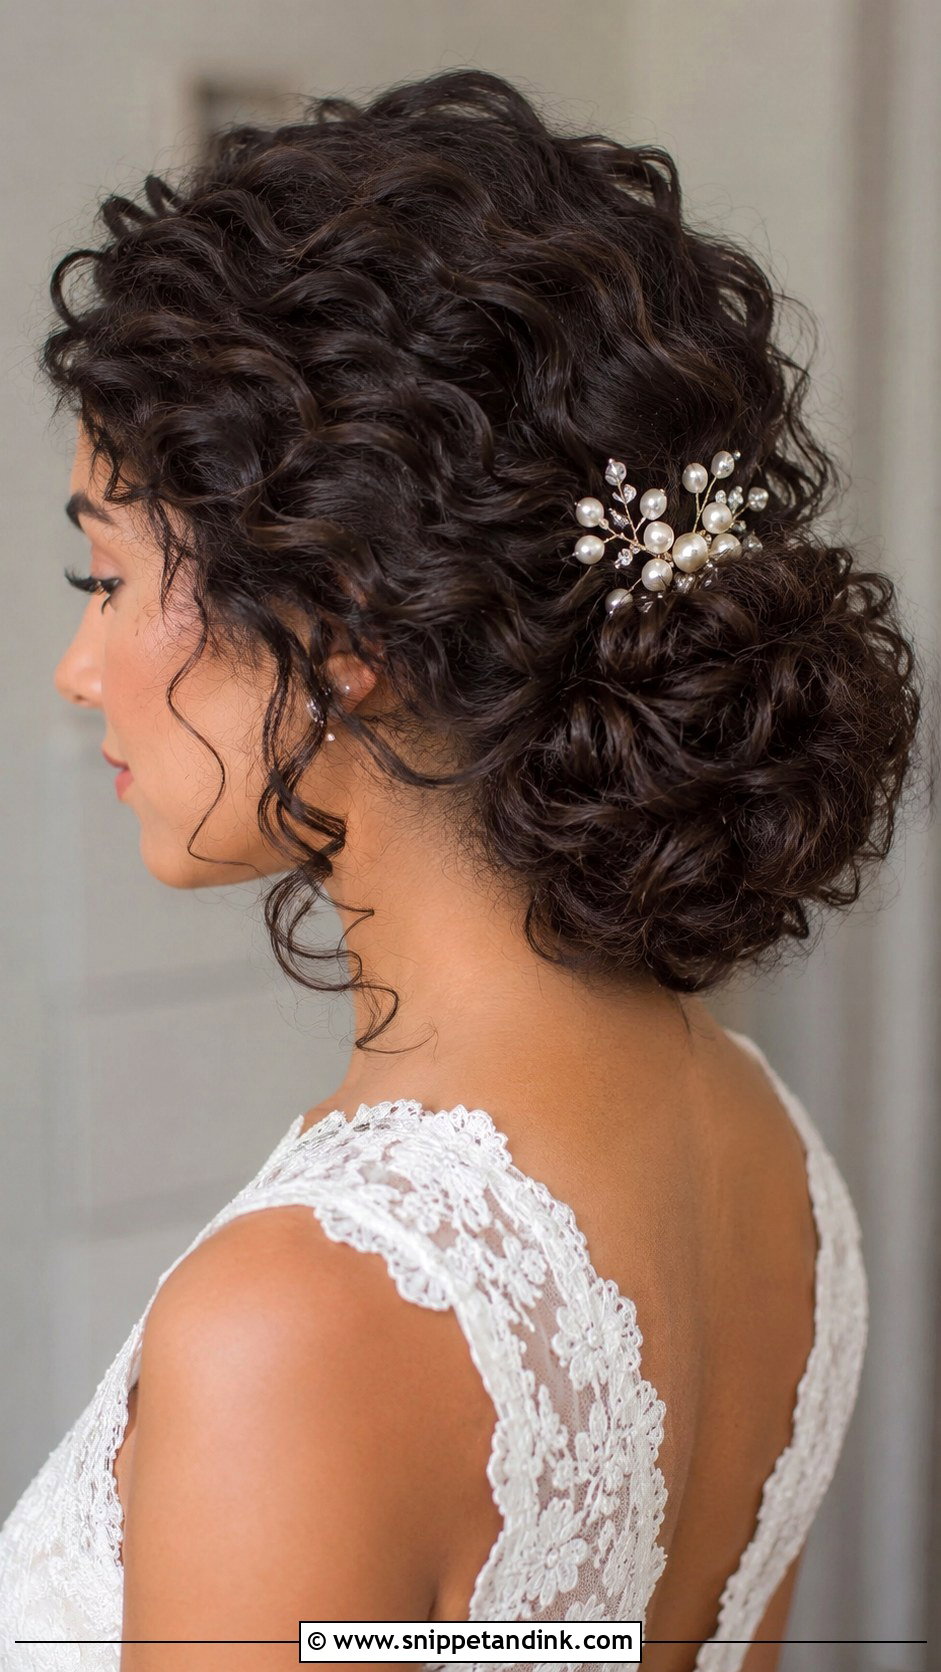
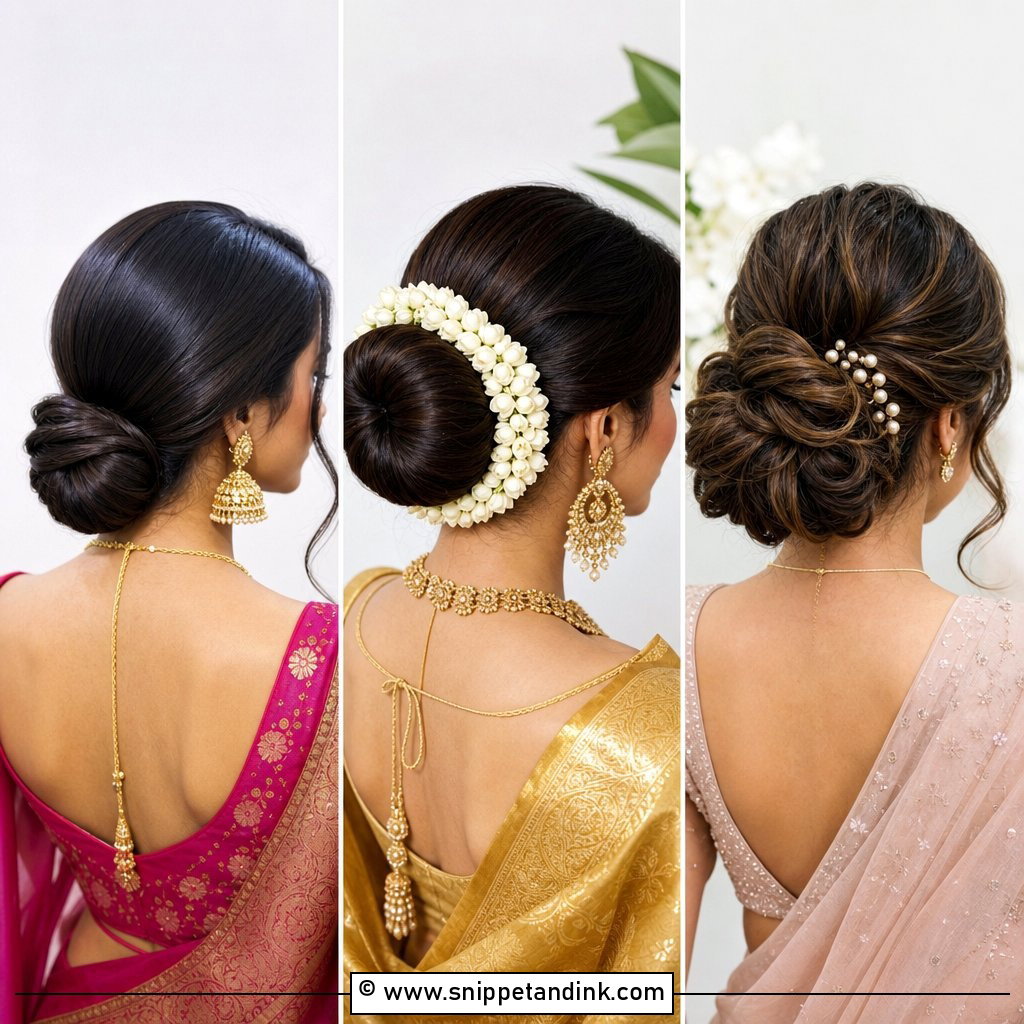
The difference between a curly chignon and a sleek one is that you can see each curl inside the shape. I curl the hair, brush it out just enough to loosen it, then roll and pin it low so it has depth instead of a smooth knot. Lace, pearls and a cathedral veil all sit well with it. On fine hair I usually add a small padding or a few clip-in wefts for volume, because there simply isn’t enough length to make a full roll. On naturally curly hair, I work with your own curl pattern rather than ironing over it, and the finish looks more like you.
5. Side Bridal Bun With Loose Curls
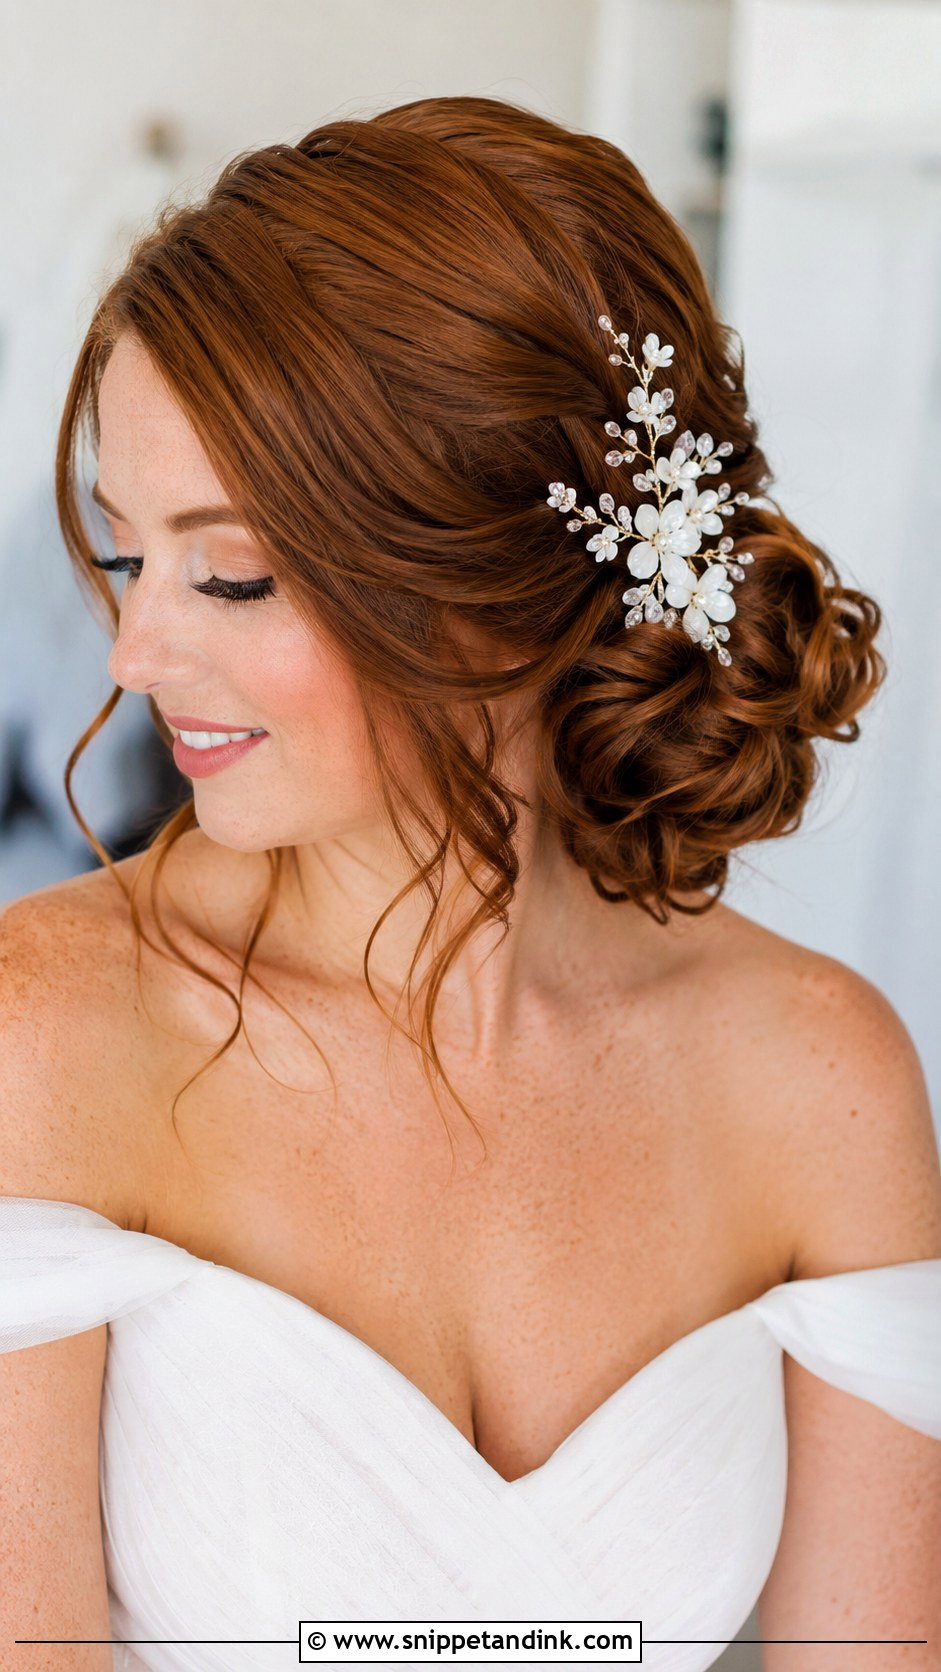
Off to one side, a low bun reads slightly vintage and is easy to see in front-facing portraits. I like it with an asymmetric or one-shoulder neckline, with the bun on the opposite side to the strap so the shapes balance. Curls are pinned loosely into it, and one or two soft pieces frame the face. A floral comb or pearl clip tucks in nicely above the bun. The thing I watch most is weight: keep the crown fairly flat, or the whole head starts to look lopsided.
6. Braided Bridal Bun With Loose Curls
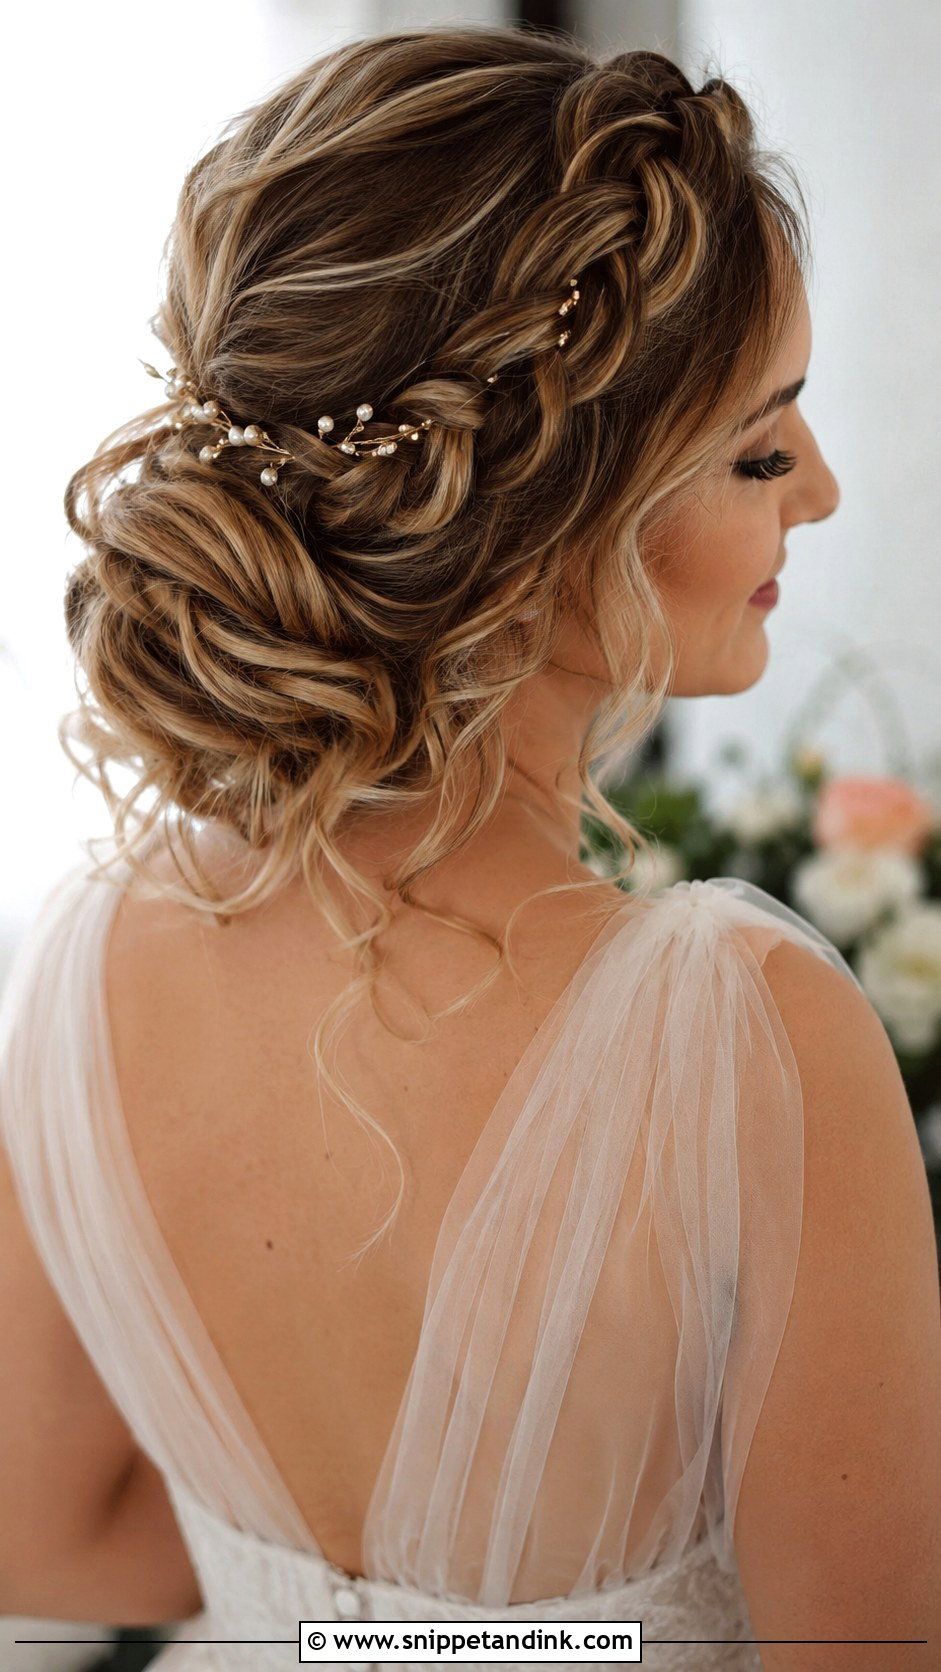
Adding a braid gives the bun texture and gives me a structural anchor, which matters on thick hair that would otherwise fight the pins. The braid can wrap into the bun, cross the crown or run along one side before it melts into the curls. I pancake each braid section a little so it looks full rather than tight. It suits outdoor and boho weddings, and small pearl pins, baby’s breath, or a delicate vine can pick out the braid without pulling attention from the curls.
7. Textured Bridal Bun With Loose Curls
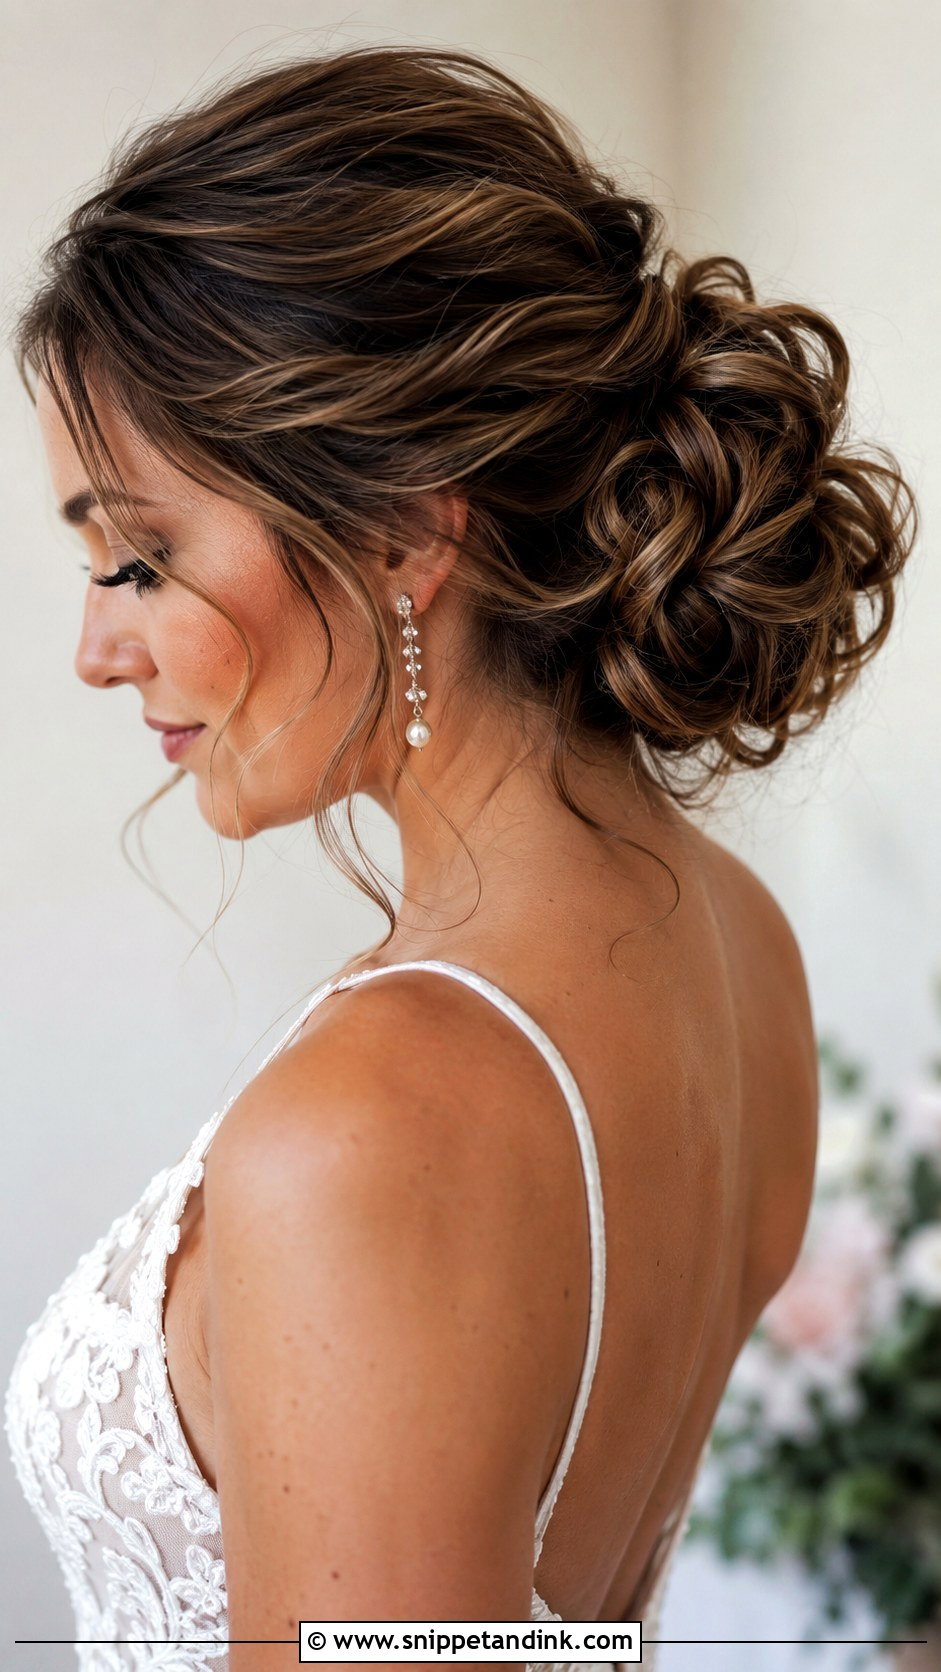
Here the bun is built in layers of curled sections, each pinned separately, so you see movement and separation rather than one smooth shape. That layering photographs well from behind and from the side, which is where guests will see you during the ceremony. It is also my go-to for fine hair, since separated curls look like twice the hair they are. The front still needs to be clean, or the whole thing tips into undone. A couple of tendrils by the jaw keep it light.
8. Romantic Bridal Bun With Face Framing Curls
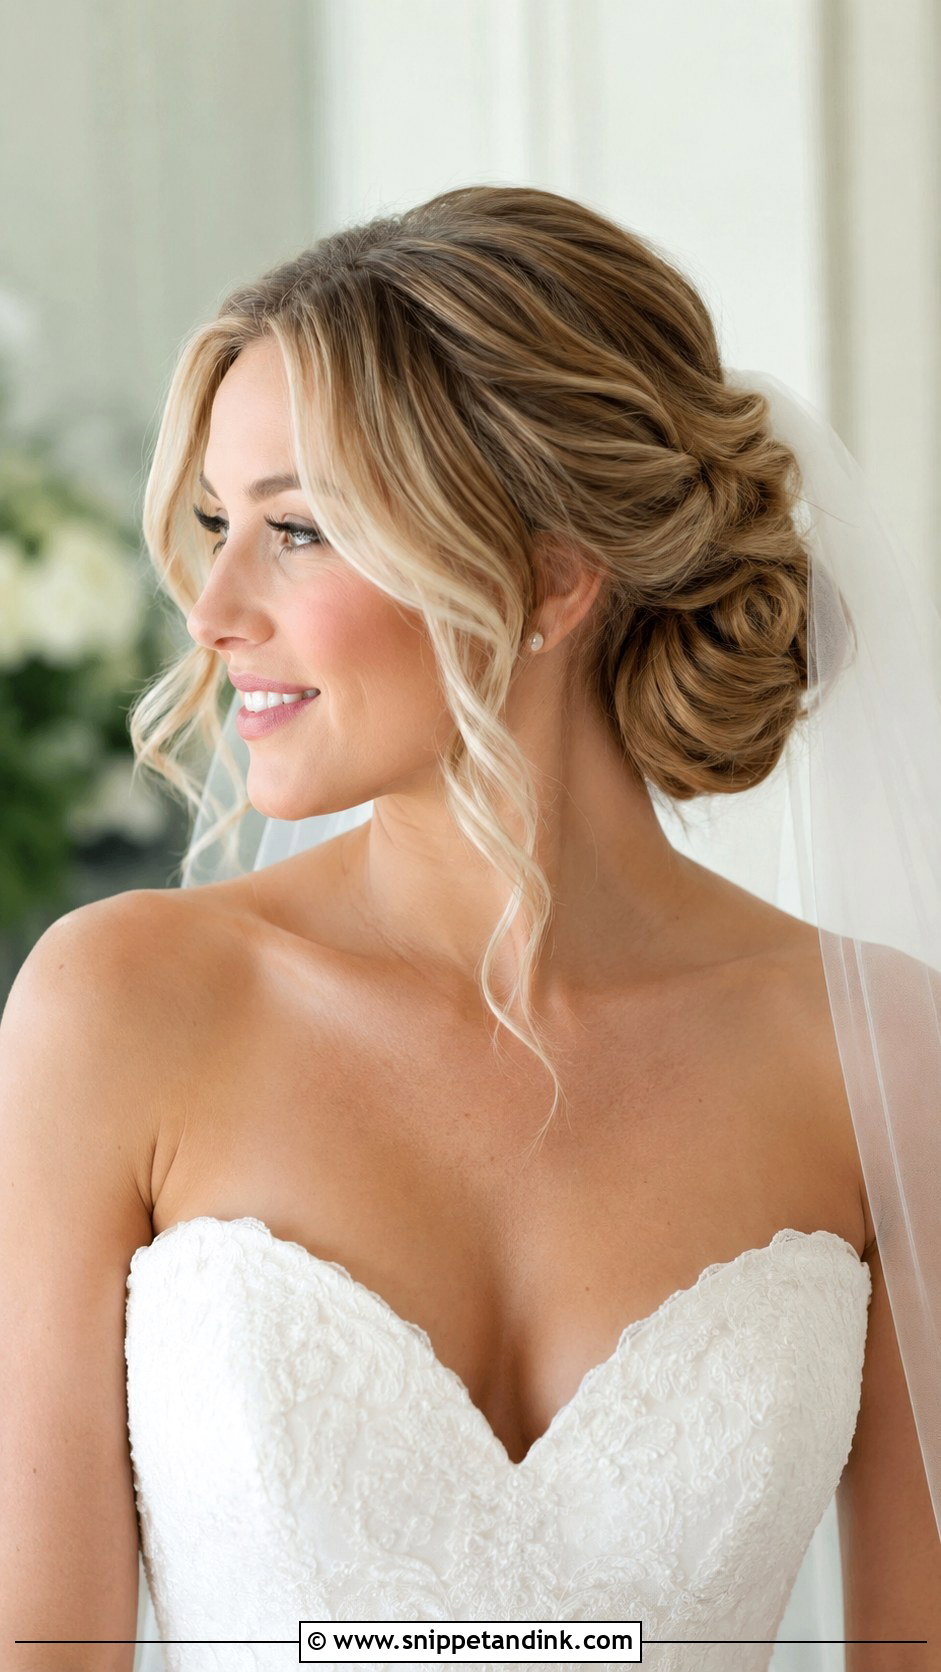
The bun matters less here than the pieces around your face, so that’s where I spend my time at a trial. Those curls need to be long enough to move but set firmly enough to survive hugs, a breeze and the dance floor. I cut the shape to your features: longer curls past the cheekbone can slim a round face, while shorter pieces near the eyes draw attention up. They pair well with glowy makeup, a soft veil and fine jewelry. One honest warning: face pieces brush against lip colour all day, so I keep them a touch shorter if you are wearing a bold lip.
9. Sleek Bridal Bun With Loose Curls
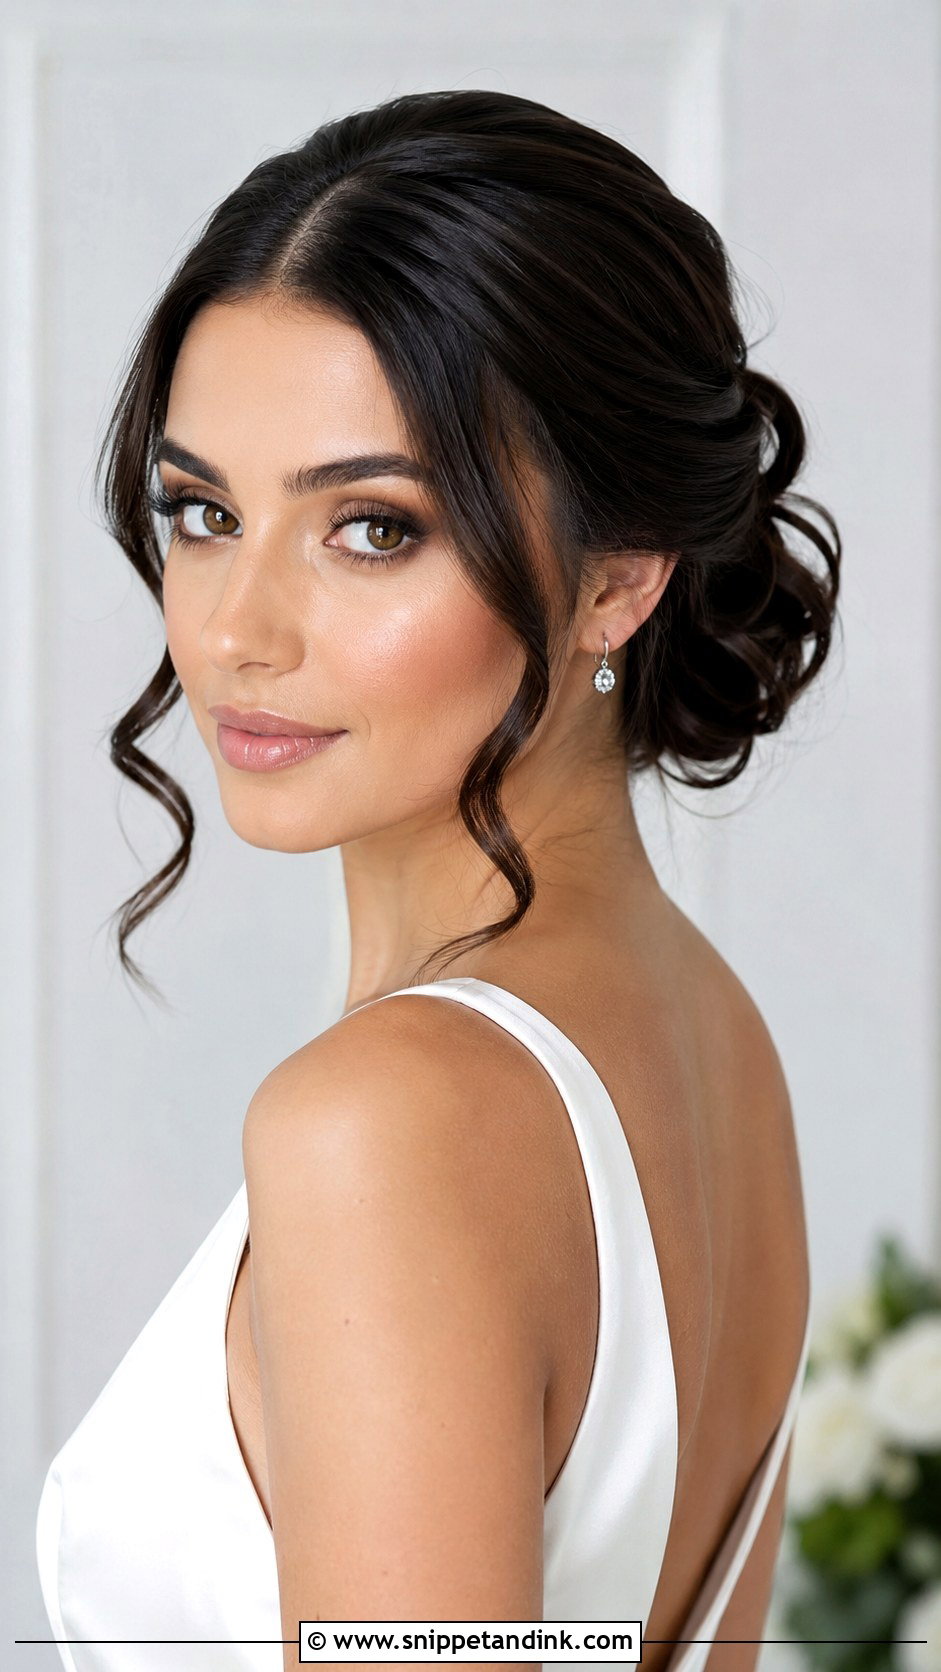
Clean lines with a bit of softness at the back: the crown and sides are smoothed close to the head, and the curls only appear at the bun or a few loose face pieces. I use a fine-tooth comb and a light gel or pomade on the base so it stays flat without looking wet. The curls then need to be glossy and deliberate, because a frizzy curl against a sleek base looks like a mistake. It suits satin, minimalist gowns and city venues. A centre part makes it modern and graphic, while a deep side part leans romantic.
10. Boho Bridal Bun With Loose Curls
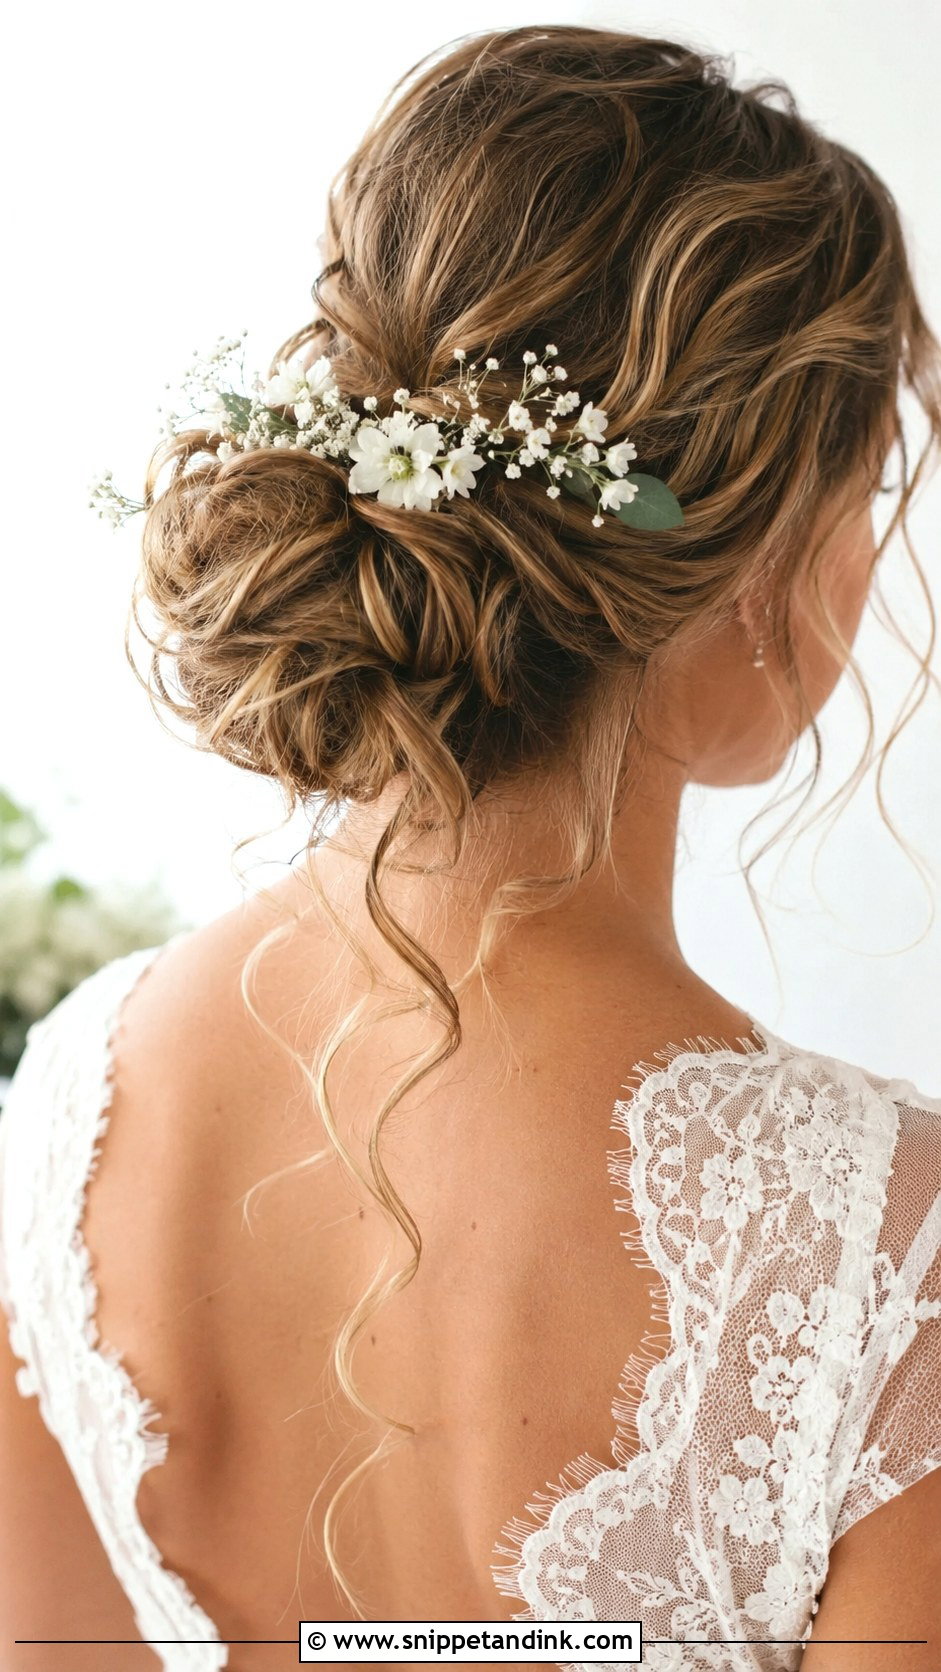
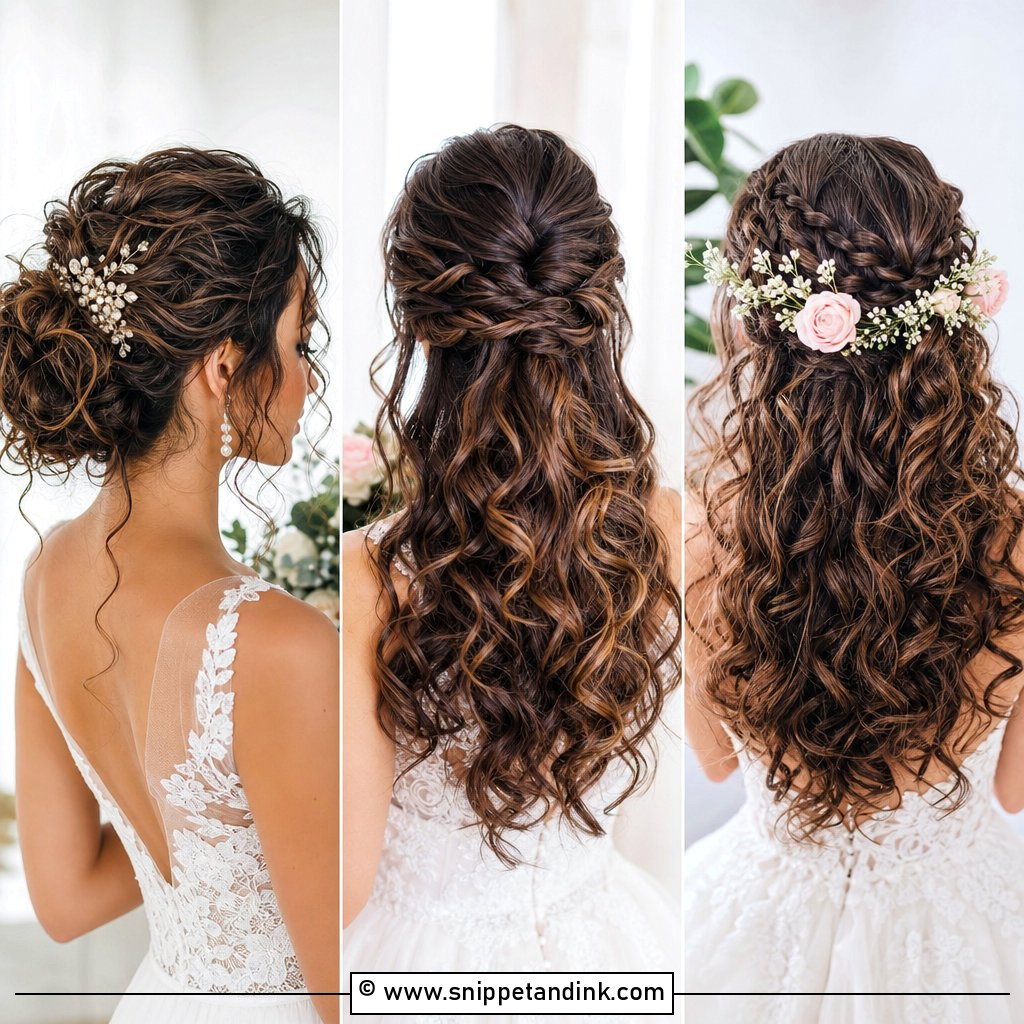
Boho buns sit low or mid-height, with loose curls and a little lift at the crown, and they pair naturally with floral pieces, leafy vines and soft veils. Garden, beach and barn weddings suit them, as do lace and floaty fabrics. The danger is that undone turns into messy by the speeches. So I still set every curl properly and pin each one into the base, then pull out wisps at the face and nape only at the very end, once the structure is secure.
11. Pearl Bridal Bun With Loose Curls
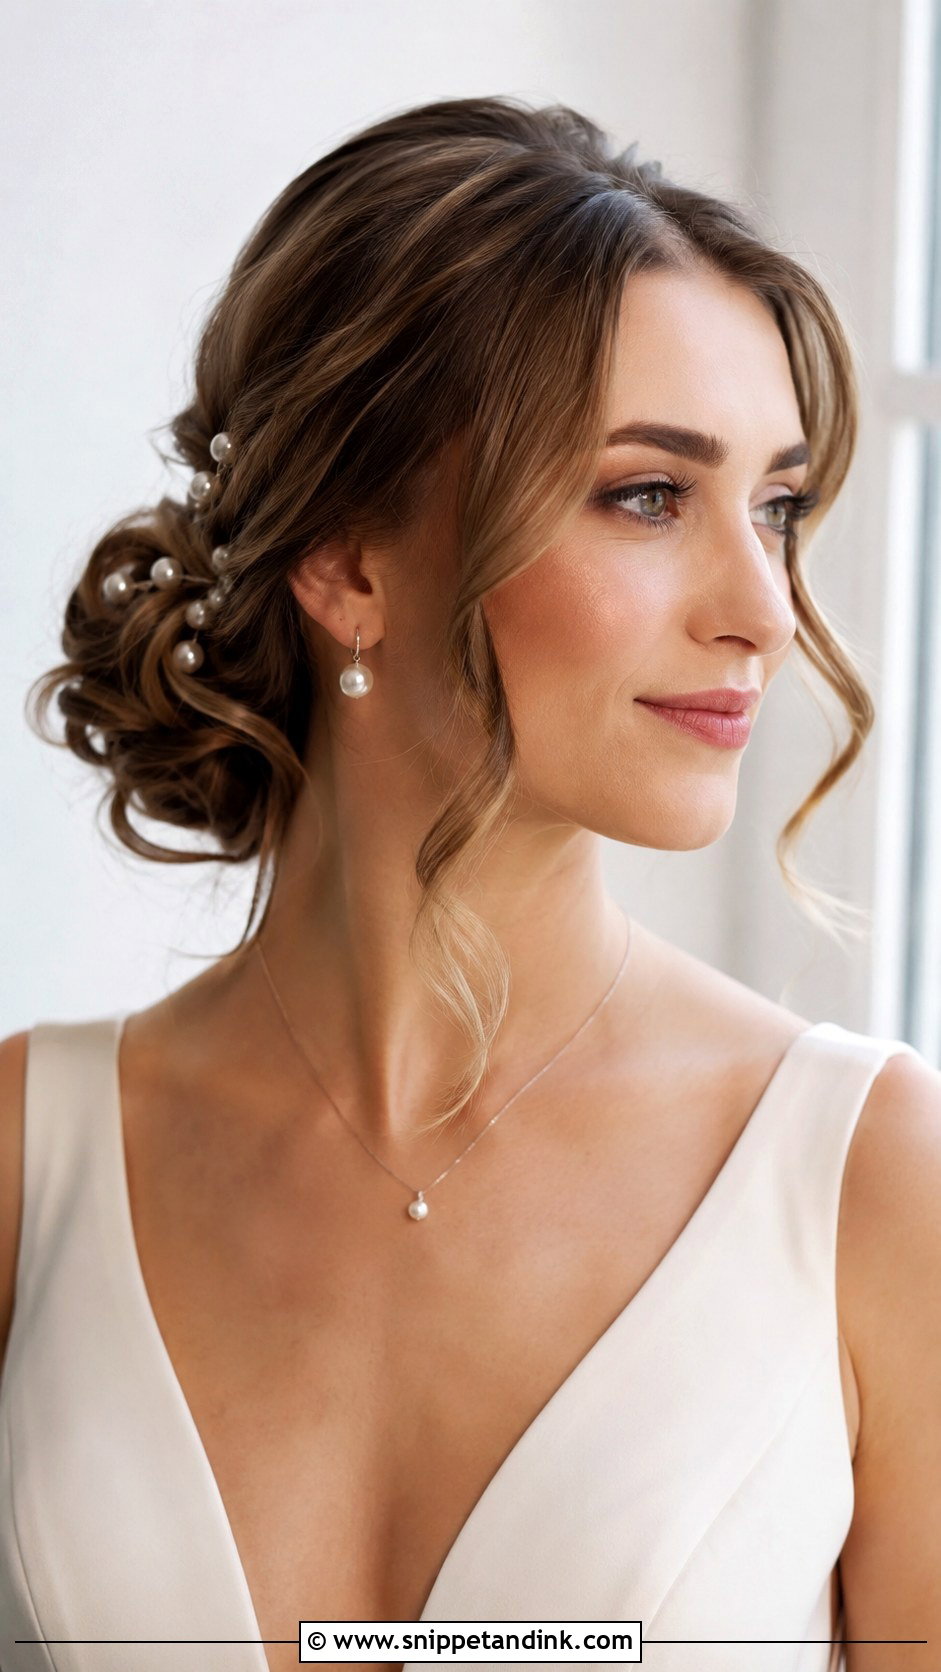
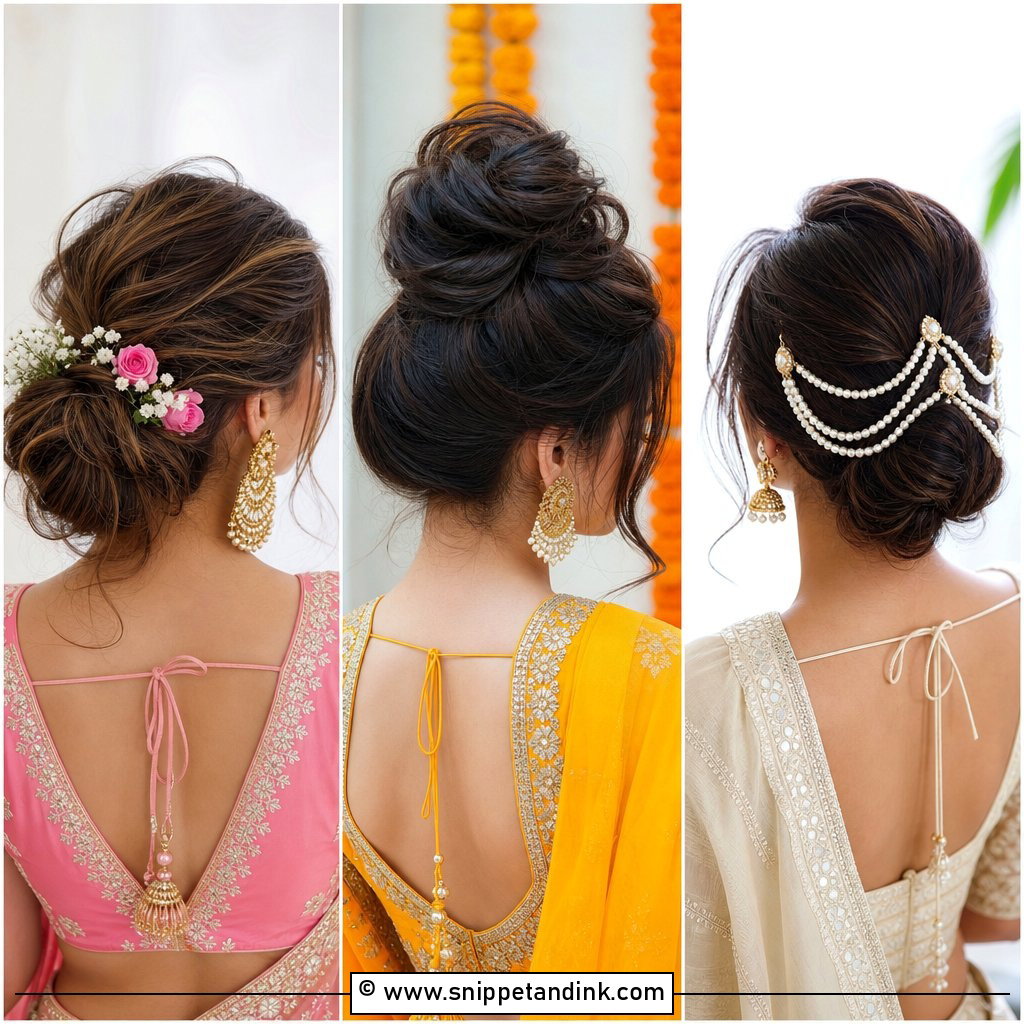
Pearls give a curled bun a finished, luxurious detail without adding bulk. I shape the bun from curled sections first, then add pearl pins, a pearl comb or a scatter of tiny pearls that follow the curve of the bun rather than dotted at random. With a simple gown, this is often all the decoration you need, and it suits lace, satin and tulle. The curls need clear definition behind the pearls, otherwise the pins disappear into fuzz. In close-up portraits and veil shots, this is the detail people zoom into.
12. Floral Bridal Bun With Loose Curls
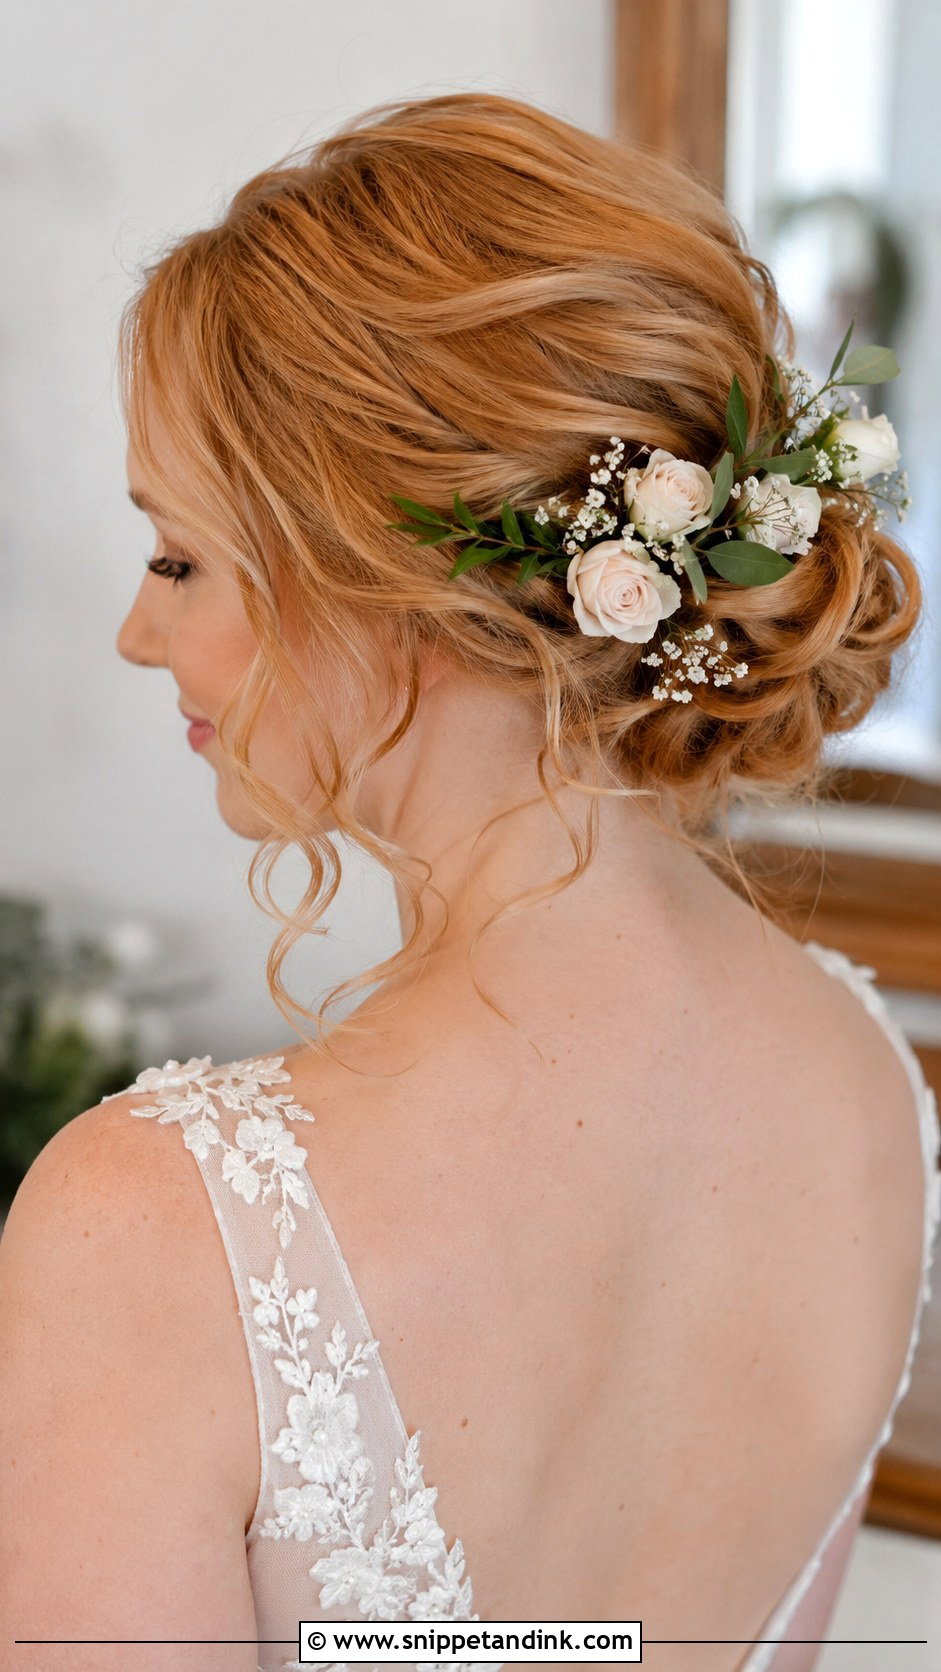
Fresh flowers in a curled bun can echo the bouquet, but only small blooms behave in hair. Large heads are heavy, they tilt the bun, and they wilt faster away from water. Baby’s breath, tiny roses and soft greenery are what I reach for. I ask the florist to wire and tape the stems and keep them in the cooler until I am ready to pin, and if they can talk to me beforehand about placement, even better. Flowers should sit along the curls, never cover the shape of the bun.
13. Veil Bridal Bun With Loose Curls
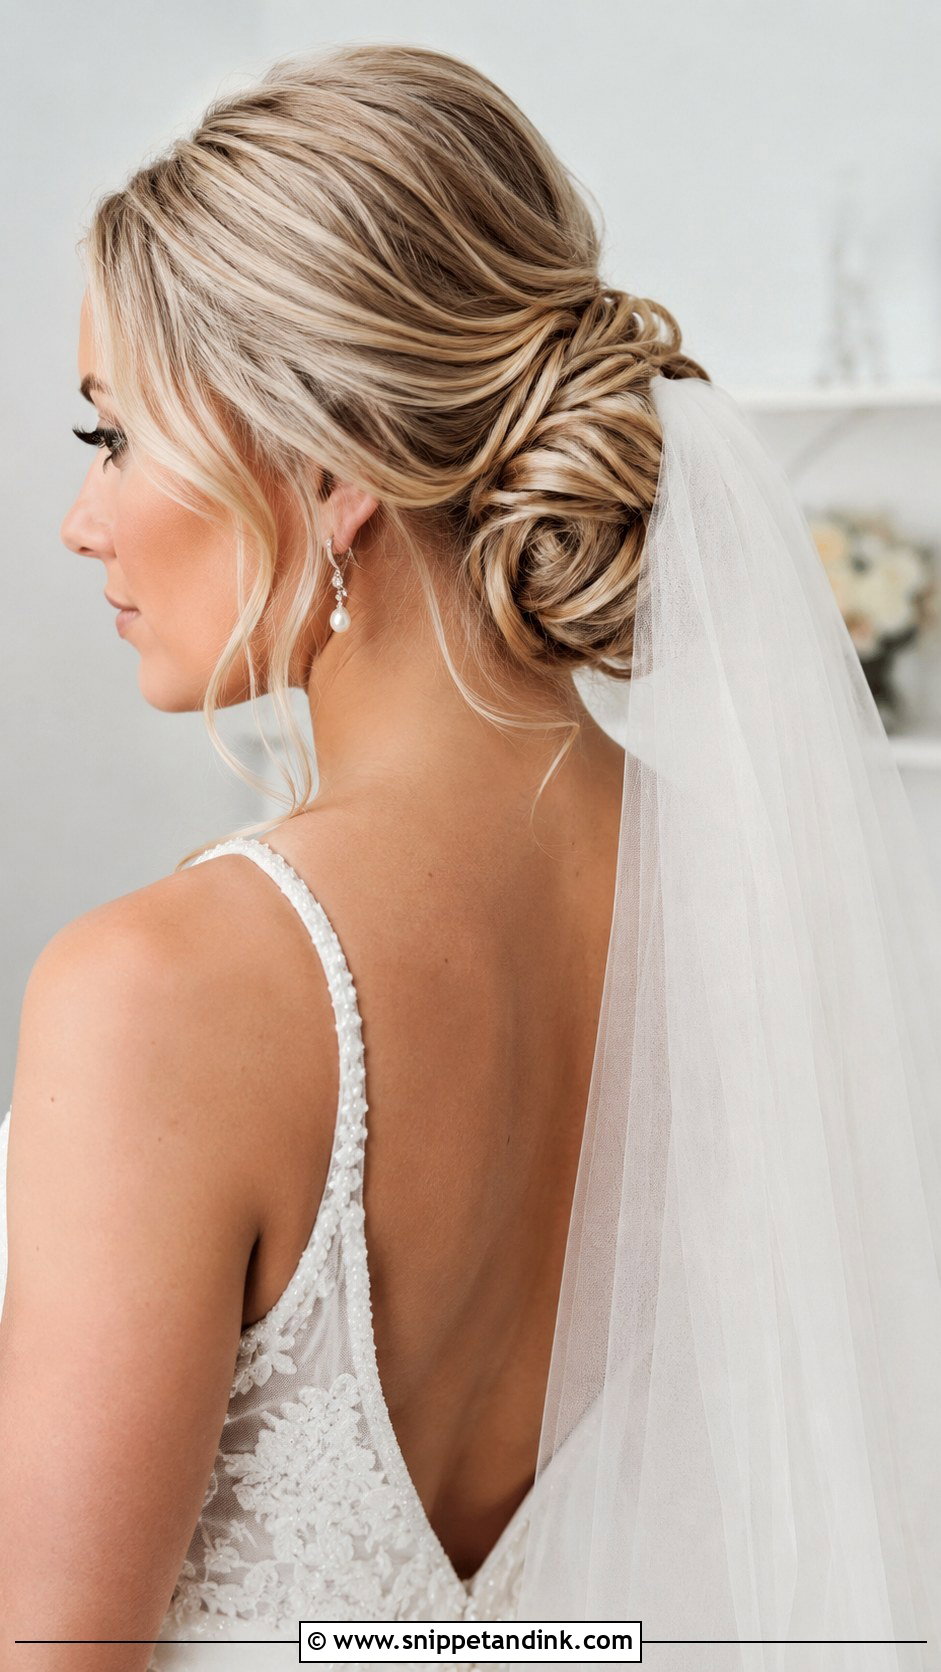
A bun gives the veil comb something solid to bite into, which is the practical reason so many brides wear one. I sit it low for a classic veil drop or higher if you want the veil to fall from the crown. The loose curls matter more after the ceremony than during it: once the veil comes off for the reception, they stop the style looking flat where the comb sat. Face-framing curls help the ceremony photos look finished. Please bring the actual veil to the trial, as combs vary in weight and I need to test the pin placement.
14. Crown Bridal Bun With Loose Curls
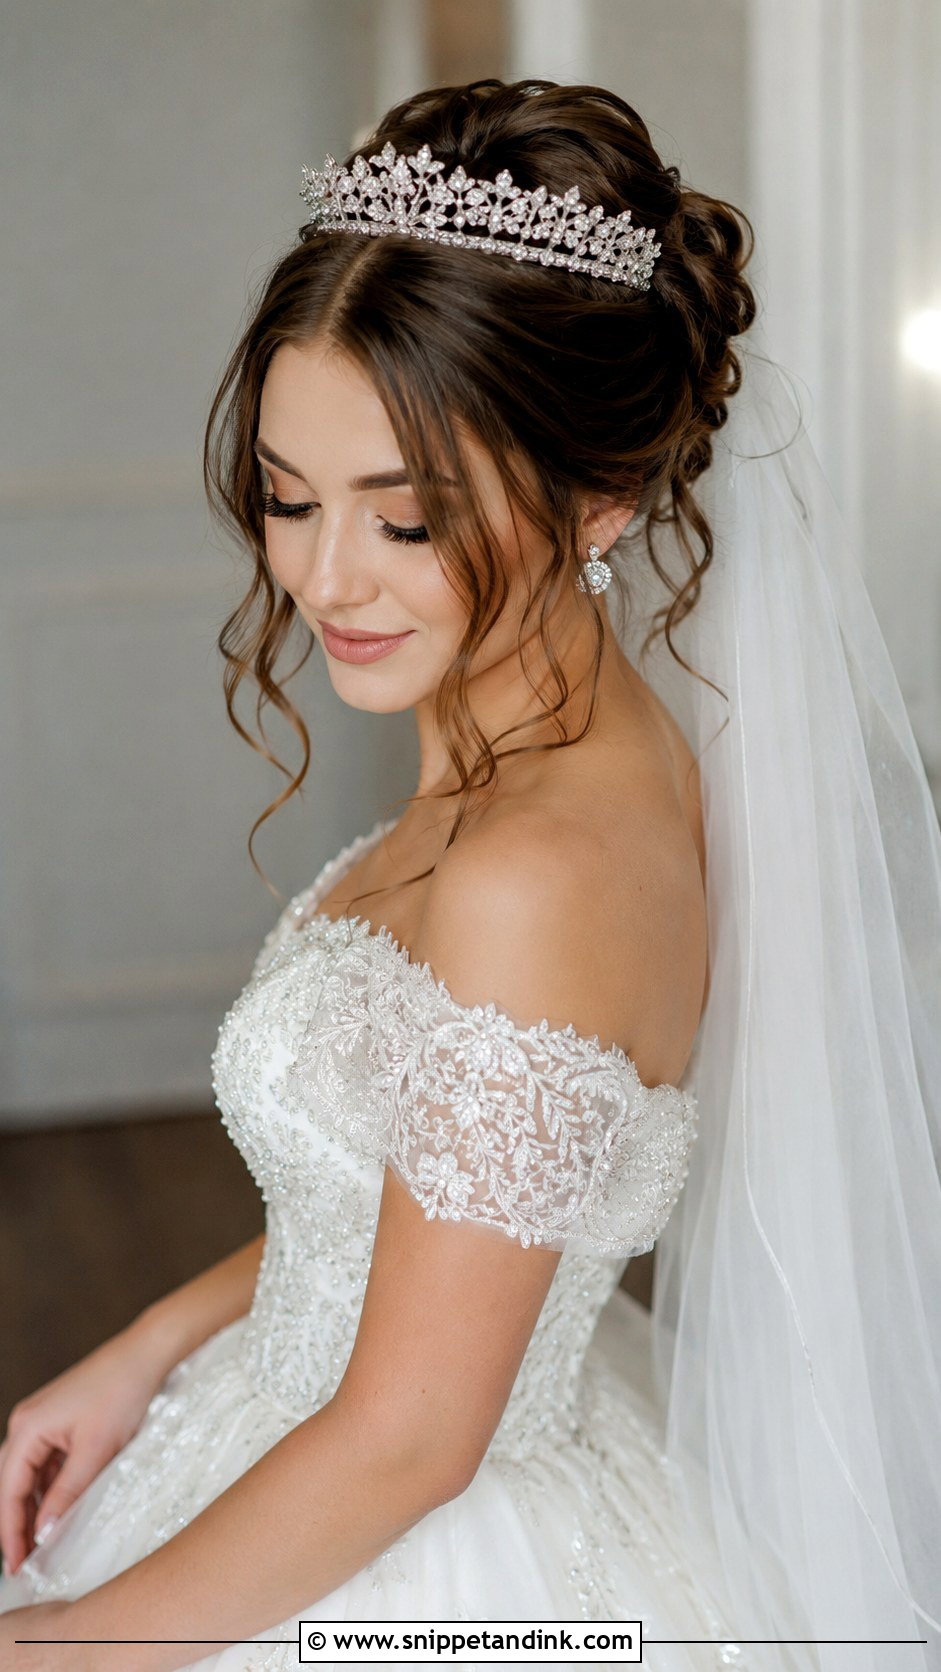
A tiara or crystal headband looks regal on curls without feeling stiff. The bun usually sits low or mid-height so the crown frames the top of the head, and the loose curls keep the overall effect soft. I build a little hidden volume just behind where the tiara sits, so its combs have something to hold and it doesn’t press into your scalp for hours. Ball gowns, classic veils and indoor venues suit it. If the crown is detailed, keep everything else plain: one star piece is enough.
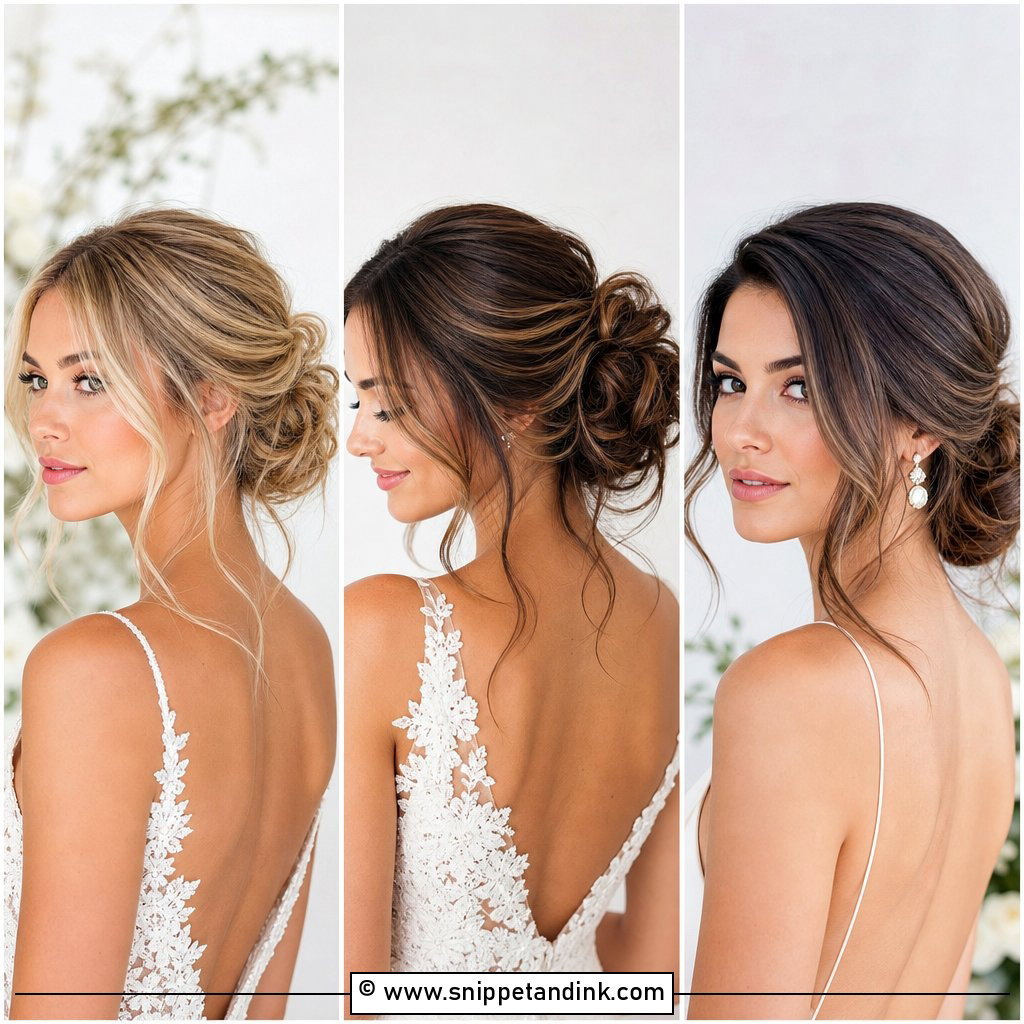
15. Twisted Bridal Bun With Loose Curls
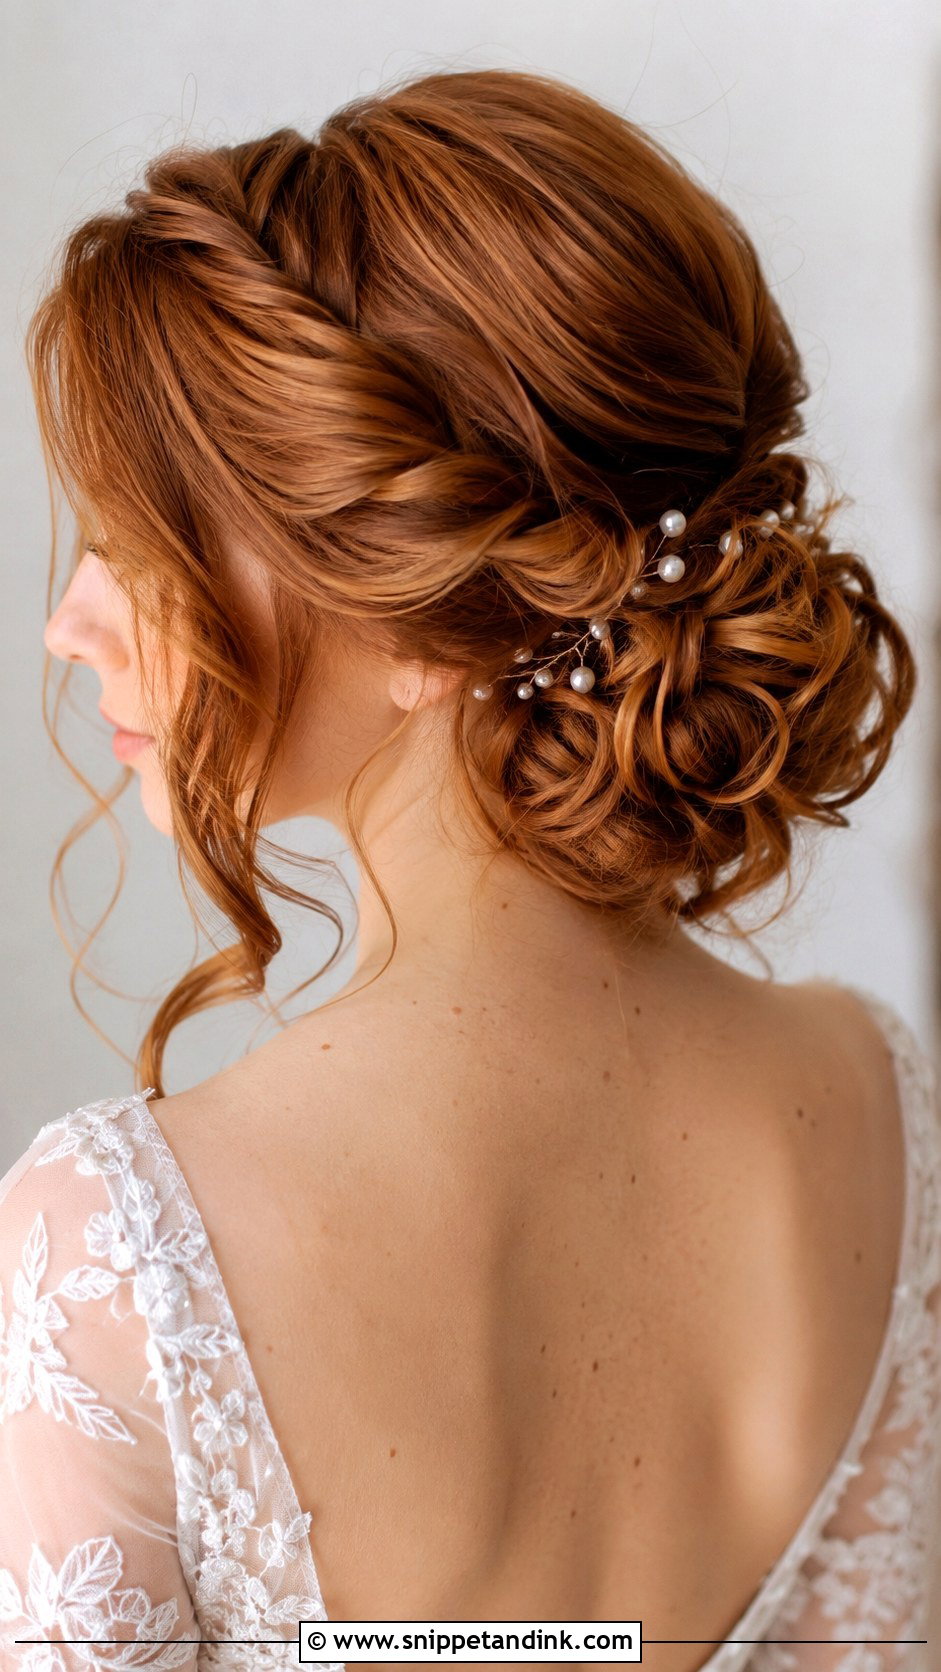
Twists give you detail that reads smoother than a braid. I take sections from the front and sides, twist them back and blend them into the bun, and the curls add depth so the twists don’t look flat. Clients who find braids too busy usually like this one. It needs medium to long hair, and I adapt the section size to texture: smaller twists on fine hair, larger on thick. The twisting also tightens tension along the sides, which is quietly what keeps this style secure through the night.
16. Vintage Bridal Bun With Loose Curls
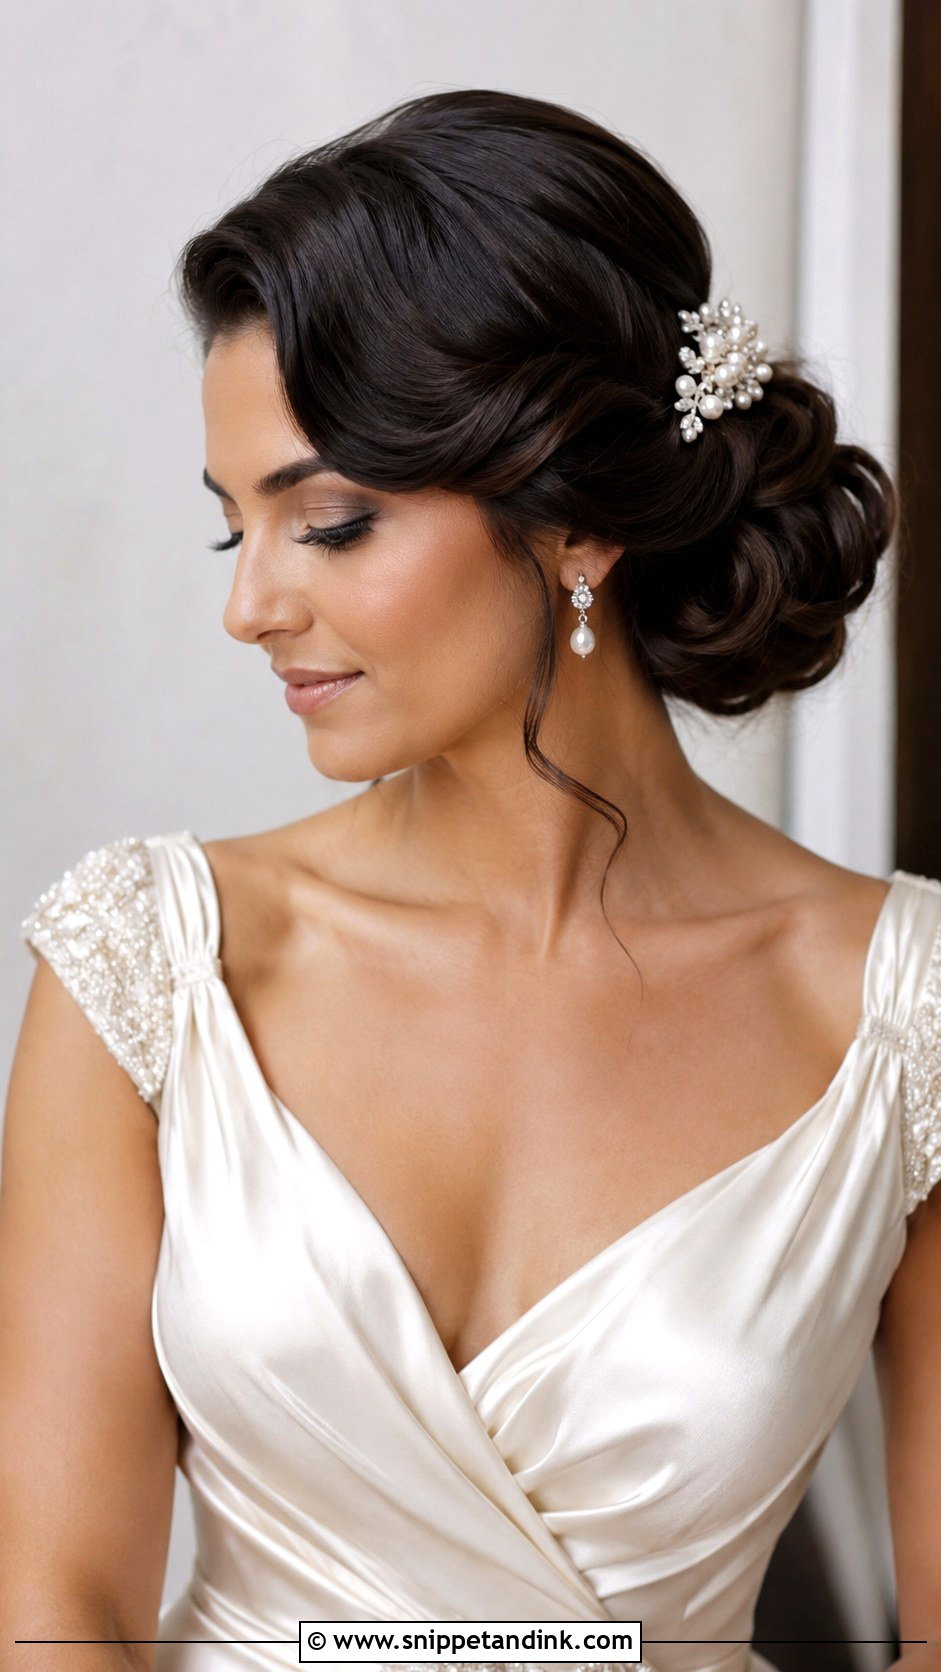
Old-Hollywood glamour, minus the helmet. The shape is a deep side part with smooth waves at the front and a low curled bun at the back. I set the front waves with clips while they cool, then brush them into one ridged shape, which is where the vintage look comes from. Lace, pearl earrings, satin and a birdcage or fingertip veil all work with it. The curls should look sculpted and polished, never messy, and a light gloss gives them that soft sheen under lights.
17. Natural Curly Bridal Bun
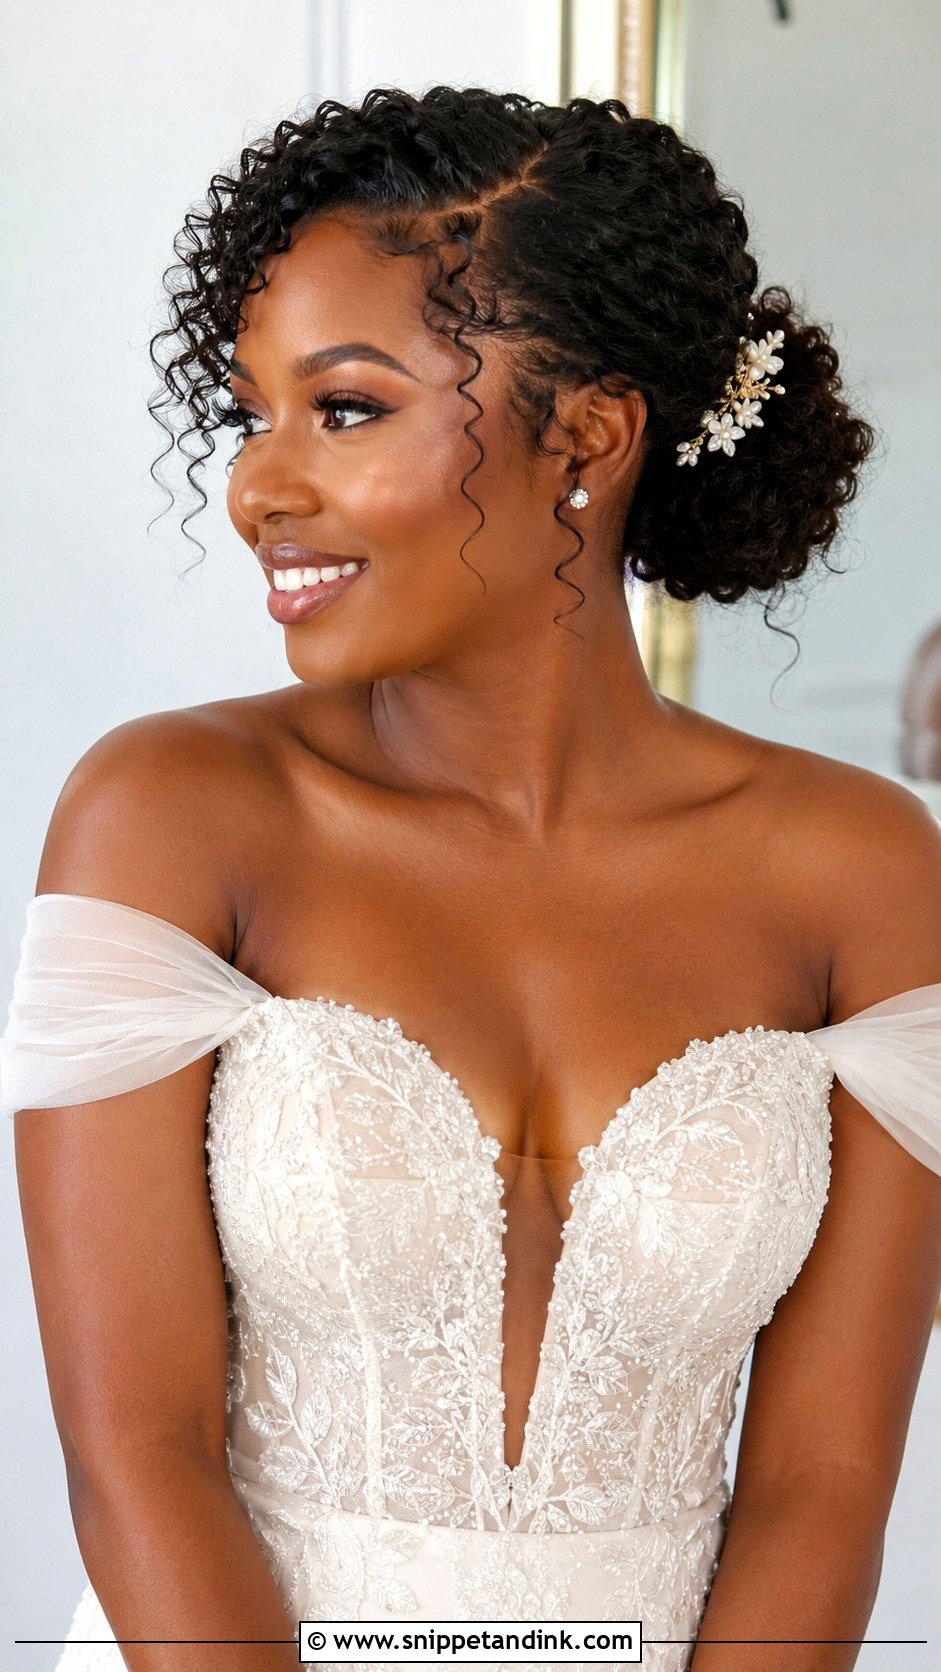
For naturally curly hair, I build the bun from your own curl pattern rather than straightening and re-curling, which tends to look less like you and holds worse. Defining the curls before pinning is what keeps their bounce inside the bun. I leave a few loose at the hairline, temples or nape. Moisture and hold have to be balanced: a cream or leave-in under a light gel stops frizz without crushing the spiral. Height and placement depend on your face shape and the dress, so we decide that at the trial.
18. Loose Curly Bridal Updo Bun
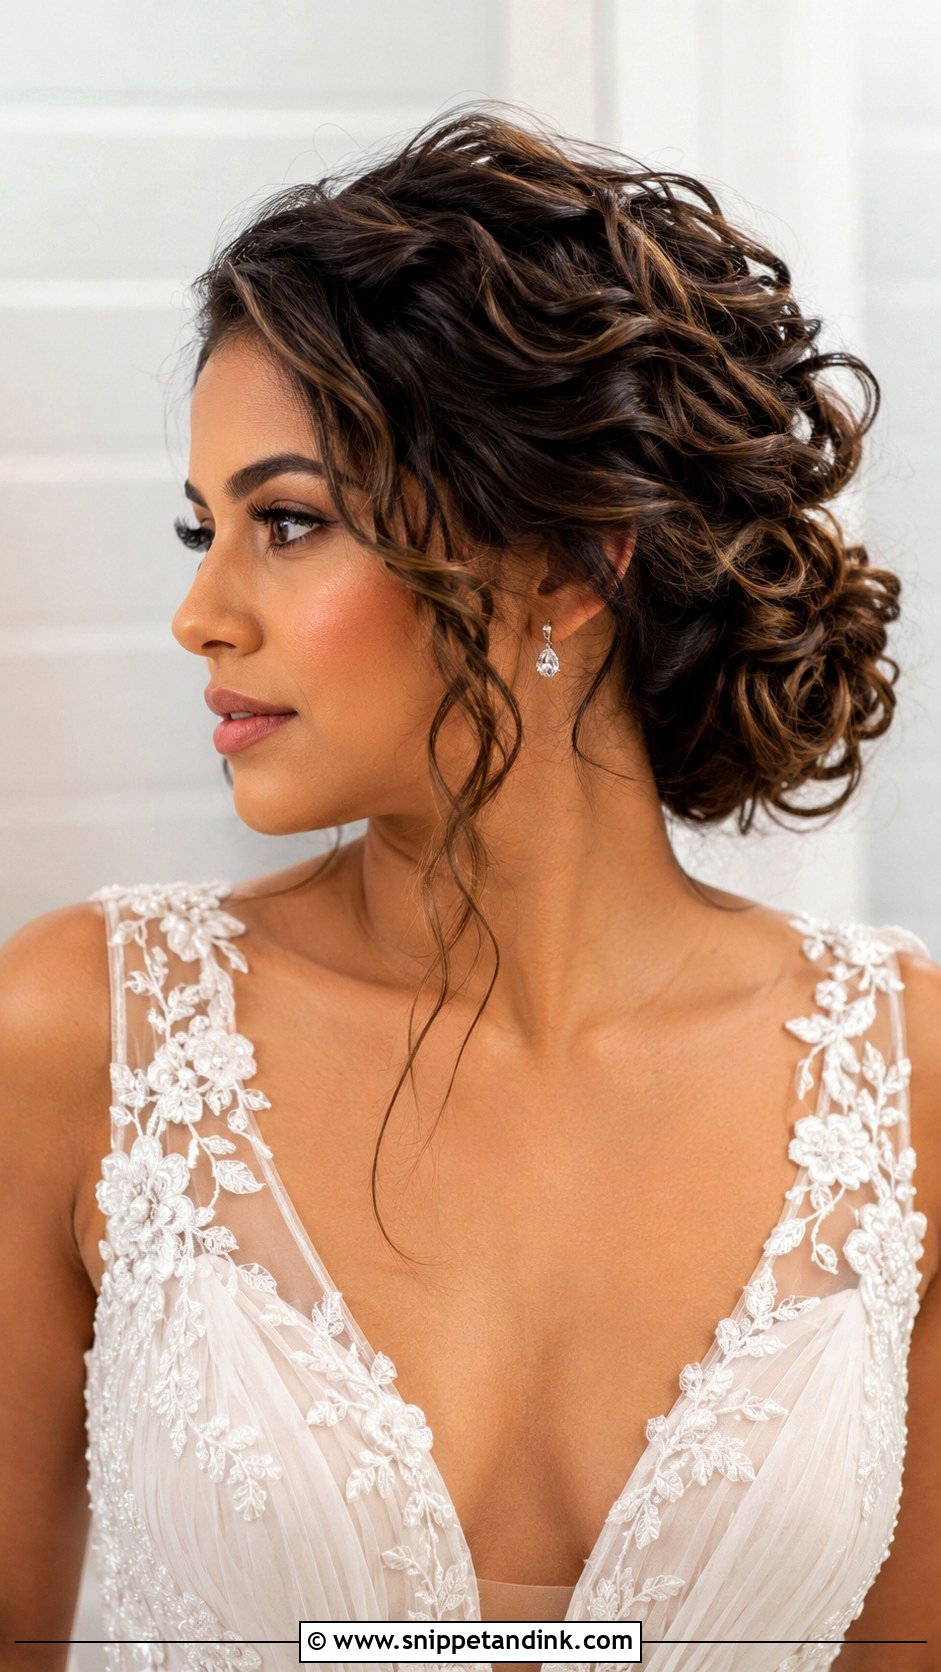
Brides who love their hair down but dread a hot reception usually end up here. The hair is curled, lifted loosely and pinned into an airy bun, so you get the movement of curls with your shoulders and neckline left open. In warm weather it’s far more comfortable than hair lying on your back for twelve hours. I aim for balance: some lift at the crown, soft curls at the face, no tight lines. Pins can dress it up or you can wear it plain.
19. Low Bun Bridal Updo With Tendrils
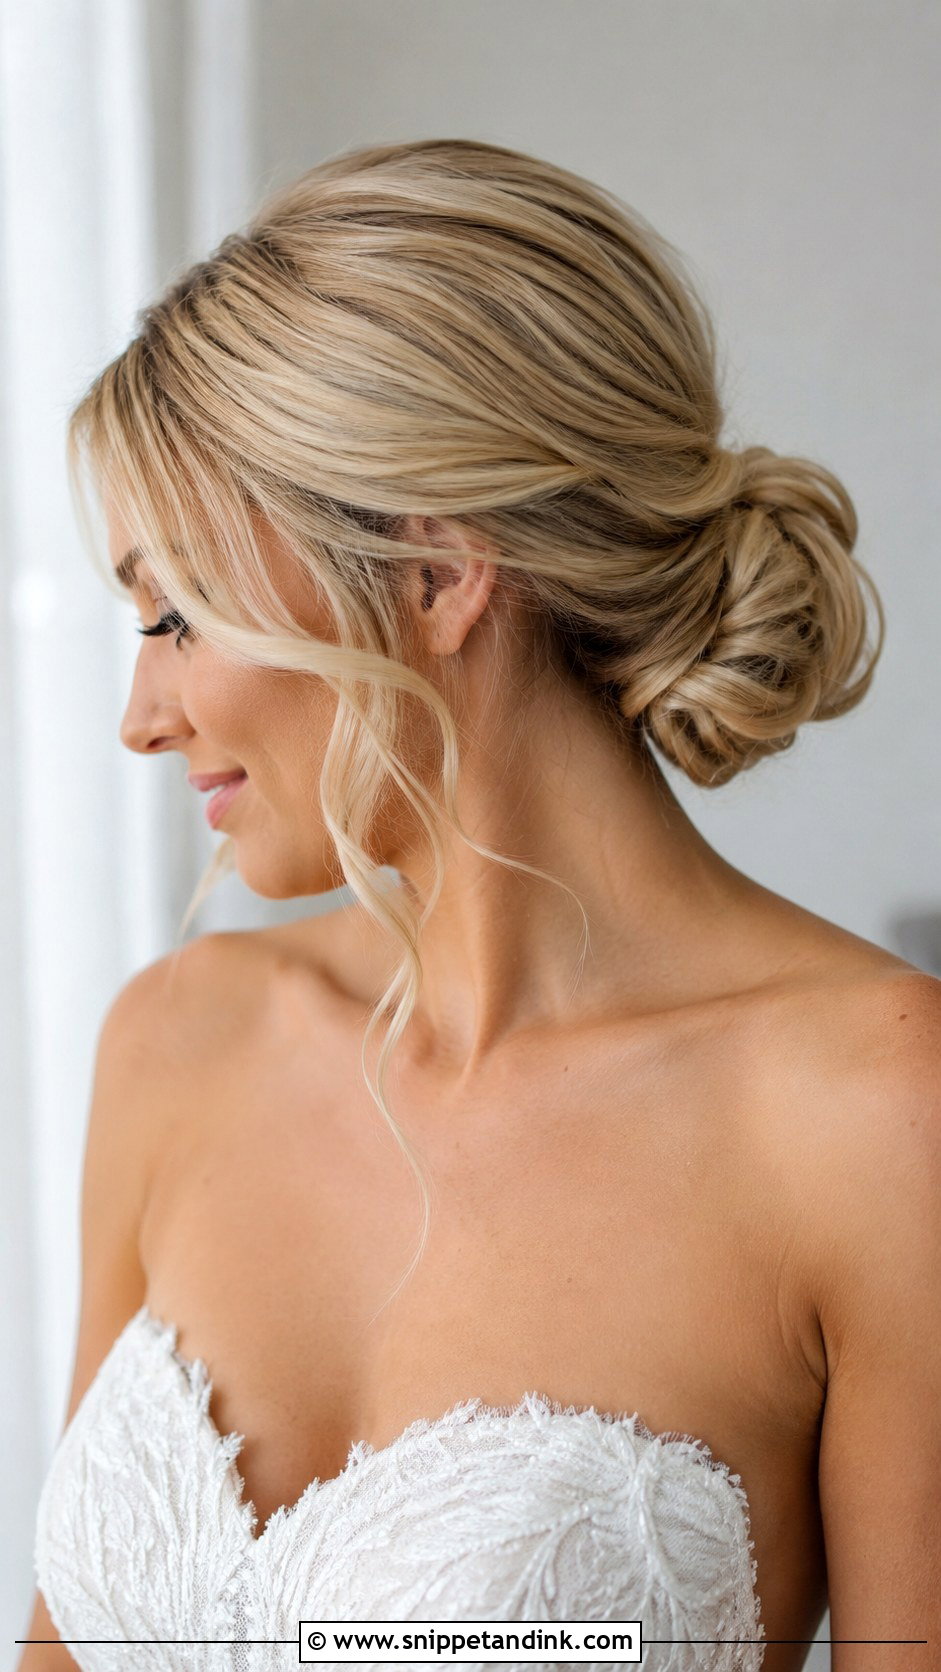
If your worry is that an updo will feel severe, start here. The bun sits low at the nape and curled tendrils fall around the face and sometimes at the neck, which softens the whole thing. I never copy the tendrils from a photo, because the right length and placement depends on your jaw, cheekbones and how your hair falls naturally. They need enough hold to keep their shape through the day, and enough lightness to move when you turn your head.
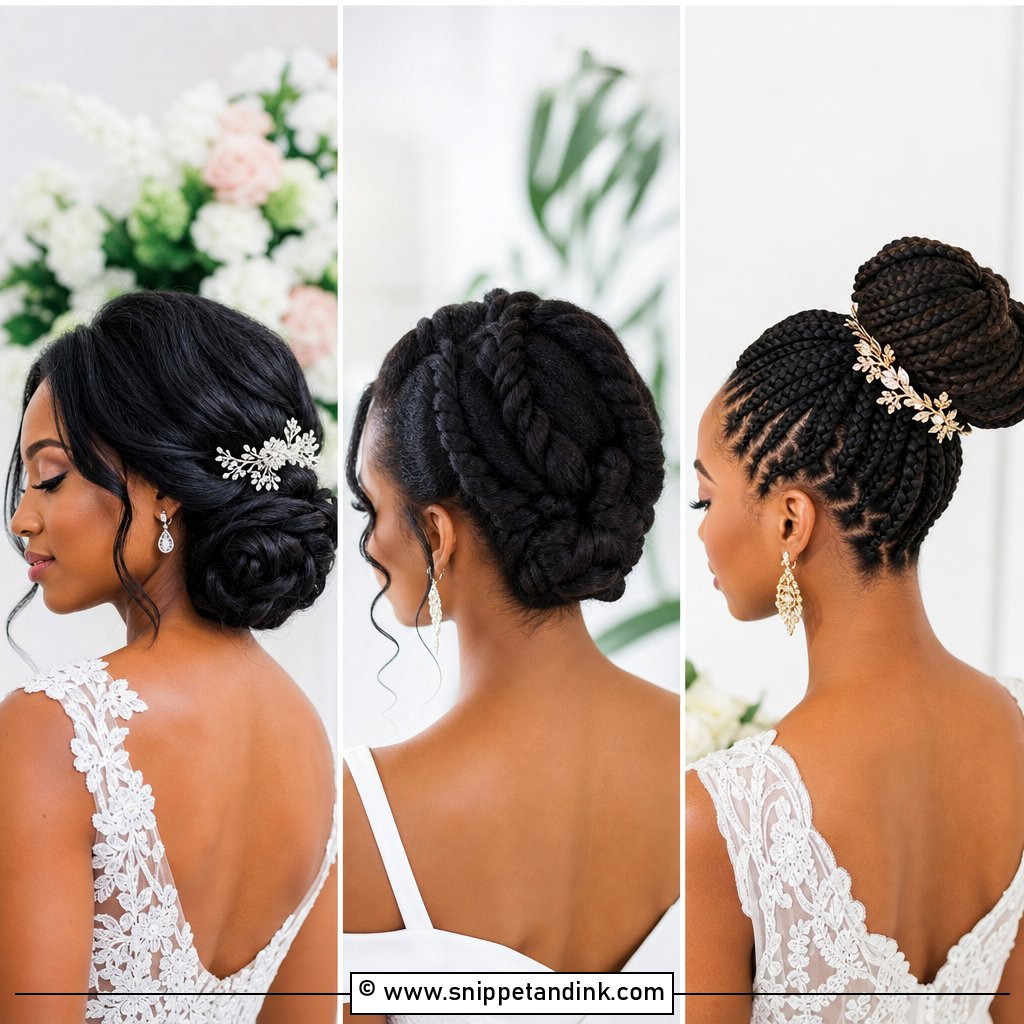
20. Soft Bridal Bun With Loose Waves And Curls
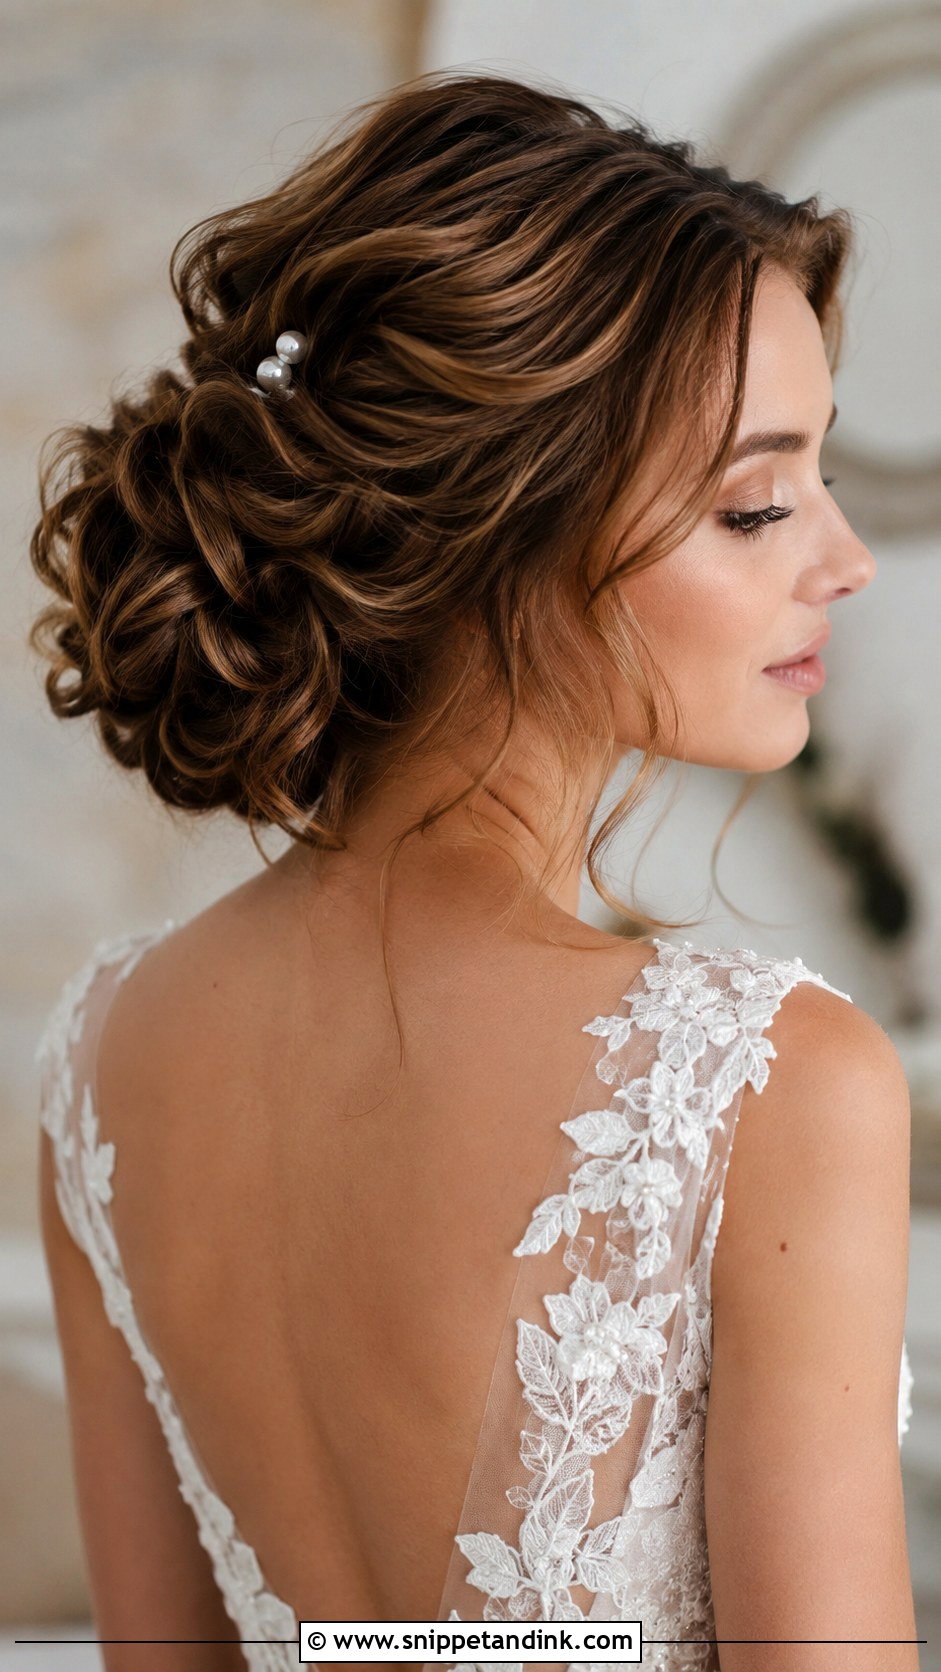
Waves on top and curls in the bun is a combination I use when someone wants softness without obvious texture at the front. I set the top section in larger barrels for loose waves and curl the back tighter so the bun has body. The crown stays smooth enough to look polished, while the bun shows the curls clearly. Sheer veils, simple pins and softer gowns suit it. It’s one of the more forgiving styles if you aren’t sure how textured you want to go.
What a Curled Bun Feels Like Nine Hours In
A bun that looks perfect at the trial can still ache by the first dance if it is too heavy or pinned too tightly. Tell me straight away if anything pinches during the trial. A pin pressing on the scalp at 10am becomes a headache by 6pm, and it is easy to move while we are still building.
Humidity is the other enemy. Curls drop faster in damp air, so for a beach or summer garden wedding I set them tighter than you will want them, knowing they will relax into the right shape by the ceremony. Face pieces drop first, since they get touched most.
Give your maid of honour a small pouch
- Six to eight bobby pins in your hair colour, plus two U-pins for re-securing the bun.
- A travel-size flexible hairspray, not a firm one, so a fix doesn’t leave a crunchy patch.
- A small mirror, so someone can check the back after the veil comes off.
- A clean mascara wand or tiny comb for smoothing flyaways at the hairline without disturbing curls.
When the veil comes out, have someone pull the comb out slowly, straight back, rather than lifting it upward. That keeps the curls around the bun intact for the rest of the night.
Your Neckline Decides Where the Bun Sits
Curled buns stay popular because they give you the security of an updo and still keep curls in the picture. In practice, the right one comes down to your dress, veil, venue and hair texture more than any photo. Low buns are the most secure, messy buns the most relaxed, sleek ones the most modern, and a curly chignon the most classic. Save the looks you like, bring them to your trial with your veil and a photo of your neckline, and let your stylist shape the face curls around your features so the result is yours.
You'll Like These Ideas:


Leave a Reply