
A loose bun is the updo I trust most for a long wedding day. It keeps hair off the neck, gives a veil something solid to hold, and still has enough softness that it doesn’t read as a formal set. What changes the mood is small stuff: where the part falls, how high the bun sits, how much texture goes into the loops and what gets pinned beside it. Shorter layers can be tucked in on purpose, and very long hair loses some of its pull when it’s folded up instead of hanging. Below are twenty versions, with the details I’d adjust for each one.
The Hidden Base That Keeps a Soft Bun From Sliding
Every soft bun on this list sits on something firm. The loops on top can be loose and pulled apart, but the base they’re pinned into has to be solid, or the whole style creeps down the neck as the day goes on. I choose the base before anything else, depending on the hair.
- A ponytail is the simplest. I tie it with a small elastic and wrap the loops around it. It’s the most secure, though it can feel tight on a sensitive scalp.
- A crisscross anchor is two pairs of bobby pins crossed into an X at the nape. It’s gentler, invisible, and suits low buns on medium hair.
- A small hidden braid is what I use on thick or very long hair, because it spreads the weight and gives every pin something to bite into.
The pins matter as much as the base. Bobby pins hold; open U-shaped hairpins shape. I use bobby pins for the foundation and U-pins for the loose loops on top, since they slide in at an angle and can be adjusted without flattening anything. Grips that match your hair colour vanish, and I won’t put shiny gold ones into dark hair.
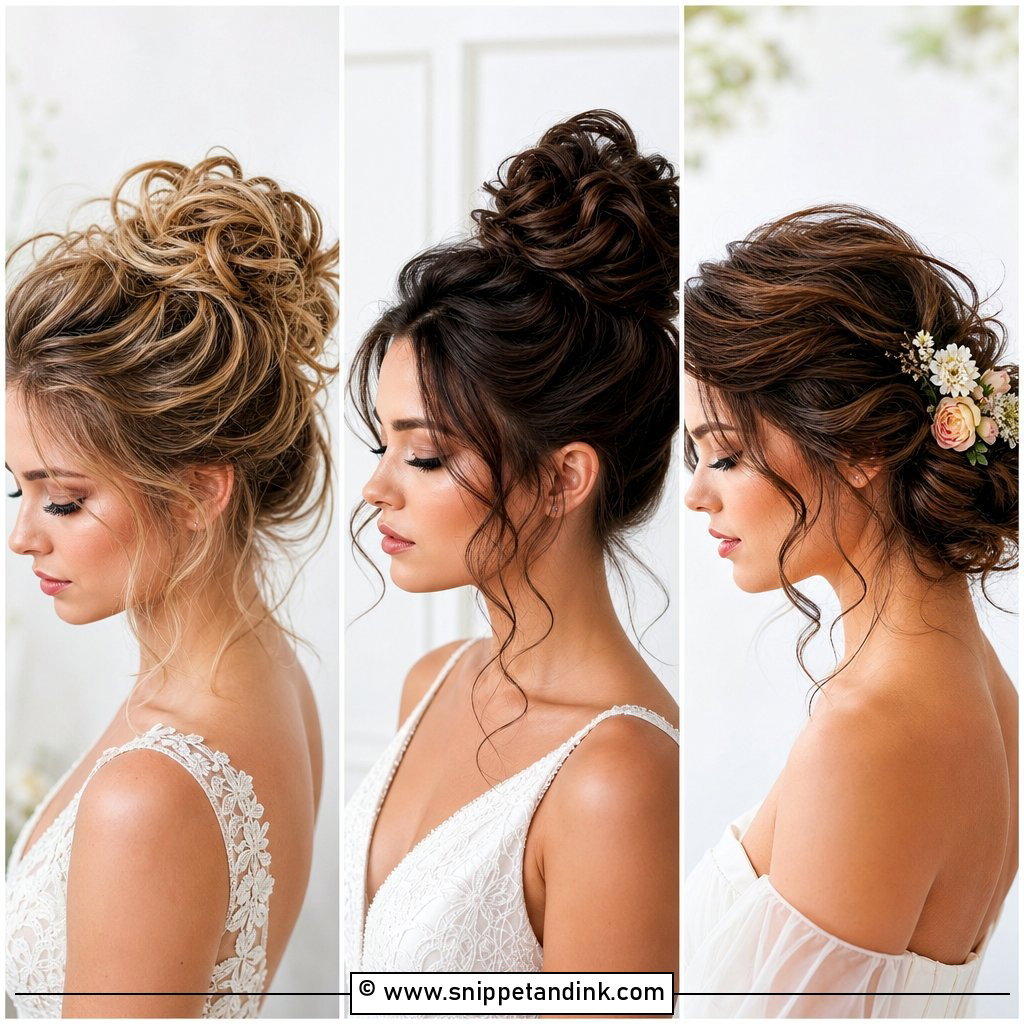
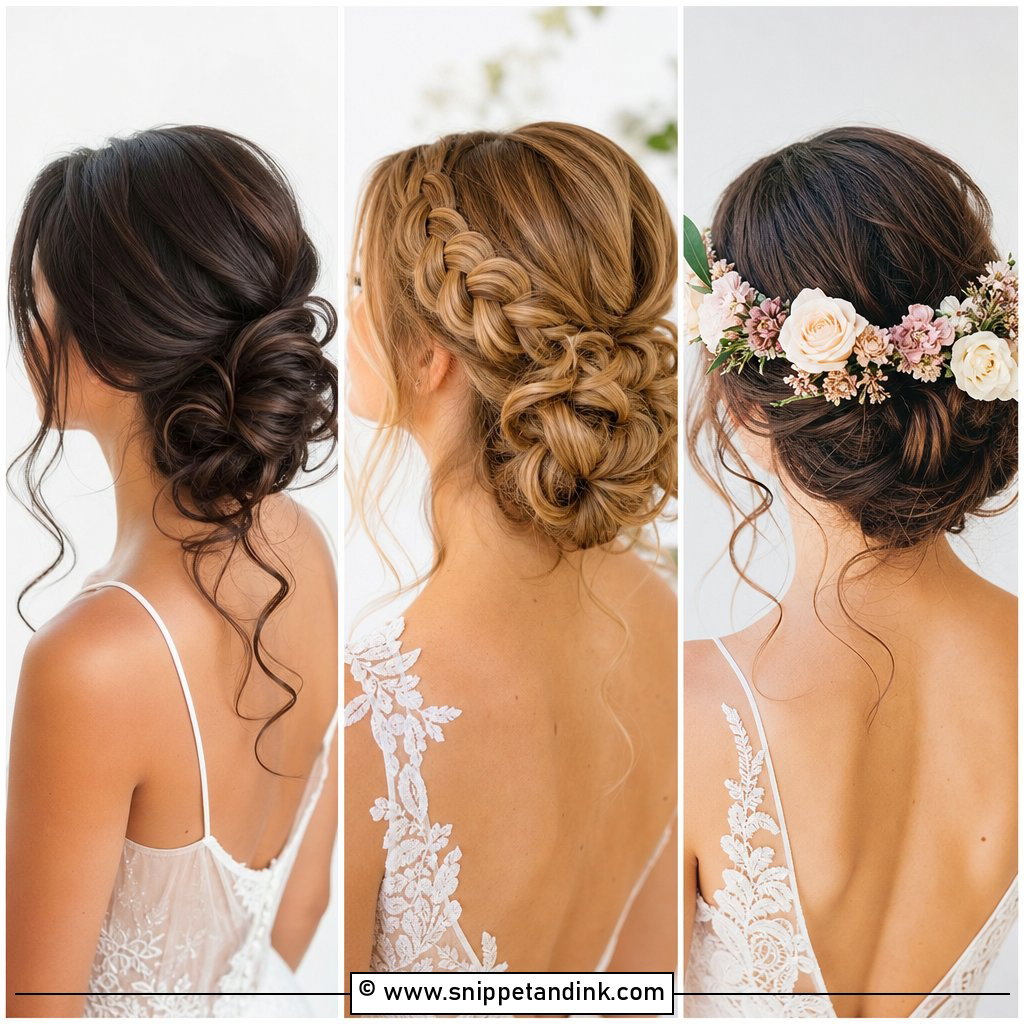
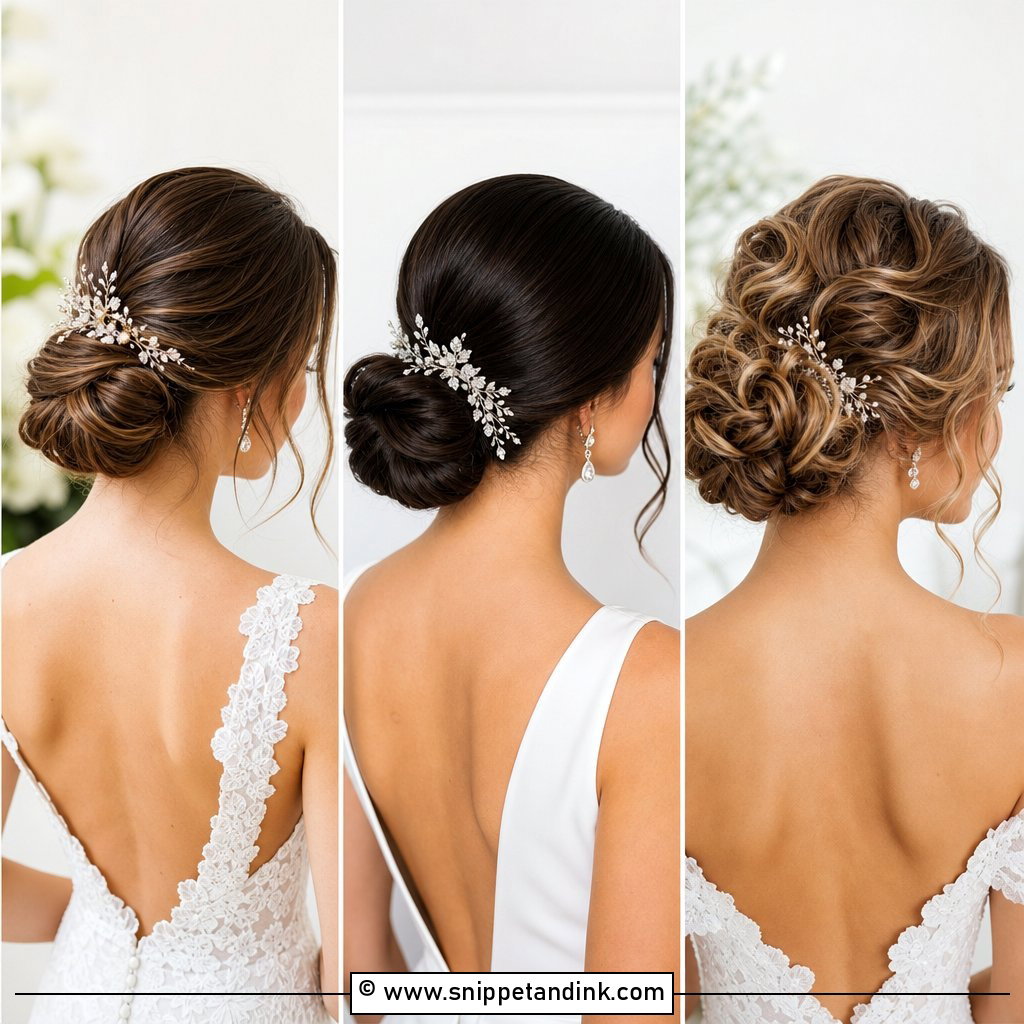
1. Low Loose Bun Wedding Hair
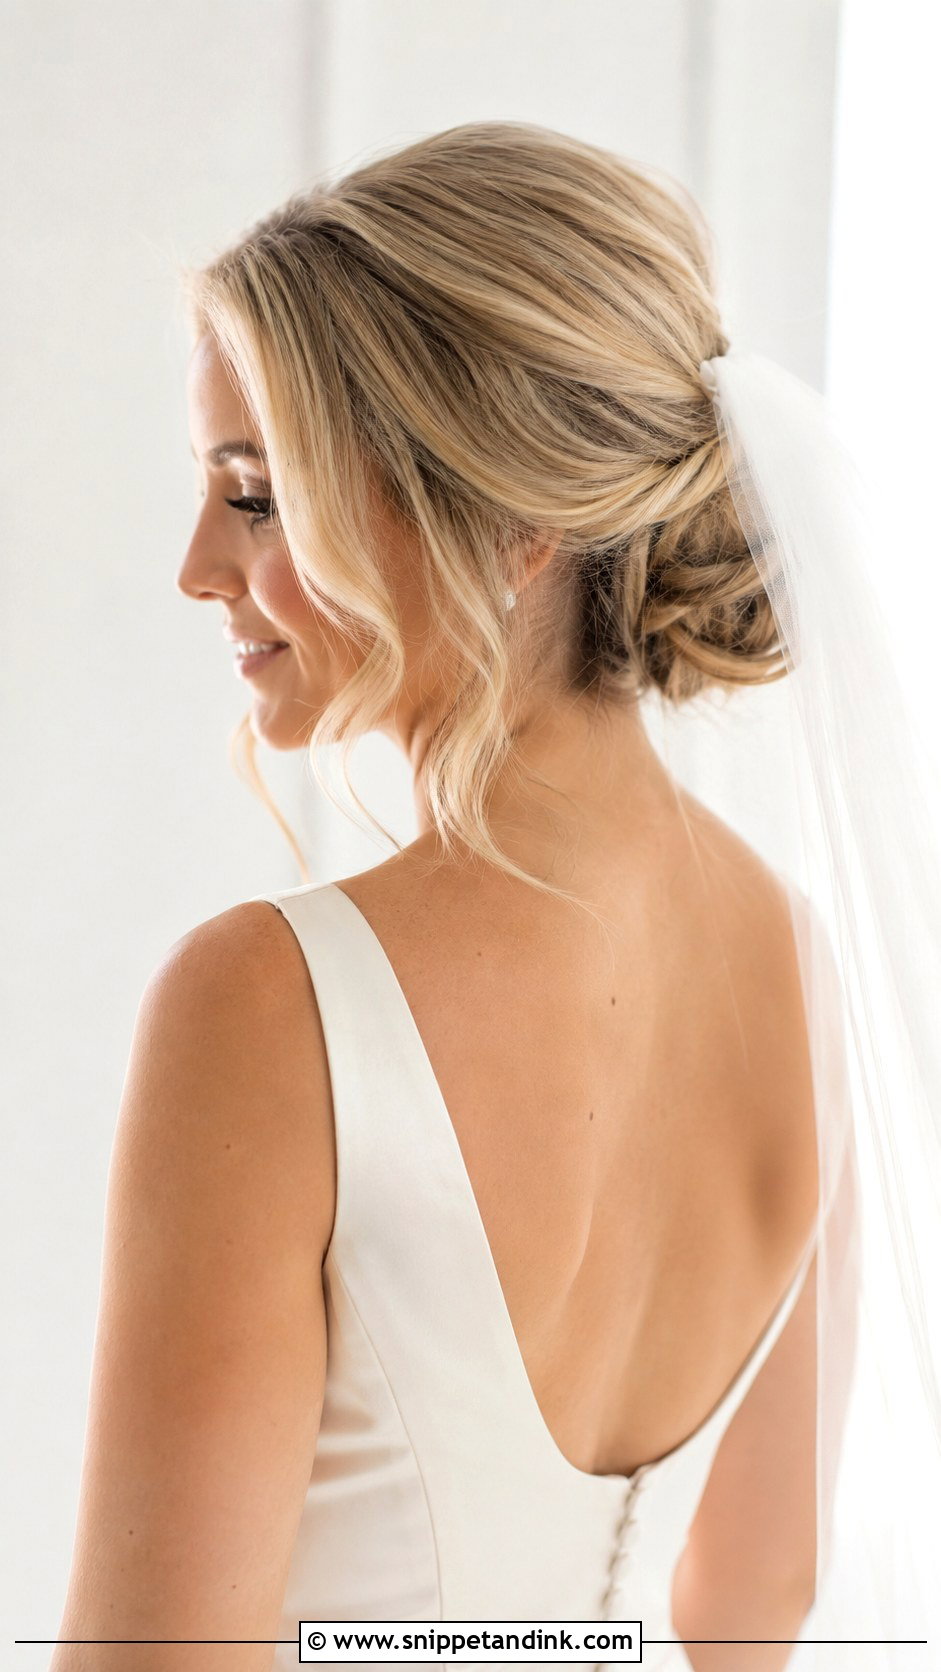
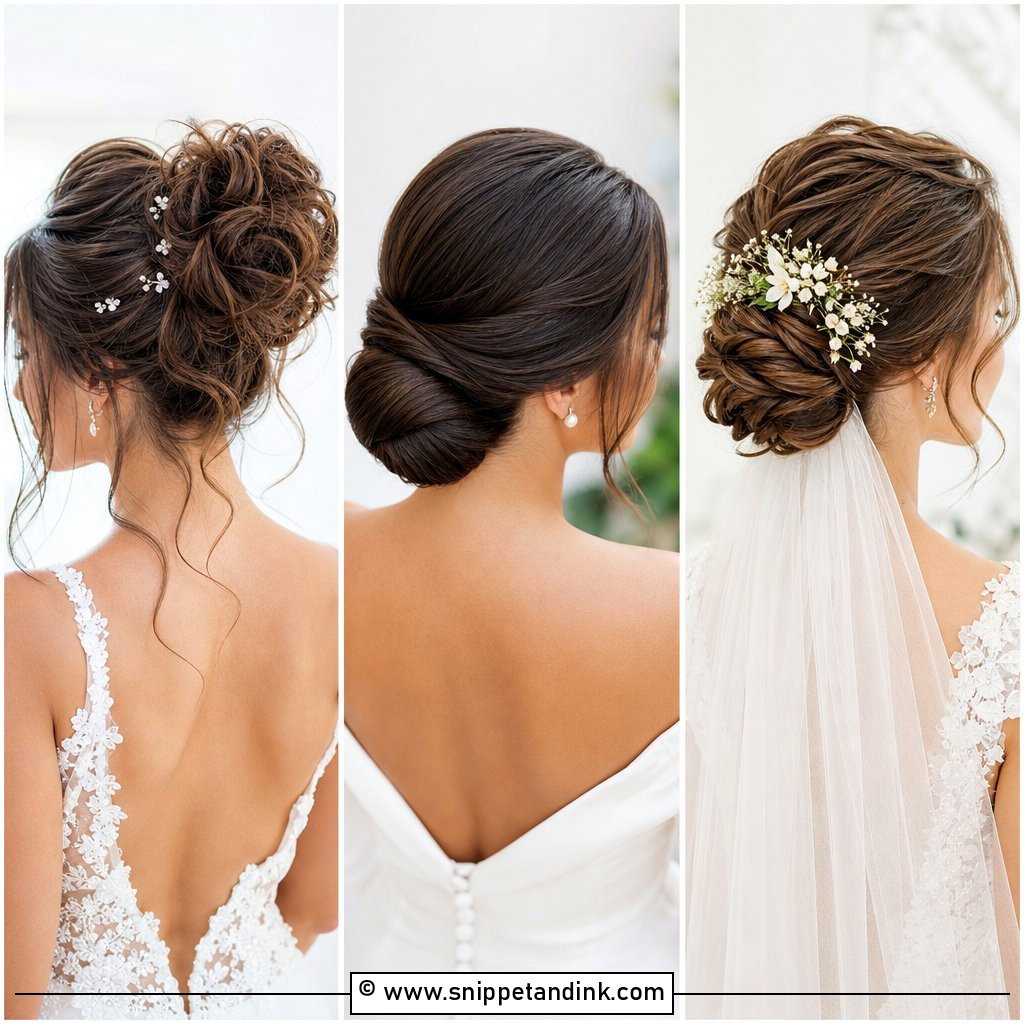
Sitting at the nape, this is the bun I suggest when a bride hasn’t decided anything yet, because it works under a veil and leaves room for earrings and a detailed neckline. I give the crown a little lift with a small backcomb so the profile has a gentle curve from forehead to bun. The mistake I correct most often is a bun built too flat. From the side, it simply disappears, so I keep fullness in the loops for photos taken from behind. Lace or satin, garden or ballroom, it adapts.
2. Messy Loose Bun Wedding Hair
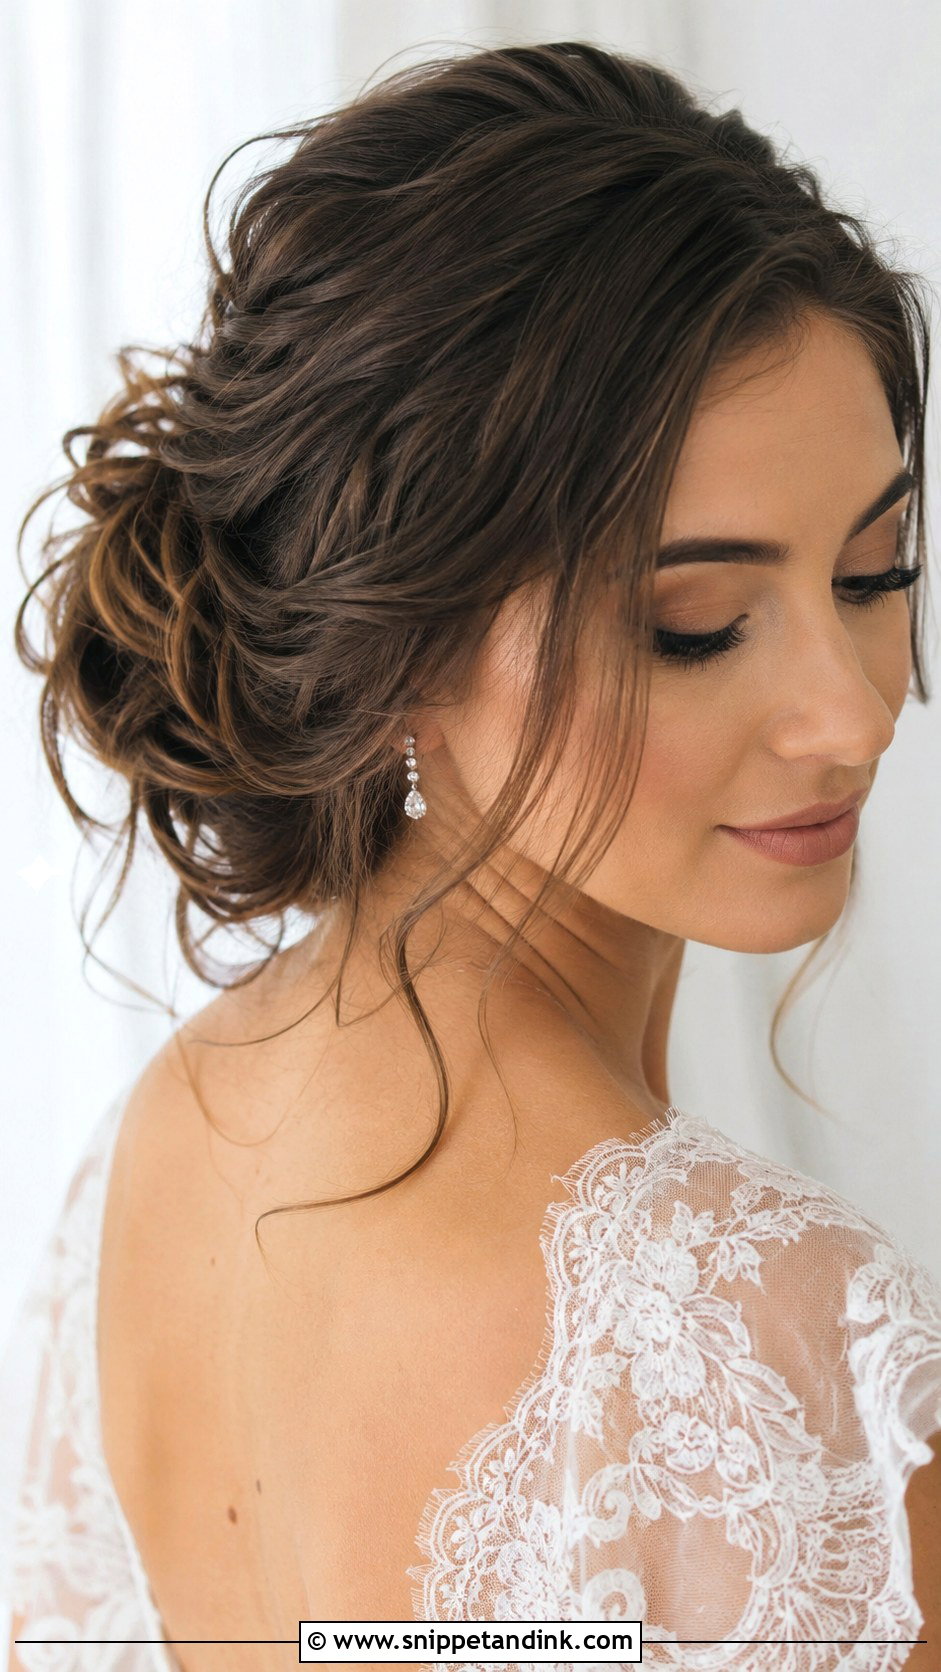
There’s nothing random about a good messy bun. I curl every section first, pin the loops loosely, then pull out pieces by hand around the face and nape a few at a time, checking in the mirror as I go. Random flyaways read as frizz in close-ups; placed pieces read as softness. I keep the front smoother than the back so the whole thing still looks bridal. Outdoors, a breeze moving those loose strands helps rather than hurts.
3. Textured Loose Bun Wedding Hair
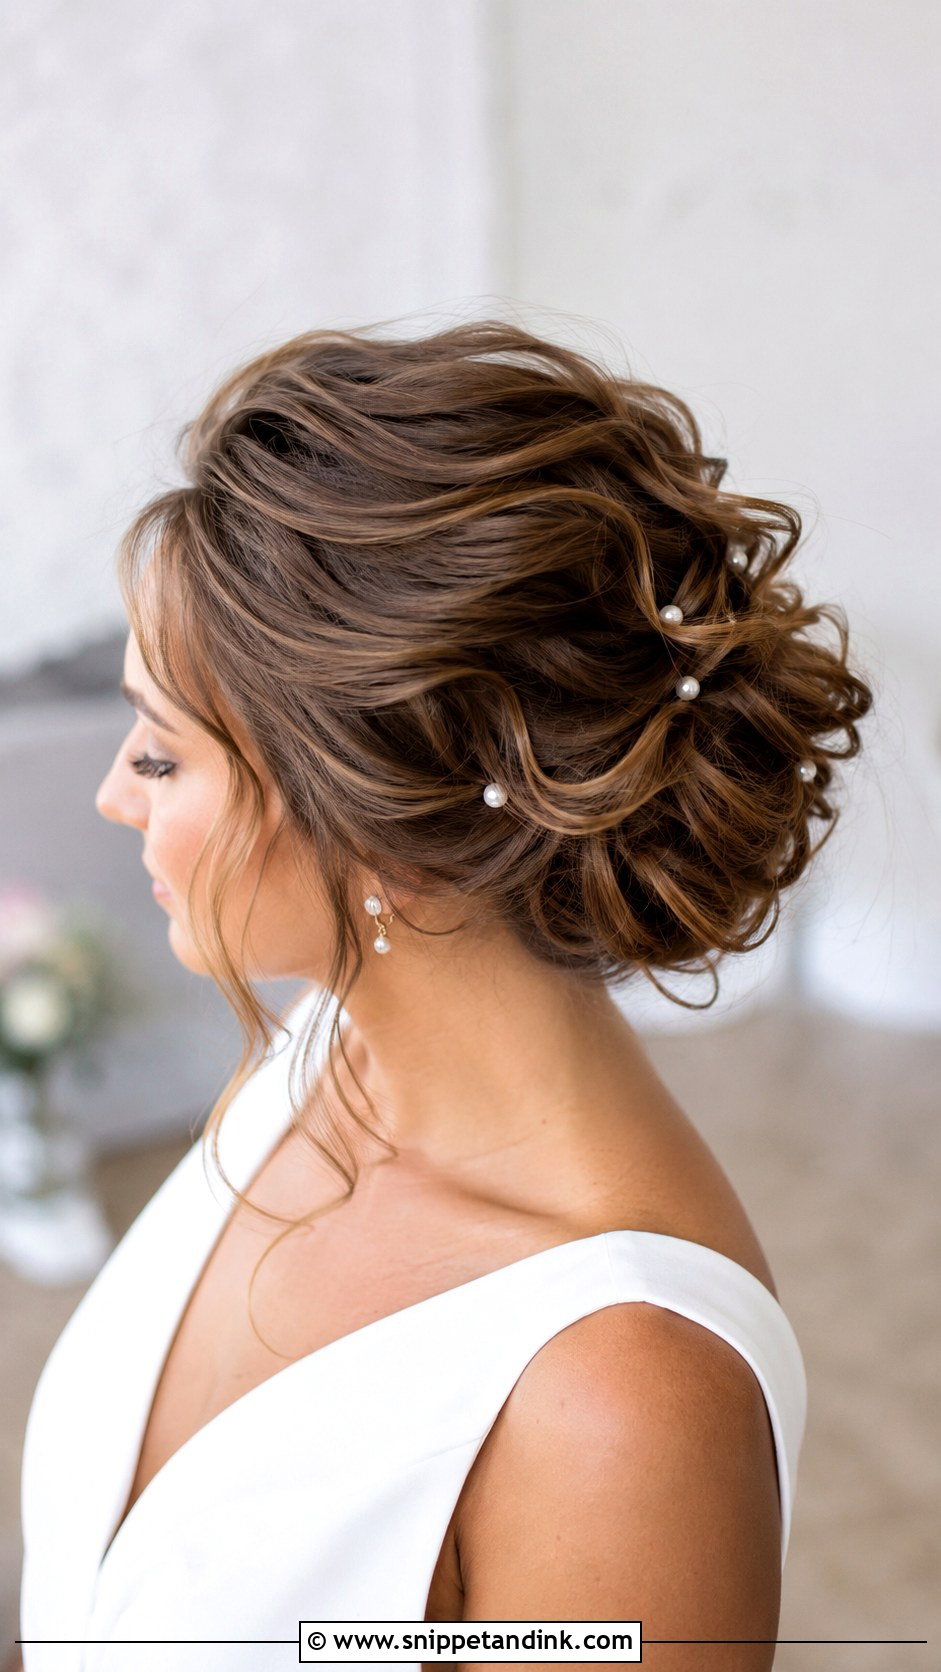
Texture is what makes a bun look full, and it has to go in before a single pin does. I wave the hair with a large barrel or a flat iron, let it cool, then mist a flexible hold spray so the bends survive being folded. Medium to long hair takes this best. A light backcomb at the crown adds height without the bun looking puffy. With a plain gown, the shape of the hair carries the interest, so a delicate comb above the bun or a few pearl pins is plenty.
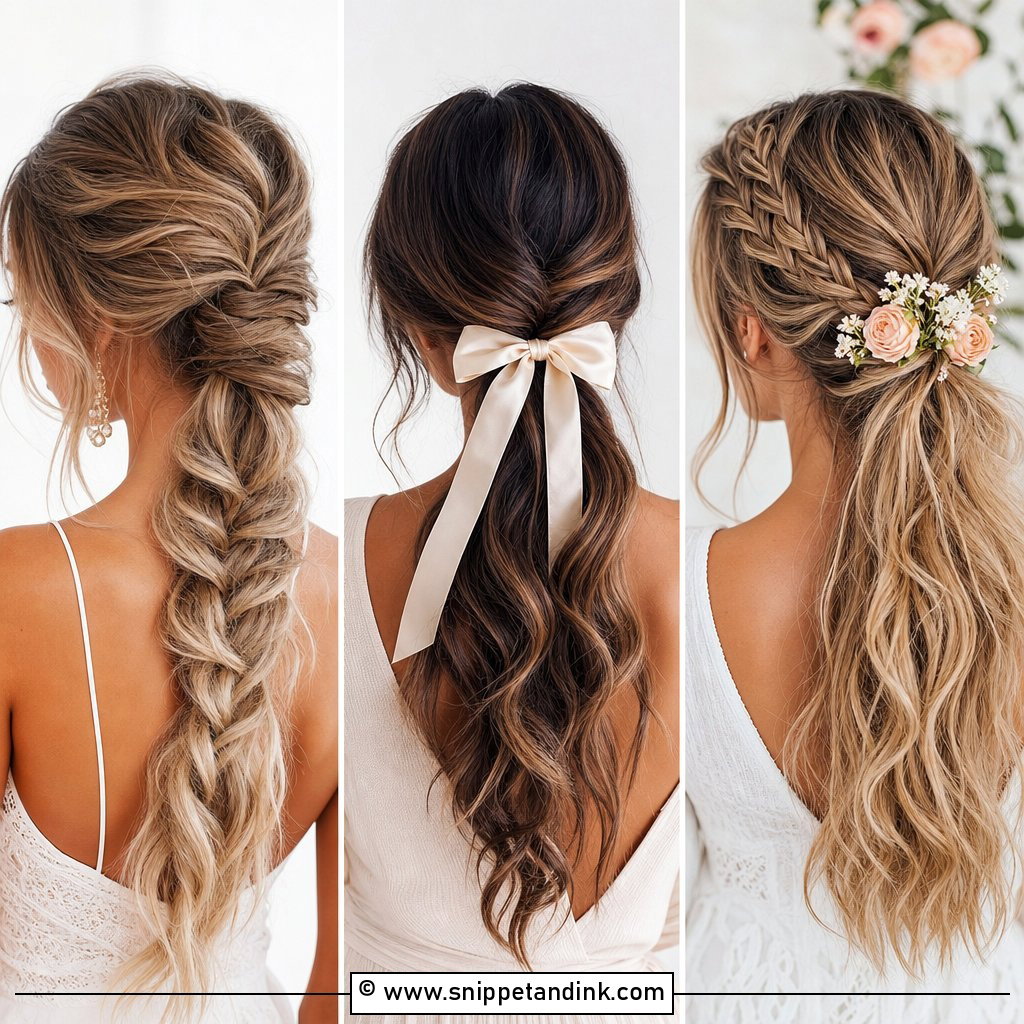
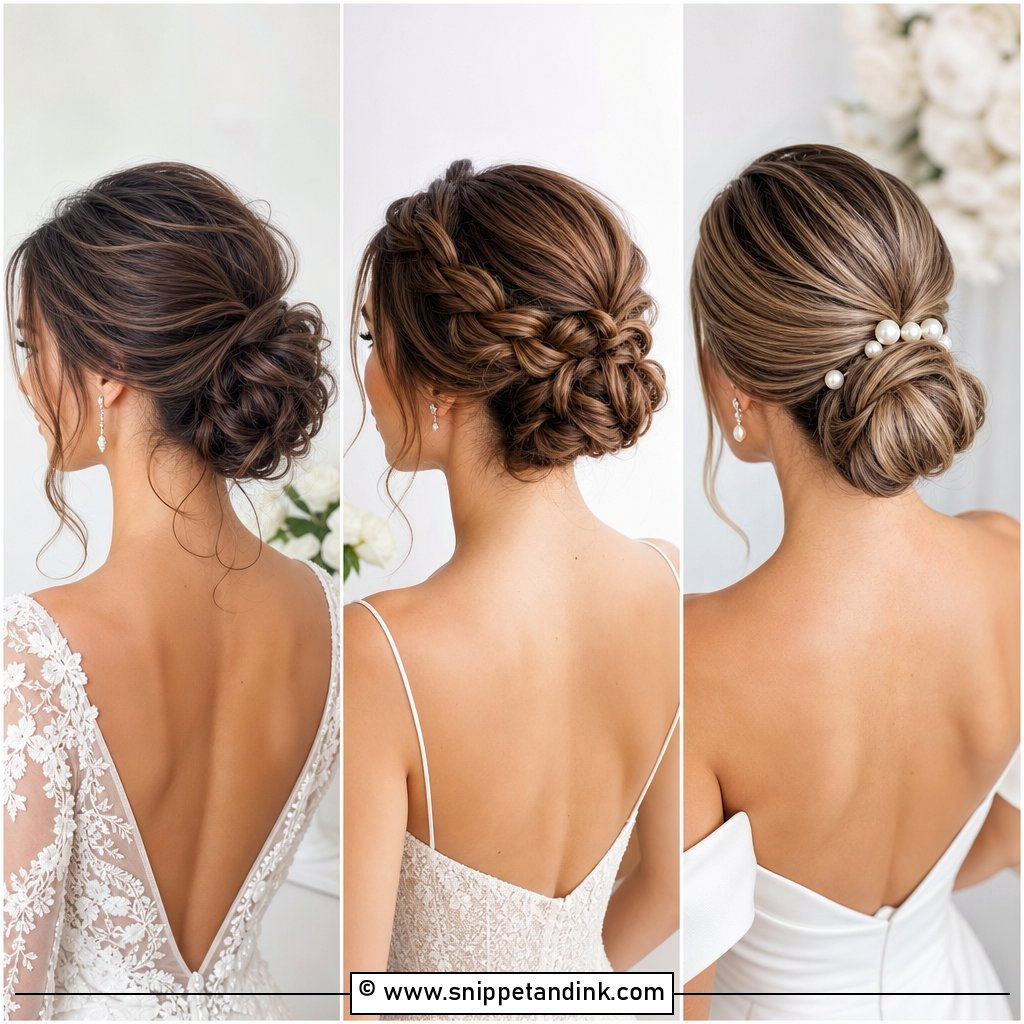
4. Braided Loose Bun Wedding Hair
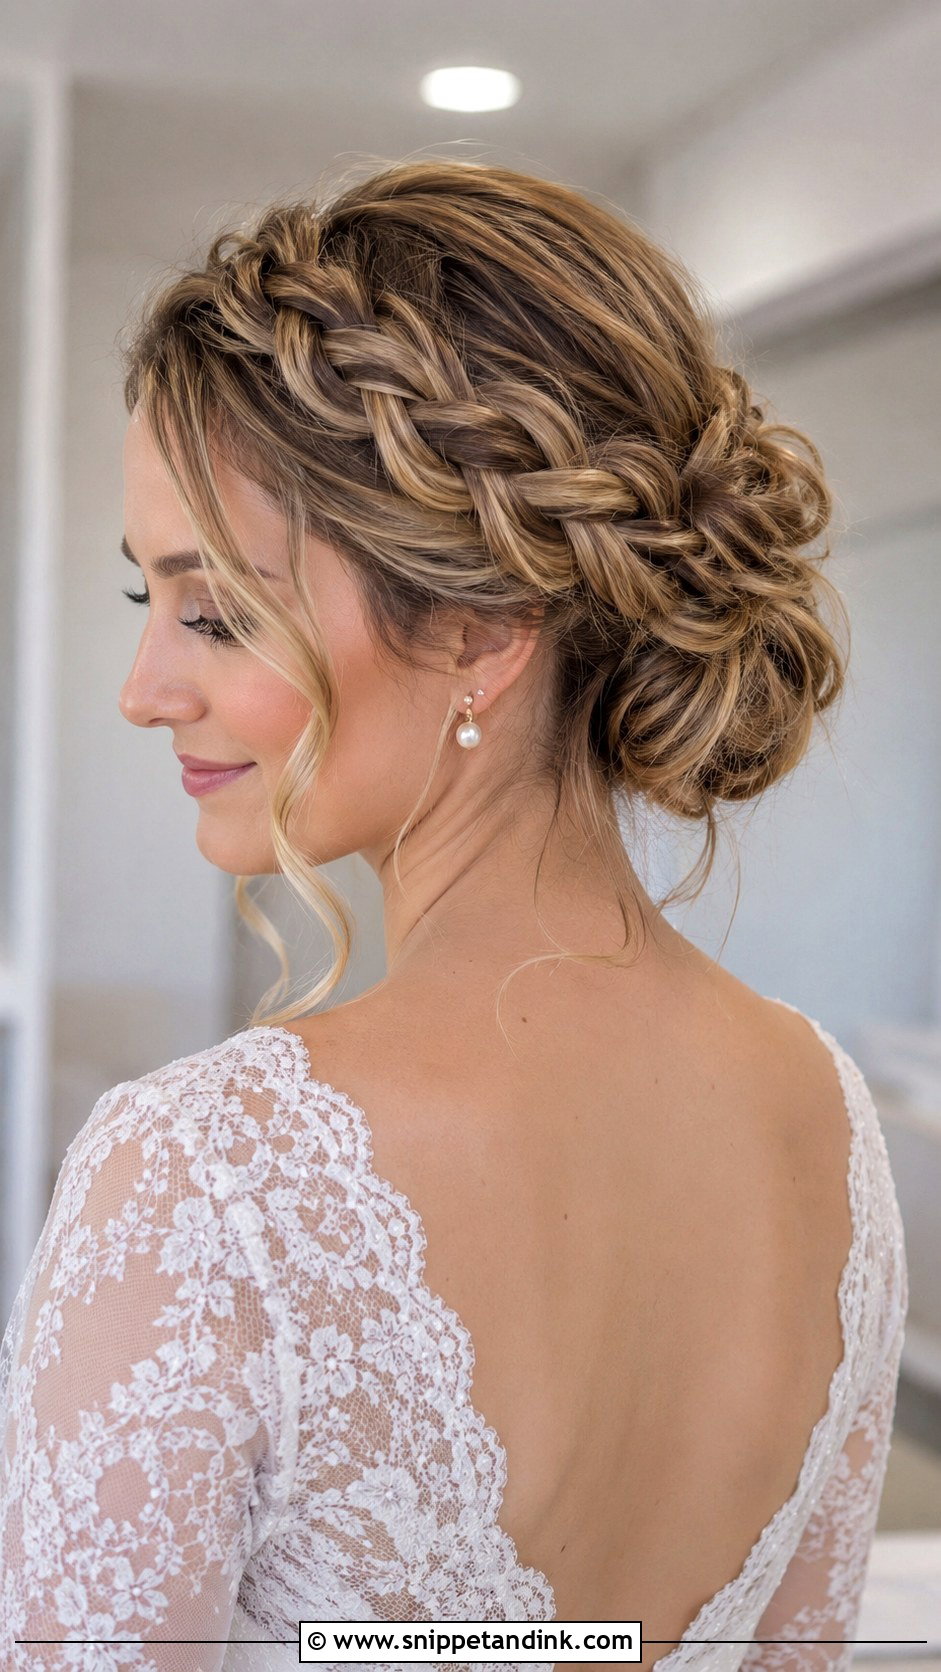
A braid wrapped into the bun is my fix for layered hair, because the shorter pieces get caught inside the plait instead of springing loose by mid-afternoon. The braid can start at one temple, wrap into the bun or cross the crown. I loosen it by pulling the edges outward so it matches the soft bun rather than standing out as a separate tight detail. It gives the style real grip through a long reception, and it looks right at a rustic venue or with an open-backed dress.
5. Twisted Loose Bun Wedding Hair
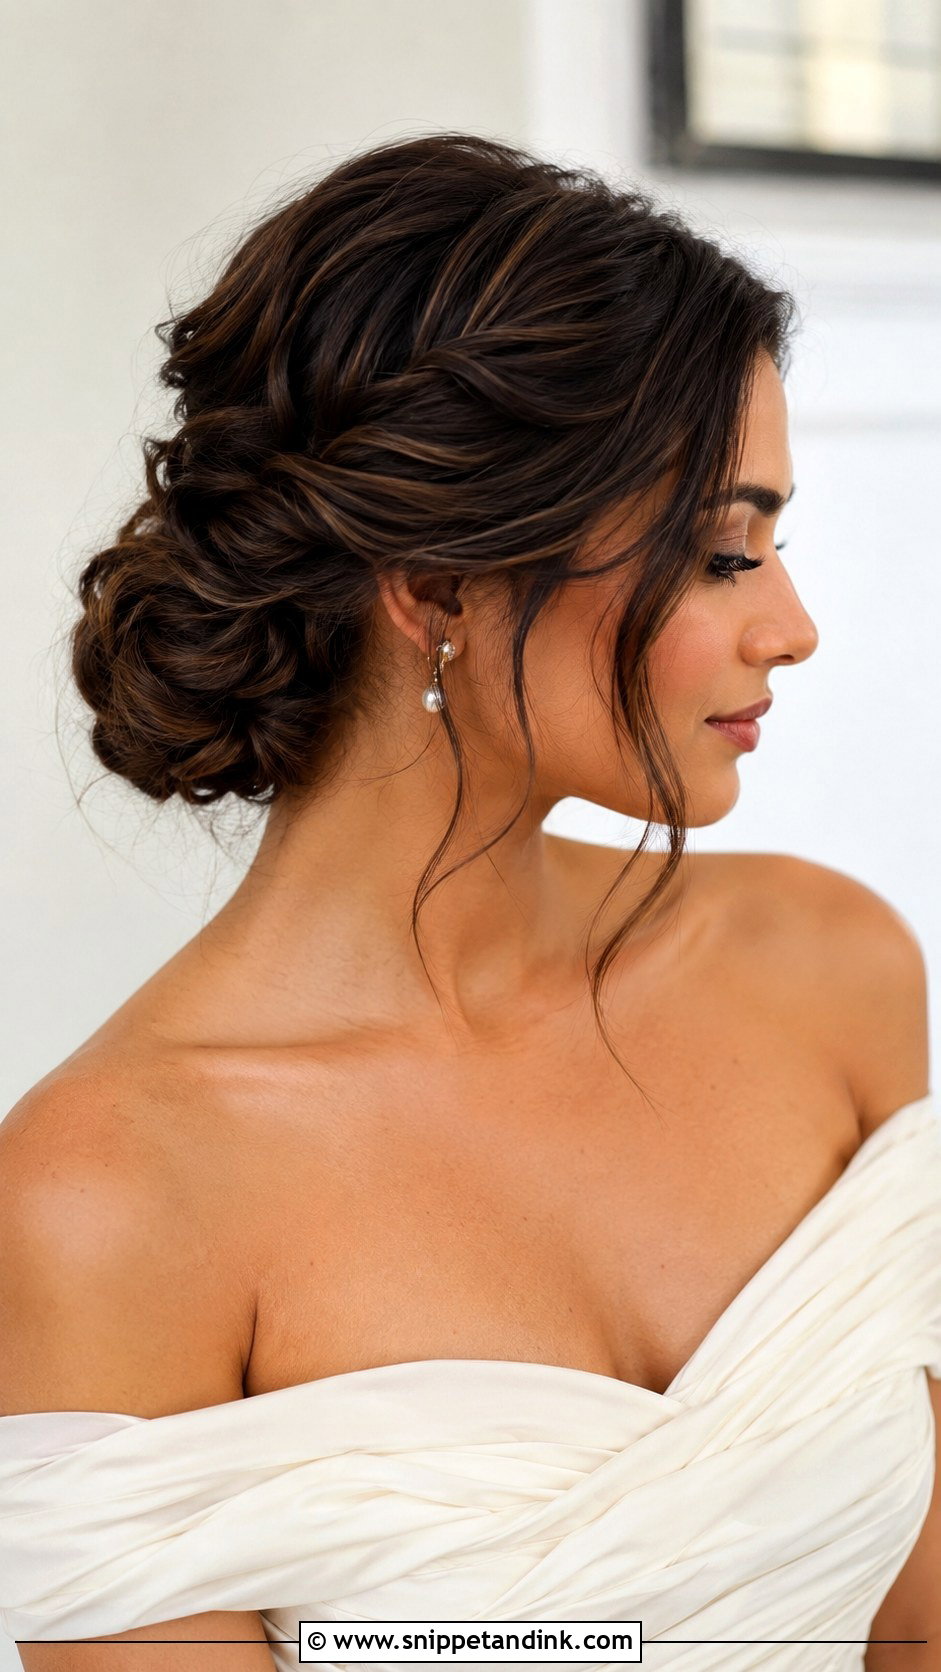
Rolled twists give a cleaner finish than braids and take less time. I twist each side back toward the bun and pin along the roll with grips hidden underneath, so it lies flat against the head. Silky hair wants to unwind, and a little texture spray before twisting stops that. Twisting both sides gives symmetry, while sweeping from one side gives a softer lean. Veil combs and small pins slot neatly into the grooves the twists leave behind.
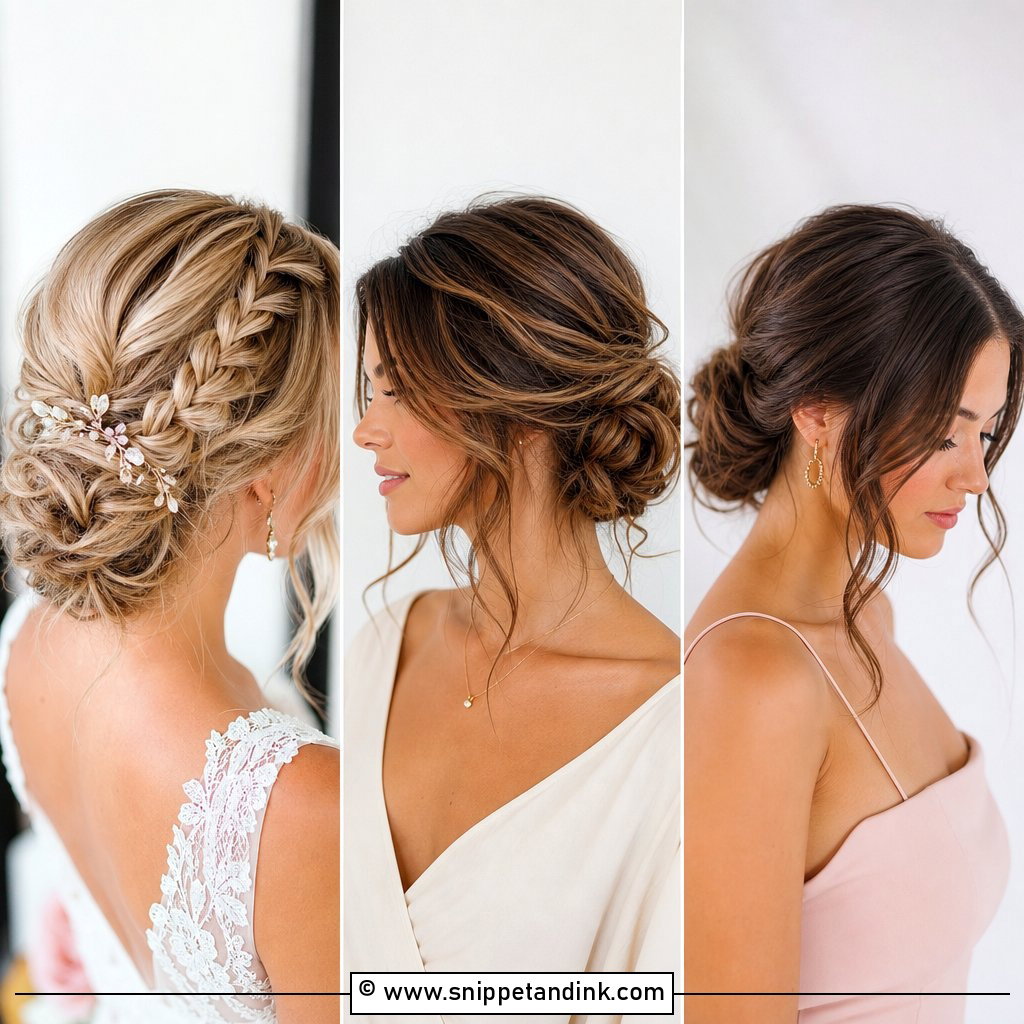
6. Side Loose Bun Wedding Hair
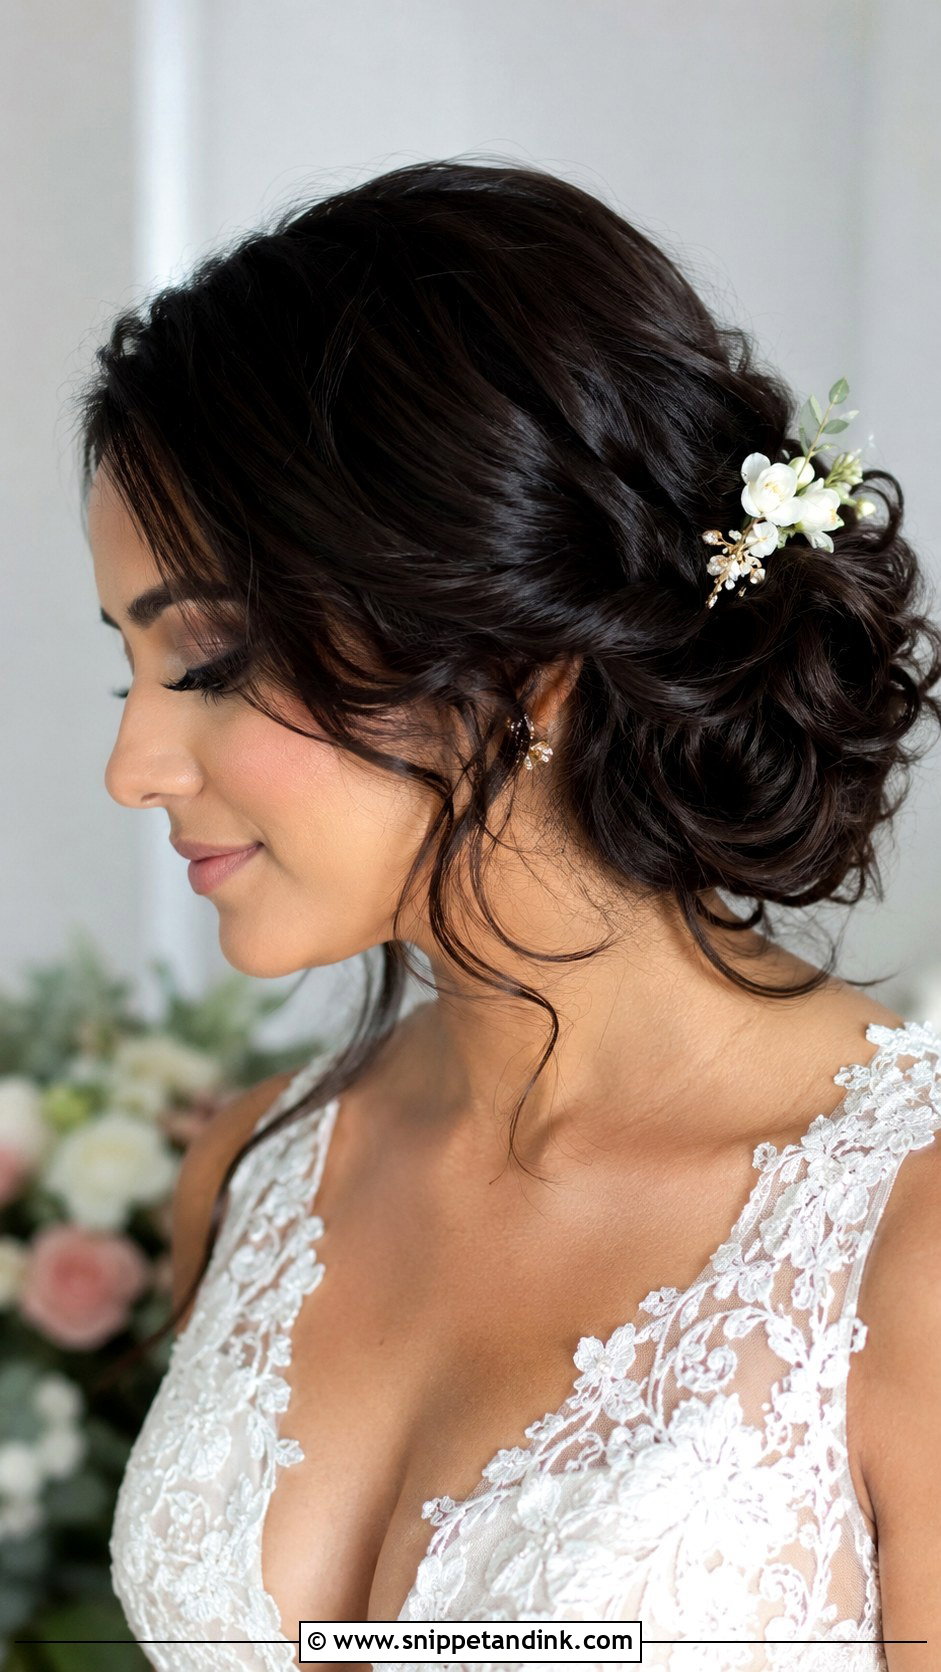
A side bun is the version your guests actually see from the front during the ceremony. I set it low, just behind and below one ear, and lean the whole style toward that side starting from the part. With a one-shoulder dress I check the balance at the trial with the gown on, because the bun and the strap shouldn’t fight for the same space. The bun needs to be full but compact; a bulky one presses against the collar every time you turn your head. A floral pin or pearl detail just above it finishes the shape.
7. High Loose Bun Wedding Hair
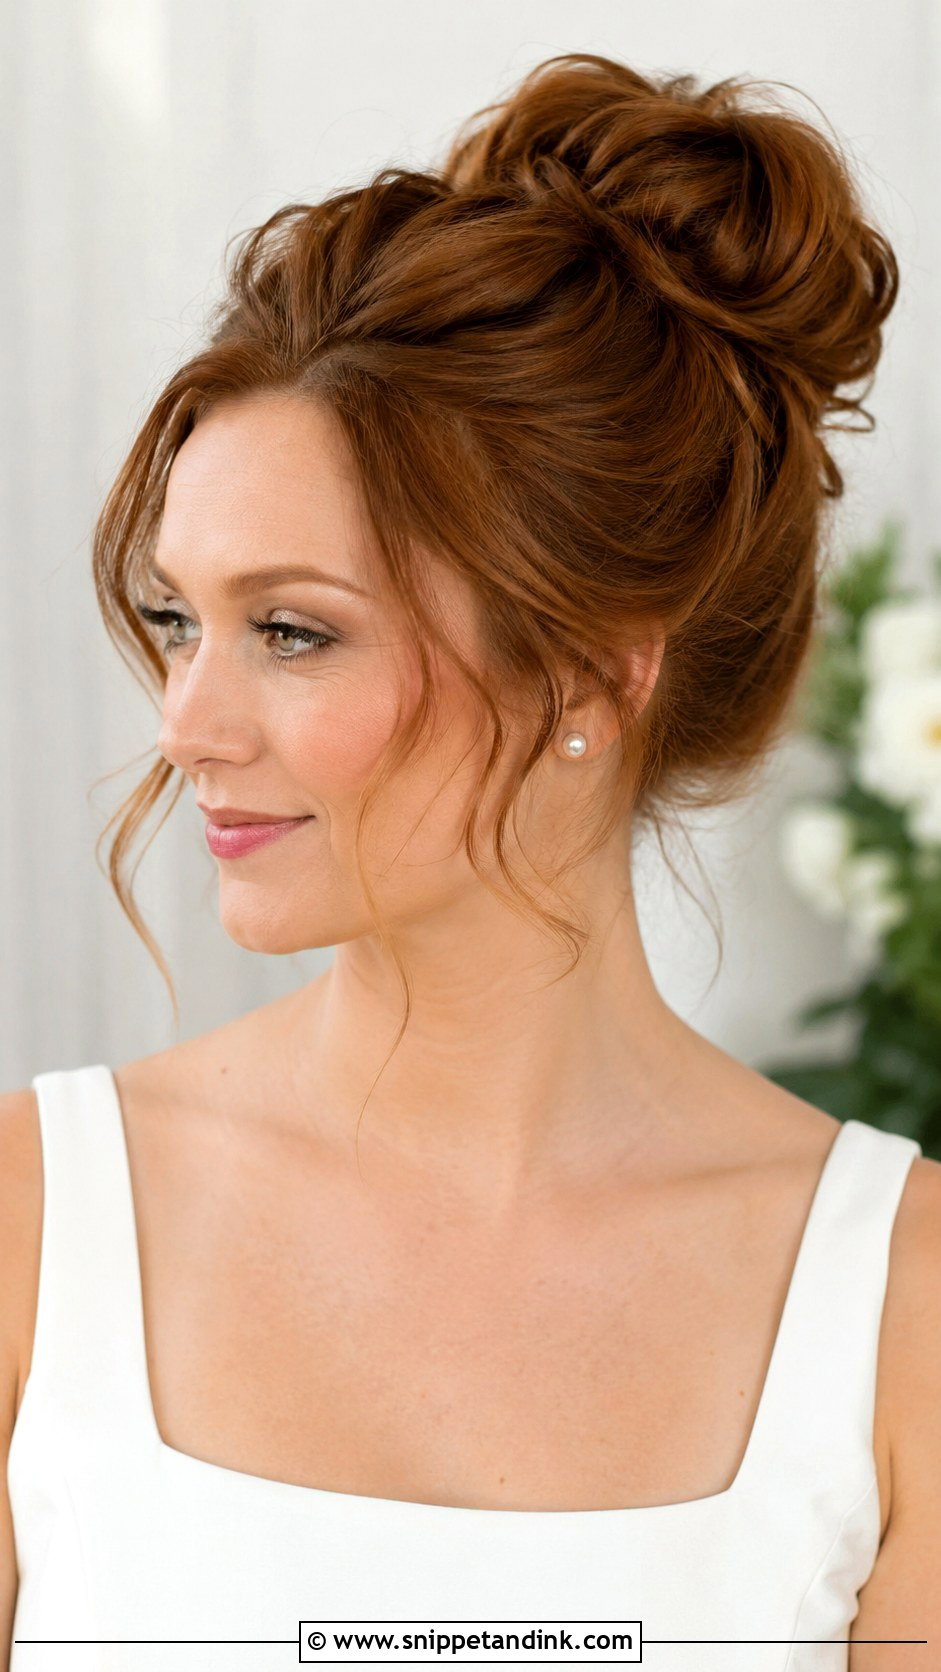
A high bun lifts everything: the eyes, the jawline, the profile. Unlike a tight ballerina bun, this one keeps volume and a few soft pieces at the hairline. I anchor it on a firm ponytail at the crown, because a high bun carries its weight further from the scalp and slips sooner than a low one. It shows off the neckline, shoulders and dress back completely, and on a hot summer day it’s the coolest option here. I’d think twice with a long, heavy veil, though, since the comb has to sit below the bun and tends to drag it.
8. Loose Chignon Wedding Hair
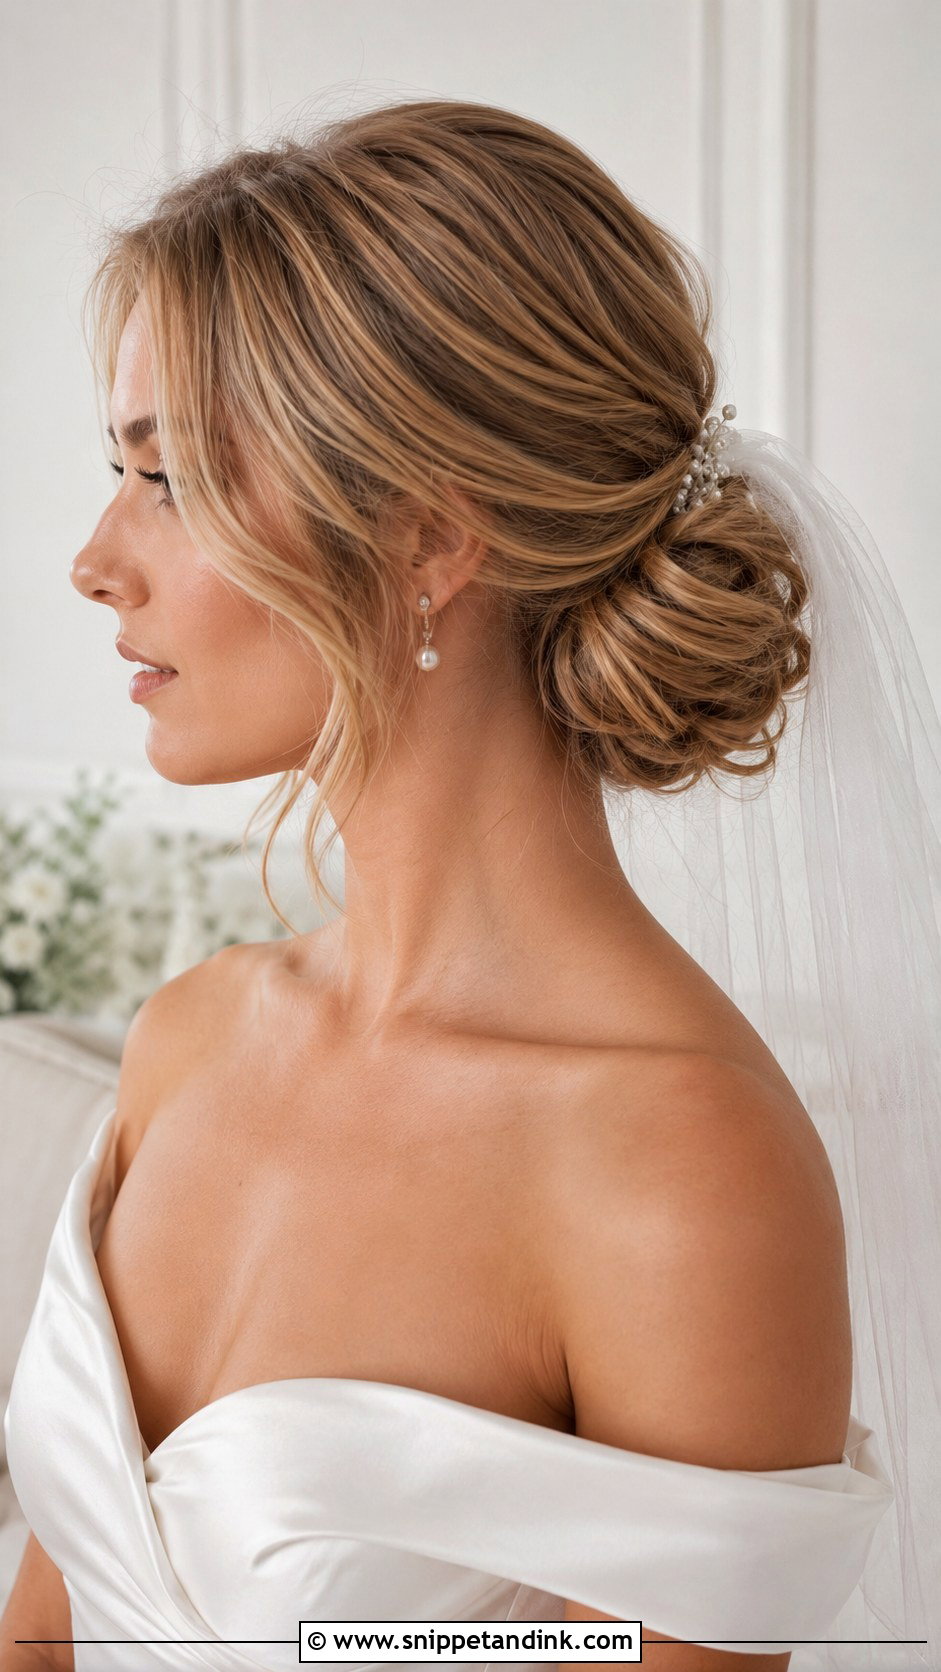
A chignon is folded rather than wrapped, which is why it sits smoother than a messy bun but softer than a sleek one. I roll the lengths up, tuck the ends inside and pin through the fold so nothing pokes out. It takes any veil length, from fingertip to cathedral. For a more current feel, I add a little crown volume and leave the tuck slightly relaxed. Minimalist crepe and satin gowns look especially clean with it, because the hair isn’t competing with the dress.
9. Curly Loose Bun Wedding Hair
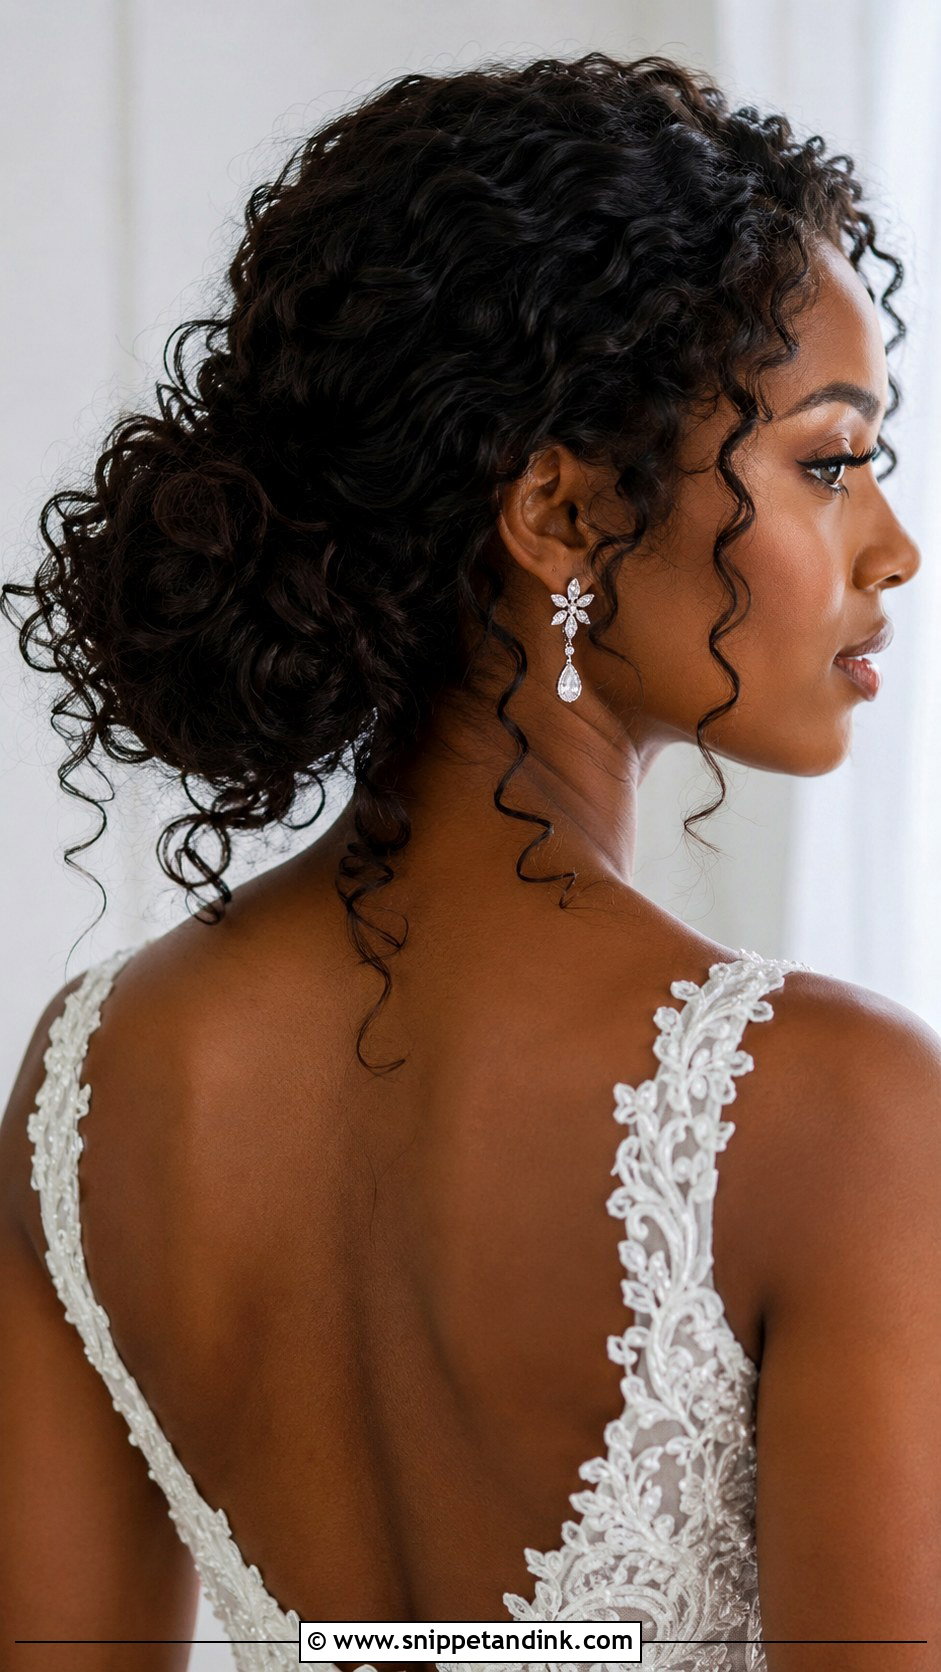
Natural curls in a bun keep their pattern only if they’re defined before they’re pinned. I refresh them with water and a leave-in, set them with a cream or gel that holds without crunch, and diffuse until they’re fully dry; pinning damp curls flattens them. Then I gather the bun loosely, at whatever height suits the dress, and leave a few defined tendrils around the face. Nobody brushes those curls once they’re formed. The pattern gives the bun depth from every angle, which the camera picks up well.
10. Boho Loose Bun Wedding Hair
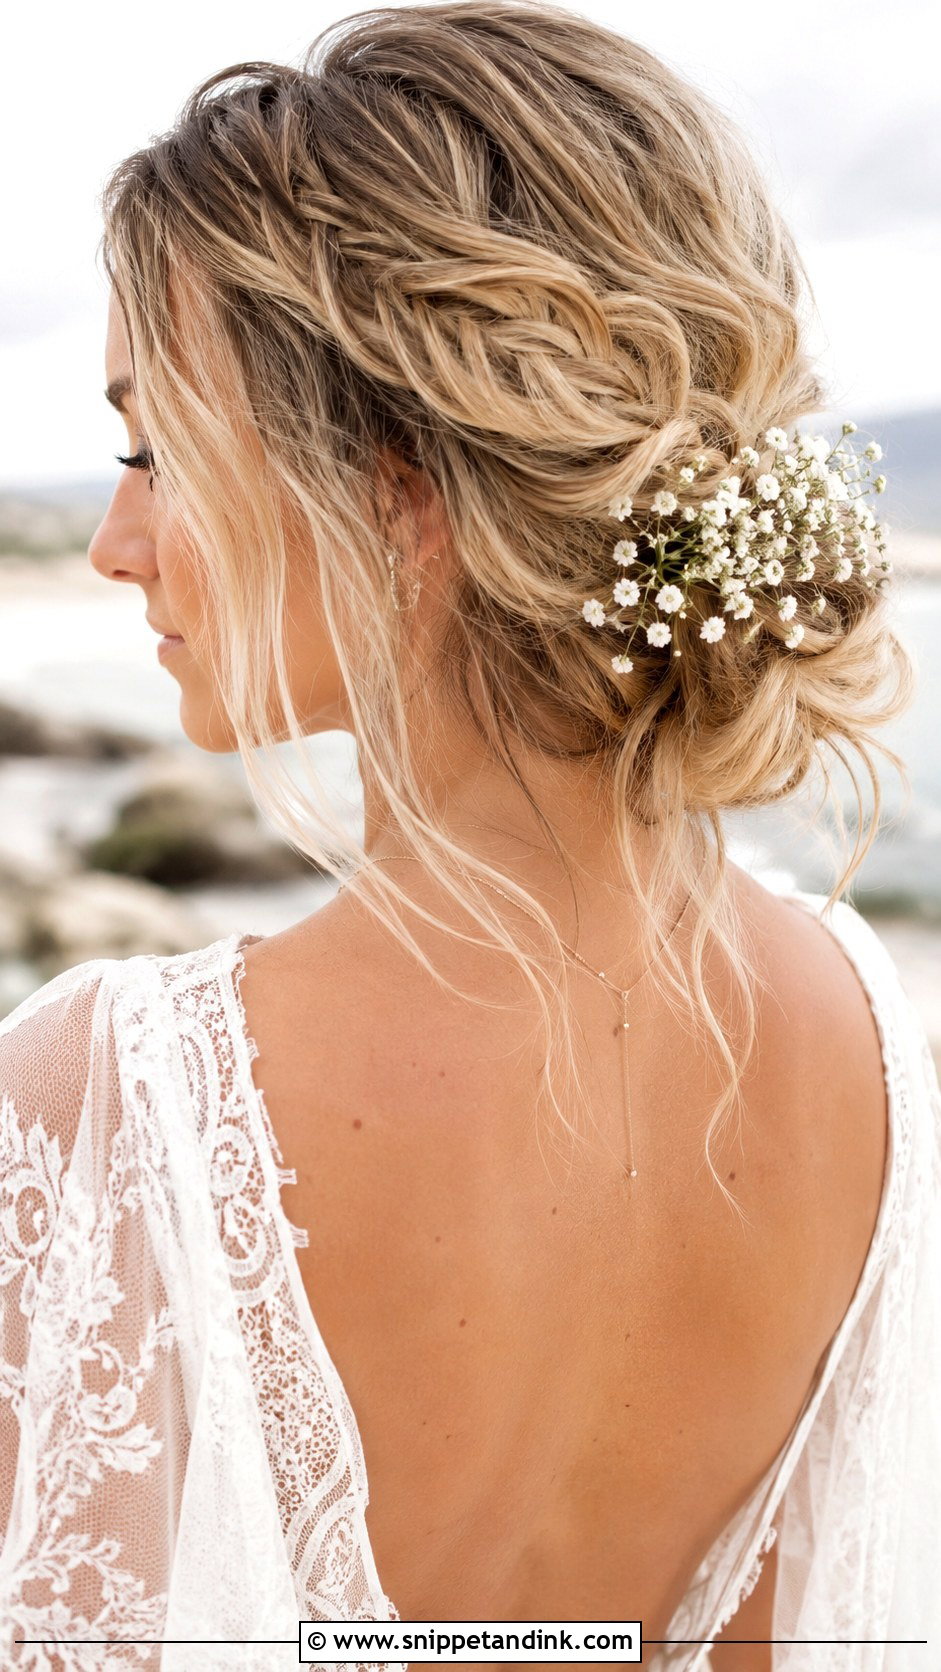
A boho bun looks the least planned and needs the most editing. I start with undone waves, add a small braid or two, pin the bun low or slightly off centre, and only then decide which pieces stay out. The face-framing strands get curled, never left limp, or the look tips from relaxed into unfinished. Small flowers go in last. It sits naturally with lace and flowing gowns, garden venues and desert weddings, though dry desert air makes fine hair staticky, so I carry a drop of light oil for flyaways.
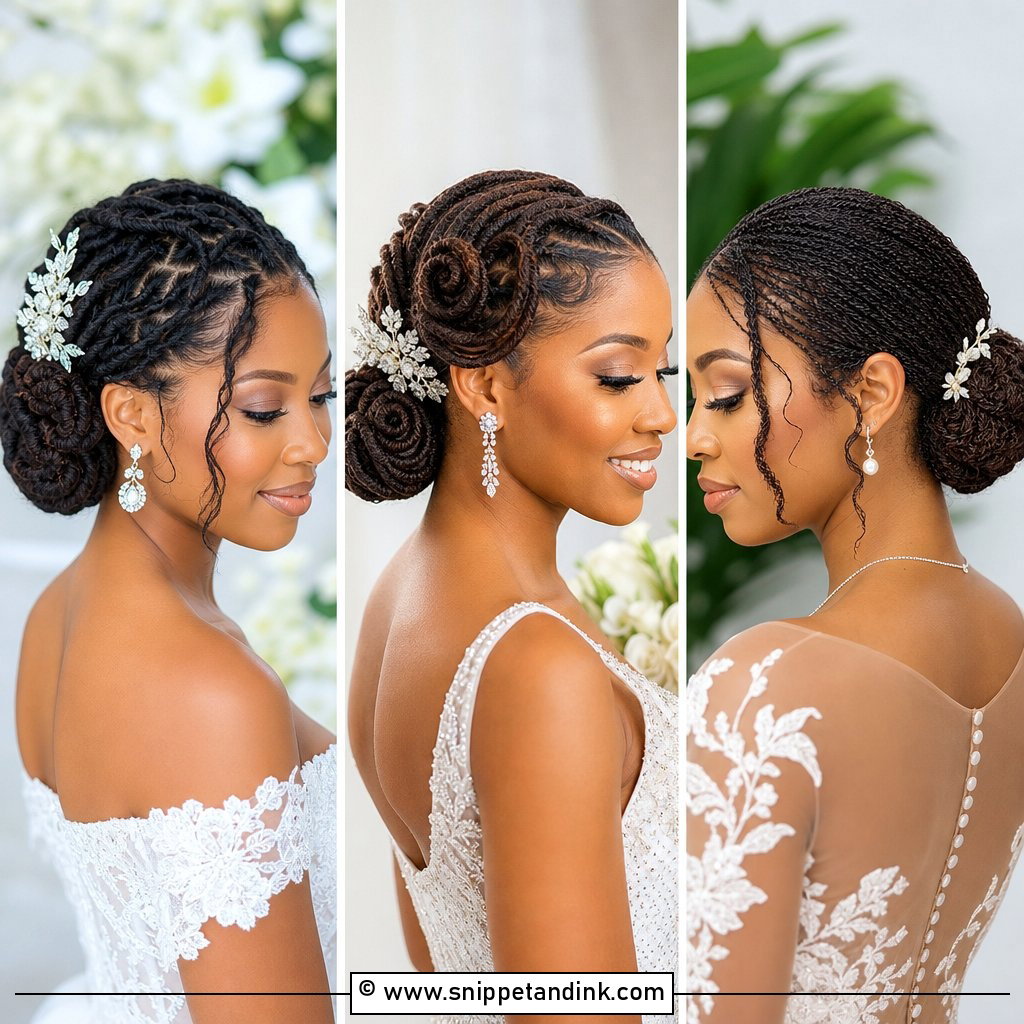
11. Loose Bun Wedding Hair With Pearls
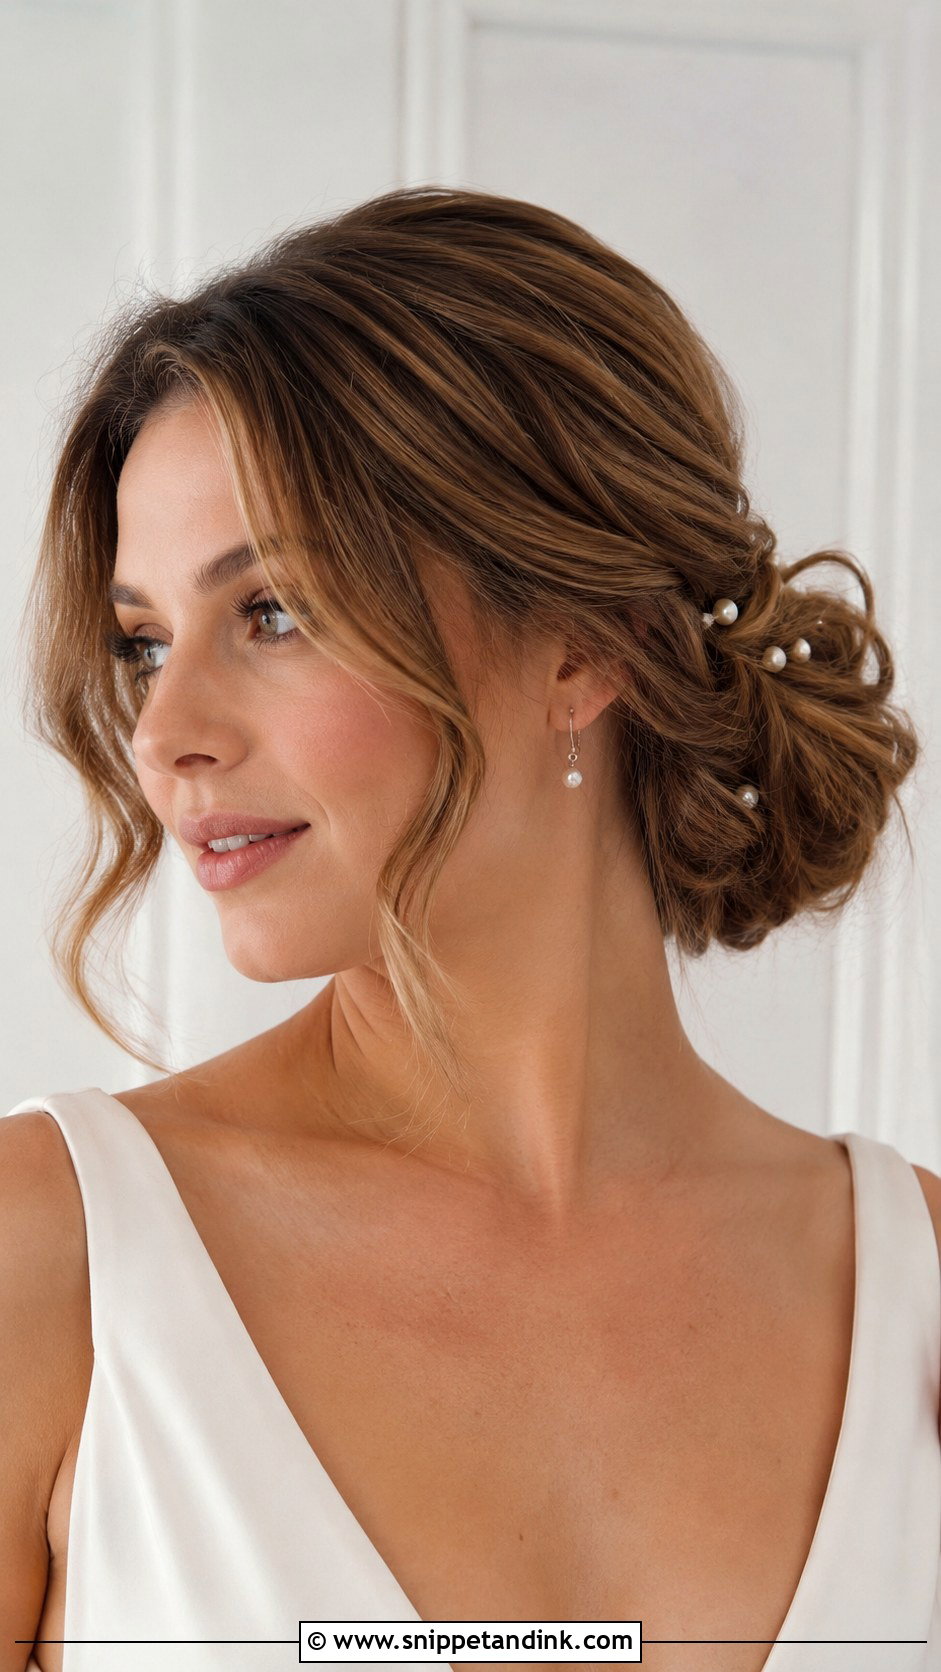
Pearls are about spacing. I place the pins in a loose curve or a small cluster on one side, roughly where the light falls, and stop before they start to look like polka dots. A handful is usually enough for a whole bun. Each pin goes in at an angle through a twist so it can’t slide out during hugs. Wearing pearl earrings as well? I’d keep the hairpins smaller than the earrings so the two don’t compete.
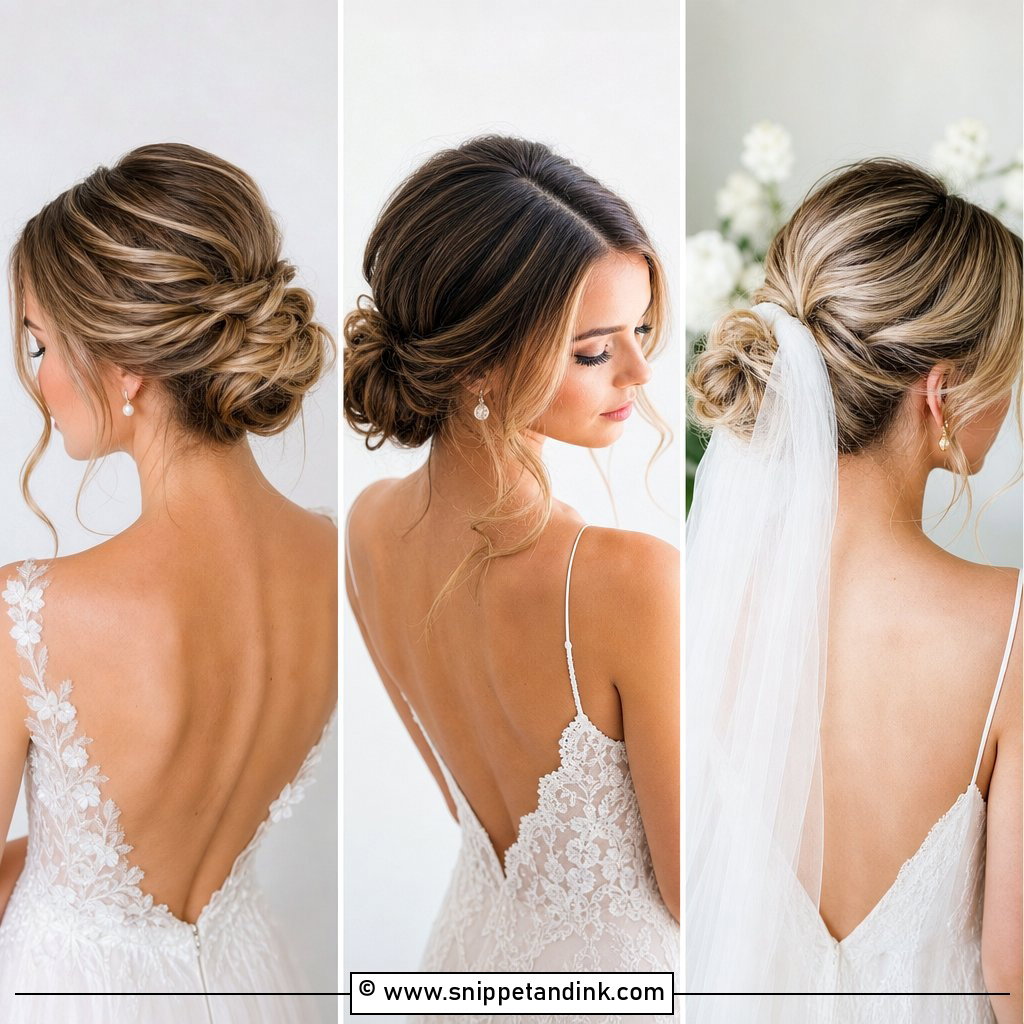
12. Loose Bun Wedding Hair With Veil
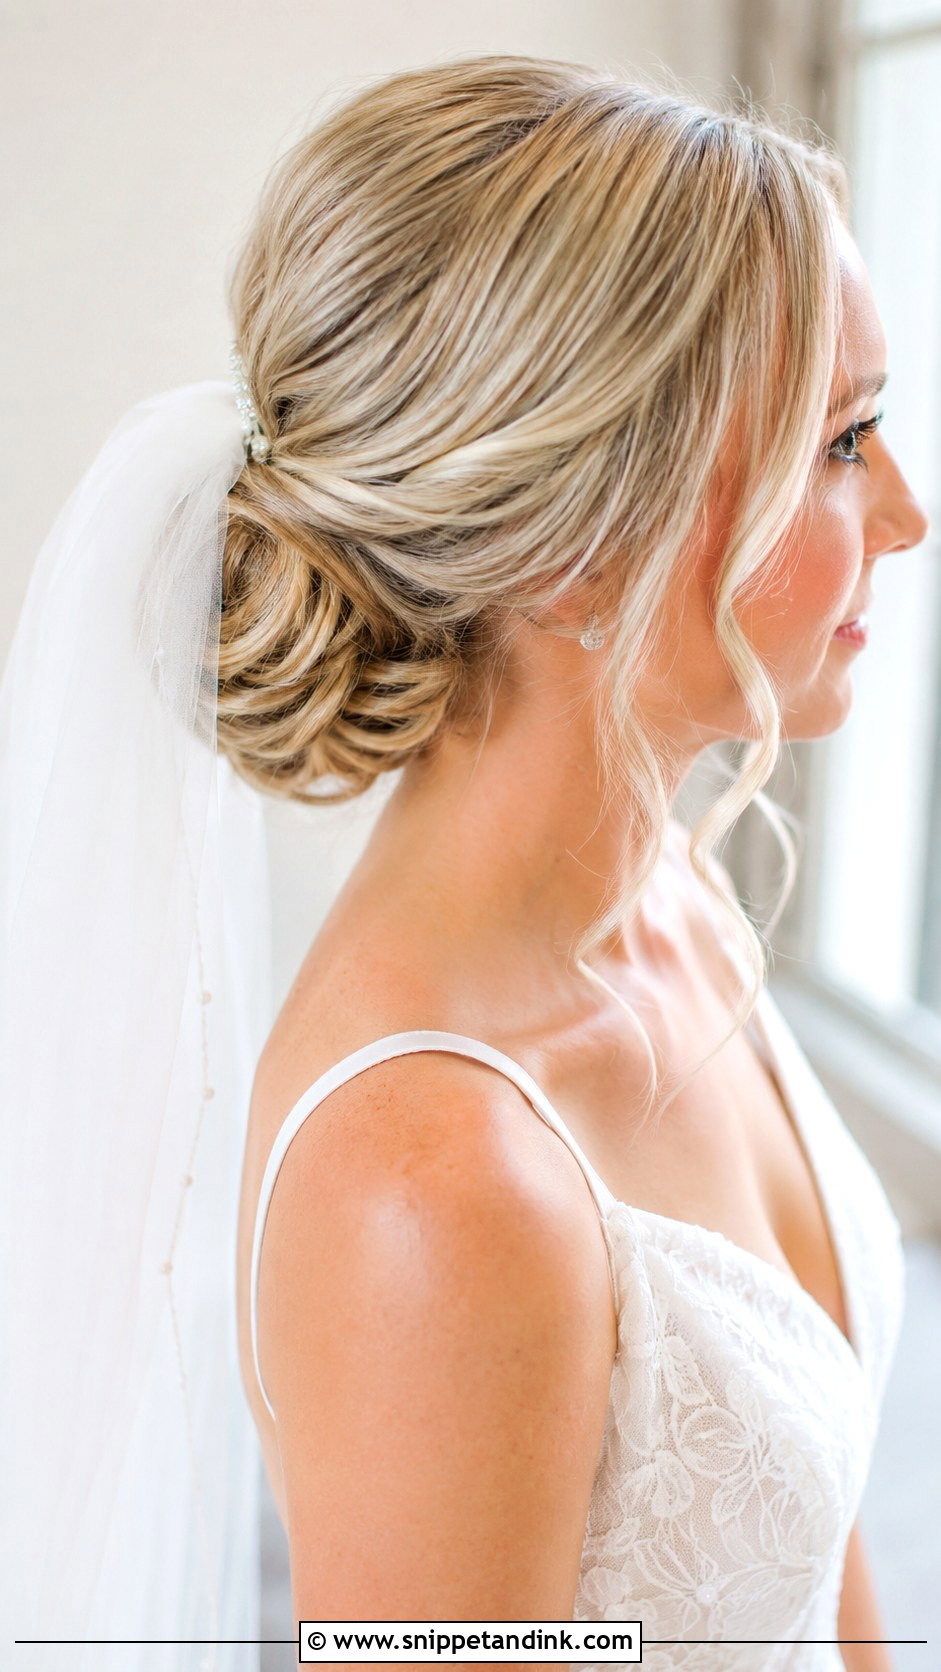
Veil placement decides how much of the bun anyone sees. A comb above the bun shows it off and lets the tulle fall behind; a comb tucked underneath hides most of it and gives a softer outline. I push the teeth into a backcombed section or into the base of the bun itself, never just the surface, because surface hair slides. That base has to be firm even when the bun on top looks relaxed. Set properly, the veil moves freely through the ceremony and the portraits.
13. Loose Bun Wedding Hair With Flowers
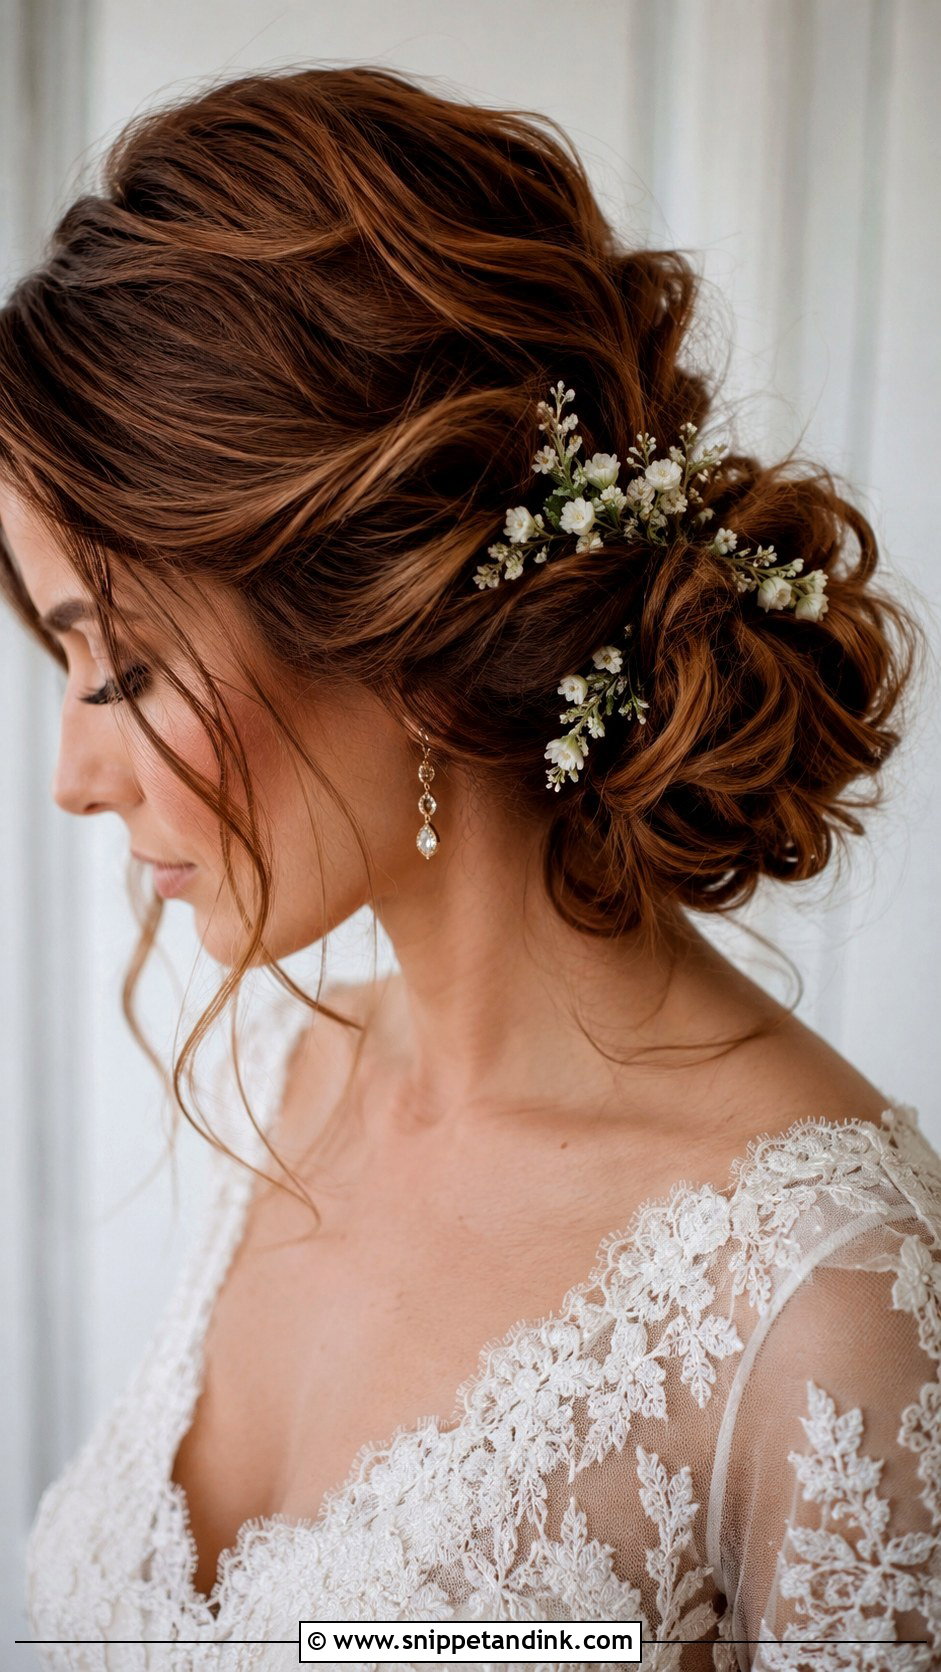
Small flowers sit into a bun; large ones sit on top of it and tend to tip. That’s why I usually ask for Baby’s breath, tiny roses, orchids and soft greenery rather than full-sized blooms. I pin them around the bun or in a cluster on one side after the hair is finished. Orchids are hardy, while thin petals bruise against pins. Have your stylist and florist talk before the day, so the stems arrive wired, short and in the quantity the bun can actually carry.
14. Loose Bun Wedding Hair For Fine Hair
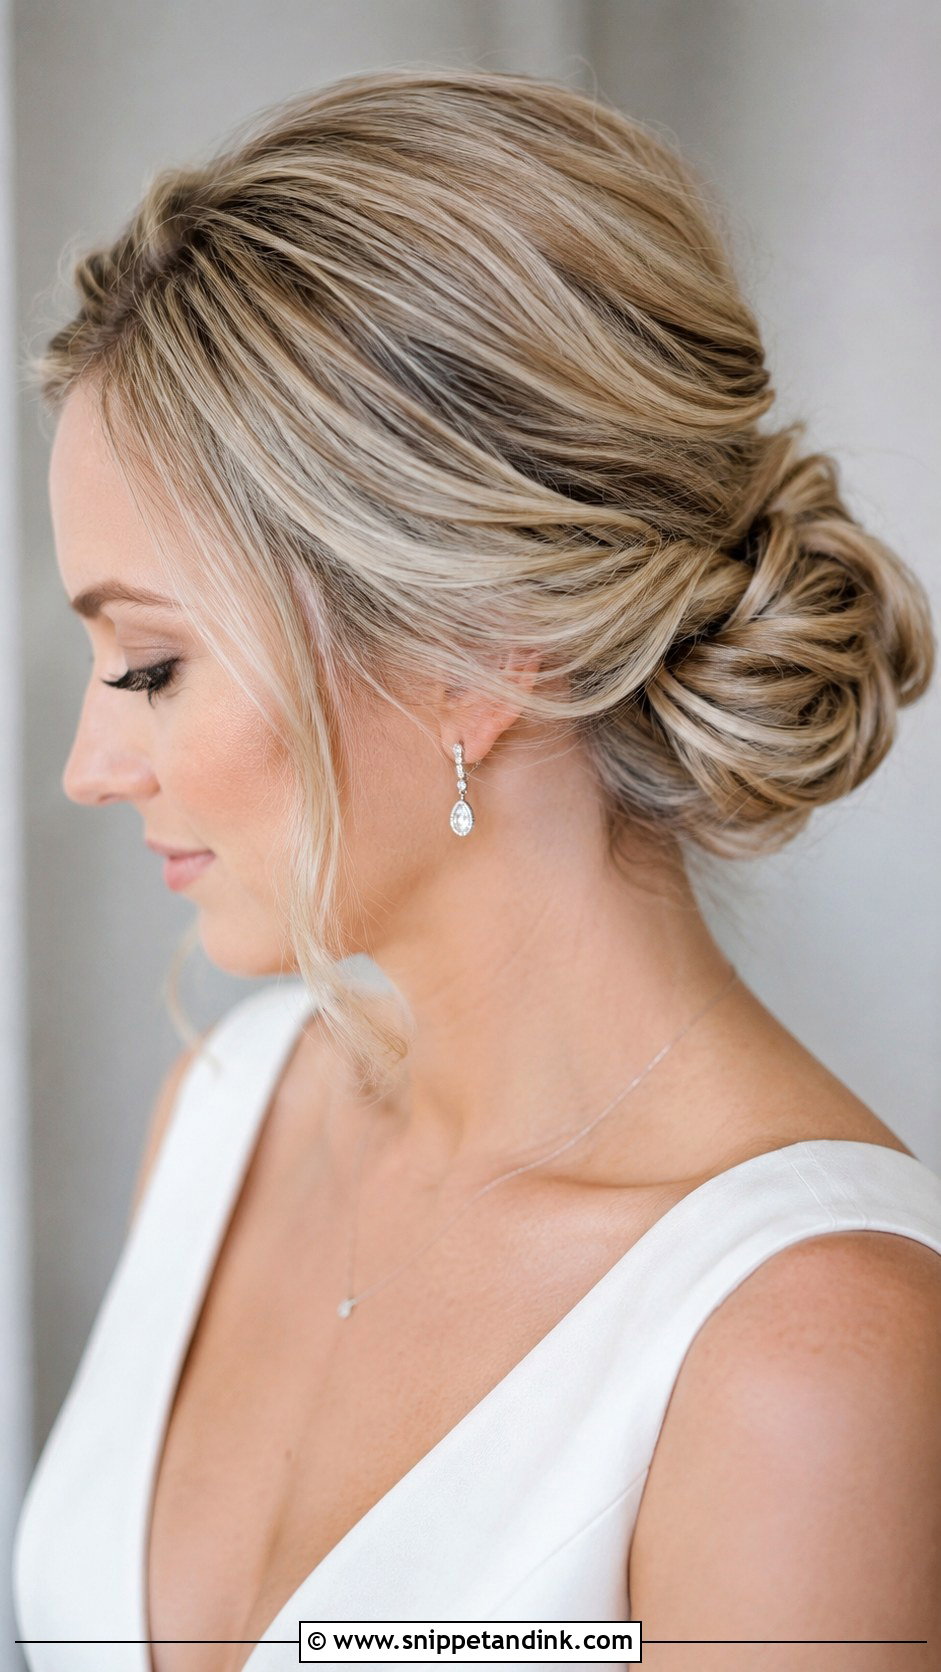
Fine hair can look full in a bun, but it needs help. I curl it first, backcomb lightly at the crown, and often build the bun around a small padding piece in your shade. Adding clip-in extensions that get folded inside the bun brings bulk without looking false. I keep fine-hair buns low or mid-height, since a high bun can expose the scalp at the back of the head. Face-framing pieces should be few and soft, because thin separated strands look stringy in photos.
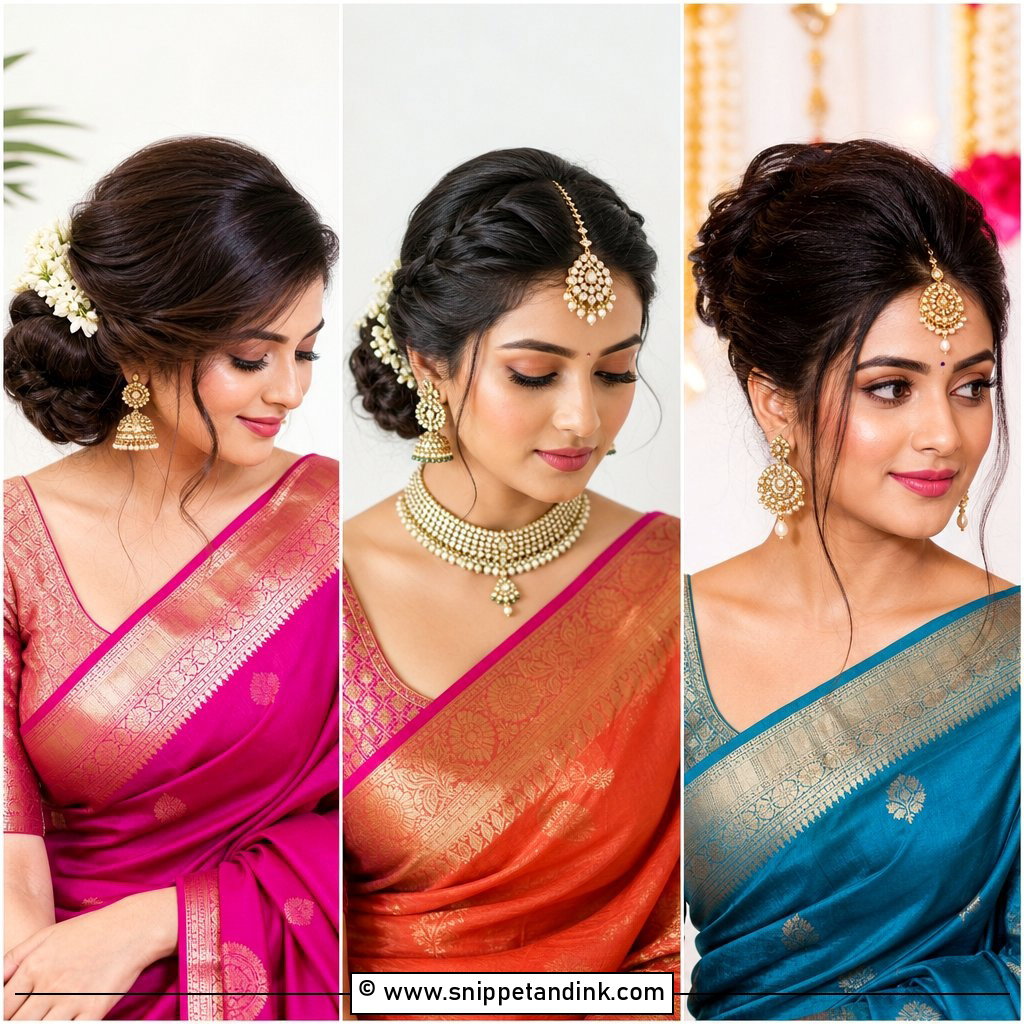
15. Loose Bun Wedding Hair For Thick Hair
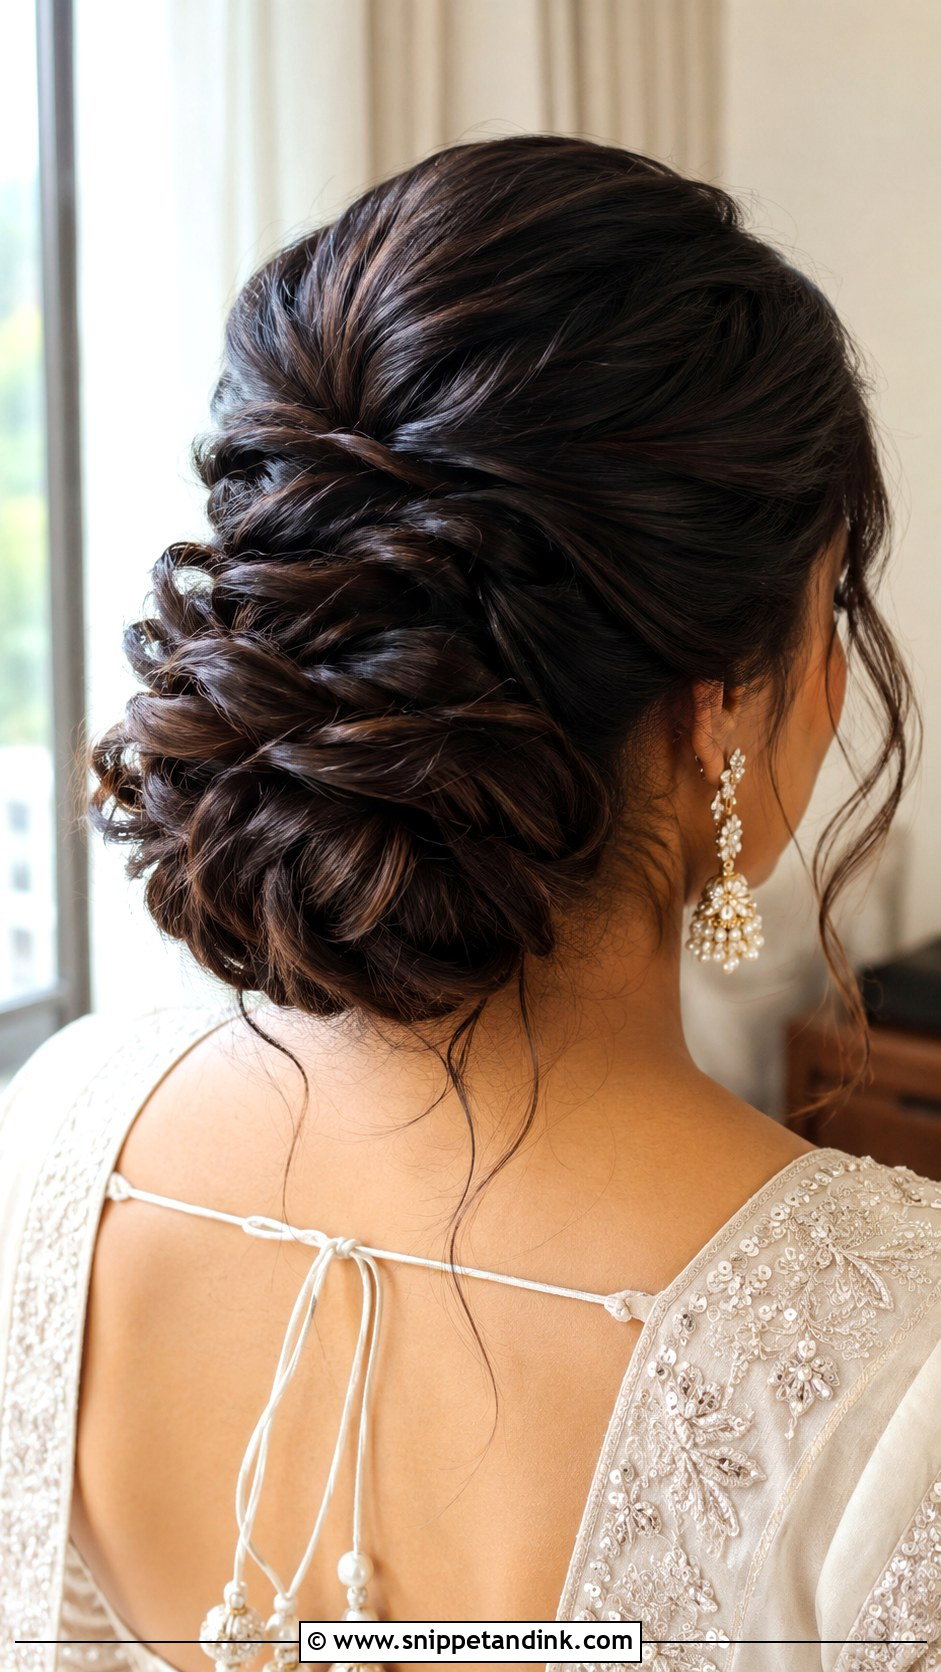
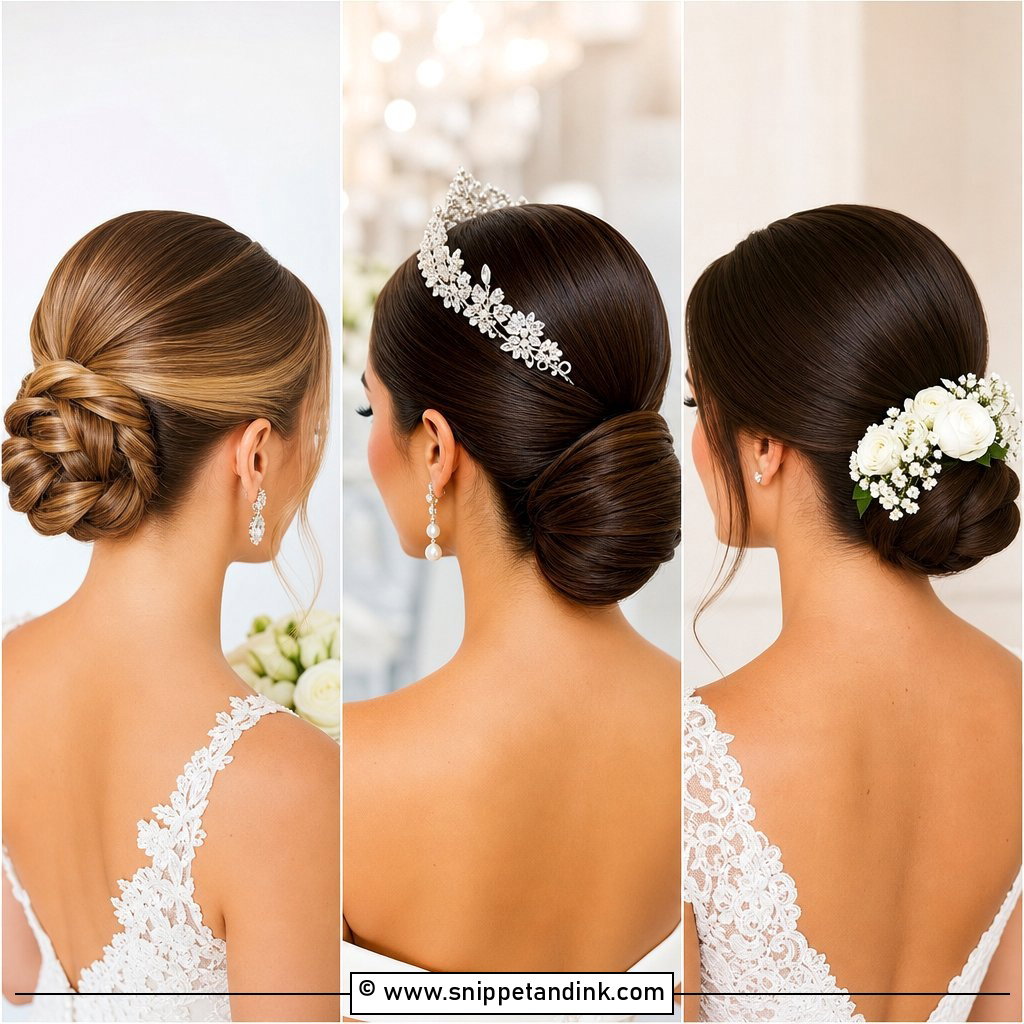
Thick hair is a weight question more than a style question. I split it into several smaller sections, pin each one separately, and often braid a hidden base so the bun has something solid to grip. A single heavy bun pulled from one ponytail will ache by the reception. With detailed shoulders or a high neck, I keep the shape compact so it doesn’t crowd the dress. Tucking less hair into the bun itself and pinning the rest flat underneath stops it looking oversized while still showing off the density.
16. Loose Bun Wedding Hair For Short Hair
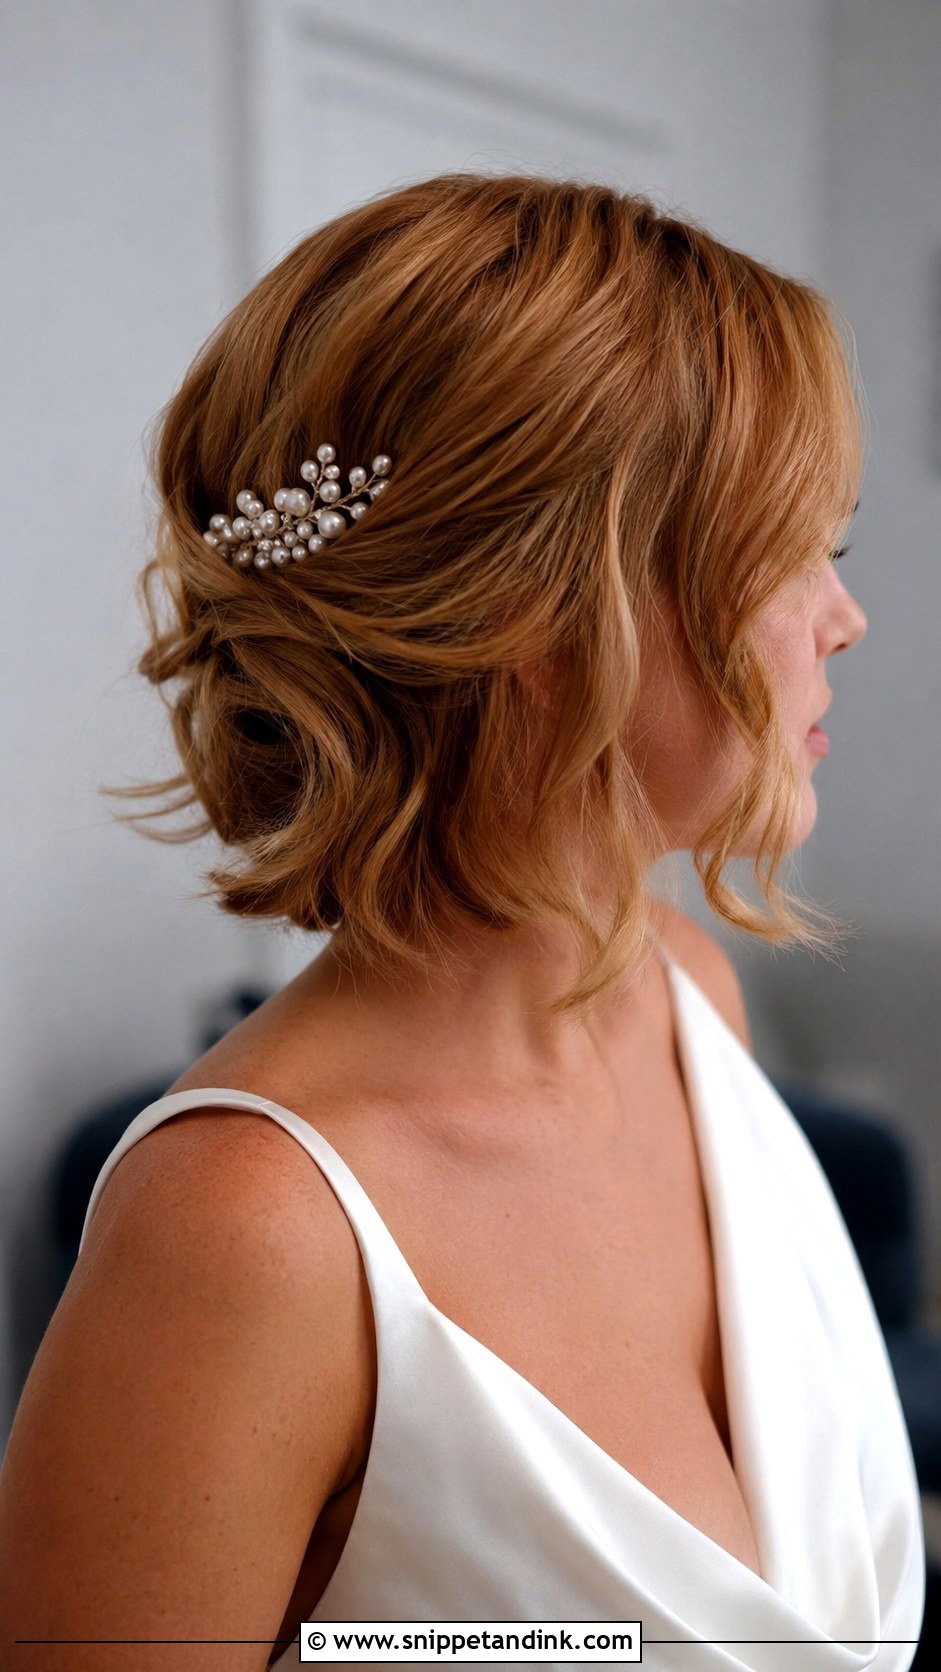
Hair at bob length or just above the shoulders can make a low tucked bun, as long as there’s texture to hide the ends. I curl everything, gather what reaches into a small low base, and pin the shorter back pieces up into it in overlapping rows. The nape is the hard part, since very short hair there falls unless it’s pinned upward and sprayed. A pearl comb or floral clip covers any gaps. If the back is truly too short, a small extension piece is the honest answer.
17. Loose Bun Wedding Hair For Long Hair
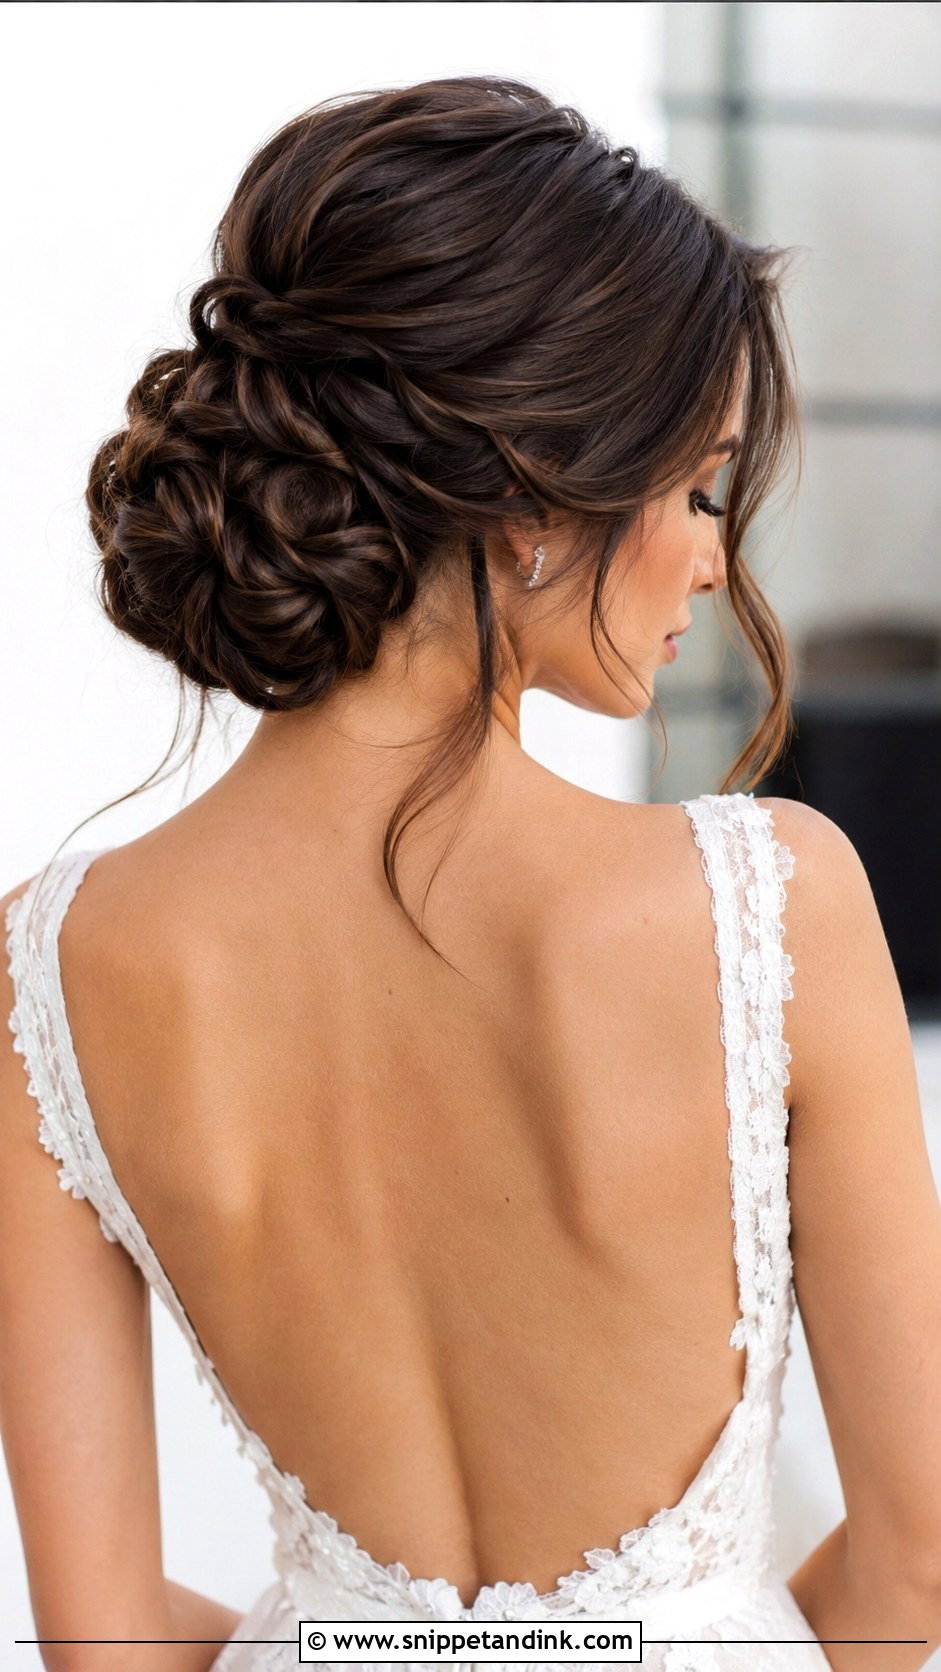
Long hair is heavy, so I never wrap it into one bun in a single go. I build it in sections, each pinned to the base, which spreads the weight and stops the bun dropping toward the collar by evening. All that length is also the advantage: full low buns, braided buns and twisted chignons need plenty of hair to fold. Face-framing pieces in front balance the volume behind. Expect a longer appointment than a shoulder-length bun would need.
18. Middle Part Loose Bun Wedding Hair
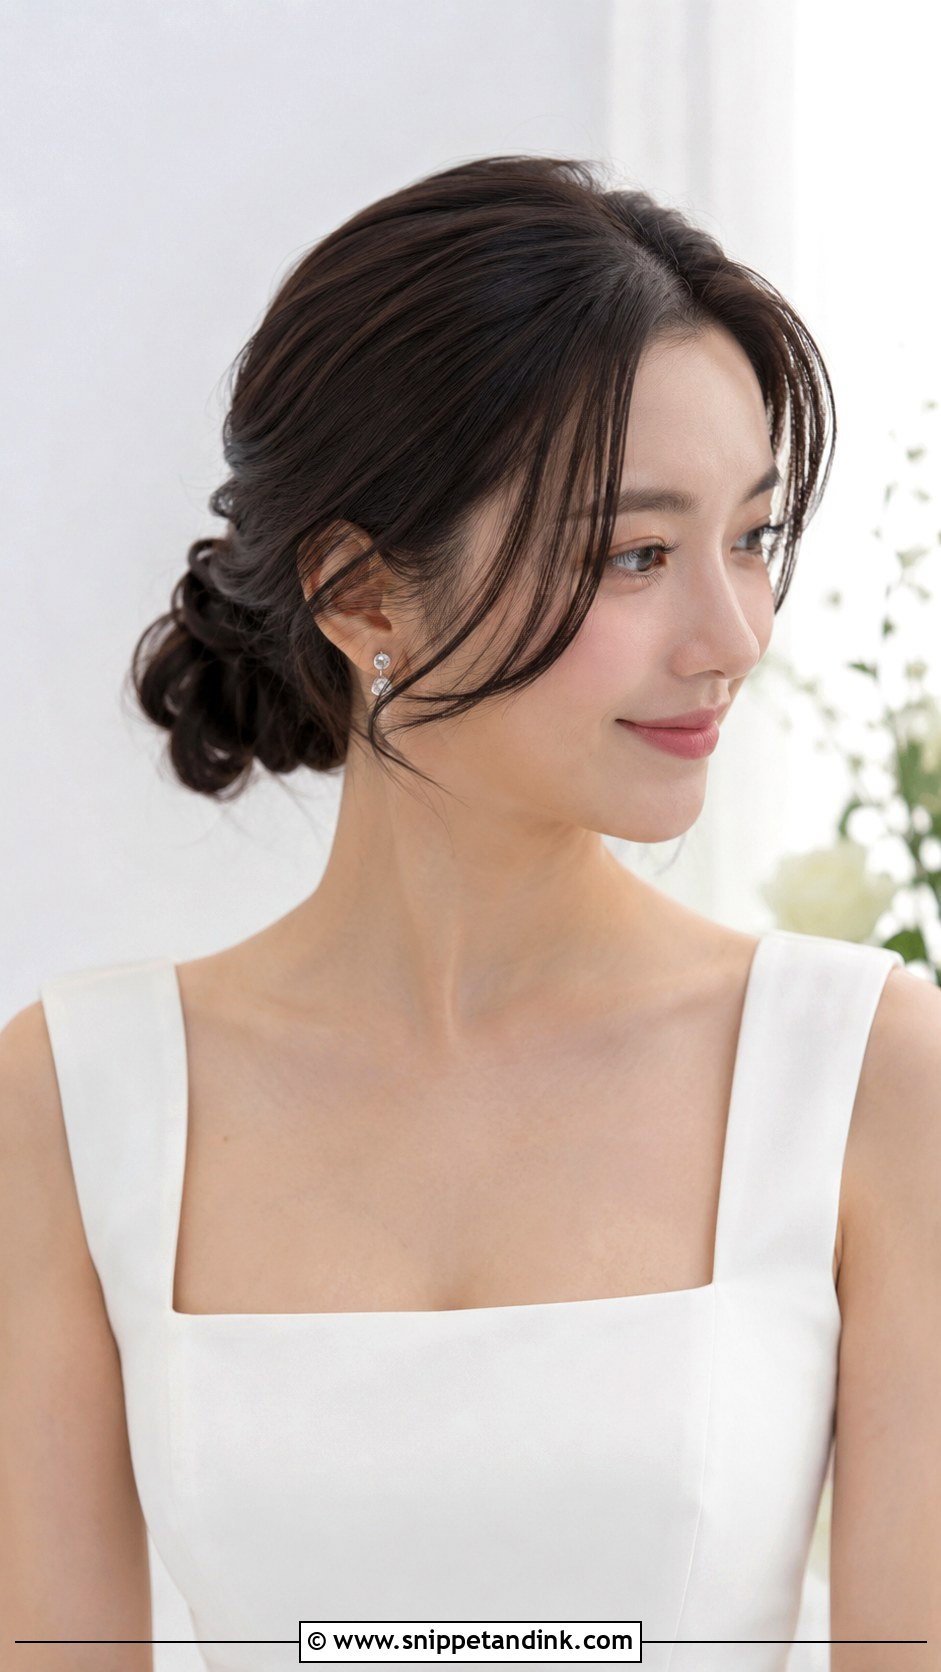
A centre part frames the face evenly, so it has to be truly centred. I find it by lining up with the nose, not by following the old part, which is often slightly off. The front can be smooth or softly waved, then curved back into a low or mid bun. It sits well with square necklines, off-the-shoulder dresses and statement earrings. One honest warning: a middle part shows any asymmetry in the face and hairline, so try it at the trial before you commit.
19. Side Part Loose Bun Wedding Hair
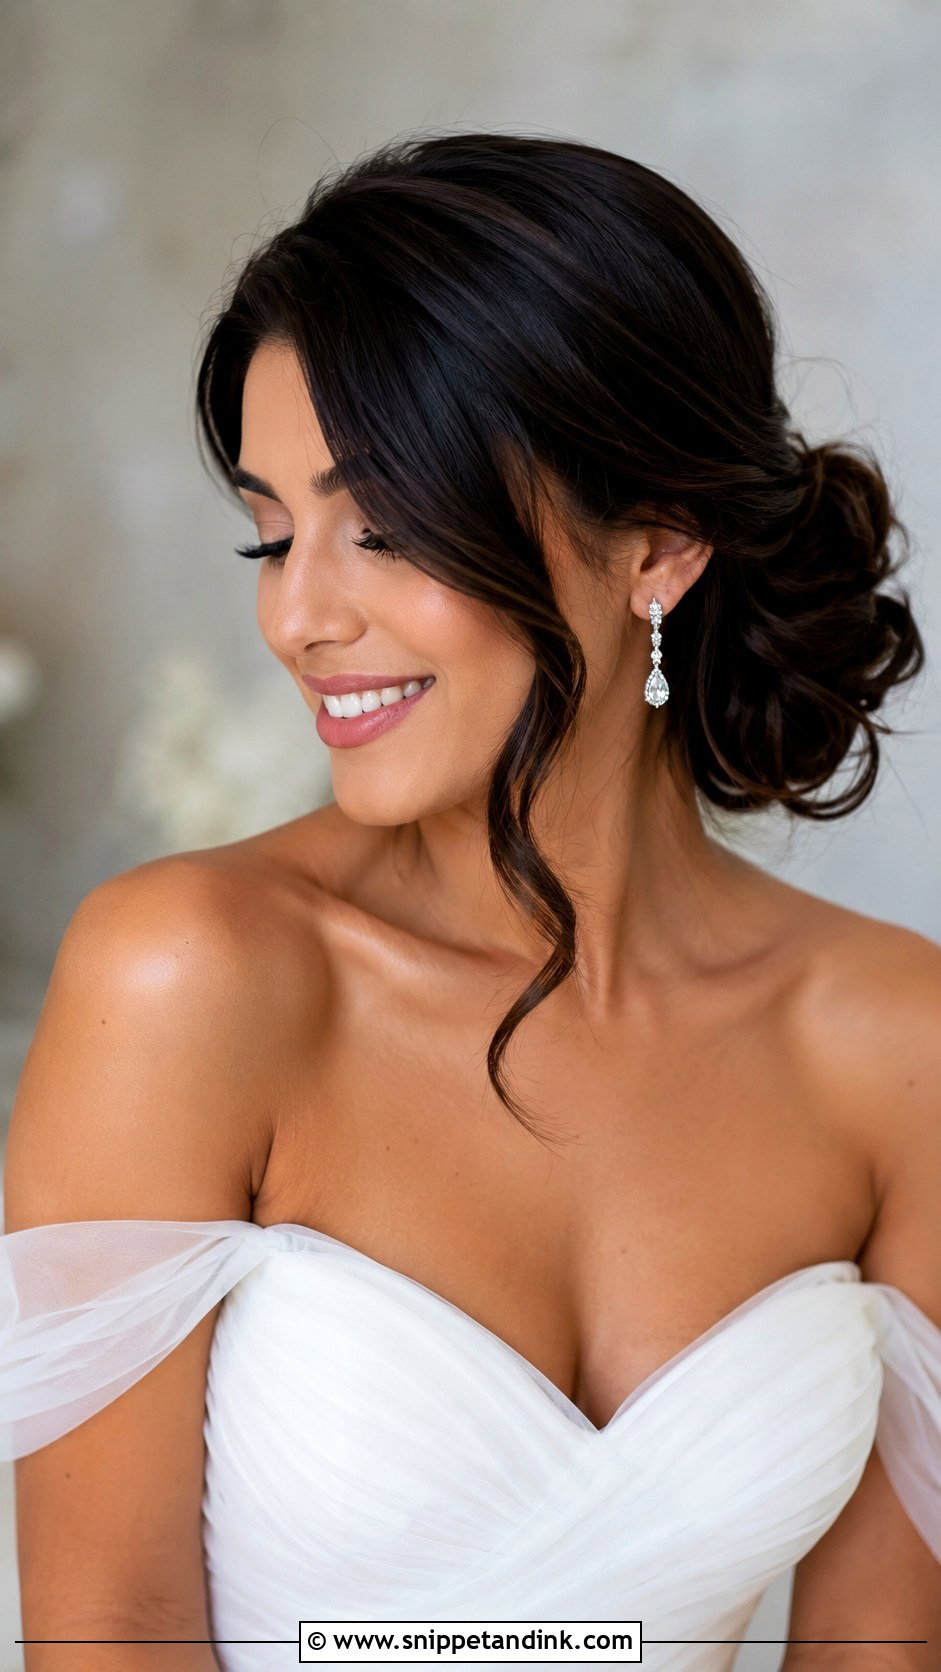
A side part gives the front a natural sweep, and I reach for it when a bride wants one ear tucked back to show an earring. I set the part while the hair is damp so it doesn’t spring back, keeping the line clean but not razor sharp. The longer side bends down and back into a low bun, side bun or chignon. It softens a strong jawline and goes nicely with romantic makeup.
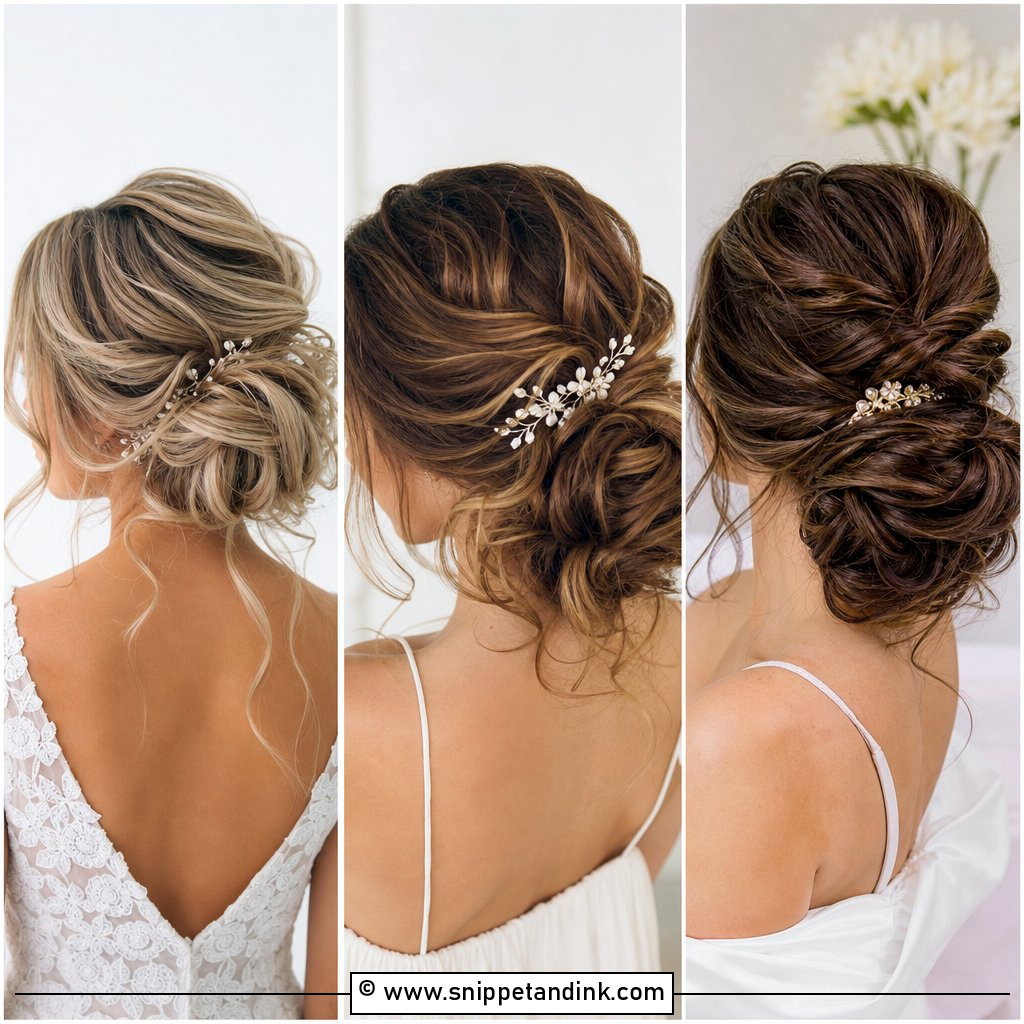
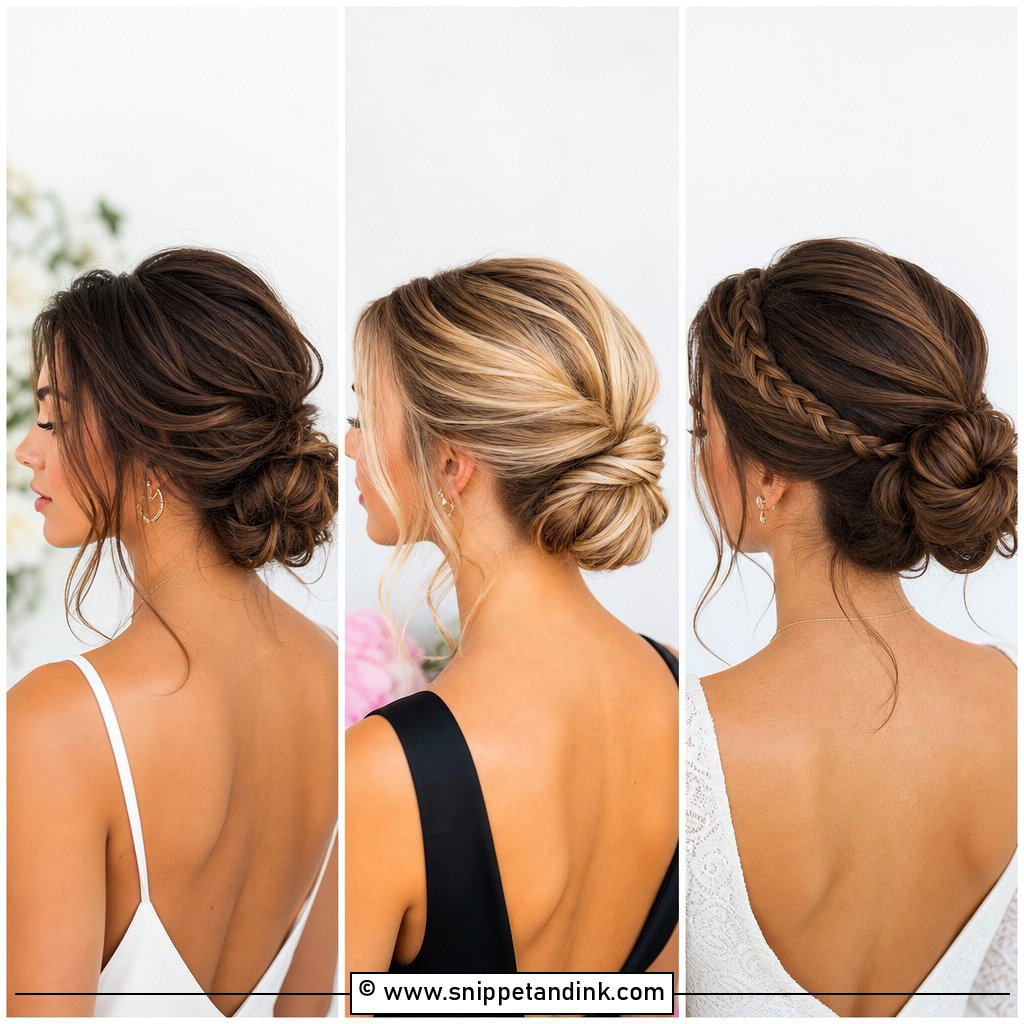
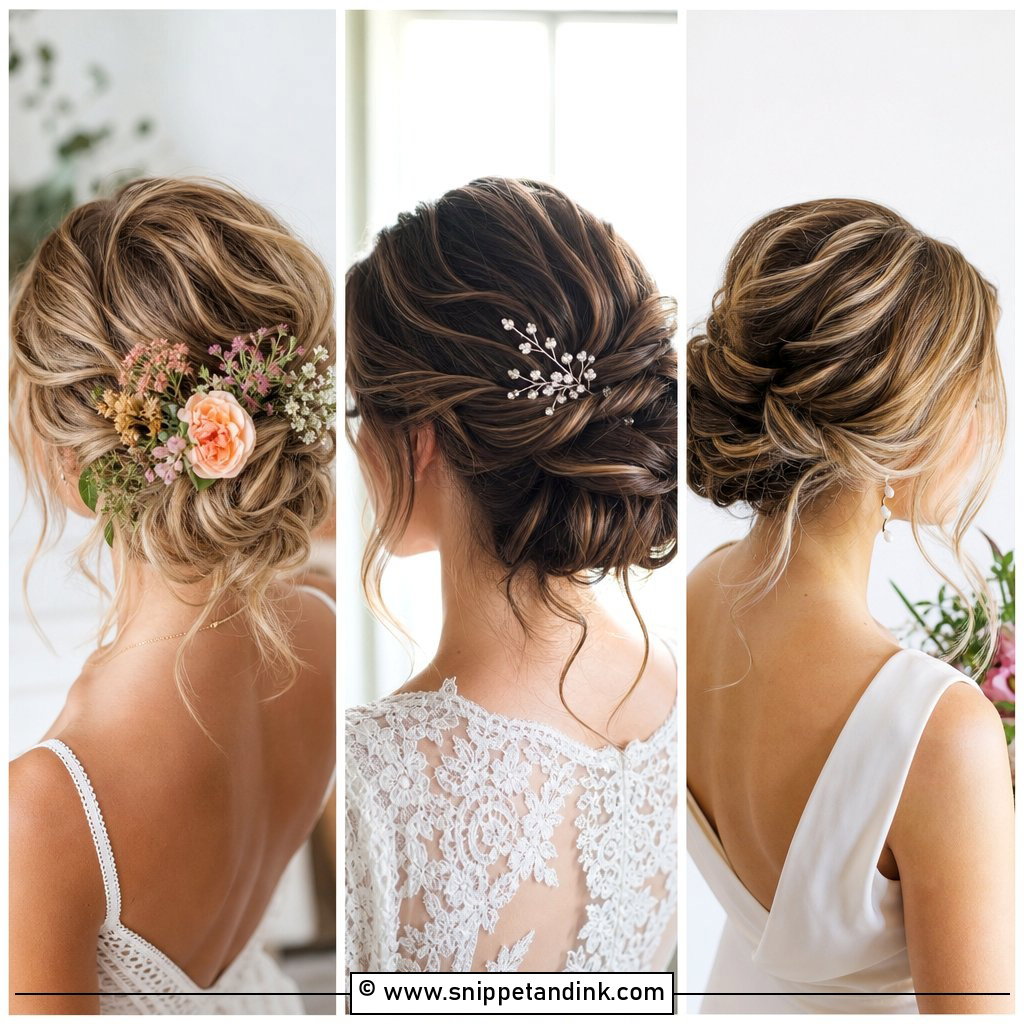
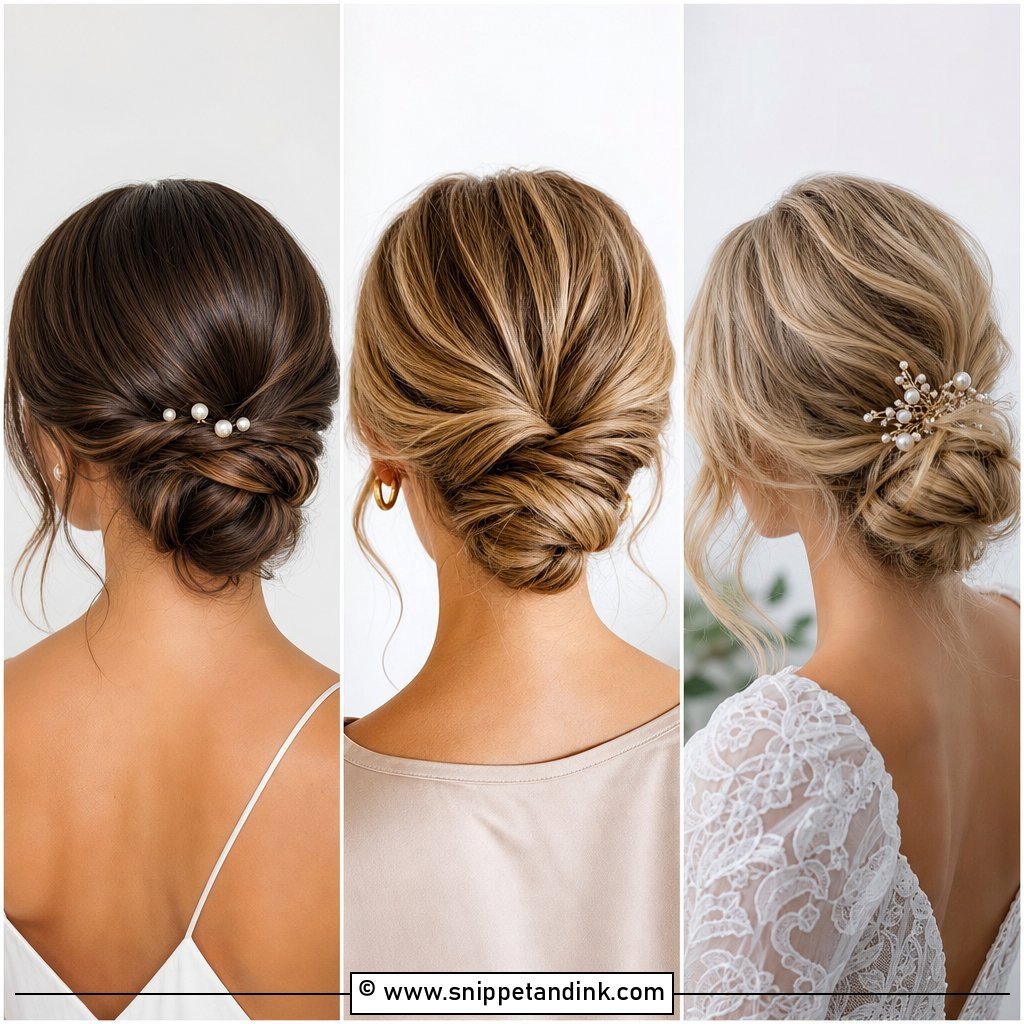
20. Loose Bun Wedding Hair With Face Framing Pieces
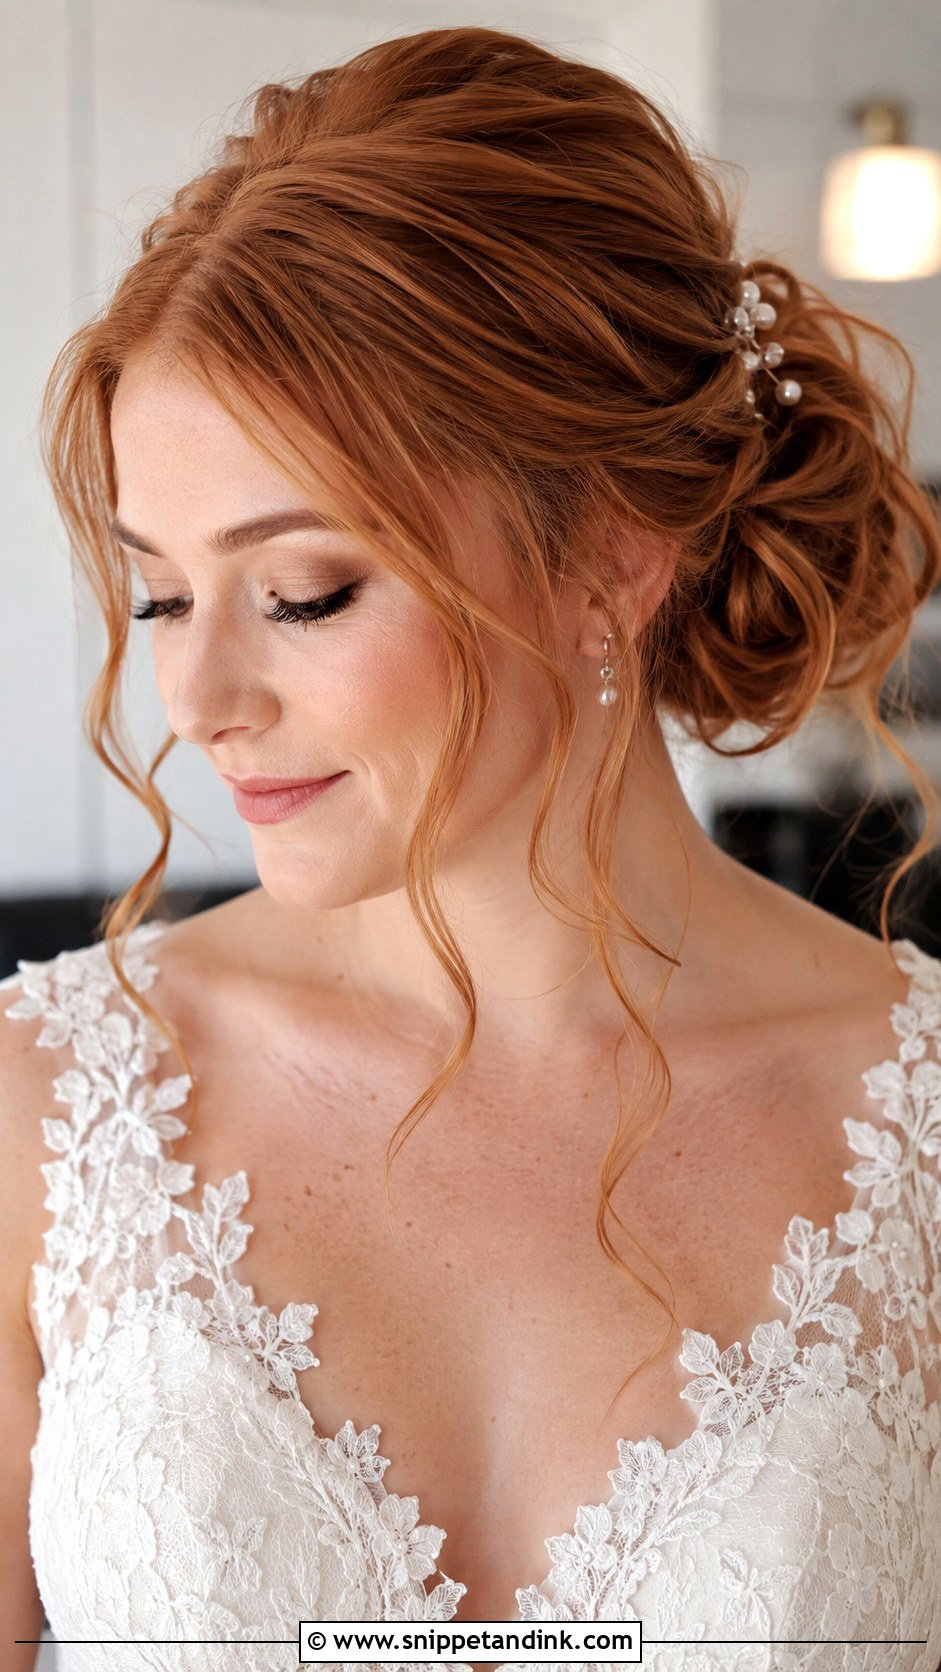
These pieces decide how the bun looks in close-ups, which is where most of your portraits happen. I curl them, unless the whole look is sleek, and take them from the hairline so they land at the cheekbone, jaw or collarbone depending on your haircut. Restraint matters here. Too many loose strands look unfinished, and two or three a side look deliberate. They also soften the temples when a veil comb sits high.
Photos of the Back Tell Me More Than Photos of the Front
Most bun inspiration is shot from behind with the head slightly turned. That angle flatters a bun but tells you little about how the style frames your face. When you collect pictures, try to find one from the back, one from the side and one from the front. Guests will see the back through most of the ceremony, while your portraits will mostly show the front.
Then compare the hair in the photo with your own. Plenty of full, airy buns online are built with extensions or padding, so if your hair is fine, show me the picture anyway and I’ll tell you honestly what it would take. A photo of a bun you dislike is useful too. It often tells me more about your taste than three you love.
Taking It Down at Midnight Without Snapping Hair
Nobody warns brides about this part. A bun that has held a veil all day is full of pins and hairspray, and pulling it apart in a hurry breaks hair.
- Find each pin with your fingertips and slide it out the way it went in. Don’t tug at the bun first.
- Once the pins are out, let the hair drop and loosen it with your fingers rather than a brush.
- Work conditioner or a detangling spray through the lengths, then comb from the ends upward.
- If your scalp feels tender from the weight, a warm shower and a loose plait for sleeping help it settle.
Ask a bridesmaid to help with the back. It’s quicker with two people, and she’ll find the pins you missed.
The Bun Has to Look Right From Every Side
A good loose bun is soft on the surface and firm underneath. It should frame your face, hold through the dancing and look as considered from the back as it does from the front, since much of the ceremony is photographed from behind. Bring your favourites from this list to your trial, along with your veil and earrings if you can, and ask your stylist to adjust the height, part and volume to suit your hair.
You'll Like These Ideas:


Leave a Reply