
Most brides tell me the same thing before portraits: “I never know what to do with my hands.” That’s normal, and it’s what a short list of poses solves. The ones below are the positions I come back to at almost every wedding, chosen because each shows a different part of the dress: the neckline, the waist, the back, the train, the way the skirt moves. They work for ball gowns, fitted dresses, A-lines, short dresses, plus-size gowns and bridal suits, with small changes I’ve noted for each. Learn the basics of a few before the day, then let me direct you and leave room for the moments nobody planned.

Matching the Poses to What Your Gown Can Actually Do
Not every pose suits every dress, and it’s better to know that before portrait time than to discover it with a photographer waiting. The cut of the gown decides how you can sit, turn and move.
- Mermaid and trumpet: fitted to the knee, so deep sitting and big steps are hard. Lean on stools or the edge of a wall instead of chairs, and favor standing angles and over-the-shoulder shots.
- Ball gowns: they sit and spread beautifully but need a helper every time you move. Twirls are slow and heavy.
- Soft A-line, chiffon and tulle: the best for twirls, walking and anything with wind.
- Short dresses and suits: legs and shoes are on show, so crossed ankles when seated and a clear step forward when standing look best. Mind the hem when sitting low.
- Heavy beading or long sleeves: arms can feel stiff after a few hours, so do the hand-heavy poses early.
Bring your shortlist to the photographer and say which dress you’re wearing. A good one will cross off anything that will fight the gown.
1. Front-Facing Wedding Dress Pose
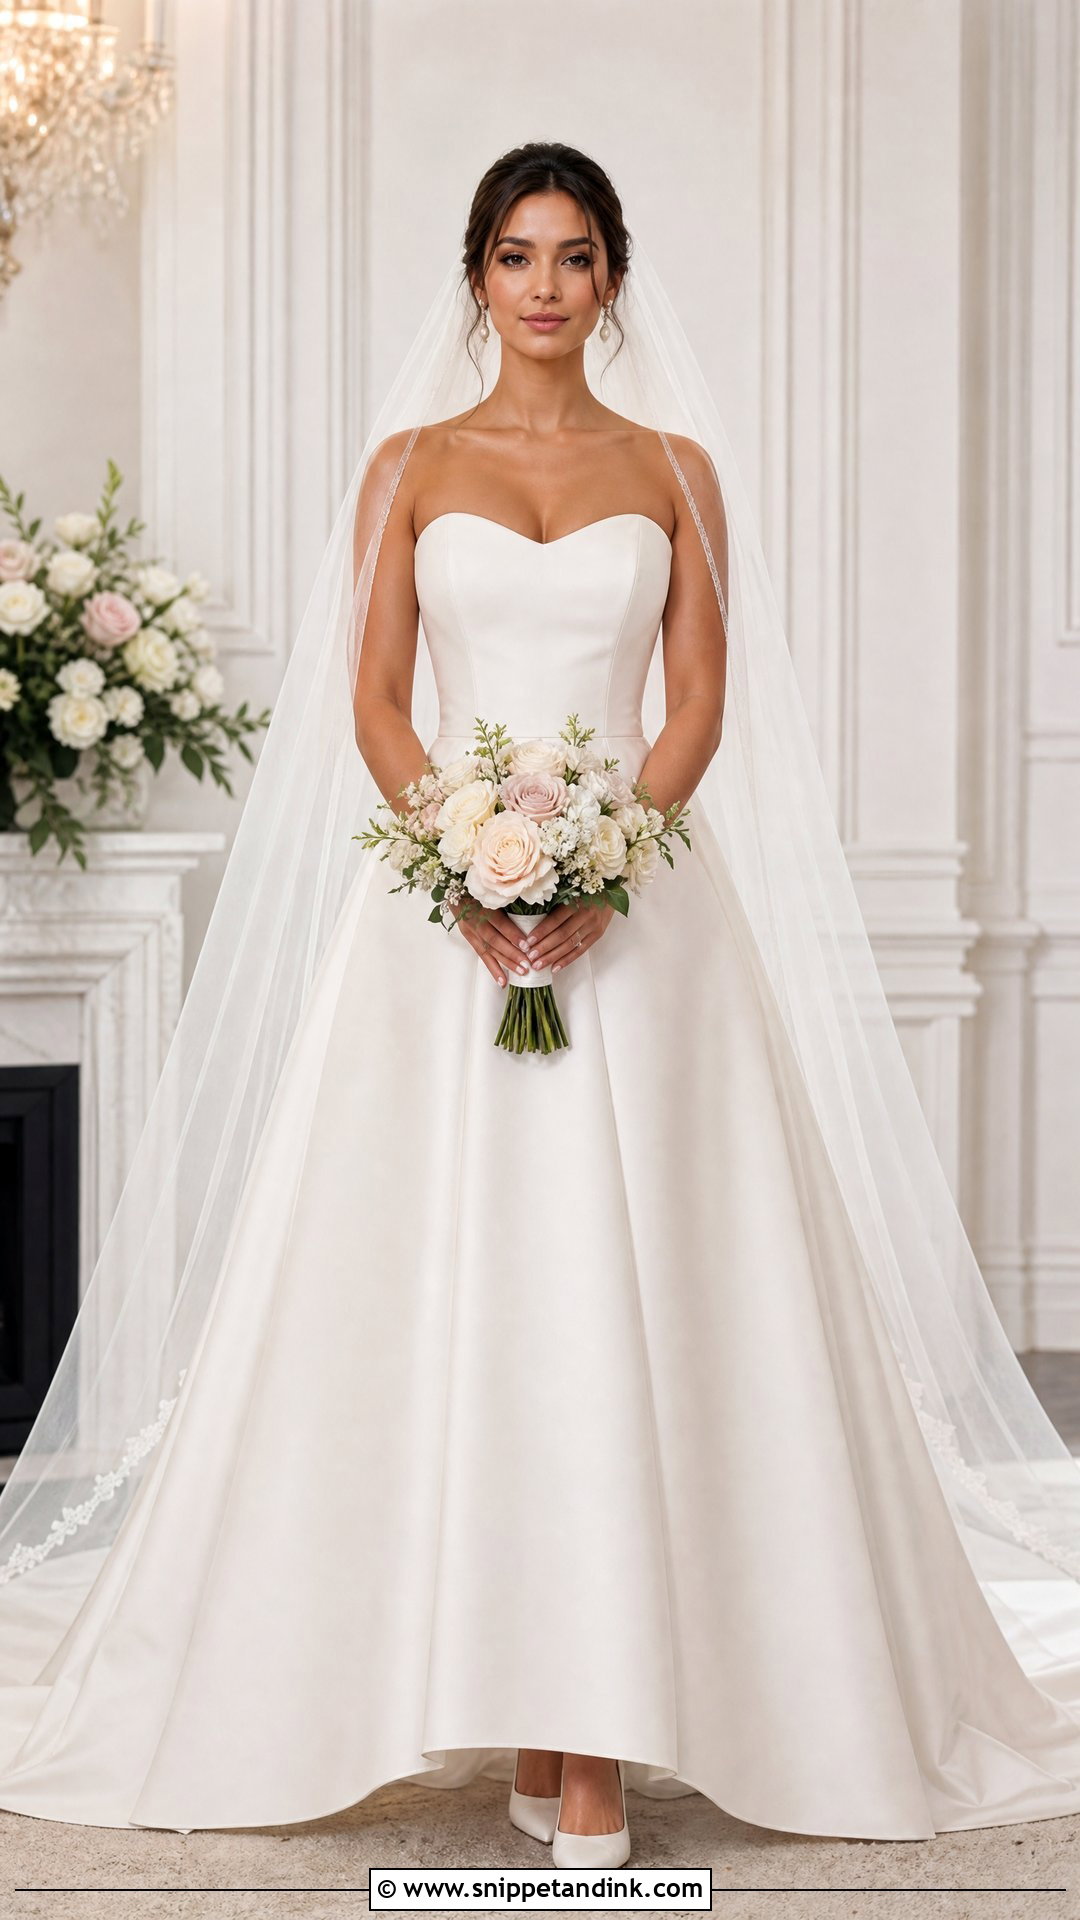
I start almost every portrait session here, because a straight-on frame is the record shot of the whole outfit. Standing square with weight on both feet looks rigid, so put most of your weight on your back leg and bring the other foot slightly forward. Relax your shoulders. Hold the bouquet at waist height rather than up at your chest, where it hides the neckline and bodice. A small gap between elbows and torso shows your waist instead of merging your arms into the dress. Look into the lens for a formal portrait or just past it for something softer. Before I shoot, someone should straighten the skirt and check the veil, necklace and sleeves sit evenly.
2. Angled Full-Length Wedding Dress Pose
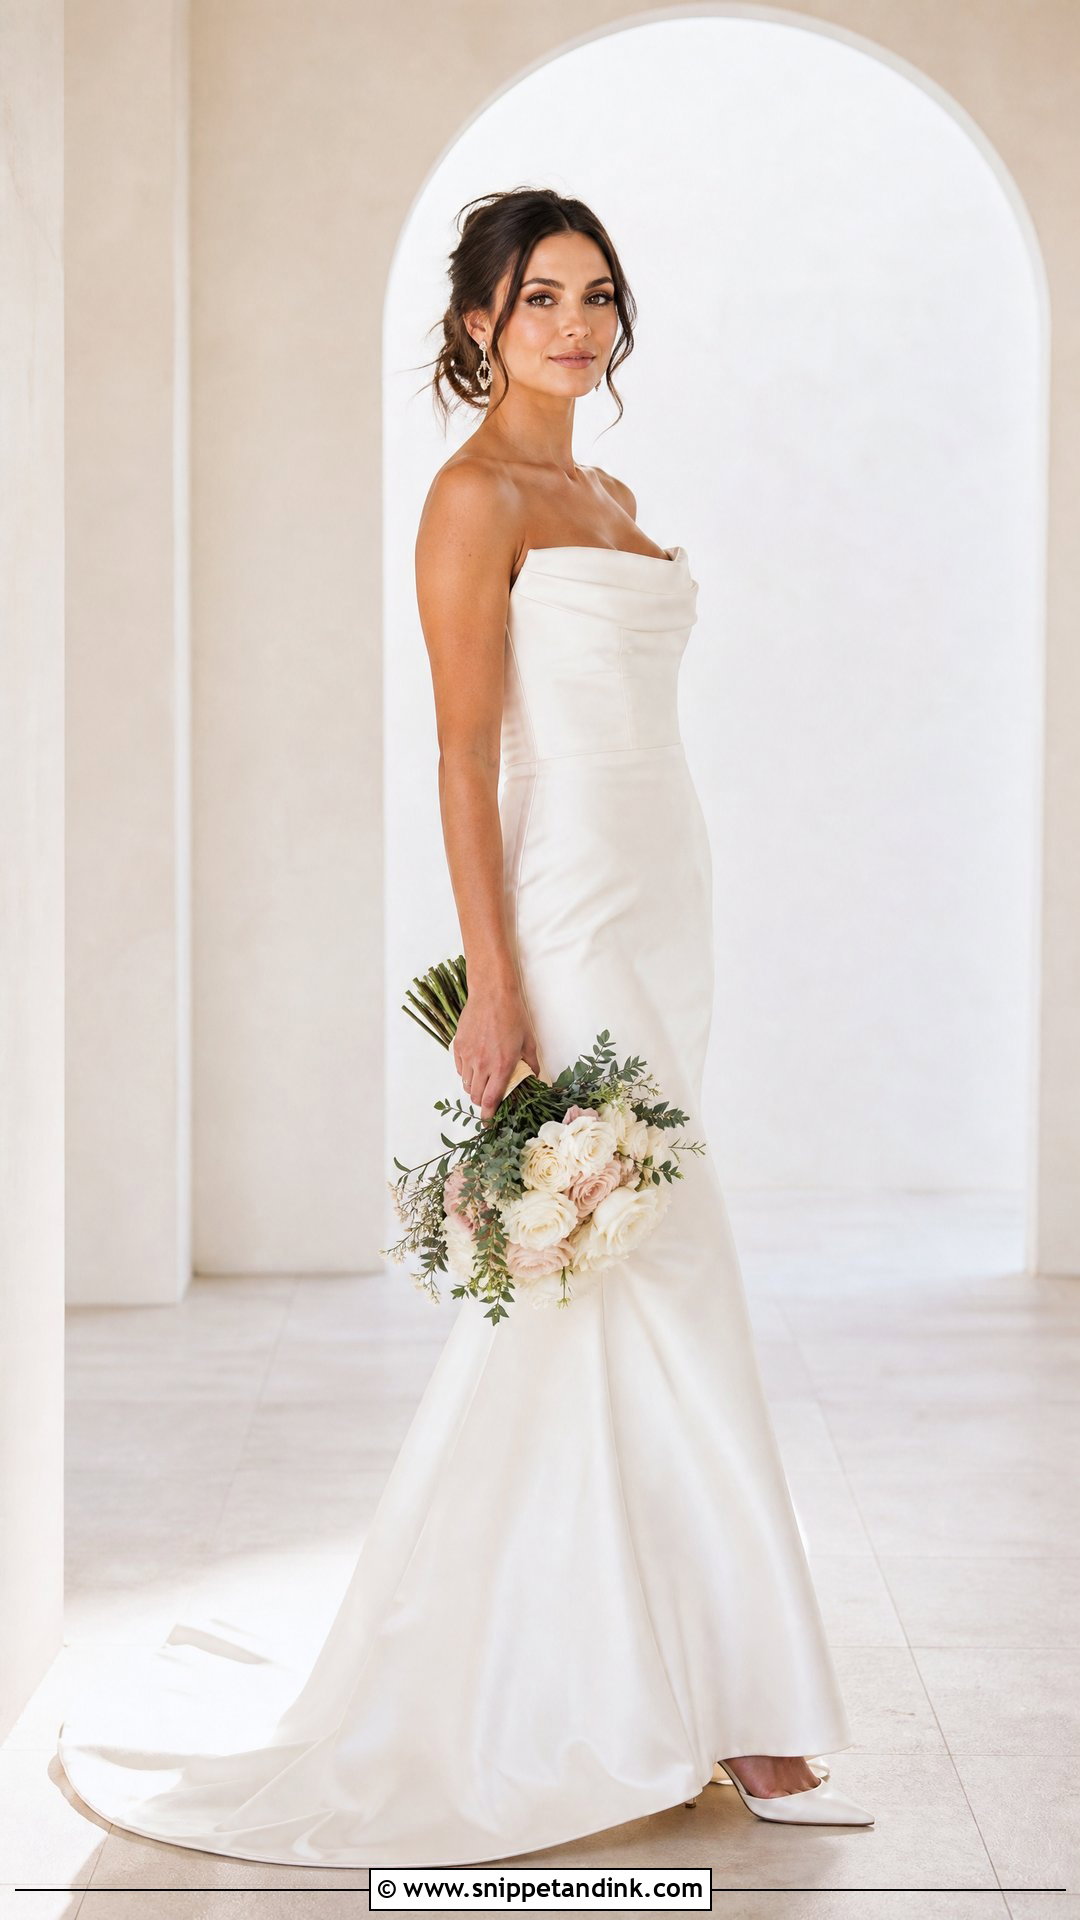
A slight turn of the body is the most flattering change you can make in a full-length portrait, and it’s the pose I use most with fitted, trumpet, column and sheath gowns. Angle your torso away a little and keep your face toward the lens. Step one foot ahead and soften the front knee. The bouquet can sit low by your hip with the other hand resting near your waist. Loose fingers matter more than people think; a clenched hand reads as tension. Arms pressed against the body flatten the silhouette. I leave enough room in the frame for the hem, shoes, veil and train.
3. Over-the-Shoulder Wedding Dress Pose
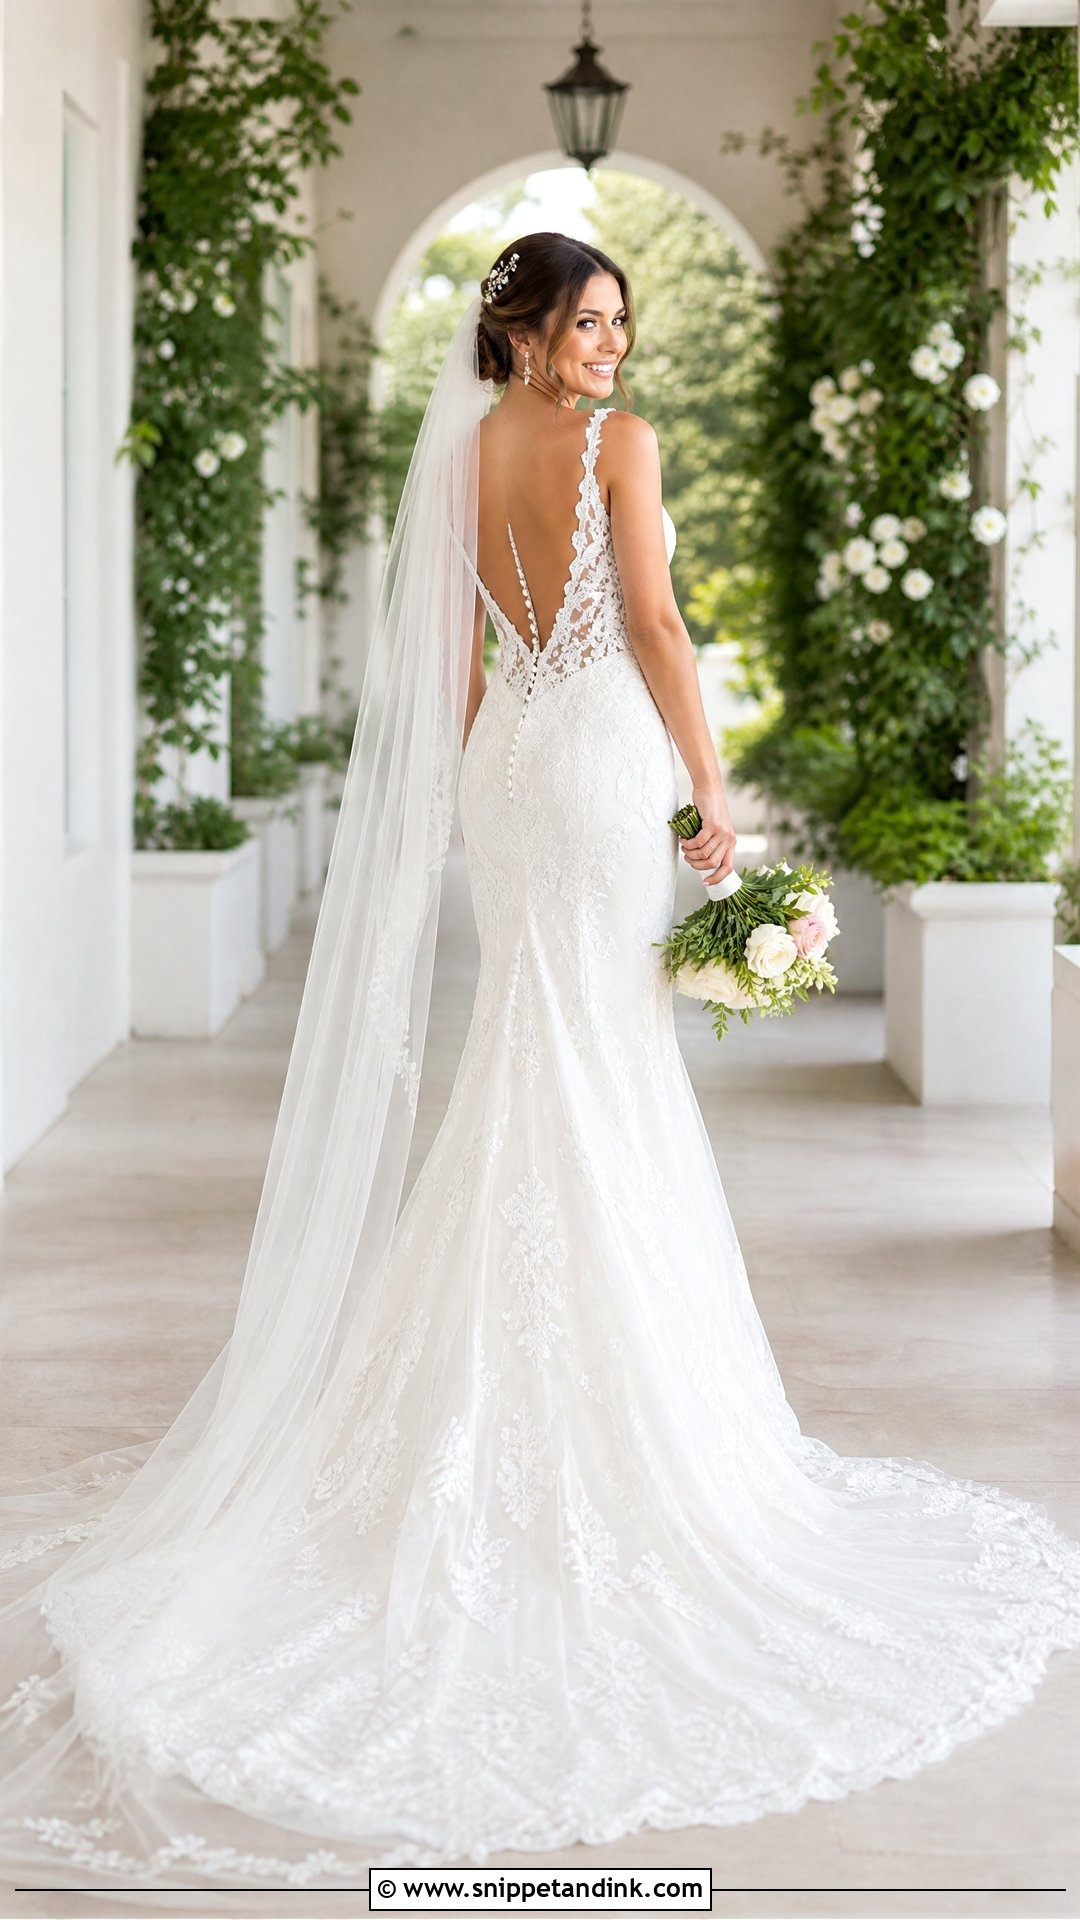
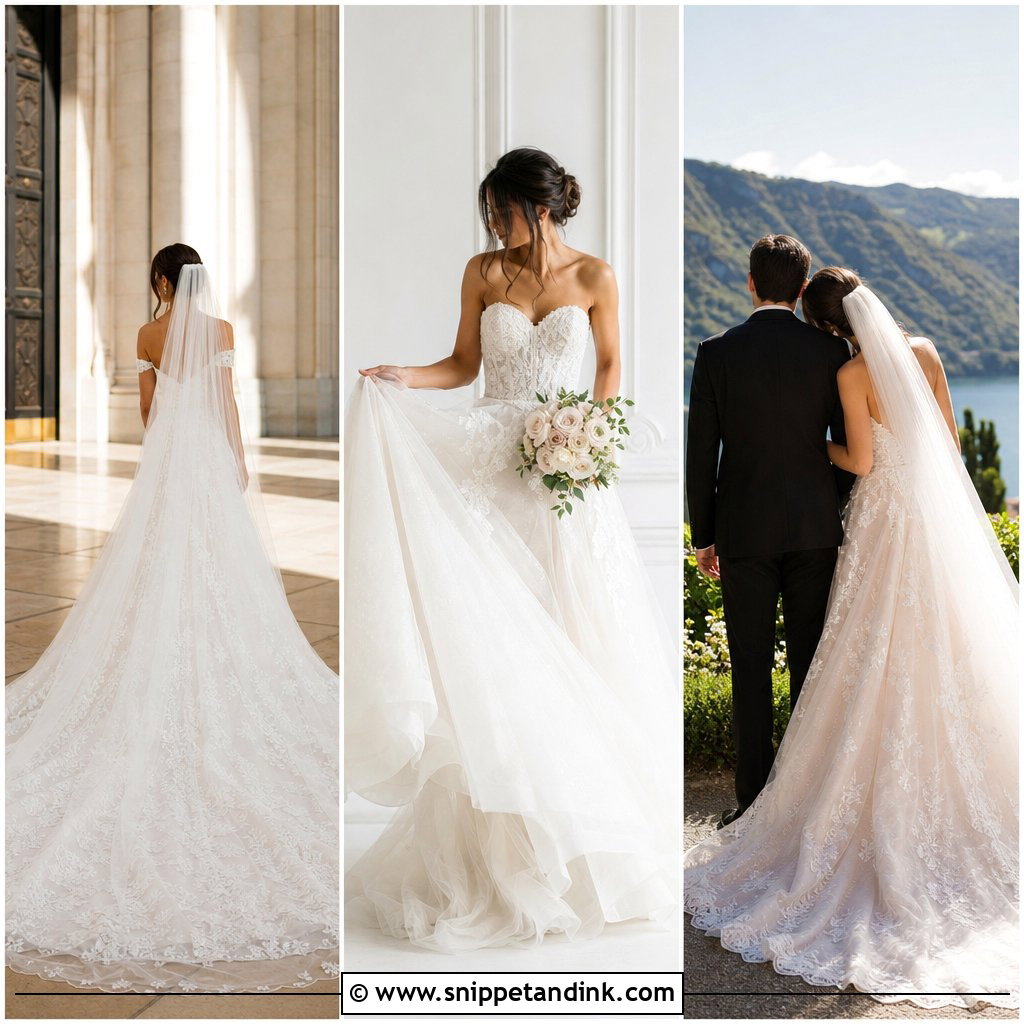
When a dress has its best details at the back, this is the pose that gets them and your face in one frame. Start with your back or side to me and turn your head toward the nearer shoulder. Keep your chin level and your shoulders down, or the neck looks strained, and only turn as far as feels easy. Lace panels, corset lacing, open backs, buttons, bows and illusion work all show well here. A helper should spread the train and place the veil so neither hides those details. The bouquet hangs loosely at your side or in the hand farthest from the camera. A soft smile, a direct look and a downward glance each give a different mood.
4. Back of Wedding Dress Pose
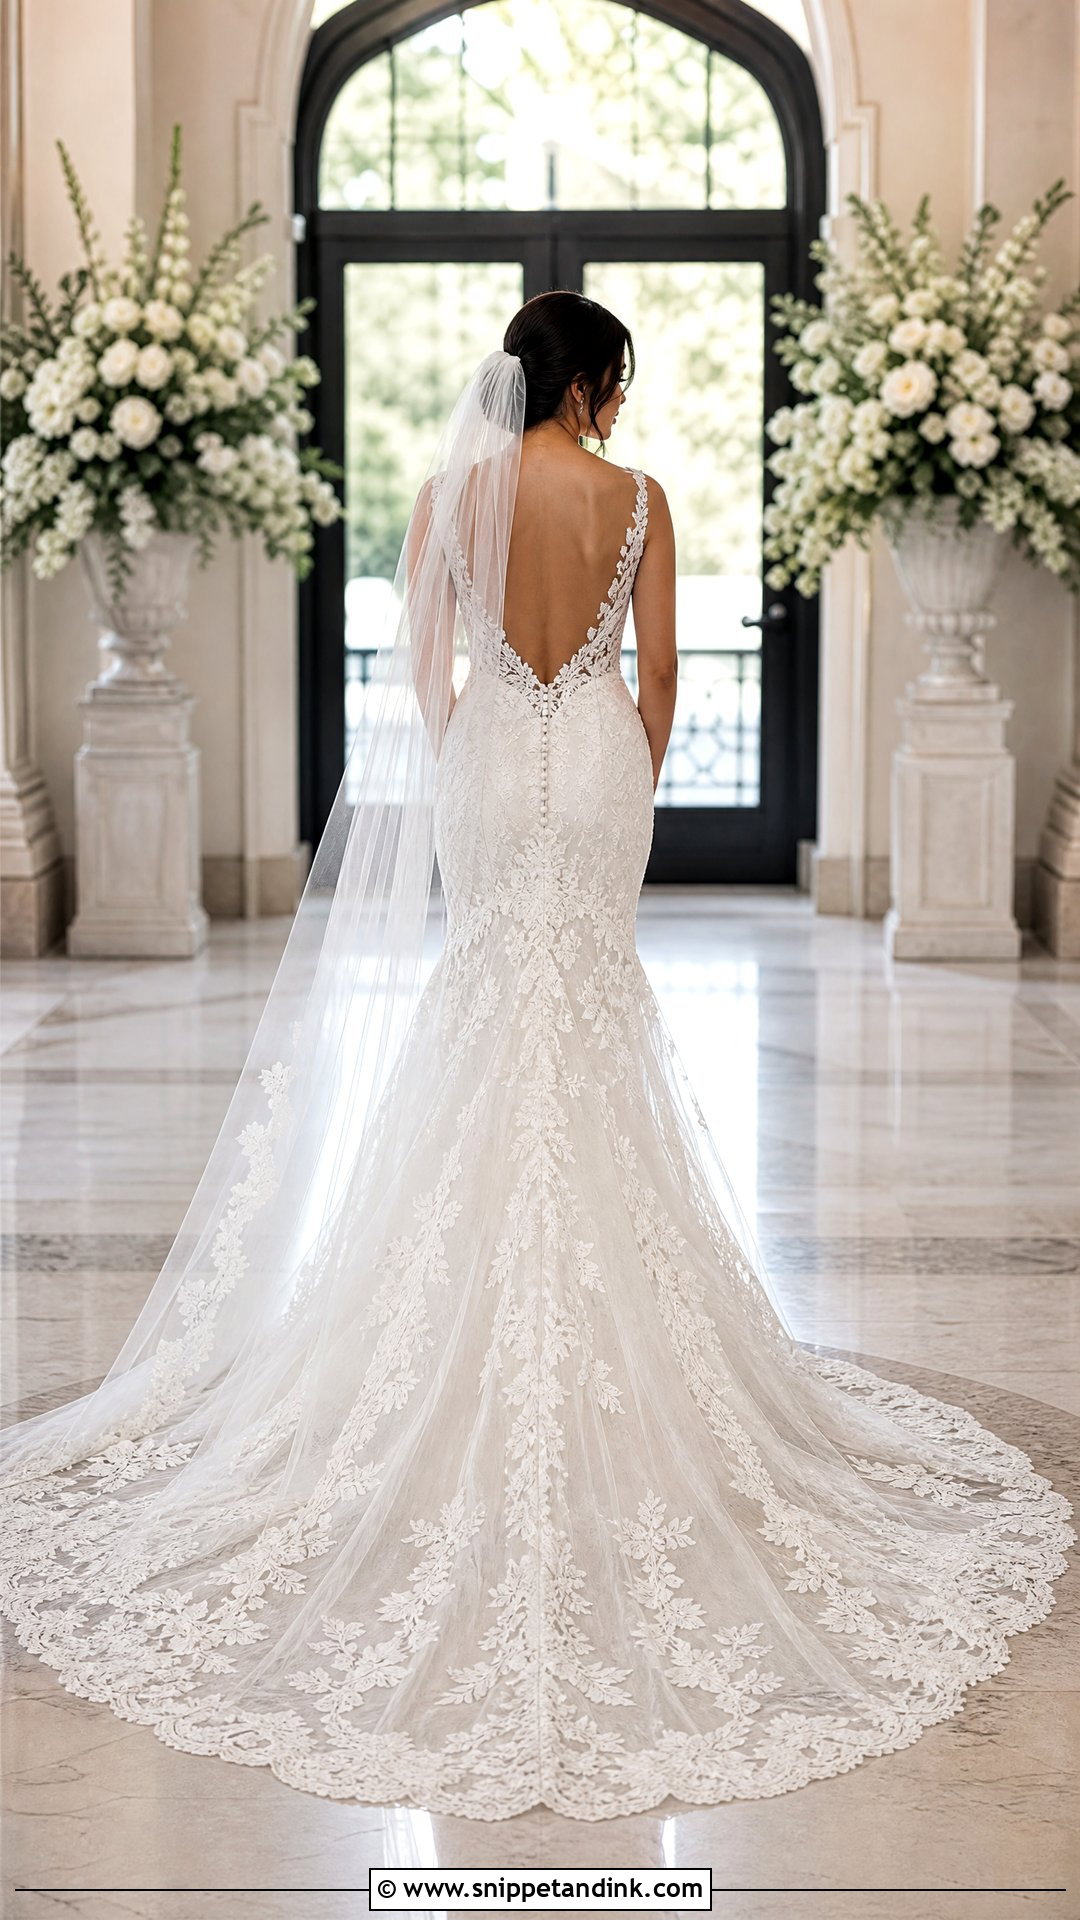
Facing completely away from the camera can feel odd, but for some gowns the back is the whole point. Stand with your weight even and your posture tall without pinning your shoulders back. Let your hands rest at your sides, clasp them softly behind your waist or hold the bouquet in one hand. The frame should show the back neckline, fastenings, fabric, veil placement and the full train. Symmetry gives a formal result; a slight head turn makes it more natural. With a cathedral veil or a long train, I’ll take a tight vertical and then a wide shot that includes the room or landscape around you.
5. Wedding Dress Pose Holding Bouquet
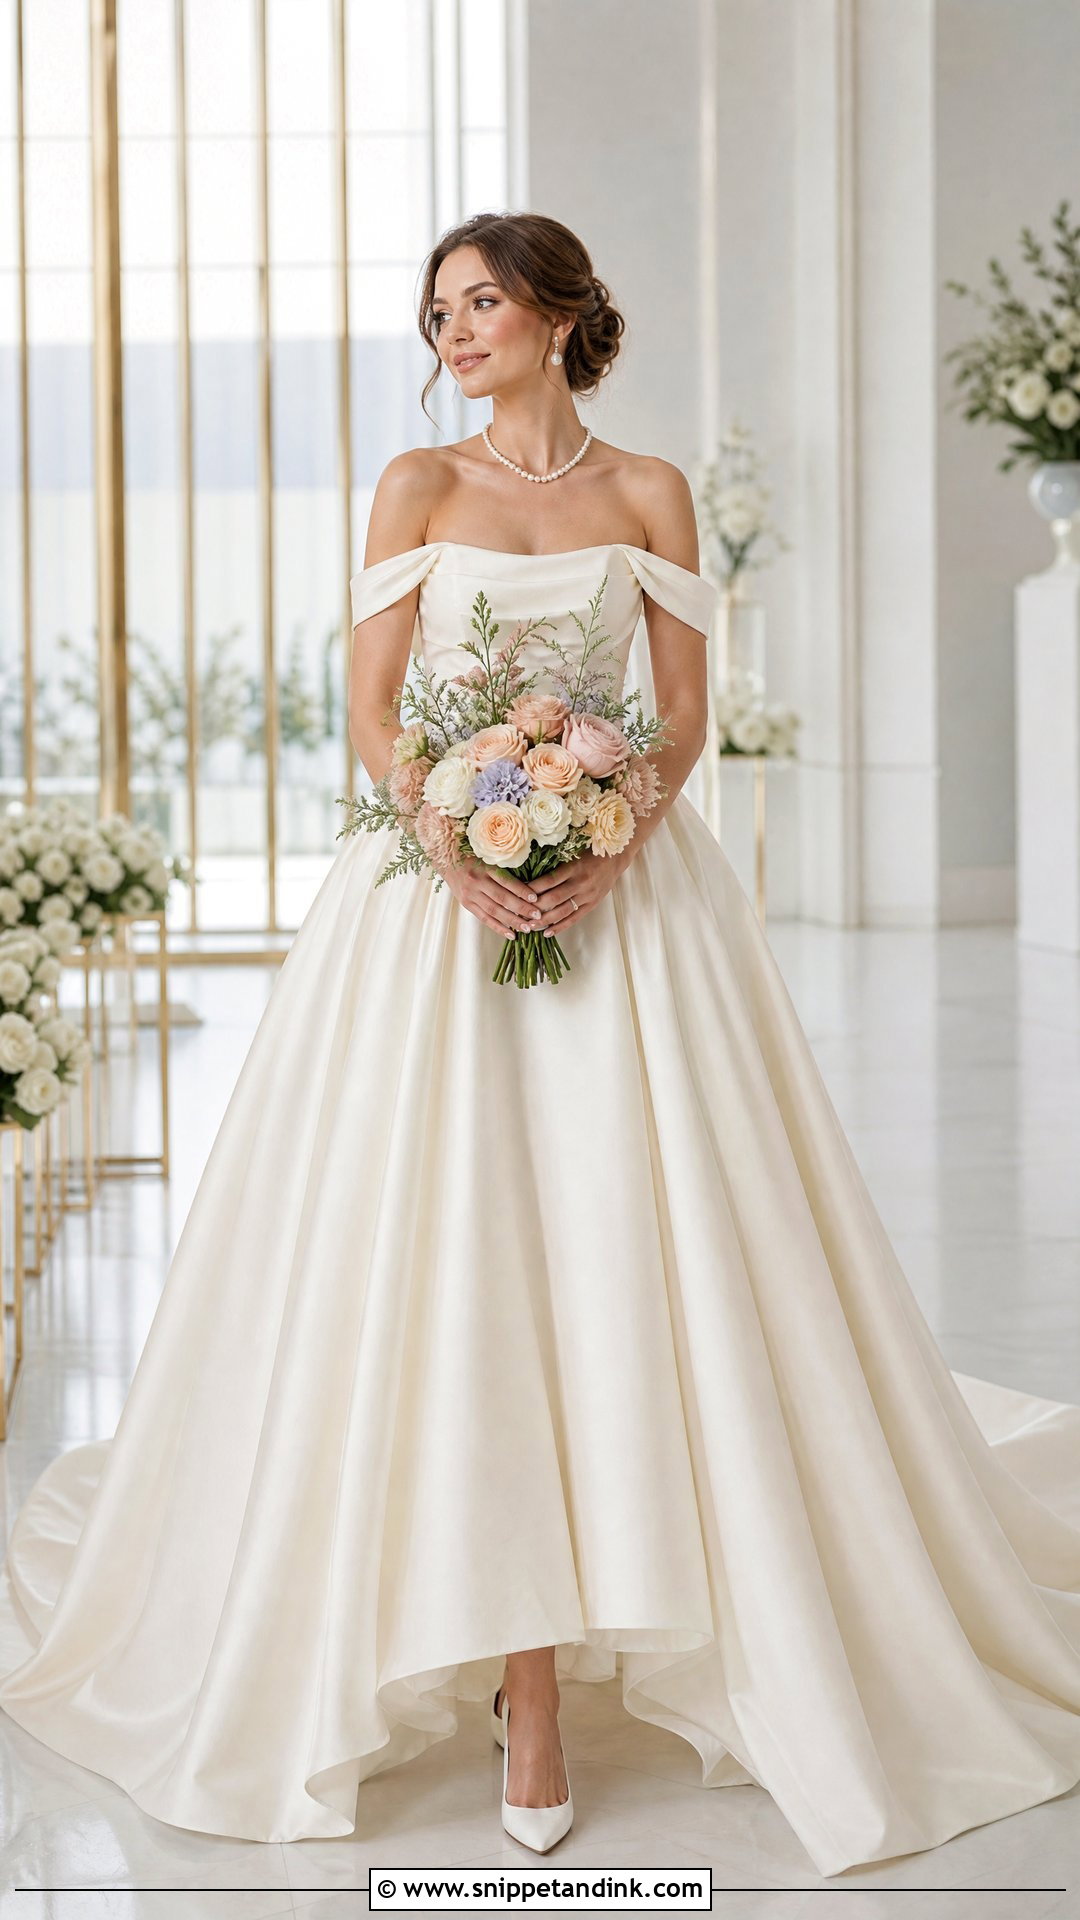
Flowers give your hands a job, which is half of why this pose feels easy. Hold the stems at hip or waist height and tip the heads slightly toward the camera so the flowers don’t look like a flat disc. Raised higher, the bouquet covers the bodice. Keep your elbows soft and slightly away from your body. Face me, turn a little or look at the flowers. With a big arrangement, holding it slightly off center stops it dominating the dress. Florists usually build a bouquet with a front, so find that side and show it. It suits ball gowns, plain dresses, suits and short dresses equally.
6. Looking Down at Bouquet Wedding Dress Pose
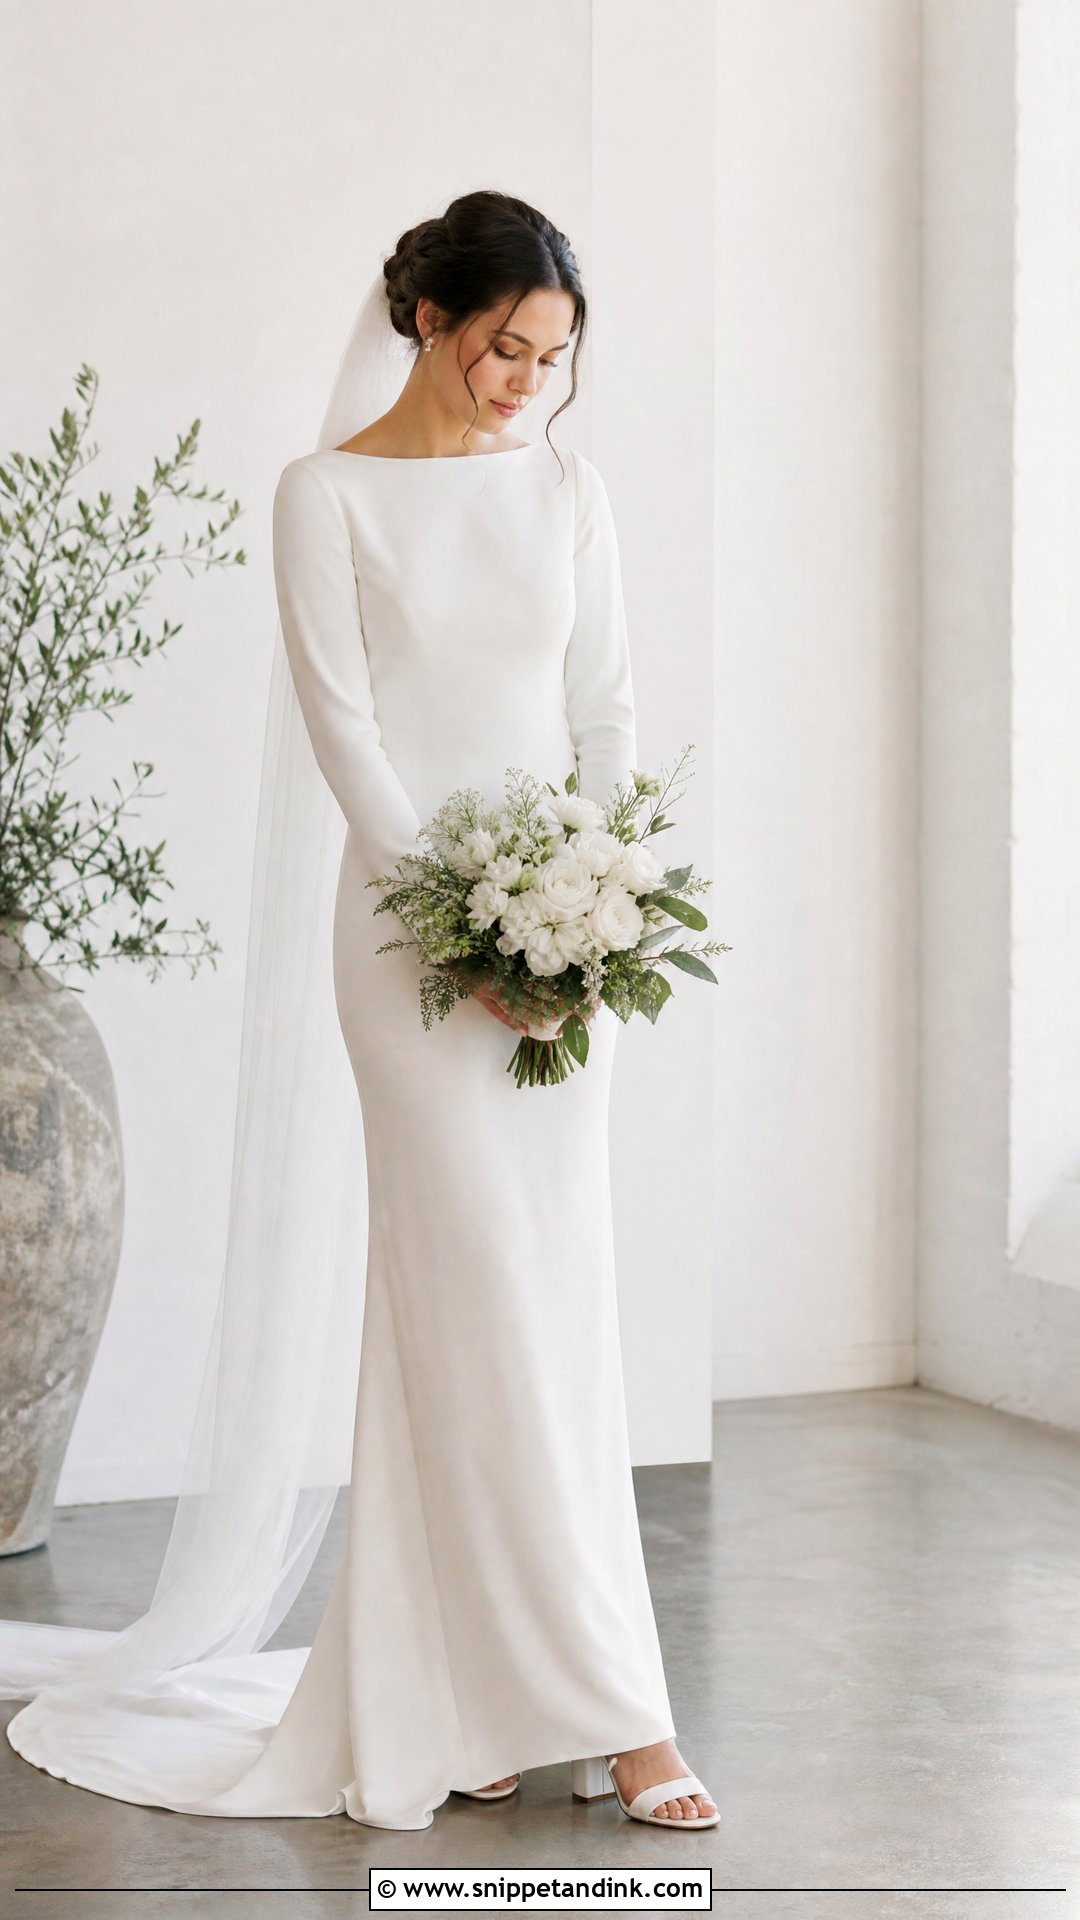
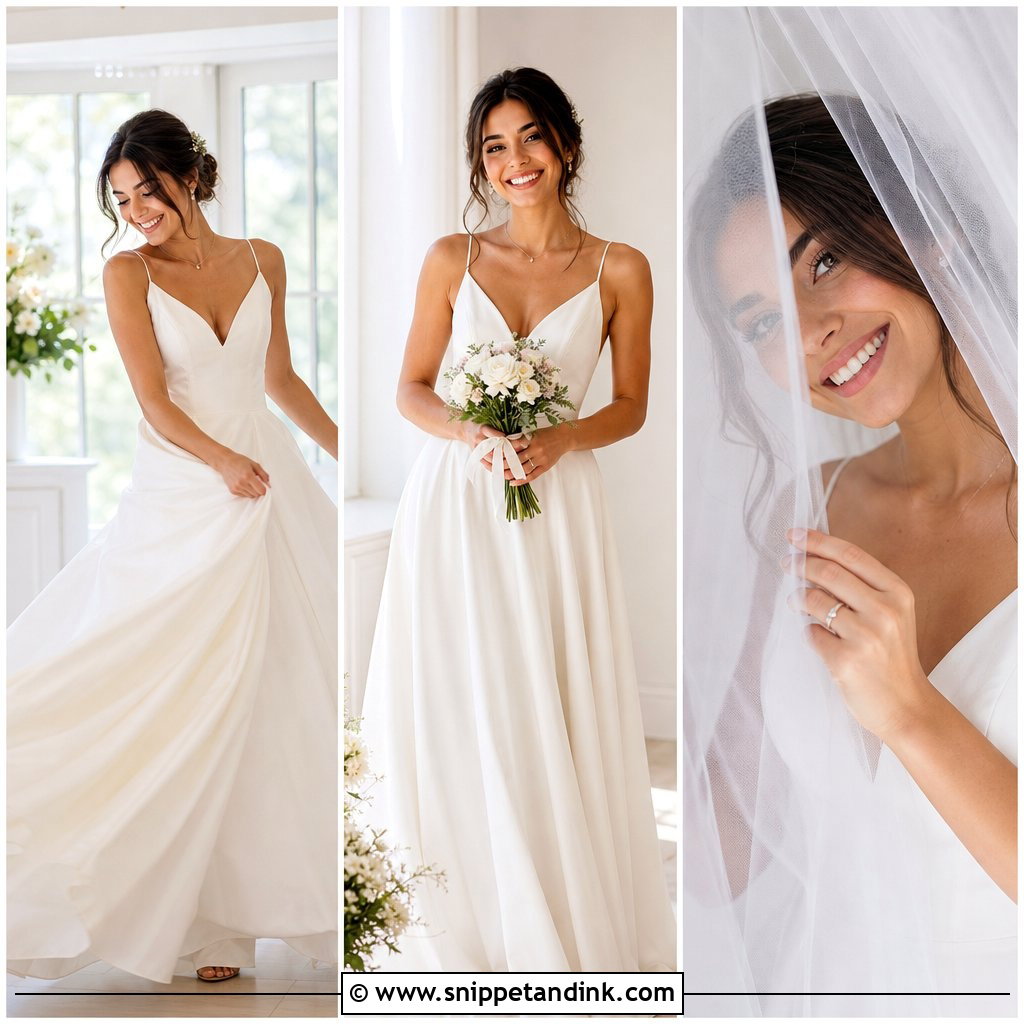
Looking down at the bouquet is my go-to for brides who freeze when they look into a lens. Turn your body slightly away and hold the flowers below your waist, angled out. Lower your eyes rather than your whole head, which creates a double chin and rounds the shoulders. Pushing the chin very slightly forward keeps the jawline clean. A small smile adds warmth; a neutral face looks more editorial. It shows off hair, earrings, makeup and sleeves along with the dress. I’ll usually take full-length and waist-up versions so the gallery has variety.
7. Veil-Over-the-Face Wedding Dress Pose
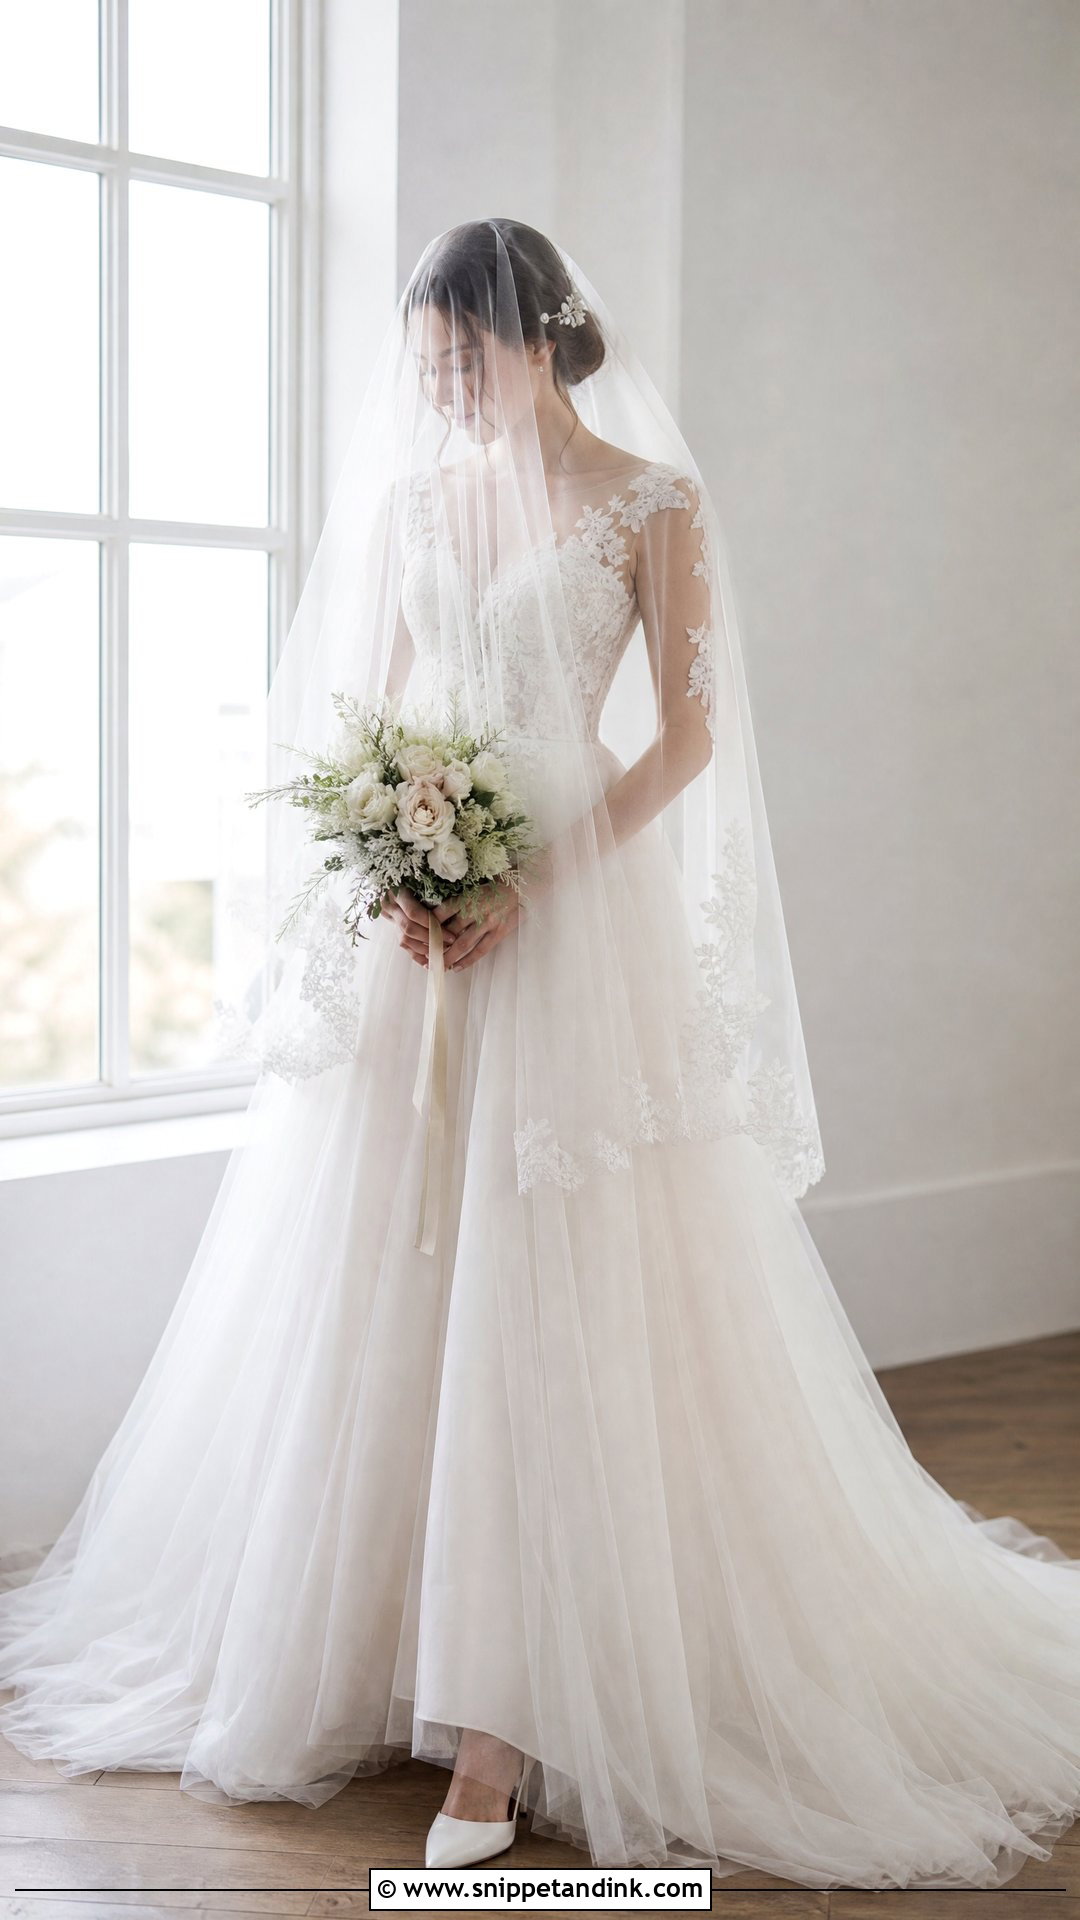
A veil over the face needs soft, even light. In hard sun the tulle throws a mesh of shadow across your skin, so I’ll move you to a bright window or open shade. Arrange the veil loosely so it doesn’t flatten your hair or tug on the comb. Angle your body slightly with relaxed hands near the bouquet or your waist. Look at me, close your eyes or look down. With a lace edge, place the border so it frames the dress instead of cutting across the bodice. I shoot the full-length first, then move in for the makeup, jewelry and veil pattern.
8. Holding the Veil Wedding Dress Pose
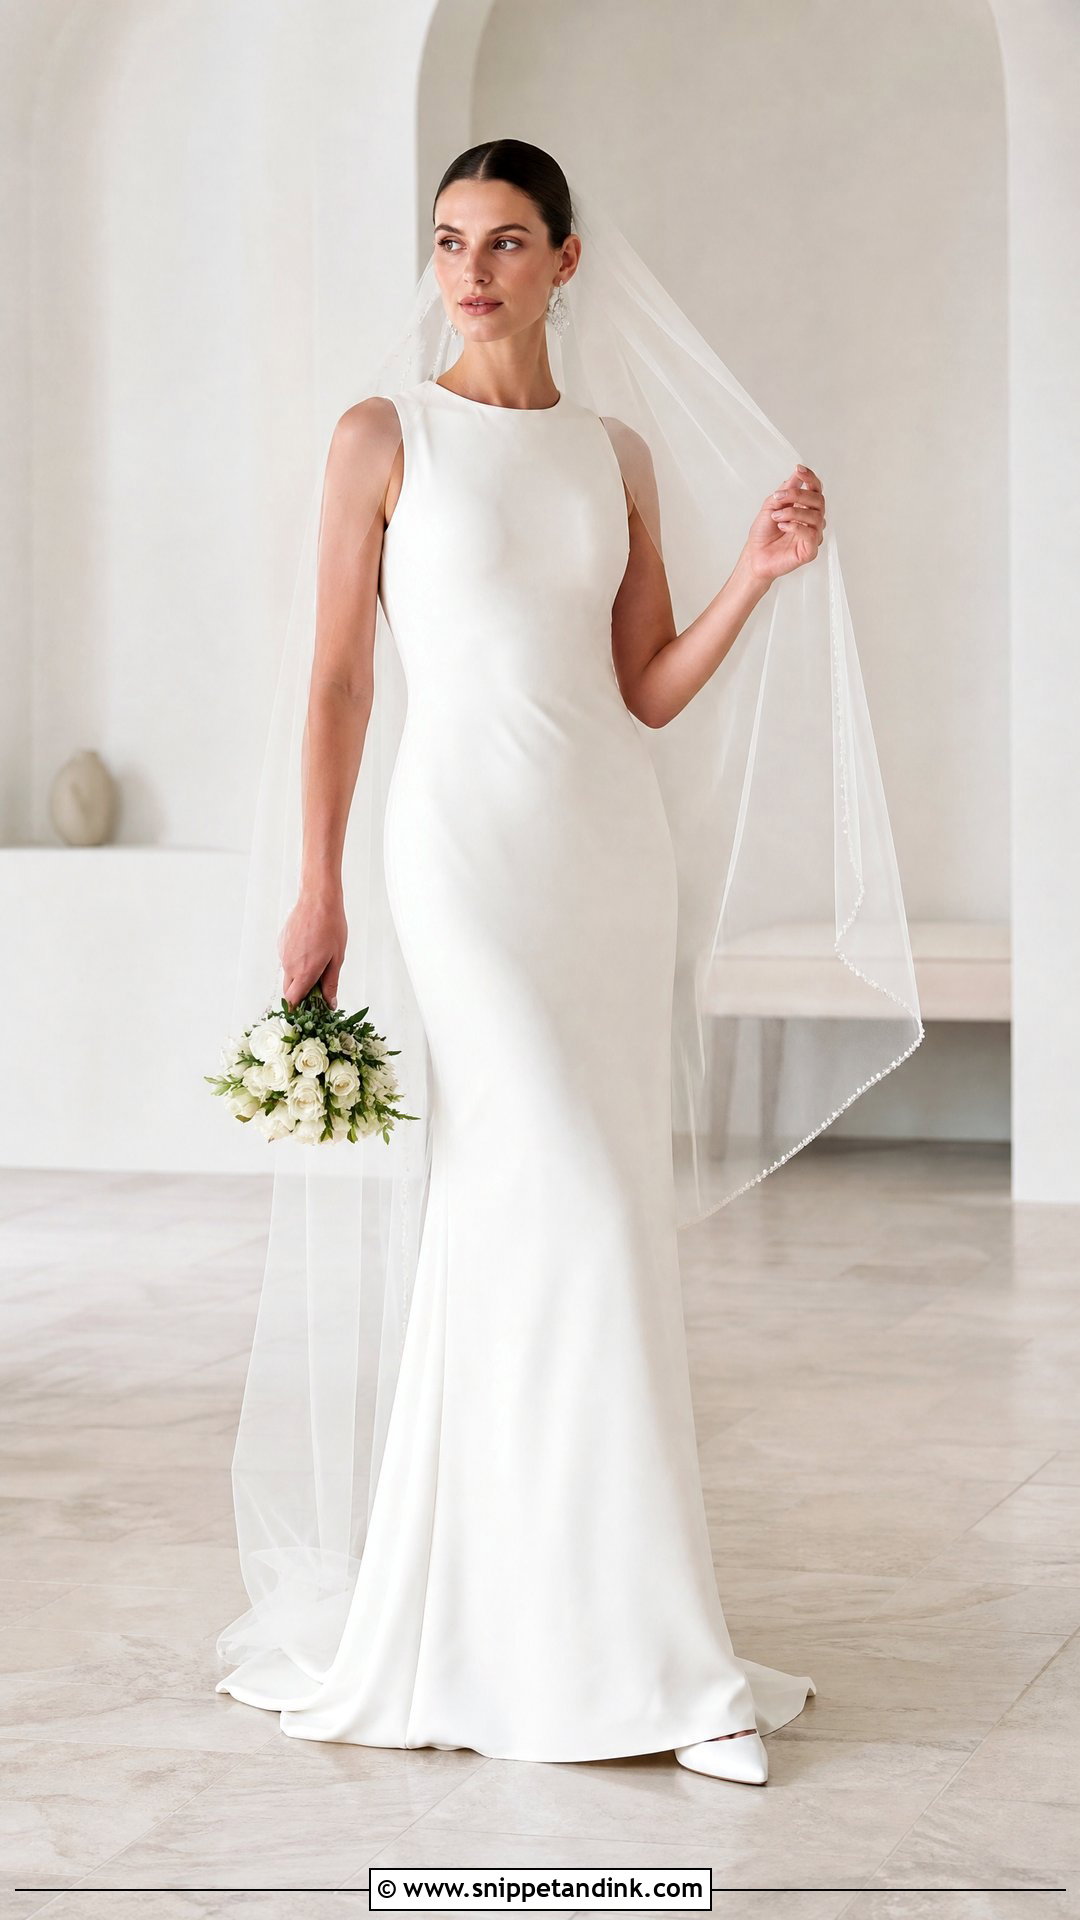
Holding one edge of your veil is a quick fix for awkward hands, and it adds a curve to a standing portrait. Turn slightly toward me and lift the edge lightly with one hand, elbow relaxed. Pulled tight, the veil looks like a sheet; let it stay loose. The other hand can hold the bouquet at your hip or rest by the dress. Fingertip, chapel and cathedral veils all work, though longer ones give more shape. Look at the fabric for something thoughtful, or at the lens for confidence. Keep the veil clear of the skirt so both read. It also shows rings, bracelets, sleeves and gloves without a forced hand close-up.
9. Flowing Veil Wedding Dress Pose
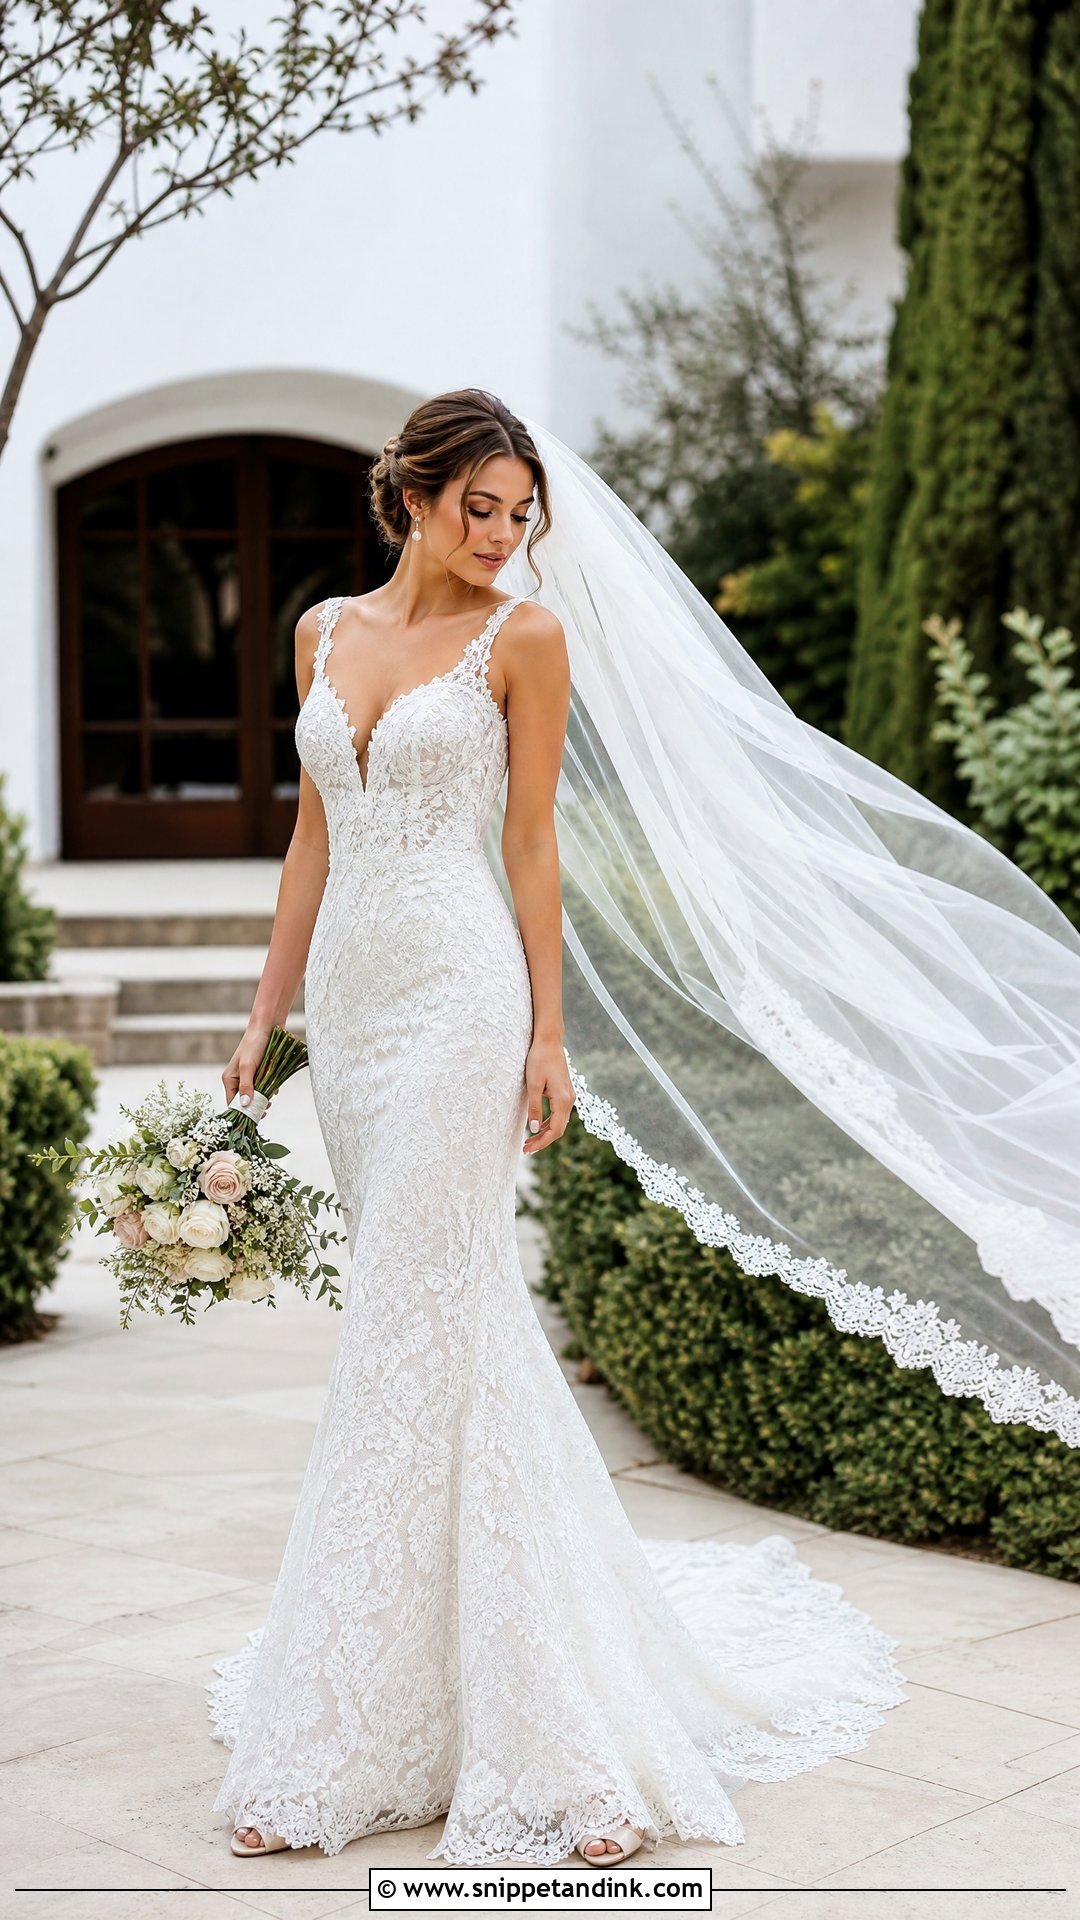
The flowing veil shot is a team effort. Someone stands out of frame, lifts the end of the veil and lets it go a beat before I press the shutter, so it floats in a curve behind you. Stand steady, angled toward me, with your face to the light. The veil should move away from you, not wrap your shoulders or cover the dress, and wind direction decides which way you face. Keep your hands simple: bouquet low, hands at the waist or arms at rest. An open, uncluttered spot is best. Expect several tries, because the veil, train, silhouette and your expression rarely all peak in the same frame.
10. Walking Wedding Dress Pose
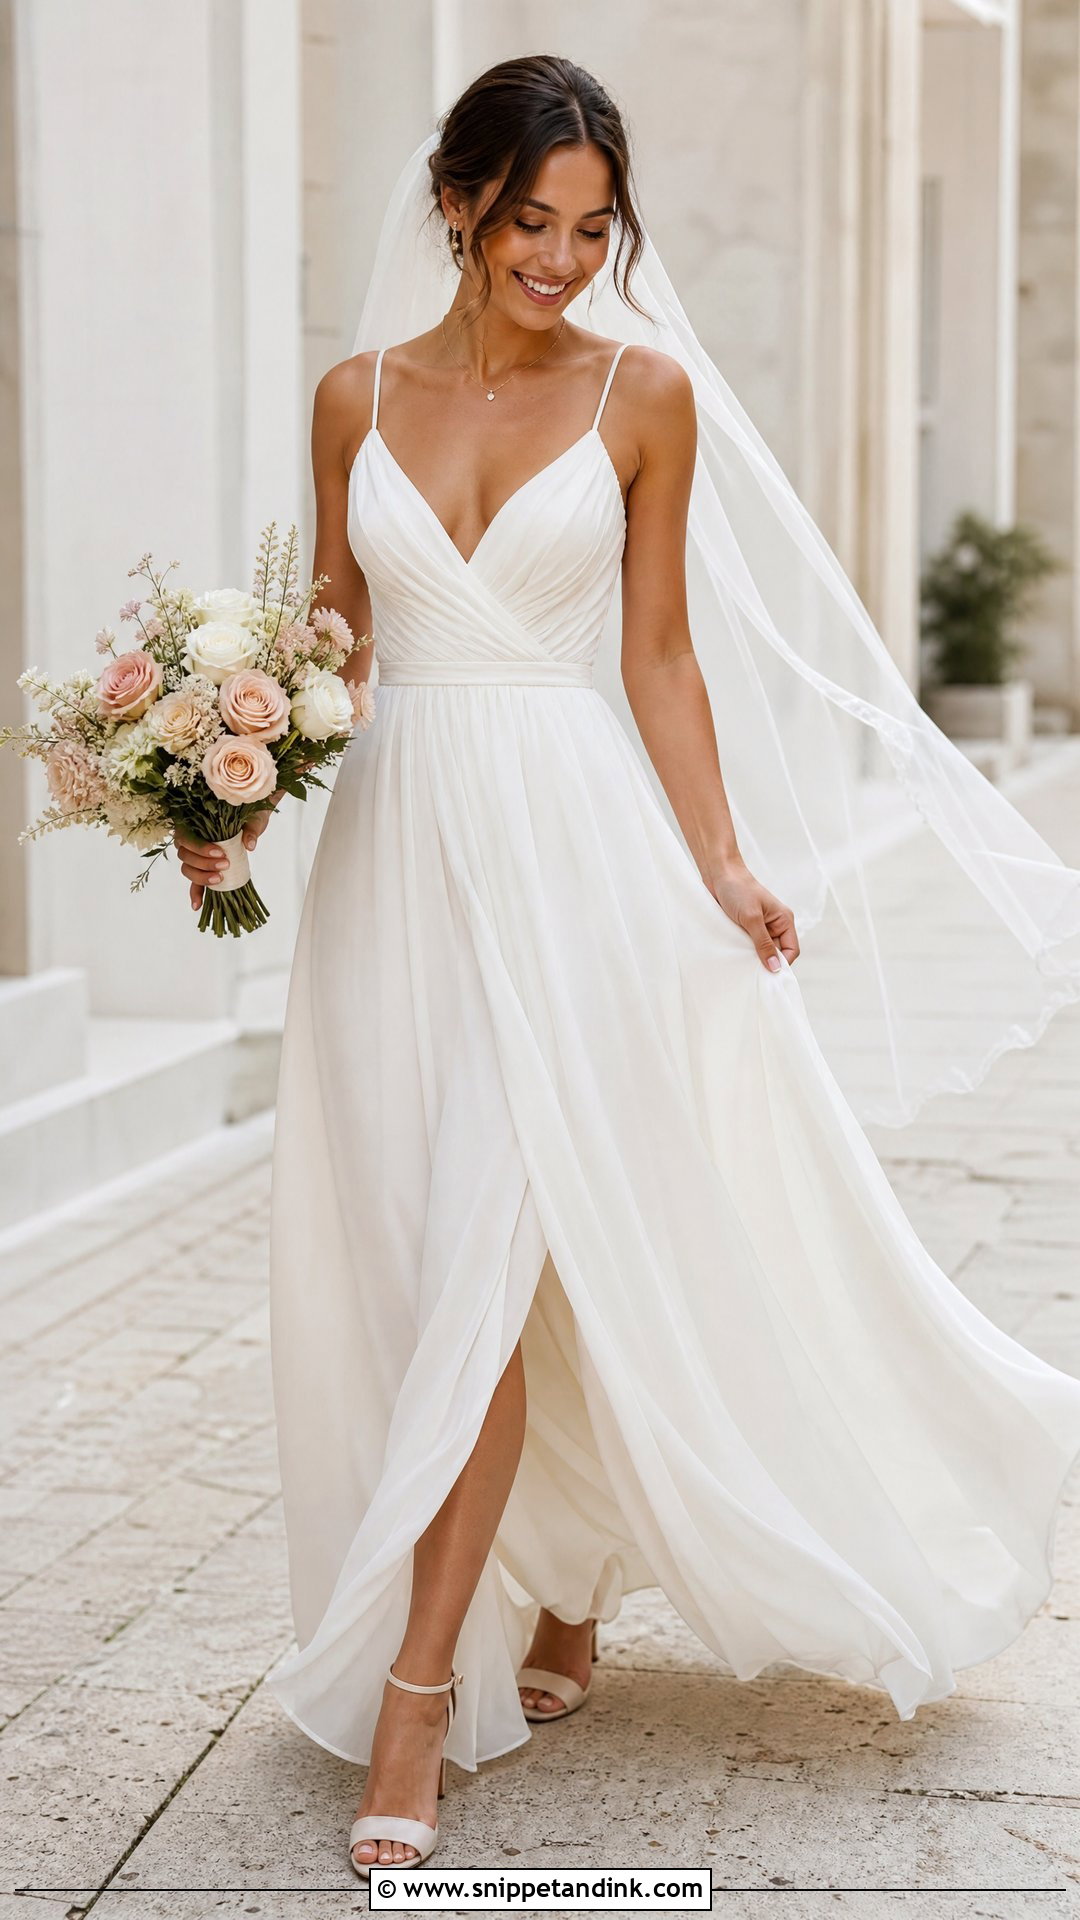
Walking makes the most relaxed photos in any gallery, but only if you walk much slower than feels normal. Take short, slow steps. Look ahead, glance toward me or look down at the path. With a long train, a helper resets it before each pass and checks the ground is clear. Hold the bouquet in one hand and lift just the front edge of the skirt with the other, enough to show your shoes without bunching the dress. Let your arms swing a little. Walking toward the camera shows the front of the gown; walking away gives the train, back, hair and veil in a candid frame.
11. Twirling Wedding Dress Pose
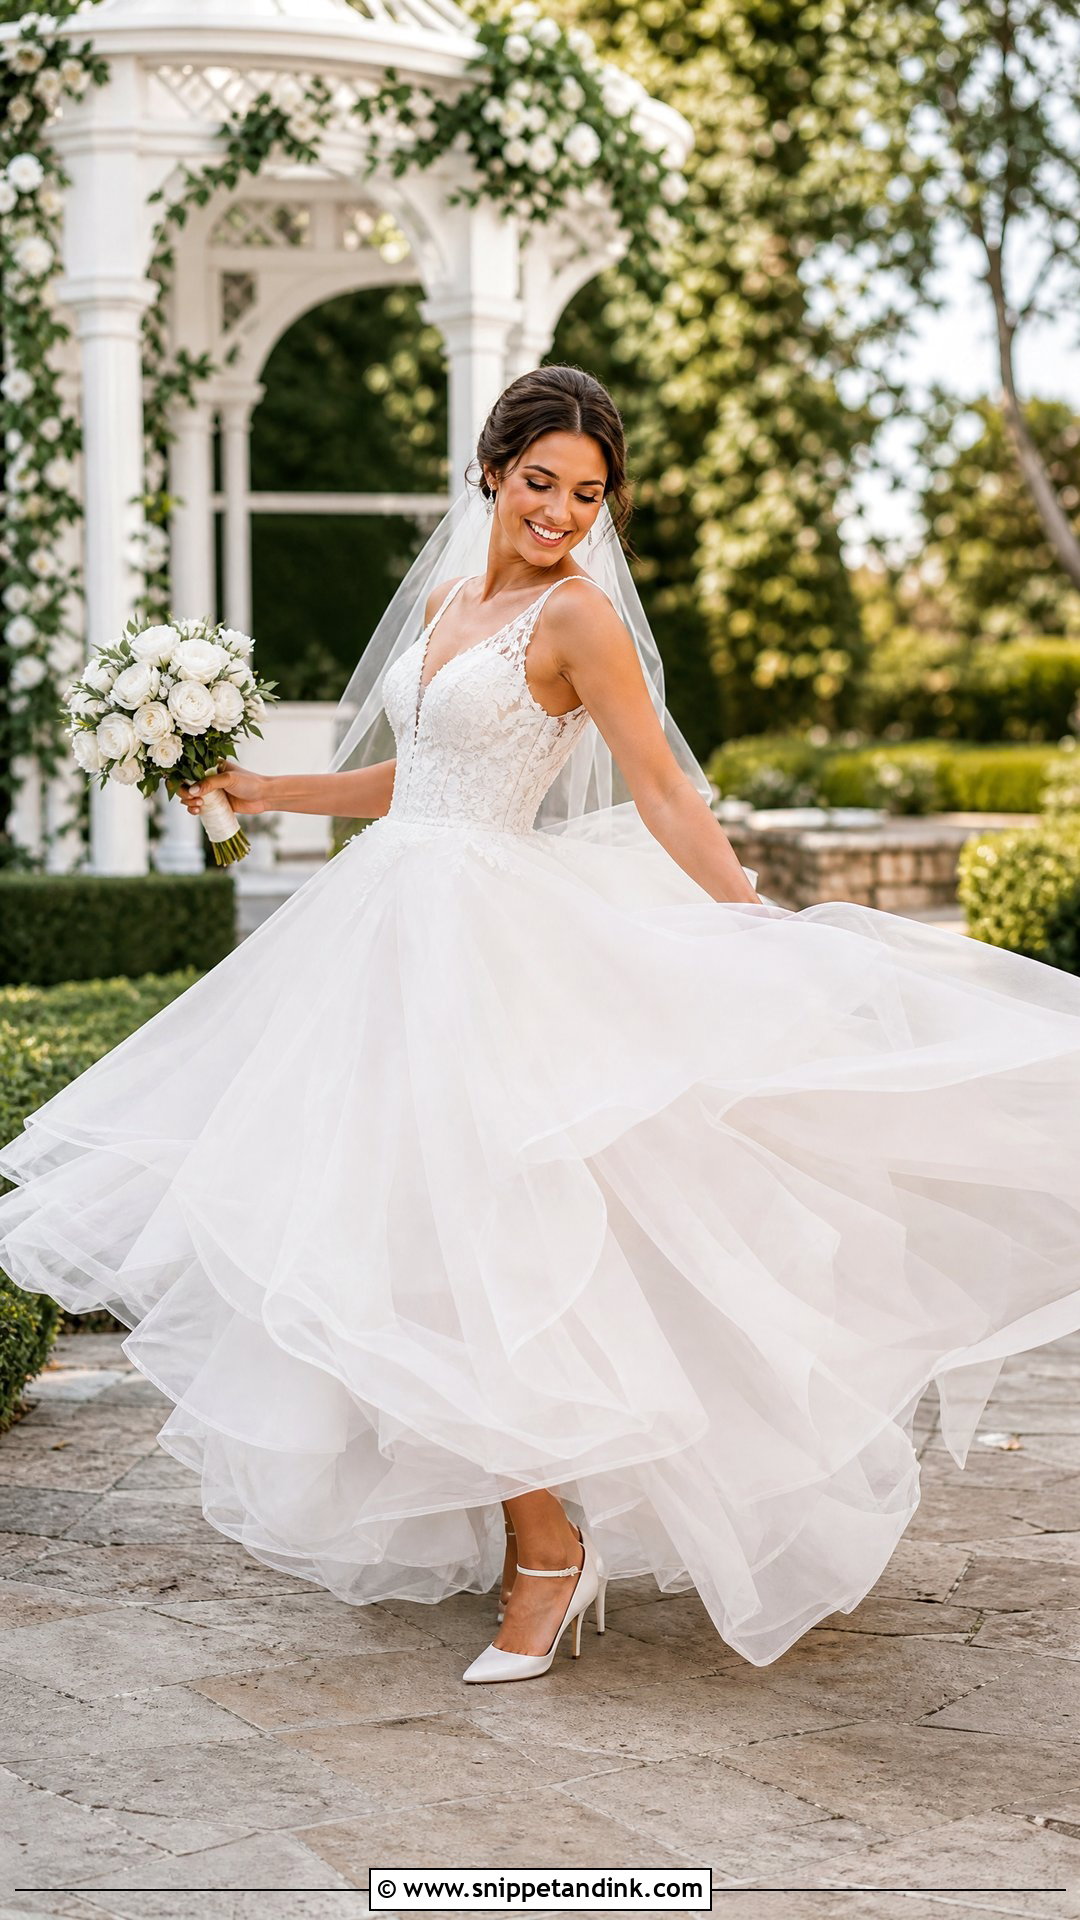
Twirls look best in A-lines, circle skirts, tulle and soft chiffon, which open up as they turn. Fitted gowns barely move, and a heavy attached train can trip you mid-spin, so skip this one if that’s your dress. Hold a little of the skirt in one or both hands and turn slowly; fast spins blur. Look back over your shoulder as the fabric lifts. A real laugh usually happens on its own here. I shoot in bursts to catch the skirt rising and settling. Choose flat ground with space around you, wear shoes you trust and do one practice turn first.
12. Lifting the Skirt Wedding Dress Pose
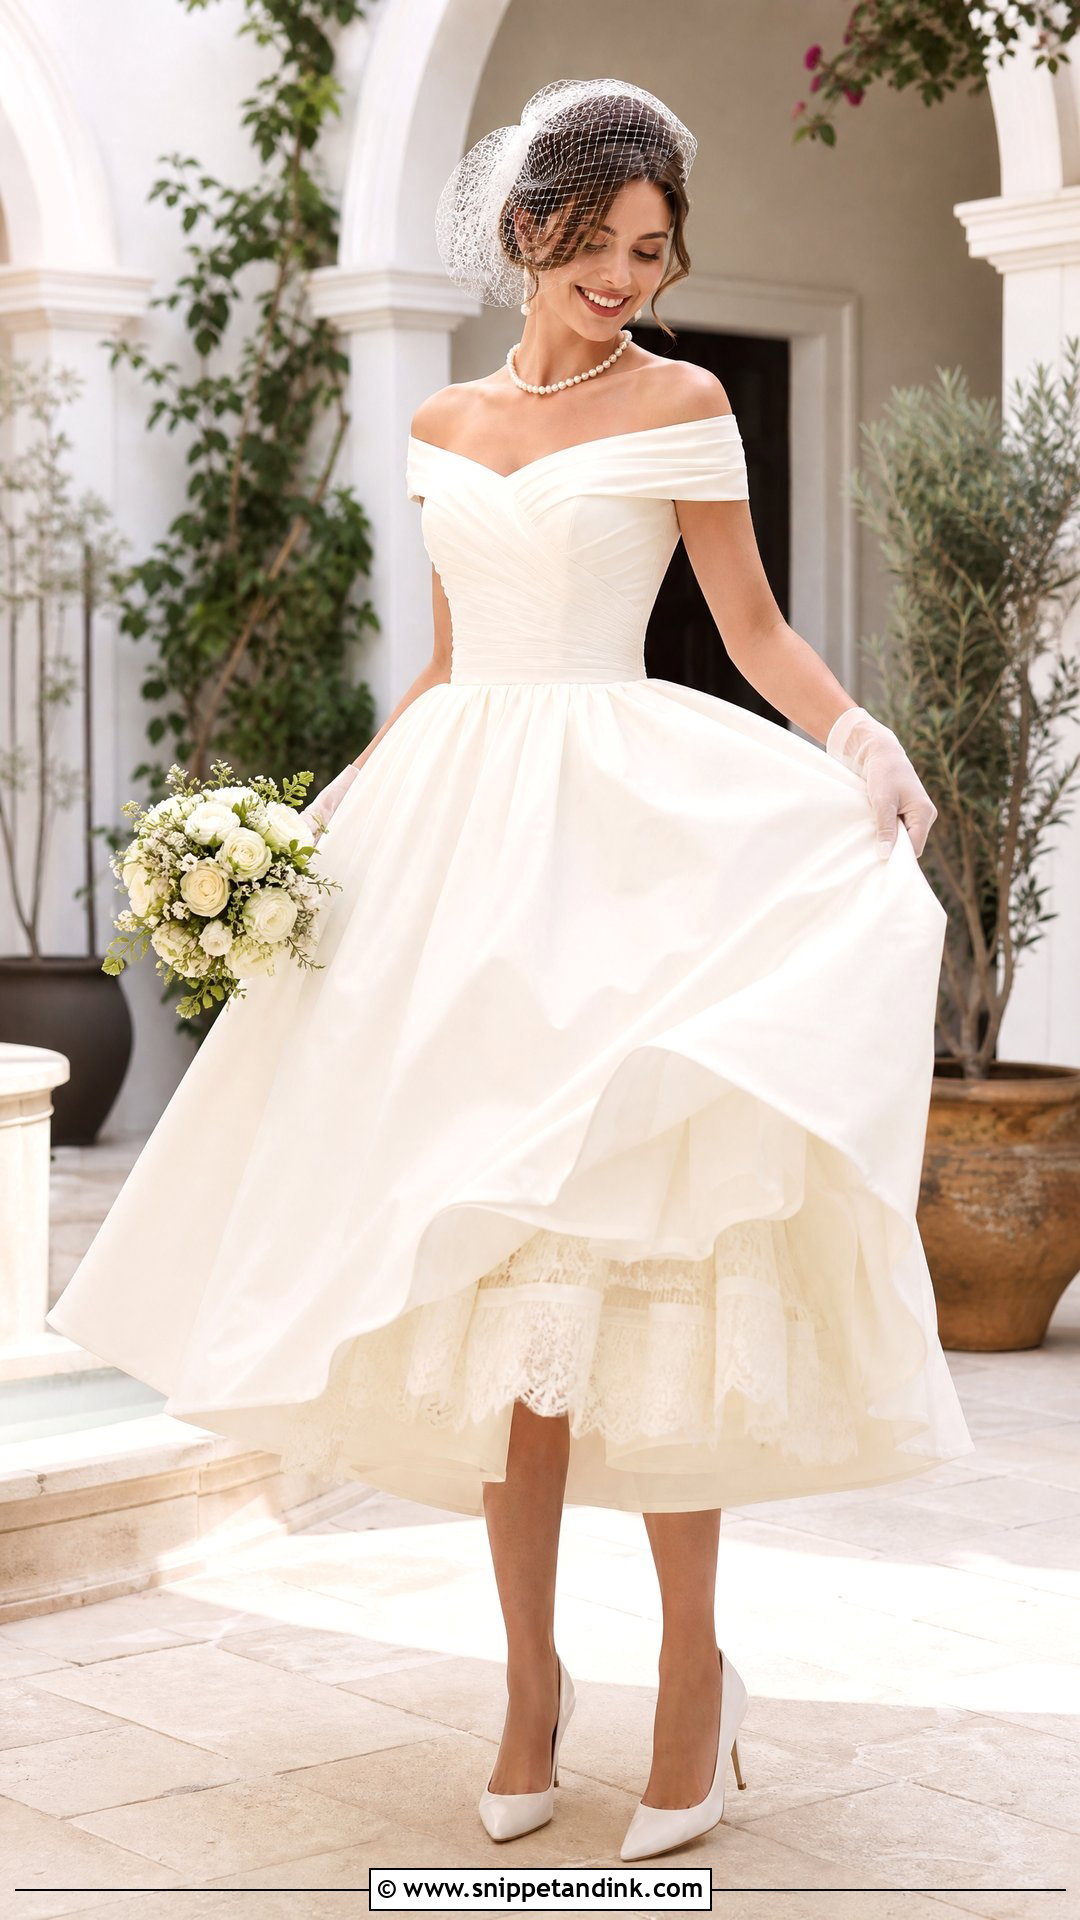
A small skirt lift shows off your shoes and makes a full-length portrait feel playful. Gather a little fabric at each side; lifting the whole skirt hides the shape of the dress. Elbows soft, hands even or slightly staggered. Point one foot forward, bend the other knee or take a careful step toward me. Full skirts and light A-lines lift easily; fitted gowns only need a small lift at the front hem. Check the fabric isn’t twisted where you’re holding it, because those folds show. Look at me for something cheerful or down at your shoes for a candid feel. Keep the hair, accessories, dress, shoes and train all in frame.
13. Seated Wedding Dress Pose
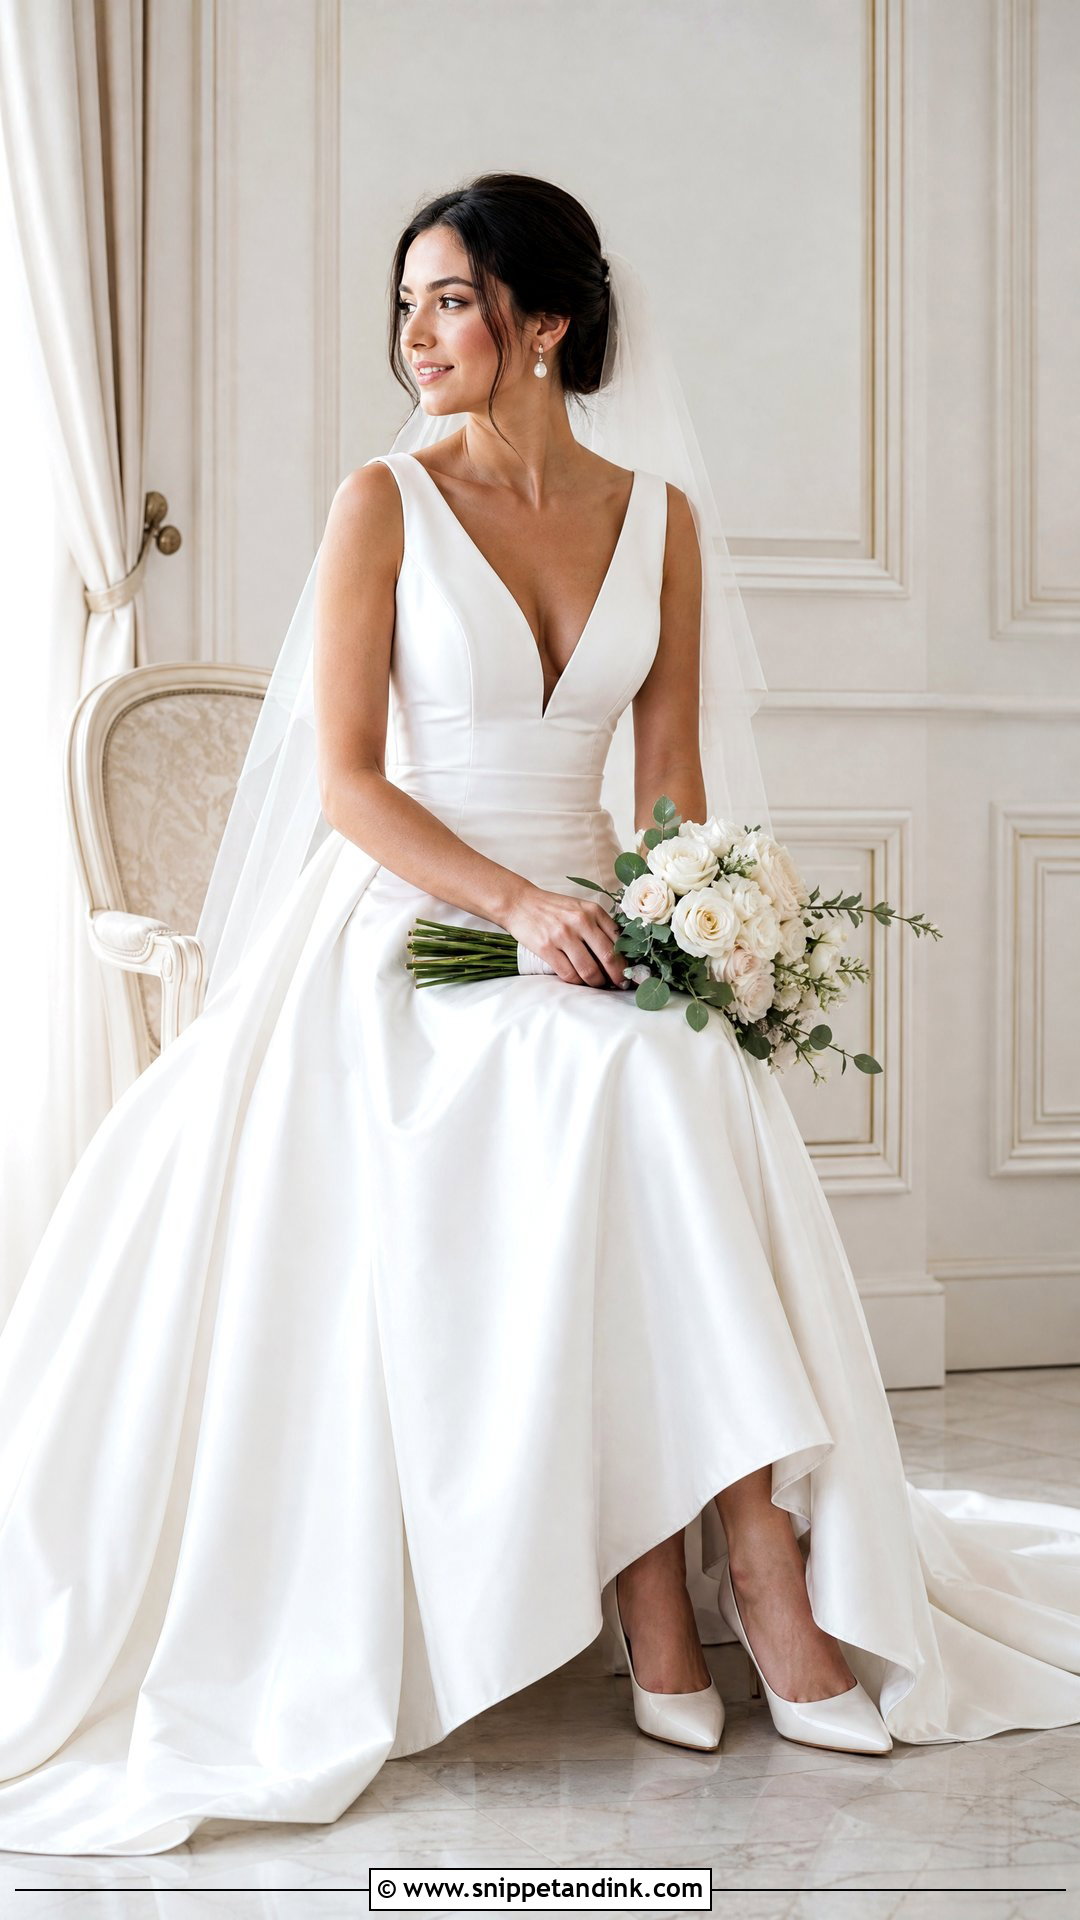
A seated bridal portrait gives a quieter frame and a break for tired feet. Pick a firm chair or bench and sit toward the edge; leaning back into a soft seat collapses your posture and creases the bodice. Angle your knees away from the camera, lengthen your spine and keep your feet together or slightly staggered. Arrange the skirt around the chair rather than under you. The bouquet can rest loosely in your lap or beside you if it covers too much. Hands lightly over one another. Full skirts and fitted gowns both work if arranged with care, and a three-quarter angle shows the dress, shoes and face better than straight on.
14. Staircase Wedding Dress Pose
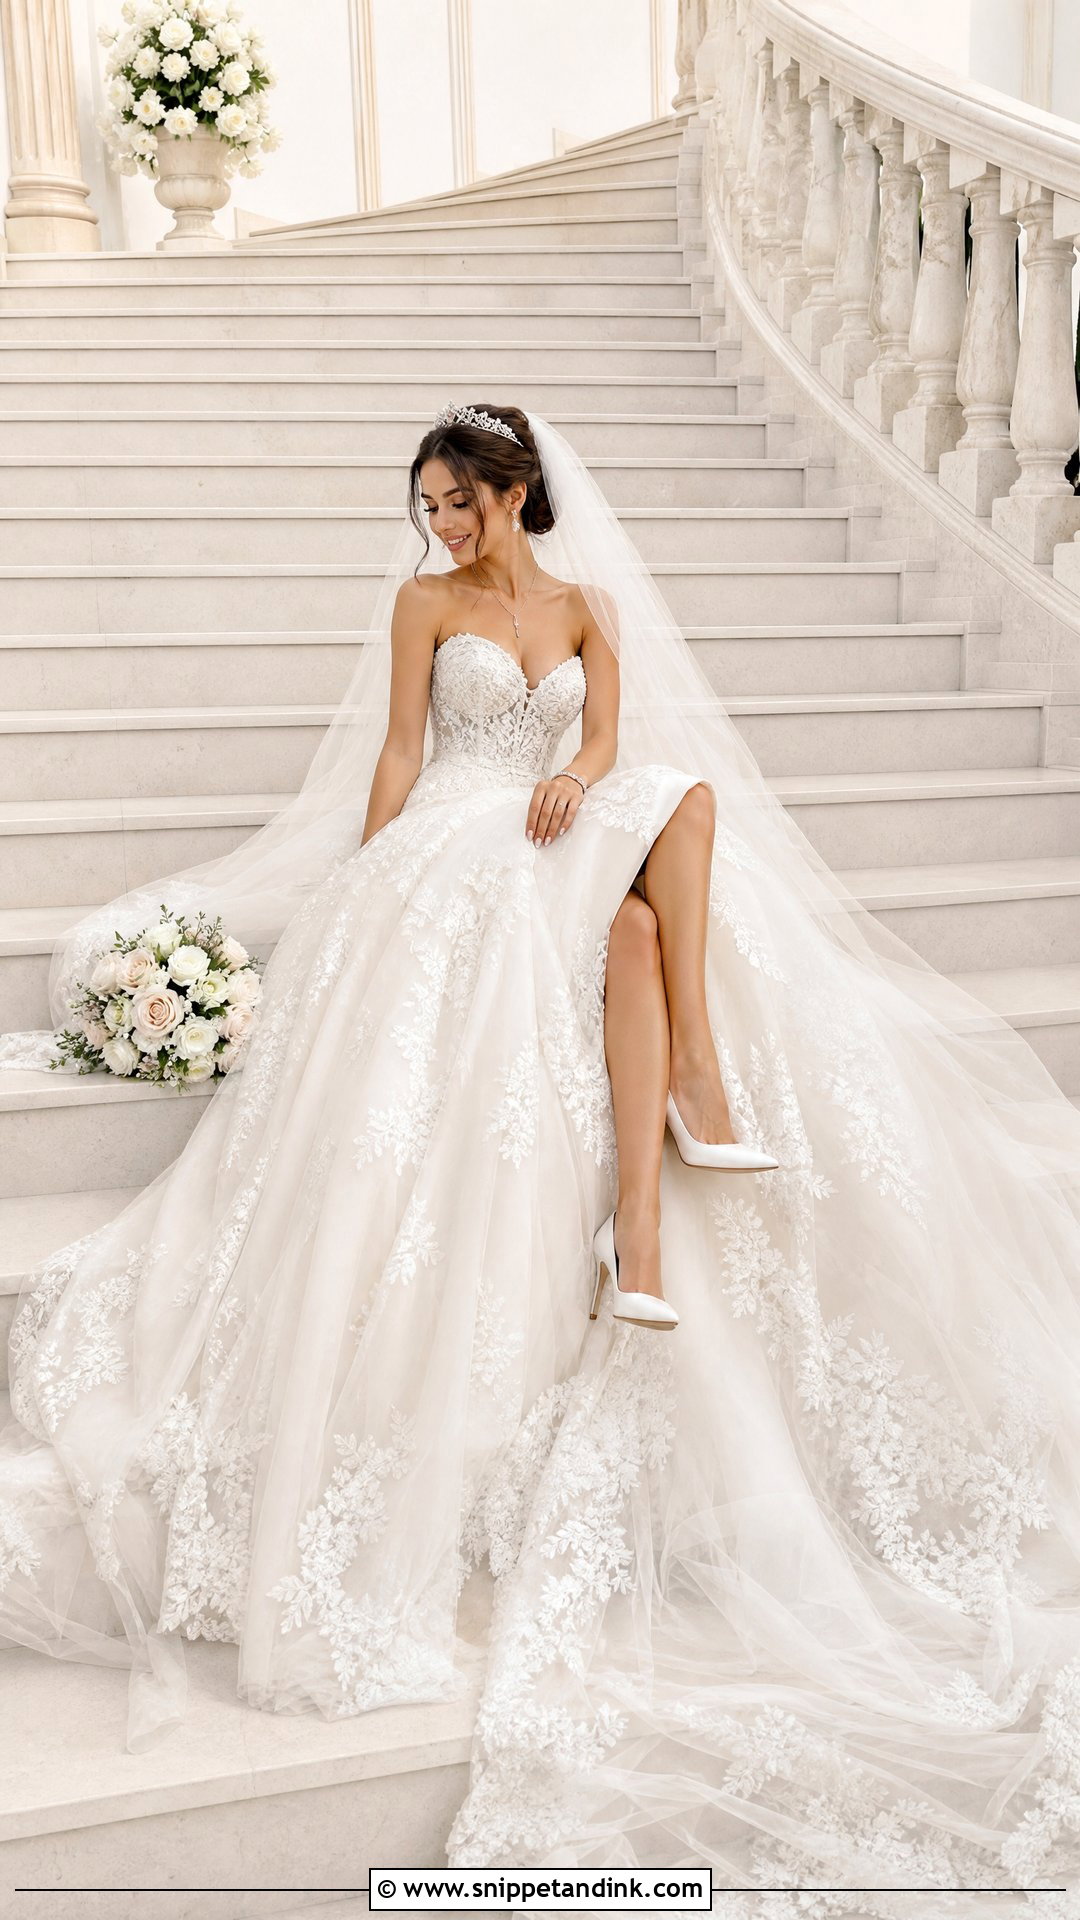
Sitting on a staircase lets a skirt and train spill down several steps, which is one of the few ways to show the whole length of a big gown in a seated shot. Wide, clean steps are essential. Sit sideways or slightly angled, back long and shoulders loose, with one leg lower than the other. Spread the skirt down the stairs so lace edges, pleats and embroidery show. The bouquet goes beside you or loosely near your lap. Turn your face to the light. It suits ball gowns and long trains most. I shoot from about your level rather than from the bottom of the stairs, which distorts proportions.
15. Walking Up the Stairs Wedding Dress Pose
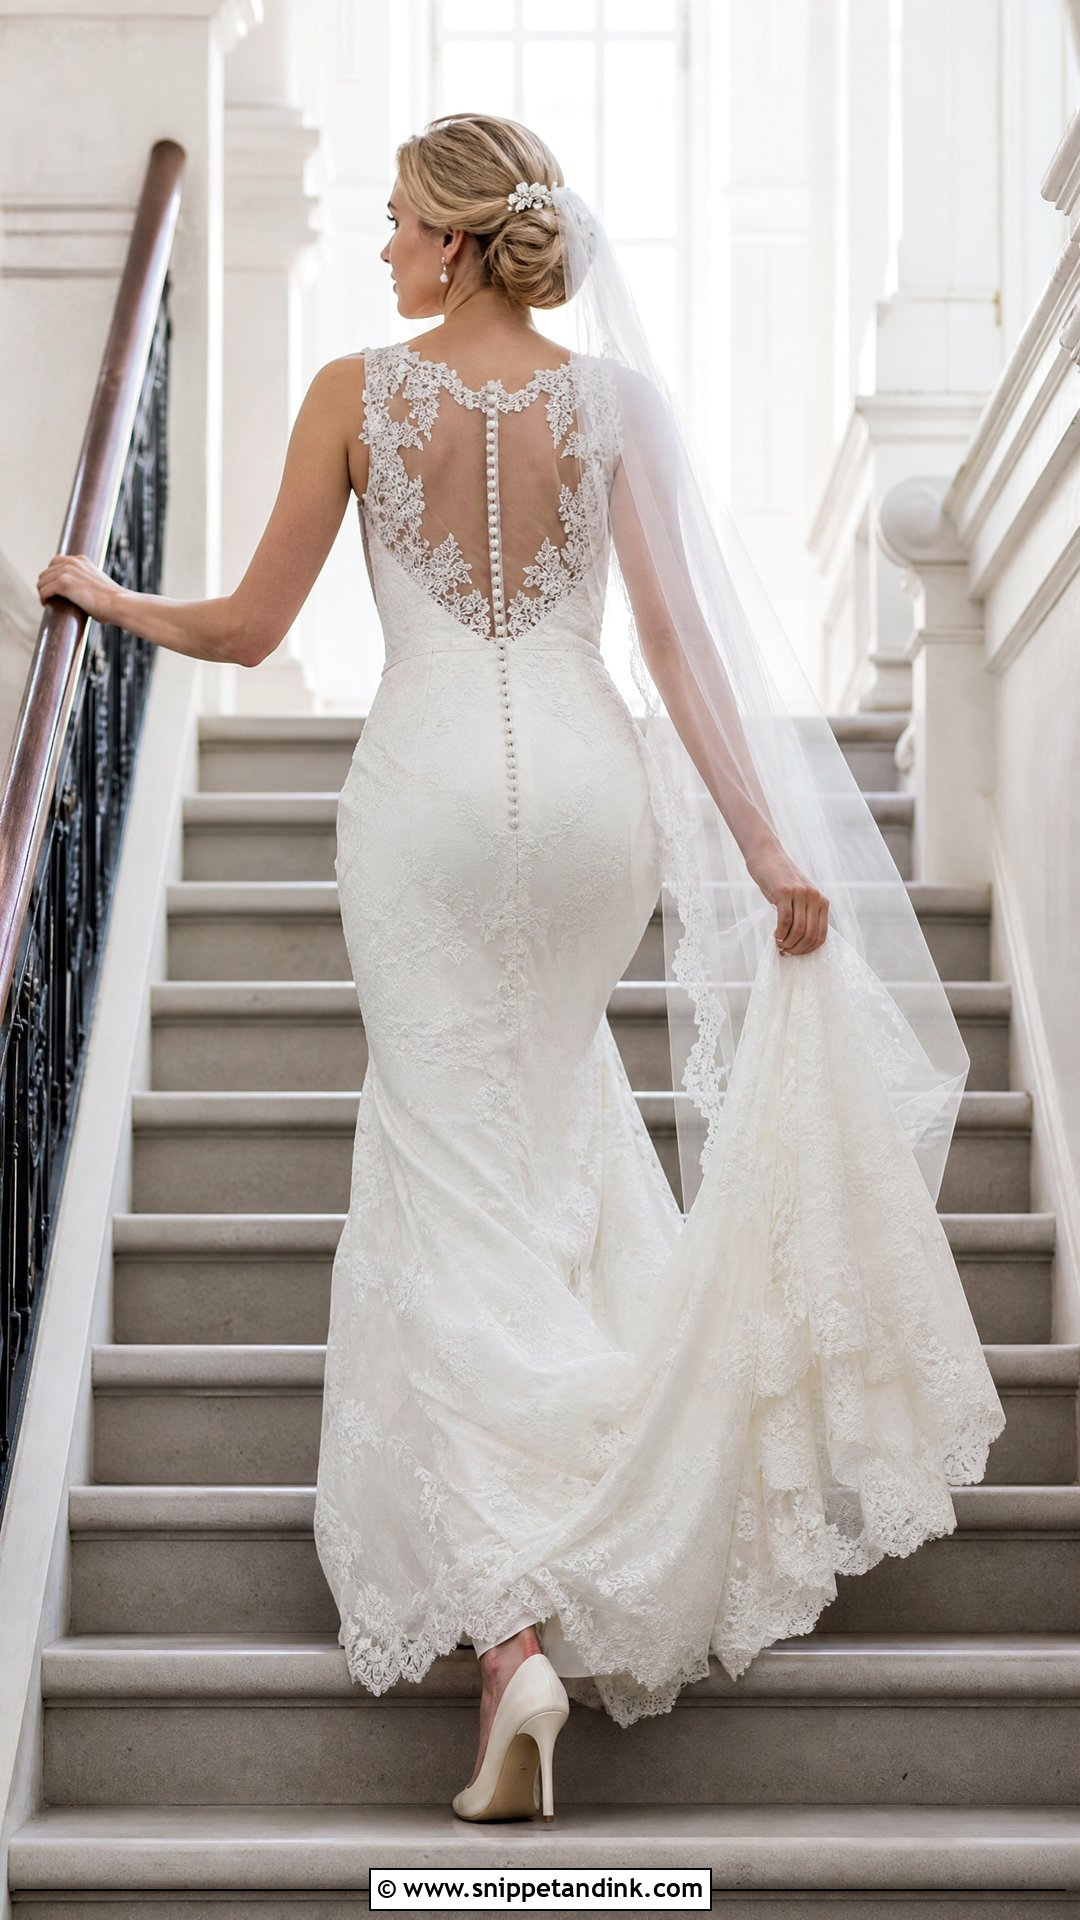
Climbing stairs slowly shows the back of the gown and the train trailing behind, but safety comes first. Hold the rail and gather a little skirt in your free hand. Go up one or two steps, pause and turn your head toward me without twisting your whole body, which is hard in a fitted dress anyway. I stand back at a safe distance and frame the stairs, veil, train and back. Check your shoes are secure and the steps are dry and clear before you move. A helper carries the train between shots and lays it out each time you stop.
16. Window Wedding Dress Pose
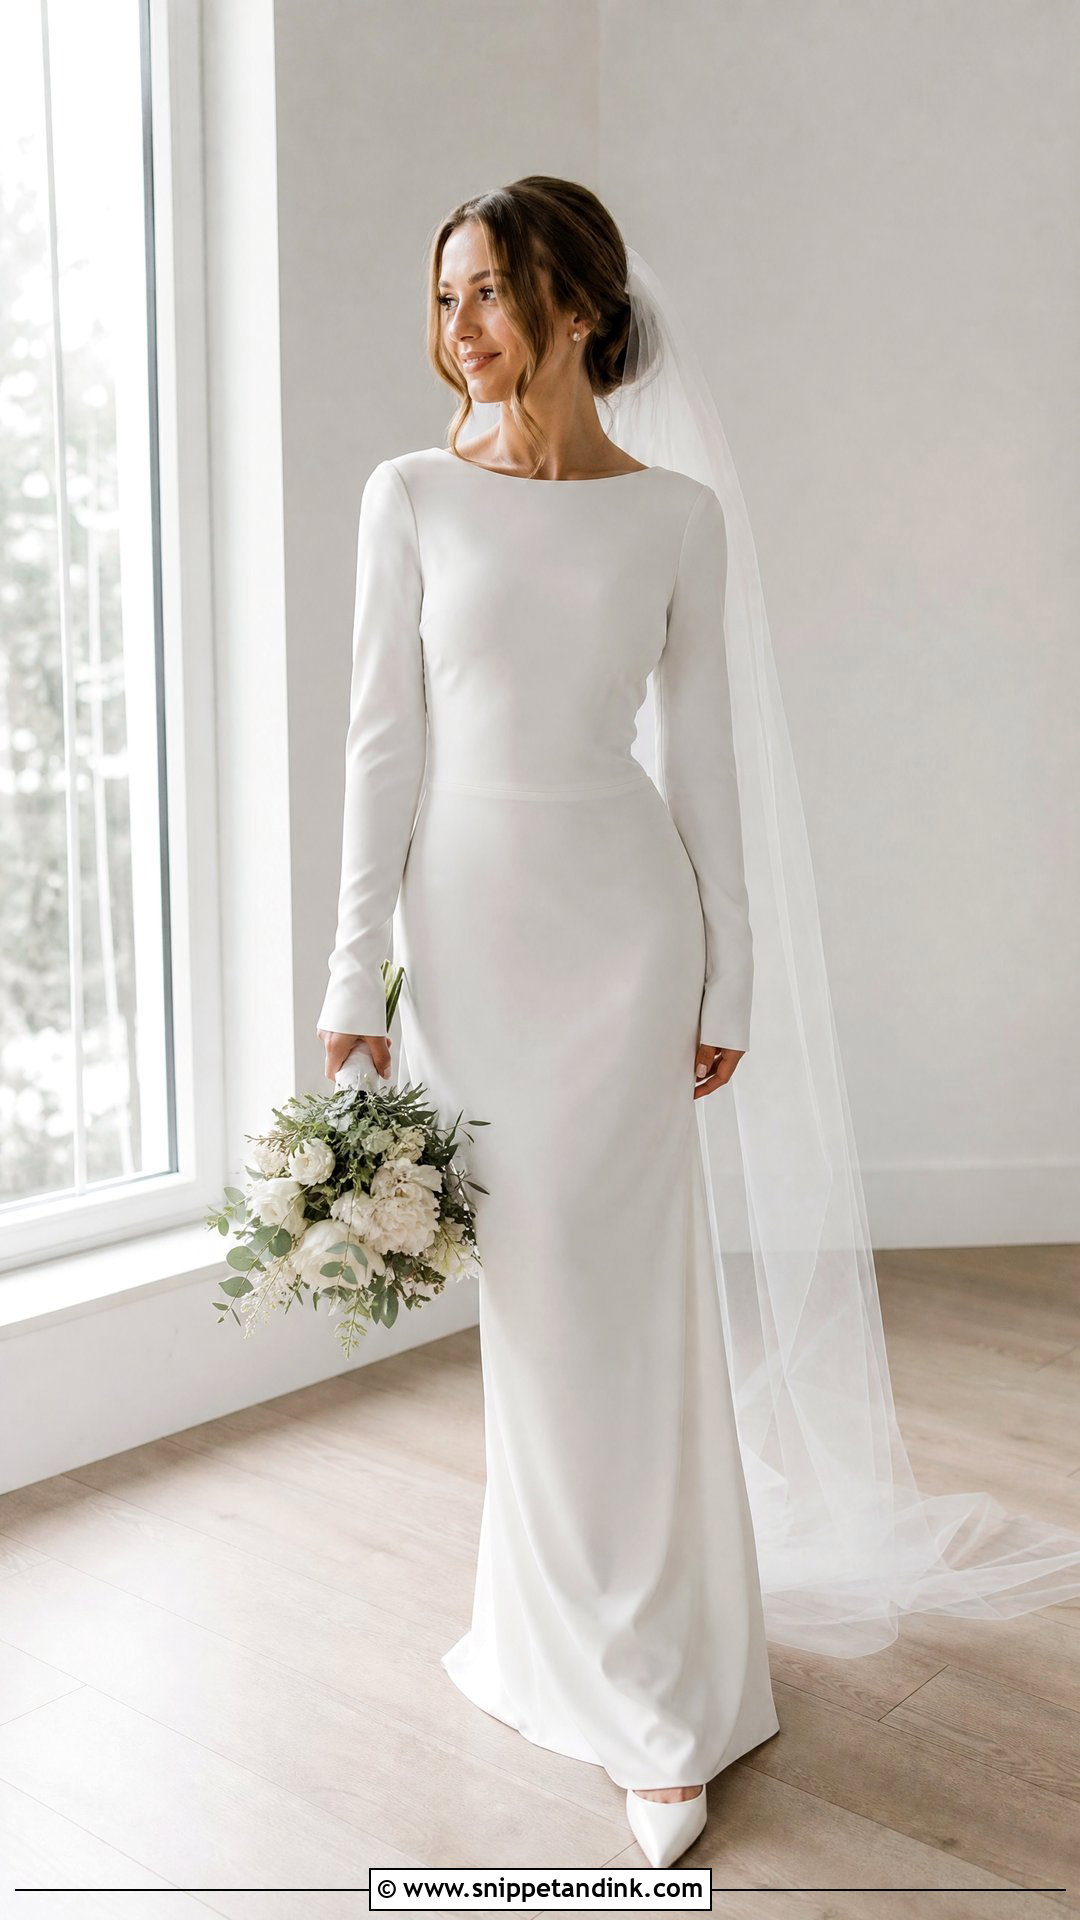
Window light is the softest light most venues have, and it’s where I take many of my favorite dress portraits. Stand beside a large window with your body angled toward it, not pressed against the glass. Hold the bouquet low or rest a hand on the frame. Look outside, toward me or close your eyes for a moment. Getting-ready rooms are cluttered, so clear the garment bags and makeup cases out of the background. Sheer curtains can frame you but shouldn’t cover the sleeves, veil or train. I’ll take a wide head-to-toe image and a closer vertical. Lace, satin, beading and long sleeves all show texture well in side light.
17. Mirror Wedding Dress Pose
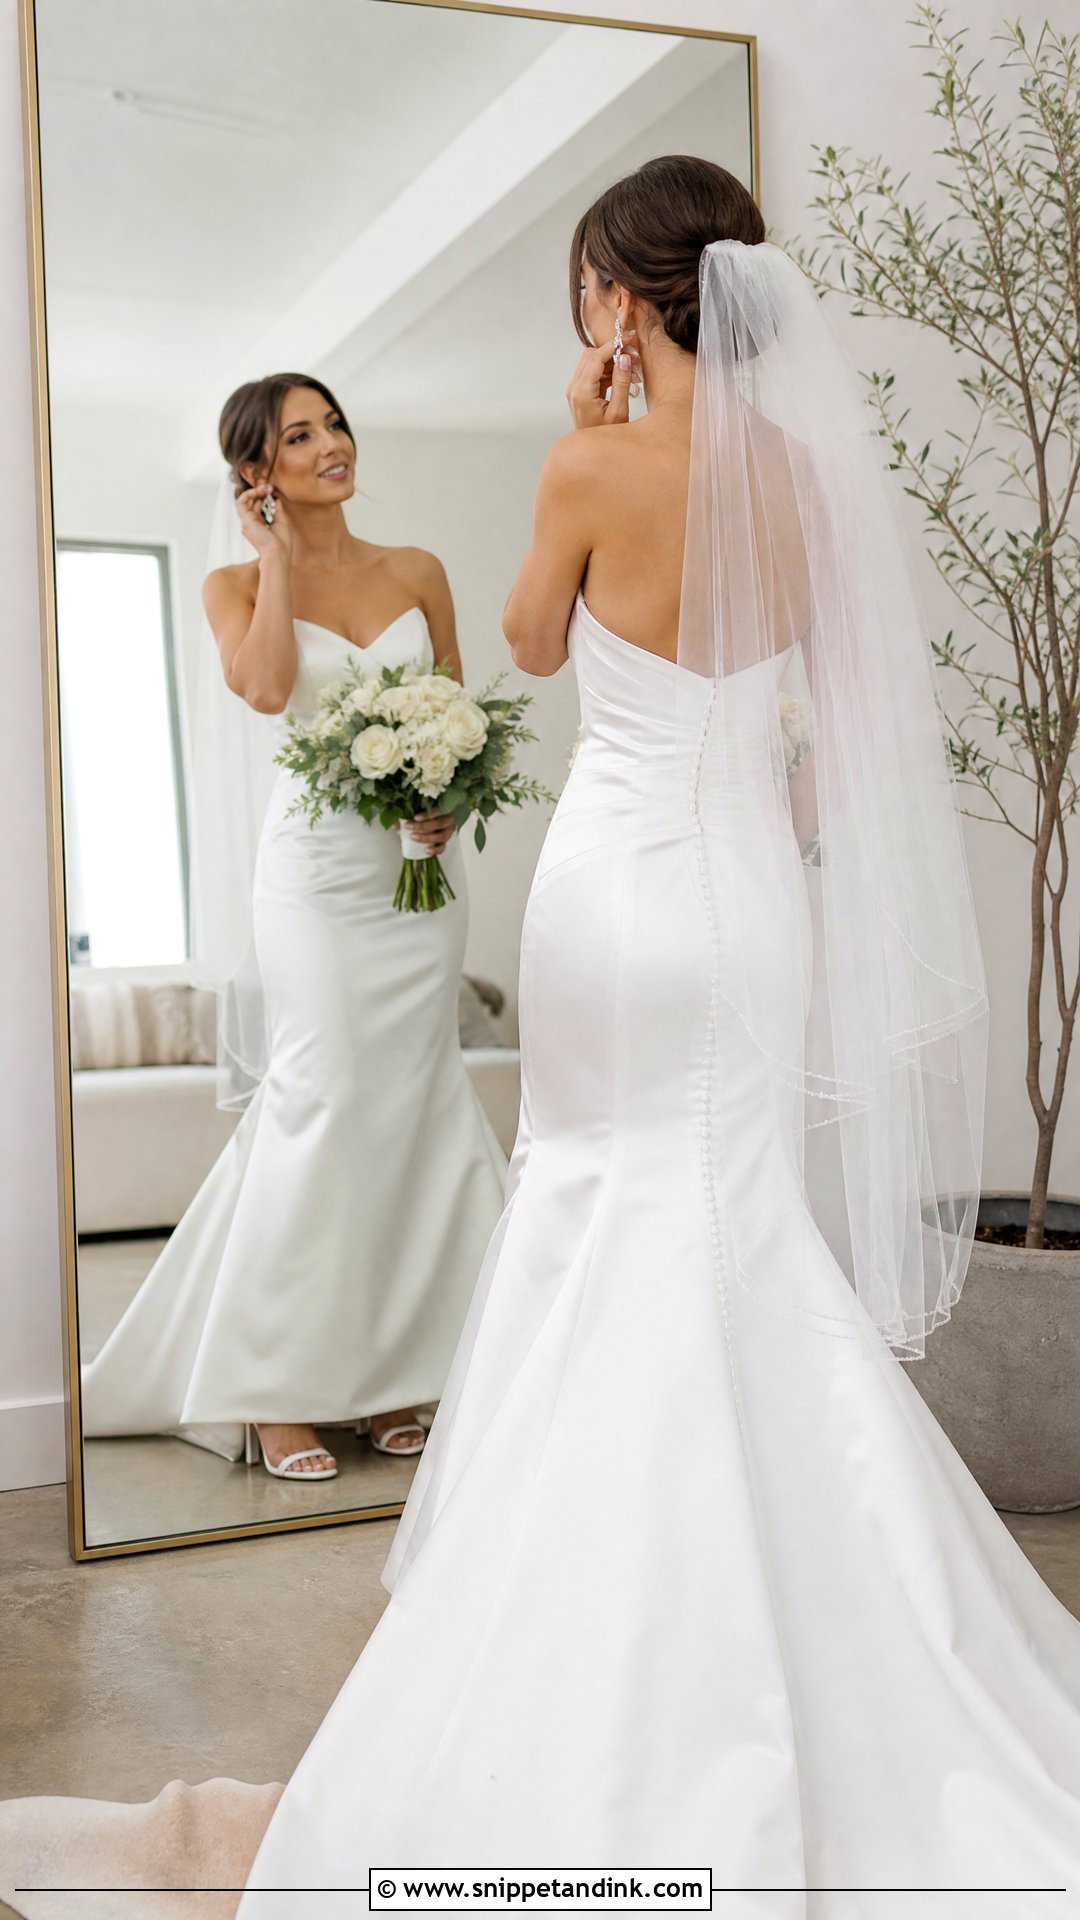
A mirror lets one frame show the front and back of the dress. Stand close enough for a clear reflection with room for me to frame your full silhouette. Turn slightly and give your hands something to do: fix an earring, touch the veil, hold the bouquet by your hip. Look at your reflection rather than the camera, which gives that getting-ready feel. Wipe the mirror and clear the surfaces around it first, because fingerprints and clutter show up sharply. Ornate frames feel traditional; a plain full-length mirror feels modern. I’ll adjust my angle so I’m not in the reflection, and even lighting keeps both your face and the dress clear.
18. Hands-on-Waist Wedding Dress Pose
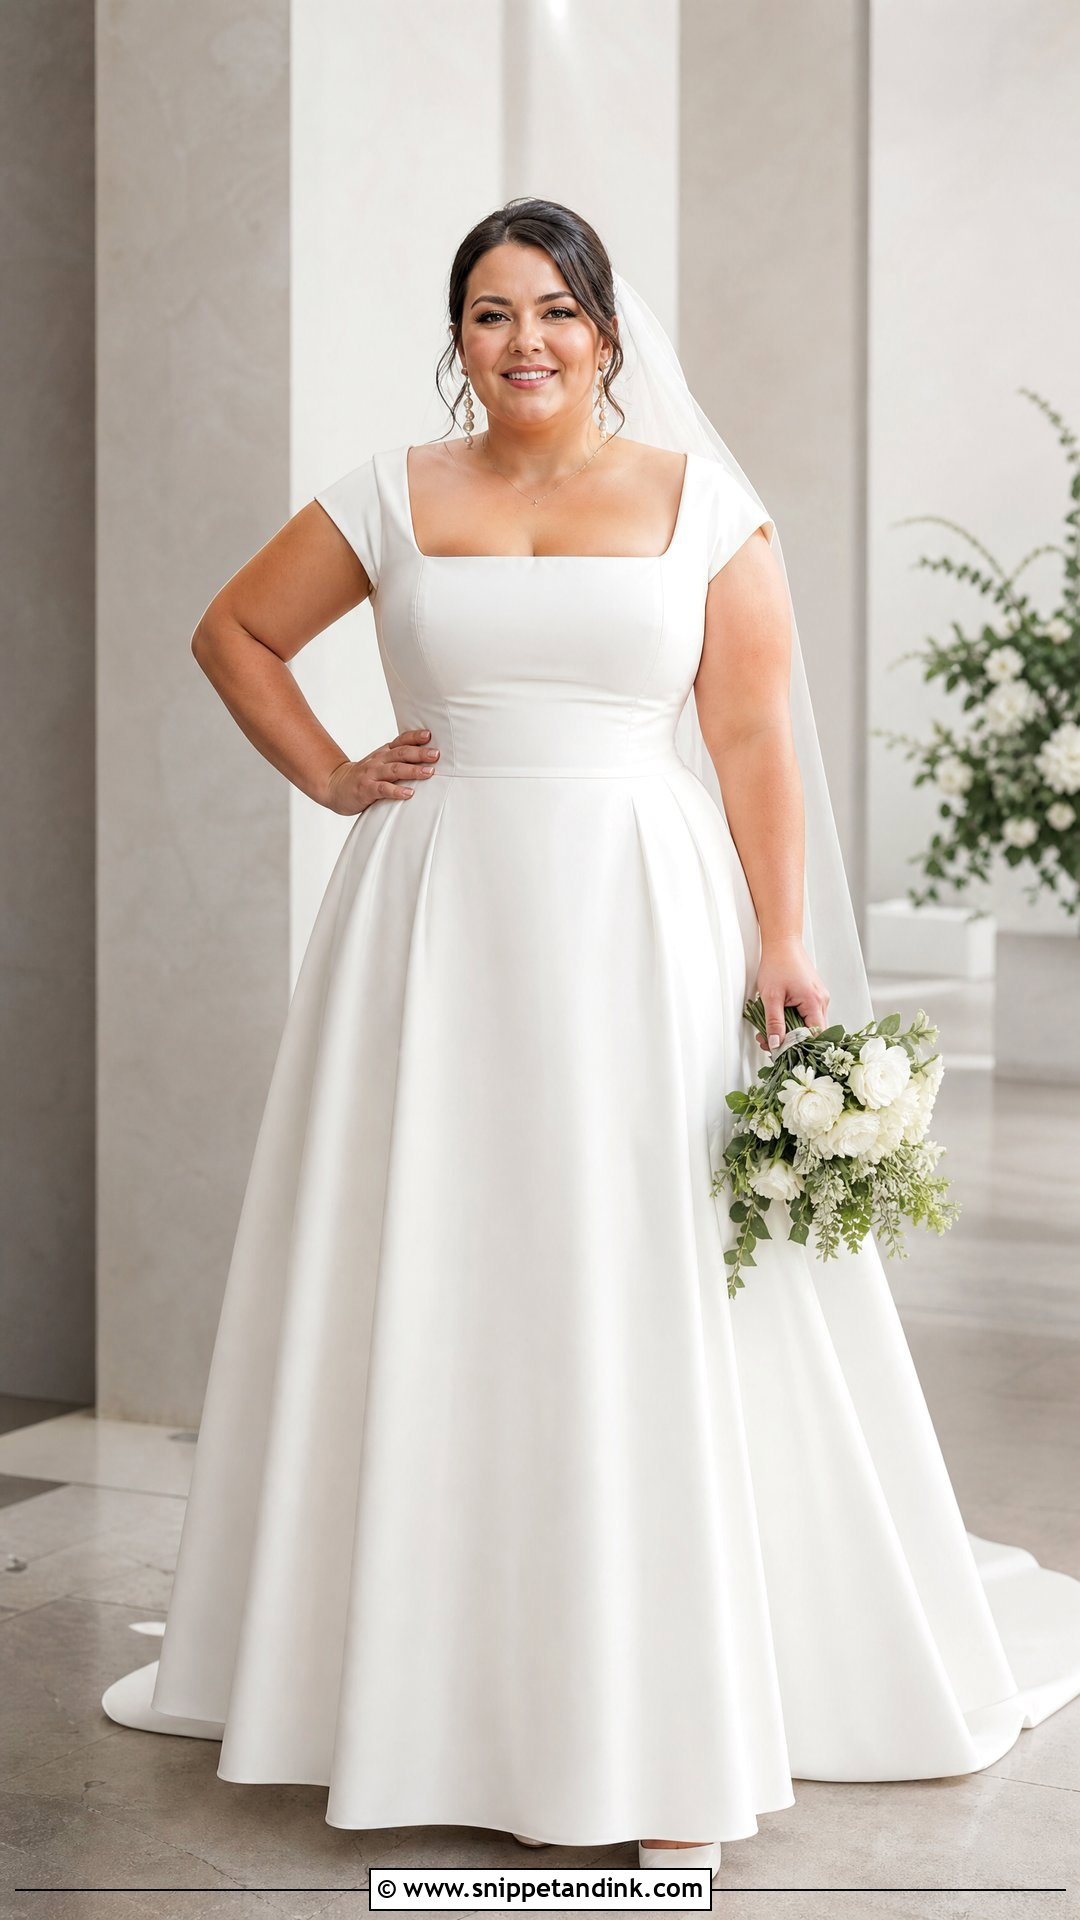
Hands at the waist define the silhouette and look confident, but press too hard and the fabric wrinkles and your arms flatten. Rest your hands lightly at the narrowest part of your torso, fingers slightly apart, wrists loose. Turn a little away, weight on the back leg, front foot forward. Structured bodices, corsets, belts, fitted waists and bridal suits suit it. Two hands can feel formal; one at the waist with the other holding the bouquet or touching the skirt is easier. Keep your shoulders down. Looking straight at me reads editorial; looking to the side softens it.
19. Wedding Dress Train Pose
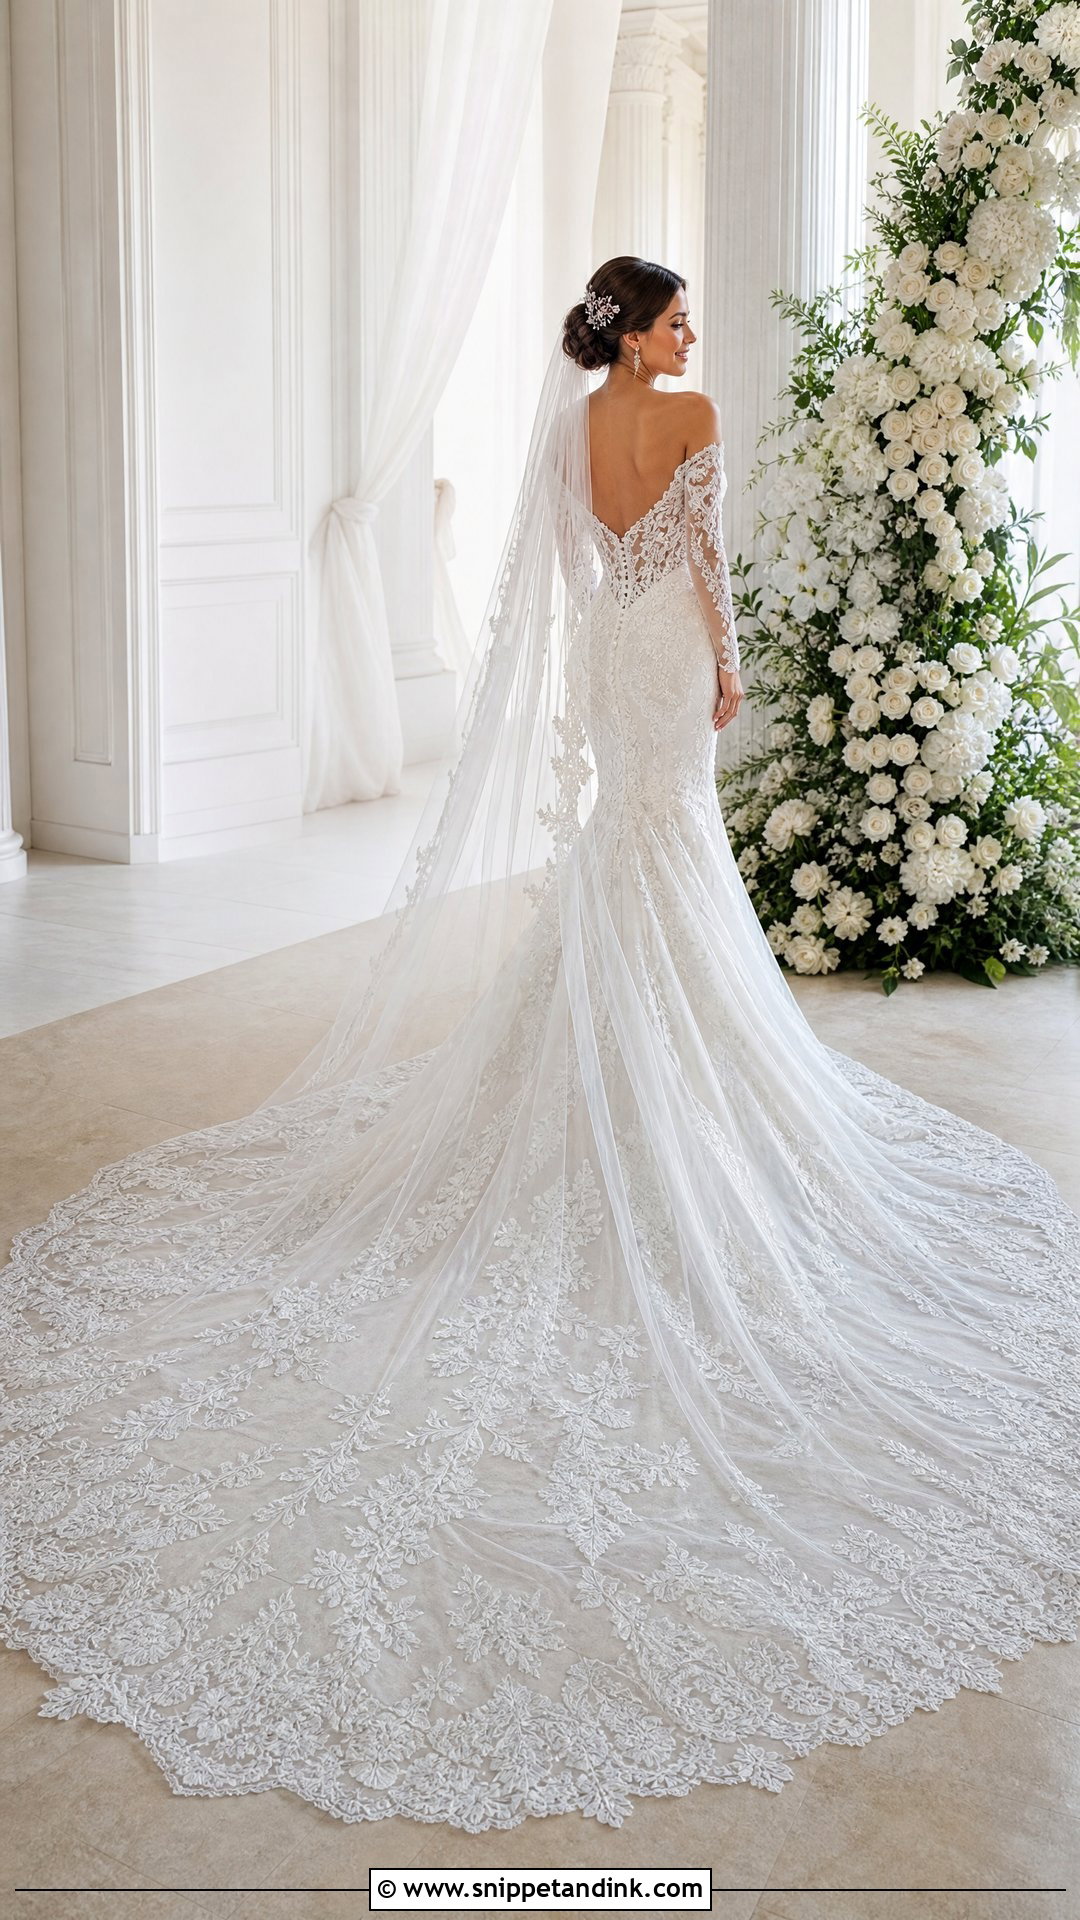
A train shot only works if someone arranges the train properly first. Stand facing away from me or at a three-quarter turn, and have a helper fan the fabric evenly along its seams and natural shape. Cathedral and chapel trains look best in a wide curve; a short sweep train only needs straightening. Spread too wide, the train looks like a separate piece of cloth. The veil can fall down your back, lie beside the train or lift slightly to show detail beneath. Look over your shoulder, or face away for a fashion feel. I shoot a wide vertical so the lace edge and final point of the train aren’t cut off.
20. Natural Laugh Wedding Dress Pose
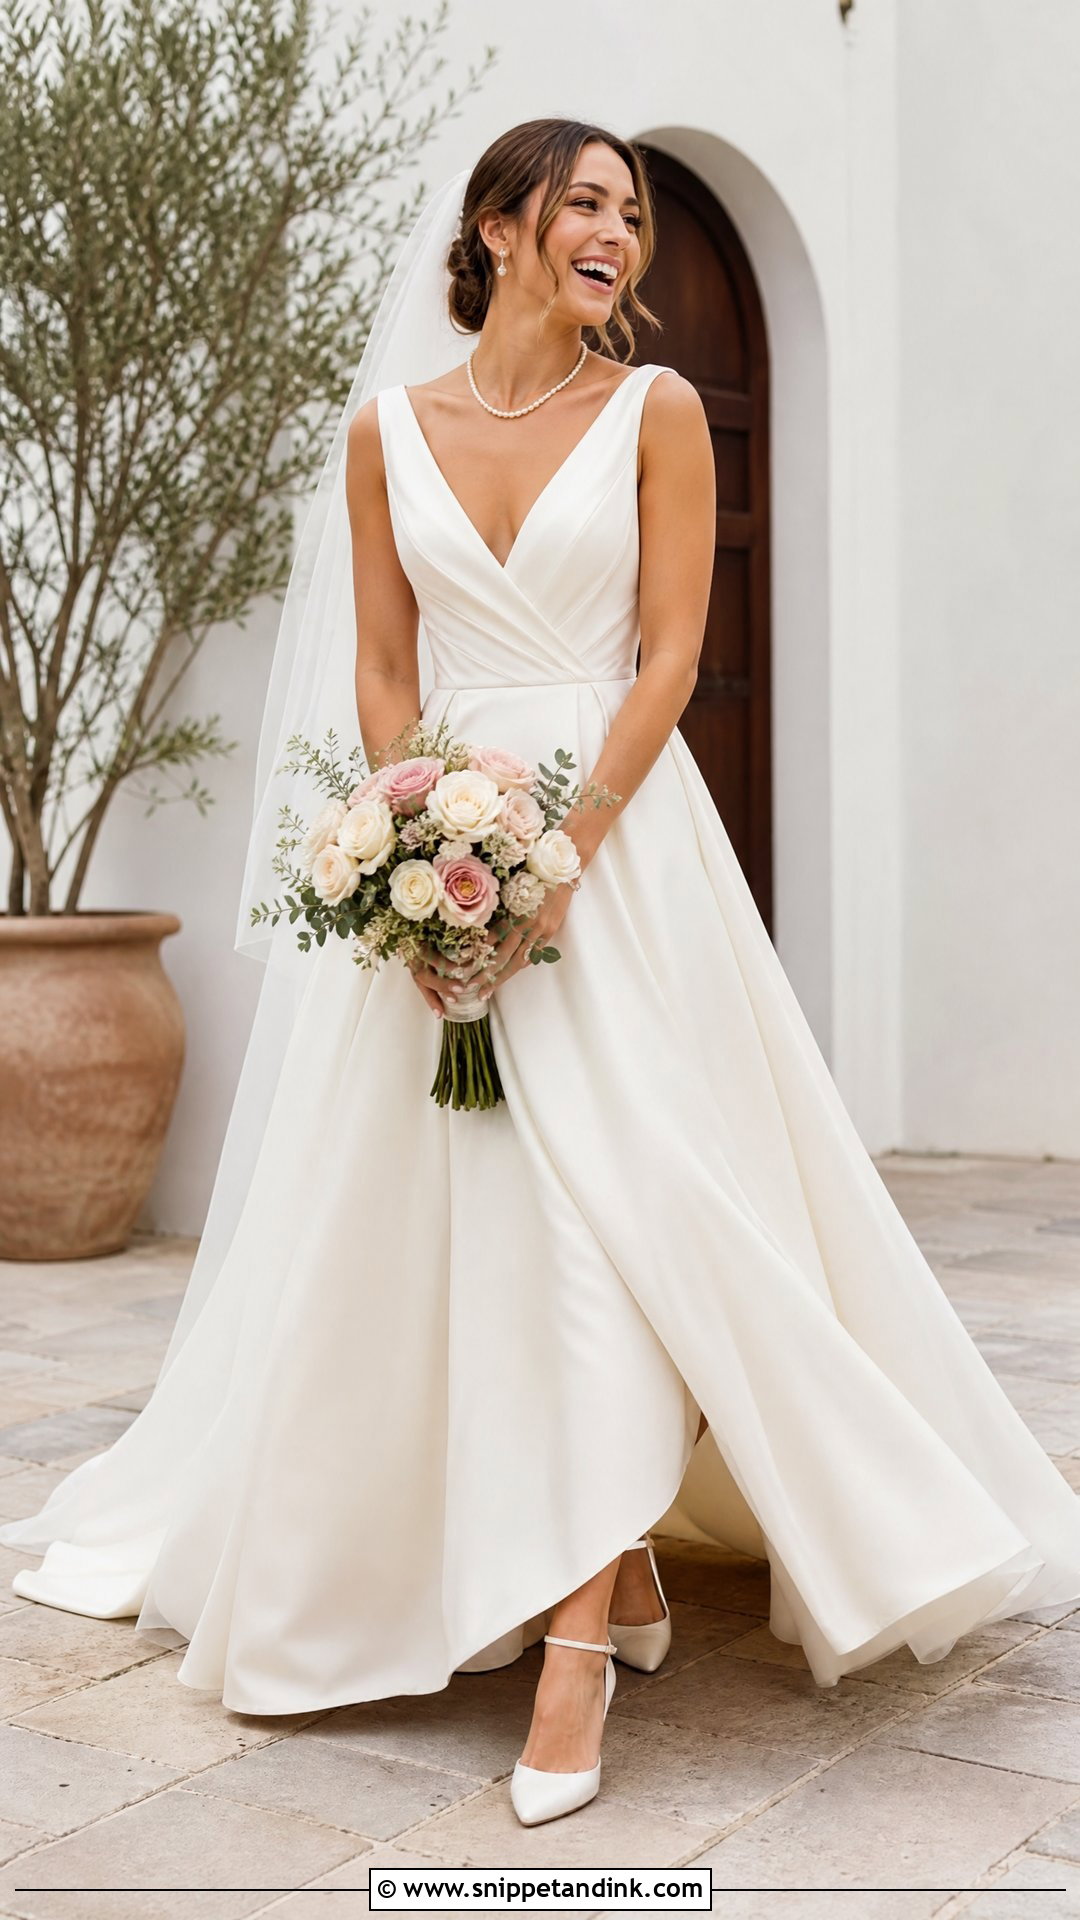
A genuine laugh rarely comes on command, which is why I save it until the formal portraits are done and you’ve relaxed. Stand or walk comfortably, and I’ll give you a prompt rather than ask you to smile. Look at someone you trust, shake out your shoulders, take a few slow steps or play with the skirt. Holding a big grin for several seconds goes stiff; the real expression usually sits between poses. Keep the bouquet below the bodice. Every silhouette and body type works here. I keep shooting through the laugh, since the best frame is often just before it or in the smile right after.
Where the Time for Bridal Portraits Actually Comes From
On most wedding days, bridal portraits get squeezed between the ceremony, family groups and dinner. Twenty poses won’t happen in five minutes, so the schedule has to make room for them.
Before the ceremony
If you’re doing a first look, or simply getting dressed early, the hour before the ceremony is the best time. Your hair and makeup are fresh, the dress hasn’t been sat in, and nobody is waiting for you. Even fifteen or twenty unhurried minutes covers a lot of this list.
Later in the day
The hour before sunset gives warm, low light that’s kind to skin and to white fabric. Ask your planner to hold ten to twenty minutes free around then. Midday sun is the hardest light for a white dress, so if portraits must happen then, we’ll look for open shade.
Whatever time you choose, keep the bustle down until portraits are finished, have one helper for the train and veil, and keep water nearby. Tired brides stiffen, and it shows.
Soft Hands, Slow Steps and a Photographer Who Knows Your List
A good portrait list covers the dress from every side: front, back, train and movement, along with the accessories and the person wearing them. The poses above mix formal portraits, movement, seated frames and veil shots. Pick the ones your gown and venue allow and that feel comfortable for your body. Share your favorites with your photographer in advance, practice just enough to know the basic shapes, and on the day keep your shoulders loose, your hands soft and your steps slow. Direction gets the dress right; how you feel gets the expression right.
You'll Like These Ideas:


Leave a Reply