
The cake cut is one of the few reception moments I can plan around almost completely. It happens in one spot, at a time we agree on, with the couple standing still for a minute. That makes it a gift for a photographer and a missed chance when the table is shoved into a dark corner by the DJ booth. A good cake picture shows the whole cake, the couple’s hands, and enough of the room to say where you were. Below are twenty cake styles I’ve photographed with couples, with notes on how each one behaves in front of a lens and what I’d set up differently for it.
Where Should the Cake Table Go?
Venues usually put the cake wherever there’s space left over, and that’s often the worst light in the room. I’d rather move a table three meters than spend the evening fighting shadows. Before the reception layout is final, I ask the coordinator these questions.
- Is there a side window or a soft light source nearby? Side light shows piping and texture far better than overhead spots.
- What will be behind the couple when they stand at the table? Fire exits, the bar, the DJ booth and catering doors all show up in every frame.
- Is there space to walk around it? I need room on at least two sides to get the wide shot and the hands close-up.
- Will colored uplighting hit the cake? A white cake picks up whatever color is pointed at it.
If the cake will sit outdoors in a warm month, also ask the baker how long it can be out. Buttercream and fresh cream cakes look their best in the first hour, so I’ll photograph the details as soon as it’s set up, before the room warms with guests and before anyone leans on the table.
1. Classic Tiered Wedding Cake Photo
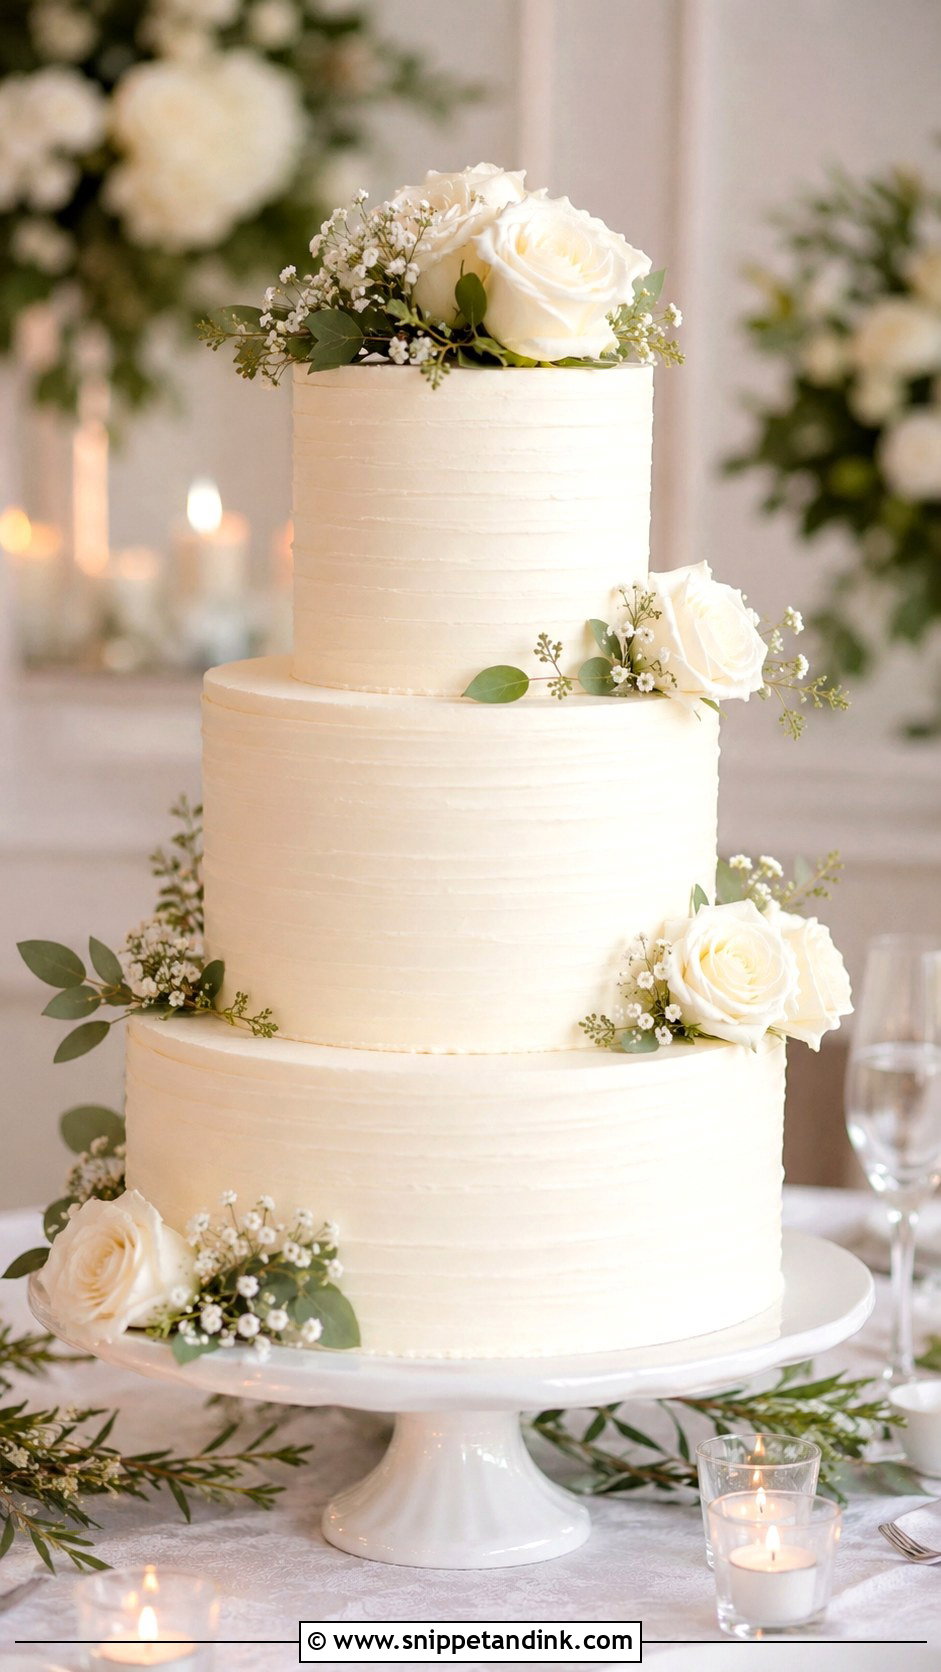
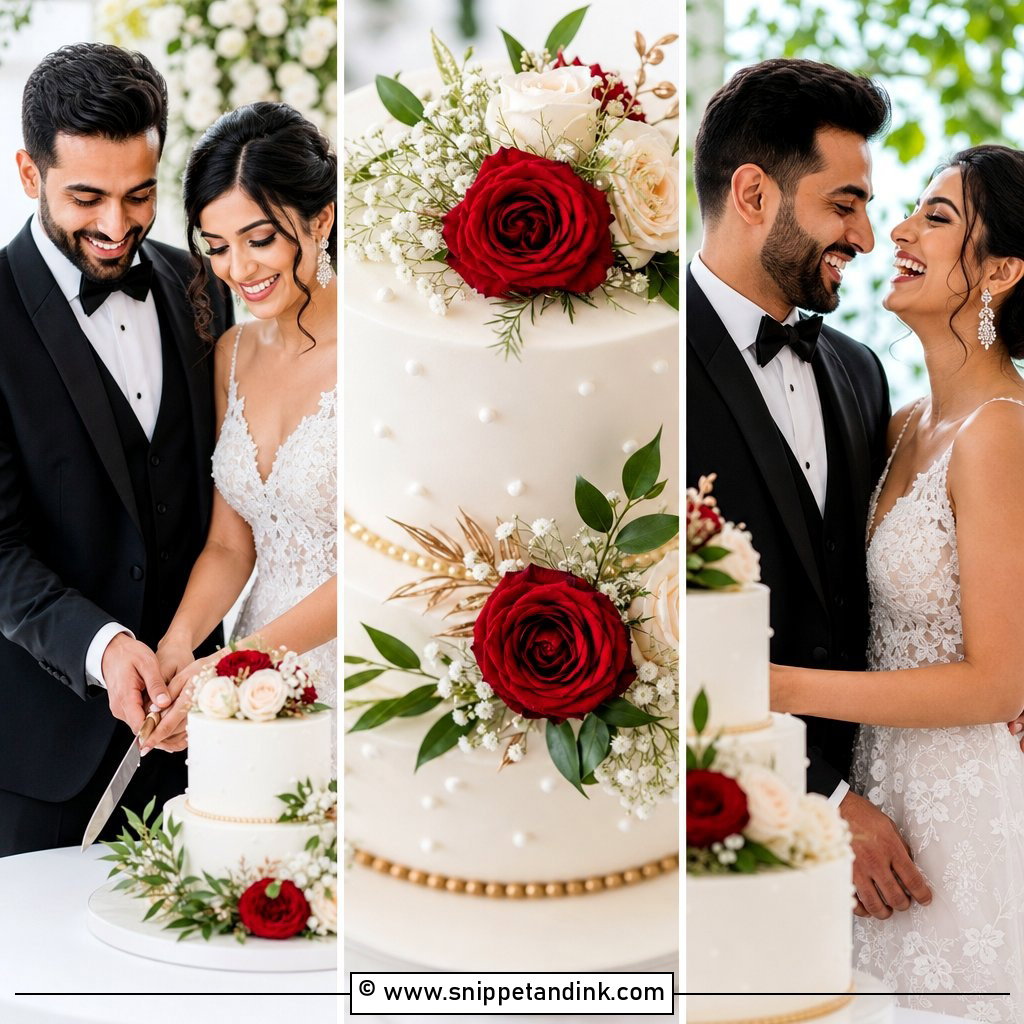
A classic tiered wedding cake is the easiest to photograph well because its outline is so clear. Ivory buttercream, a few roses or ranunculus, and a clean pedestal give me a shape I can frame from across the room. The one rule I give couples: don’t stand in front of it. Stand to either side, slightly behind, so the full height of the tiers stays visible. A soft, dim background behind the table helps more than any decoration on it.
2. Heart Shaped Wedding Cake Photo
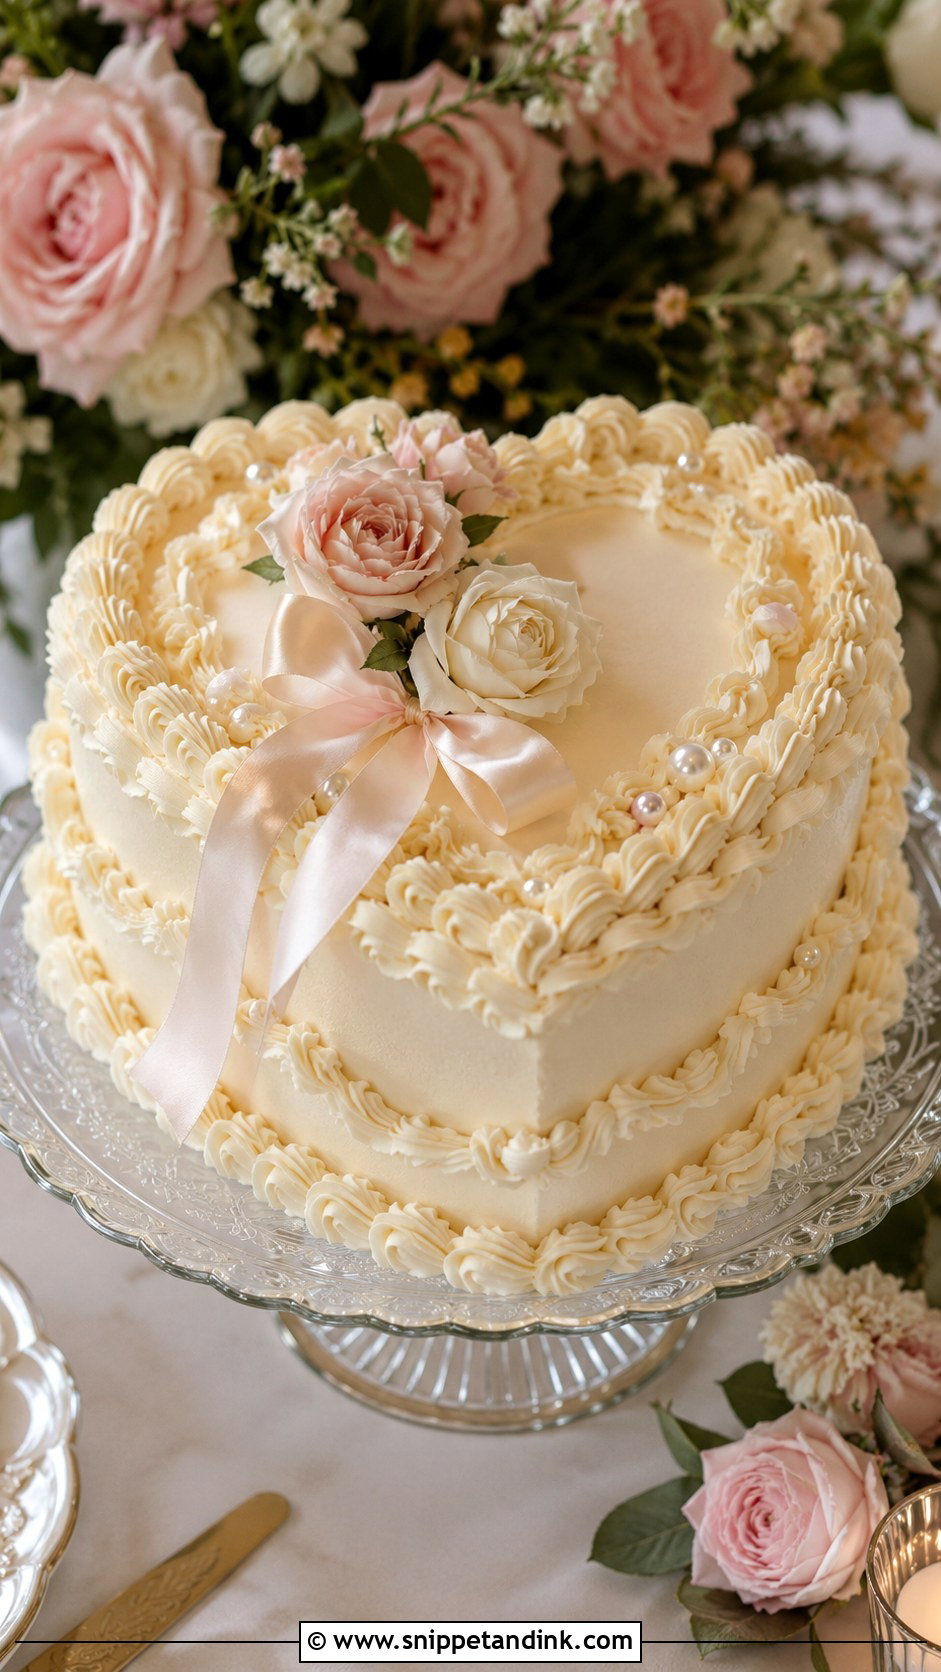
A heart shaped wedding cake loses its shape when it is shot straight on at eye level. From the front it can look like a lumpy round. I shoot these from a slightly raised angle, about forty-five degrees, so the outline of the heart reads clearly. Piped borders and small pearls help define the edge. Keep the rest of the table bare; ribbons and props crowd the shape. Laughing over the first slice works better here than a stiff pose.
3. Vintage Wedding Cake Couple Photo
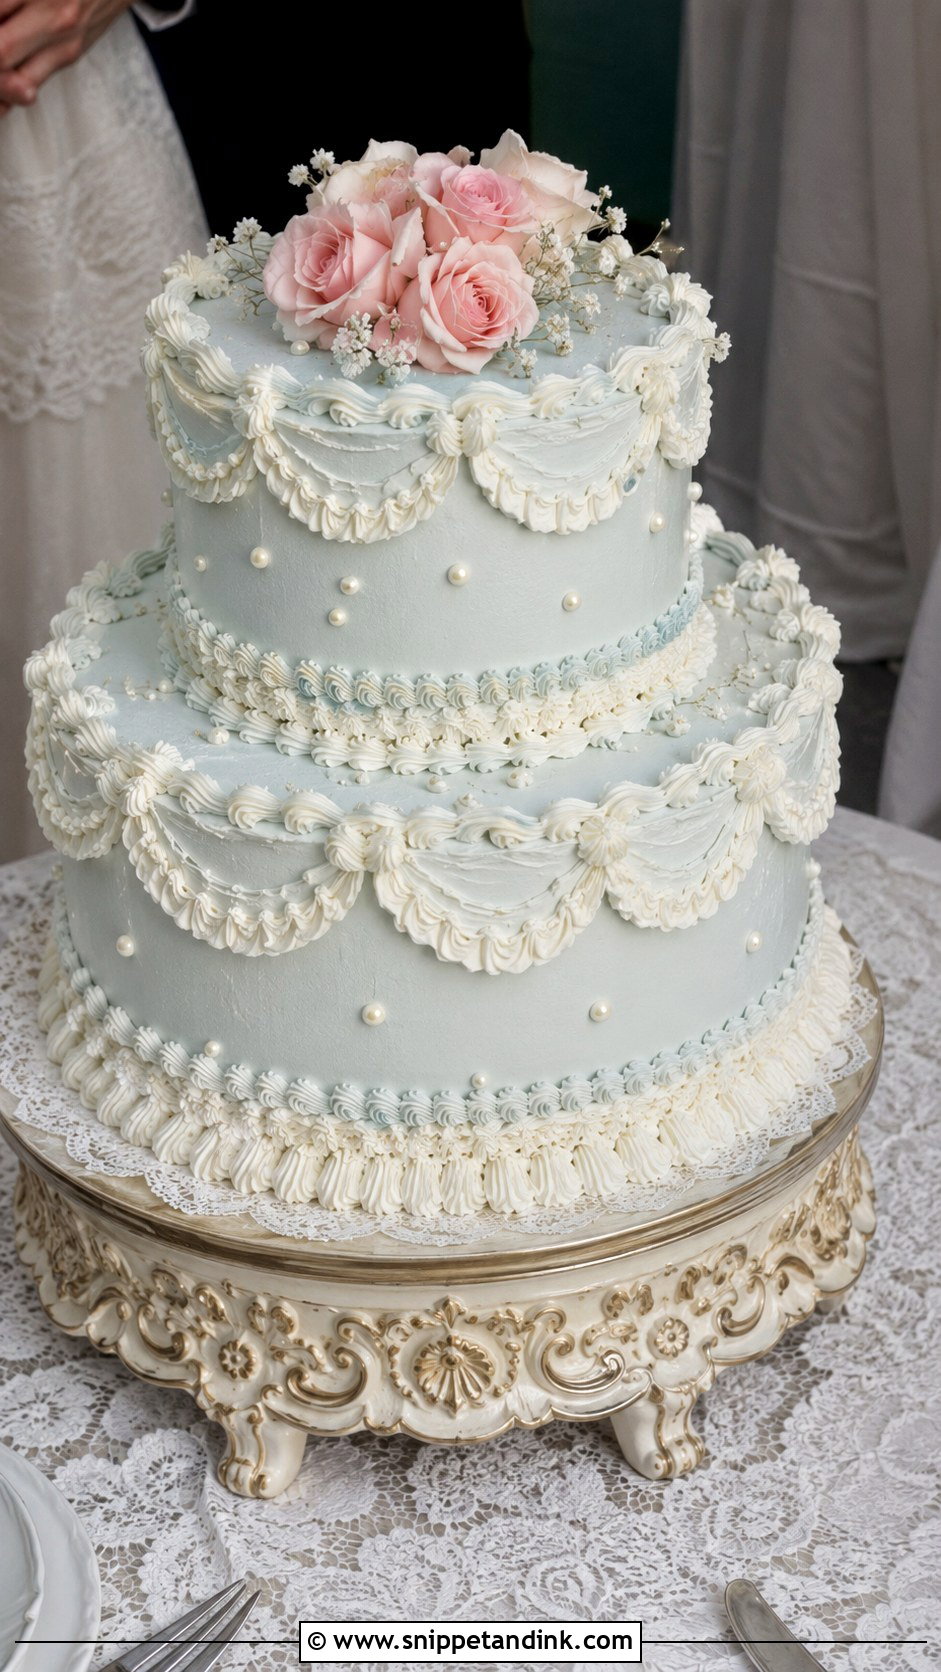
Lambeth piping, shells, swags and ruffles create shadows, and shadows are what make texture show up in a picture. That is why vintage cakes look so rich on camera, especially in side light from a window. Under flat overhead lighting the same piping can look like a white blur. If your venue allows it, I’d place this cake near a side window. Pale blue, blush and ivory all hold their color well. Stand close, but let the cake’s front face the camera fully.
4. Pearl Wedding Cake Photo
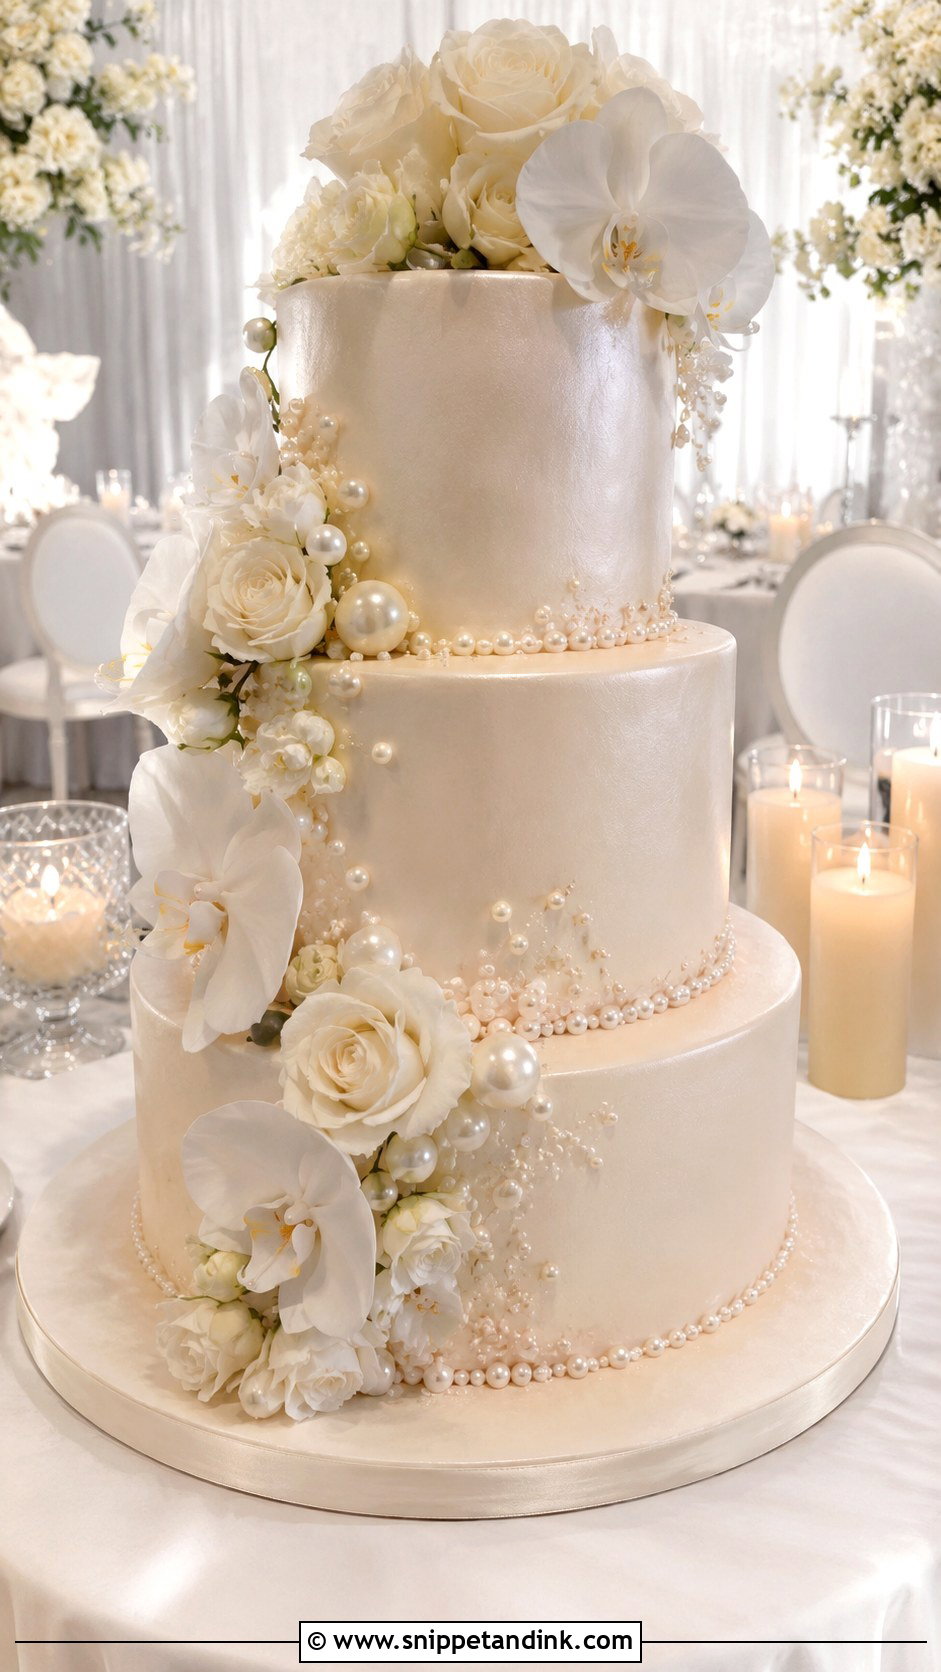
Pearls catch light, which is good in moderation and a problem under direct flash, where each one turns into a white pinpoint. I bounce my flash off a wall or ceiling for pearl cakes so the sheen stays soft. Clusters and borders photograph better than an all-over pearl coat. Keep flowers to one or two kinds, white orchids or cream roses, so the pearls are still the detail people notice in close-ups.
5. Floral Wedding Cake Couple Photo
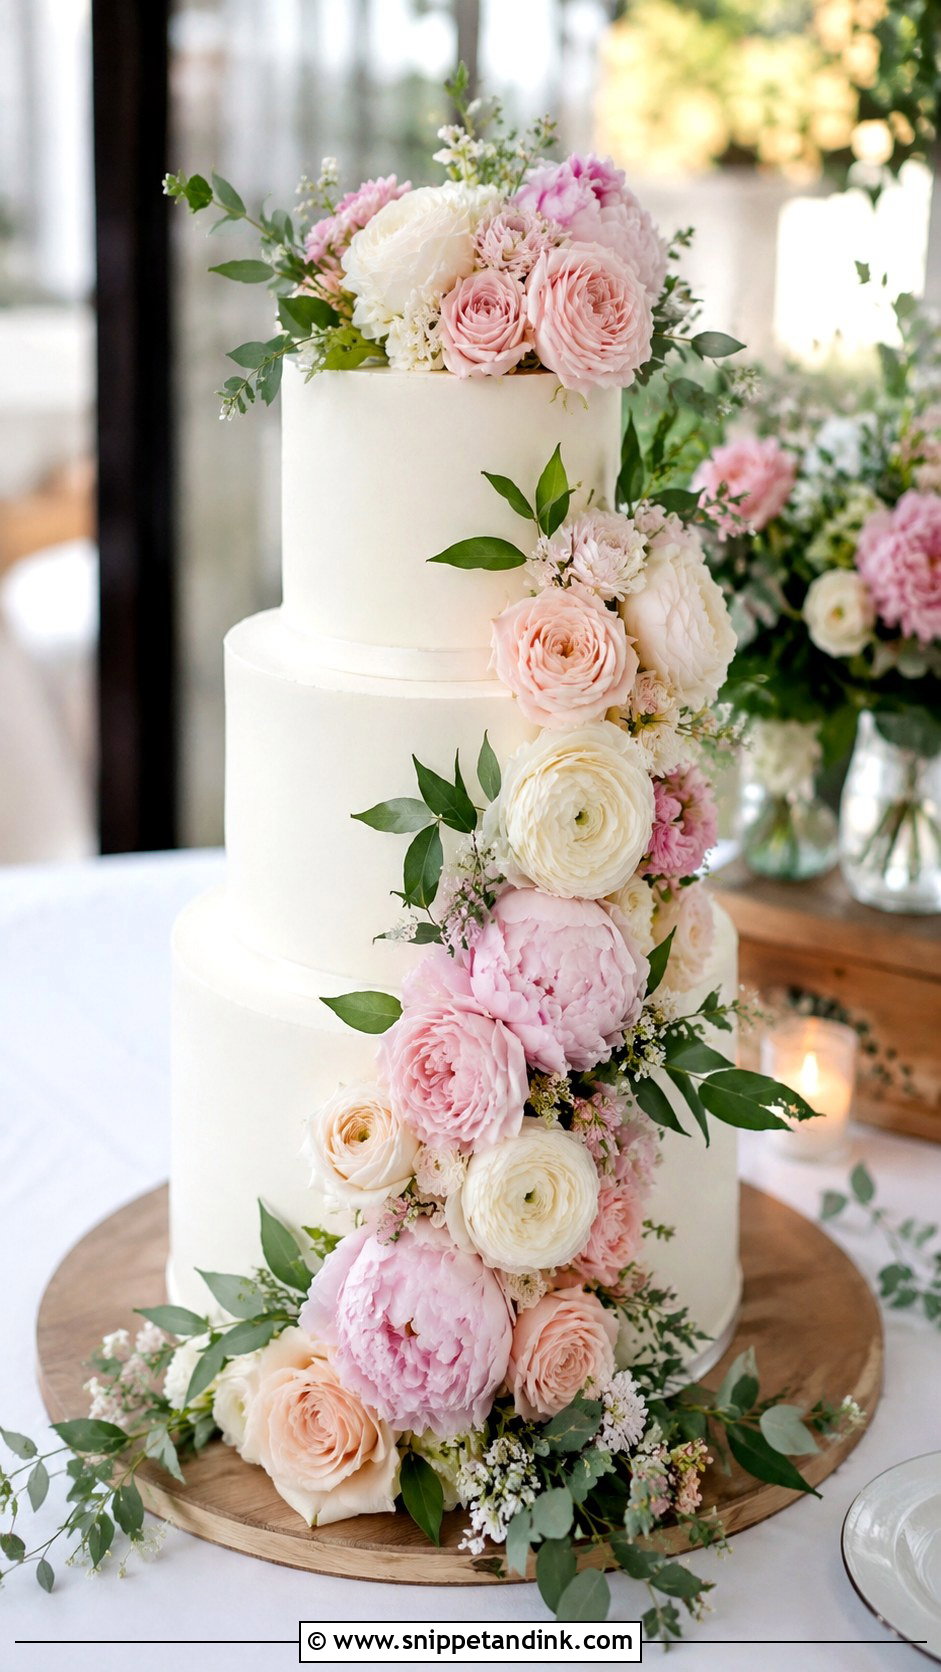
Fresh flowers tie the cake to the bouquet and centerpieces, so the photos look like they belong to the same wedding. I ask the florist and baker to agree on placement before the day. Cascades look good in person but can hide the tiers completely in a photograph, especially from the couple’s side. A white buttercream cake with flowers on one side, leaving a clear face toward the room, gives me both the blooms and the cake. Garden and ballroom settings both suit it.
6. Minimal Wedding Cake Photo
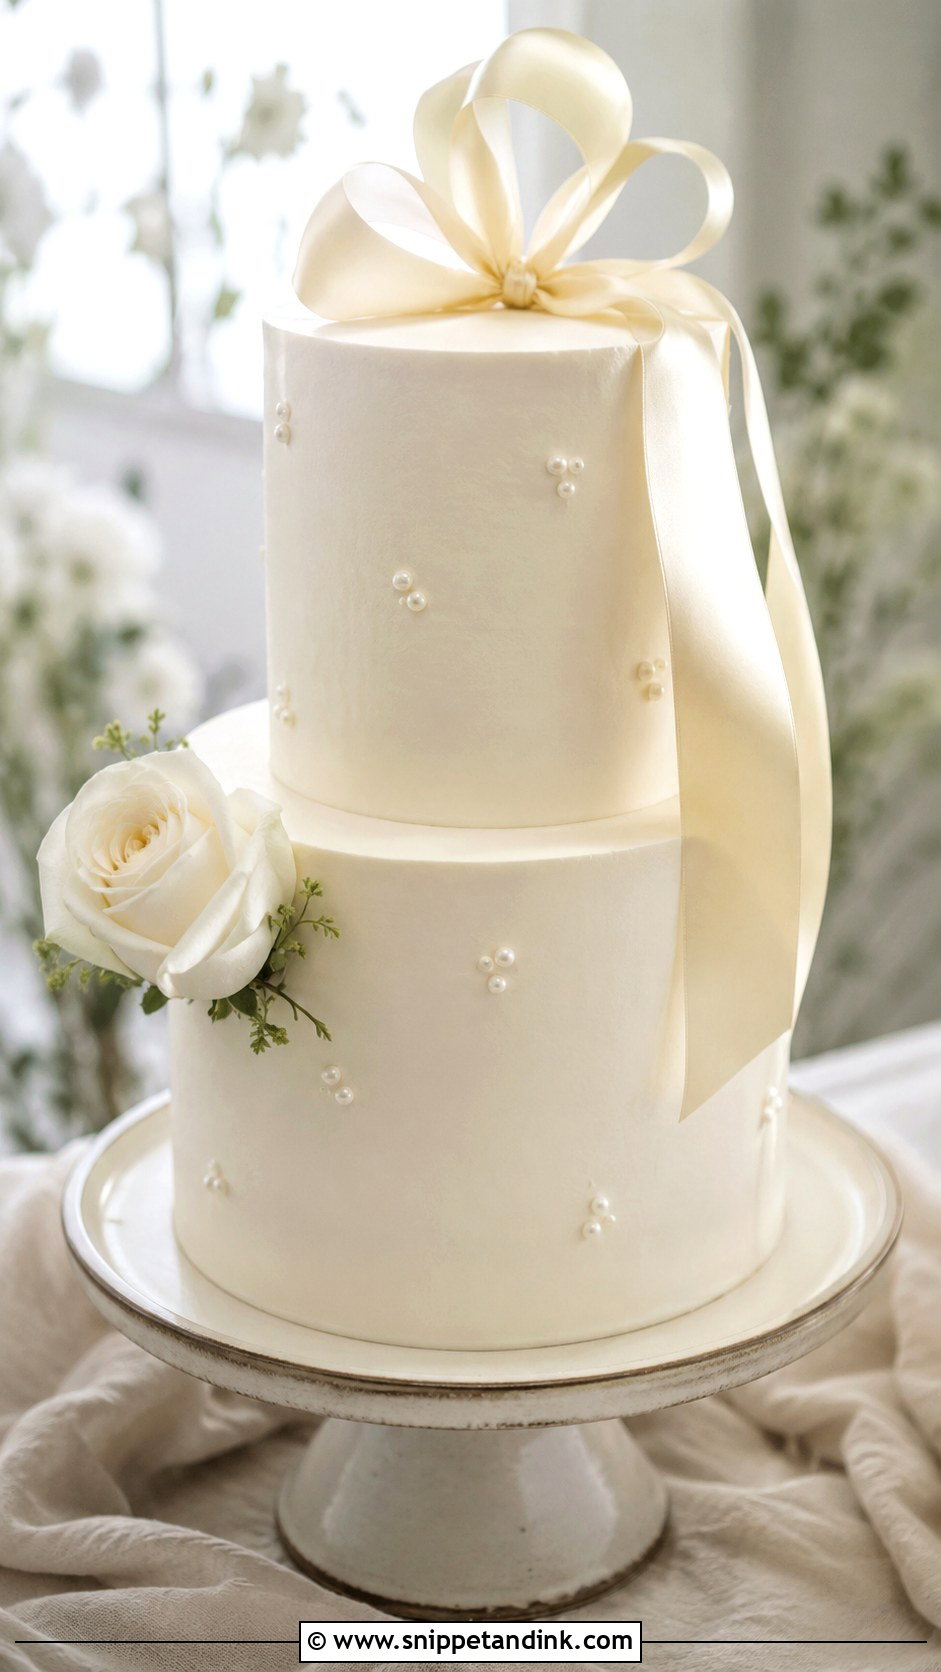
Minimal cakes are honest about everything around them. With no piping to look at, the eye goes to the stand, the linen and whatever is behind the table, so a fire exit sign or stacked chairs will show. I check the background before the couple walks over. A white two-tier cake with one flower or a small monogram, on a plain stand, against an uncluttered wall: that is where the simple look pays off. It suits intimate rooms and editorial-style galleries.
7. Square Wedding Cake Couple Photo
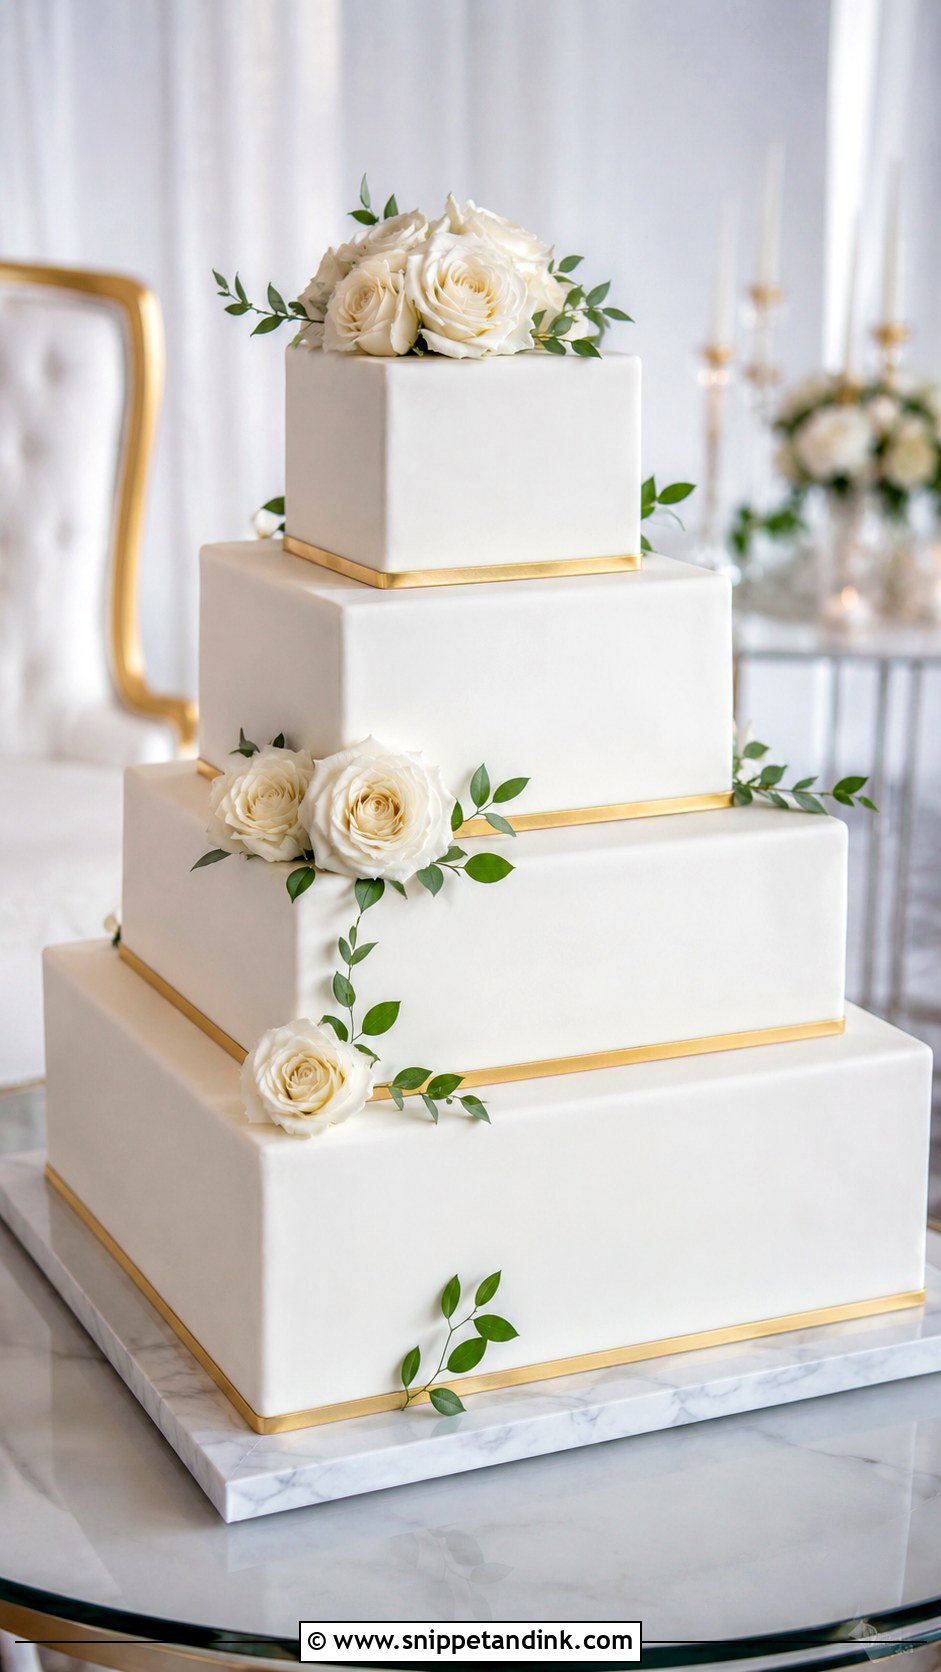
Square tiers give hard vertical lines, and hard lines show every degree of camera tilt. I level carefully for these and shoot square to one face of the cake rather than to a corner, unless I want the more dramatic diamond view. Fondant with subtle panels shows the edges crisply on a marble or white stand. Couples with both hands near the knife look balanced in this frame. A few flowers at one corner soften it. Black-tie rooms and hotel ballrooms are where I see it most.
8. Single Tier Wedding Cake Photo
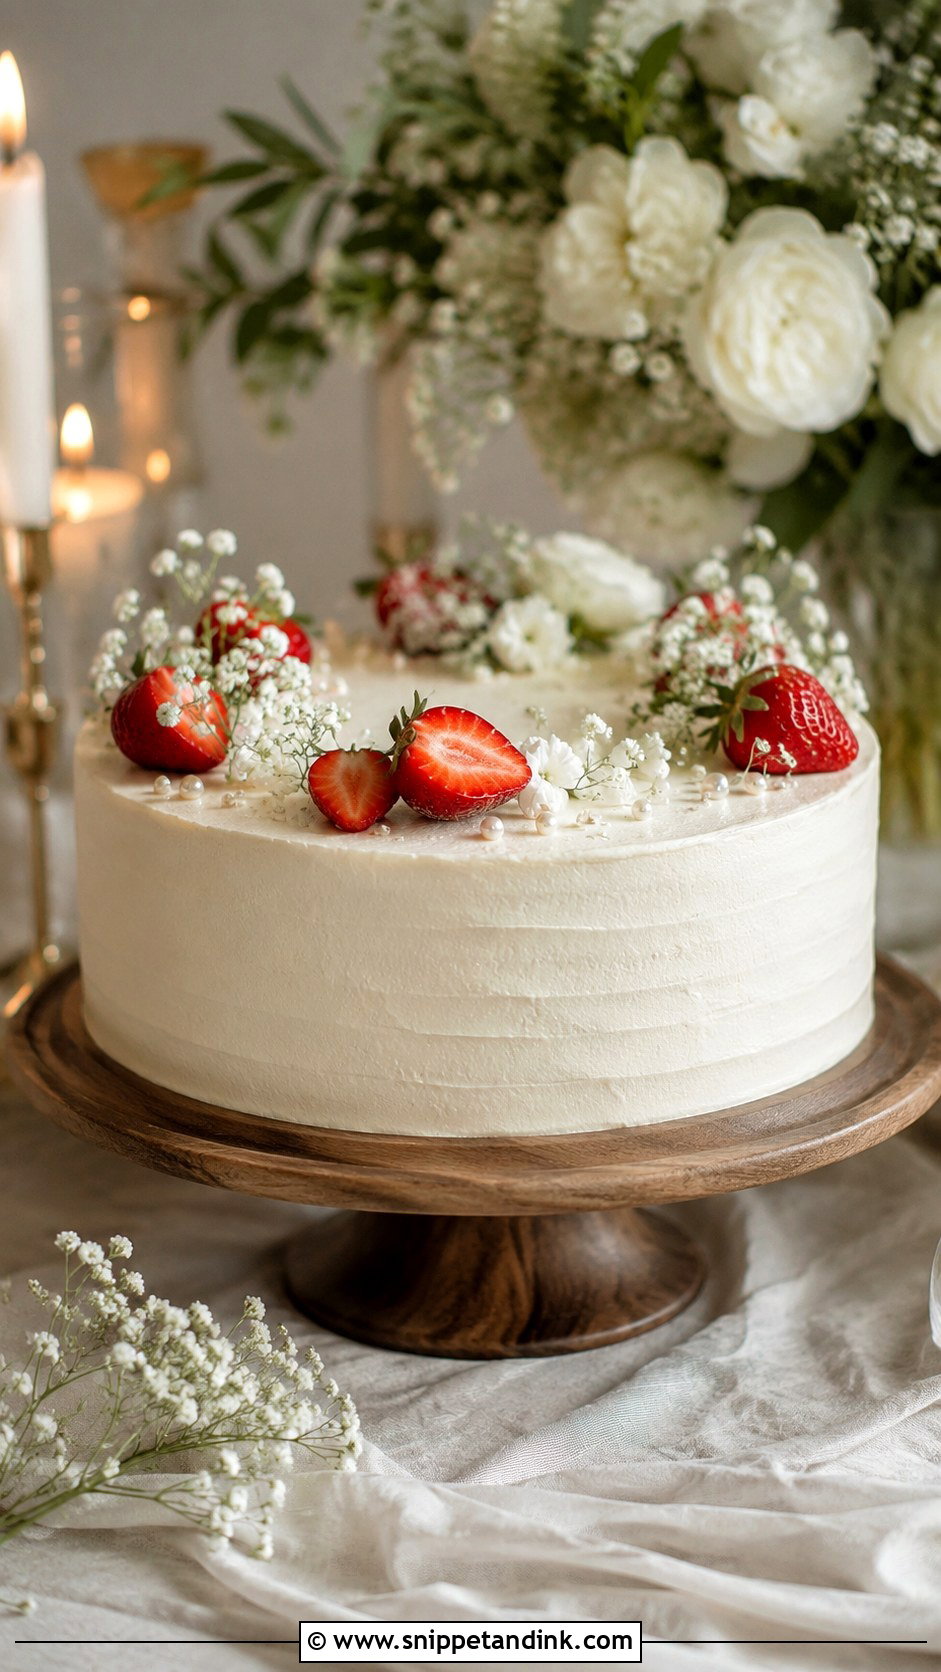
A single tier is small in the frame, so I move closer and shoot lower rather than trying to show the whole table. That changes the picture into something more personal. Sitting together beside it, at a courthouse lunch or a small dinner, works well. Candles and a few small blooms around a wide single-tier cake make the setup feel finished. Use a cake stand rather than placing it flat on the table, or it disappears among the glasses.
9. Tall Wedding Cake Couple Photo
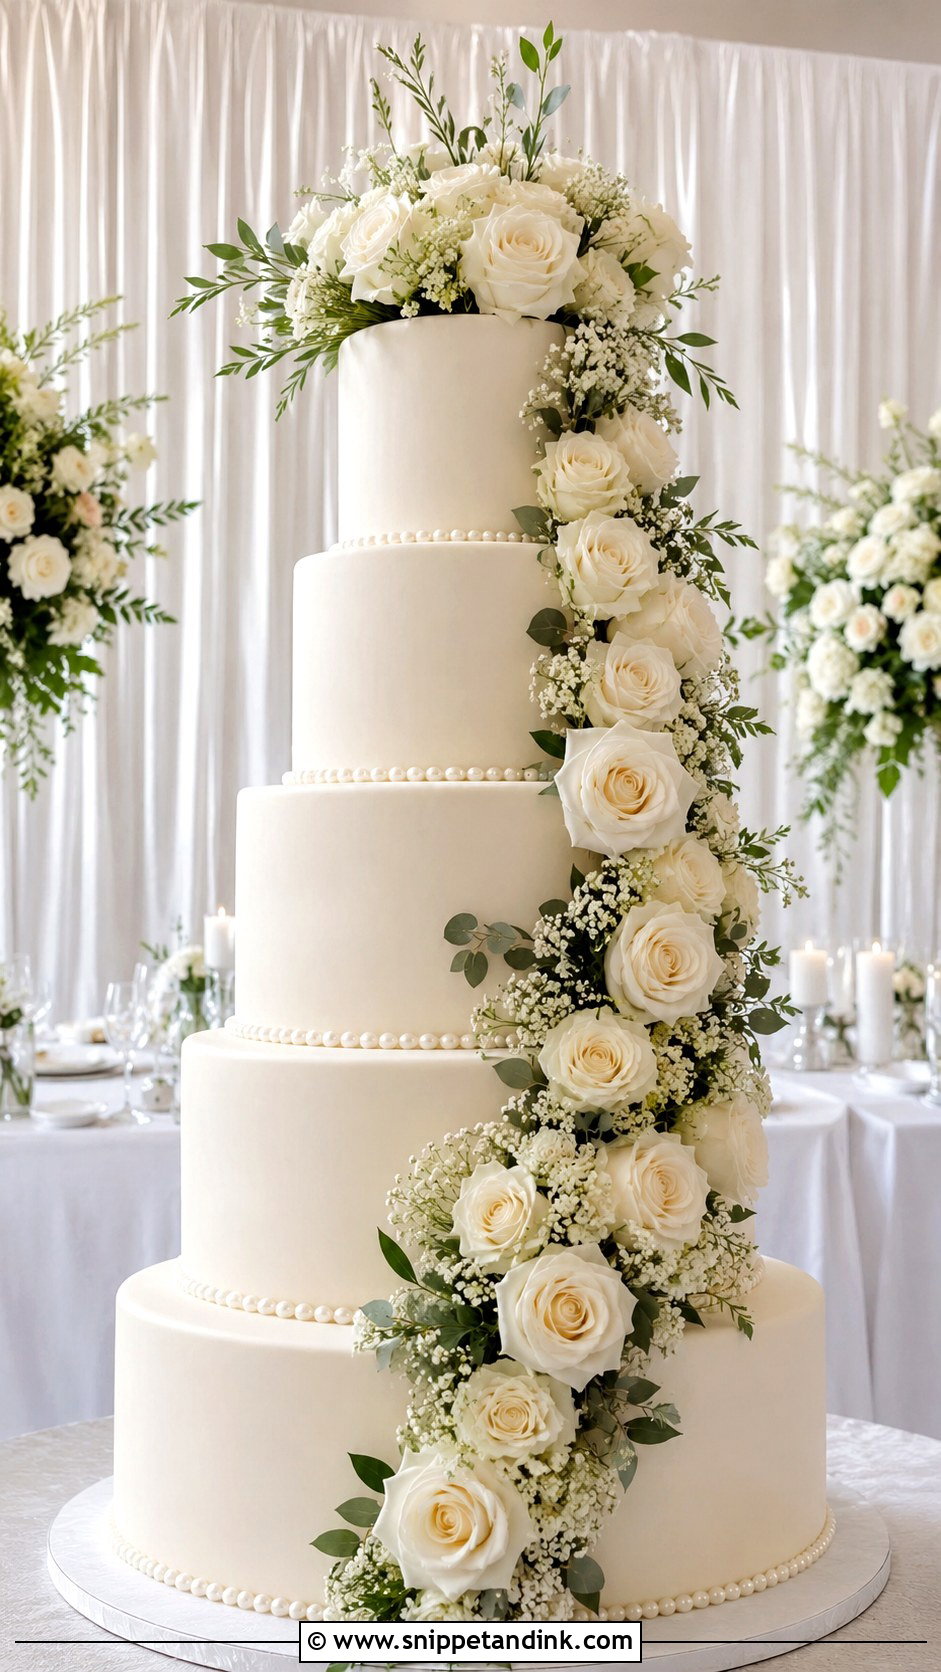
A tall wedding cake needs room around it. Four or five tiers against a low ceiling or a busy wall loses its silhouette. I step back and use a longer lens so the cake and couple stay in proportion, and I ask for the couple to stand on either side so the scale is obvious. Make sure nothing else on the table is above the bottom tier; a big floral arrangement next to it competes with the height.
10. Buttercream Wedding Cake Photo
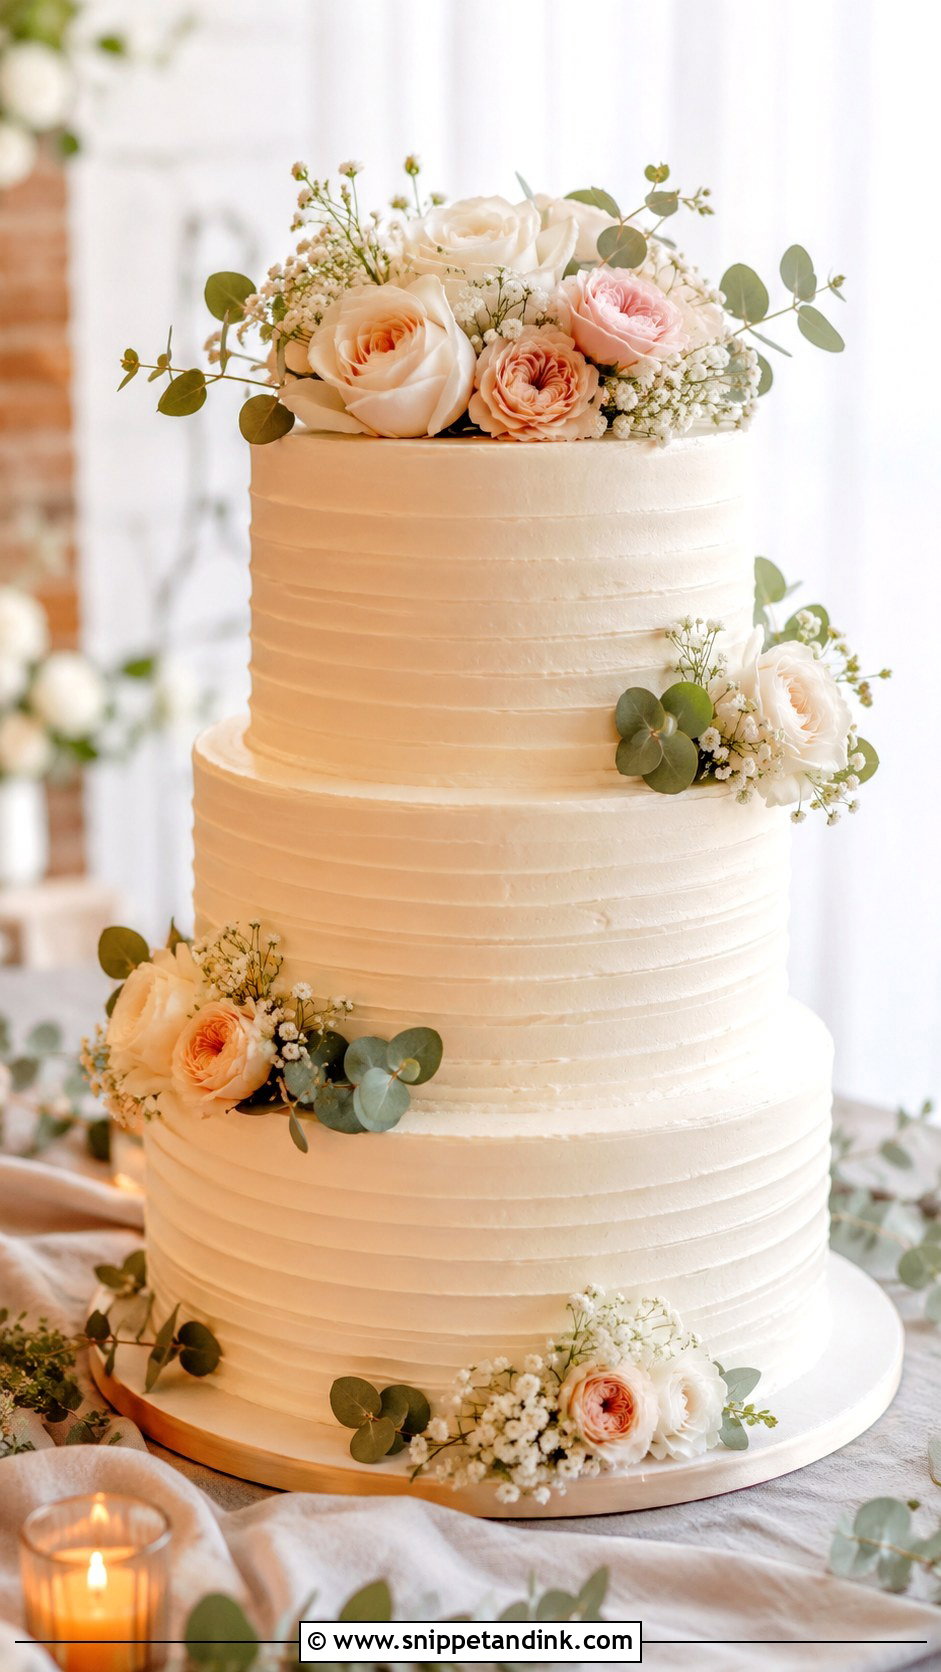
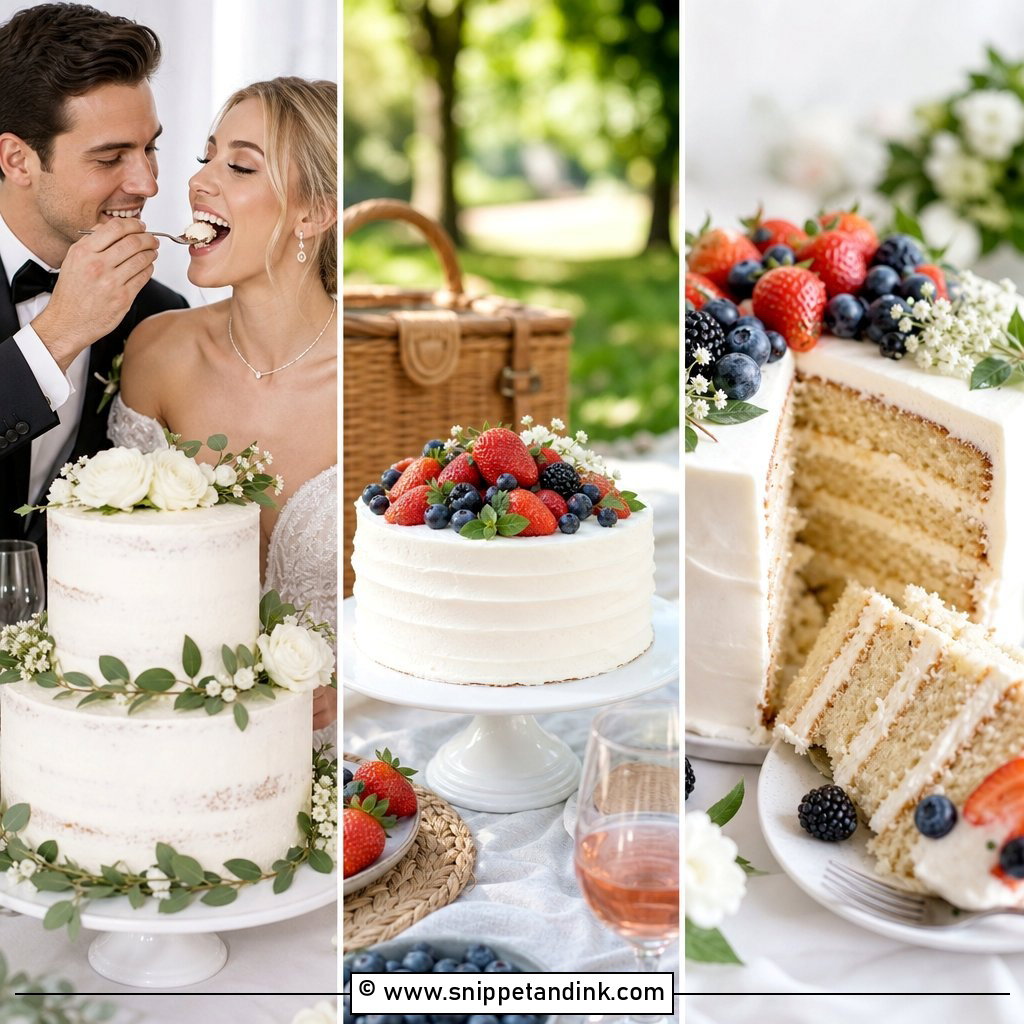
Buttercream absorbs light rather than bouncing it, which gives a soft, matte look that is very forgiving in pictures. Ridged and ruffled finishes show texture especially well. The catch is heat. In a warm tent the frosting starts to slump and gets shiny, so I like to photograph buttercream cakes early, before the room fills. A couple can pose while holding the cake knife or simply stand close behind the table. Fresh fruit and greenery add color without much work.
11. Fondant Wedding Cake Couple Photo
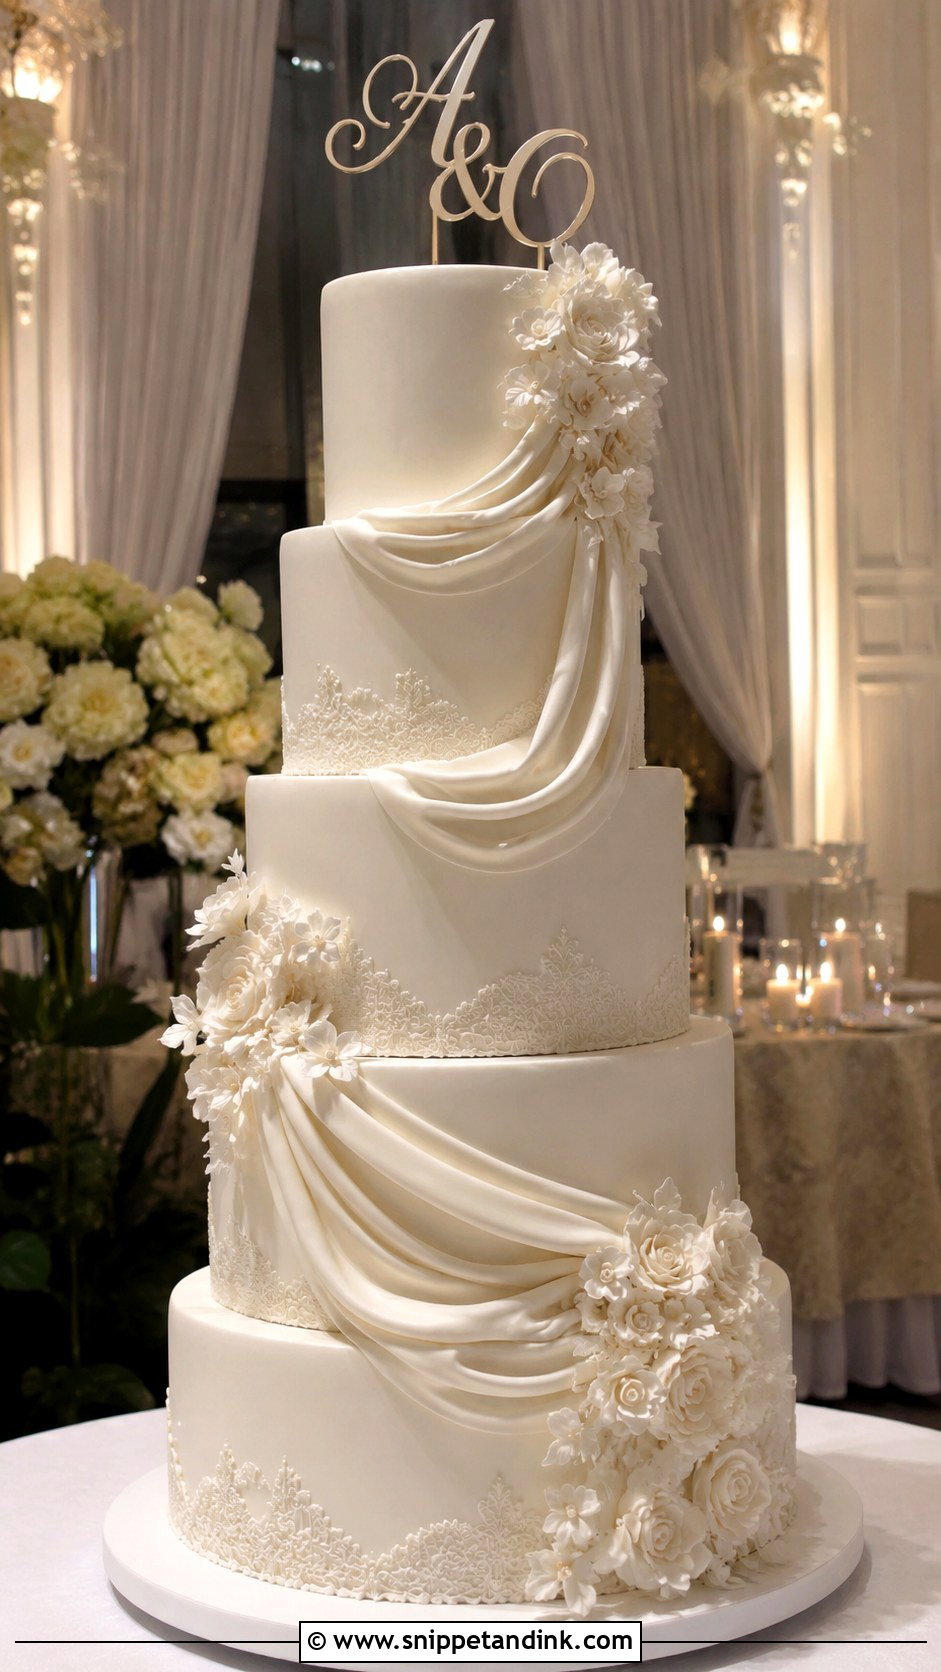
Fondant shows sharp edges, sculpted drapes and embossed patterns very clearly, and that crispness is the reason to choose it. Under harsh direct light, though, fondant can look flat and plastic. Soft, angled light brings out the embossing. I also check the front: custom details should face the camera, and I’ll ask the venue to turn the cake if they set it up backwards, which happens more than you’d think. Formal ballrooms suit it.
12. Gold Wedding Cake Photo
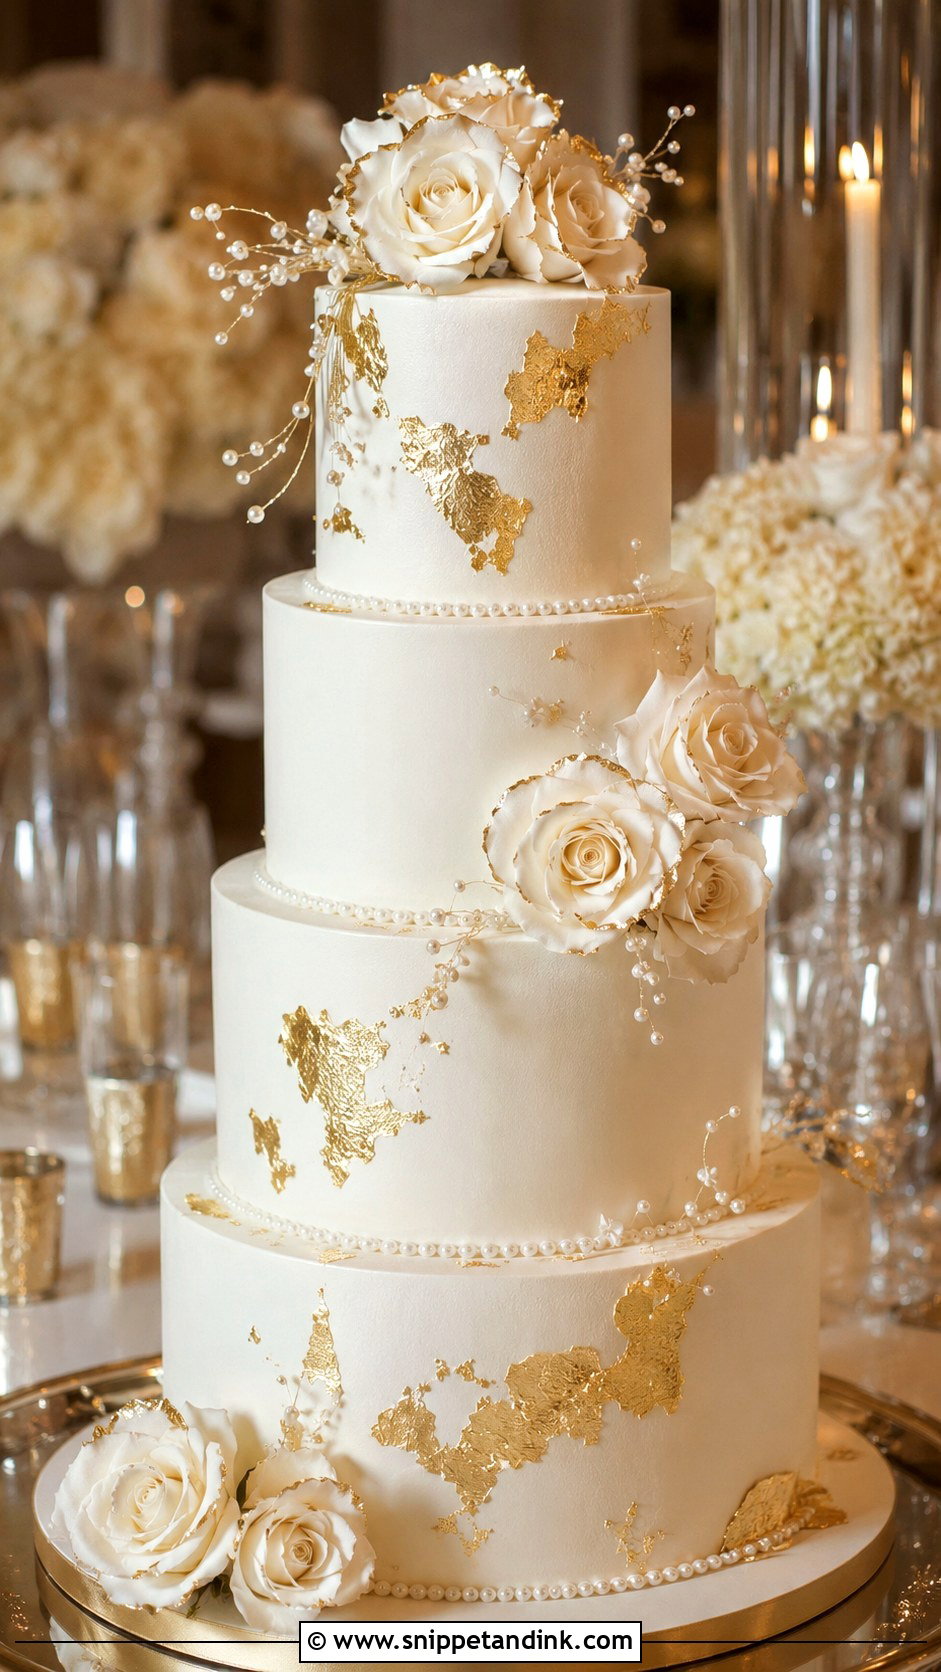
Gold leaf and metallic paint reflect whatever is around them. Warm candlelight makes gold glow; cold LED uplighting can turn it greenish. A white cake with a few gold strokes and cream flowers is easier to light than a fully gilded one, and it keeps the attention on the couple rather than on a mirror-bright surface. Hands together on the knife catch the gold nicely. Evening receptions are where it looks best.
13. Bow Wedding Cake Couple Photo
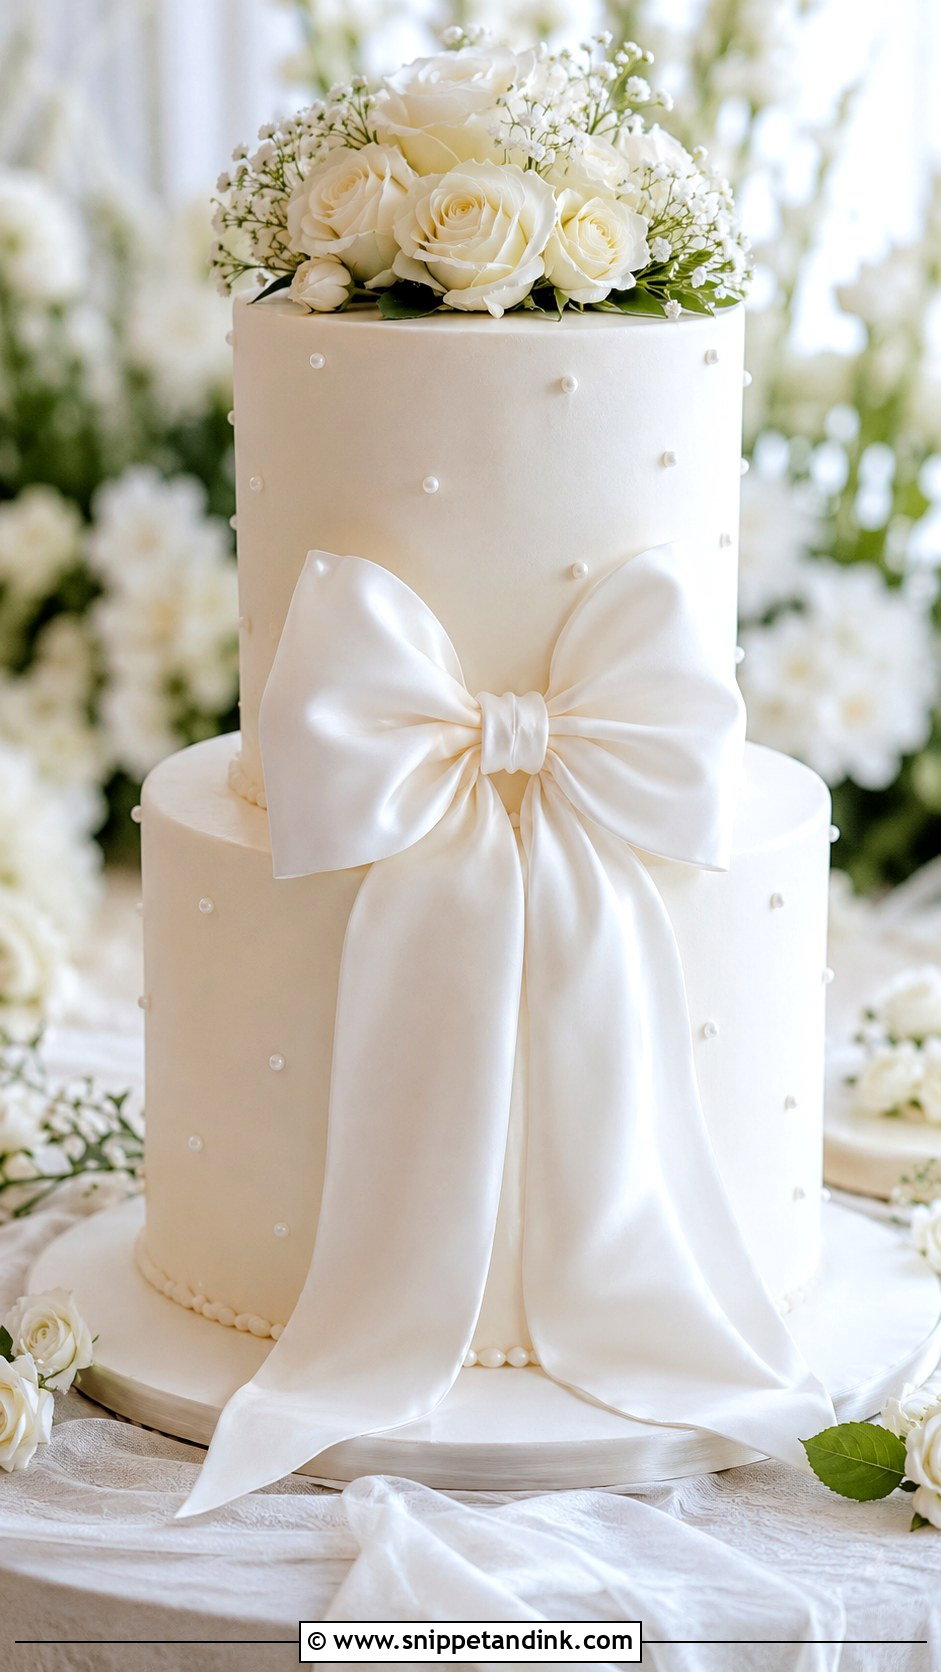
Bows are one of the newer cake details I’m seeing, made from fondant, sugar paste, satin ribbon or buttercream. One oversized bow on a white tiered cake reads well from across the room; several small ones are better for close-ups. Whatever the size, make sure the bow faces the camera, not the wall. Keep the rest of the cake plain so the bow is clearly the point. Cutting it together, with the bow toward me, makes an easy frame.
14. Sheet Wedding Cake Couple Photo
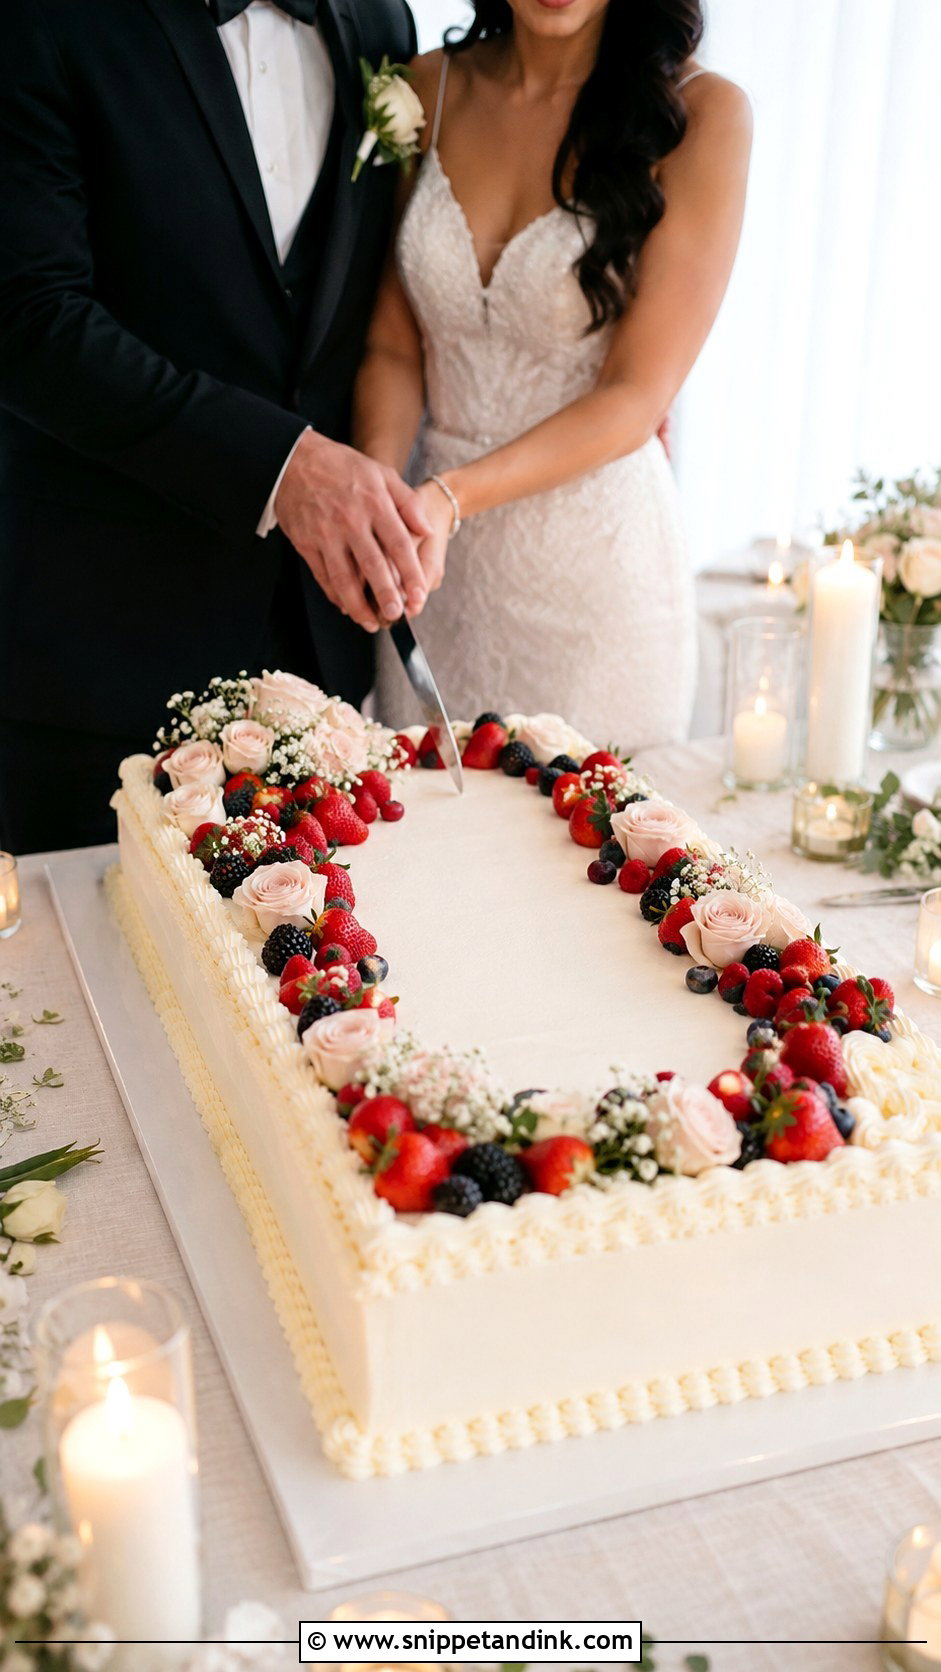
A sheet wedding cake is wide and low, so the best angle is from above or from a raised three-quarter view, which shows off the piping and fruit across the whole surface. Couples stand along the long side, holding the knife together. I’ll often stand on a chair for one frame. Candles, small flower clusters and clean linen finish it. It also serves a large crowd easily, which many couples appreciate.
15. Italian Wedding Cake Photo
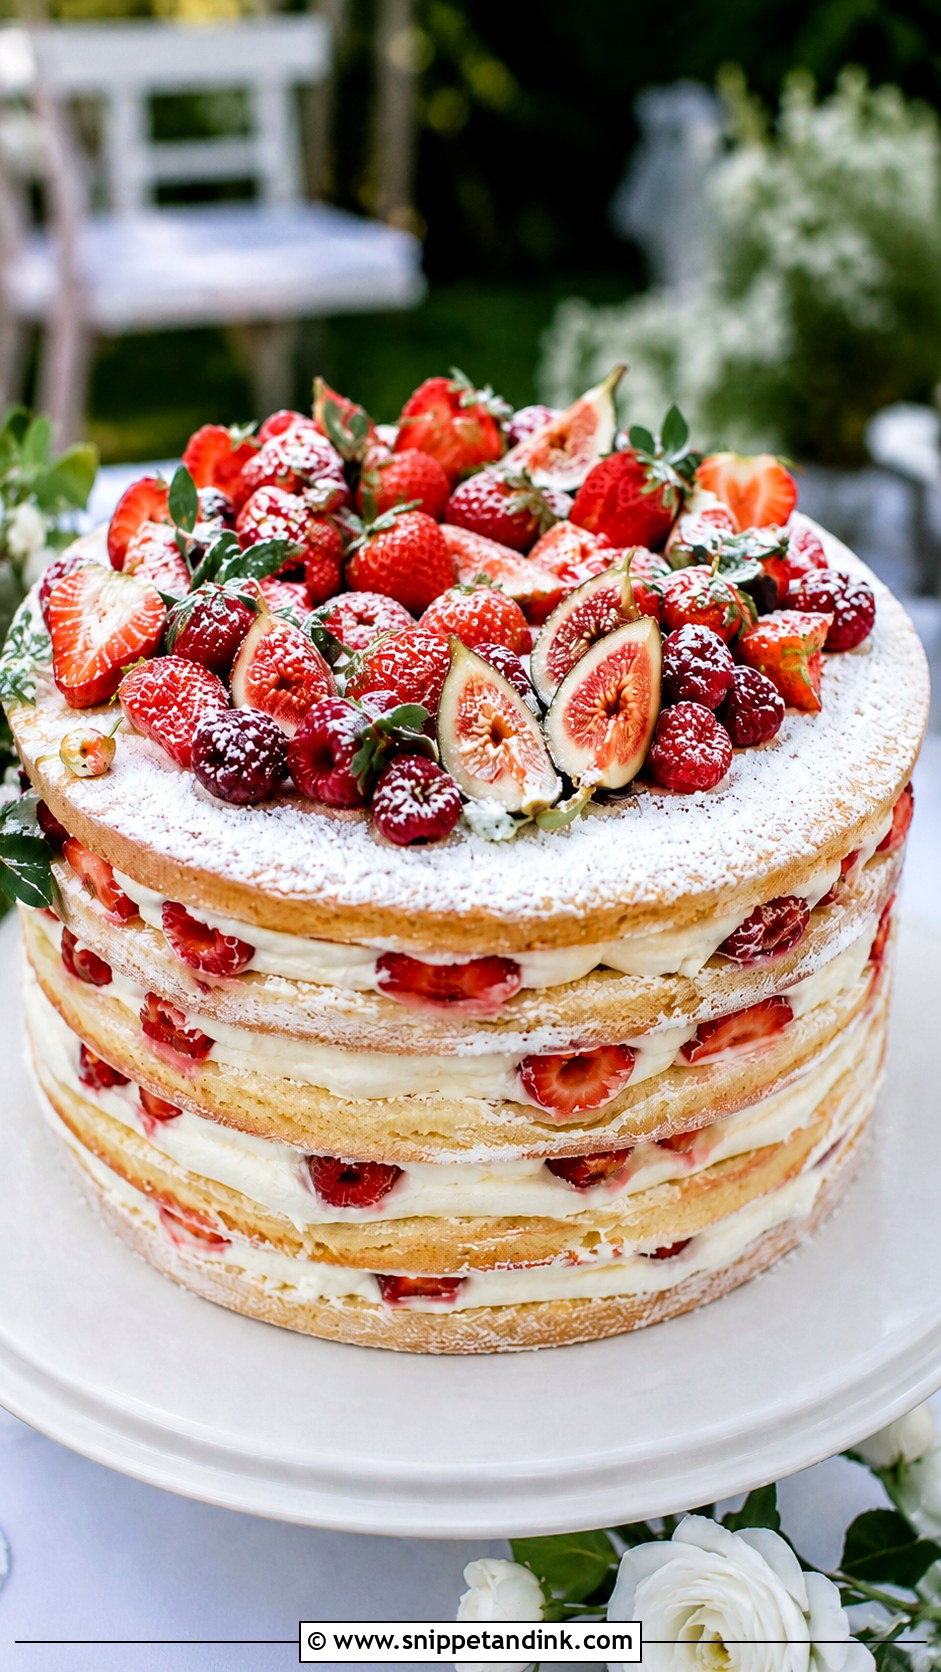
An Italian-style cake, wide and low with cream, berries and powdered sugar, is relaxed by nature, so I don’t pose it stiffly. Couples dusting the sugar on together or cutting into the open layers give me natural movement. One practical note: powdered sugar dissolves in humidity and cream softens quickly in the sun, so on a warm outdoor day the cake looks its best in the first half hour. A simple wide platter suits it more than a tall stand.
16. Monogram Wedding Cake Photo
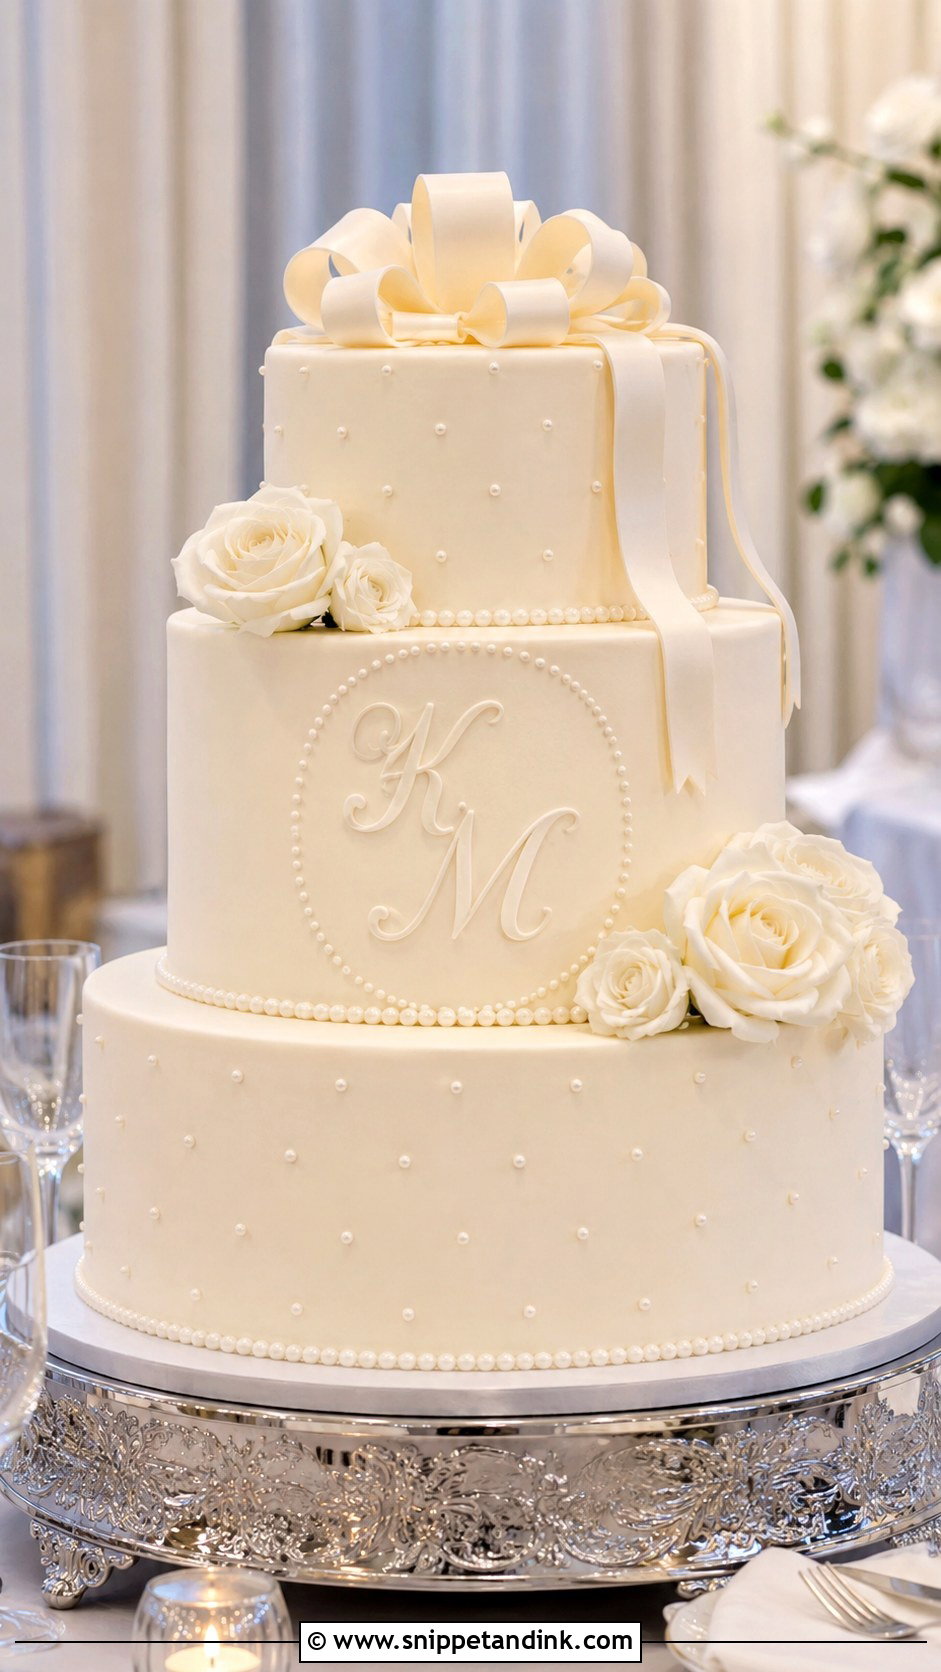
A monogram on the front of a smooth cake is a small detail that needs a direct, straight-on angle to read. I take a separate detail shot of the lettering before the cut, then pose the couple close together behind the cake so the initials sit between them. A ribbon border or a few pearl dots keeps it from looking bare. It suits classic receptions and couples taking a new shared initial.
17. Blue Wedding Cake Couple Photo
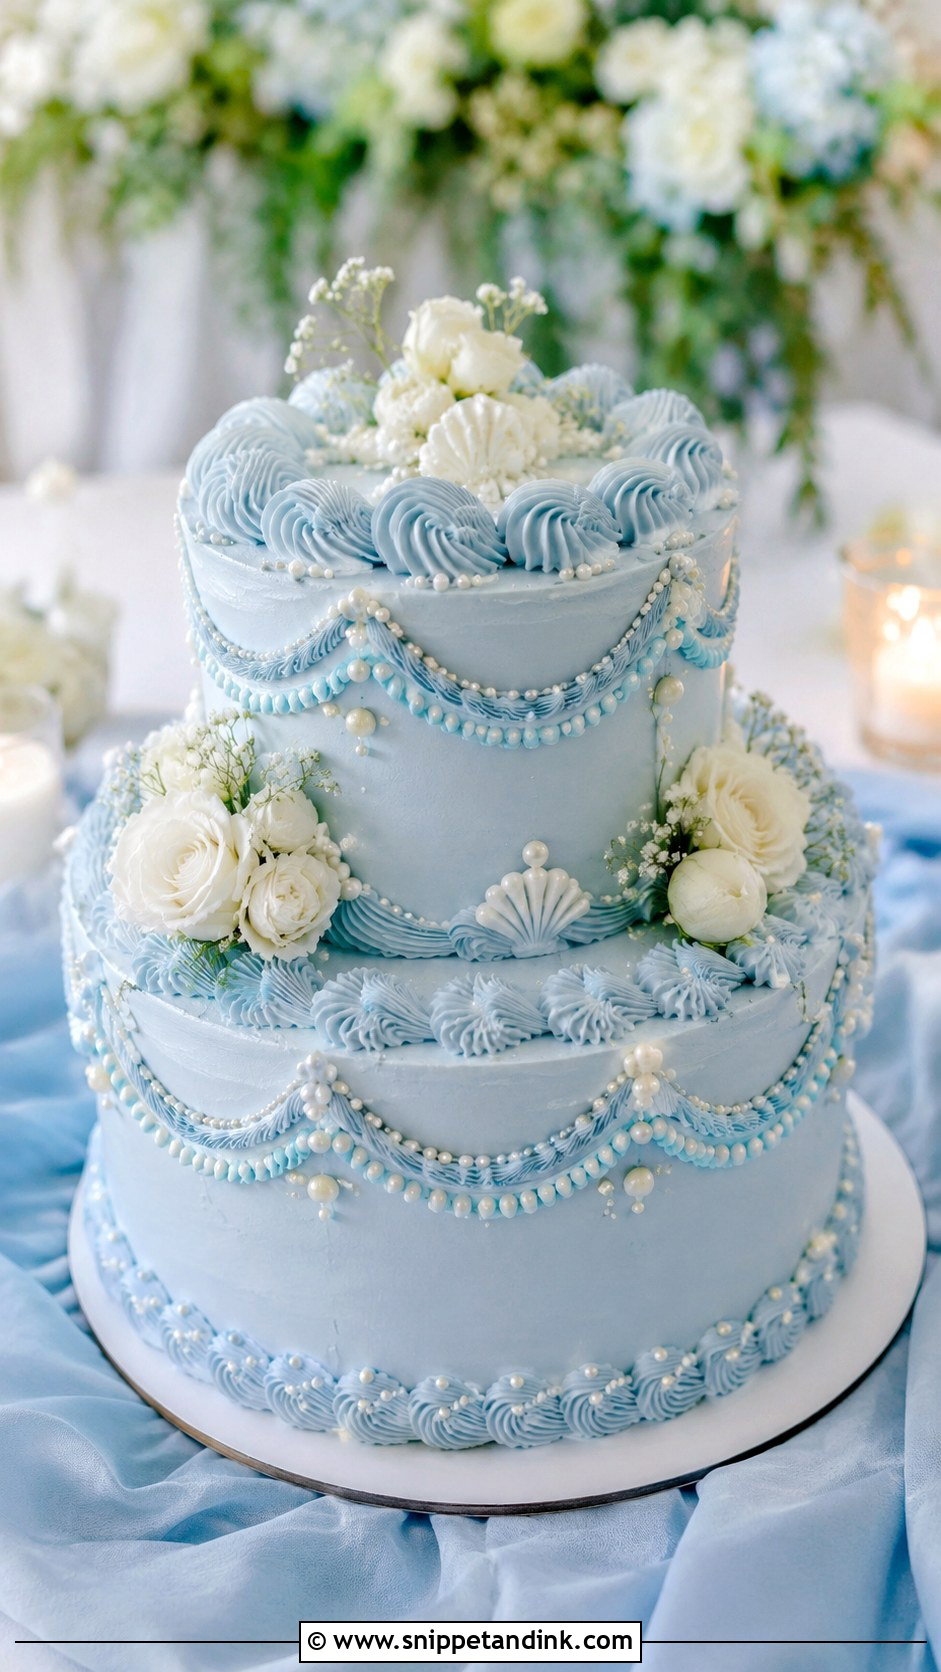
Blue is trickier on camera than it looks. Pale blue can drift grey under fluorescent light and purple under some uplighting, so I check my white balance on the cake itself before the couple arrives. Dusty blue with vintage piping or white flowers holds up well. Matching napkins and linens nearby tie it to the palette. A neutral background lets the color stand out at coastal and spring weddings.
18. Black And White Wedding Cake Photo
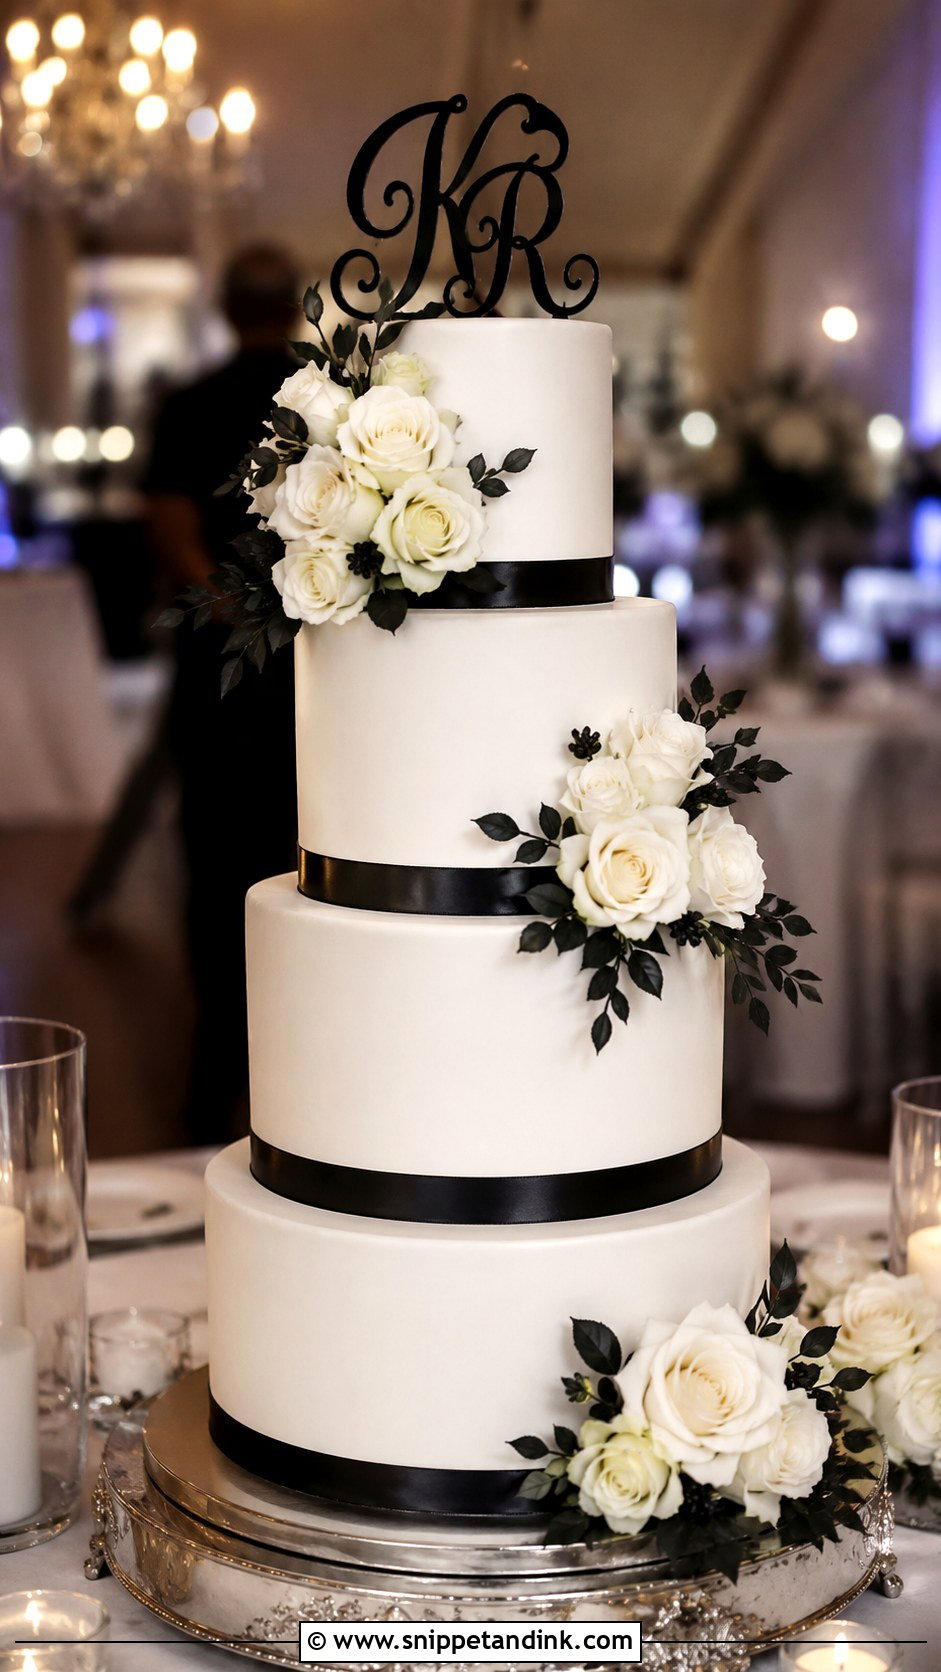
High contrast is hard for cameras: expose for the white icing and black details go solid, expose for the black and the white burns out. I meter for the white and let the black stay rich. A white cake with black ribbon or a dark monogram works best when the black is a small accent. It pairs naturally with tuxedos and black-tie rooms. White roses with dark leaves keep the flowers in the same story.
19. Rustic Wedding Cake Couple Photo
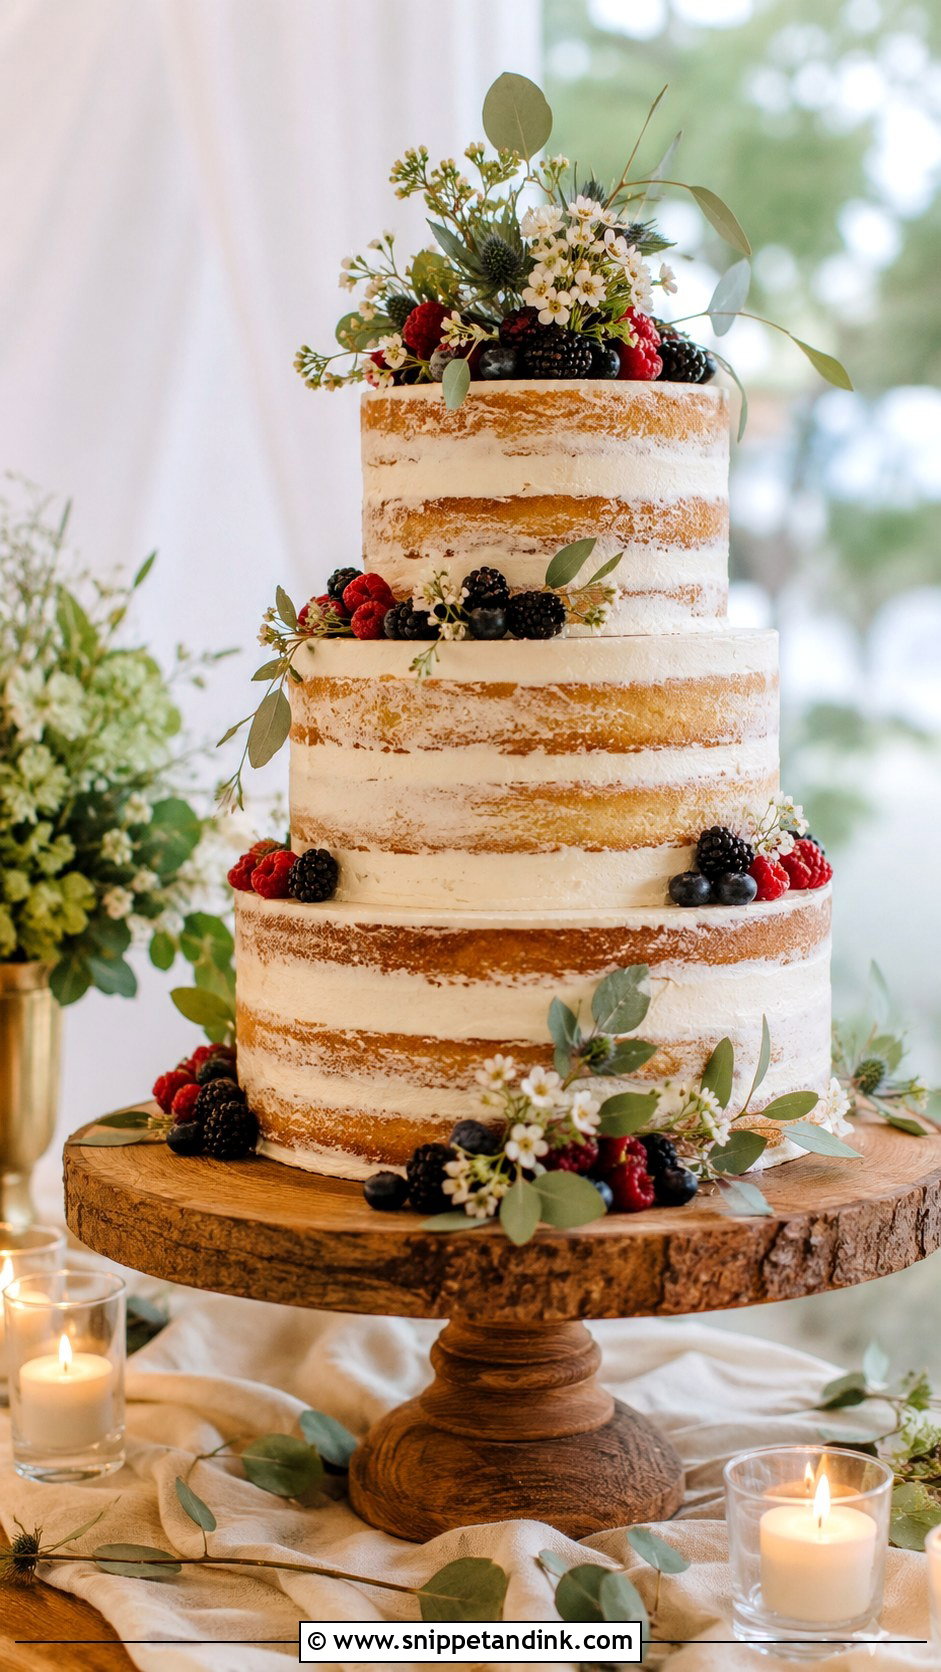
A semi-naked cake with visible layers, berries and greenery suits barns and outdoor receptions. Wood tables and natural light make it warm without any editing. My one warning: semi-naked cakes dry out at the edges if they sit uncovered for hours, and that shows in close-ups as cracking crumb. Ask the baker to deliver close to the reception. Linen runners and a few candles are enough props; too many jars and crates look busy.
20. Cake Cutting Wedding Photo
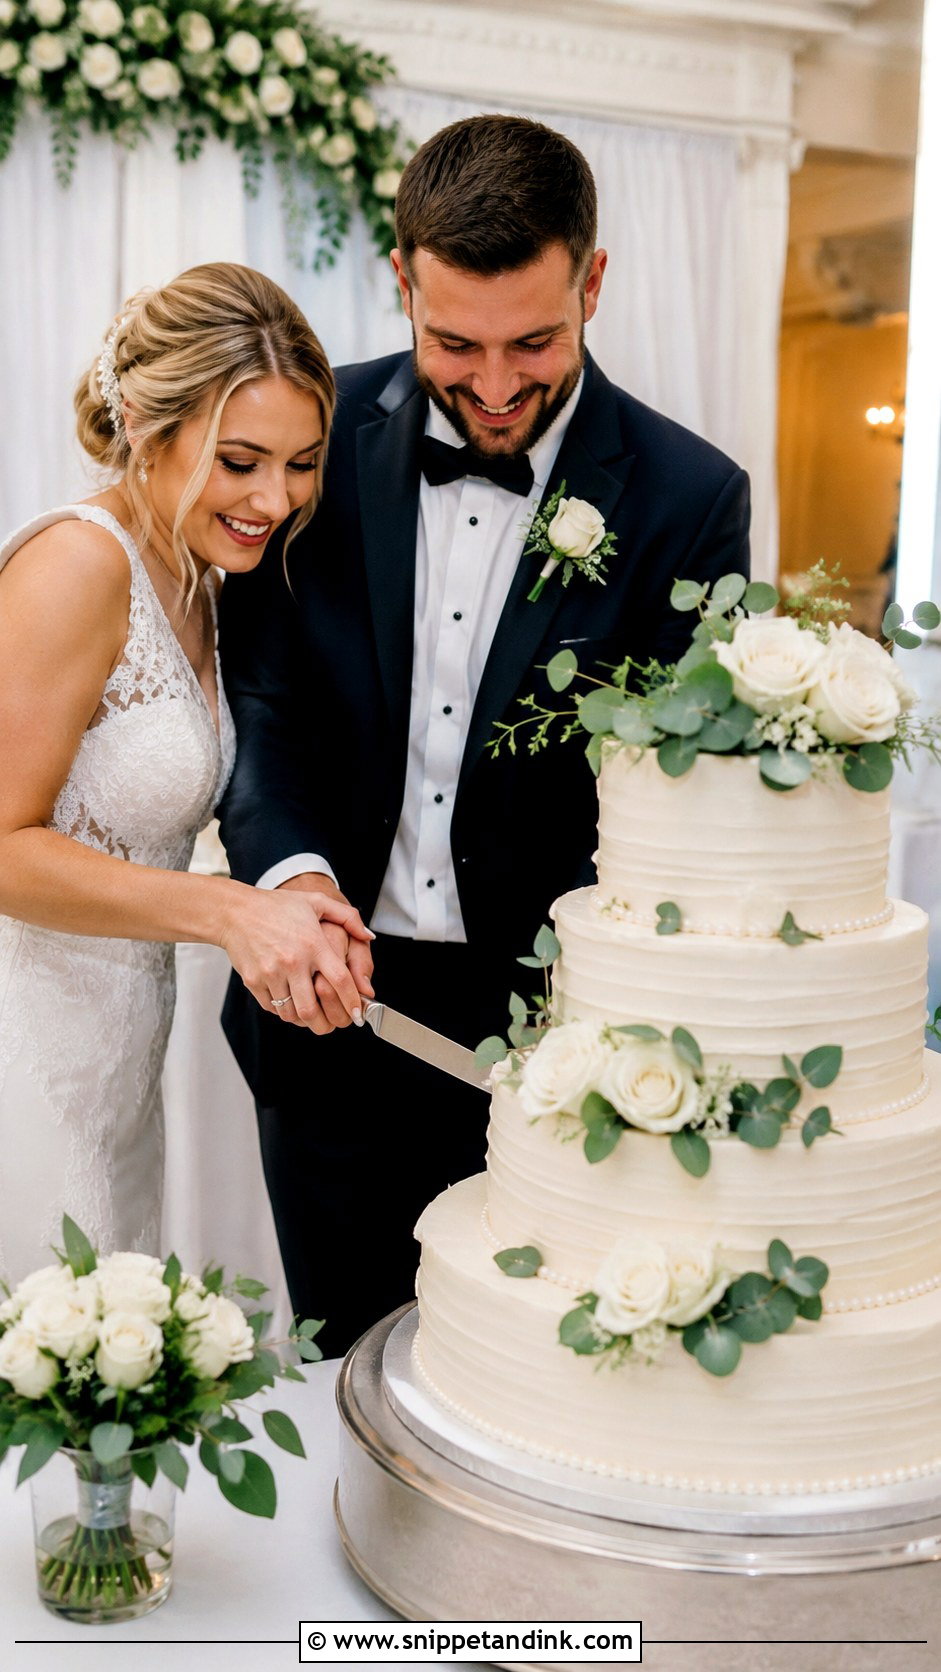
The cut itself happens fast, and that’s the frame couples care about most. I ask them to hold the knife together, pause with the blade touching the cake, look at each other, then at me, then cut slowly. Faces, hands and the full cake should all be in the frame. Move the table away from speakers and stacked equipment before the evening starts; I can’t fix that after. A white tiered cake with flowers or soft piping is easy to light from most angles.
The Ninety Seconds of the Cut, Step by Step
Couples often rush the cut because everyone is watching. Slowing it down is what gives me usable frames. Here’s the order I talk couples through, usually in a quiet word just before the announcement.
- Have the DJ or planner announce it, so guests gather and I’m not the only one who knows it’s happening.
- Stand to the side of the cake, both hands on the knife, the cake fully visible between you and the room.
- Pause with the blade touching the icing for a few seconds. That’s the frame most couples end up printing.
- Cut slowly, then serve each other a small piece. Small bites avoid frosting on the dress, unless you’ve agreed otherwise.
Phones are the other issue. Guests crowding in with screens raised will block the wide shot. I’m happy to ask the room to step back for one minute, and most planners will do the same if you mention it beforehand. If you want a guest’s phone view too, ask one friend to film from behind me rather than everyone pressing in.
Walk the Cake Table Before Anyone Sits Down
Most of what makes a cake photo work is decided before the cake arrives: where the table sits, what is behind it, and what light falls on it. A simple cake on a good stand with flowers can look as strong as a five-tier one, provided the background is clean and the couple doesn’t block it. Pick details that match the rest of the day, then check the front, side and cutting views once before guests come in. That small walk-through is what turns the cut into a picture you’ll want to print.
You'll Like These Ideas:


Leave a Reply