
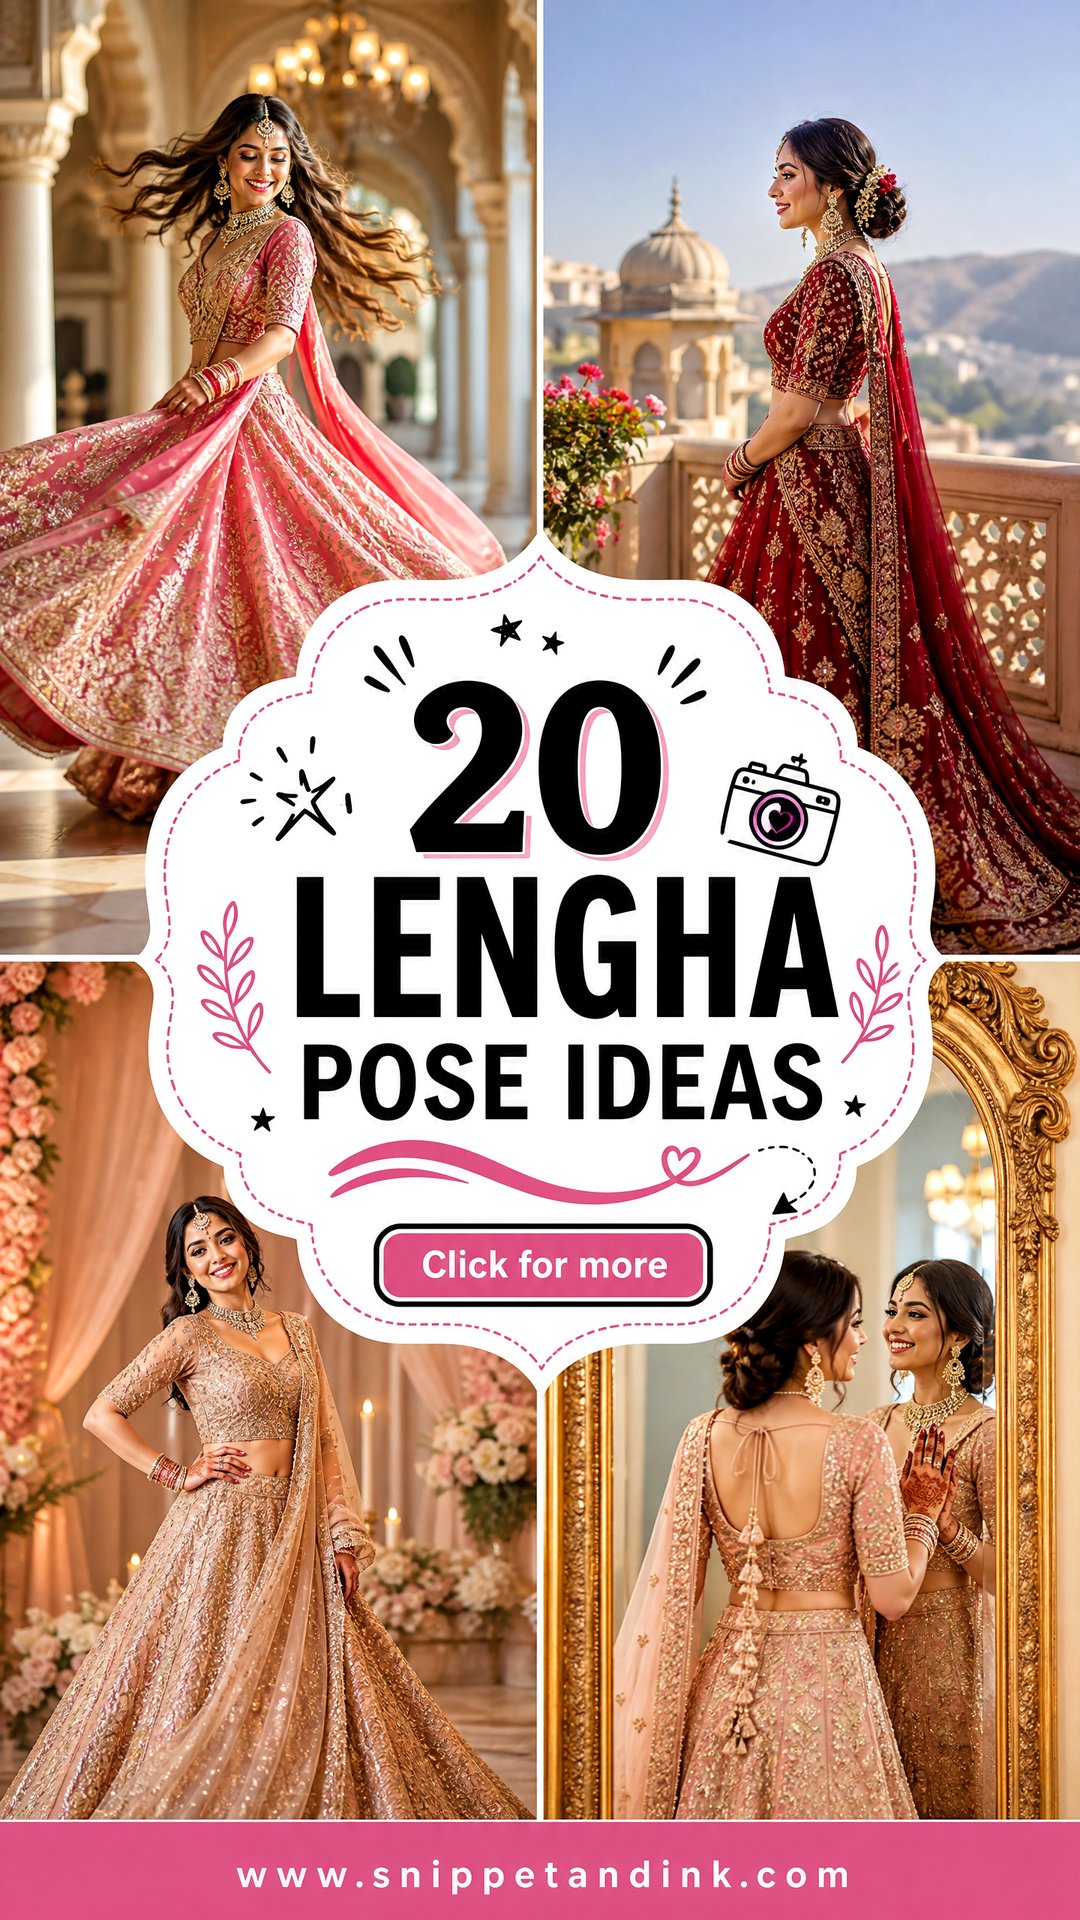
A pose decides which part of a lengha the camera actually sees, from the embroidered blouse and flowing skirt to the dupatta, jewelry and shoes. Posture, where your hands go and the angle I shoot from matter as much as the outfit. Brides tend to love twirls, walking shots, seated frames, over-the-shoulder looks and dupatta movement, and all of them are here alongside quieter standing poses. Practice a few at home in your wedding shoes, and choose movements that suit the weight of your lengha, because a heavily worked skirt won’t twirl the way light georgette does. They work for a wedding, engagement, sangeet or reception alike.
Where I Put a Bride Before I Ask Her to Pose
Light does more for a lengha photo than any pose. Zari, sequins and mirror work all reflect, so the direction of the light decides whether embroidery reads as texture or as glare.
Indoors, I place a bride near a large window with the light falling across her at an angle rather than straight on. That side light brings out raised embroidery and keeps the face soft. Outdoors, open shade beside a building or under trees gives even color, while harsh midday sun bleaches pale lenghas and throws dark shadows under the eyes and jewelry.
Direct flash is the hardest light on heavy work. It turns metallic thread into bright white spots and can flatten deep reds. In a dark venue I bounce the flash off a wall or ceiling instead.
Then there’s distance. I shoot full-length lengha portraits from a few steps back with a longer lens, because standing close with a wide lens stretches whatever sits nearest the camera, usually the skirt or feet, and shrinks the head. If a friend is shooting on a phone, ask them to step back and zoom in slightly instead of crowding you.
1. Front Standing Lengha Pose
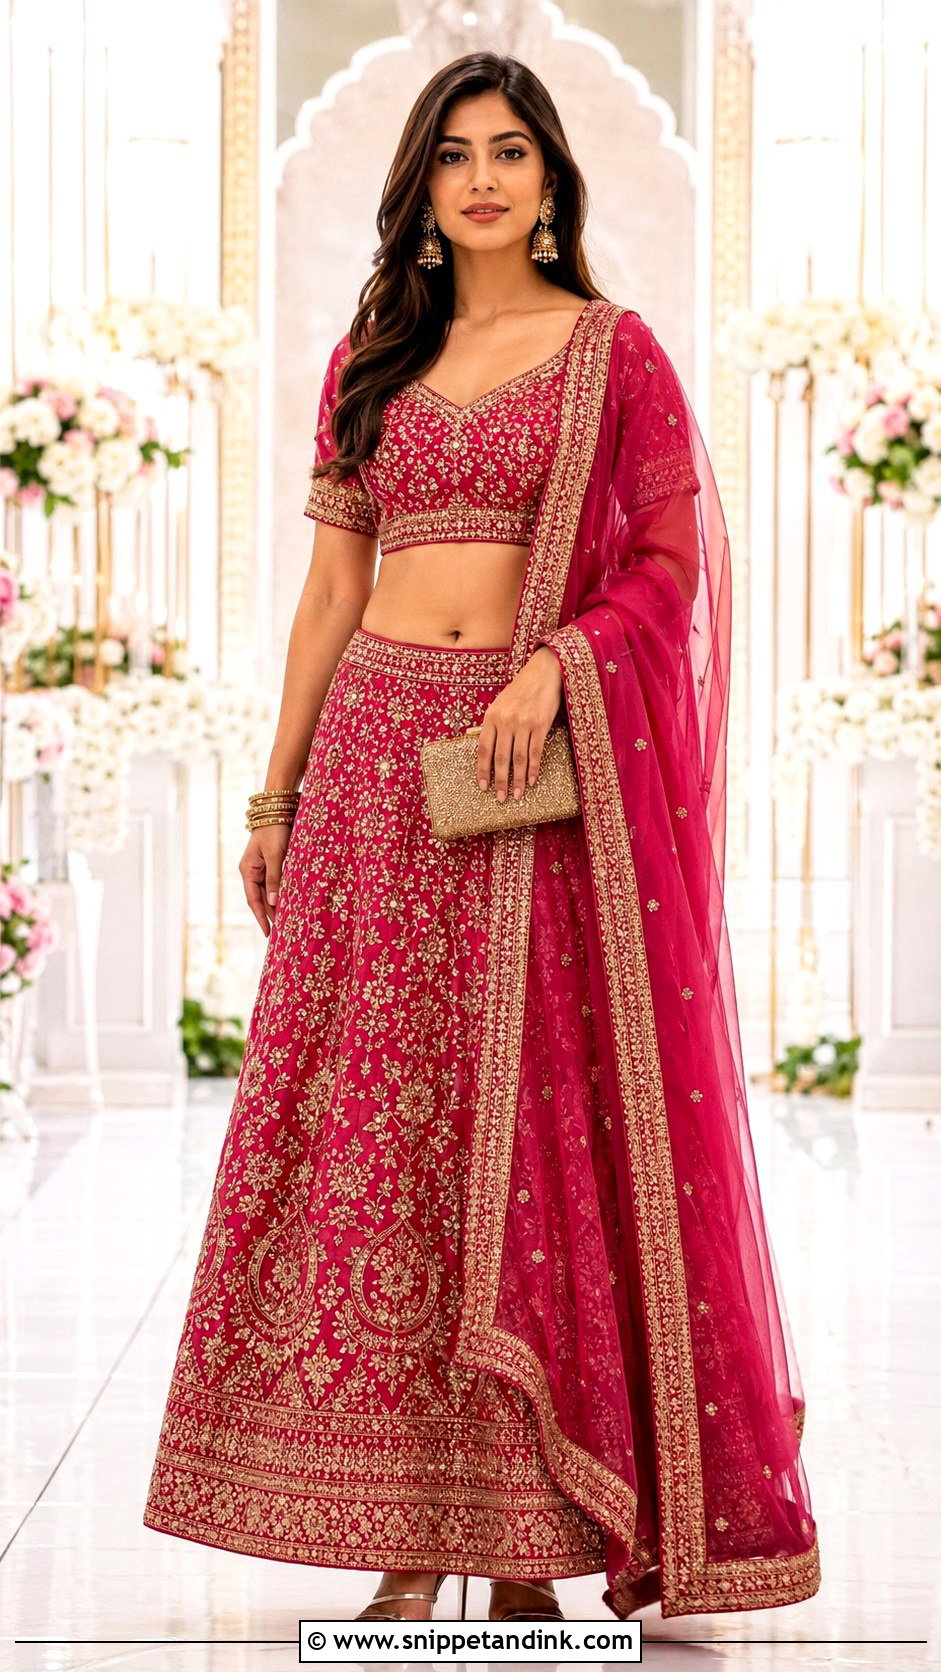
I start almost every lengha session here, because it shows everything at once and it warms a bride up. Stand tall with relaxed shoulders and turn one foot slightly outward; feet planted straight together look stiff and make the skirt hang flat. Rest one hand near the waist and let the other sit on the skirt or hold the dupatta edge. Keep your chin level and nudge it a touch forward, which defines the jawline. I leave space around the skirt in the frame so the flare isn’t clipped. Heavy embroidery, a statement necklace and the shoes all read clearly from the front.
2. Twirling Lengha Pose
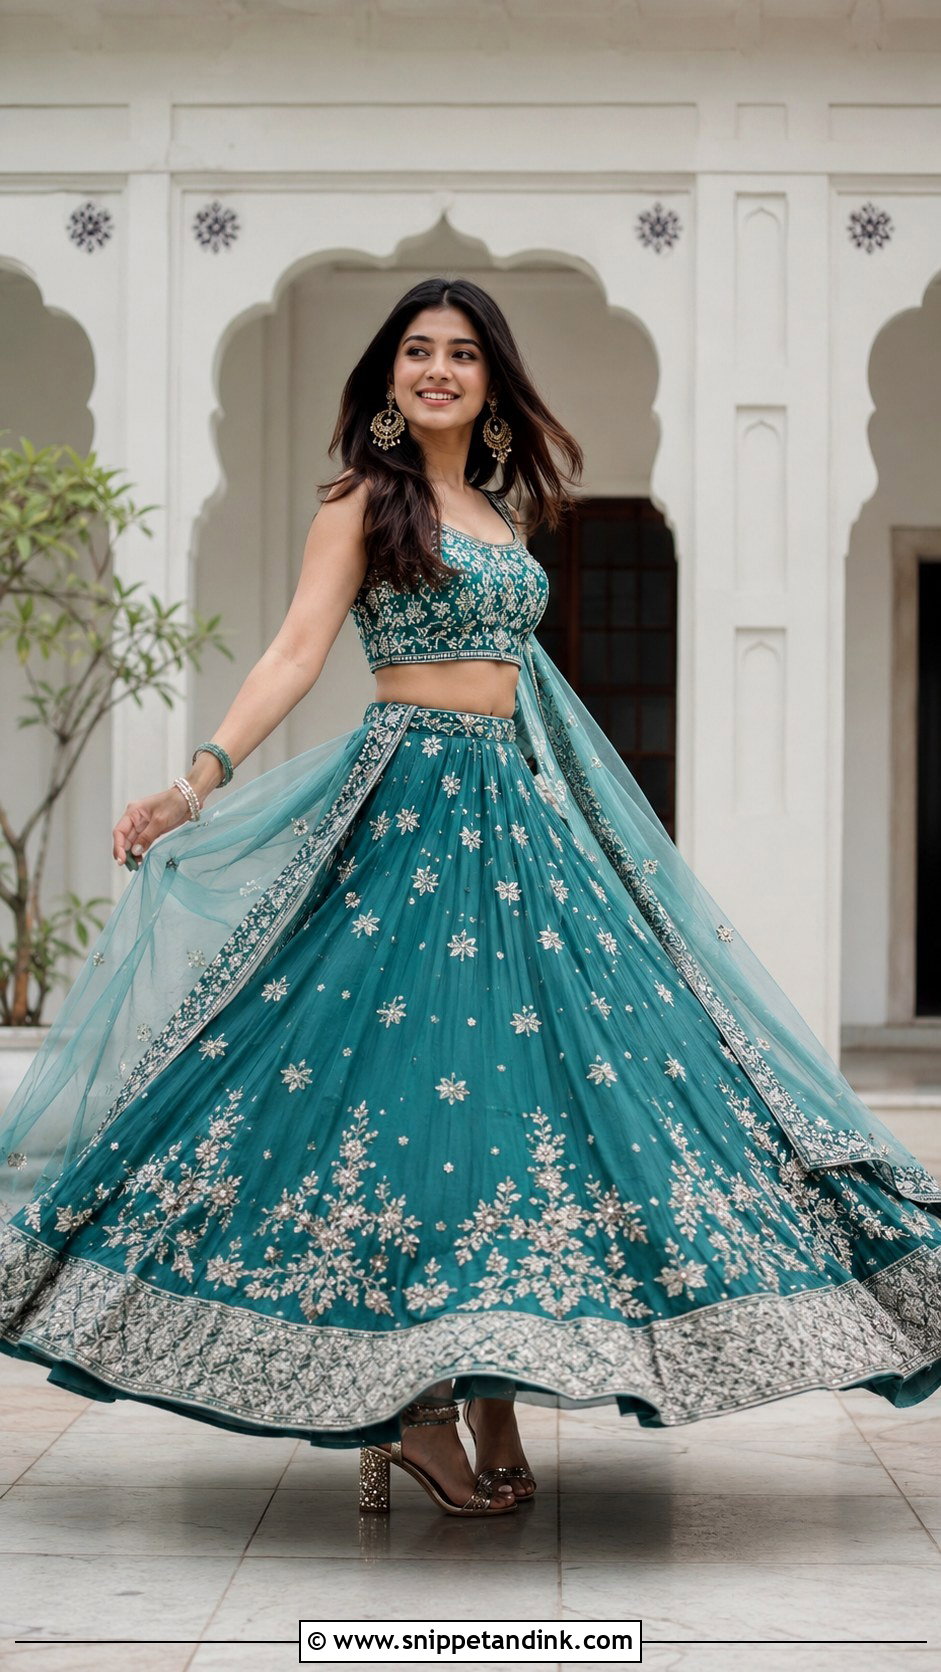
The twirl is everyone’s favorite and the pose most likely to go wrong. Spin too fast in a heavy skirt and you’ll lose balance or blur. Hold one side lightly, keep your upper body lifted and turn smoothly; a controlled half-turn usually gives me a cleaner shape than a full spin. I shoot in burst mode so we catch the skirt at its widest. Look at the camera, over a shoulder or down at the fabric for different moods. Pin the dupatta first, or it whips across your face. Two or three goes is plenty, since brides get dizzy and makeup starts to shine.
3. Over The Shoulder Lengha Pose
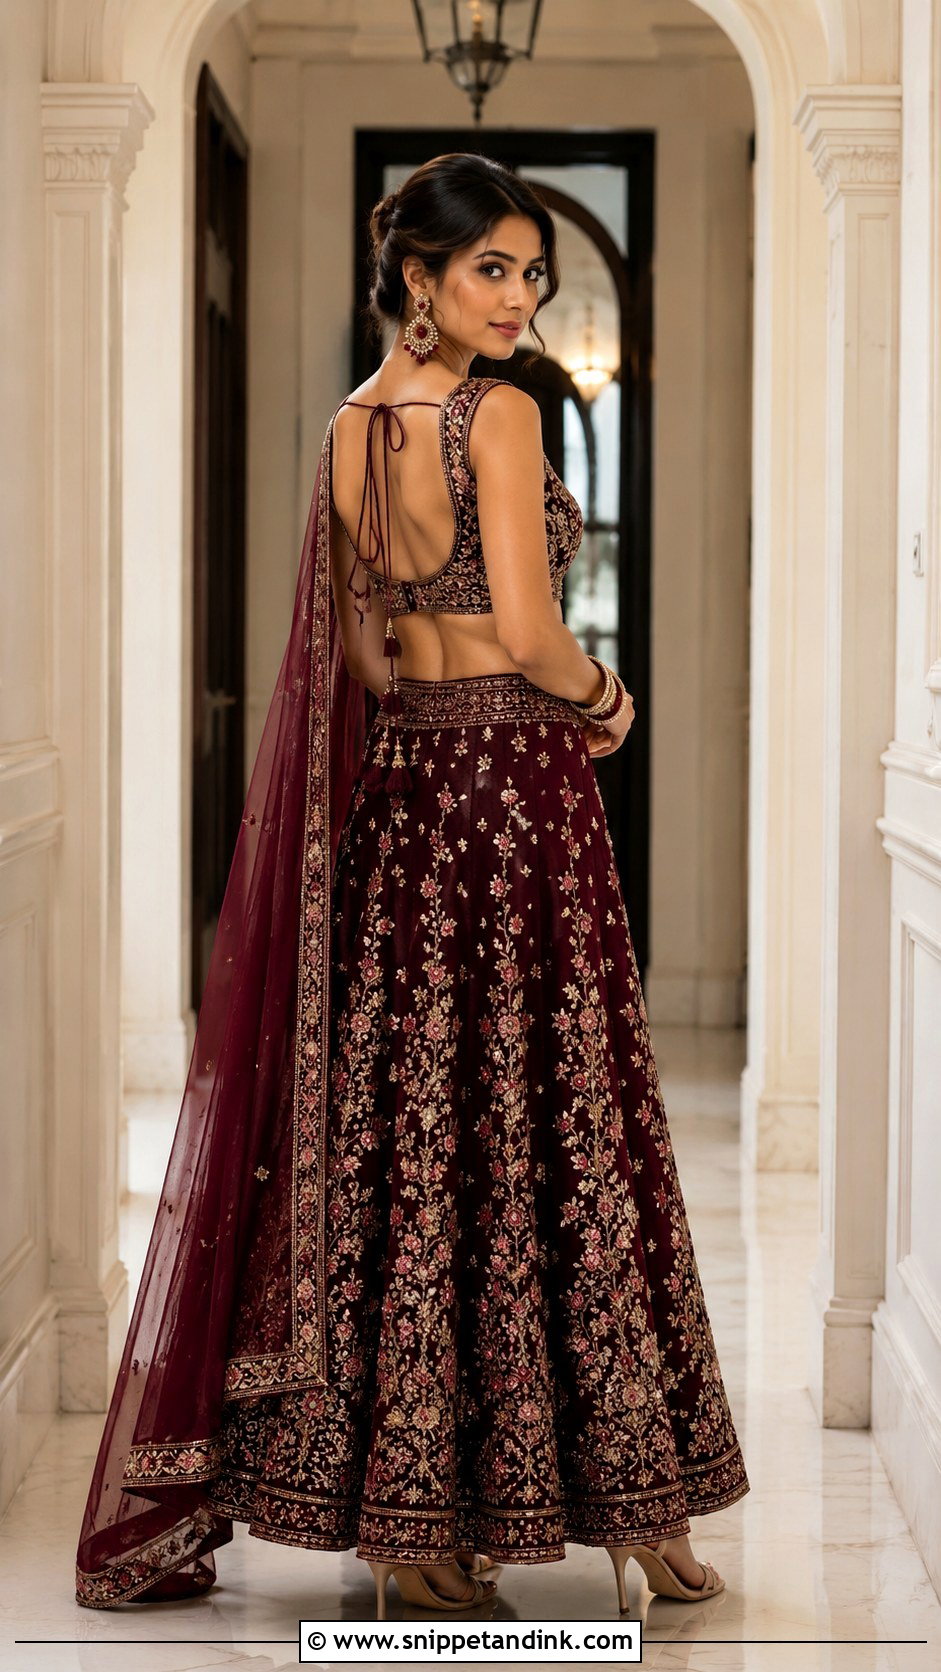
Turn your back partly toward the camera and look over one shoulder, and you finally get the blouse back into the album, the part many brides spent weeks designing and never see. Tie details, tassels and back embroidery all show here. Keep your spine straight and drop the near shoulder slightly. The usual mistake is twisting the neck too far, which creases the skin at the neck, so turn from the waist first. One hand rests at the waist and the other holds the dupatta or skirt. Arrange the dupatta to frame your back without covering the work. I take a full-length version, then step closer for the blouse and earrings.
4. Walking Lengha Pose
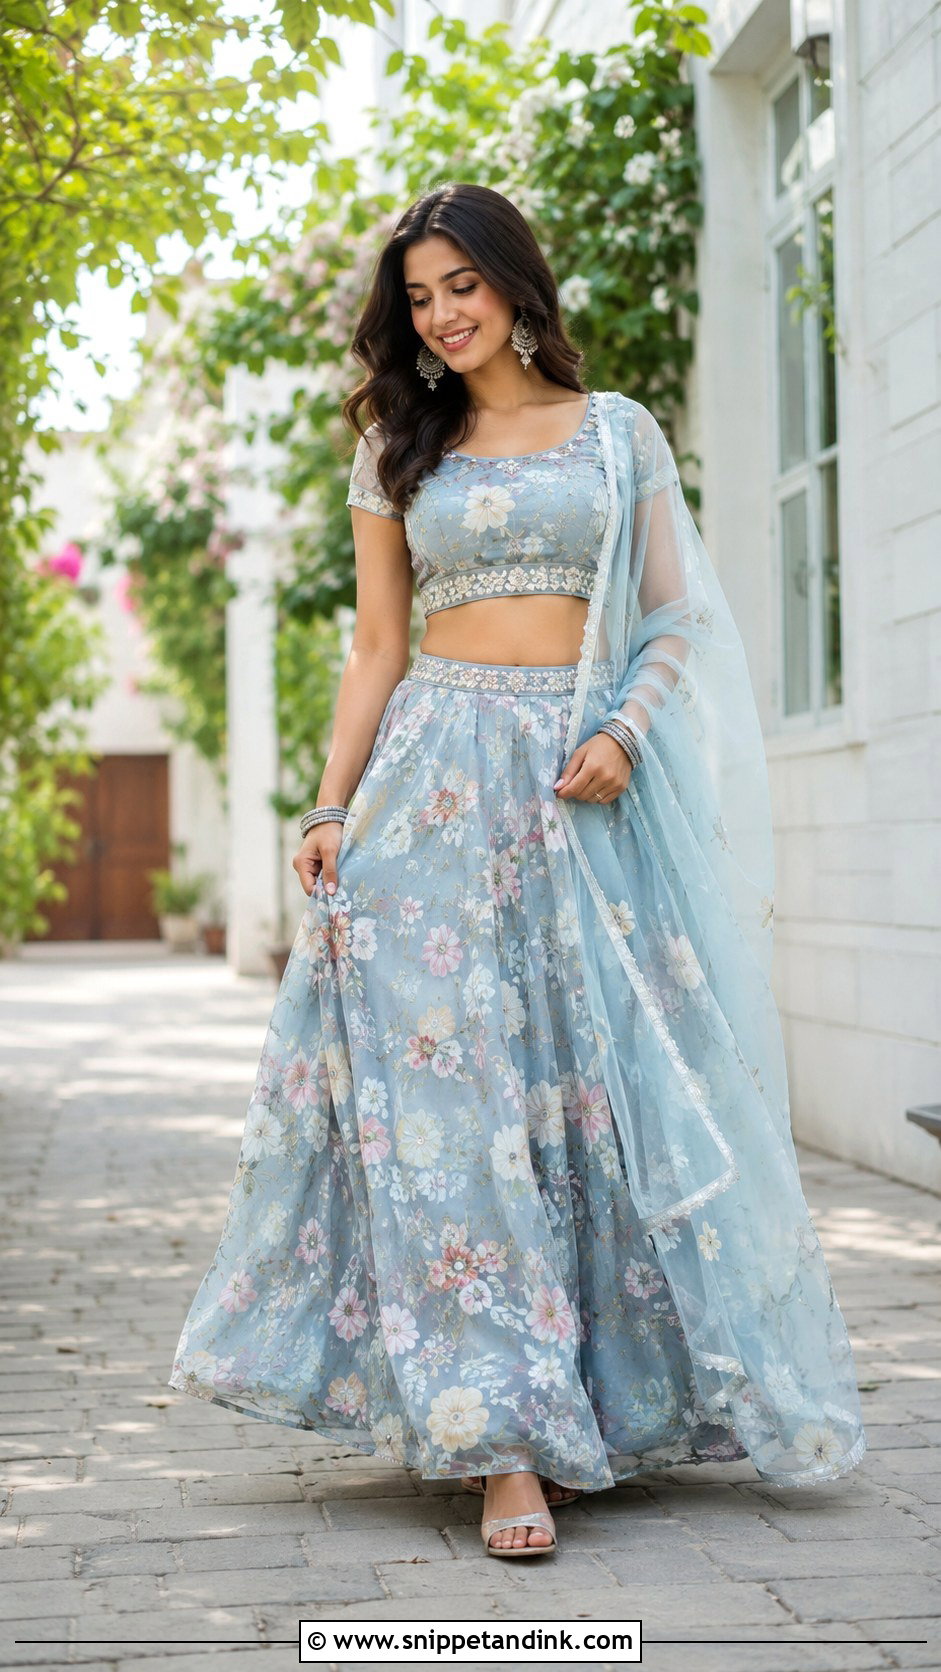
Walking shots look candid but need a little setup. Start several steps back and walk toward me at an easy pace, with smaller steps than usual so the skirt swings evenly and your heel doesn’t catch the hem. Look down, glance aside or smile toward the camera; I’ll usually ask you to walk the same stretch two or three times. Let one arm move naturally while the other holds the skirt or dupatta. In a heavy lengha, lift the front edge just enough to walk safely, not so high that the can-can shows. Pathways, courtyards, corridors and venue entrances all work.
5. Side Profile Lengha Pose
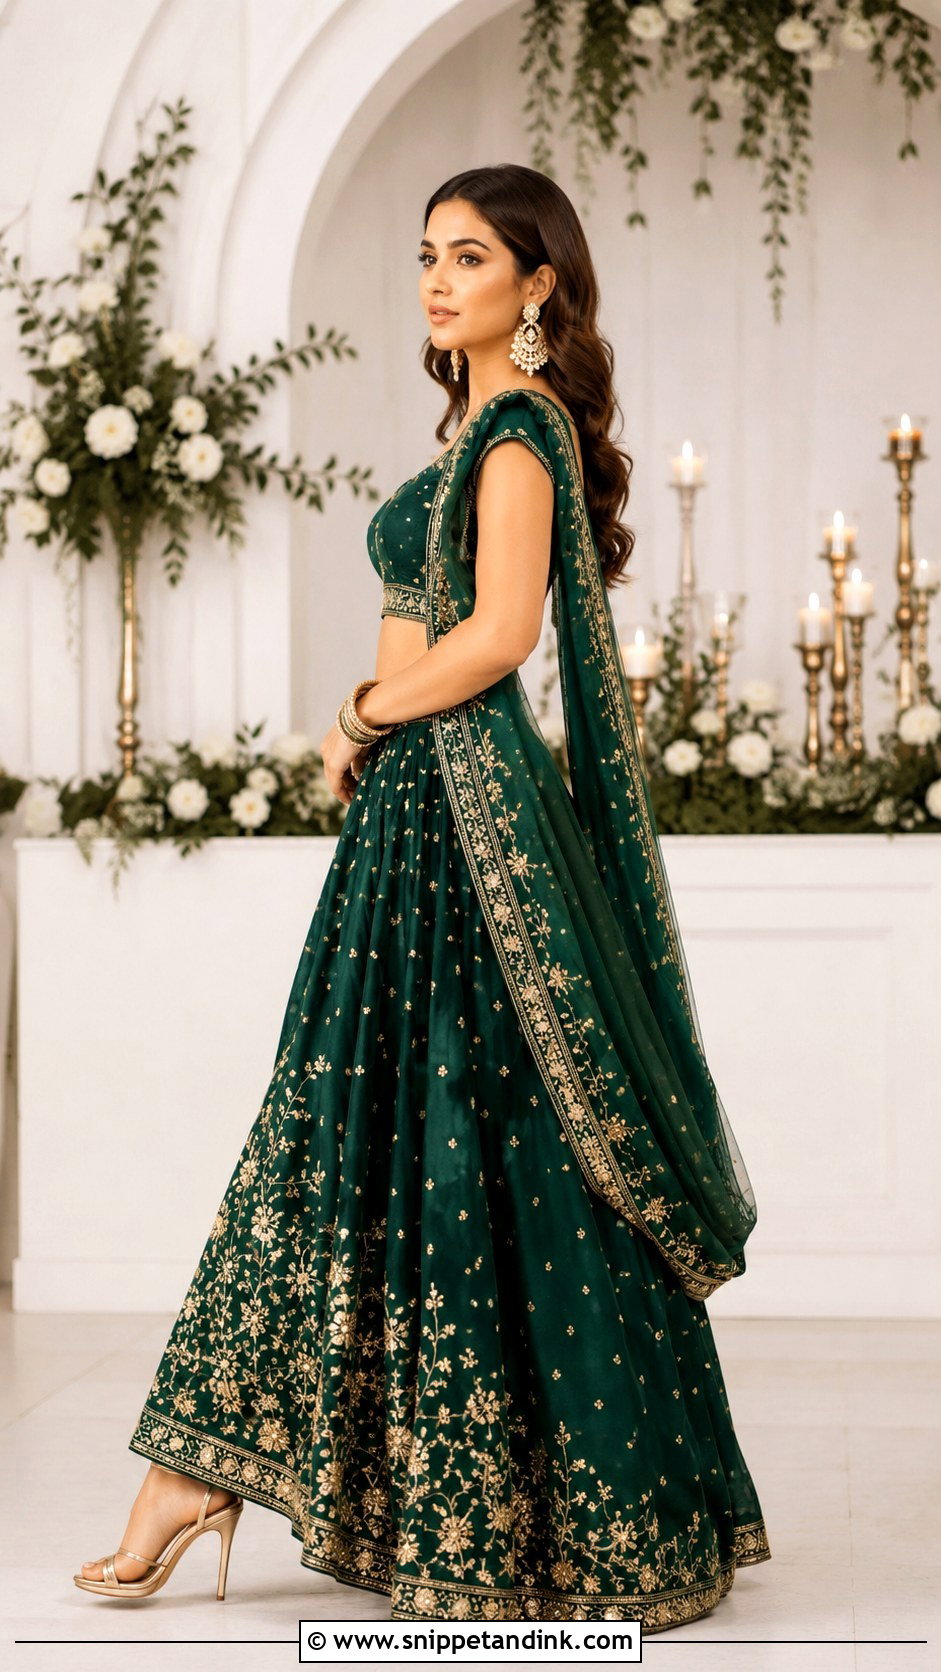
A side profile shows the blouse shape and the curve of the skirt. Turn sideways, put your weight on the back foot and slide the front foot slightly forward, which narrows the body line. Angle your face toward the light so it doesn’t fall into shadow. Leave a little space between your arms and torso, because arms pressed flat widen the silhouette and hide the waist. One hand can rest at the waist, the other at a bangle, earring or dupatta border. It flatters a defined waistband, a structured blouse or a dramatic drape, and I usually take a full-length and a three-quarter frame.
6. Looking Down Lengha Pose
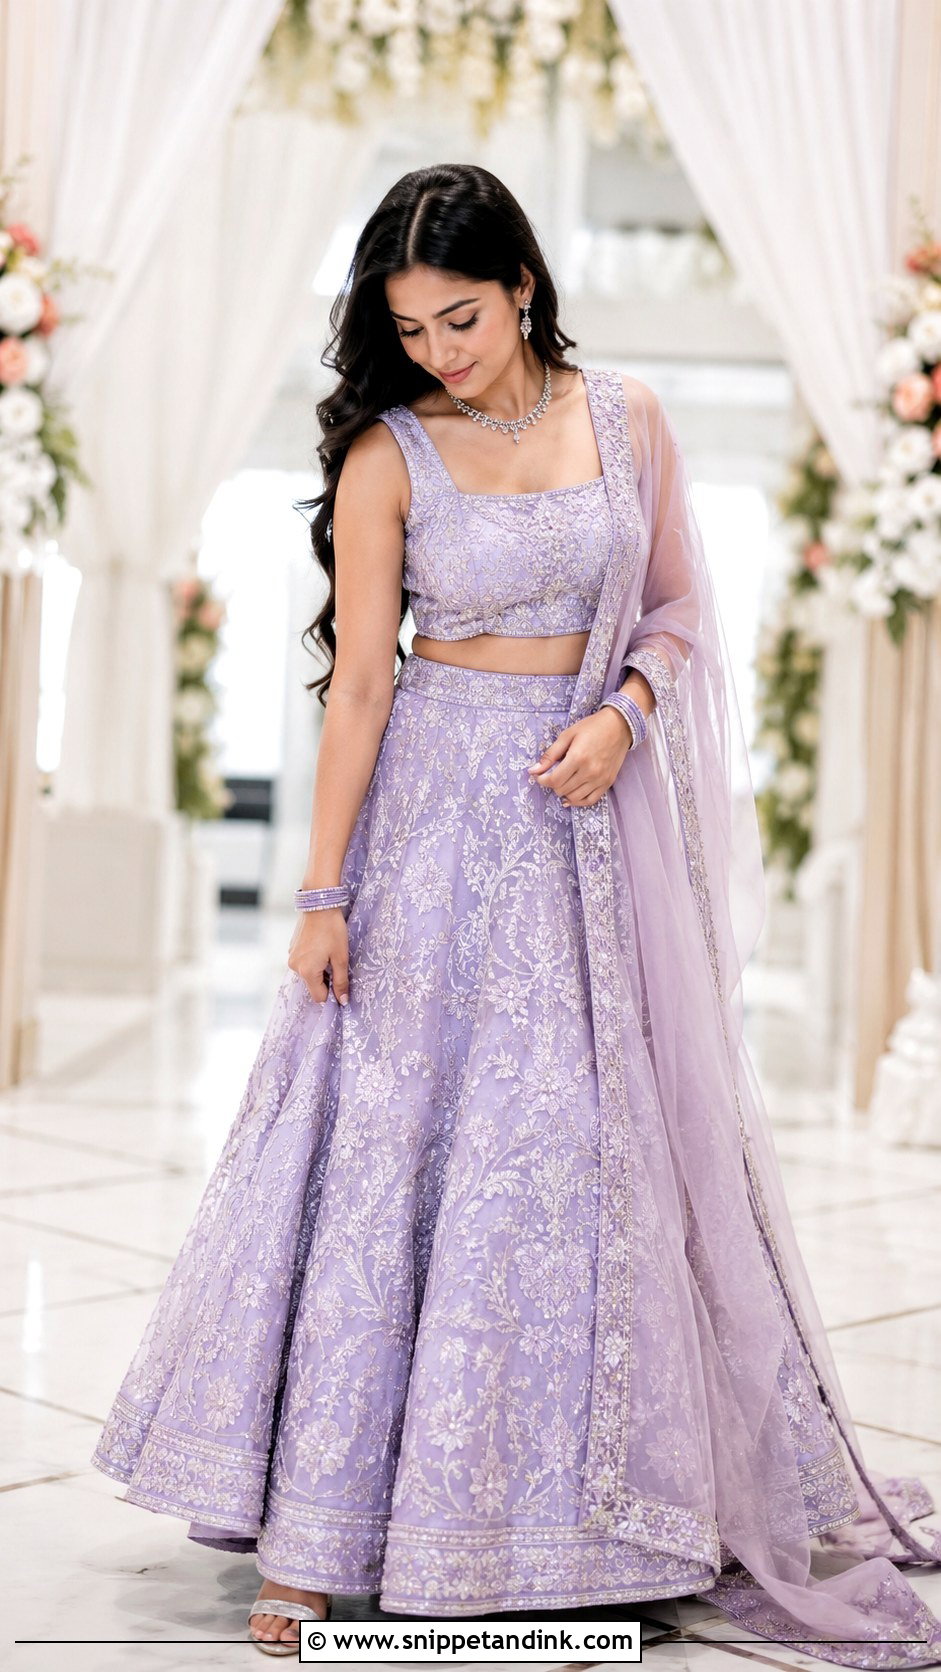
Looking down is my rescue pose for brides who feel awkward staring into a lens. Stand at a slight angle with your back straight and lower your eyes to your hands or skirt rather than dropping your whole head, so your face stays visible and lit. Give your hands a task: touch a bangle, hold the dupatta border or gather a little of the skirt. It shows off eye makeup, lashes, earrings and hair accessories, plus any embroidery near the waist or hem. Keep one foot forward. I’ll include the full skirt rather than cropping at the knees, which always looks accidental.
7. Dupatta Flow Lengha Pose
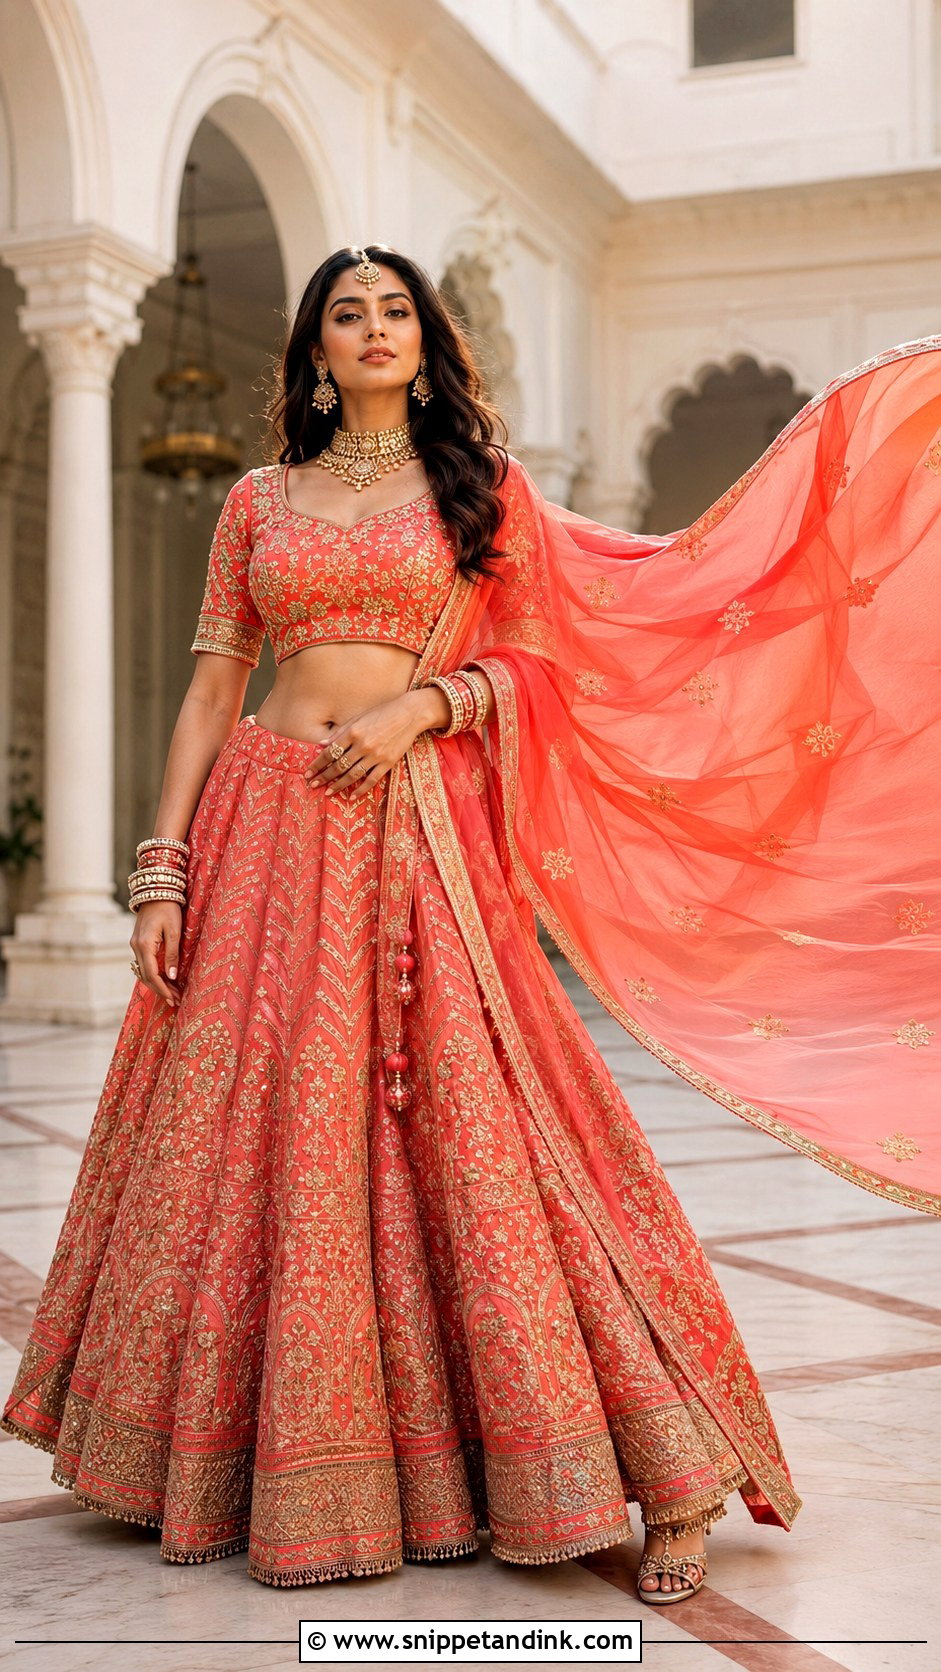
Floating dupatta shots need a helper and good timing. Stand tall or walk slowly while someone just out of frame lifts the loose end and lets go on my count. The fabric should drift, not cover your face or wrap around your arm. Keep one hand near the shoulder drape and let the other rest at your side. Lightweight net, chiffon or organza floats; heavy silk drops straight down and looks thrown. Pin the shoulder or head section firmly first. It usually takes a handful of throws before one lands right, and a light outdoor breeze does half the work.
8. Hand On Waist Lengha Pose
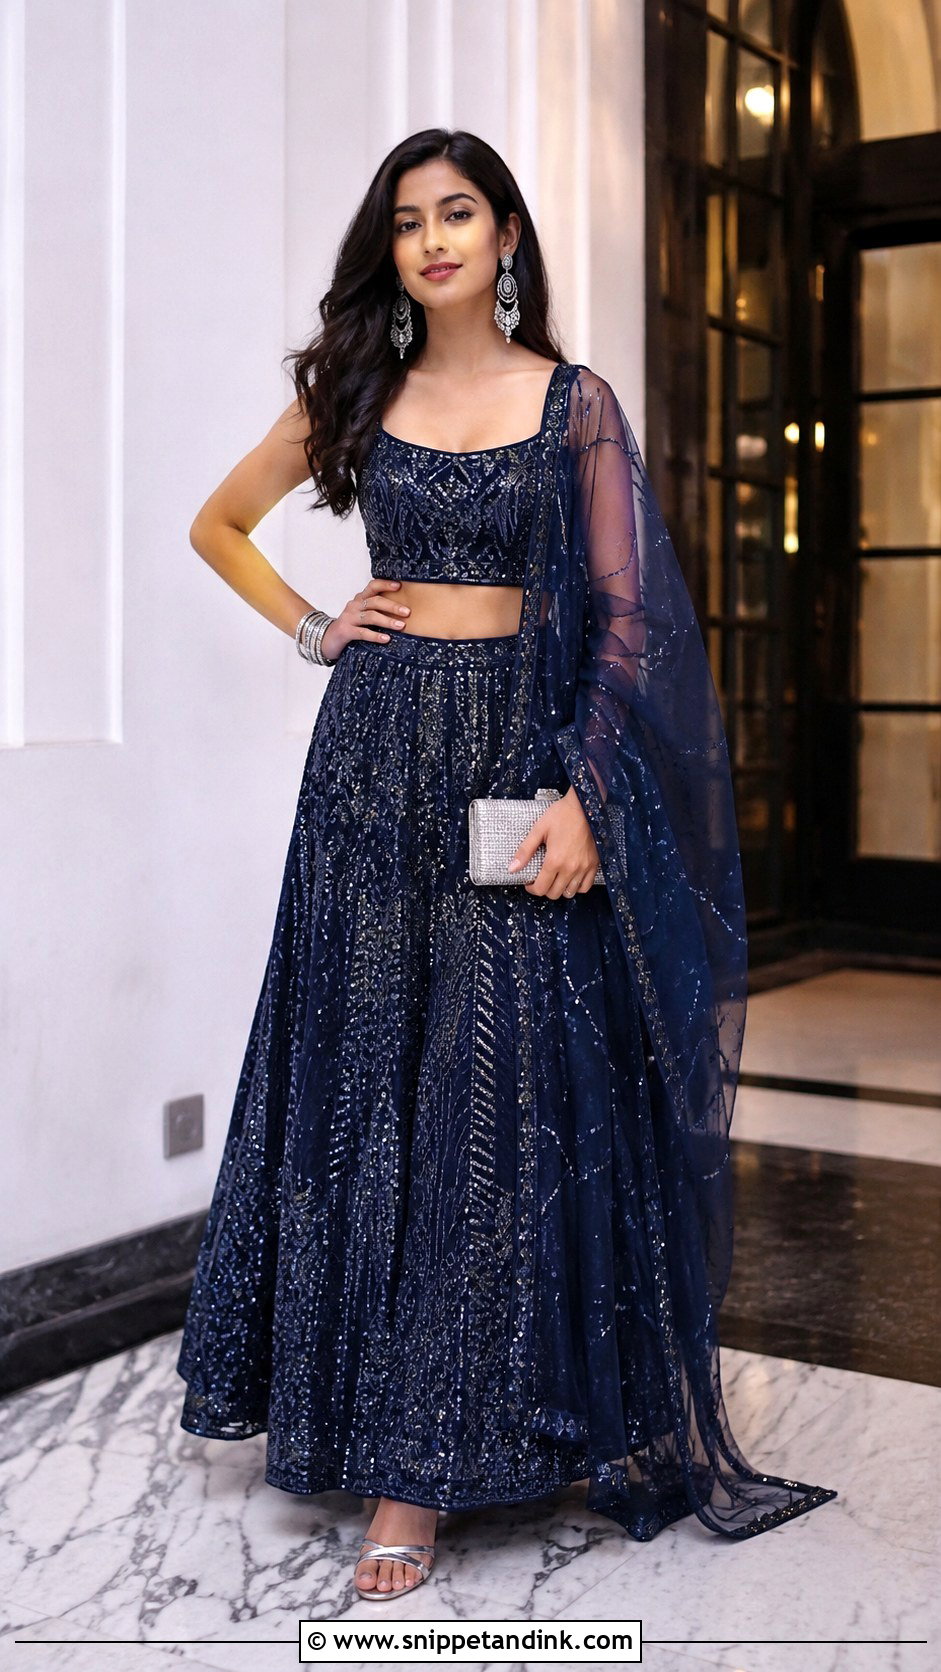
When a bride needs a confident pose that takes no thought, I go here. Place one hand on your waist and angle your body slightly away from me. Keep the elbow soft rather than jutting out, and the fingers relaxed instead of spread wide. The other hand can hold the dupatta, touch the skirt or hang naturally. Shift your weight onto one leg and ease the other foot forward. It defines the waist and gives a clear view of blouse and skirt, so it suits bridal, festive, and contemporary lenghas, crop-top designs included. A direct gaze feels like fashion; a small smile feels softer.
9. Sitting On Stairs Lengha Pose
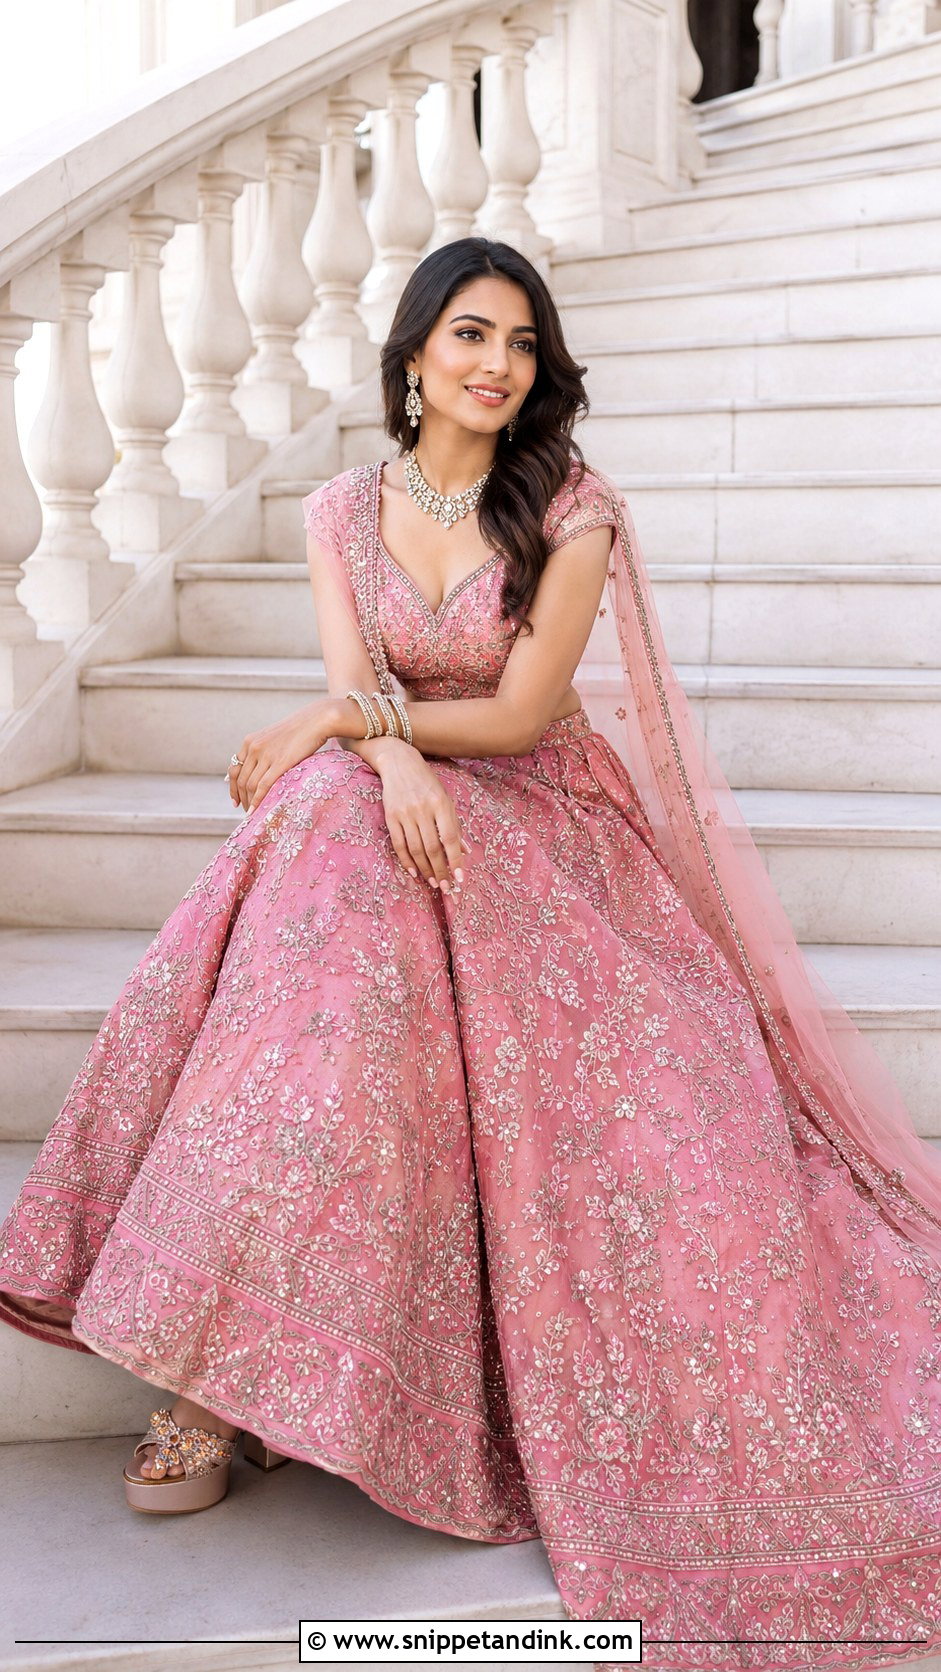
Stairs give the skirt somewhere to fall. Sit sideways on a wide, clean step and let the lengha cascade down the steps below instead of bunching under you. Keep your torso upright and rest your hands in your lap, near your knee or on the step. Angle your feet to one side and check that the hem covers them neatly. The dupatta can rest over a shoulder or trail behind you. I usually shoot from a few steps below, which makes the cascade look longer. Check that the step is dry and clean first, because outdoor stone stairs leave dust marks on pale fabric.
10. Floor Sitting Lengha Pose
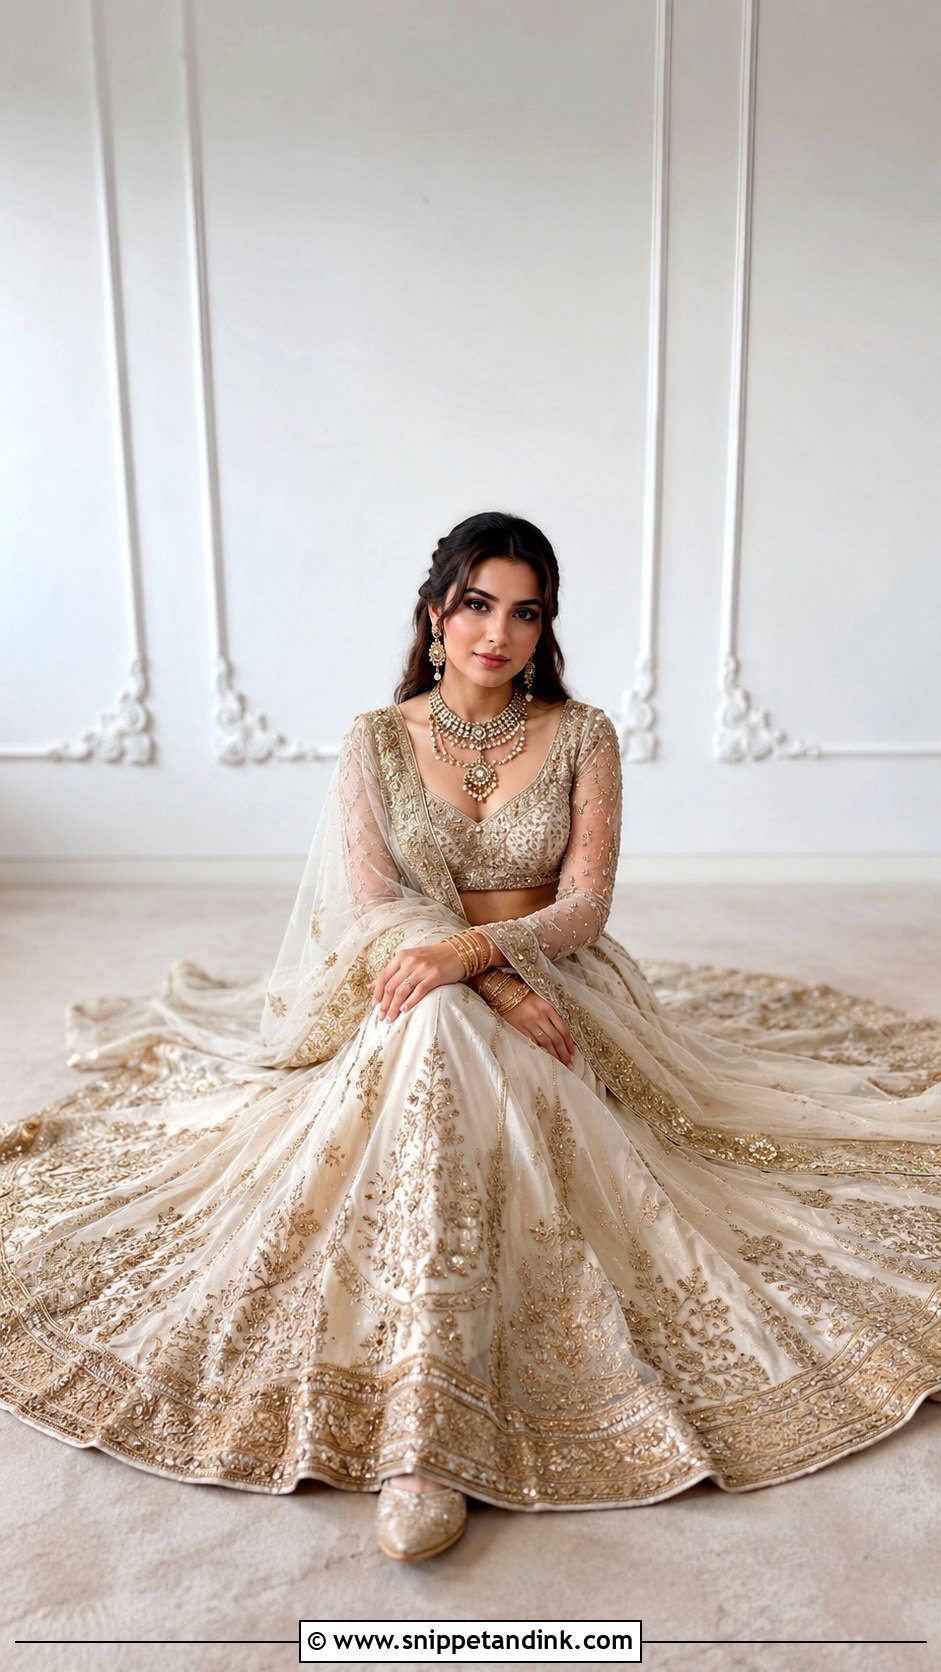
Sitting on the floor makes a full lengha look regal, since the skirt spreads into a circle around you. Sit on a clean surface with your legs folded to one side, then spread the skirt evenly. Avoid sitting on embroidery, stiff borders or stonework; they press marks into the fabric and dig into you. Keep your back straight and your hands light in your lap or on the skirt. Settle the dupatta so it frames the shoulders without bulky folds. A slightly raised camera shows the circle of the skirt, while a straight-on angle shows the blouse and jewelry better, so I take both. Bright, uncluttered indoor backgrounds suit it.
11. Mirror Reflection Lengha Pose
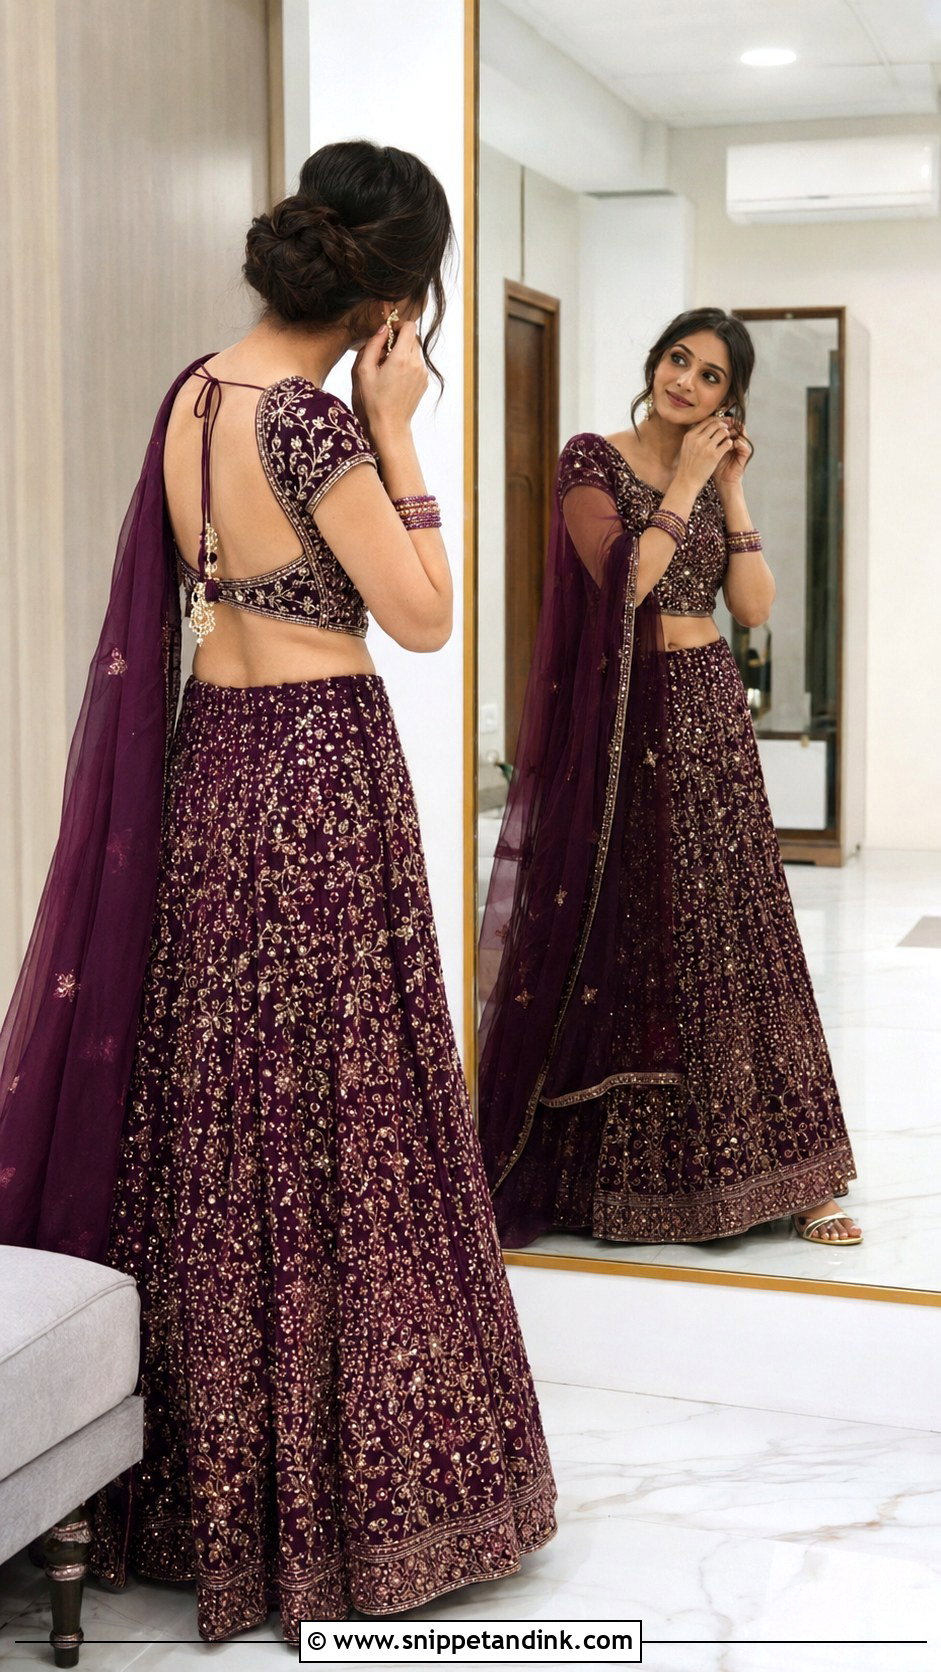
Mirror frames show front and back in one picture. Stand at a slight angle near a large mirror and look at your reflection rather than the camera. Adjust an earring, touch the dupatta or rest a hand at your waist. Keep some distance so the skirt doesn’t crowd the frame. I stand behind and off to one side to stay out of the reflection, and finding that spot takes a moment. I use it most for lenghas with detailed blouse backs, layered dupattas or long braids. Wipe the mirror first and choose a tidy room with even light, because every smudge and stray bag shows up twice.
12. Dupatta Over Head Lengha Pose
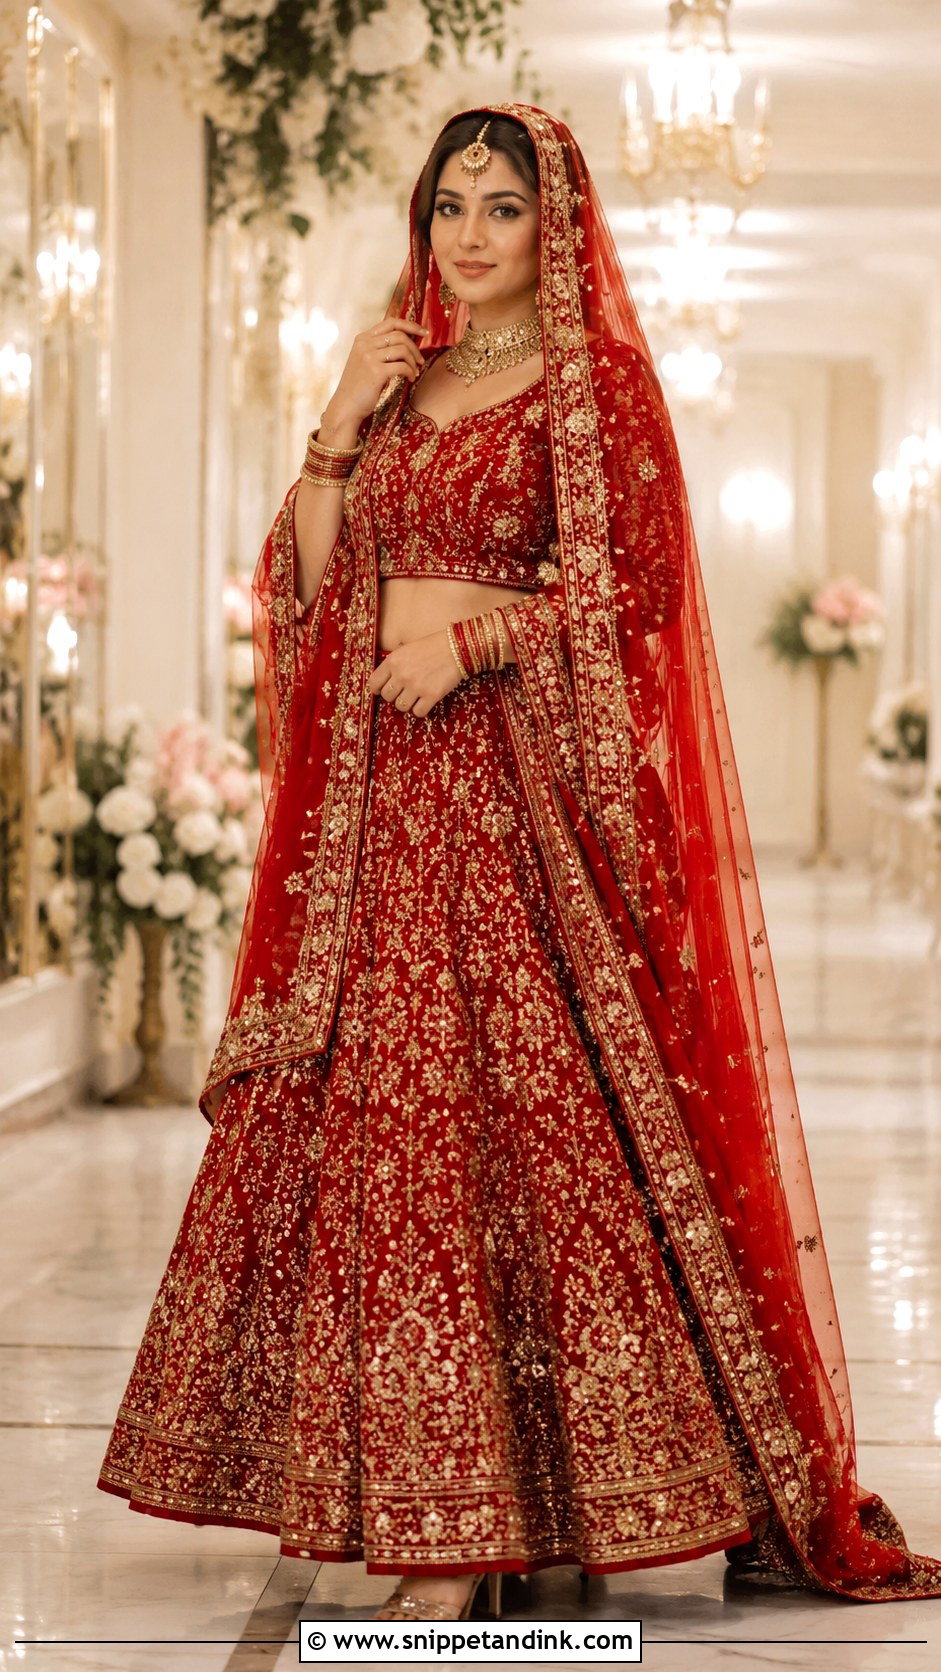
A dupatta over the head gives the most traditional portrait of the day. Arrange the border evenly along the hairline and let the sides fall naturally over your shoulders. Hold one edge near your collarbone, or rest both hands at your waist. Posture matters more than usual: with fabric over the head, rounded shoulders look heavy, so lift through the chest. Face the camera for a formal portrait, or turn slightly and lower your eyes. Maang tikka, earrings, necklace, bangles and dupatta embroidery all appear together. A colored sheer dupatta can tint the skin beneath it, so I shoot this one in even window light and keep an eye on skin tone.
13. Holding The Lengha Skirt Pose
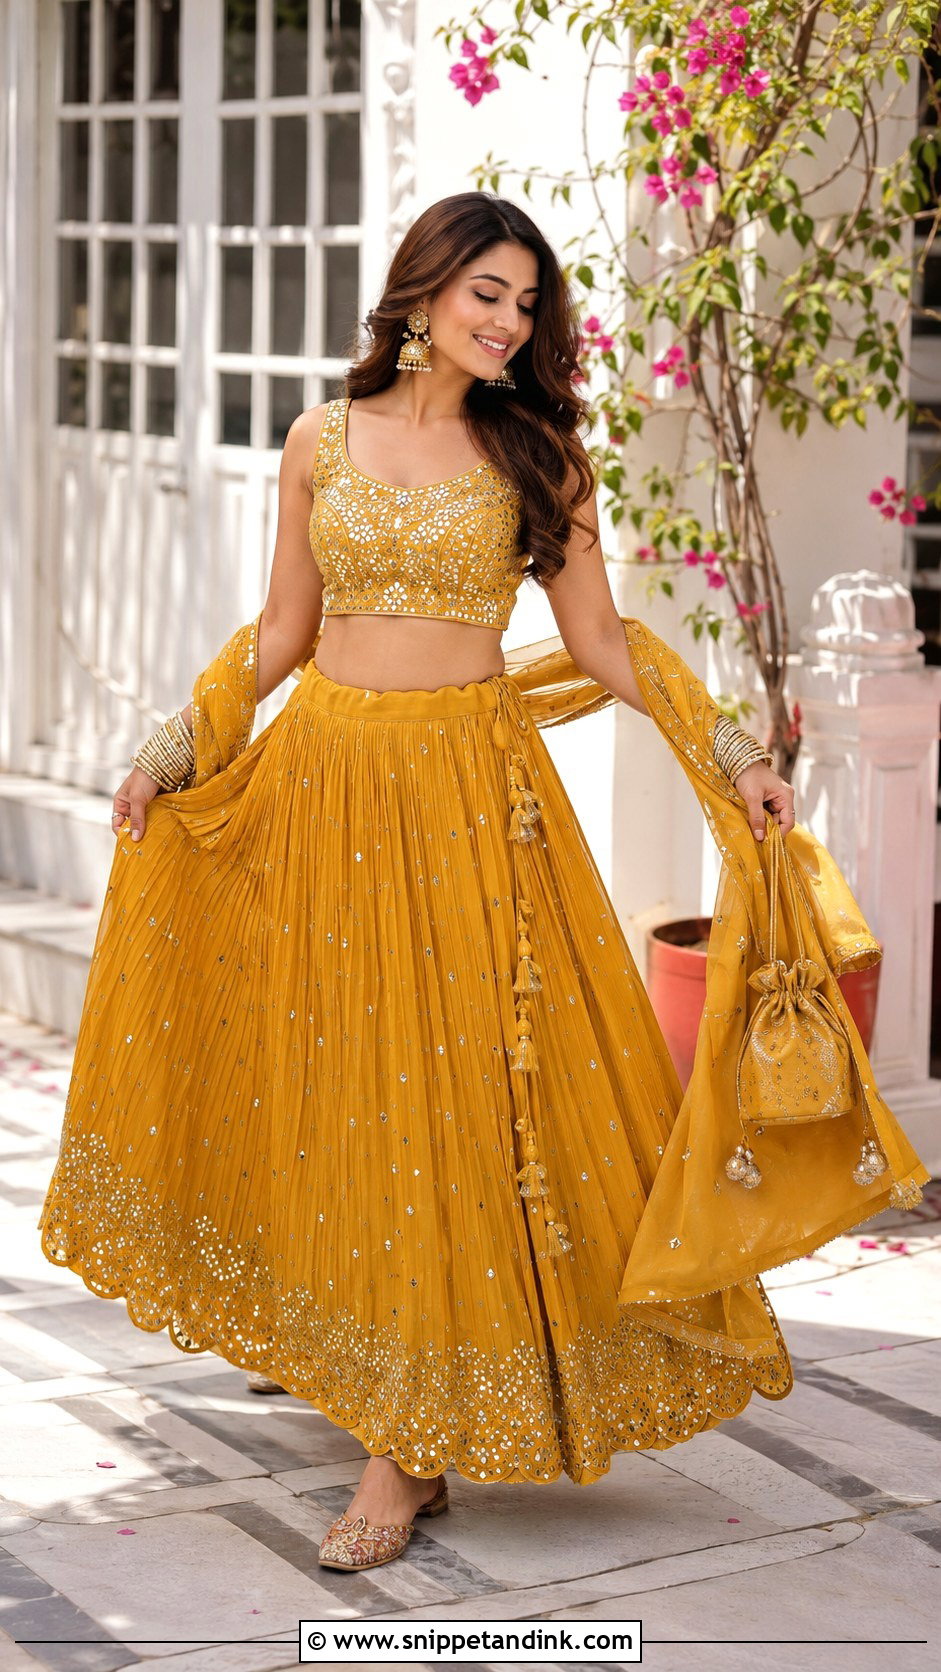
Holding the skirt gives your hands a job and shows off the border. Gather a little fabric at both sides without hoisting it high or crushing the embroidery. Step one foot slightly ahead and lift only enough to create soft folds. Look at me, glance at the fabric or start a slow step. Light festive lenghas and outdoor shoots suit this best. On heavily embellished skirts, hold the lining underneath rather than gripping the surface work, which snags threads and leaves finger marks. Keep elbows relaxed and shoulders level so it looks easy instead of arranged.
14. Adjusting Earring Lengha Pose
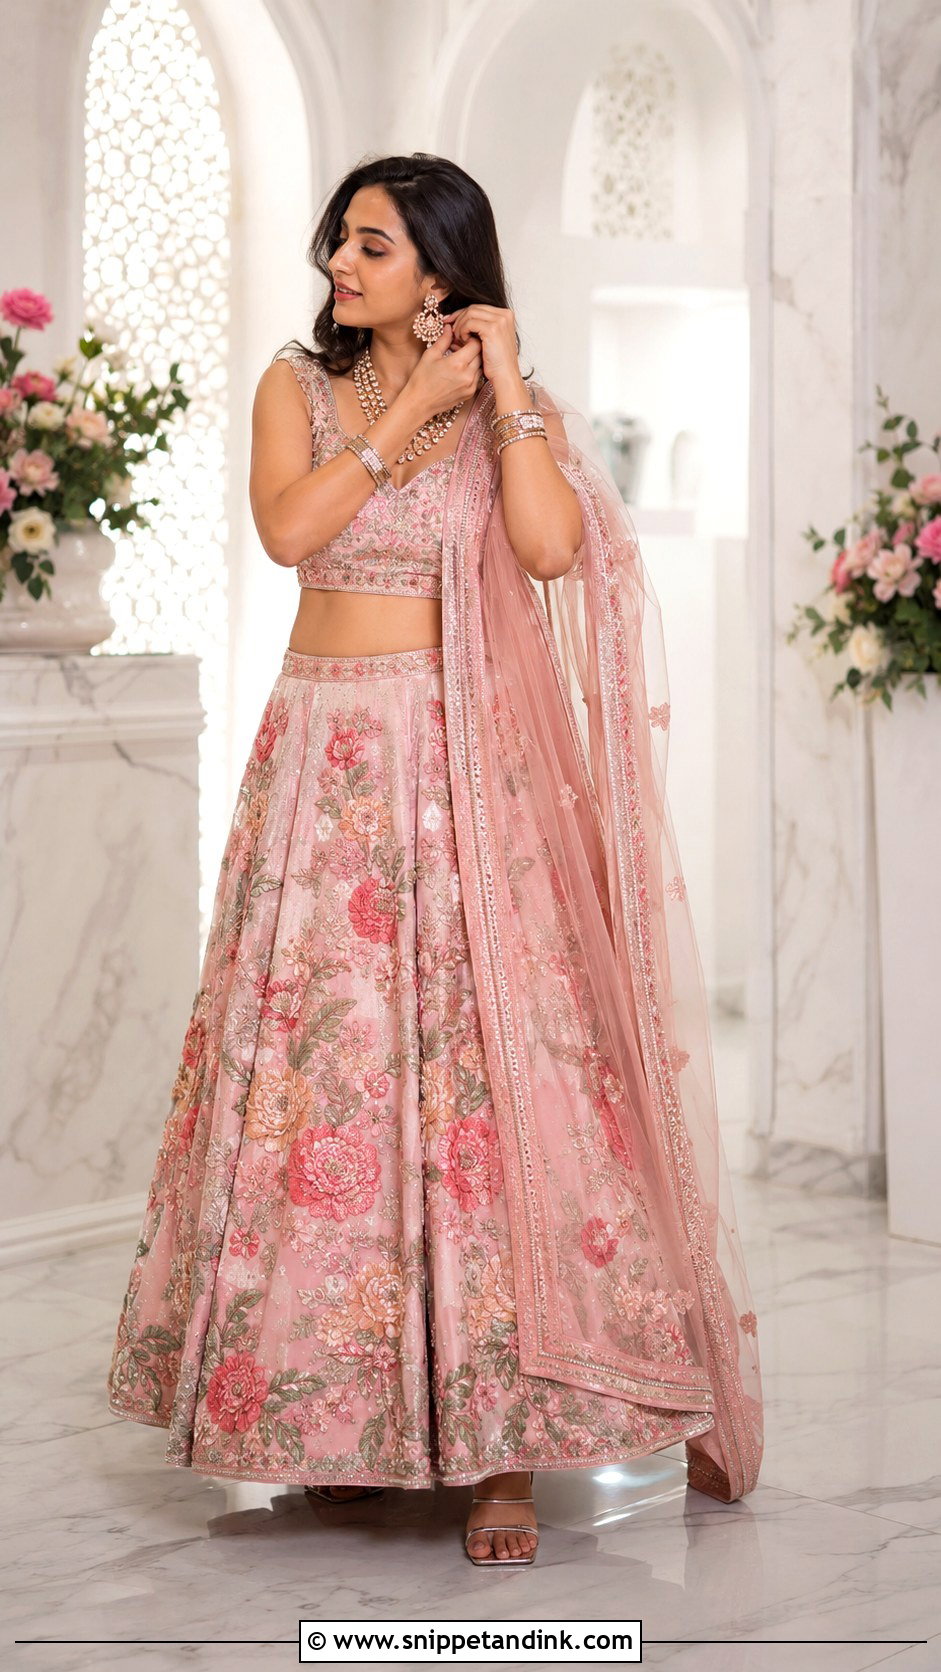
A small jewelry adjustment makes a natural-looking candid. Turn to a three-quarter angle and raise one hand to your earring, fingers soft and placed so they don’t hide the earring or your cheek. The other hand holds the dupatta or rests near the skirt. Look down, close your eyes briefly or glance away. It highlights statement earrings, makeup, hair and the blouse neckline. I take a full-length frame first, with the skirt arranged and one foot forward, then move in for the portrait. Brides often lift the elbow too high, which hikes up the blouse, so keep it low.
15. Adjusting Bangles Lengha Pose
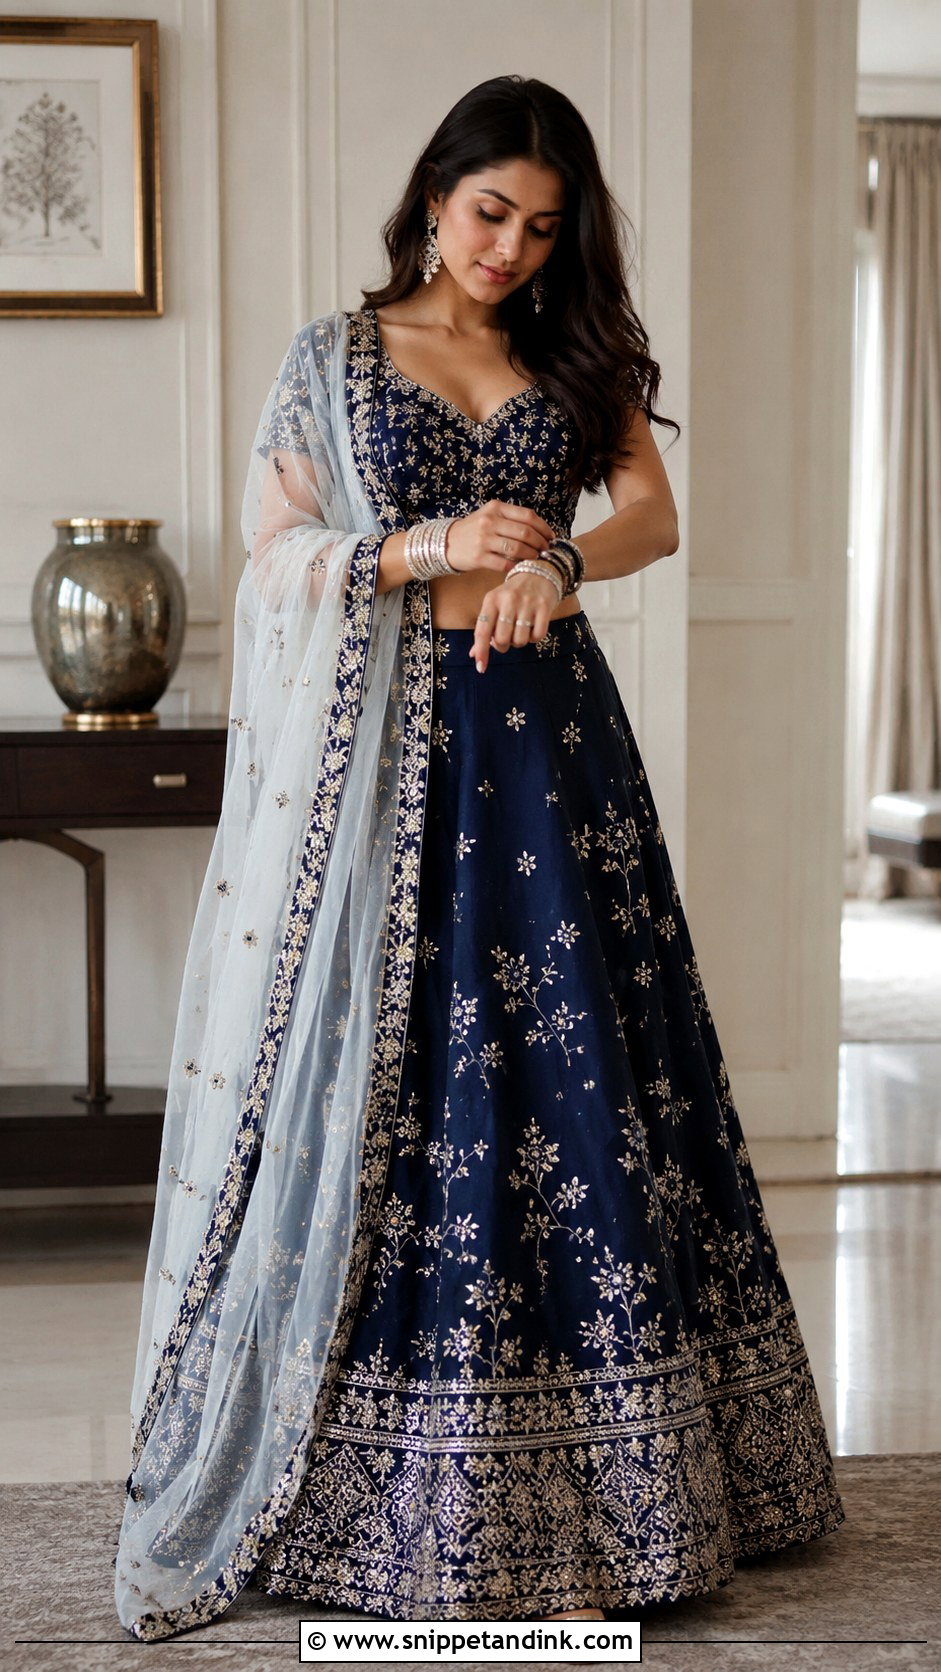
Adjusting bangles gives you natural hand placement and puts traditional jewelry in focus, especially a chooda or a fresh bridal stack. Stand at a slight angle, bring your hands together at waist level and straighten the bangles on one wrist with the other hand. Look down at the movement or turn your face toward nearby light. Leave a small gap between arms and body so the blouse and waistband stay visible. Rings, bracelets and detailed sleeves suit it too. I shoot a full-body frame first, then a close crop of the hands. Tidy the skirt and dupatta before we start, because hand close-ups show every stray thread.
16. Leaning Against Wall Lengha Pose
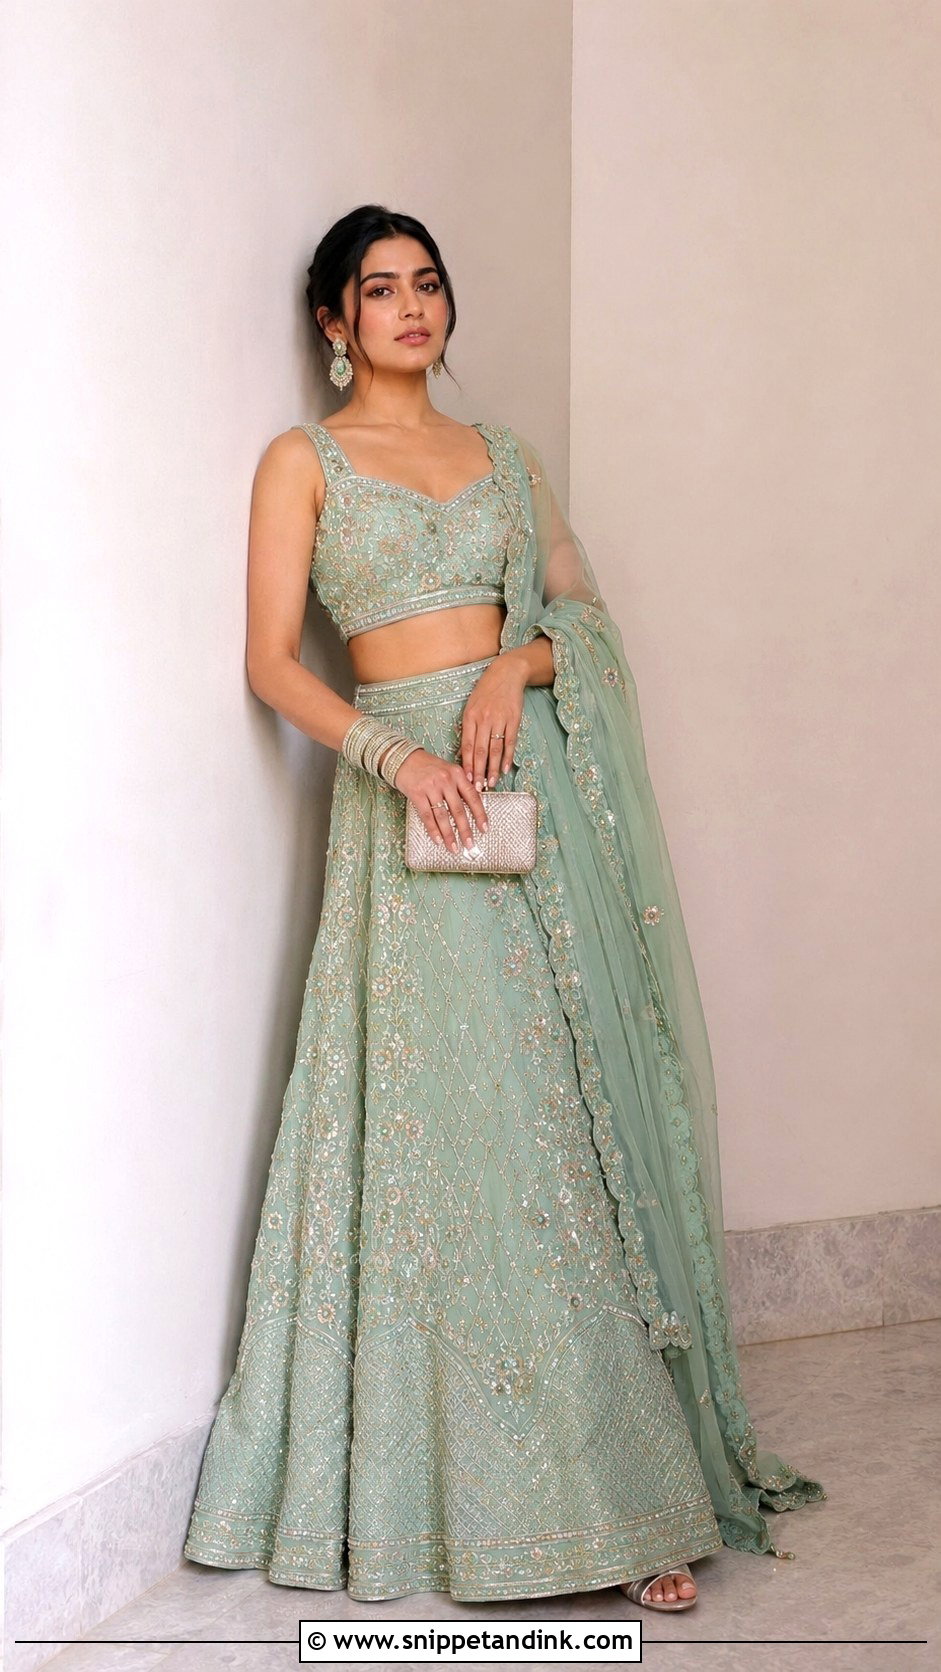
A wall gives nervous brides something to lean on, literally, and that helps them loosen up. Stand beside a clean, plain wall and rest one shoulder lightly against it, keeping most of your weight on your feet. Leaning back fully pushes the shoulders up and looks slumped. Bend one knee slightly and angle the front foot toward the camera. One hand rests at the waist, the other on the dupatta or an accessory, and your face turns to the light. Hallways, balconies and courtyards all work. Run a hand over the wall first, since whitewash and dust rub off onto embroidery and pale fabric.
17. Looking Back While Walking Lengha Pose
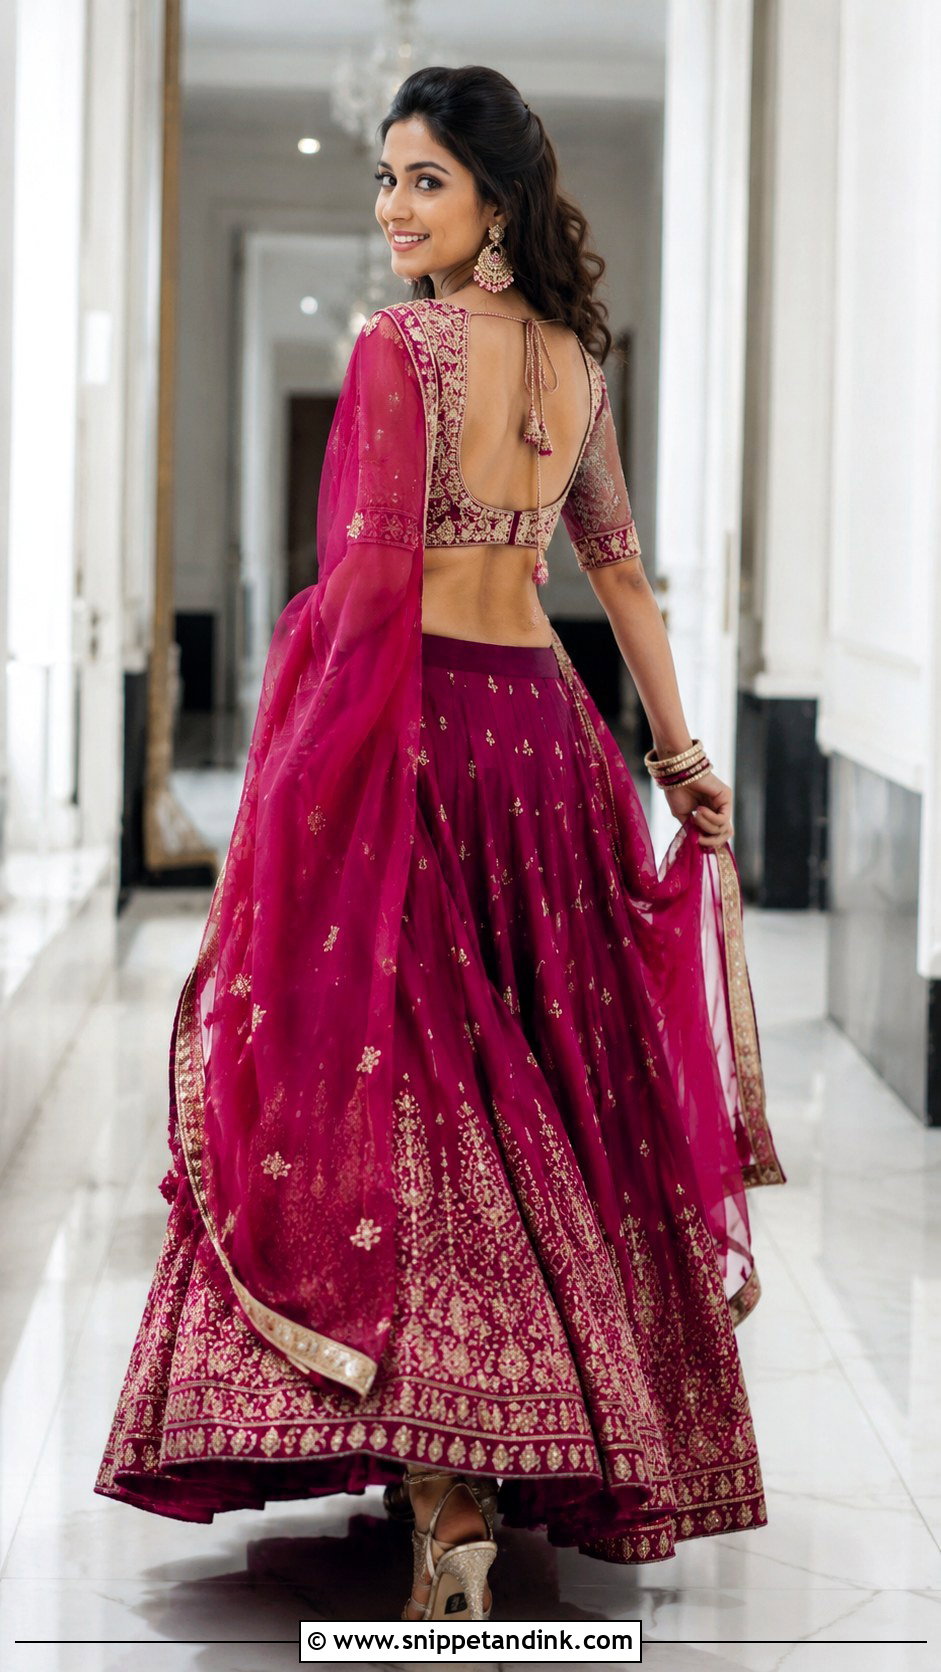
For something that feels spontaneous, walk slowly away from me and glance back over your shoulder. Arrange the skirt and dupatta before you start, then take small, careful steps. Turn the upper body only slightly; a big twist mid-step unbalances you in a heavy skirt. A soft smile reads cheerful, a neutral face more editorial. One hand holds the skirt or dupatta while the other arm relaxes. The blouse back, hair, tassels, flare and trailing dupatta all land in one frame. A long, uncluttered space works best, and I shoot continuously because the best expression often lands between steps.
18. Hands Together Lengha Pose
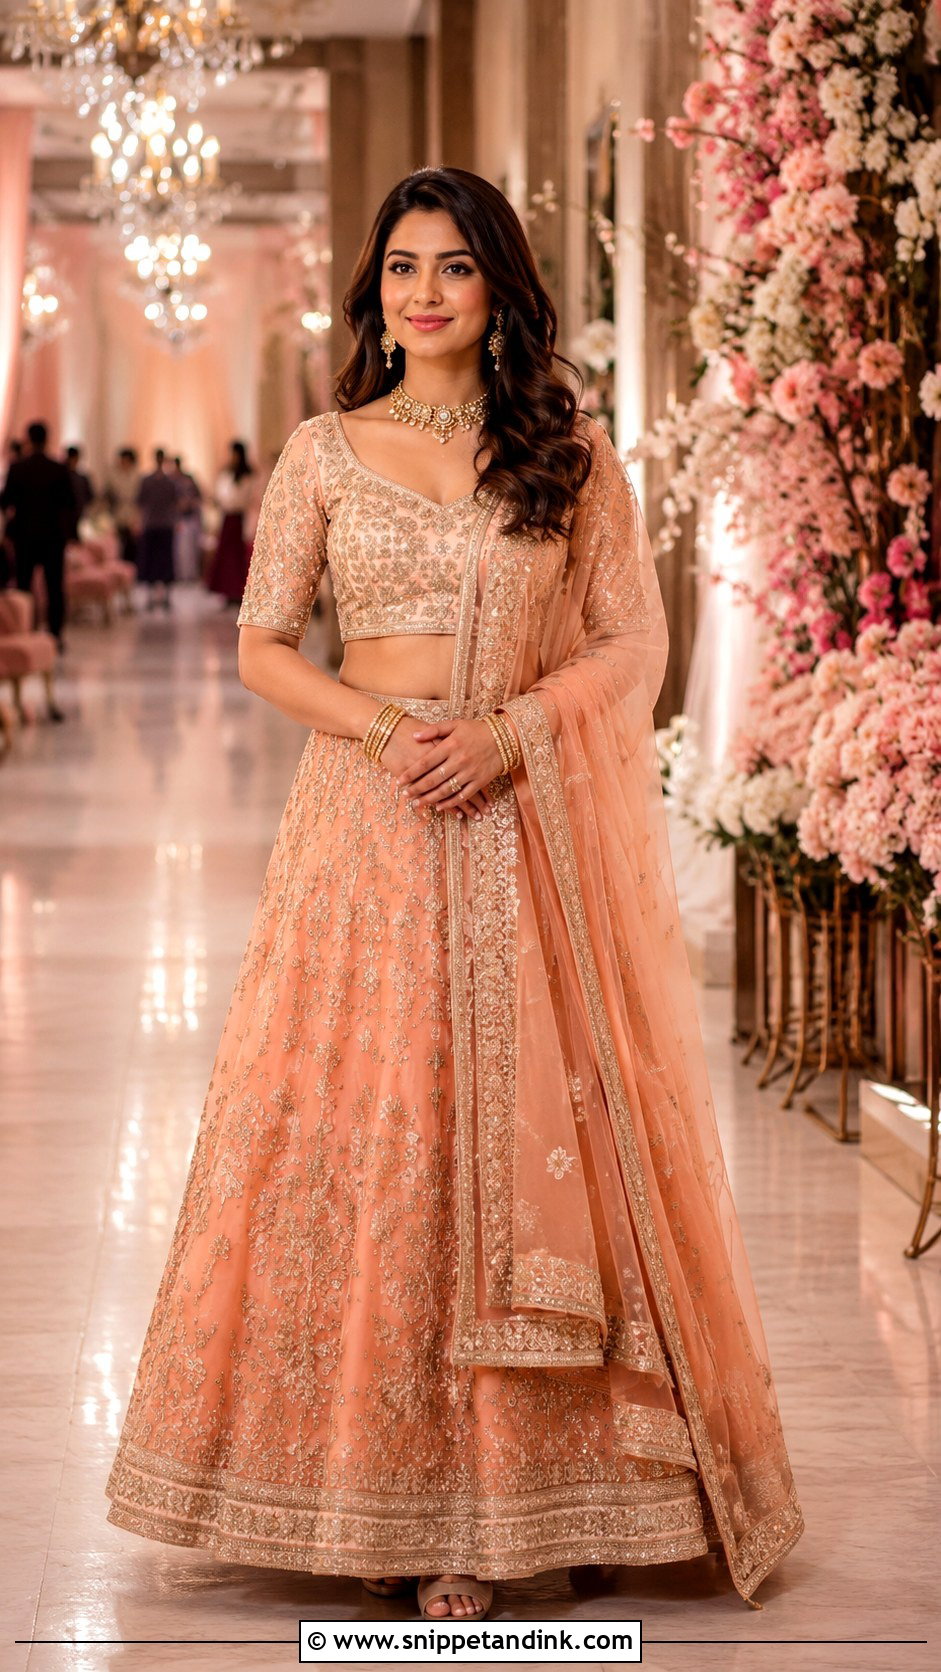
Hands together in front is a restful pose, which makes it ideal for heavy bridal lenghas that limit movement and for long family photo sessions. Stand at a three-quarter angle and bring your hands softly together below the waist. Don’t interlock your fingers; rest one hand over the other so bangles and rings stay visible. Shift your weight to the back leg and point the front foot out. Keep your shoulders down and chin level. It works just as well once family join you after the solo portraits. Watch that your hands don’t cover the waistband, blouse details or the latkans hanging at the sides.
19. Candid Laughing Lengha Pose
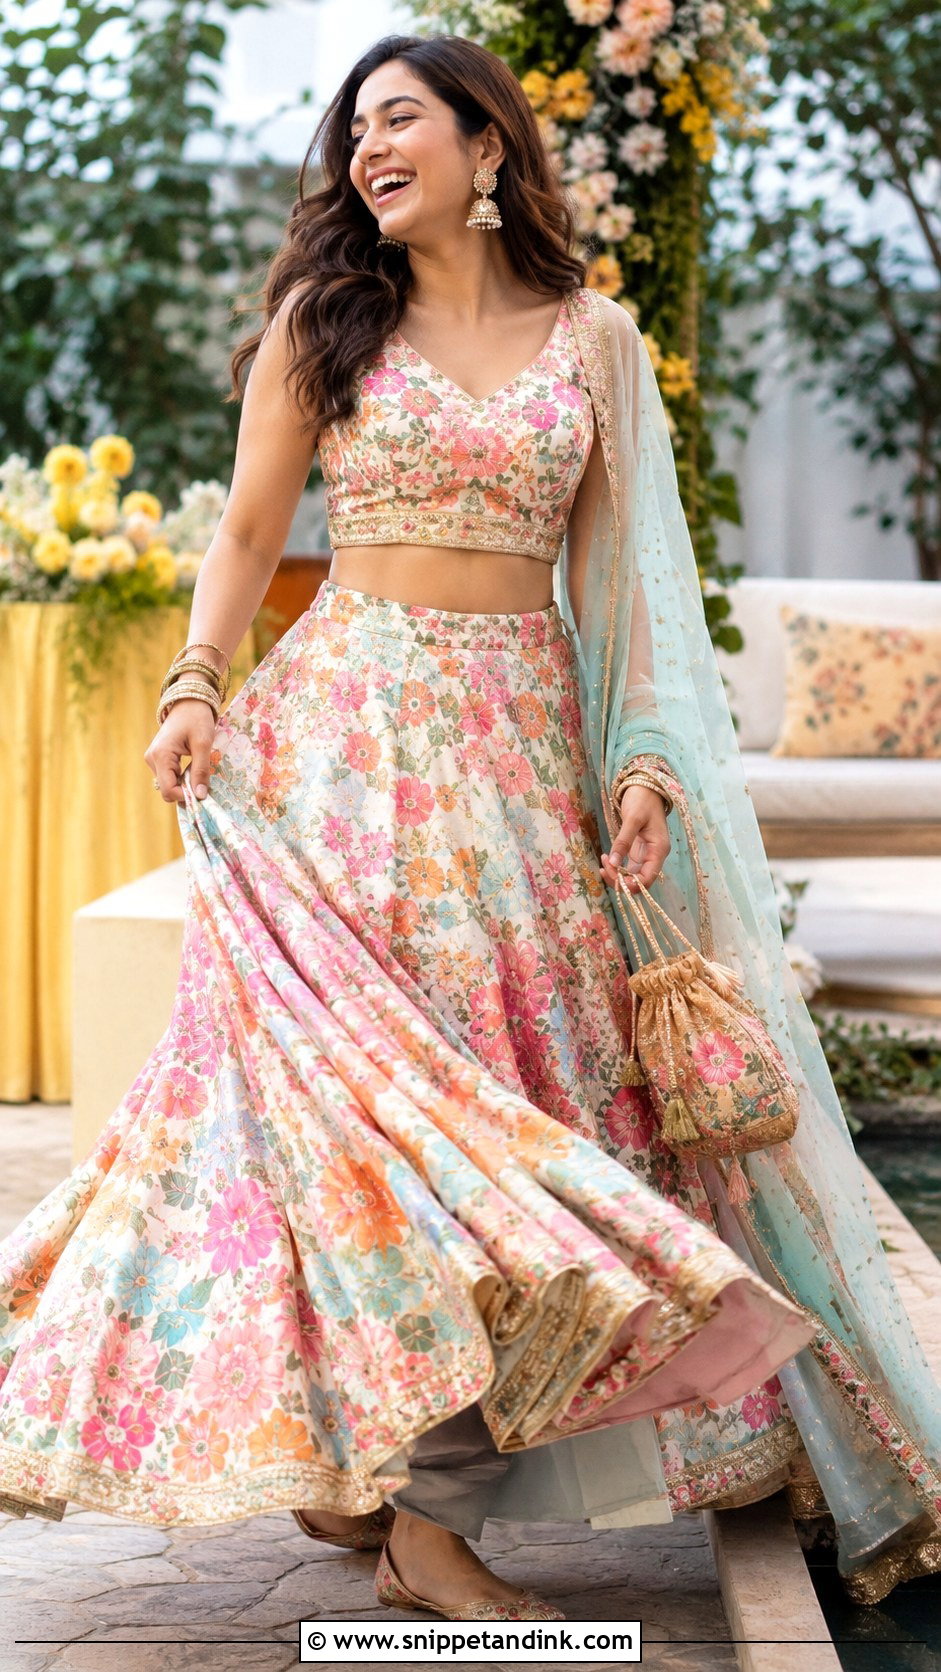
A genuine laugh brings energy to a formal look, and it can’t be forced. I’ll ask a sibling or friend to stand behind me and talk to you, which works far better than me telling you to laugh. Keep your body turned slightly to one side and let your hands move freely, holding the dupatta, touching the skirt or coming near your face without covering it. Stay upright even mid-laugh so the outfit stays readable. Colorful festive lenghas and bridesmaid portraits suit it especially. I shoot in bursts and keep the full outfit in several frames.
20. Top Angle Lengha Pose
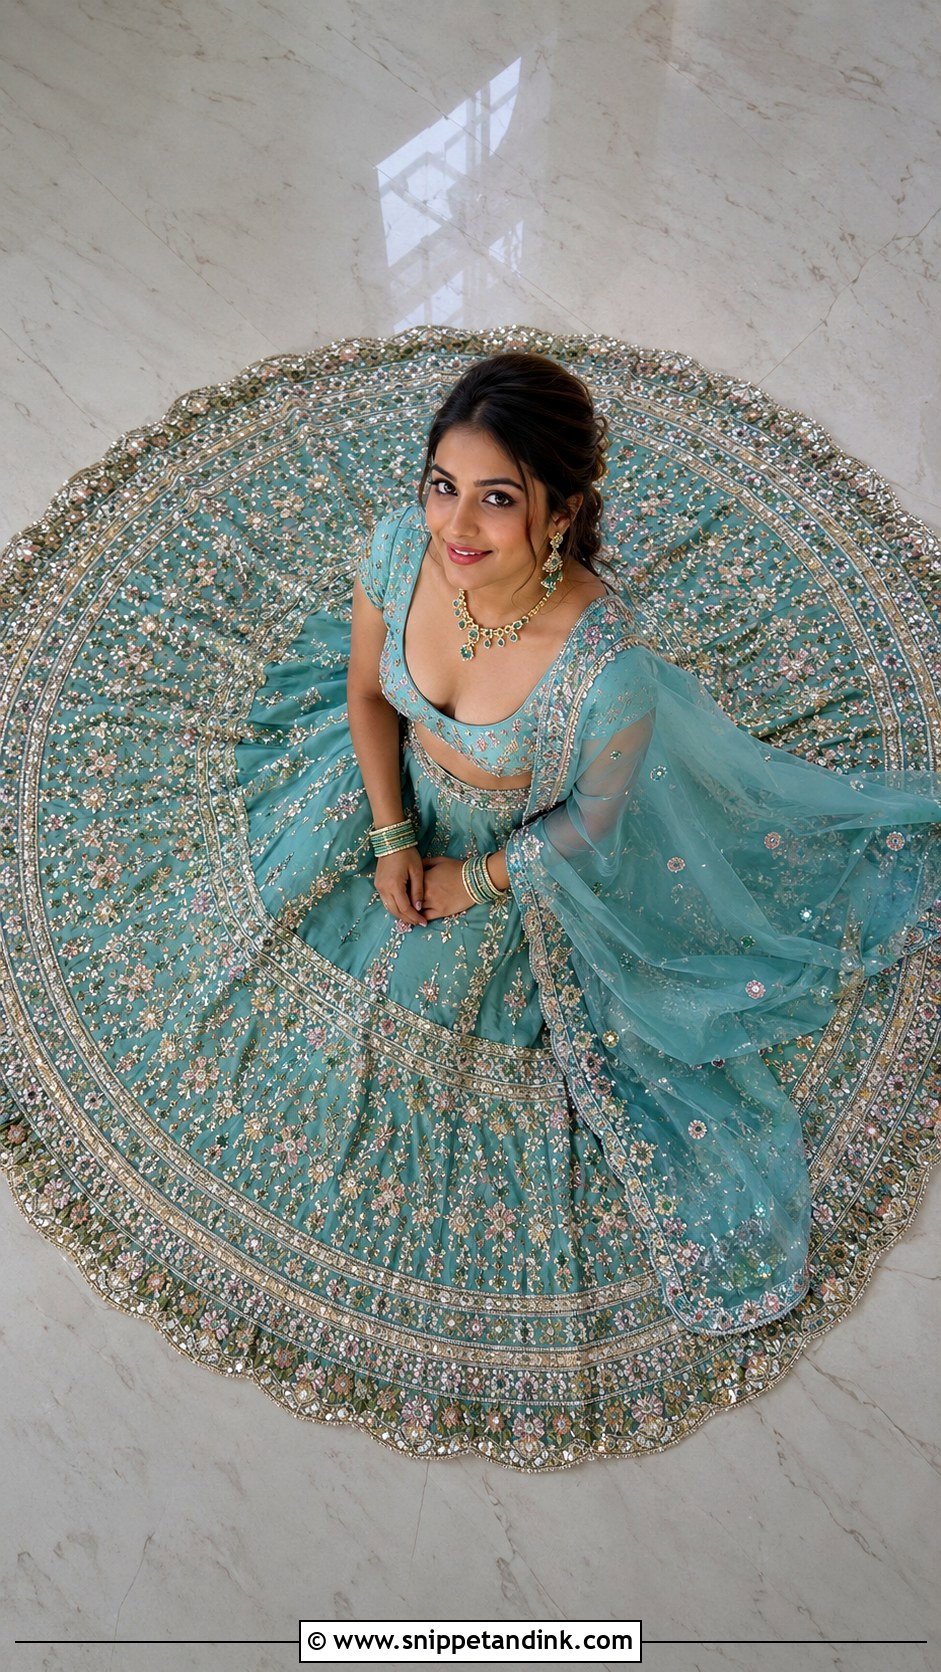
From above, the skirt becomes a circle and its pattern finally shows. Sit on a clean floor or low platform, spread the skirt evenly and tuck your legs underneath, hands resting in your lap. Look up toward the camera with a soft smile, or lower your eyes. I shoot from a stable stepladder or a balcony, never by leaning off furniture or stairs. Arrange the dupatta as an extra layer of color without hiding the blouse. It’s the best angle for embroidered, printed, or paneled skirts, since a standing shot hides most of the pattern in folds. Looking up also smooths the jawline, which most brides appreciate.
Ordering the Poses So the Outfit Survives the Shoot
Portrait time on a wedding day is usually short, and the order of poses matters more than people think. Every movement changes the outfit a little, so I work from tidiest to messiest:
- Standing frames first, while the dupatta pins are fresh and the skirt is crease-free.
- Detail shots next: earrings, bangles, the blouse back and the mirror frame.
- Movement after that, meaning walks, dupatta throws and the twirl. These loosen pins and shift the drape.
- Sitting poses last, because floor and stair shots crease the skirt and there’s no undoing that before the ceremony.
Ask one person, ideally whoever helped you dress, to stay with you through the session. Their job is fluffing the can-can, re-pinning the dupatta and spotting a twisted necklace clasp before I do. Also send your photographer the three or four frames that matter most to you, such as the blouse back you designed or a portrait wearing your grandmother’s jewelry, so those are done first if time runs short.
Practice in Your Shoes, Then Forget the List
Posing gets easier once you know your outfit’s weight, shape and best details. Start with simple standing frames before twirls, walks, sitting poses or dupatta throws. Keep your hands soft, your posture comfortable and your movements small rather than forcing dramatic angles. Try a few in front of a mirror wearing similar shoes. On the day, be careful around stairs, long hems and delicate embroidery, and let your expressions be your own. A varied set of poses gives you a full record of the outfit, but the frames you’ll treasure are the ones where you forgot the camera was there.
You'll Like These Ideas:


Leave a Reply